Import WebSphere Application Server Network Deployment cells
Importing an existing WebSphere® Application Server Network Deployment cell creates a WAS-ND-Cell Kubernetes custom resource to represent the cell. Application Navigator automatically discovers enterprise applications that are deployed on the cell and creates WAS-Traditional-App Kubernetes custom resources to represent those applications. Application Navigator periodically polls the cell to keep the state of the WAS-ND-Cell resources and WAS-Traditional-App resources synchronized with the cell.
About this task
You can import an existing WebSphere Application Server Network Deployment cell into IBM Application Navigator to establish visibility and access to the Network Deployment cell. A cell can be imported into Application Navigator with the “WAS ND Cells” page in Application Navigator or the Kubernetes kubectl command.
Procedure
Import the WebSphere Application Server Network Deployment cell by using the “WAS ND Cells” page
-
Open the WebSphere Application Server Network Deployment cell page and launch create dialog.
Click the
WAS ND Cellsmenu item to open the cell view page.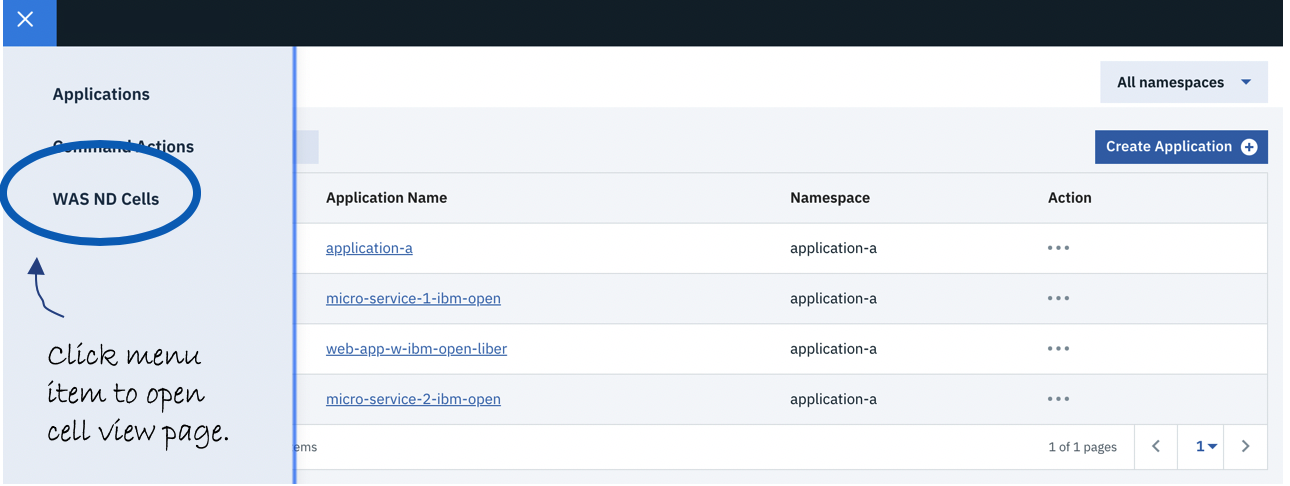
-
Enter details and create the cell.
-
Under the General details tab, enter a name for the cell in the
Namefield.This name is unique in the specified namespace on your Kubernetes cluster. Then, click
Create WAS ND Cellto launch the new cell dialog.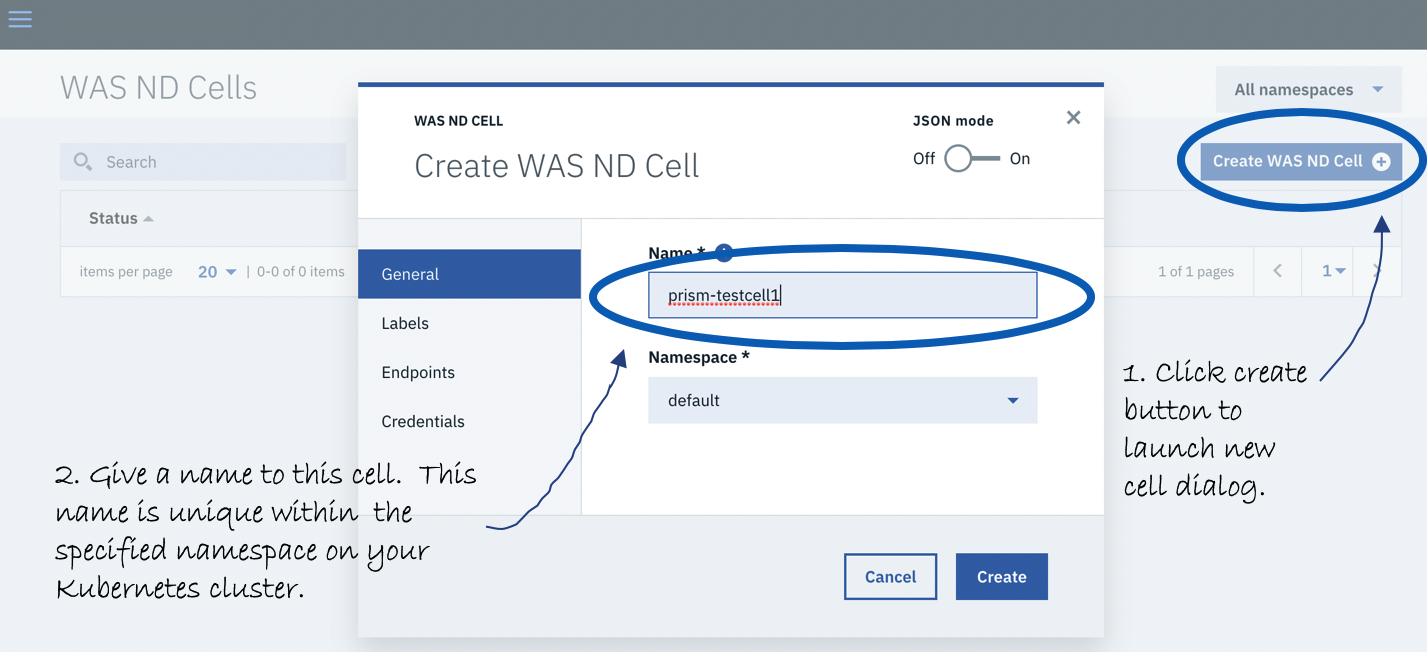
-
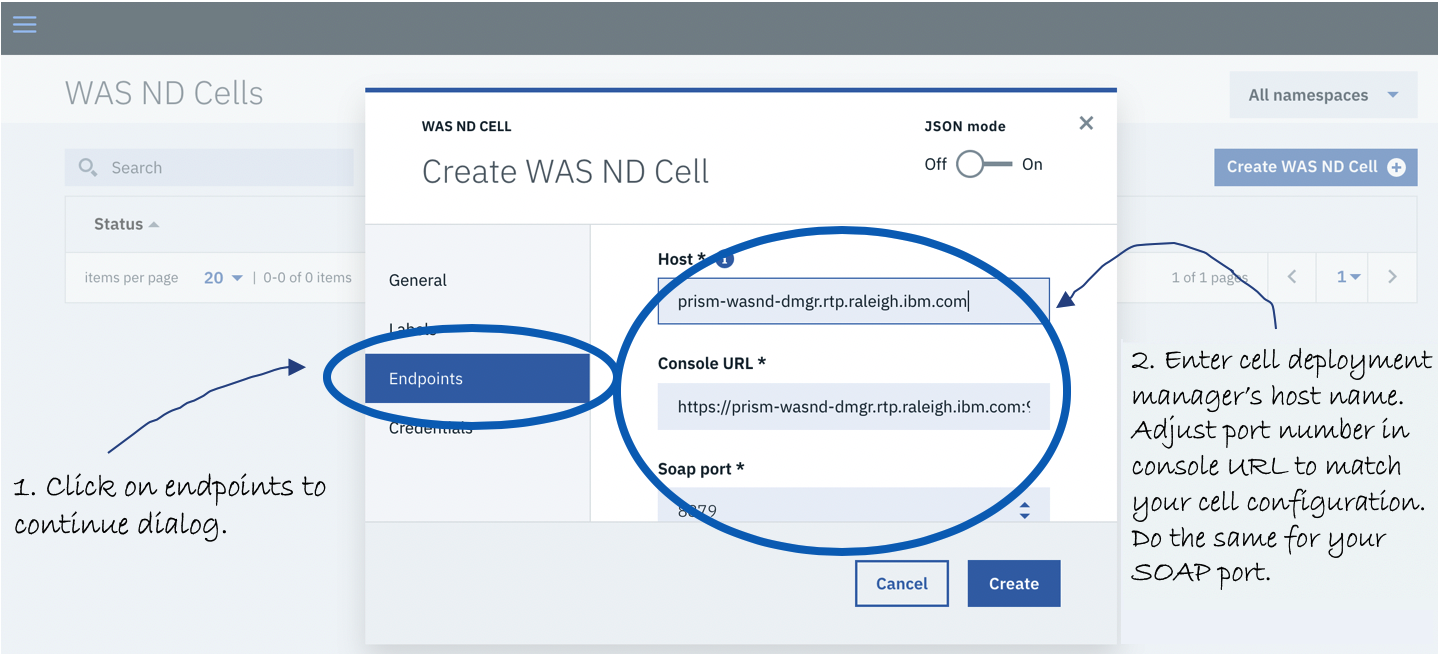
Click Endpoints and enter your host name, and adjust any port values (defaults are provided).
Adjust the port number in the console URL to match your cell configuration. Do the same for your SOAP port.
-
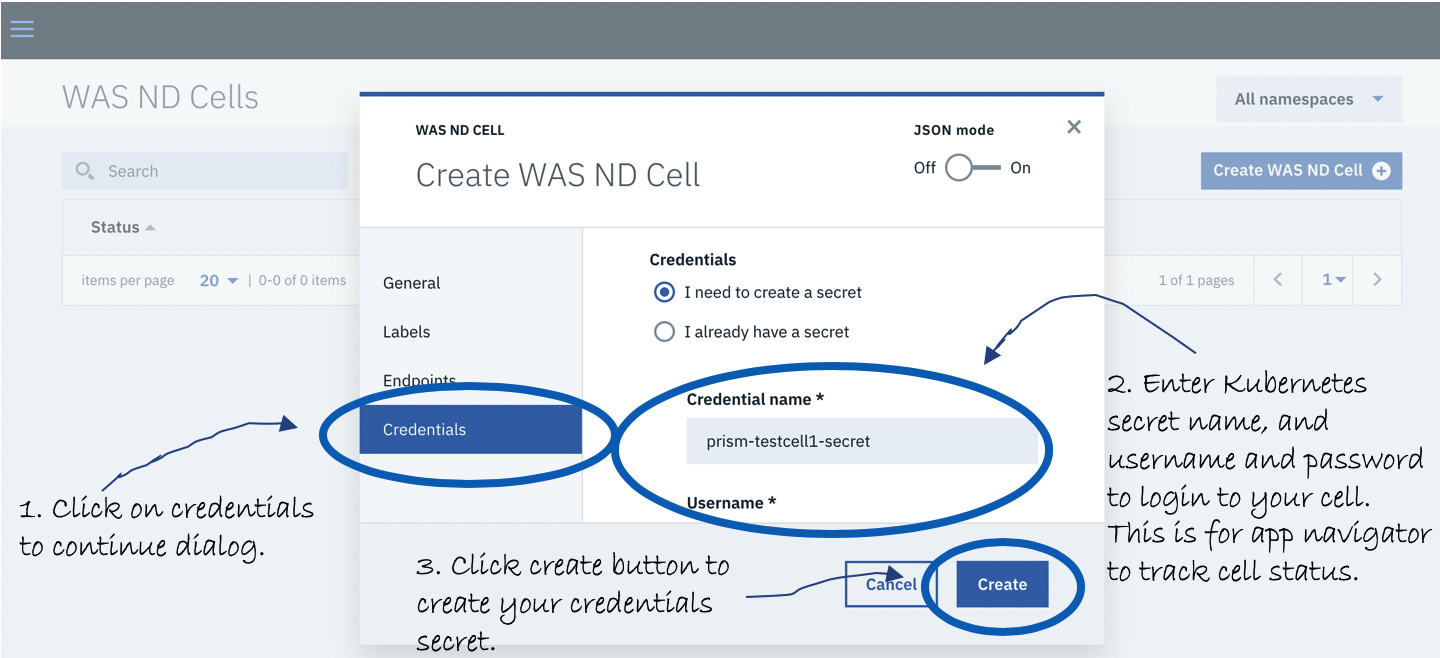
Click Credentials and enter a Kubernetes secret name, user name, and password to log in to your cell so that application navigator can track cell status.
- Click Credentials.
- In the Credentials field, select whether you need to create a secret or whether you already have a secret.
- For the Credential name field, enter the Kubernetes secret name.
- Enter your username and password so that you can log in to your cell.
- Click Create to create your credentials secret.
-
Click the Create button to create your credentials secret.
Attention: You can create a new Kubernetes secret or choose an existing one. For a new one, the user name and password you specify is stored as base 64 encoded values in the secret.
-
-
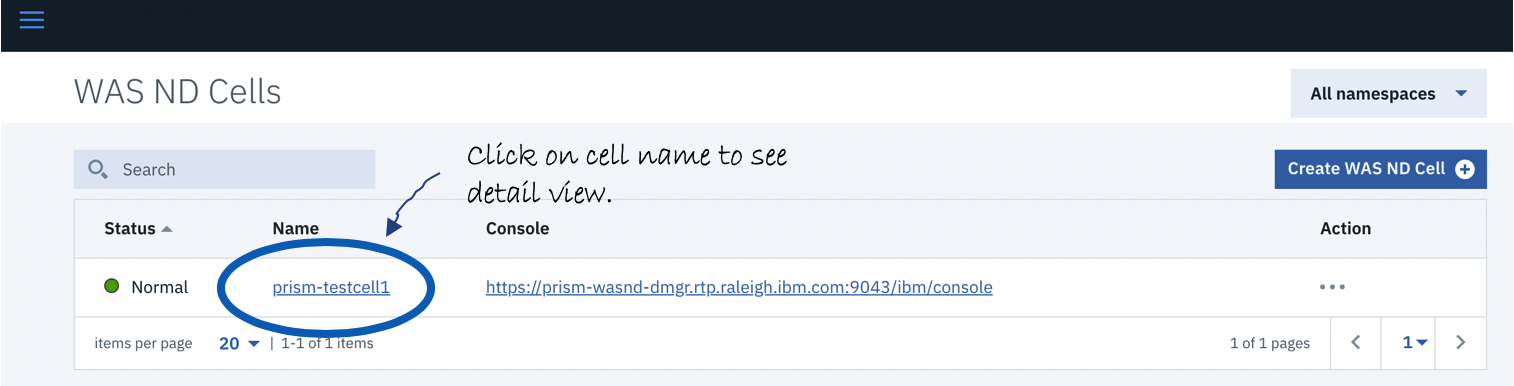
Optional: Inspect the cell.
-
Click cell name to see the detail view.
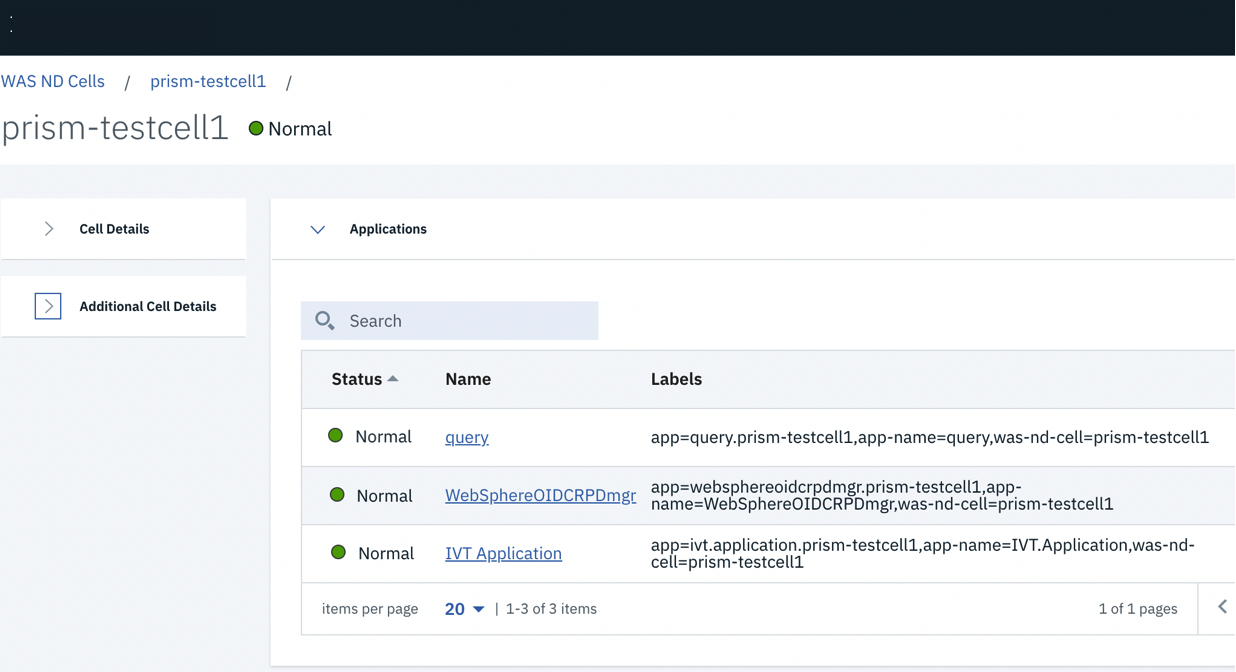
-
Use the detail view to see cell details.
-
Import the WebSphere Application Server Network Deployment cell by using the Kubernetes command-line tool
- Create the WebSphere Application Server Network Deployment cell resource.
- All fields that are shown are required.
- Credentials are a Kubernetes secret in the same namespace.
- Interval is the controller polling interval for syncing cells with Kubernetes resources.
-
Create the
cell.yamlfile:apiVersion: kappnav.io/v1beta1 kind: WAS-ND-Cell metadata: name: prism-testcell1 namespace: default spec: console_url: https://prism-wasnd-dmgr.rtp.raleigh.ibm.com:9043/ibm/console credentials: prism-testcell1-secret host: prism-wasnd-dmgr.rtp.raleigh.ibm.com interval: 30 soap_port: 8879 -
Create the resource with the following command:
kubectl create -f cell.yaml
- Create the secret for the cell credentials.
- The user name and password fields must be base 64 encoded.
- The secret must be in the same namespace as the corresponding cell.
-
Create the
secret.yamlfile.apiVersion: v1 data: password: dGVzdHVzZXJwd2Q= username: dGVzdHVzZXI= kind: Secret metadata: name: prism-testcell1-secret namespace: default -
Create the resource with the following command:
kubectl create -f secret.yaml
-
Inspect twas-apps resources.
Use the following commands to see your cell and its secret in the
yamlformat:kubectl get twas-cell prism-testcell1 -o yaml kubectl get twas-apps -o yaml kubectl get secret prism-testcell1-secret -o yaml
Results
You get a WAS-ND-Cell Kubernetes resource that represents your WebSphere Application Server Network Deployment cell and one WAS-Traditional-App Kubernetes resource for each enterprise application deployed to that cell.