Table of Contents generated with DocToc
- Deploy Cloud Pak for Watson AIOps with OpenShift GitOps
- Prerequisite
- Install Infra (Crossplane CP4WAIOPS Provider)
- Storage Consideration
- Deploy Cloud Paks
Deploy Cloud Pak for Watson AIOps with OpenShift GitOps
Prerequisite
- NOTE: Only OpenShift 4.6 with CP4WAIOPS 3.1 are fully tested, NOT A RELEASED FEATURE FOR CP4WAIOPS.
- Install gitops operator(Red Hat OpenShift GitOps) in ocp operator-hub
- Install crossplane operator(Upbound Universal Crossplane (UXP)) in ocp operator-hub
Install Infra (Crossplane CP4WAIOPS Provider)
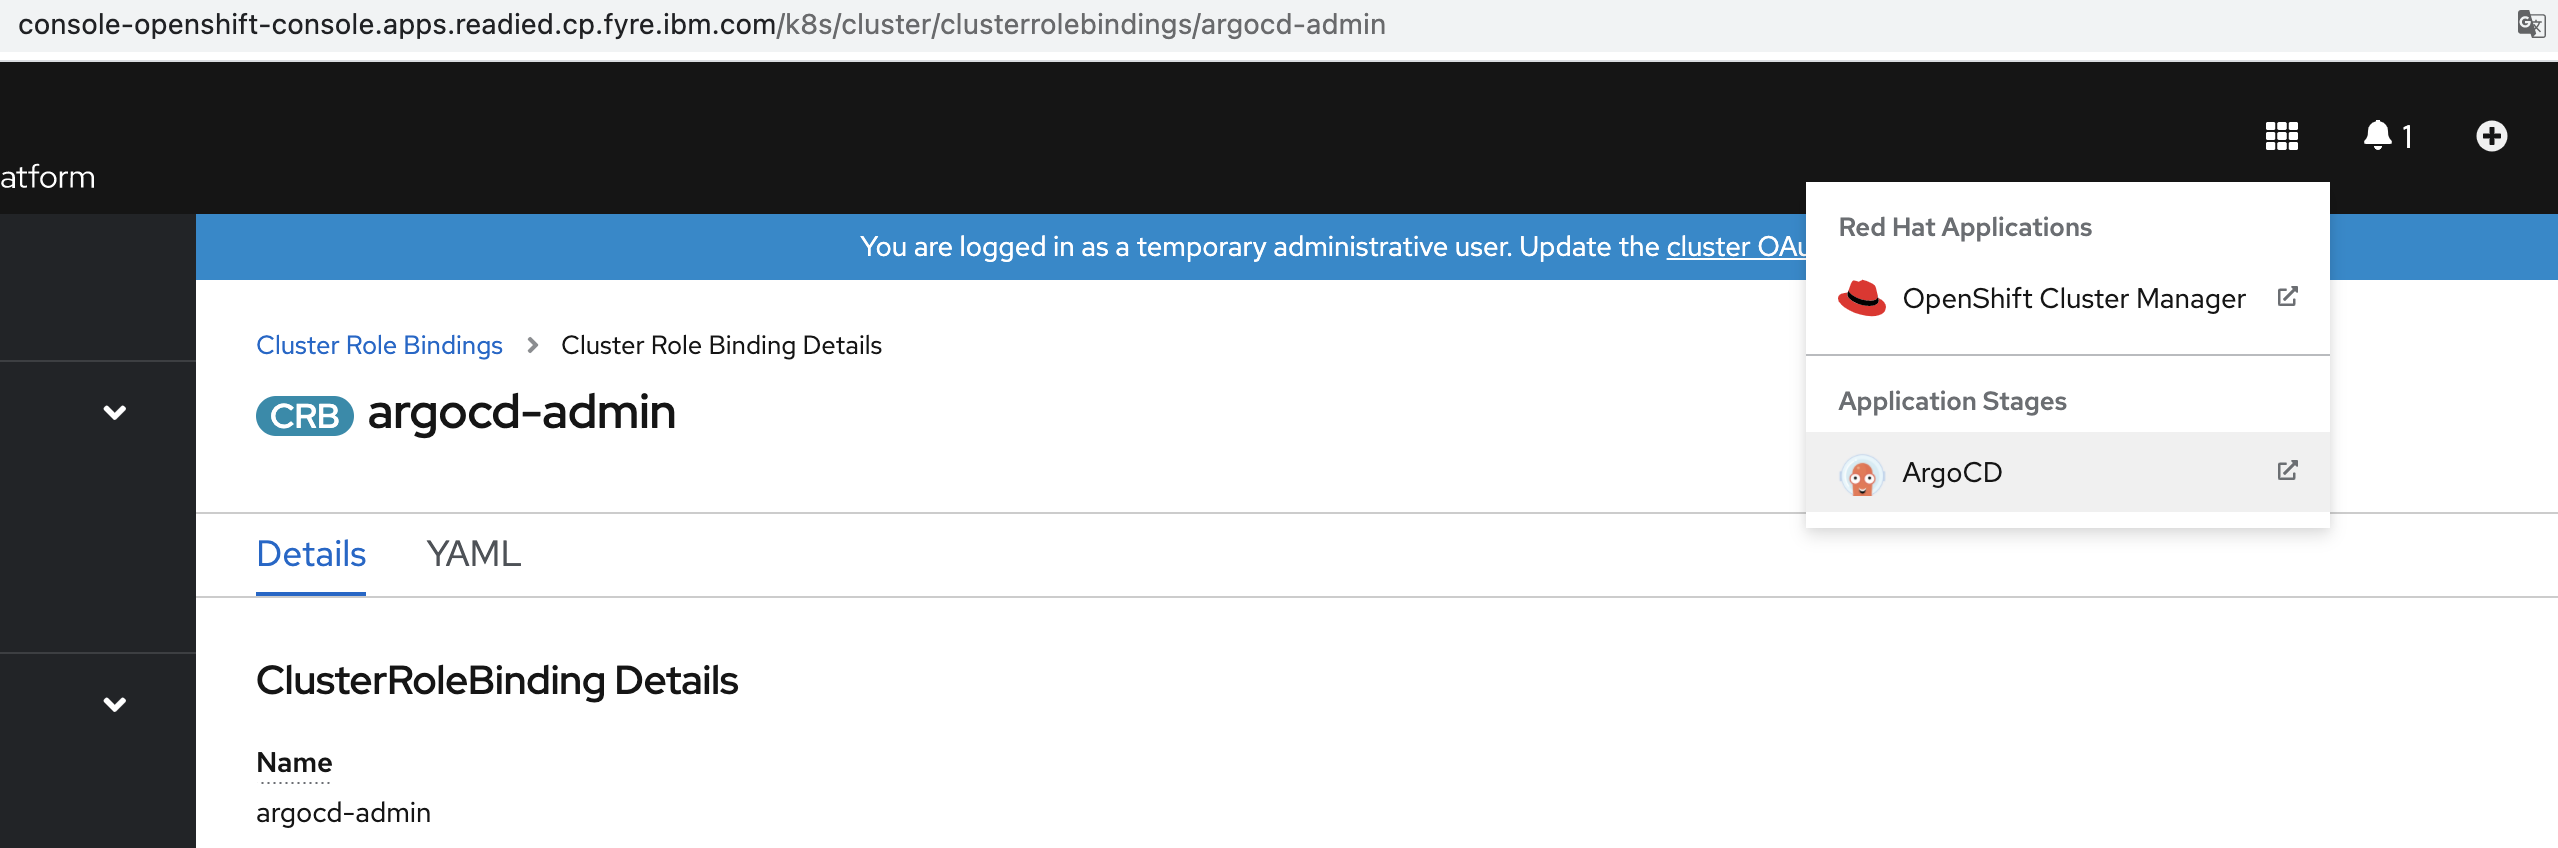
Grant Argo CD Enough Permissions
kind: ClusterRoleBinding
apiVersion: rbac.authorization.k8s.io/v1
metadata:
  name: argocd-admin
subjects:
  - kind: ServiceAccount
    name: openshift-gitops-argocd-application-controller
    namespace: openshift-gitops
roleRef:
  apiGroup: rbac.authorization.k8s.io
  kind: ClusterRole
  name: cluster-admin
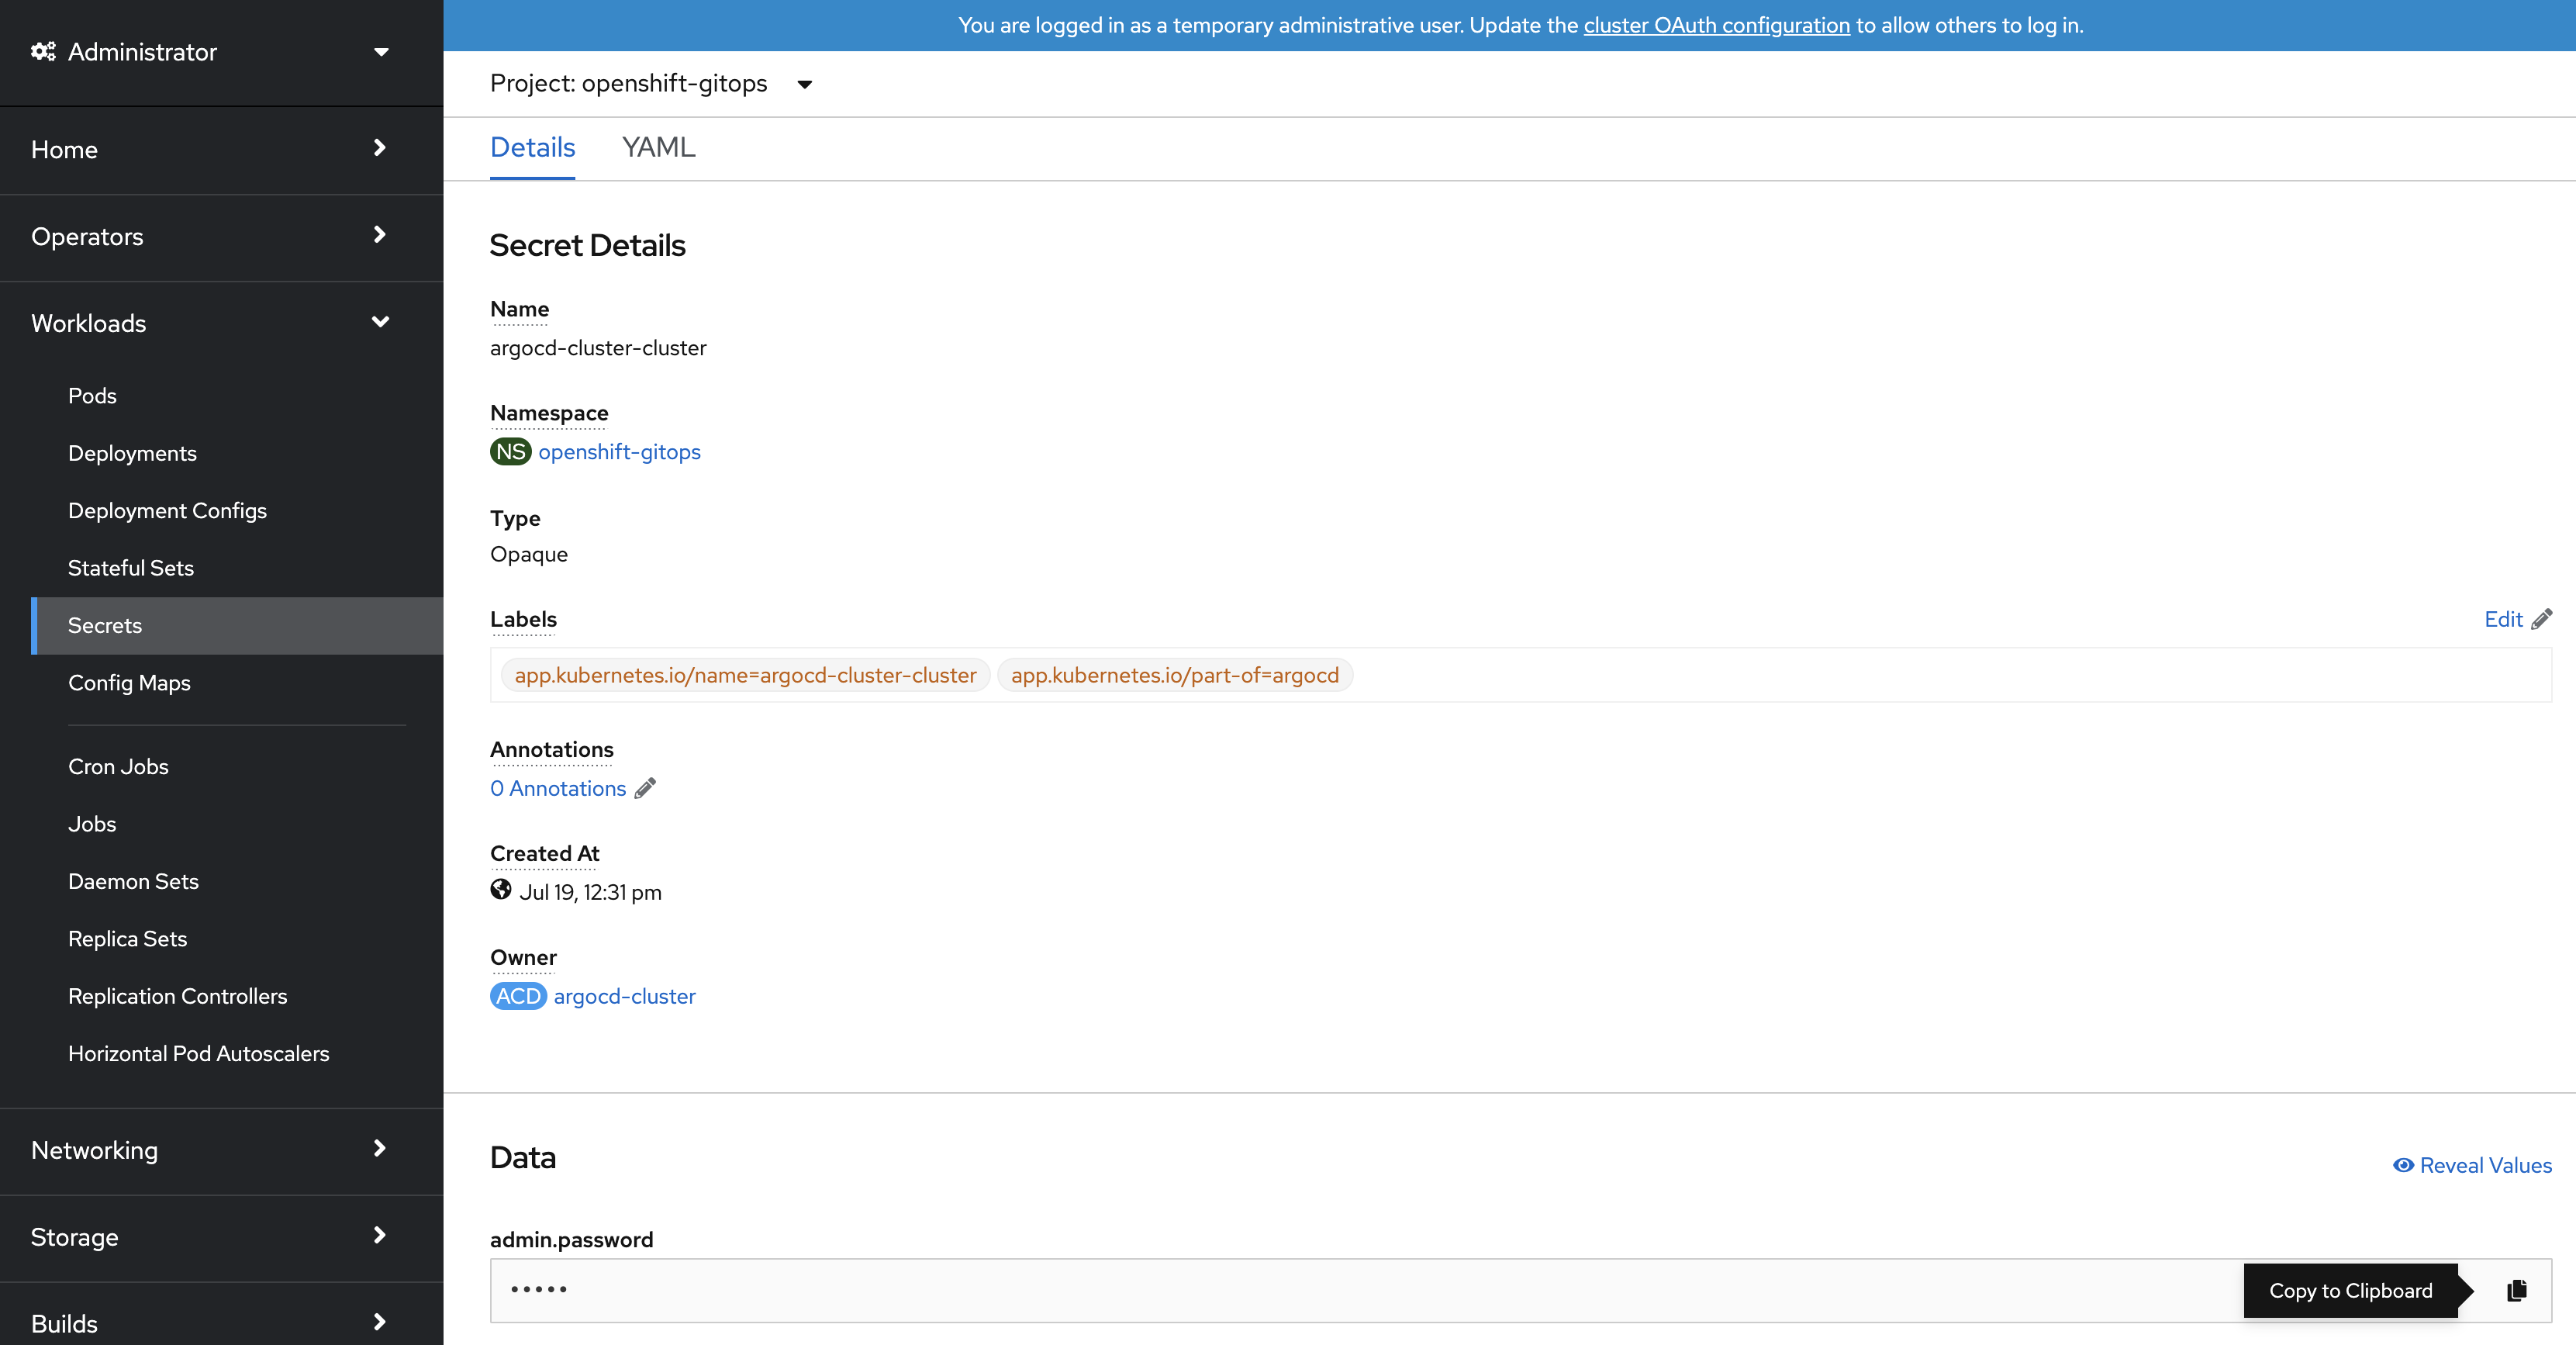
Login to Argo CD
Login ArgoCD entrance
Login Username/Password
Username: admin
Password: Please copy the Data value of secret "openshift-gitops-cluster" in namespace "openshift-gitops"
Install CP4WAIOPS Provider
Create application.
Choose "New App" in "Applications".
Fill in like below, then choose "create".
GENERAL
Application Name: anyname(like "crossplane-provider")
Project: default
SYNC POLICY: Automatic

SOURCE
REPO URL : https://github.com/IBM/cp4waiops-gitops
Target version: HEAD
path: config/3.1/argocd-apps/infra

DESTINATION
Cluster URL: https://kubernetes.default.svc
Namespace: upbound-system

HELM
metadata.argocd_app_namespace: openshift-gitops
metadata.cp4waiops_provider_namespace: upbound-system
metadata.crossplane_namespace: upbound-system
repoURL: https://github.com/IBM/cp4waiops-gitops
Verify Crossplane Provider
CLI Verify
After cp4waiops provider was deployed, you can run the command as follows to check:
kubectl get po -n upbound-system
kubectl get application -A
In this tutorial, the output of the above command is as follows:
# kubectl get po -n upbound-system
NAME                                            READY   STATUS      RESTARTS   AGE
add-scc-policy-2wgw7                            0/1     Completed   0          98m
crossplane-5d88f96479-jdnf2                     1/1     Running     2          4h14m
crossplane-provider-cloudpak-57cf9bb7c8-5l852   1/1     Running     0          98m
crossplane-rbac-manager-58c6656768-4cgr5        1/1     Running     2          4h14m
upbound-bootstrapper-67d458bf85-kkgq9           1/1     Running     0          4h14m
xgql-7b65998b88-p6shn                           1/1     Running     2          4h14m
# kubectl get application -A
NAMESPACE          NAME                      SYNC STATUS   HEALTH STATUS
openshift-gitops   ceph                      Synced        Healthy
openshift-gitops   crossplane-provider       Synced        Healthy
openshift-gitops   crossplane-provider-app   Synced        Healthy
UI Verify
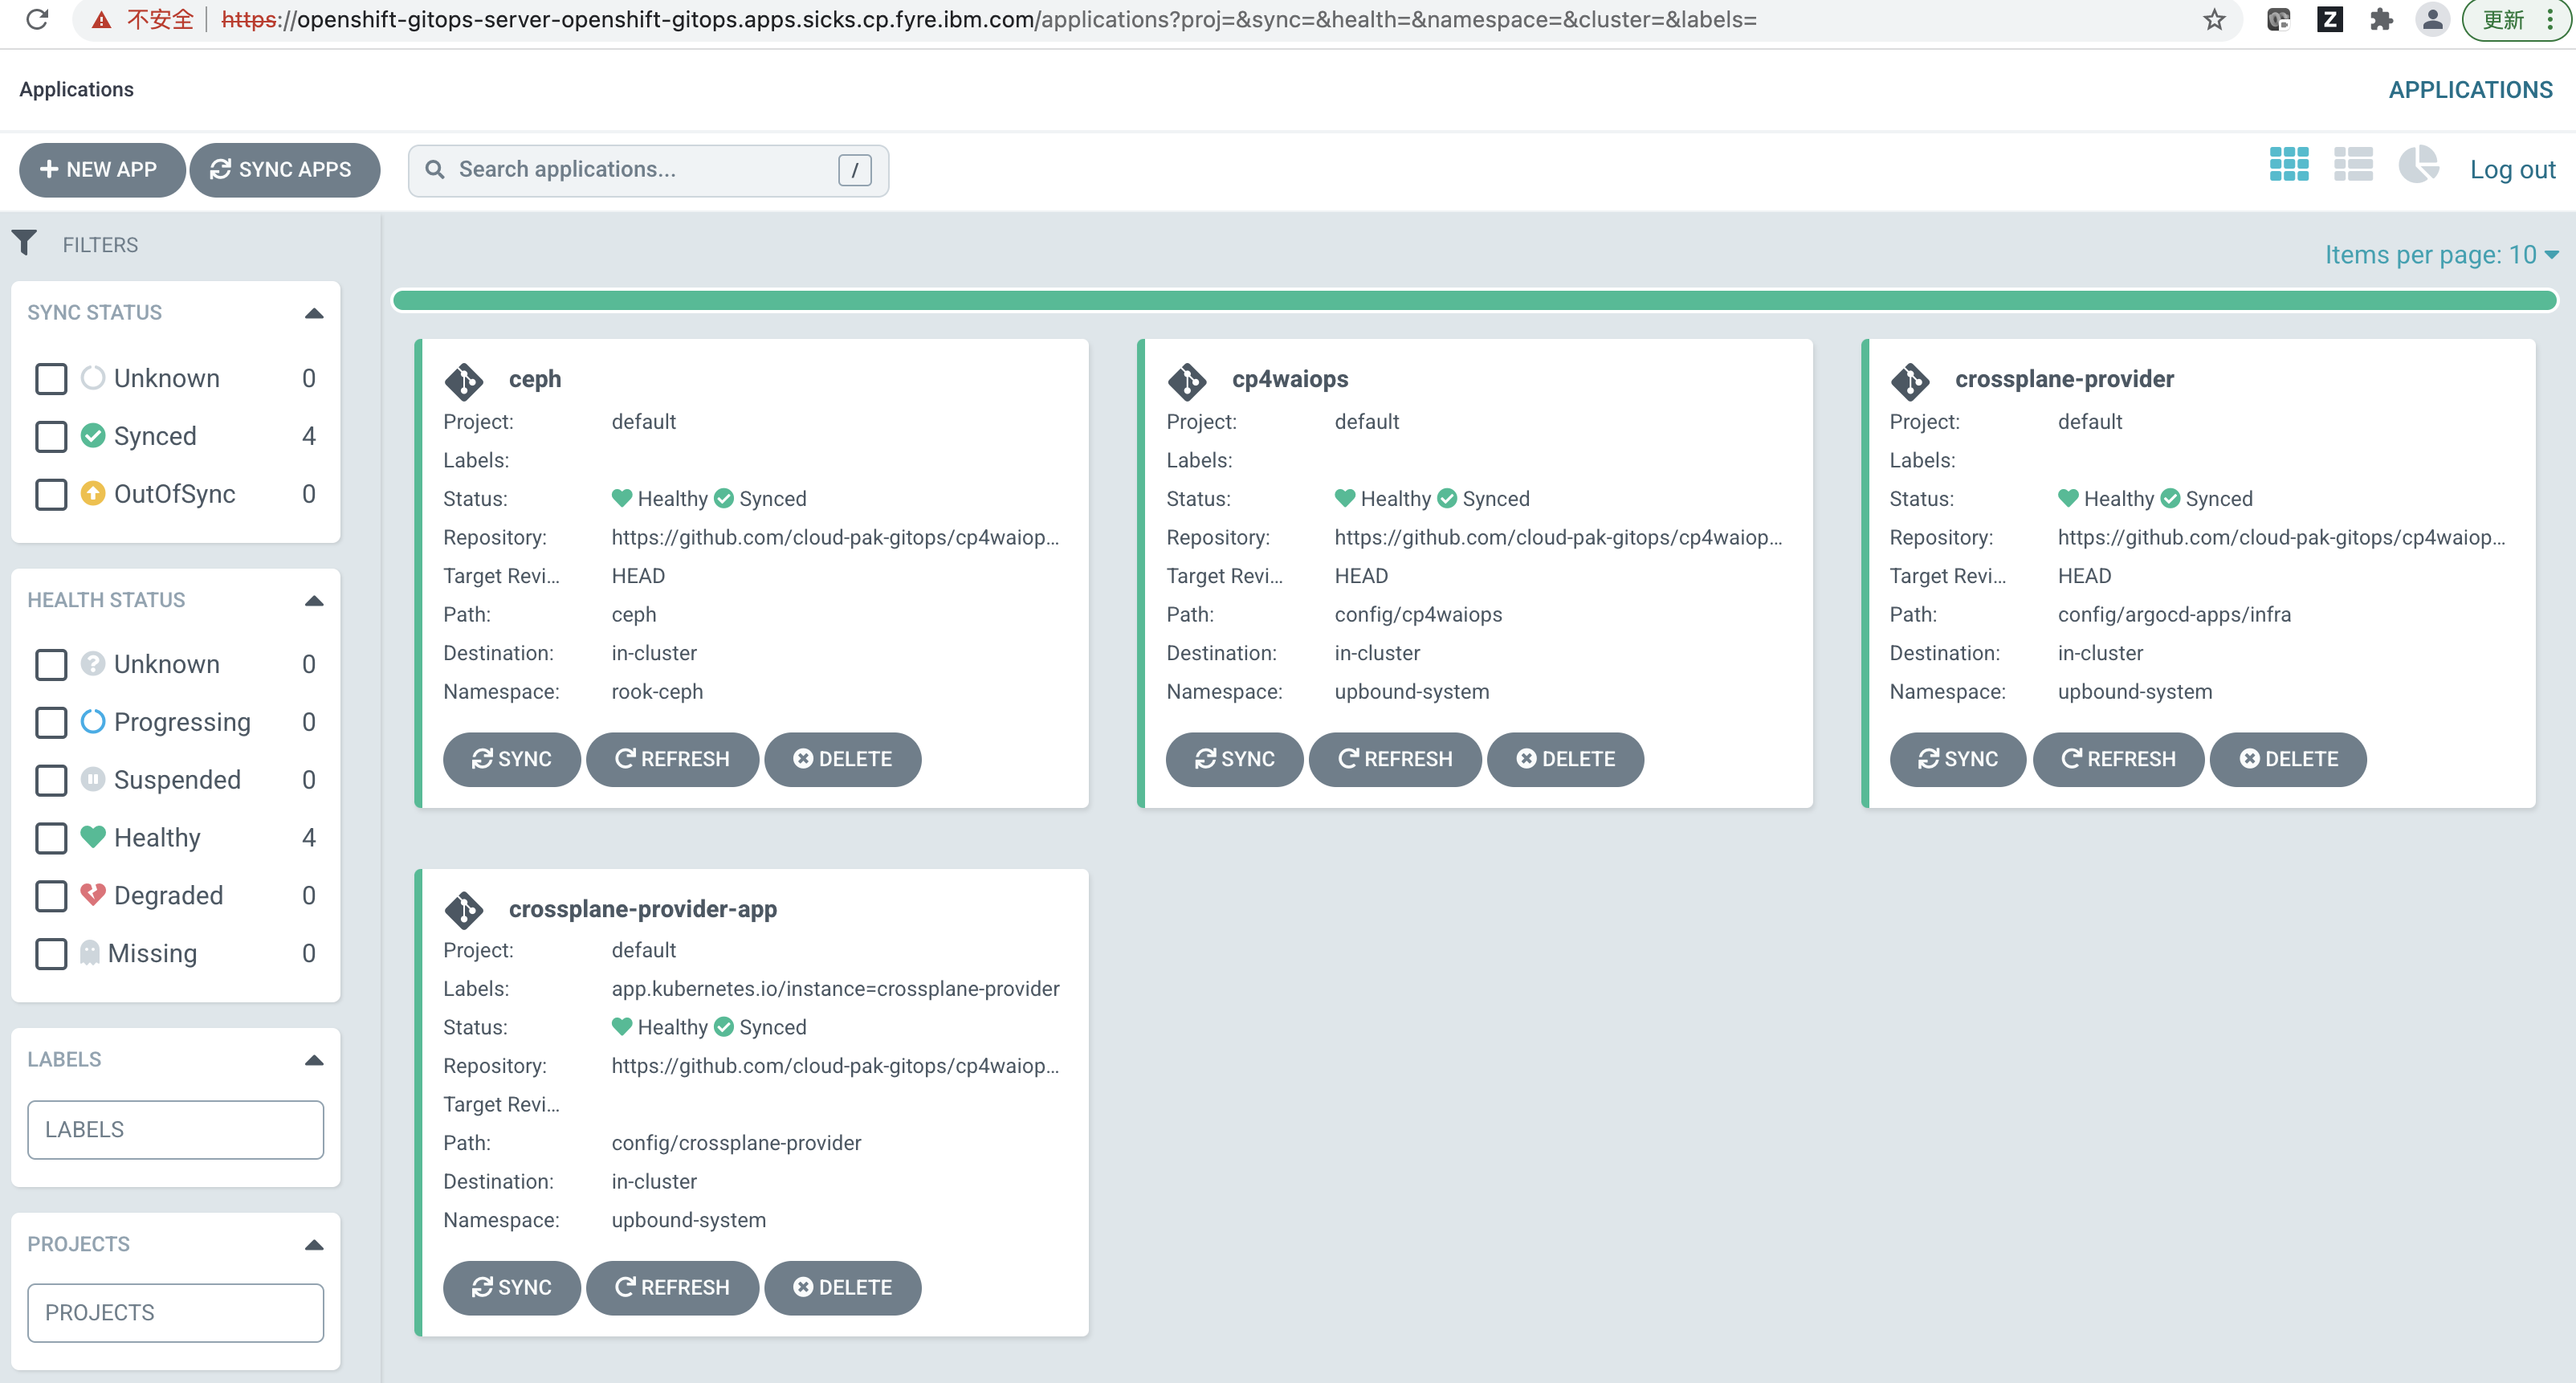
From Argo CD UI, you will be able to see there are two applications as follows:
- There are two applications, one is
crossplane-providerand another iscrossplane-provider-app. Thecrossplane-providerbring up thecrossplane-provider-appvia the app-of-apps pattern.
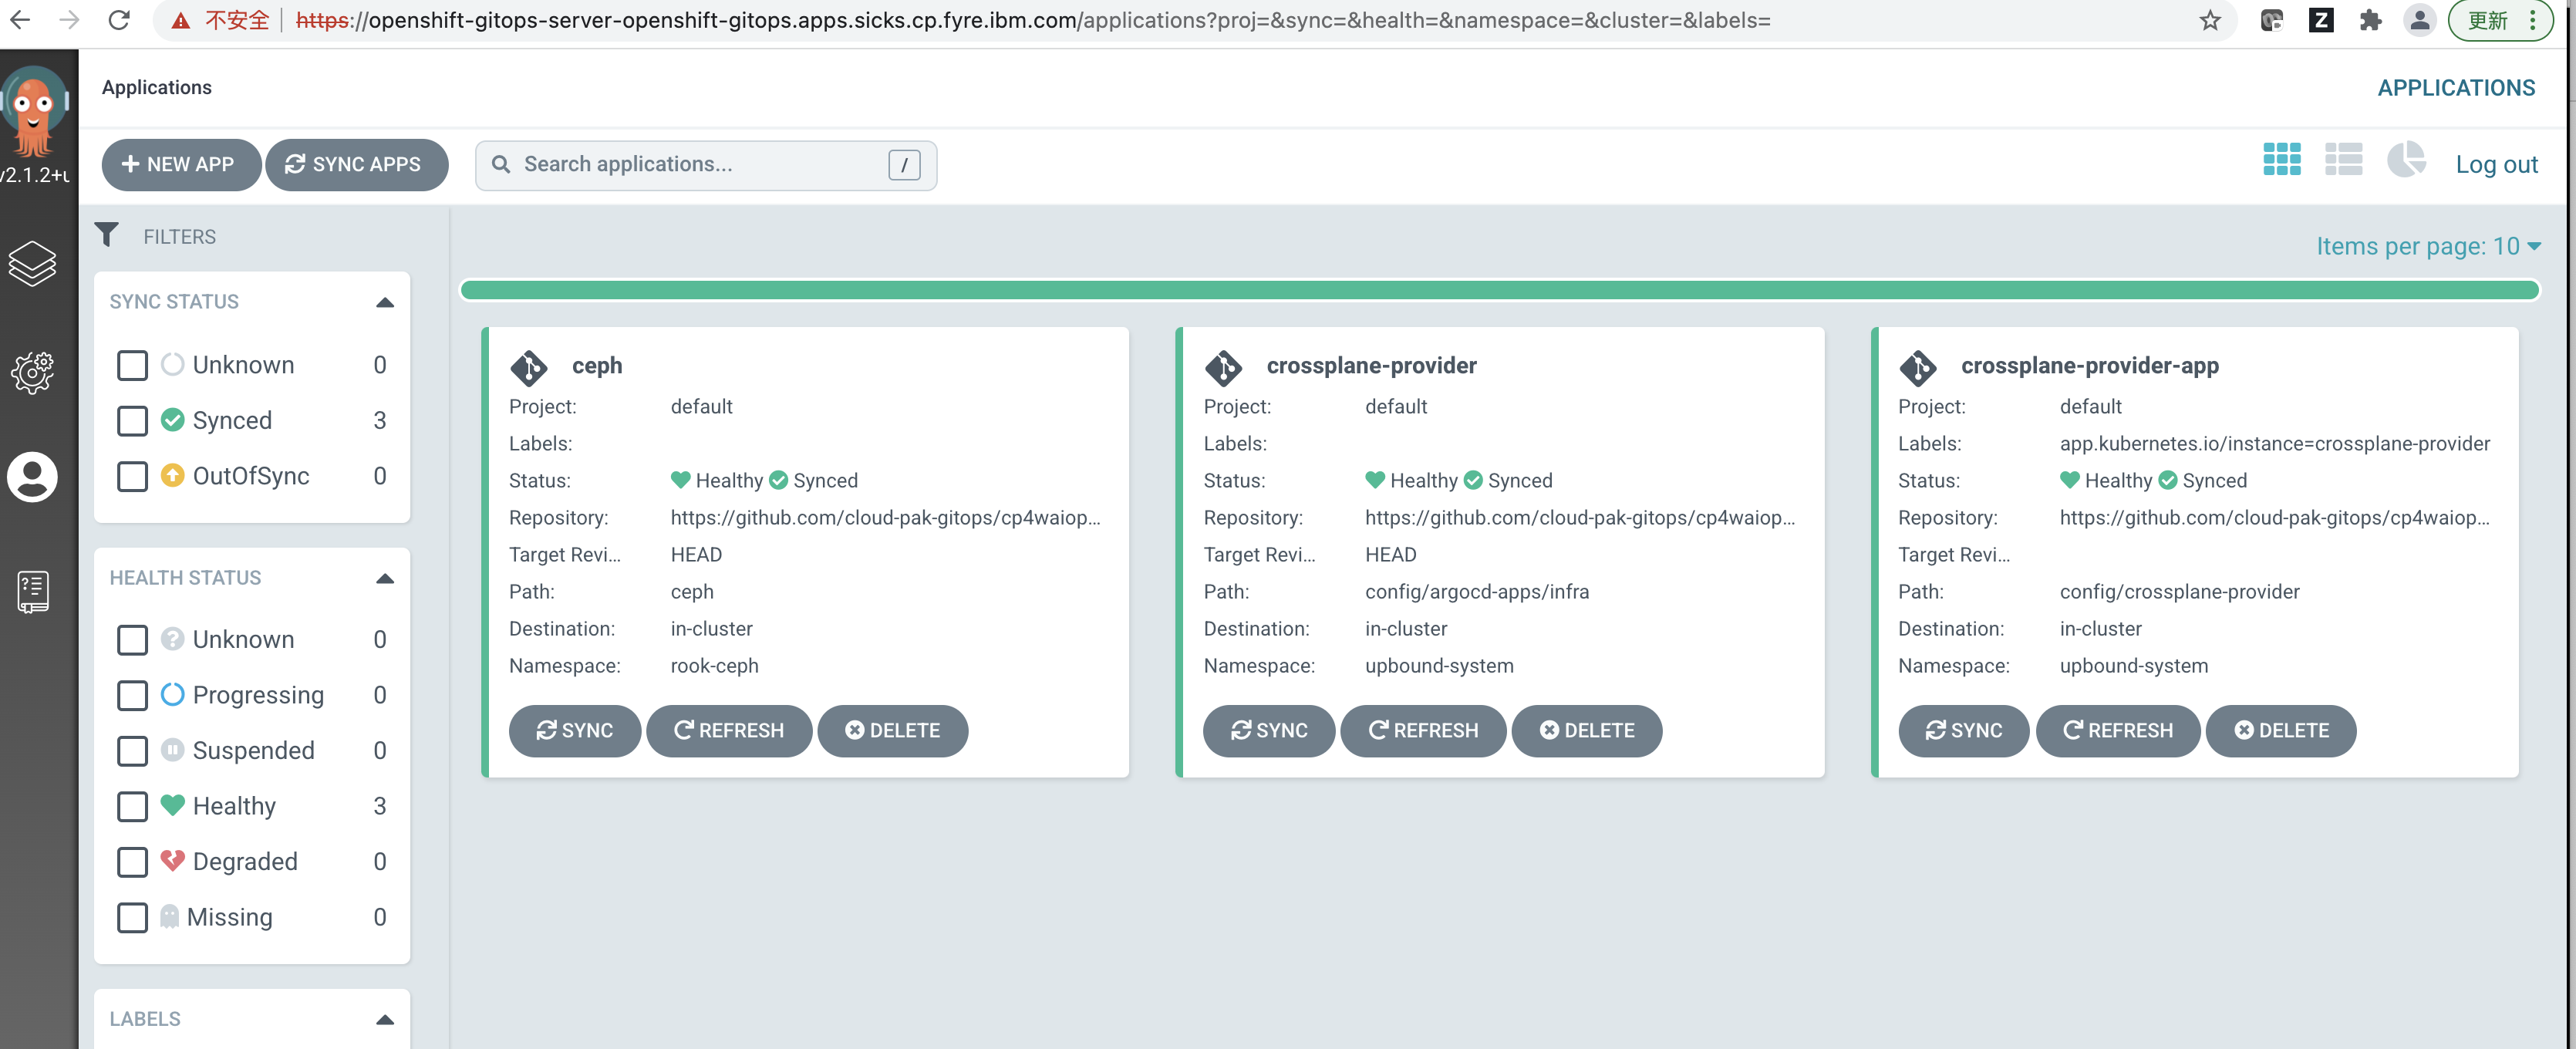
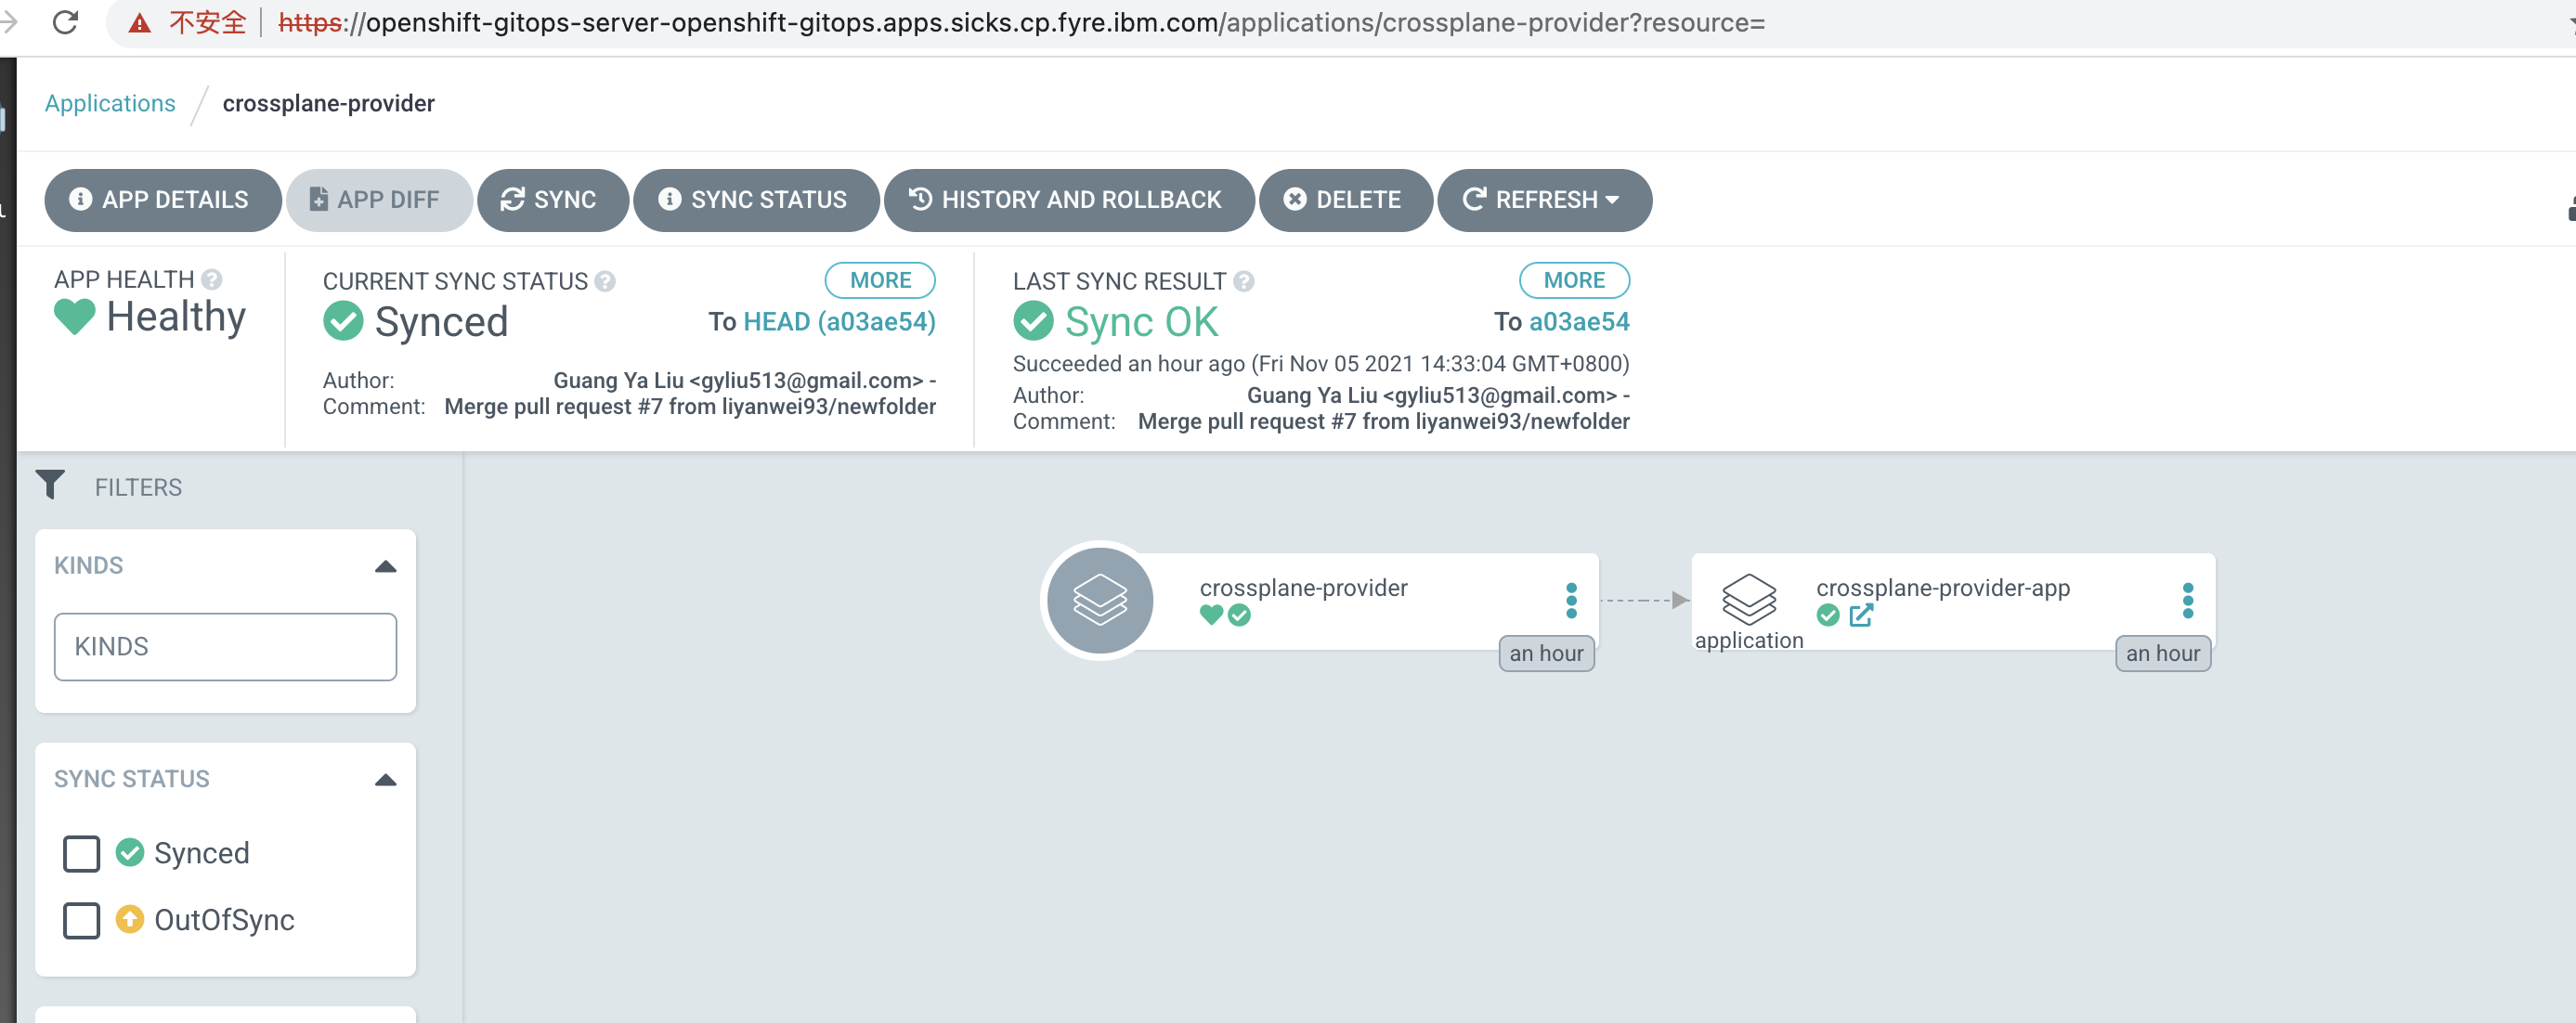
- This is the deatail of app
crossplane-provider, and the following picture describes the app-of-apps pattern.
- The following picture is the detail of the
crossplane-provider-app, you can see all of the resources for this app.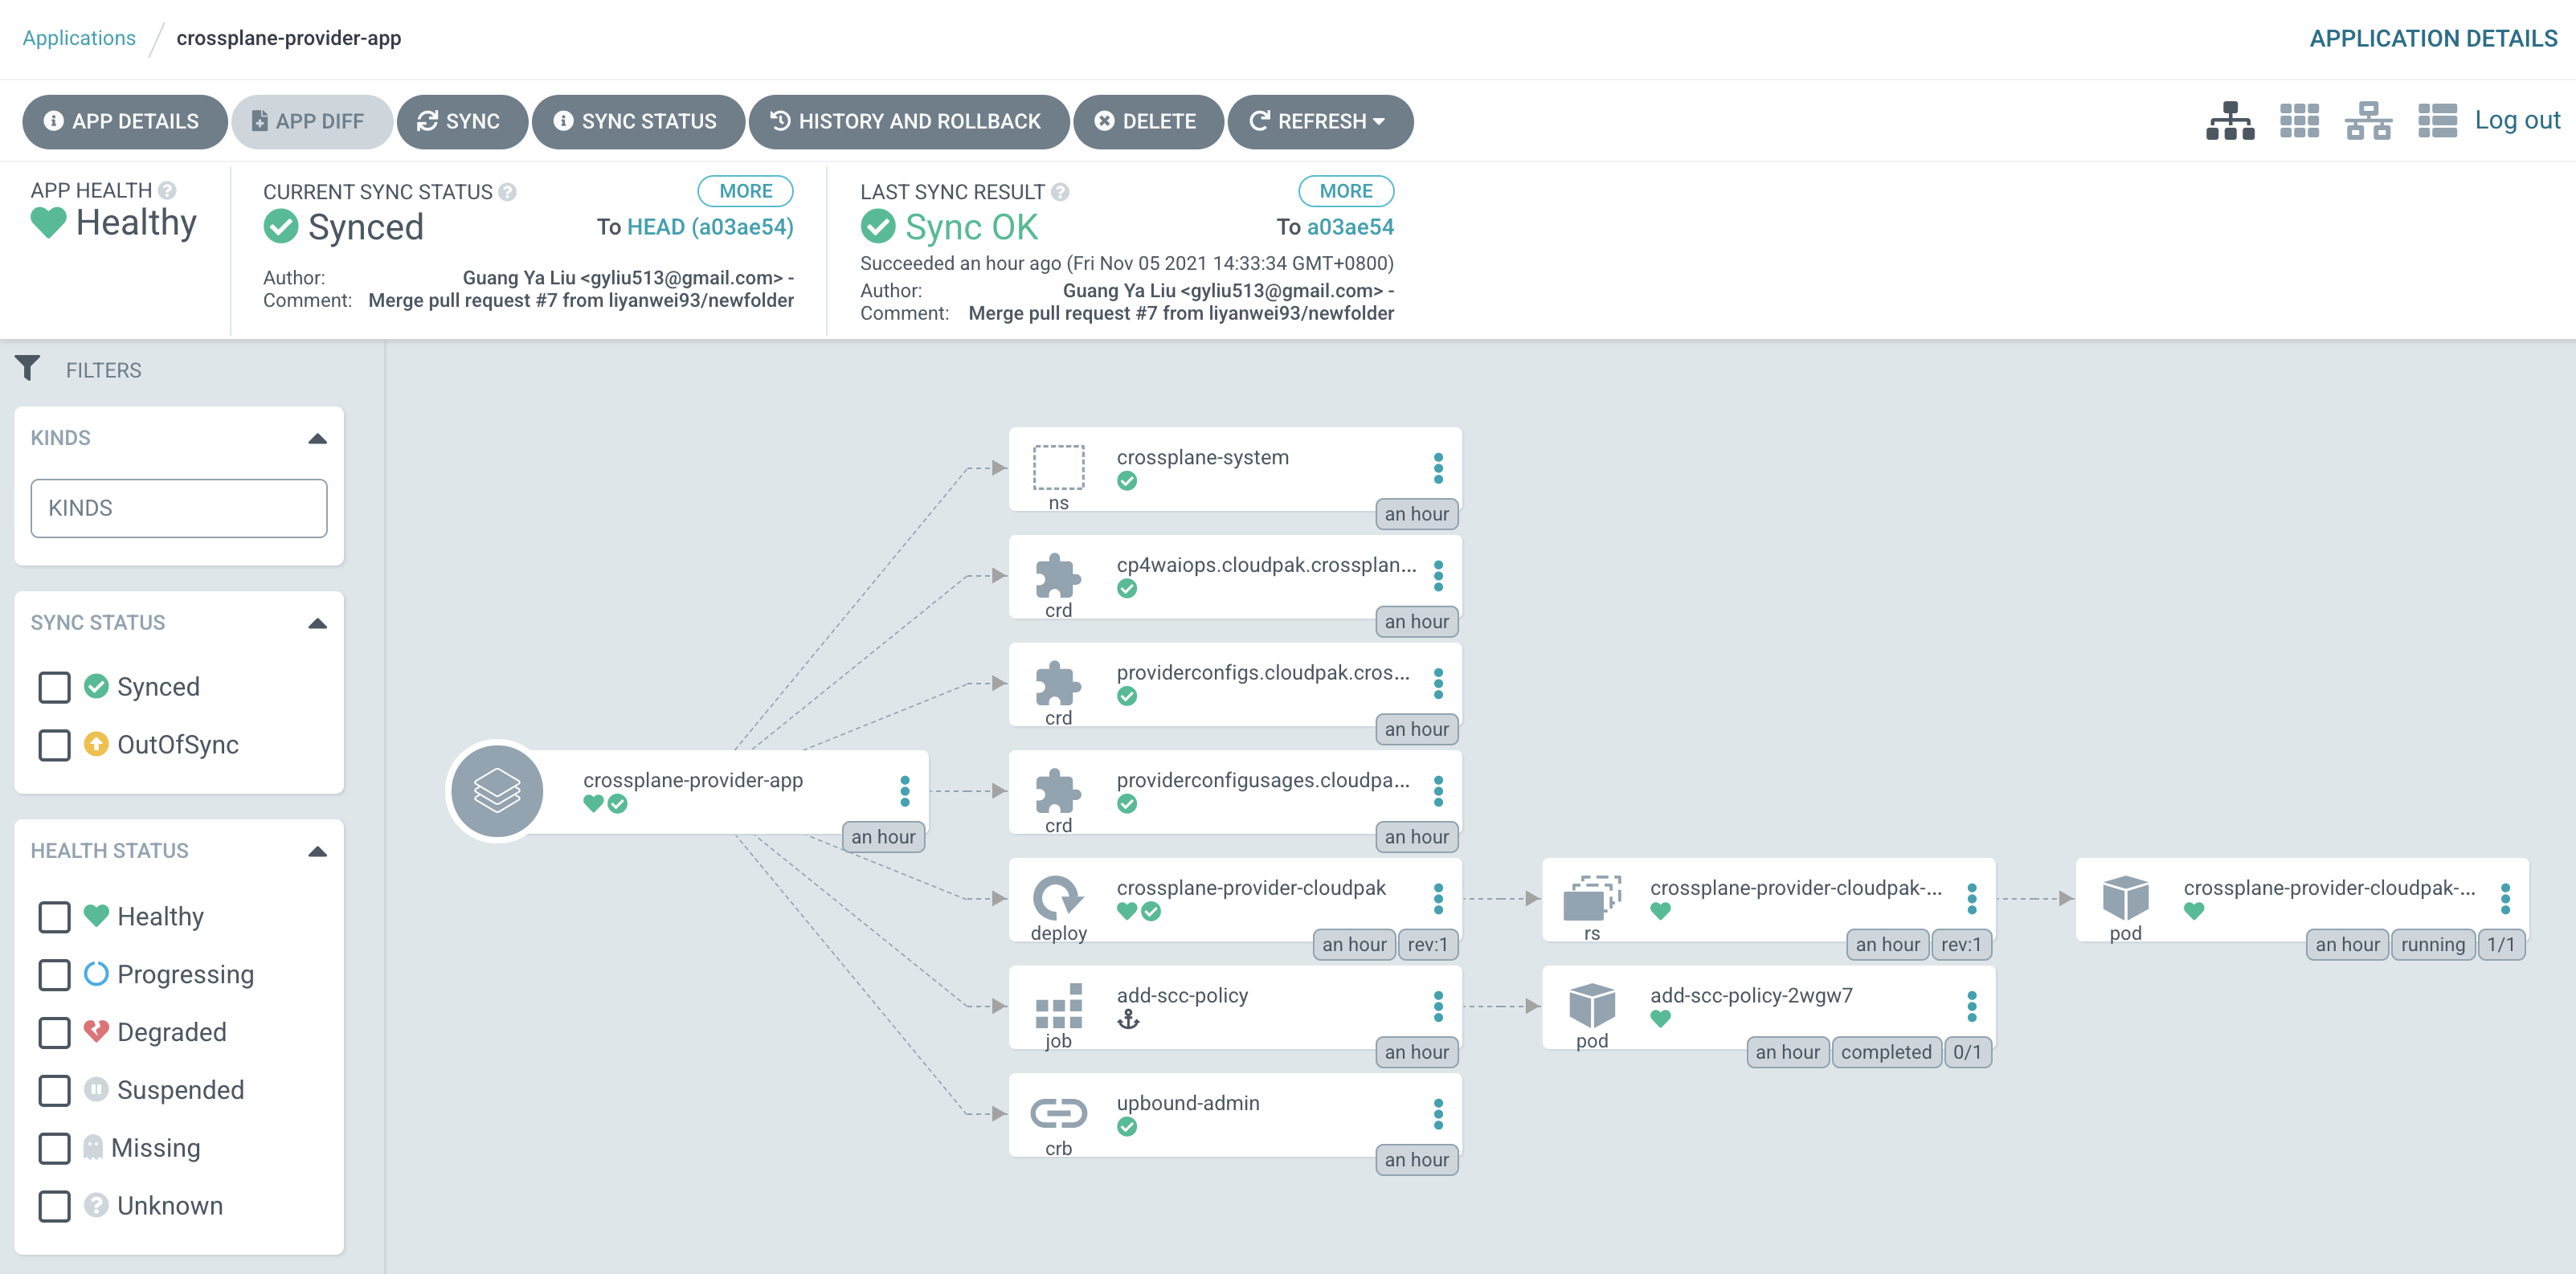
Storage Consideration
It depends where the OCP comes from , if you're using fyre , then could create gitops application
GENERAL
Application Name: ceph
Project: default
SYNC POLICY: Automatic

SOURCE
REPO URL : https://github.com/IBM/cp4waiops-gitops
Target version: HEAD
path: ceph

DESTINATION
Cluster URL: https://kubernetes.default.svc
Namespace: rook-ceph
DIRECTORY
DIRECTORY RECURSE: tick it
Deploy Cloud Paks
Create a secret storing your entitlement key:
kubectl create secret generic image-pull-secret --from-literal=cp.icr.io=cp:<entitlement-key> -n crossplane-system
Note: refer to CP4WAIOPS-KC to replace the entitlement-key
Create a secret storing target ocp cluster kubeconfig :
kubectl create secret generic openshift-cluster-kubeconfig --from-file=credentials=<kubeconfig> -n crossplane-system
Note: please replace the kubeconfig to your real file , default value : /root/.kube/config
Create a ArgoCD application for installing cp4waiops in-cluster
GENERAL
Application Name: anyname(like "cp4waiops")
Project: default
SYNC POLICY: Automatic

SOURCE
REPO URL : https://github.com/IBM/cp4waiops-gitops
Target version: HEAD
path: config/3.1/cp4waiops

DESTINATION
Cluster URL: https://kubernetes.default.svc
Namespace: upbound-system

HELM
spec.cp4waiops_namespace: cp4waiops
spec.channel: v3.1
spec.imageCatalog: icr.io/cpopen/aiops-orchestrator-catalog:3.1-latest
spec.imagePullSecret: ibm-entitlement-key
spec.kubeConfigSecretName: openshift-cluster-kubeconfig
spec.kubeConfigSecretNS: crossplane-system
spec.providerConfigRef: openshift-cluster-provider-config
spec.storageClass: rook-cephfs
spec.storageClassLargeBlock: rook-cephfs
Verify Cloud Paks Installation
CLI Verify
After instana instance was deployed, you can run the command as follows to check:
kubectl get application -A
In this tutorial, the output of the above command is as follows:
# kubectl get application -A
NAMESPACE          NAME                      SYNC STATUS   HEALTH STATUS
openshift-gitops   ceph                      Synced        Healthy
openshift-gitops   cp4waiops                 Synced        Healthy
openshift-gitops   crossplane-provider       Synced        Healthy
openshift-gitops   crossplane-provider-app   Synced        Healthy
Wait a while and check if all pods under namespace cp4waiops and are running well without any crash.
kubectl get pod -n cp4waiops
UI Verify
From Argo CD UI, you will be able to see there are another application added as follows:
- The following picture is the detail of the
cp4waiops, you can see all of the resources for this app.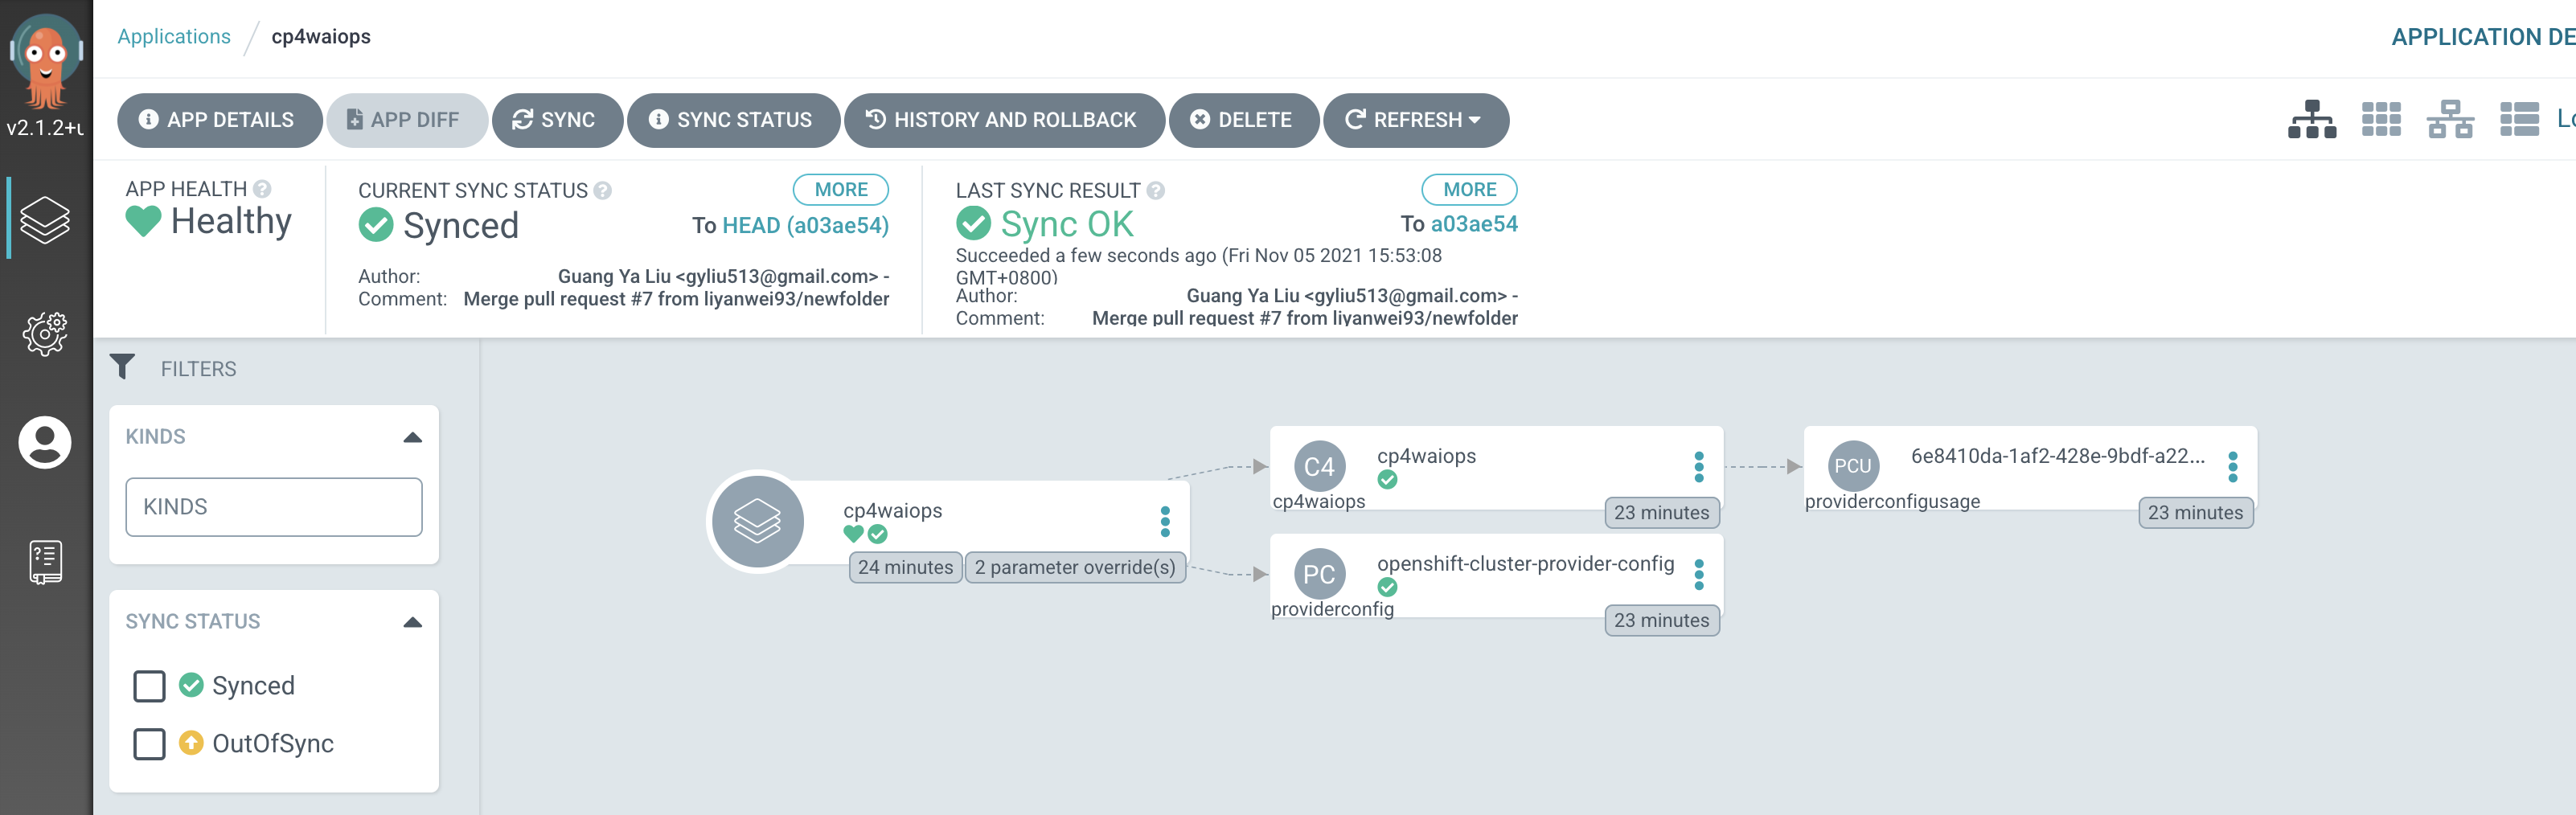
Access CP4WAIOps UI
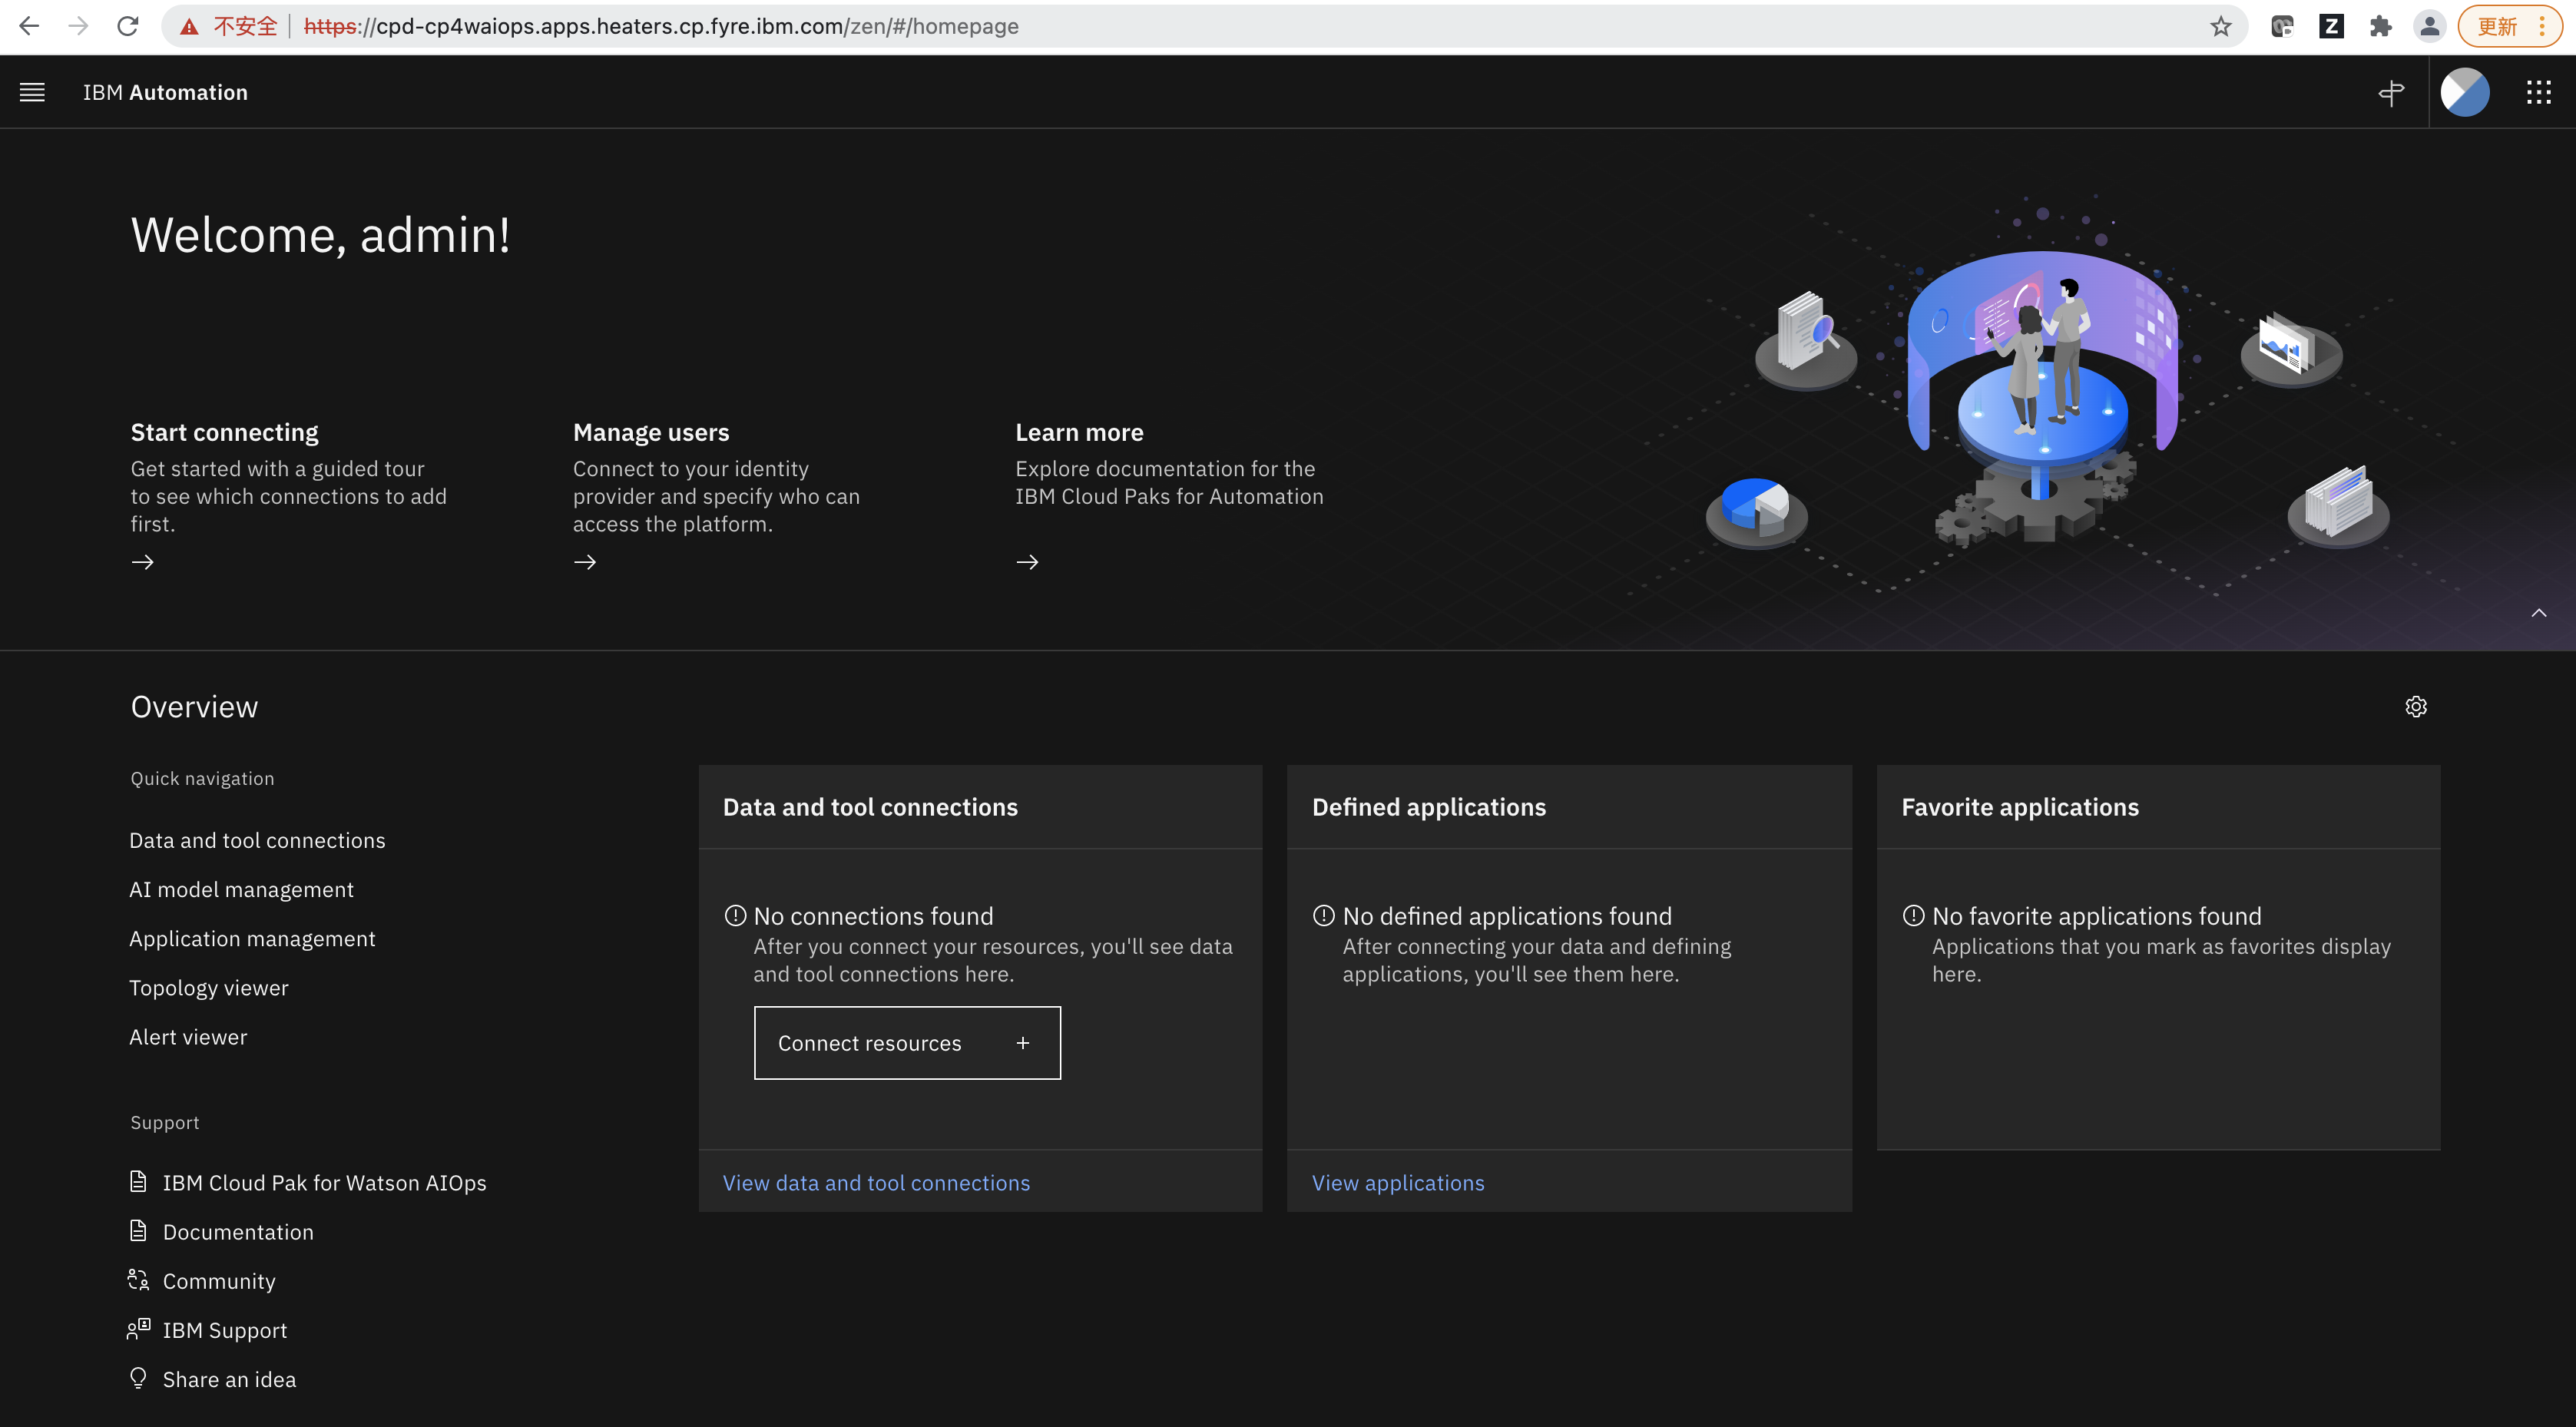
After you successfully install IBM Cloud Pak for Watson AIOps, check CP4WAIOPS-KC to get the URL for accessing the IBM Cloud Pak for Watson AIOps console, username and password.
After click Log In, you will be navigated to the CP4WAIOps UI as follows.