OpenShift Operator
公式ドキュメント:https://www.ibm.com/docs/ja/instana-observability/current?topic=agents-installing-red-hat-openshift
はじめに
本ページでは、OpenShift に Instana Agent を導入するまでの手順を記述しています。
OpenShift に Instana Agent を導入する方法は複数ありますが、ここでは最も簡単な Operator での導入を案内します。
Helmによるインストール方法や、非インターネット接続環境などでのインストールなどをご案内しています。
なお、Instana AutoTrace Webhookは、すでに稼働しているアプリケーションには有効となりません。すでに稼働しているアプリケーションに対してInstana AutoTrace Webhookを設定するためには、Pod, ReplicaSets, StatefulStes, Deployments, DeploymentConfigsを再起動してください。
対象環境
本ページ作成時の対象環境は以下です。
- 作成日: 2025年7月26日
- OpenShift バージョン: 4.16
- Instana バージョン: 1.0.300
事前確認
OpenShift CLI(oc) が使えることを確認してください。
また、oc login でOpenShiftに管理者権限でログインしておいてください。
詳細は Red Hat Documentation - OpenShift Container Platform を参照ください。
Instana情報の確認
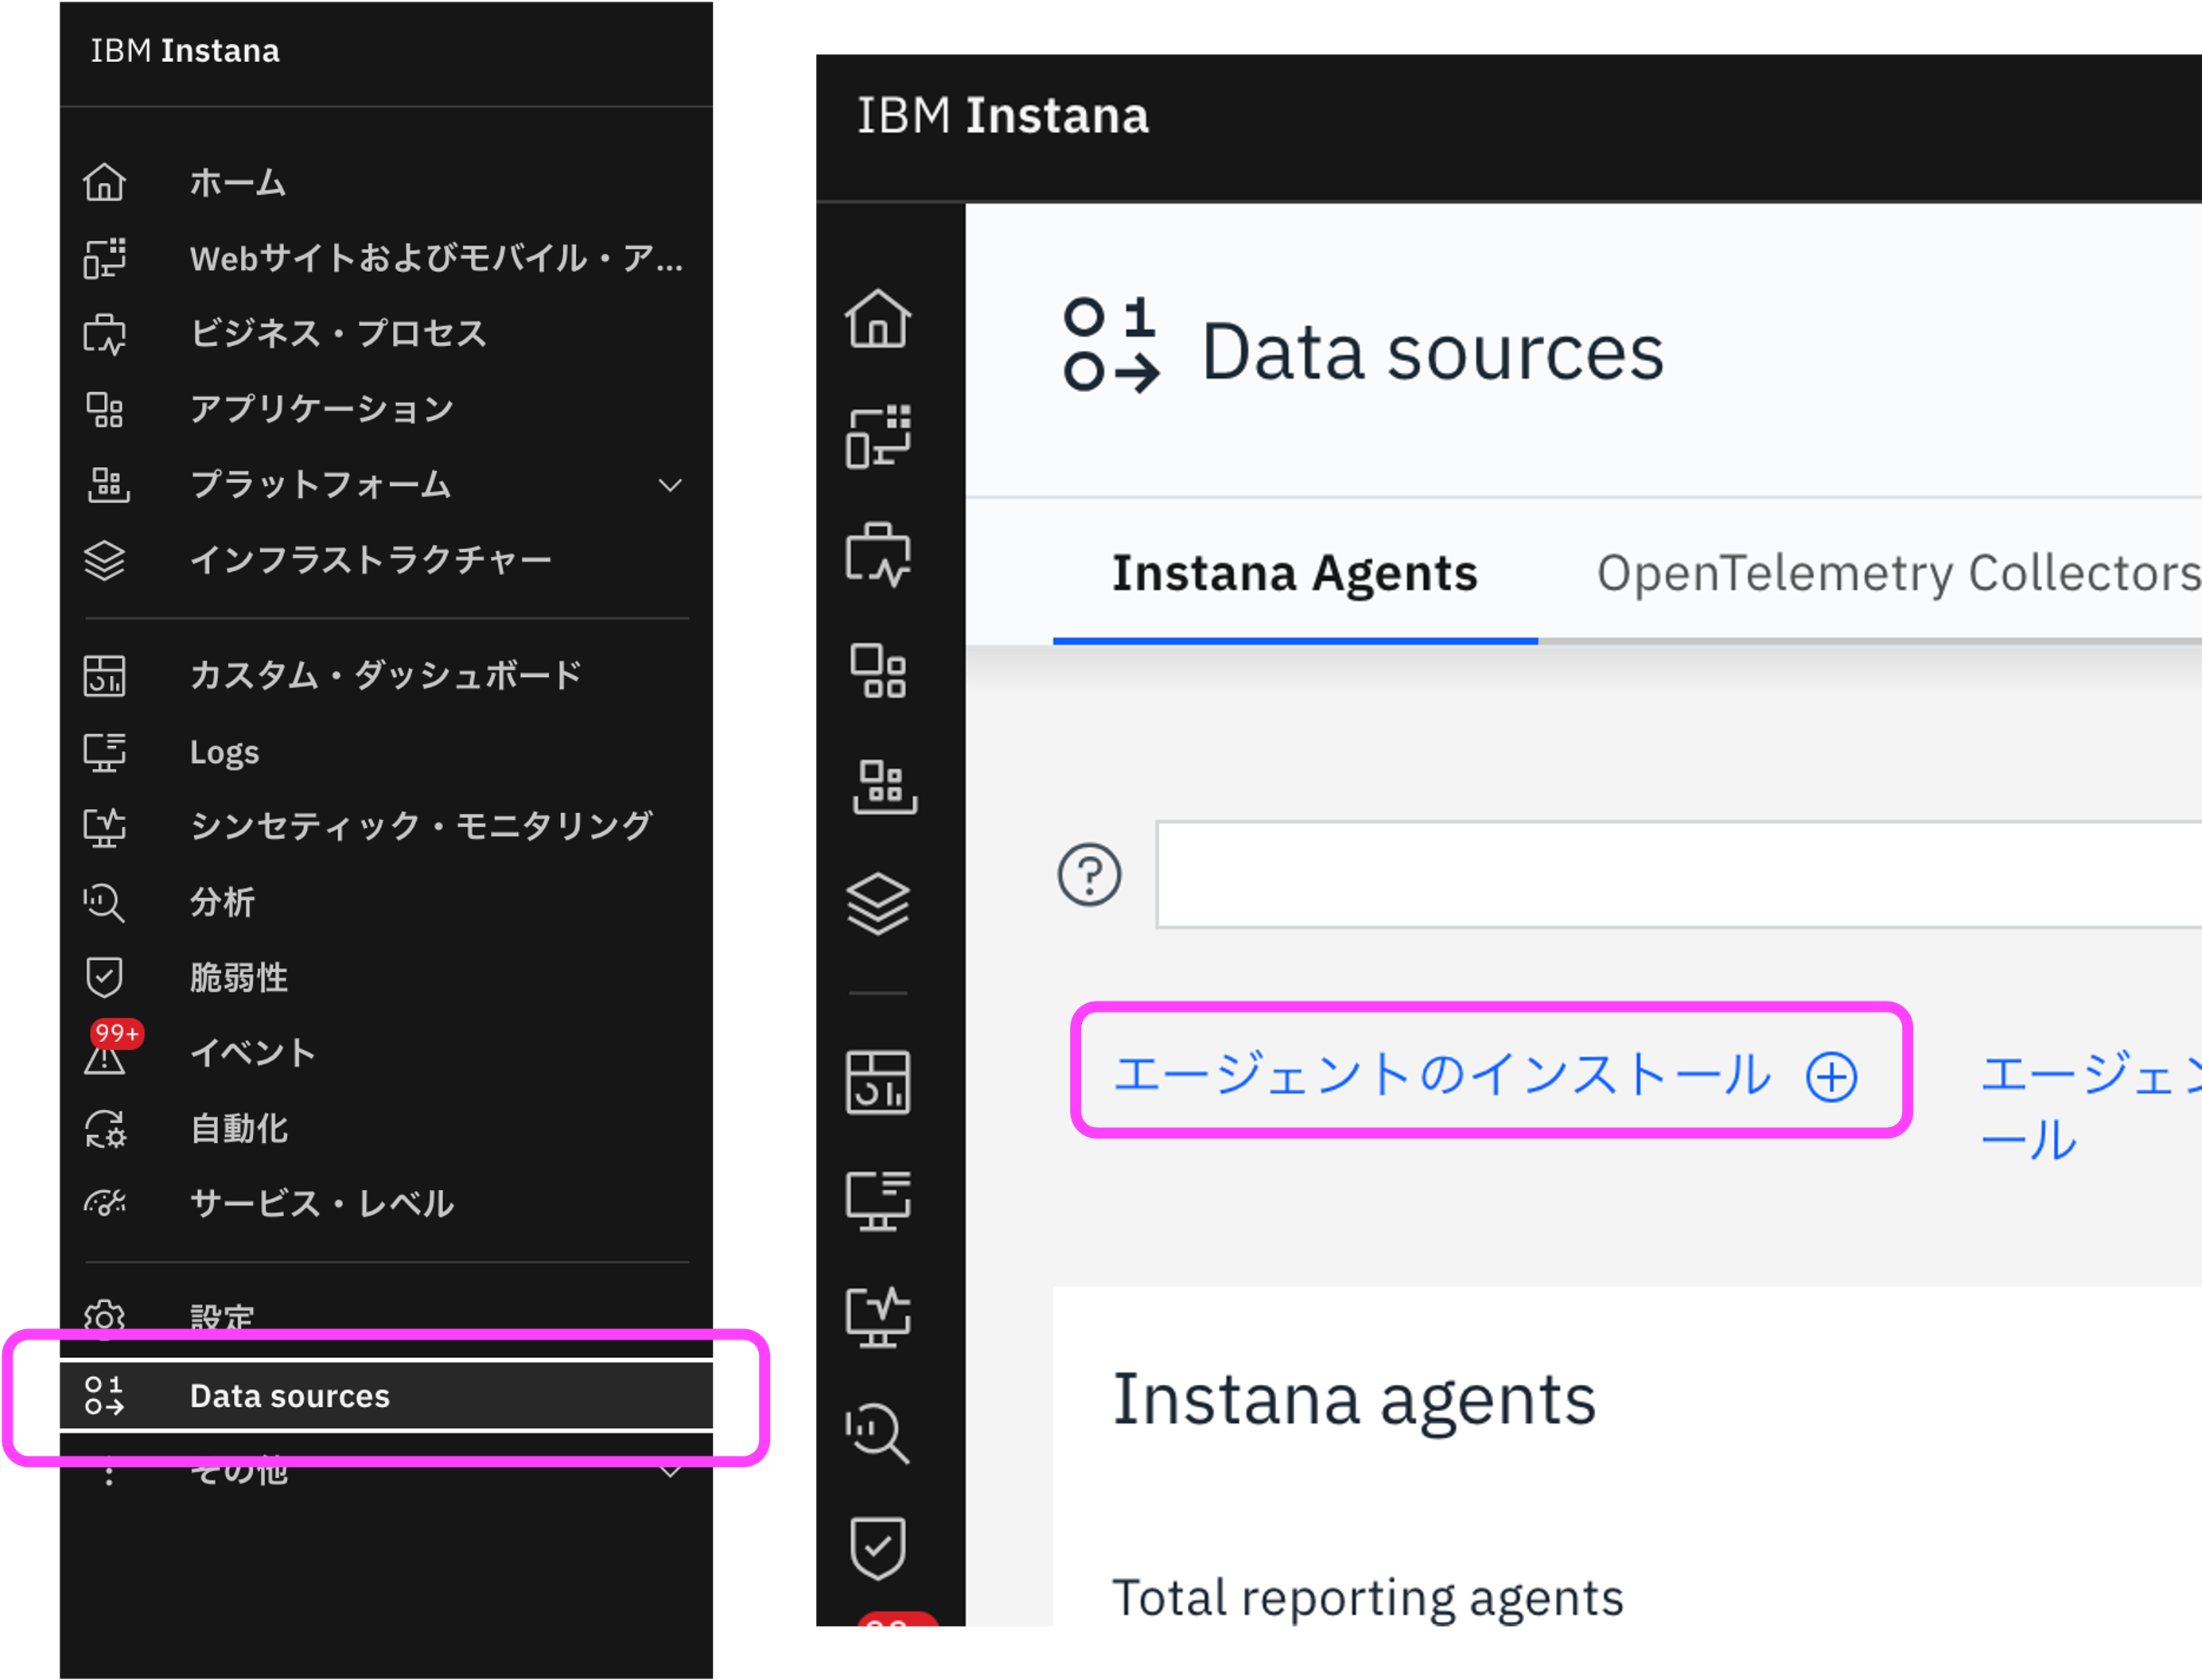
Instana SaaS にログインし、メニューの「Data Sources」をクリック、「エージェントのインストール」リンクをクリックします。
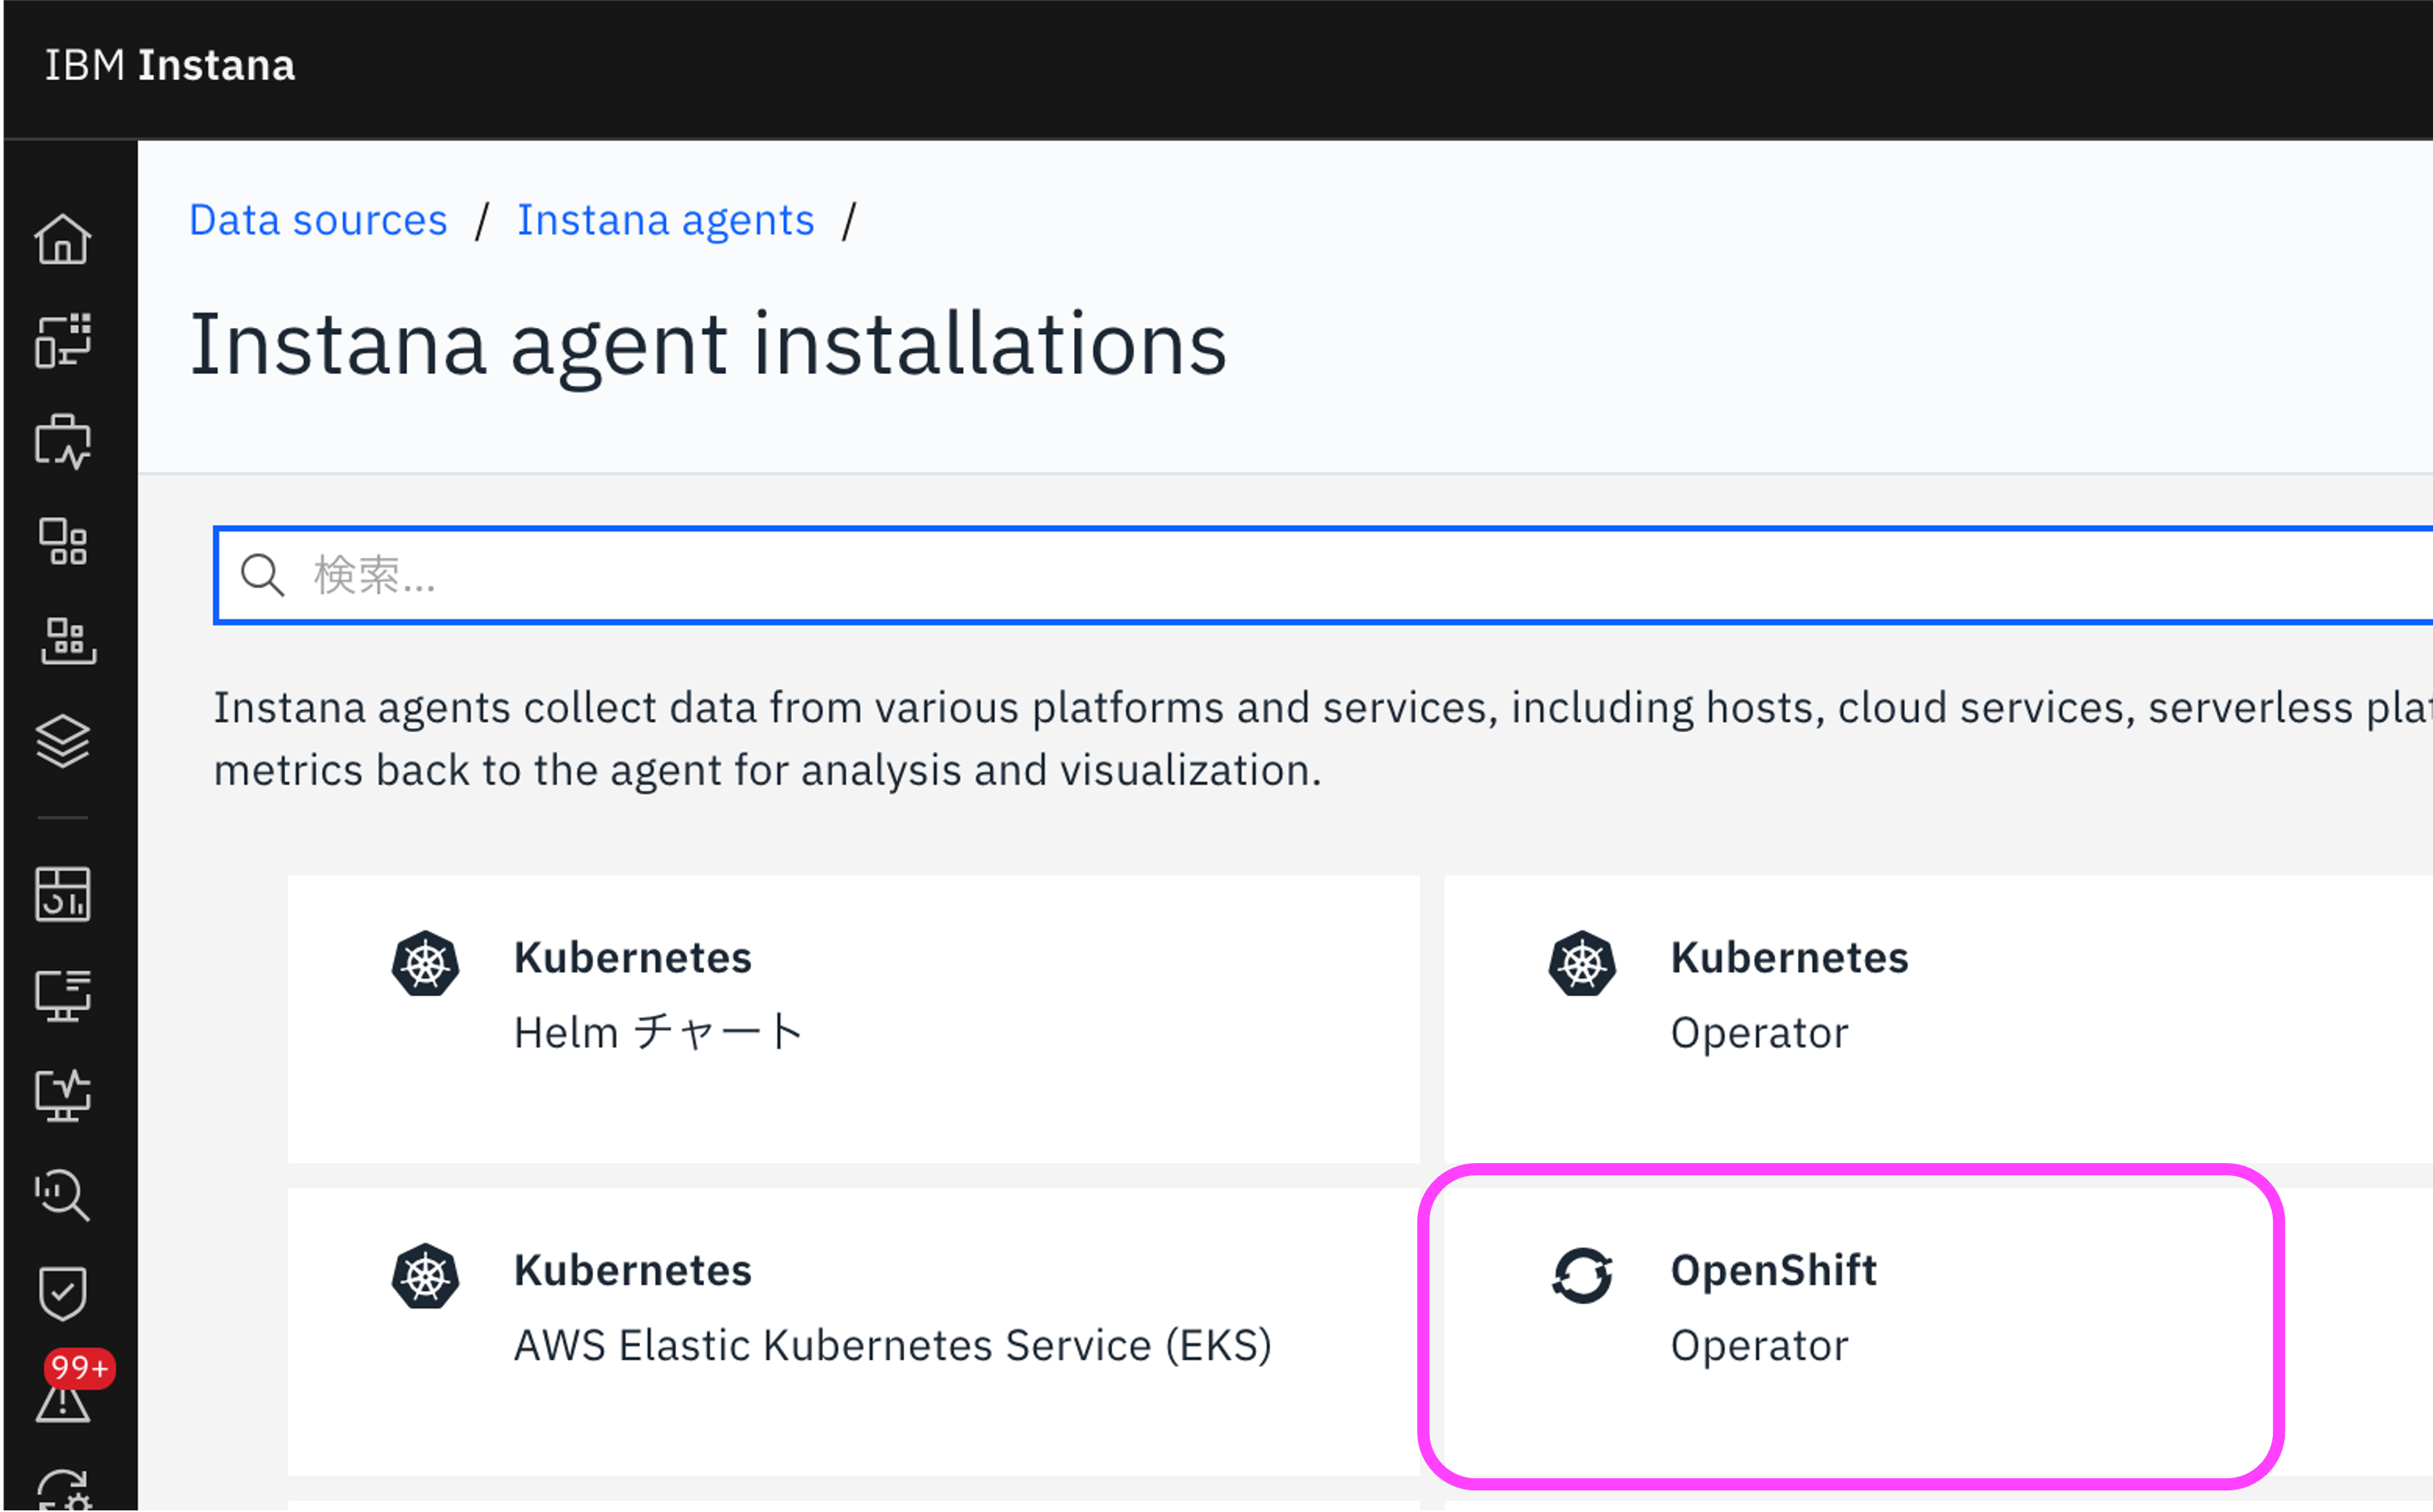
OpenShift Operator を選択します。
画面に従って、Step1〜Step4を実施します。
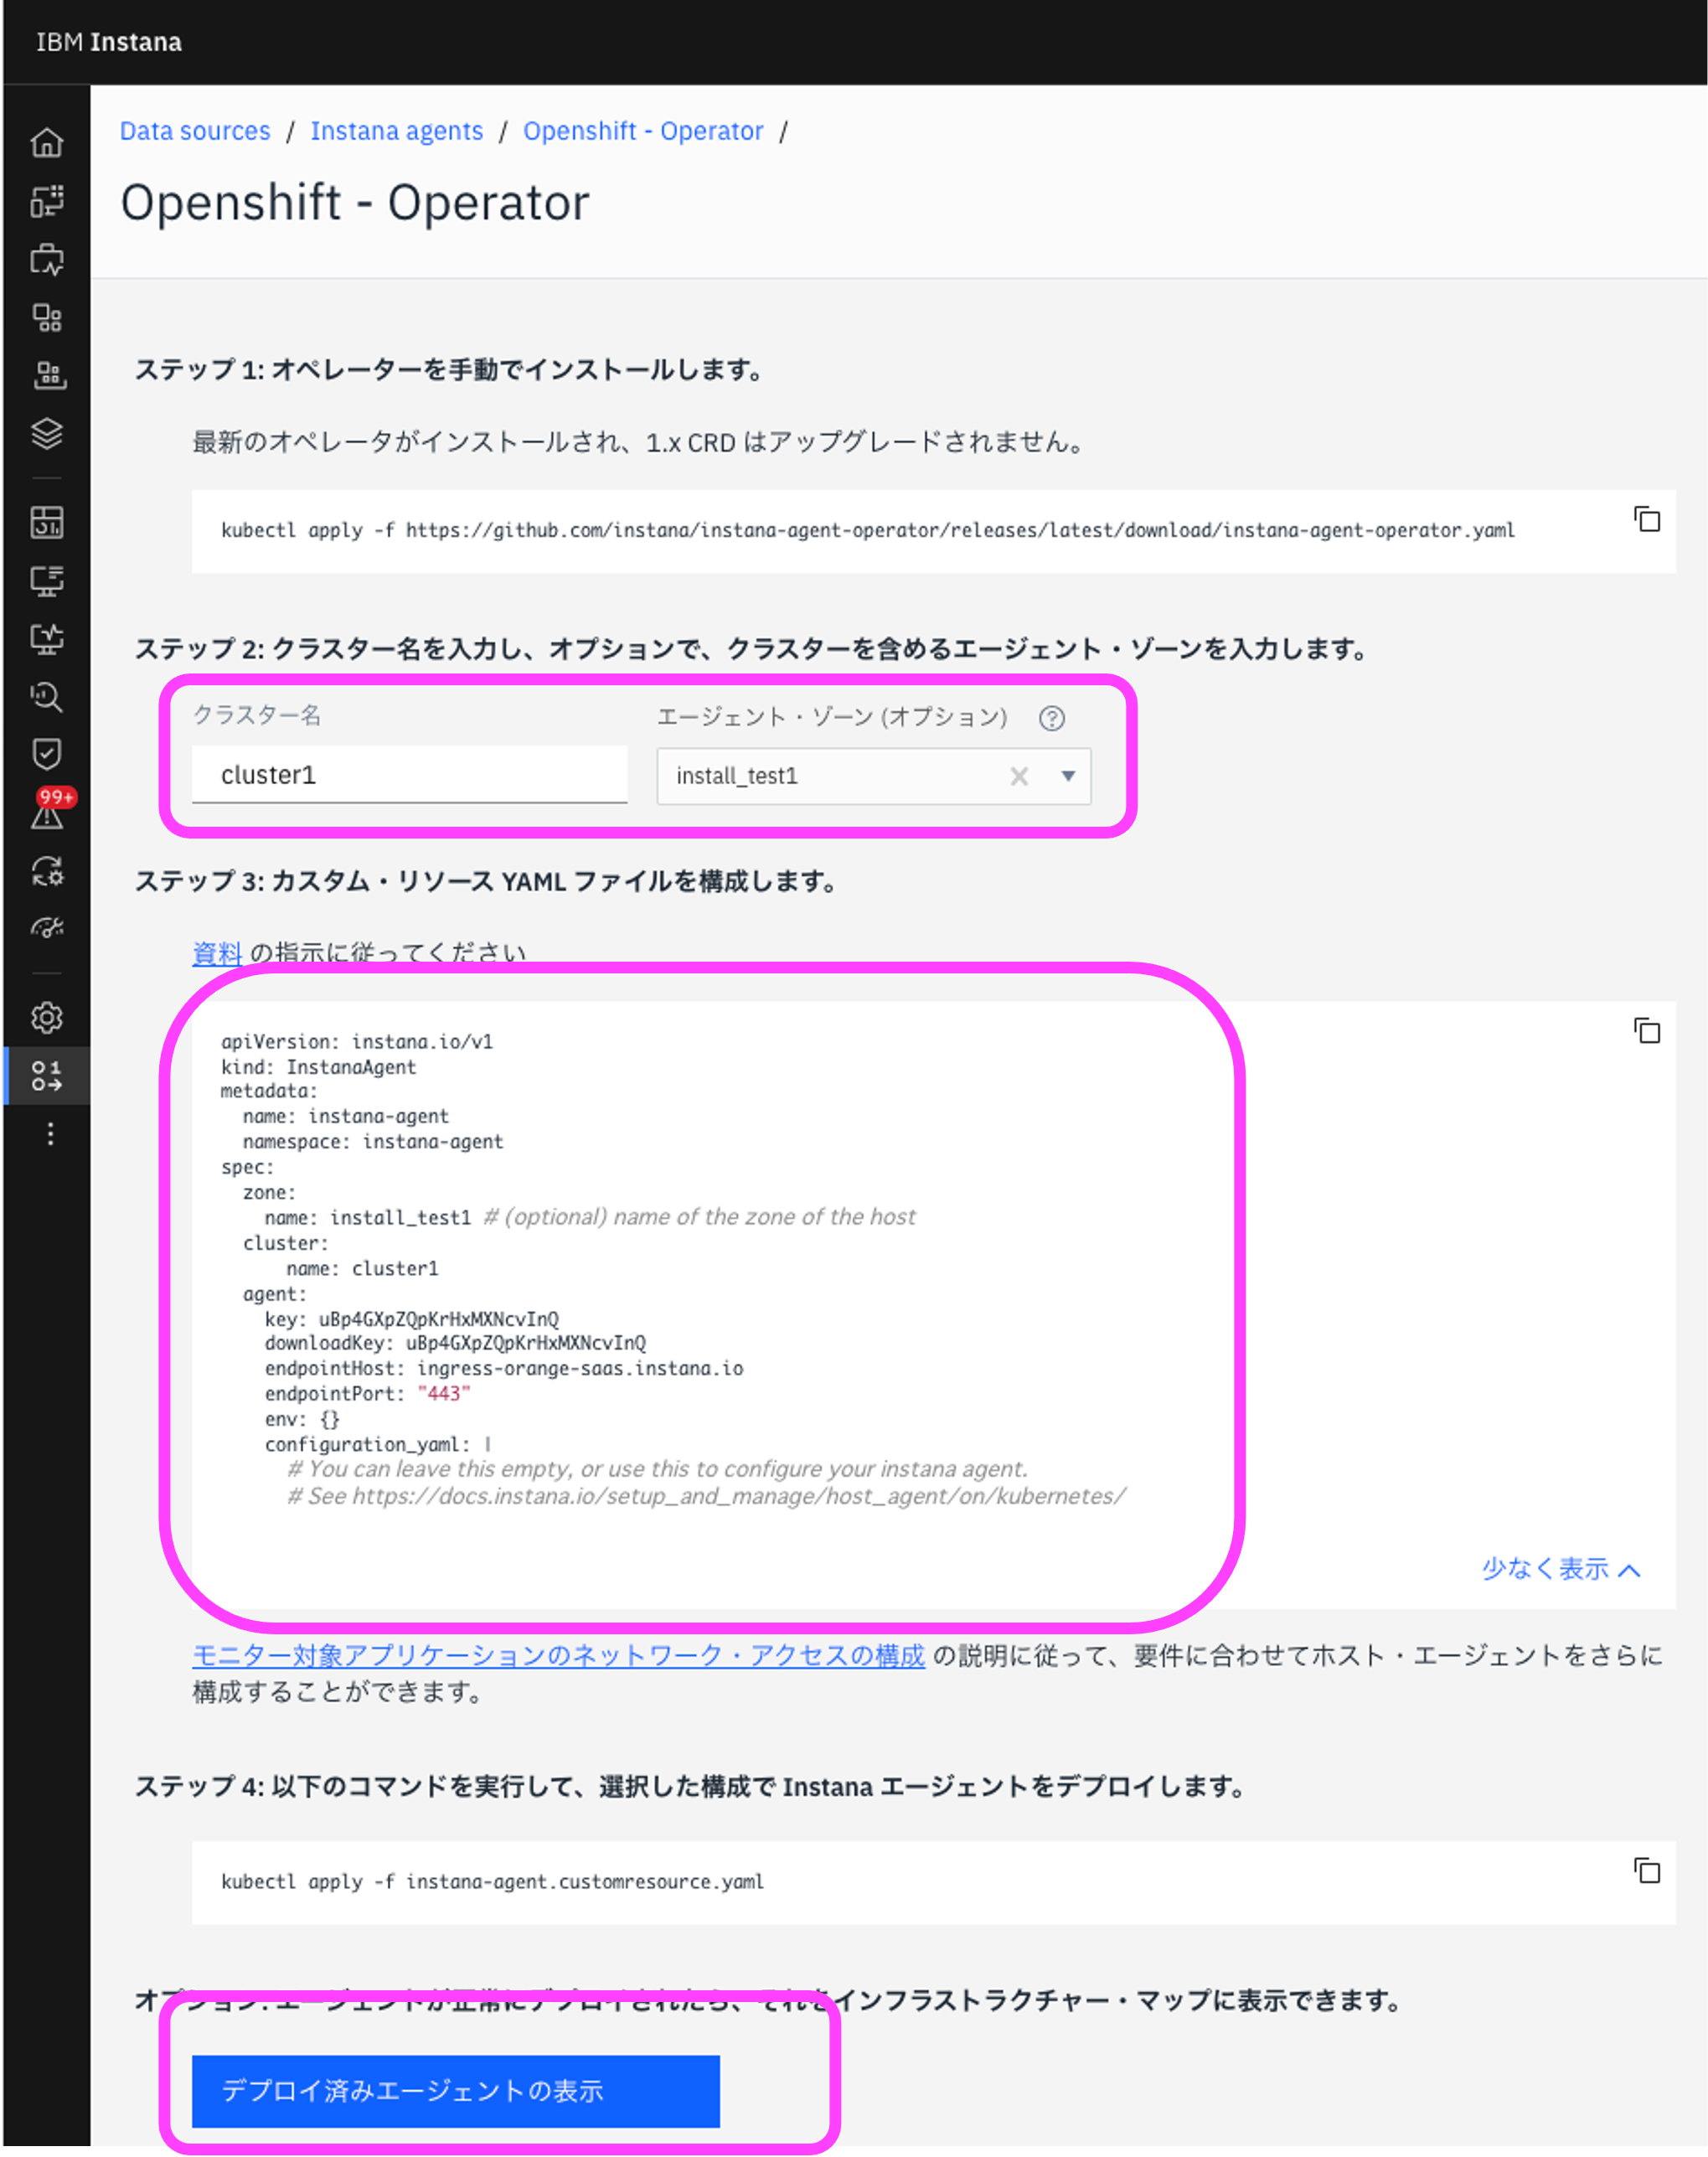
Step1: Operatorを手動でインストール
最新のOperatorをインストールするために、以下のコマンドを実行します。
oc apply -f https://github.com/instana/instana-agent-operator/releases/latest/download/instana-agent-operator.yaml
以下の形でさまざまなオブジェクトが作成されます。
namespace/instana-agent created
customresourcedefinition.apiextensions.k8s.io/agents.instana.io created
customresourcedefinition.apiextensions.k8s.io/agentsremote.instana.io created
serviceaccount/instana-agent-operator created
clusterrole.rbac.authorization.k8s.io/instana-agent-clusterrole created
clusterrole.rbac.authorization.k8s.io/leader-election-role created
clusterrolebinding.rbac.authorization.k8s.io/instana-agent-clusterrolebinding created
clusterrolebinding.rbac.authorization.k8s.io/leader-election-rolebinding created
configmap/manager-config created
deployment.apps/instana-agent-controller-manager created
詳細はInstana Agent Operator の説明画面をご参照ください。
Step2: クラスター名を入力
Instana の画面上で、管理対象のクラスター名を入力します。
例として、cluster1を入力します。
続けて、エージェント・ゾーンを入力します。ゾーンはInstanaのインフラストラクチャーマップでクラスタを利用者が判別するために使うもので、データセンター名やシステム名などわかりやすいものを利用してください。
今回は、install_test1を入力します。
Step3: カスタム・リソース YAML ファイルを構成
Step2で入力したクラスター名がStep3の画面上に表示されています。
文字列をコピーし、任意のテキストエディタにペーストし、instana-agent.customresource.yamlとして保存します。
Step4: カスタム・リソース YAML を apply
Step3で作成した instana-agent.customresource.yaml を OpenShiftに適用します。
oc apply -f instana-agent.customresource.yaml
以下の形でオブジェクトが作成されます。
instanaagent.instana.io/instana-agent created
Agentがデプロイされたことを確認
インストール後、以下のコマンドで全てのコマンドがRunningであることを確認します。
oc get pod -n instana-agent
10分ほどして、Instana で「インフラストラクチャー」画面を開きます。
Instana Agentを導入したOpenShiftクラスタがWorkerノード分表現されていたら、導入は成功です。
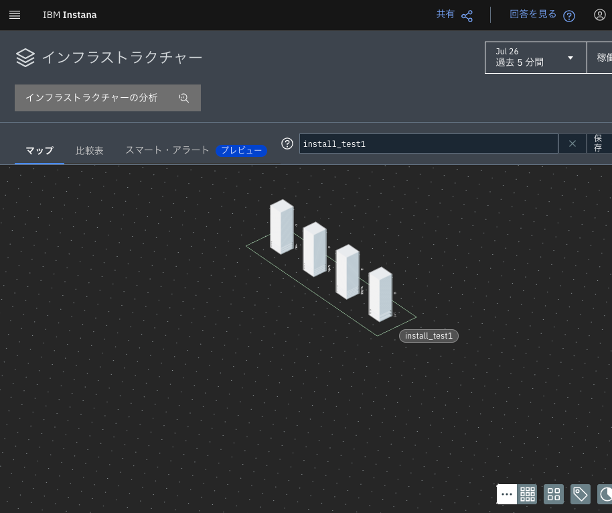
cluster1)やゾーン名(今回はinstall_test1)を入力することで、対象を容易に絞り込むことが可能です。