Integrate SevOne Metadata into ServiceNow attributes
Overview
In this lab we will review how we can copy SevOne Metadata into ServiceNow.
The flow of this lab is the following:
Firstly we will create the new attributes in ServiceNow
We will get the list of devices in SevOne
For each of the devices, we will check if the device exists in ServiceNow
If the device exists, we will get the values of the metadata attributes that we want to send to ServiceNow
We will update the ServiceNow CI with the values
Prerequirements
In order to complete this lab, it is required to have access to a ServiceNow instance. If you don't have one already, please create one using following the steps defined on this link.
It's important to change your role to admin to be able to use the instance properly (see link here )
We strongly recommend doing the 'Sync Sevone Devices with ServiceNow' lab first to have the same devices in both platforms
Prepare the System
As we will copy some custom metadata into ServiceNow, firstly we need to prepare ServiceNow to support the new attributes.
Go to your ServiceNow instance
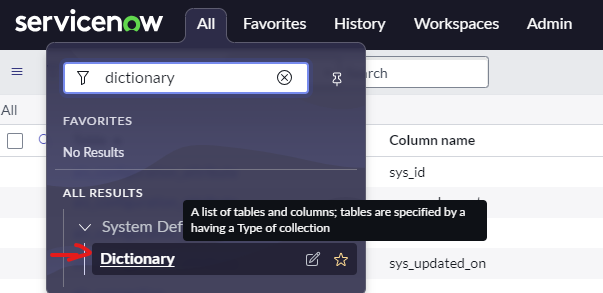
a. Click on All
b. Search for dictionary, and click on Dictionary
c. Click on New (top right corner)

    i. Table: IP Device

    ii. Type: String

    iii. Column label: Contact

    iv. Column name: u_contact

    v. Max length: 256

    vi. Click Submit

d. Click on New (top right corner)

    i. Table: IP Device

    ii. Type: Integer

    iii. Column label: SevOne_ID

    iv. Column name: u_sevone_id

    v. Max length: 16

    vi. Click Submit
SevOne - ServiceNow attribute sync
If SevOne authentication has already been created, please skip this block of actions and continue to step 5.
Log into SANO automation platform
Go to Authentications
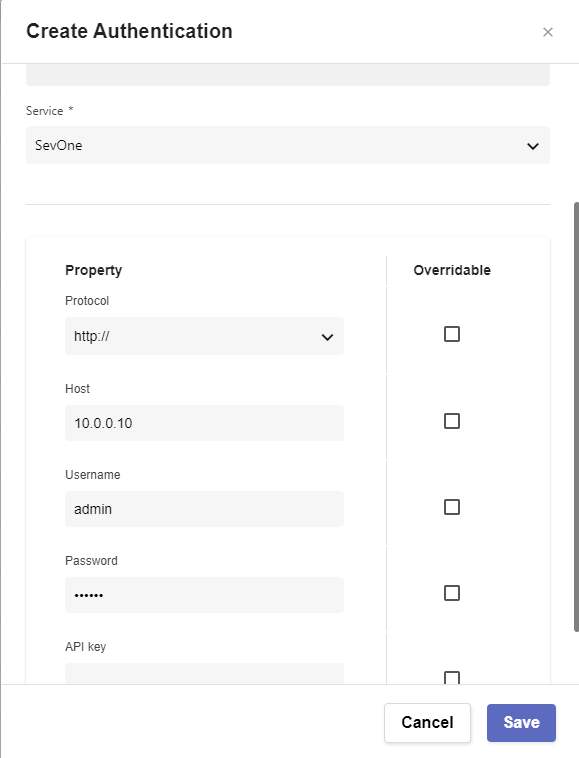
Click Create Authentication
a. Name: SevOne
b. Service: SevOne
c. Protocol: http:// (<-- important)
d. Host: 10.0.0.10
e. Username: admin
f. Password: SevOne
If ServiceNow authentication has already been created, please skip this block of actions and continue to step 6.
Click Create Authentication
a. Name: ServiceNow
b. Service: ServiceNow
c. Protocol: https://
d. Host: (Your SNOW instance URL, example: dev109667.service-now.com)
e. Username: (Your SNOW instance username, example: admin)
f. Password: (Your SNOW instance password)
Go to Workflows
Click Create Workflow
a. Name: Sync SevOne metadata with ServiceNOW attributes
b. Layout type: Sequence
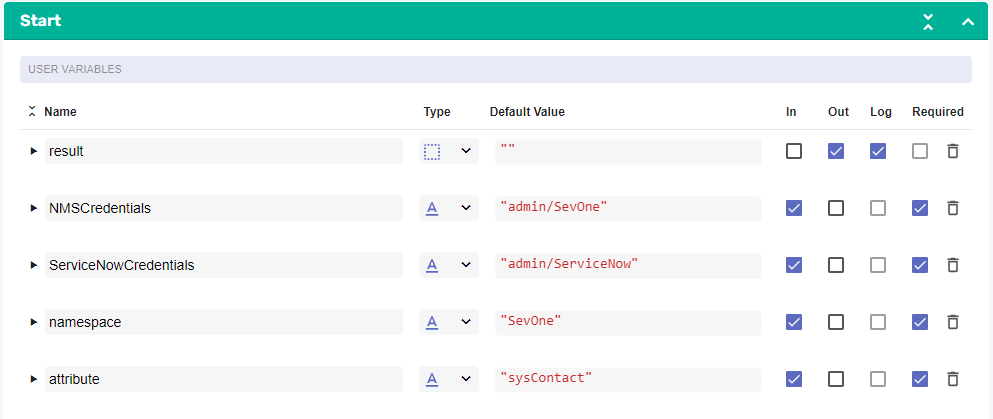
Add variables to Start
a. NMSCredentials
i. Name: NMSCredentials

ii. Type: Authentication -> SevOne

iii. Default Value: "admin/SevOne"

iv. In

v. Required
b. ServiceNowCredentials
i. Name: ServiceNowCredentials

ii. Type: Authentication -> ServiceNow

iii. Default Value: "admin/ServiceNow"

iv. In

v. Required
c. namespace
i. Name: namespace

ii. Type: string

iii. Default Value: "ServiceNow"

iv. In

v. Required
d. attribute
i. Name: attribute

ii. Type: string

iii. Default Value: "sysContact"

iv. In

v. Required
Change to Flow View
On the left hand side panel, Click on SevOne -> REST v3 -> Metadata
Select "Metadata Devices (POST)" and drop it after the building block START
a. Change name to SevOne_Get_Devices
b. Click on the building block to open the right side panel and complete the following fields
i. authKey: $NMSCredentials
Add a new building block, Common -> ForEach
a. Change name to ForEach_Device
b. Click on the building block to open the right side panel and complete the following fields
i. list: $SevOne_Get_Devices.result.devicesInside the LOOP, add a new building block, ServiceNow -> getTable
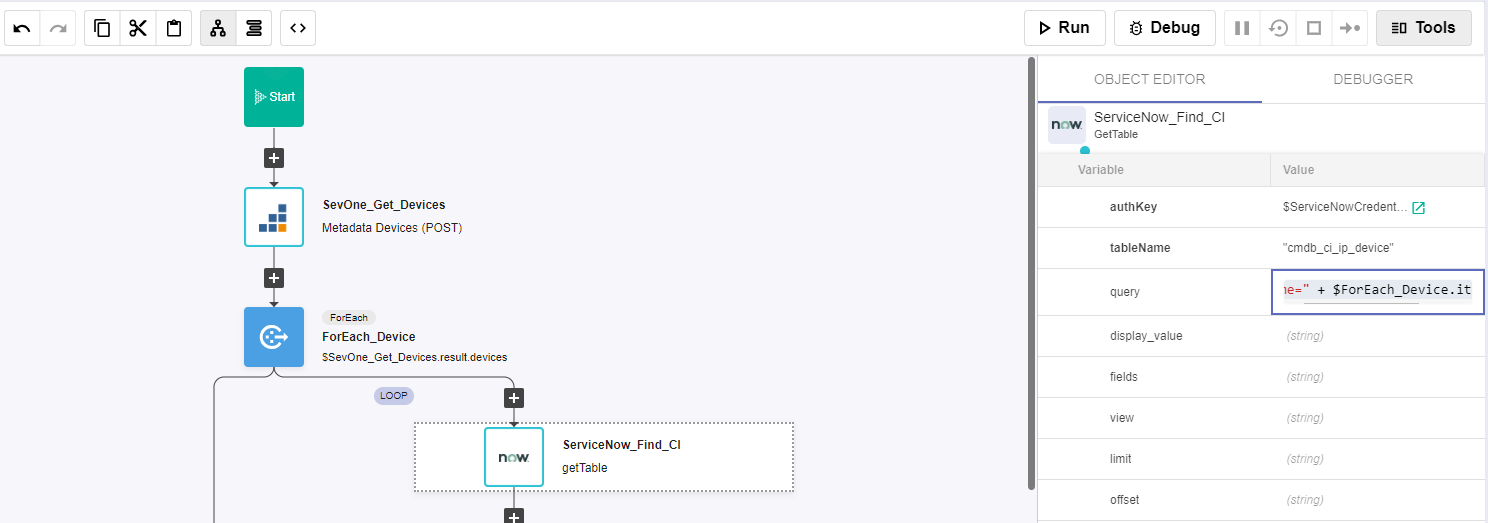
a. Change name to ServiceNow_Find_CI
b. Click on the building block to open the right side panel and complete the following fields
i. authKey: $ServiceNowCredentials

ii. tableName: "cmdb_ci_ip_device"

iii. query: "name=" + $ForEach_Device.item.name
Add a new building block, Common -> If
a. Change name to If_CI_Found
b. Click on the building block to open the right side panel and complete the following fields
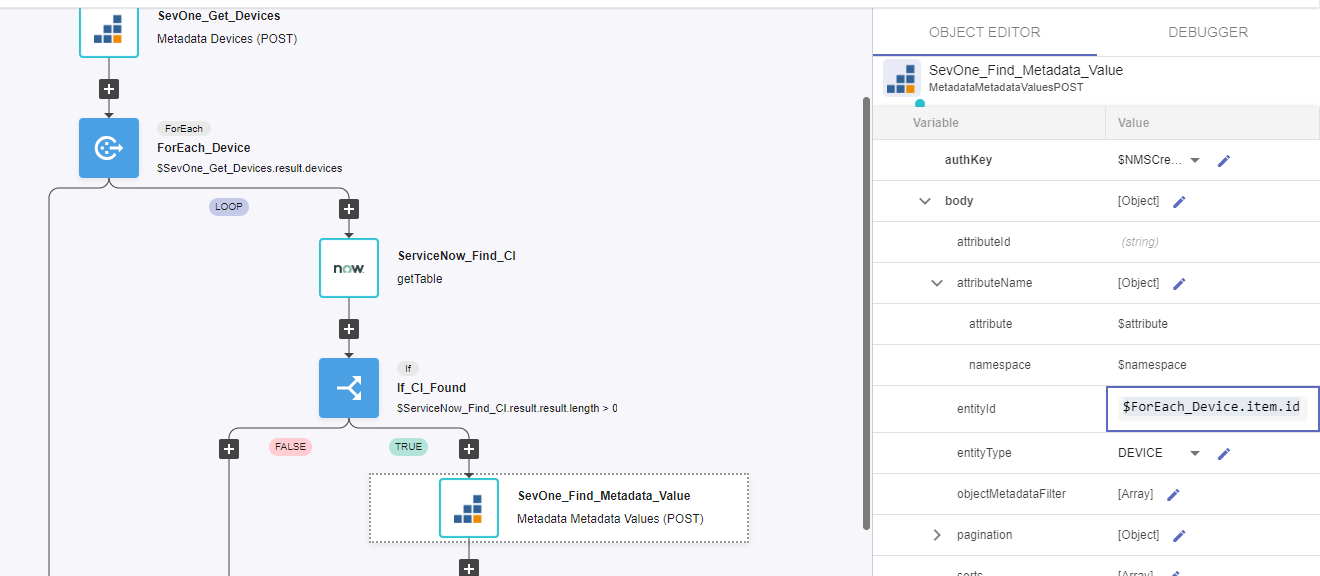
i. condition: $ServiceNow_Find_CI.result.result.length > 0In the 'TRUE' branch of the If, add a new building block, SevOne -> REST v3 -> Metadata -> Metadata Metadata Values (POST)
a. Change name to SevOne_Find_Metadata_Value
b. Click on the building block to open the right side panel and complete the following fields
i. authKey: $NMSCredentials

ii. body:

    1. attributeName:

        a. attribute: $attribute

        b. namespace: $namespace

    2. entityId: $ForEach_Device.item.id

    3. entityType: DEVICE
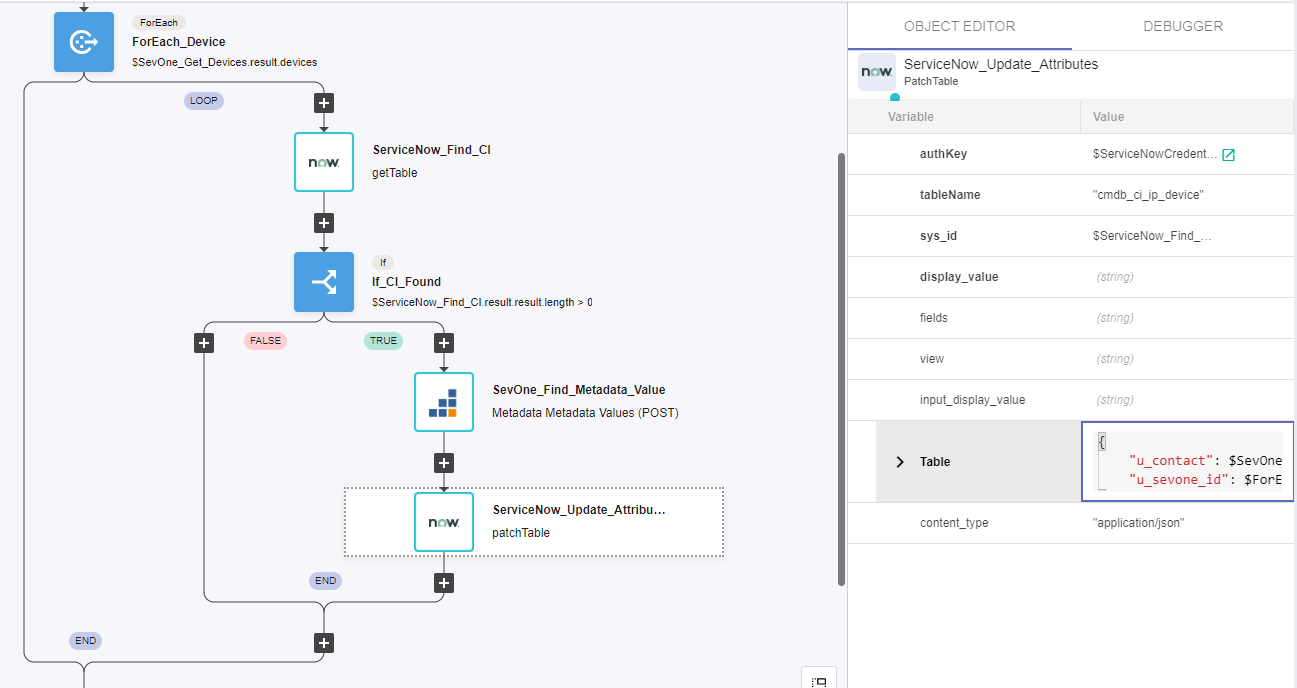
Add a new building block, ServiceNow -> patchTable
a. Change name to ServiceNow_Update_Attribute
b. Click on the building block to open the right side panel and complete the following fields
i. authKey: $ServiceNowCredentials

ii. tableName: "cmdb_ci_ip_device"

iii. sys_id: $ServiceNow_Find_CI.result.result[0].sys_id

iv. Table: click on the pencil item and paste the following content

    {
        "u_contact": $SevOne_Find_Metadata_Value.result.values[0],
        "u_sevone_id": $ForEach_Device.item.id
    }

v. content_type: "application/json"
Review
To test the workflow, click on Run (it will take around 1 minute to complete)
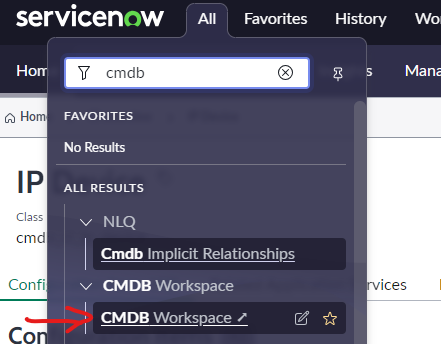
Go to your ServiceNow instance
i. Click on All
ii. Search for CMDB
iii. Click on CMDB workspace (inside the CMDB workspace group)
- Scroll down where CI overview is, and click on the 'Devices' column
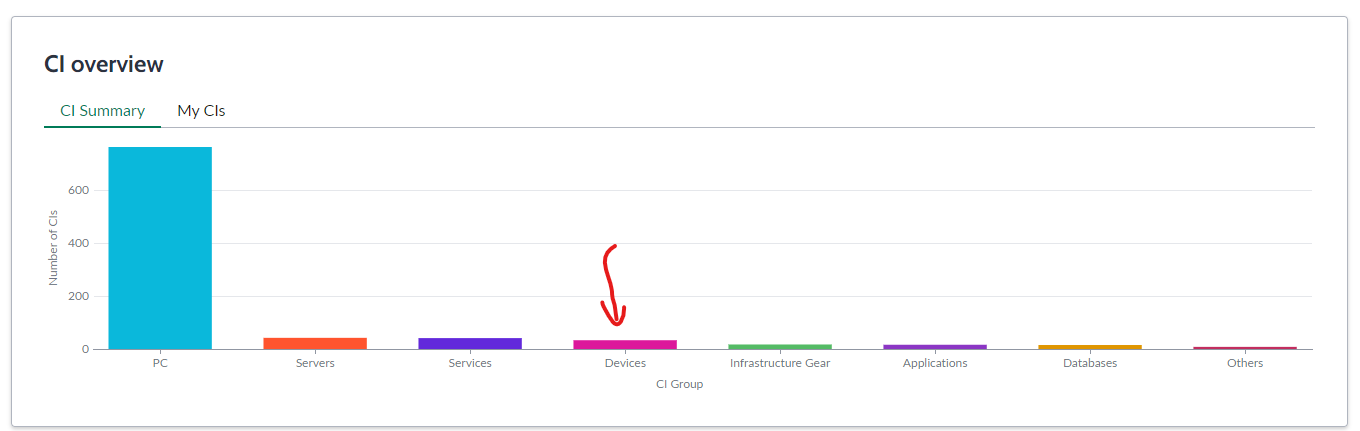
- Click on IP Device
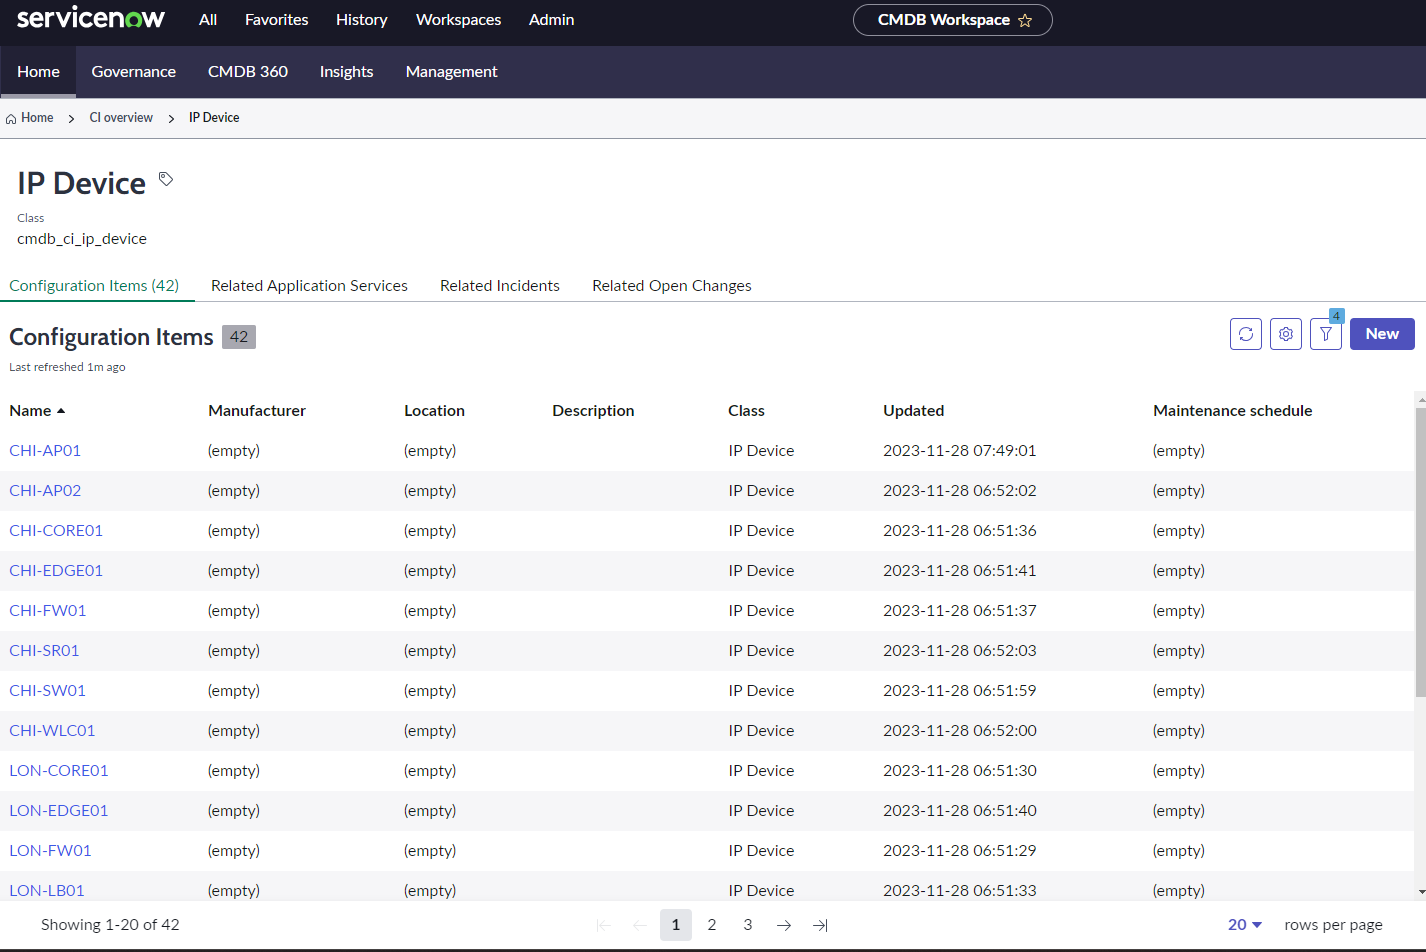
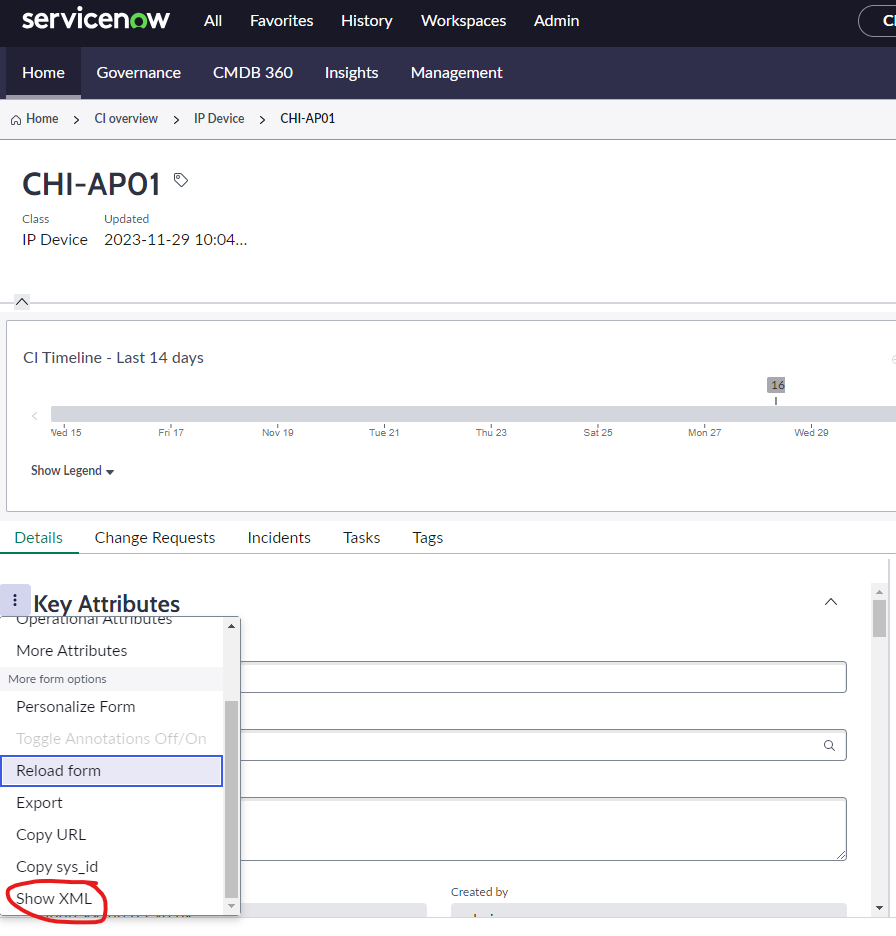
Click on any device, for example CHI-AP01
a. Navigate to the Details section (bottom half)
b. Click on the three dots next to Key Attributes
c. Click Show XML
- At the bottom of the XML file you should see the new fields populated, u_contact and u_sevone_id
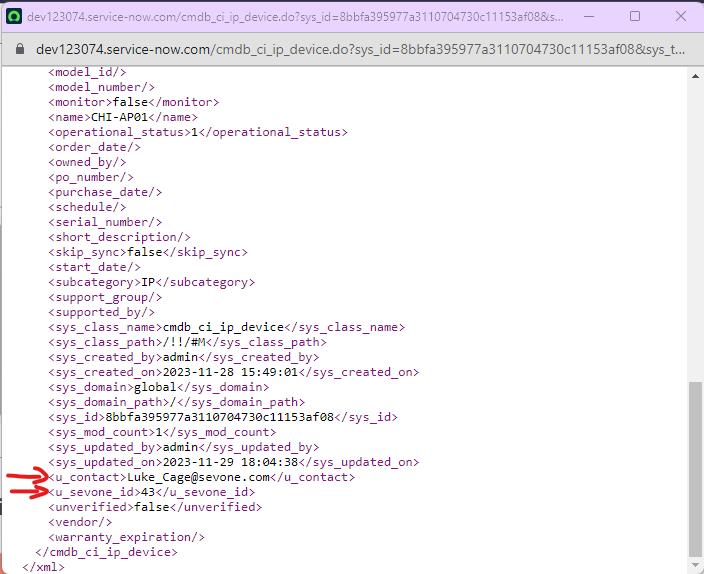
NOTE: the reason why these new fields don't appear directly on the web interface is because we haven't edited the out-of-the-box form in ServiceNow to display those new attributes.