Application Management
Table of Contents
- Introduction
- IBM Application Navigator (Hands-on)
- Application Logging (Hands-on)
- Application Monitoring (Hands-on)
- Day-2 Operations (bonus lab) (Hands-on)
- Summary
Introduction
In the previous labs, you learned to containerize and deploy modernized applications to OpenShift. In this section, you’ll learn about managing your running applications efficiently using various tools available to you as part of IBM Cloud Pak for Applications.
IBM Application Navigator
IBM Application Navigator provides a single dashboard to manage your applications running on cloud as well as on-prem, so you don’t leave legacy applications behind. At a glance, you can see all the resources (Deployment, Service, Route, etc.) that are part of an application and monitor their state.
-
In OpenShift console, from the left-panel, select Networking > Routes.
-
From the Project drop-down list, select
kappnav. -
Click on the route URL (listed under the Location column).
-
Click on
Log in with OpenShift. Click onAllow selected permissions. -
Notice the list of applications you deployed. Click on them to see the resources that are part of the applications.
As you modernize your applications, some workload would still be running on traditional environments. IBM Application Navigator, included as part of IBM Cloud Pak for Applications, supports adding WebSphere Network Deployment (ND) environments. So they can be managed from the same dashboard. Importing an existing WebSphere Application Server ND cell creates a custom resource to represent the cell. Application Navigator automatically discovers enterprise applications that are deployed on the cell and creates custom resources to represent those applications. Application Navigator periodically polls the cell to keep the state of the resources synchronized with the cell.
Application Navigator also provides links to other dashboards that you already use and are familiar with. You can also define your own custom resources using the extension mechanism provided by Application Navigator.
Application Logging
Pod processes running in OpenShift frequently produce logs. To effectively manage this log data and ensure no loss of log data occurs when a pod terminates, a log aggregation tool should be deployed on the cluster. Log aggregation tools help users persist, search, and visualize the log data that is gathered from the pods across the cluster. Let’s look at application logging with log aggregation using EFK (Elasticsearch, Fluentd, and Kibana). Elasticsearch is a search and analytics engine. Fluentd to receive, clean and parse the log data. Kibana lets users visualize data with charts and graphs in Elasticsearch.
Launch Kibana
-
In OpenShift console, from the left-panel, select Networking > Routes.
-
From the Project drop-down list, select
openshift-logging. -
Click on the route URL (listed under the Location column).
-
Click on
Log in with OpenShift. Click onAllow selected permissions. -
The following steps are illustrated in the screen recording at the end of this section. In Kibana console, from the left-panel, click on
Management. - Click on
Index Patterns. Click onproject.*.- This index contains only a set of default fields and does not include all of the fields from the deployed application’s JSON log object. Therefore, the index needs to be refreshed to have all the fields from the application’s log object available to Kibana.
-
Click on the refresh icon and then click on
Refresh fields.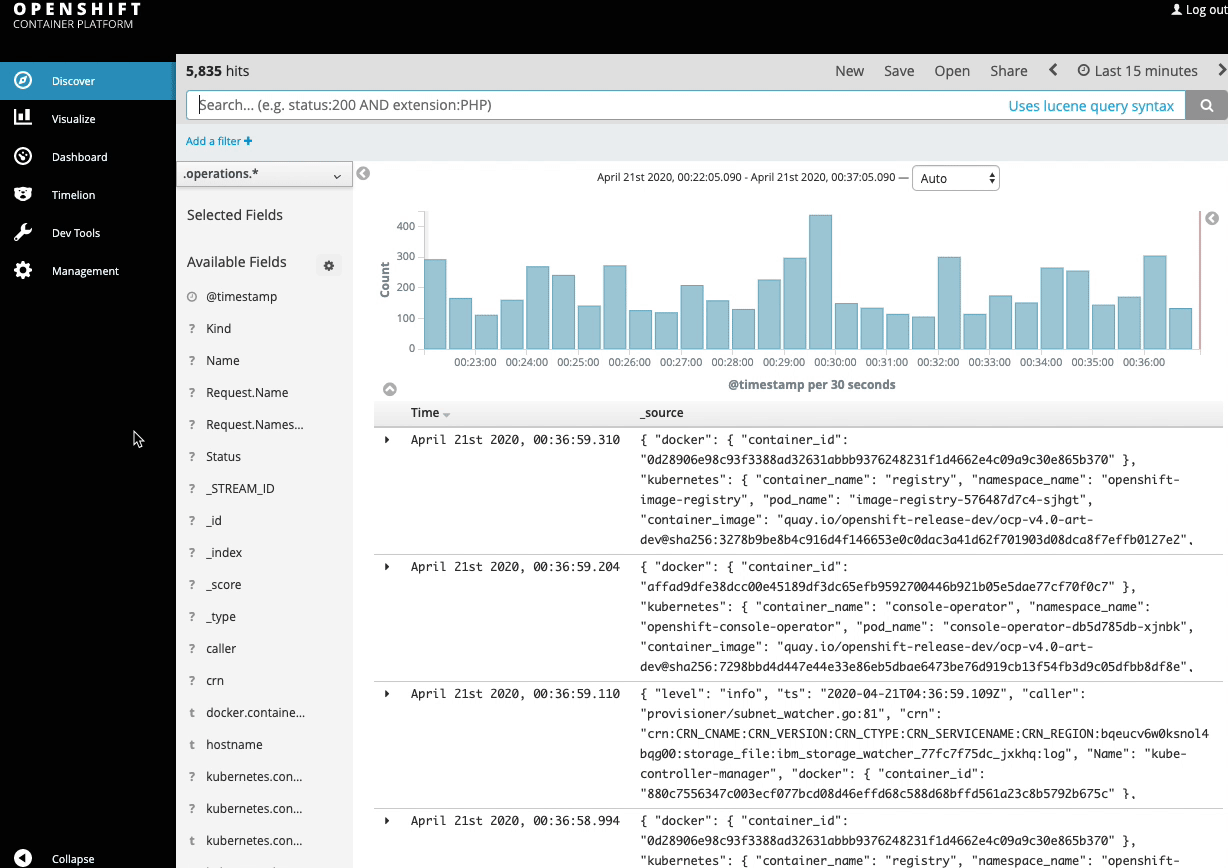
Import dashboards
The following steps to import dashboards into Kibana are illustrated in the screen recording at the end of this section:
-
Download zip file containing dashboards to your computer and unzip to a local directory.
-
Let’s import dashboards for Liberty and WAS. From the left-panel, click on
Management. Click onSaved Objectstab and then click onImport. -
Navigate to the kibana sub-directory and select
ibm-open-liberty-kibana5-problems-dashboard.jsonfile. When prompted, clickYes, overwrite alloption. It’ll take few seconds for the dashboard to show up on the list. -
Repeat the steps to import
ibm-open-liberty-kibana5-traffic-dashboard.jsonandibm-websphere-traditional-kibana5-dashboard.json.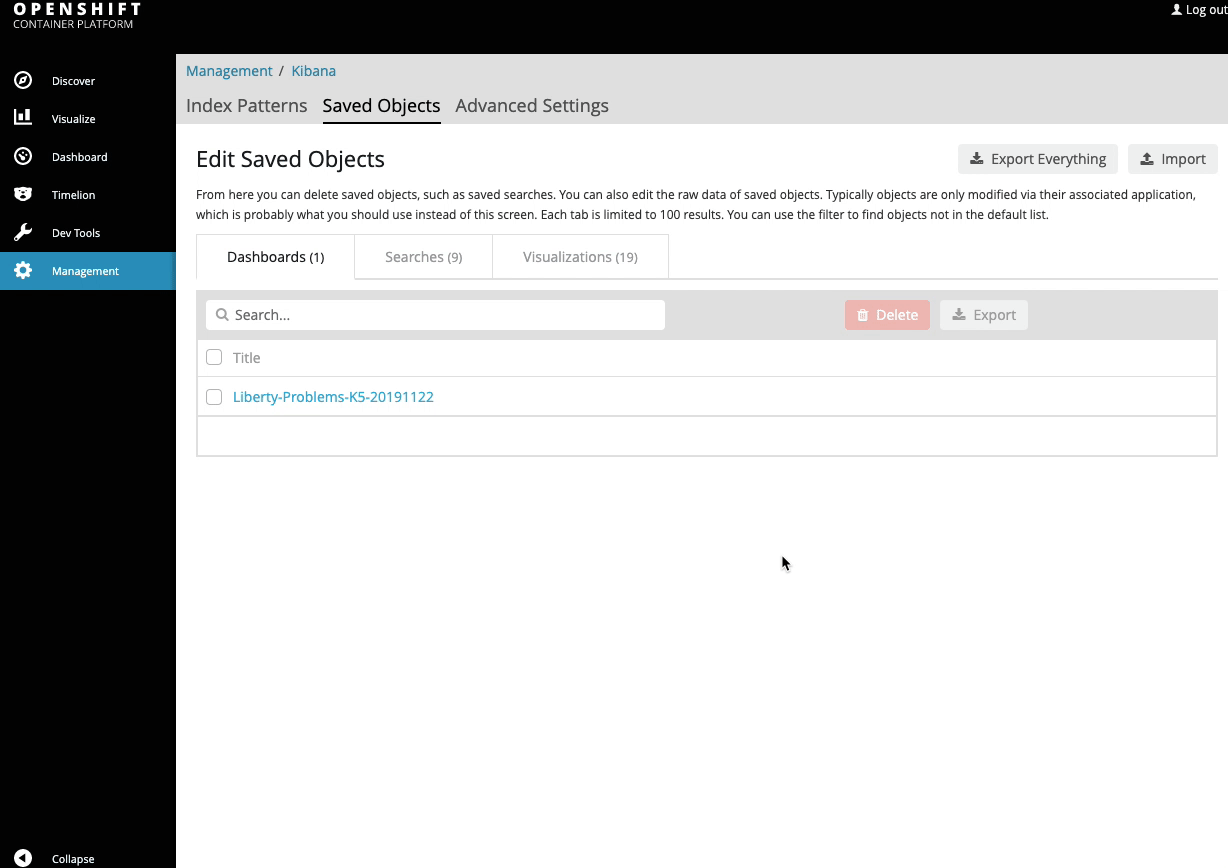
Explore dashboards
In Kibana console, from the left-panel, click on Dashboard. You’ll see 3 dashboards on the list. The first 2 are for Liberty. The last one is for WAS traditional. Read the description next to each dashboard.
Liberty applications
The following steps to visualize problems with applications are illustrated in the screen recording below:
-
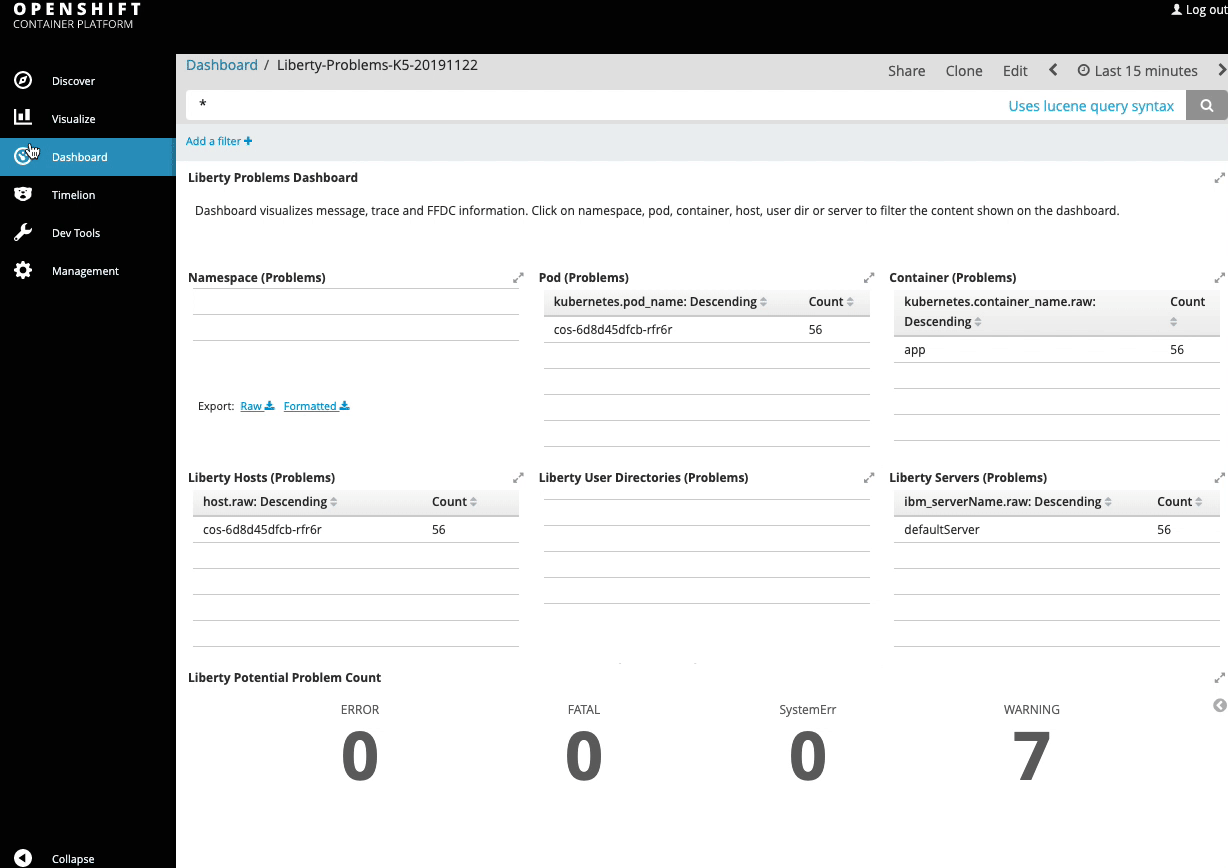
Click on Liberty-Problems-K5-20191122. This dashboard visualizes message, trace and FFDC information from Liberty applications.
-
By default, data from the last 15 minutes are rendered. Adjust the time-range (from the top-right corner), so that it includes data from when you tried the Open Liberty application.
-
Once the data is rendered, you’ll see some information about the namespace, pod, containers where events/problems occurred along with a count for each.
-
Scroll down to
Liberty Potential Problem Countsection which lists the number of ERROR, FATA, SystemErr and WARNING events. You’ll likely see some WARNING events. -
Below that you’ll see
Liberty Top Message IDs. This helps to quickly identify most occurring events and their timeline. -
Scroll-up and click on the number below WARNING. Dashboard will change other panels to show just the events for warnings. Using this, you can determine: whether the failures occurred on one particular pod/server or in multiple instances, whether they occurred around the same or different time.
-
Scroll-down to the actual warning messages. In this case some files from dojo were not found. Even though they are warnings, it’ll be good to fix them by updating the application (we won’t do that as part of this workshop).

-
The following steps to visualize traffic to applications are illustrated in the screen recording at the end of this section: Go back to the list of dashboards and click on Liberty-Traffic-K5-20191122. This dashboard helps to identify failing or slow HTTP requests on Liberty applications.
-
As before, adjust the time-range as necessary if no data is rendered.
-
You’ll see some information about the namespace, pod, containers for the traffic along with a count for each.
-
Scroll-down to
Liberty Error Response Code Countsection which lists the number of requests failed with HTTP response codes in 400s and 500s ranges. - Scroll-down to
Liberty Top URLswhich lists the most frequently accessed URLs- The /health and /metrics endpoints are running on the same server and are queried frequently for readiness/liveness probes and for scraping metrics information. It’s possible to add a filter to include/exclude certain applications.
-
On the right-hand side, you’ll see list of endpoints that had the slowest response times.
-
Scroll-up and click on the number listed below 400s. Dashboard will change other panels to show just the traffic with response code in 400s. You can see the timeline and the actual messages below. These are related to warnings from last dashboard about dojo files not being found (response code 404).
Traditional WebSphere applications
-
Go back to the list of dashboards and click on WAS-traditional-Problems-K5-20190609. Similar to the first dashboard for Liberty, this dashboard visualizes message and trace information for WebSphere Application Server traditional.
-
As before, adjust the time-range as necessary if no data is rendered.
-
Explore the panels and filter through the events to see messages corresponding to just those events.
Application Monitoring
Building observability into applications externalizes the internal status of a system to enable operations teams to monitor systems more effectively. It is important that applications are written to produce metrics. When the Customer Order Services application was modernized, we used MicroProfile Metrics and it provides a /metrics endpoint from where you can access all metrics emitted by the JVM, Open Liberty server and deployed applications. Operations teams can gather the metrics and store them in a database by using tools like Prometheus. The metrics data can then be visualized and analyzed in dashboards, such as Grafana.
Grafana dashboard
- Custom resource GrafanaDashboard defines a set of dashboards for monitoring Customer Order Services application and Open Liberty. In web terminal, run the following command to create the dashboard resource:
oc apply -f https://raw.githubusercontent.com/IBM/teaching-your-monolith-to-dance/liberty/deploy/grafana-dashboard-cos.yaml -
The following steps to access the created dashboard are illustrated in the screen recording at the end of this section: In OpenShift console, from the left-panel, select Networking > Routes.
-
From the Project drop-down list, select
app-monitoring. -
Click on the route URL (listed under the Location column).
-
Click on
Log in with OpenShift. Click onAllow selected permissions. -
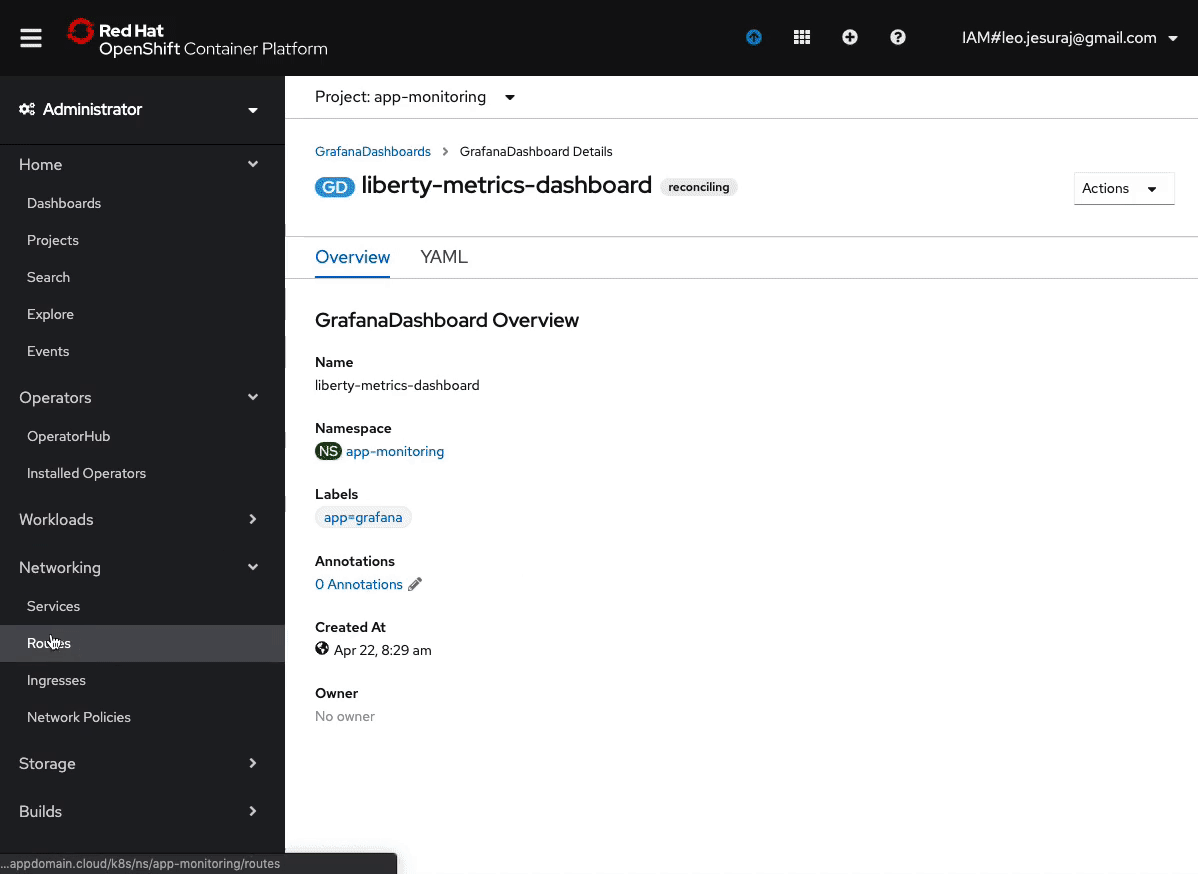
In Grafana, from the left-panel, hover over the dashboard icon and click on
Manage. -
You should see
Liberty-Metrics-Dashboardon the list. Click on it. -
Explore the dashboards. The first 2 are for Customer Order Services application. The rest are for Liberty.
-
Click on
Customer Order Services - Shopping Cart. By default, it’ll show the data for the last 15 minutes. Adjust the time-range from the top-right as necessary. -
You should see the frequency of requests, number of requests, pod information, min/max request times.
-
Scroll-down to expand the
CPUsection. You’ll see information about process CPU time, CPU system load for pods. -
Scroll-down to expand the
Servletssection. You’ll see request count and response times for application servlet as well as health and metrics endpoints. -
Explore the other sections.
Day-2 Operations (bonus lab)
You may need to gather server traces and/or dumps for analyzing some problems. Open Liberty Operator makes it easy to gather these on a server running inside a container.
A storage must be configured so the generated artifacts can persist, even after the Pod is deleted. This storage can be shared by all instances of the Open Liberty applications. RedHat OpenShift on IBM Cloud utilizes the storage capabilities provided by IBM Cloud. Let’s create a request for storage.
Request storage
-
In OpenShift console, from the left-panel, select Storage > Persistent Volume Claims.
-
From the Project drop-down list, select
apps. -
Click on
Create Persistent Volume Claimbutton. -
Ensure that
Storage Classisibmc-block-gold. If not, make the selection from the list. -
Enter
libertyforPersistent Volume Claim Namefield. -
Request 1 GiB by entering
1in the text box forSize. -
Click on
Create. -
Created Persistent Volume Claim will be displayed. The
Statusfield would displayPending. Wait for it to change toBound. It may take 1-2 minutes. -
Once bound, you should see the volume displayed under
Persistent Volumefield.
Enable serviceability
Enable serviceability option for the Customer Order Services application. In productions systems, it’s recommended that you do this step with the initial deployment of the application - not when you encounter an issue and need to gather server traces or dumps. OpenShift cannot attach volumes to running Pods so it’ll have to create a new Pod, attach the volume and then take down the old Pod. If the problem is intermittent or hard to reproduce, you may not be able to reproduce it on the new instance of server running in the new Pod. The volume can be shared by all Liberty applications that are in the same namespace and the volumes wouldn’t be used unless you perform day-2 operation on a particular application - so that should make it easy to enable serviceability with initial deployment.
-
Specify the name of the storage request (Persistent Volume Claim) you made earlier to
spec.serviceability.volumeClaimNameparameter provided byOpenLibertyApplicationcustom resource. Open Liberty Operator will attach the volume bound to the claim to each instance of the server. In web terminal, run the following command:oc patch olapp cos -n apps --patch '{"spec":{"serviceability":{"volumeClaimName":"liberty"}}}' --type=mergeAbove command patches the definition of
olapp(shortname forOpenLibertyApplication) instancecosin namespaceapps(indicated by-noption). The--patchoption specifies the content to patch with. In this case, we set the value ofspec.serviceability.volumeClaimNamefield toliberty, which is the name of the Persistent Volume Claim you created earlier. The--type=mergeoption specifies to merge the previous content with newly specified field and its value. -
Run the following command to get the status of
cosapplication, to verify that the changes were reconciled and there is no error:oc get olapp cos -n apps -o wideThe value under
RECONCILEDcolumn should be True.Note: If it’s False then an error occurred. The
REASONandMESSAGEcolumns will display the cause of the failure. A common mistake is creating the Persistent Volume Claim in another namespace. Ensure that it is created in theappsnamespace. -
In OpenShift console, from the left-panel, click on Workloads > Pods. Wait until there is only 1 pod on the list and its Readiness column changed to Ready.
-
Pod’s name is needed for requesting server dump and trace in the next sections. Click on the pod and copy the value under
Namefield.
Request server dump
You can request a snapshot of the server status including different types of server dumps, from an instance of Open Liberty server running inside a Pod, using Open Liberty Operator and OpenLibertyDump custom resource (CR).
The following steps to request a server dump are illustrated in the screen recording below:
-
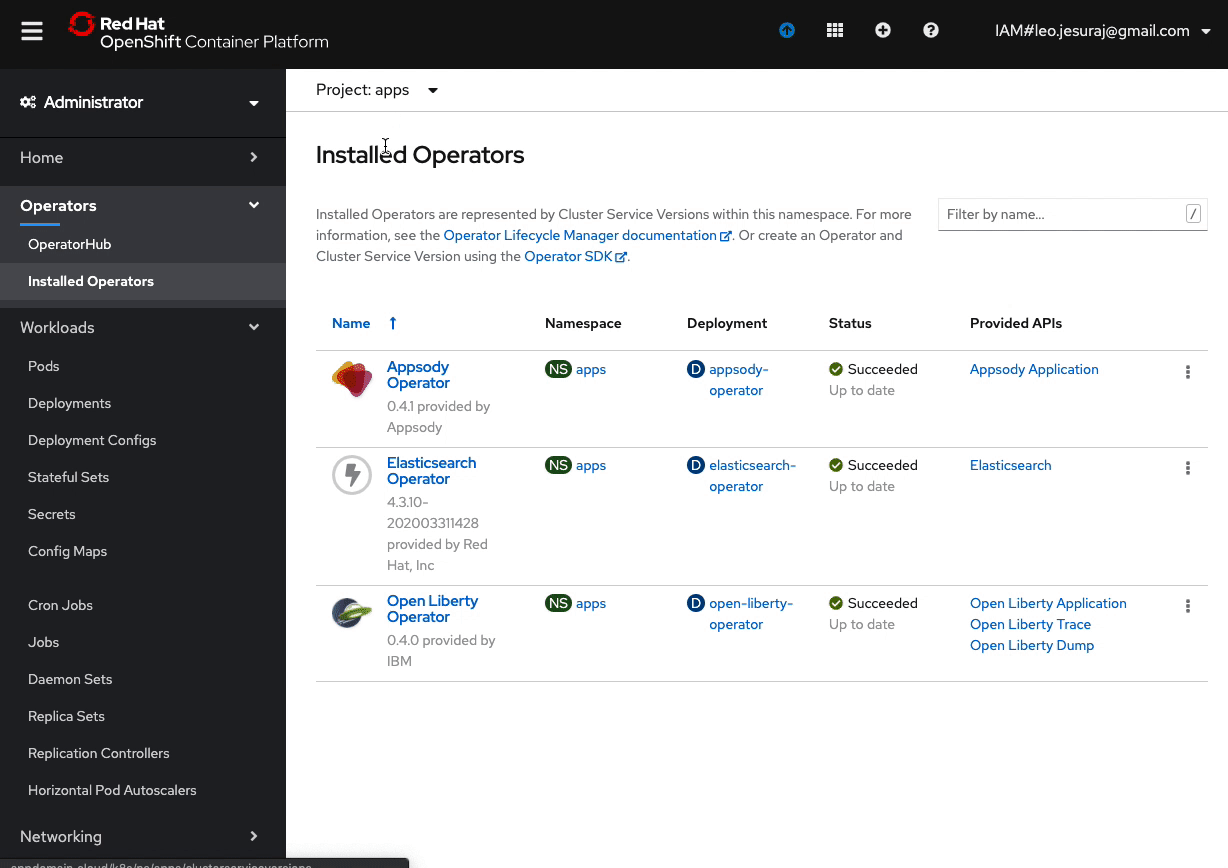
From the left-panel, click on Operators > Installed Operators.
-
From the
Open Liberty Operatorrow, click onOpen Liberty Dump(displayed underProvided APIscolumn). -
Click on
Create OpenLibertyDumpbutton. -
Replace
Specify_Pod_Name_Herewith the pod name you copied earlier. -
The
includefield specifies the type of server dumps to request. Heap and thread dumps are specified by default. Let’s use the default values. -
Click on
Create. -
Click on
example-dumpfrom the list. -
Scroll-down to the
Conditionssection and you should seeStartedstatus withTruevalue. Wait for the operator to complete the dump operation. You should see statusCompletedwithTruevalue.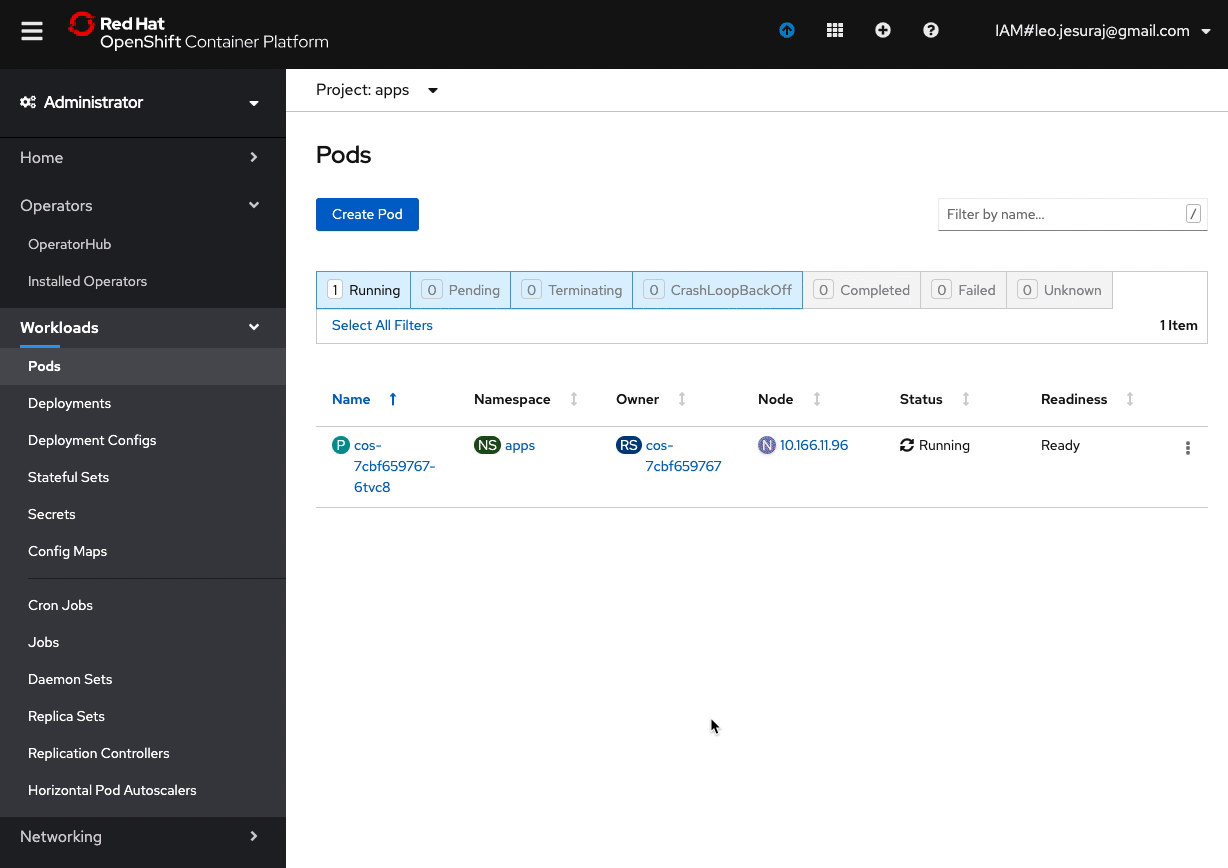
Request server traces
You can also request server traces, from an instance of Open Liberty server running inside a Pod, using OpenLibertyTrace custom resource (CR).
The following steps to request a server trace are illustrated in the screen recording below:
-
From the left-panel, click on Operators > Installed Operators.
-
From the
Open Liberty Operatorrow, click onOpen Liberty Trace. -
Click on
Create OpenLibertyTracebutton. -
Replace
Specify_Pod_Name_Herewith the pod name you copied earlier. -
The
traceSpecificationfield specifies the trace string to be used to selectively enable trace on Liberty server. Let’s use the default value. -
Click on
Create. -
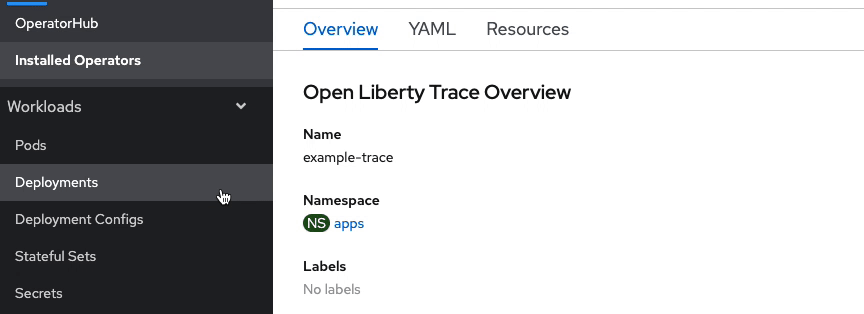
Click on
example-tracefrom the list. -
Scroll-down to the
Conditionssection and you should seeEnabledstatus withTruevalue.- Note: Once the trace has started, it can be stopped by setting the
disableparameter to true. Deleting the CR will also stop the tracing. Changing thepodNamewill first stop the tracing on the old Pod before enabling traces on the new Pod. Maximum trace file size (in MB) and the maximum number of files before rolling over can be specified usingmaxFileSizeandmaxFilesparameters.
- Note: Once the trace has started, it can be stopped by setting the
Accessing the generated files
The generated trace and dump files should now be in the persistent volume. You used storage from IBM Cloud and we have to go through a number of steps using a different tool to access those files. Since the volume is attached to the Pod, we can instead use Pod’s terminal to easily verify that trace and dump files are present.
The following steps to access the files are illustrated in the screen recording below:
-
From the left-panel, click on Workloads > Pods. Click on the pod and then click on
Terminaltab. -
Enter
ls -R serviceability/appsto list the files. The shared volume is mounted atserviceabilityfolder. The sub-folderappsis the namespace of the Pod. You should see a zip file for dumps and trace log files. These are produced by the day-2 operations you performed. -
Using Open Liberty Operator, you learned to perform day-2 operations on a Liberty server running inside a container, which is deployed to a Pod.
Summary
Congratulations! You’ve completed the workshop. Great job! A virtual “High Five” to you!
Check out the Next Steps to continue your journey to cloud!