Manage Instances
This section describes the steps required to request an intent on a Network Service Instance, and then view the topology of the instance and the execution of the intent. A Network Service Instance is created from an already existing Network Service Design.
Objectives
- Learn how to request an intent on a Network Service Instance
- View the execution of the intent
- View the topology of the Network Service Instance
Pre-requisites
- An existing Network Service Design
- Access to the UI of a running instance of Telco Network Cloud Orchestration (TNC-O)
Assembly Instances
Recent Assembly Instances
Once Network Services and VNFs are designed, they can be put into production. The Operations section in TNC-O allows for assemblies to be searched, and actions to be taken. To find an assembly, you can go to the Recent Assembly Instances section to see the last Assembly Instances that have changed state.
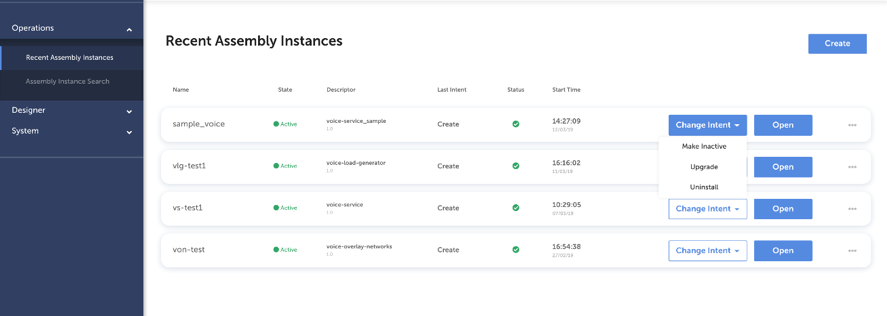
You see the name of the assembly instance, the status, descriptor name, and the last Intent and time that was executed. For each assembly instance, you have the option to manually change the intent (e.g. make inactive, upgrade, uninstall). You can also open that assembly instance which will bring you to the topology view. From the Assembly Instance when clicking the … button, you can open a current intent execution graph (when running), the assembly design, or view the intent execution history that shows all intents for that assembly instance. You can also Create a new Assembly Instant.
Search for Assembly Instances
You can search for any assembly instance by clicking Search Assembly Instance in the Operations section of TNC-O.

Create an Assembly Instance
Once the design is finalized, the first thing you will do is to create an Assembly Instance. You can do this by clicking Create Instance. This will ask you to provide a name, select a descriptor, and in what intended state the instance should be in after installation (active, inactive or installed). it will then ask you to change any properties if needed and allows you to review before continuing.
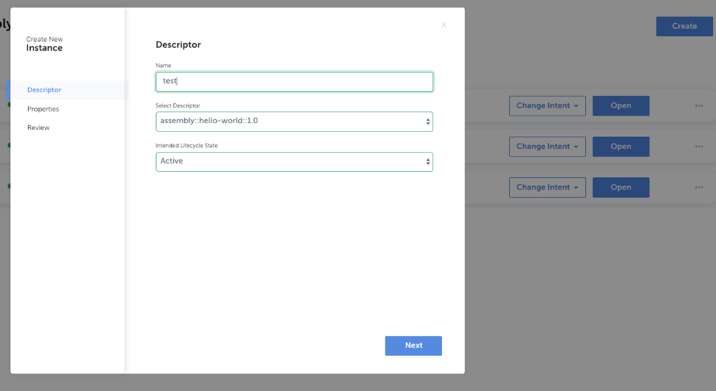
Once you press Create, the Assembly Instance will show up on the Recent Assembly Instances tab and you will see that is being brought into its intended state by the Intent Engine. You are able to follow the Intent Engine execution tasks by going to the Execution Graph (see next section).
Intent Execution Graph
TNC-O includes intent based orchestration capabilities. Once you have onboarded and designed your VNF and Network Services, the Intent Engine automatically calculates and executes the best path to get an assembly from the current state to the desired state without having to manually program any of the tasks. The Intent Execution graph is a view all the tasks that the Intent Engine is executing to bring the Network Service or VNF into its intended state.
When an Intent is being executed, you can view all the tasks the Intent Engine is performing in real-time in a moving graph. You can see what task is performed first, and what lifecycle action or operation is being performed.
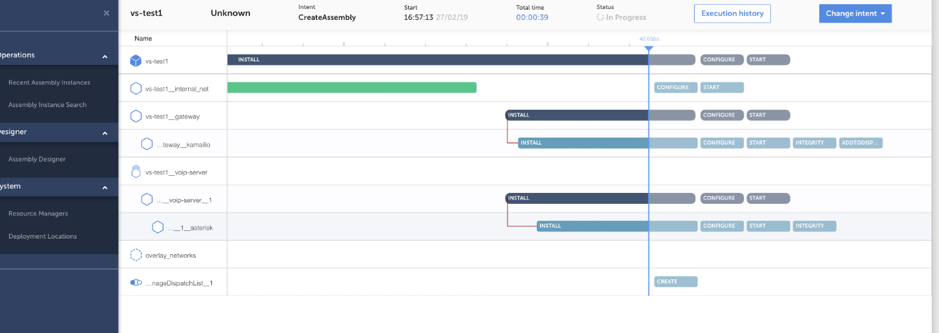
You can also view the Execution History of an Intent that has been executed. A pop-up screen will show all the Intents that were run for that assembly and you can can select which one to view.
Topology View
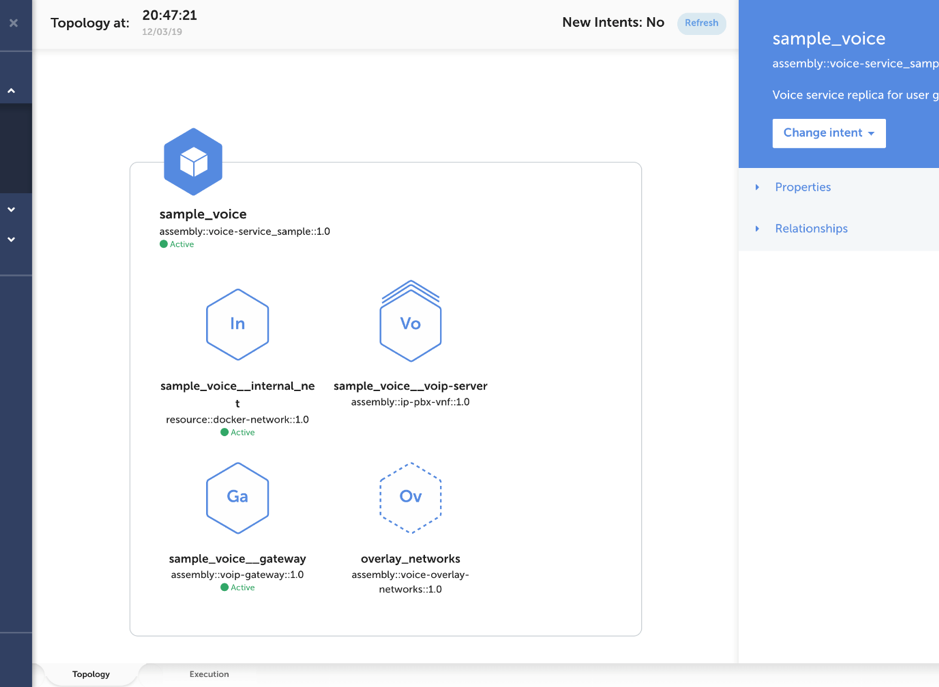
When you click Open in the Recent Assembly Instance view, you are taken to the Topology view. This shows the Network Service or VNF, and the components inside of that and their status. As before in the design, you will see VNF/NS elements, clustered elements and referenced elements. You can also see the properties and relationships on the right panel, and change the Intent. You can also go to the Execution Graph by clicking the tab on the bottom.
Lifecycle Transitions
Create a New Network Service
A new network service instance can be created by clicking the “Create” button in the top right corner of either “Recent Assembly Instances” or “Assembly Instance Search” page. Below screenshot shows the “Create” button on “Assembly Instance Search” page.

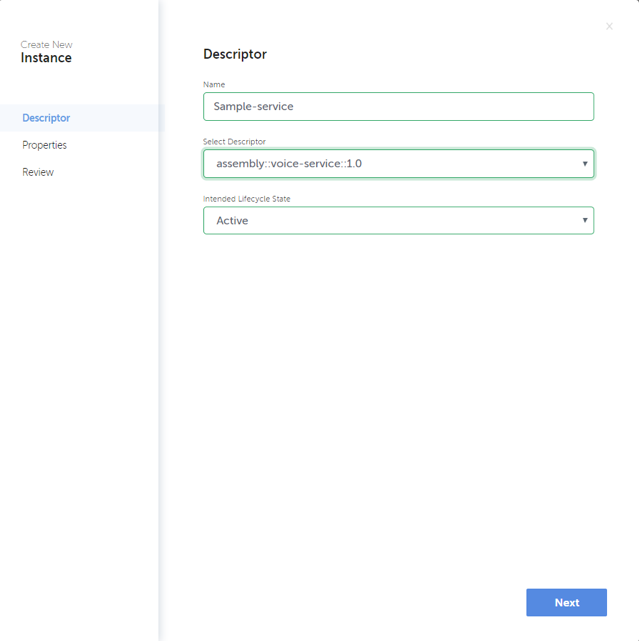
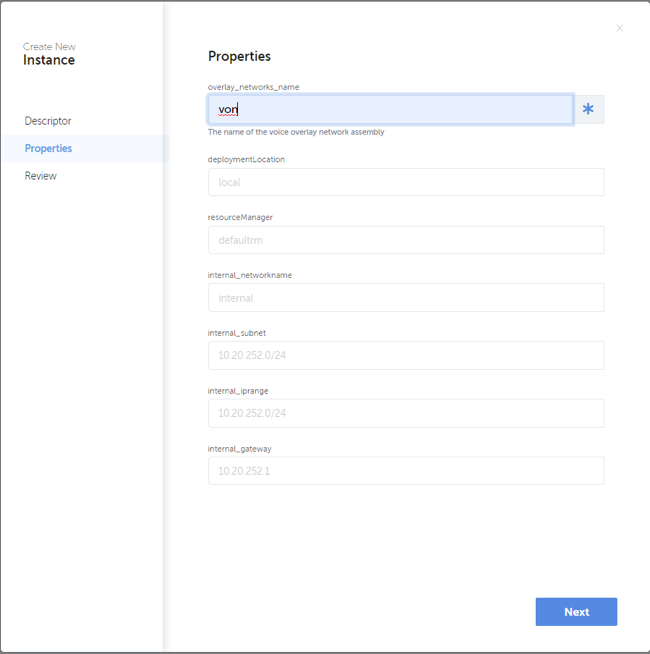
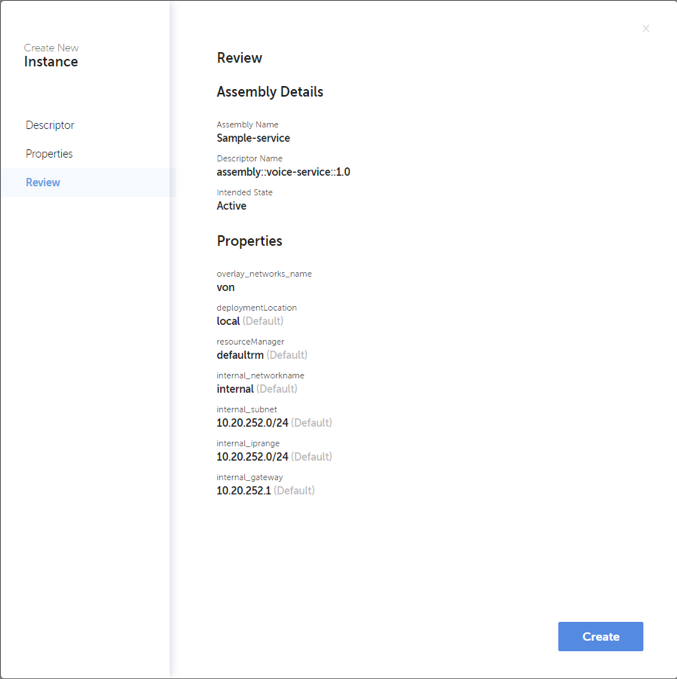
When clicking “Create” button a dialog is opened to fill in details required to create the service instance. This includes a unique name for the new instance, descriptor to be used, intended target state, and necessary property values. After filling in all necessary data, the definitions can be reviewed before triggering the instantiation. Example dialog to create a service instance is shown in below.
Terminate Network Service
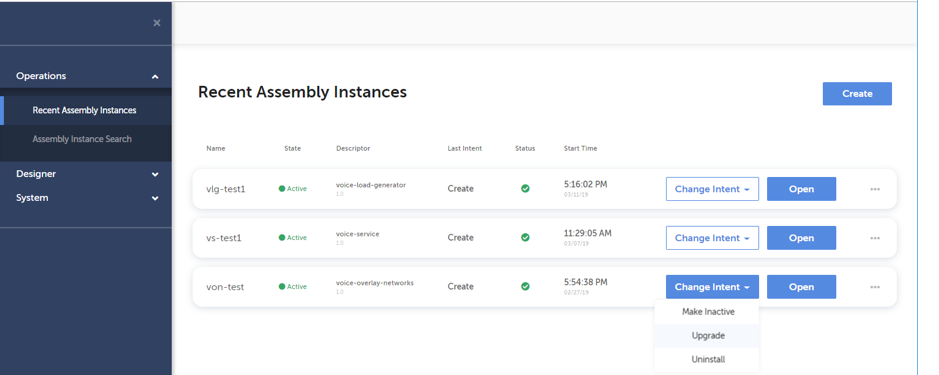
A network service instance can be deleted by clicking the “Change Intent” button associated to the instance and selecting “Uninstall” from the dropdown menu. The “Change Intent” button can be found on “Recent Assembly Instances”, “Assembly Instance Search”, and opened “Topology” and “Execution” pages. Below screenshot shows the “Change Intent” button clicked on “Recent Assembly Instances” page.
Change Network Service State
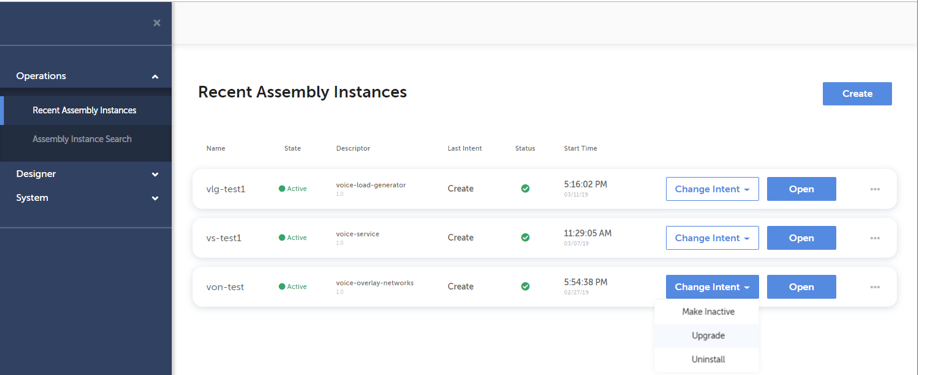
The operational state of an existing network service instance can be changed by clicking the “Change Intent” button associated to the instance and selecting desired transition from the dropdown menu. The “Change Intent” button can be found on “Recent Assembly Instances”, “Assembly Instance Search”, and opened “Topology” and “Execution” pages. The options available in the dropdown menu are dependent on the current state of the service instance. Below screenshot shows the “Change Intent” button clicked on “Recent Assembly Instances” page.
Trigger Healing of a VNFC
Manual healing for a VNFC can be triggered by navigating to the “Topology” view of a network service and selecting the target element from the service topology. If the service contains nested assemblies and the actual VNFC is not on the highest level of service elements, lower level service elements can be seen by clicking the icon of the corresponding parent element. Once the target VNFC is selected, the healing sequence can be triggered by clicking the “Heal” button shown in the header of the right hand panel as illustrated in below screenshot.

Trigger Scaling of a VNF
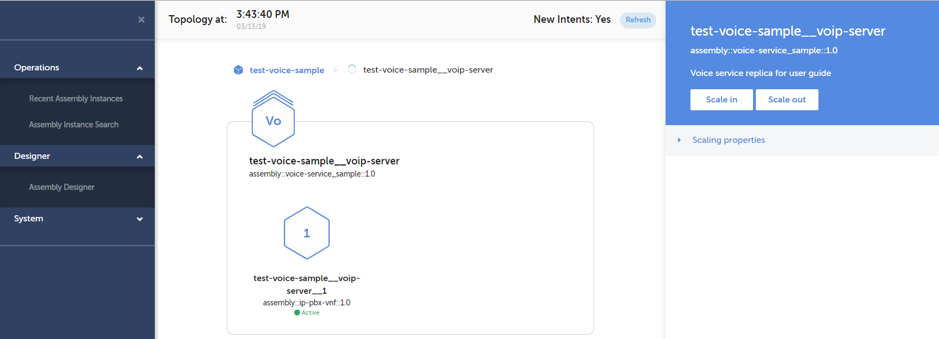
Similarly to healing, scaling of a clustered element can be triggered by navigating to the “Topology” view of a network service and selecting the target element from the service topology. Scaling is only available for clustered service elements and thus the selected element should be defined as a cluster. Once the target cluster is selected, the scaling sequence can be triggered by clicking either the “Scale In” or “Scale Out” button shown in the header of the right hand panel as illustrated in below screenshot.
Upgrade Network Service
Upgrade of a network service instance can be performed by clicking the “Change Intent” button associated to the instance and selecting “Upgrade” from the dropdown menu. The “Change Intent” button can be found on “Recent Assembly Instances”, “Assembly Instance Search”, and opened “Topology” and “Execution” pages. Below screenshot shows the “Change Intent” button clicked on “Recent Assembly Instances” page.
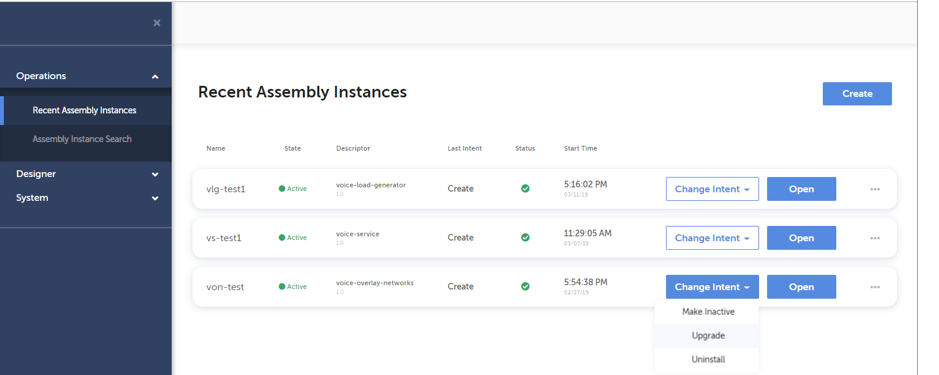
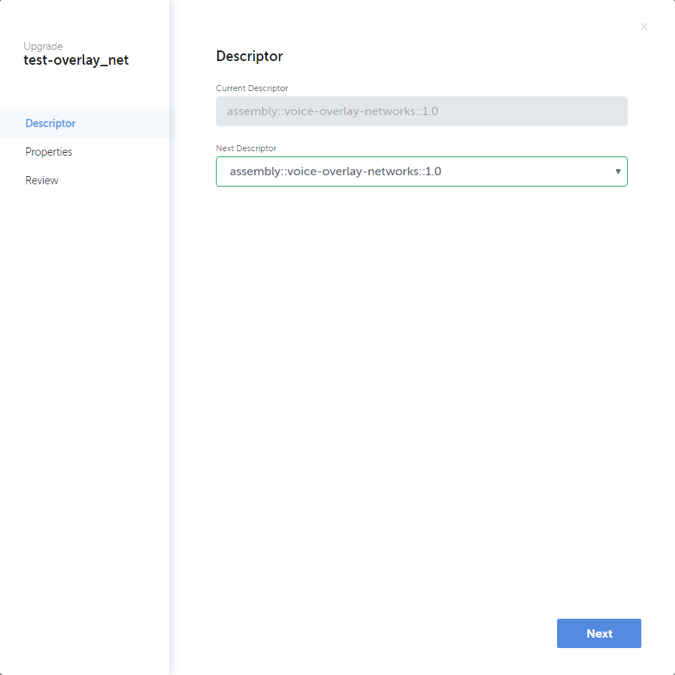
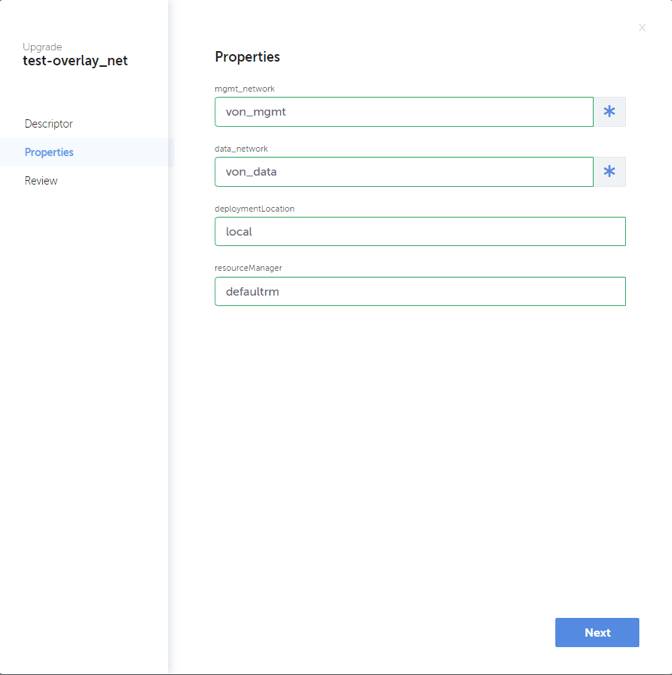
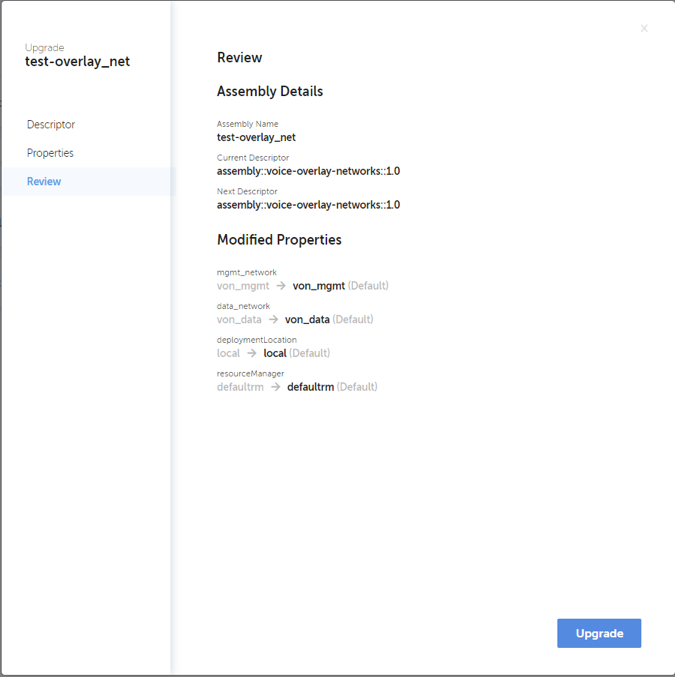
Once “Upgrade” option is selected, a dialog is opened to fill in details about the targeted upgrade. An upgrade can include changing the whole service descriptor and/or changing property values defined for the service. Actual upgrade sequence depends on the defined changes. Below screenshots illustrate the sequence of upgrade definition.
