5. Create a runbook
3.1: Overview
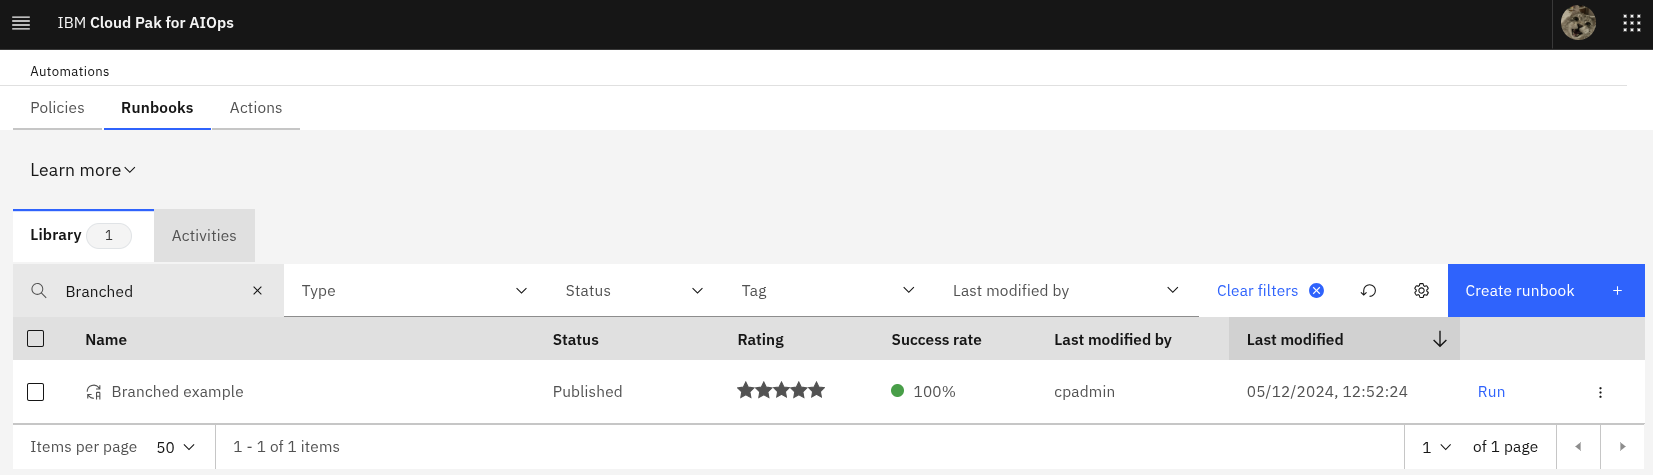
In this lab, you will create a new runbook that will use the two actions you created in the previous module. This runbook will include a branch and will pass the action output from the first action as input to the second action, to demonstrate these two concepts.
3.2: Create a new runbook
Use the following steps to create a new runbook:
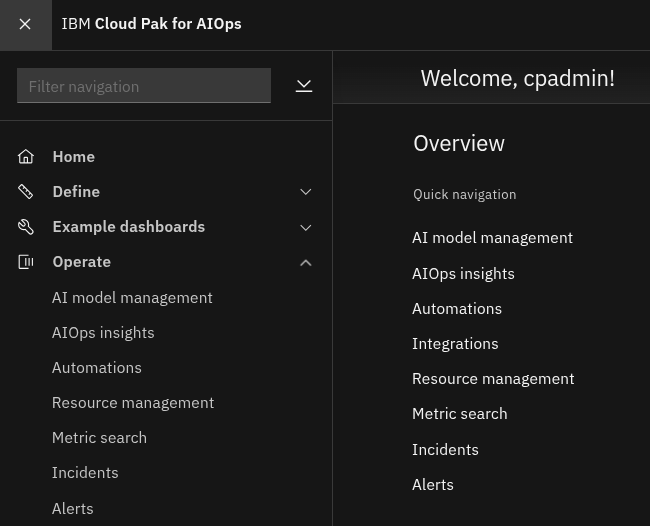
- Log in to the AIOps console
- Select Automations from the Quick navigation menu or Operate → Automations from the main menu
- Select the Runbooks tab
- Click the Create runbook button to create a new runbook
- Enter a Name for the runbook:
Branched example - Click the Add action step button to add the first of three runbook actions
- Select the Fix problem action and click the Select this action button
- Click the Add action step button to add the second of three runbook actions
- Select the Fix problem action and click the Select this action button
Note that we are adding this action step twice. We will be creating a branch shortly that will bypass the second action step if the first action step is successful.
- Click the Add action step button to add the third of three runbook actions
- Select the Create file action and click the Select this action button
- Complete the parameter configuration as follows:

- Choose Use default value for target: it will load this default value from the action
- Choose Use default value for user: it will load this default value from the action
- Choose Action output and Step 1 for $filename: it will inherit the value from the first action step
- Click Save to save the action step parameters
- Scroll back up to Step 1
- Set the Use configure branching (optional) selector to Yes (green) to configure branching for Step 1
- Under If the action is successful, then go to select Step 3 from the drop-down menu
- Under Else, if the action is not successful, then go to select Step 2 from the drop-down menu
The select drop-down menu contains Step 2 by default. To change it, you will need to click on the X at the right of the first drop-down menu item, then reselect the drop-down menu and choose Step 3.
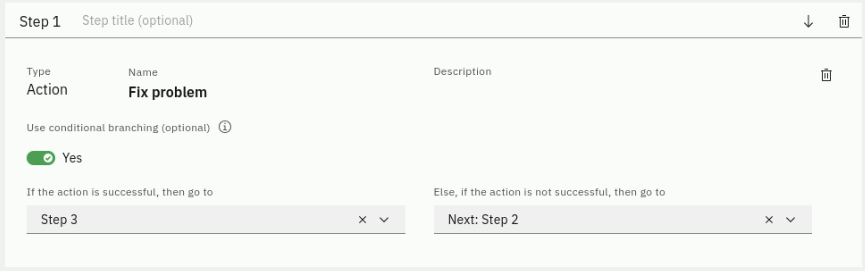
- If action Step 1 is successful, execution should jump to Step 3, bypassing Step 2
- If action Step 1 is unsuccessful, execution should continue to Step 2
- We are anticipating Step 1 to be successful, so we should see execution skipping Step 2
- Click the Add parameter button top-right to add a new parameter
- Enter a Parameter name:
Hostname - Select A single string value from the Type drop-down menu
- Click the Save button to save the new parameter
This parameter won't be used in our example but is added so you can see how it can be passed from the runbook policy, which we will create next.
- Click on the Publish button to save the runbook and make it available for use: