Install the Robot Shop Application
3.1: Introduction
In this lab, you will learn how to install the demo application, Robot Shop.
Robot Shop is pre-configured with changes needed to enable Instana monitoring. Some technologies such as java don't require any configuration, but others require configuration changes so the application can be monitored.
During the install, you will also specify the required information that is necessary for Instana to monitor the End User Experience (EUM) / Real User Monitoring (RUM) data.
If you are unsure how to get access to the Bastion host (Guacamole) see Accessing a Lab Environment
From the Bastion host open the Firefox browser and select the Instana bookmark.
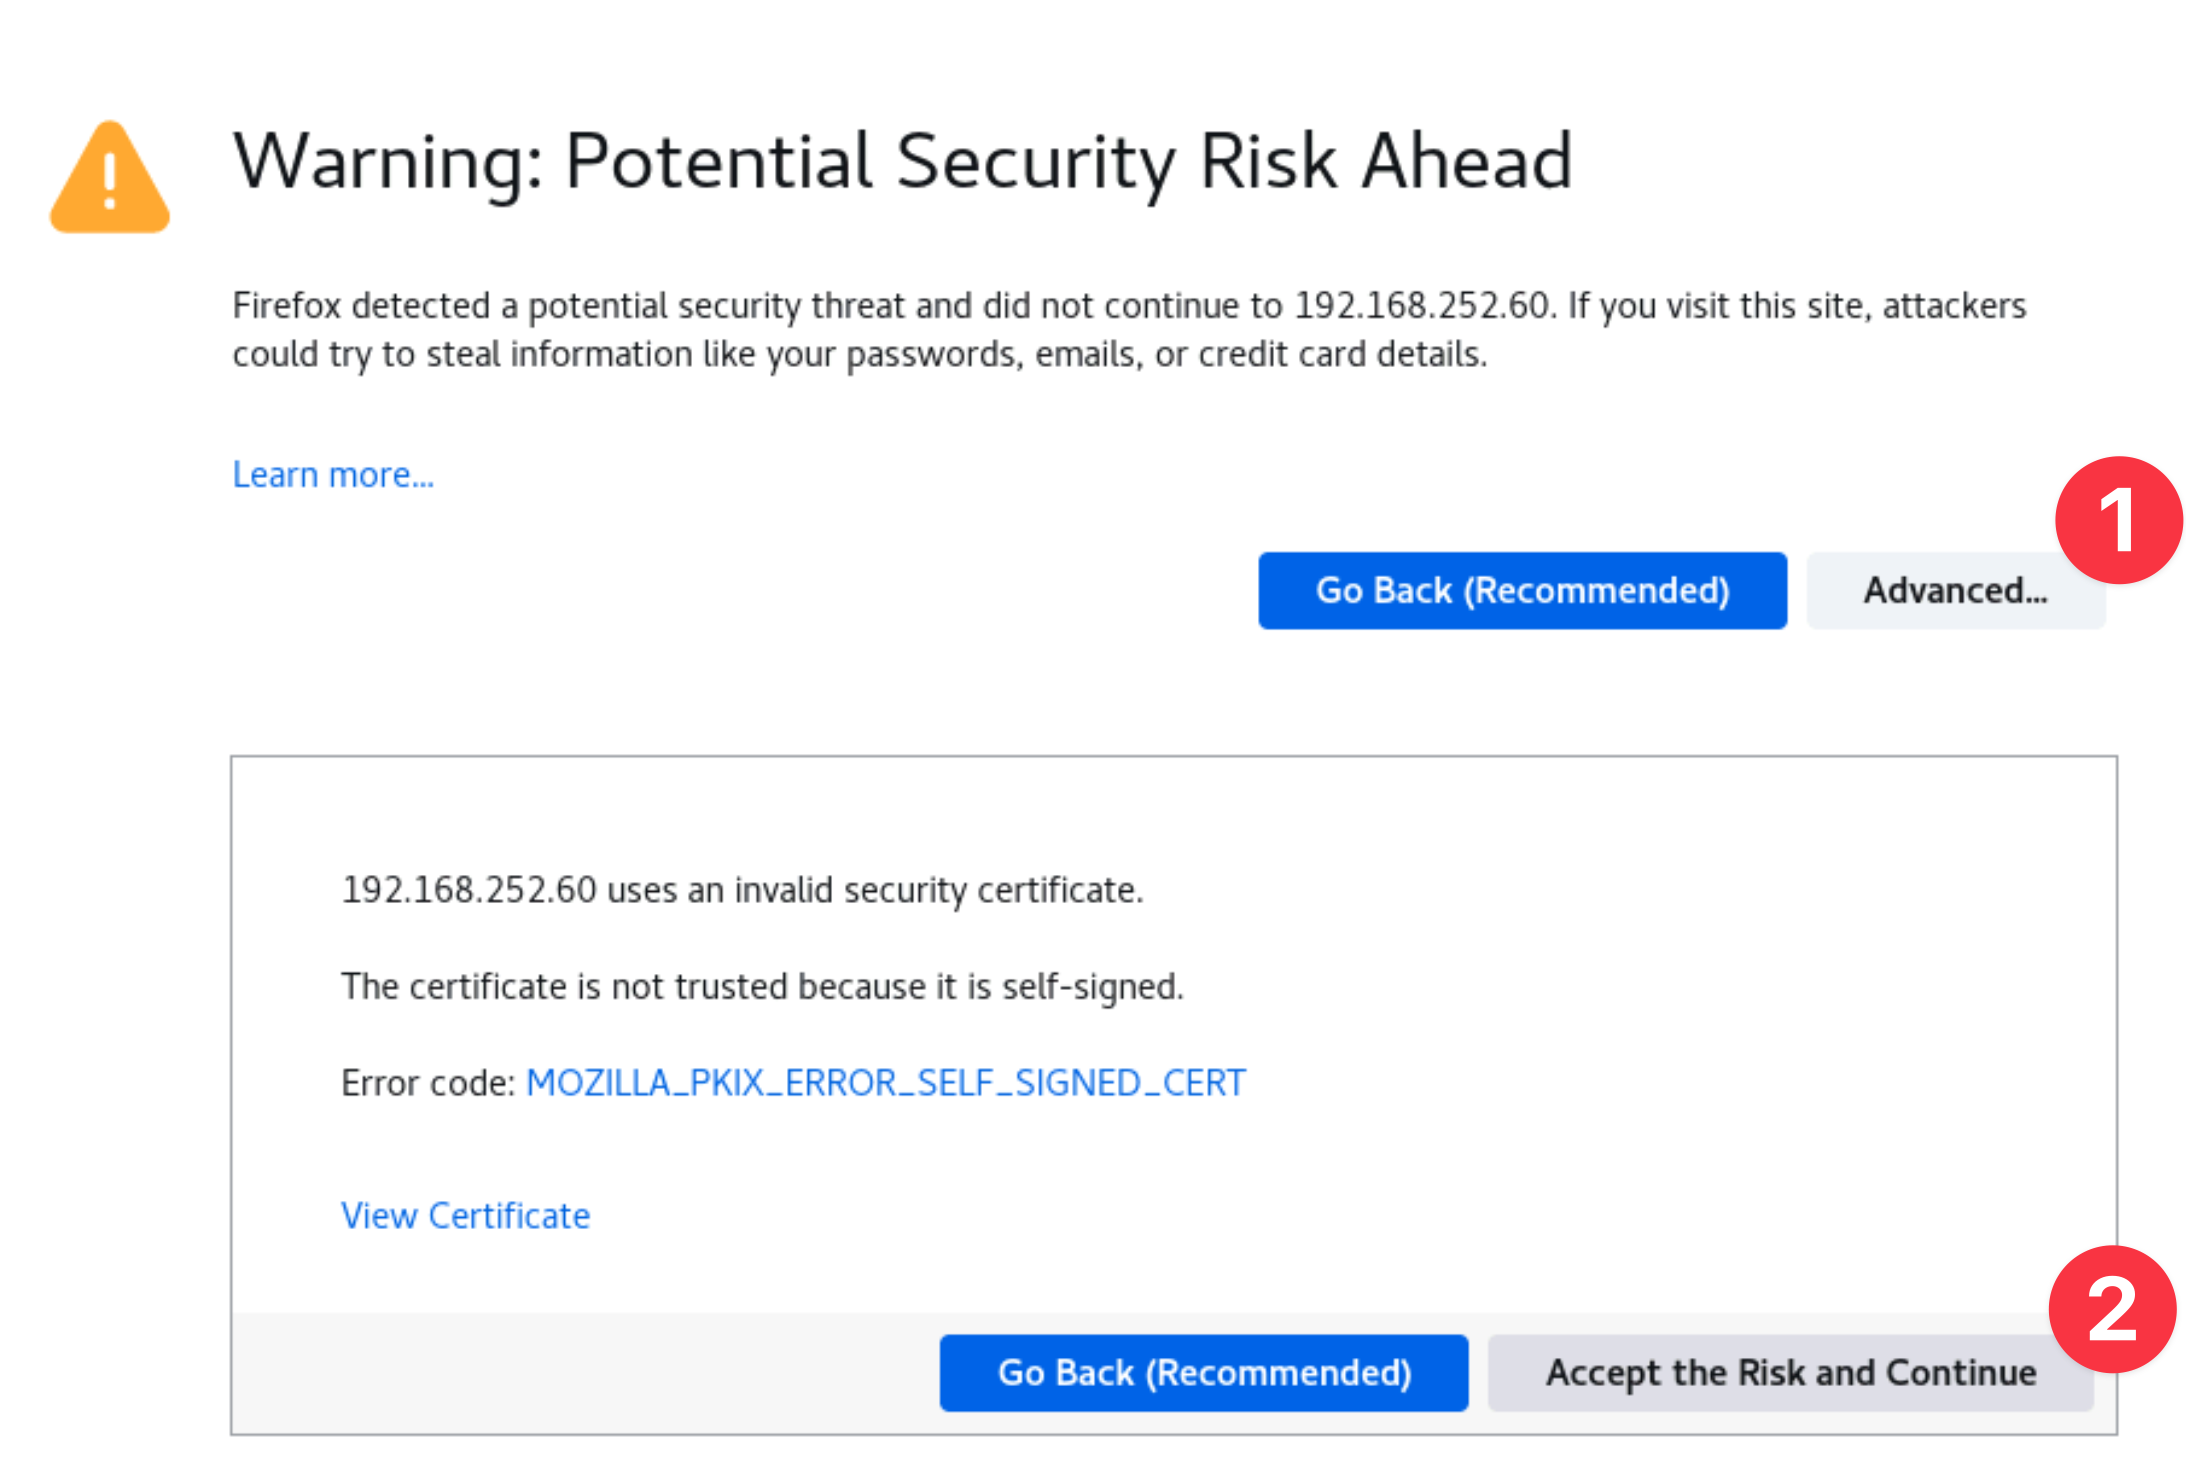
You can safely ignore the warning about the certificate being untrusted.
When prompted, enter the Instana username and password as seen below.
- Username: admin@instana.local
- Password: Passw0rd

3.2: Create the Website in Instana
If you want to capture EUM/RUM data within Instana, you must first create a website within the GUI (or via API).
From the Instana GUI, on left side navigation, select Websites & Mobile Apps. Then, click the Add Website link.

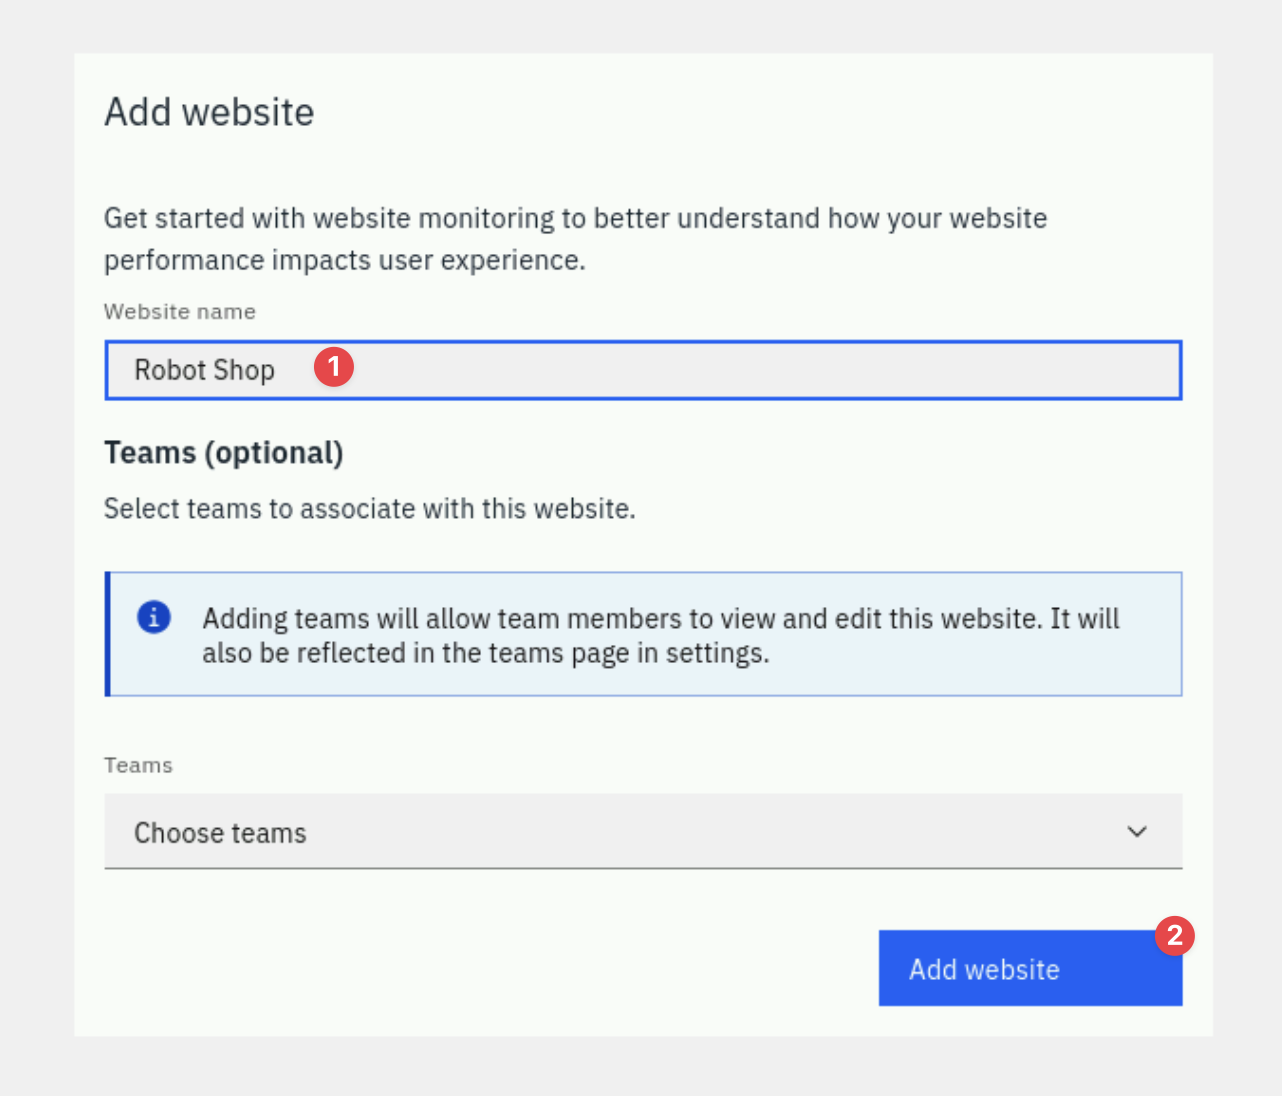
You'll see a dialog where you can enter a Website Name (If it's the first time
you open the Website & Mobile Apps page, you won't have any existing website
configured, then you'll directly see this dialog). Enter Robot Shop as the
website name and click the Add website button.
A new dialog containing some options and javascript will open. Leave the default options as is and scroll down to Add tracking script.
In a more typical application, you would follow the instructions and copy/paste
the javascript into the website's <head/> tag.
Note: For Apache and IBM HTTP Servers, you do not need to update the HTML pages. You can configure the Instana agent where the Apache HTTP Server is present, to automatically inject the JavaScript agent into the website to enable website monitoring. Refer to Website automatic instrumentation for more details.
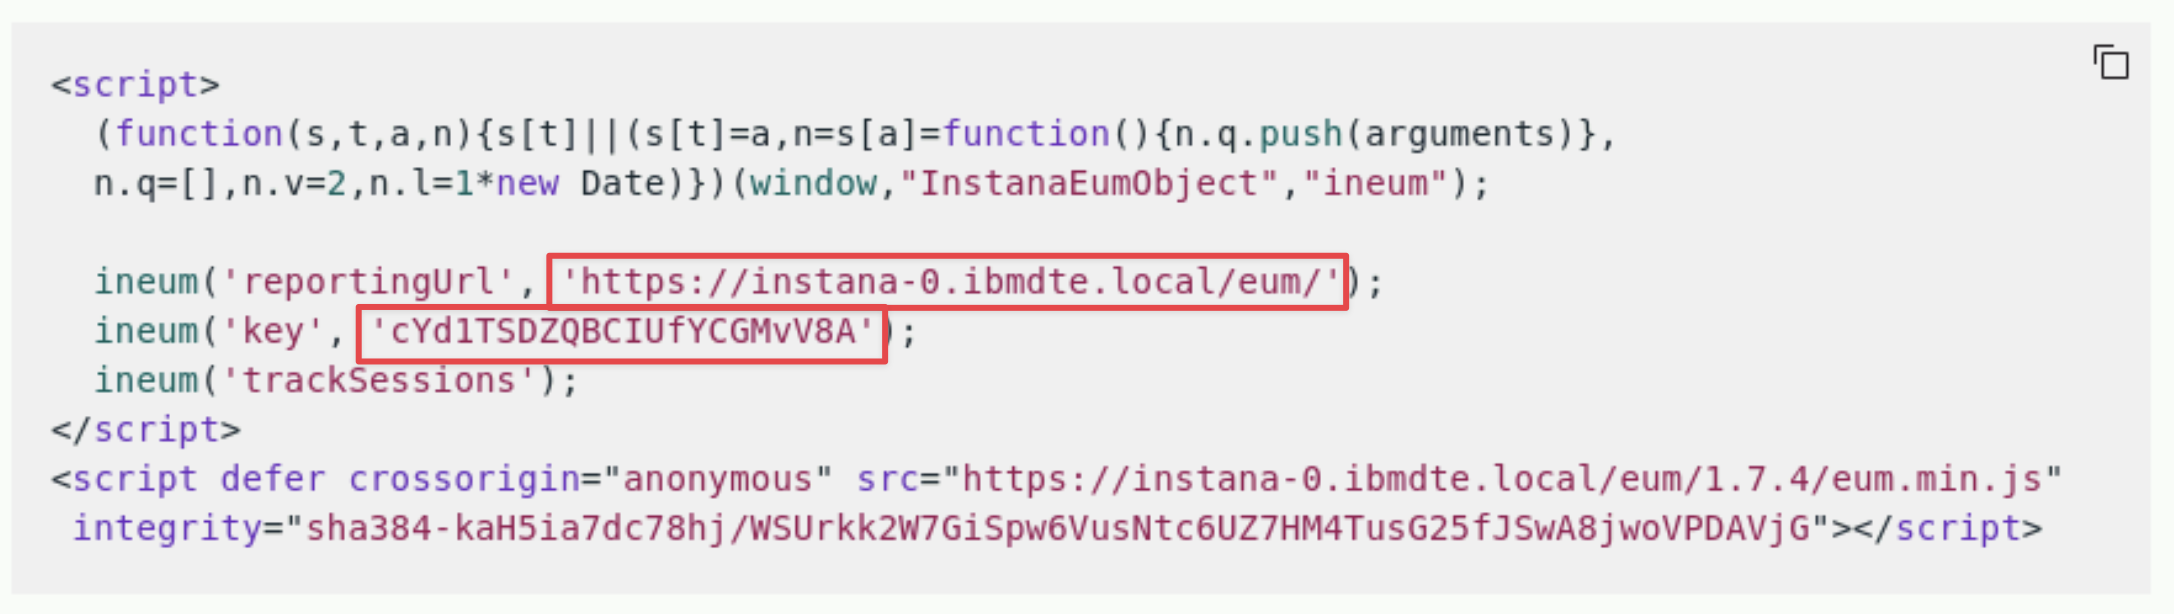
Robot Shop has already done some of the work for us by embedding this script with variable placeholders for the unique values into the application. When we deploy the application, we can pass parameters into the Helm Chart to populate the unique variables. There are two parameters within the javascript that we will need to copy and use when we do the install. You will need the key and the reportingURL. Make a copy of these values now by copying the code block to a text document.
Select Go to website dashboard
3.3: Install Robot Shop
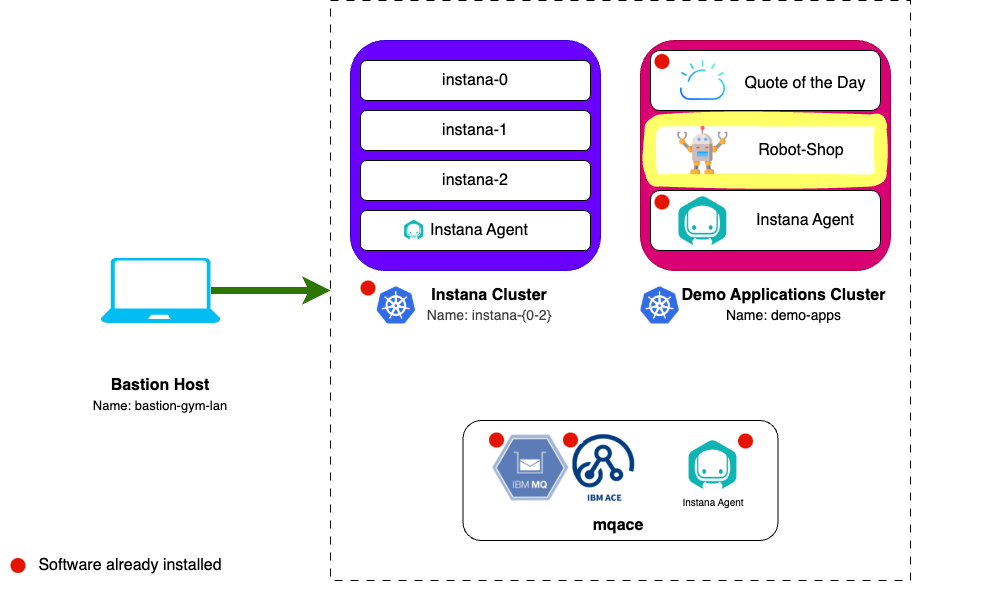
We will install Robot Shop on the Demo Applications Cluster in the demo-apps vm.
The full installation instructions for Robot Shop can be found here. You'll notice that there are instructions for installing Robot Shop into a number of different environments including docker, kubernetes, and OpenShift. This lab uses a Kubernetes environment, so we'll be following those steps.
We have documented the steps below, so there is no need to refer to the GitHub instructions.
This section should be run from the demo-apps host.
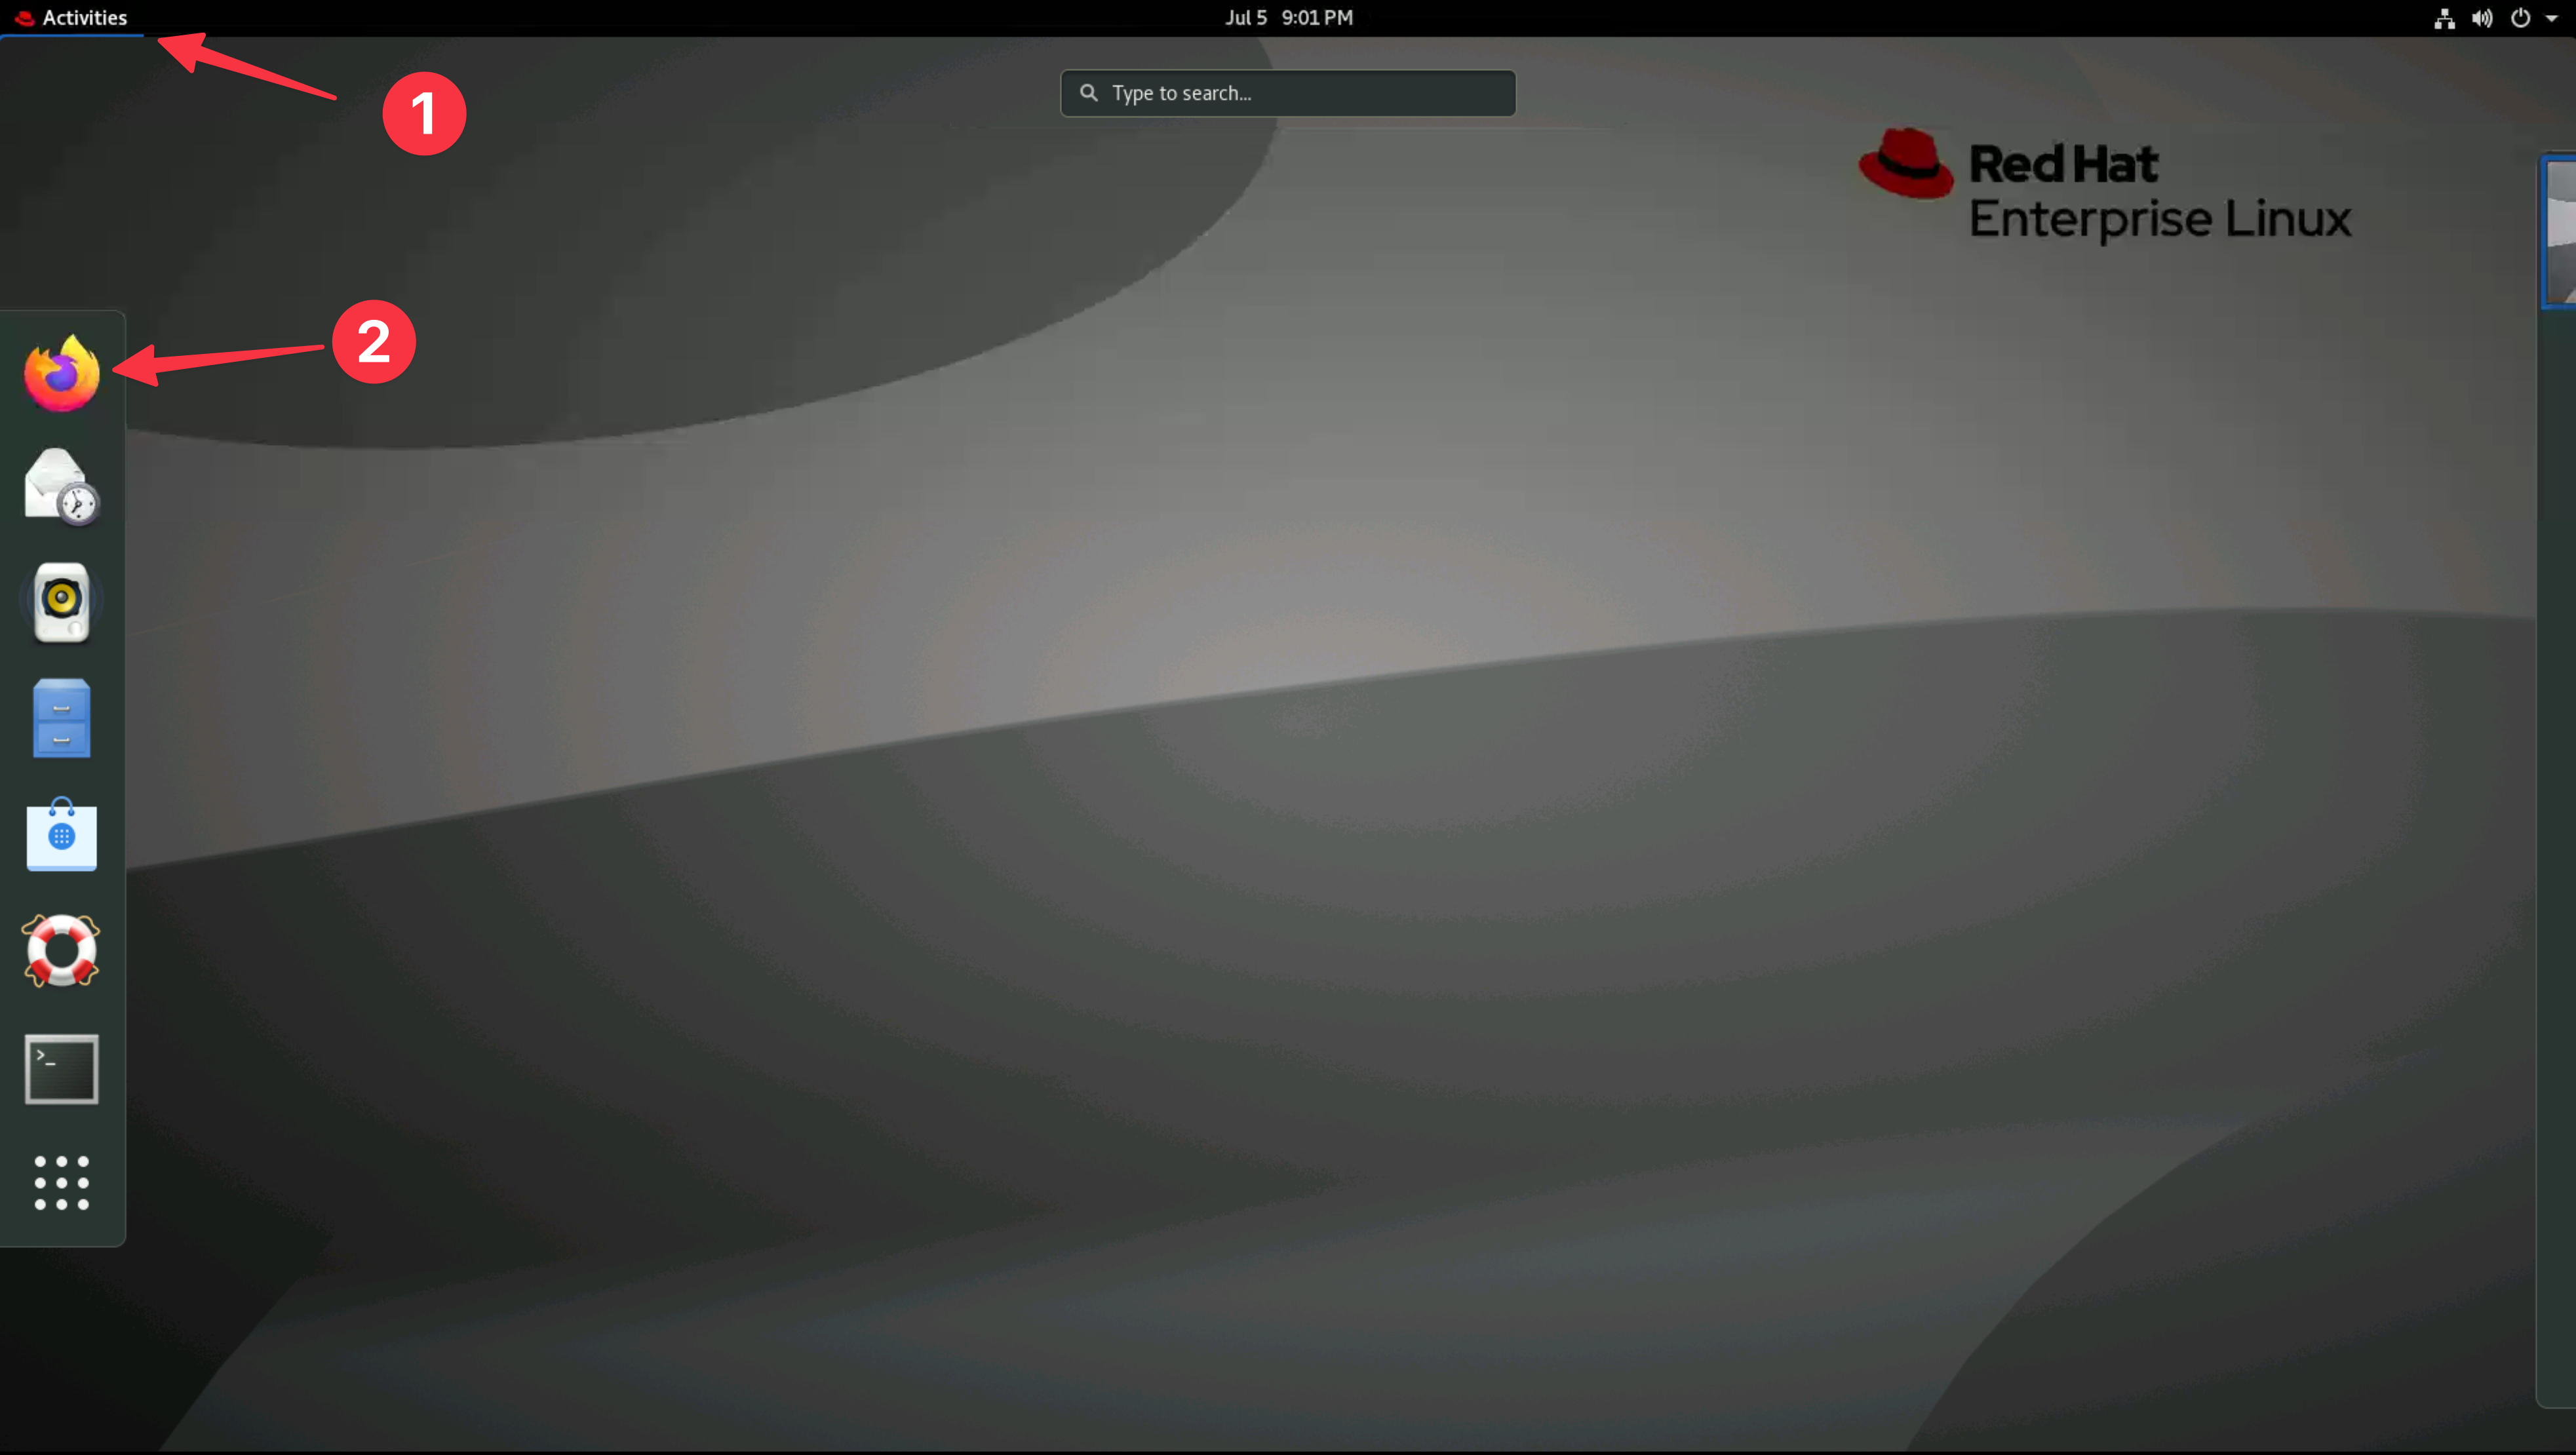
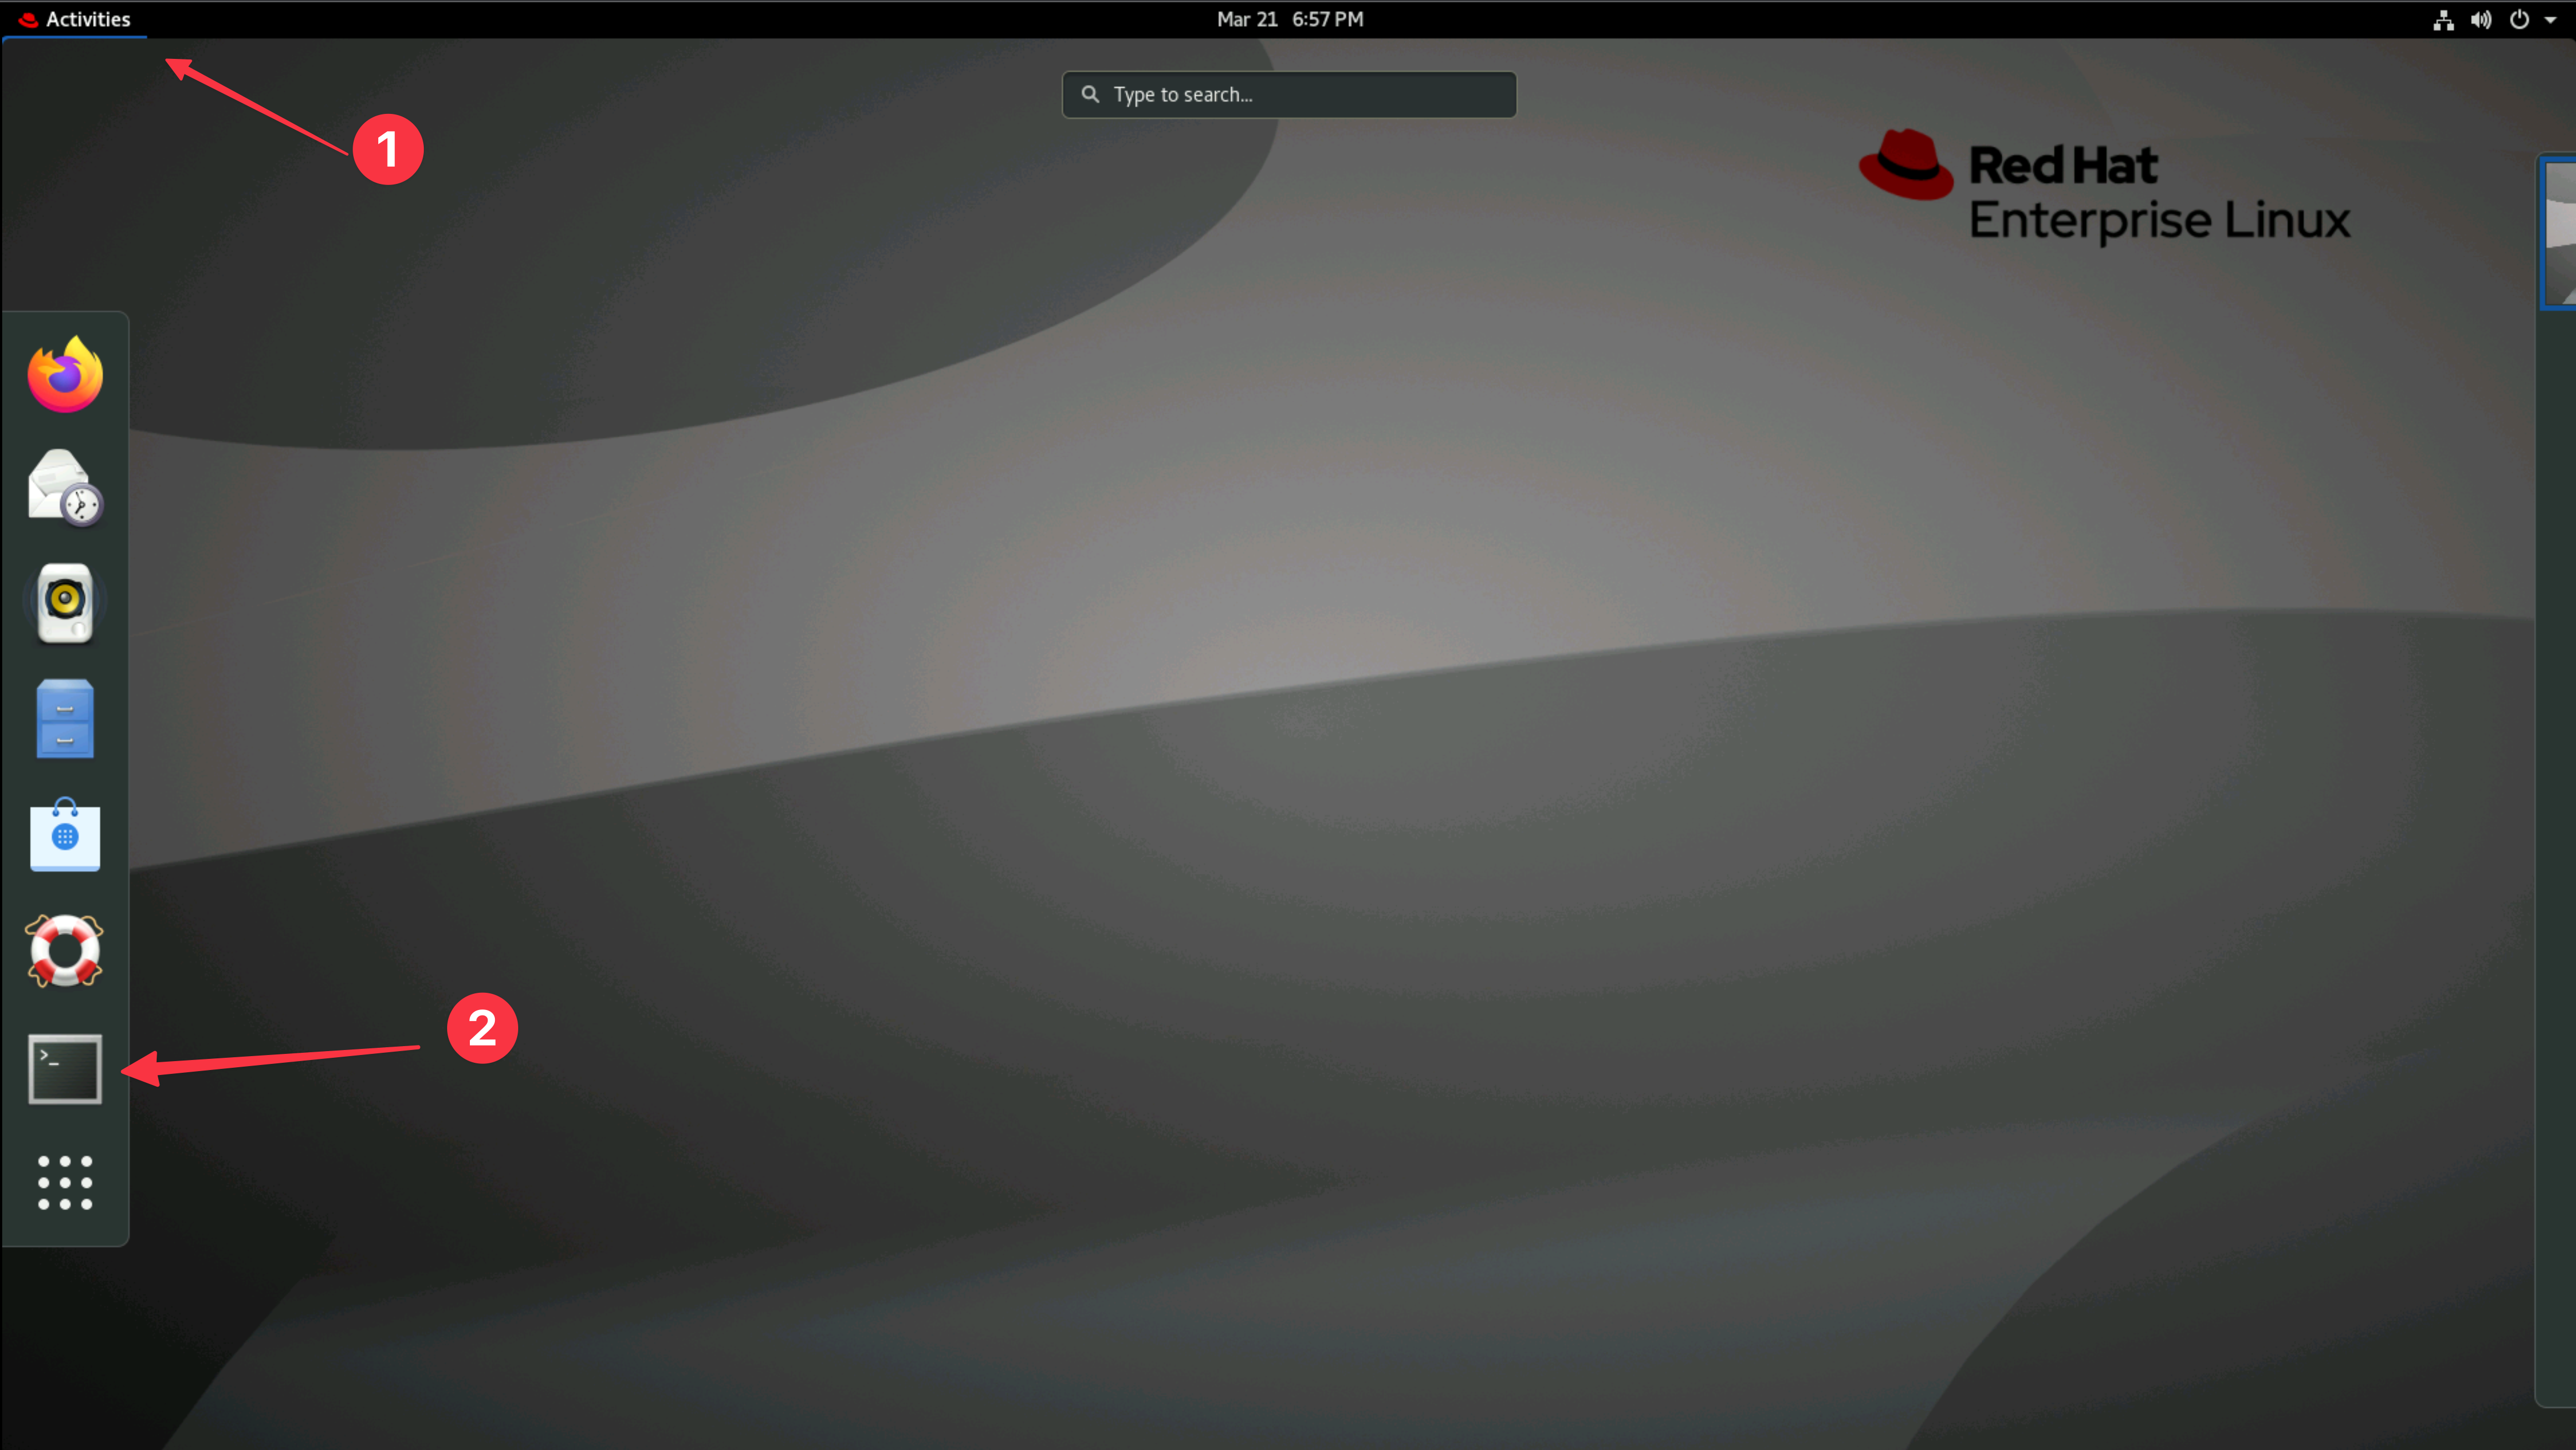
From the Bastion host, open a new terminal window by selecting Activities at the top left of the screen and then the terminal icon.
Run the following to connect to the demo-apps vm:
ssh jammer@demo-apps
Enter yes when prompted if you are sure you want to continue connecting.
Run the following command to become the root user:
sudo -i
We will use Helm, a package manager for Kubernetes to install Robot Shop. First install Helm by running the following commands:
curl -fsSL -o get_helm.sh https://raw.githubusercontent.com/helm/helm/main/scripts/get-helm-3
chmod 700 get_helm.sh
./get_helm.sh
Clone the Robot Shop GitHub repository by running the following command:
cd ~ && git clone https://github.com/instana/robot-shop.git
Create the robot-shop namespace:
cat <<EOF | kubectl apply -f -
apiVersion: v1
kind: Namespace
metadata:
  name: robot-shop
EOF
Install the Robot Shop application using Helm:
- Set your reporting URL by replacing your-instana-reporting-url with the reporting URL from your website definition in the Instana UI. Then, run the command below.
- your-instana-reporting-url is the reportingURL you obtained in section
3.2.
Example:https://instana-0.ibmdte.local/eum/.
export REPORTING_URL=<your-instana-reporting-url>
- Set your key value by replacing your-instana-key with the key from your website definition in the Instana UI. Then, run the command below.
your-instana-key is the key you obtained in section 3.2 from the Instana
user interface.
Example: cYd1TSDZQBCIUfYCGMvV8A.
export EUM_KEY=<your-instana-key>
-
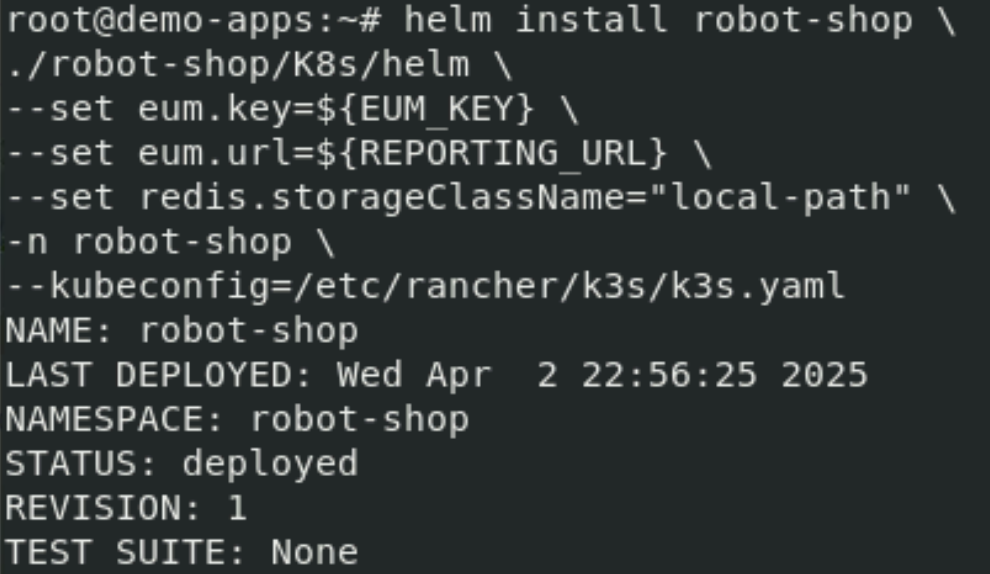
Deploy the Robot Shop application with the following Helm command:
Host: demo-appshelm install robot-shop \
./robot-shop/K8s/helm \
--set eum.key=${EUM_KEY} \
--set eum.url=${REPORTING_URL} \
--set redis.storageClassName="local-path" \
-n robot-shop \
--kubeconfig=/etc/rancher/k3s/k3s.yaml
If successful, you should see the results similar to what's shown below.
Check the status of the Robot Shop deployment by watching the pods:
Type Ctrl-C to exit the watch loop.
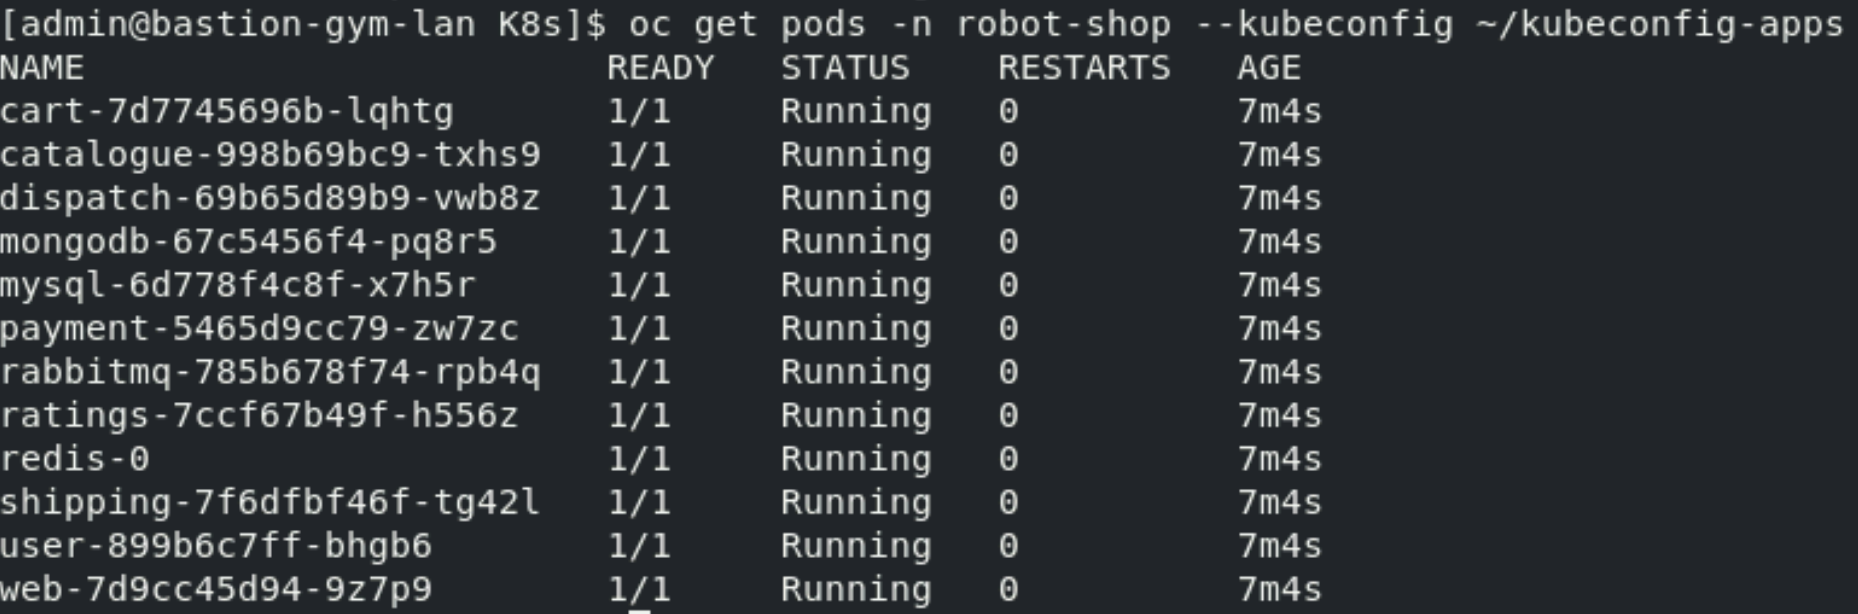
kubectl get pods -n robot-shop -w
If the install was successful, you'll see the following pods running.
If some of the pods (for example ratings or shipping) show 0/1 instead of 1/1 in the READY column or the pods aren't yet in a Running state you may need to wait a little longer. It can take as much as 15 minutes before all of the pods are running. If you don't want to wait, you can exit the watch and proceed to the next steps.
If you need to uninstall Robot Shop from your cluster to attempt a reinstall you can run the following:
helm uninstall robot-shop -n robot-shop --kubeconfig=/etc/rancher/k3s/k3s.yaml
There is currently a bug in the Robot Shop application where a trailing slash is stripped from the reporting URL. Until a fix is merged upstream we will modify the Robot Shop web pod to fix this issue by running the following code block:
# 1. Find the robot-shop web pod name
export POD_NAME=$(kubectl get pods -n robot-shop -l "service=web" -o jsonpath='{.items[0].metadata.name}')

# 2. Wait for pod to be ready
kubectl wait --for=condition=ready pod/$POD_NAME -n robot-shop --timeout=300s

# 3. Wait until the file exists and is accessible
until kubectl exec $POD_NAME -n robot-shop -- test -f /usr/share/nginx/html/eum.html 2>/dev/null; do
    echo "Waiting for eum.html to be available..."
    sleep 2
done

# 4. Fix the trailing slash bug
kubectl exec $POD_NAME -n robot-shop -- \
    sed -i "s|/eum')|/eum/')|g" /usr/share/nginx/html/eum.html
Finally, we want to expose the Robot Shop UI. K3s includes a Traefik Ingress Controller that we can use to create a new Ingress for the app. Run the following to create the ingress:
cat <<EOF | kubectl apply -f -
apiVersion: networking.k8s.io/v1
kind: Ingress
metadata:
  name: robot-shop-ingress
  namespace: robot-shop
spec:
  rules:
  - host: robot-shop.apps.demo-apps.ibmdte.local
    http:
      paths:
      - path: /
        pathType: Prefix
        backend:
          service:
            name: web
            port:
              number: 8080
EOF
The url to the application has already been saved to a bookmark called Robot Shop in Firefox. Alternatively you can issue the following command to get the url to the application
kubectl get ingress -n robot-shop
The result should look similar to: robot-shop.apps.CLUSTER_DOMAIN. In our case
it is robot-shop.apps.demo-apps.ibmdte.local

Wait for all pods to be in a running state before you continue.
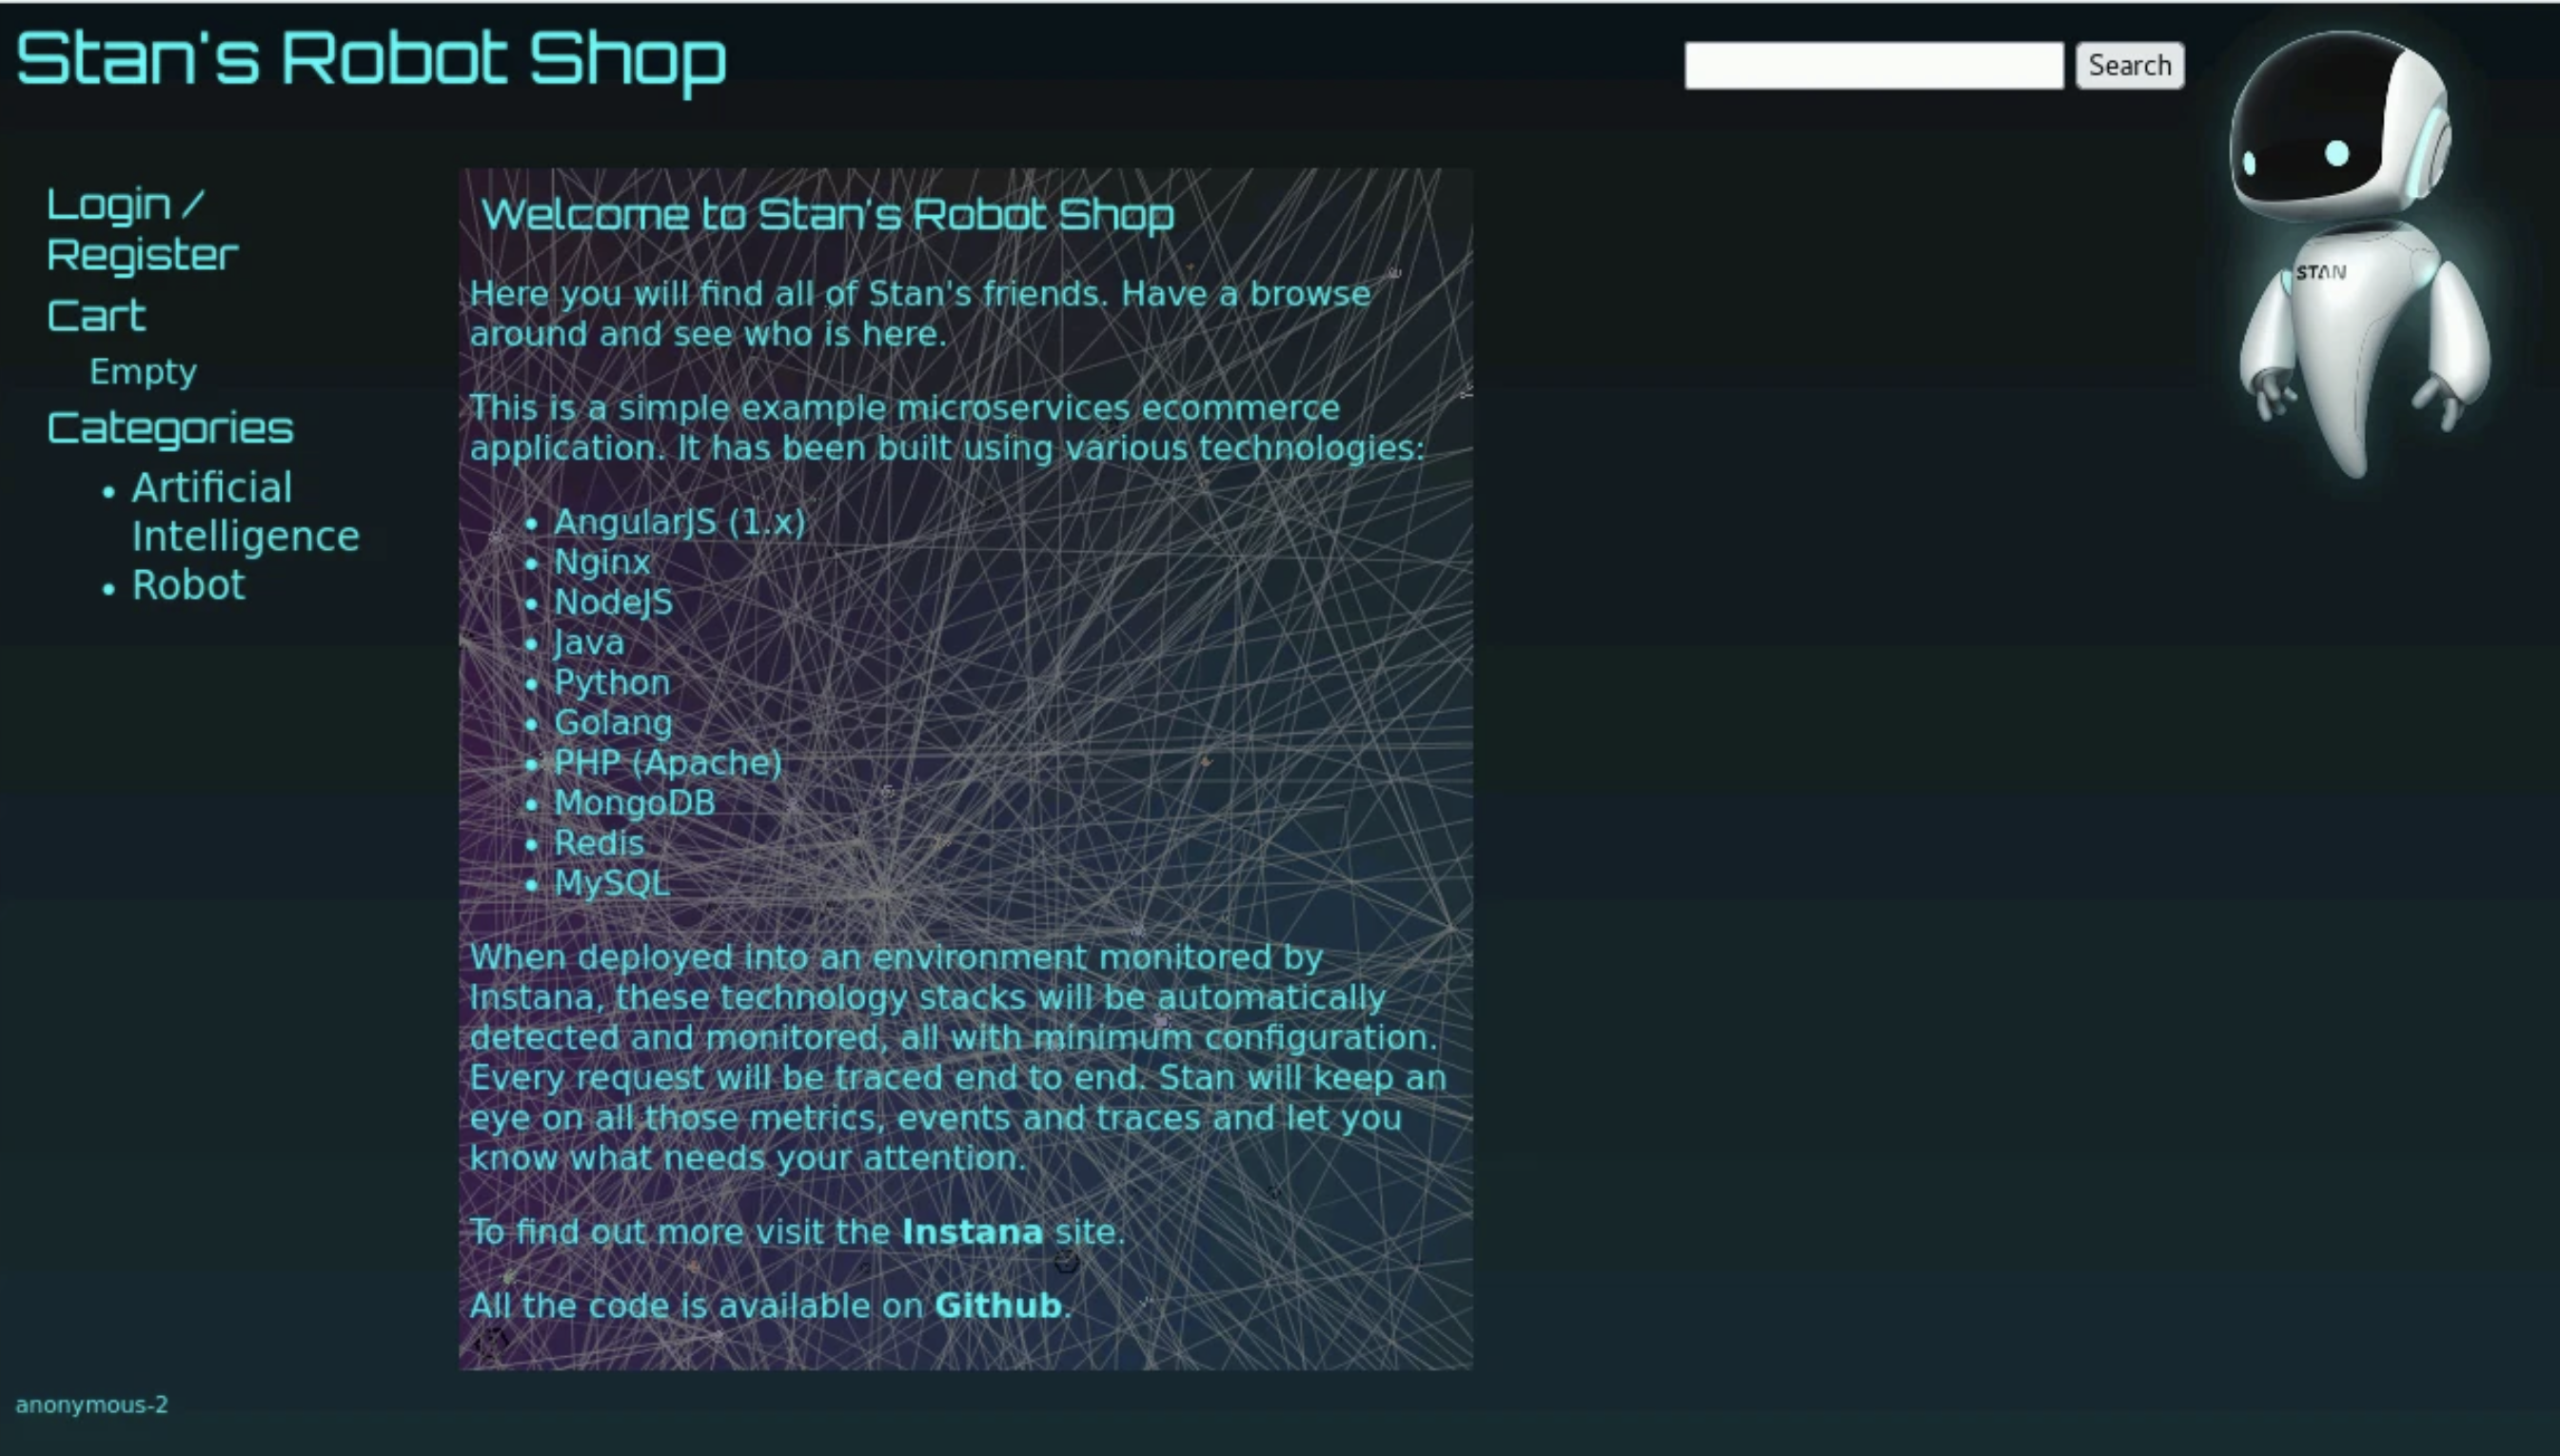
Open a new Firefox tab and select the Robot Shop bookmark to navigate to the Robot Shop application.
If using the route you printed earlier make sure you pay attention to the 'Port' field, for this application you will be using http (80) instead of https (443).
Robot Shop Self Signed Certificate Warning
You can now navigate and use the Robot Shop application, however if you navigate to Websites & Mobile Apps > Robot Shop you will not see any EUM data displayed in Instana.
The reason this is happening is because the Instana EUM reporting URL uses HTTPS
https://instana-0.ibmdte.local/eum/ and the browser is not able to verify the
Self Signed Certificate used by Instana in this lab.
To fix this first issue we need to manually accept the Self Signed Certificate, from Firefox select the bookmark EUM TLS and accept the certificate by selected Advanced... and then Accept the Risk and Continue.
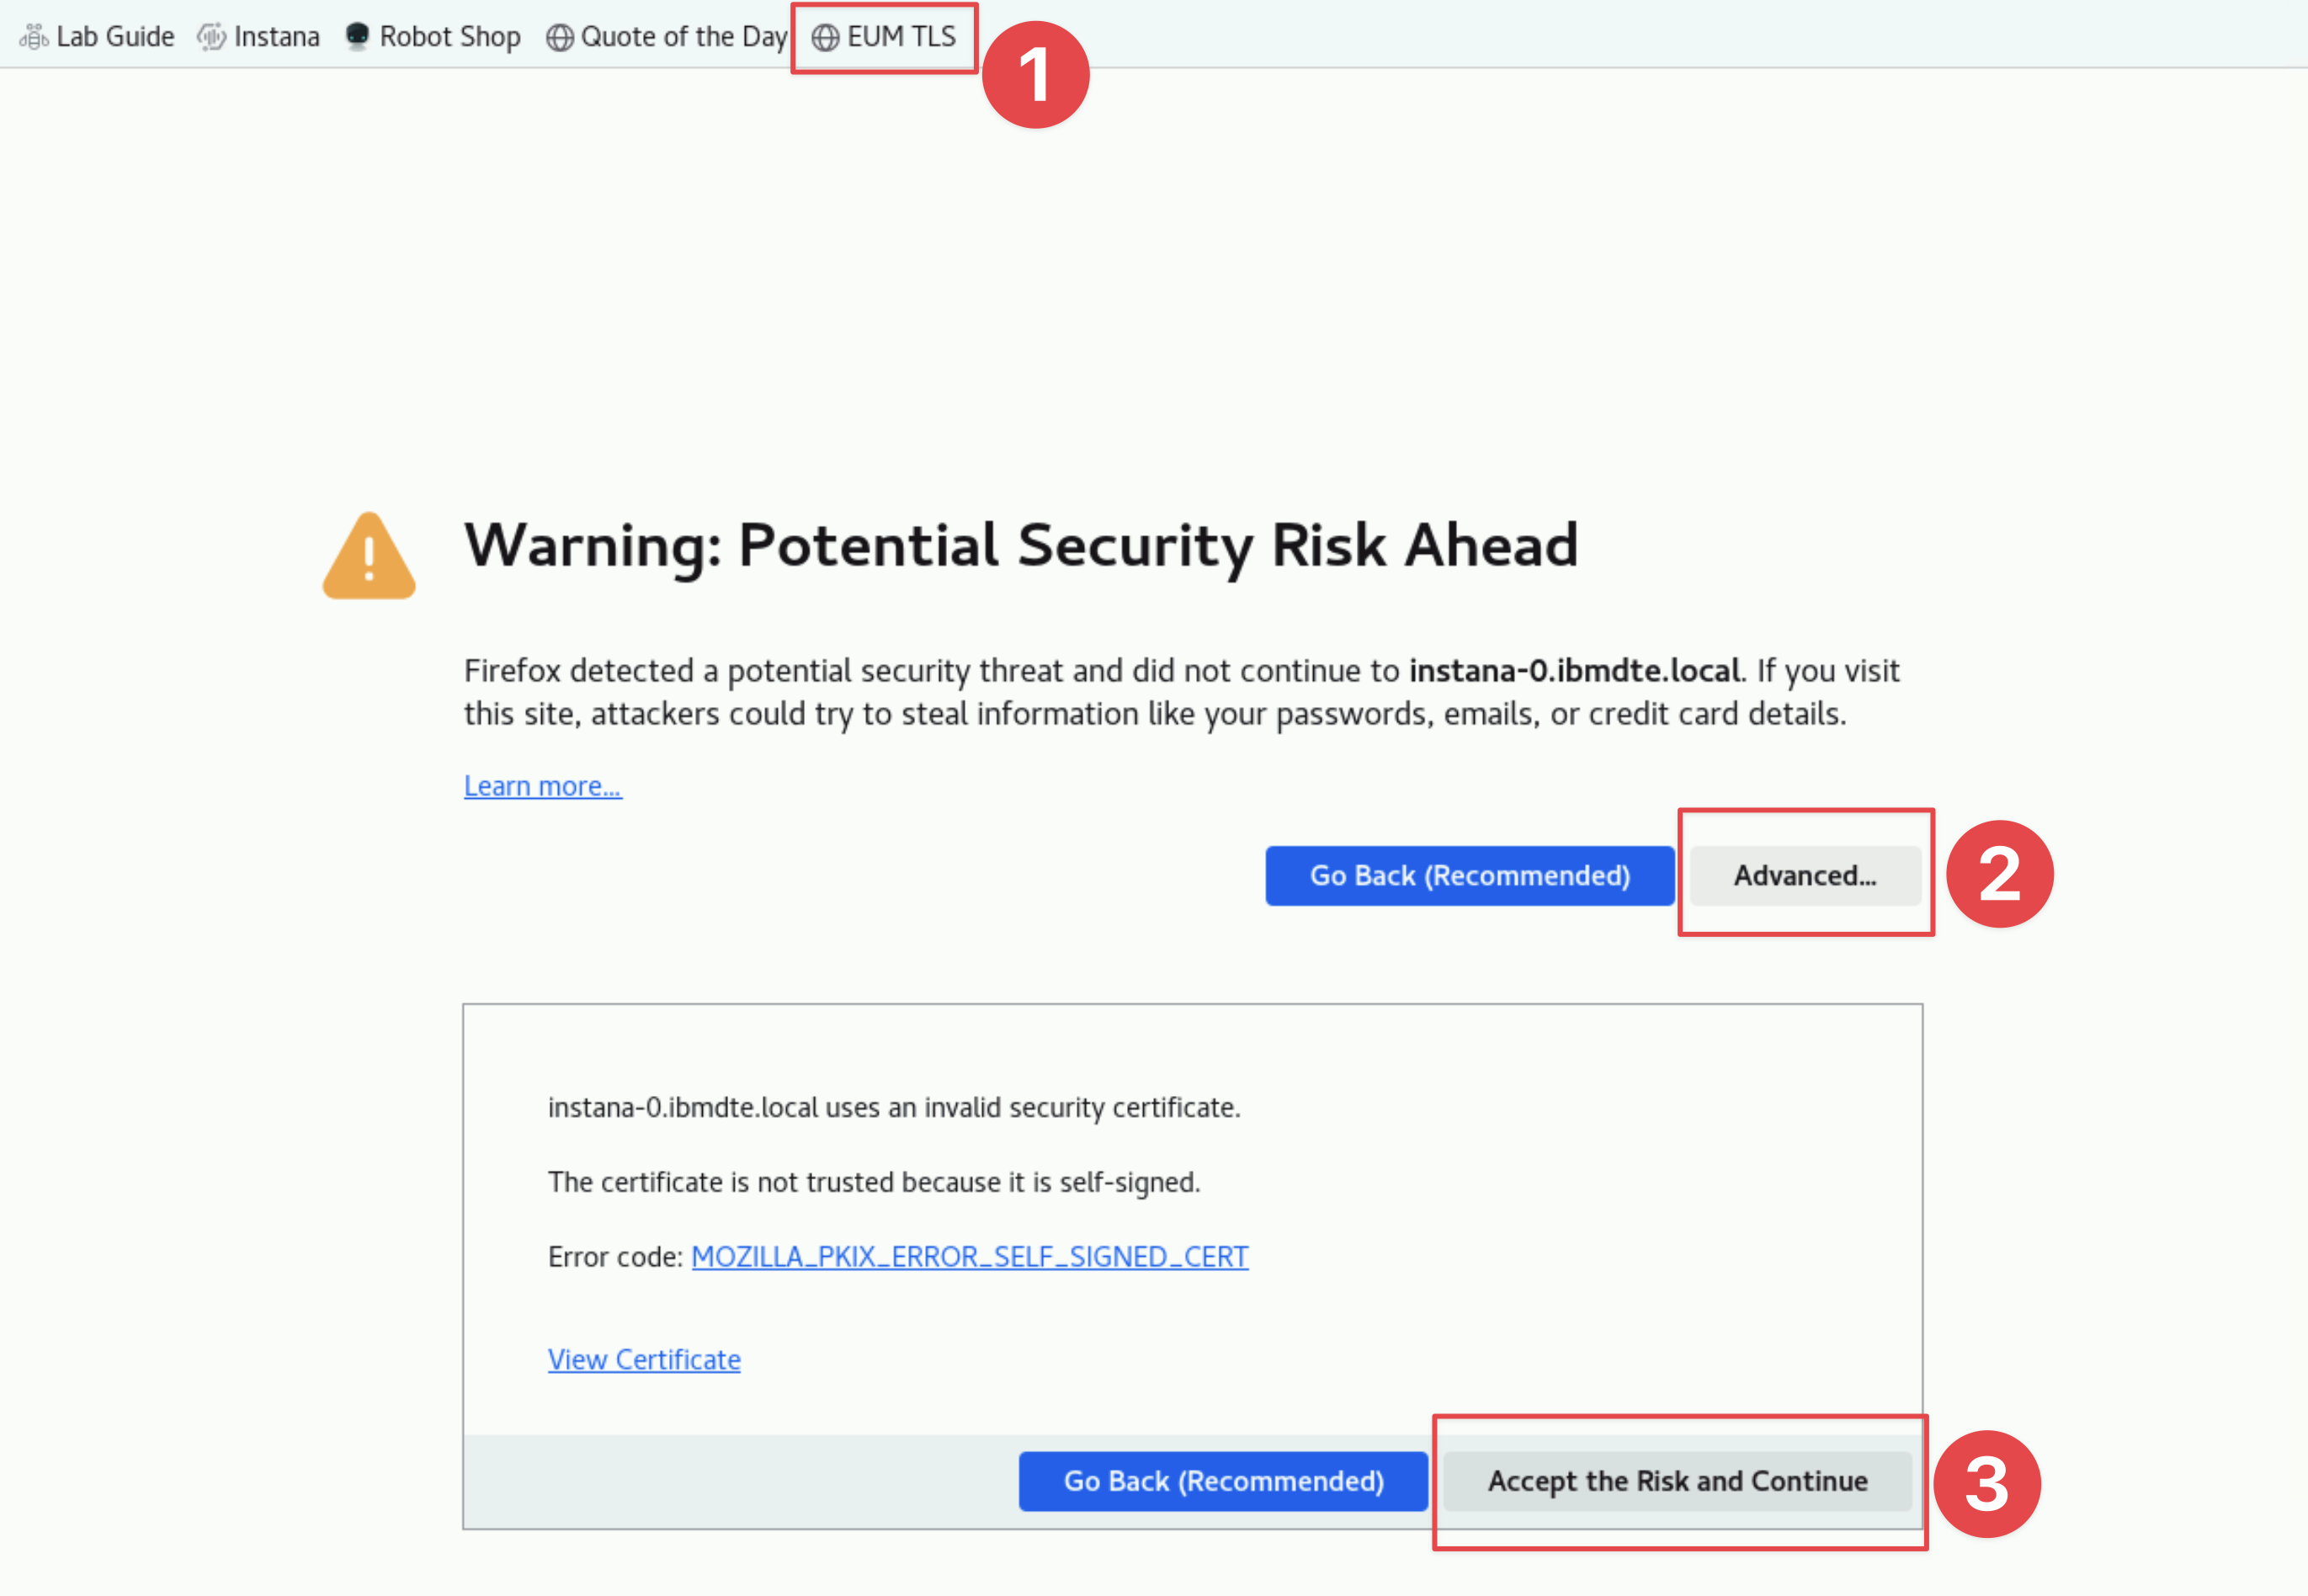
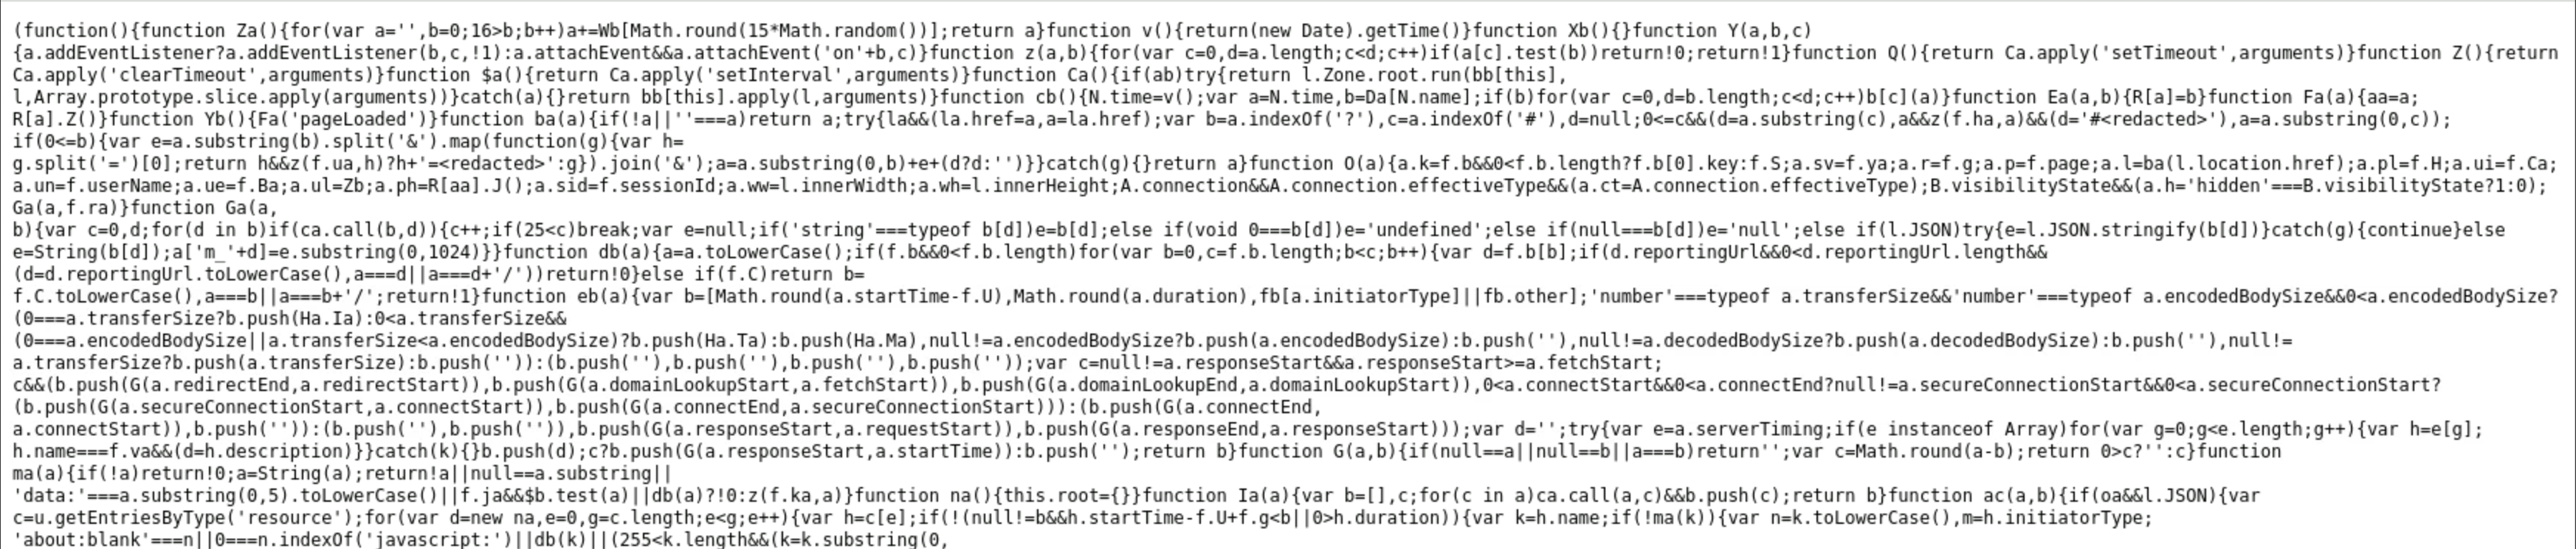
If you have done this correctly you should now see the eum.min.js file.
You can now close the tab.
3.4: Setup Automated Load
Now that the application is running and EUM data in displaying, we can generate some artifical traffic against the Robot-Shop application.
Issue the following command to install the load generation pod.
cat <<EOF | kubectl create -f -
apiVersion: apps/v1
kind: Deployment
metadata:
  name: rs-website-load
  namespace: robot-shop
  labels:
    service: rs-website-load
spec:
  replicas: 1
  selector:
    matchLabels:
      service: rs-website-load
  template:
    metadata:
      labels:
        service: rs-website-load
    spec:
      containers:
      - name: rs-website-load
        env:
          - name: HOST
            value: "http://web:8080/"
        image: brightzheng100/rs-website-load:latest
EOF
Run the kubectl get pods command.
kubectl get pods -n robot-shop
You should now see an additional pod named rs-website-load-* running within the project.
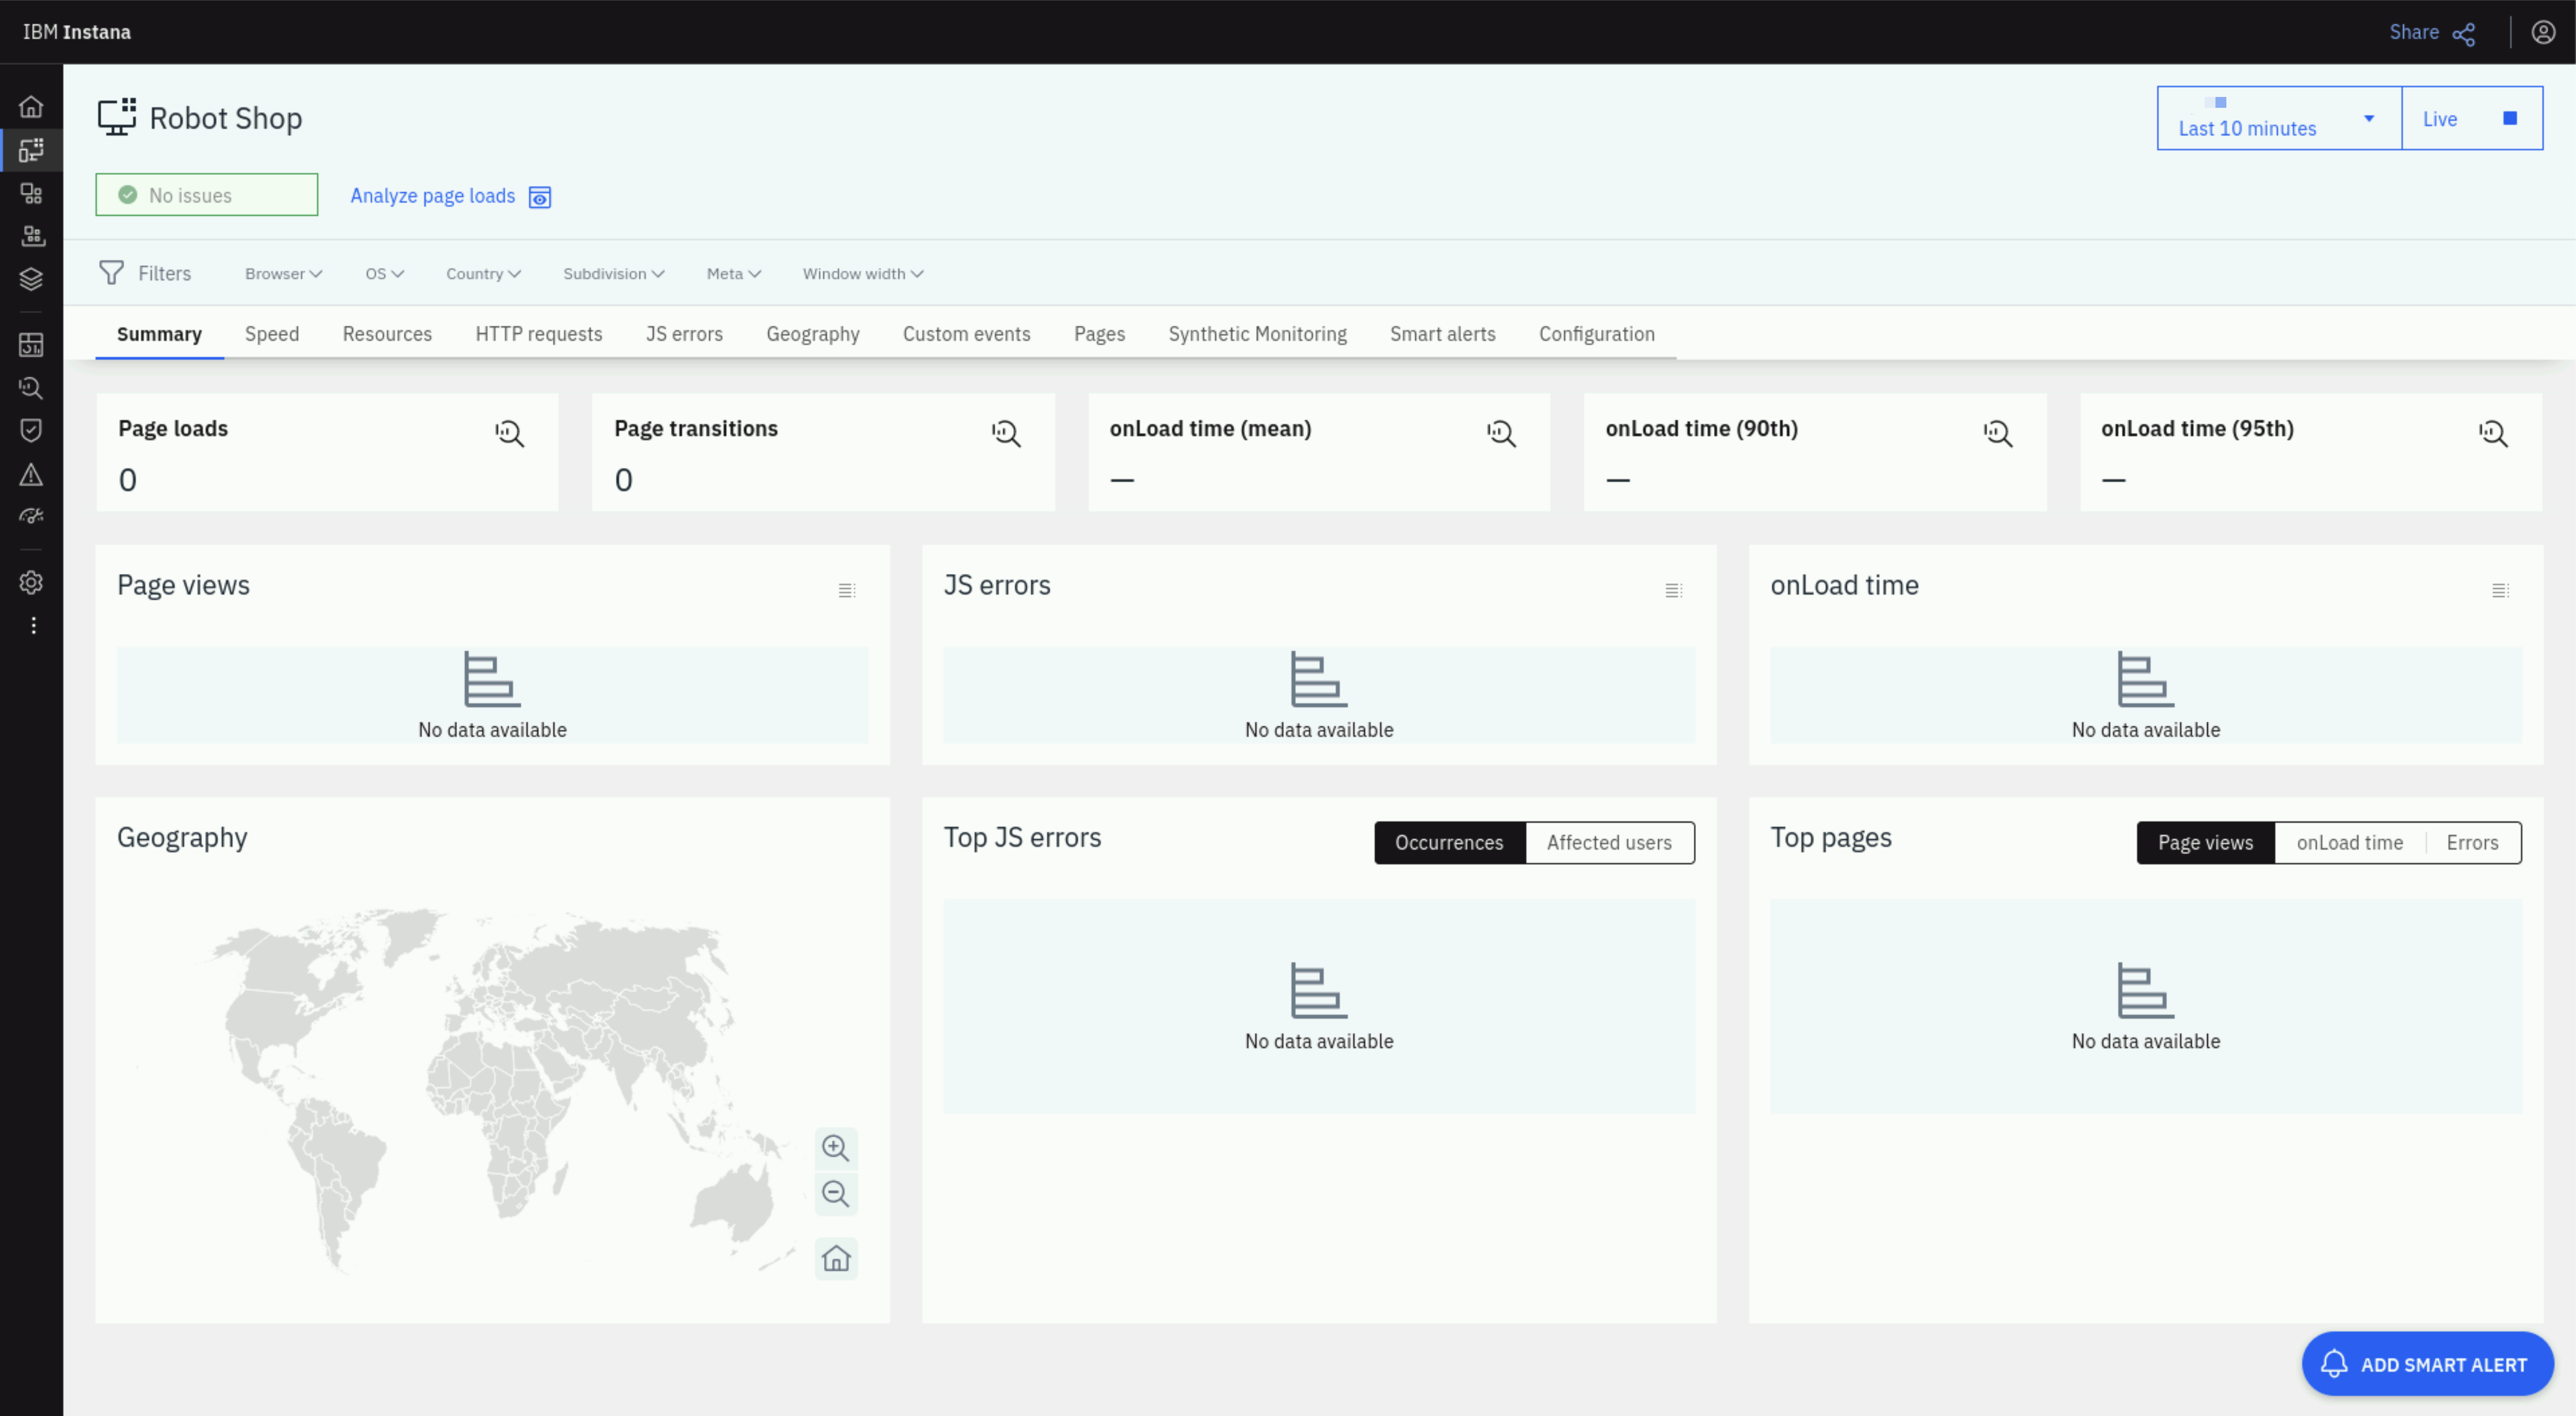
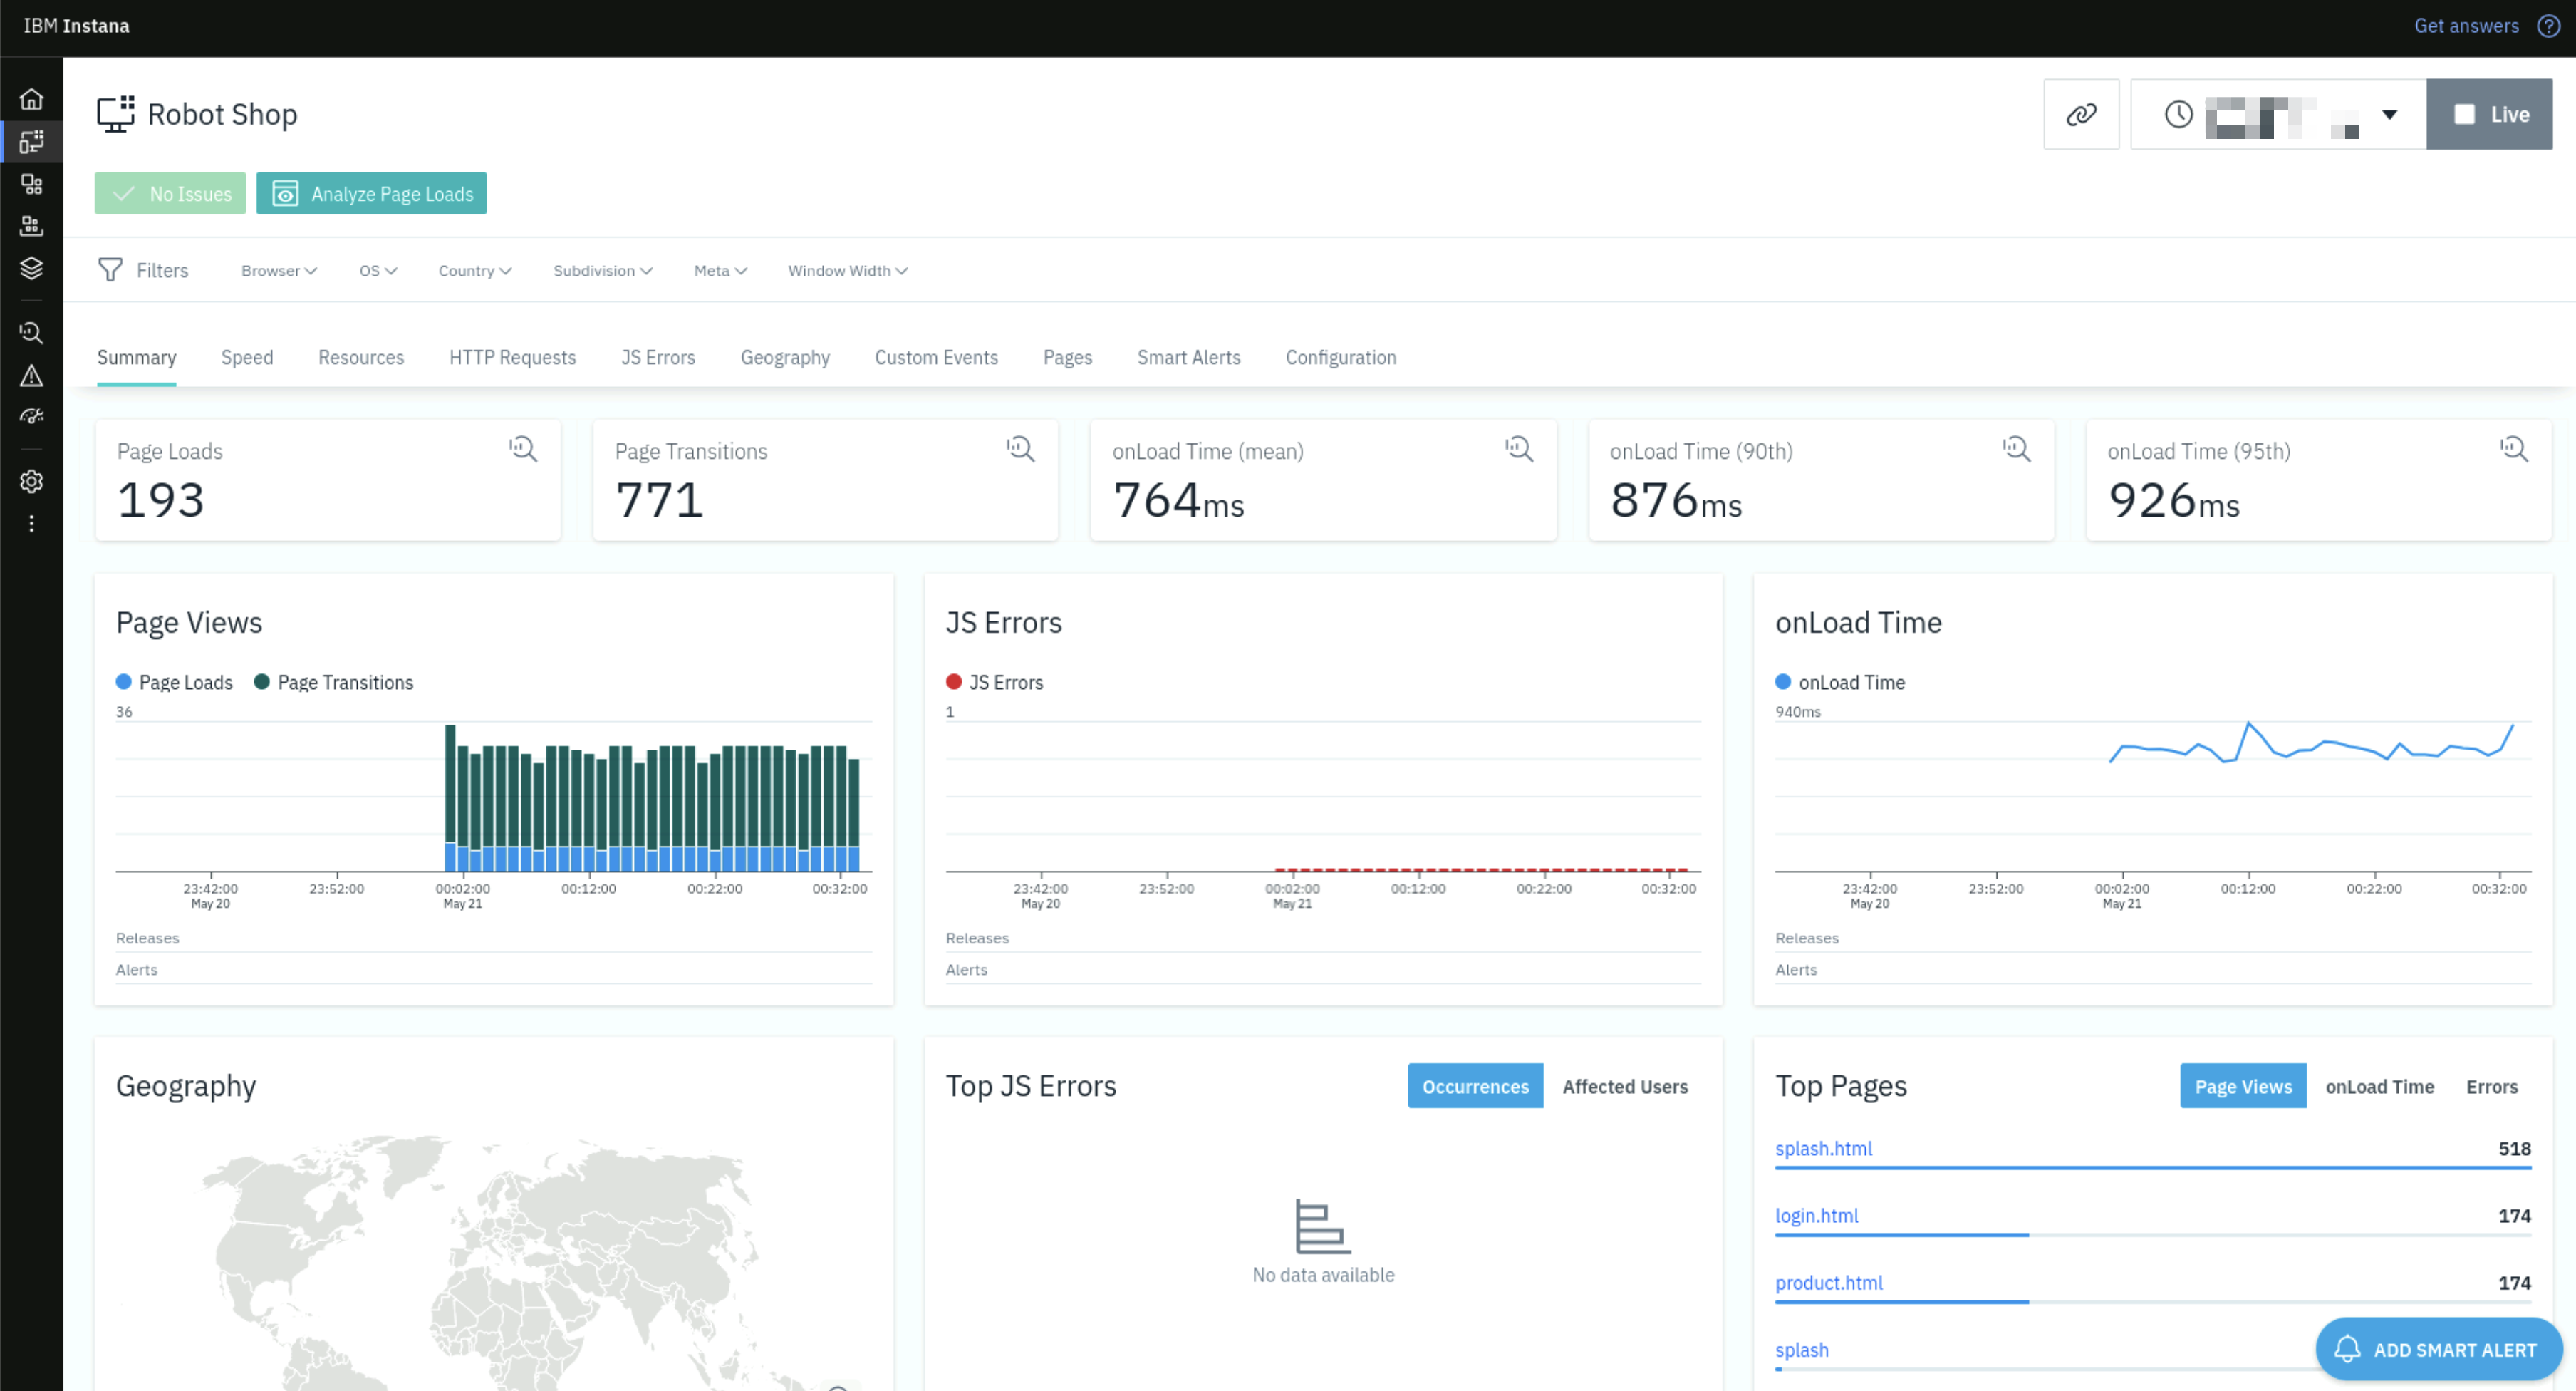
Navigate to Websites & Mobile Apps and select the the Robot Shop application you just created. After a few minutes you should begin to see traffic in the Robot Shop dashboard.
You can change the filter at the top right of the page to Live and Last minute to see the traffic in real time.

3.5: Summary
In this section, you learned how to install an application that includes monitoring and configure it for Website EUM/RUM monitoring.
Now you can proceed to the next section of the lab where you will configure the monitoring for IBM MQ and IBM App Connect Enterprise (ACE).