Synthetic Monitoring
This lab focuses Instana's synthetic monitoring feature.
Key capabilities that will be exercised are:
- Setting up the synthetic "Point of Presence". This is the component that executes the synthetic test(s).
- Creating a test for TLS certificate checking.
- Creating a single REST API synthetic test.
- Using JavaScript to execute a scripted synthetic test that exercises multiple REST calls.
- Configure Smart Alerts against synthetic tests.
Before we can create any synthetic tests, we must first set up a synthetic "Point of Presence" or "PoP server" to playback our synthetic tests. Many customers deploy two or more "Points of Presence" so that they can compare the response time and availability from different network zones. For example, if a PoP server running in the LAN network performs well, but a PoP server located on a WAN network is performing poorly, it is a clear indication that the problem is the network or load balancer rather than the application.
In the lab, we will begin by installing the "Synthetic Point Of Presence".
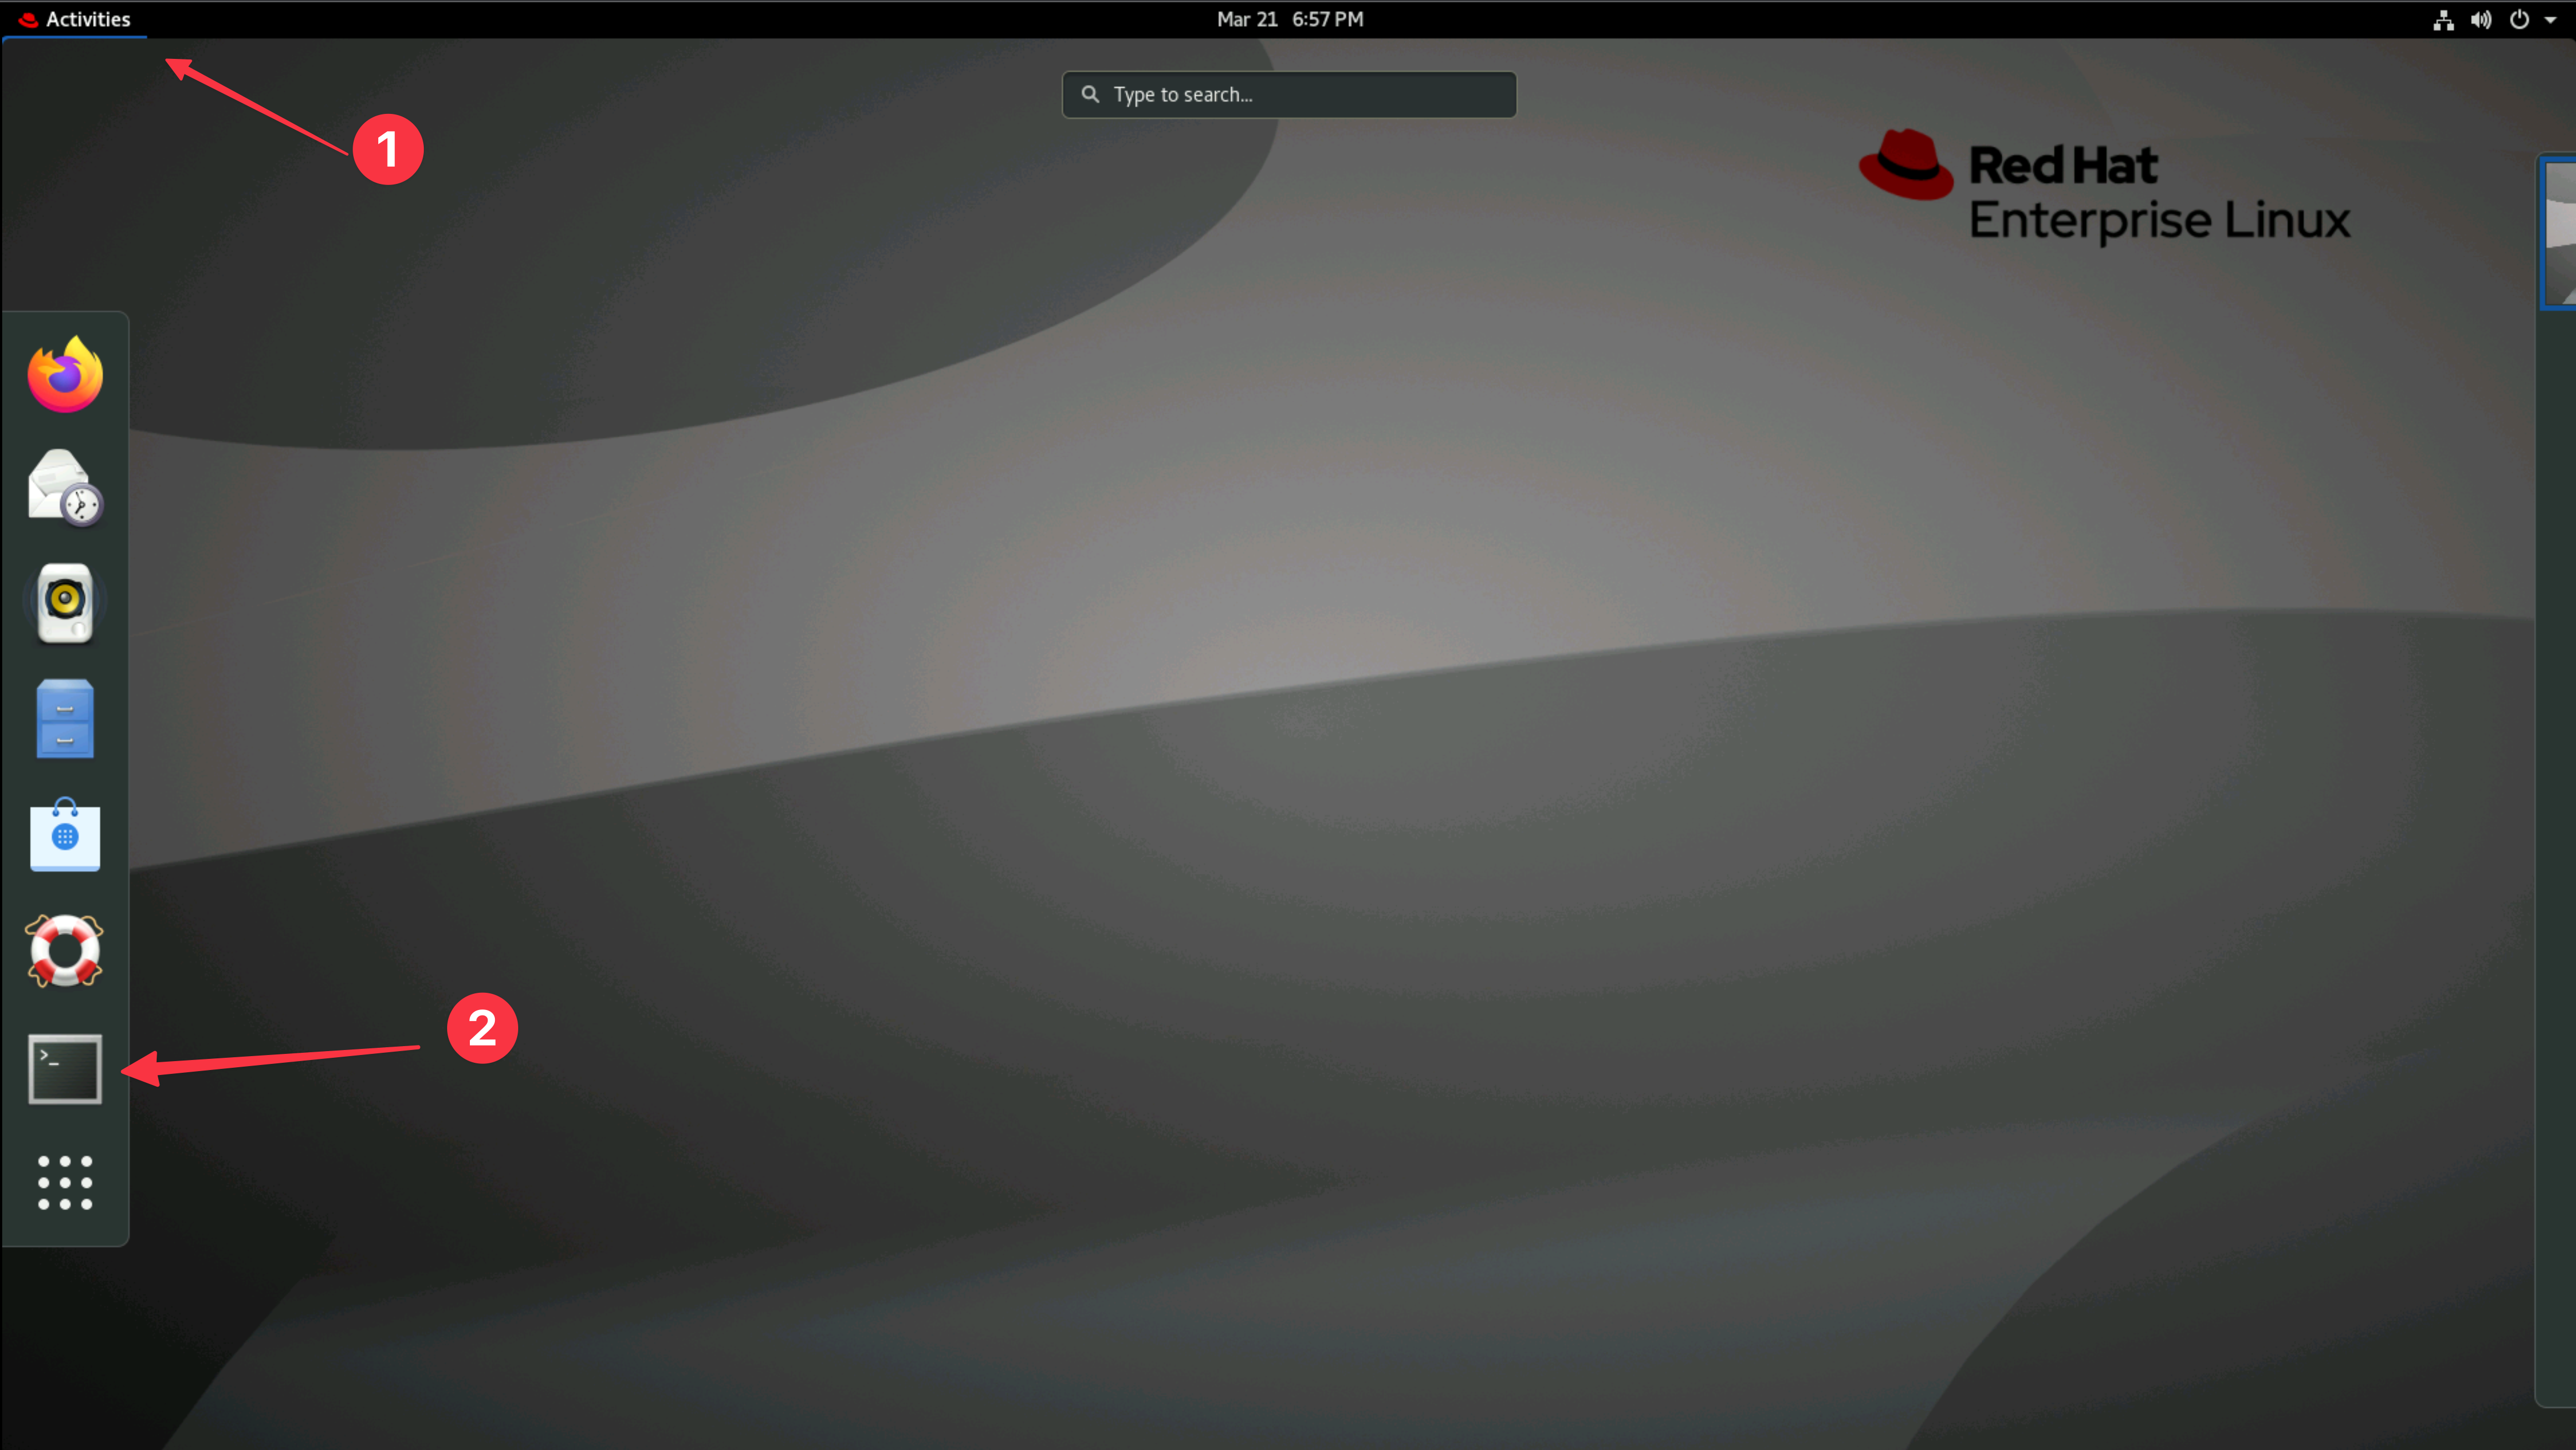
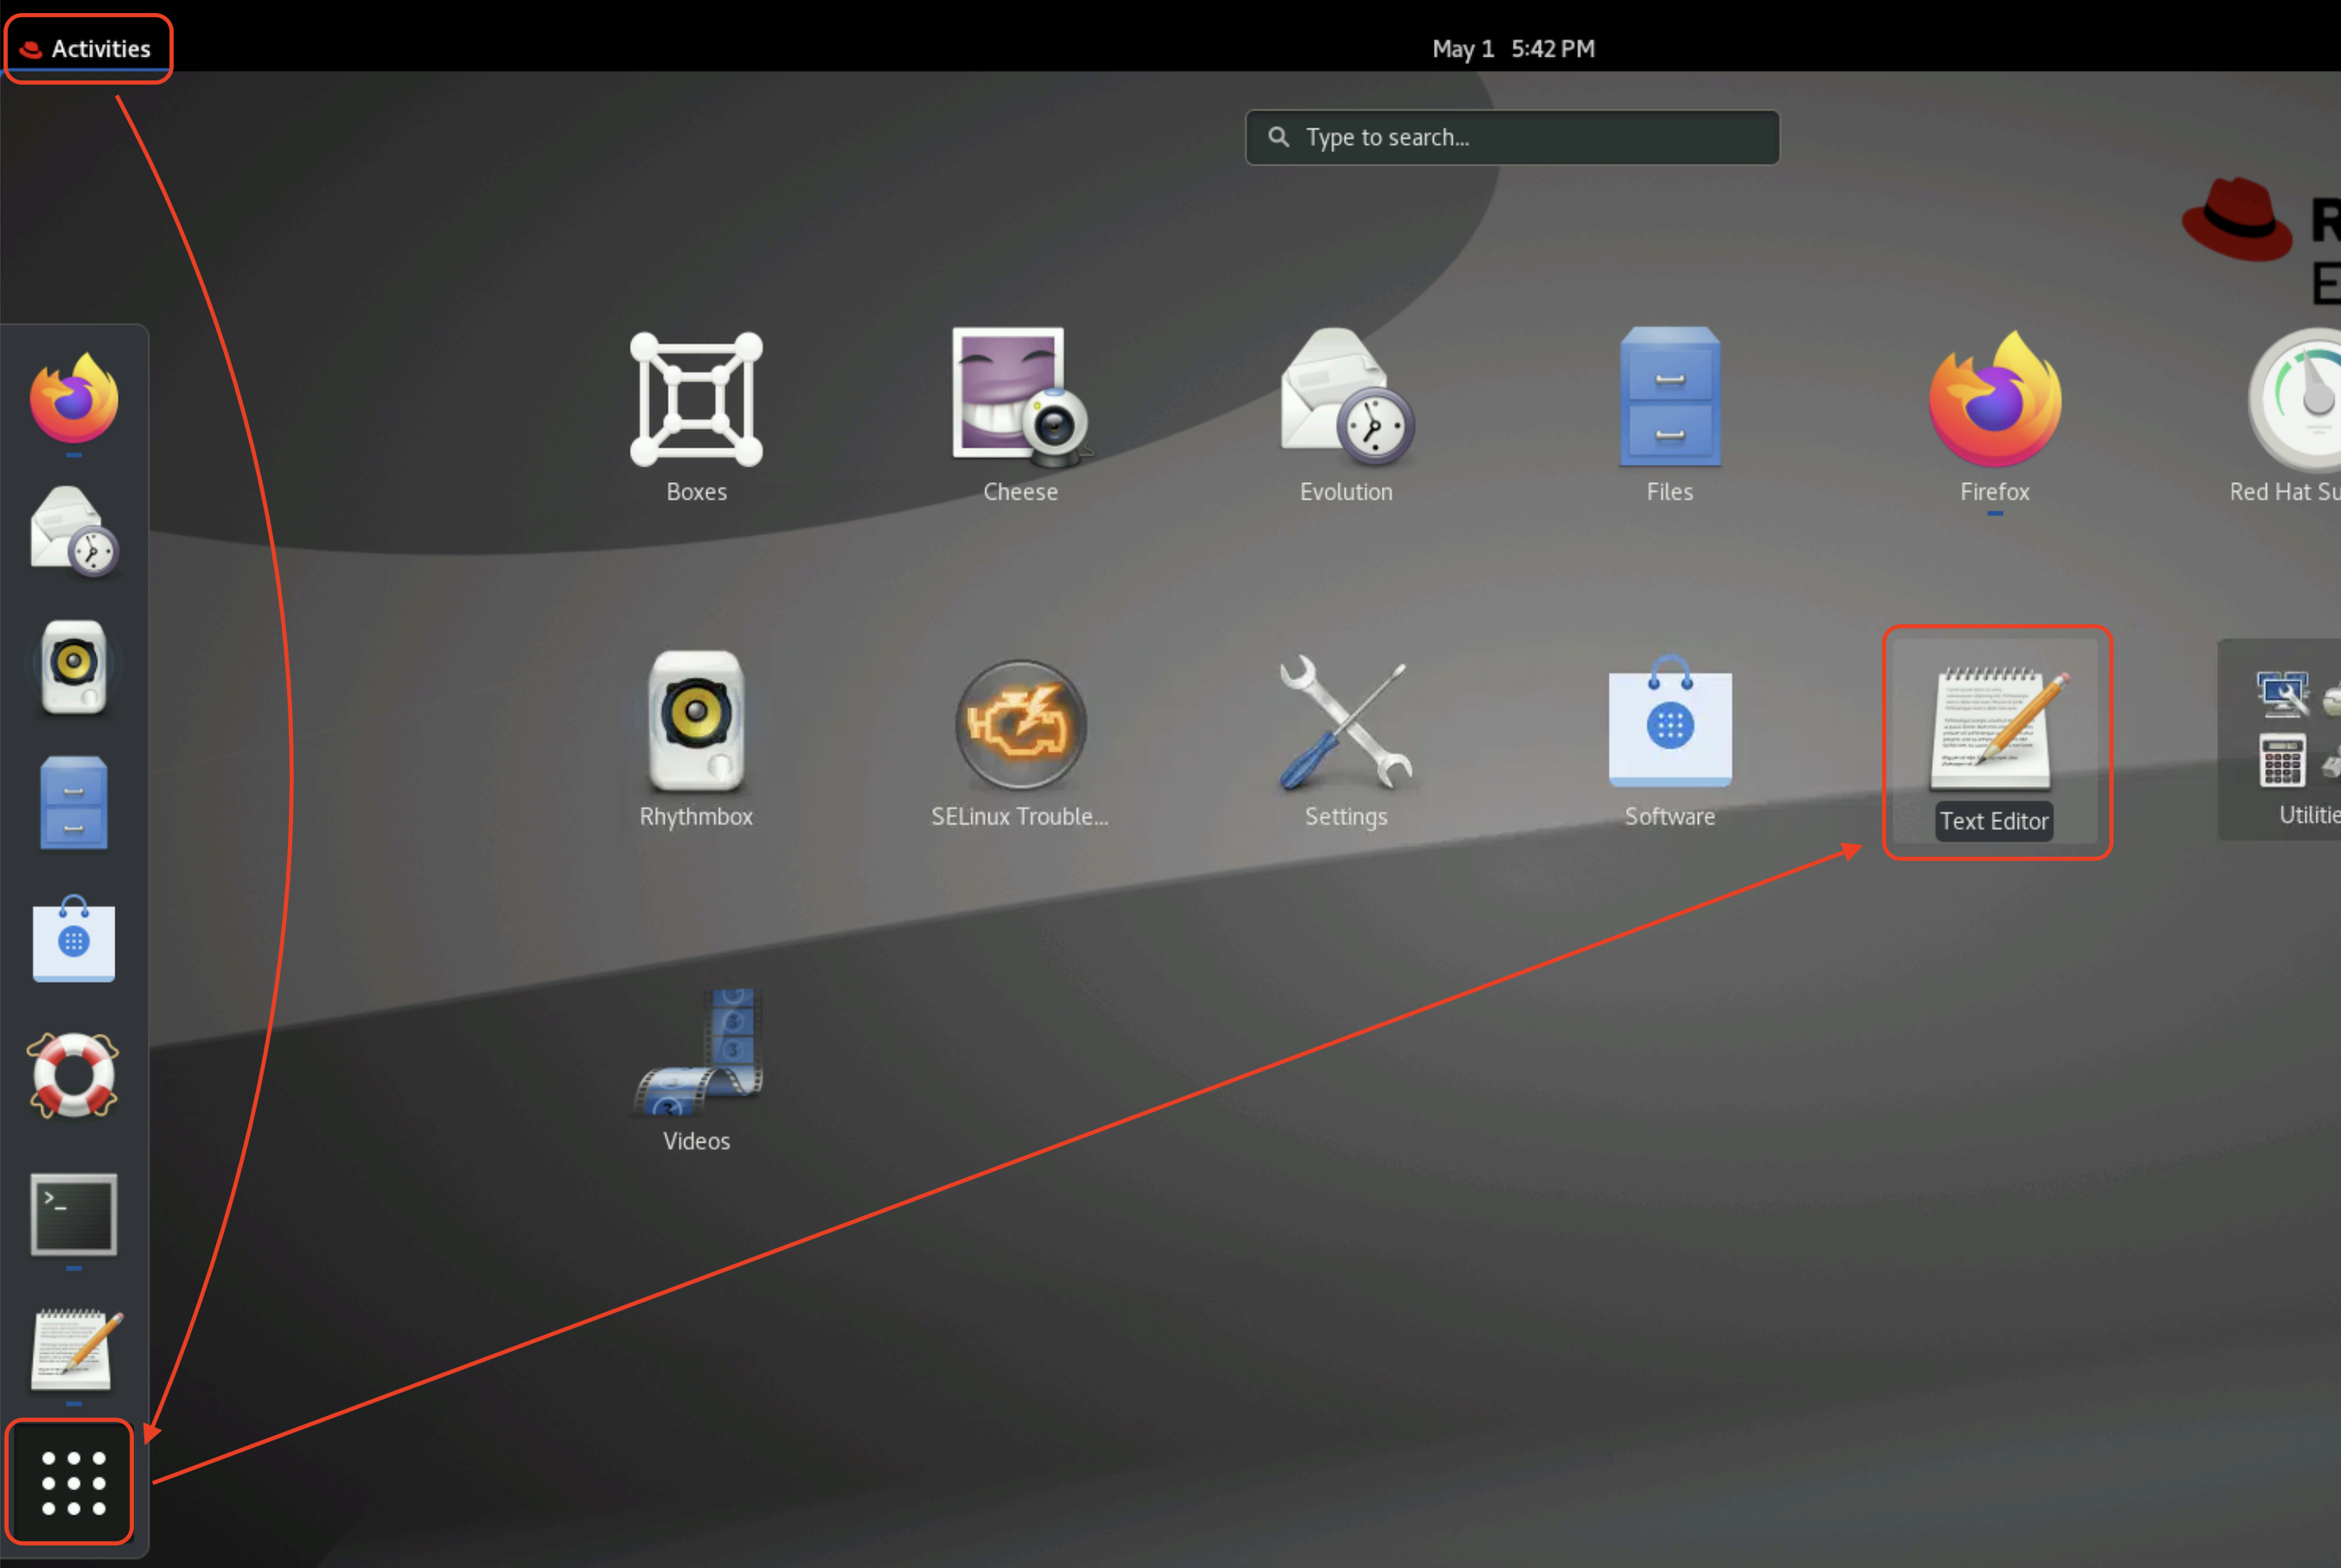
From the Bastion host, open a terminal window by selecting Activities at the top left of the screen and then the terminal icon.
If you are unsure how to get access to the Bastion host (Guacamole) see Accessing a Lab Environment
3.1 Enable the Synthetic Point Of Presence backend feature
We will be installing the Synthetic Point Of Presence onto the same K3s cluster that the Instana backend is running on. In order to do that, we'll need a CLI with access to the K3s cluster.
In the bastion terminal window use the following command to connect to the primary Instana host:
ssh jammer@instana-0
When prompted if you want to continue connecting, type: yes
Use sudo to become root.
sudo -i
You are now operating as root on the primary Instana host.
You can check to ensure you are in the right place by running the following:
kubectl get nodes
You should see the following output:
NAME        STATUS   ROLES                       AGE     VERSION
instana-0   Ready    control-plane,etcd,master   4h21m   v1.32.4+k3s1
instana-1   Ready    control-plane,etcd,master   4h20m   v1.32.4+k3s1
instana-2   Ready    control-plane,etcd,master   4h20m   v1.32.4+k3s1
A synthetic feature must be enabled in the Instana backend in order to execute the synthetic tests. Follow the steps below to enable the synthetics feature within the Instana cluster. The feature is a backend functionality that allows the integration of one or many Synthetics Point Of Presence components, placed in different locations, into the same Instana Backend.
Enable the synthetic feature of the core component:
stanctl backend apply --core-feature-flags feature.synthetics.enabled=true
If prompted, press ENTER to auto-generate TLS certificate.
If asked, select "Proceed without installing the update". The goal of the lab is not spend time on Instana update, but to demonstrate Synthetic feature.
Ensure synthetic pods have started successfully:
watch -n 2 "kubectl get pods -A | grep synthetic"
list of pods should include 5 components:
instana-core      sli-synthetics-filter-6b4d4cc884-g9qfv          1/1     Running   0   45s
instana-core      synthetics-acceptor-6cfff7c567-b867k            1/1     Running   0   45s
instana-core      synthetics-health-processor-79d9998465-b8w5r    1/1     Running   0   45s
instana-core      synthetics-reader-65fb59499f-vq667              1/1     Running   0   45s
instana-core      synthetics-writer-6fbfc76b56-kpg4d              1/1     Running   0   44s
Once all pods are in a Running state, press CTRL+C to return to the terminal
prompt.
At this point, the Instana cluster is capable of displaying synthetic tests, but you still need to install the "Synthetic Point Of Presence", the component which will run the tests.
3.2 Install the Synthetic Point Of Presence component
This is the component that plays synthetic tests and reports results to the Instana backend server.
We will use Helm, a package manager for Kubernetes to install the Synthetic Point of Presence component. First install Helm by running the following commands:
curl -fsSL -o get_helm.sh https://raw.githubusercontent.com/helm/helm/main/scripts/get-helm-3
chmod 700 get_helm.sh
./get_helm.sh
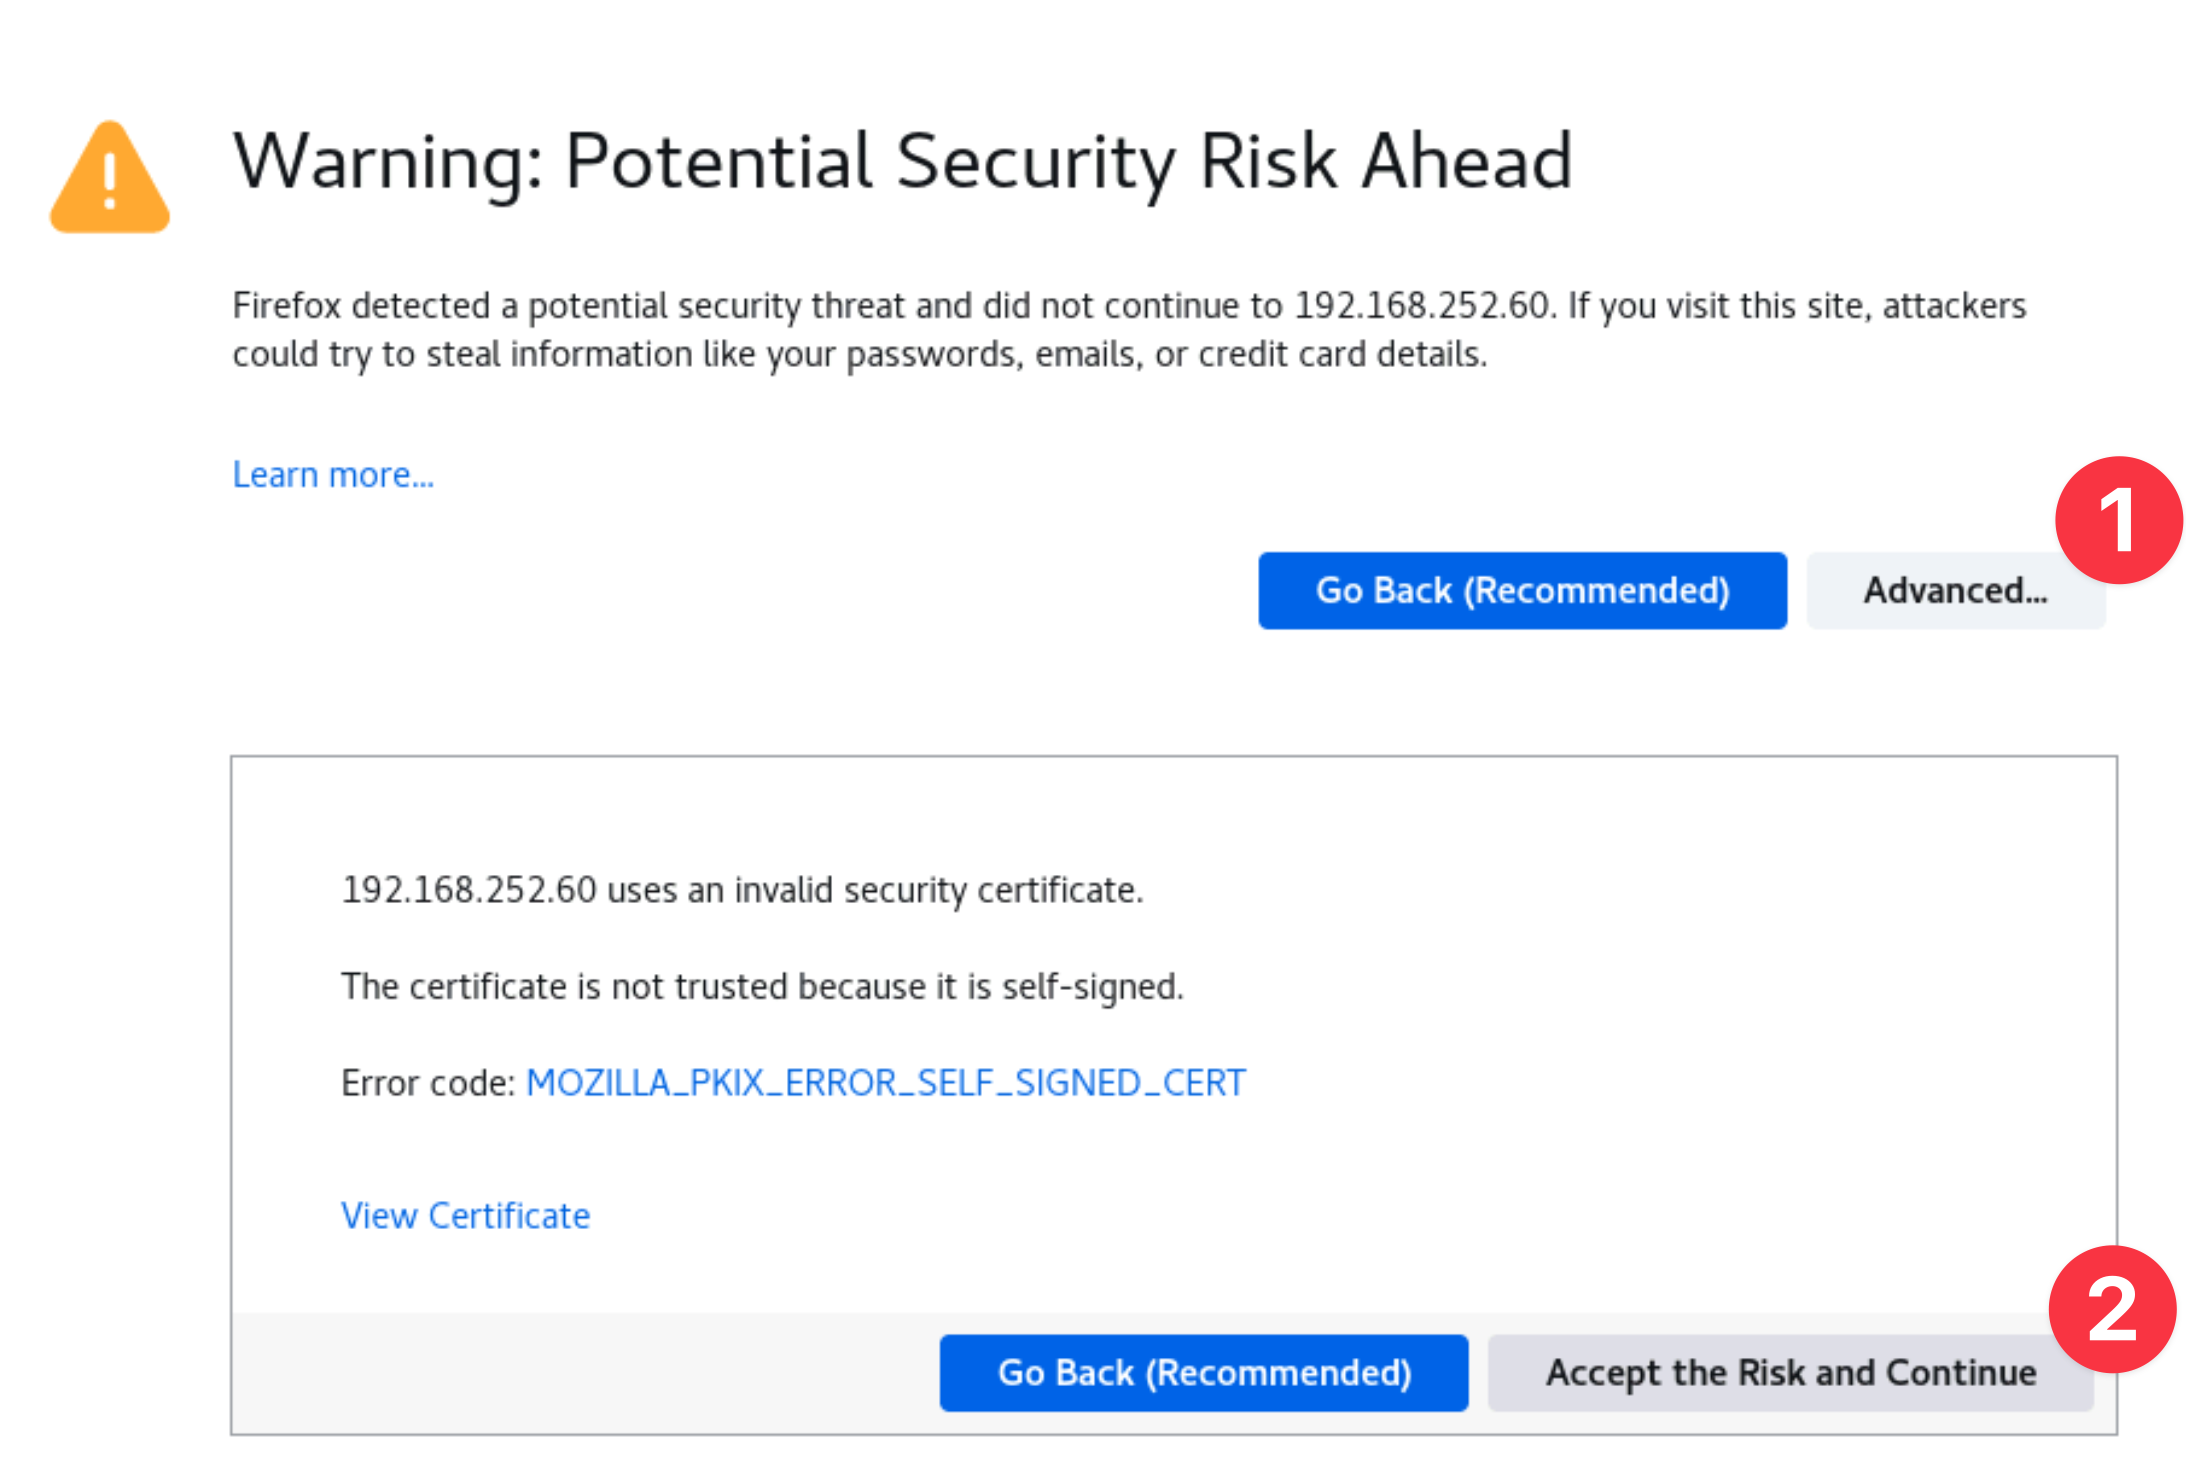
From the Bastion host open the Firefox browser and select the Instana bookmark.
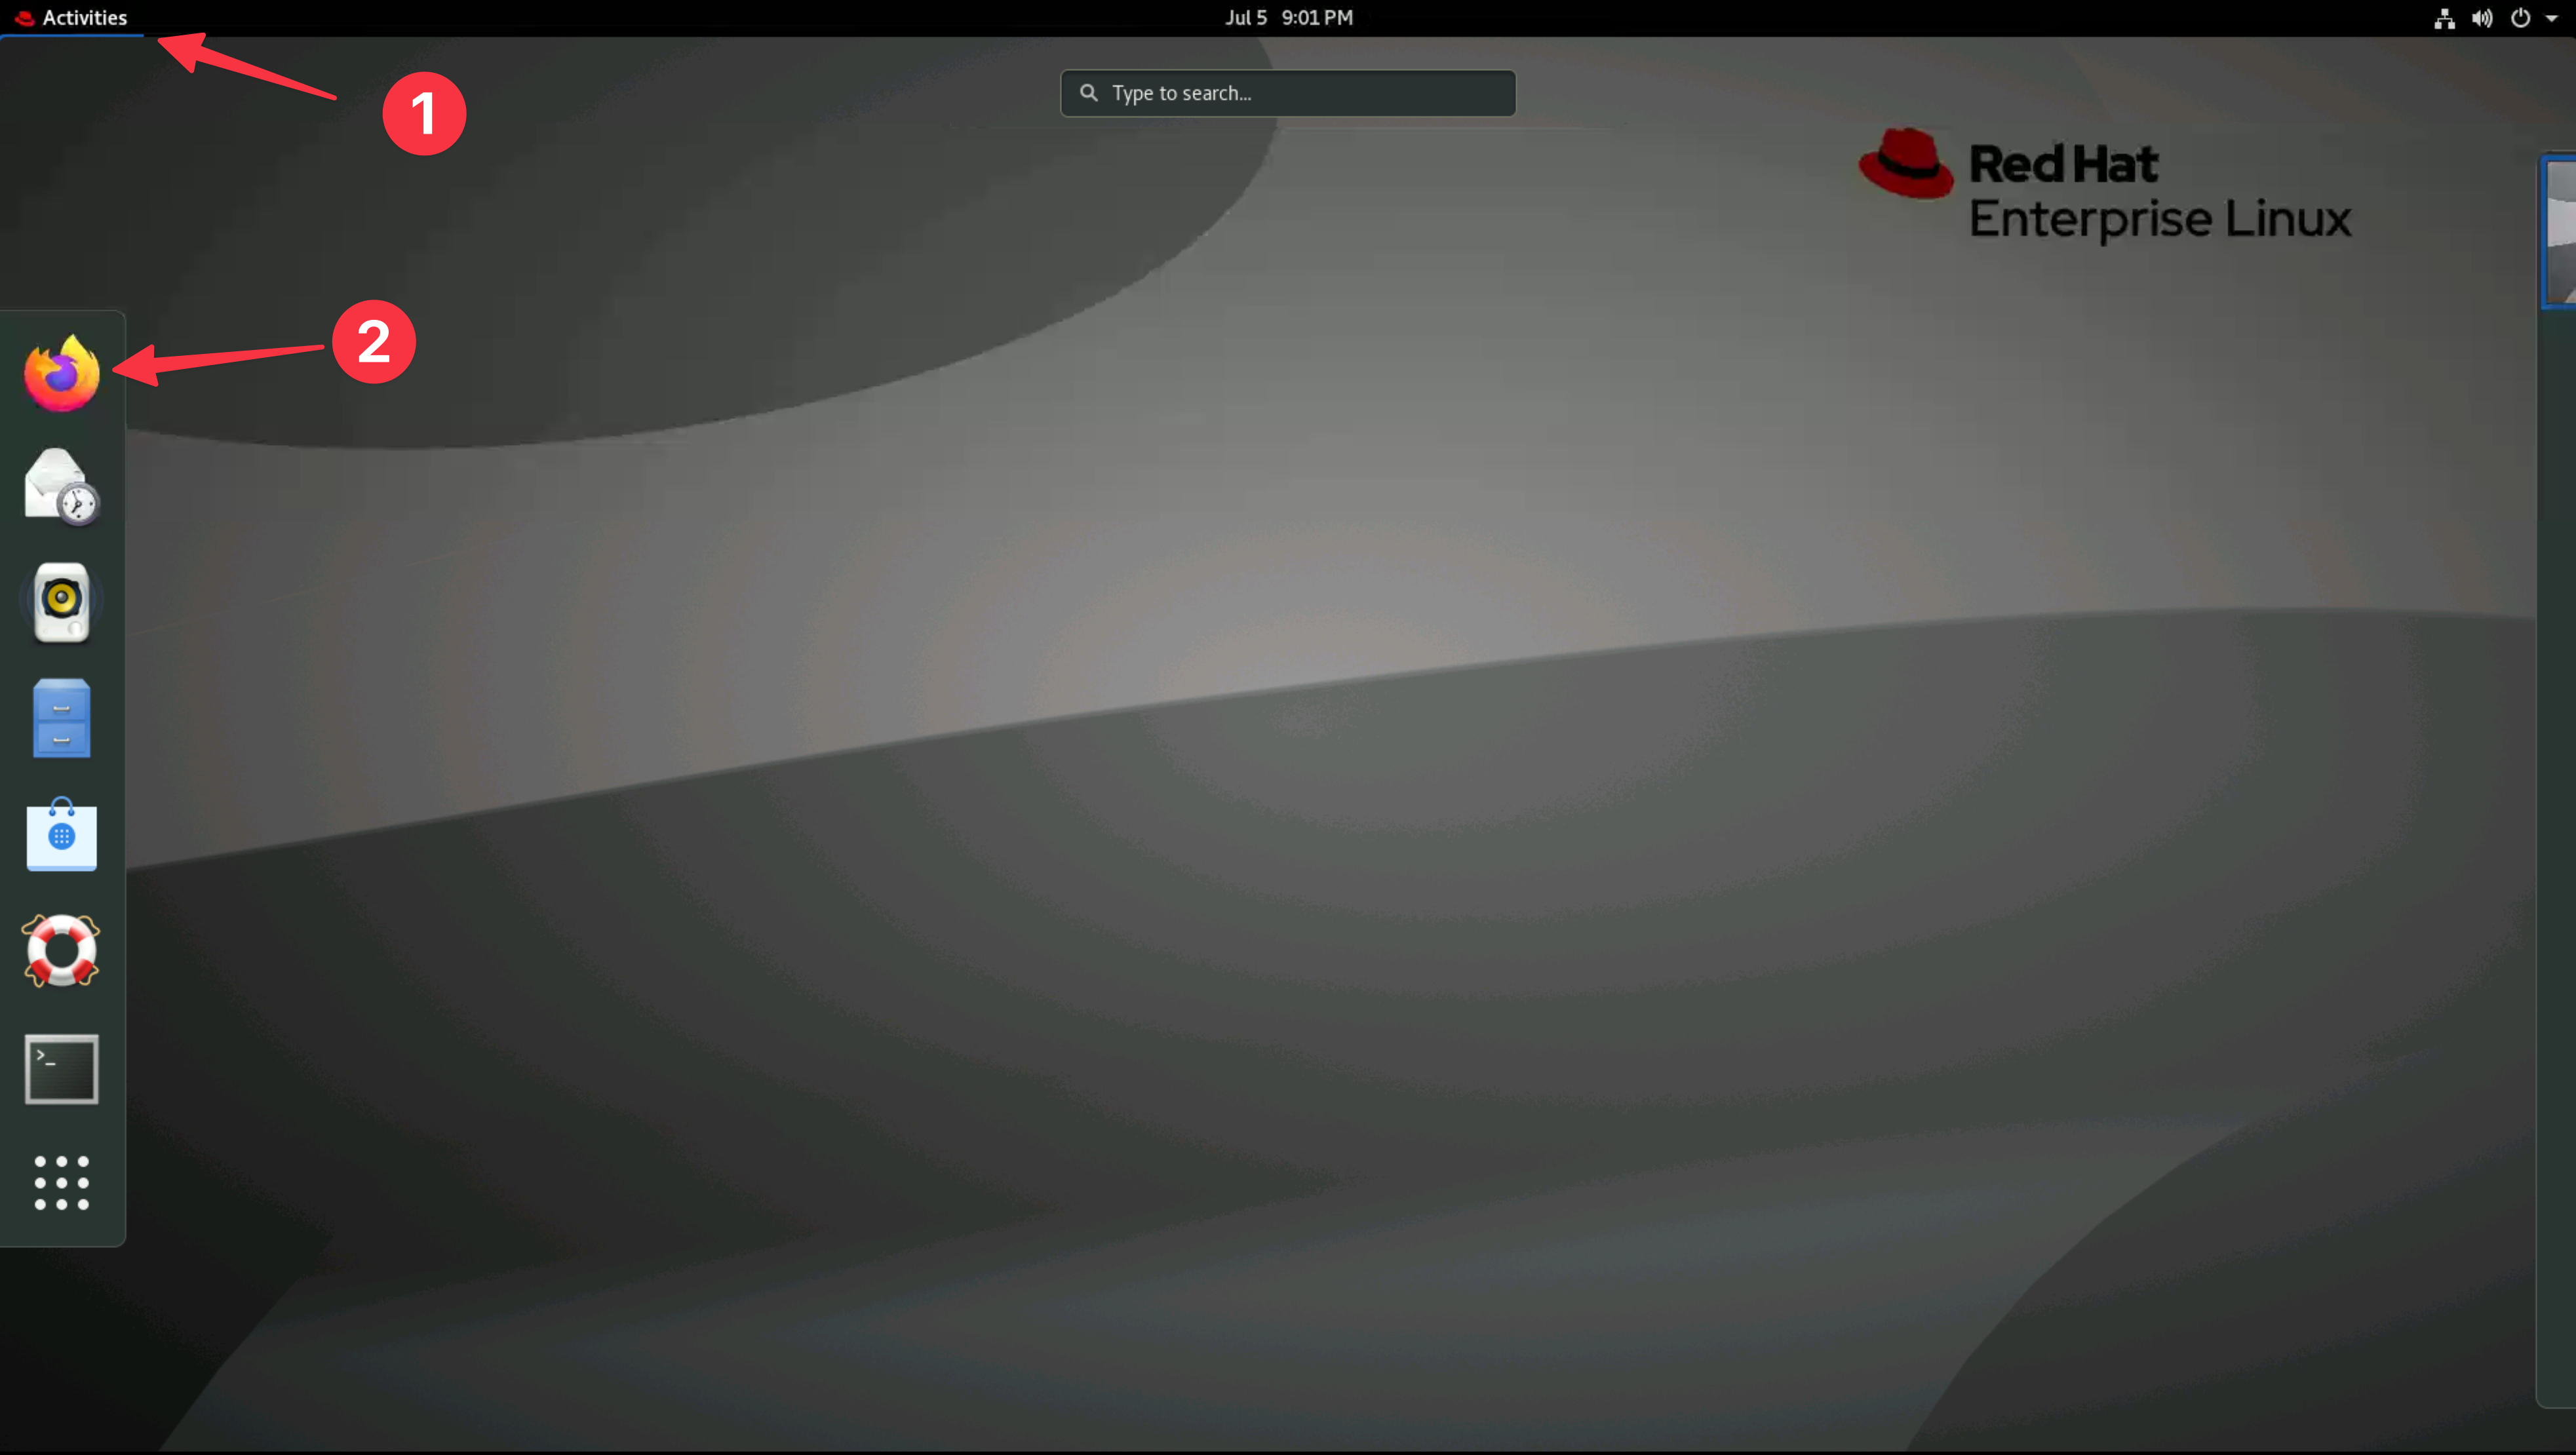
You can safely ignore the warning about the certificate being untrusted.
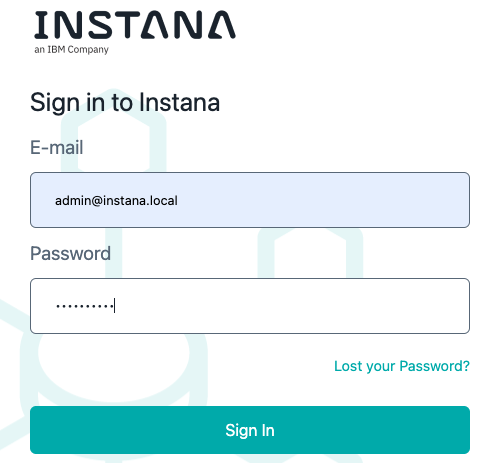
When prompted, enter the username and password:
- Username: admin@instana.local
- Password: Passw0rd
From the left menu select Synthetic Monitoring and then click the Deploy a PoP button on the right side:
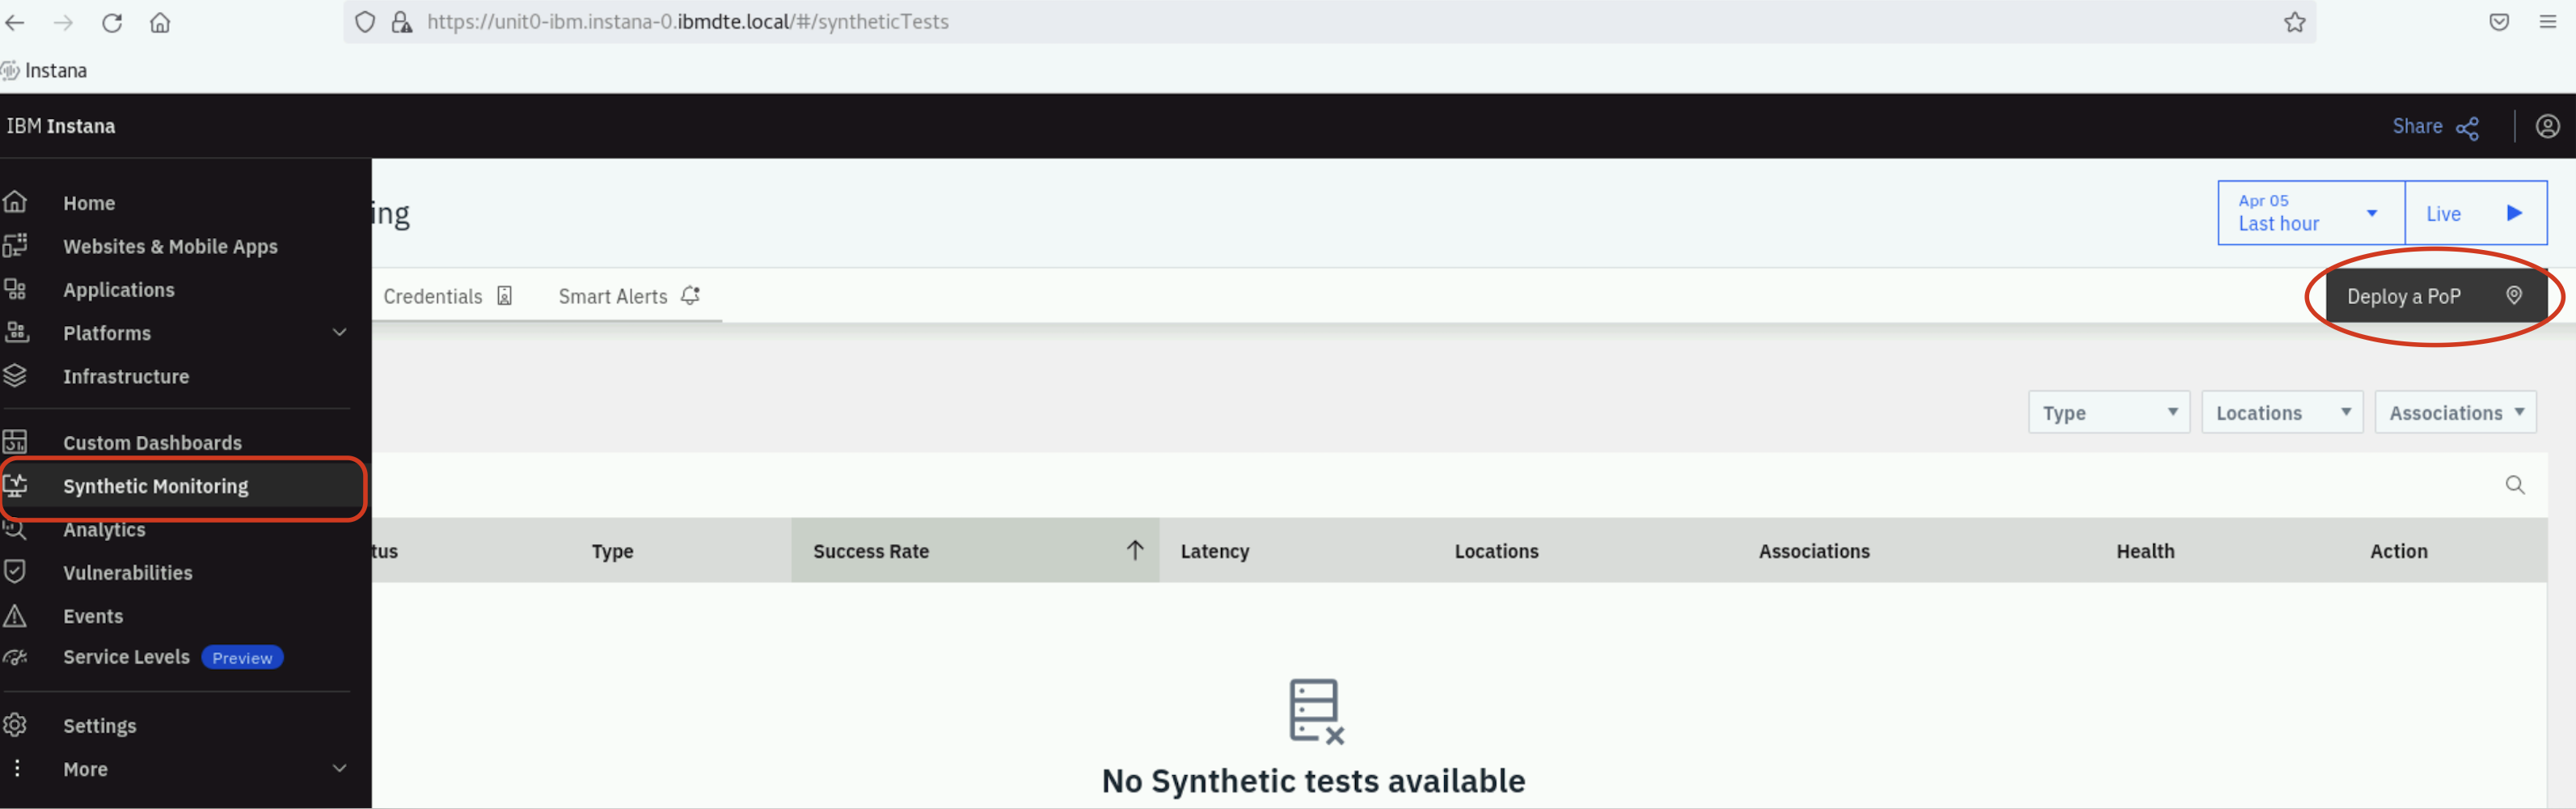
In a normal working environment, if you already had the Instana web console open before you enabled the Synthetic Point of Presence feature, a page refresh is required to see the new Synthetic Monitoring navigation item.
Use the Simple tab for a Helm deployment command:
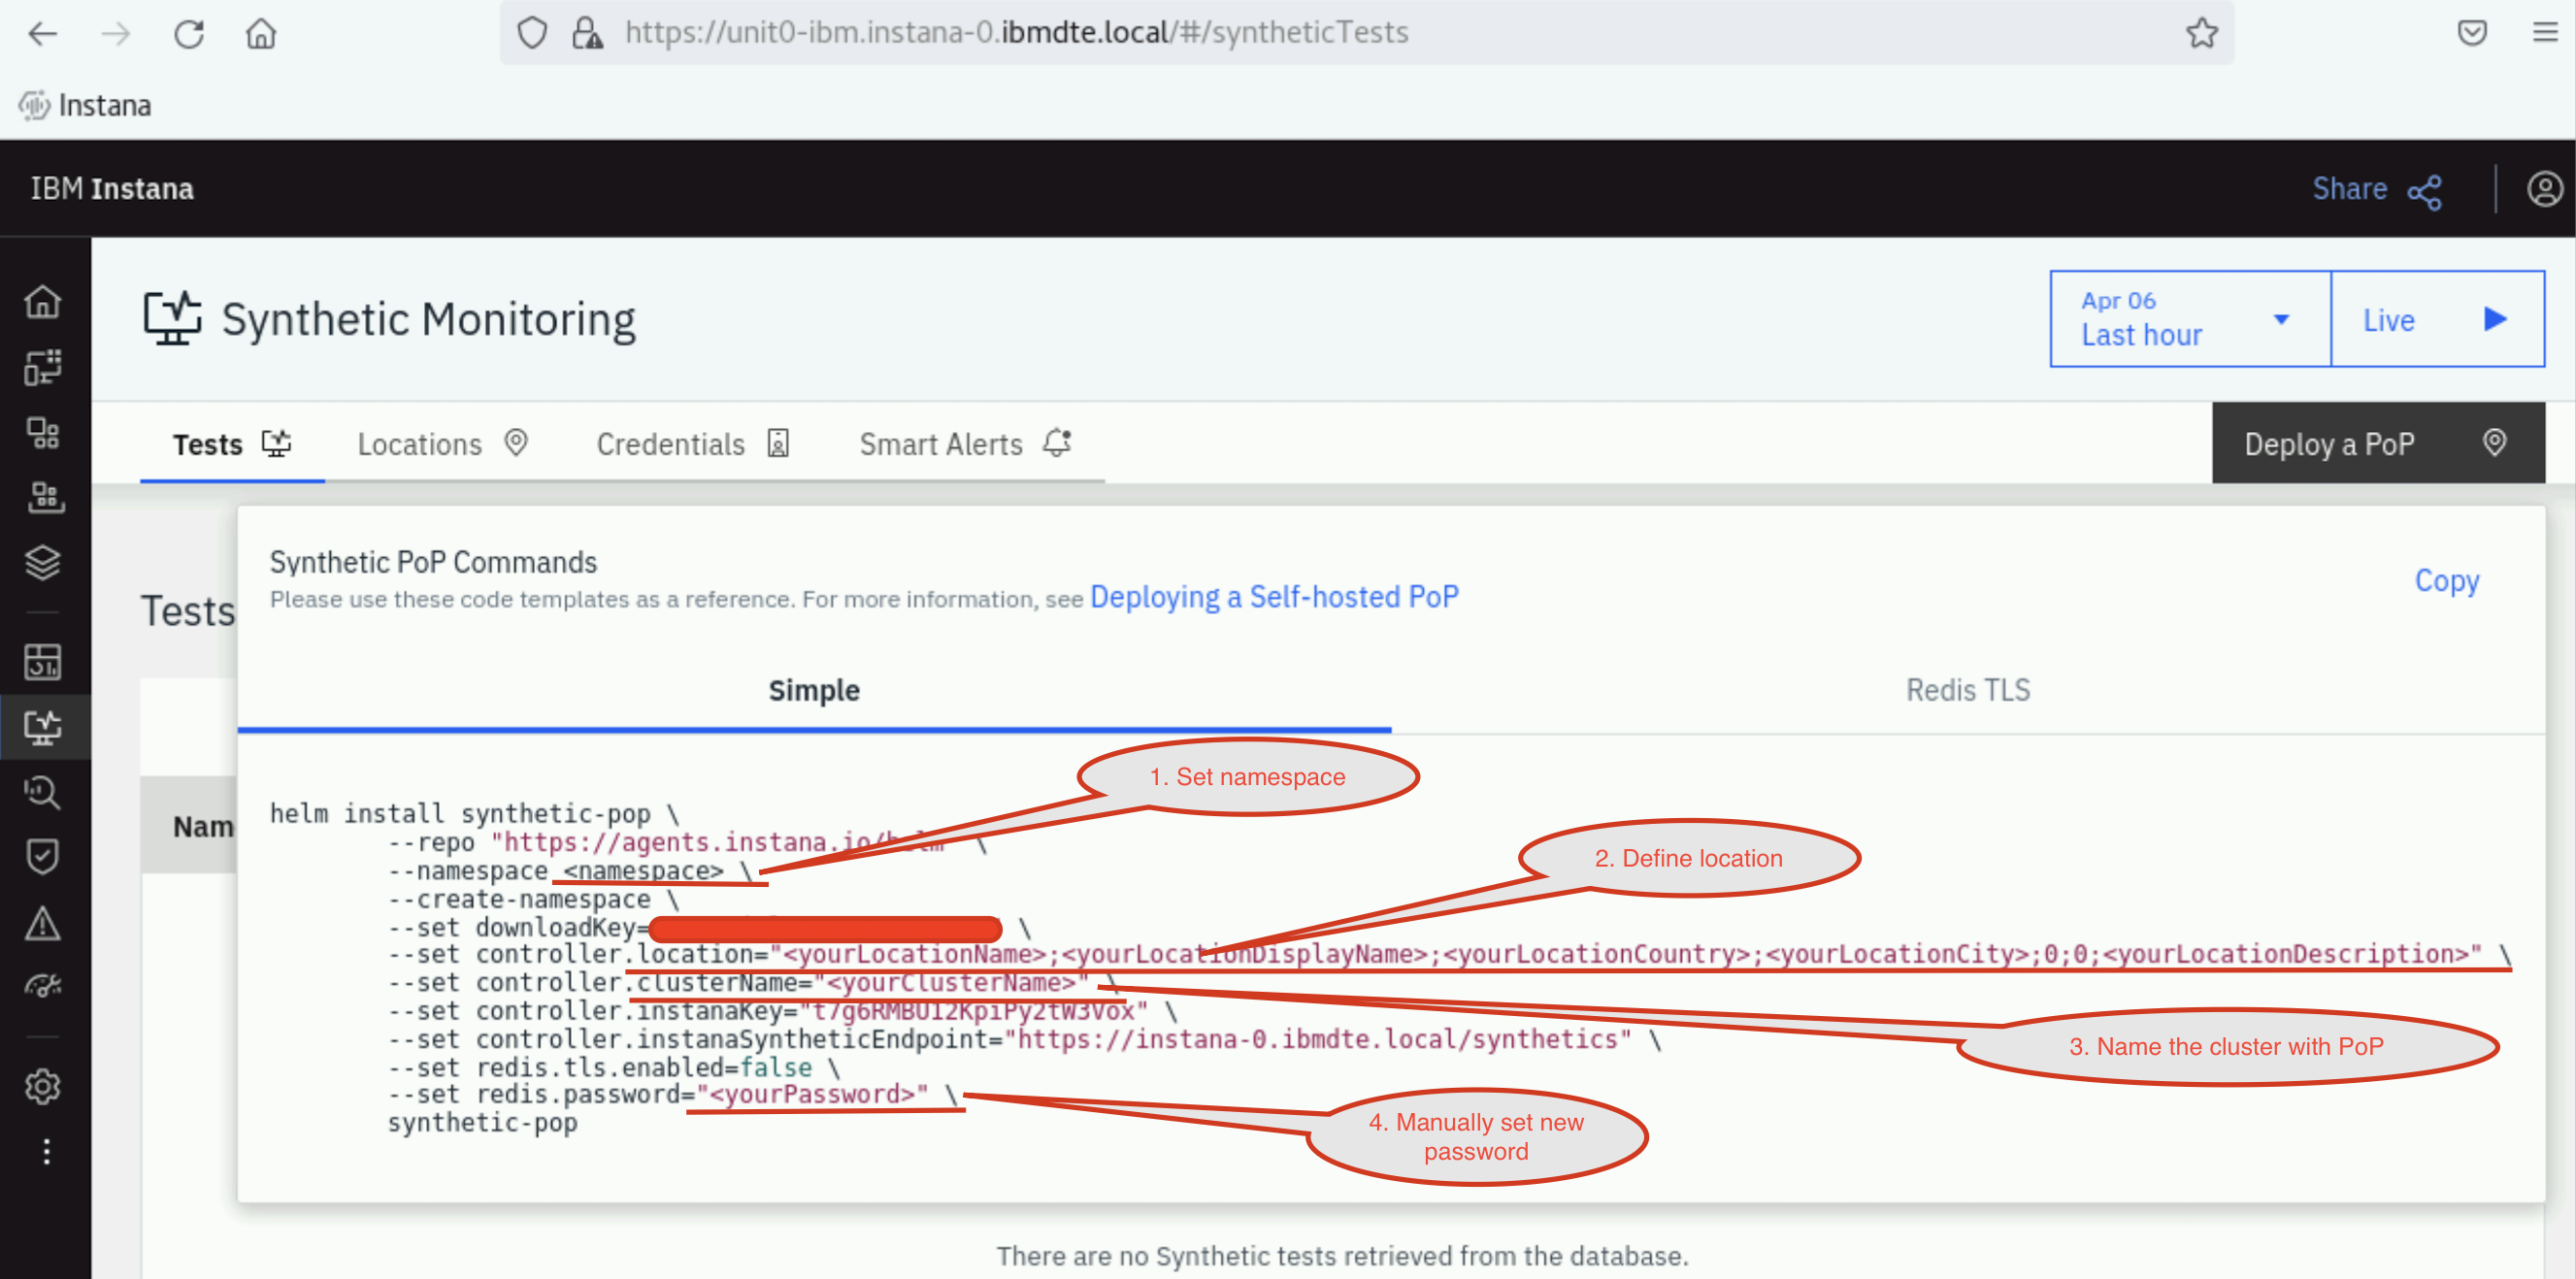
You will need to copy and edit the parameters of the helm command, so copy and paste the text into a temporary file where you can edit the content before executing it, for example "Text editor":
For Synthetic Point Of Presence we need to modify some of the parameters and provide one additional parameter.
-
Set namespace for PoP on a new cluster, let's use
instana-synthetic. -
Modify the controller.clusterName parameter and provide a meaningful name, let's set it as
MyInstanaCluster. -
In the controller.location parameter, specify a name, display name, country, etc. for your Point of Presence.
Format of location parameter is
label; displayLabel; country; city; latitude; longitude; description, where label acts as the PoP identifier, it must be a single string without any space characters. Thelabelfield can contain only letters, numbers, hyphens, and the underscore character.For example:
"Local;on Instana cluster;Serbia;Belgrade;39.54;116.23;A test _Synthetic Point Of Presence_" -
Enter a redis password. This can be any value since you are setting the password. We will use
a1fc5d01bcbb.
For OpenShift based deployments, add the following parameter to you helm
command:
--set seccompDefault=true
This parameter is not required for this lab as it is using Instana Standard Edition (on K3s).
Execute the helm chart install command by copying it from your test editor and
pasting it into the root@instana-0 terminal session prompt. You should see an
output similar to the following:
root@instana-0:~# helm install synthetic-pop \
        --repo "https://agents.instana.io/helm" \
        --namespace instana-synthetic \
        --create-namespace \
        --set downloadKey="<hidden-in-this-example>" \
        --set controller.location="Local;on Instana cluster;Serbia;Belgrade;39.54;116.23;A test _Synthetic Point Of Presence_" \
        --set controller.clusterName="MyInstanaCluster" \
        --set controller.instanaKey="hhoOIodXPR6FhWGq468XUi" \
        --set controller.instanaSyntheticEndpoint="https://instana-0.ibmdte.local/synthetics" \
        --set redis.tls.enabled=false \
        --set redis.password="a1fc5d01bcbb" \
        synthetic-pop

NAME: synthetic-pop
LAST DEPLOYED: Tue Oct 28 03:07:44 2025
NAMESPACE: instana-synthetic
STATUS: deployed
REVISION: 1
TEST SUITE: None
NOTES:
CHART NAME: synthetic-pop
CHART VERSION: 1.2.30
APP VERSION: 1.307.0
3.3 Verify installation
Confirm that all pods of the Synthetic Point Of Presence are running:
watch -n 2 "kubectl get pods -n instana-synthetic"
Wait for all pods to be running and stop the watch command using "Ctrl+C".
It might happen that one of the pods is not starting due to insufficient number of CPU resource on the lab environment: For example:
kubectl describe po synthetic-pop-browserscript-playback-engine-ff58c546-r7dlh -n instana-synthetic
. . .
Events:
  Type     Reason            Age                 From               Message
  ----     ------            ----                ----               -------
  Warning  FailedScheduling  11m                 default-scheduler  0/3 nodes are available: 1 node(s) had untolerated taint {node-role.instana.io: datastore}, 2 Insufficient cpu. preemption: 0/3 nodes are available: 1 Preemption is not helpful for scheduling, 2 No preemption victims found for incoming pod.
  Warning  FailedScheduling  67s (x2 over 6m7s)  default-scheduler  0/3 nodes are available: 1 node(s) had untolerated taint {node-role.instana.io: datastore}, 2 Insufficient cpu. preemption: 0/3 nodes are available: 1 Preemption is not helpful for scheduling, 2 No preemption victims found for incoming pod.
If th pod failing, execute the following command to reduce CPU requests to be able to schedule the pod:
kubectl patch deployment/synthetic-pop-browserscript-playback-engine  -n instana-synthetic \
  -p '{"spec":{"template":{"spec":{"containers":[{"name":"synthetic-playback-browserscript","resources":{"requests":{"cpu":".5"}}}]}}}}'
After the Synthetic Point Of Presence is installed verify its appearance in the interface (refresh the browser page):

3.4 Certificate expiration check with synthetic tests
This functionality allows you to establish certificate expiration checks for
websites. In the lab we will use a test application, Quote of the day, which
is installed on the demo-apps cluster.
SSL Certificate synthetic test
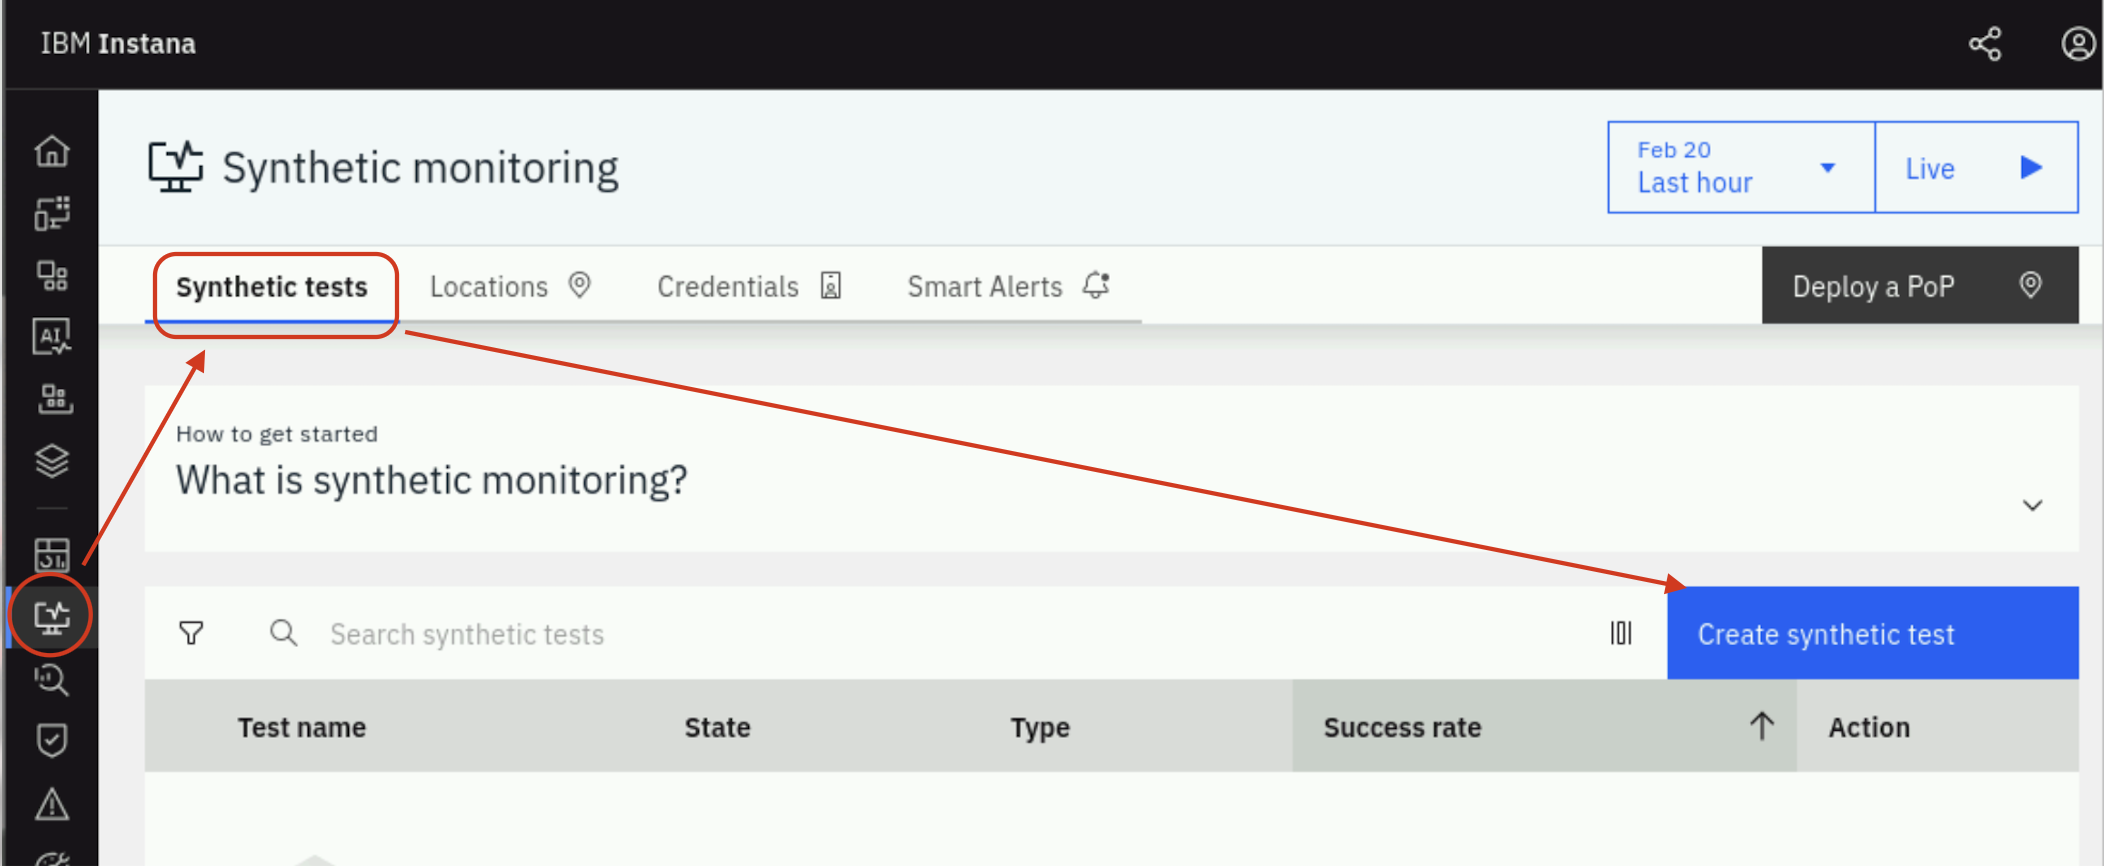
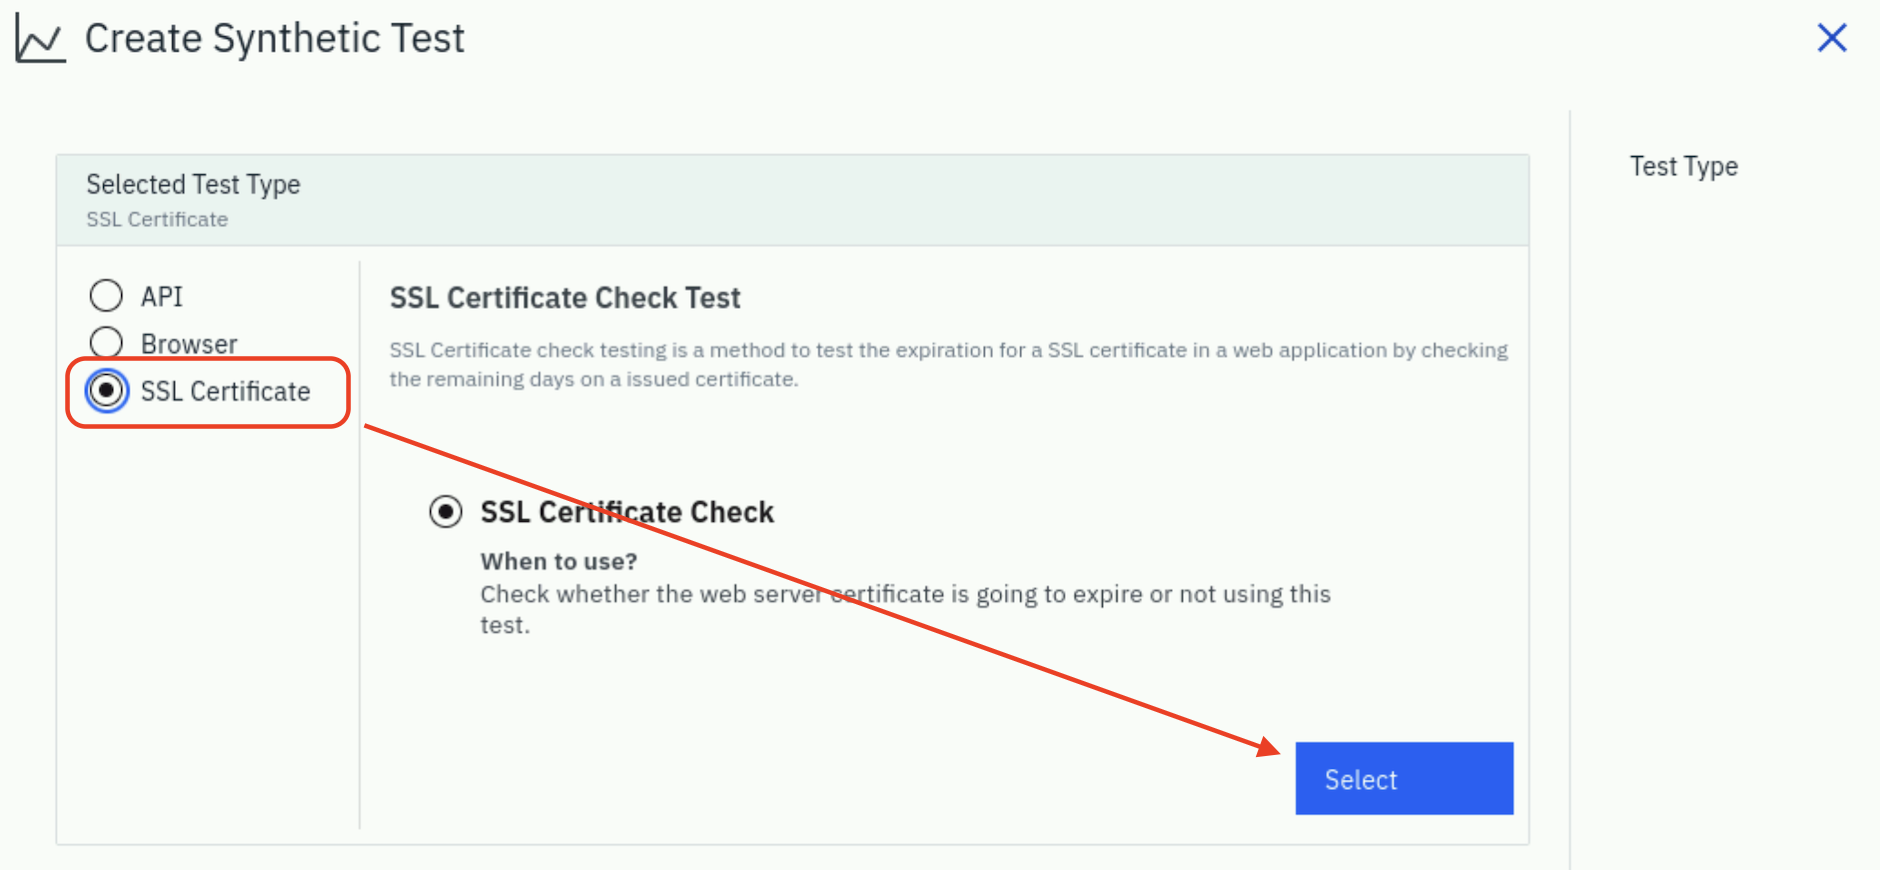
From the left navigation menu select Synthetic Monitoring. Then select the Synthetic tests tab and click the Create synthetic test button:
On the top right corner of the dialogue click the "Switch to advanced mode" button, then select SSL Certificate and click Select:
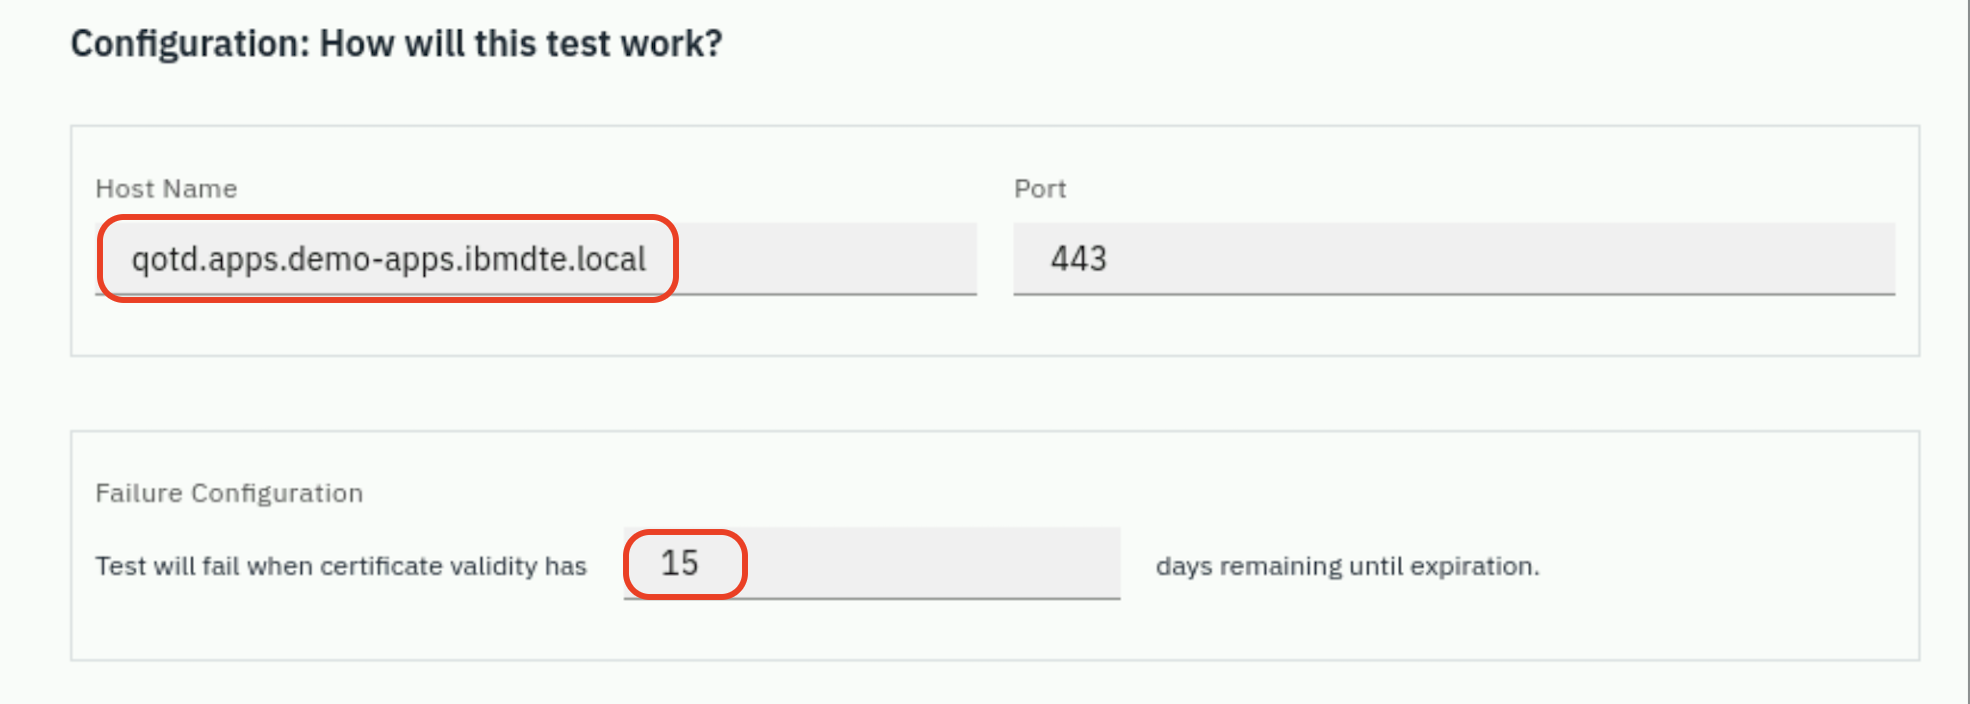
Specify the address of the test website as qotd.apps.demo-apps.ibmdte.local
and the number of days before certificate expiration that will trigger the test
to fail as 15:
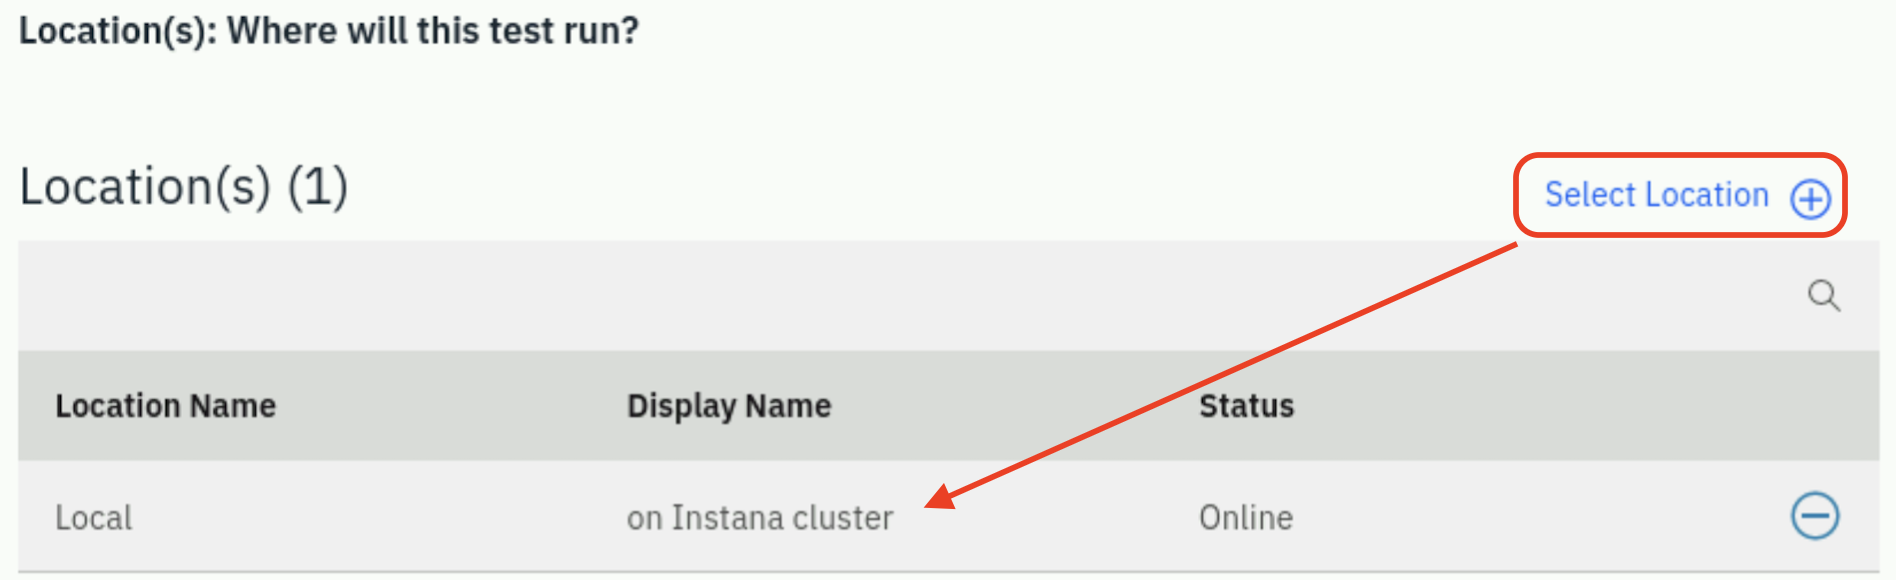
Scroll down to the Locations section and click Select Location, then
enable the Local location and click Add Location:
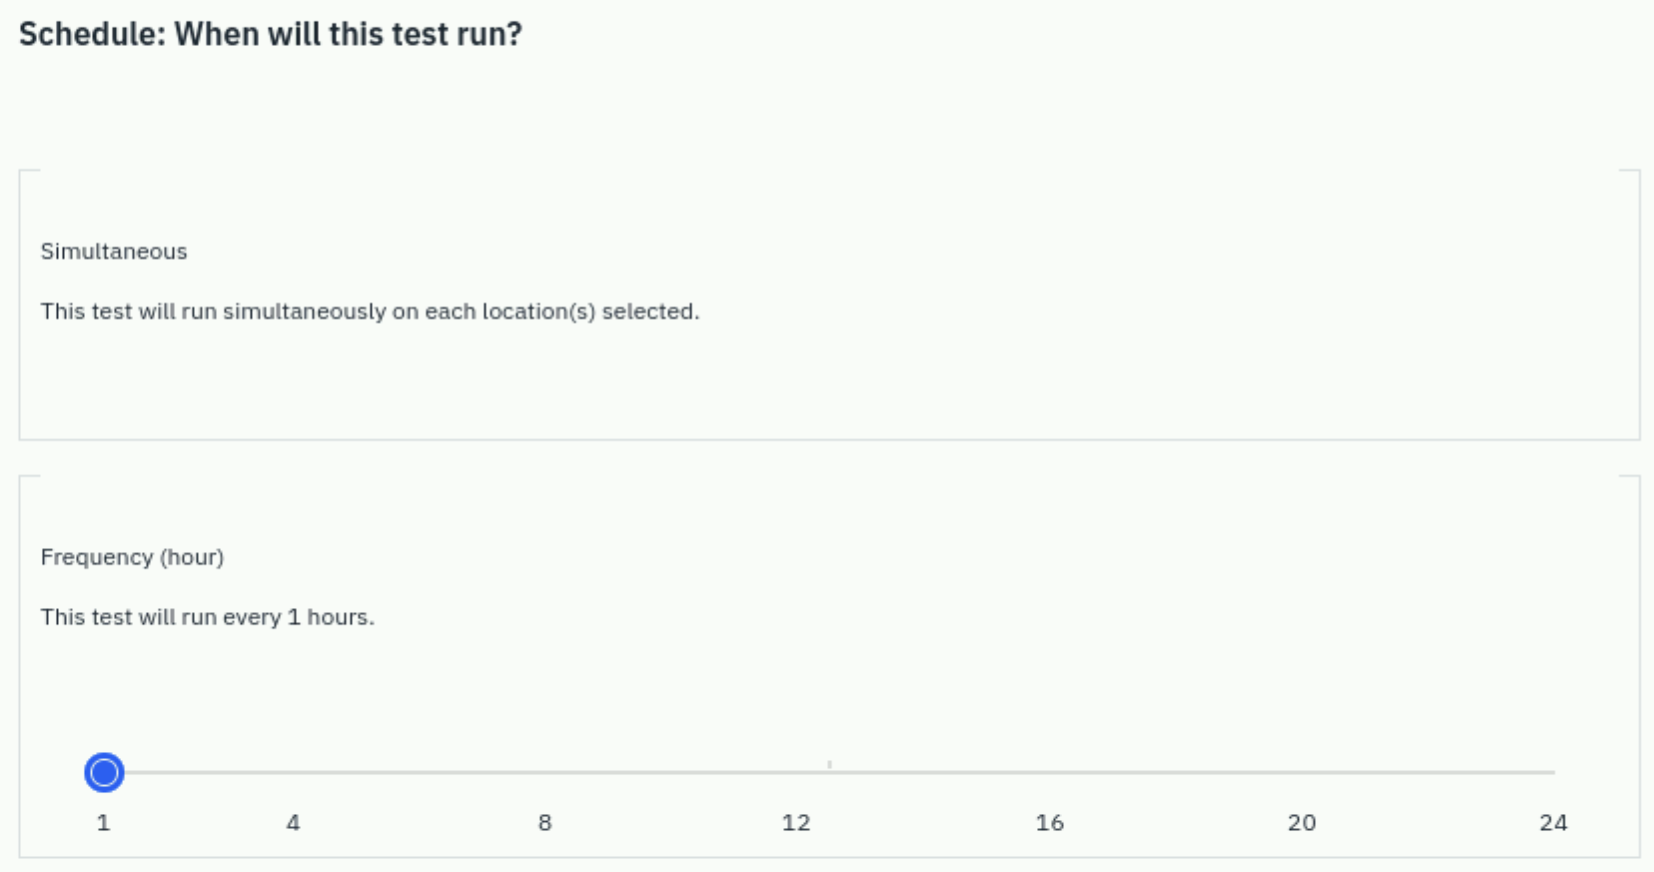
Scroll a little further to the Schedule: When will this test run? section
and set the frequency of the SSL checks to run every 1 hour:
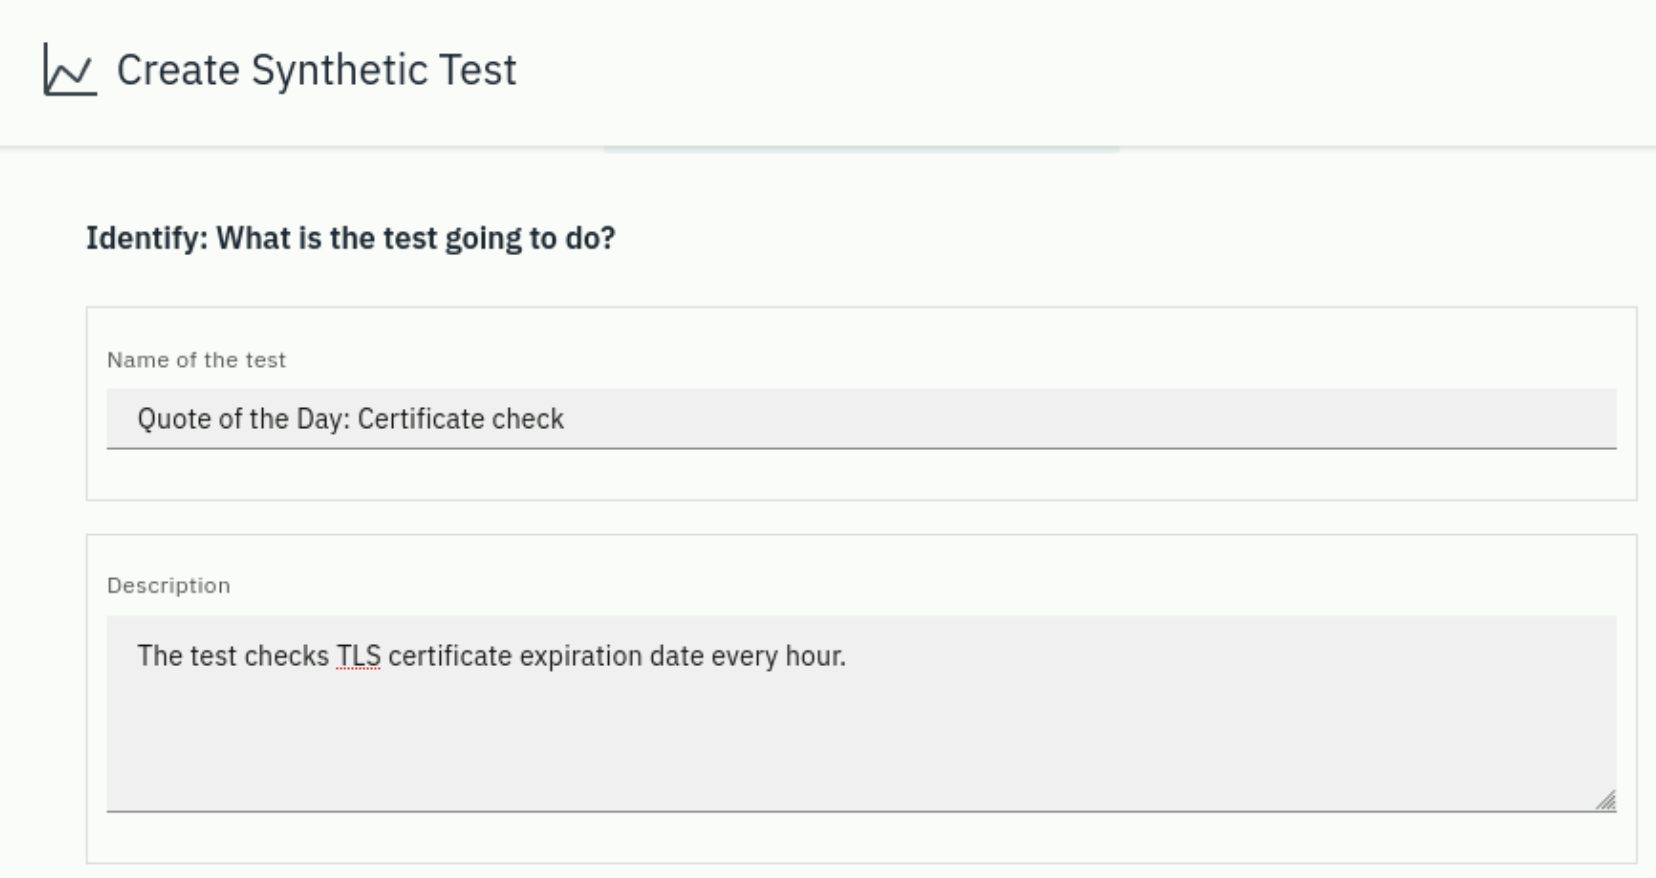
Scroll to the Identify: What is the test going to do? section and give the test a name and description. We will use values:
- Name:
Quote of the Day: Certificate check - Description:
The test checks TLS certificate expiration date every hour.
When the website is part of an Application or Website/Mobile App, we can choose certain defined Application perspectives or Website / Mobile Apps to associate the test with. In that case filtering events by the selected perspective will provide relevant context including TLS certificate checks.
You can also set Custom Properties in order to differentiate projects or particular certificates for notifications.
We will not do these in this lab.
Click Create to create the test.
If you are not seeing the test appear in the Tests table, or the status update, toggle on the Live button to get the latest updates.
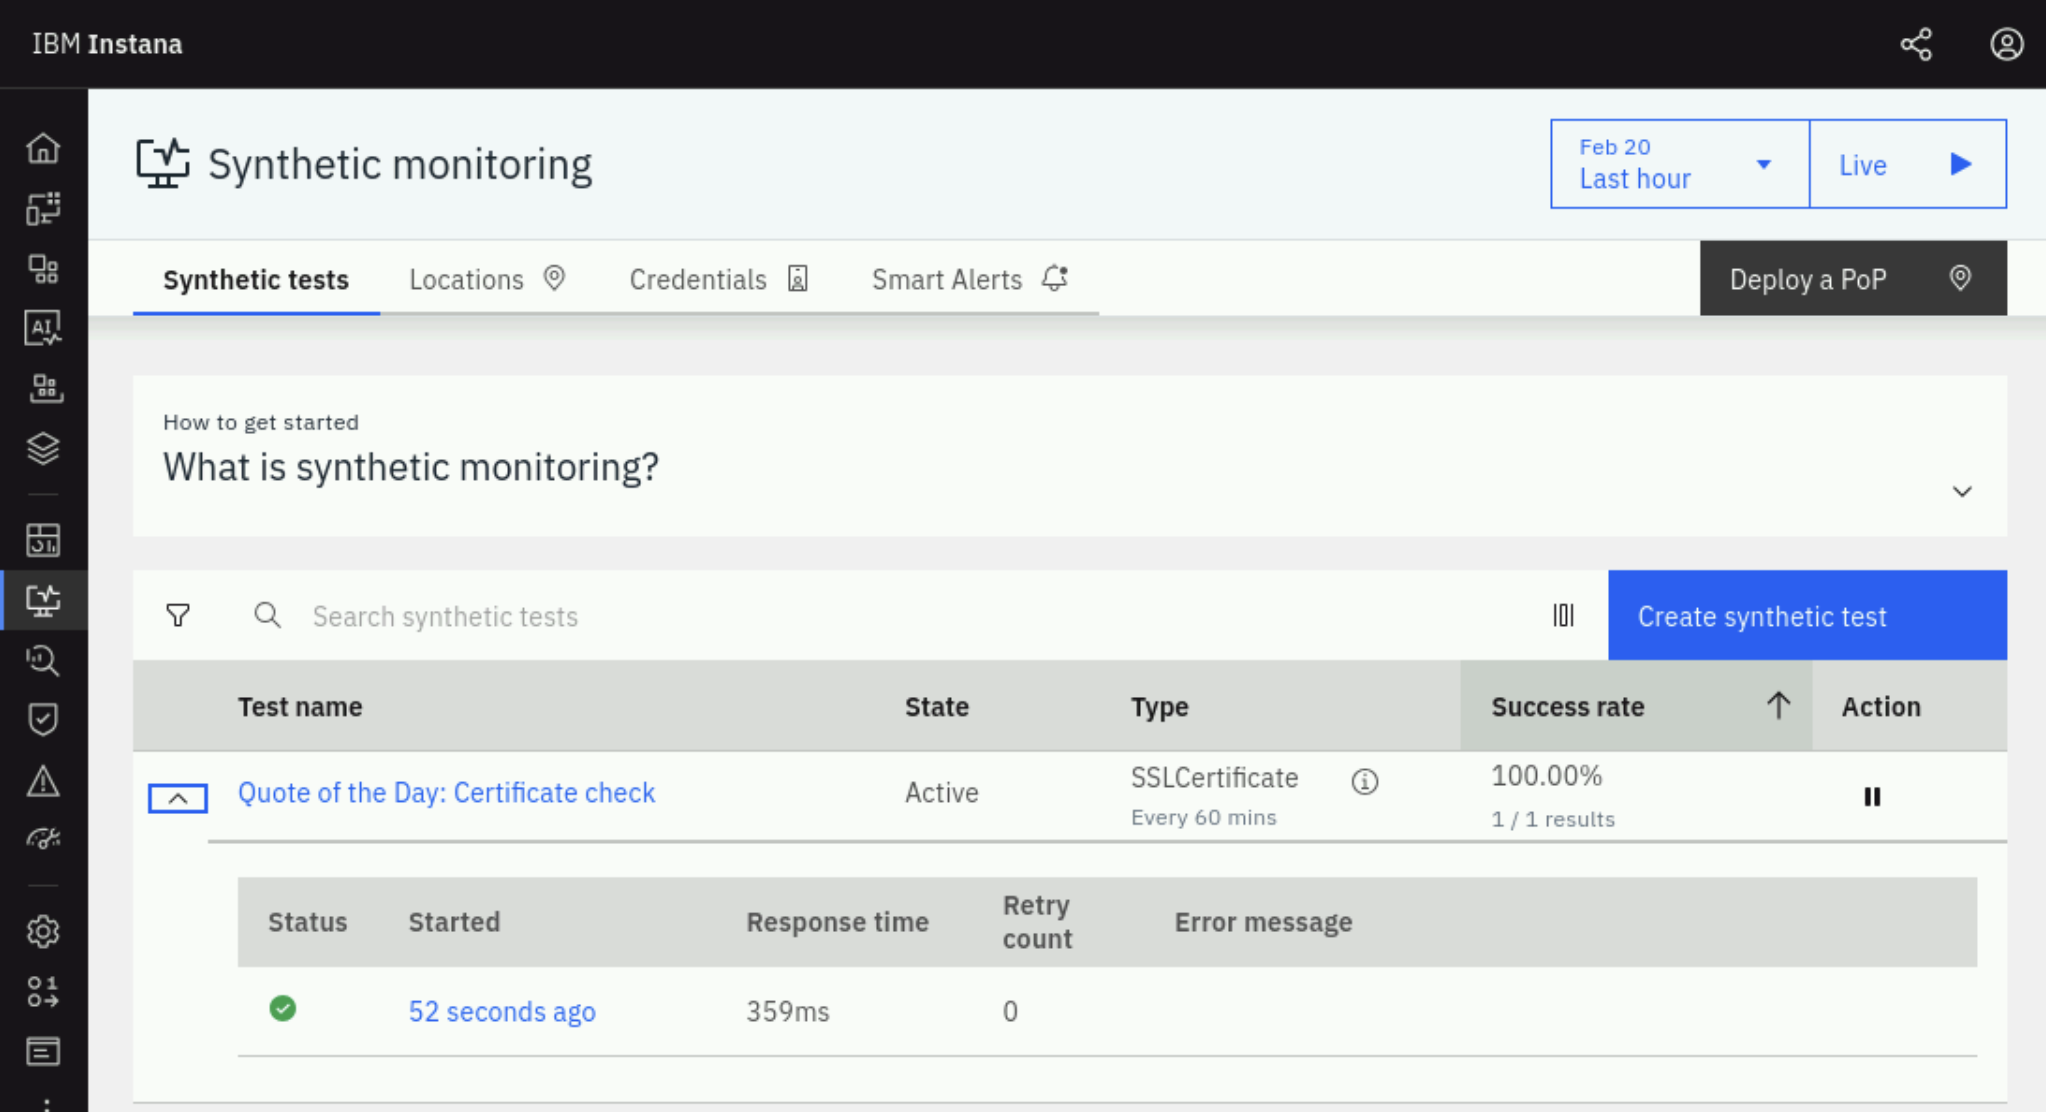
Click on the name of the test to investigate the summary of the certificate
check. If you see a message like No results for this time frame, then wait
a few minutes, change time the frame to a longer period, for example
last 30 minutes and refresh the browser page.
3.5 REST API Synthetic Tests
In this exercise we will create a series of probes to test application REST API endpoints.
Simple REST API test
Let's begin by executing a simple REST API test. This will be a single HTTP
GET request.
Begin by navigating to Synthetic Monitoring in the left navigation menu, select Synthetic tests and then click the Create synthetic test button:
On the dialog that opens, you will see two options under API test. Choose API Simple and click the Select button:
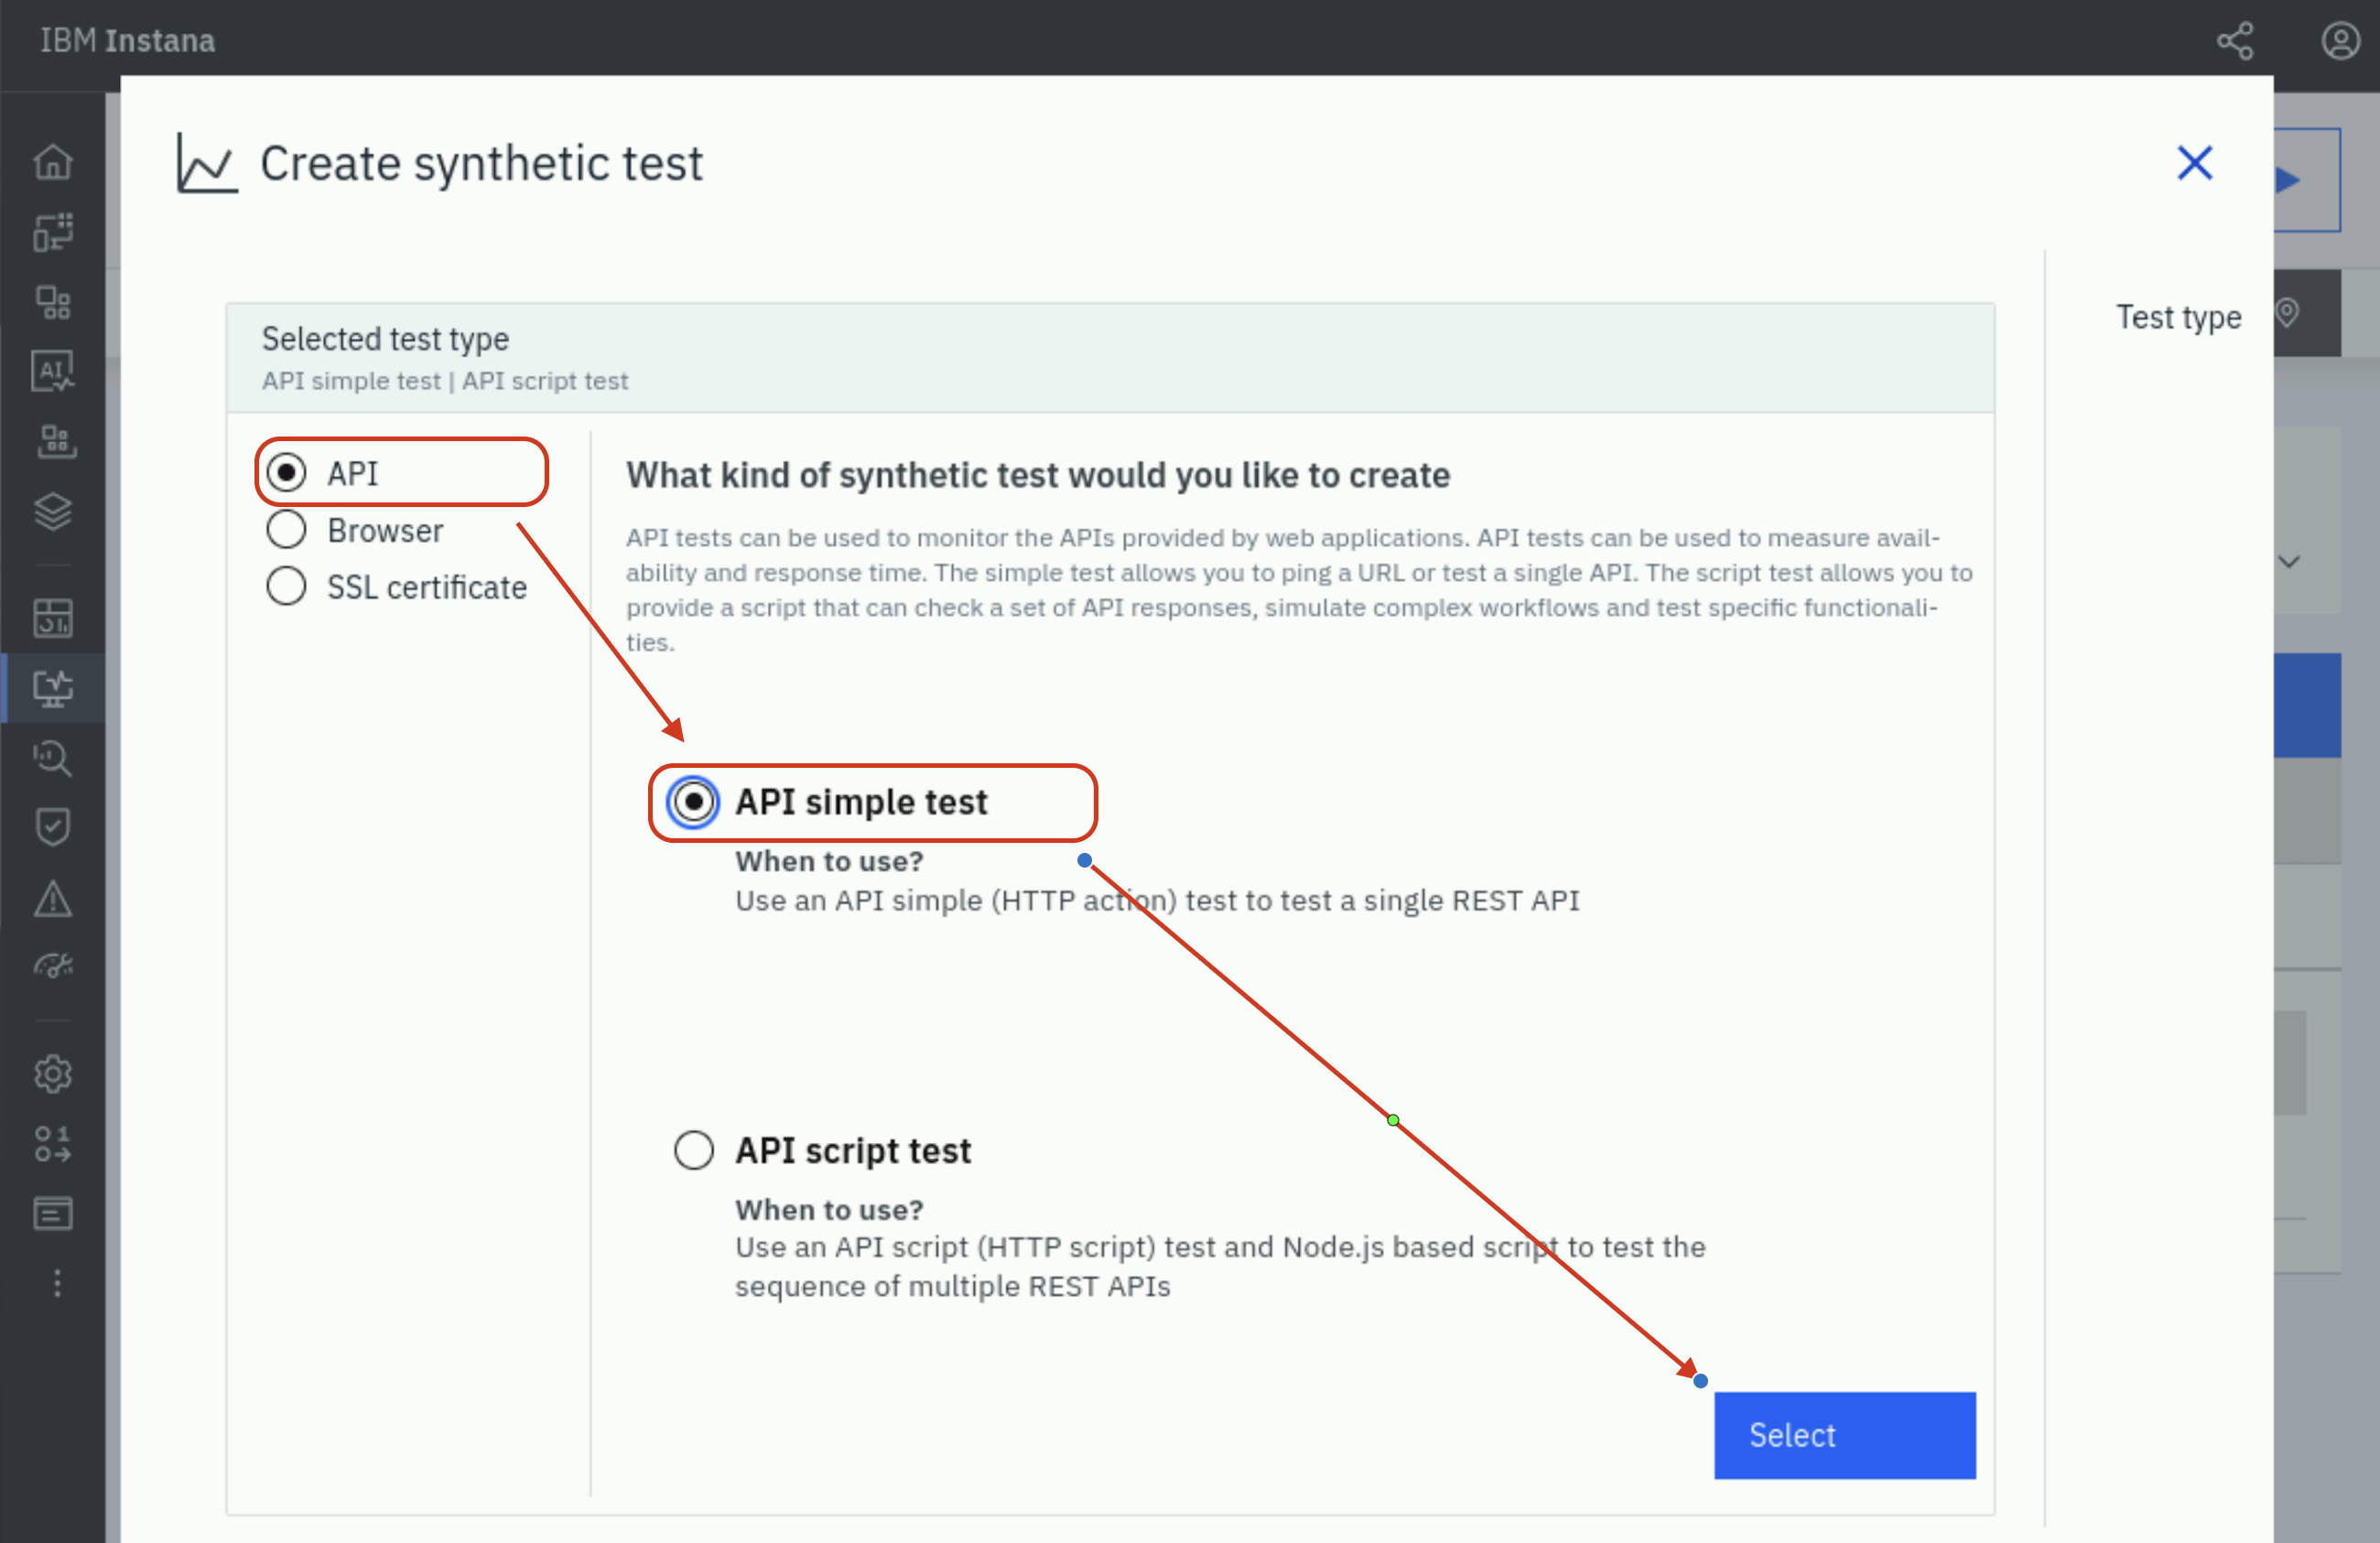
Scroll down for a new dialog prompting for the REST API GET URL. Enter the following URL:
https://qotd.apps.demo-apps.ibmdte.local/random
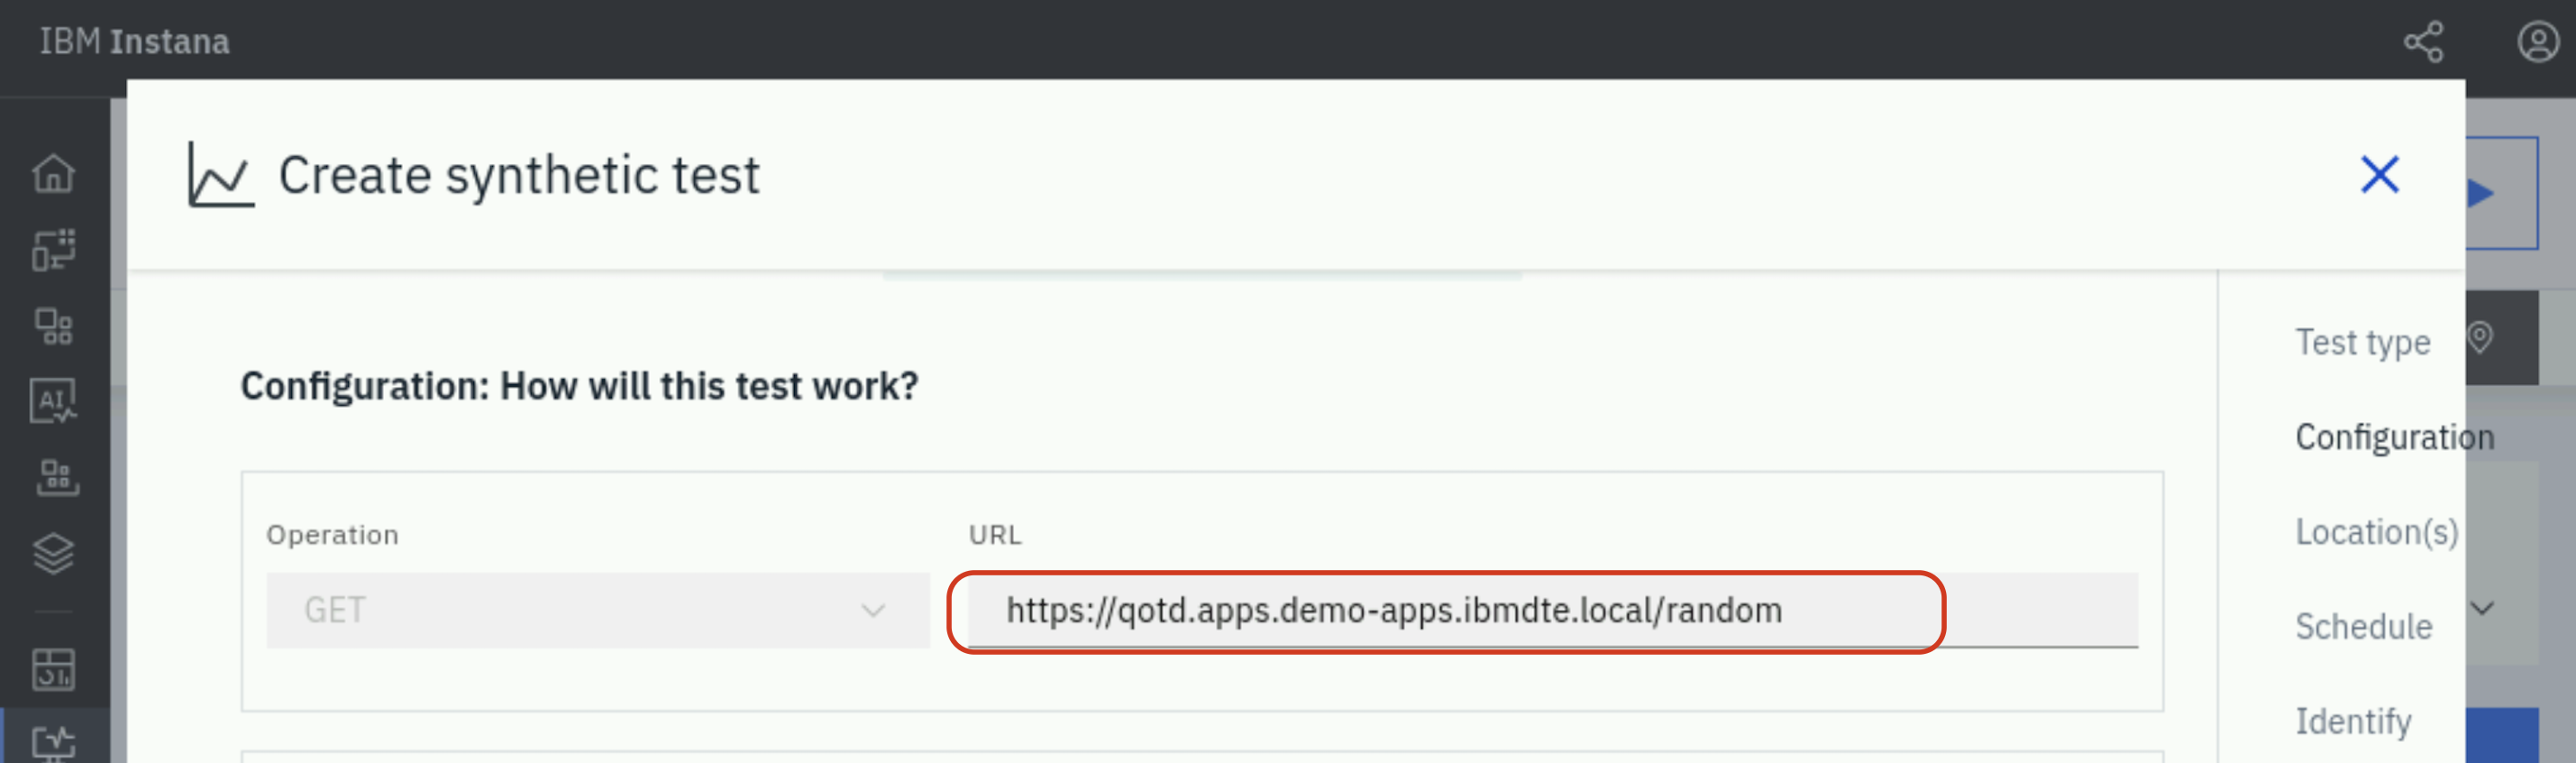
This could be any REST request. In this case, we are testing the /random API
call within the Quote of the Day application.
Then, scroll down to Locations and select your on Instana Cluster location. This allows you to choose the
location(s) where you want your synthetic script to execute. In the lab, you
only have 1 location that you can select, so we choose on Instana cluster and click
Add location:
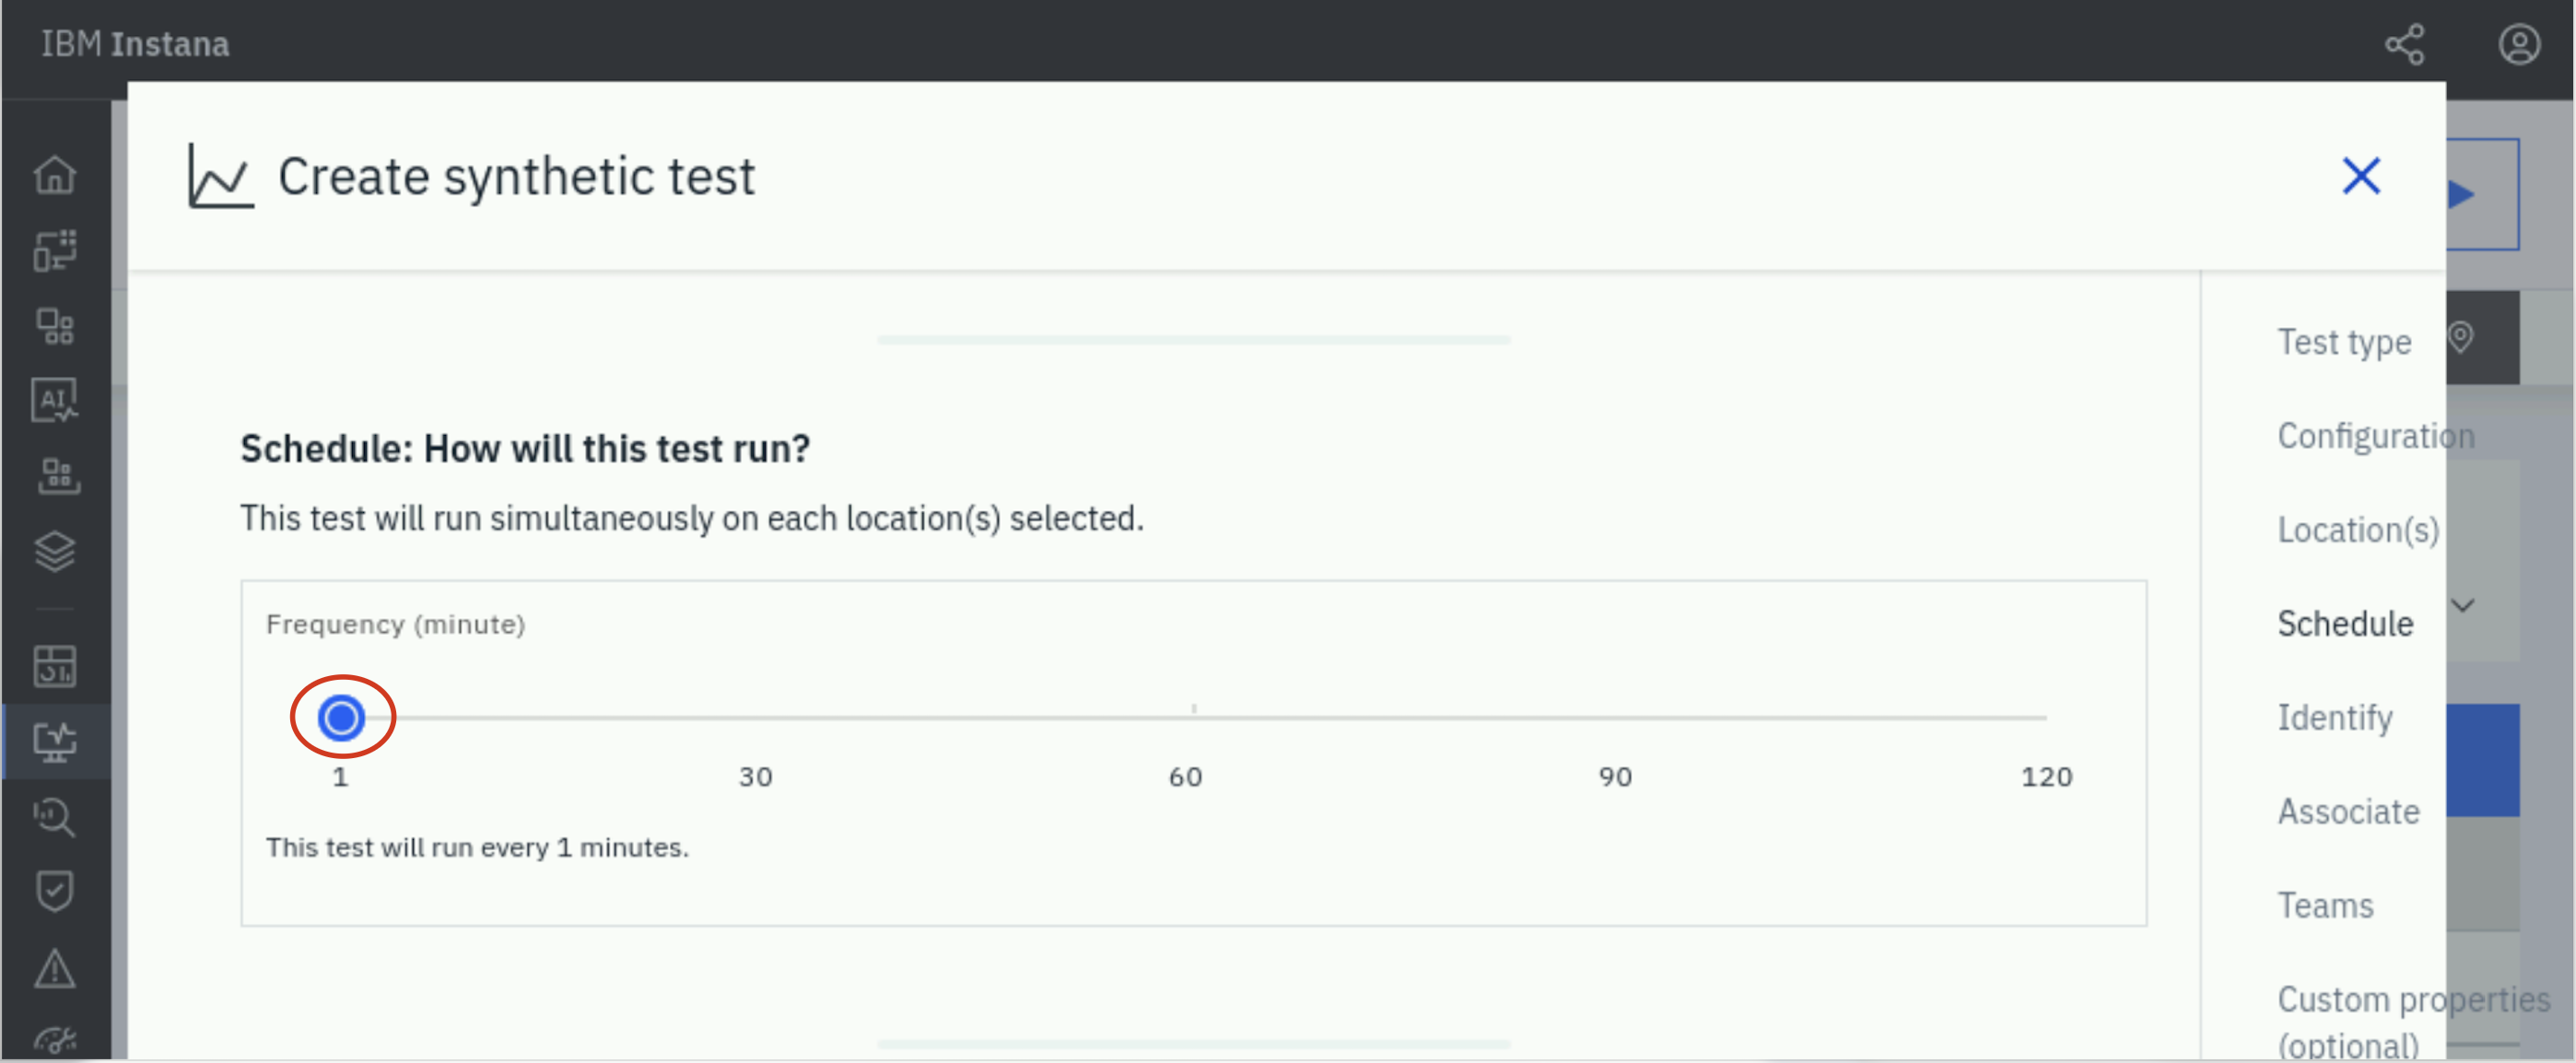
The next step allows you to specify the scheduling interval for your synthetic test. Drag the time slider to 1 minute. Then, scroll down:
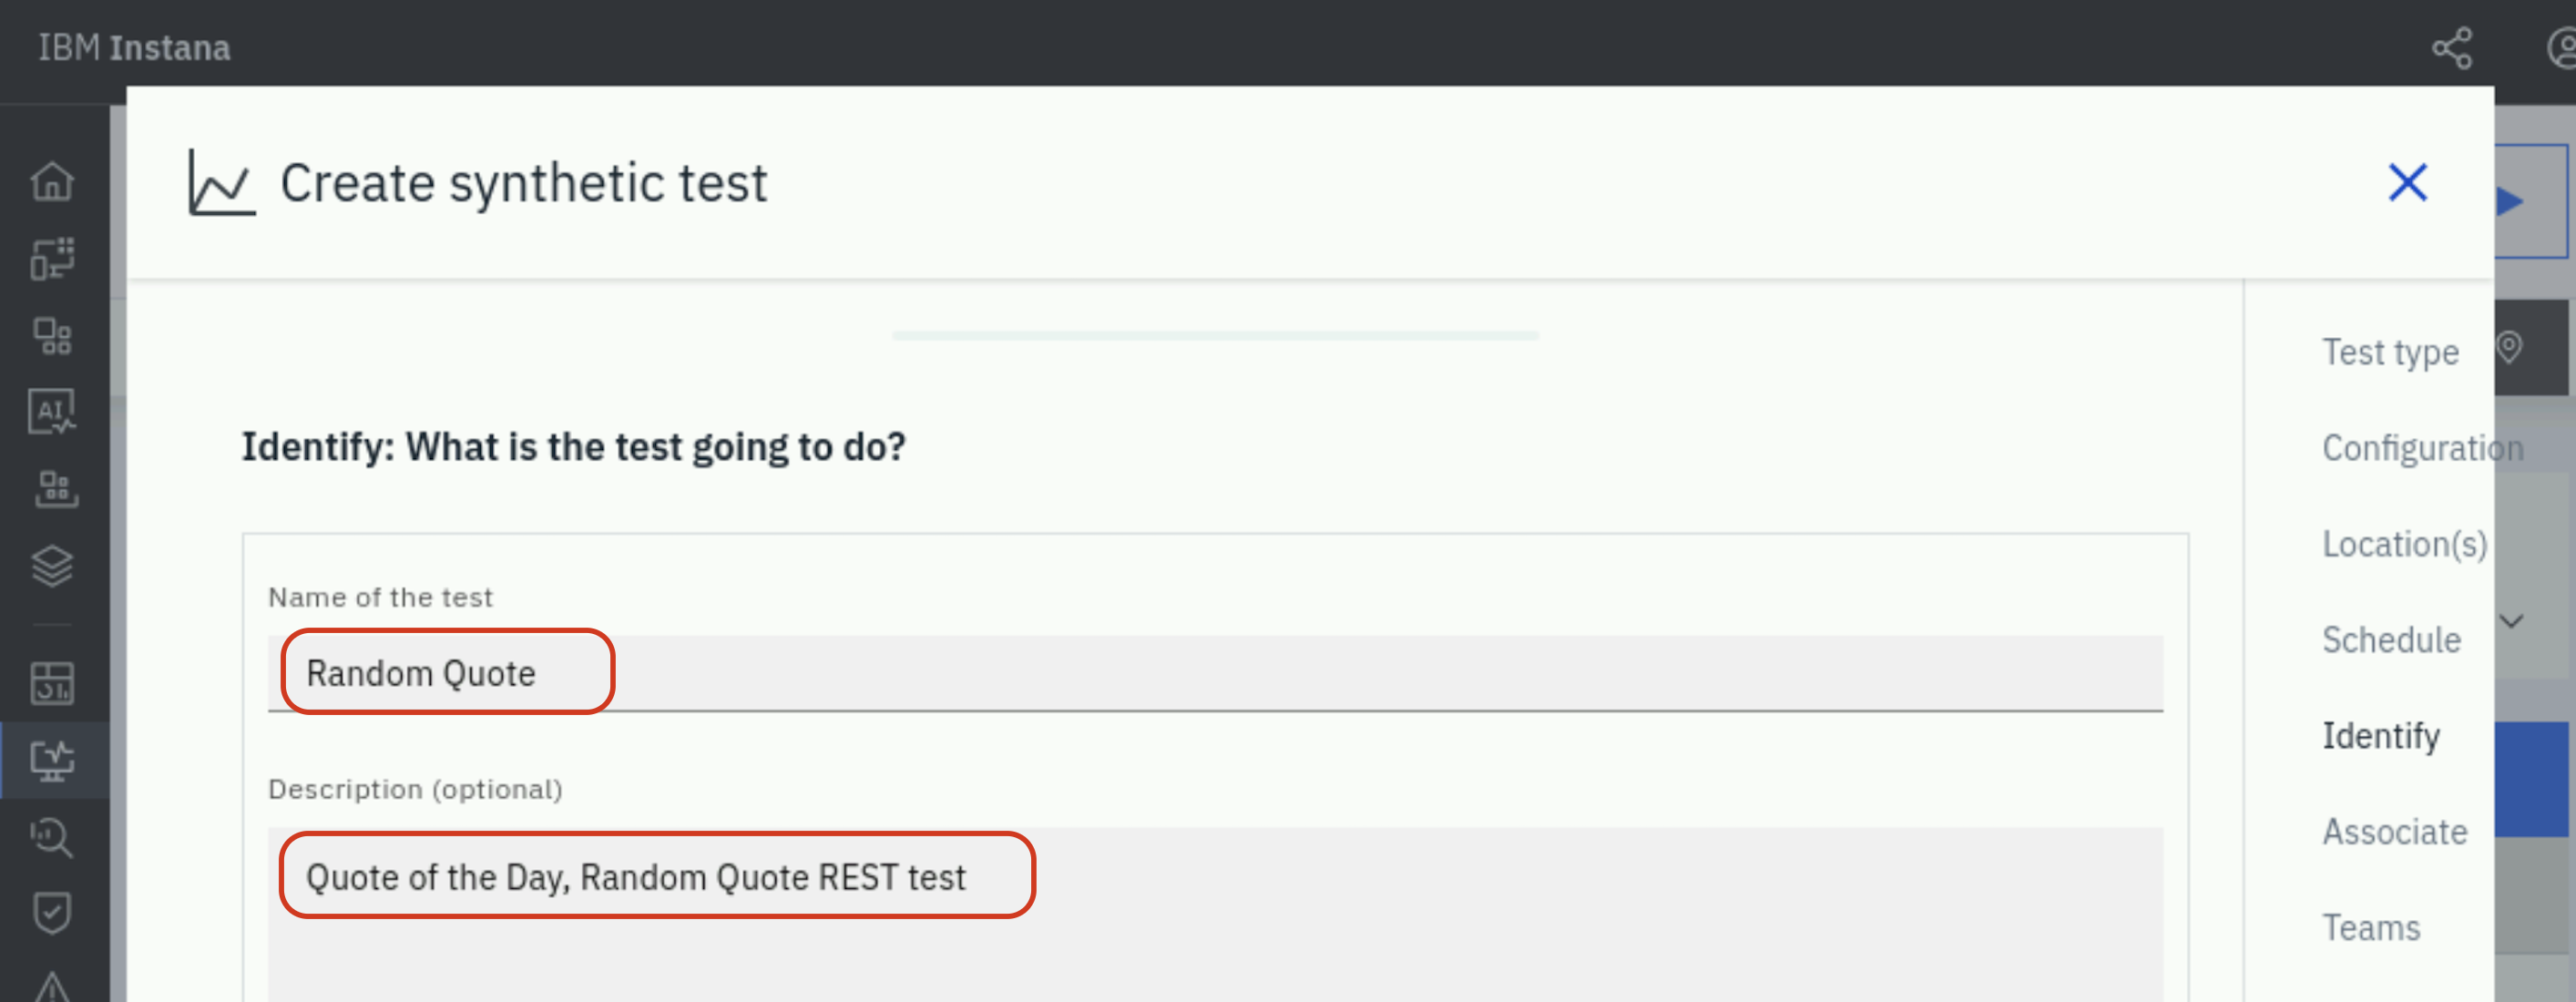
On the next screen you will give your synthetic test a name and description using the values:
- Name of the test:
Random Quote - Description:
Quote of the Day, Random Quote REST test
Scroll down.
On the next step, you can associate the synthetic test with an application. In this lab we didn't create any Application Perspectives, we will skip the optional step.
Finally, click the Create button to finish creating your synthetic test.
At this point, you should see a synthetic test named Random Quote:
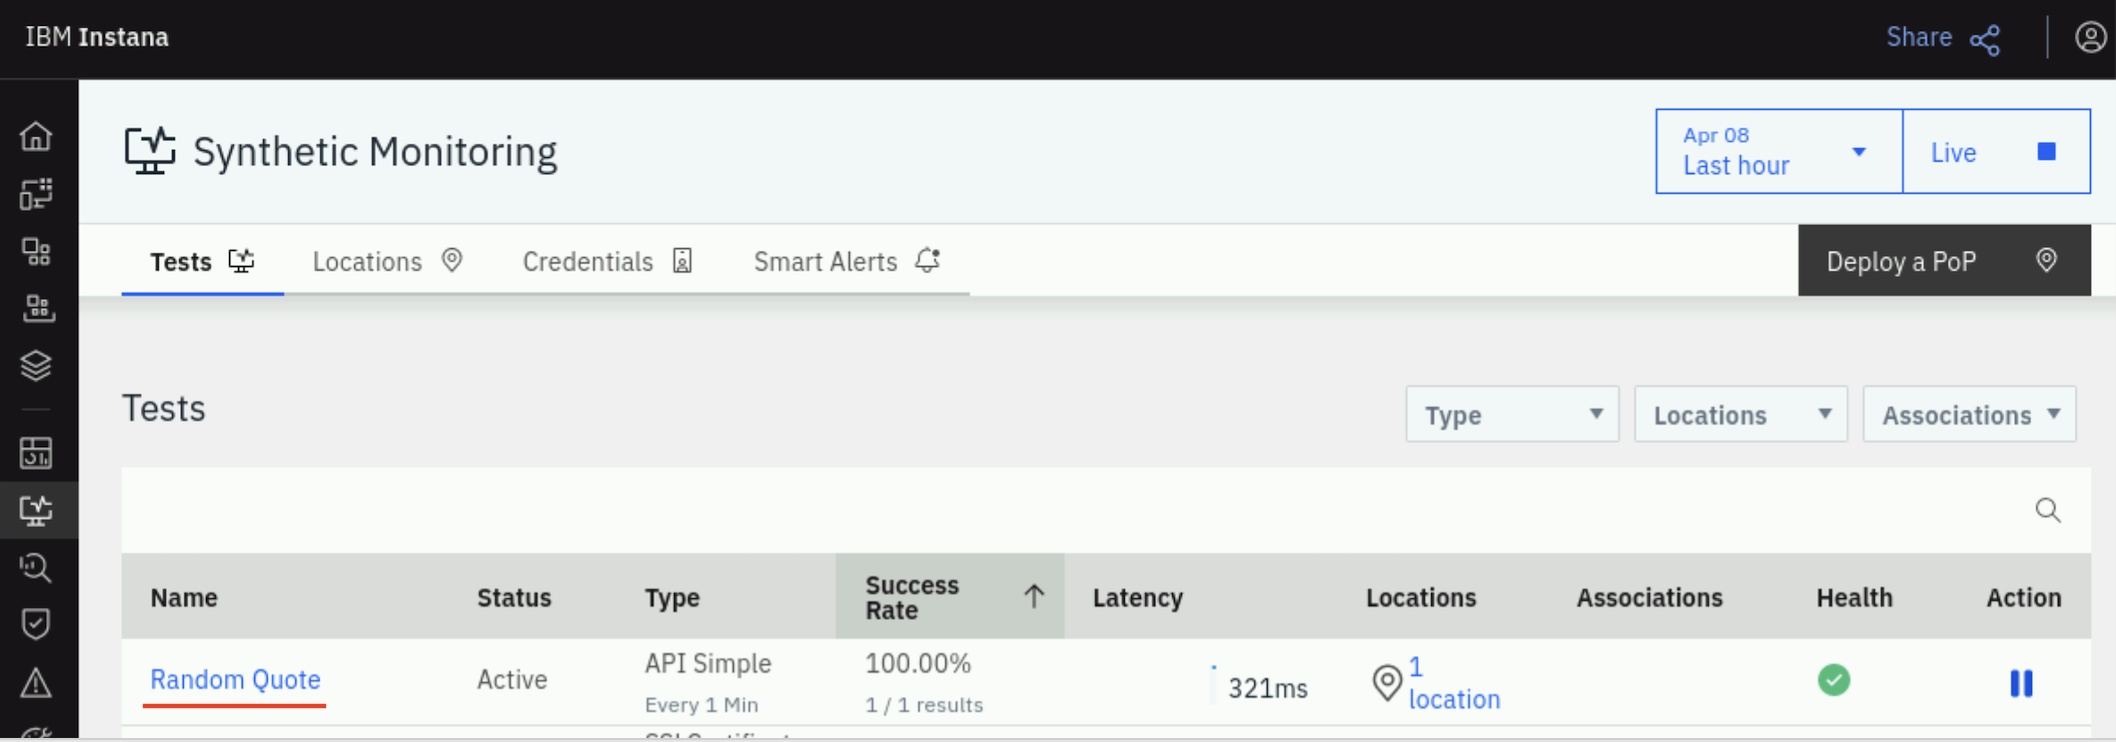
It will take up to a minute for the synthetic tests to begin executing, so wait for the Health to update and show a green check mark.
Click on the Random Quote link to drill down into the details of the synthetic test.
On the screen, you can see a summary of the synthetic results. Make sure to
adjust the time window to Last 5 minutes:
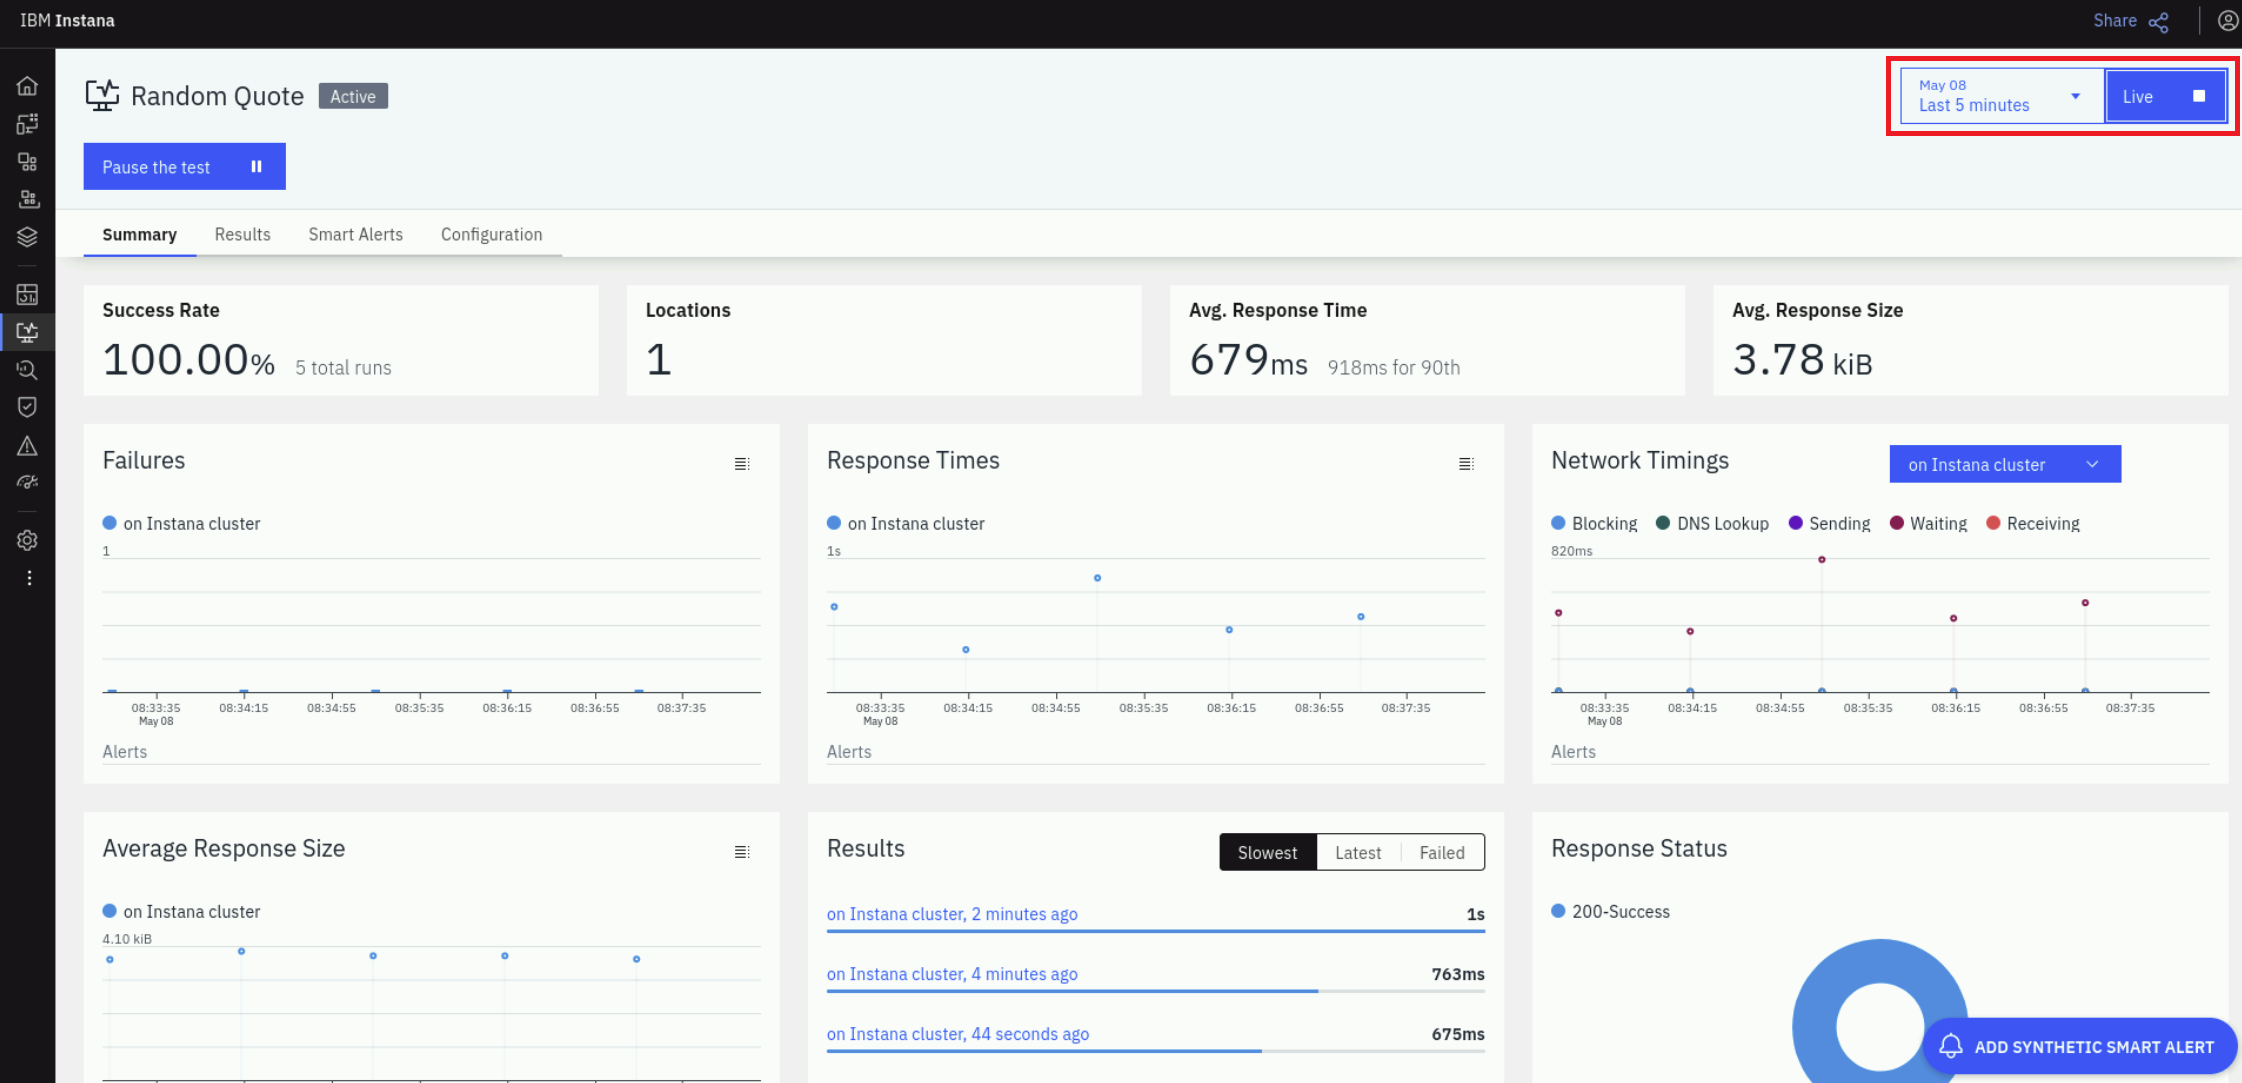
You can also click on the Results tab and see the detailed results of each synthetic test.
You have now created a synthetic test against a single REST API. Next, we will be learning how to create more complex synthetics using JavaScript.
Creating a scripted REST API test
Scripted REST API synthetic tests may include several calls and different
HTTP methods, e.g. GET | POST |PUT |DELETE in the same test. During the lab we
will be testing two GET requests:
- First, we will check if the Quote of the day application returns a success code of 200.
- Next, the script will perform a functional test by checking for the
correctness of a
GETrequest response.
To create a synthetic test navigate to Synthetic Monitoring in the left navigation menu, choose Synthetic tests and click the Create synthetic test button:
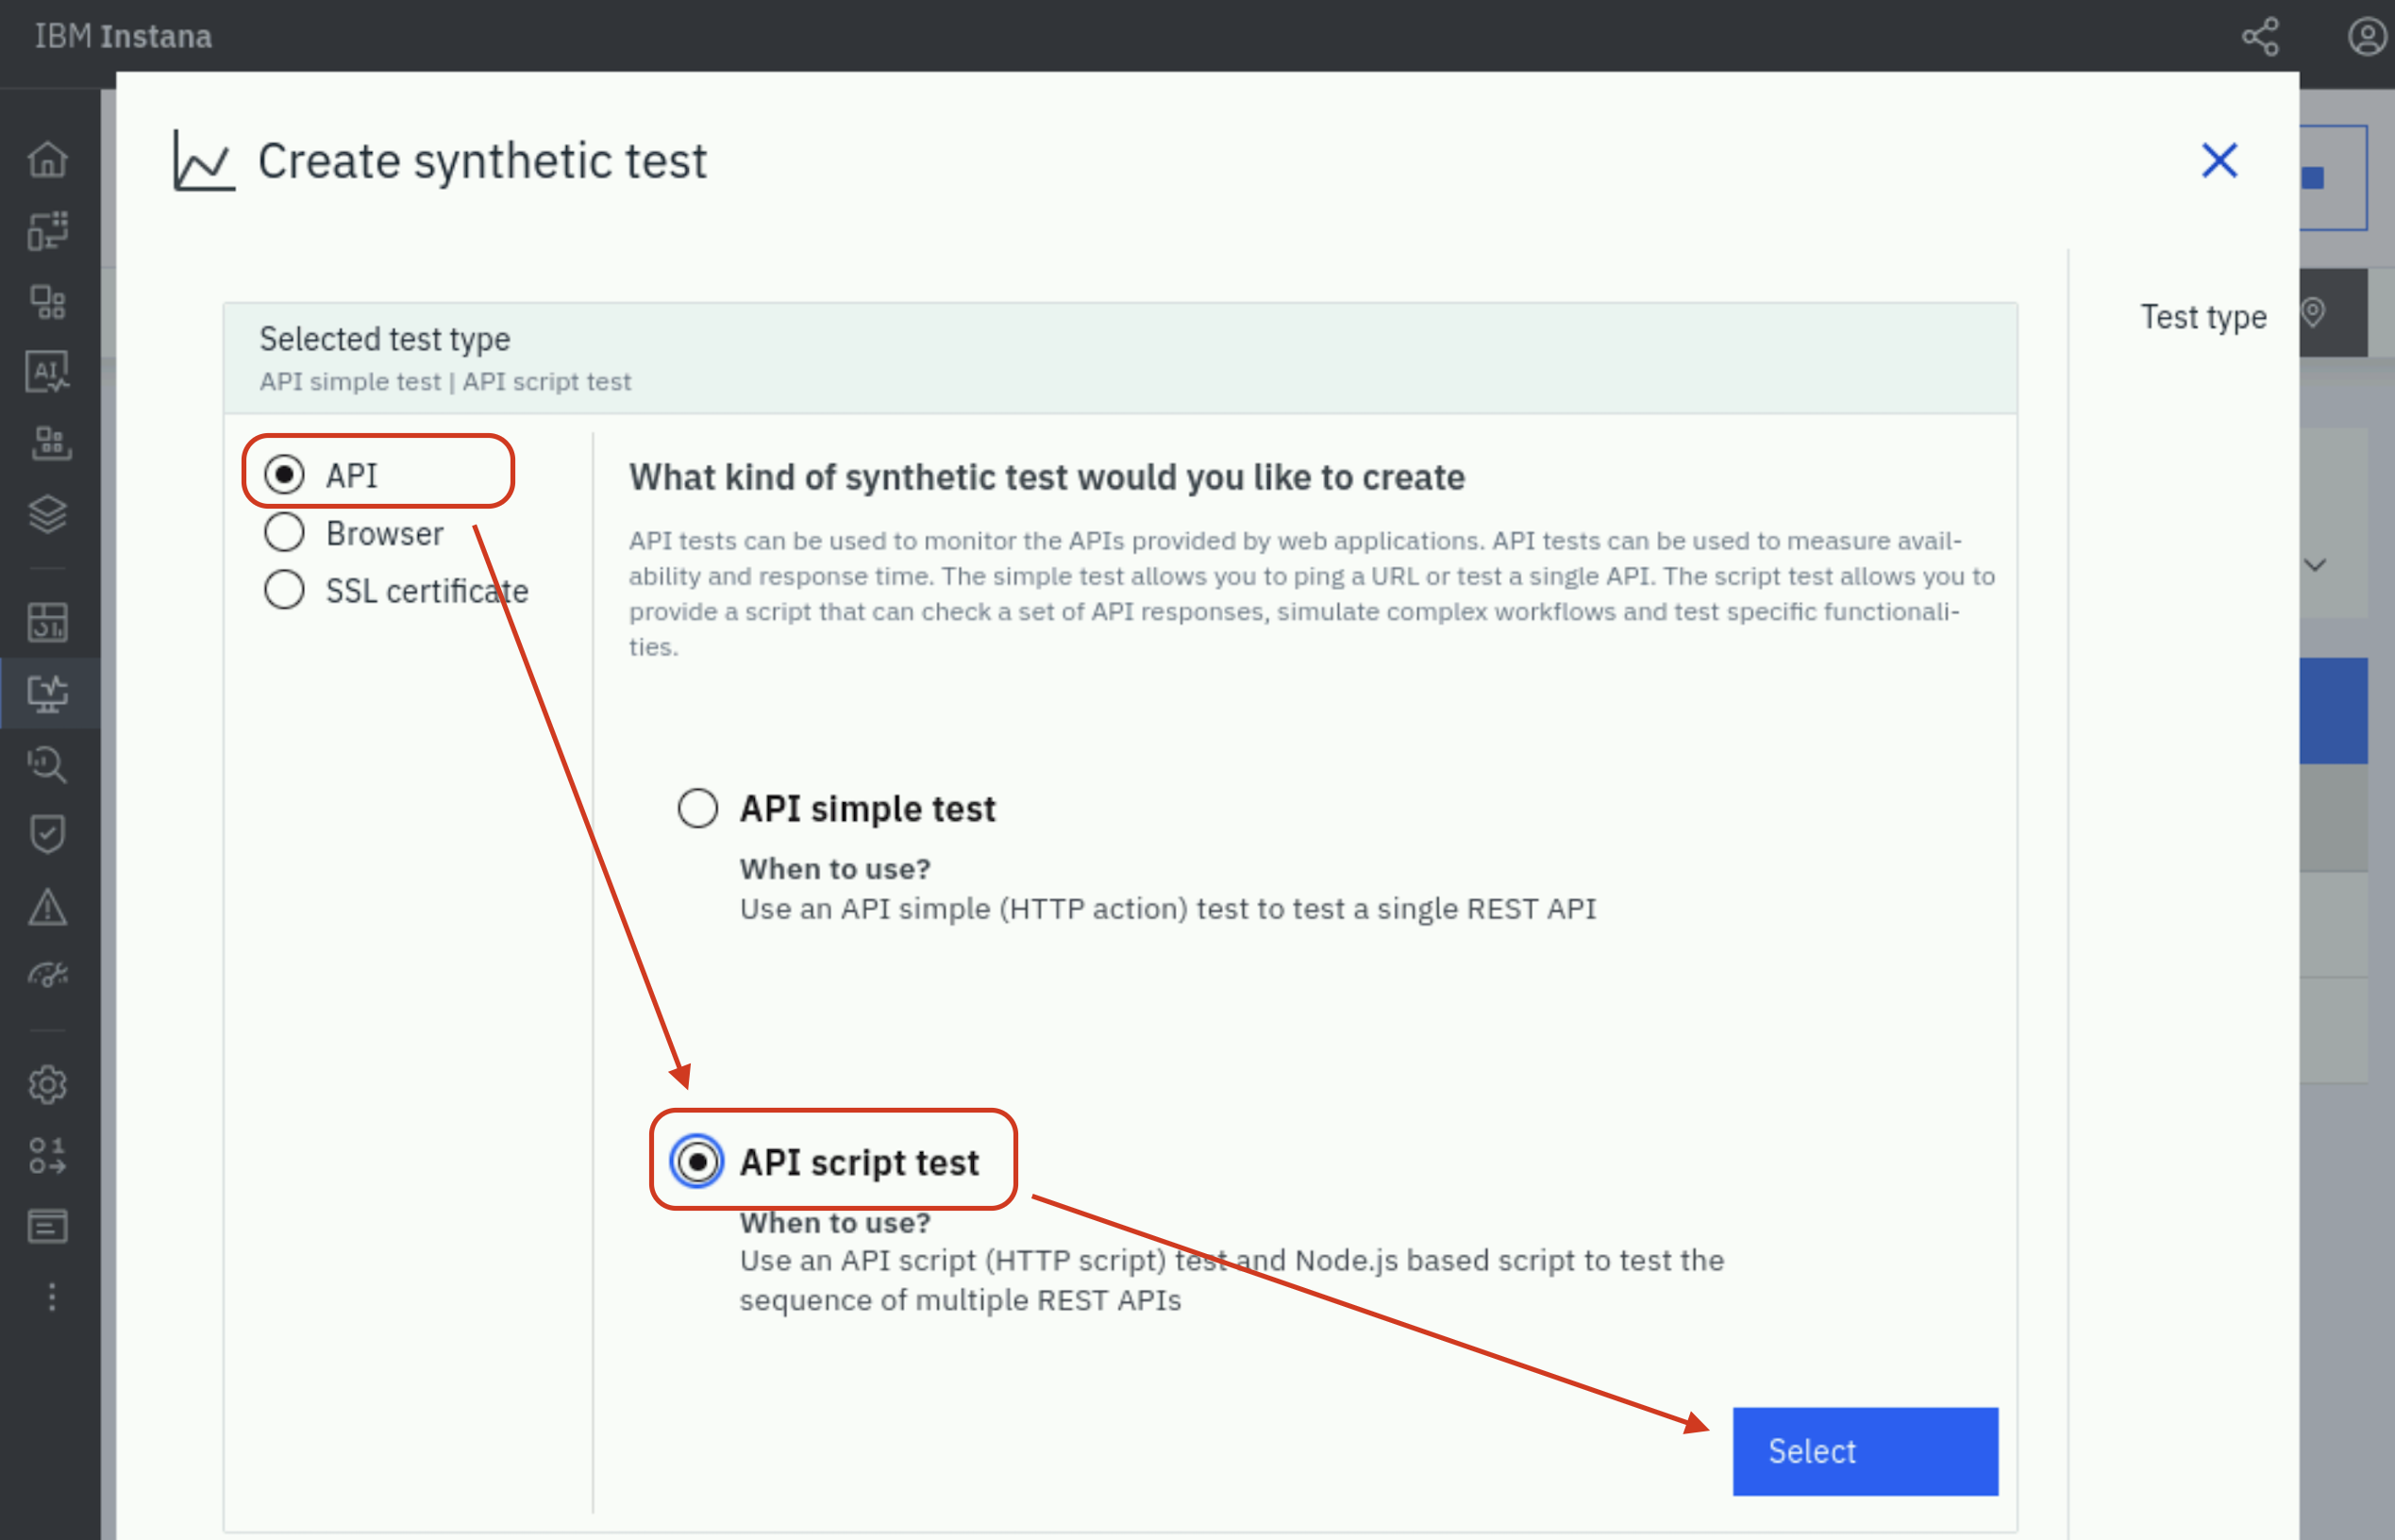
In the Create Synthetic Test dialog, select API and API Script test click the Select button:
Scroll down to Script section and click Add Script. Paste the following JavaScript code into the script text field as shown below:
var assert = require("assert")

// Address that Synthetic PoP will use to access target host to interrogate:
var SERVER_ADDR = "http://qotd-api.apps.demo-apps.ibmdte.local"

// ======================================================================
// First call
// create Object option with details of request including URI and header:
var options = {
  uri: SERVER_ADDR + "/usecase",
  strictSSL: false,
  headers: {
    "Content-type": "application/json"
  }
}

// Send request and check if the response code is 200
$http.get(options, function (error, response, body) {
  var bodyObj = JSON.parse(body)
  assert.ok(
    response.statusCode == 200,
    "GET status should be 200. Instead it's " + response.statusCode
  )
})

// ======================================================================
// Second call
// create Object option with details of request including URI and header:
var options = {
  uri: SERVER_ADDR + "/usecase",
  strictSSL: false,
  headers: {
    "Content-type": "application/json"
  }
}

// Send request and check if the status is empty
$http.get(options, function (error, response, body) {
  var bodyObj = JSON.parse(body)
  assert.ok(
    bodyObj[0].status == "",
    "First anomaly status: " + bodyObj[0].status
  )
})
Click Save
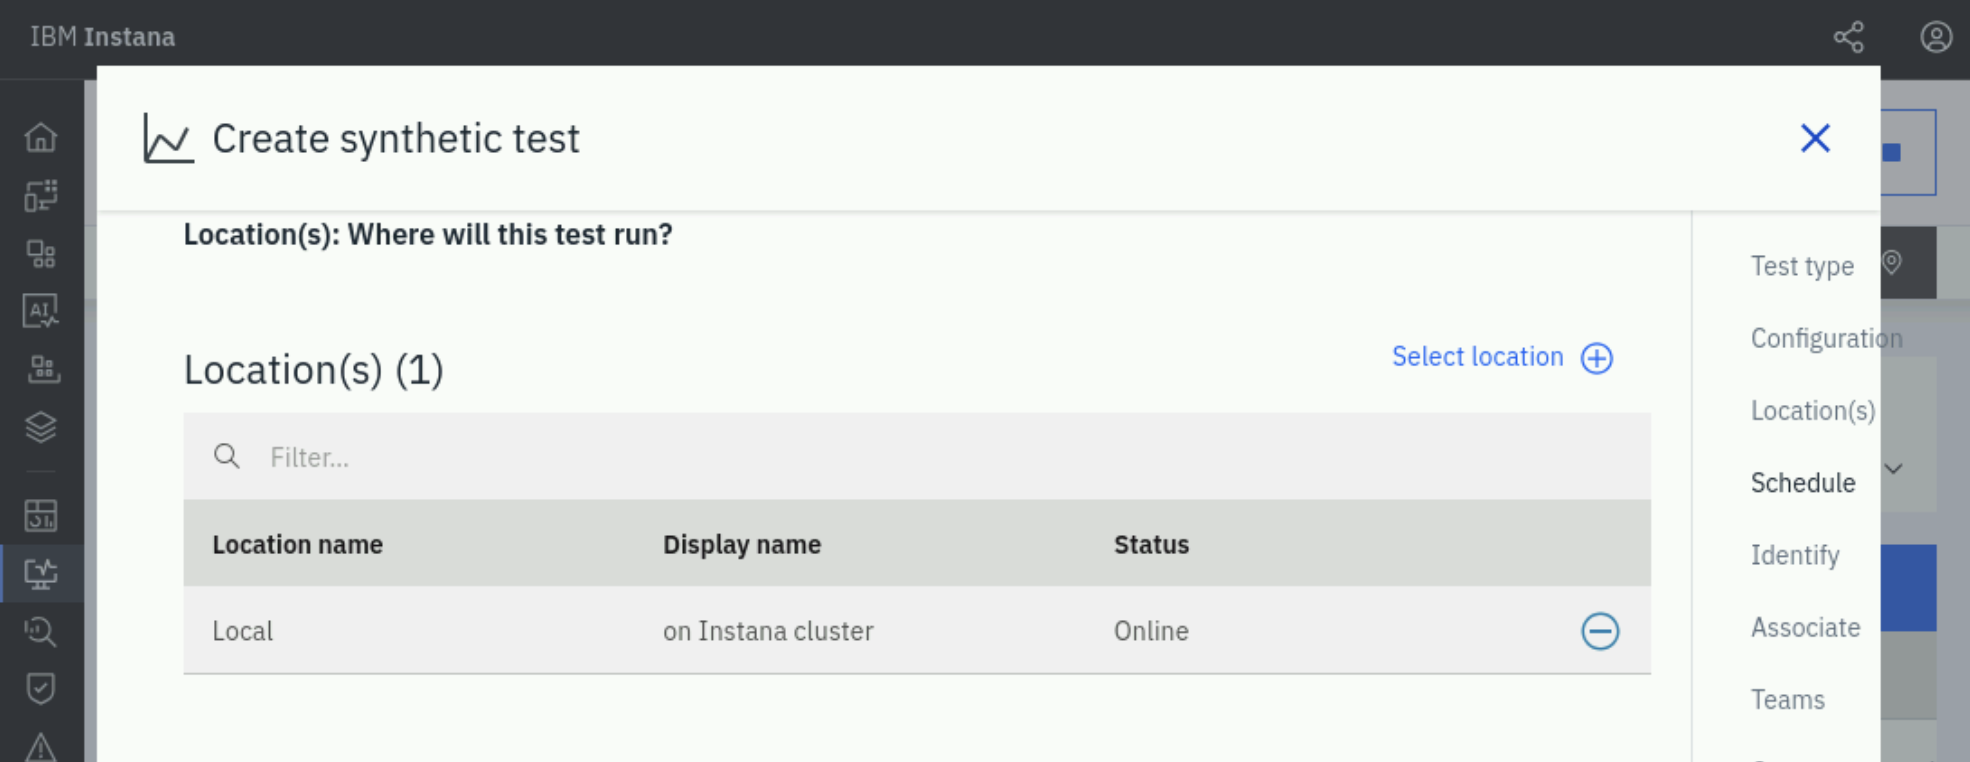
Scroll down, ensure to select the on Instana cluster location. Instana will run the
script from the previously installed Synthetic Point of Presence, which can be
placed at multiple locations across available infrastructure. The one we will
use is deployed on the same cluster with Instana. Note, it may have a different
name in different releases of Instana:
Scroll down.
In the Scheduling section, adjust the time slider to run the test every 1
minute:
Then, scroll down.
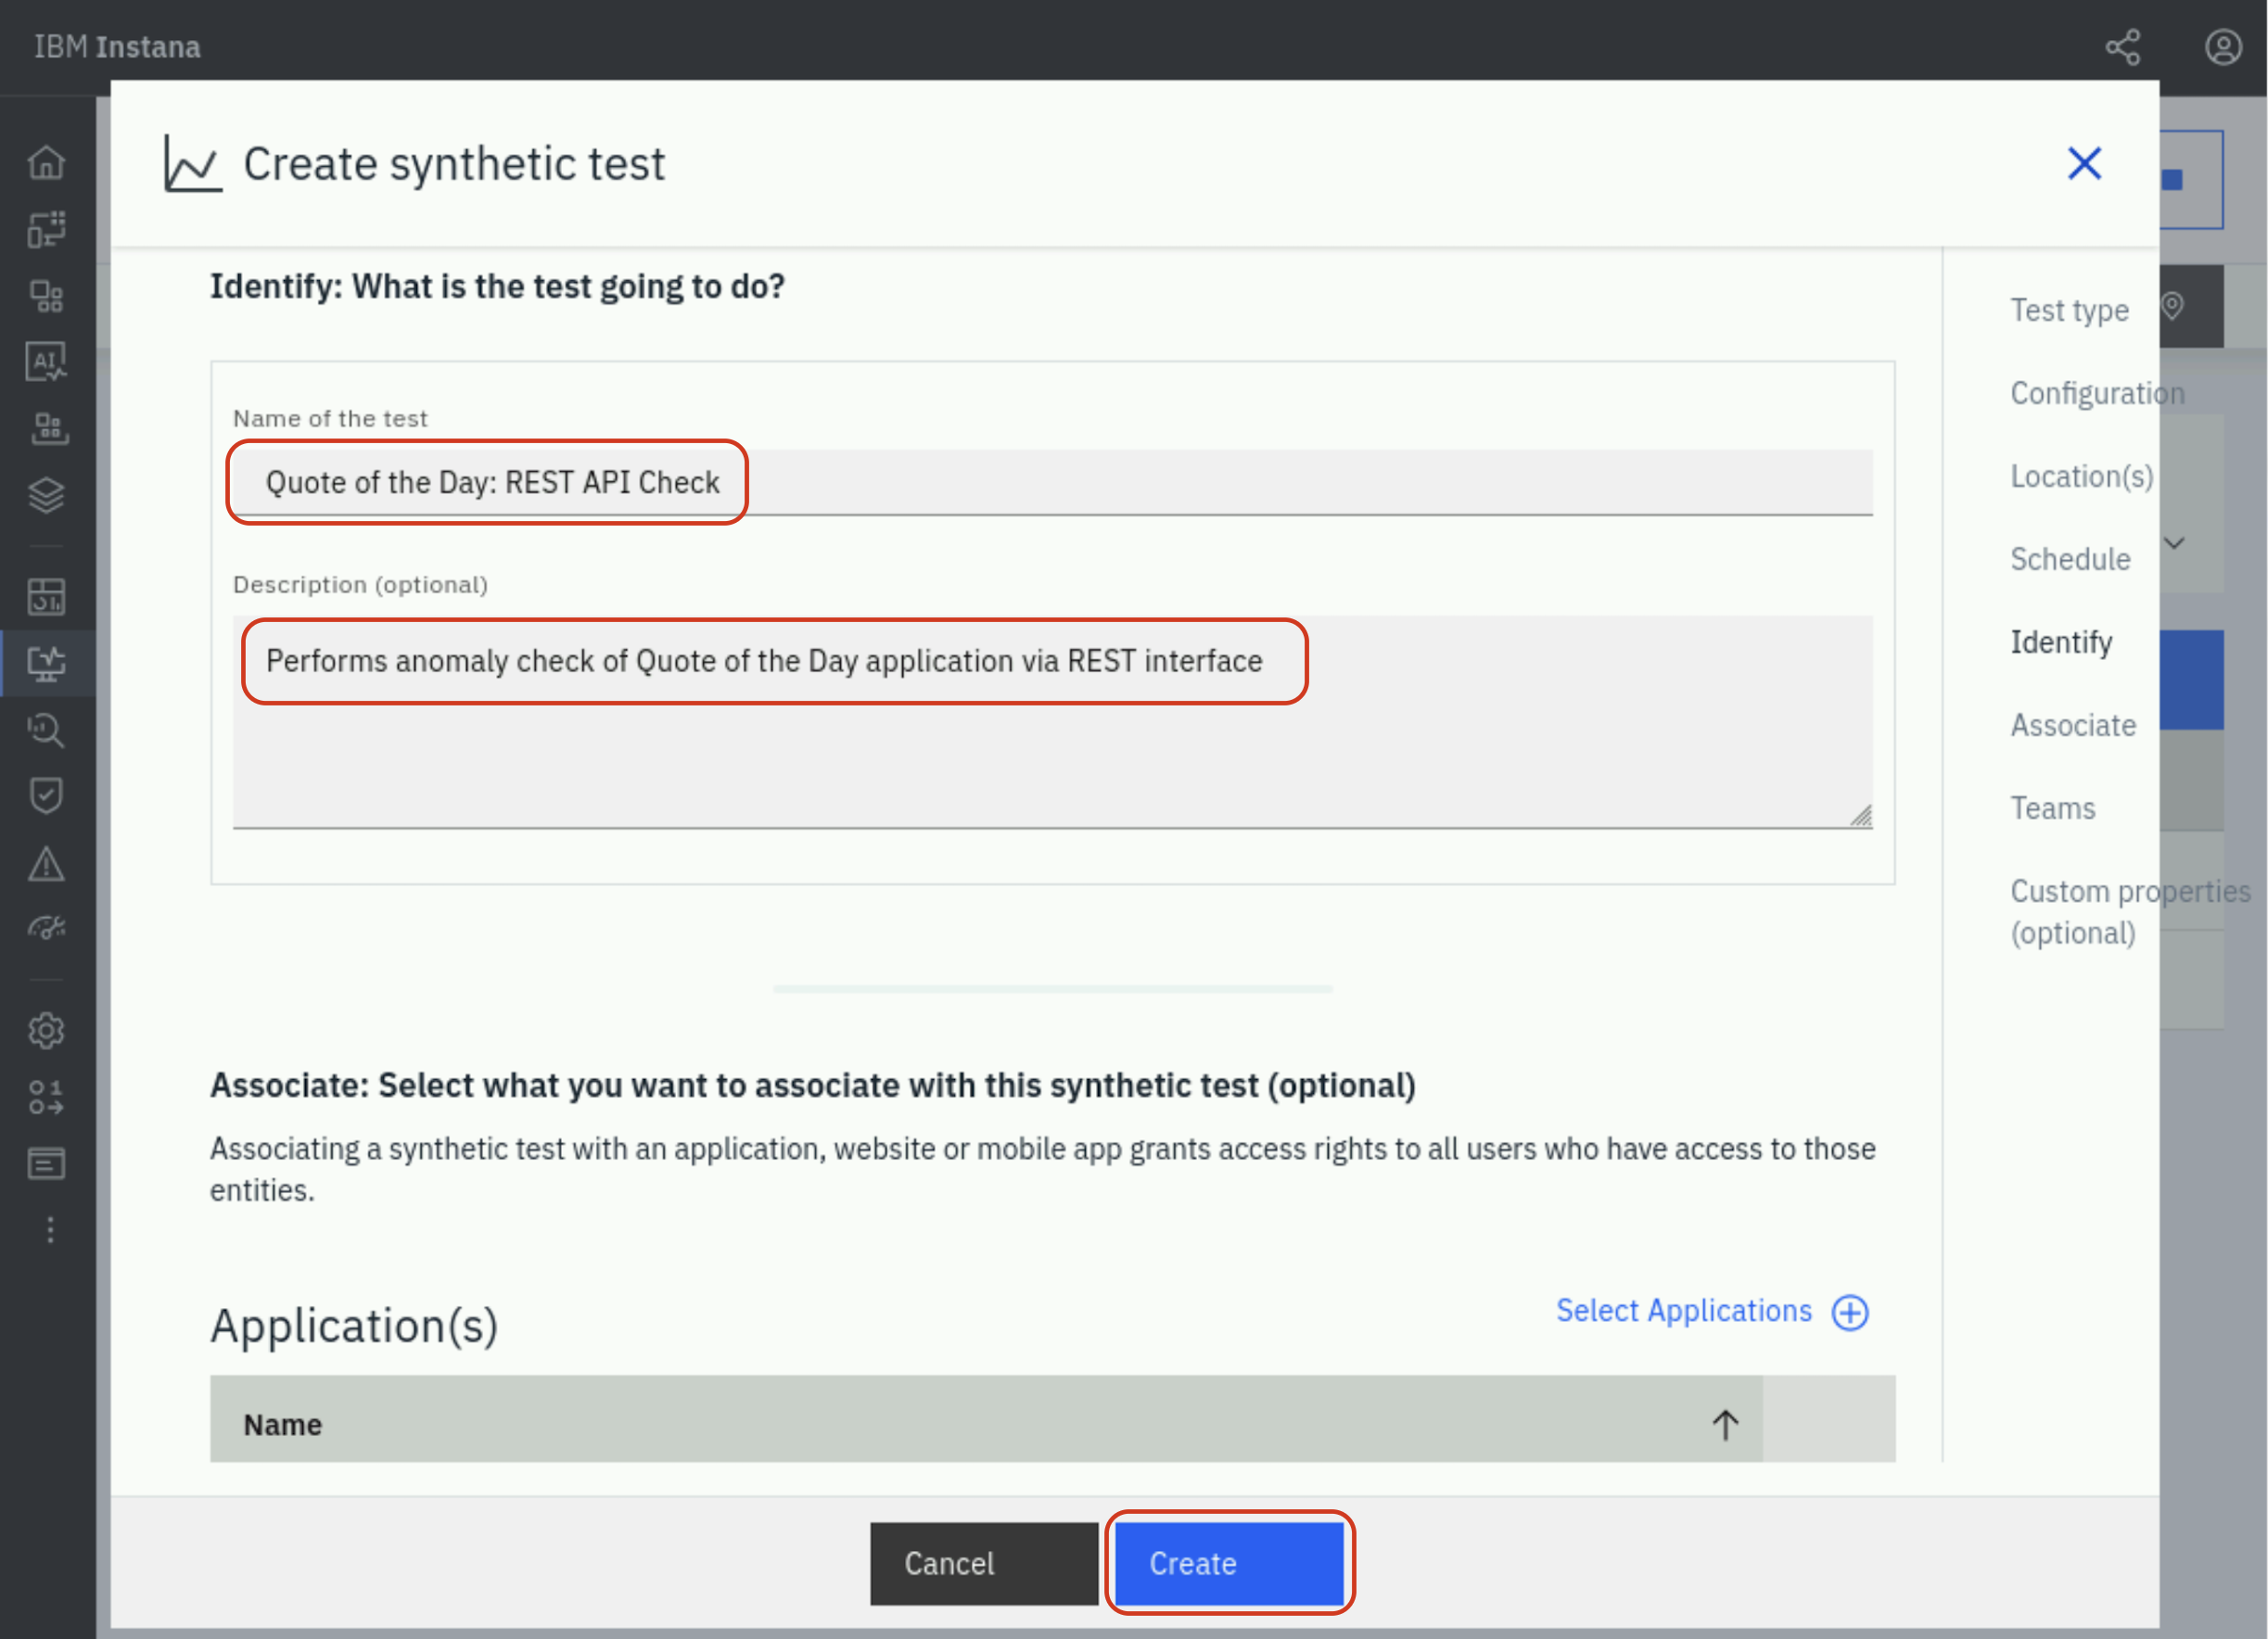
Give the test a meaningful name and description, then scroll down. We will use values:
- Name of the test:
Quote of the Day: REST API Check - Description:
Performs anomaly check of Quote of the Day application via REST interface
At the Associate step you may specify the list of existing application perspectives for which the test is relevant. The result of the test will appear on the Synthetic Monitoring tab of the Application dashboard and you will be able to filter tests by application on the Synthetic Monitoring dashboard. We didn't create any Application Perspectives in this lab, so will skip this step.
Click the Create button.
It may take up to a minute for Instana to perform the first test and show the results. You can refresh the browser window or change the time duration for the dashboard on right top of the window to speed up the status update.
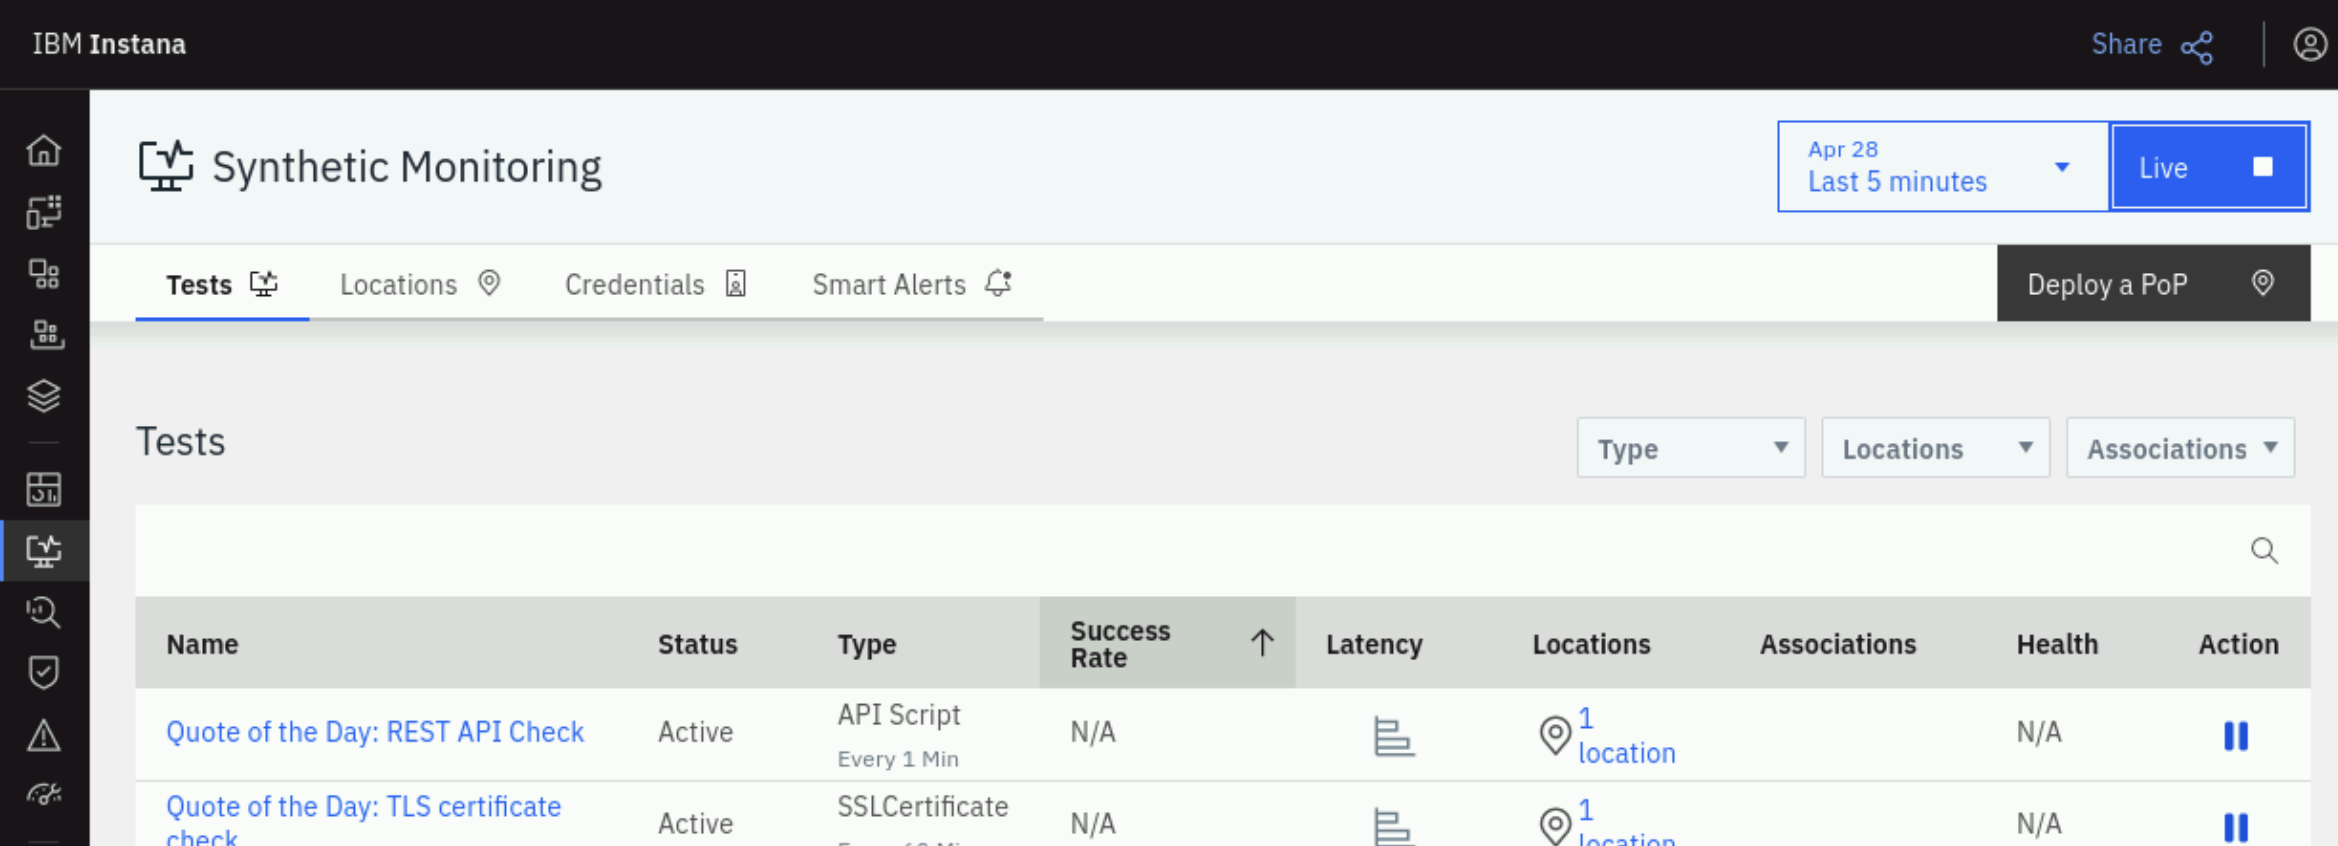
For this lab, change the time window to Last 5 minutes and wait for a few minutes.
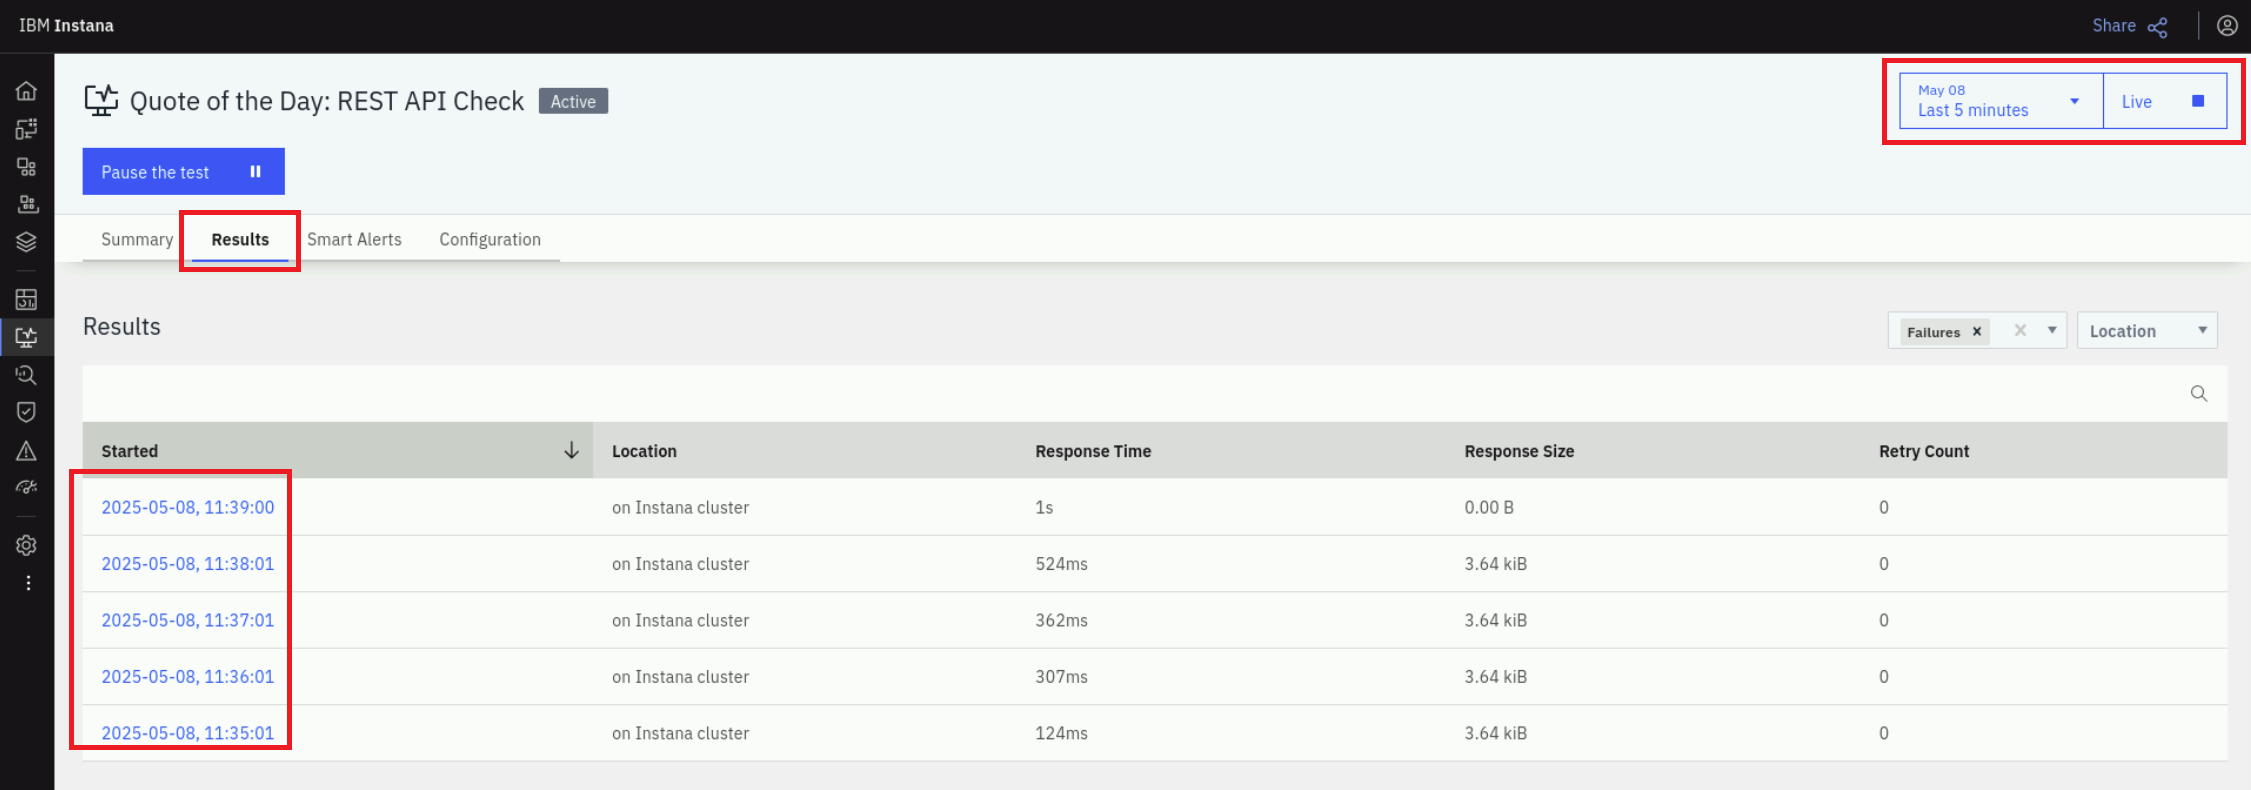
By now you should see a list of tests:
Click on the test name to access the dashboard of the synthetic test, open Results tab and select one of the test records:
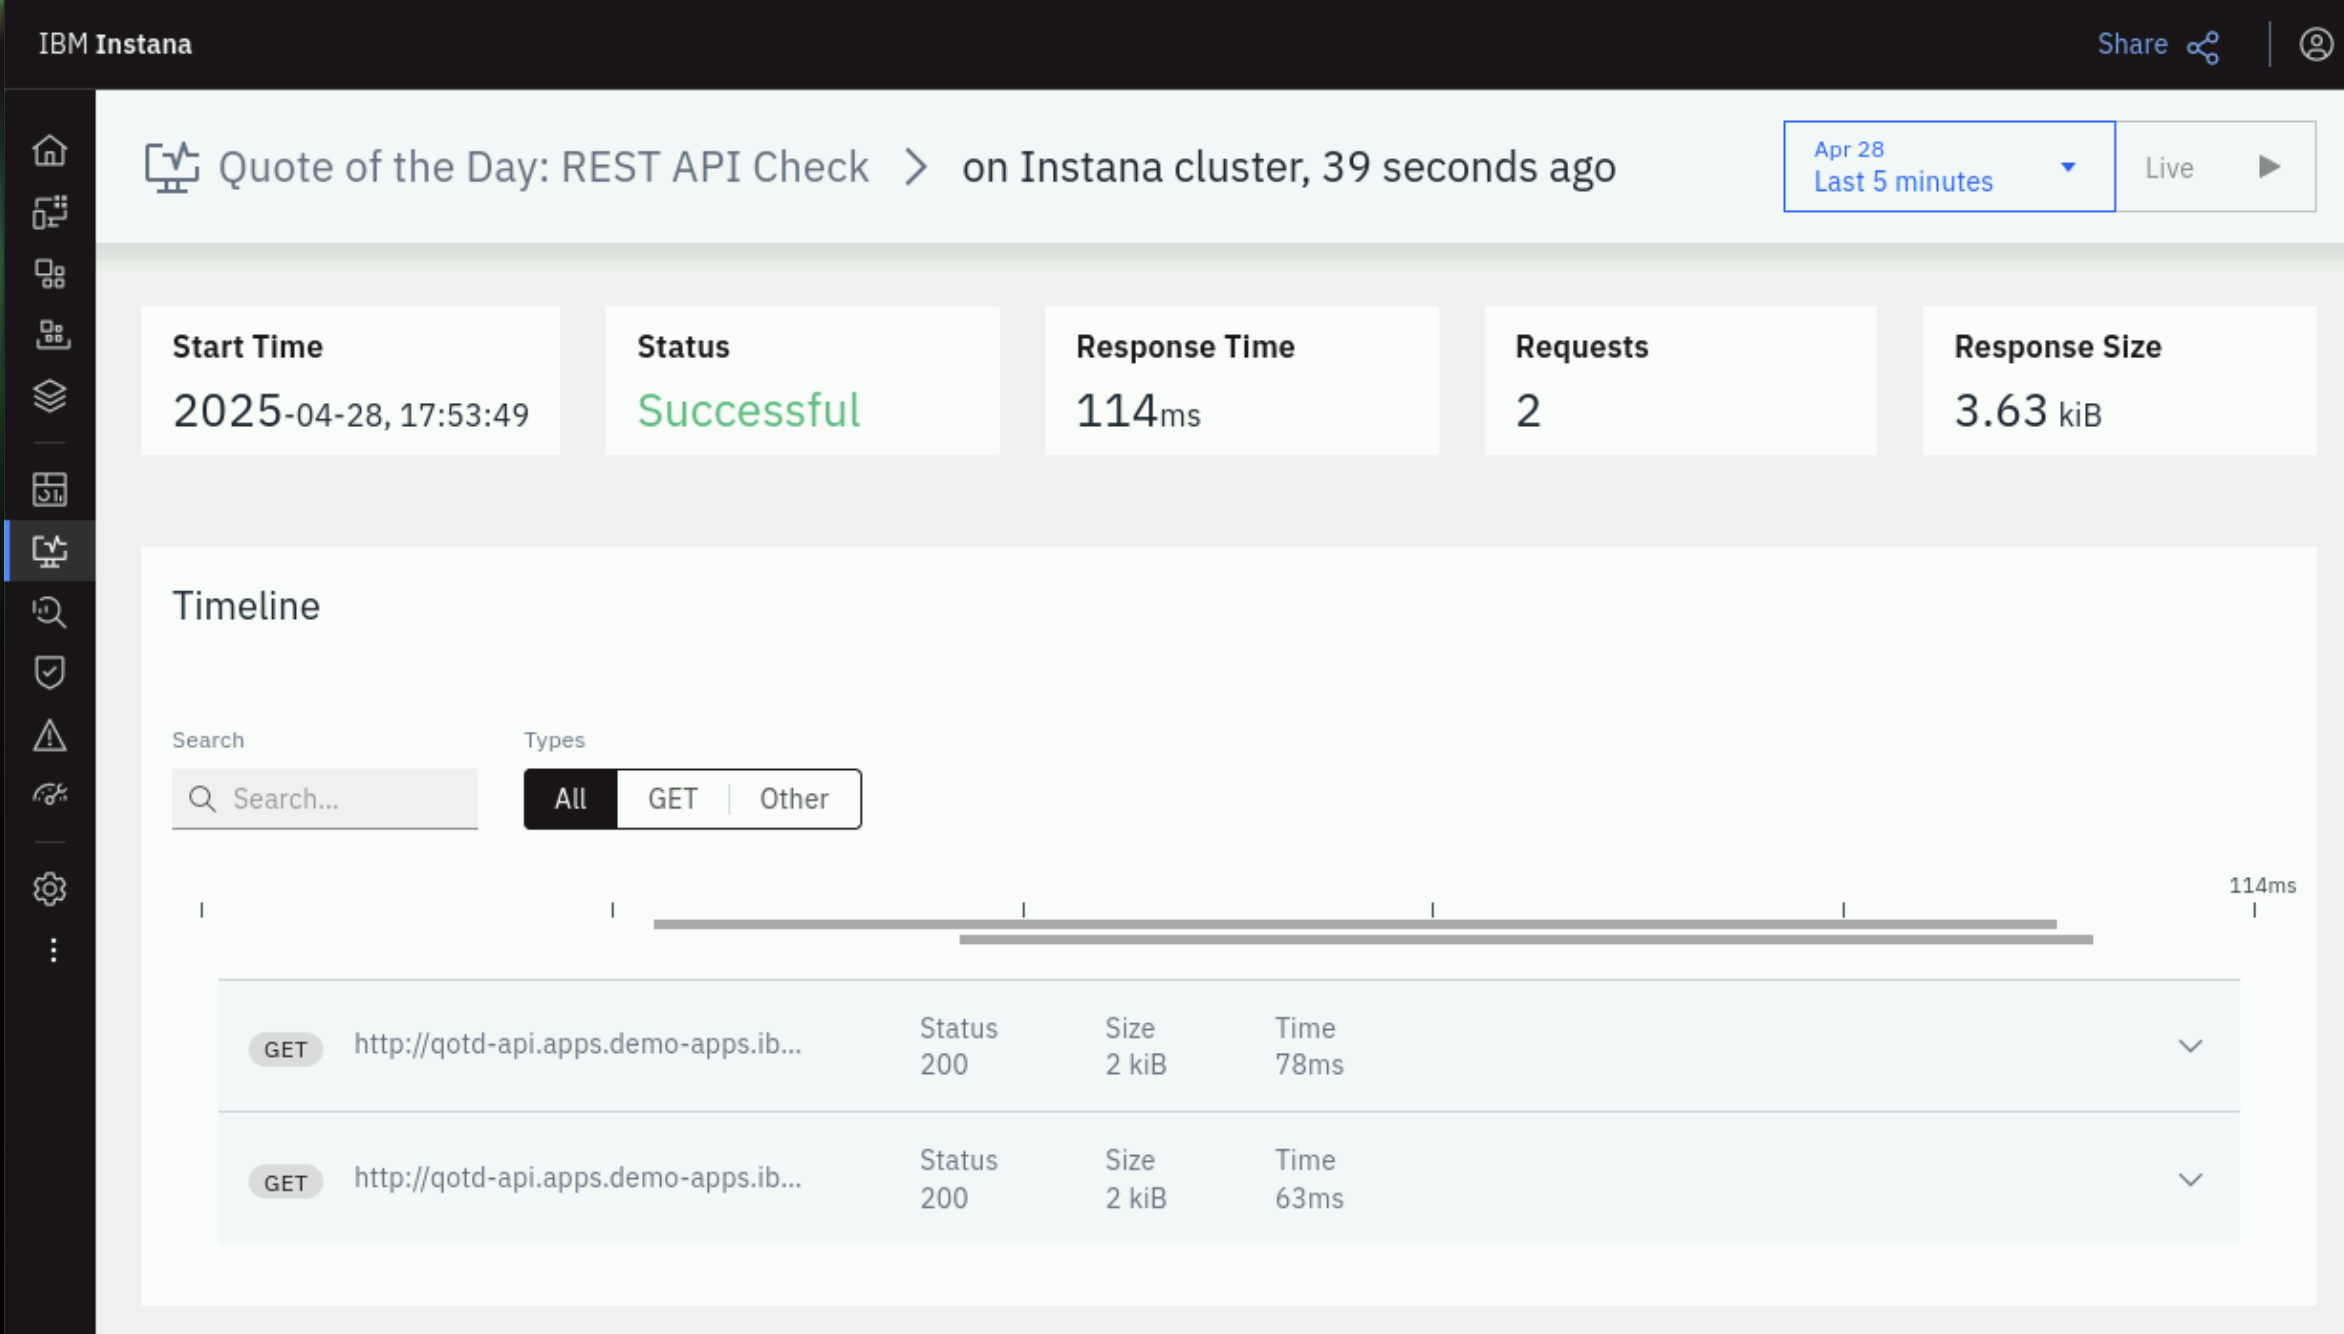
In this lab, we use Quote of the Day's Anomaly Generator service as an example
of an application with a REST API. The script we implemented above is checking
the status of the first task in the generator's list, i.e. task
Quote, PDF, Web, Rating service cascade failure:
. . .
// Send request and check if the status is empty
$http.get(options, function(error, response, body) {
    var bodyObj = JSON.parse(body);
    assert.ok(bodyObj[0].status == "", "First anomaly status: " + bodyObj[0].status);
});
There are two possible values, "" (empty) and "running". Once we execute the
anomaly test Quote, PDF, Web, Rating service cascade failure which is first in
the list, the status of the record will become running and our API REST script
test will fail because it expects an empty value.
Generate the error for the test to detect
Start by checking the status of the first record by opening the following address in a new browser tab:
http://qotd-api.apps.demo-apps.ibmdte.local/usecase

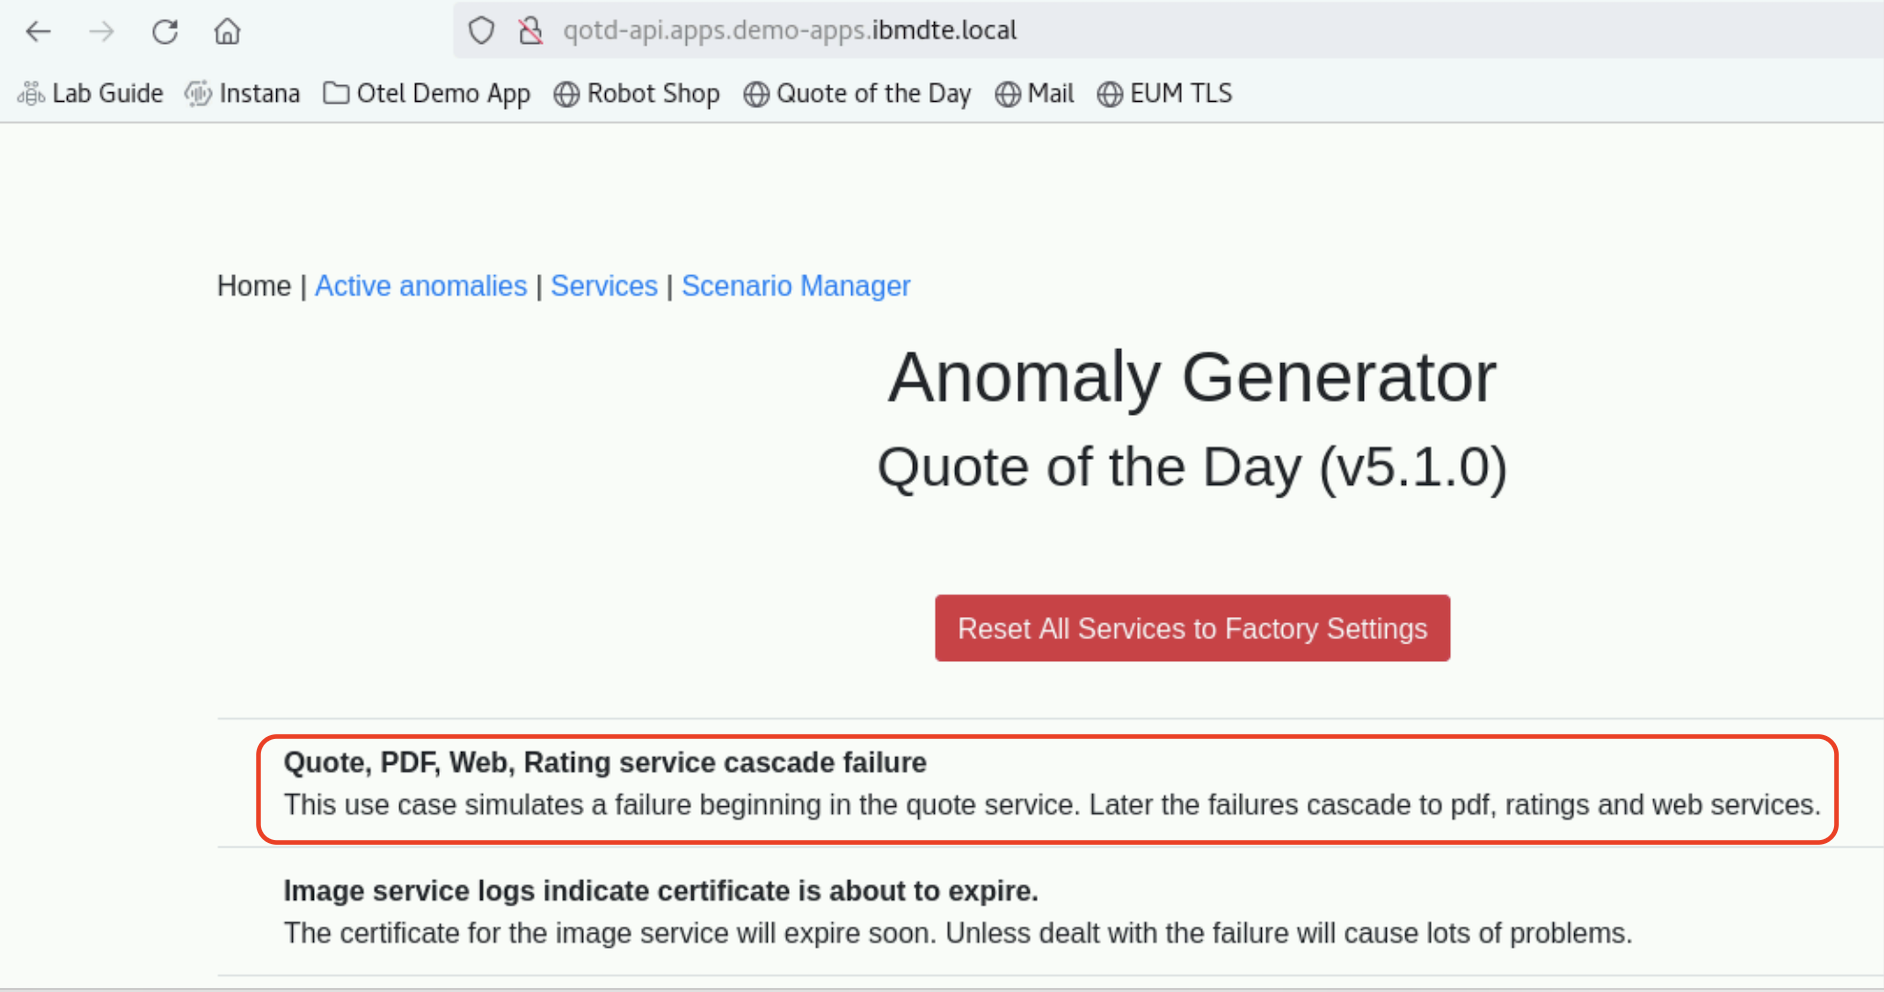
Next, in a separate browser tab, open the Anomaly generator:
http://qotd-api.apps.demo-apps.ibmdte.local
Click on the first anomaly Quote, PDF, Web, Rating service cascade failure:
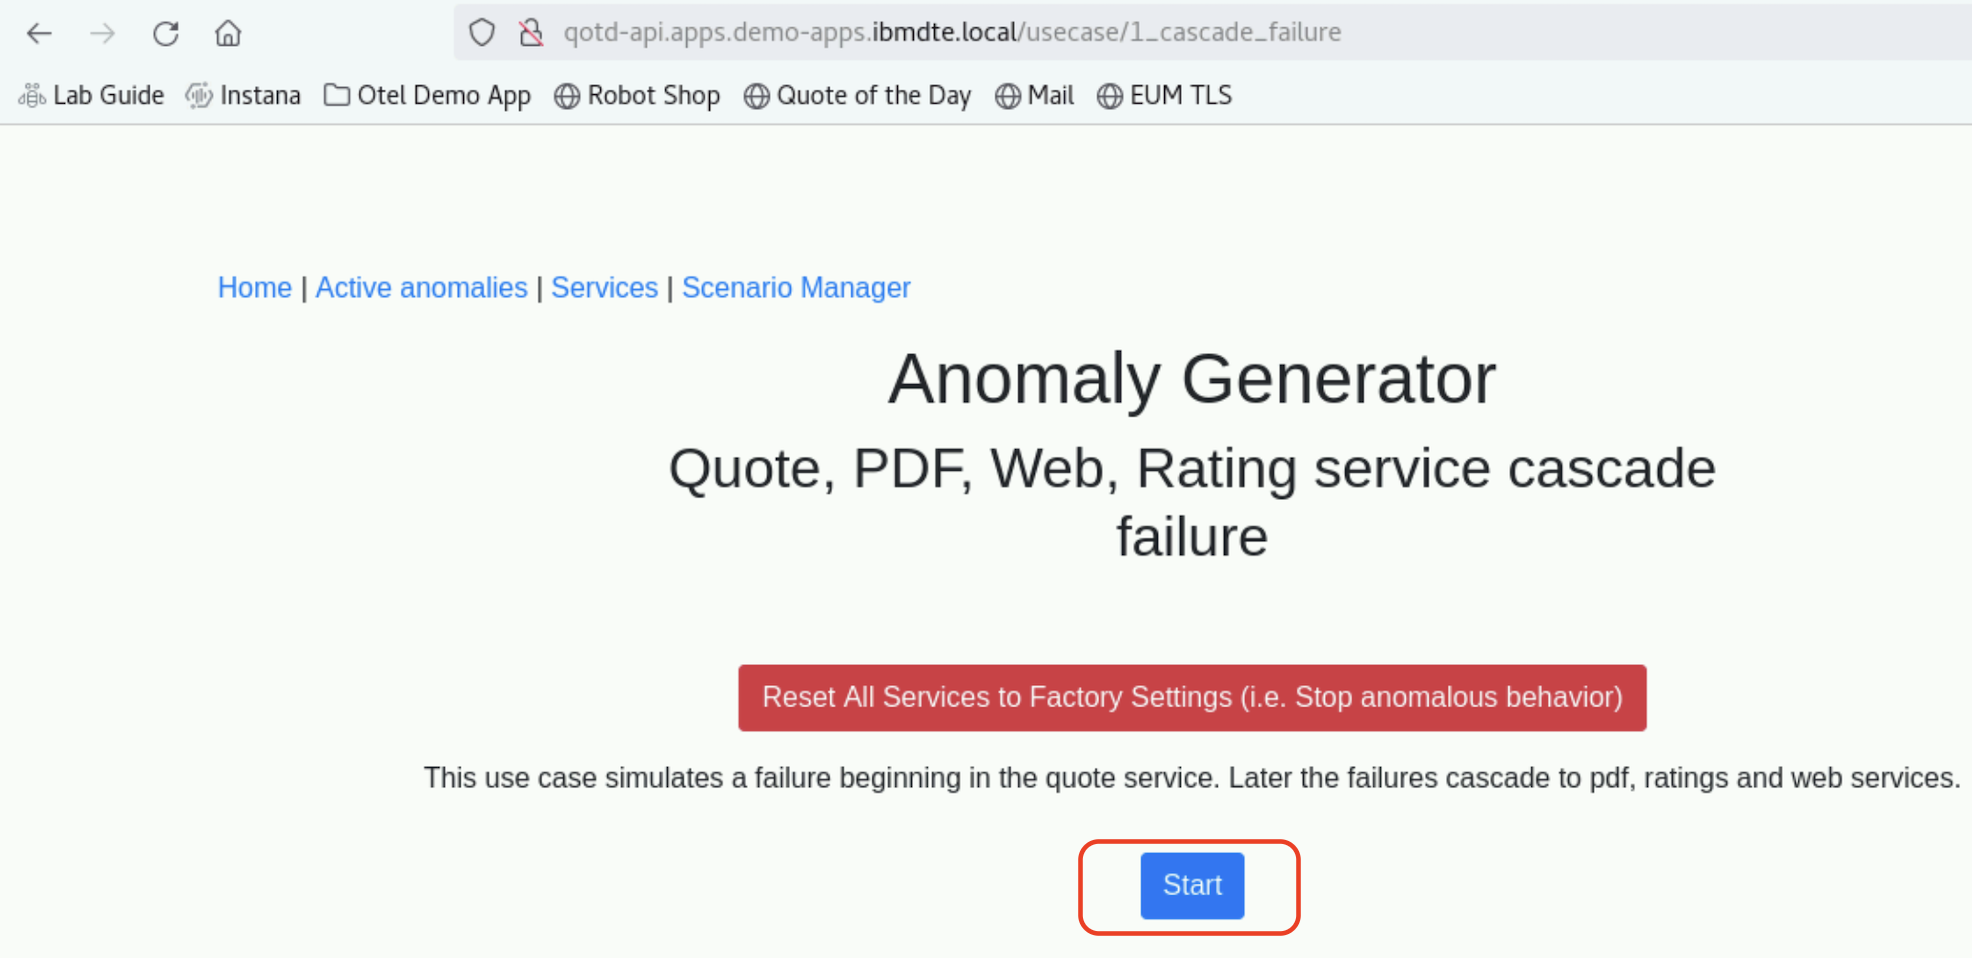
Click the Start button to generate the anomaly:
Switch to Instana browser tab, click on the Results tab and then click the Live button to view the results of the synthetic tests as they become available.
Filter on Failed tests:
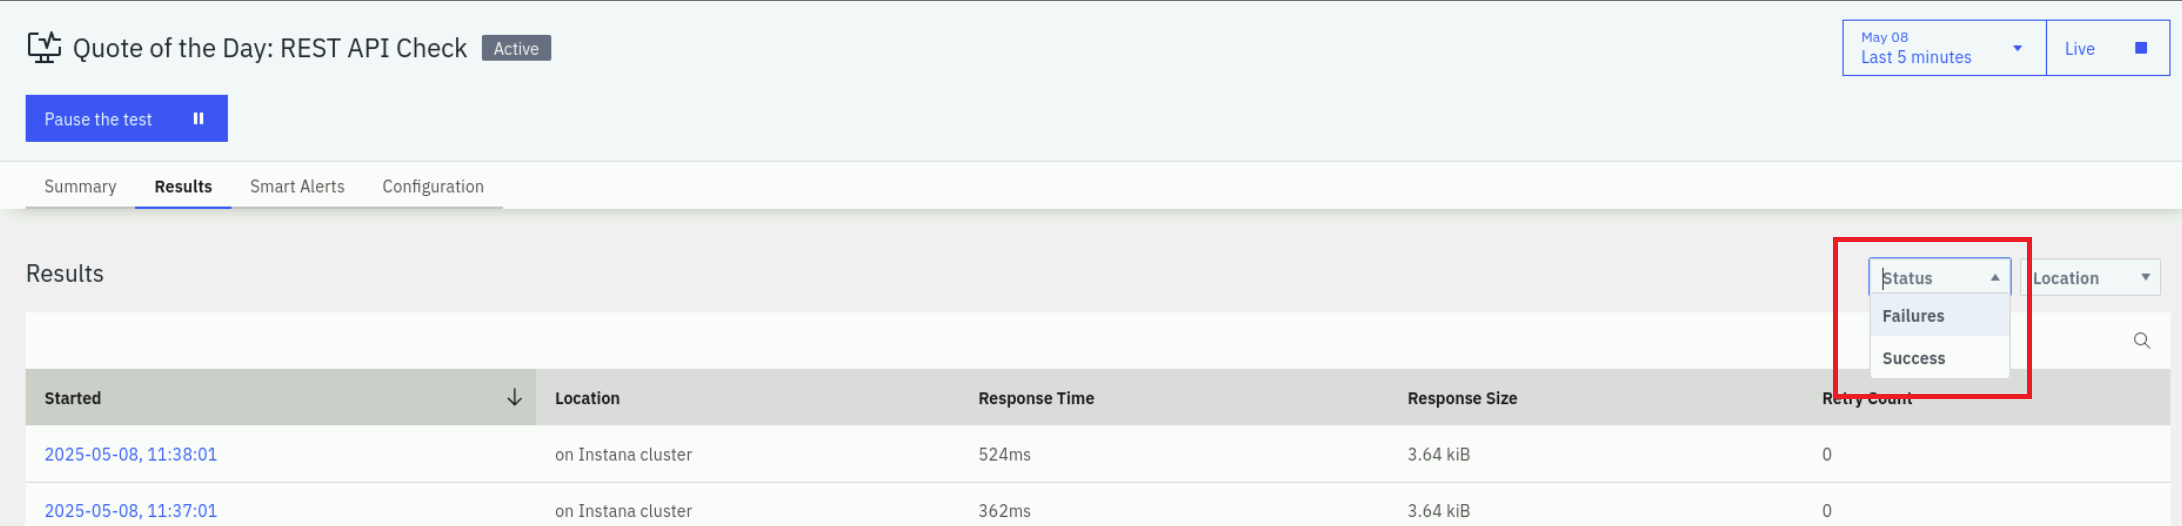
Now, wait about a minute and you will see new test results that have a failure status (to avoid waiting for automatic refresh you can change the timeframe in the top right corner, next to Live button):
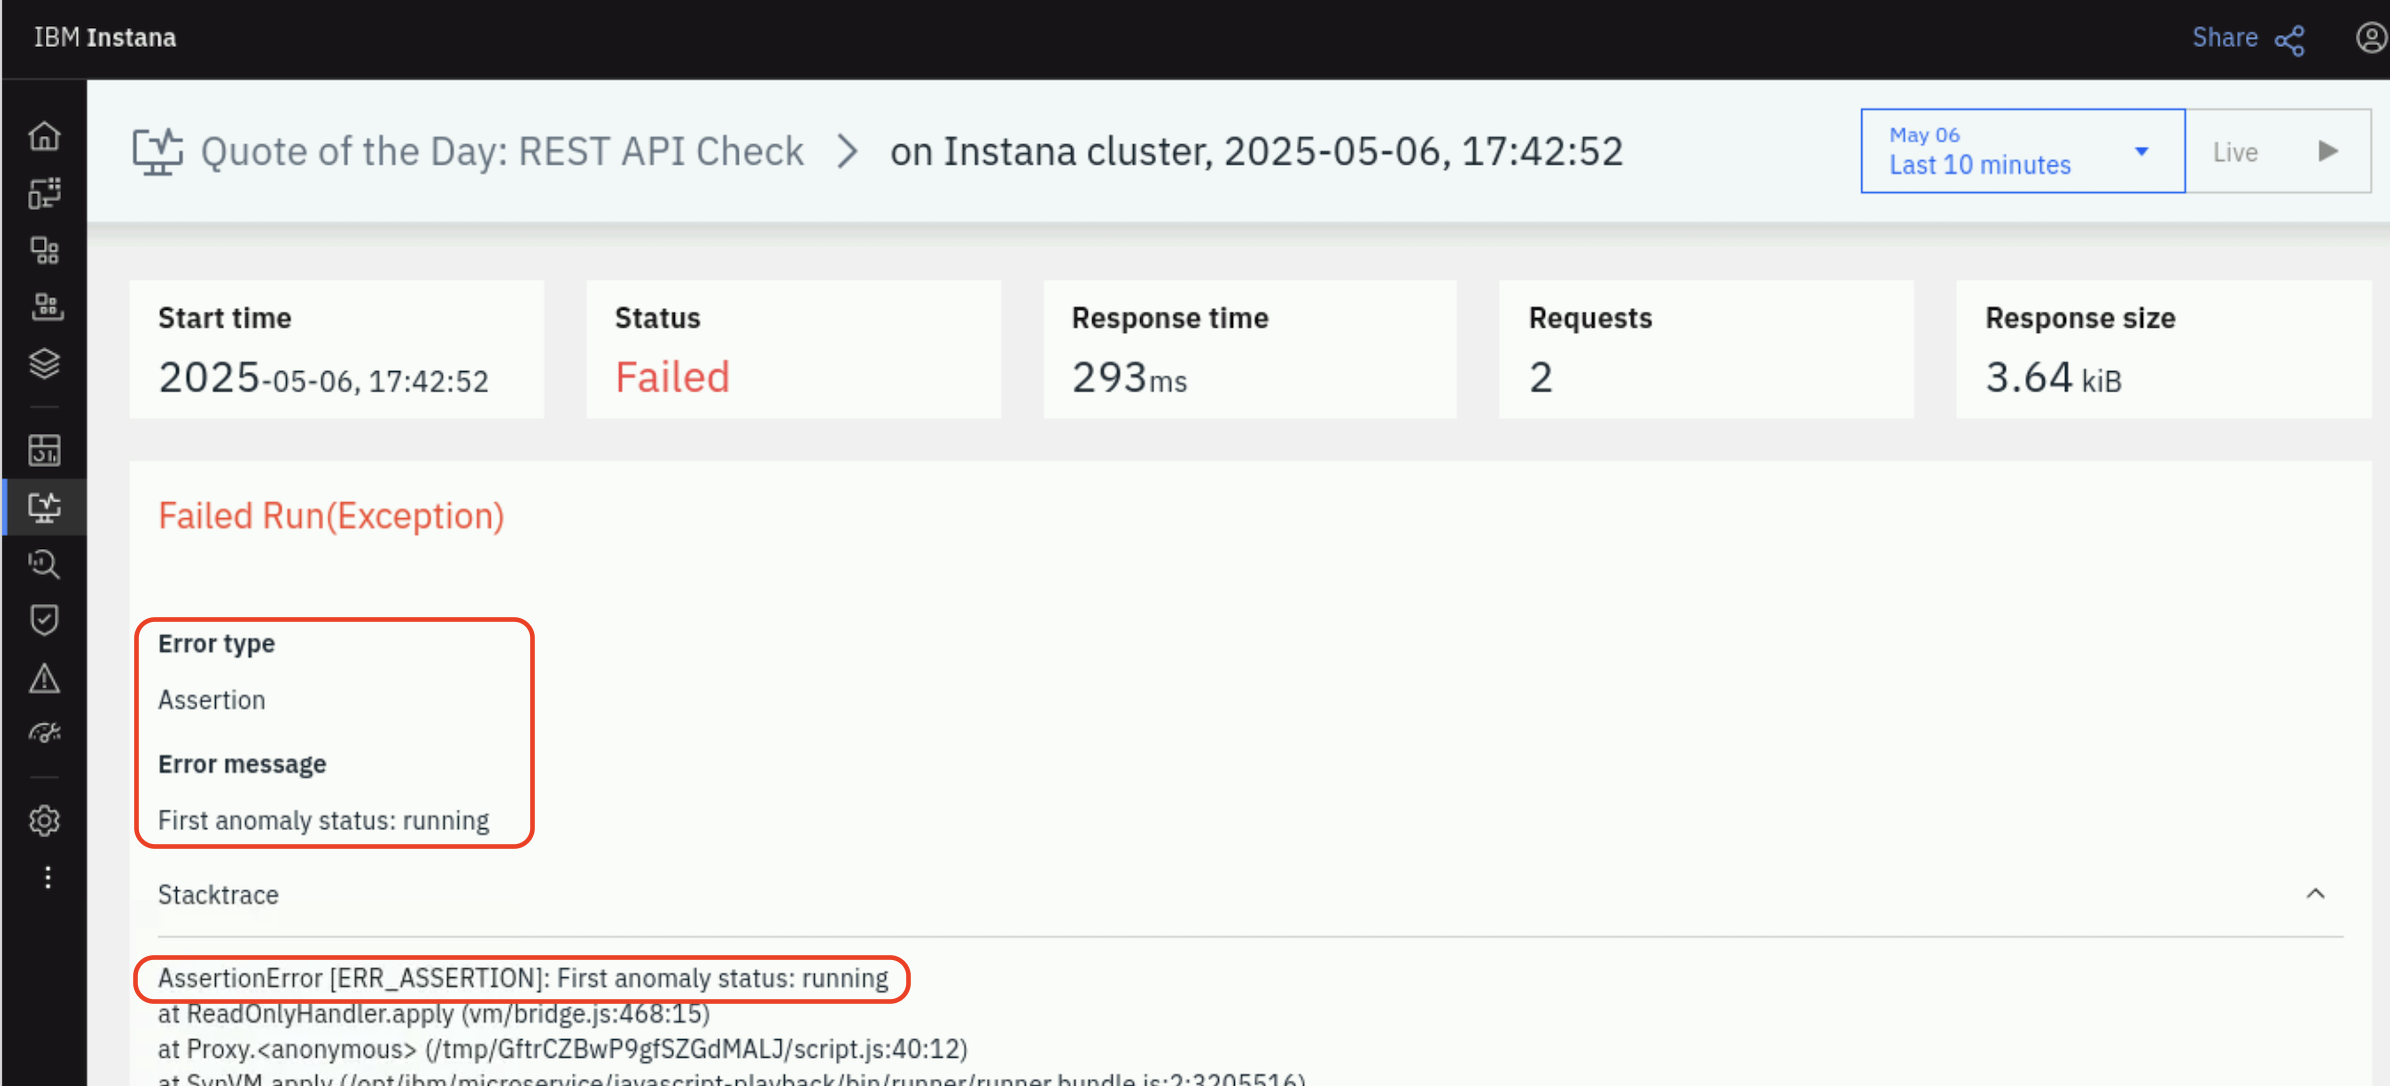
Click on any failed test and you should see a result similar to:
"undefined" is not valid JSON or other result?Sometimes, since this is a lab environment with limited resources, you may see a different result, such as:
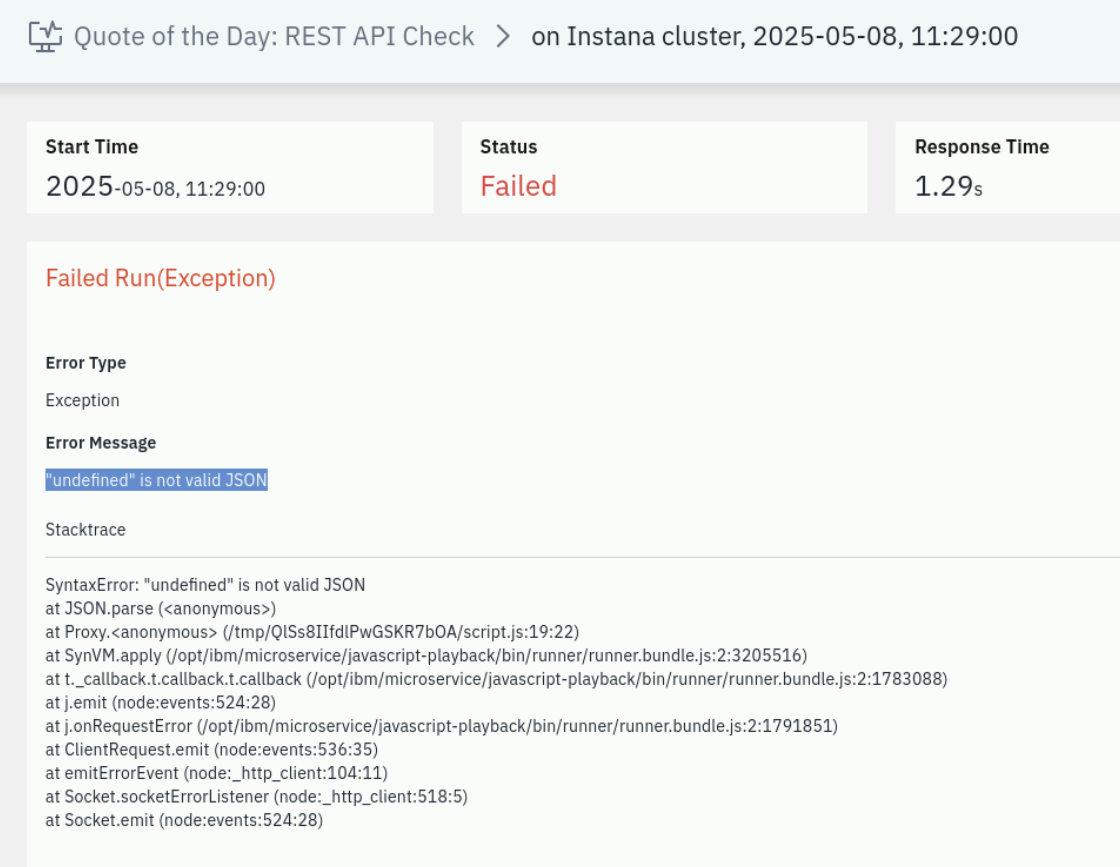
If you happen to see this or another error, it is ok and you can still carry on. Either try clicking on a few other results and you will see one that matches the expected error, or ignore this and carry on to the next step.
The key point of this section is that a test failure should generate an event in the next section.
The test fails because the Synthetic API test expects an empty status, but in
this case it receives status running.
3.6 Create a Smart Alert for a test
Smart Alerts allow you to identify a threshold violation. Then, if desired, alert people via external systems like AIOps, Email, Slack, Service Now, etc. In Instana, the notification mechanism is called an Alert Channel.
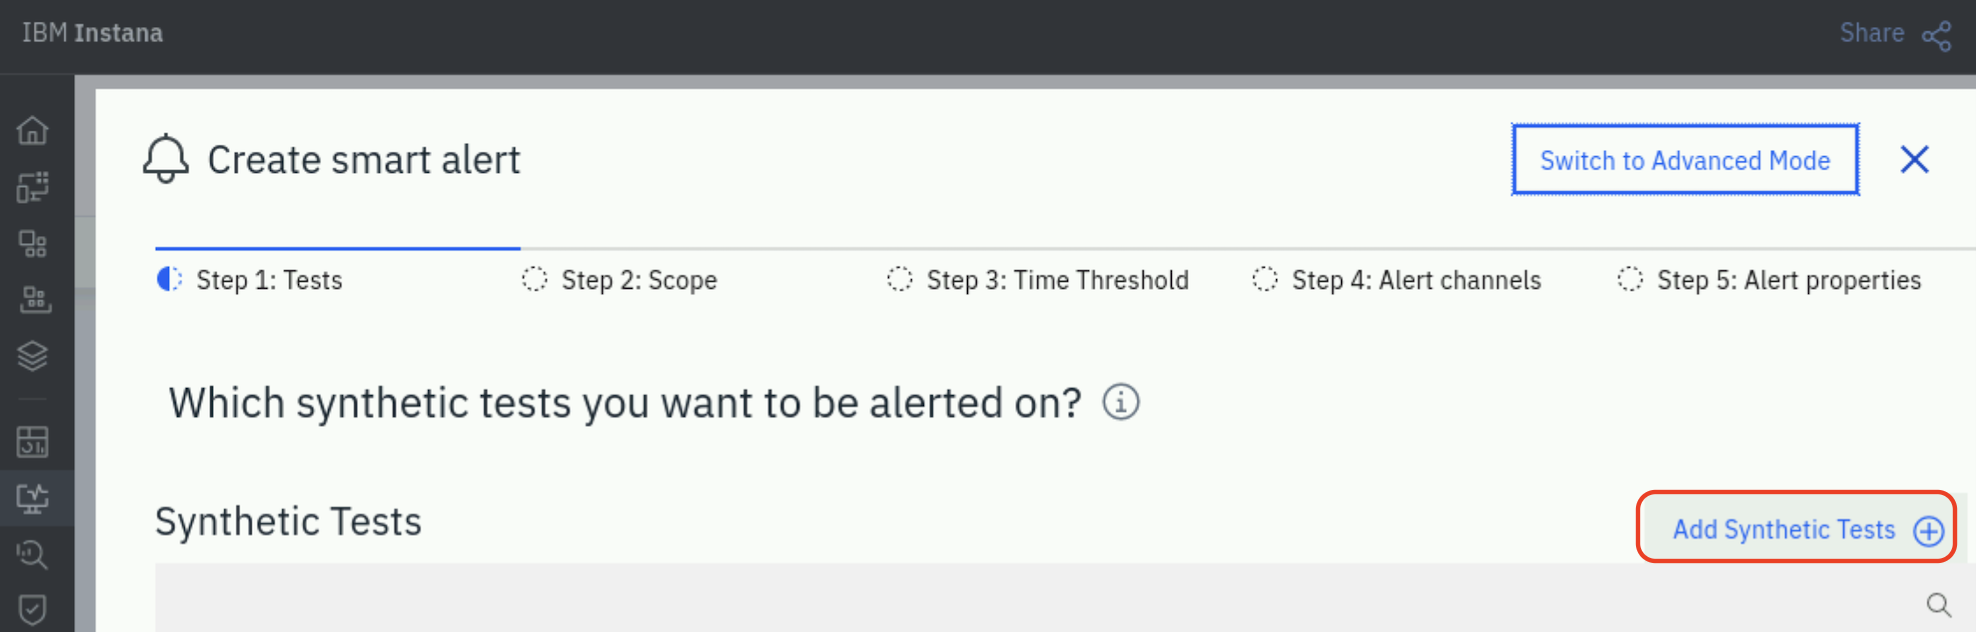
To create an Alert Channel, navigate to Synthetic Monitoring, select Smart Alerts tab, then click Create Smart Alert button:

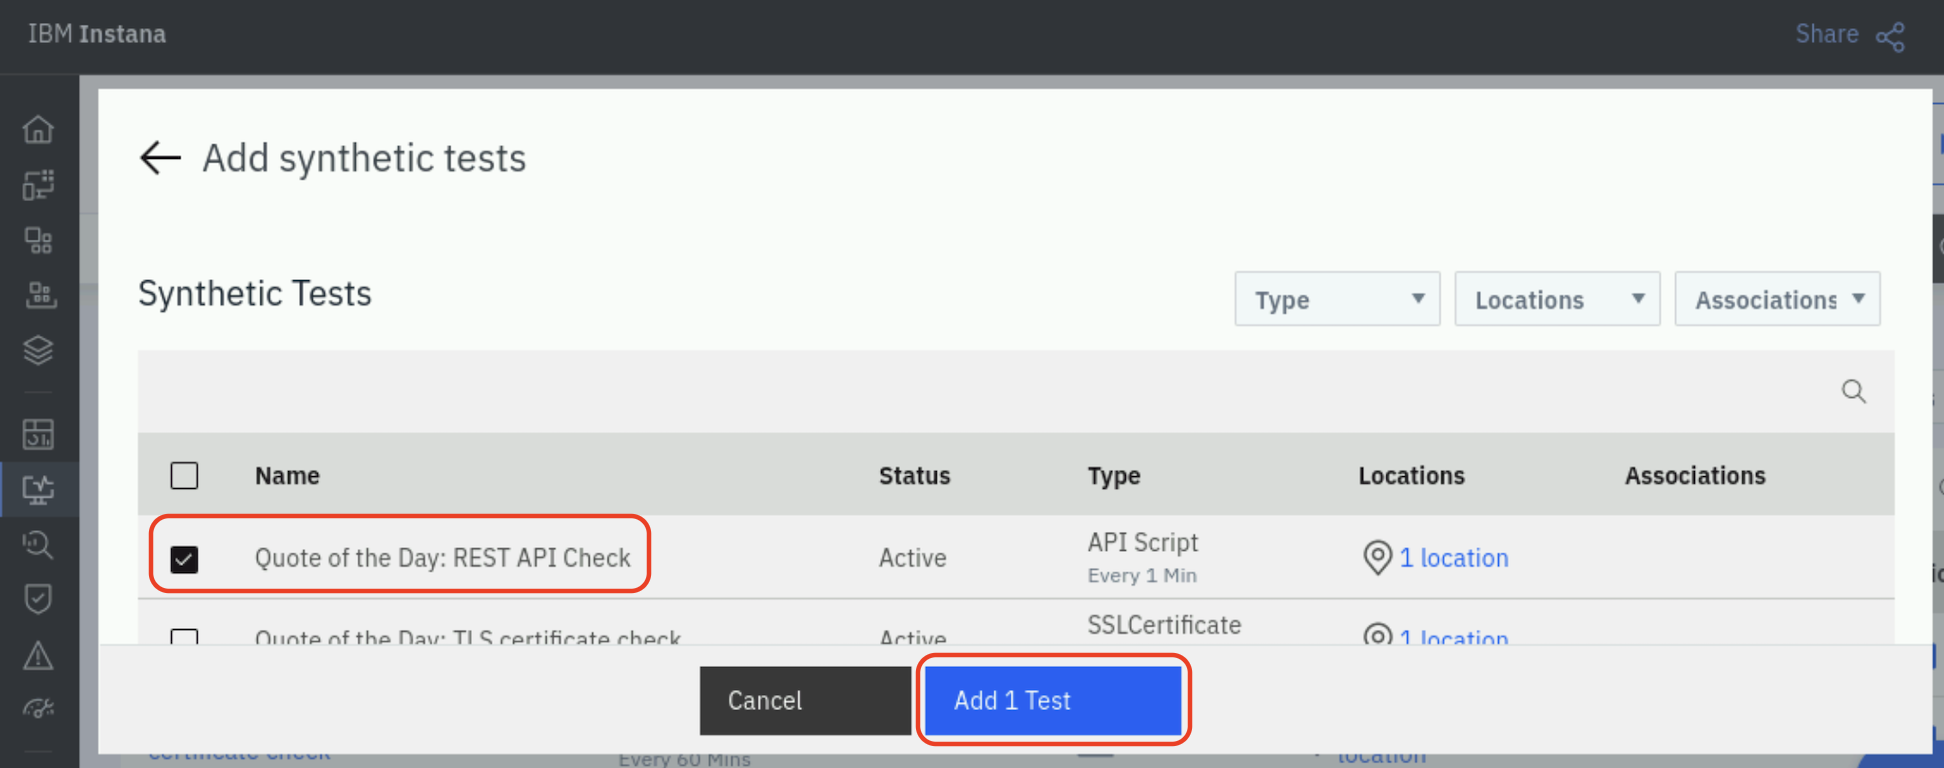
Next, in the Create smart alert dialog, click the Add Synthetic Test link:
Find the test you created earlier and select the checkbox. Then, click Add 1 Test
Click Next to go to Step 2: Scope of the dialog.
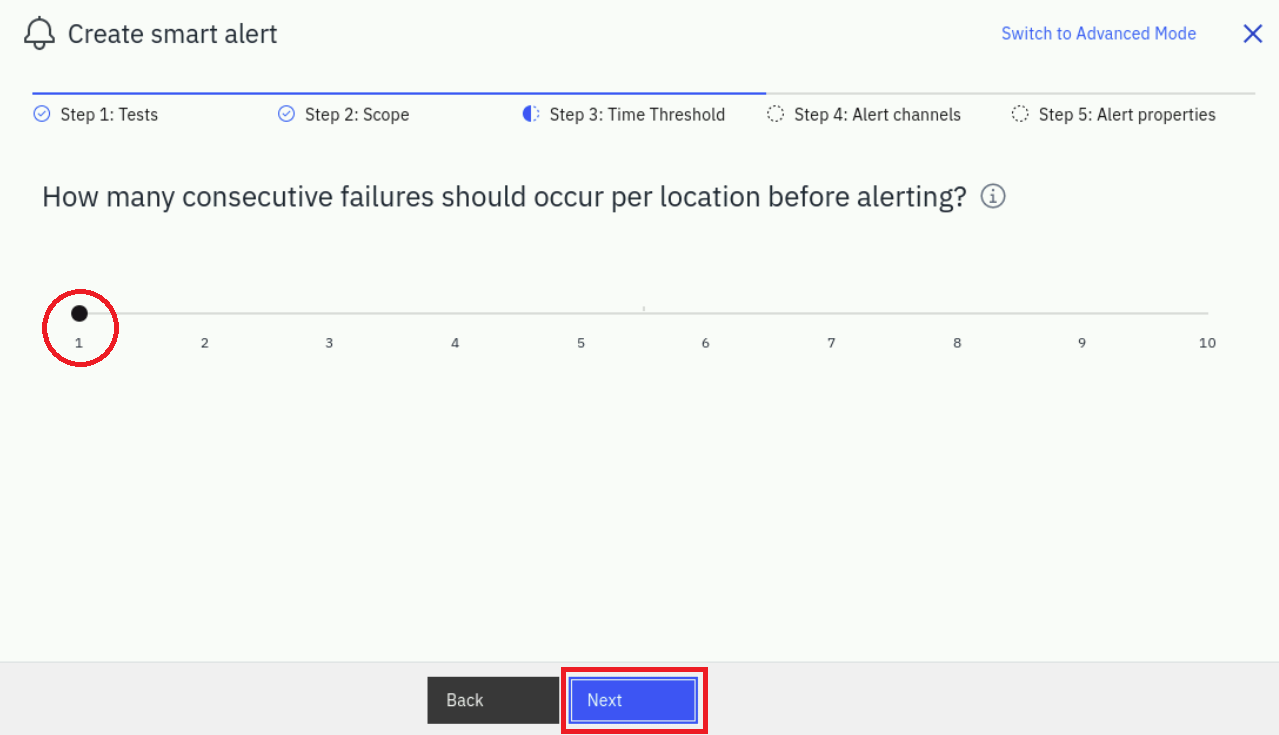
You may optionally add filters to scope what is being monitored. In this case, we will not be adding any filters, so click Next to go to the Step 3: Time Threshold section of the dialog.
We choose 1 consecutive occurrence to fire an alert, then click Next to go to Step 4: Alert channels:
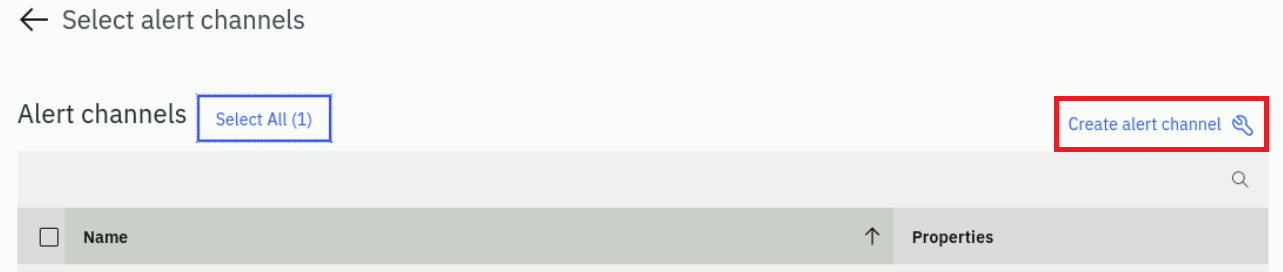
On this step, we will be selecting an Alert Channel. These allow you to notify people and teams through various channels such as email, slack, ServiceNow, etc.
Click the "Select alert channels" link, then in the new dialog section that appears, click the Create alert channel link :

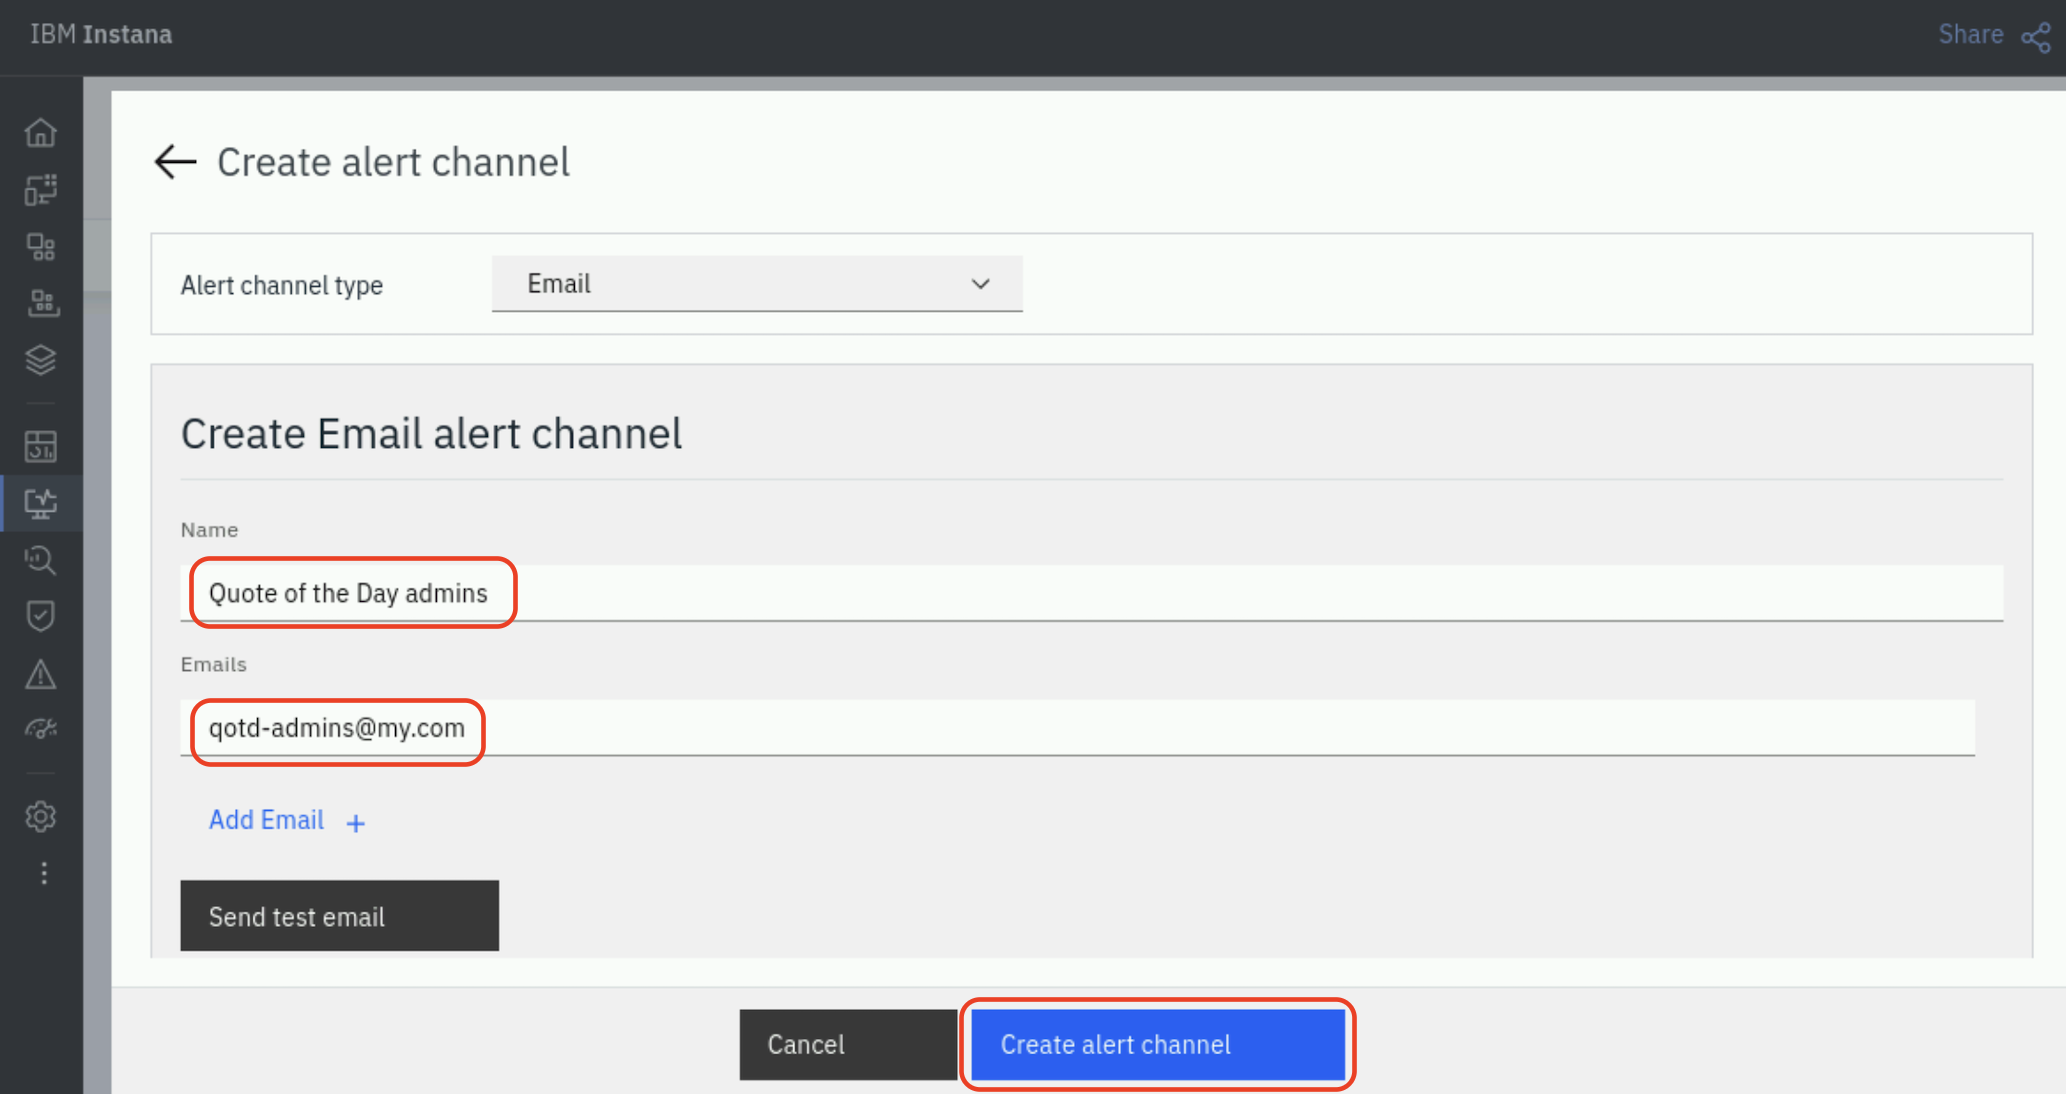
Now, populate the alert channel details as below:
- Alert channel type:
Email - Name:
Quote of the Day admins - Emails:
qotd-admins@my.com:- Note: We will not send emails to real addresses in this lab, so just populate the field with any email address.
Click the Create Alert Channel button to create the new channel:
Now, select the newly created channel and click the Add 1 Channel button:
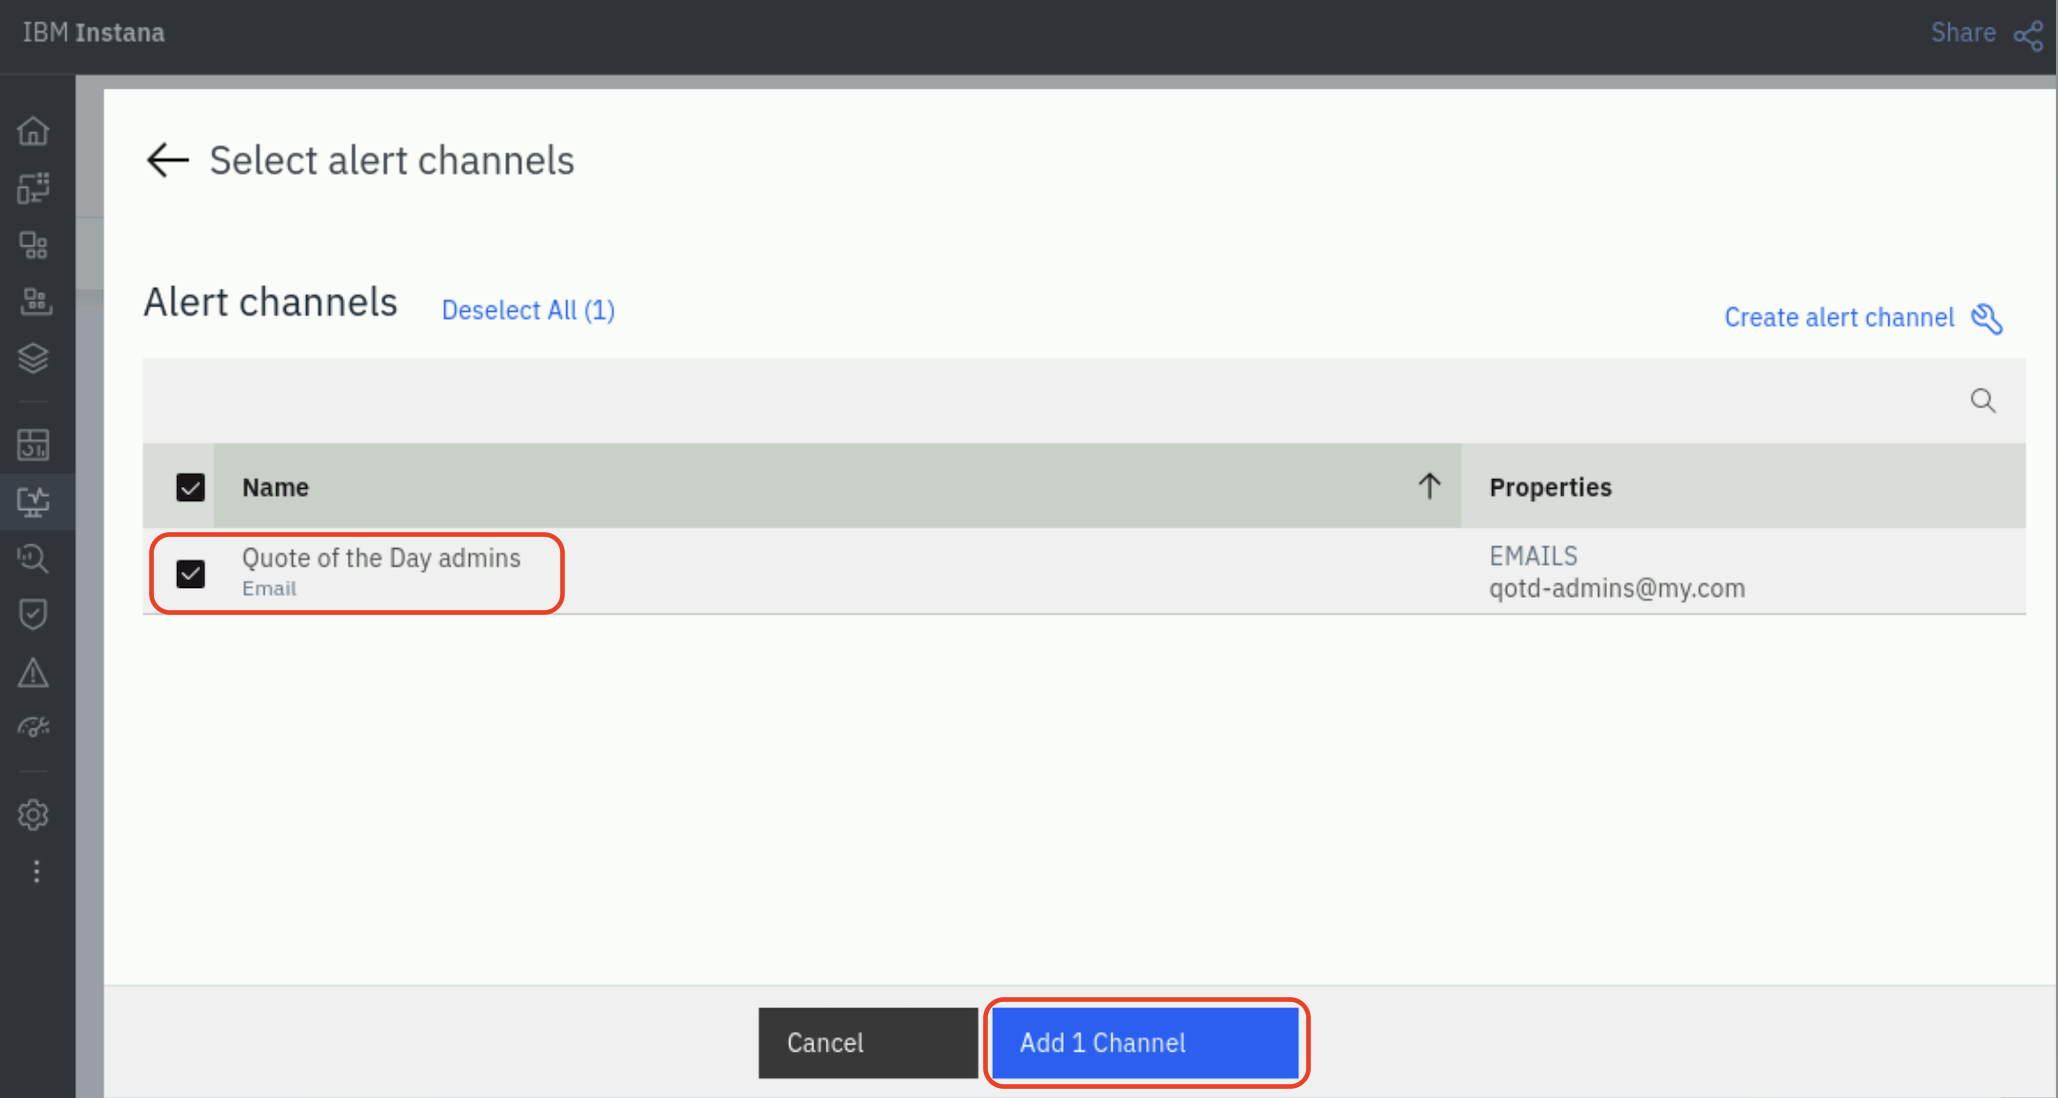
You may miss the selected Item in the table, just ensure that in the top of the table you see "Selected 1 channel".
Next, click the Next button to proceed to the Step 5: Alert properties section.
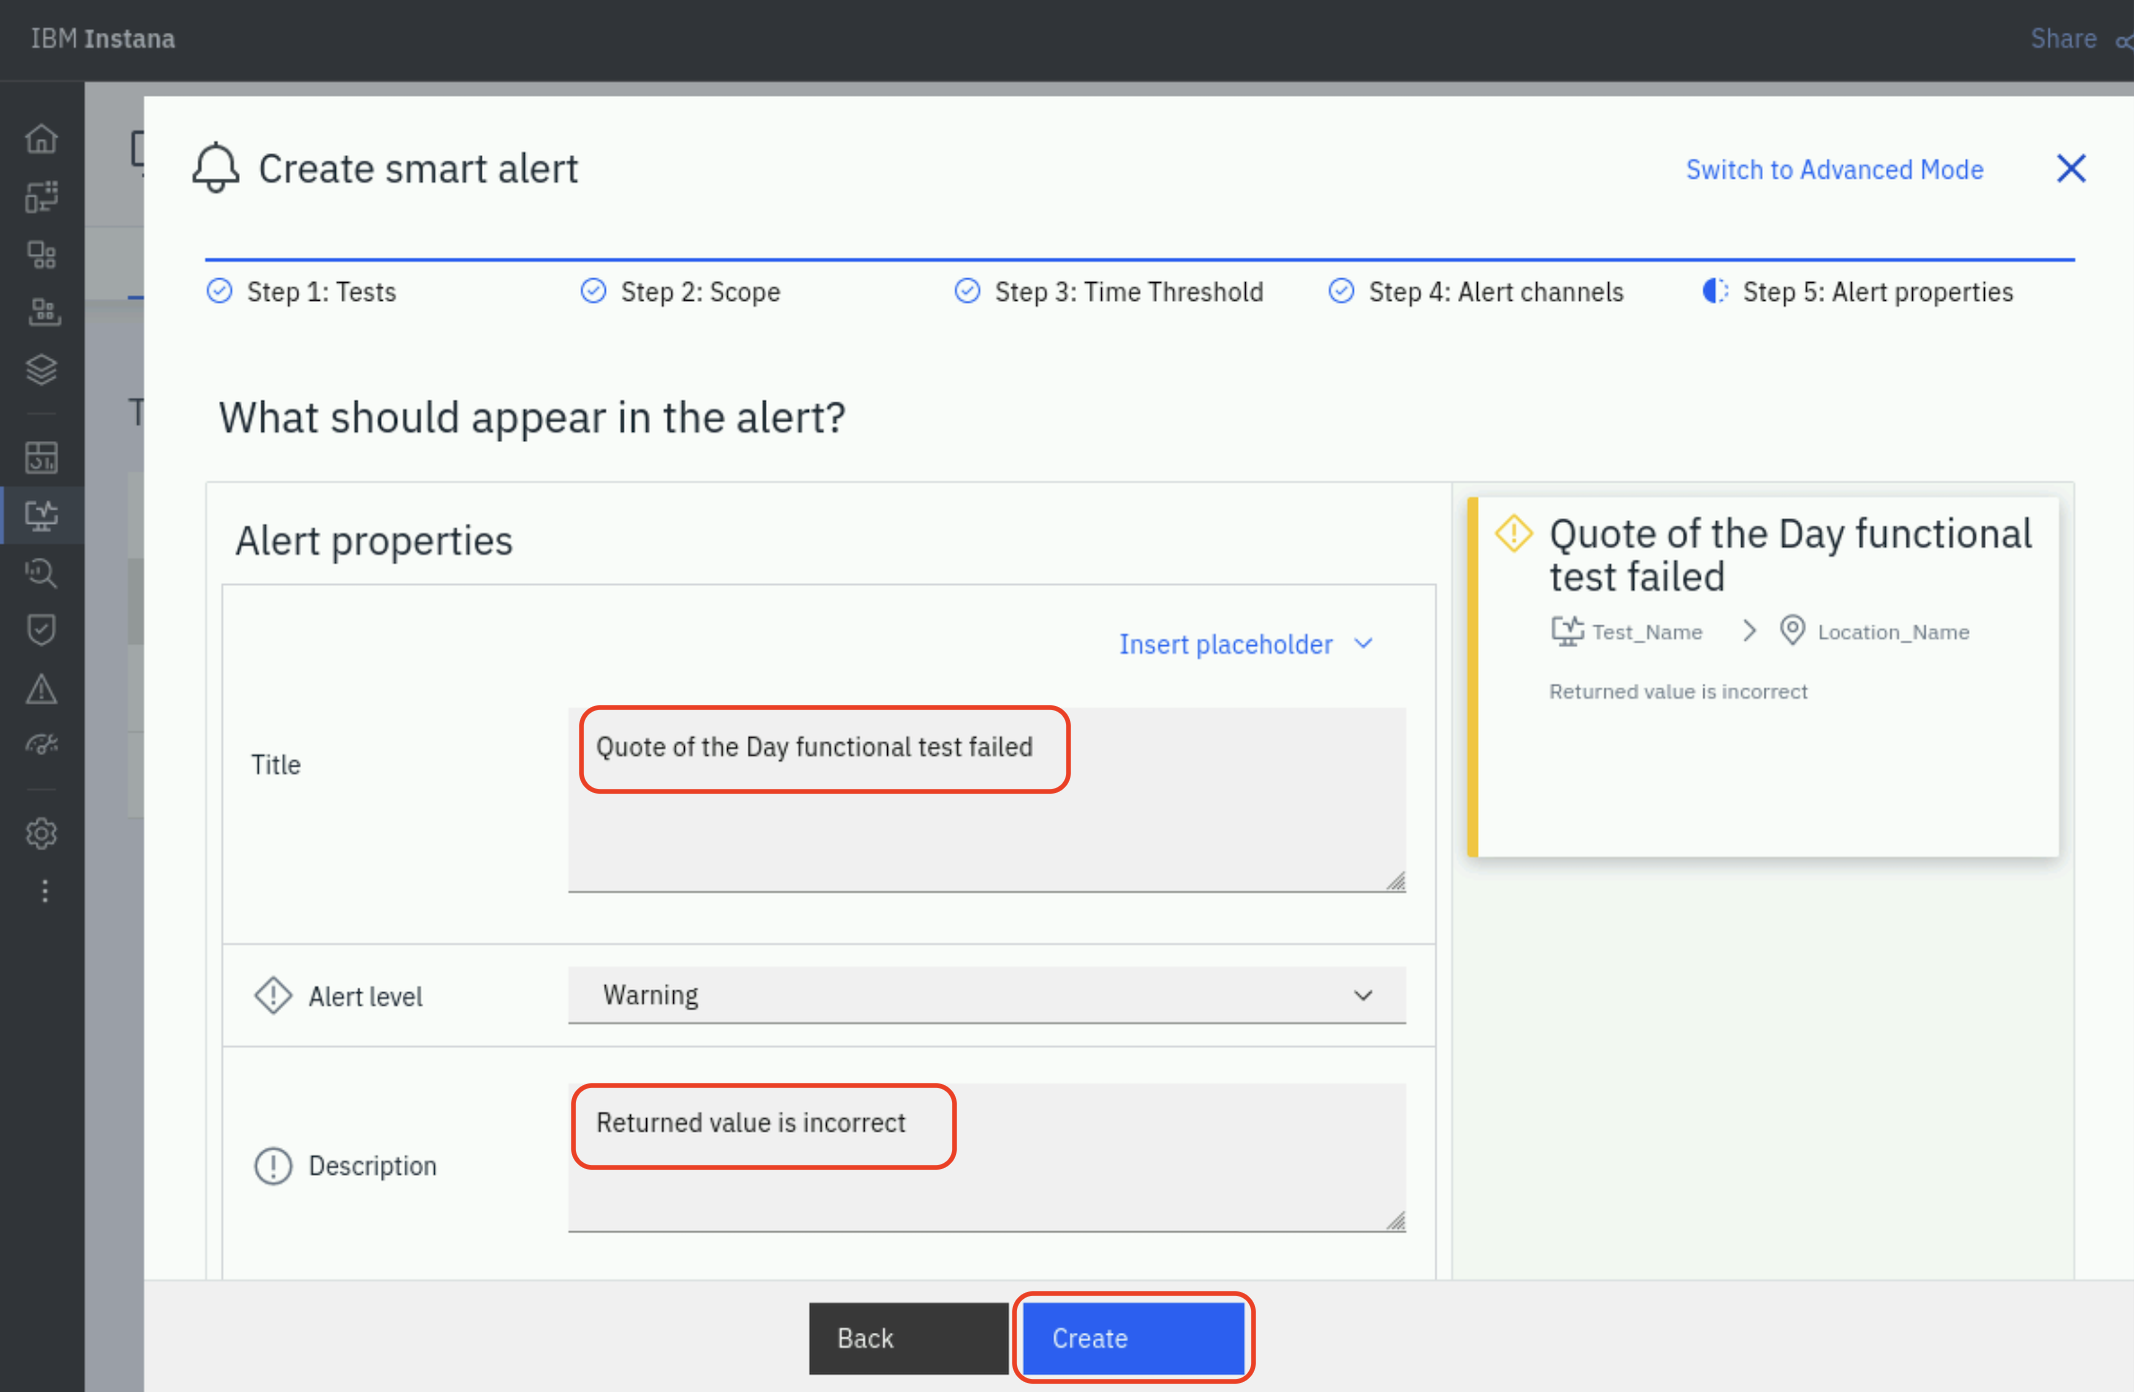
Configure the alert that will be visible when the threshold is violated. Set the following values:
- Title:
Quote of the Day functional test failed - Alert level:
Warning - Description:
Returned value is incorrect
Then click the Create button:
Now, back in the Synthetic Monitoring view, select the Smart Alerts tab to see the newly configured alert:
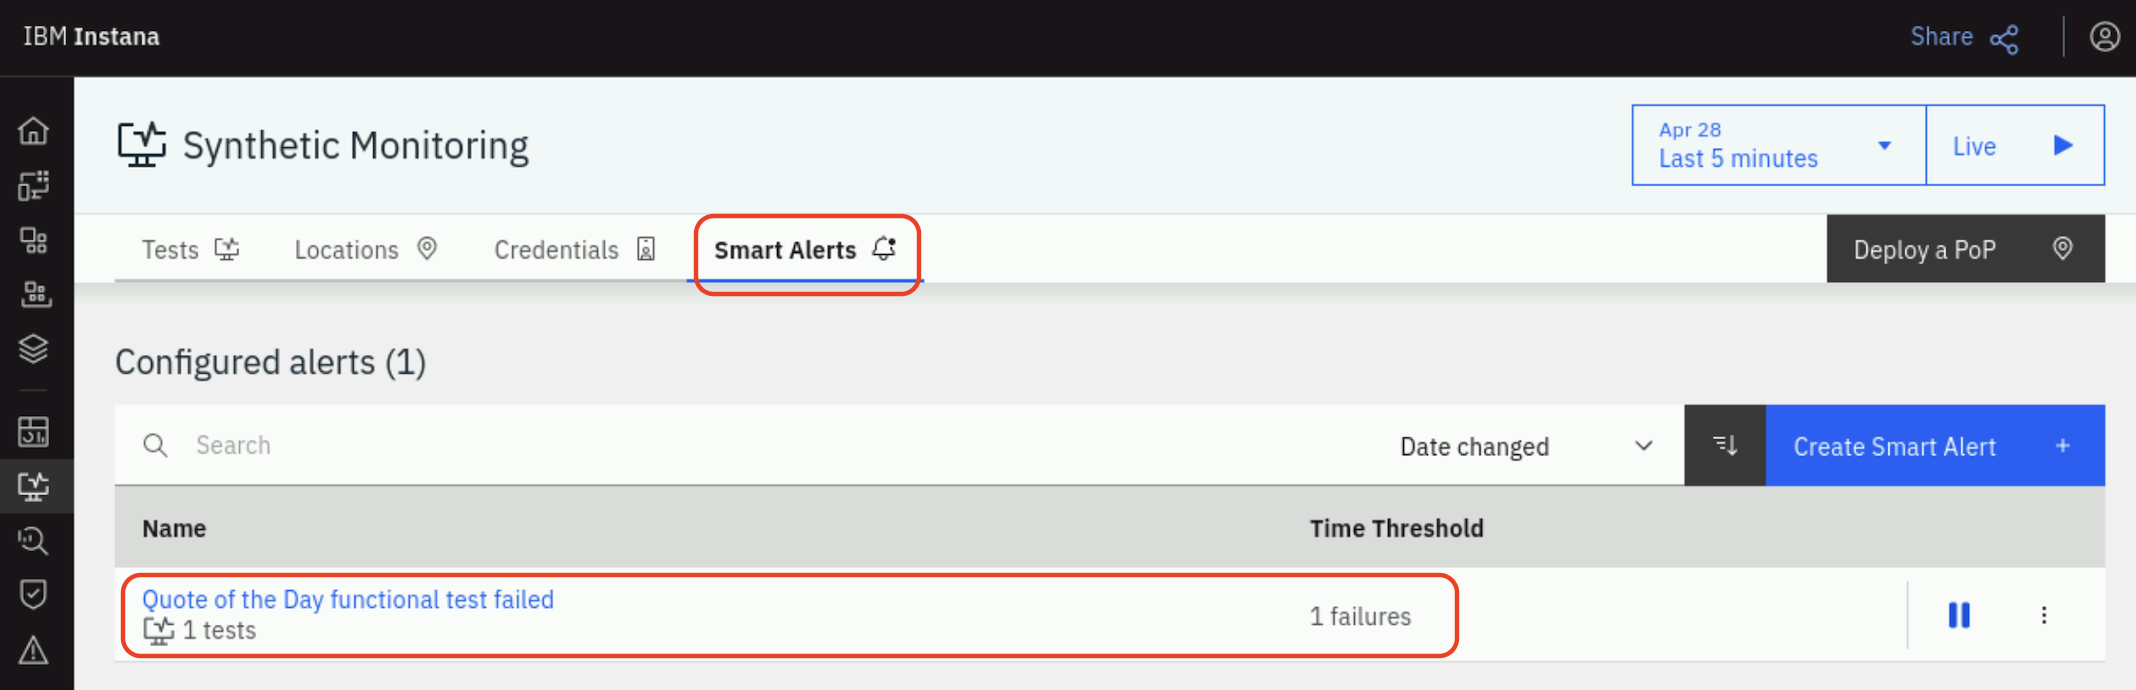
Try refreshing the page.
Next, navigate to the Events view and select the Issues tab to ensure that an event was generated:
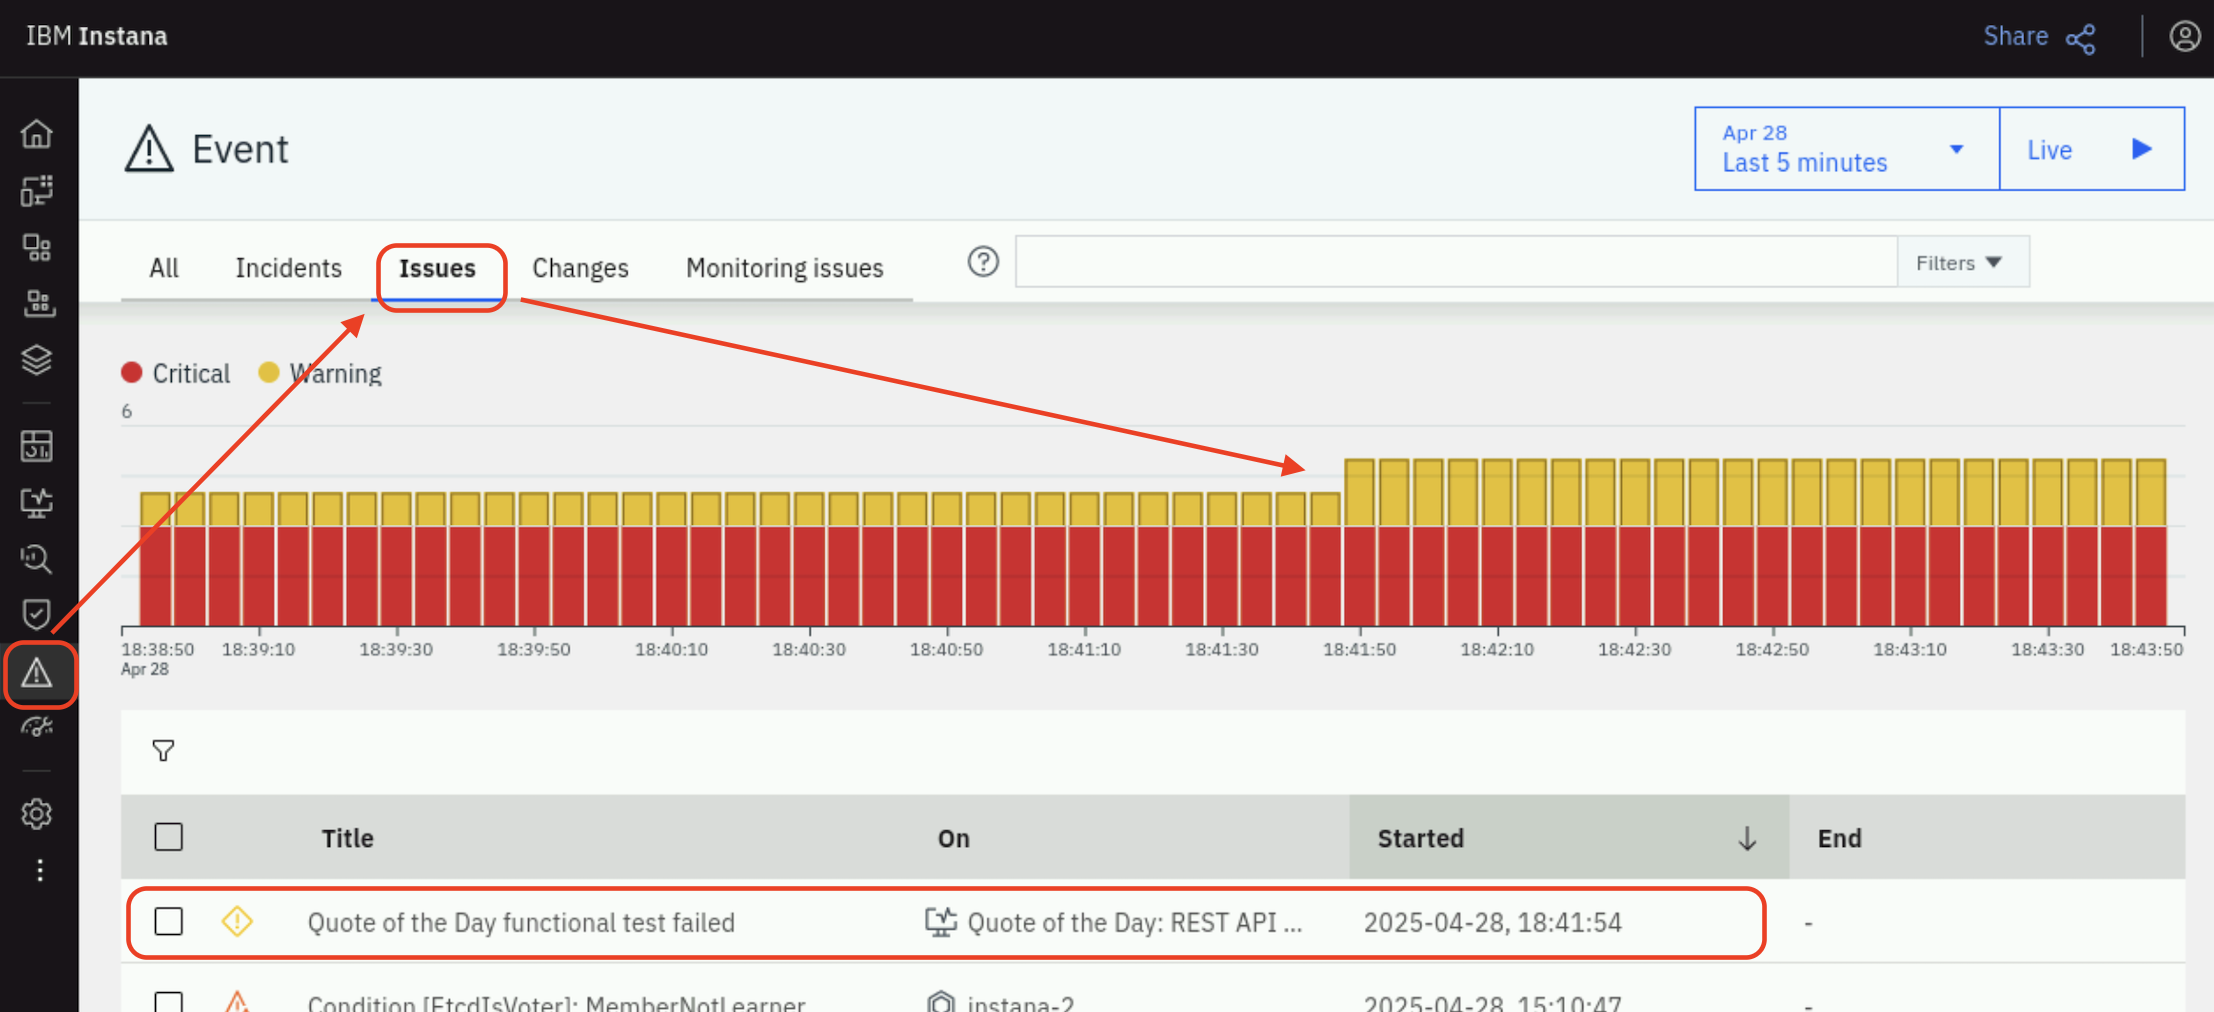
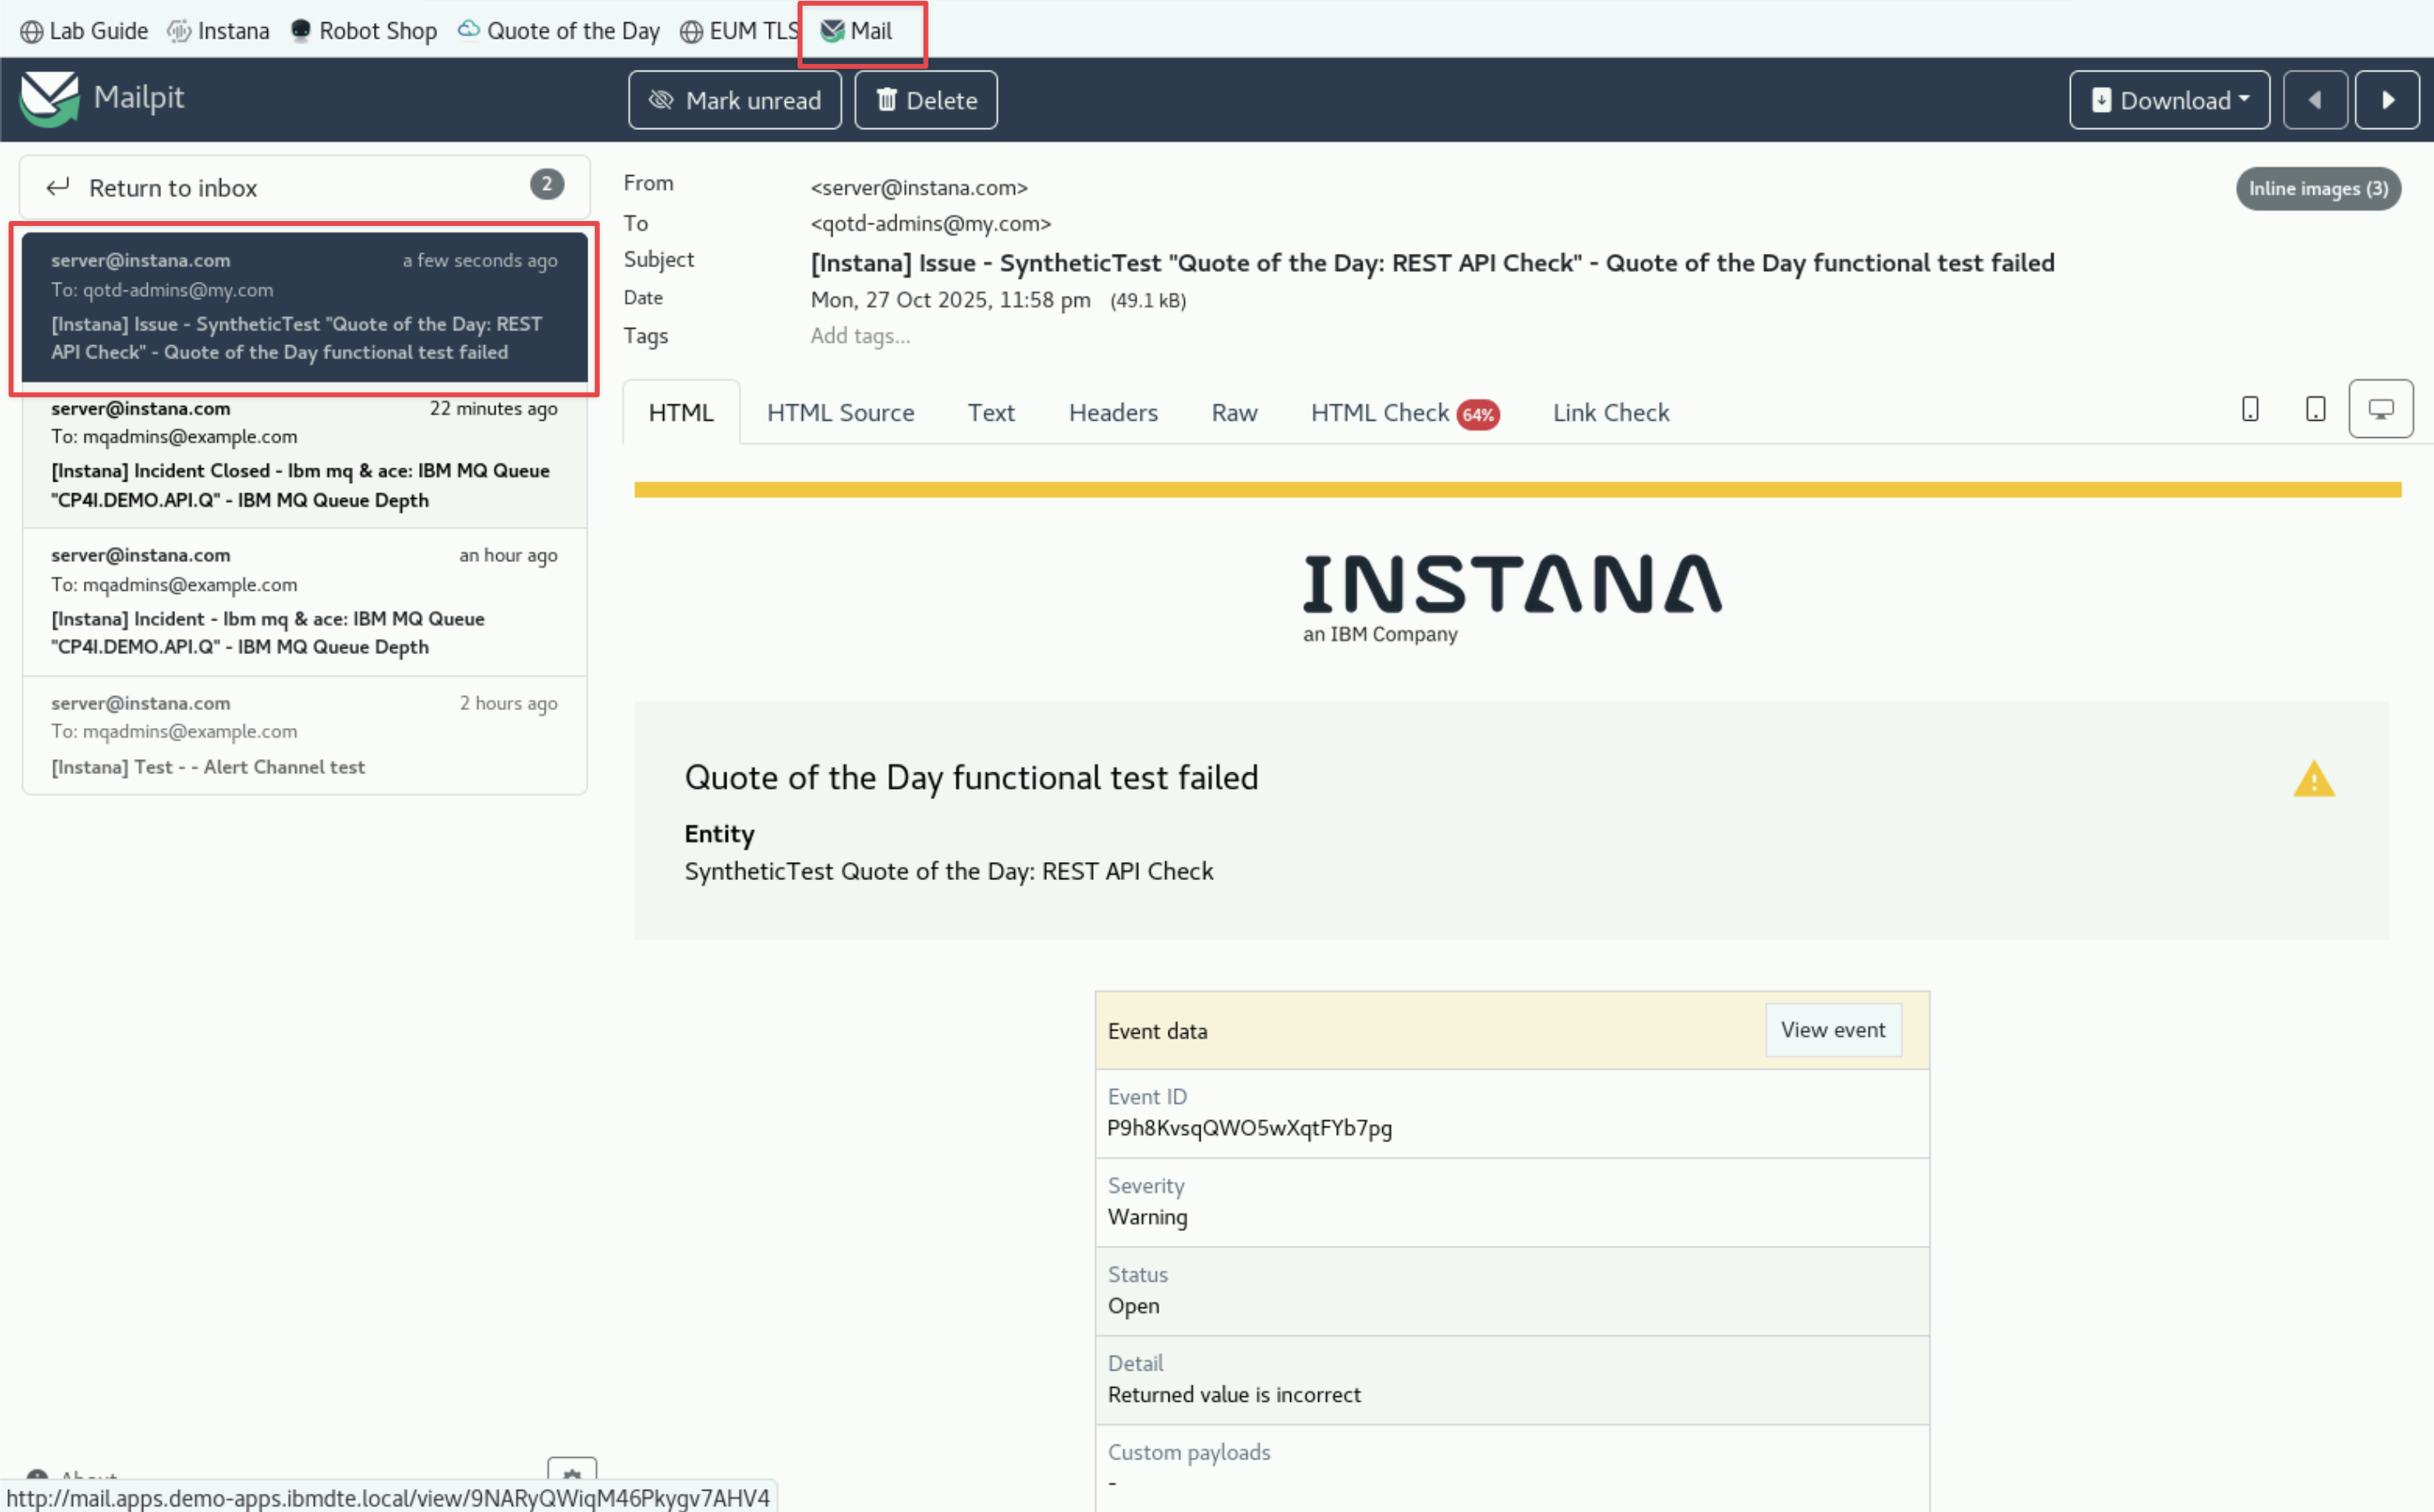
When new events trigger on the synthetic test, an email will be sent out via the Alert Channel notifying the recipients of the failure. Click on the event to investigate the details.
You can view the email Alert by navigating to the Mail bookmark in Firefox or by entering address in a browser: http://mail.apps.demo-apps.ibmdte.local/
3.7 Summary
During this lab we have:
- Enabled the Synthetic feature that allows the Instana backend to receive and display synthetic test results.
- Installed a Synthetic Point Of Presence that executes tests and report results to the Instana Backend.
- Created a TLS certificate expiration test.
- Created a simple synthetic test using a REST
GETcall that checks if we receive a200response status code. - Created a complex synthetic test that uses JavaScript to exercise two REST calls and perform an evaluation on the response.
- Configured a Smart Alert for a synthetic test to report issues in the Instana Events dashboard and send notifications to admins via email.