Turbonomic Server Installation
3.1: Introduction
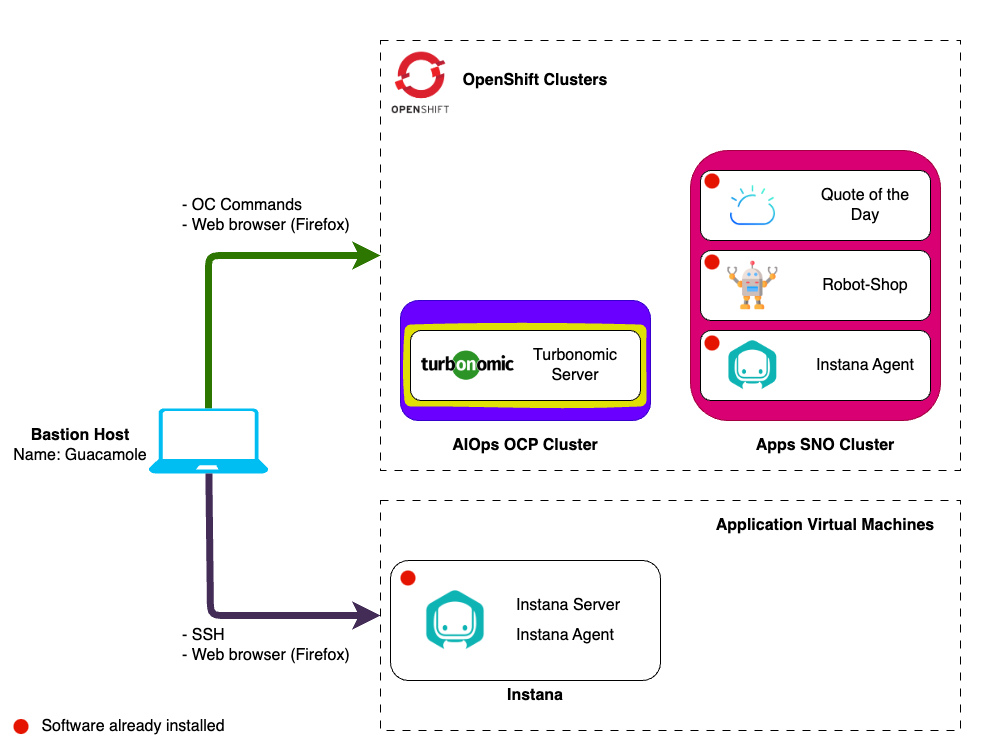
In this lab you will be installing the Turbonomic Platform (highlighted in yellow) on your AIOps OpenShift cluster.
The t8c-install repository contains information about installation methods, sizing, architecture and more.
The instructions in this lab are a streamlined and contextual version of the information from the above repository, designed to get up and running quickly and build out a lab or demo environment in OpenShift.
3.2: Prerequisites
If you are unsure how to get access to the Bastion host (Guacamole) see Accessing a Lab Environment
From the Bastion host (Guacamole), open a terminal window by selecting Activities at the top left of the screen and then the terminal icon.
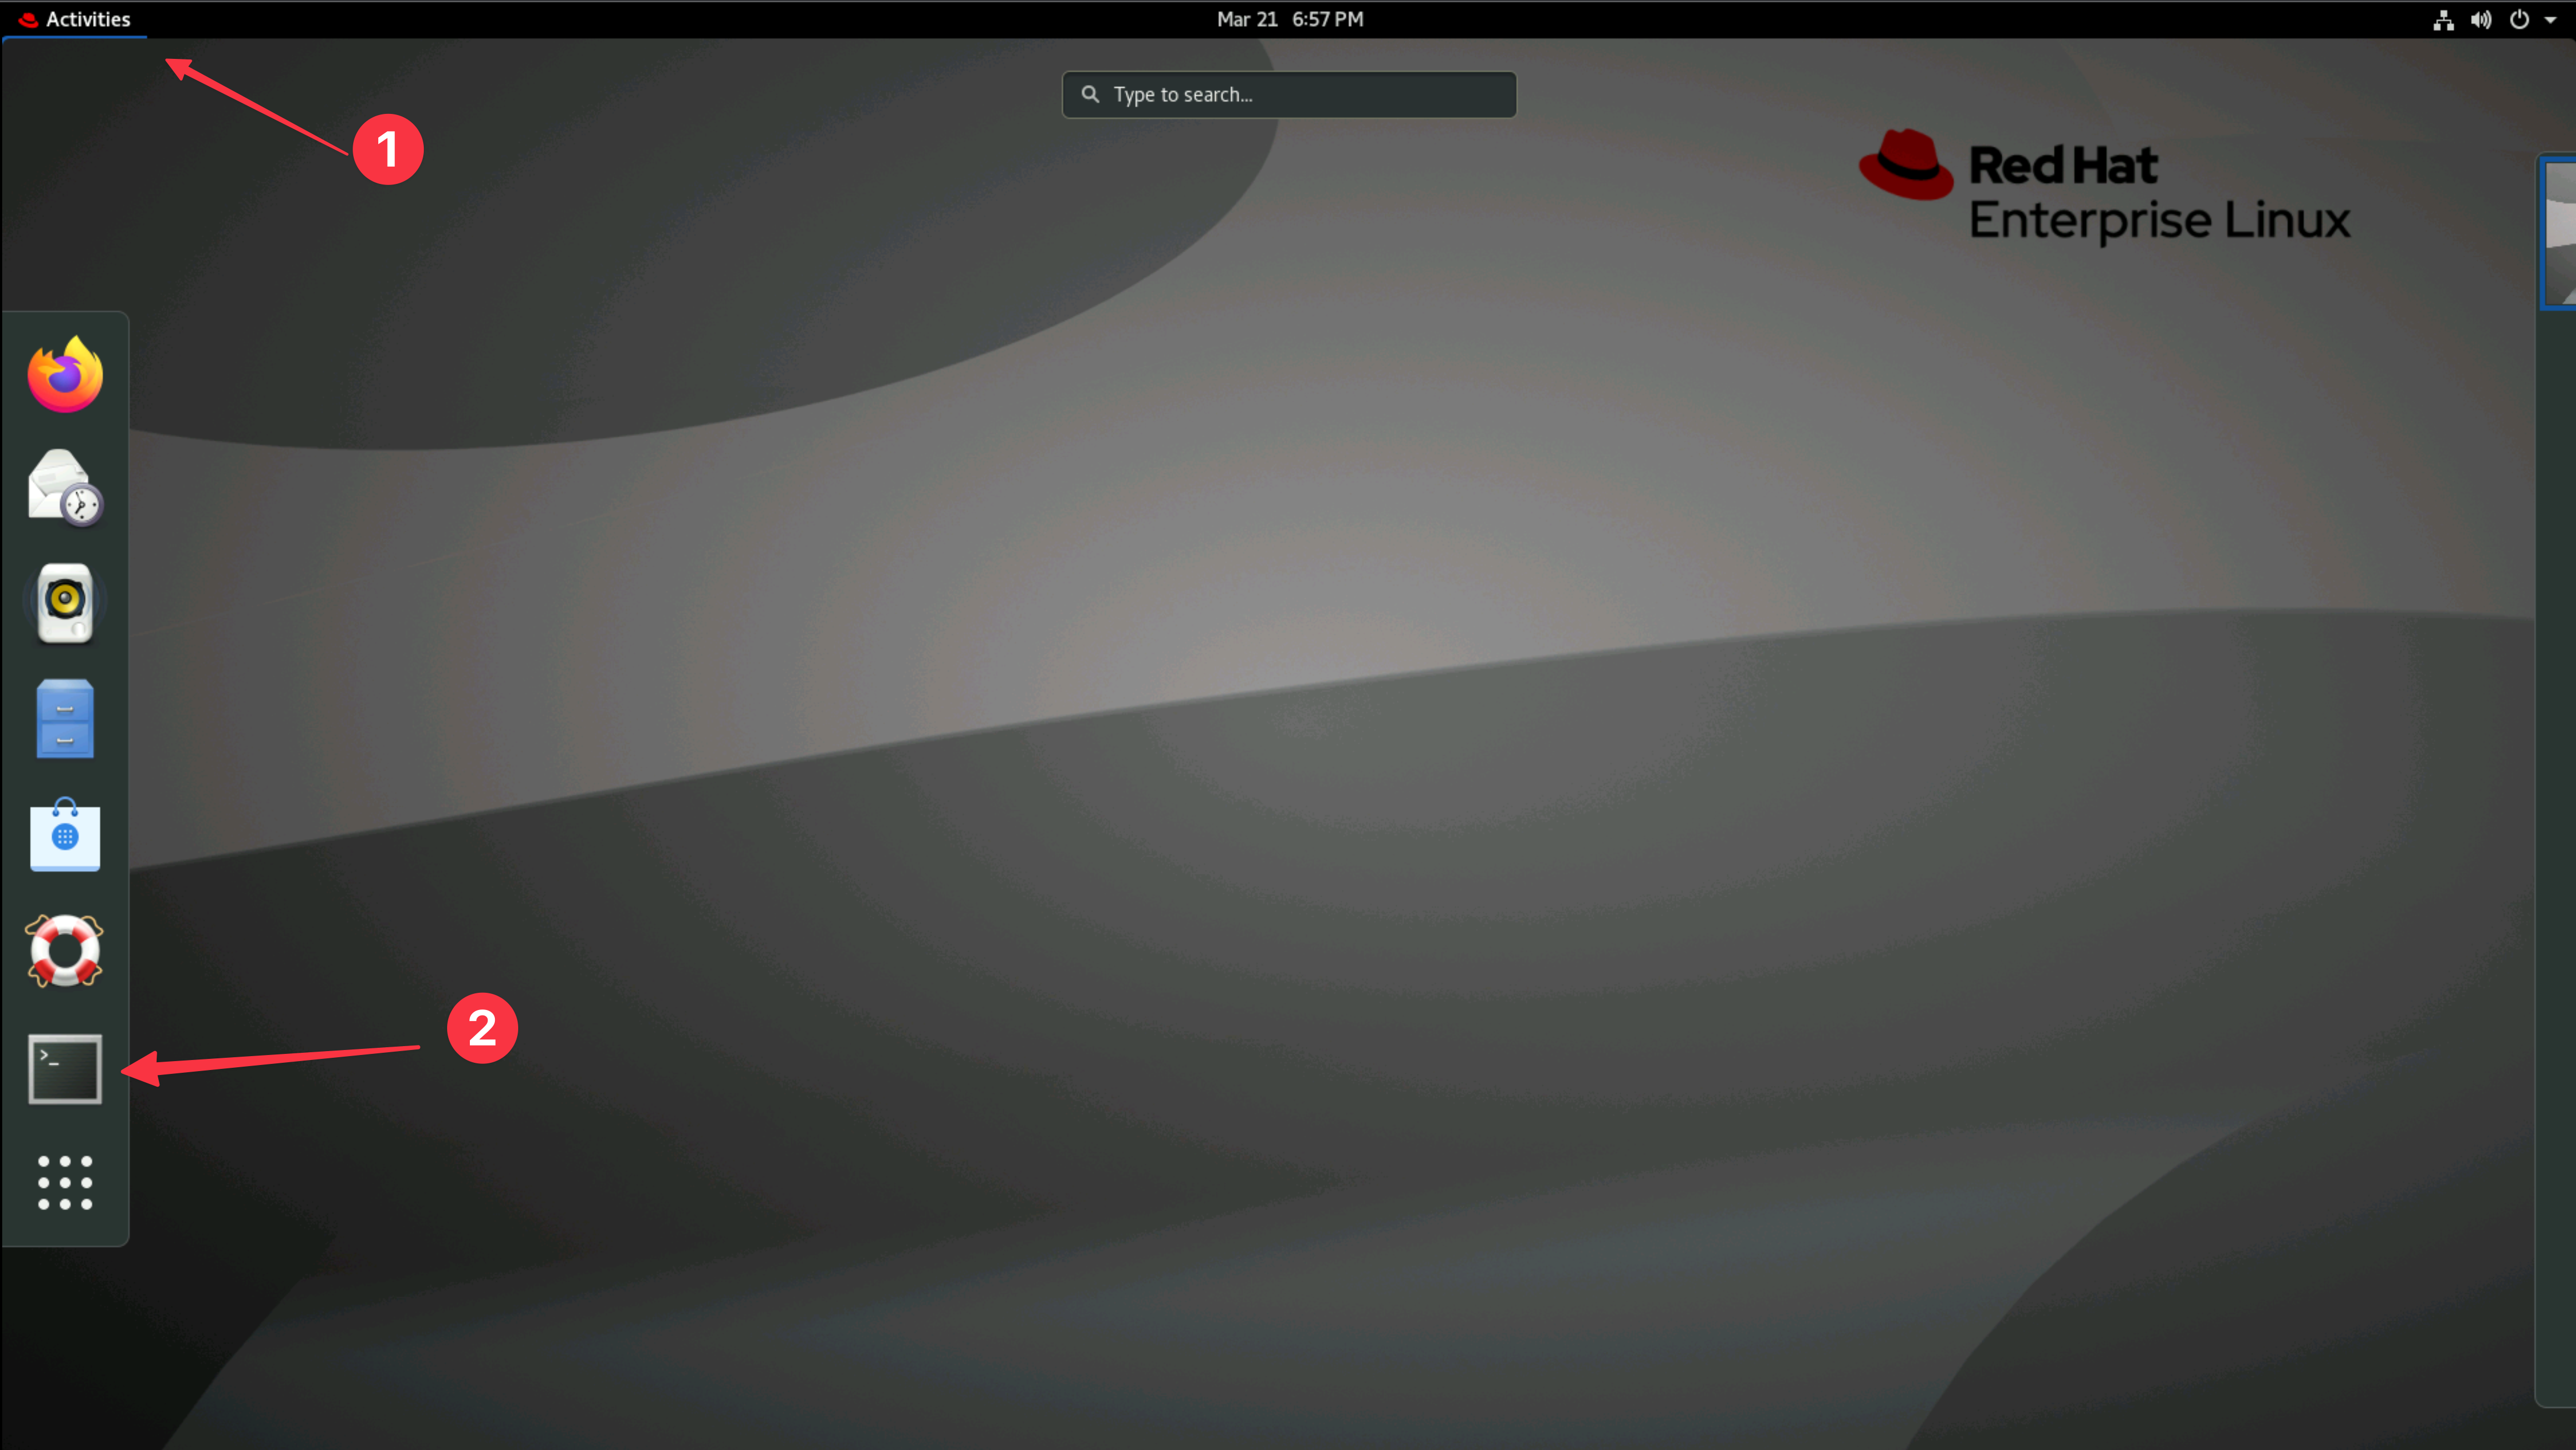
This installation procedure will be completed from the bastion host (Guacamole)
as the admin user. Ensure your prompt in the terminal looks something like
admin@bastion-gym-lan. If you are unsure you can open a new terminal tab or
terminal window.
The instructions in this guide use environment variables so it is important that you use the same terminal prompt for the duration of the guide.
-
Run the following commands to check you are in the right place:
cd ~
export KUBECONFIG=kubeconfig-aiops
oc get nodes --kubeconfig kubeconfig-aiops
You should see output like the below with multiple master and worker nodes which indicates that you are connecting to the AIOps OpenShift cluster.

-
From your command prompt, issue the following command to create the namespace:
export NS=turbonomic-platform
oc create namespace ${NS} --kubeconfig kubeconfig-aiops -
The Turbonomic application will create PVs. To have the services access their PVs, we will use the UID value of the
sa.scc.uid-rangeof the project:export FSGROUP=$(
oc get ns ${NS} -o yaml --kubeconfig kubeconfig-aiops | \
grep uid-range | \
awk '{print $2}' | \
awk -F '/' '{print $1}'
) -
Create the Custom Resource Definition (CRD) to allow Turbo operator to deploy all the necessary resources
tipThis is for Kubernetes version 1.22 and higher. When performing this step on another cluster you can check the Kubernetes version of OCP using the
oc versioncommand.oc create -f https://raw.githubusercontent.com/turbonomic/t8c-install/master/operator/config/crd/bases/charts.helm.k8s.io_xls.yaml --kubeconfig kubeconfig-aiops
You are now ready to deploy the operator
3.3: Deploy the Operator
-
Create the operator service account and cluster role and cluster role binding:
oc create -f https://raw.githubusercontent.com/turbonomic/t8c-install/master/operator/deploy/service_account.yaml -n ${NS} --kubeconfig kubeconfig-aiops
oc create -f https://raw.githubusercontent.com/turbonomic/t8c-install/master/operator/deploy/cluster_role.yaml -n ${NS} --kubeconfig kubeconfig-aiops -
Create the cluster role binding:
cat << EOF | oc -n ${NS} --kubeconfig kubeconfig-aiops apply -f -
kind: ClusterRoleBinding
apiVersion: rbac.authorization.k8s.io/v1
metadata:
  name: t8c-operator
subjects:
  - kind: ServiceAccount
    name: t8c-operator
    namespace: turbonomic-platform
roleRef:
  kind: ClusterRole
  name: t8c-operator
  apiGroup: rbac.authorization.k8s.io
EOF -
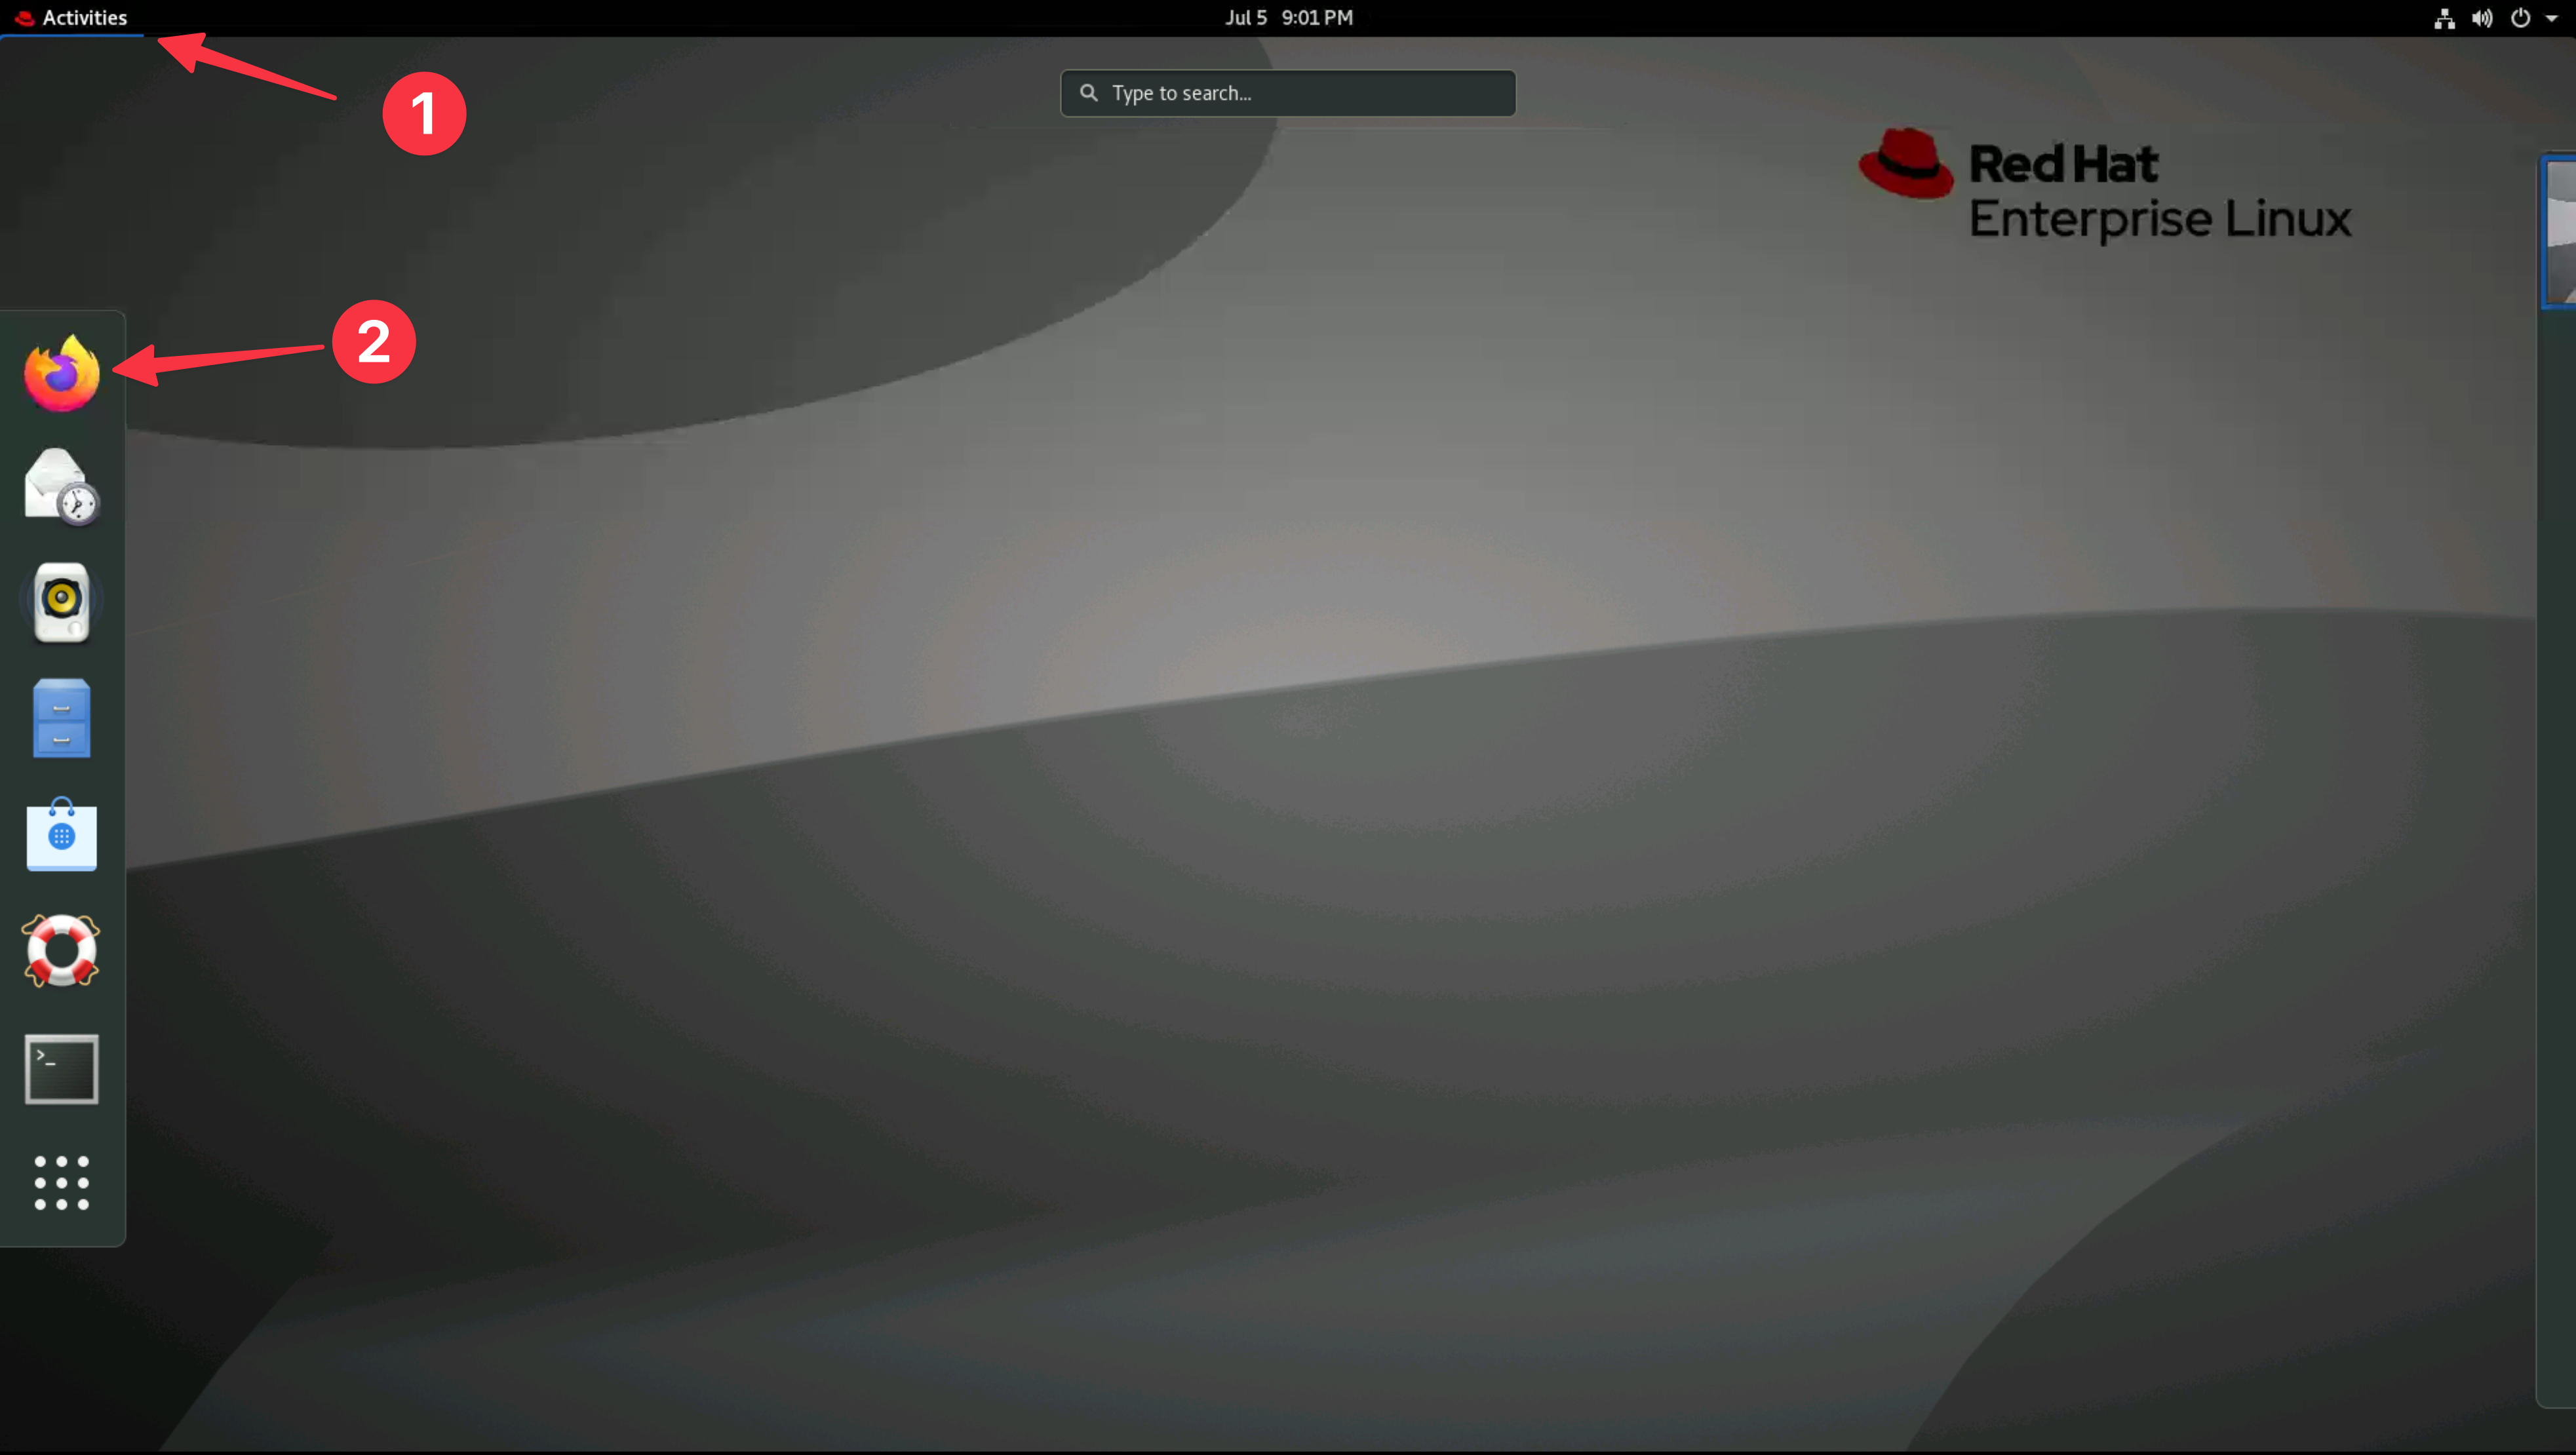
Open a Firefox browser window
-
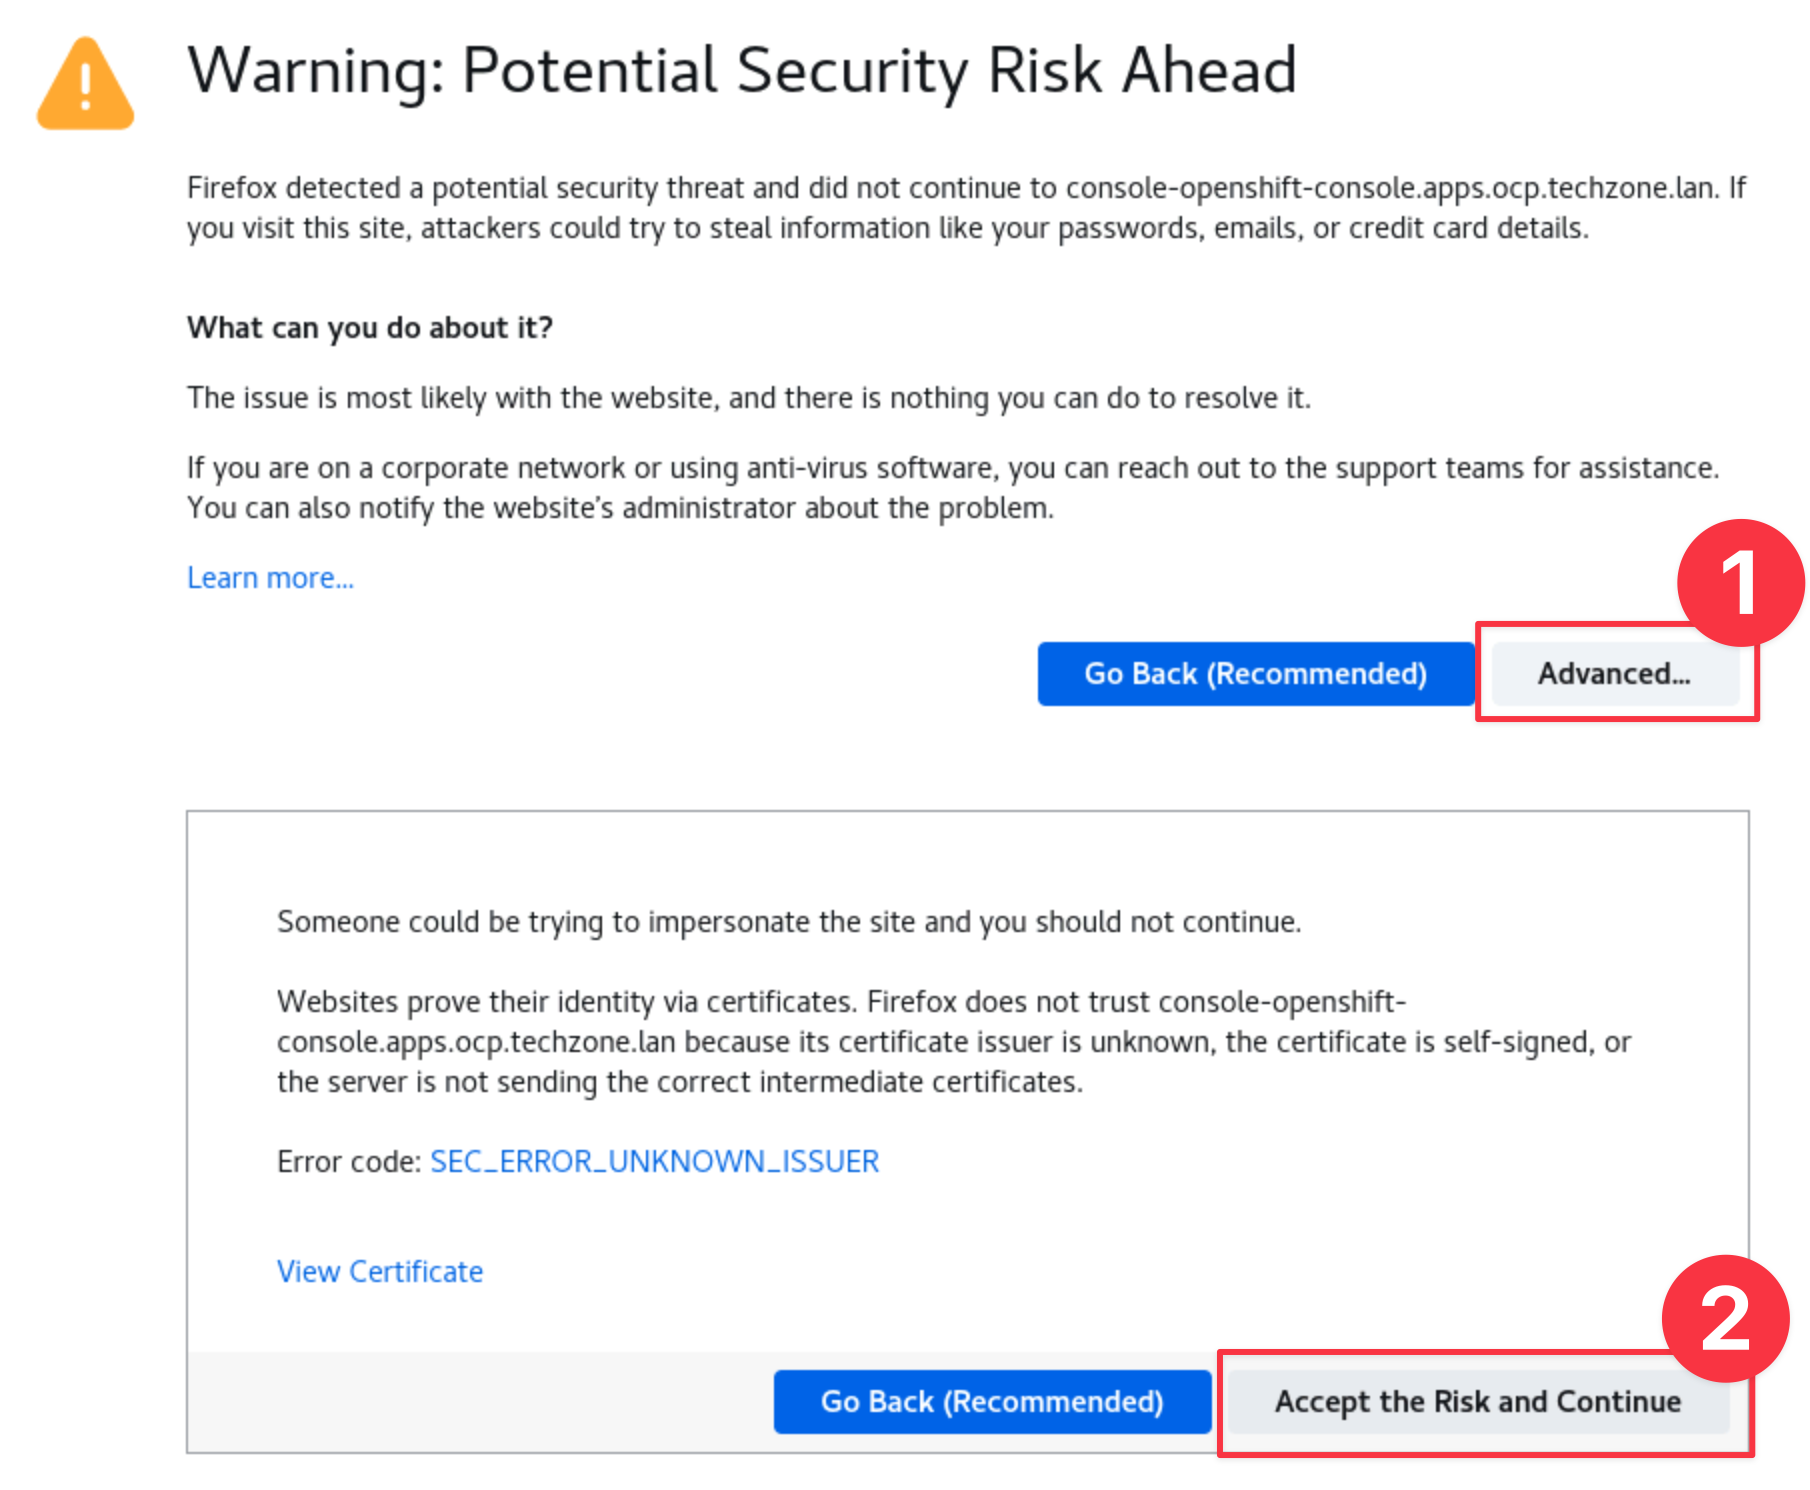
Use the Firefox Bookmark OCP Dashboard to open your OpenShift AIOps OCP Console.
infoYou can safely ignore the warning about the certificate being untrusted.
-
Login to the OCP Console using the credentials provided in IBM Tech Zone.
- Username: kubeadmin
- Password: The value of "OCP Cluster Admin Password" from your IBM Tech Zone reservations or the environment ready email you received from IBM Tech Zone.
-
Launch the operator pod:
Click on
Operators -> OperatorHub. Ensure theturbonomic-platformproject is selected in the dropdown. Search forturbonomic platformand select the Certified operator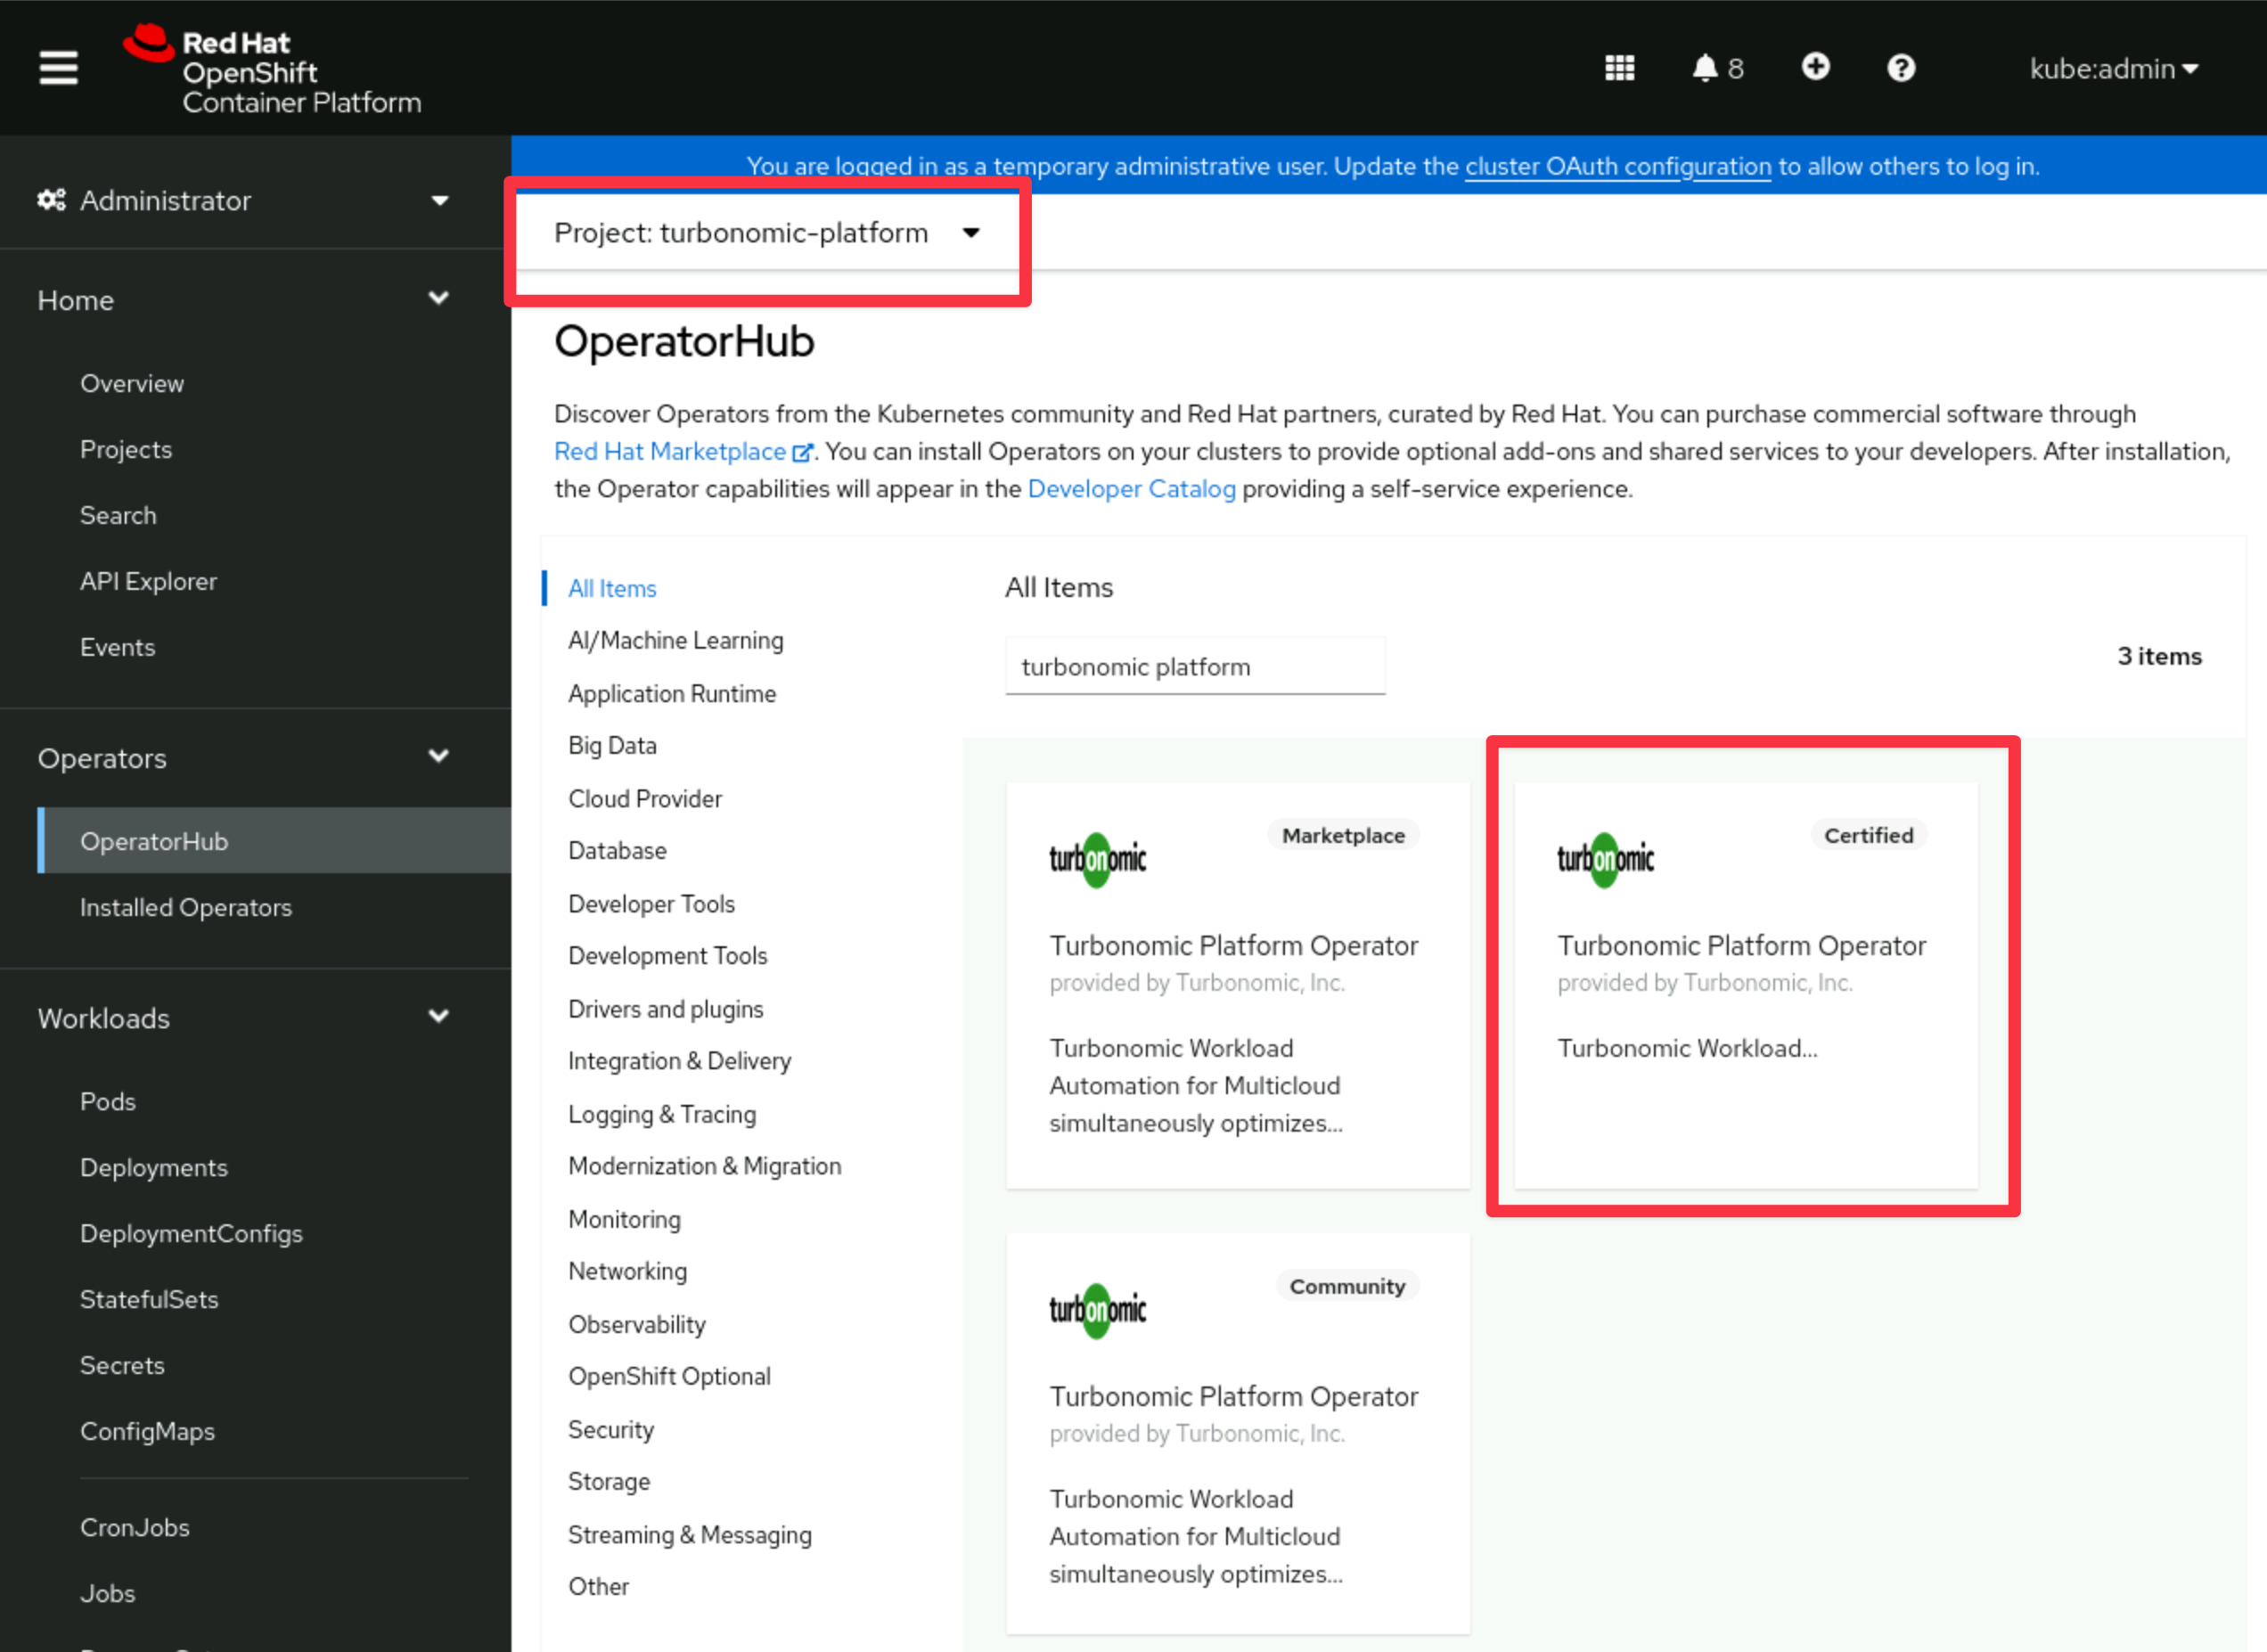
-
Select and click on the
Installbutton: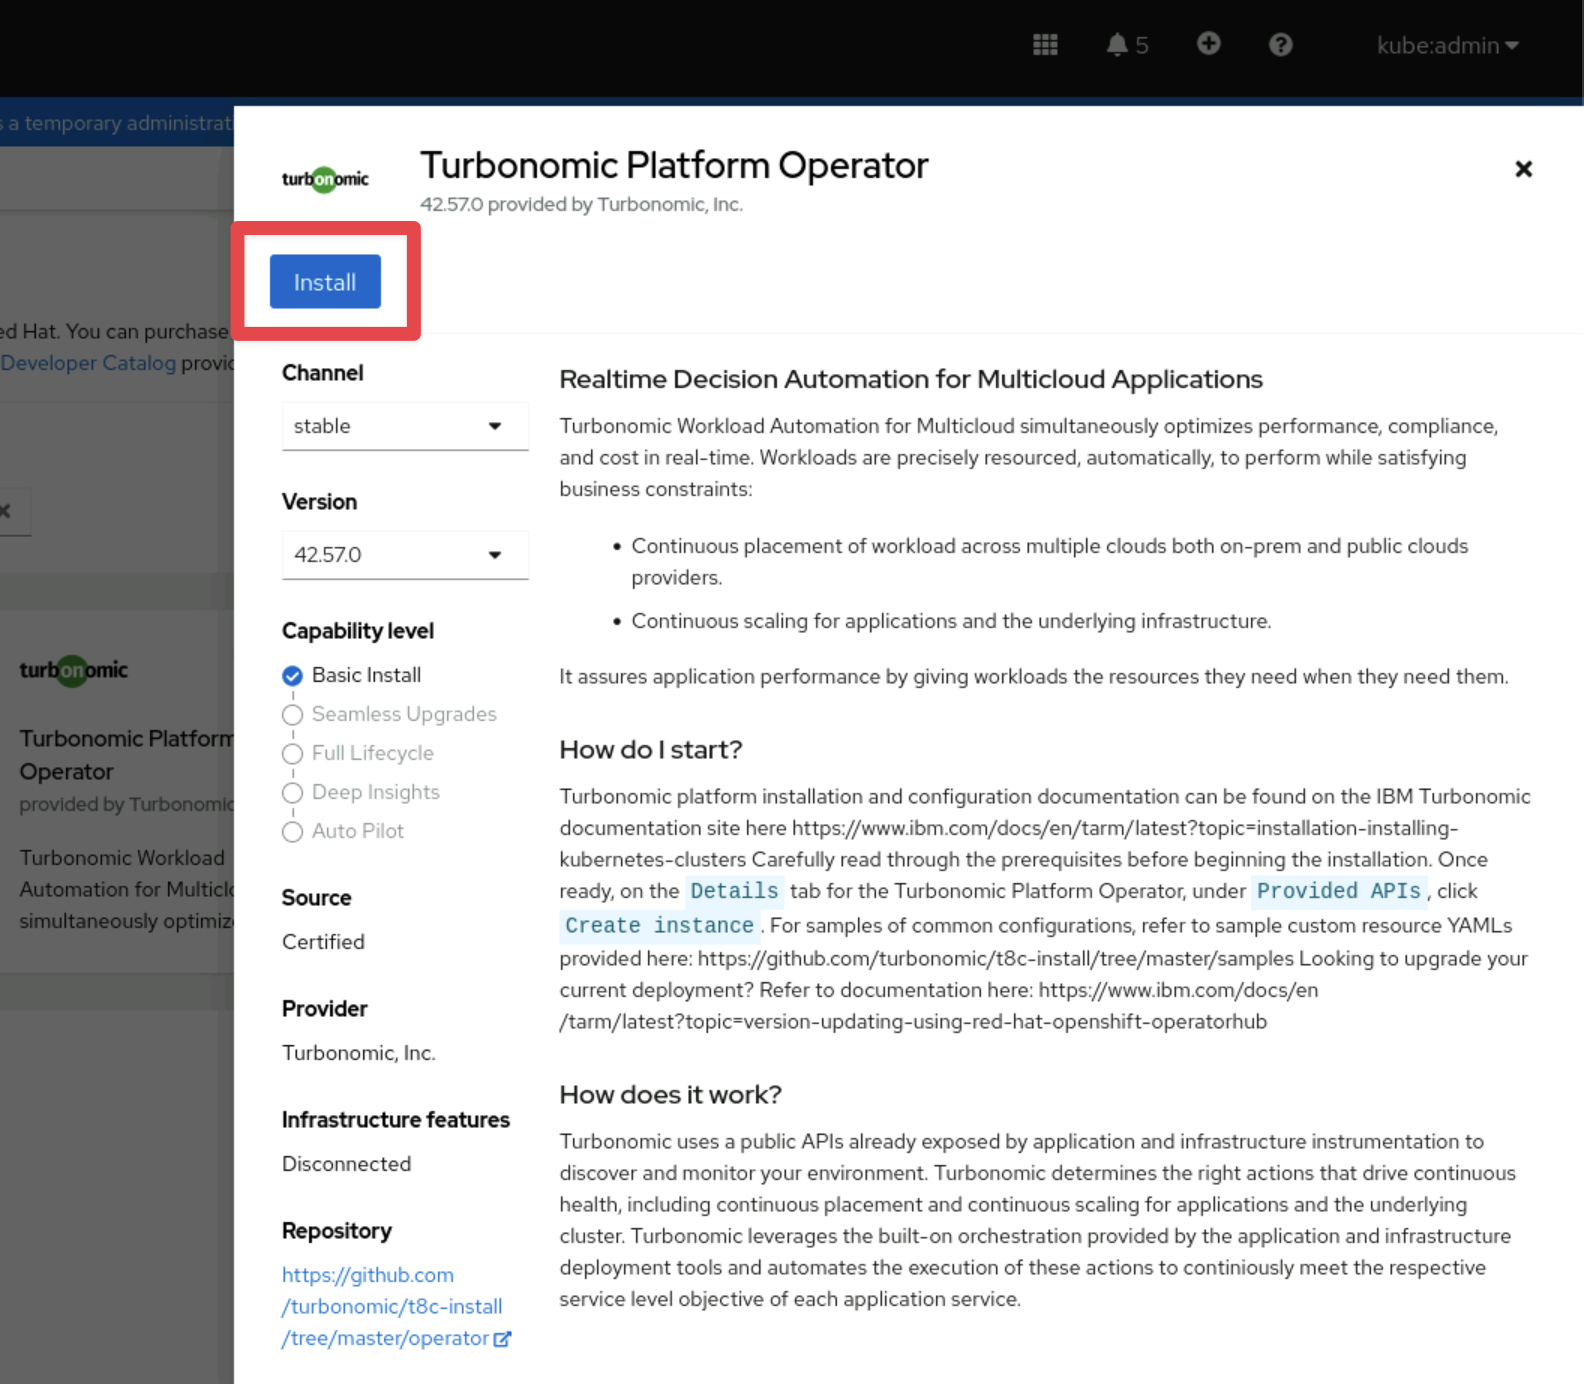
-
Select options as below:
- Ensure Installed Namespace is set to turbonomic-platform
- Click Install.
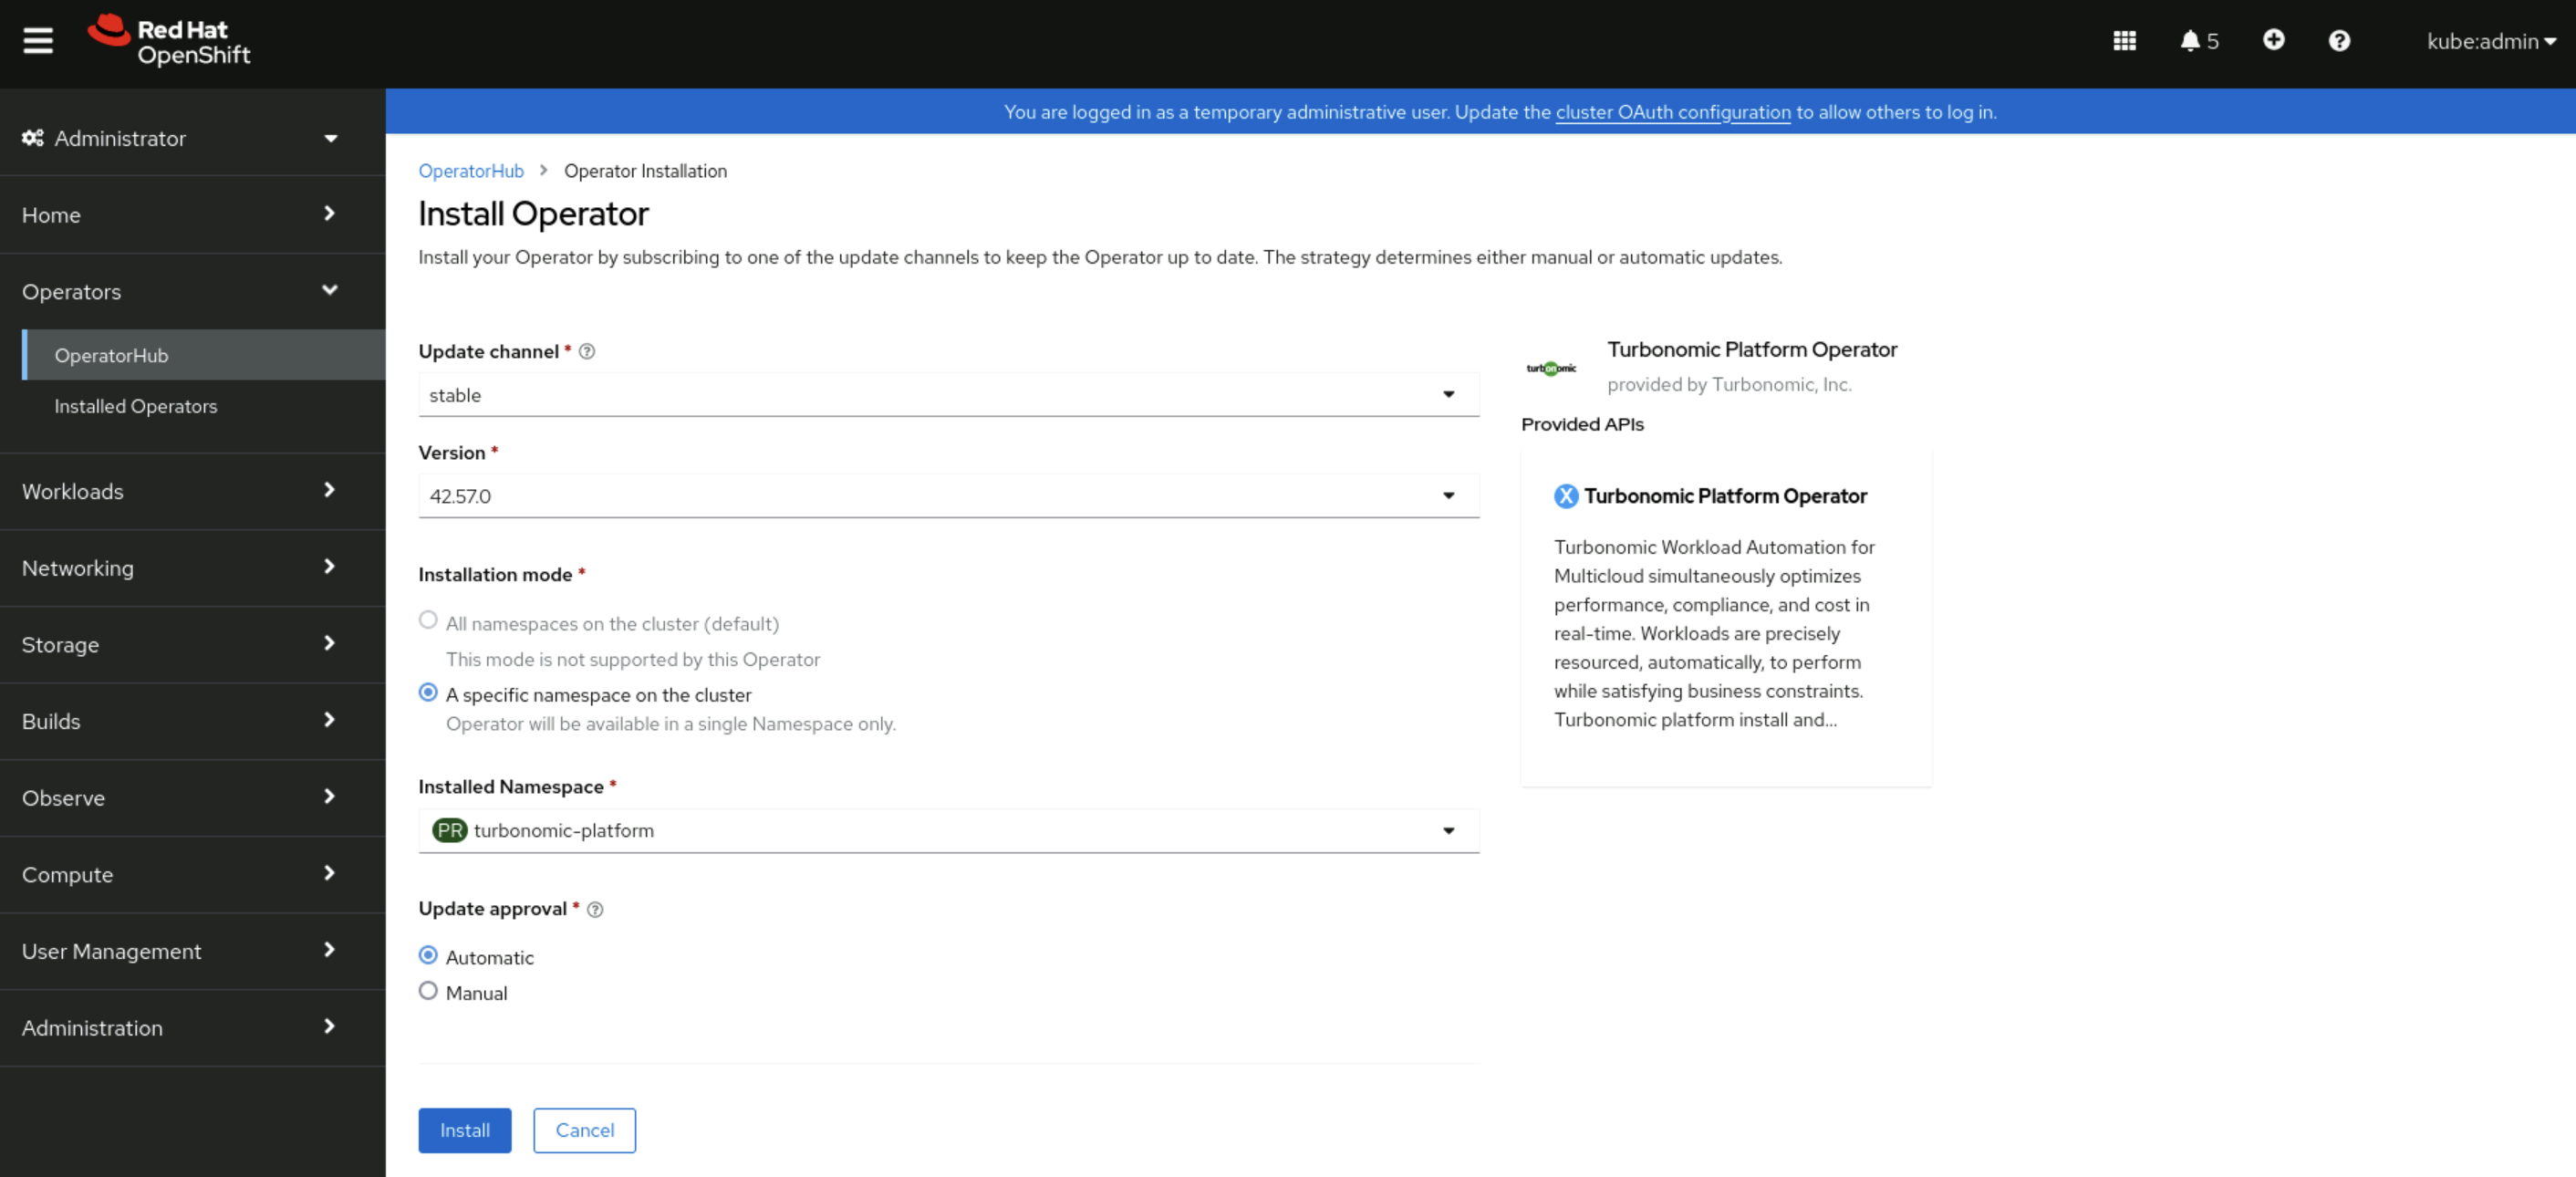
- Ensure Installed Namespace is set to turbonomic-platform
-
Wait for the operator to become available (status = running with 1/1 ready). Check the status by running the following command in the Terminal:
oc get pods -n ${NS} -w --kubeconfig kubeconfig-aiopsExample output:
NAME                           READY   STATUS    RESTARTS   AGE
t8c-operator-fdd8b8c94-dhrt4 1/1 Running 0 72stipType
Ctrl-Cto exit the watch loop once you see Running.
3.4: Configure the Turbonomic Instance: Custom Resource
-
Set the Storage Class by running the following in the Terminal:
infoYou can view your available storage classes using
oc get storageclass.The Tech Zone environment has already configured a class called ocs-storagecluster-ceph-rbd that we will be using.
export TURBONOMIC_REPOSITORY=icr.io/cpopen/turbonomic
export TURBONOMIC_TAG=8.11.4
export STORAGE_CLASS=ocs-storagecluster-ceph-rbd -
Ensure you have values set for the following environment variables:
echo ${NS} && \
echo ${FSGROUP} && \
echo ${TURBONOMIC_REPOSITORY} && \
echo ${TURBONOMIC_TAG} && \
echo ${STORAGE_CLASS}
The output should look like this (the FSGROUP value will likely be different):
turbonomic-platform
1000680000
icr.io/cpopen/turbonomic
8.11.4
ocs-storagecluster-ceph-rbd -
Apply a custom resource file to launch Turbonomic:
cat << EOF | oc -n ${NS} --kubeconfig kubeconfig-aiops apply -f -
apiVersion: charts.helm.k8s.io/v1
kind: Xl
metadata:
  name: xl-release
  namespace: ${NS}
spec:
  global:
    customImageNames: false
    repository: ${TURBONOMIC_REPOSITORY}
    securityContext:
      fsGroup: ${FSGROUP}
    storageClassName: ${STORAGE_CLASS}
    storageSelector: false
    tag: ${TURBONOMIC_TAG}
  openshiftingress:
    enabled: true
  kubeturbo:
    enabled: true
  nginx:
    httpsRedirect: false
    nginxIsPrimaryIngress: false
  nginxingress:
    enabled: false
  instana:
    enabled: true
EOF -
Deployment will begin for all the Turbonomic pods. Depending on the environment, this may take some time to complete, anywhere from 5 to 20 minutes. Use the command below to check the status of the deployment.
oc get pods -n ${NS} -w --kubeconfig kubeconfig-aiopsnoteType
Ctrl-Cto exit the watch loop.Ensure all the pods:
- are in a
Runningstate (STATUScolumn) and - show
1/1in theREADYcolumn.
Example output only (Do not copy and paste into your terminal):
NAME                                   READY   STATUS    RESTARTS      AGE
action-orchestrator-55bbb96fd8-bxv59   1/1     Running   2 (14m ago)   17m
api-6d876bd5c8-ntpc9                   1/1     Running   0             17m
auth-57d95cdc4f-7x7jq                  1/1     Running   0             17m
clustermgr-5bff4bc746-9fvz4            1/1     Running   2 (14m ago)   17m
consul-6b979f7d9d-ncb9f                1/1     Running   0             17m
cost-679689bcb8-9r8h7                  1/1     Running   2 (14m ago)   17m
db-5547b8bb9c-xjlk8                    1/1     Running   0             17m
group-7c66b96cd6-jf69l                 1/1     Running   2 (14m ago)   17m
history-75c89bdcdb-vcsv4               1/1     Running   2 (14m ago)   17m
kafka-54b458c5ff-25tkp                 1/1     Running   0             17m
kubeturbo-6b7568cbd-8gdqp              1/1     Running   0             17m
market-784cd4f9fb-26879                1/1     Running   2 (14m ago)   17m
plan-orchestrator-5fb588cdc6-wsz4l     1/1     Running   2 (14m ago)   17m
repository-85bb8b95c4-w85nv            1/1     Running   2 (14m ago)   17m
rsyslog-64c7fb4467-qcj9v               1/1     Running   0             17m
t8c-operator-fdd8b8c94-jwwj8           1/1     Running   0             18m
topology-processor-77f7f95c8-lmpzr     1/1     Running   0             17m
ui-6d4ff8787d-6zhm4                    1/1     Running   0             17m
zookeeper-57658f68c6-6qdgb 1/1 Running 0 17m - are in a
3.5: Launch the Turbonomic User interface
You are now ready to open a new browser tab and login to the Turbonomic user interface.
-
Open the Turbonomic UI in a new browser tab by using the bookmark called Turbonomic. Advance through any certificate warnings you may get.
tipIf you did not have a Bookmark available you can get the Turbonomic UI route after the deployment completes by running the following command:
oc get route -n ${NS} --kubeconfig kubeconfig-aiops | grep api | awk '{print $2}' -
The first time you log in to Turbonomic, you will be prompted to create a password for the
administratoruser: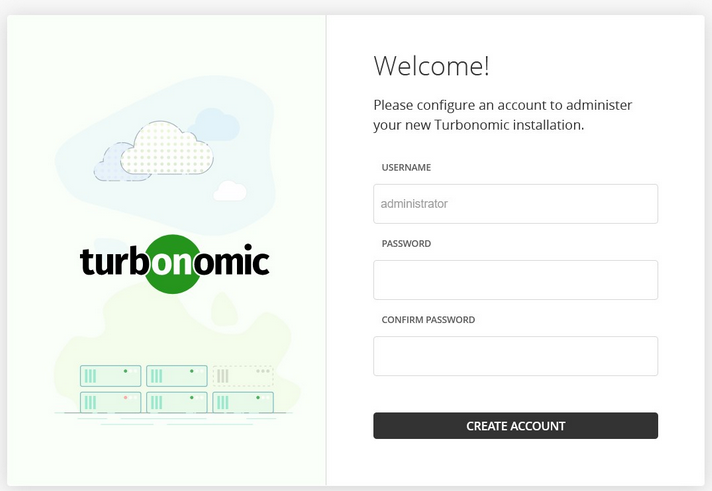
- Set the password to
Passw0rd - Save the password for future logins.
- Click on the
CREATE ACCOUNTbutton.
- Set the password to
-
If you are prompted with a Share Analytics and usage information modal you can leave it unchecked and select SAVE AND CONTINUE.
3.6: License Configuration
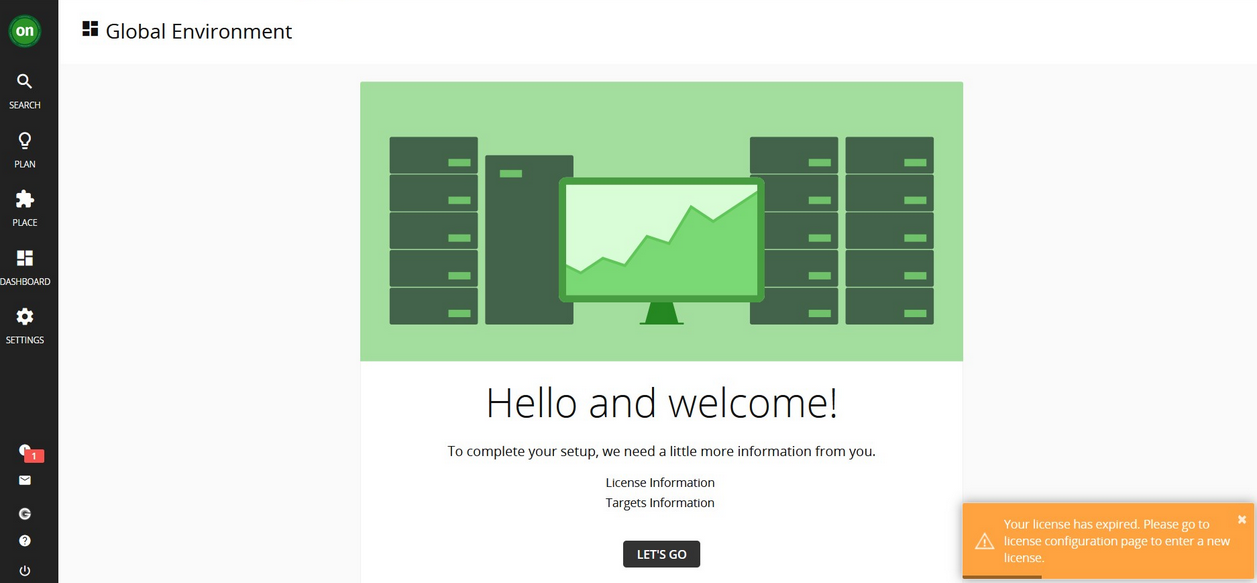
Once logged in, the setup wizard will prompt you to import the license key:
-
From the Guacamole host create a file called
turbo-licenseand copy the contents of the turbonomic license file.noteIt is recommended to use a text editor to modify the following command before pasting it into the Terminal.
cat << EOF > ~/turbo-license.lic
<replace_this_with_license_file_contents>
EOF -
Click on
LET'S GObutton. -
Click on
IMPORT LICENSEbutton and browse for the newly created license file in the Home directory.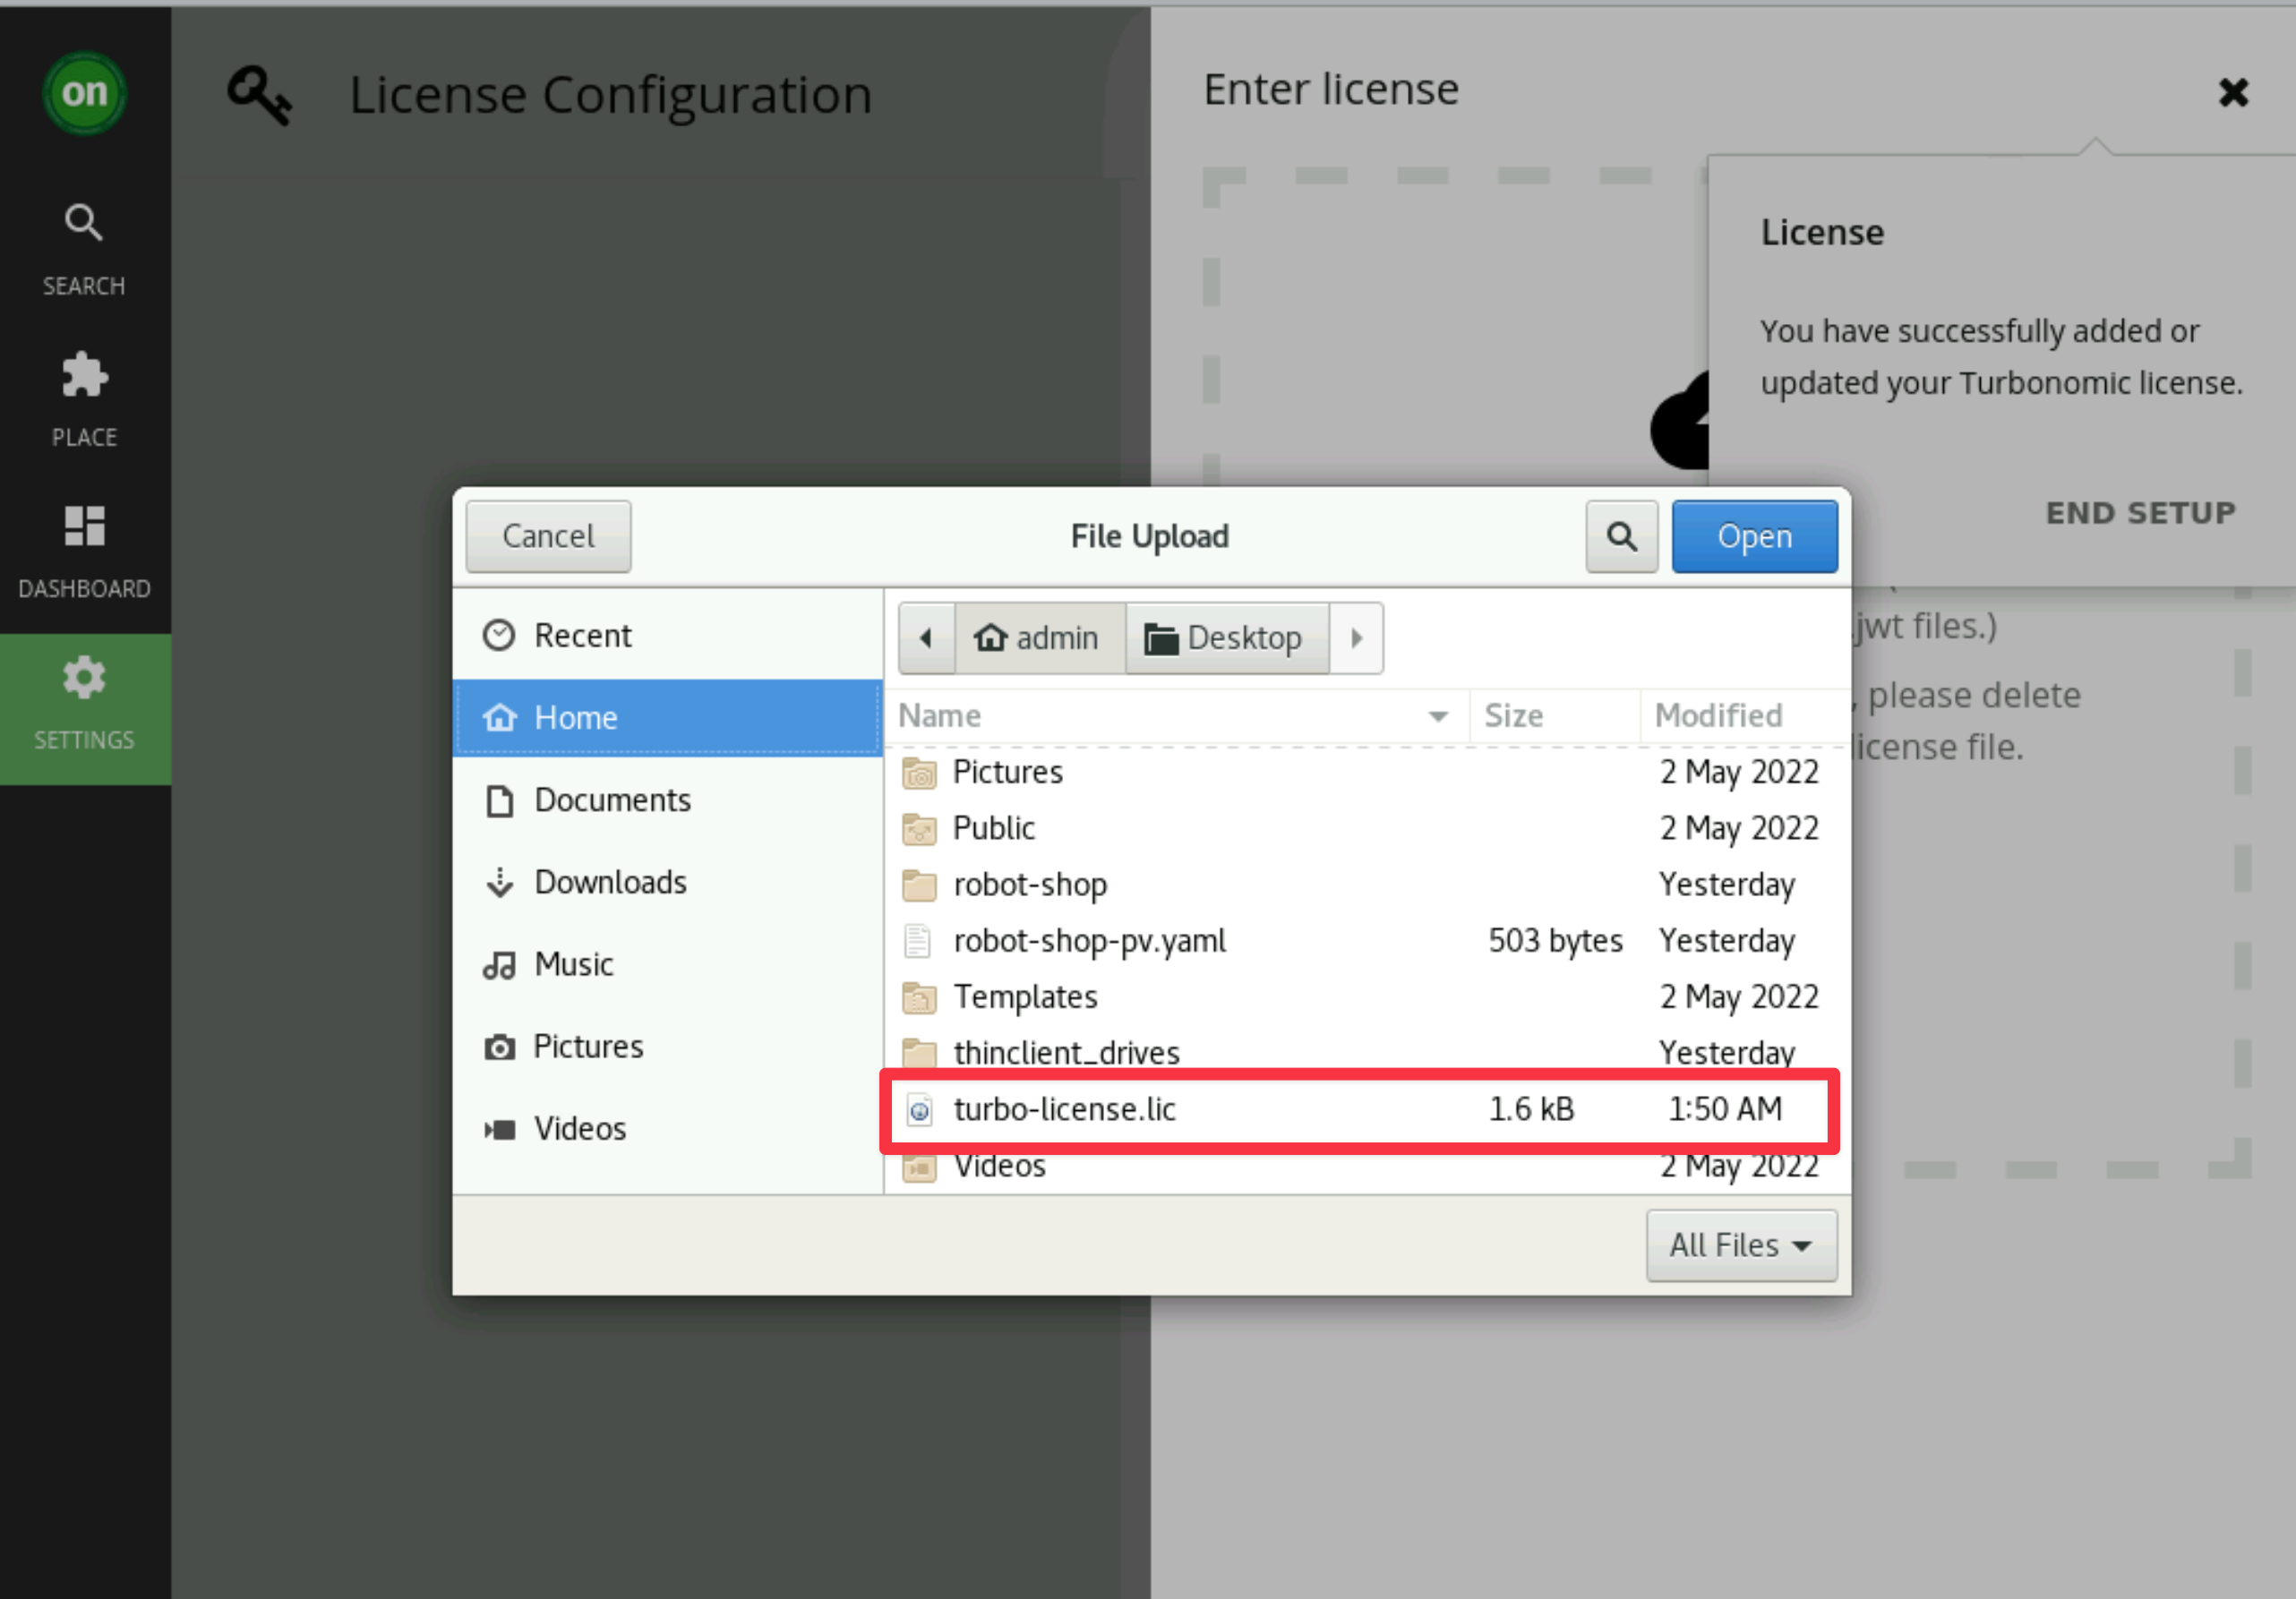
-
Then click on
Savebutton. You will see the page below if it's successful: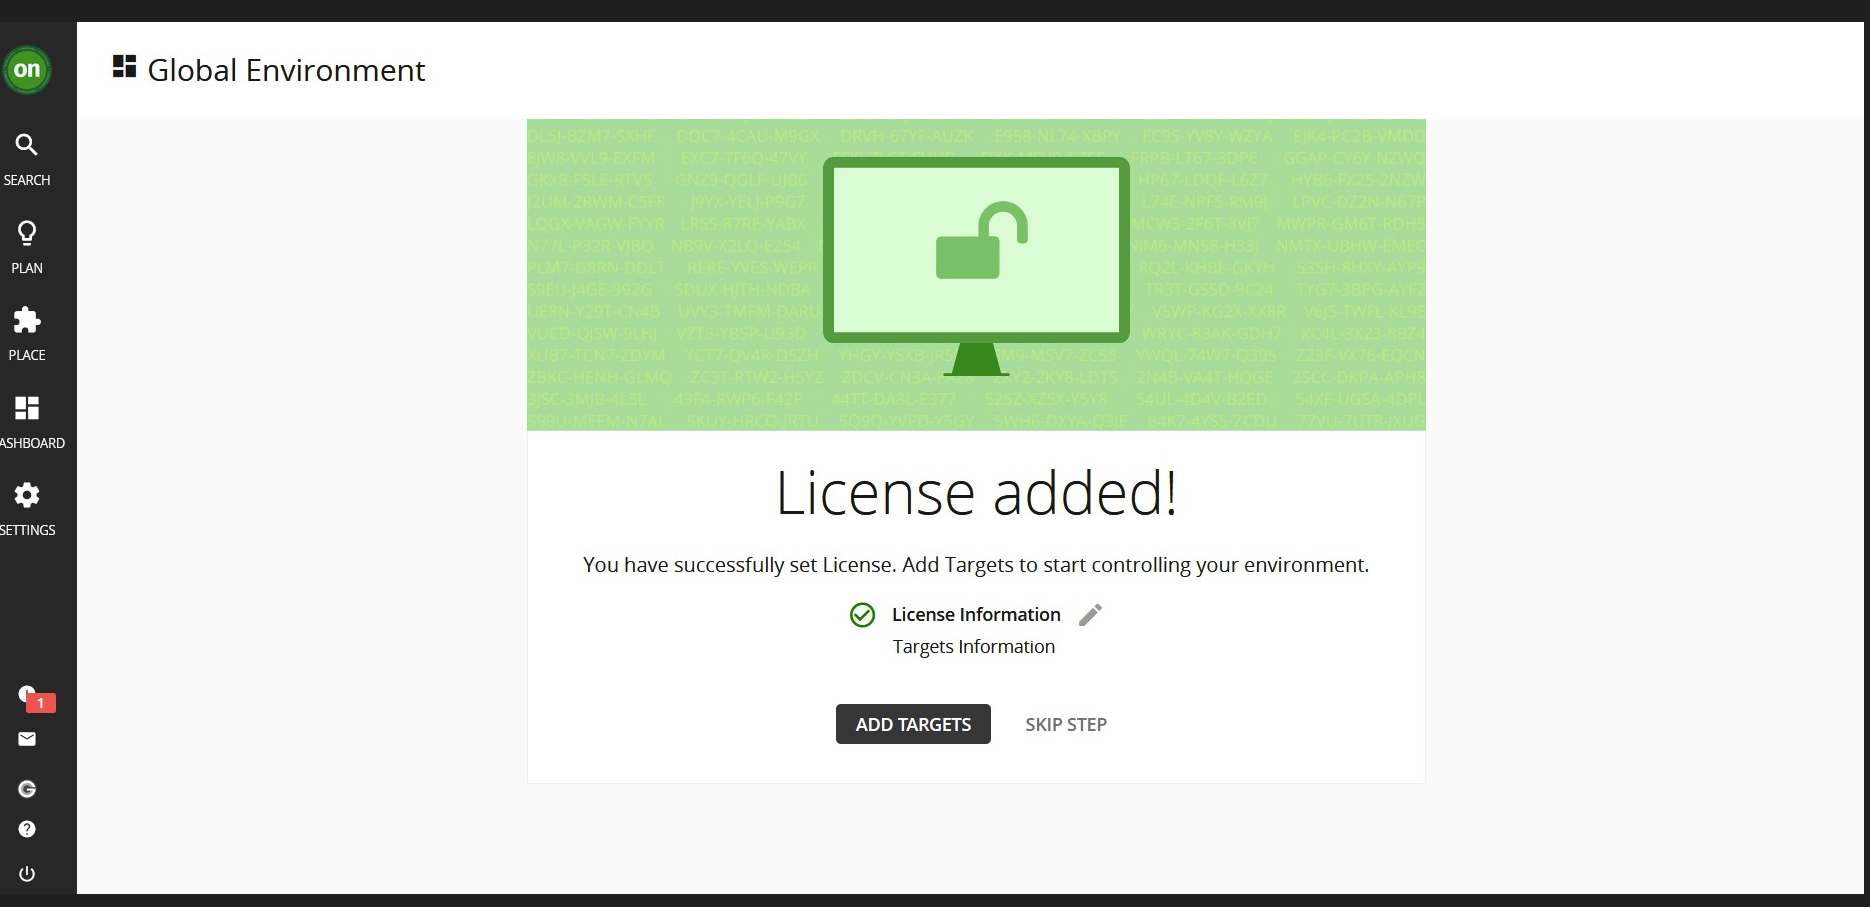
3.7: Summary
In this portion of the lab, you have learned how to install and license Turbonomic on OpenShift.
Move onto the next section to learn how to integrate Instana for application monitoring data ingestion so Turbonomic can start assuring the performance of your business applications.