Scenario
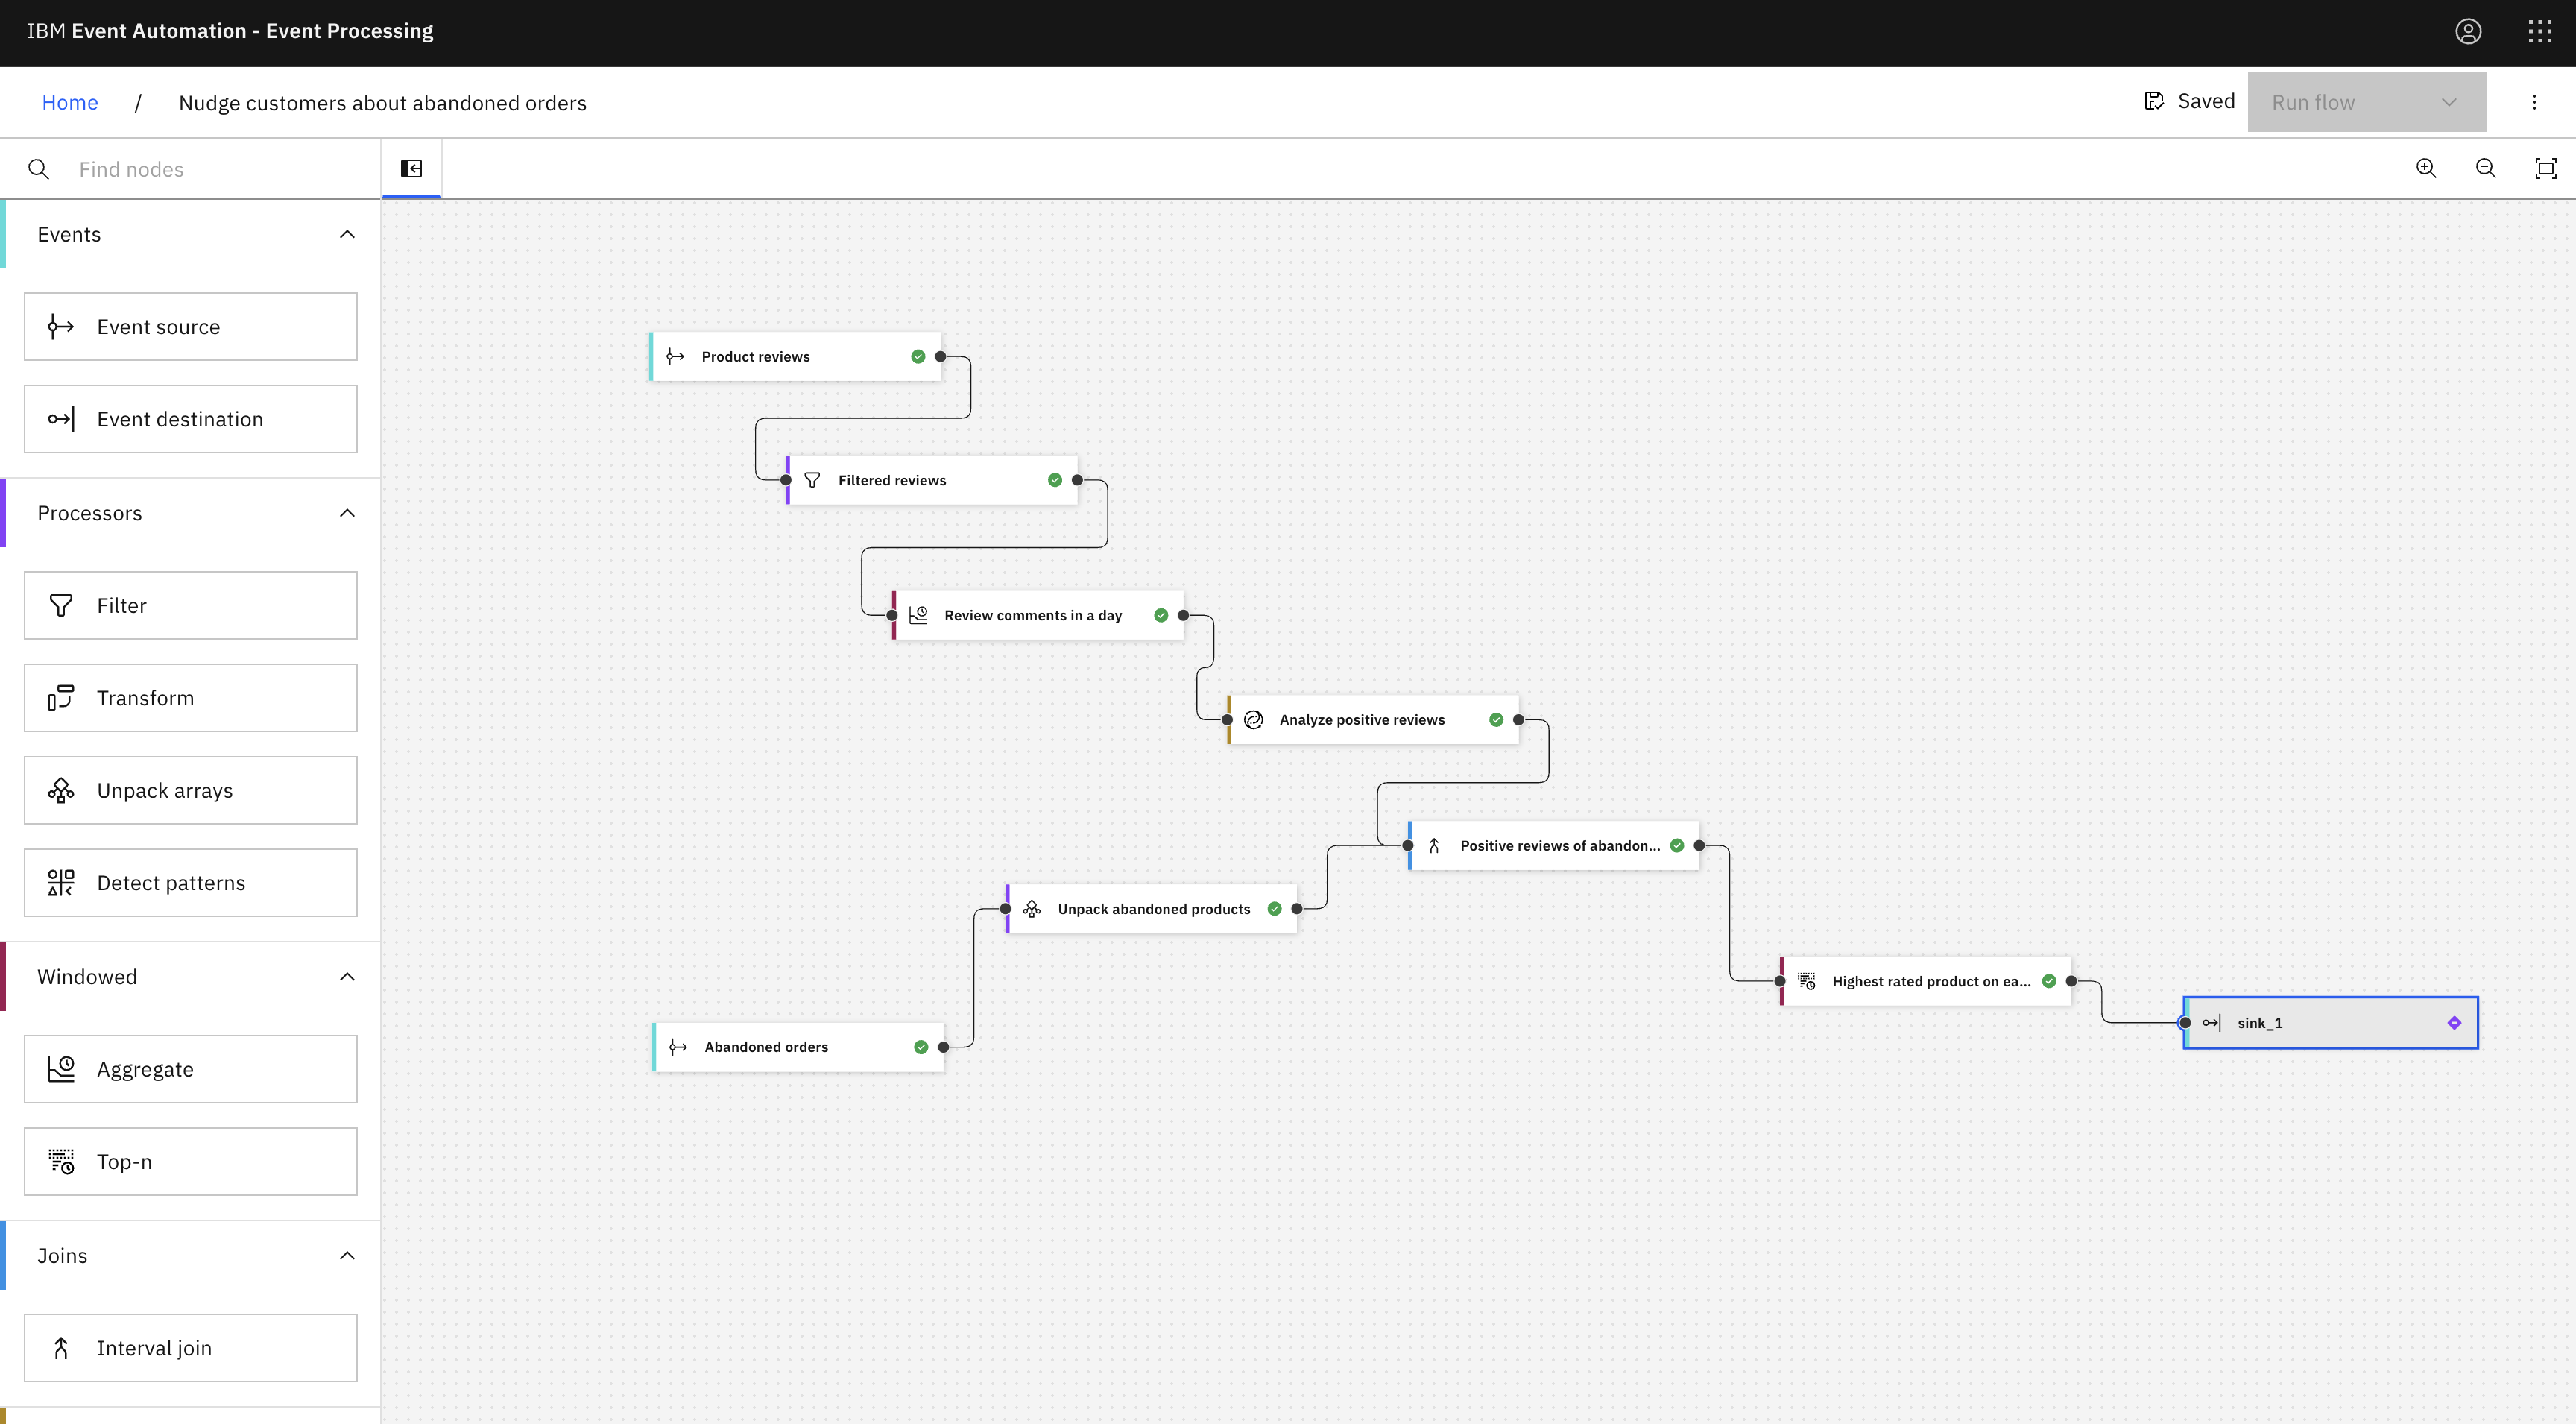
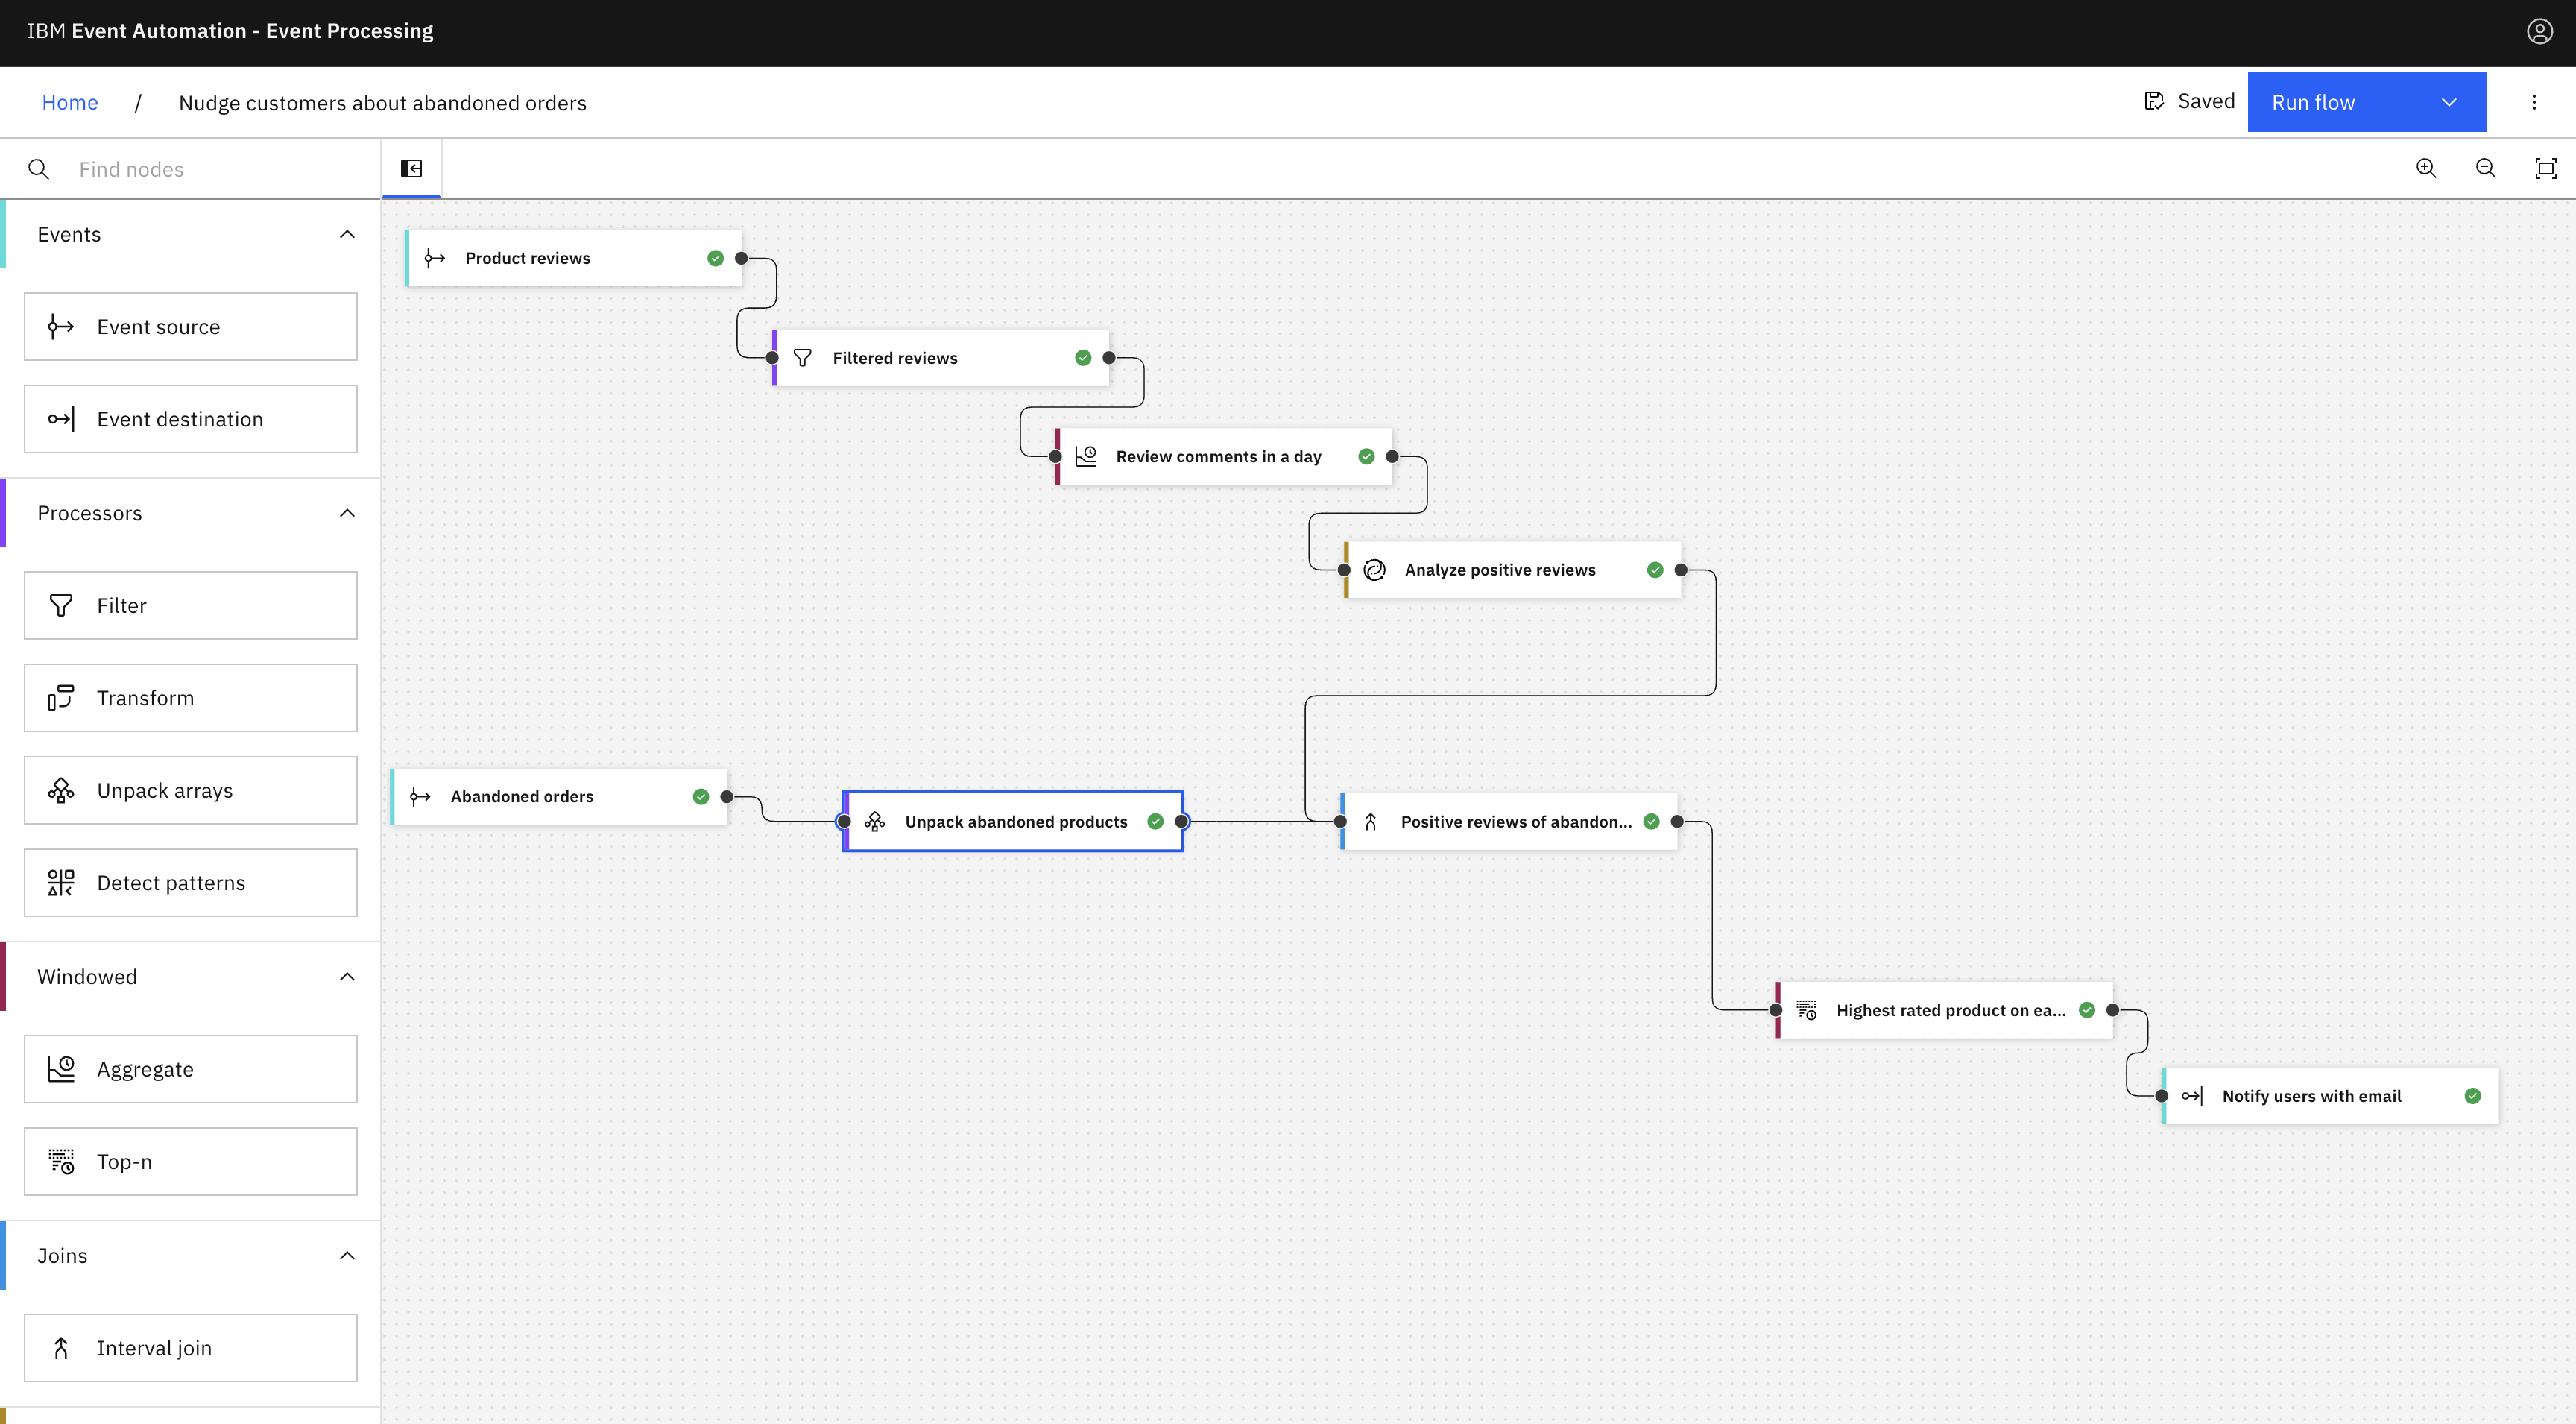
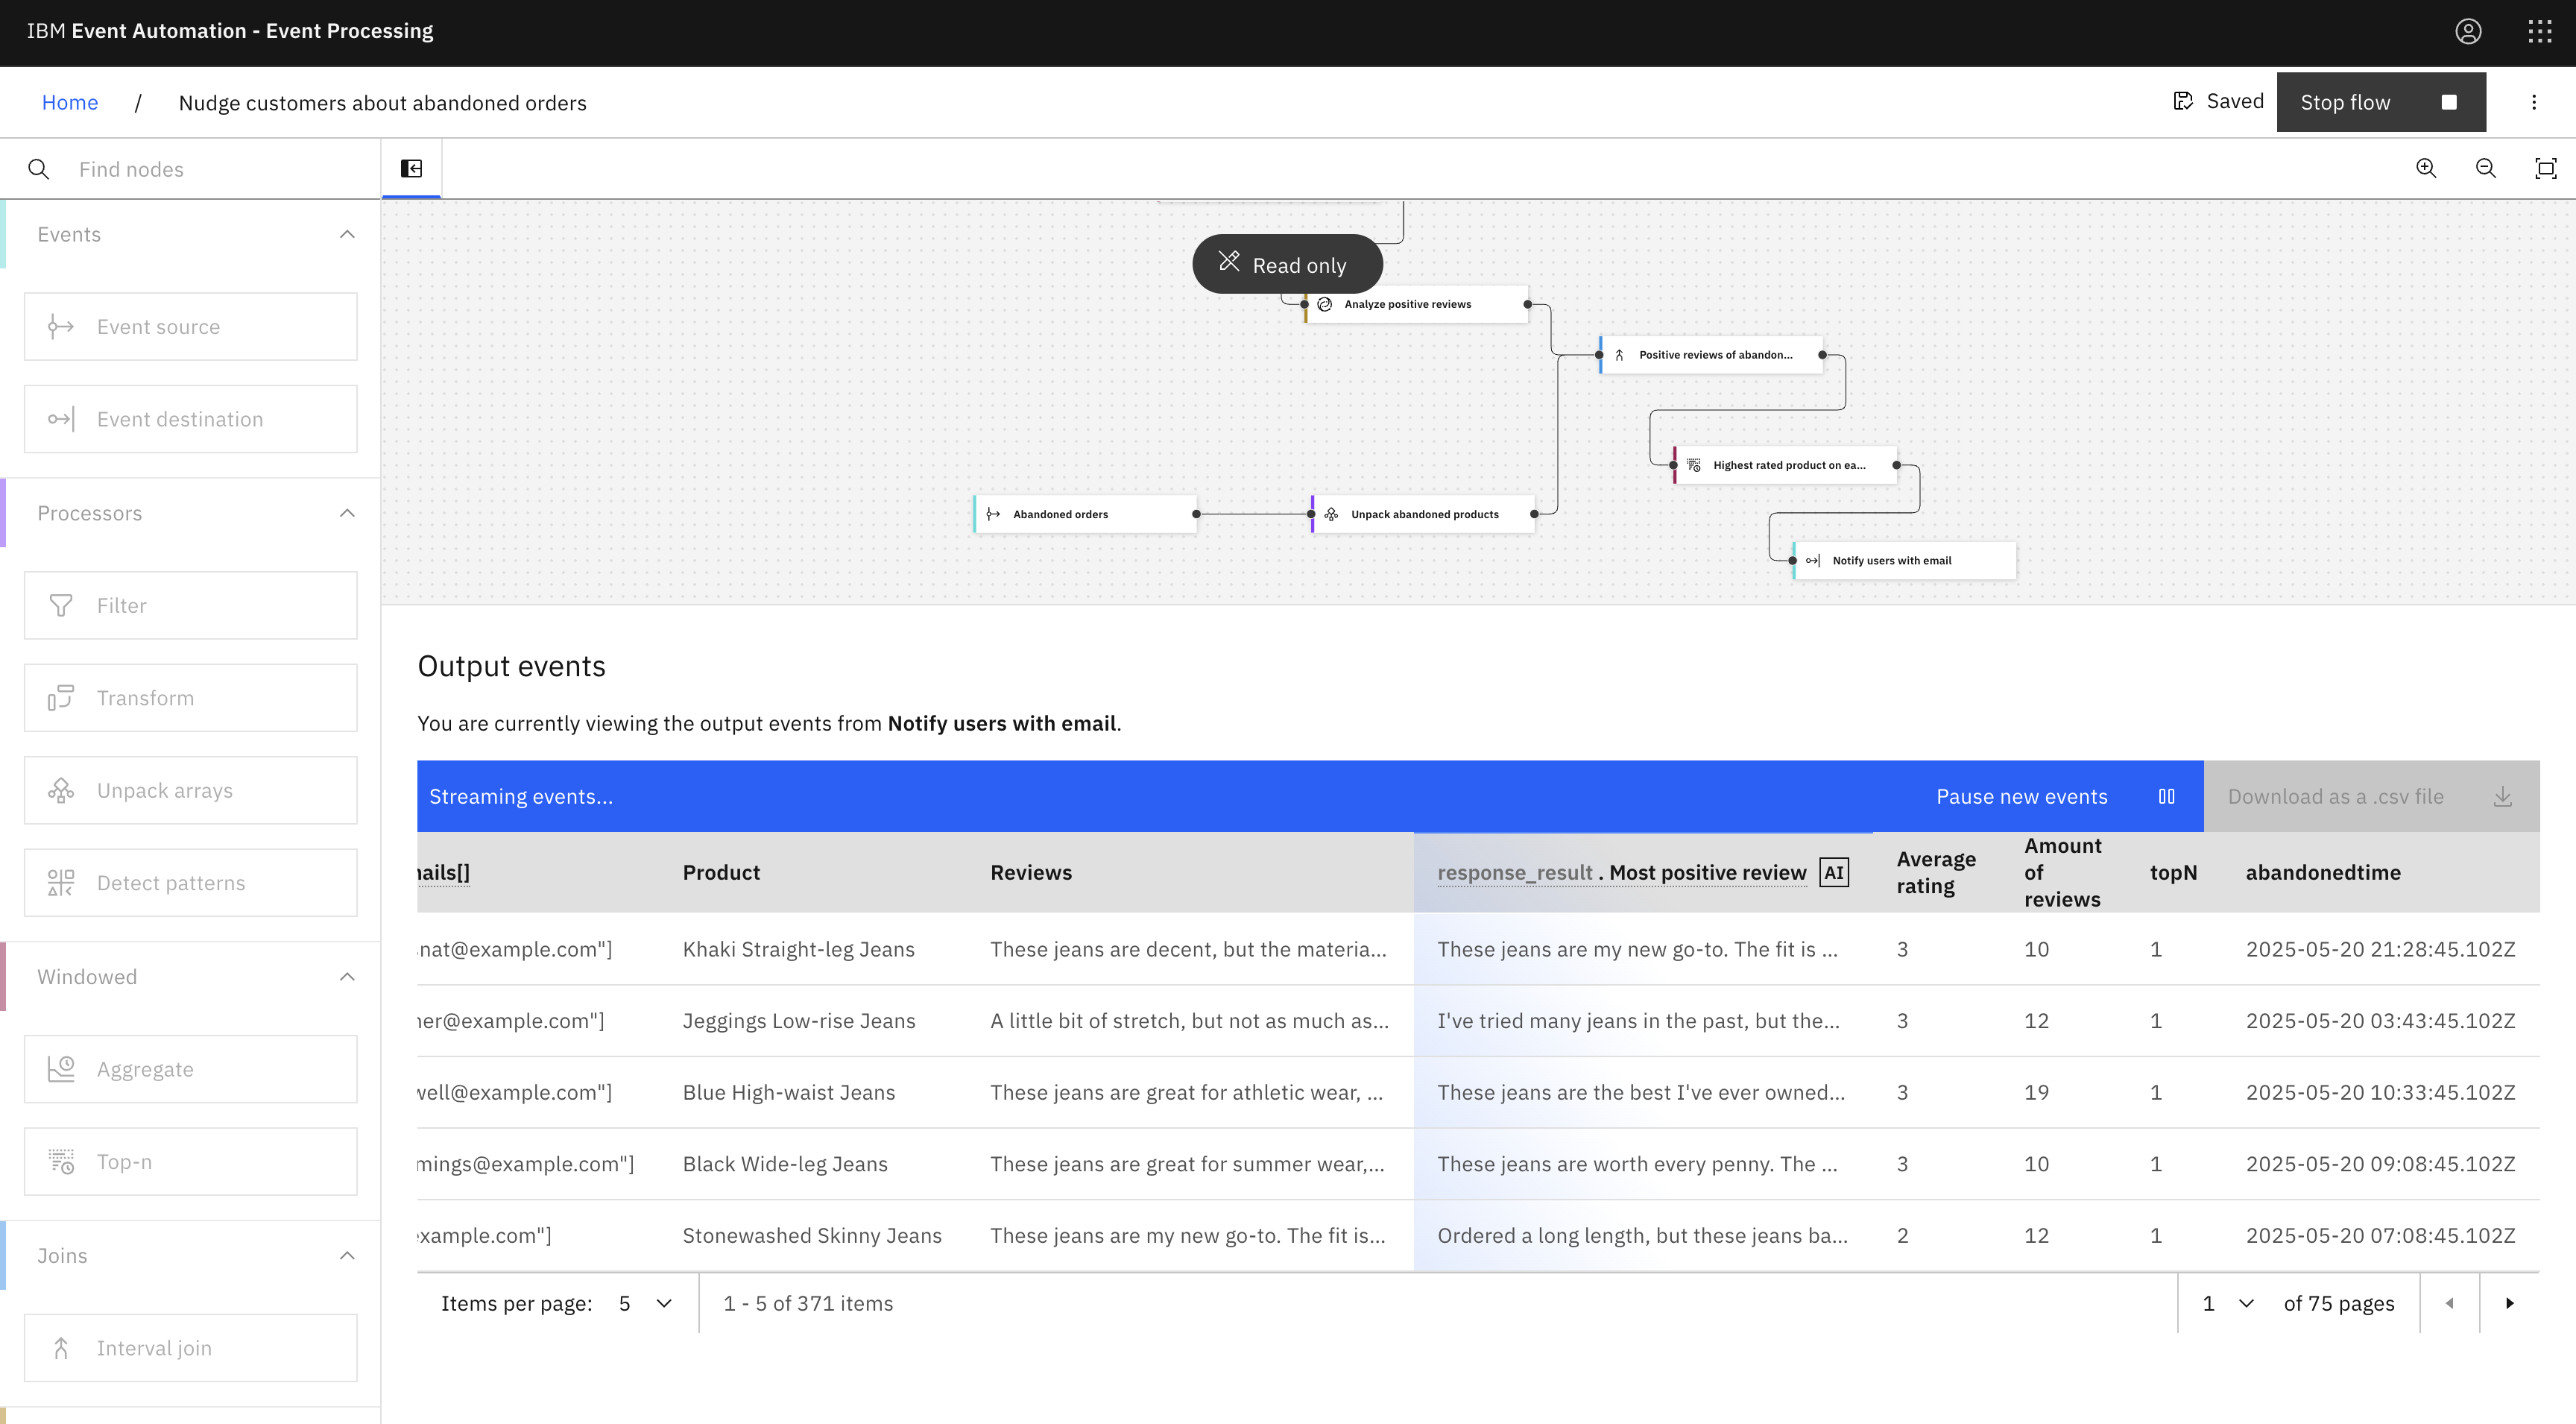
As a retailer, you want to reengage customers who have abandoned products in their shopping carts. This tutorial aims to identify which product left in the cart has the highest average customer rating and then highlighting that product along with its most positive review and email IDs.
To achieve this, you can use the watsonx.ai node to identify the abandoned products.
watsonx.ai node
With the watsonx.ai node, you can create AI-generated text responses from a deployed watsonx.ai prompt template.
Before you begin
-
The instructions in this tutorial use the Tutorial environment, which includes a selection of topics each with a live stream of events, created to allow you to explore features in IBM Event Automation. Following the setup instructions to deploy the demo environment gives you a complete instance of IBM Event Automation that you can use to follow this tutorial for yourself.
-
Ensure that you have a watsonx.ai account and complete the following steps.
Note: The free plan quota for watsonx.ai is limited. Therefore, the flow used in the following tutorial is configured such as it consumes a small volume of events with watsonx.ai. Upgrade if you want to modify the flow to consume more events with watsonx.ai.
-
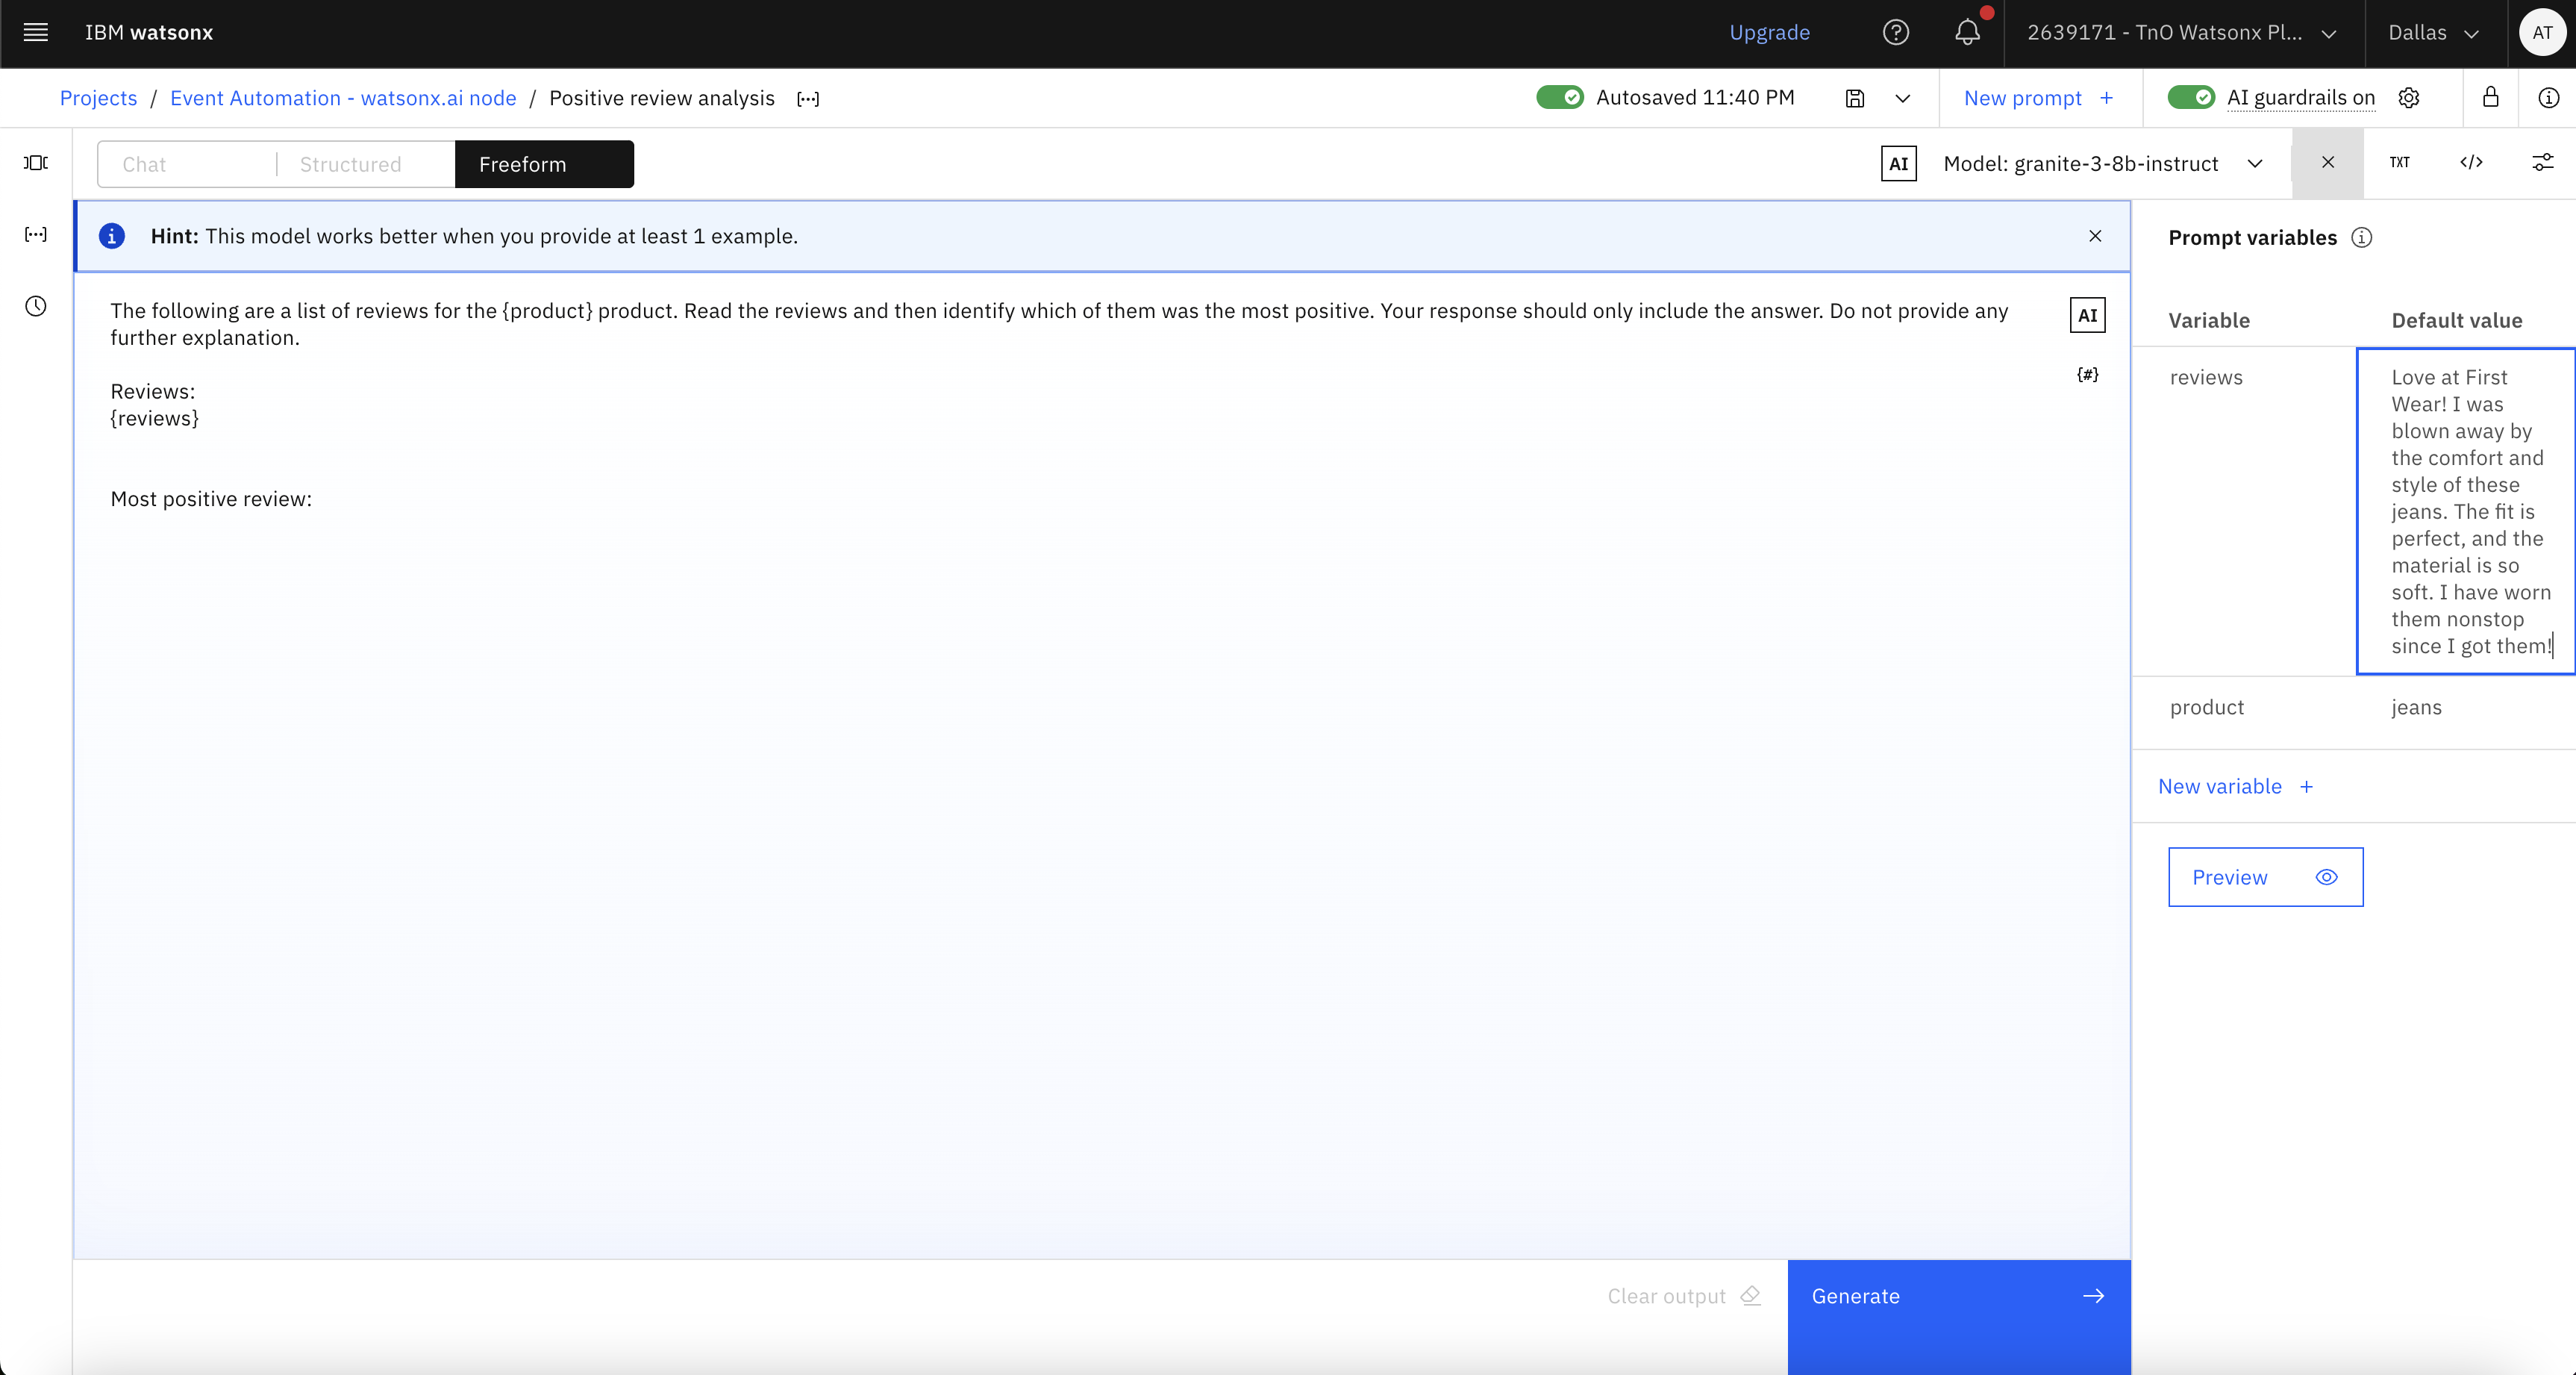
Create a prompt in the Prompt Lab in watsonx.ai. In the Freeform tab, enter your prompt in the text area. The following prompt is used in this tutorial:
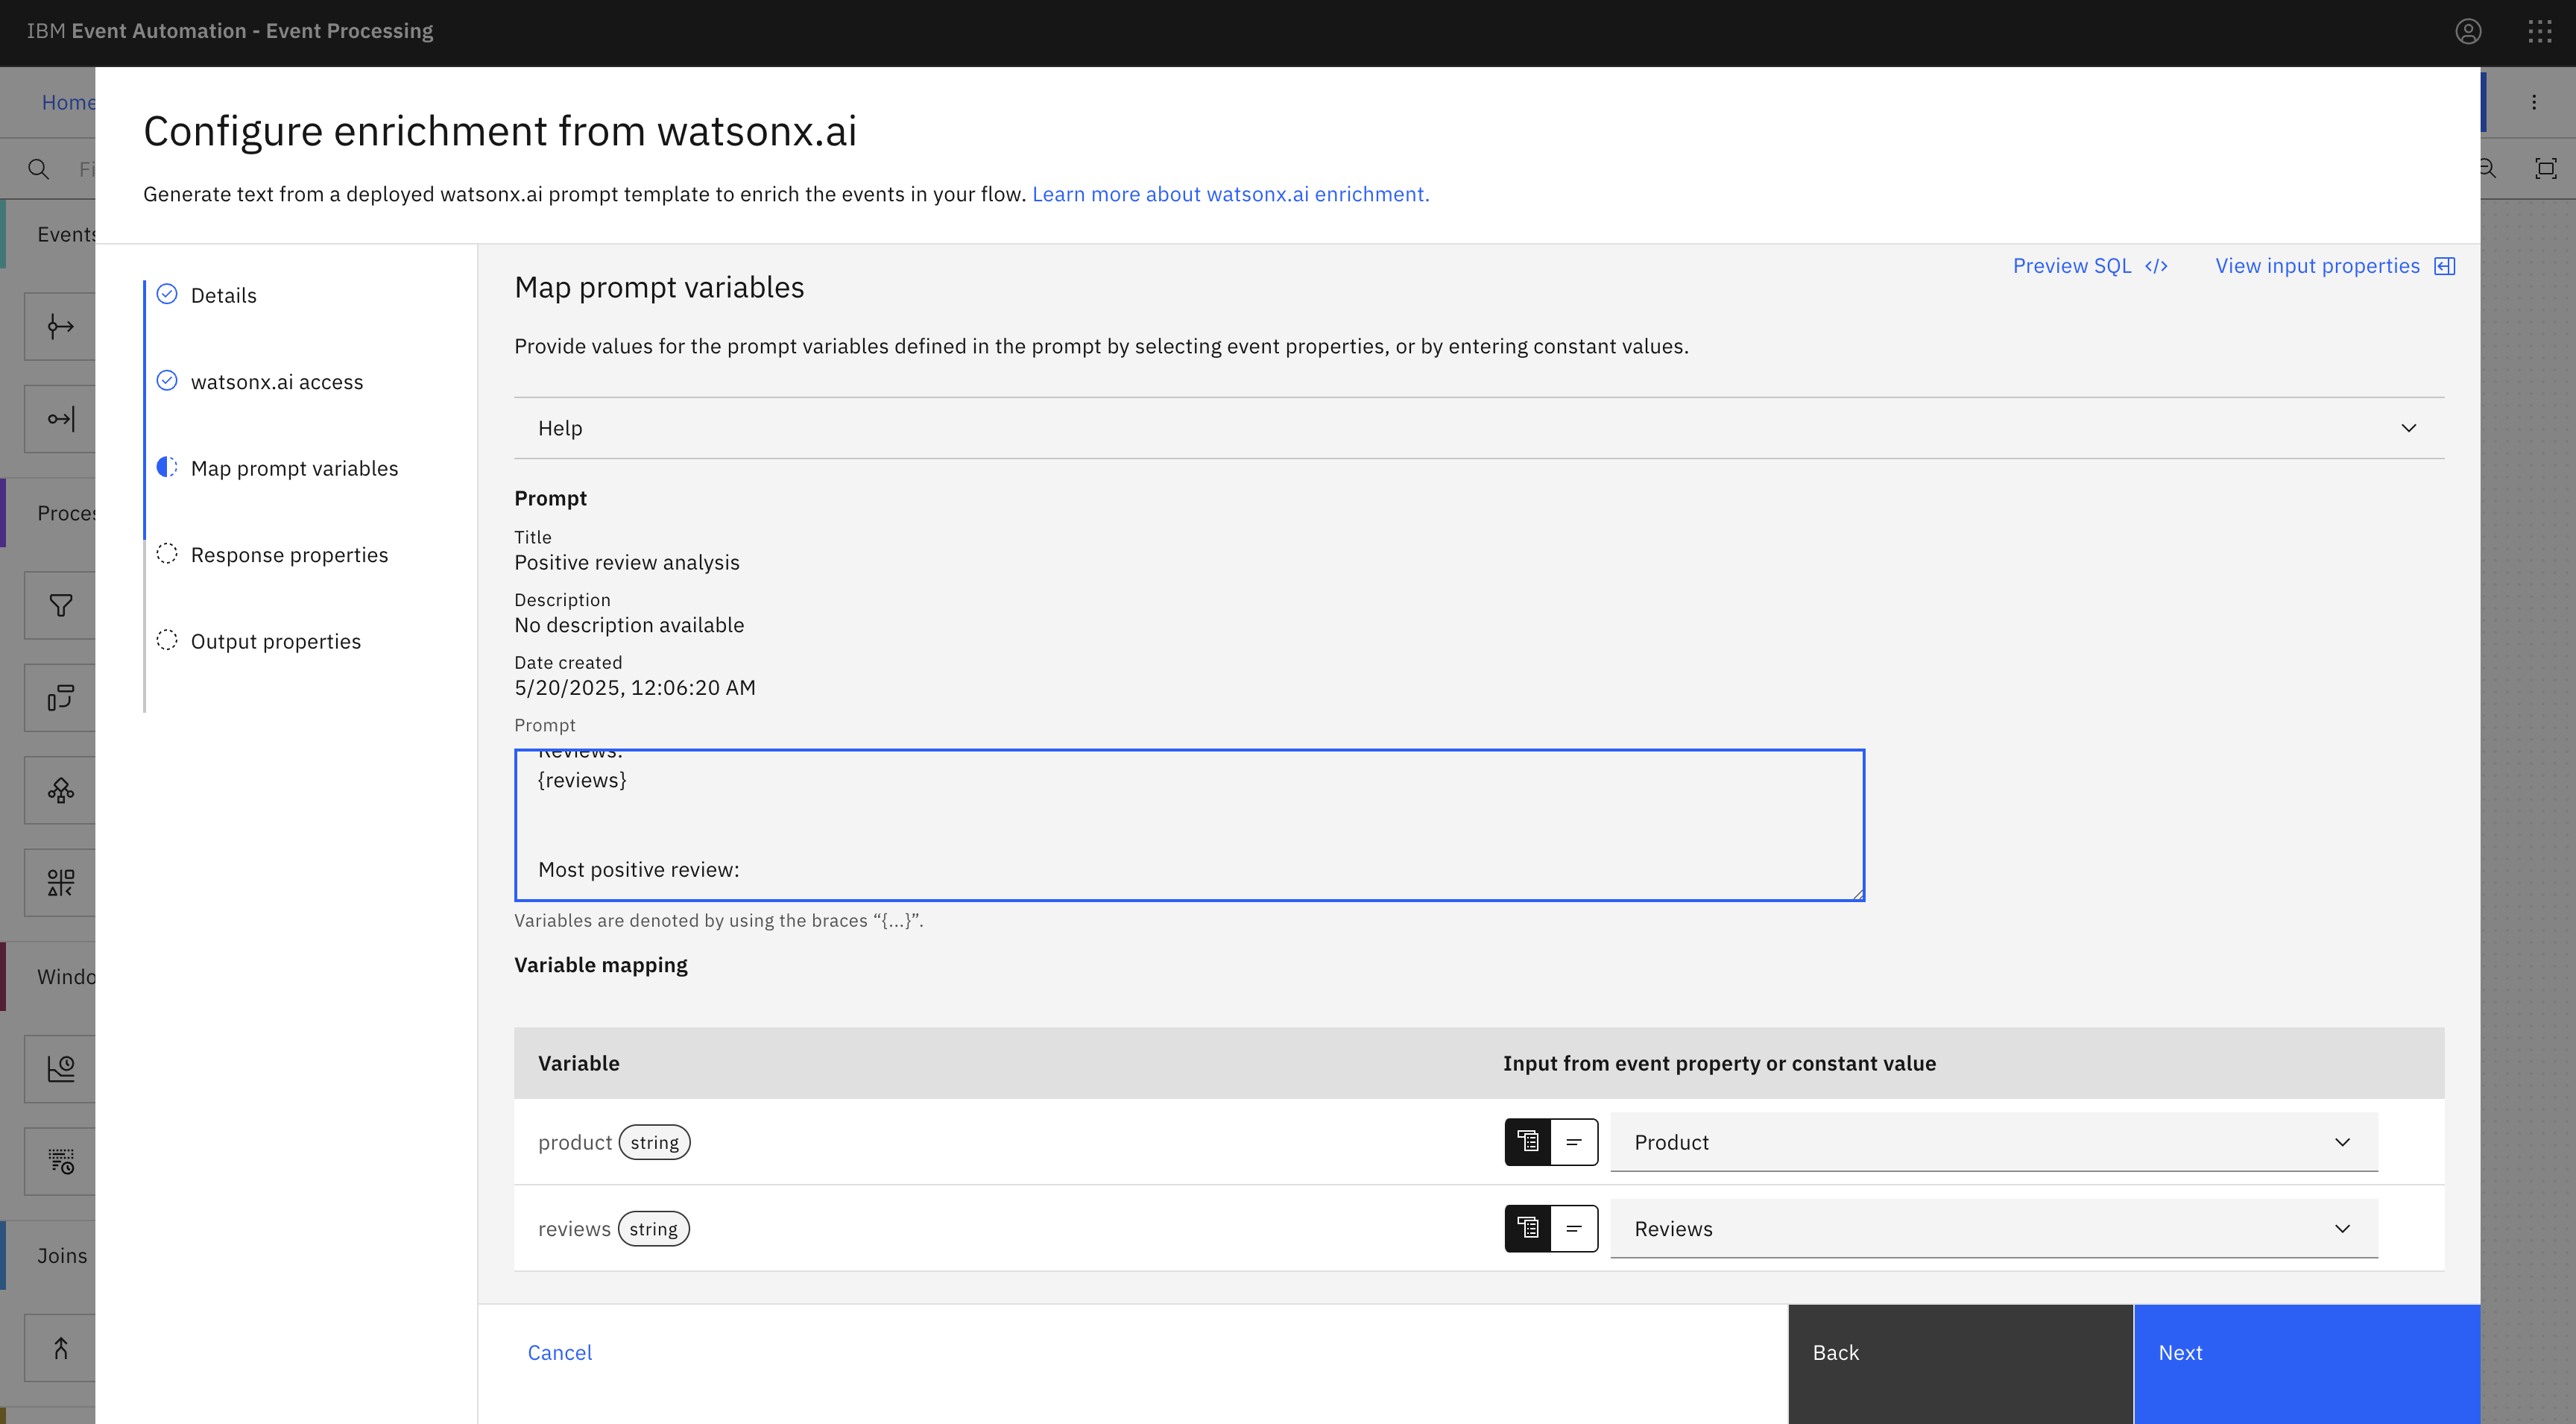
The following are a list of reviews for the {product} product. Read the reviews and then identify which of them was the most positive. Your response should only include the answer. Do not provide any further explanation.

Reviews:
{reviews}


Most positive review:
Tip: A prompt is an input that guides AI models to generate responses. For tips on crafting effective prompts, see prompt tips.
-
Configure prompt variables, select the model and modify model parameters as required within the Prompt Lab. The model used in this tutorial is
granite-3-8b-instructfrom IBM.The variables used are:
productandreviewsand the respective values arejeansandLove at First Wear! I was blown away by the comfort and style of these jeans. The fit is perfect, and the material is so soft. I have worn them nonstop since I got them!.Note: At least one prompt variable must be configured.
- Save your prompt as a prompt template:
Positive review analysis. - Deploy the prompt template to a deployment space.
-
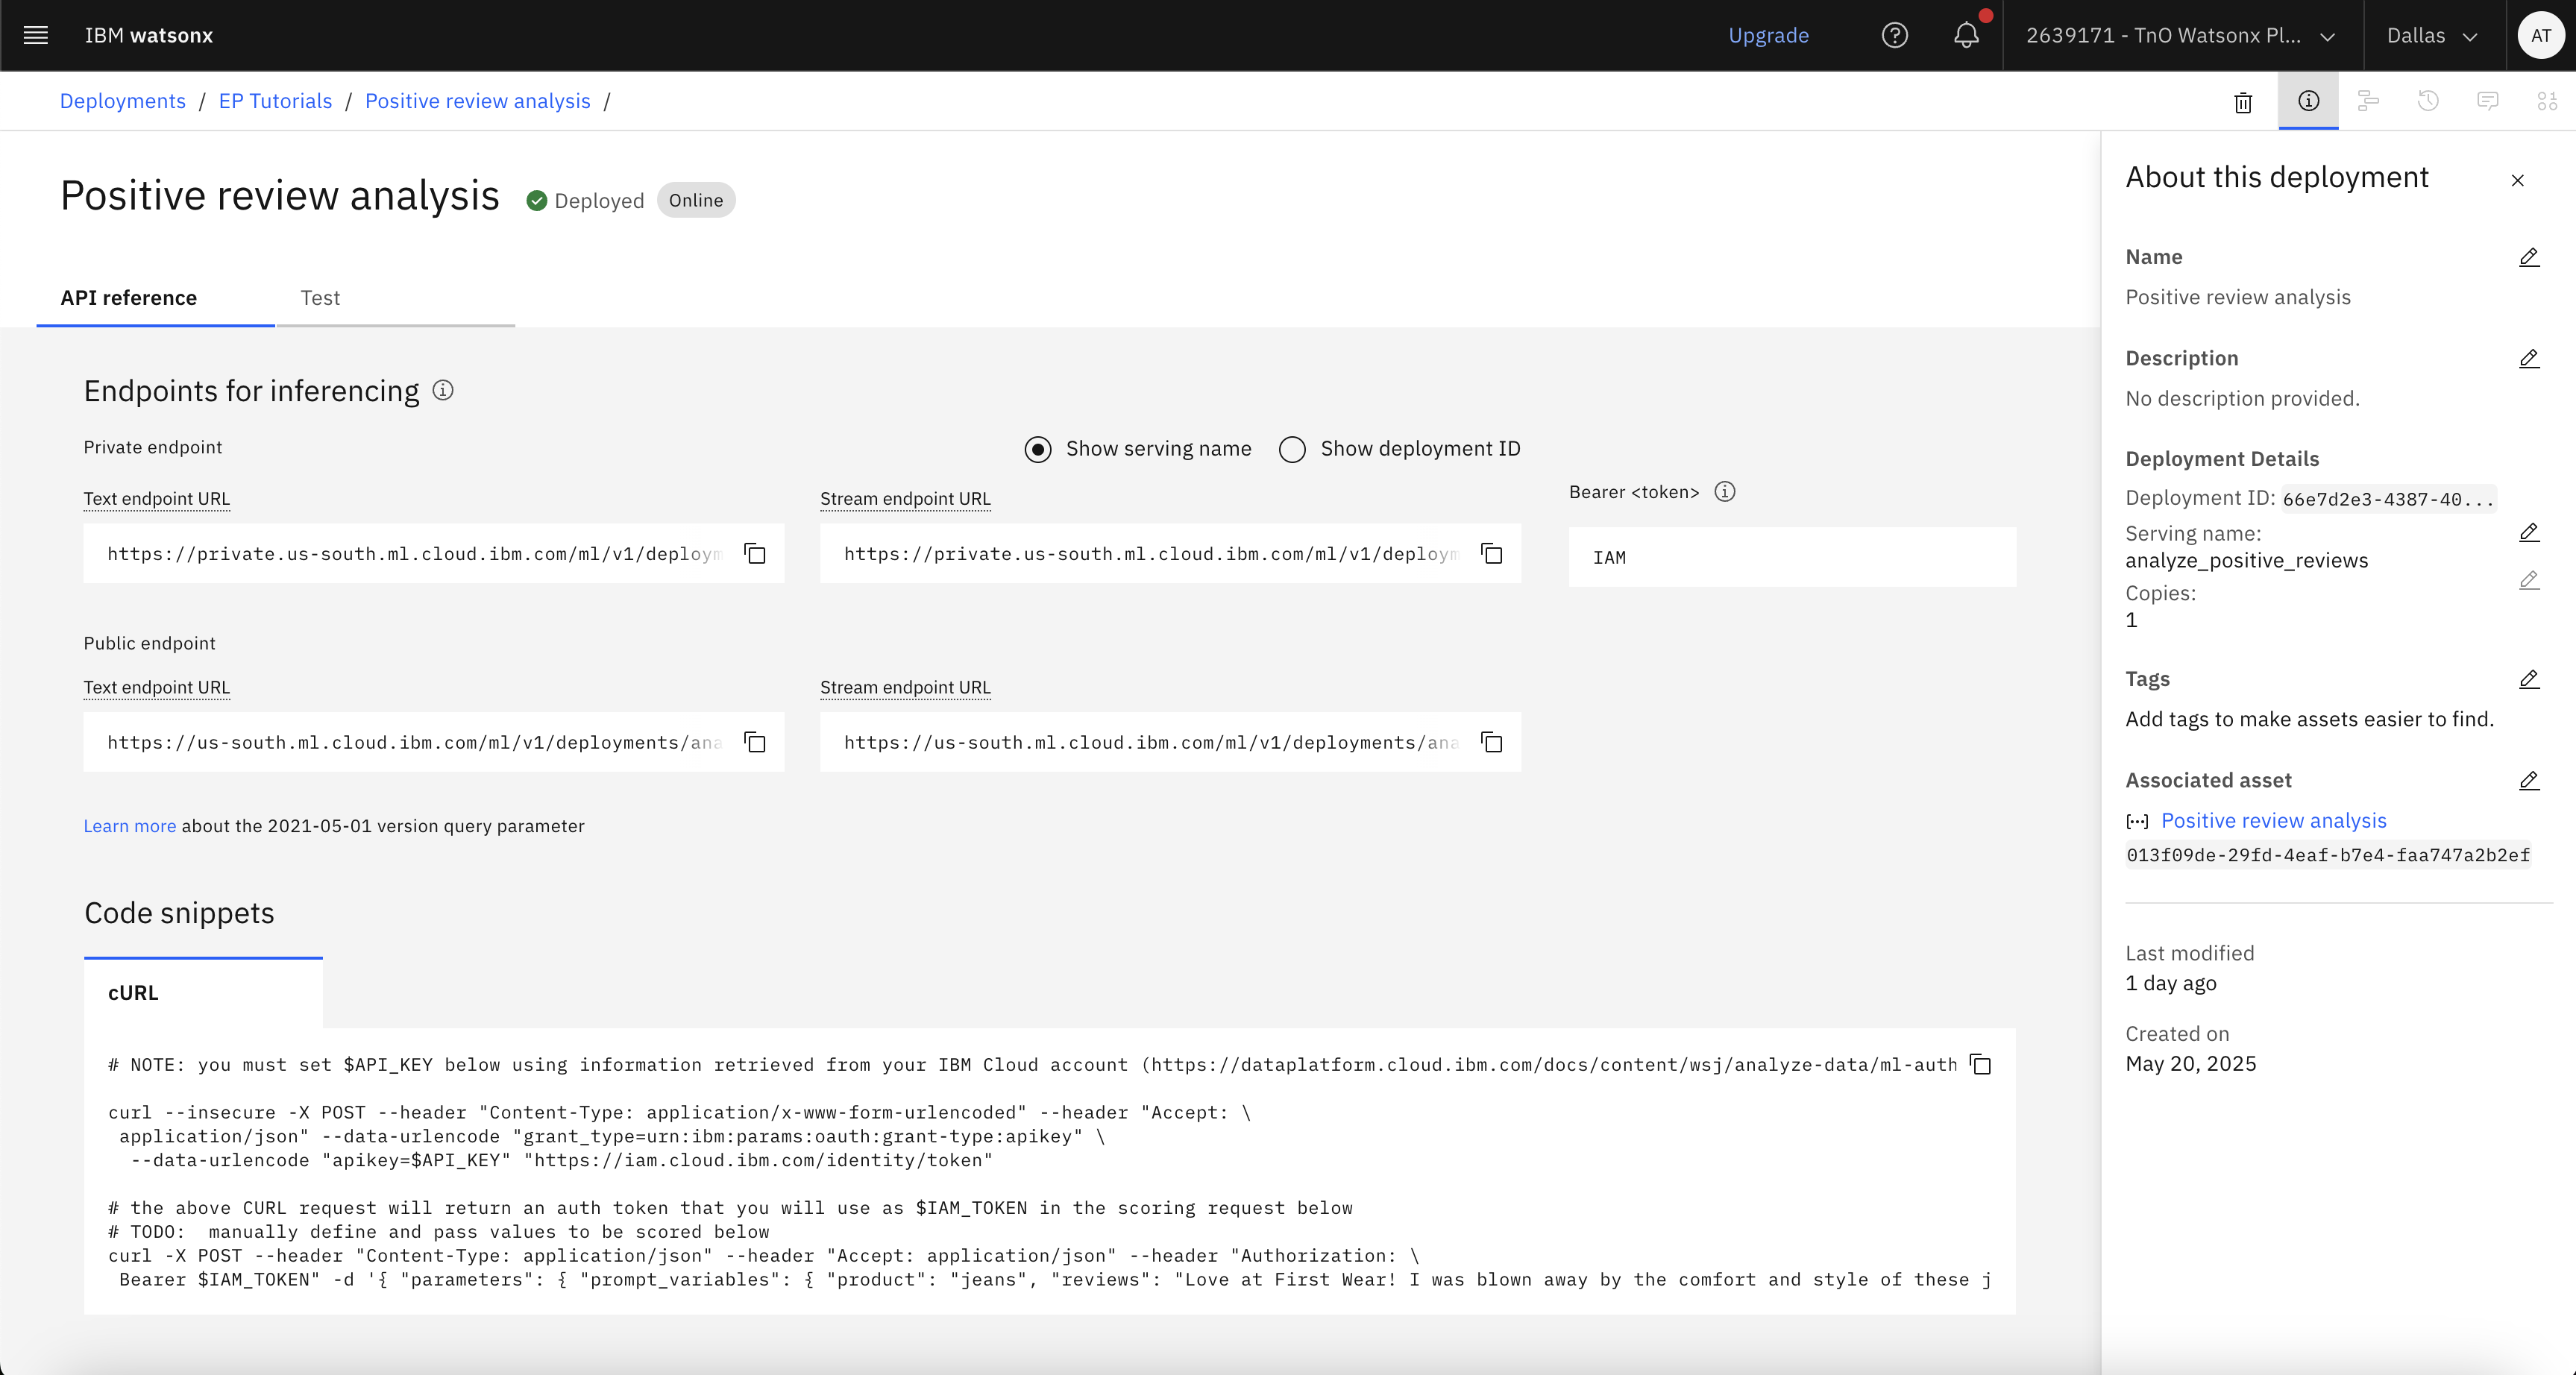
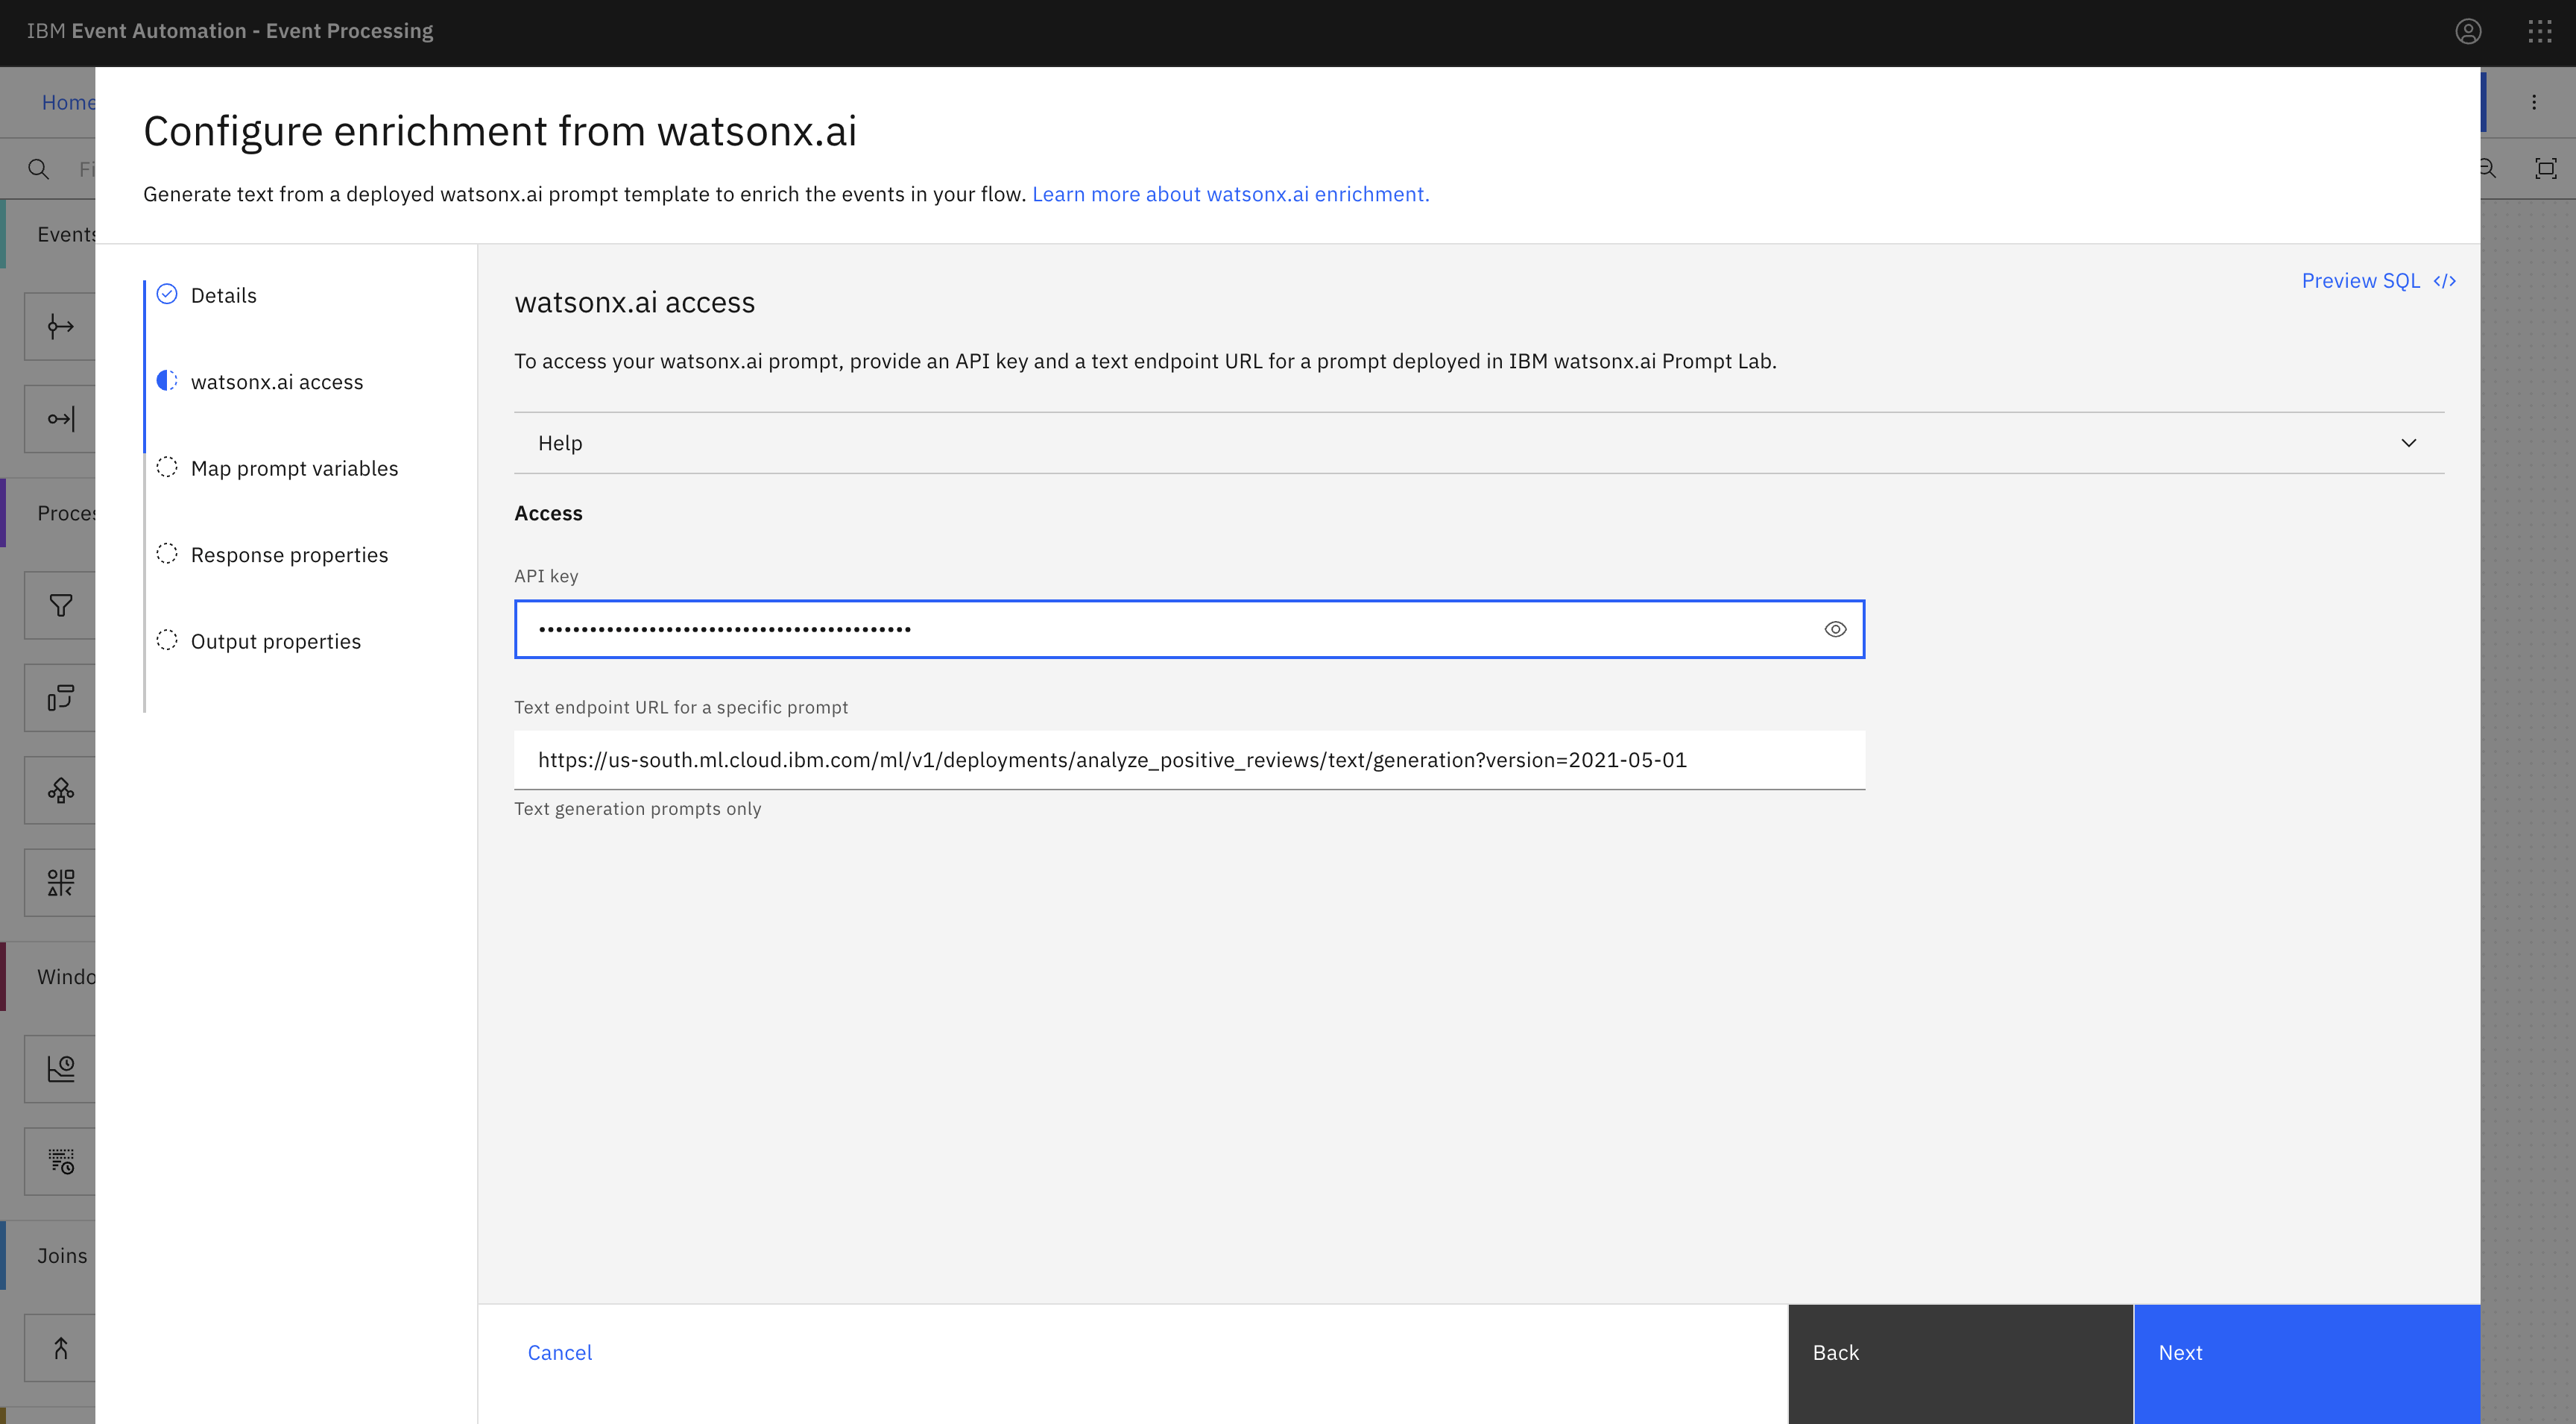
After your prompt template is successfully deployed, open the deployed prompt and copy the URL in the Text endpoint URL field from the Public endpoint section. The text endpoint URL is required later when configuring the watsonx.ai node.
The watsonx.ai node supports public text endpoint URLs with a serving name or a deployment ID.
Note: Deployment spaces might incur charges depending on your watsonx.ai runtime plan. For more information, see the IBM documentation. The flow used in this tutorial is configured such that it makes only few calls to watsonx.ai and can be used with a free plan.
-
-
Create an API key by completing the following steps:
-
In your IBM Cloud account, go to the API keys page and click Create.
-
Enter a name for the API key and an optional description, then click Create again.
-
Ensure you have copied the API key, as the key is required later when configuring the watsonx.ai node.
Alternatively, you can create API key for a service ID by following the instructions in the IBM Cloud documentation.
-
Versions
This tutorial uses the following versions of Event Automation capabilities. Screenshots can differ from the current interface if you are using a newer version.
- Event Streams 12.0.1
- Event Endpoint Management 11.6.3
- Event Processing 1.4.5
Instructions
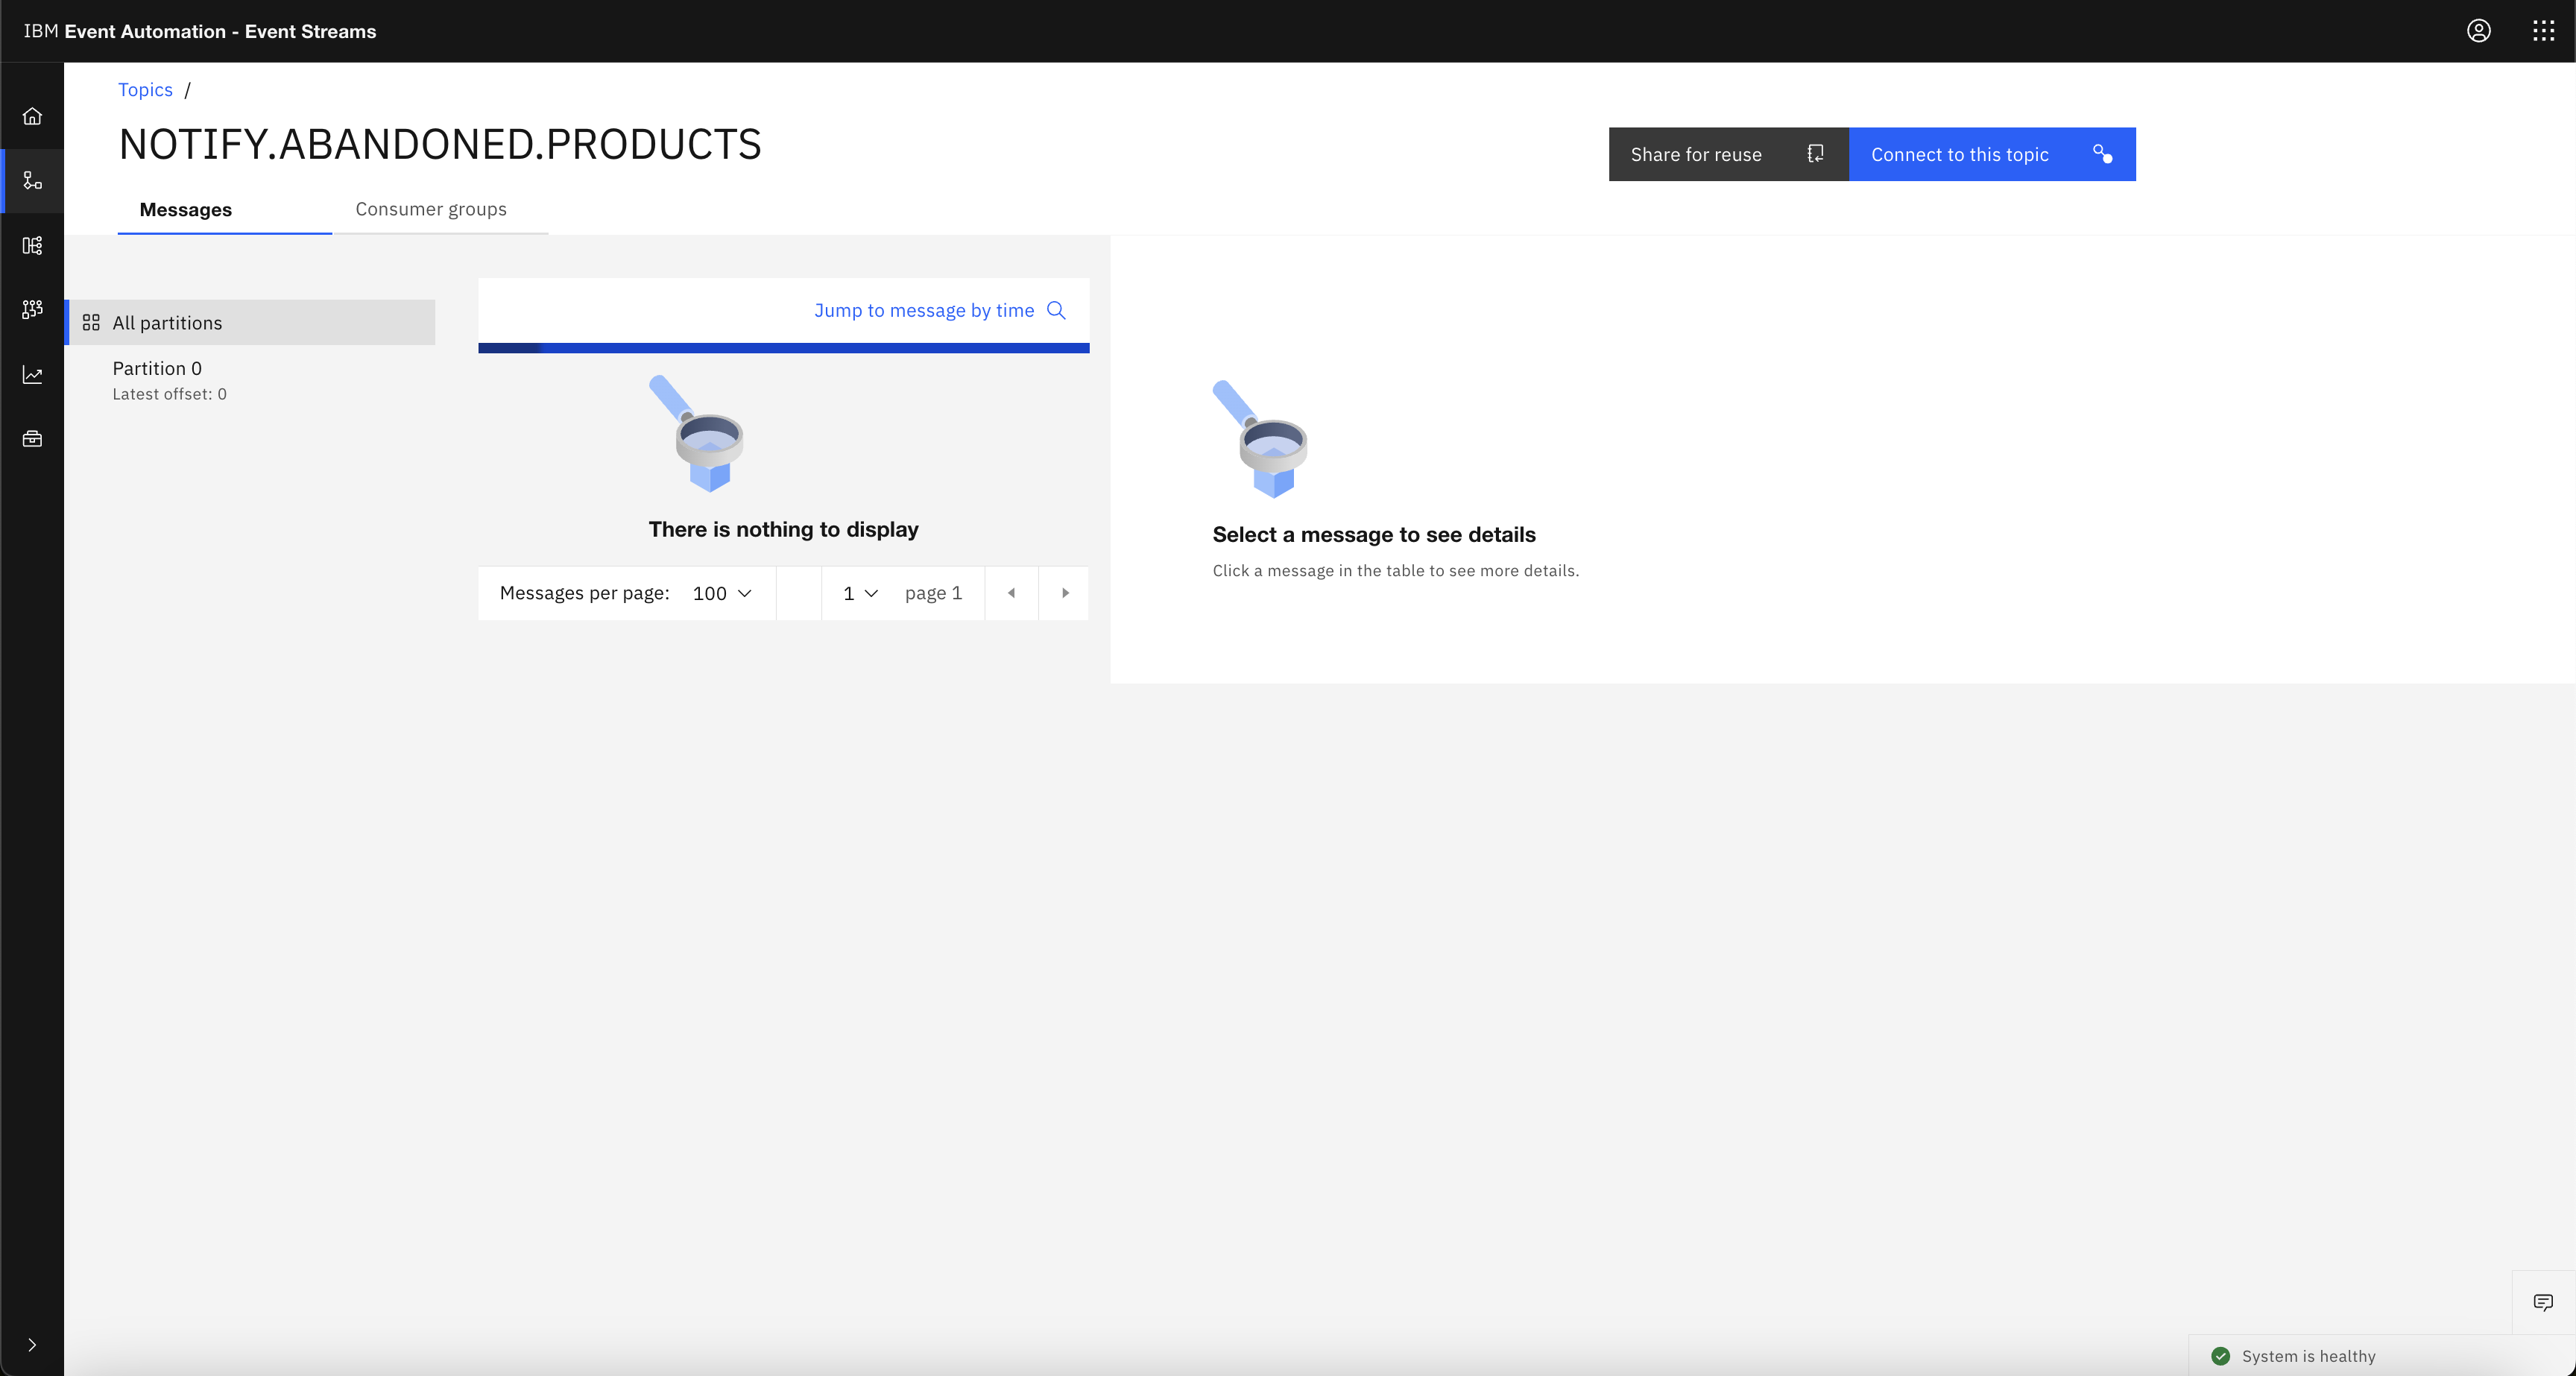
Step 1: Create a destination topic for notifying abandoned products
You can configure a processing flow to write the events to a separate topic, which you can then use as a source for systems that are unable to process idempotently.
You can create the topic by completing the following steps.
-
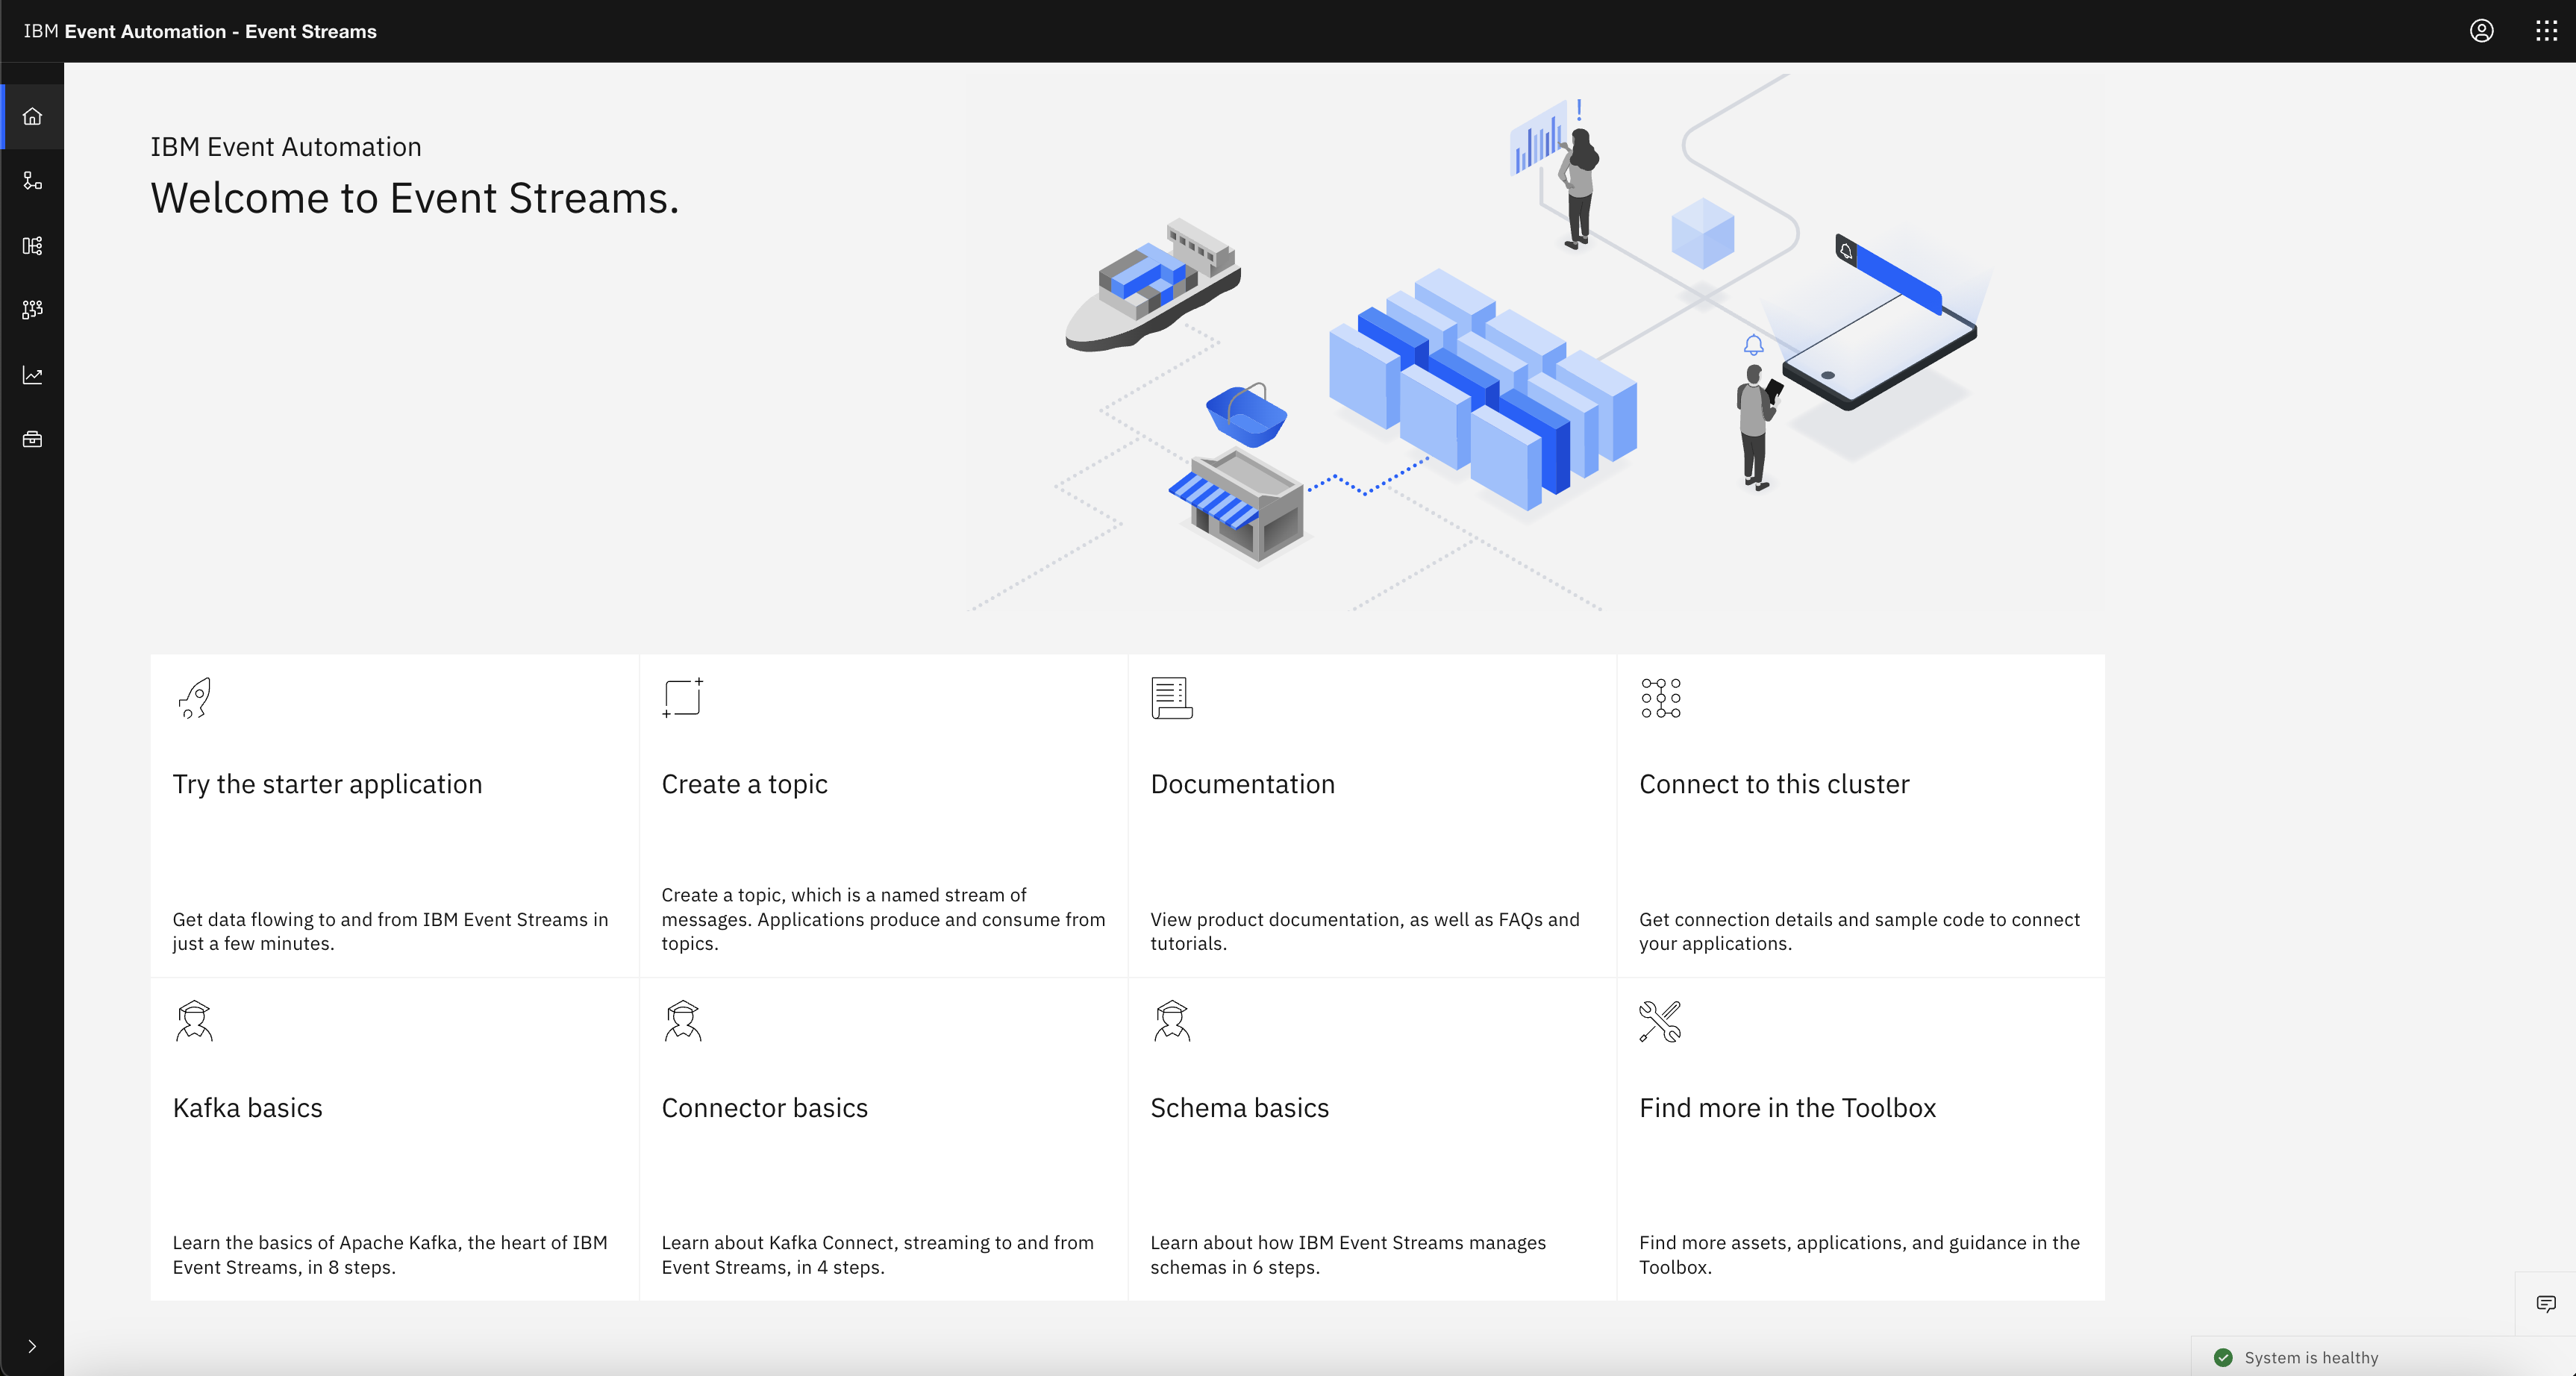
In the Event Streams UI, click Home in the primary navigation, and then click the Create a topic tile.
If you need a reminder about how to access the Event Streams web UI, you can review Accessing the tutorial environment.
-
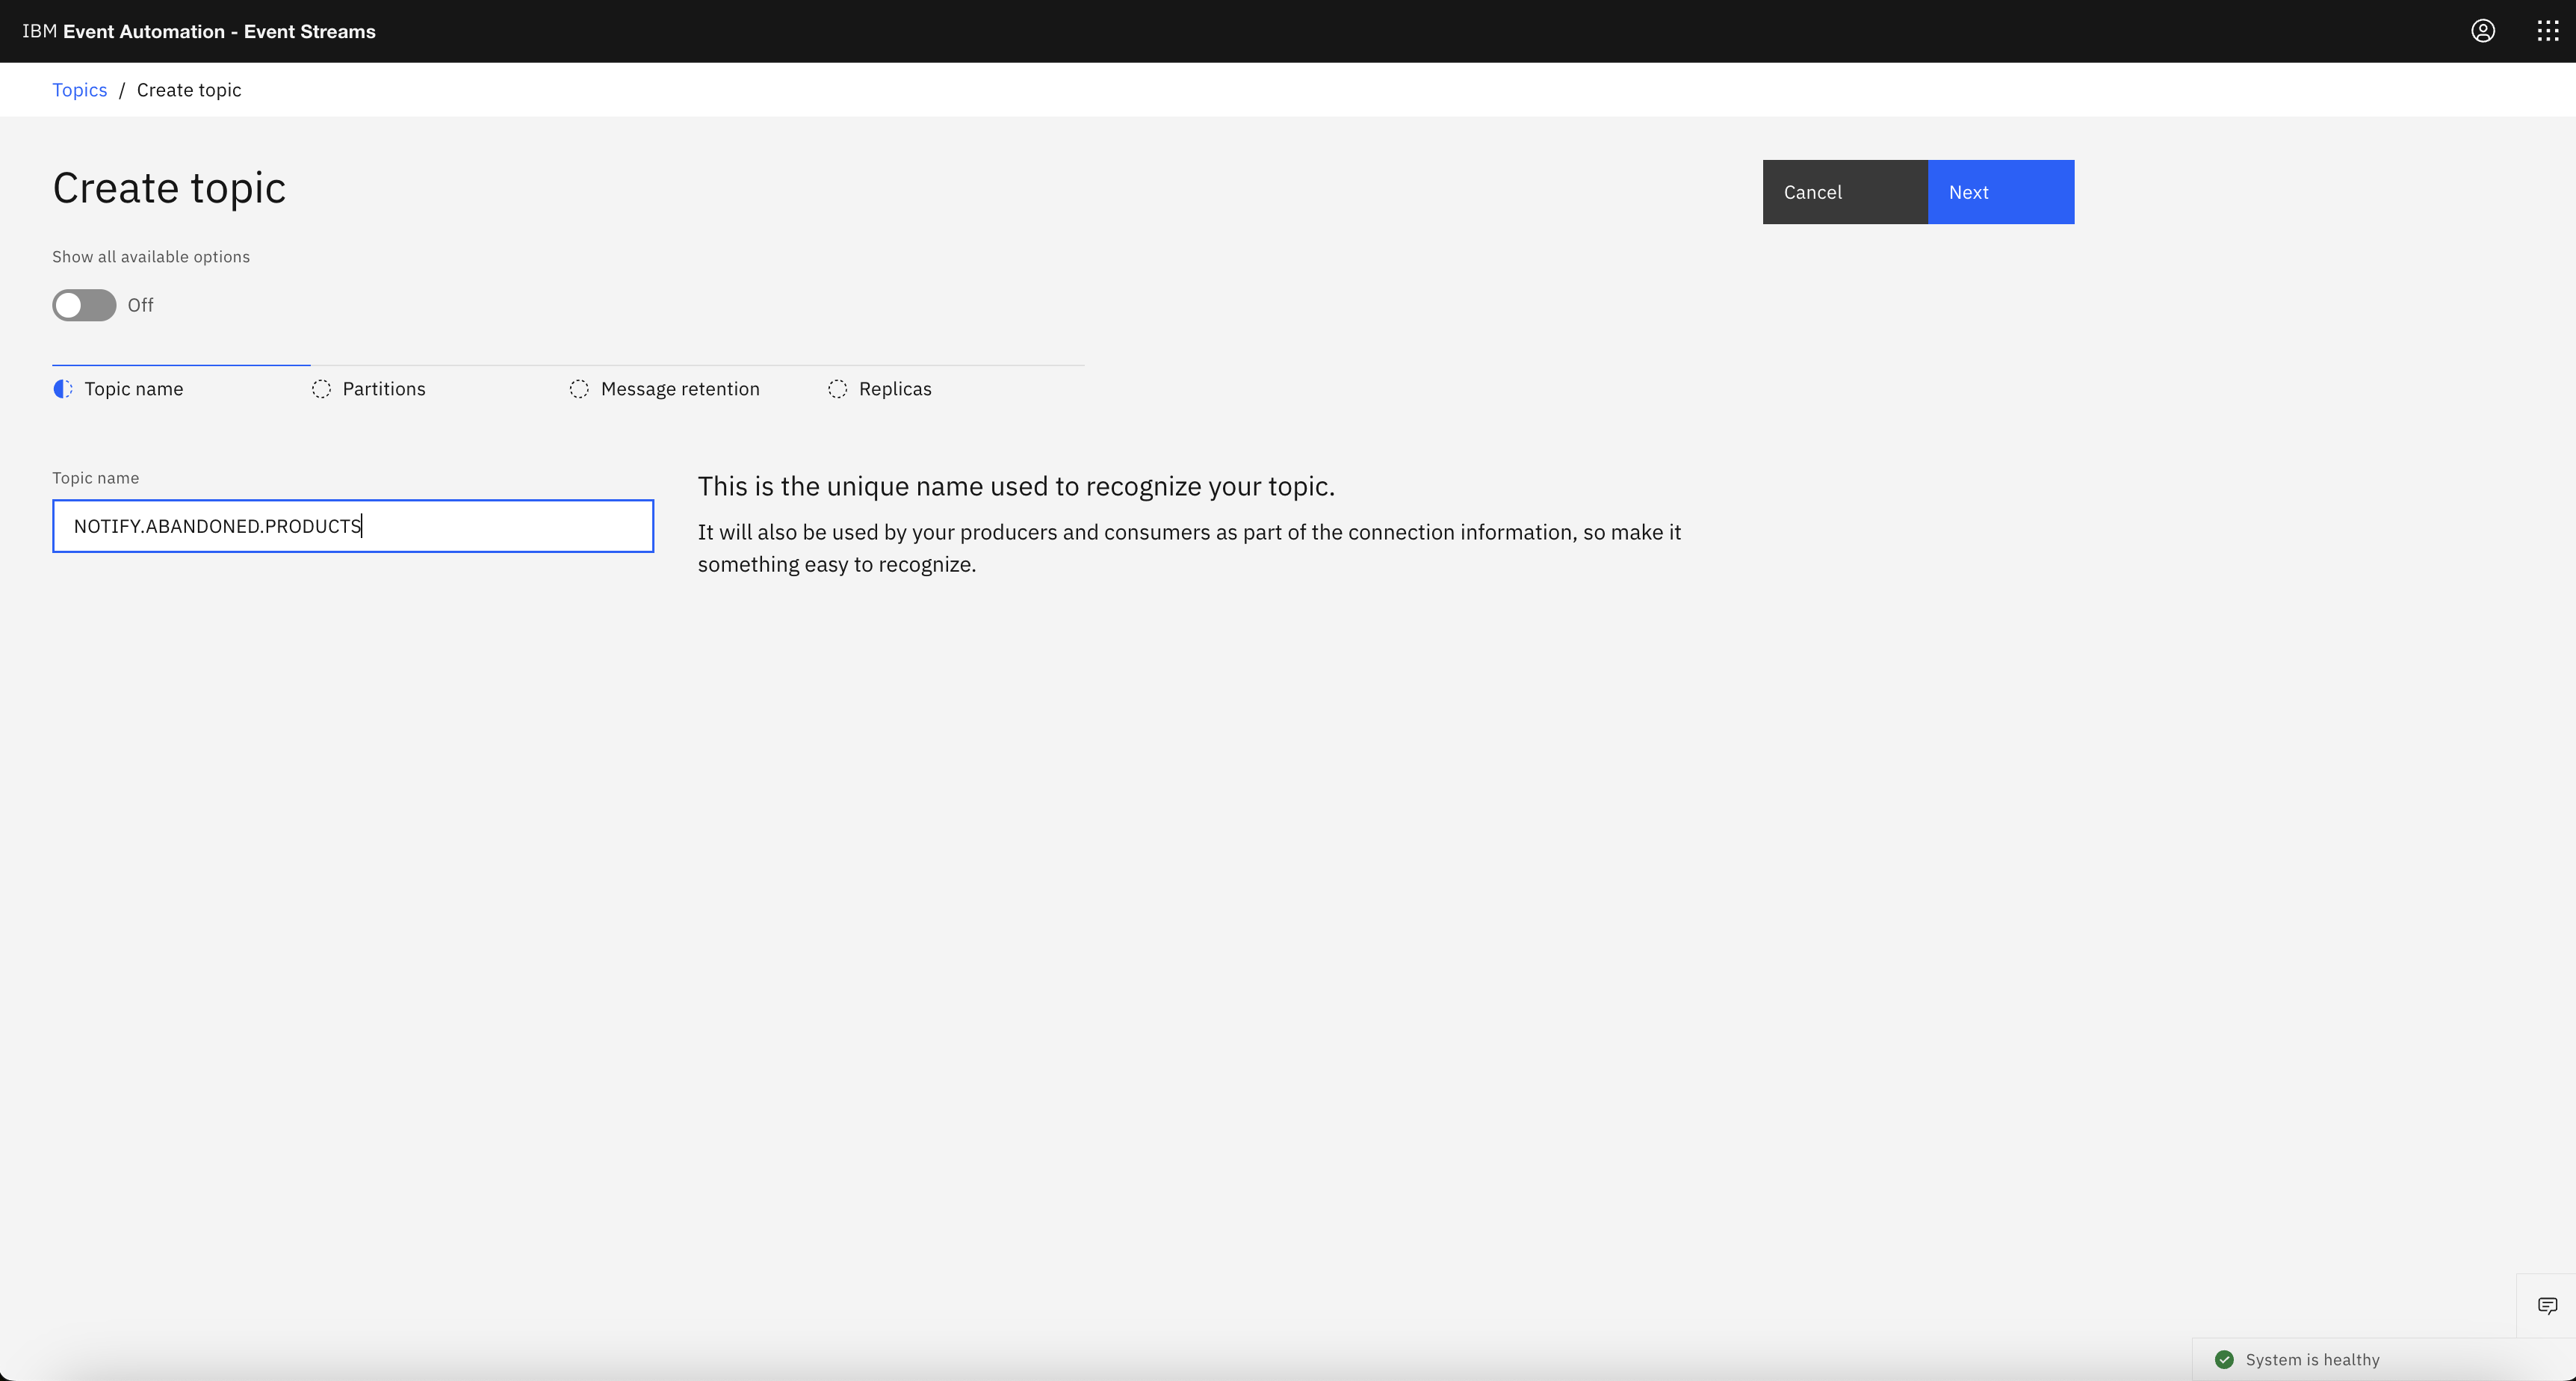
Create a new topic called
NOTIFY.ABANDONED.PRODUCTS. -
Create the topic with 1 partition.
Step 2: Discover the topics to use
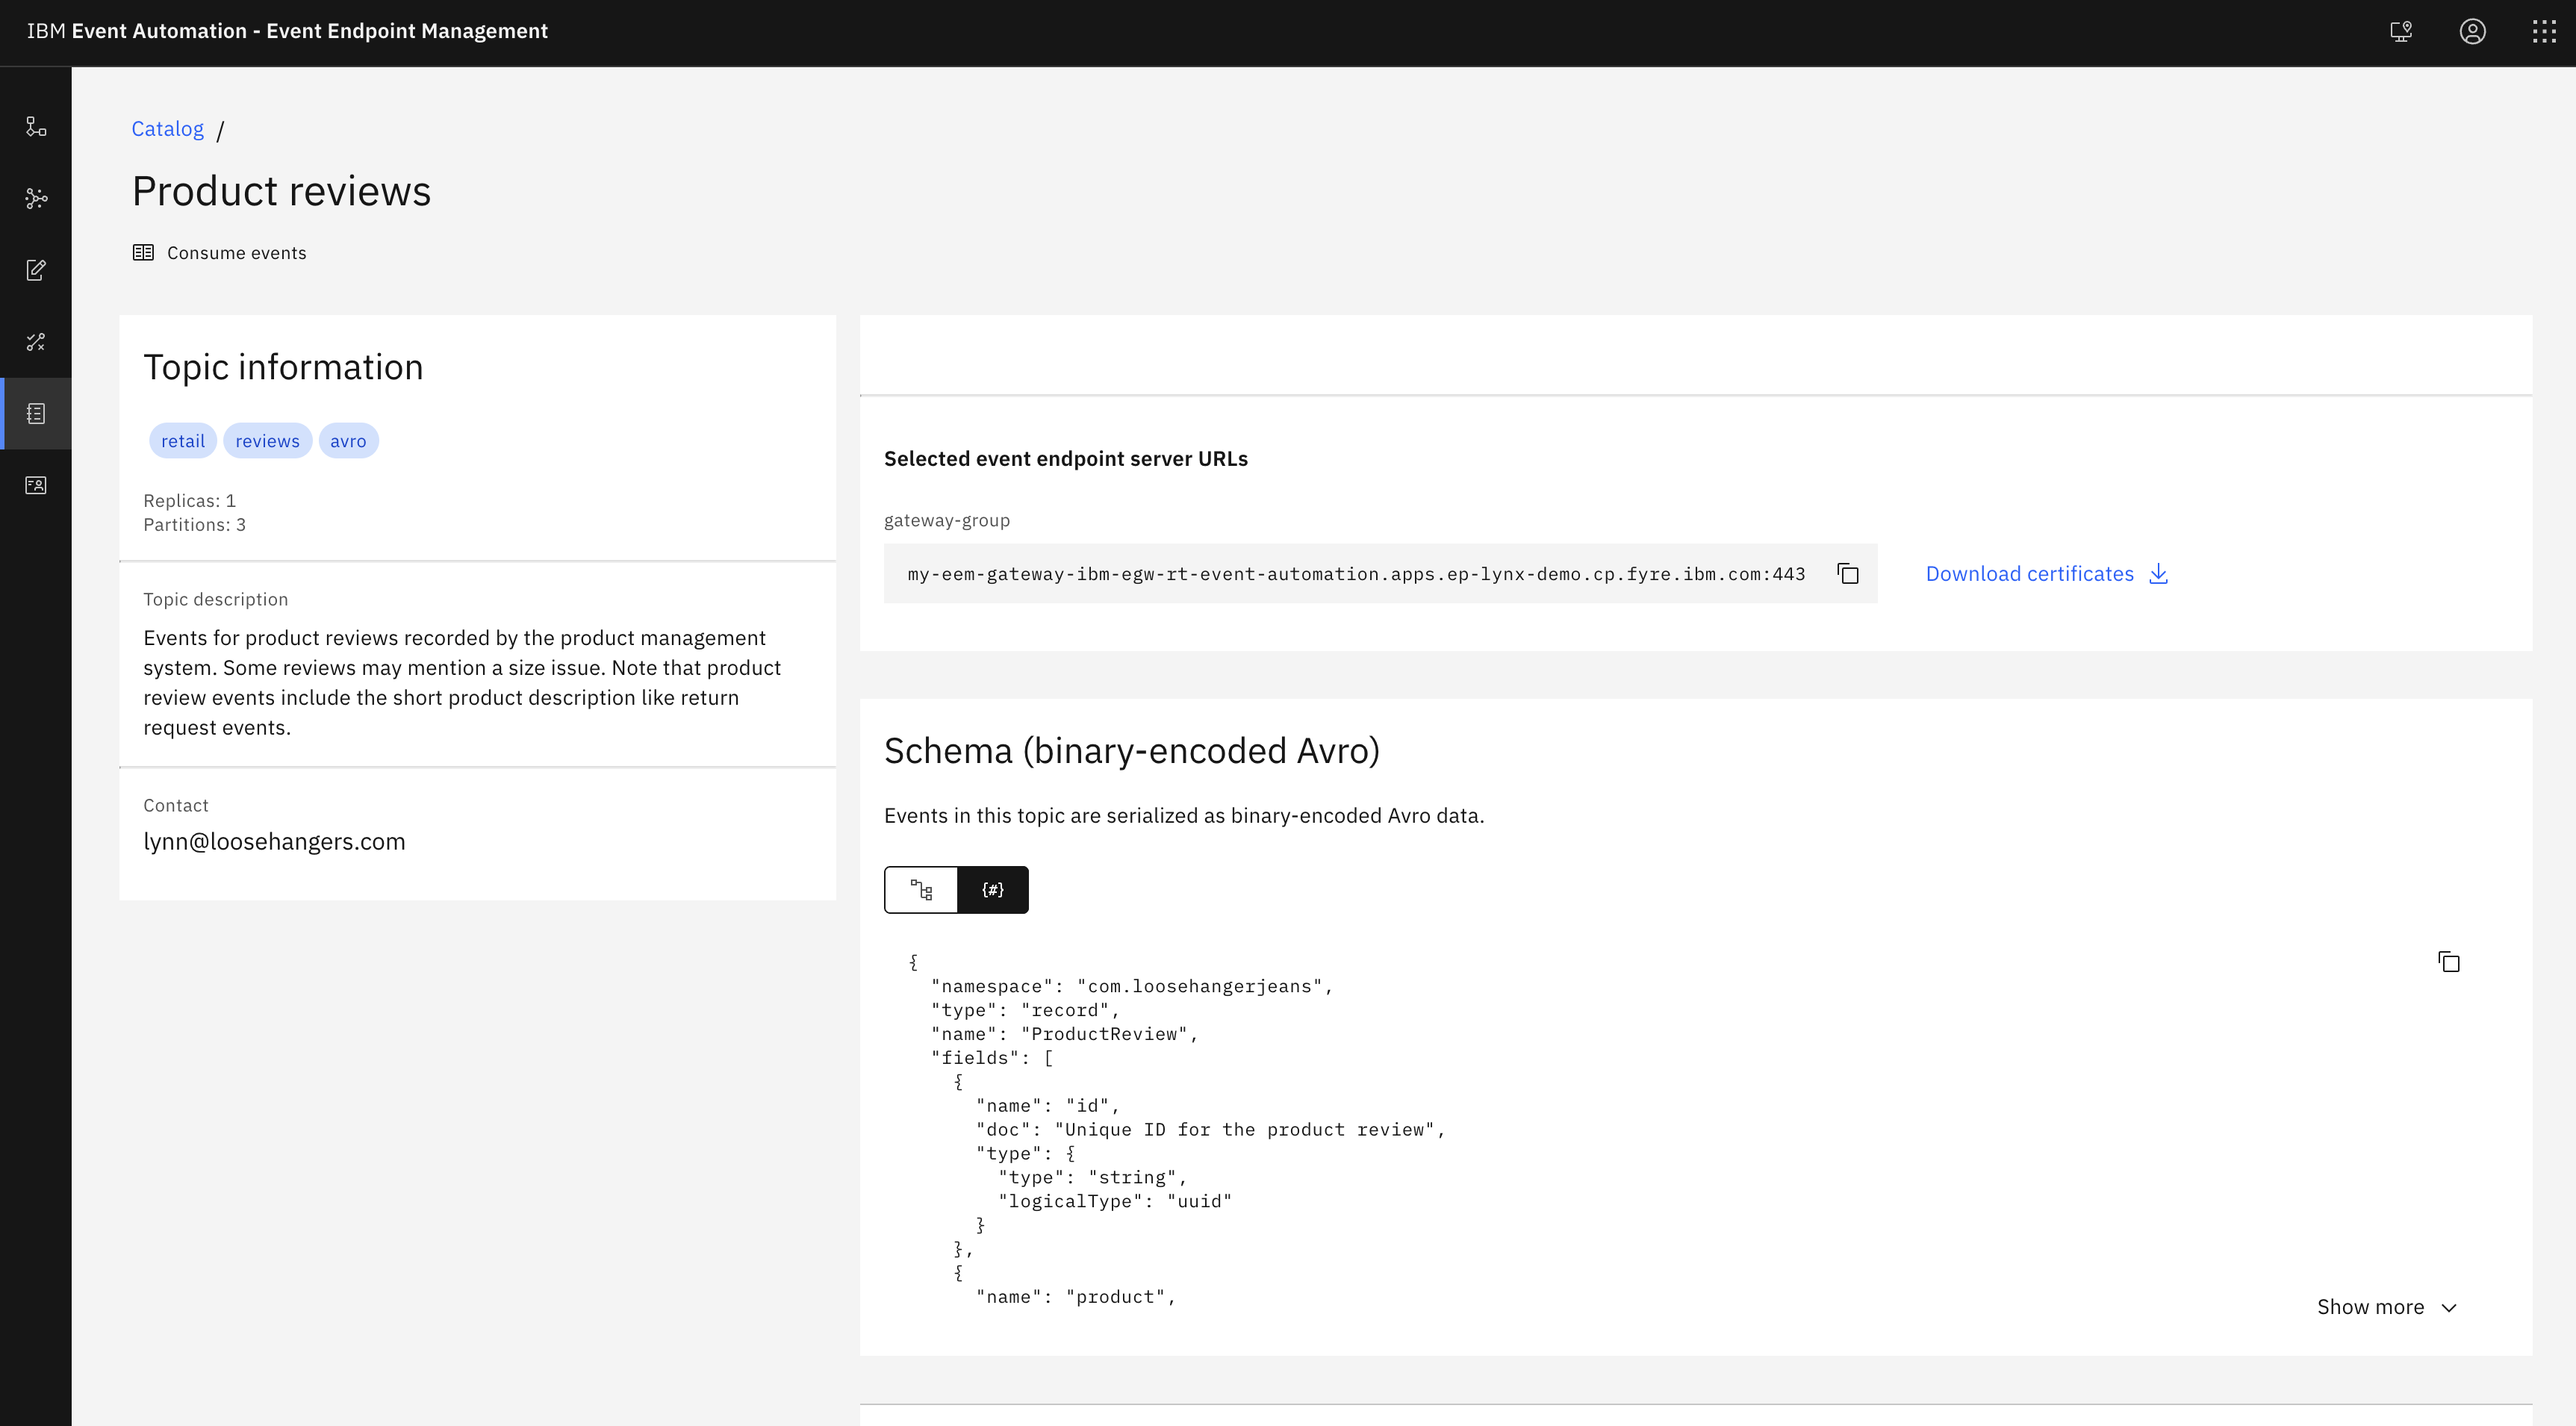
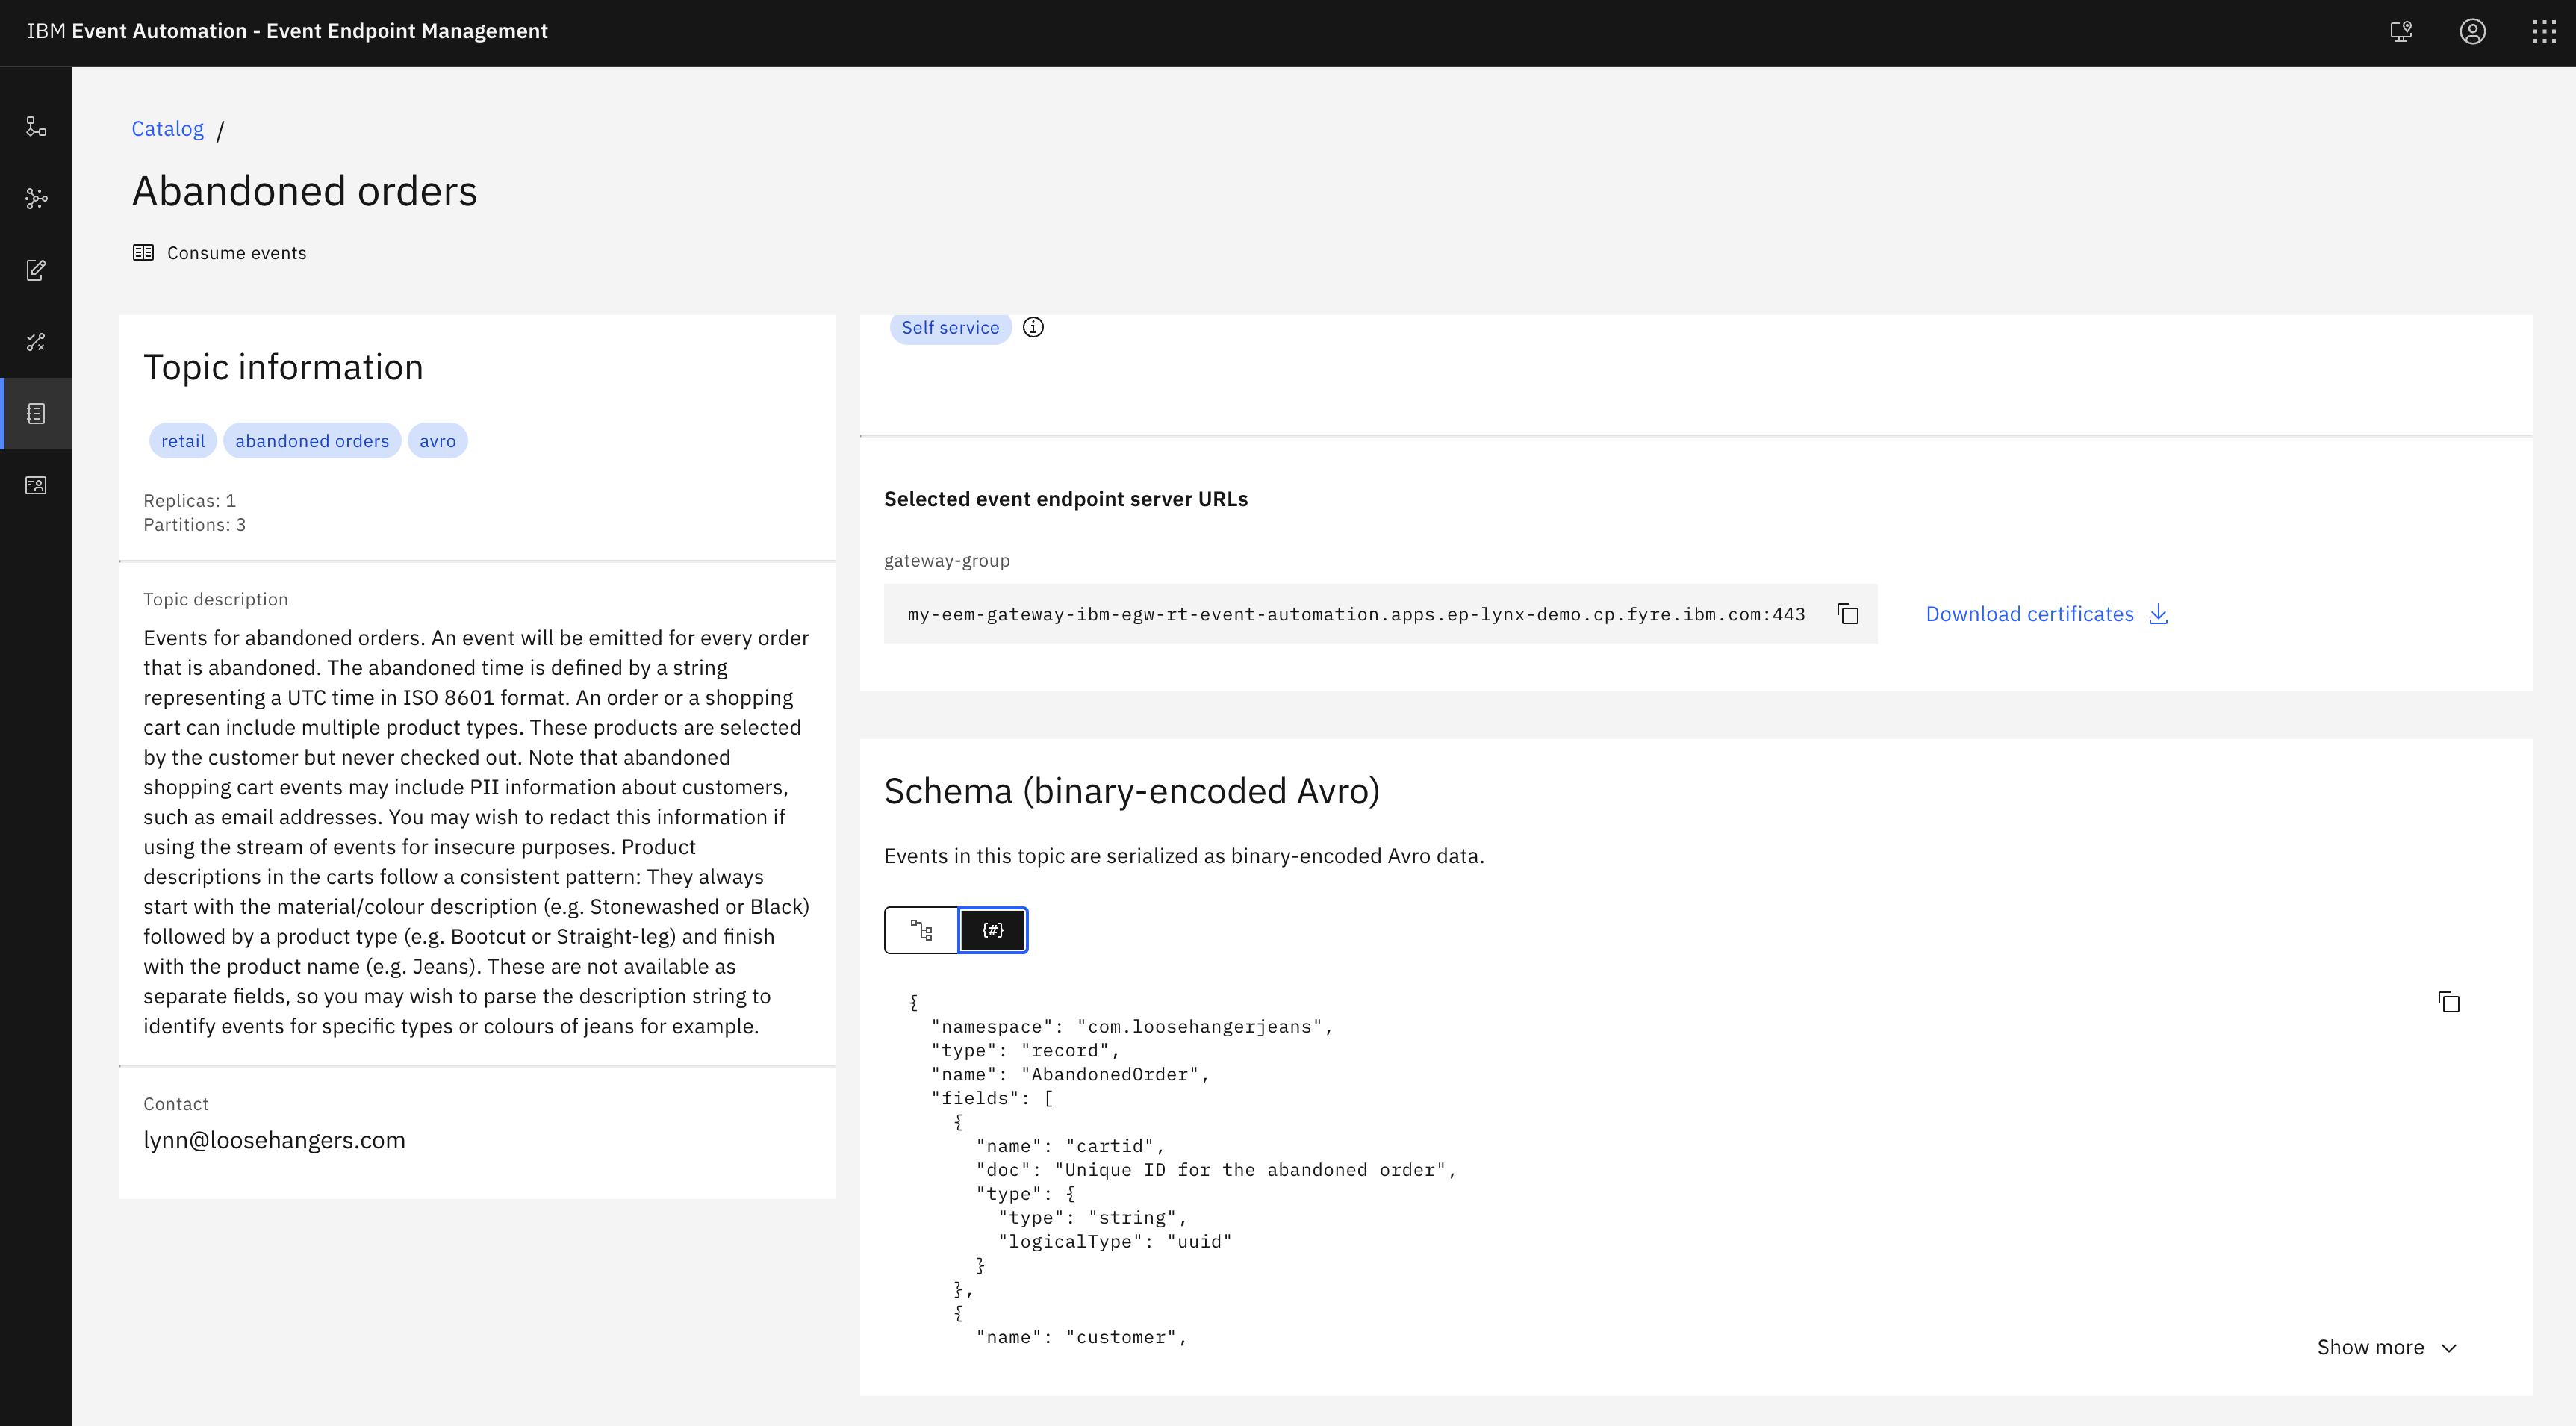
For this scenario, you need a source for the Product reviews events and the Abandoned orders events.
-
Go to the Event Endpoint Management catalog.
If you need a reminder about how to access the Event Endpoint Management catalog, you can review Accessing the tutorial environment.
-
Find the
Product reviewsand theAbandoned orderstopics. -
Click into the topics to review the information about the events that are available here.
Look at the schema to see the properties in the events, and get an idea of what to expect from events on these topics.
Tip: Keep this page open. It is helpful to have the catalog available while you work on your event processing flows, as it allows you to refer to the documentation about the events as you work. Complete the following steps in a separate browser window or tab.
Step 3: Create a flow
The next step is to start processing this stream of events, to create a custom subset that contains the events that you are interested in.
-
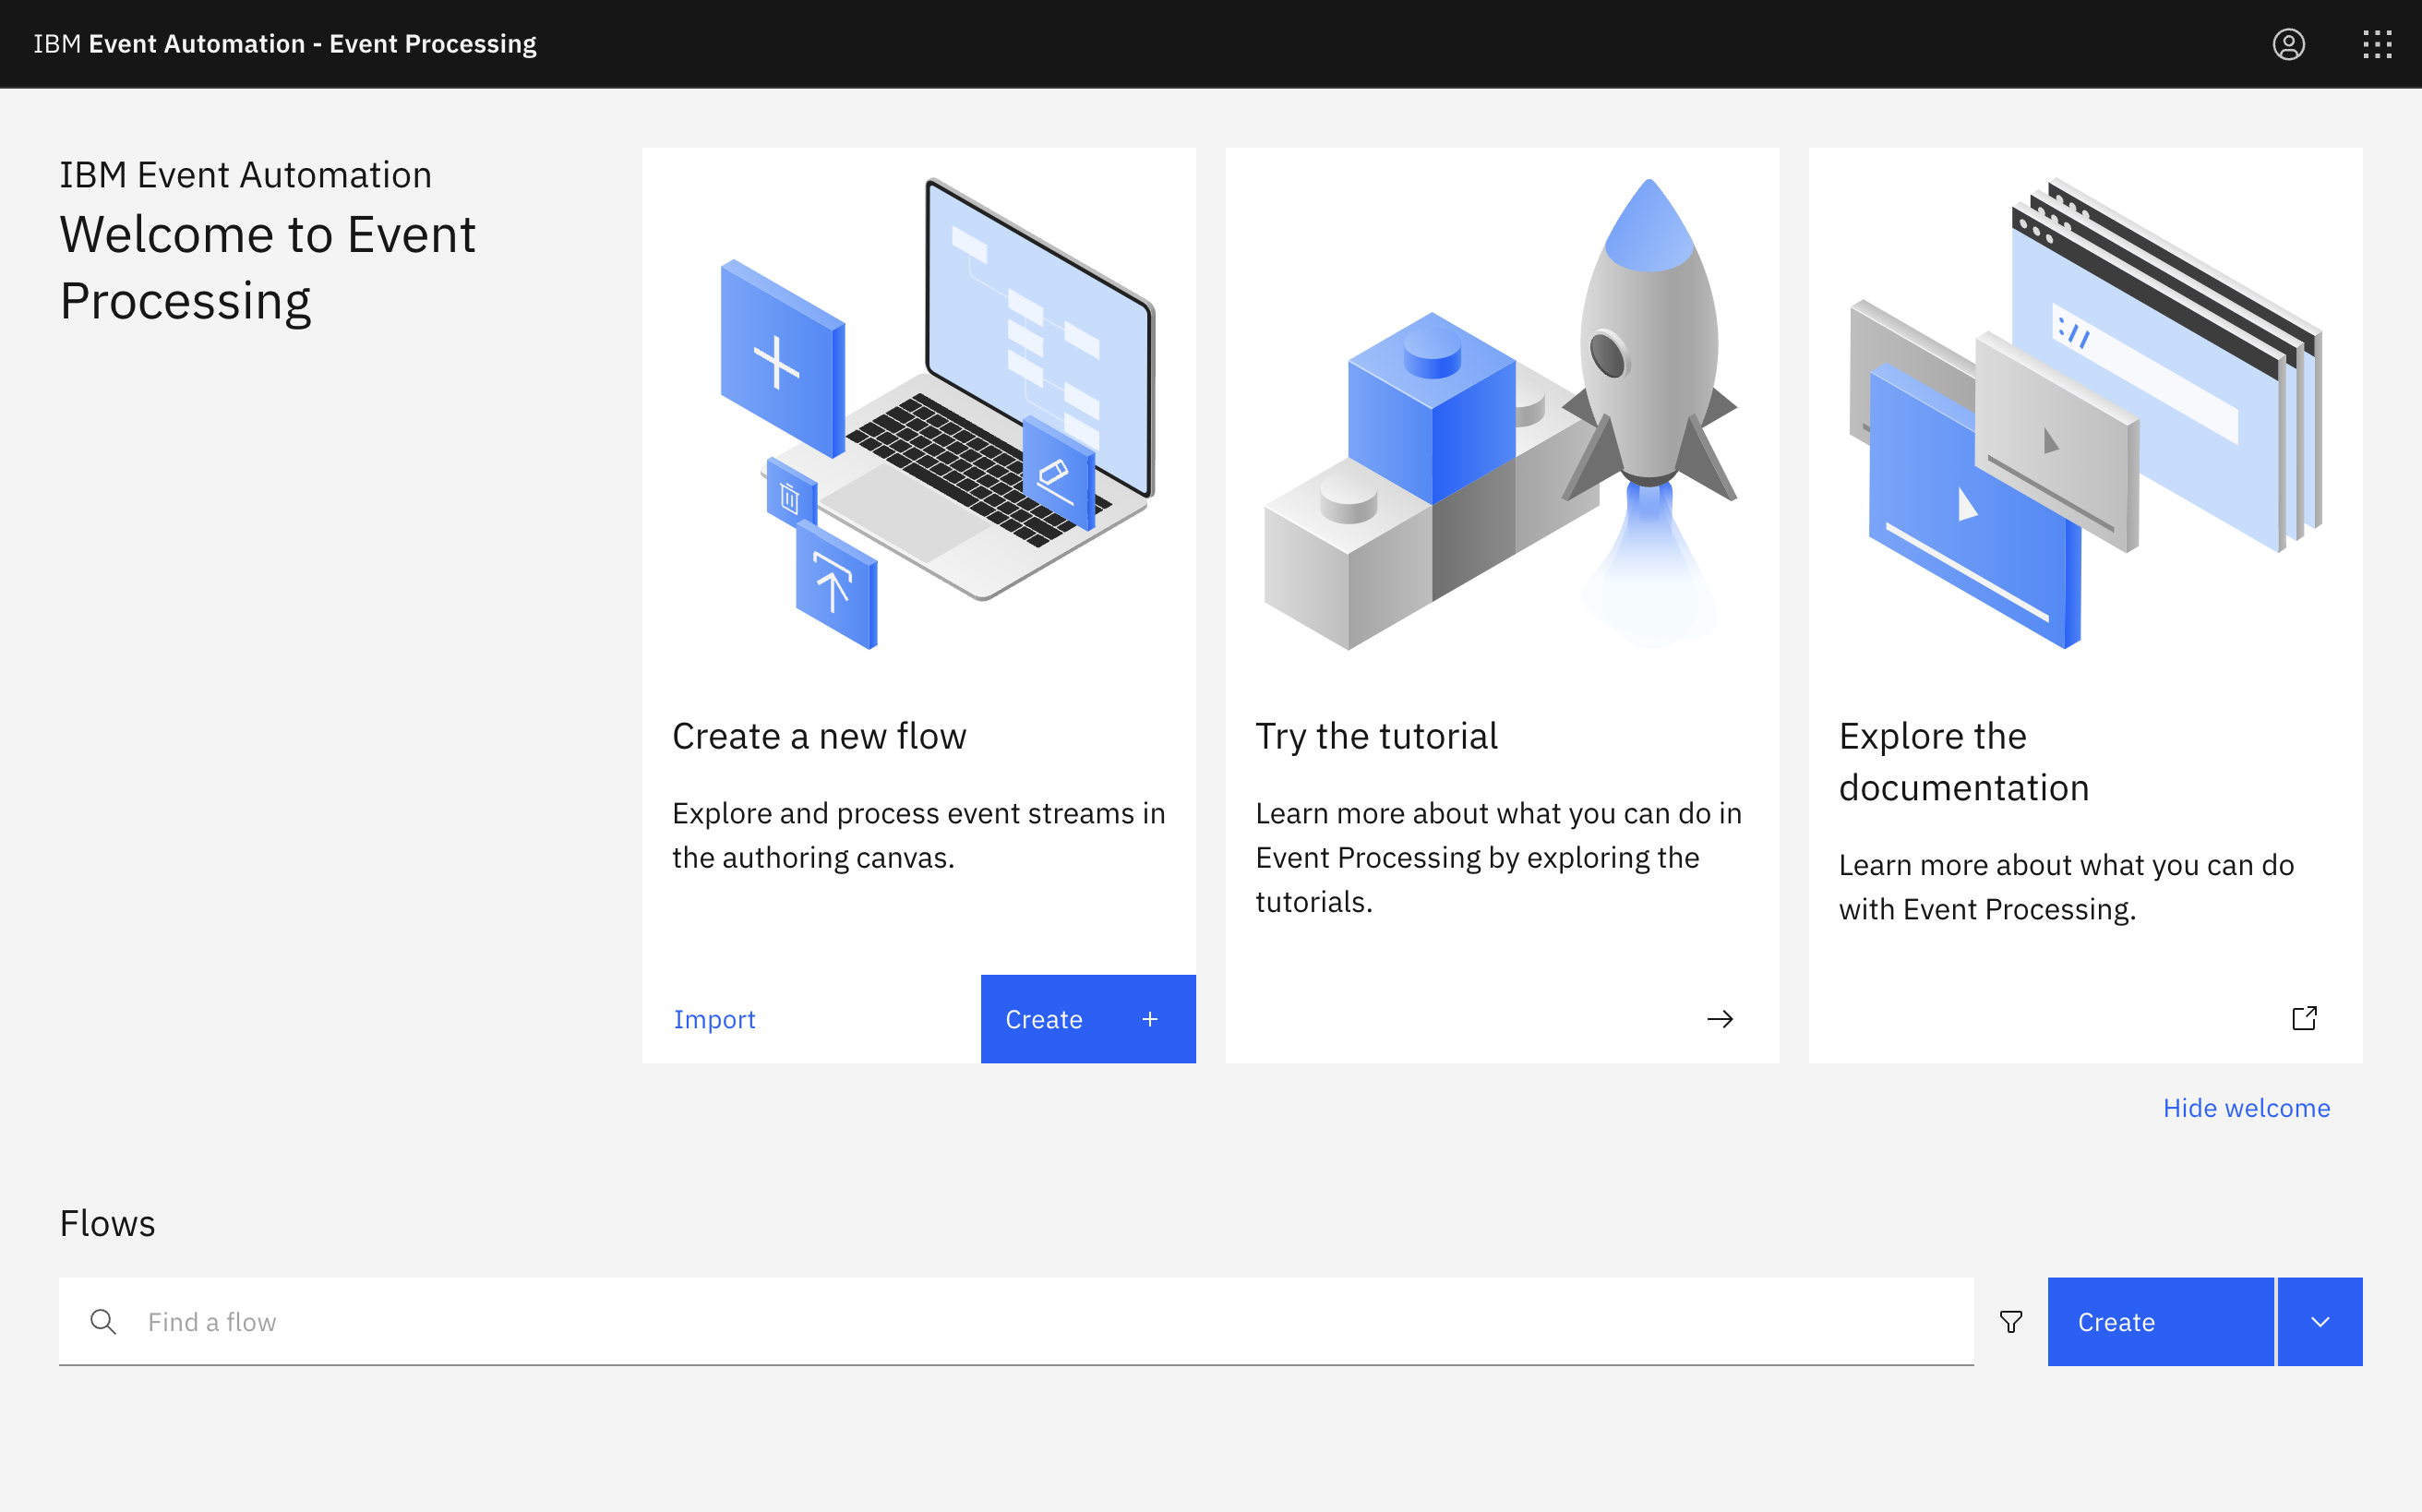
Go to the Event Processing home page.
If you need a reminder about how to access the Event Processing home page, you can review Accessing the tutorial environment.
-
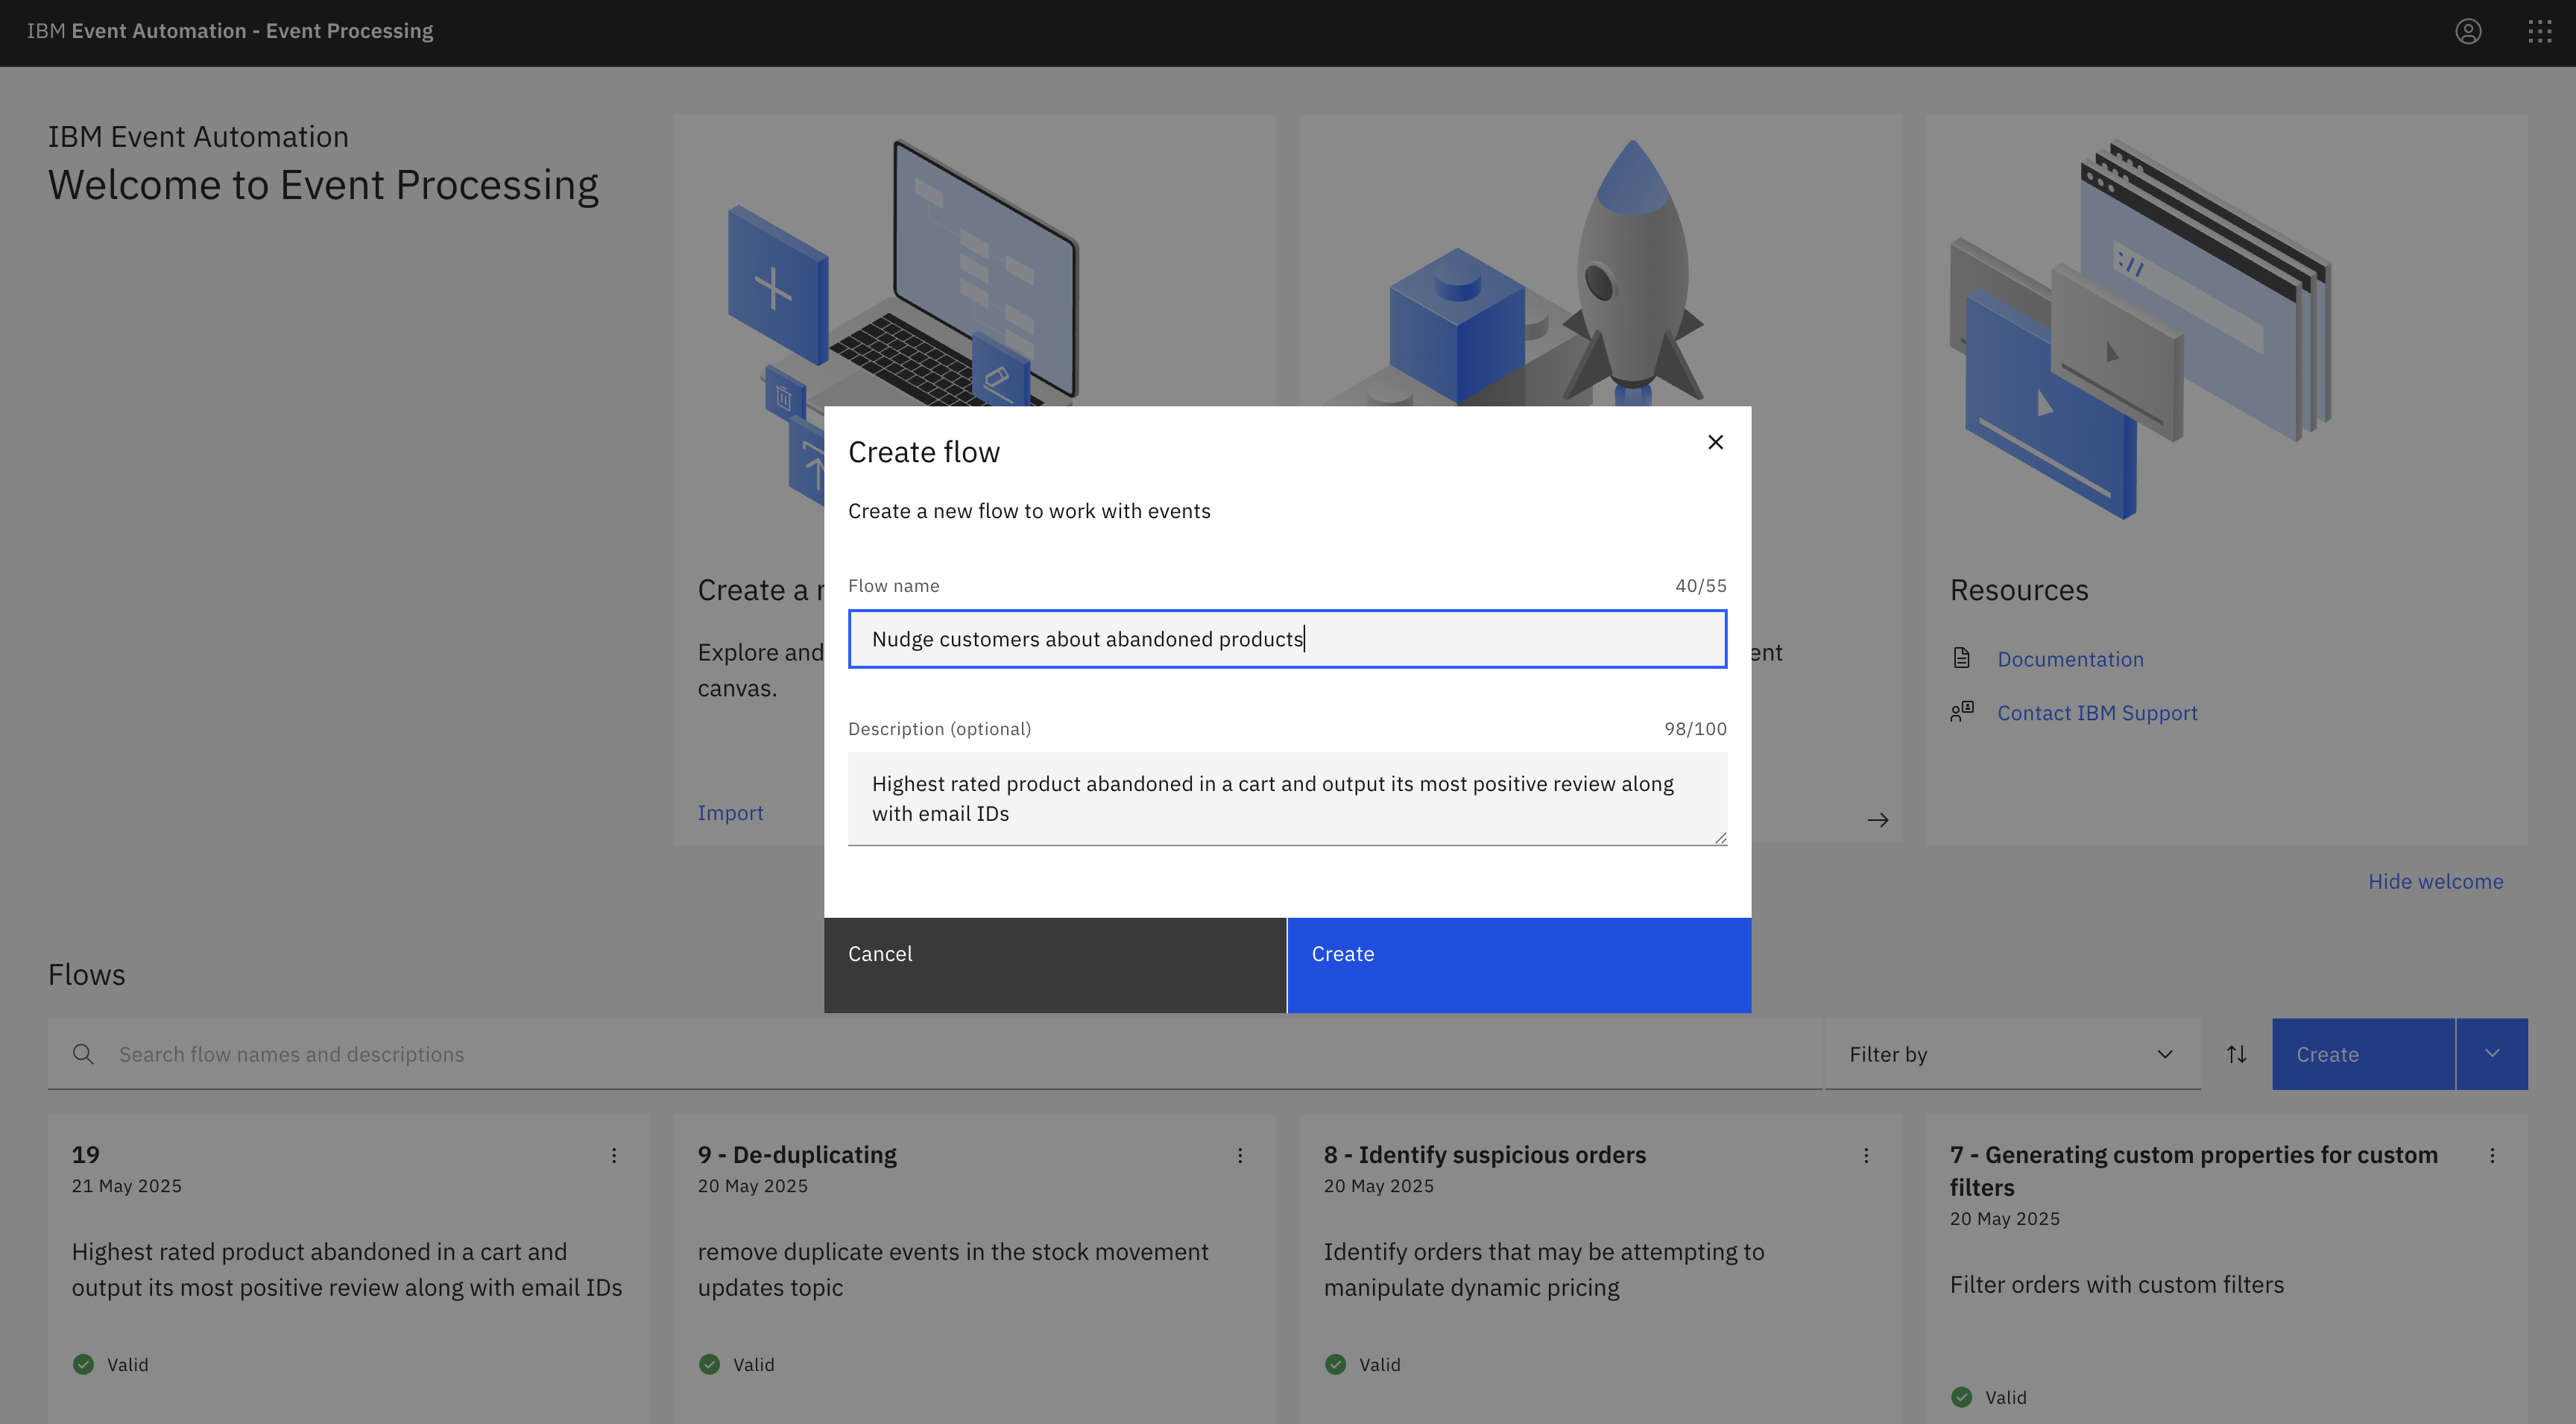
Create a flow, and give it a name and description to explain that you will use it to analyze a stream of product reviews:
Nudge customers about abandoned products
Step 4: Provide sources of events
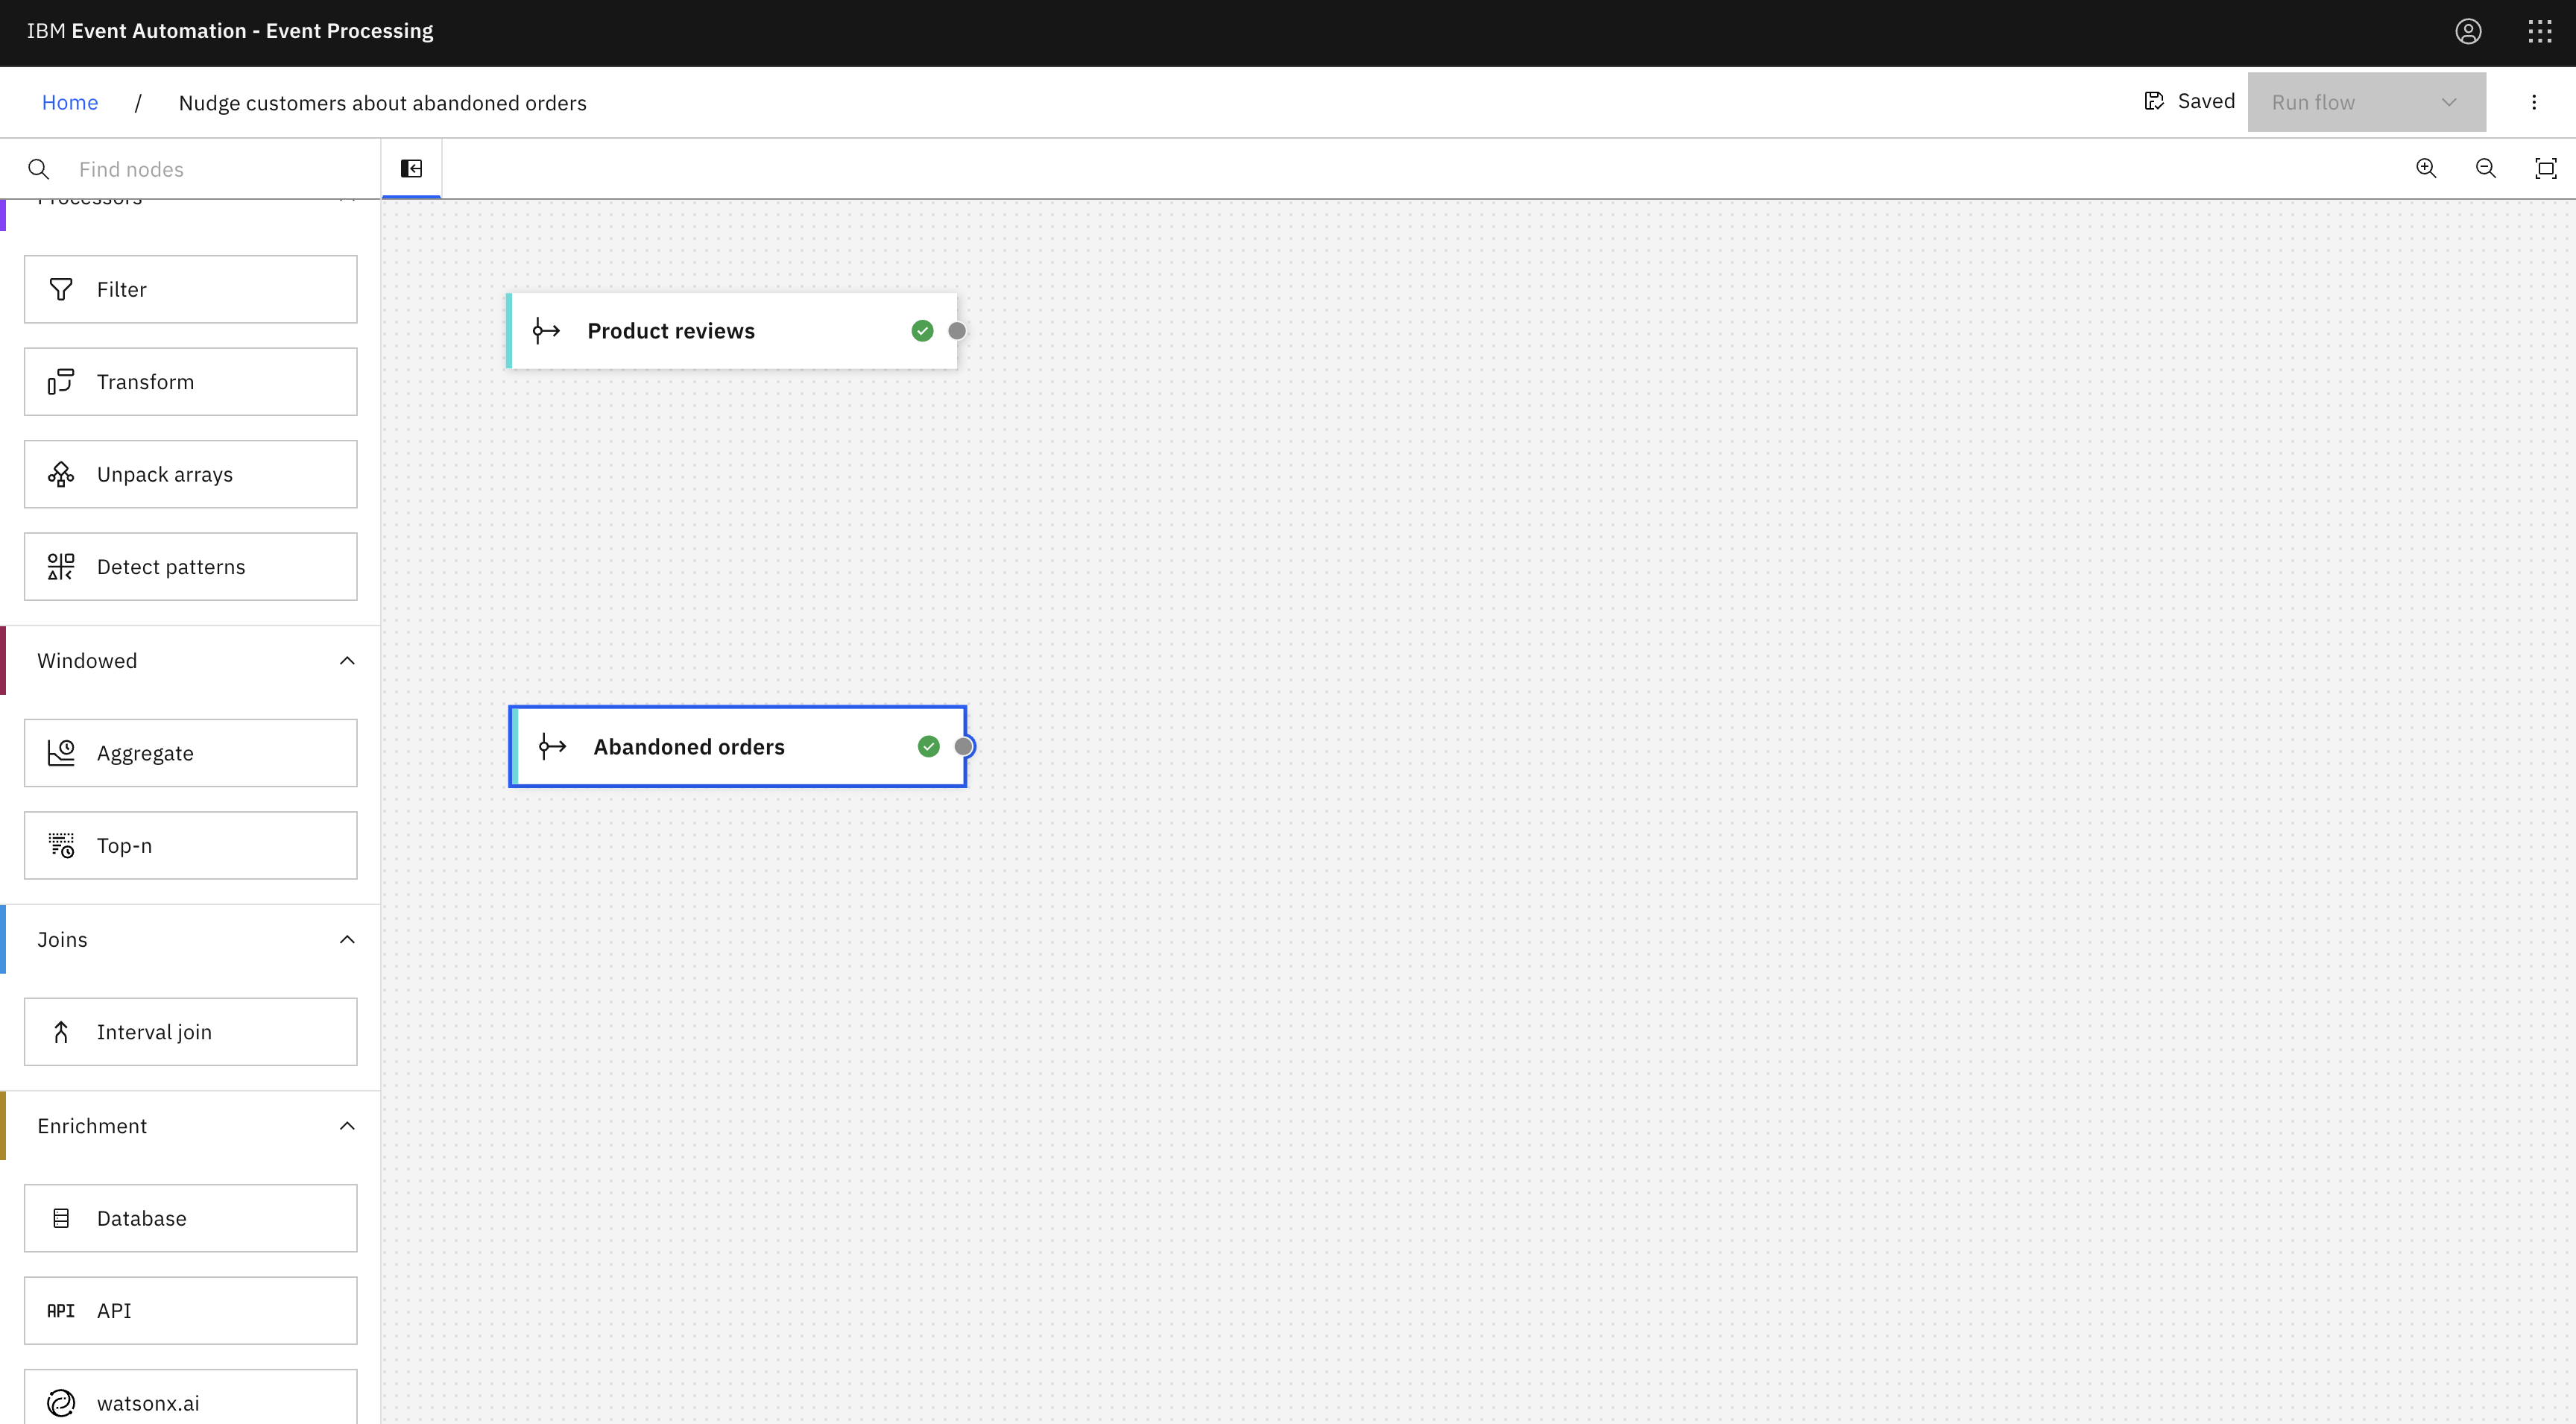
The next step is to create event sources in Event Processing for the Product reviews and the Abandoned orders topics to use in the flow.
Use the server address information and Generate access credentials button on each topic page in the catalog to define an event source node for each topic.
Tip: If you need a reminder about how to create an event source node, you can follow the Identify orders from a specific region tutorial.
Step 5: Filter reviews received today
-
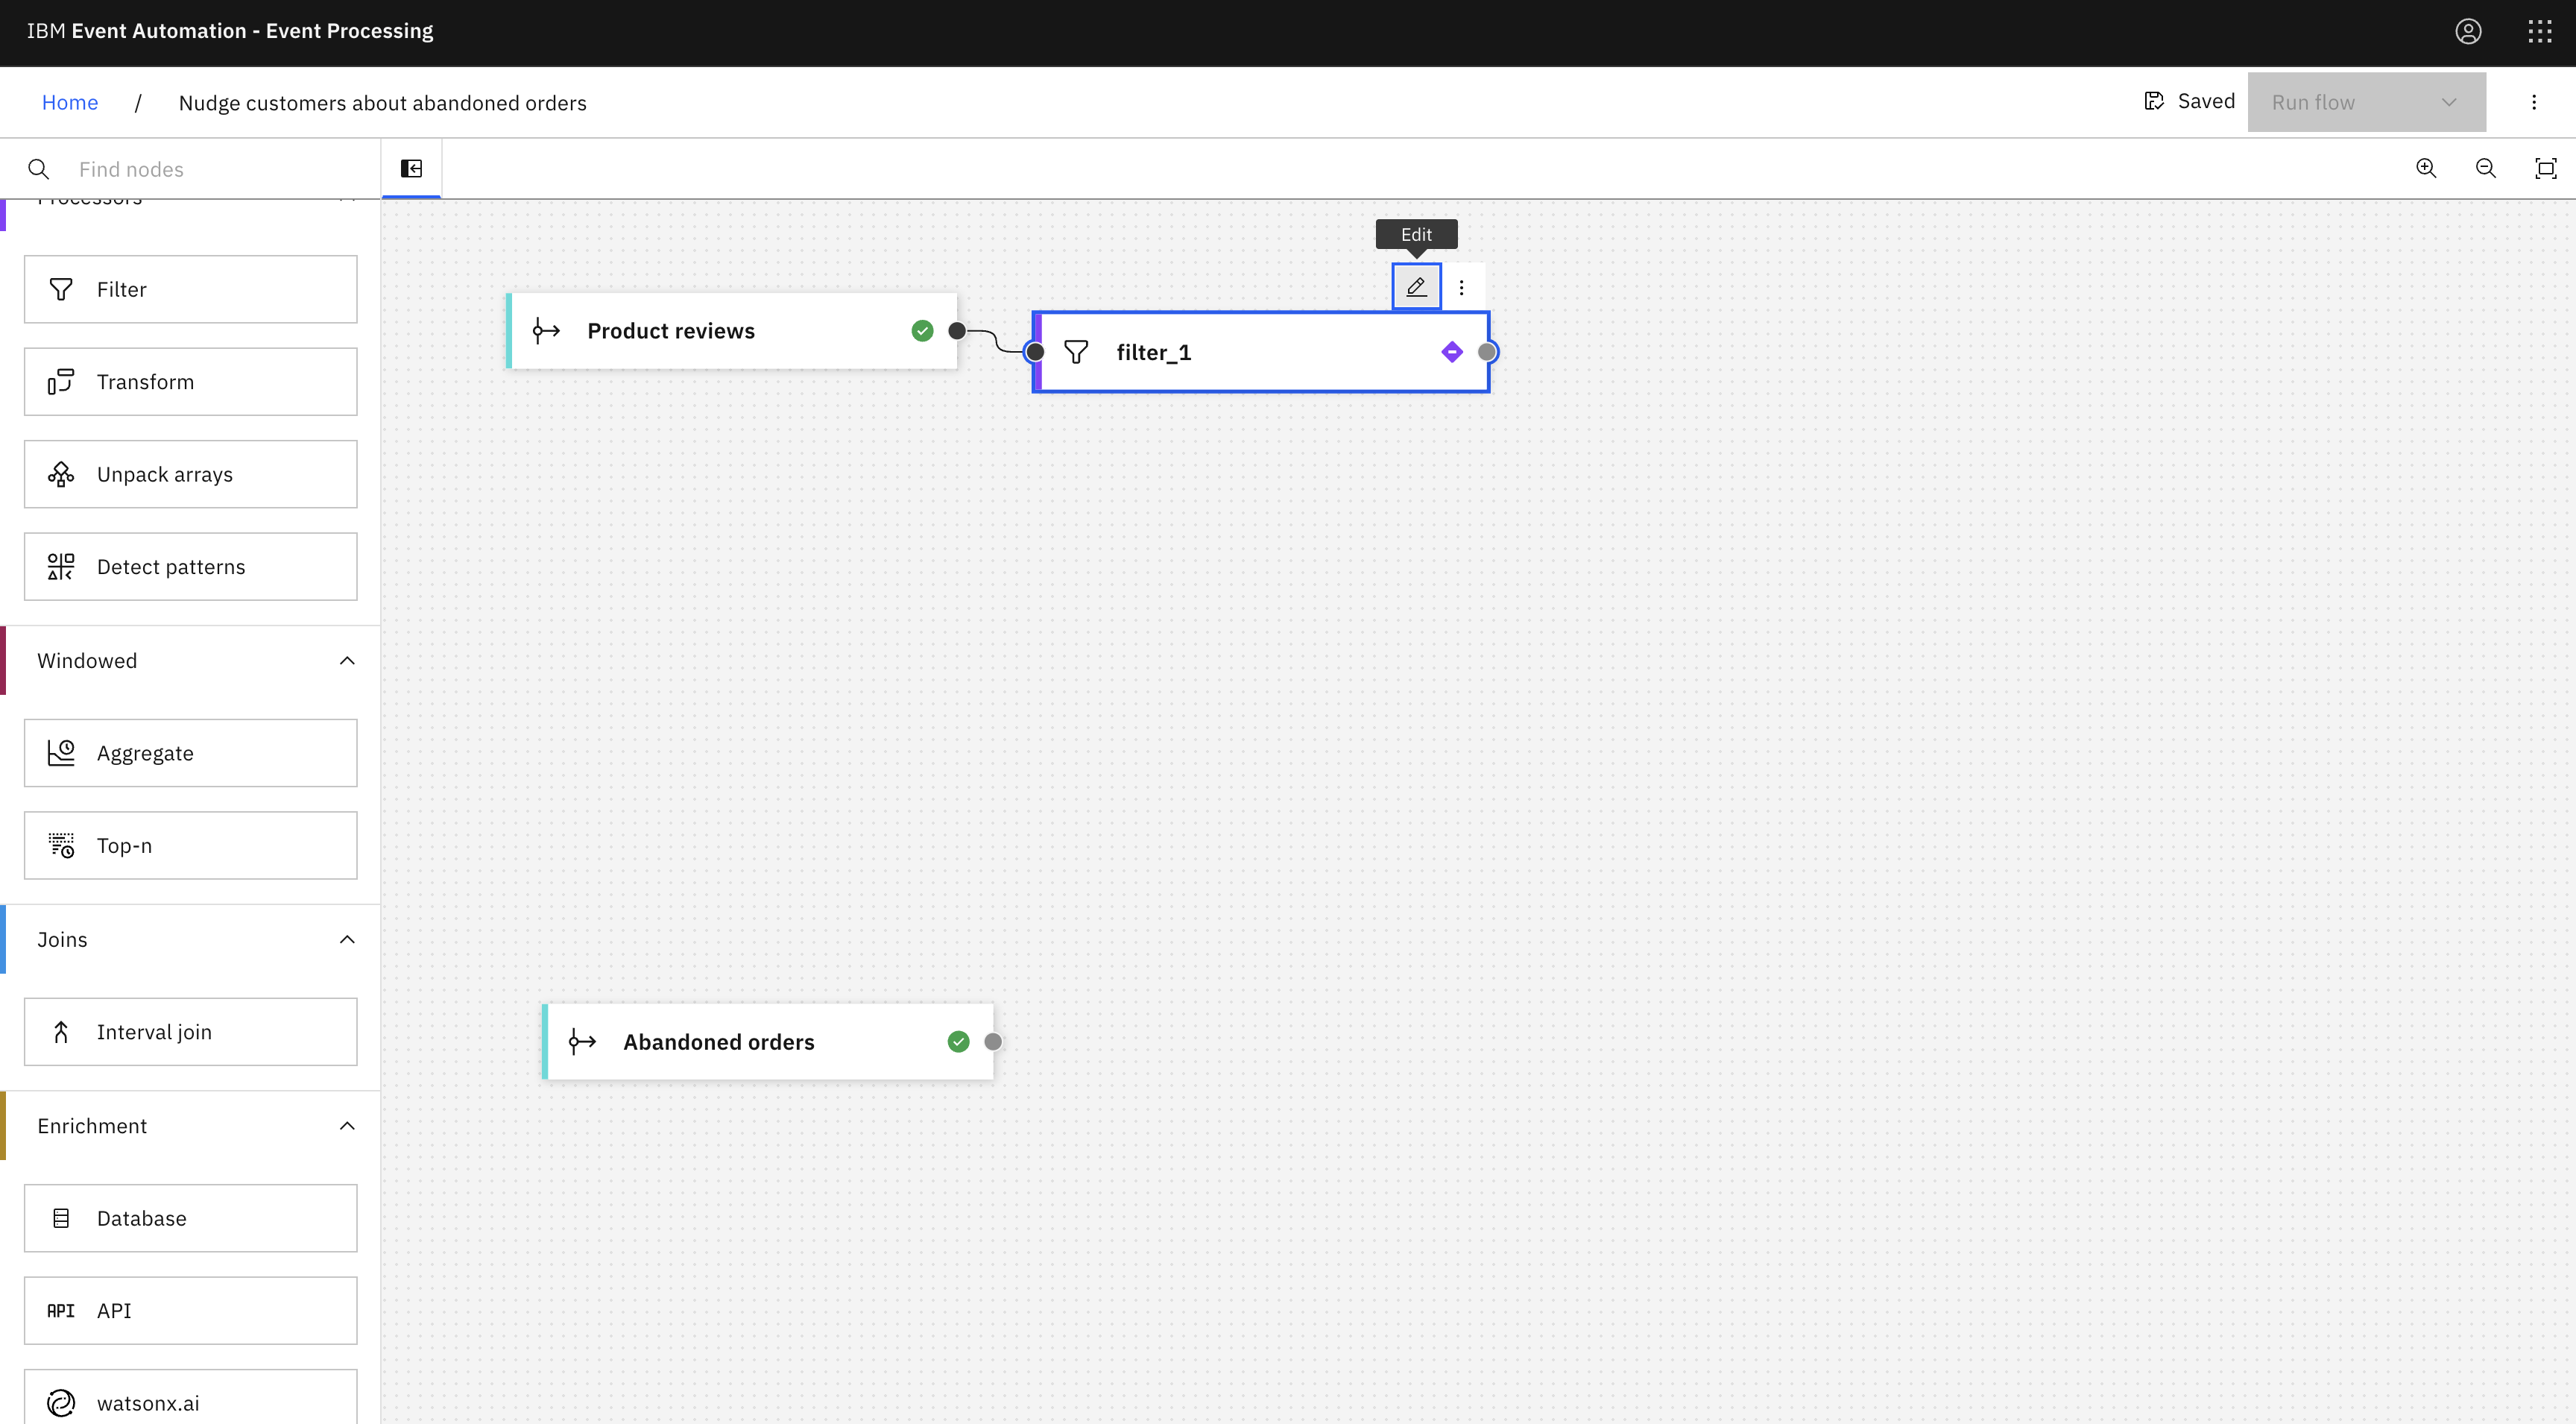
Add a Filter node to the flow and it to the
Product reviewsnode.Create a filter node by dragging one onto the canvas. You can find this in the Processors section of the left panel.
Click and drag from the small gray dot on the event source to the matching dot on the filter node.
-
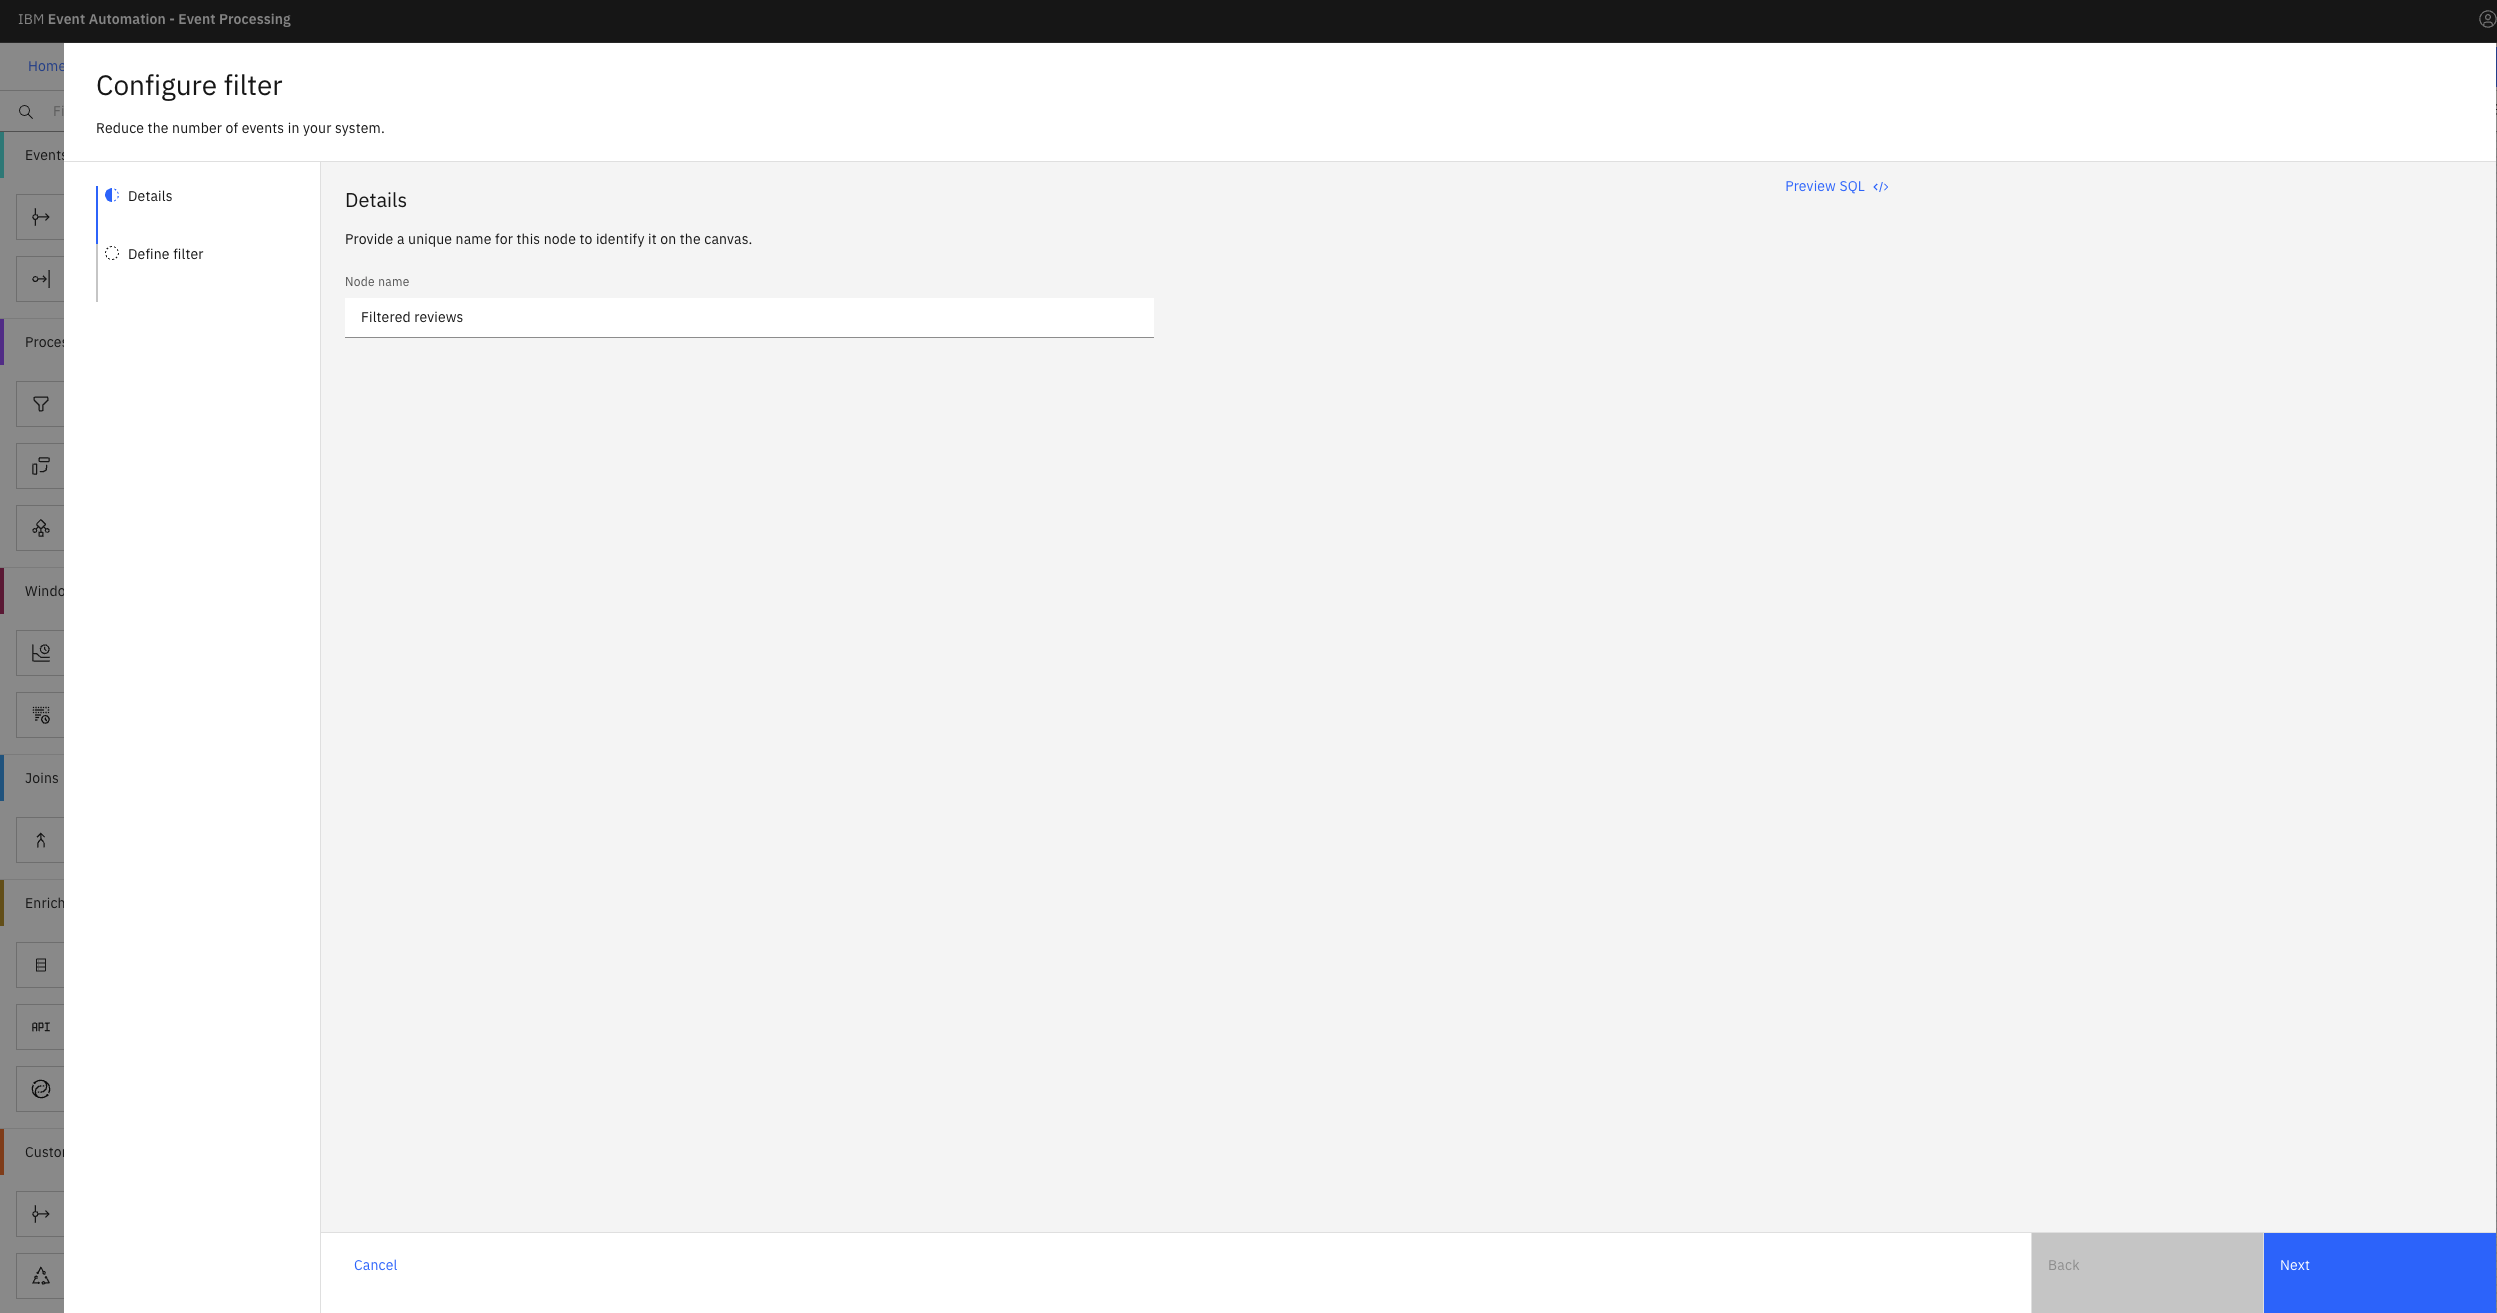
Give the filter node a name that describes the results:
Filtered reviews.Hover over the filter node and click
Edit to configure the node.
-
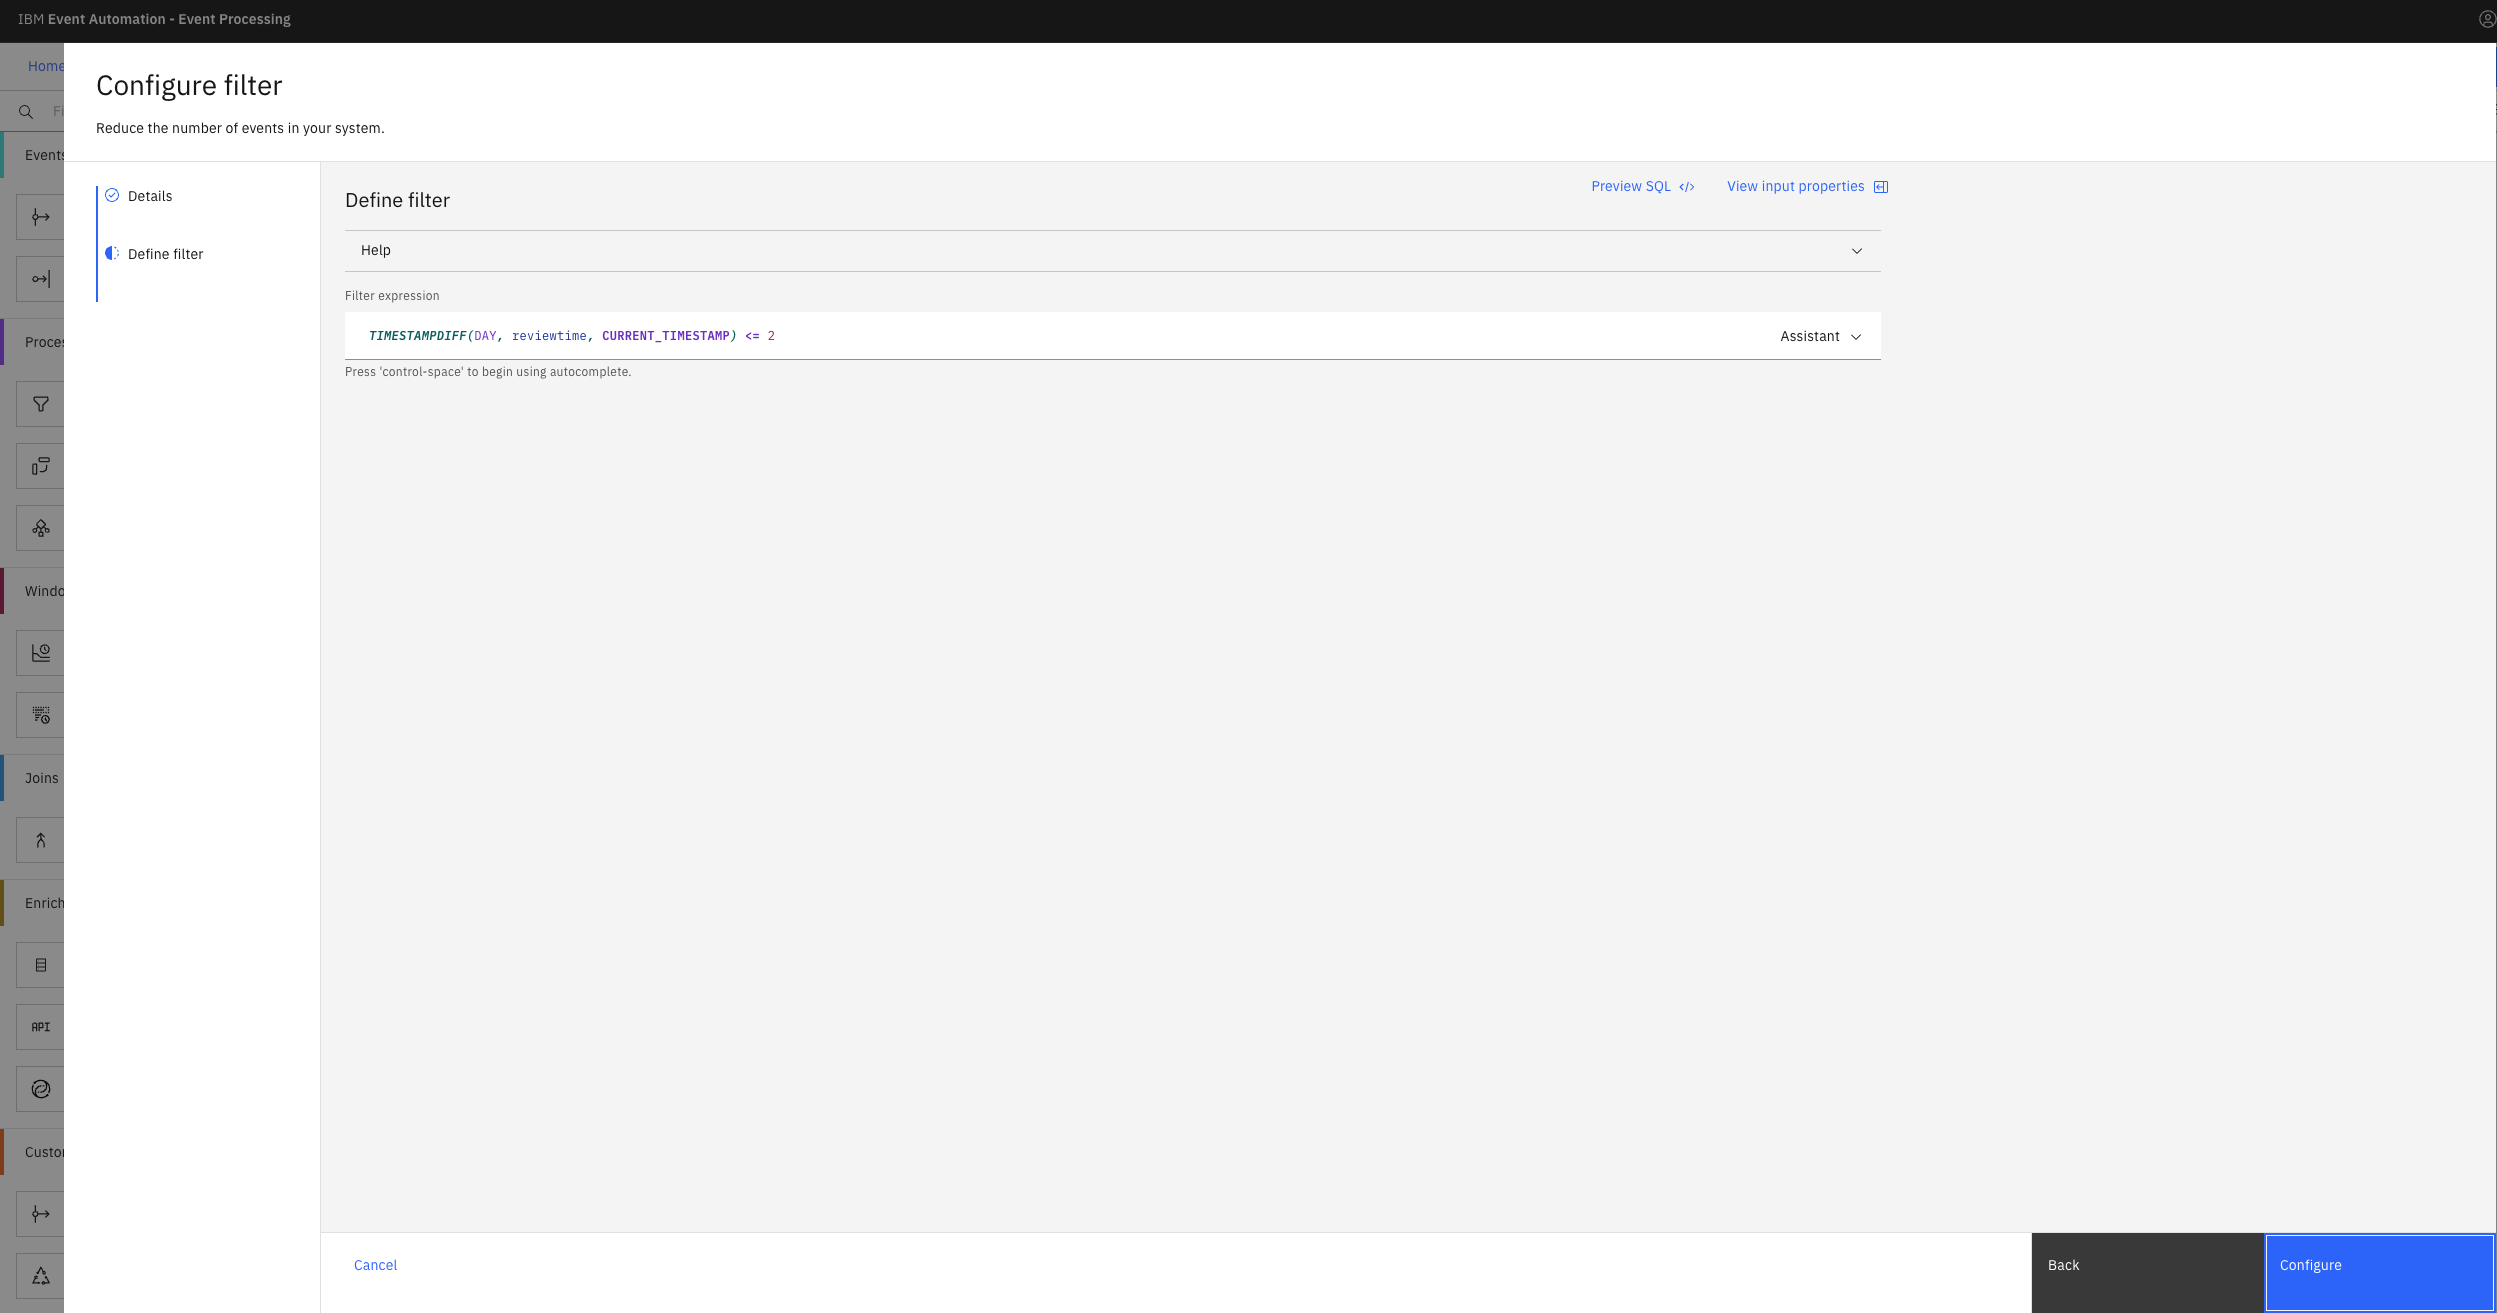
Use the expression editor to define a filter that filters records where
reviewtimeis today, and click Add to expression.TIMESTAMPDIFF(DAY, reviewtime, CURRENT_TIMESTAMP) = 0 -
Click Next to open the Output properties pane. Choose the properties to output.
-
Click Configure to finalize the filter.
Step 6: Calculate the average rating and review count
The next step is to count the number of review comments and the average review rating received within a 1-day window.
-
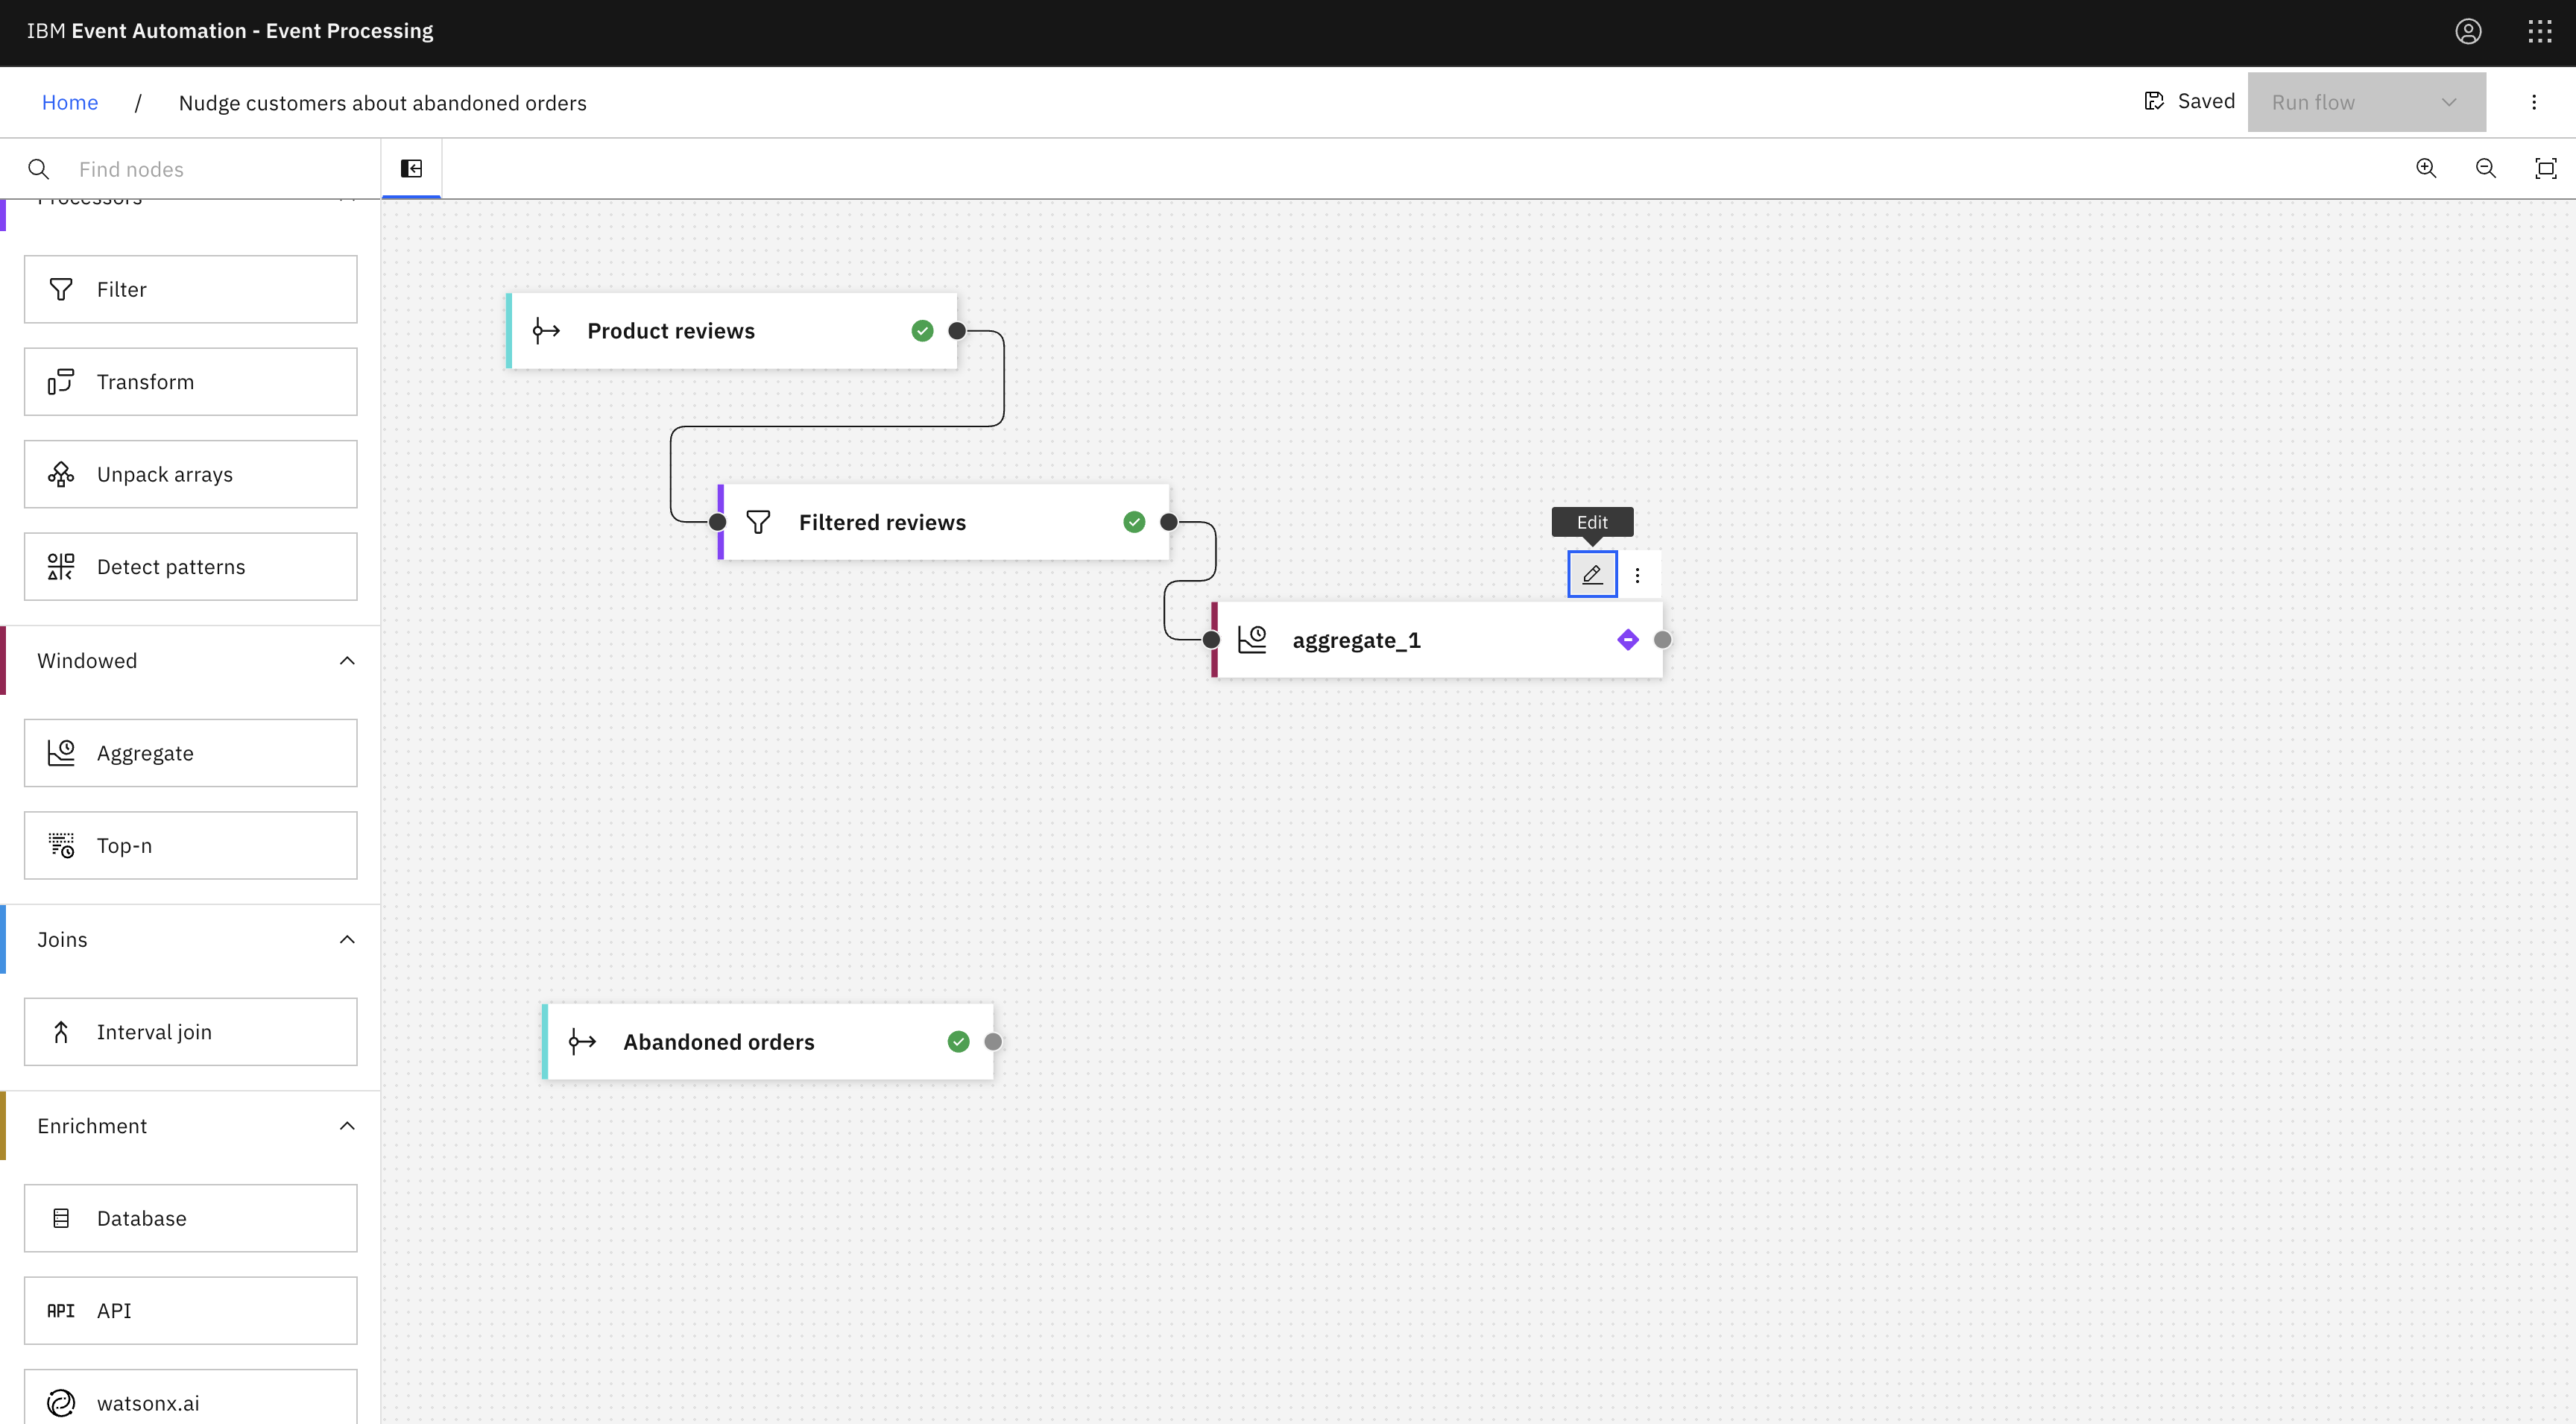
Add an Aggregate node and link it to your filter node.
Create an aggregate node by dragging one onto the canvas. You can find this in the Windowed section of the left panel.
Click and drag from the small gray dot on the output of the filter node to the matching dot on the input of the aggregate node.
Hover over the aggregate node and click
Edit to configure the node.
-
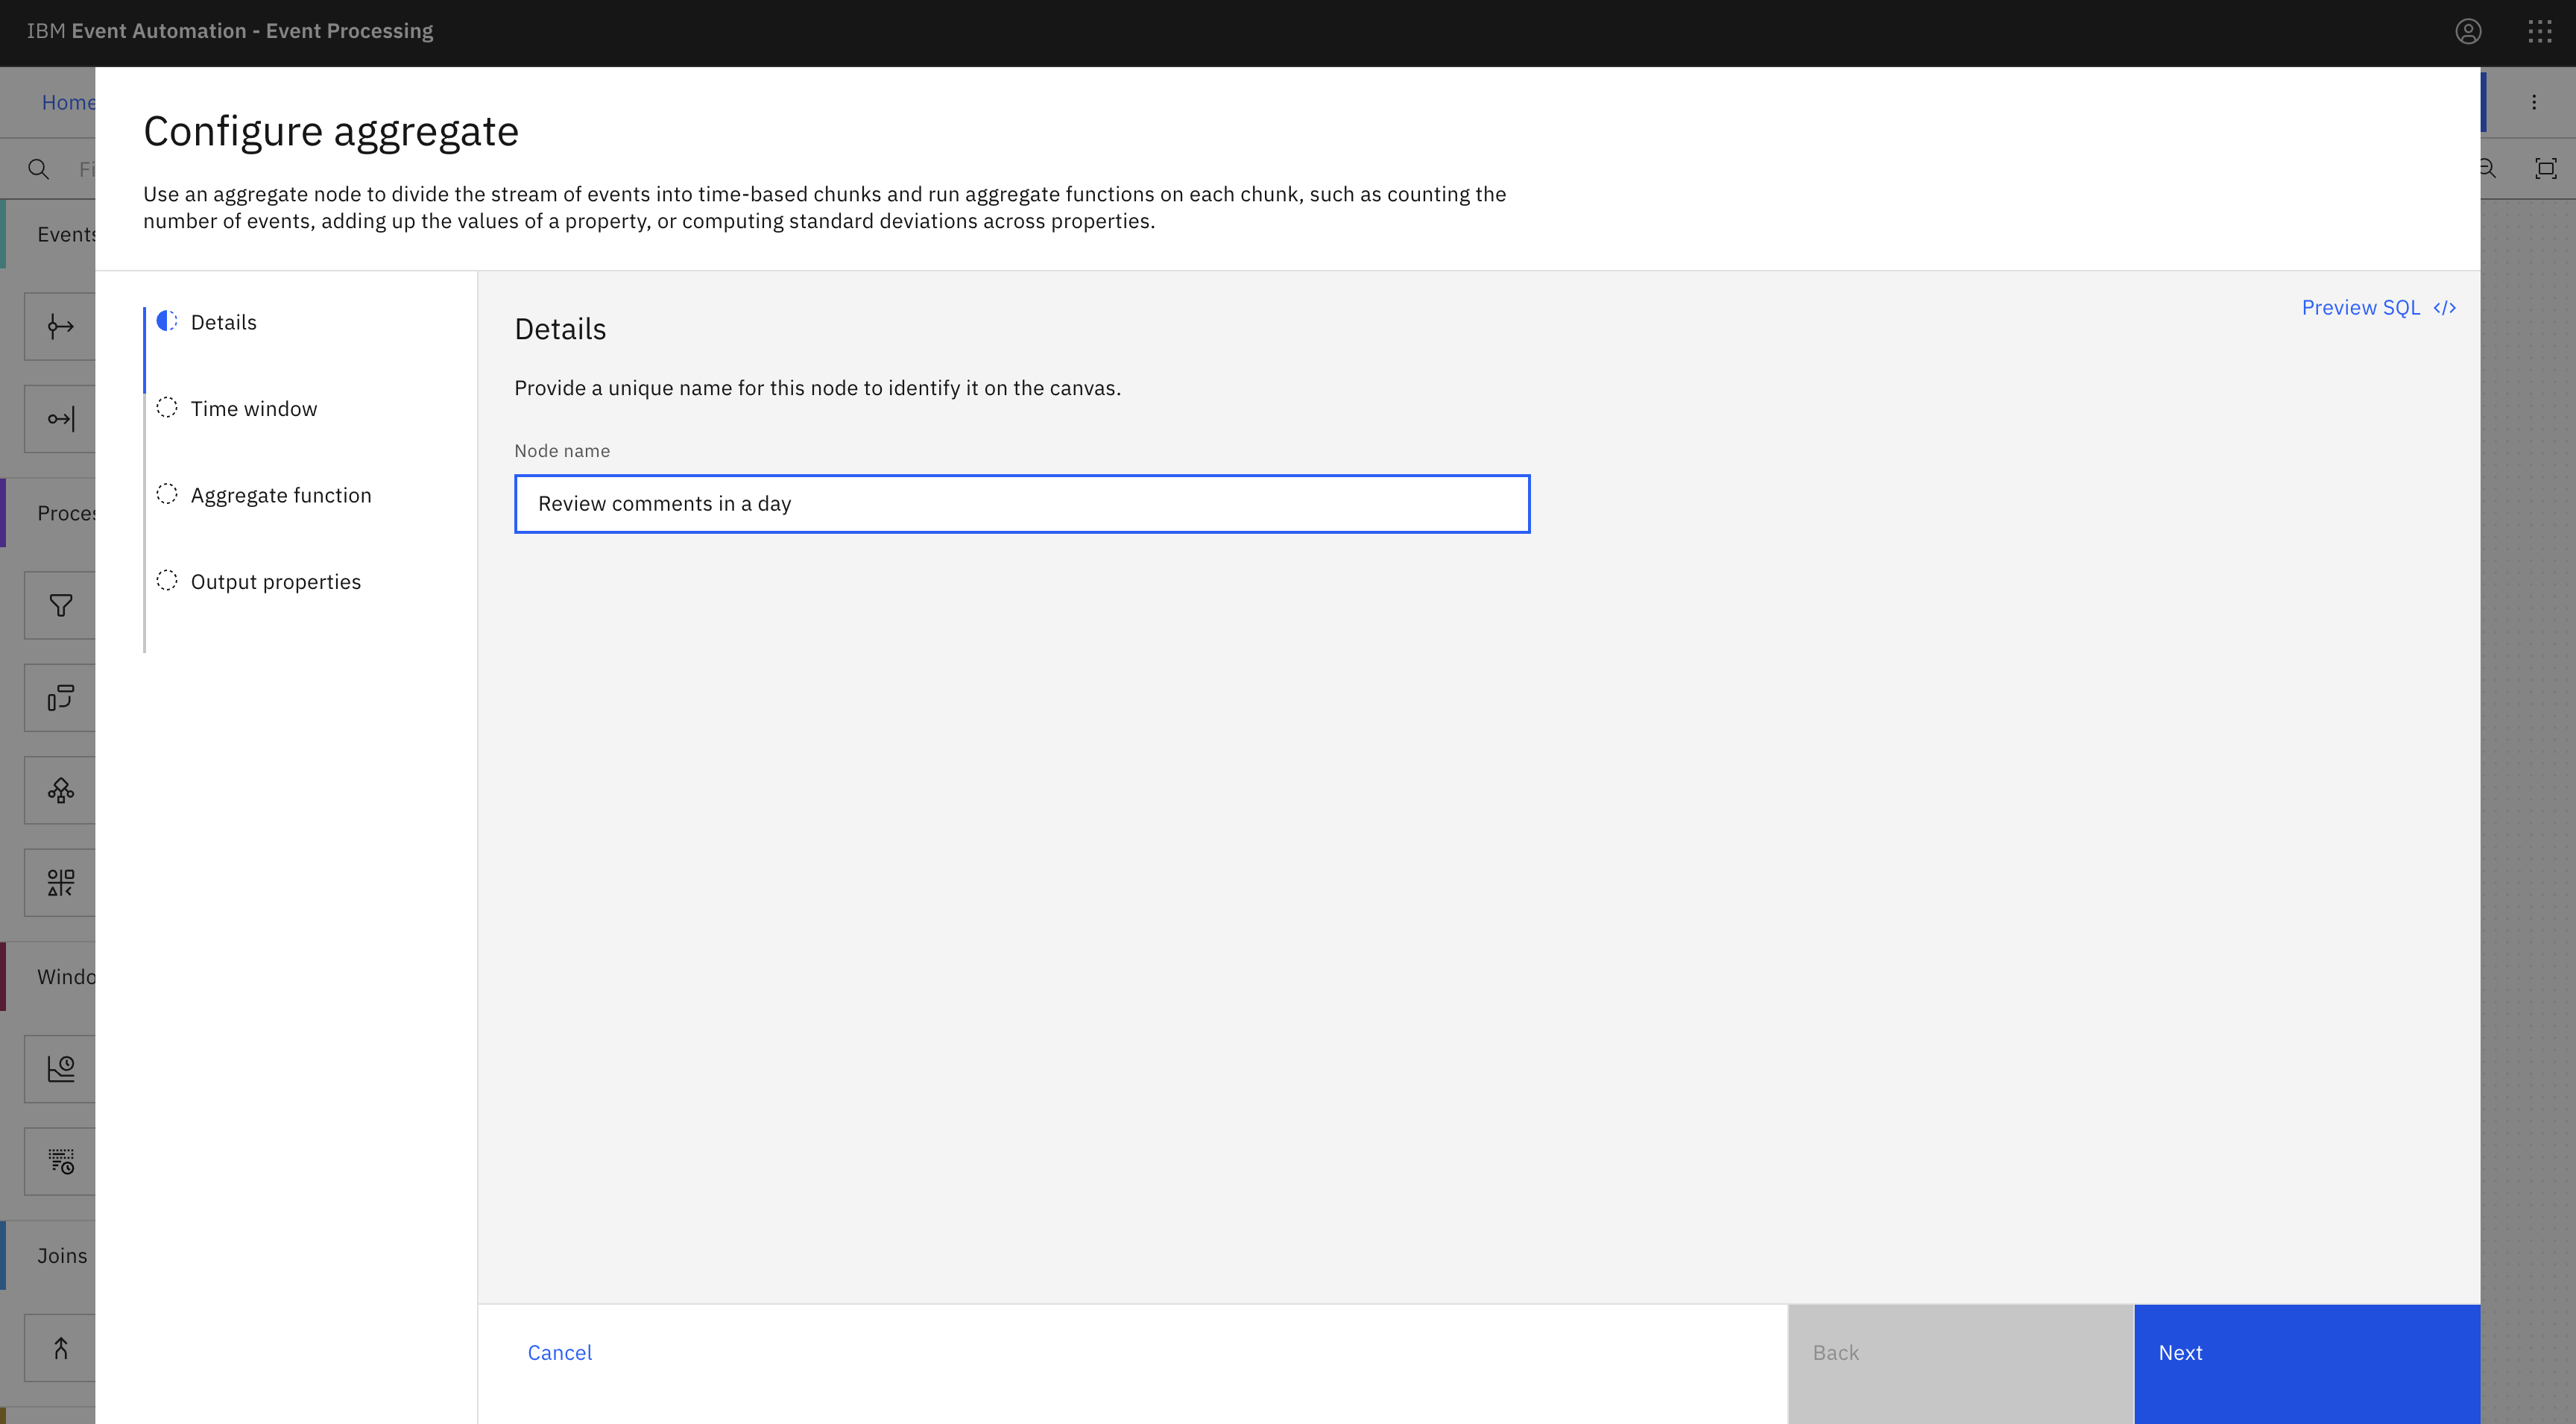
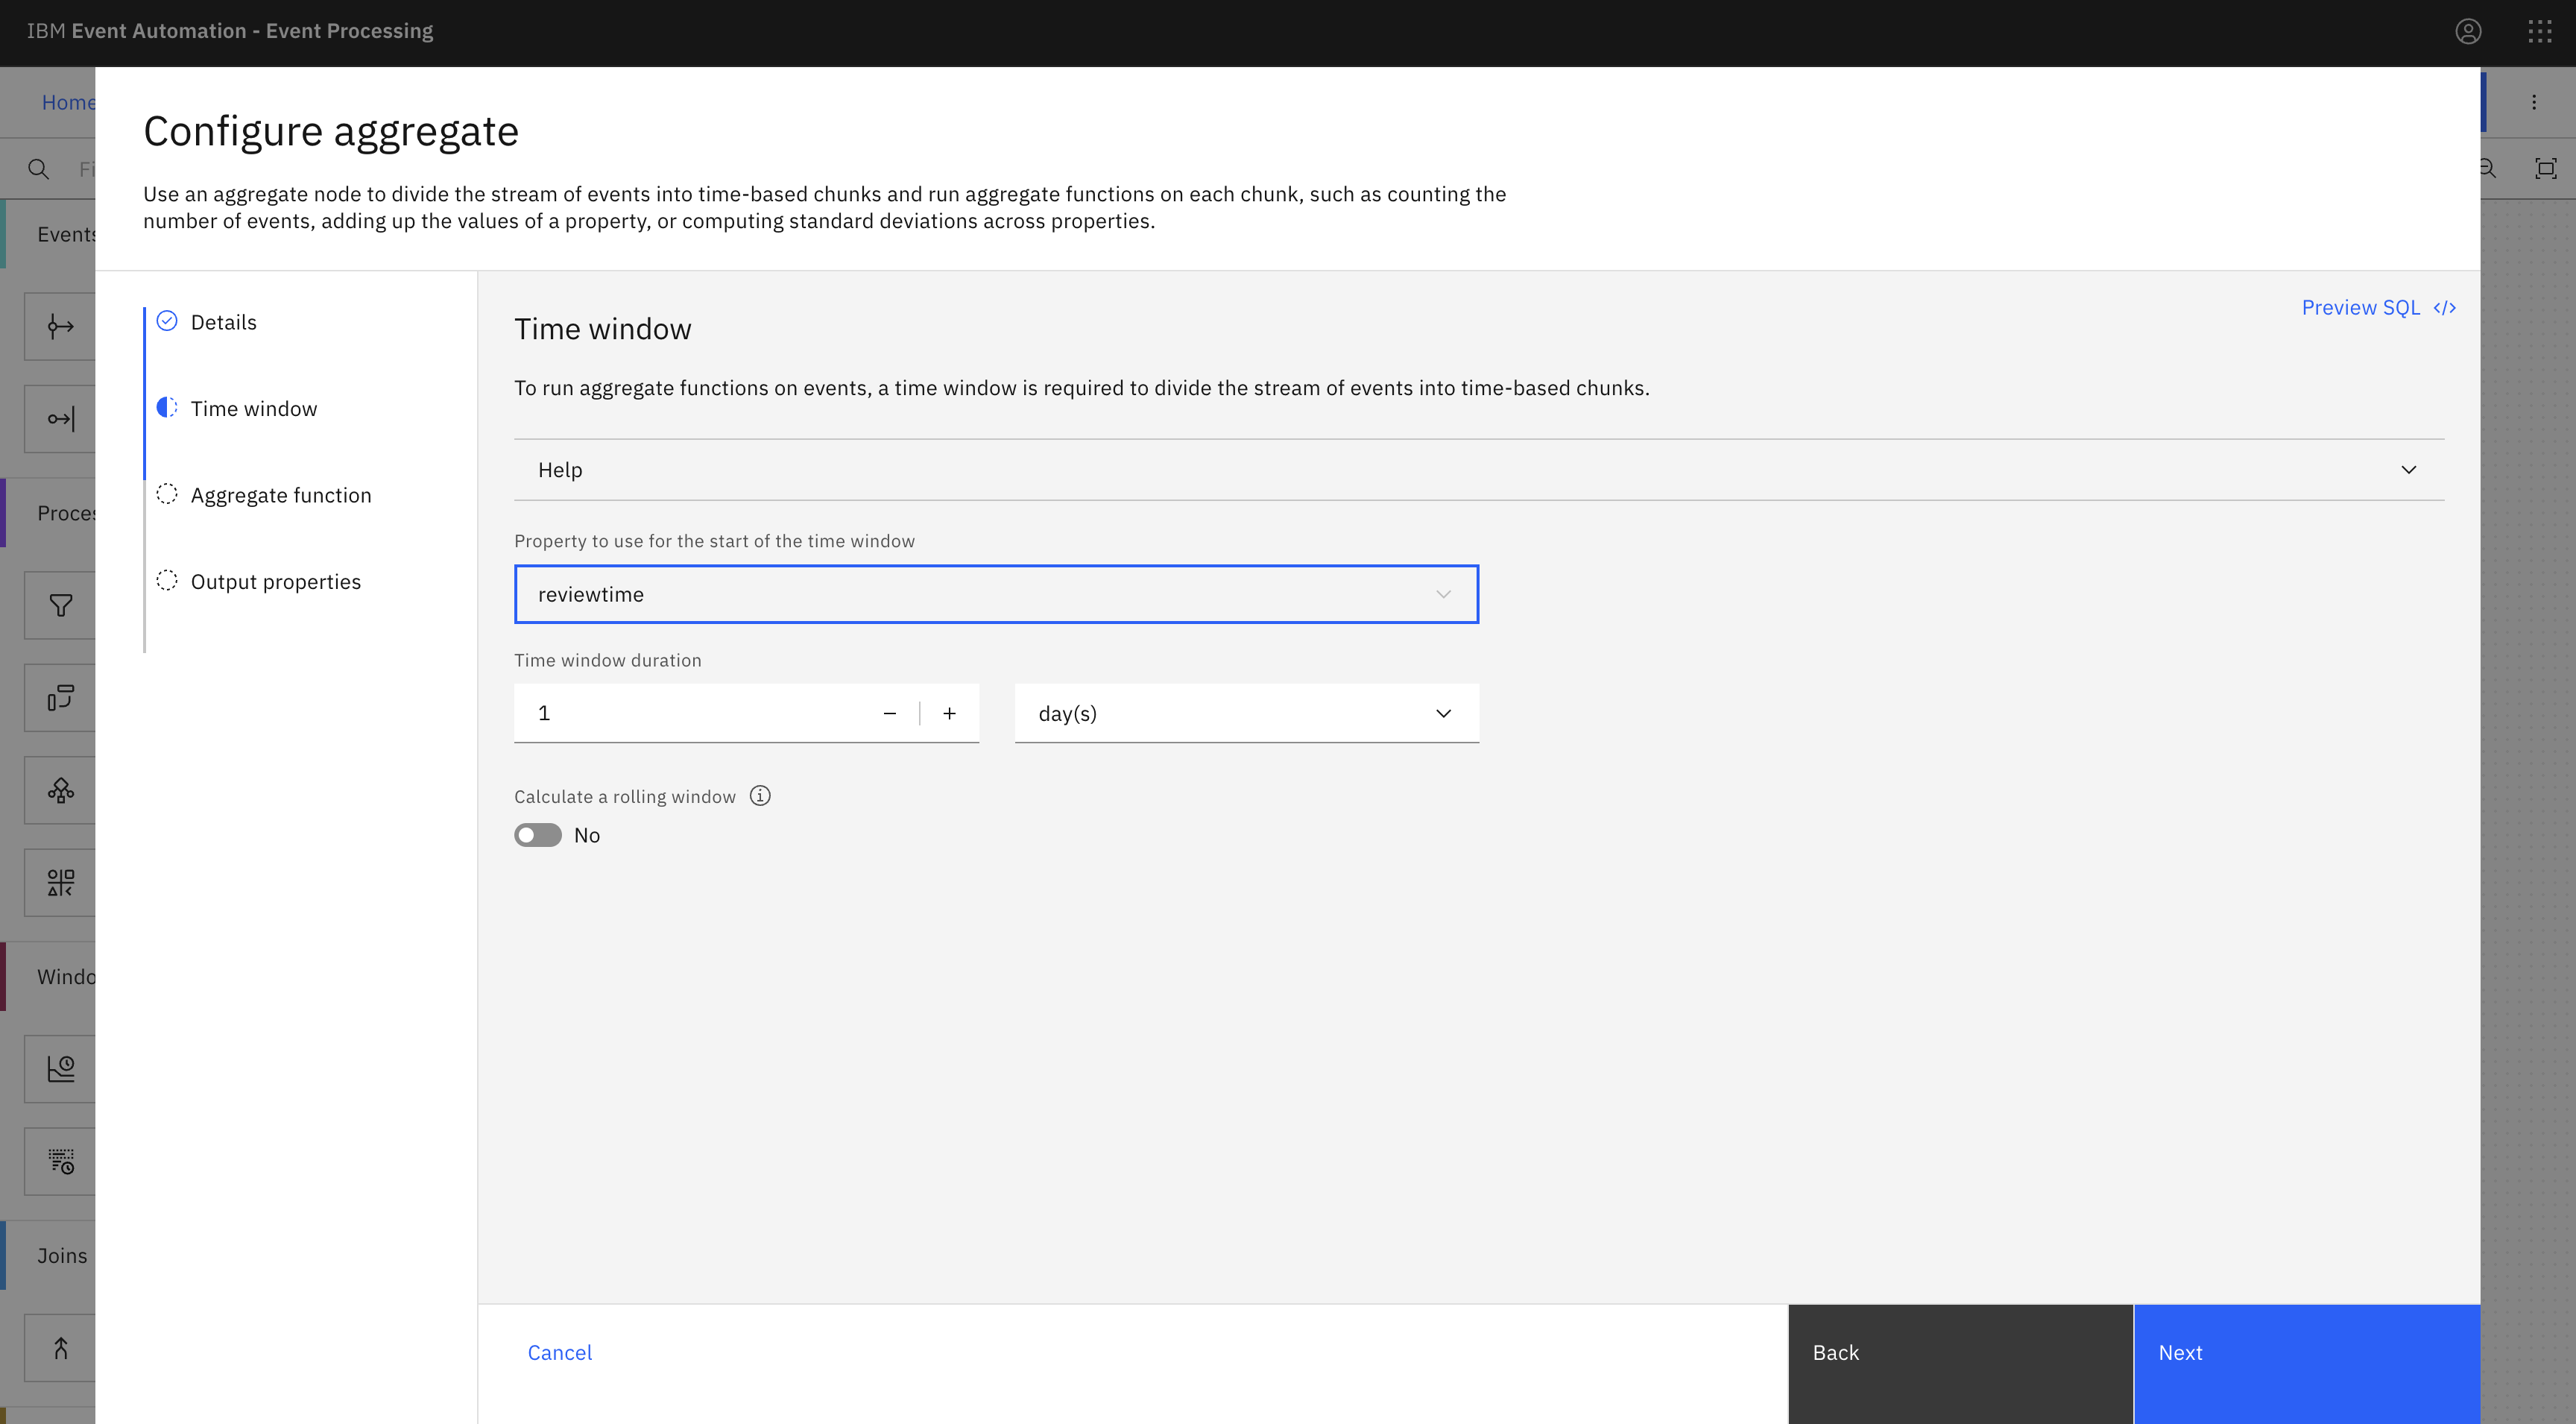
Name the aggregate node to show that it will count the number of review comments in one day:
Review comments in a day. -
Specify a 1-day window.
-
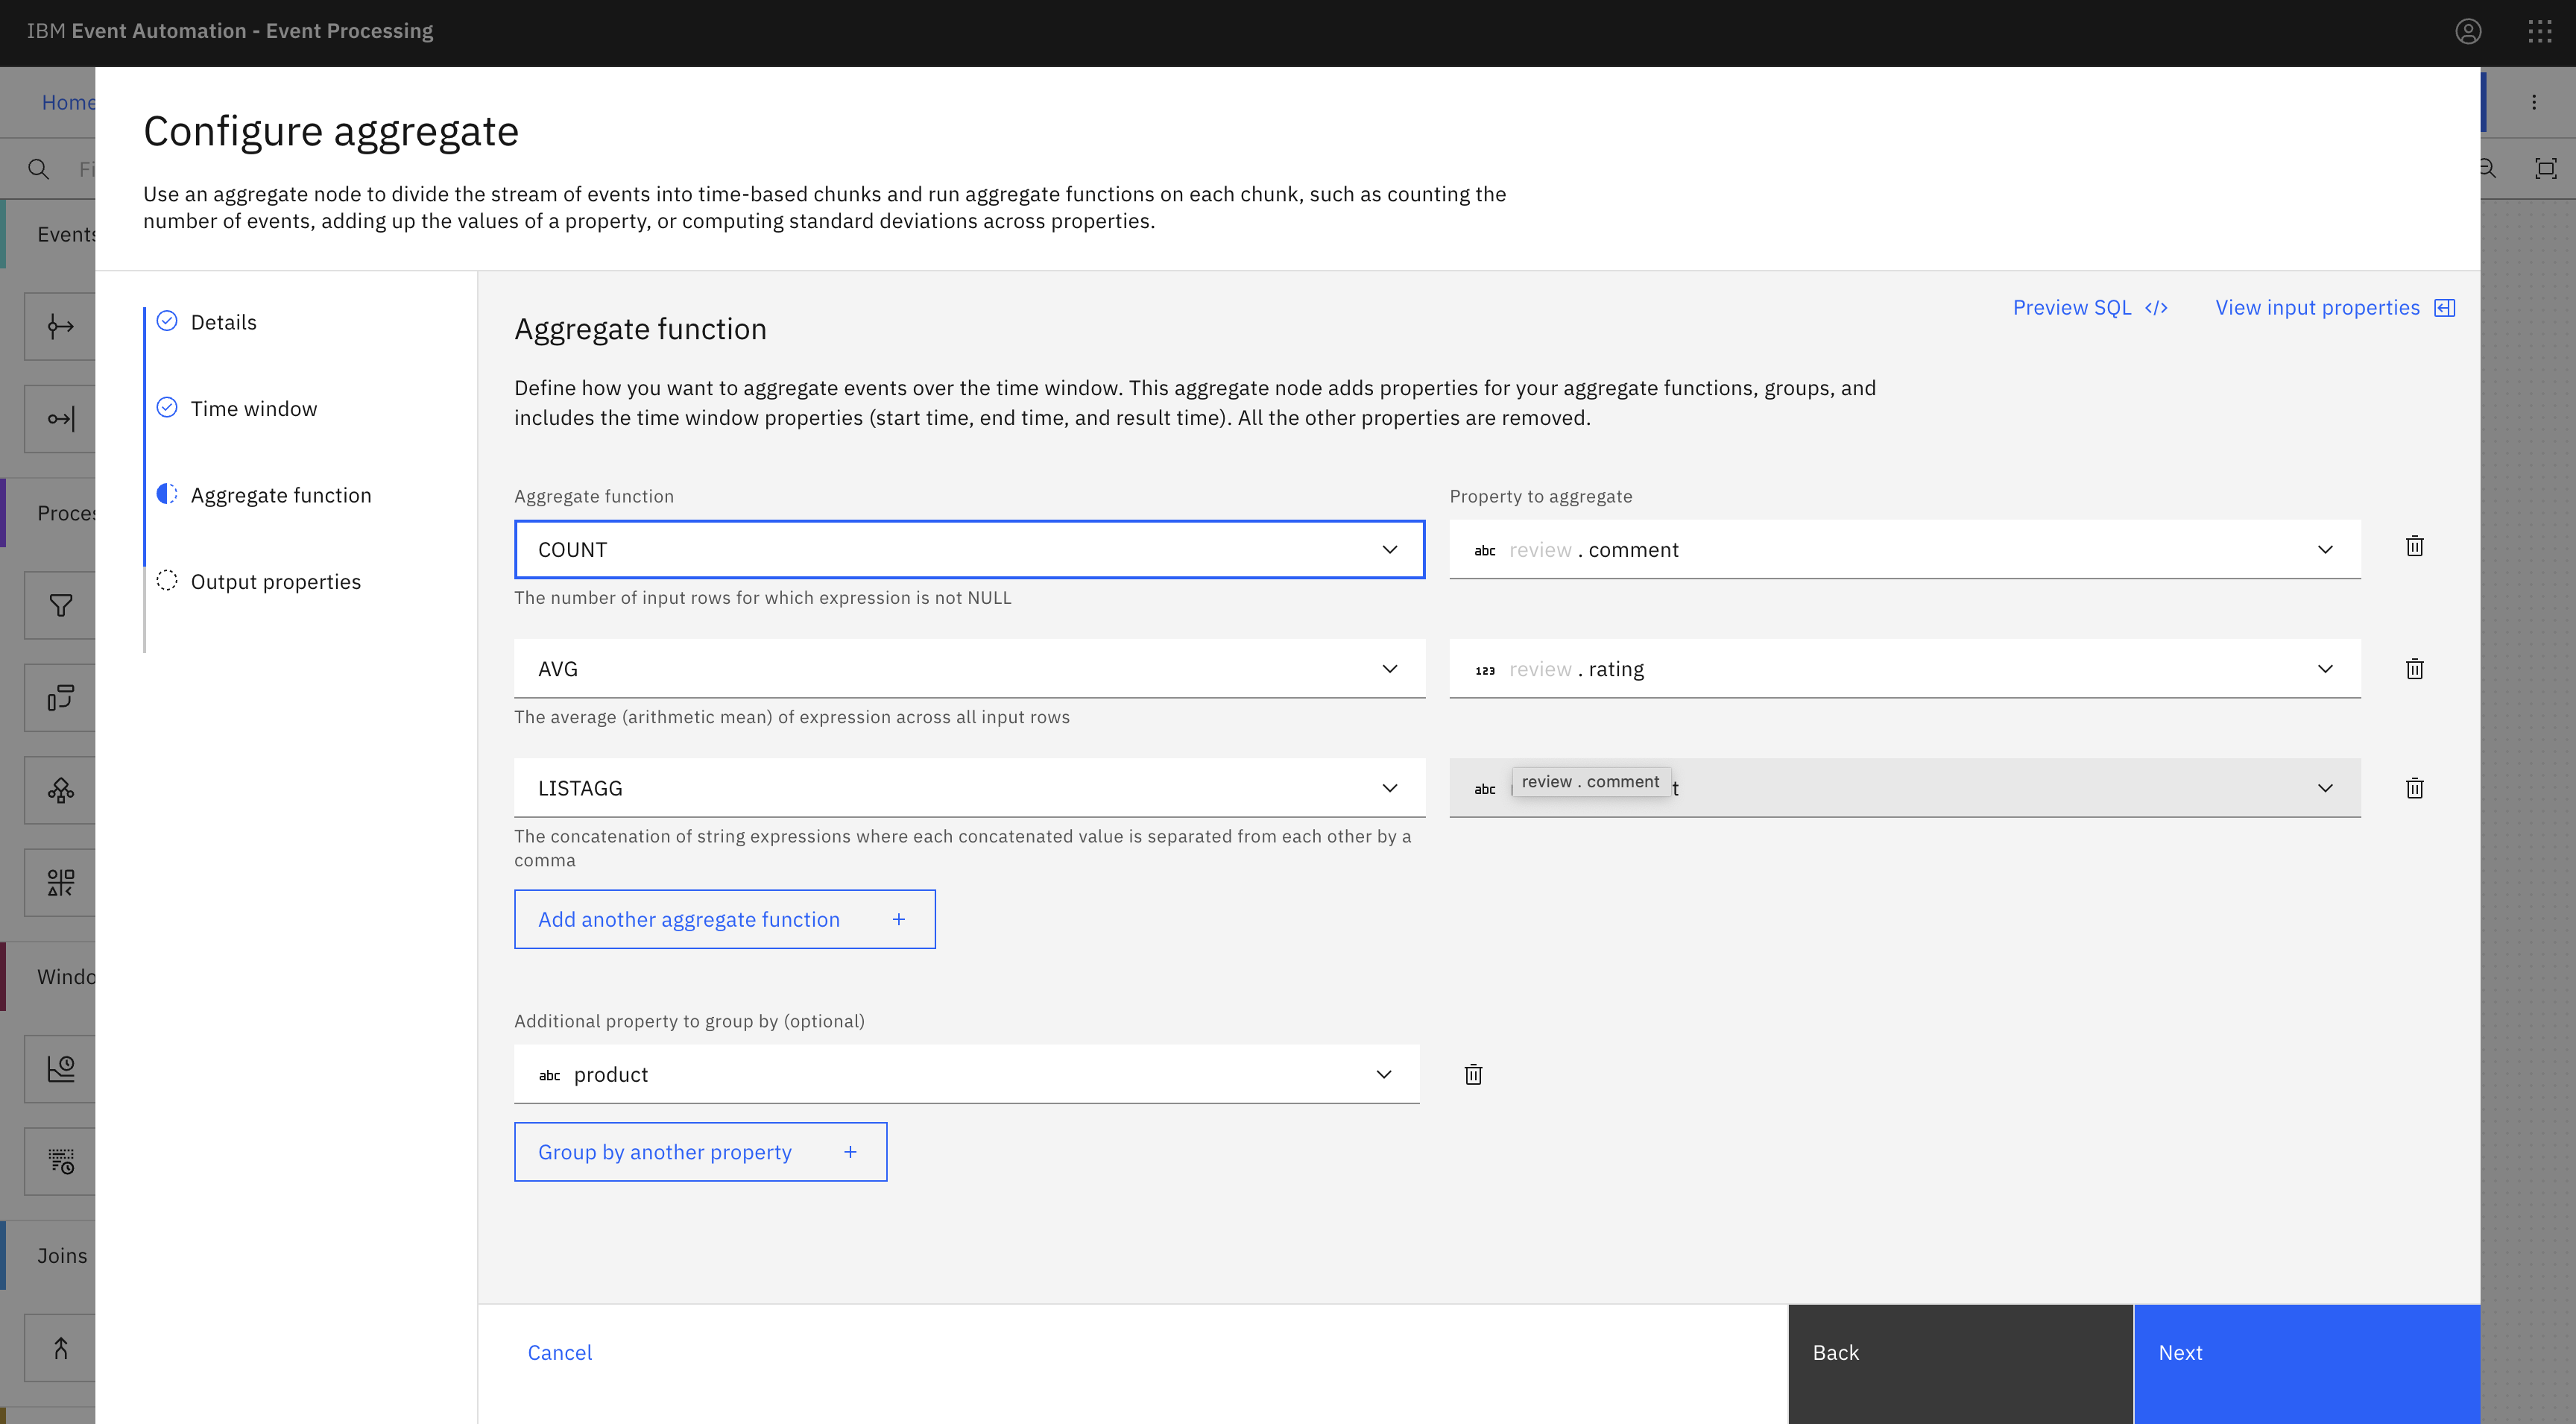
Add an aggregate function to count the number of review comments in one day, grouped by
review.comment.Select
COUNTas the aggregate function.The property we are adding up is
review.comment- the number of review comments received. This will add up the number of review comments received within the time window. -
Add another aggregate function to calculate the average of the review ratings in one day, grouped by
review.rating.Select
AVGas the aggregate function.The property we are calculating average of is
review.rating- the rating received in a review comment. This will calculate the average of review ratings received within the time window. -
Add another aggregate function to list the review comments, grouped by
review.comment.Select
LISTAGGas the aggregate function.The property we are listing is
review.comment- the number of review comments received. This will list the review comments received within the time window. - Select
productas an additional property for group by. Then click Next. -
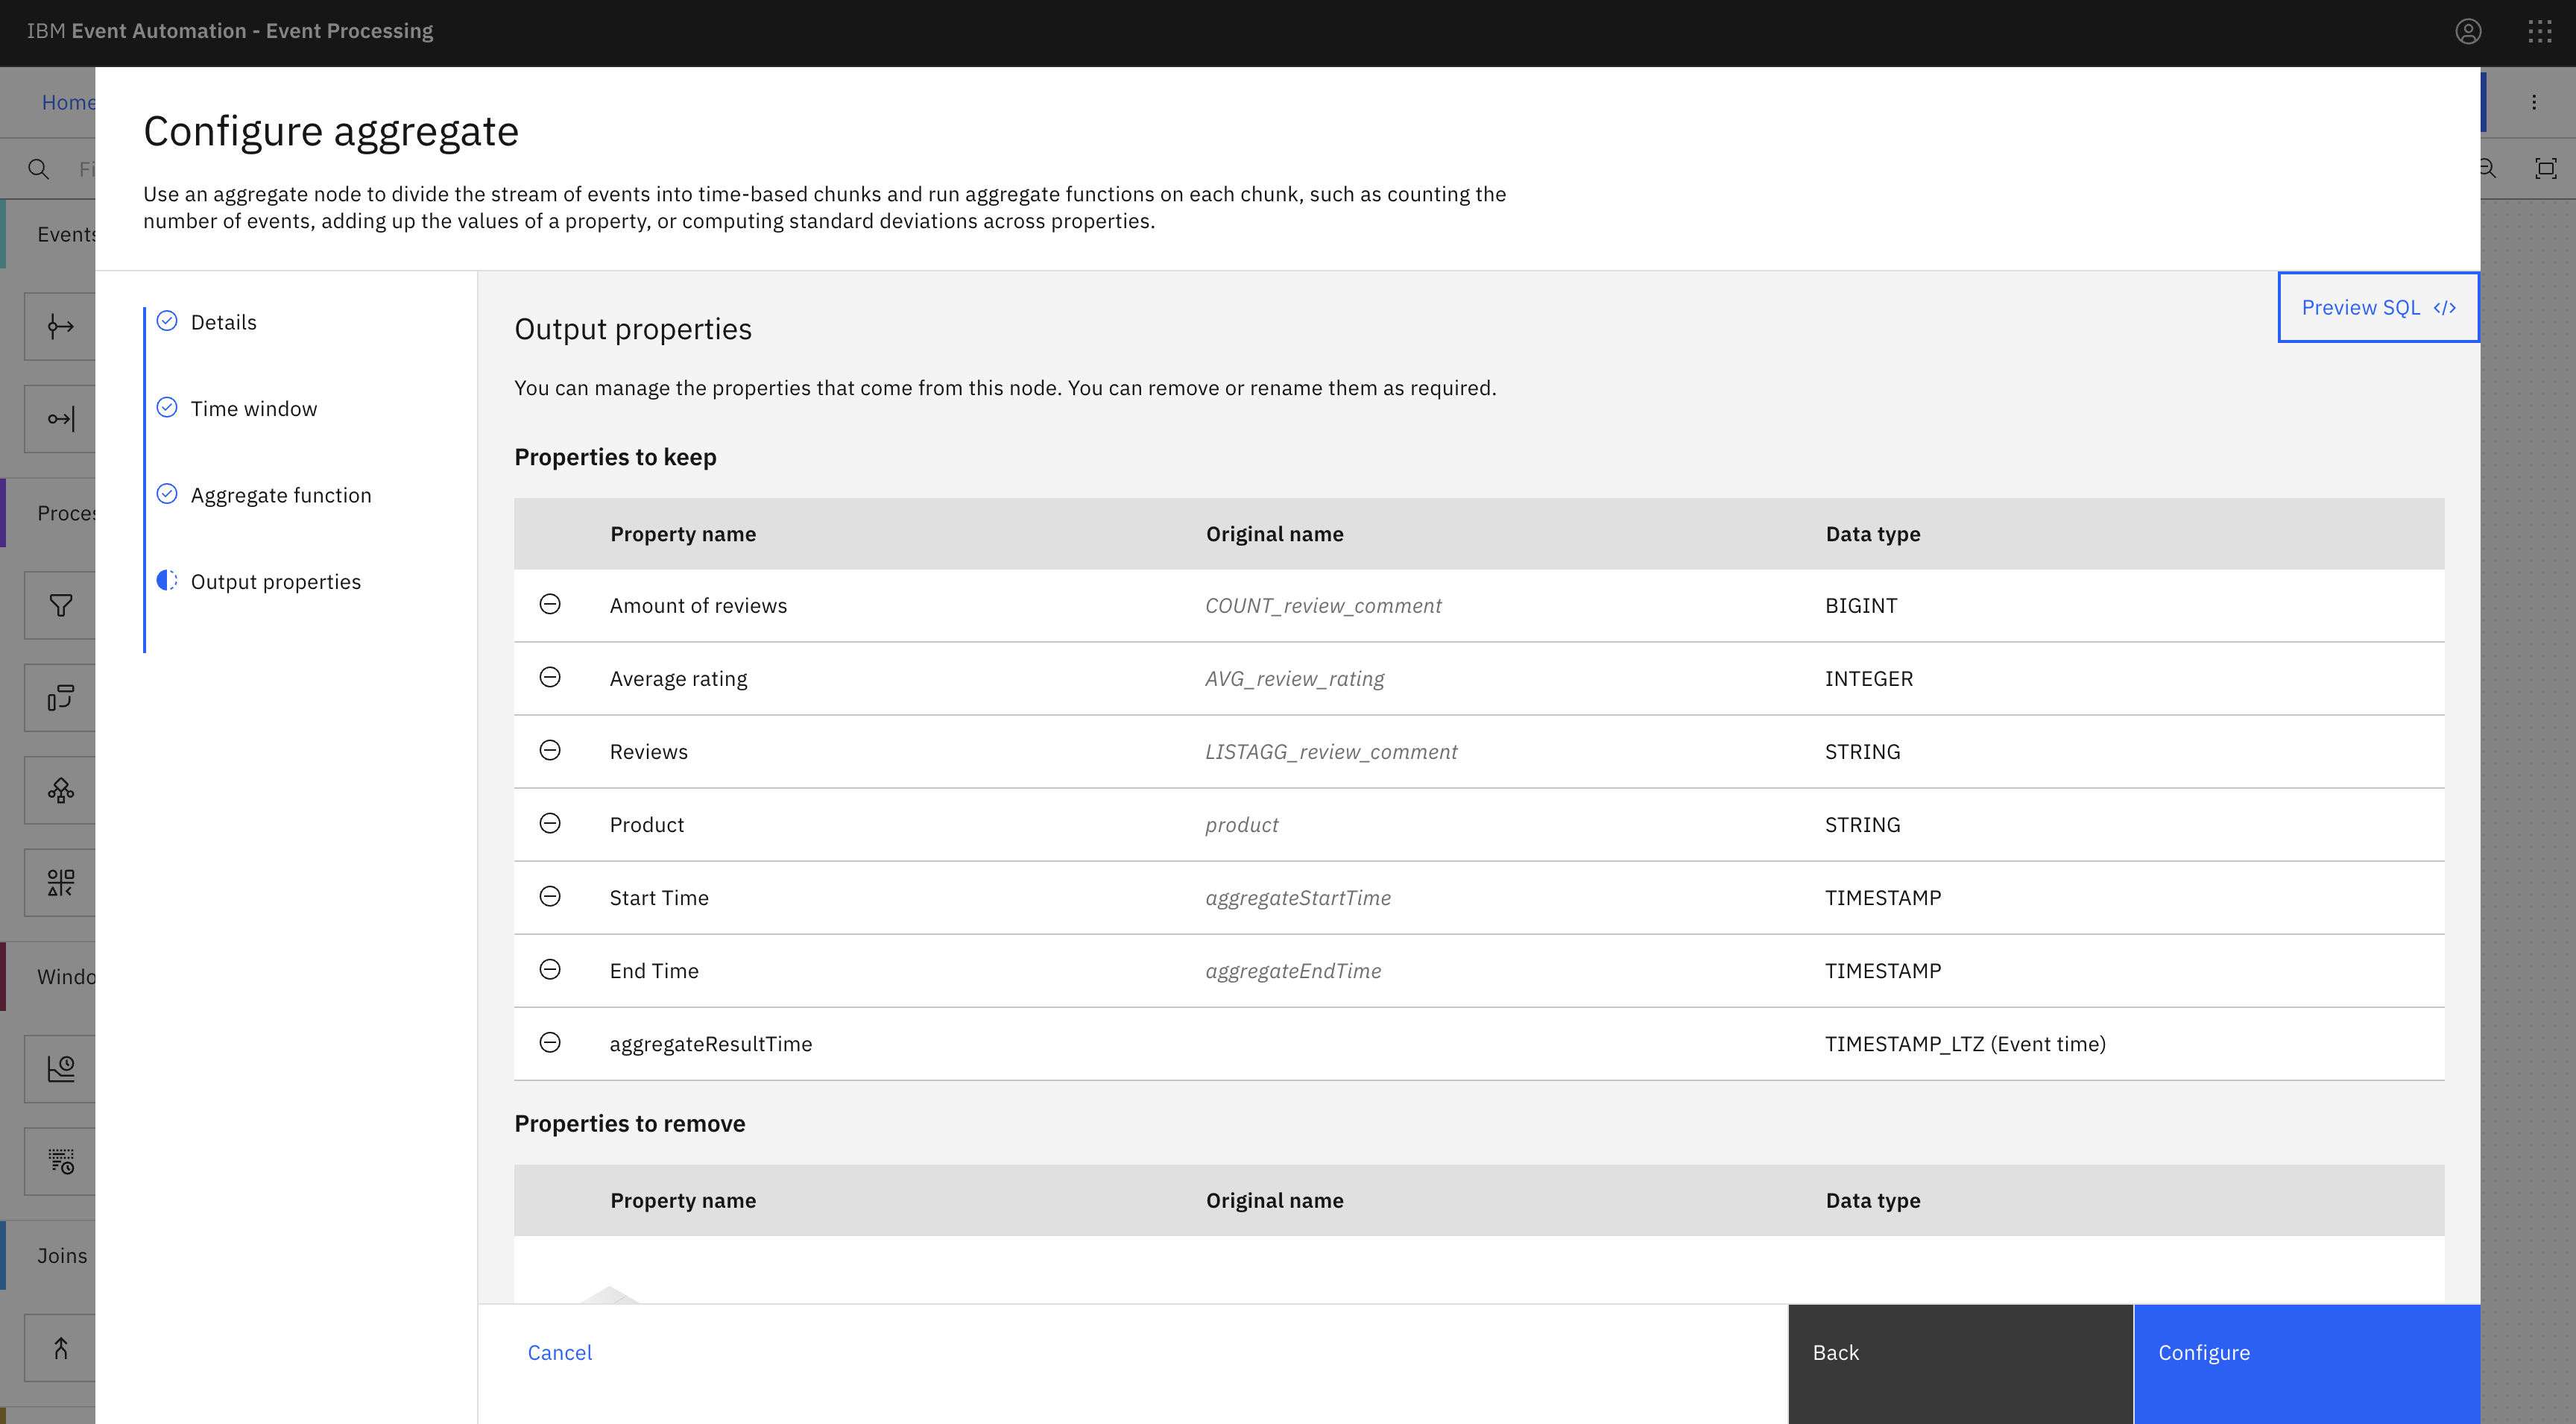
Rename the output aggregate properties:
- COUNT_review_comment → Amount of reviews
- AVG_review_rating → Average rating
- LISTAGG_review_comment → Reviews
- product → Product
- aggregateStartTime → Start time
- aggregateEndTime → End time
Tip: It can be helpful to adjust the name of properties to something that will make sense to you, such as describing the
AVG_review_ratingproperty asAverage rating. - Click Configure to finalize the aggregate.
Step 7: Unpack the abandoned products into events
The next step is to unpack the list of products from the abandoned orders into events.
To add an unpack array node, complete the following steps:
For more information about how to create an unpack array node, see unpack array node.
-
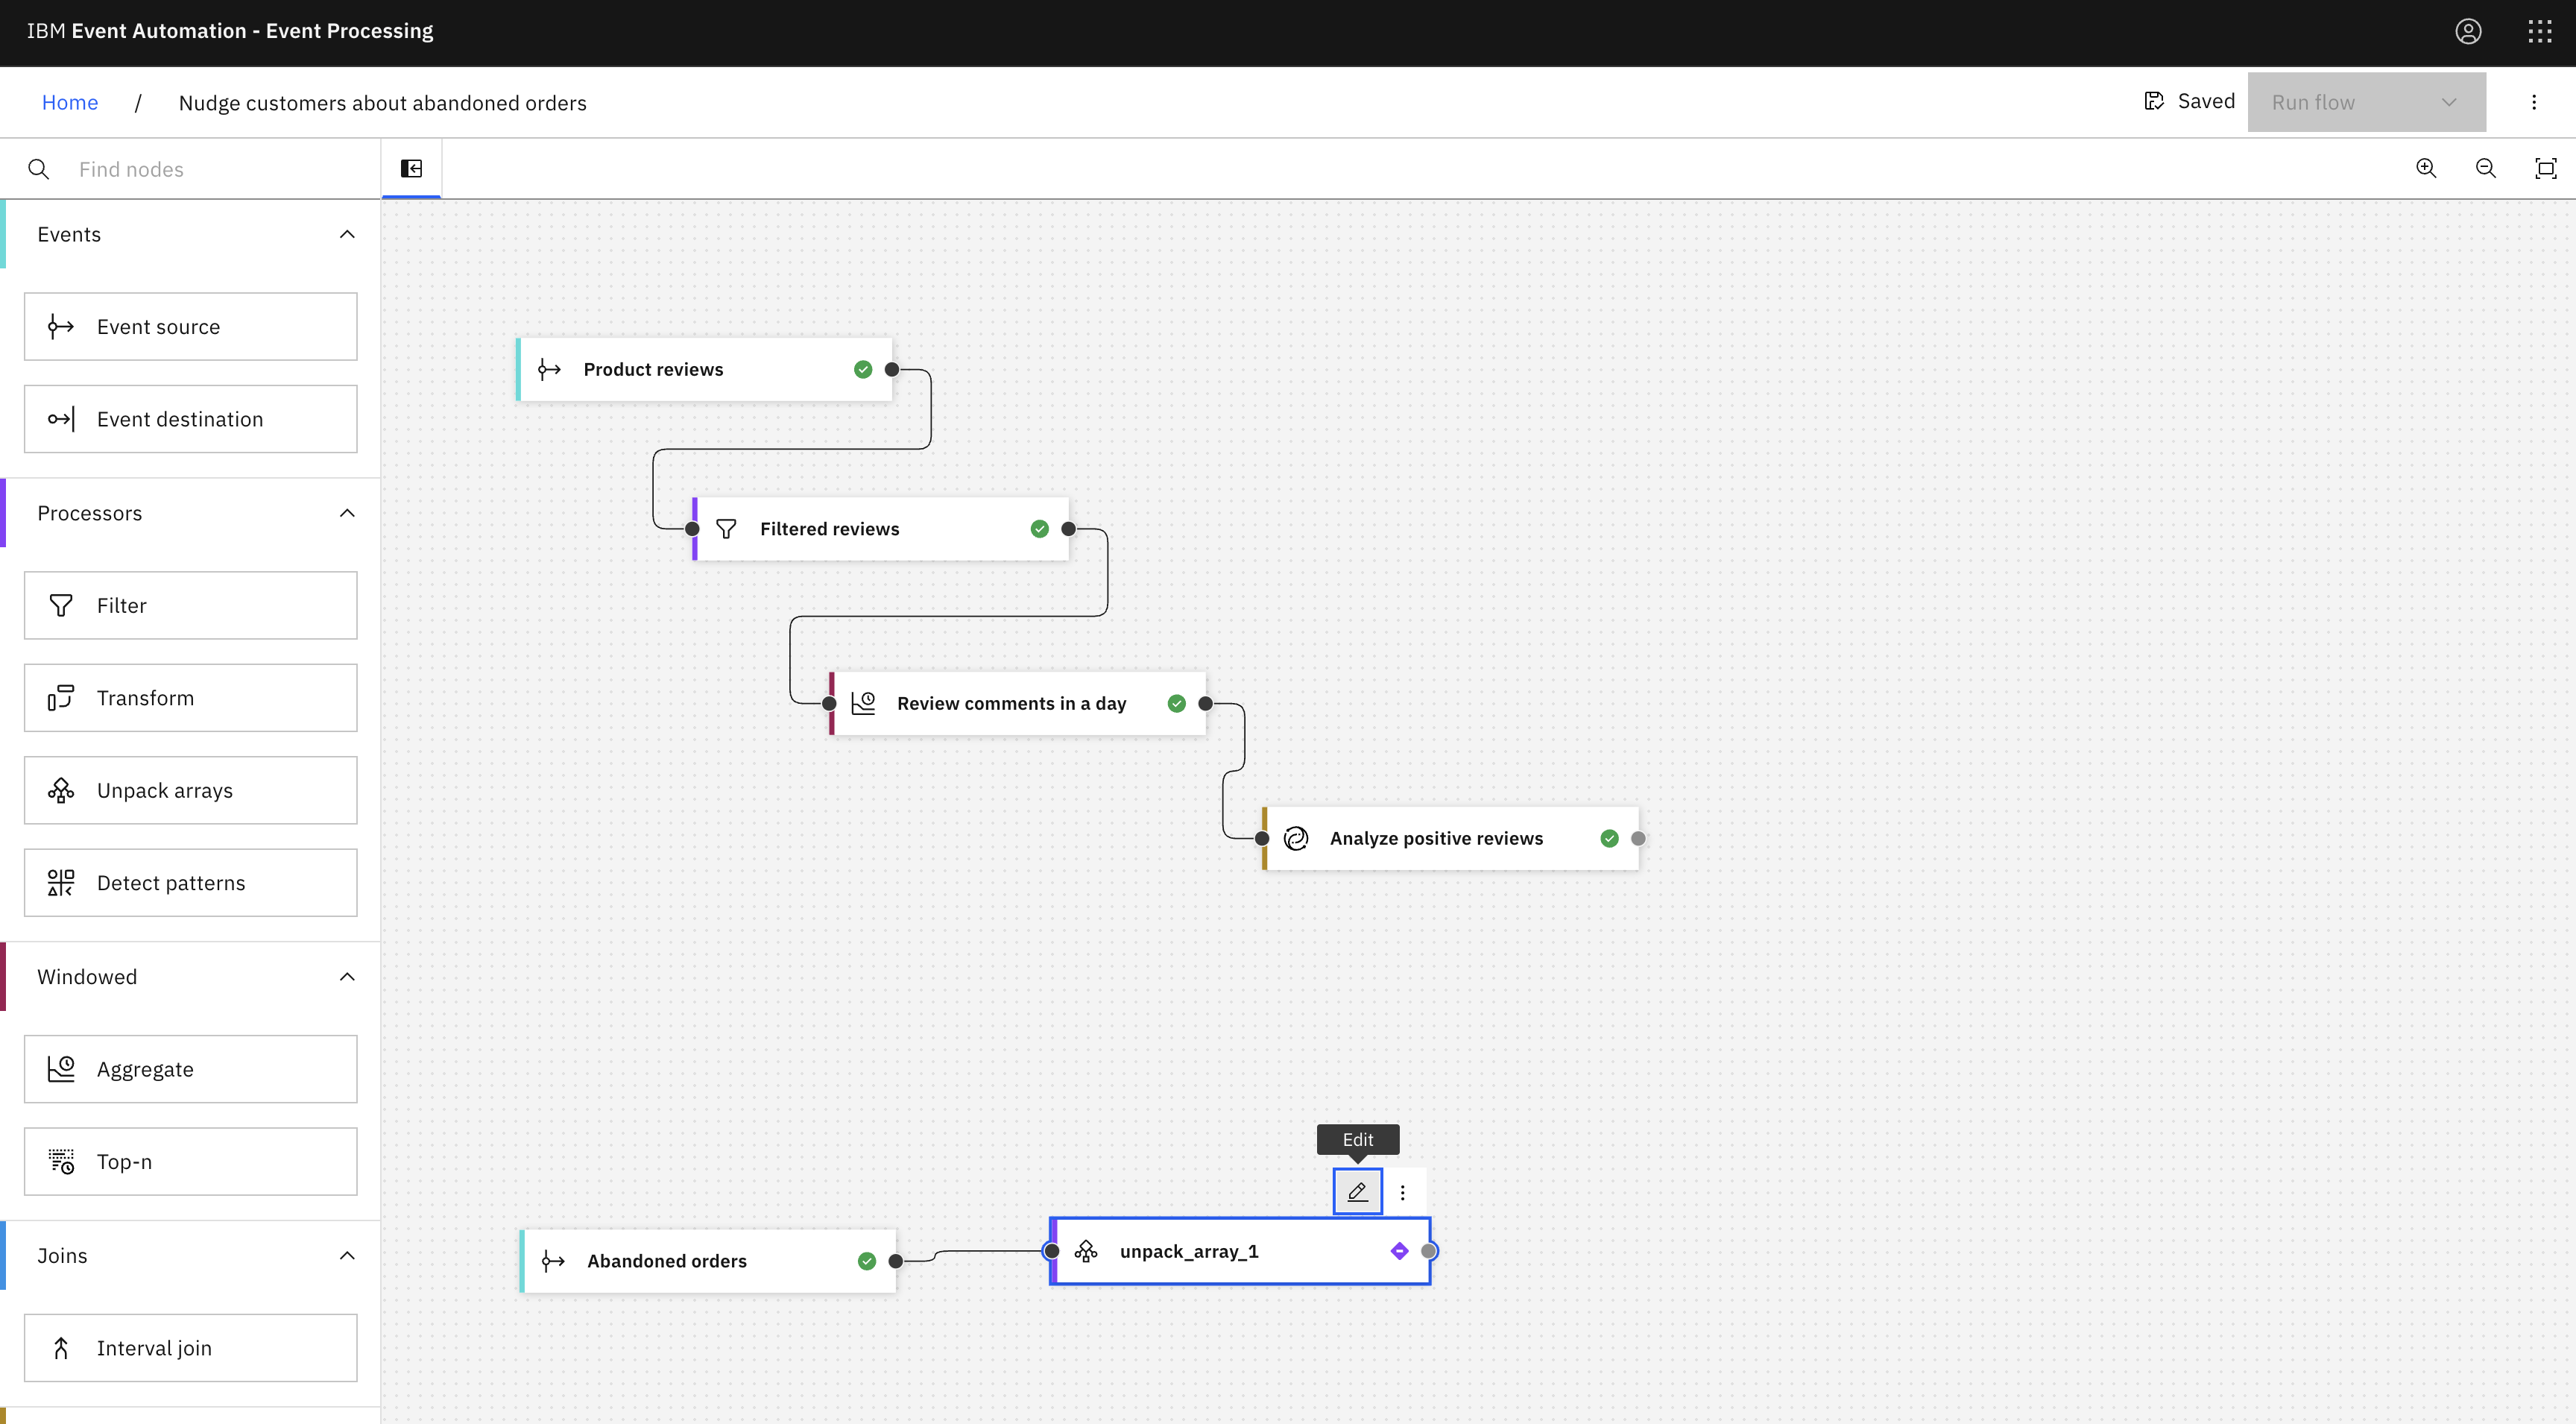
Add an unpack array node and link the
Abandoned ordersnode to the unpack array node.Hover over the unpack array node, and click
Edit to configure the node.
-
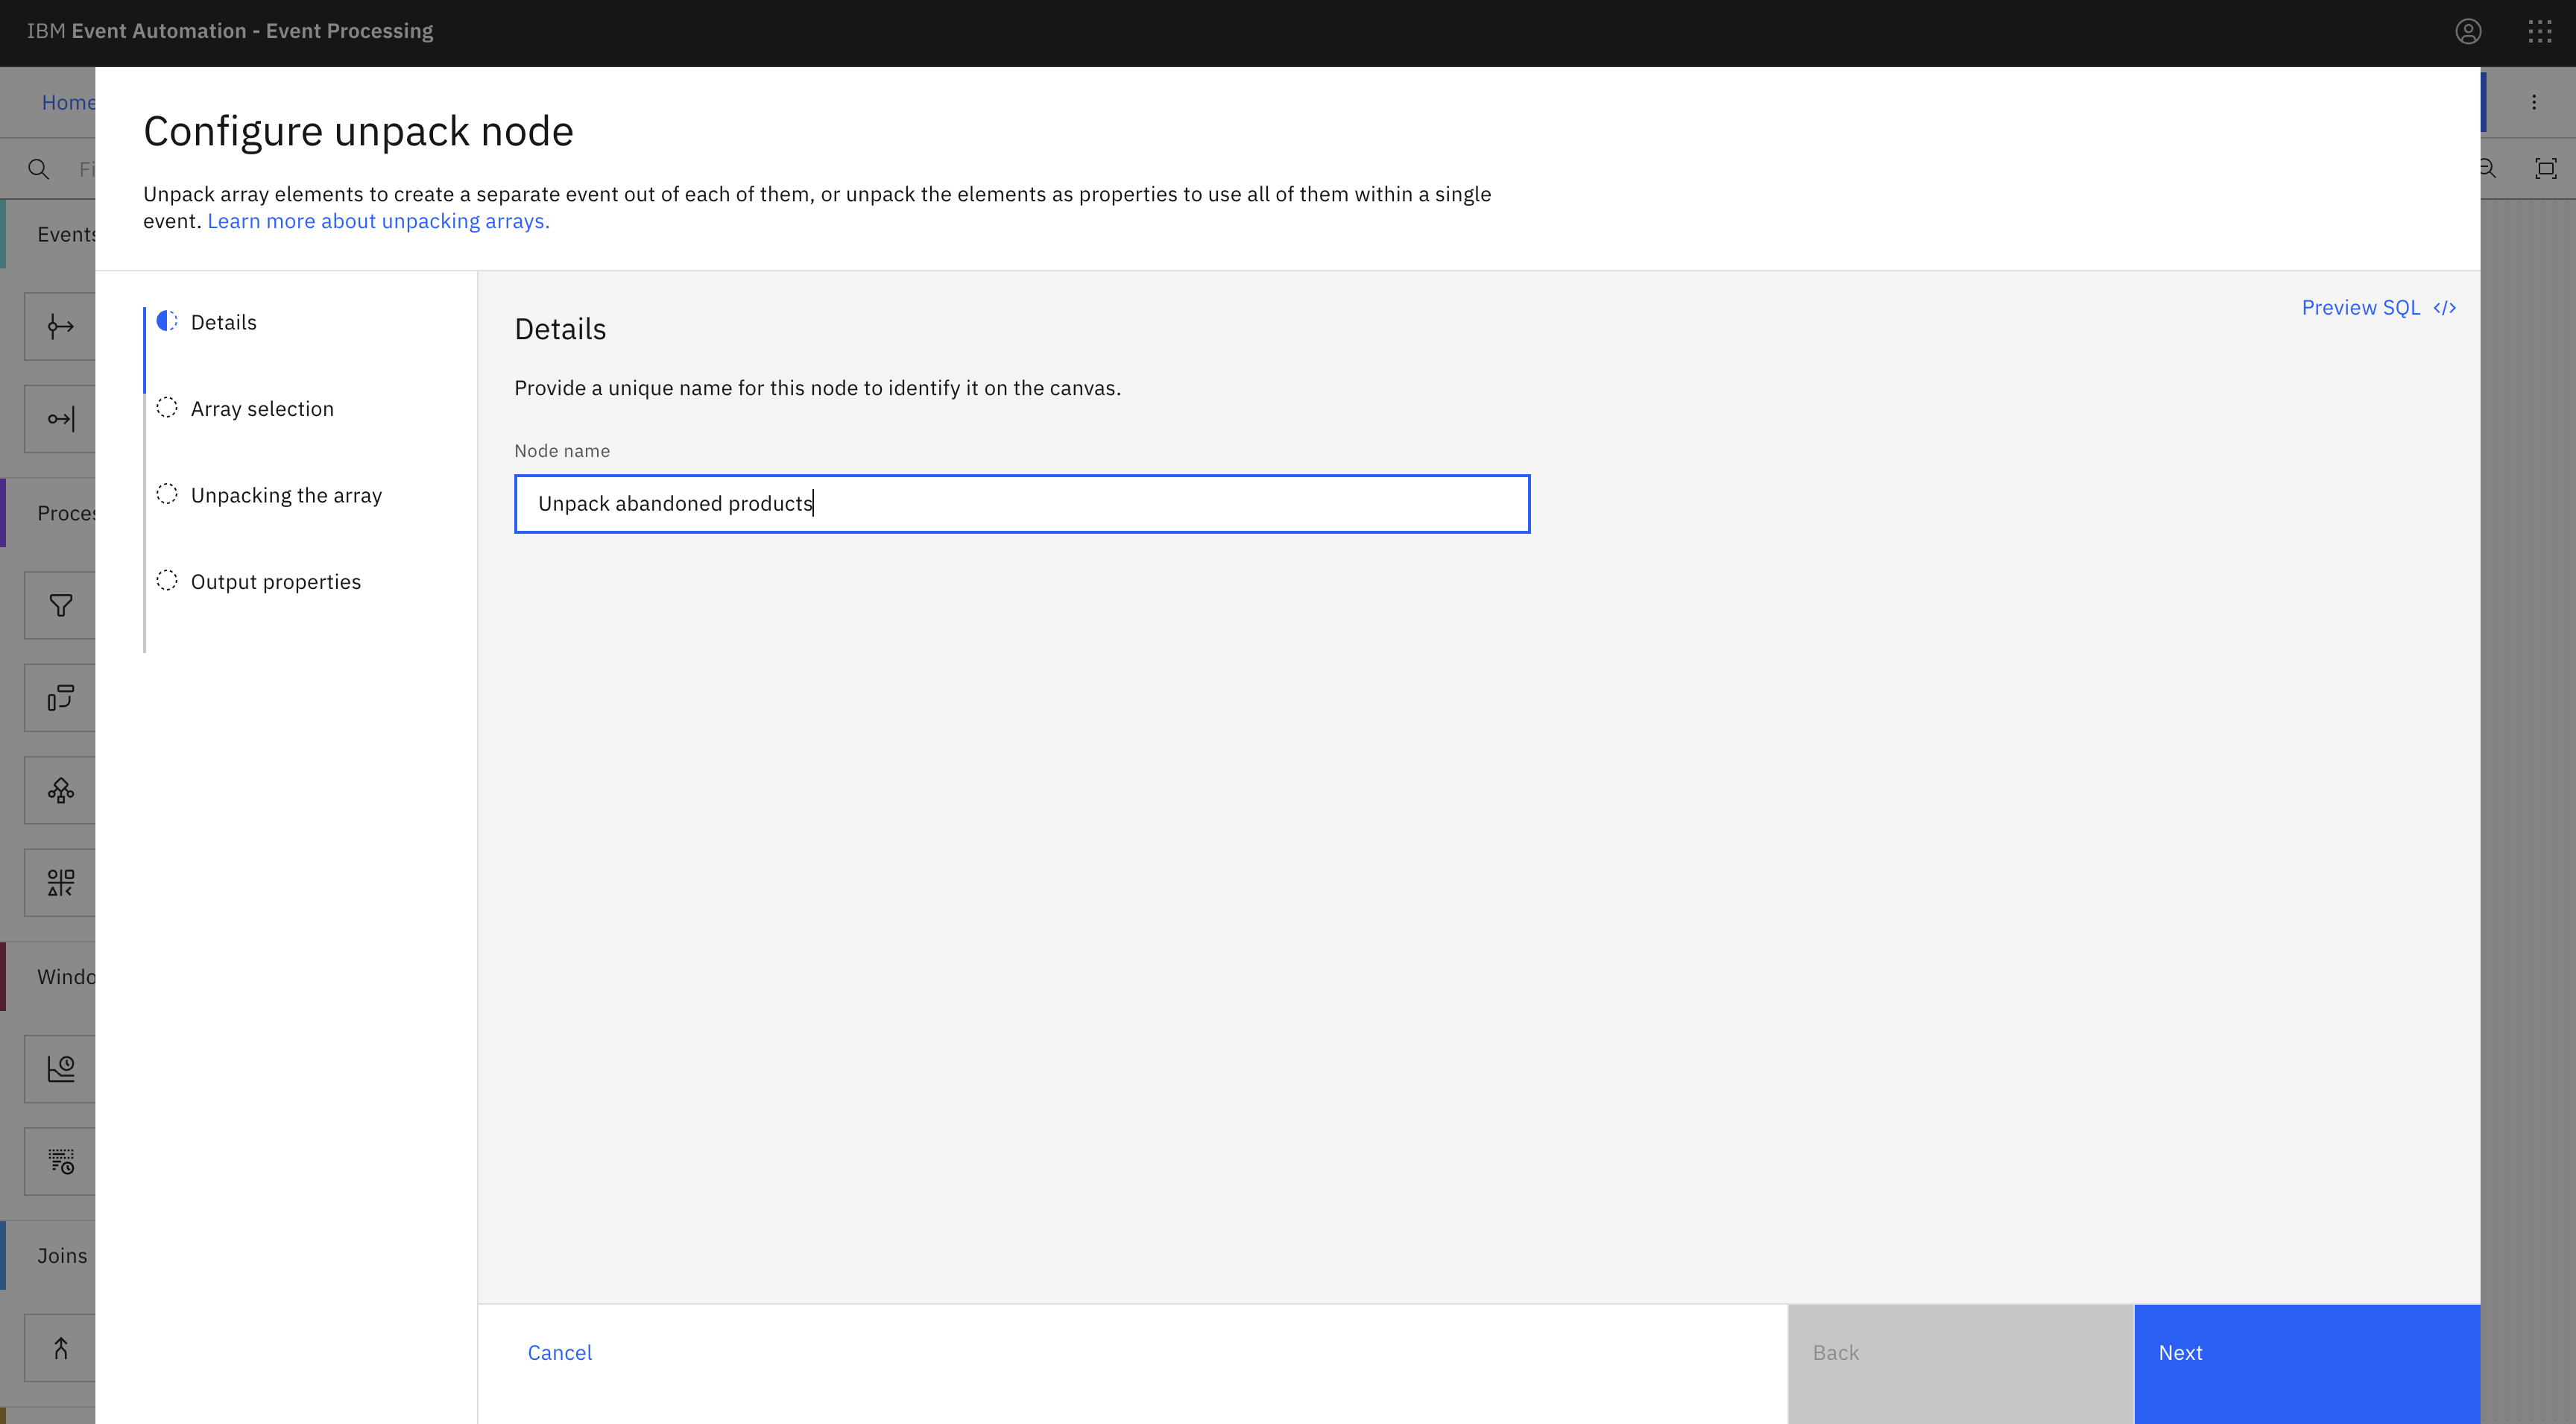
In the Node name field, enter the name of the unpack array node as
Unpack abandoned products, and then click Next. -
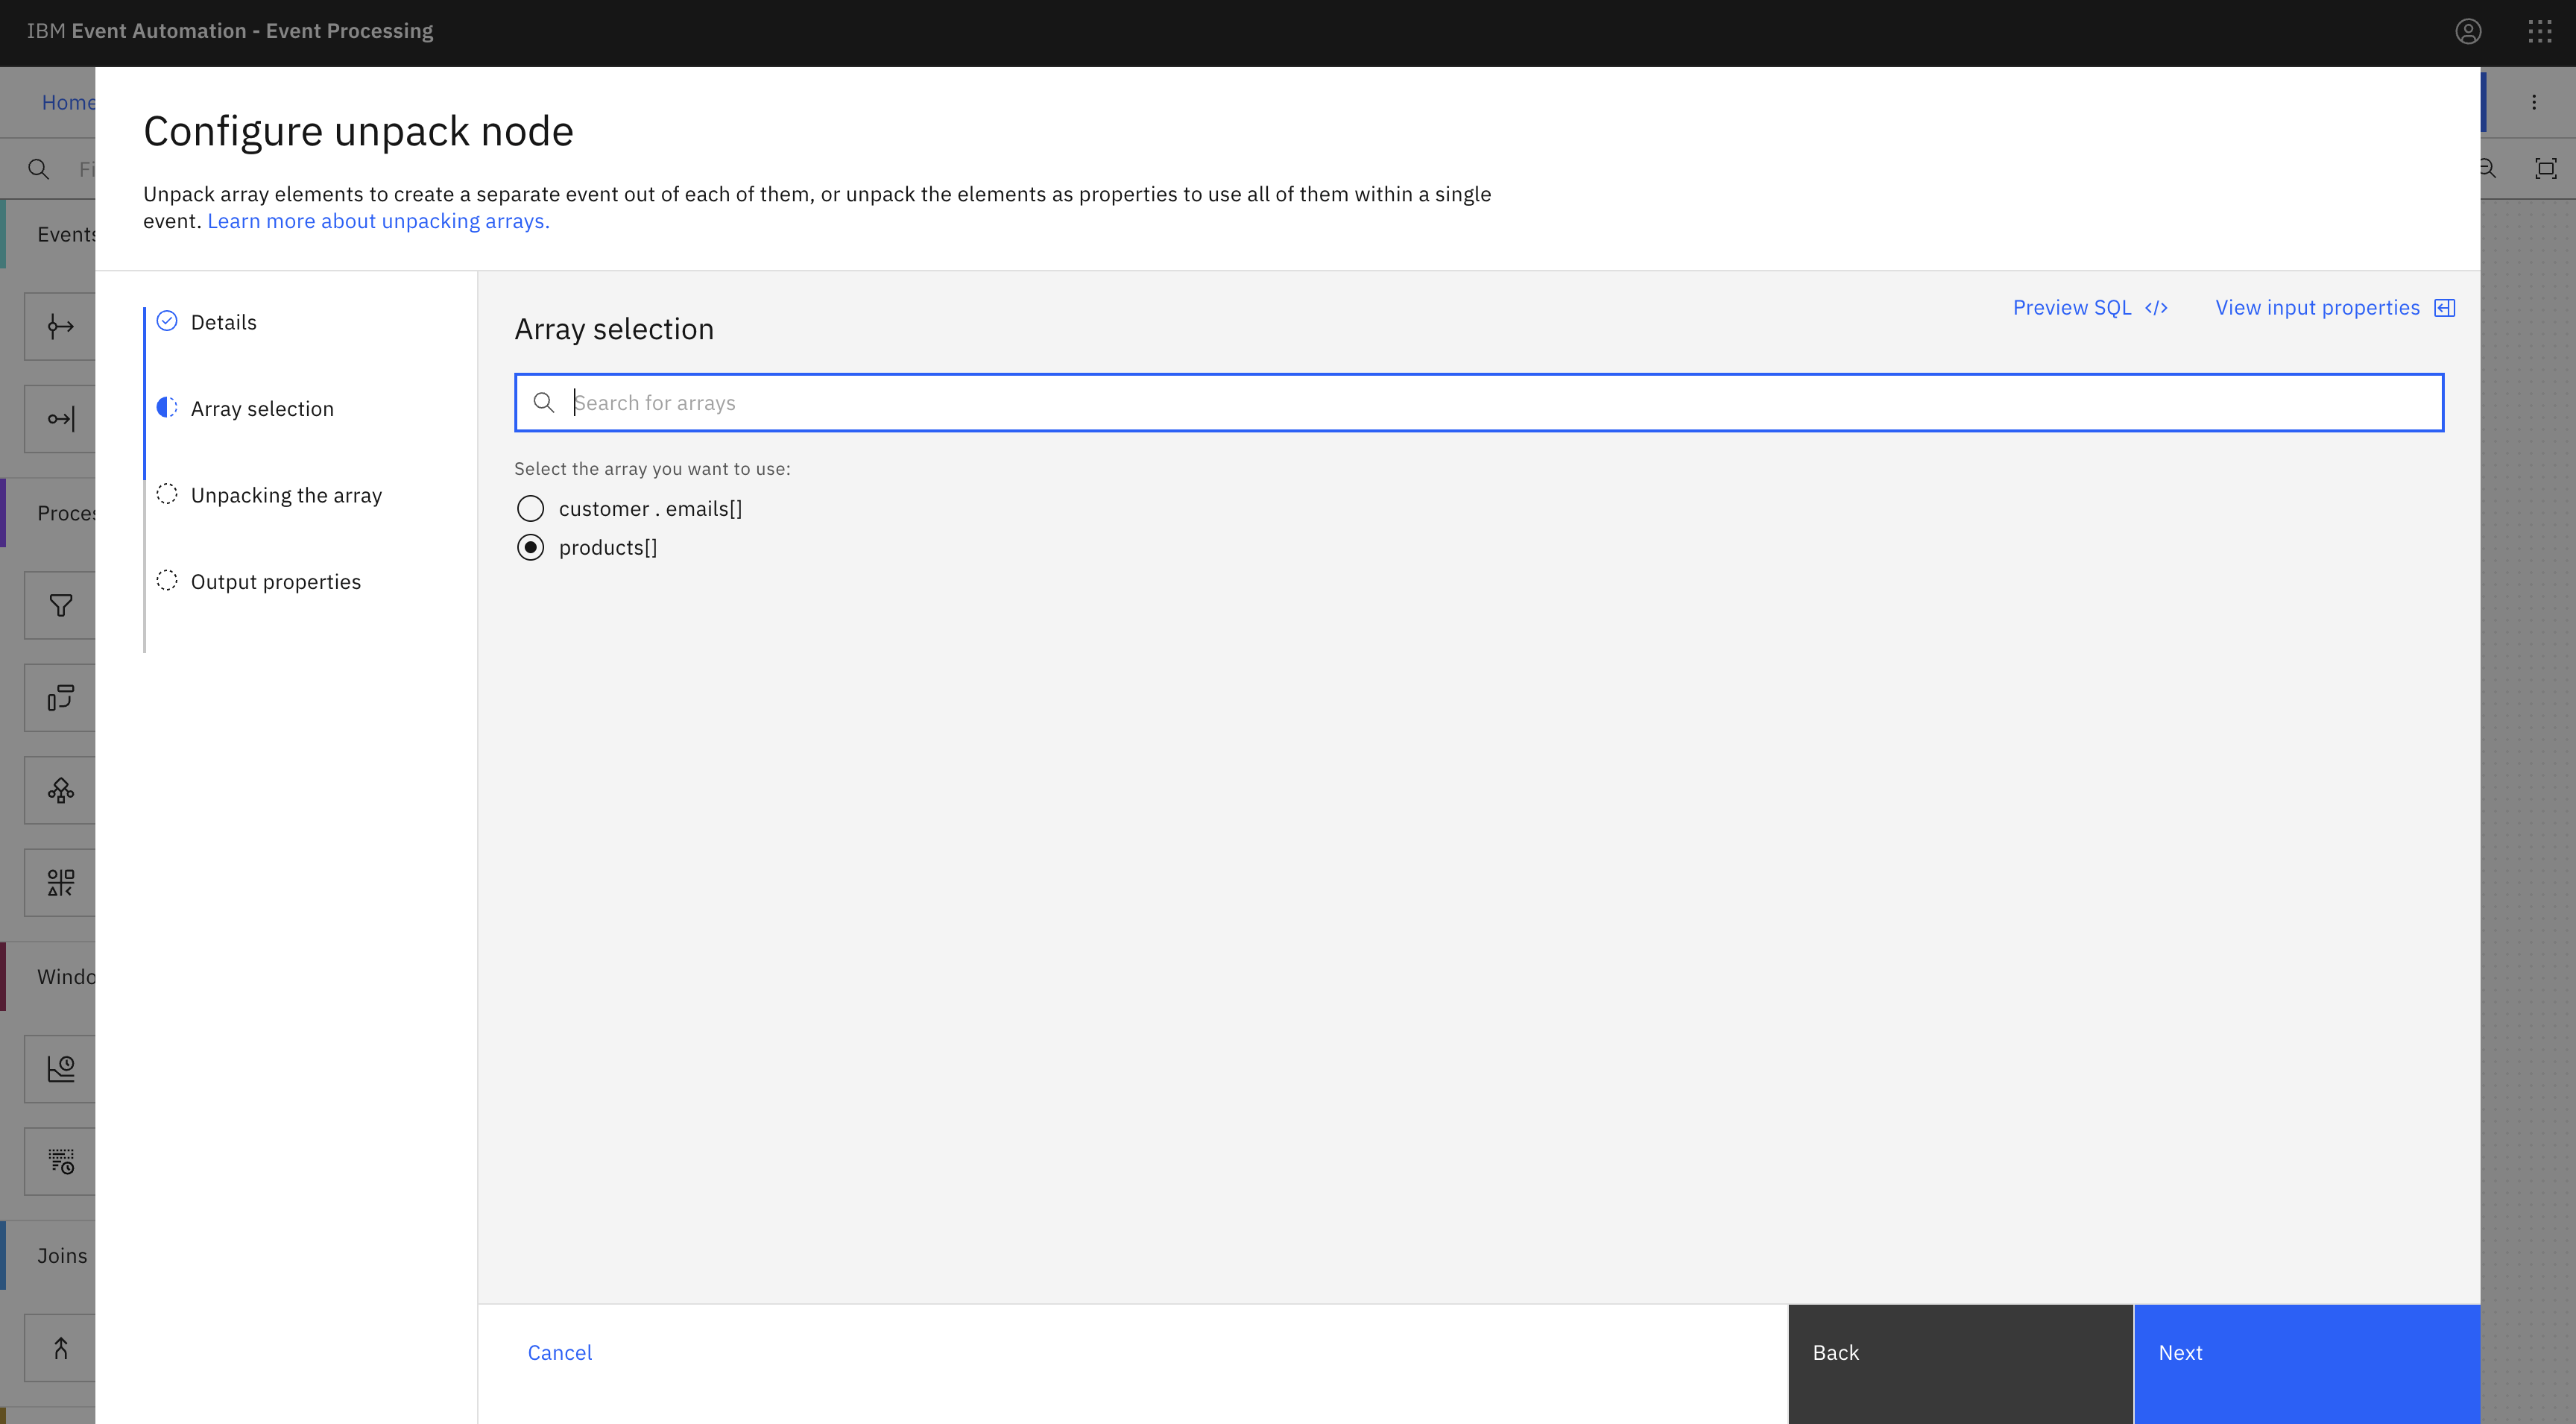
In the Array selection pane, select the products array, and then click Next.
-
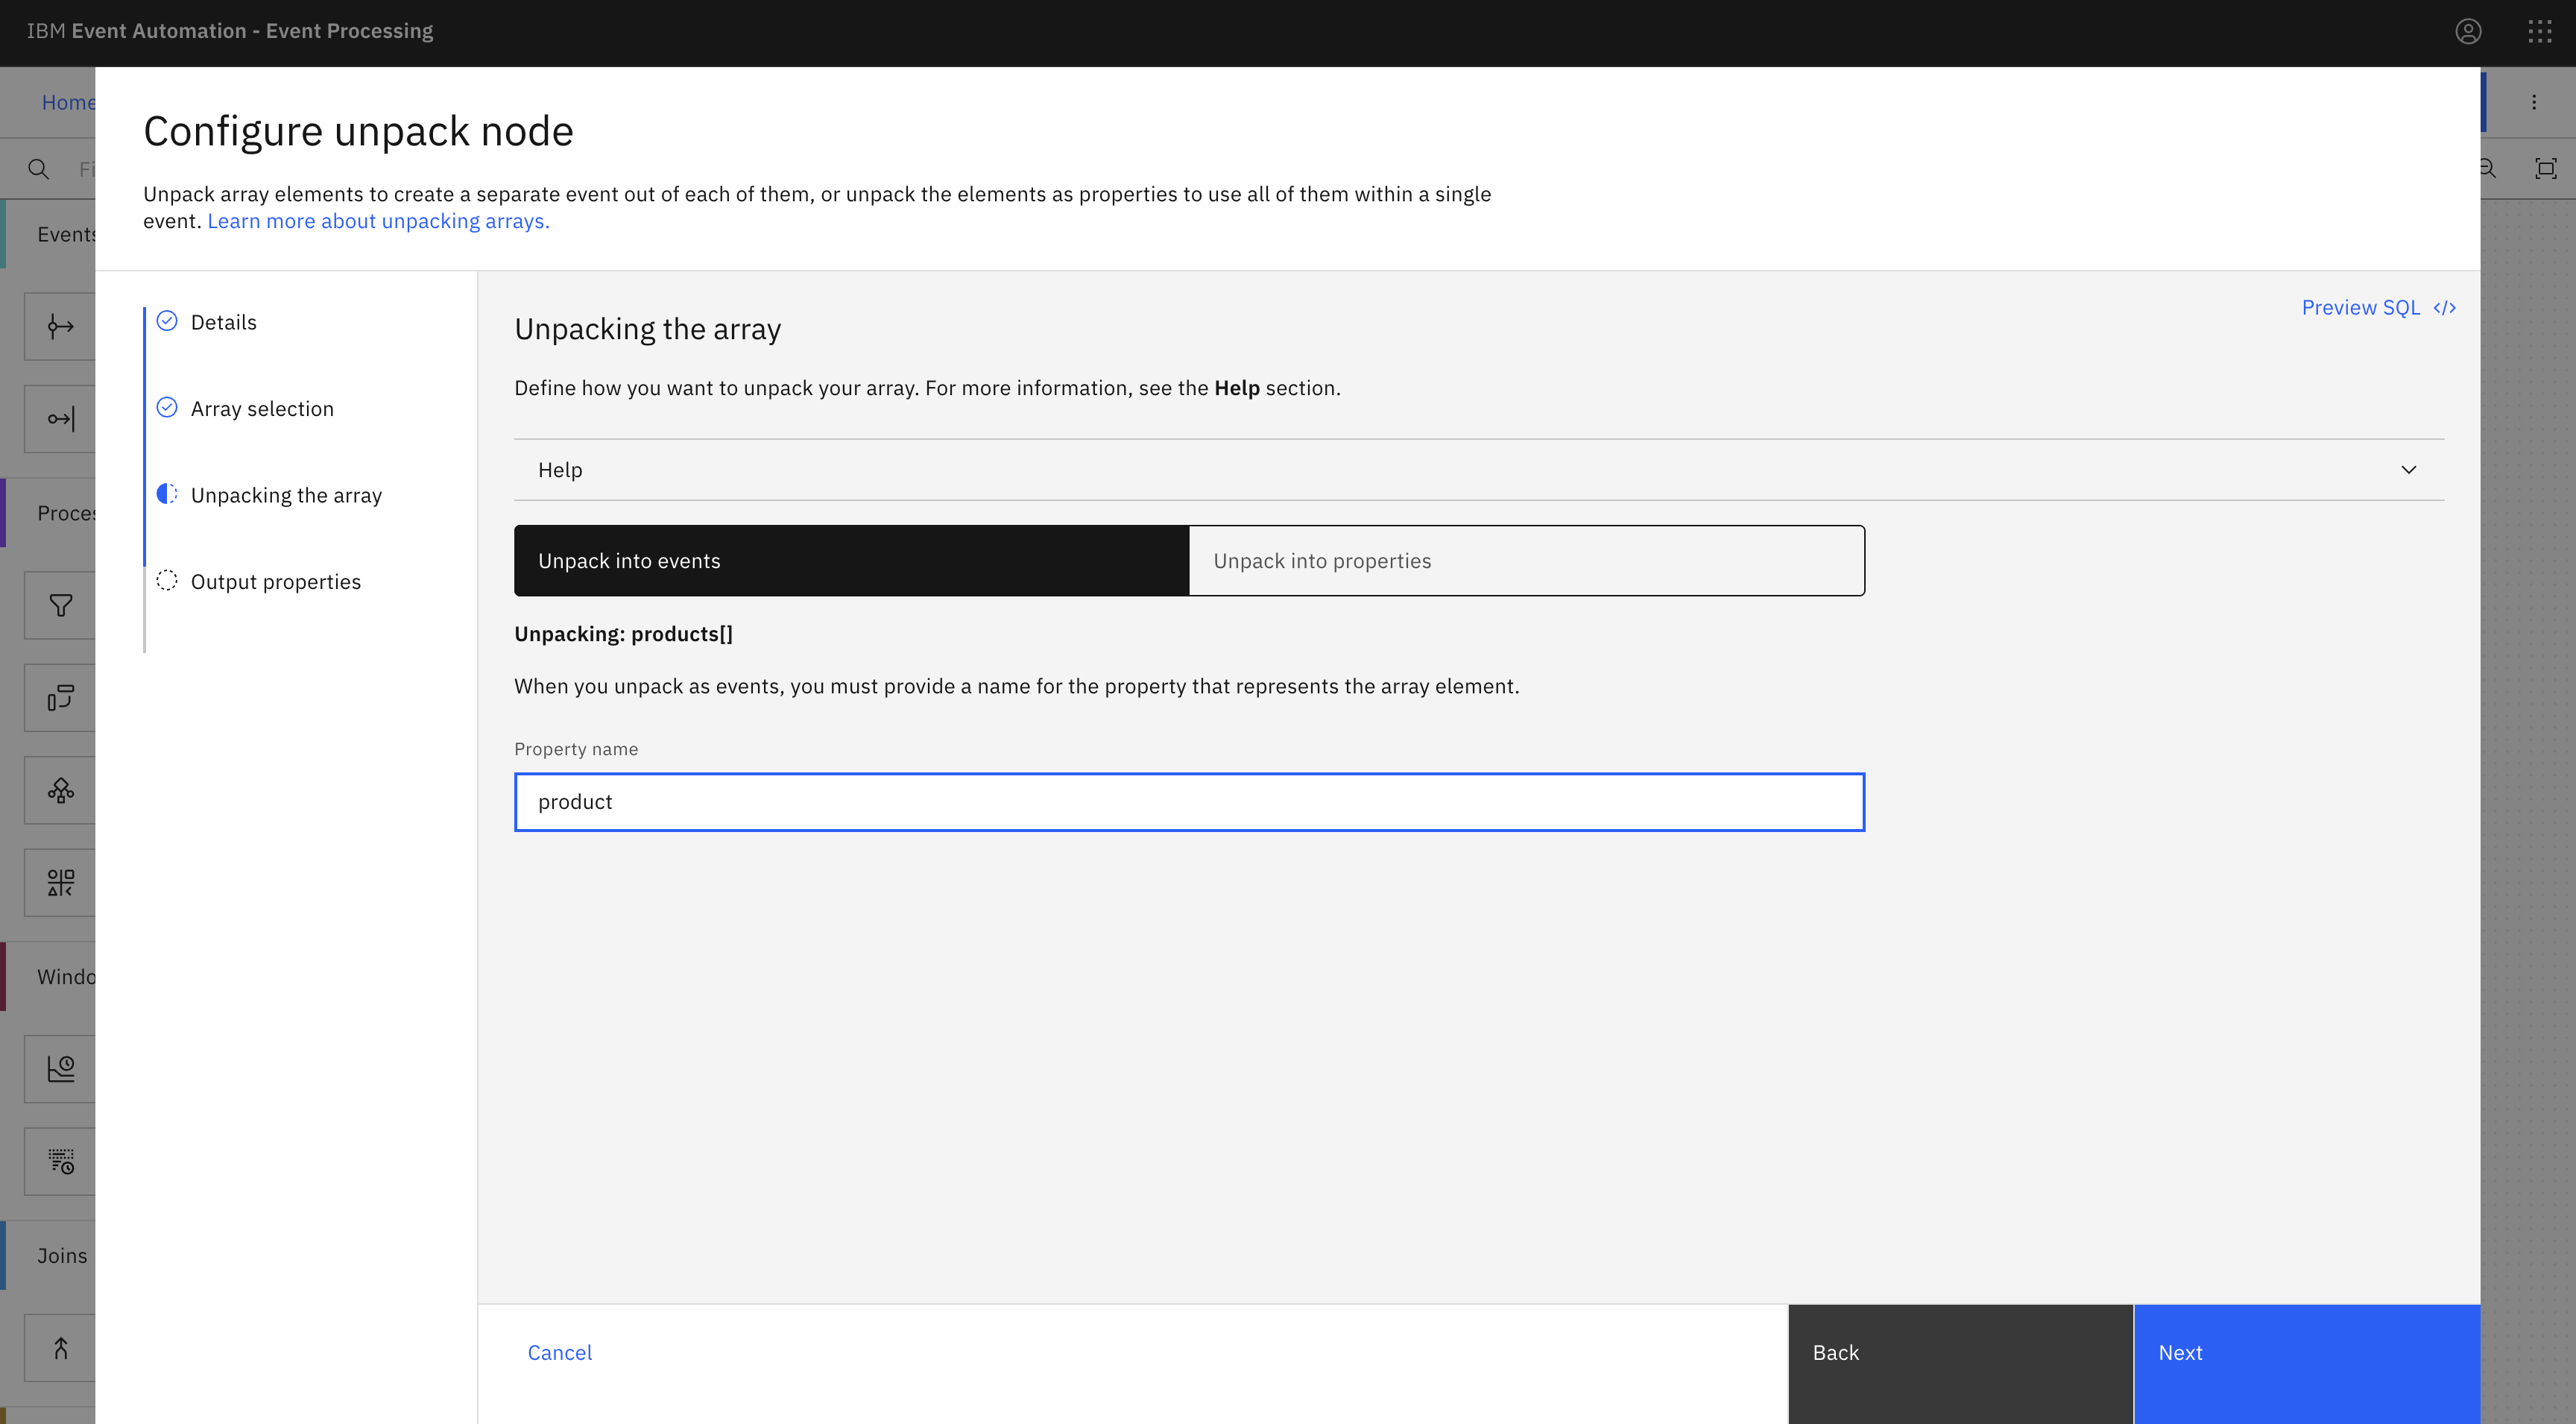
In the Unpack into events tab, enter
productin the Property name field, and then click Next.Note: By default, the Unpack the array pane displays the Unpack into events tab.
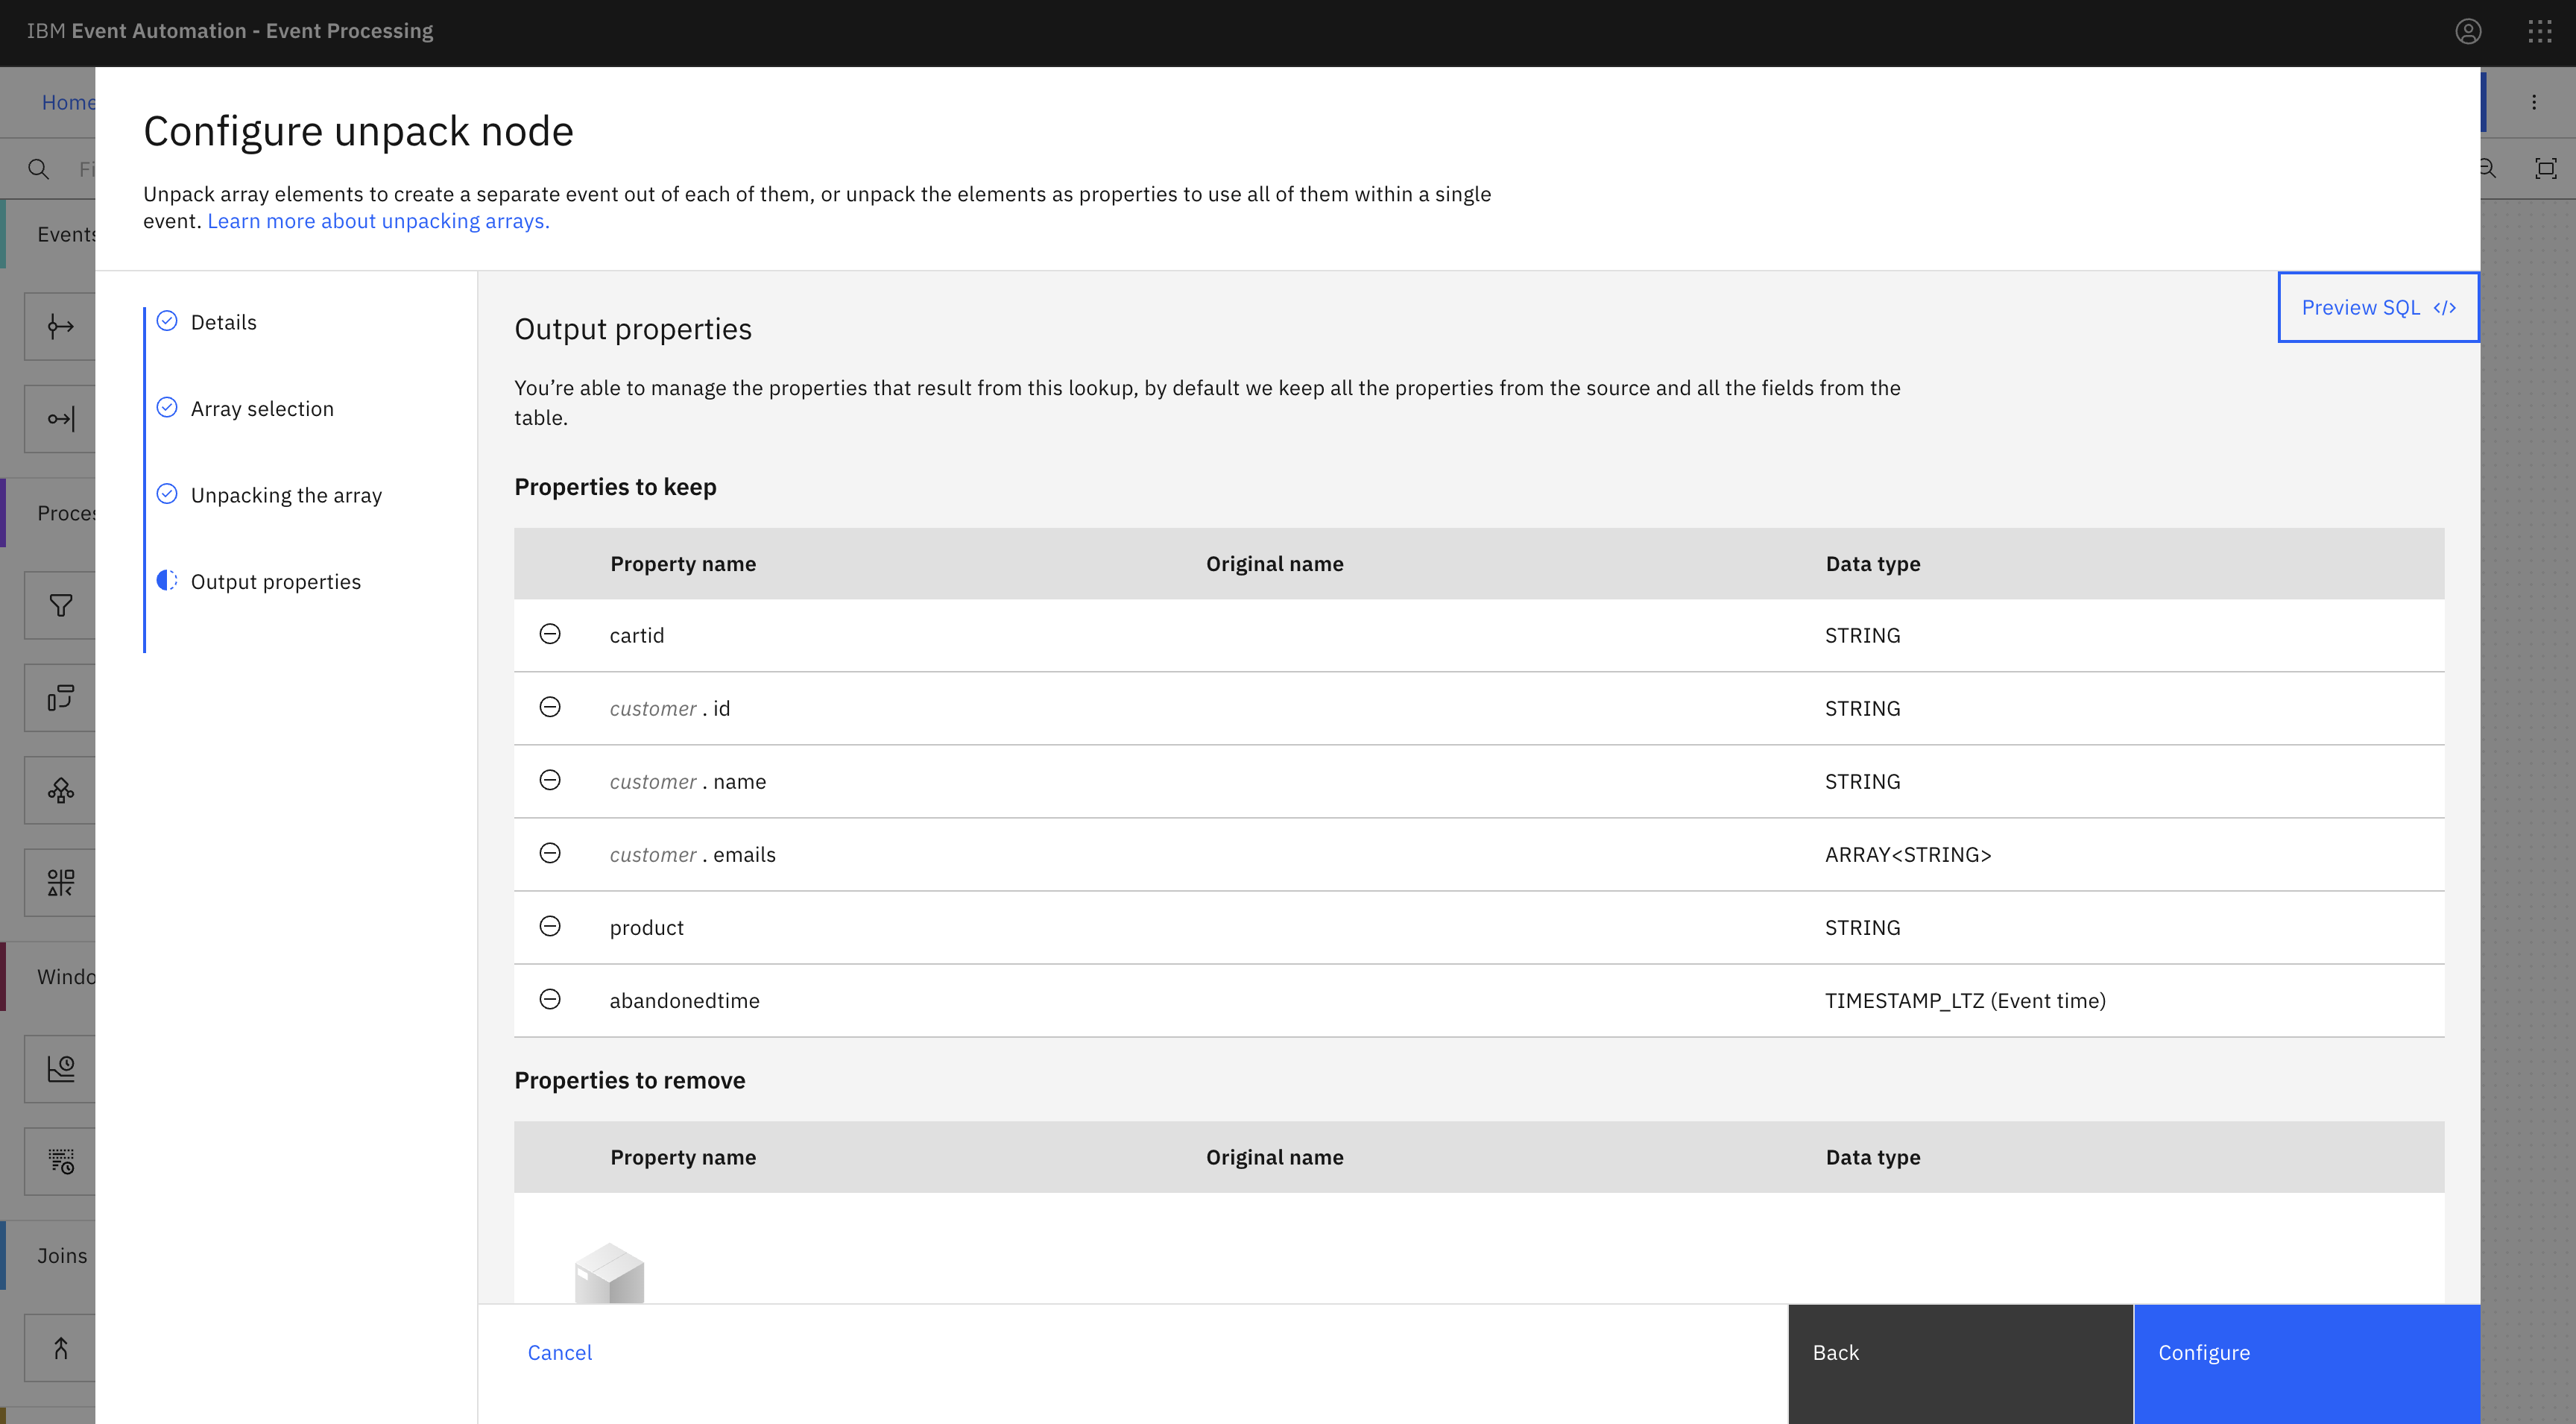
In the Output properties pane, you can see that each event has only one single return object, and there is no products array anymore.
-
Click Configure to finalize the unpack array node configuration.
Step 8: Identify positive reviews of abandoned products
The next step is to specify how to correlate the daily product reviews with the abandoned cart products.
-
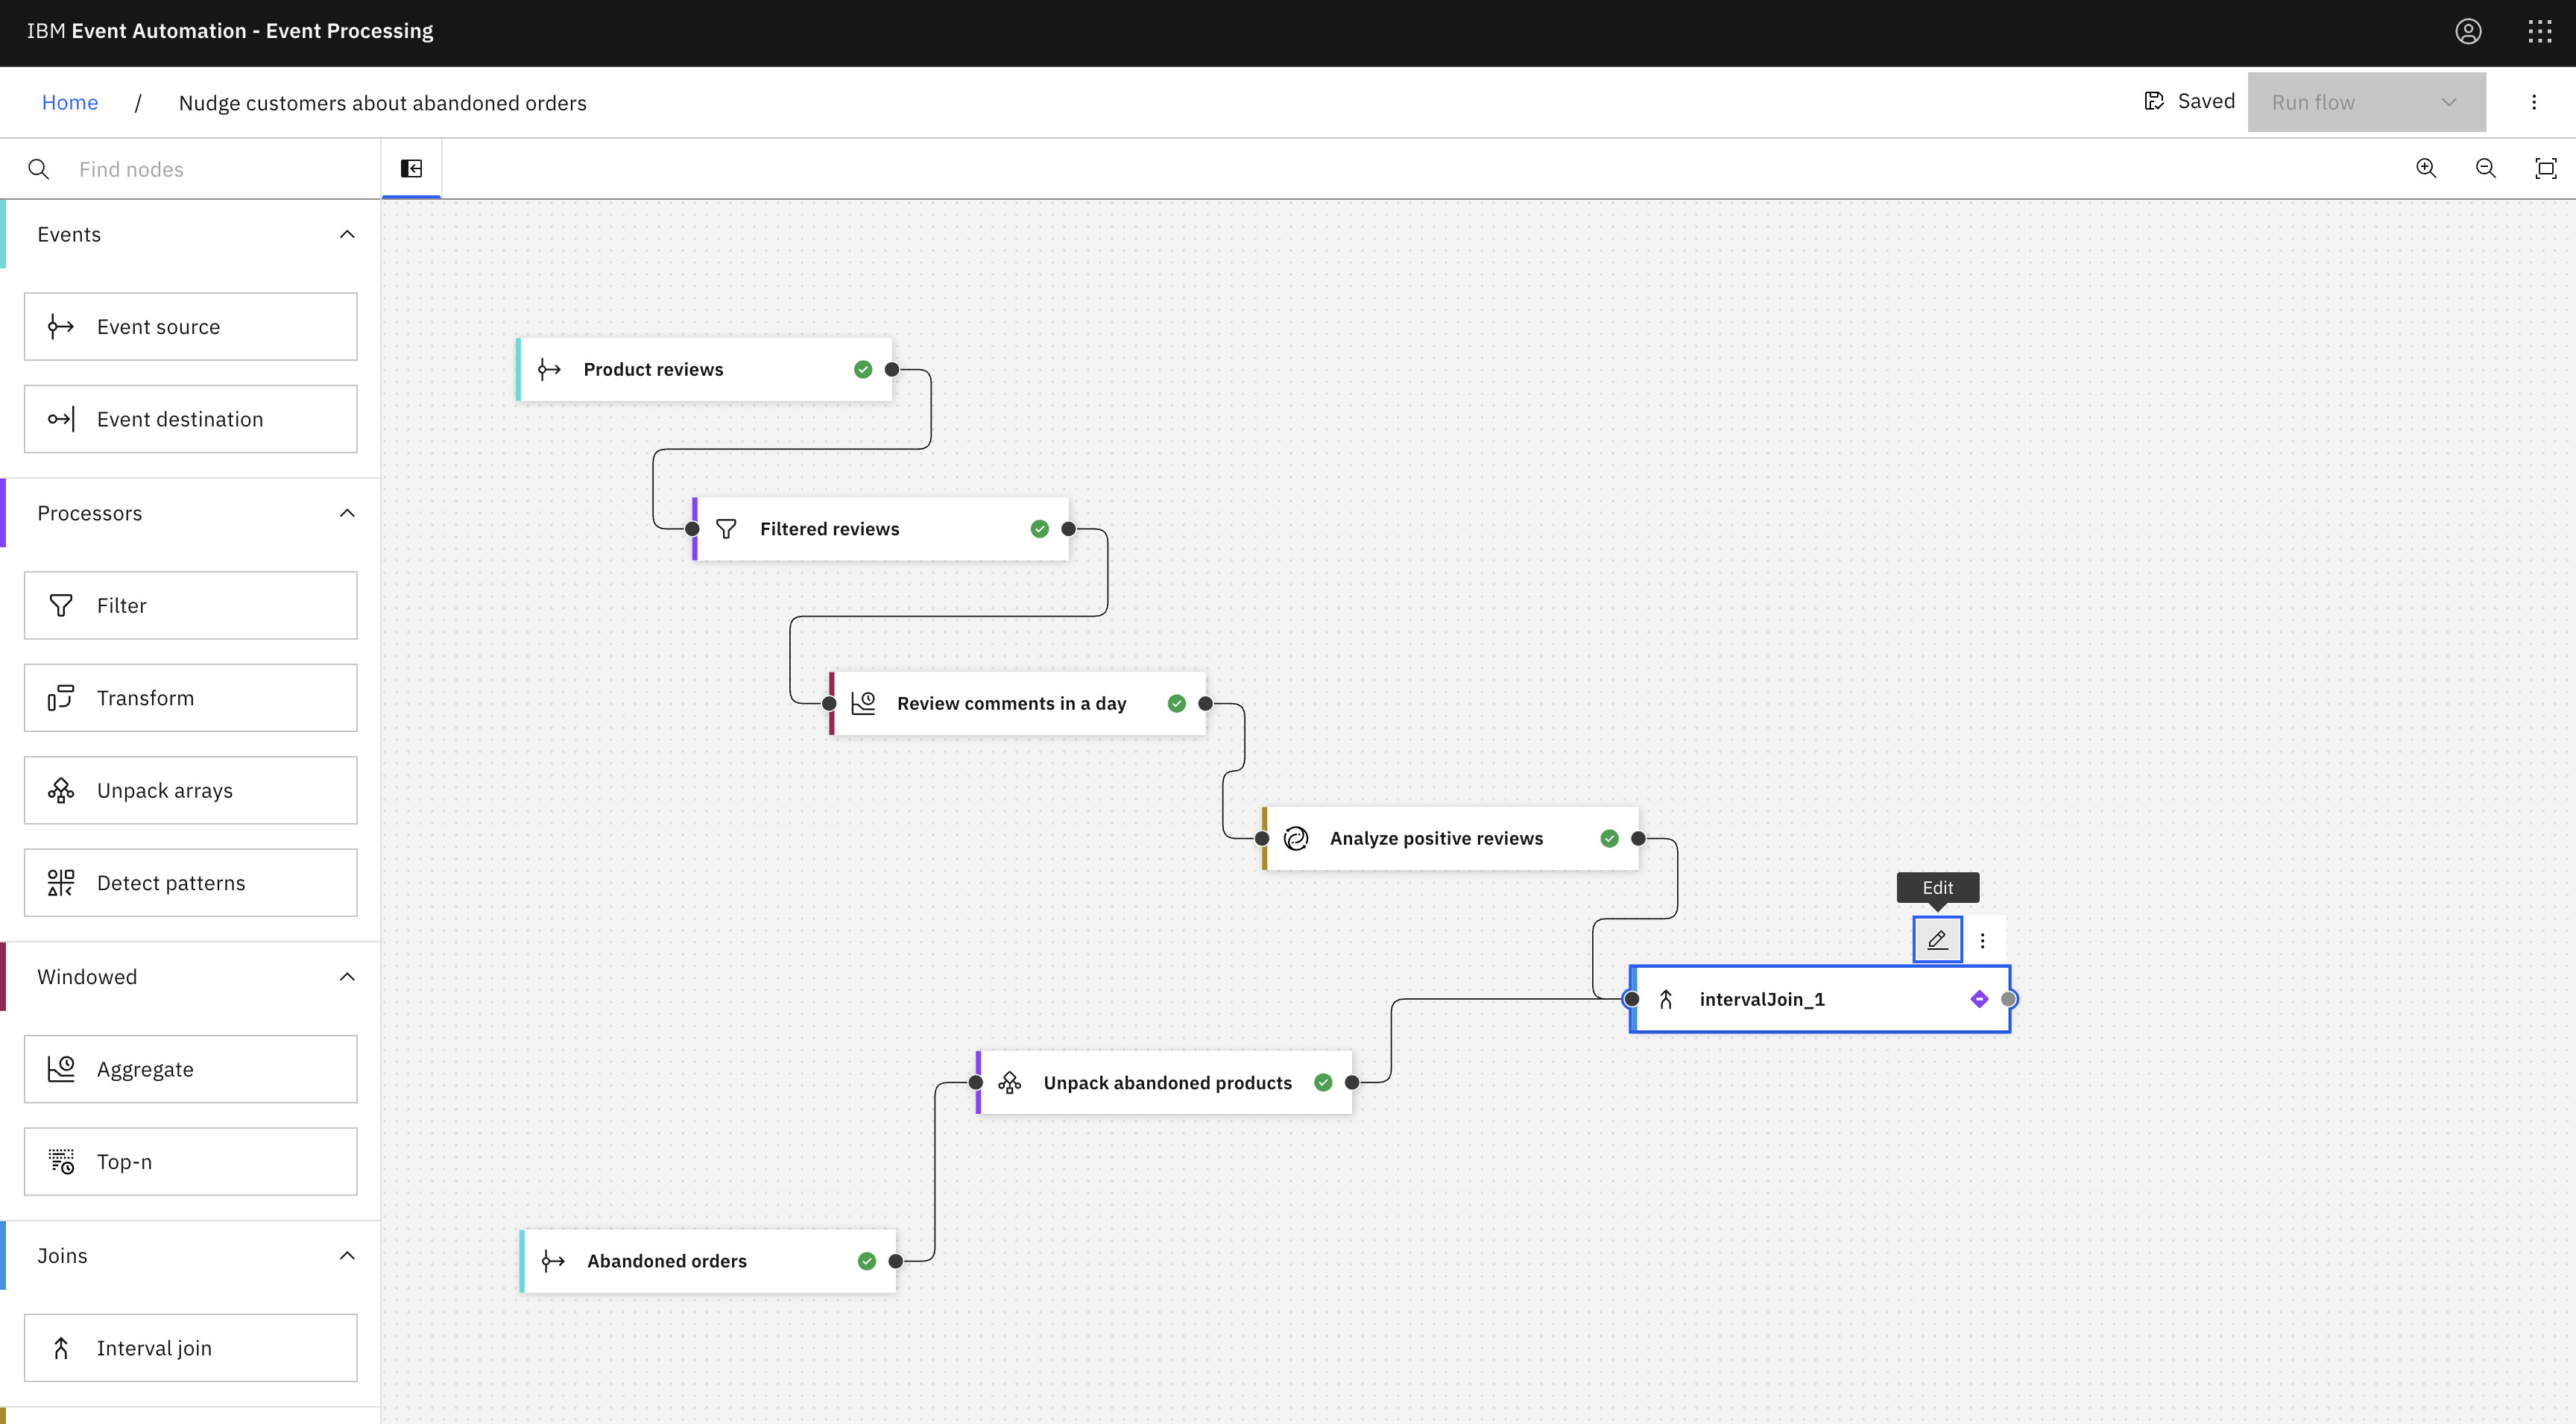
Add an Interval join node to combine the product reviews with the abandoned products.
-
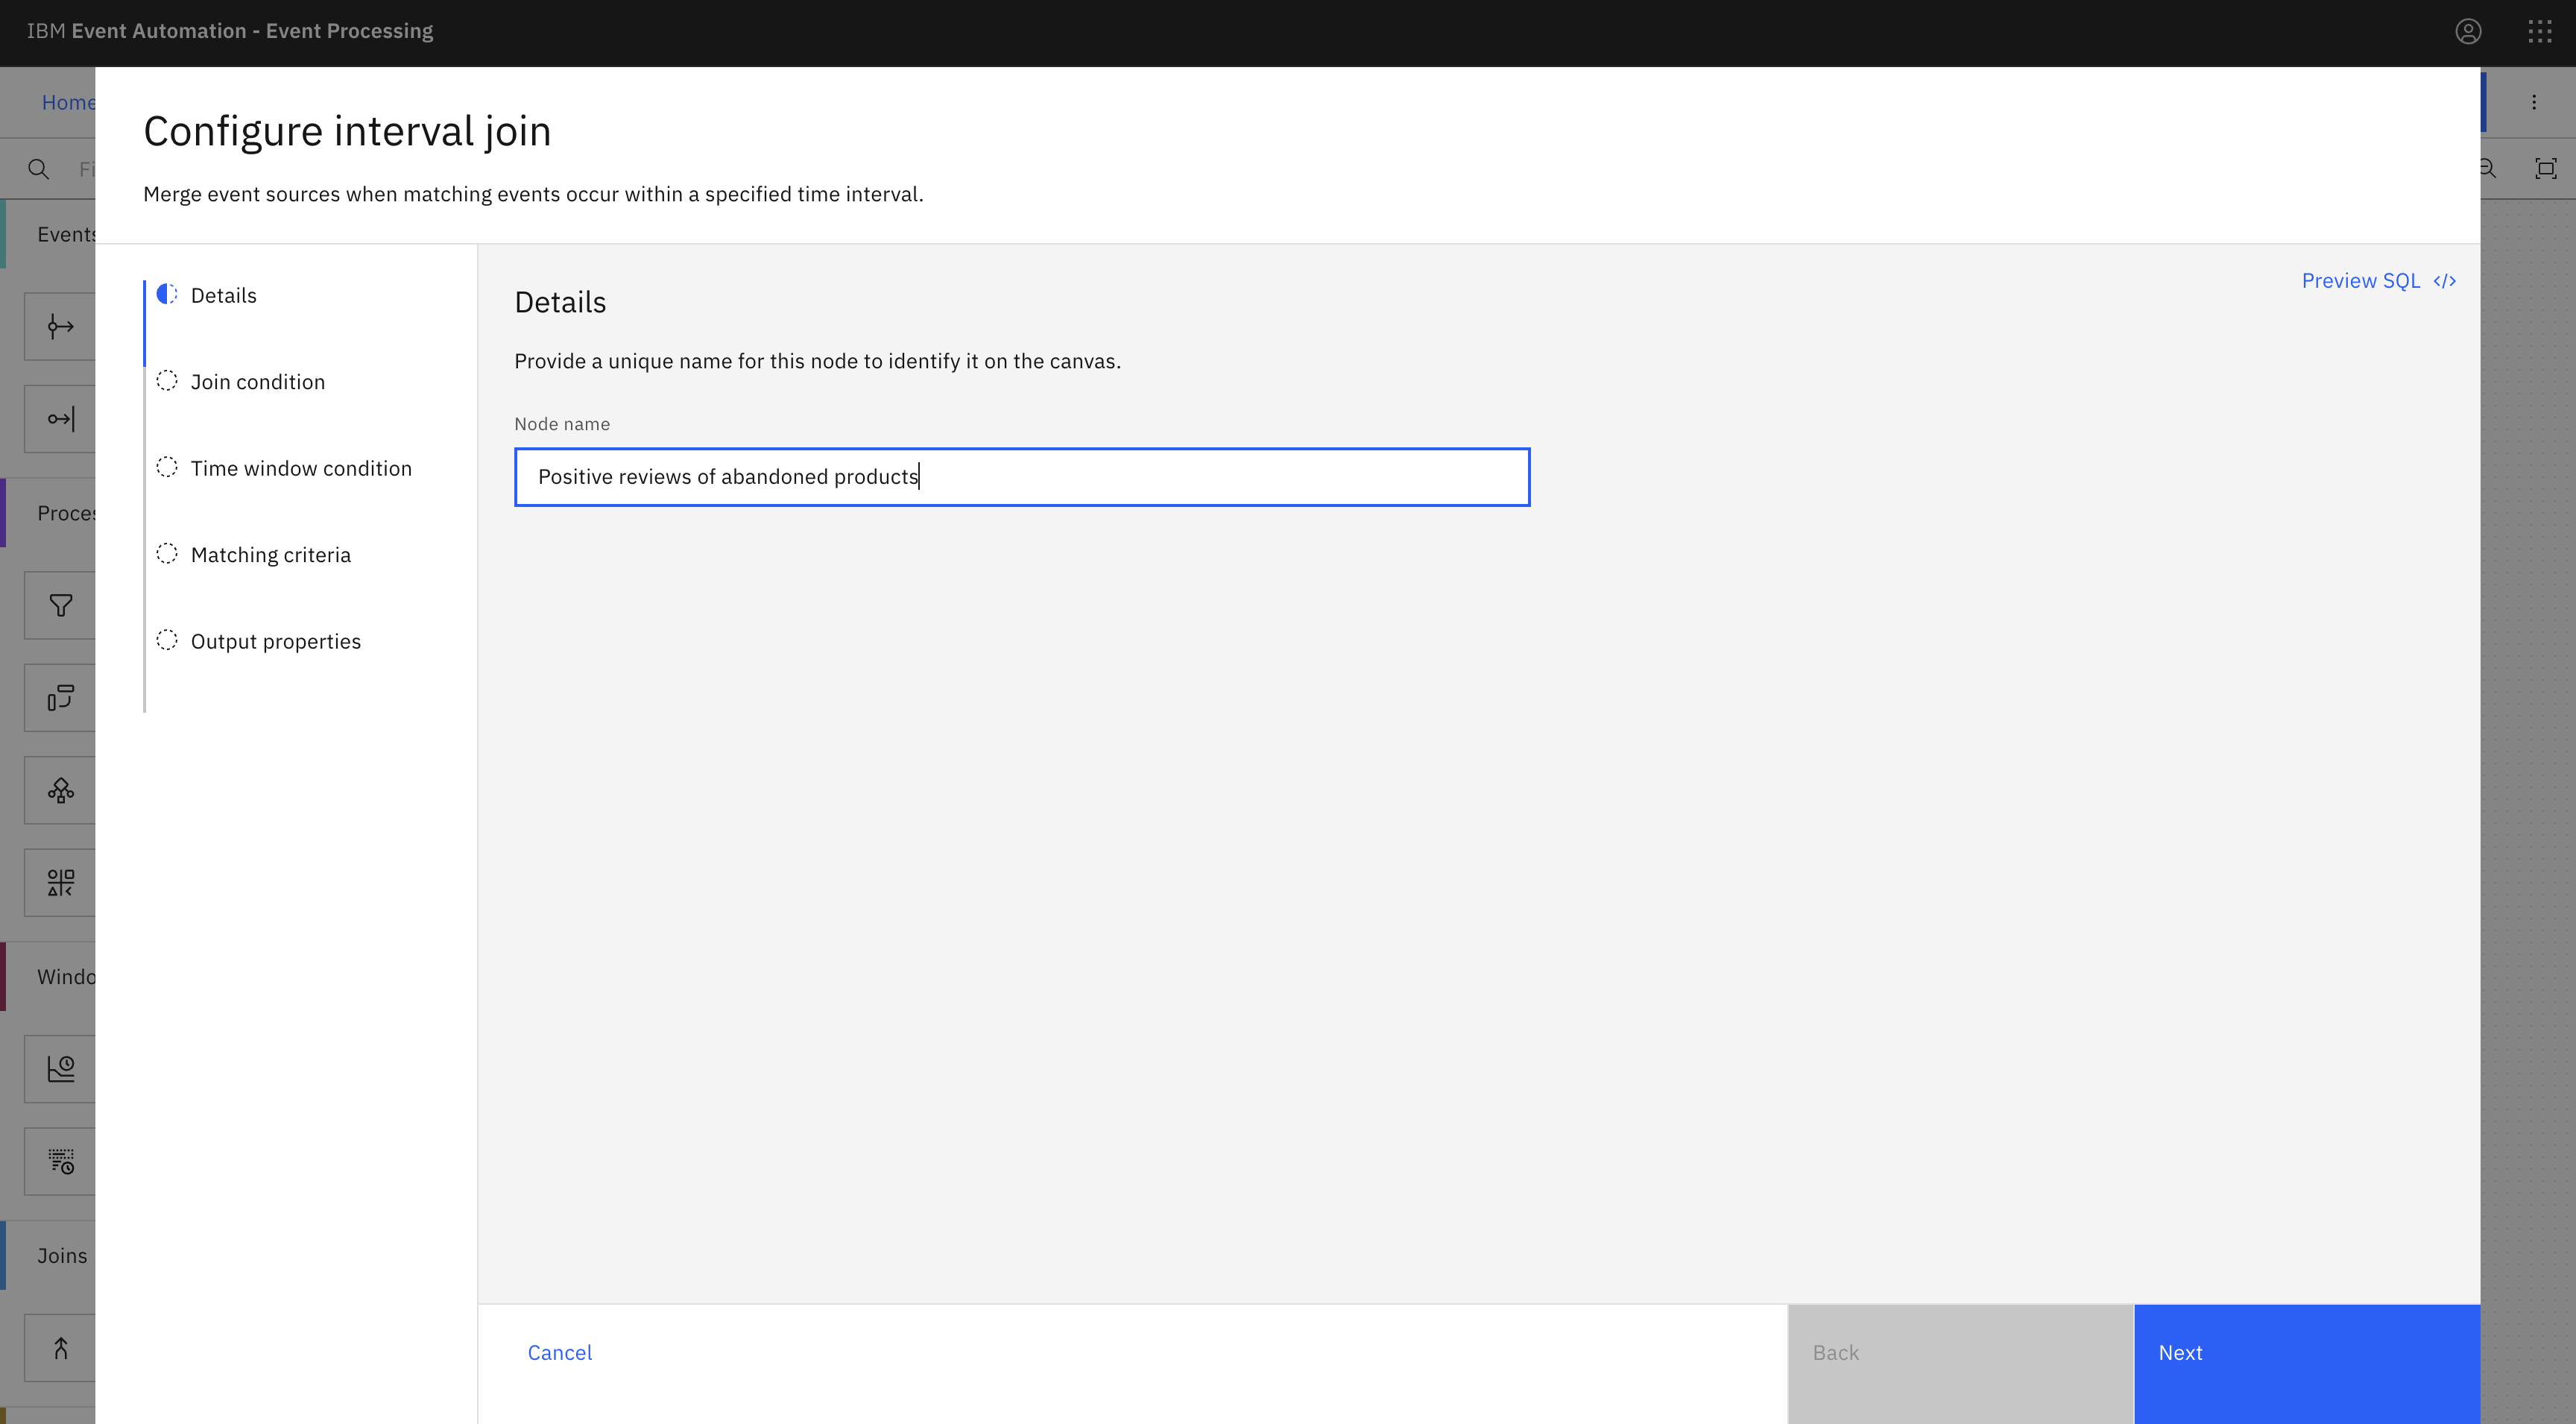
Give the join node a name that describes the events it should identify:
Positive reviews of abandoned products -
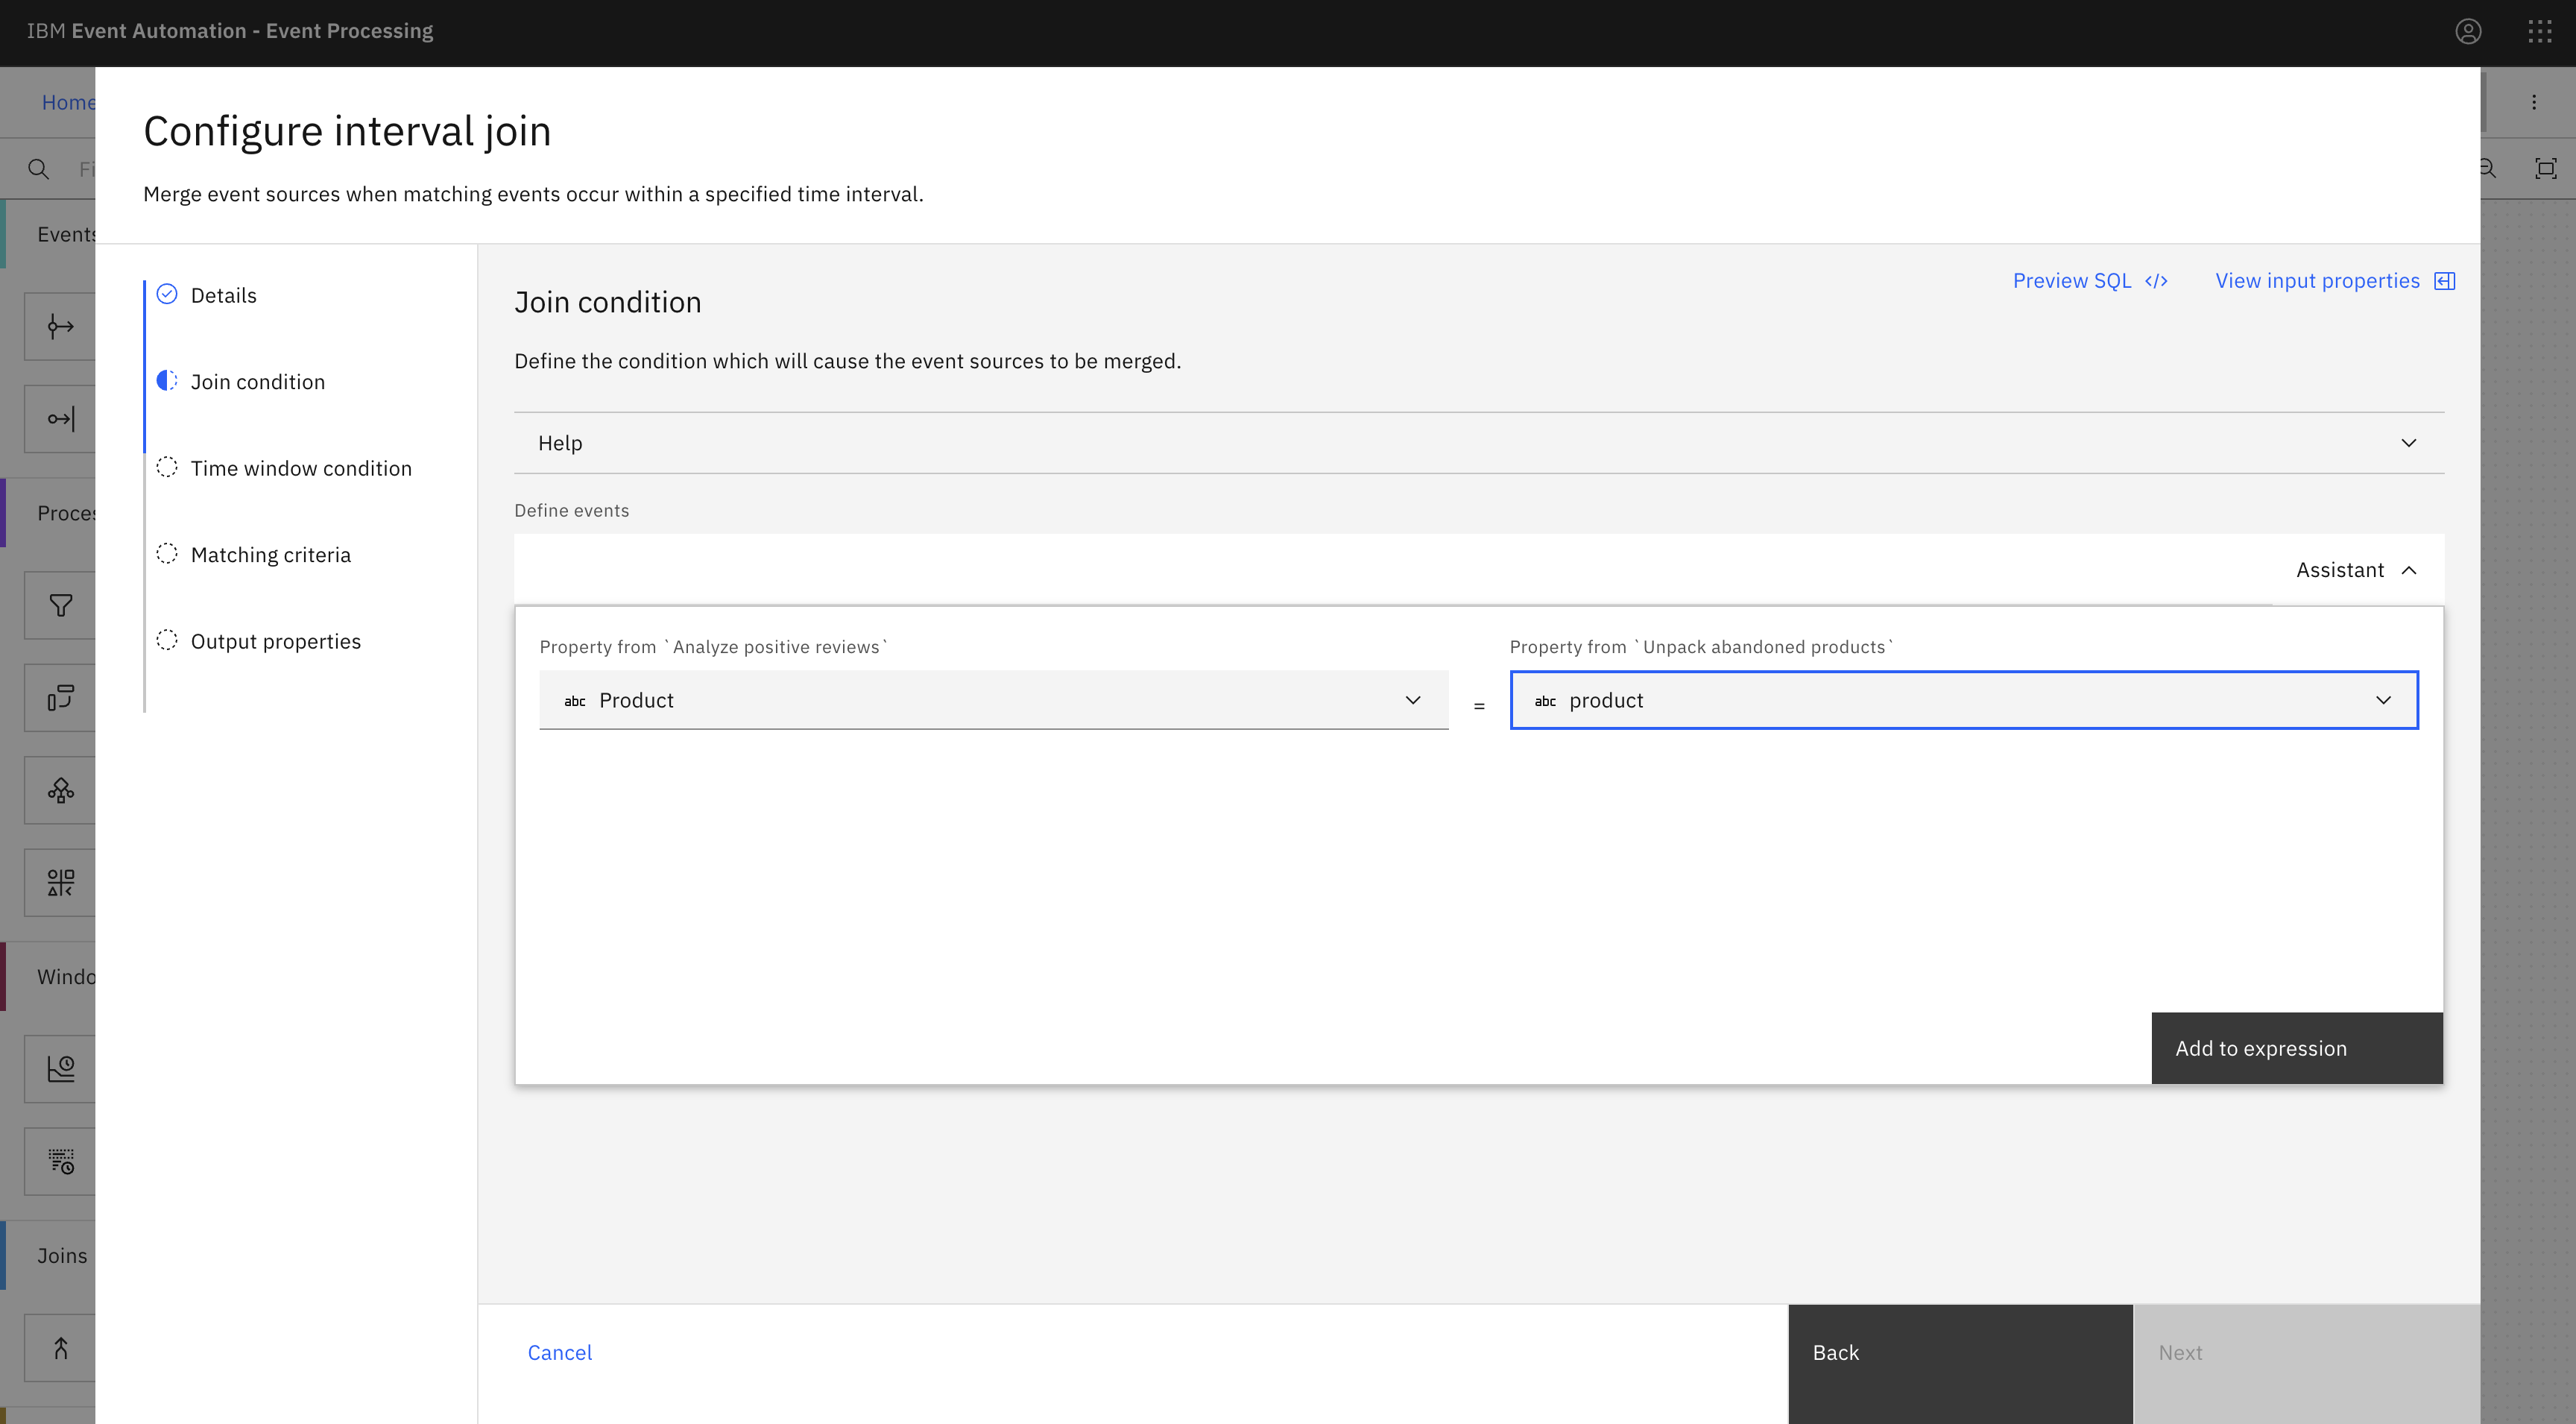
Define the join by matching the
productfromAnalyze positive reviewsevents with theProductfromUnpack abandoned productsevents. -
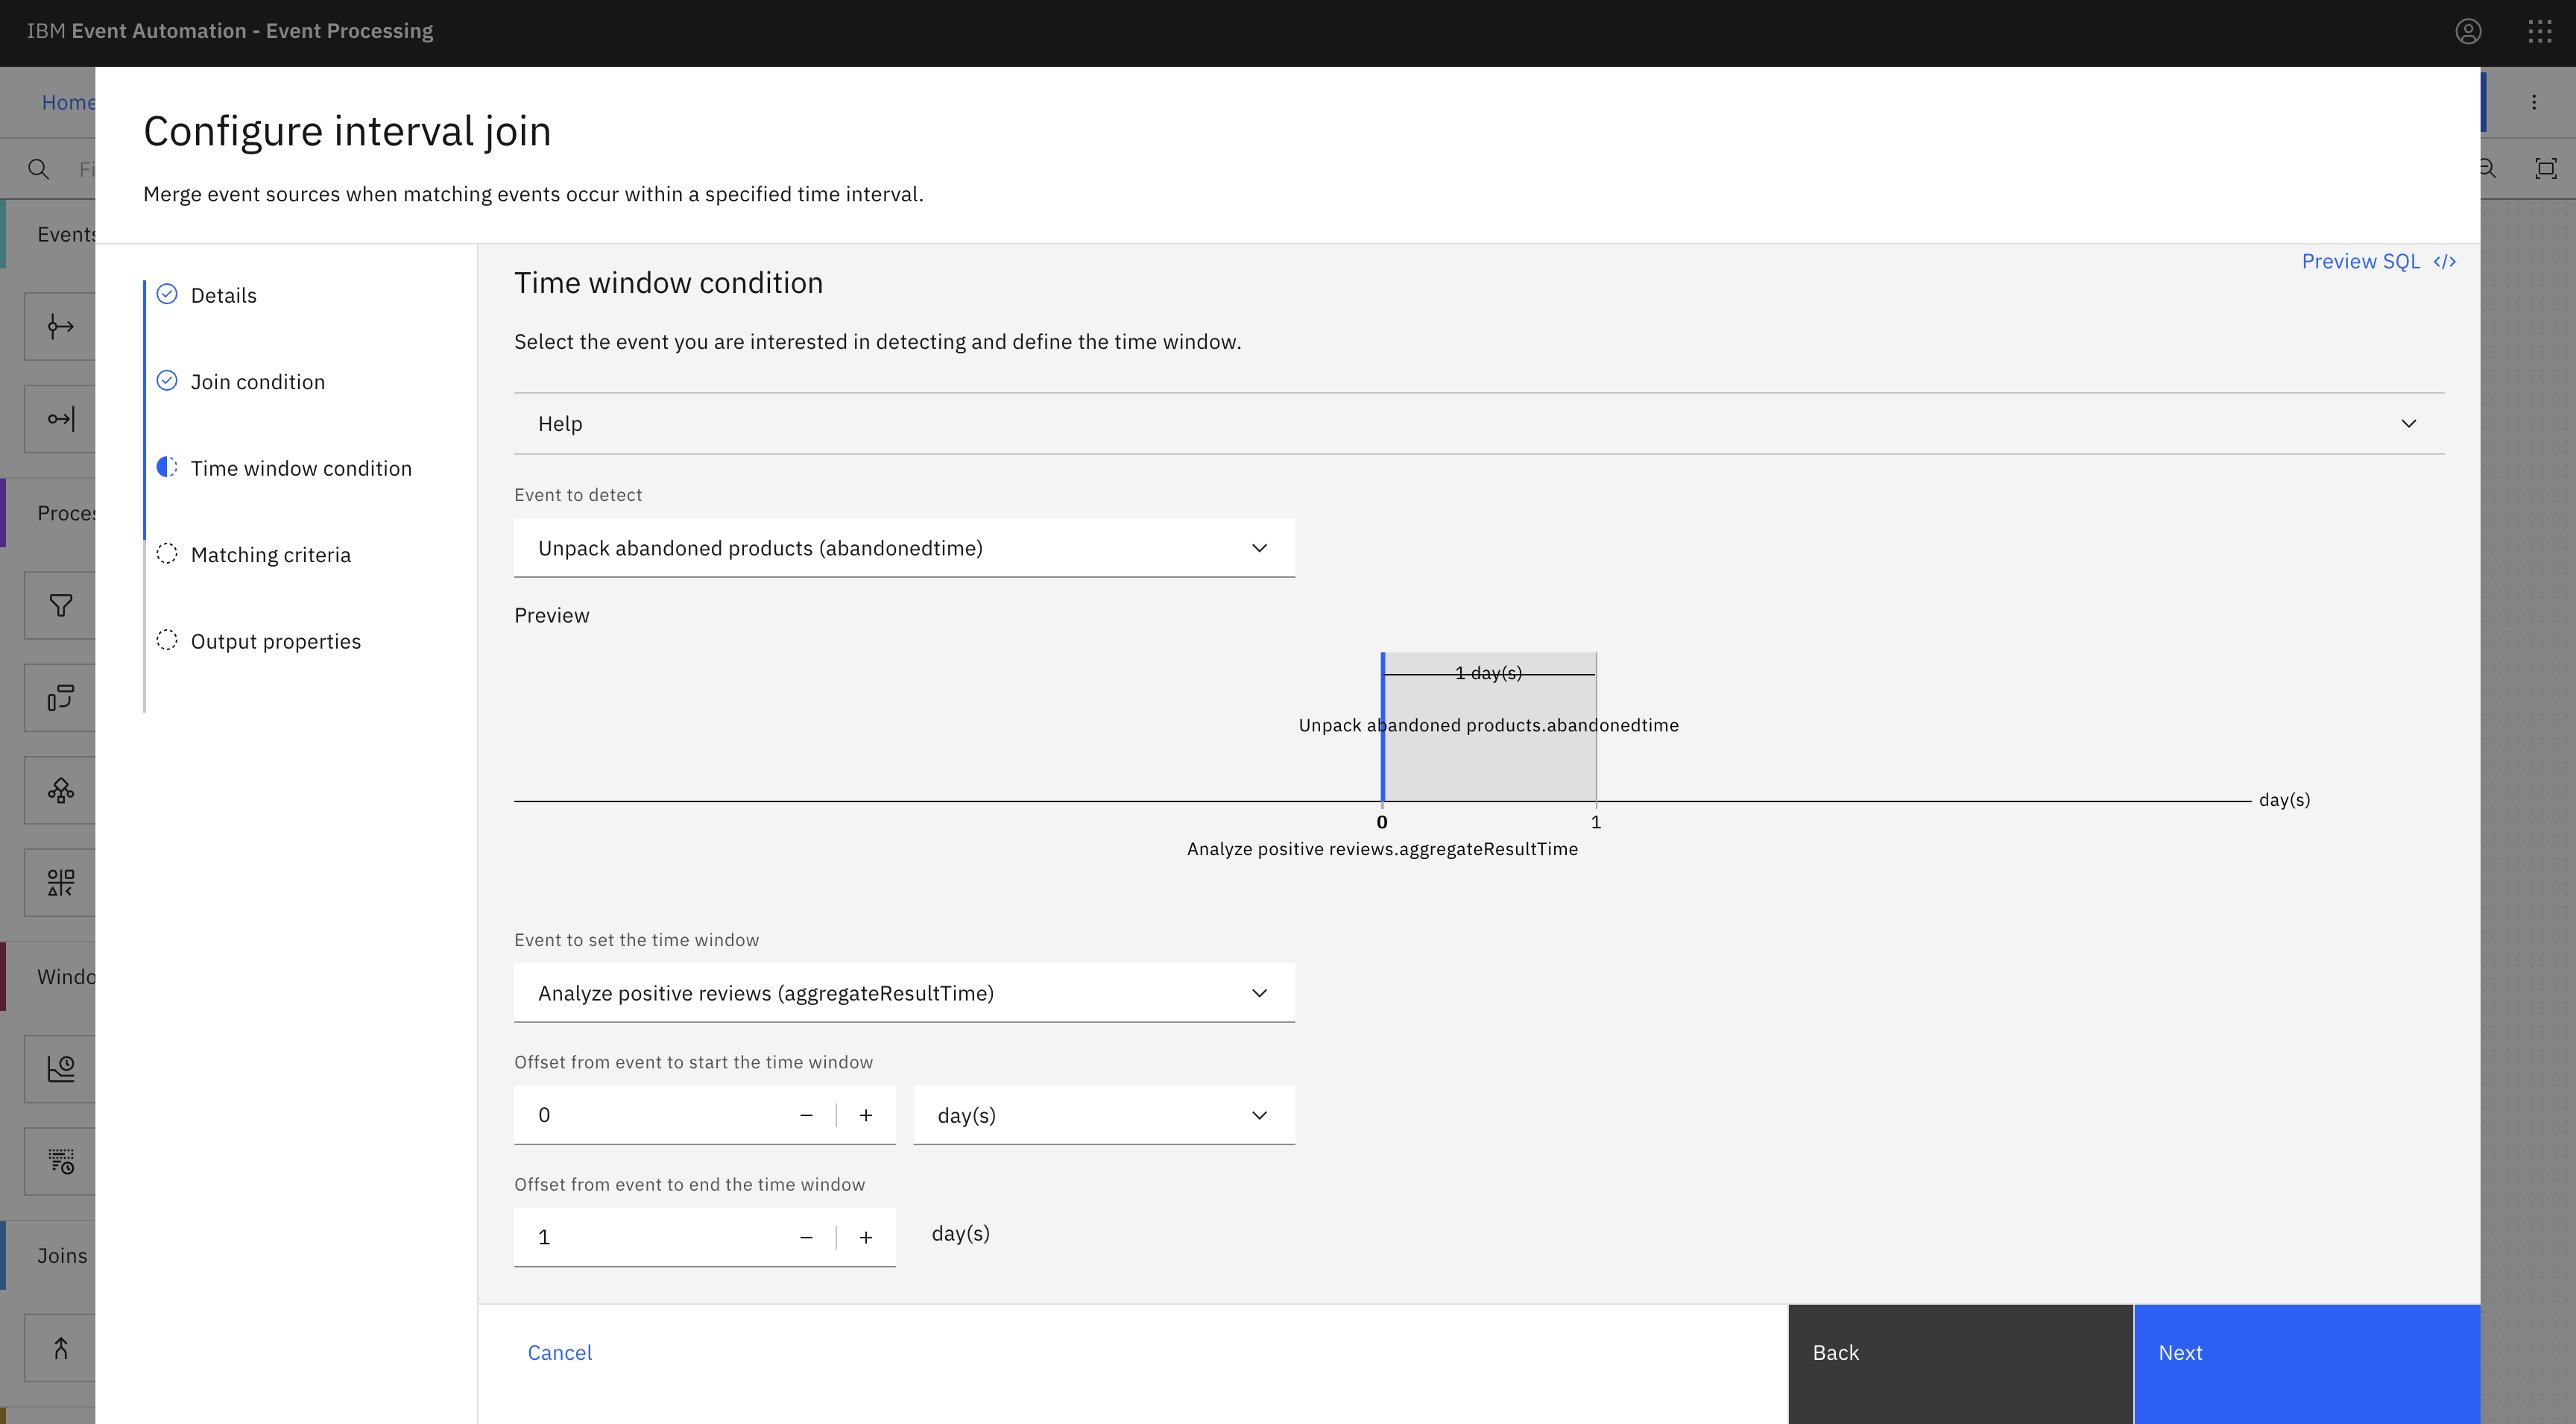
Specify that you are interested in detecting abandoned orders that are made within 1 day of the positive review, and then click Next.
-
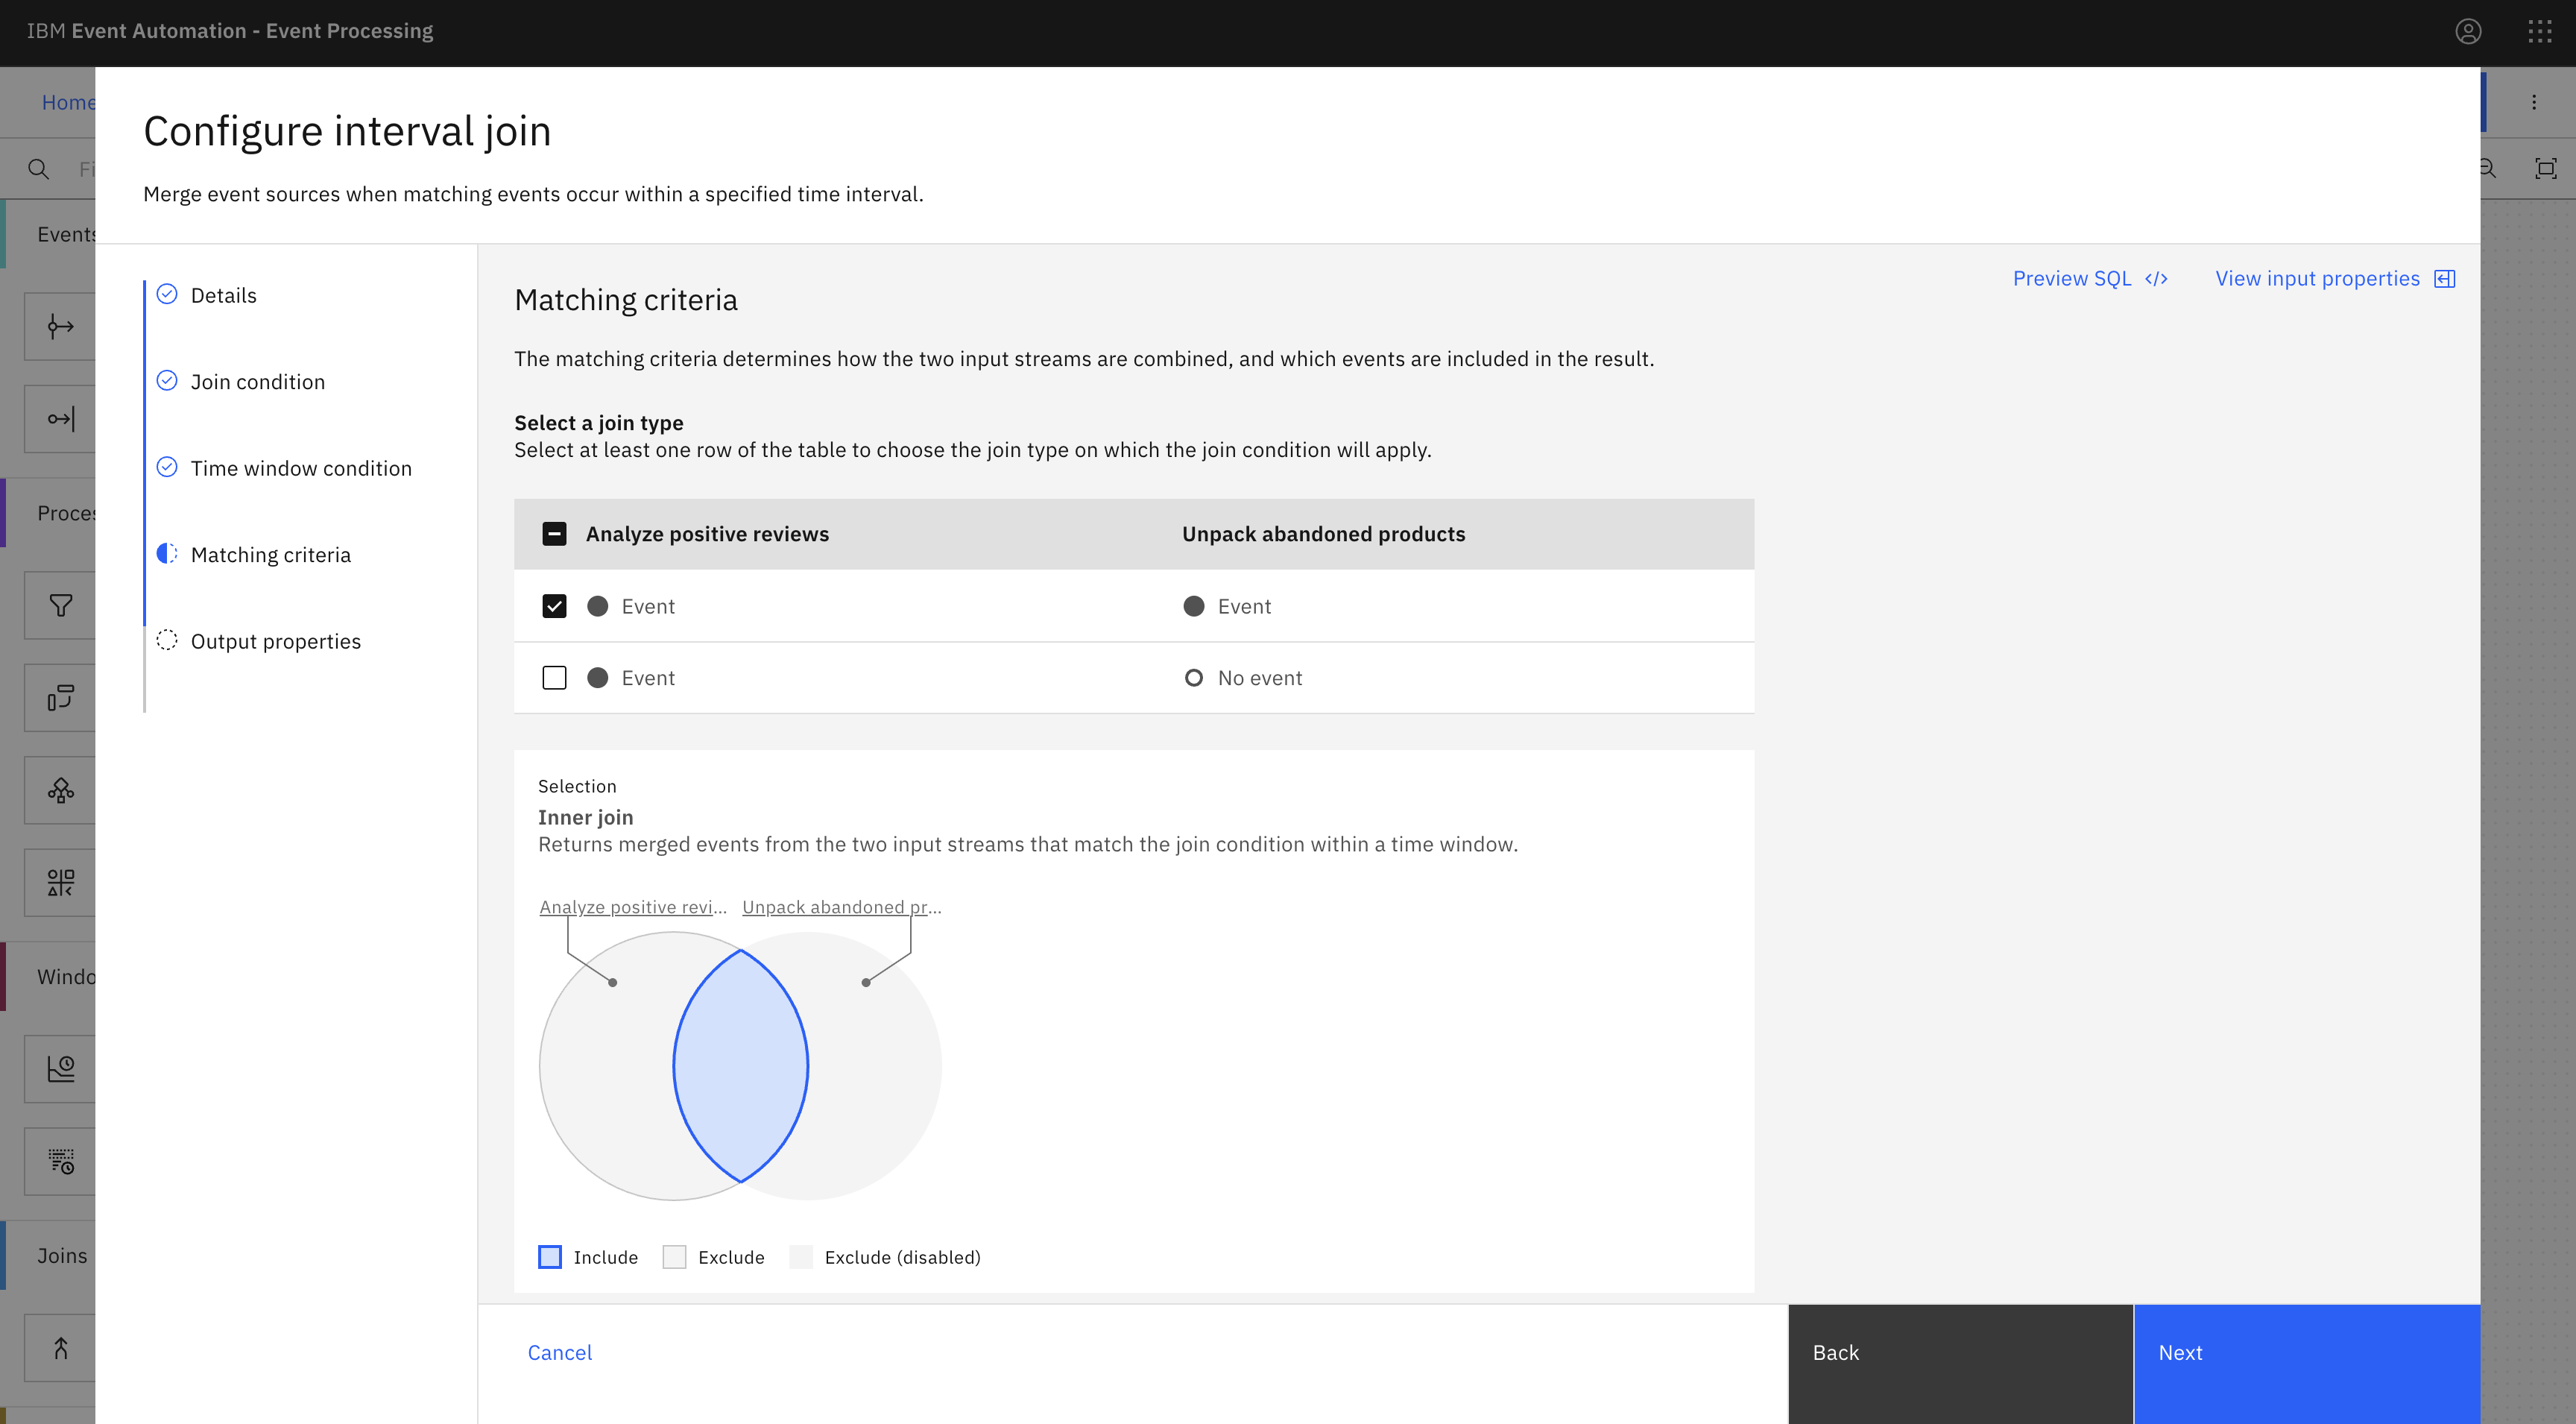
Select the join type as
Inner jointo retrieve only the common events from the two input streams. Then click Next. -
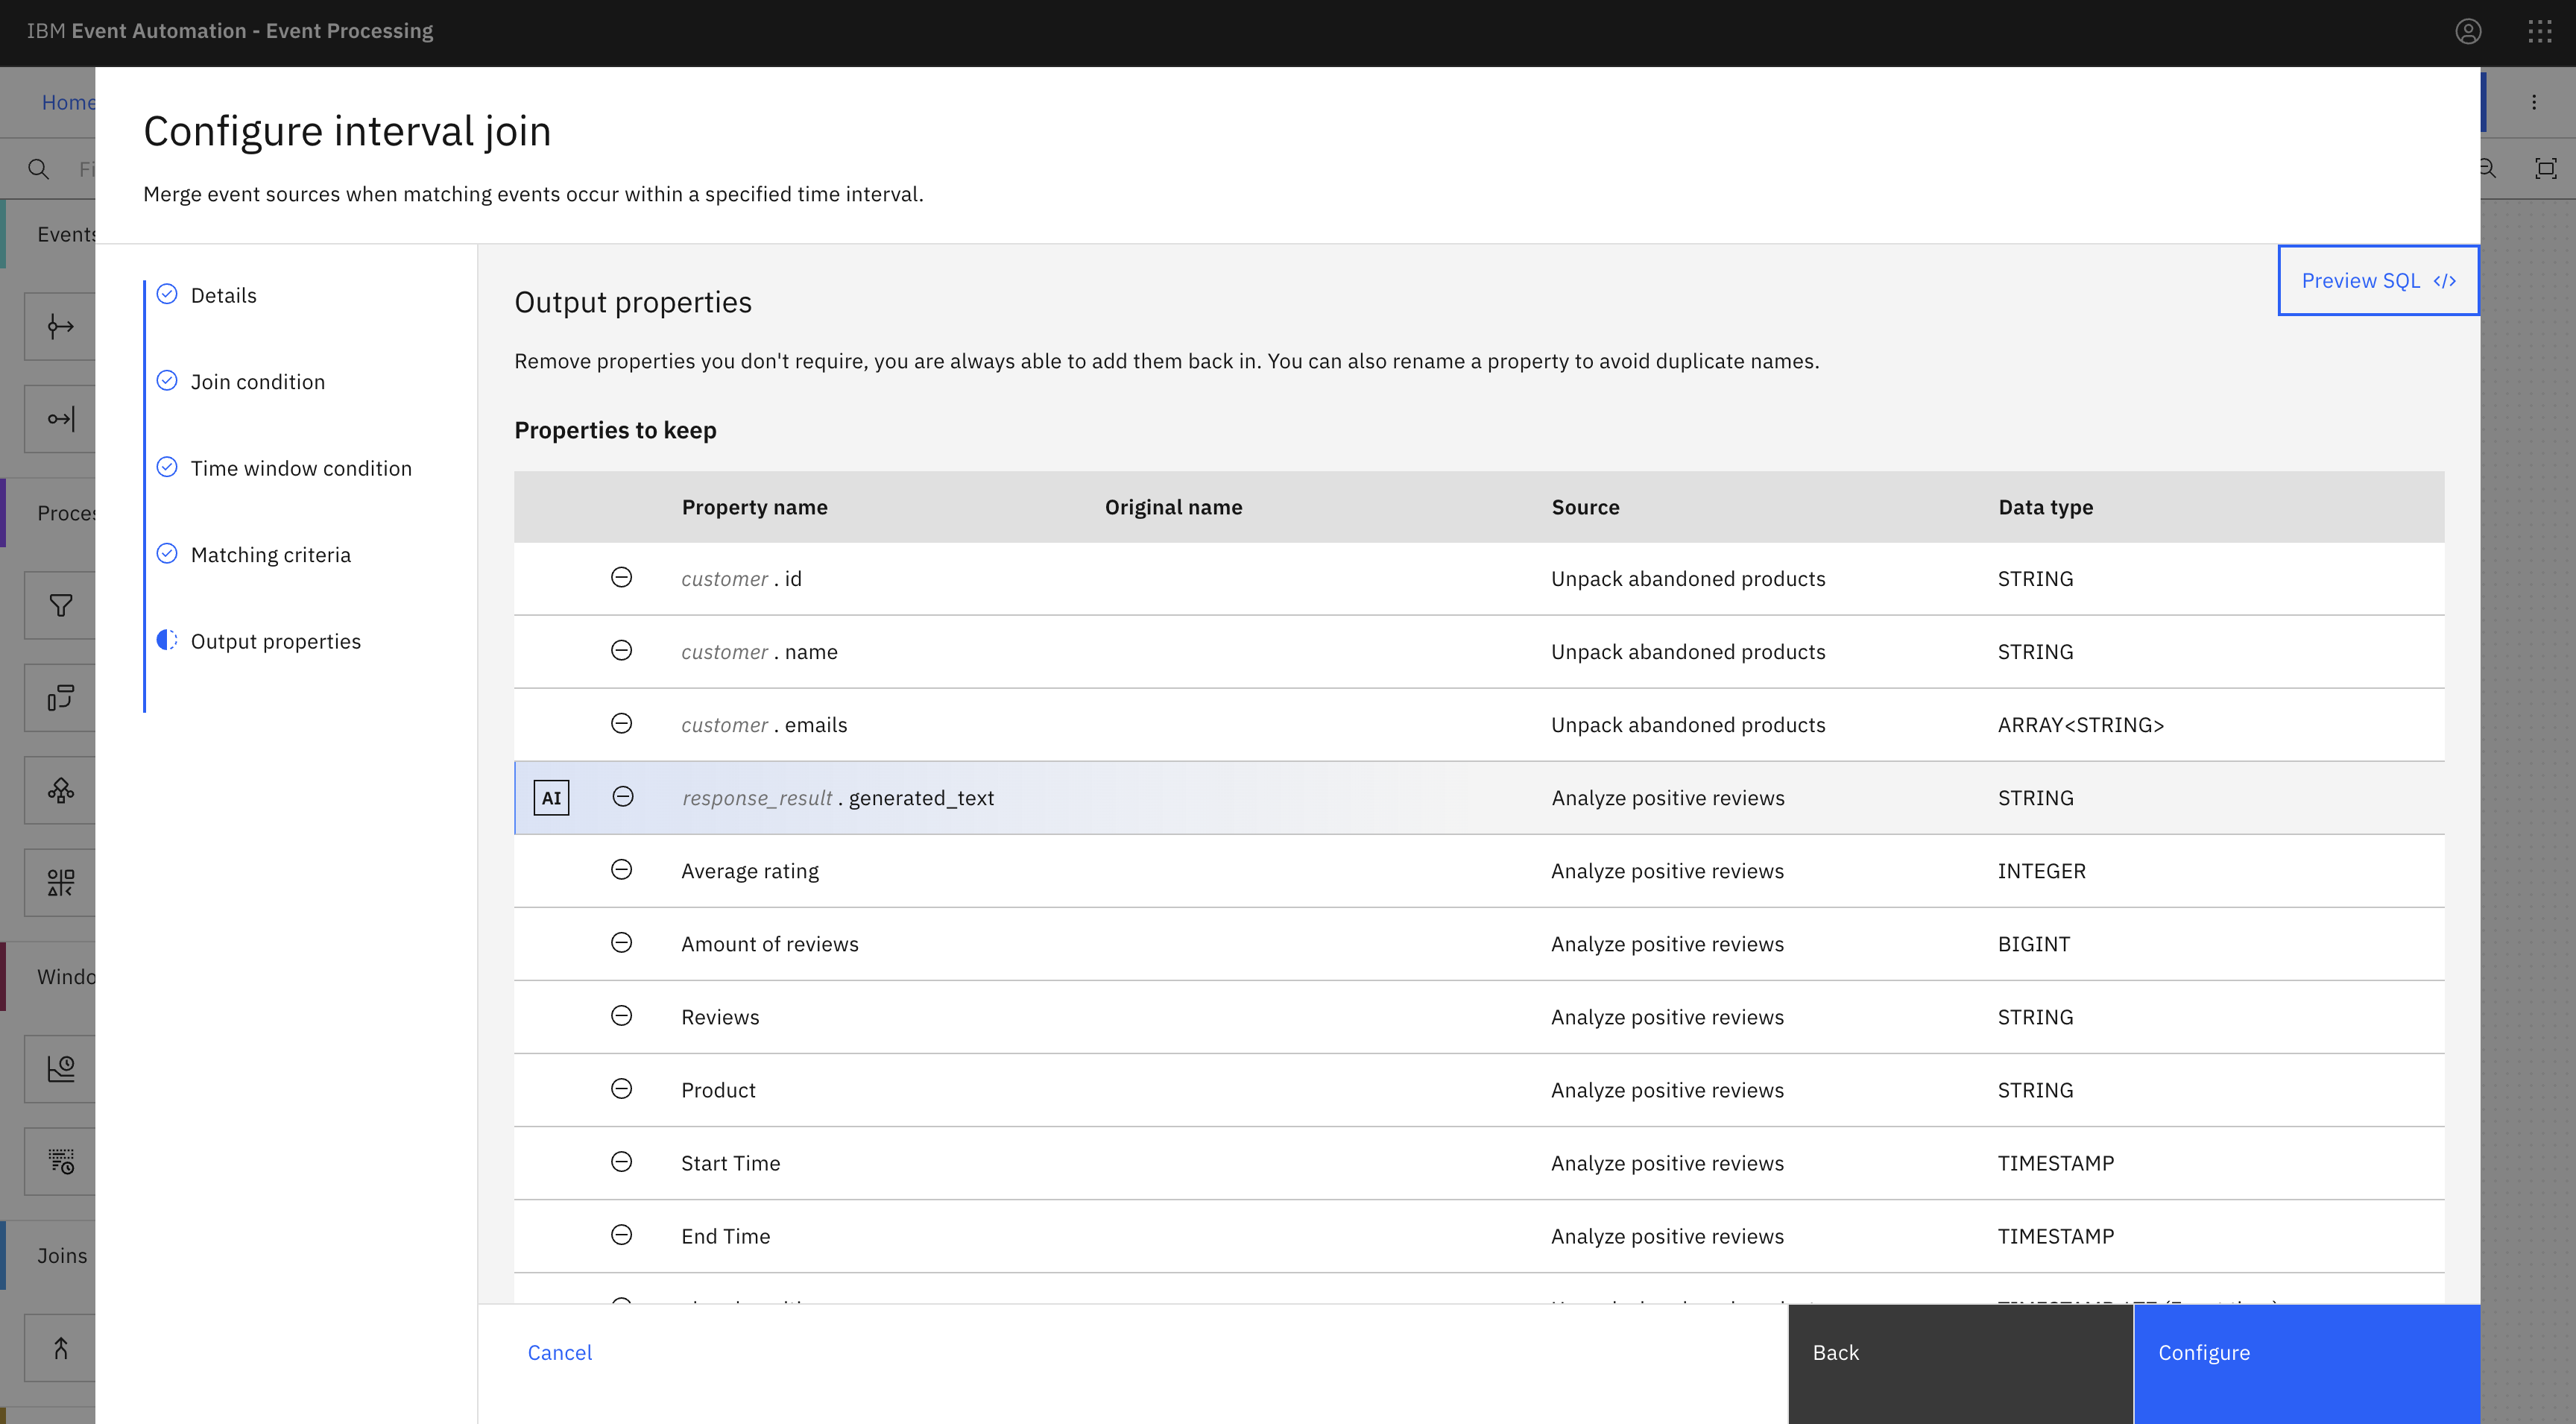
Choose the output properties that will be useful to return.
-
Click Configure to finalize the interval join configuration.
Step 9: Identify the highest rated product on each abandoned cart
-
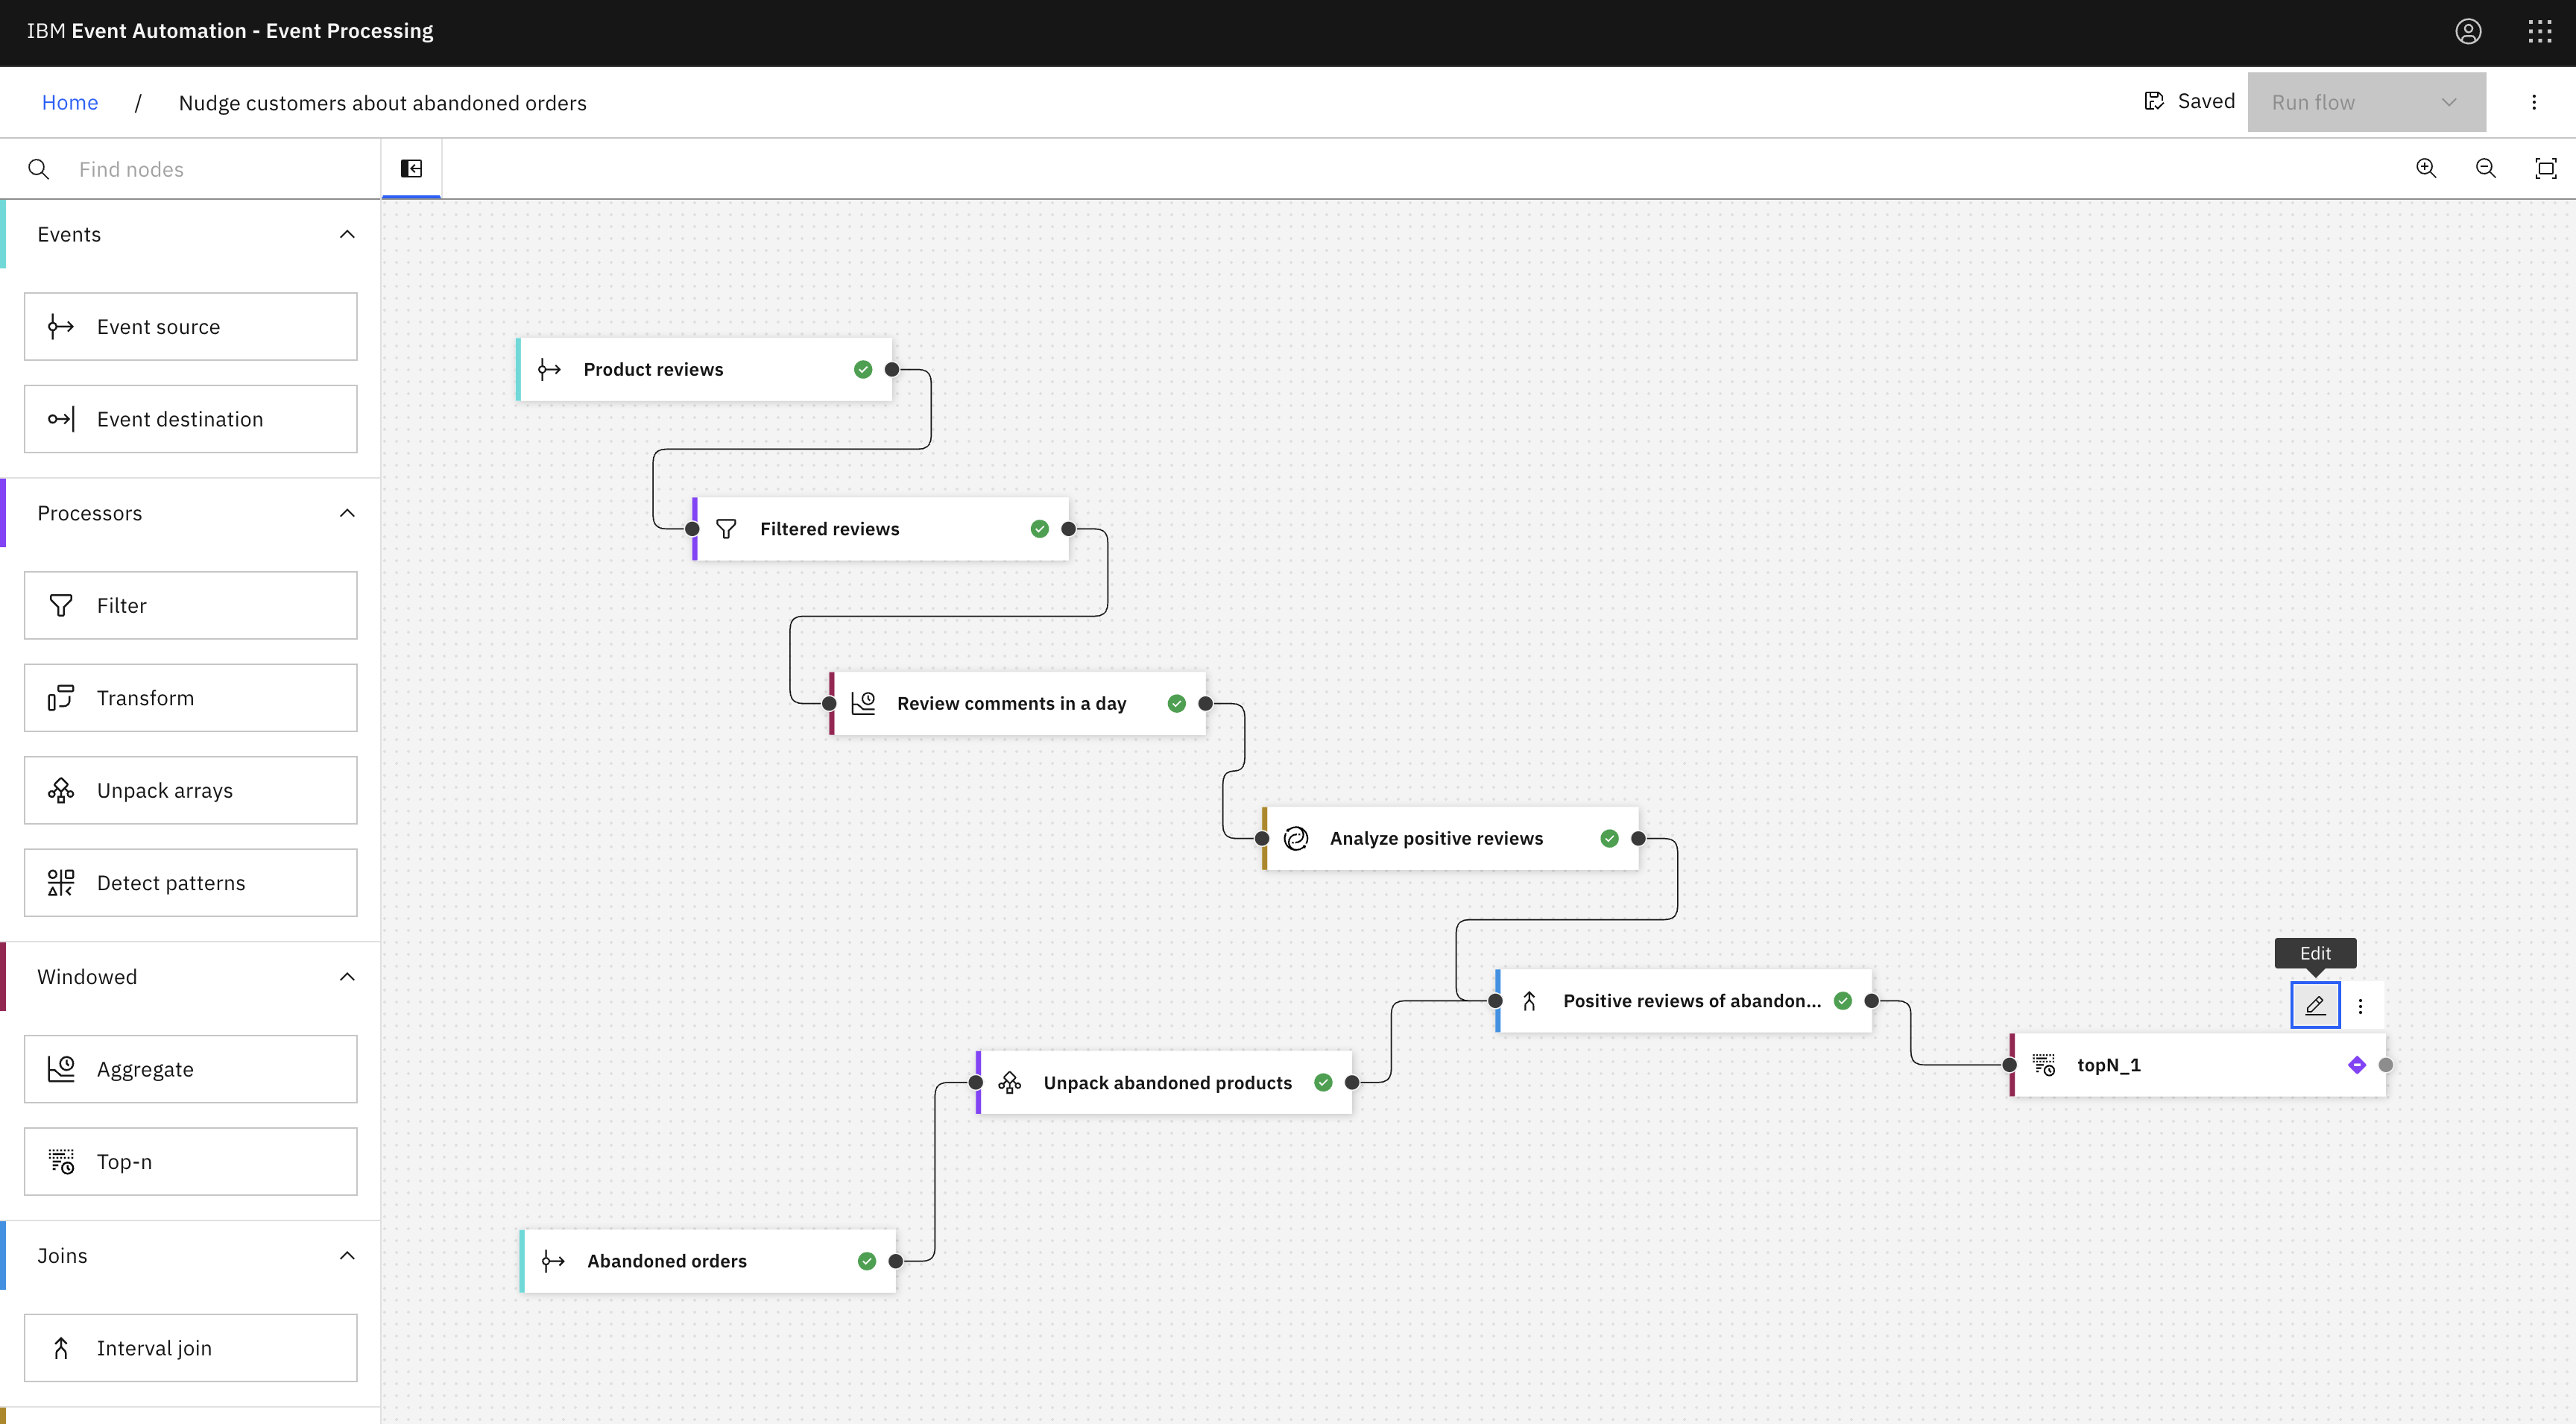
Add a Top-n node and link it to the join node.
Create a top-n node by dragging one onto the canvas. You can find this in the Windowed section of the left panel.
Click and drag from the small gray dot on the output of the filter node to the matching dot on the input of the top-n node.
Hover over the top-n node and click
Edit to configure the node.
-
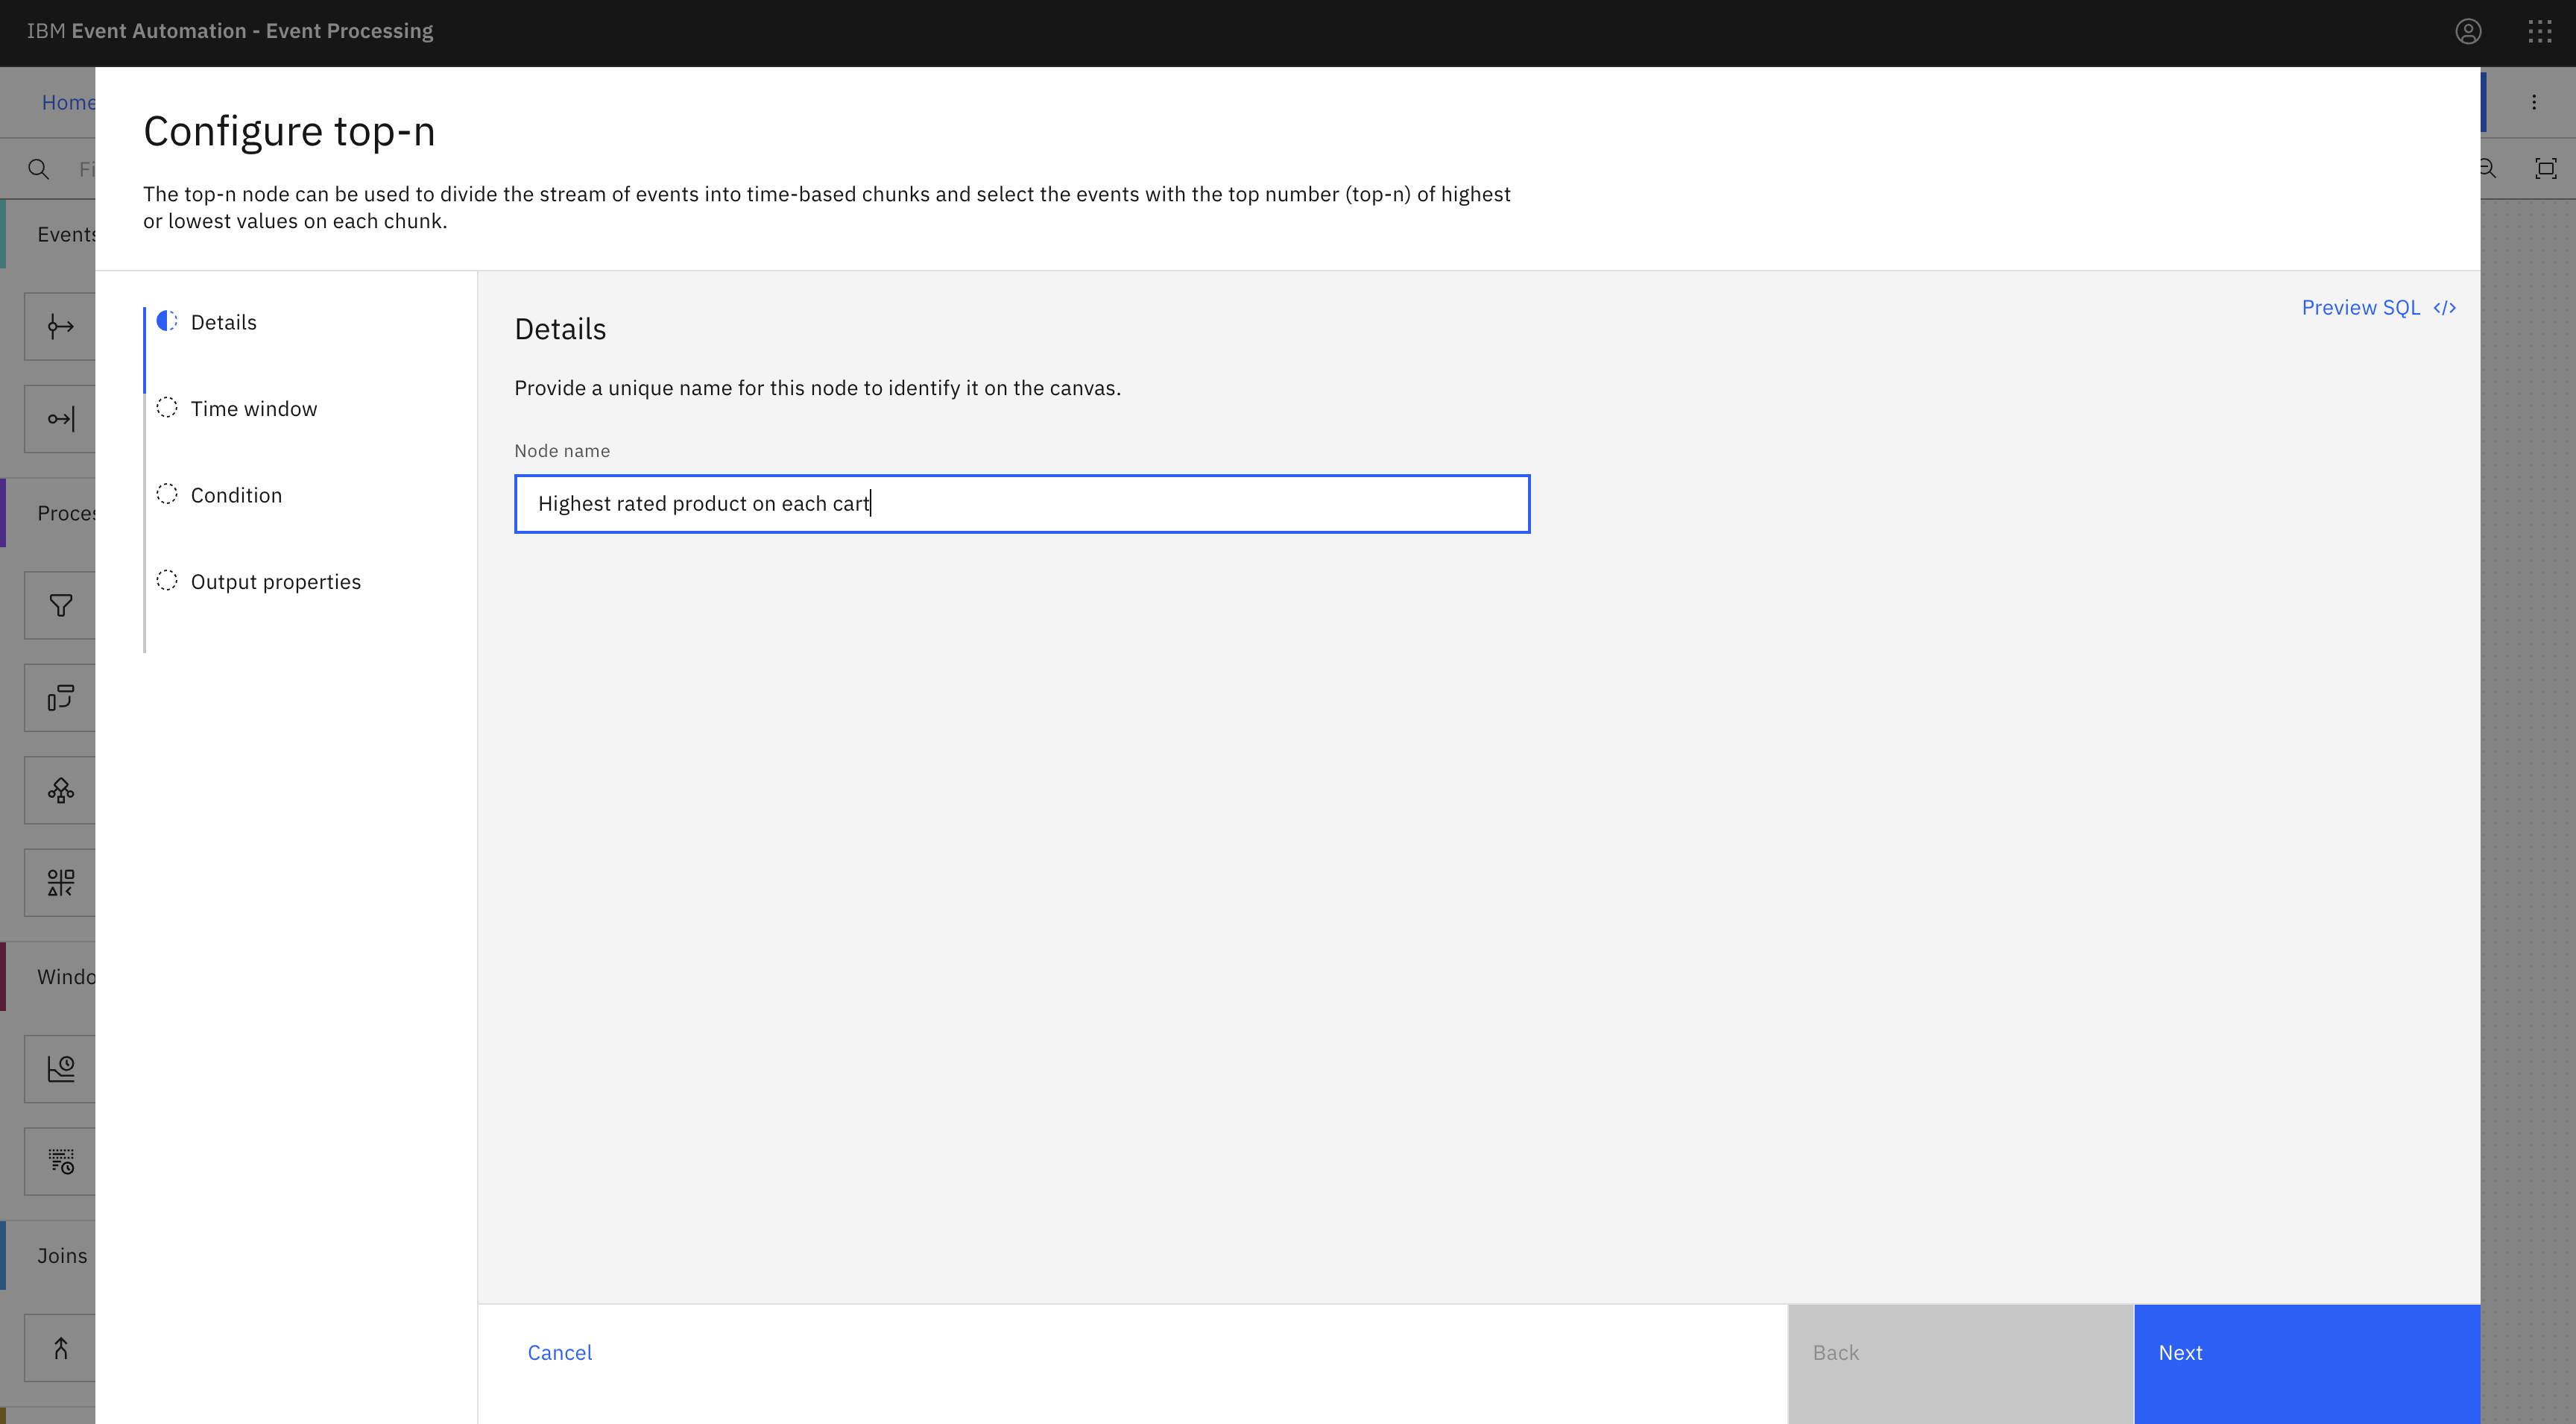
Name the top-n node to show that it will only display two results on each time window:
Highest rated product on each cart. -
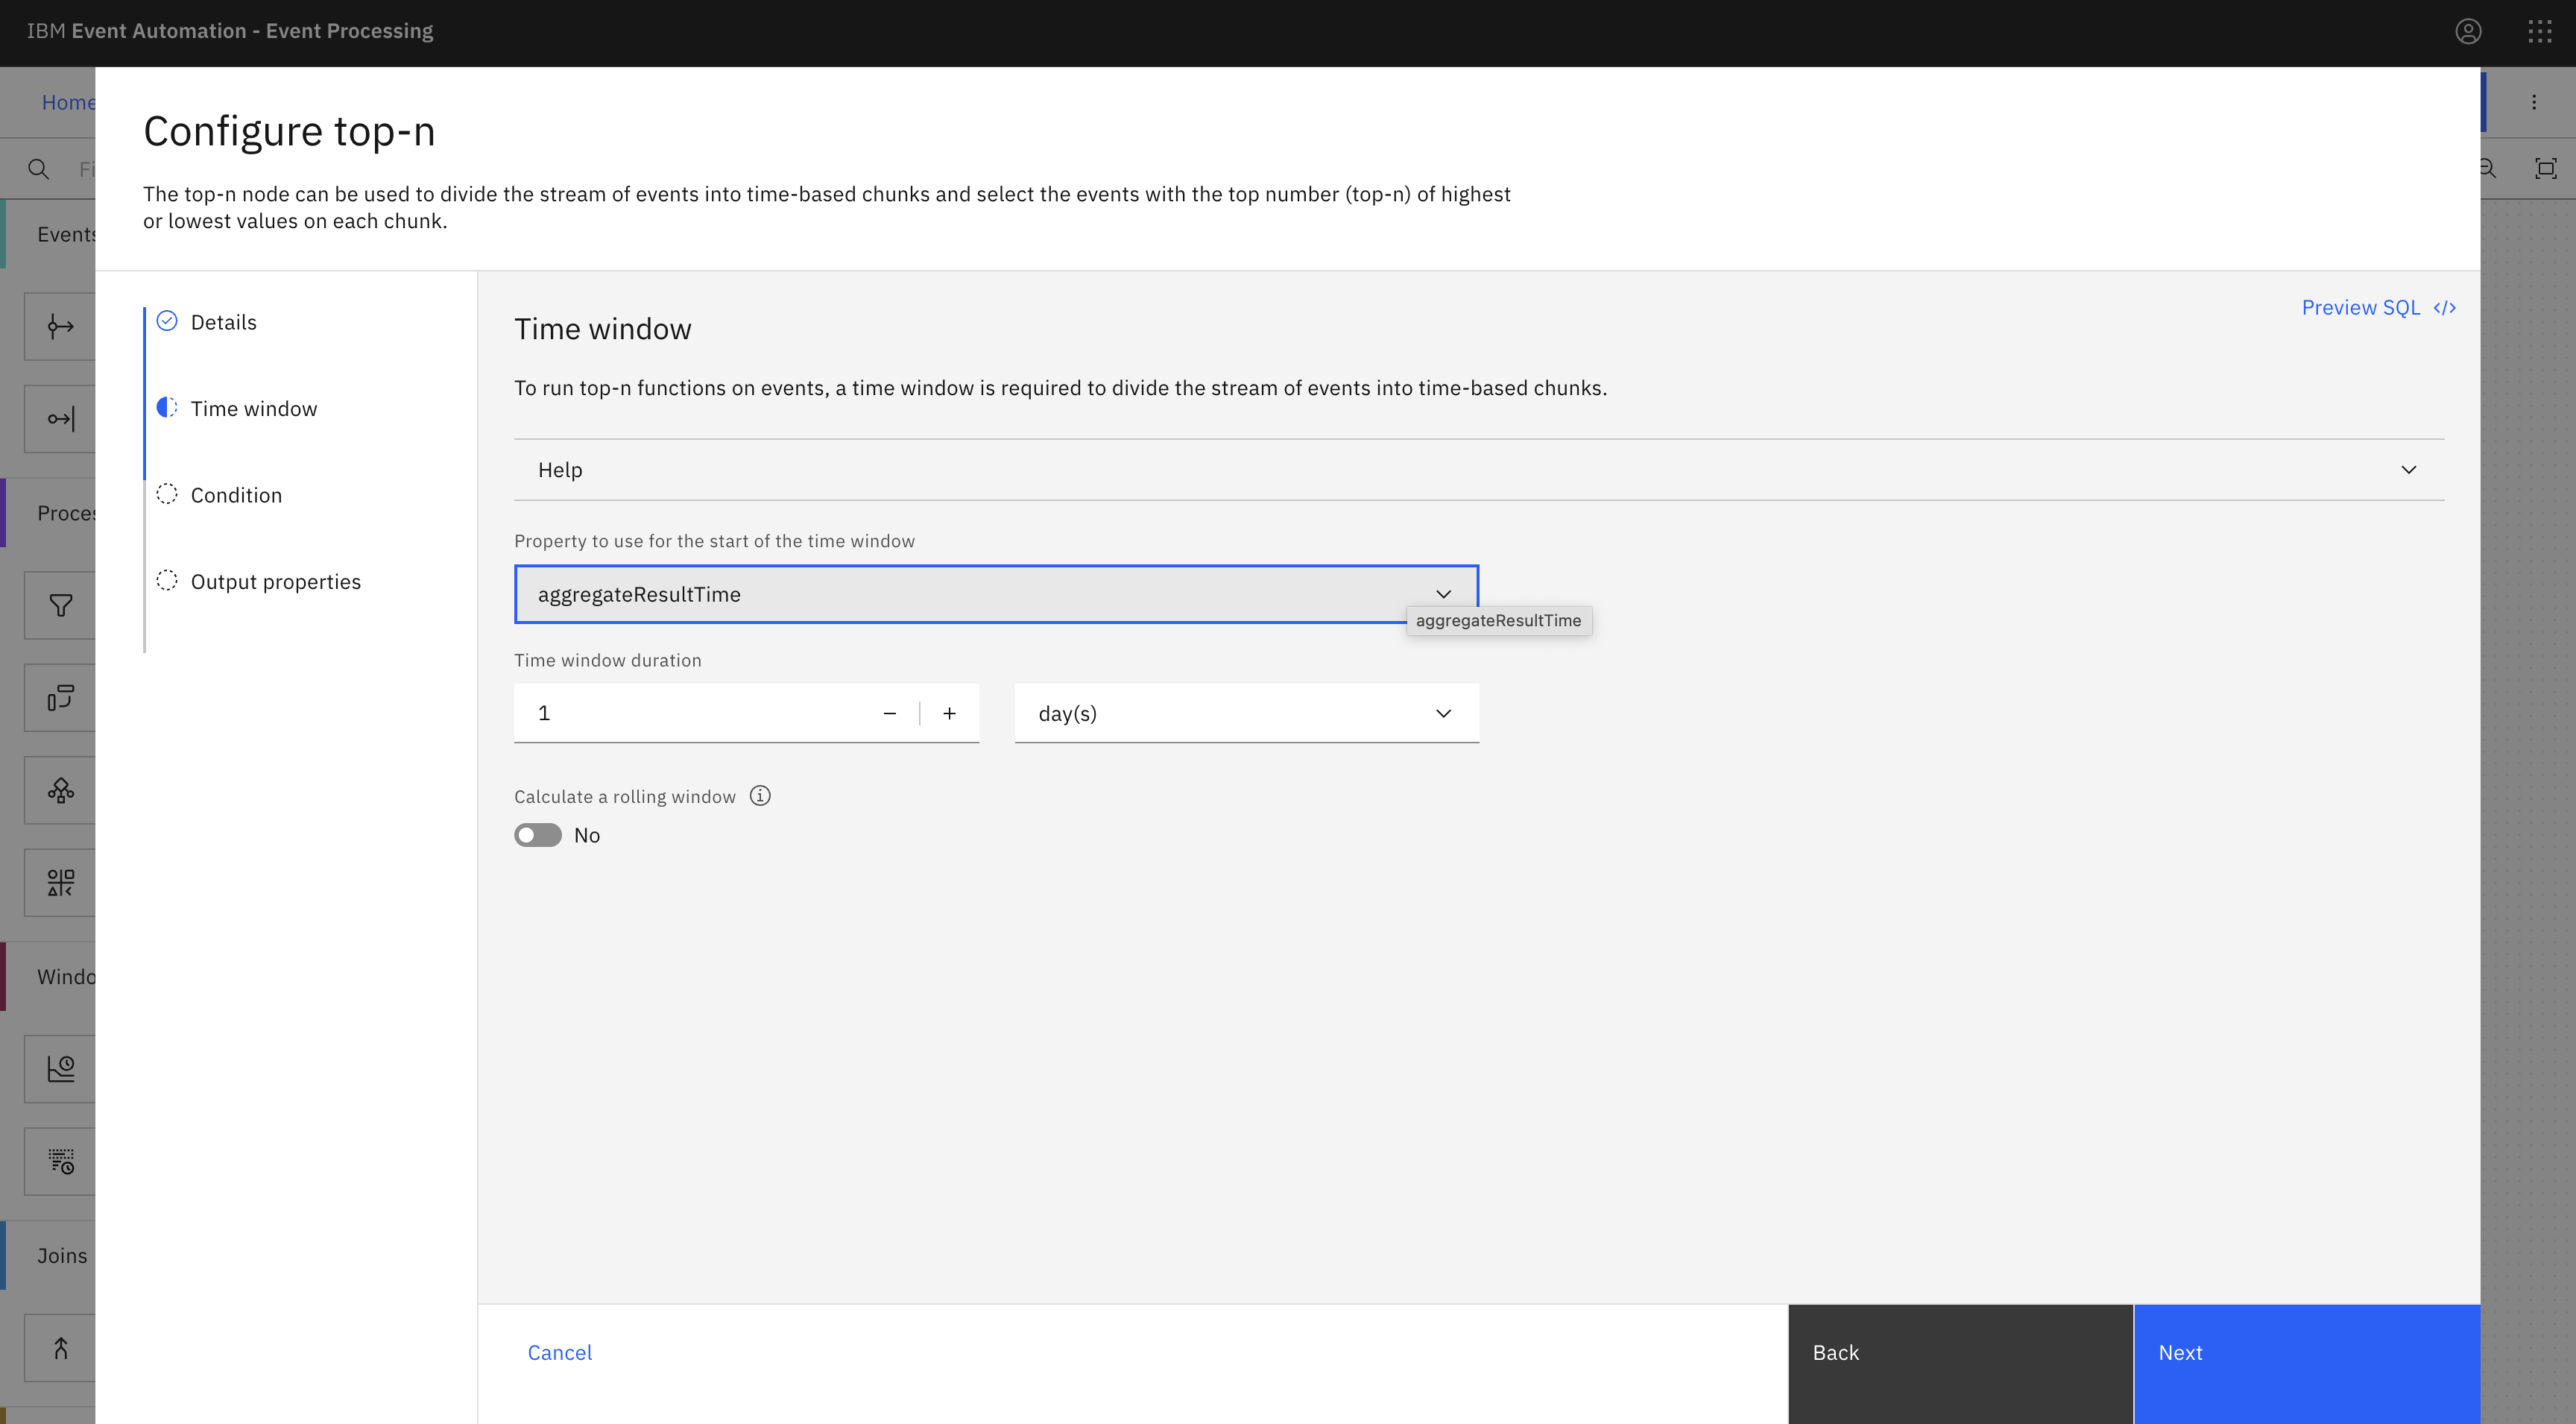
In the Time window pane, ensure that the
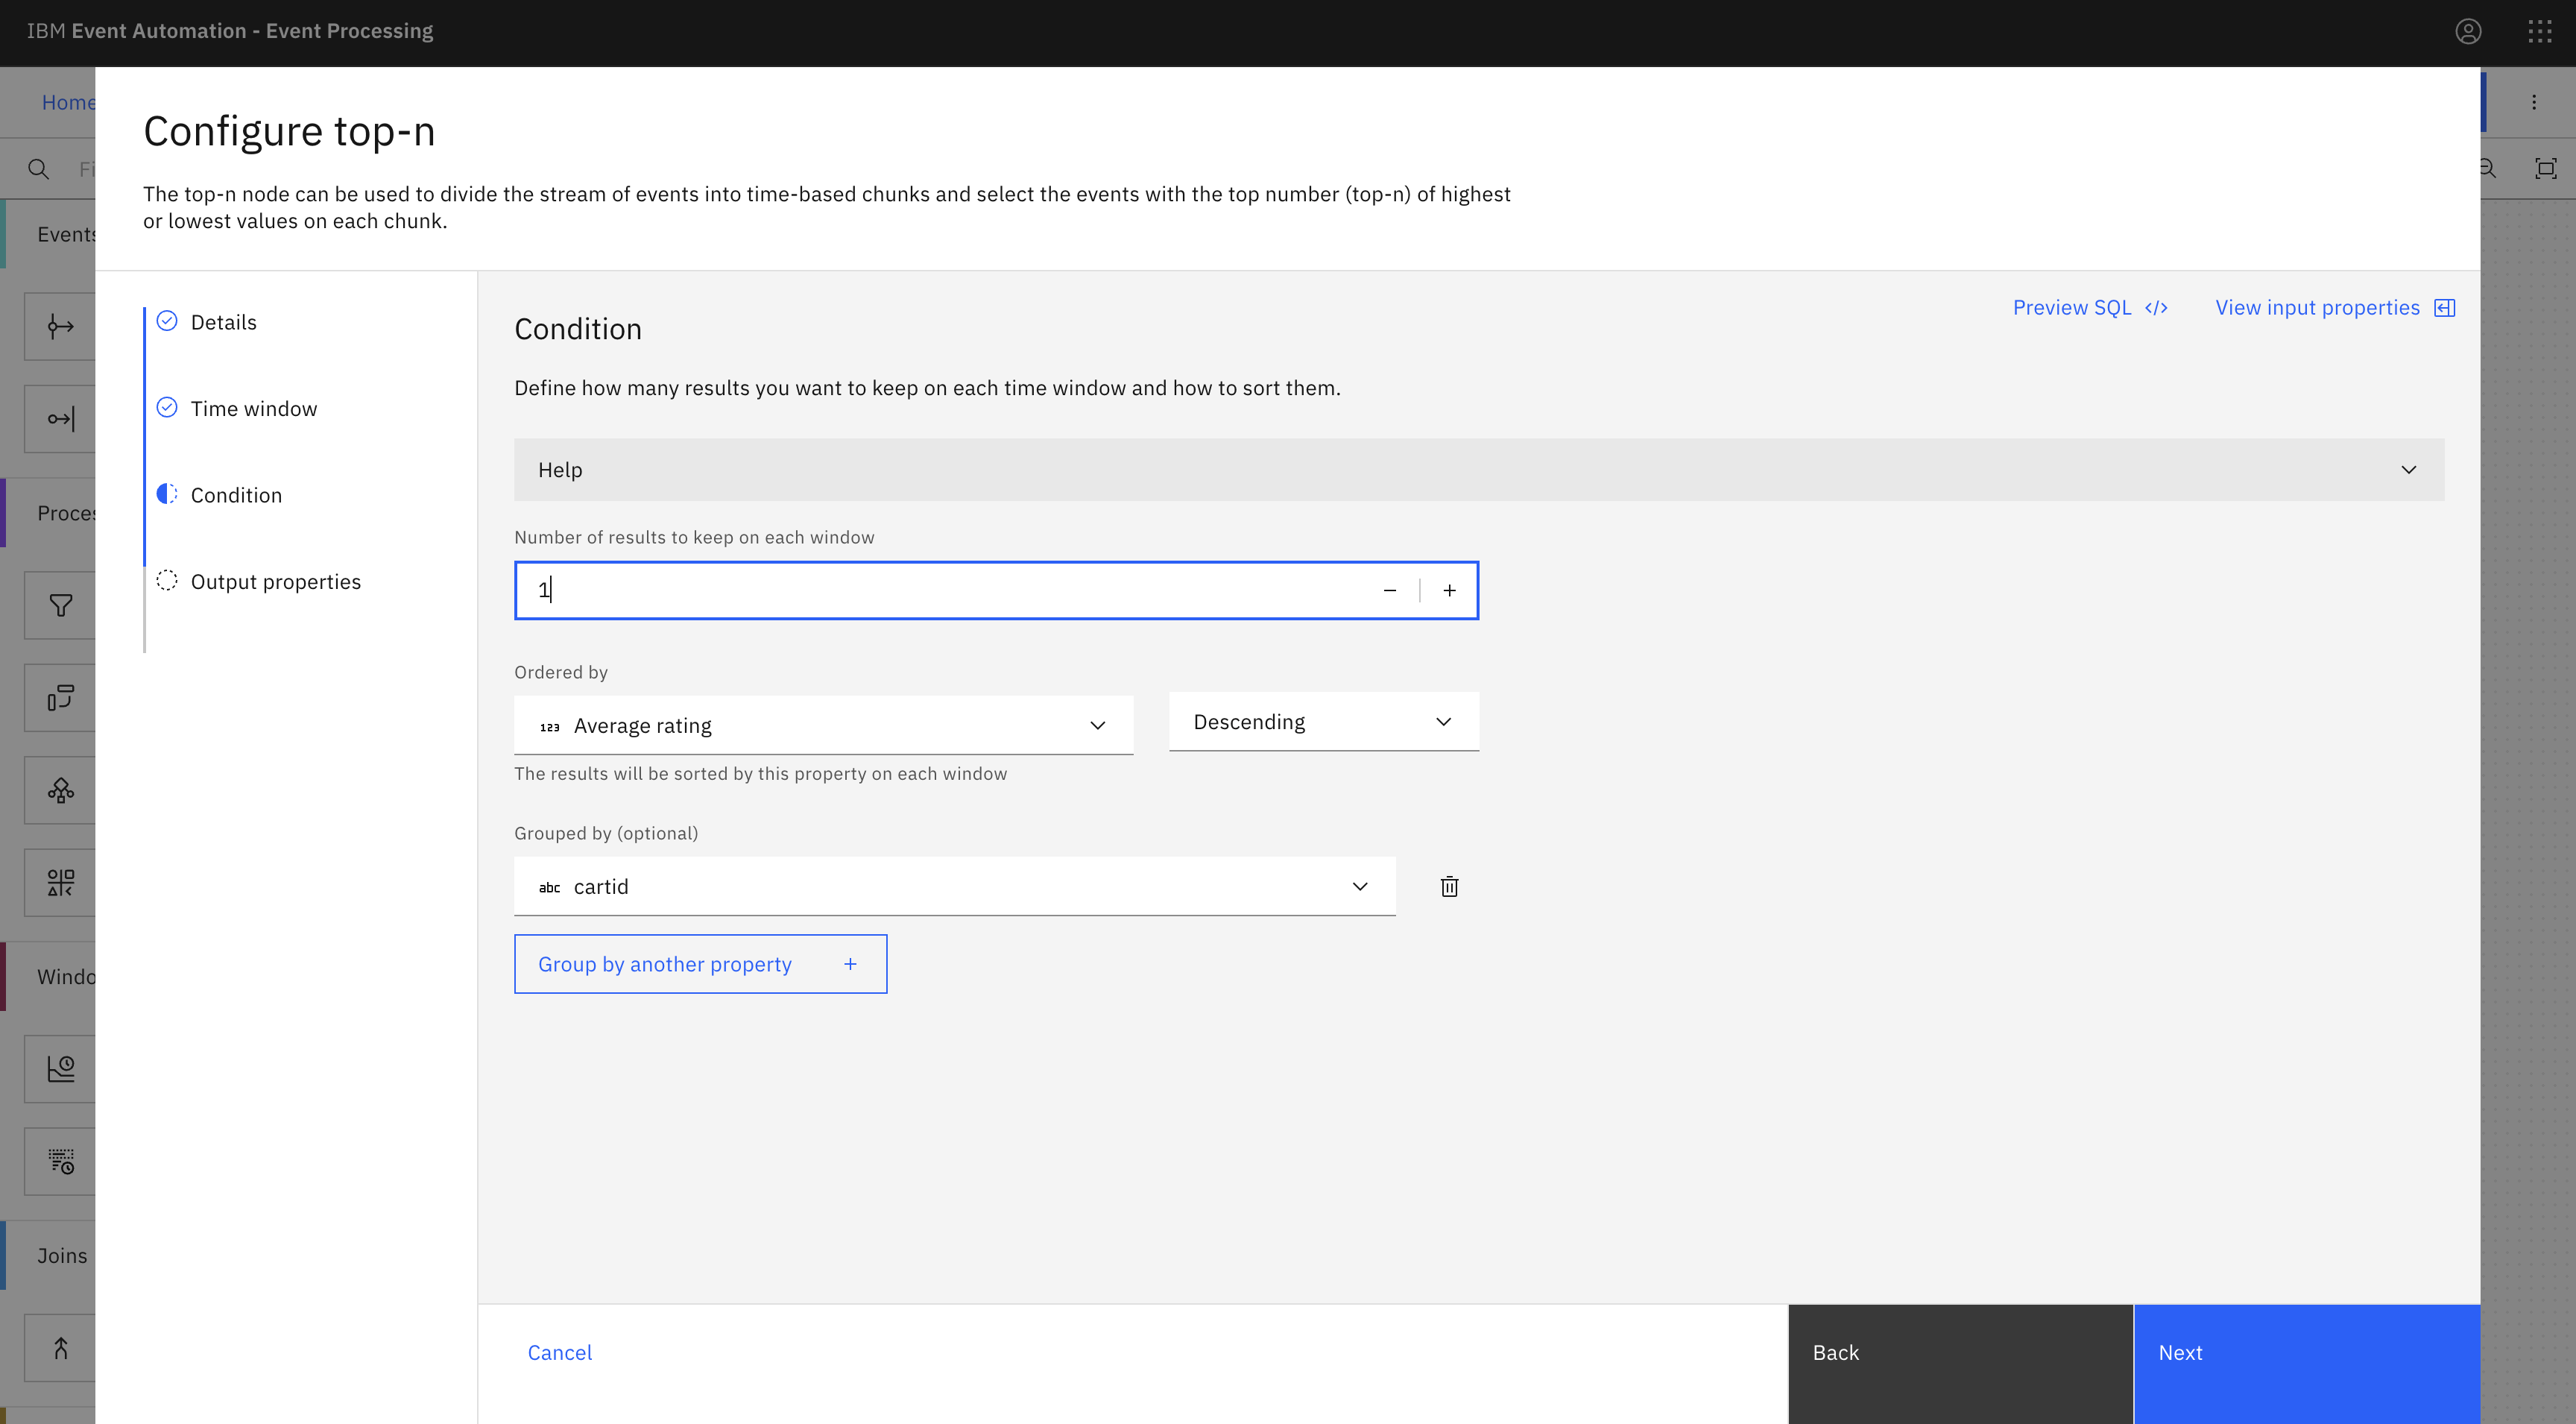
aggregateResultTimeis selected to use for start of the time window and set to 1 hour, and then click Next. - In the Condition pane, enter the values in the following fields, and then click Next:
- Number of results to keep on each window: 1
- Ordered by:
Average rating, Descending
-
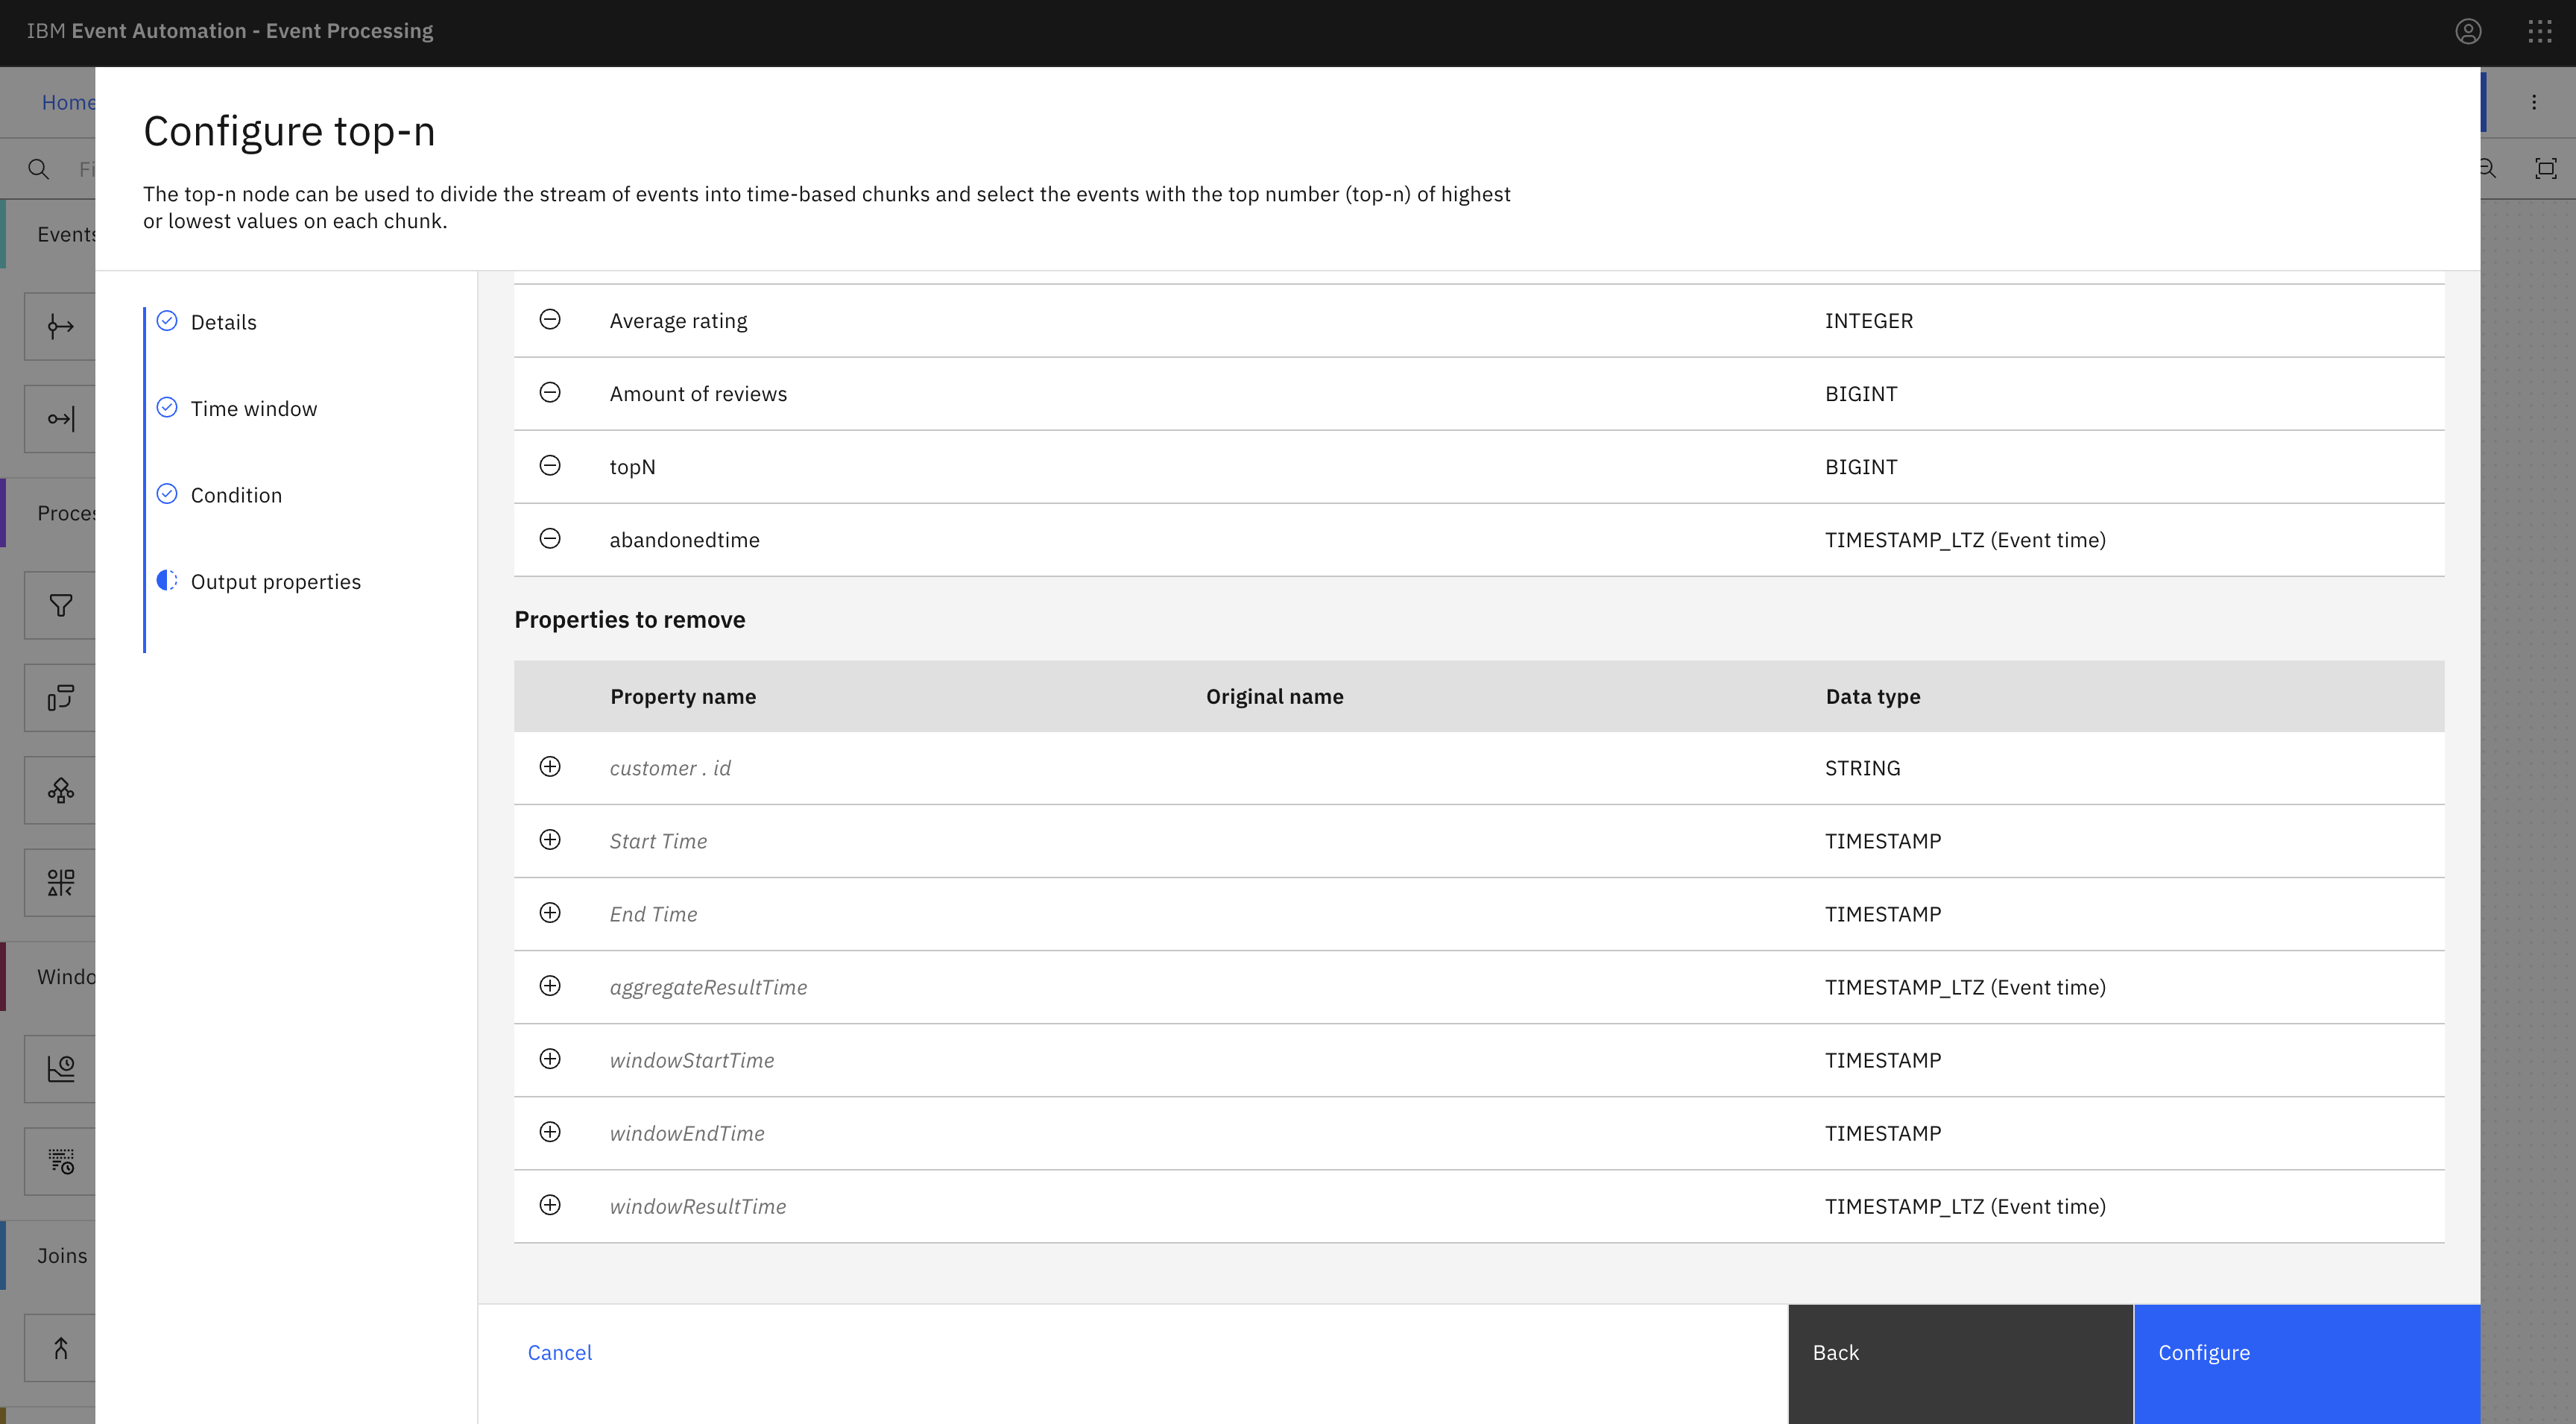
Remove the following properties:
aggregateResultTime,Start time,End time,windowResultTime,windowStartTime,windowEndTime,customer . id. - Click Configure to finalize the top-n configuration.
Step 10: Create a watsonx.ai node
The next step is to identify products with the most positive review by using the watsonx.ai node.
-
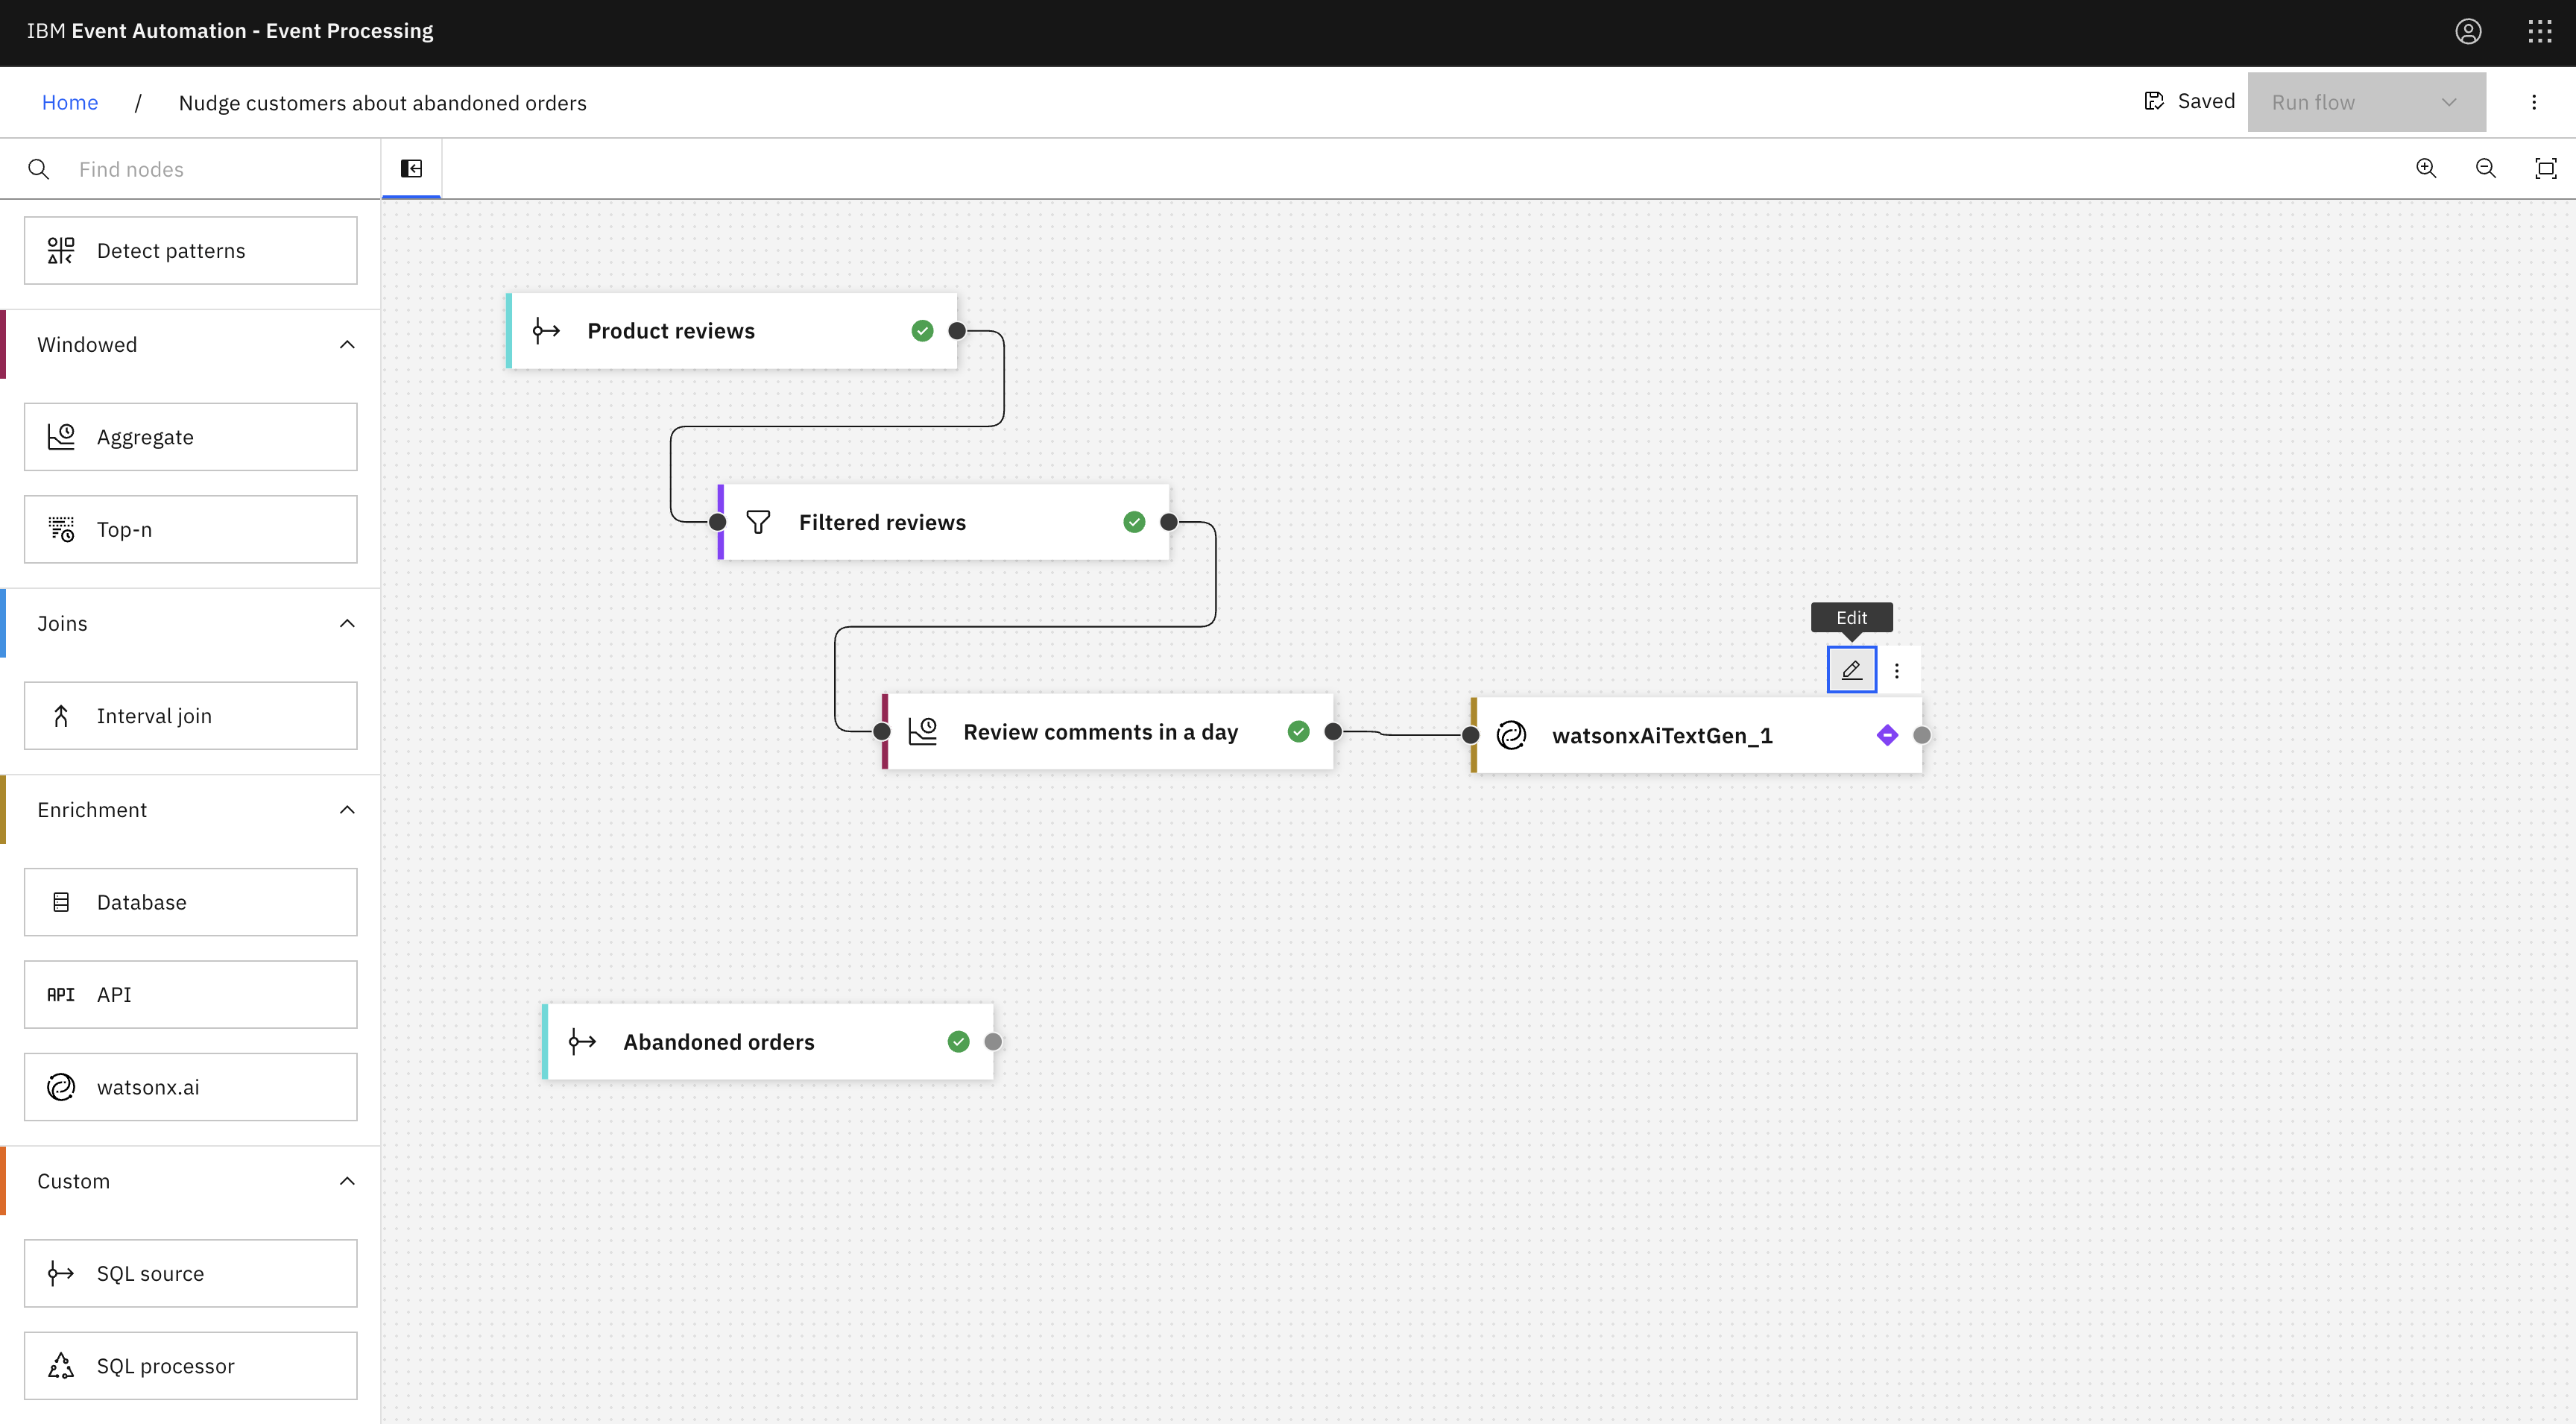
Add a watsonx.ai node and link it to the aggregate node.
Create a watsonx.ai node by dragging one onto the canvas. You can find this in the Enrichment section of the left panel, and link it to the aggregate node.
Hover over the node and click
Edit to configure the node.
-
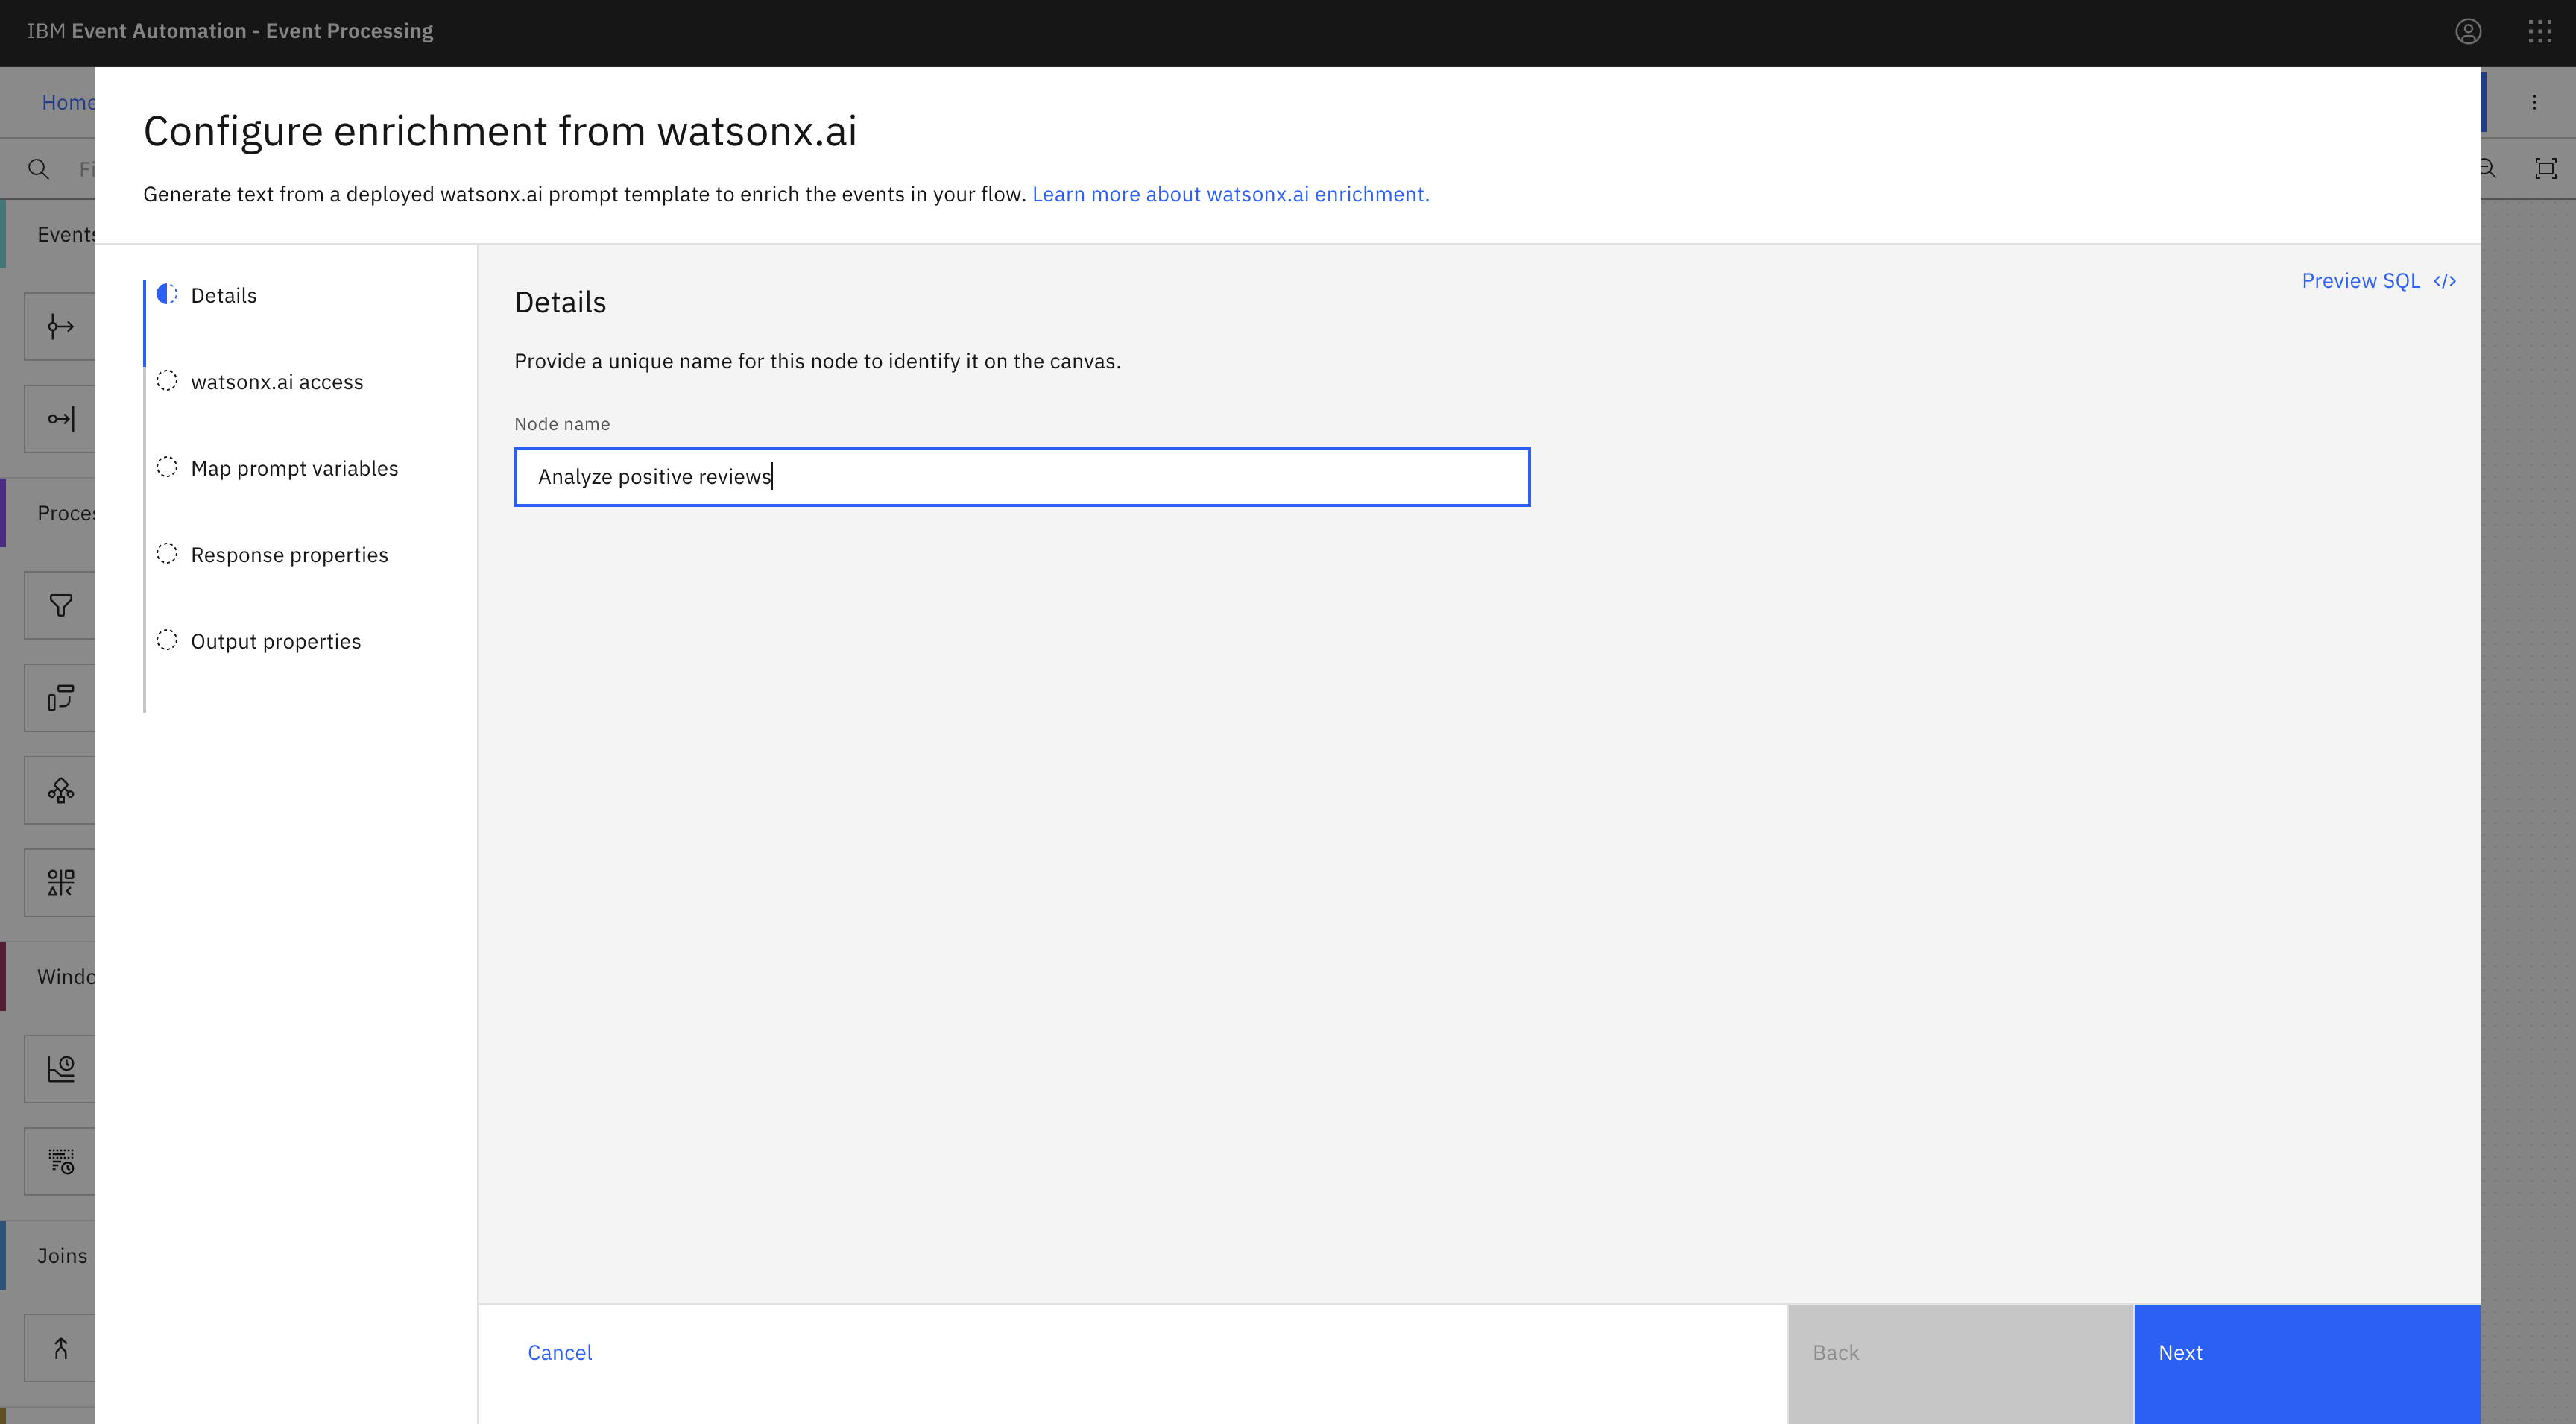
Give the watsonx.ai node a name that describes the events it must summarize:
Analyze positive reviewsand click Next. -
Provide the API key and the public text endpoint URL for the
Positive review analysisprompt that you created earlier.Click Next.
-
In the Map prompt variables pane, the prompt that you created earlier is displayed. In the Variable mapping section, toggle the values for
productandreviewsto take input properties and selectProductandReviewsrespectively.Click Next.
-
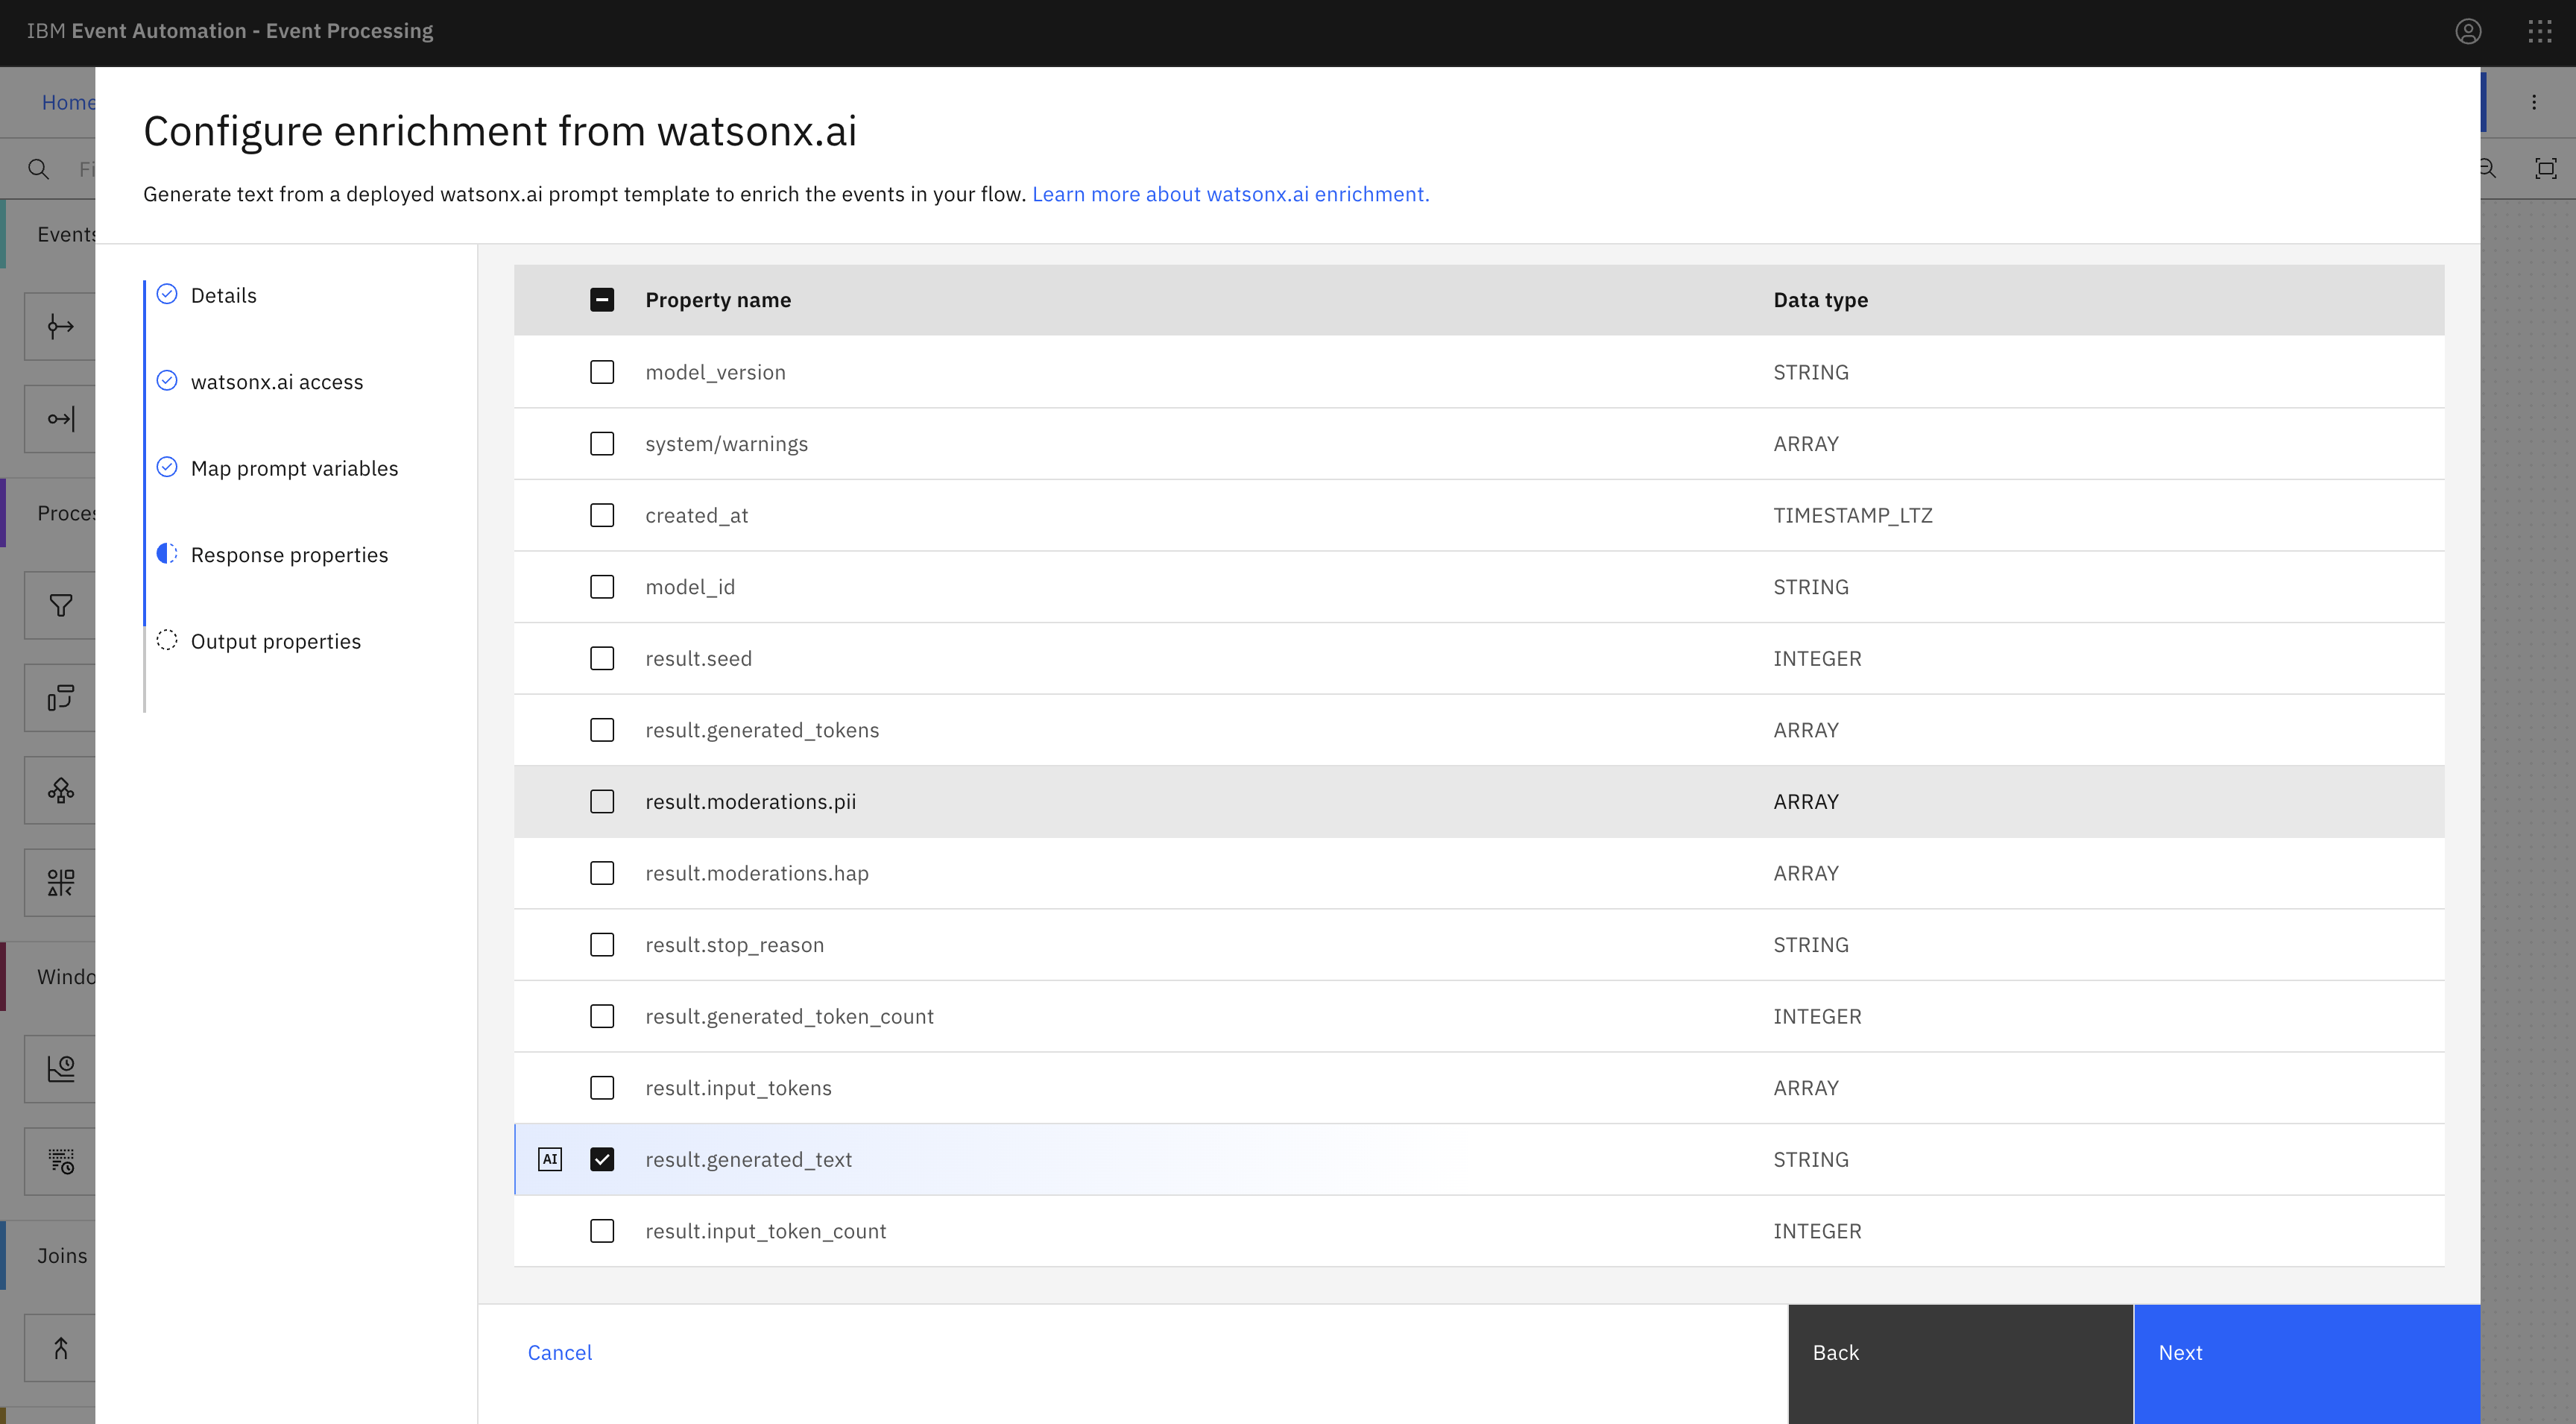
In the Response properties pane, properties returned from watsonx.ai are displayed. Add or remove the fields properties that you do not want to include further.
Note: Properties providing watsonx.ai generated values are marked with an AI tag and ensure to not remove those properties. To rename properties, hover over a property, and click the
Edit icon.
Click Next.
- You can choose the output properties that you want in the Output properties pane. KOKO
- Click Configure to finalize the watsonx.ai node configuration.
Step 11: Write your events to a Kafka topic
The results must be written to a different Kafka topic. You can use the event destination node to write your events to a Kafka topic.
-
Create an event destination node by dragging one onto the canvas. You can find this in the Events section of the left panel.
-
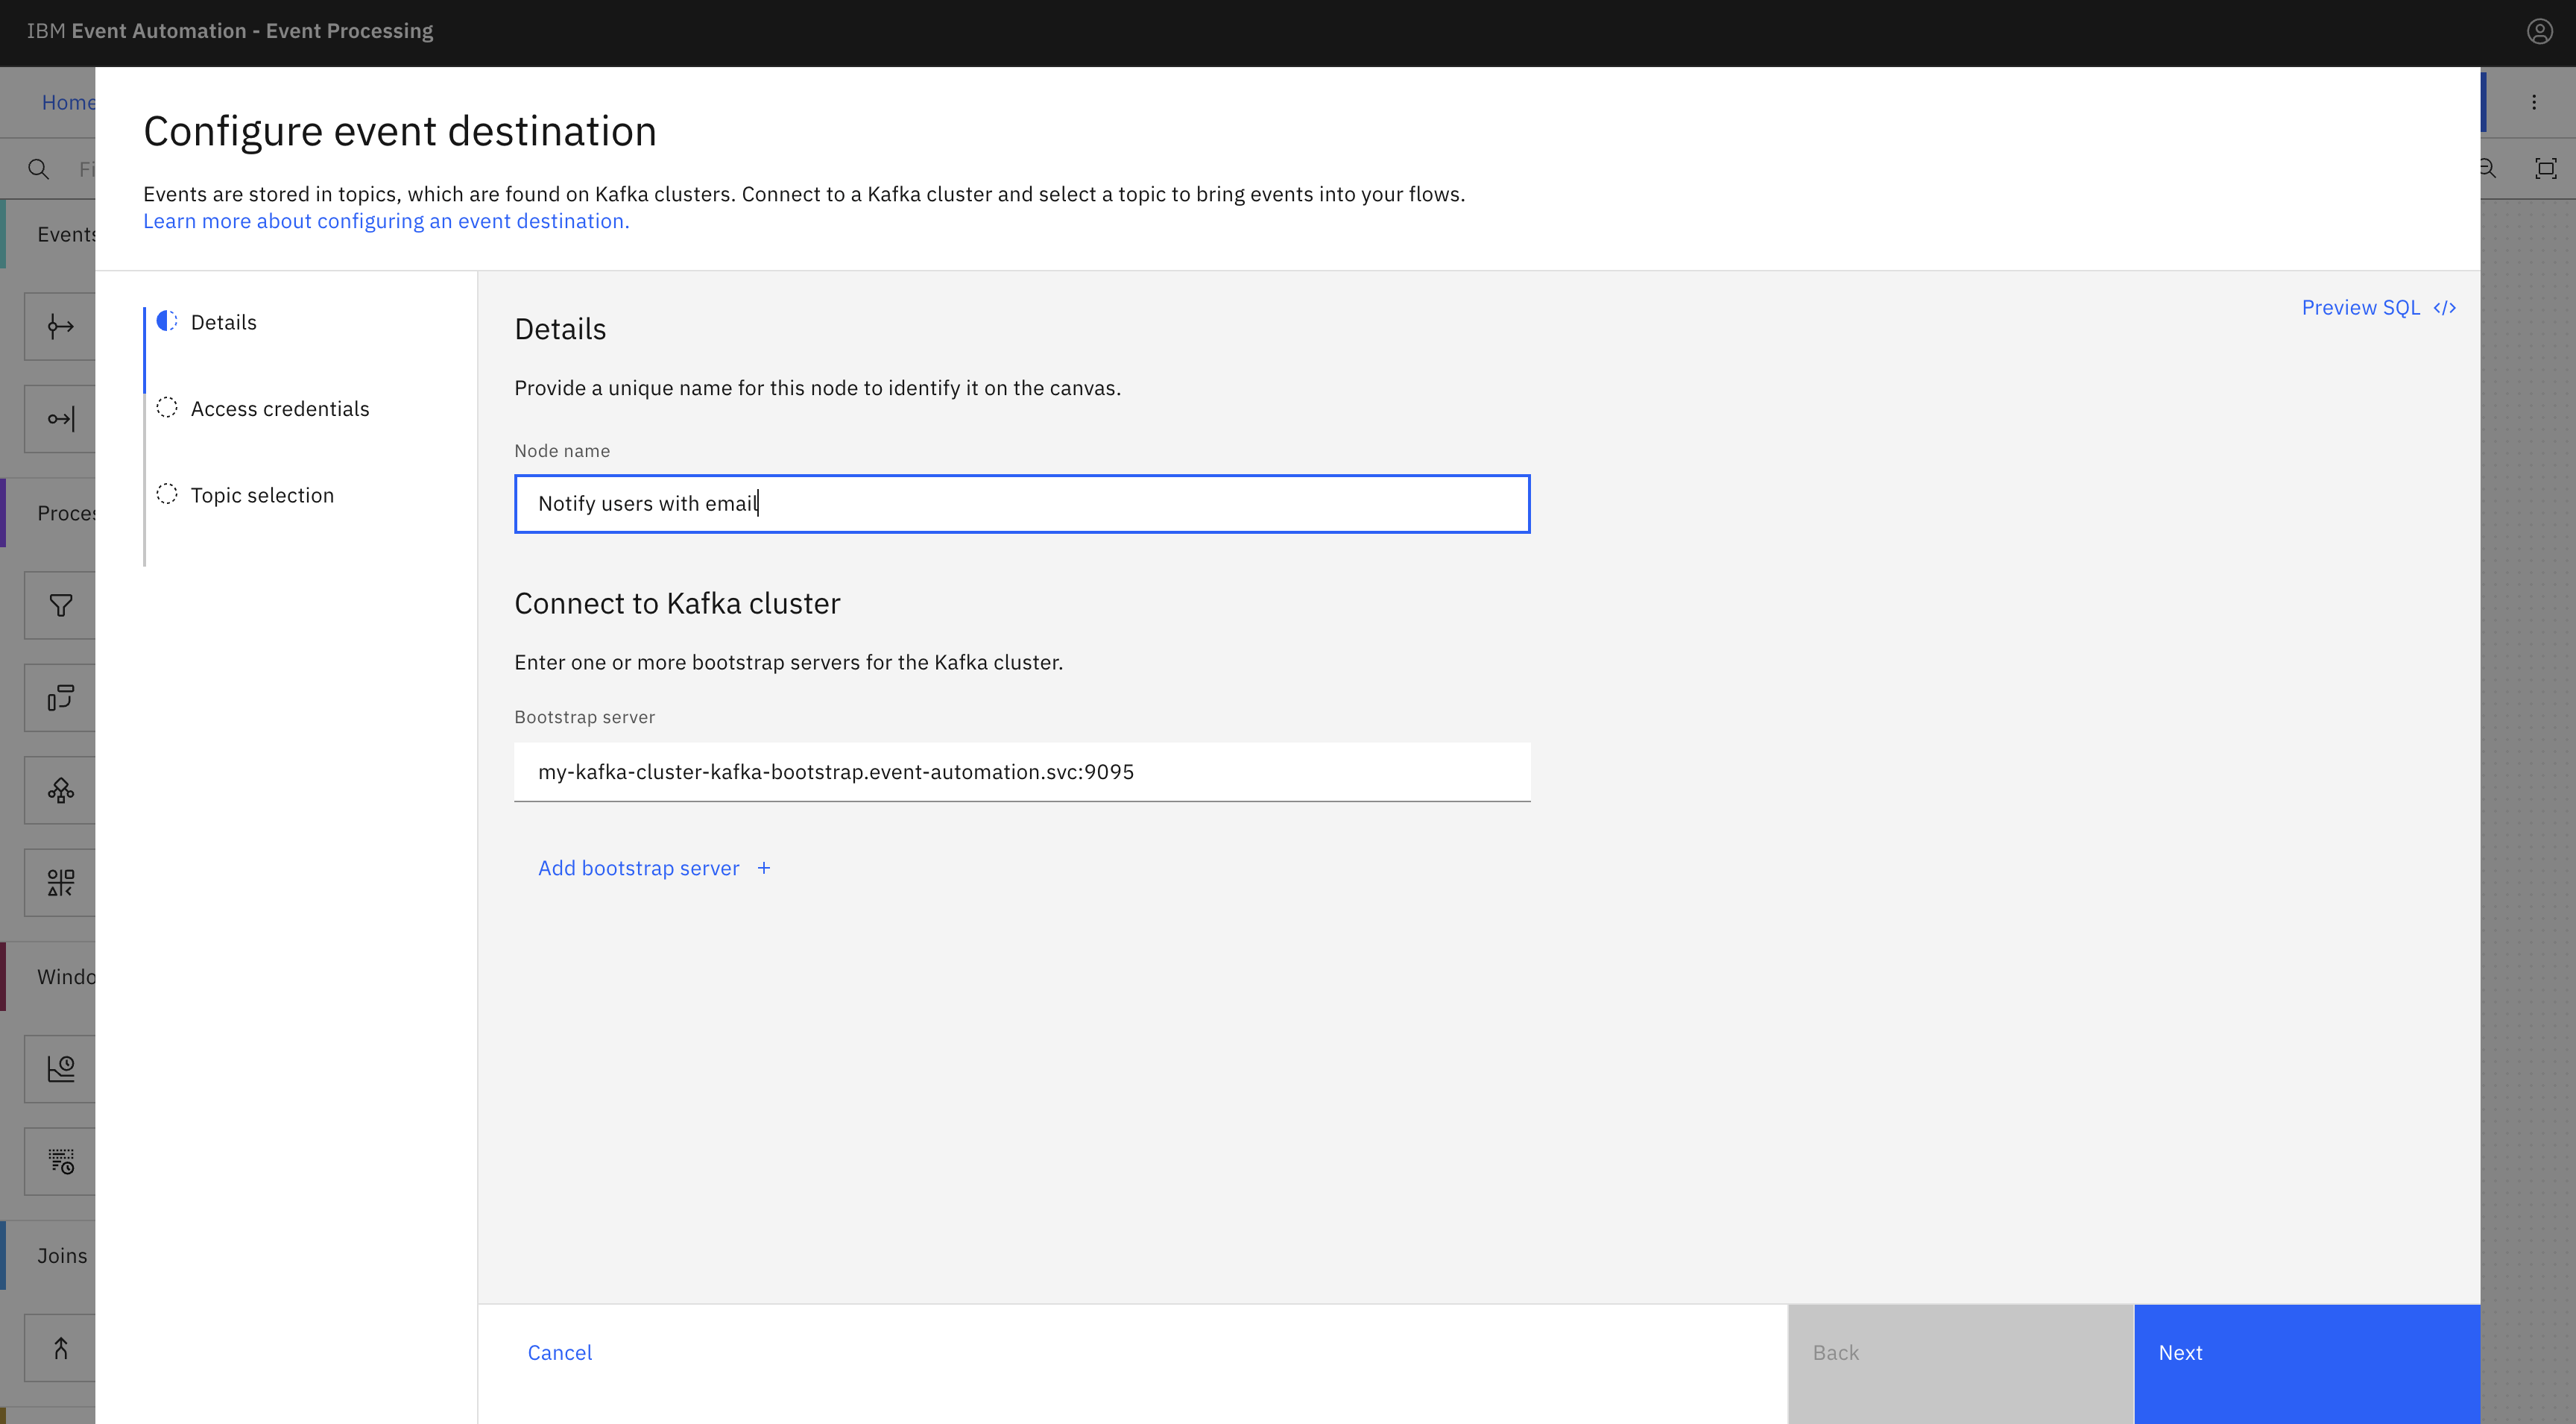
Enter the node name as
Notify users with email. -
Configure the event destination node by using the internal server address from Event Streams.
-
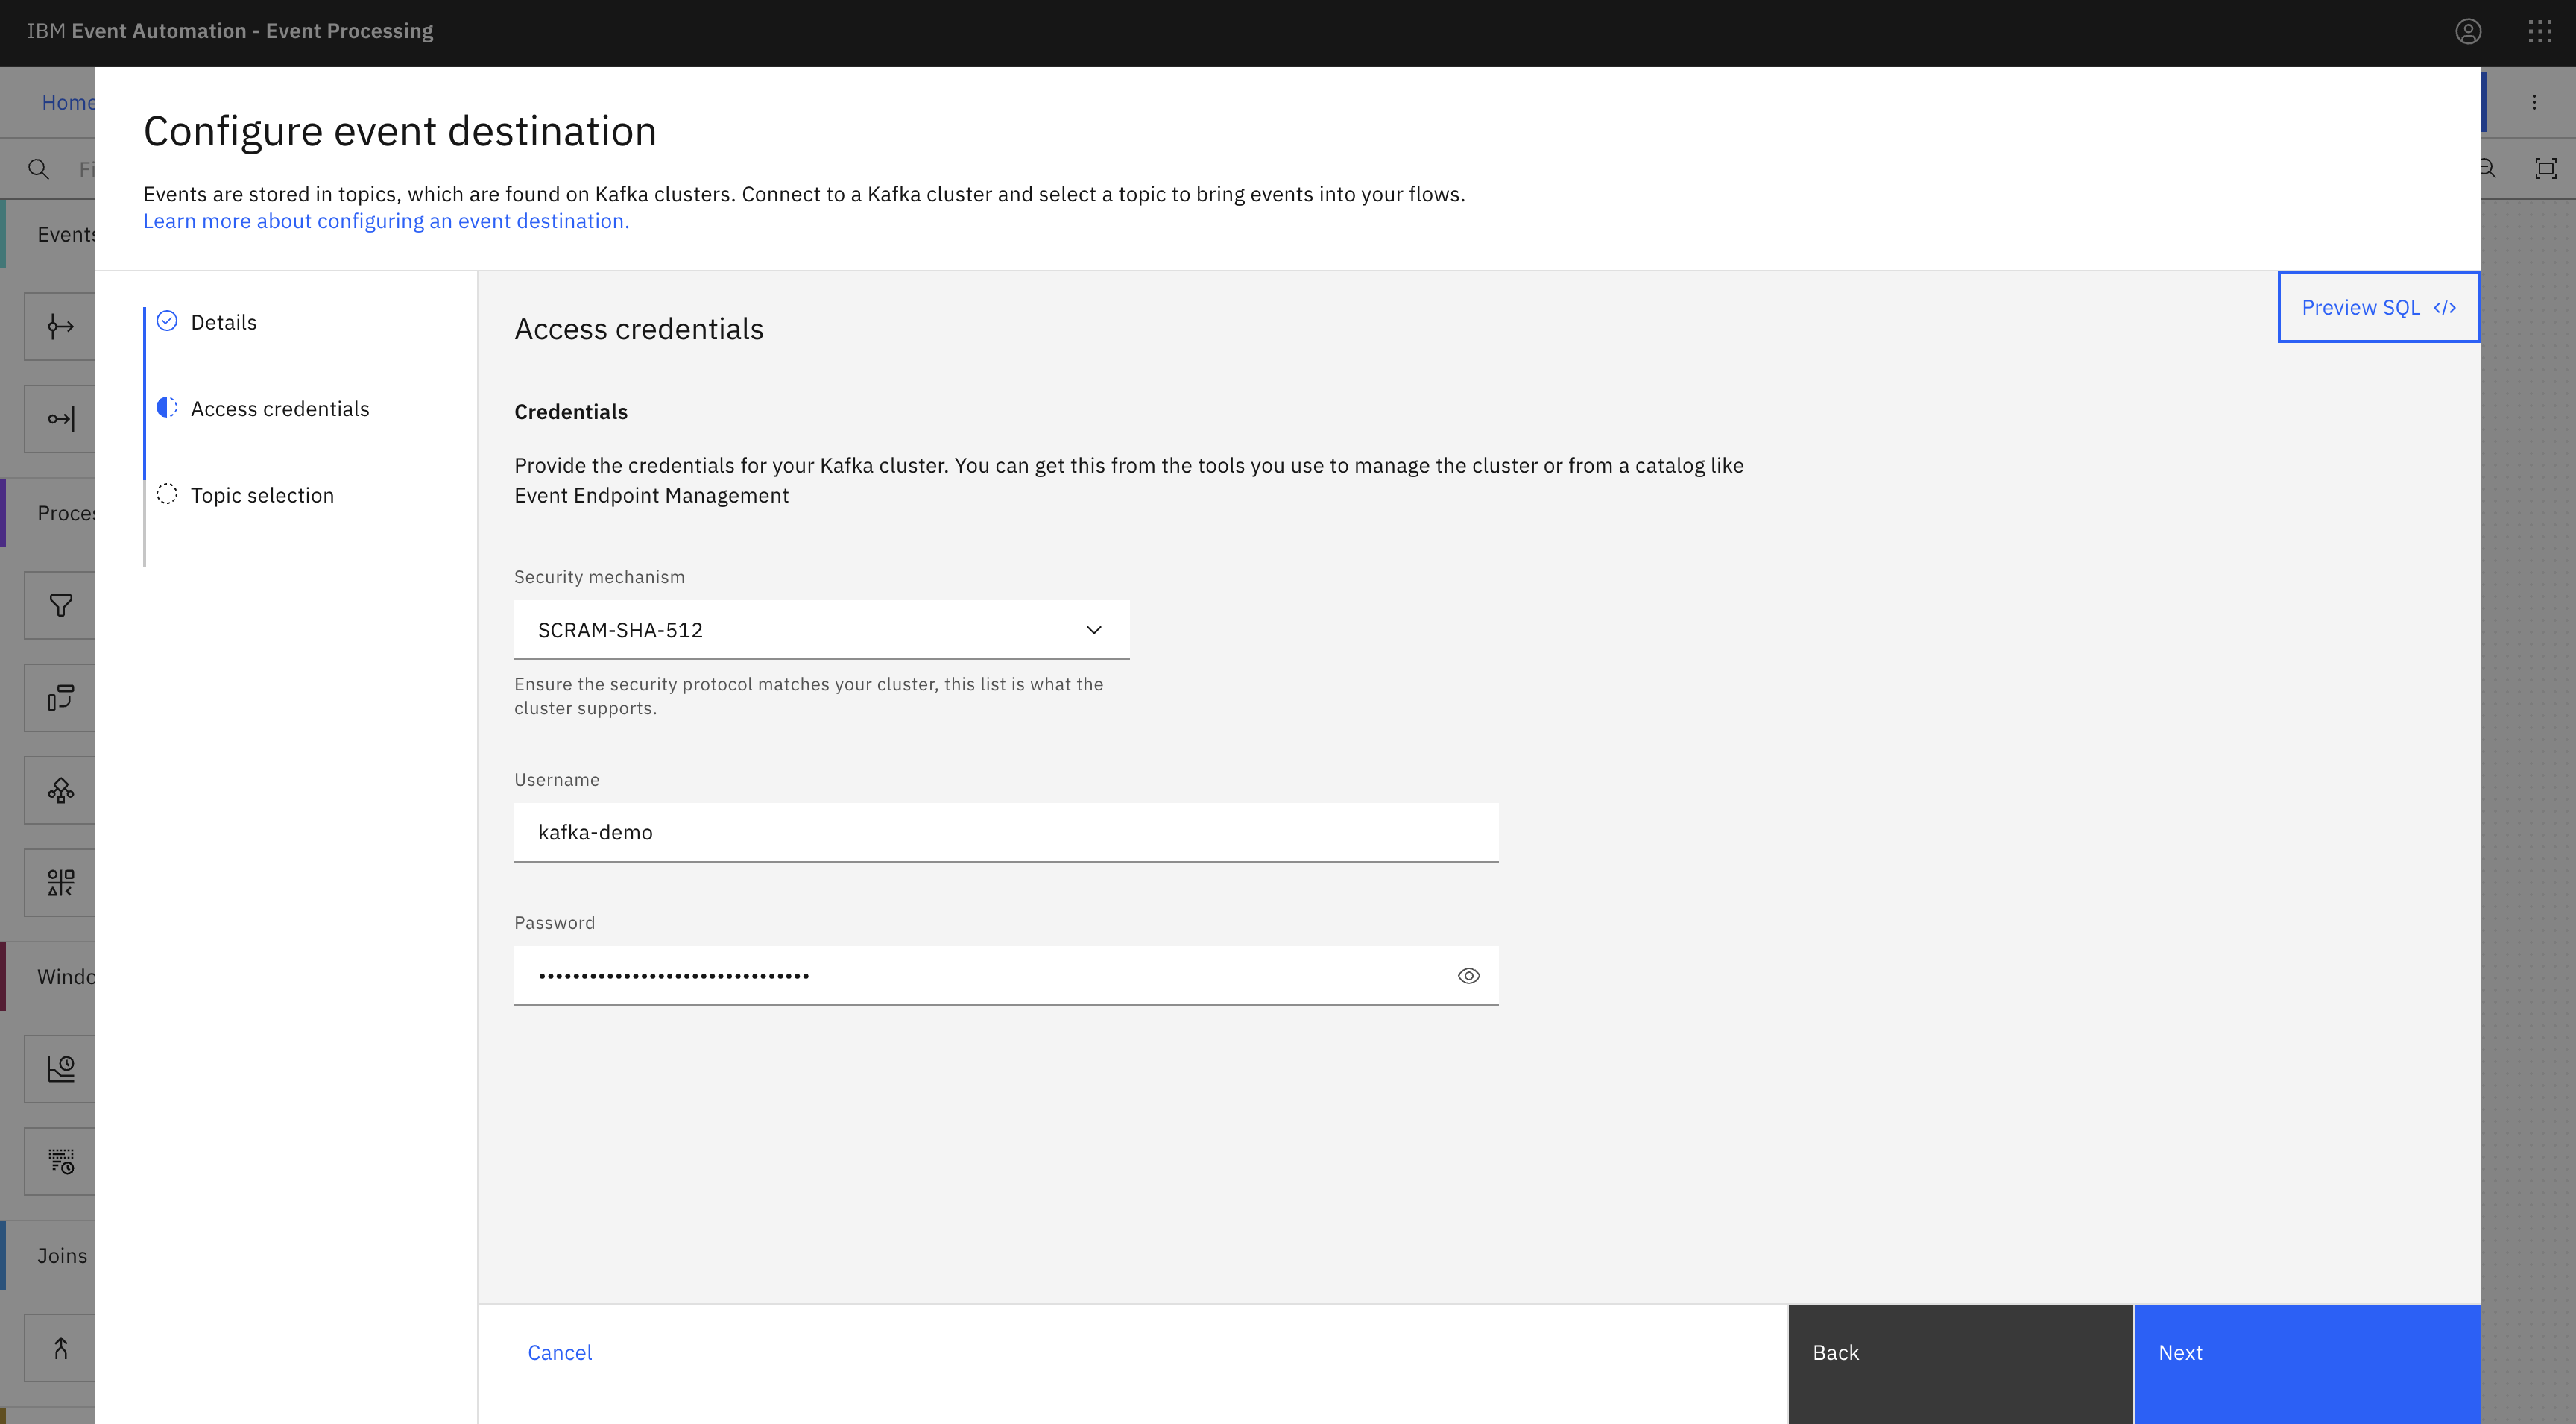
Use the username and password for the
kafka-demo-appsuser for accessing the new topic.If you need a reminder of the password for the
kafka-demo-appsuser, you can review the Accessing Kafka topics section of the Tutorial Setup instructions. -
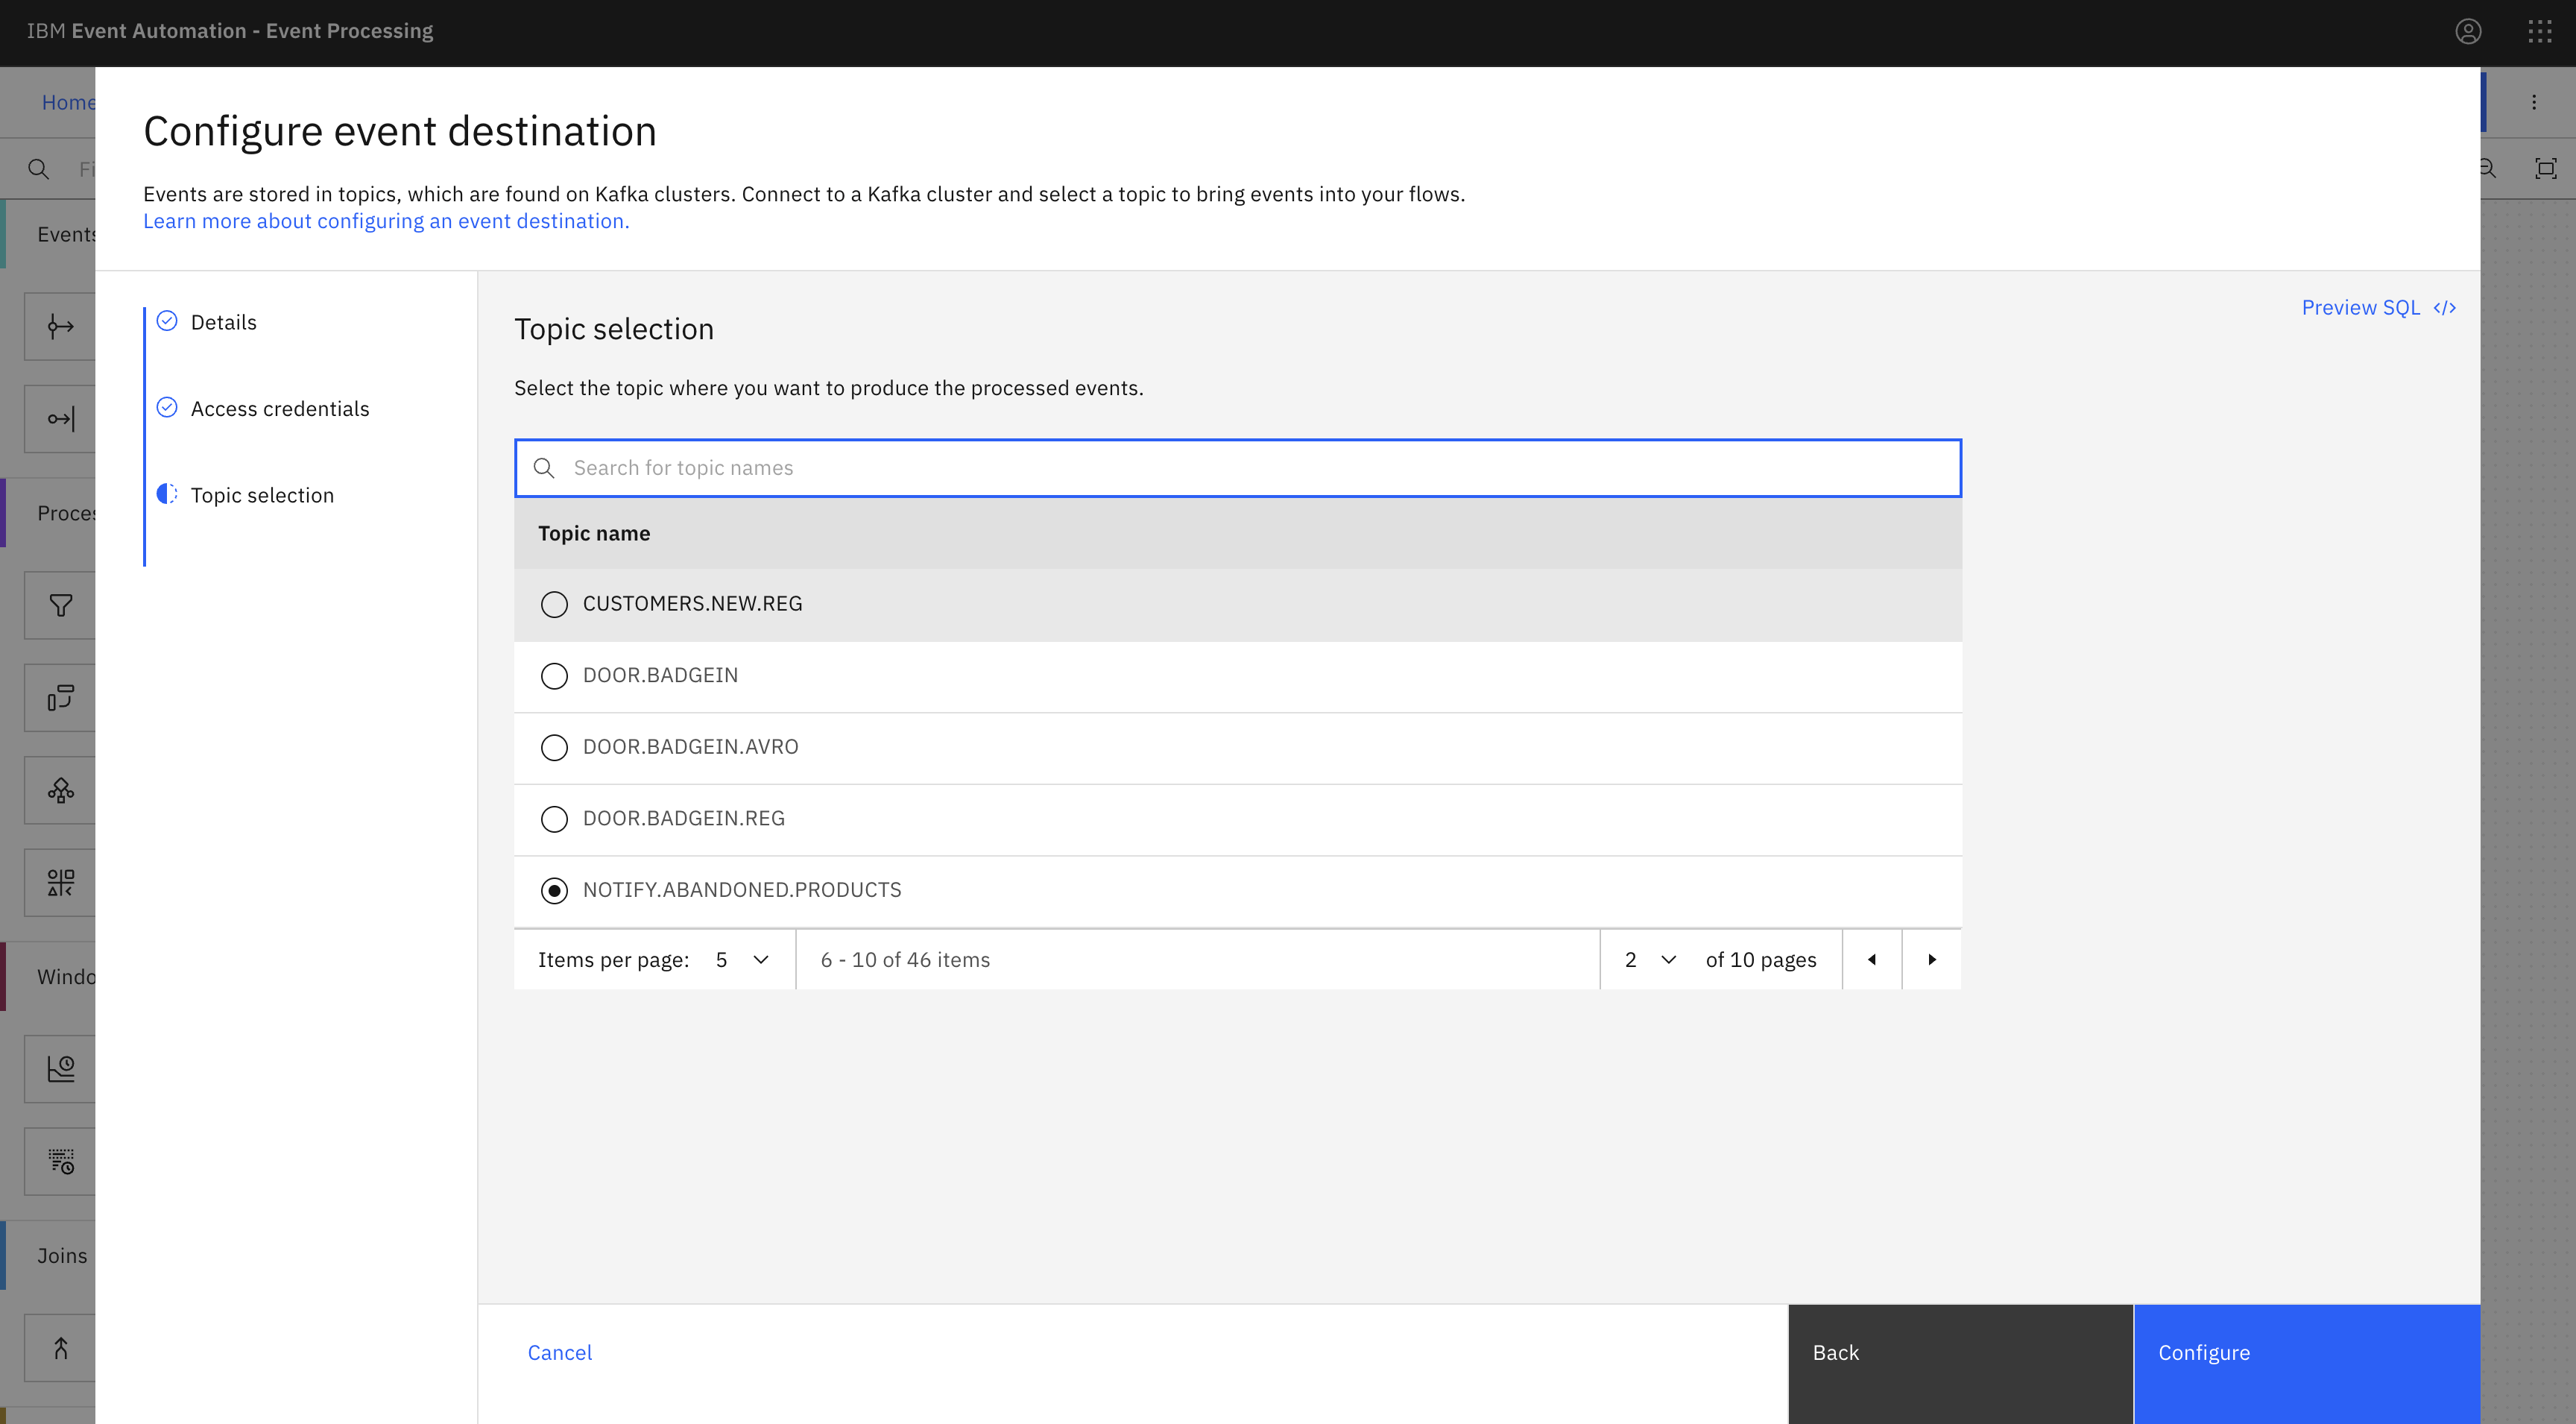
Choose the
NOTIFY.ABANDONED.PRODUCTStopic created in Step 1. -
Click Configure.
Step 12: Test the flow
The final step is to run your event processing flow and view the results.
Use the Run menu, and select Include historical to view the most positive review comments for your abandoned products placed in your cart.
Recap
You used the watsonx.ai node to view which product left in the cart has the highest average rating and then send an email to the user highlighting that product along with its most positive review.
