
| DEMO OVERVIEW | |
|---|---|
| Scenario overview | This demo shows how the IBM Cloud Pak for Business Automation integrates machine learning to improve decisions. To illustrate this, a company’s customer retention offer process is automated. |
| Demo products | Cloud Pak for Business Automation, Cloud Pak for Data (Machine learning capabilities) |
| Demo capabilities | Decision management; Machine learning |
| Sales guidance | Download the sales guidance document here. |
| Demo intro slides | Download the Introduction and Overview slides here. This is a short deck of customer-facing slides that sets the context for the demo. |
| Demo script | A complete demo script is on the second tab above. You can download a printer-ready PDF of the demo script here. This demo script has multiple tasks that each have multiple steps. In each step, you have the details about what you need to do (Actions), what you can say while delivering this demo step (Narration), and screenshots of what you will see. This demo script is a suggestion, and you are welcome to customize based on your sales opportunity. Most importantly, practice this demo in advance. If the demo seems easy for you to execute, the customer will focus on the content. If it seems difficult for you to execute, the customer will focus on your delivery. |
| Demo downloads | • SkyTalk’s Retention offer document.pdf • SkyTalk customer loyalty data.csv • SkyTalk customer value data.csv • SkyTalk_call_center_application_23.0.2.twx • SkyTalk-customer-retention_23.0.2.zip |
| Sales enablement video | View the enablement video here. This video is for enablement purposes only (IBMers and Business Partners) and is not customer-ready. |
| Required versions | Cloud Pak for Business Automation V23.0.2, Cloud Pak for Data 4.0 |
| How to get support | • Open a support case at IBM Technology Zone Help regarding issues with reserving and provisioning Tech Zone environments. • IBMers, contact #ba-techlcd-support regarding issues with setting up and running this demo. |
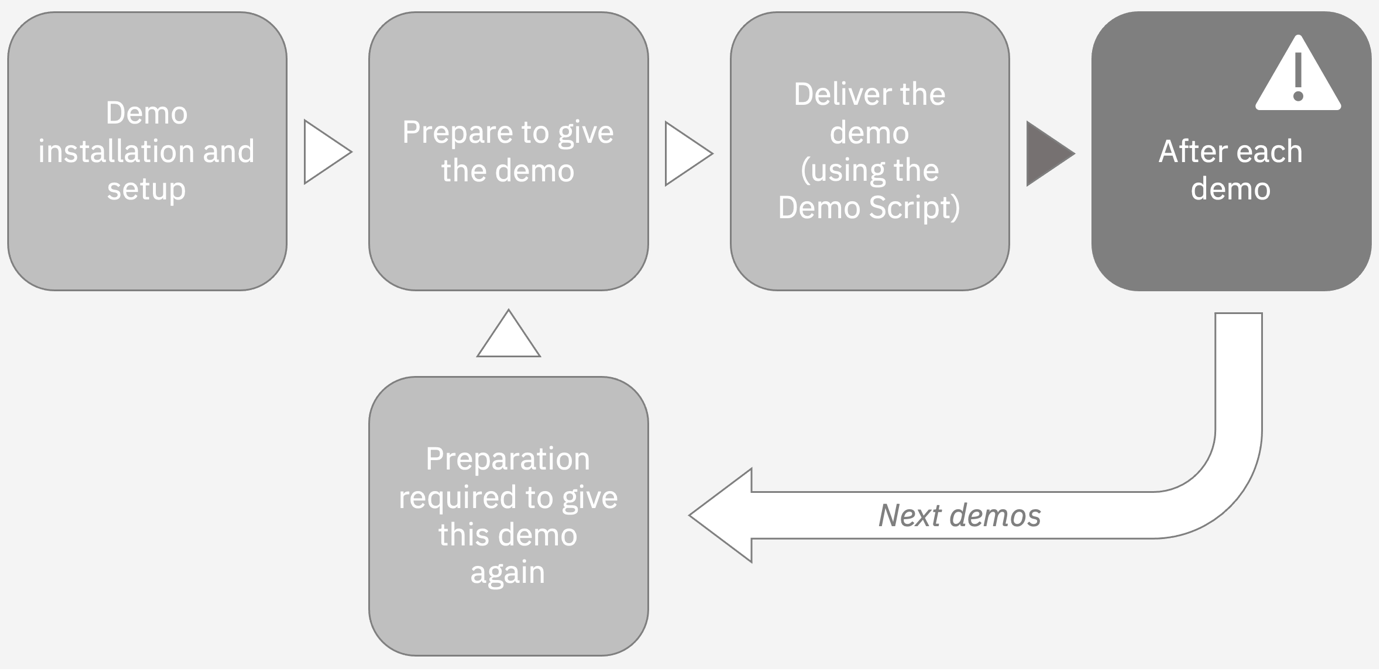
This platinum demo uses machine learning resources that are subject to a quota. It is critical to stop depleting your machine learning quota by following the ‘After each demo’ steps detailed in this preparation guide unless you are practicing or presenting this demo.
The ‘Preparation required to give this demo again’ section details how to re-deploy the required machine learning service prior to your next demo.
The five components of the demo:
MANAGING YOUR WATSON STUDIO FREE SUBSCRIPTION
This demonstration requires Watson Studio and a Watson Machine Learning subscription. If you don’t have a paid subscription, you can use a free Lite version (which has a limited quota). This preparation guide explains how to provision a Watson Studio account.
The Lite version entitles you to 10 free CUH (capacity units) per calendar month. The quota resets on the first of each month.
The 10 CHU allows for 3 to 5 hours of usage, which is measured as the total time Watson Machine Learning is deployed. To stop the clock, you must undeploy the 2 ML services (see the ‘After each demo’).
Assuming you undeploy after each time you give or practice the demo, we estimate that you can do the demo three to five times per month without exceeding the free Watson Machine Learning limit. If you leave the two machine learning services deployed overnight, it will consume all your monthly limit in just 3 to 5 hours of time.
DEMO INSTALLATION AND SETUP
1 - Provision an OpenShift environment and deploy Cloud Pak for Business Automation
To run this demonstration, you will need an OpenShift environment with Cloud Pak
for Business Automation 23.0.2 installed. We will use IBM Operational Decision
Manager on prem version contained in this installation.
-
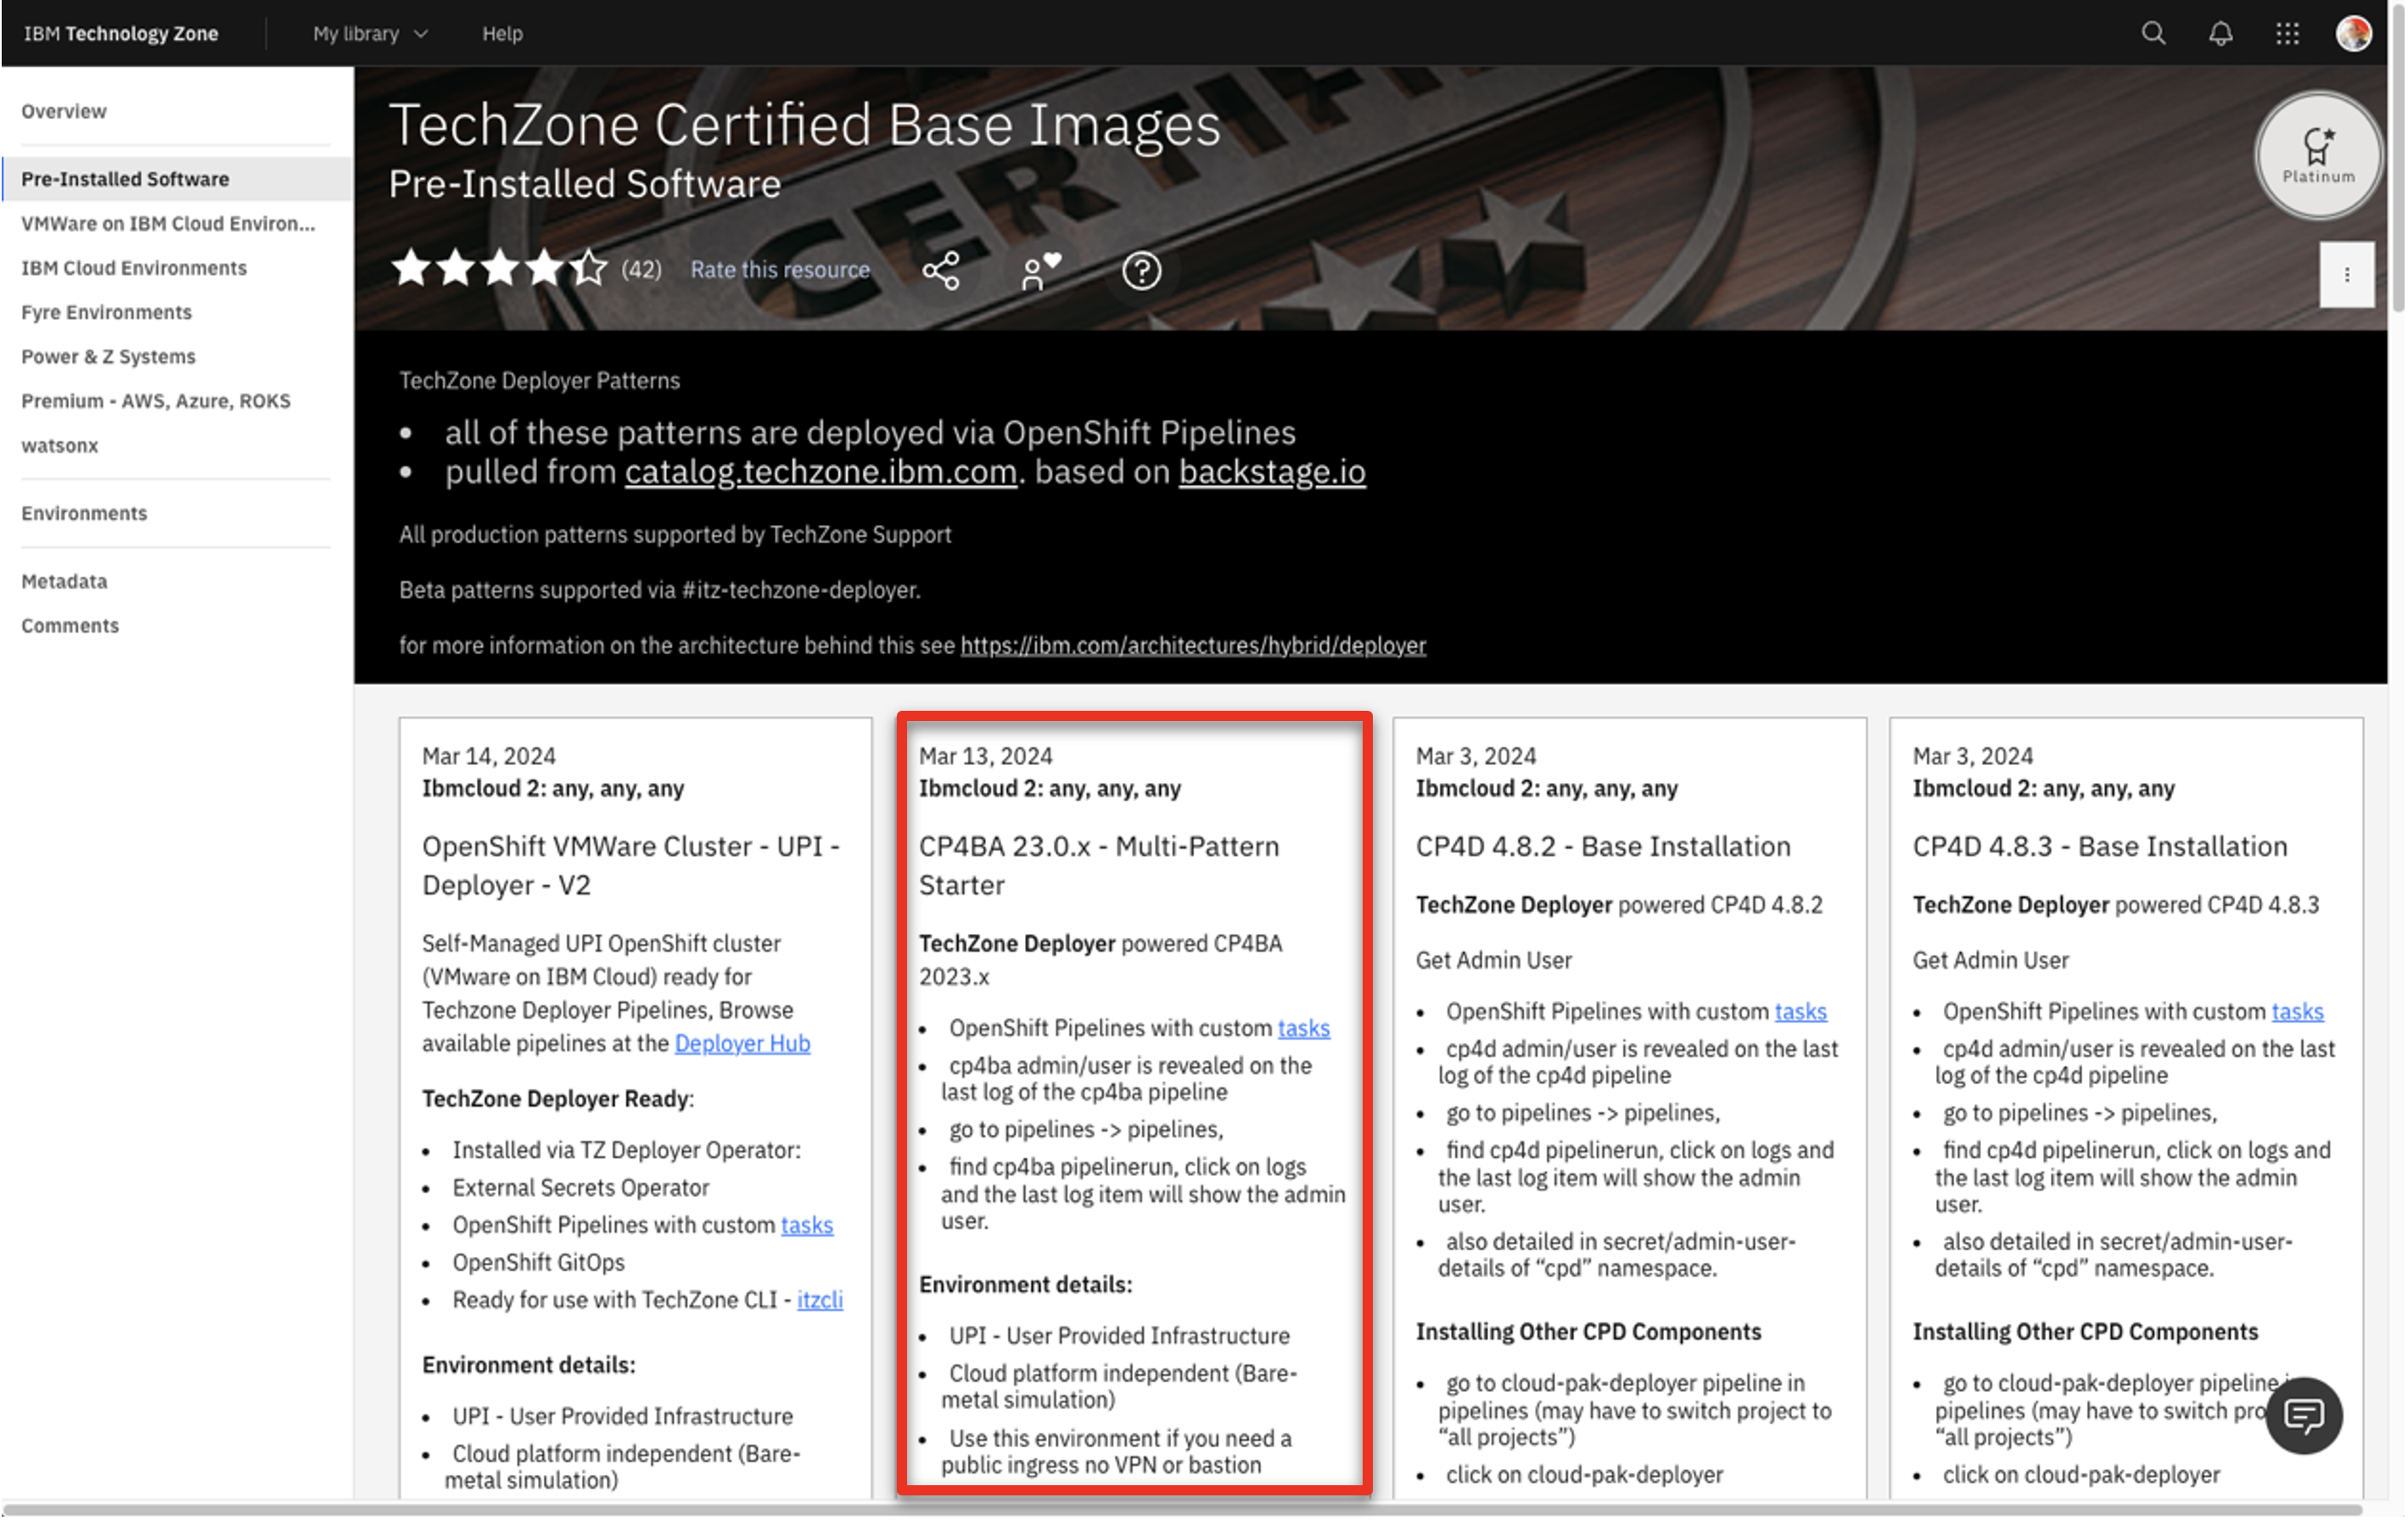
Visit the TechZone environment provisioning page.
-
Click the CP4BA 23.0.x - Multi-Pattern Starter tile.
-
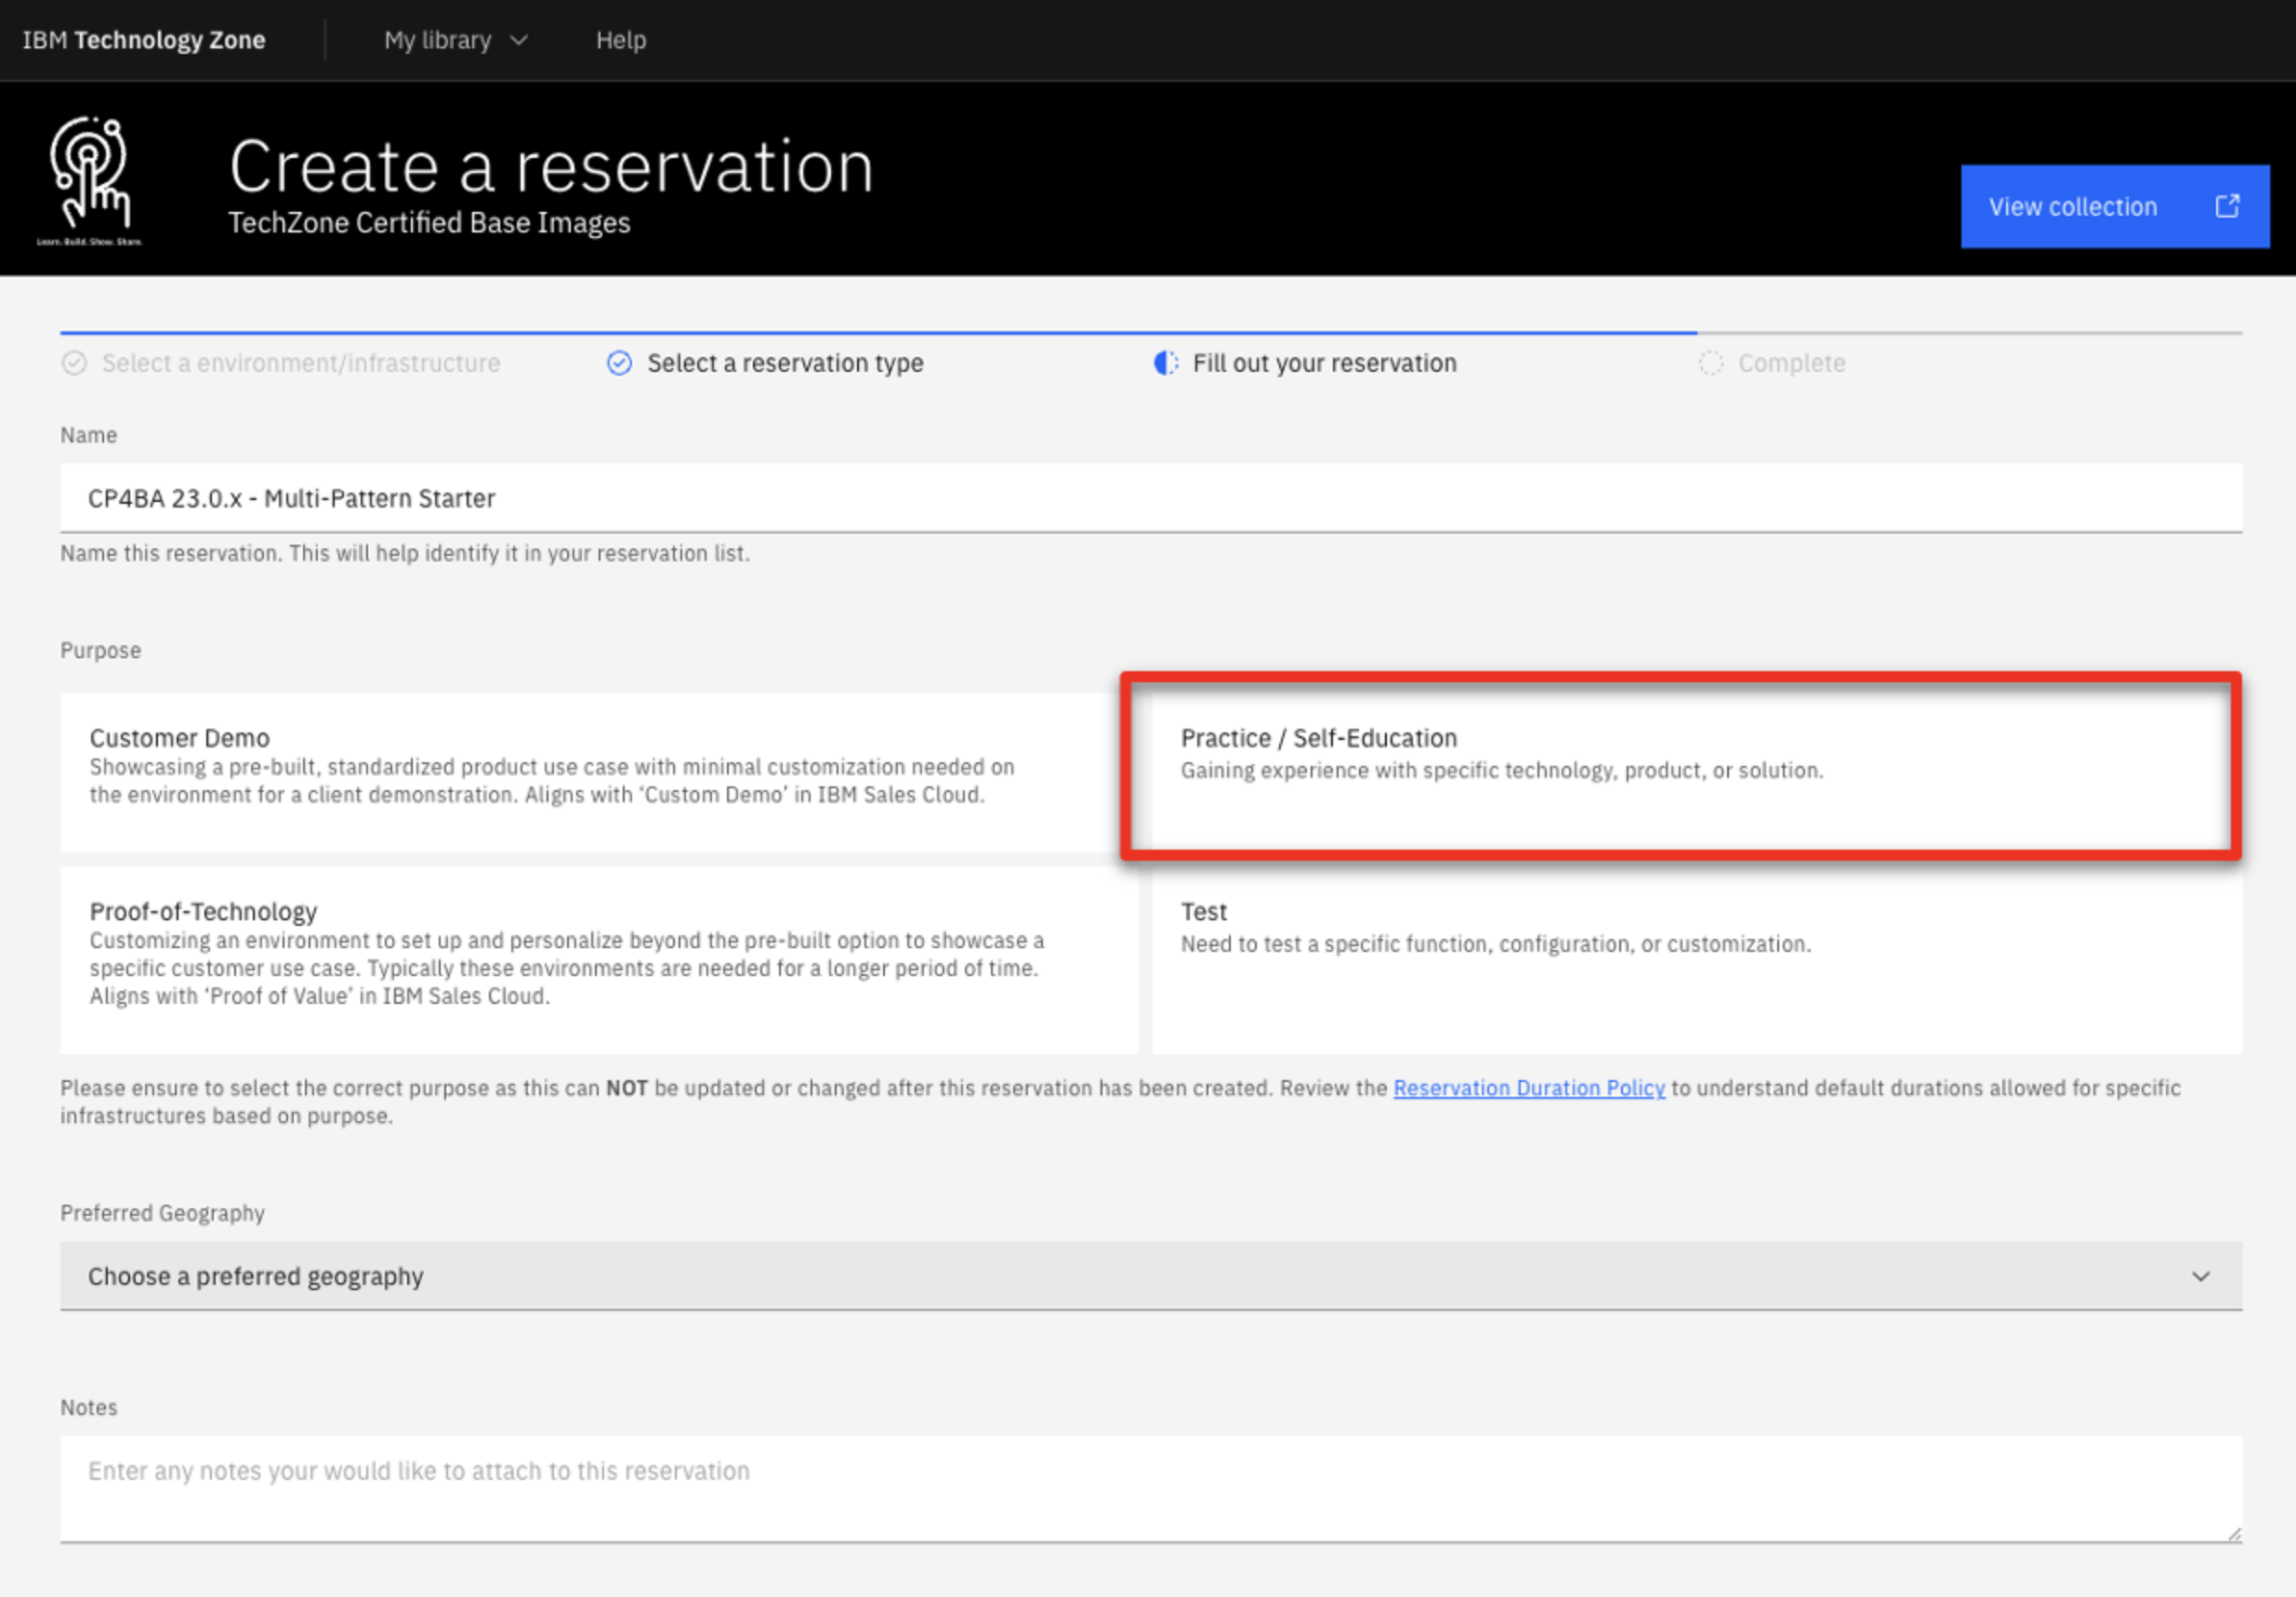
Select Reserve now tile.

-
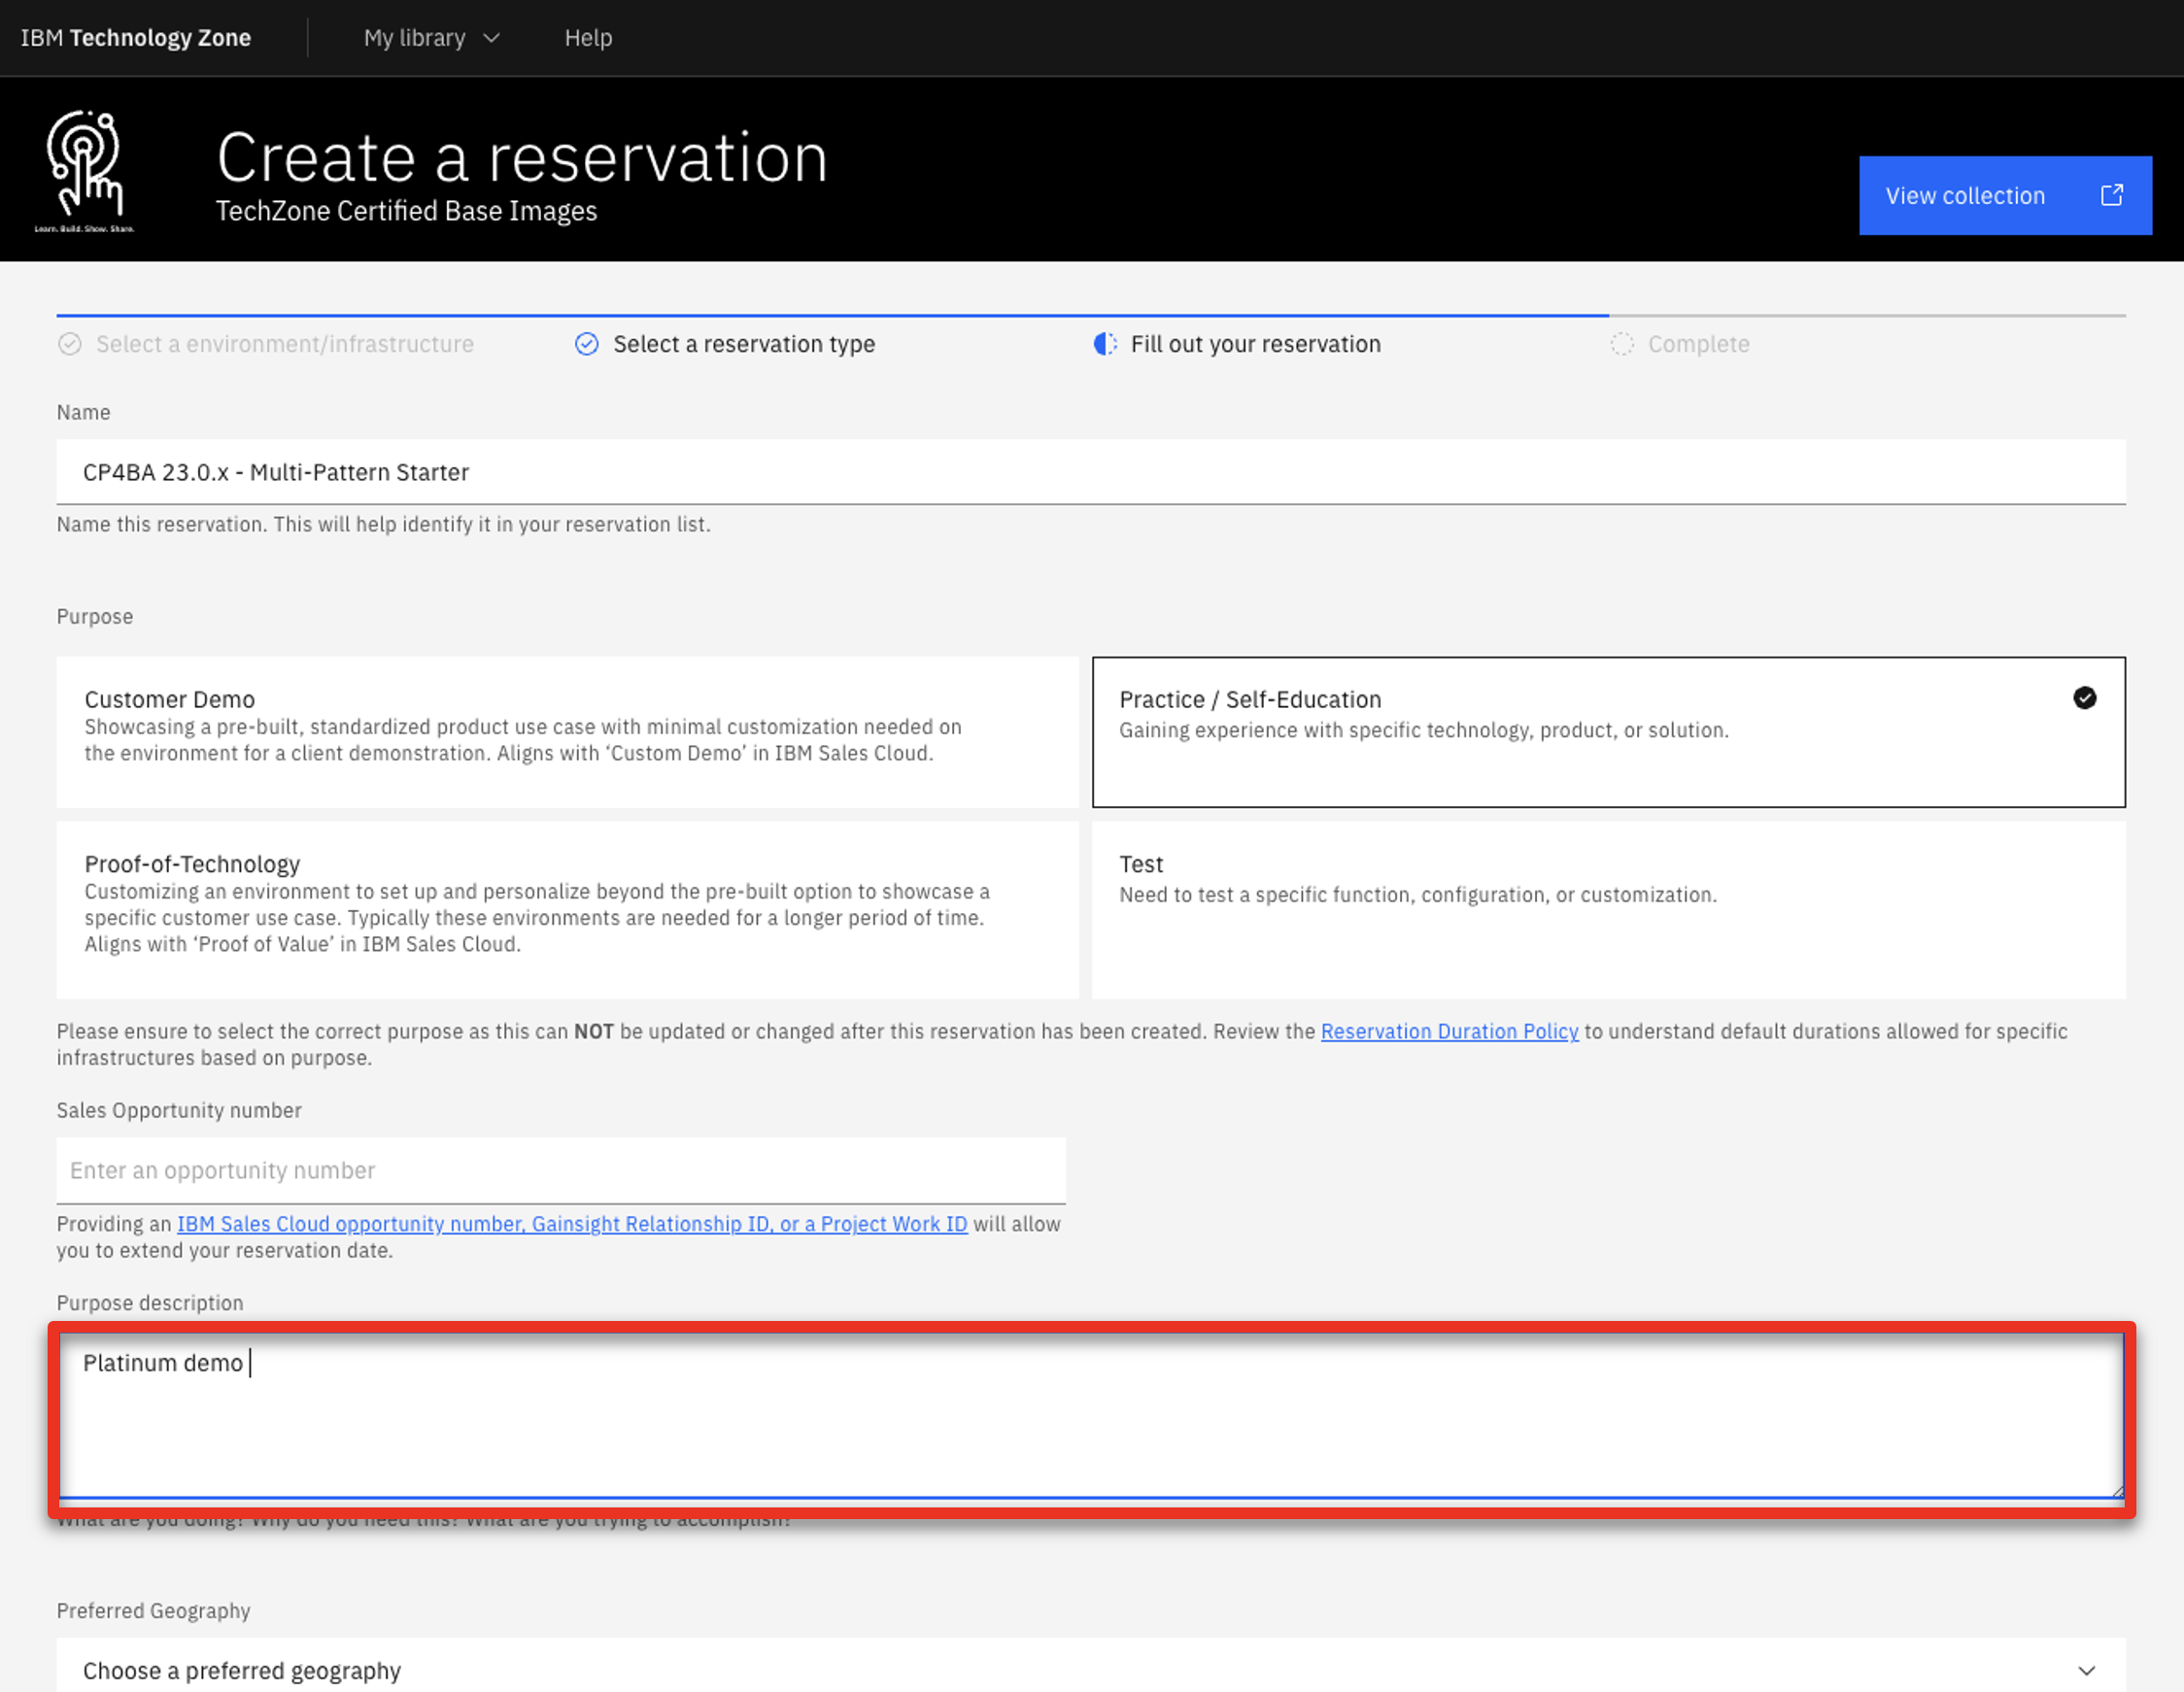
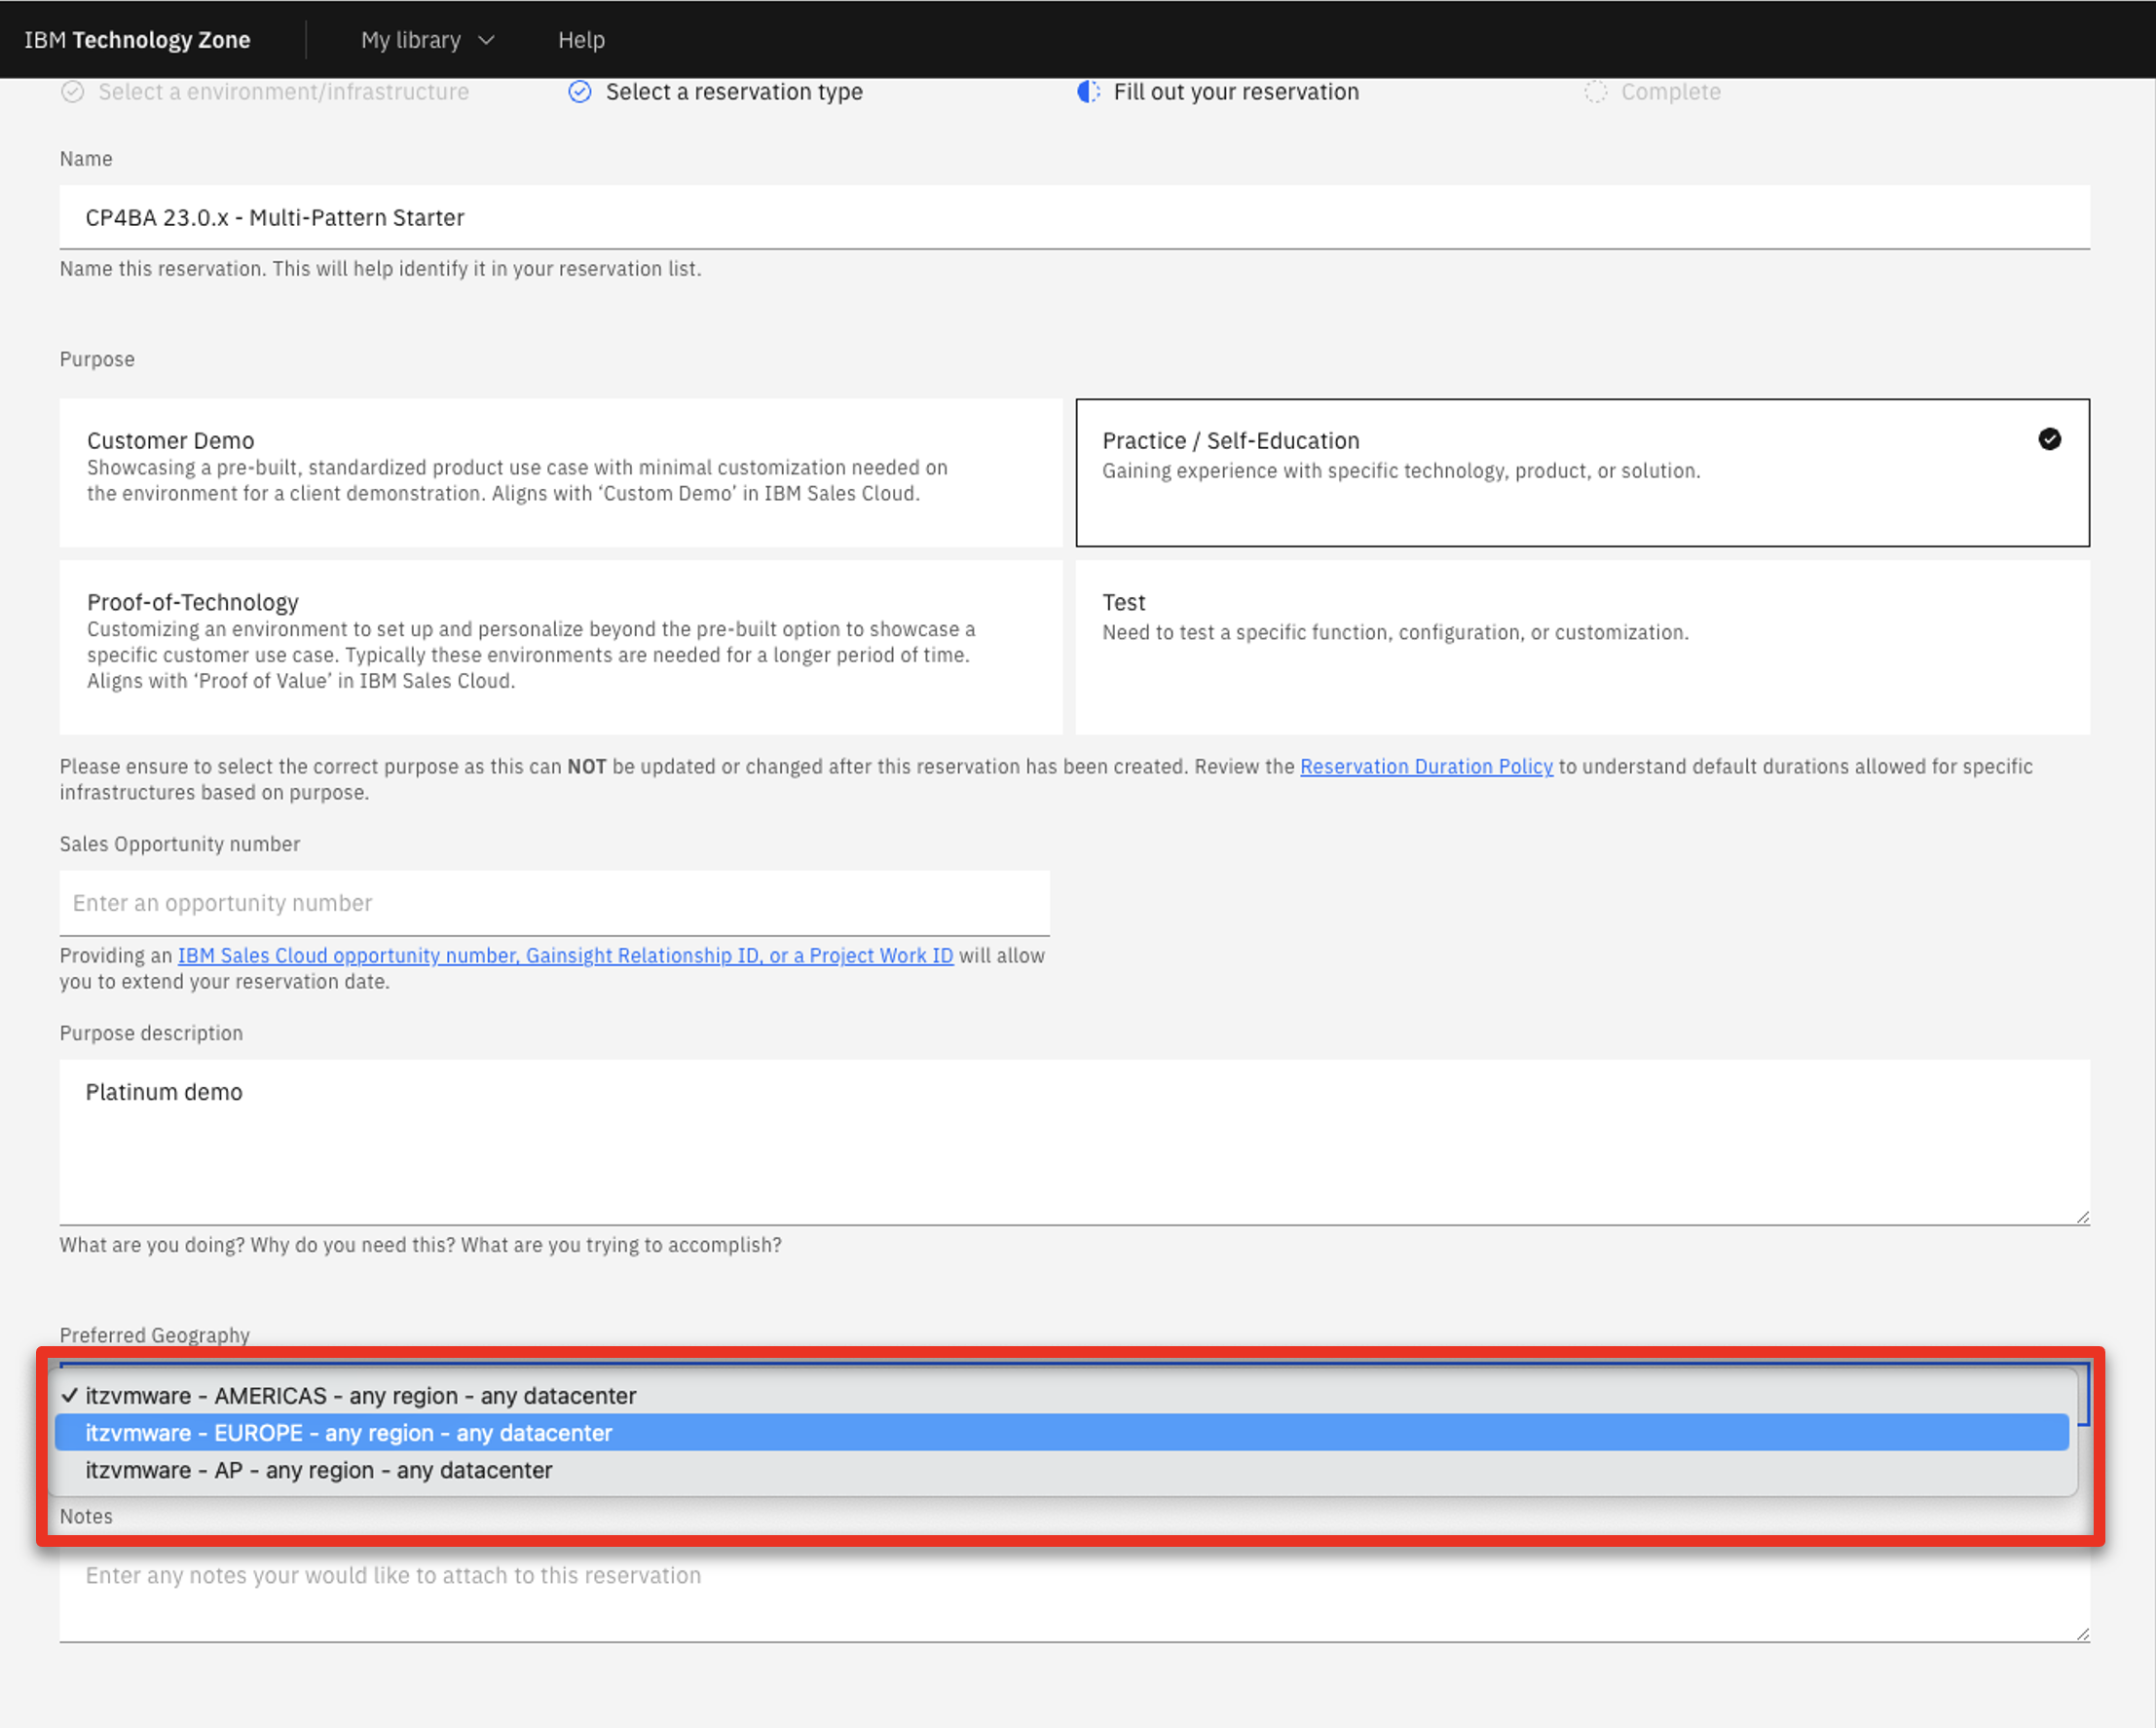
Select Practice / Self-Education
-
Enter a Purpose description
-
Select your Preferred Geography
-
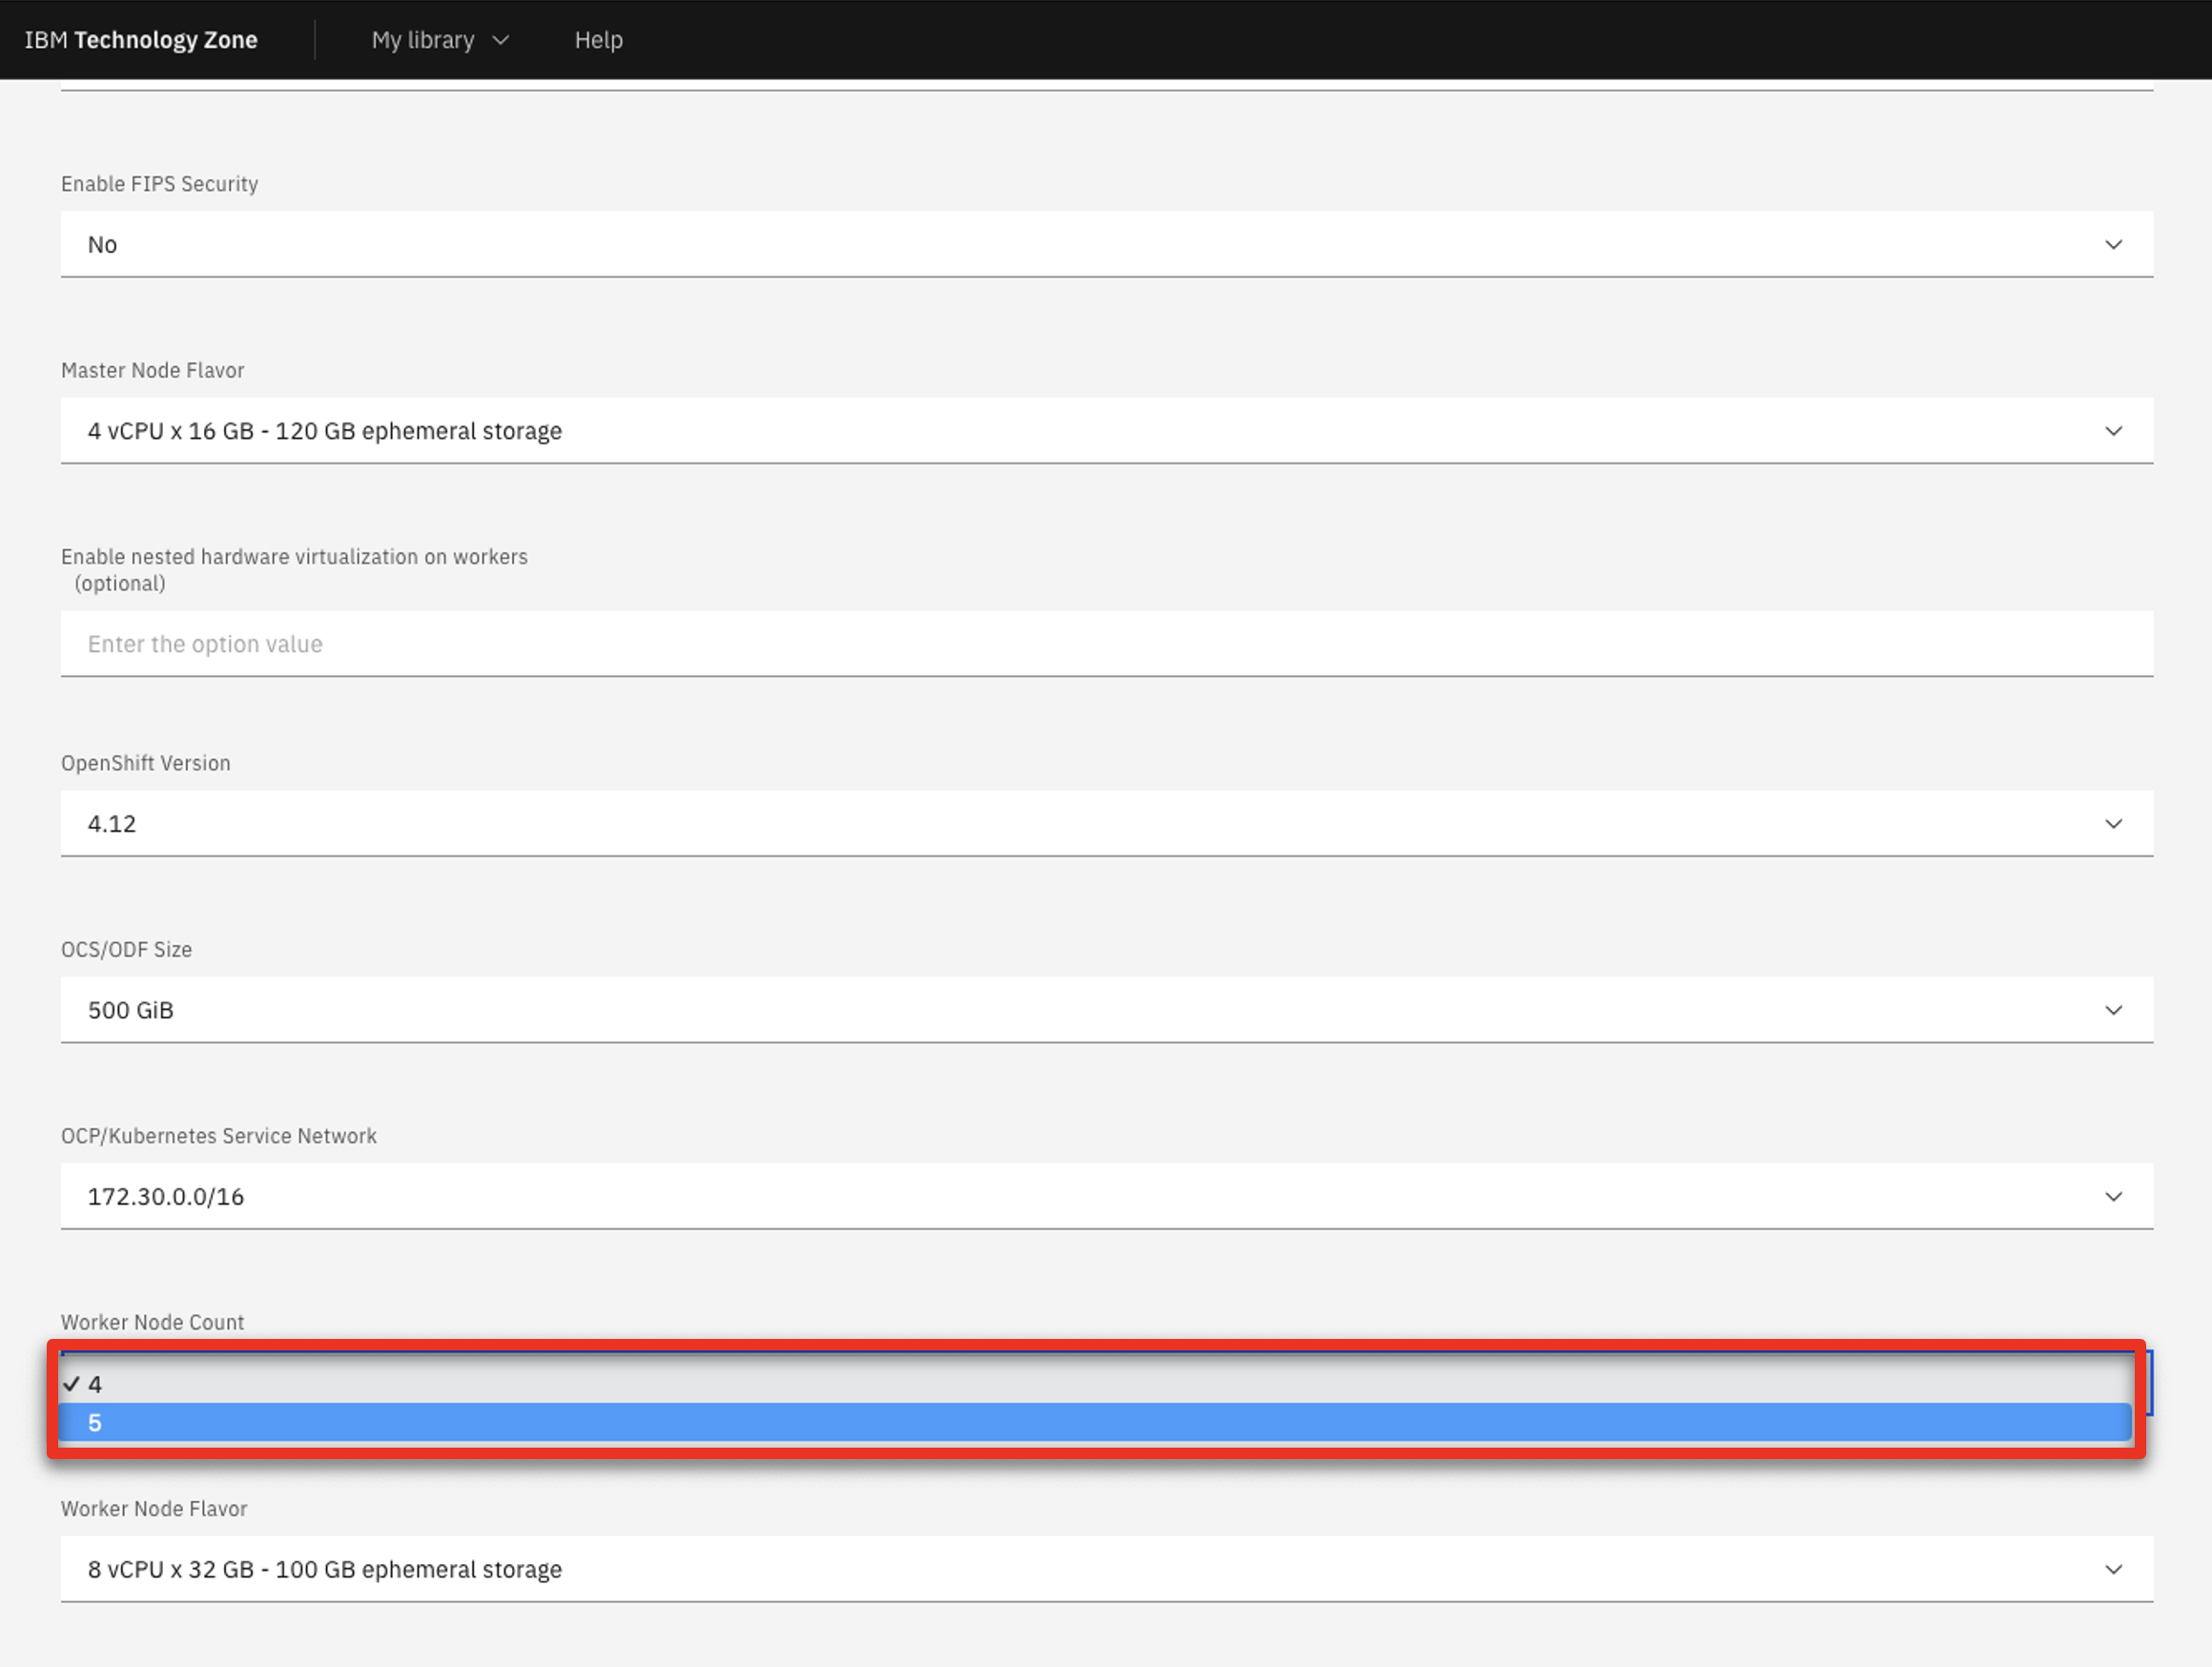
Select ‘5’‘ as ‘Worker Node Couunt’
-
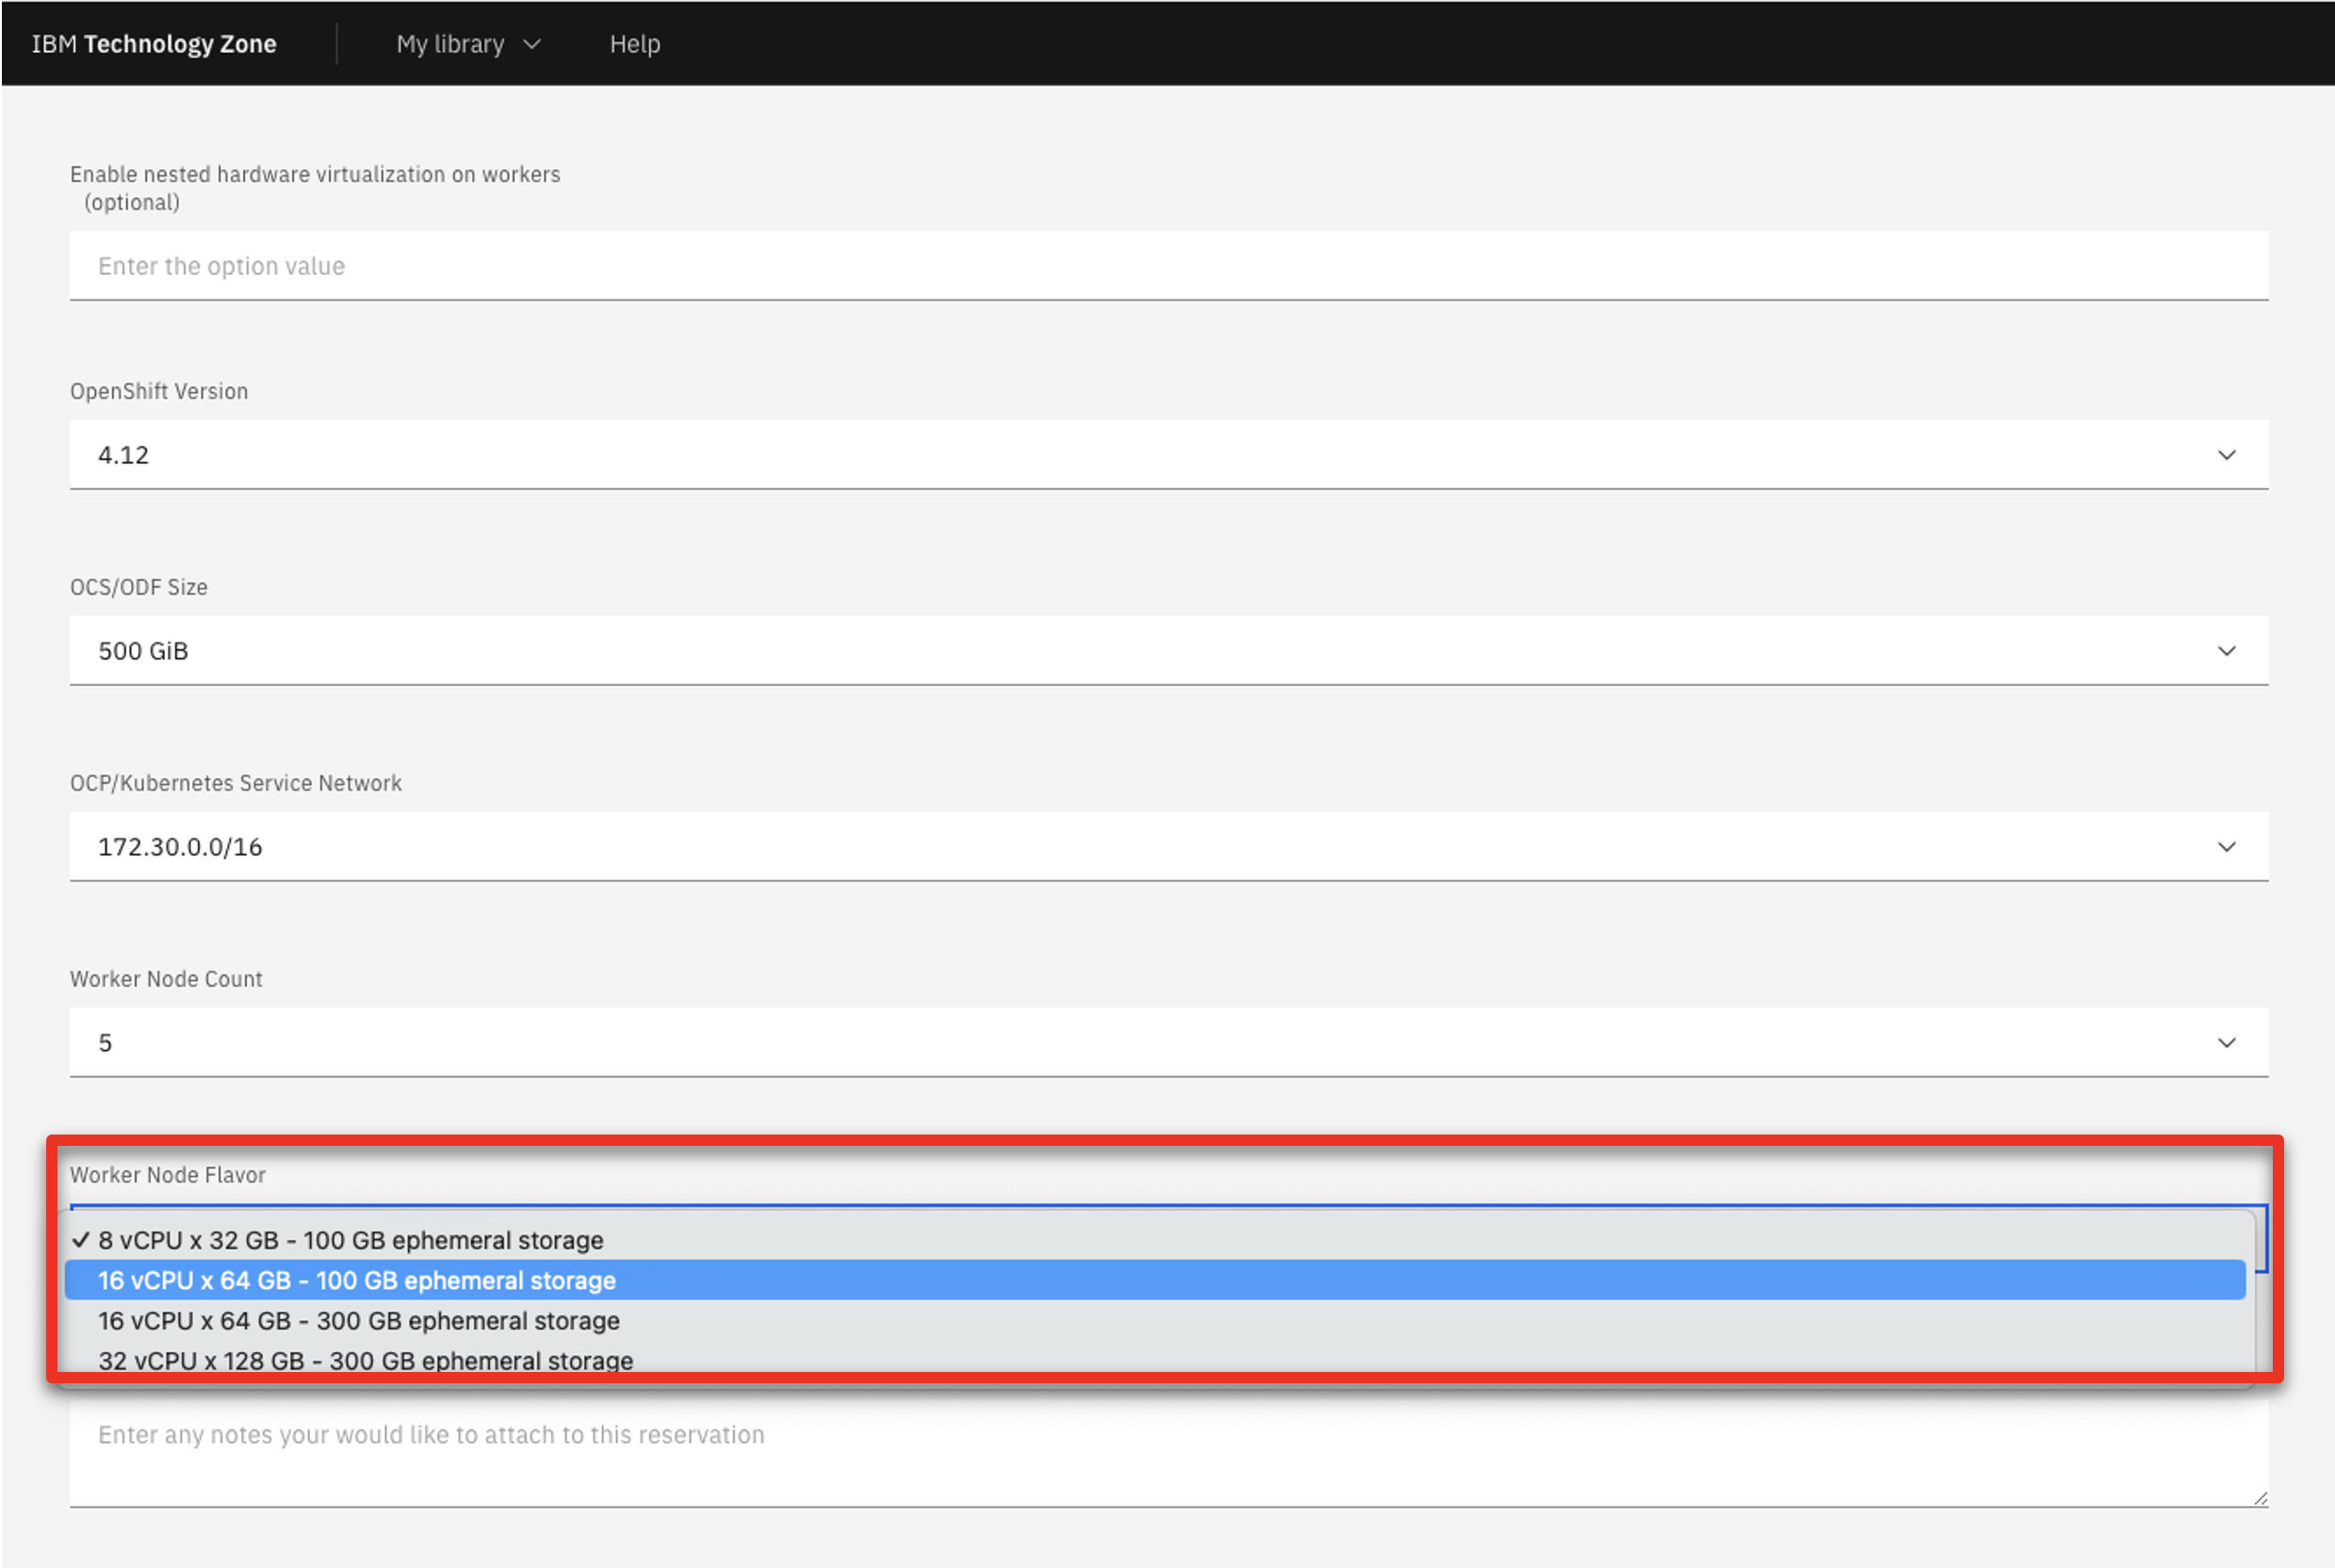
Select ’16 vCPU x 64GB – 100GB ephemeral storage’ as the Starter service (1) in the Worker Node Flavor
-
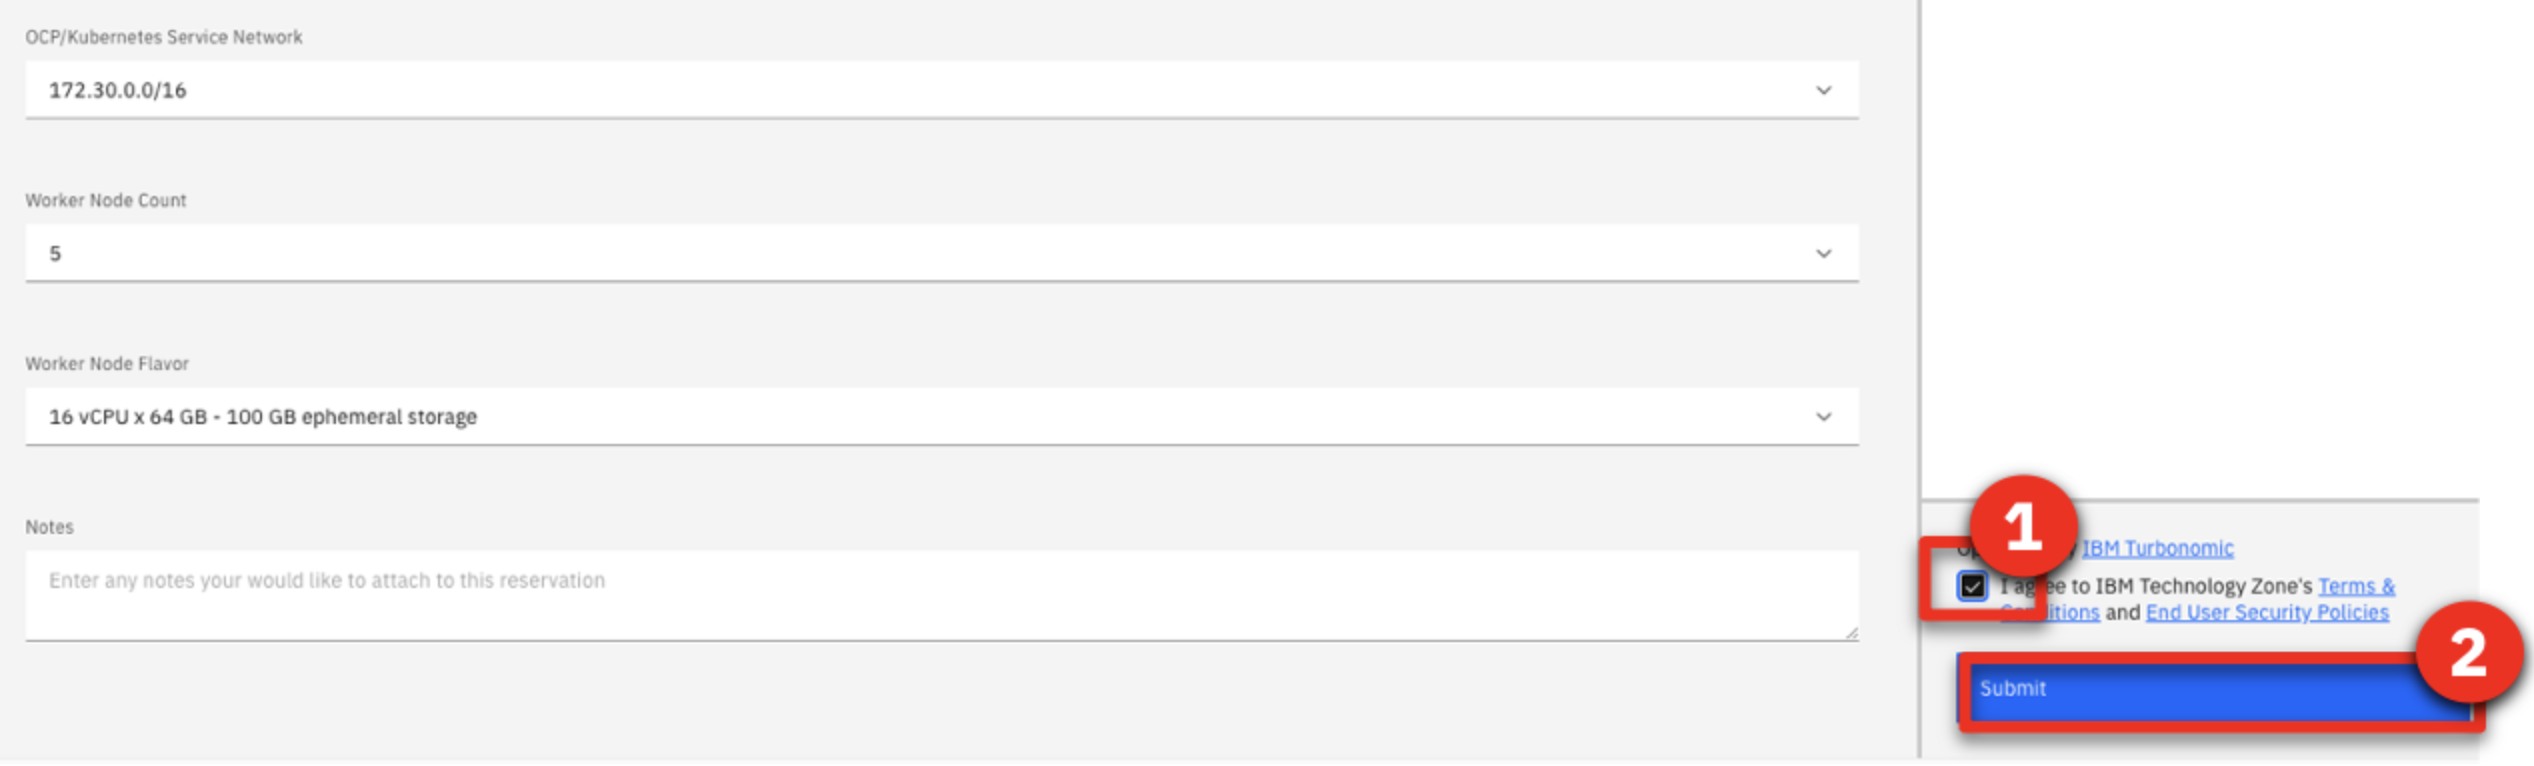
Read and agree to IBM Technology Zone’s Terms and Conditions and End User Security Policies (1). Click Submit (2).
-
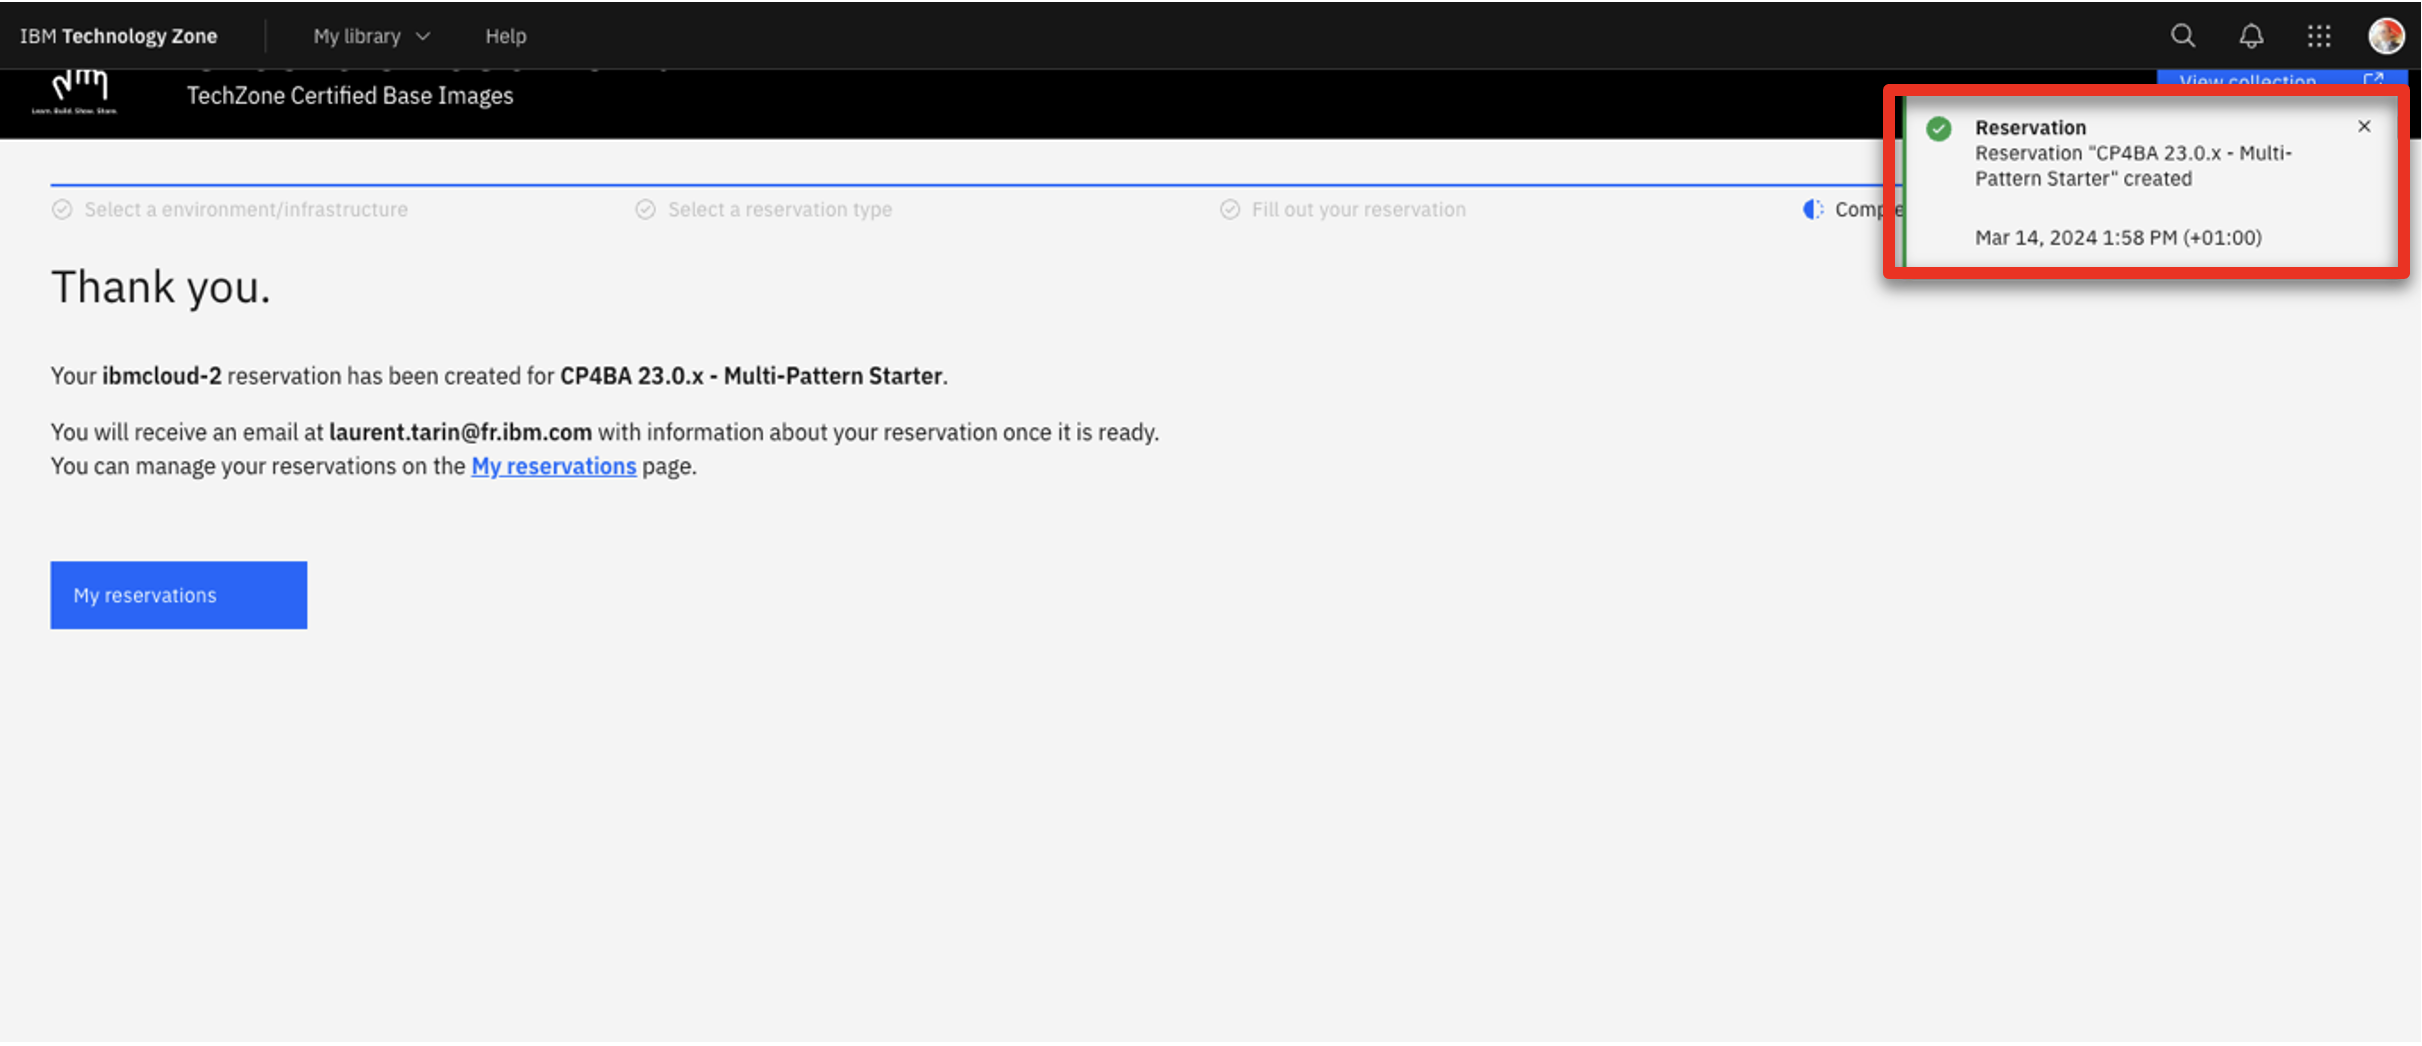
Check that the request was correctly submitted, and wait for the confirmation emails.
2 - Validate your environment and bookmark your IDs and URLs
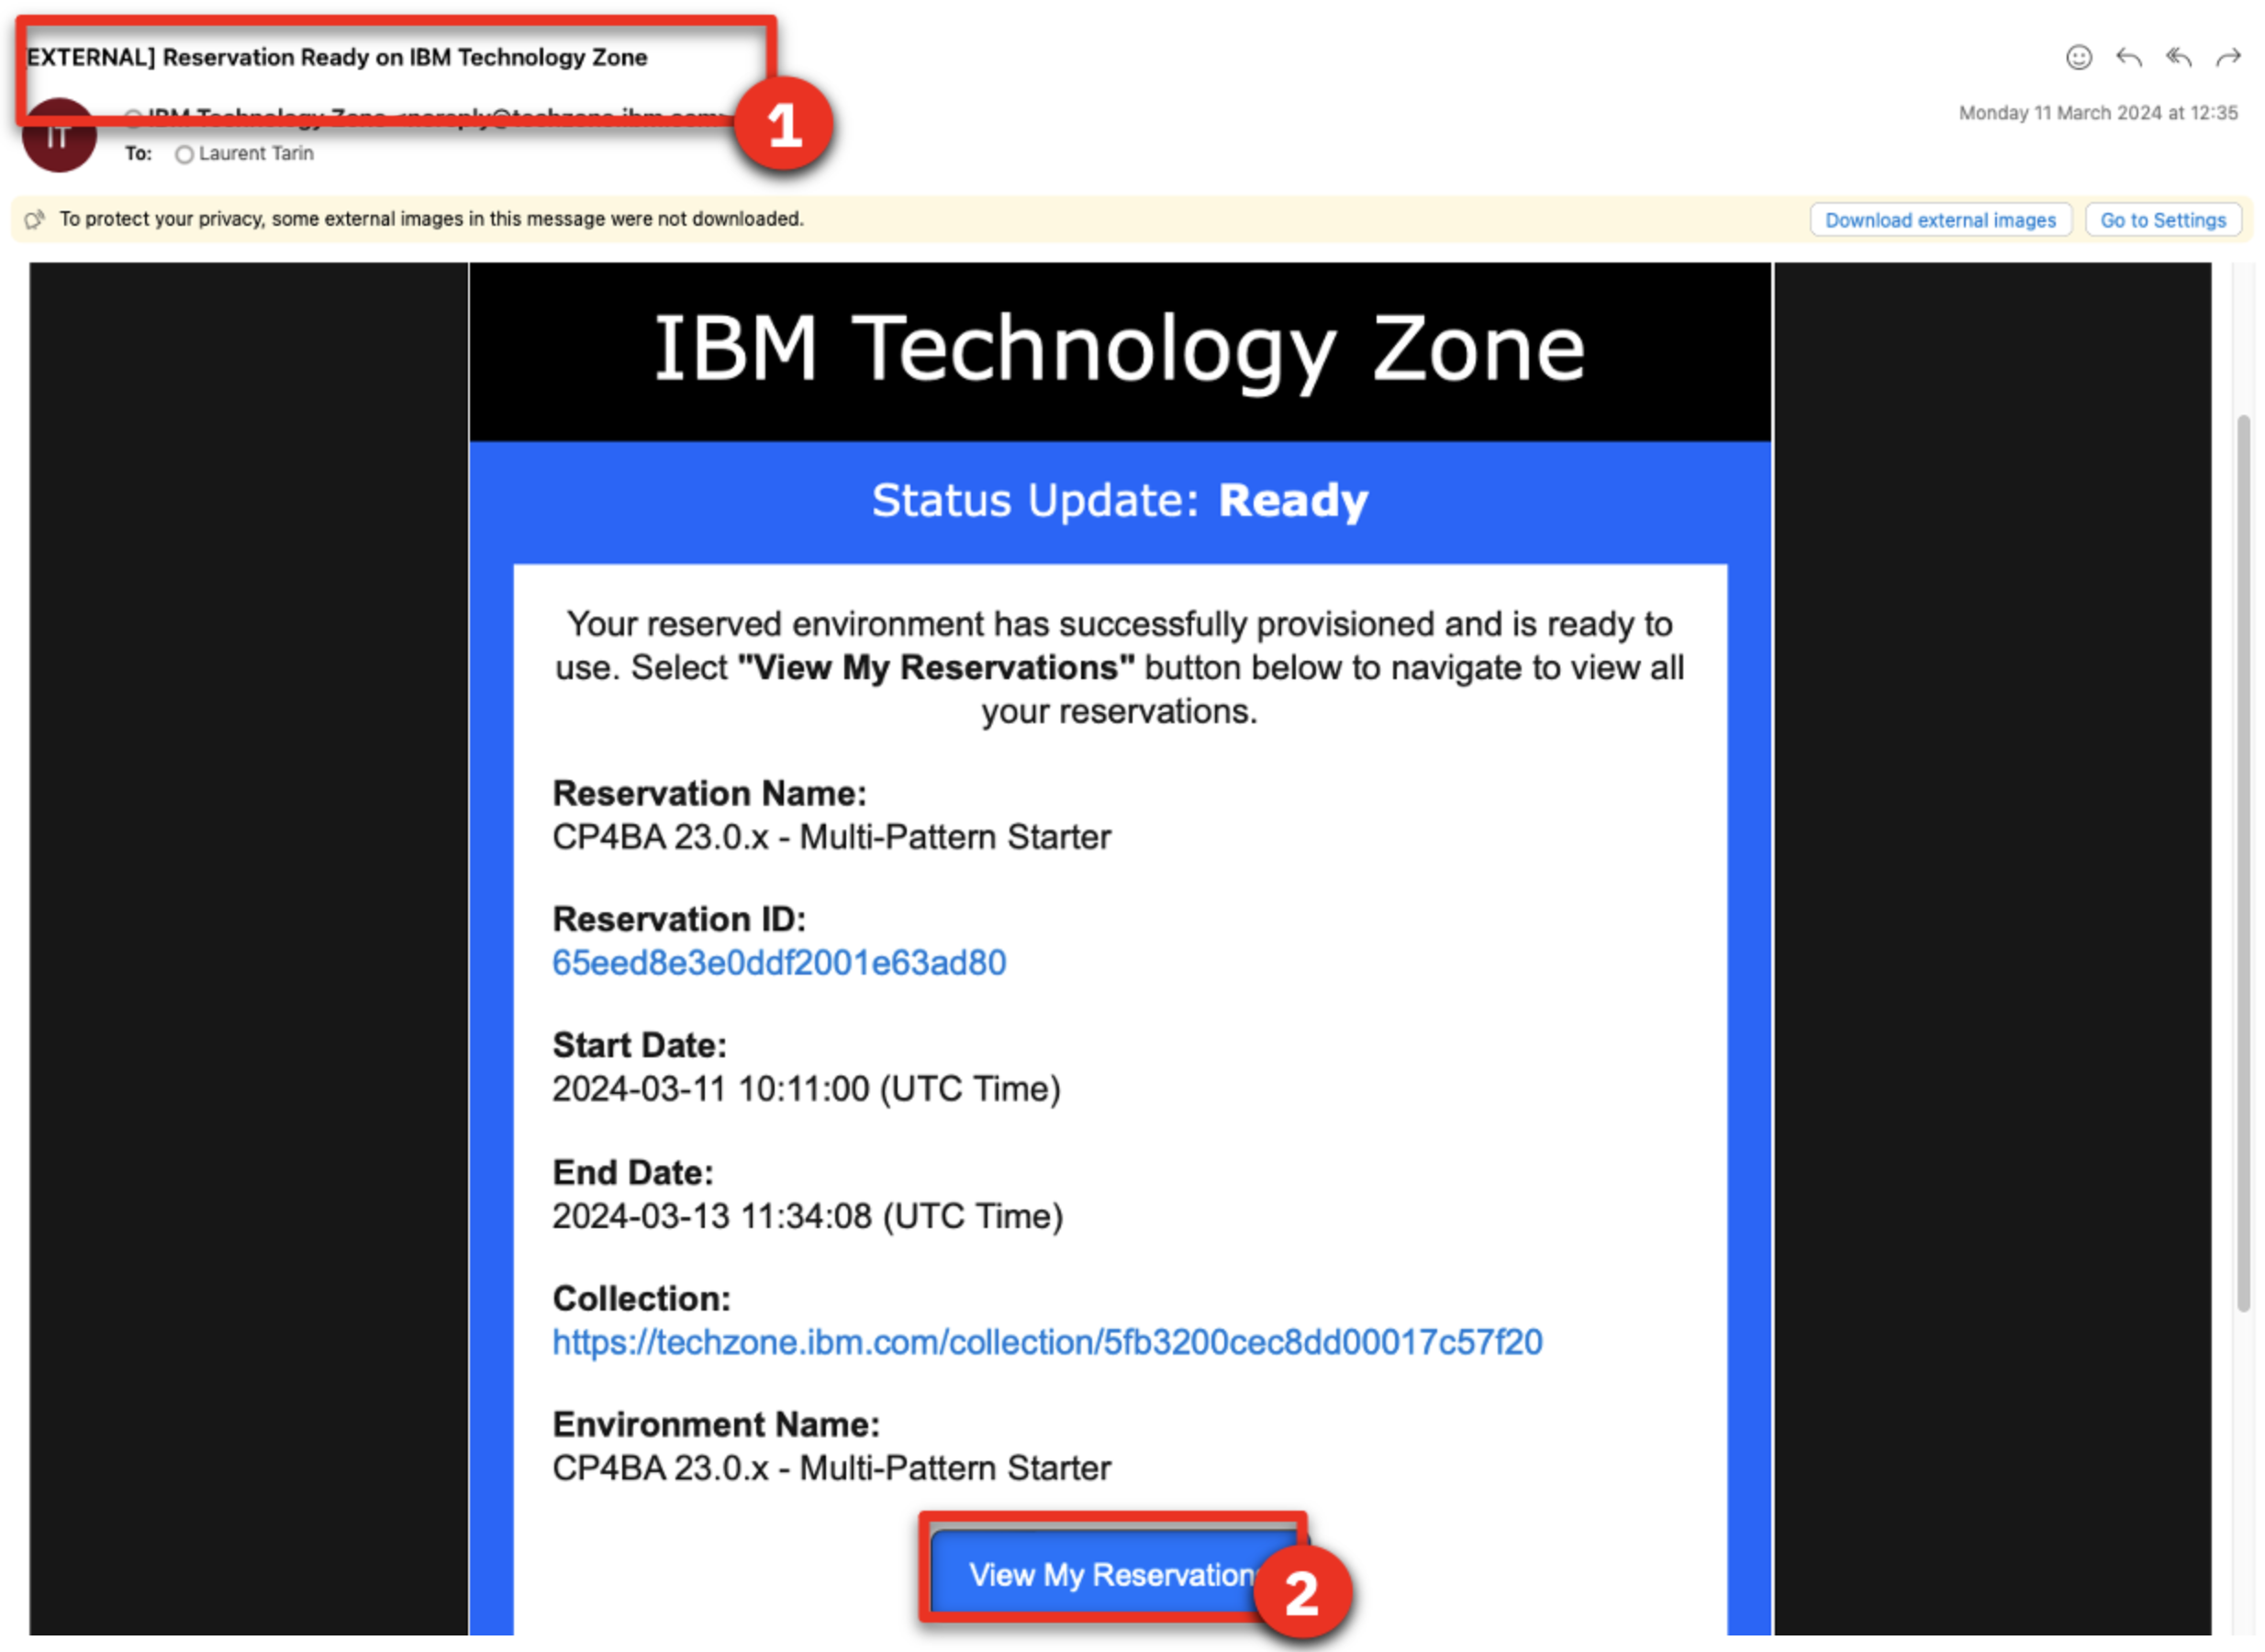
After 4-5 hours, your Cloud Pak for Business Automation (CP4BA) should be ready. After requesting your CP4BA, you will receive a series of emails from IBM Technology Zone regarding the progress of your request.
-
Check for an email with the subject Reservation Ready on IBM Technology Zone (1). Click View My Reservations (2)
-
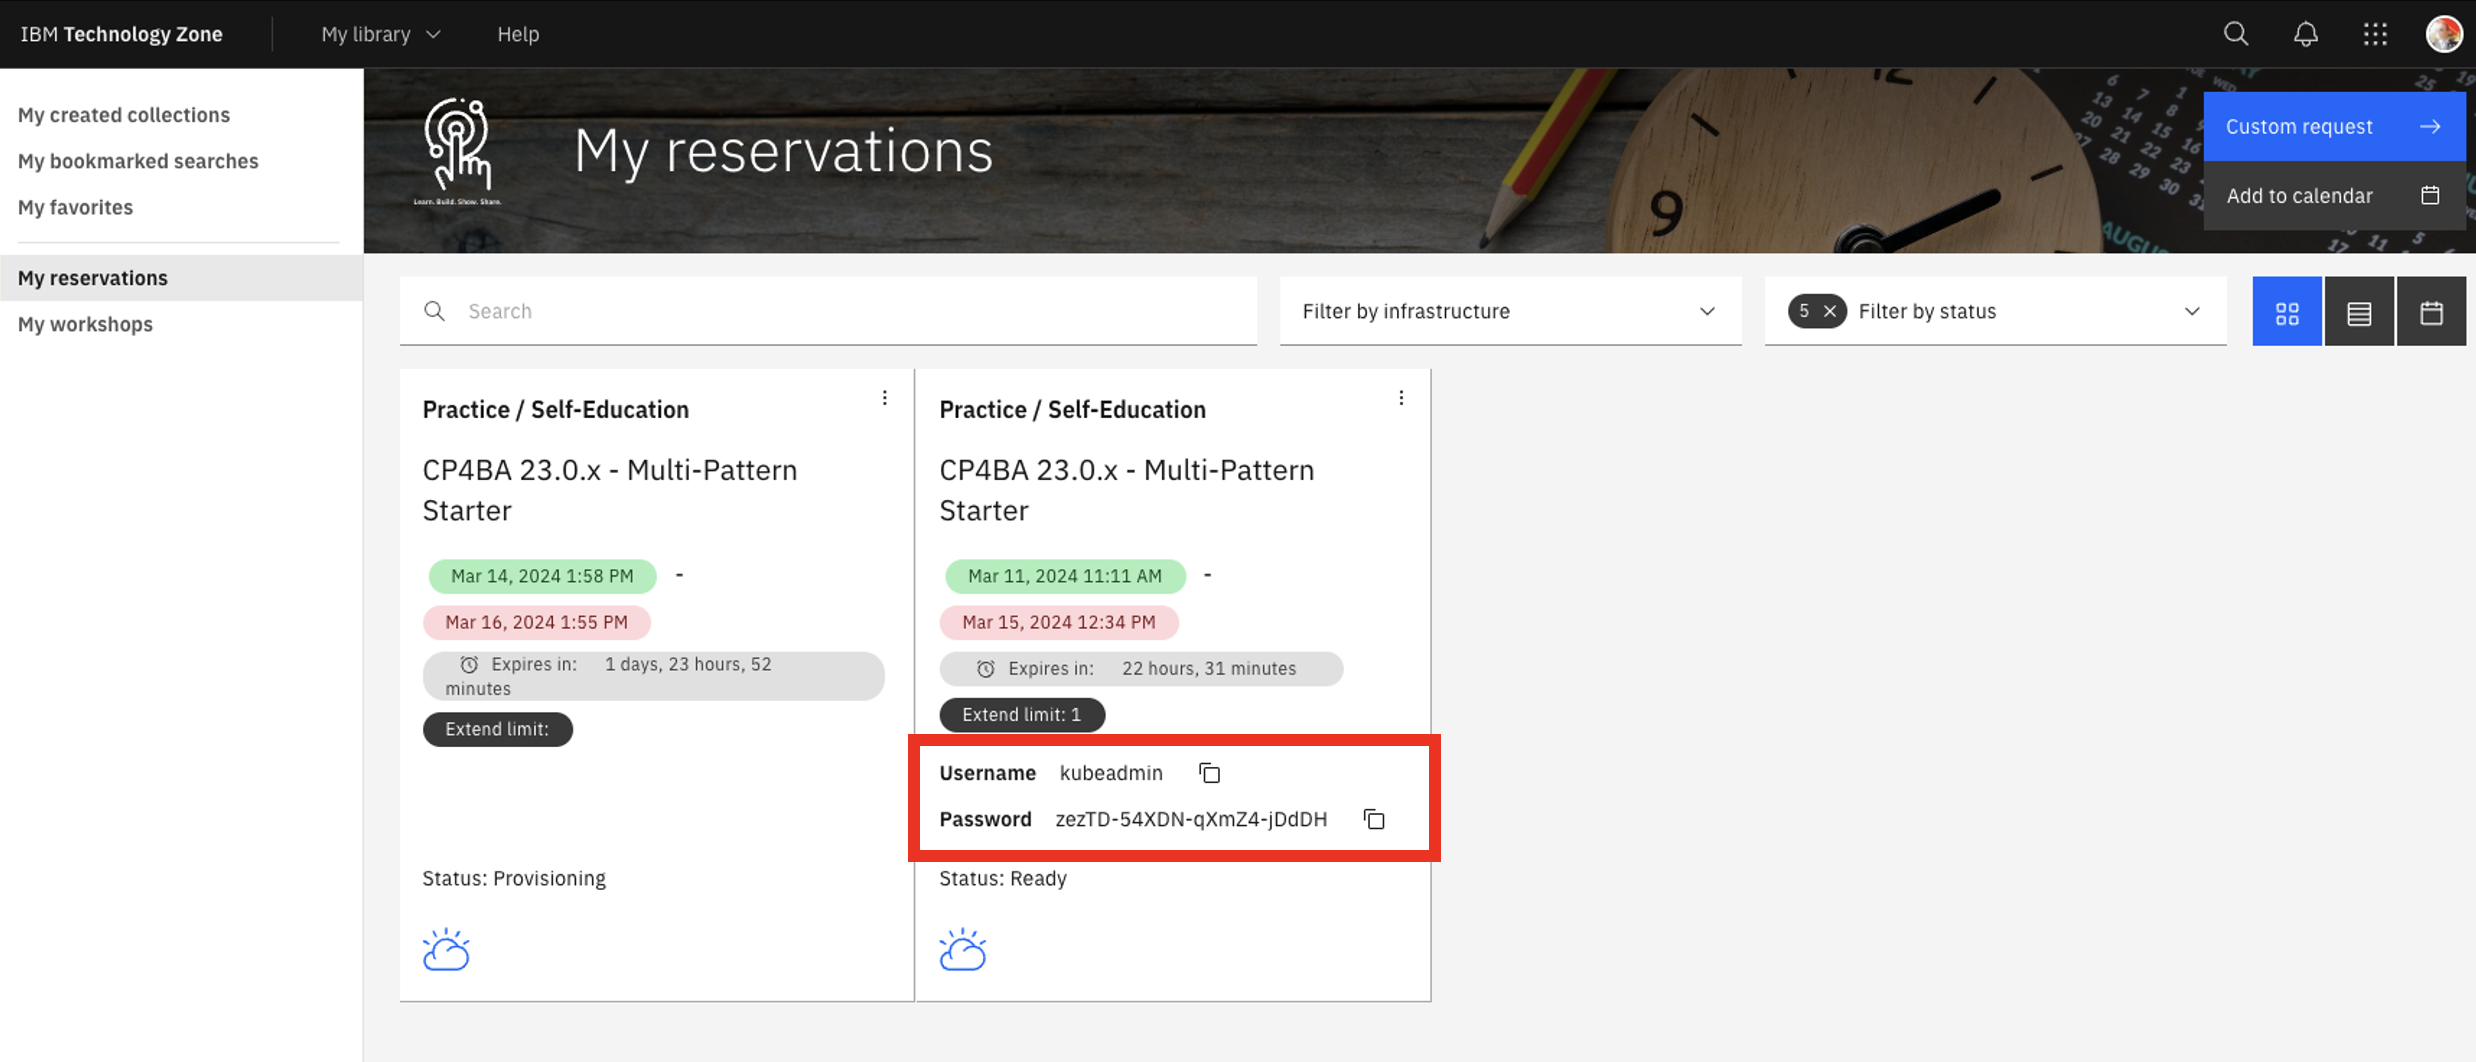
Copy paste your Kubeadmin / Passwords in your notebook
-
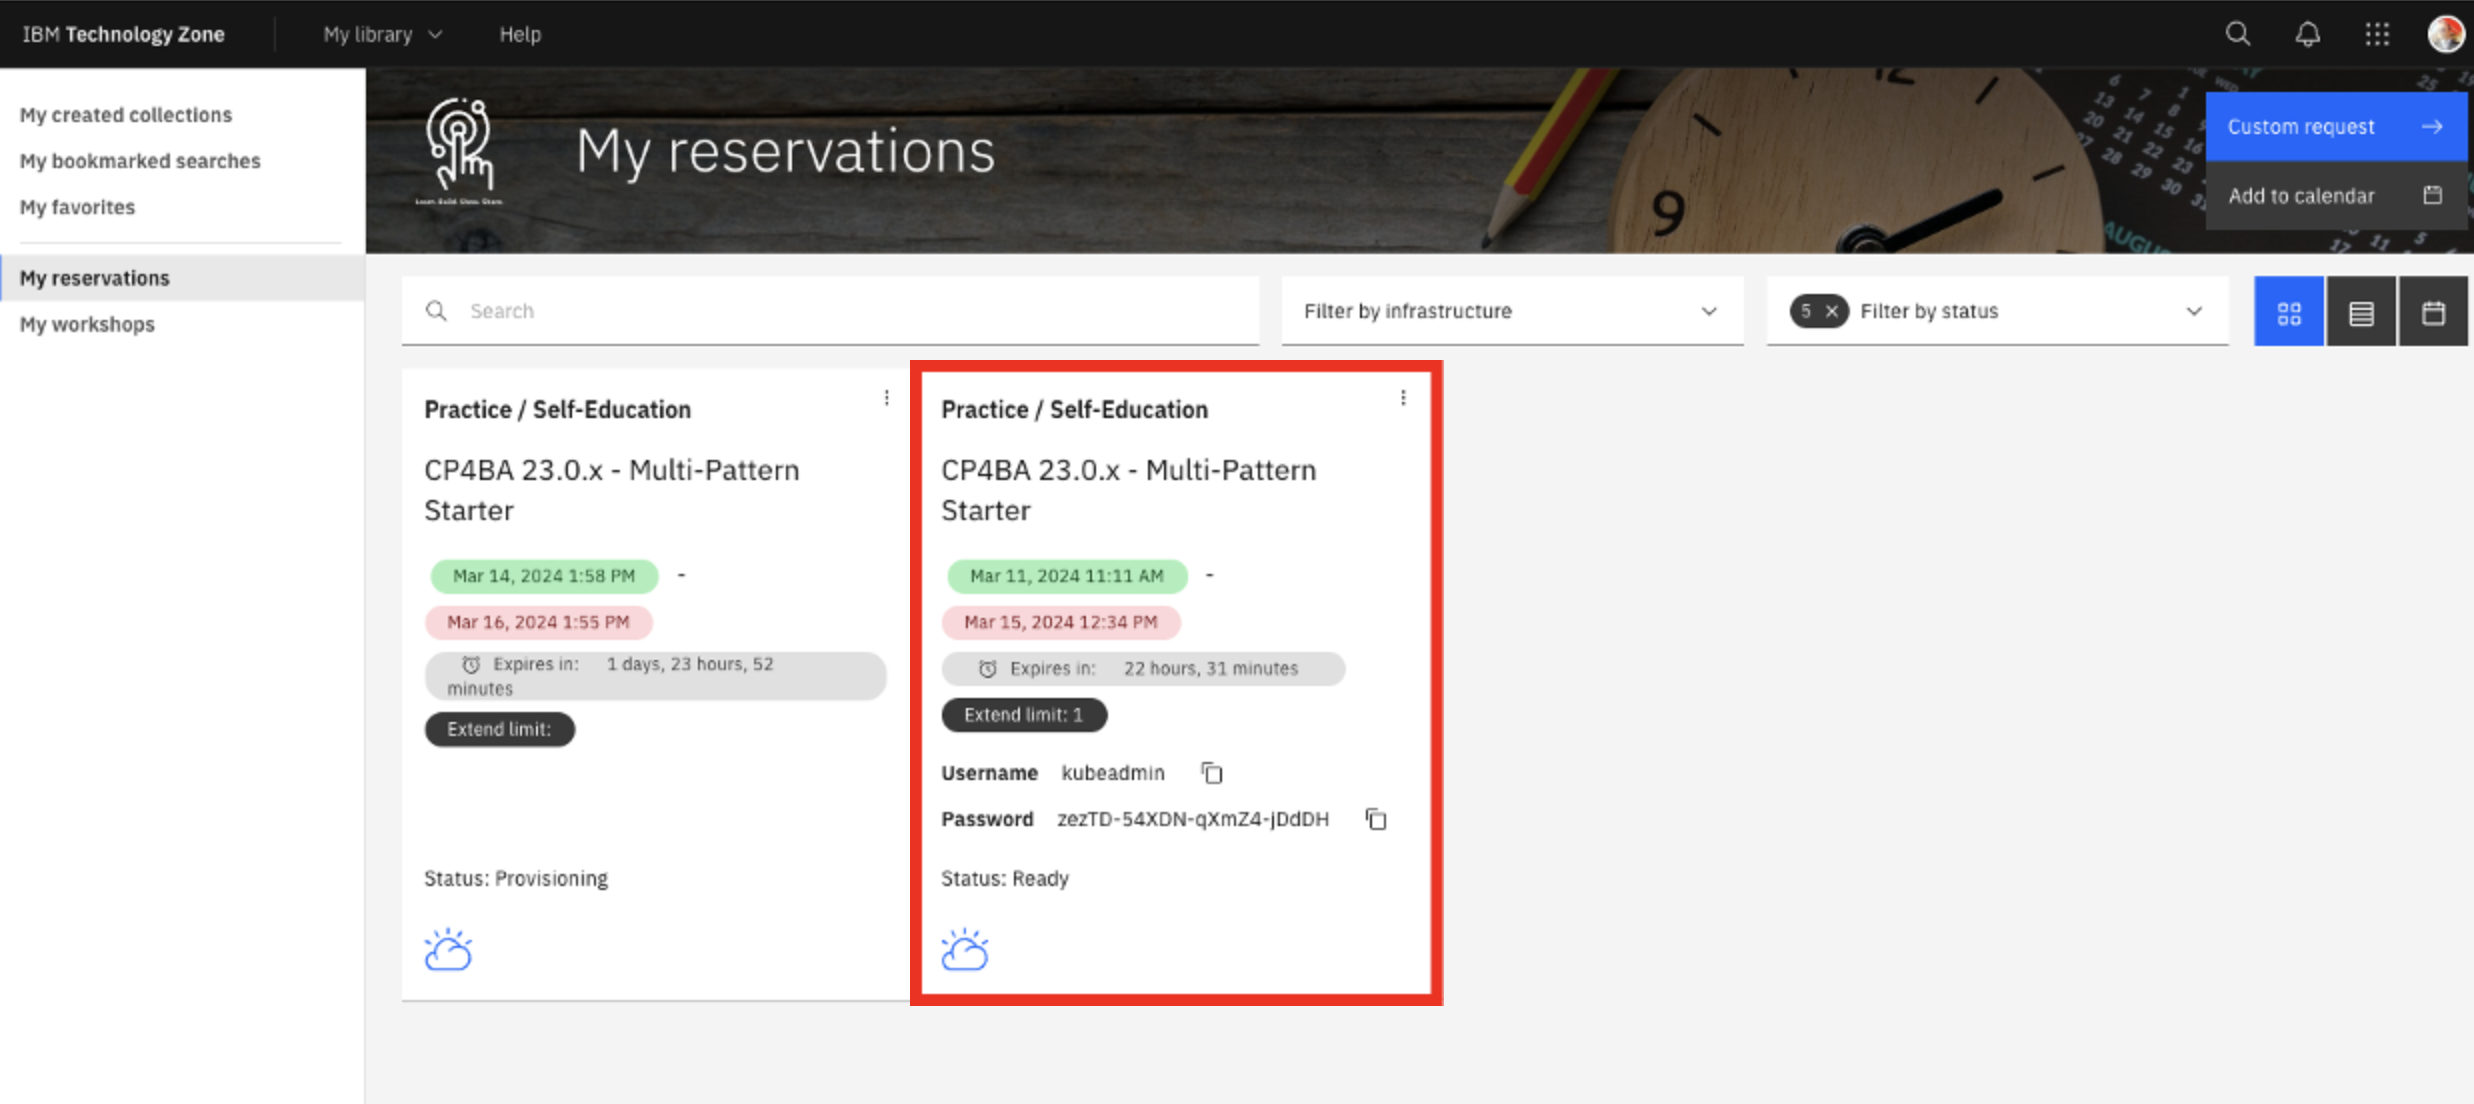
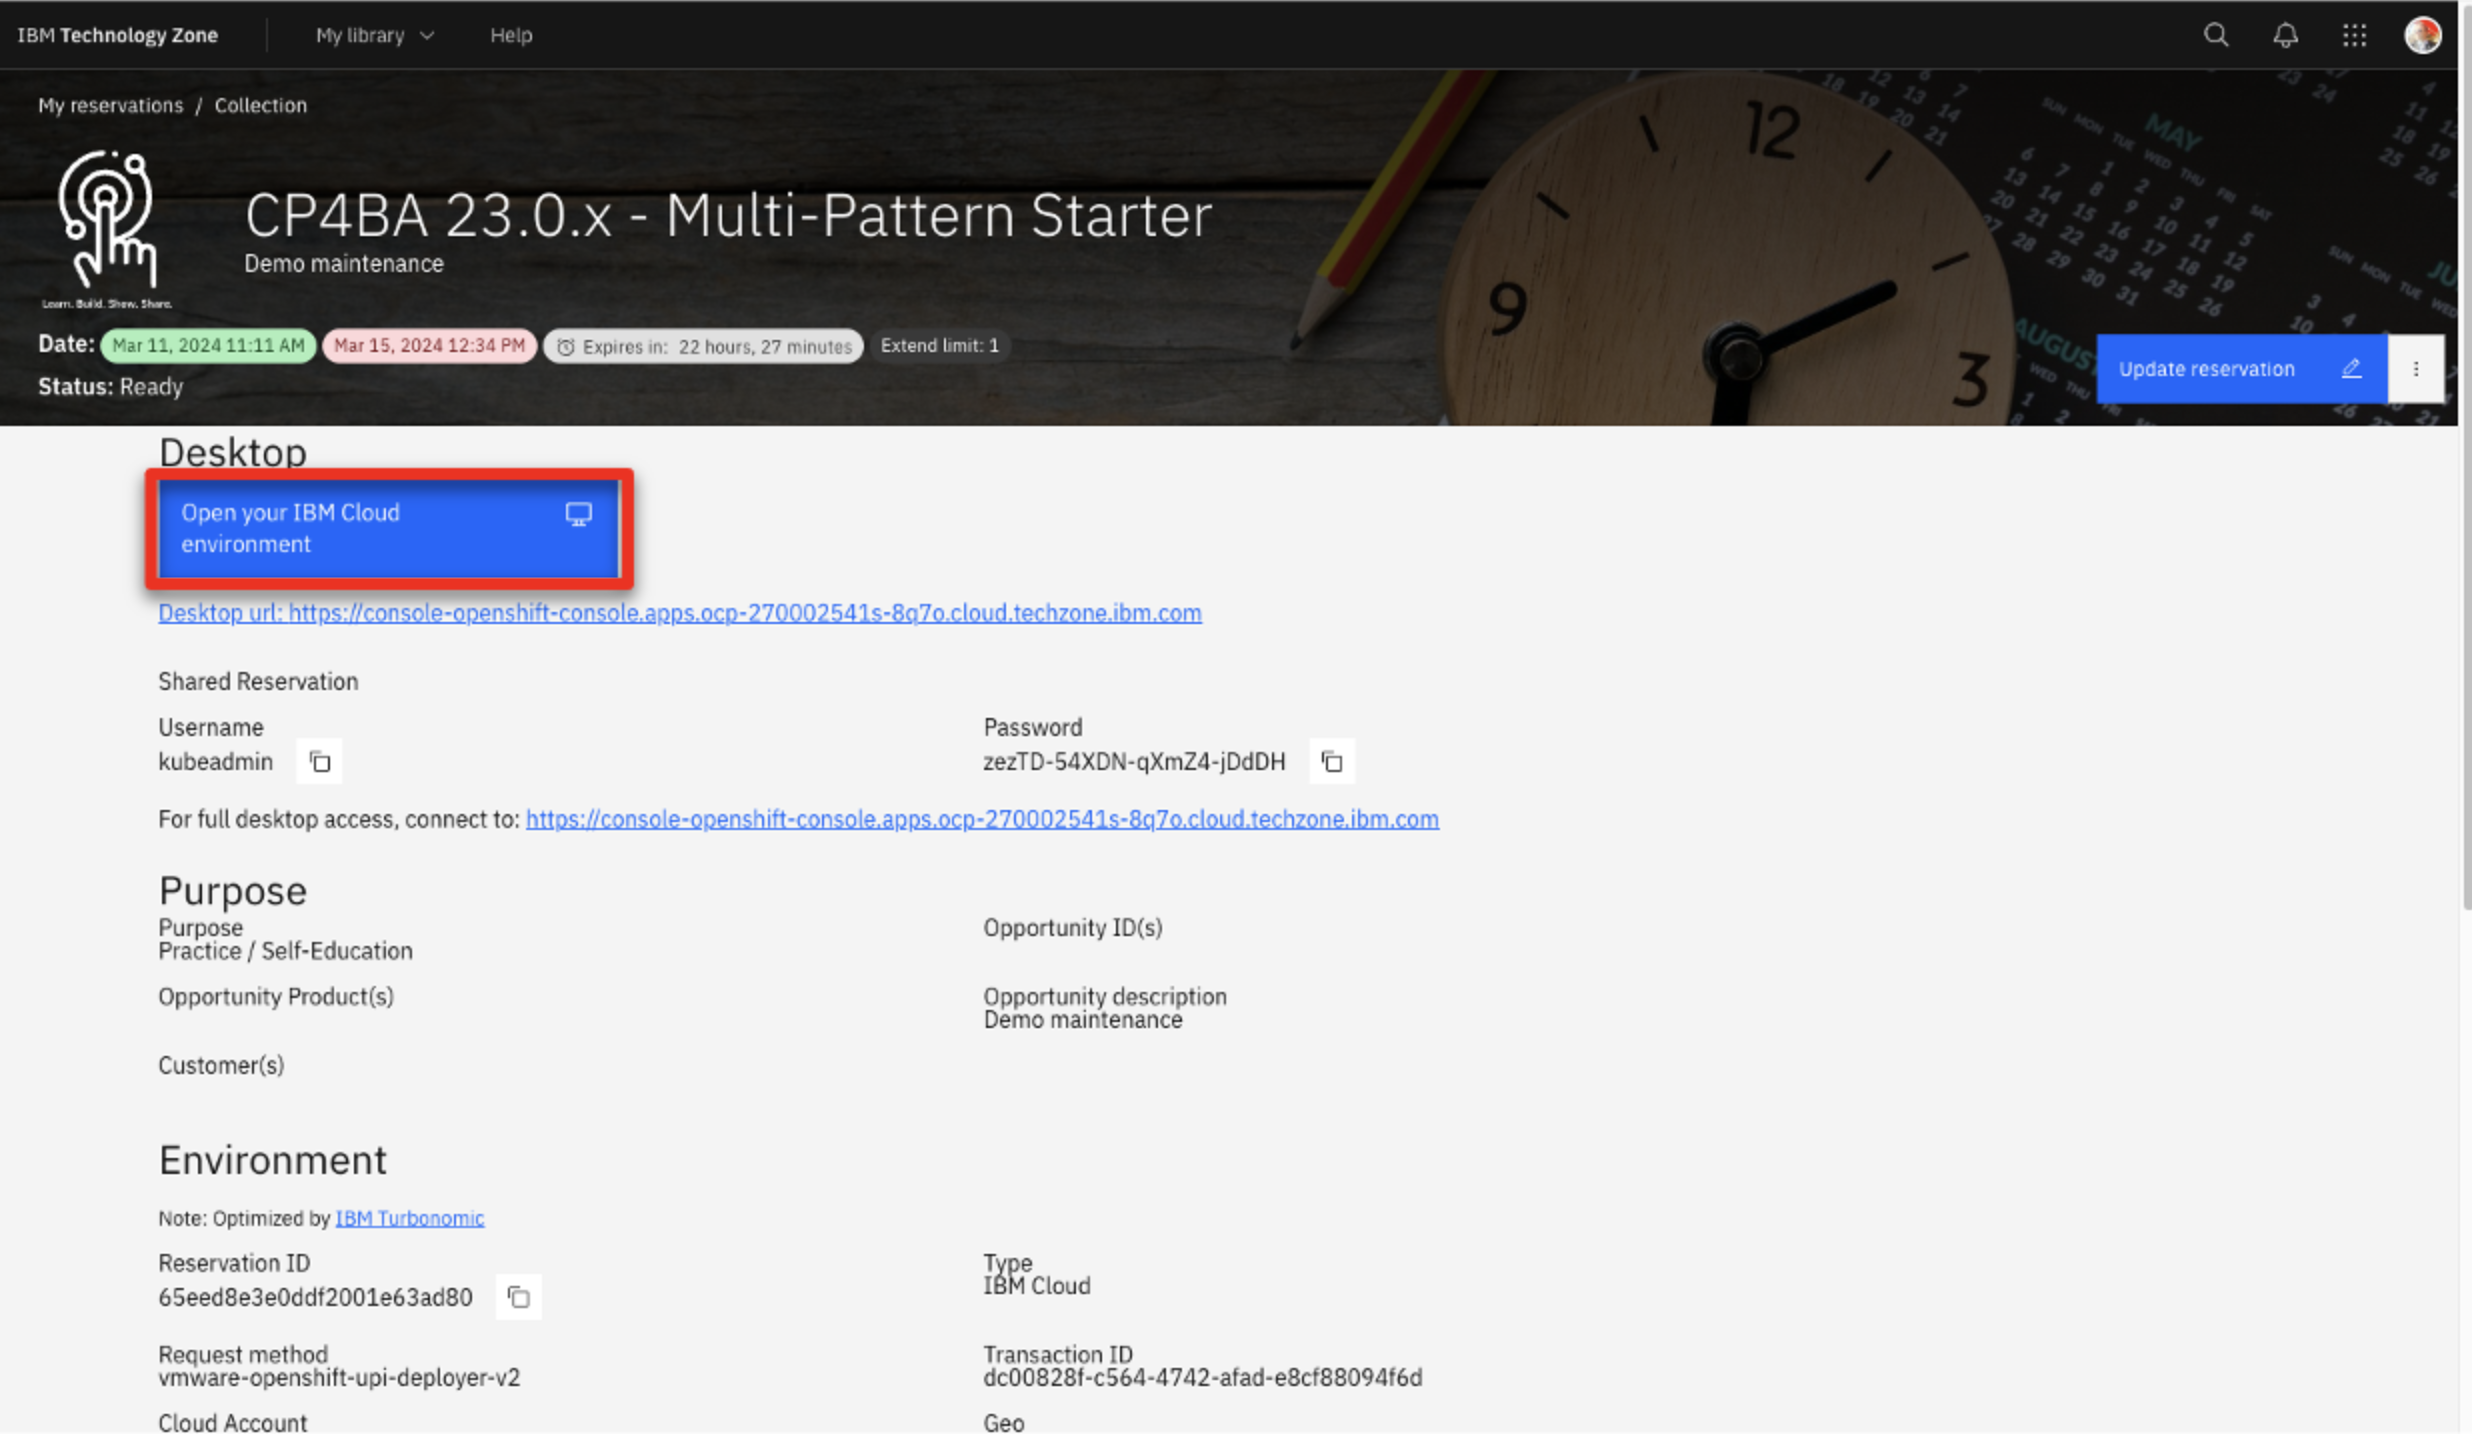
Click your reservation tile.
-
Click the Open your IBM Cloud environment.
-
Log in to your OpenShift console using the credentials provided during section 1 above.
-
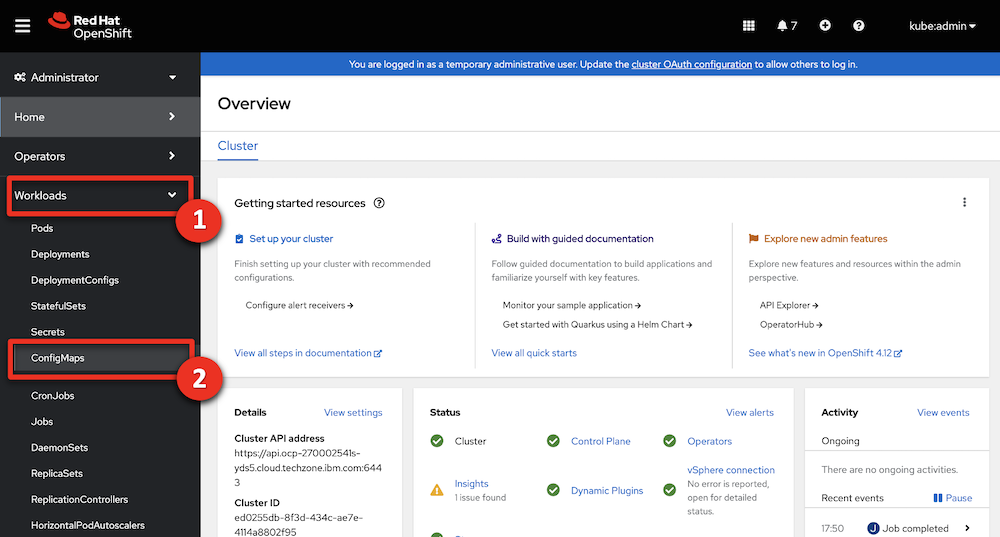
Expand the Workloads (1) and click ConfigMaps (2).
-
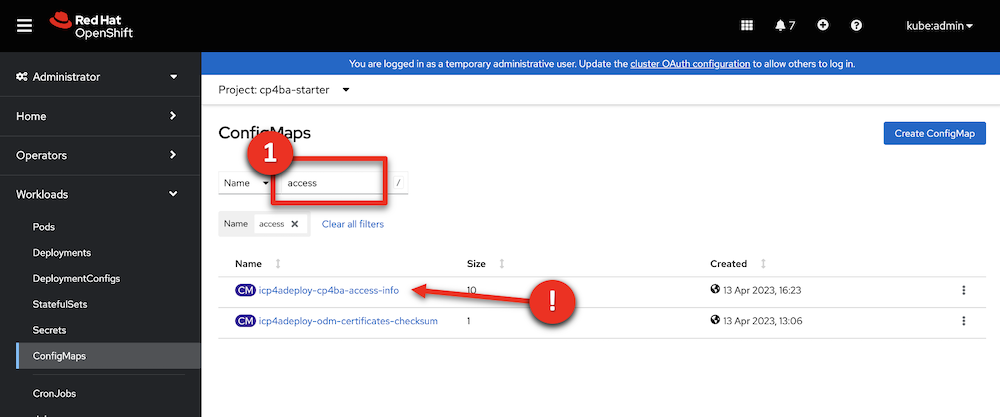
Expand the projects menu (1) and click cp4ba-starter (2).

-
Type ‘access’ (1). Check that the icp4adeploy-cp4ba-access-info config map is present.
-
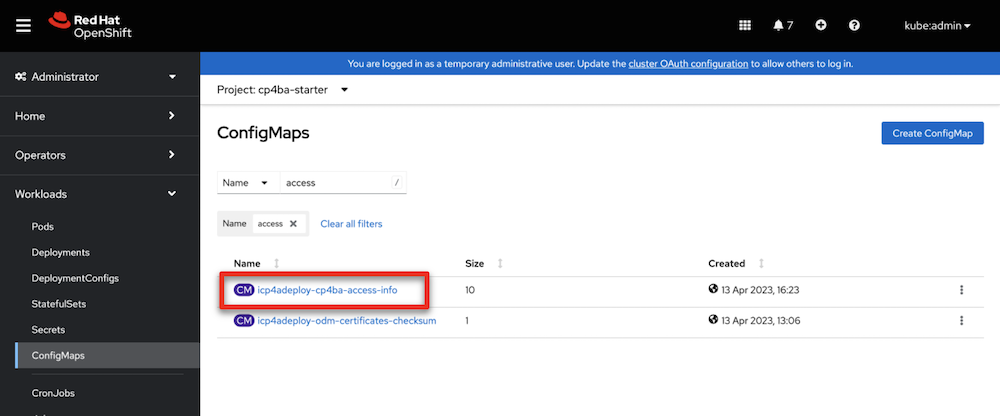
Click icp4adeploy-cp4ba-access-info.
-
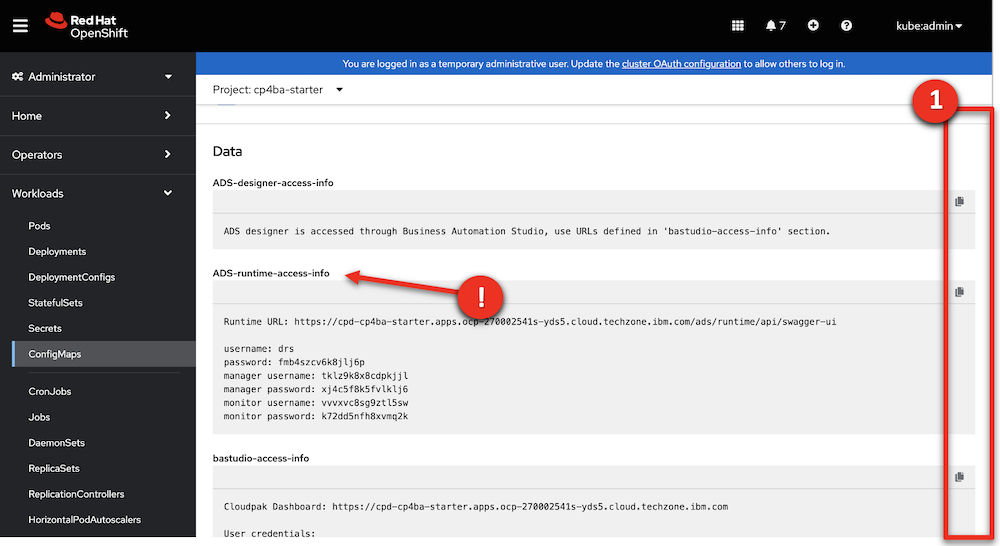
Scroll down (1) and check that all the ADS access information is displayed. ADS is the last element to install, so your CP4BA setup is completed once this info displays.
-
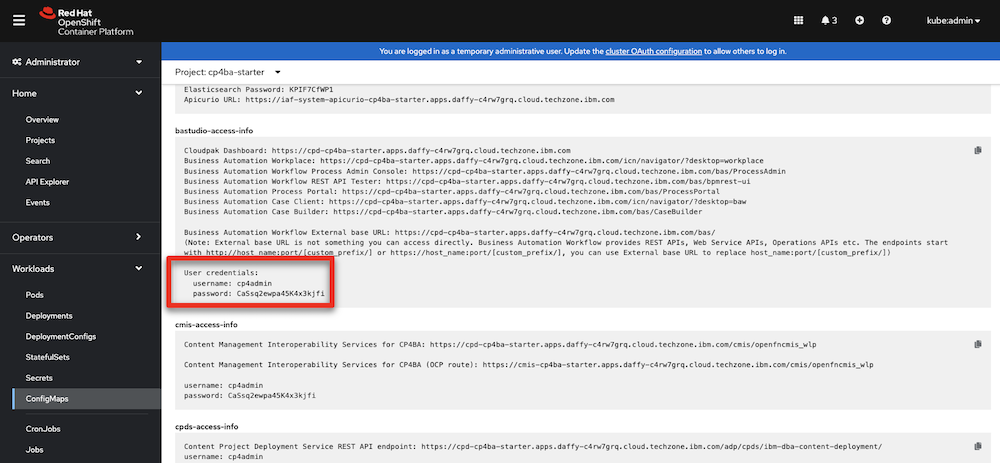
Copy the CP4admin username and password used to log in to the various CP4BA components into a note to access later.
-
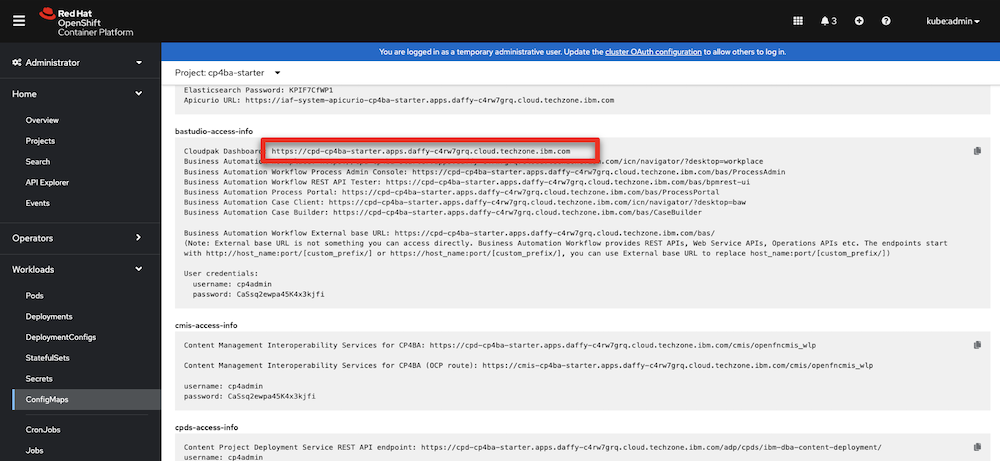
Copy the URL needed to access the various products required in this demonstration into a note to access later.
3 - Create and configure a GitHub repository
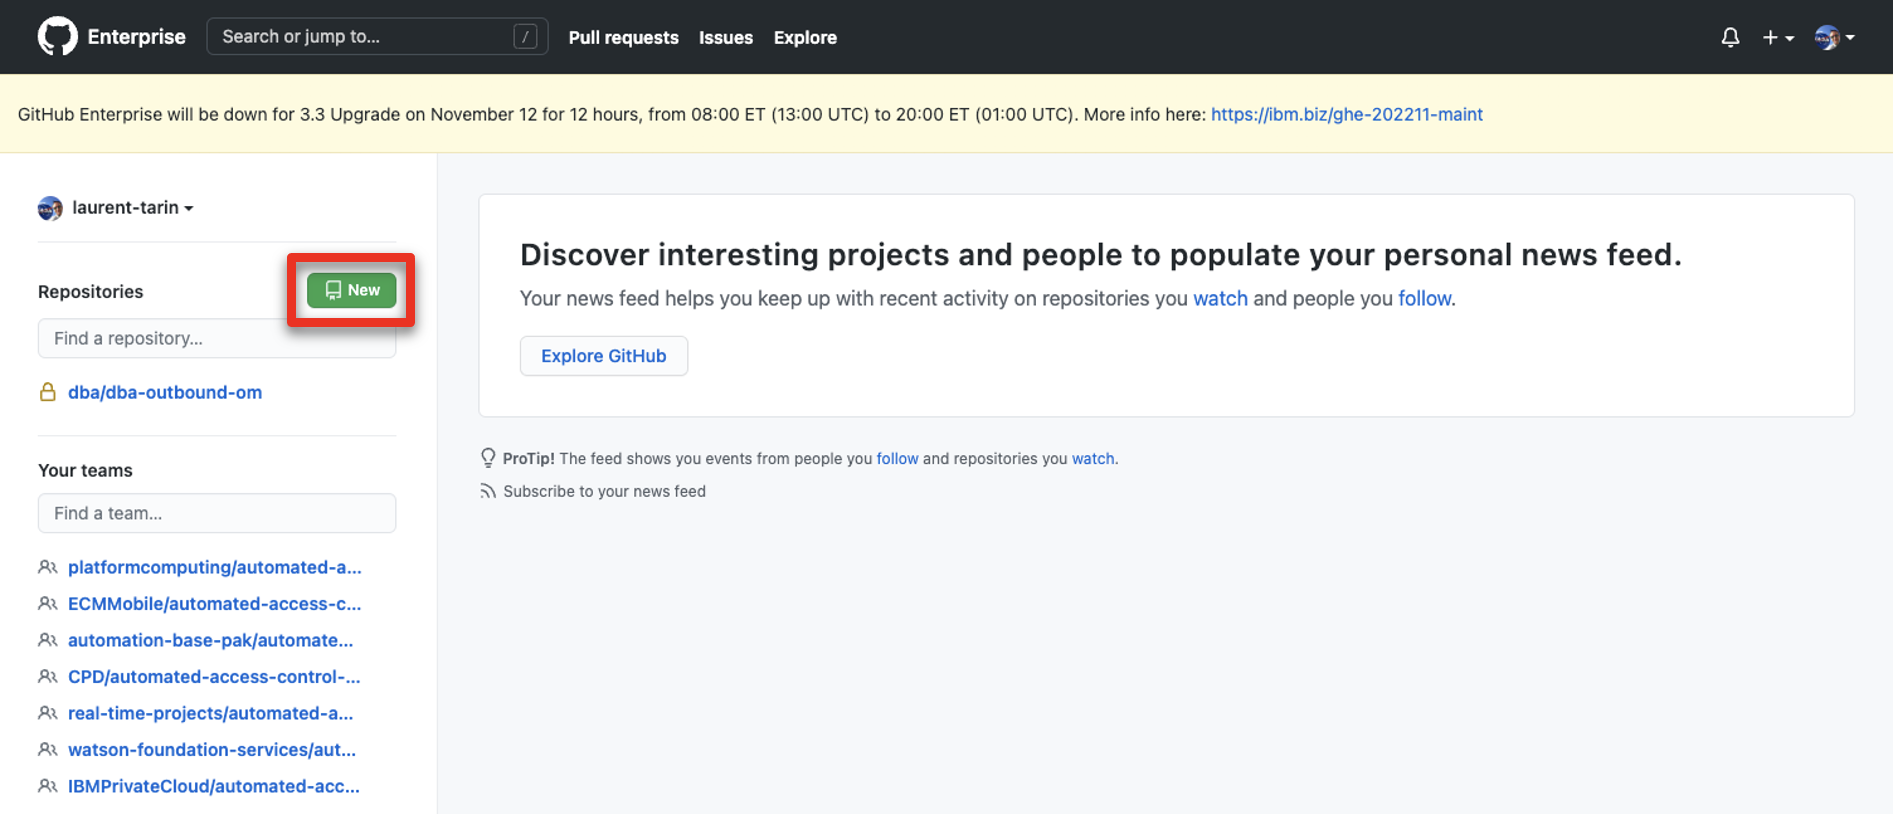
A GitHub repository is required to manage decision projects in ADS. You must create a personal Git repository. You can use for example https://github.com and create your own account. IBMers can use the IBM enterprise git on https://github.ibm.com.
After logging into GitHub:
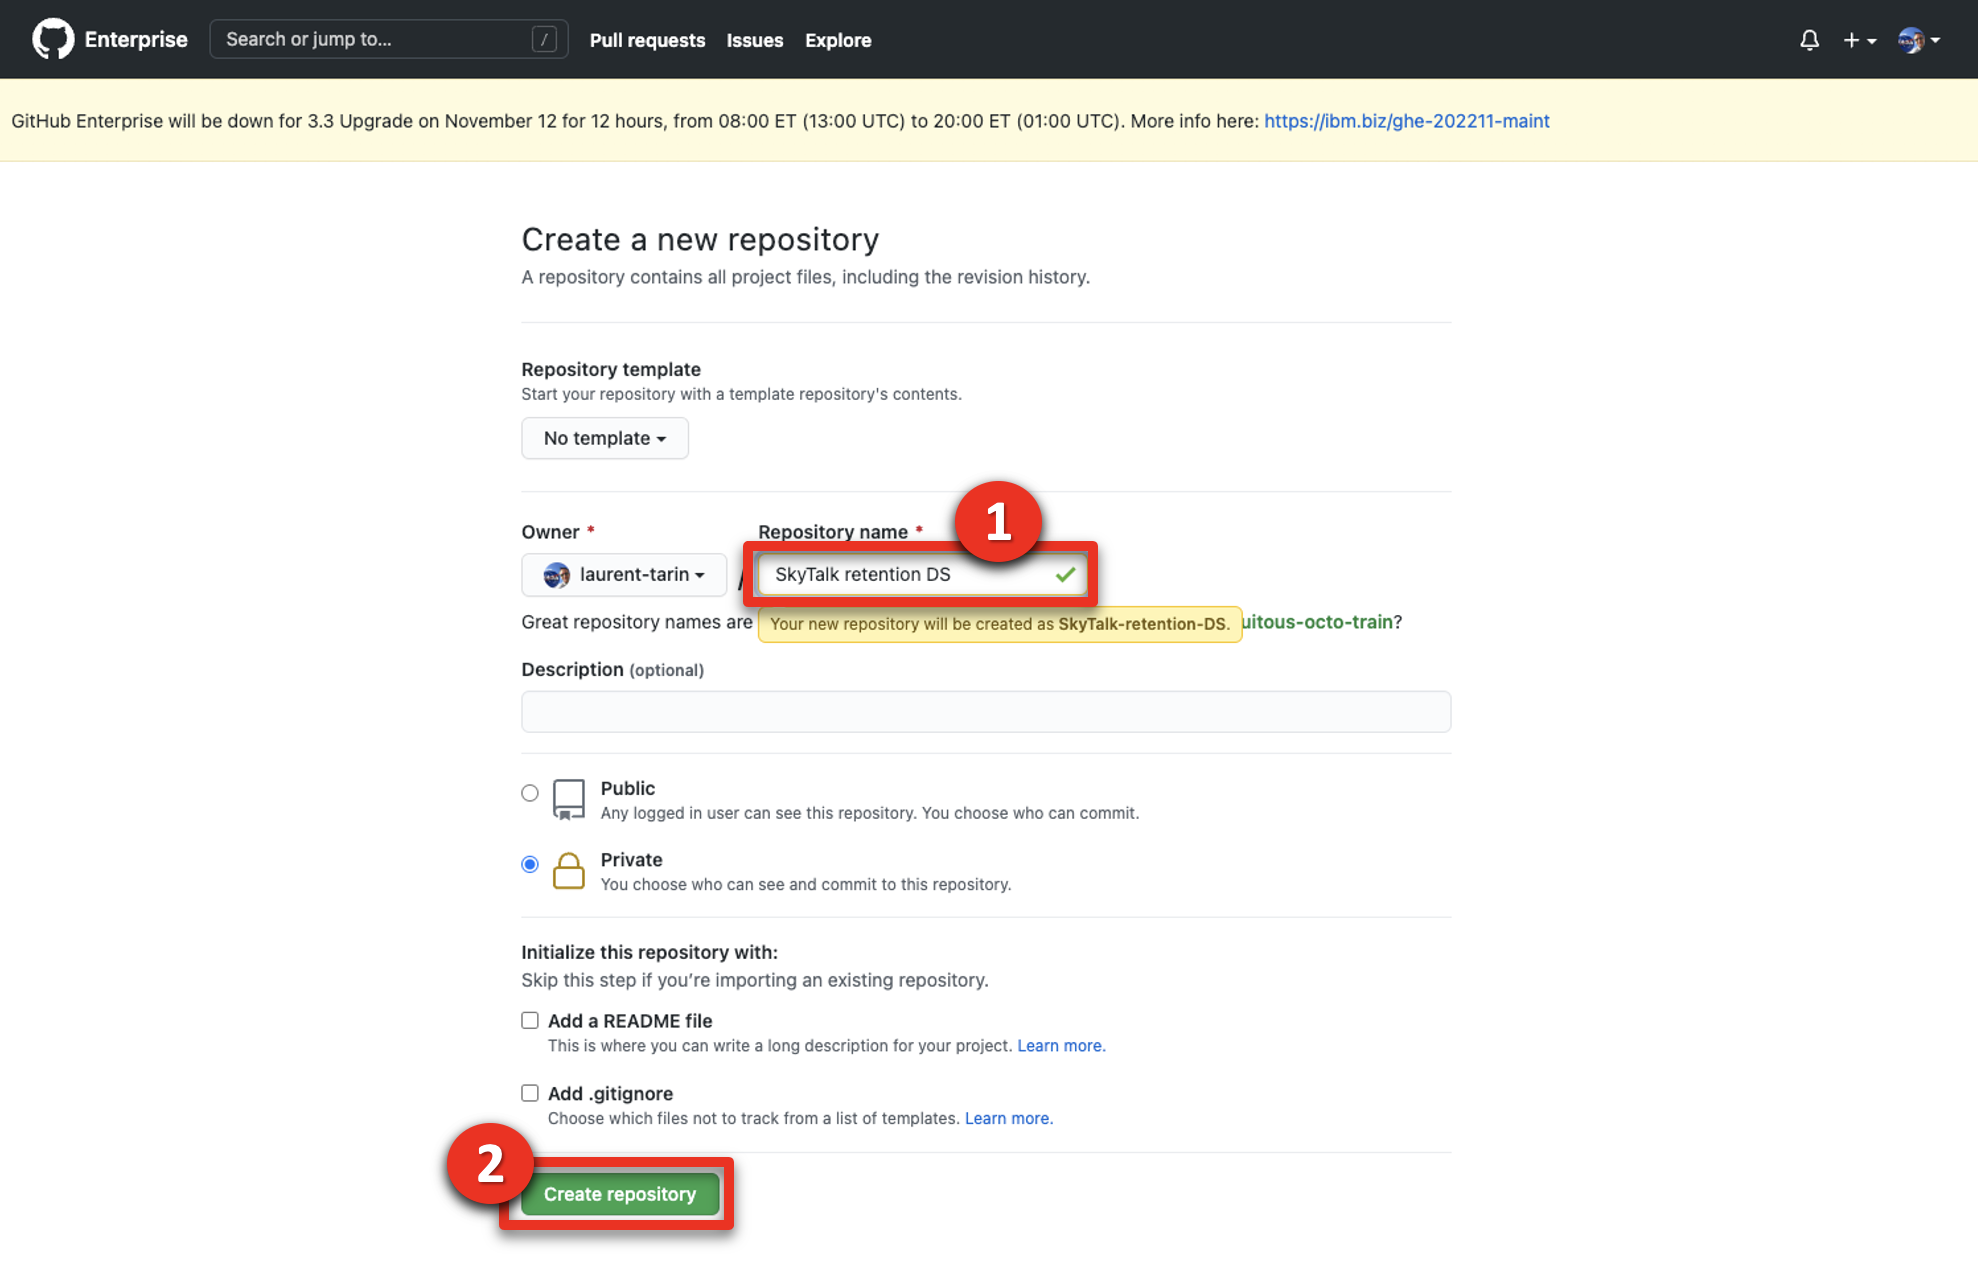
- Click New in the repository section.
- Enter ‘SkyTalk retention DS’ (1) in the Repository name field. Click Create repository (2).
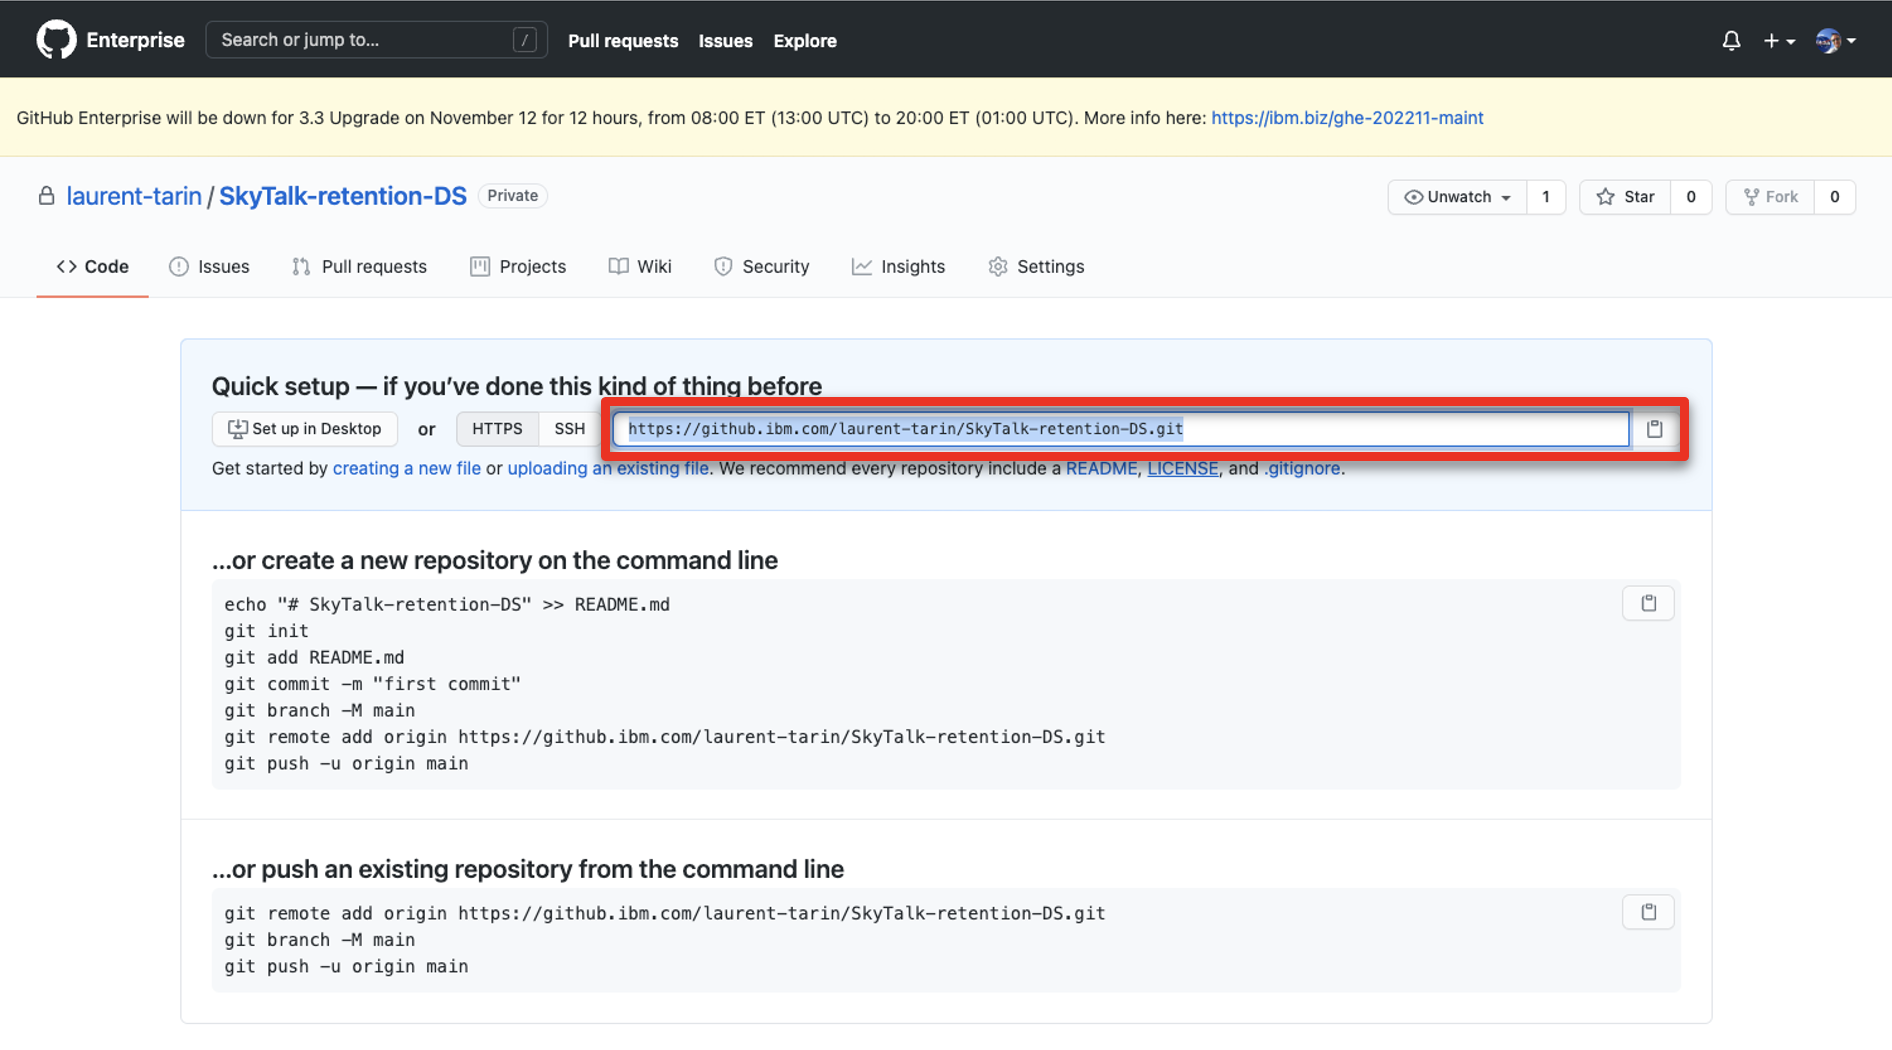
- Bookmark the repository URL (to configure ADS in a future step).
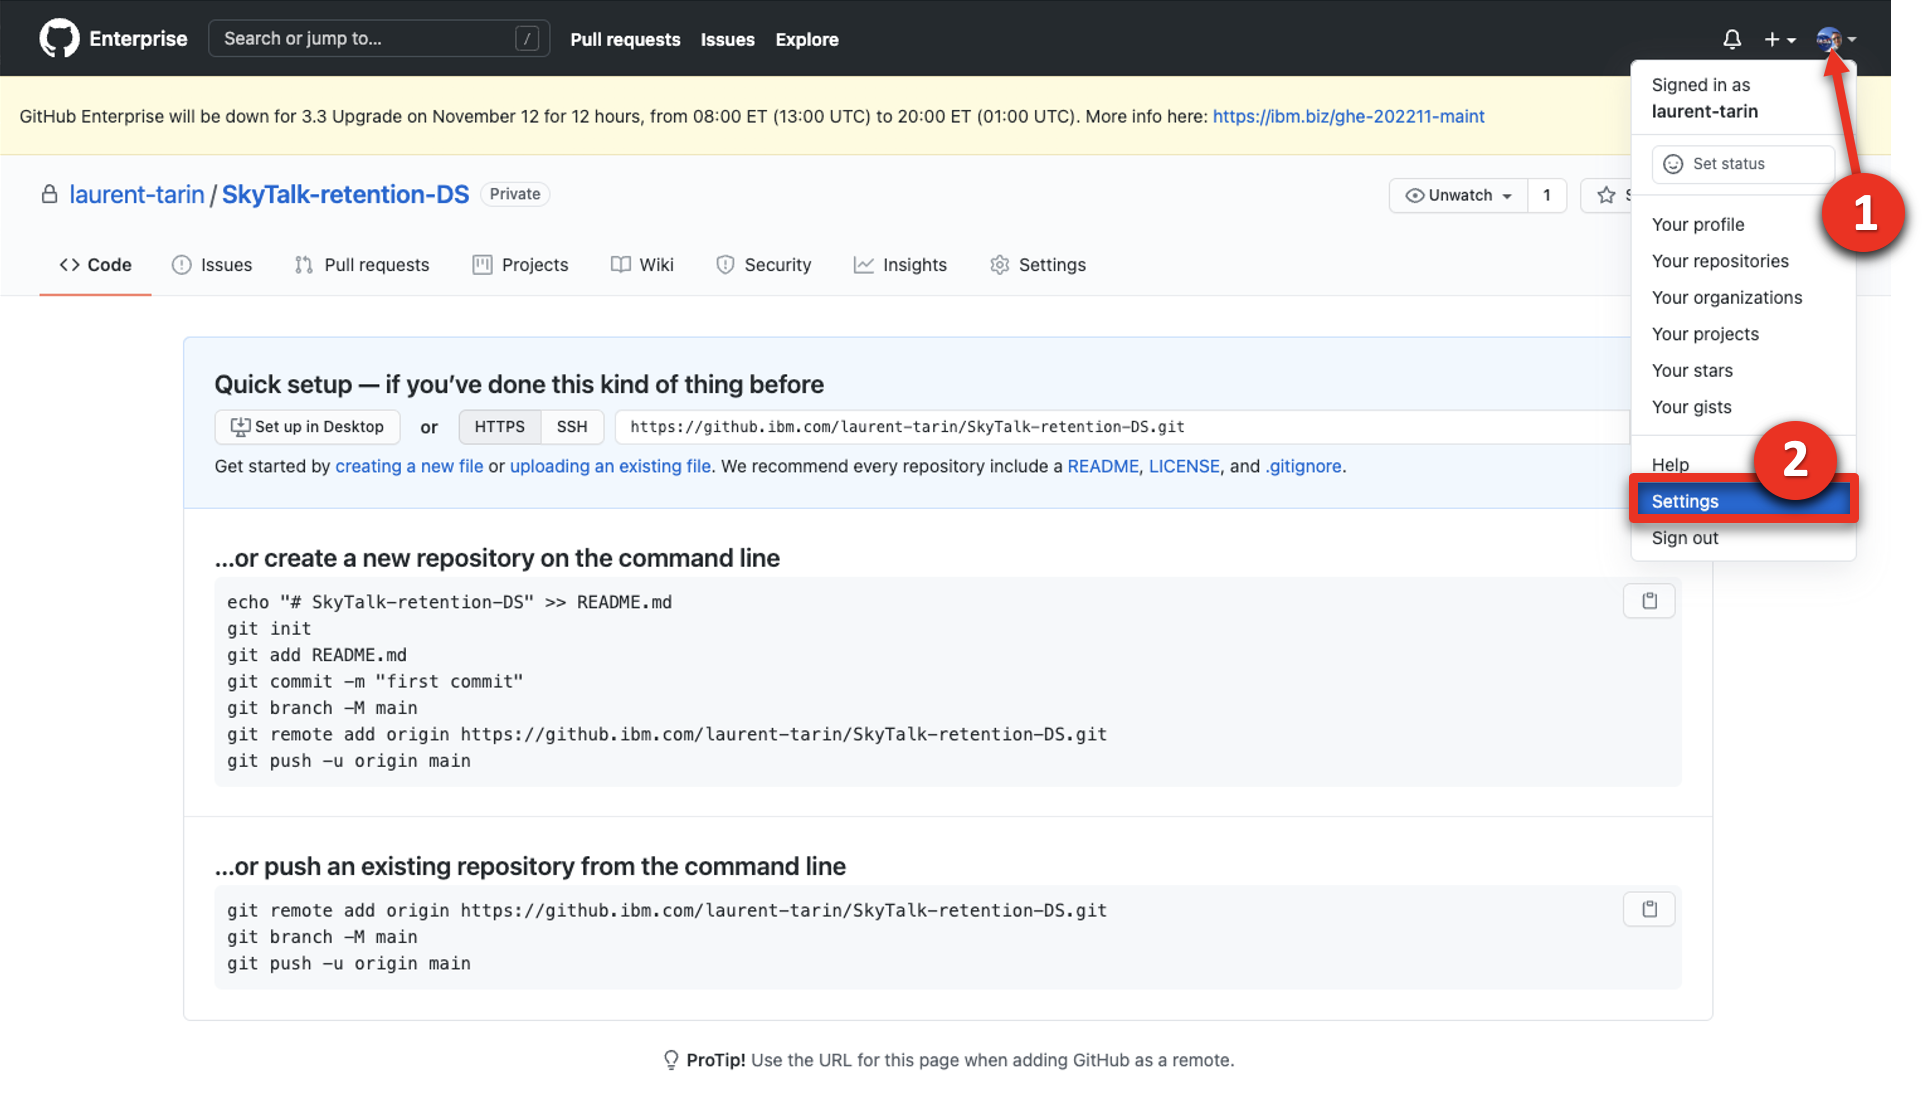
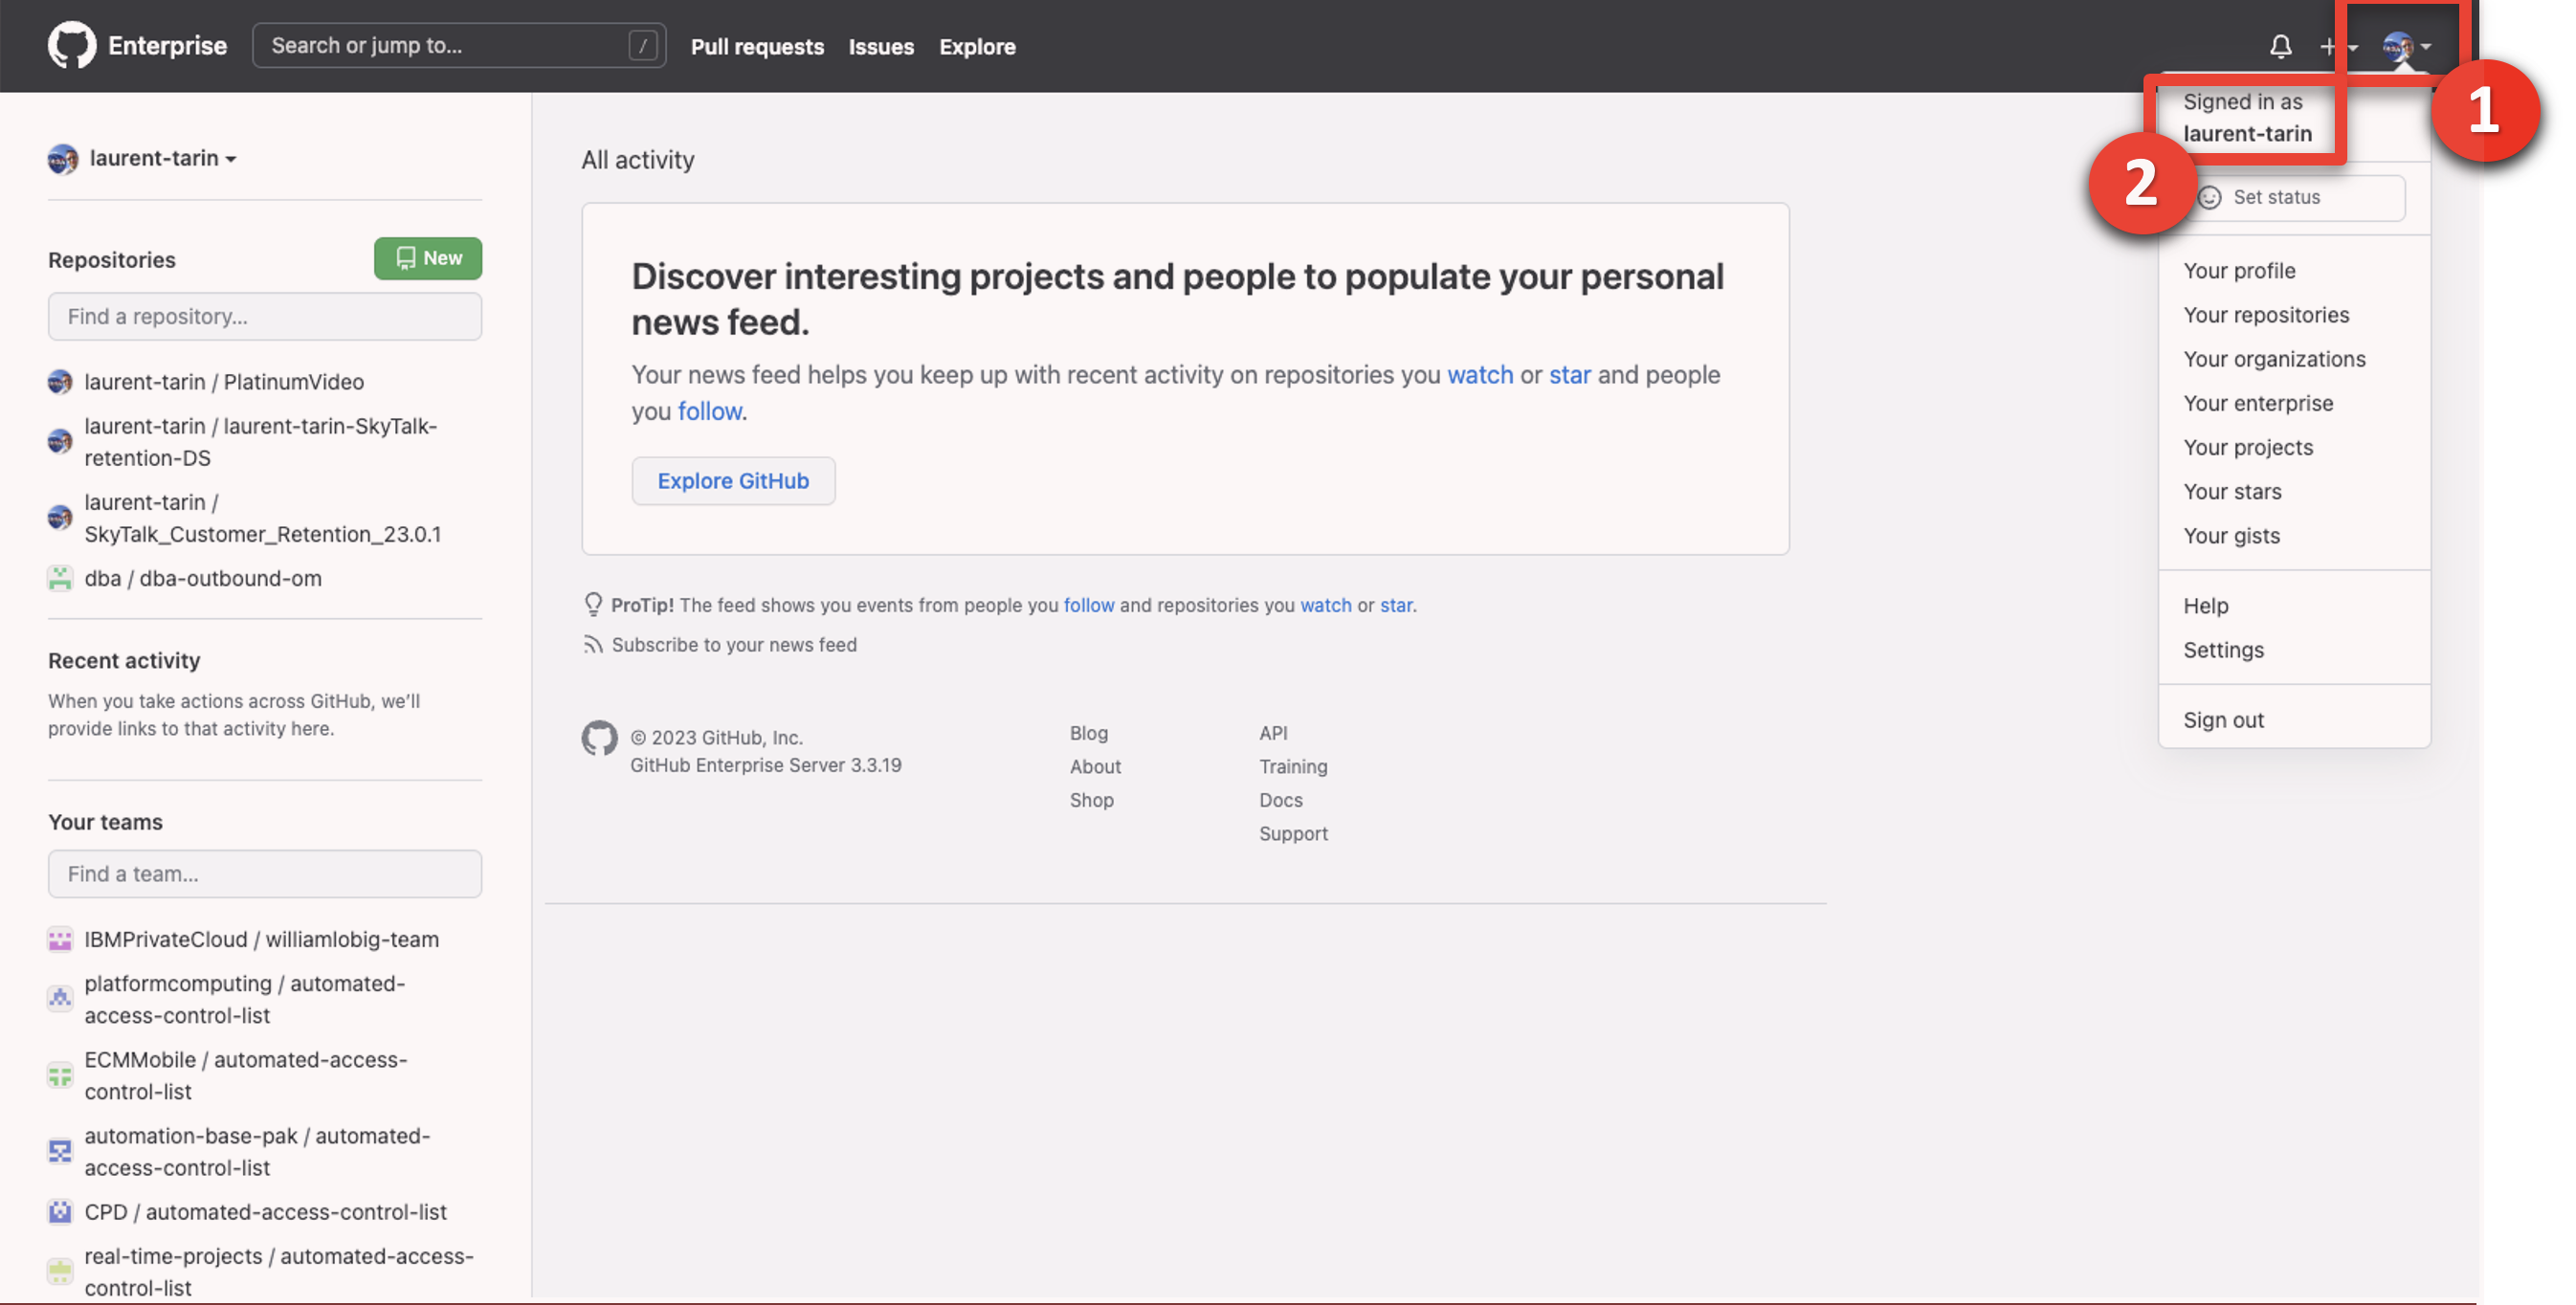
- Click your profile icon (1), then select Settings (2).
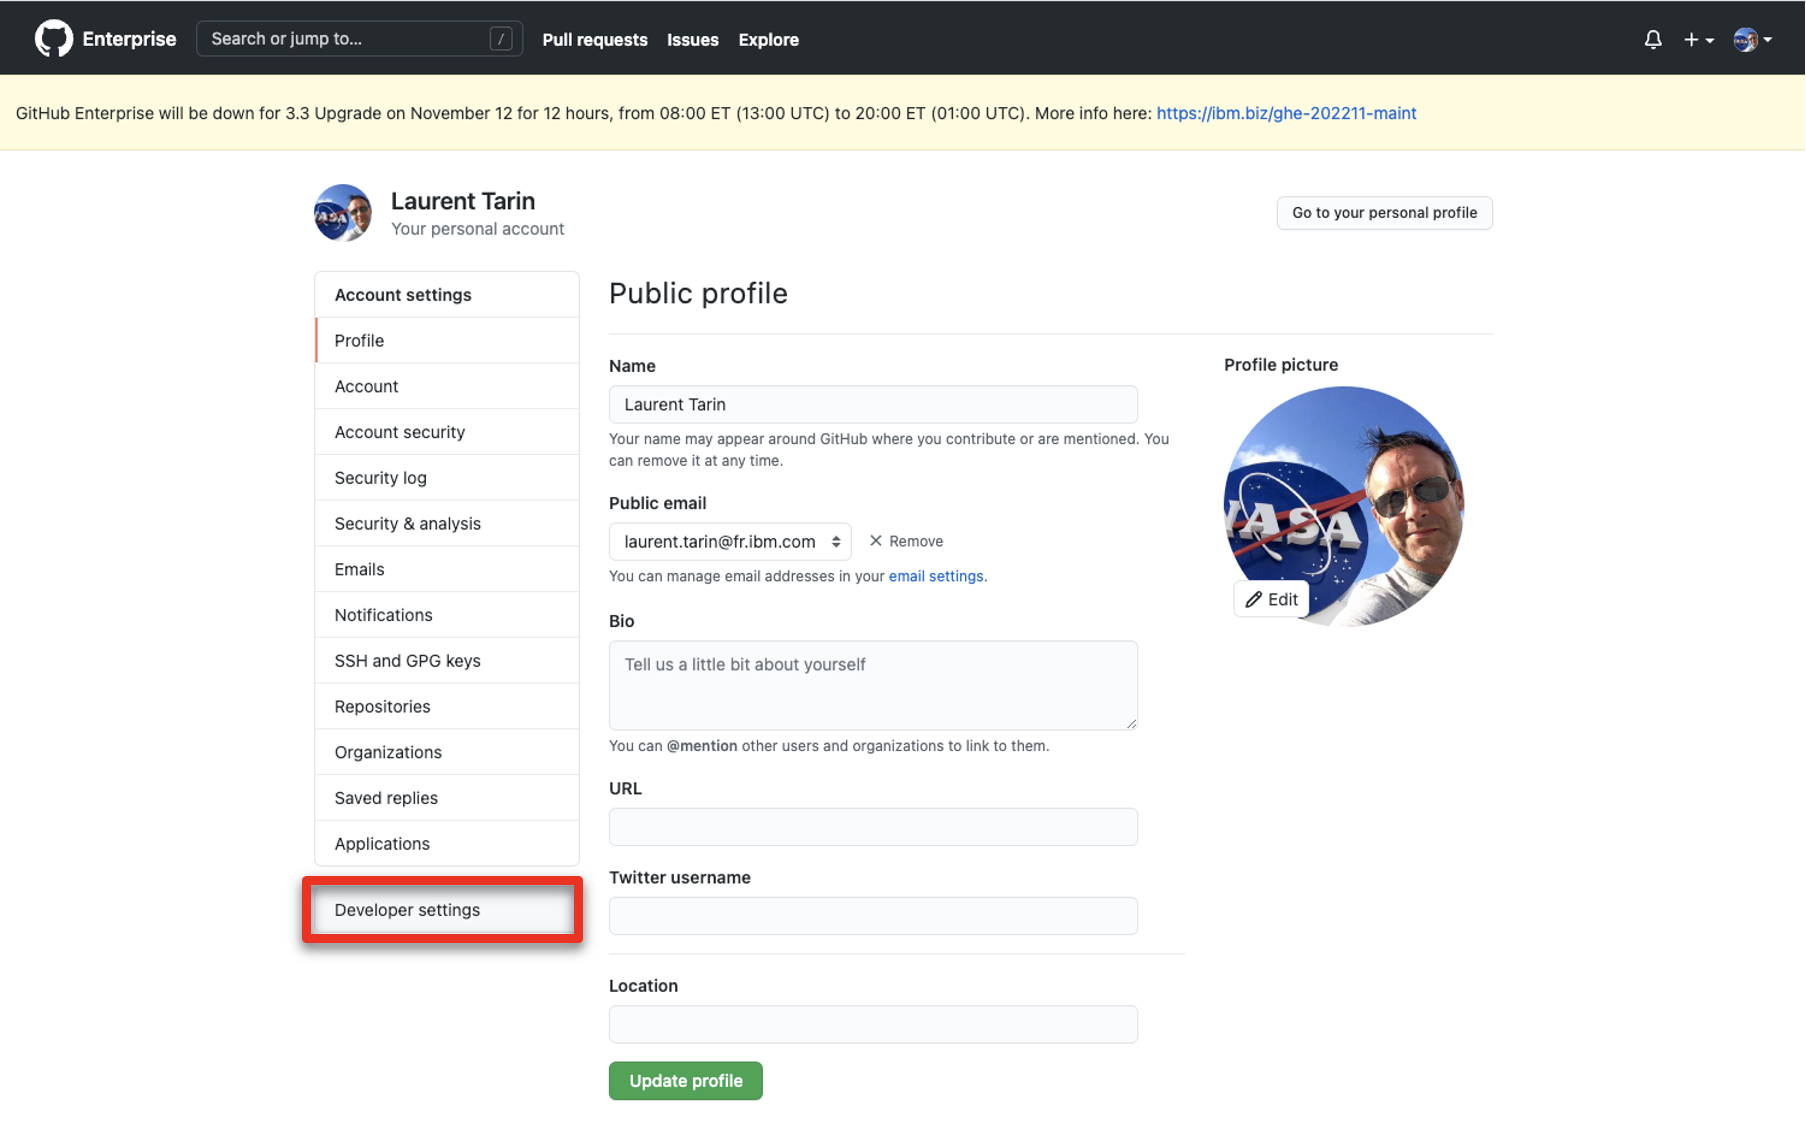
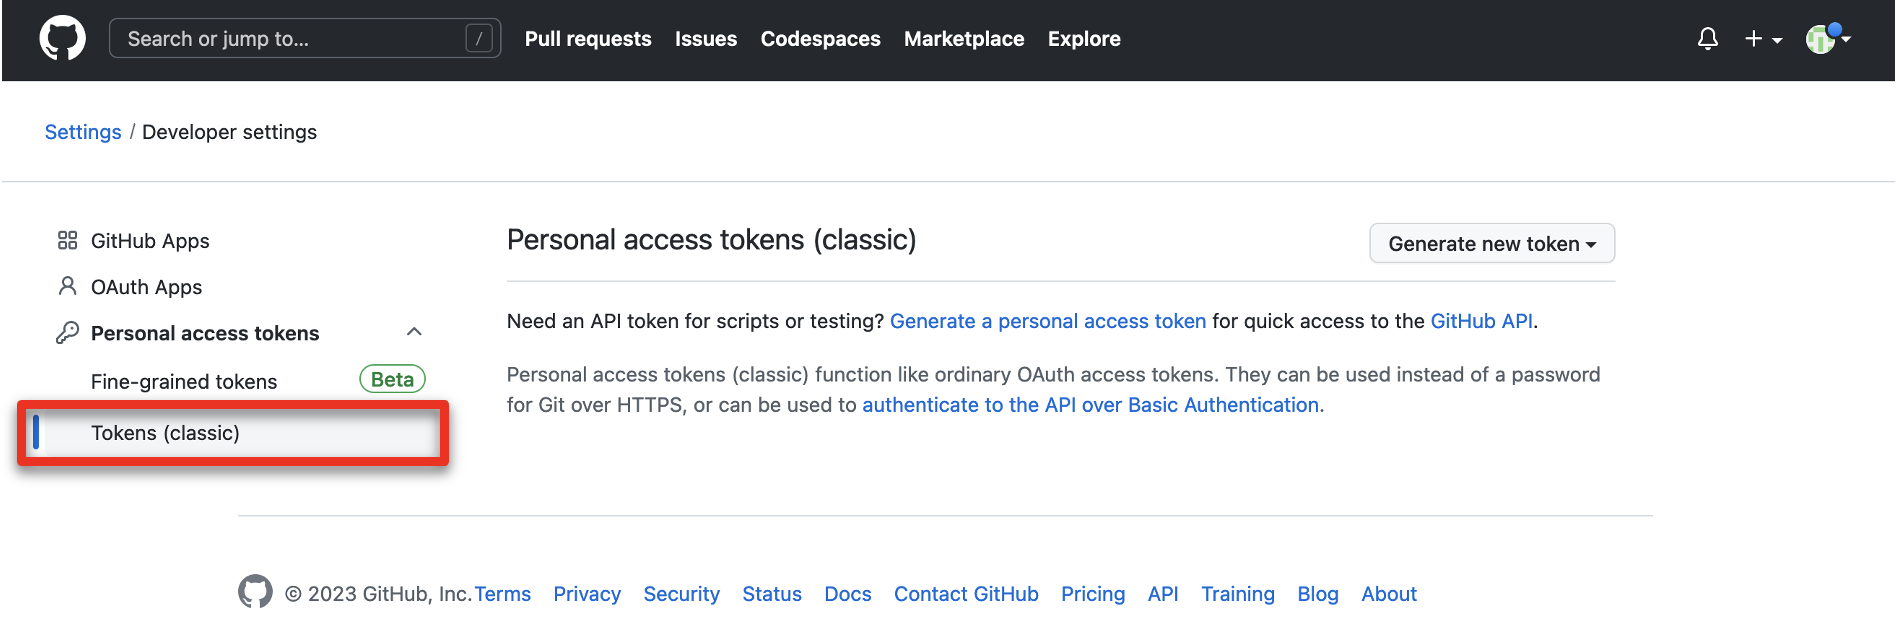
- Click Developer settings.
- Expand Personal access tokens and click Tokens (classic).
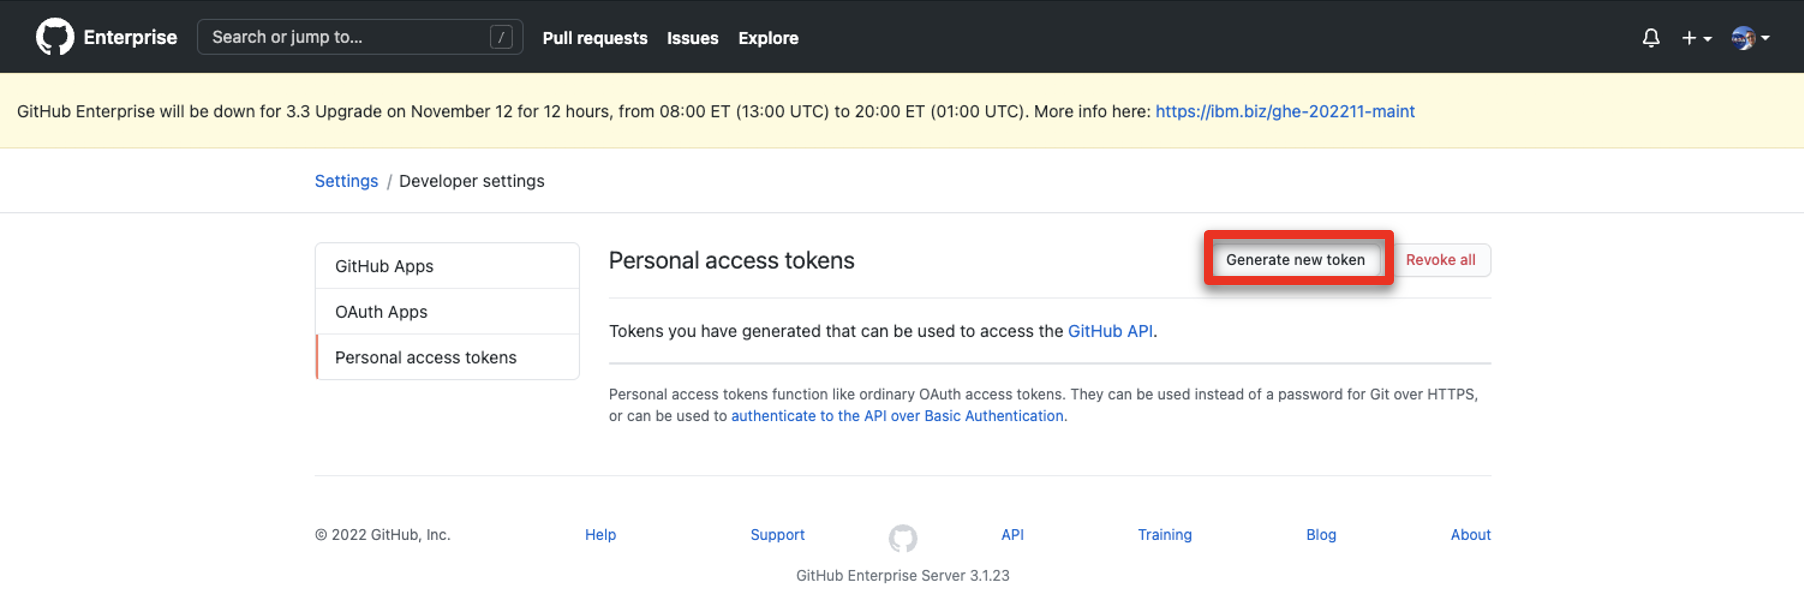
- Click Generate new token.
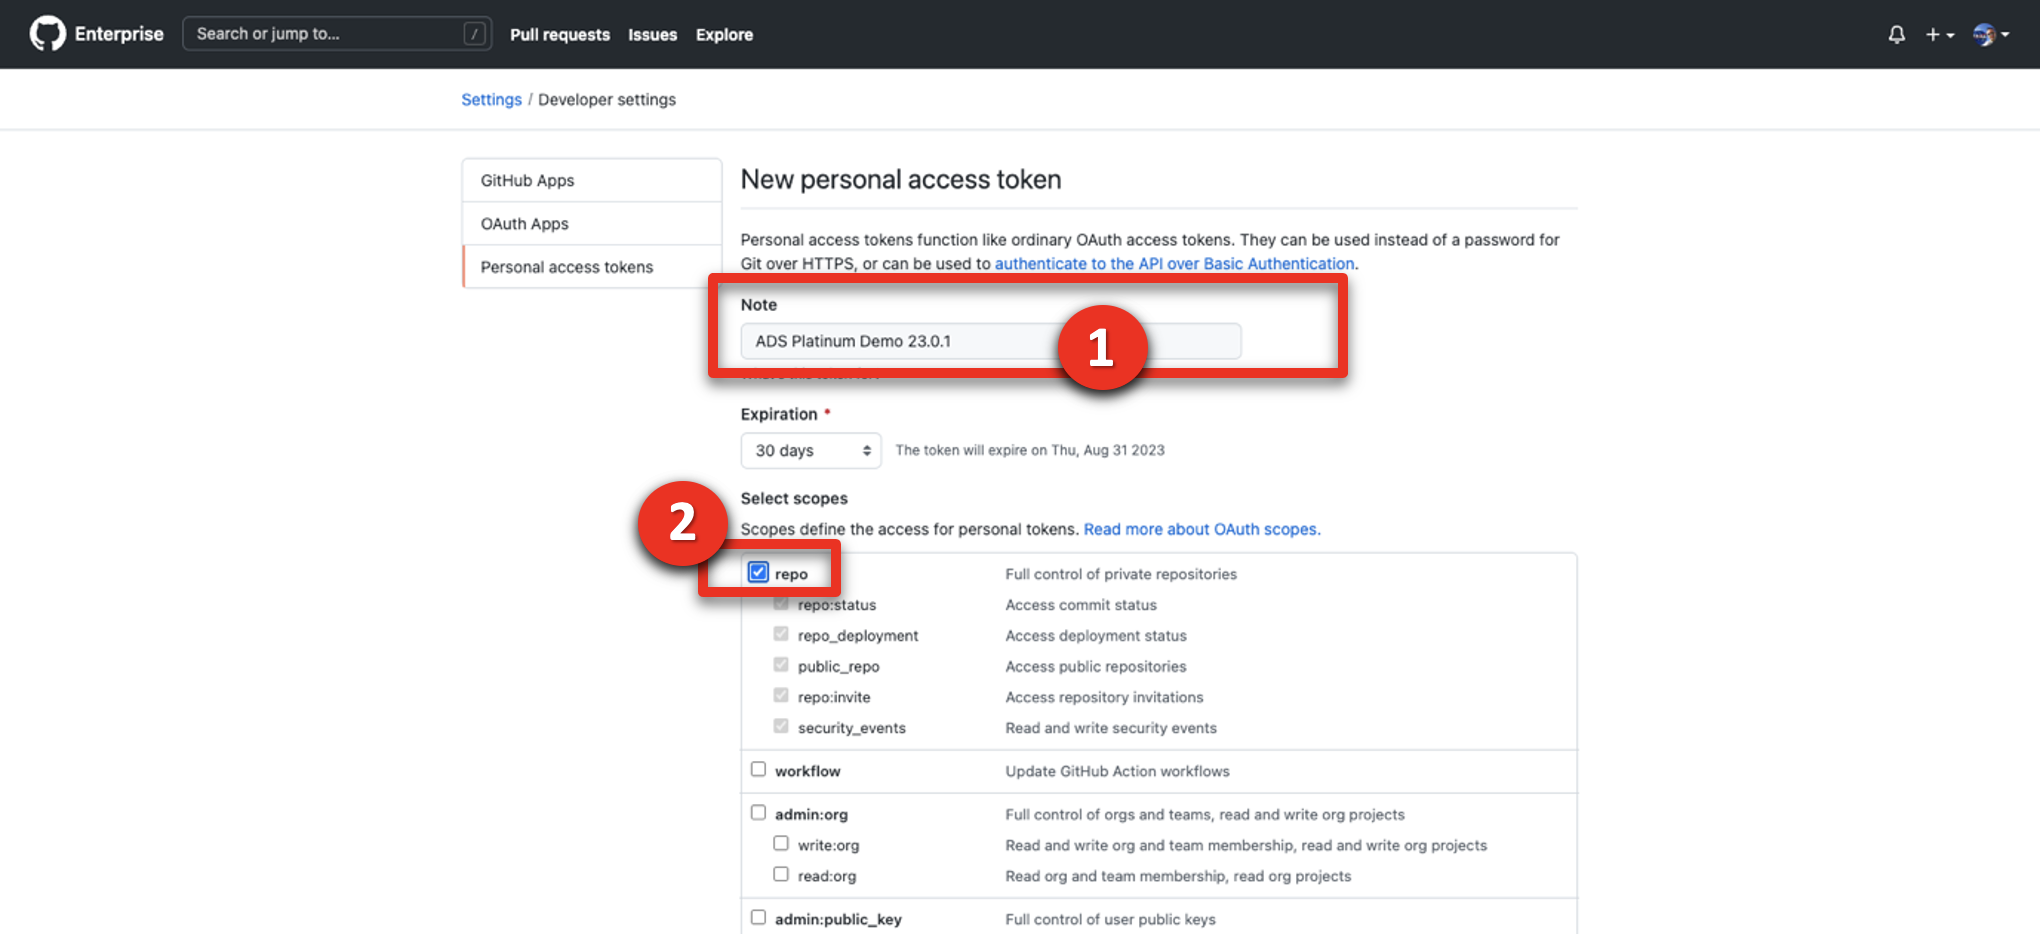
- Enter ‘ADS Platinum demo 23.0.2’ in the Note (1) and check repo (2).
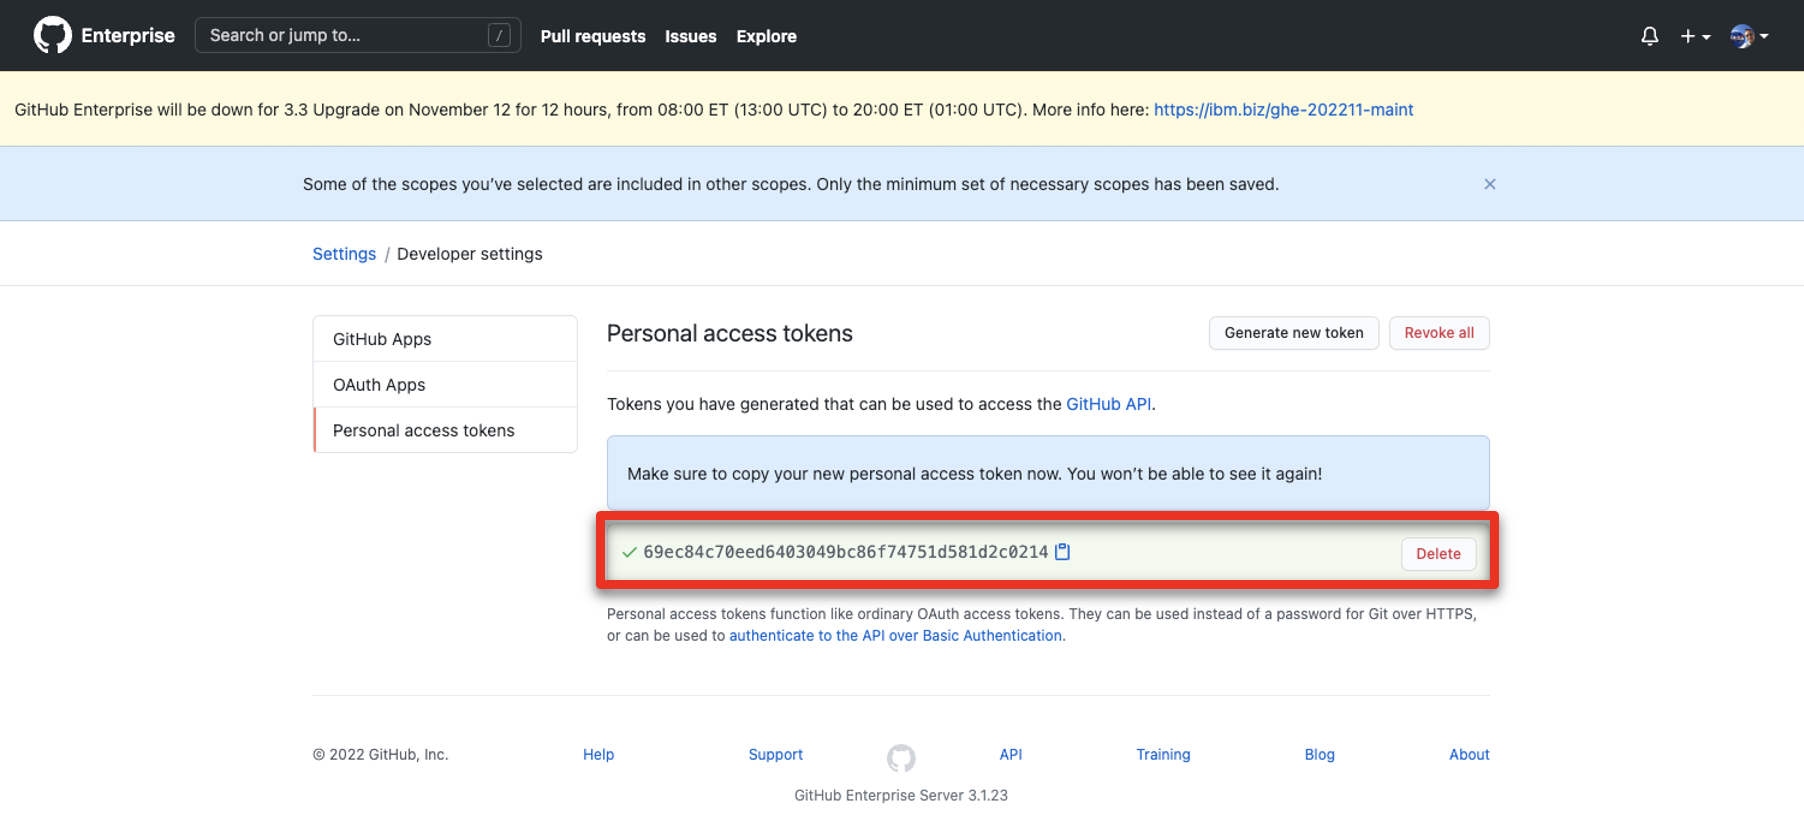
- Scroll down and click Generate token.
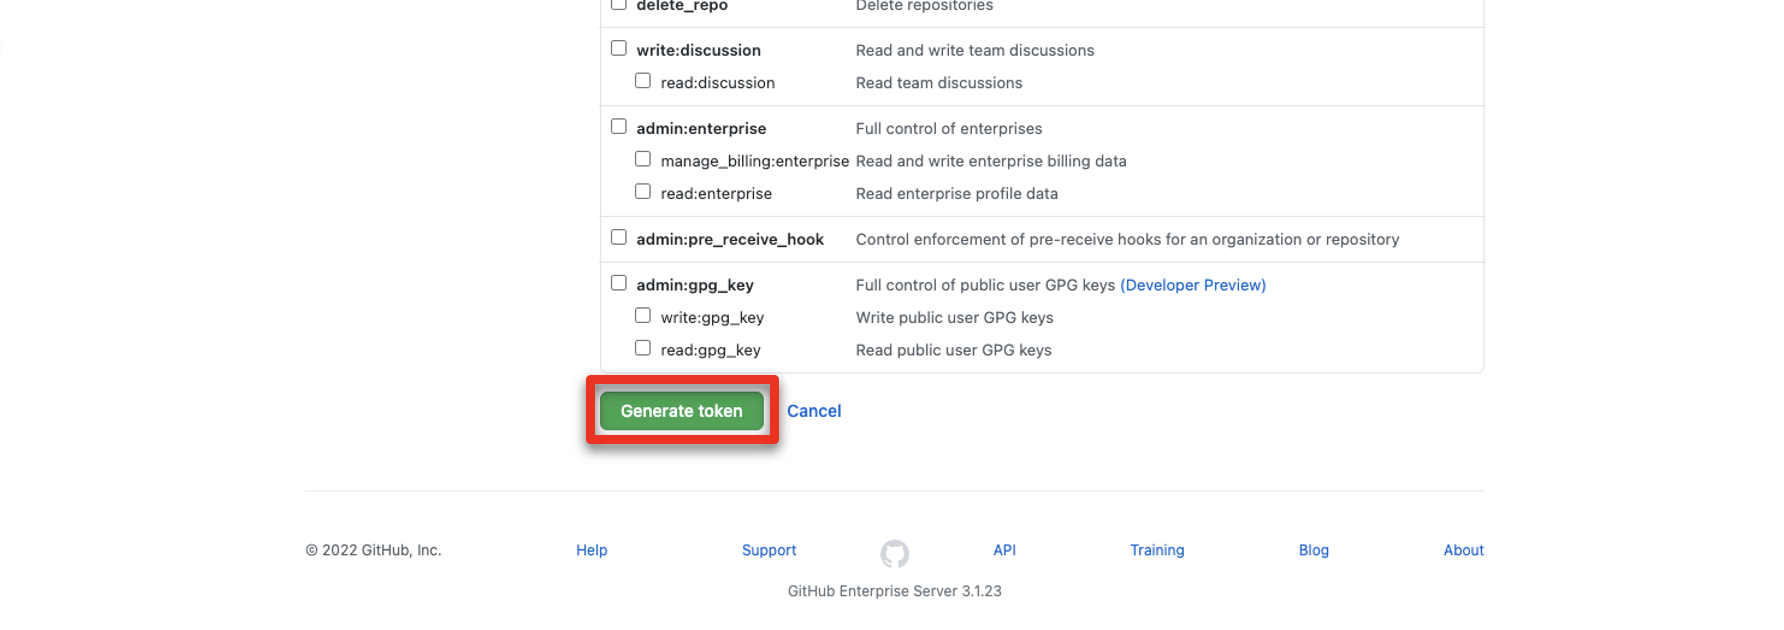
- Copy the Personal access token ID (it will be used in ADS).
- Expand your profile (1) and copy your username (it will be used in ADS).
4 - Create and set up a Watson Studio account
- Go to IBM Cloud.
- Enter your IBM ID. If you do not have one, create a new one.
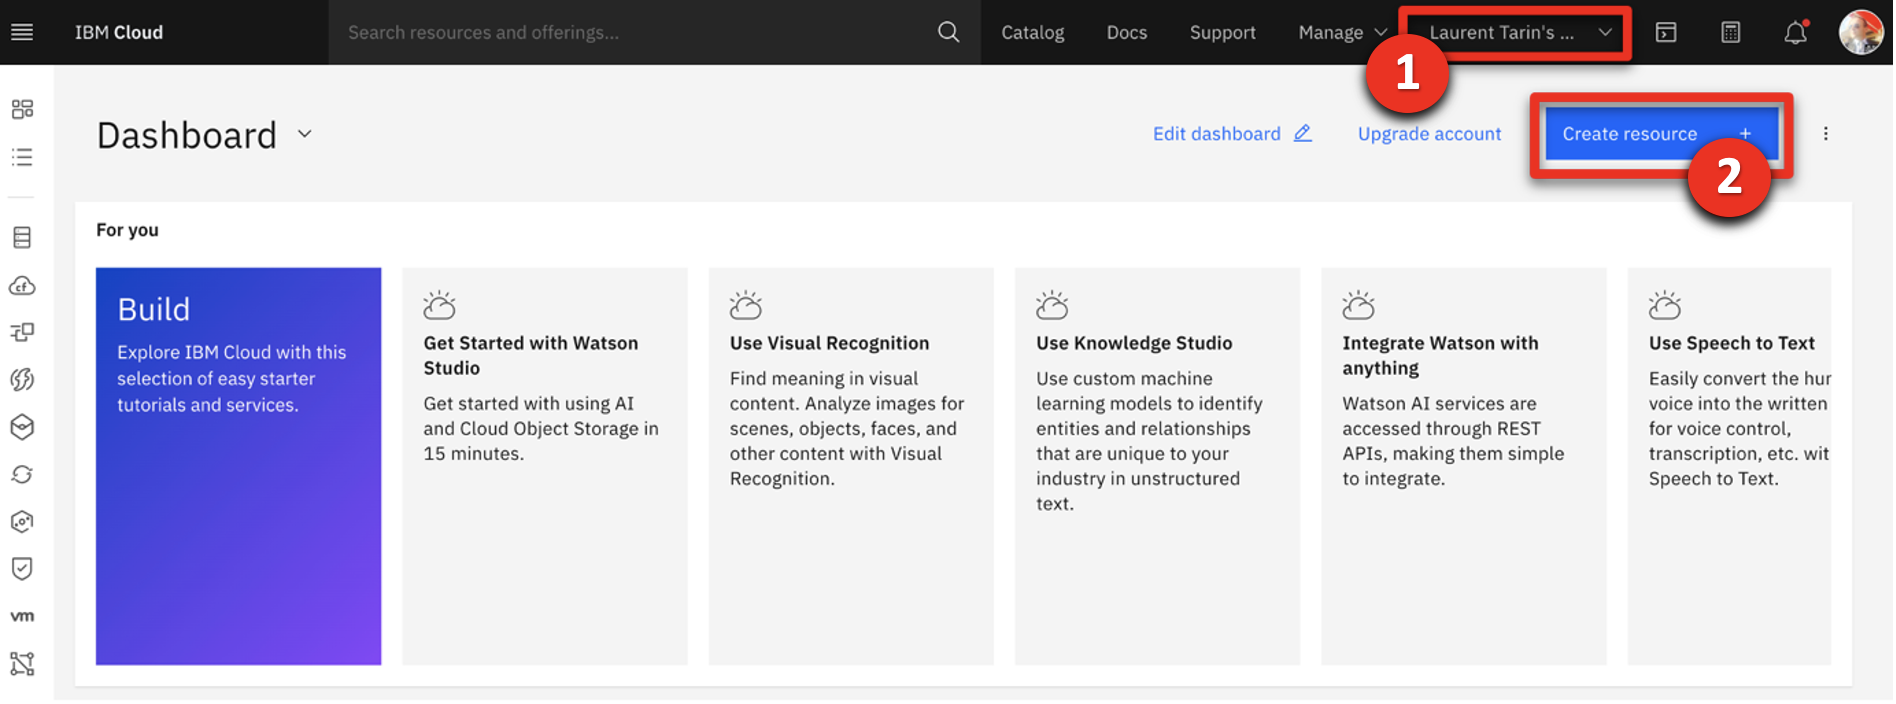
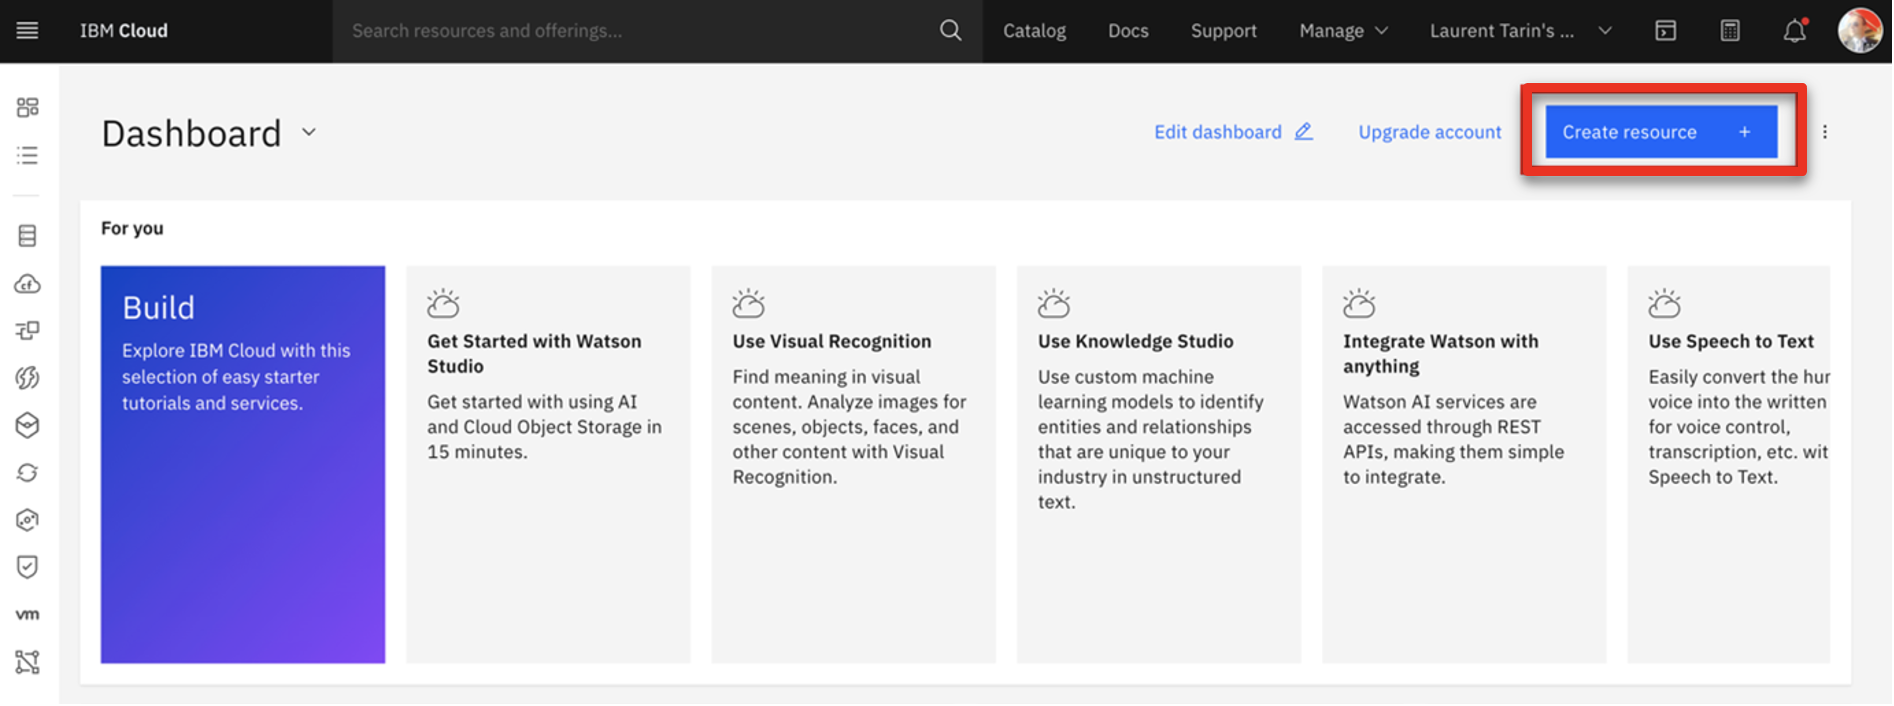
- Ensure you are in your own Cloud Pak for Data account instance (1). Click Create resource (2).
- If prompted, click Go in the Internal Paid Account column.

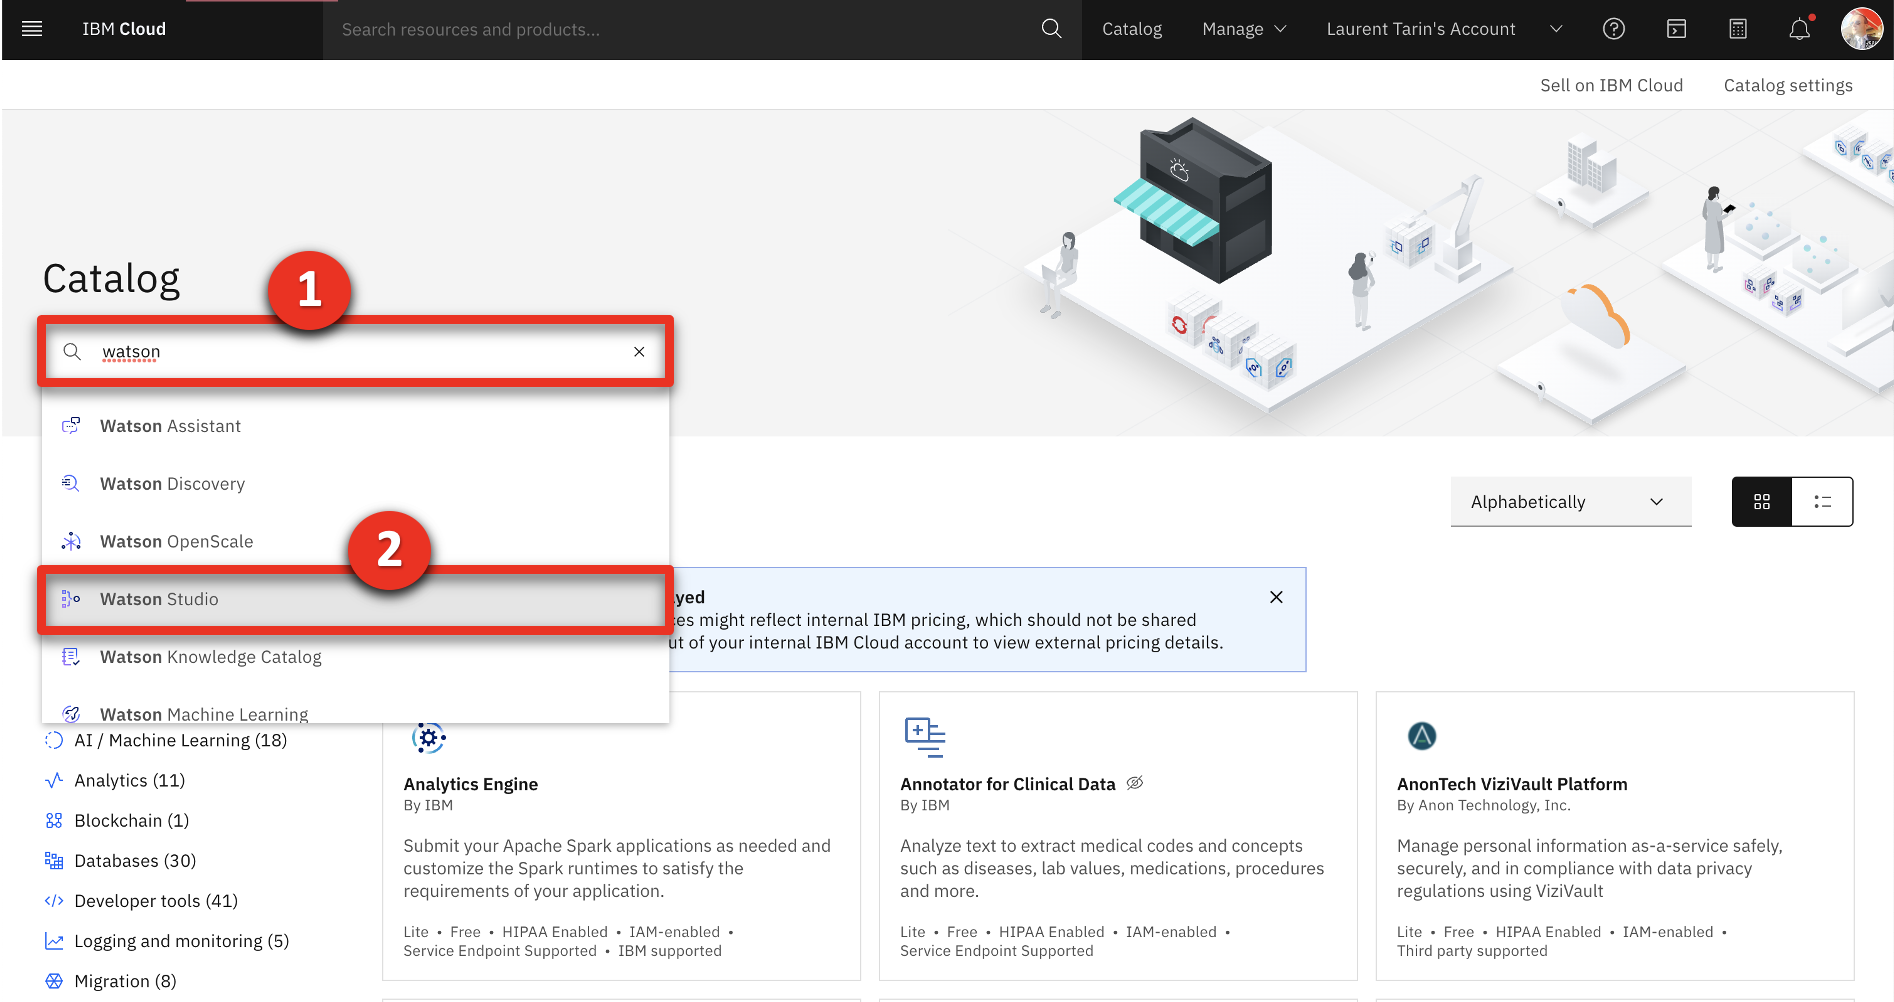
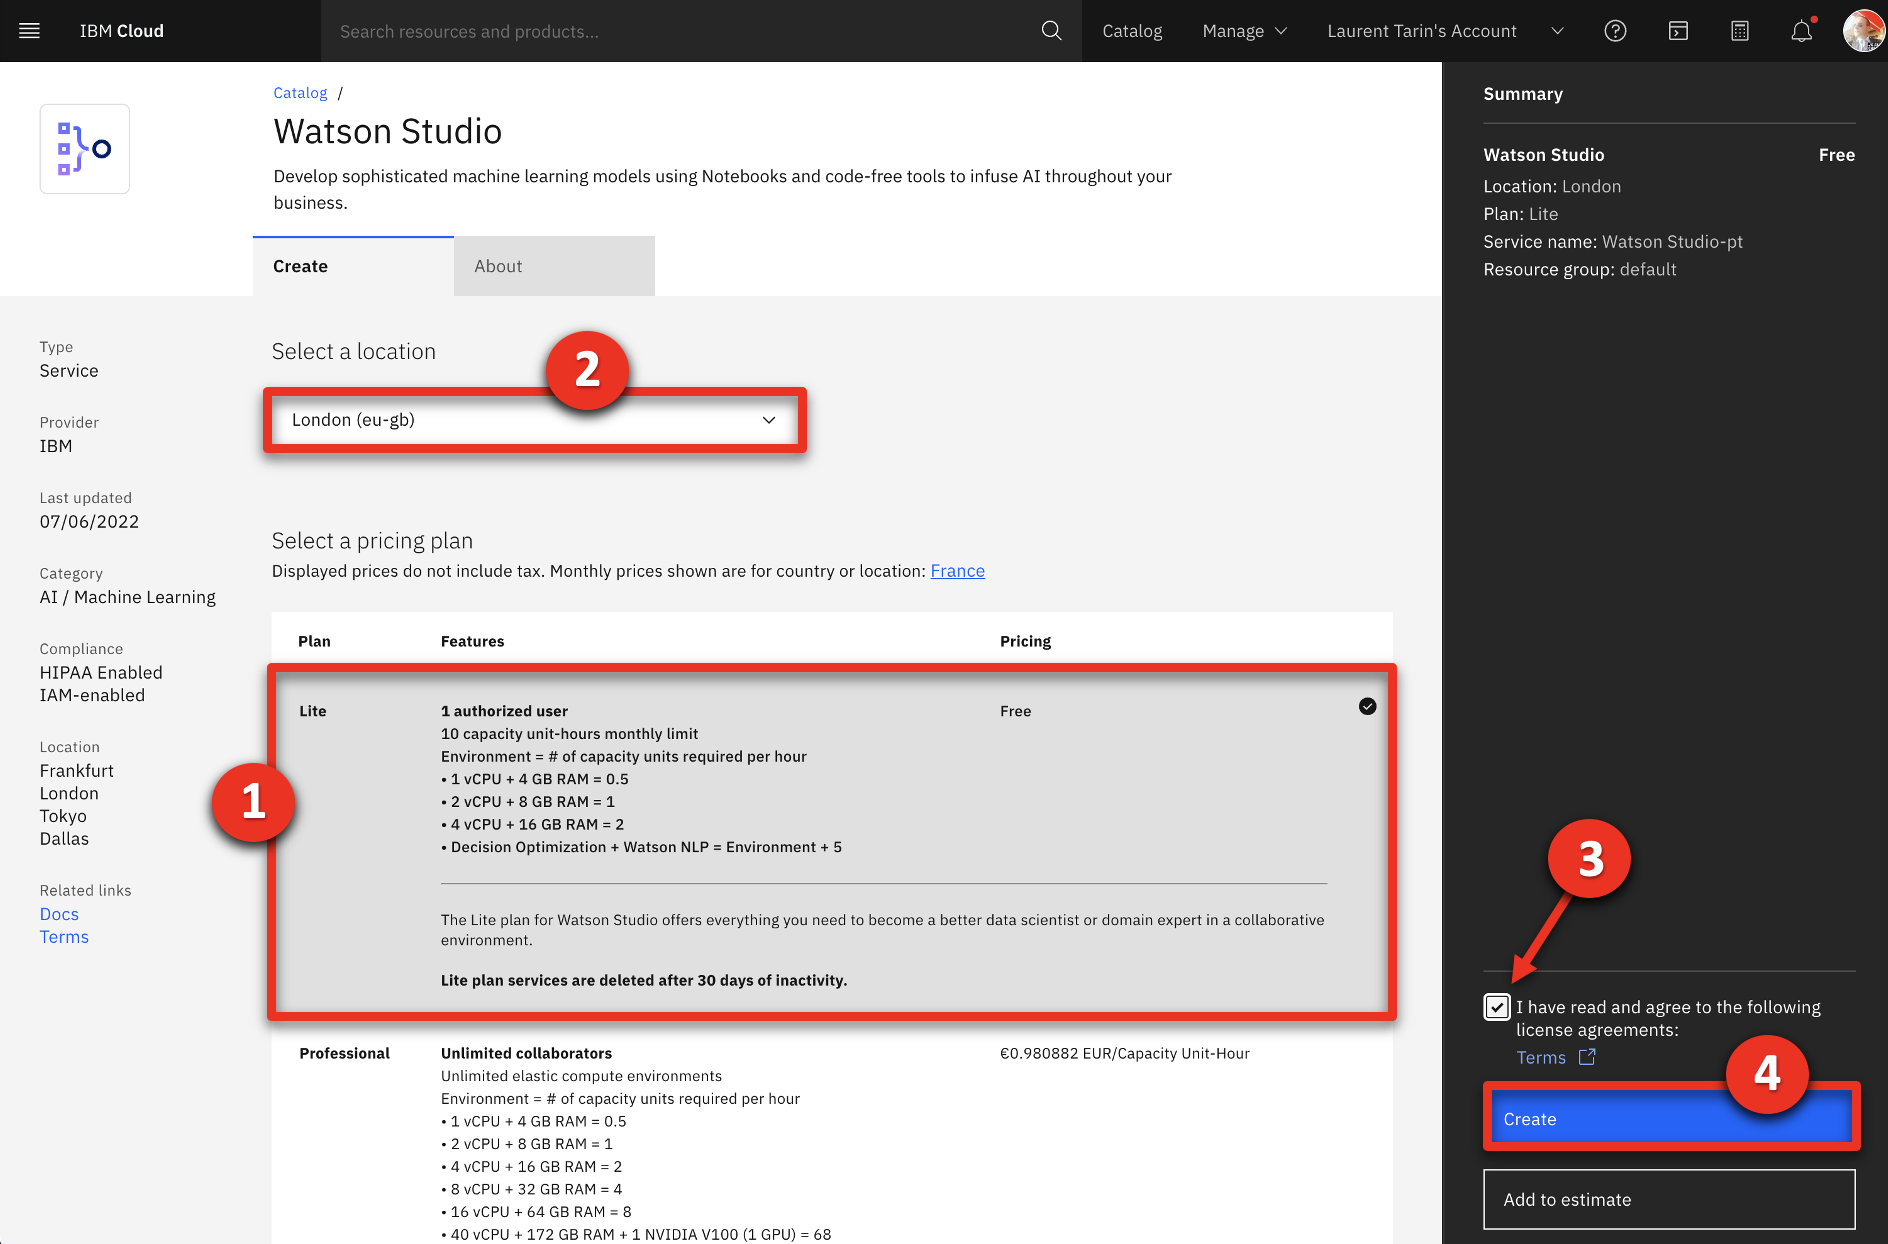
- Type ‘watson’ (1) in the search field and then select Watson Studio (2).
- Select the Lite plan (1) and a location (2). Read and accept license agreements (3). Click Create (4).
- Return to IBM Cloud.
- Click Create resource.
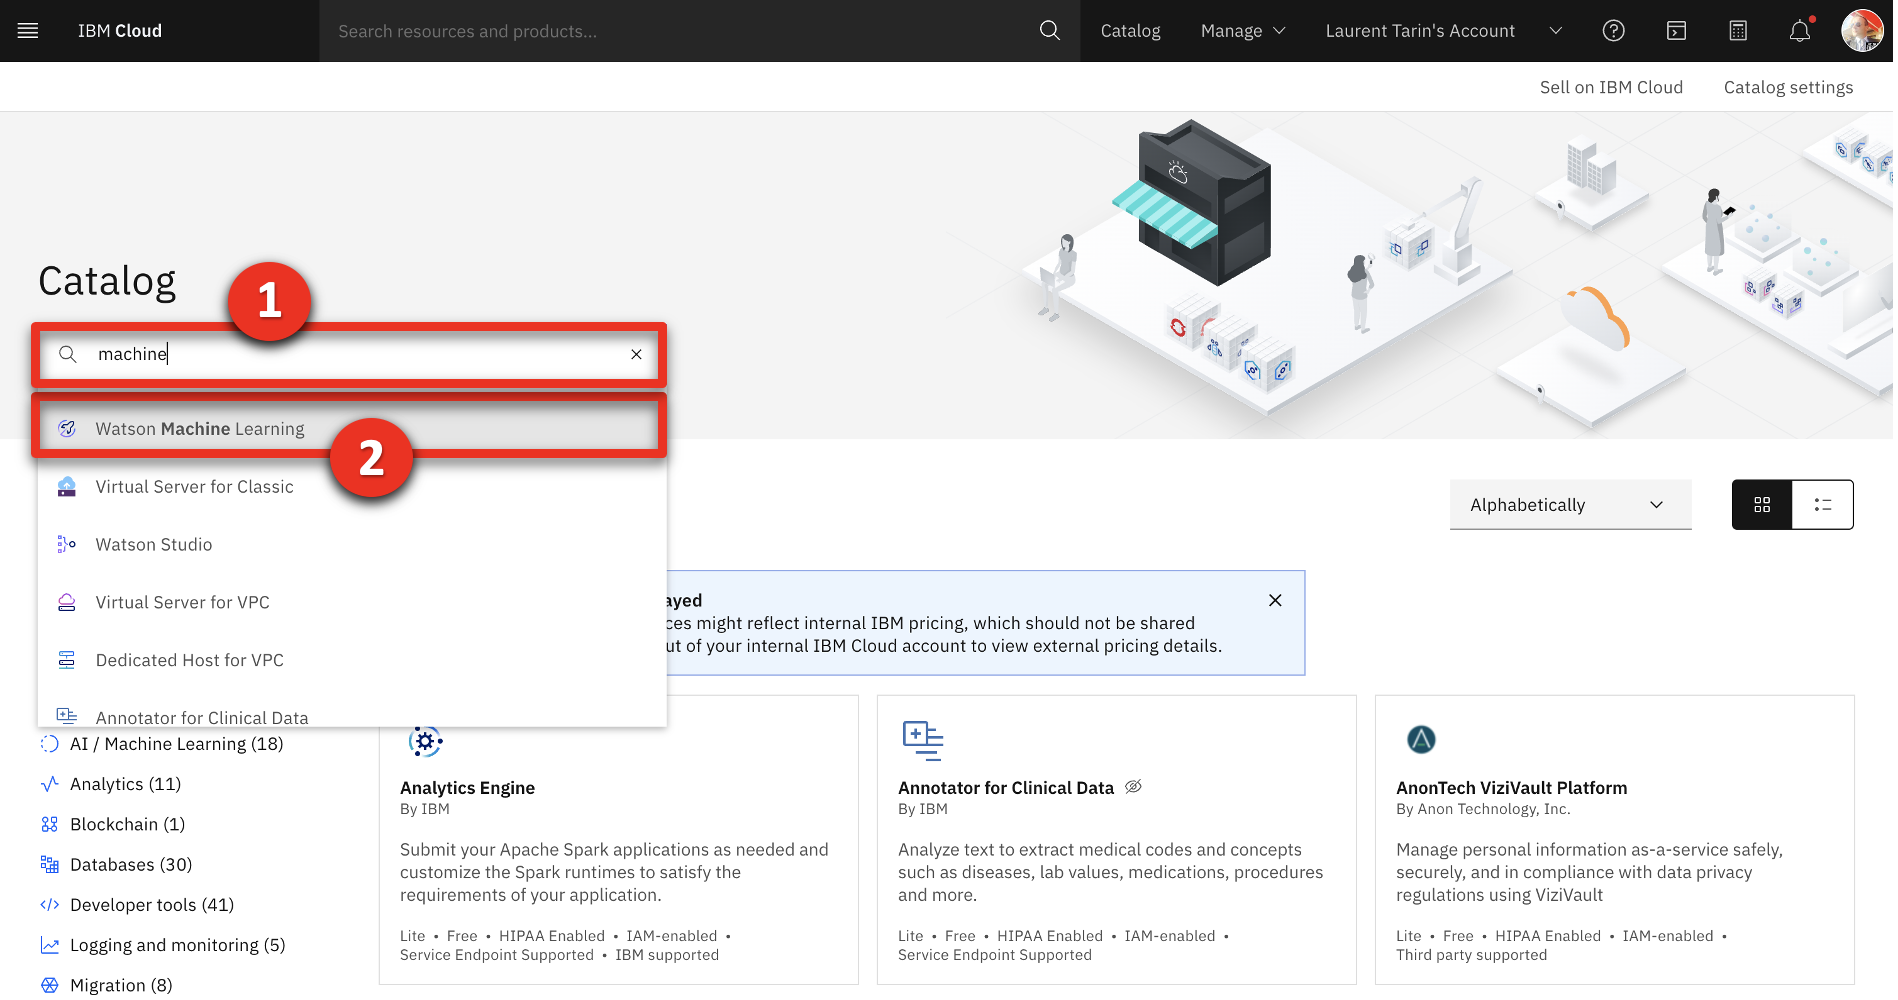
- Type ‘machine’ (1) in the search field and then select Watson Machine Learning (2).
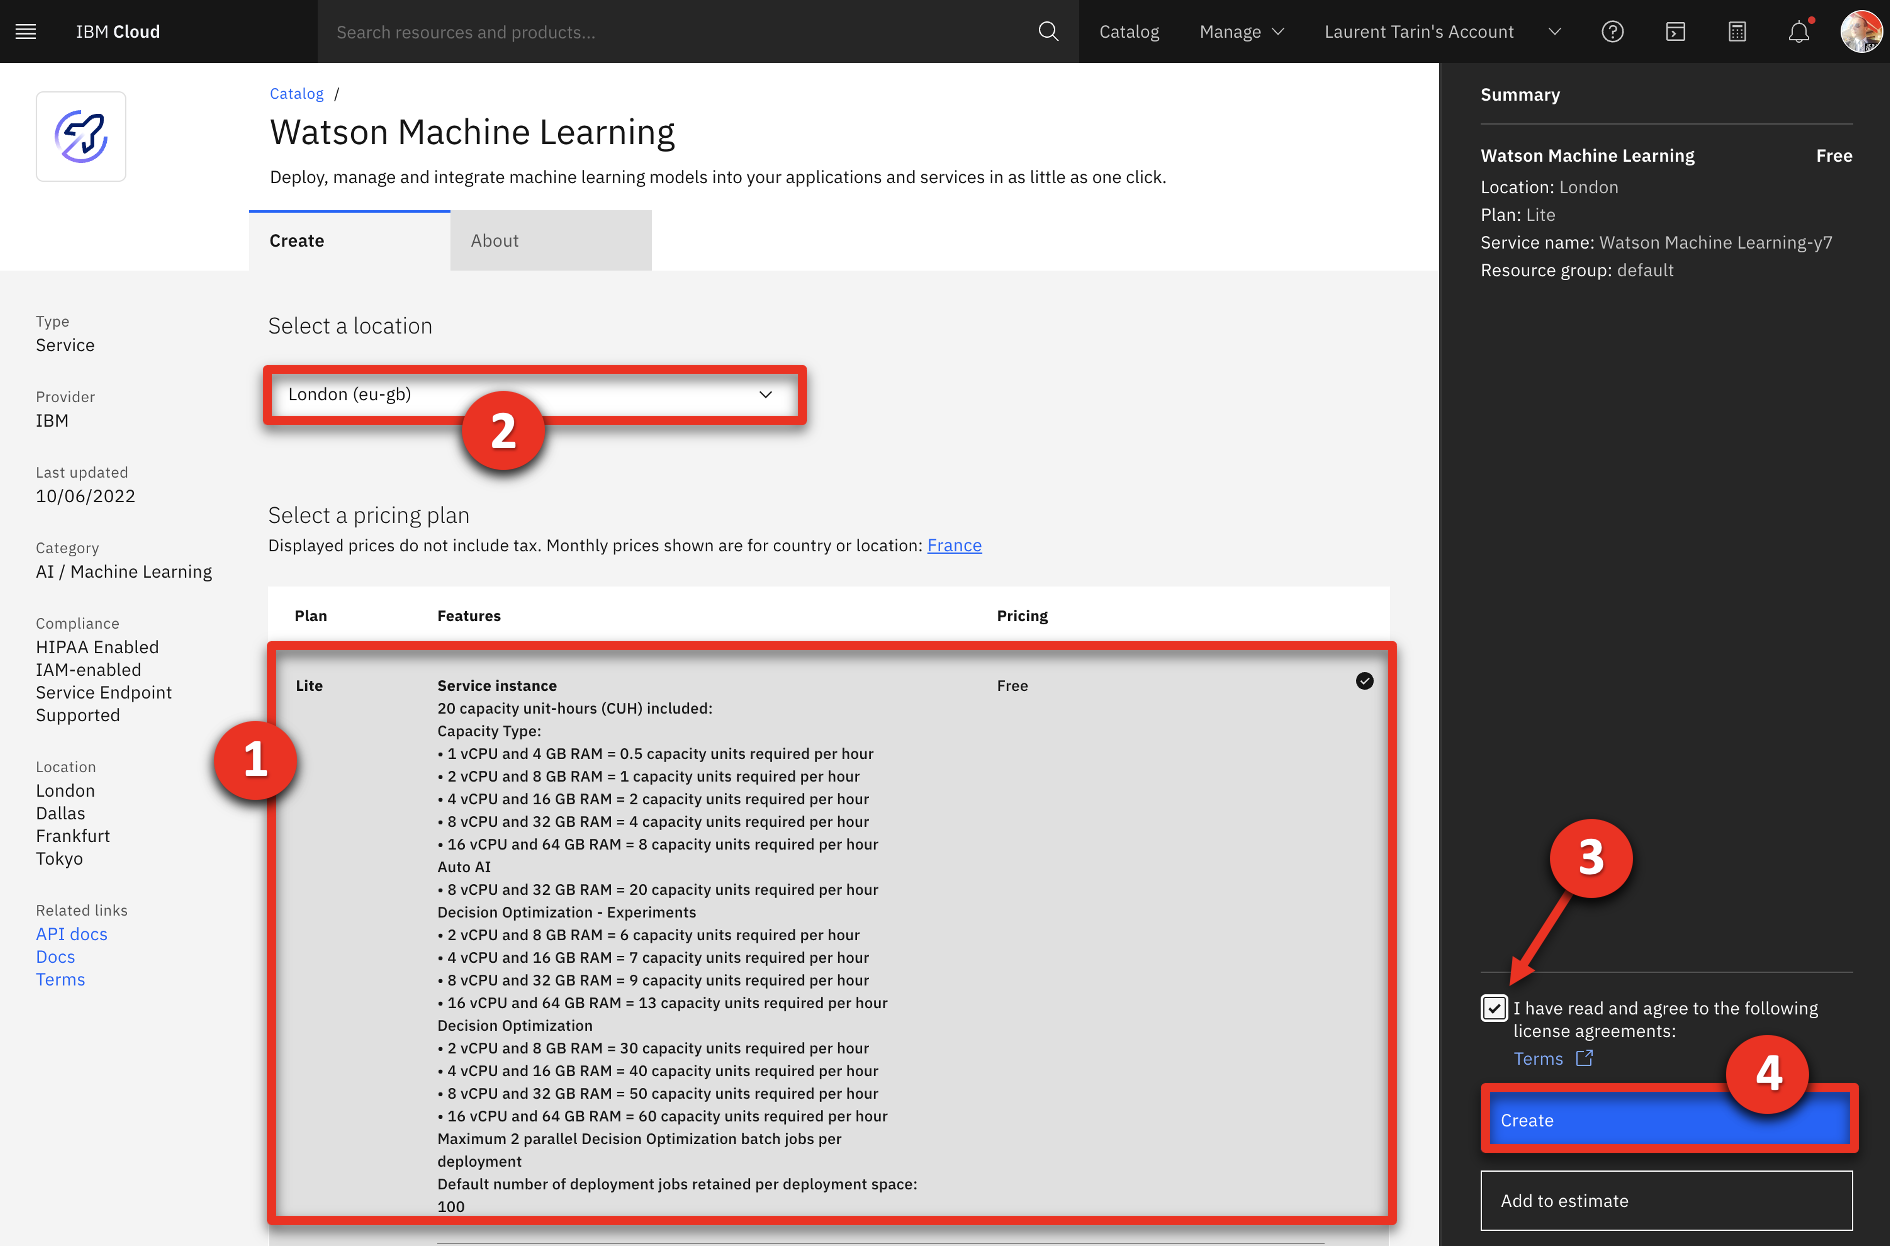
- Select the Lite plan (1) and a location (2). Read and accept license agreements (3). Click Create (4).
- Return to IBM Cloud.
- Click Create resource.

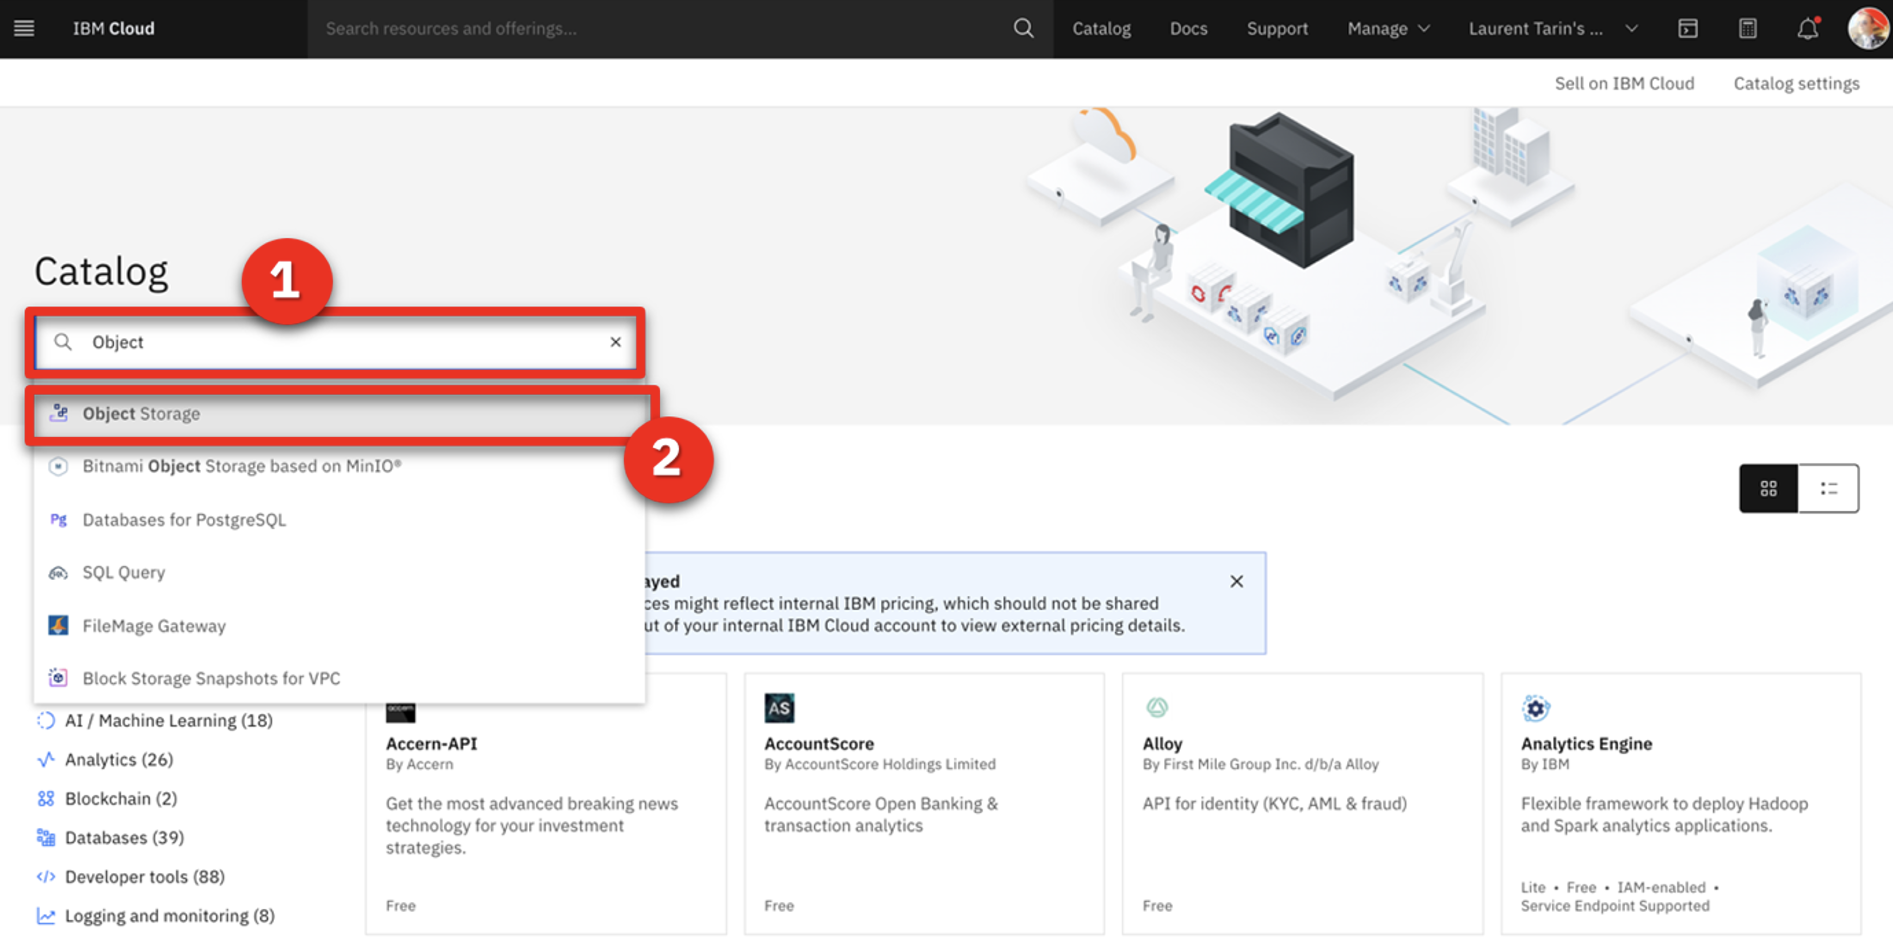
- Type ‘Object’ (1) in the search field and then select Object Storage (2).
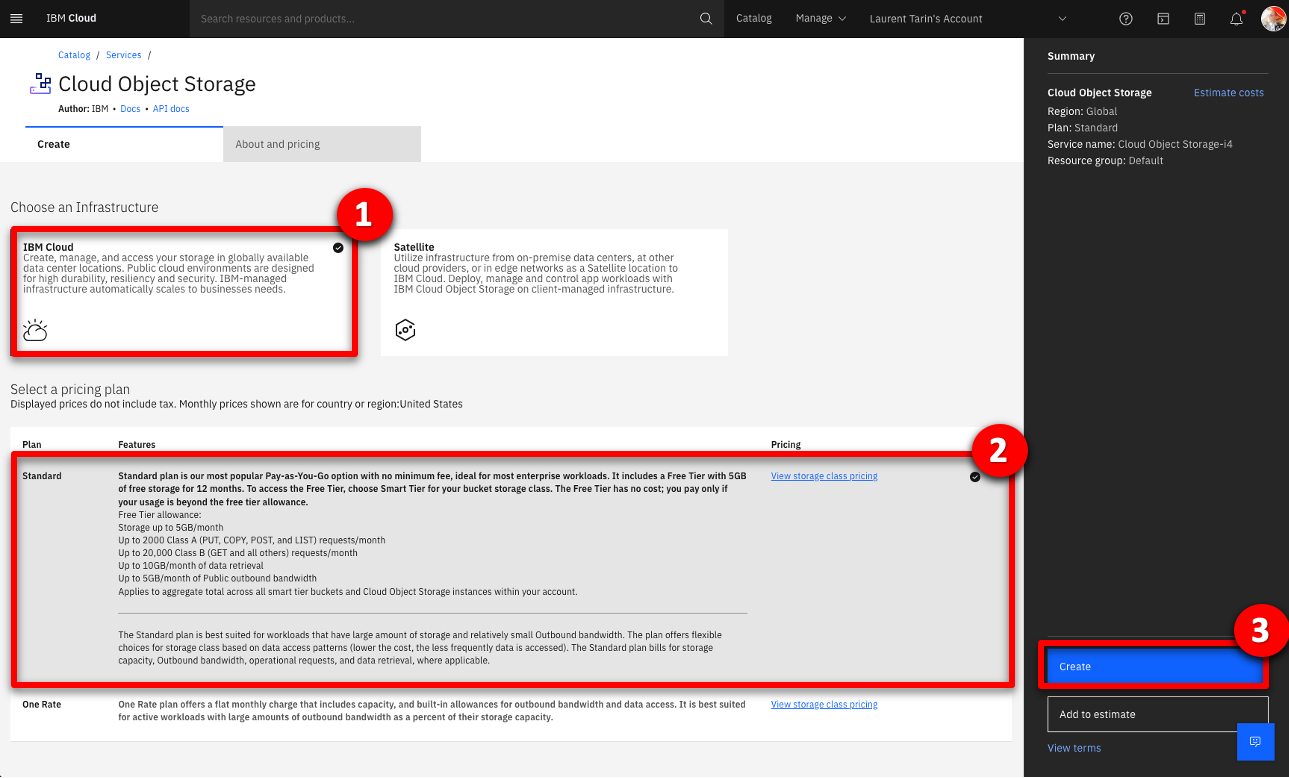
- Select IBM Cloud (1). Choose the Standard plan (2) and click Create (3).
- Expand the top menu (1) and then select Resource list (2).
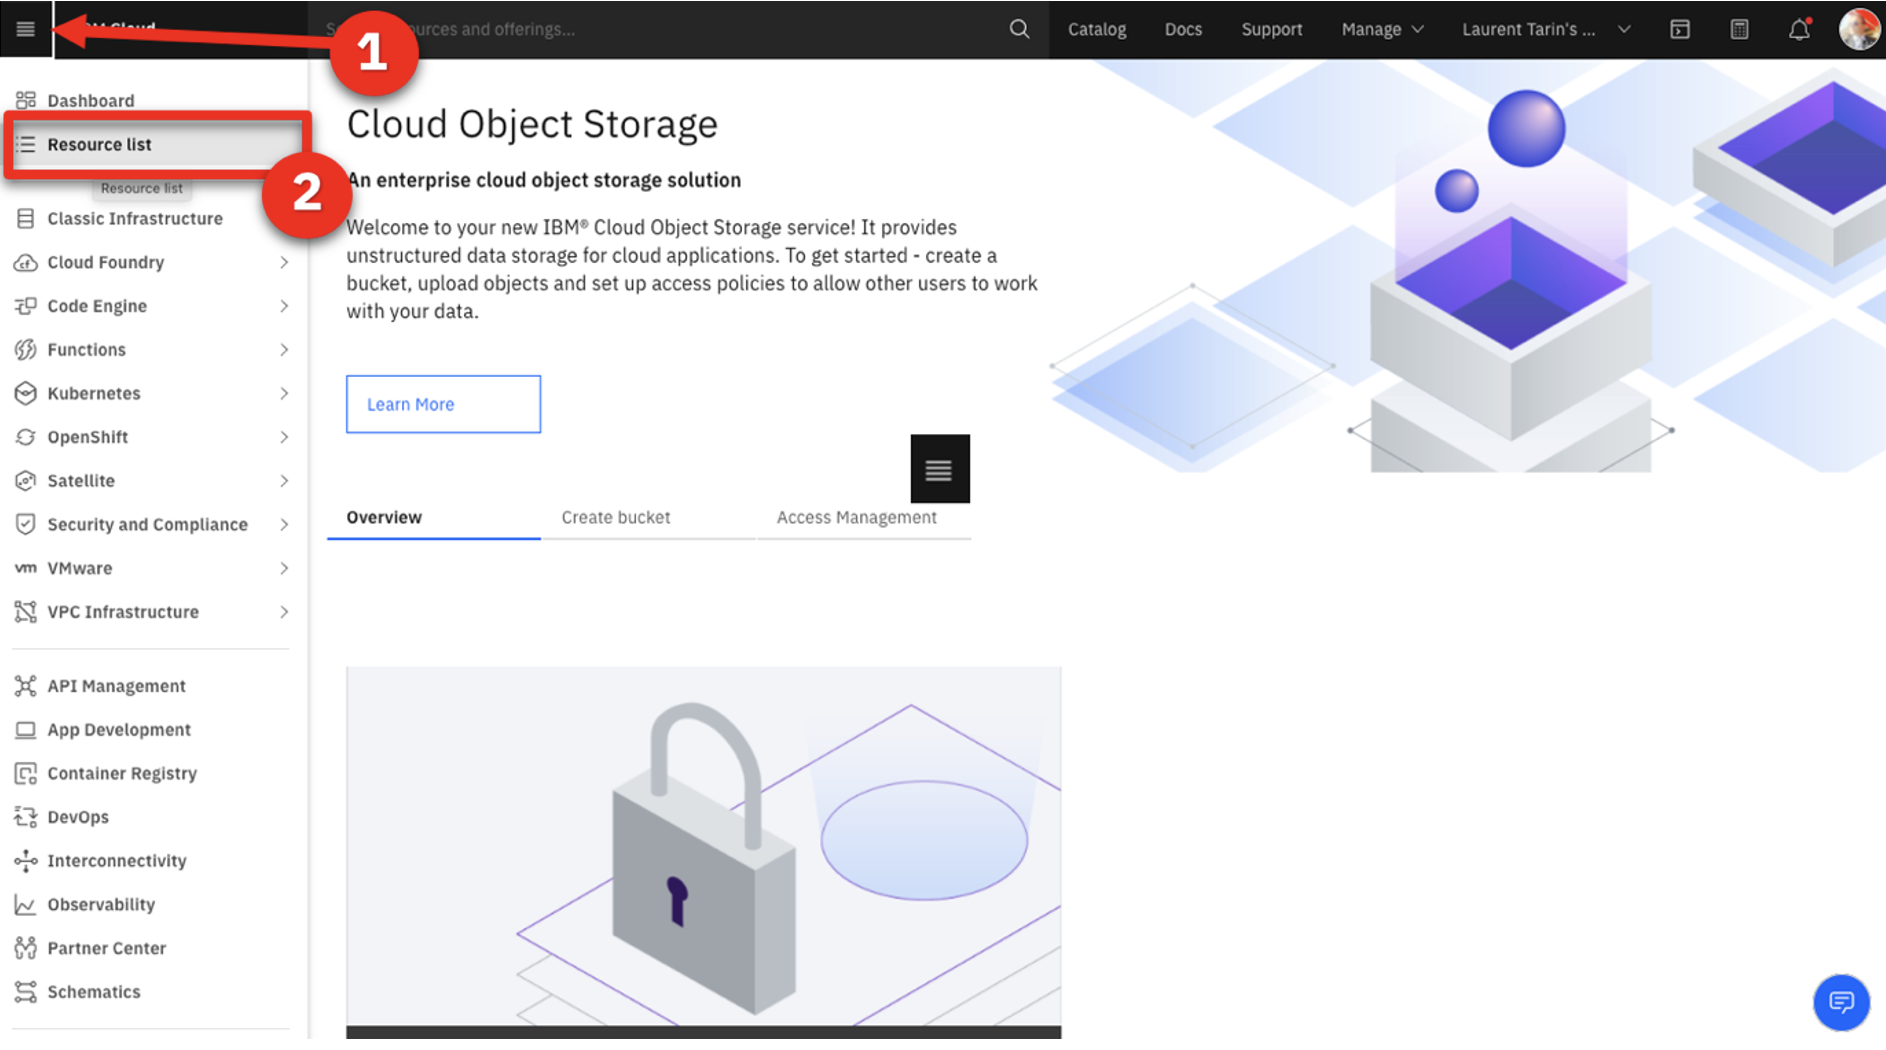
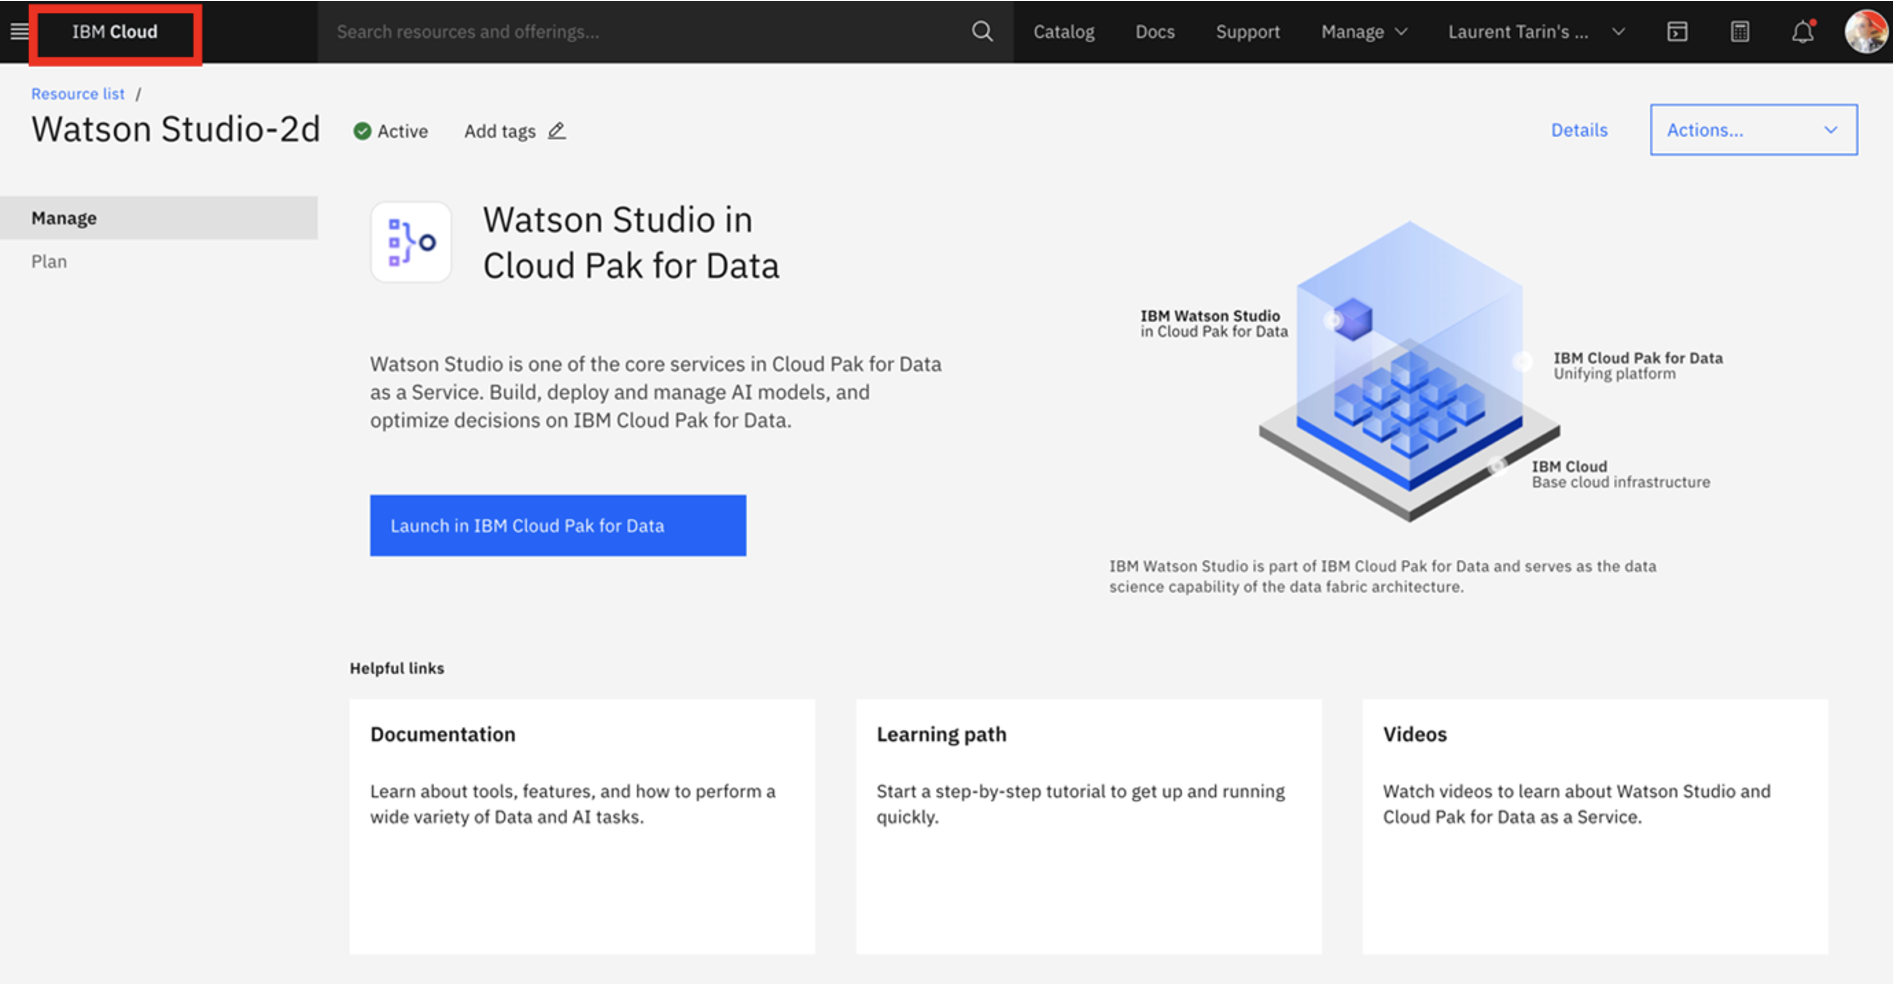
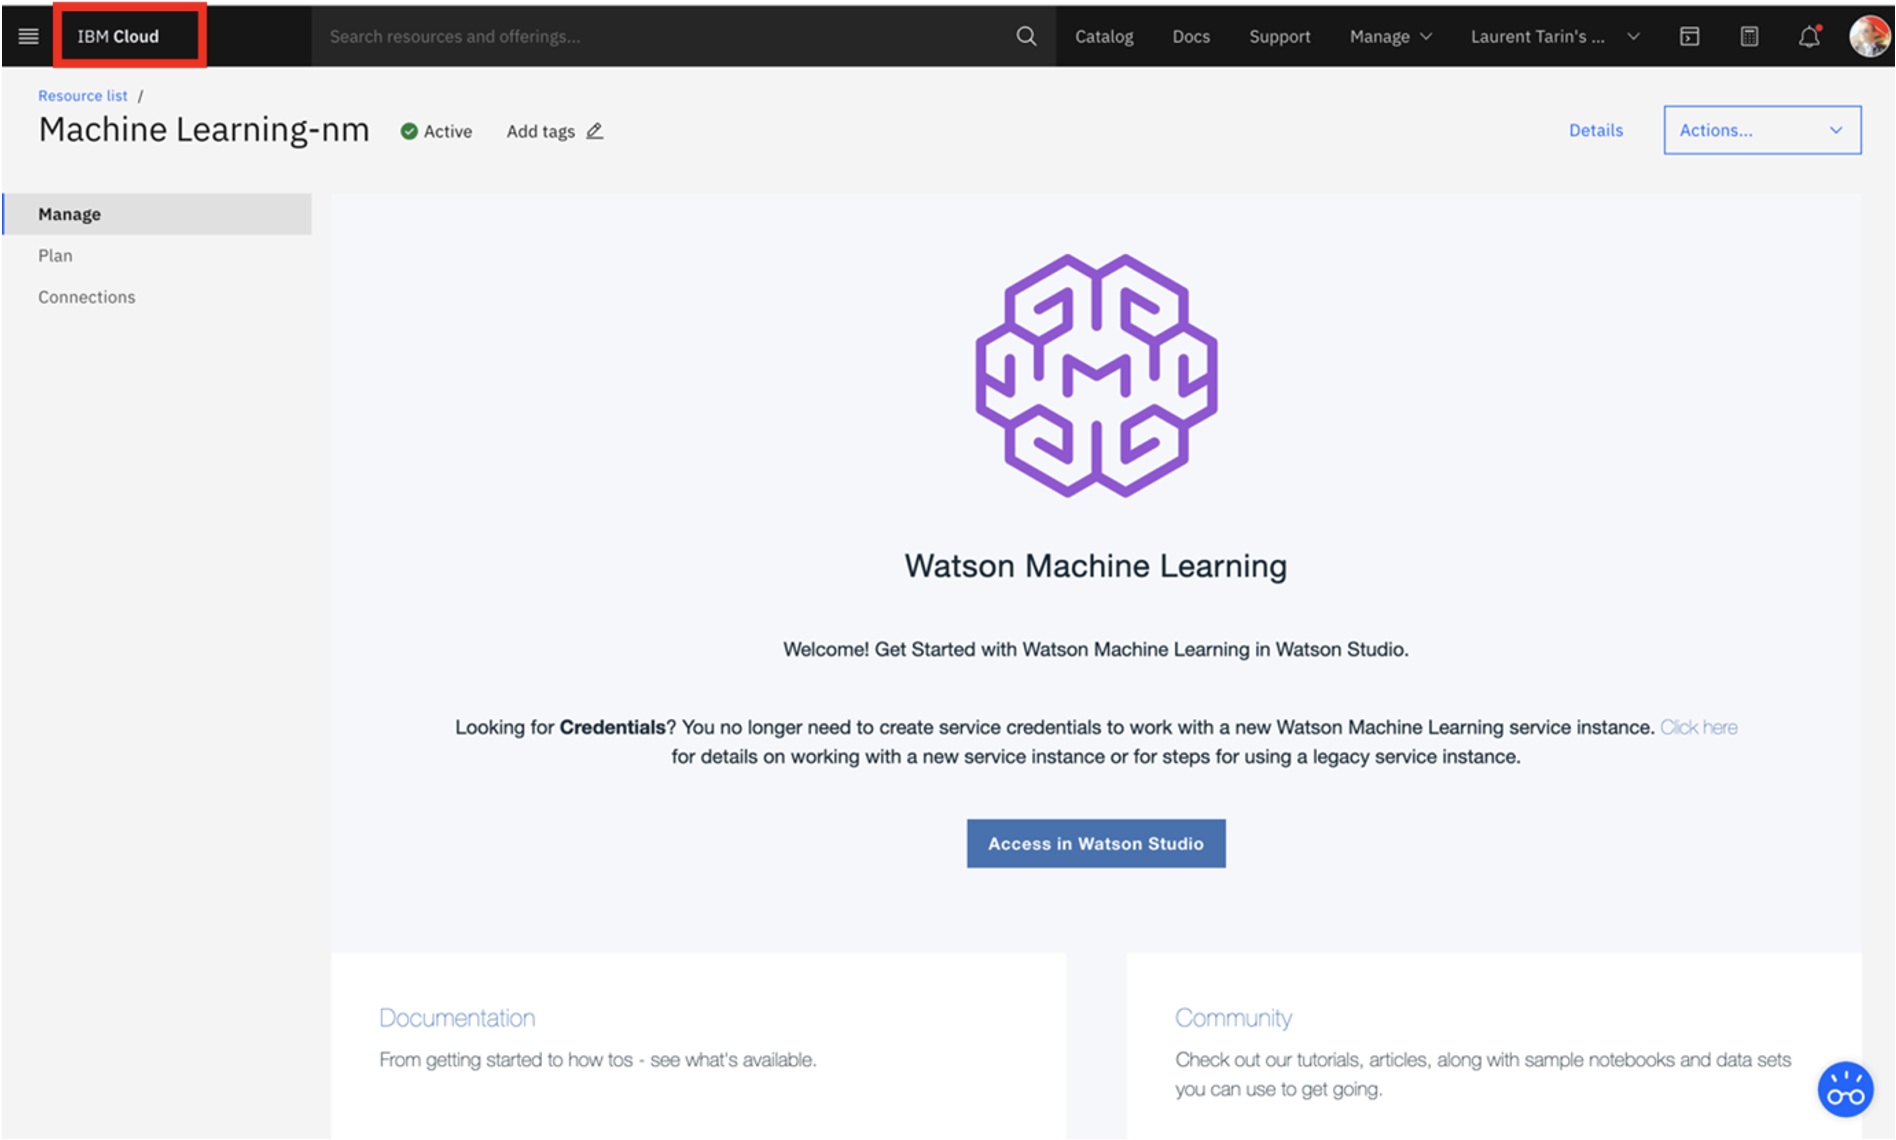
- The new services should appear. Click Watson Studio-2d.
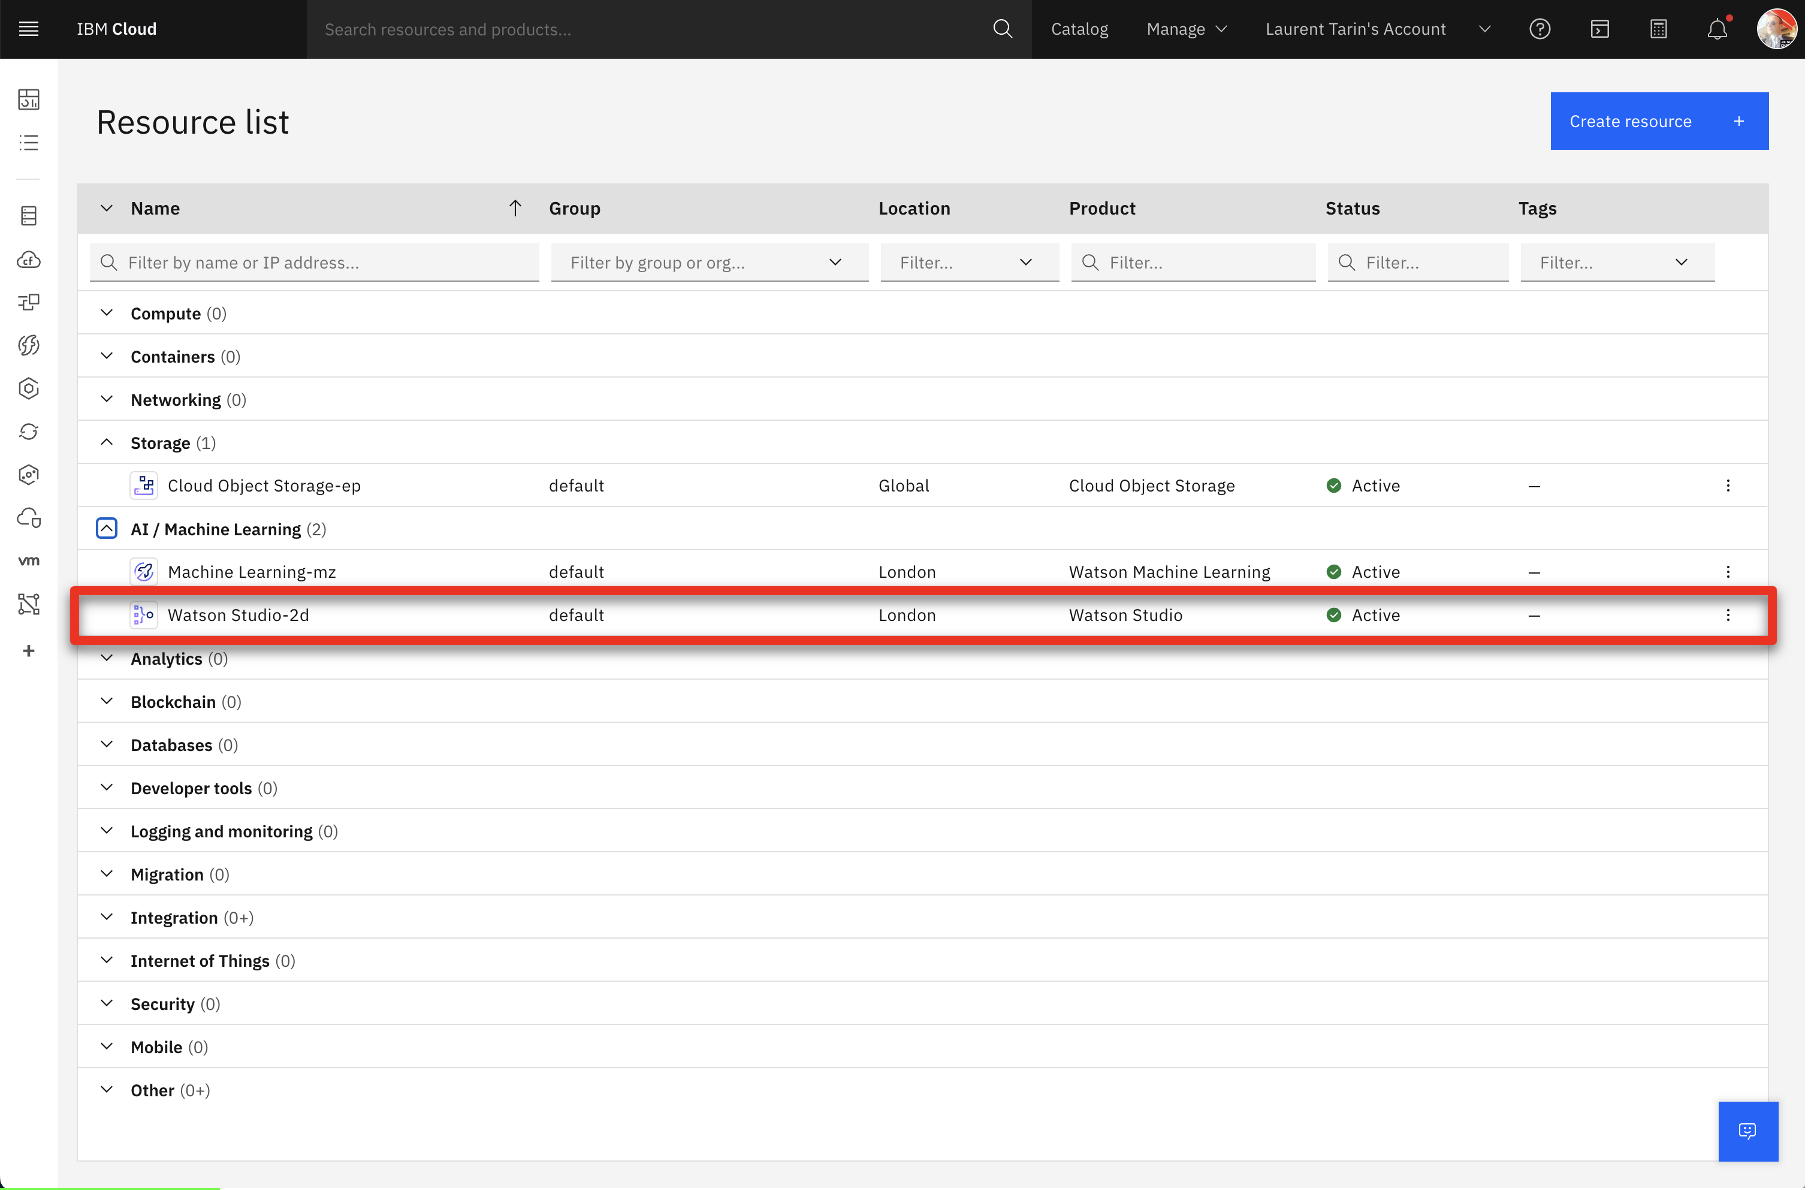
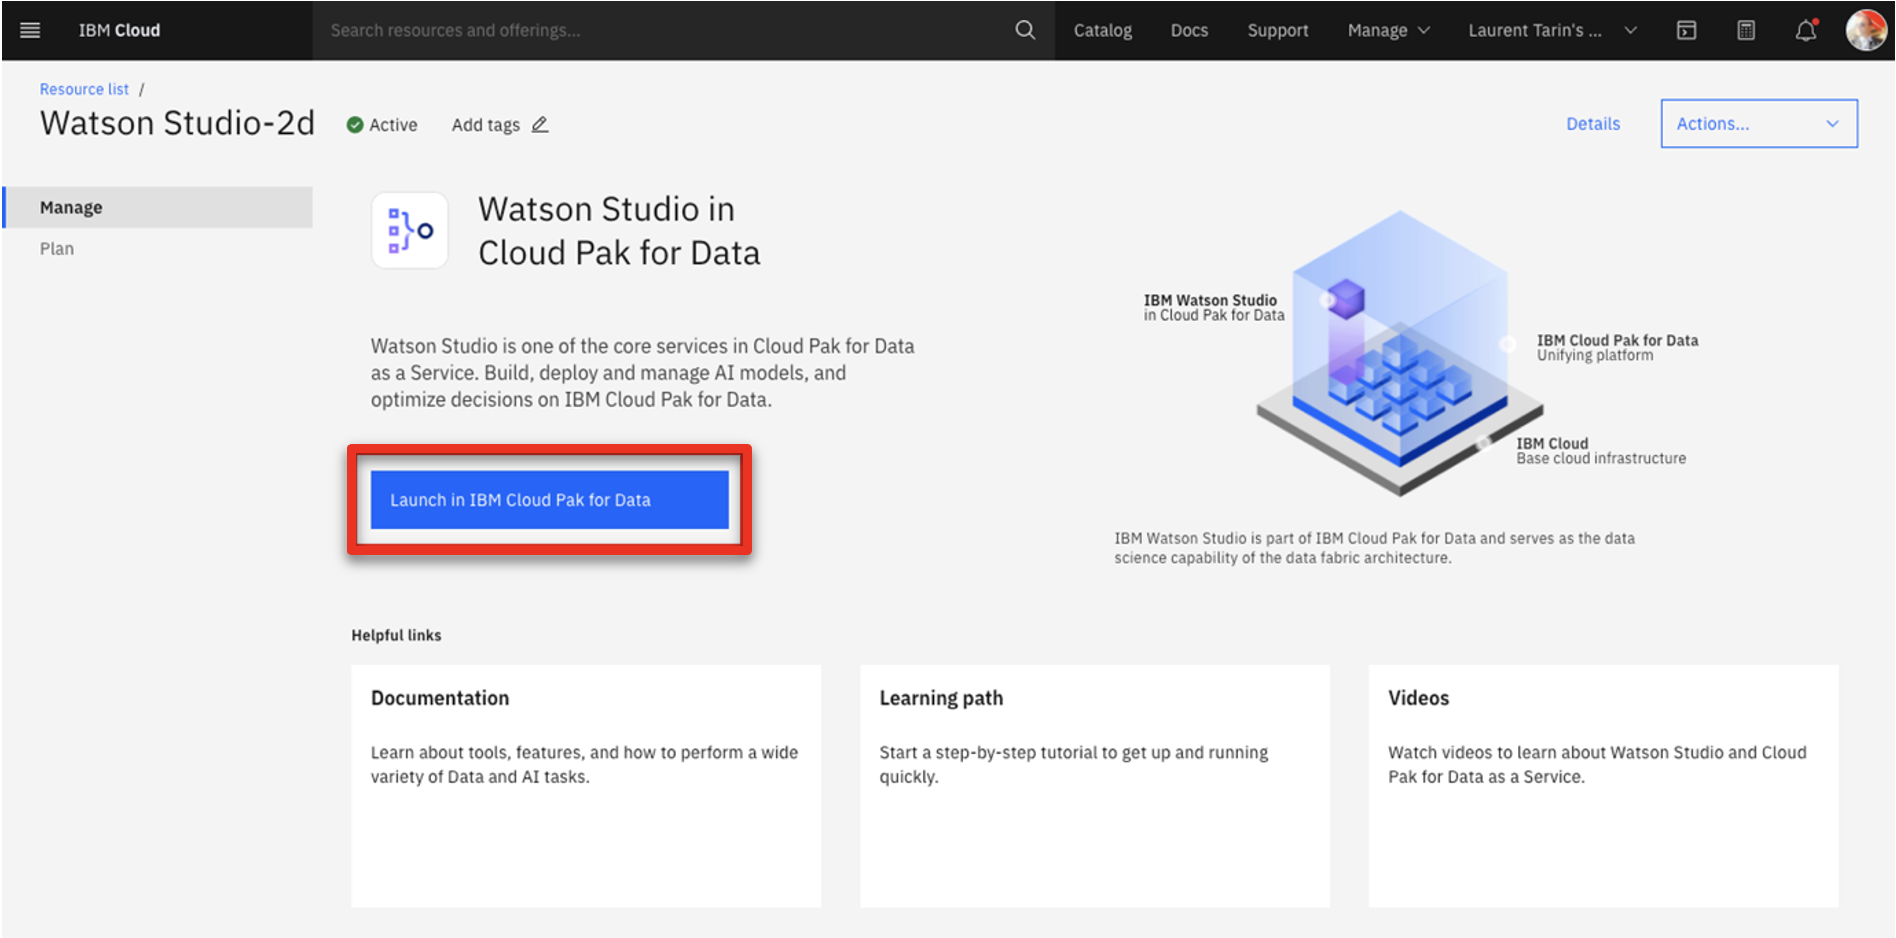
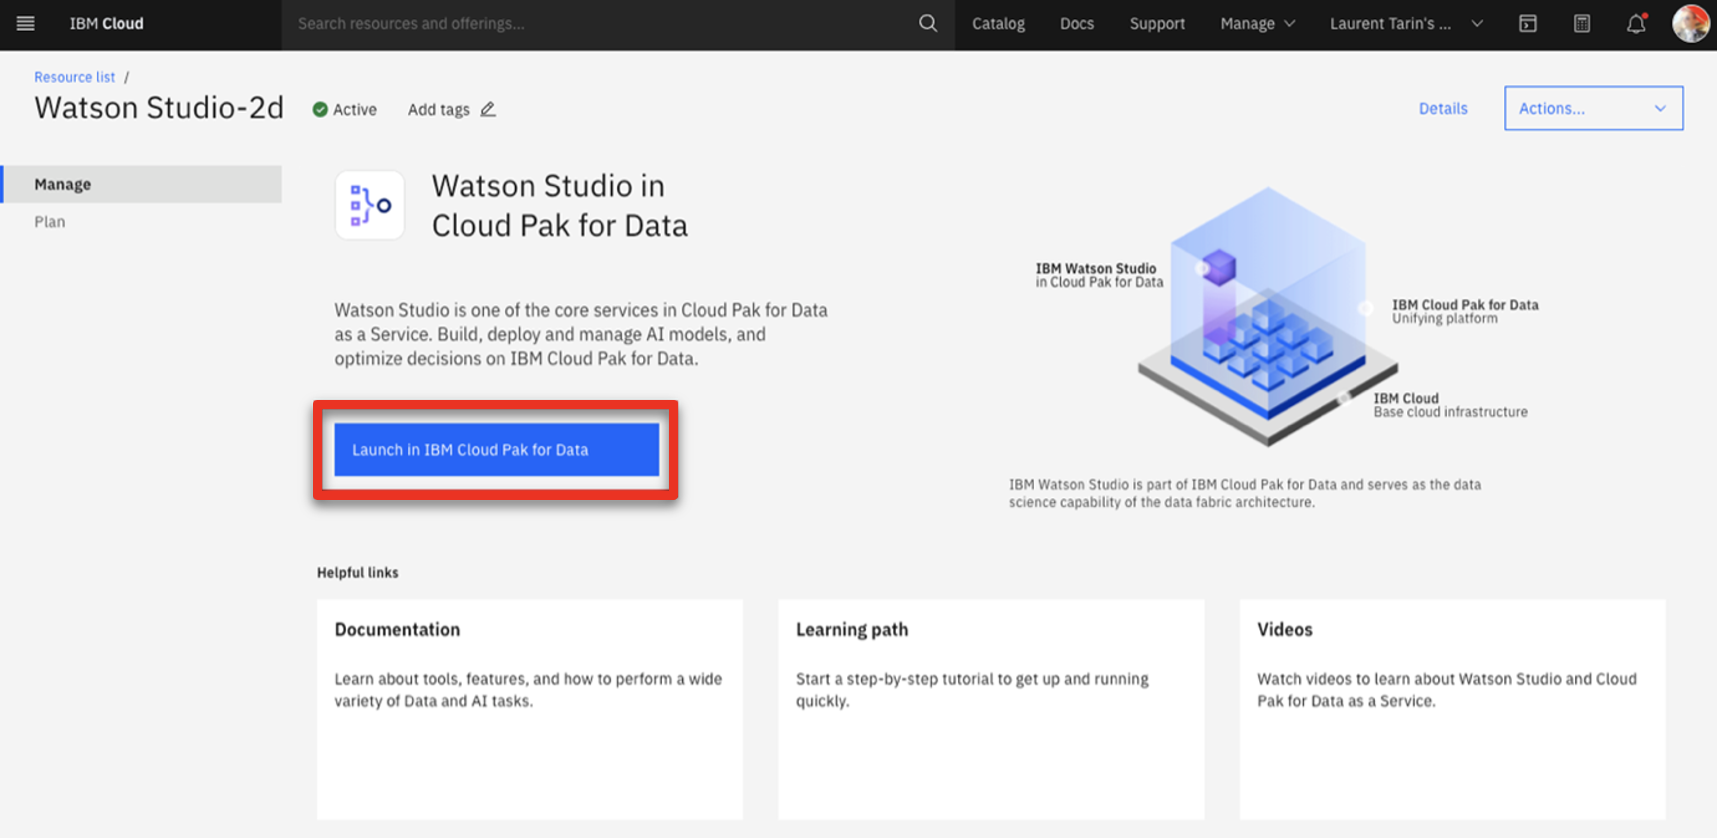
- Click Launch in IBM Cloud Pak for Data.
- Click + next to Deployments.
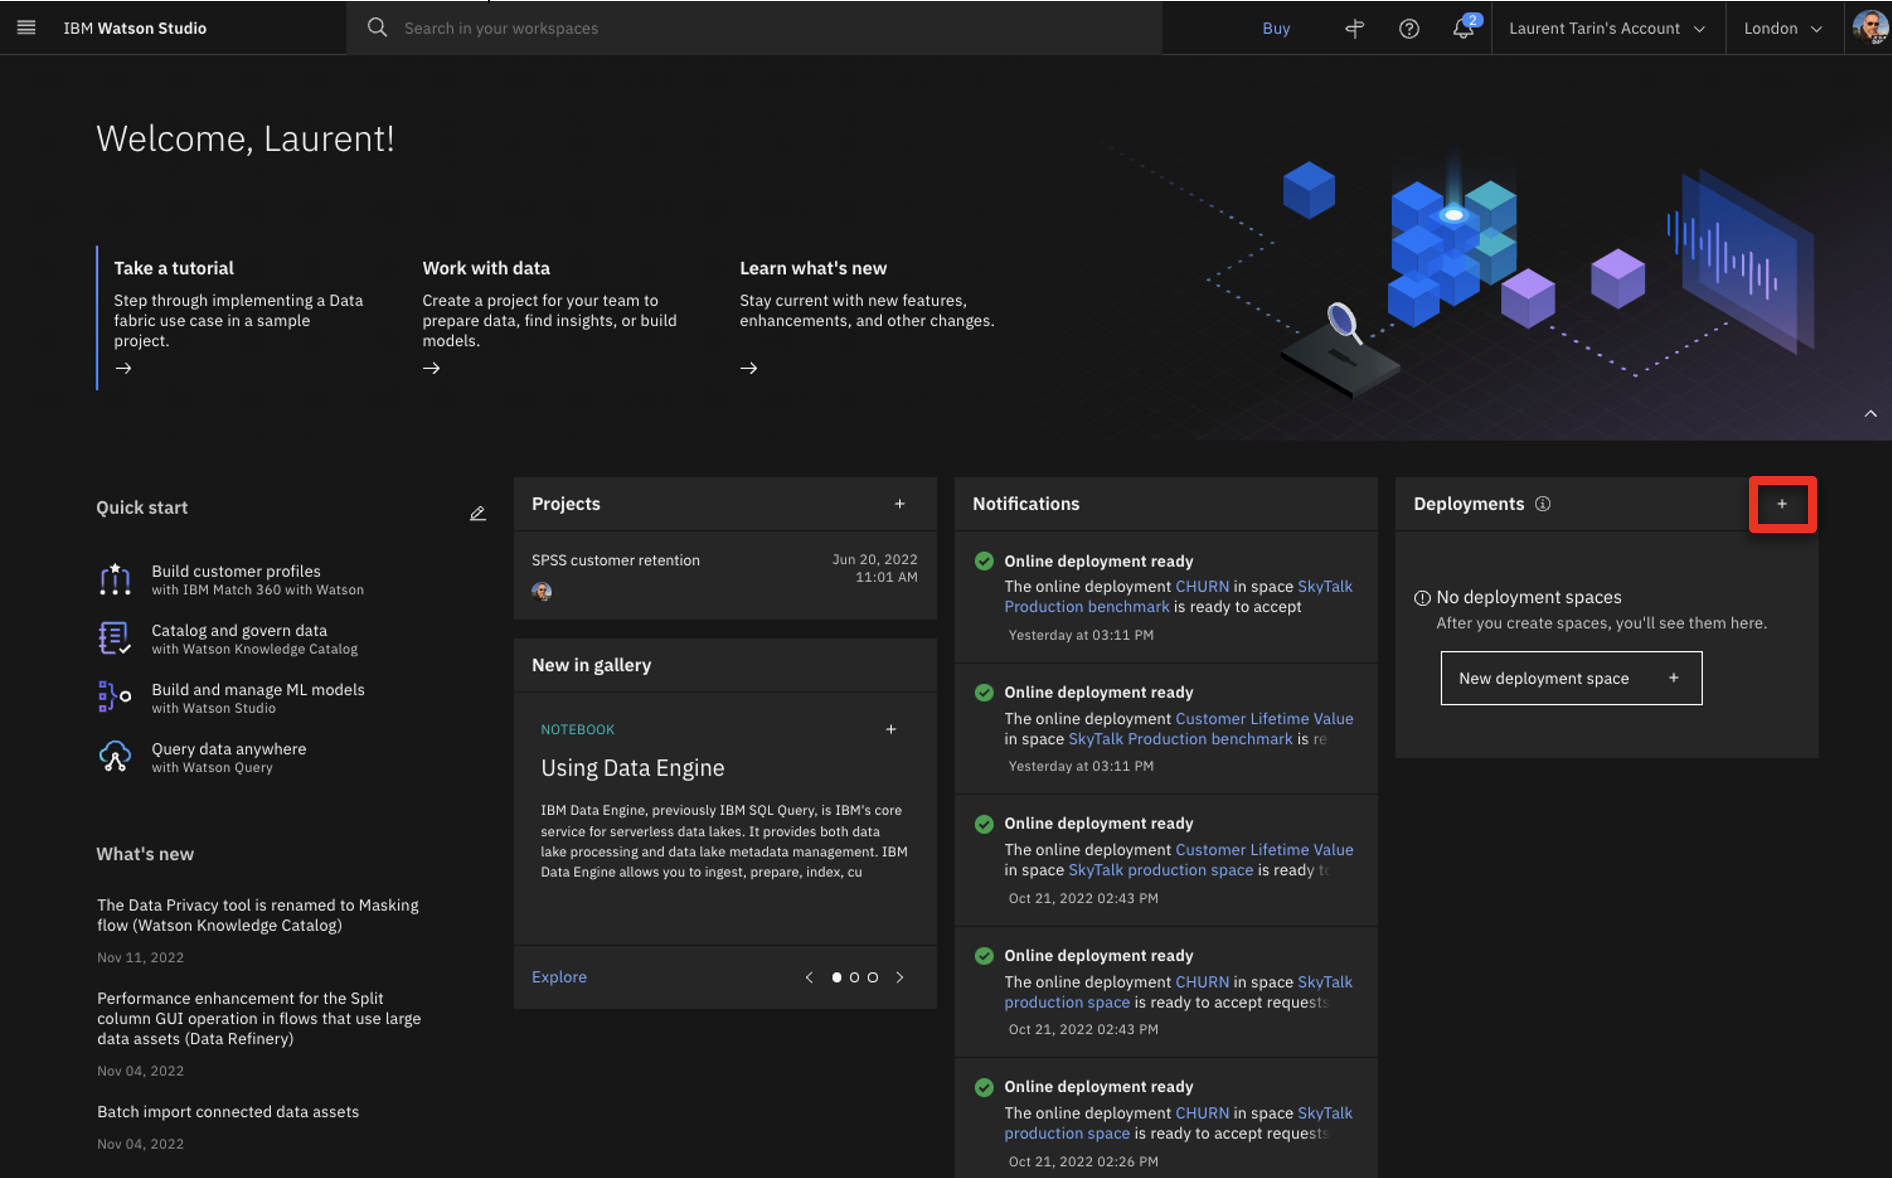
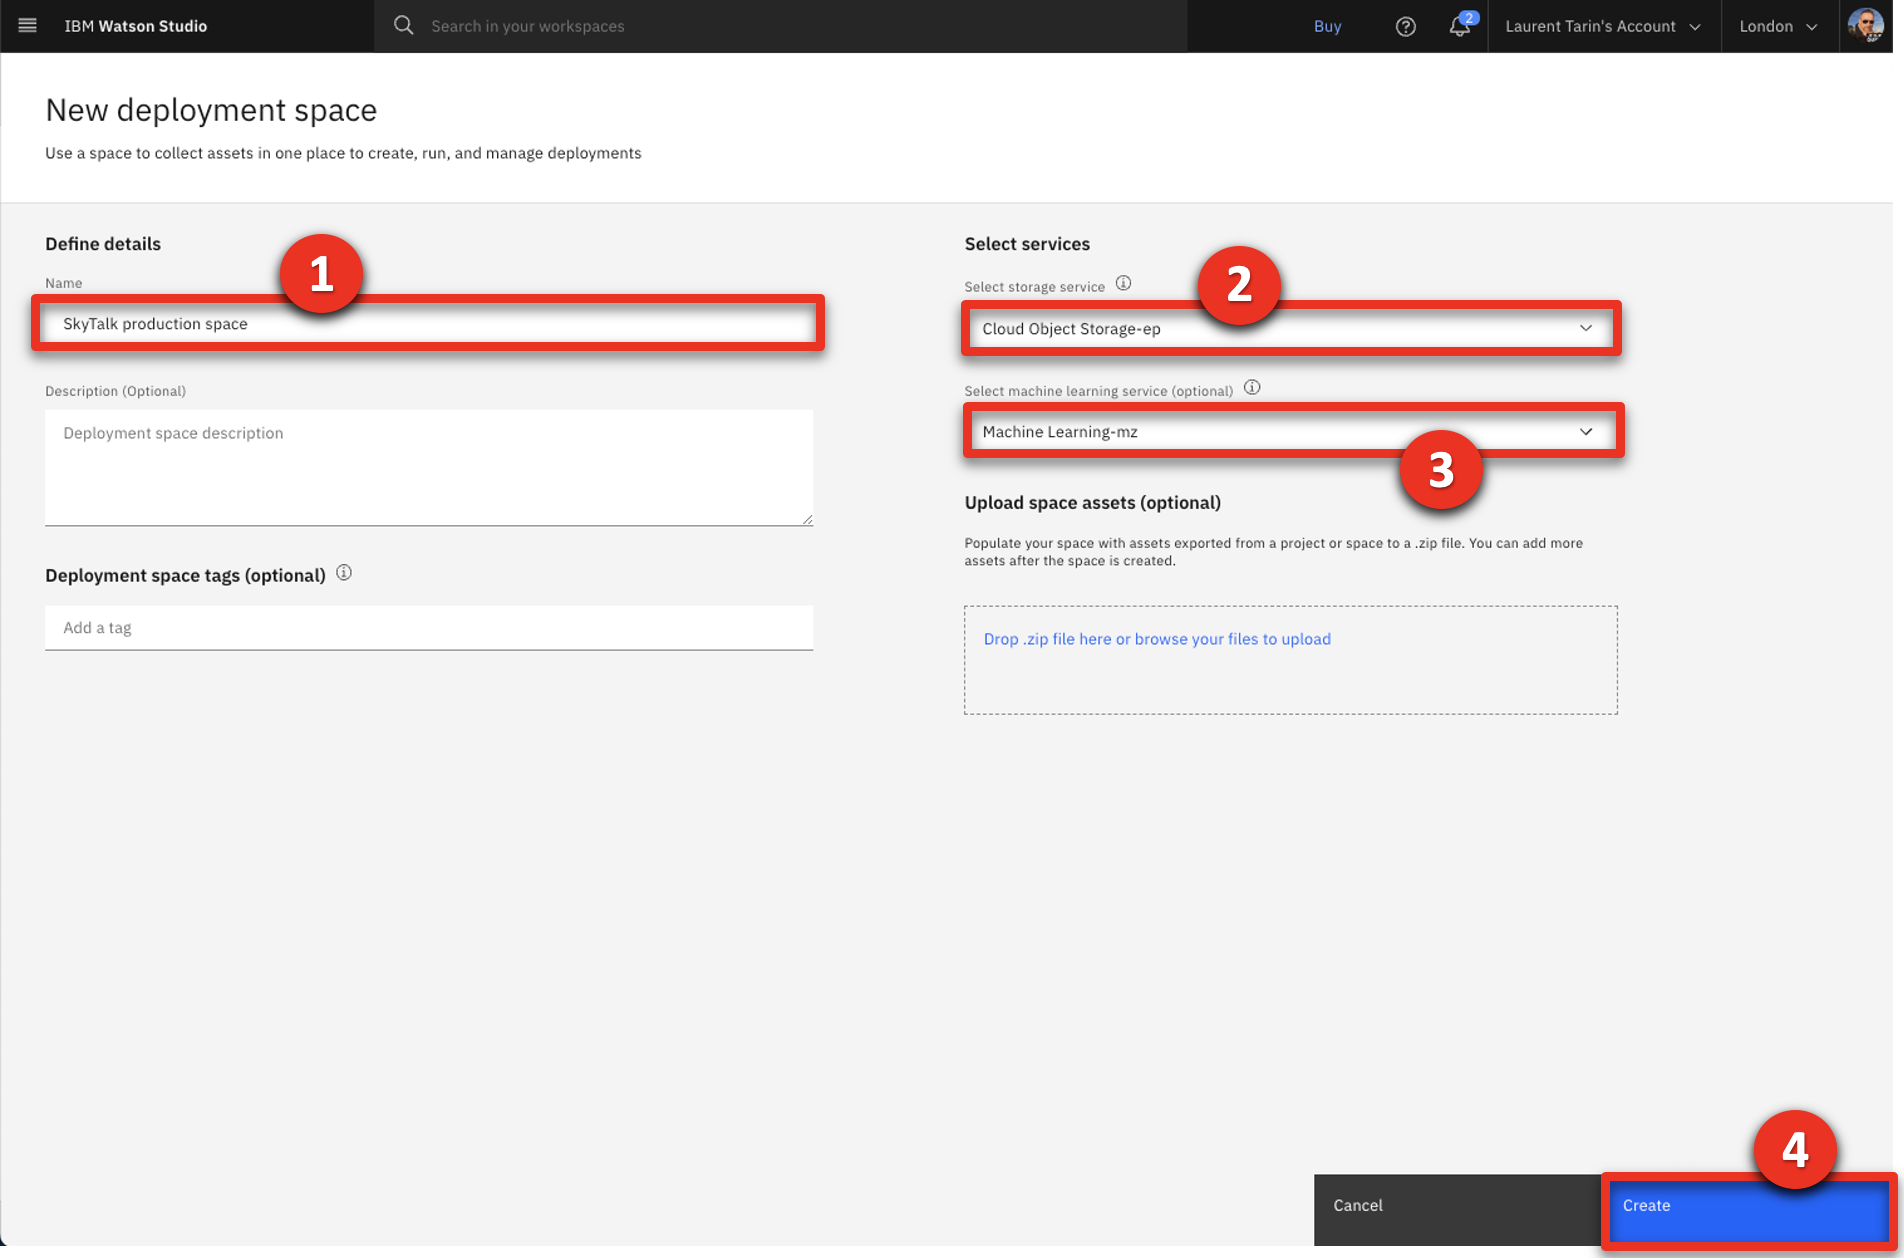
- Name the production space ‘SkyTalk production space’ (1). Select Cloud Object Storage-xx as the storage service (2). Select your Machine Learning-xx (3) as the machine learning service. Click Create (4).
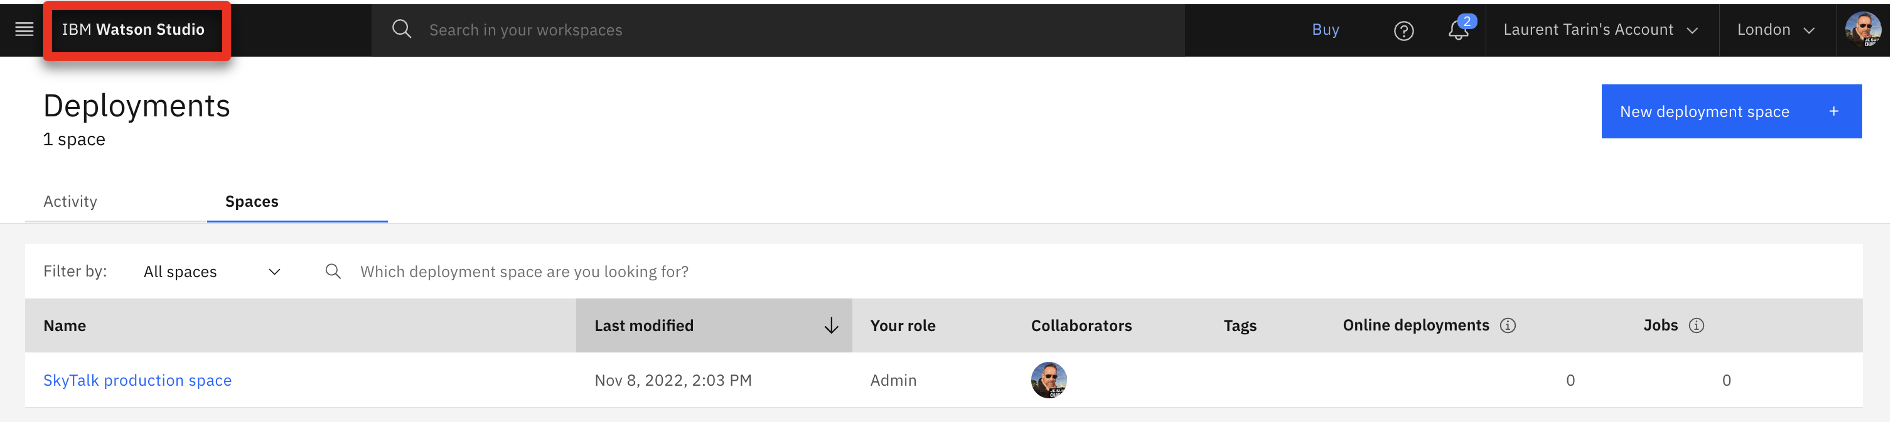
- Click Close.

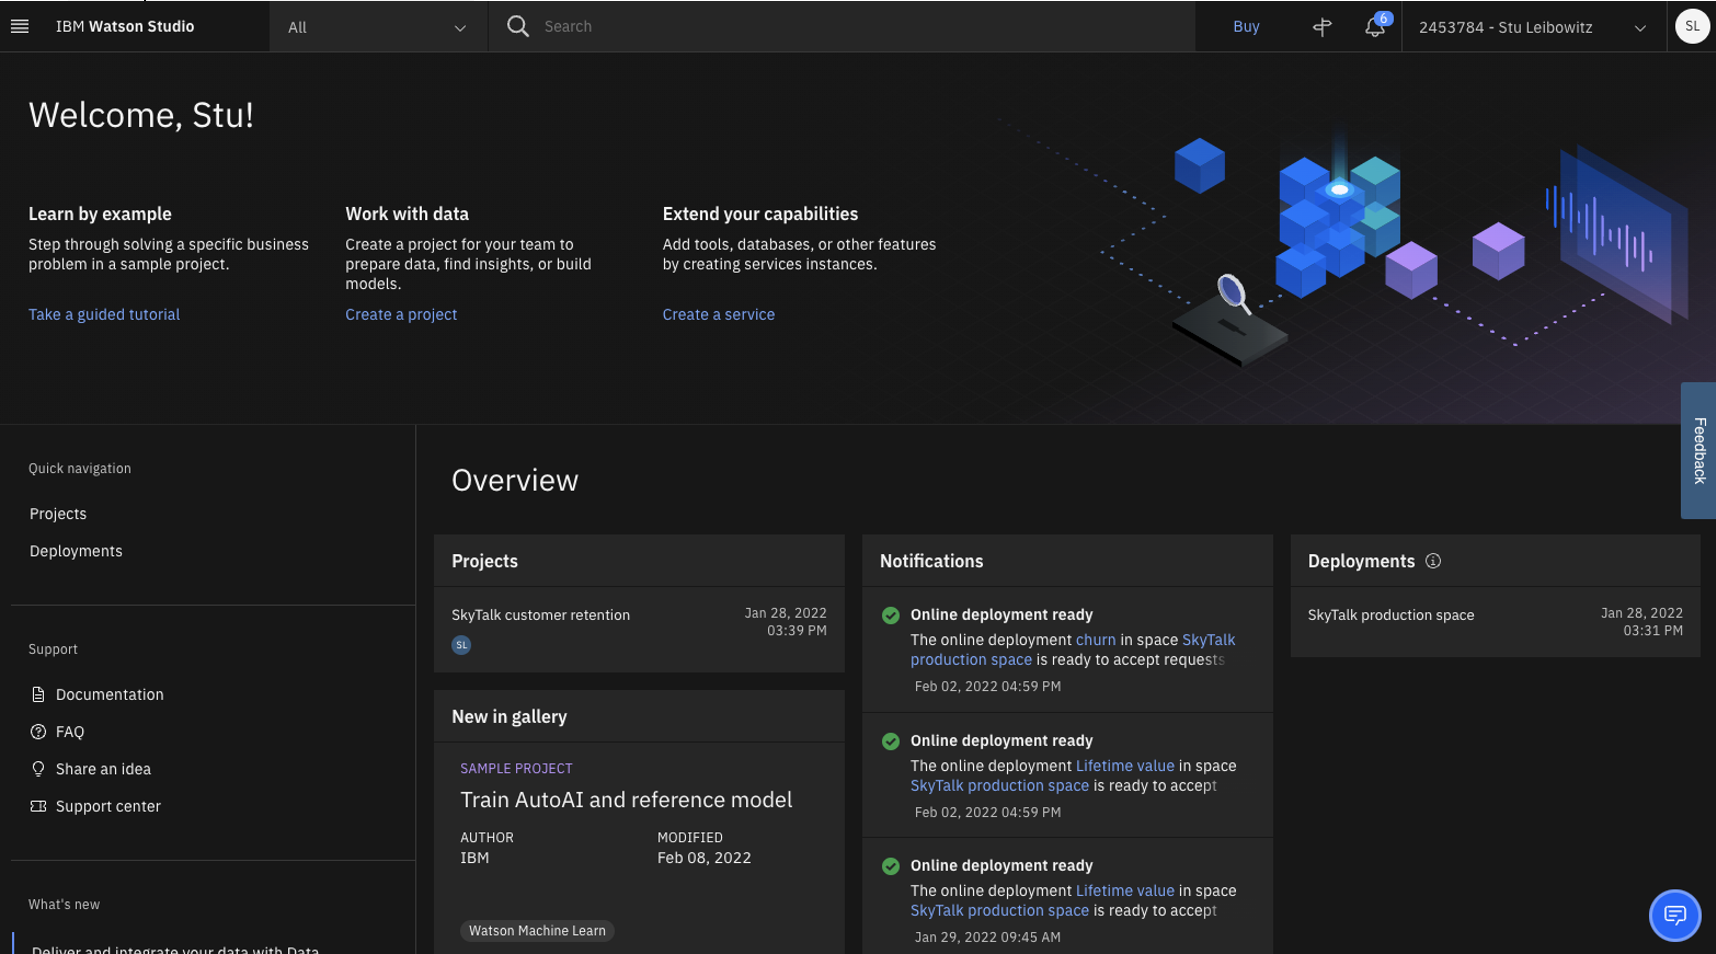
- Click the IBM Watson Studio logo on the left side of the toolbar to return to the home page.
5 - Set up two machine learning models
The Watson Studio environment is completely set up. The three services (Watson Studio, ML, and Storage) are ready, and the deployment environment is set up. Now let’s create the two prediction services using AutoAI in Watson Studio.
Ensure you have downloaded these two data files prior to starting this step:
SkyTalk customer loyalty data.csv
SkyTalk customer value data.csv
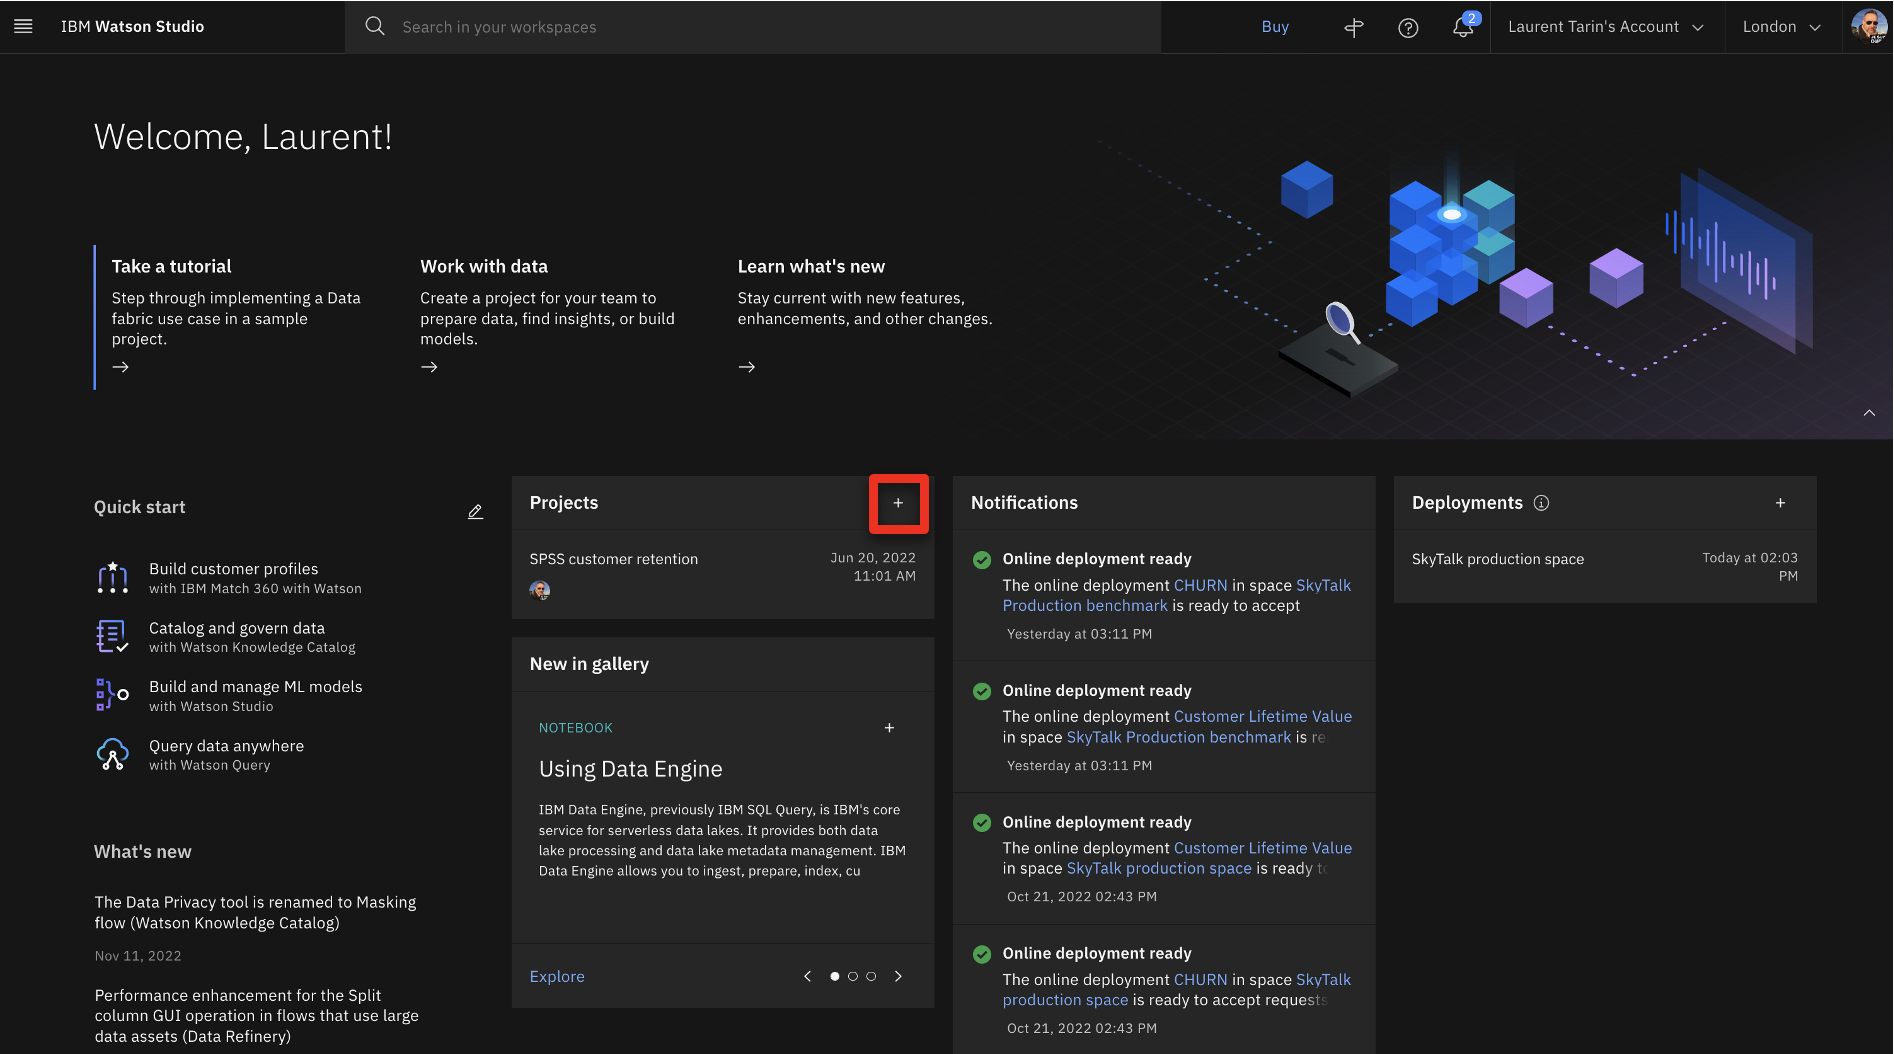
- Click + next to Projects.
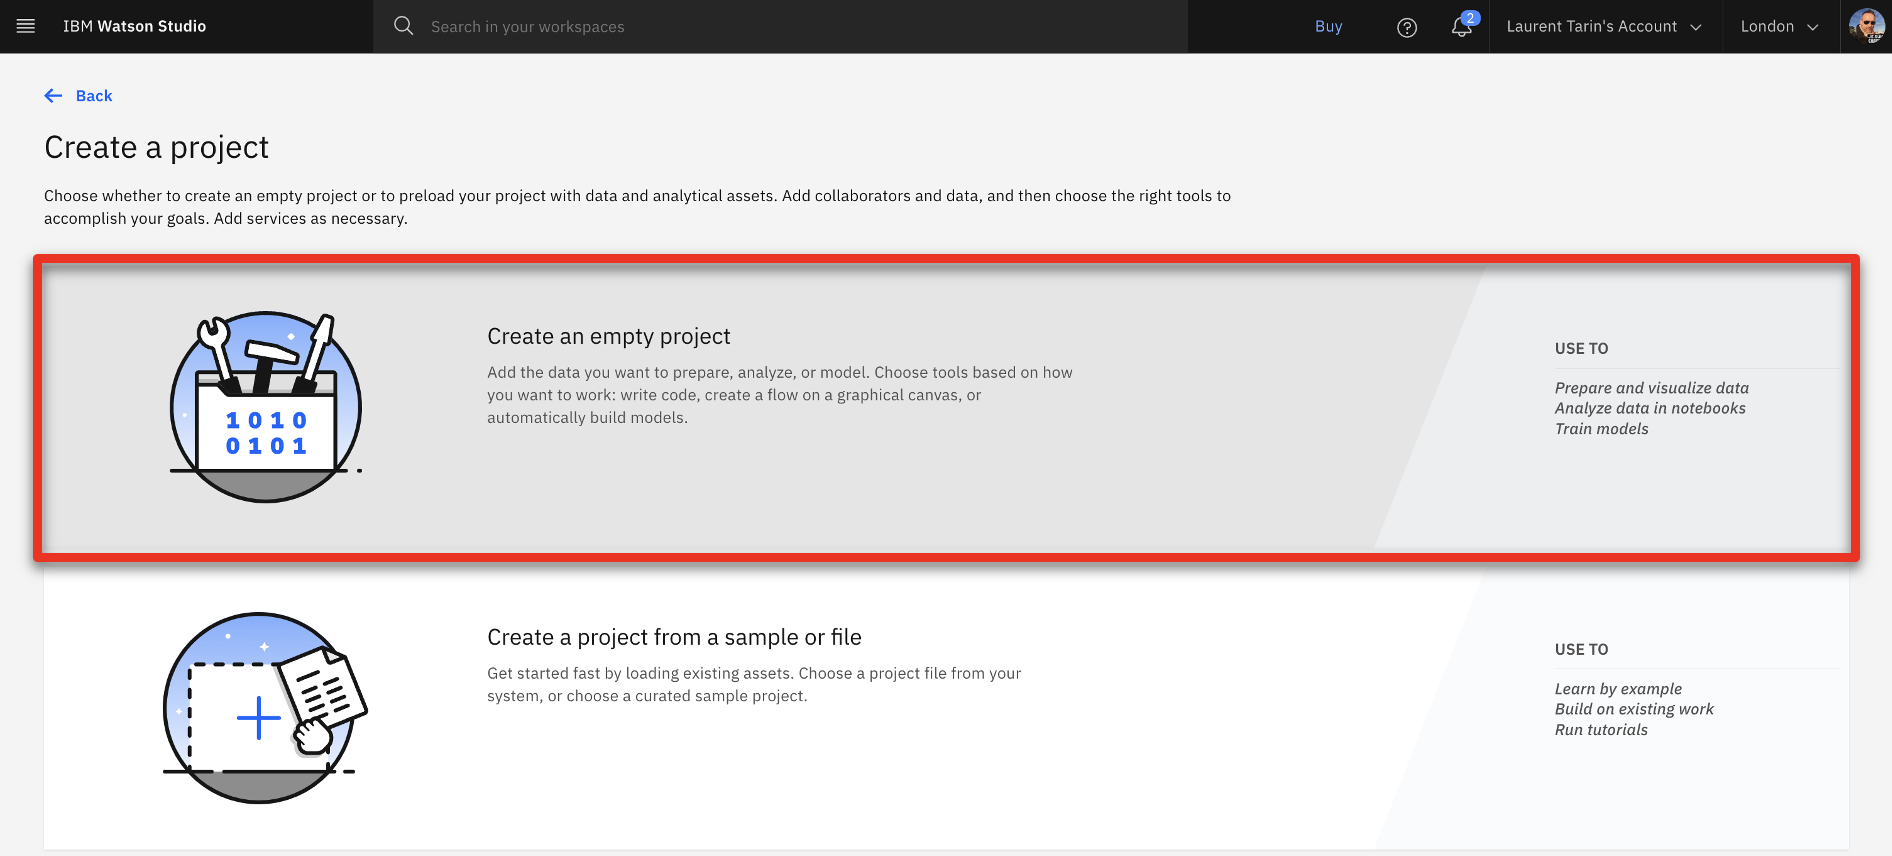
- Select Create an empty project.
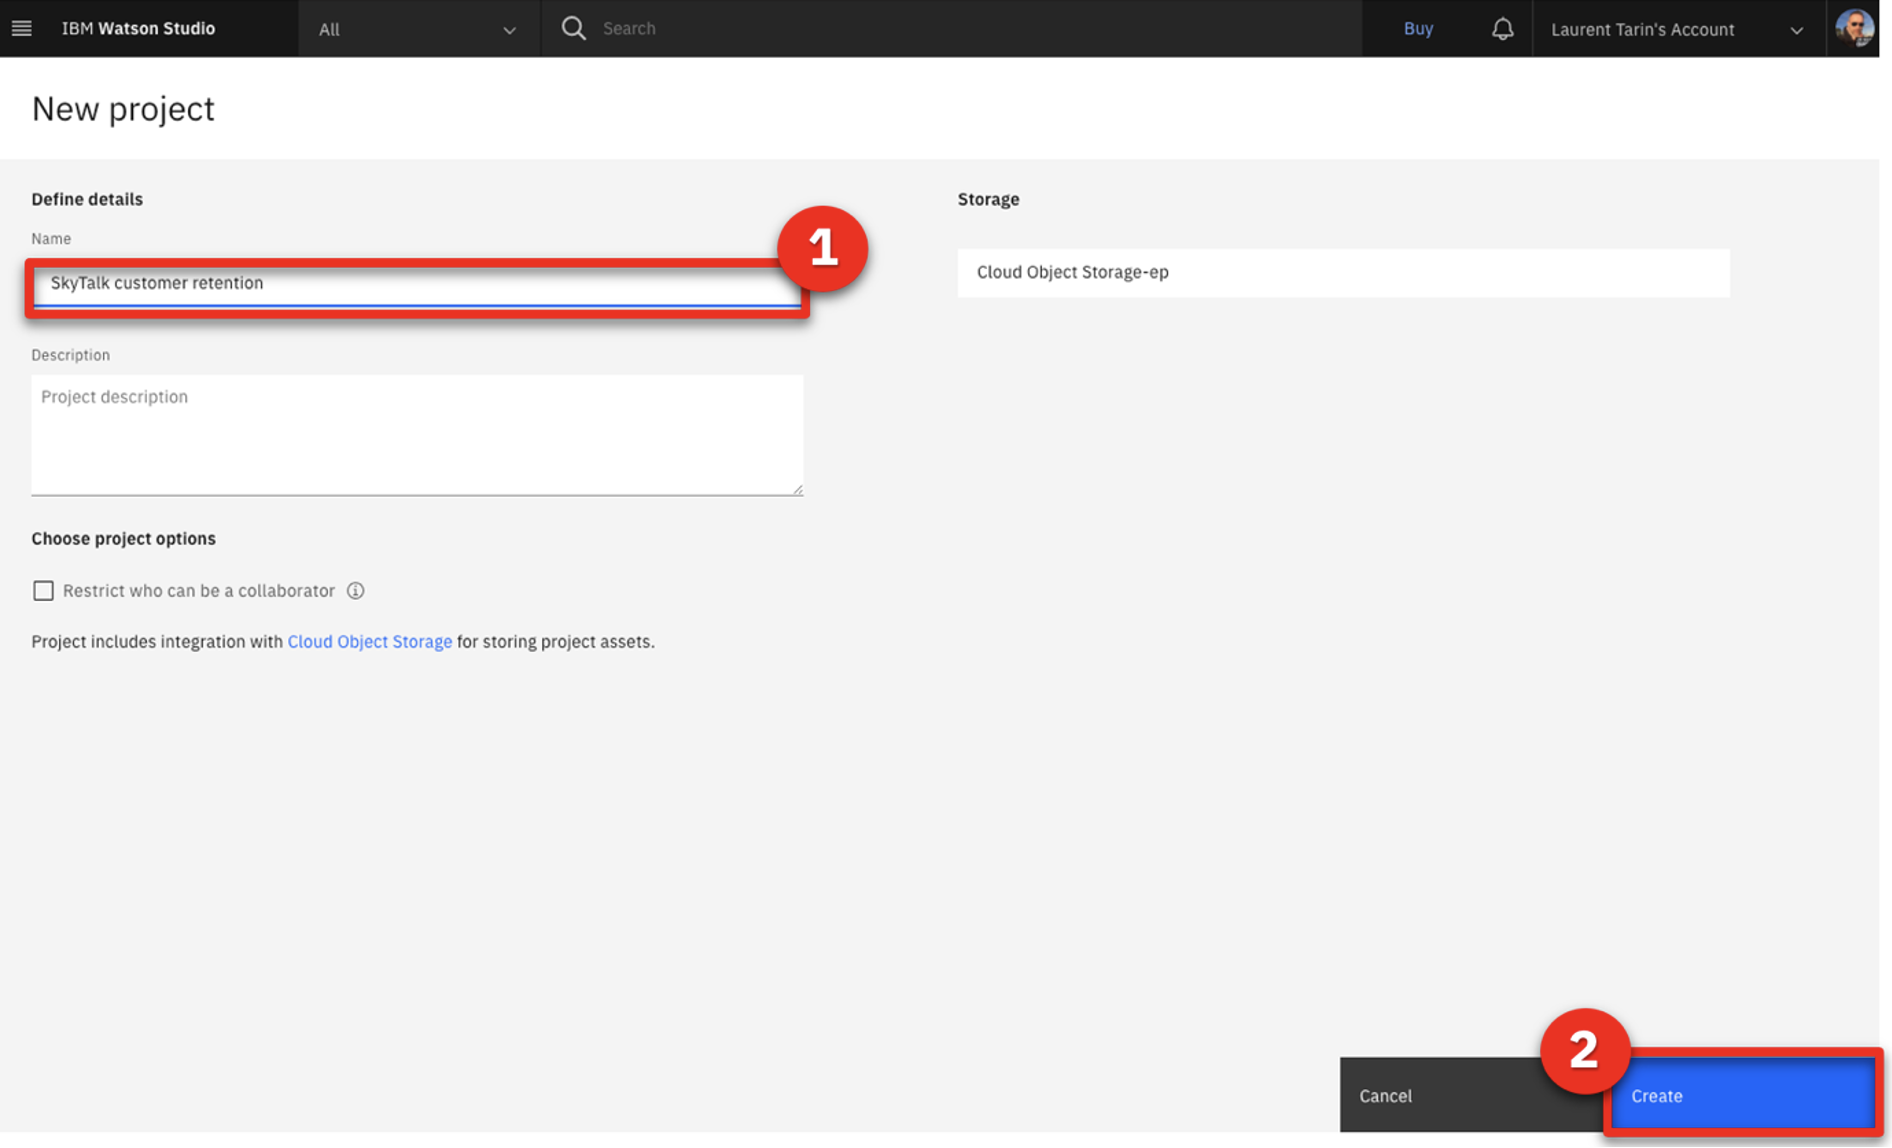
- Name the project ‘SkyTalk customer retention’ (1) and click Create (2).
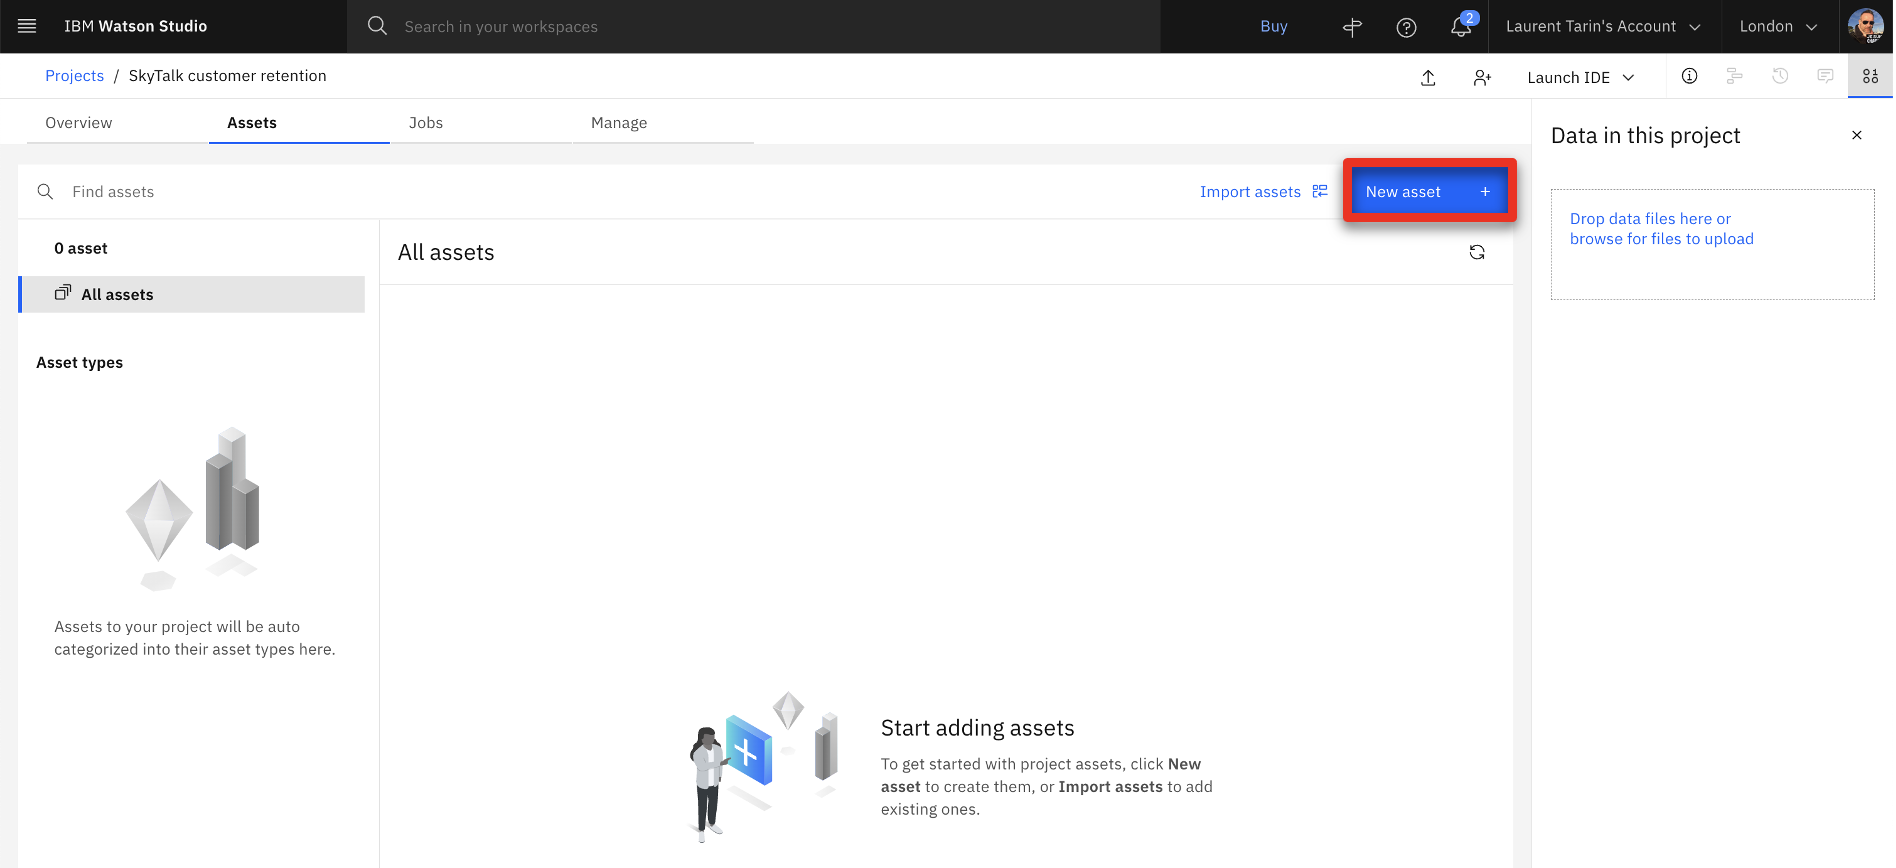
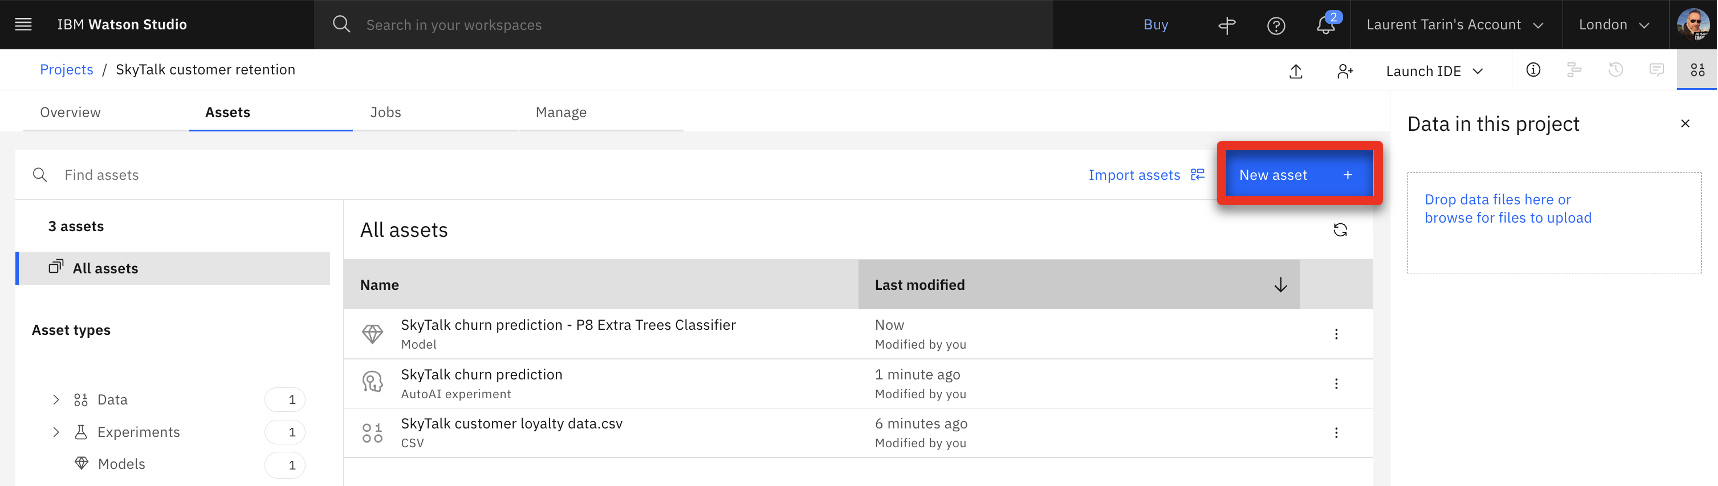
- Click the Assets tab.

- Click New asset +.
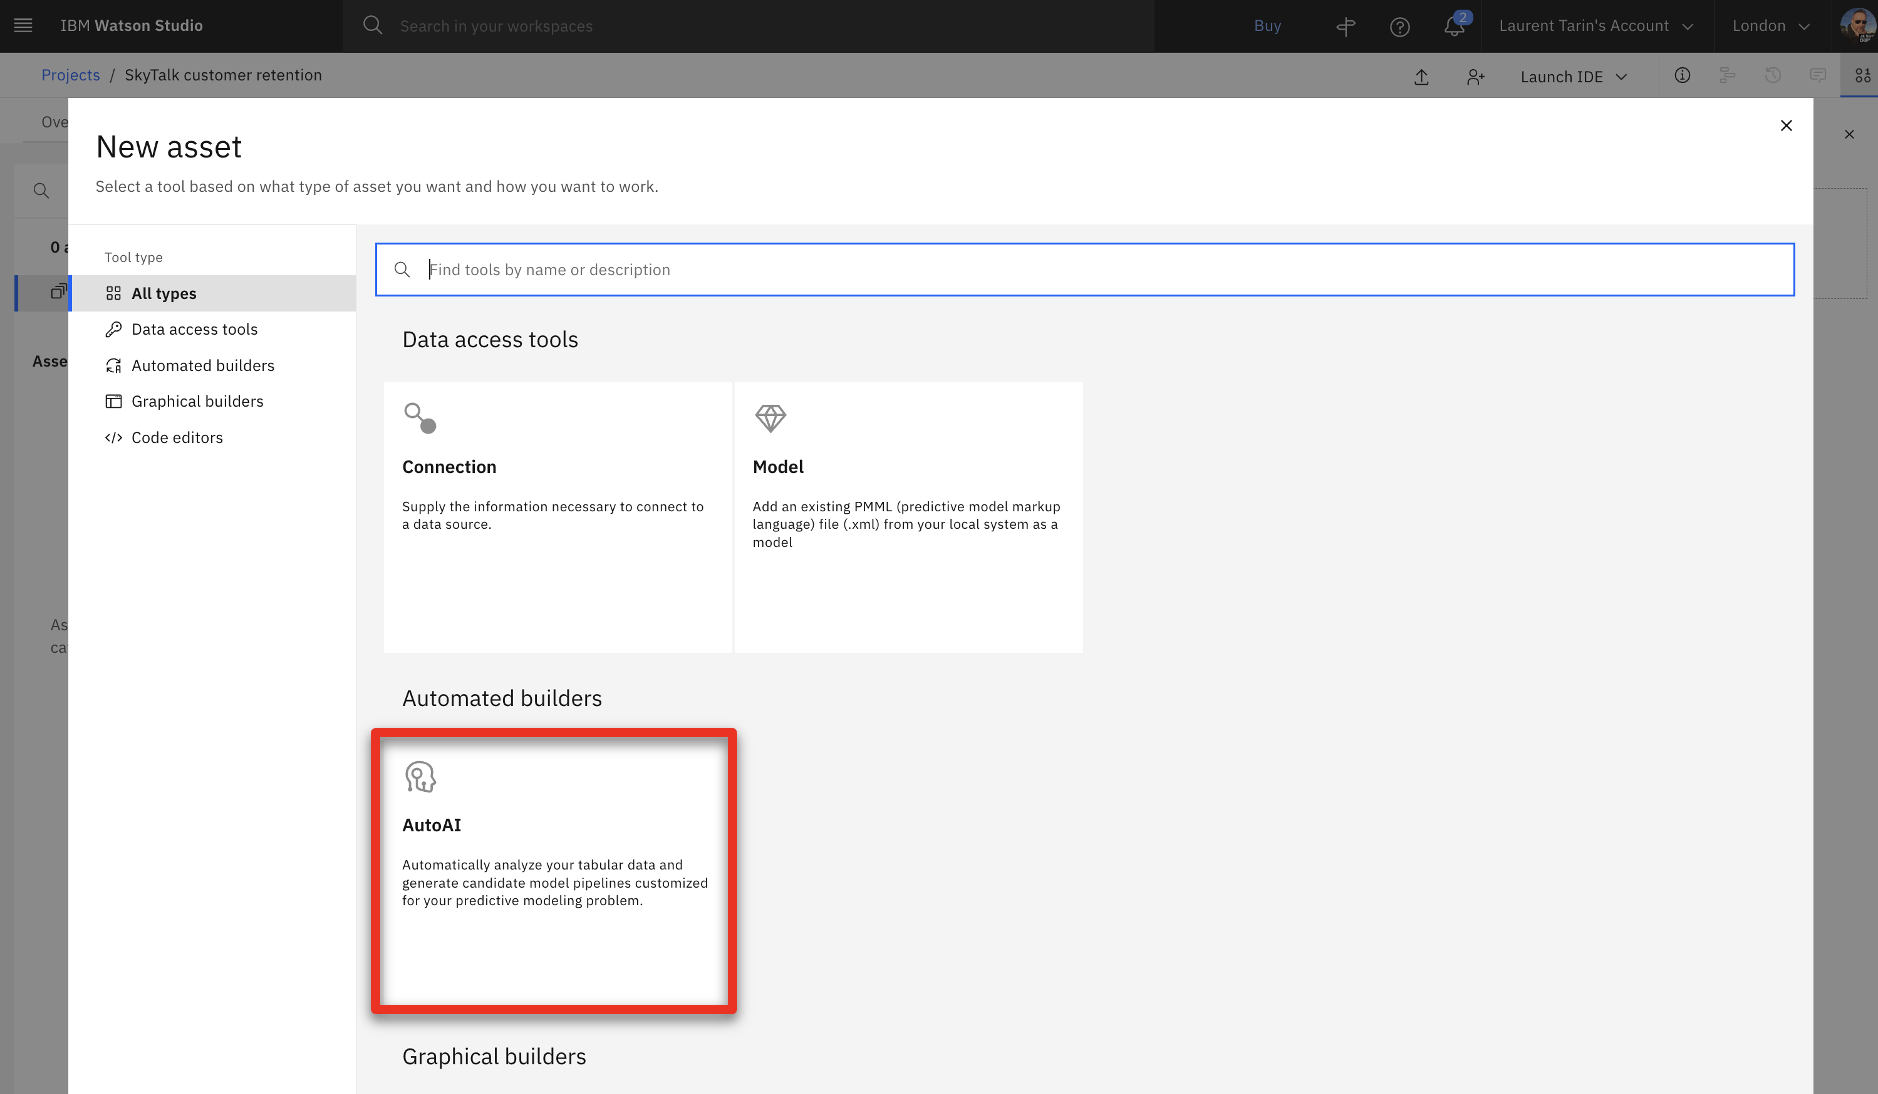
- Select AutoAI.
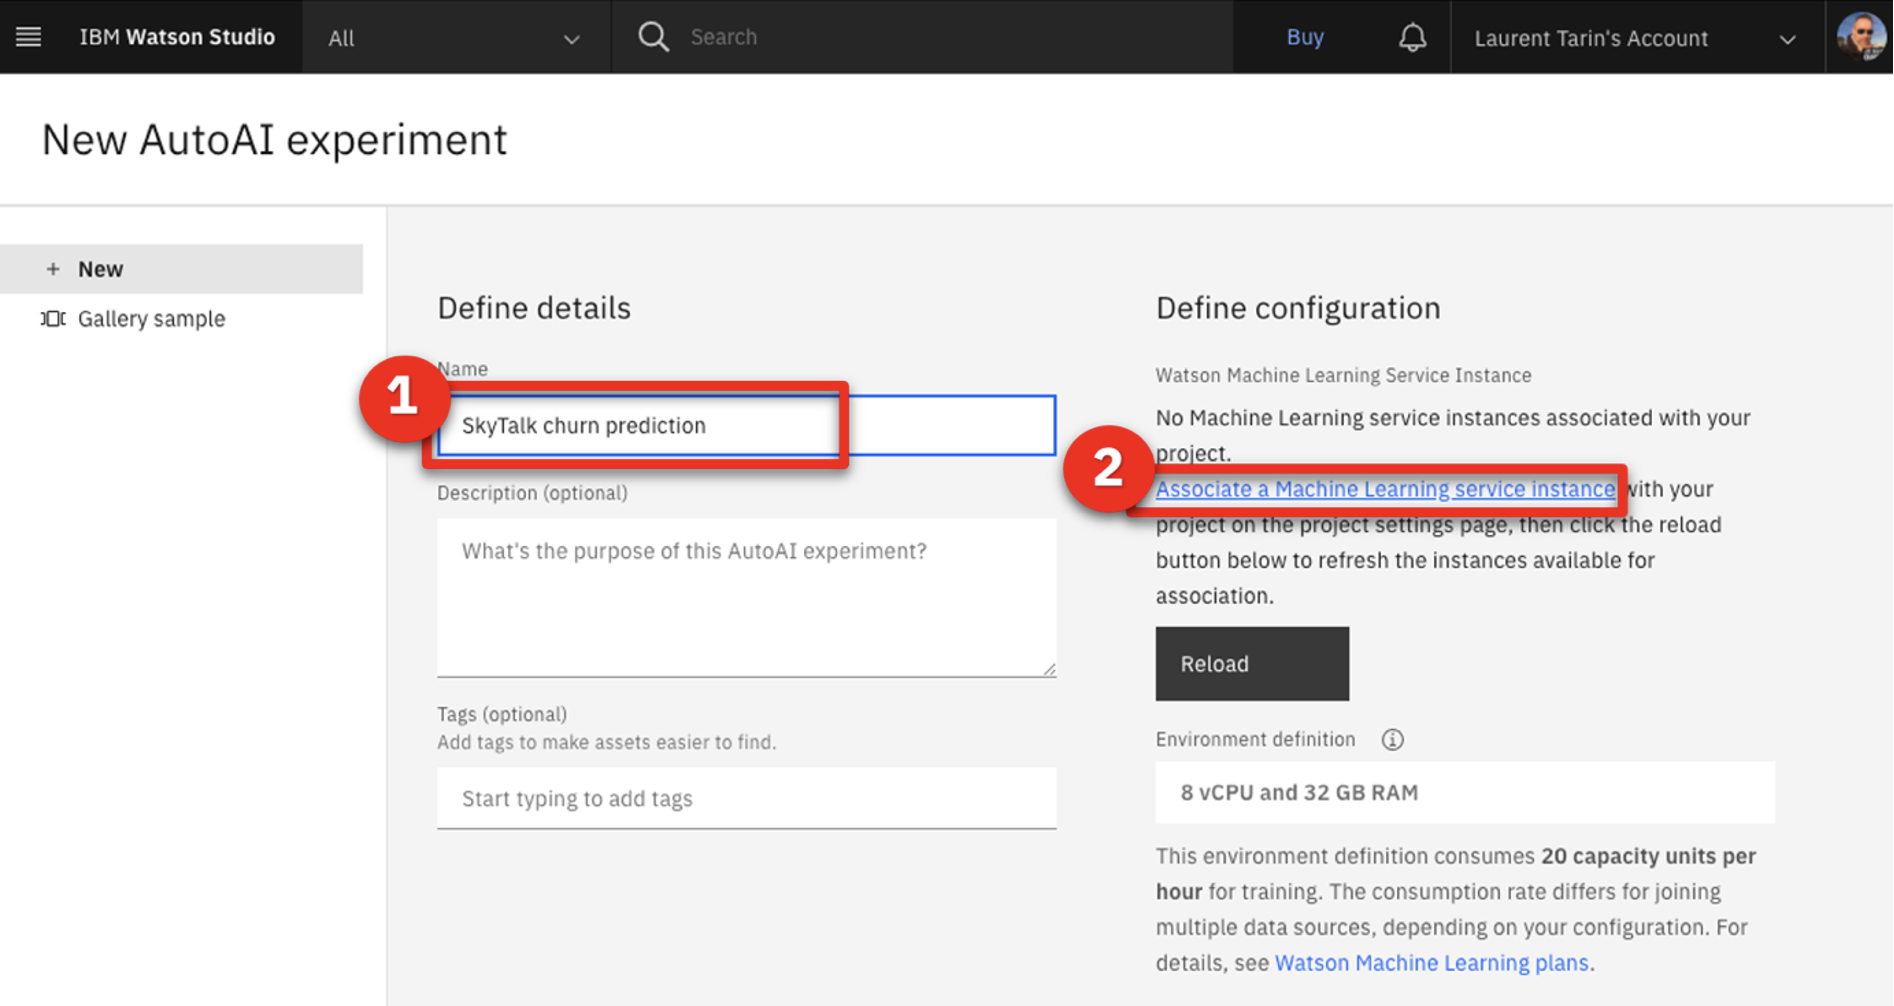
- Name the AutoAI experiment ‘SkyTalk churn prediction’ (1) and click Associate a Machine Learning service instance (2).
- Select the Machine learning-xx (1) service. Click Associate (2).

- Click Reload.
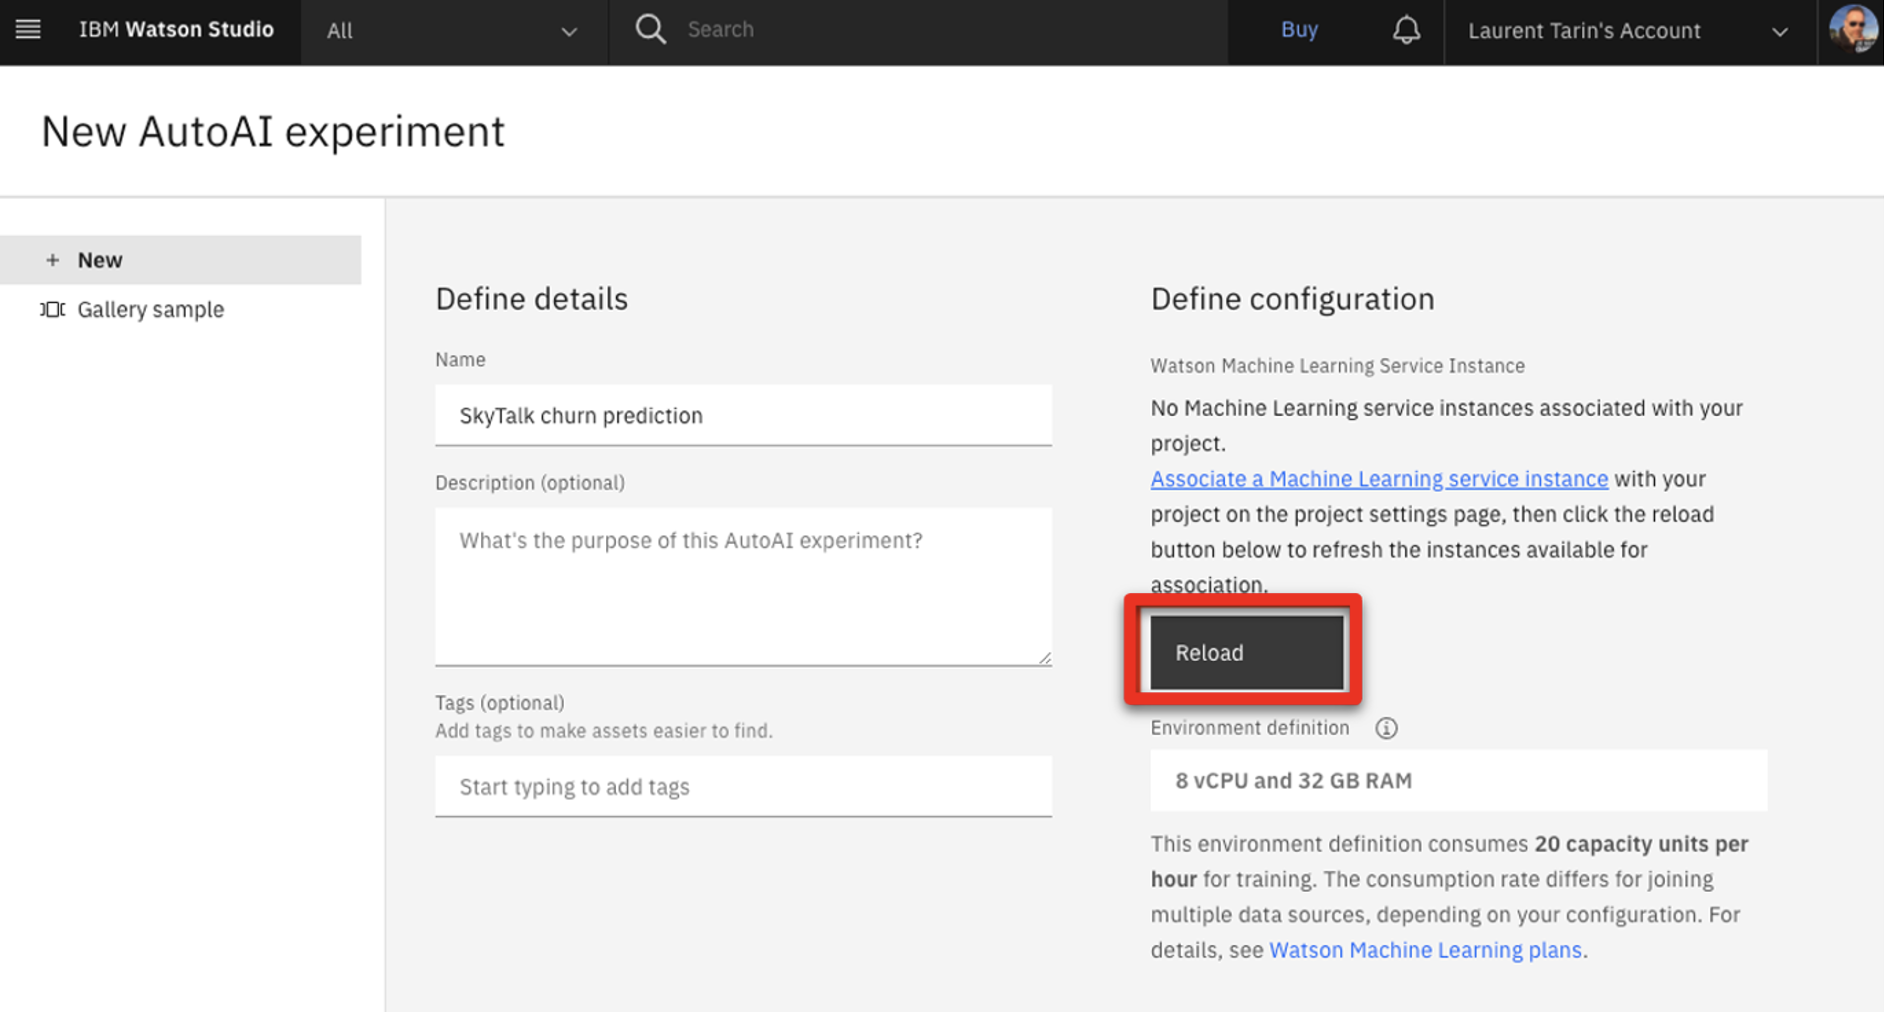
- Click Create.

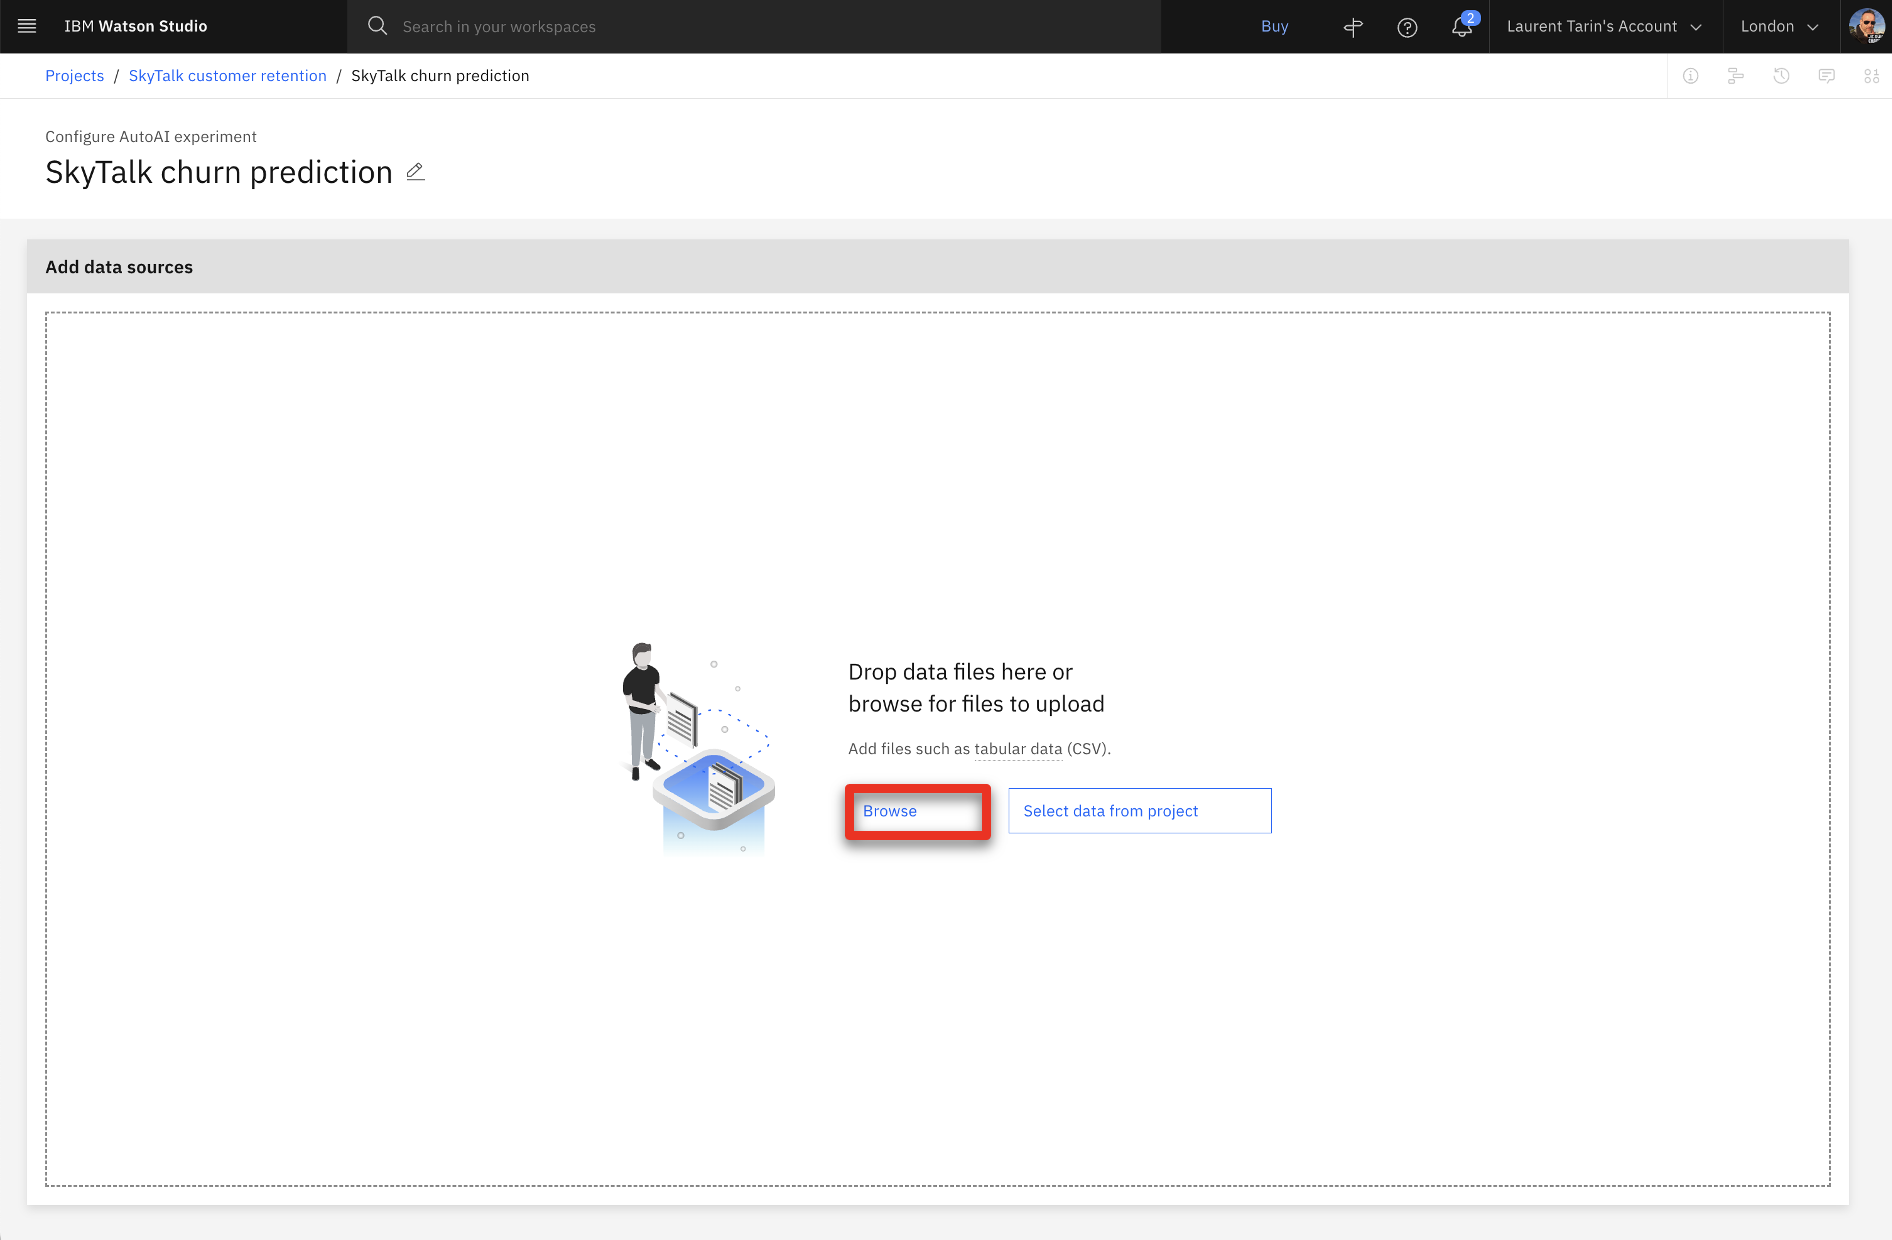
- Click Browse.
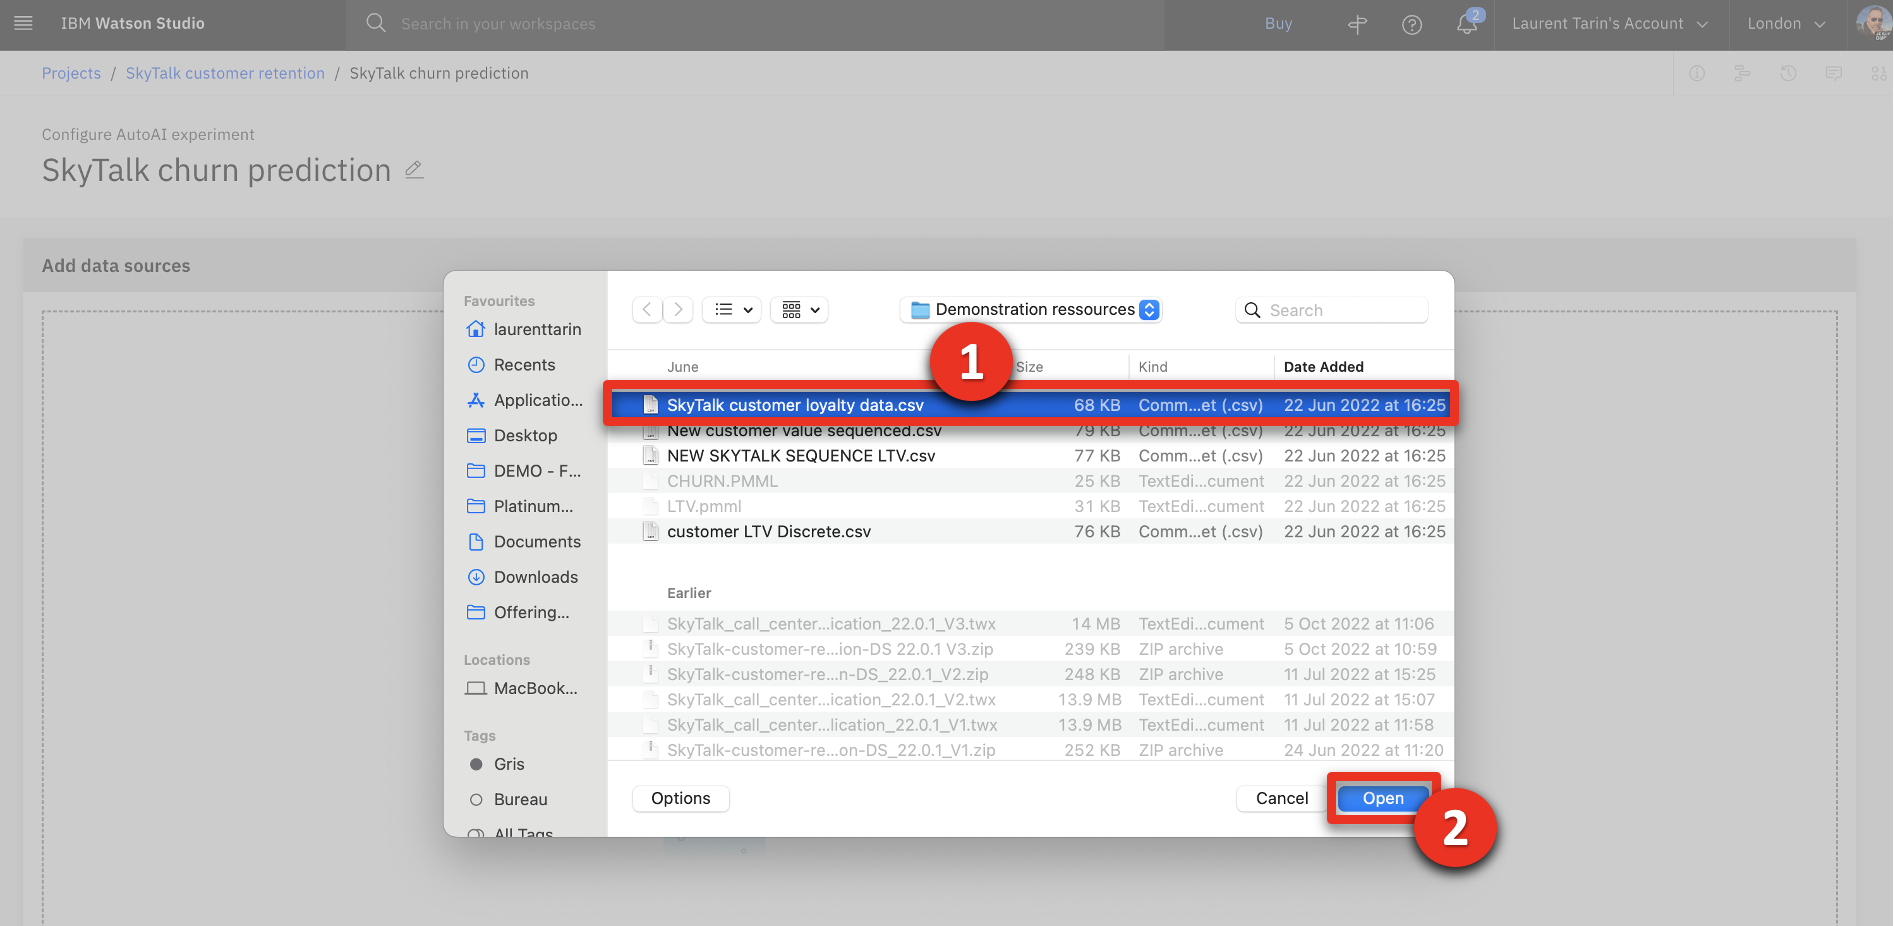
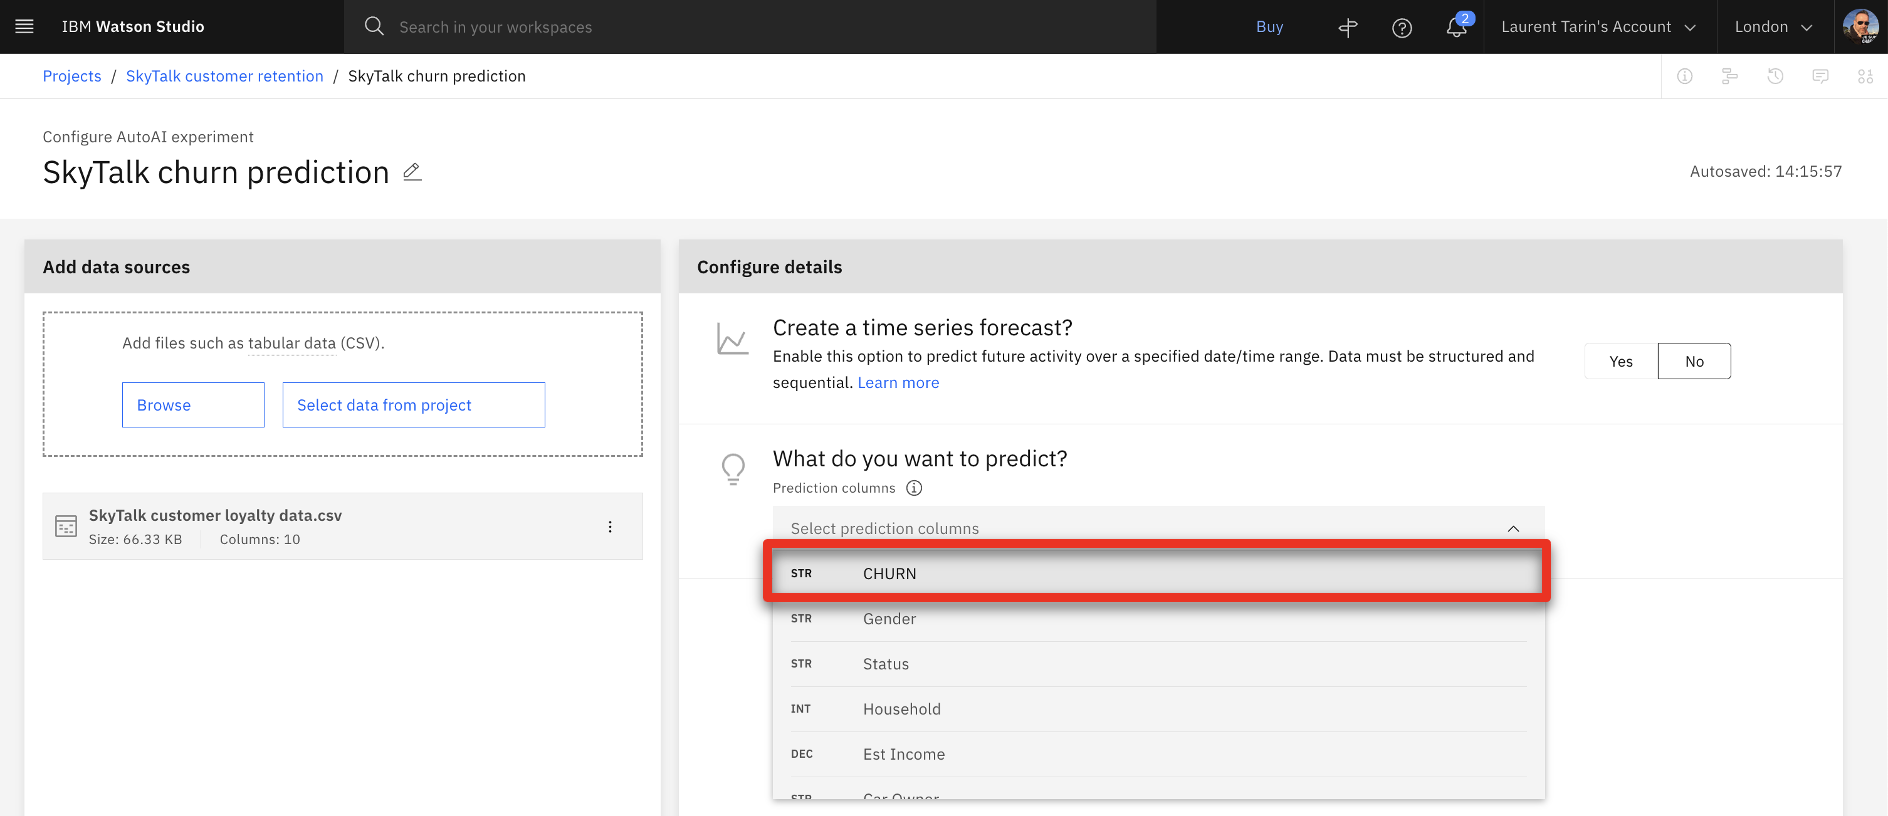
- Select the SkyTalk customer loyalty data.csv file (1) and click Open (2).
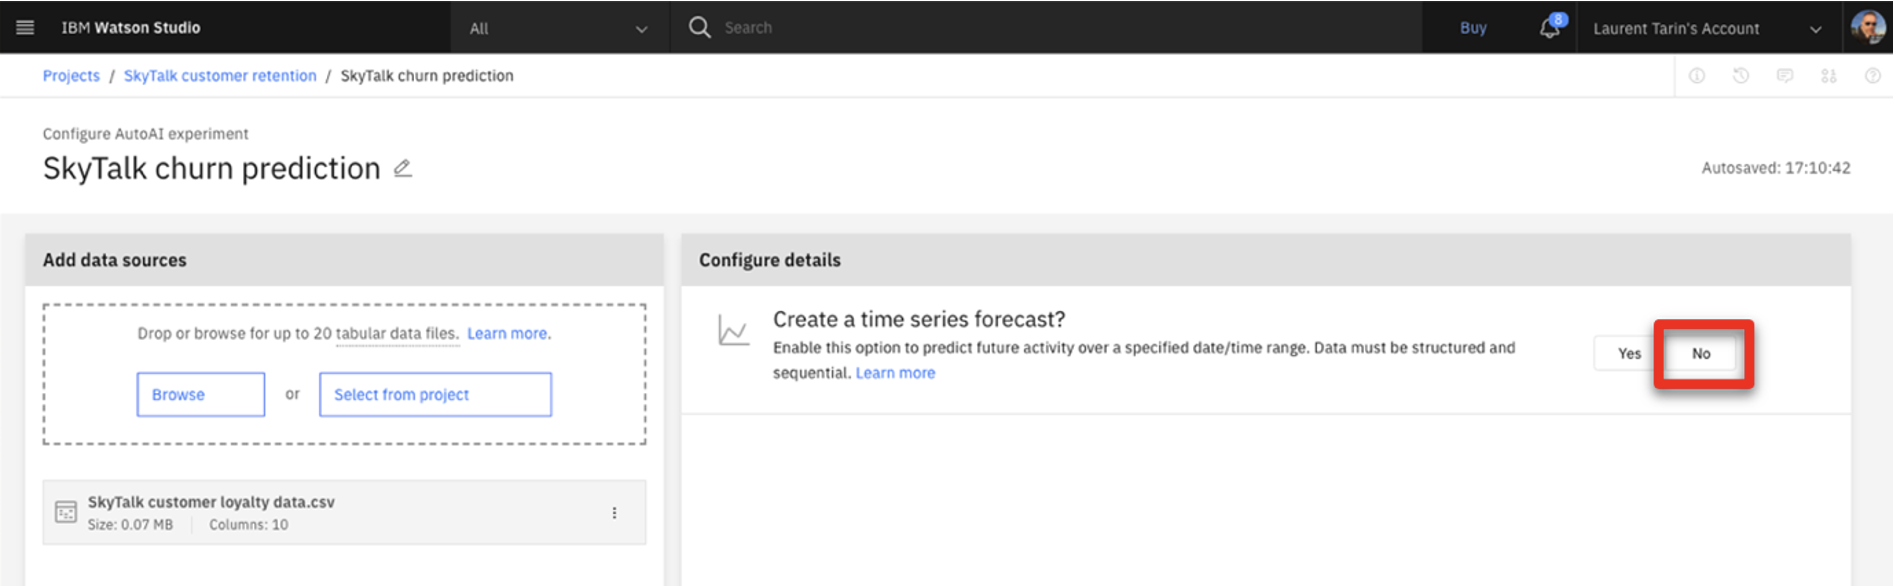
- When prompted ‘Create a time series forecast?’, click No.
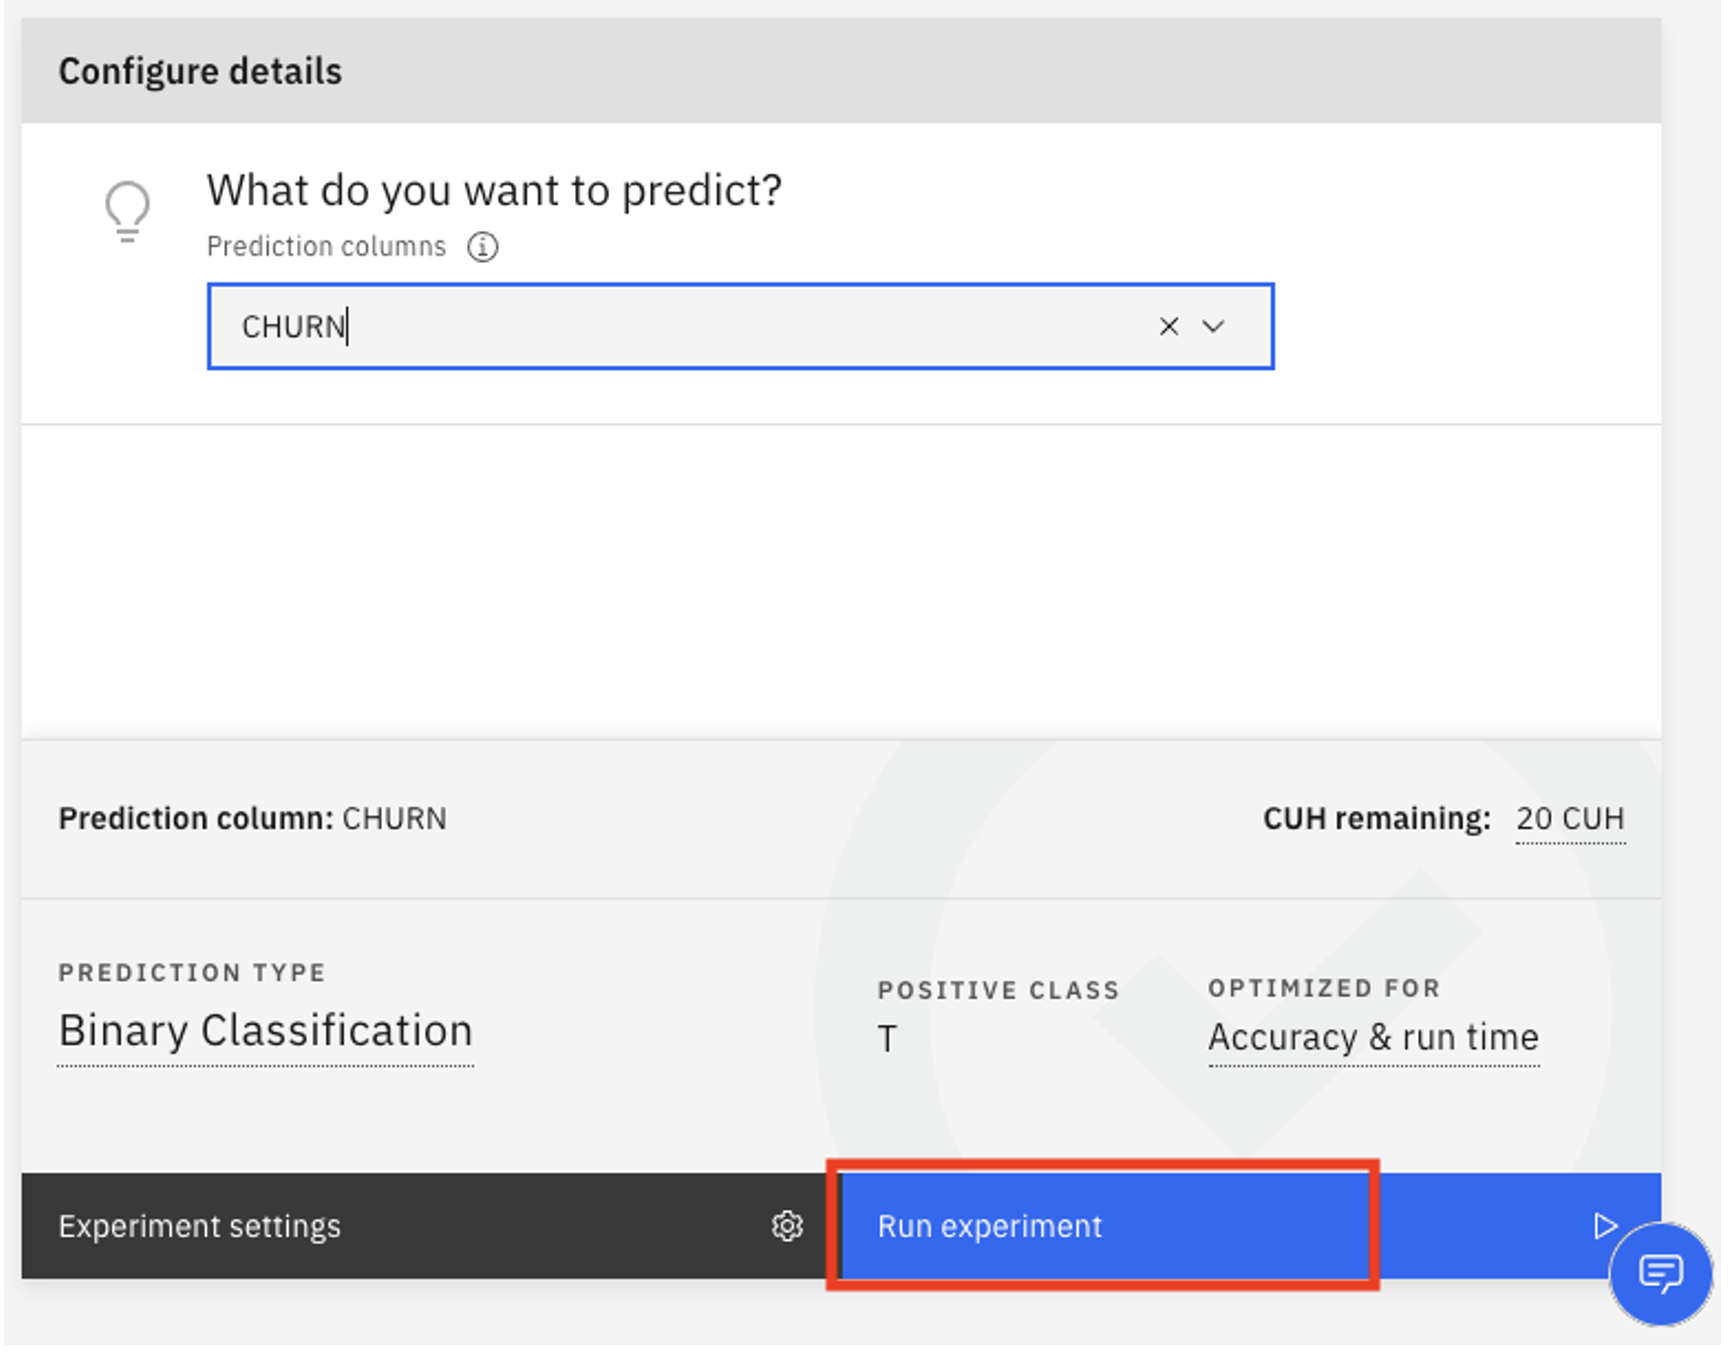
- When prompted ‘What do you want to predict?’, select CHURN.
- Click Run experiment.
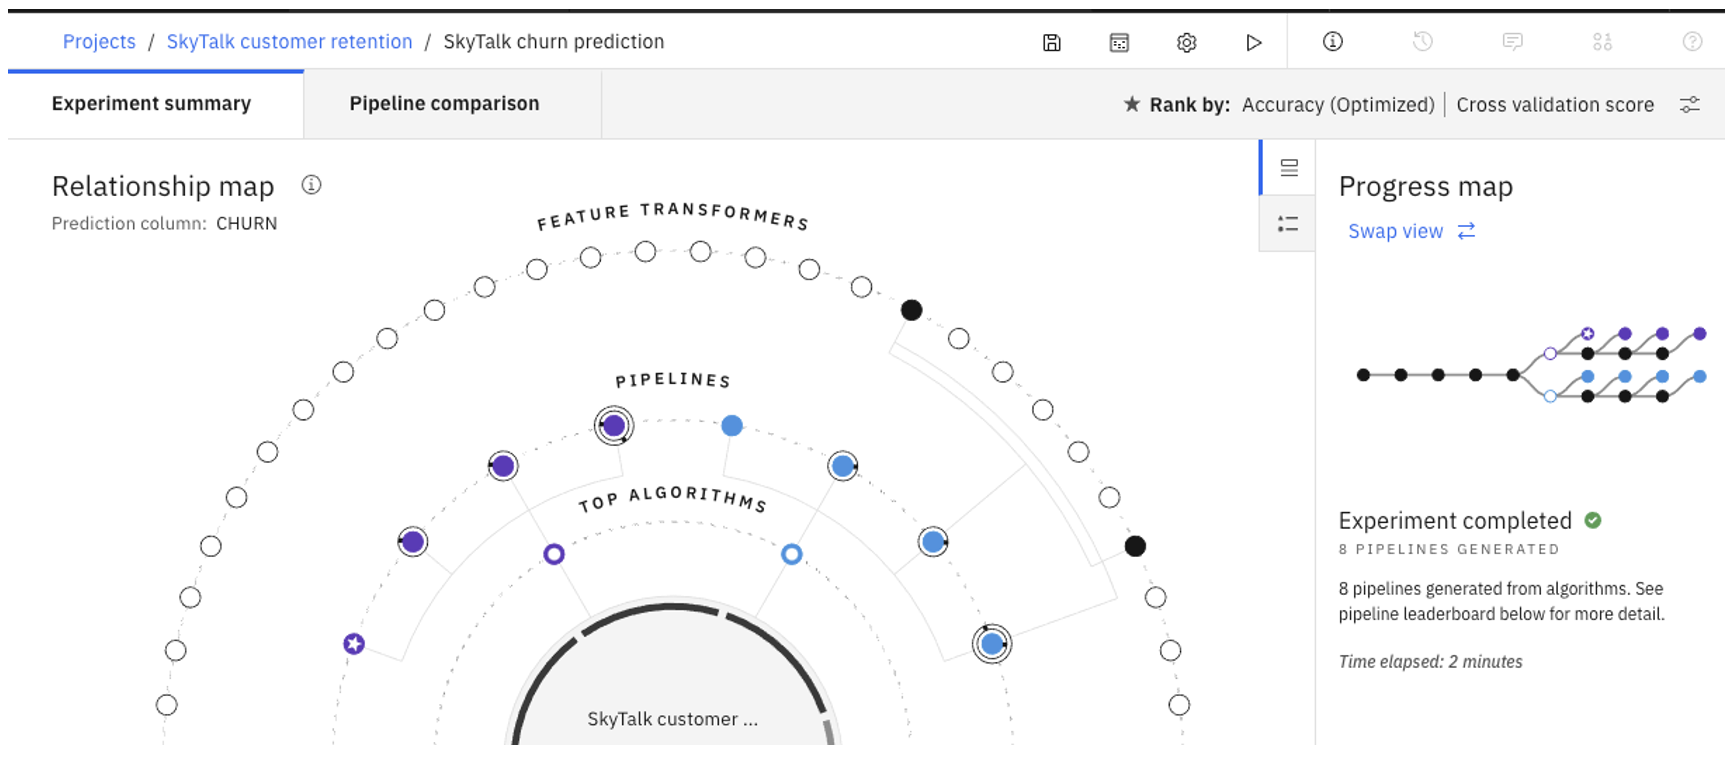
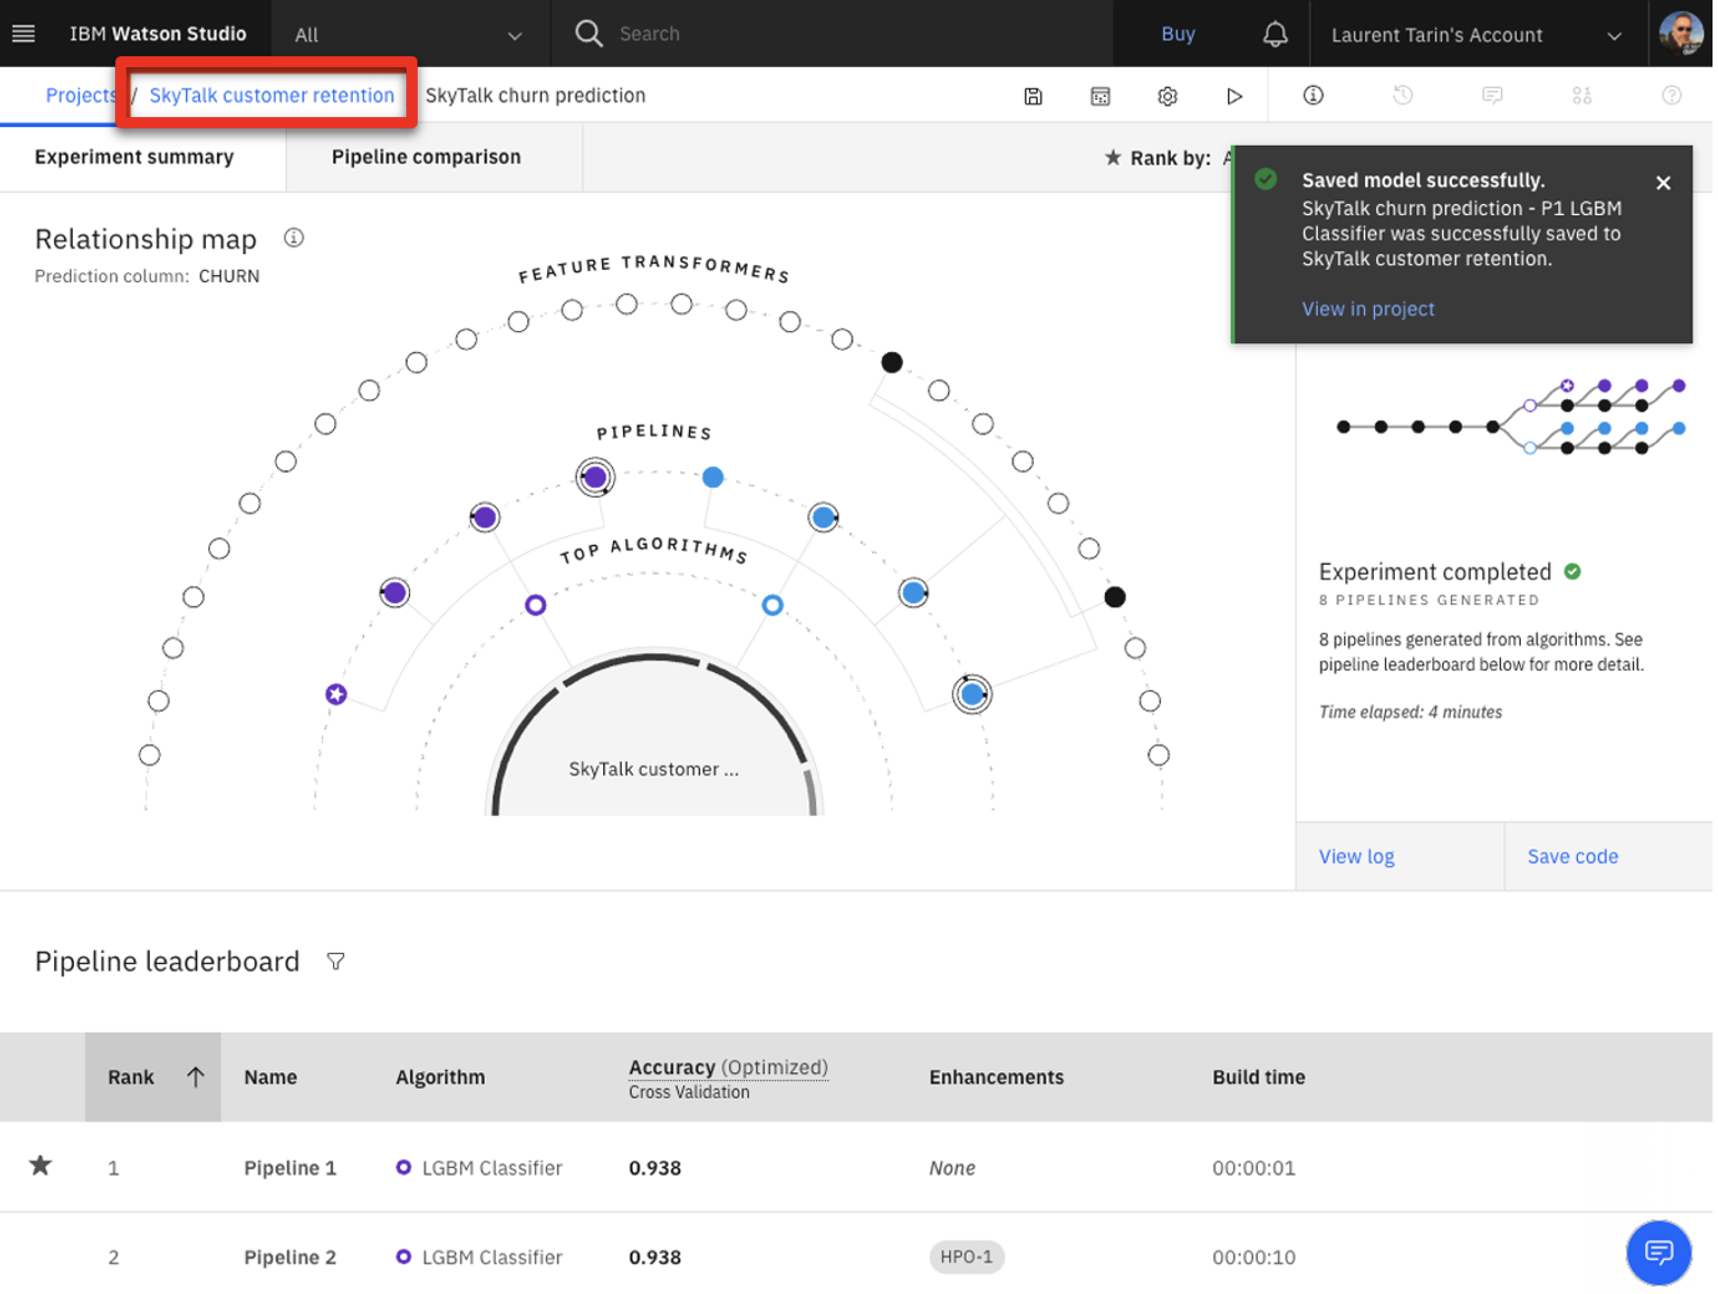
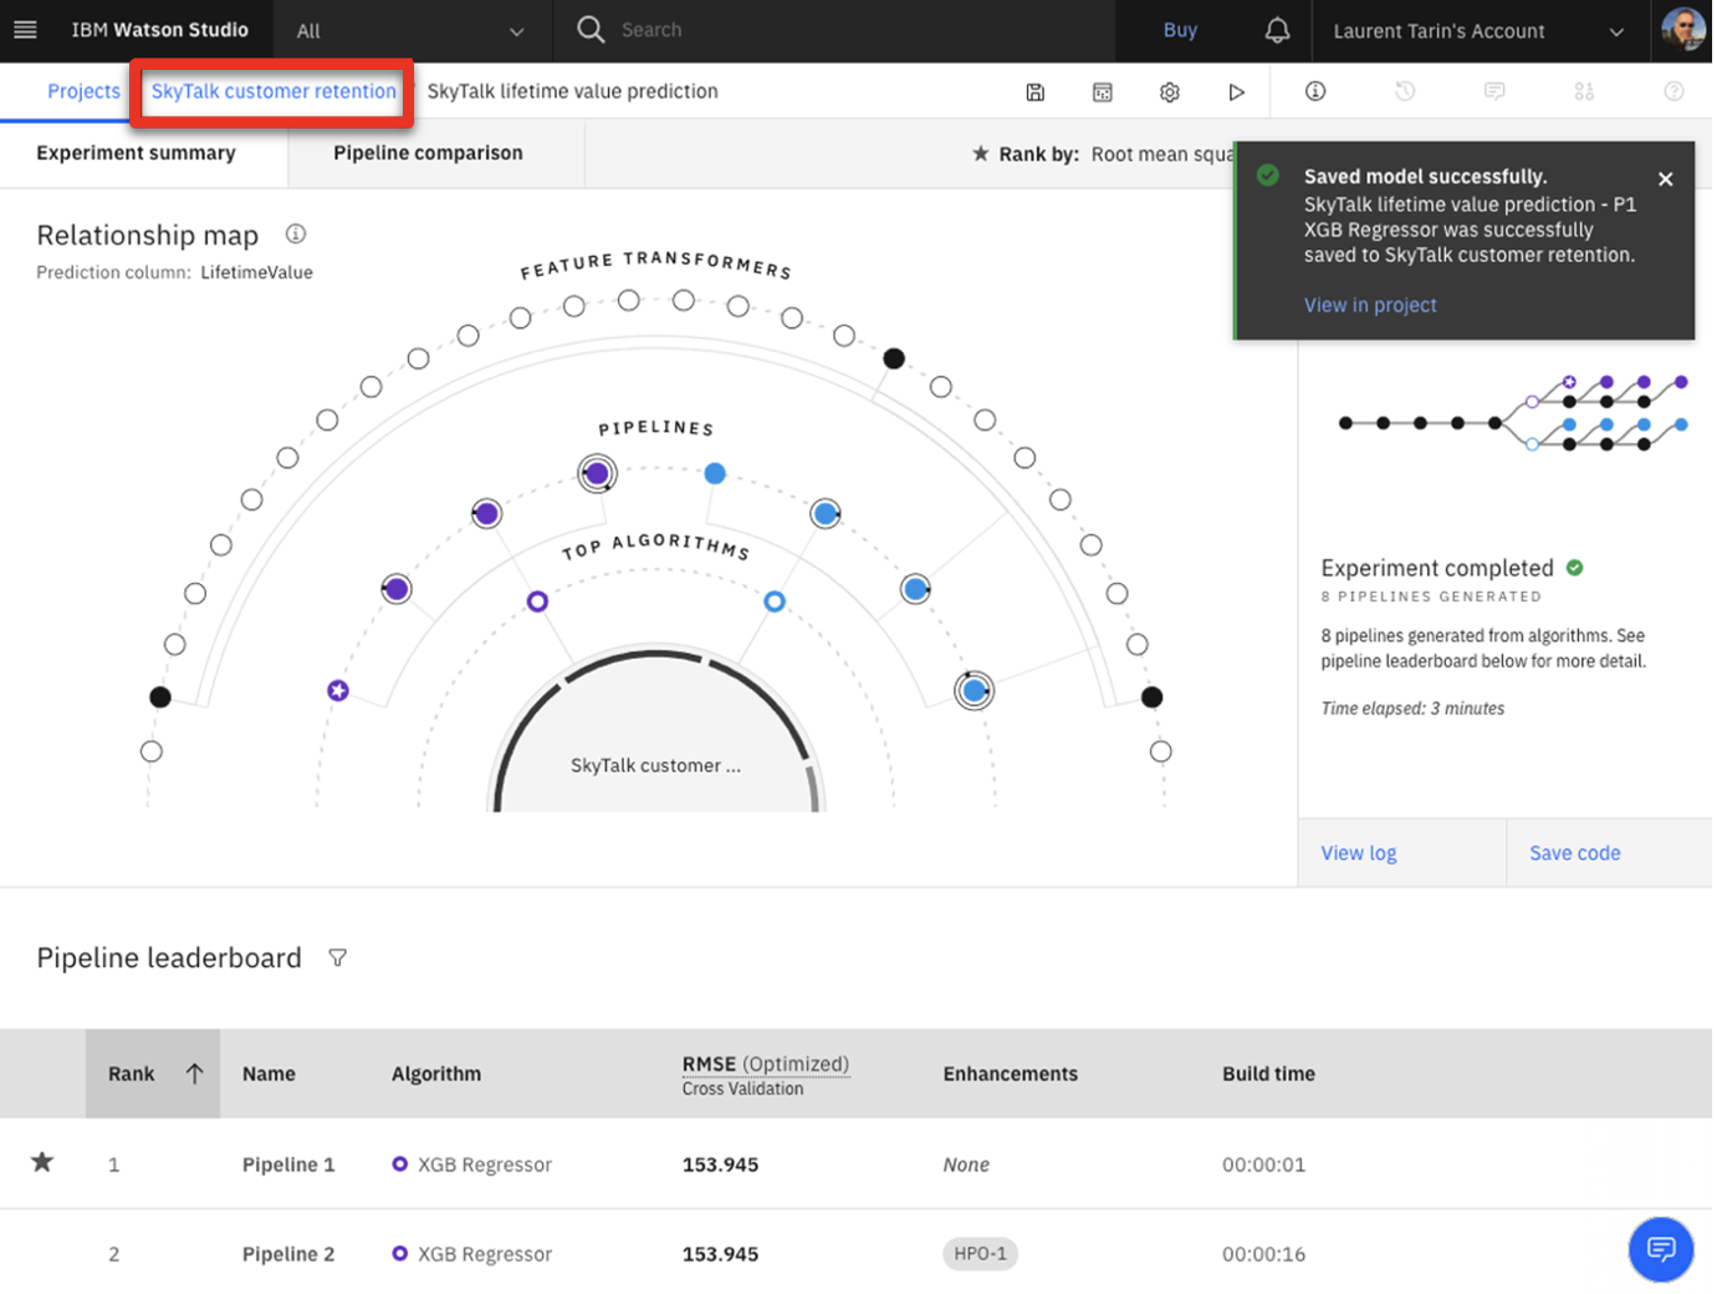
- The tool will create 8 pipelines, which will take approximately two minutes.
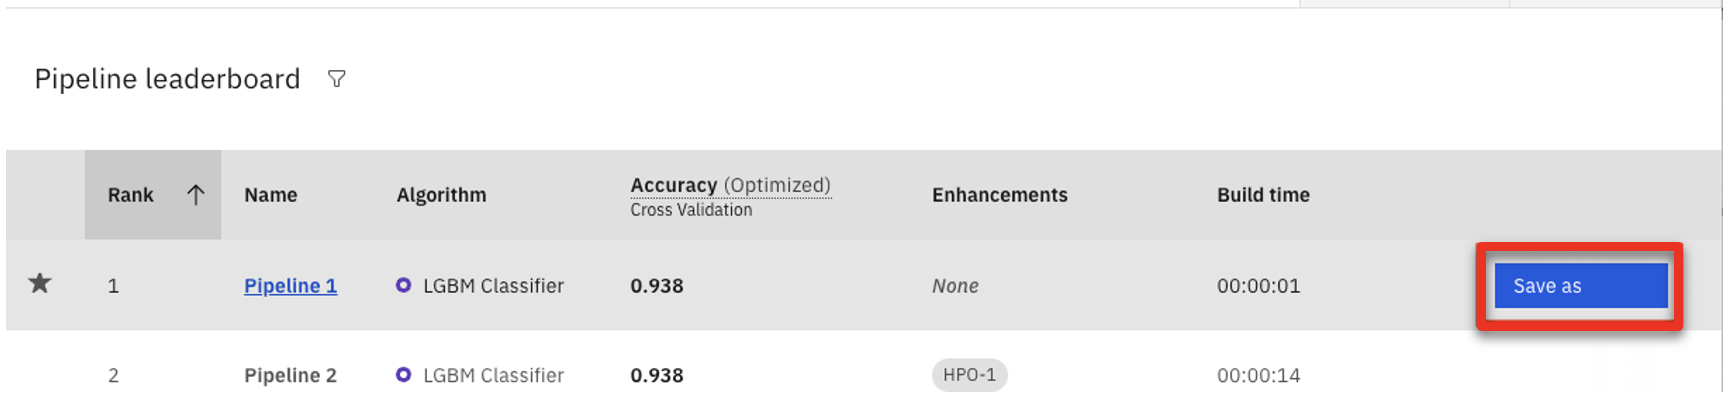
- Scroll down to the pipeline marked with a star in the Pipeline leaderboard list and click Save as in the corresponding row.
- Select Model (1) and click Create (2).
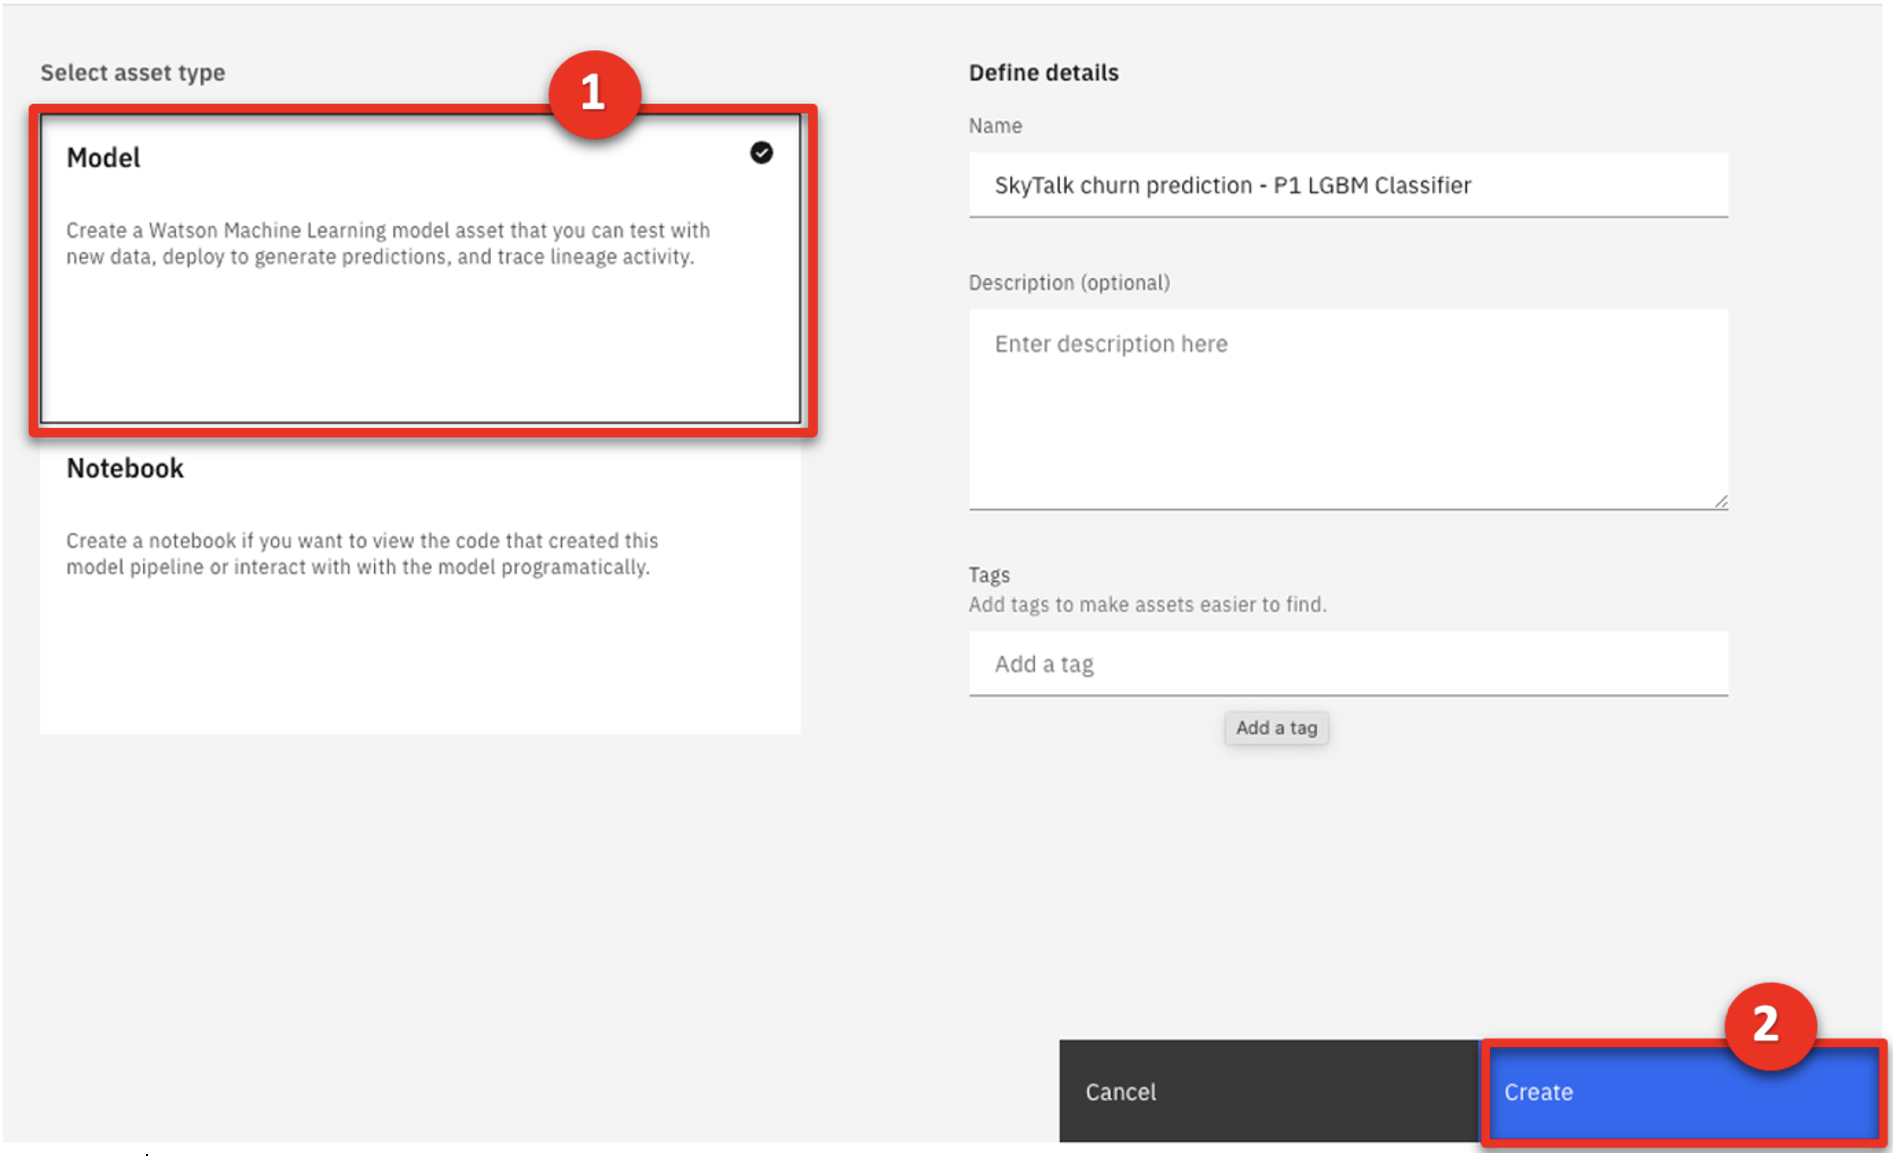
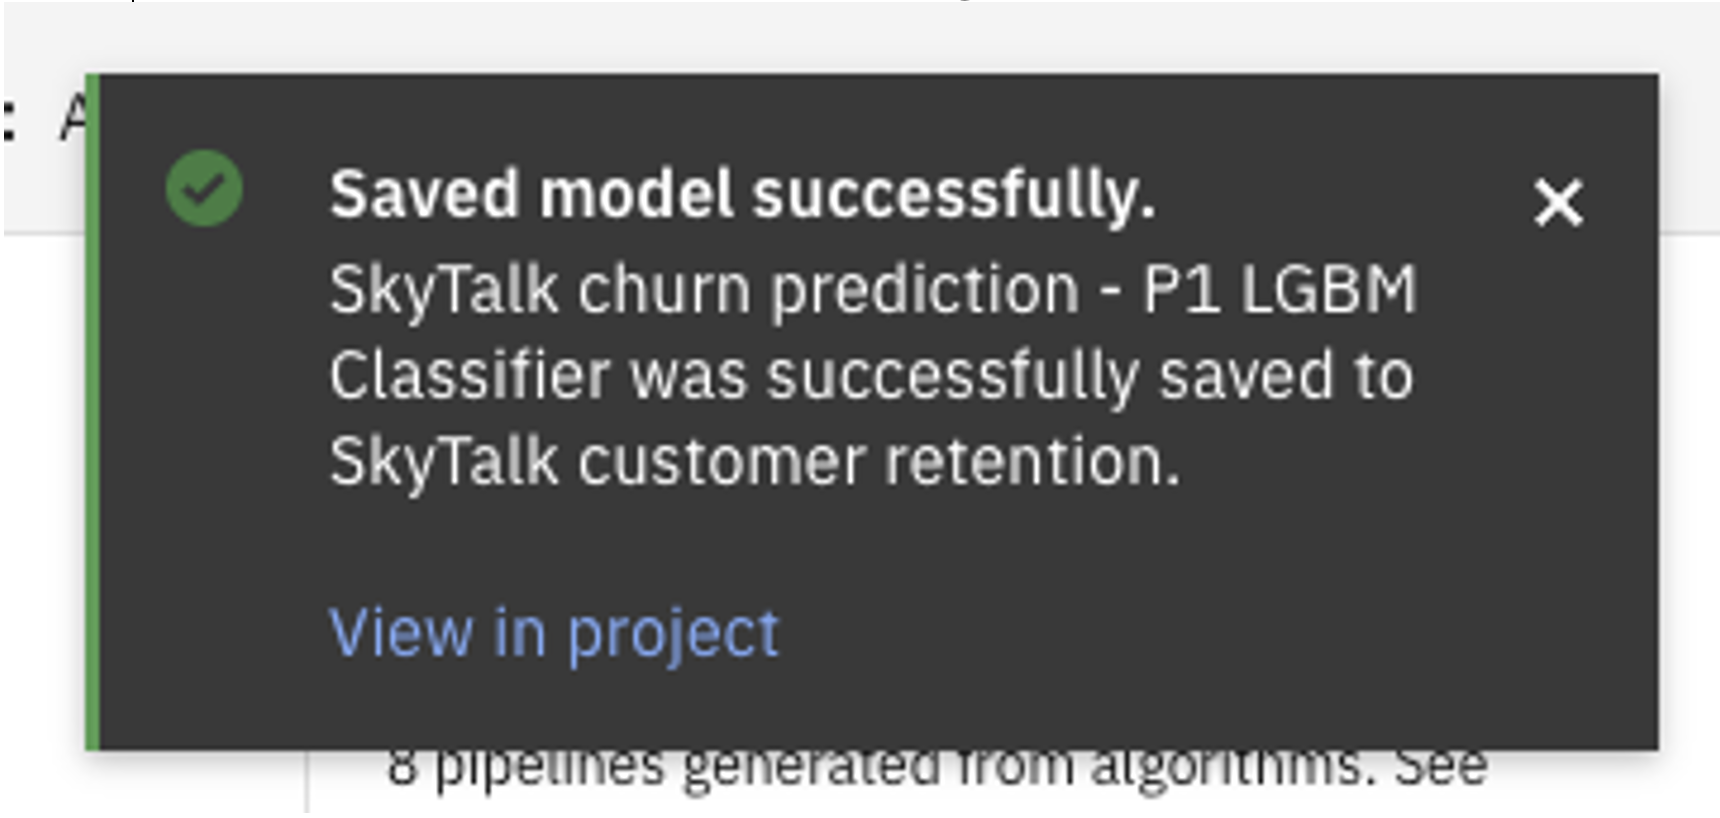
- A Saved model successfully confirmation message appears.
- Return to the project view by clicking SkyTalk customer retention in the breadcrumb navigation.
- Click New asset +.
- Repeat steps 6 – 21 to create another model to predict Skytalk’s customer lifetime value.
• When repeating step 7, name the AutoAI experiment ‘SkyTalk lifetime value prediction’.
• When repeating step 12, select the SkyTalk customer value data (2) file.
• When repeating step 14, select the Lifetimevalue. - After saving the starred pipeline as the Skytalk lifetime value prediction model, return to the project view by clicking SkyTalk customer retention in the breadcrumb menu.
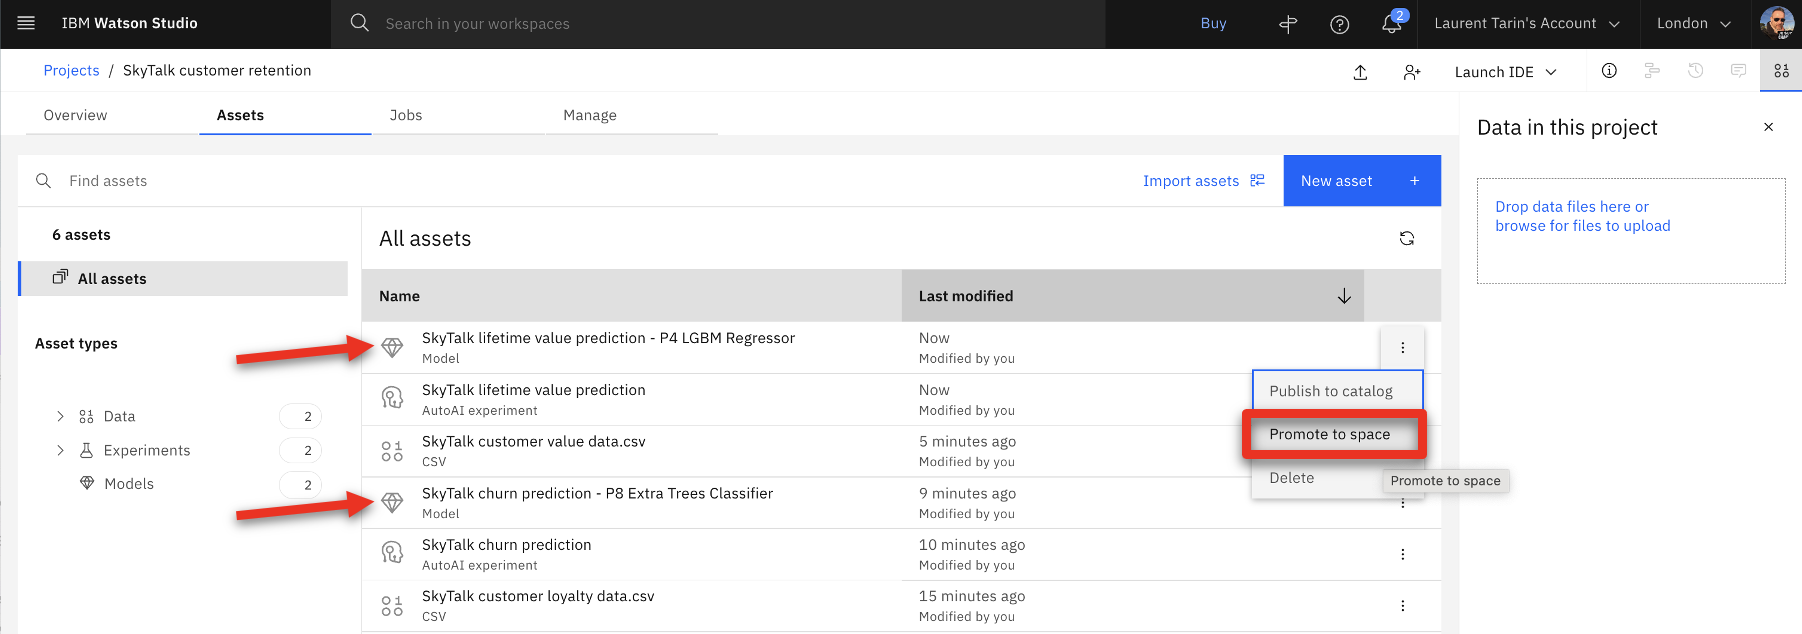
The two models display and are ready to be published in the deployment space.
- Hover the mouse over the first model and click Promote to space.
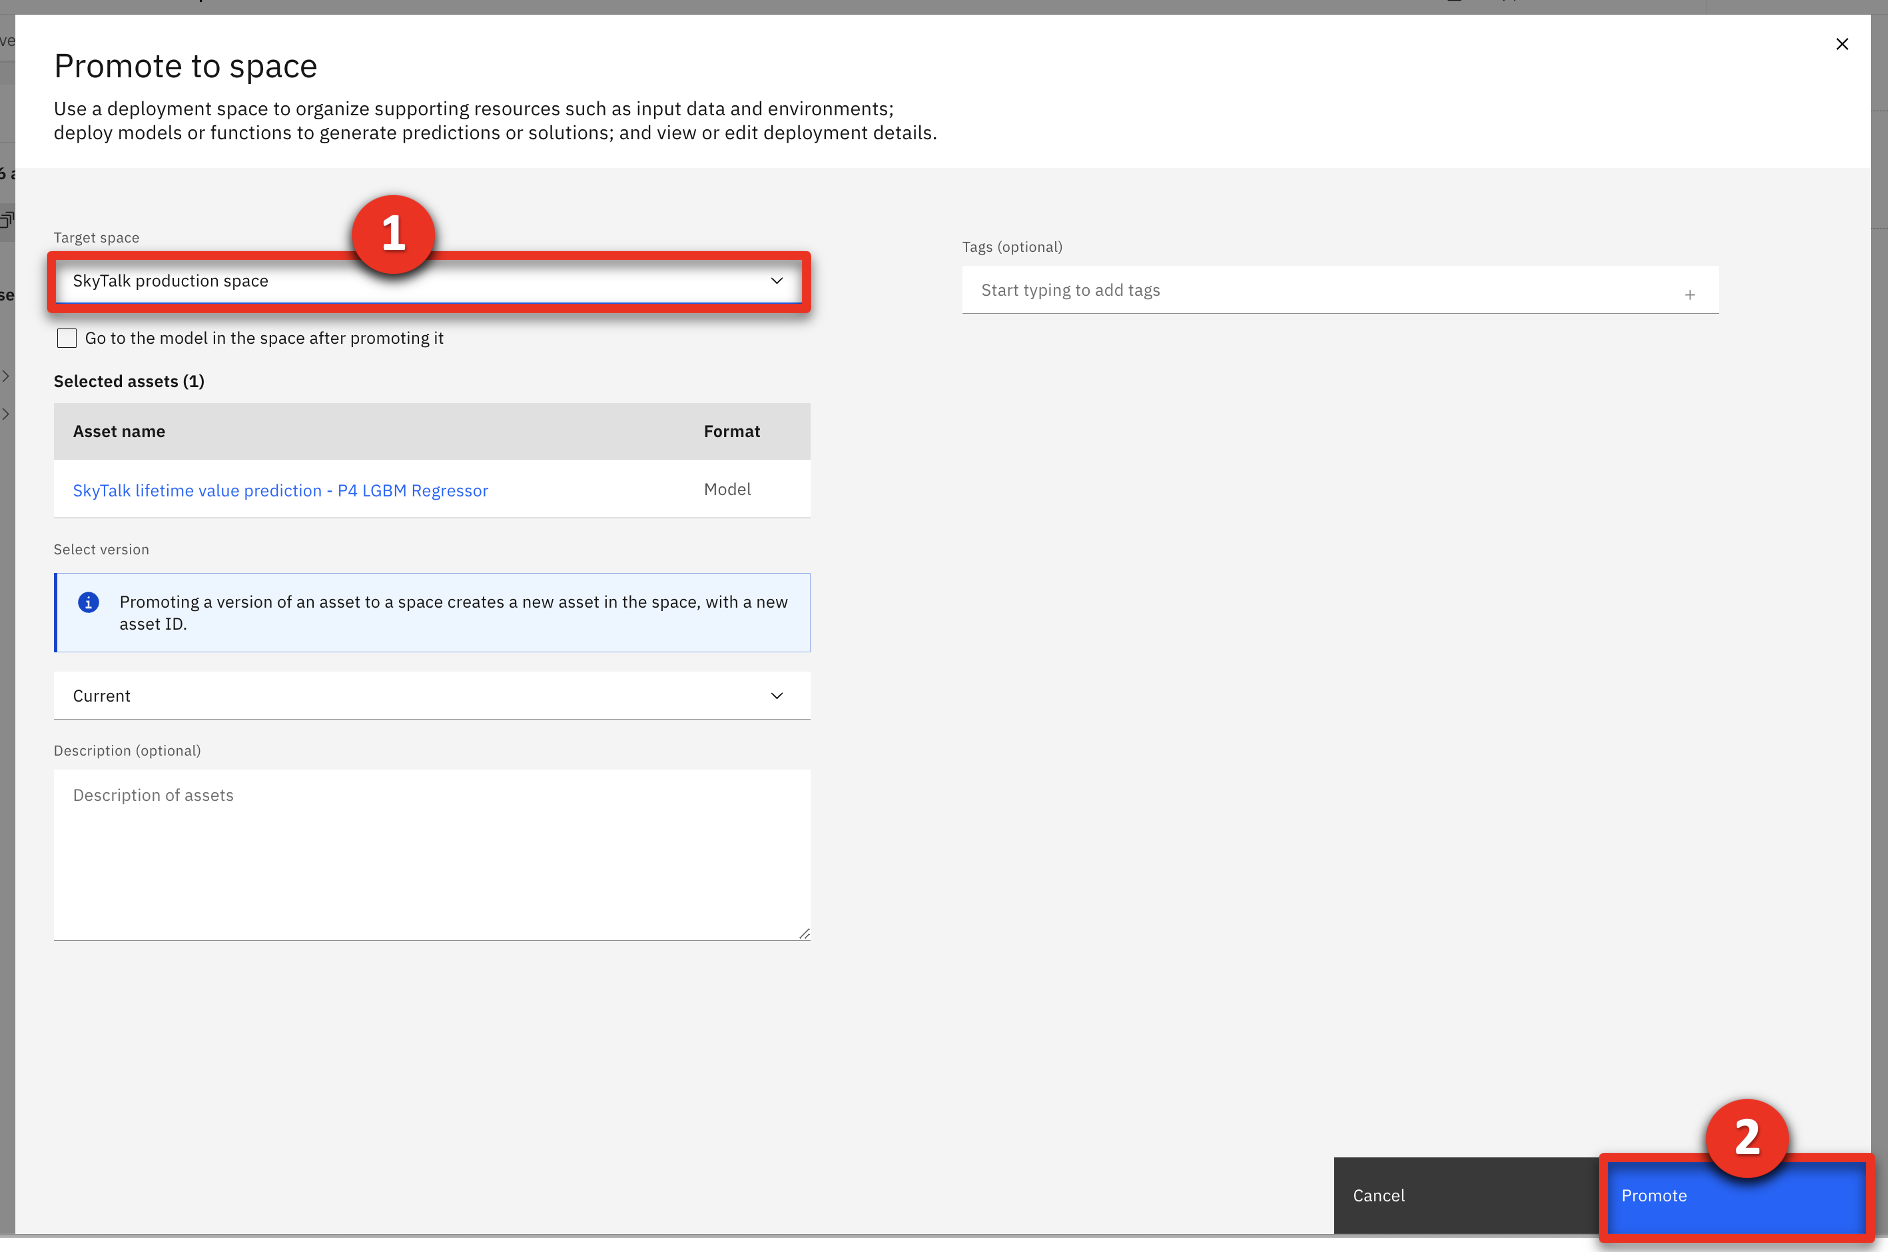
- Choose the SkyTalk production space (1) as the Target space and click Promote (2).
- Repeat steps 4.24 and 4.25 to promote the second model.
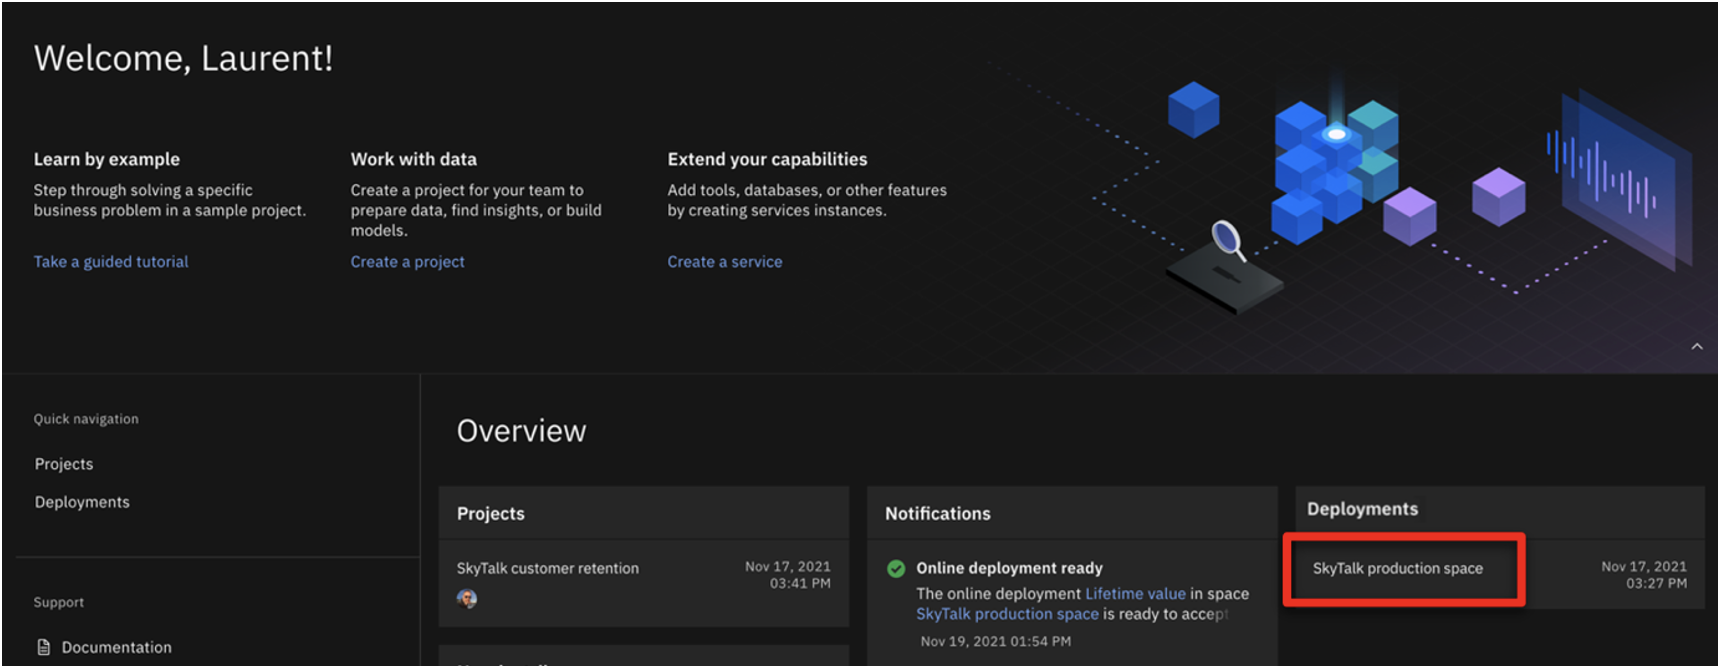
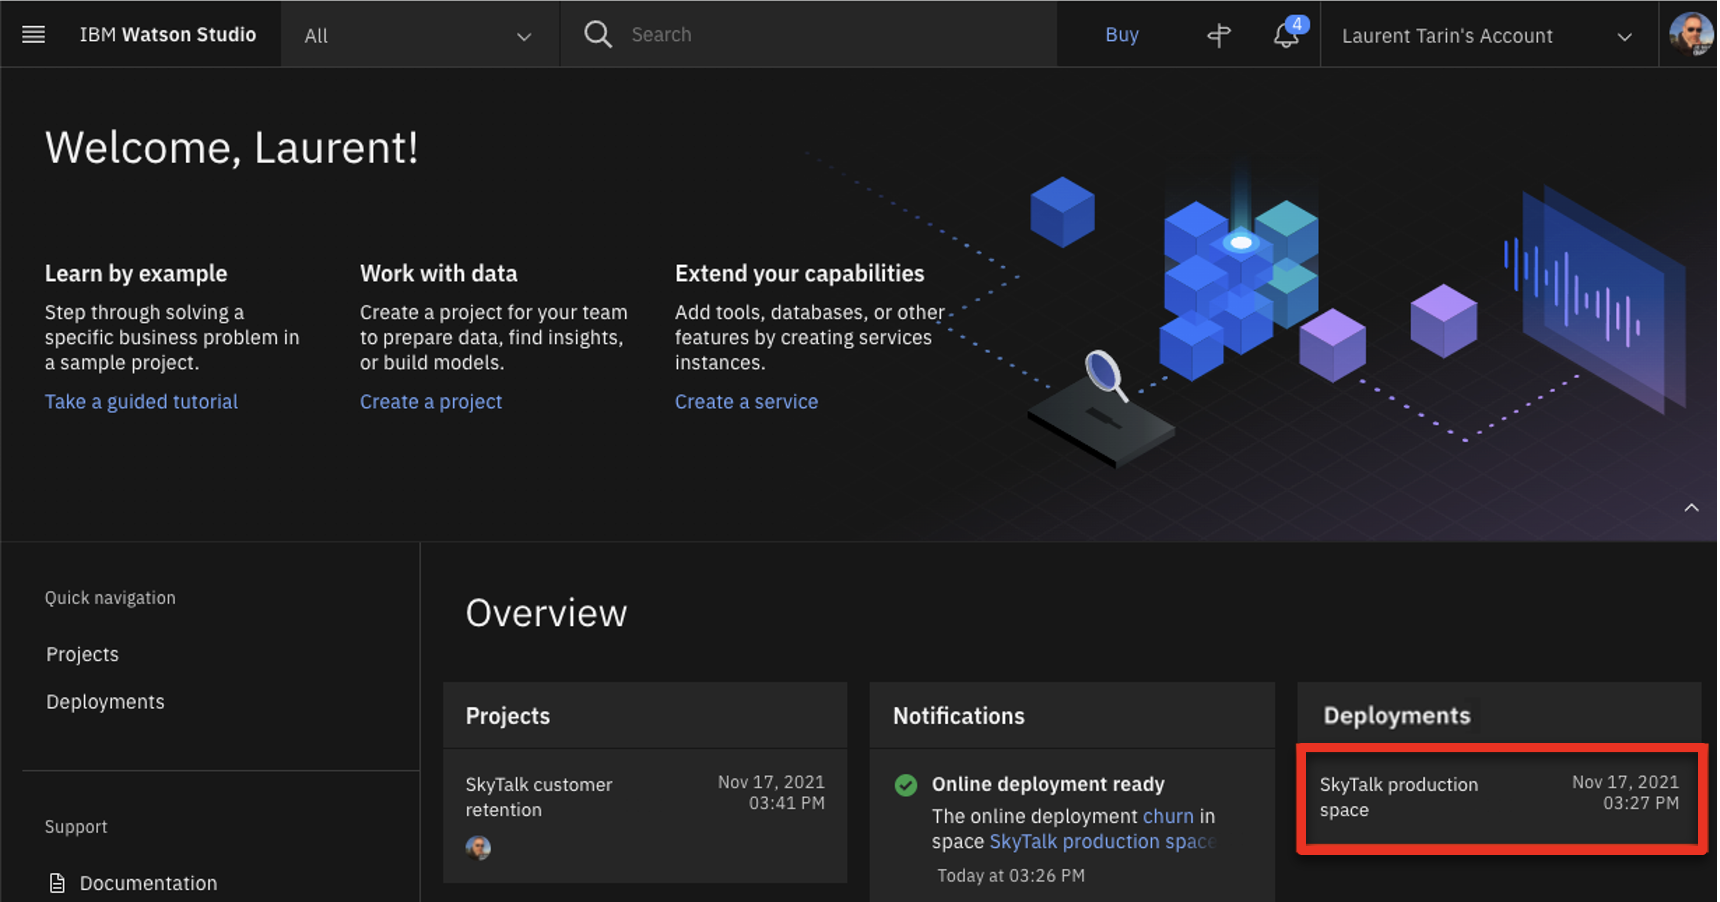
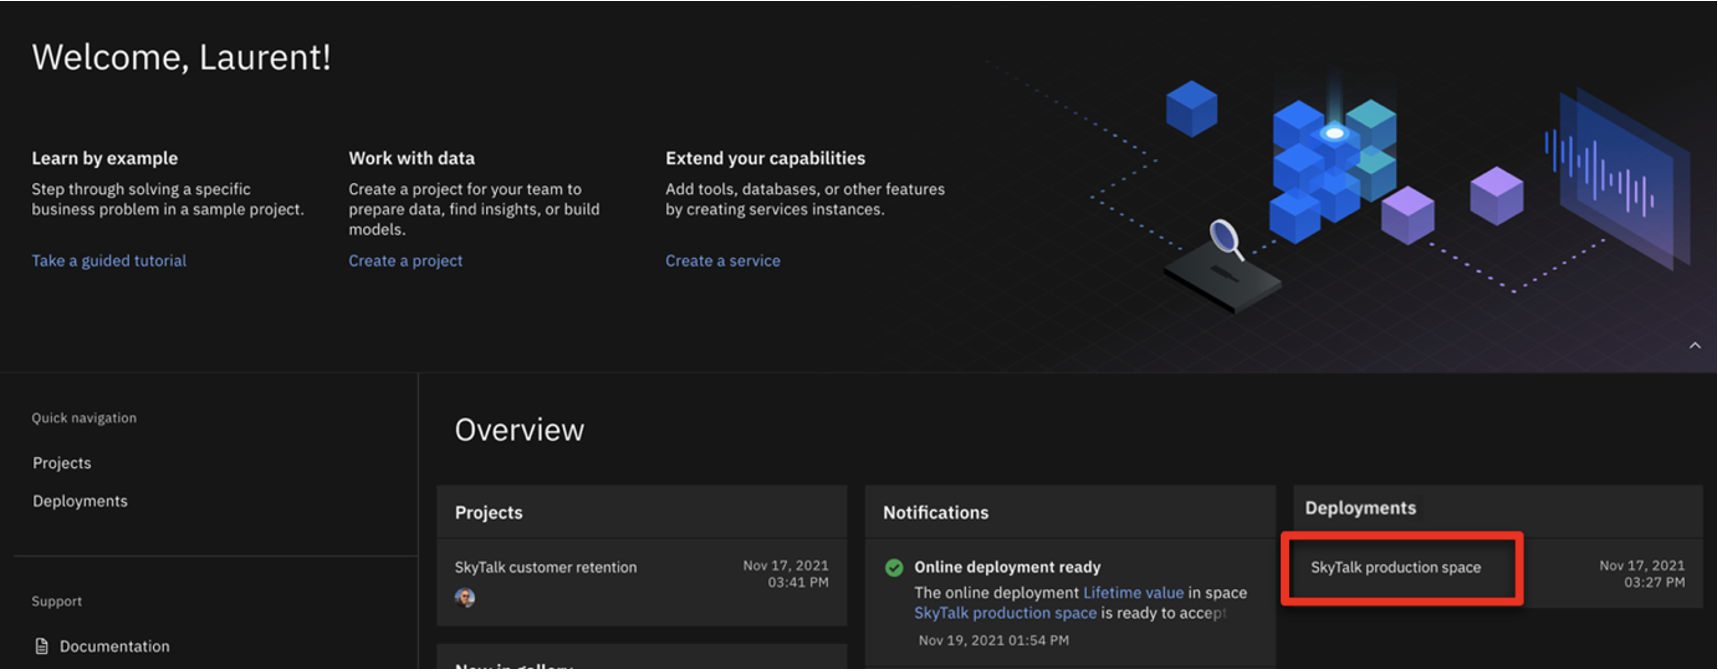
- Return to the IBM Watson Studio home page then click SkyTalk production space in the deployment space section.

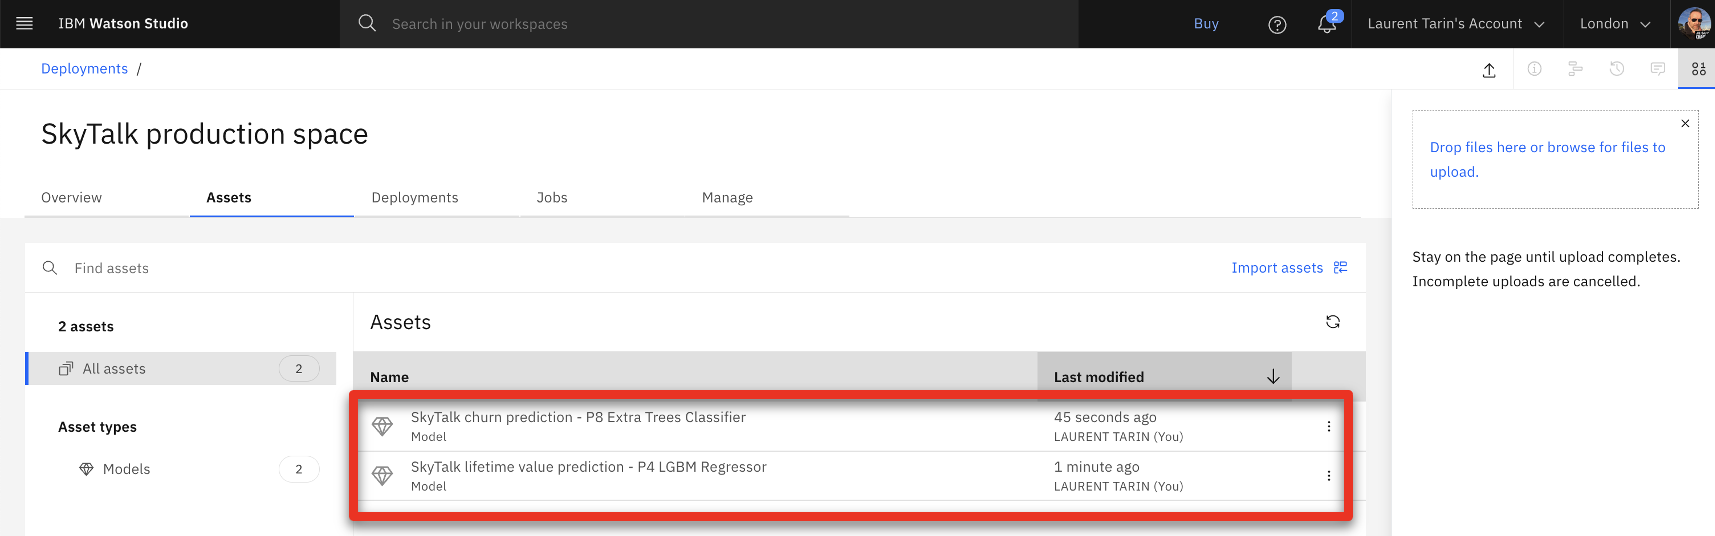
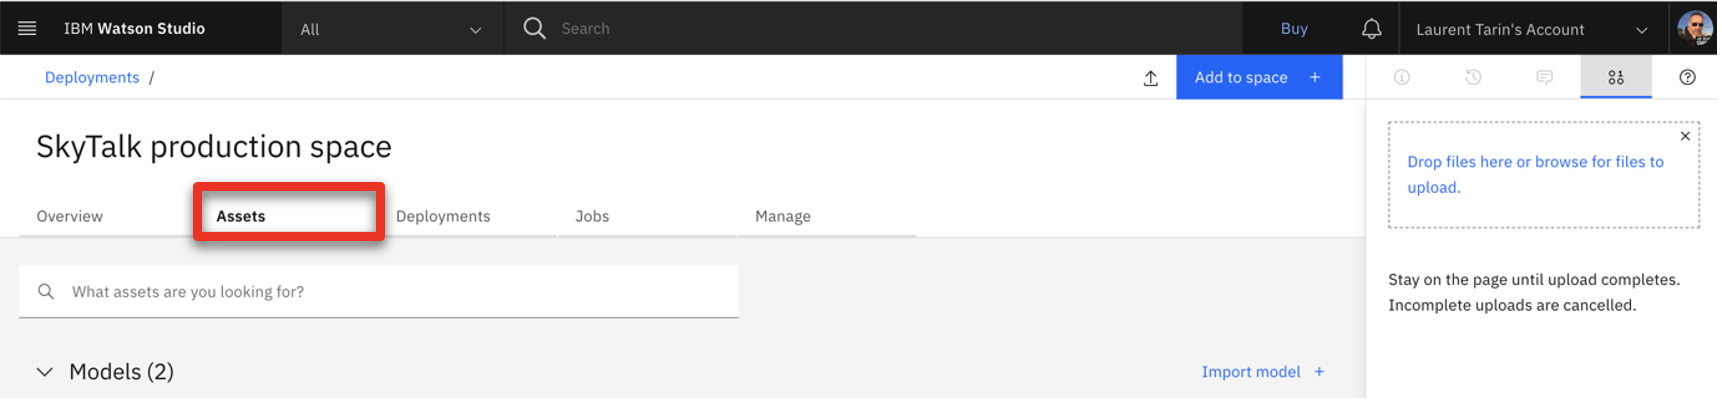
- Select the Assets tab.
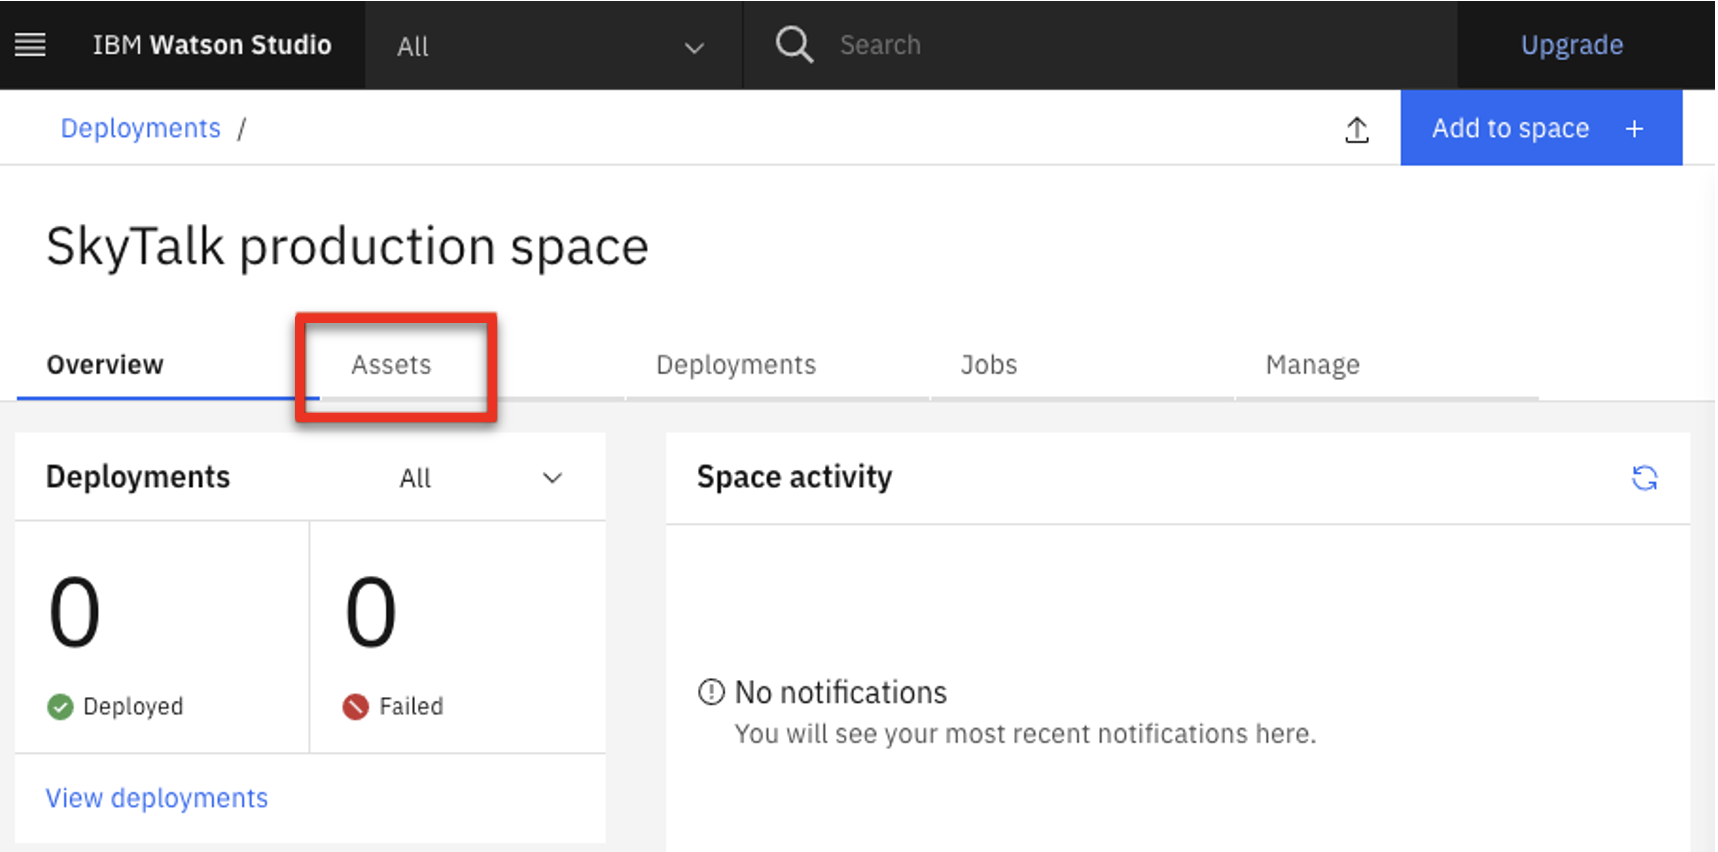
- The Assets tab displays. The two Machine learning services are ready to be deployed.
6 - Deploy the ML models
The Reset the demo to its beginning state step on this page below contains the process to undeploy the services and stop the billing process.
Redeploy your ML services approximately 15 minutes prior to practicing or giving this demo.
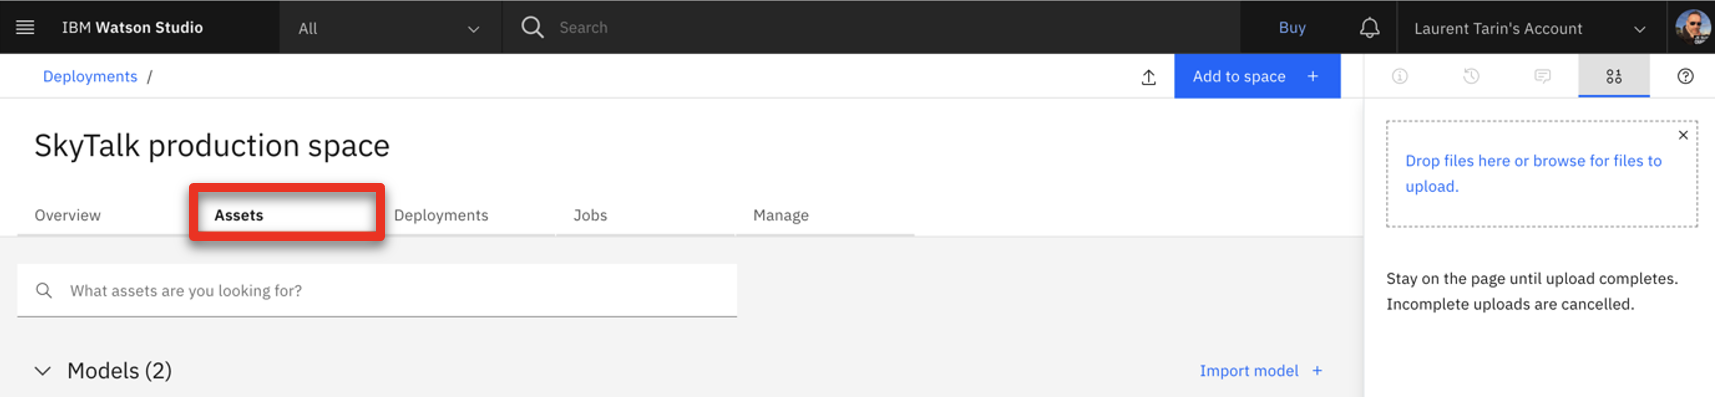
- From the Watson Studio environment, select the SkyTalk production space deployment space.
- Select the Assets tab.
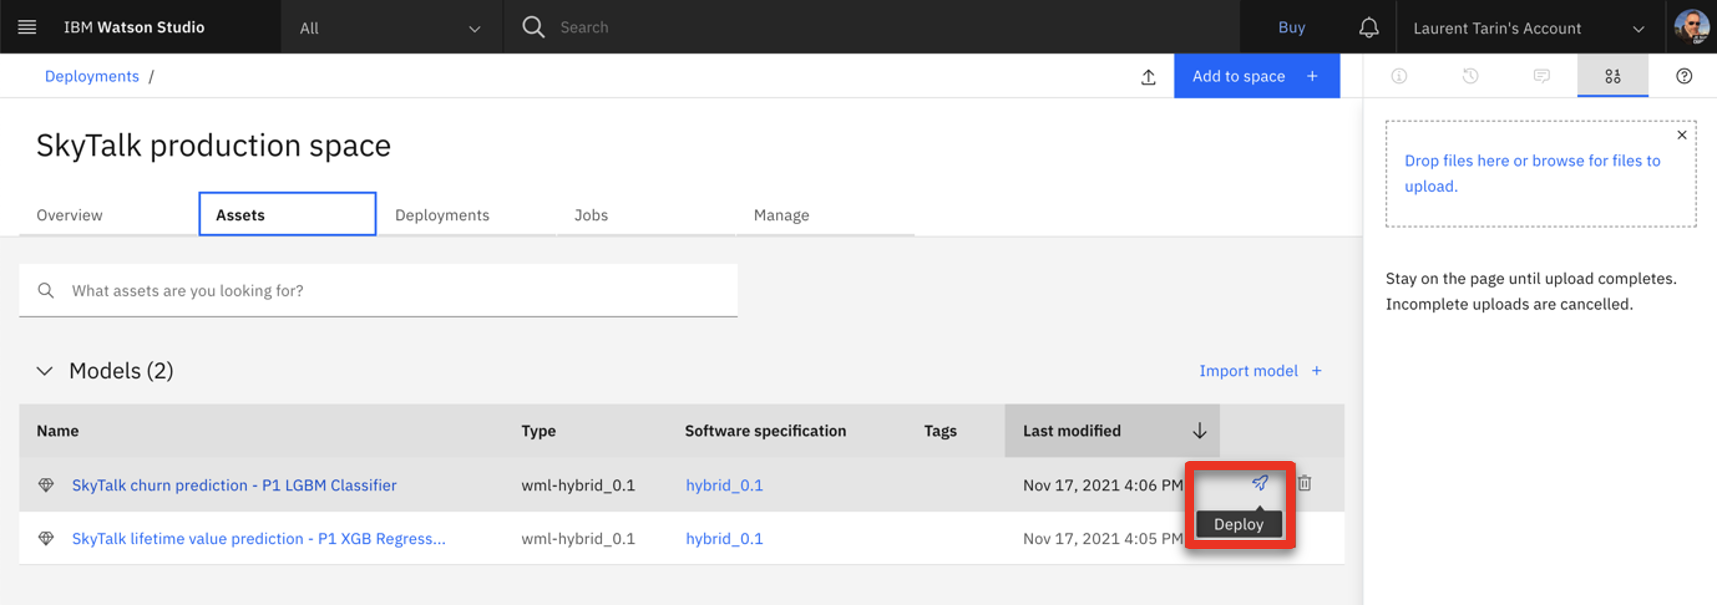
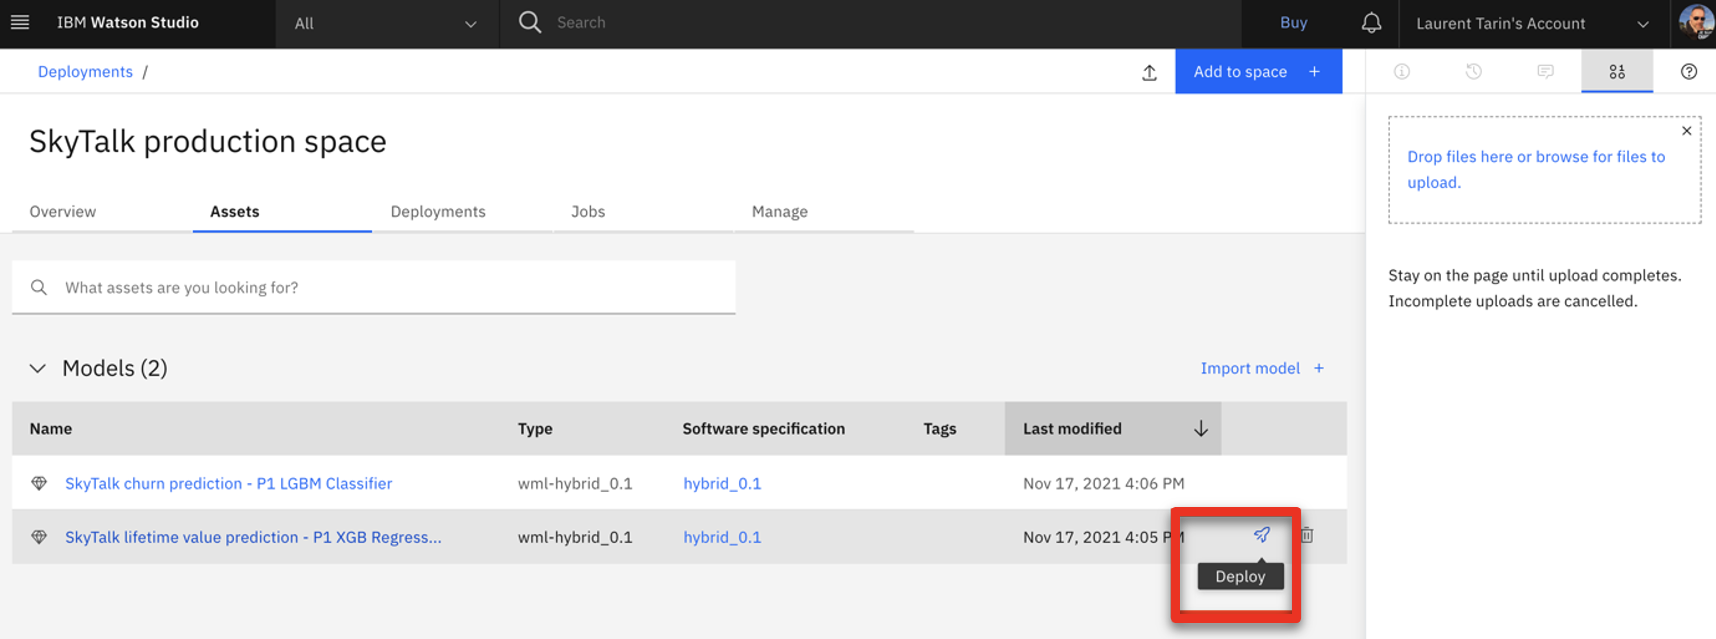
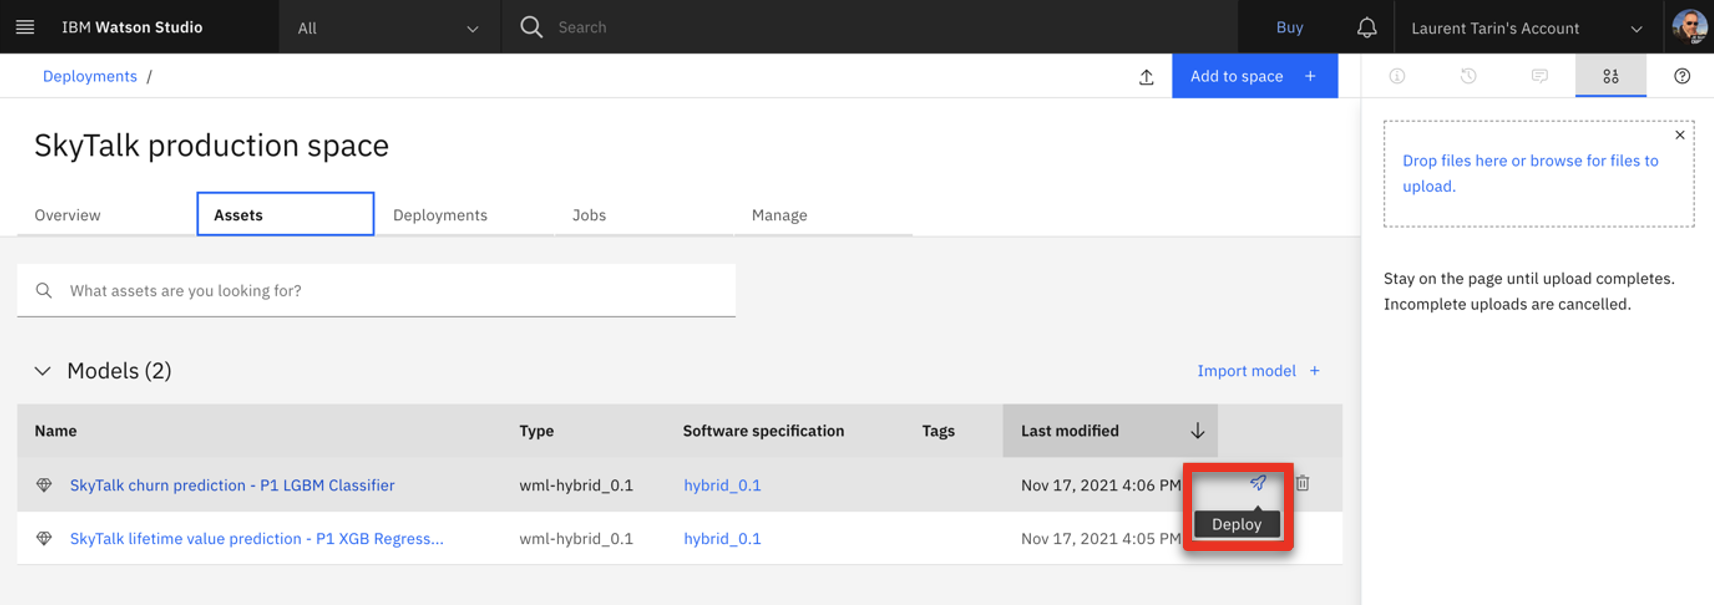
- Deploy the Skytalk churn prediction by hovering your mouse over the right side of the corresponding row, clicking the rocket icon that appears, and clicking Deploy.
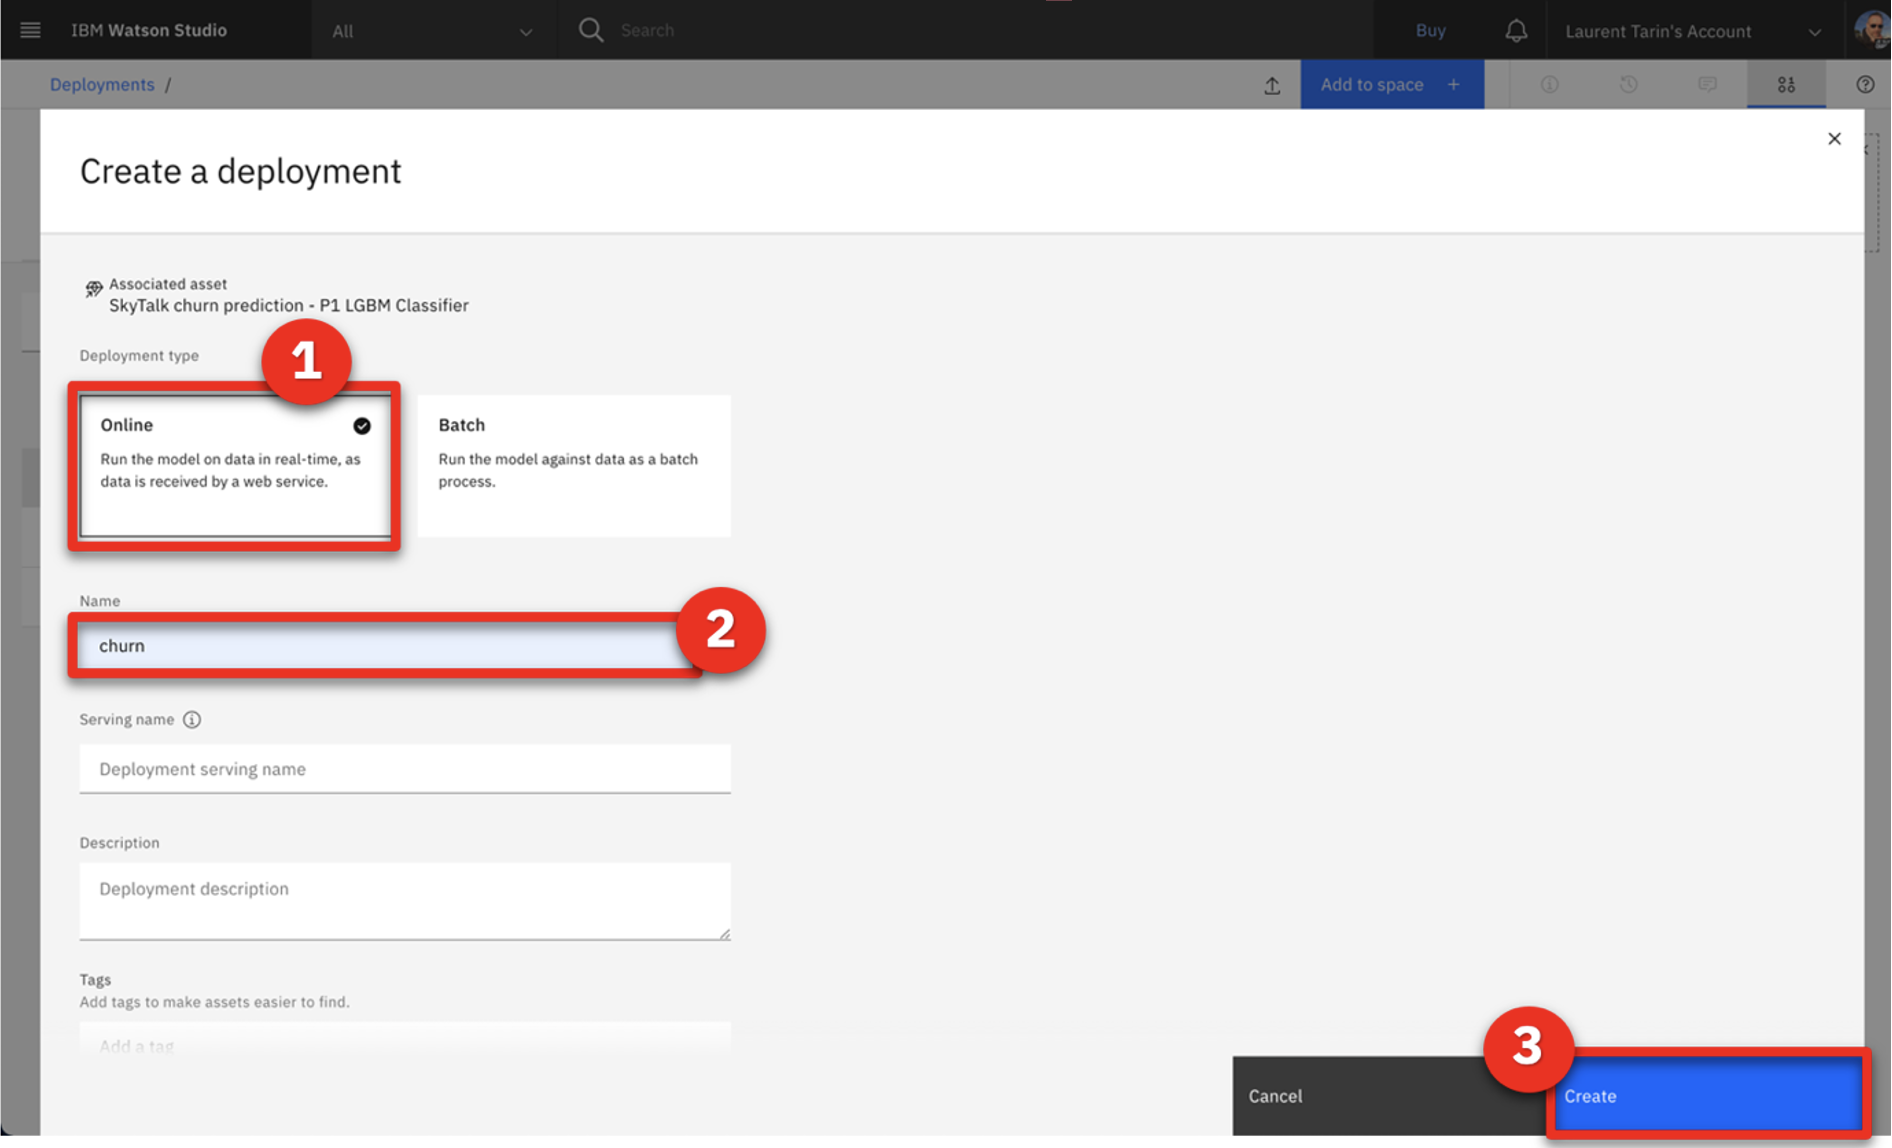
- Select Online (1), name the deployment ‘churn’ (2), and click Create (3).
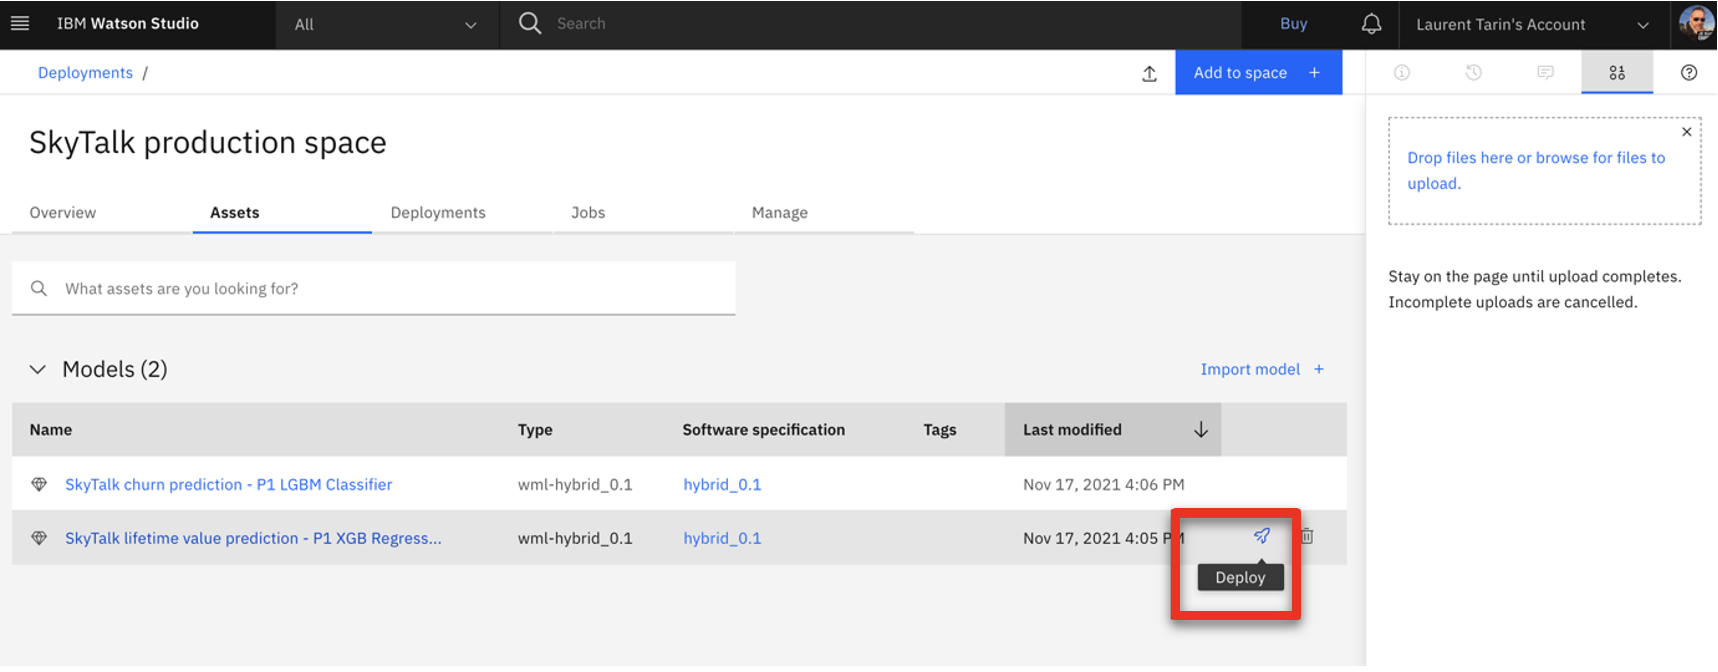
- Return to the SkyTalk production space using the breadcrumb menu and deploy the Skytalk lifetime value prediction by hovering your mouse over the right side of the corresponding row, clicking the rocket icon that appears, and clicking Deploy.
- Select Online (1), name the deployment ‘Lifetime value’ (2), and click Create (3).

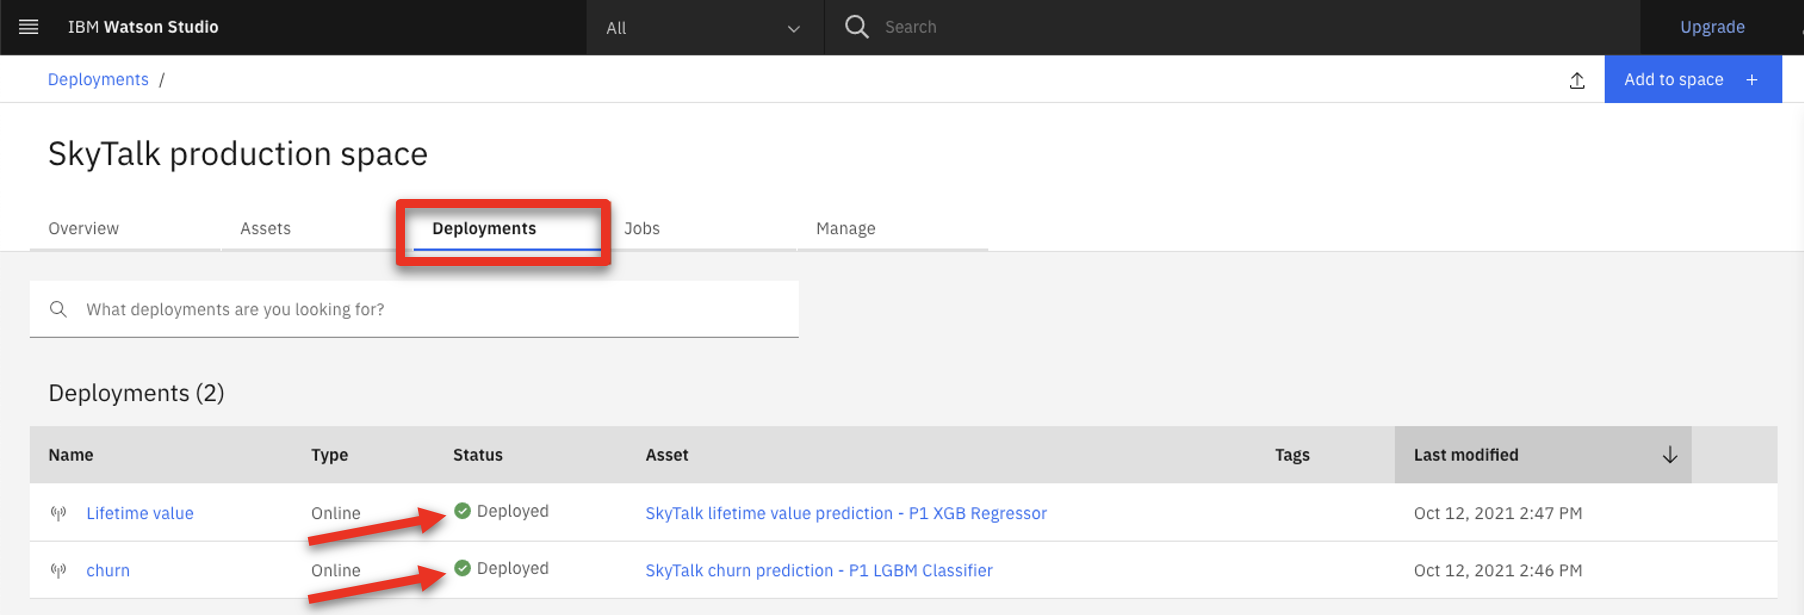
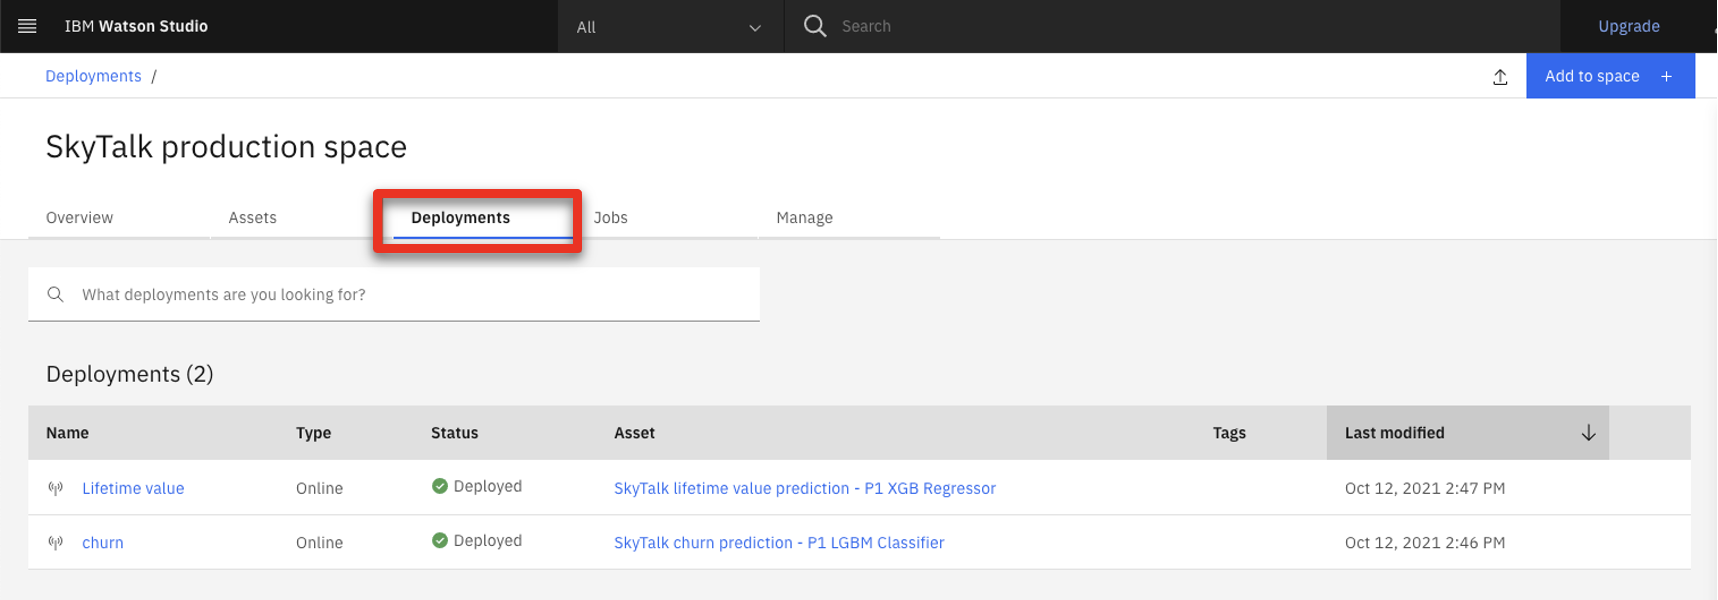
- Return to the SkyTalk production space using the breadcrumb menu and click the Deployments tab. Ensure the two services are deployed.
7 - Get the credentials to set up the ML provider
This section explains how to get the credentials to set up the machine learning provider in ADS.
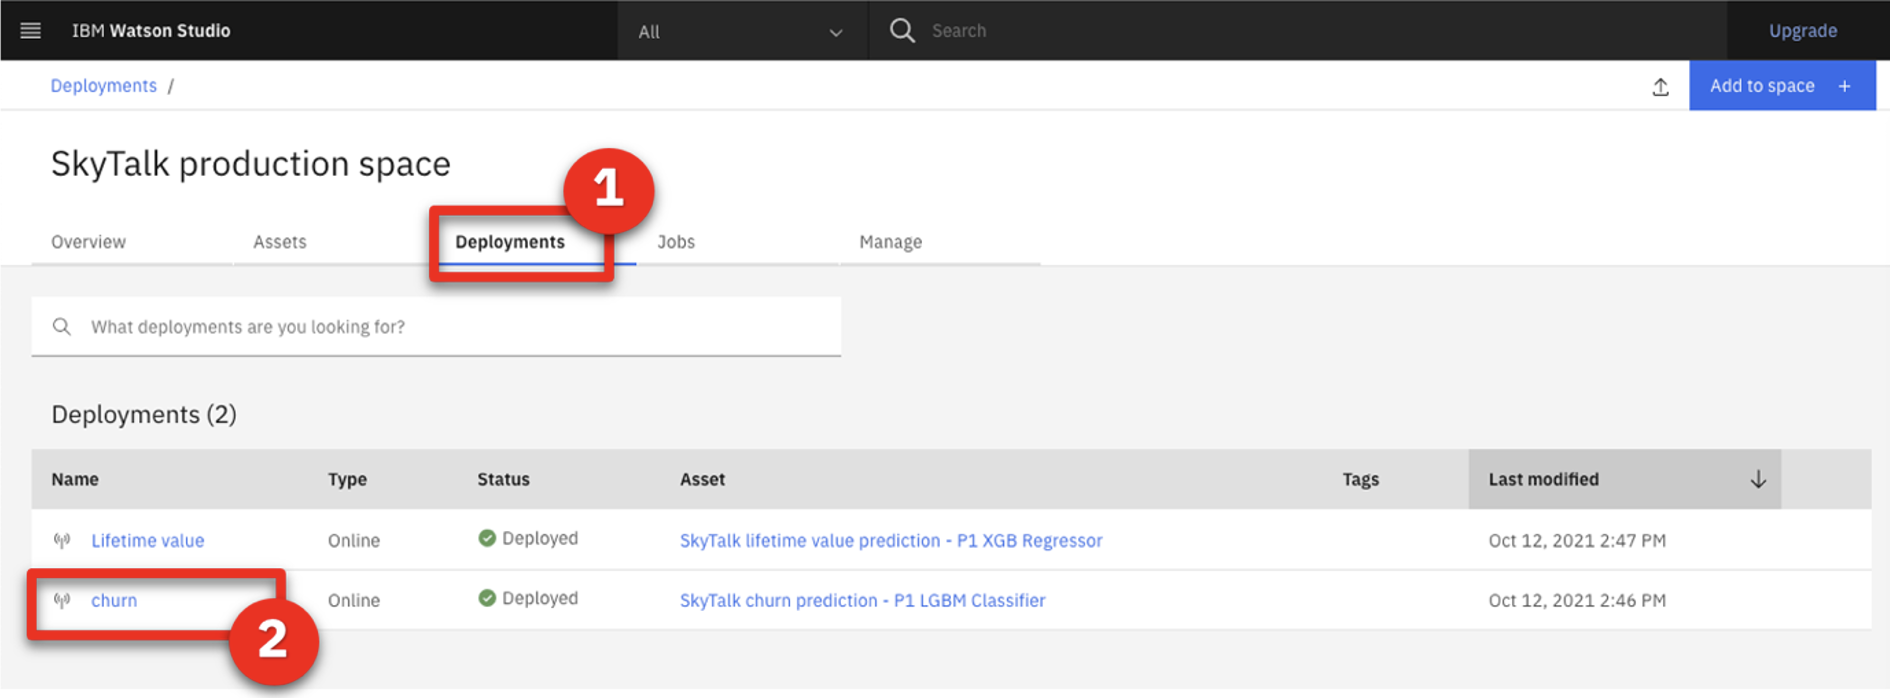
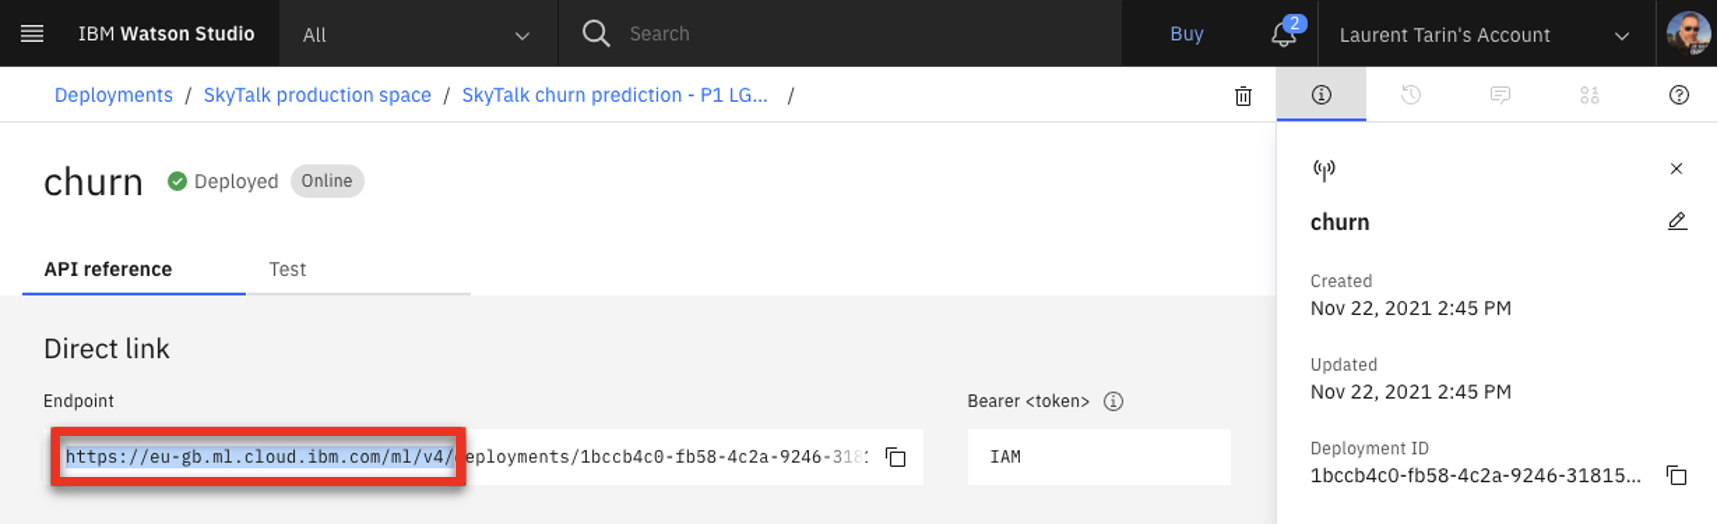
- In the Deployments - SkyTalk production space, select the Deployments tab (1) and click churn (2).
- Copy the first portion of the Endpoint URL path (the blue hightlighted section in the screenshot) and save it for the upcoming ML provider configuration.
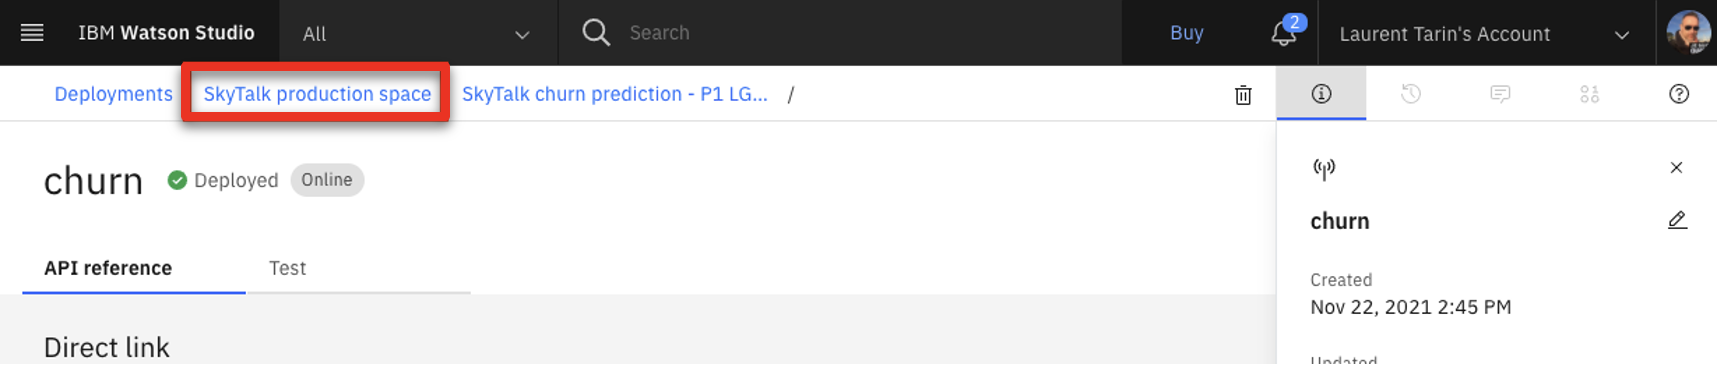
- Click SkyTalk production space in the breadcrumb menu.
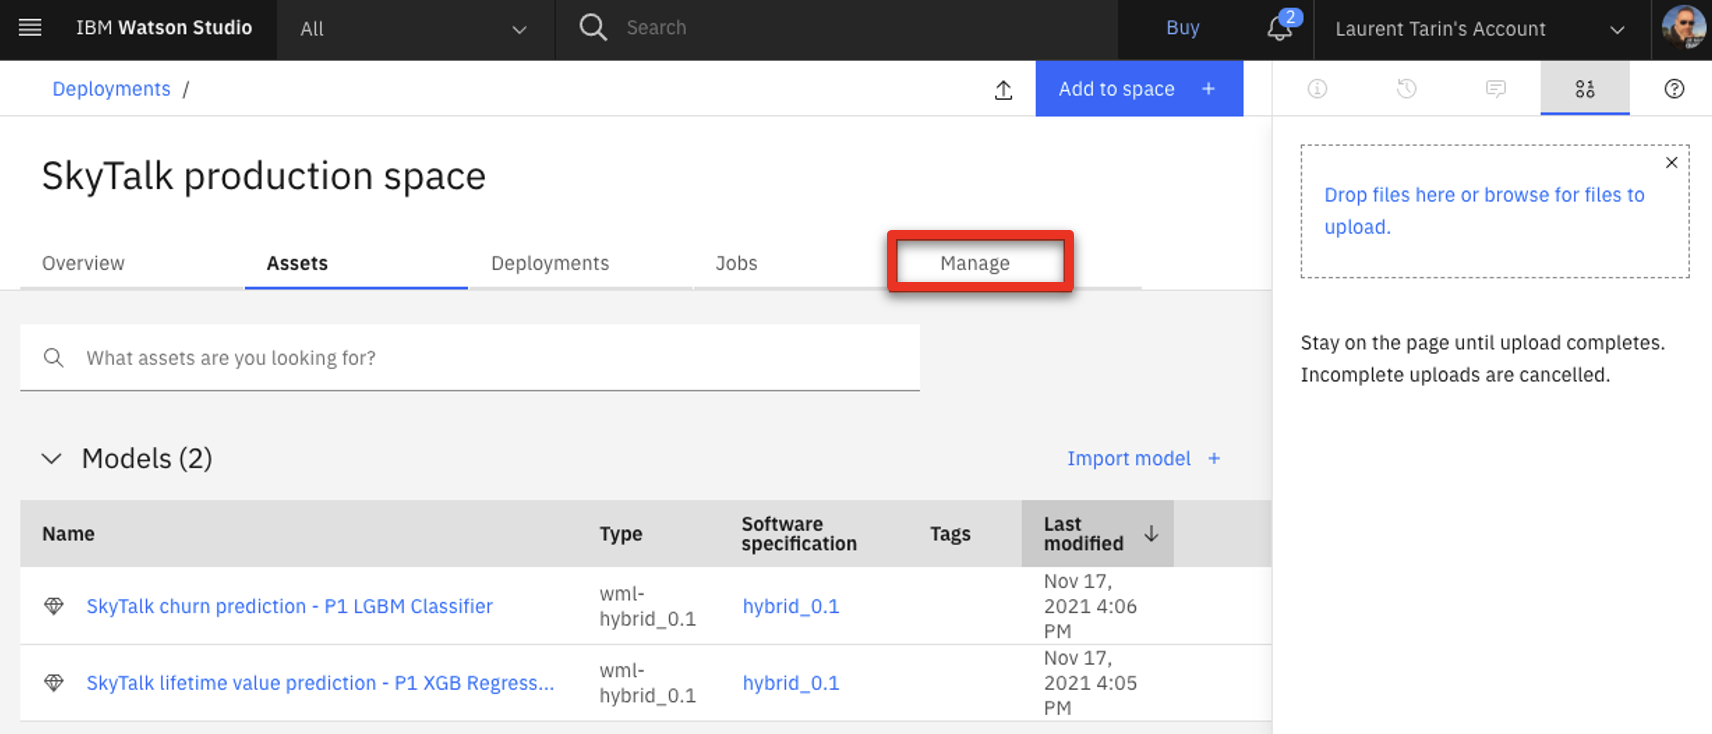
- Select the Manage tab.
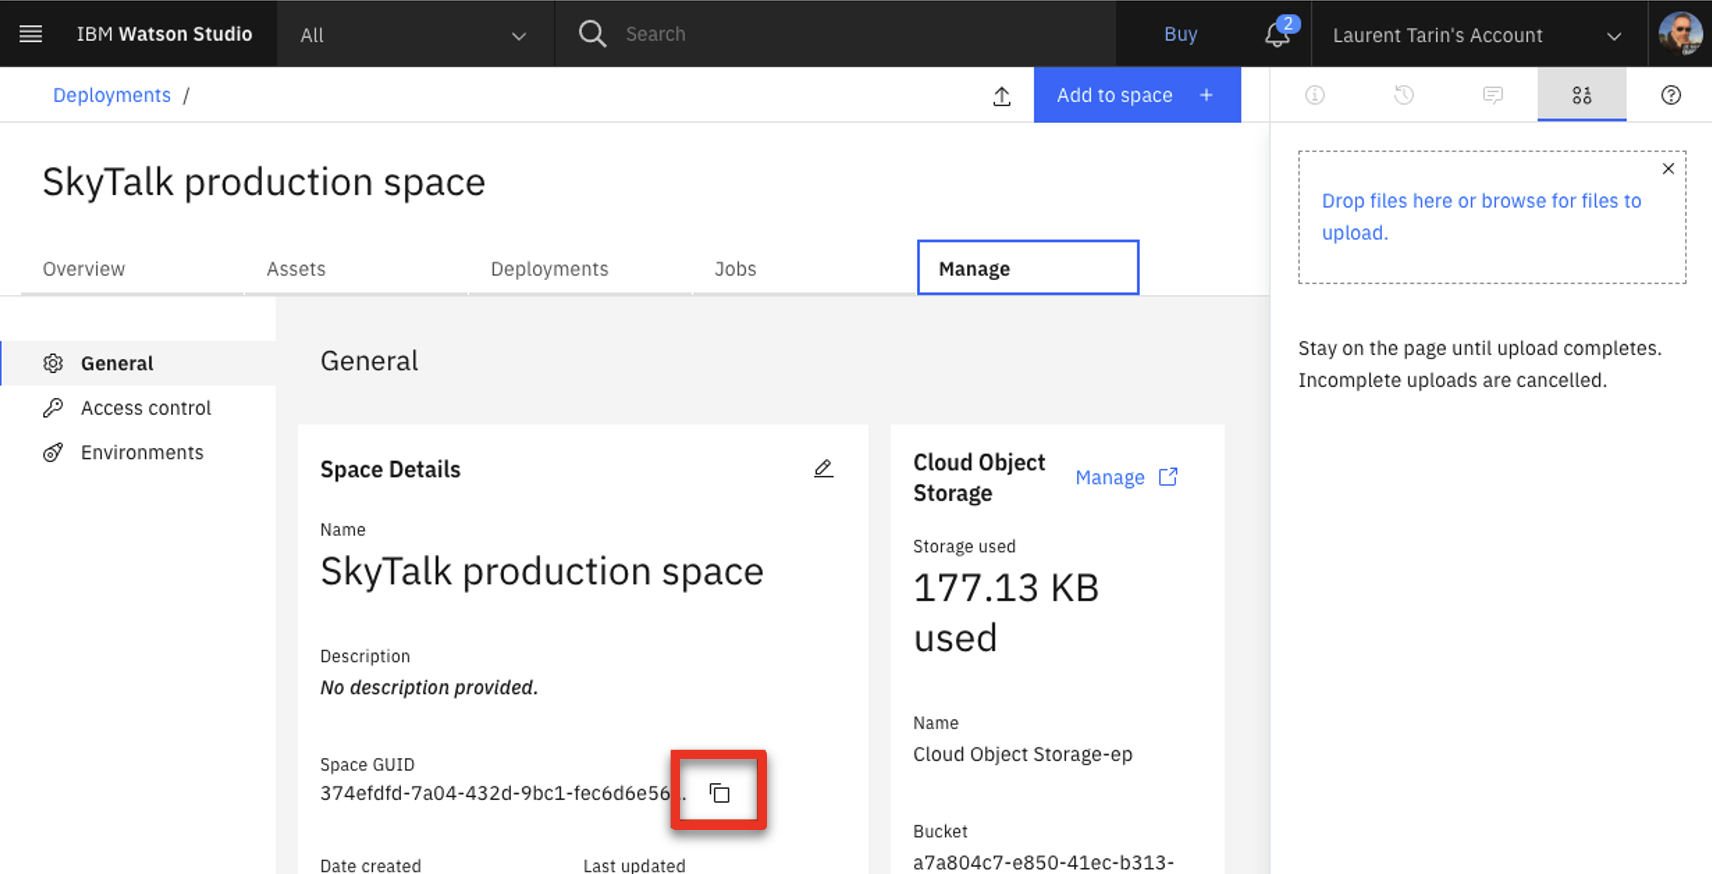
- Copy the deployment Space GUID and save it for the upcoming ML provider configuration step.
- Log out and return to the IBM Cloud environment at cloud.ibm.com . Make sure you are in your personal Cloud Pak for Data instance.
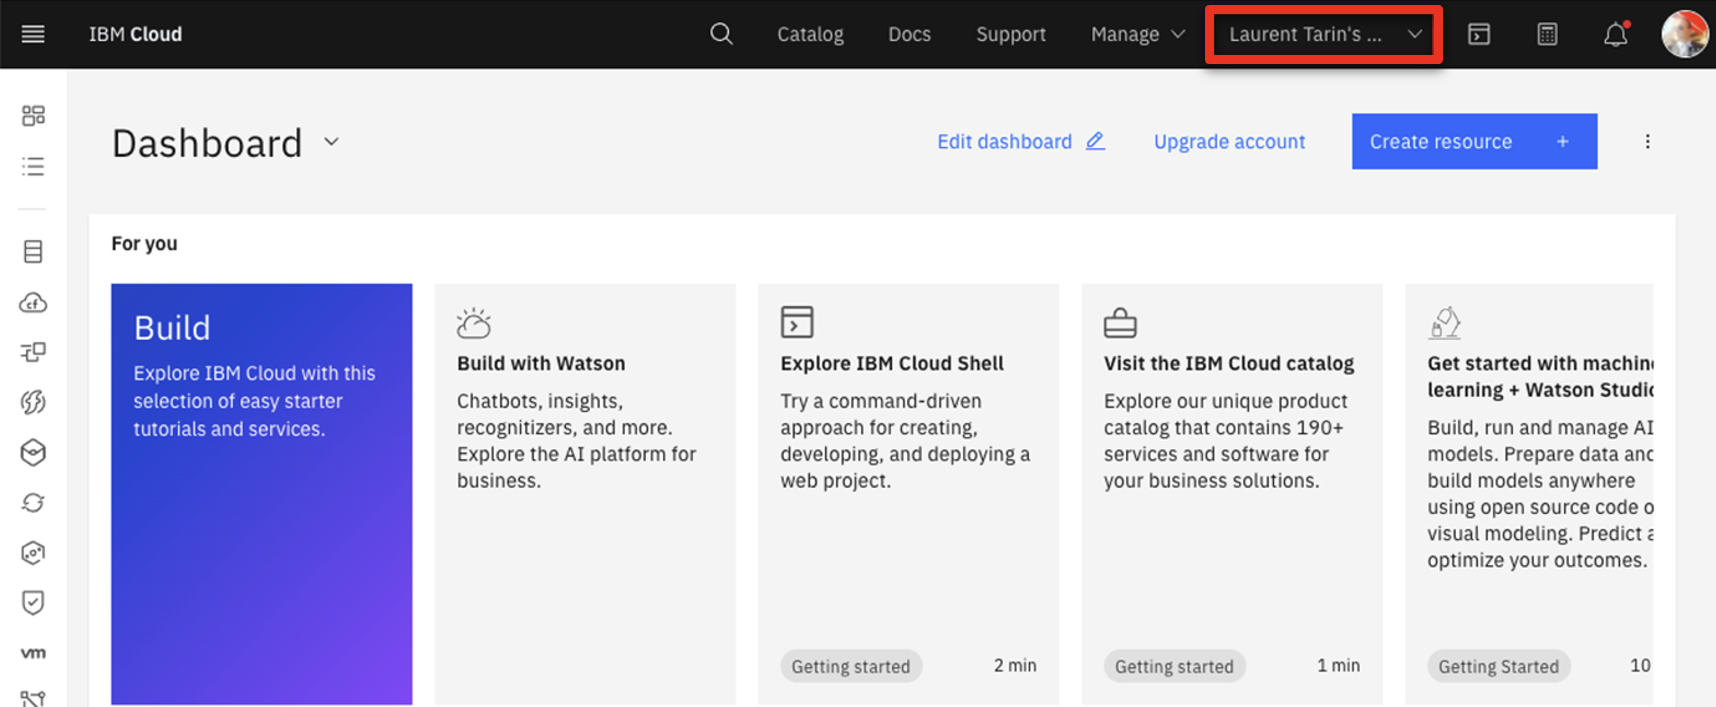
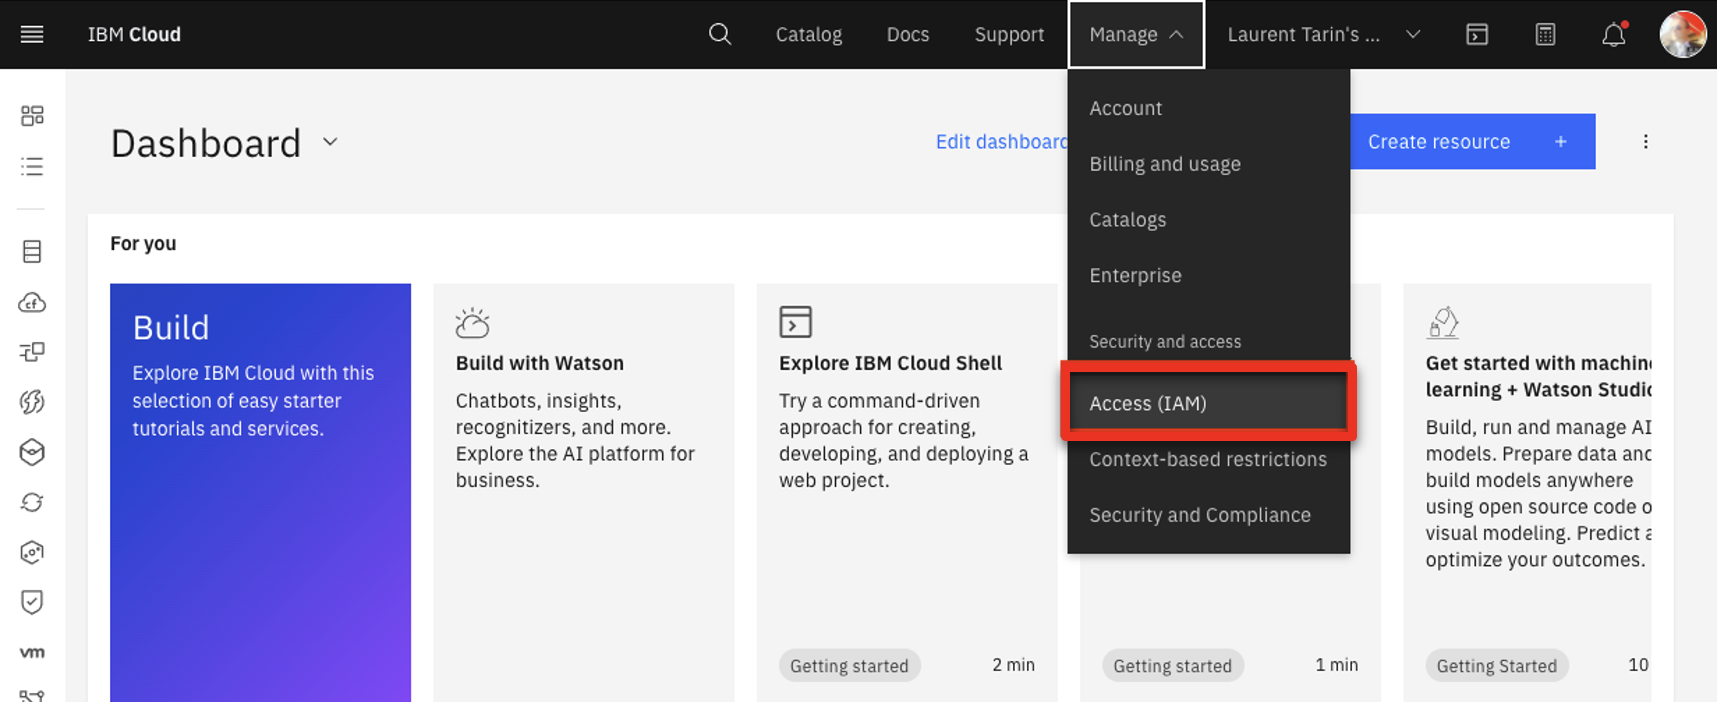
- Click the Manage tab and select Access (IAM).
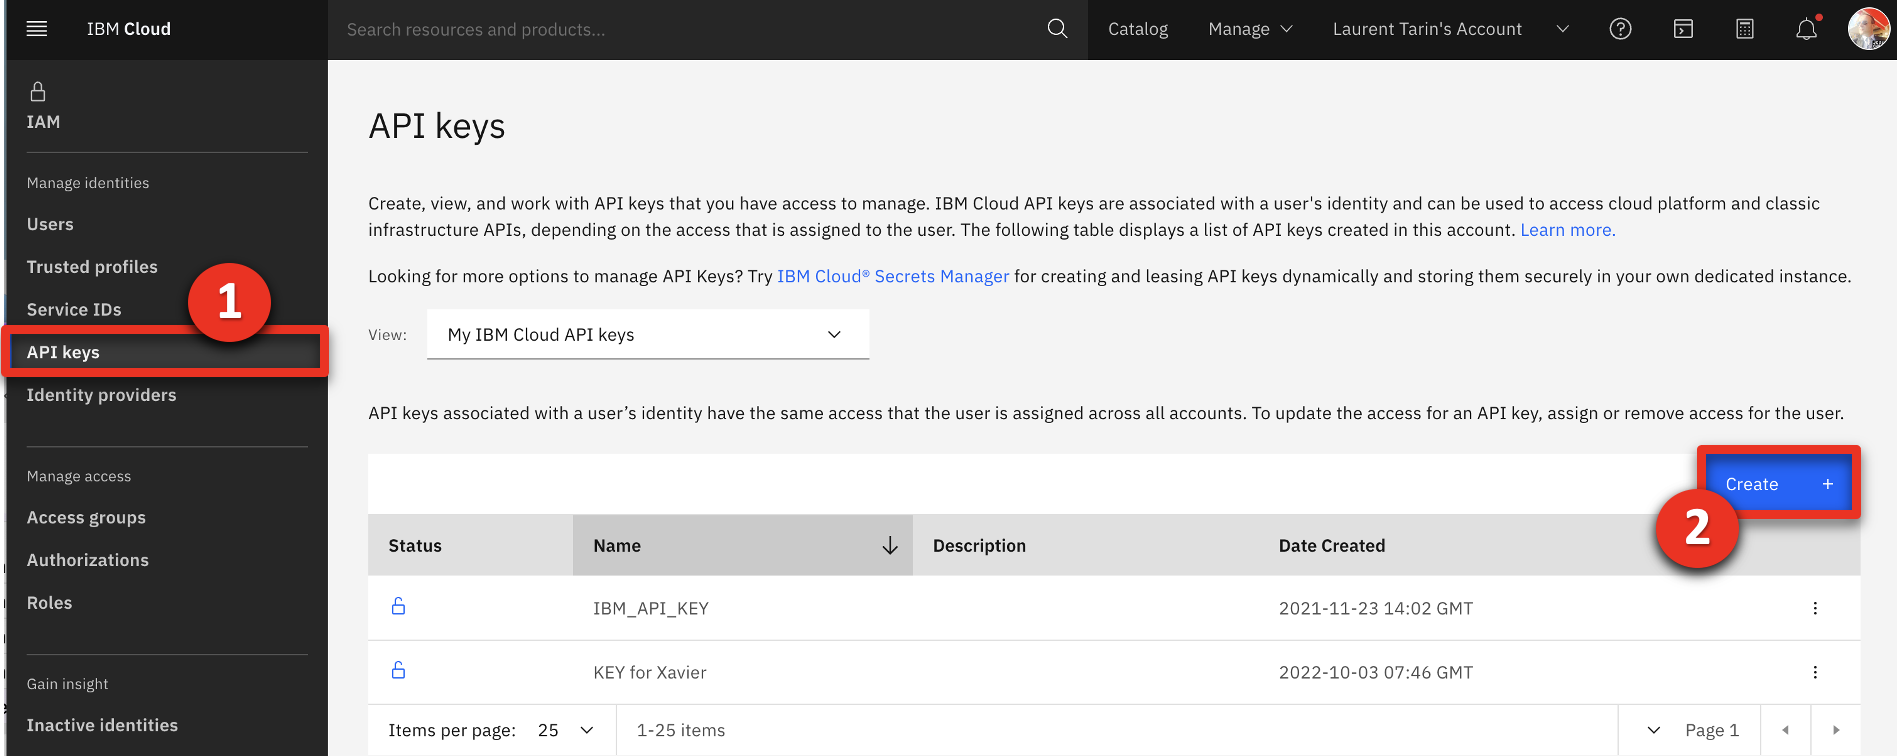
- Click API keys (1) and then click Create + (2).
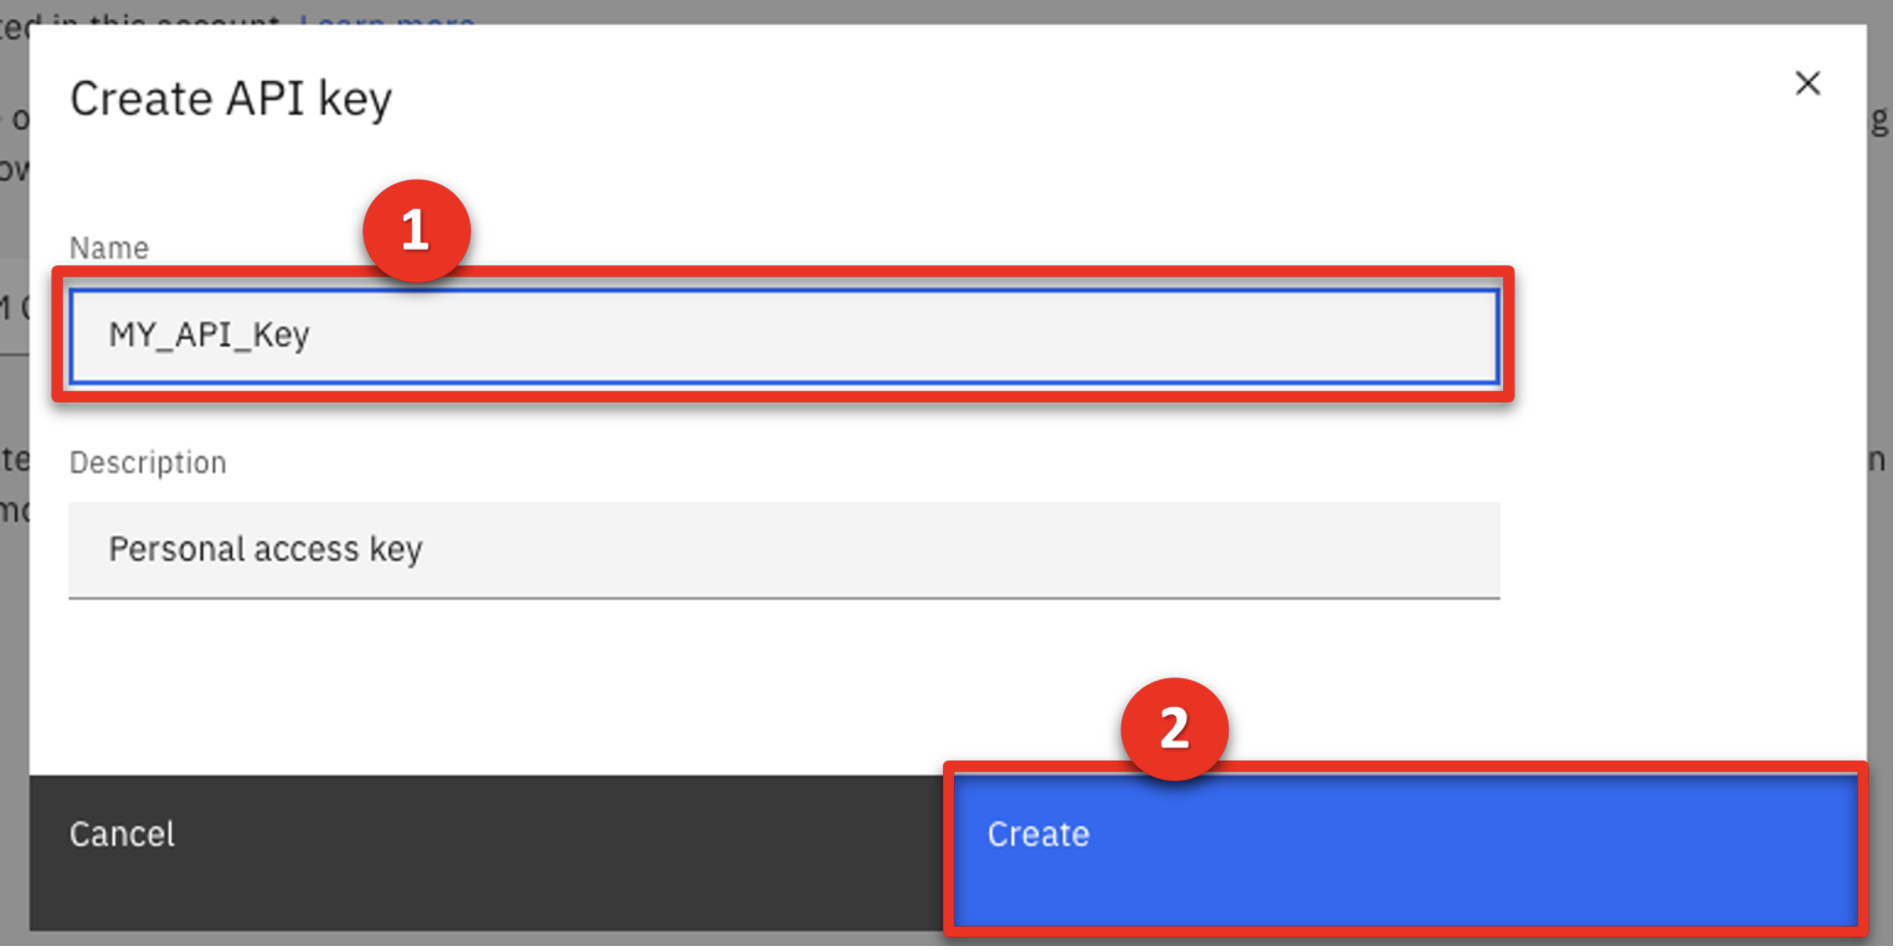
- Name the key ‘MY_API_Key’ (1) and click Create (2).
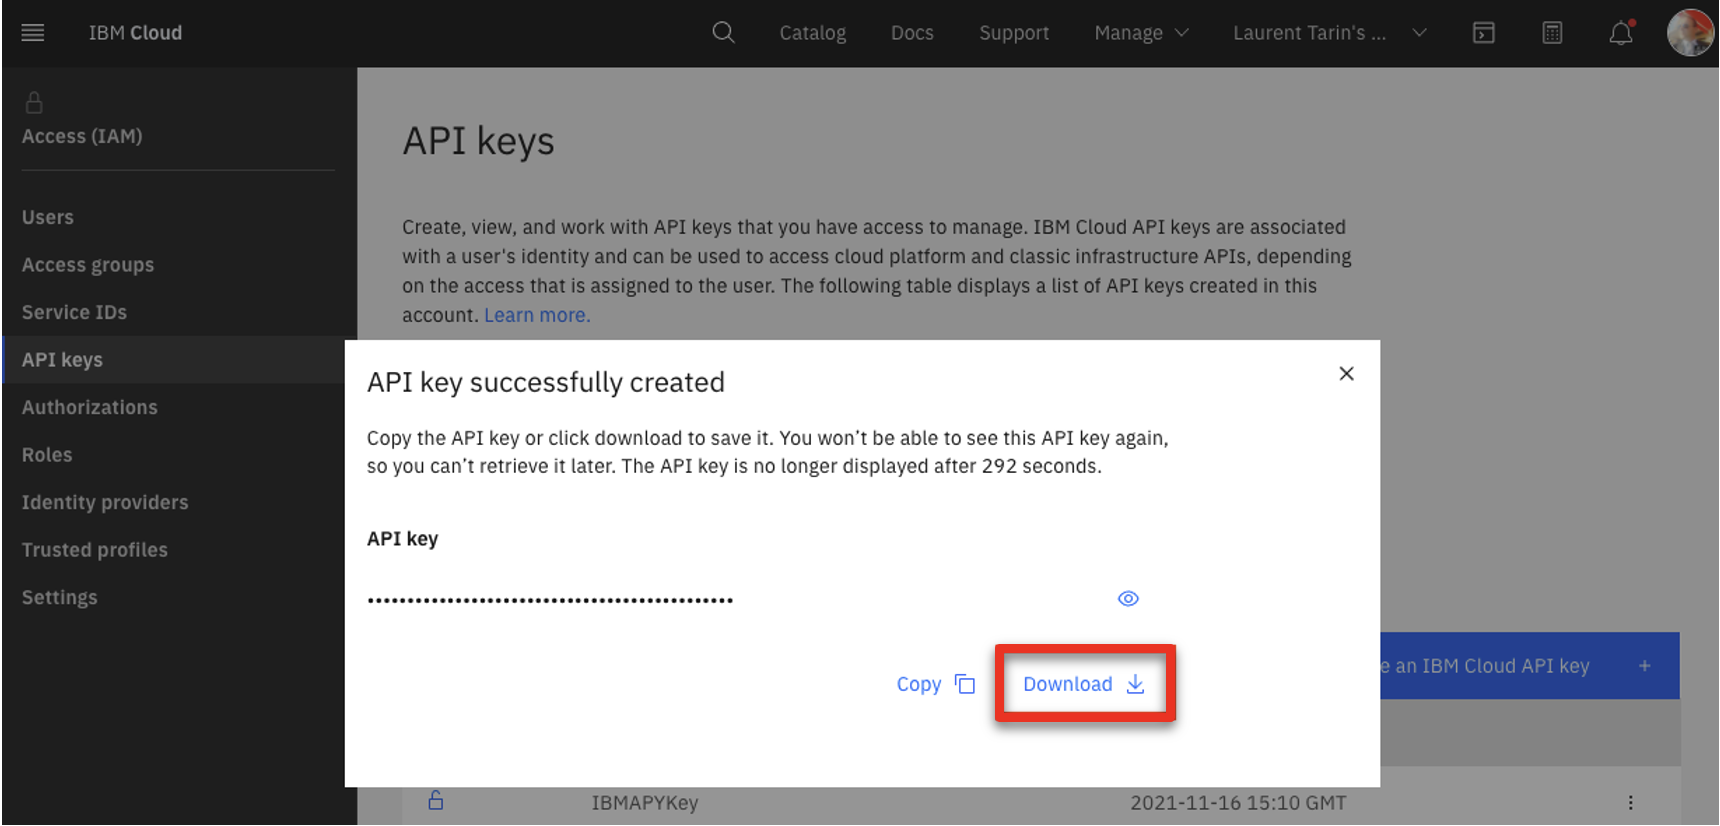
- Click Download to save the API key file for the upcoming ML provider configuration.
8 - Open Automation Decision Services (ADS) and import the ADS demo project
Prior to performing this step, make sure you have downloaded the SkyTalk-customer-retention_23.0.2.zip file. This file is required to set up the ADS decision service.
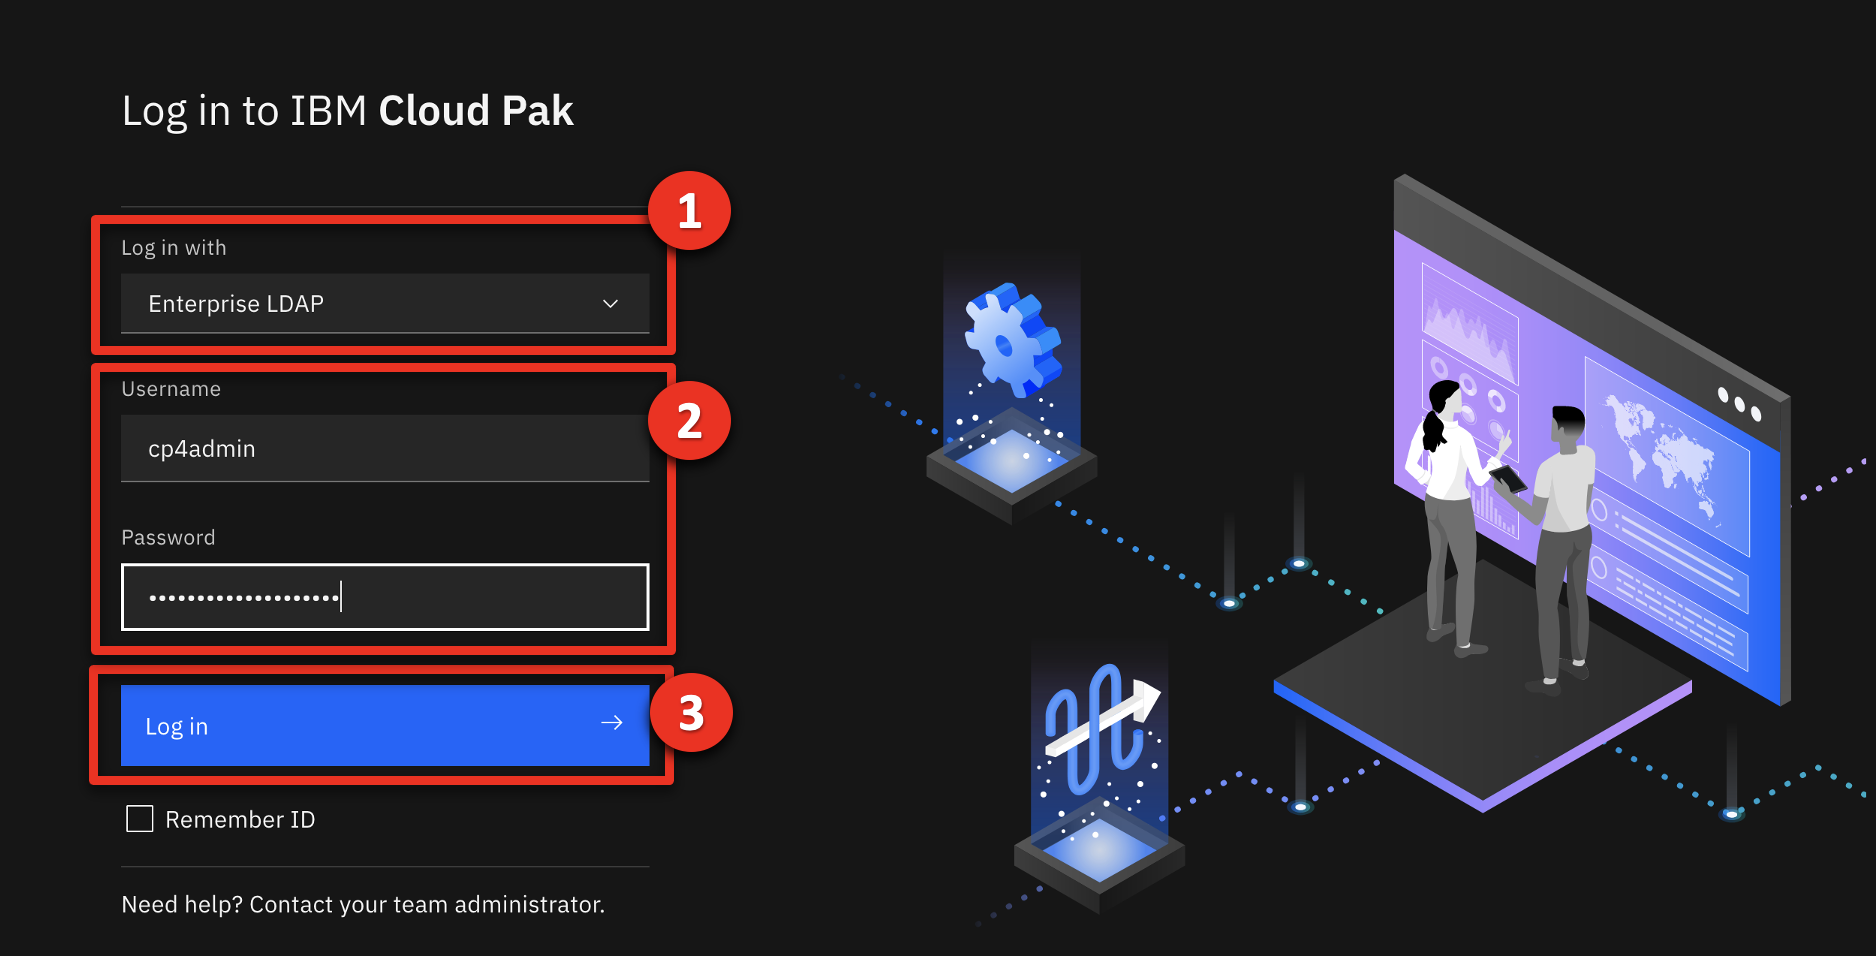
- Access the Cloud Pak for Business Automation using the bookmark saved in step 2. Select Enterprise LDAP in the Log in with drop down menu (1). Enter ‘cp4admin’ as the Username and the Password (2) from your note. Click Log in (3).
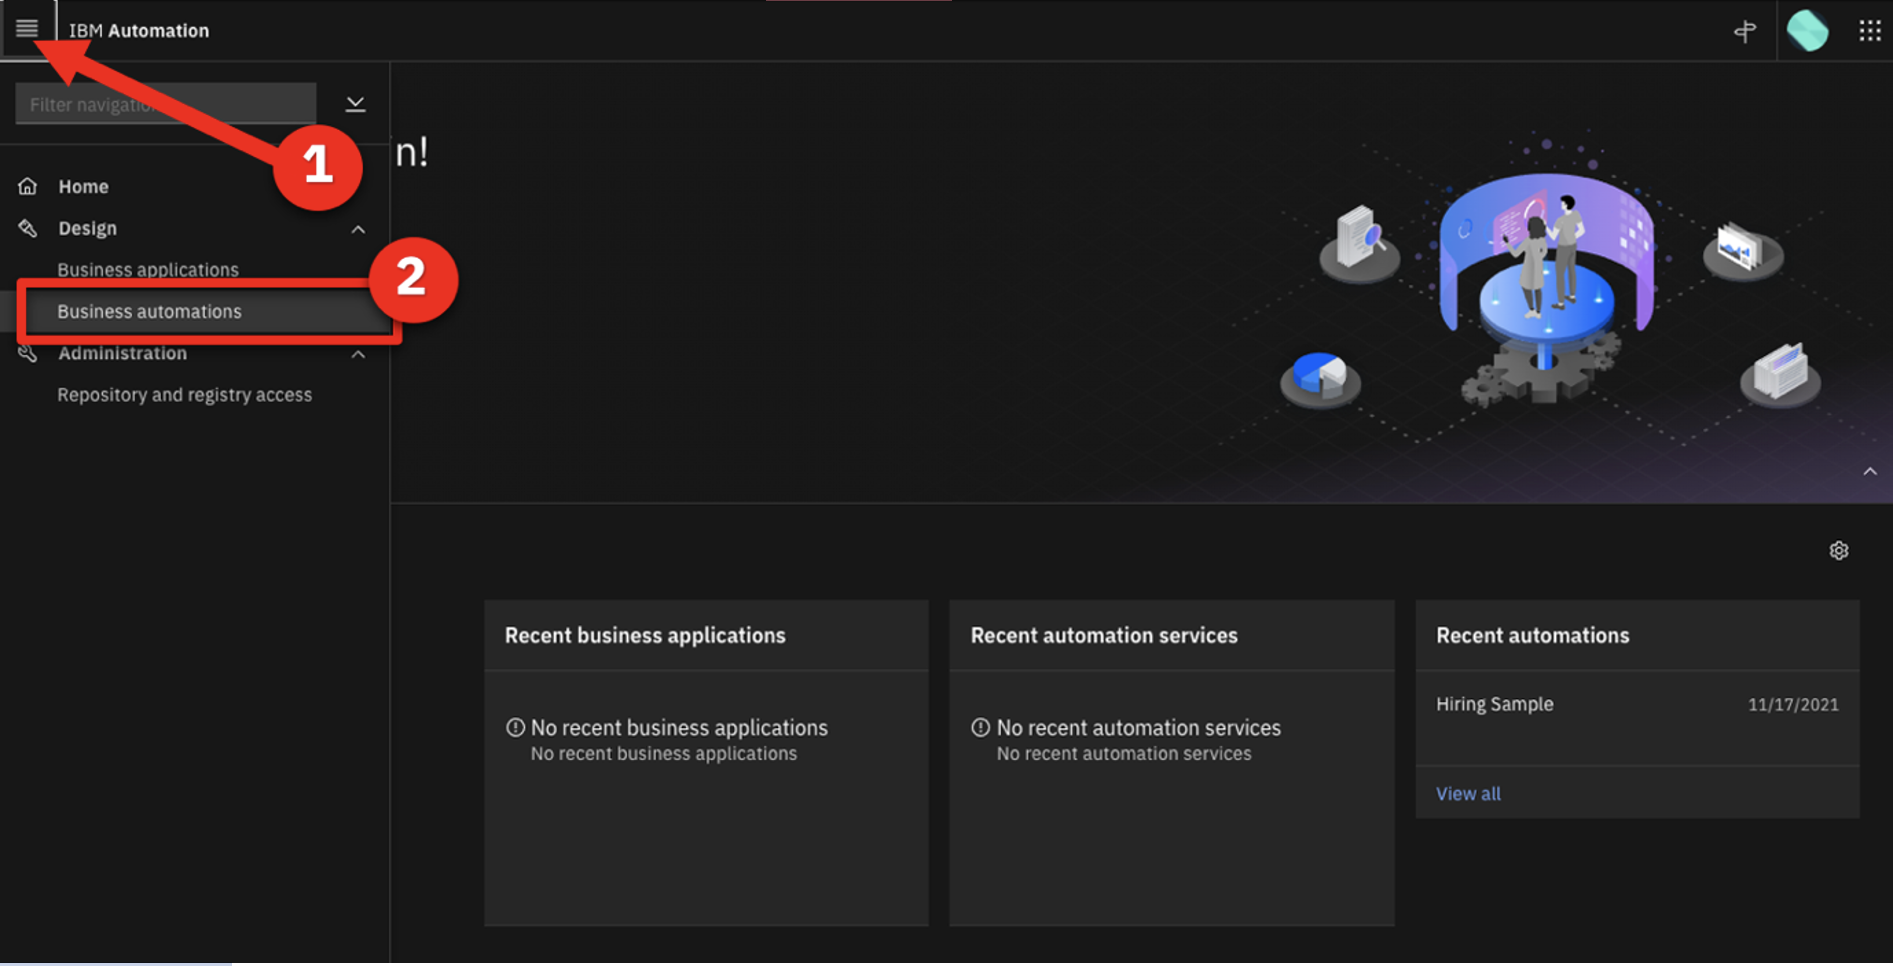
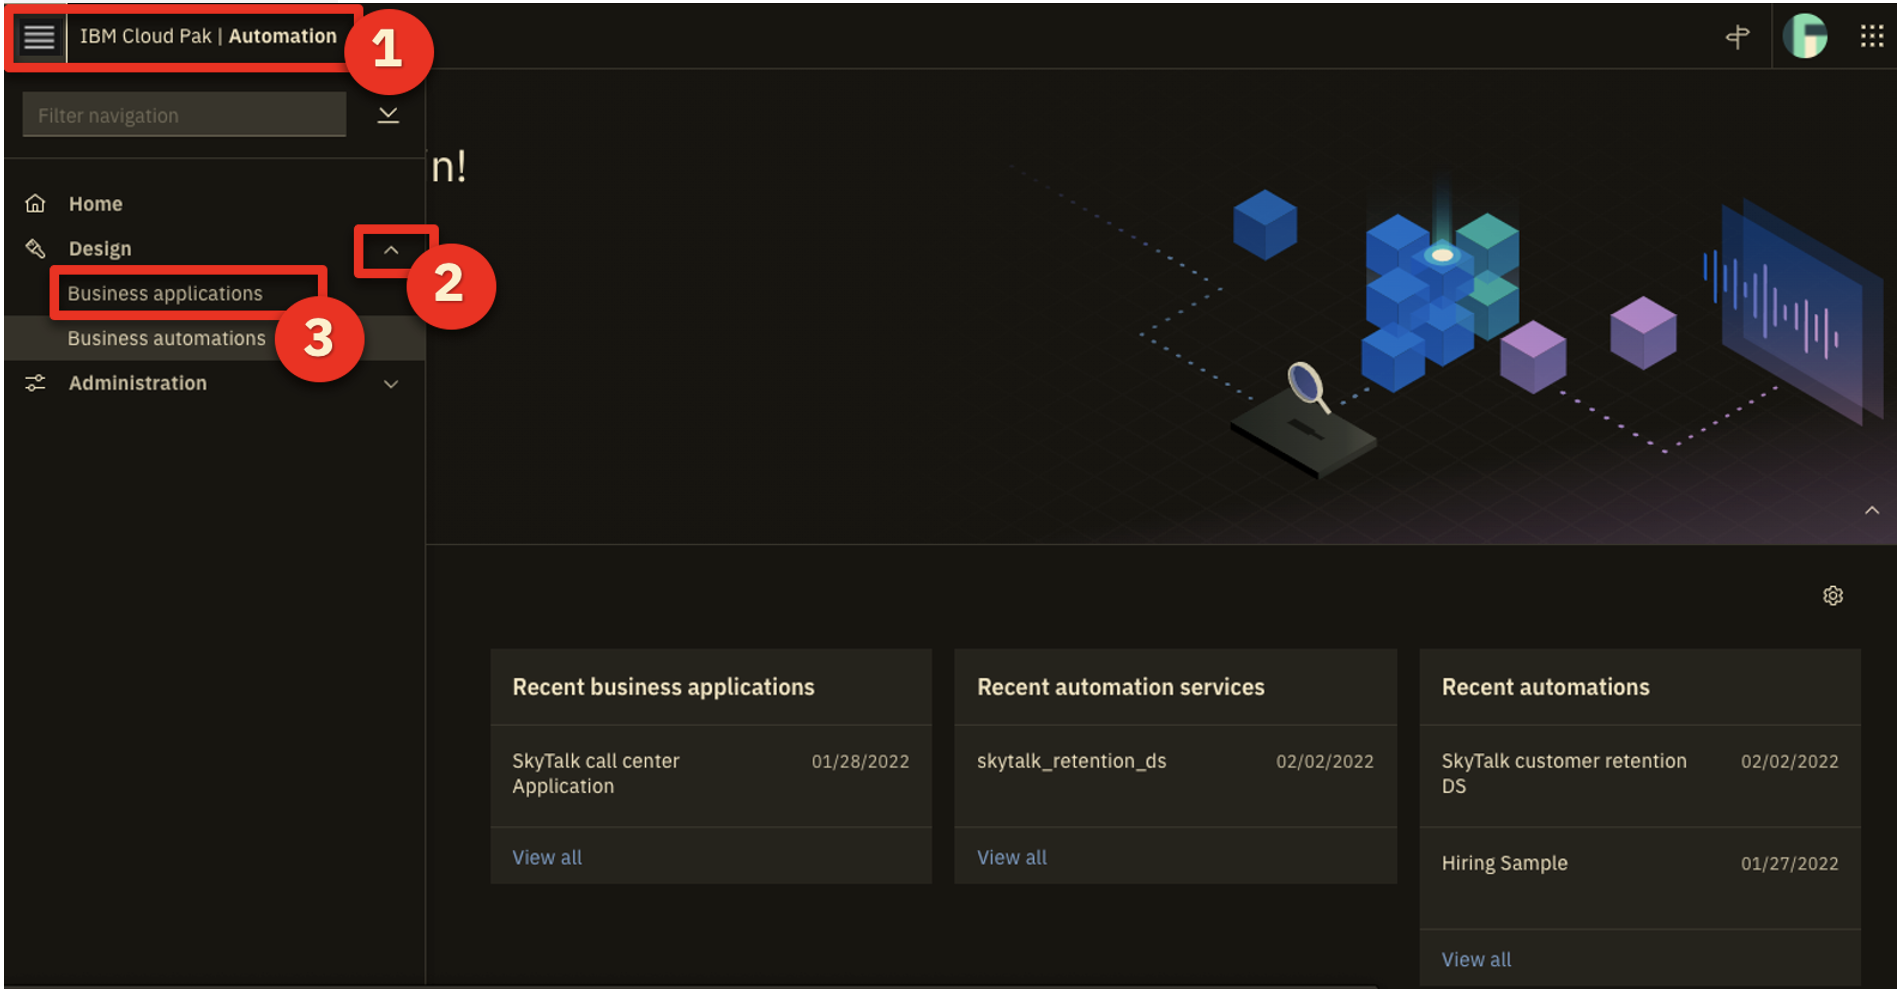
- Expand the top menu (1) and click Business automations (2) under Design.
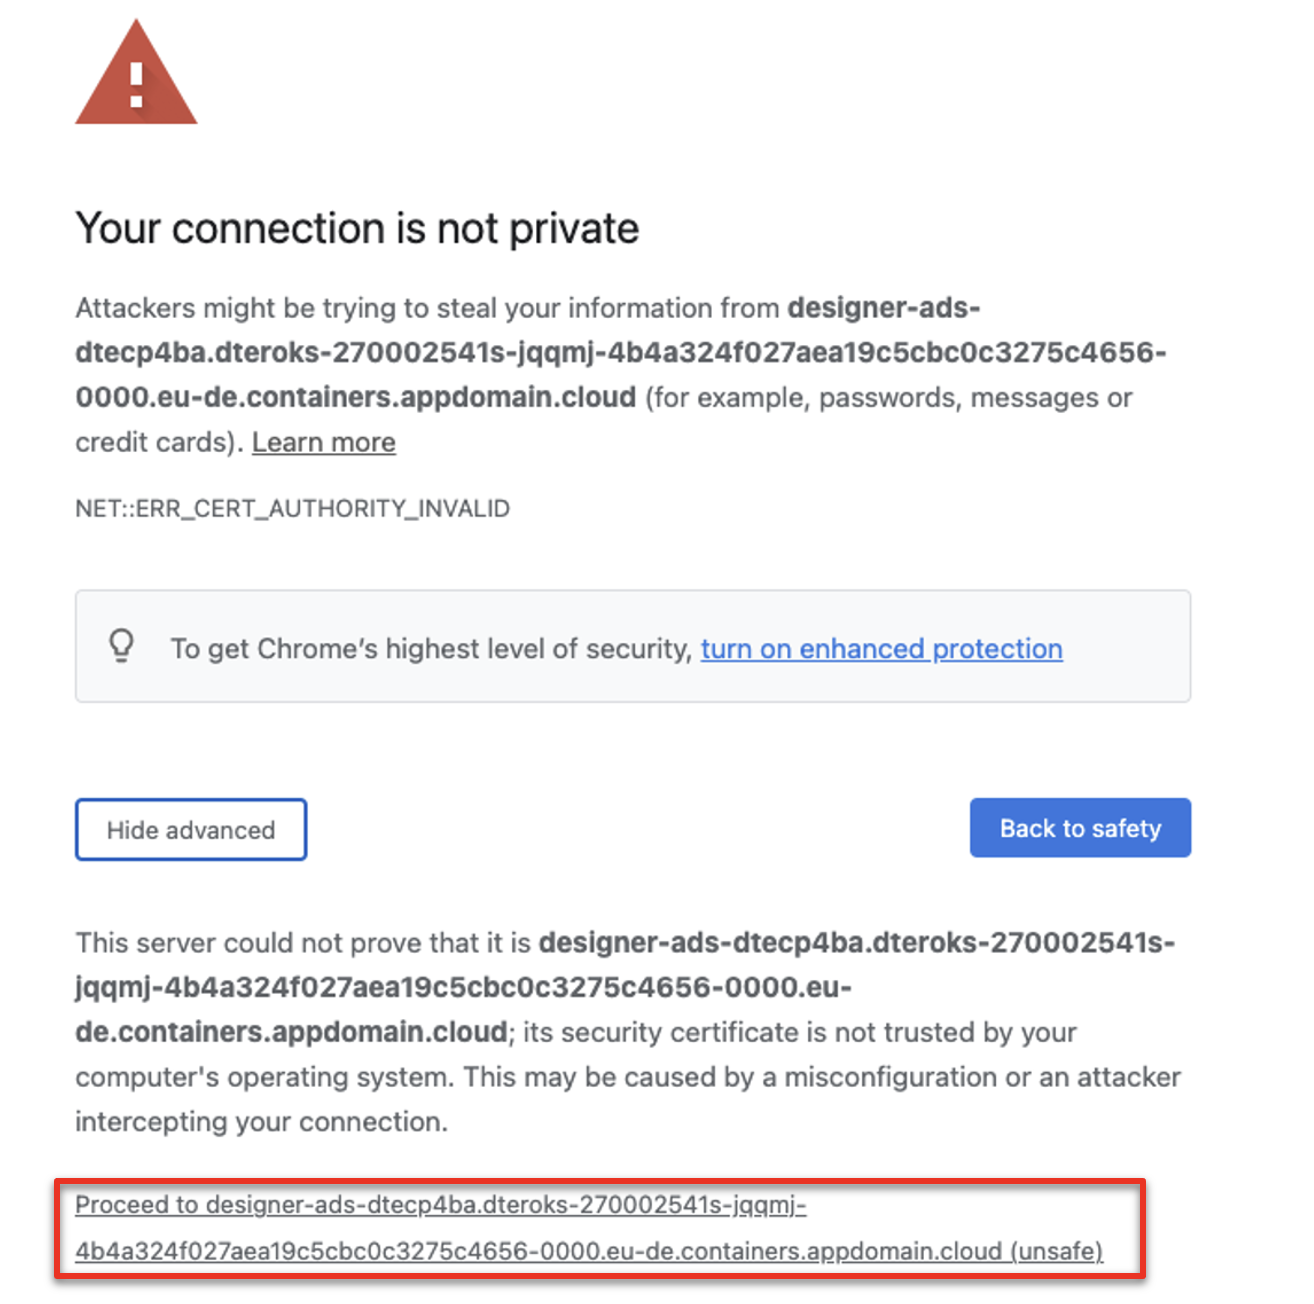
- Pass through the privacy warning messages by clicking advanced and then the ‘proceed…‘ link.
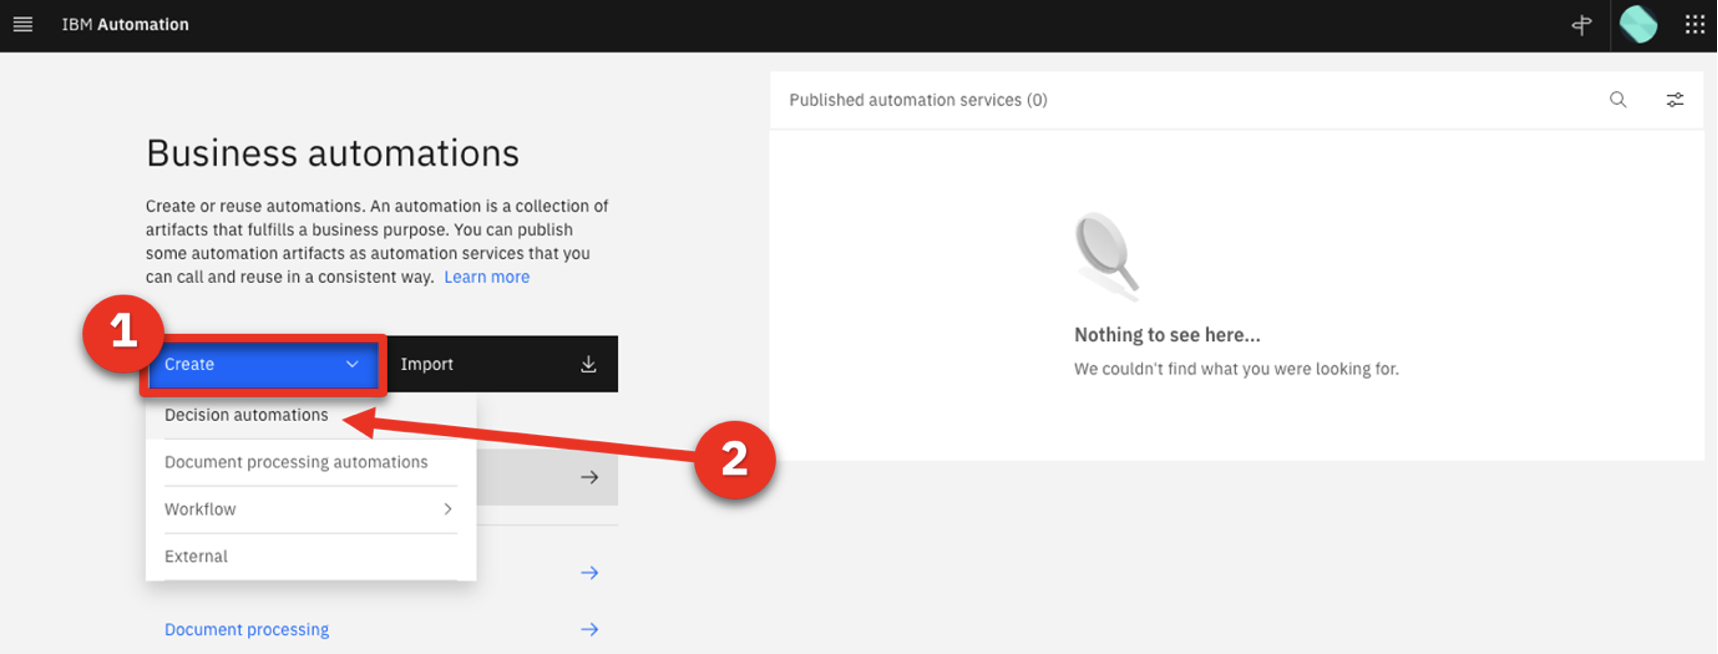
- Under Business automations, click Create (1) and select Decision automations (2).
- Name the automation ‘Customer retention’ (1) and then click Create (2).

- Accept any privacy checks that may appear.
- Close any guided tour views.
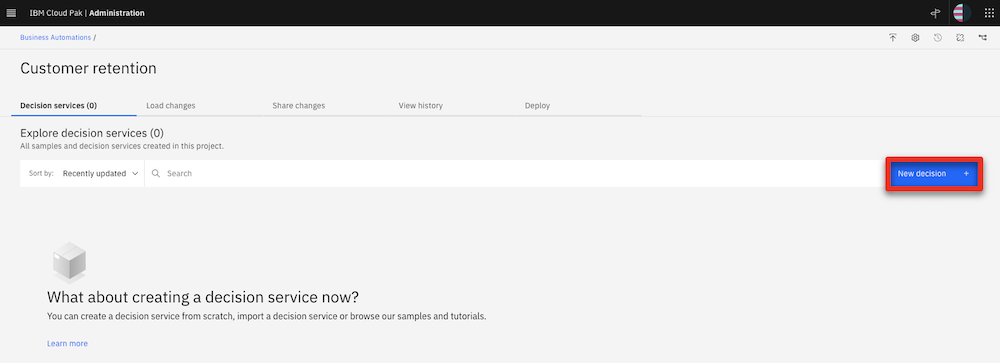
- Click New decision.
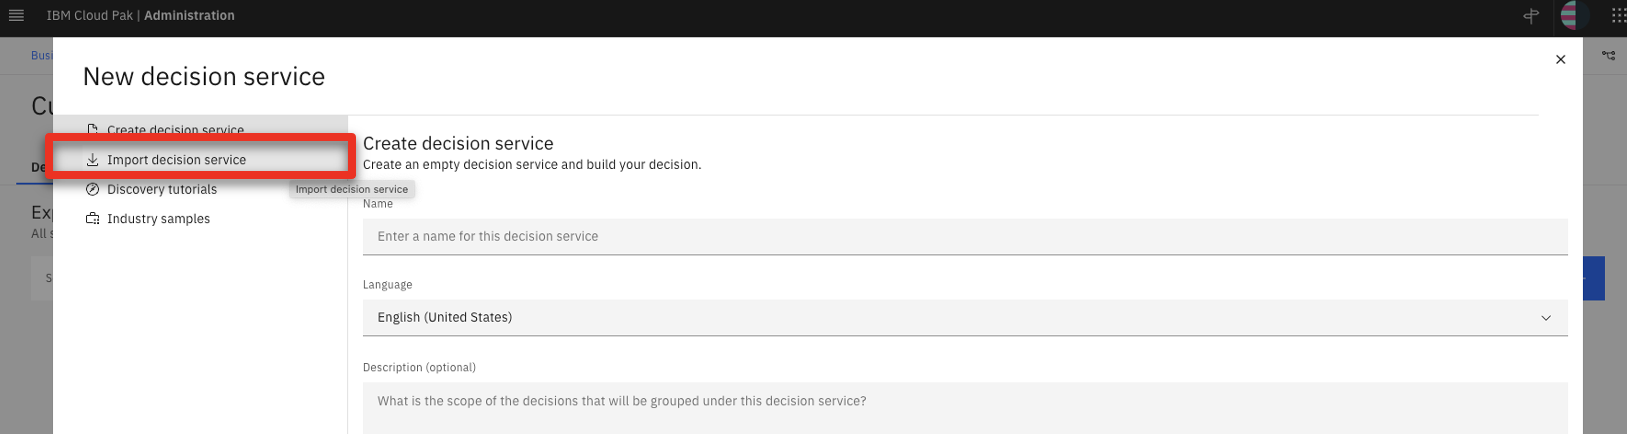
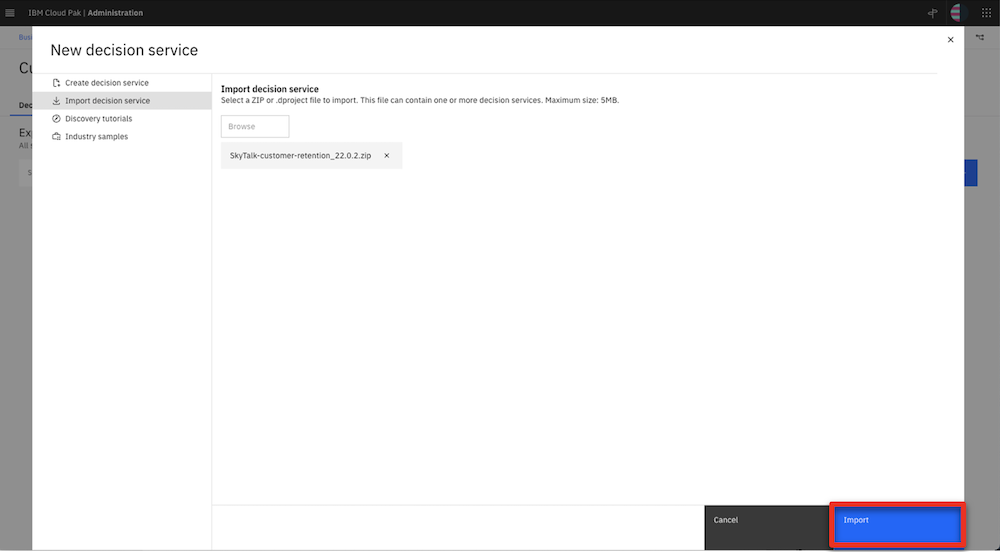
- Click Import decision service.
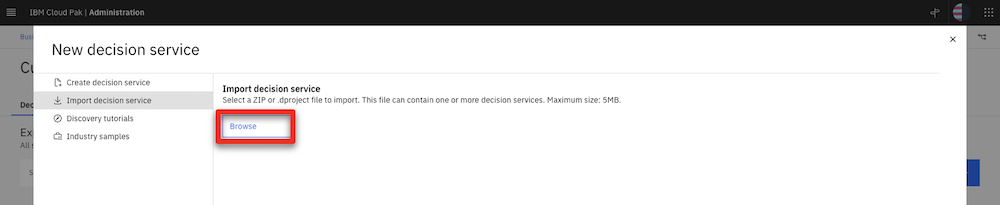
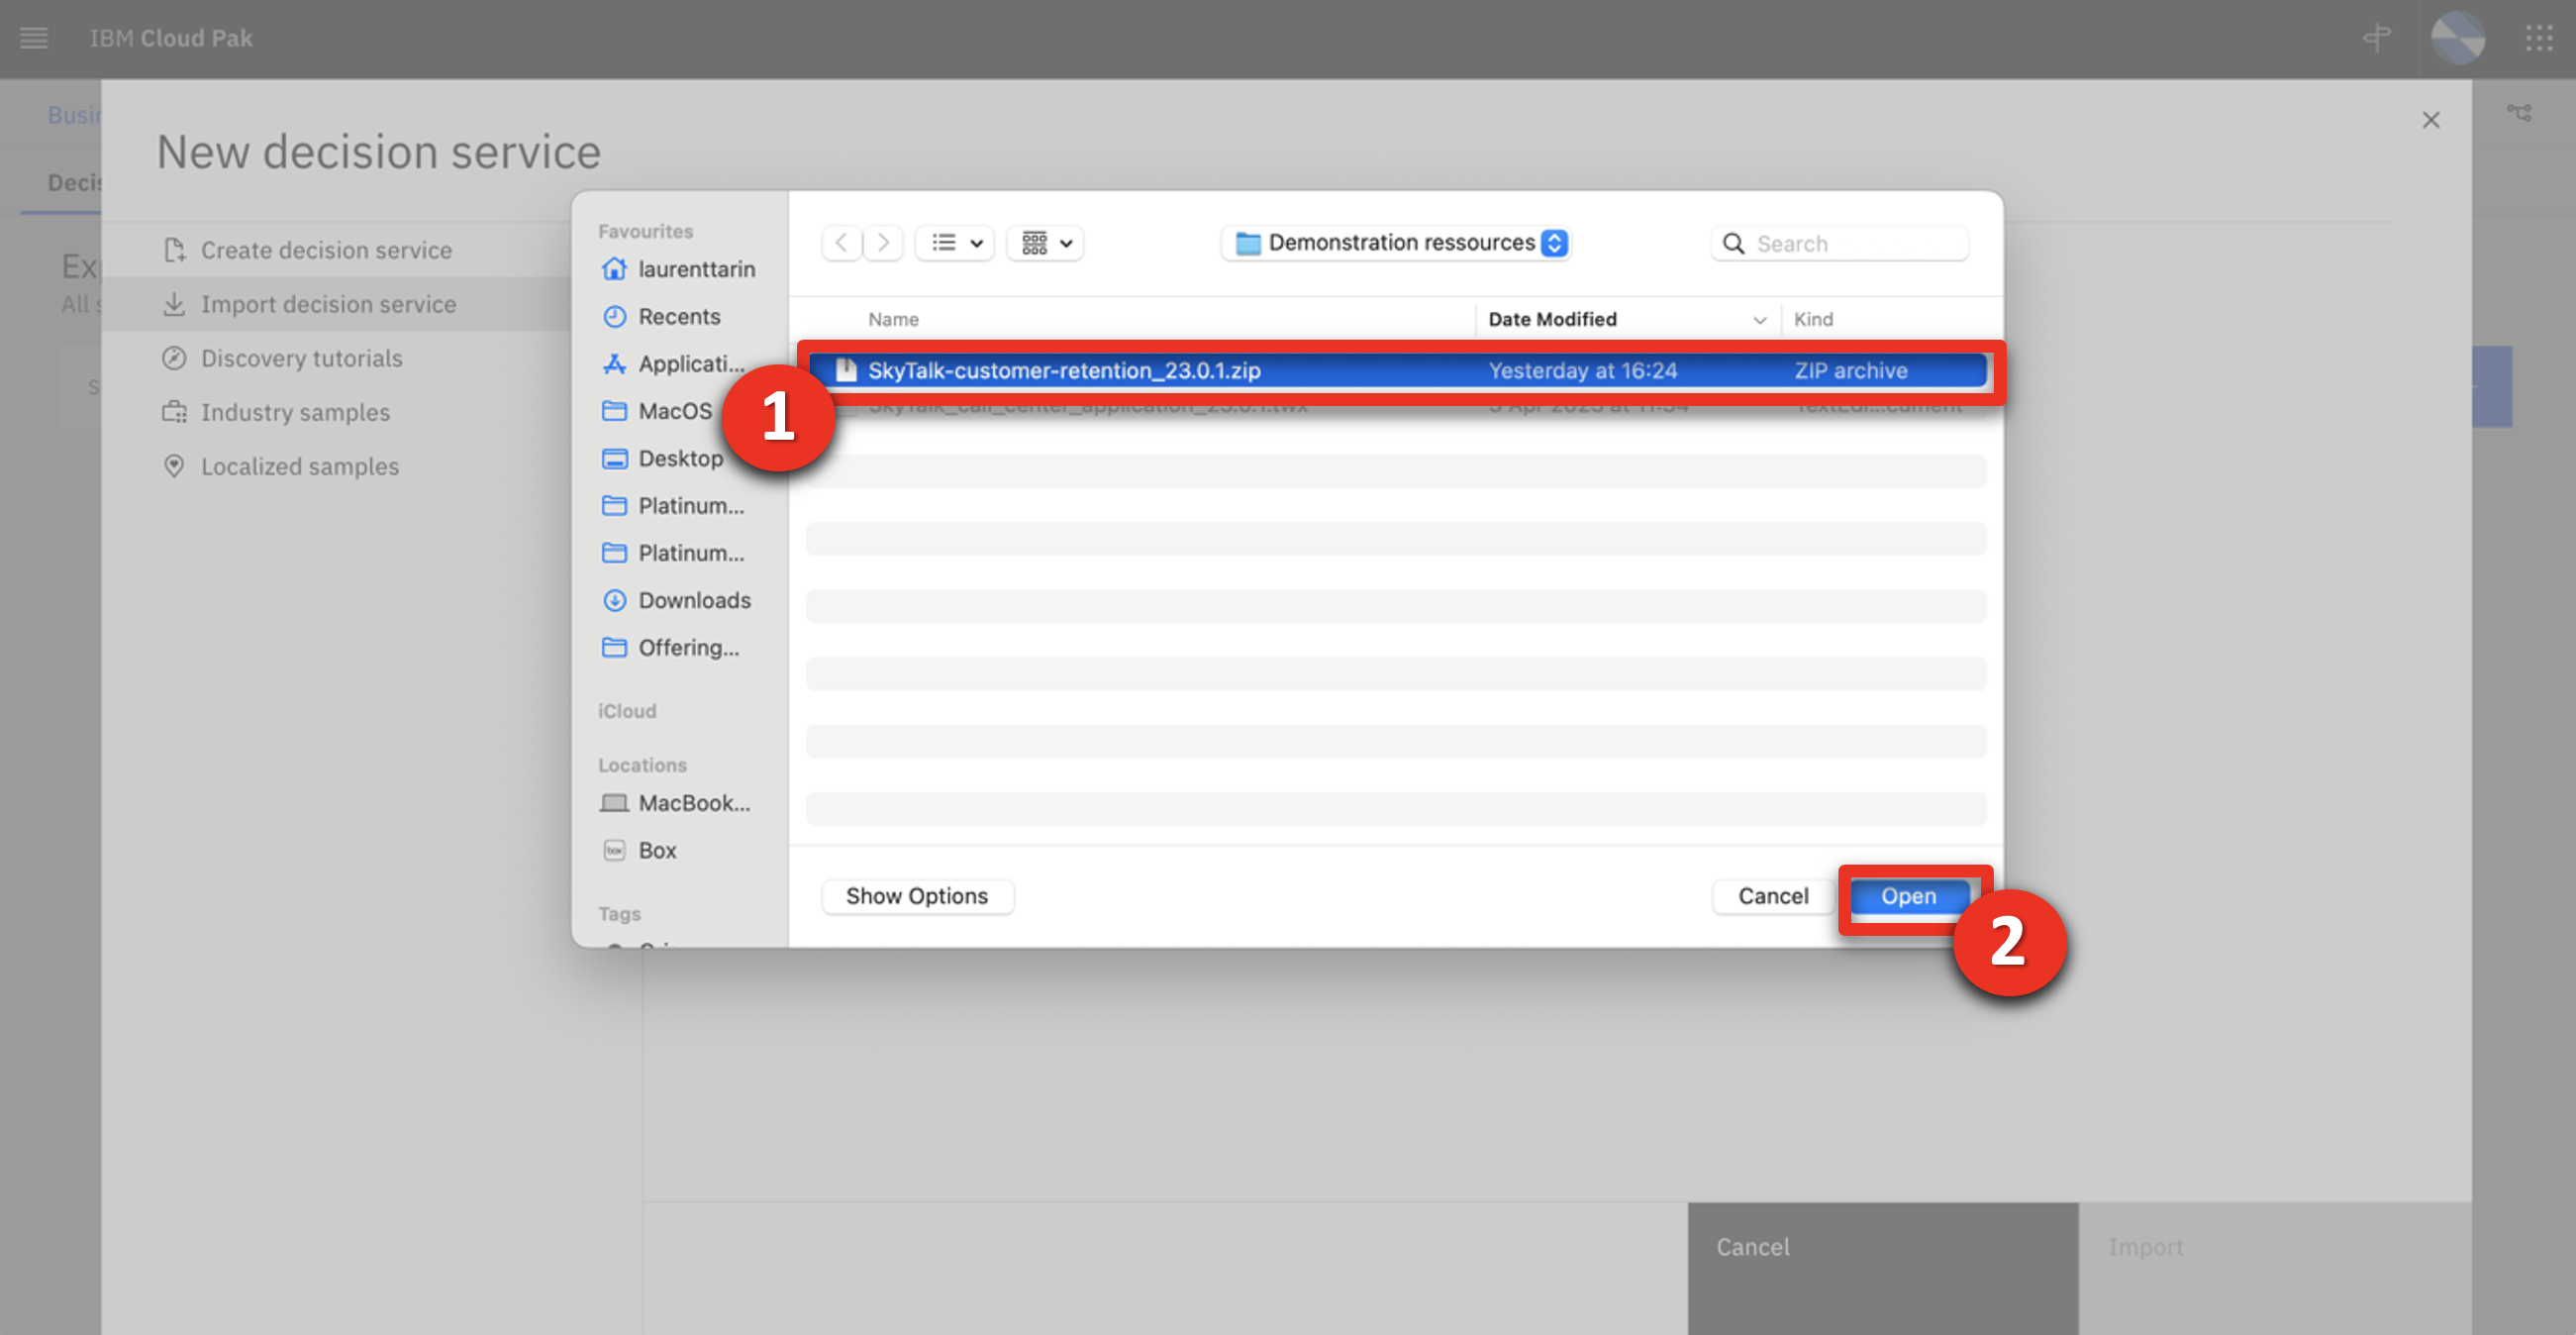
- Click Browse.
- Select the SkyTalk-customer-retention_23.0.2.zip file (1) and click Open (2).
- Click Import.
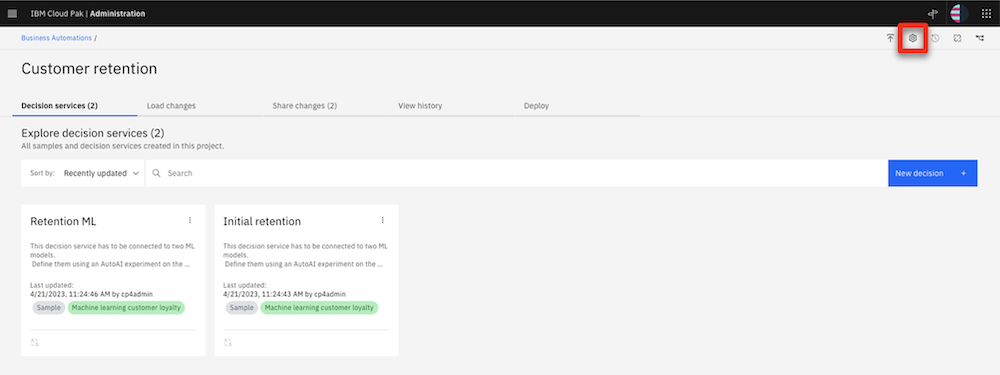
- Configure the ADS environment by clicking the Settings icon.
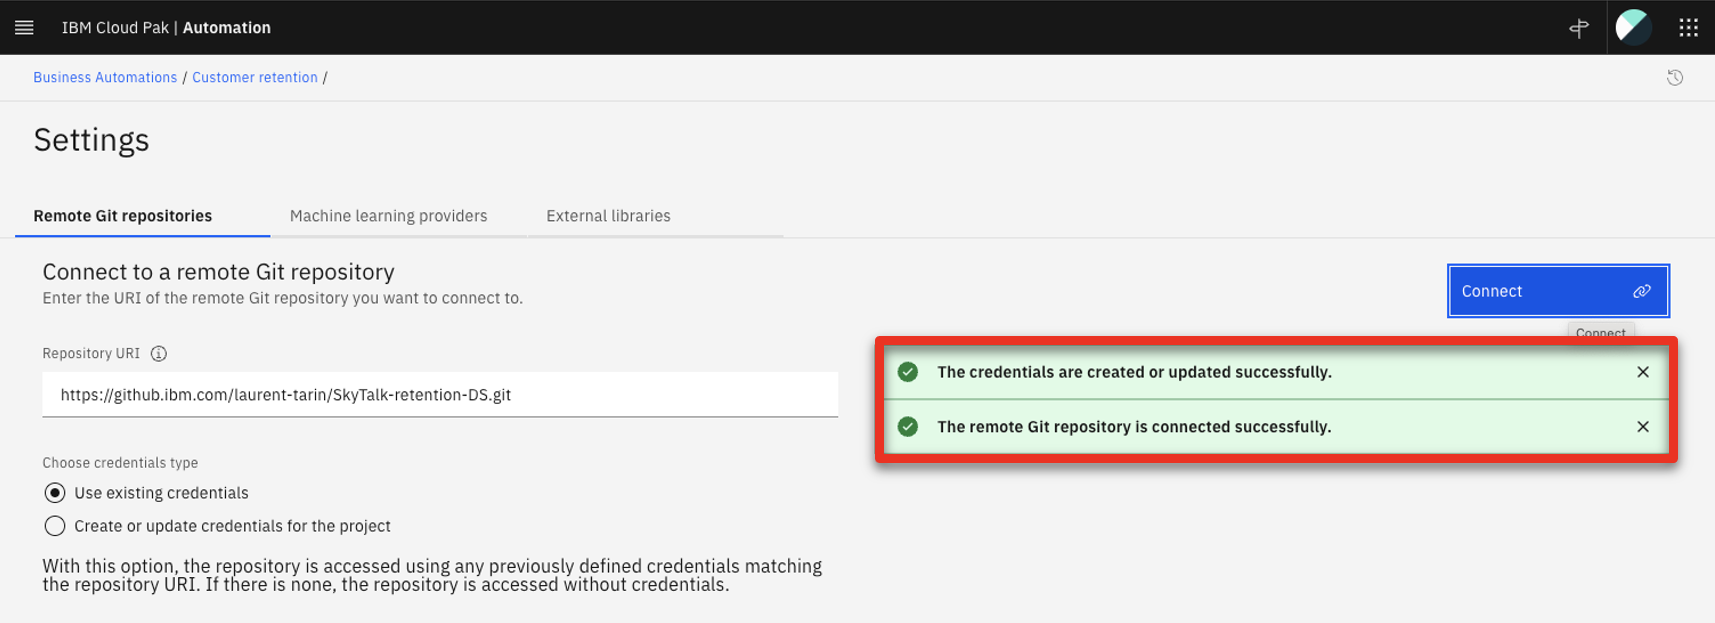
- In the Remote Git repositories tab, paste the git Repository URL (1) from step 2.3. Select Create or update credentials for the decision automation (2).

- Click Username & password (1), enter your Git username in the Username field, and enter the Git Personal access token (API key) from step 2.10 in the Password field (3). Click Connect (4).
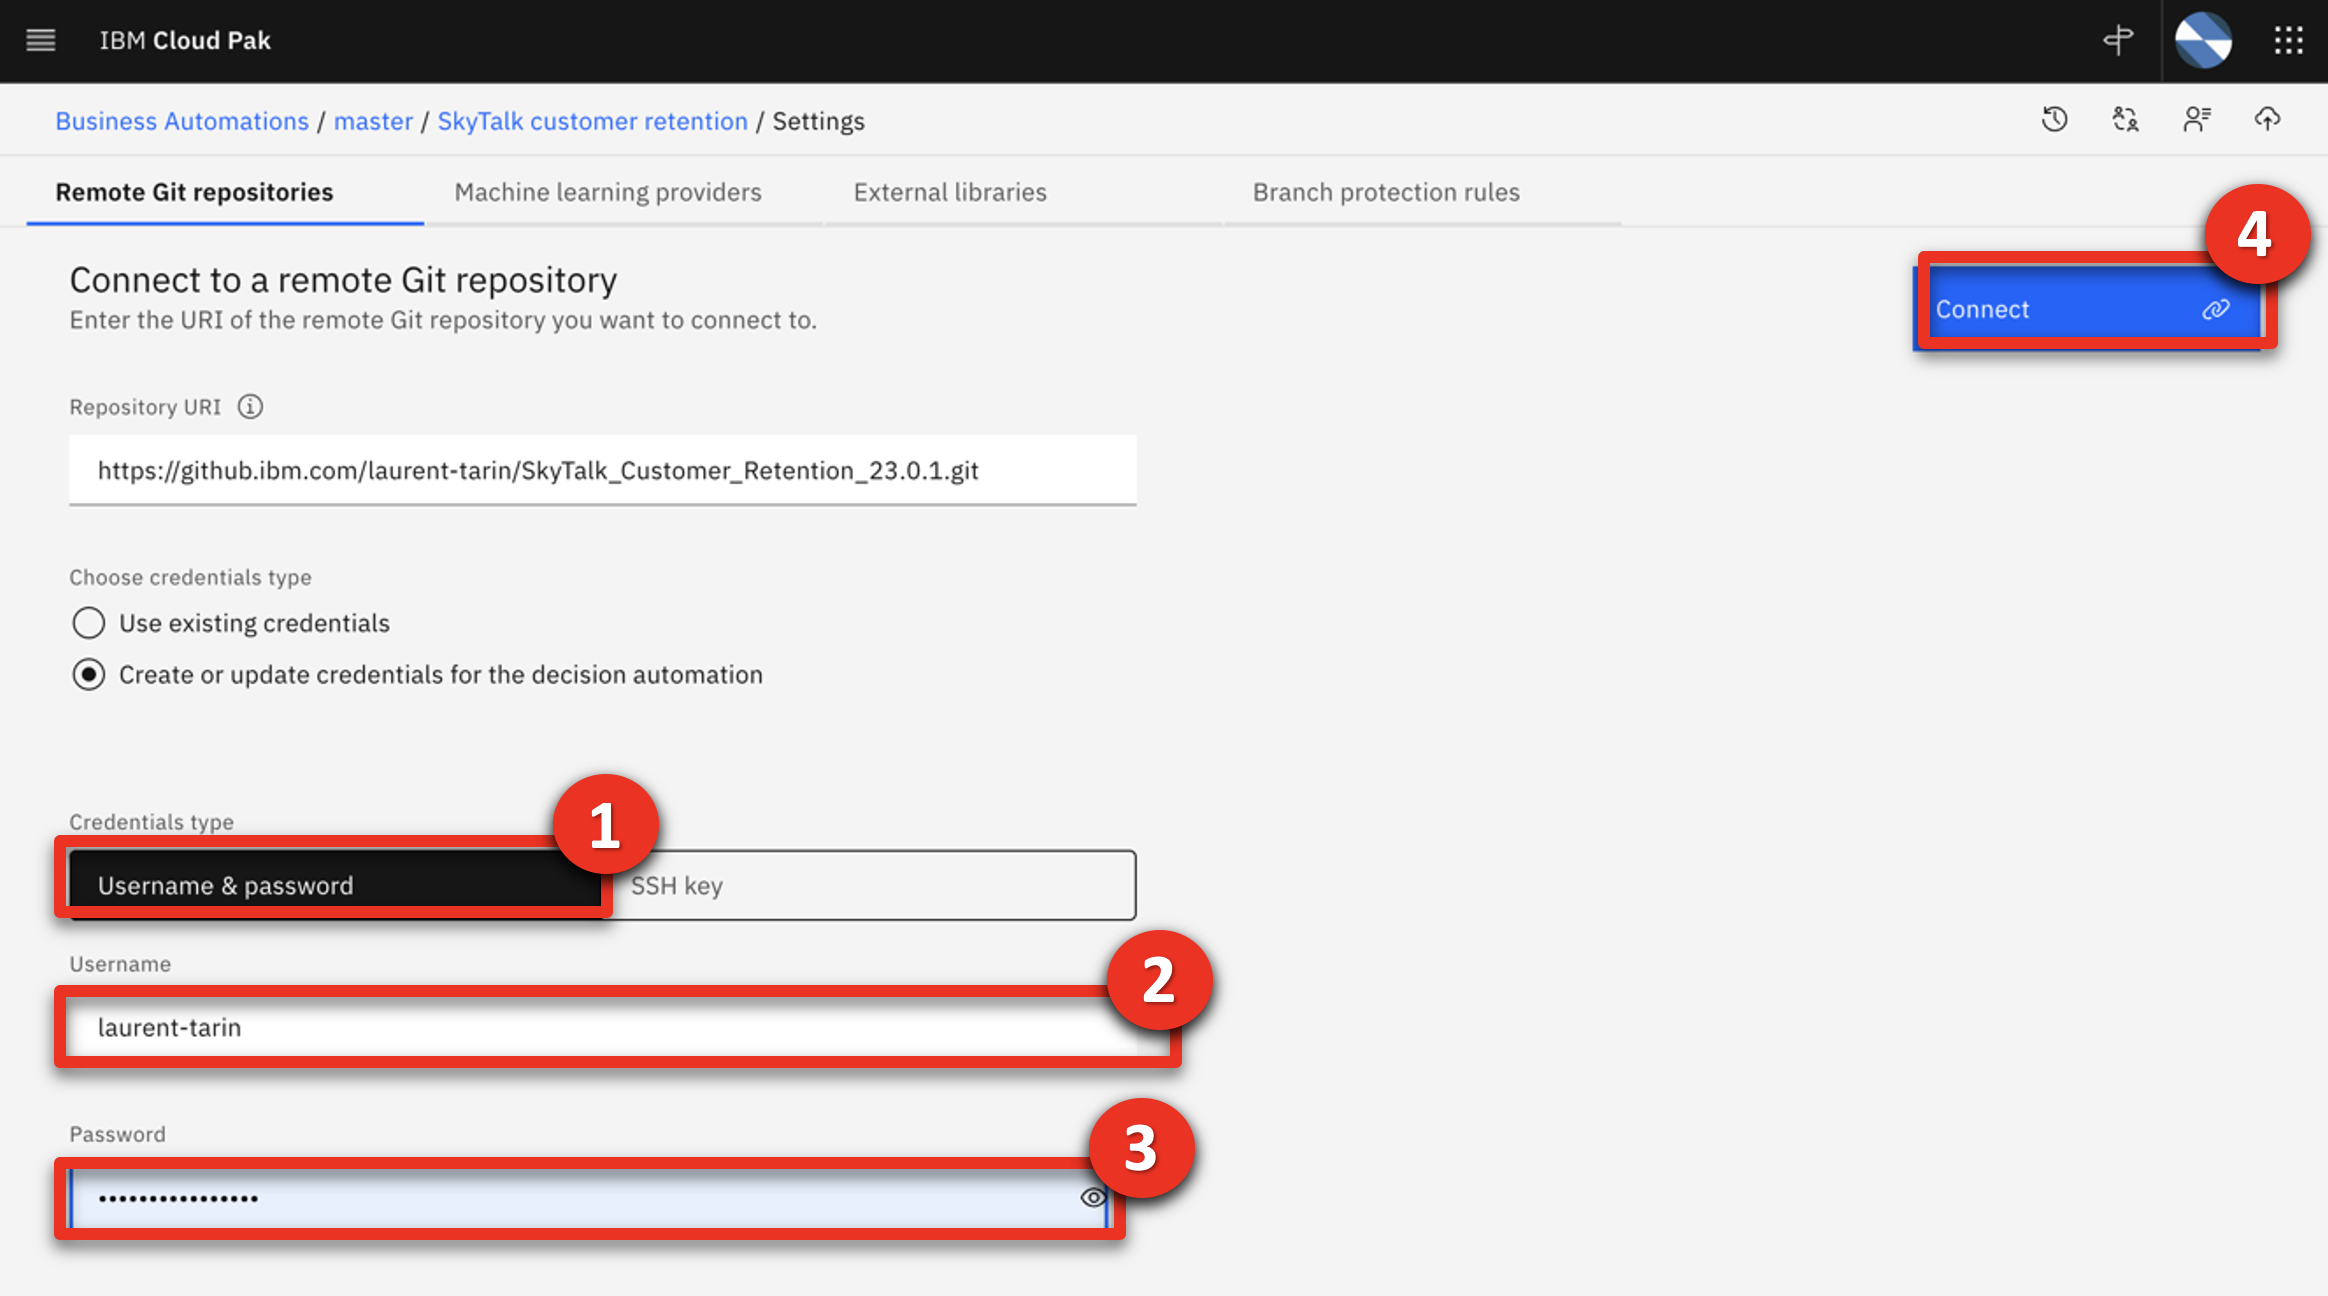
- Ensure that the Remote Git repository status is successfully connected.
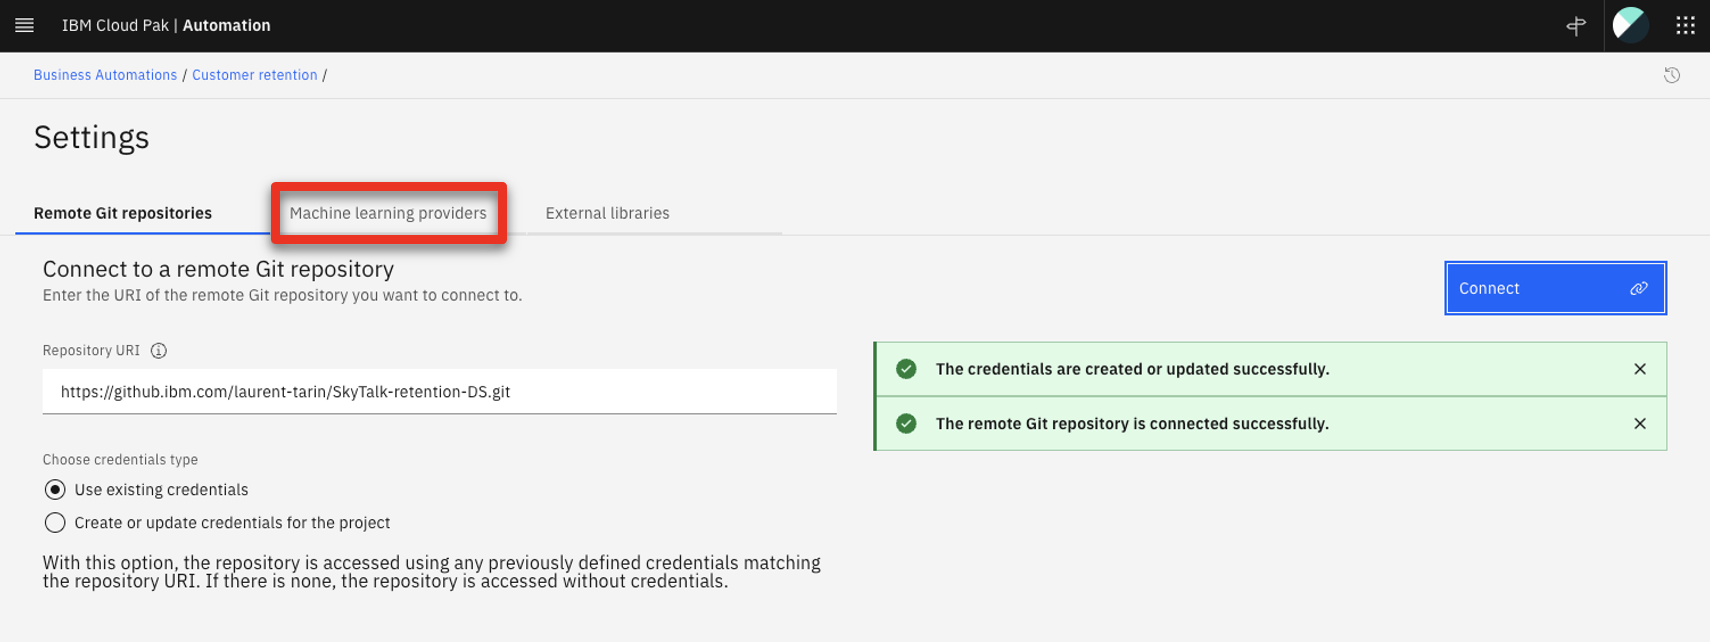
To perform the following steps, your two machine learning services must be deployed in the Watson Studio deployment environment. - Click the Machine learning providers tab to configure the machine learning provider.
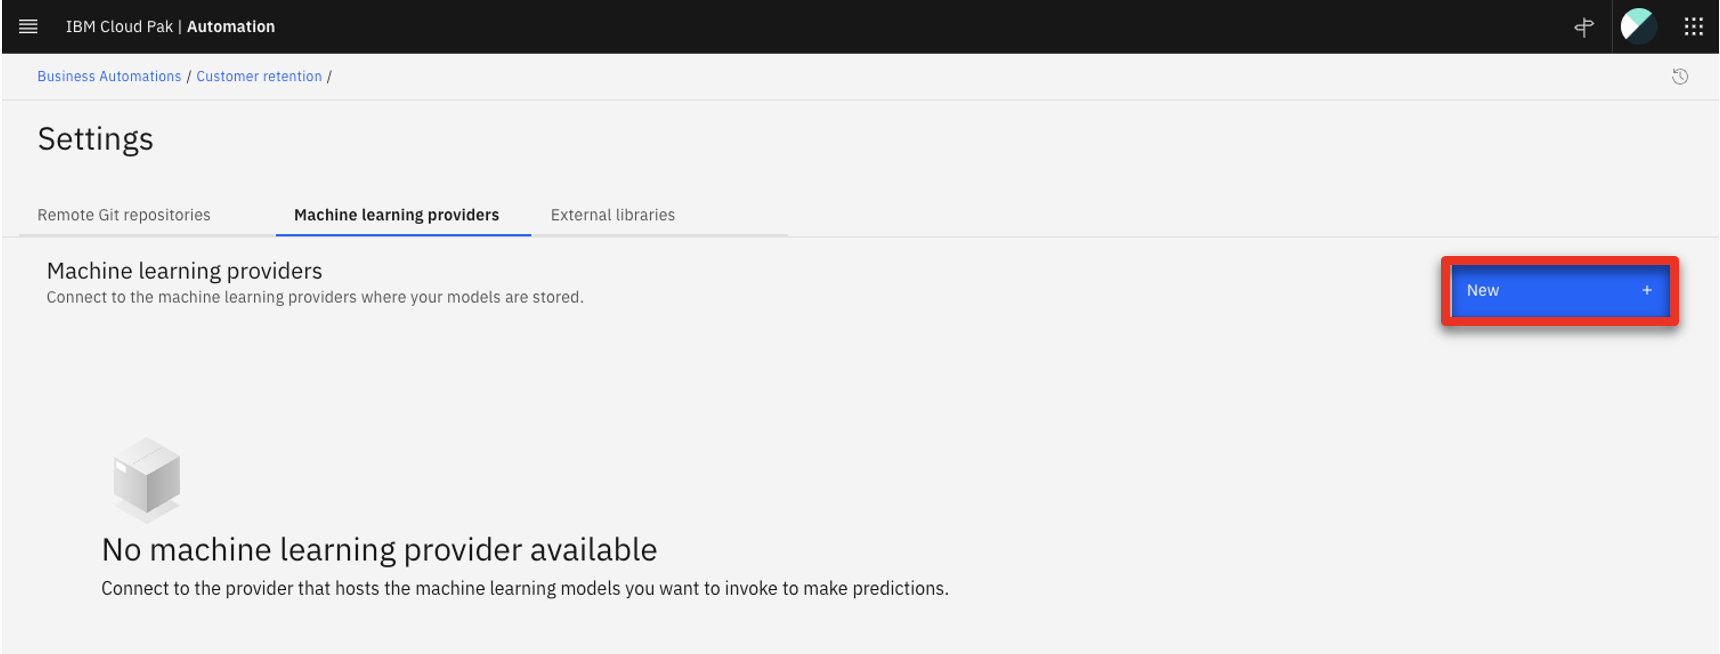
- Click New +.
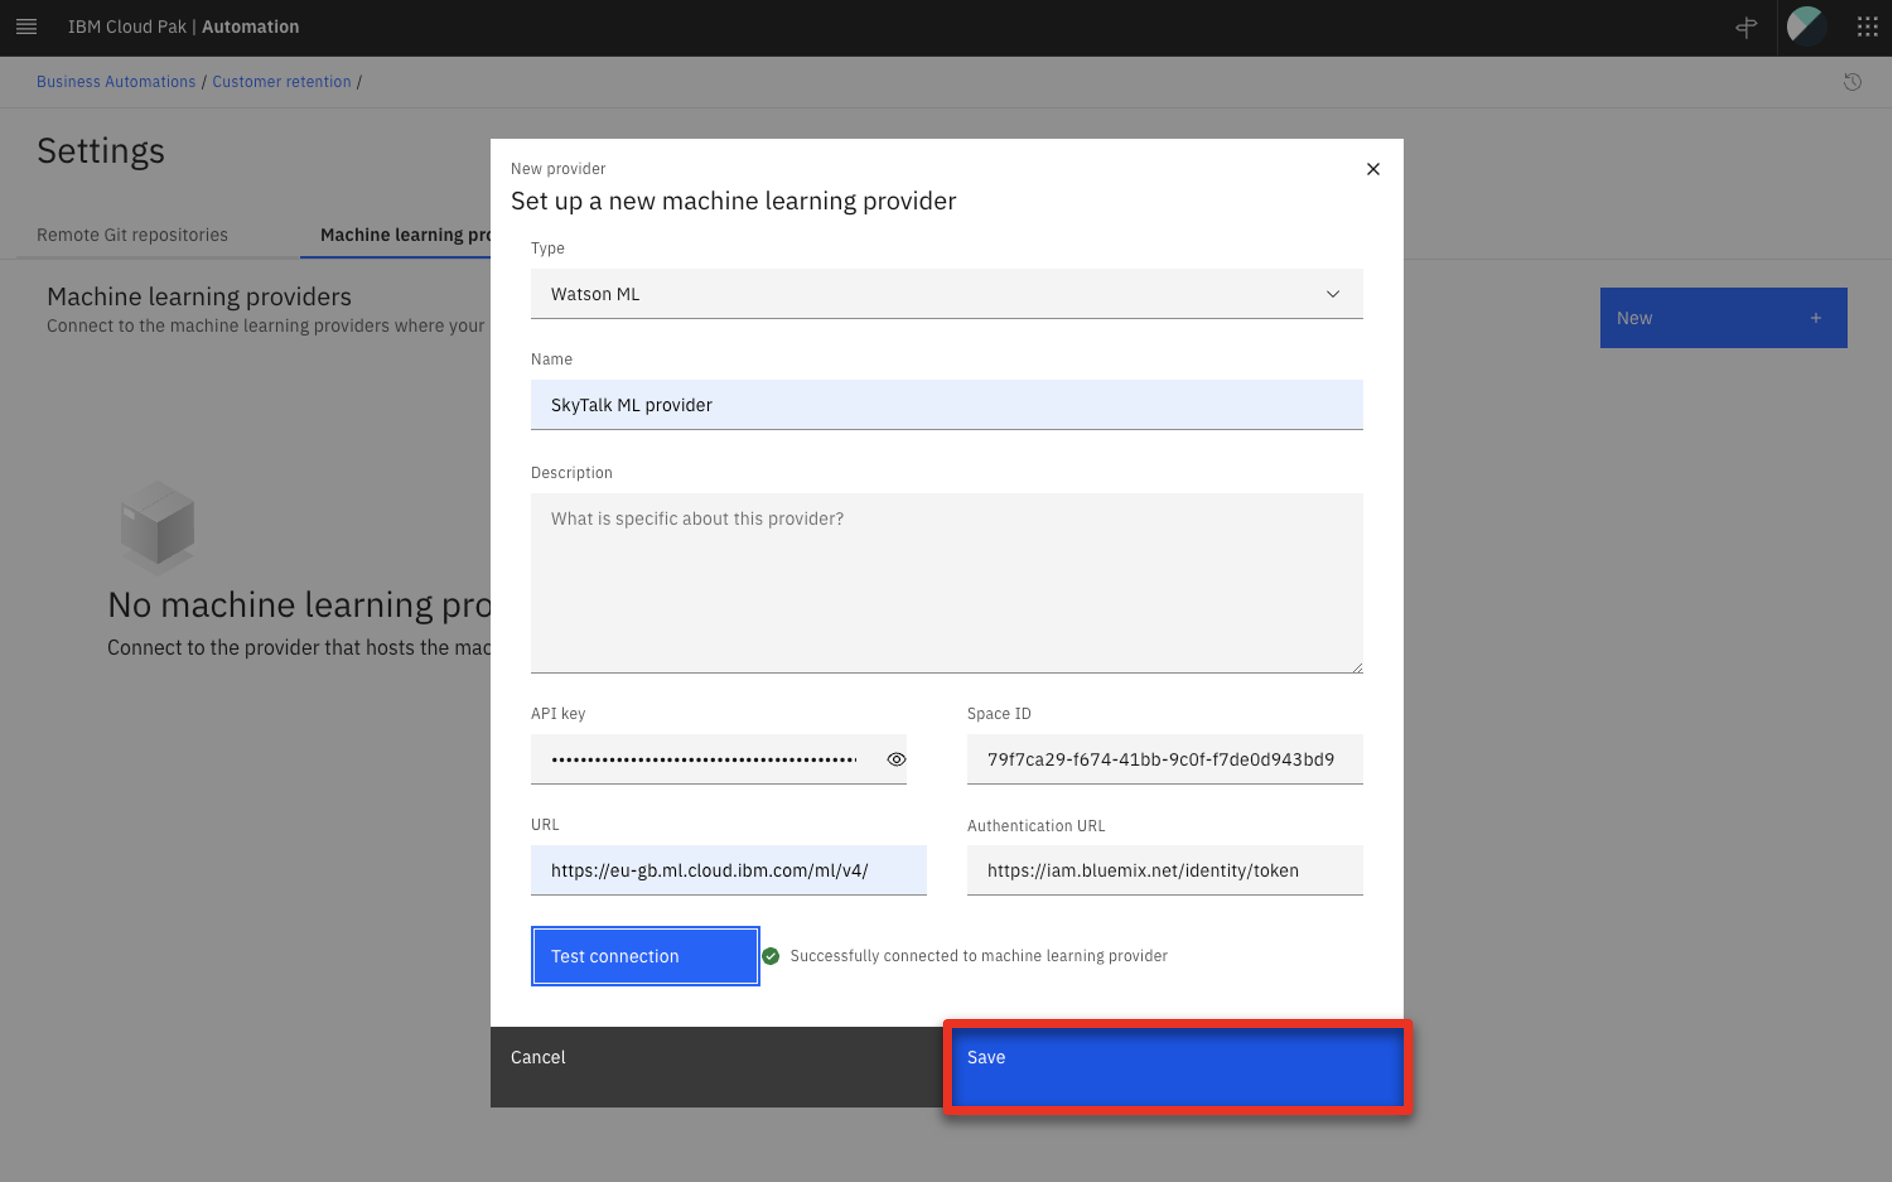
- Select the Watson ML (1) machine provider type and name the ML provider ‘SkyTalk ML provider’ (2). Enter the URL (3) and Space ID (4) from step 7.5 and scroll down.
NOTE: The Space ID is the Space GUID.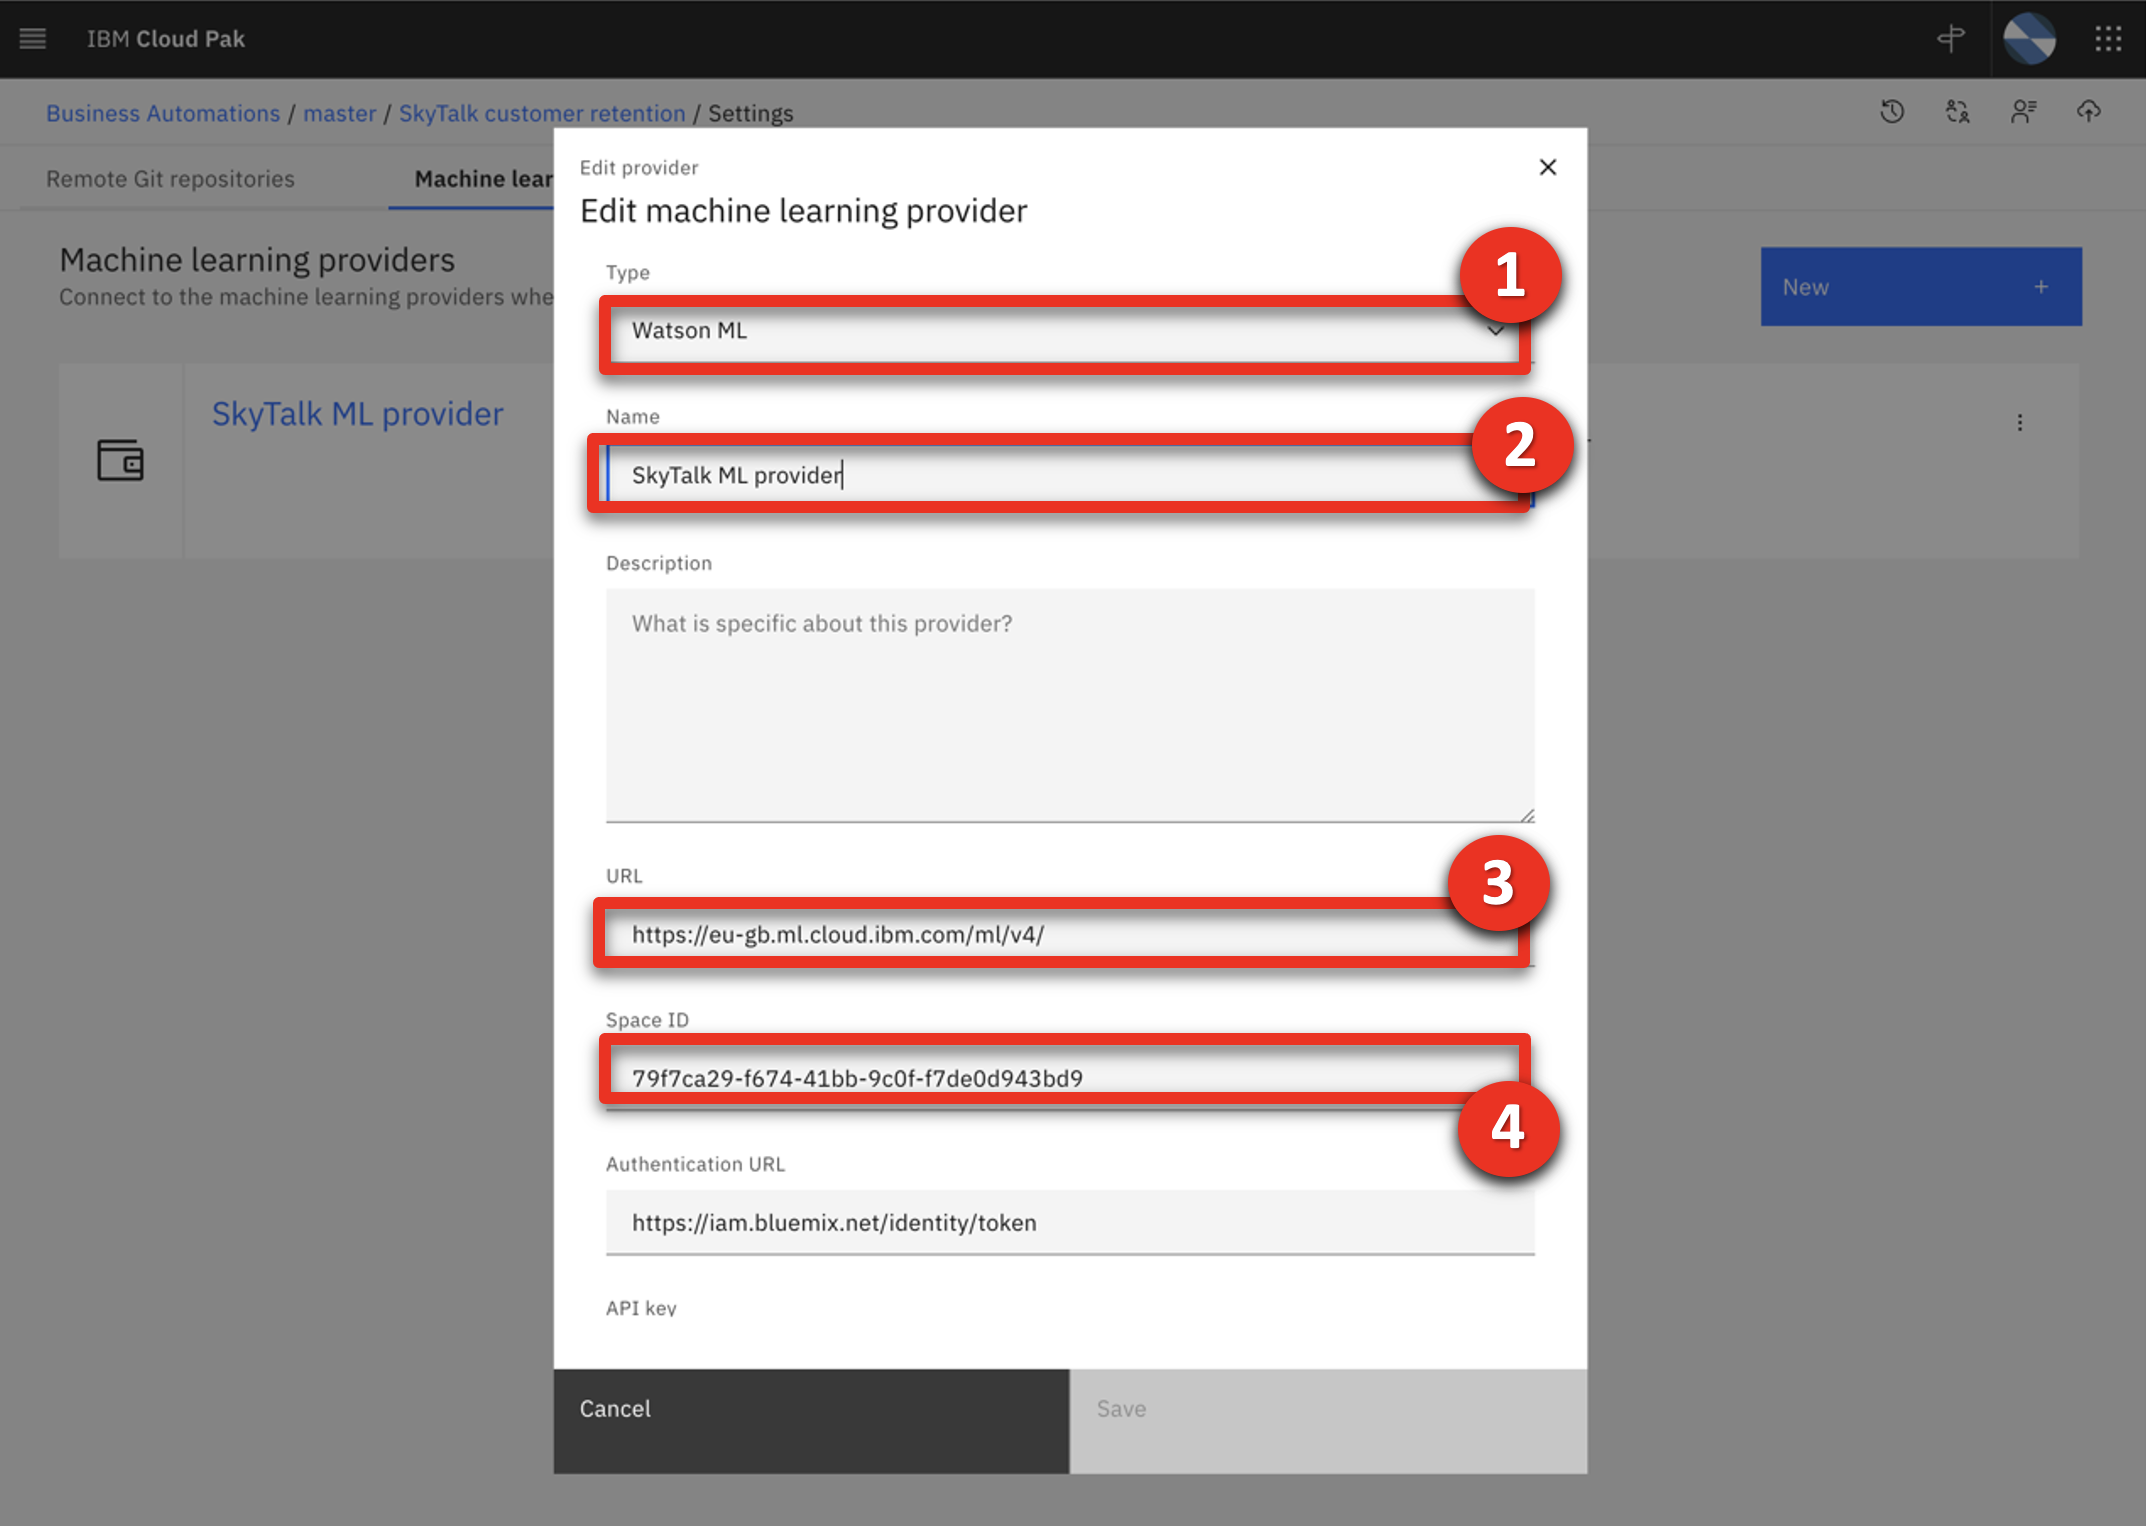
- Enter the API key (1) from step 7.5, and click Test connection (2).
NOTE: The Space ID is the Space GUID.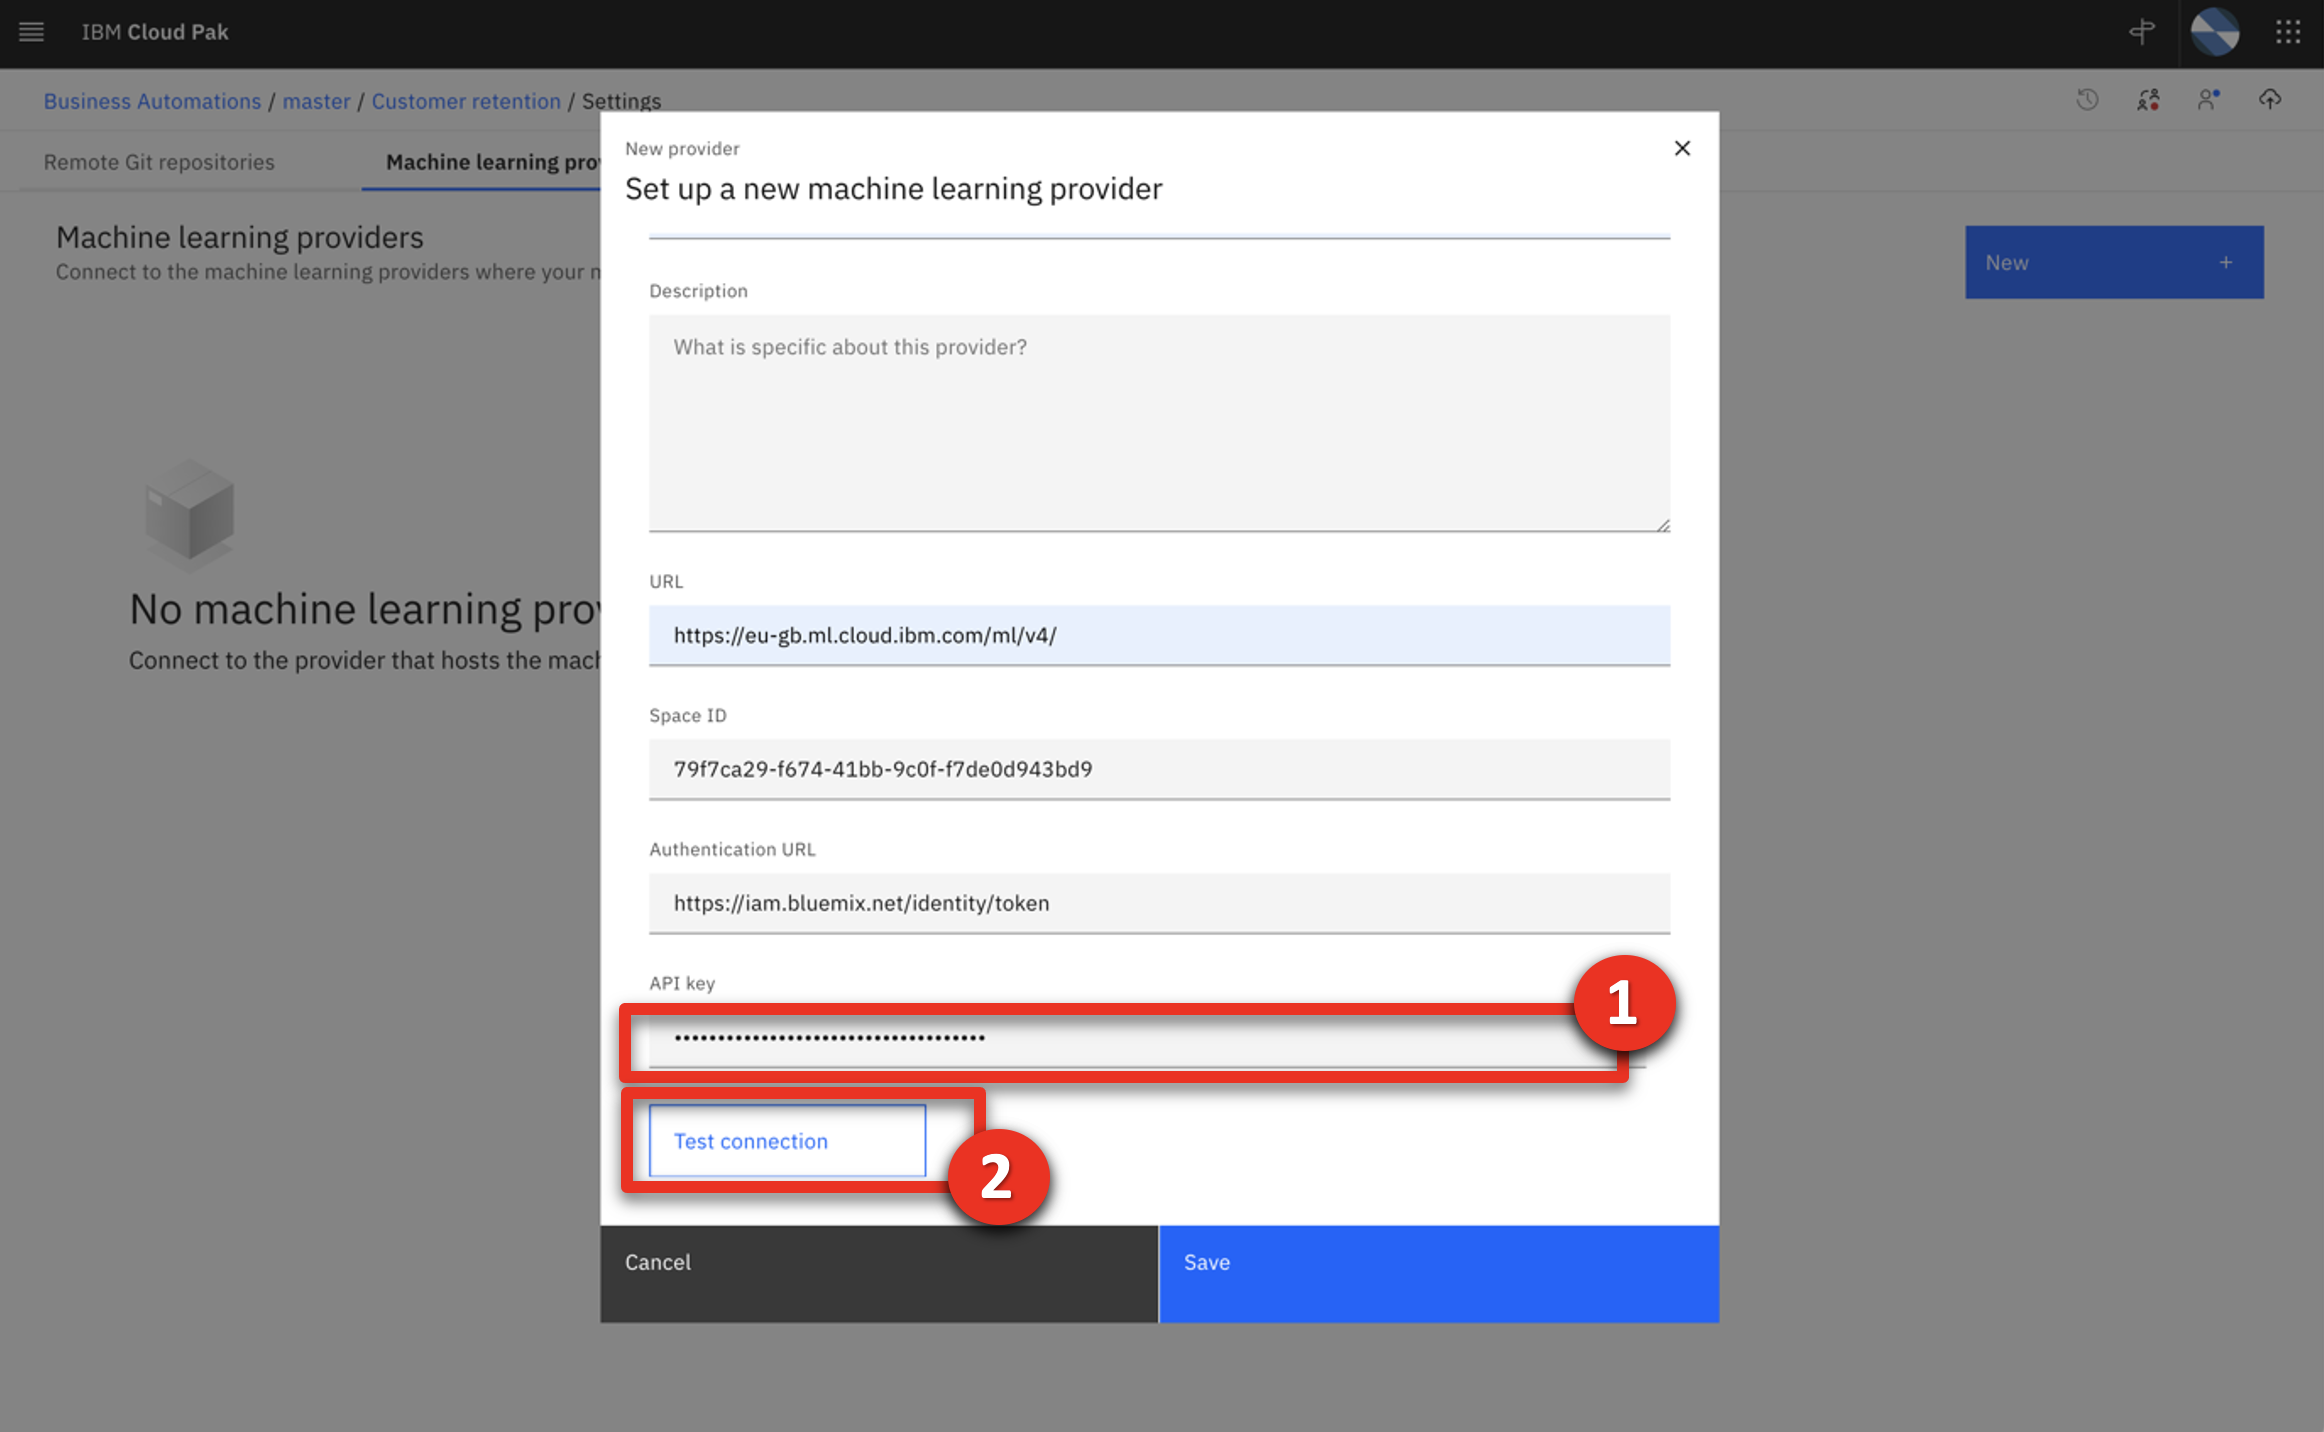
- If the connection is successful, click Save.
- Click Customer retention in the breadcrumb menu.

9 - Update the decision model with the deployed ML models
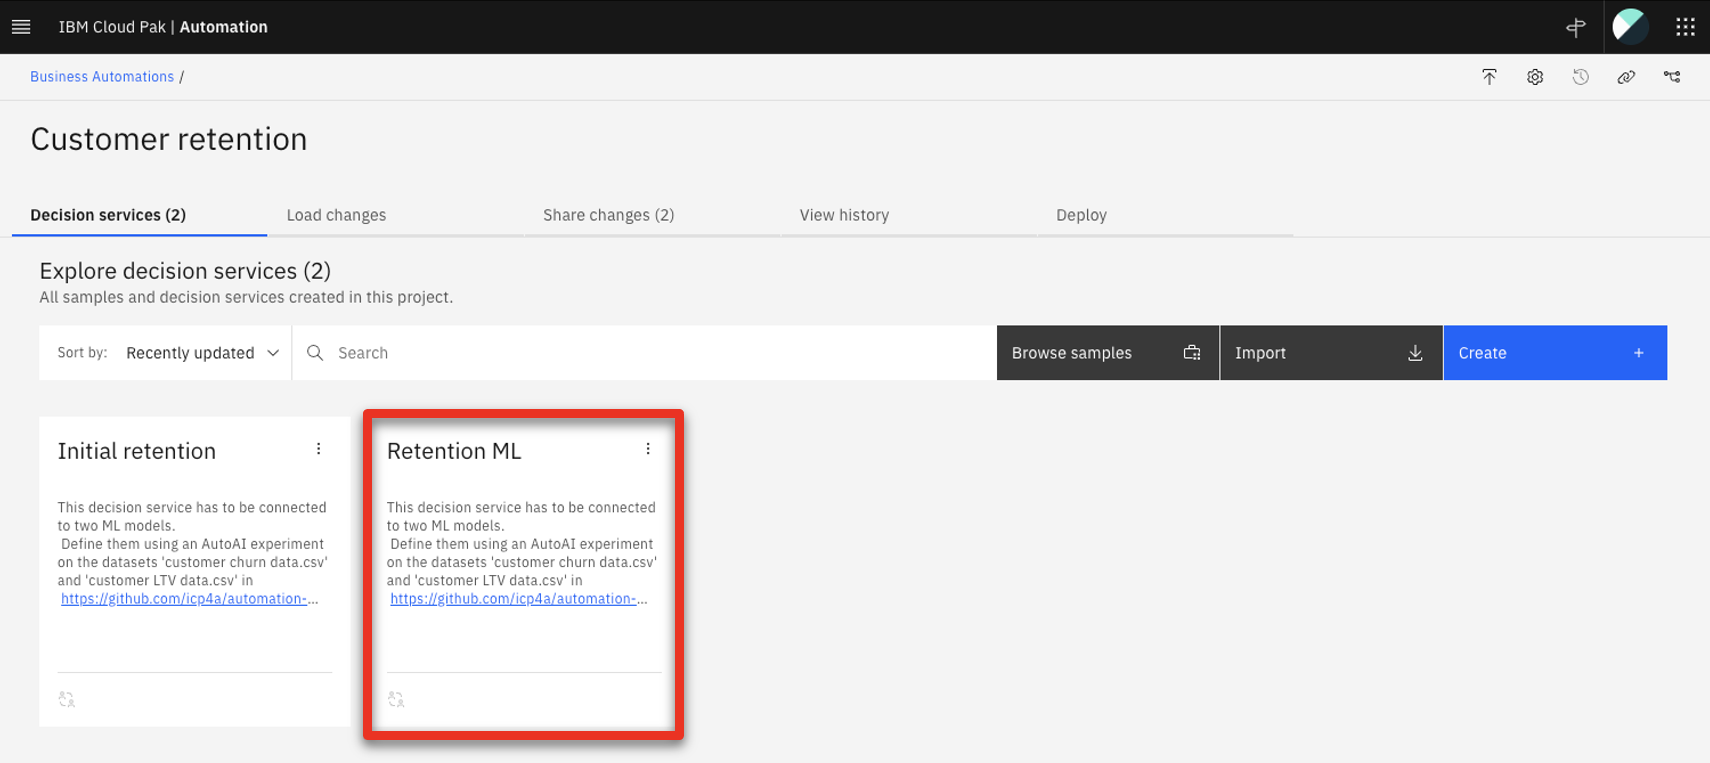
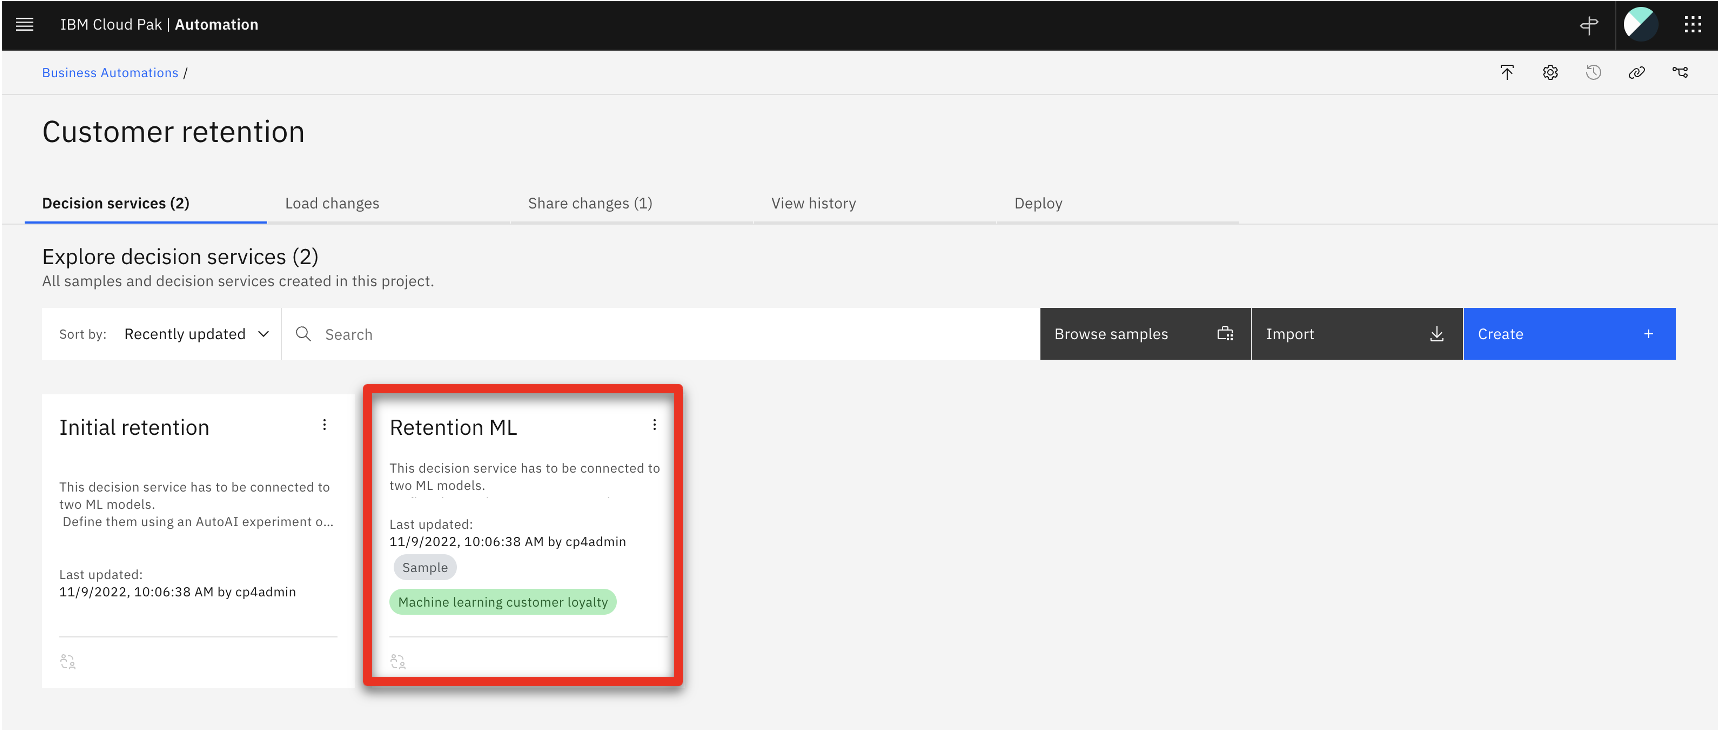
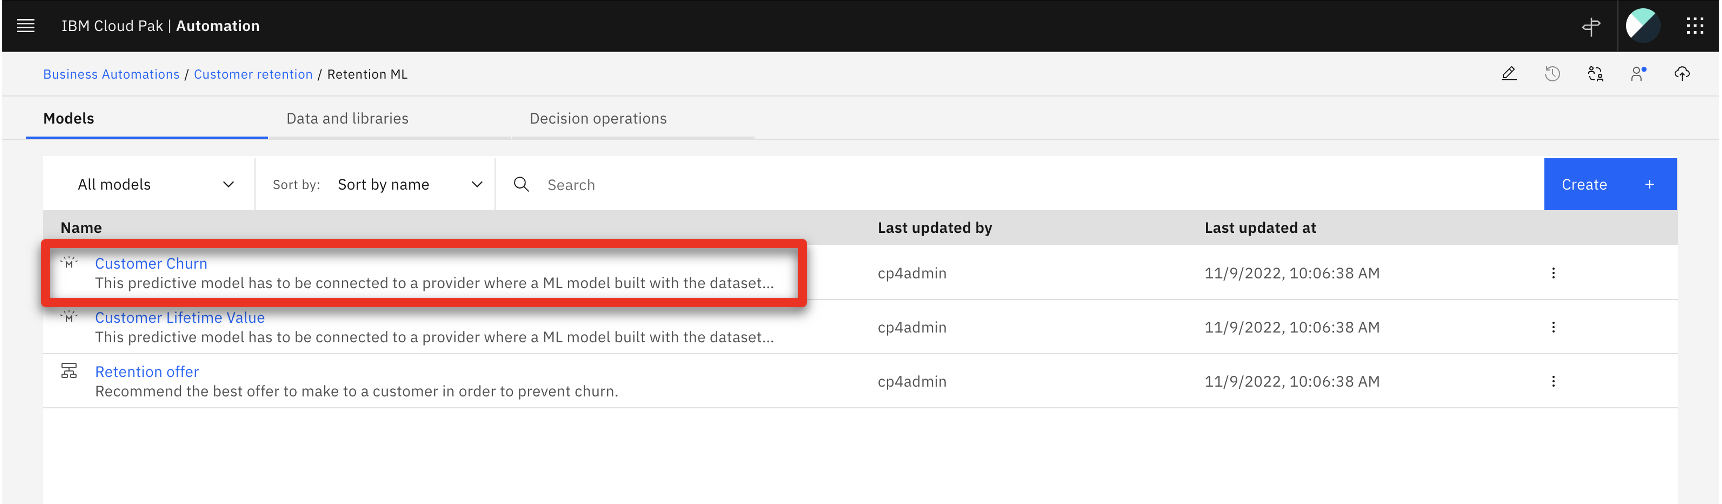
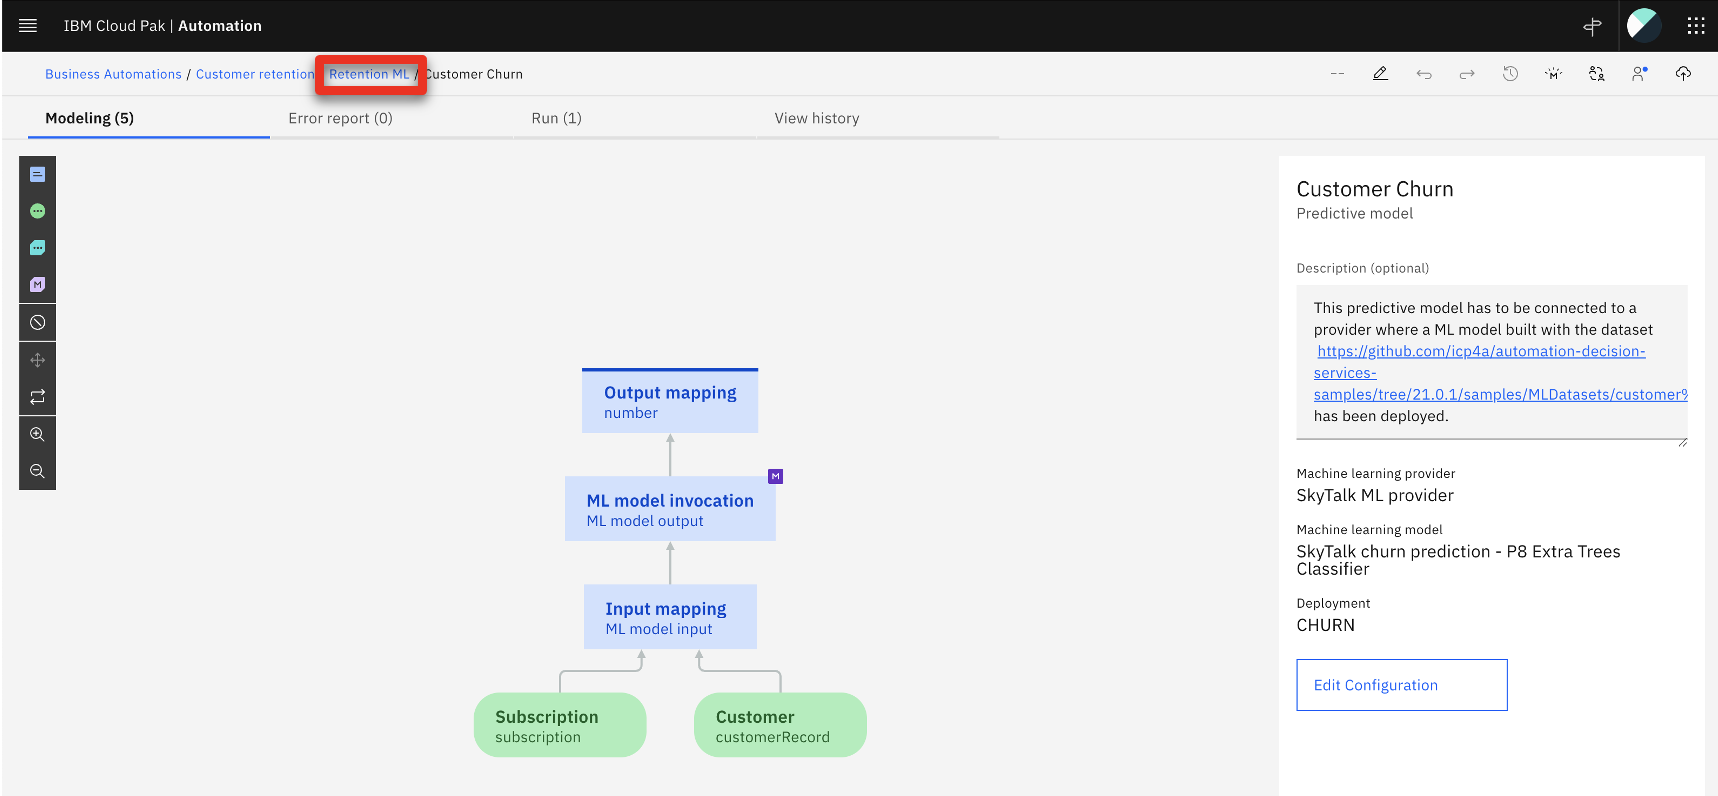
- Click the Retention ML tile.
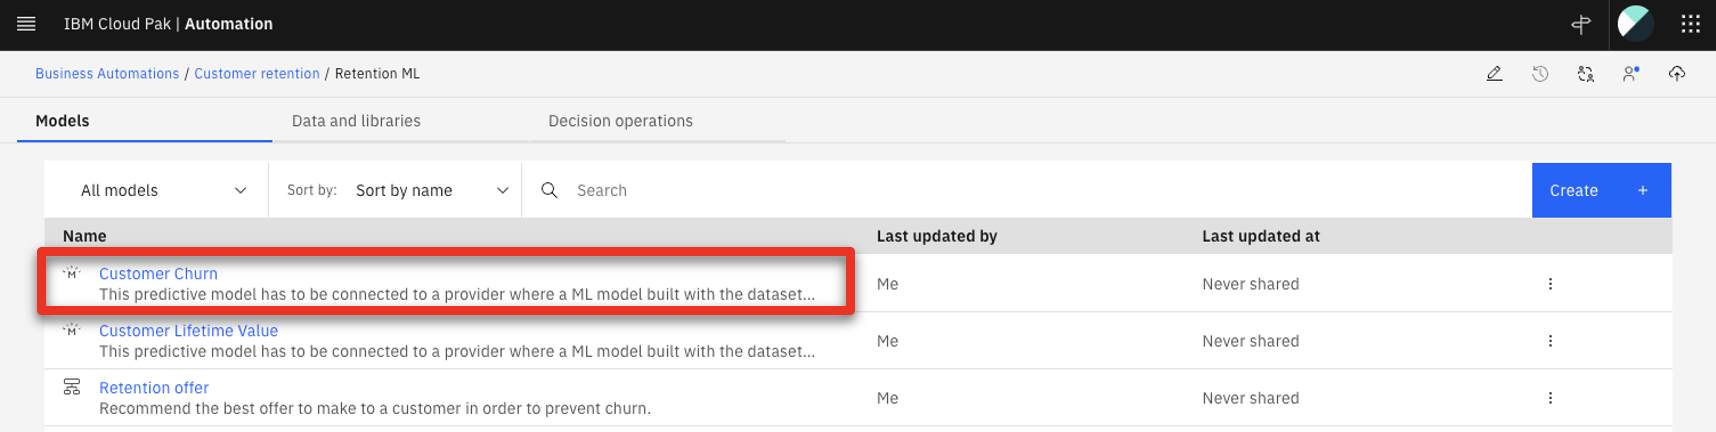
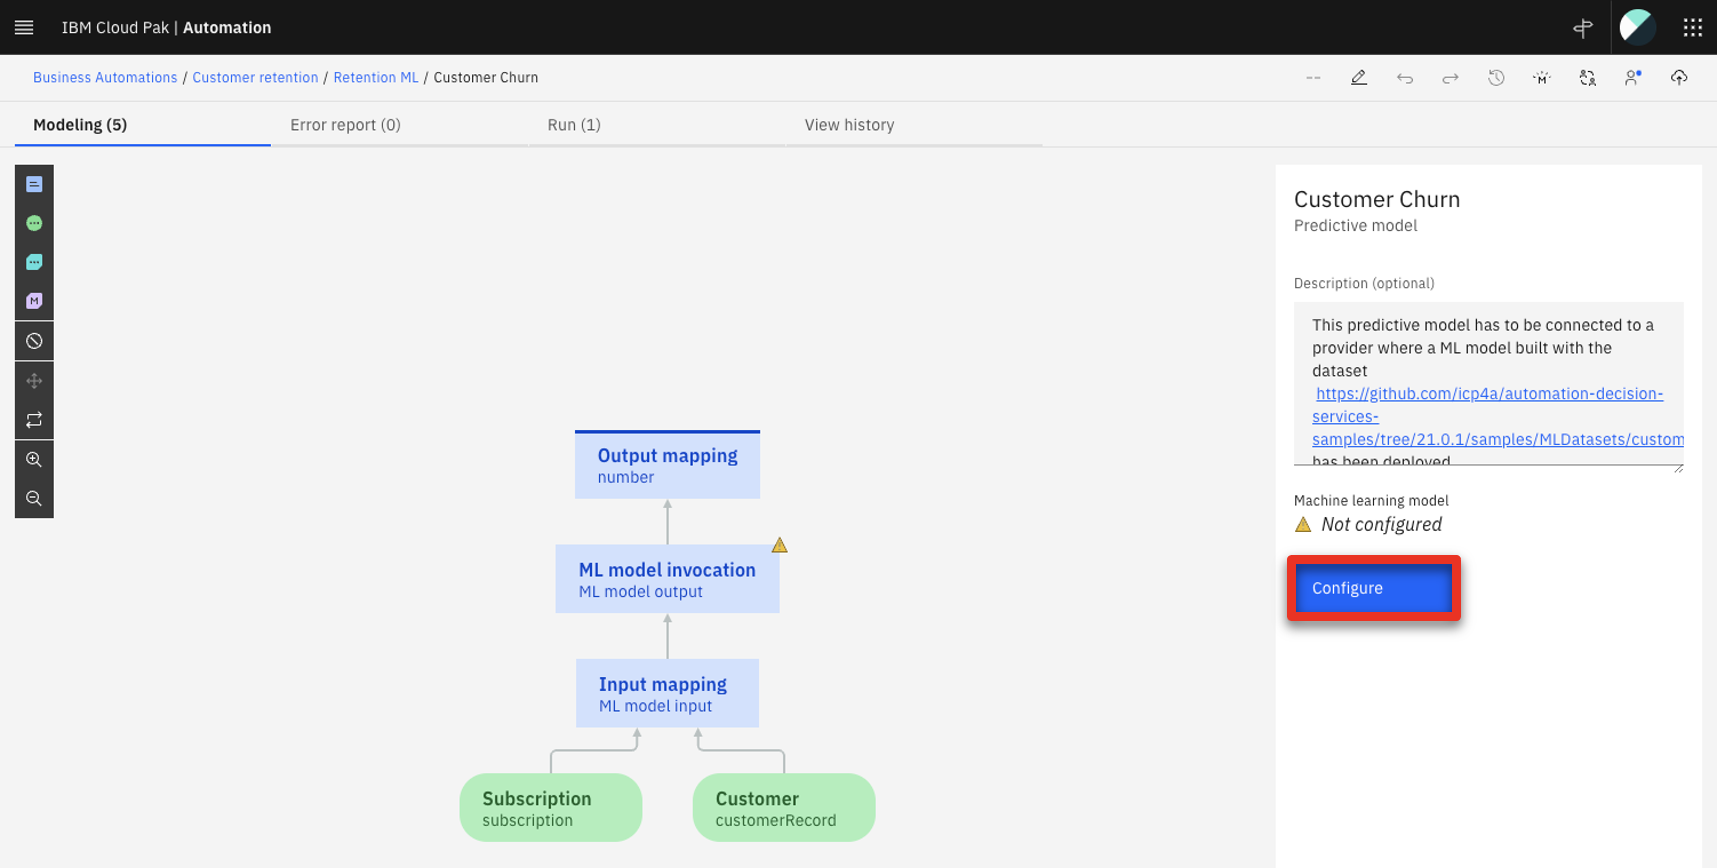
- Click the Customer Churn model on the Models tab.
- Click Configure.
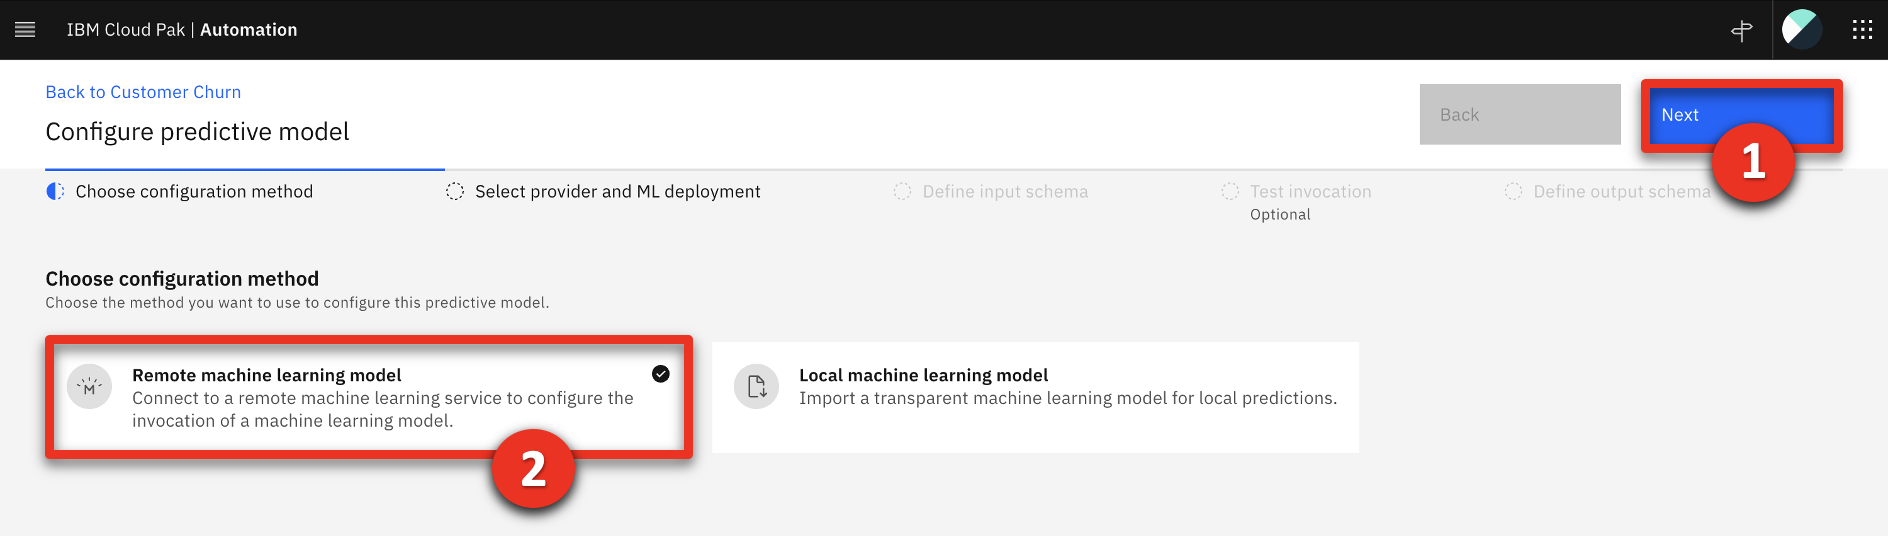
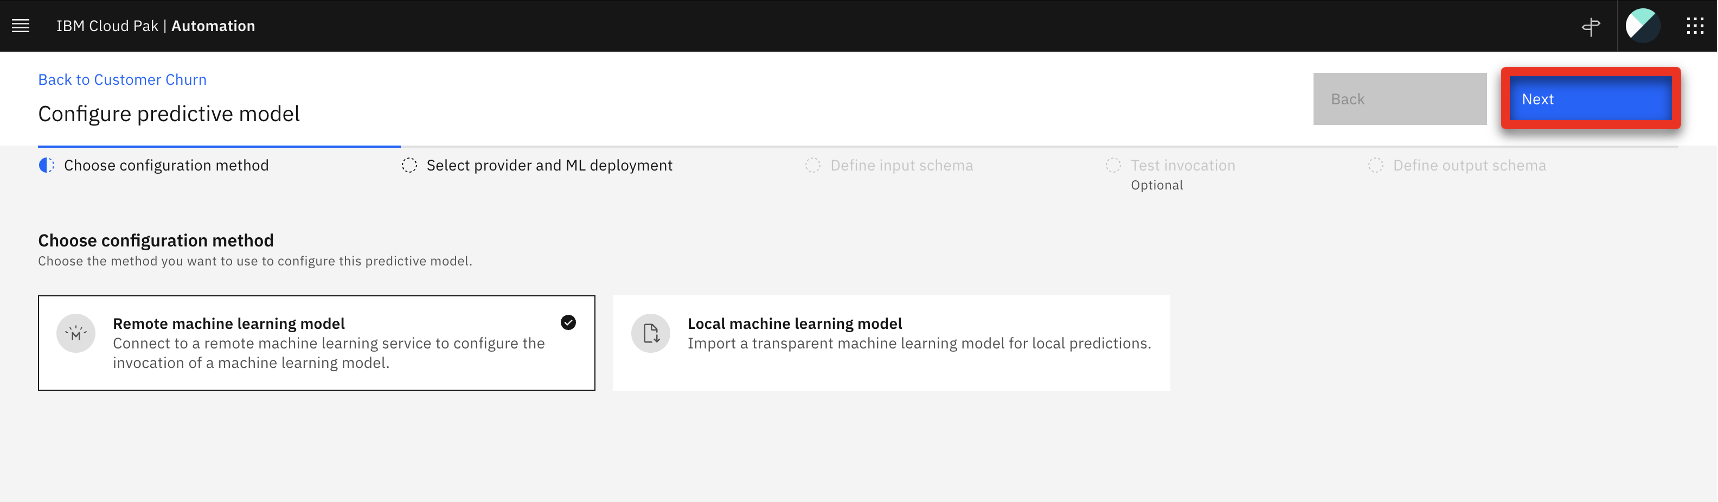
- Select Remote machine learning model (1) and click Next (2).
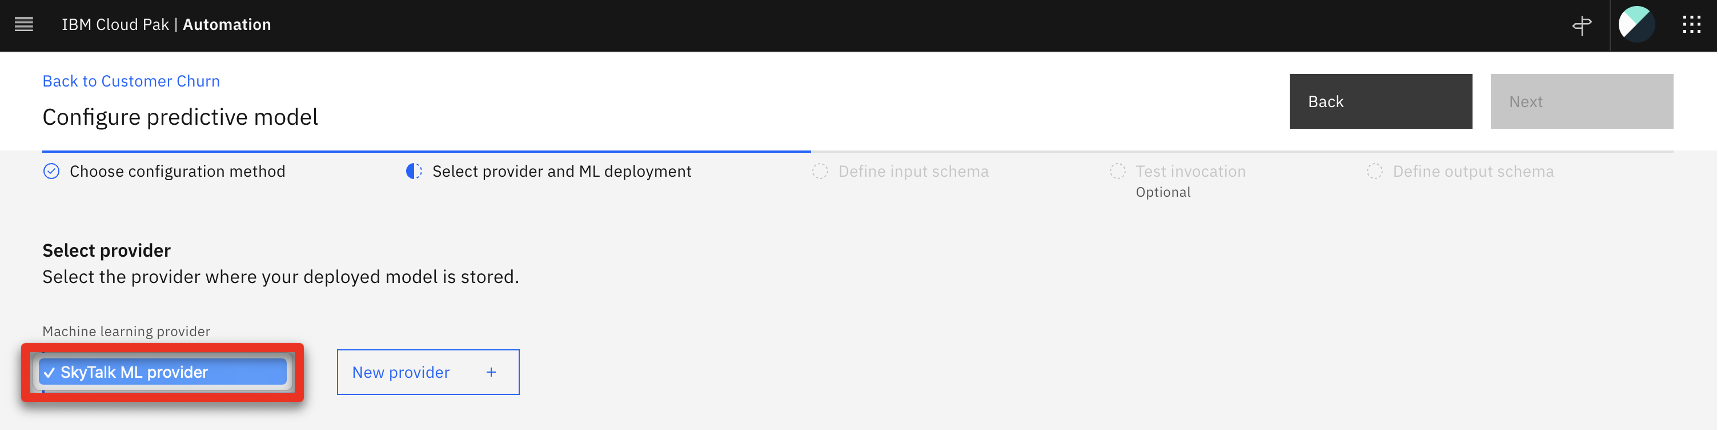
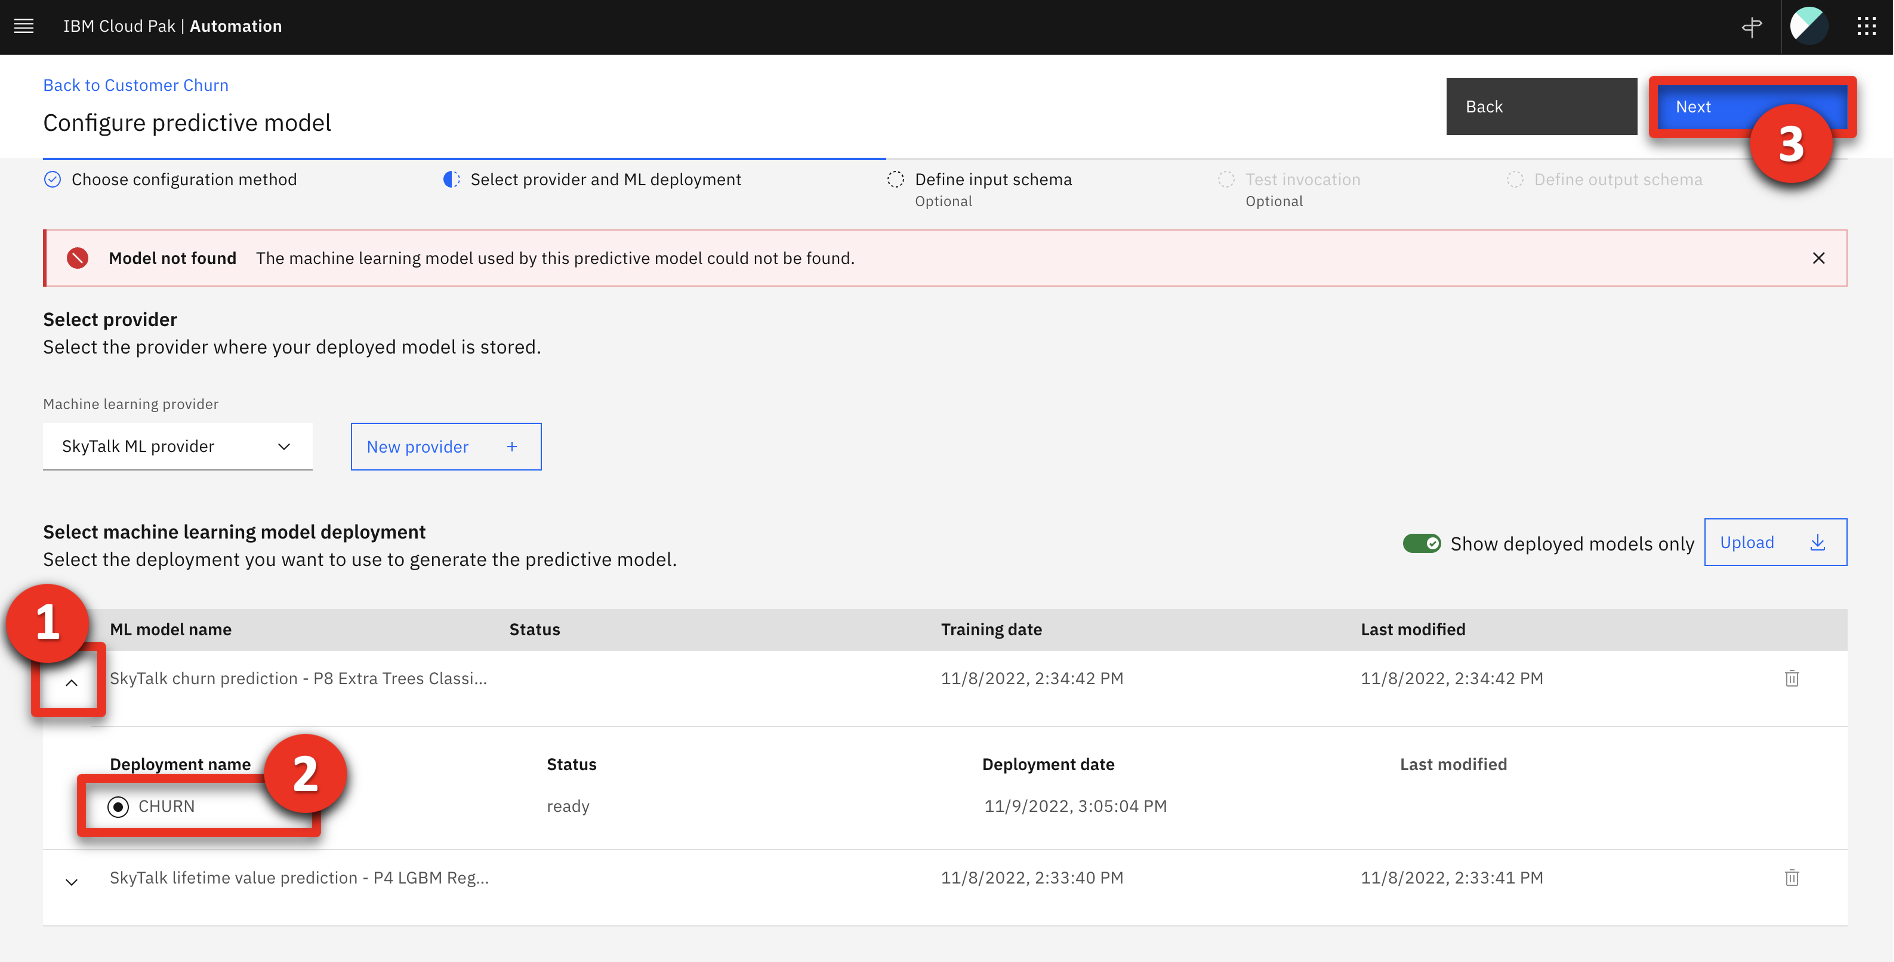
- Select SkyTalk ML provider as the Machine learning provider.
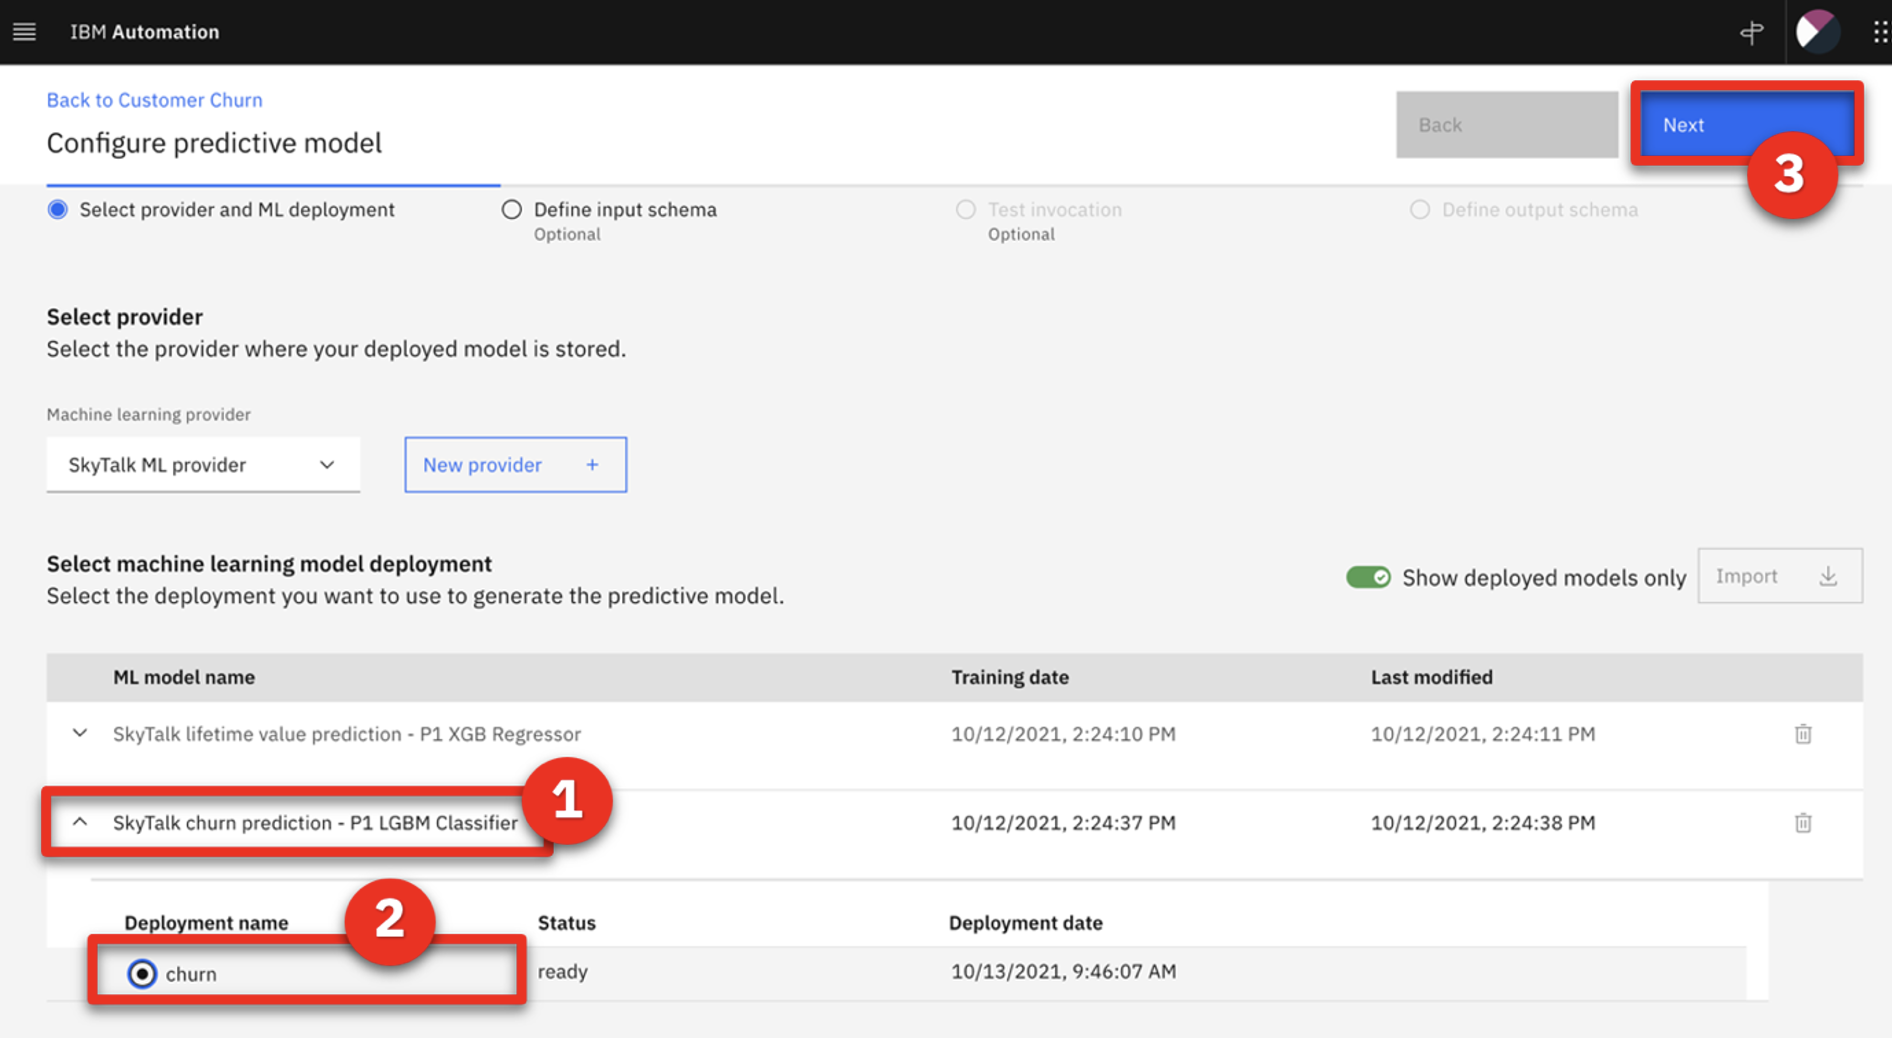
- Expand the SkyTalk churn prediction model (1), select the churn deployment (2), and click Next (3).
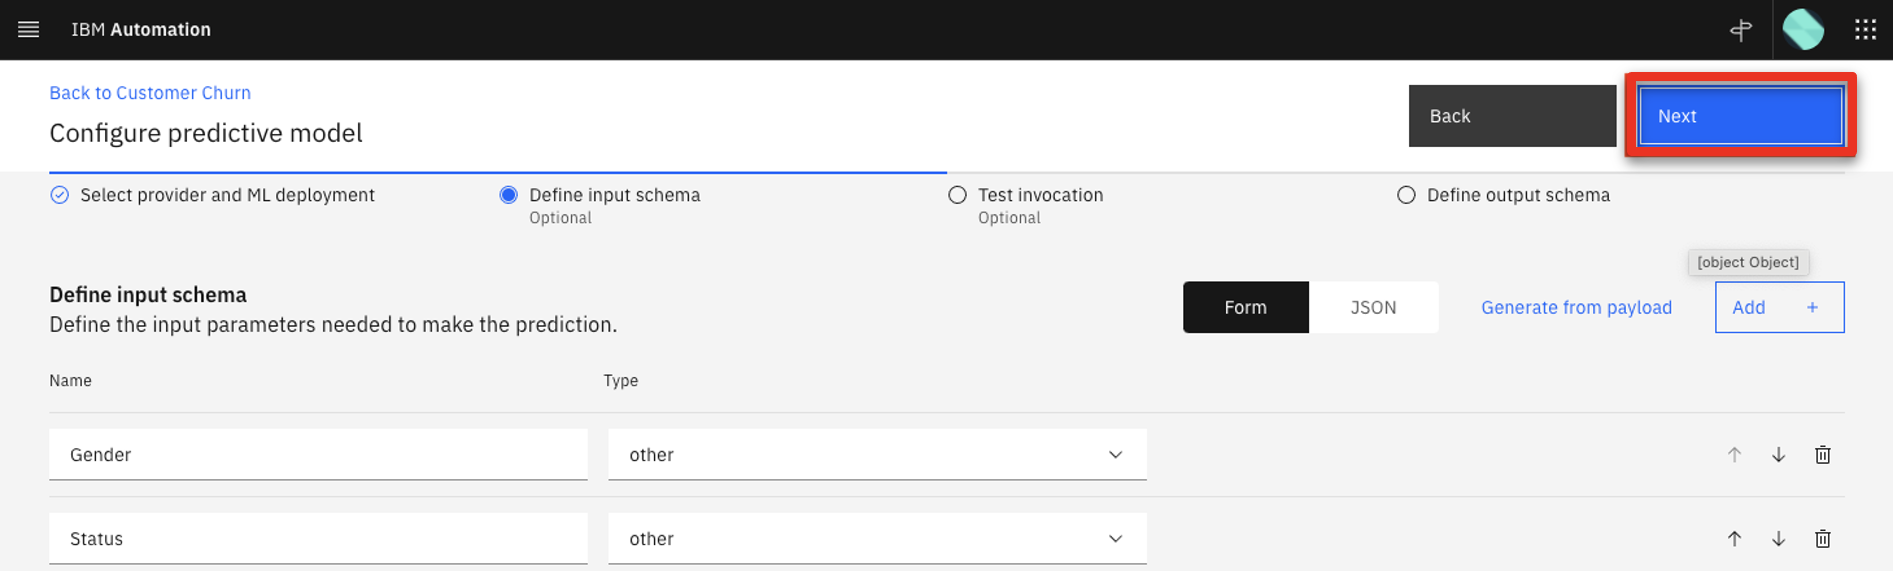
- Click Next.
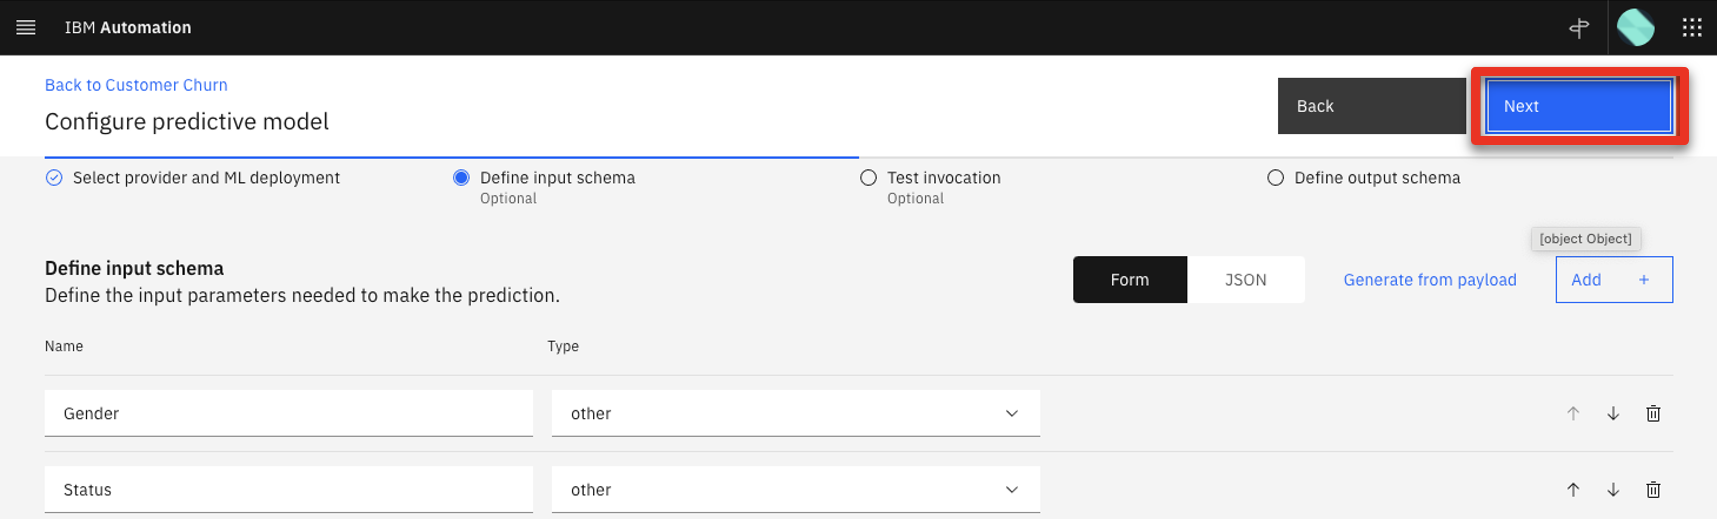
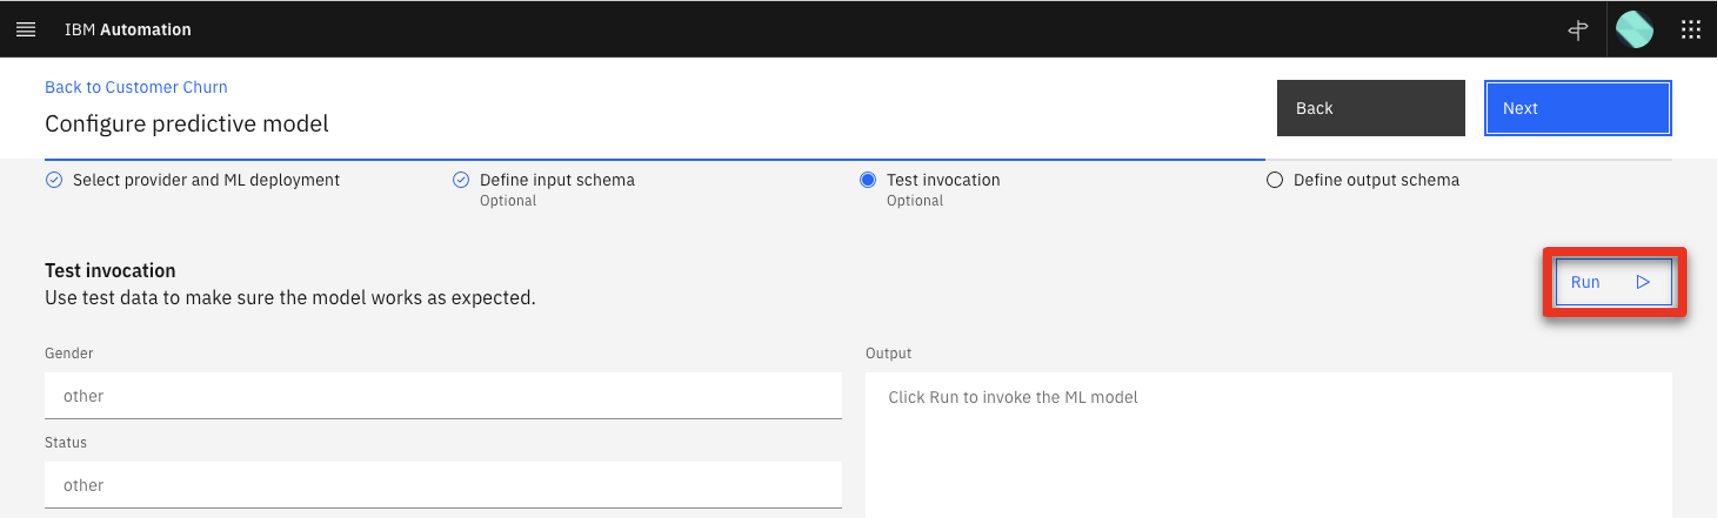
- Click Run to test the invocation.
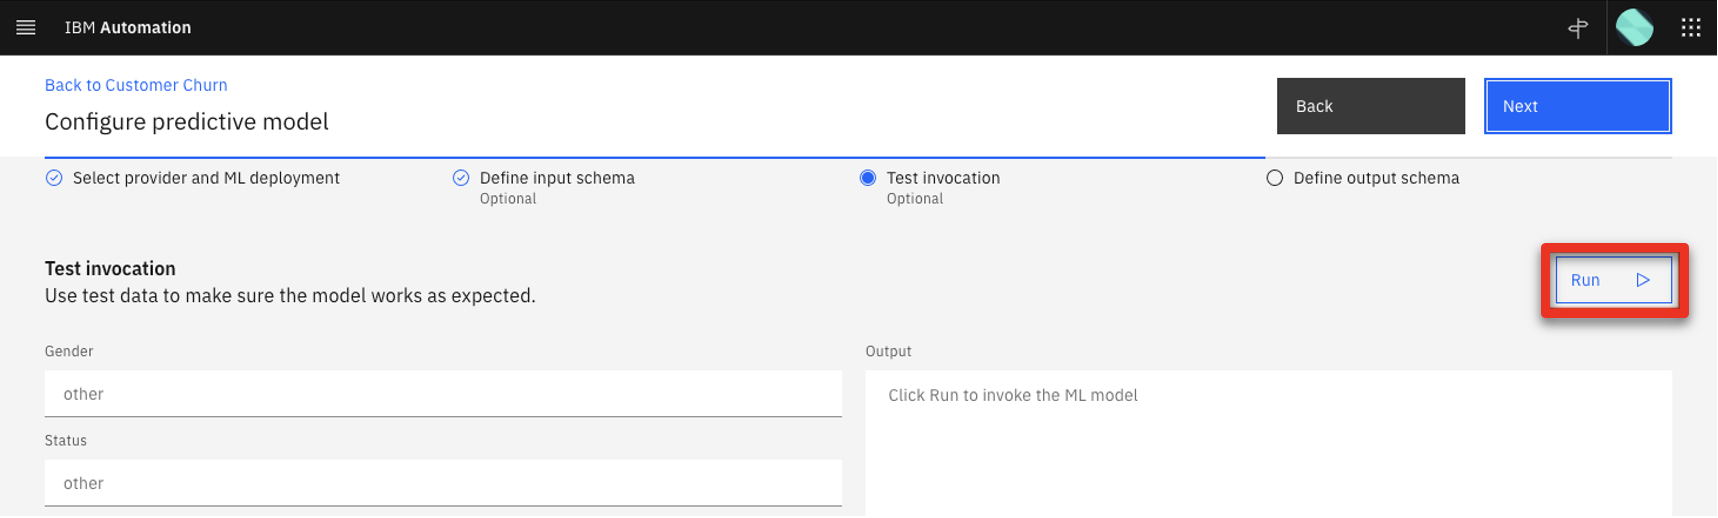
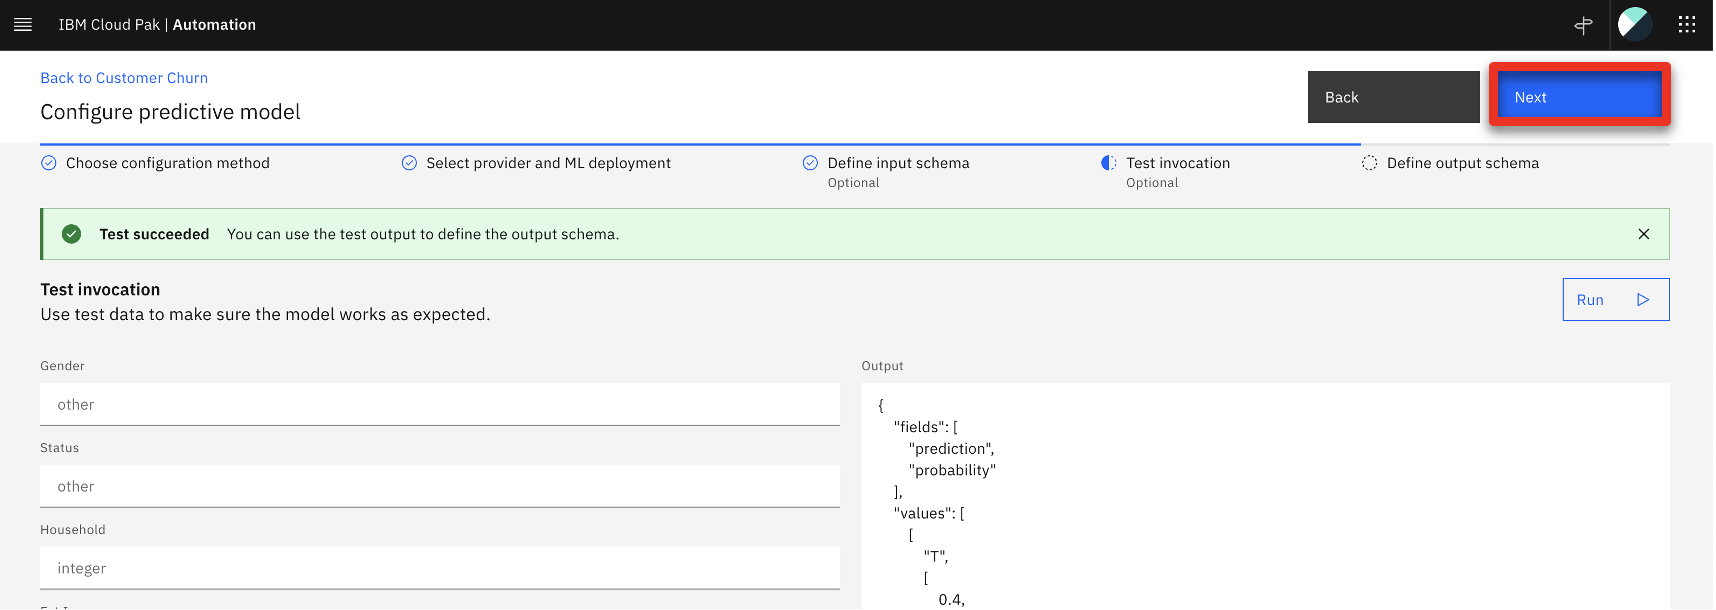
- If the test succeeds, click Next.
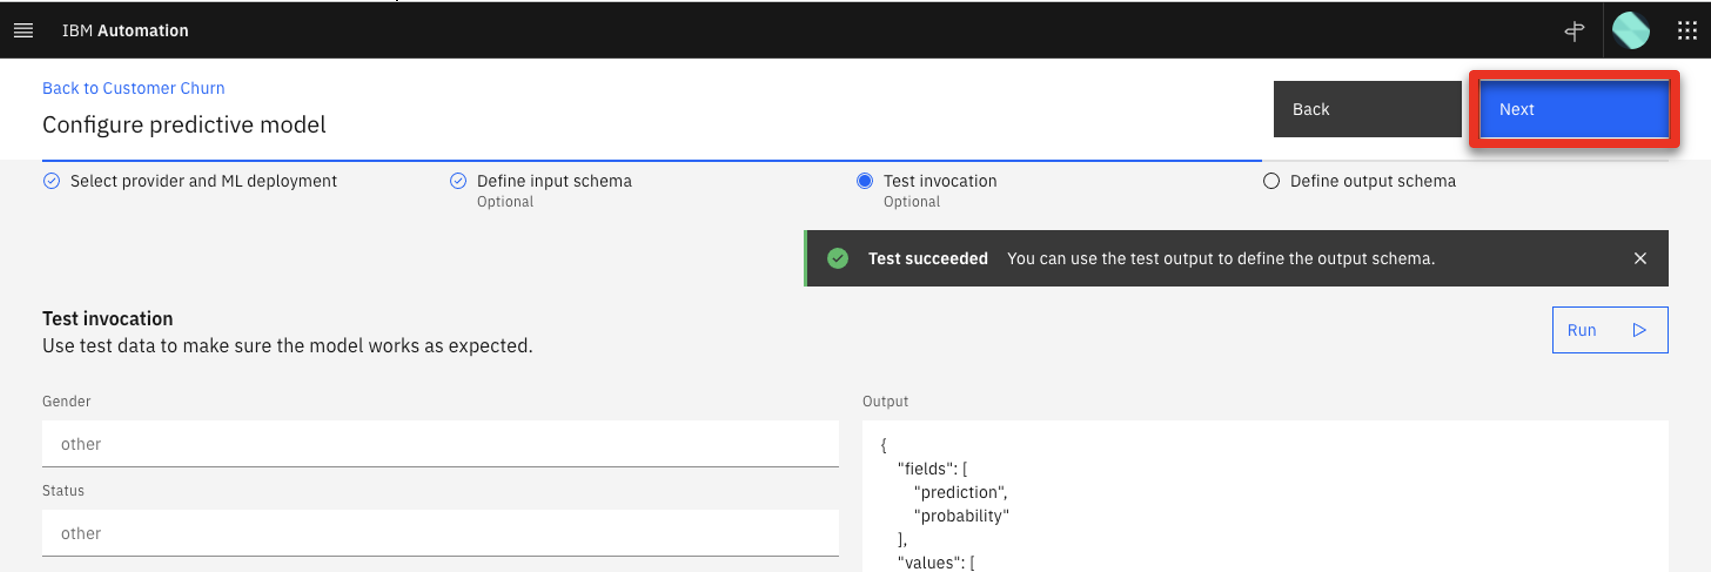
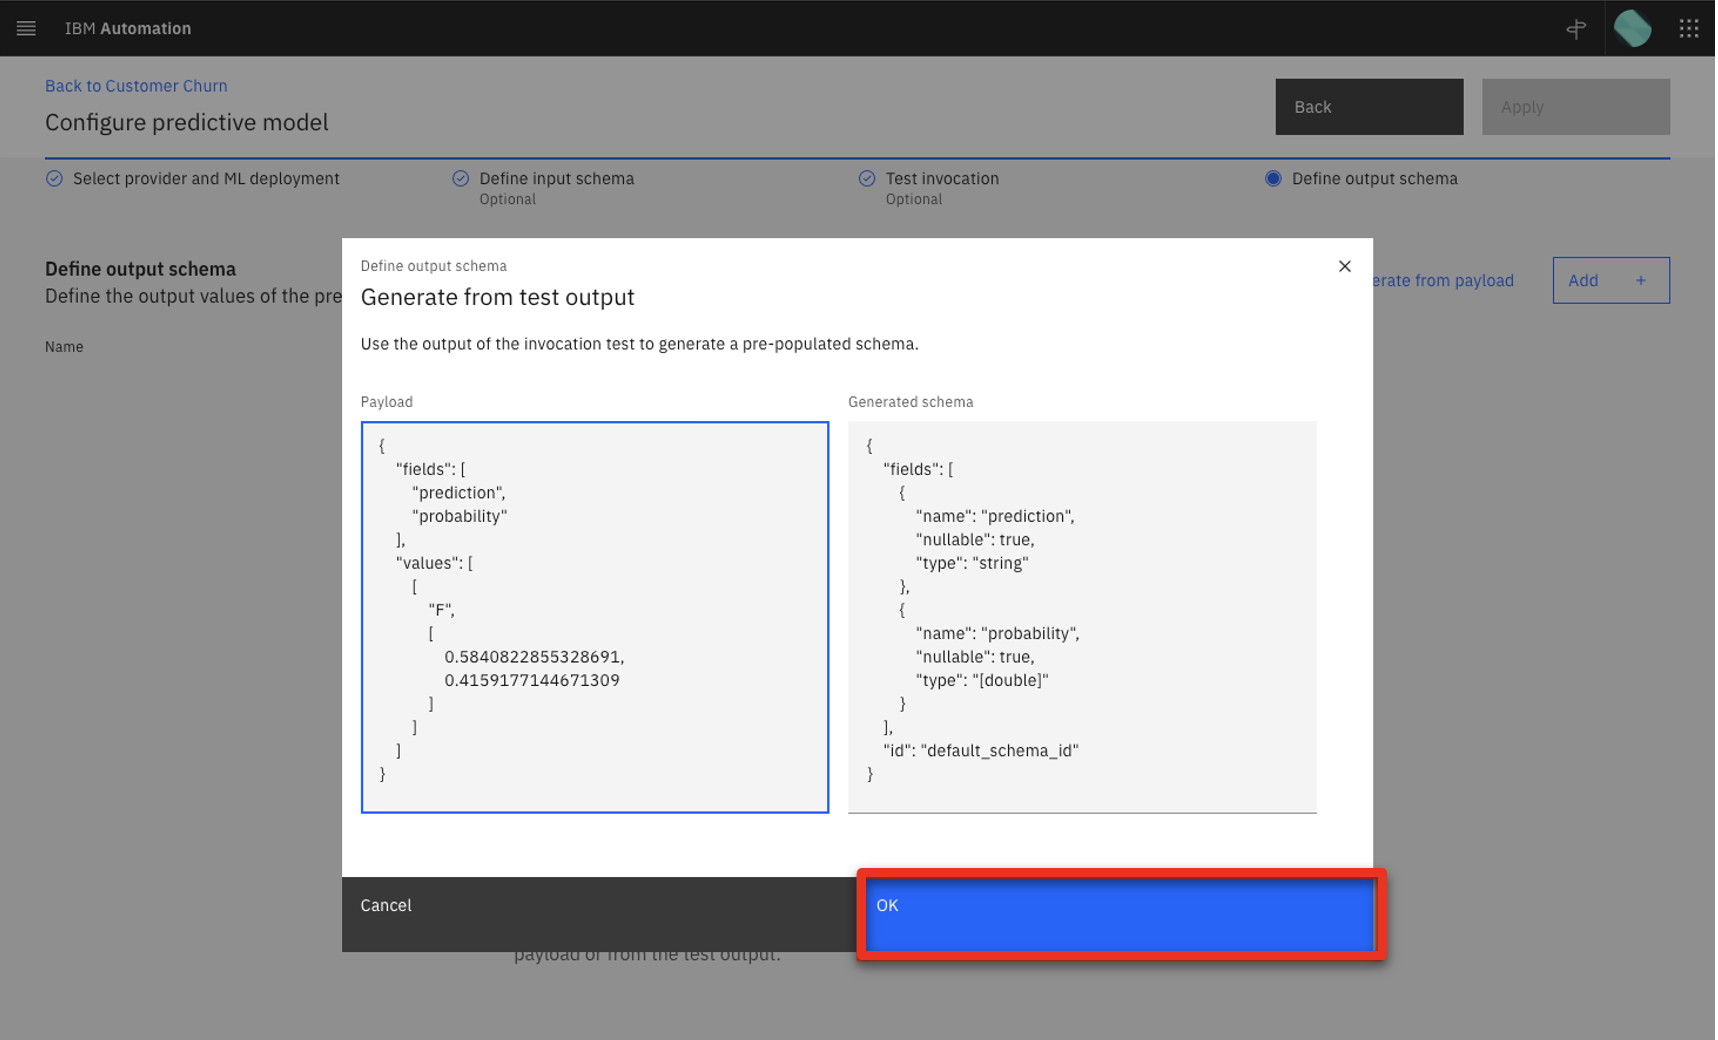
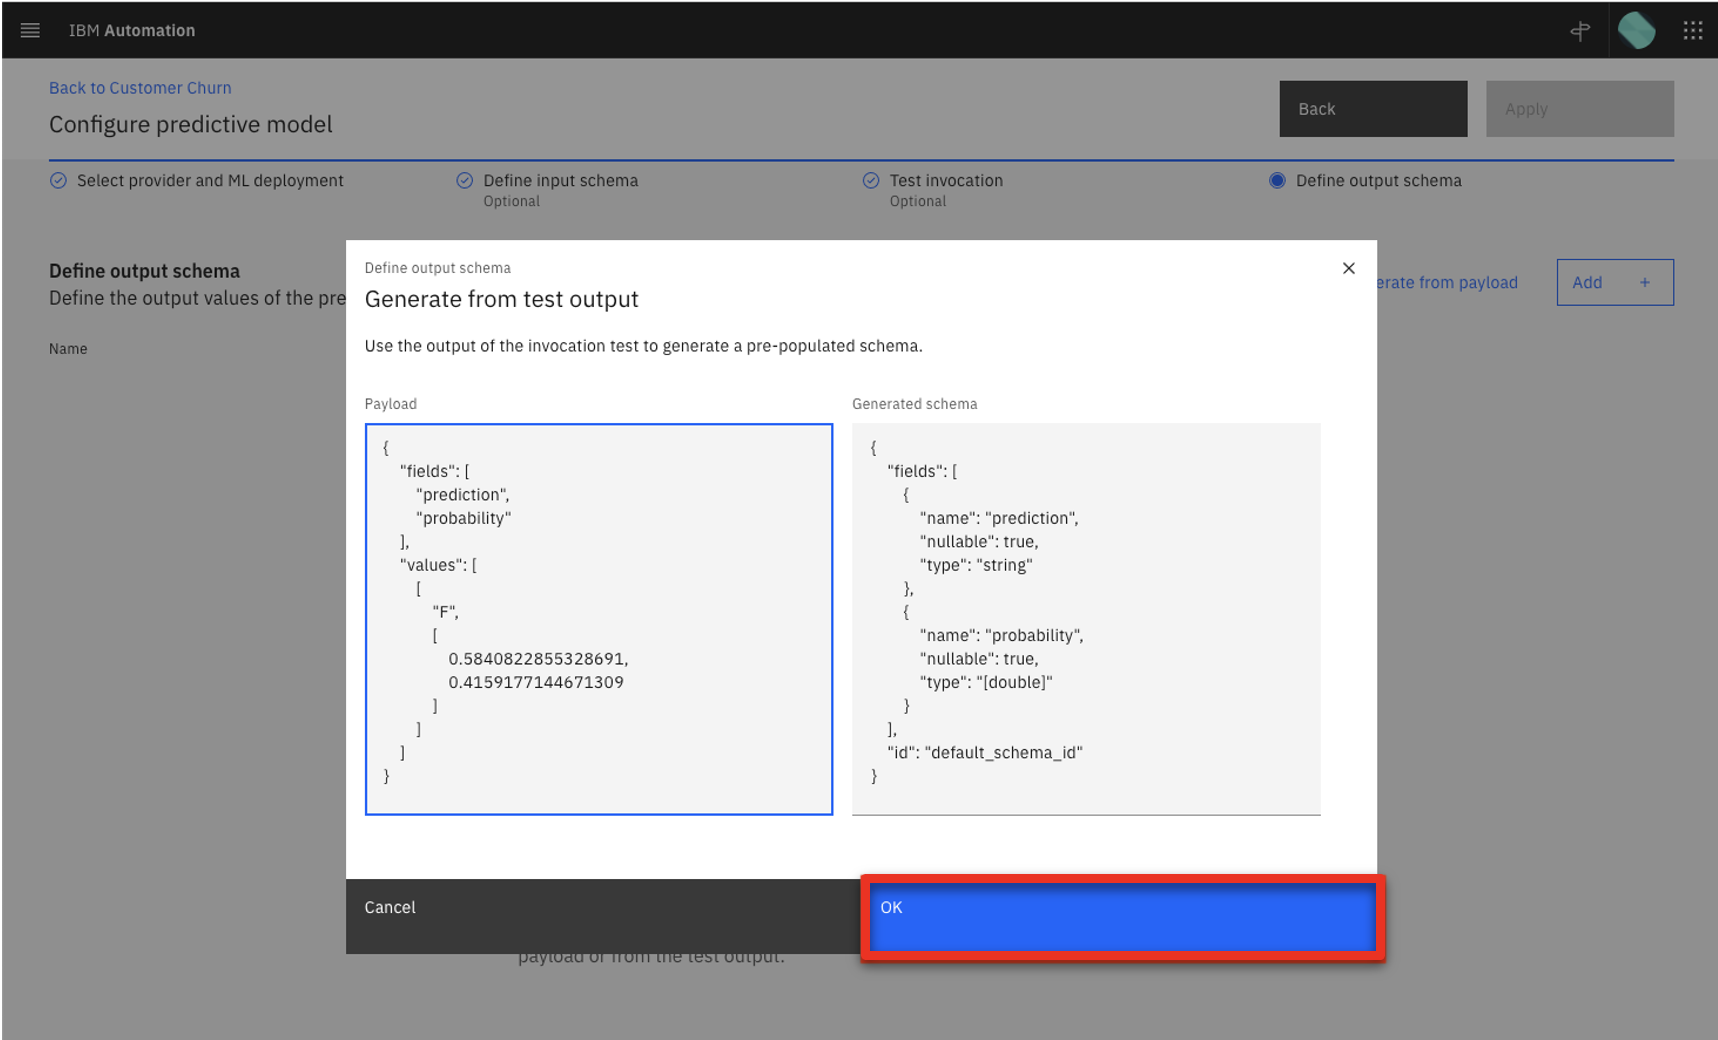
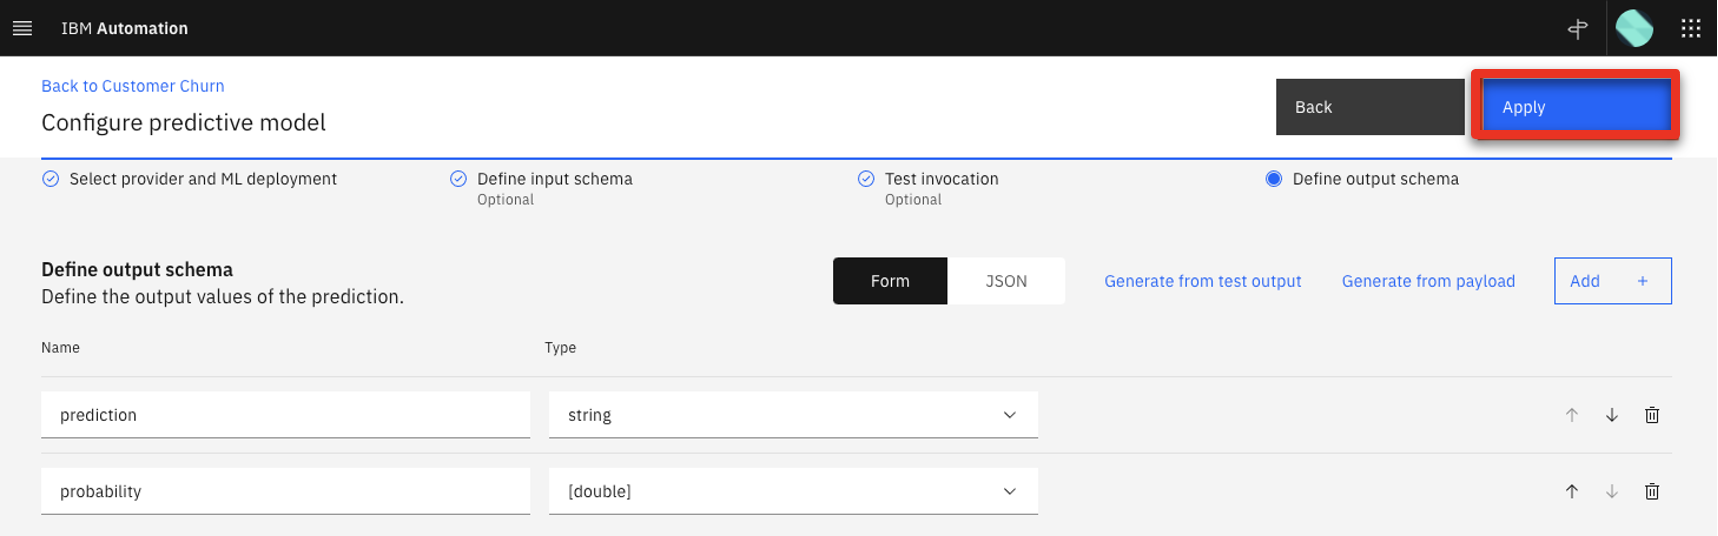
- Click Generate from test output.
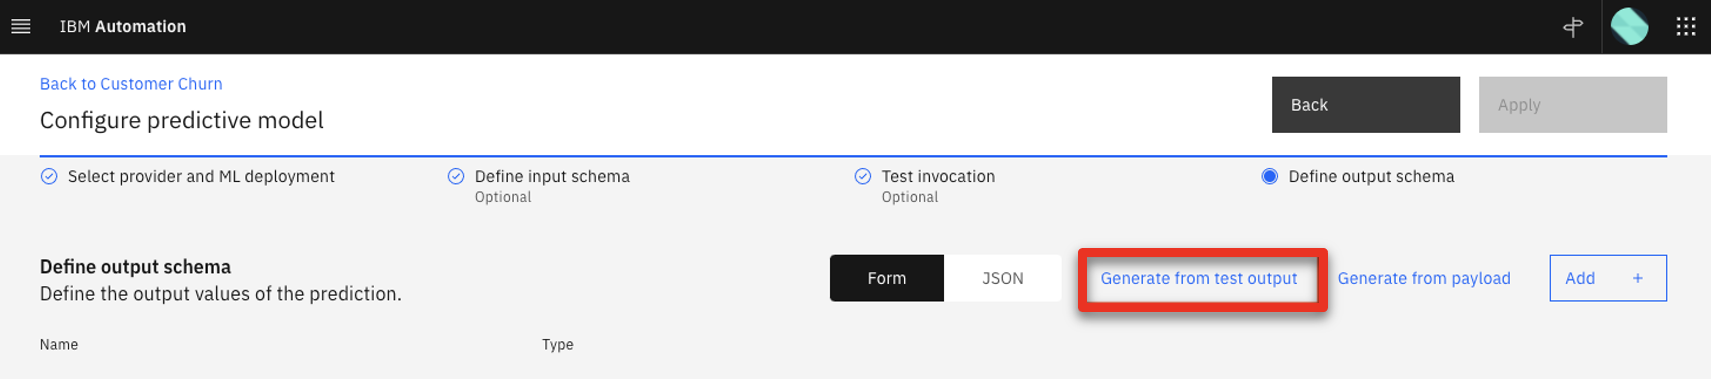
- Click OK.
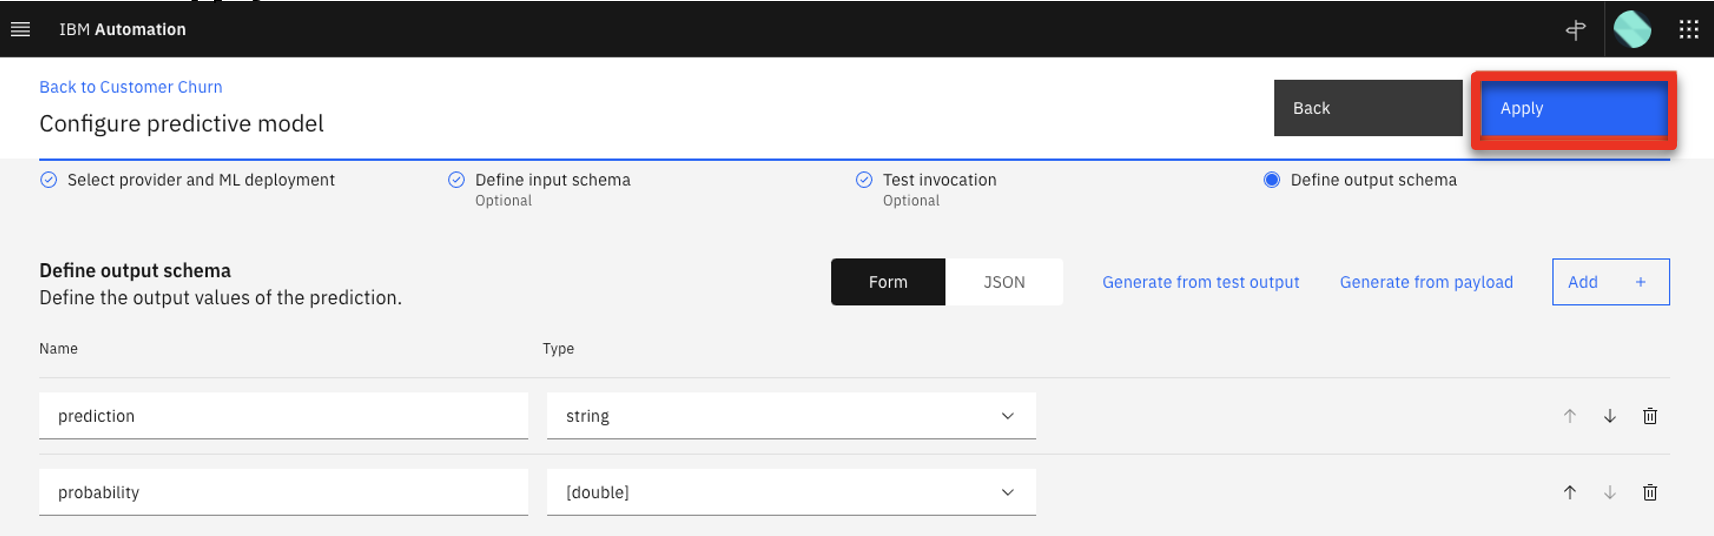
- Click Apply.
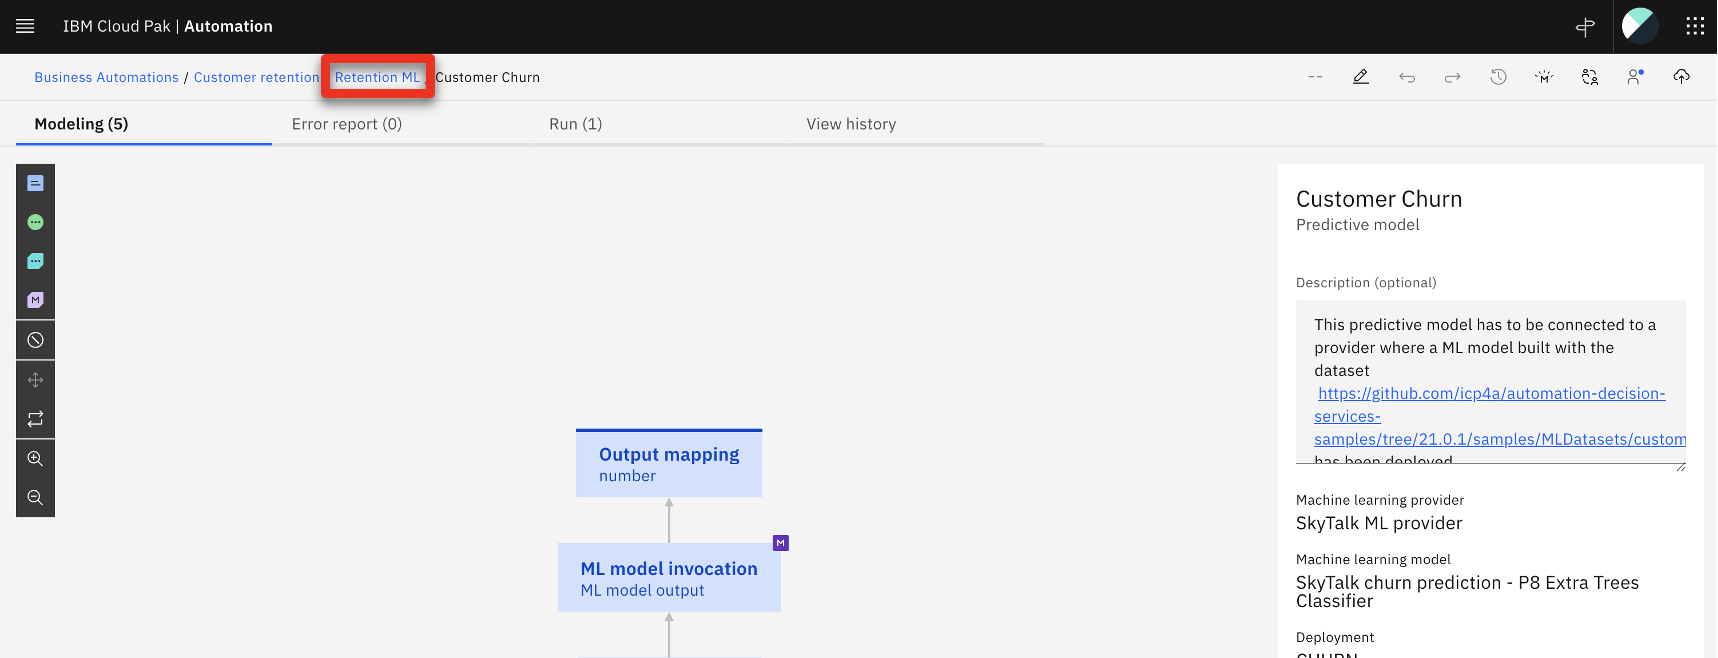
- Click Retention ML in the breadcrumb menu.
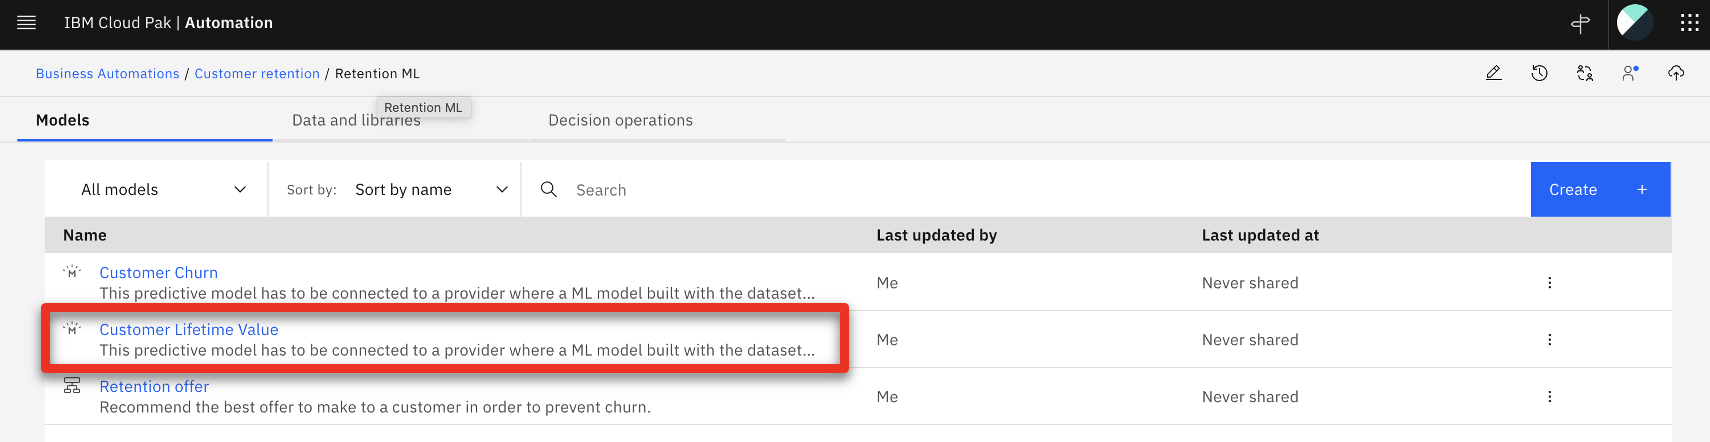
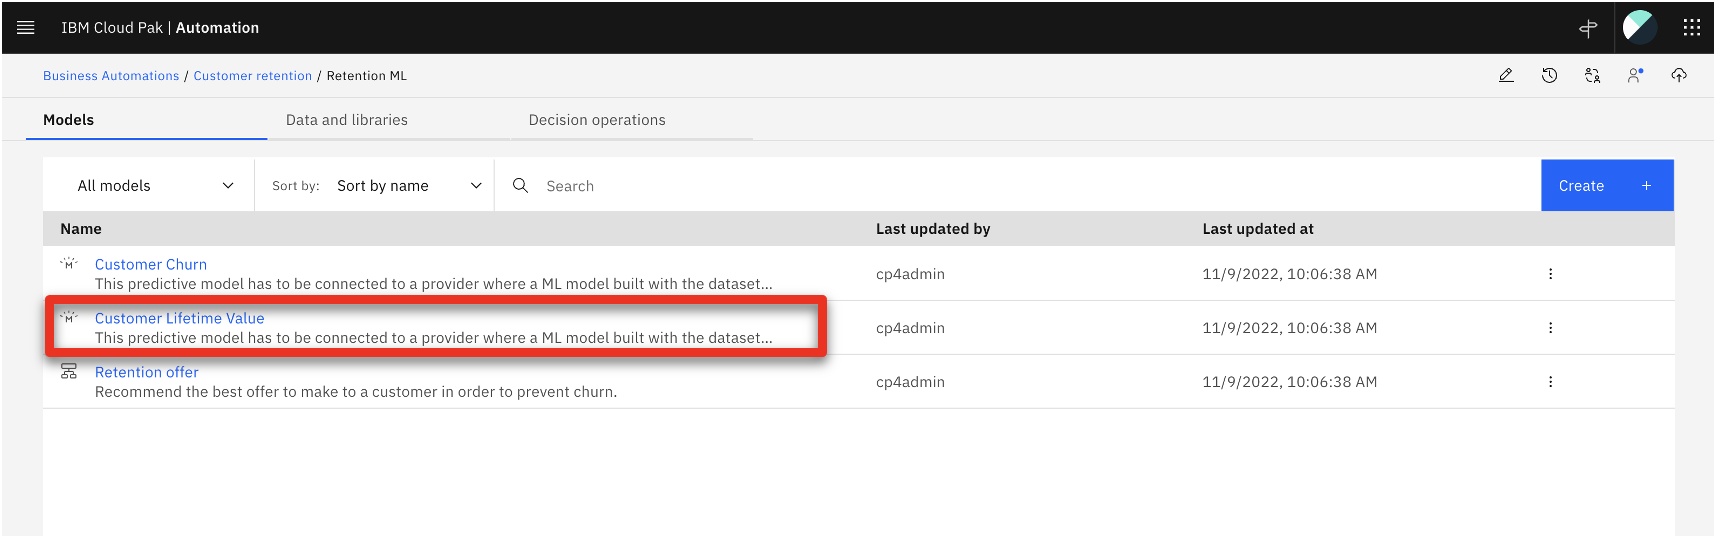
- Click Customer Lifetime Value and repeat steps 3 - 13 to configure the model. When repeating step 6, expand the Skytalk lifetime value prediction ML model and select Customer lifetime value.
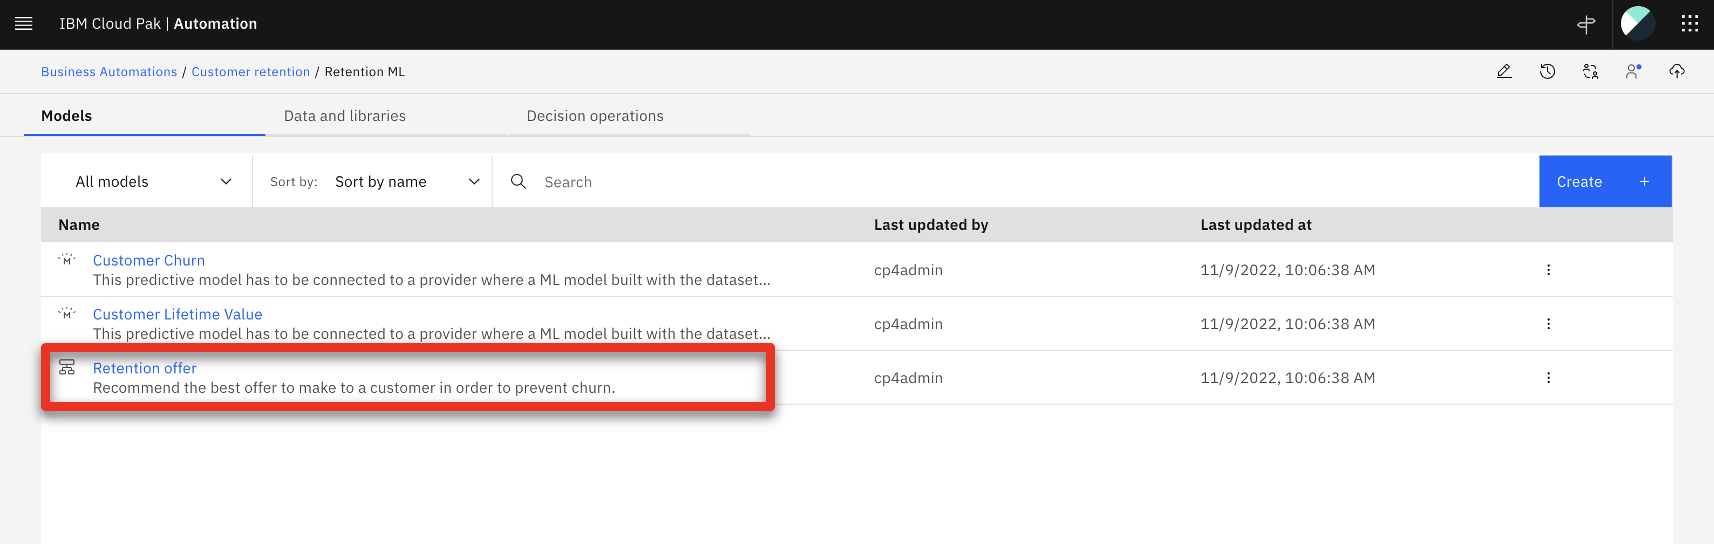
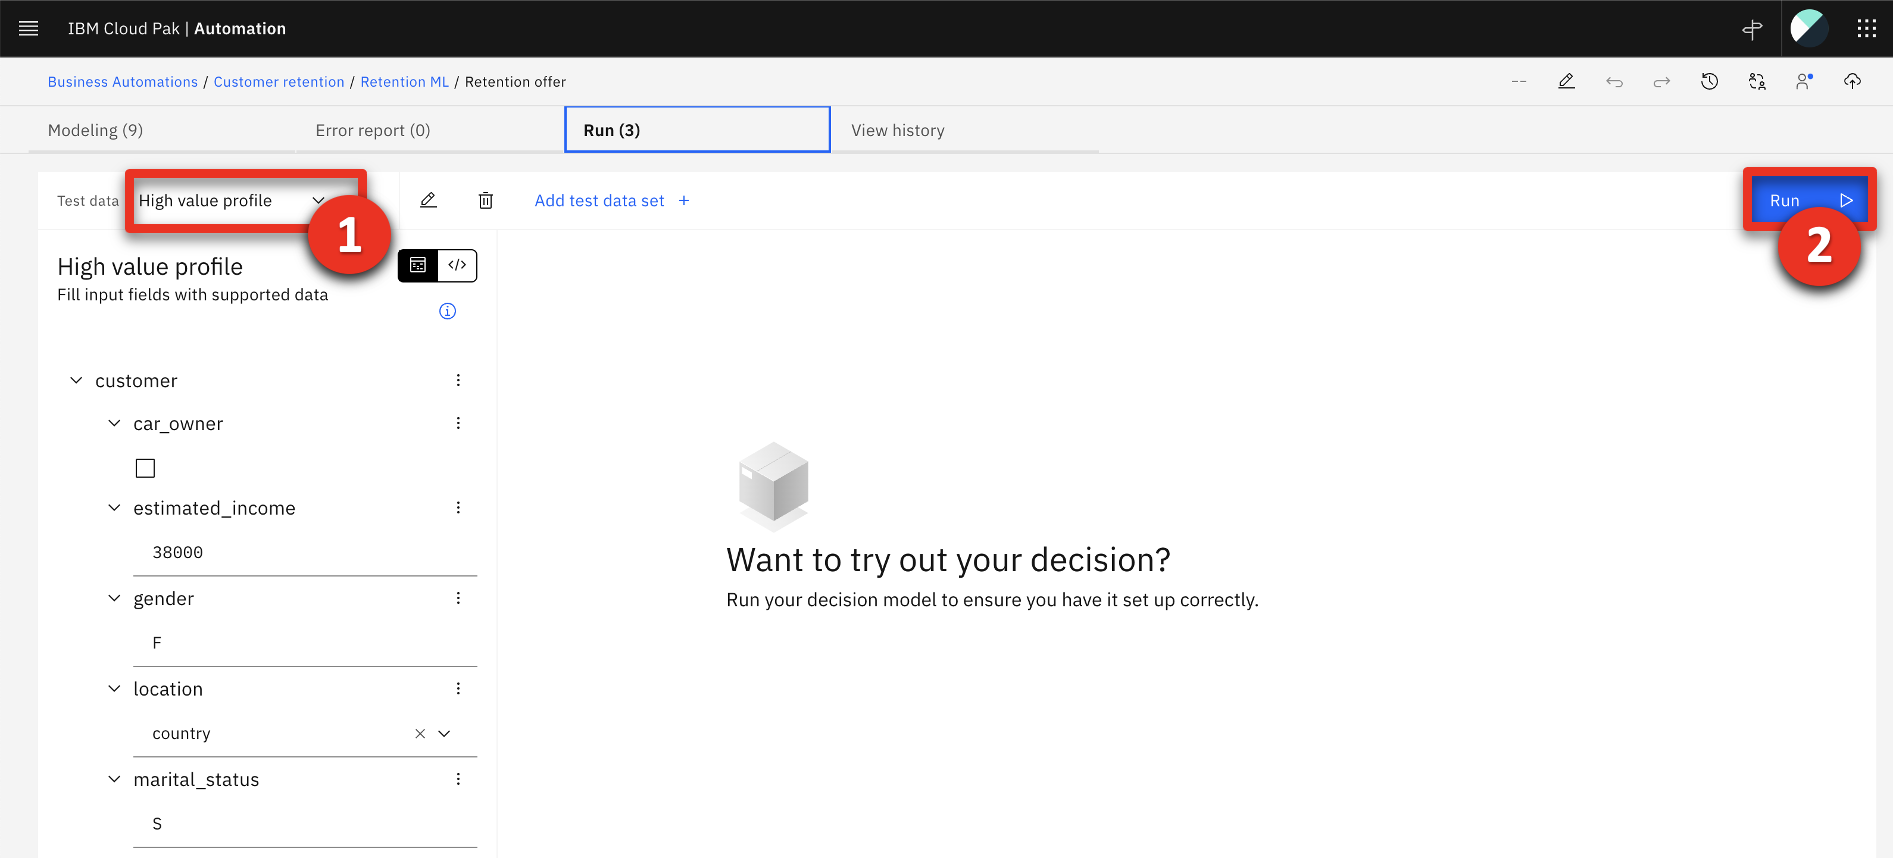
- Click the Retention offer model.

- Select the Run tab.
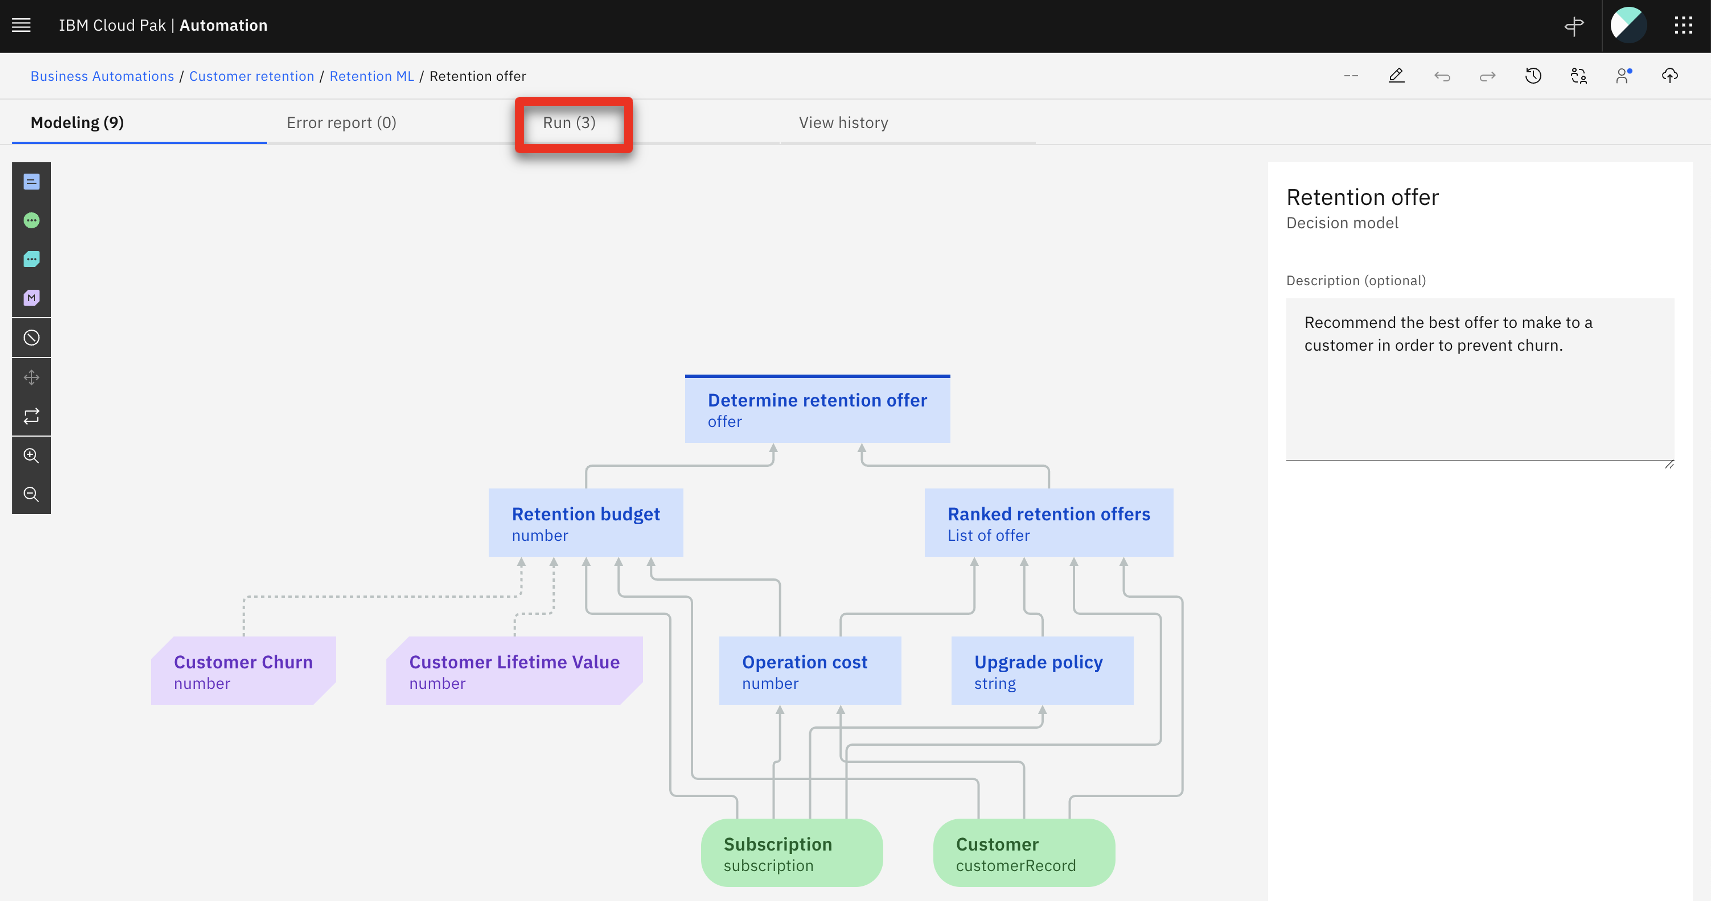
- Select the High value profile test file (1) and click Run (2).
The retention offer Result should display. Click Run again if you get a timeout error the first time.
Your result should match the screenshot below.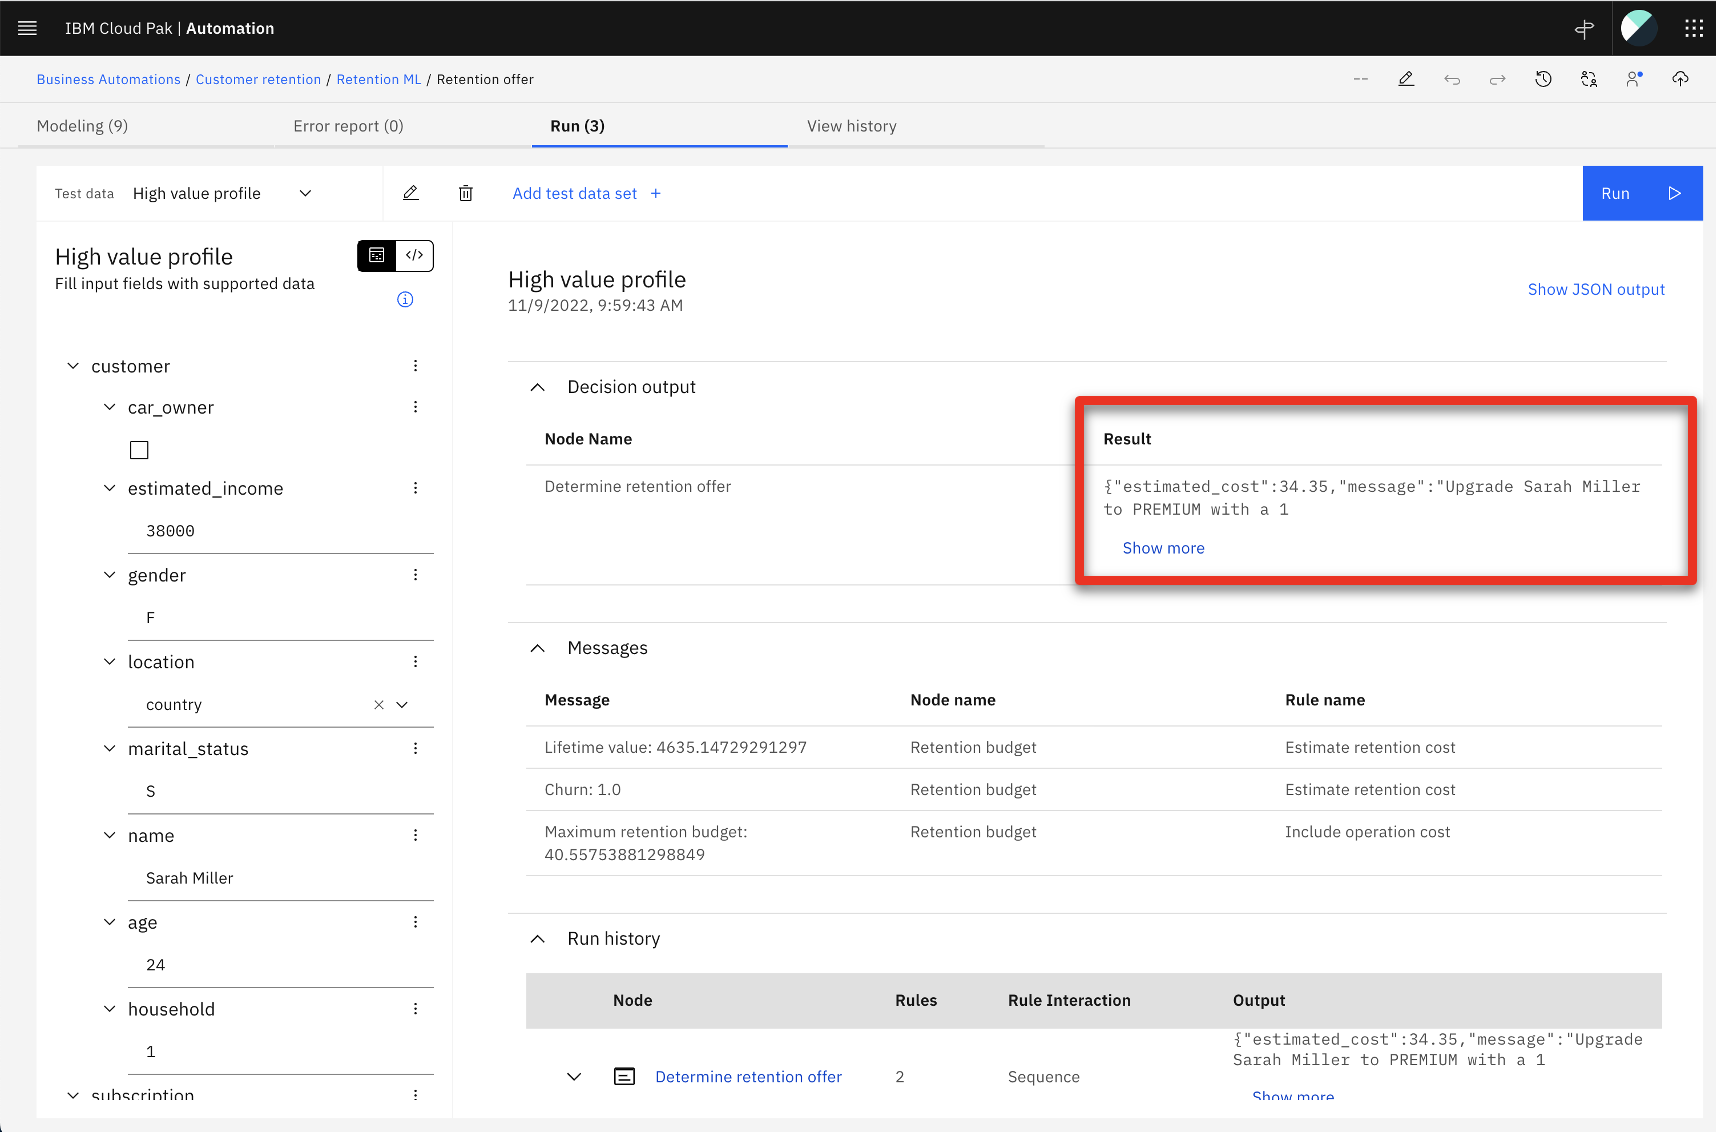
10 - Deploy the decision service
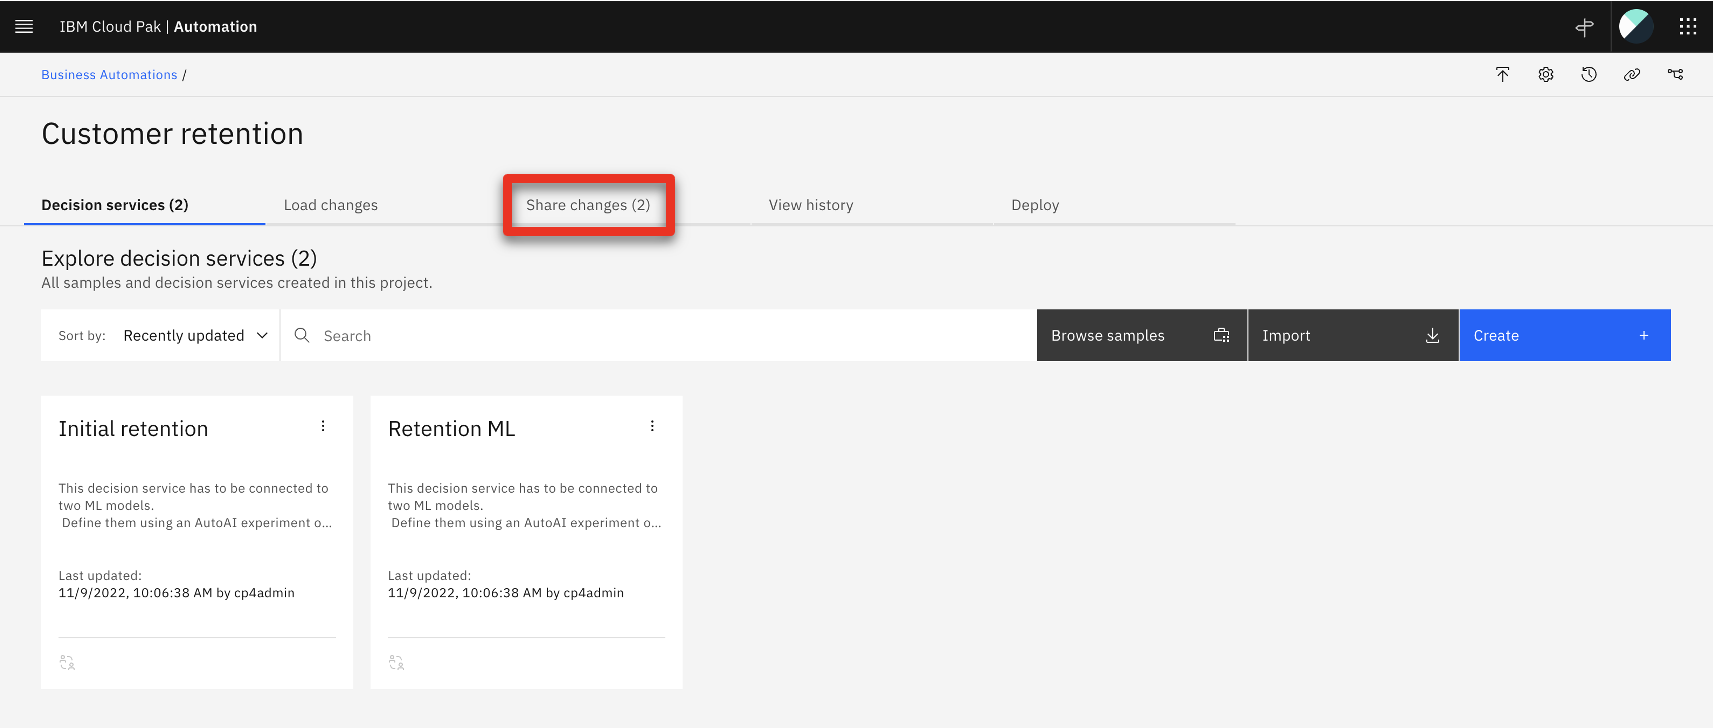
- Click Customer retention in the breadcrumb menu.
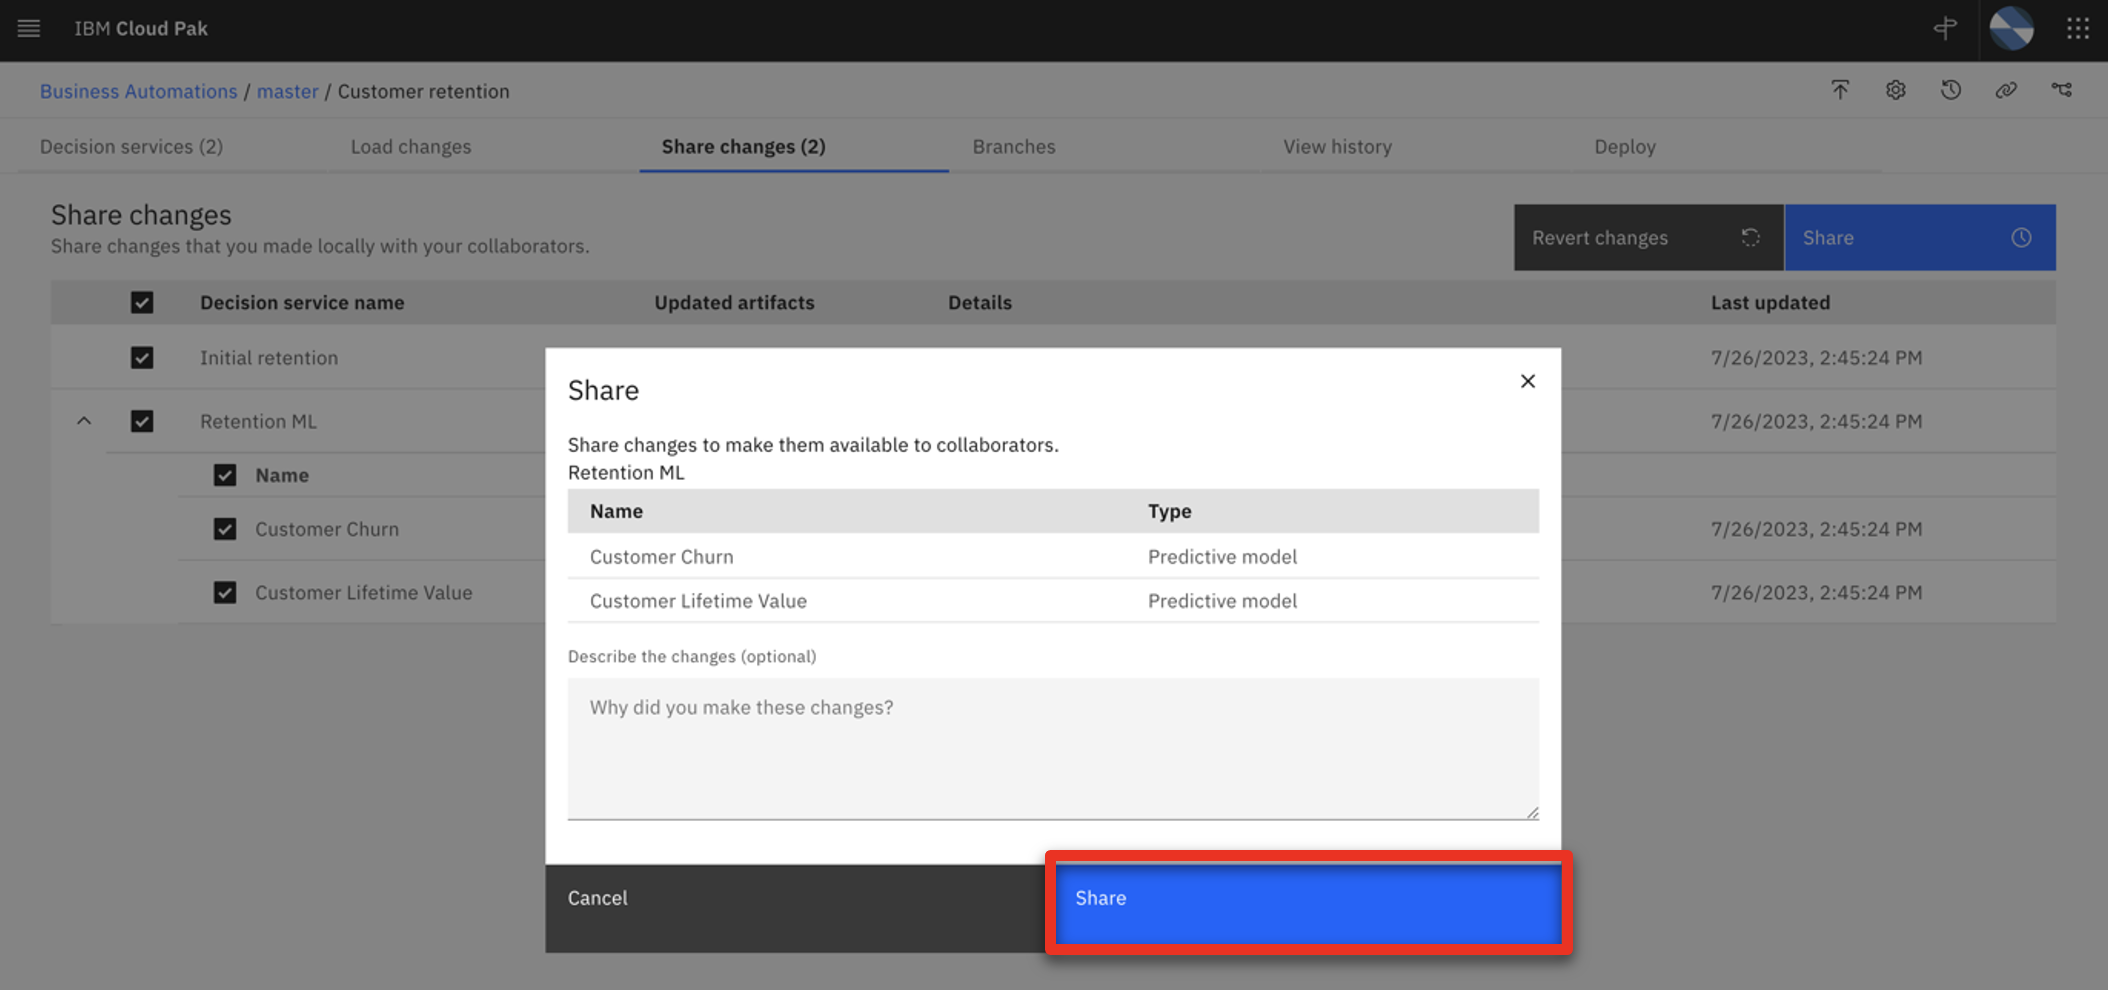
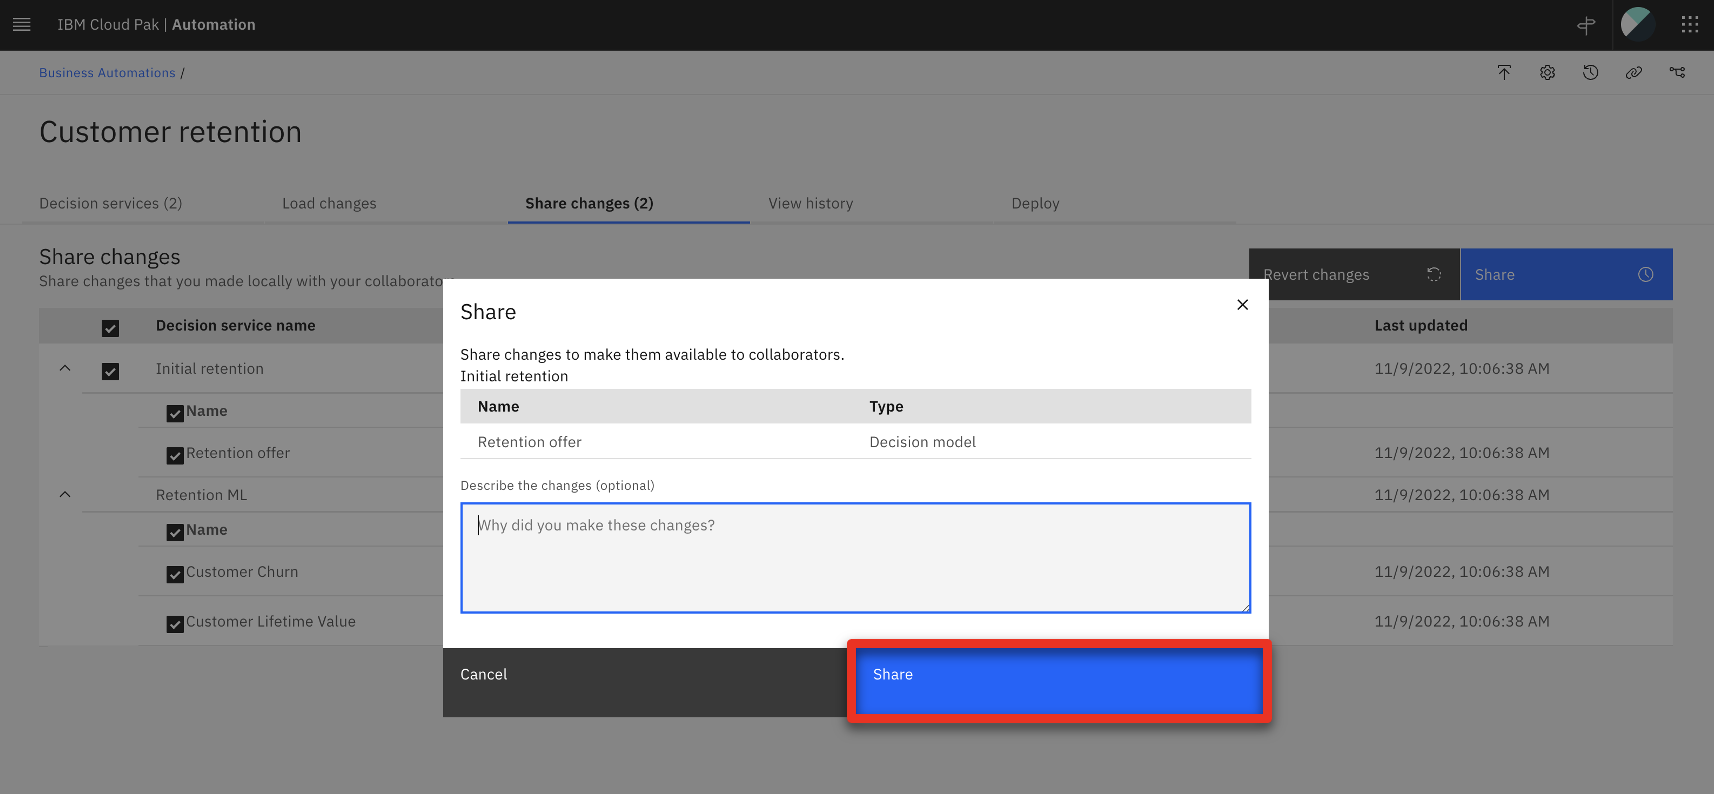
- Select the Share changes tab.

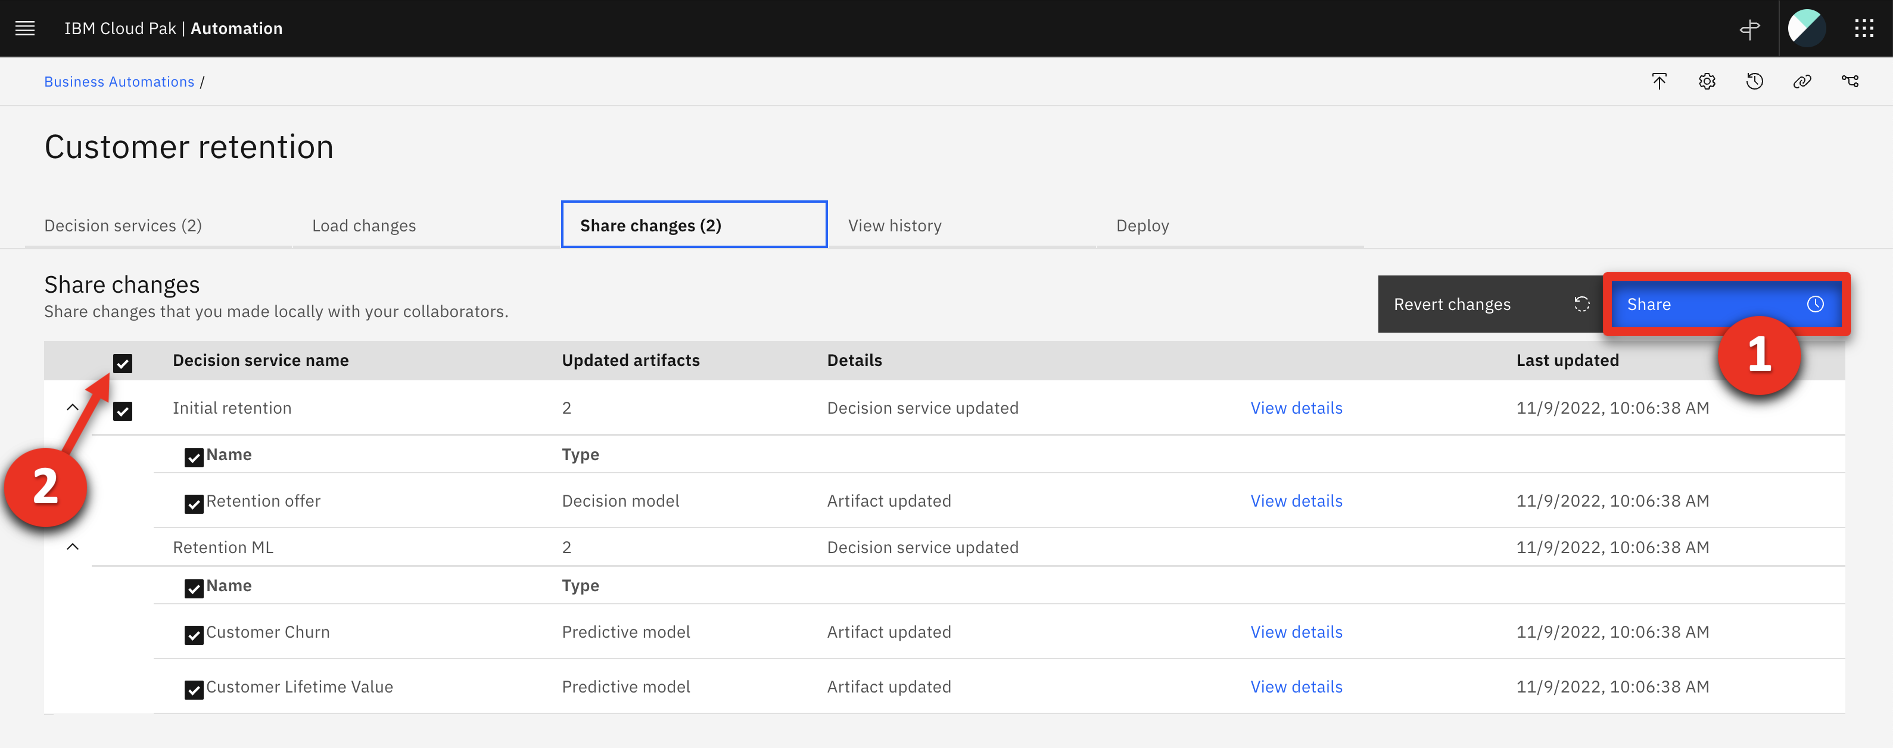
- Click the share all changes box (1) and click Share (2).
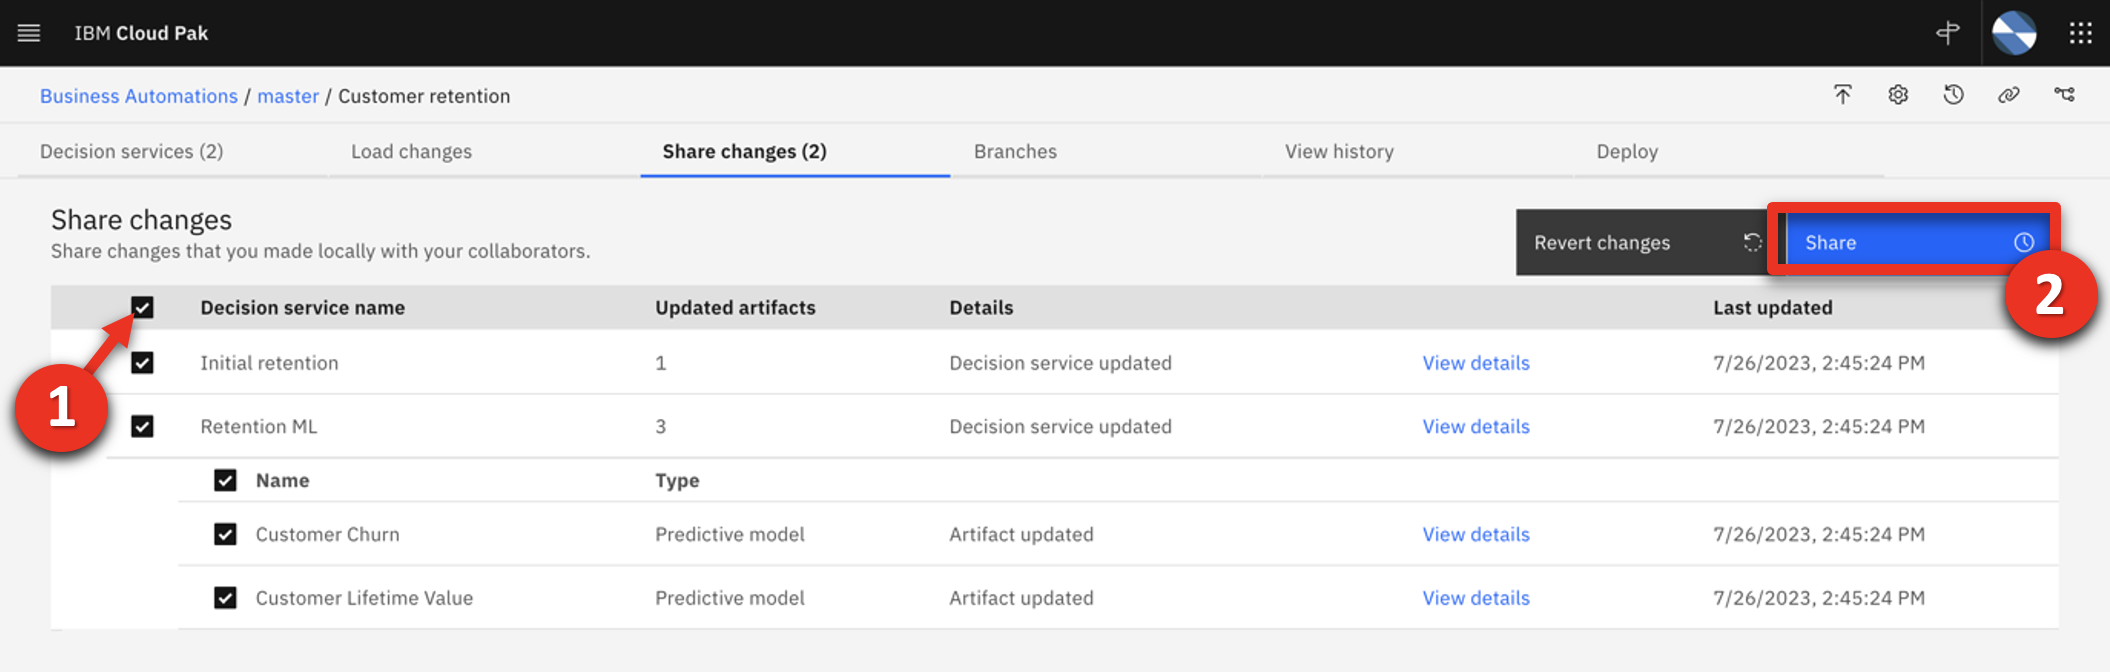
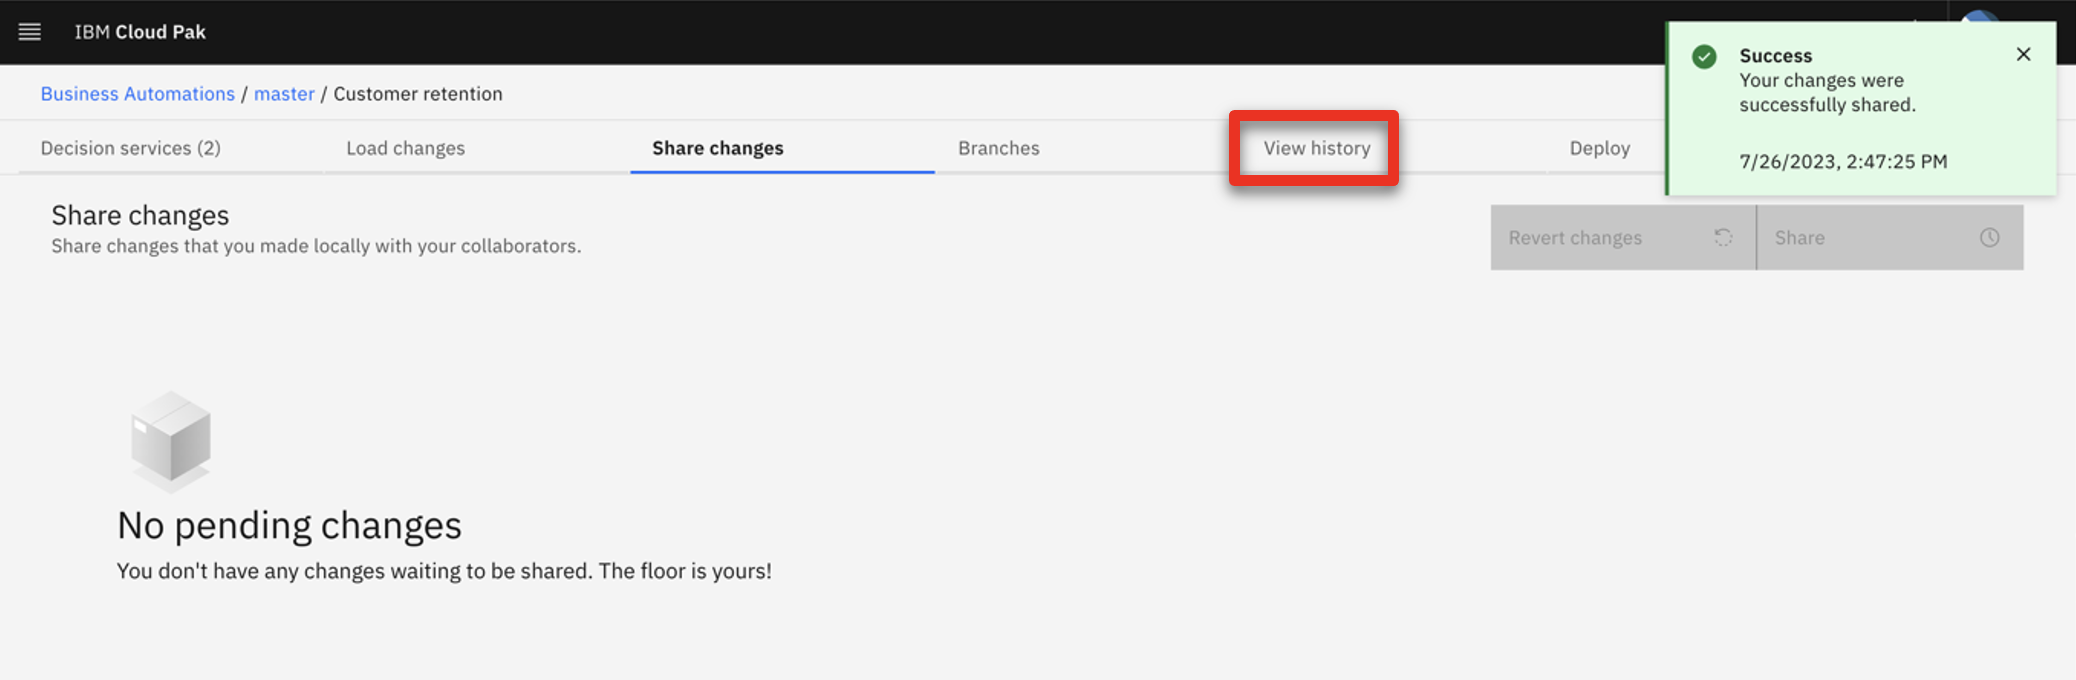
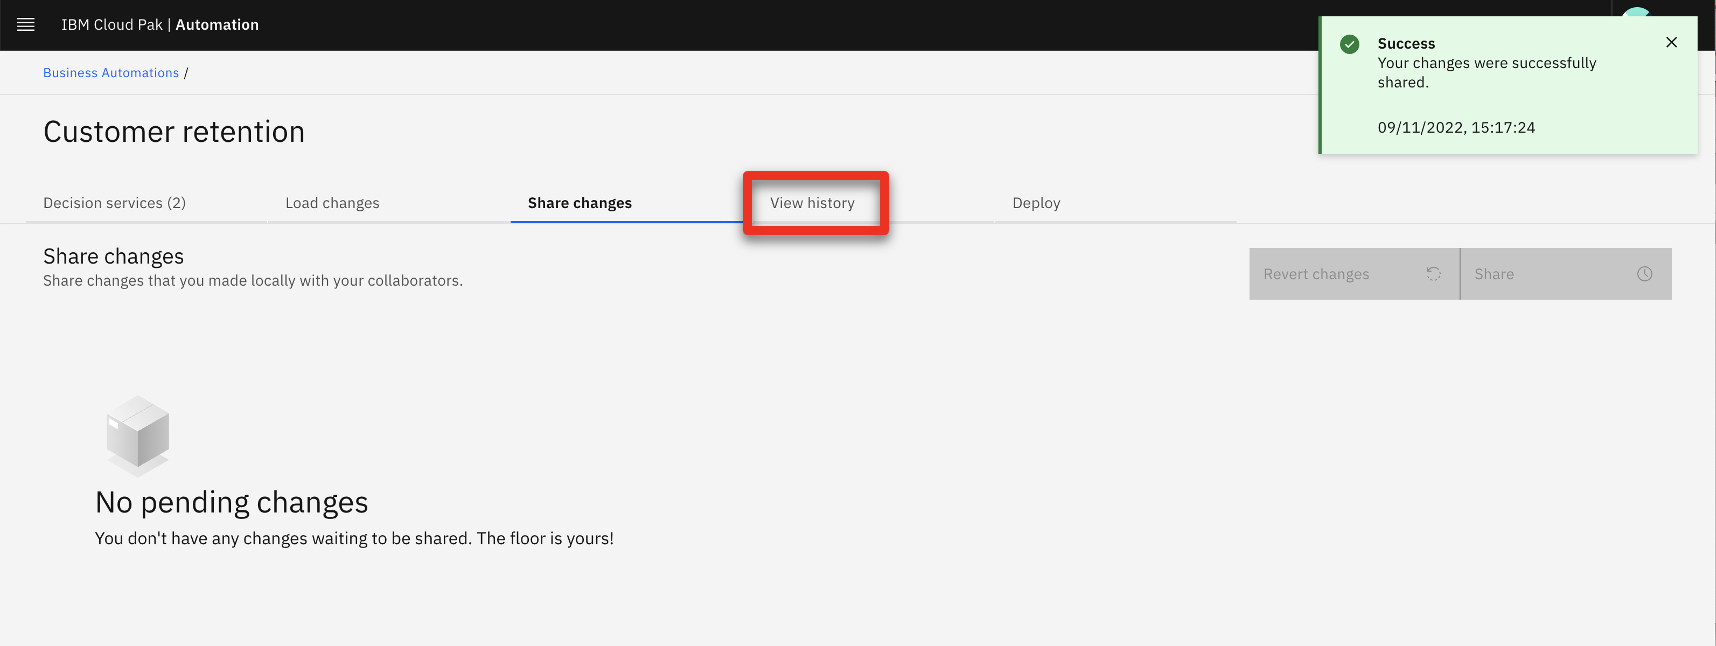
- Click Share to push the updates to the Git repository.
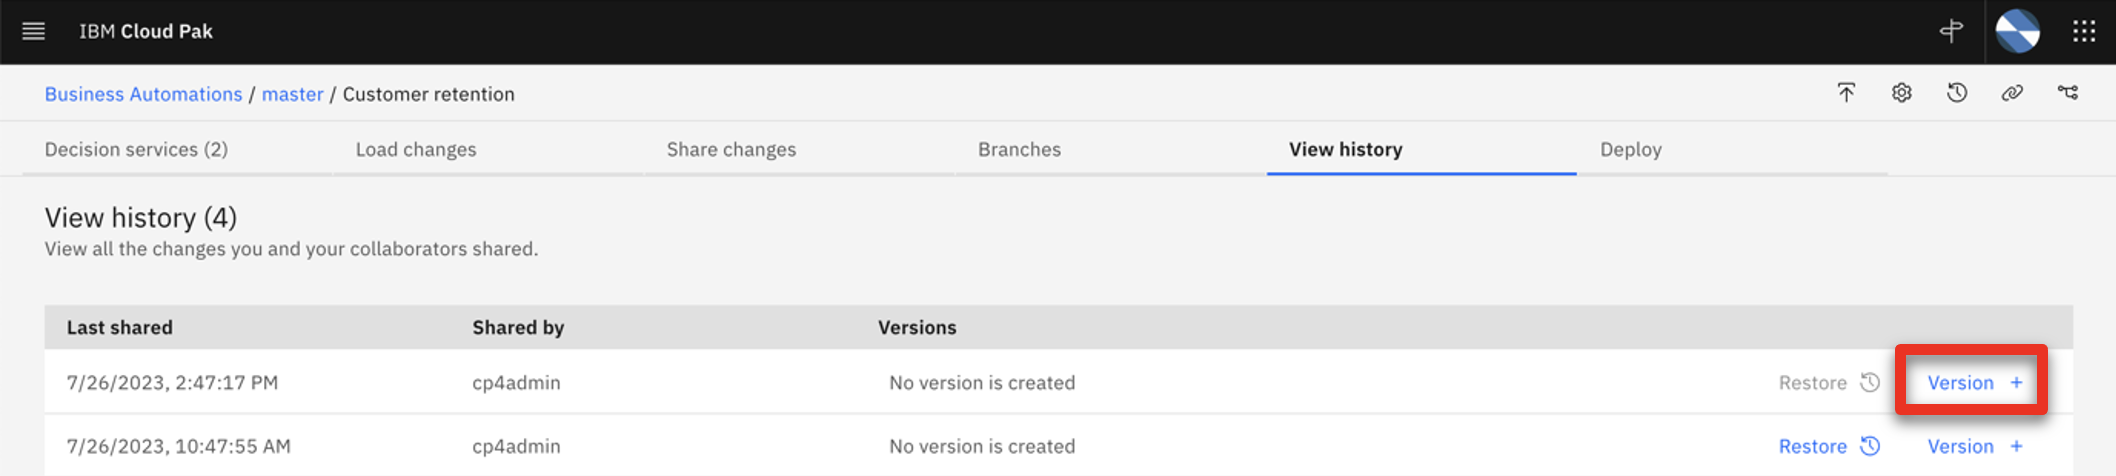
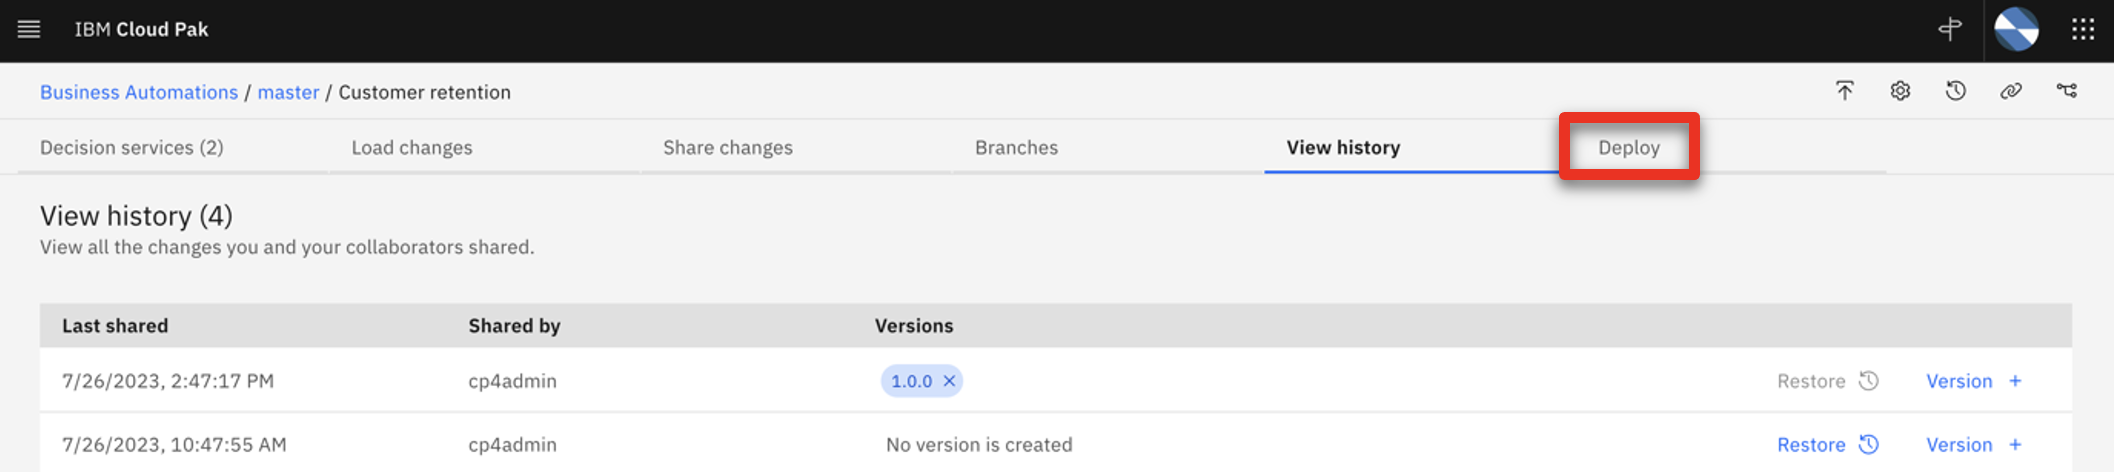
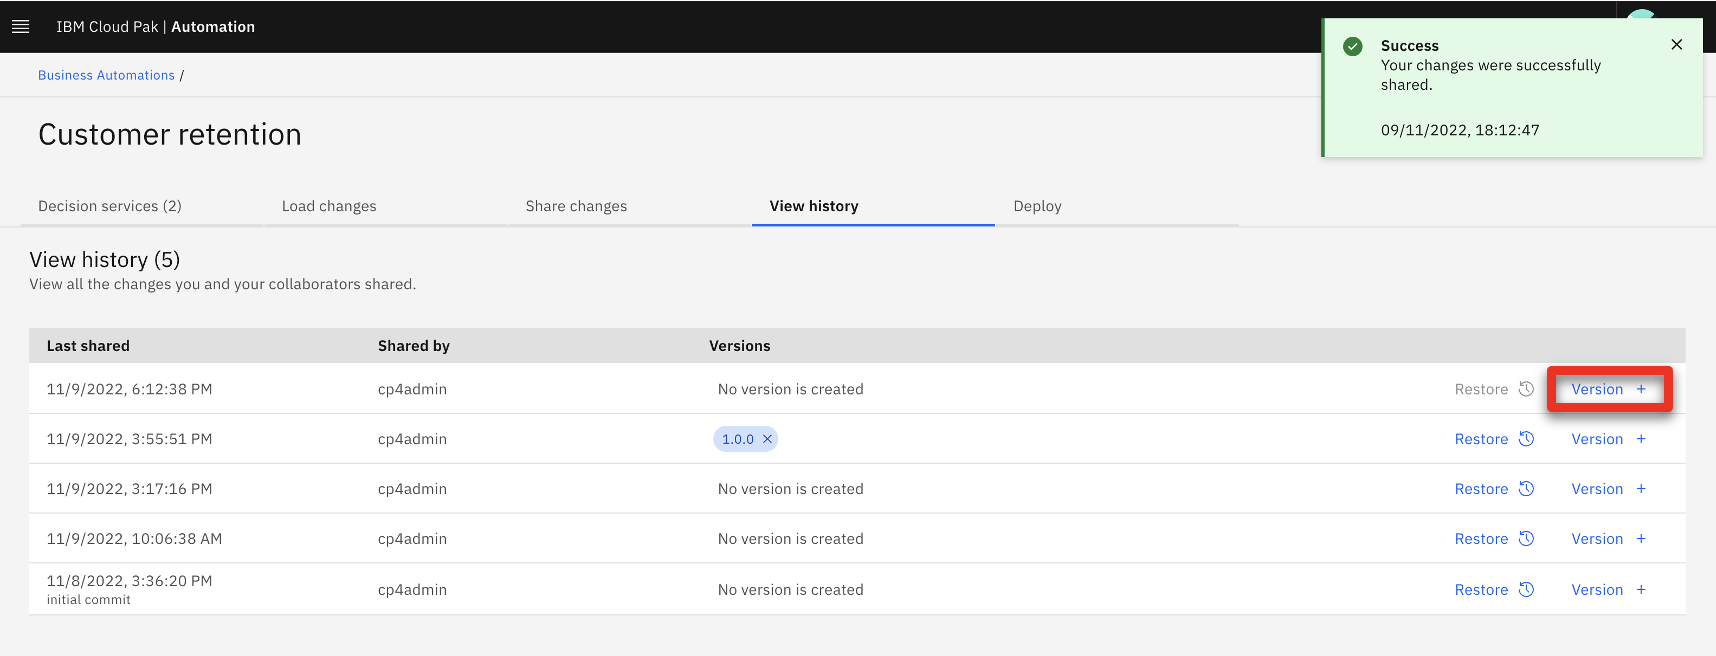
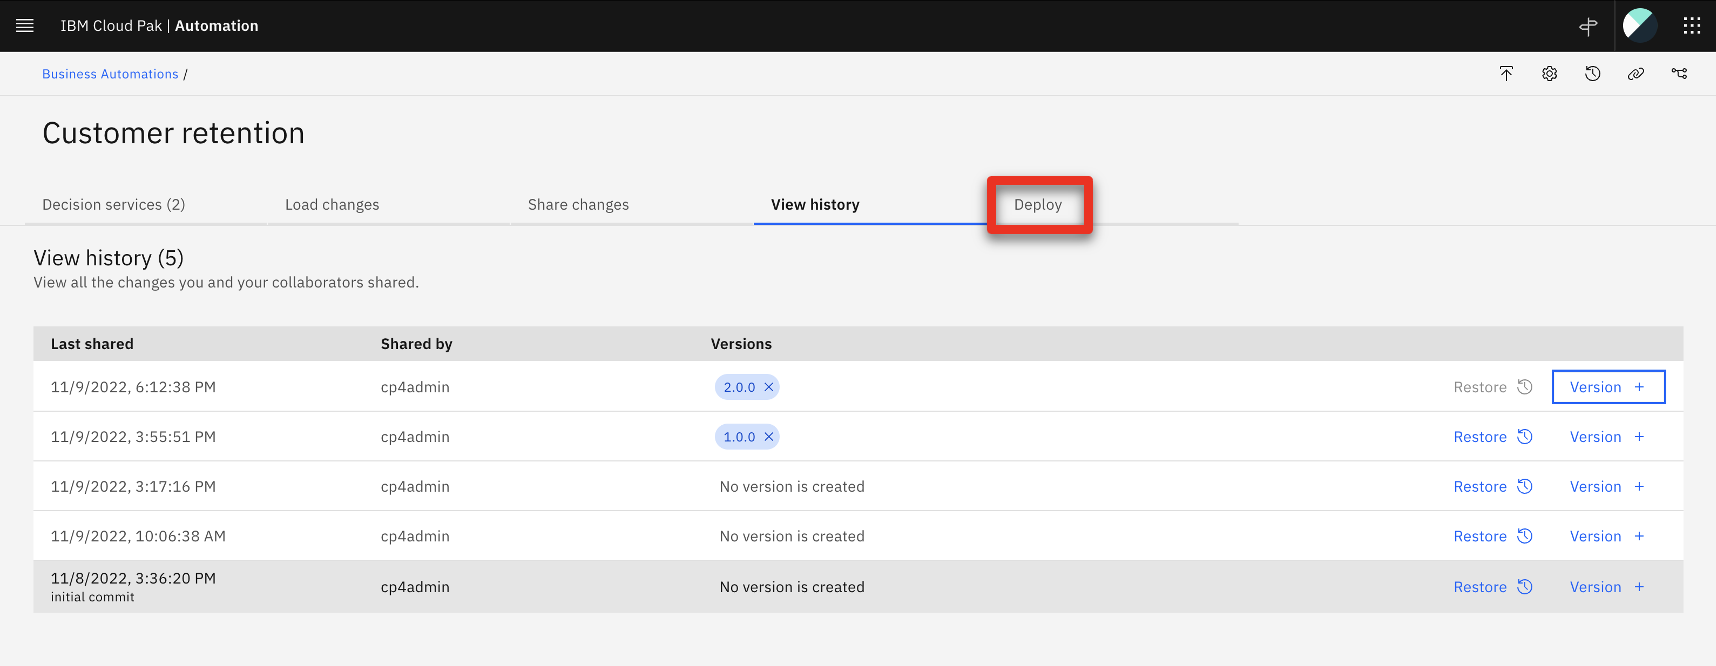
- Select the View history tab.
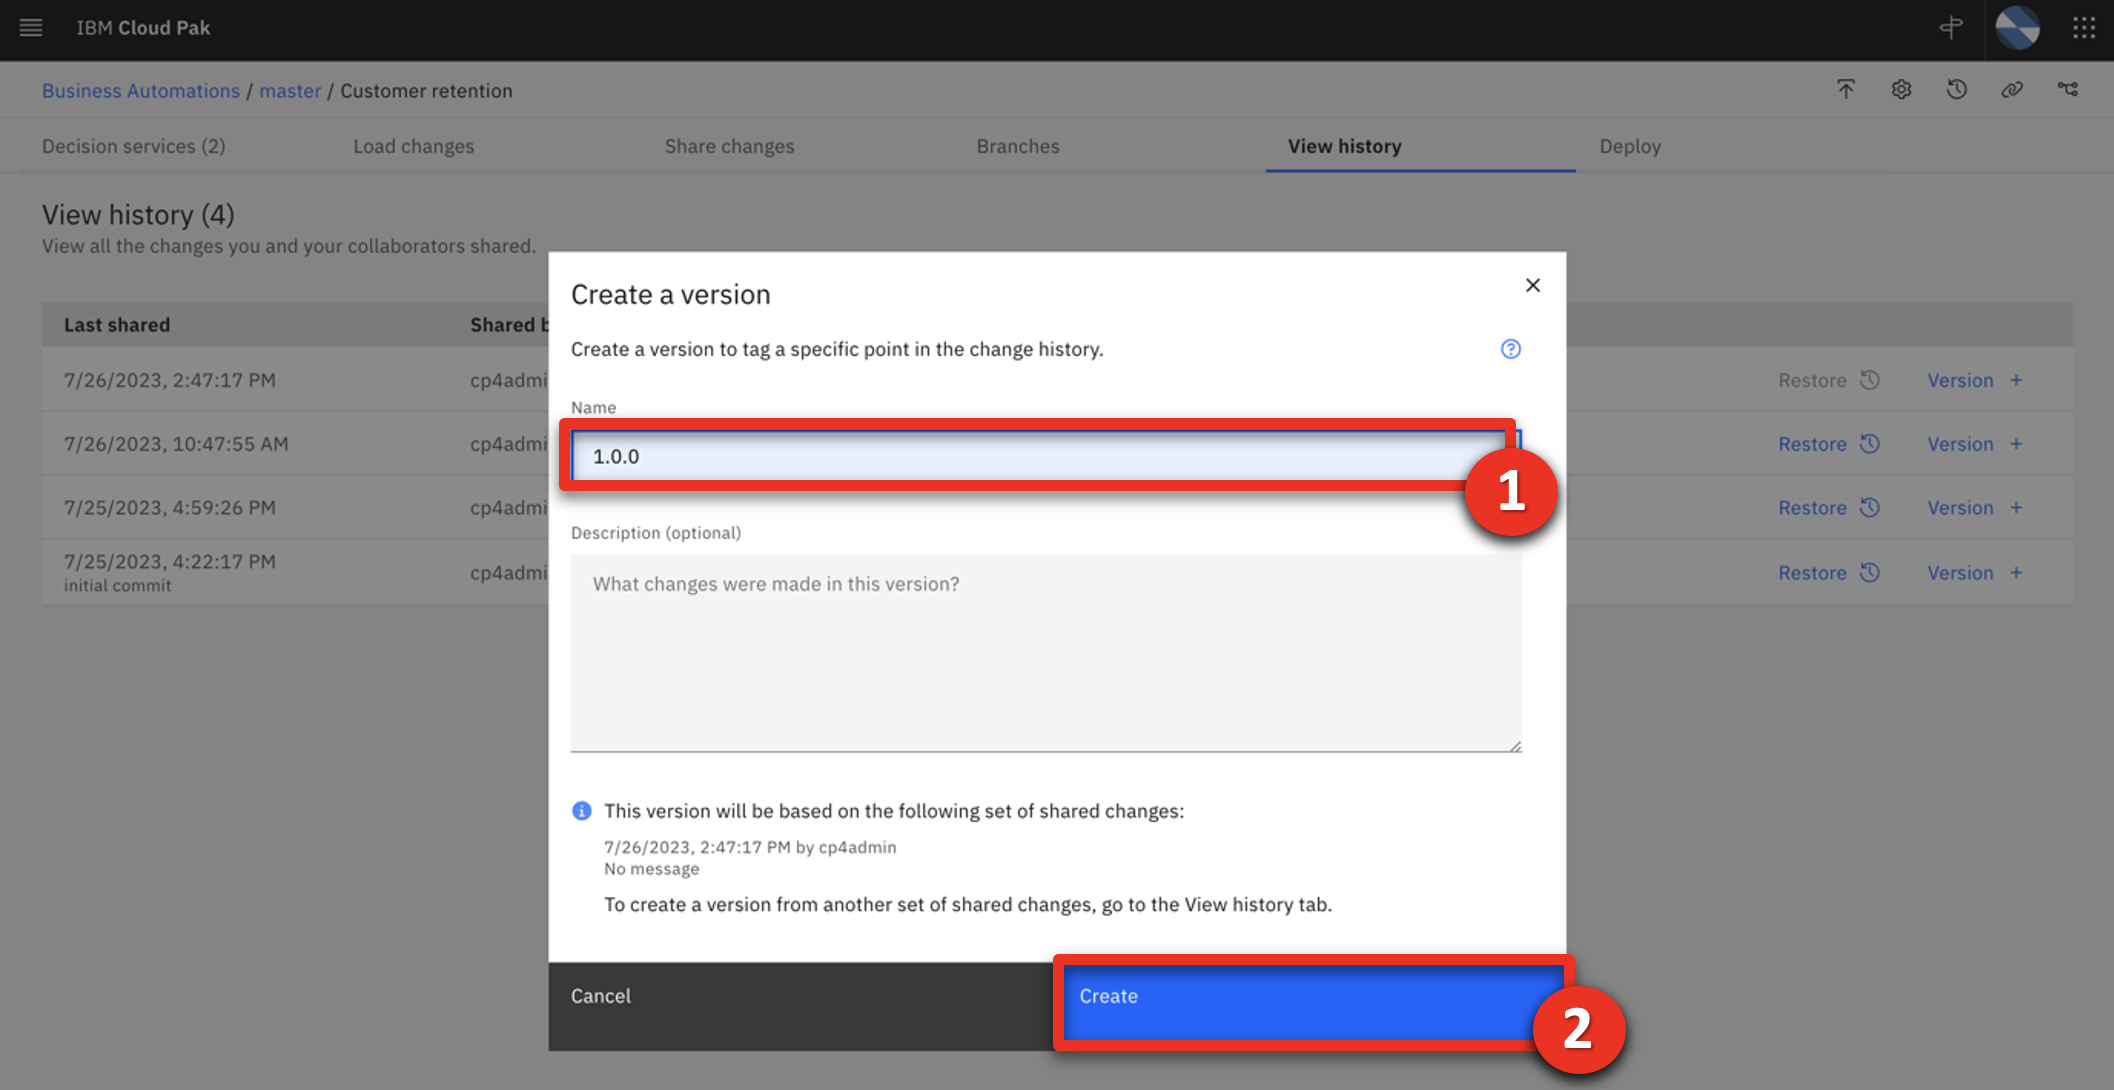
- Refresh the page and then click Version + in the latest shared history.
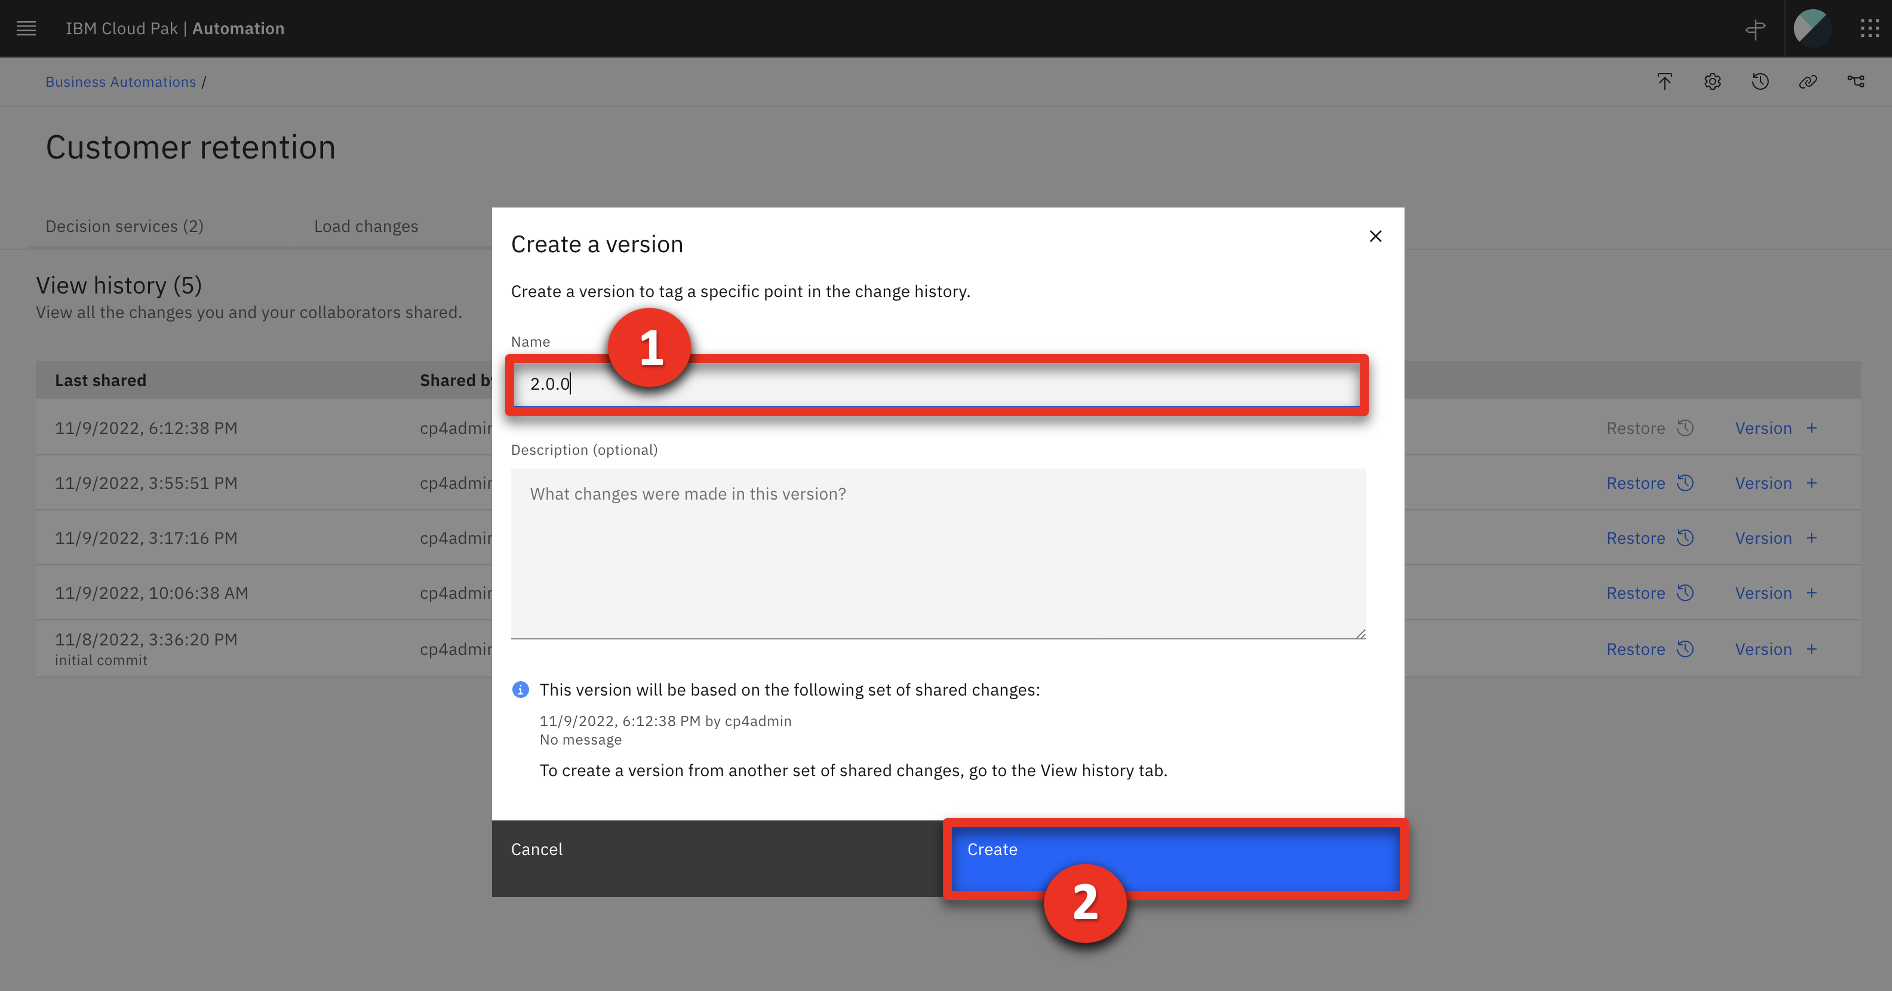
- Enter version ‘1.0.0’ (1) in the Name field and click Create (2).
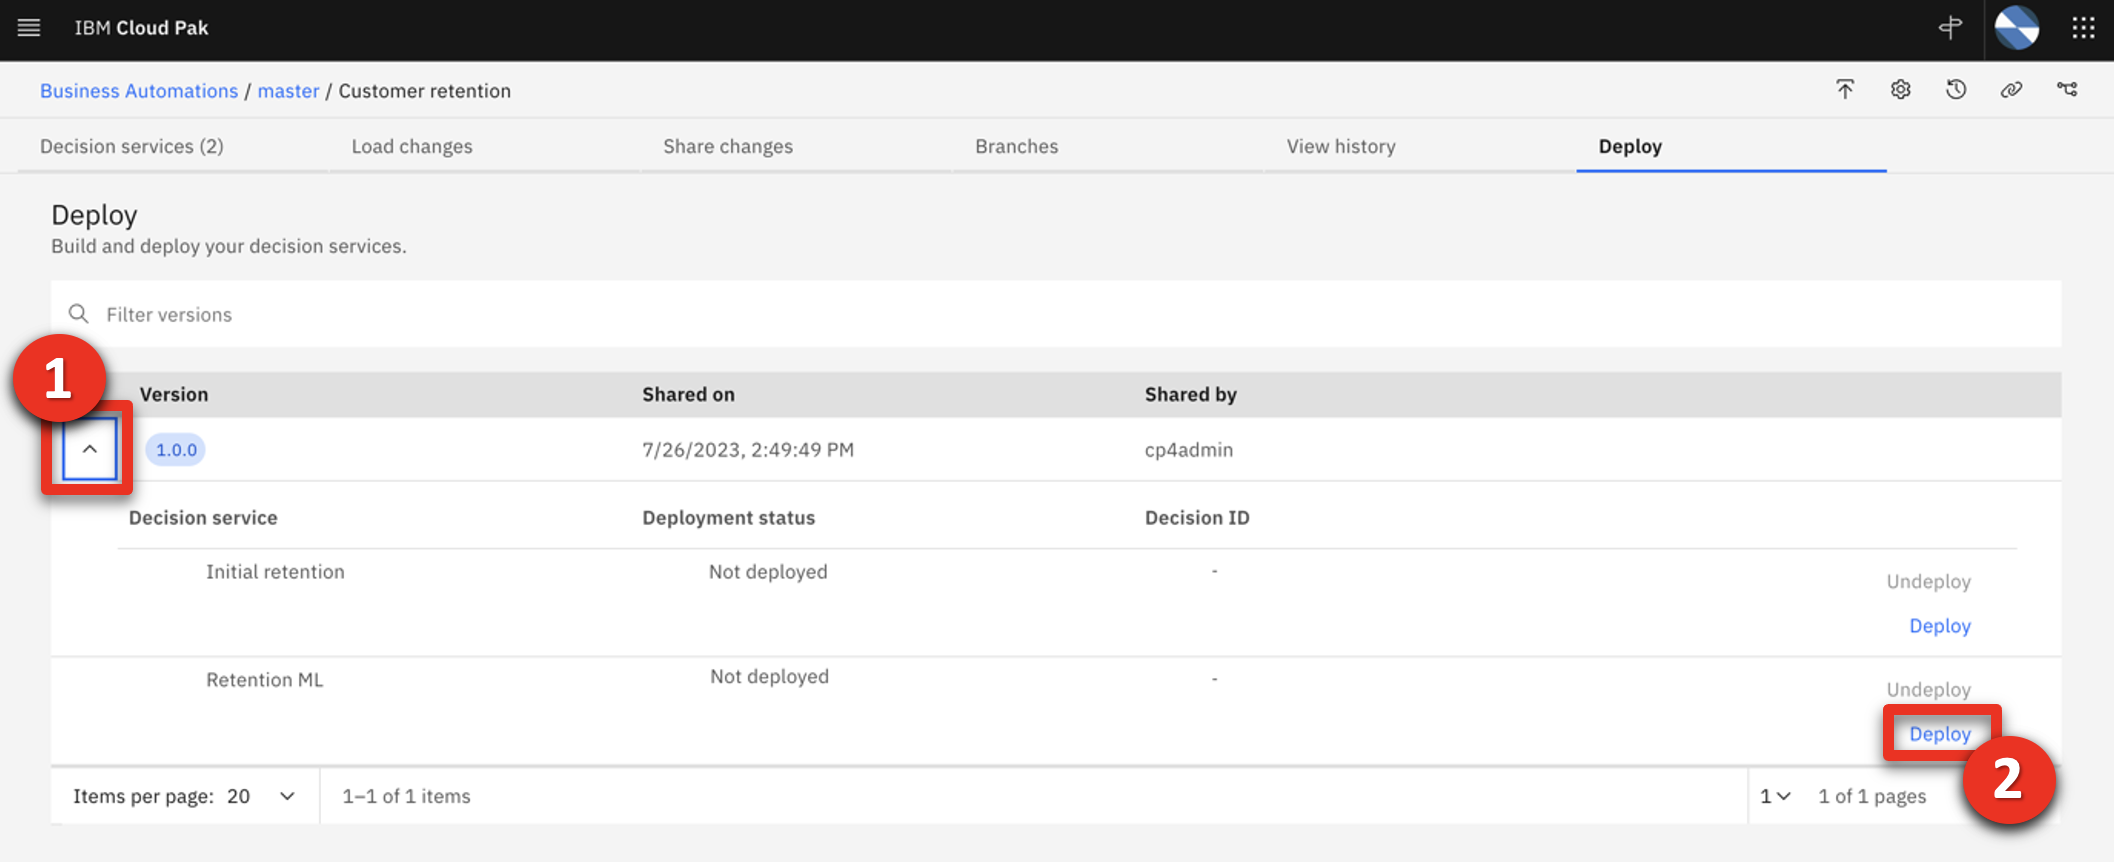
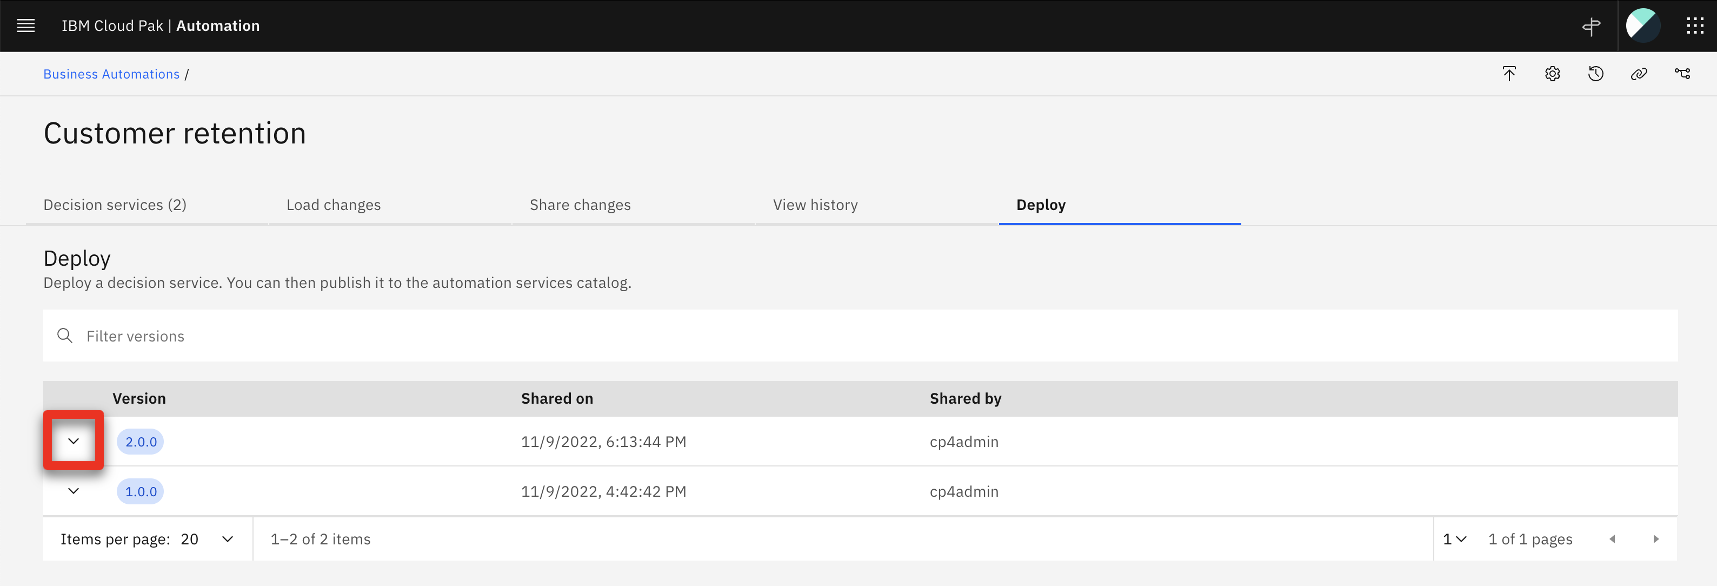
- Click the Deploy tab.
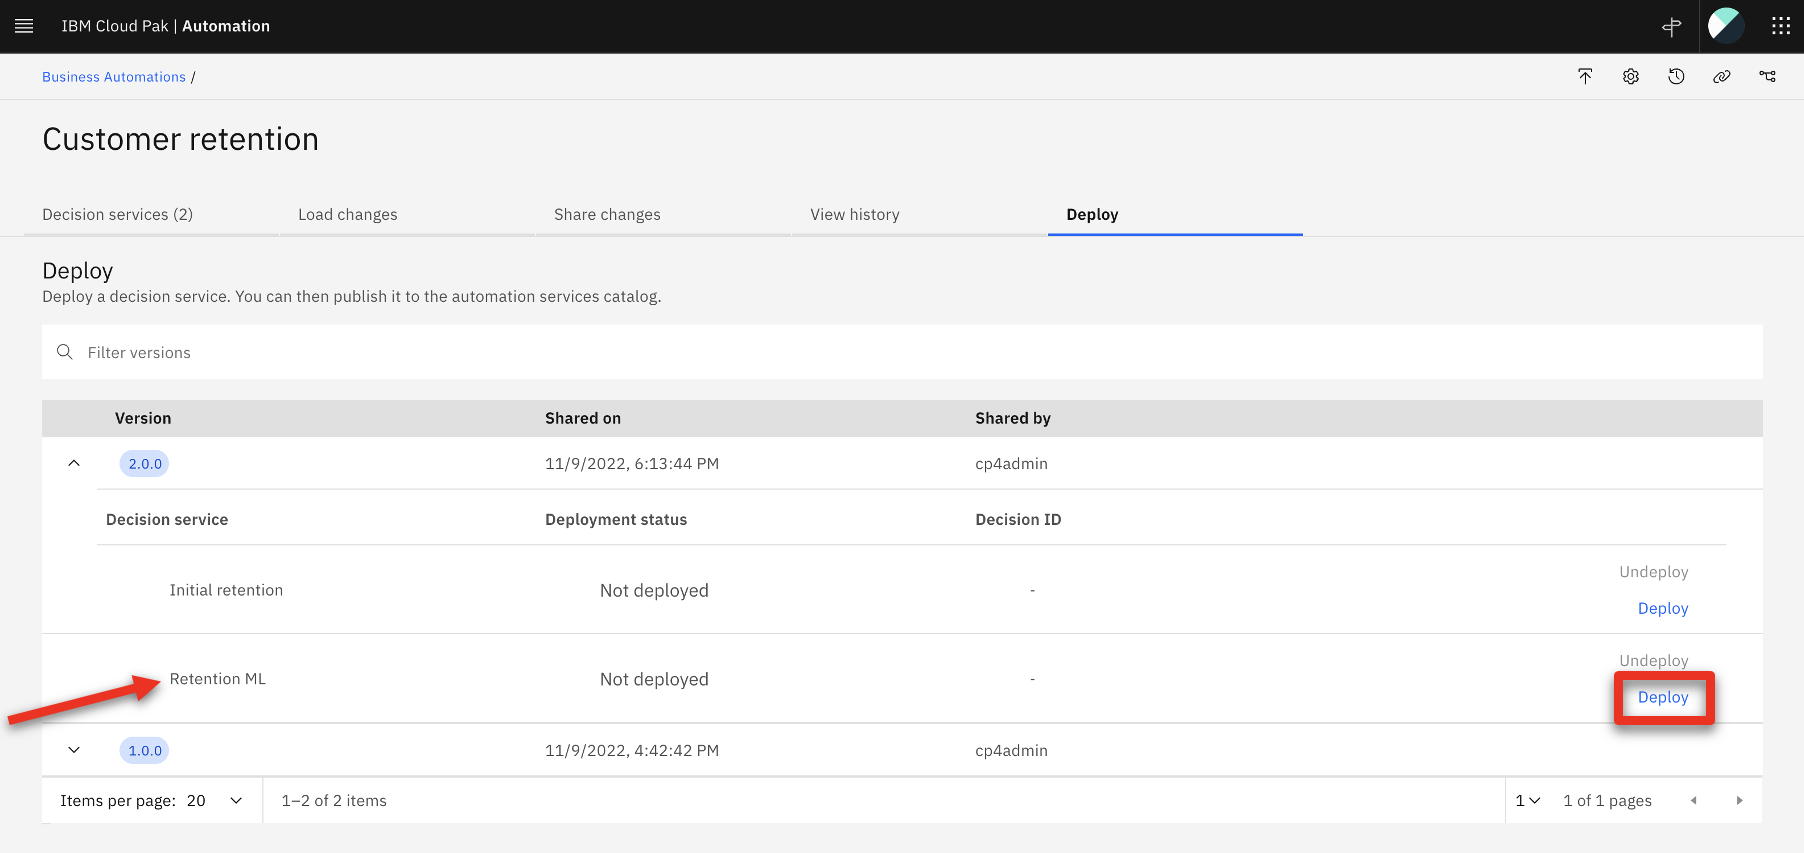
- Expand the most recently created version (1.0.0) (1) and click Deploy (2) in the Retention ML row.
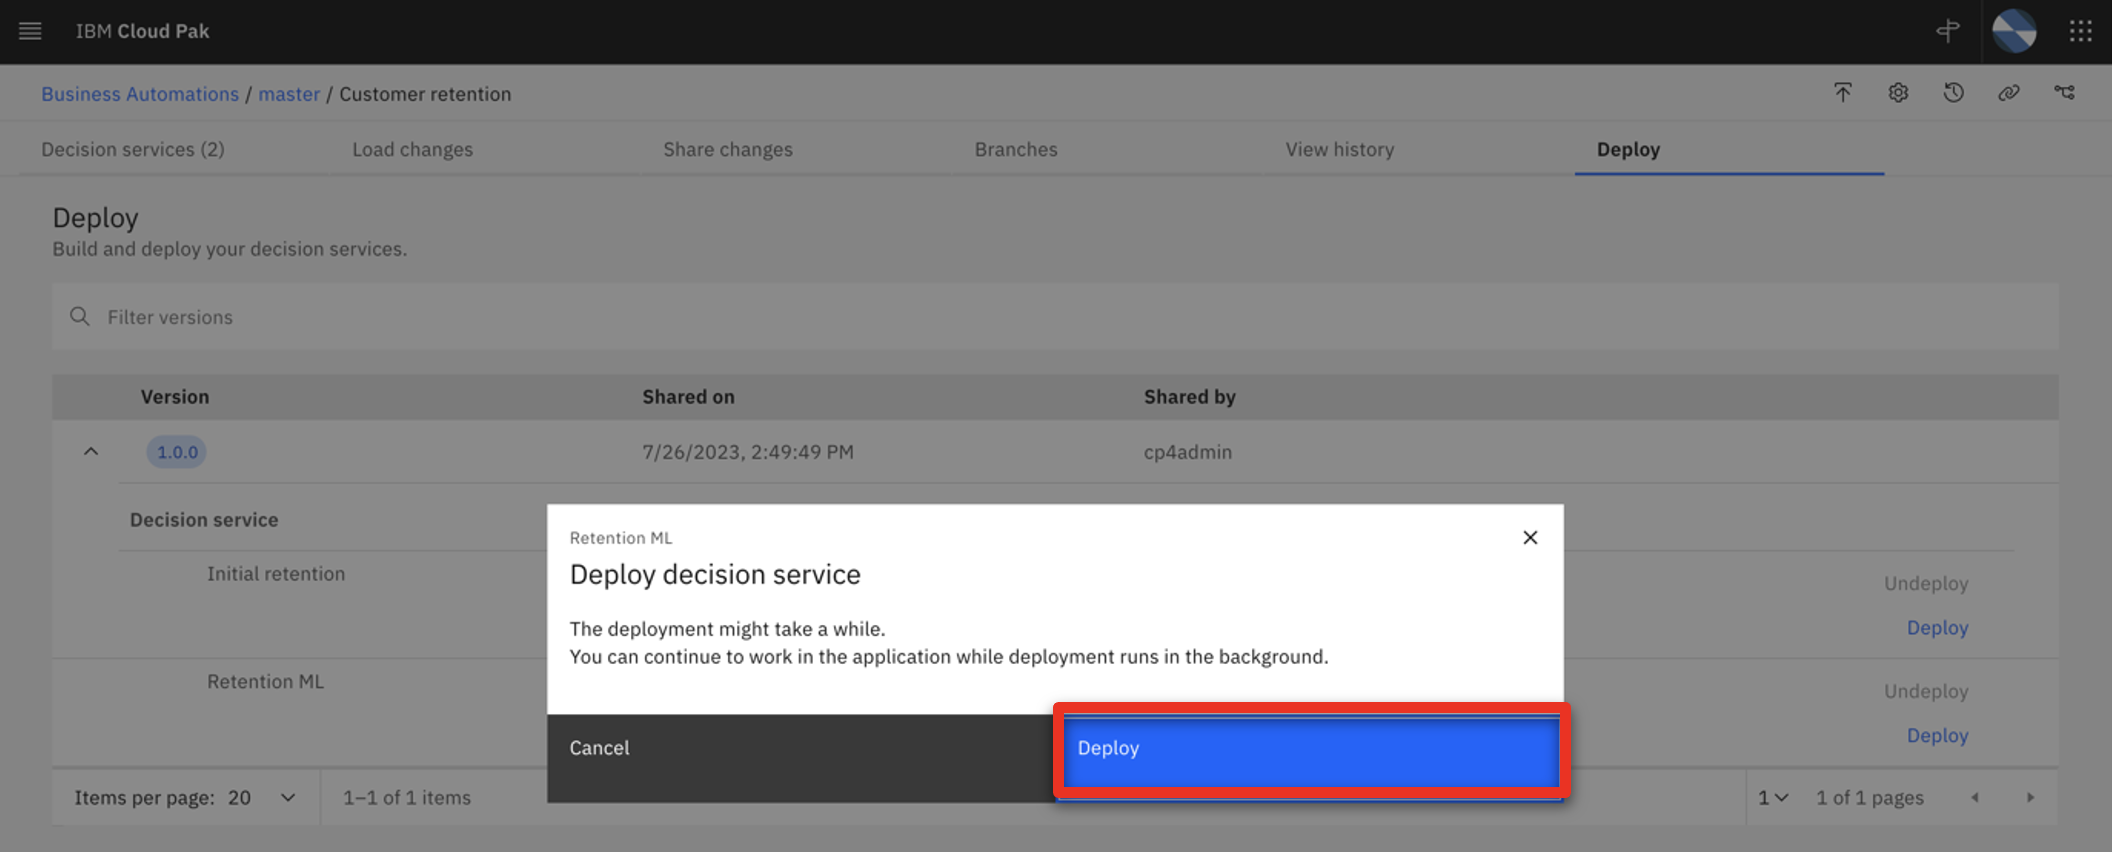
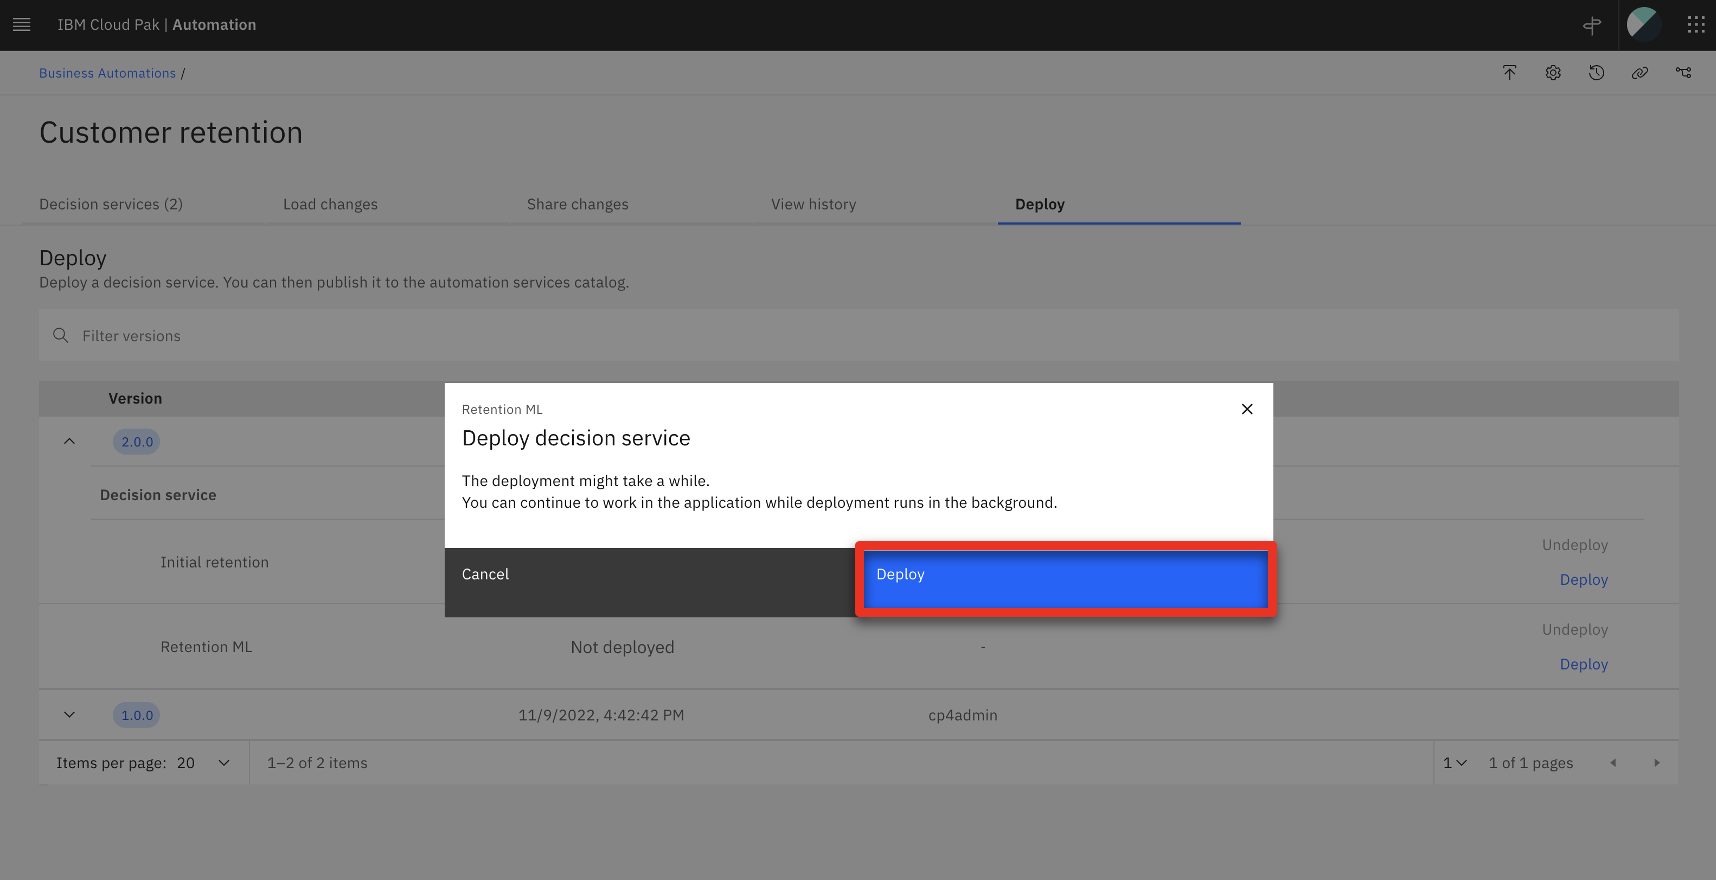
- Click Deploy to confirm.
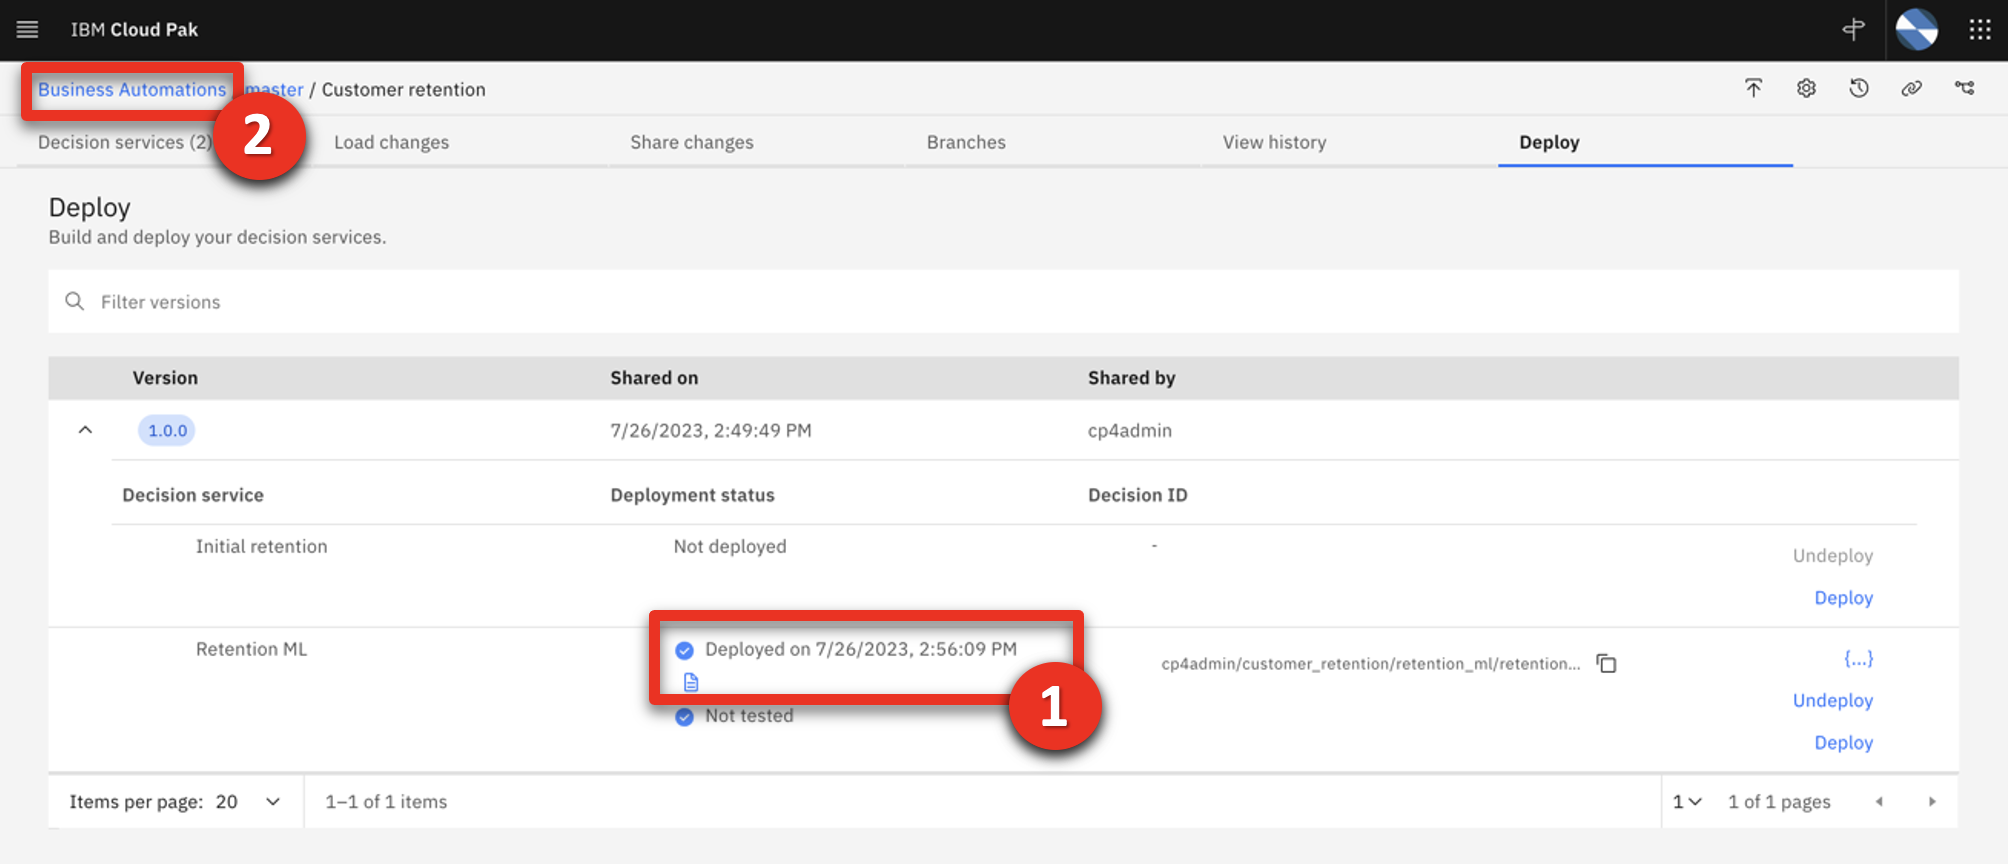
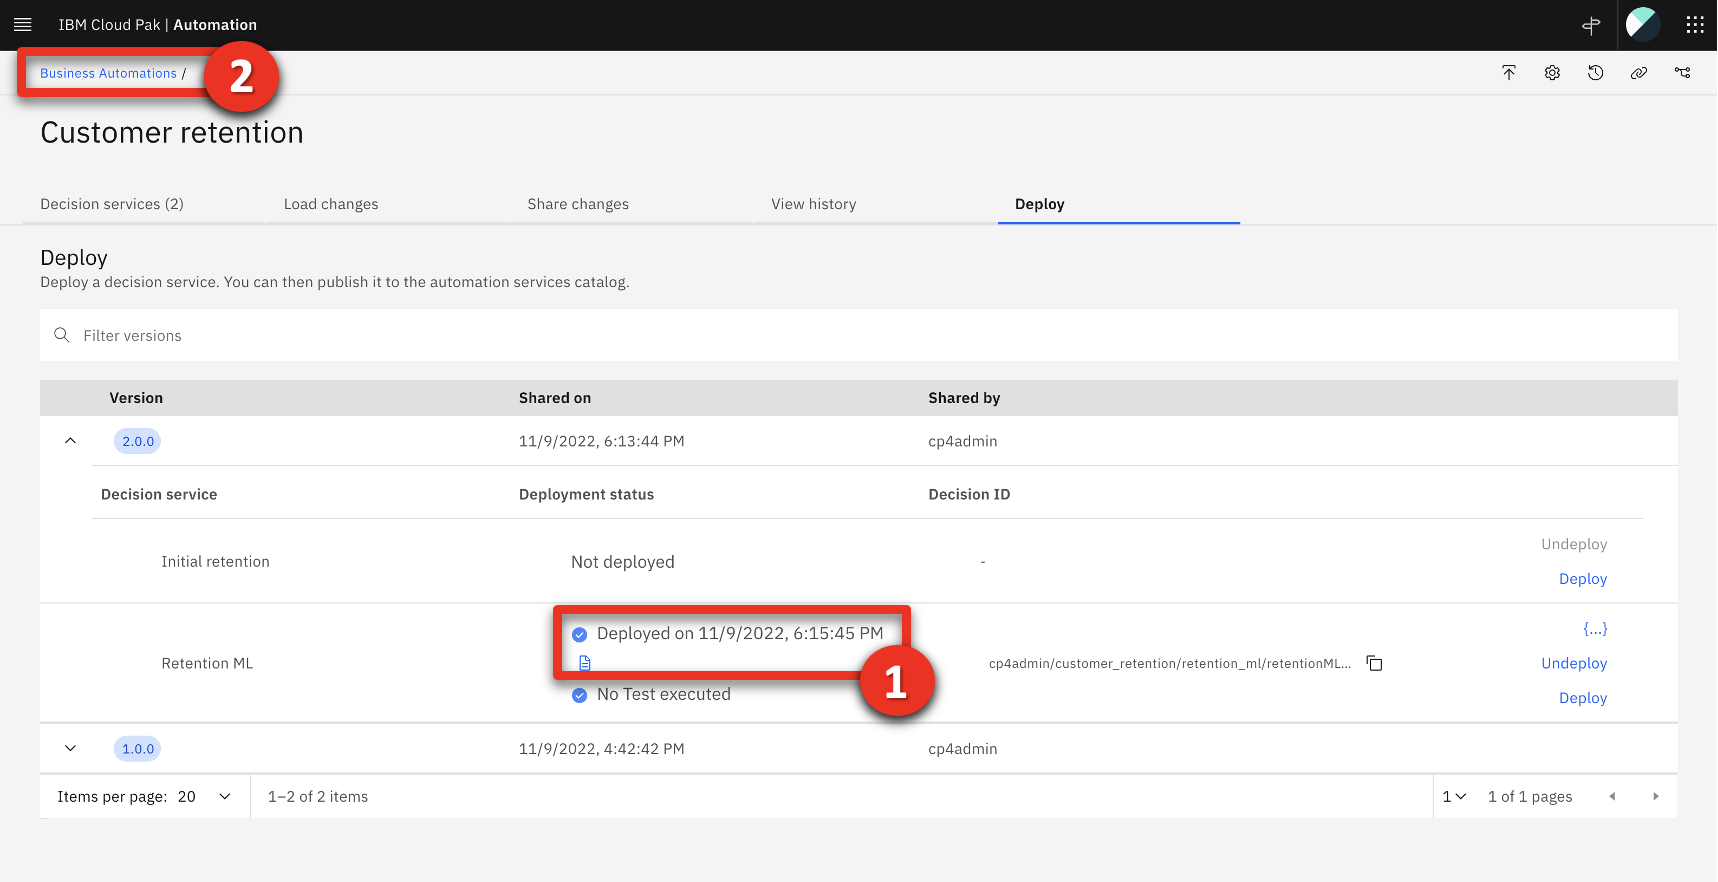
- Wait for the deployment to finish (1). Click Business Automations (2) in the breadcrumb menu.
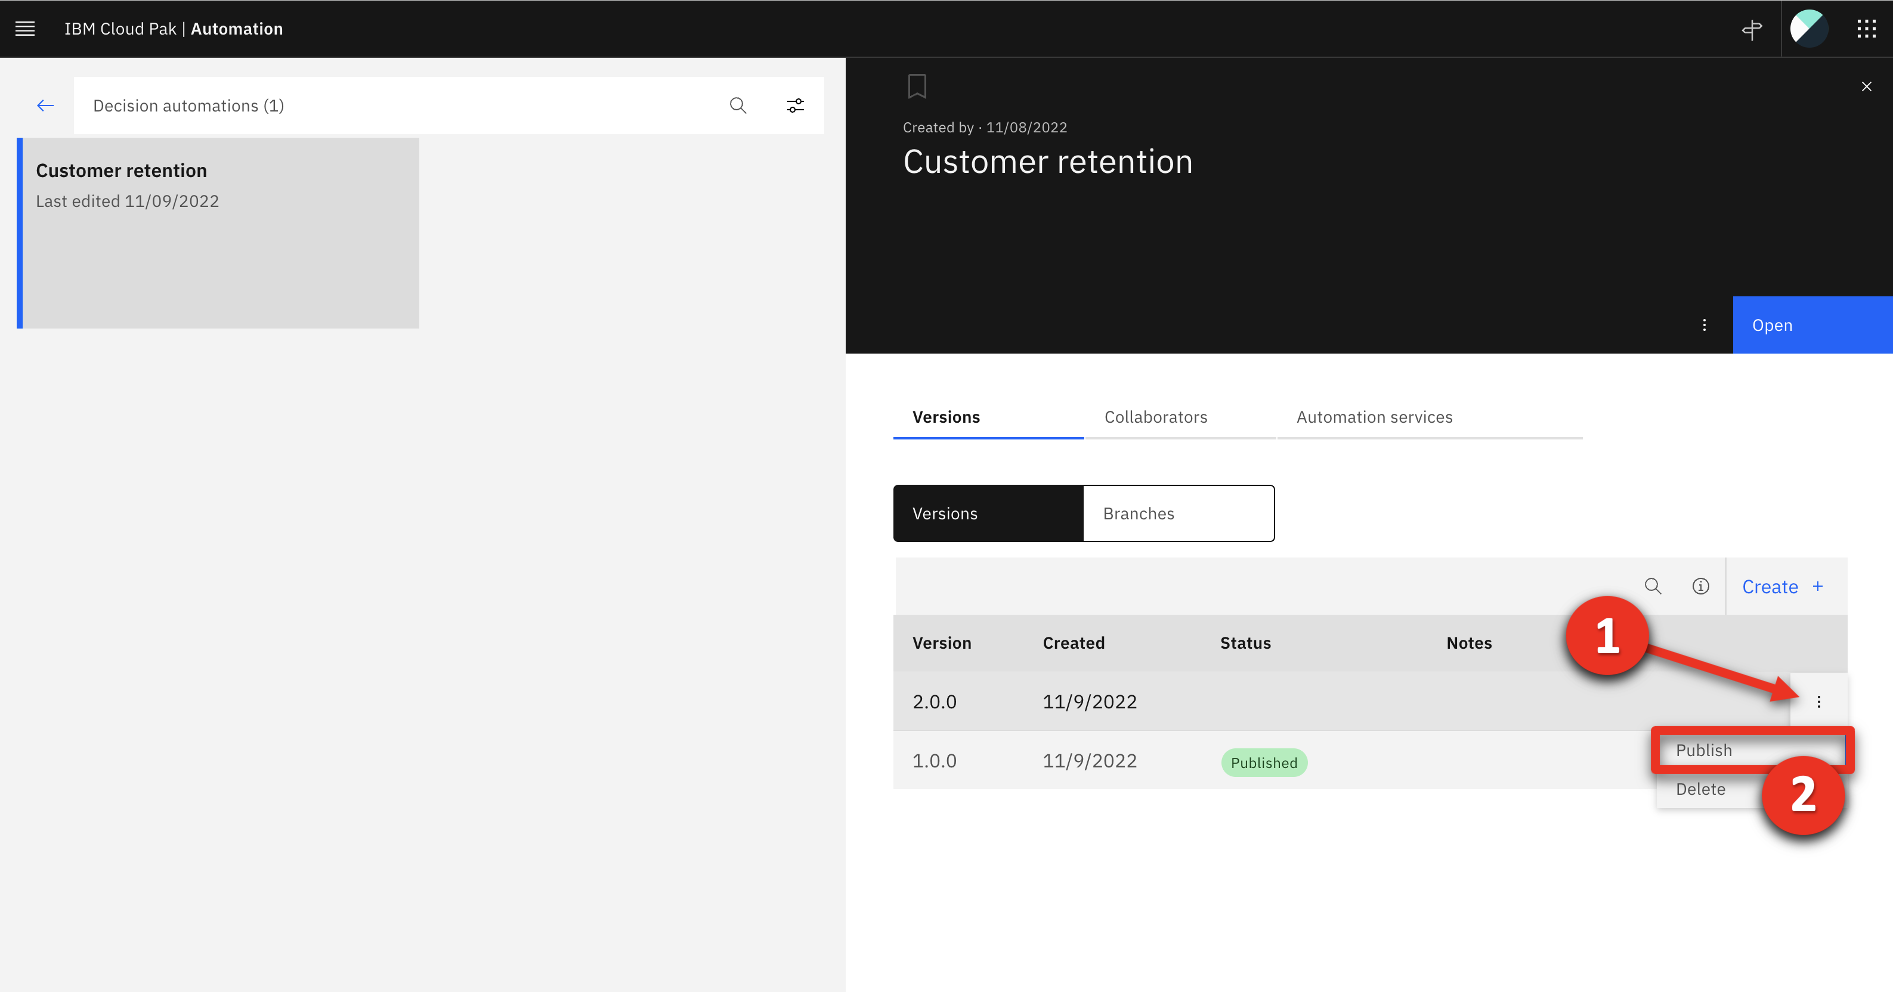
- Select Decision (1) and then click the Customer retention tile (2).
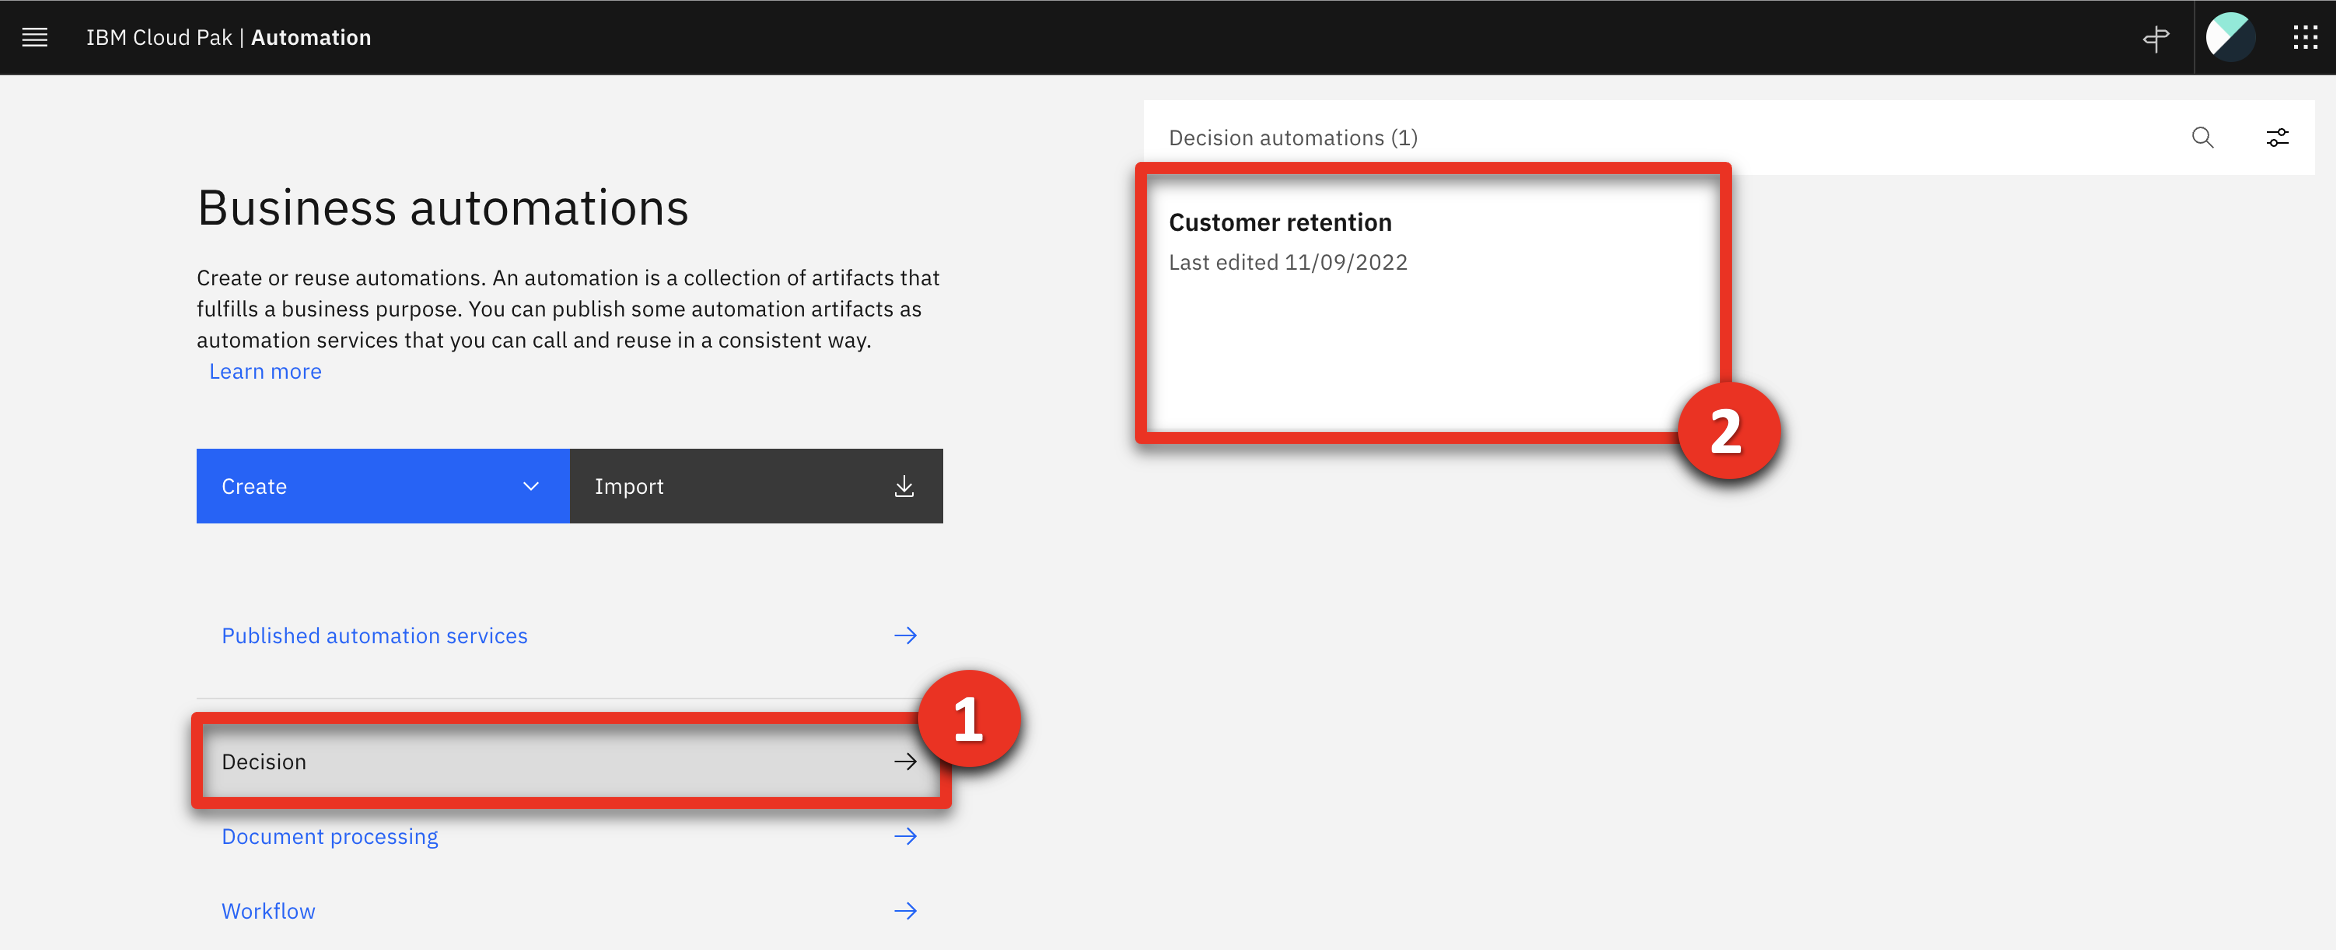
- The most recently deployed service displays. Click the three dots icon (1) and then select Publish (2).

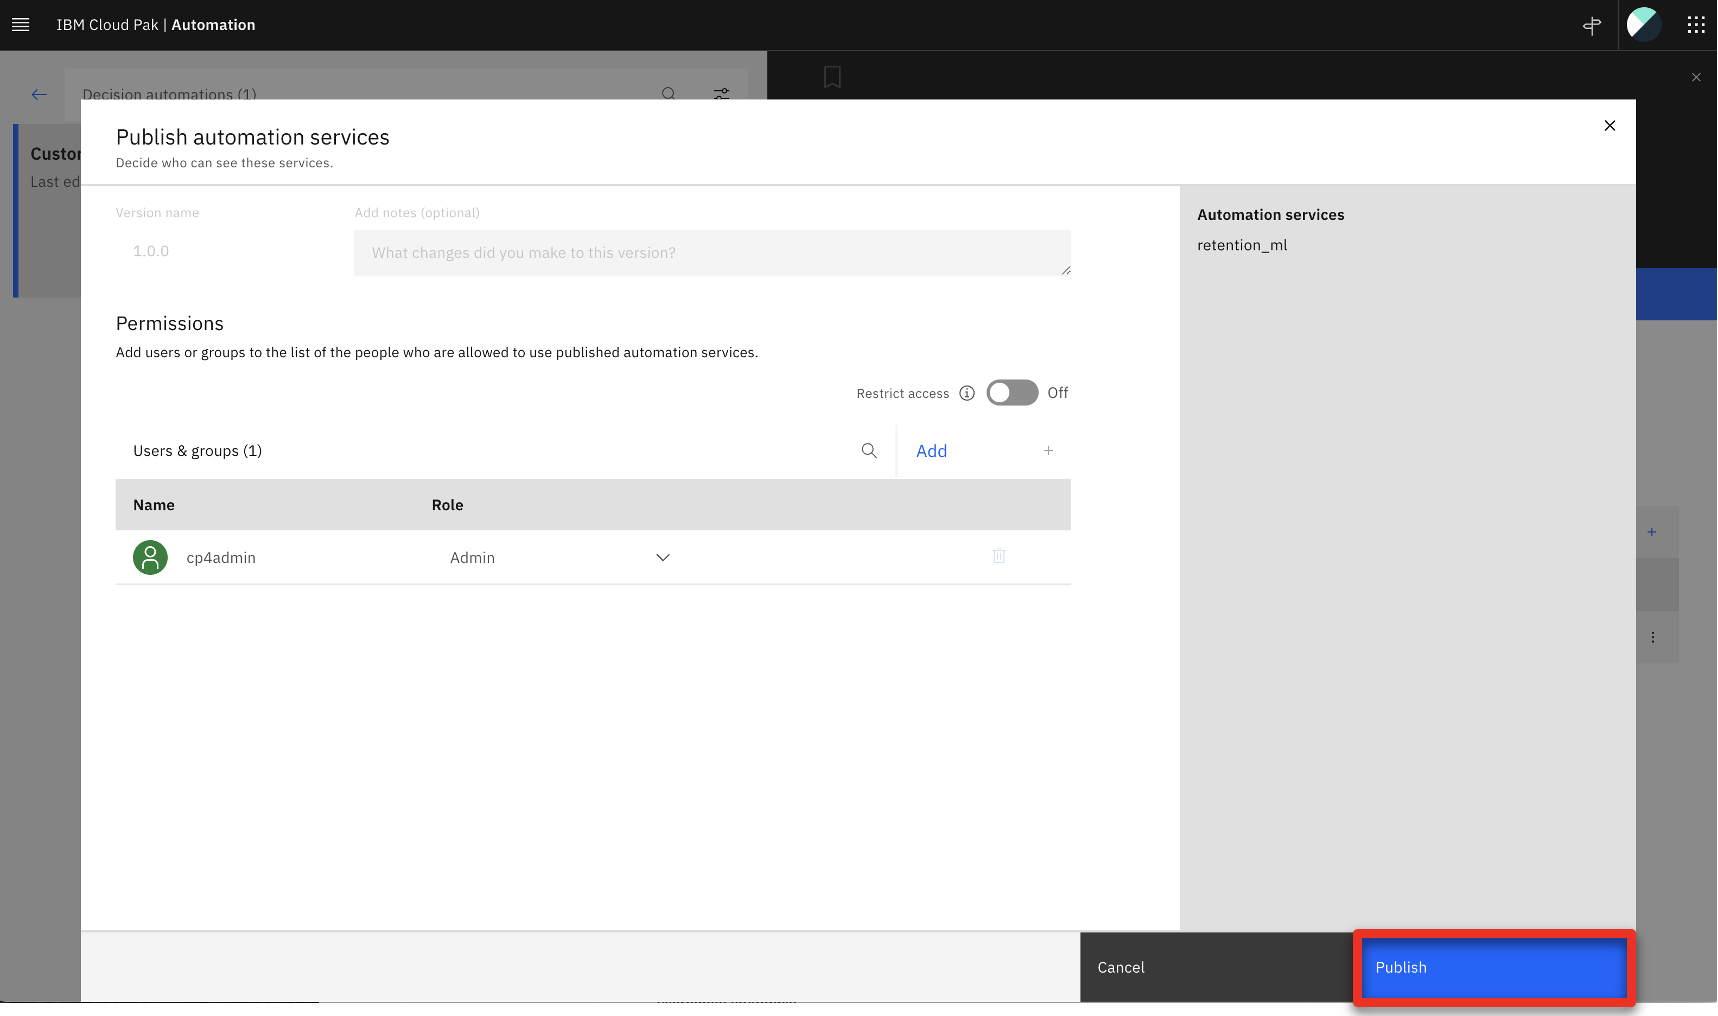
- Click Publish.
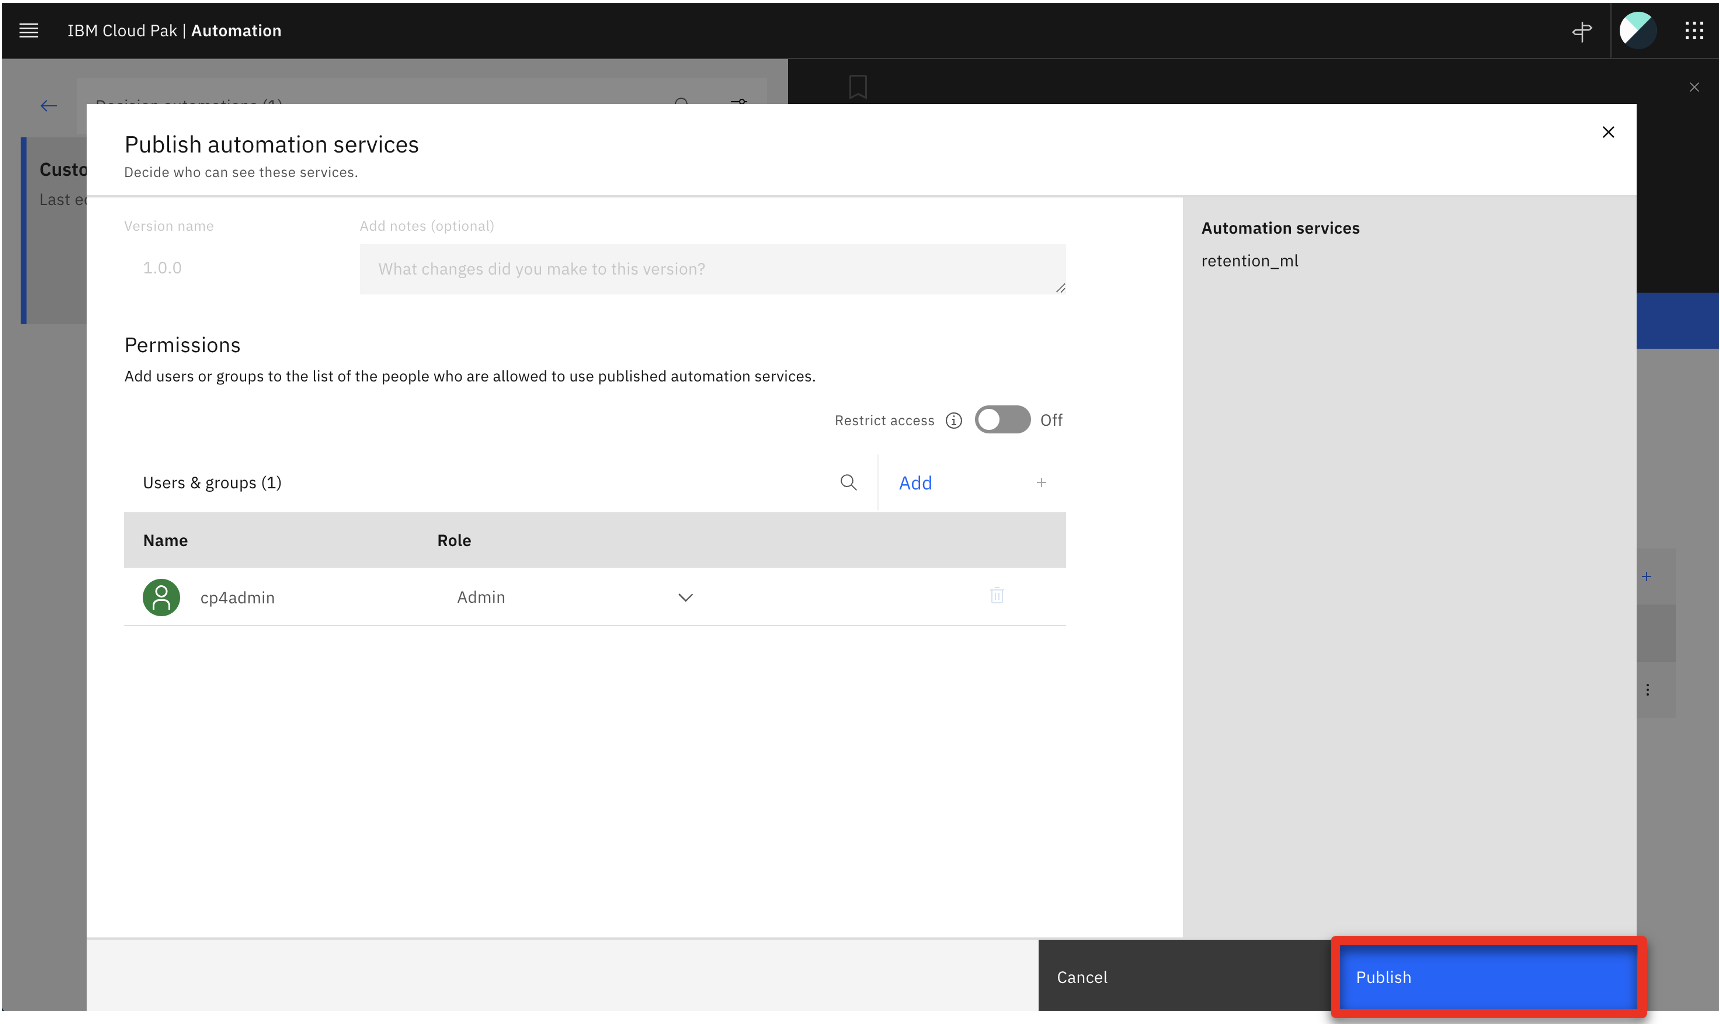
- Ensure the service appears as Published.

11 - Configure Application Designer and import the client application
Prior to performing this step, make sure you have downloaded the SkyTalk_call_center_application_23.0.2.twx archive file. This file is required to set up the ADS decision service.
-
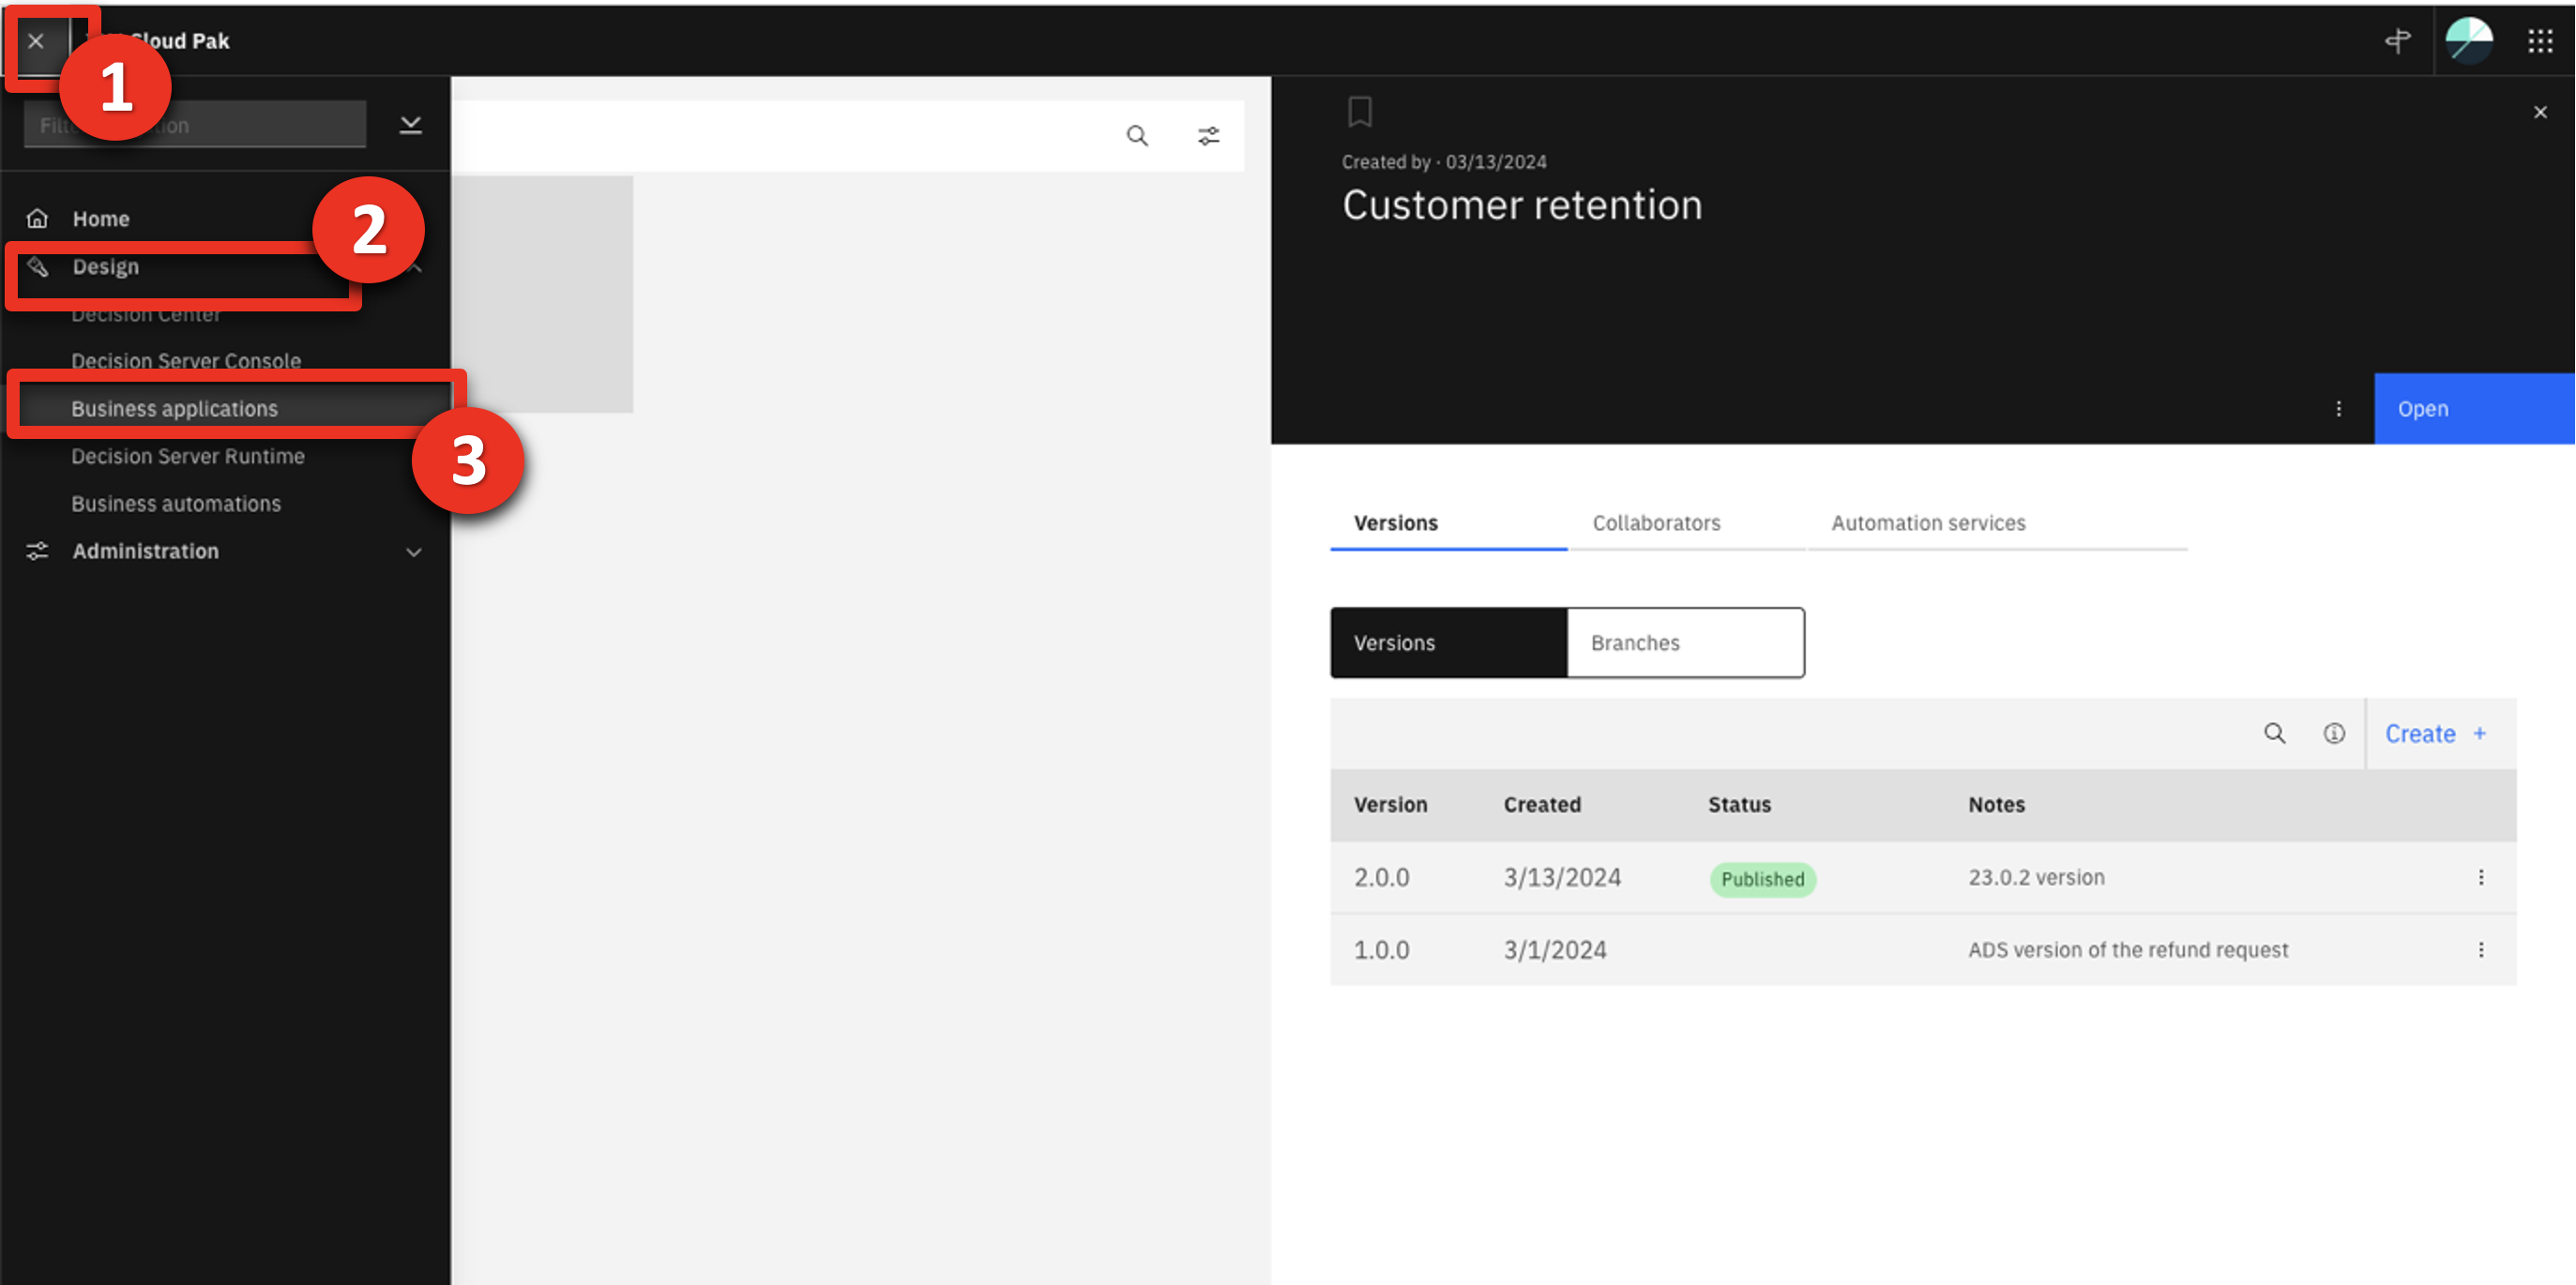
Expand the top menu (1), click Design (2), and then click Business applications (3).
-
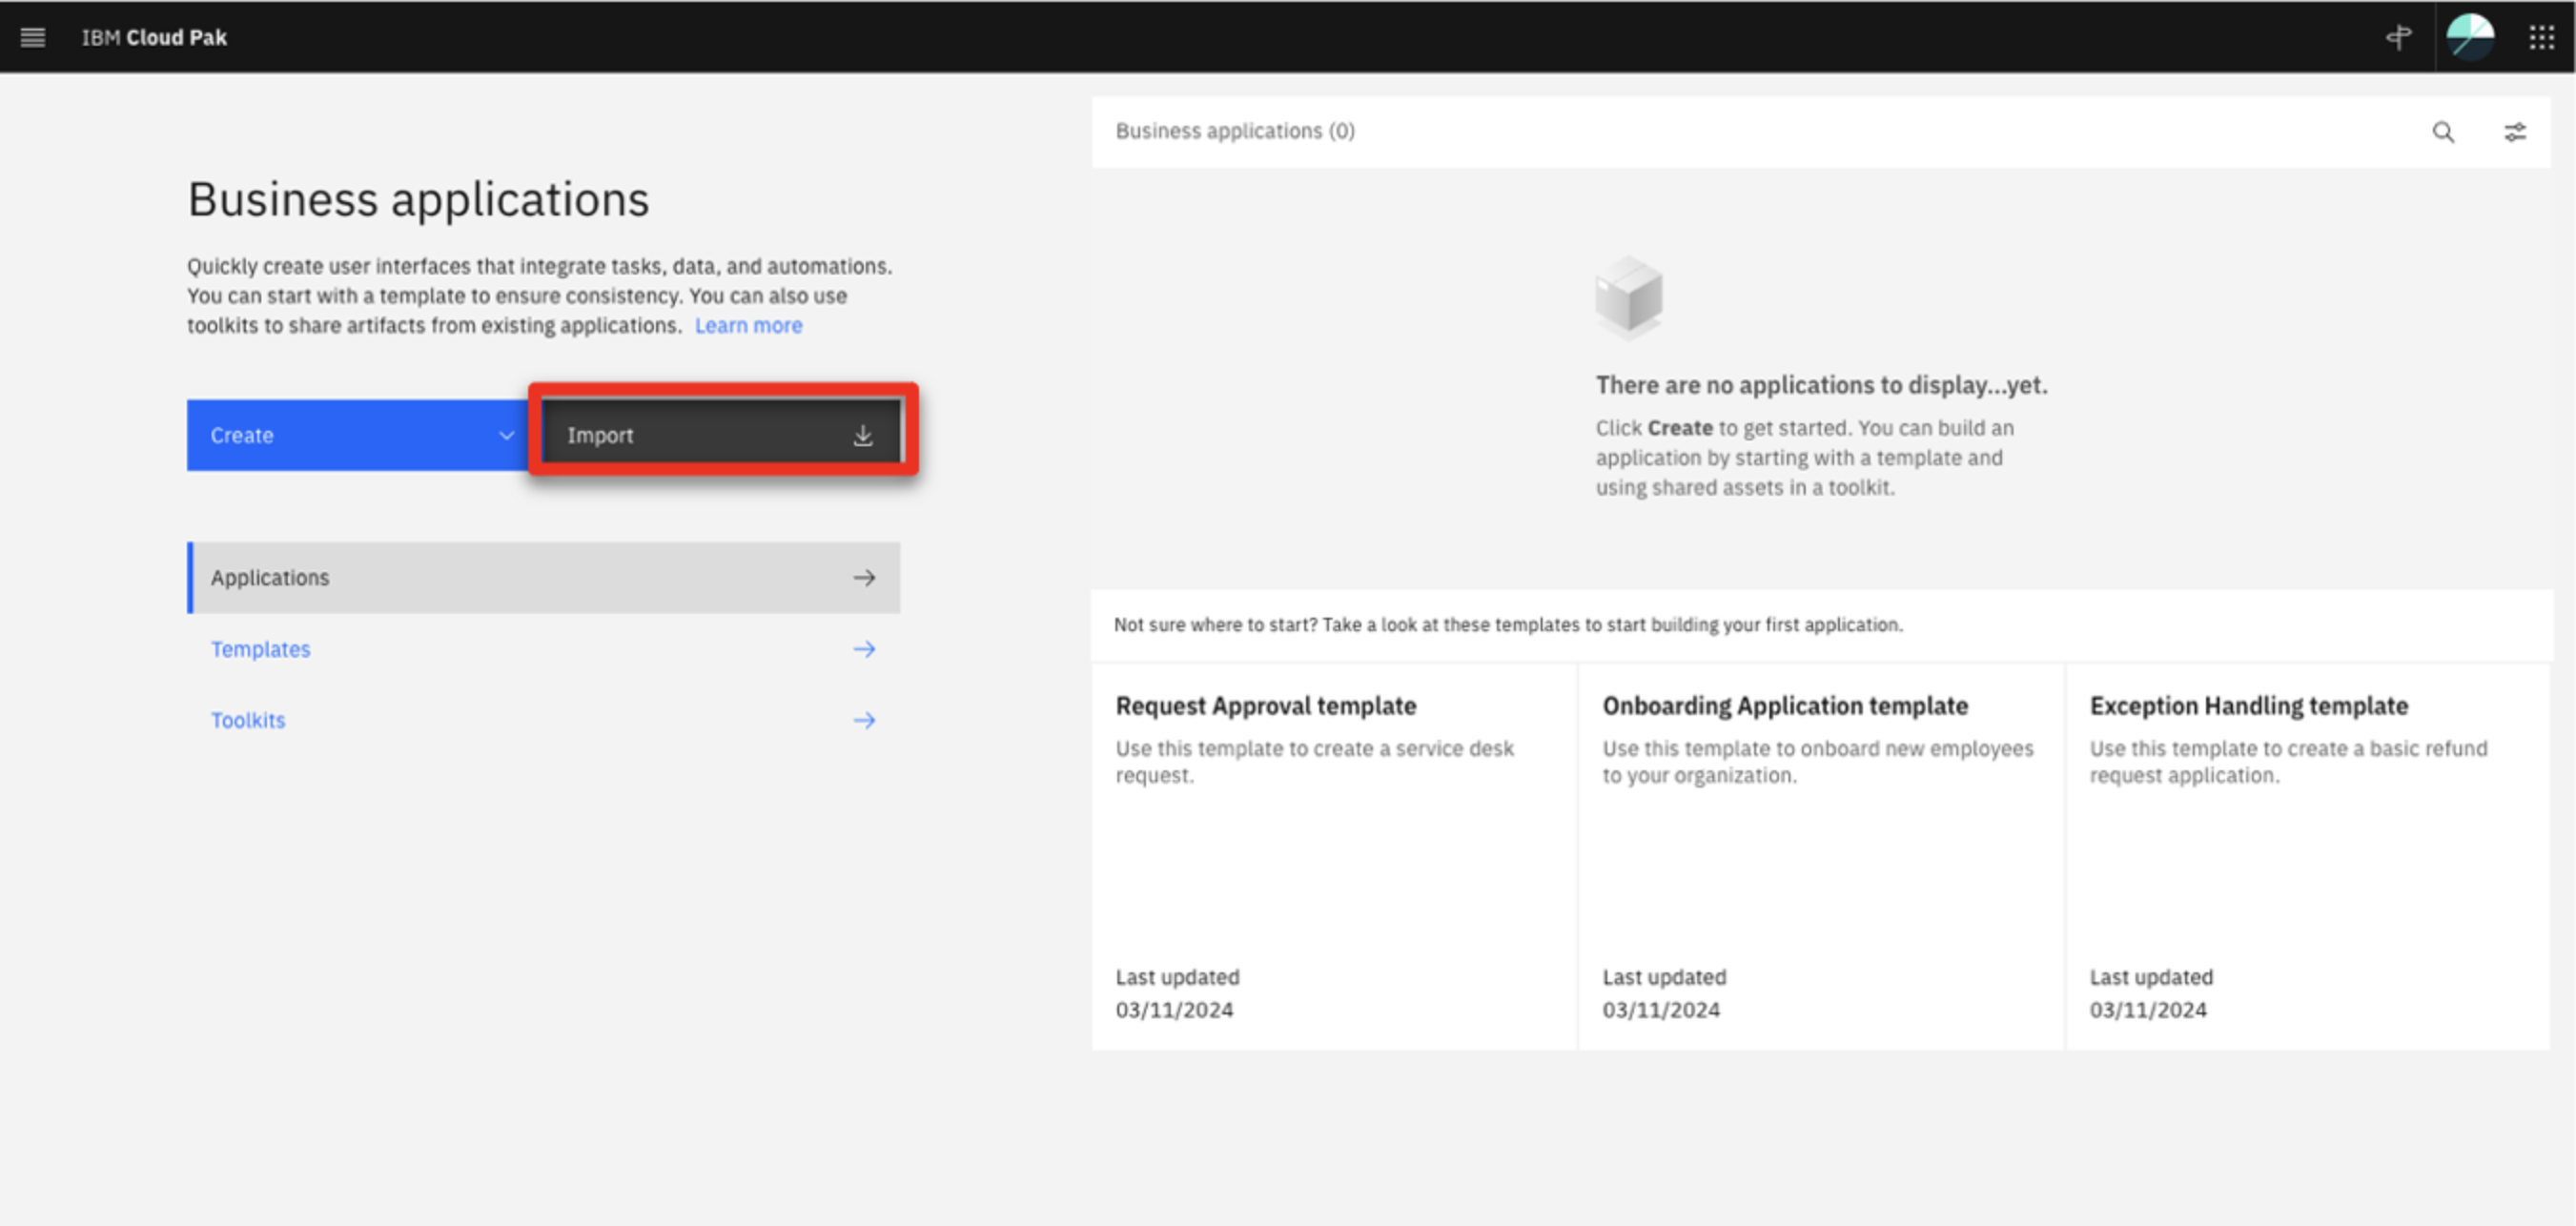
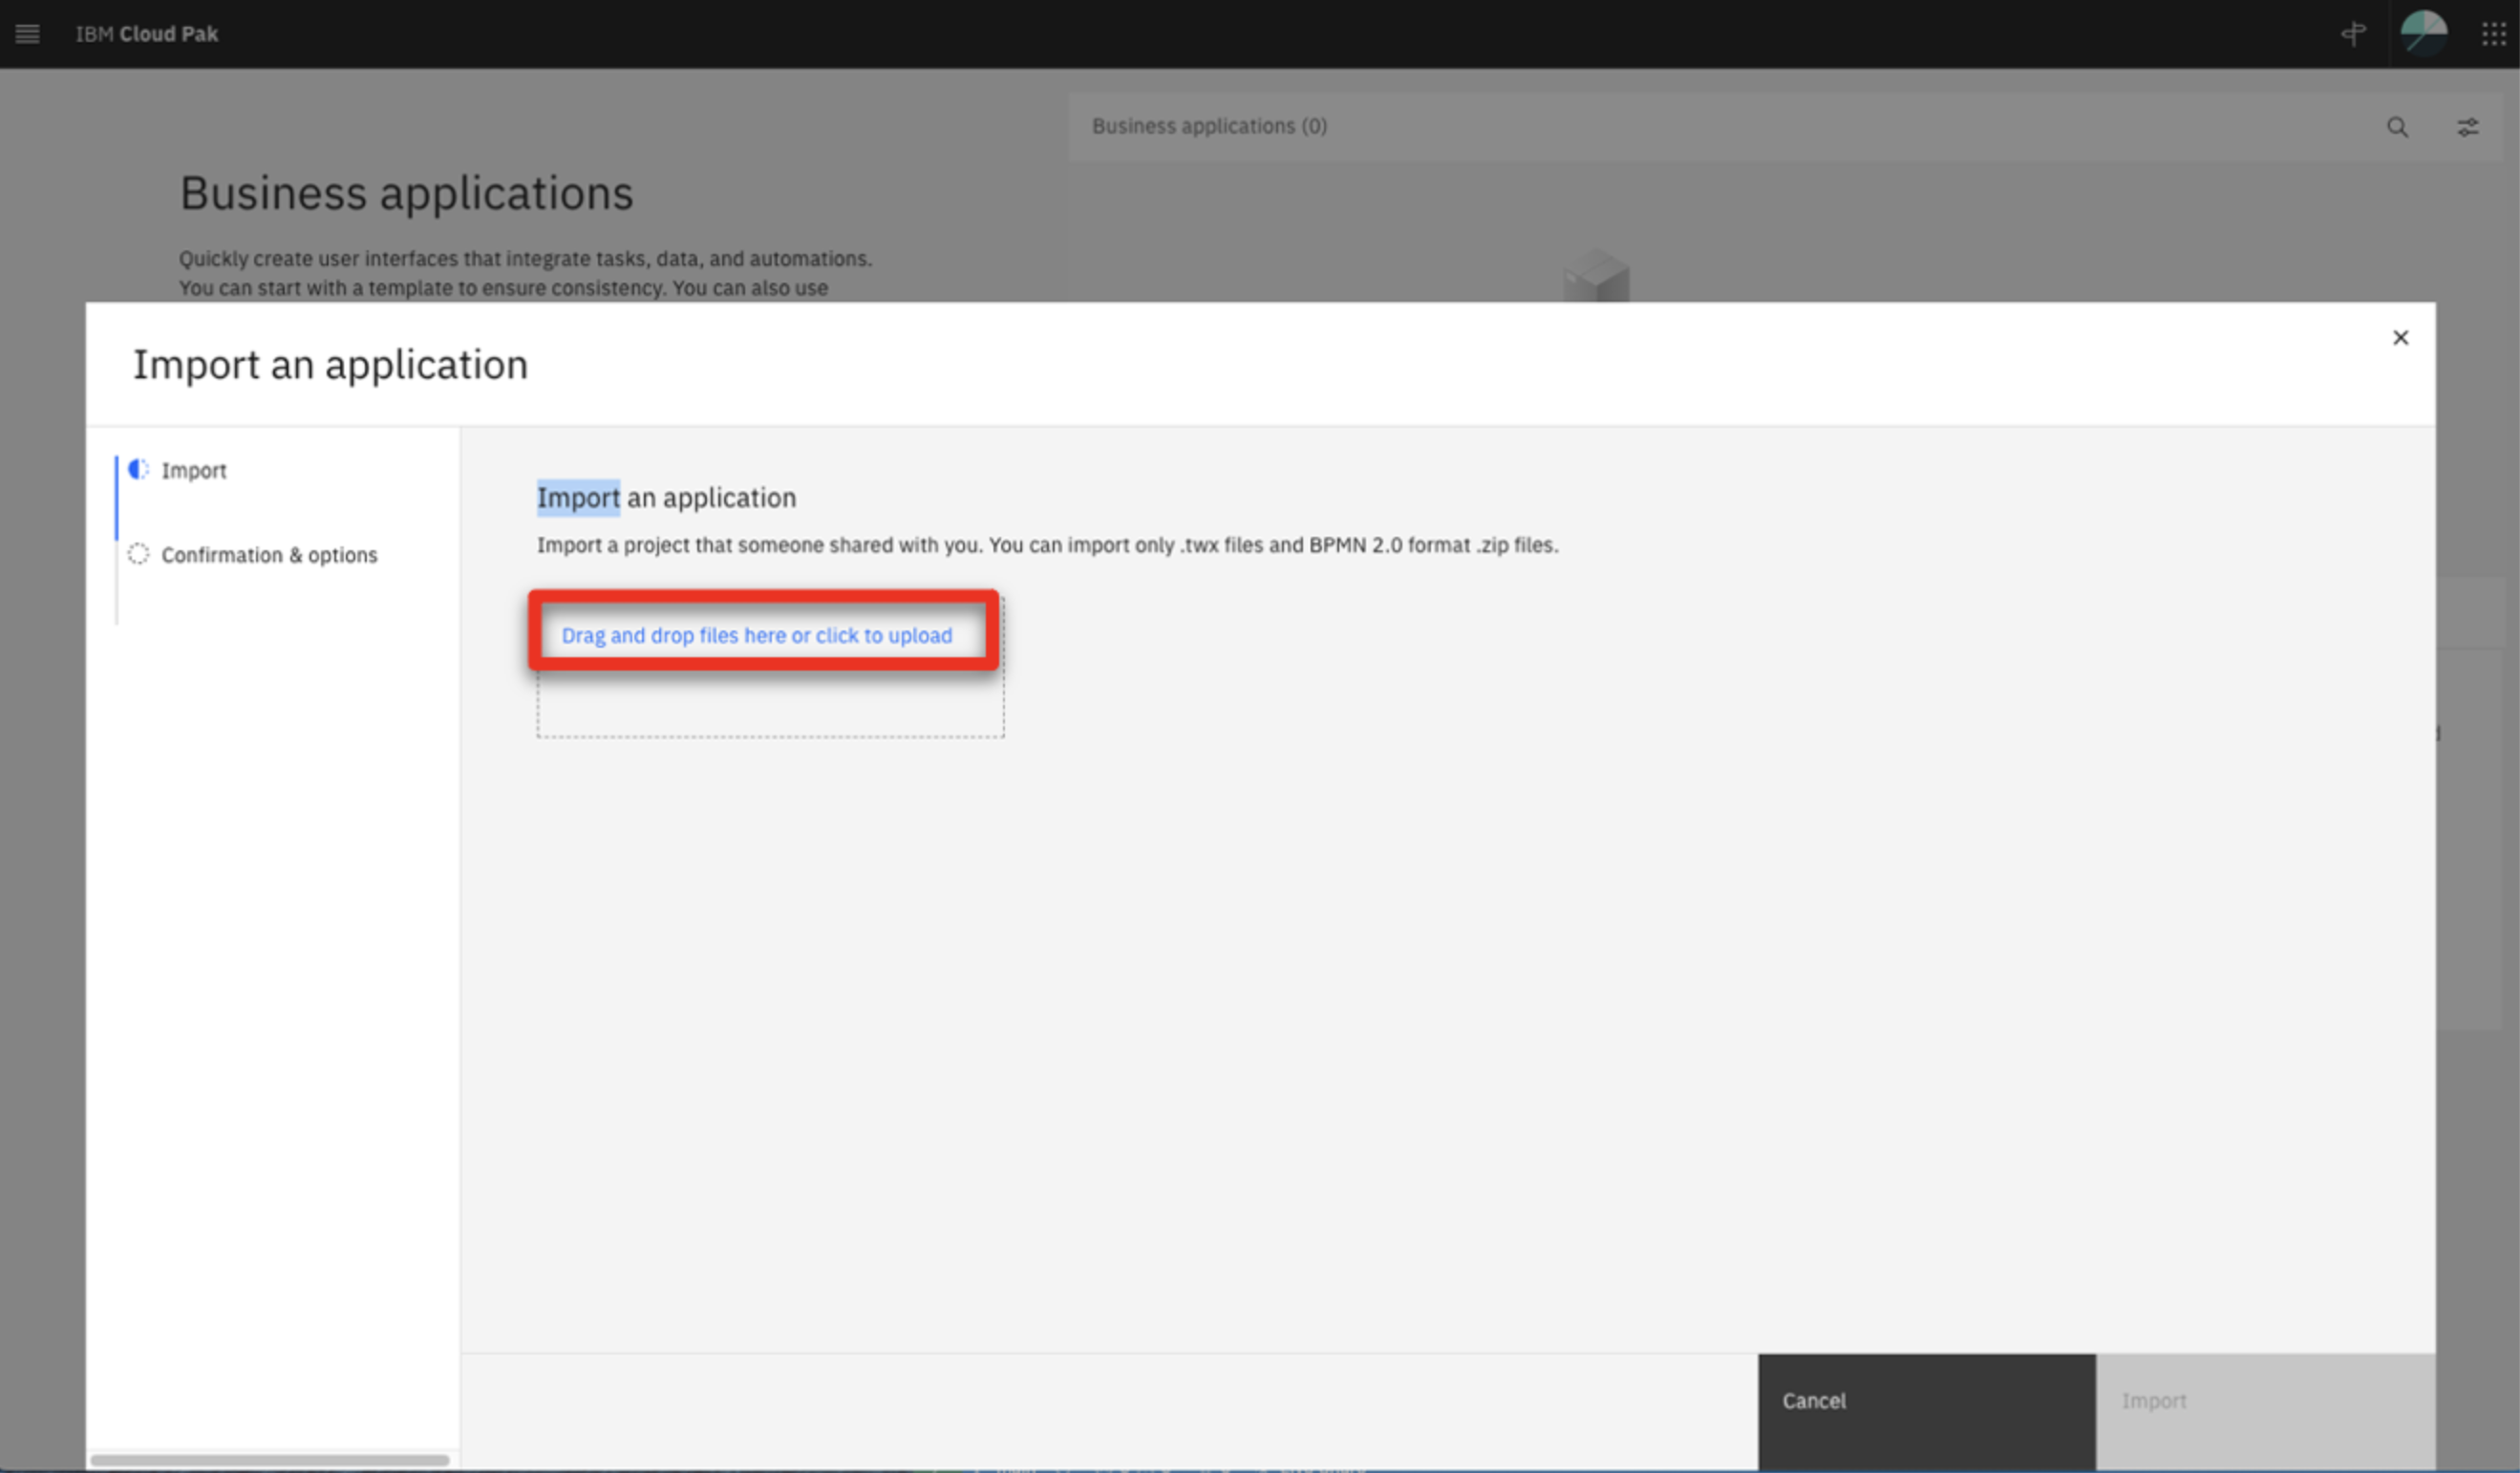
Click Import.
-
Click the upload link.
-
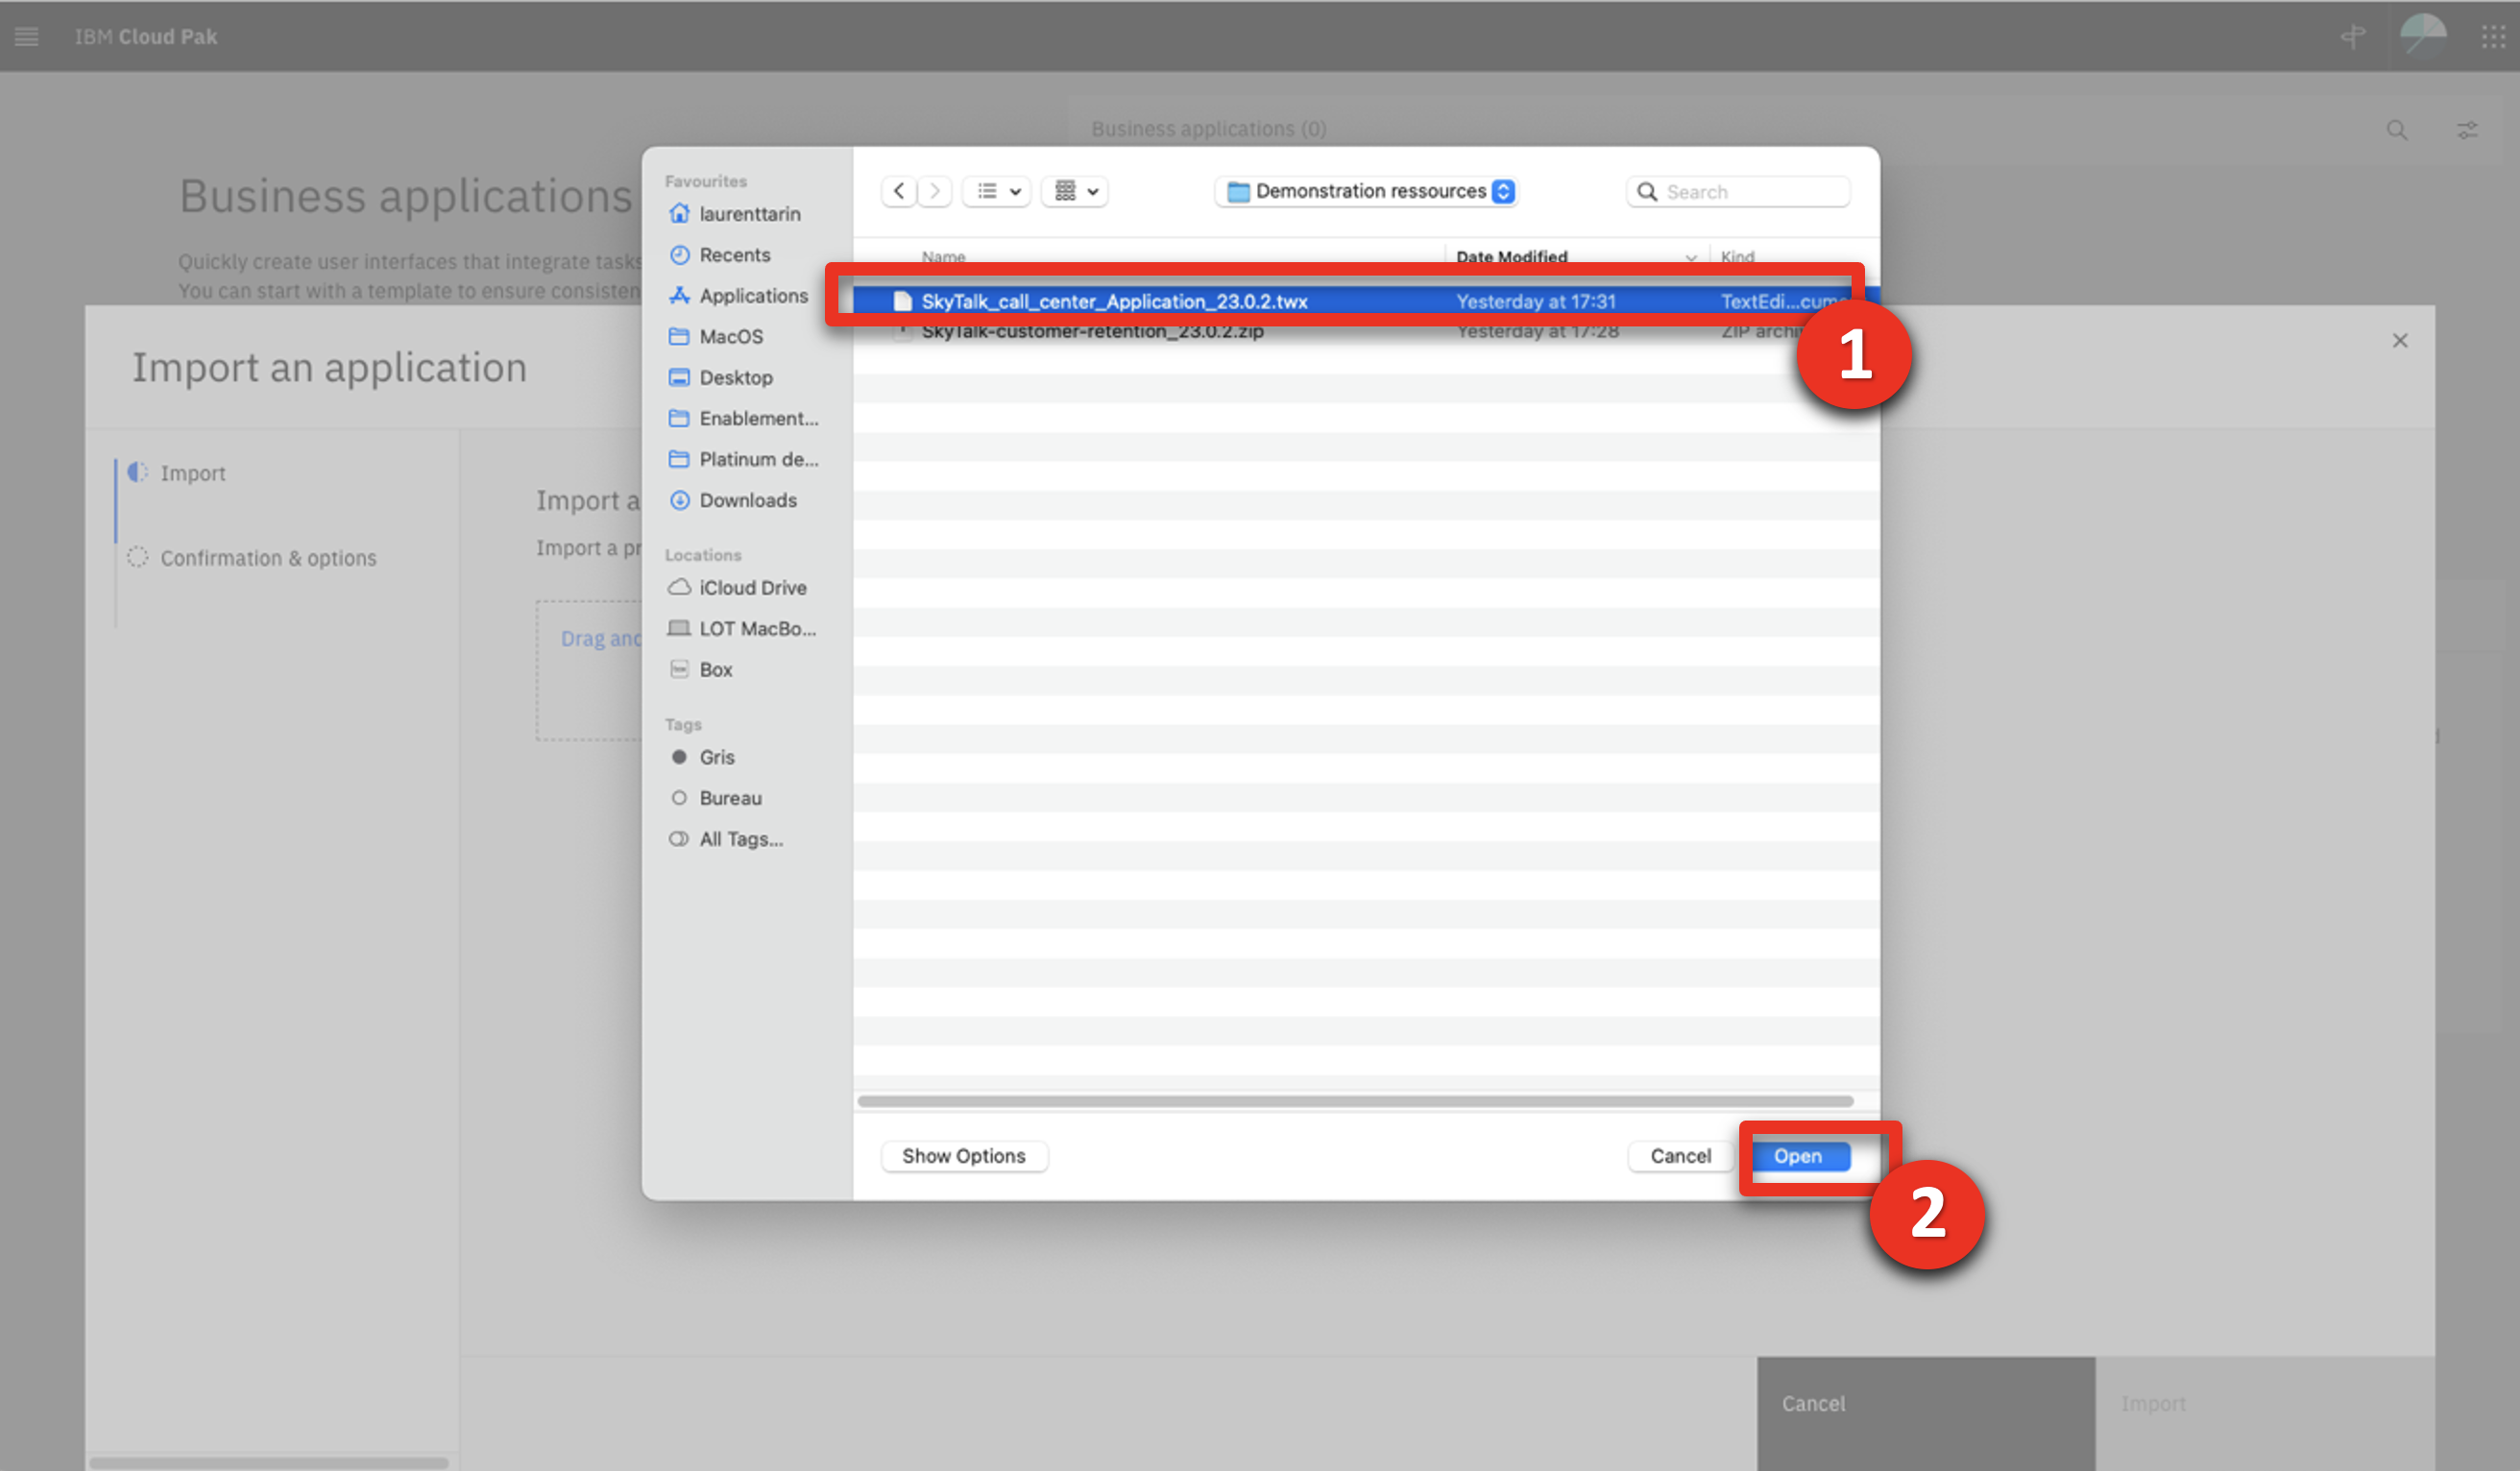
Select the SkyTalk_call_center_application_23.0.2.twx file (1) and then click Open (2).
-
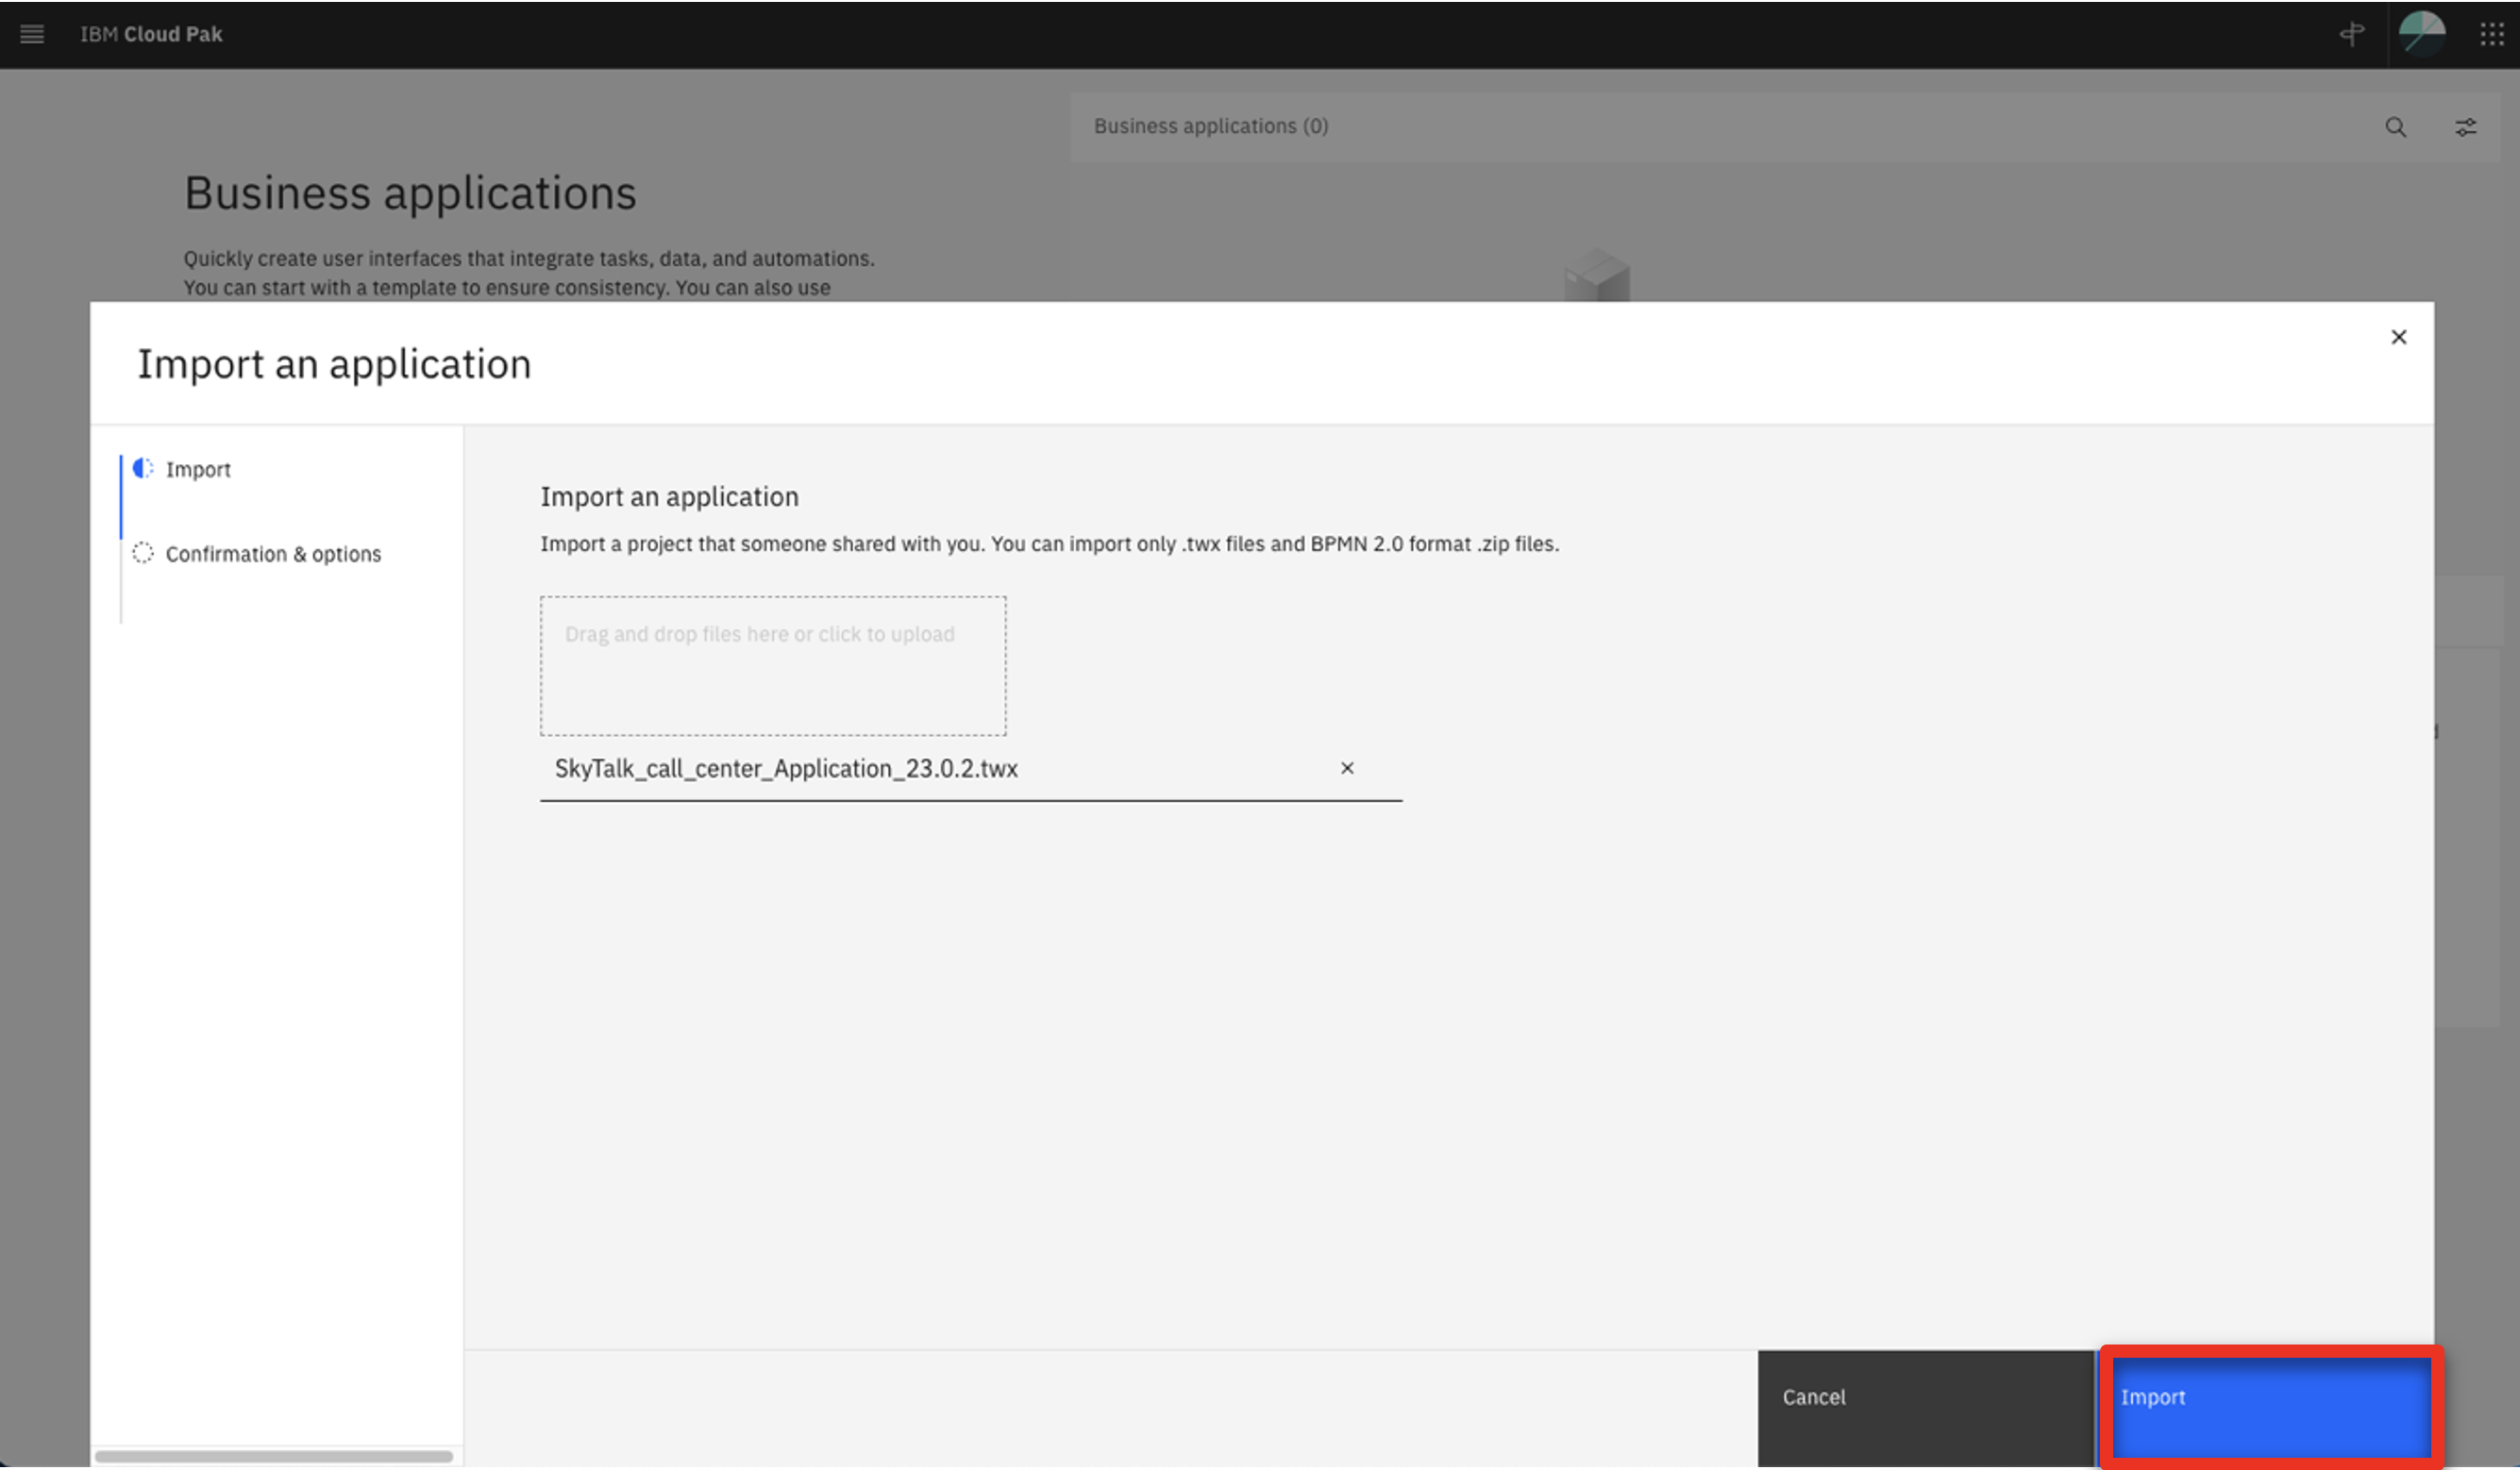
Click Import.
-
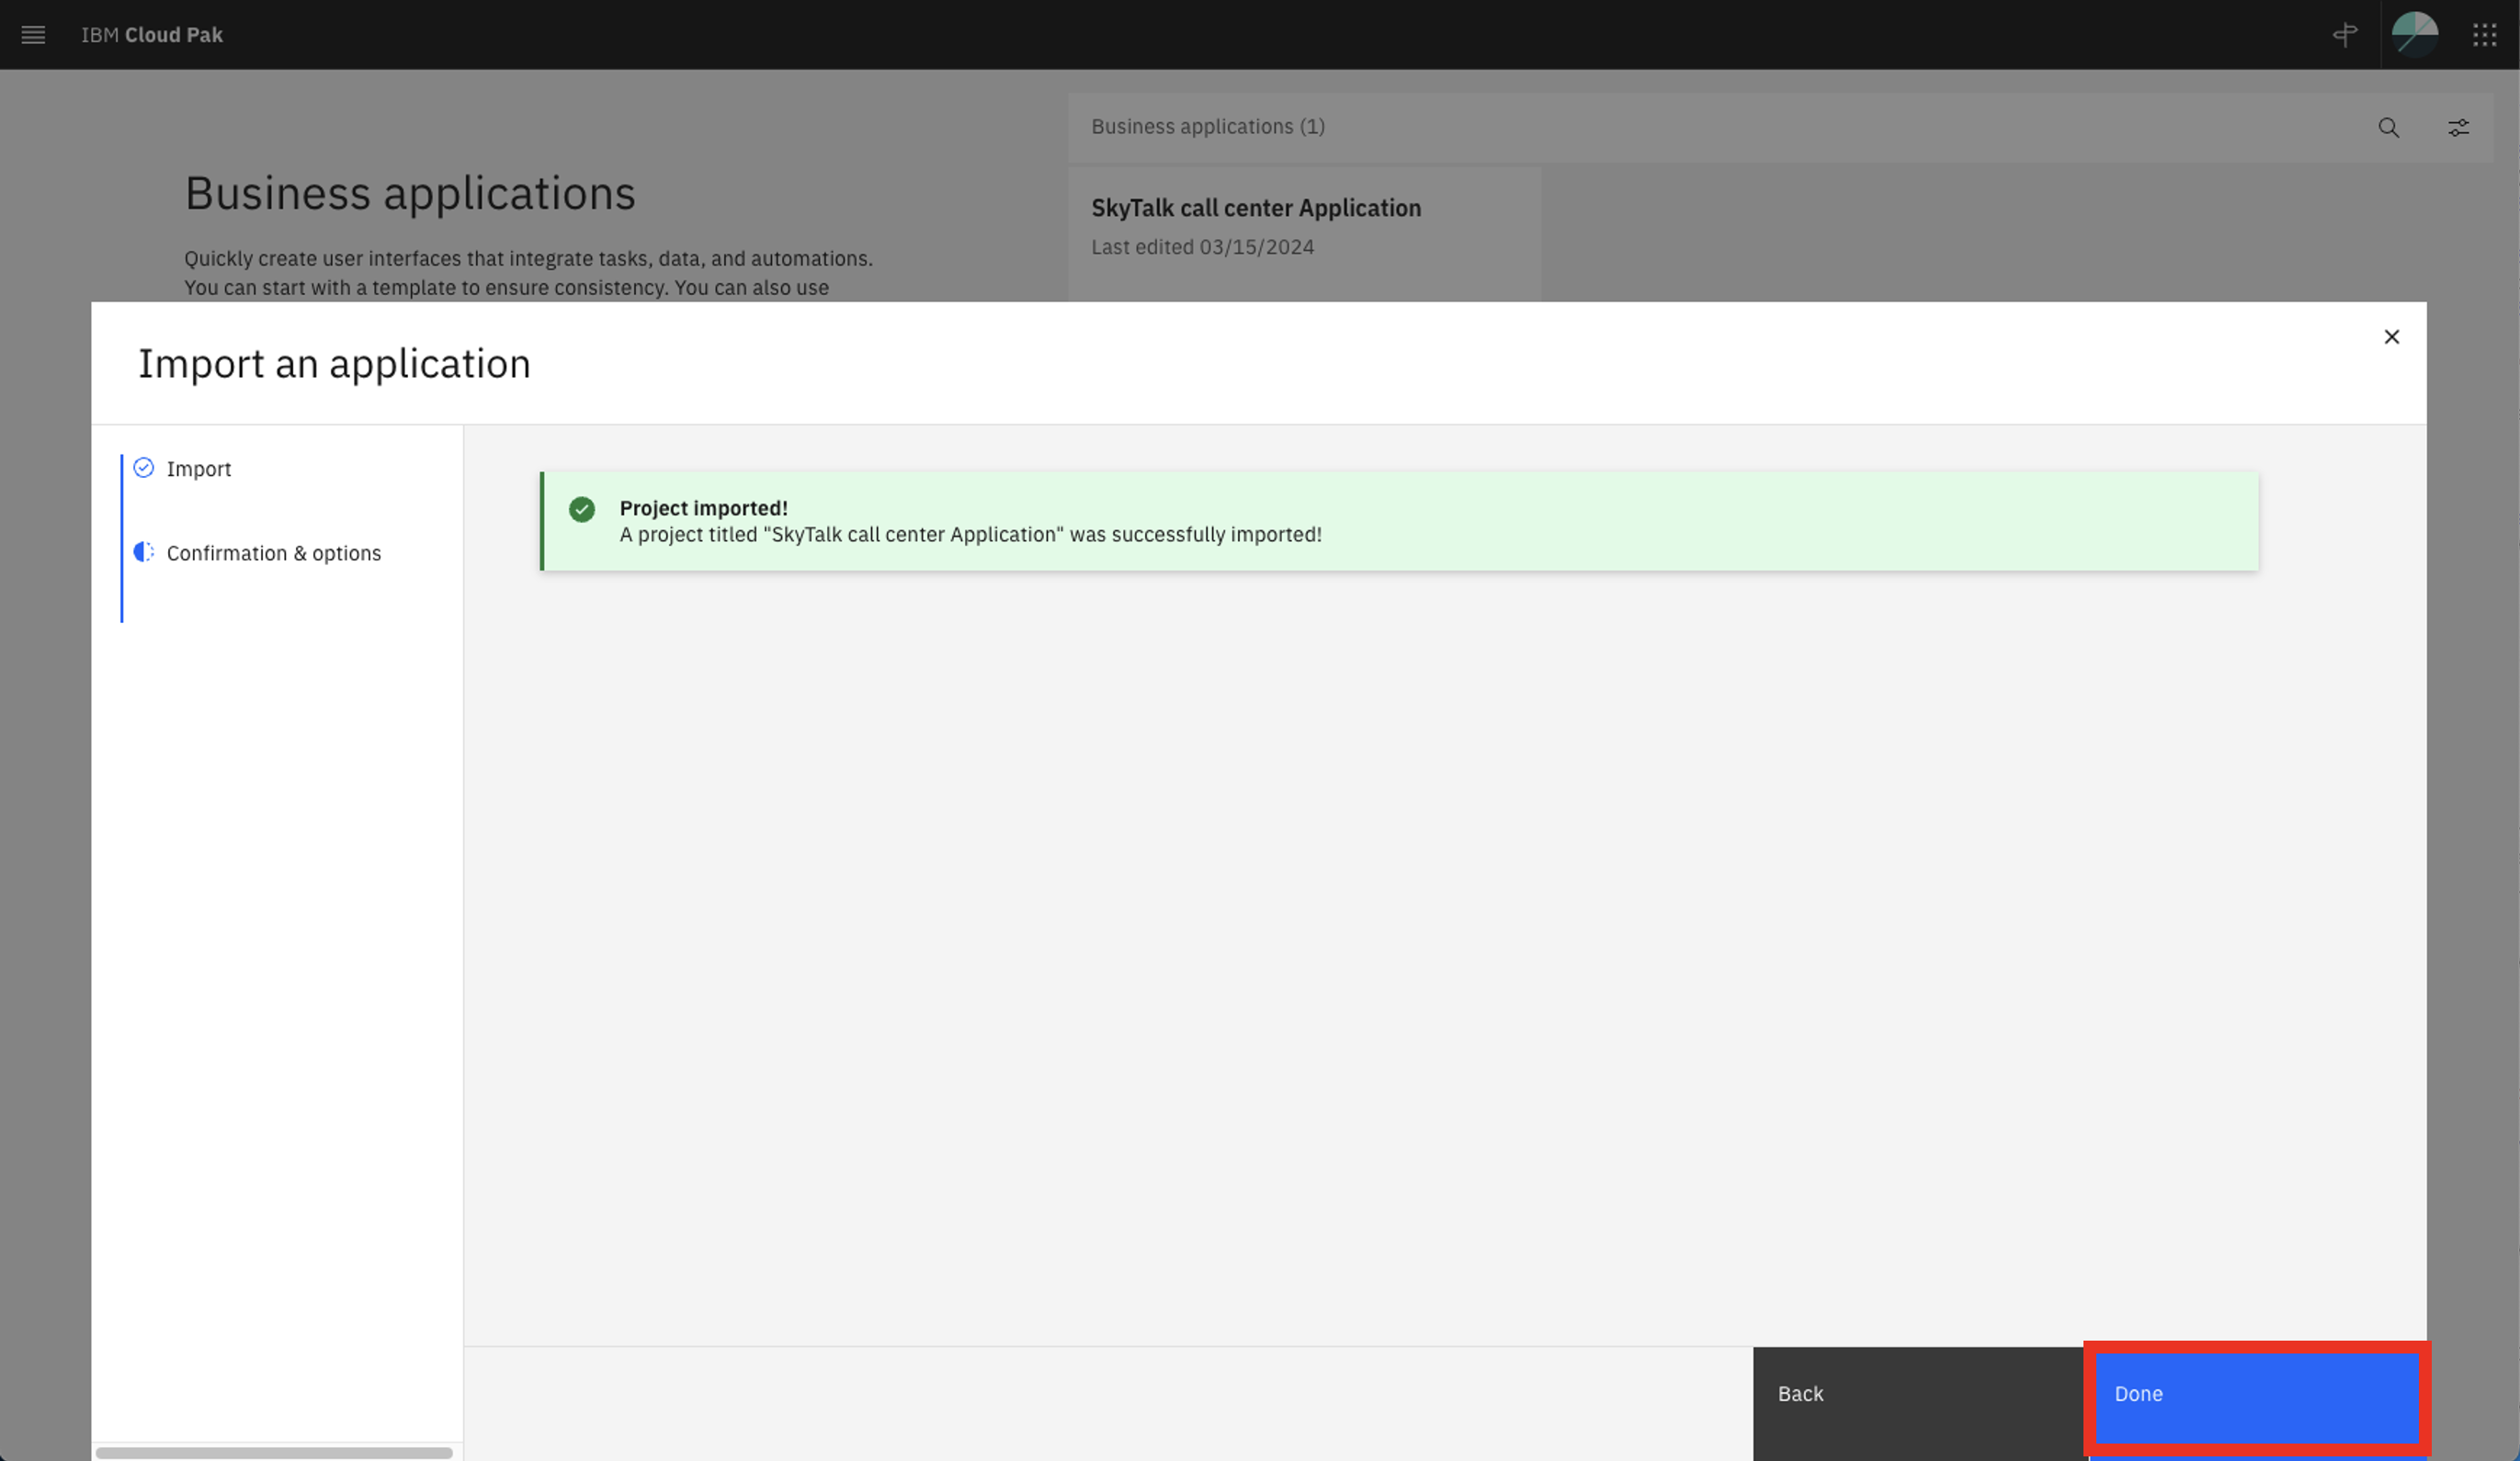
Click Done.
-
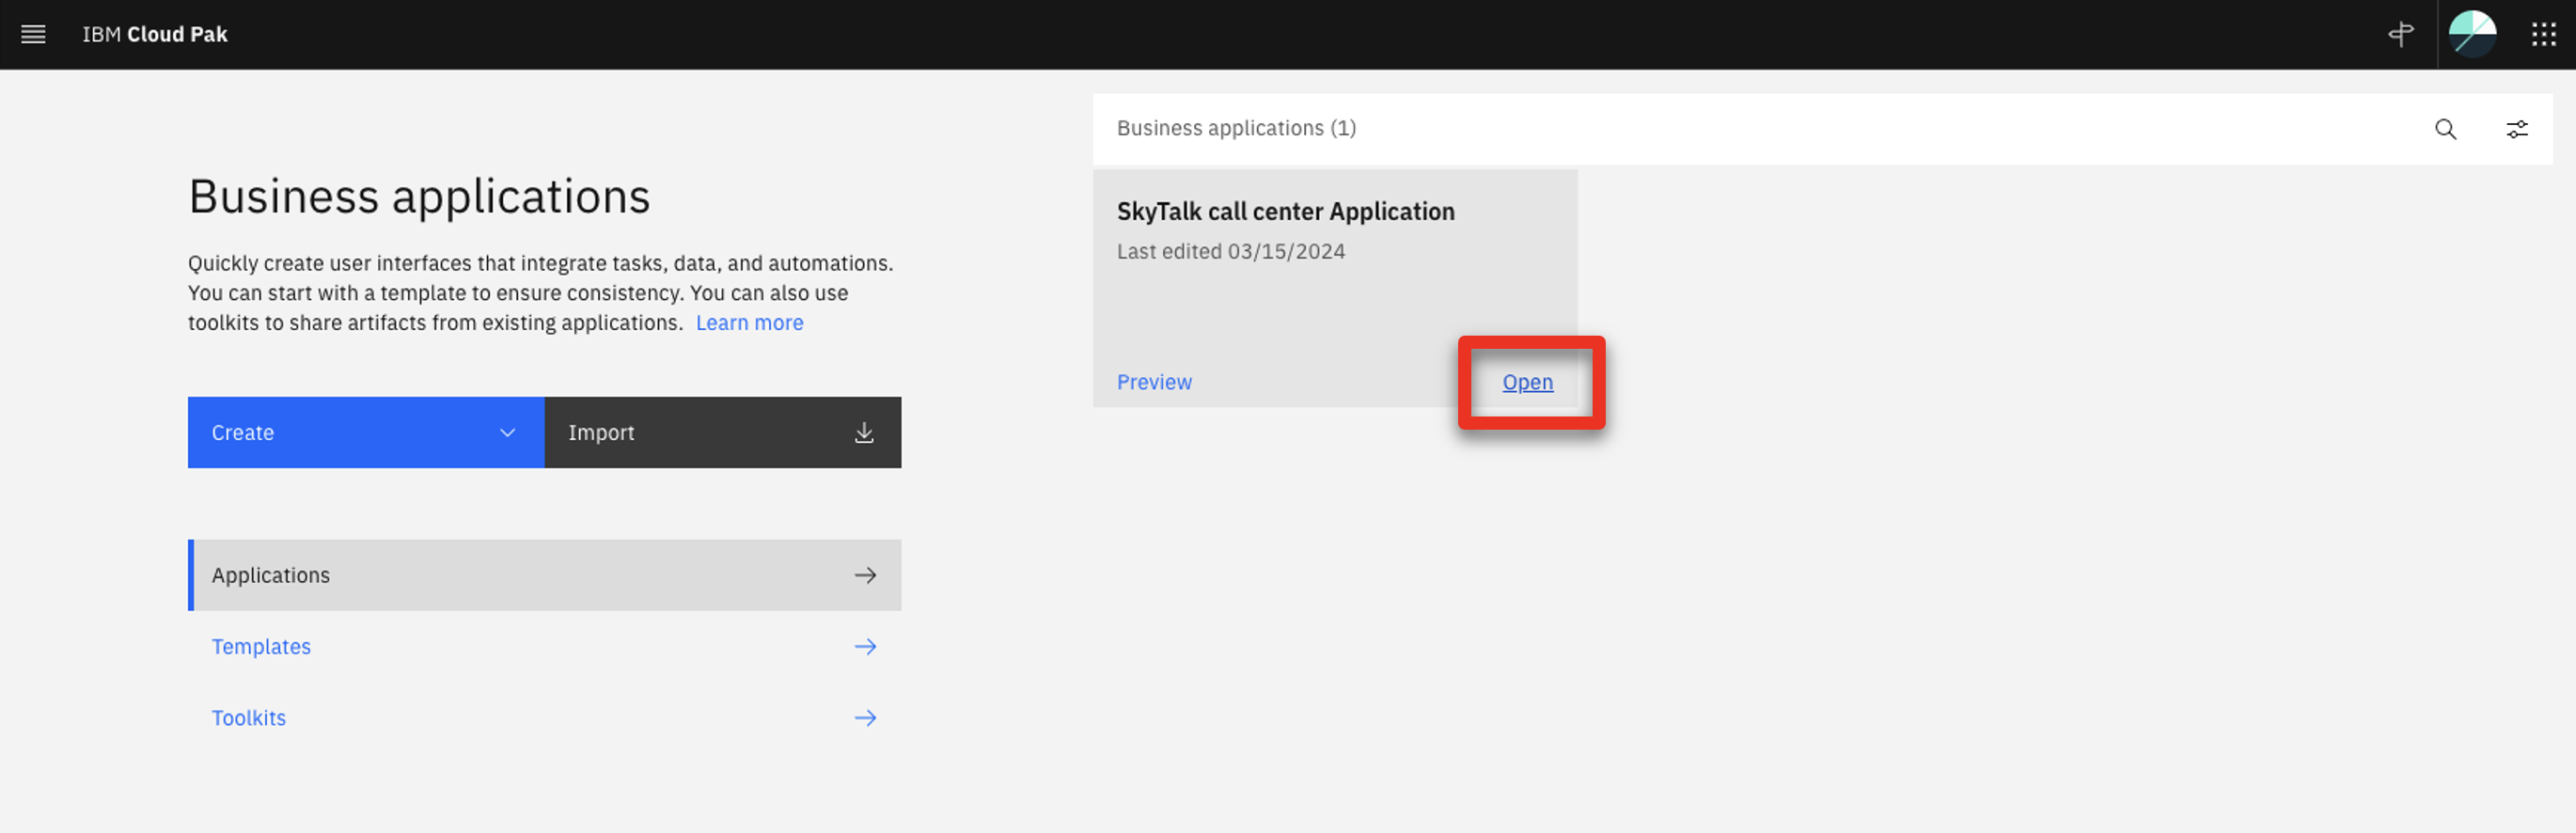
After the import, hover the mouse over the SkyTalk call center Application tile and click Open.
-
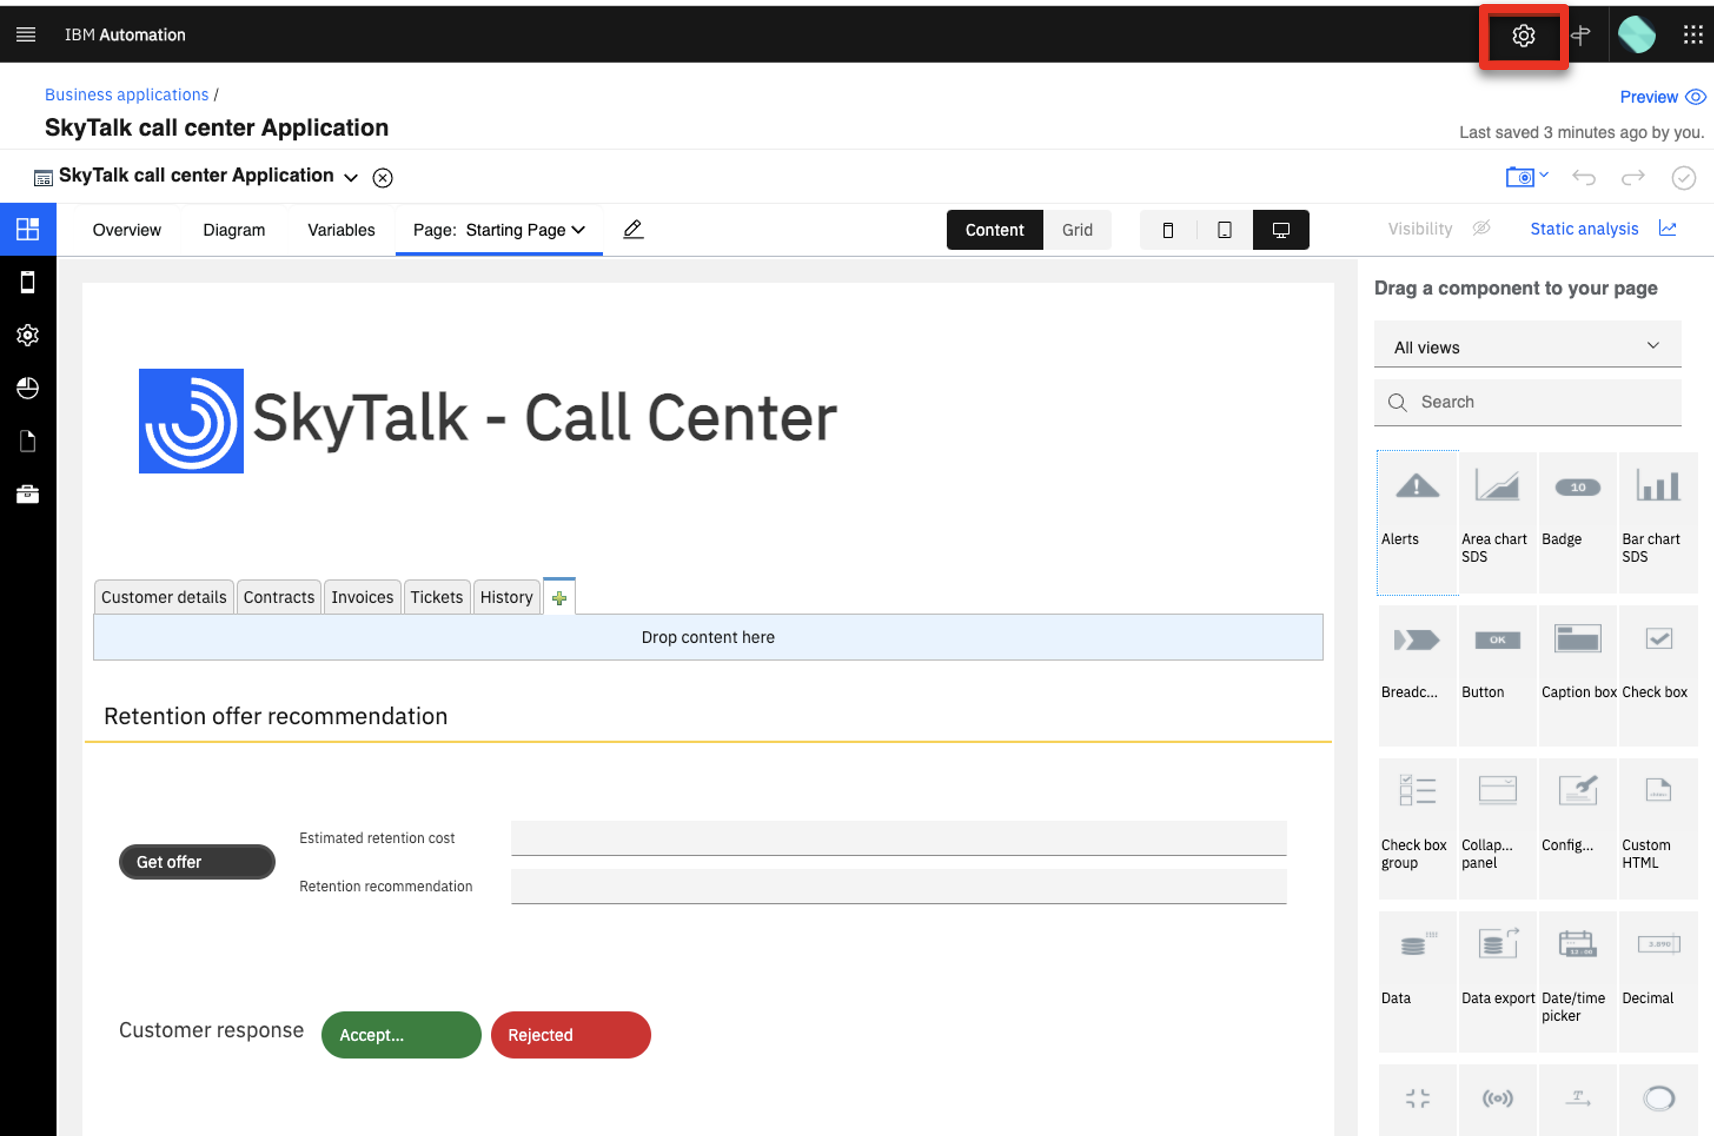
Click the gear icon.
-
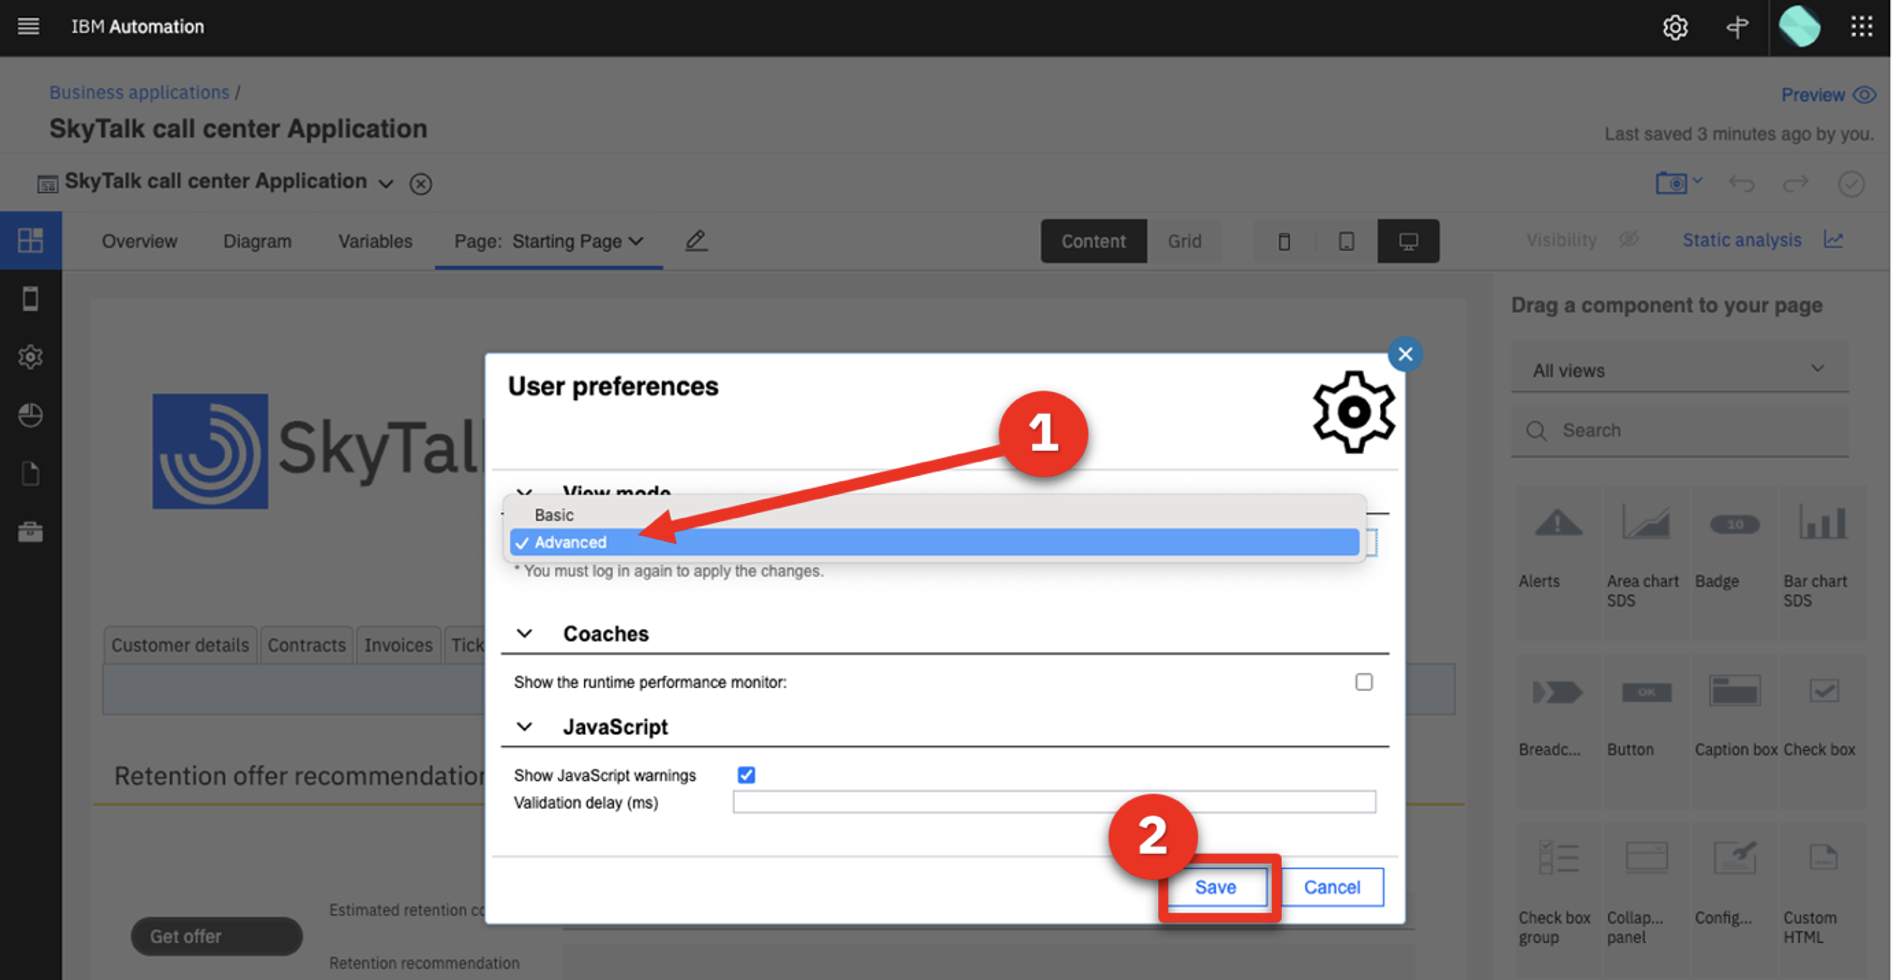
Set the View mode (1) to Advanced. Click Save (2).
-
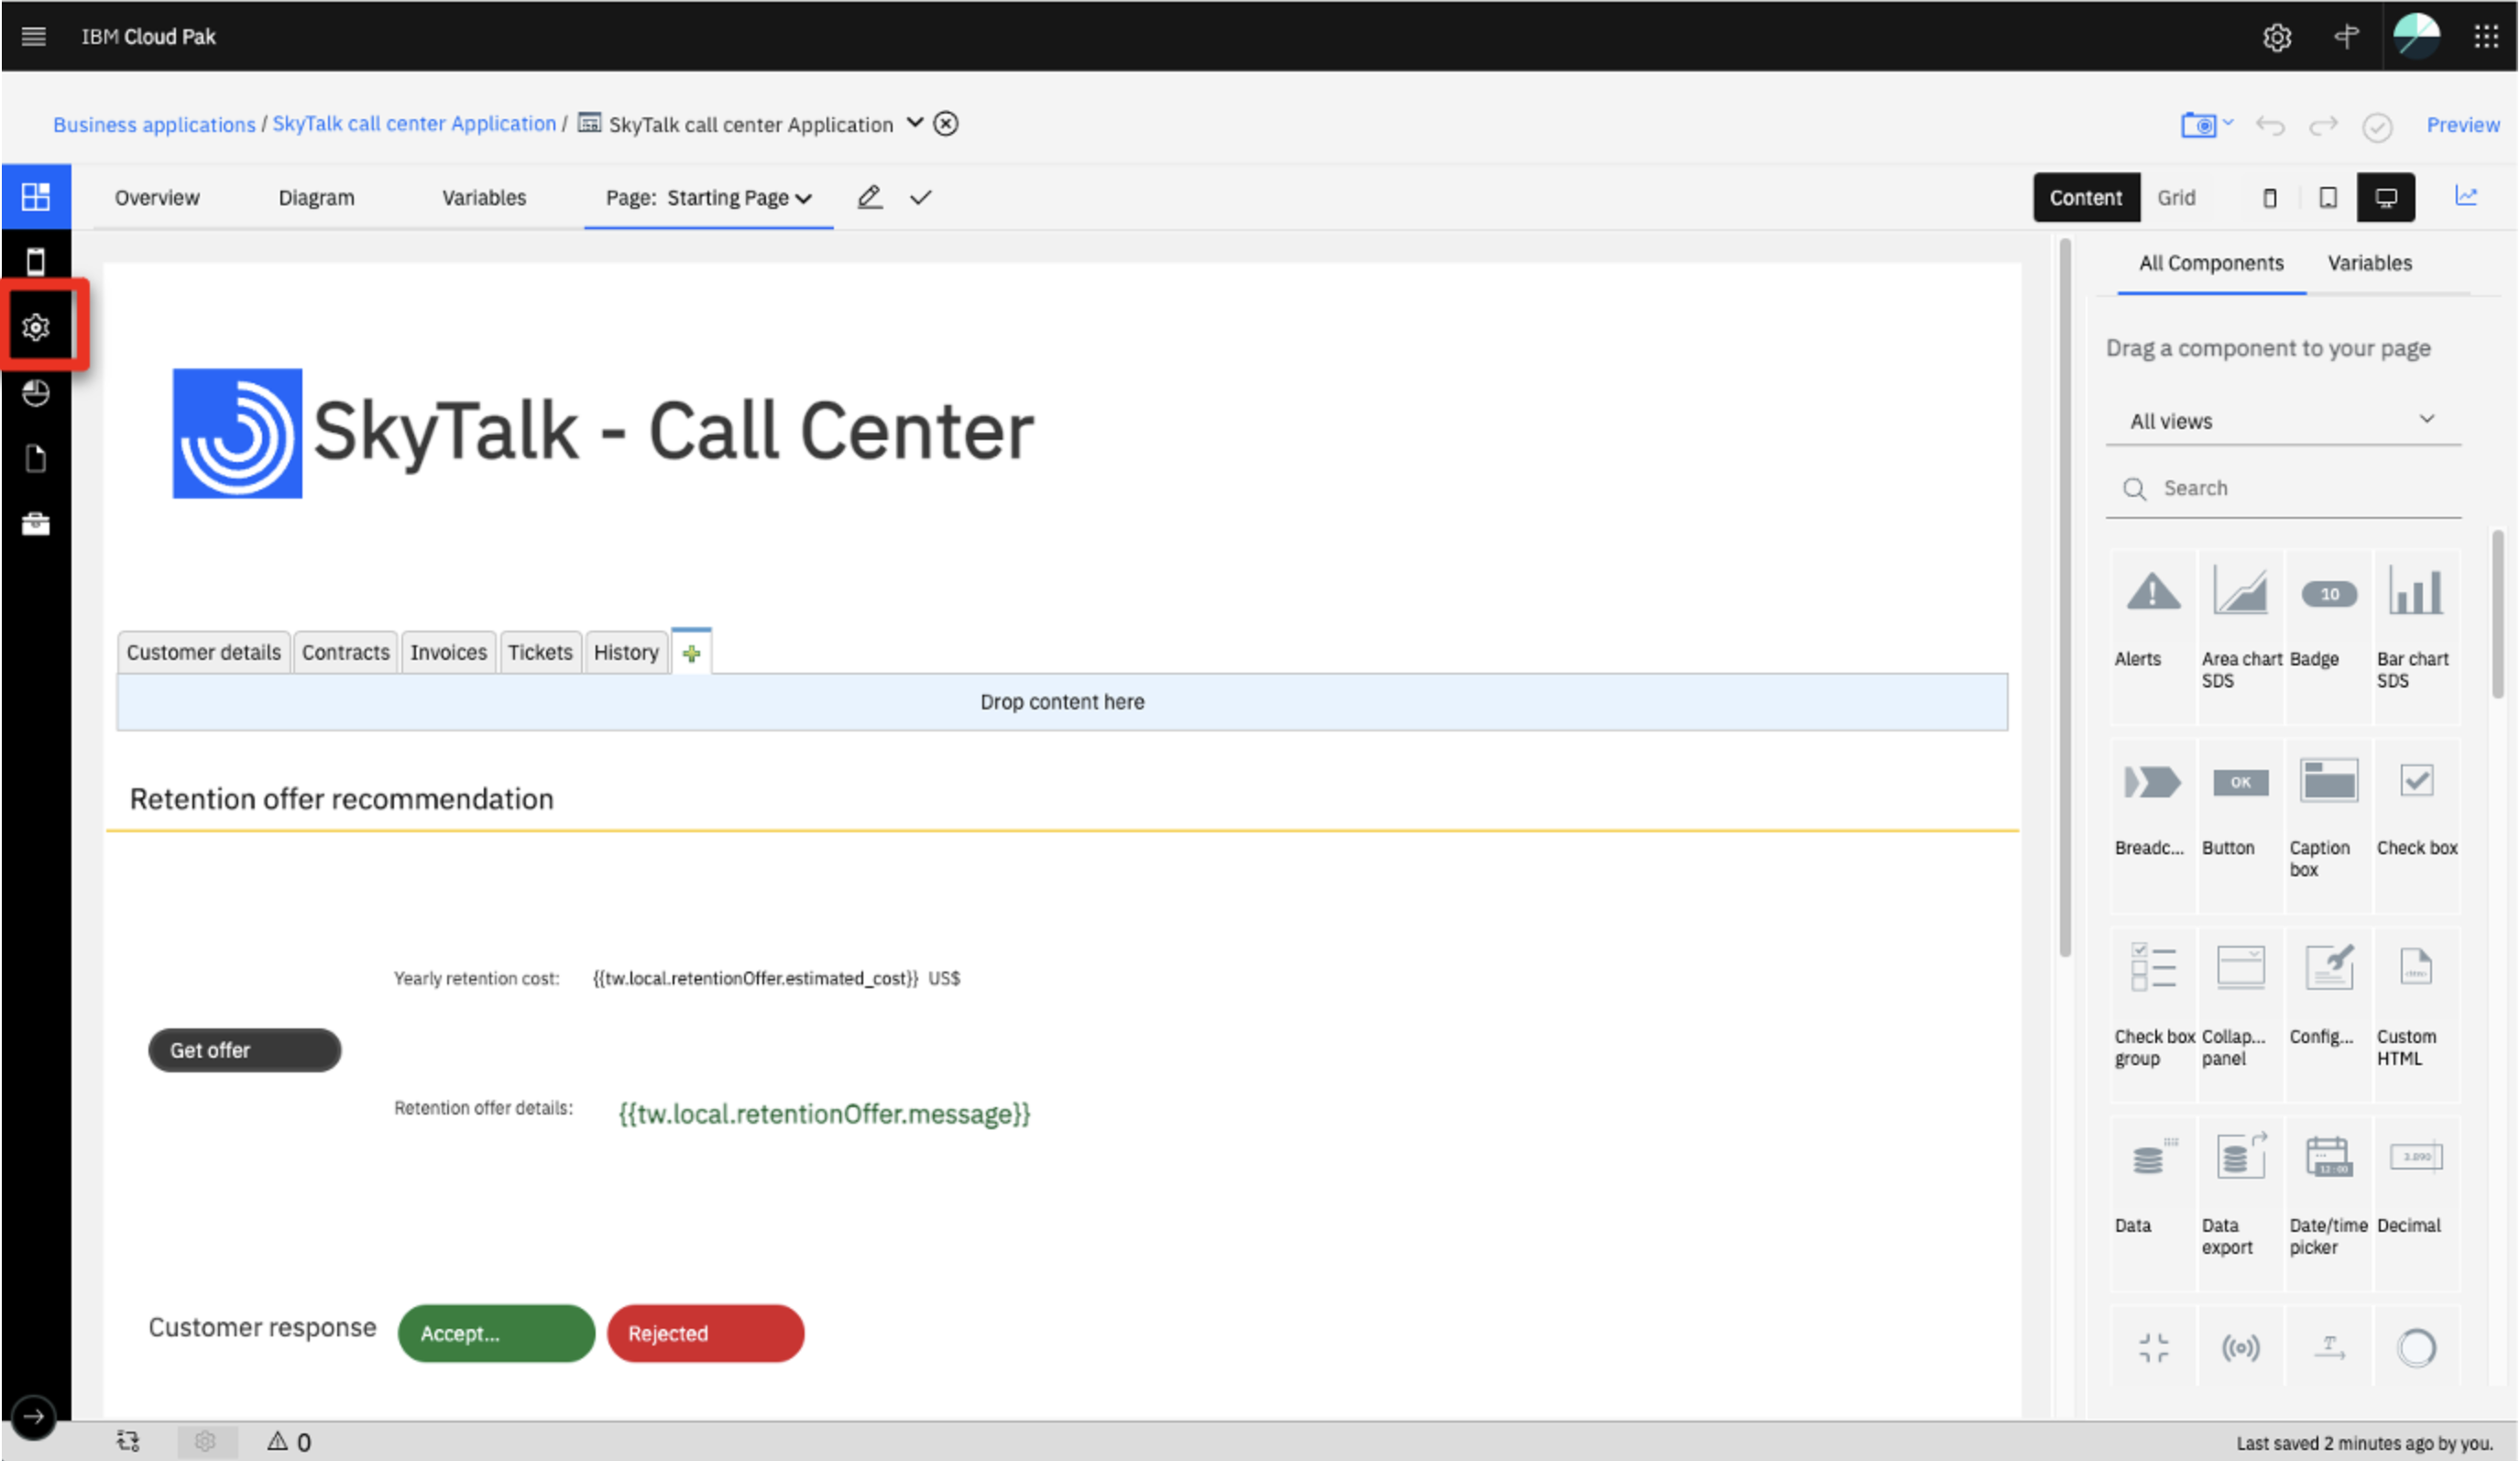
Refresh the page and ensure the Overview, Diagram, and Variables tabs are visible.

-
Click the gear icon on the left-hand side ribbon.
-
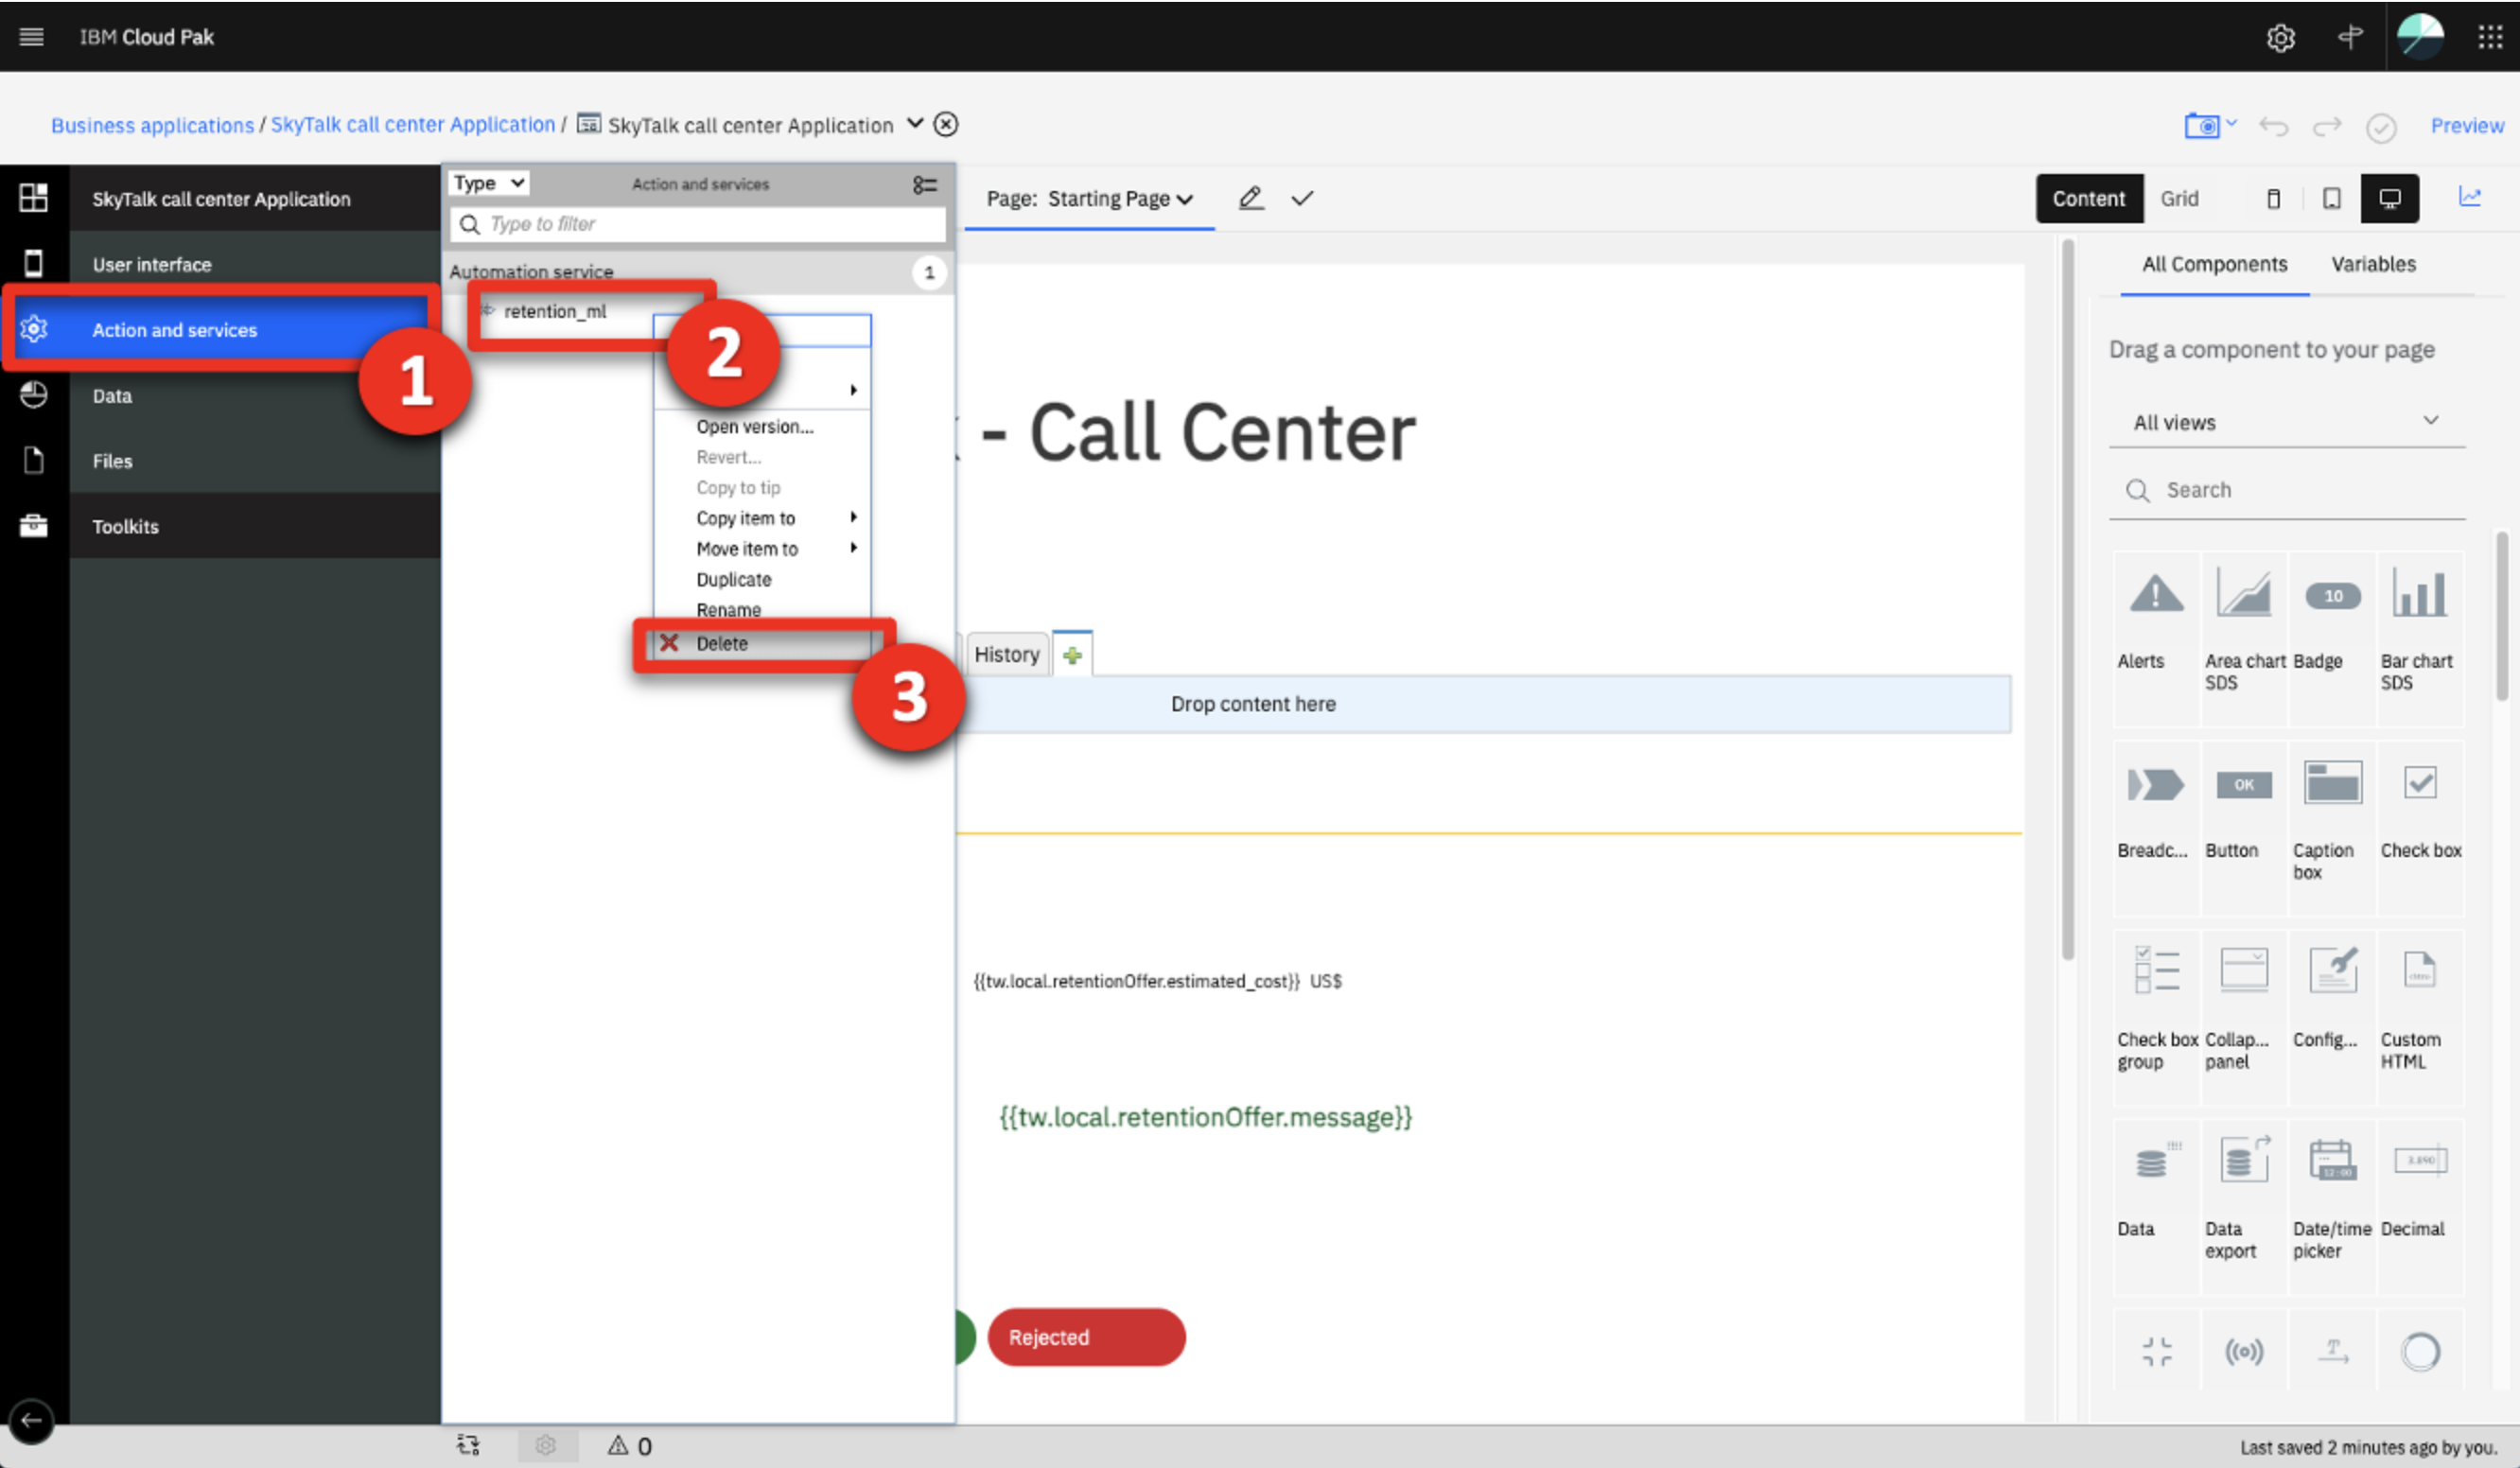
Click Action and services (1), right-click rentention_ml (2) and then click Delete (3).
-
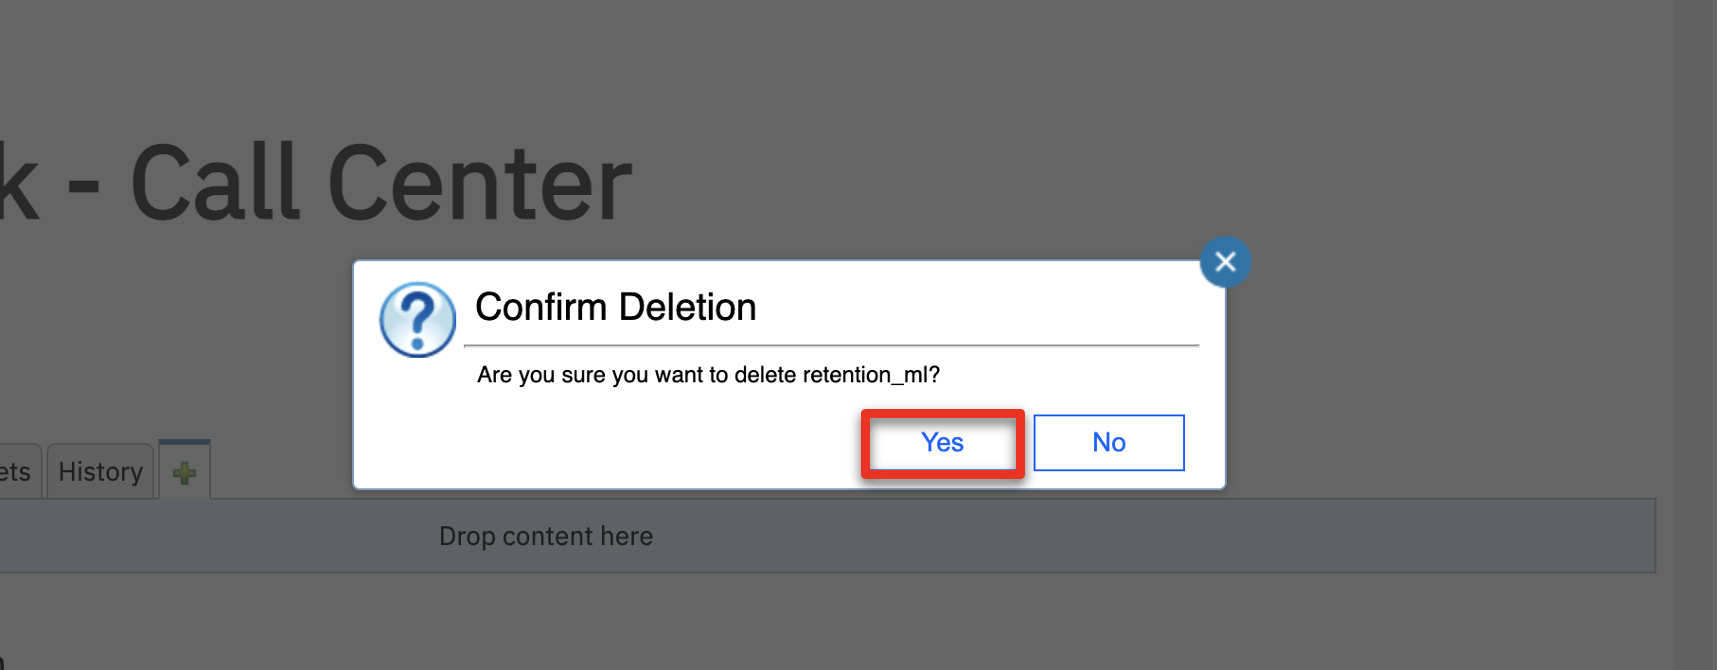
Click Yes to confirm.
-
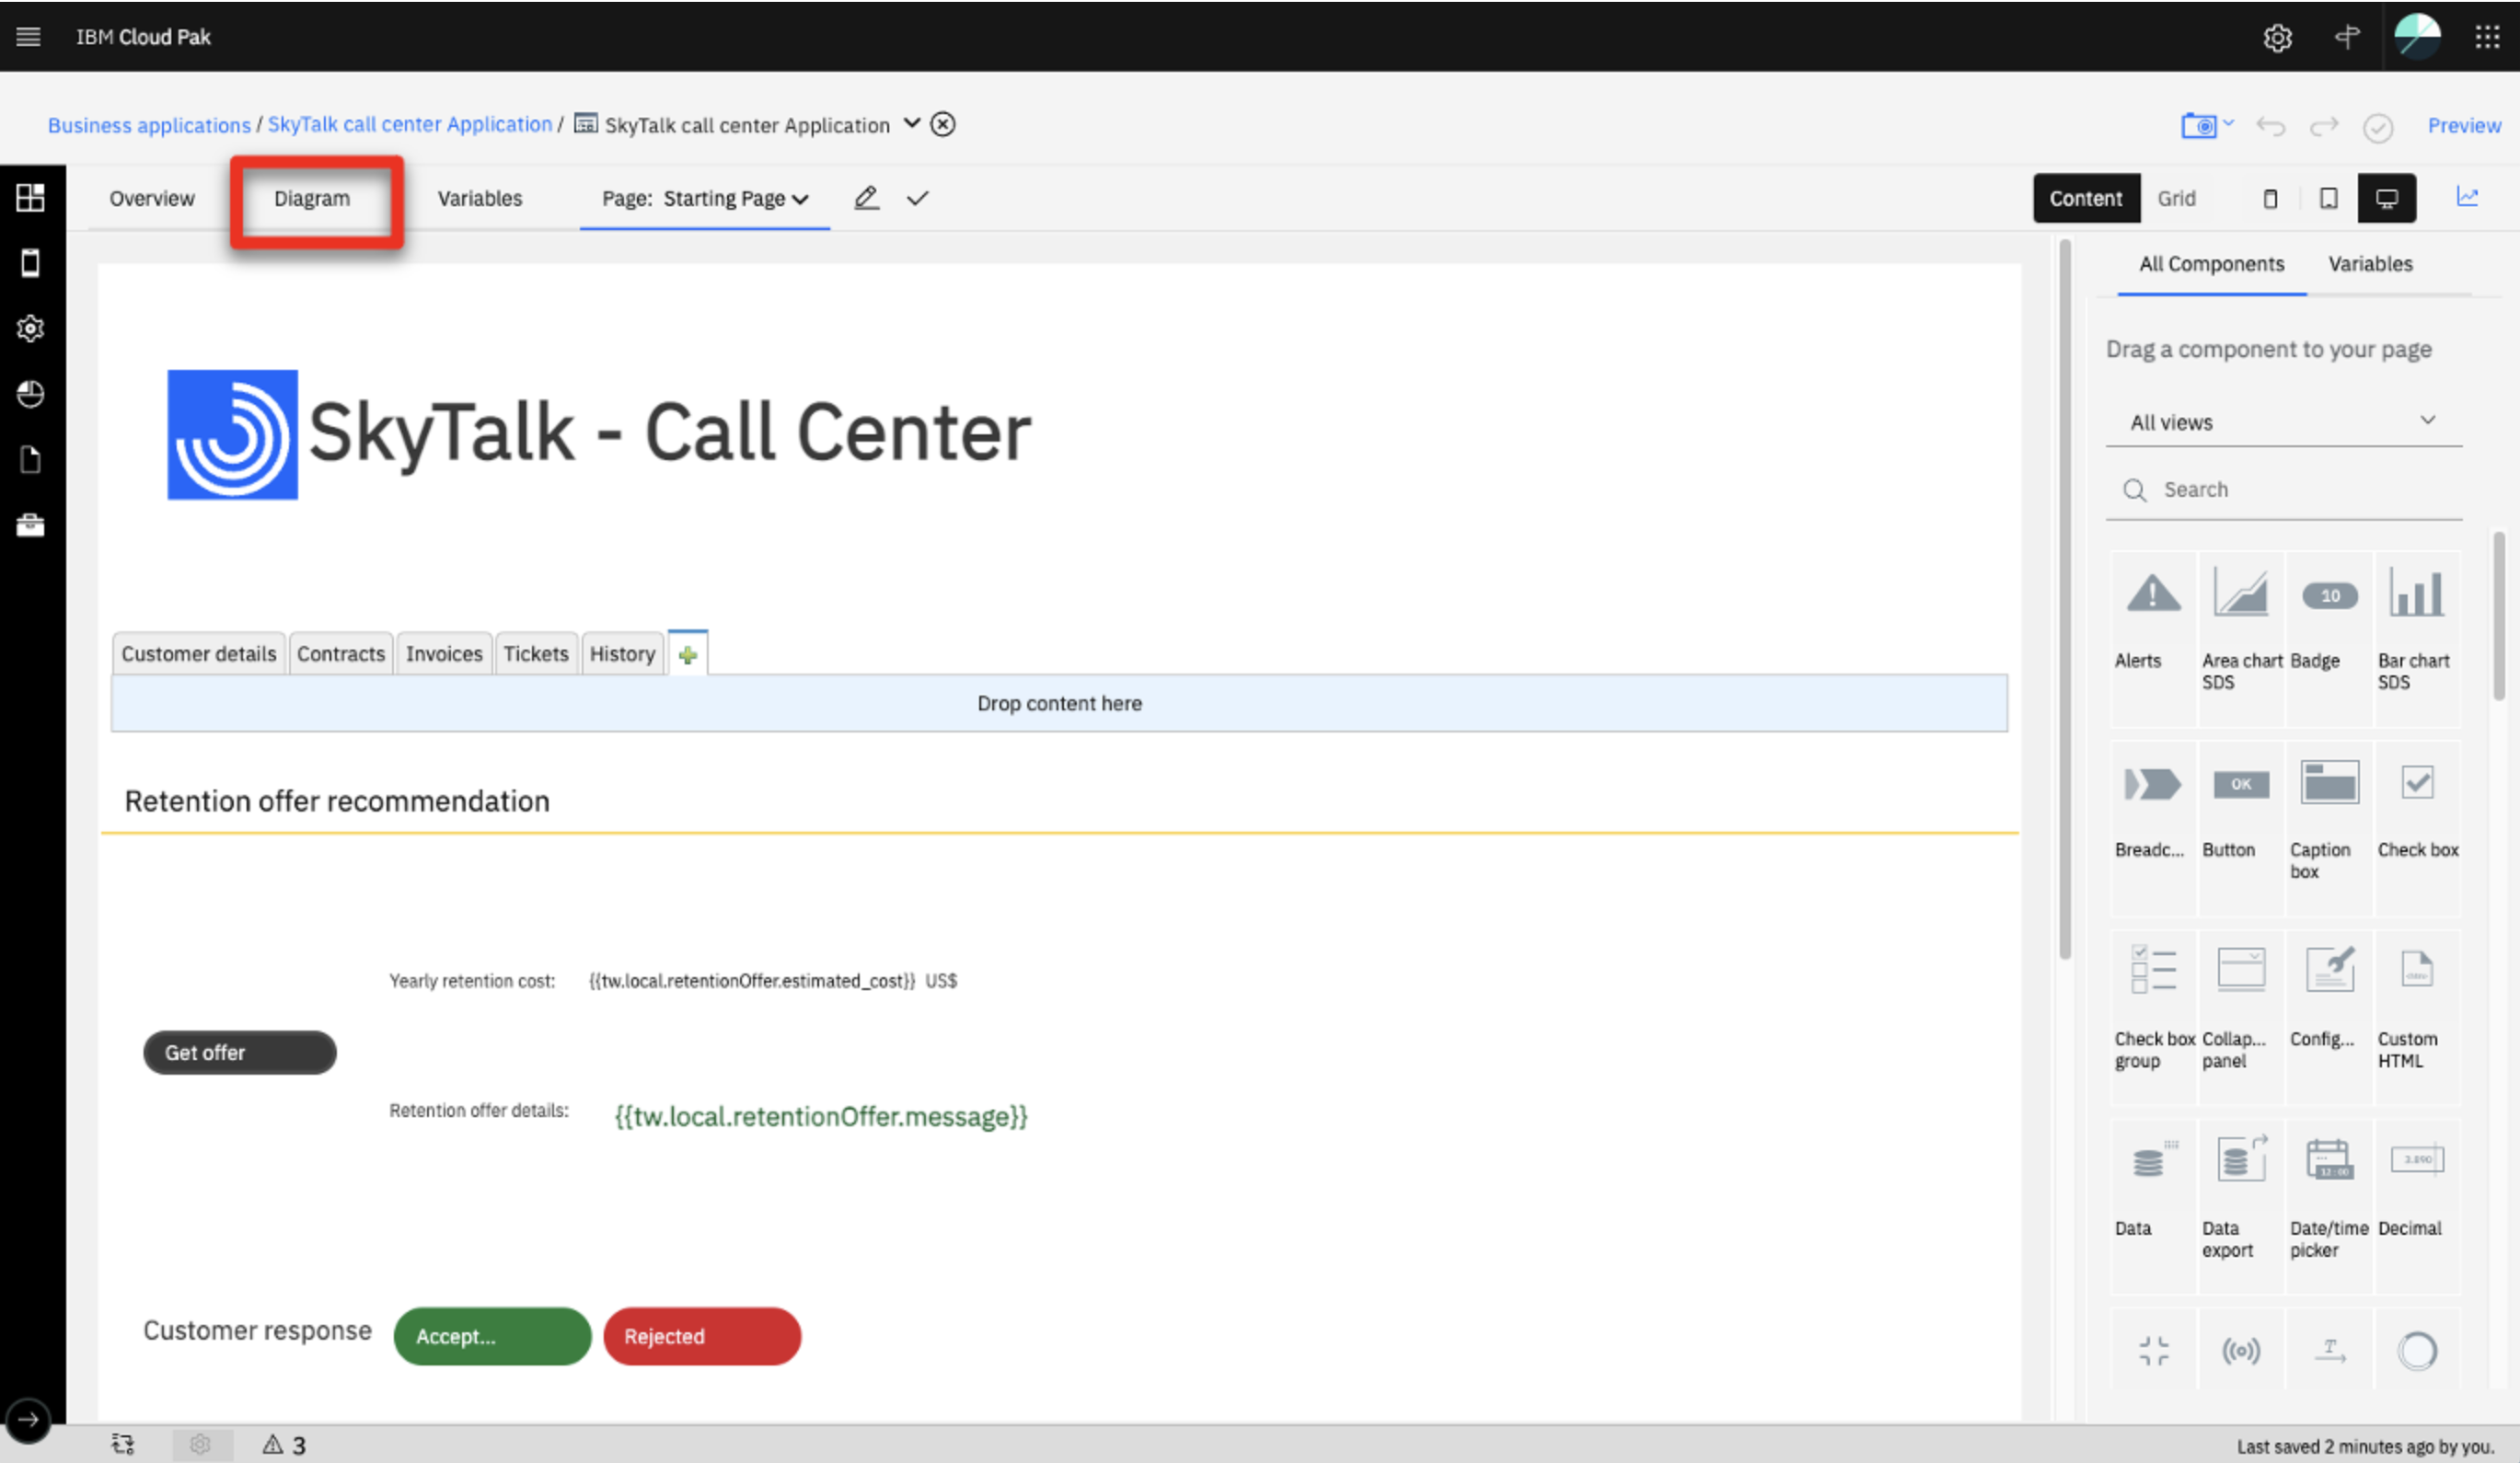
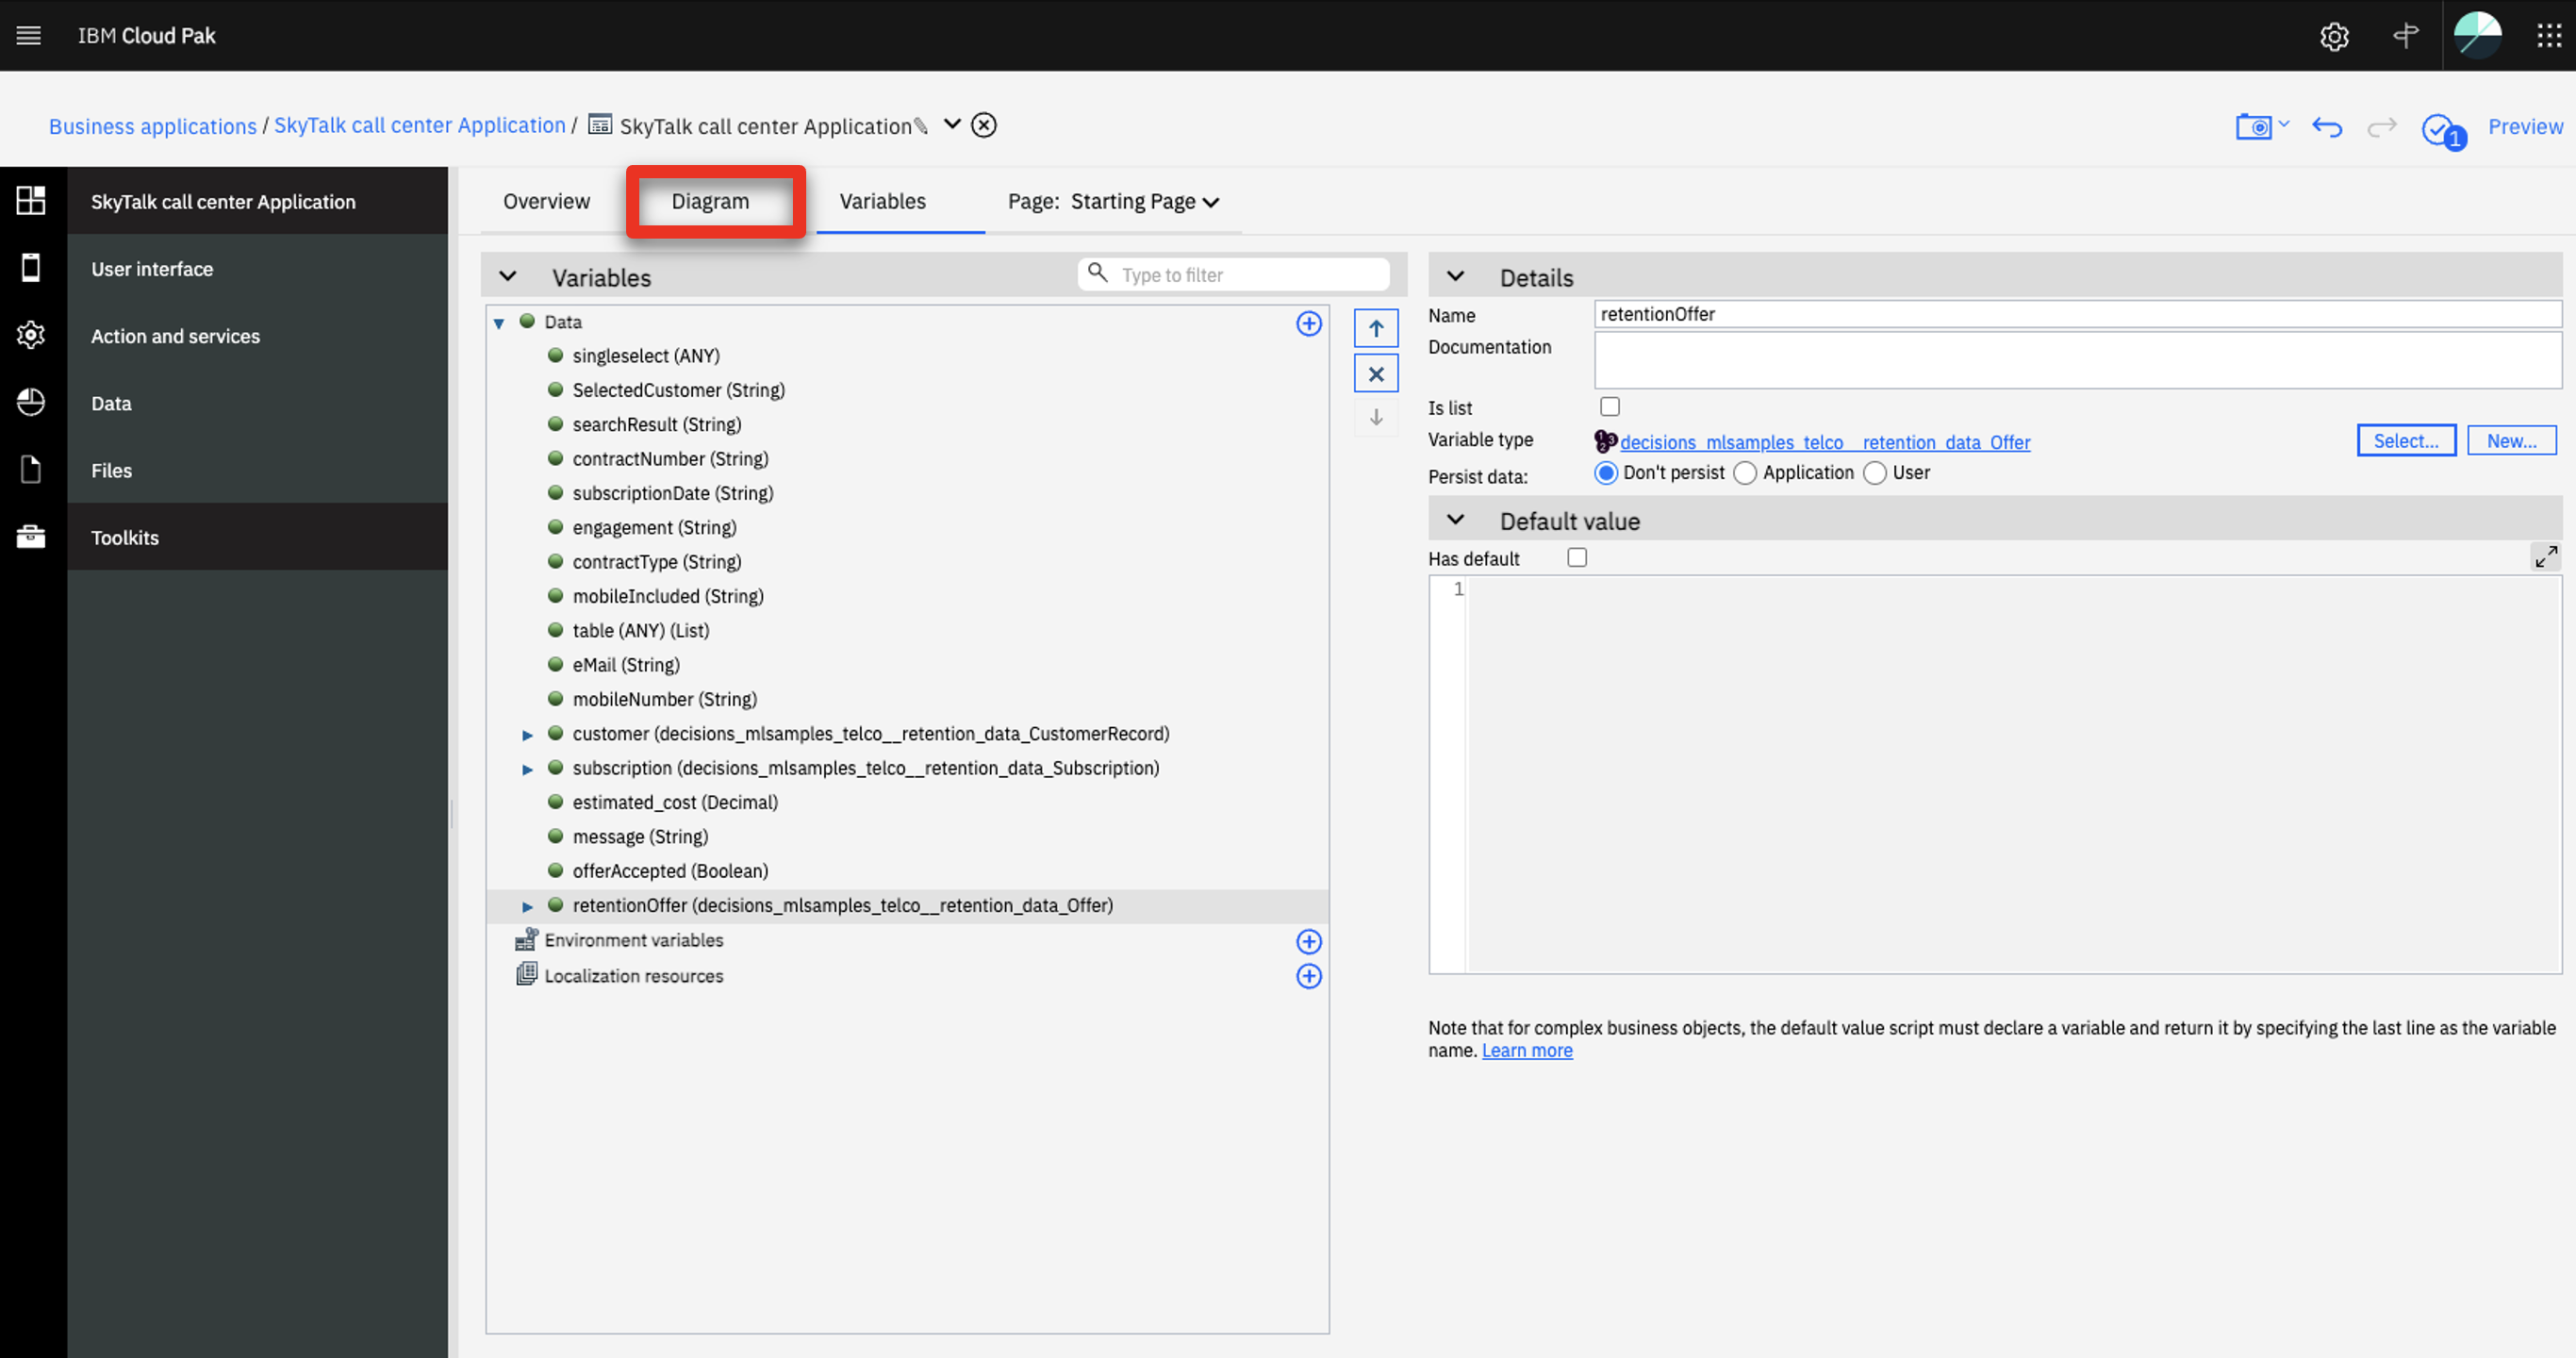
Click the Diagram tab.
-
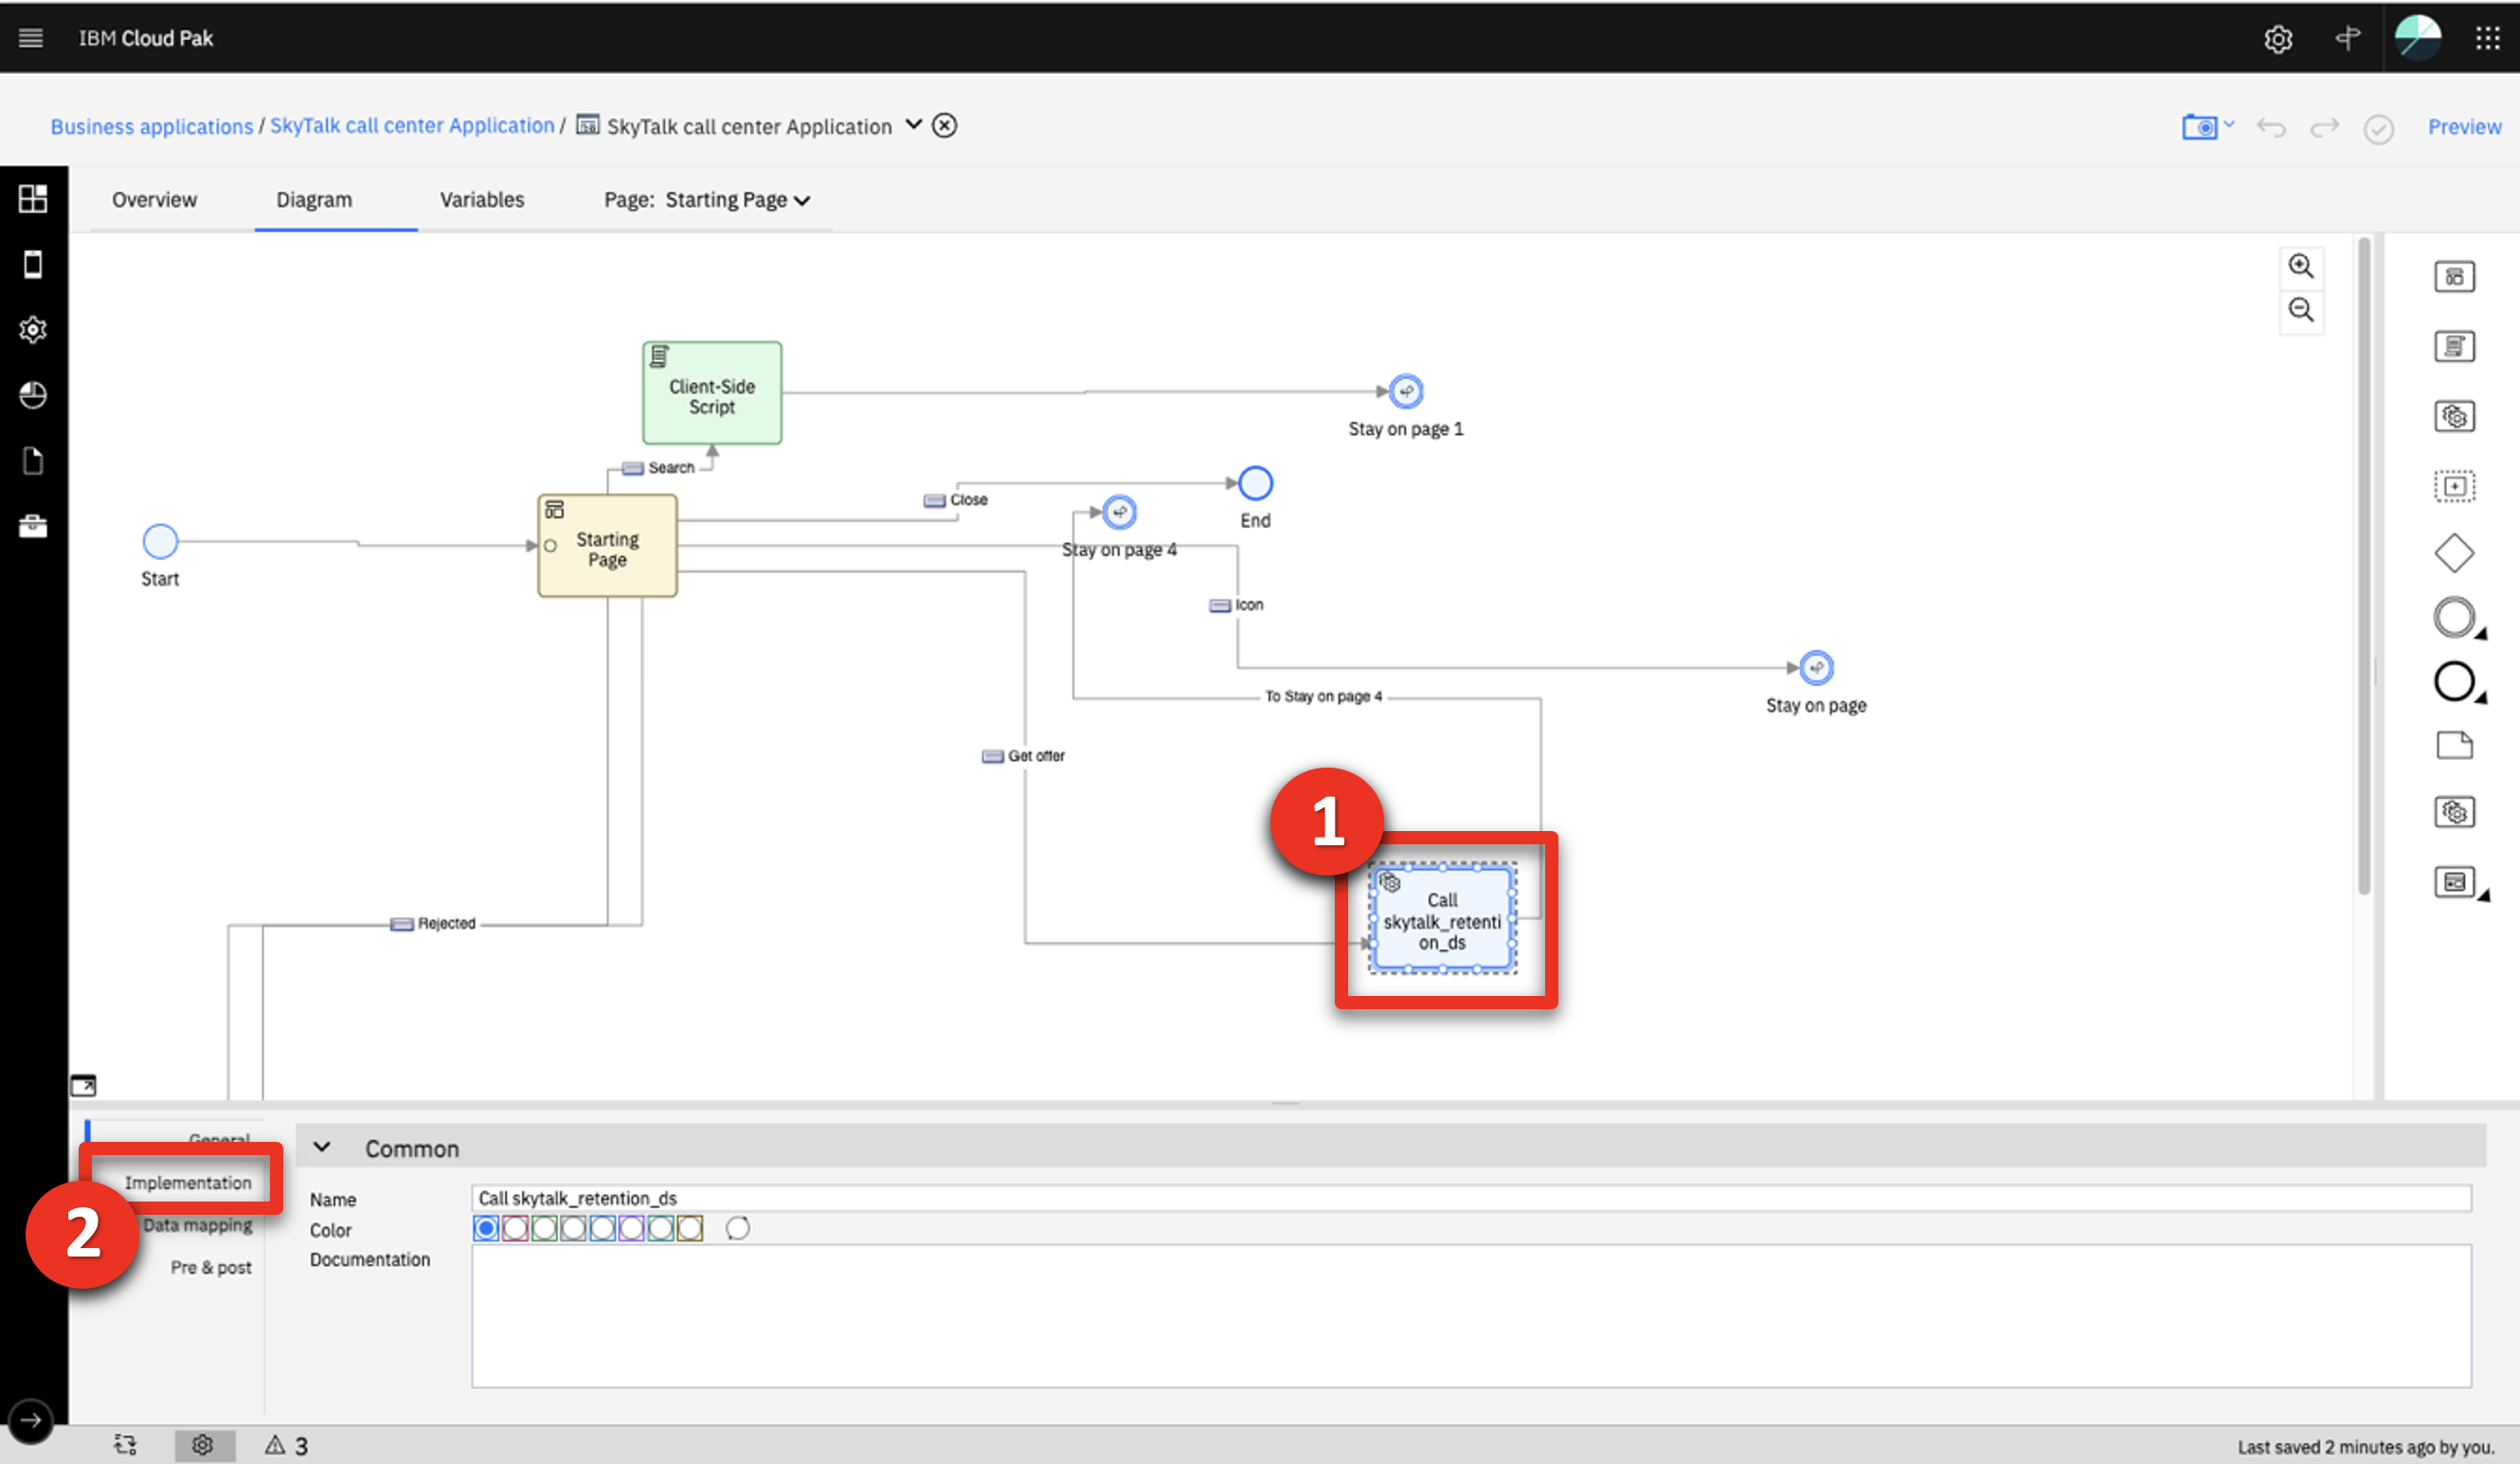
Select the Call skytalk_retention_ds node (1) and then click the Implementation tab (2) below the diagram.
-
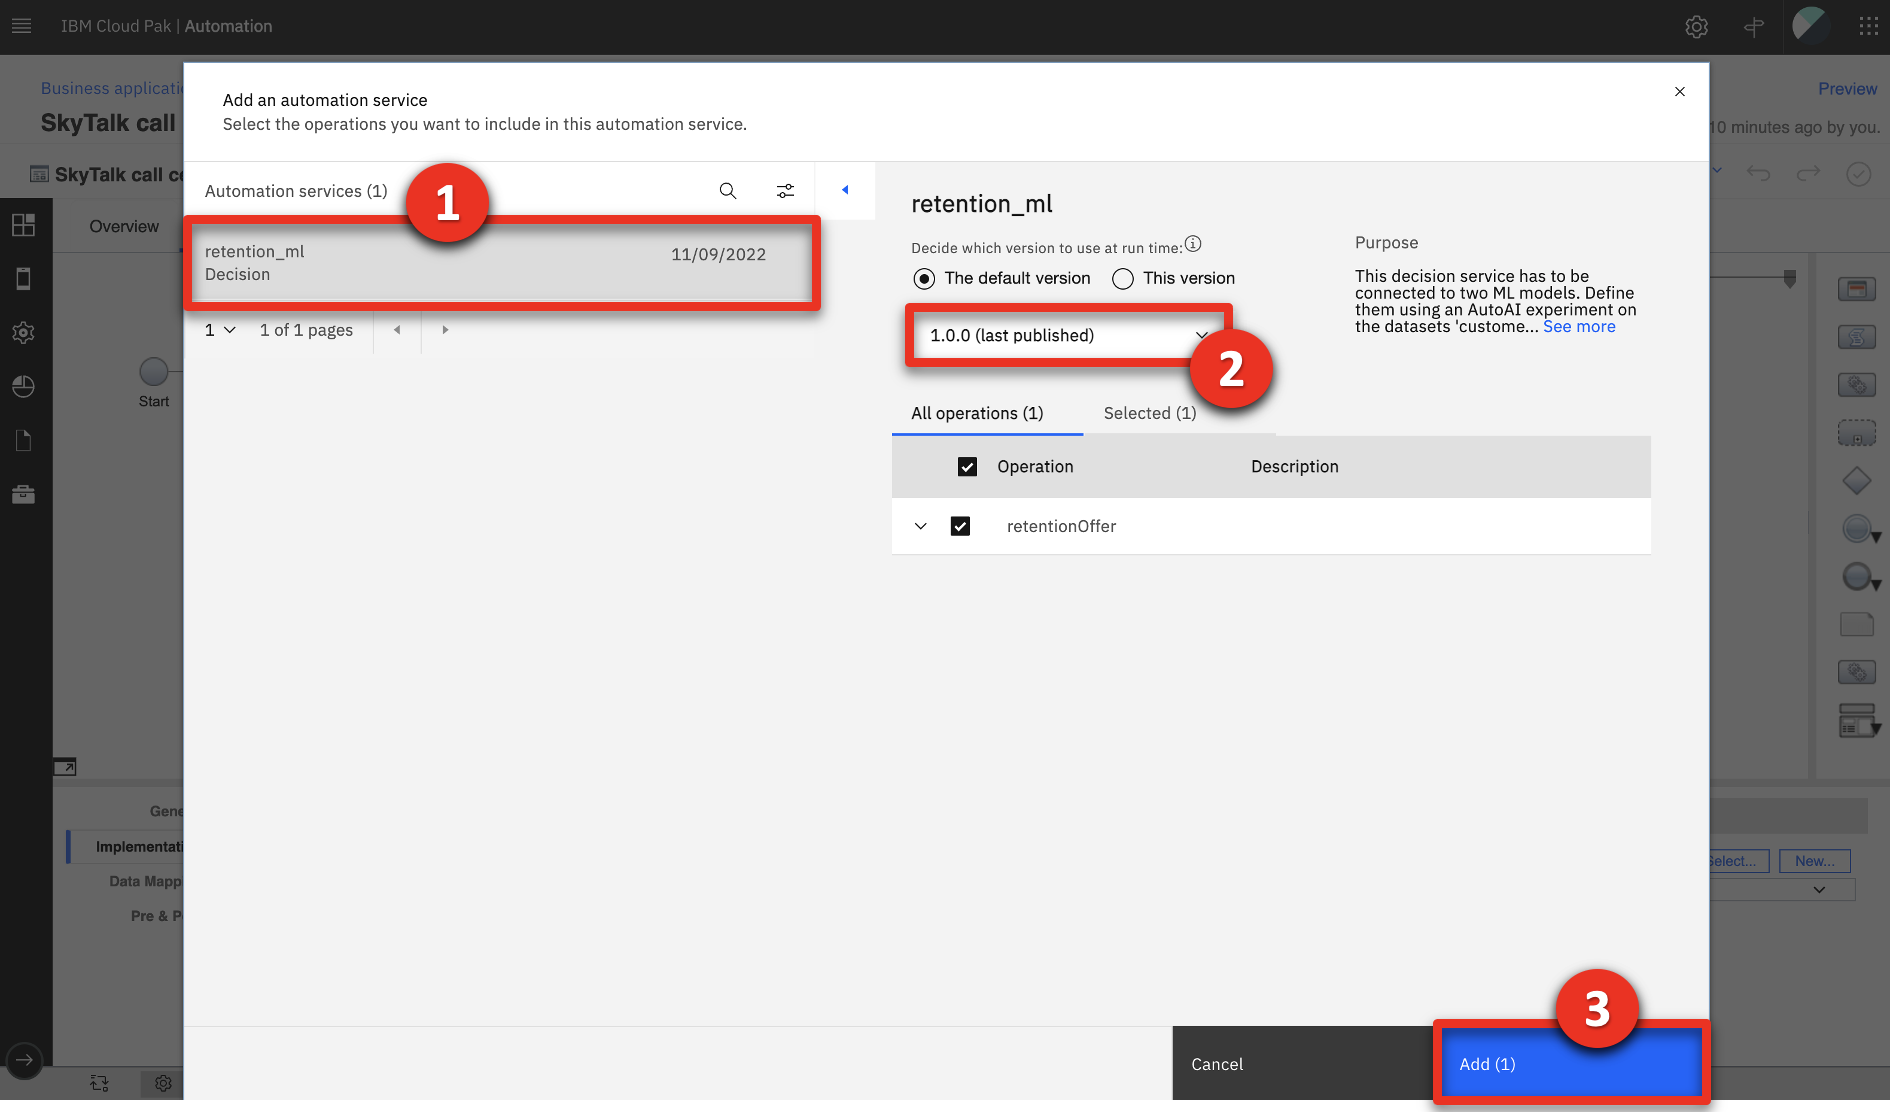
Click New…

-
Click retention_ml Decision (1), select the most recent version (2) as the default version to use at runtime, and click Add (3).
-
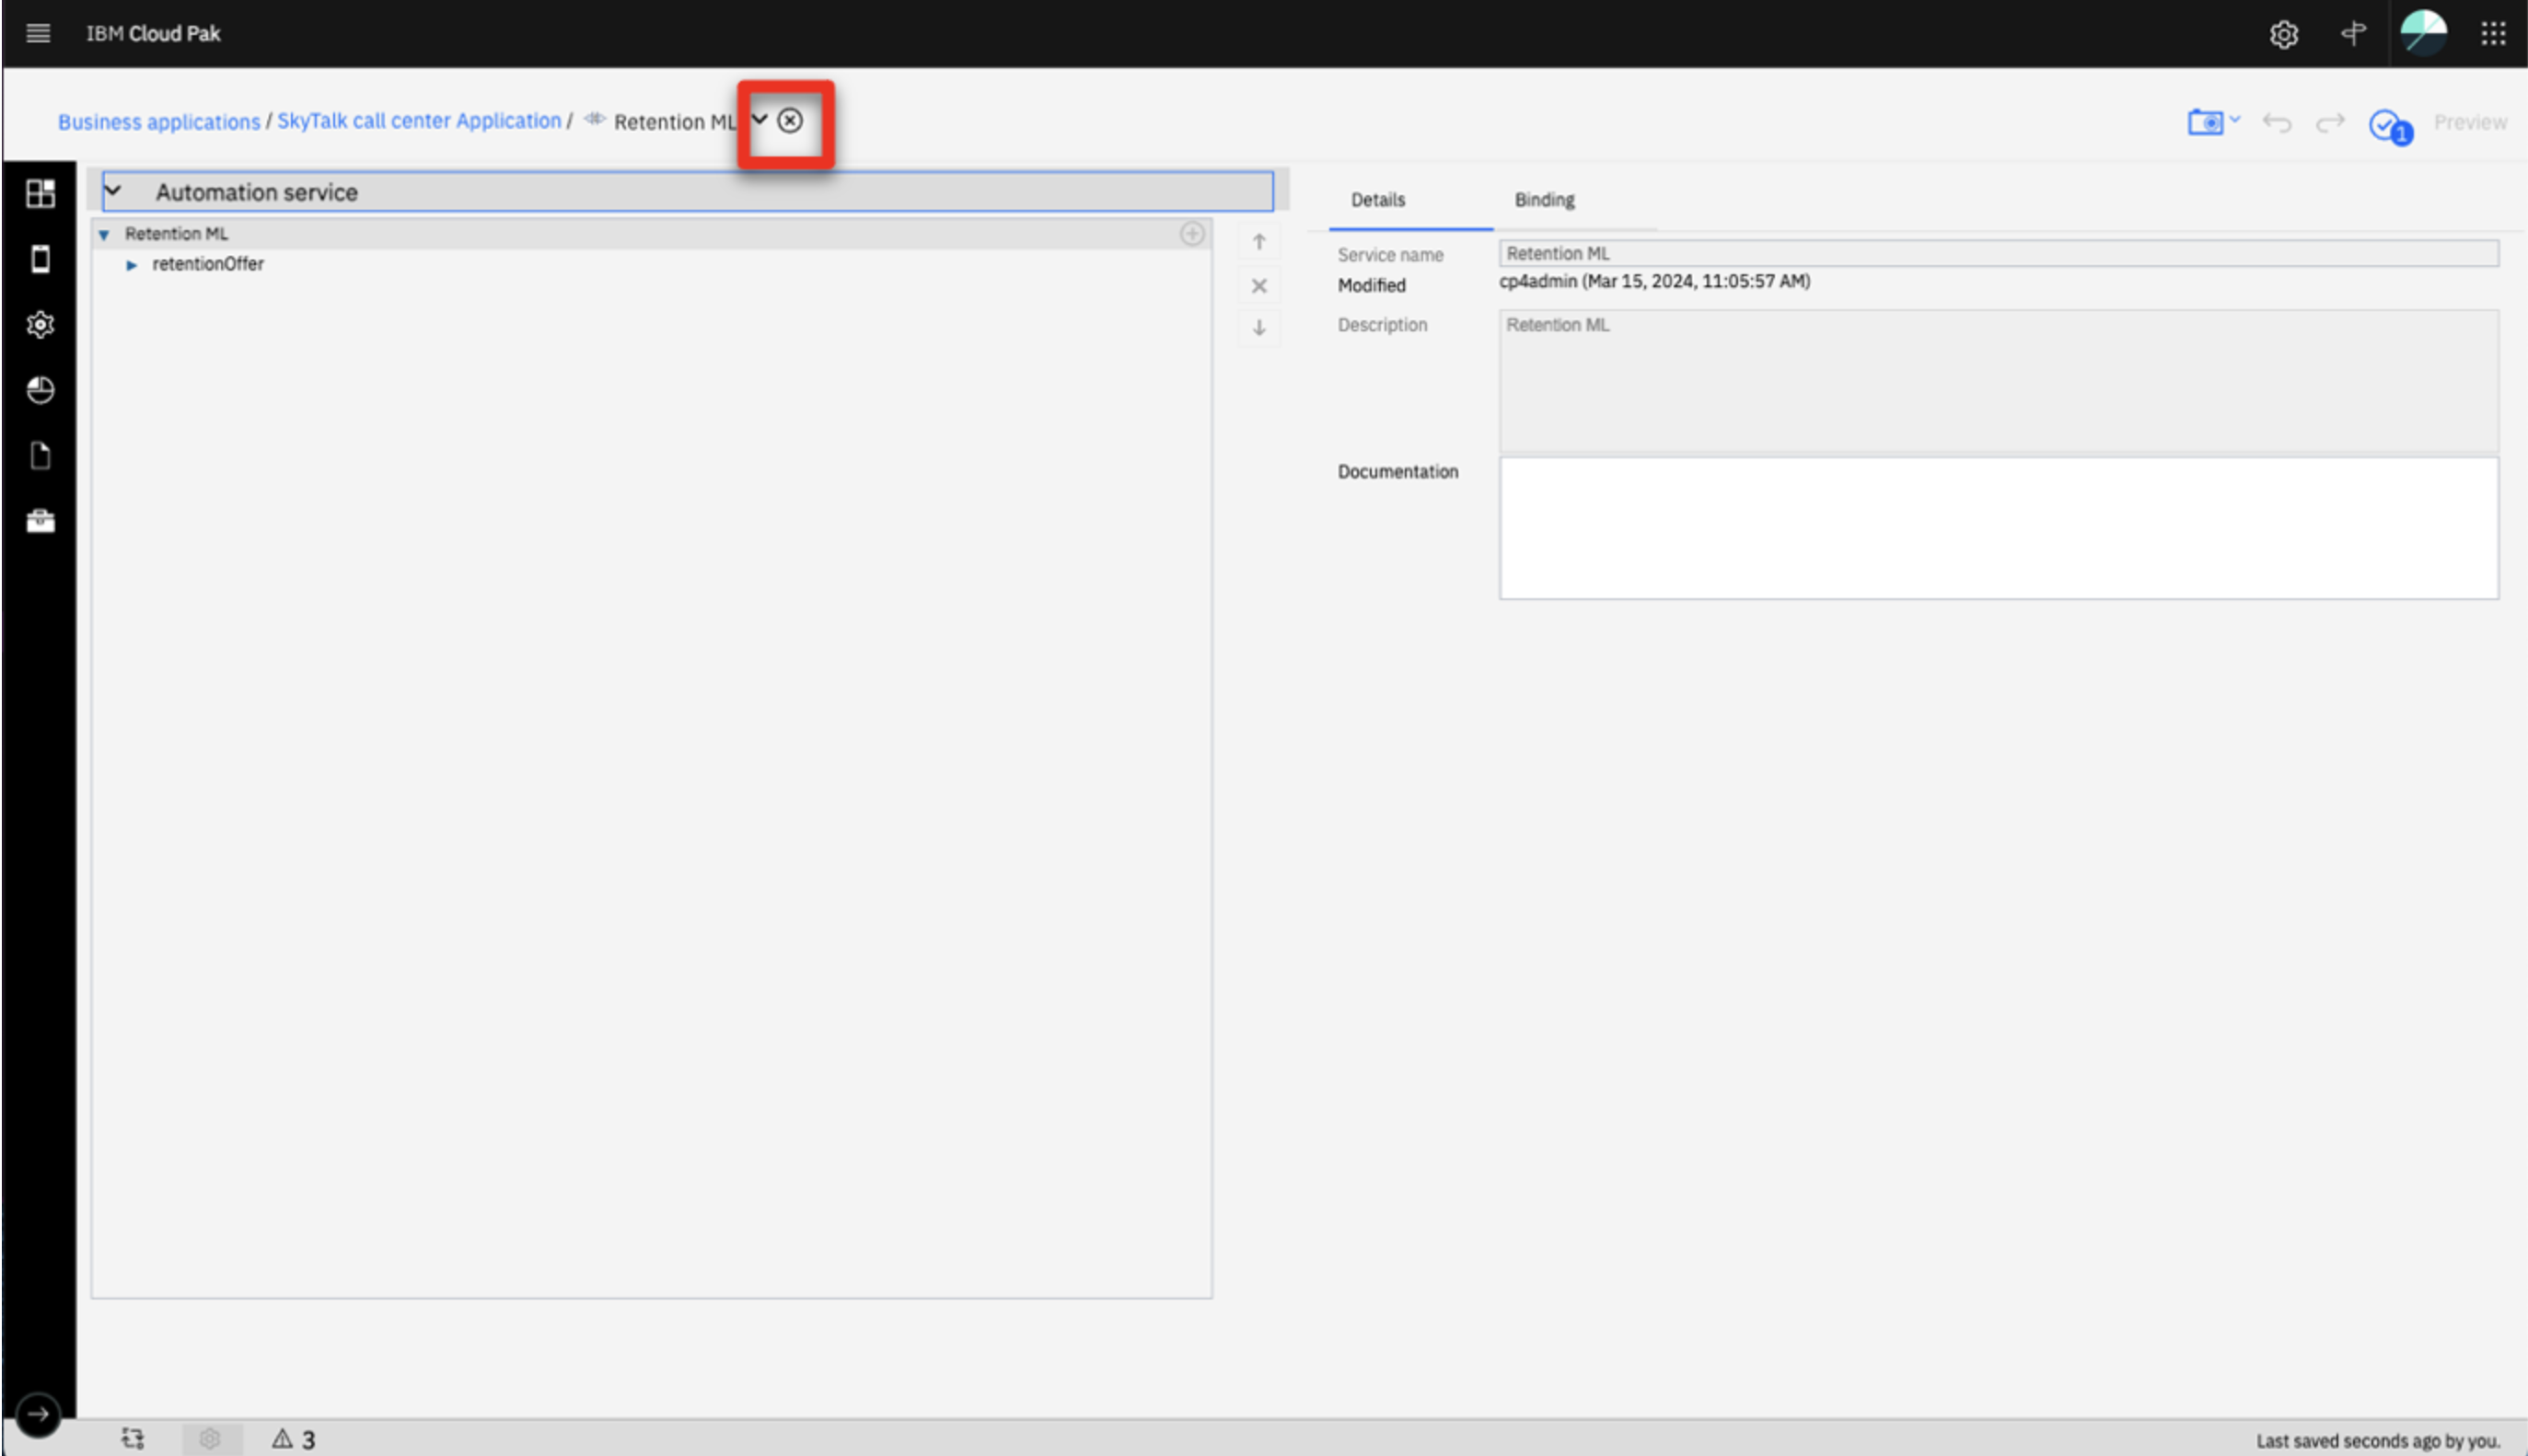
Click x to close the retention_ml service display.
-
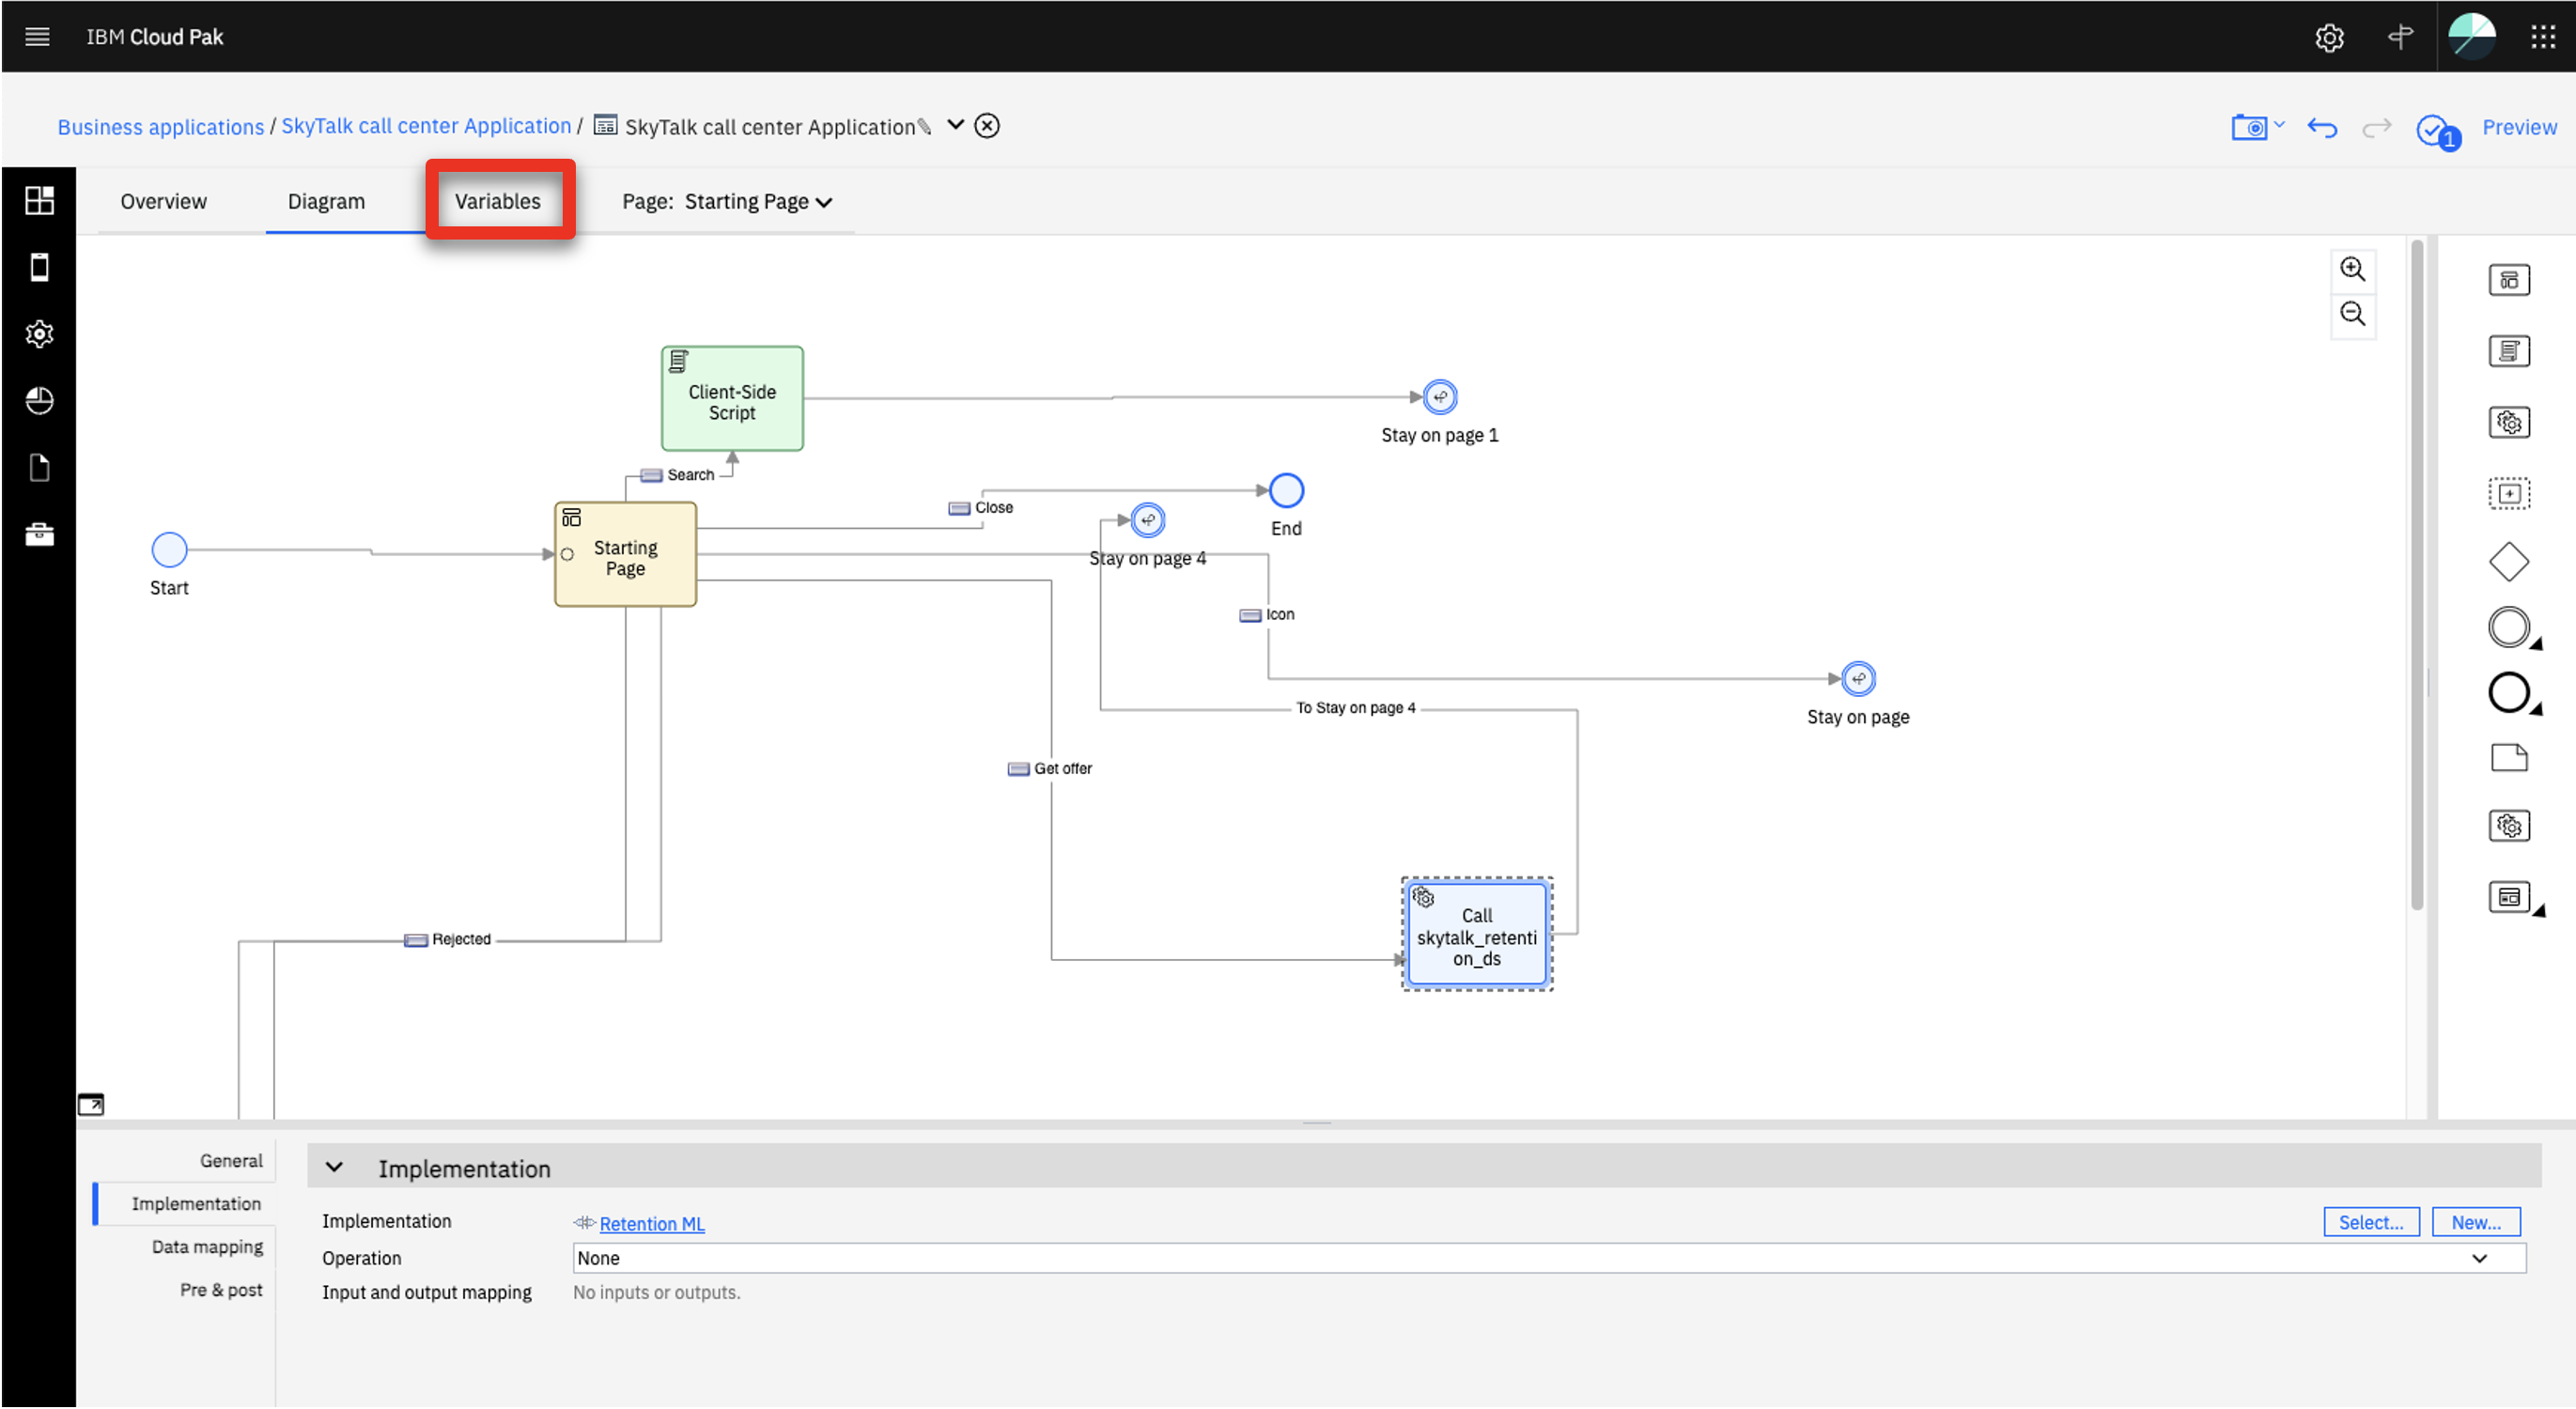
Click the Variables tab at the top of the diagram.
-
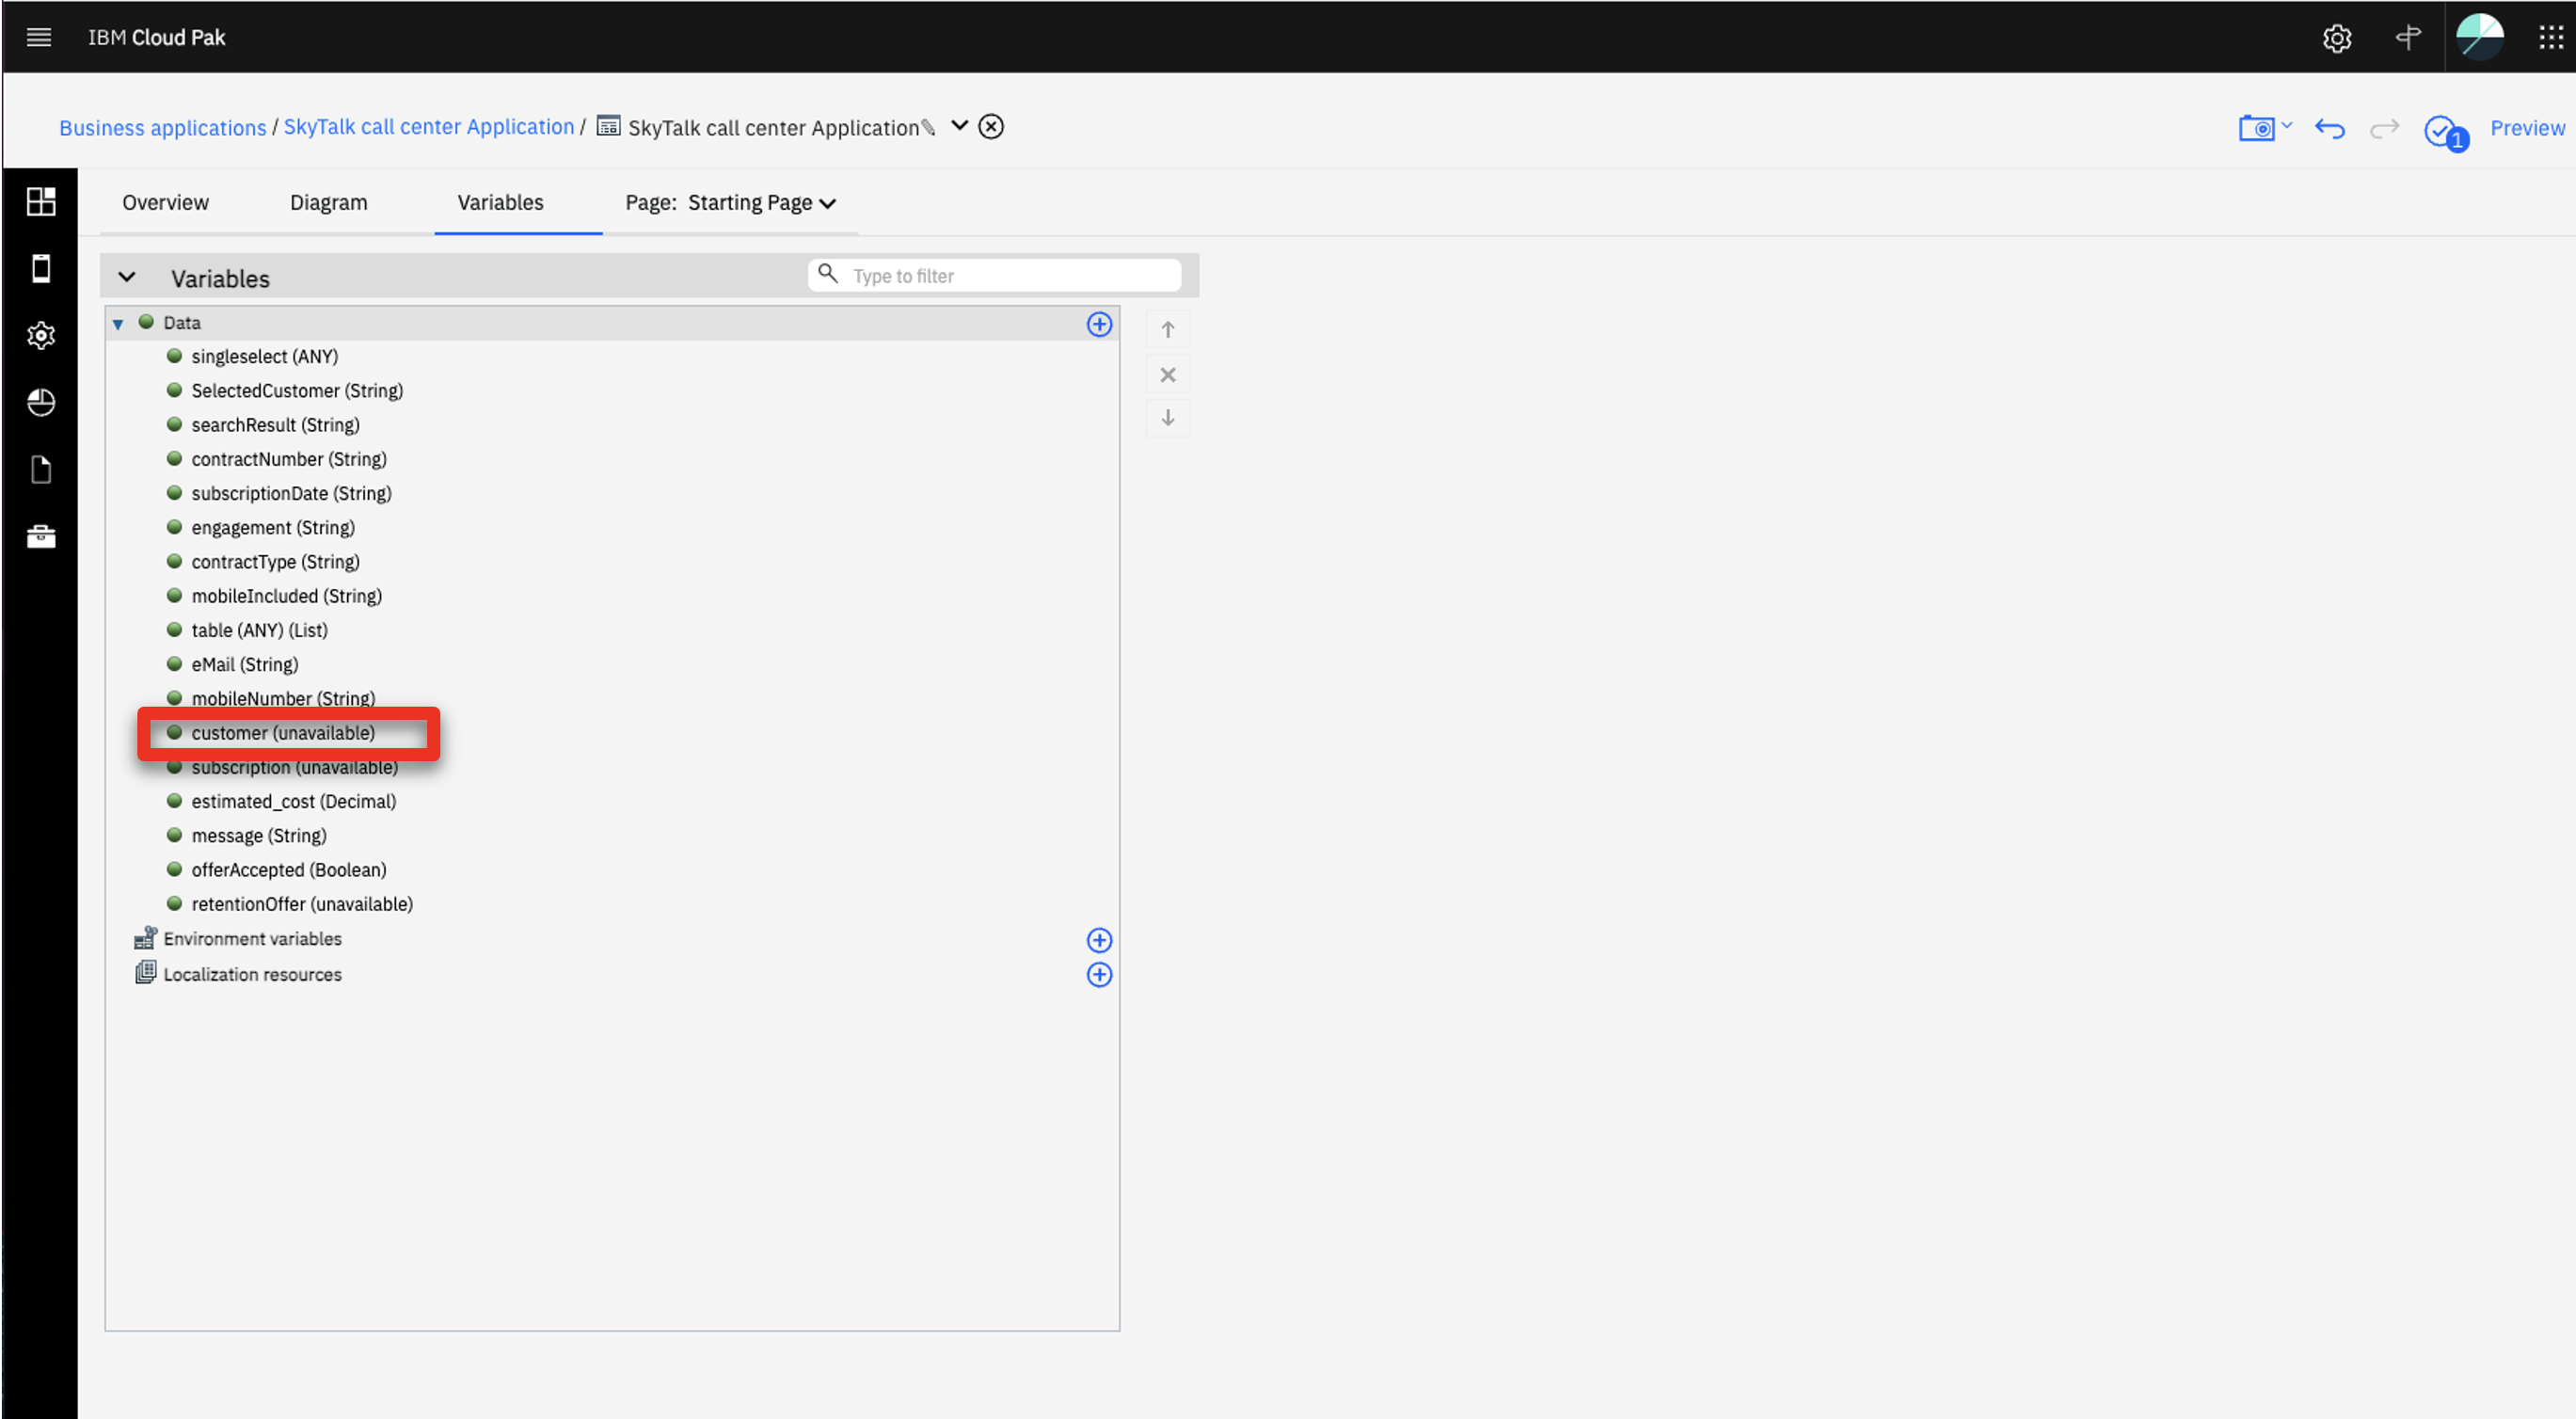
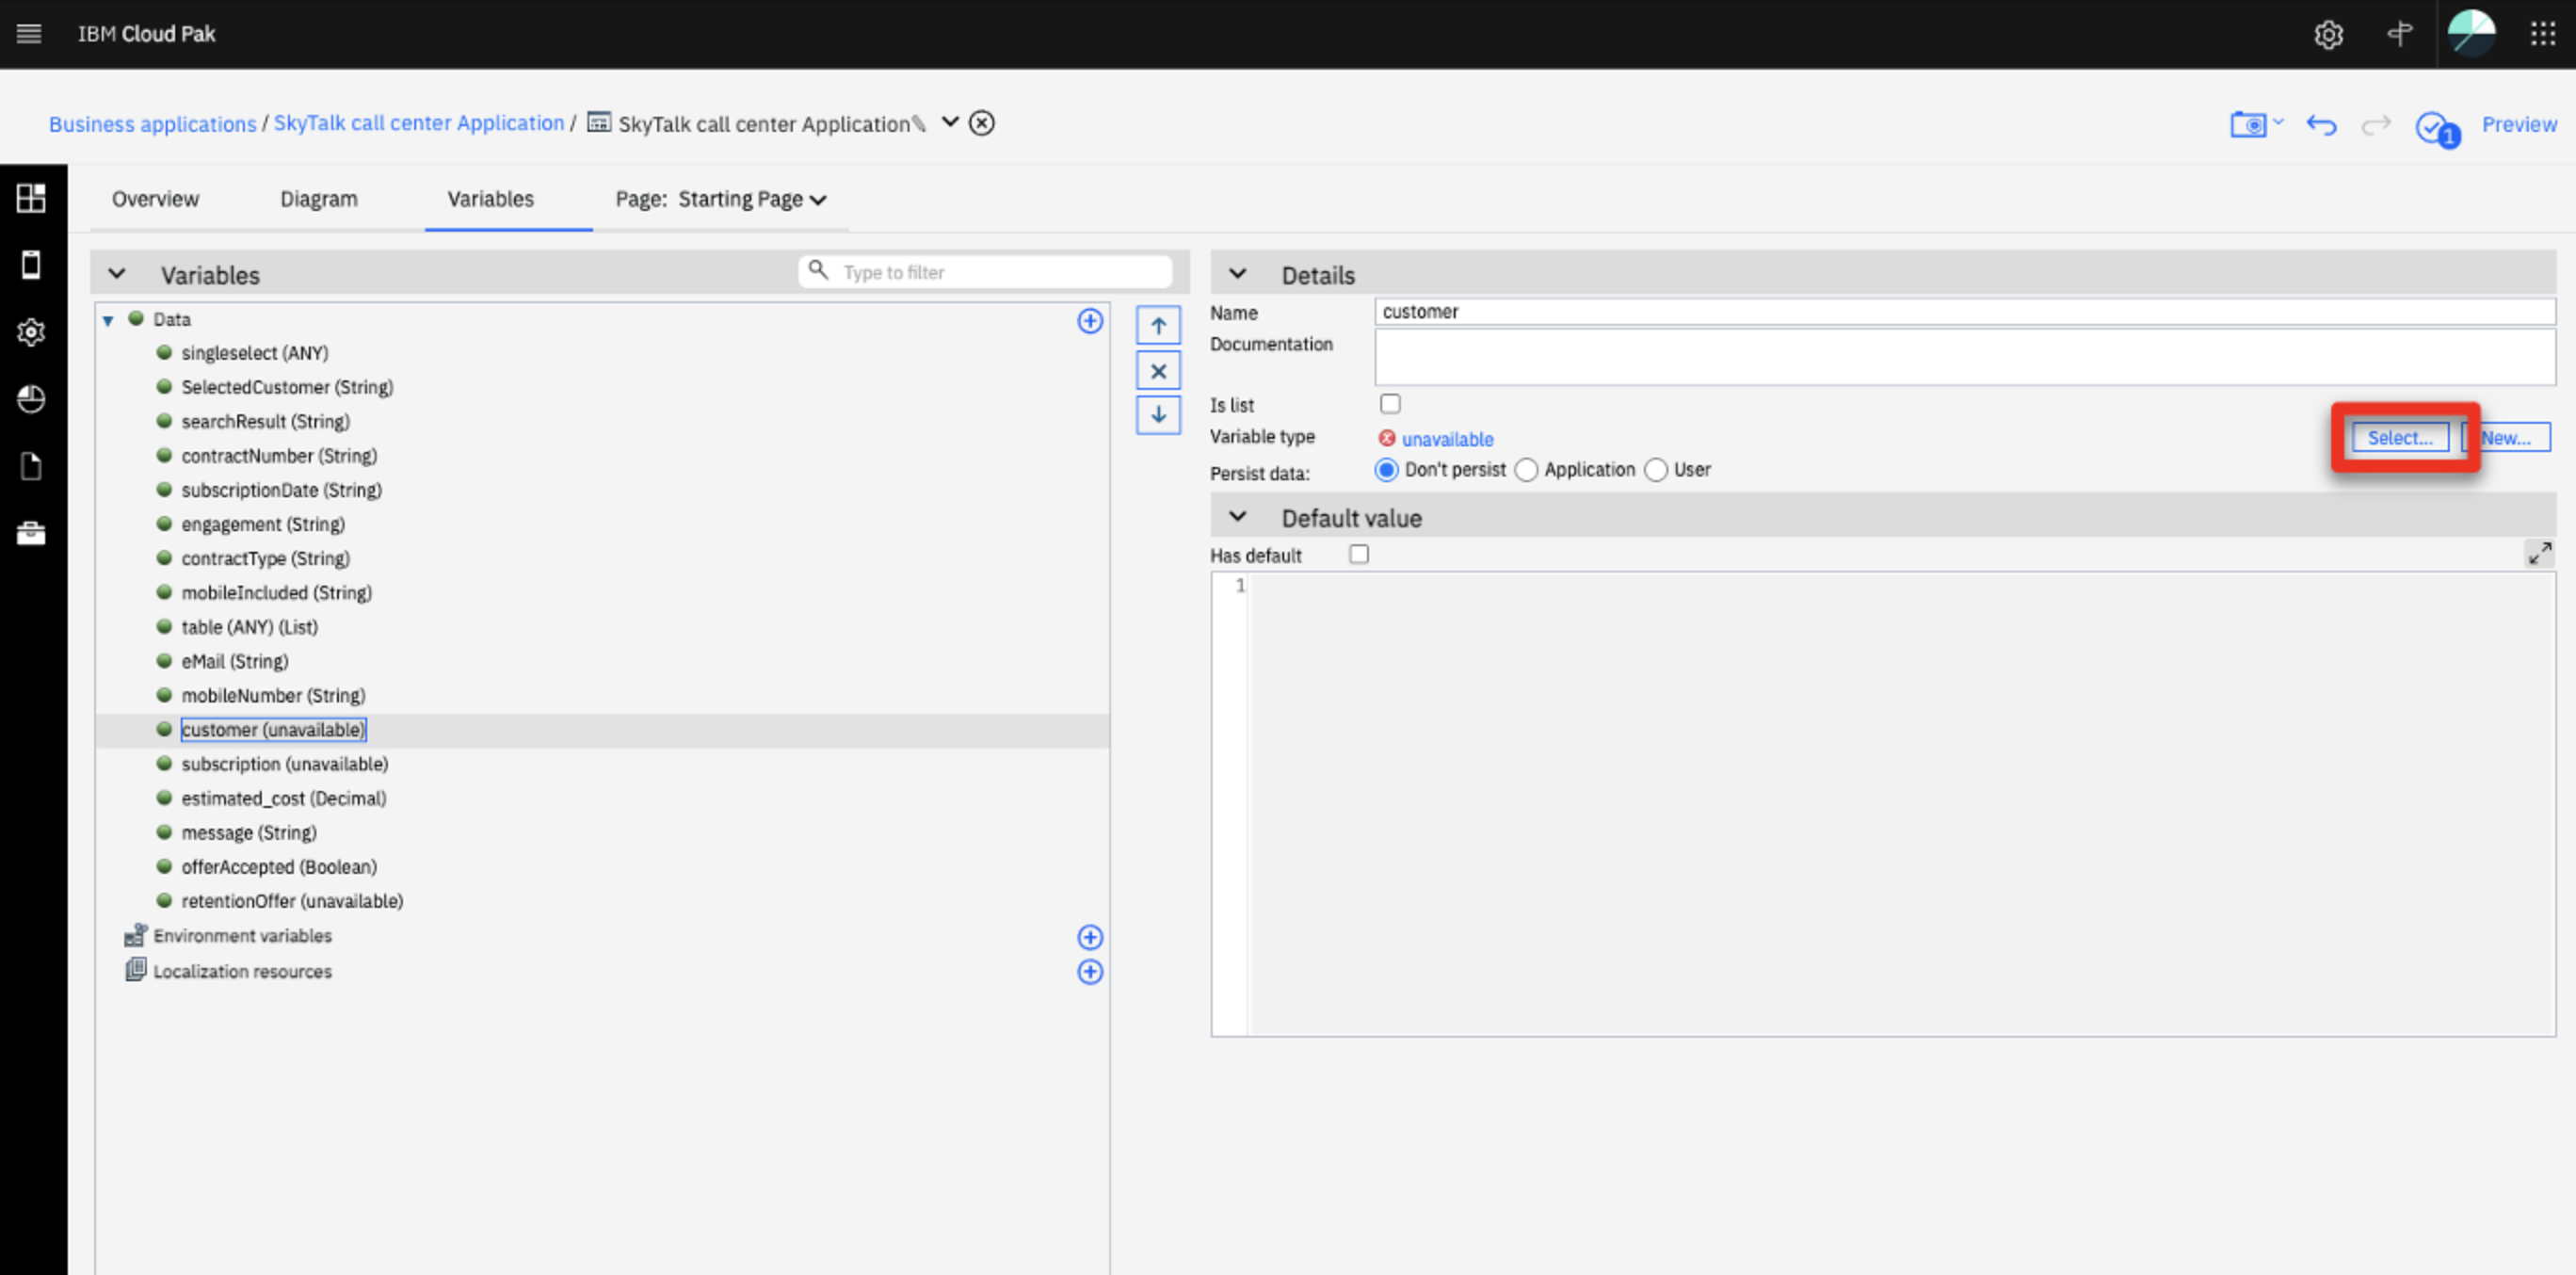
Select customer (unavailable) in the Data variables list.
-
Click Select… in the Details pane.
-
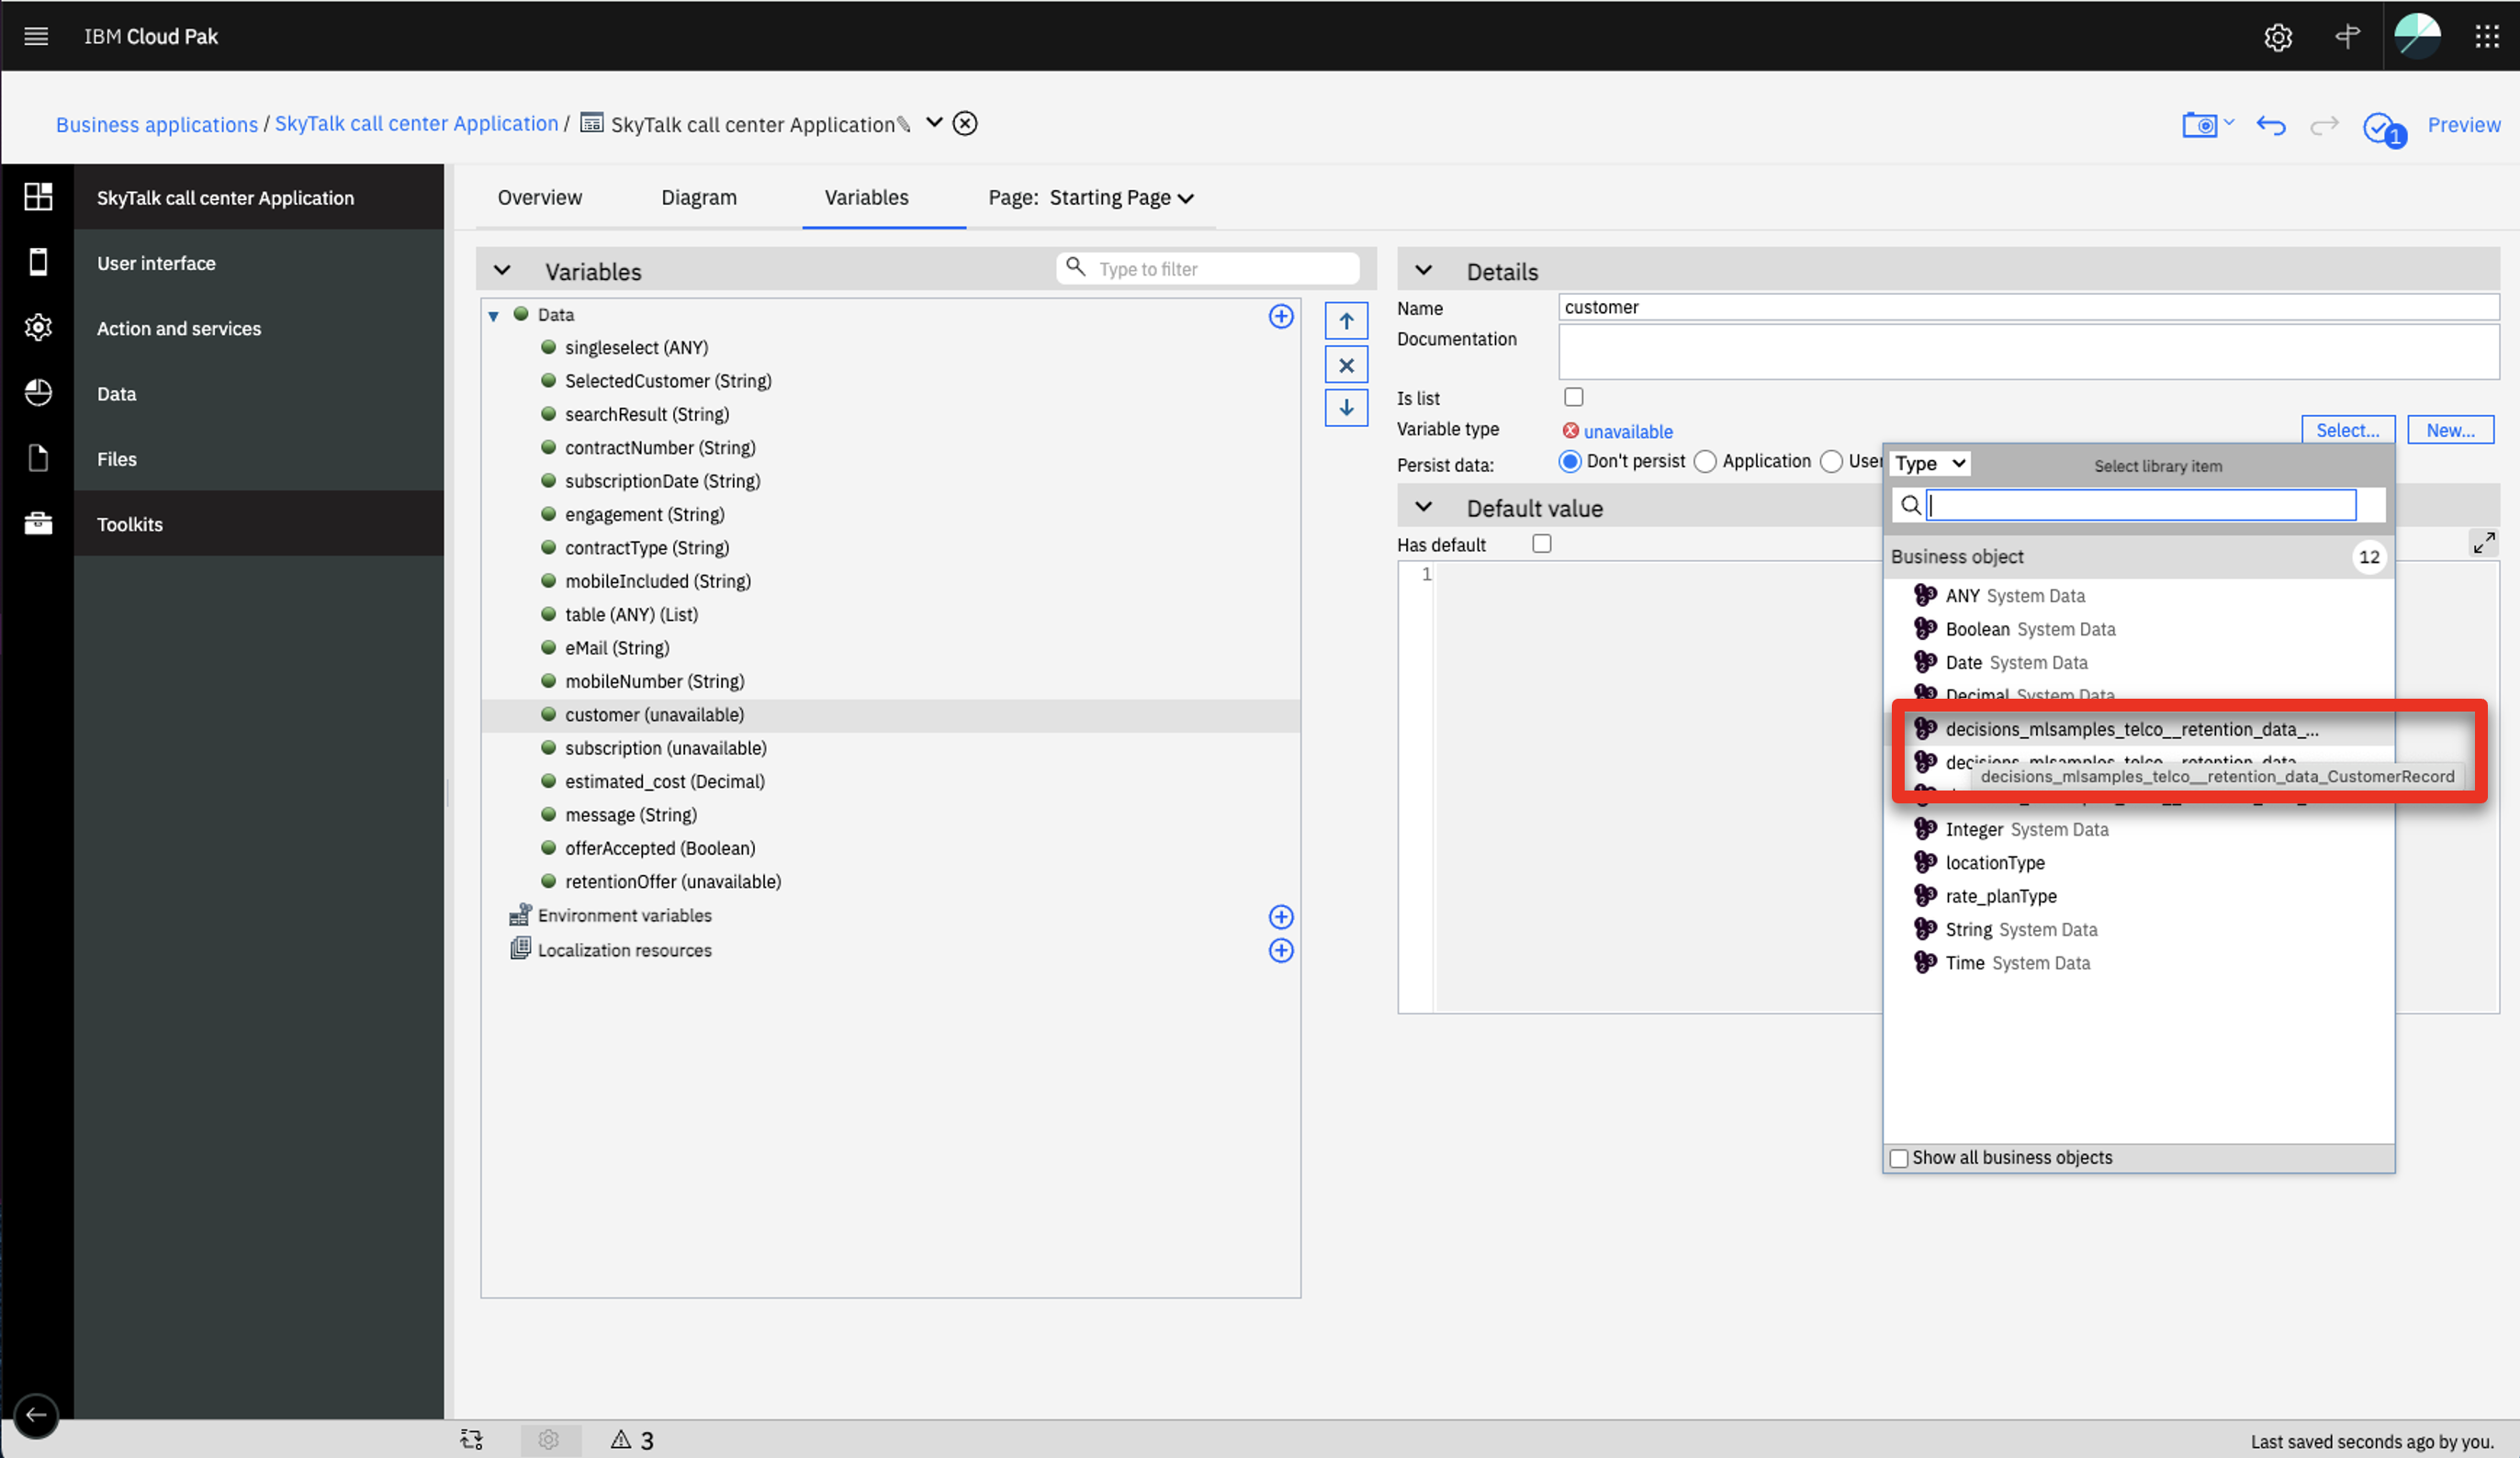
Select decision_mlsamples_telco_retention_data_CustomerRecord as the Business Object.
-
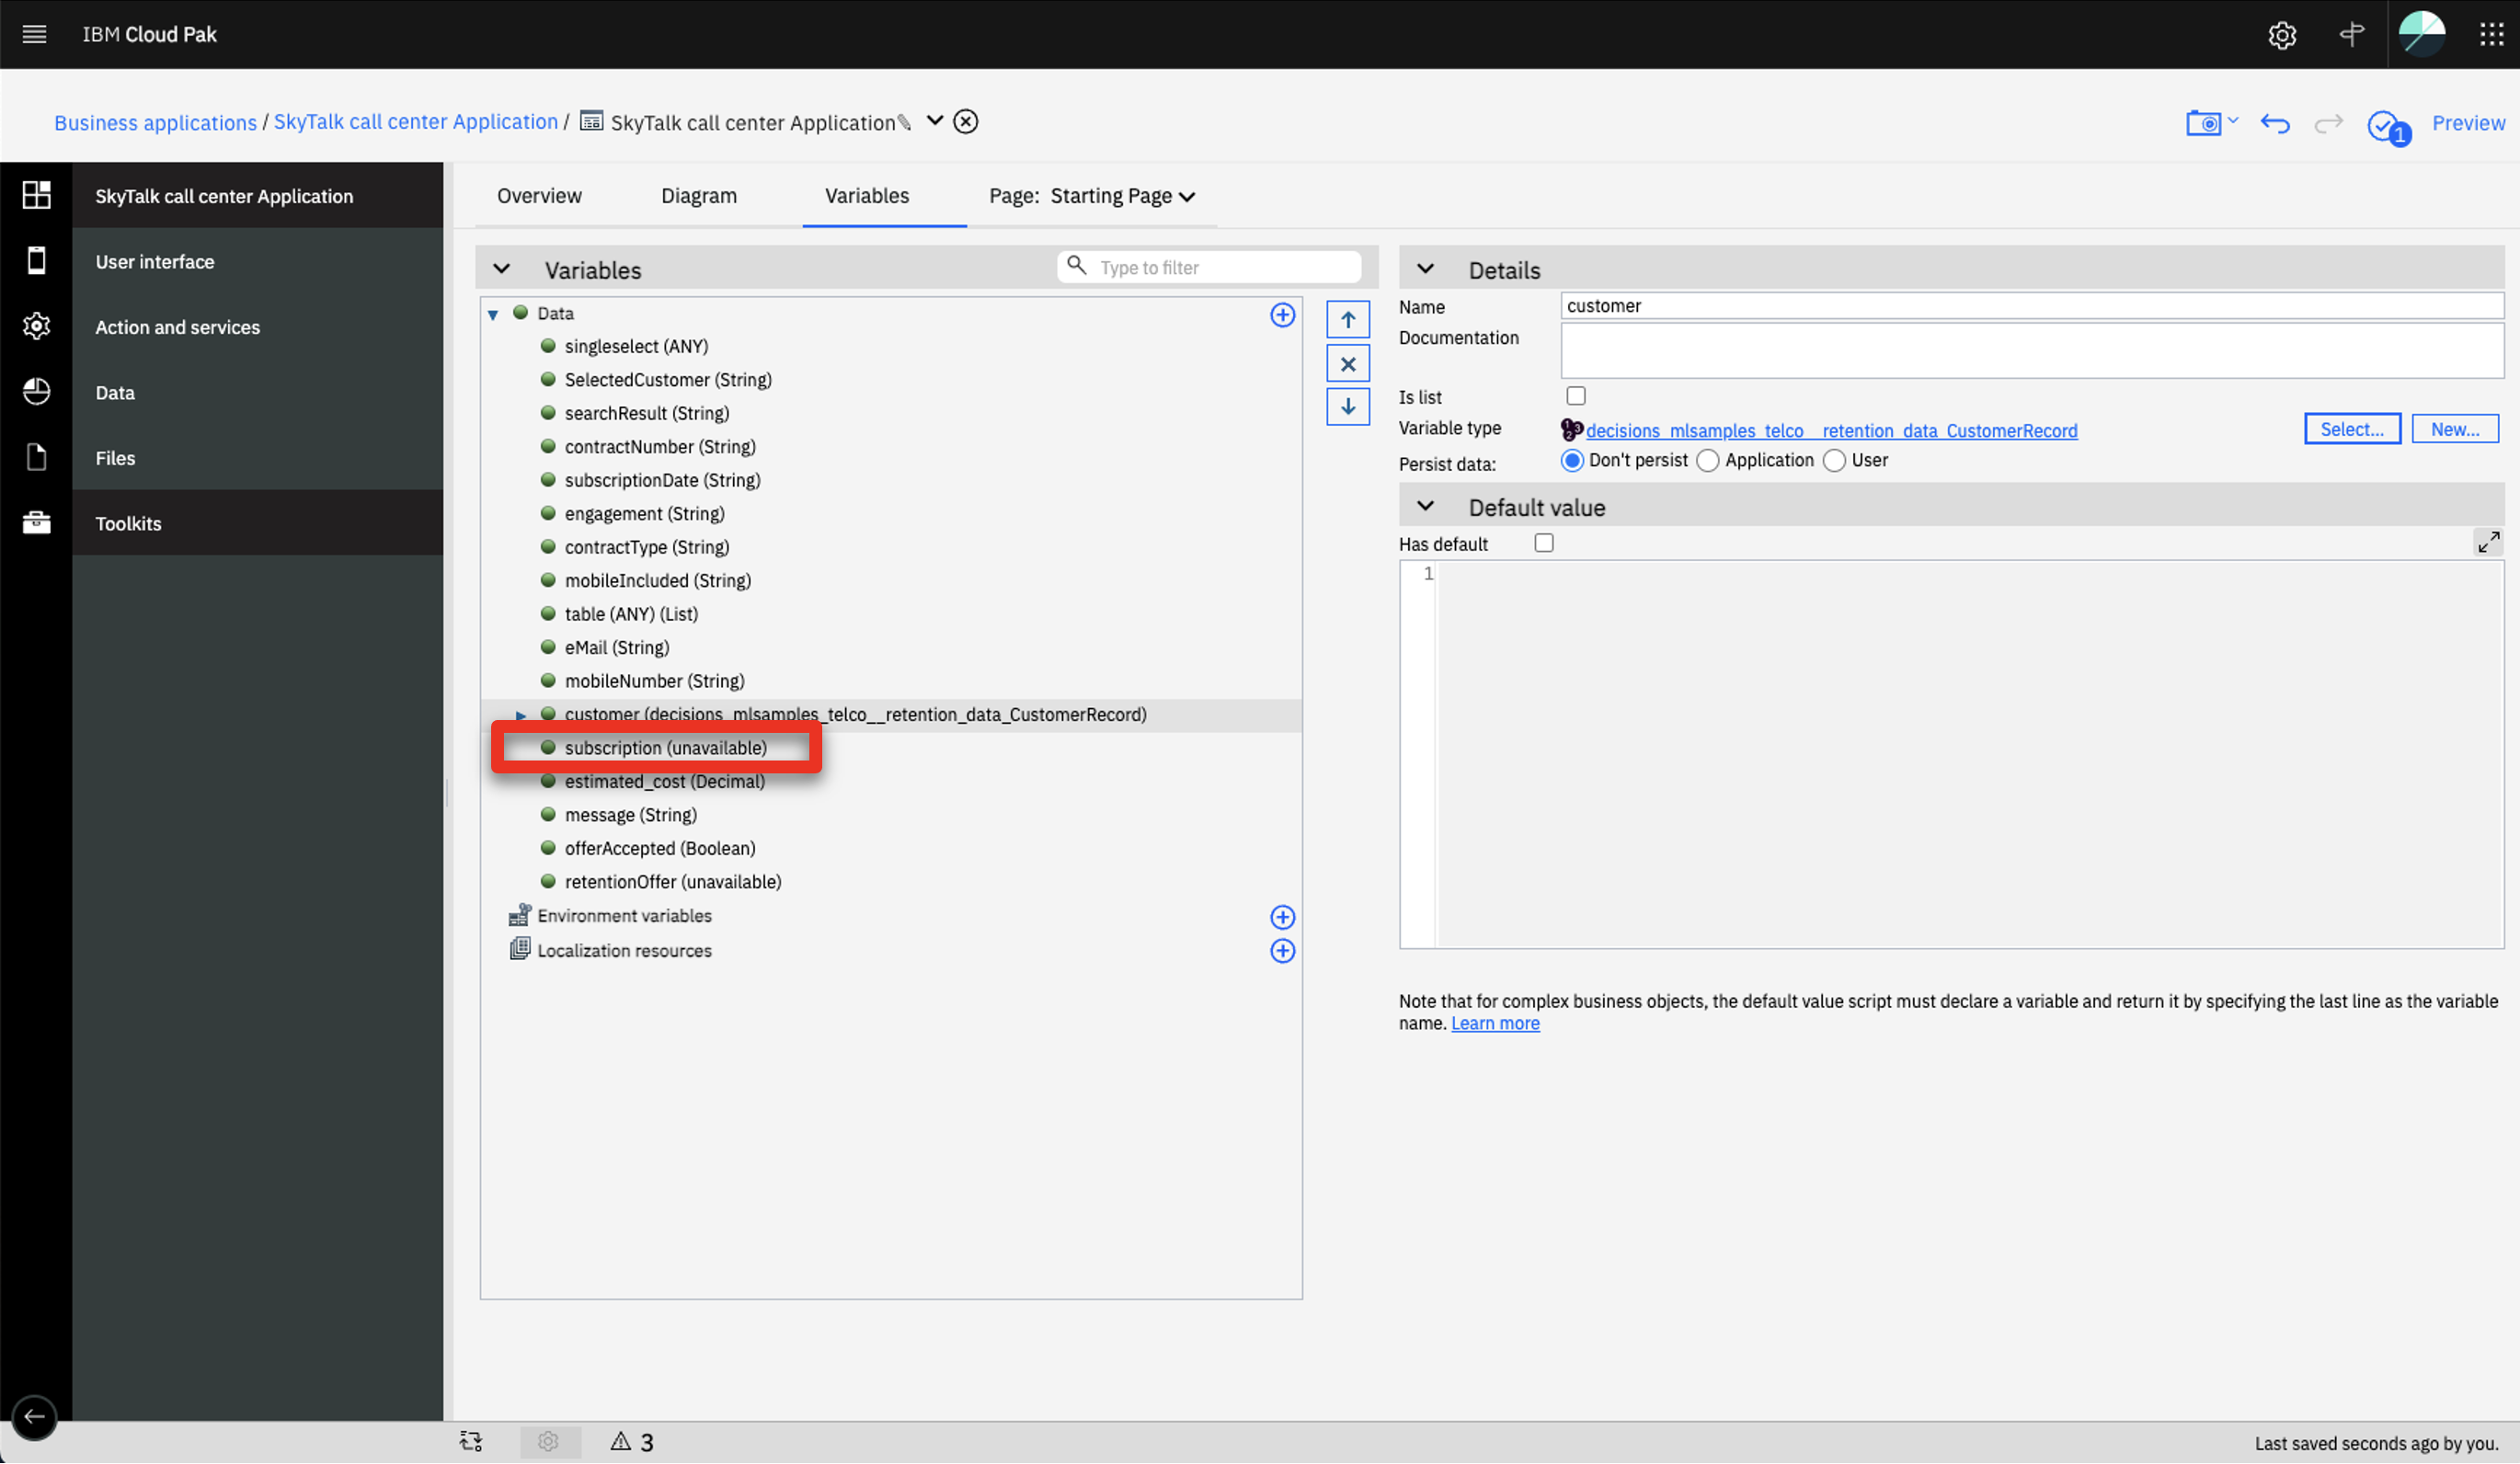
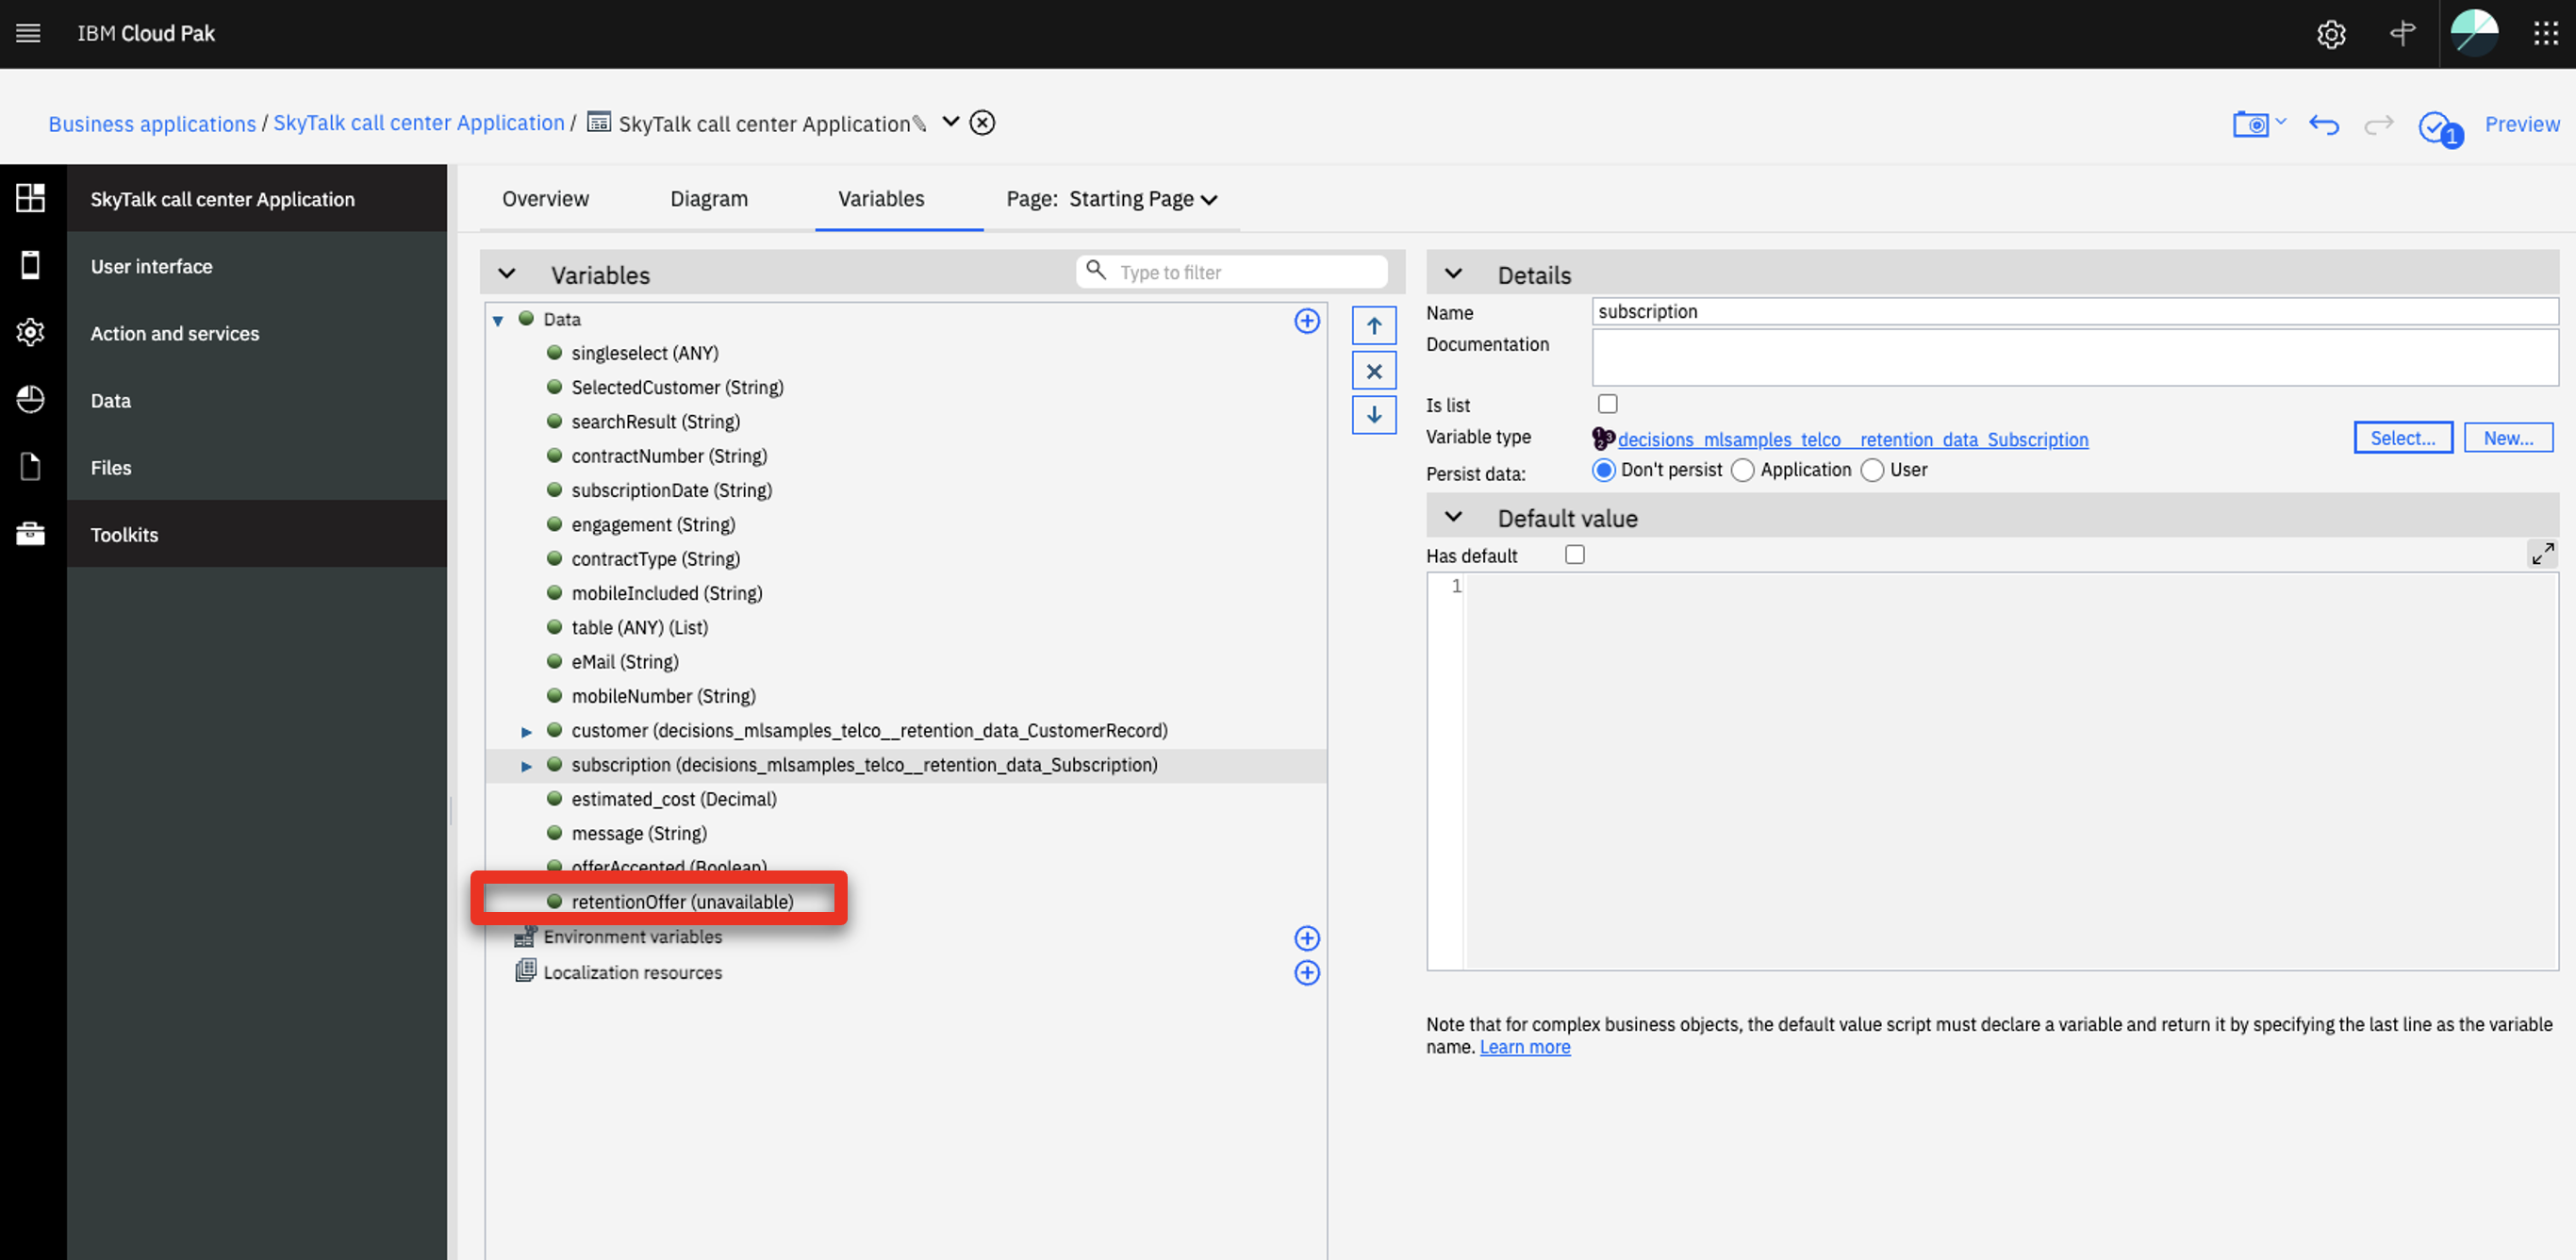
Select subscription (unavailable) in the Data variables list.
-
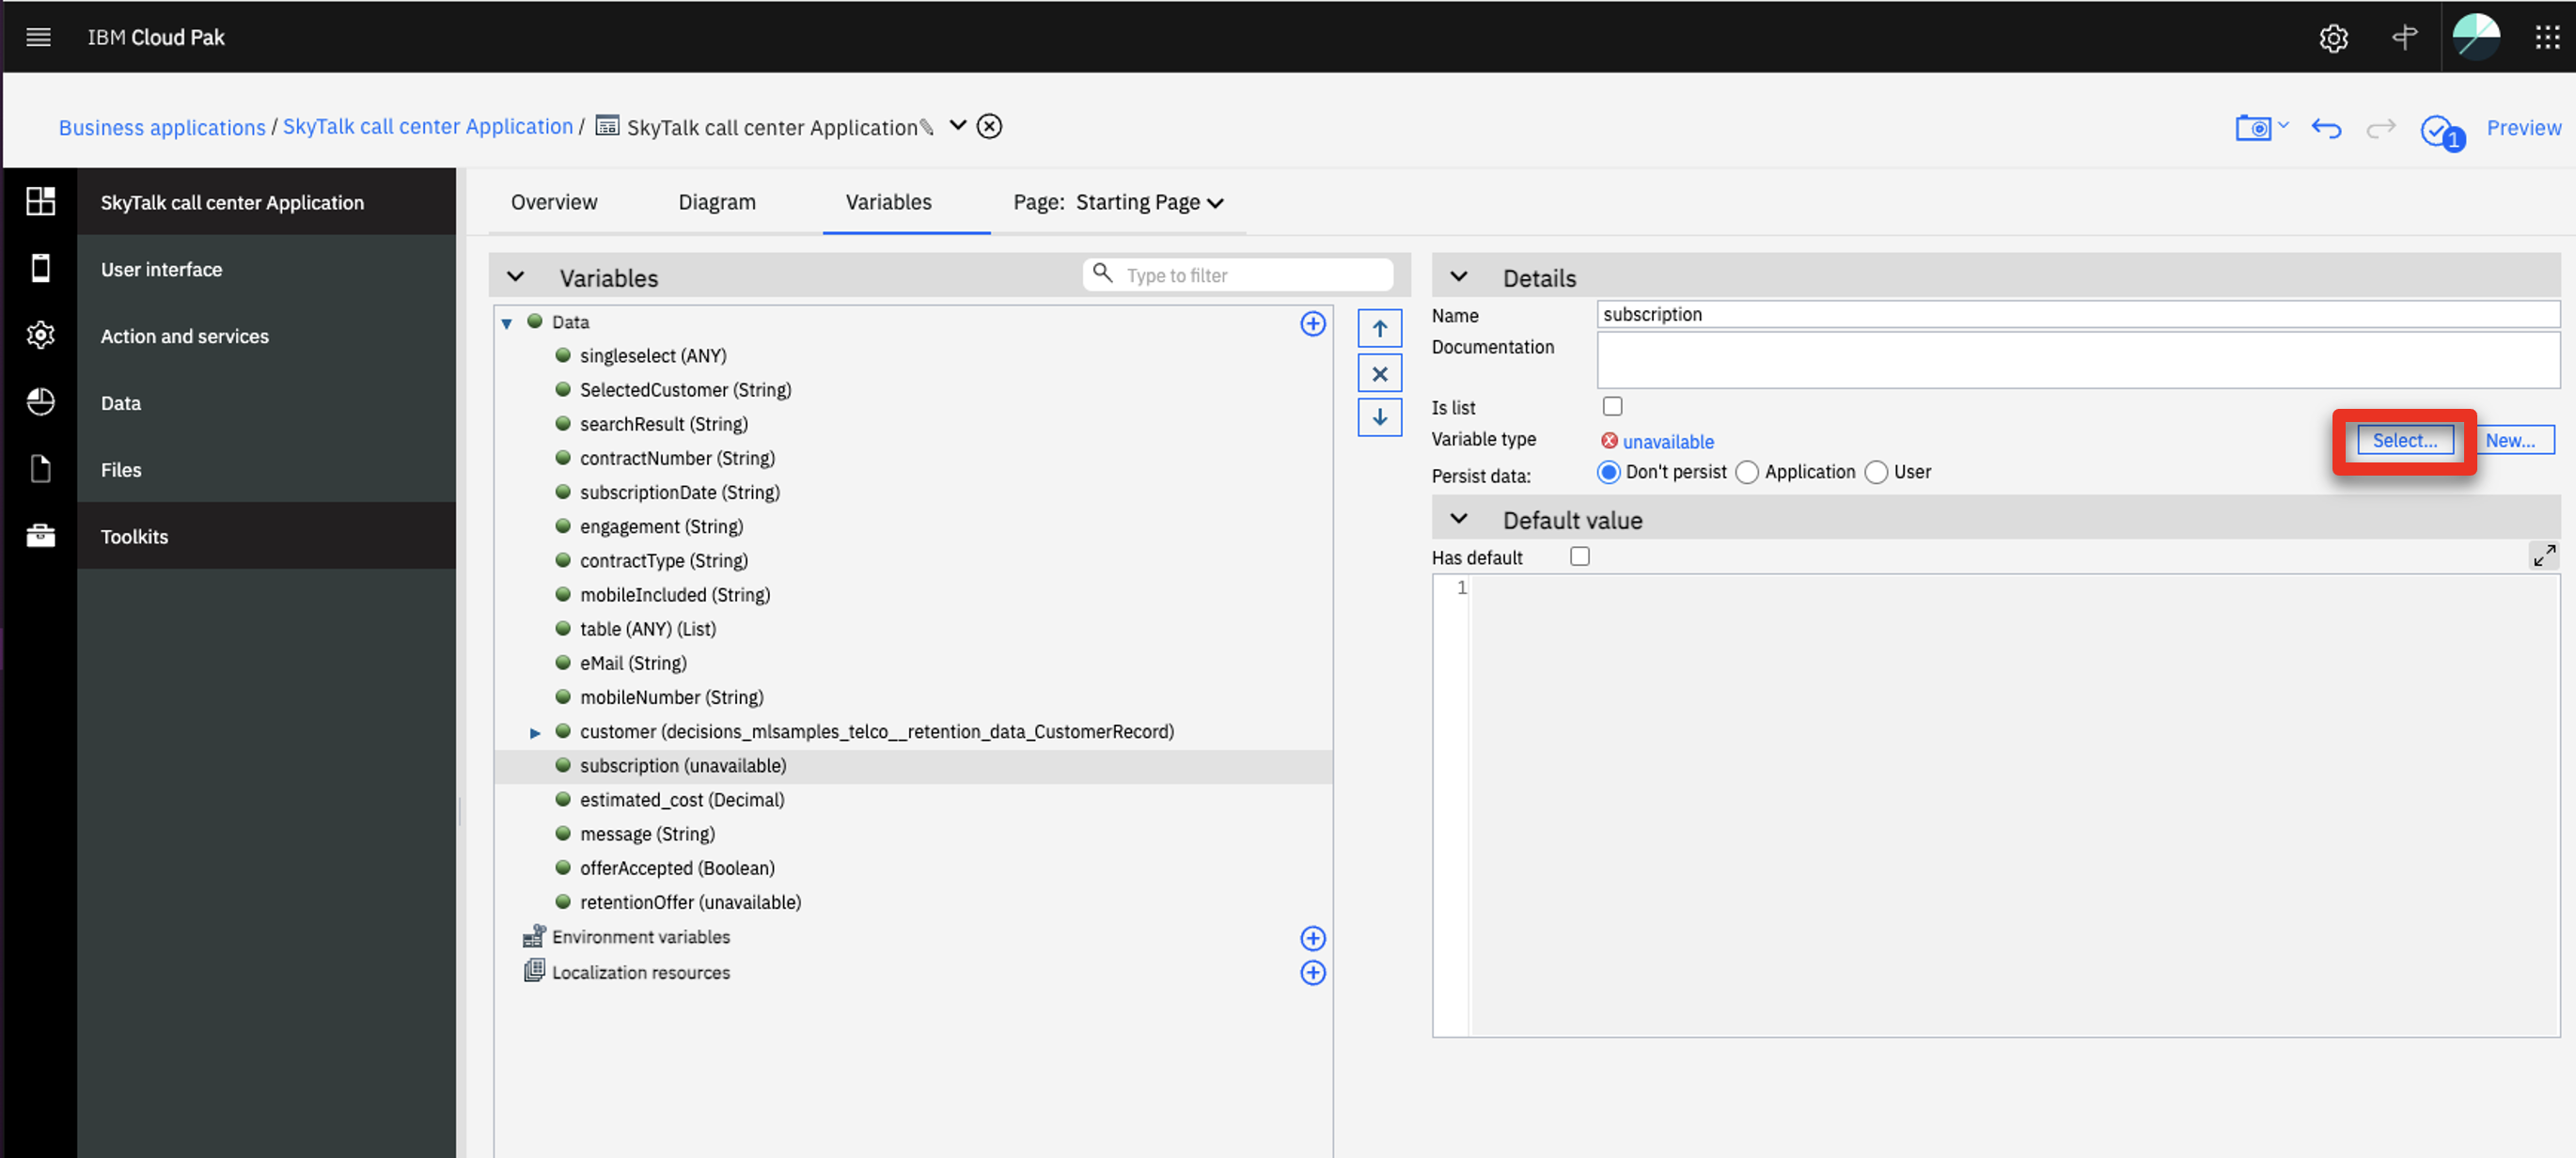
Click Select… in the Details pane.
-
Select decision_mlsamples_telcor_etention_data_Subscription as the Business Object.
-
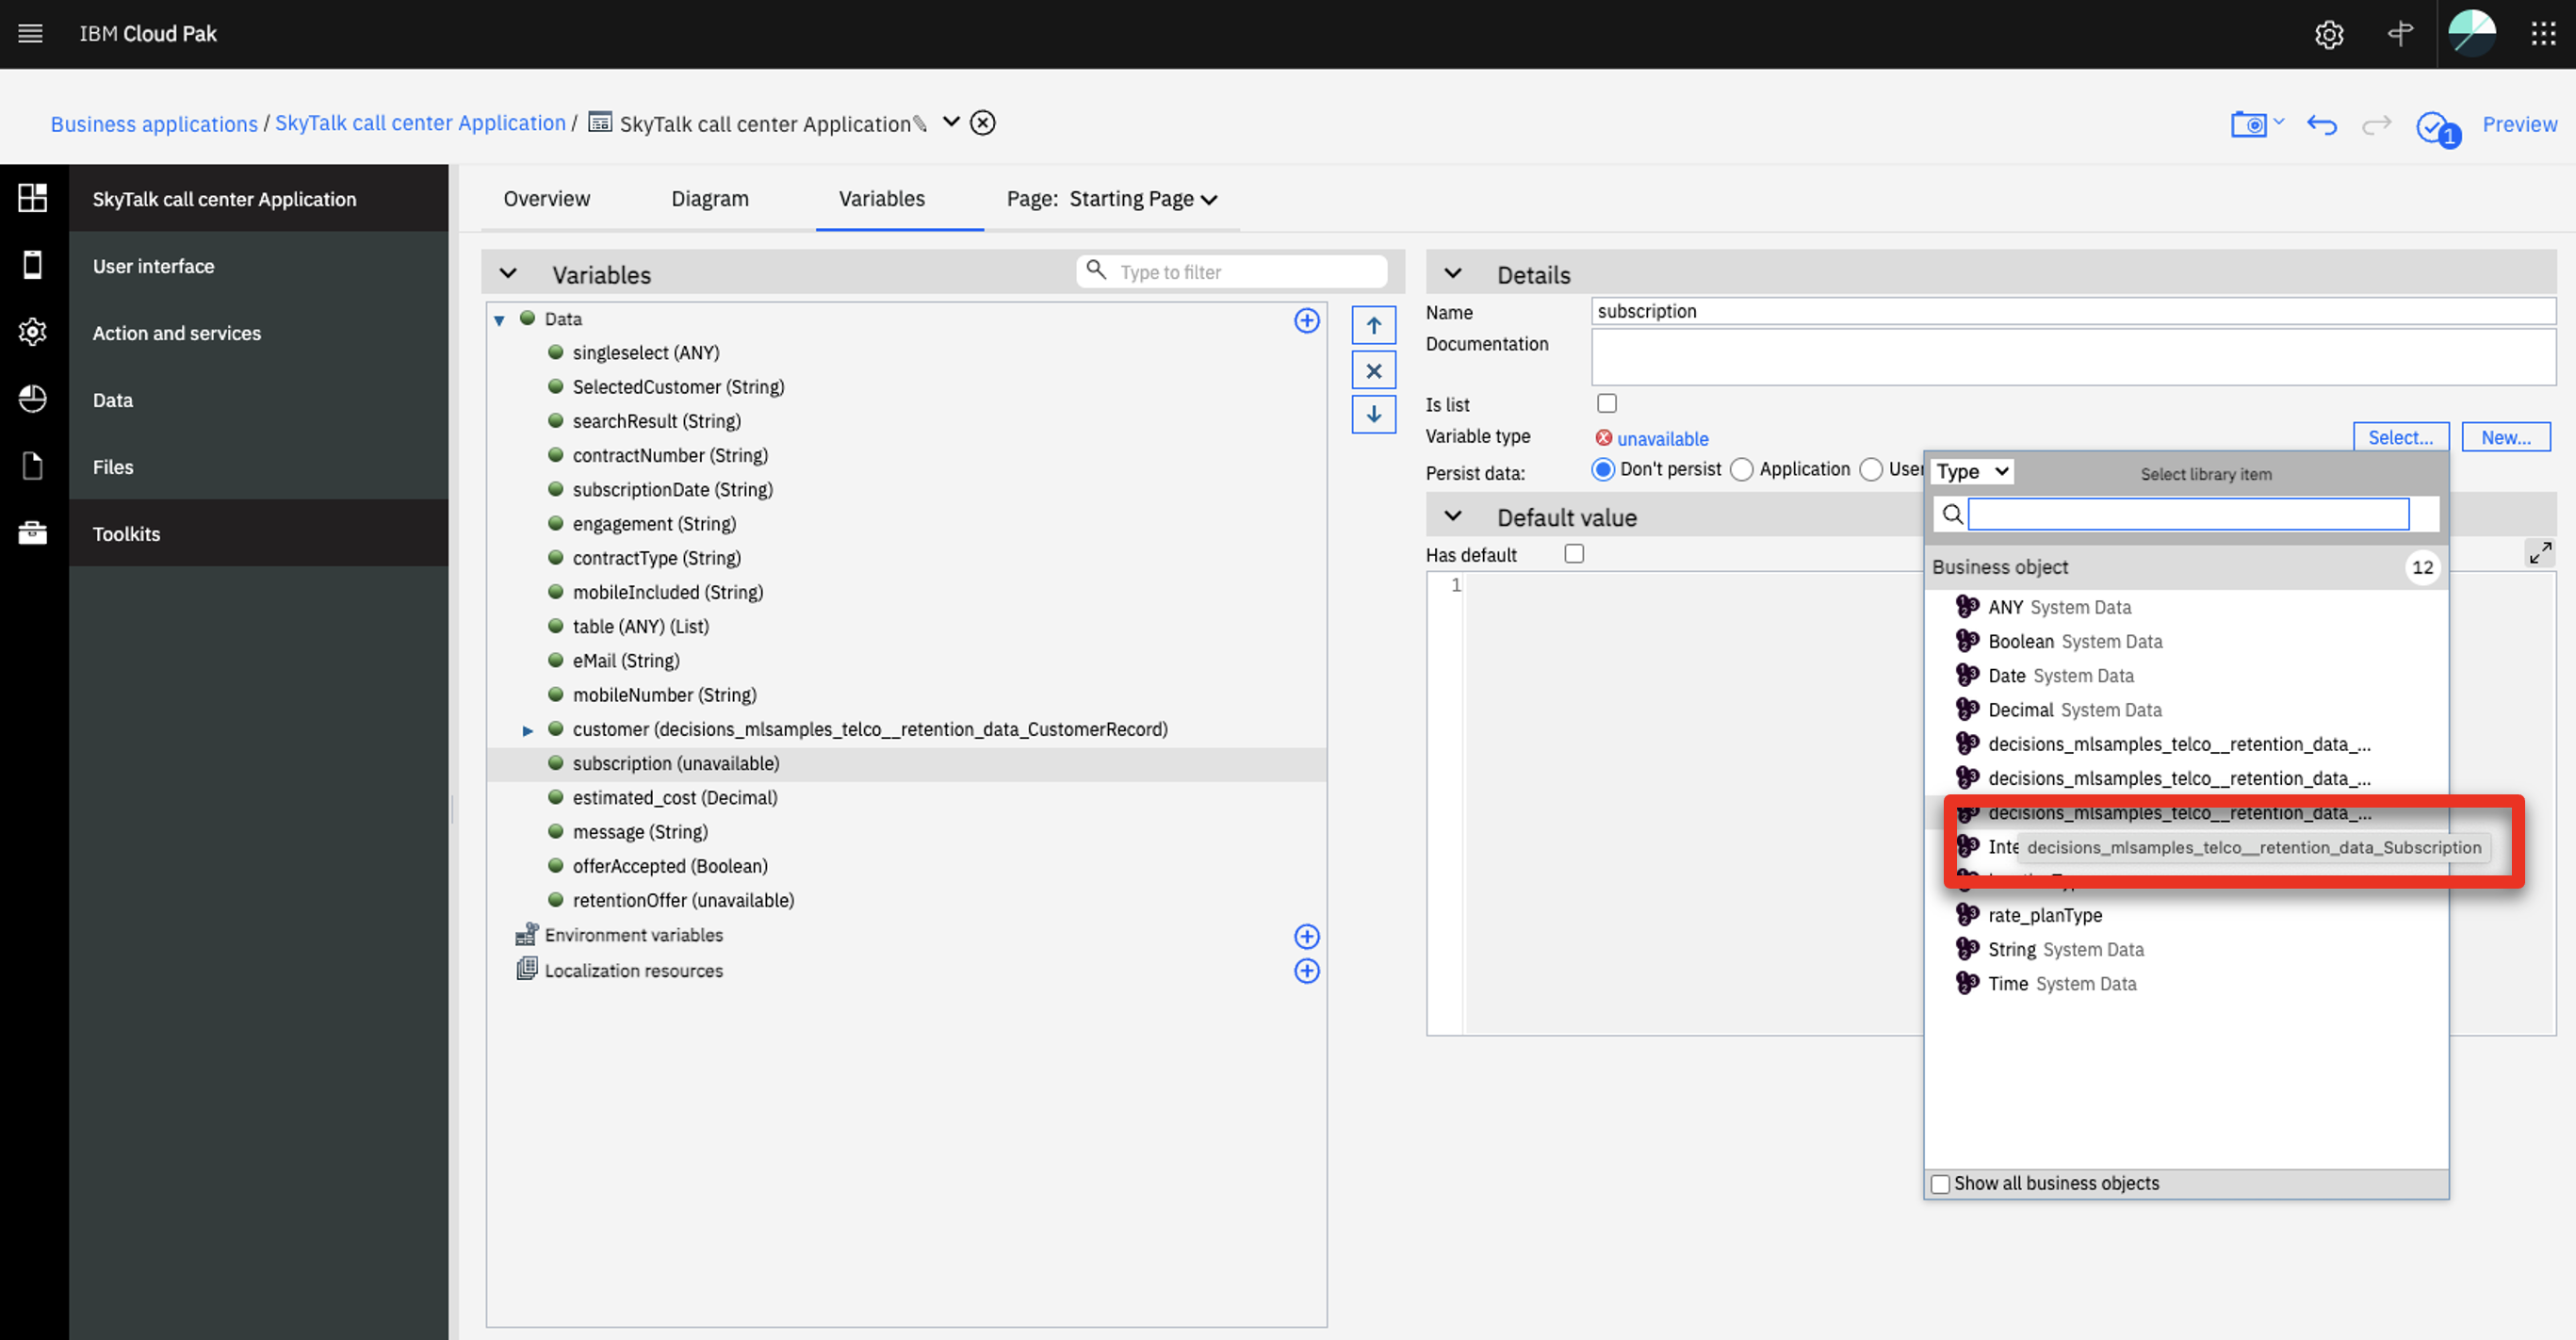
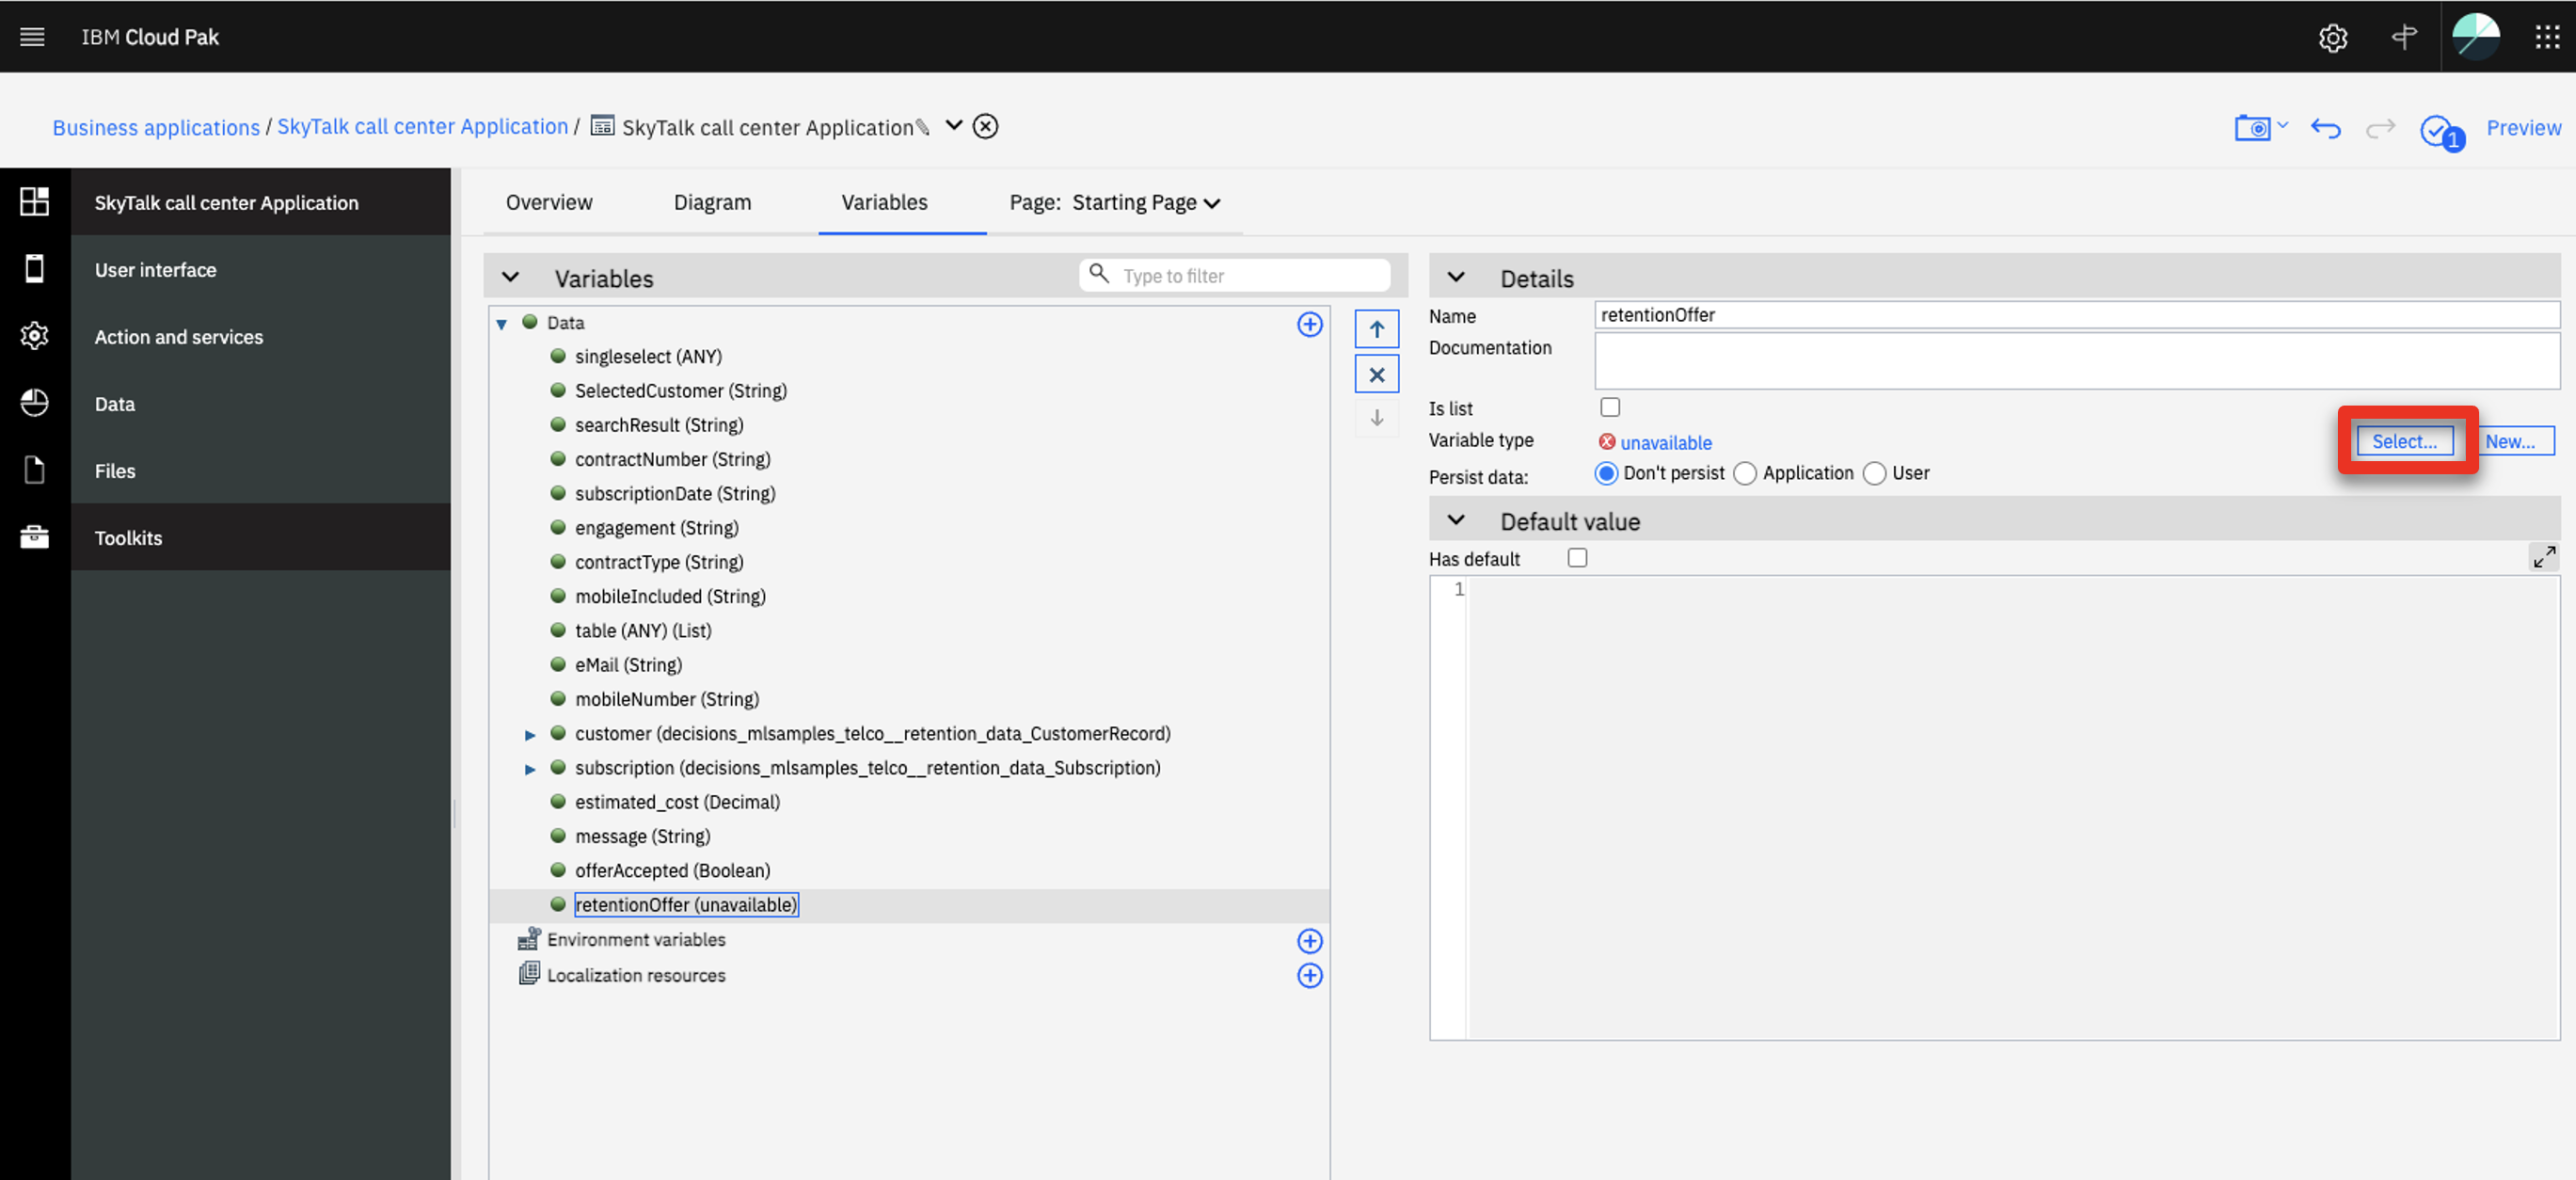
Select retentionOffer (unavailable) in the Data variables list.
-
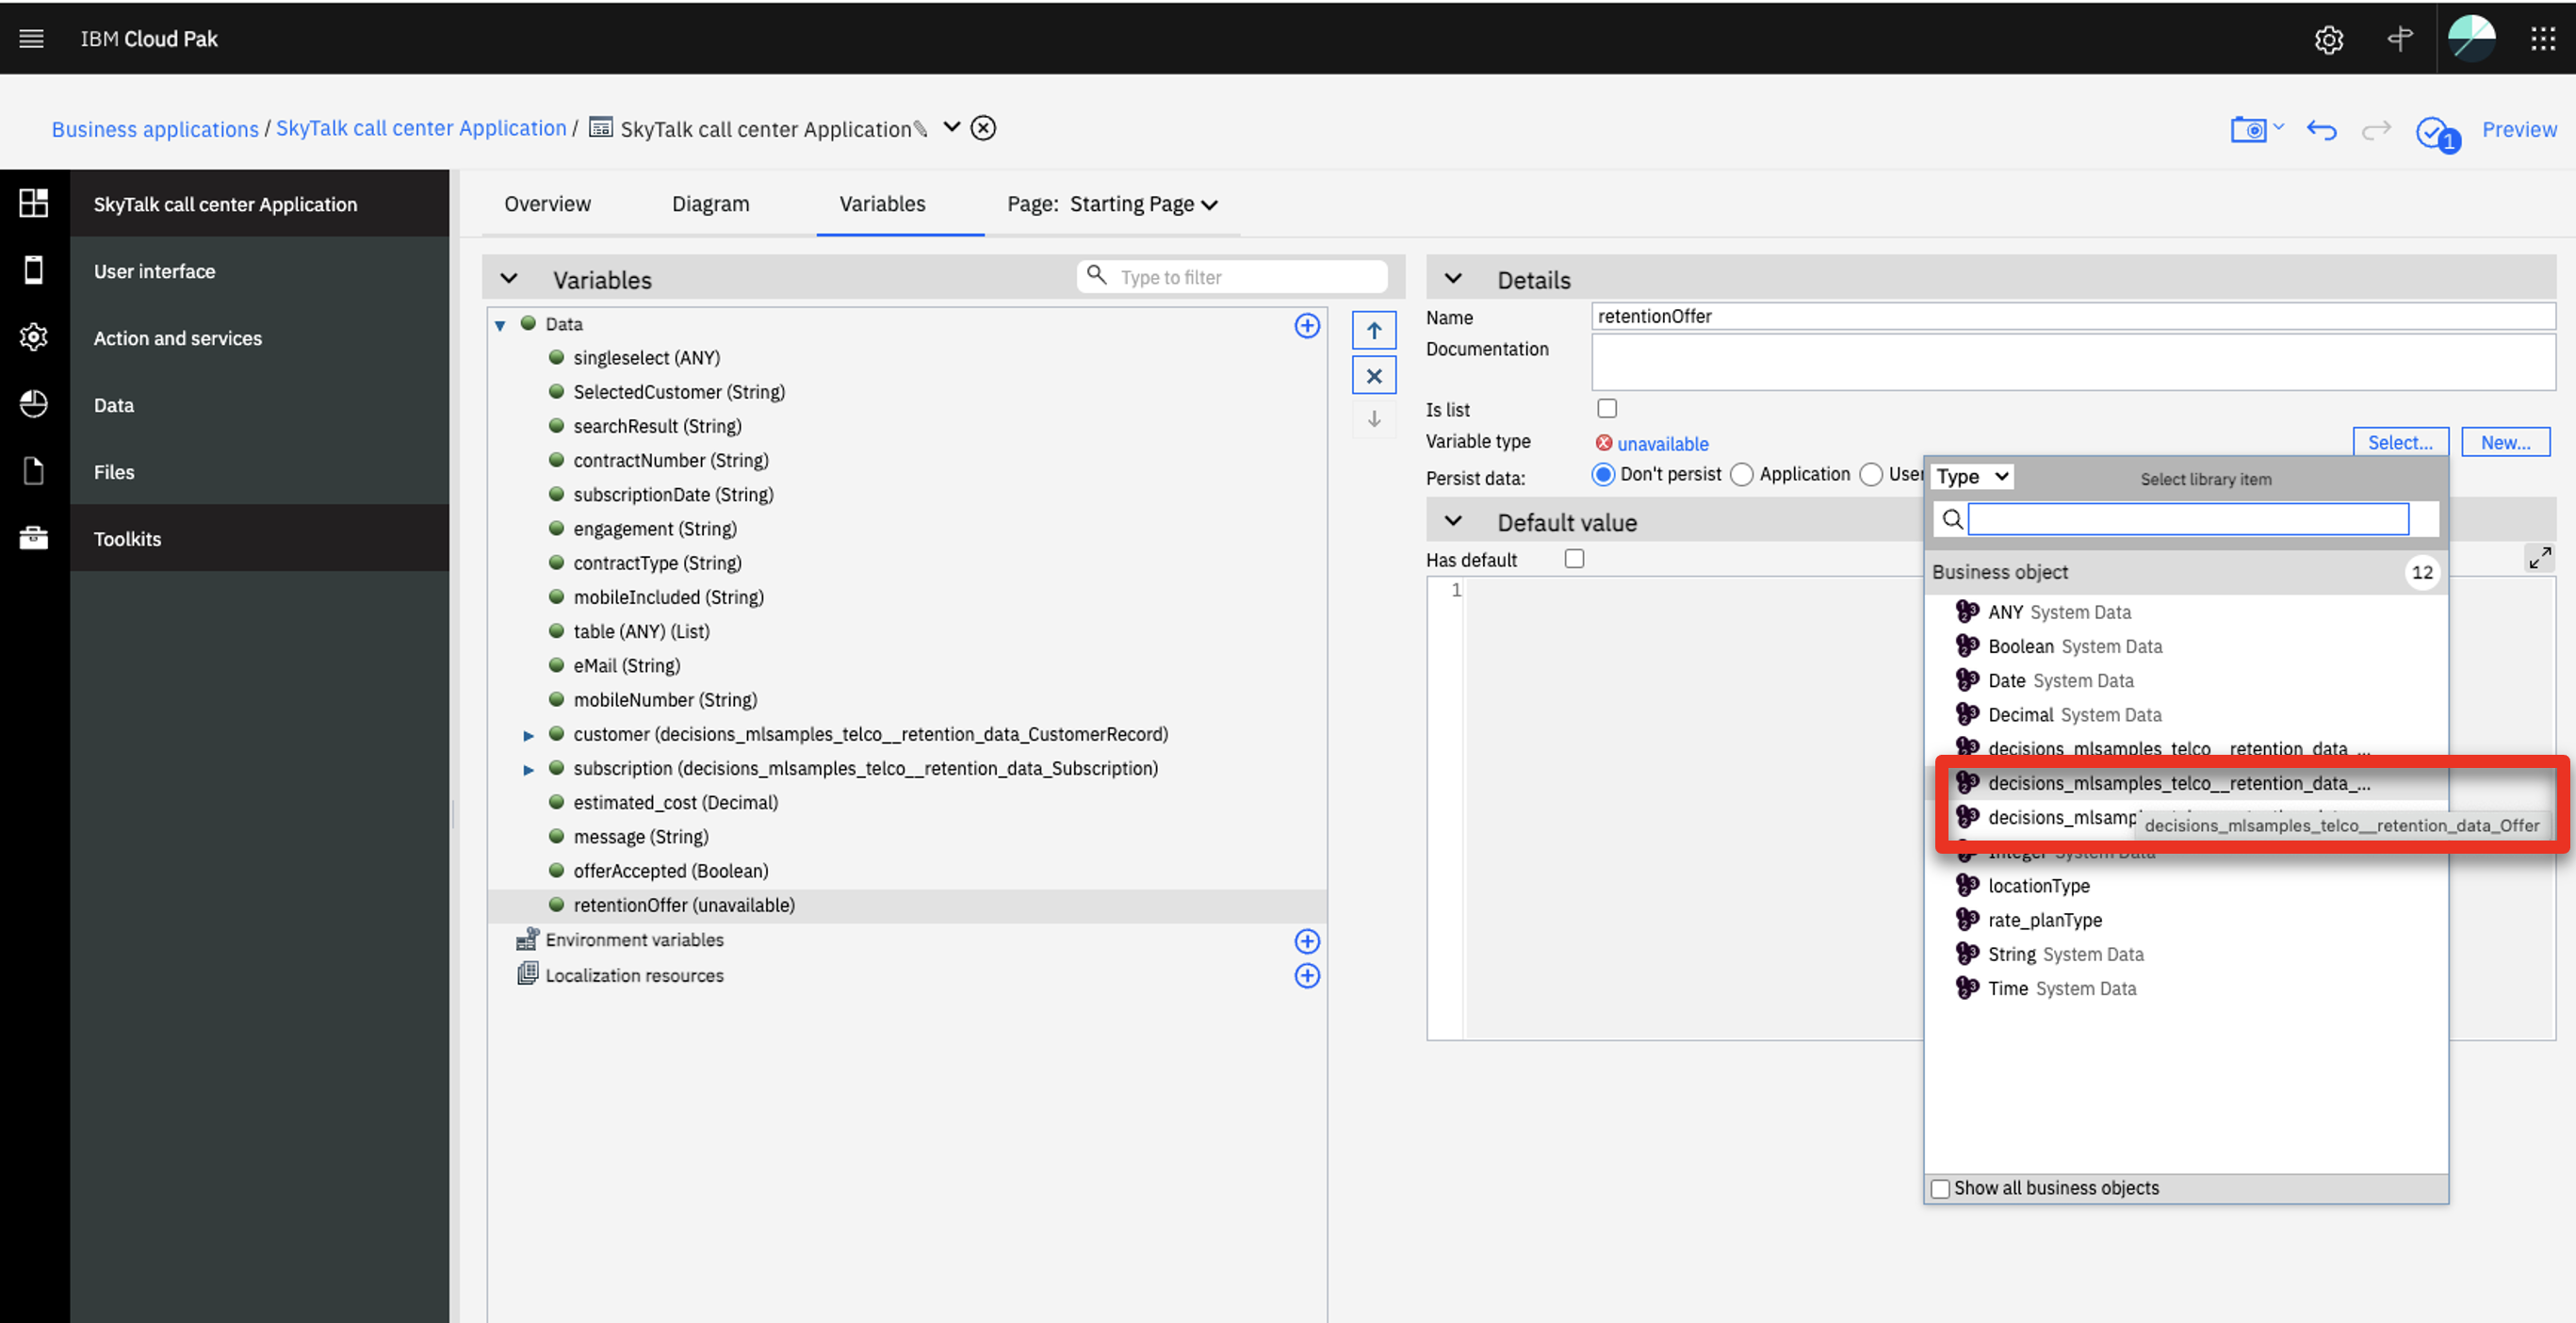
Click Select… in the Details pane.
-
Select decision_mlsamples_telco_retention_data_Offer as the Business Object.
-
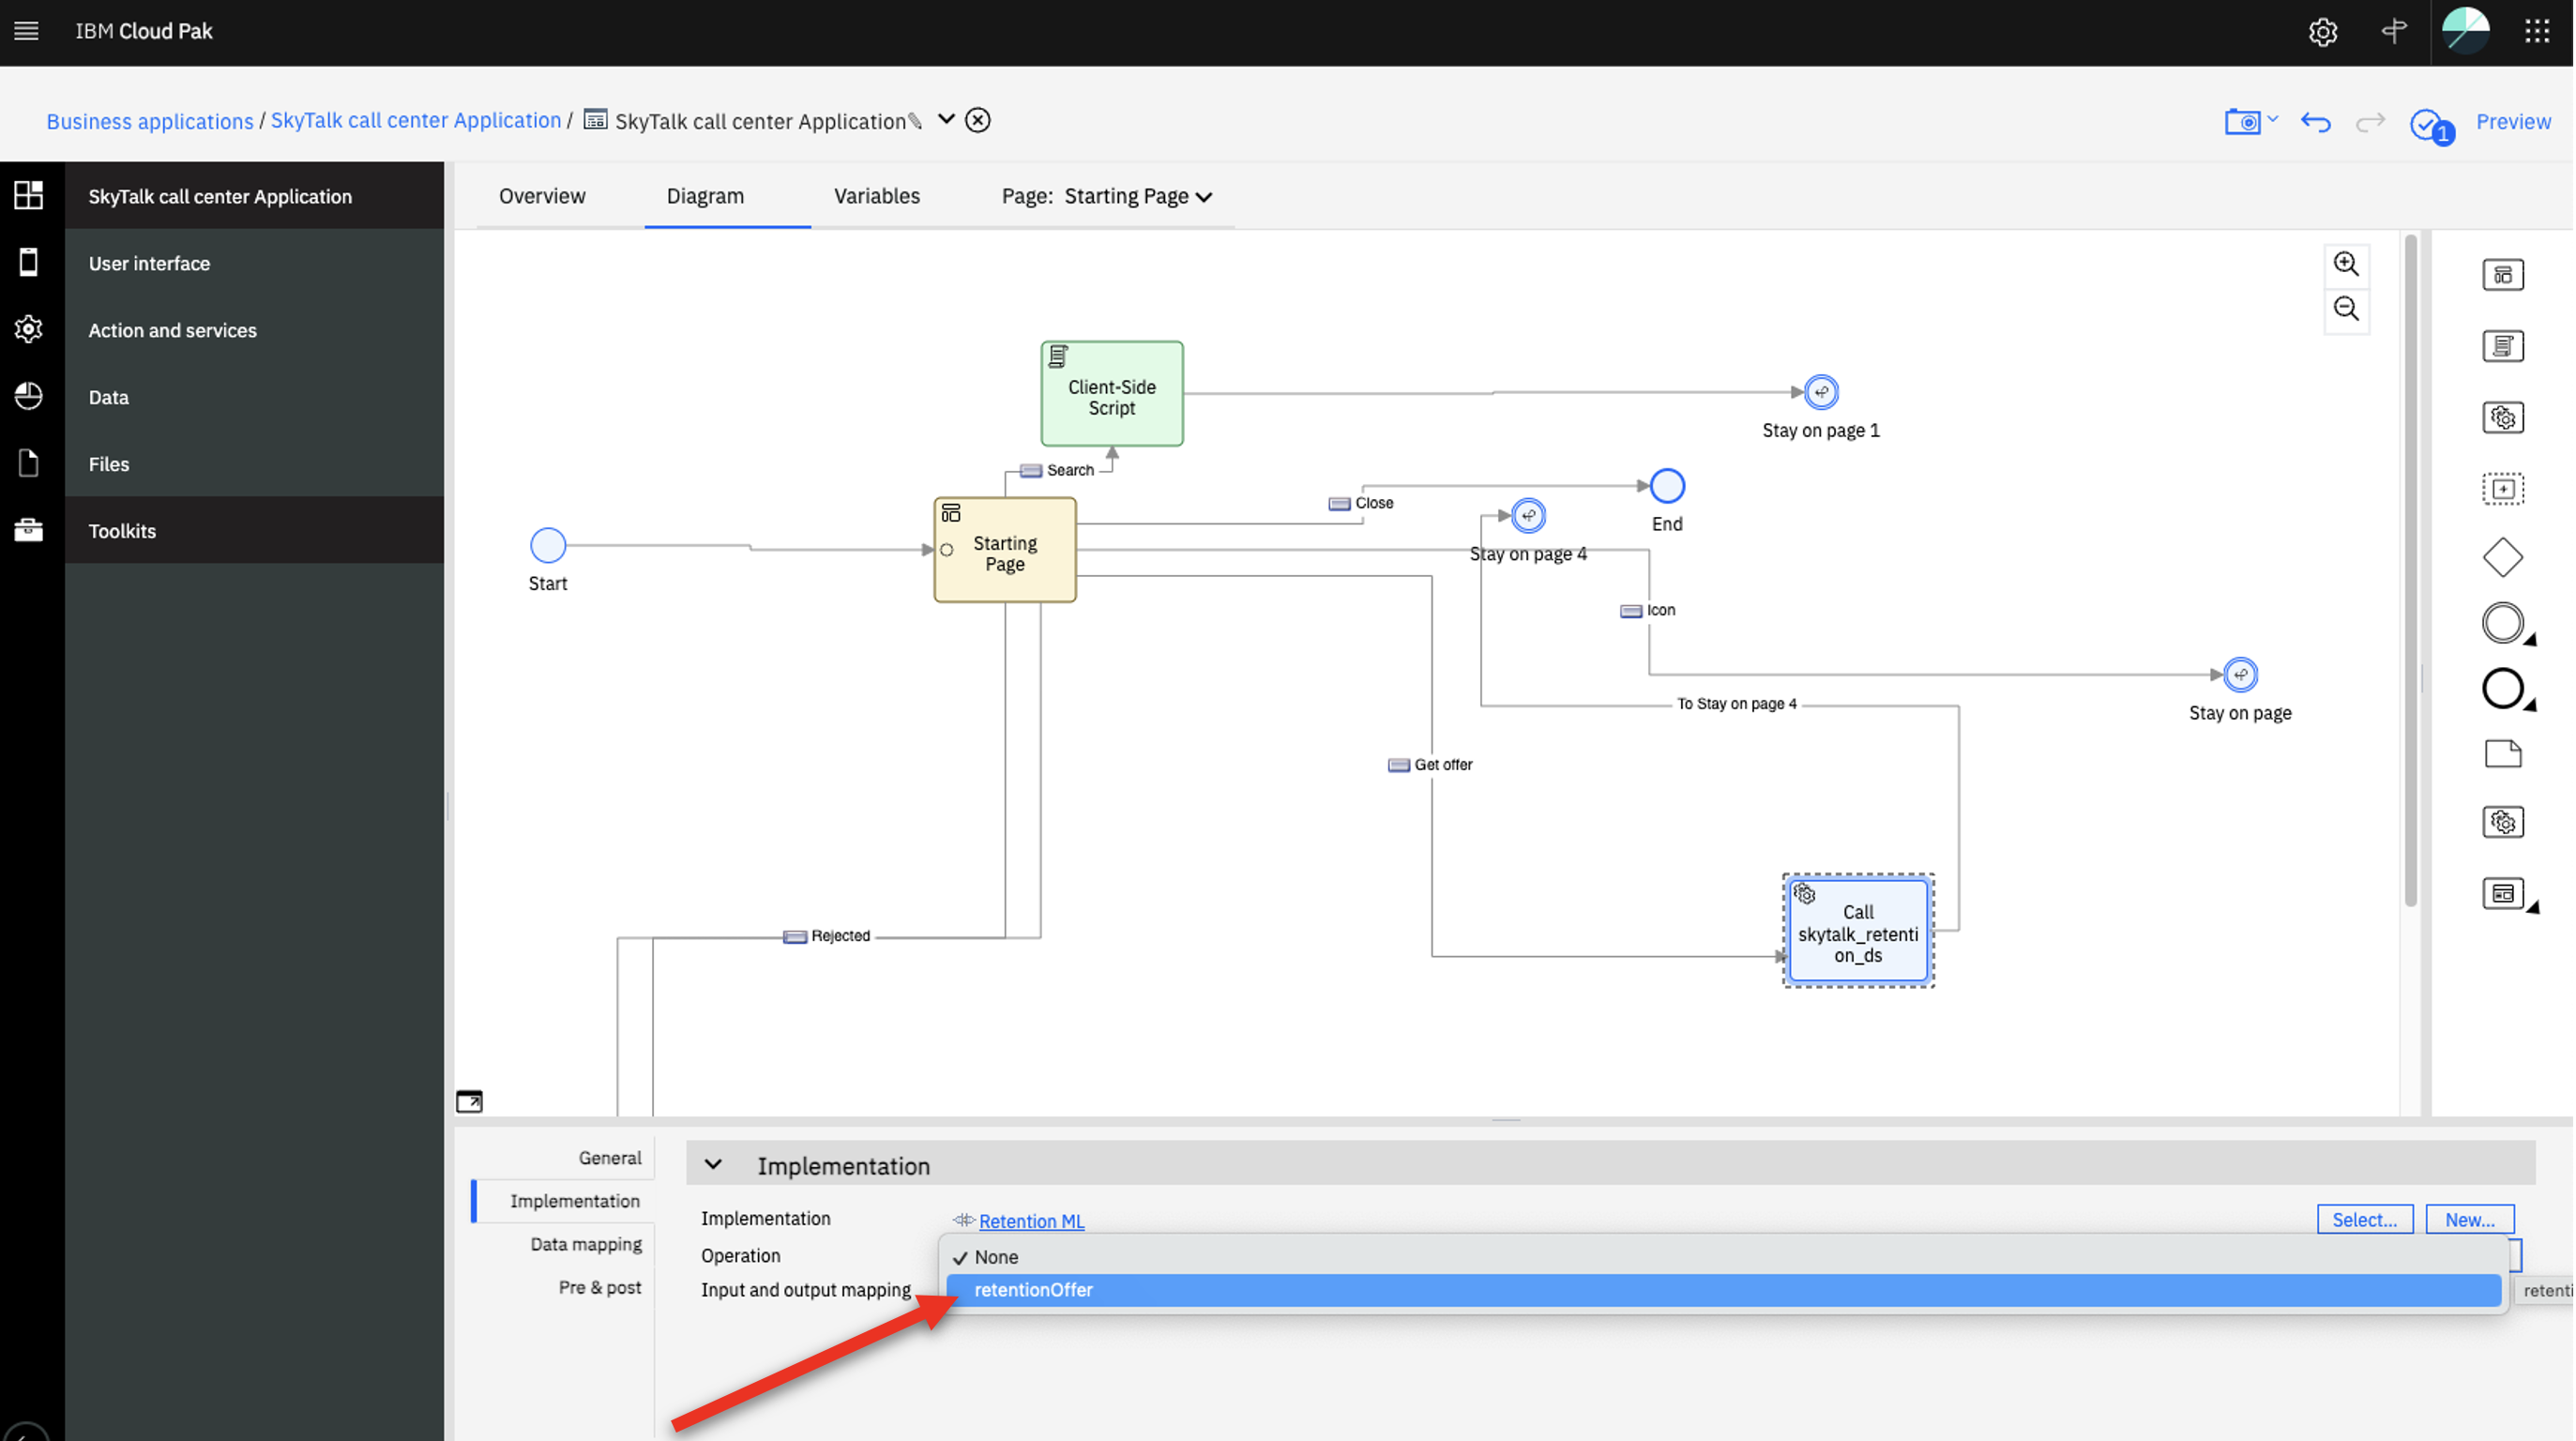
Click the Diagram tab.
-
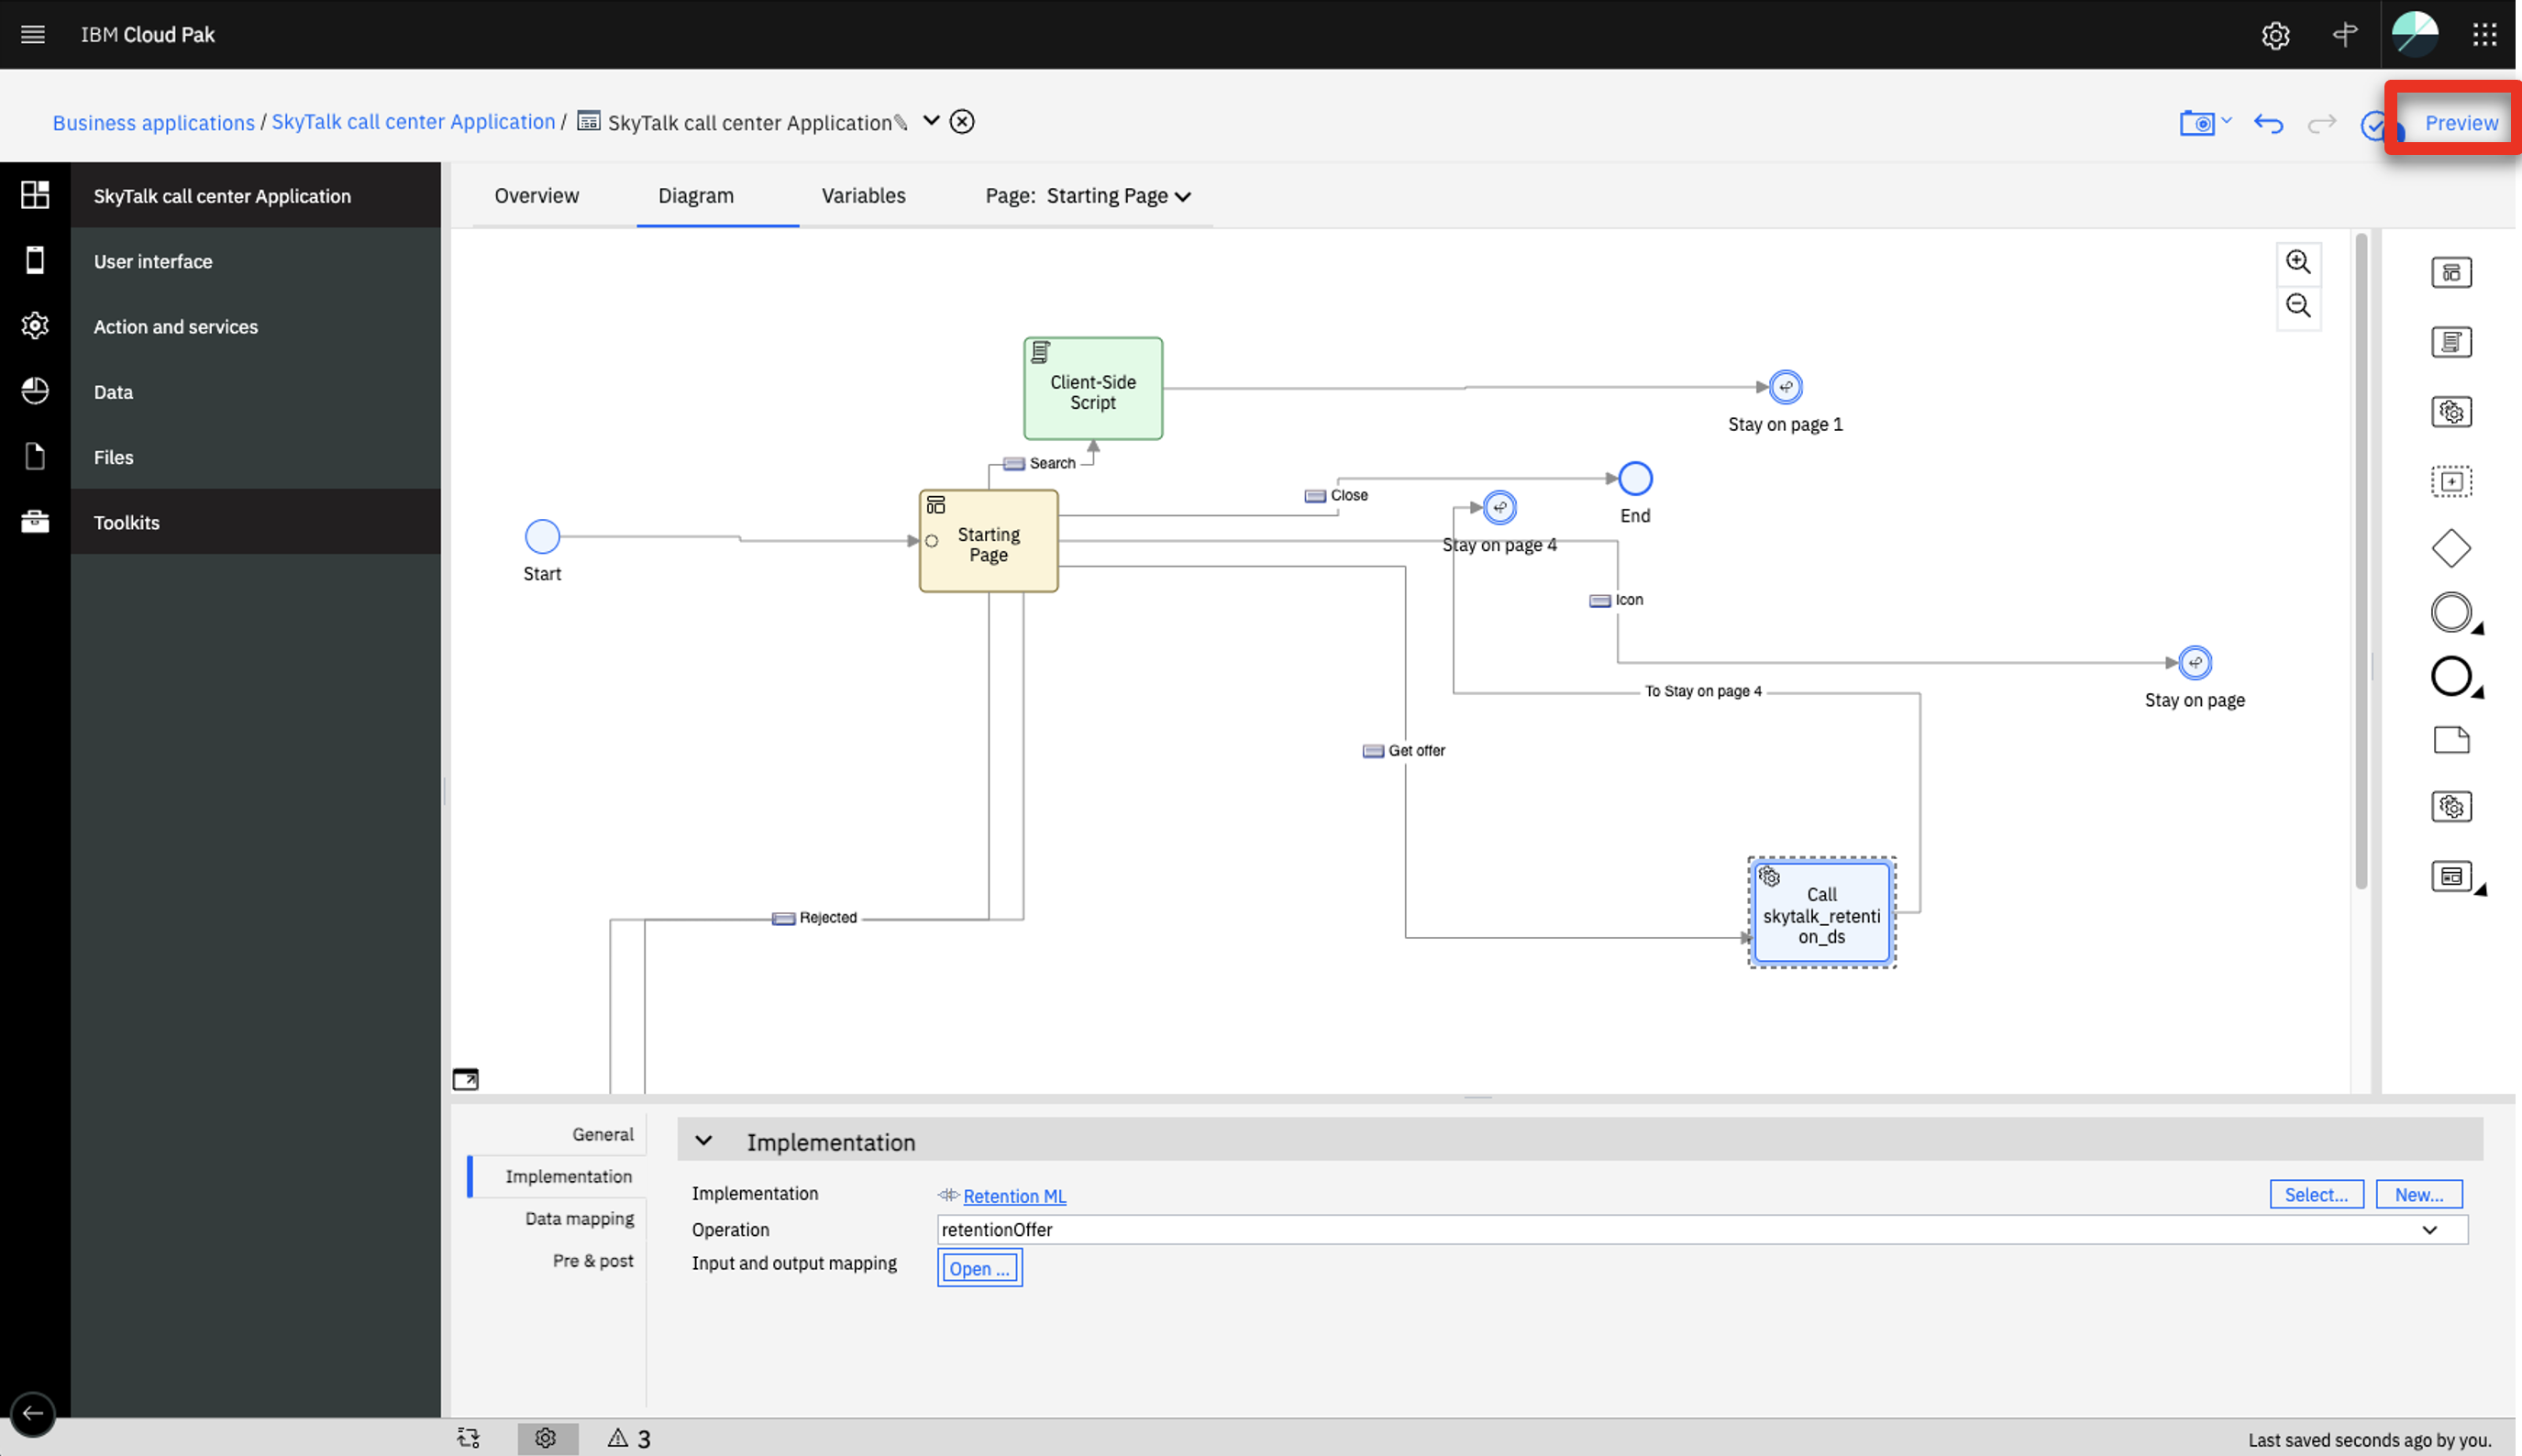
Select retentionOffer on the Operation selector in the Implementation tab below the diagram.
-
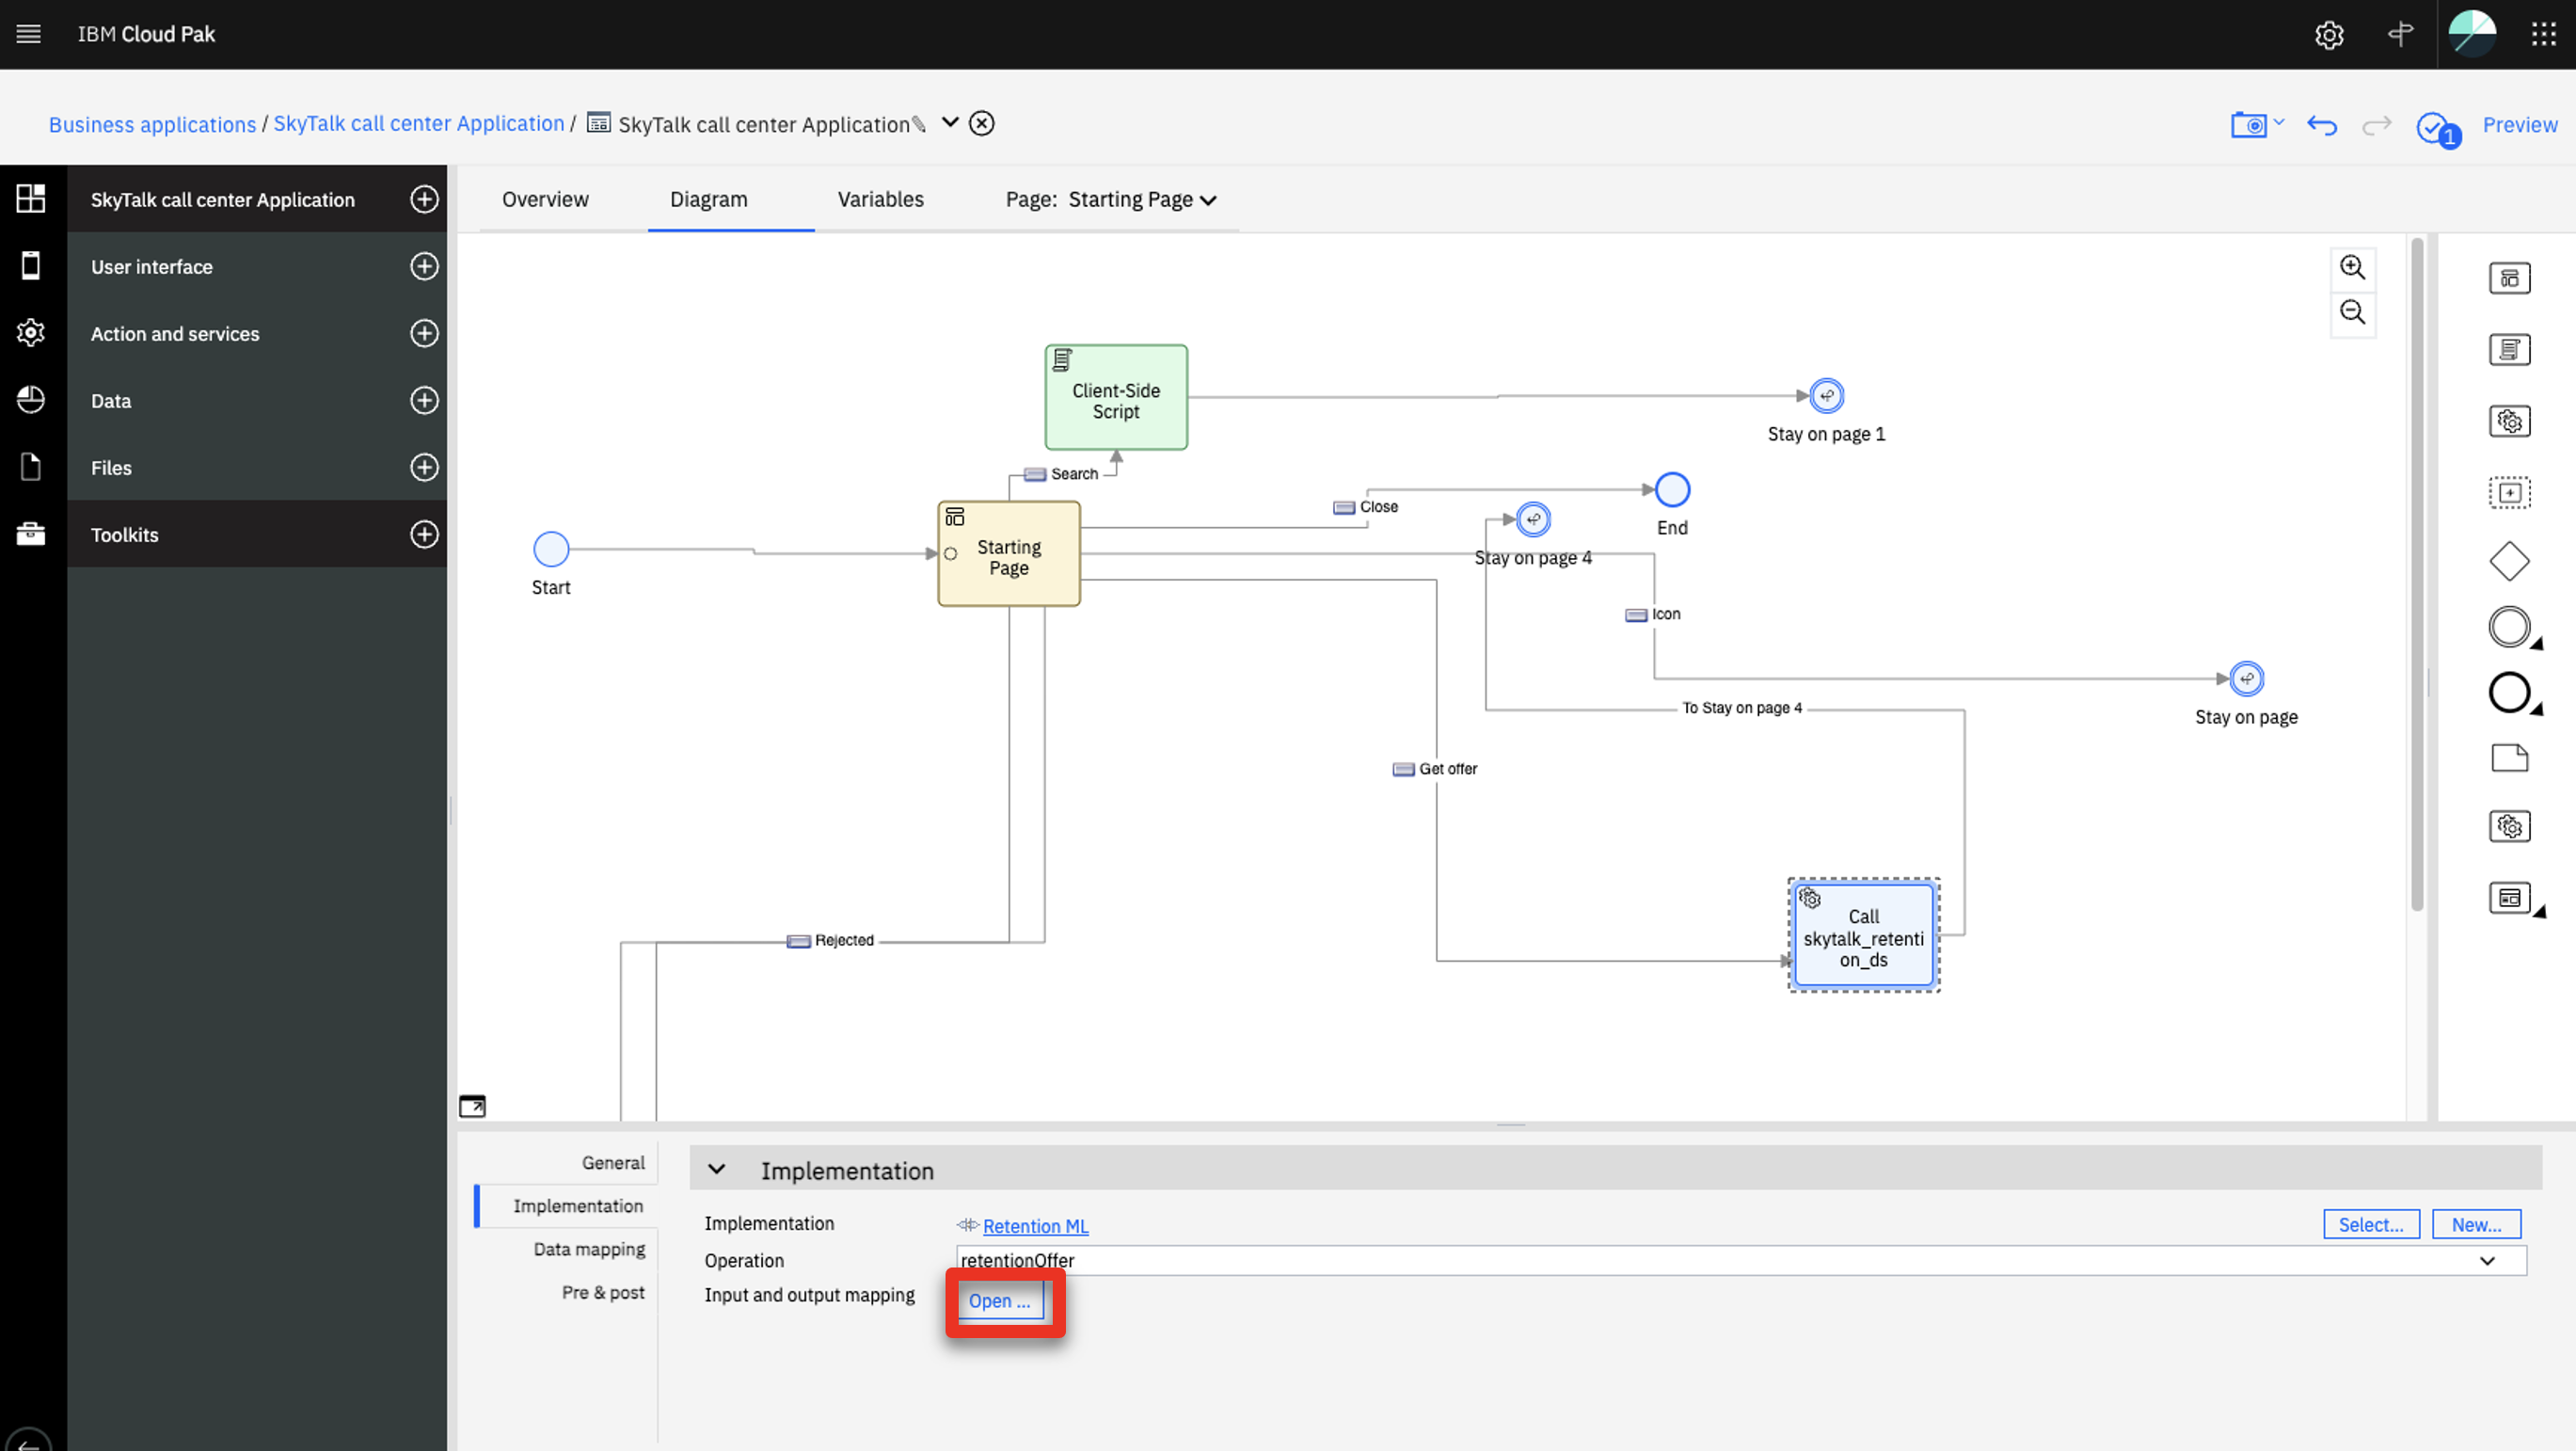
Click Open in the Input and Output mapping.
-
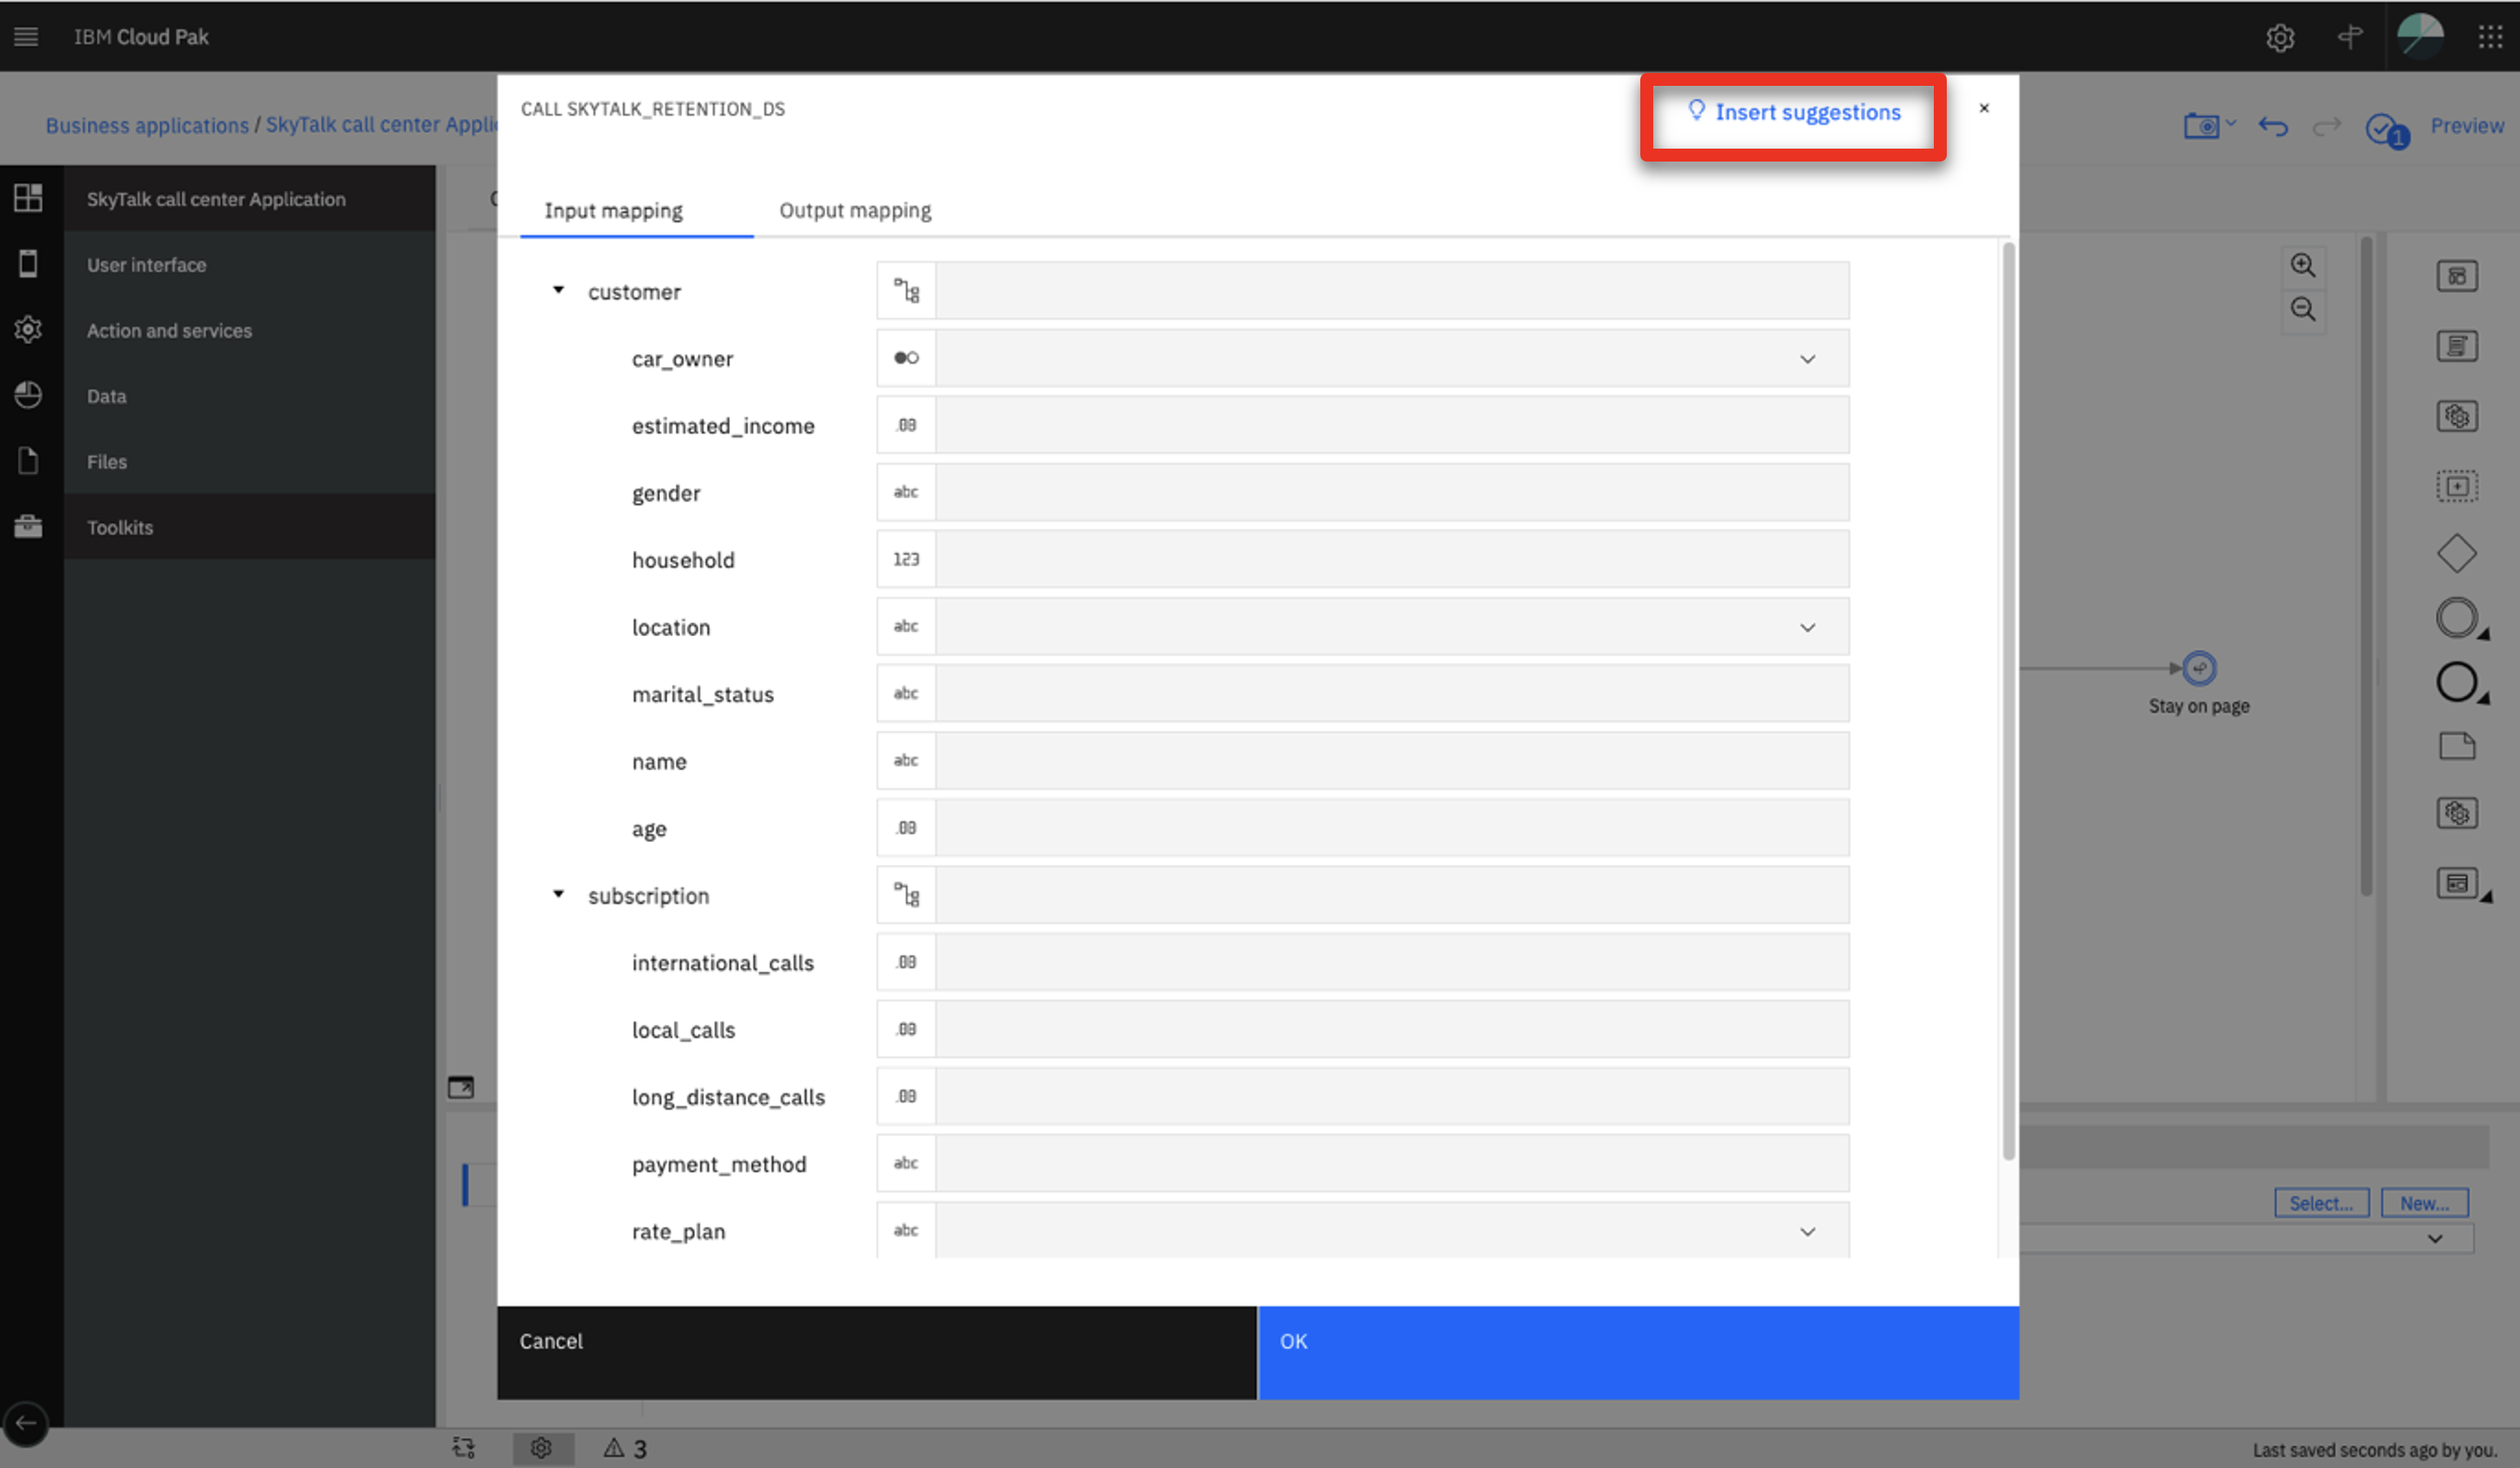
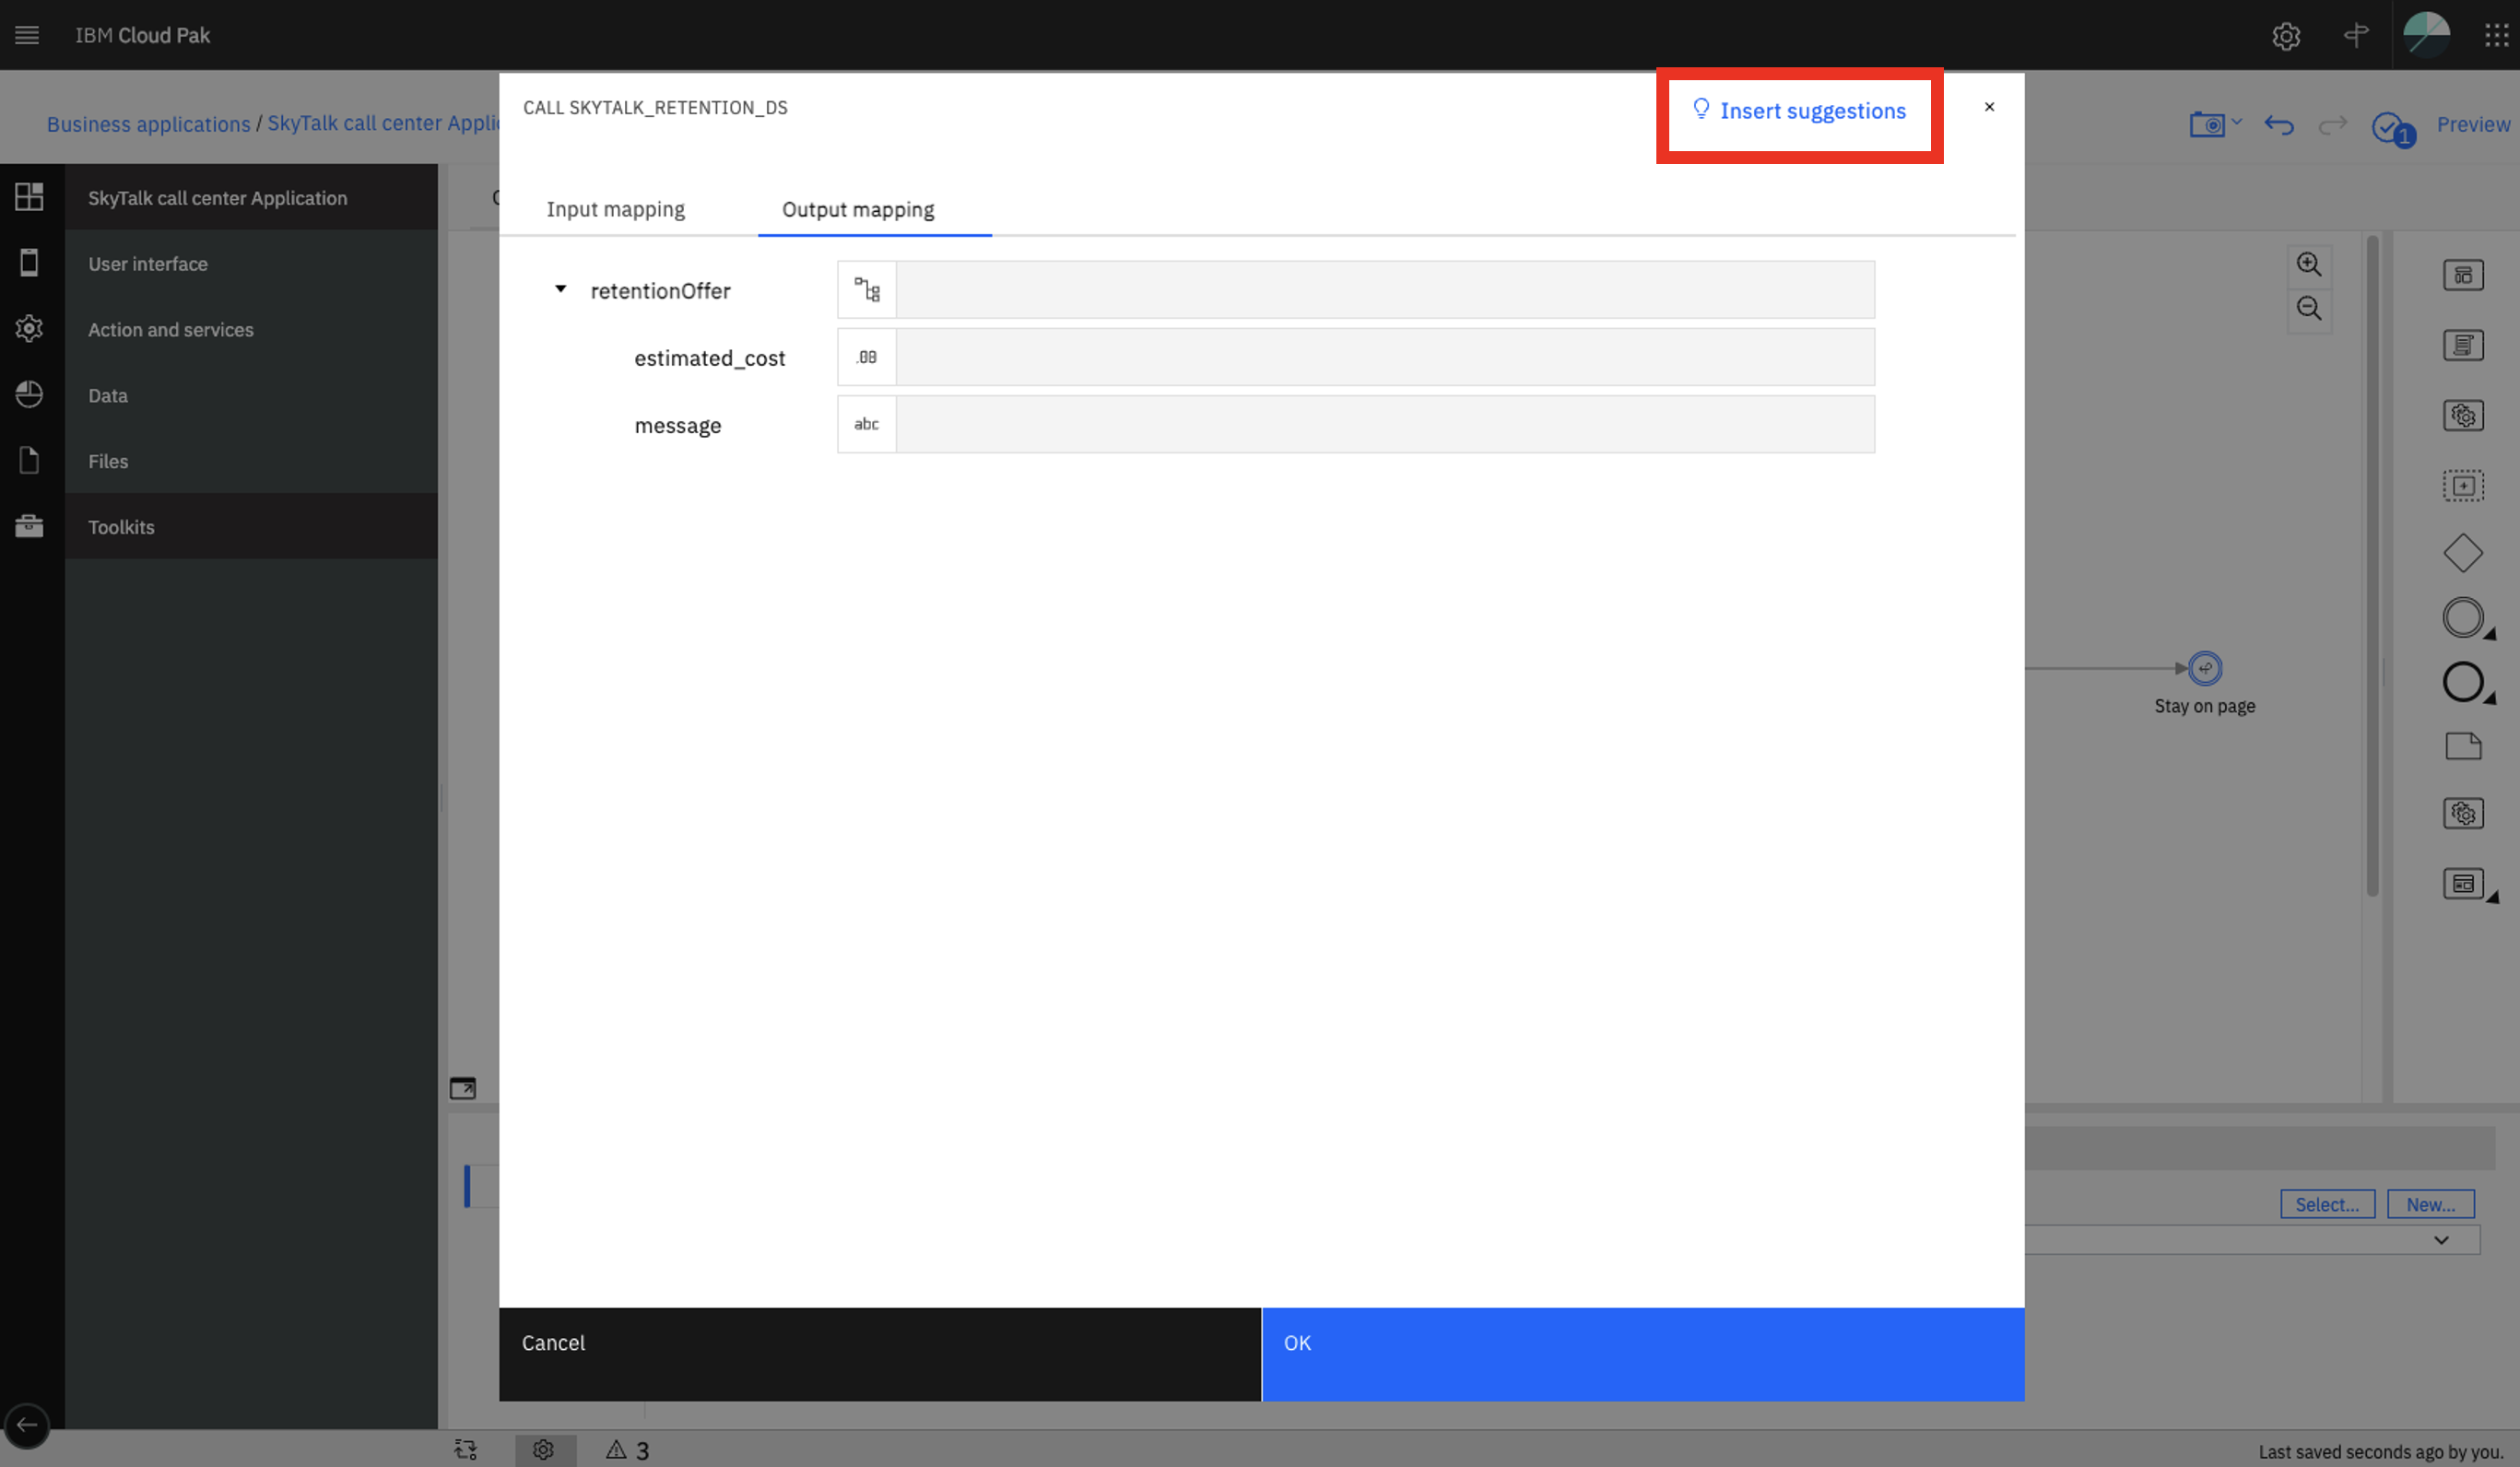
Click Insert suggestions.
-
Click the Output mapping tab.

-
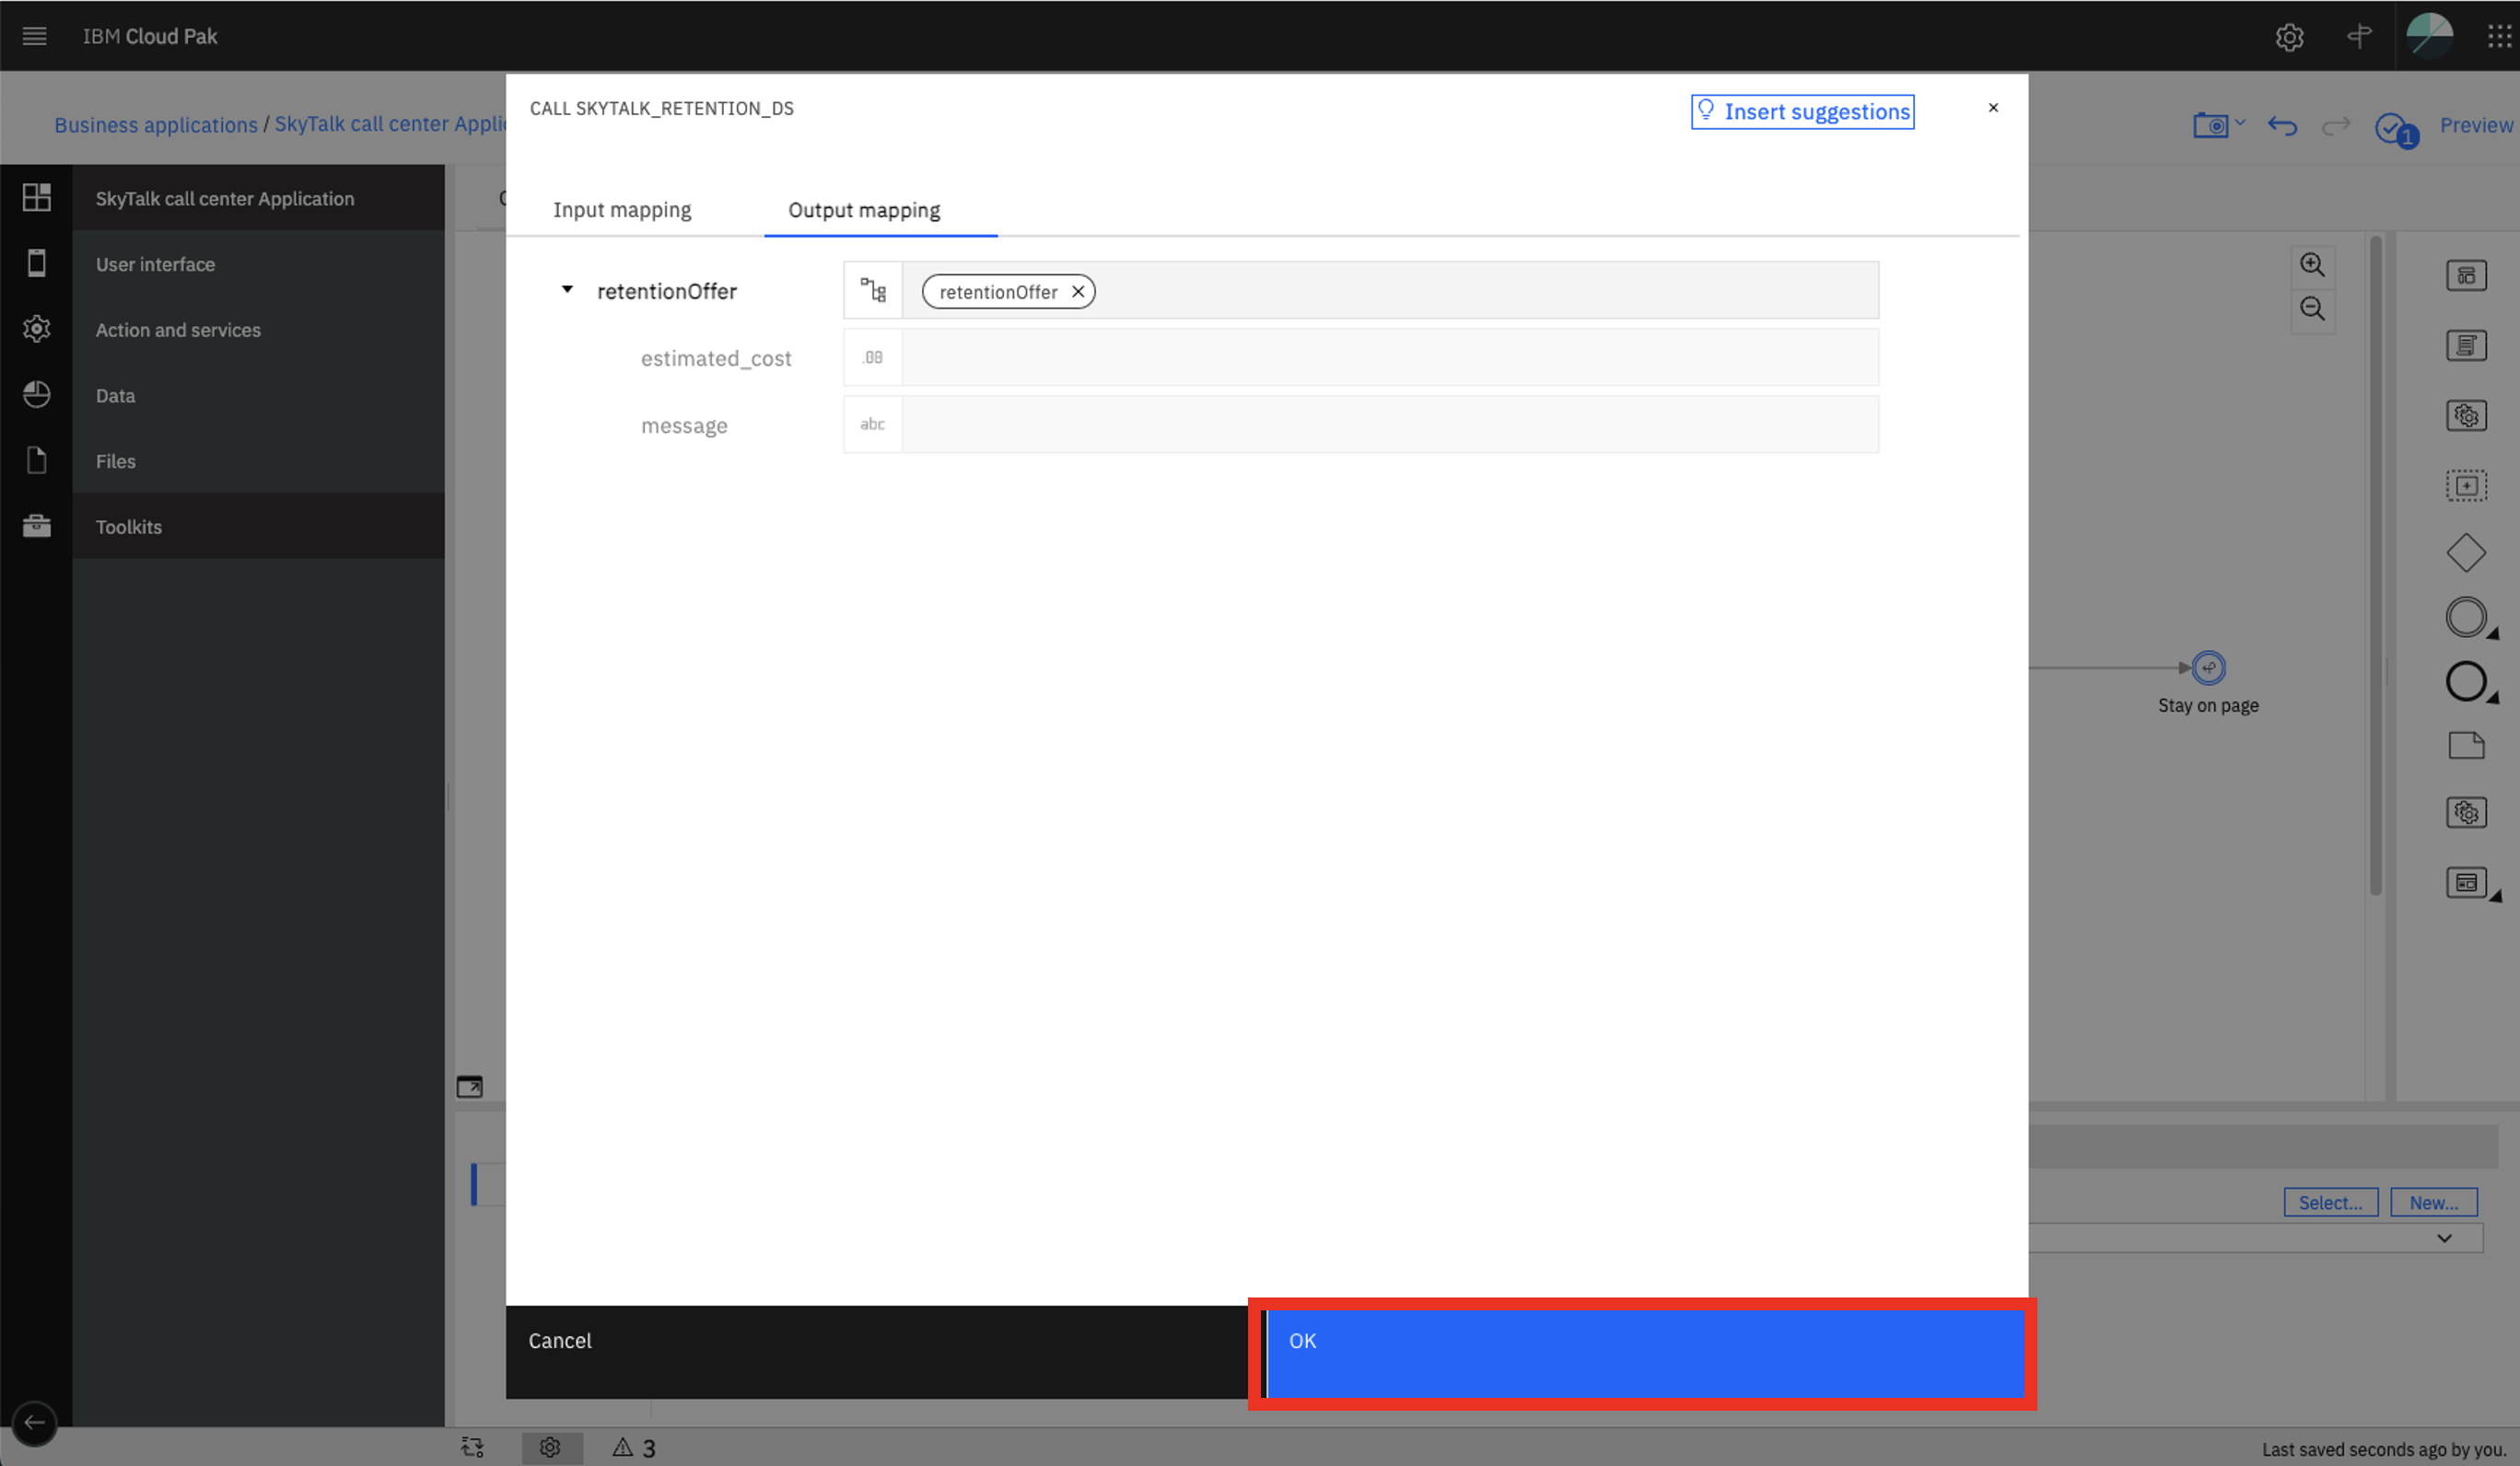
Click Insert suggestions.
-
Click OK
-
Click Preview
-
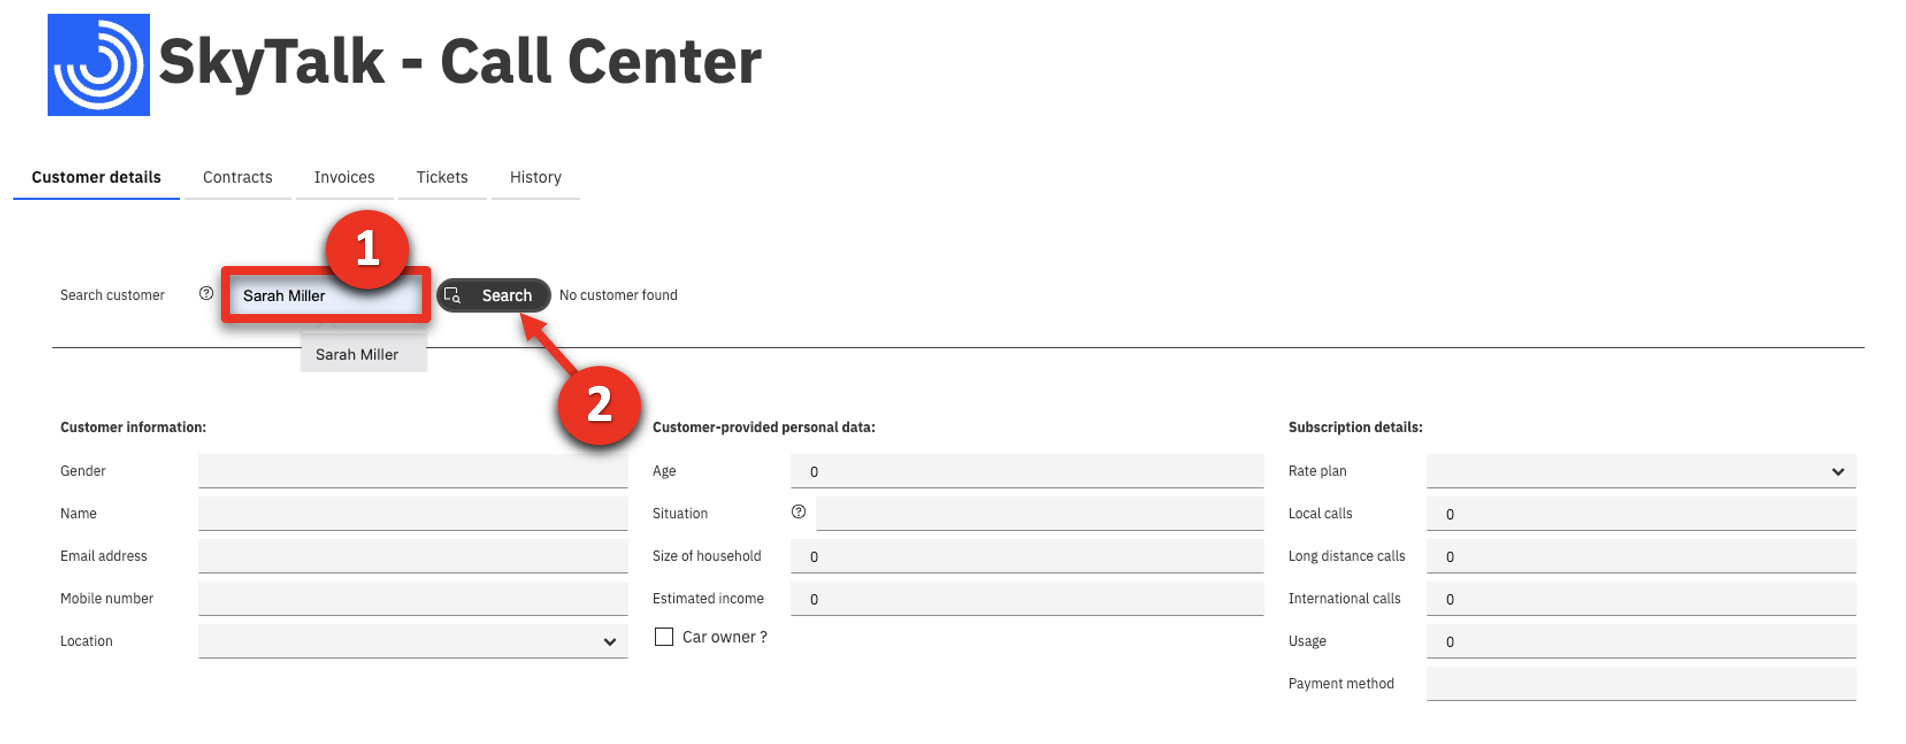
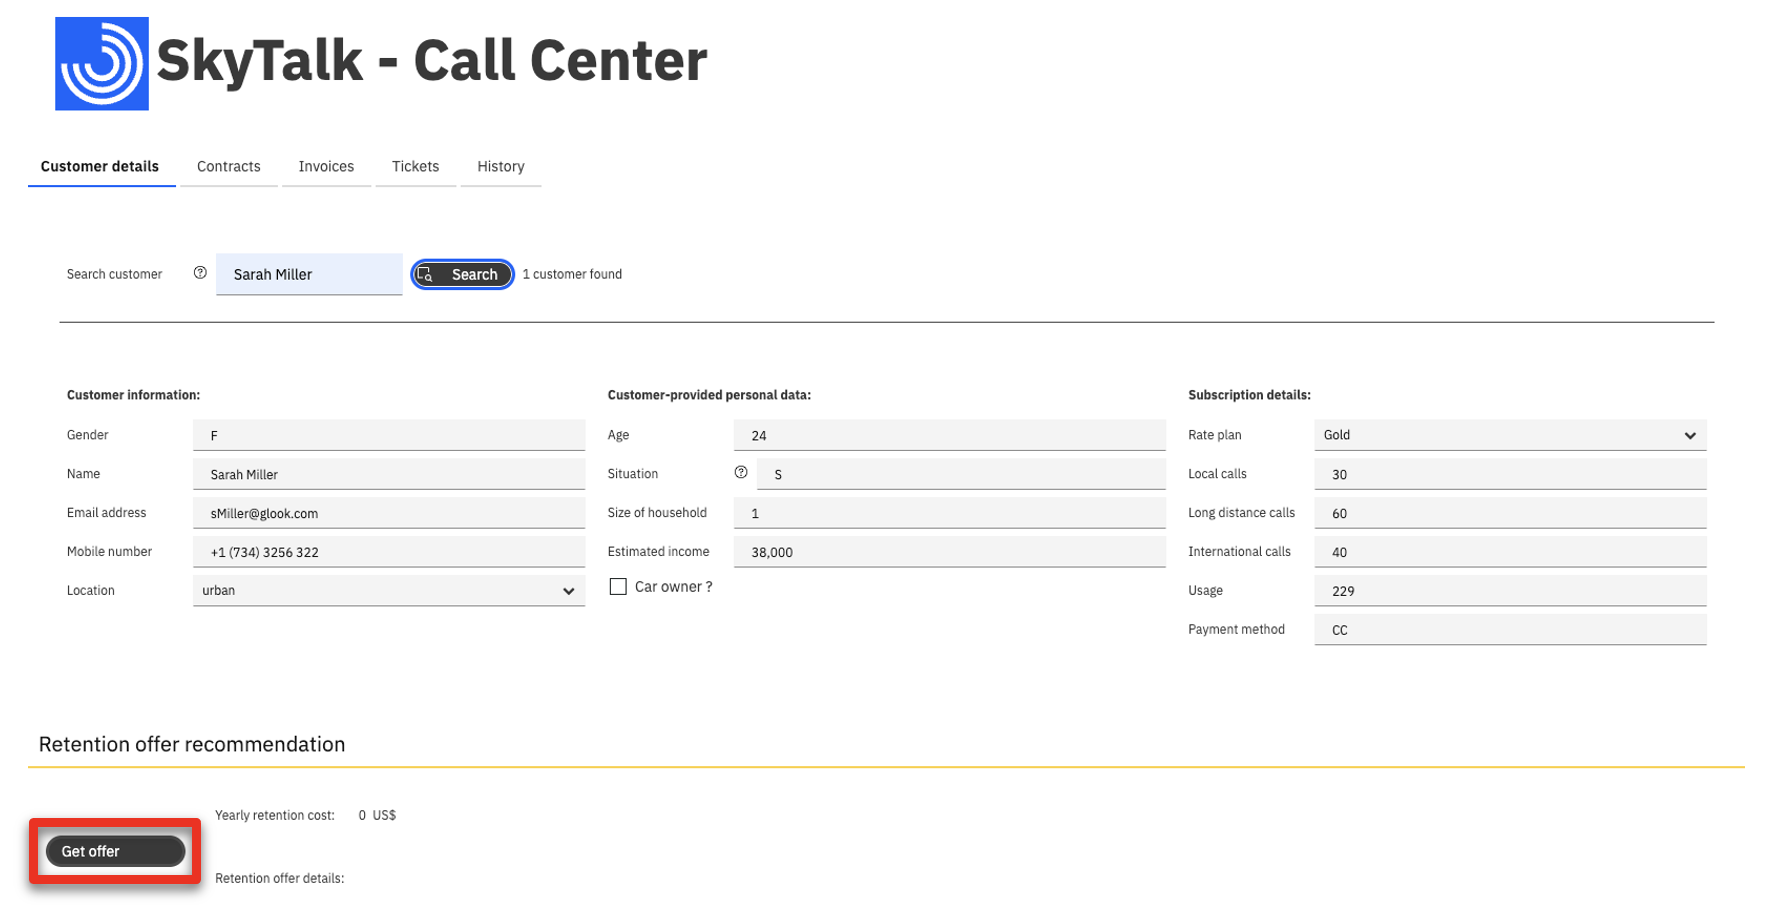
Enter ‘Sarah Miller’ (1) in the Search customer field and click Search (2).
-
Click Get offer.
-
If you get a response without an error message, you are ready to demo.

Go to top
PREPARE TO GIVE THE DEMO
Open these resources before starting the demonstration
1 - SkyTalk call center application
- Log in to Cloud Pak for Business Automation. Use the bookmark and credentials saved in step 2.
- Expand the top menu (1), select the arrow icon (2) in the Design row, and click Business applications (3).
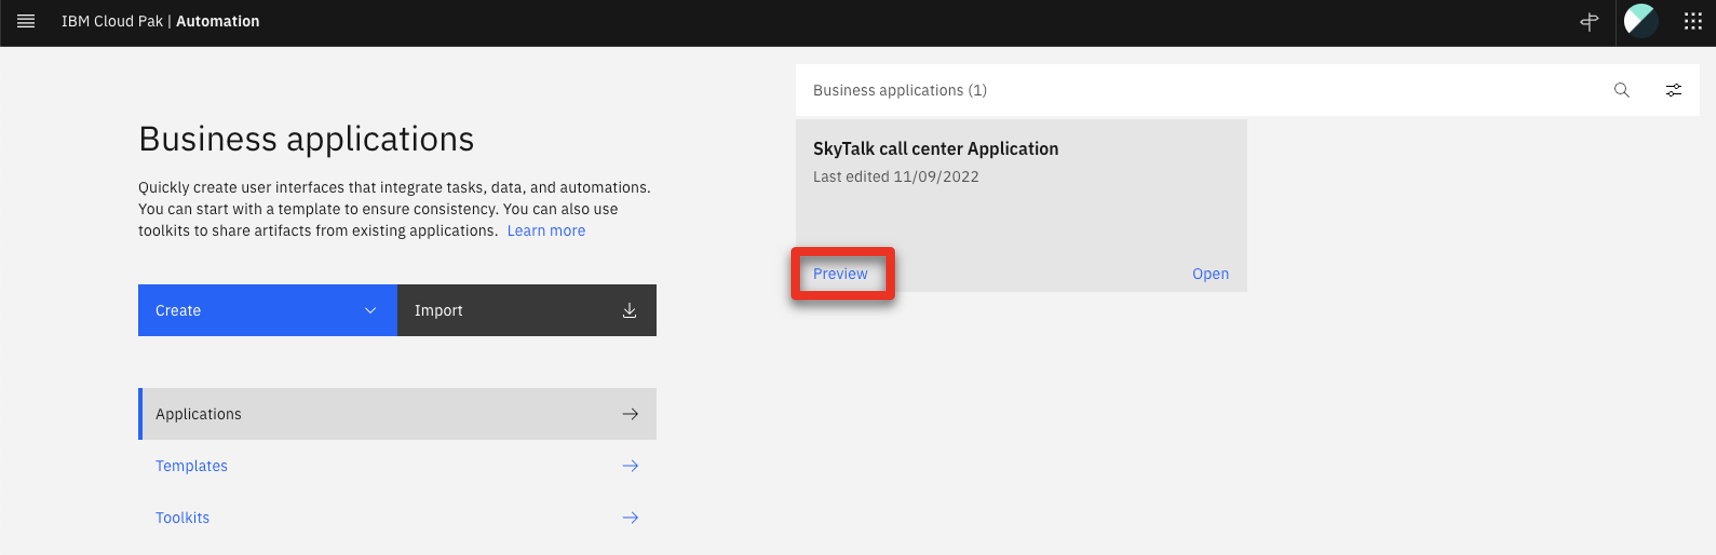
- Hover the mouse over the SkyTalk call center Application tile and click Preview.
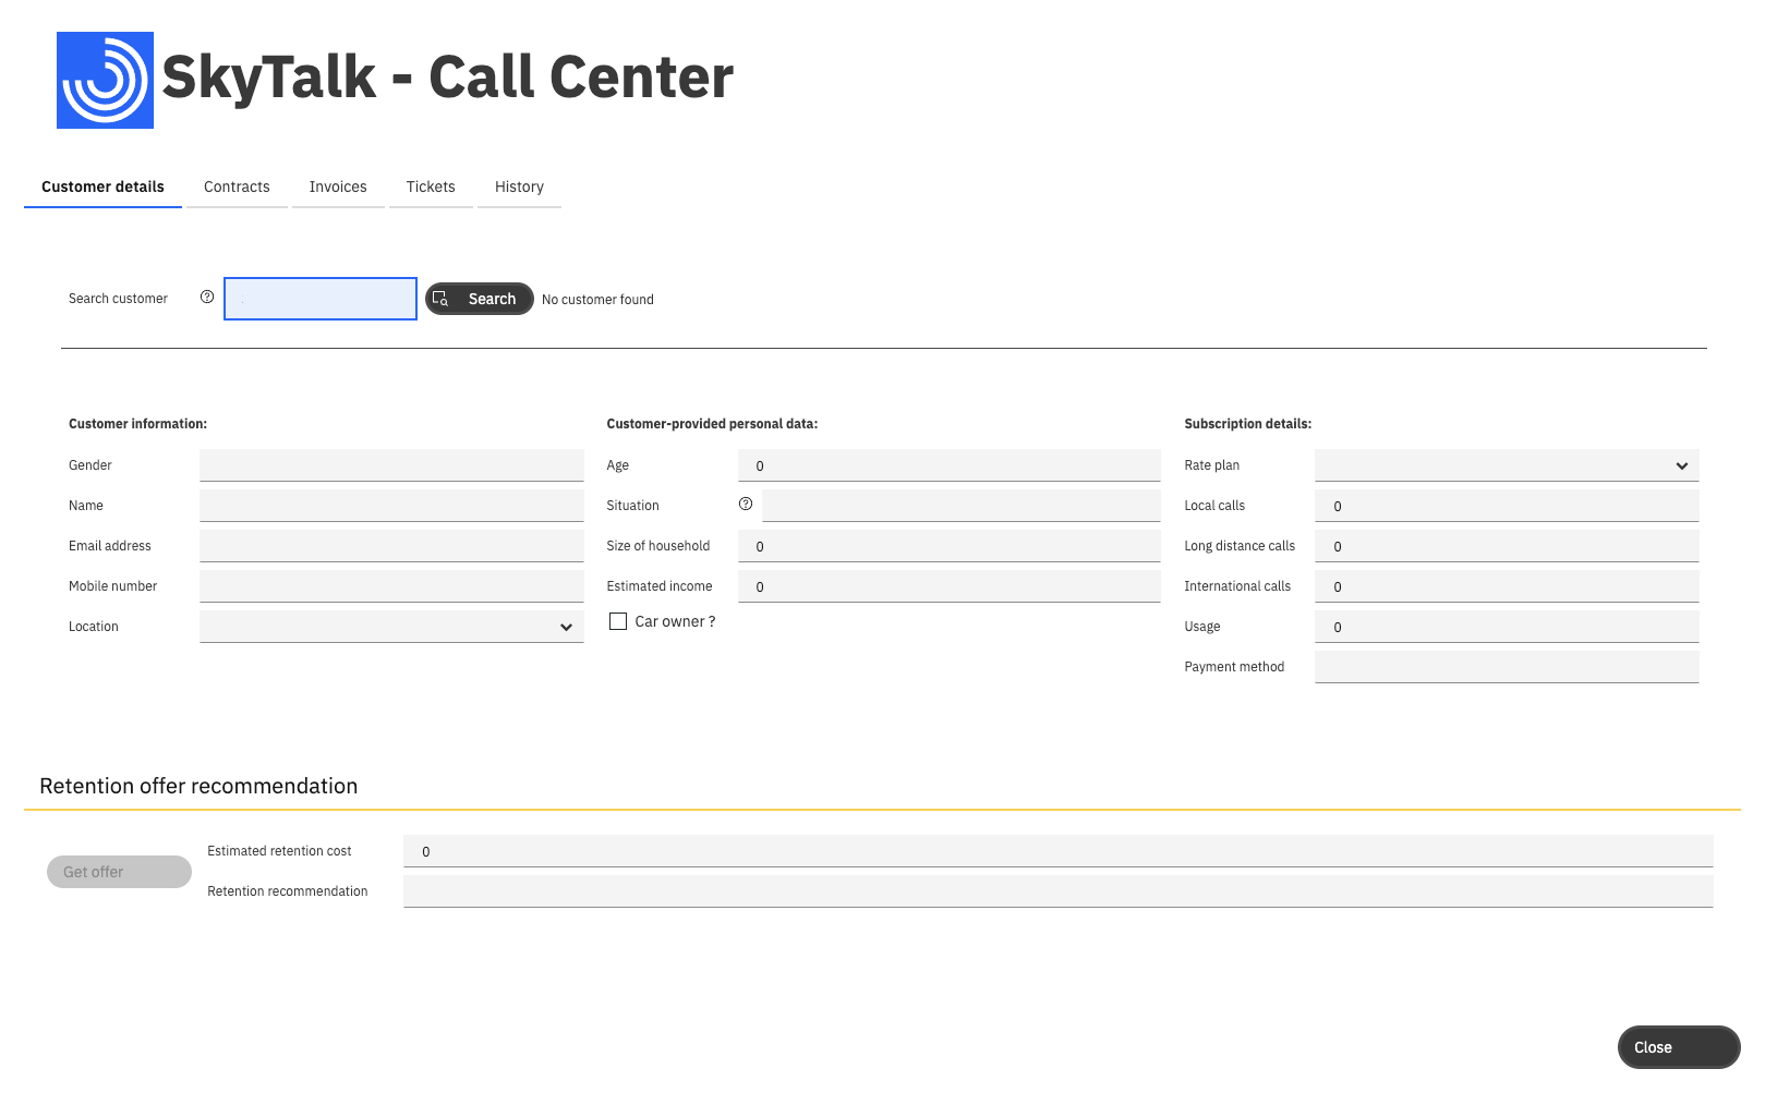
- The SkyTalk - Call Center application opens.
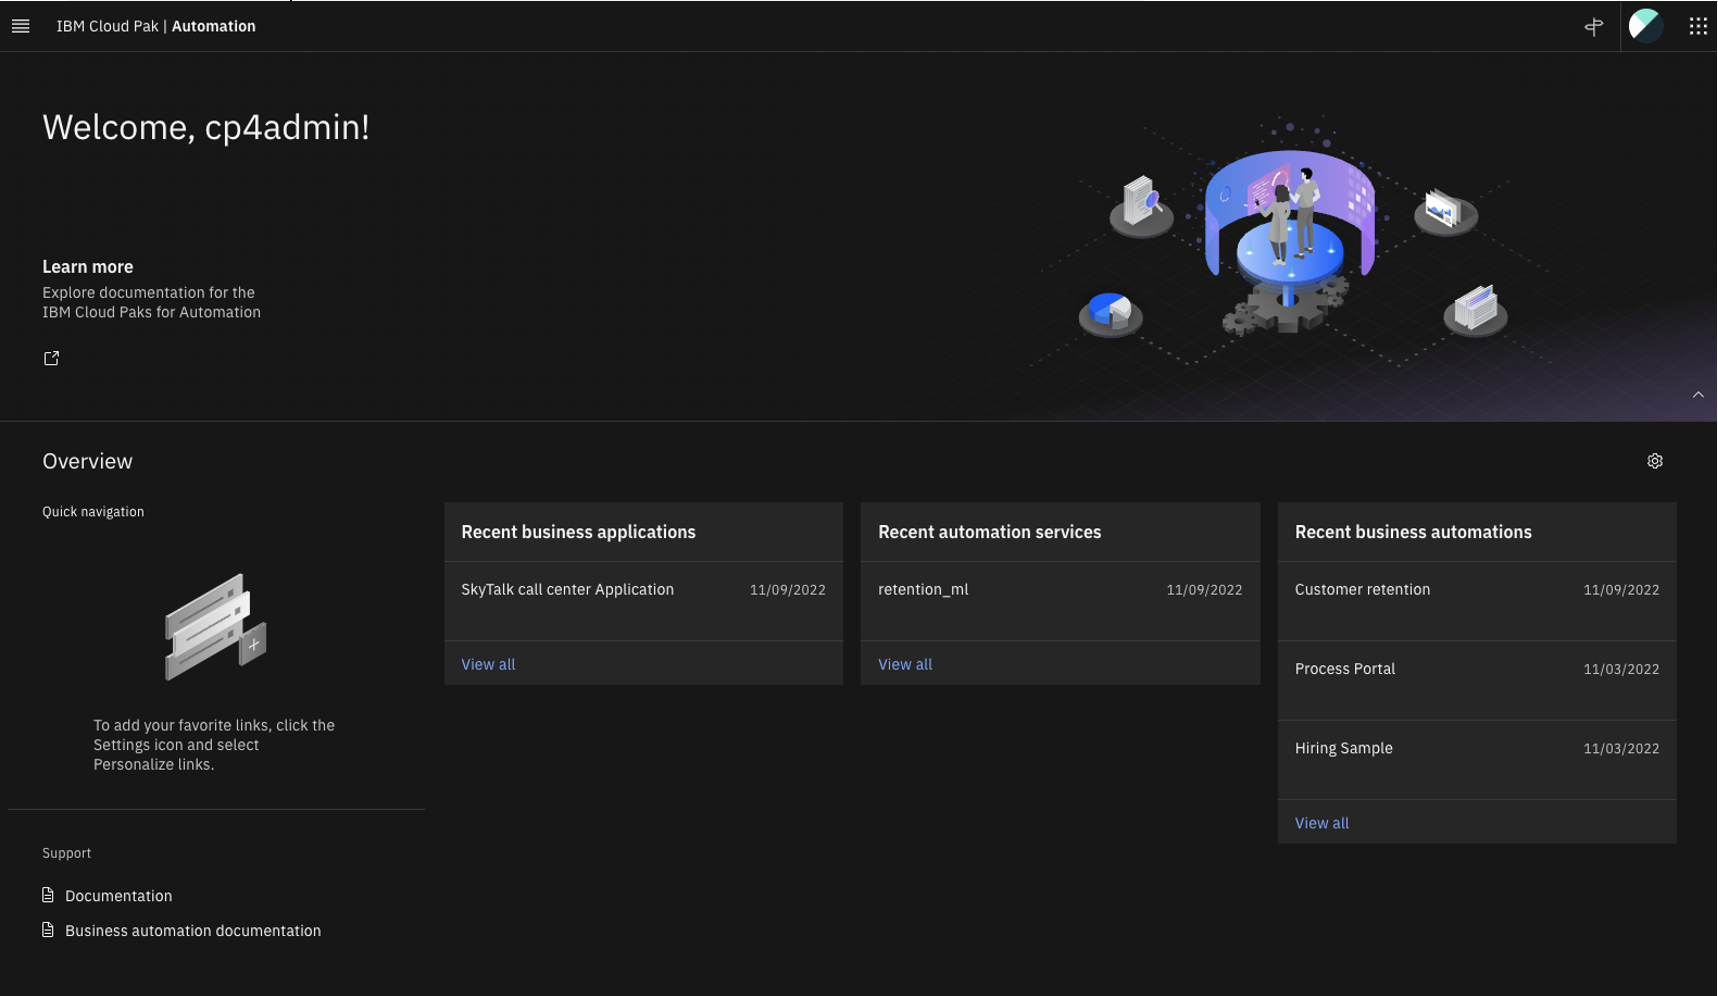
2 - IBM Cloud Pak for Business Automation
- Click IBM Cloud Pak / Automation.
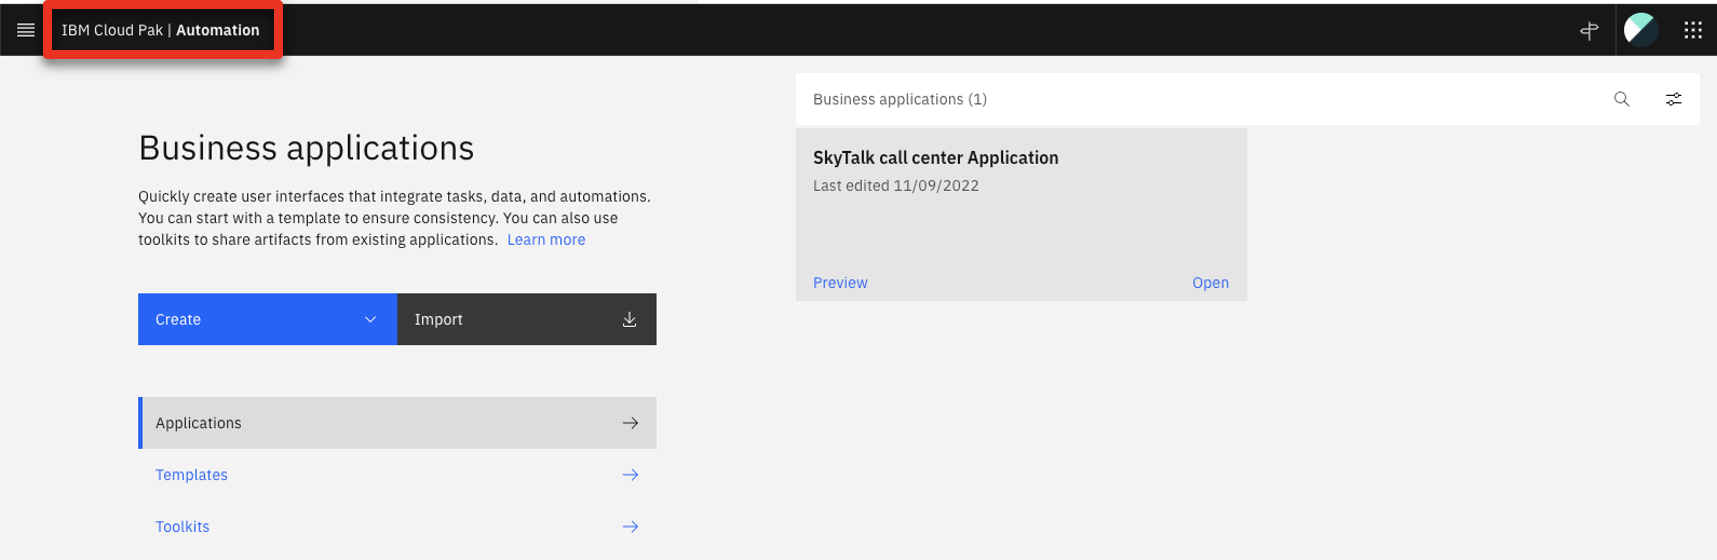
- The Cloud Pak for Business Automation home page opens.
3 - Watson Studio
- Go to the IBM Cloud environment and log in using your personal credentials. Ensure you are in your Cloud Pak for Data instance.
- Click the Resource list menu icon (1) and then select Watson Studio-xx (2).
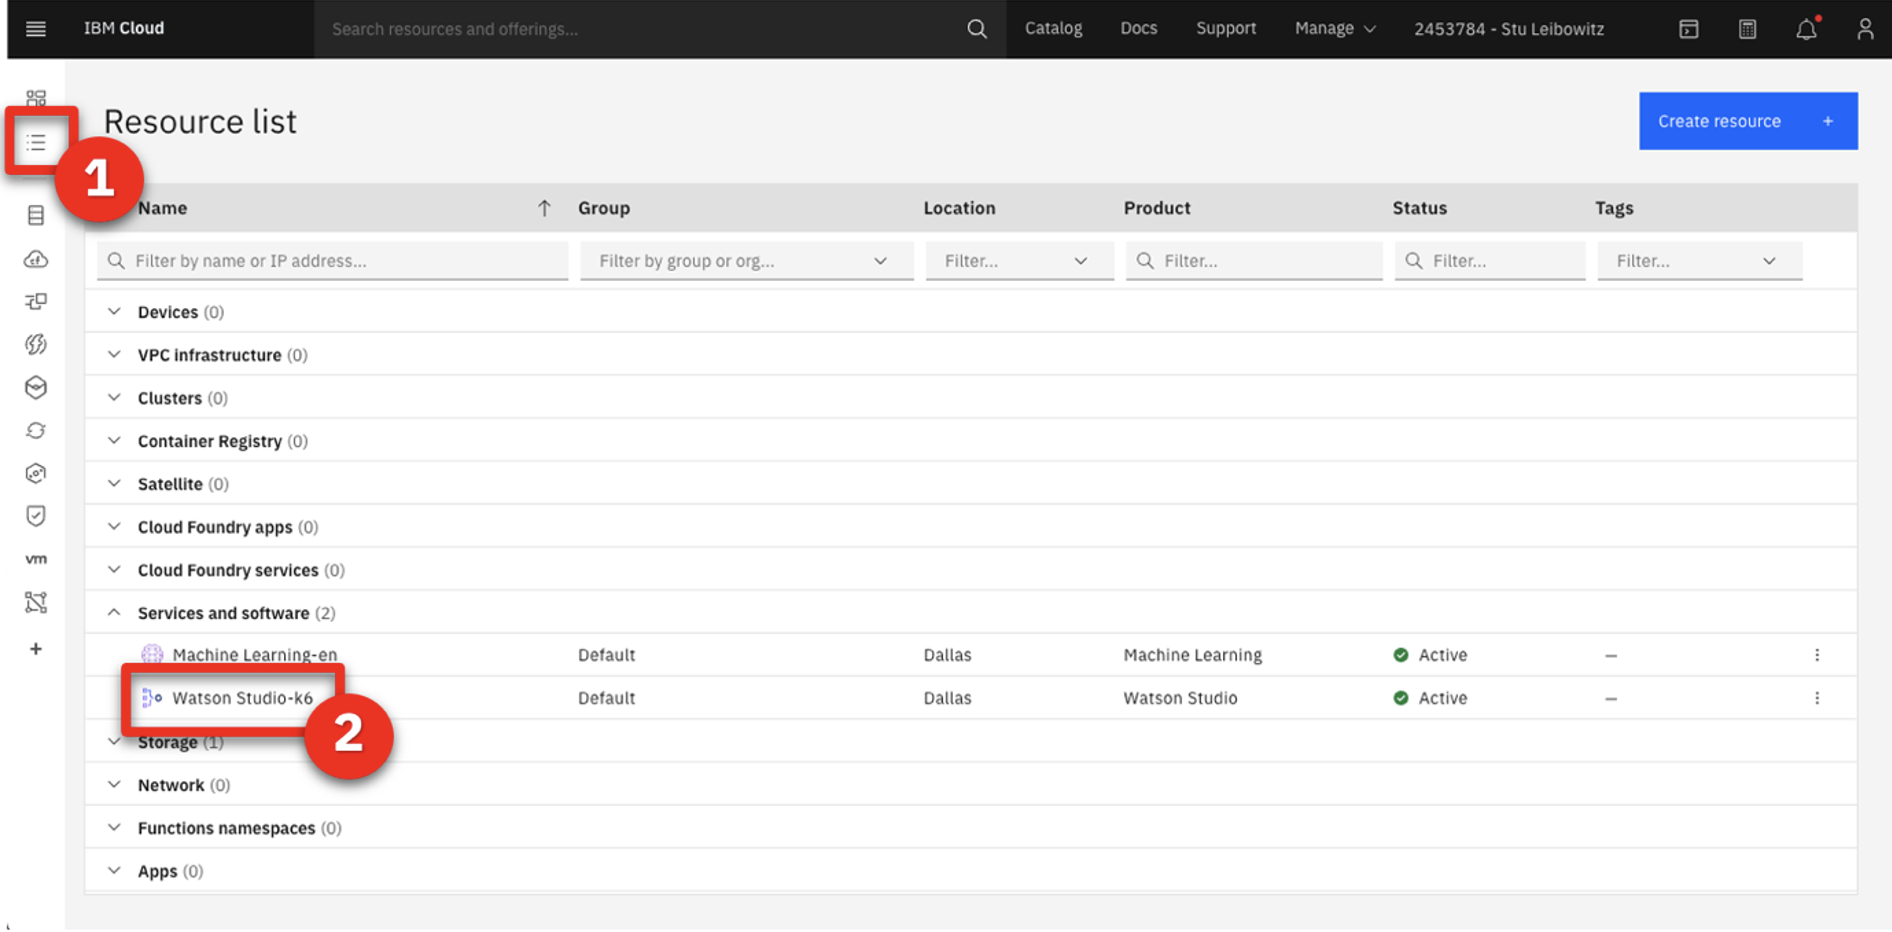
- Click Launch in IBM Cloud Pak for Data.
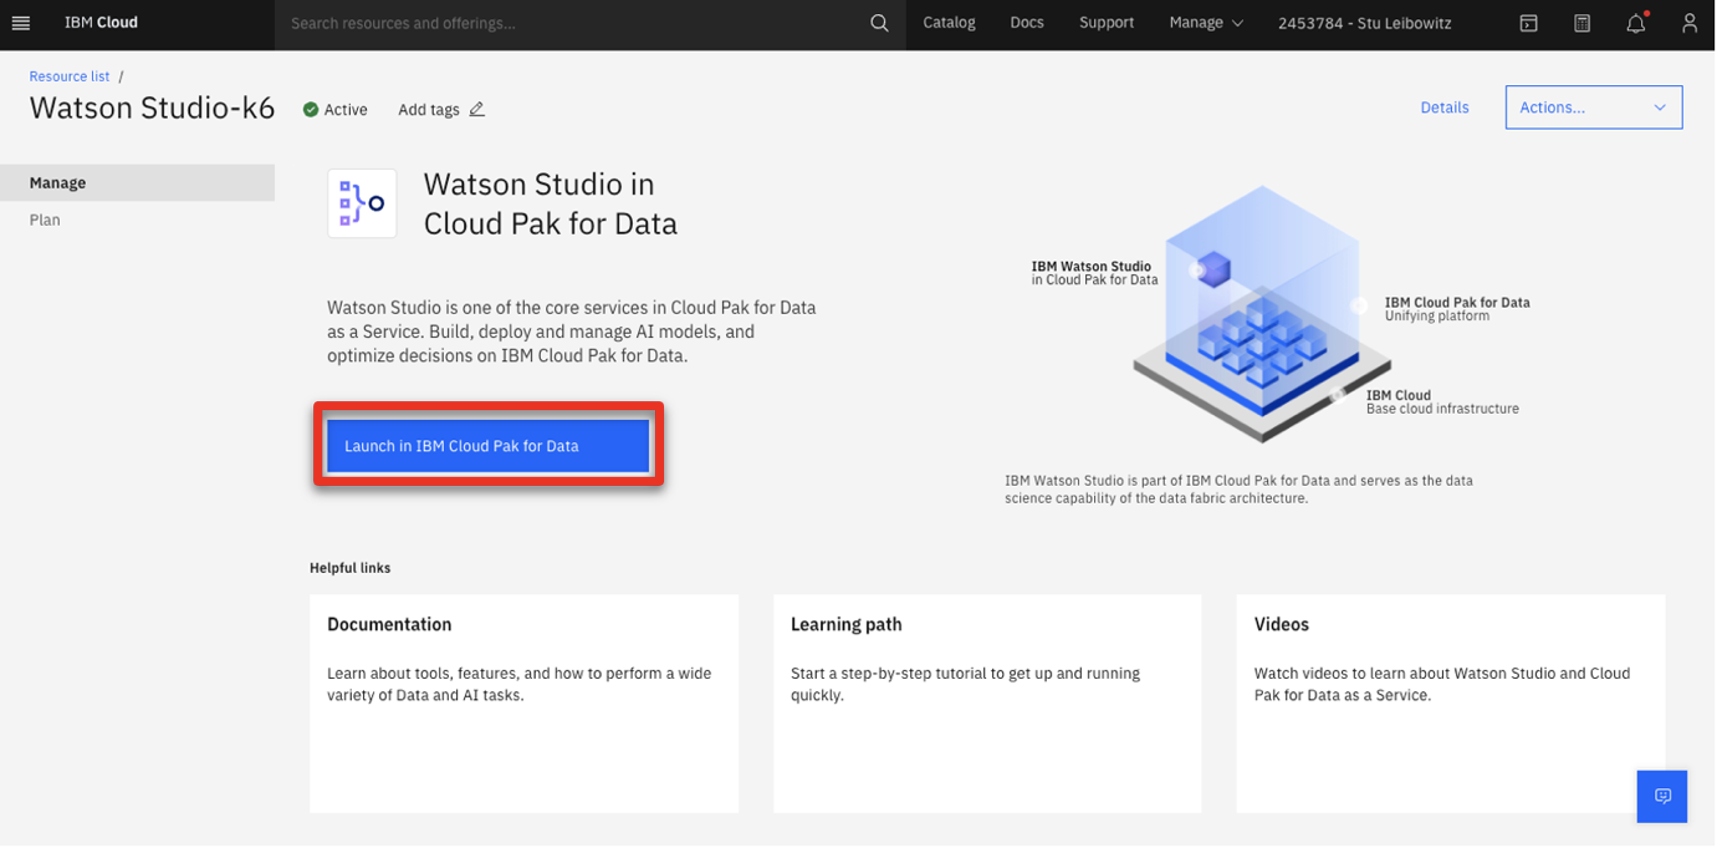
- Watson Studio opens.
4 - SkyTalk customer retention policy.pdf
- Click this link to open SkyTalk customer retention policy.pdf.
AFTER EACH DEMO
1 - Undeploy the two Watson Machine Learning services
- Click the SkyTalk production space deployment.
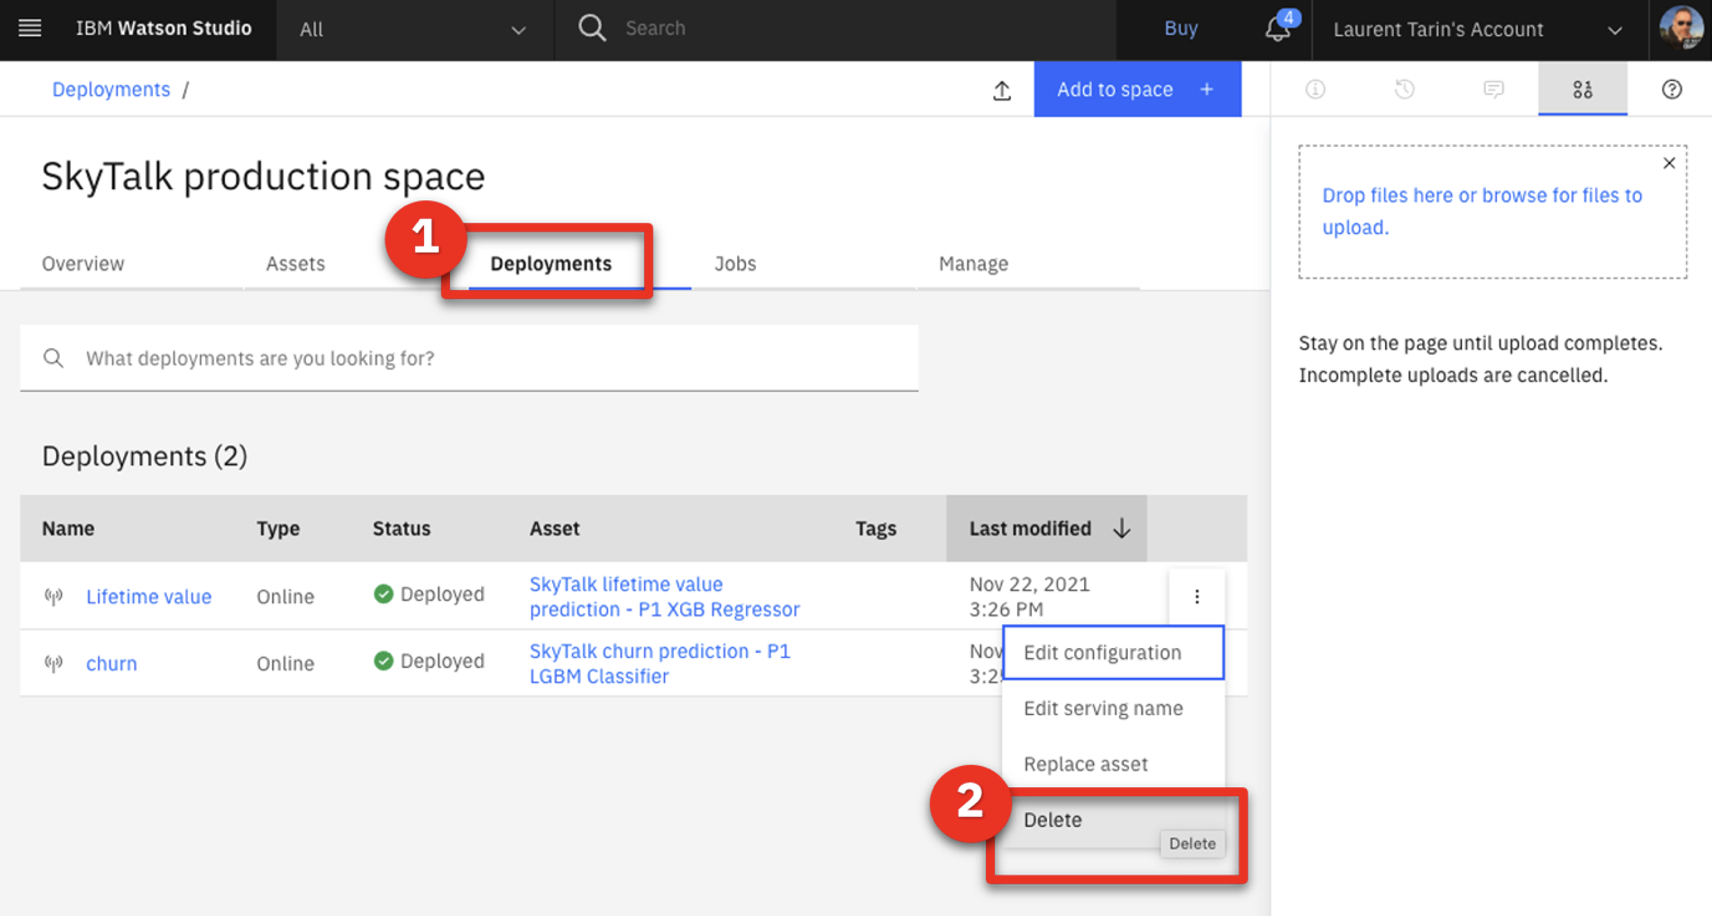
- Click the Deployments tab (1). Click the three dots icon in the Lifetime value row and select Delete (2).
Click Delete again to confirm the deletion.
- Repeat step 2 and delete the deployment for the churn prediction row.
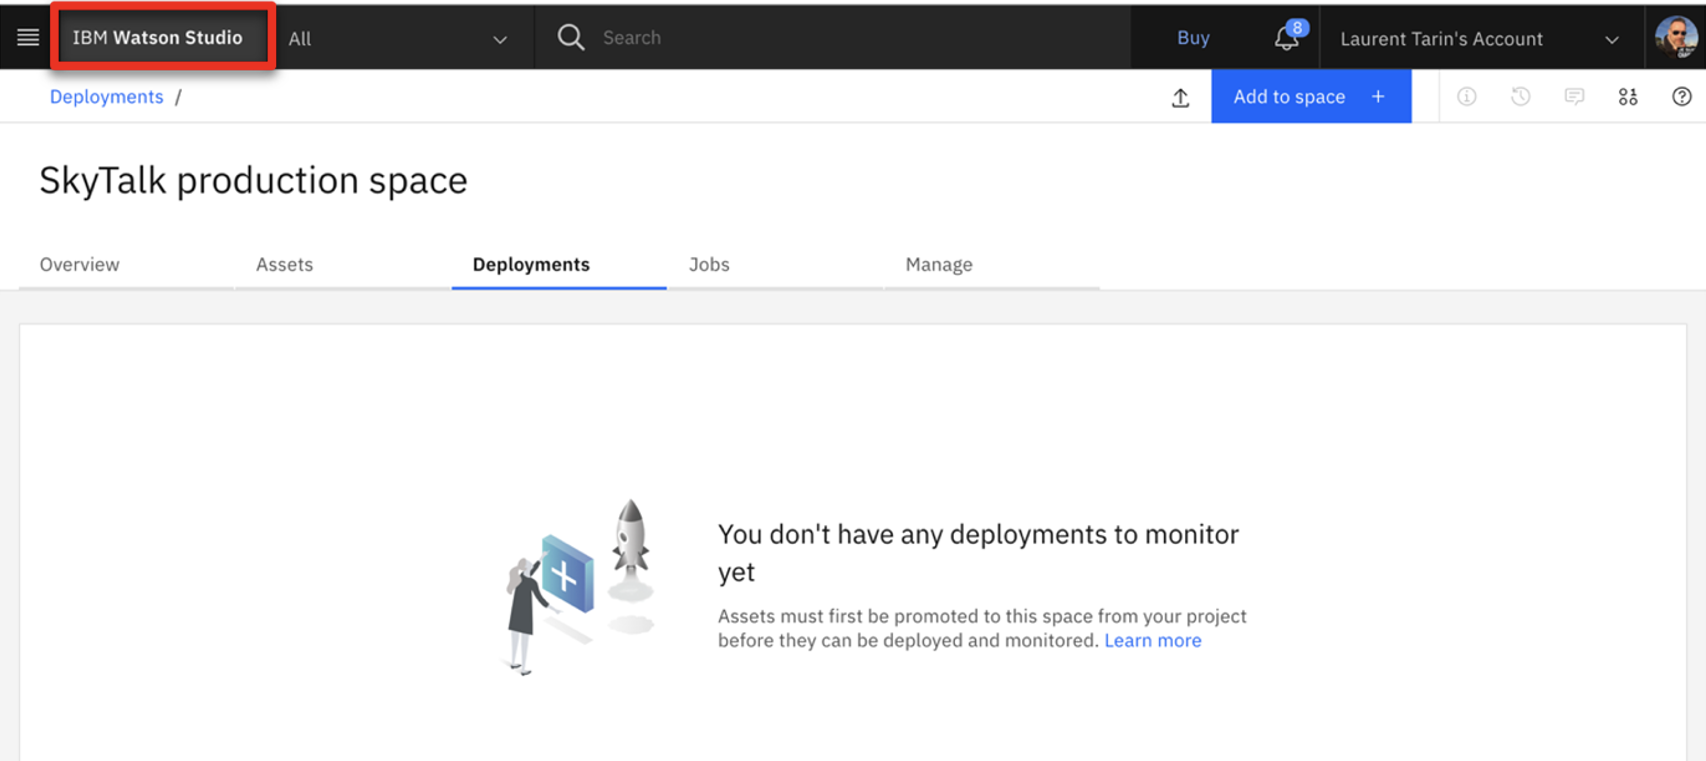
- Click Watson Studio to return to the Watson Studio home page.
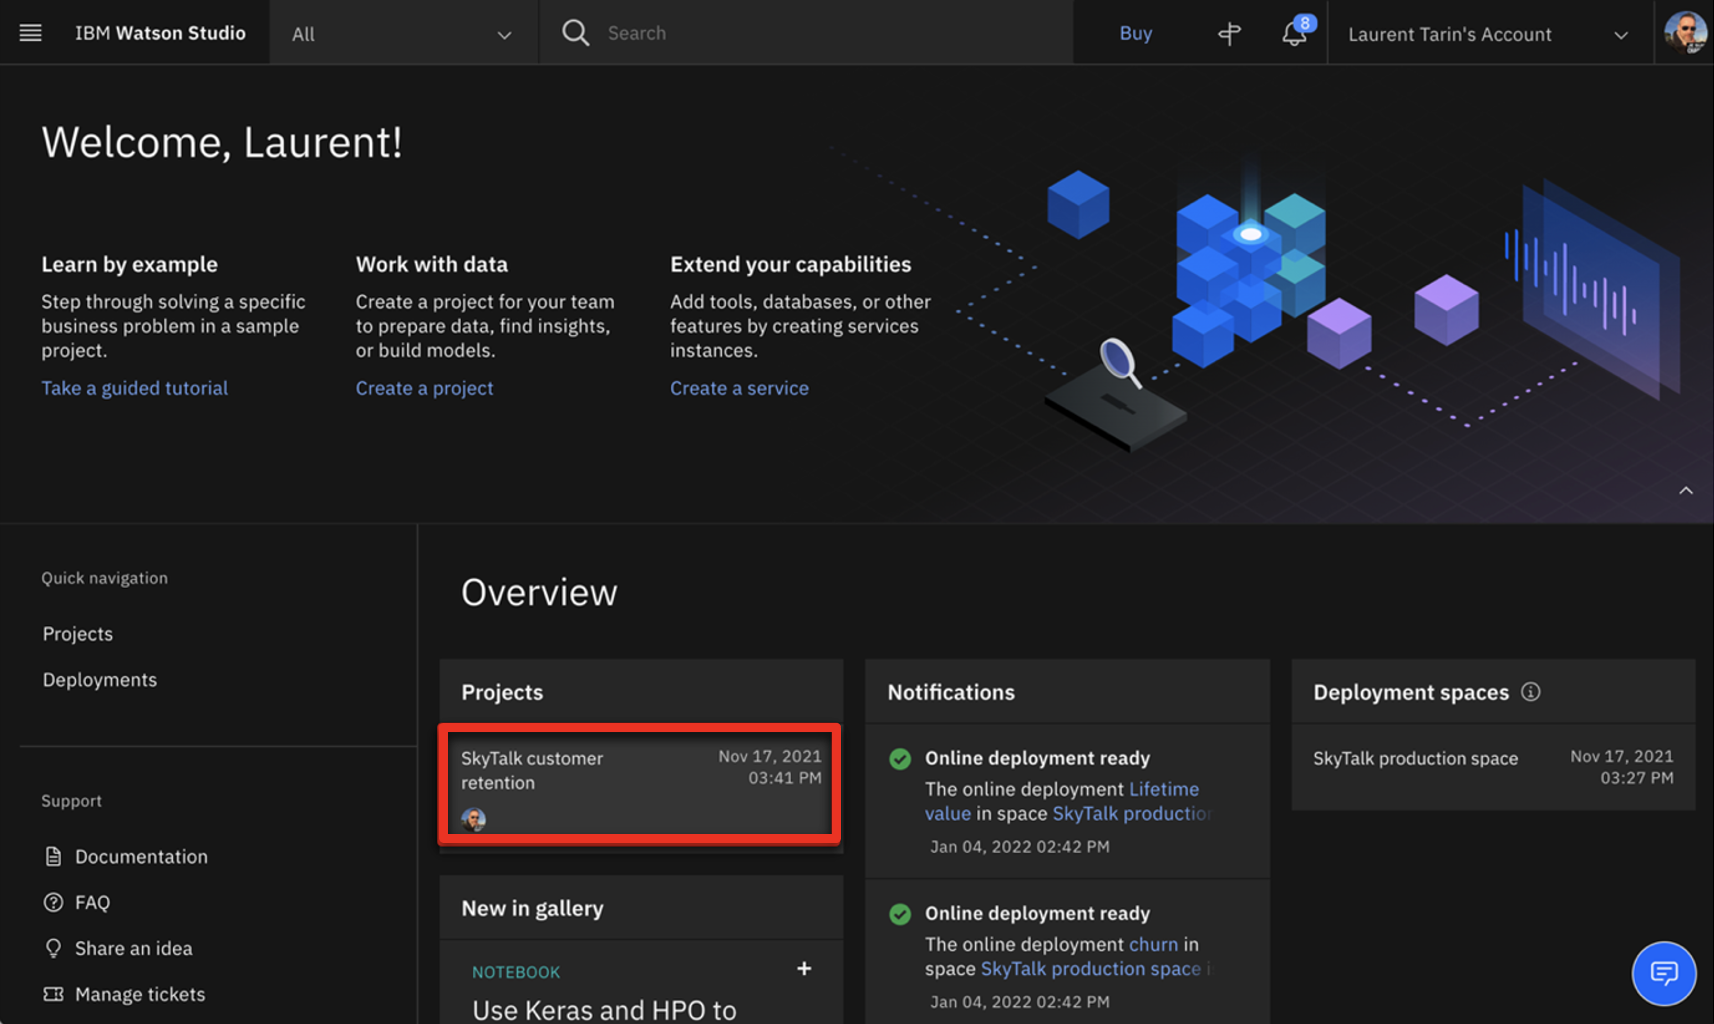
- Click the SkyTalk customer retention project.
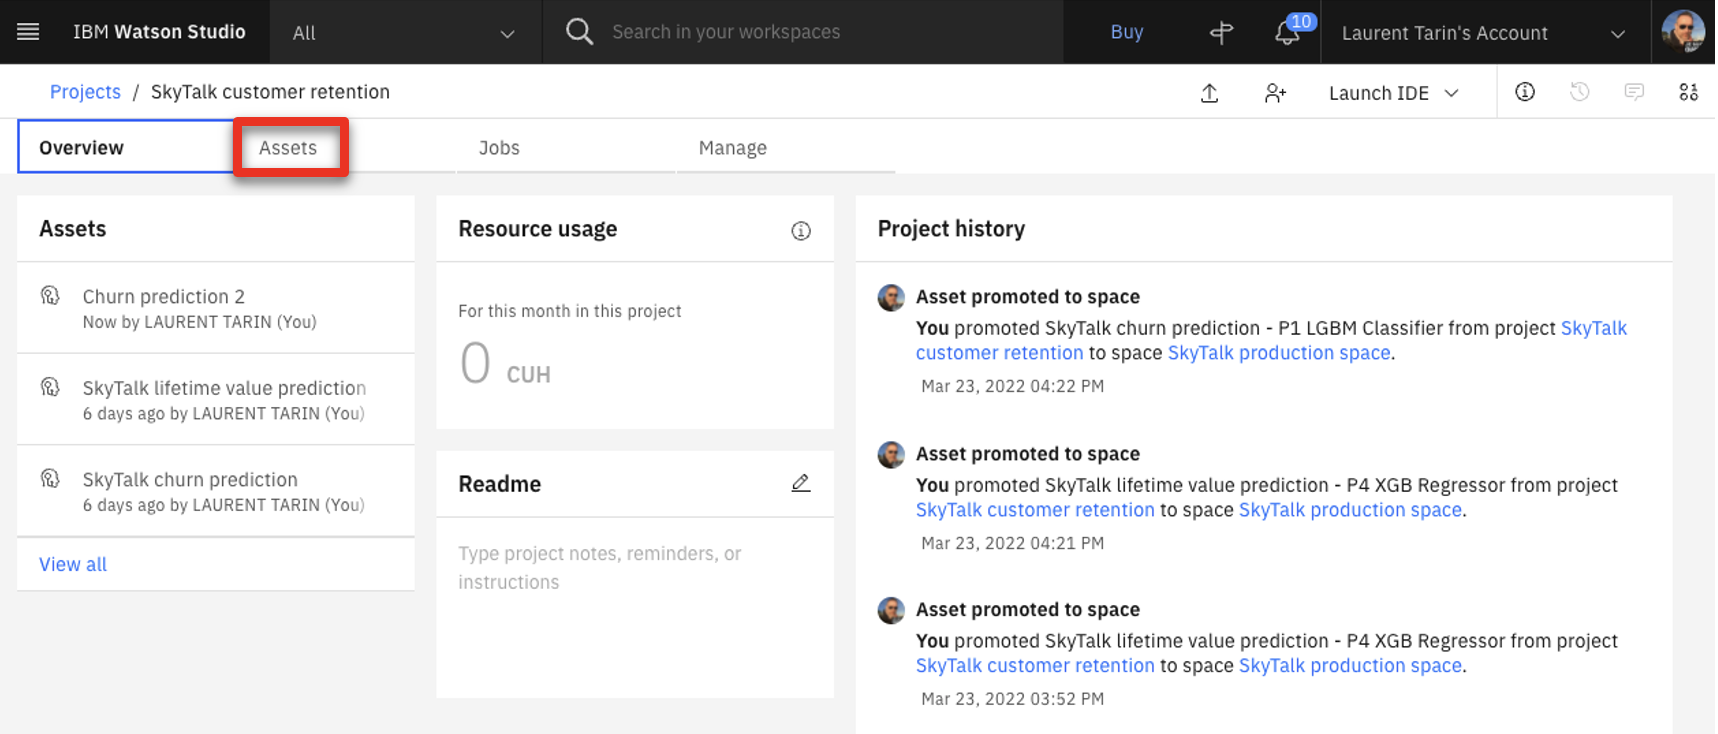
- Click the Assets tab.
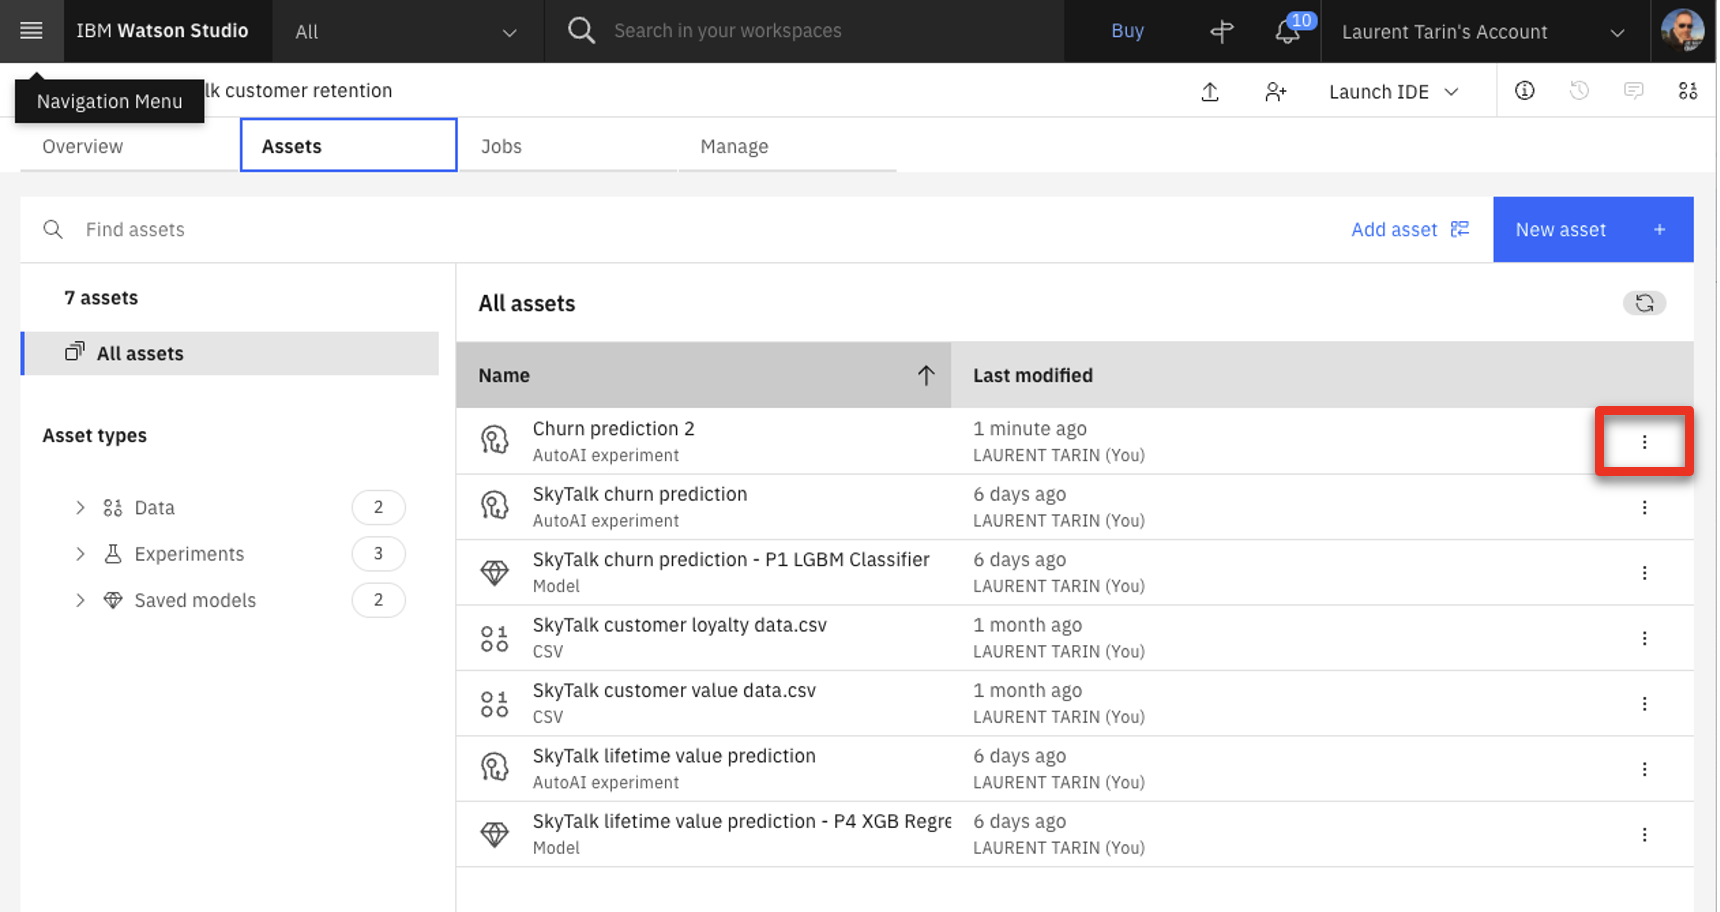
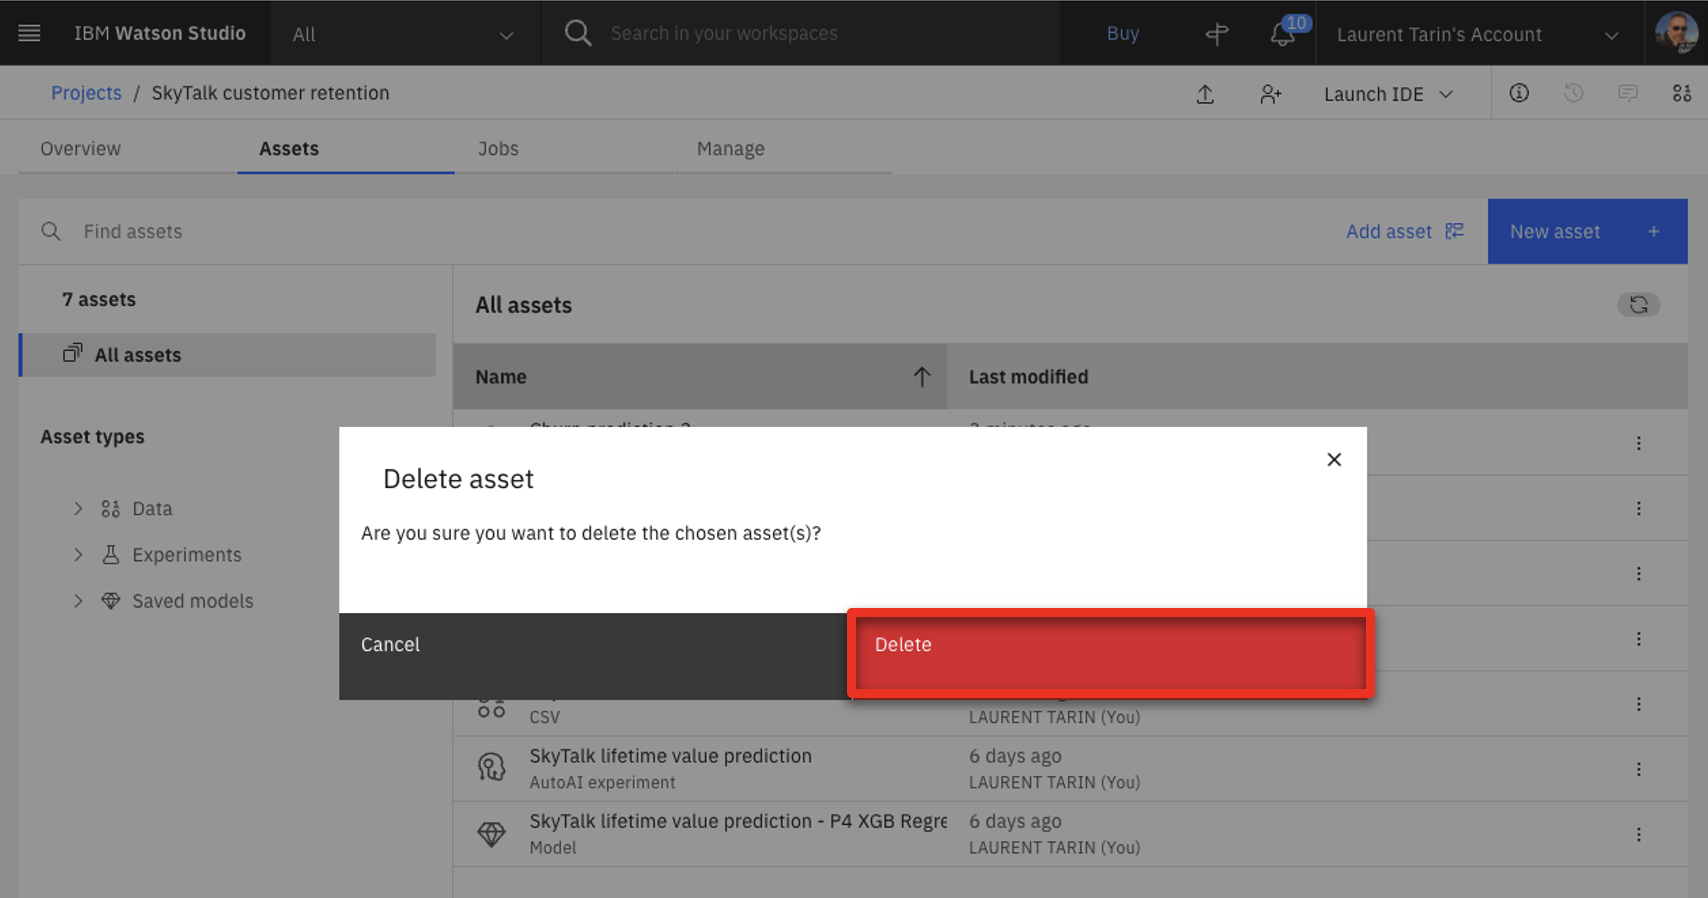
- Click the three dots icon in the Churn prediction 2 AutoAI experiment row.
- Click Delete.
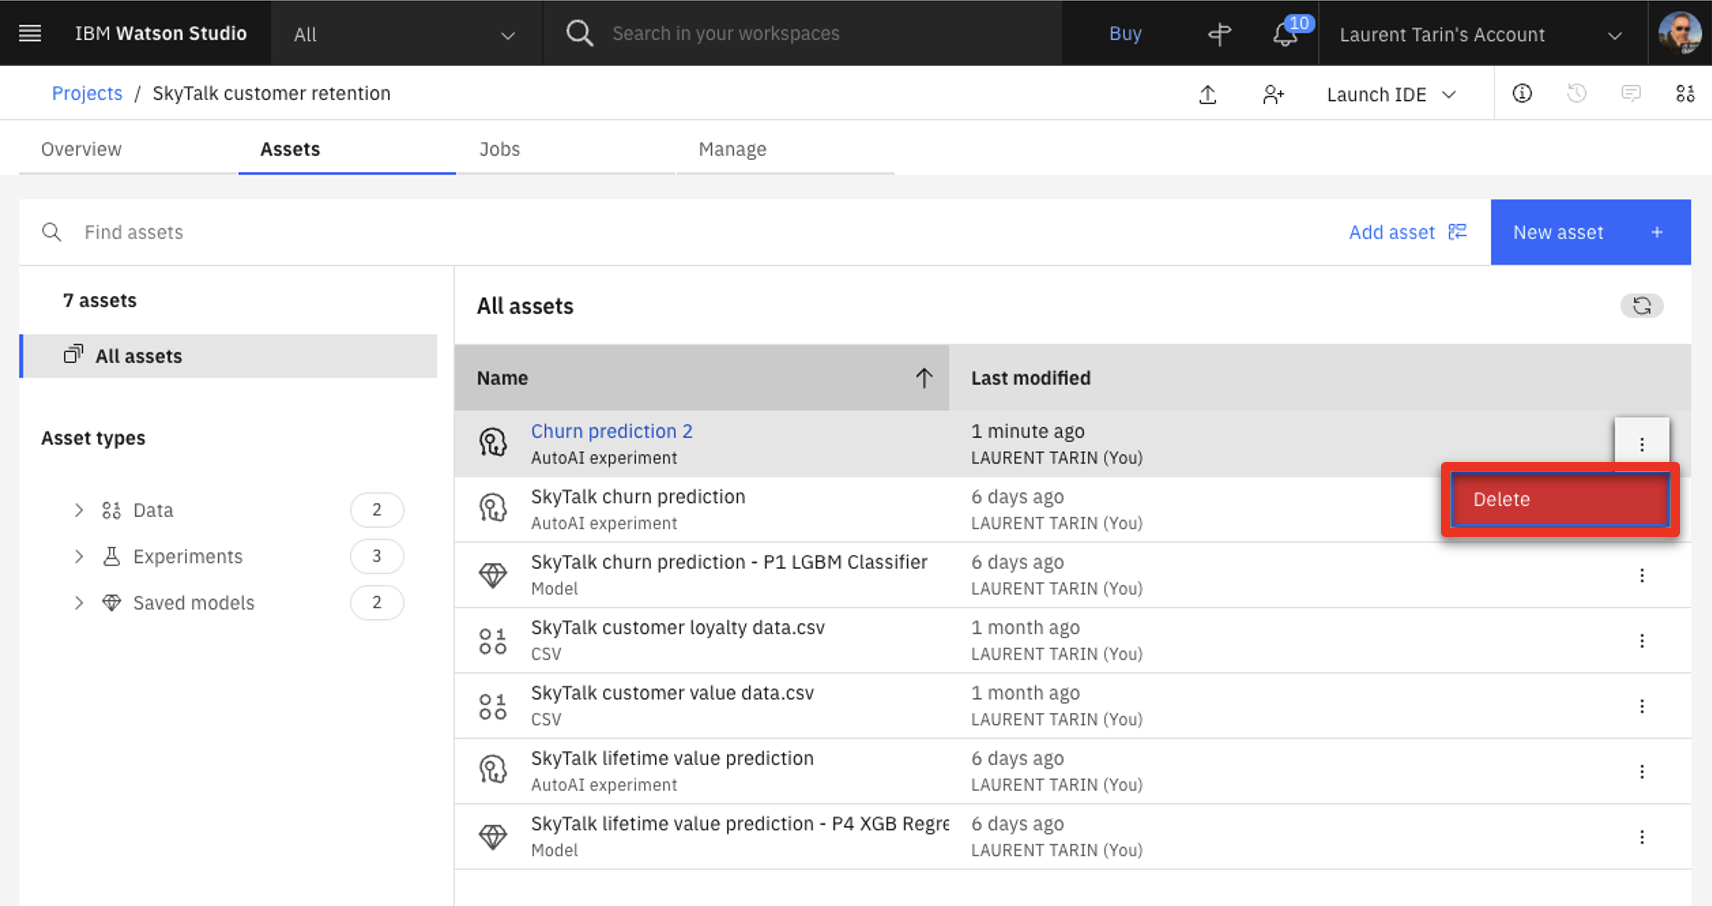
- Click Delete again to confirm the removal.
2 - Reset the demo to its beginning state
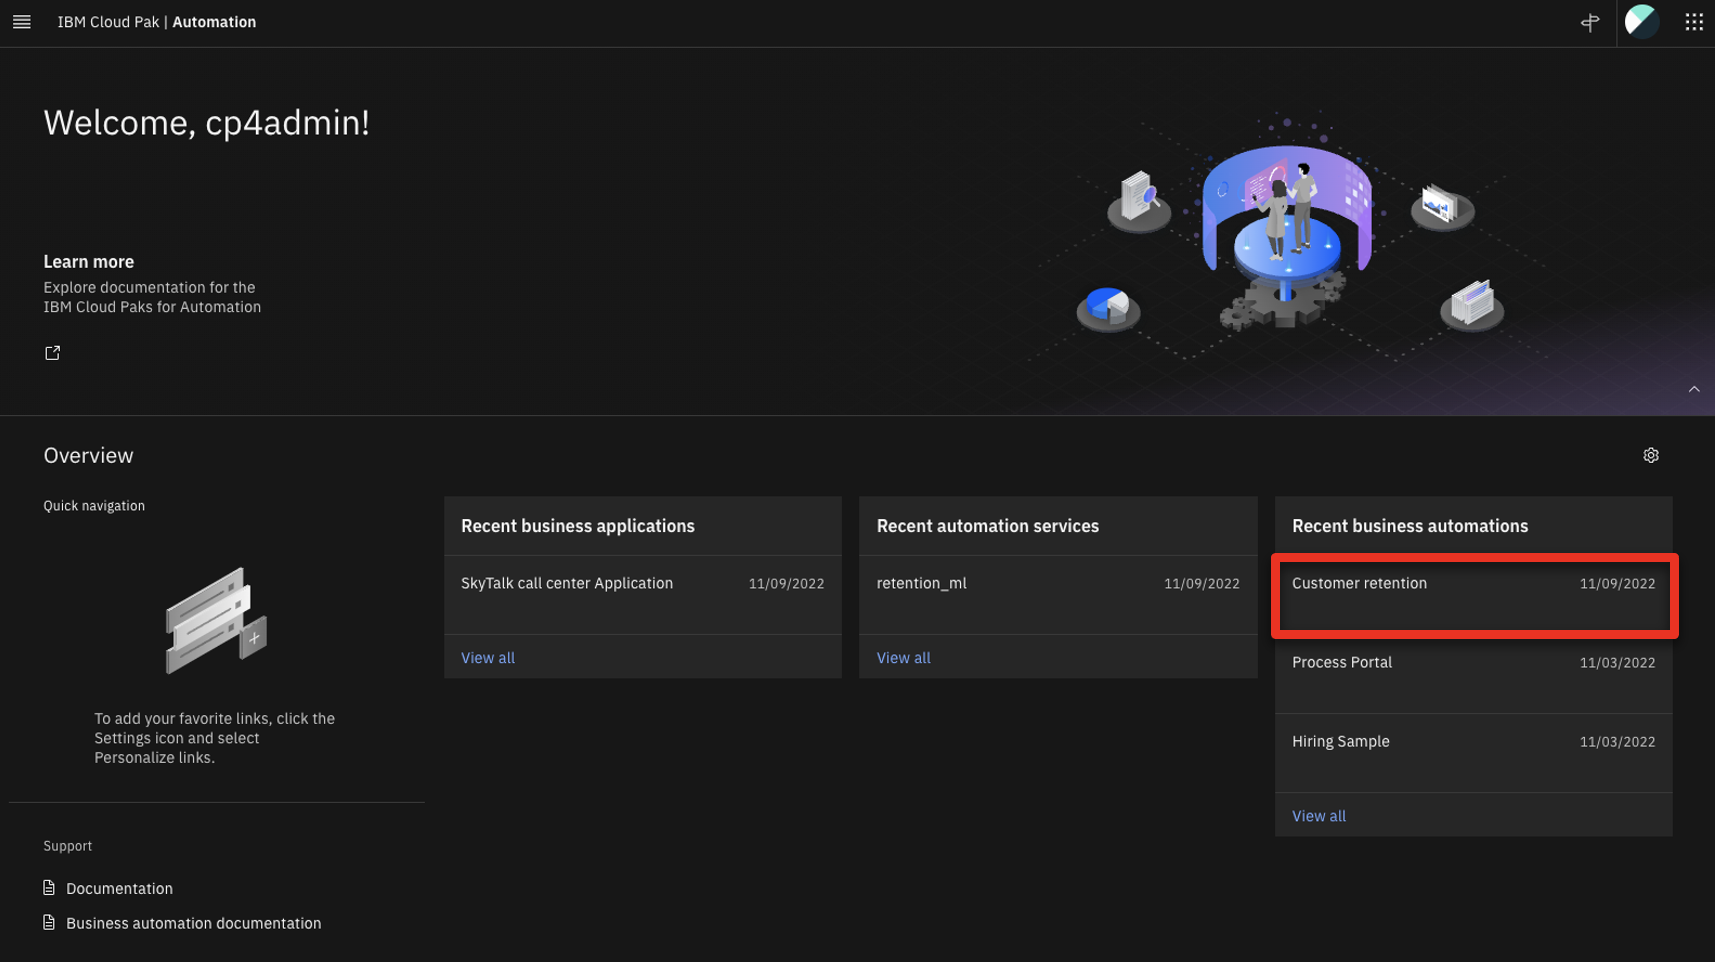
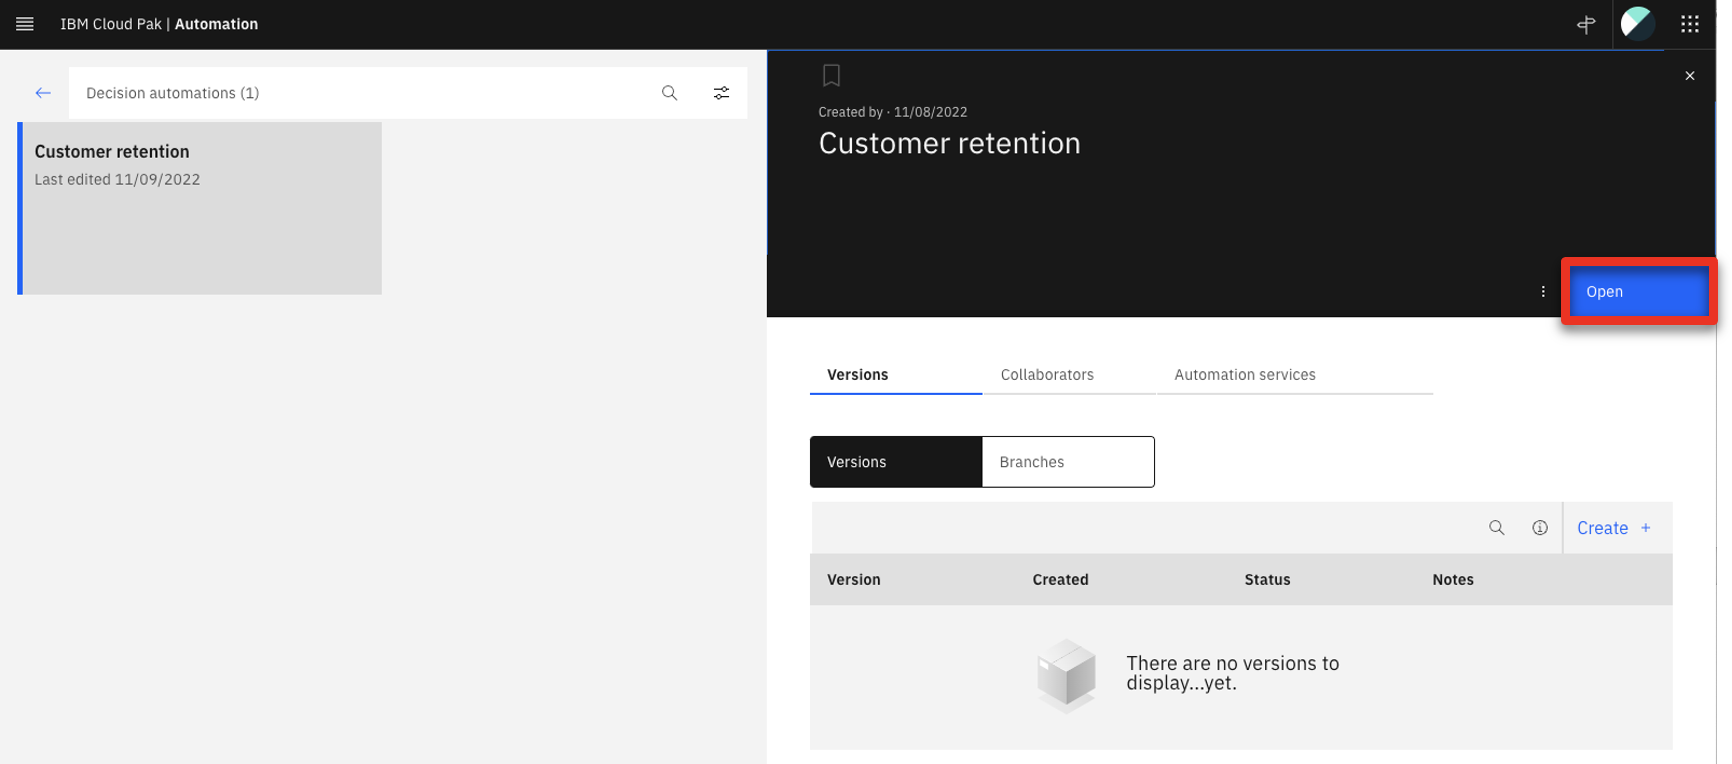
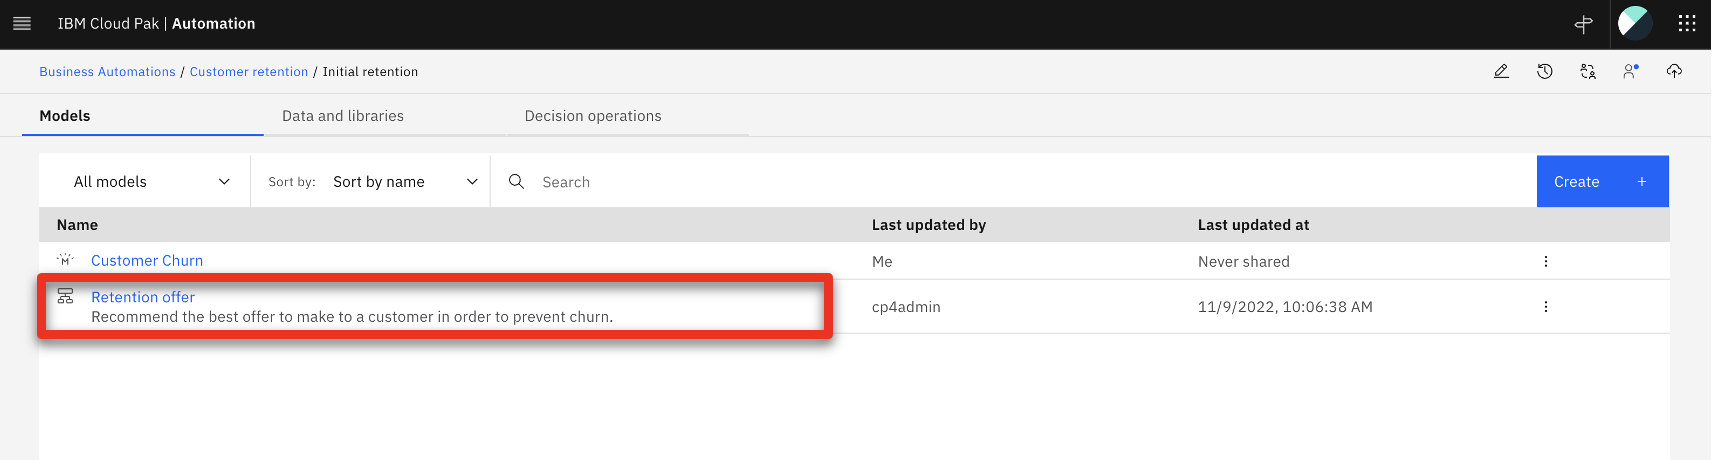
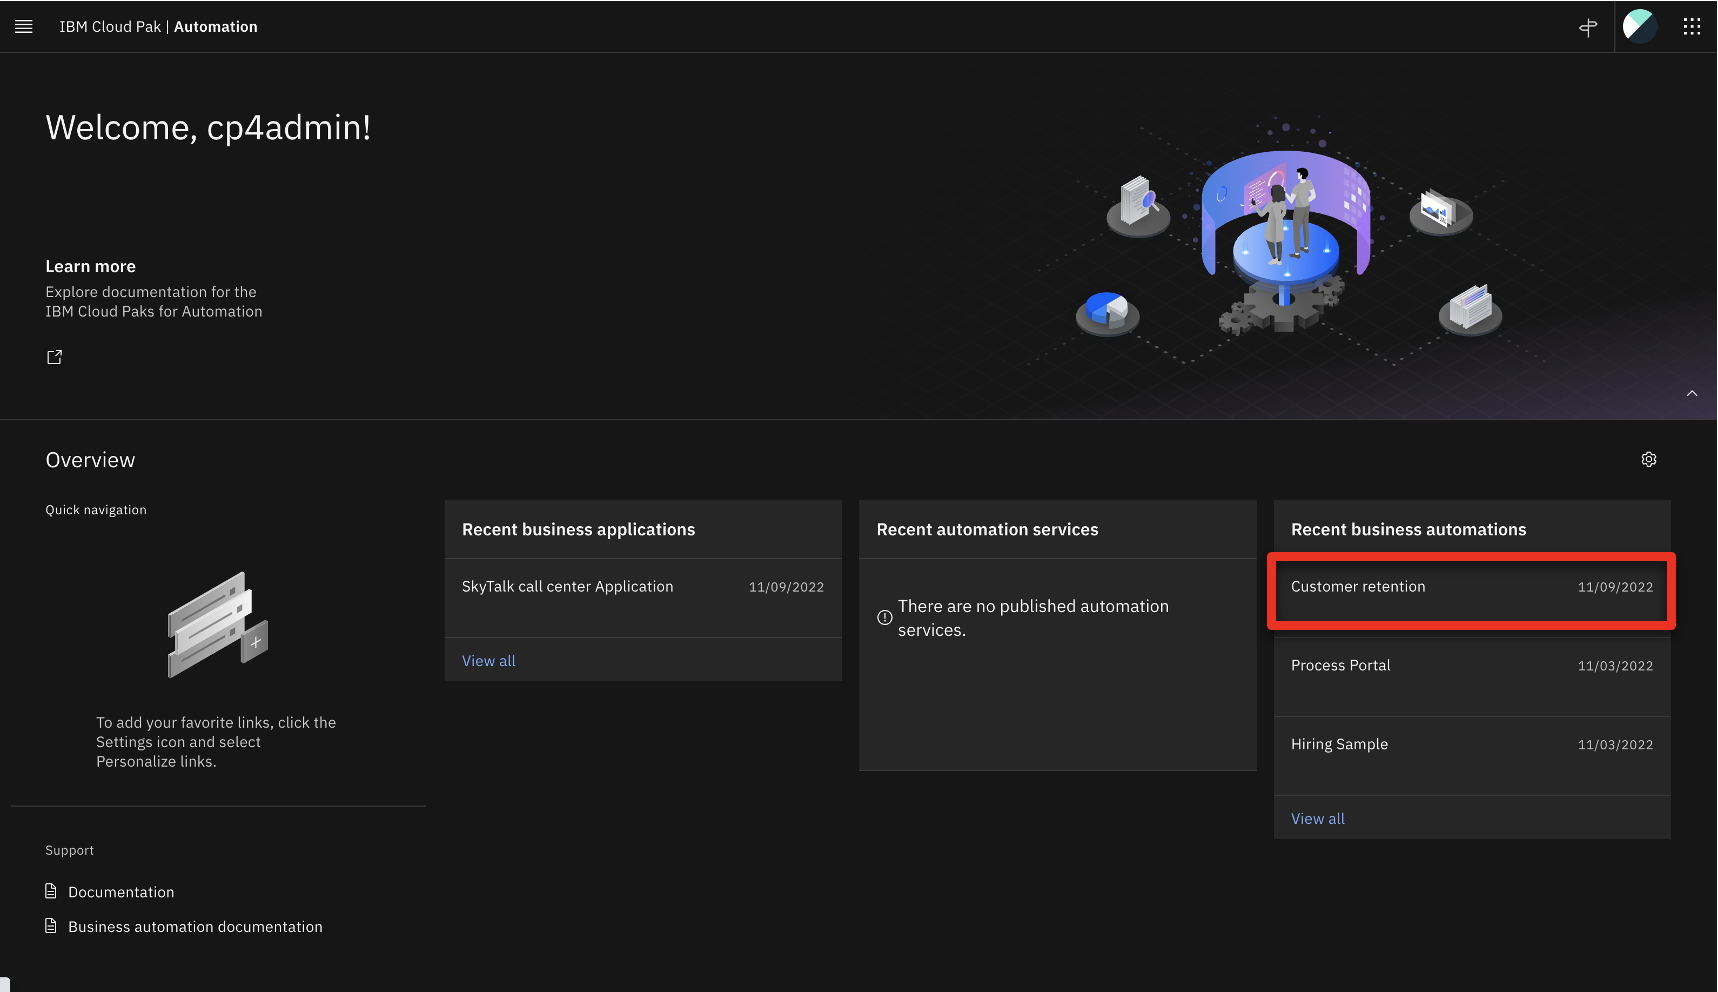
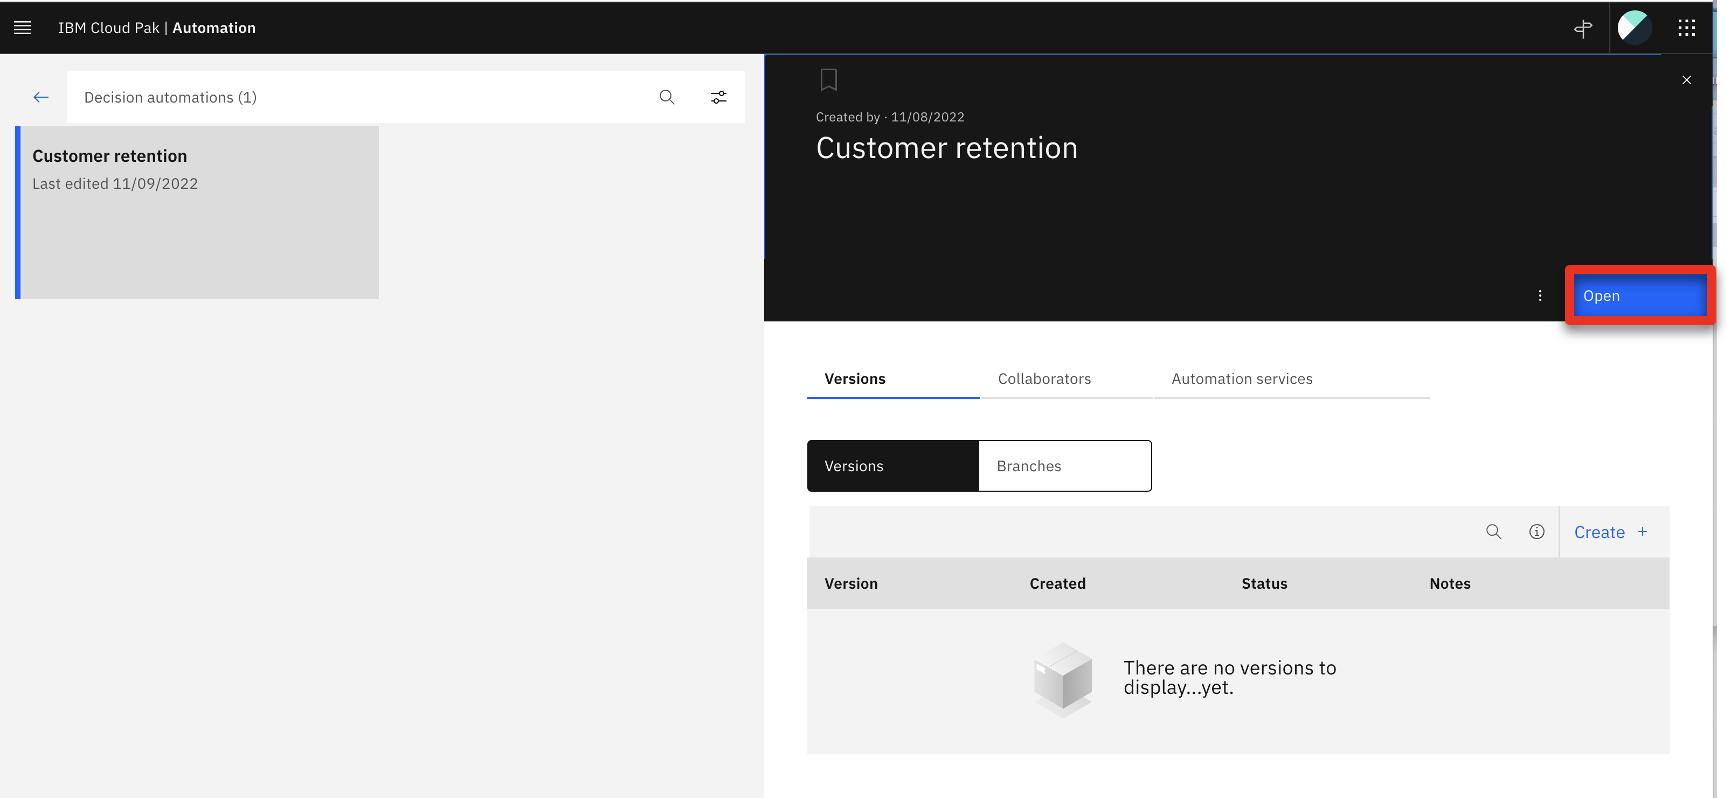
- Go to the previously opened Cloud Pak for Automation browser tab. Click Customer retention.
- Click Open.
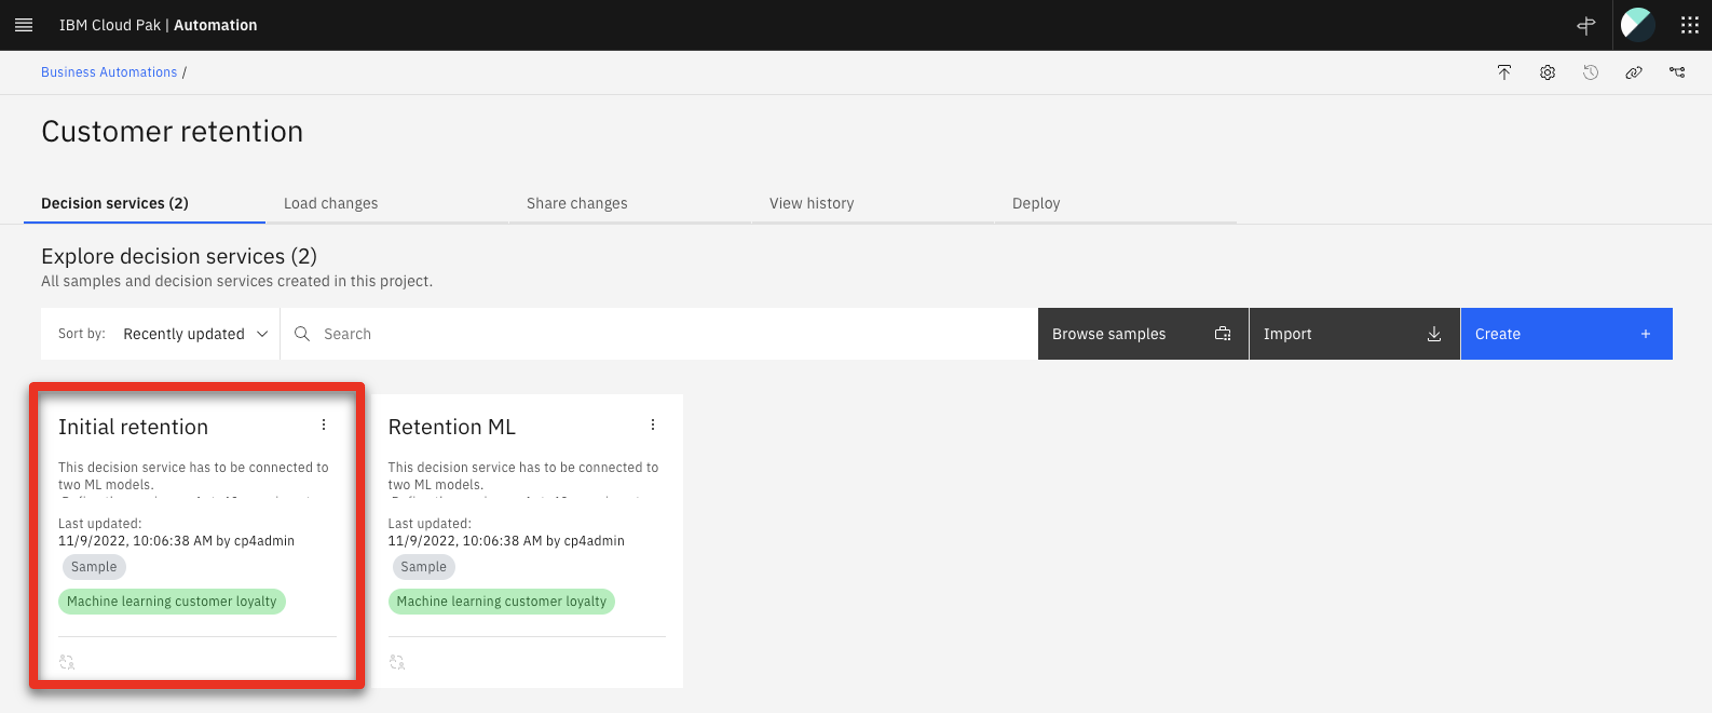
- Select the Initial retention tile.
- Click Retention offer.
- Hover the mouse over the purple Customer Churn rounded box.
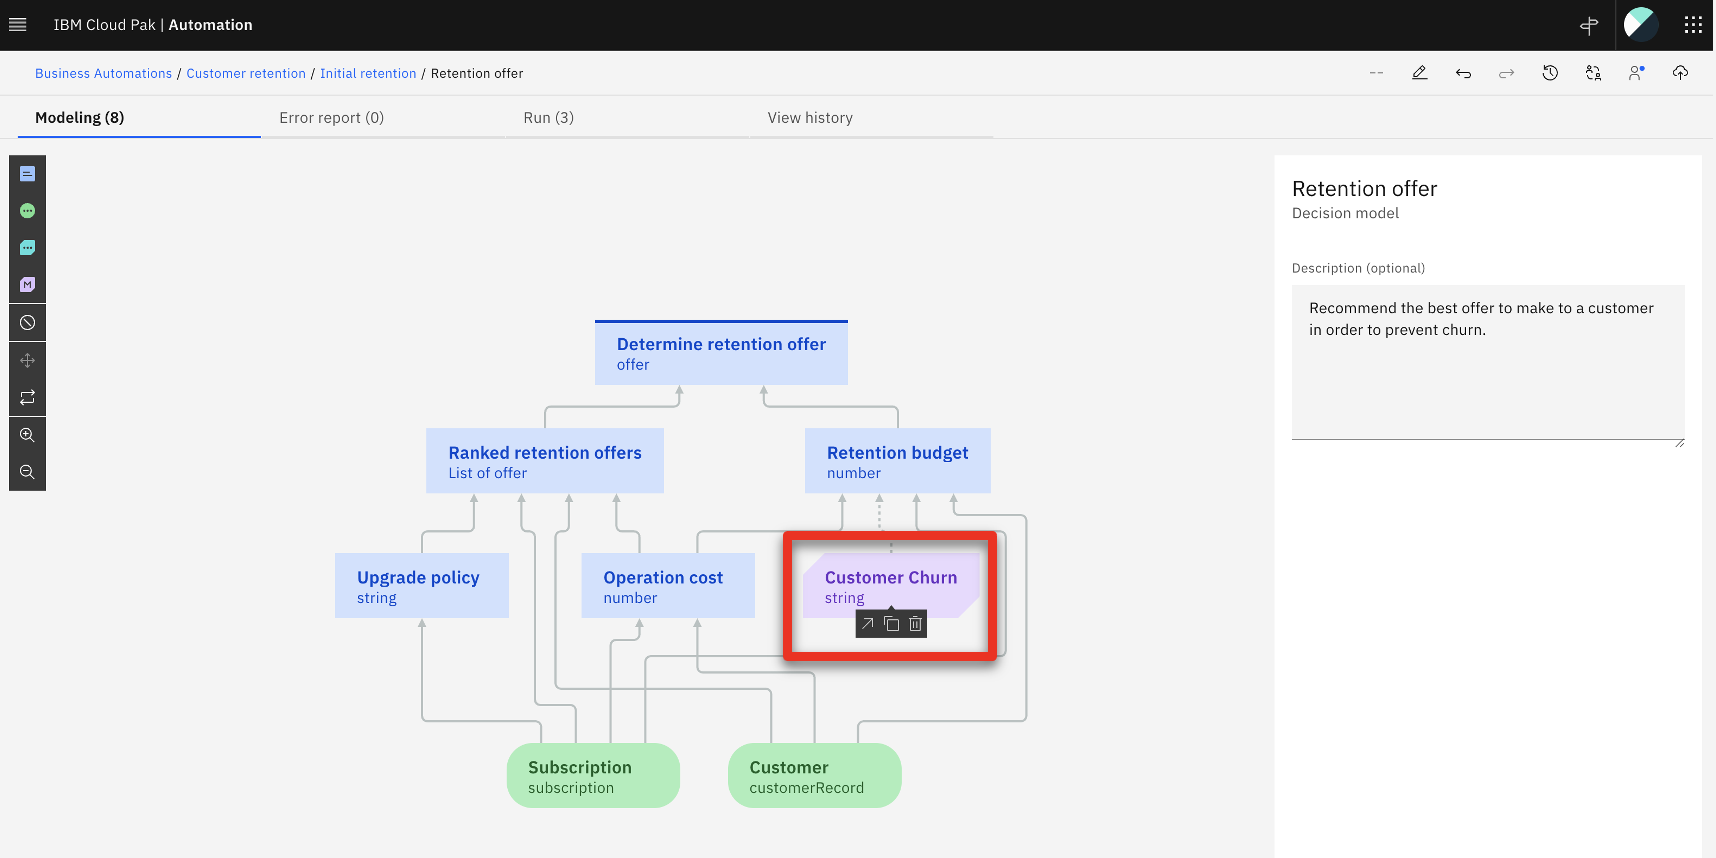
- Click the trash icon to delete the node.

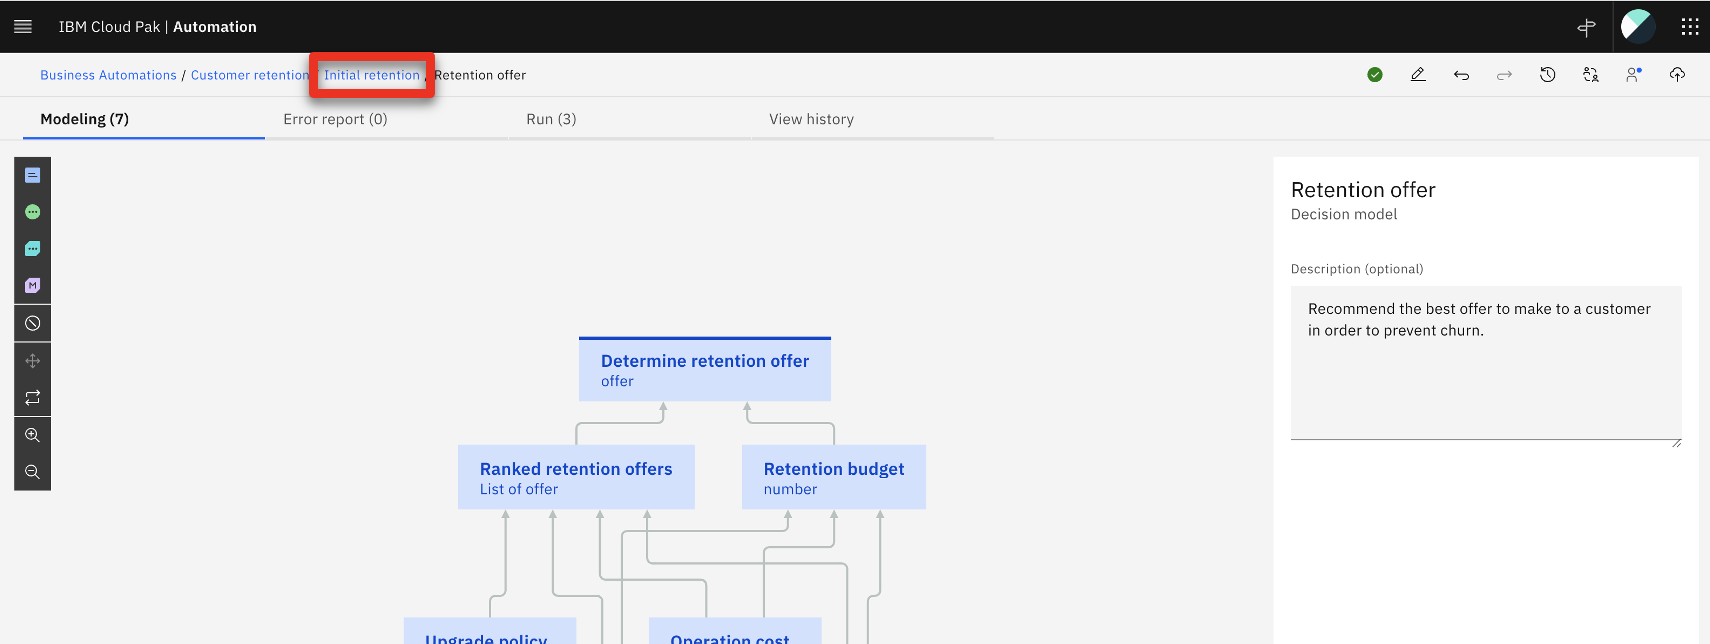
- Click Initial retention in the breadcrumb menu.
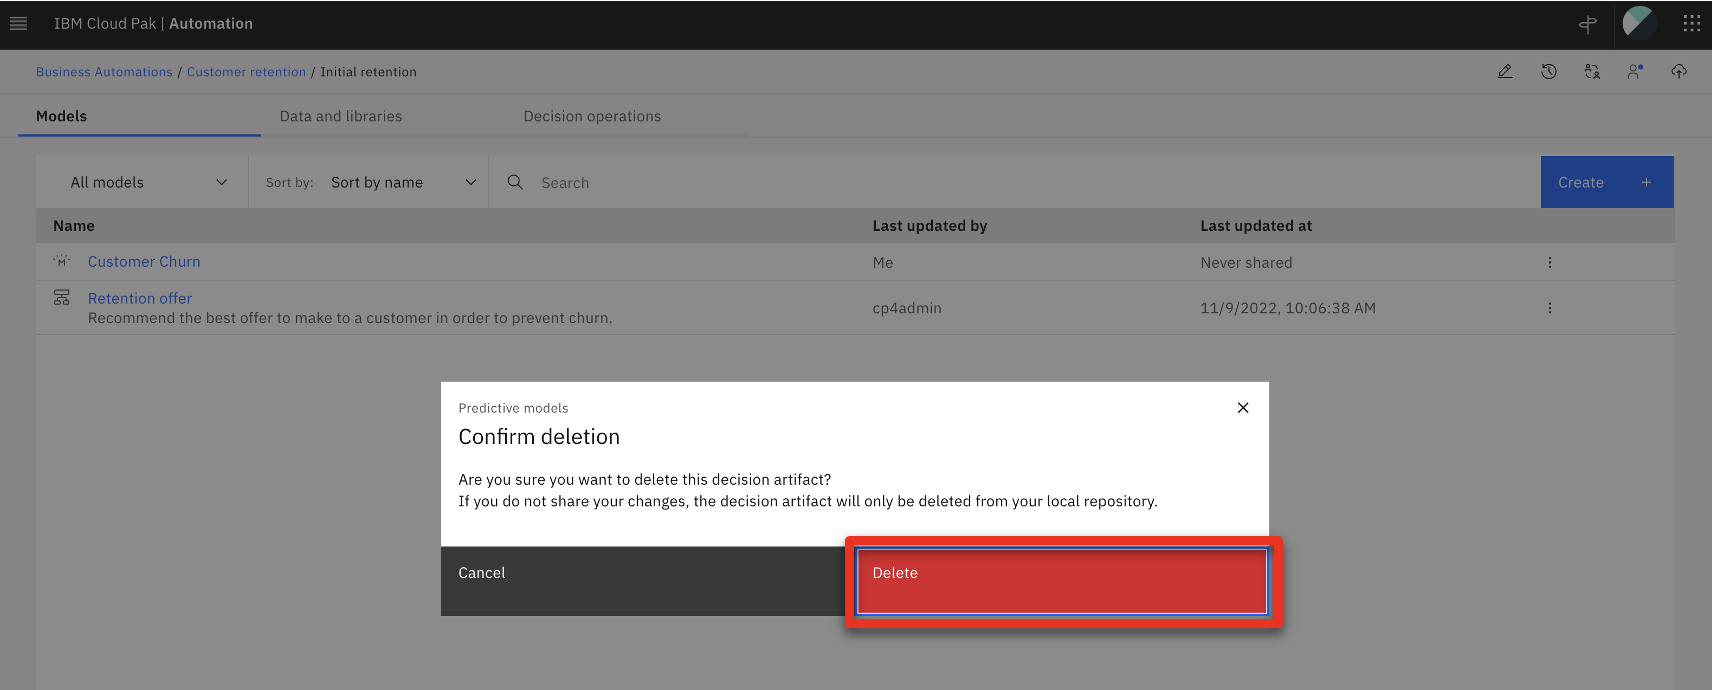
- Click the three dots icon that appears when you move your cursor over the Customer Churn predictive model row.

- Click Delete.
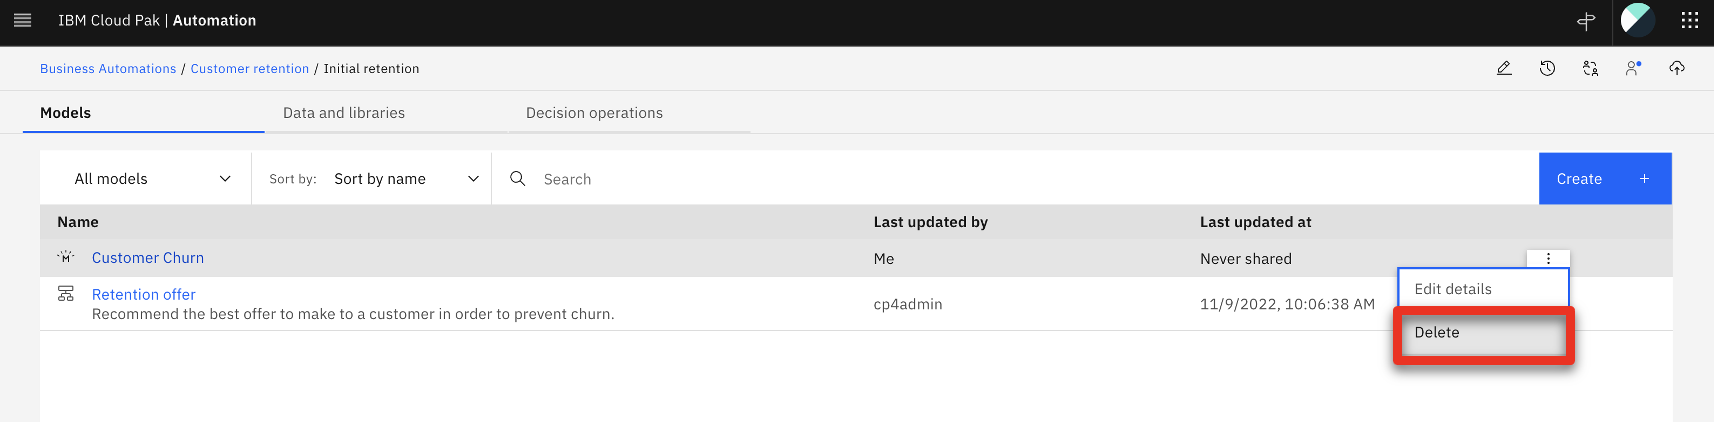
- Click Delete to confirm.
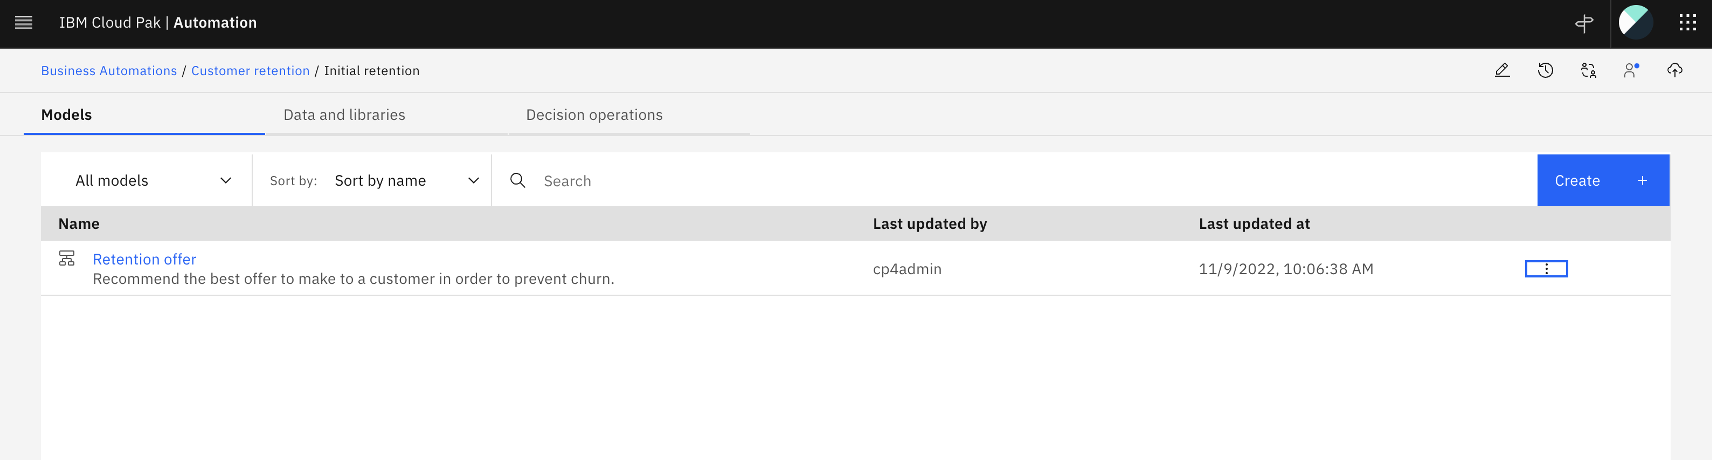
- Only the Retention offer predictive model should remain.
PREPARATION REQUIRED TO GIVE THIS DEMO AGAIN
1 - Redeploy both ML models in Watson Studio
Before starting a new demo, you must redeploy the two ML models you previously created.
The Reset the demo to its beginning state step on this page below contains the process to undeploy the services and stop the billing process.
Redeploy your ML services approximately 15 minutes prior to practicing or giving this demo.
- Go to **IBM Cloud **.
- Enter your IBM ID. If you do not have one, create a new one.
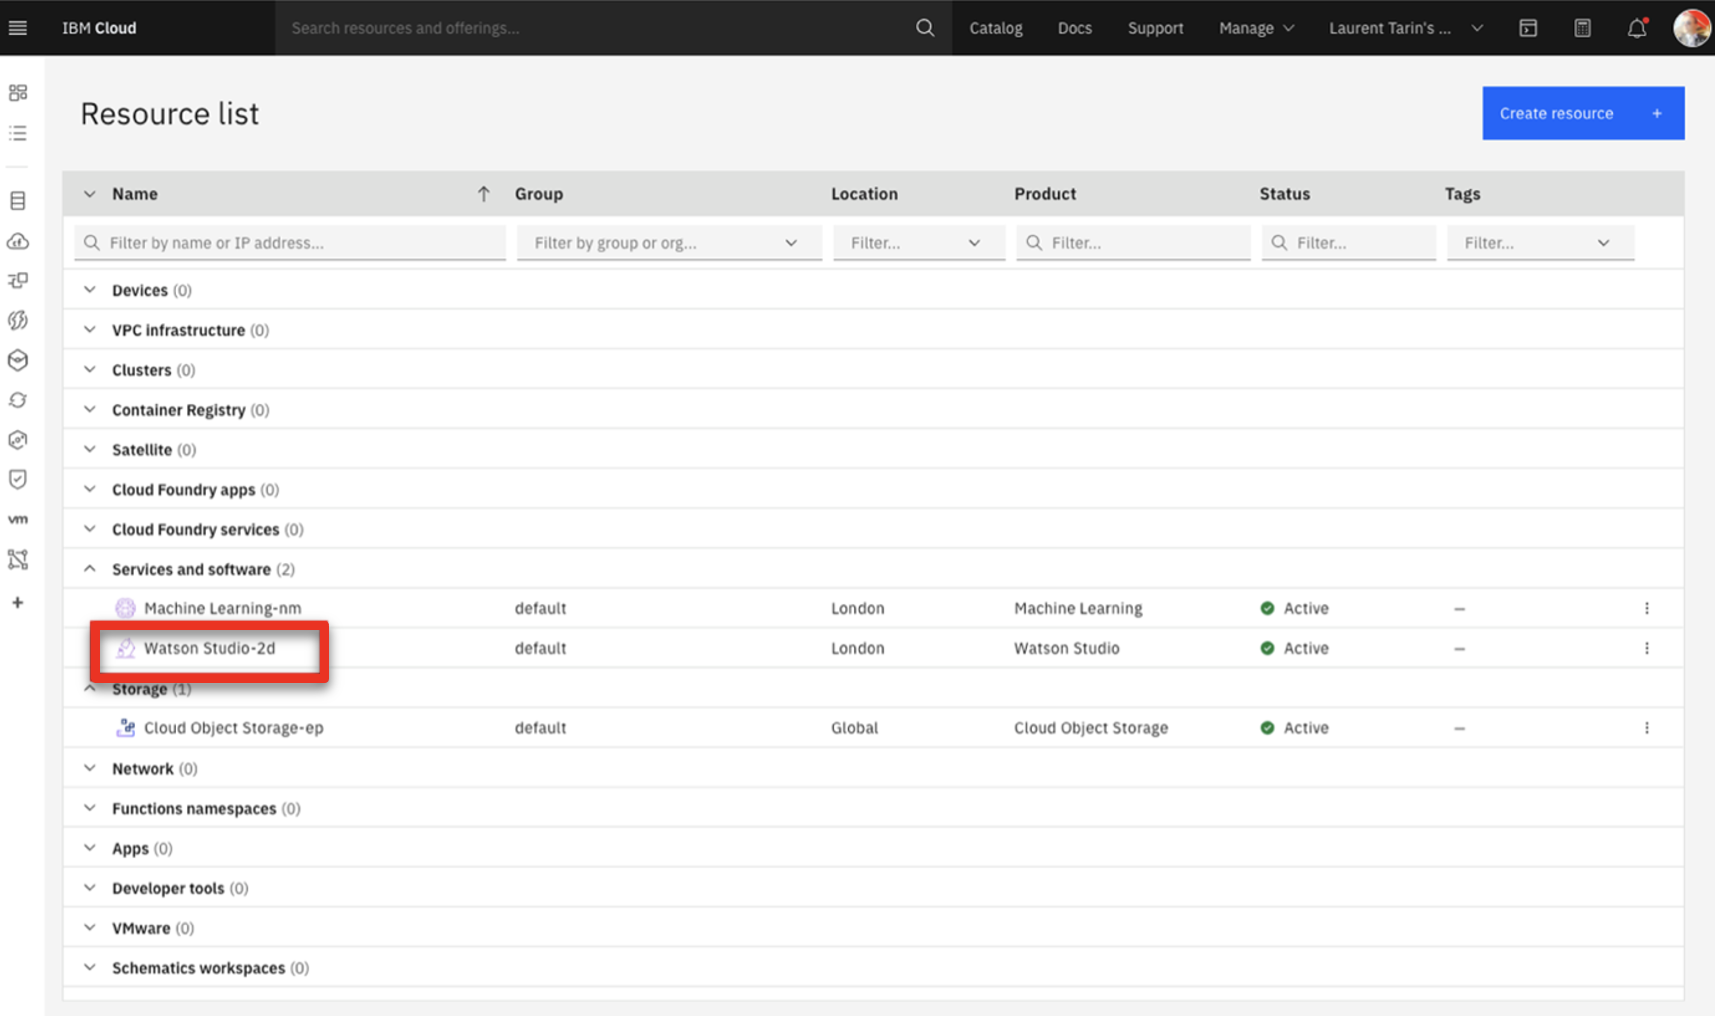
- Expand the top menu (1) and then select Resource list (2).
<img src=”images/Prep195.png” width=”800” / - Click Watson Studio-2D in the Services and software section.
- Click Launch in IBM Cloud Pak for Data.
- From the Watson Studio environment, select the SkyTalk production space deployment.
- Click the Assets tab.
- Deploy the Skytalk churn prediction by clicking the corresponding rocket icon that appears when you hover over the right side of the row.
- Select Online (1), name the deployment churn (2), and click Create (3).

- Deploy the SkyTalk lifetime value prediction by clicking the corresponding rocket icon that appears when you hover over the right side of the row.
- Select Online (1), name the deployment ‘Lifetime value’ (2), and click Create (3).

- Click the Deployments tab. Ensure the two services are deployed.
2 - Reconnect both ML models to Automation Decision Services
- Log in to Cloud Pak for Business Automation. Use the bookmark and credentials saved in step 2.
- Click the recent automation Customer retention.
- Click Open.
- Click Retention ML.
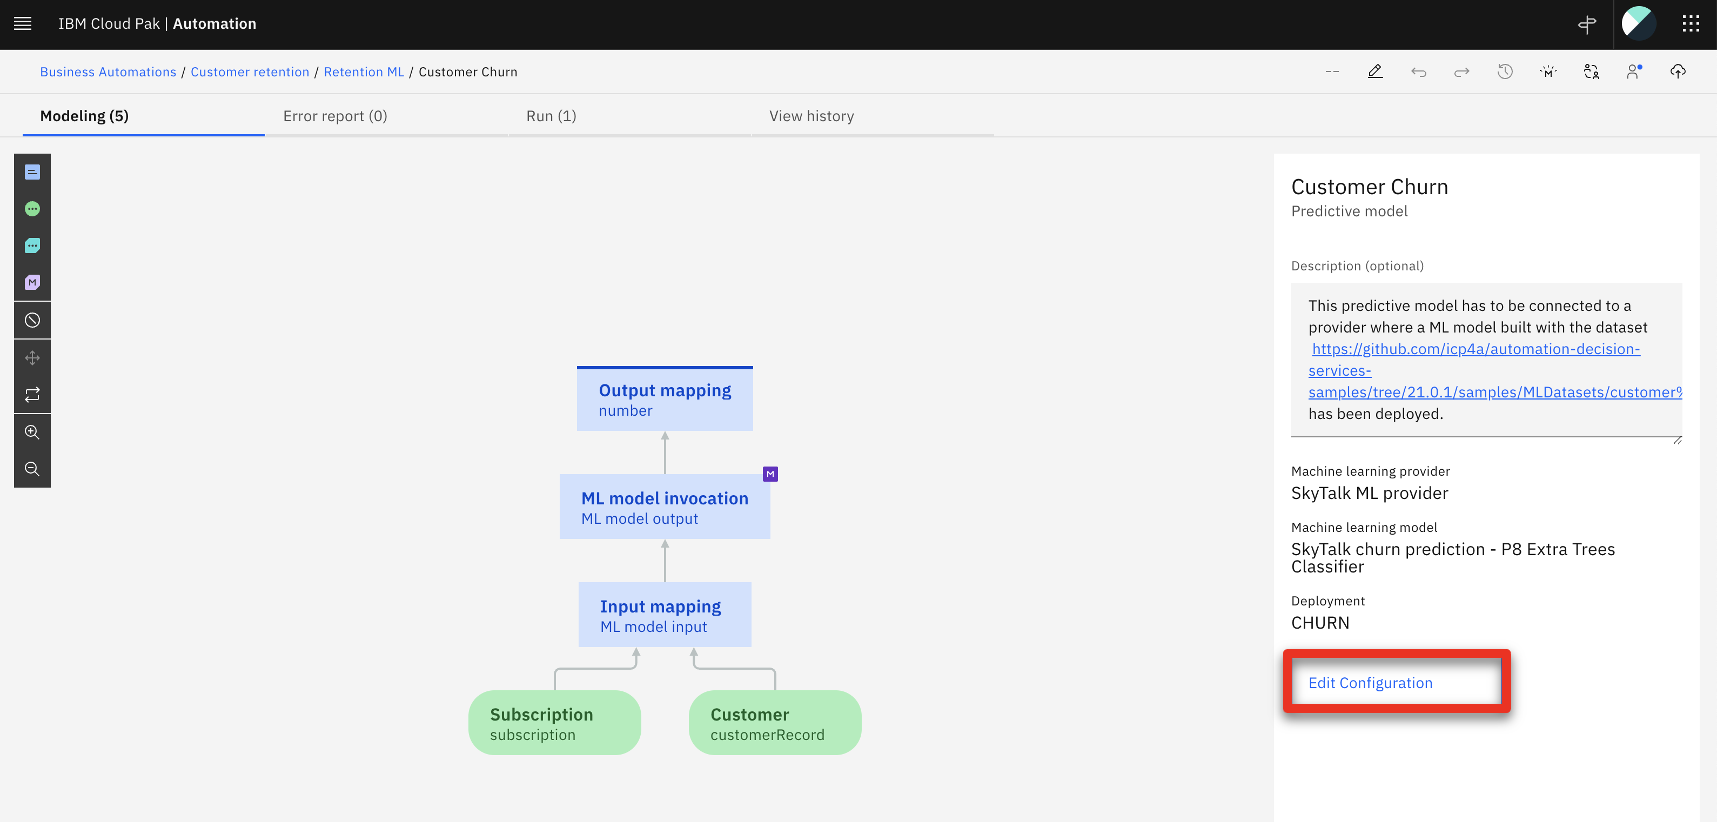
- Click the Customer Churn model on the Models tab.
- Click Edit Configuration.
- Click Next.
- Expand the SkyTalk churn prediction model (1), select the CHURN deployment (2), and click Next (3).
- Click Next.
- Click Run to test the invocation.
- If the test succeeds, click Next.
- Click Generate from test output.

- Click OK.
- Click Apply.
- Return to the Retention ML using the breadcrumb menu.
- Click Customer lifetime value and then repeat previous steps 2 - 12, expanding and selecting the Customer lifetime value ML model.
- Click the Retention offer model.
- Select the Run tab.

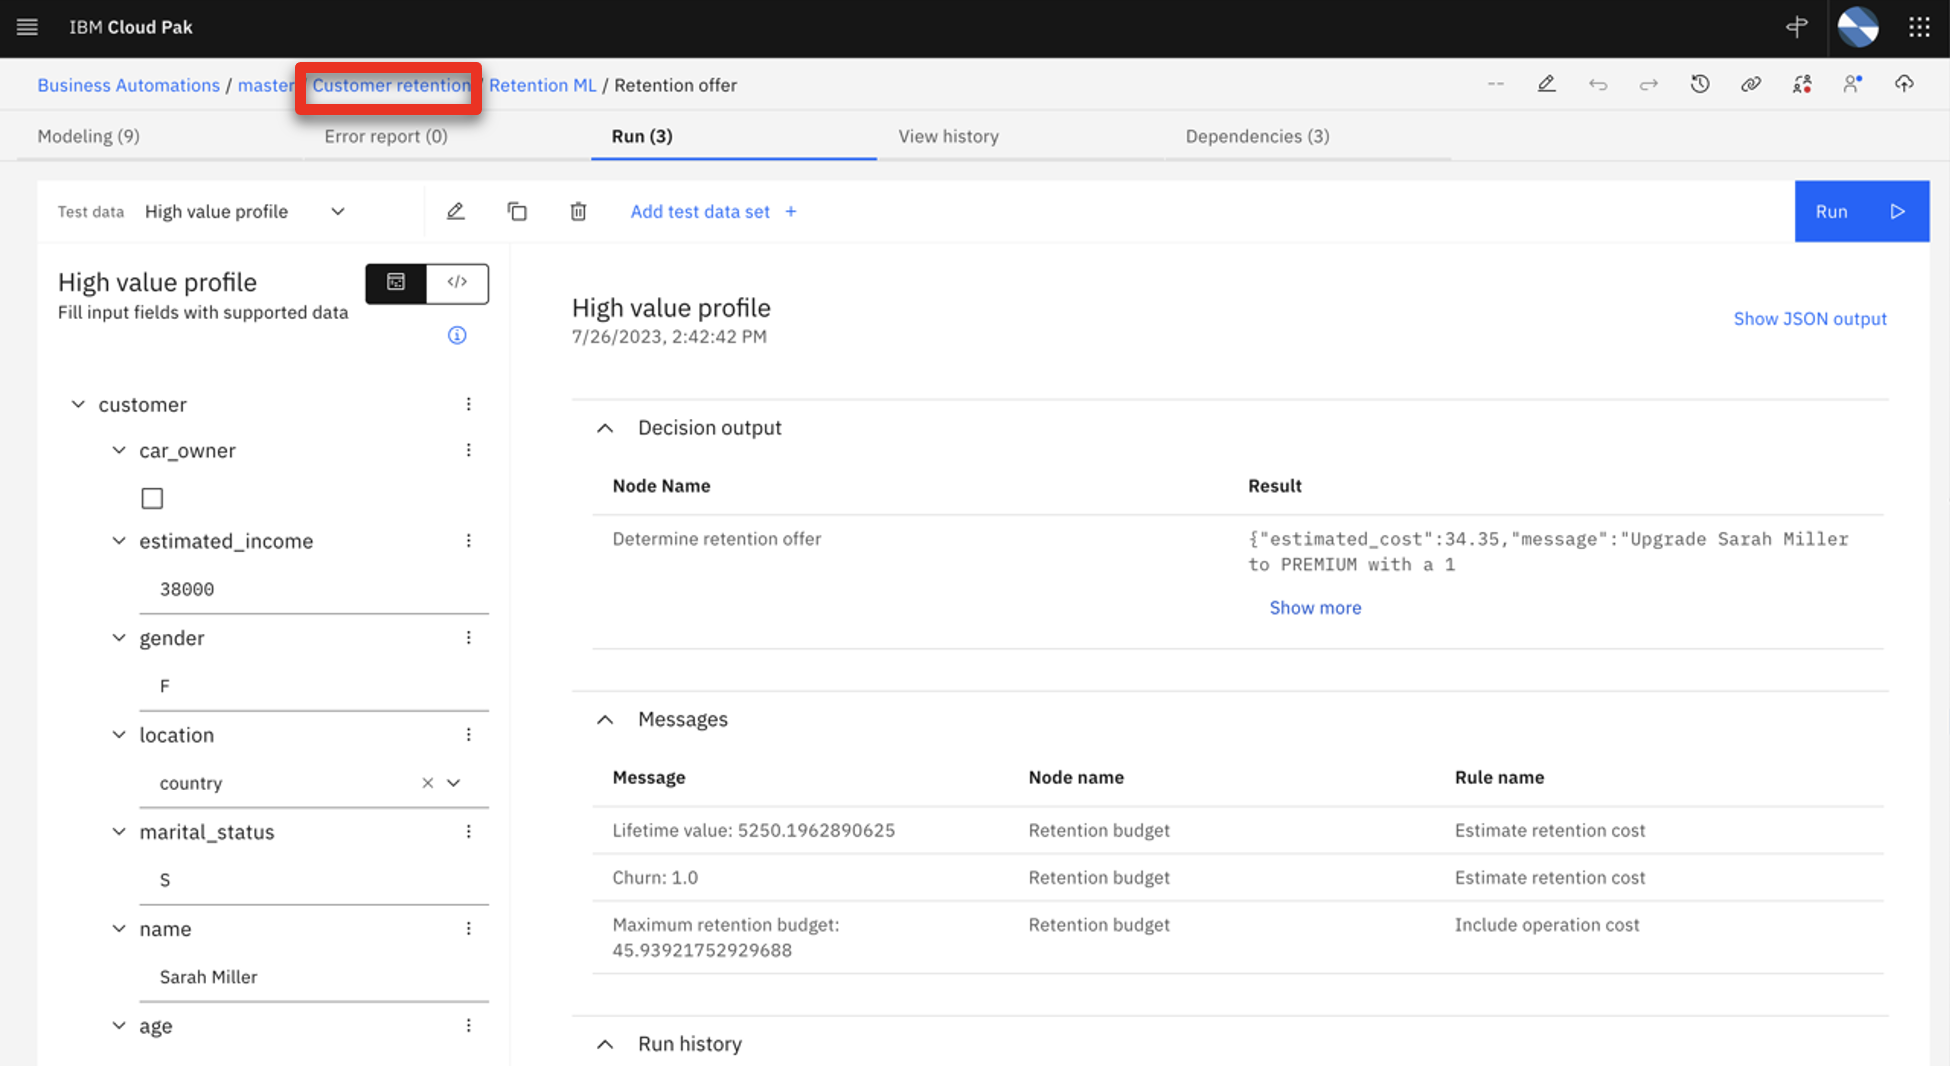
- Select the High value profile test file (1) and click Run (2).
Your result should match the screen below: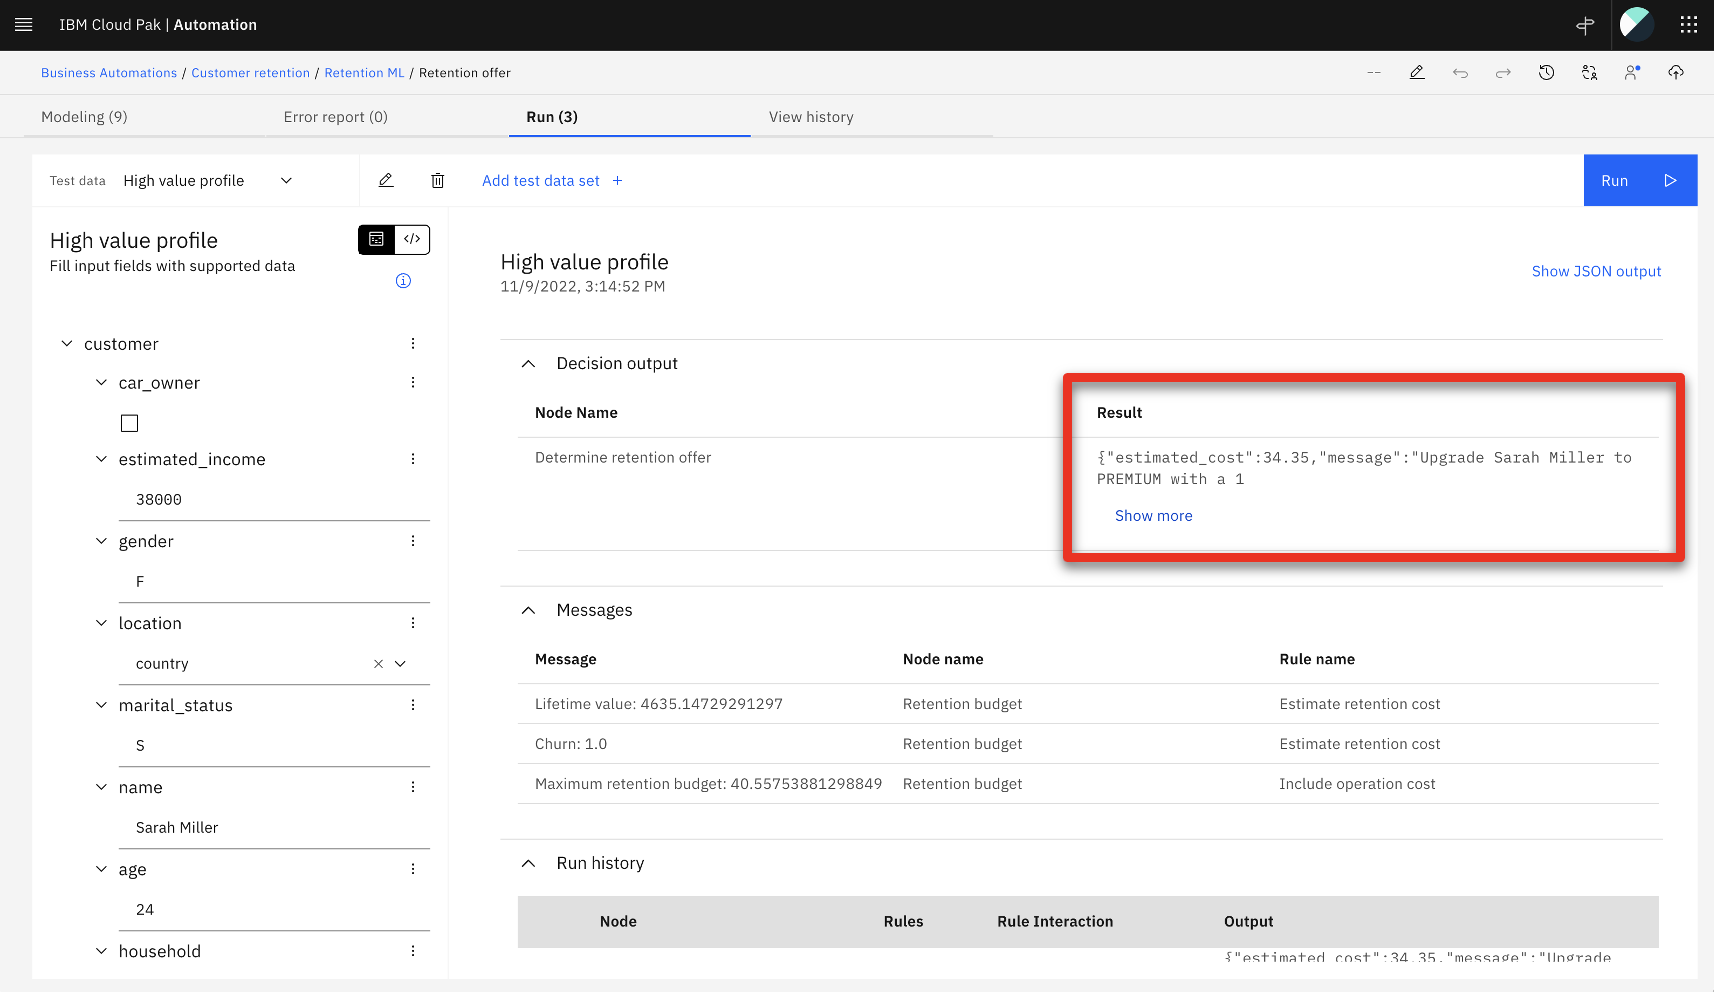
3 - Redeploy the decision service
- Click Customer retention in the breadcrumb menu.

- Select the Share changes tab.
- Click the share all changes box (1) and click Share (2).
- Click Share to push the updates to the Git repository.
- Select the View history tab.
- Click Version + in the row with the deployment you just created.
- Name the version number ‘2.0.0’ (1). Click Create (2).
- Click the Deploy tab.
- Expand the latest version.
- Click Deploy in the Retention ML row.
- Click Deploy when prompted.
- Wait for the deployment to finish (1). Click Business Automations (2) in the breadcrumb menu.
- The most recently deployed service displays. Click the three dots icon (1) and then select Publish (2).
- Click Publish.
- Ensure the service appears as Published.

4 - Reconnect the decision services to the call center application
This step must be performed anytime a new version of the SkyTalk_rentention_DS is deployed. Make sure only the latest deployed DS is published to prevent Data renaming issues when reimporting the new service
Once your decision service is deployed, repeat the Application configuration strating from step 11.12
Click here to go to the Demo script on the next tab.