Manage Users with LDAP Admin
The following guide is an extension of User Configuration with OpenLDAP with more detailed instructions for using LDAP Admin client. This guide is tested with version 1.8.3 of the client.
Pre-requisites
To complete this guide you will need:
- An existing installation of the Telco Network Cloud Orchestration (TNC-O)
- OpenLDAP accessible to your client
- LDAP Admin Client installed on your environment
Connecting to OpenLDAP
- To get LDAP connection details follow this guide.
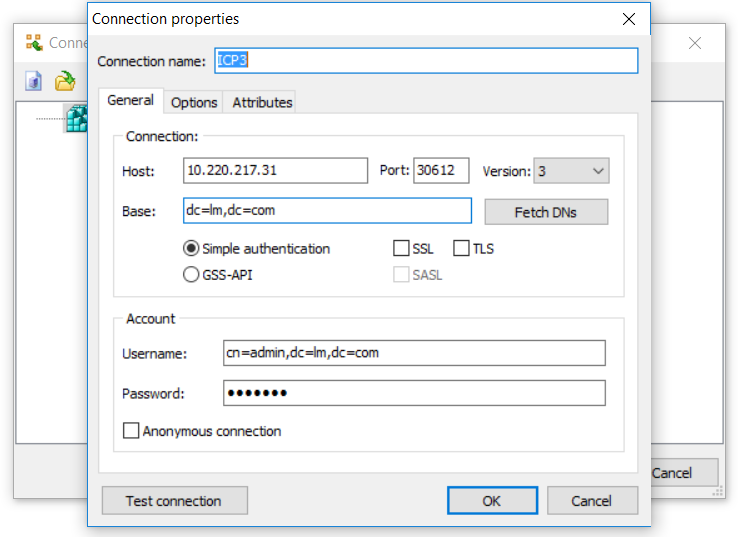
- Open the LDAP Admin window, click Start -> Connect -> New Connection and fill in details collected earlier.

- Click “Test Connection” to make sure it is working before confirming with “OK”.
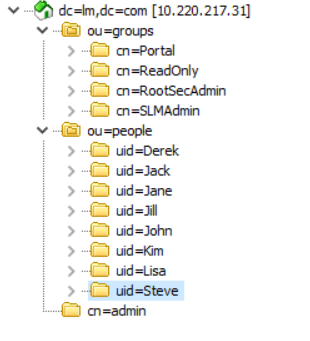
- An LDAP server that is configured for TNC-O will have a layout of organization units
groupsandpeopleon the left-hand panel.
Adding new user with access to TNC-O
To add a new user
- Right click on
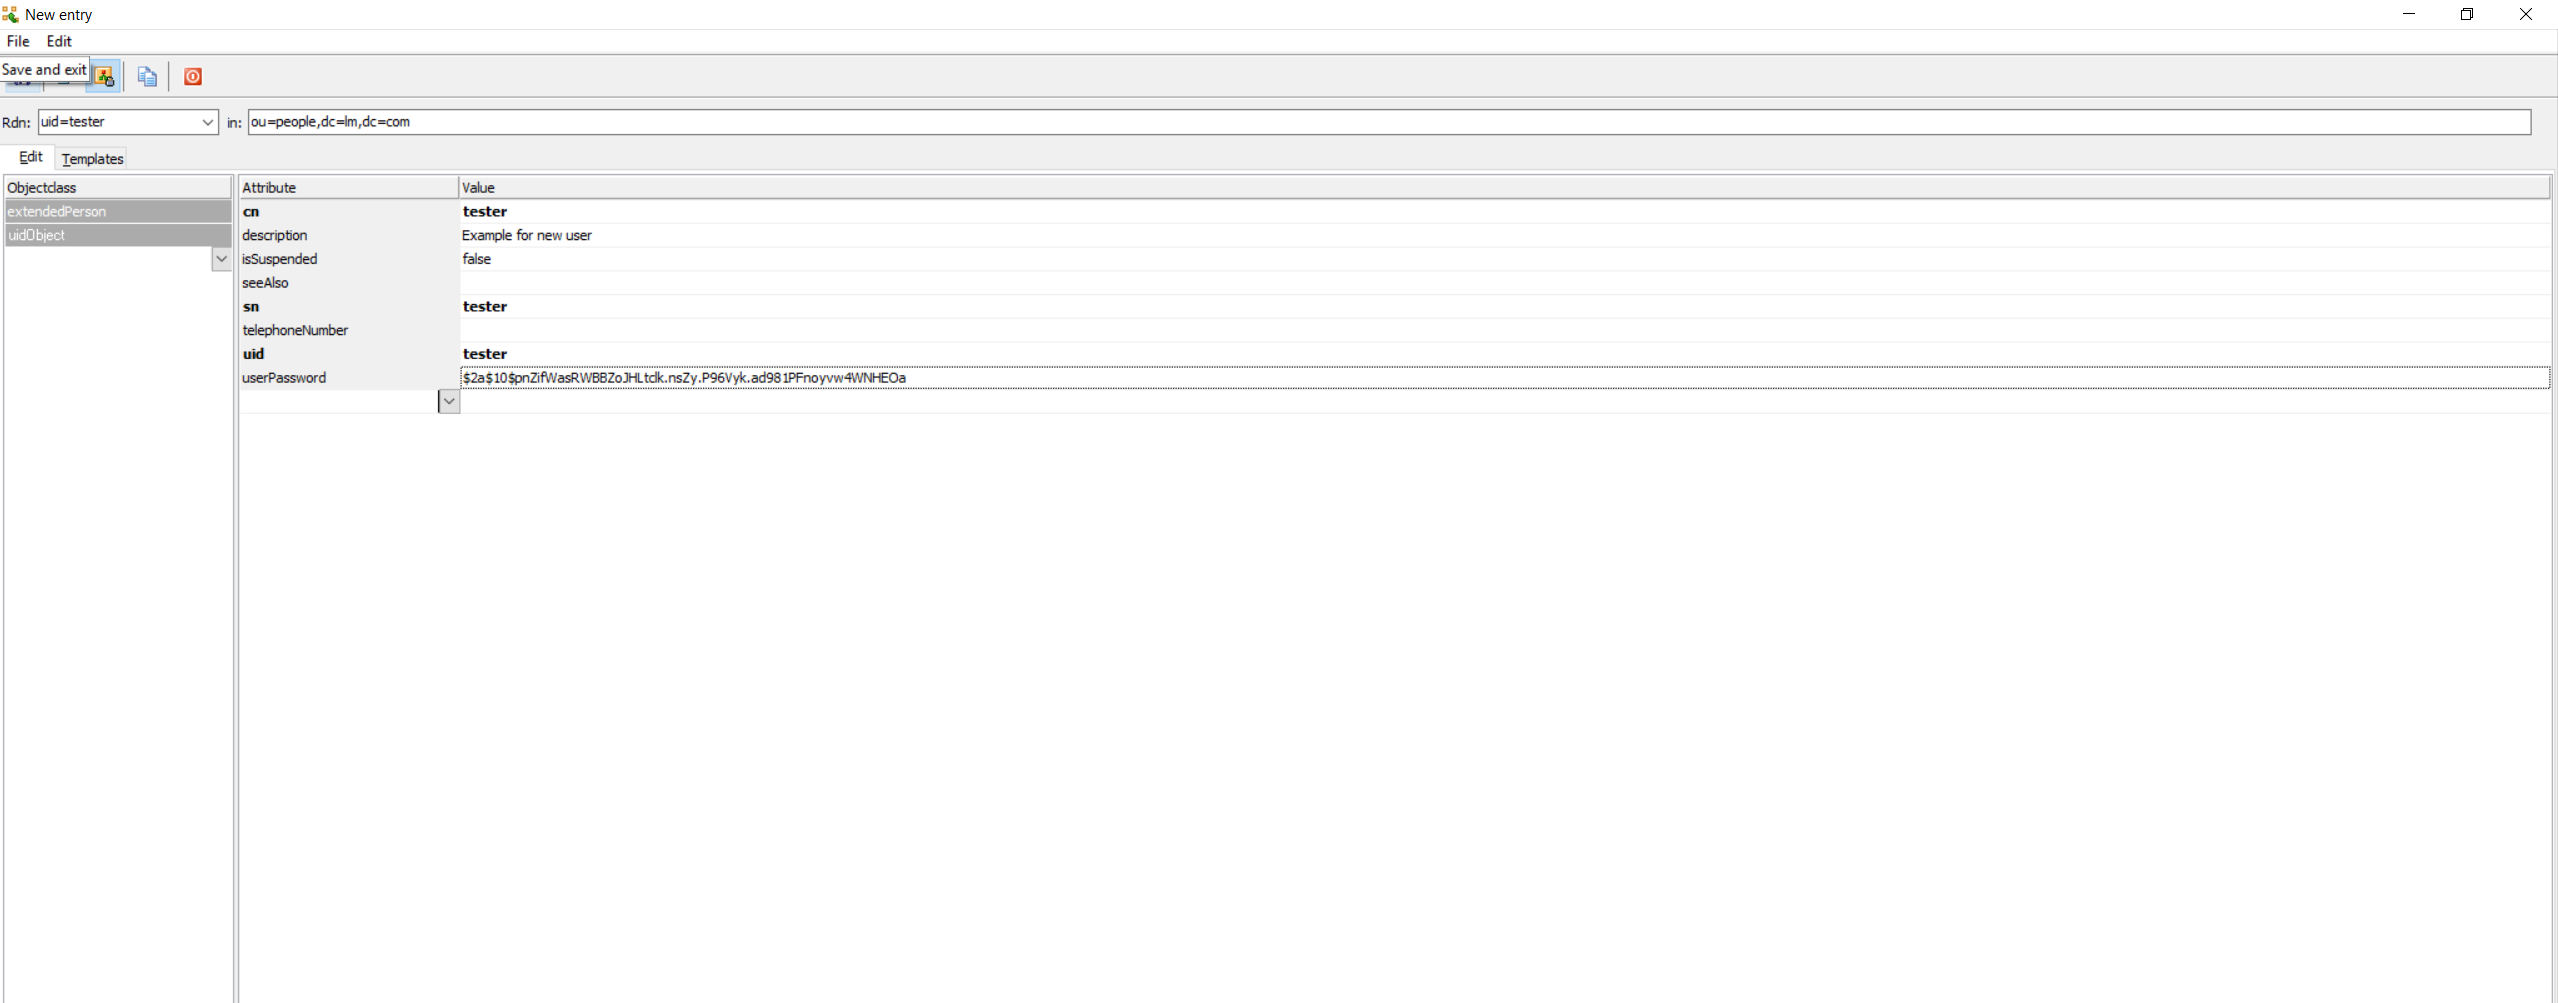
ou=people-> New -> Entry - Add the fields
extendedPersonanduidObjectin the left-hand column forObjectclass - The right-hand panel will be filled with a list of attributes for you to fill in, with
cnsnanduidbeing compulsory. It is recommended that the 3 fields should have the same value - the username of your new user. - For userPassword, you need to convert plain-text passwords to BCrypt. Use bcrypt-cli or browser-based generator. Check that password hashes have the
$2aprefix. - Choose
uid=...in fieldRdn:in the upper left-hand corner then click the “Save and exit” icon.
To grant access to a new user
- Read about default groups and decide the group to which you want to add your user.
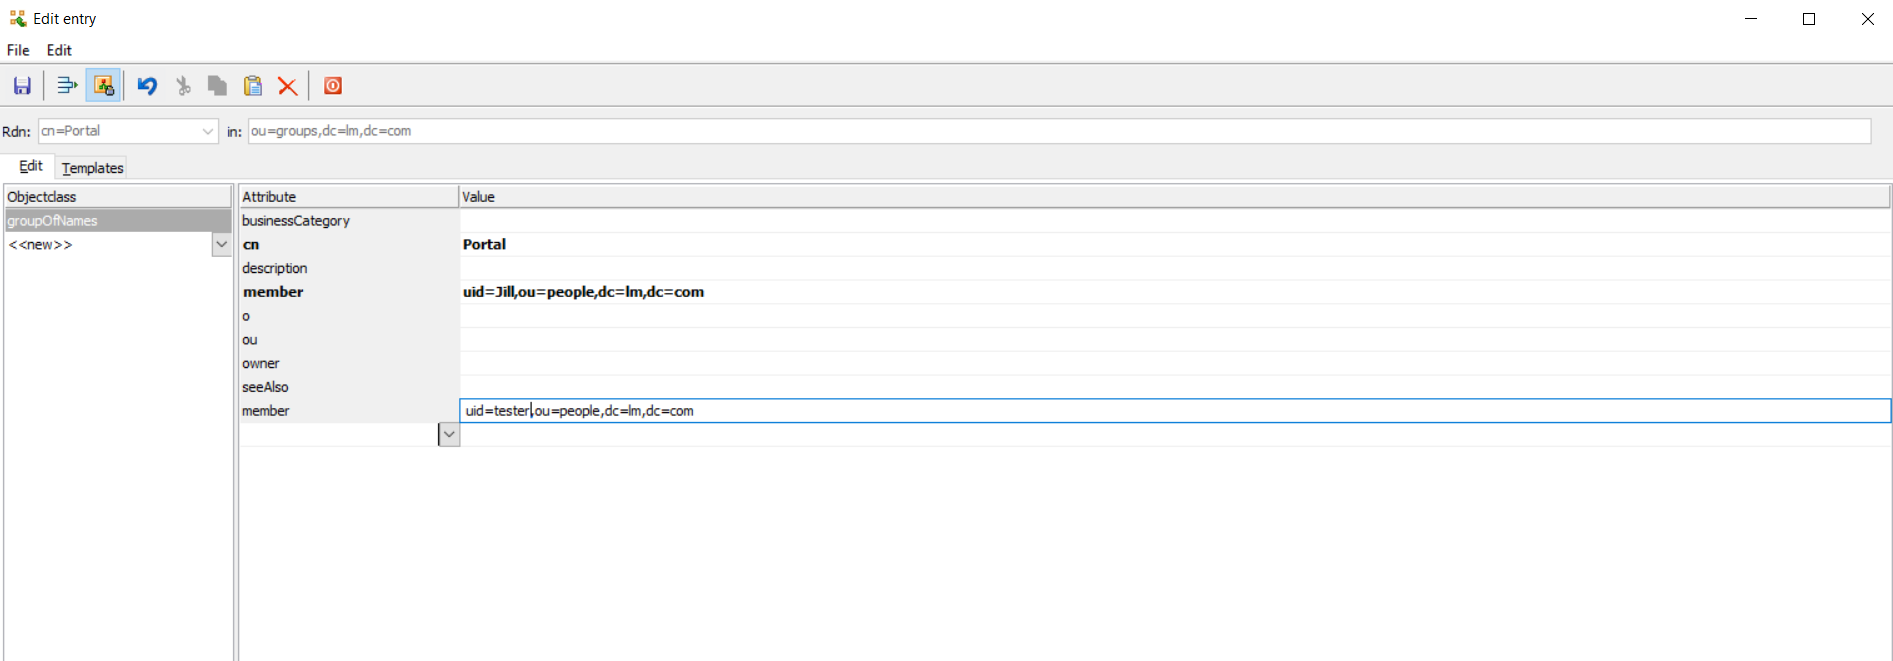
- After adding a new user, return to the LDAP Admin main panel and right click on wanted group e.g
cn=Portal-> Edit Entry. - Add a new row, choose
memberas attribute and add as valueuid=<created-user-uid>,ou=people,dc=lm,dc=com. - Save and exit

Test access with TNC-O
- Go to the TNC-O UI and log in with created username and password.
- Verify that your new user has correct access according to their roles.