Scenarios
A scenario outlines the list of steps to execute in order to simulate actions or assert expectations of lifecycle behaviour or metric values. It can be thought of as a script, that will execute commands one-by-one till completion. Each step represents a command which must pass in order for the scenario to continue execution. If a step fails, the scenario is stopped and marked as failed. Any steps scheduled after the failing step are not executed.
Scenarios are created by first outlining the “actors” involved. Each actor is just an assembly instance to be created from an assembly configuration previously created by the user in the current project. You will then select the steps to be executed, potentially referencing the assembly actors to simulate behaviour.
Creating Scenarios
To create a scenario click on “Create Scenario”. Provide a name and a description to outline the purpose of the scenario.
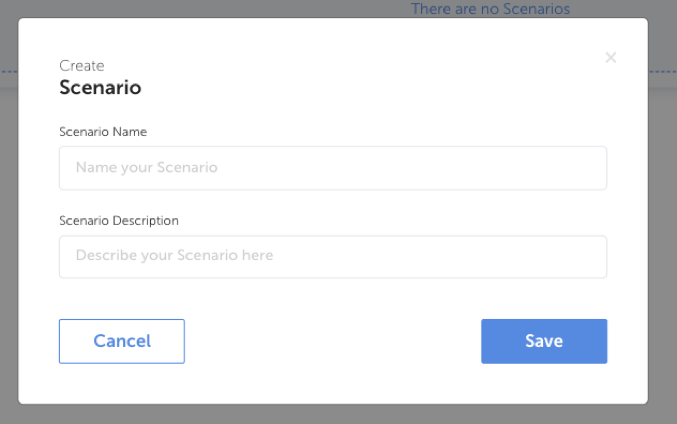
Click “Save” to finish creating the scenario. Once it appears in the scenario list you may use the “Open” button to navigate to the scenario designer where you may begin adding assembly configurations and steps.
Scenario Designer
The following sections show you how to make changes to the scenario using the designer. It’s important to note that any changes made are not saved until you click the “Save” button at the top of the designer.
Manage Assembly Actors
In the designer for your chosen scenario you will see the “Assemblies” panel at the top and the “Scenario Palette” on the right hand side. If you expand the “Assembly Configurations” section of the palette you will see a list of the configurations you have created in this project. You will also see an additional configuration called “Existing Provided Assembly” which will be covered later.
Add an Assembly Actor
To include a new actor in your scenario, drag an assembly configuration from the right hand panel into the dotted “Assemblies” area to the left.

Dragging it across will create an entry in the scenario:

The configuration is now an actor in the scenario. When the scenario is executed an assembly instance will be created based on the descriptor and properties set in this configuration.
You may use the input fields on the new entry to decide the name of the future assembly instance and also decide the state it should be created in. The final input lets you choose what should happen to this assembly when the scenario completes successfully: uninstall or keep it. When choosing uninstall, it is important to know that this takes place at the end of the scenario, after all the steps have completed. This means if the scenario fails then the assembly will not be uninstalled, as the step to uninstall it will never be reached.
Multiple assembly actors can be included on the scenario by dragging in further assembly configurations or by re-using the same configuration, just be sure to give each assembly a unique name.

The order of the assembly actor entries is important, as this is the order each instance will be created in. You can re-order the assemblies by dragging each entry up or down.
Remove Assembly Actor
An assembly actor may also be removed by clicking on the trash icon in the top right of the entry.
Manage Stages
Below the “Assemblies” panel is the “Stages” section. You will need at least one stage in the scenario before you can add any steps (there should already be a “Default Stage” included on any new scenario).
A stage is a logical group of steps, allowing you to break the scenario down into smaller sections for readability. The use of stages has no impact on the scenario execution.
Add a Stage
Add a new stage by clicking the “Add Stage” button below the current list of stages.

The stage will be immediately added to the bottom of the list, with a default name of “Stage”. You can modify the name by clicking the “pencil” button next to the current name. This will open an input box for you to enter an alternative name. Save your changes with the “tick” button.
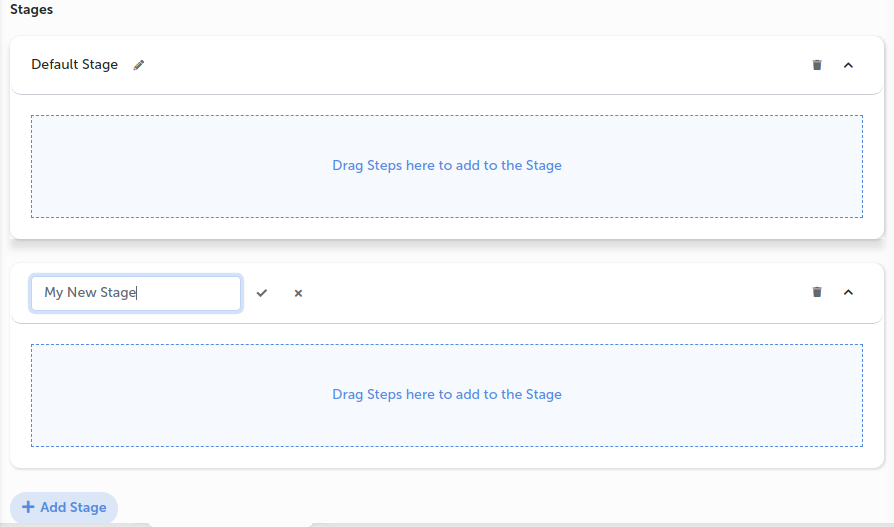
The order of the stages is important, as the steps in each stage are executed in linear order, starting with the first stage in the list. You can re-order the stages by dragging each entry up or down.
Remove a Stage
A stage may be removed by clicking on the trash icon in the top right of the entry. You will be prompted to confirm your intention to remove the stage, as this will remove all of the steps included on it.
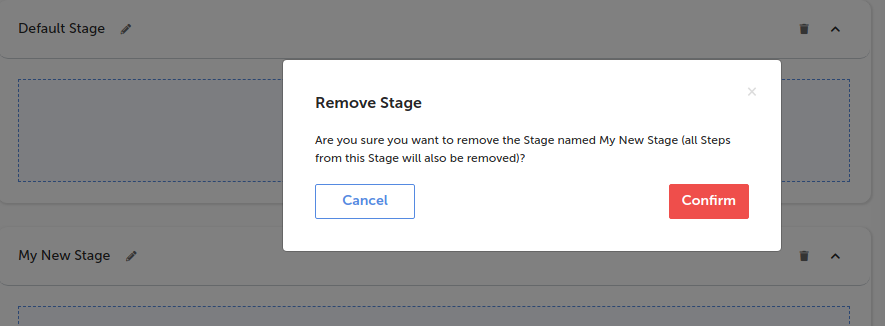
Manage Steps
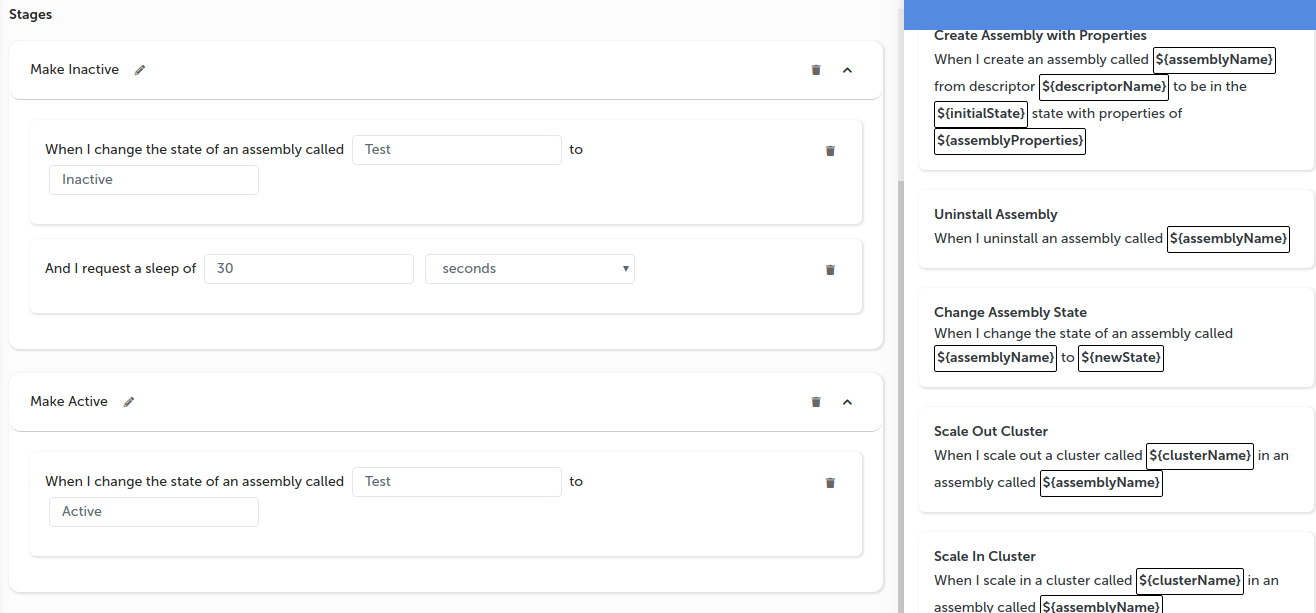
The “Scenario Palette” to the right of the designer contains the set of steps which you may add to your scenario. View the steps by clicking on one of the group titles, this will expand the group to reveal the steps it contains. You can close the group by clicking the title again.
Each step features a sentence which declares the action or assertion it will take. Some parts of this sentence are configurable, indicated by a square with a variable name inside curly brackets e.g. ${assemblyName}.
Add a Step
Add a step by dragging it from the palette into one of your stages.

This will create an entry in the stage. You can configure the properties by filling out the input boxes.

You may add as many steps as you desire to each stage. The order of the steps is important as this is the order they will be executed. The first step in the first stage will be executed, following by the next step in the stage. After all the steps in a stage are complete, the first step in the next stage will be executed and so on until there are no more stages.
You can re-order the steps by dragging each entry up or down. You may also move steps from one stage to another by dragging it across to the new stage.
Remove a Step
A step may be removed by clicking on the trash icon in the top right of the entry. You will be prompted to confirm your intention to remove the step.

Step Reference
For a complete guide on the behaviour of each step offered in the palette please read the Step Reference
Executing Scenarios
A scenario may be executed from the designer by clicking the “Run Scenario” button at the top of the screen. Be sure to save any changes first, by clicking the “Save” button.
You will be re-directed to the scenario execution screen which shows it’s progress. The status of the steps are shown on the left side whilst the right hand panel will show metric charts if a record metric step has been executed.
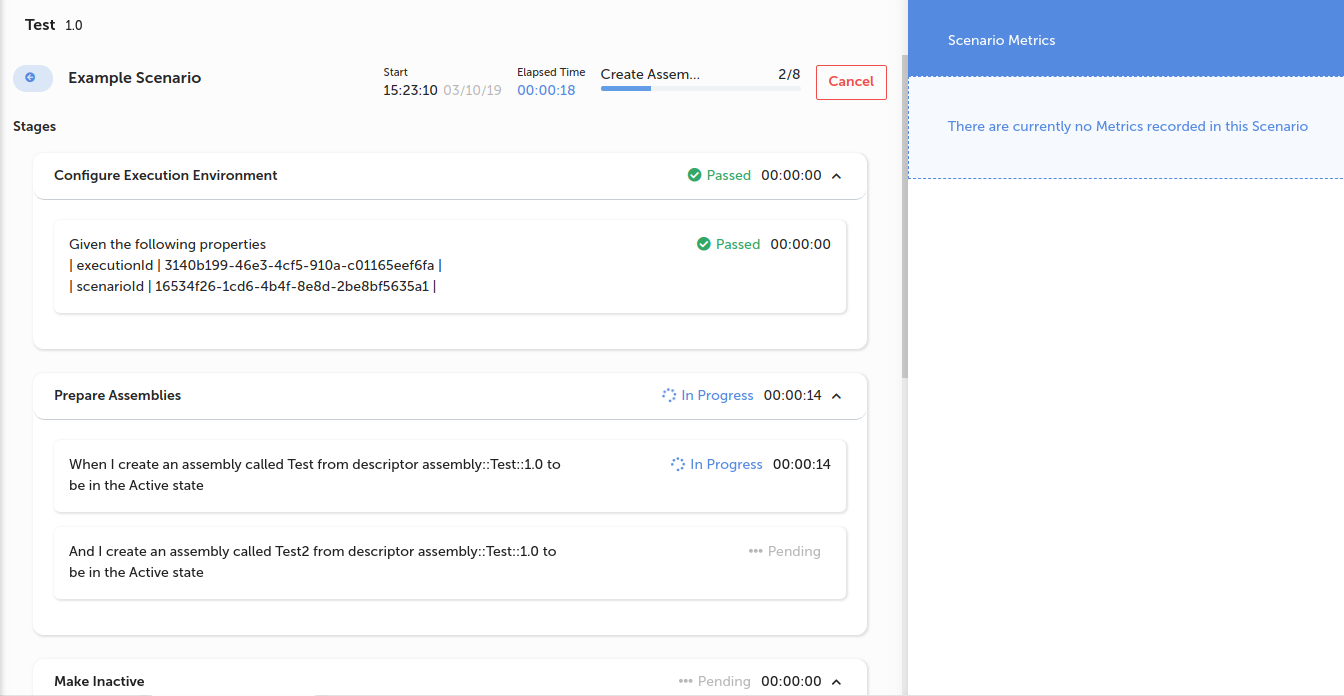
You will notice some additional stages added before and after the stages you added in your design. The “Configure Execution Environment” initiates the start of an execution. The “Prepare Assemblies” stage will create the assembly instances for any actors you specified on the scenario (by dragging in assembly configurations). The “Cleanup Assemblies” stage, added to the end of the scenario, will uninstall any assembly instances with the “uninstall” option set on their actor entry.