2. Lab Environment
In this Lab, you will have access to one OpenShift cluster via a bastion virtual machine that has installed Red Hat Enterprise Linux (RHEL). Note that inside OpenShift, the cluster has installed the Cloud Pak for AIOps. It also has installed the Red Hat OpenShift Data Foundation (ODF) which is a software-defined, container-native storage solution that provides storage classes that will be used by the Cloud Pak for AIOps to dynamically request storage.
The following diagram describes the infrastructure for the Lab:

2.1: Prerequisites
Create an IBM ID
You will need an IBM ID to request and access your lab environment in IBM TechZone. You can create an IBM ID here.
Obtain your Entitlement key
Navigate to the IBM Container Software Library to obtain your entitlement key. The entitlement key is assigned to your IBM ID which will grant you access to the IBM Container Registry.
You can check your entitlement key by clicking View Library. Take note of this key as you will need it later in the Lab.

If your entitlement key is not valid for the Cloud Pak for AIOPs, you can register for a 60 day trial using the following link: Request trial.
2.2: Requesting a Lab Environment
Below is a live chart showing Tech Zone capacity in each available region. When requesting your environment it would be wise to select the region that has the most capacity available.
Follow these instructions for step by step guidance on requesting and accessing a lab environment in IBM Tech Zone.
Request Tech Zone environment:
2.3: Logging In
Connecting to the OpenShift Cluster
Connecting to the OpenShift cluster using the OpenShift CLI (oc commands) can be done by following the instructions below:
- From the bastion VM desktop, open a Terminal window (you may need to click on Activities in the top-left to remove the screen-saver)
- In the Terminal window, copy & paste the oc command below to login into the cluster. Get your kubeadmin password from your environment details page. This command will make a connection to your cluster and authenticate you, so you will be ready to start issuing oc commands during the Lab as needed.
oc login --server=https://api.ocp.techzone.lan:6443 --username kubeadmin --password <your password>
Cloud Pak for AIOps Console
Locate the console URL and the admin login credentials from your deployed instance of the Cloud Pak for AIOps.
Find the Cloud Pak for AIOps URL to access the console by running the following command from the Terminal window:
echo -e "https://$(oc get route -n cp4aiops cpd -o jsonpath='{.spec.host}')\n"
Find the password for the admin username by running the following command from the Terminal window:
oc -n cp4aiops get secret platform-auth-idp-credentials -o jsonpath='{.data.admin_password}' | base64 -d ; echo -e "\n"
Open a Firefox browser window and navigate to the AIOps dashboard using the url you discovered in the previous step.
https://cpd-cp4aiops.apps.ocp.techzone.lan
You will get one or more security Warning: Potential Security Risk Ahead. This is because we have used self-signed certificates for this Lab. Just accept the risk and continue.
- Username:
cpadmin - Password: The password you found in the previous step.

After you login, you will land into the Cloud Pak for AIOps home page as shown below:

2.4: Lab Data Cleanup
If you have just provisioned a new lab environment from TechZone, you can skip this section.
Otherwise, if this environment has been used for a previous lab, ask the Lab Instructor if you need to remove any leftover configuration and data before you proceed with the lab exercises. If you need to do a cleanup, follow the steps below.
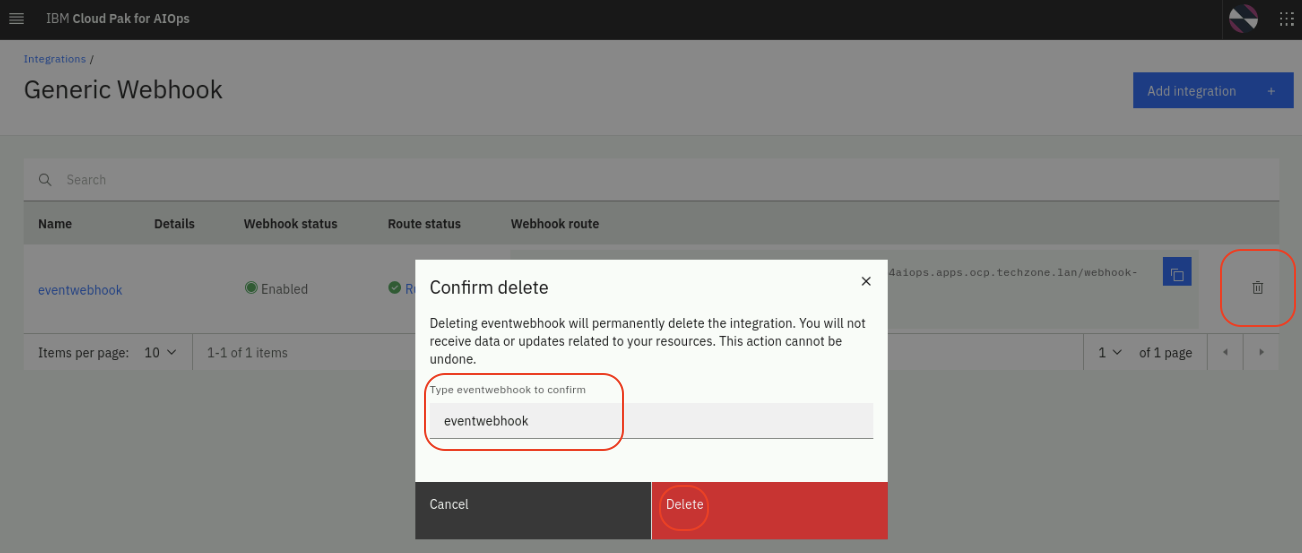
Integrations Cleanup
From the burger menu in the top-left navigate to: Define → Integrations. Delete all integrations listed. To delete an integration: Select the integration type, and click on the trash can icon on the right, on the popup dialog type the integration name and click on Delete as shown below. Don't wait for the deletion to complete, you can proceed to the next step.
Alert Cleanup
From the burger menu in the top-left navigate to: Operate → Alerts. If you see any alerts listed:
- Select all the Alerts, right-click and select Clear. Select Continue on the popup dialog.
- The Alerts will change state from Open to Clear and eventually to Closed.
- Don't need to wait for them to be Closed, you can proceed to the next step.
Topology Cleanup: resource groups
From the burger menu in the top-left, navigate to: Operate → Resource management. In the Resource management page, click on the Resource group templates icon in the top-right.

In the Resource group templates page, select any existing templates and click on the Delete topology template in the top-right. Click Delete on the popup dialog.
Topology Cleanup: resources
From the burger menu in the top-left, navigate to: Operate → Resource management. In the Resource management page, click on the Settings gear icon in the top-right as shown below:
![]()
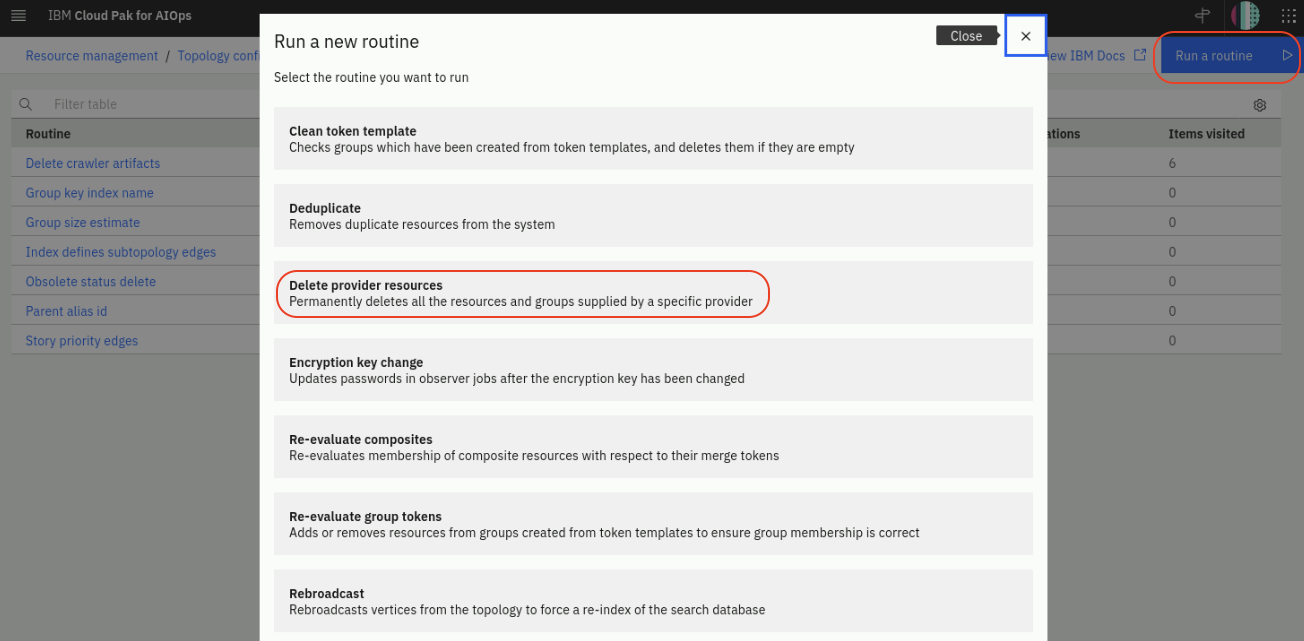
Select Topology configuration. From the Topology configuration page, in the Data administration routines card shown below select Configure. On the Data administration routines page, in the top-right select Run a routine and on the popup dialog select Delete provider resources as shown below:
On the Run delete provider resources dialog, select FILE.OBSERVER:infrastructure.txt and click on Run as shown below. Click Yes on the popup dialog to confirm.
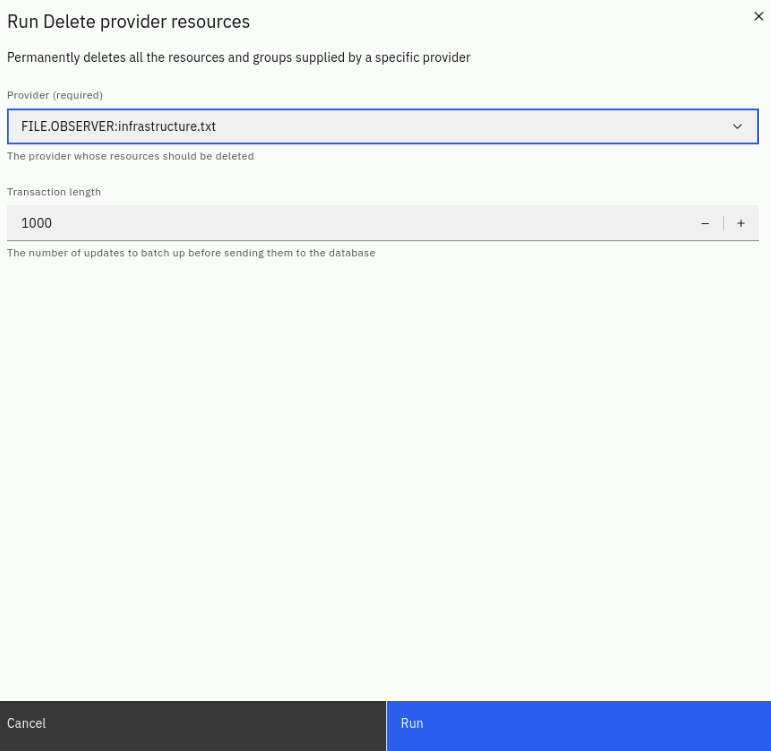
Repeat this step for every FILE.OBSERVER:filename.txt that you see listed.
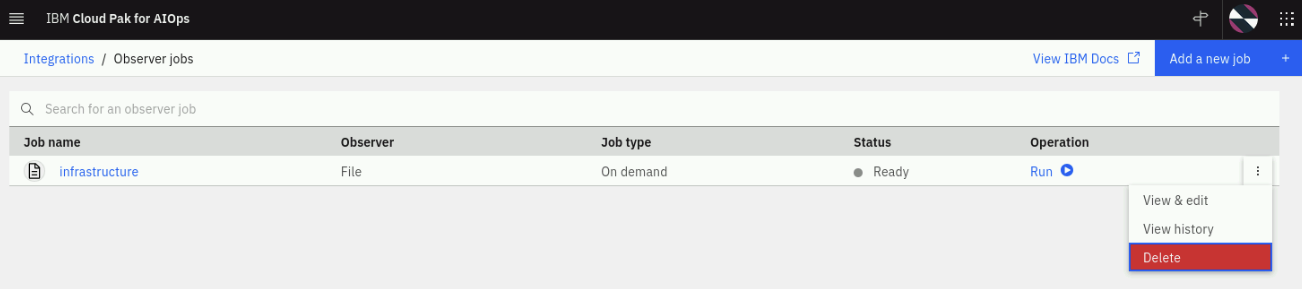
Topology Cleanup: observer jobs
- From the burger menu in the top-left navigate to: Define → Integrations
- From the Integrations page, click on Manager observer jobs and select Configure, schedule, and manage observer jobs
- Delete all existing jobs by clicking on the 3 dots on the right and selecting Delete as shown below. Confirm the deletion on the popup dialog.