Managing z/OS resources with IBM RSE API Plug-in for Zowe CLI tutorial
This tutorial demonstrates some features of IBM RSE API Plug-in for Zowe CLI (RSE CLI plug-in) and includes exercises to help you become familiar with managing z/OS resources via command-line operations and the Zowe Explorer VS Code extension.
Learning objectives
This tutorial does not cover all features of the RSE CLI plug-in, but demonstrates the approaches that you can apply when managing z/OS resources.
By completing the tutorial, you learn about the following approaches to manage z/OS resources with the RSE CLI plug-in:
- Use the Zowe Explorer VS Code extension
- Use a command-line window
- Use a script to automate the command-line operations
Tutorial scenario
The tutorial scenario is based on a fictitious company that has applications written in COBOL. The company does not have z/OSMF configured on z/OS. As an alternative, they have installed and configured IBM Remote System Explorer API (RSE API) on z/OS. They want to use the RSE CLI plug-in to interact with z/OS by using RSE API instead of using z/OSMF.
In this scenario, you will:
- Import application code to your local machine.
- Submit JCL files to run jobs on z/OS.
- List data sets.
- Upload files to data sets.
- Check job status.
- Download output files of jobs.
Time required
It takes approximately 10 minutes to complete each approach. If you explore other features related to this tutorial, it can take longer to complete.
Audience
This tutorial is for mainframe developers who want to use the RSE API support provided by the RSE CLI plug-in as an alternative to using z/OSMF to manage z/OS resources.
Prerequisites
Before getting started with the tutorial, you must complete the following tasks:
Create an RSE profile. For instructions, see Creating an RSE profile via command line, or Setting up and using RSE profiles to create the profile via Zowe Explorer.
Clone the sample repository and switch to the
tutorial-completeGit branch that has the final updated set of programs and support files to perform the tasks described in this tutorial by following these steps:Clone the sample repository by issuing the following command in a command-line window:
git clone git@github.com:IBM/zopeneditor-sample.gitcdinto the zopeneditor-sample directory that was just cloned.Switch to the
tutorial-completeGit branch with the command:git checkout tutorial-complete
Approach 1: Using the Zowe Explorer VS Code extension to manage z/OS resources
This section describes the procedure of managing z/OS resources with the Zowe Explorer VS Code extension.
To get set up with VS Code, ensure that IBM Z Open Editor VS Code extension and Zowe Explorer VS Code extension are installed. For more information, see Using RSE support in Zowe Explorer VS Code extension.
Open VS Code, select File > Open Folder (Windows) or File > Open... (Mac) from the top menu bar, and select the folder zopeneditor-sample that was cloned.

In the lower left corner, make sure the Git branch that is selected is the
tutorial-completebranch. If it is not on that branch, click the Git branch that is shown and selecttutorial-completeororigin/tutorial-completebranch from the list of available branches.Open the JCL folder within VS Code and click
ALLOCATE.jclto edit theALLOCATE.jclfile on line 16 and set the HLQ.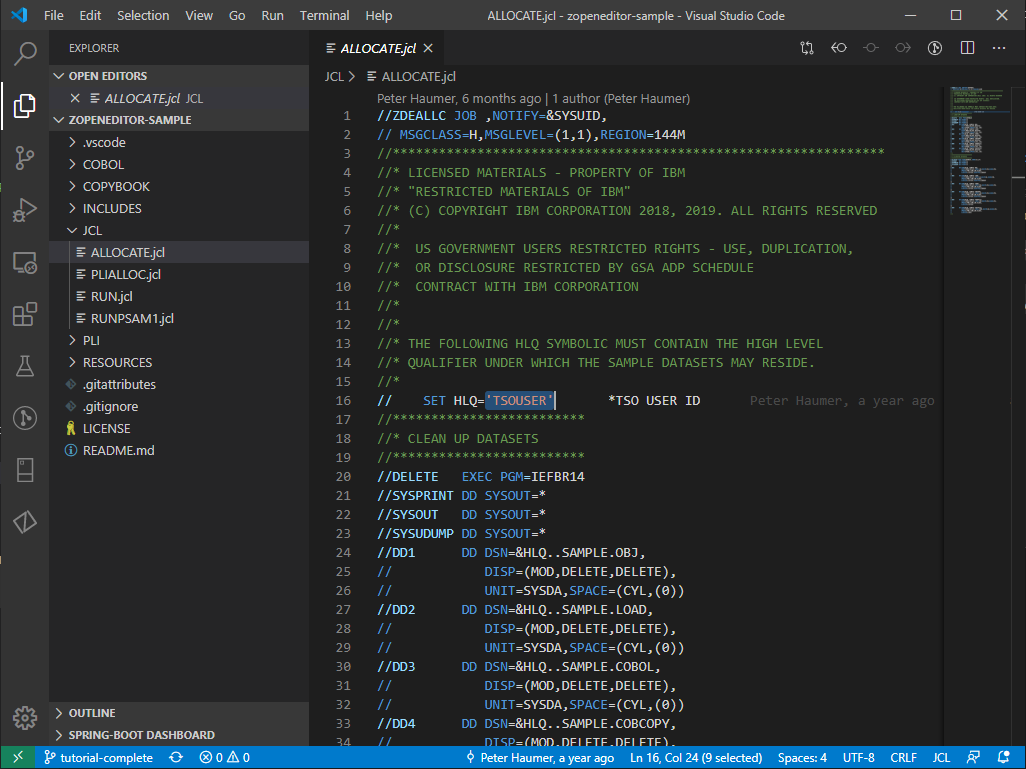
Click
Terminalfrom the top VS Code menu bar, and then selectNew Terminalto open the terminal.Submit the local
ALLOCATE.jclfile by entering this command in the terminal:zowe rse submit local-file "./JCL/ALLOCATE.jcl"After the job is submitted, click the Zowe icon on the left side of VS Code. In the DATA SETS view, click the + symbol to add the RSE profile to the view. Repeat this with the JOBS view.
Once the RSE profile shows up in the view window, click the magnifying glass next to the RSE profile name and enter
HLQ.SAMPLE*in the search bar. You need to replaceHLQwith the modification to it as you did inALLOCATE.jcl. The data sets created byALLOCATE.jclshould be listed in the Data Sets View.You can check the job from the JCL that was submitted by clicking the magnifying glass next to the RSE profile in the JOBS view and entering the HLQ that was added to
ALLOCATE.jclinto the search bar as the filter. You can view the spool files by opening the Job nameZDEALLCand clicking the spool file to open it in the Editor.
Upload the COBOL and copybook files into the created data sets,
HLQ.SAMPLE.COBOL,HLQ.SAMPLE.COBCOPY, andHLQ.SAMPLE.COPYLIB, after you replace HLQ with the value entered inALLOCATE.jcl. Right-click the data set and select the member to upload. In thezopeneditor-sampledirectory that was cloned, choose the files in the COBOL directory for theHLQ.SAMPLE.COBOLdata set and the files in the COPYBOOK directory for theHLQ.SAMPLE.COBCOPYdata set.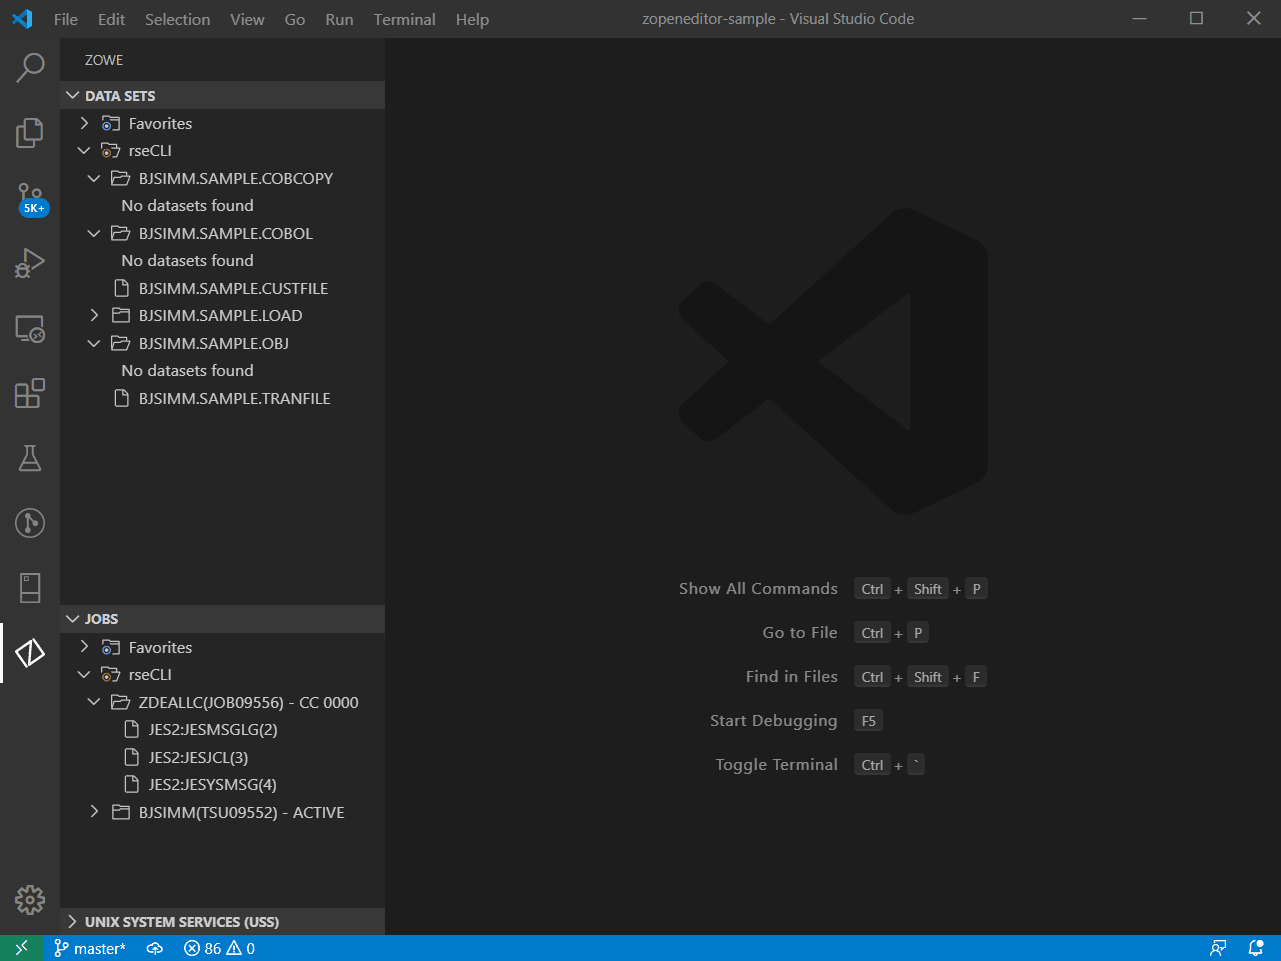
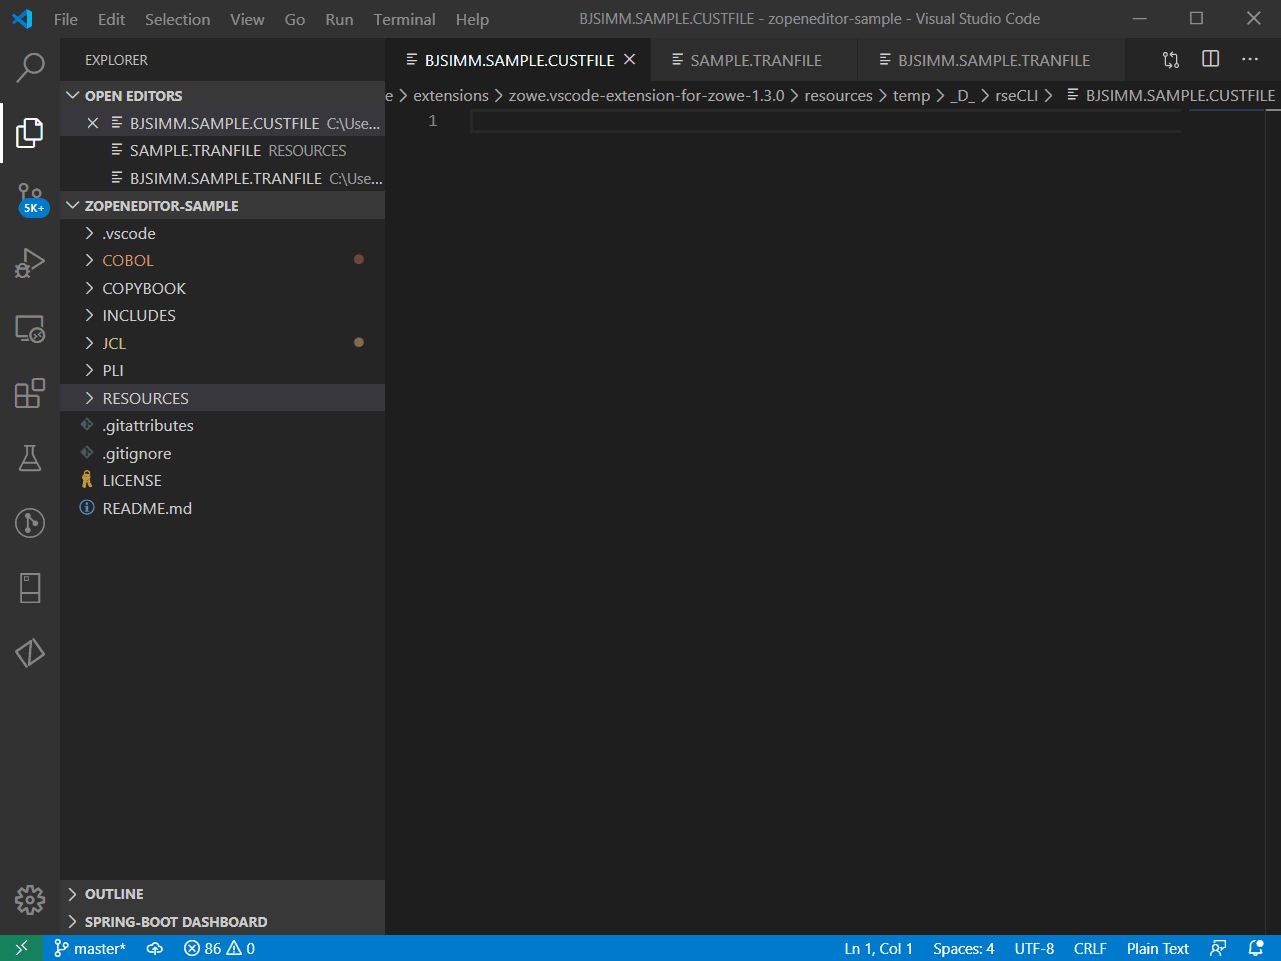
Copy and paste the following files in the
RESOURCESdirectory of zopeneditor-sample into the appropriate sequential data set with in the Zowe Explorer Data Sets View, replacing HLQ with the value entered inALLOCATE.jcl. Save the files in Zowe Explorer Data Sets View so they can be uploaded to z/OS.RESOURCES/SAMPLE.CUSTFILEinto the sequential data setHLQ.SAMPLE.CUSTFILERESOURCES/SAMPLE.TRANFILEinto the sequential data setHLQ. SAMPLE TRANFILE
In the JCL directory of zopeneditor-sample, repeat the modification to the
RUN.jclon line 30 and set the HLQ with the same one used inALLOCATE.jcl. You might or might not need to modify the other symbolics depending on the compile and link libraries your host system uses. You might or might not change theSPACE1andSPACE2symbolics, and save the file.Click
Terminalfrom the top VS Code menu bar, then selectNew Terminalto open the terminal.Submit the local
RUN.jclfile by entering this command in the terminal:zowe rse submit local-file "./JCL/RUN.jcl"View the status of the Job for the submission of
RUN.jclby refreshing the Zowe Explorer's Jobs View and selecting the Job NameZDERUN.After the job completes, refresh Zowe Explorer's Data Sets View to see the new data sets that were created by the
RUN.jcl. These data sets include the following files, replacing HLQ with the value entered in theRUN.jcl.HLQ.SAMPLE.CUSTOUTHLQ.SAMPLE.CUSTRPT
You can view the files by clicking them to open in the Editor.
To download the resulting files from the job, click
Terminalfrom the top VS Code menu bar, then open a terminal by selectingNew Terminaland enter the following commands replacing HLQ with the value entered in theRUN.jcl.zowe rse download data-set "HLQ.SAMPLE.CUSTOUT" zowe rse download data-set "HLQ.SAMPLE.CUSTRPT"Switch back to the Files view to the opened folder
zopeneditor-sampleand the downloaded files will be in a folder named after the HLQ value entered in the commands above.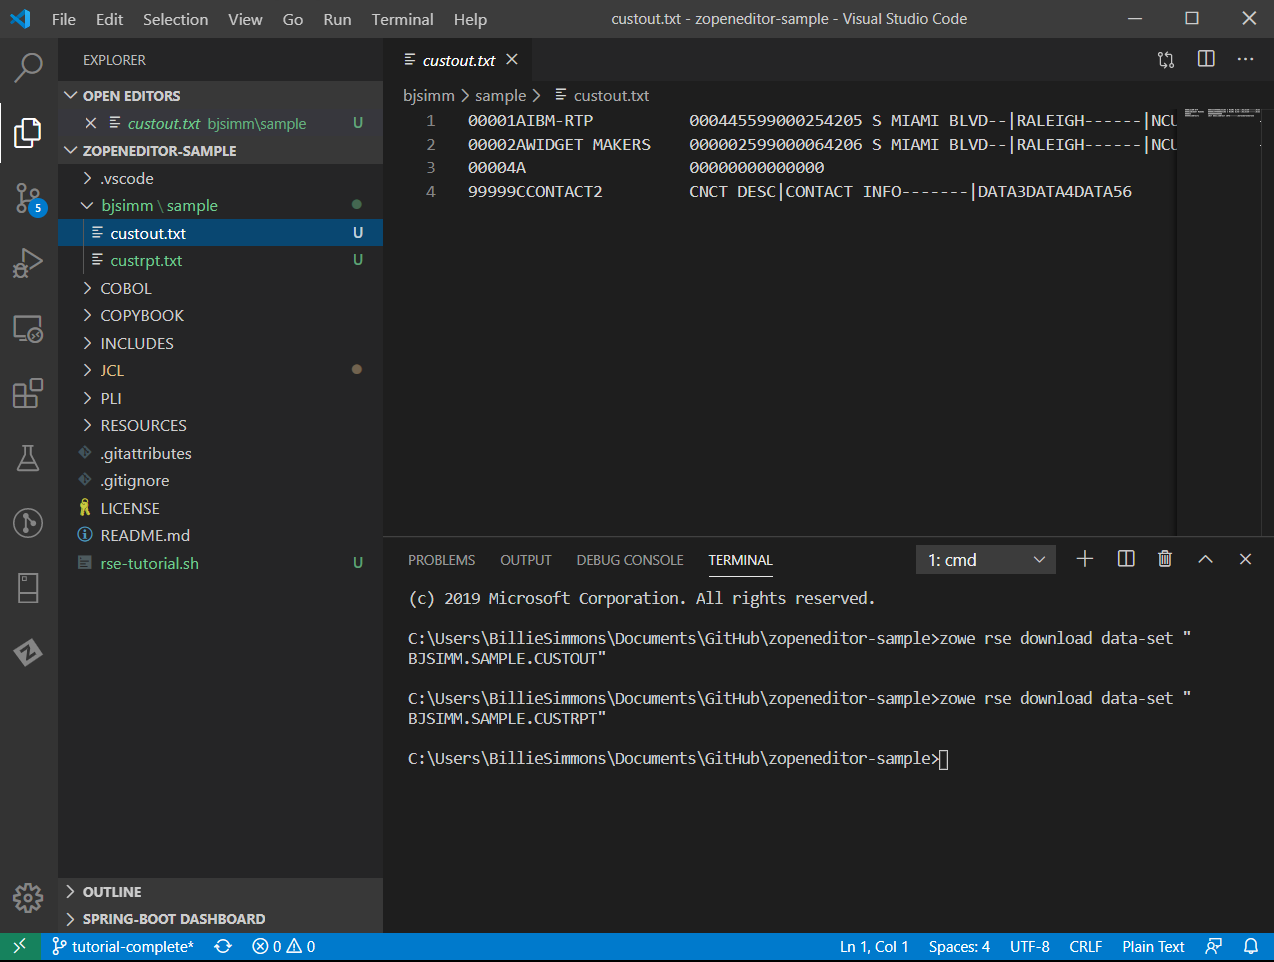
Approach 2: Using a command-line terminal to manage z/OS resources
This section describes the procedure of how you manage z/OS resources in a command-line terminal.
Edit the
ALLOCATE.jclfile on line 16 and set the HLQ.Submit the JCL to run on z/OS with the following command:
zowe rse submit local-file "./JCL/ALLOCATE.jcl"The output of the job submission will be printed in the terminal displaying the job id, return code, job name, and status of the job.
List the data sets that were created by the JCL replacing HLQ with the value set in
ALLOCATE.jcl.zowe rse list data-set HLQ.SAMPLE*The output should be as follows:
HLQ.SAMPLE.COBCOPY HLQ.SAMPLE.COBOL HLQ.SAMPLE.CUSTFILE HLQ.SAMPLE.CUSTOUT HLQ.SAMPLE.CUSTRPT HLQ.SAMPLE.LOAD HLQ.SAMPLE.OBJ HLQ.SAMPLE.TRANFILEUpload the files from the cloned repository into the newly created data sets, replacing HLQ with the value set in
ALLOCATE.jcl.zowe rse upload dir-to-pds "./COBOL" "HLQ.SAMPLE.COBOL"zowe rse upload dir-to-pds "./COPYBOOK" "HLQ.SAMPLE.COBCOPY"zowe rse upload file-to-data-set "./RESOURCES/SAMPLE.CUSTFILE" "HLQ.SAMPLE.CUSTFILE"zowe rse upload file-to-data-set "./RESOURCES/SAMPLE.TRANFILE" "HLQ.SAMPLE.TRANFILE"Make sure that the terminal response is
success: truefor all the uploads.Perform the same modification to the
RUN.jclon line 30 and set the HLQ with the same one used inALLOCATE.jcl.You might or might not need to modify the other symbolics depending on the compile and link libraries your host system uses. You might or might not change the
SPACE1andSPACE2symbolics, and save the file.Submit the
RUN.jclwith the following command:zowe rse submit local-file "./JCL/RUN.jcl"The response will include the
jobid. To check the completion of the job, replace thejobidin the following command with the returned job ID and run it in the terminal window:zowe rse view job-status-by-jobid jobidWhen the status of the job is complete, download the files that result from the job with the following commands:
zowe rse download data-set "HLQ.SAMPLE.CUSTOUT" zowe rse download data-set "HLQ.SAMPLE.CUSTRPT"To see the downloaded files enter the command
ls(Mac) ordir(Windows).
Approach 3: Using a script to automate command-line operations against z/OS resources
You can do the same actions as described in approach 1 in a shell script. This section describes how to create and use the script.
Edit the
ALLOCATE.jclfile on line 16 and set the HLQ.Perform the same modification to the
RUN.jclon line 30 and set the HLQ with the same one used inALLOCATE.jcl. You might or might not need to modify the other symbolics depending on the compile and link libraries your host system uses. You might or might not change theSPACE1andSPACE2symbolics, and save the file.The script
zowecli-cobol-upload-run-tutorial.shis located in theSCRIPTSdirectory of the cloned repo. Edit the HLQ variable in the code on line 12 to match the modification to the JCL files.Open a terminal in VS Code and enter
SCRIPTS/zowecli-cobol-upload-run-tutorial.sh.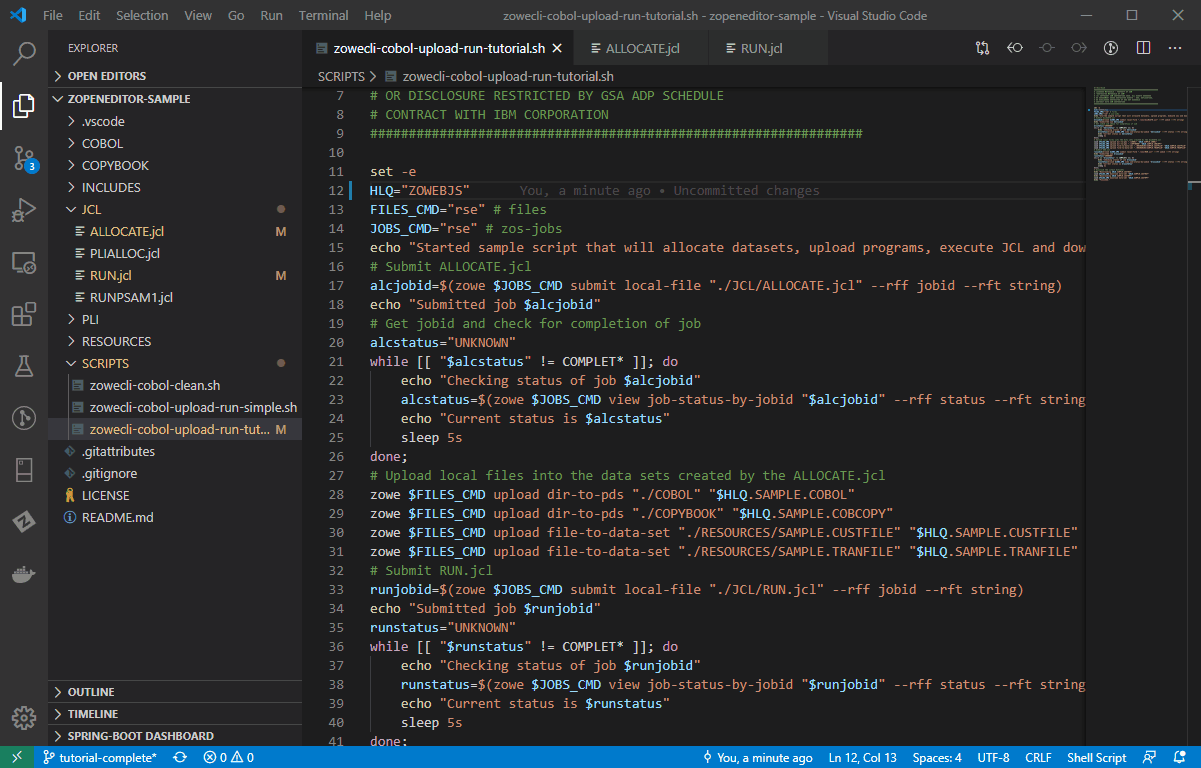
Alternatively, you can run this script with Zowe CLI, which uses z/OSMF on the host instead of RSE API. To adapt the script for use in Zowe CLI, change the values of the variables FILES_CMD and JOBS_CMD in the script to the following:
FILES_CMD="files"JOBS_CMD="jobs"
The RSE CLI plug-in also has support for Interactive TSO commands, you can read more about this under Run interactive TSO commands.