Scenario
IBM MQ queues and topics are a valuable source of events for processing. In this tutorial, you will see how MQ messages can be surfaced on Kafka topics, from where they can be used as a source of events for Event Processing.
Before you begin
The instructions in this tutorial use the Tutorial environment, which includes a selection of topics each with a live stream of events, created to allow you to explore features in IBM Event Automation. Following the setup instructions to deploy the demo environment gives you a complete instance of IBM Event Automation that you can use to follow this tutorial for yourself.
You will also need to run the optional instructions for deploying an MQ queue manager. In addition to setting up the MQ queue manager, it will also start the Kafka Connect connector to flow messages from MQ into Kafka.
Tip: The MQ Connector is just one of many connectors available for bringing data into Kafka. Connectors are an effective way to enable processing events from a wide variety of systems and technologies.
Versions
This tutorial uses the following versions of Event Automation capabilities. Screenshots can differ from the current interface if you are using a newer version.
- Event Streams 11.5.0
- Event Processing 1.2.0
- MQ 2.4.0
Instructions
Step 1: Discover the MQ queue
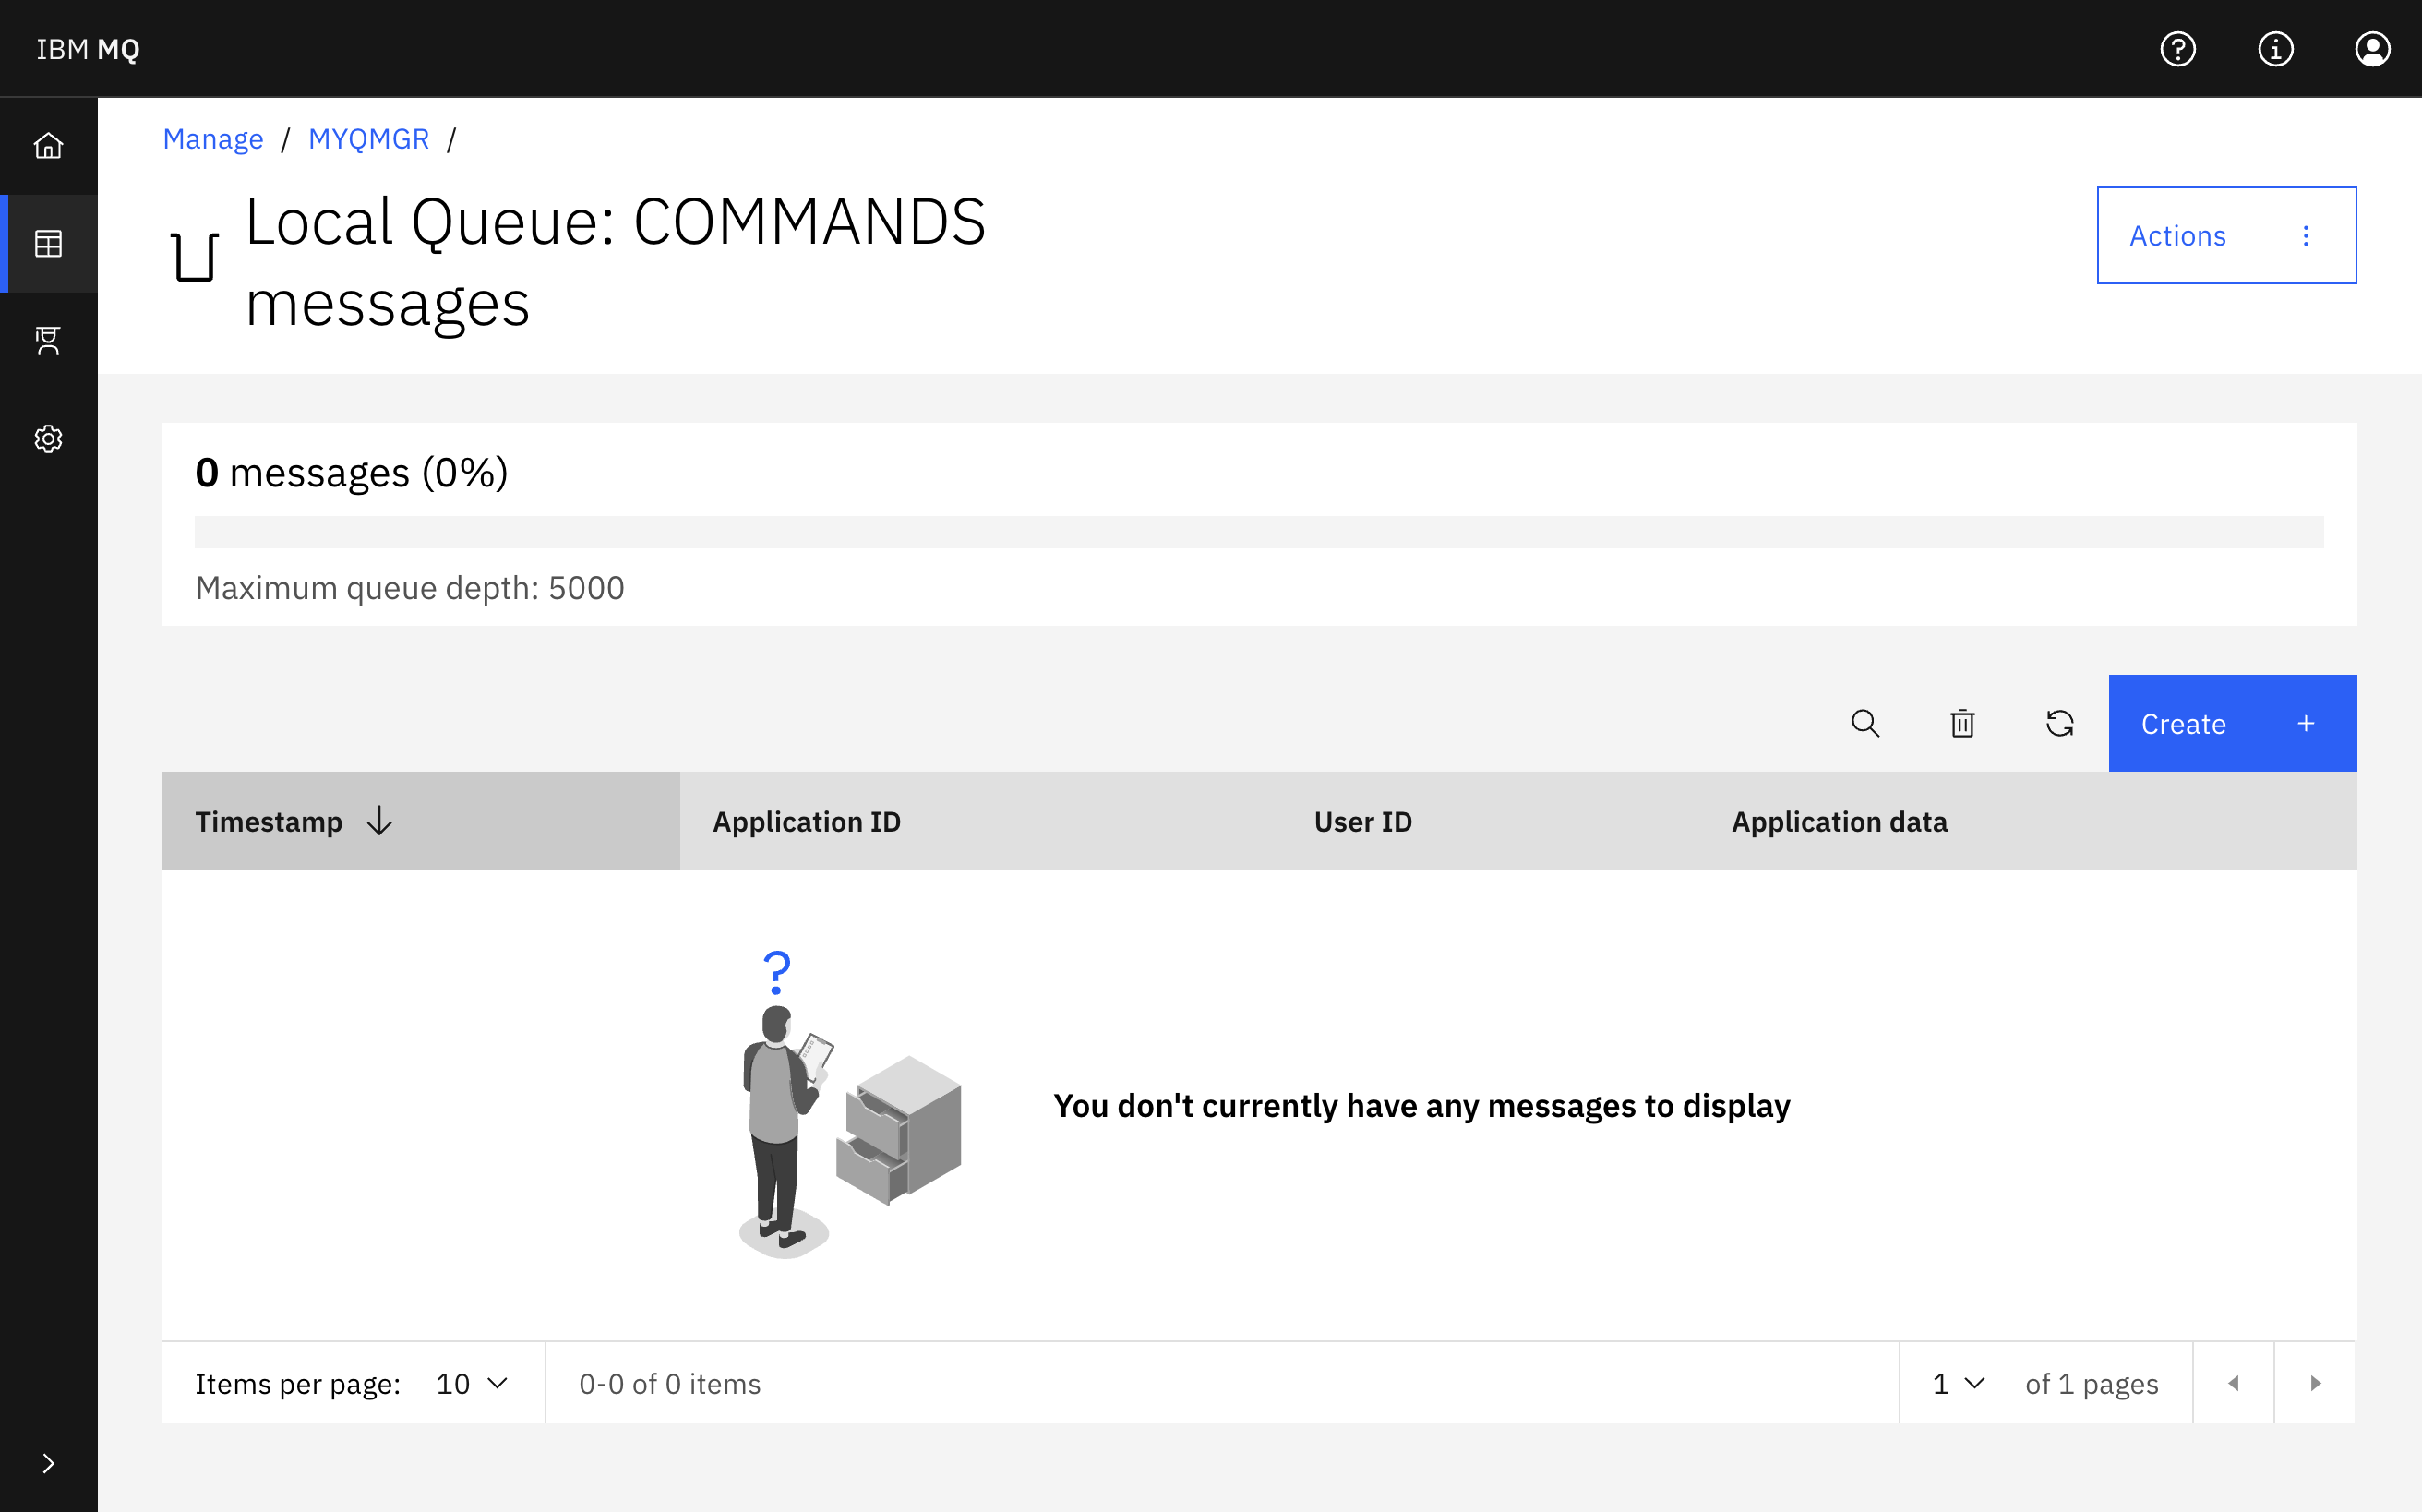
Messages in this scenario will start life on an MQ queue called COMMANDS. Start by accessing the queue in the MQ Console.
-
Go to the MQ web console.
You can get the URL for the web console from the
queuemanager-ibm-mq-webroute, and the password from theplatform-auth-idp-credentialssecret.If you have
ocCLI access to your Red Hat OpenShift Container Platform cluster, you can use the following commands:# URL oc get route \ queuemanager-ibm-mq-web \ -n event-automation \ -o jsonpath='https://{.spec.host}' # password for 'admin' user oc get secret \ platform-auth-idp-credentials \ -n ibm-common-services \ -o jsonpath='{.data.admin_password}' | base64 -d -
Navigate to the
COMMANDSqueue.
Step 2: Verify the MQ connector
The next step is to verify that MQ messages are surfaced on the Kafka topic as a stream of events.
-
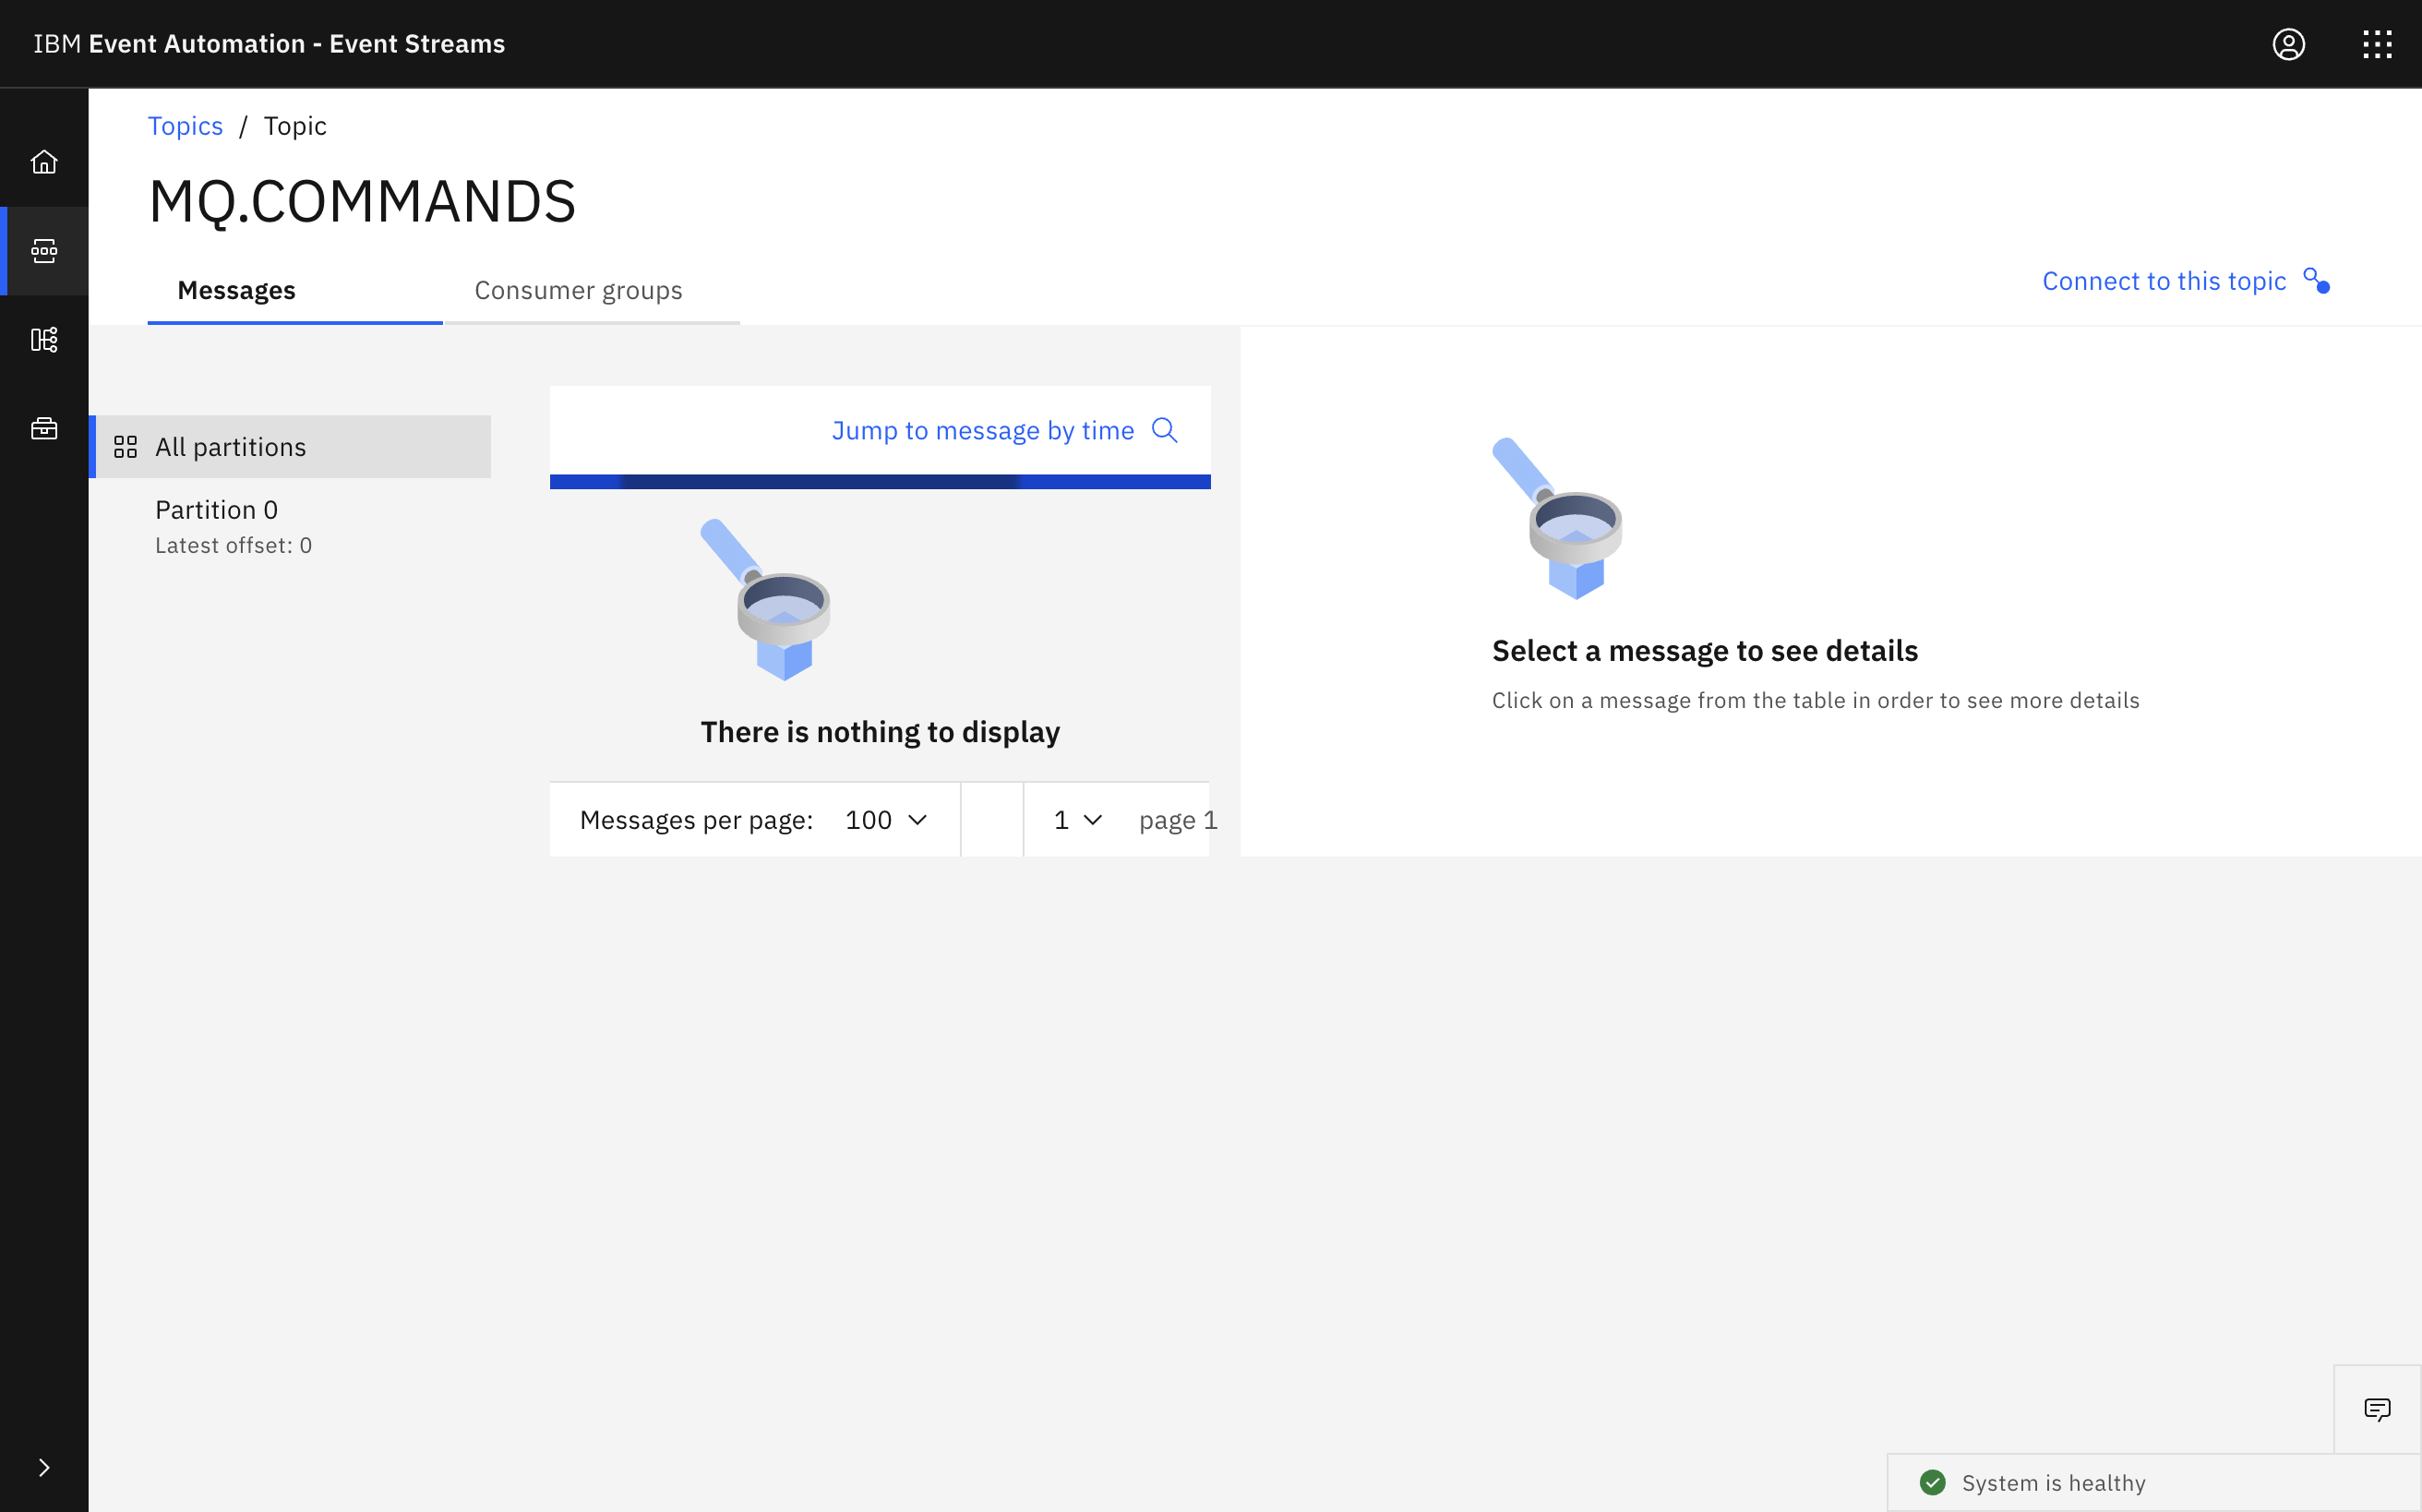
Go to the Event Streams topics list, and find the
MQ.COMMANDStopic.If you need a reminder of how to access the Event Streams web UI, you can review Accessing the tutorial environment.
-
Use the Create button in the MQ Console to PUT a JSON message to the MQ queue.
{ "id": "cbeecfcb-27da-4e59-bbcd-8a974fe22917", "customer": { "id": "79df63d7-7522-4972-8546-1f1c33531e44", "name": "Lelia Langworth" }, "creditcard": { "number": "5532169298805994", "expiry": "04/25" }, "product": { "description": "L Denim Ripped Jeans", "price": 45.48 }, "order": { "quantity": "2" }, "ordertime": "2023-06-28 22:38:35.089" } -
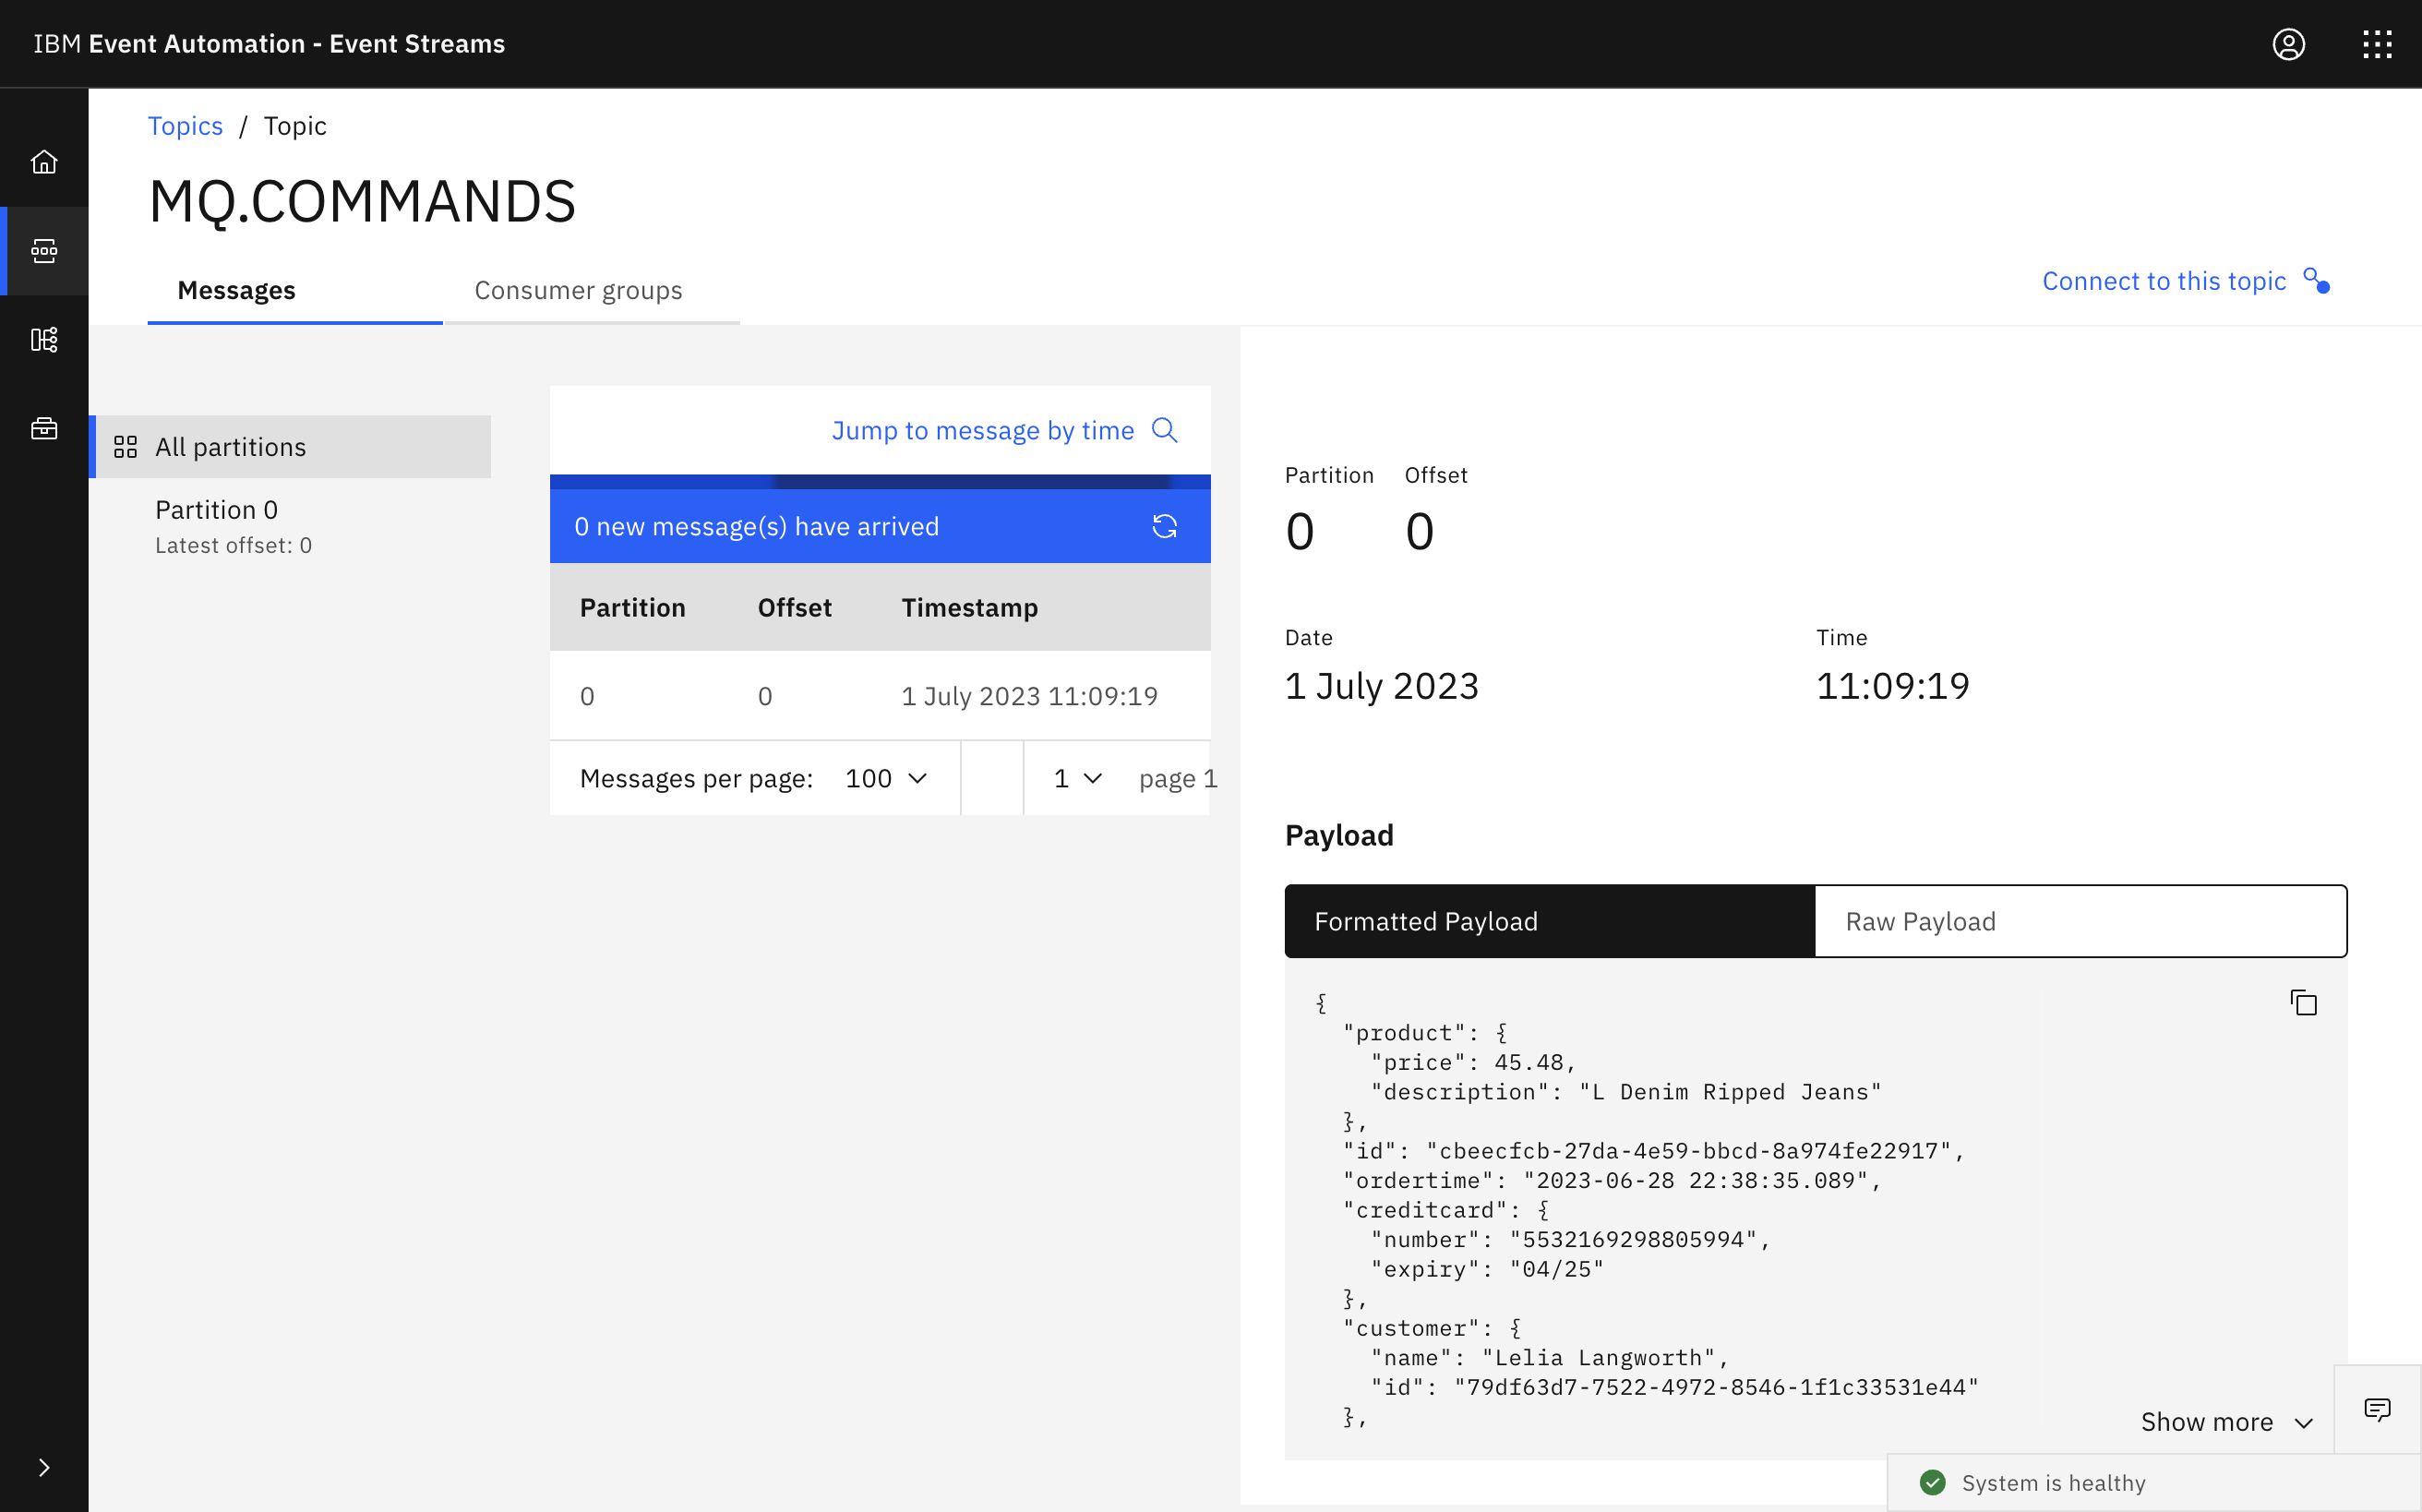
Use the Event Streams topic page to verify that the message appears as an event on the Kafka topic.
-
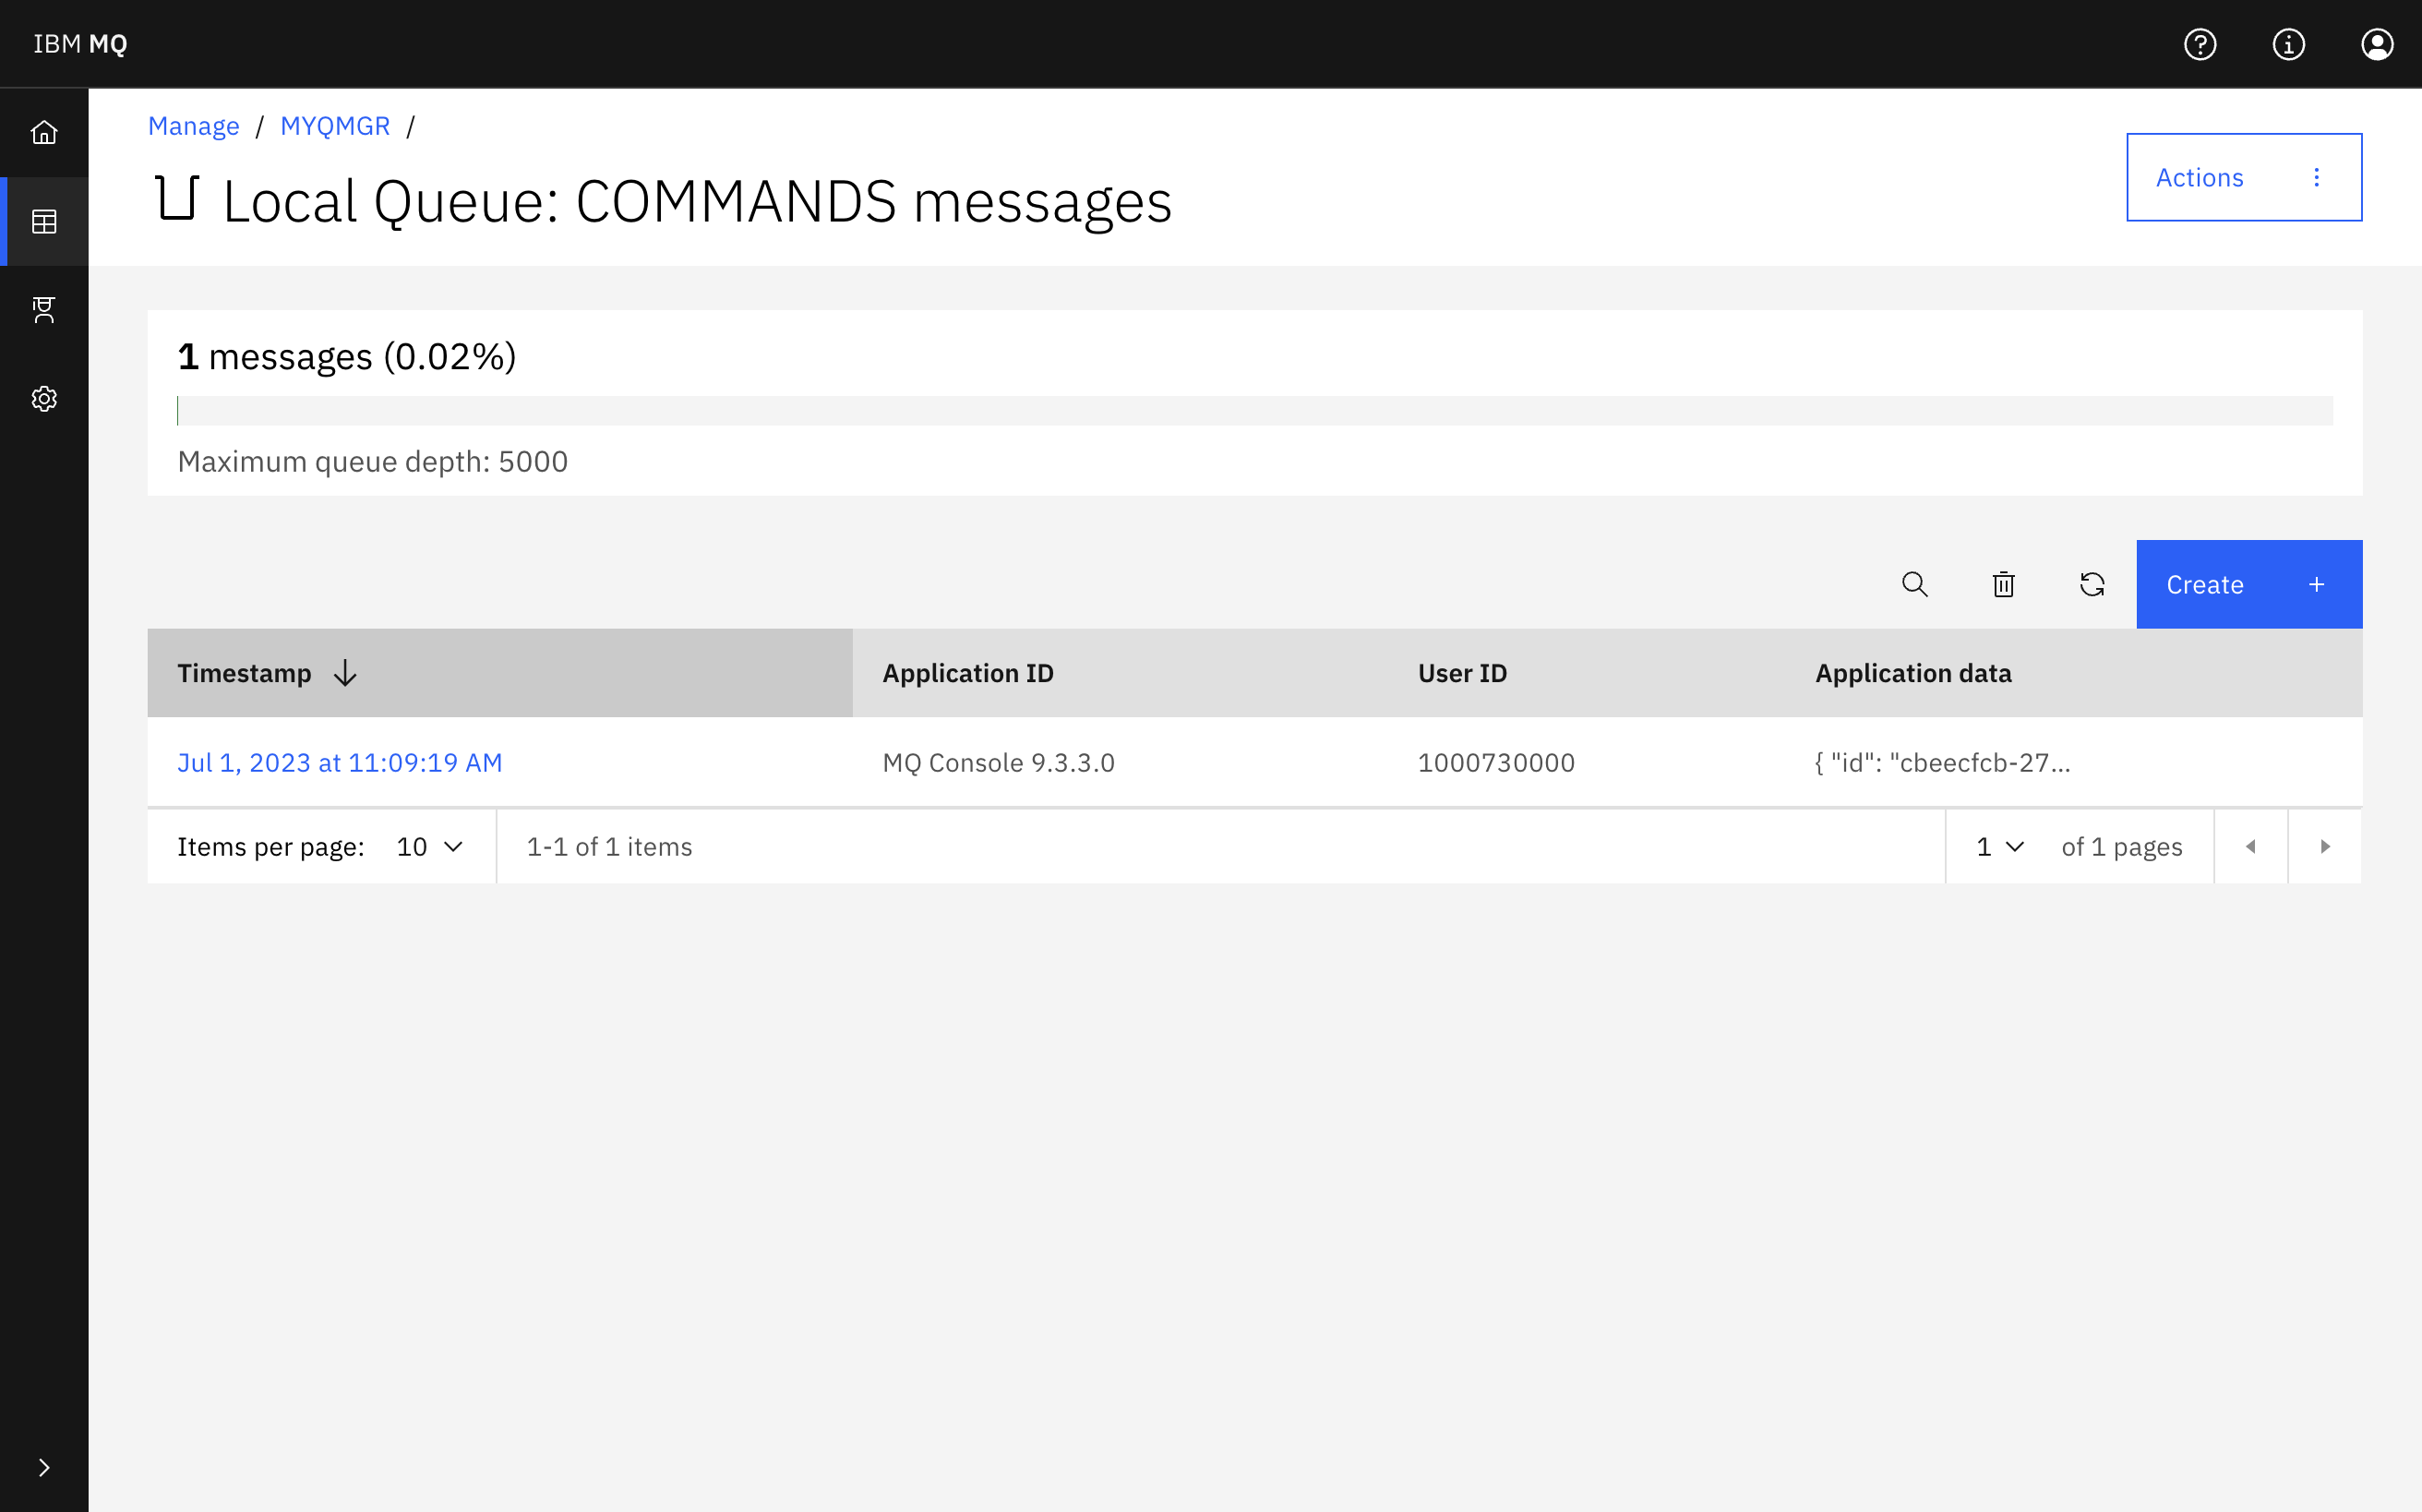
Confirm that the message remains available on the
COMMANDSqueue.The use of a streaming queue means that a copy of messages can be made available for transferring to Kafka without disrupting any existing MQ application that is getting the messages.
Step 3: Flattening the MQ messages
To process the messages in Event Processing, you first need to flatten the nested JSON payloads.
-
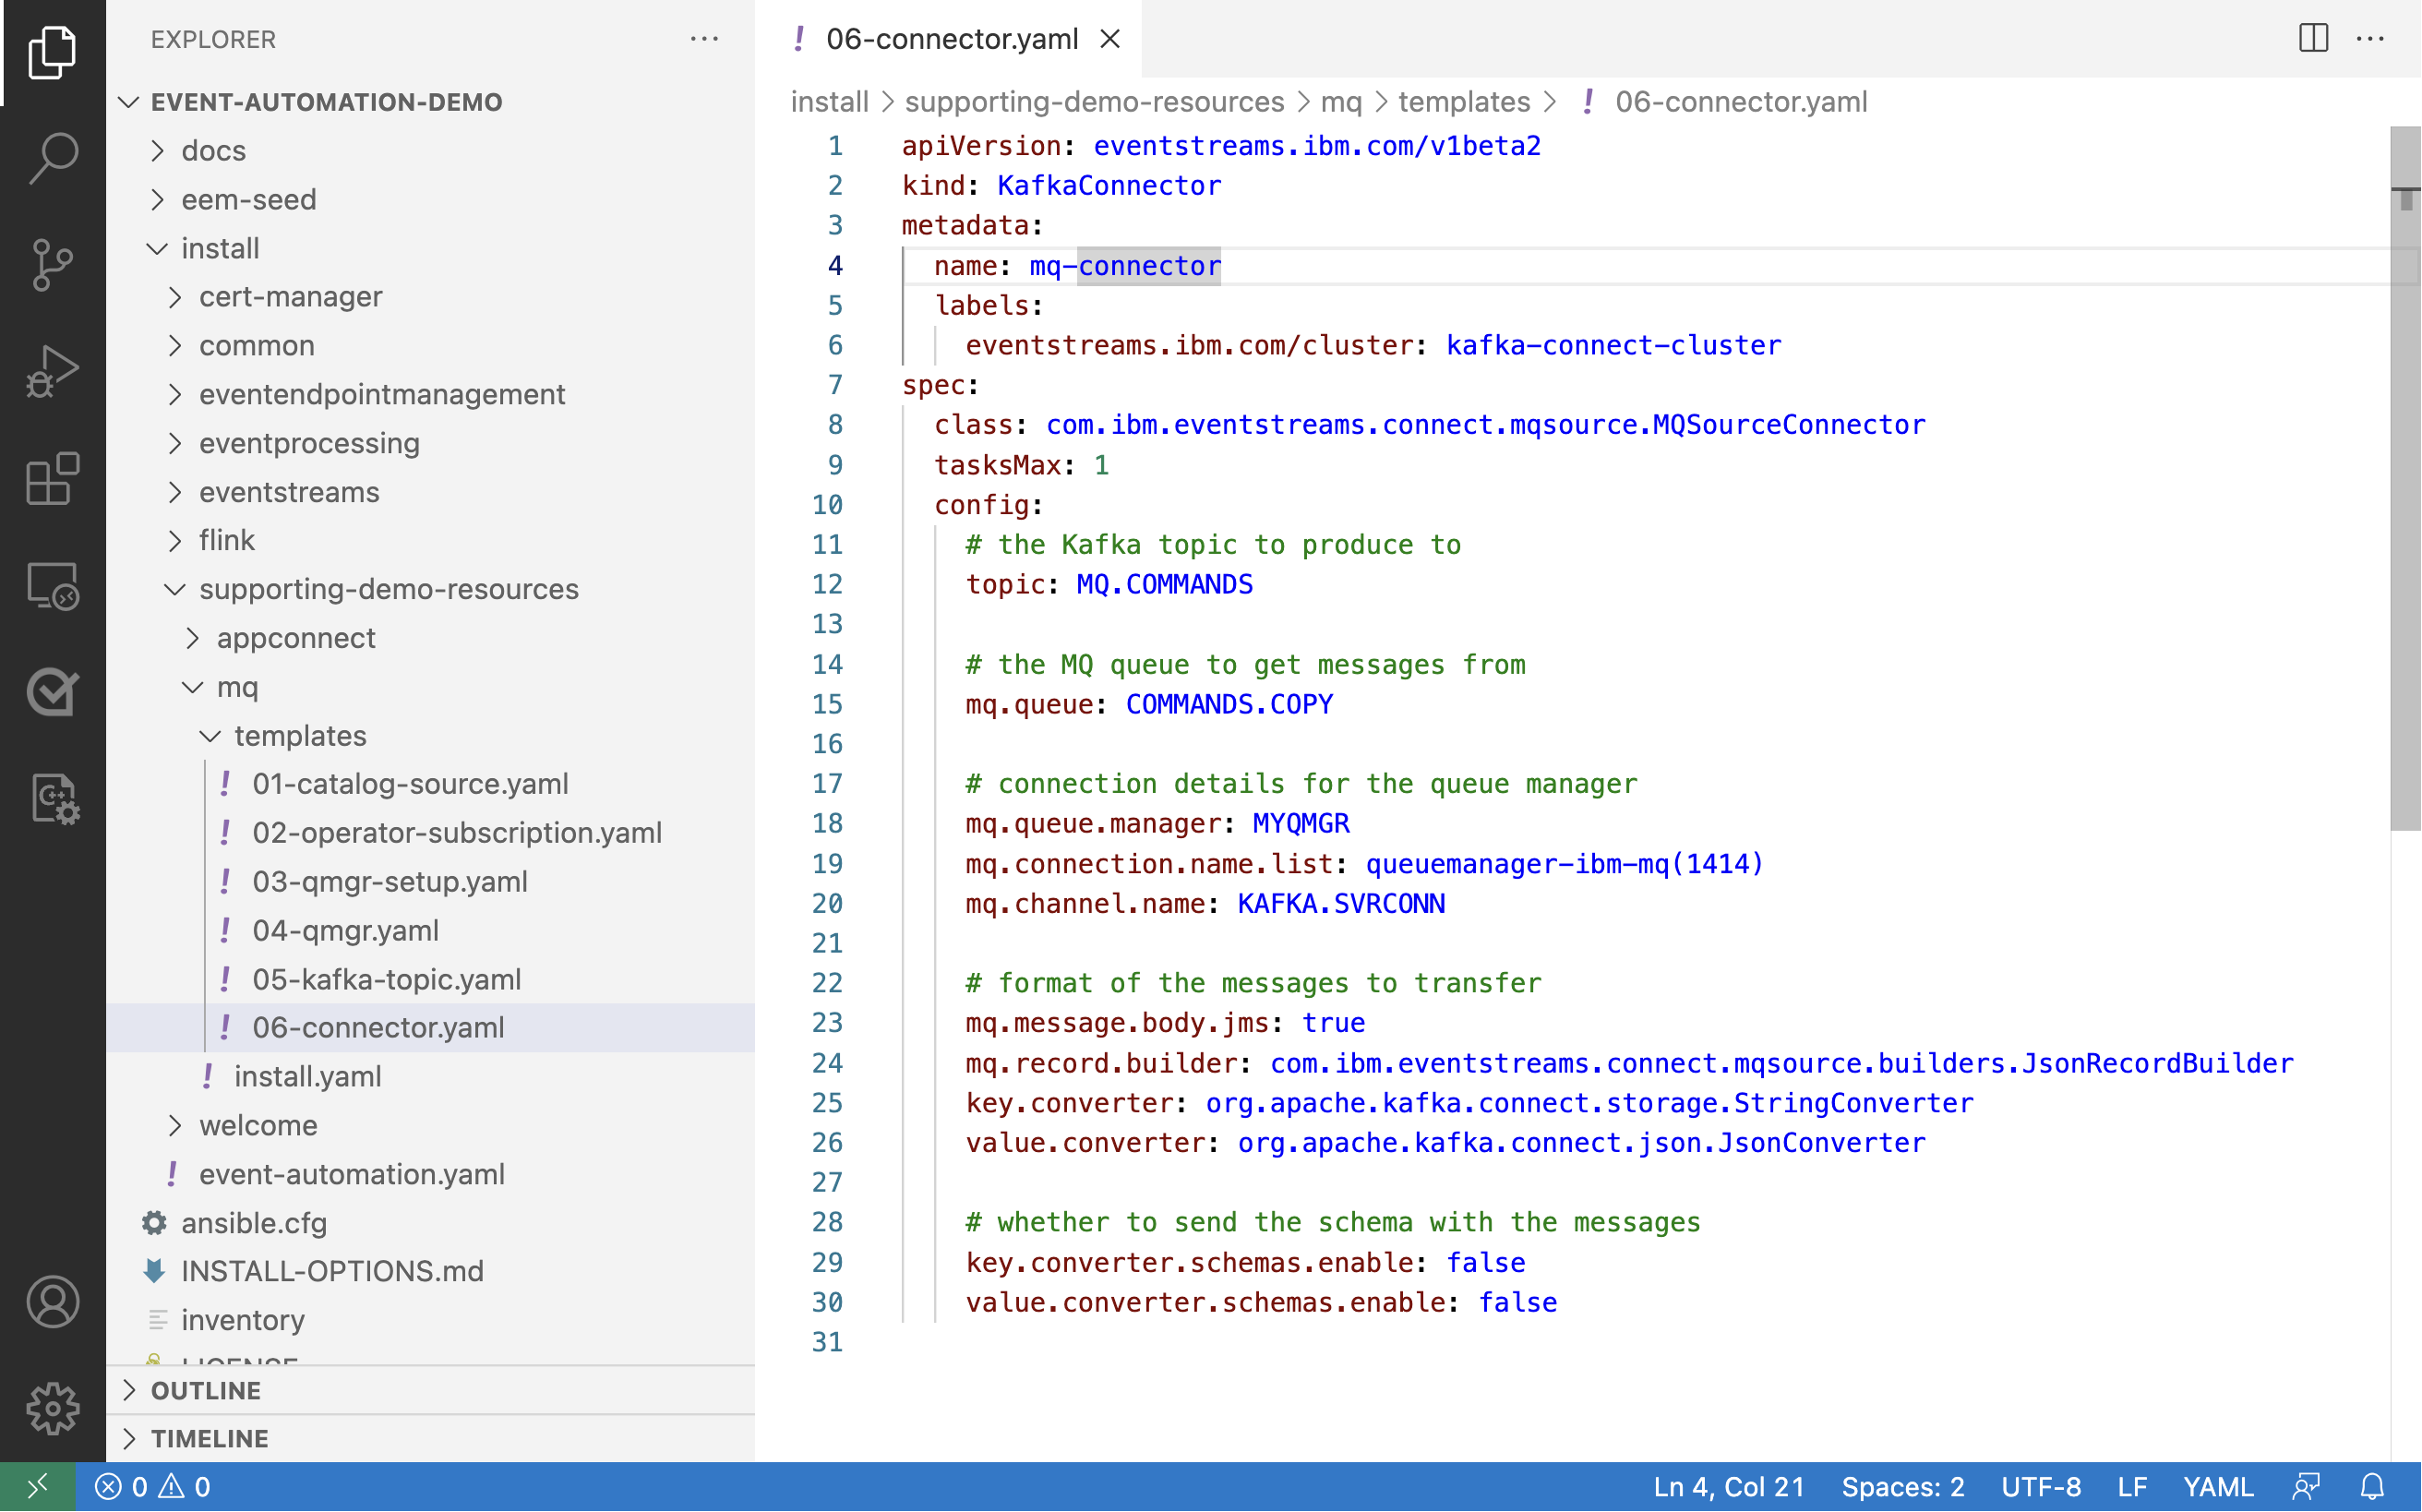
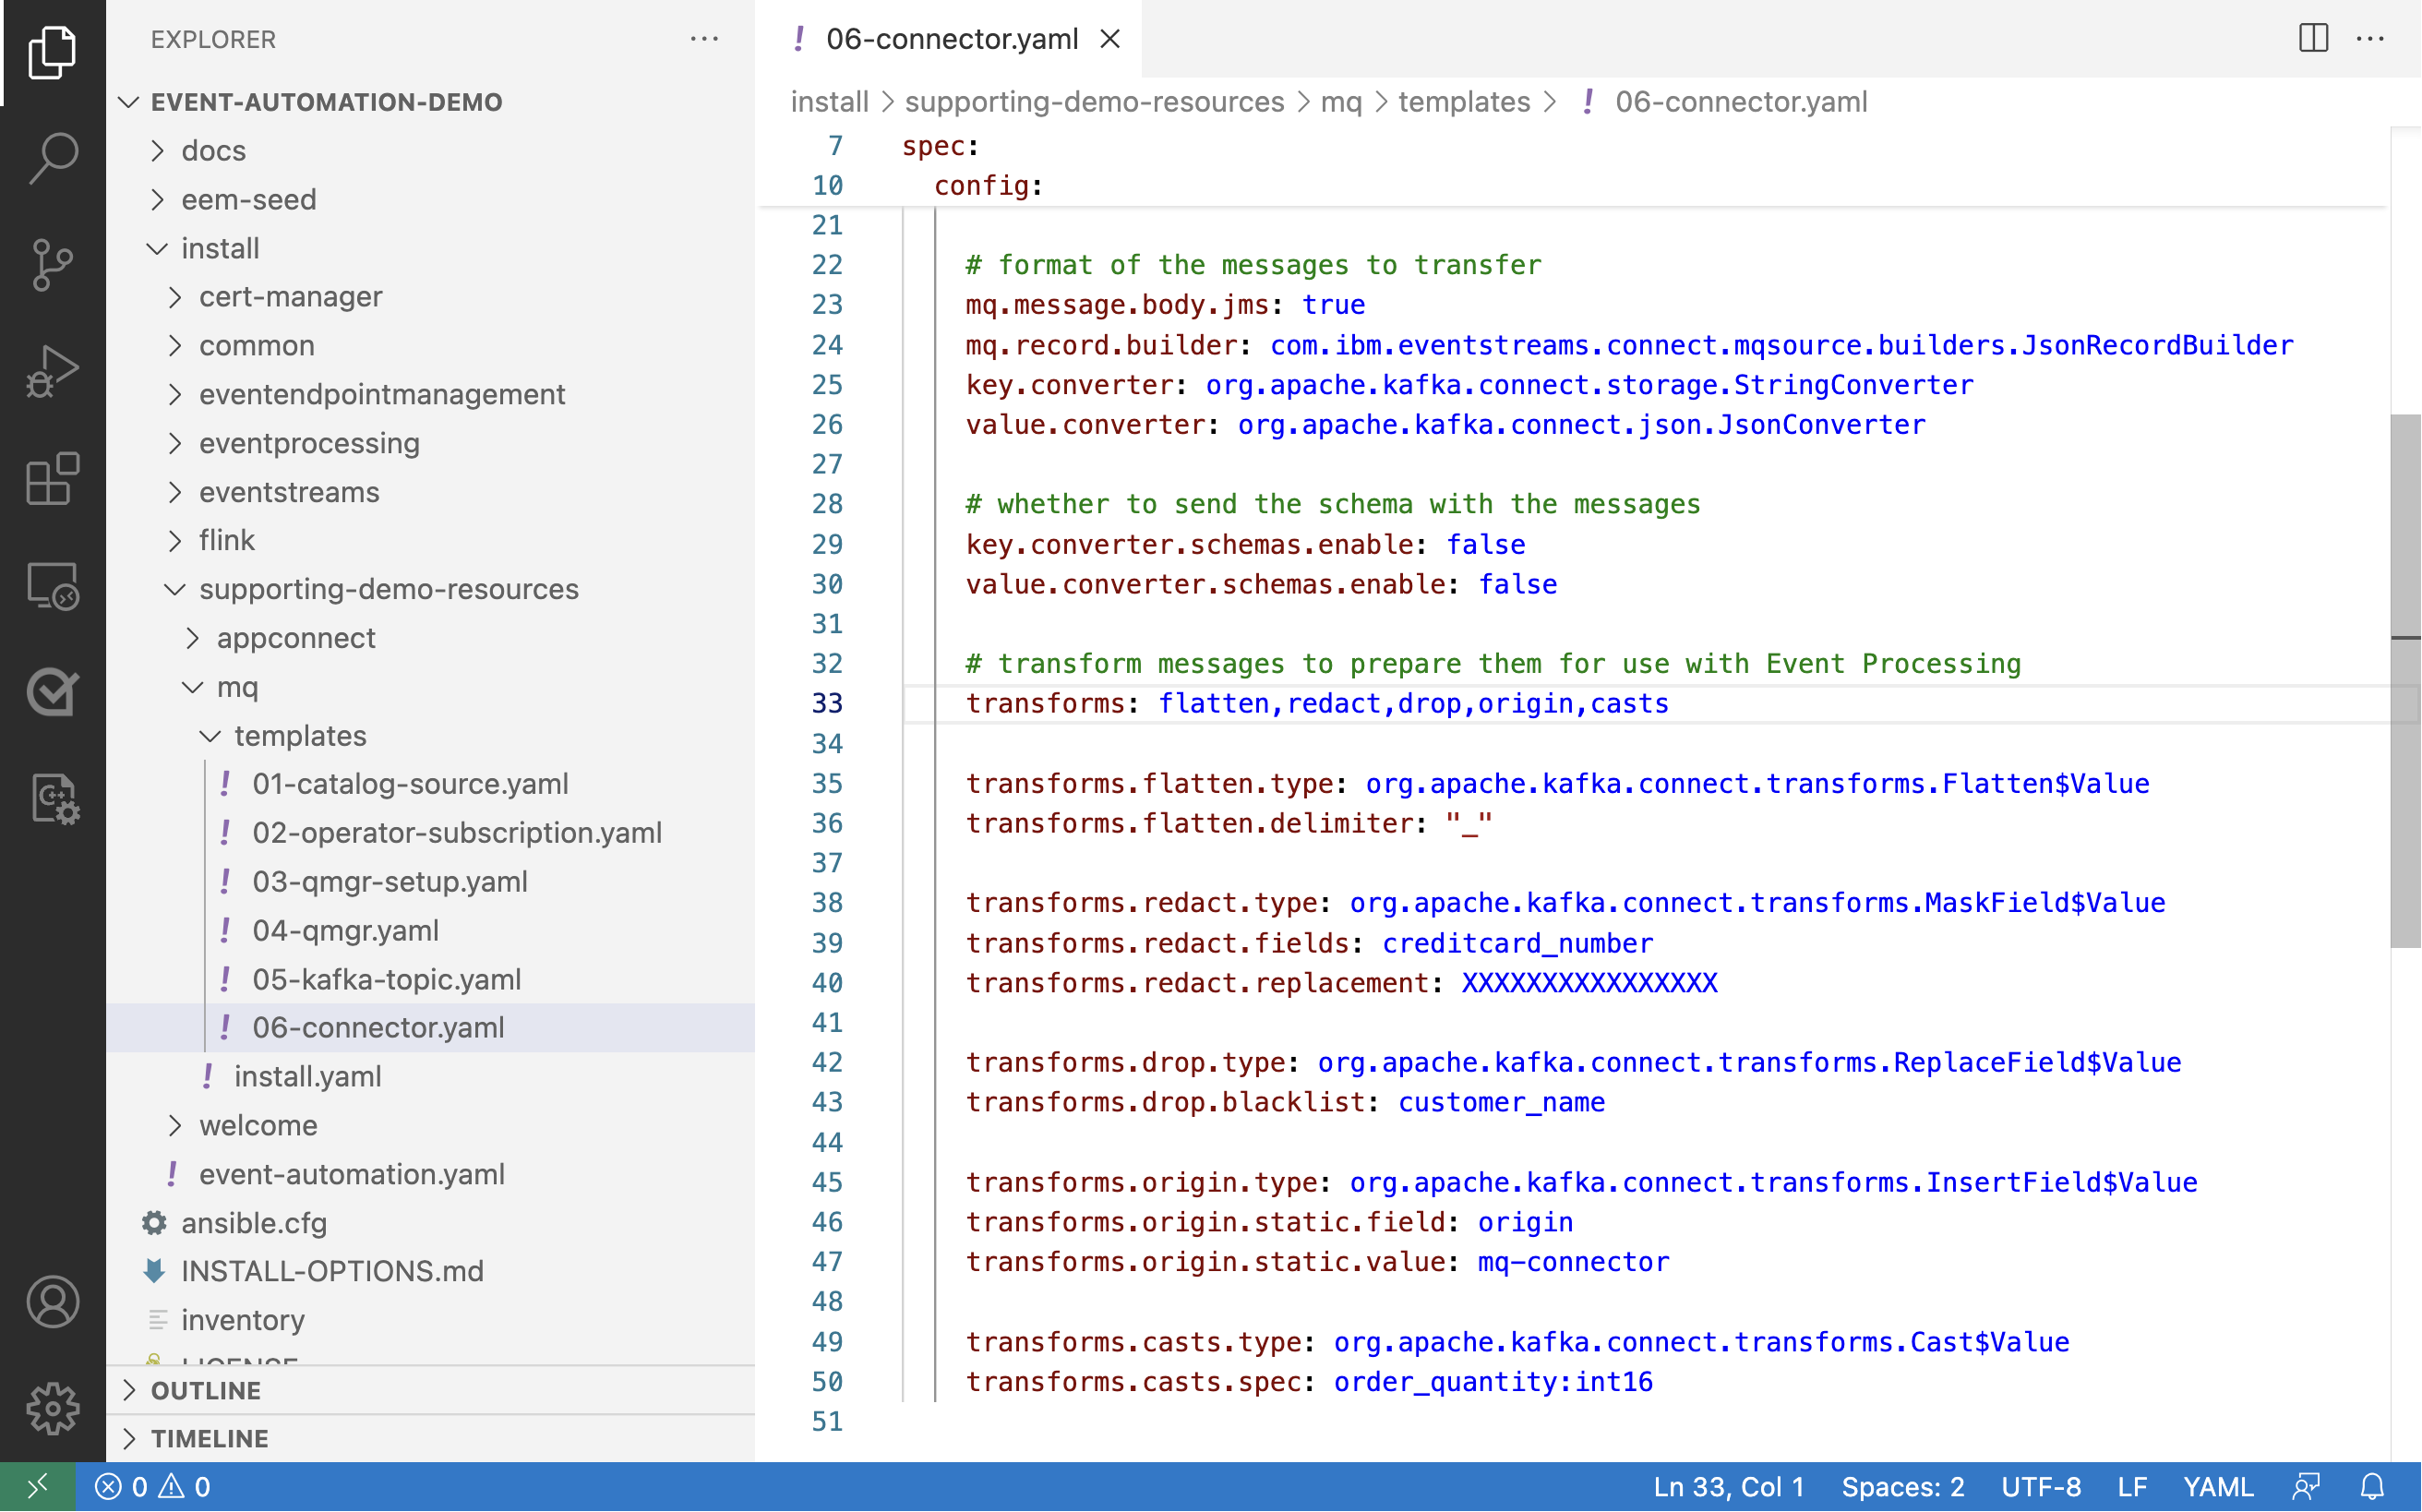
Open the specification for the Kafka MQ Source Connector in a text editor.
It is the install/supporting-demo-resources/mq/templates/06-connector.yaml file, included in the folder for the files you used to set up the MQ queue manager for this tutorial.
-
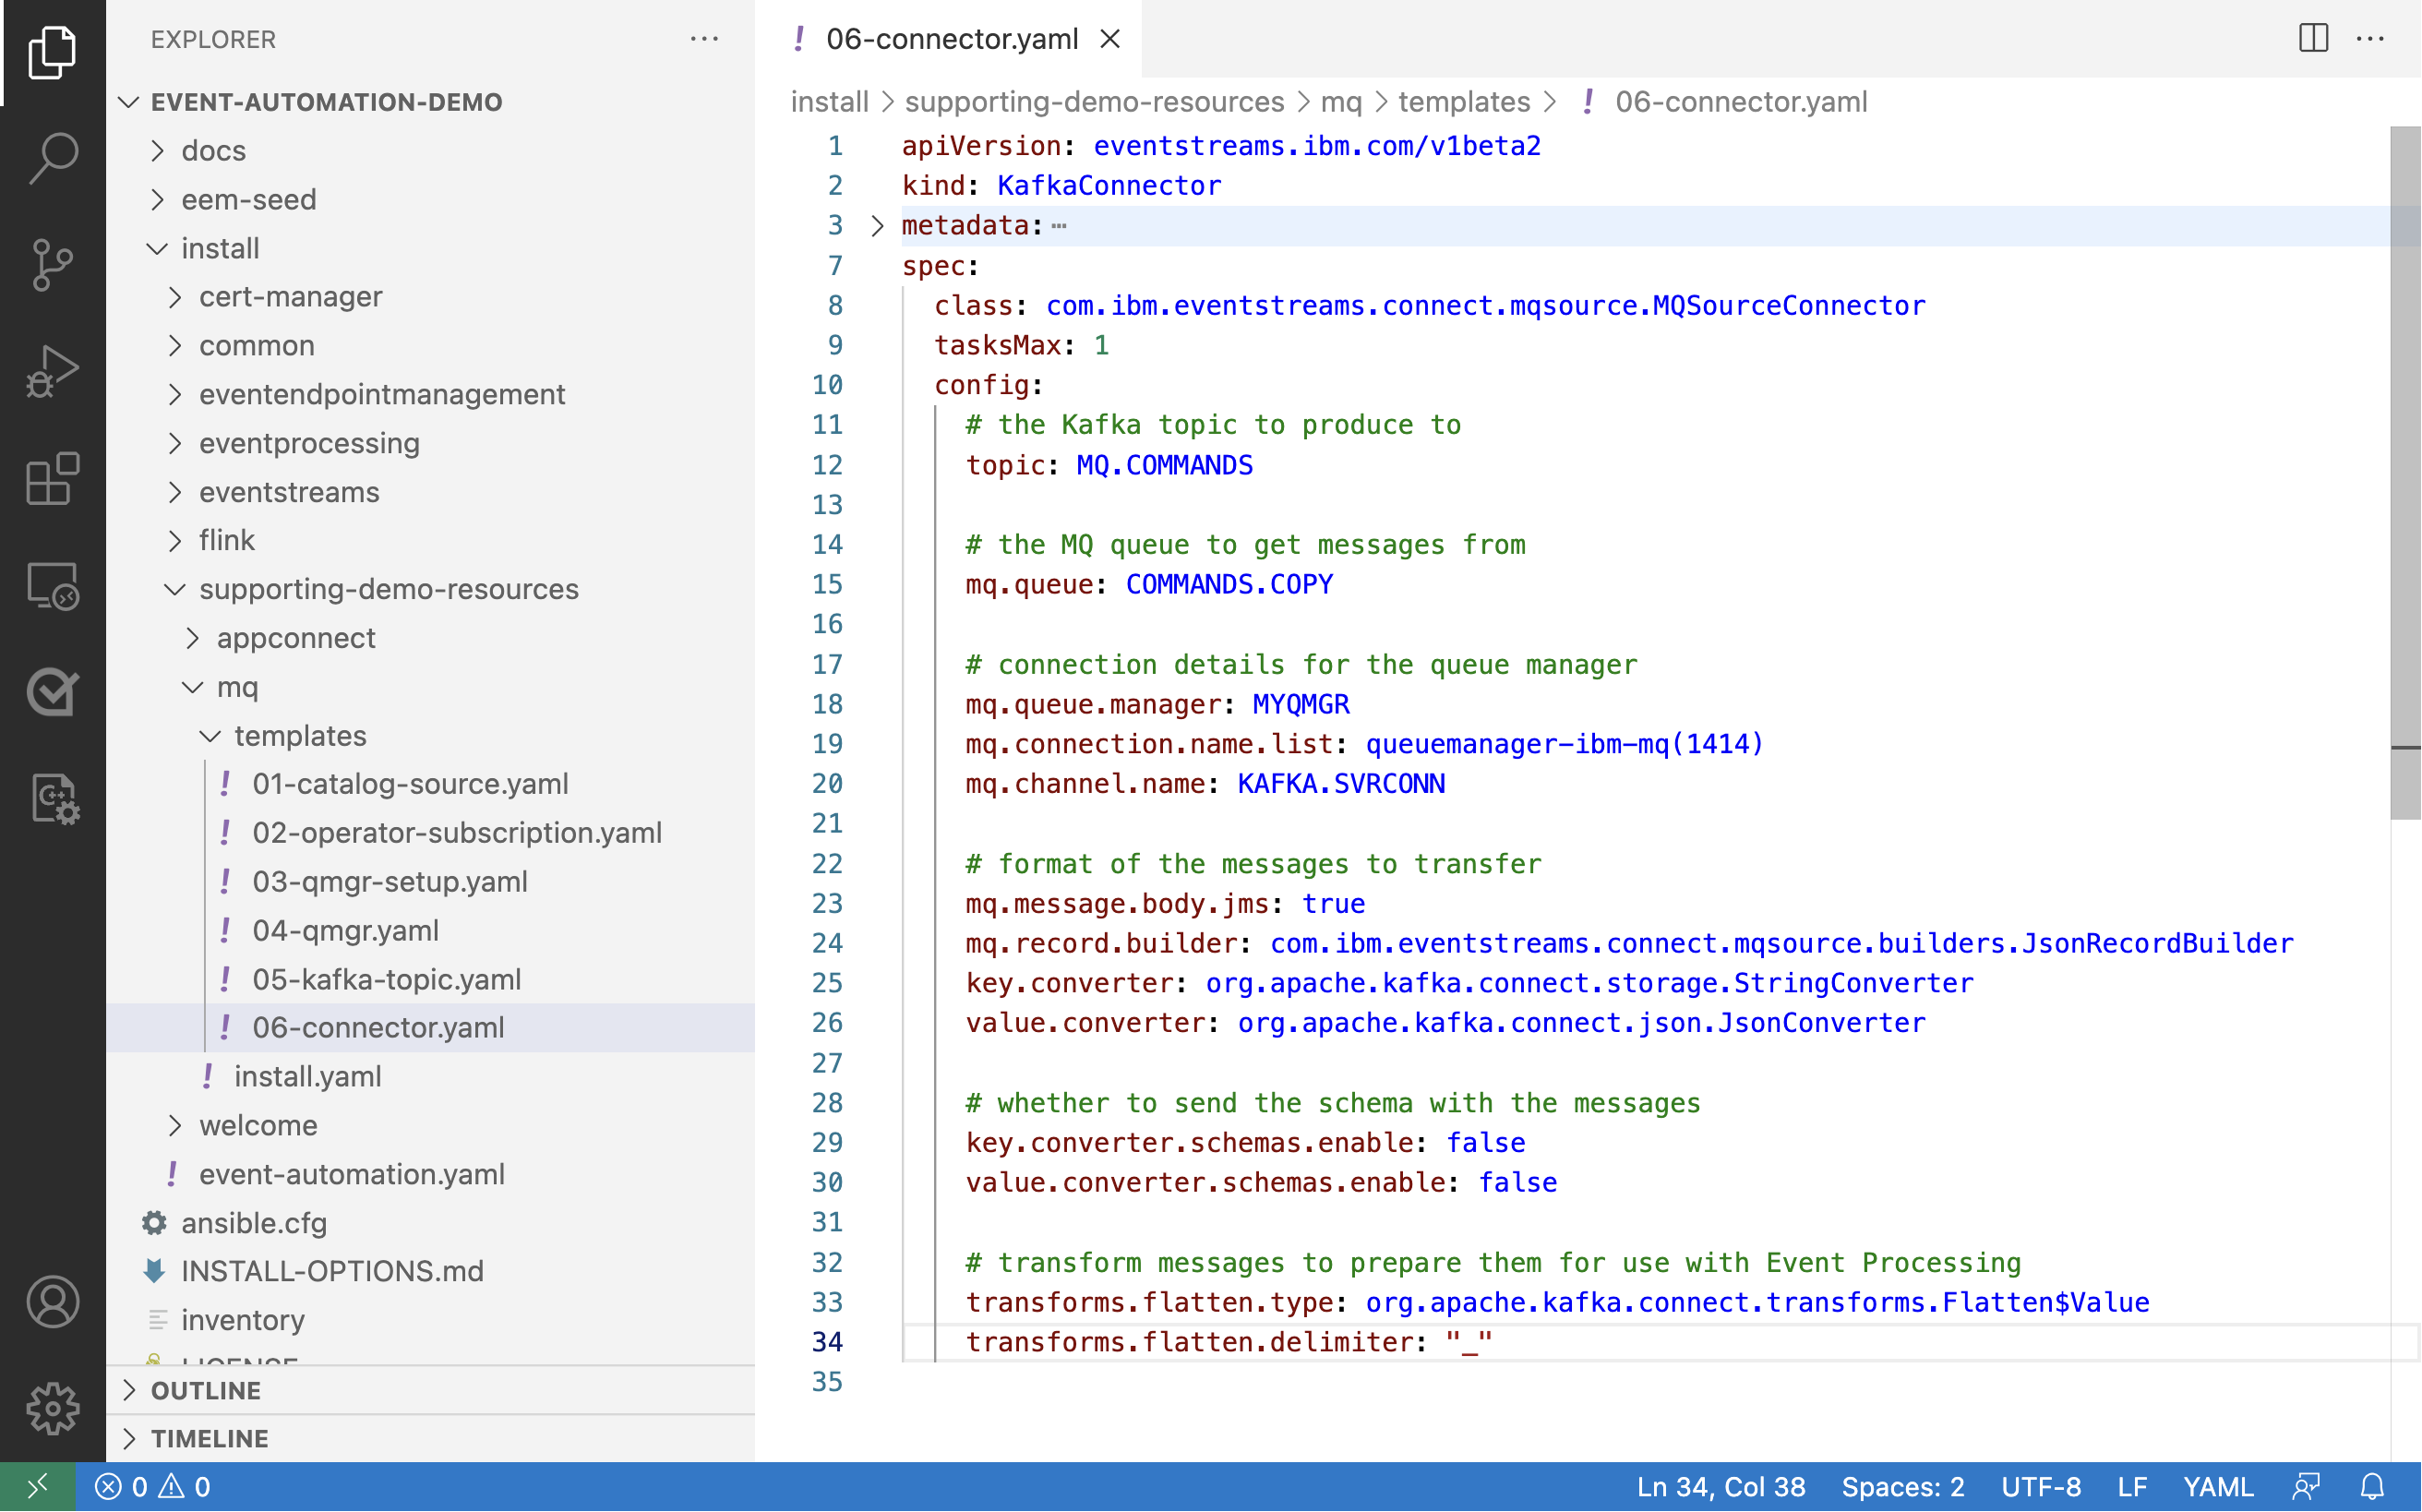
Add a transform definition to flatten the message value.
transforms.flatten.type: org.apache.kafka.connect.transforms.Flatten$Value
transforms.flatten.delimiter: "_"
Add this definition to the
.spec.configsection of the connector definition.In the screenshot it is added to the end of the config, but the order is not significant, as long as it is within
.spec.config. -
Add your new transform to the list of transformations that are to be applied to messages.
transforms: flattenAdd this line to the
.spec.configsection of the connector definition. -
Apply your changes to the connector definition.
oc apply -n event-automation \
    -f install/supporting-demo-resources/mq/templates/06-connector.yaml
You need to be logged in to run this command.
Log in to your Red Hat OpenShift Container Platform as a cluster administrator by using the
ocCLI (oc login). -
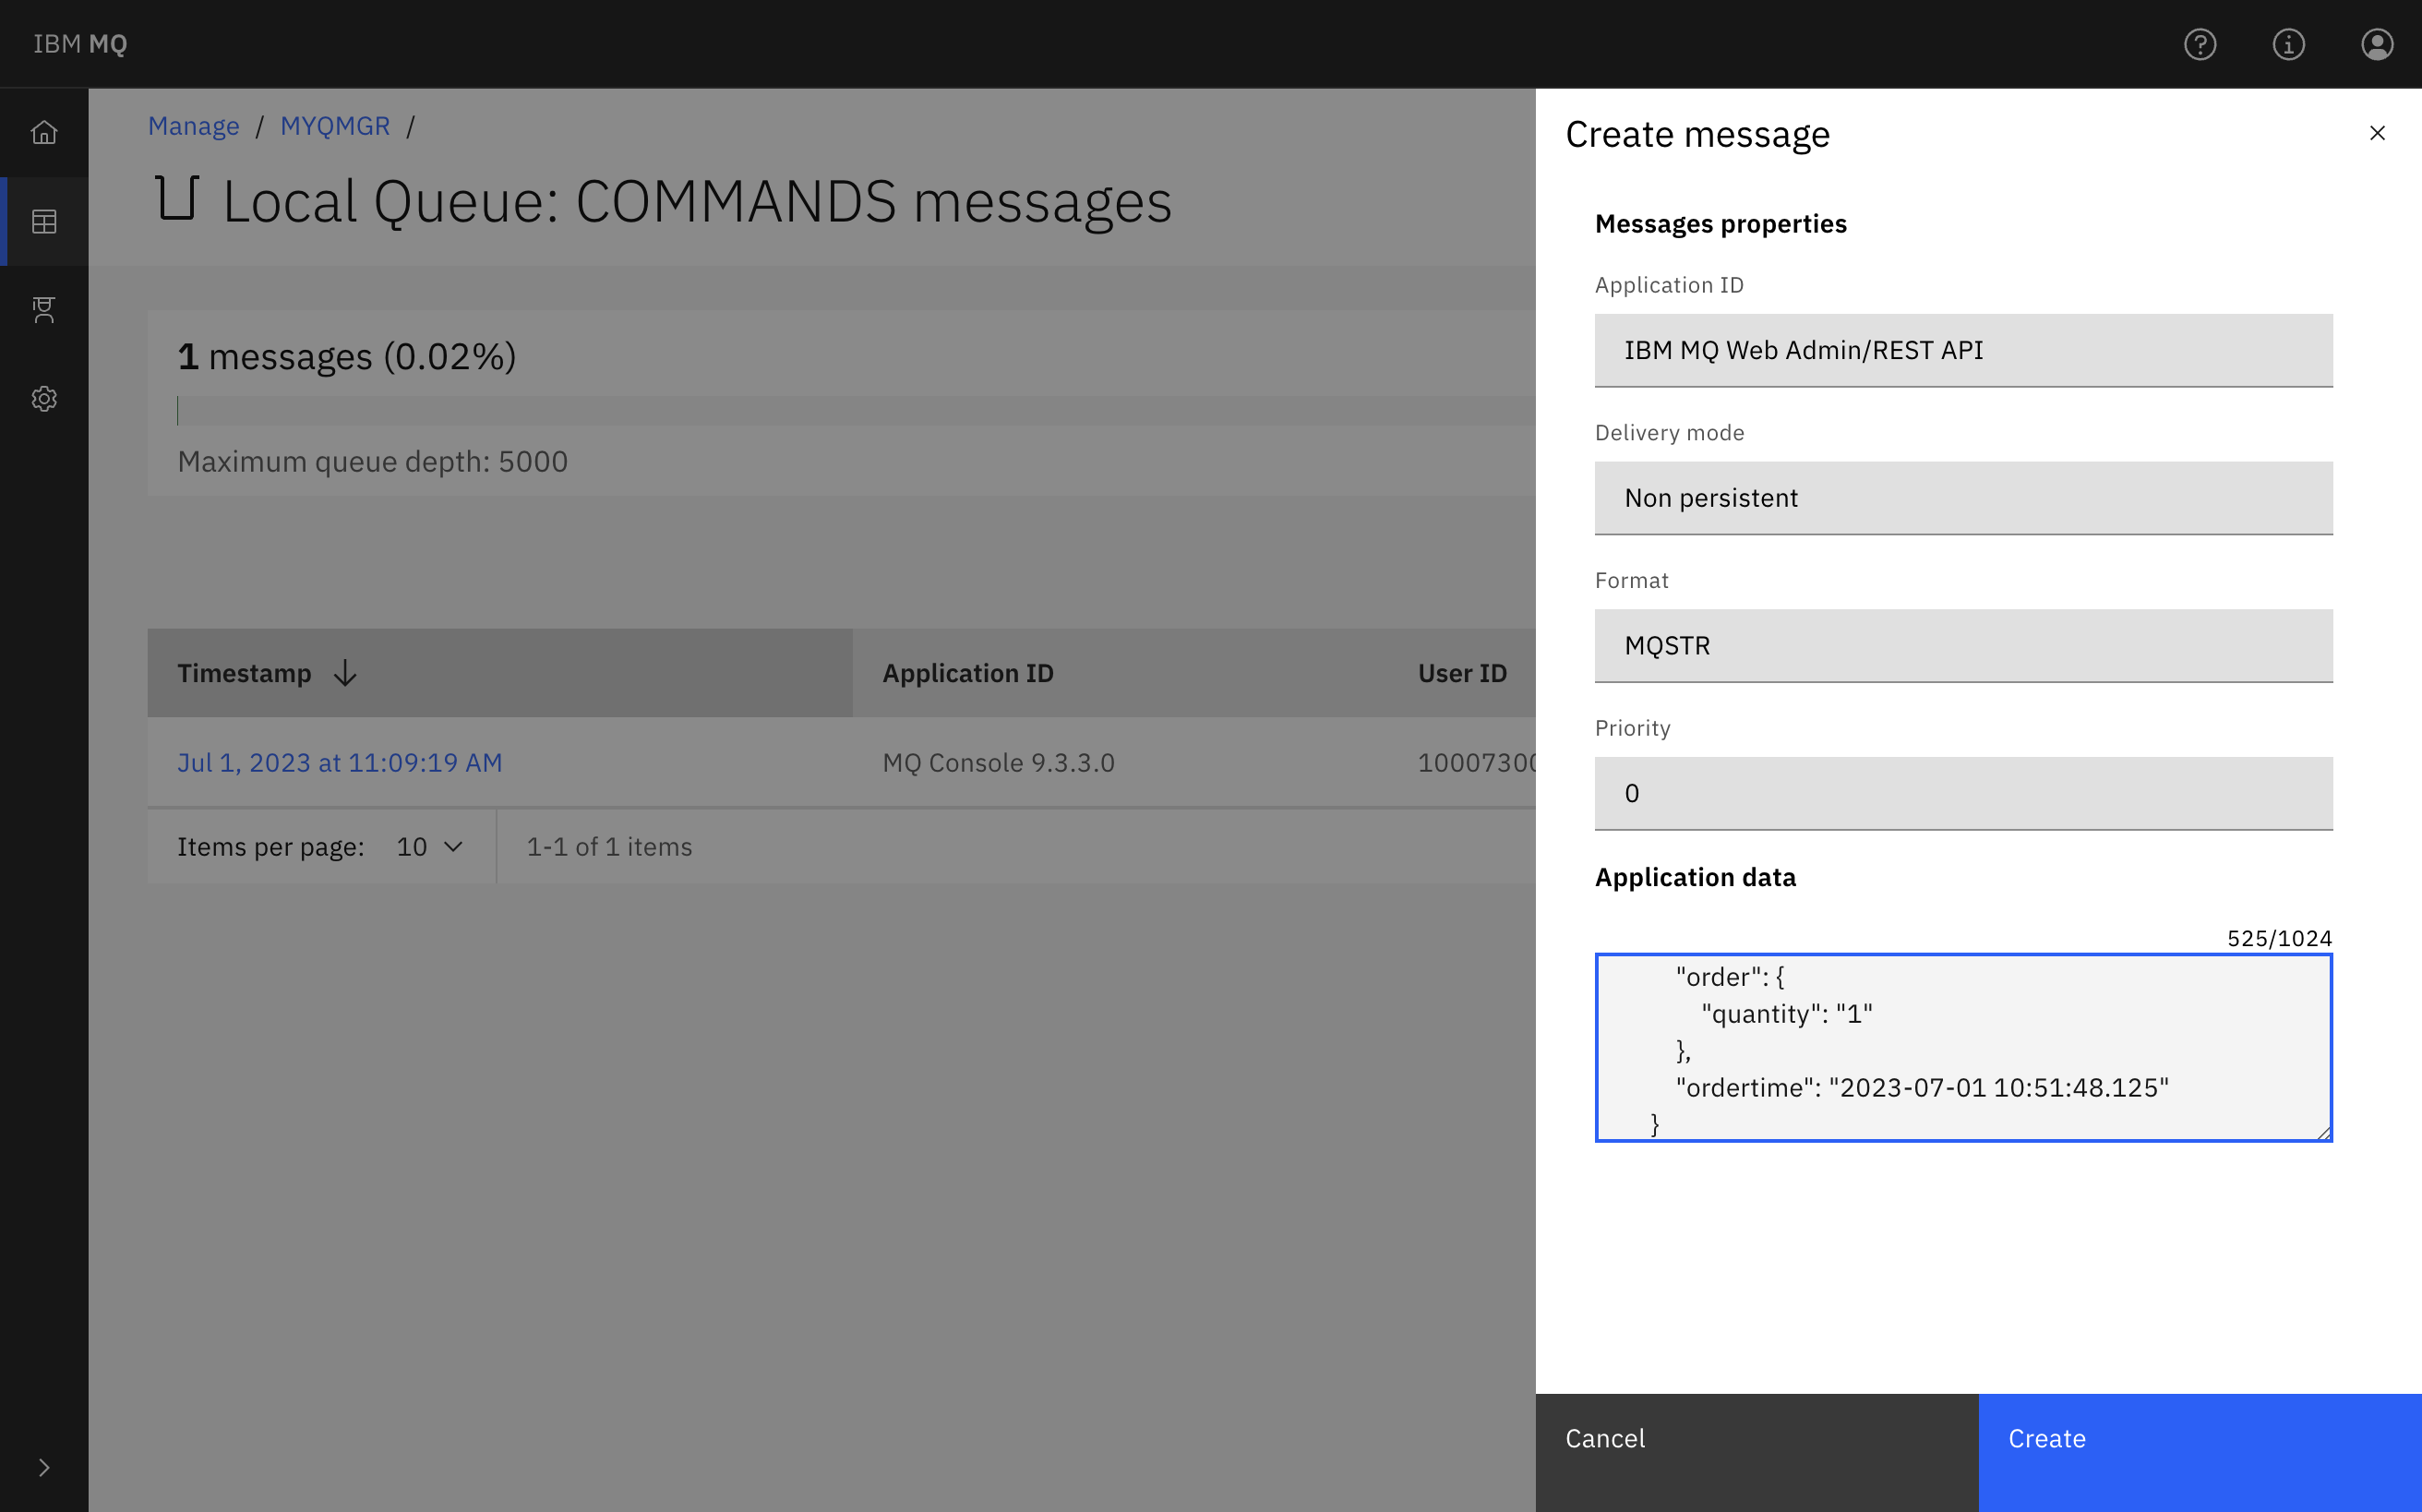
Test the transform by putting a new test message to the
COMMANDSqueue in the MQ queue manager.{ "id": "6446ef47-79a1-4b8a-a441-a58de8a90188", "customer": { "id": "a20533e6-88ee-478e-b42f-7a1a028b0b12", "name": "Roseanna Cremin" }, "creditcard": { "number": "5532144297701443", "expiry": "09/24" }, "product": { "description": "XS Acid-washed Low-rise Jeans", "price": 33.88 }, "order": { "quantity": "1" }, "ordertime": "2023-07-01 10:51:48.125" } -
Verify that the transform is working by checking the Event Streams topic page.
You should see the message that is produced to the Kafka topic:
{
    "product_price": 33.88,
    "product_description": "XS Acid-washed Low-rise Jeans",
    "id": "6446ef47-79a1-4b8a-a441-a58de8a90188",
    "ordertime": "2023-07-01 10:51:48.125",
    "creditcard_number": "5532144297701443",
    "creditcard_expiry": "09/24",
    "customer_name": "Roseanna Cremin",
    "customer_id": "a20533e6-88ee-478e-b42f-7a1a028b0b12",
    "order_quantity": "1"
}
Changes to connector specifications can sometimes take a moment to apply. If the message produced to the Kafka topic is not flattened, try waiting for 30 seconds, and then put the MQ message again.
This topic is now ready for use by Event Processing. Before trying that, we will add some additional transformations to see what is possible.
Step 4: Transforming the MQ messages
The flatten transformation that you have applied is one of a wide range of transformations available.
In this step, you will apply a few more of these to see what transformations are possible:
- Redact the credit card number from the events
- Remove the customer name from the events
- Insert a static property to identify where the event came from
- Cast the quantity property from a string to an integer
Other available transformations are described in the Kafka Connect documentation.
-
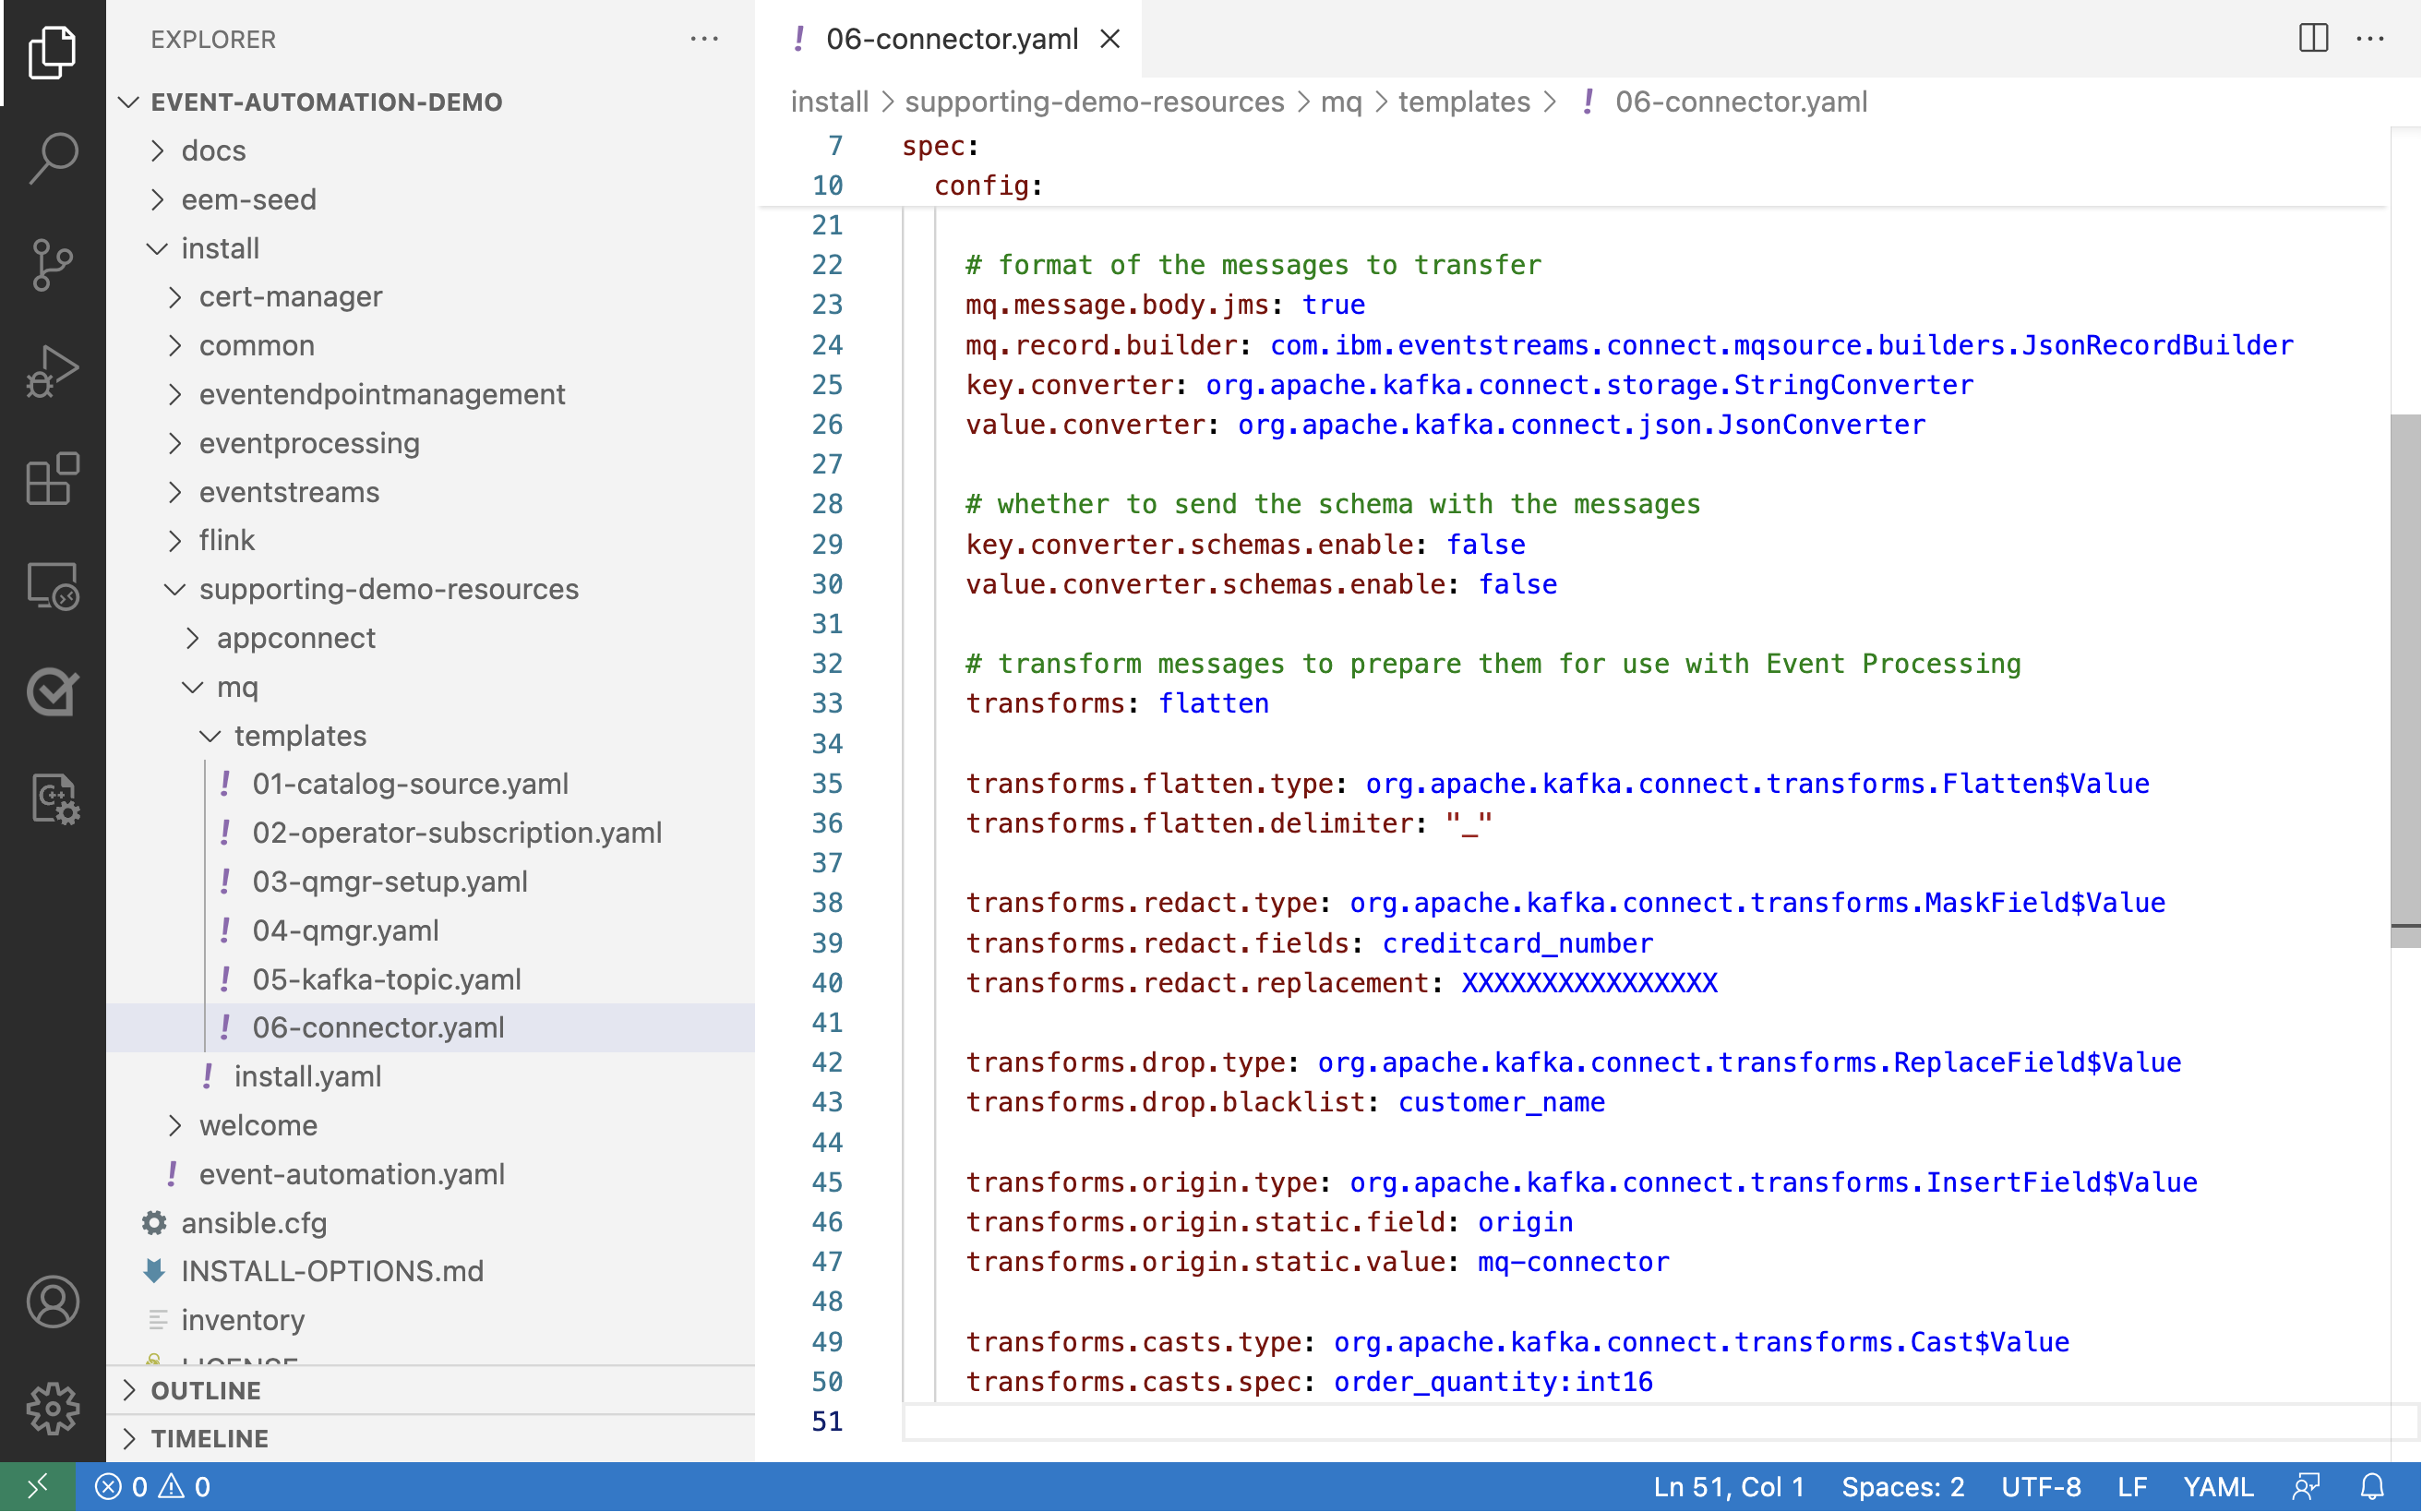
Add the following transformation definitions to the Connector specification.
transforms.redact.type: org.apache.kafka.connect.transforms.MaskField$Value transforms.redact.fields: creditcard_number transforms.redact.replacement: XXXXXXXXXXXXXXXX transforms.drop.type: org.apache.kafka.connect.transforms.ReplaceField$Value transforms.drop.blacklist: customer_name transforms.origin.type: org.apache.kafka.connect.transforms.InsertField$Value transforms.origin.static.field: origin transforms.origin.static.value: mq-connector transforms.casts.type: org.apache.kafka.connect.transforms.Cast$Value transforms.casts.spec: order_quantity:int16 -
Add your new transforms to the list of transformations that are to be applied to messages.
transforms: flatten,redact,drop,origin,castsTip: The order of these in the comma-separated list is the order that the transformations are applied in.
In this case, it is important that the
flattentransformation is applied first. This is because properties referred to in the later transformations (for example,creditcard_numberandcustomer_name) do not exist until after the flatten transformation is complete. -
Apply your changes to the connector definition.
oc apply -n event-automation \ -f install/supporting-demo-resources/mq/templates/06-connector.yaml -
Test the transform by putting a new test message to the
COMMANDSqueue in the MQ queue manager.{ "id": "d83bb1f5-933a-4251-b29b-0a1ec7d4e56e", "customer": { "id": "bd02c5f3-3246-4701-9c0b-159c7a7334b0", "name": "Fernanda Hermiston" }, "creditcard": { "number": "5226589295805765", "expiry": "01/24" }, "product": { "description": "L White Jogger Jeans", "price": 42.88 }, "order": { "quantity": "2" }, "ordertime": "2023-07-01 11:10:48.124" } -
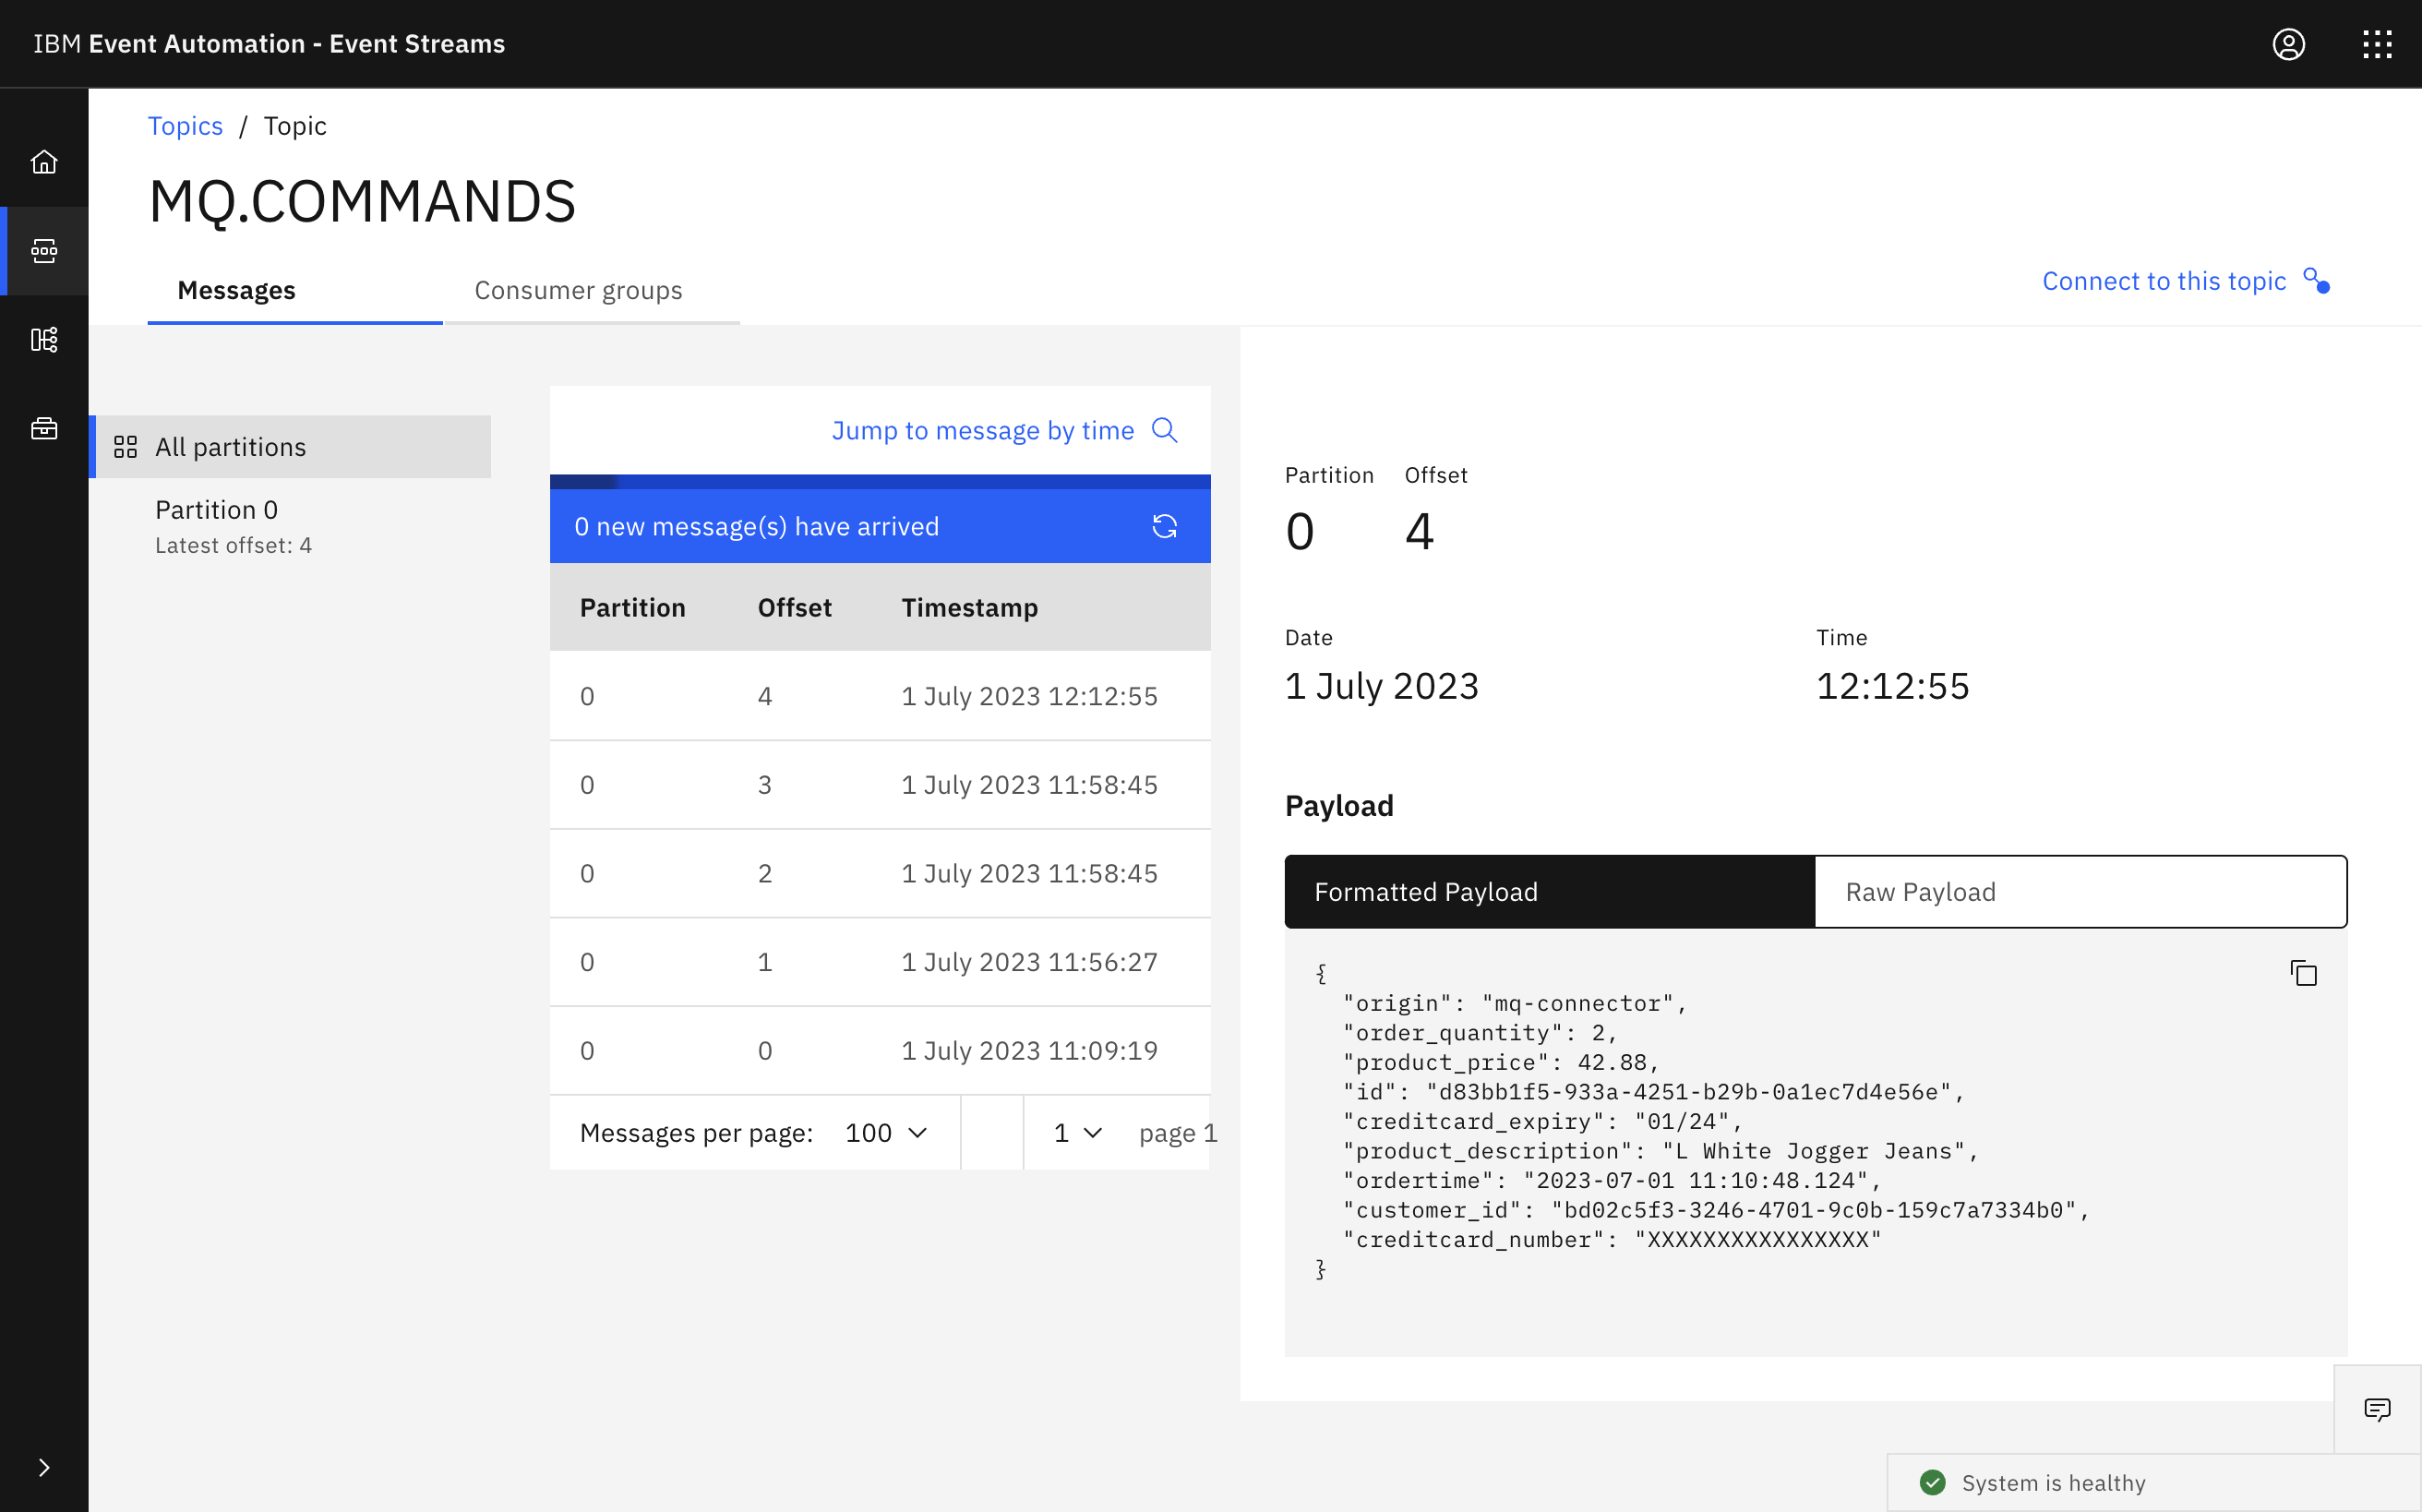
Verify that the transform is working by checking the Event Streams topic page.
You should see the message that is produced to the Kafka topic:
{
    "origin": "mq-connector",
    "order_quantity": 2,
    "product_price": 42.88,
    "id": "d83bb1f5-933a-4251-b29b-0a1ec7d4e56e",
    "creditcard_expiry": "01/24",
    "product_description": "L White Jogger Jeans",
    "ordertime": "2023-07-01 11:10:48.124",
    "customer_id": "bd02c5f3-3246-4701-9c0b-159c7a7334b0",
    "creditcard_number": "XXXXXXXXXXXXXXXX"
}
Notice that:
- The message contains an
originproperty, which was inserted by the connector - The
creditcard_numberproperty has been masked out withXcharacters - The
customer_nameproperty has been removed - The string
order_quantityproperty has been cast to an integer
- The message contains an
This is now ready for use by Event Processing.
Step 5: MQ messages as a source of events
The next step is to create an event source in Event Processing based on the source of events from the MQ queue.
-
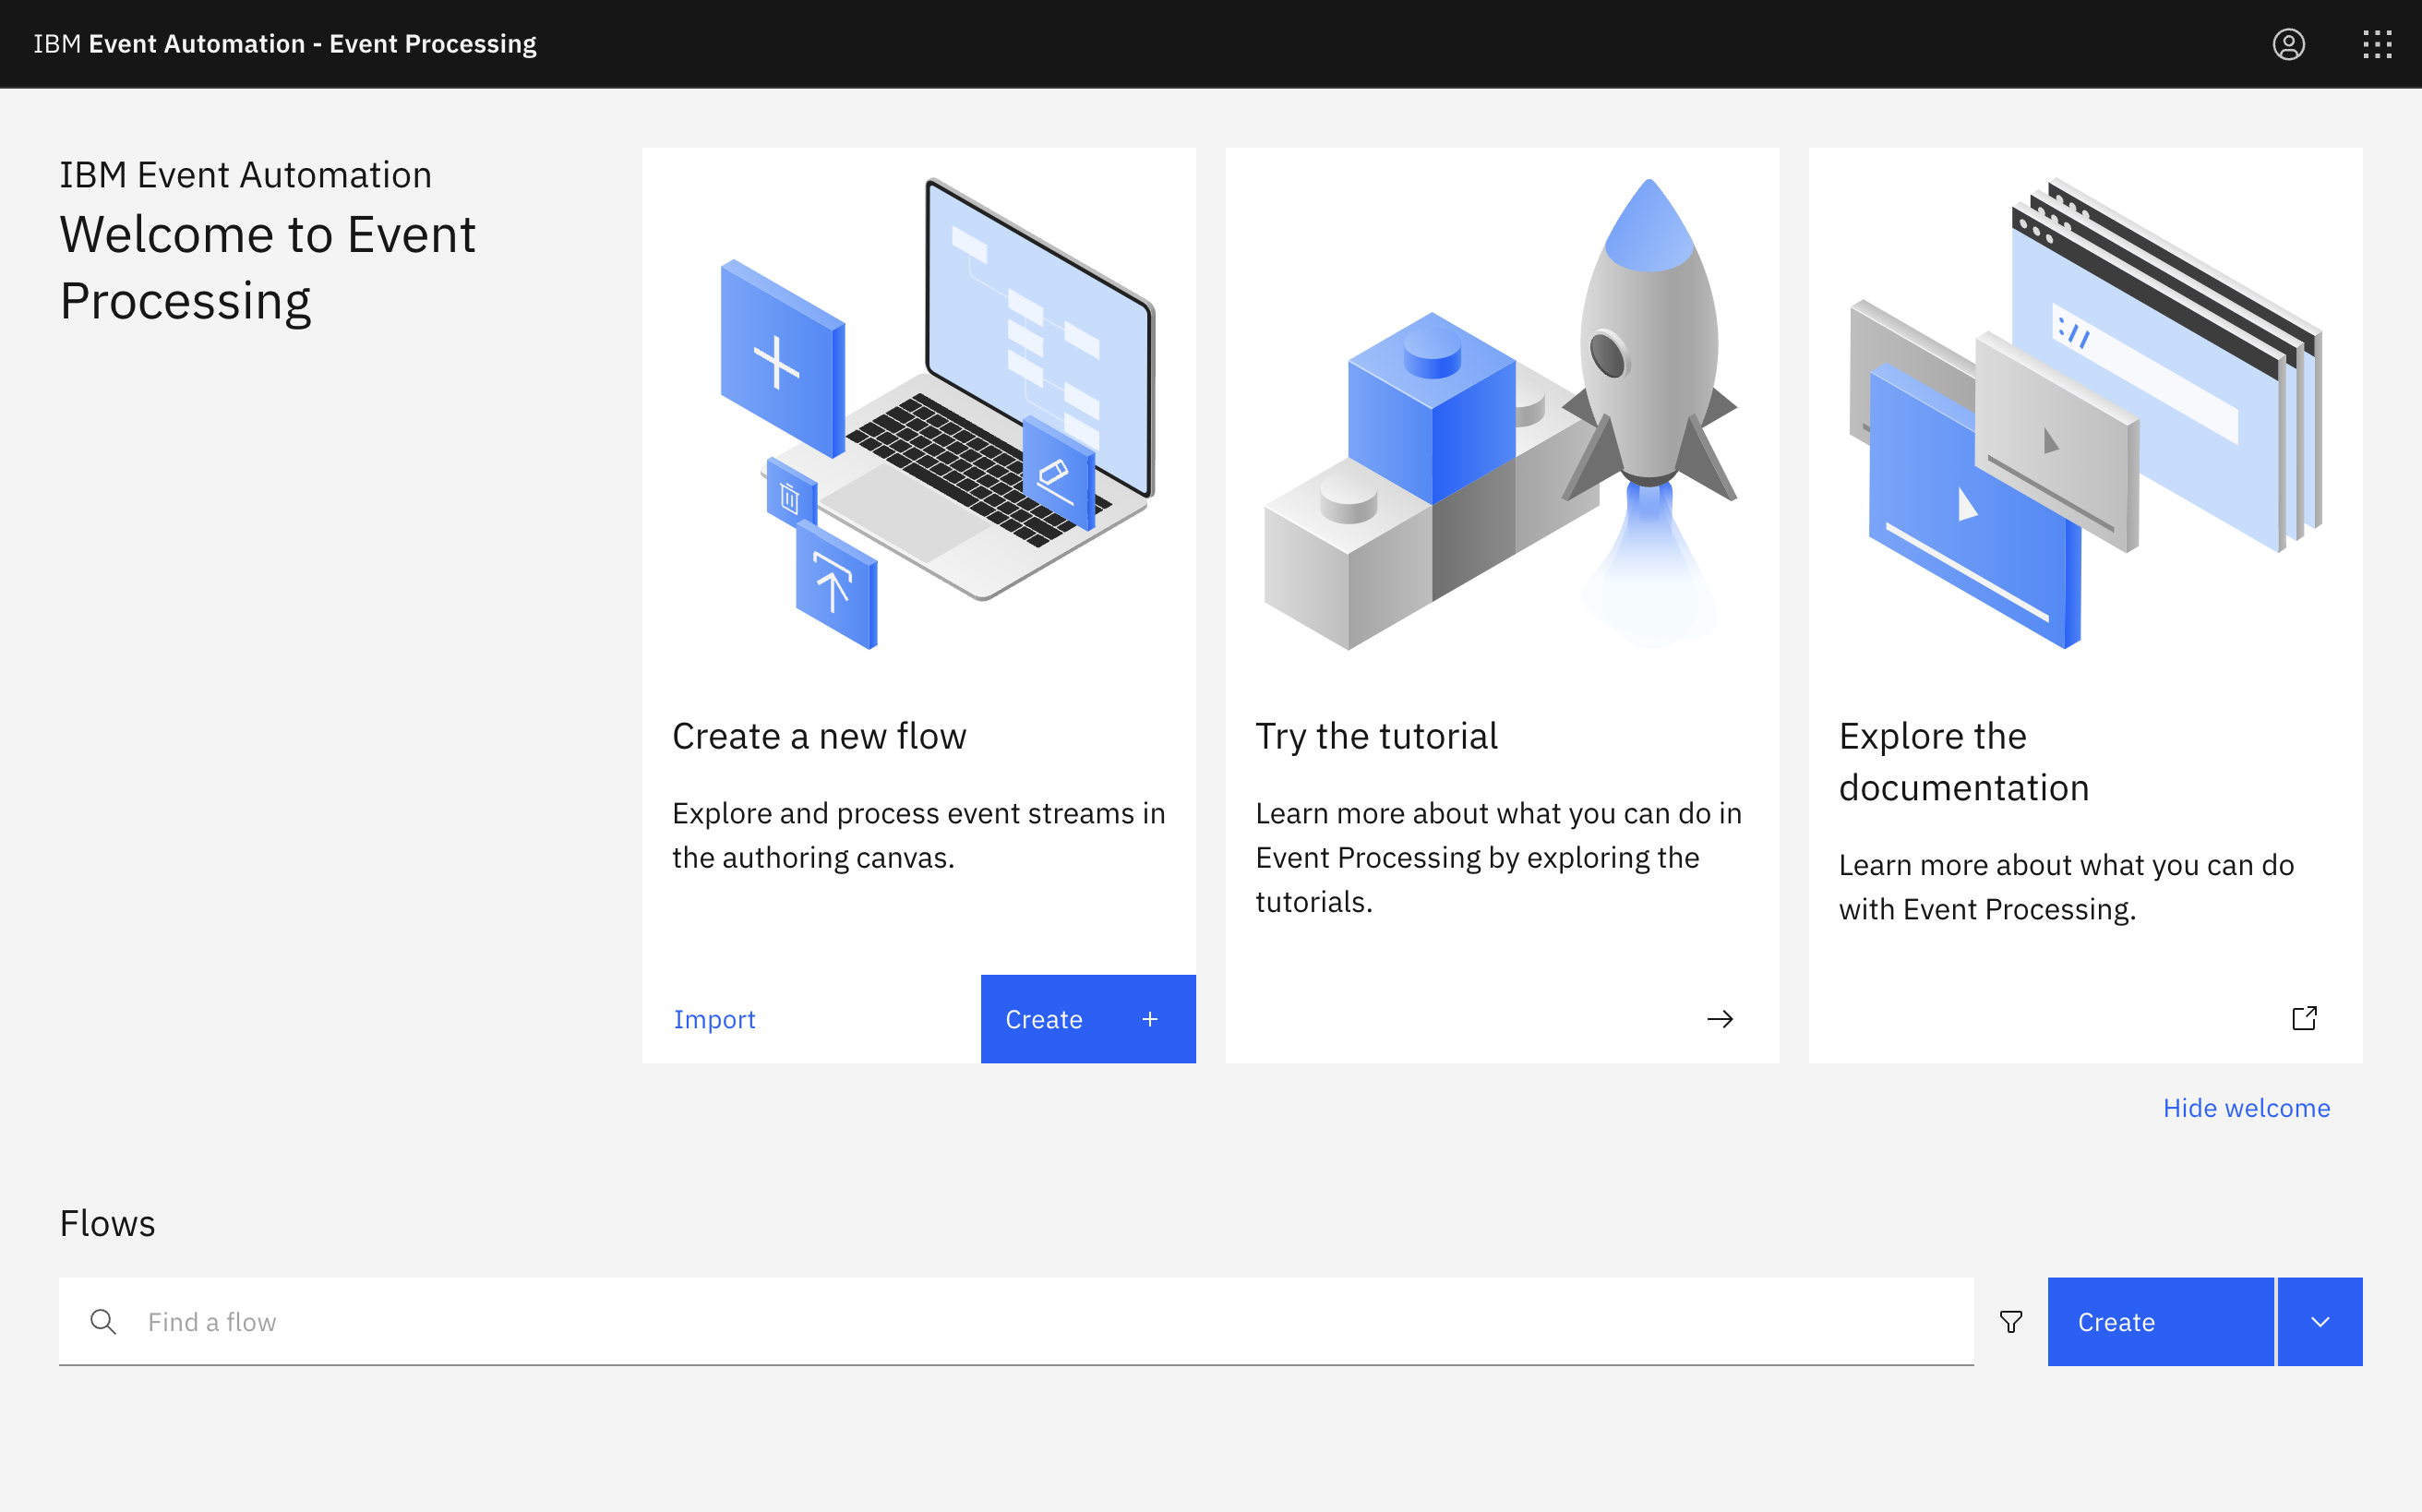
Go to the Event Processing home page.
If you need a reminder of how to access the Event Processing home page, you can review Accessing the tutorial environment.
-
Create a flow, and give it a name and description to explain that you will use it to process events originating from MQ.
-
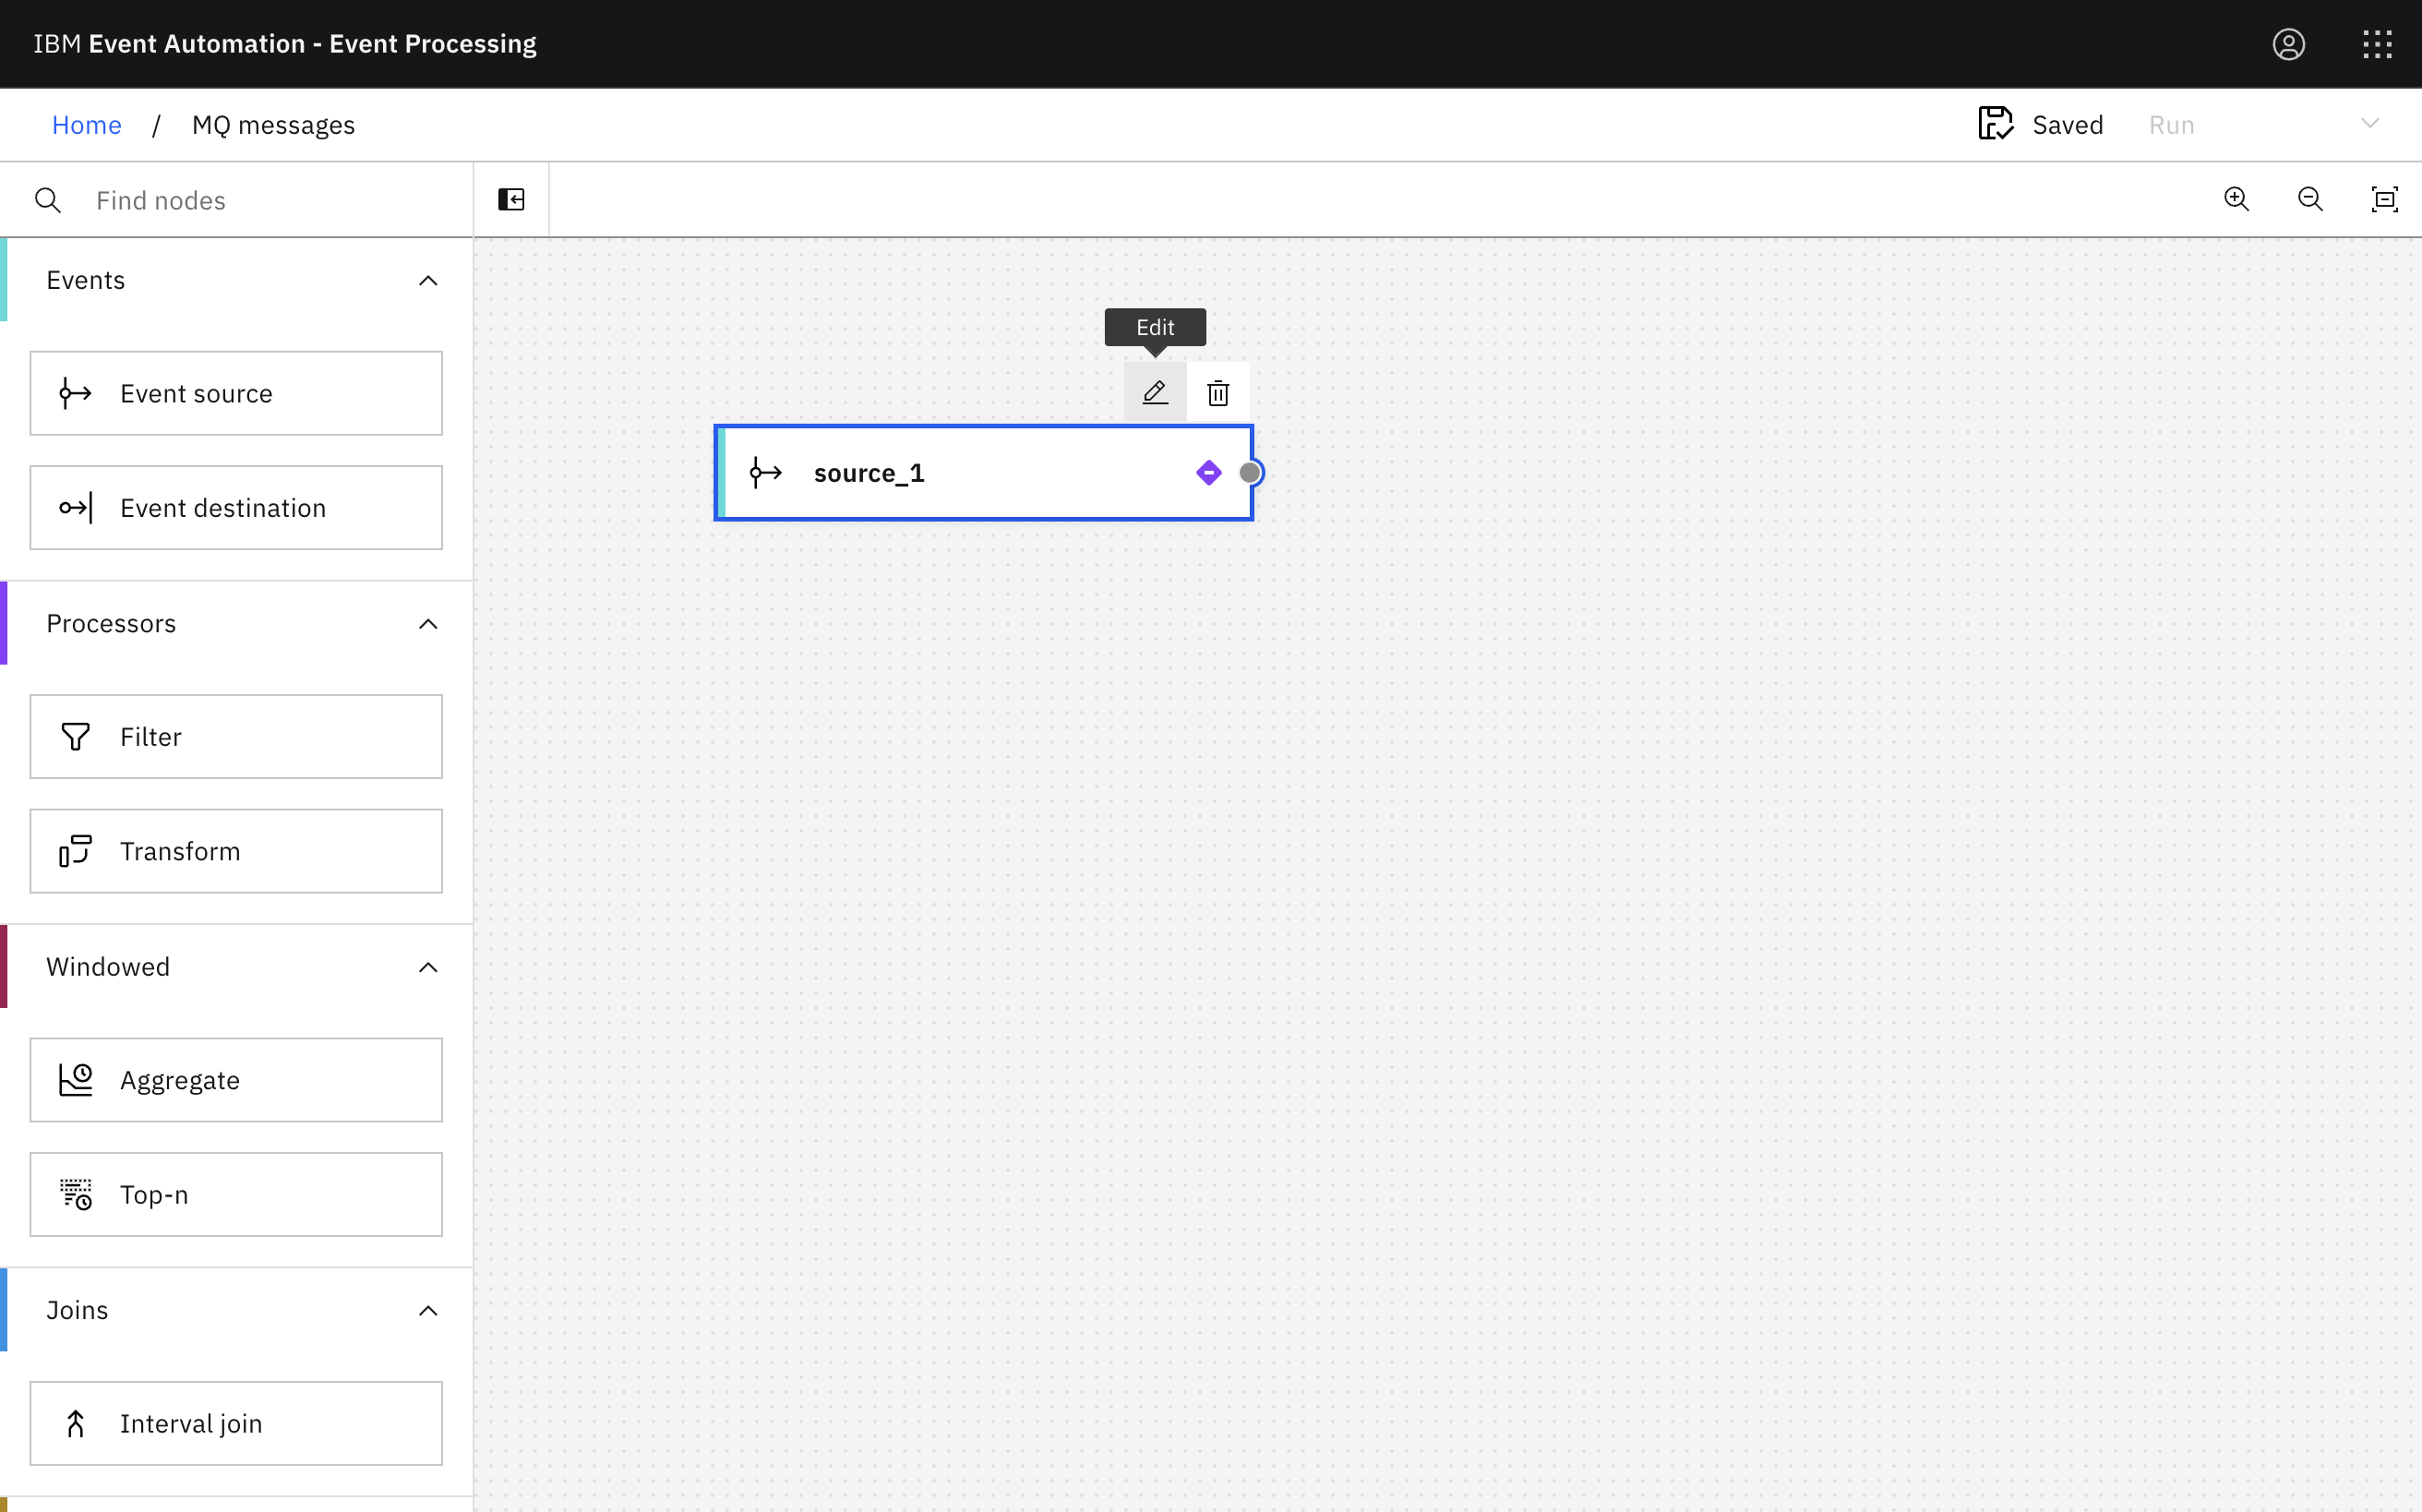
Update the Event source node.
Hover over the node and click
Edit.
-
Add a new event source.
-
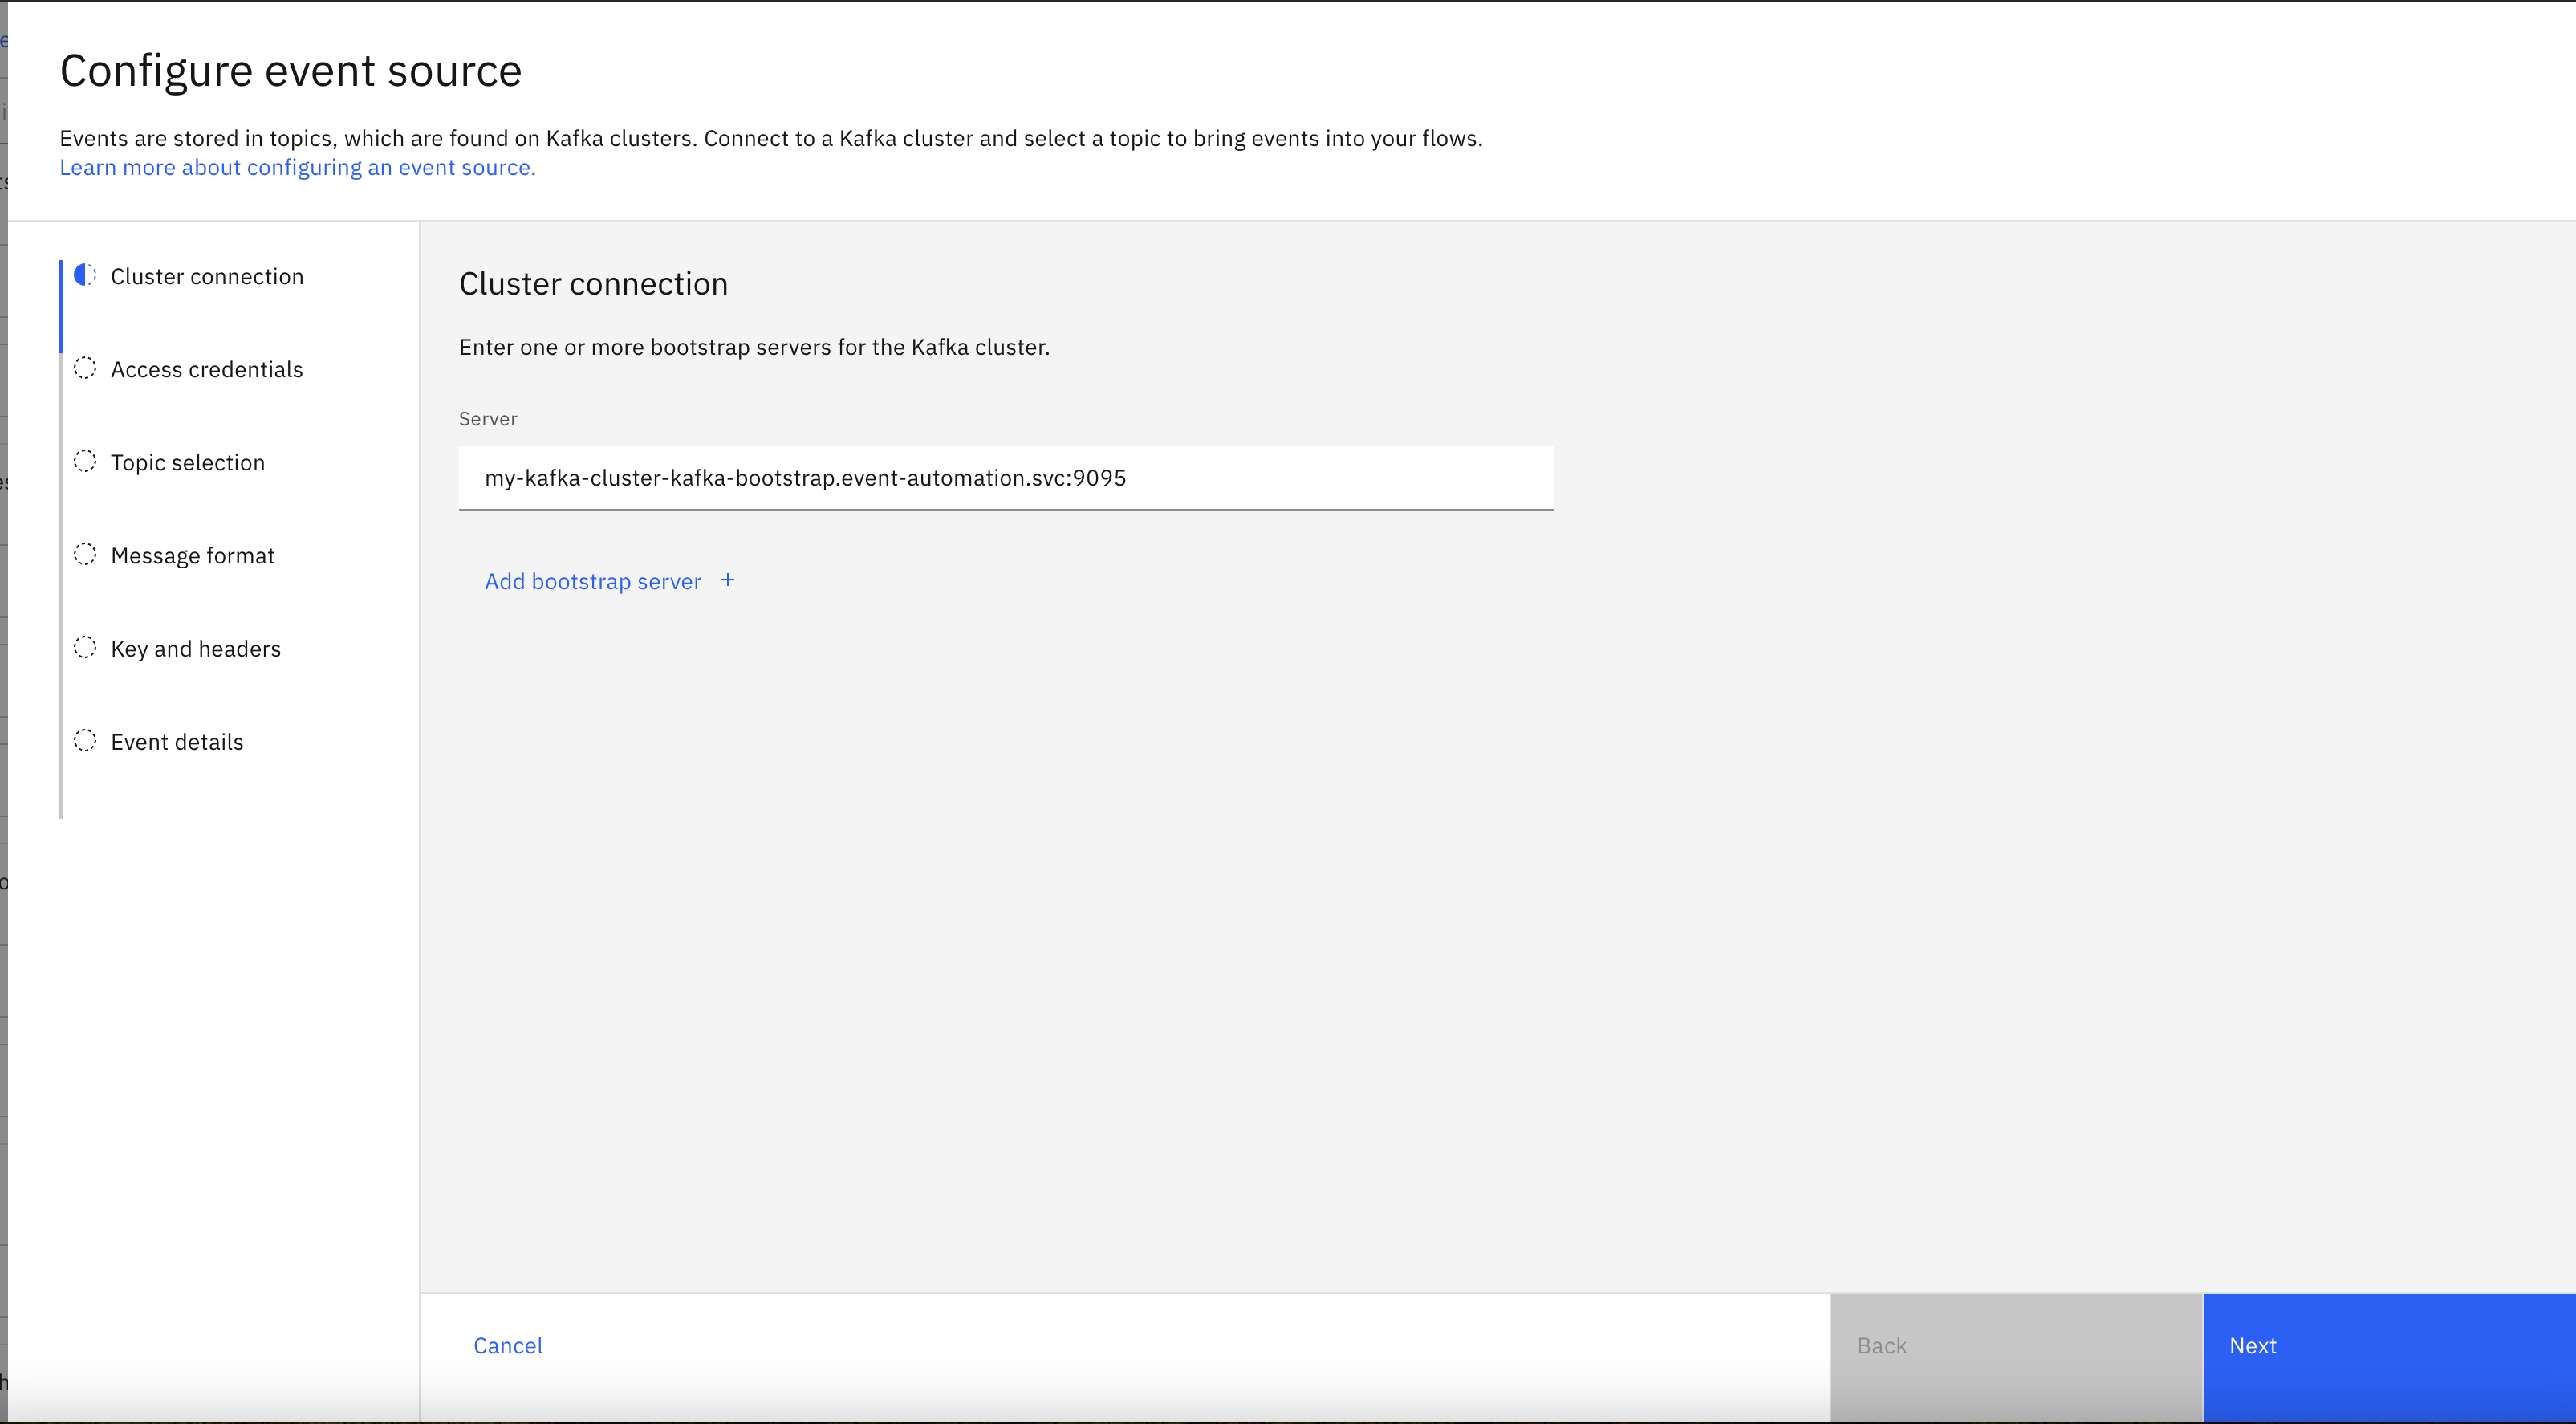
Put the Kafka listener address from Event Streams into the server address for the event source node.
-
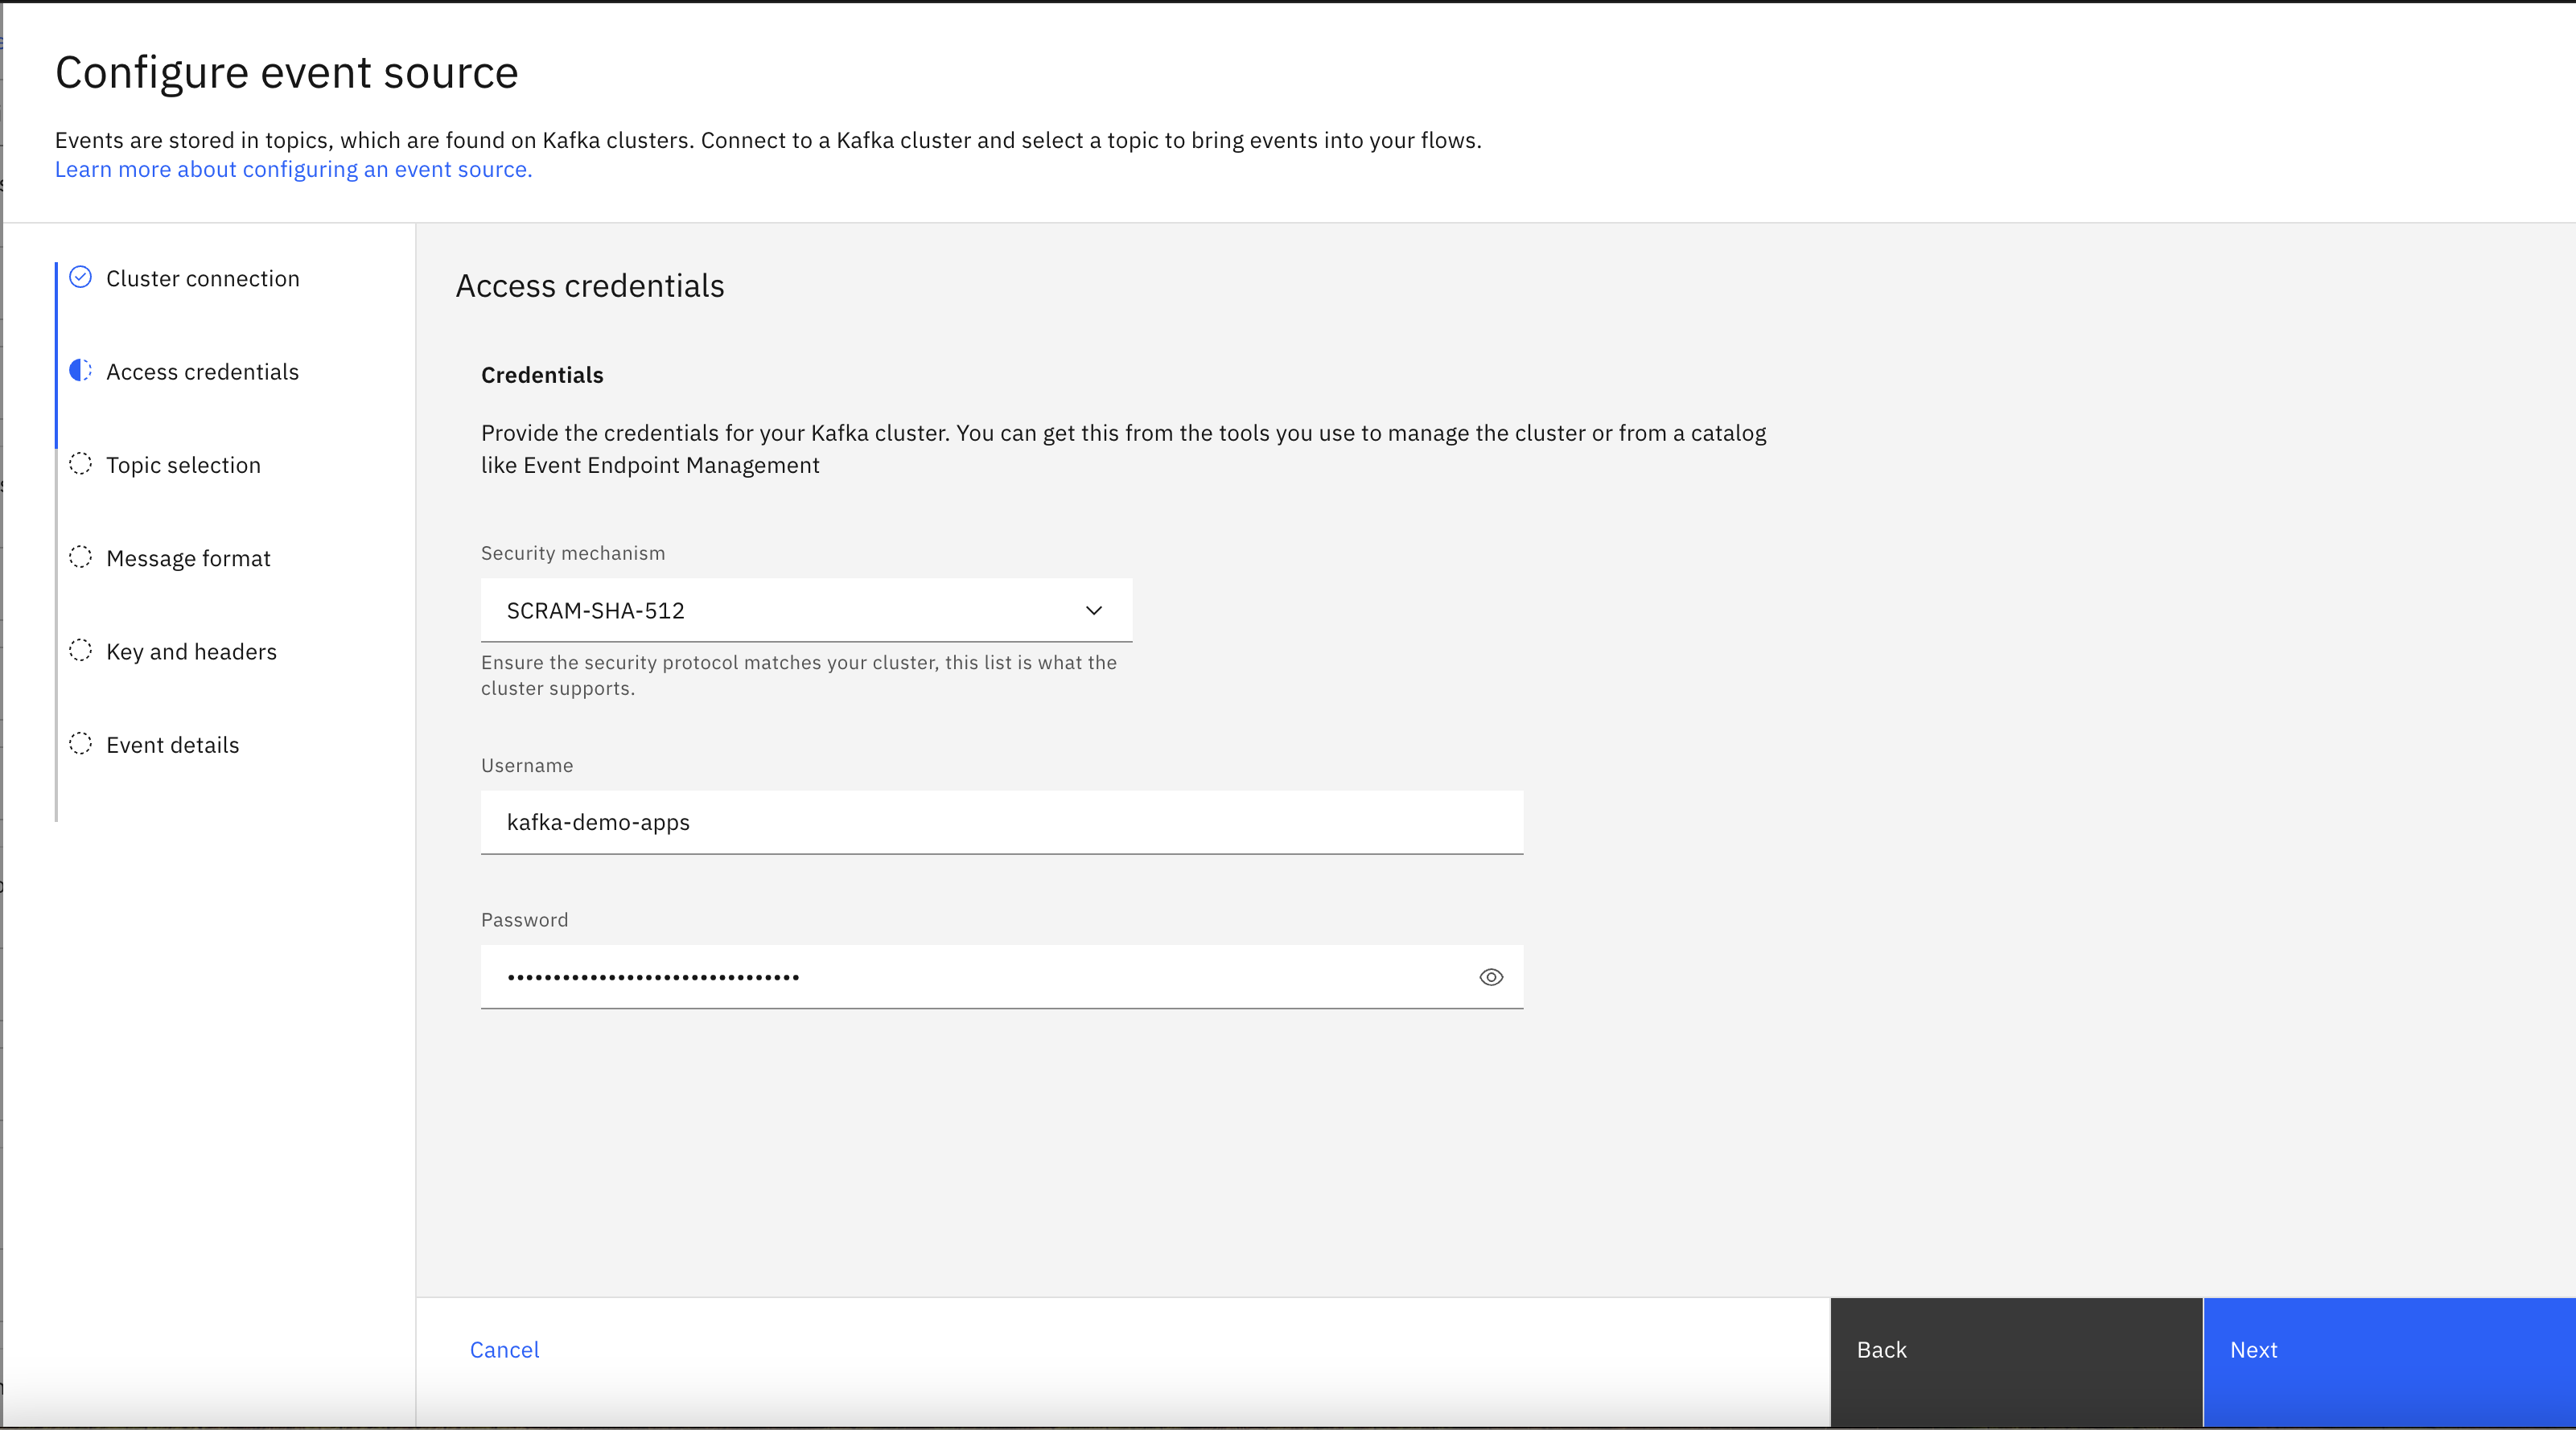
In the Access credentials pane, use the username and password for the
kafka-demo-appsuser for accessing the new topic.If you need a reminder of the password for the
kafka-demo-appsuser, you can review the Accessing Kafka topics section of the Tutorial Setup instructions. -
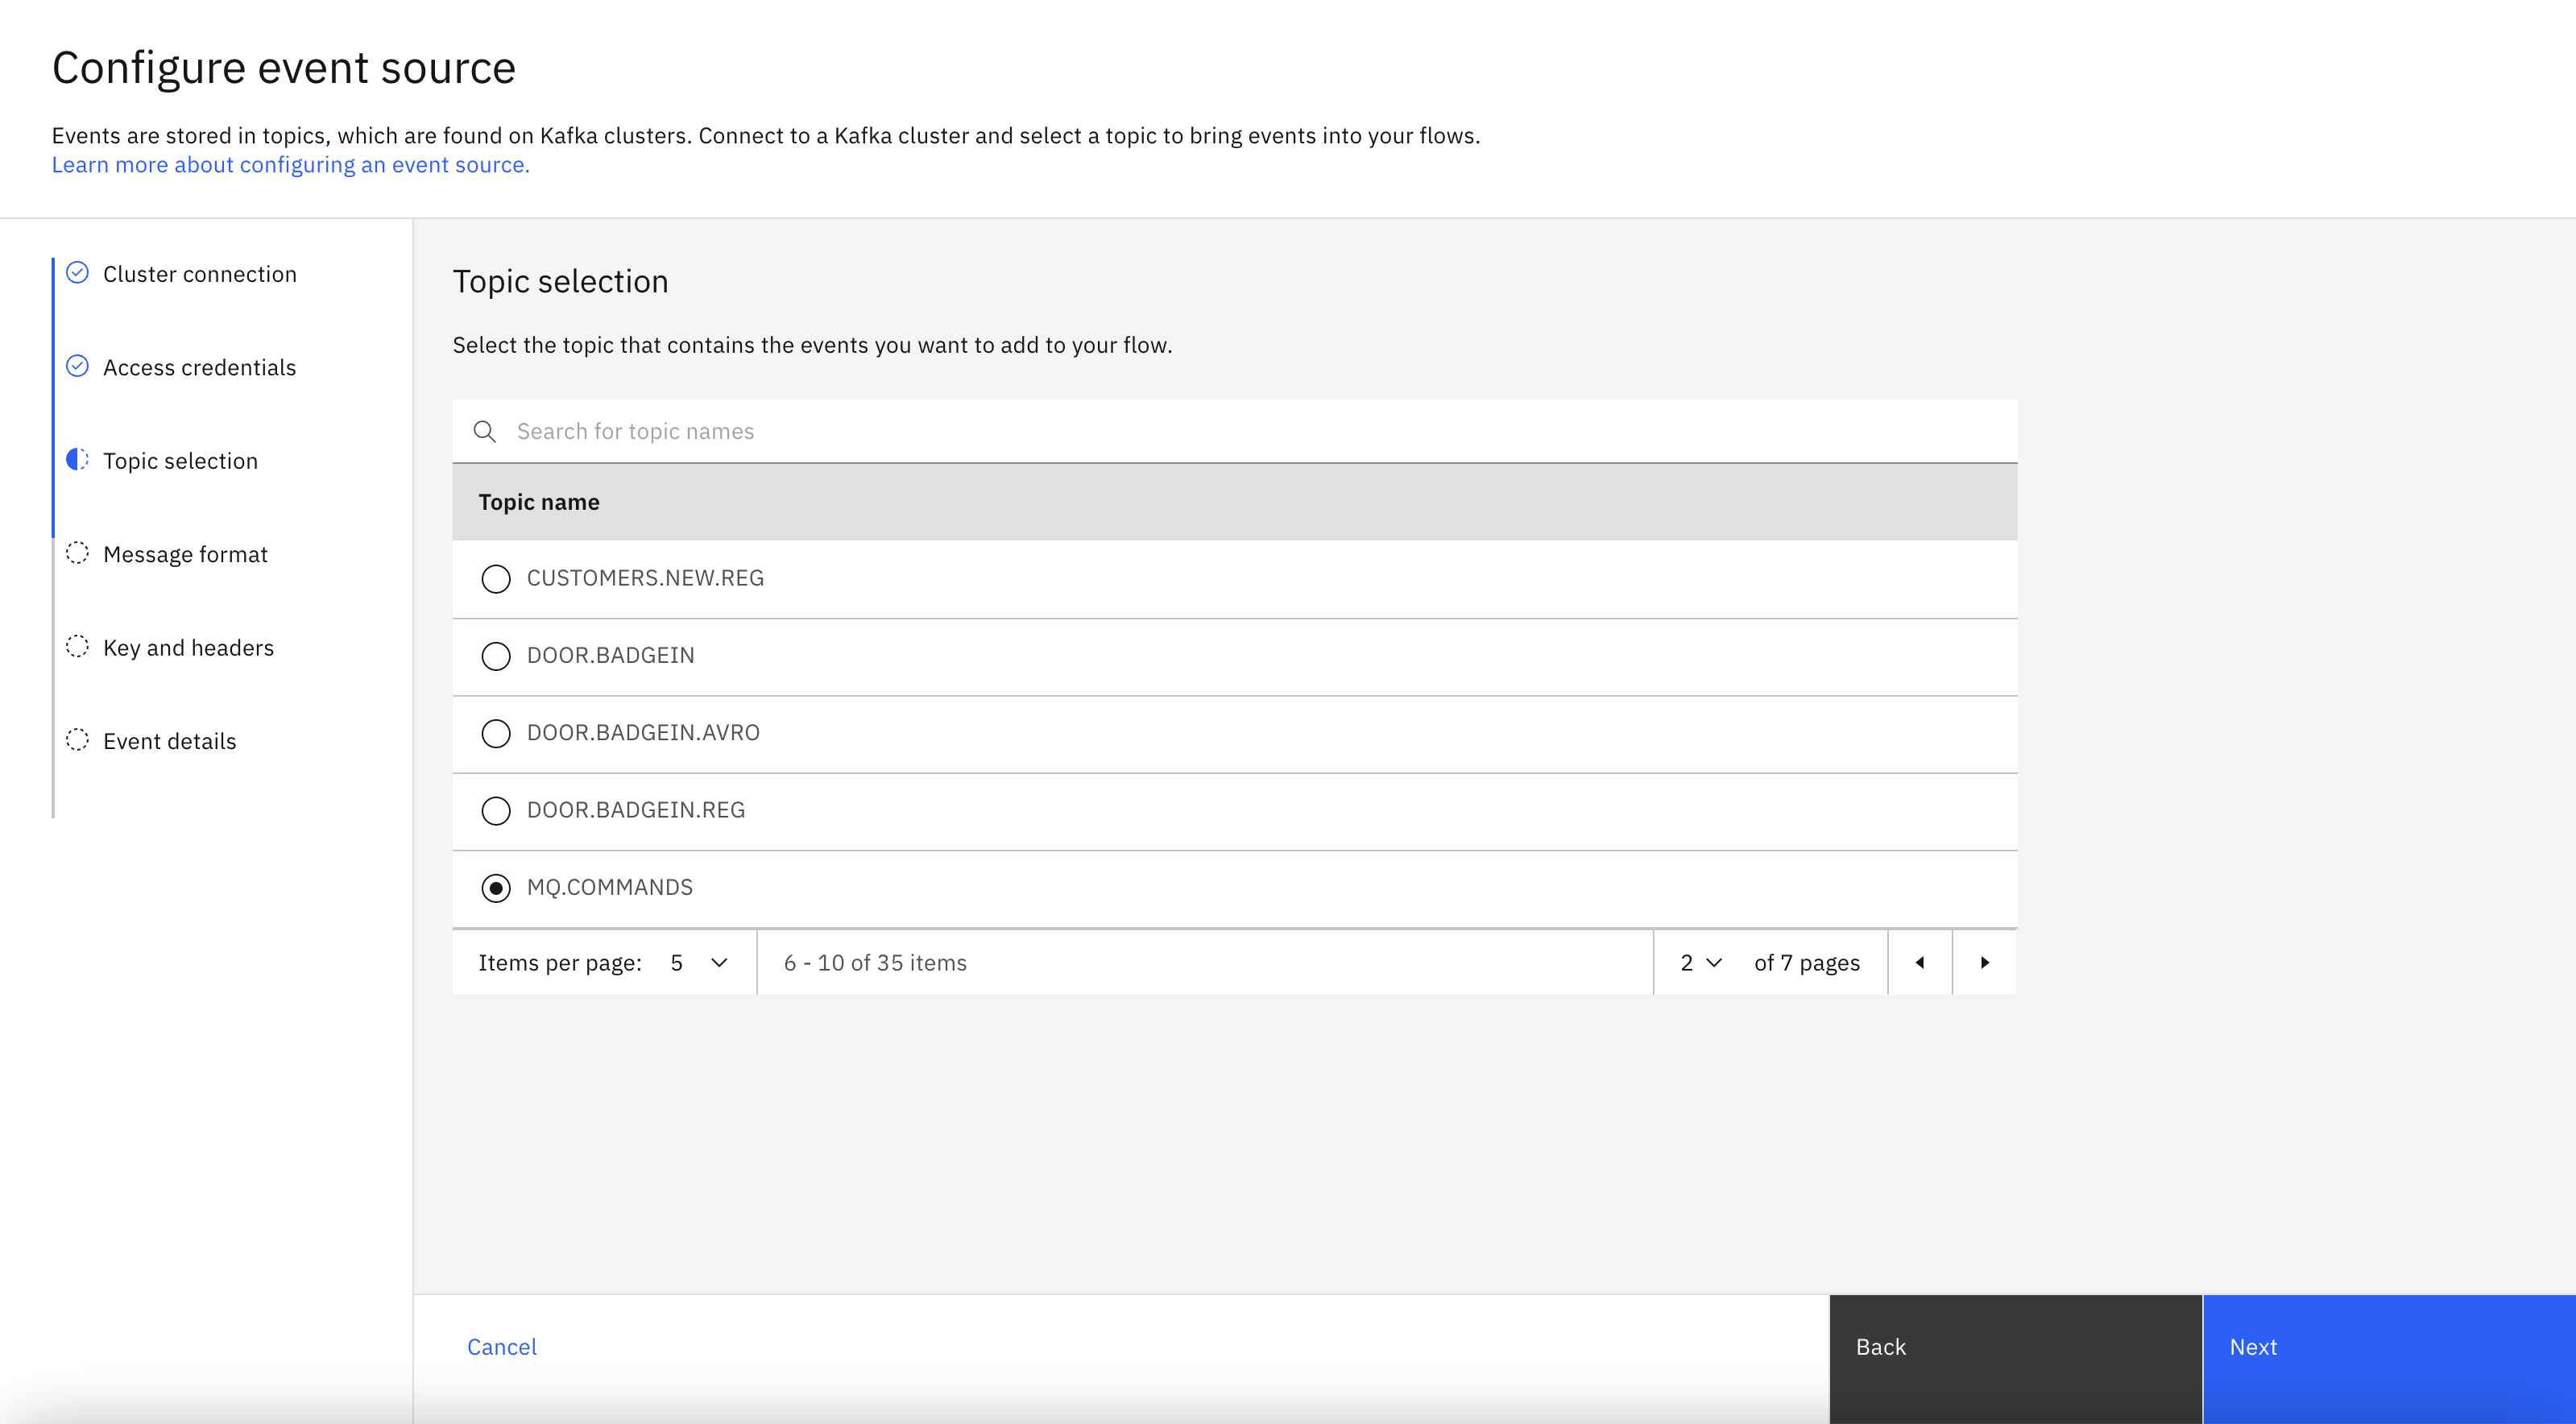
Select the
MQ.COMMANDStopic, and click Next. -
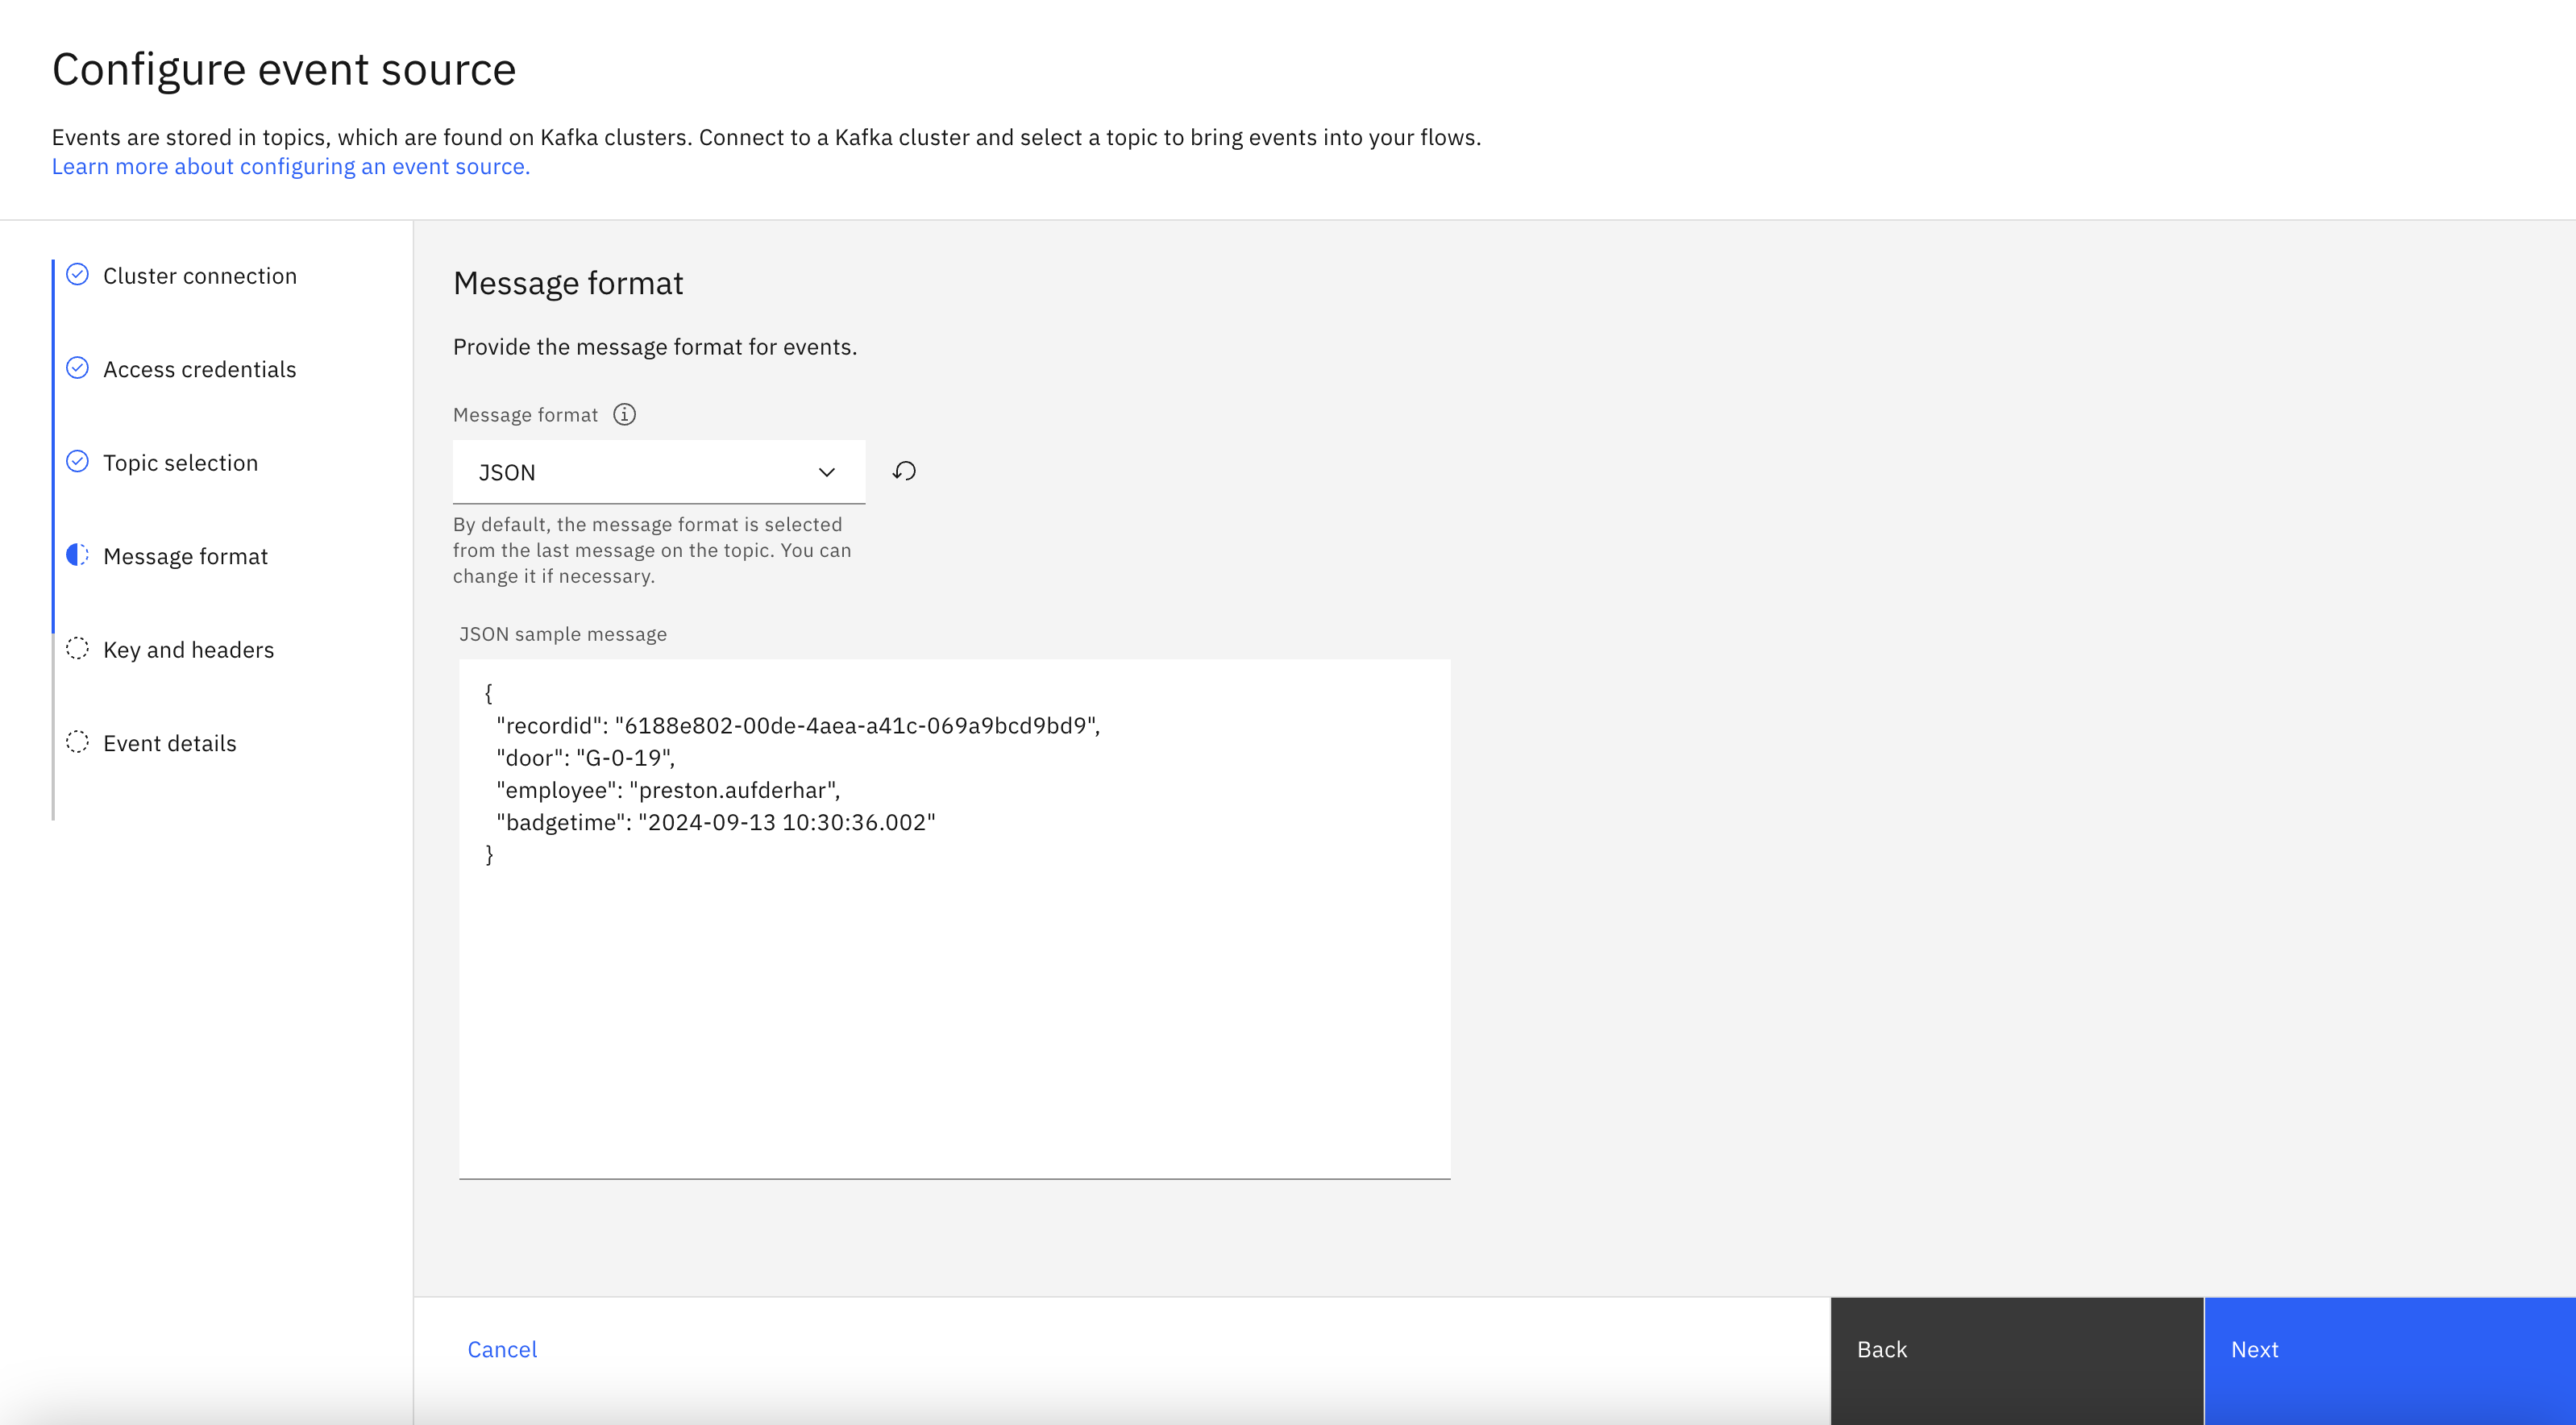
The format
JSONis auto-selected in the Message format drop-down and the sample message is auto-populated in the JSON sample message field. -
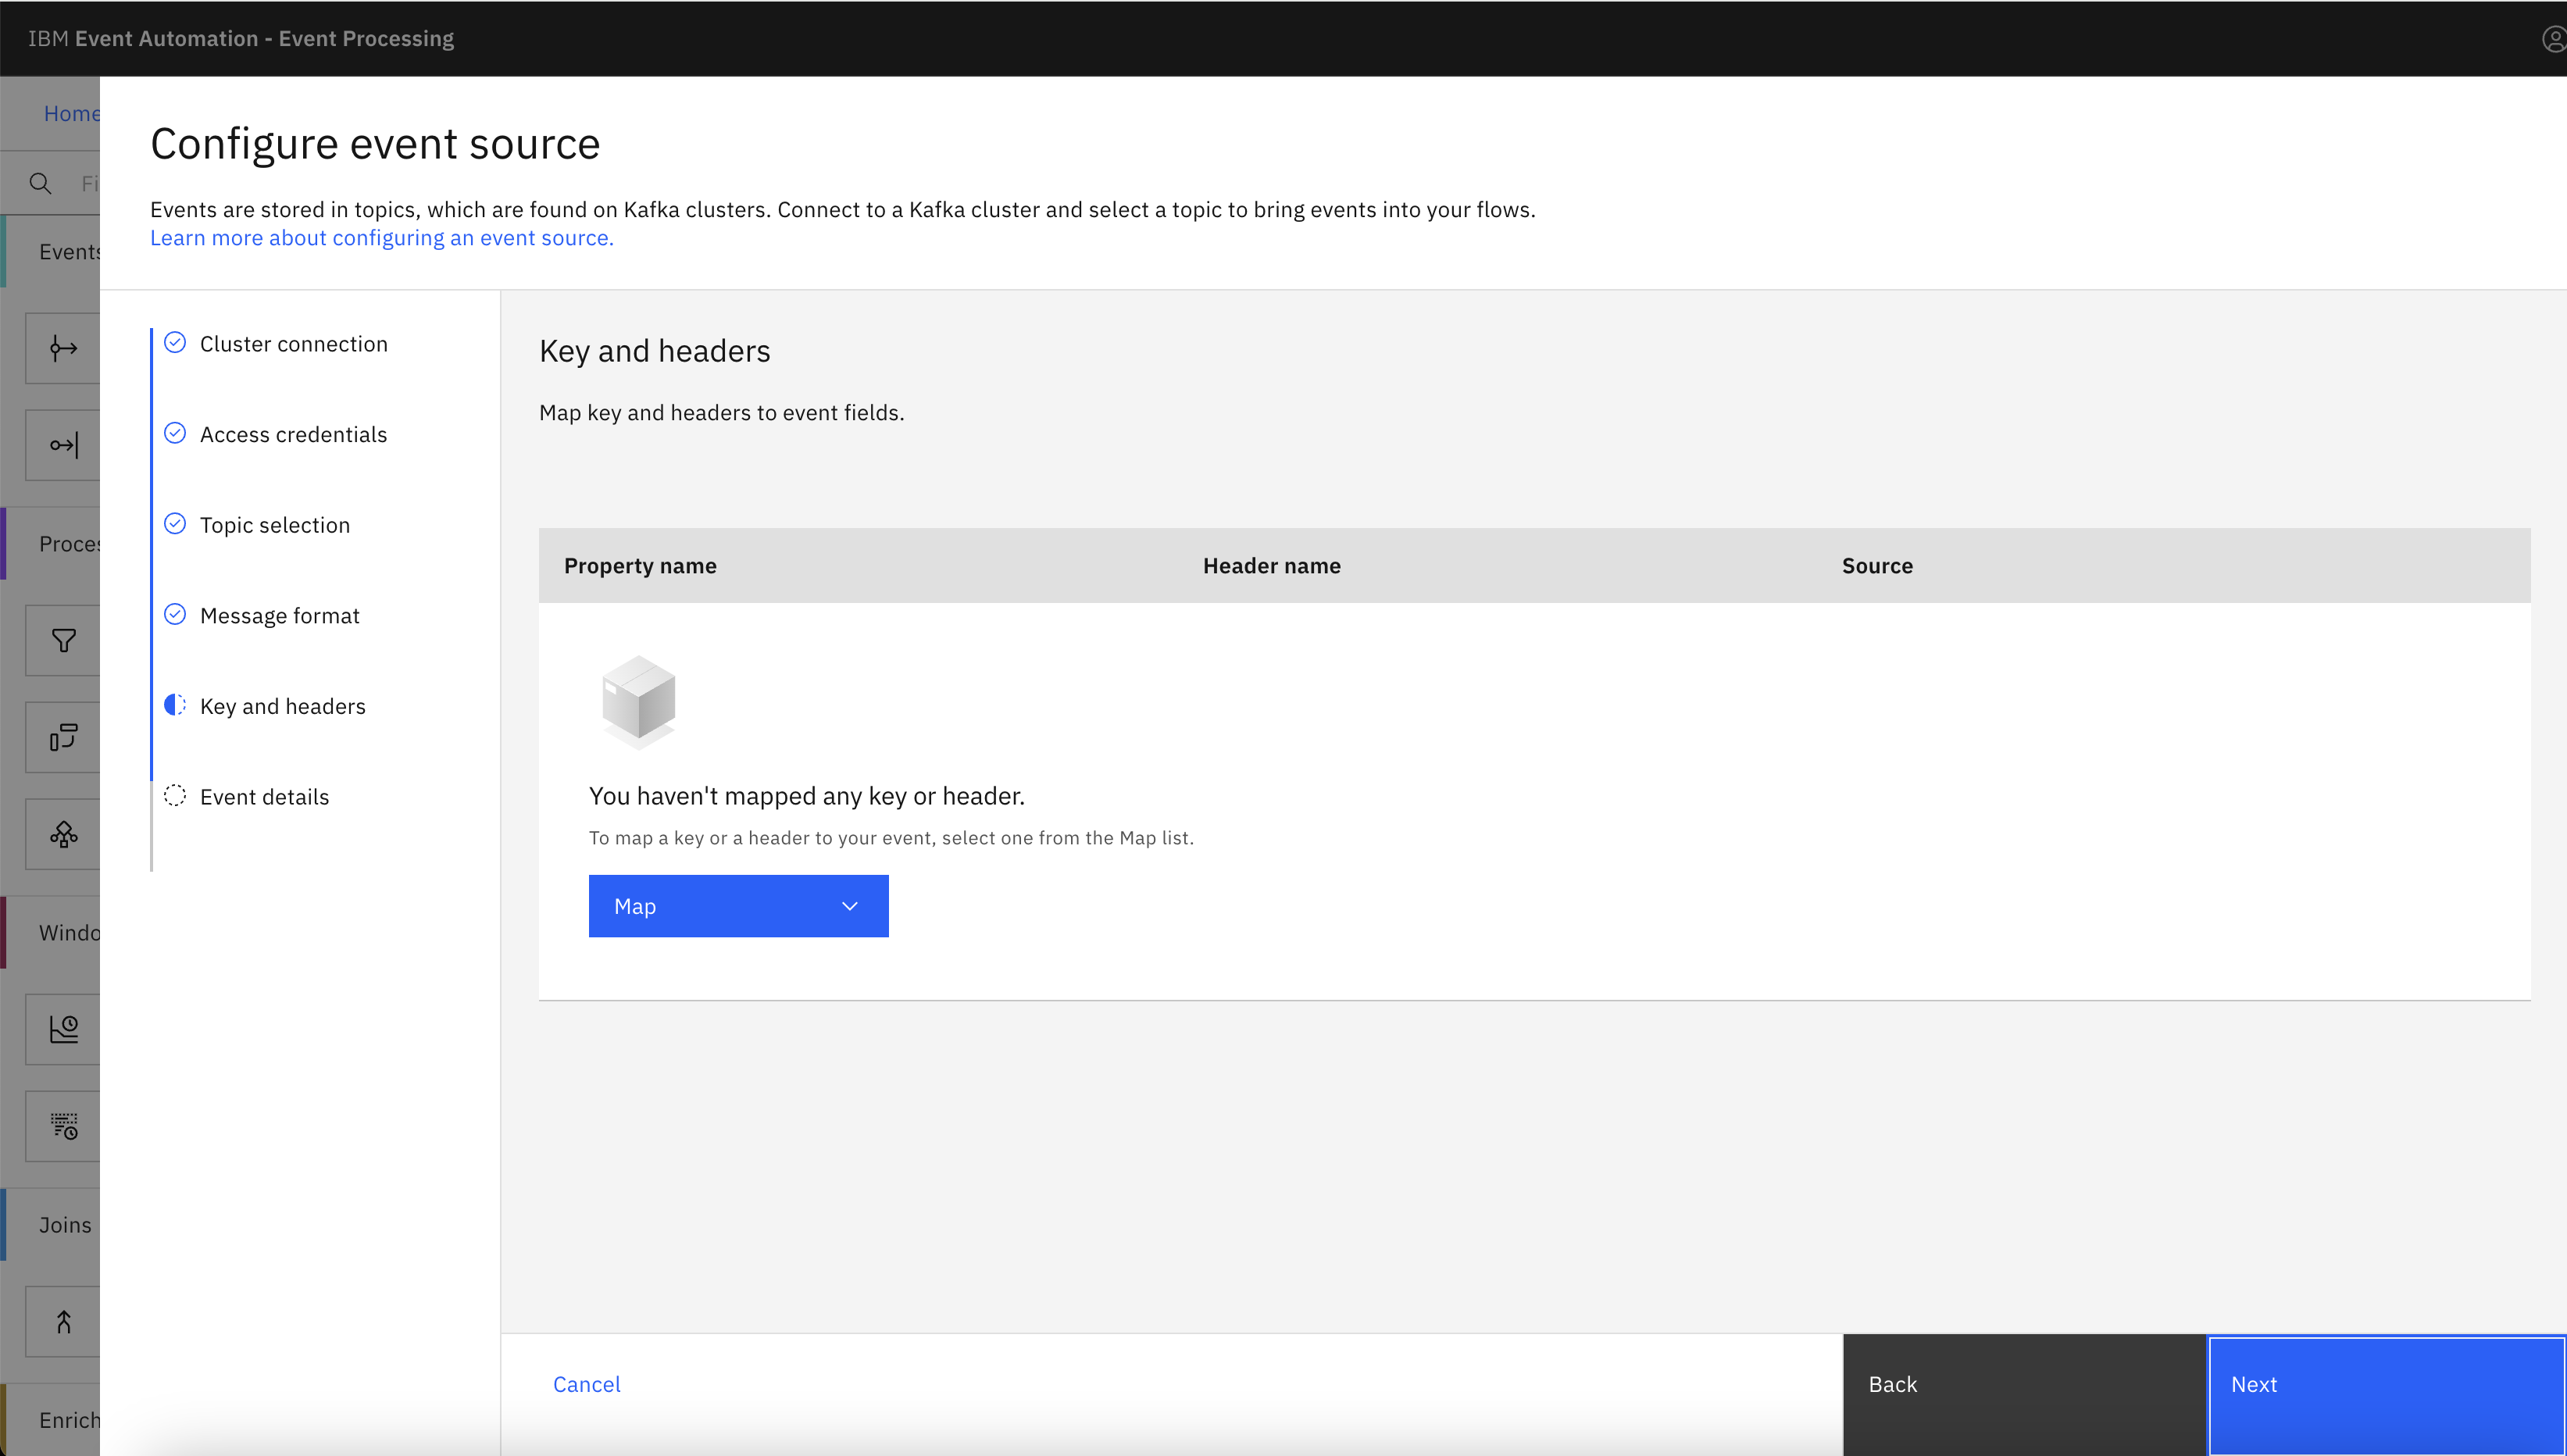
In the Key and headers pane, click Next.
Note: The key and headers are displayed automatically if they are available in the selected topic message.
-
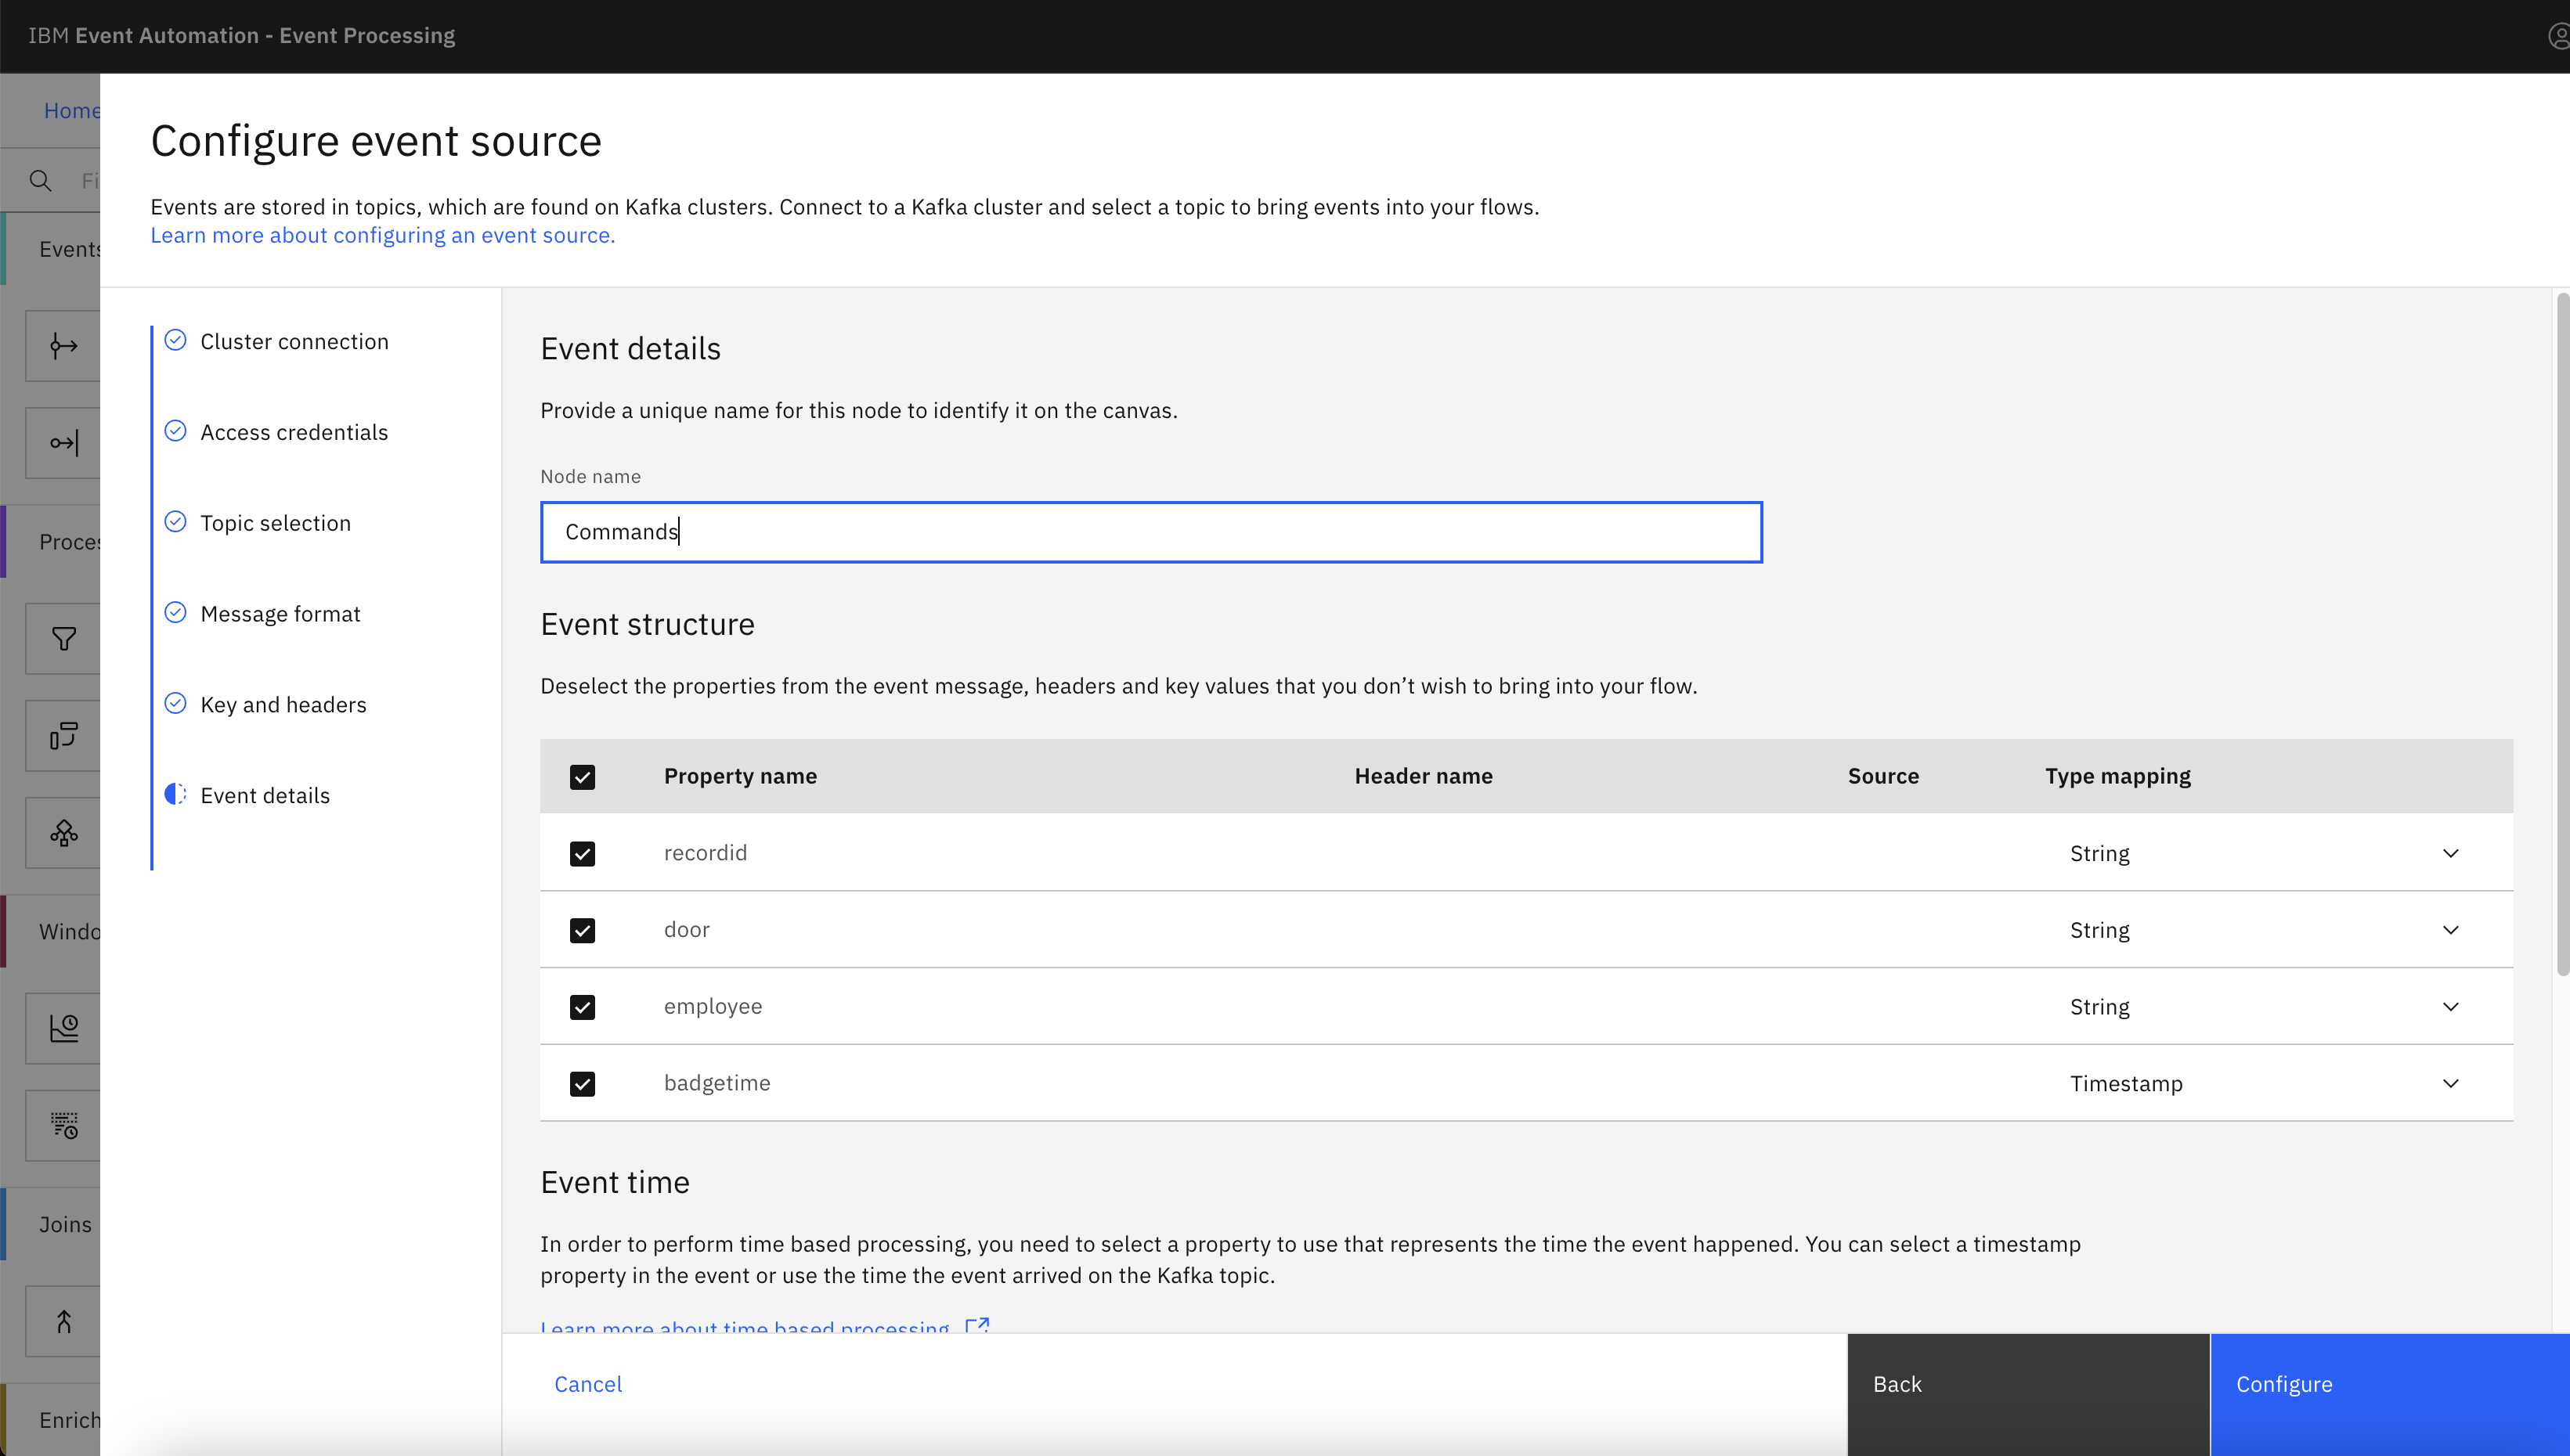
In the Event details pane, enter the node name as
Commandsin the Node name field. -
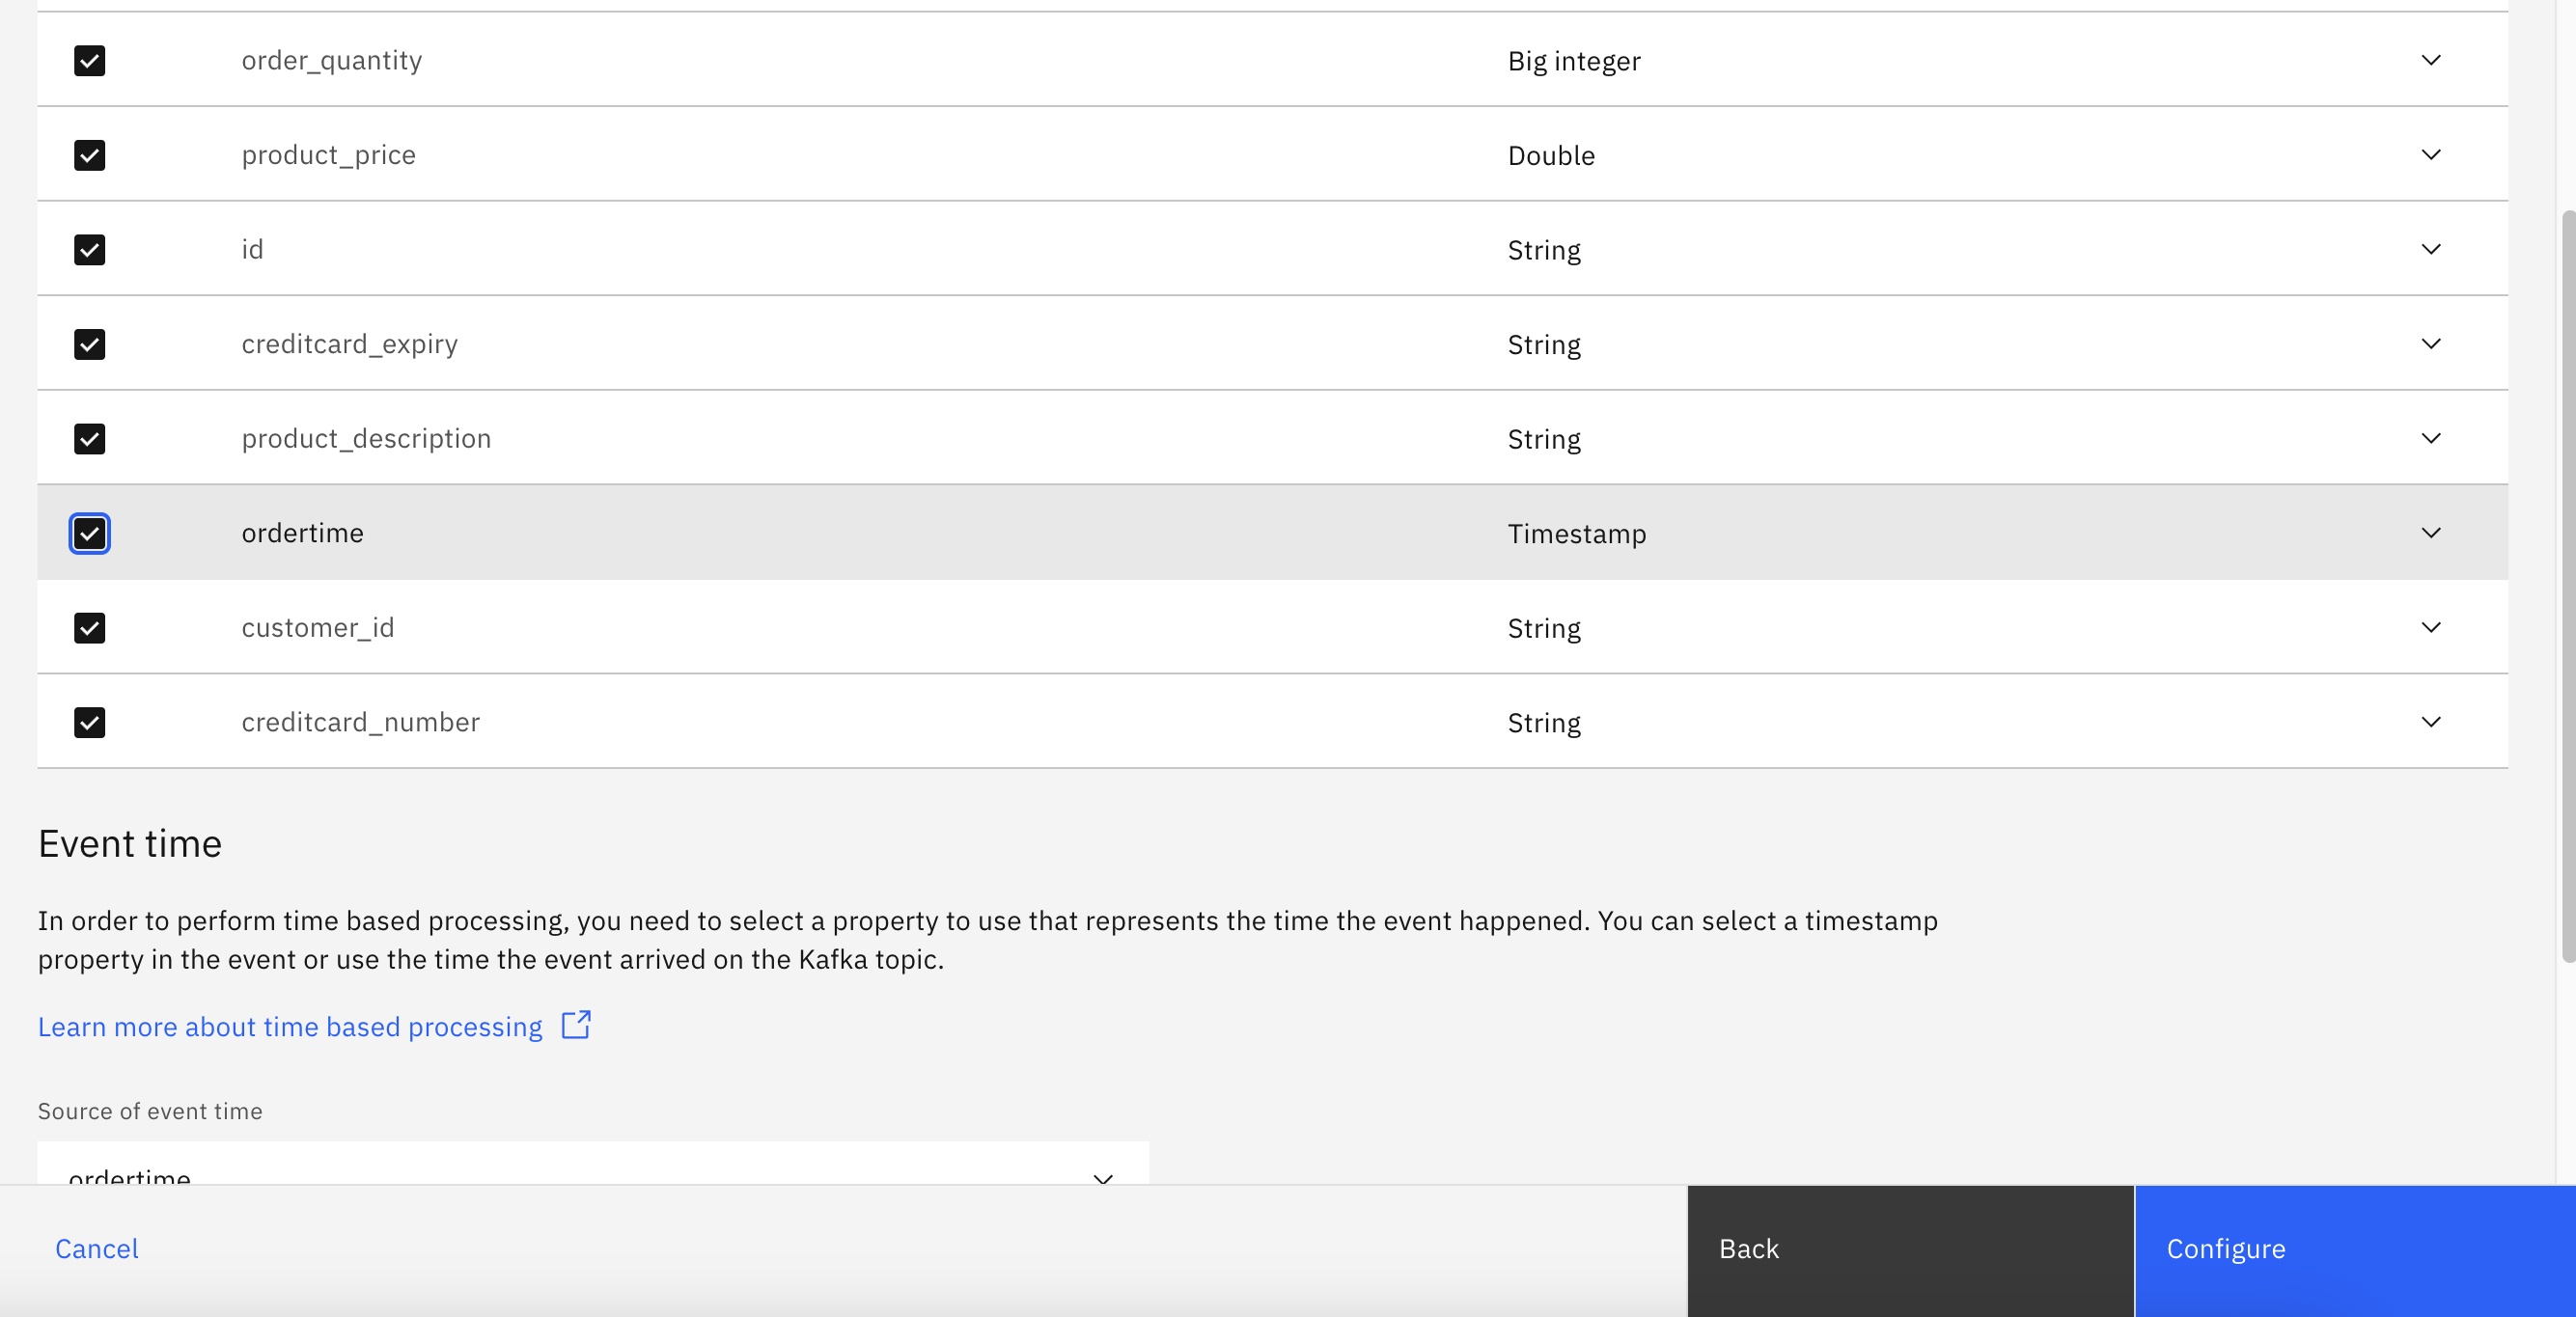
Verify that the
ordertimeproperty in the message contents has been automatically detected as a timestamp. -
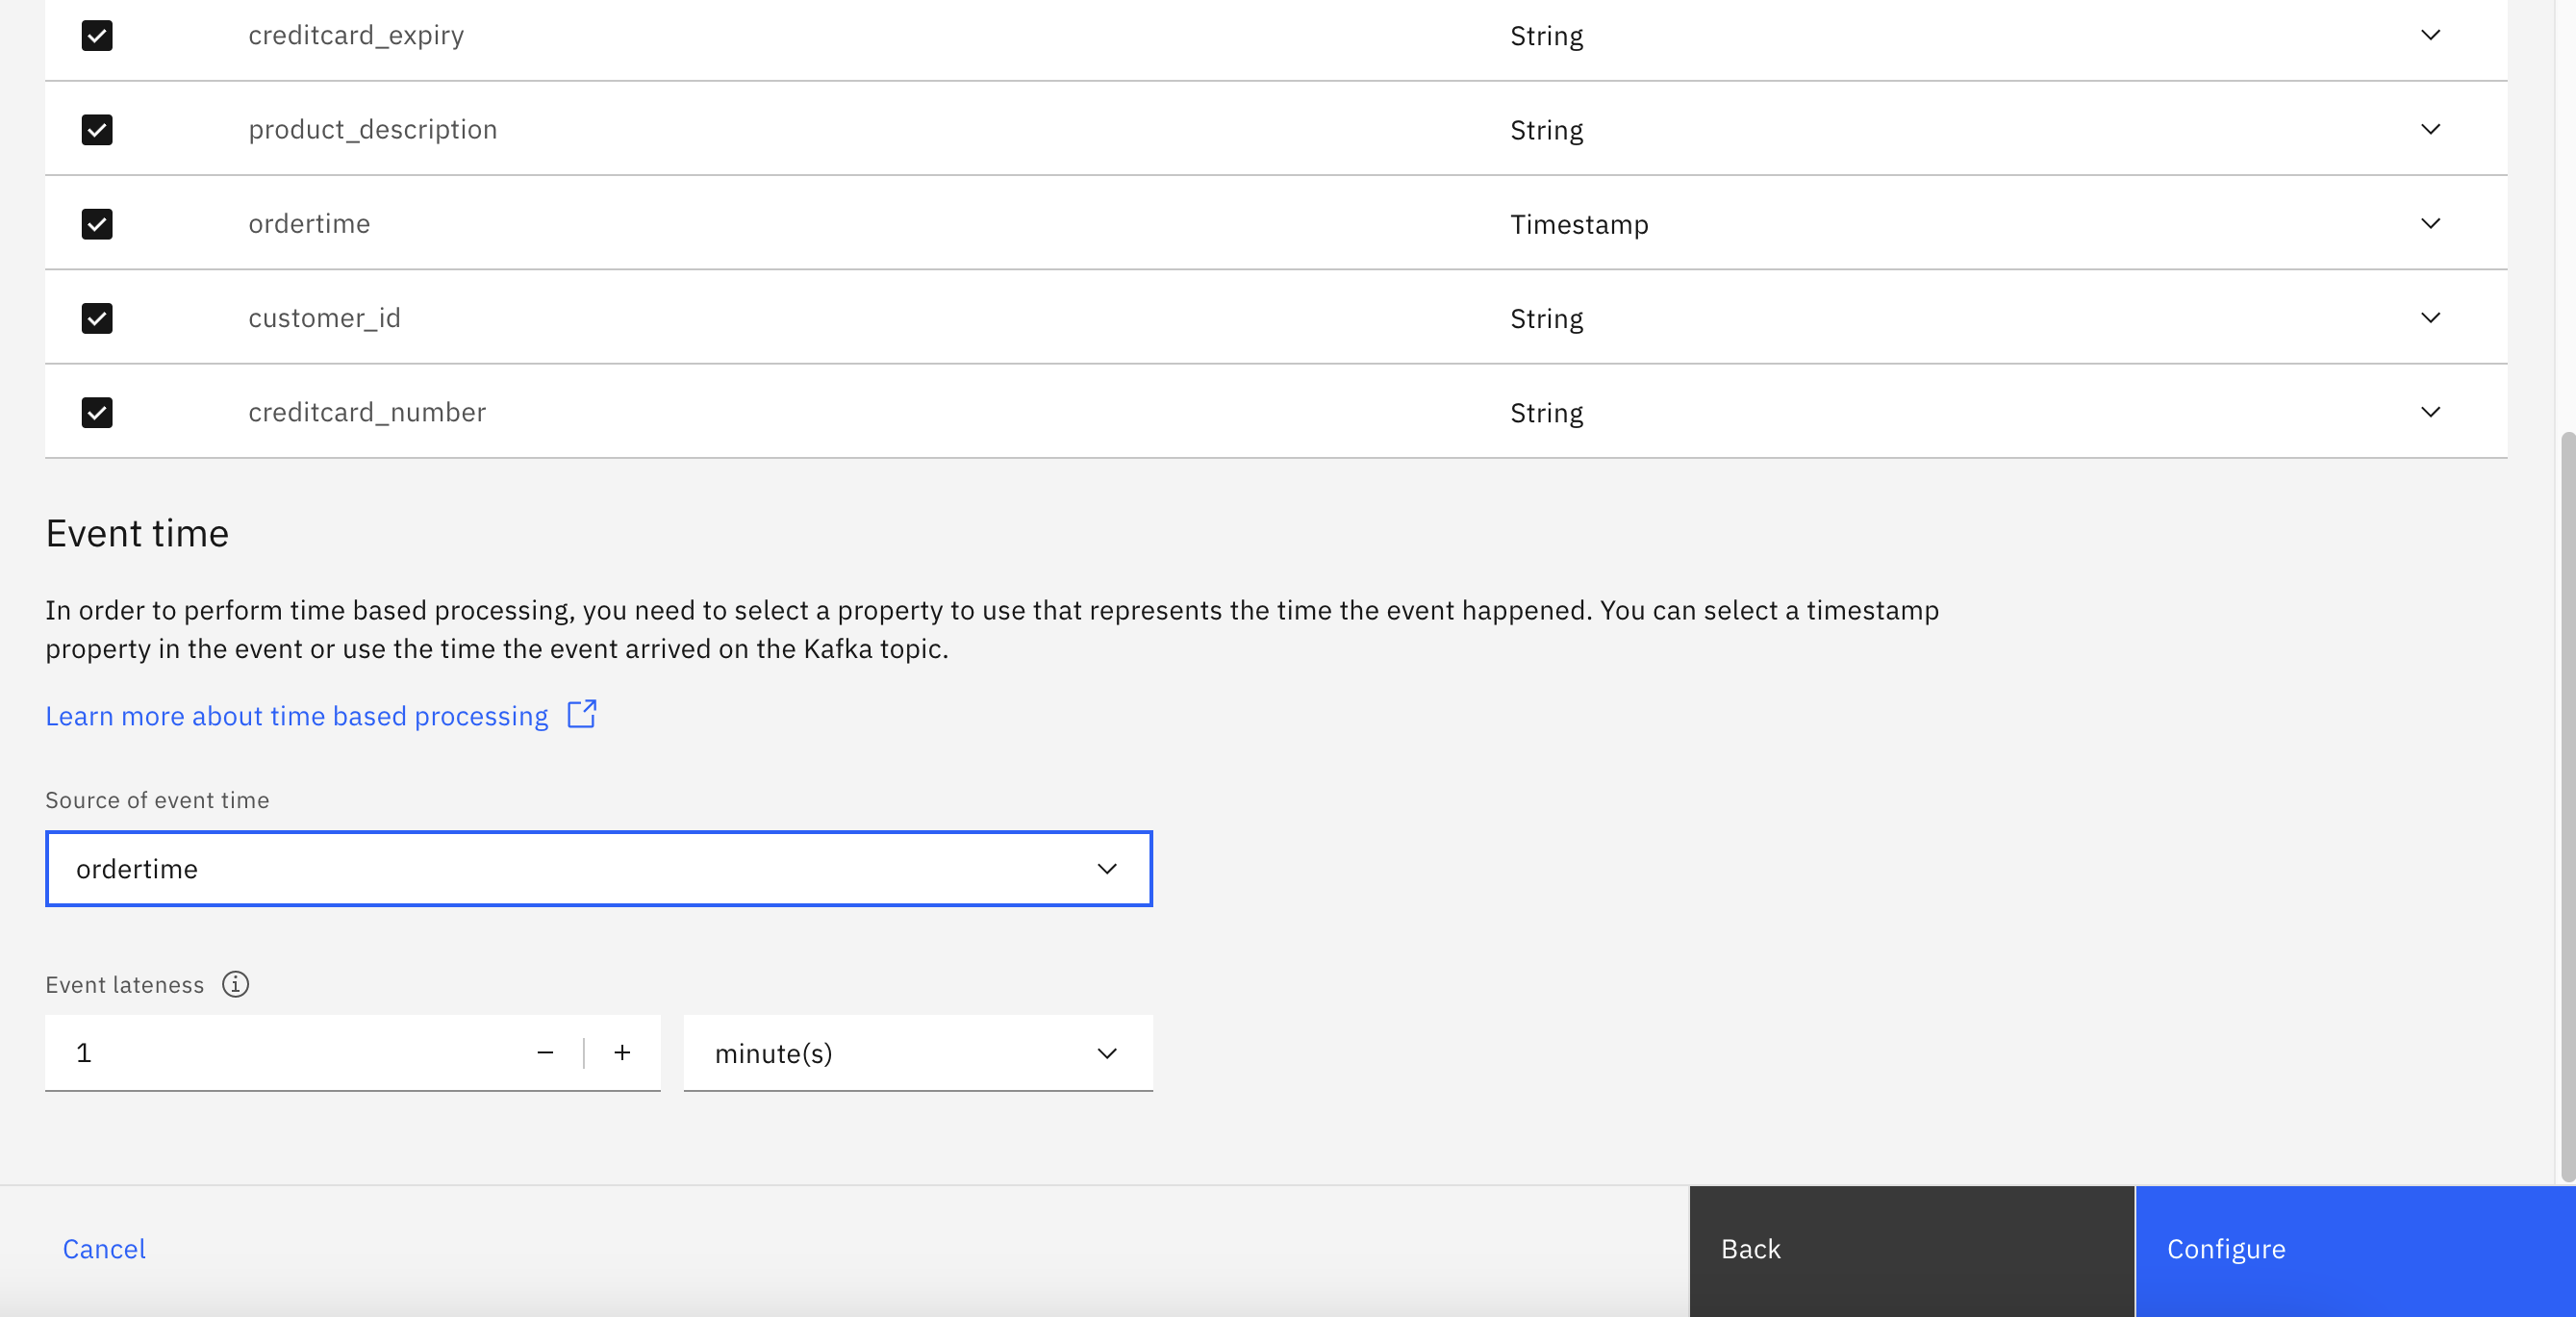
Identify the
ordertimeproperty as the timestamp to use for events.In the Event time options, choose
ordertimeas the source of event time.This means that any delay introduced by the connector transferring the message from MQ to the Kafka topic will not impact any time-based processing you perform.
The timestamp in the message payload will be treated as the canonical timestamp for the message, rather than when it was produced to the Kafka topic.
-
Click Configure to finalize the event source.
Step 6: Aggregate the events
-
Create an Aggregate node.
Create an aggregate node by dragging one onto the canvas. You can find this in the Processors section of the left panel.
Click and drag from the small gray dot on the event source to the matching dot on the aggregate node.
Did you know? Instead of dragging the node, you can add a node onto the canvas and automatically connect it to the last added node by double-clicking a node within the palette. For example, after configuring an event source node, double-click any processor node to add and connect the processor node to your previously configured event source node.
-
Hover over the aggregate node and click
Edit to configure the node.
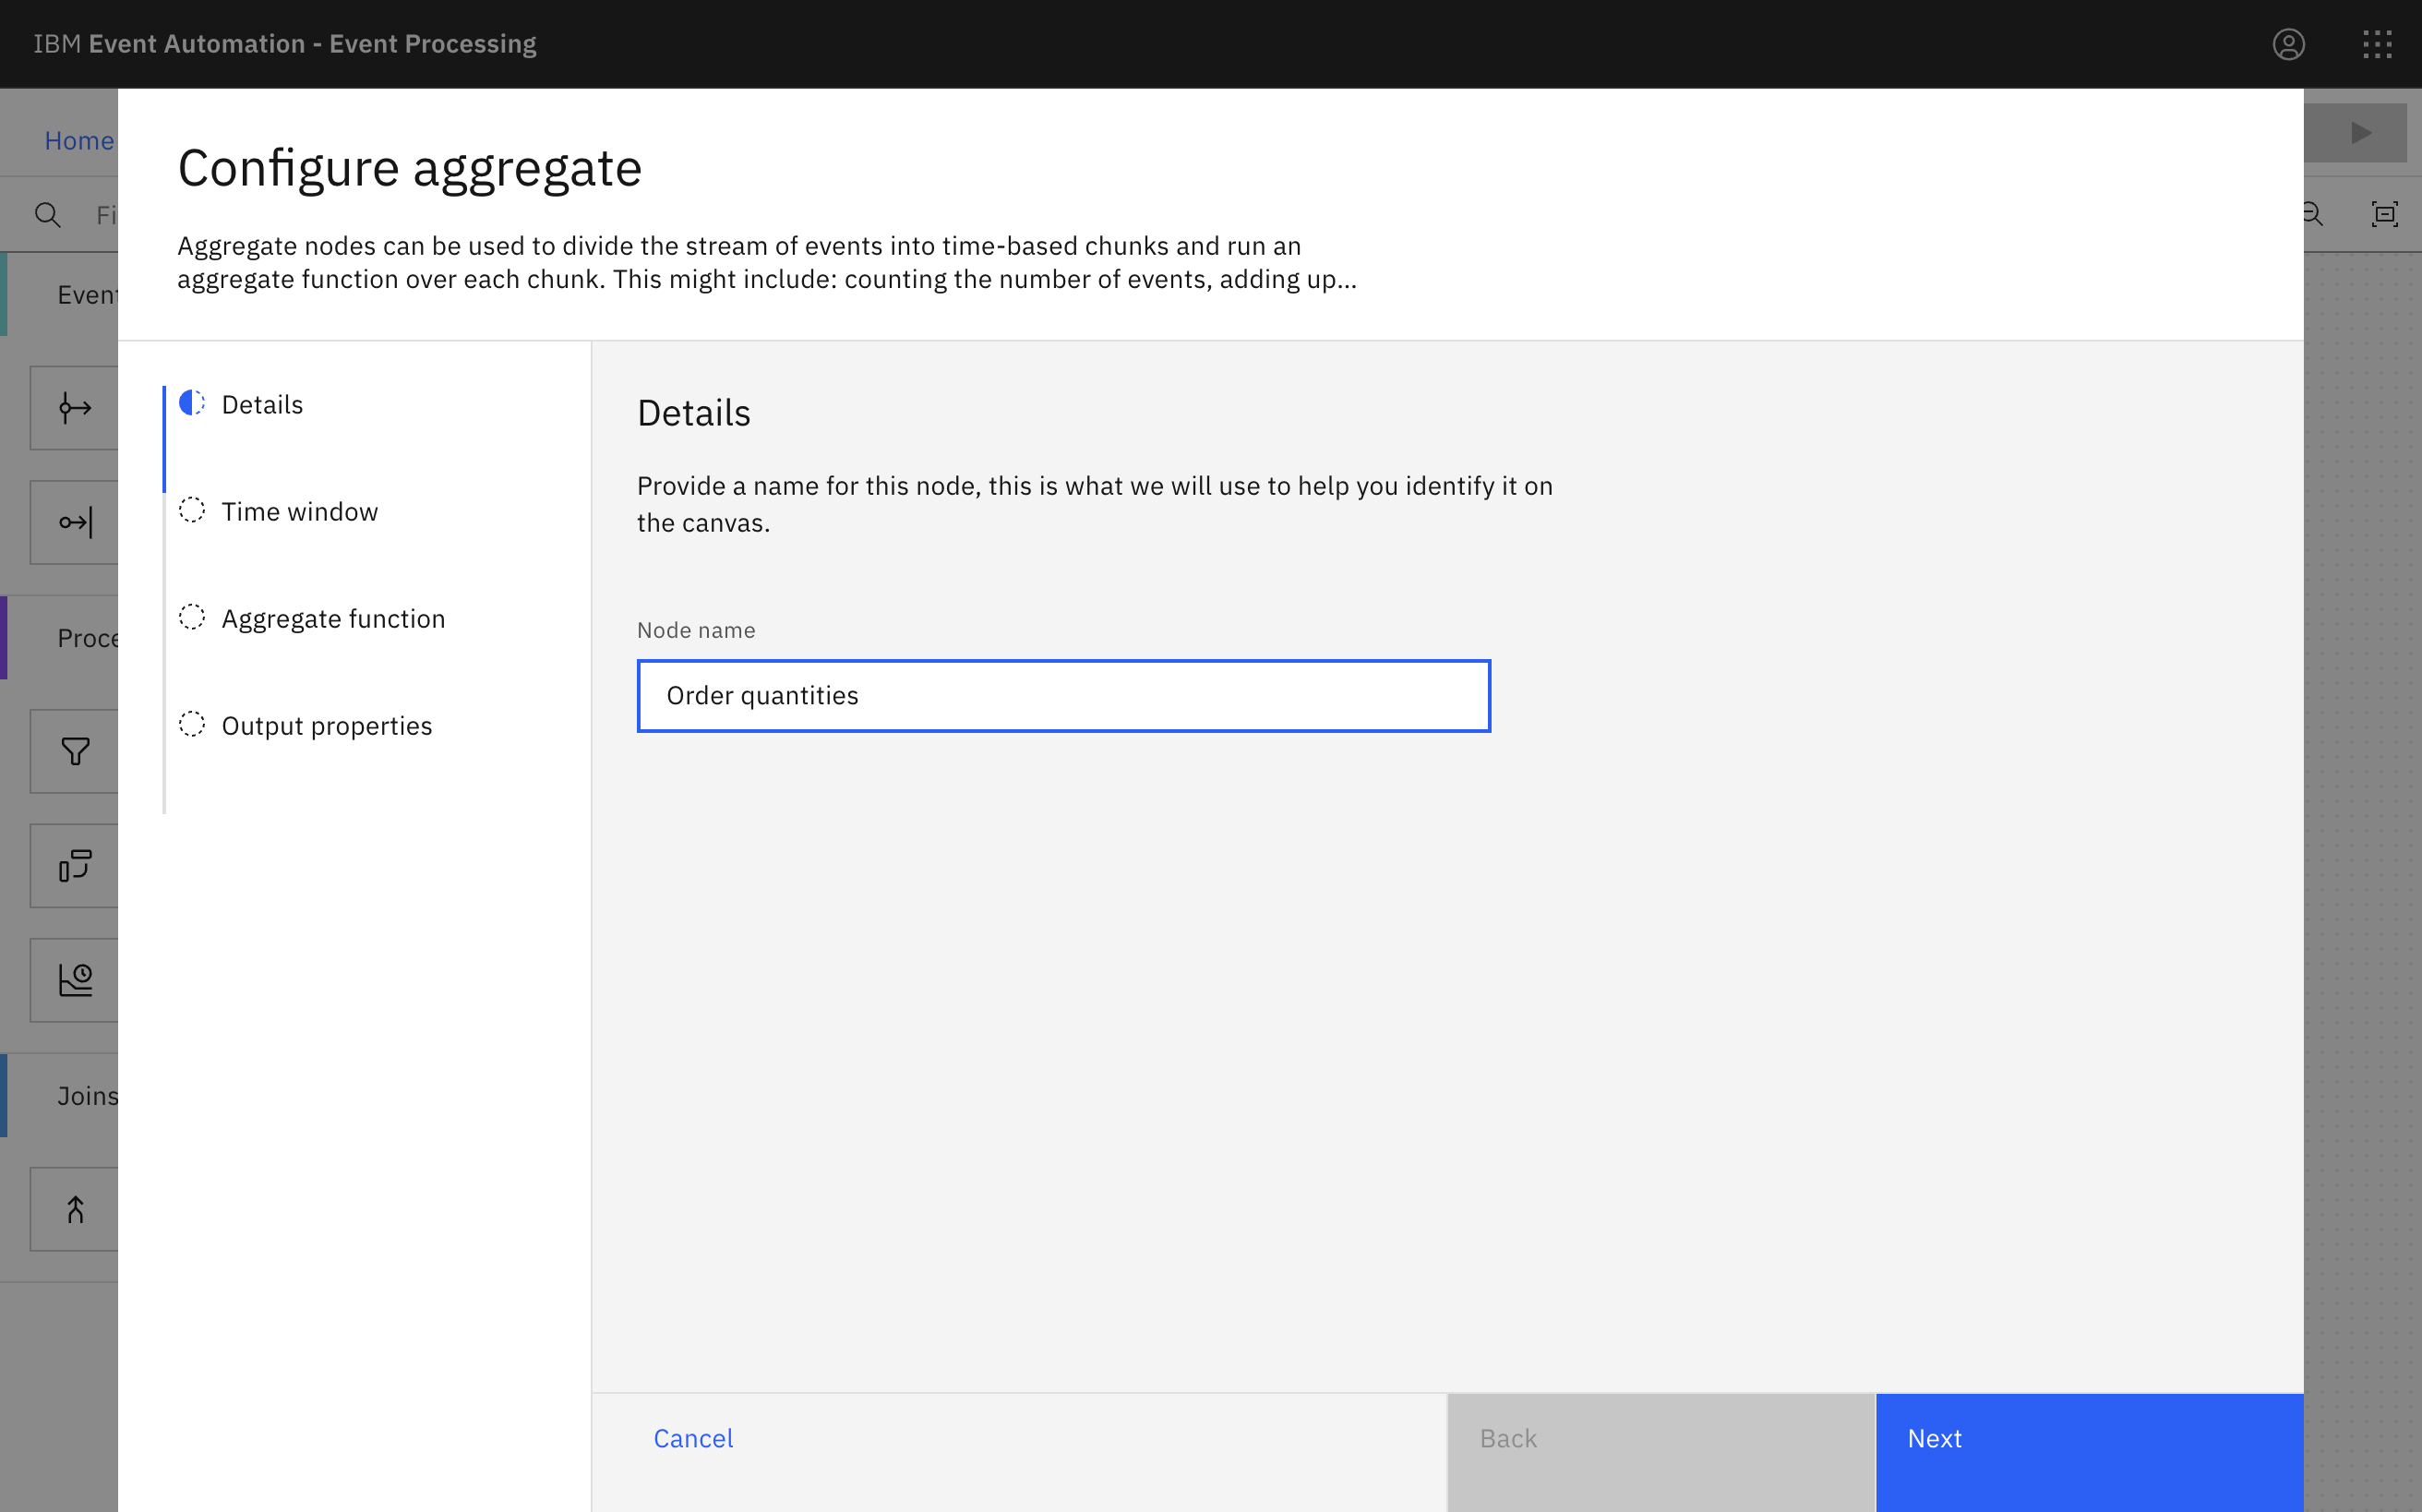
Name the aggregate node
Order quantities. -
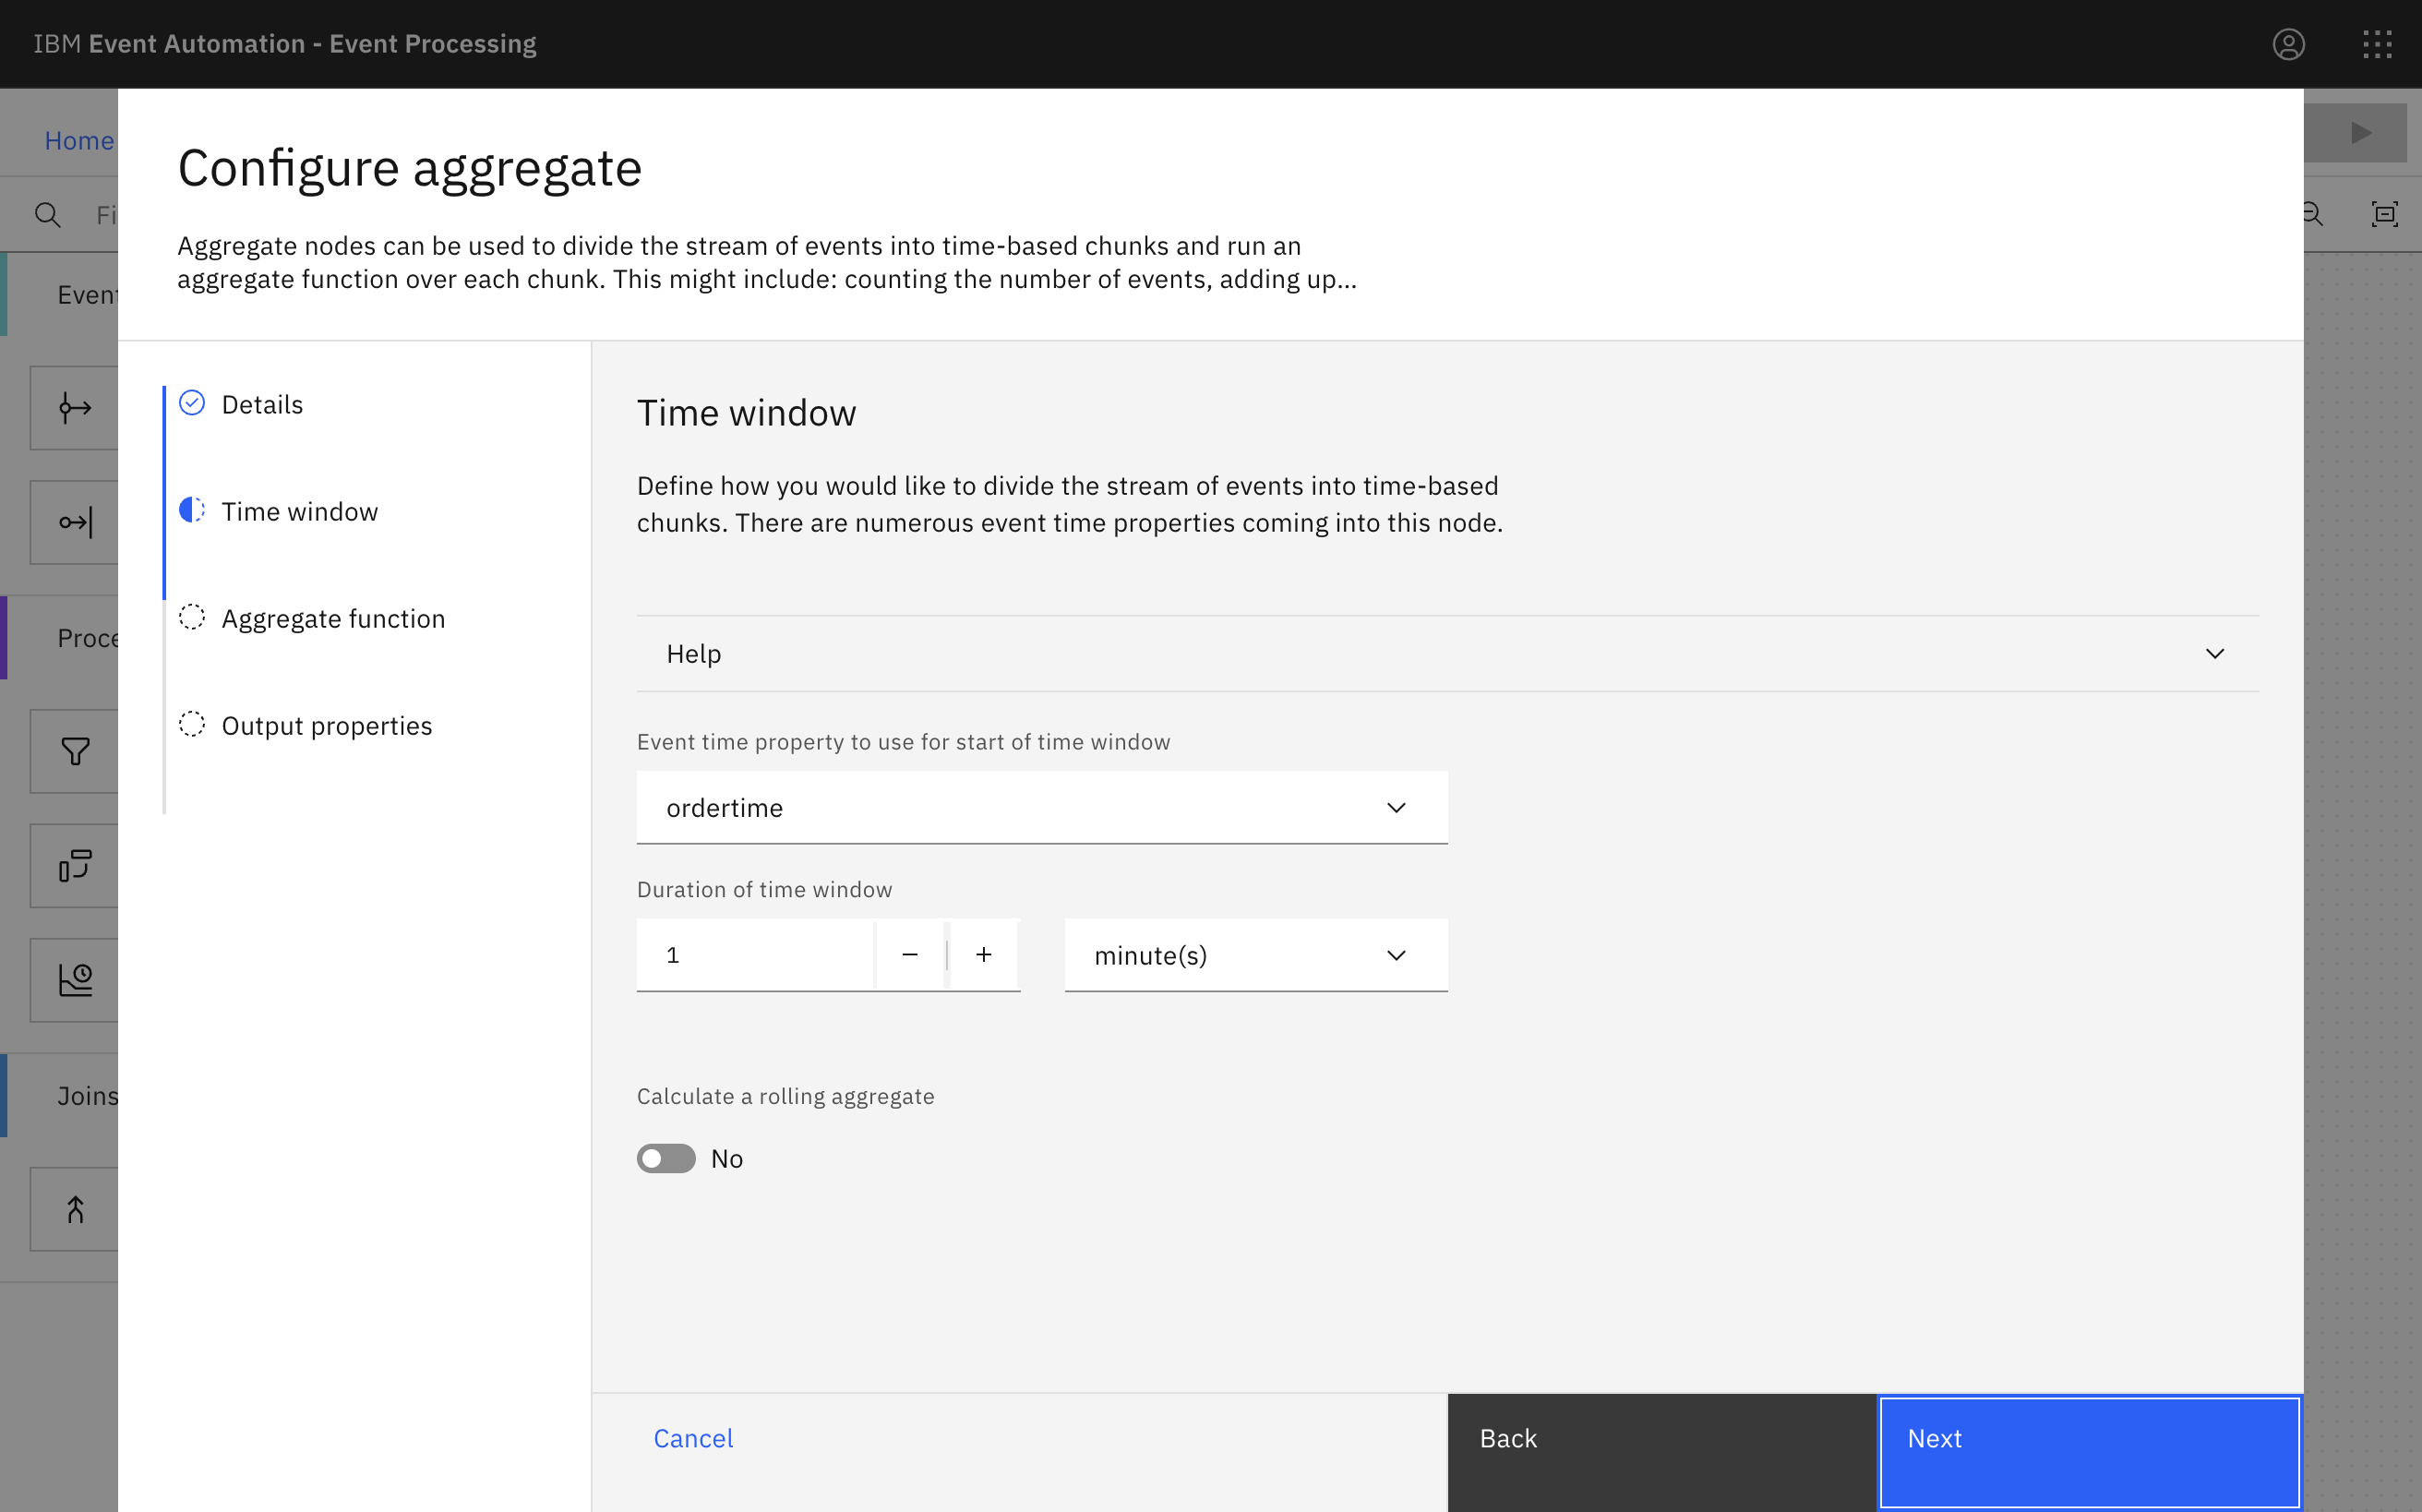
Aggregate the order events in 1-minute windows.
Making the window very small is useful for the tutorial as it means you will see results quickly.
-
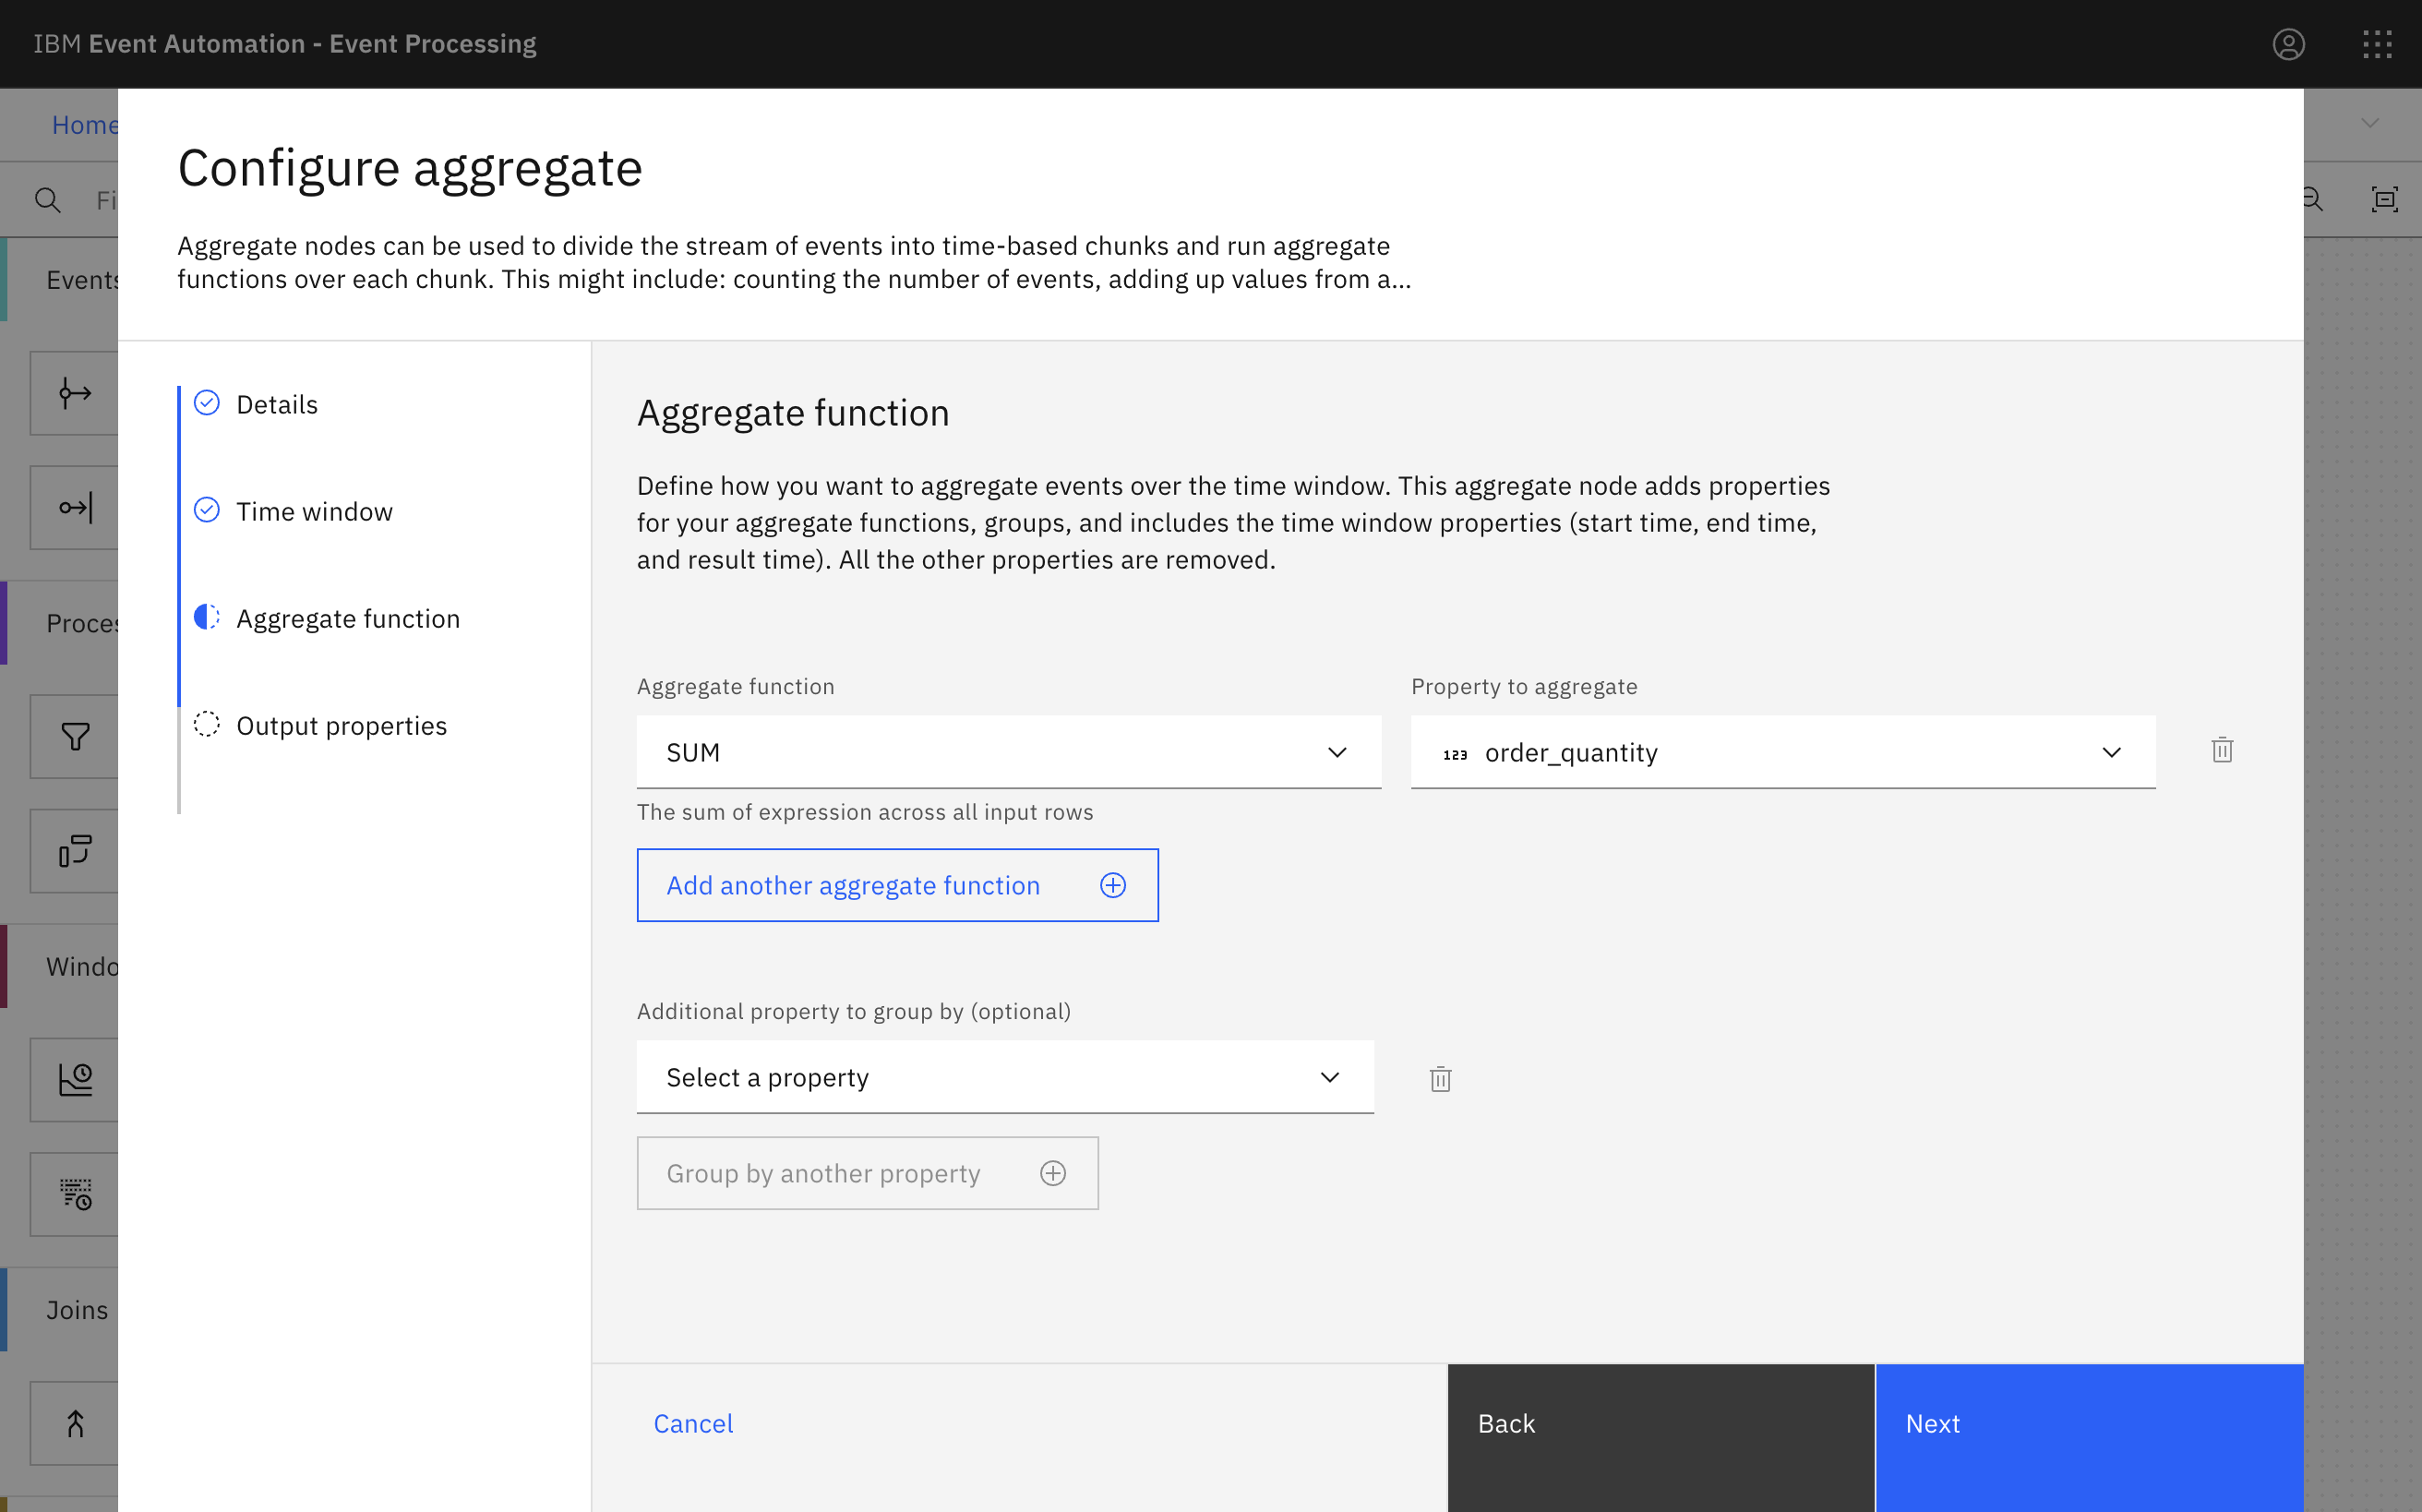
Sum the
order_quantityproperties.Select SUM as the aggregate function, and
order_quantityas the property to aggregate.This configures the aggregate node to add up the quantity in each of the order events, emitting a total for all of the events in each 1-minute window.
-
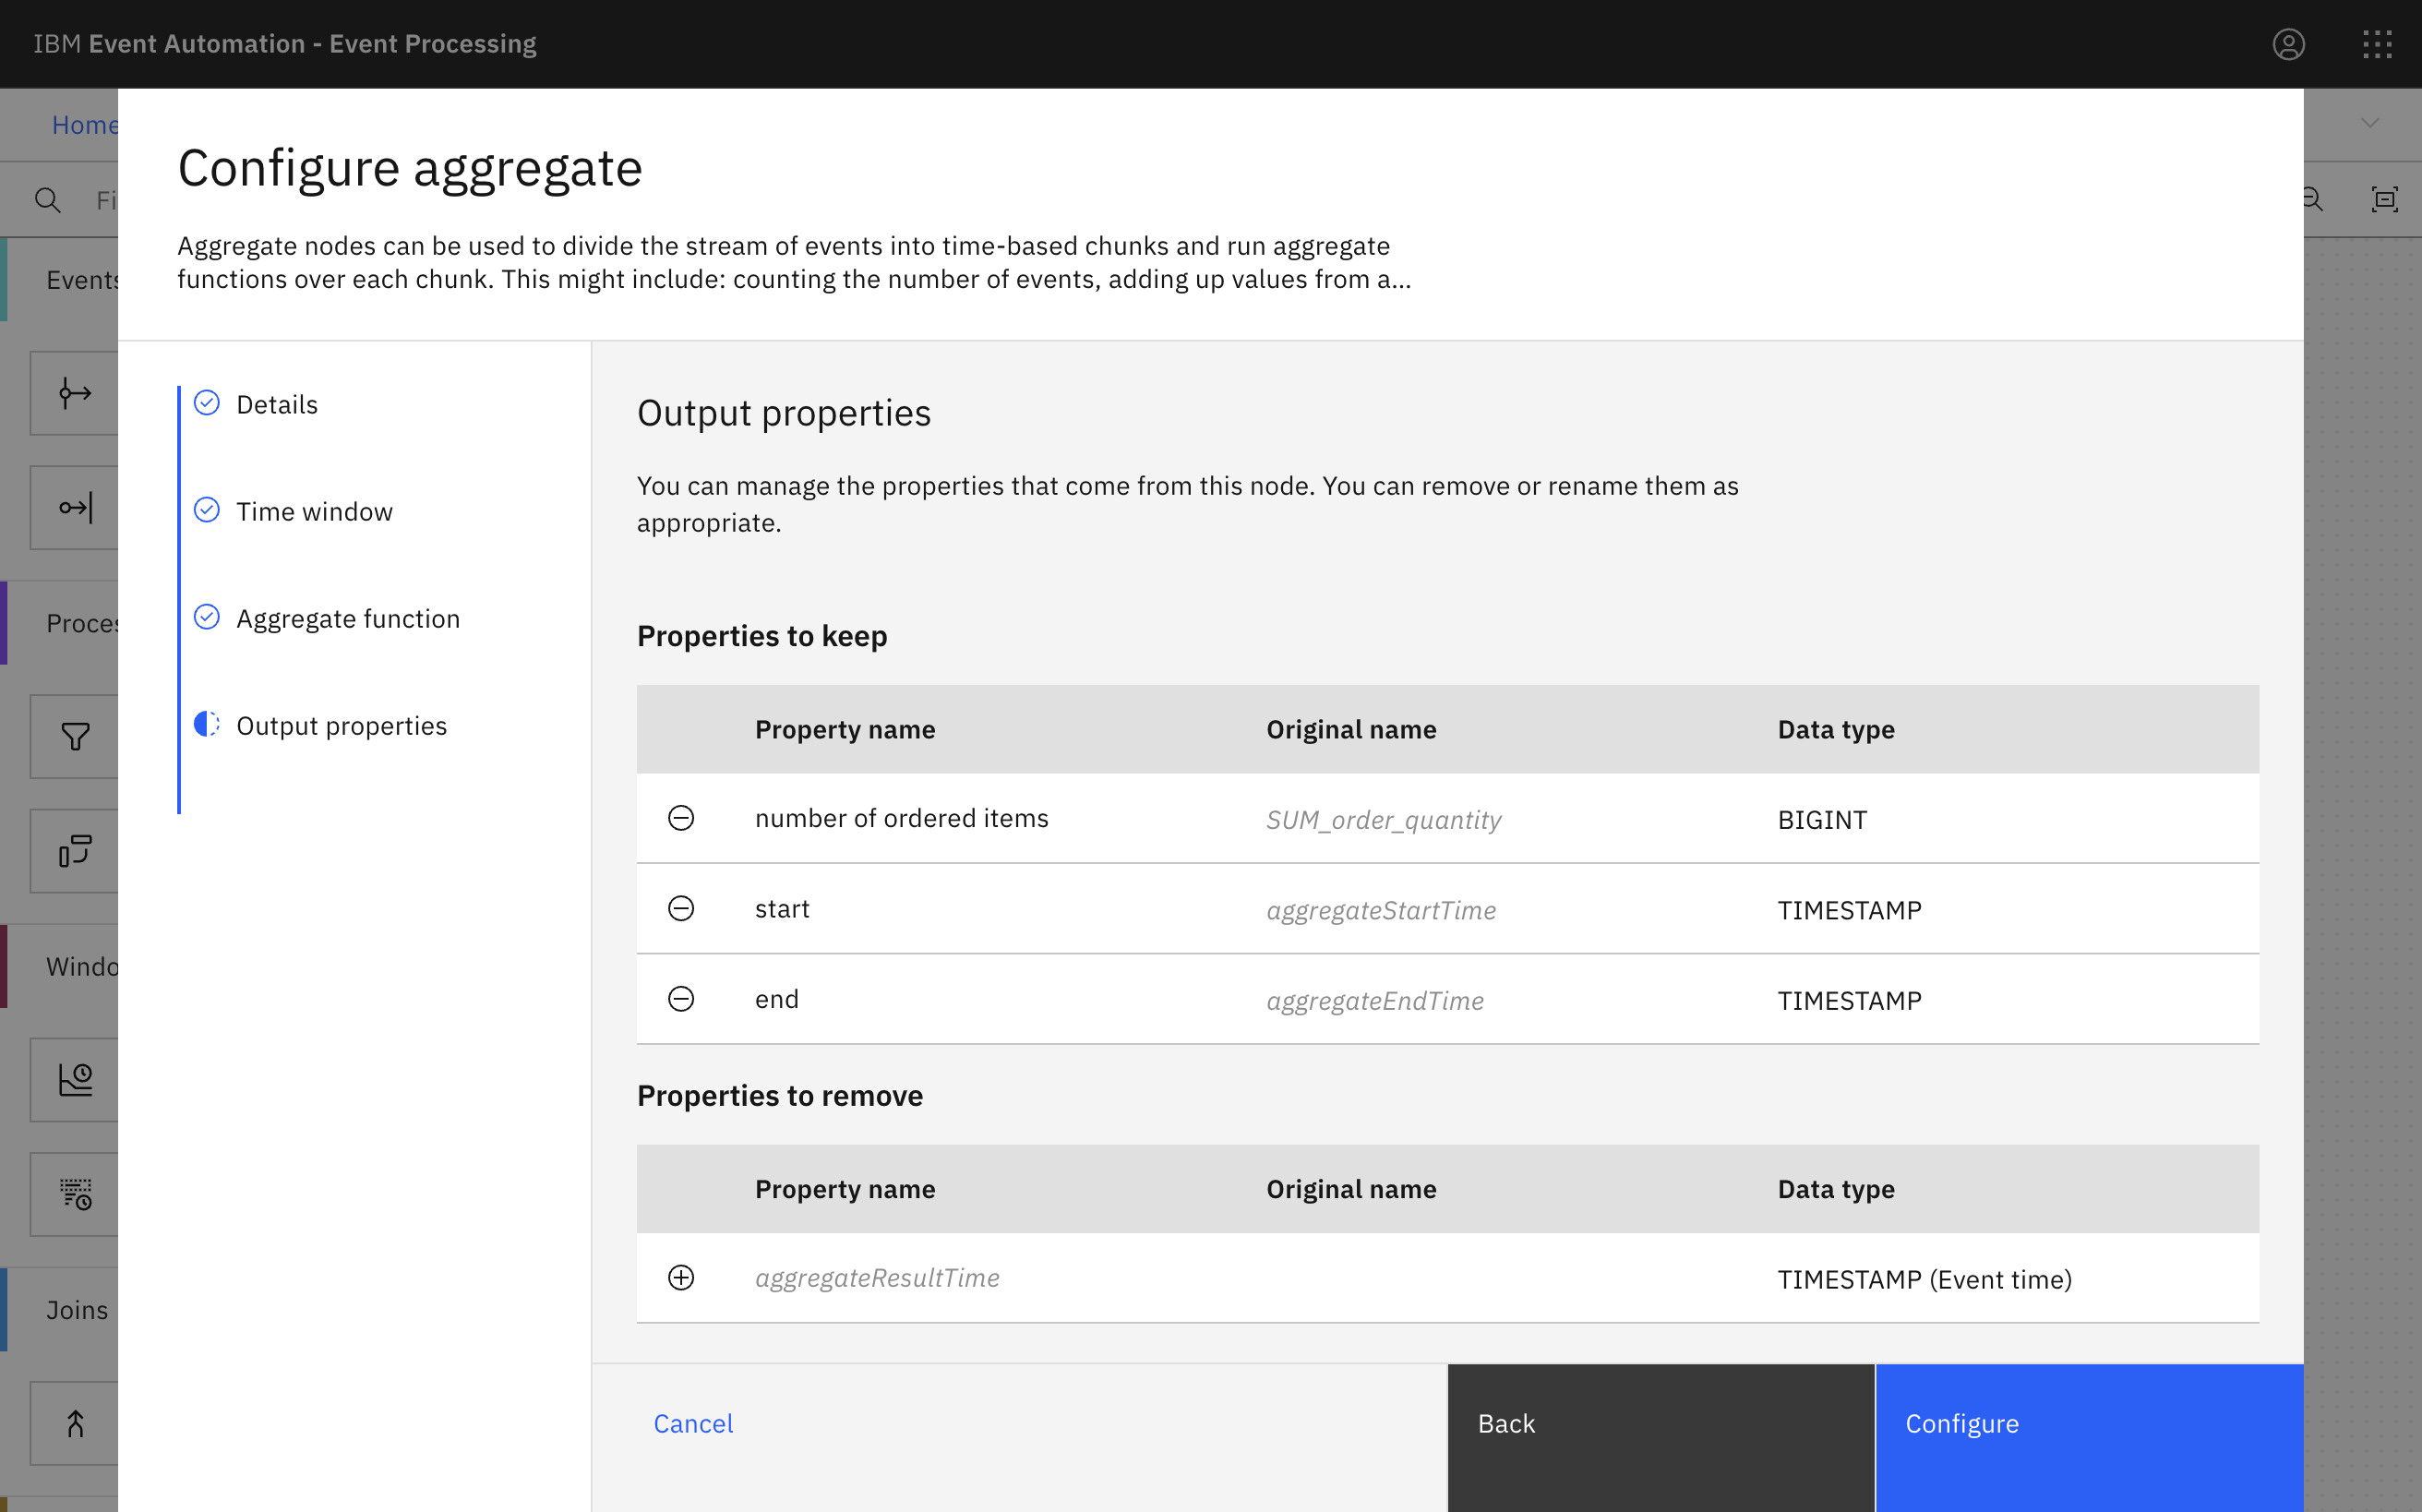
Rename the output to display the total number of ordered items in the time window, and the start and end time for the window.
-
Click Configure to finalize the aggregate.
Step 7: Test the flow
The final step is to run your event processing flow and view the results.
-
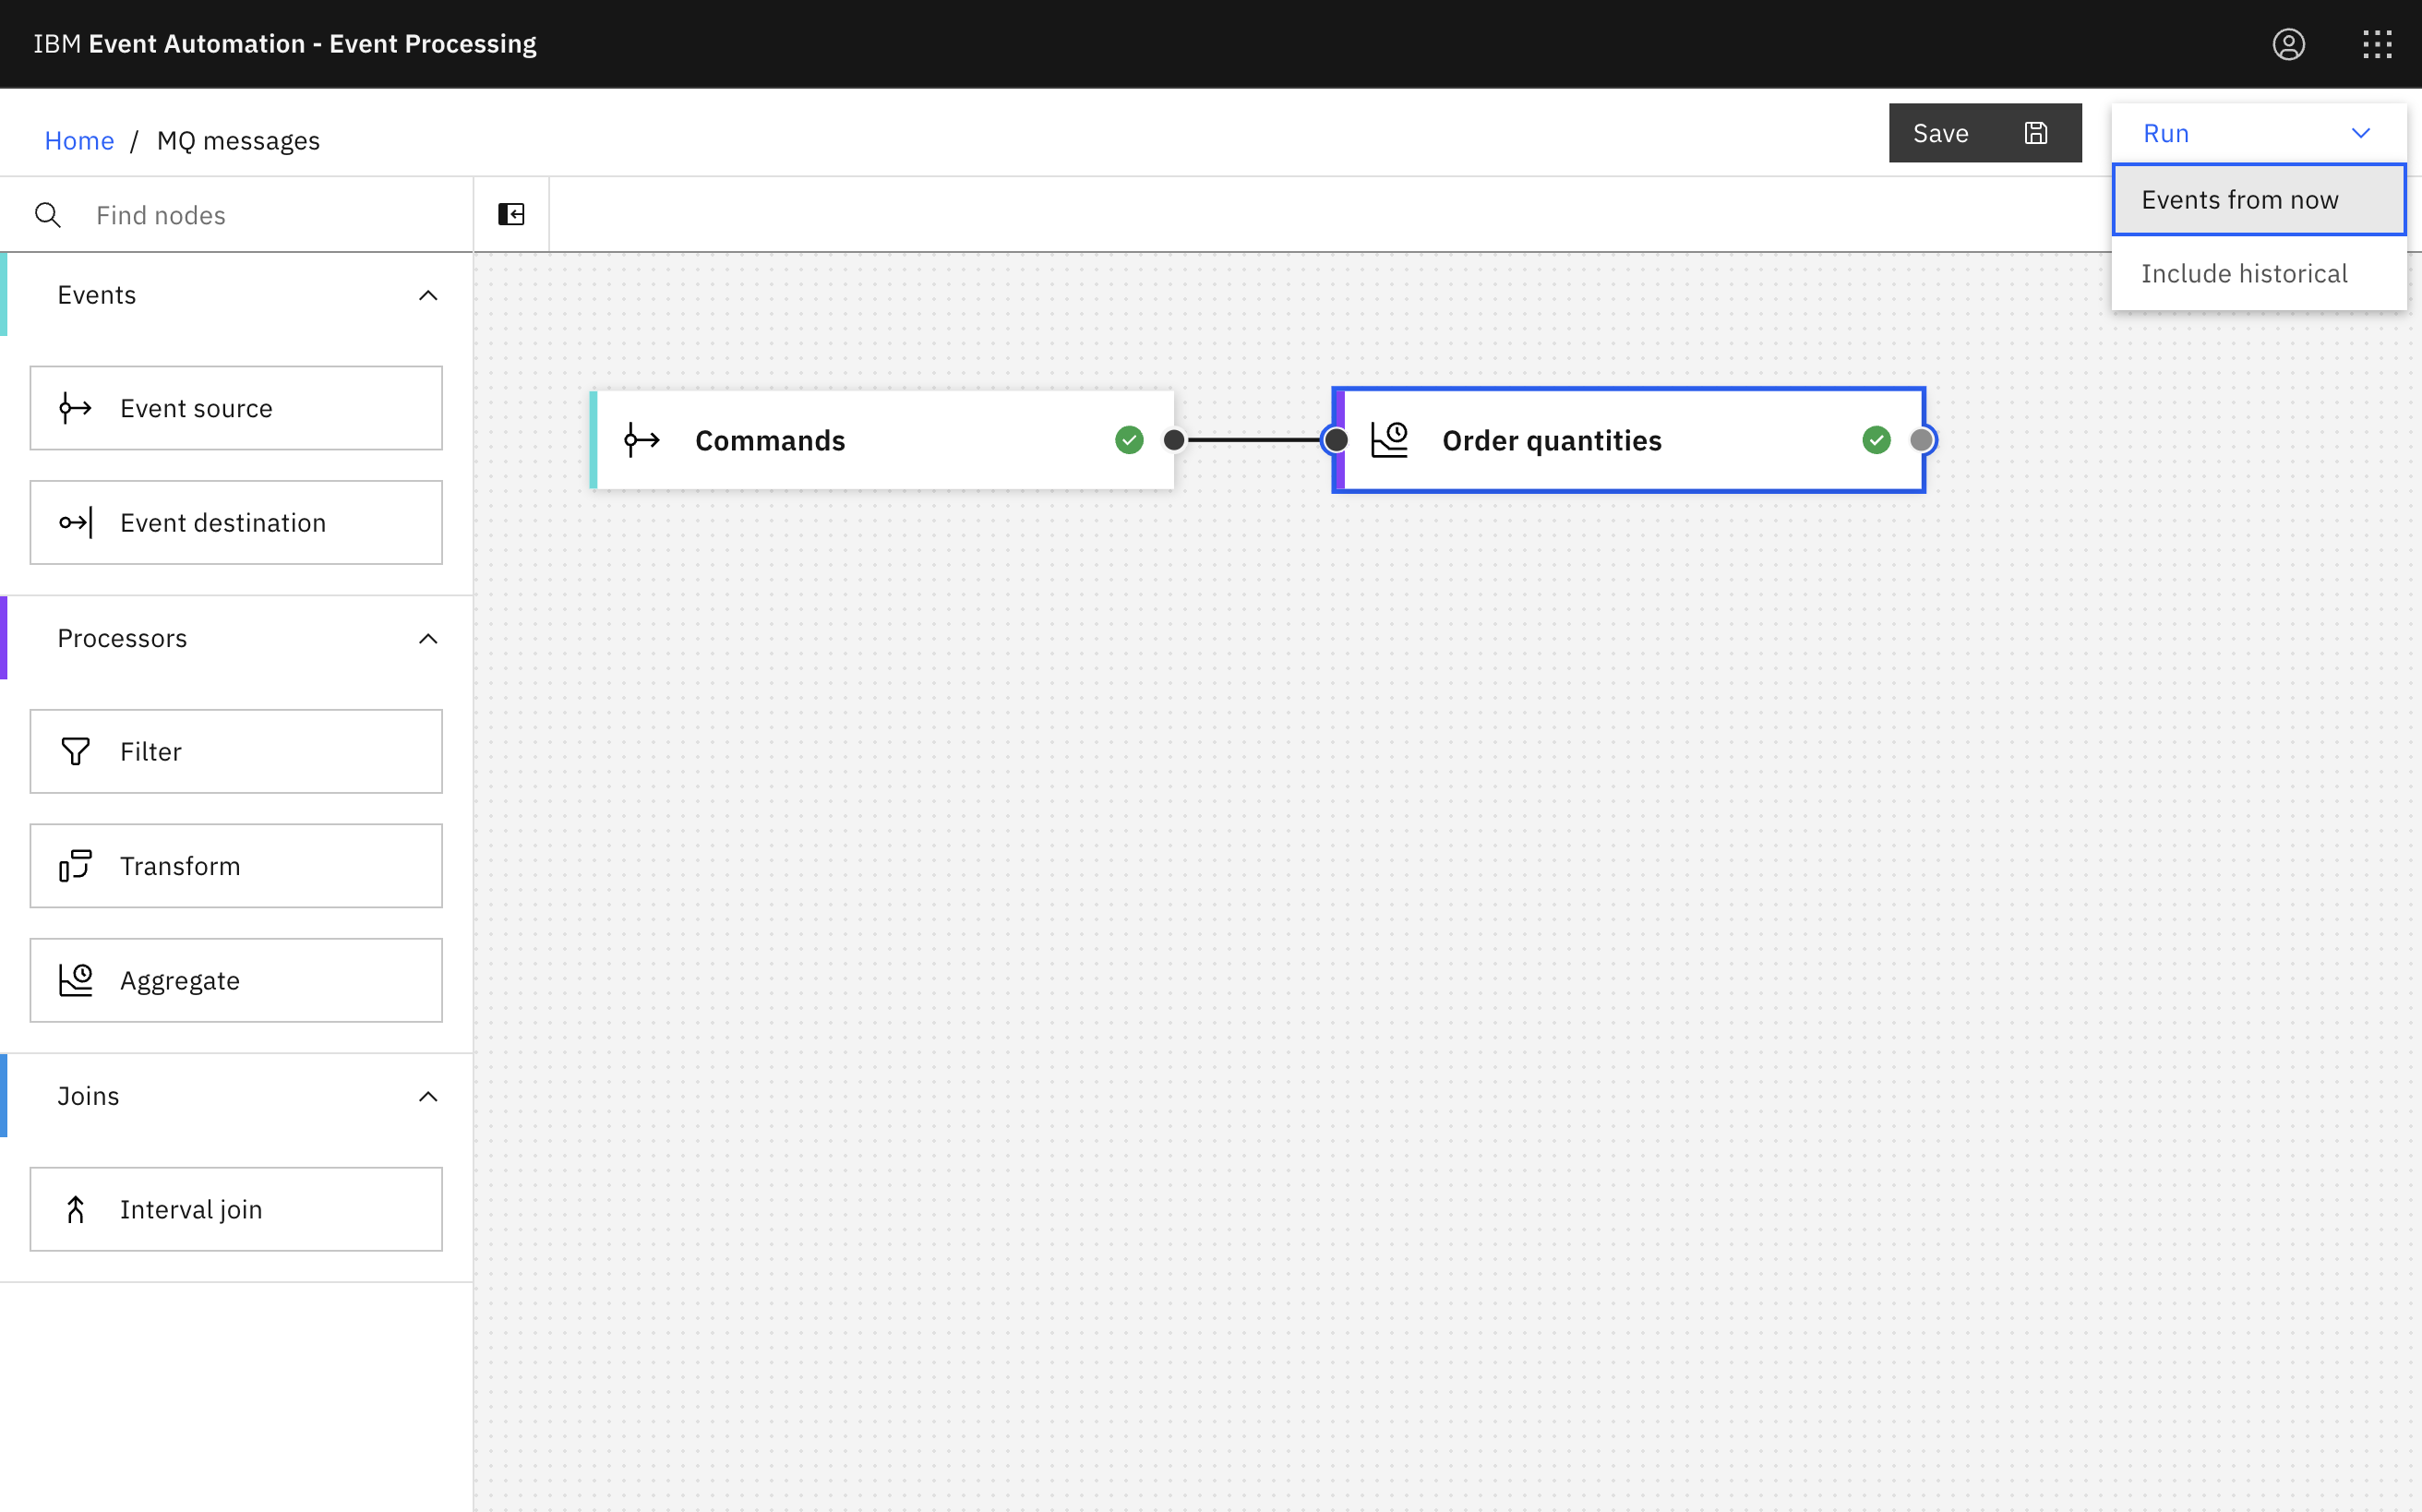
Go to the Run menu, and select Events from now to run your flow on the new messages you are about to put to the MQ queue.
-
Click the aggregate node to see a live view of results from your flow. It will be updated as new events are emitted onto the commands topic.
-
Put these JSON messages to the MQ queue by using the MQ console.
{
    "id": "37169553-1b97-49c2-b16d-924257f4e888",
    "customer": {
        "id": "3ba7c289-6d02-40fd-9925-837d9573d5f6",
        "name": "Darin Becker"
    },
    "creditcard": {
        "number": "5434297065054394",
        "expiry": "12/29"
    },
    "product": {
        "description": "XXS Blue Crochet Jeans",
        "price": 30.59
    },
    "order": {
        "quantity": "2"
    },
    "ordertime": "2023-07-01 11:26:18.124"
}
{ "id": "87193fcd-0ca5-437f-b377-d2beb7e2fca4", "customer": { "id": "0c6767e4-3eee-4016-91a8-1c0b1699076e", "name": "Sharie Nolan" }, "creditcard": { "number": "5300726992175816", "expiry": "07/23" }, "product": { "description": "XL Blue Skinny Jeans", "price": 40.99 }, "order": { "quantity": "3" }, "ordertime": "2023-07-01 11:31:18.124" }{ "id": "6e6885f0-8655-4ba3-bb1f-6834a7d5059c", "customer": { "id": "003f8d4e-5488-4923-beb7-0846463e2b54", "name": "Brandi Lubowitz" }, "creditcard": { "number": "5505432597412091", "expiry": "07/26" }, "product": { "description": "L Retro Flare Jeans", "price": 28.99 }, "order": { "quantity": "1" }, "ordertime": "2023-07-01 11:33:48.125" } -
Verify that the results are displayed in the Event Processing flow.
-
When you have finished reviewing the results, you can stop this flow.
Recap
Connectors enable you to bring streams of events from a wide variety of external systems into Kafka topics, from where you can analyze them by using Event Processing.
Transformations are a helpful way to prepare the events to be in a format suitable for use with Event Processing.
