Lab 2 (Optional) - Running the Java Microservice locally
Note: If you want to examine the java developer task you can do that lab, if not, just directly jump into lab 4 - Deploying to OpenShift.
Running the Java microservice locally: video (3:51 mins)
Overview
In this workshop we create a microservice that has been implemented with Java EE and Eclipse MicroProfile.
The microservice has been kept as simple as possible, so that it can be used as a starting point for other microservices. It contains the following functionality:
- Image with OpenJ9, OpenJDK, Open Liberty and MicroProfile: Dockerfile
- Maven project: pom.xml
- Open Liberty server configuration: server.xml
- Health endpoint: HealthEndpoint.java
- Kubernetes yaml files: deployment.yaml and service.yaml
- Sample REST GET endpoint: AuthorsApplication.java, GetAuthor.java and Author.java
This service provides a REST API ‘getauthor’. Normally we would use a database but in this example we just simulate with local sample data. With this small example we touch the following topics:
- Usage of Maven for Java
- Configuration of an OpenLiberty Server
- Implementation of a REST GET endpoint with MicroProfile
- Health check implementation using a MicroProfile for Kubernetes
- Definition of a Dockerfile with the reuse for existing containers from Dockerhub
Definition of the Image
For the image we use a stack of open source components to run the Java microservice on Open Liberty.
- OpenJ9 0.12.1
- OpenJDK 8u202-b08 from AdoptOpenJDK
- Open Liberty 18.0.0.4
- MicroProfile 2.1
Read the article How to build and run a Hello World Java Microservice to learn more.
In the Dockerfile we define how to build the container image. For detailed information check the Dockerfile documentation
When we build a new container image we usually start with an existing container image that already contains a minimum of the configuration we need, for example the OS, the Java version or even more. For this we search DockerHub or on the internet to find a starting point which fits to our needs.
Inside of our Dockerfile we use two stages to build the container image. The reason for the two stages is that we want to be independend of an existing local environment when we build our production services. With this concept we don’t have to ensure that e.g. Java and Maven or correct versions of them are installed on the local machine of the developers.
With this two stage approach there is one container responsible to build the microservice, let us call this container build environment container, and another container will contain the microservice itself, we call this the production container. Only this production container is later used.
Build environment container
In the following Dockerfile sample we can see how we create our build environment container based on the maven 3.5 image from DockerHub.
We use the pom file that we defined before to build our Authors service with RUN mvn -f /usr/src/app/pom.xml clean package.
FROM maven:3.5-jdk-8 as BUILD

COPY src /usr/src/app/src
COPY pom.xml /usr/src/app
RUN mvn -f /usr/src/app/pom.xml clean package
Production container
The starting point for the Production container is an OpenLiberty container.
We copy the Authors service code together with the server.xml for the OpenLiberty server to this container.
REMEMBER: The service.xml contains the ports we use for our Authors service.
FROM open-liberty:microProfile2-java11

COPY liberty/server.xml /config/
COPY --from=BUILD /usr/src/app/target/authors.war /config/apps/

EXPOSE 3000
Run the Container locally
Note: Here are some additional instructions based on your choosen setup.
Tools - Option 1 (prefered for Mac and Linux)
| Step | |
|---|---|
| 1 | You need to open a new local terminal |
| 2 | Navigate to your local project folder openshift-on-ibm-cloud-workshops/deploying-to-openshift |
| 3 | Move on with the lab. |
Tools - Option 2 (prefered for Windows)
| Step | |
|---|---|
| 0 | Open a new local terminal session |
| 1 | You need to download or clone the project onto your local PC, first. $ git clone https://github.com/IBM/openshift-on-ibm-cloud-workshops.git |
| 2 | Open a new terminal and navigate tp your local project folder openshift-on-ibm-cloud-workshops/deploying-to-openshift |
| 3 | Move on with the lab. |
Run the container locally
Step 1:
To test and see how the code works you can run the code locally as a Docker container
$ ROOT_FOLDER=$(pwd)
$ cd $ROOT_FOLDER/deploying-to-openshift
$ docker build -t authors .
$ docker run -i --rm -p 3000:3000 authors
Step 2:
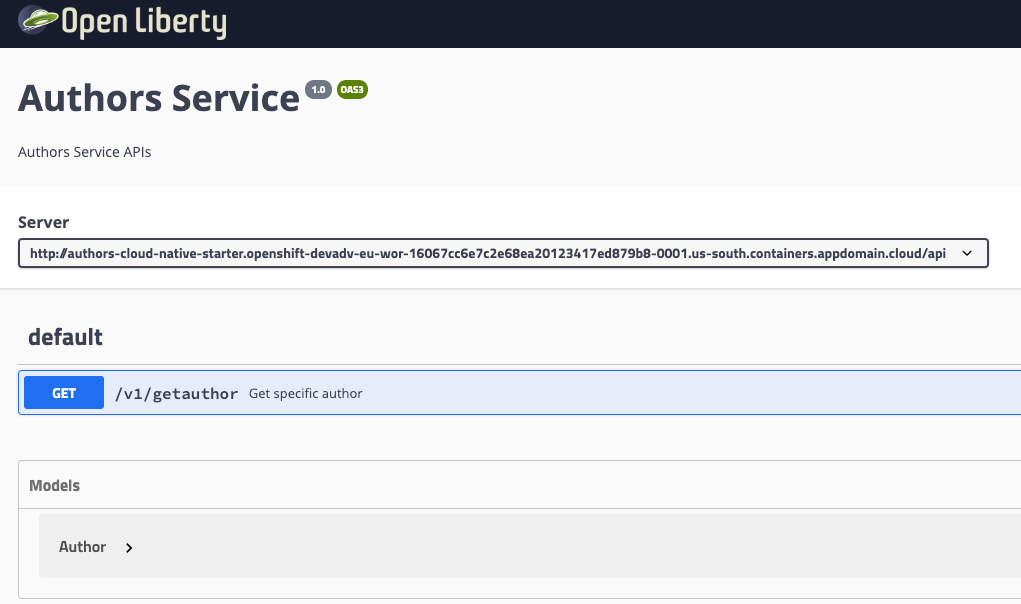
Open the Swagger UI of the mircoservice in a browser.
http://localhost:3000/openapi/ui/

Step 3:
If you can not open a browser, just use this curl command to access the microservice on your local machine.
$ curl -X GET "http://localhost:3000/api/v1/getauthor?name=Niklas%20Heidloff" -H "accept: application/json"
Continue with Lab 4 - Deploying to OpenShift. If you are interested in coding you can go to Lab 3 - Understanding the Java Implementation