
Introduction
Today we’ll see how IBM’s content management capabilities are used to manage and secure content across an organization at scale. We’ll see how using an enterprise platform to share and manage content enhances productivity, increases security and mitigates risk.
Using an HR hiring scenario, we’ll show how to easily configure a centralized repository for document collaboration. We’ll look at how to secure documents using redaction and role-based access capabilities. And we’ll see how the built-in workflow capabilities are used to manage document approvals.
We’re using a hiring example, but the same document repository can extend and scale to many scenarios across your enterprise.
Let’s get started!
(Printer-ready PDF of demo script here)
1 - Configuring a new space for document collaboration
| 1.1 | Create a new teamspace |
|---|---|
| Narration | Focus Corp’s HR department needed a way to organize job candidate documents and facilitate collaboration among hiring decision-makers. When a candidate submits a new application, the HR manager uses the company’s enterprise content management system to create a teamspace, which is a dedicated place to share information and collaborate. |
| Action 1.1.1 | Show the IBM Content Navigator screen that you opened during demo preparation. Sign in using the Username: henry and Password: henry. Click Log in. |
| Action 1.1.2 | Click the Teamspaces tile. 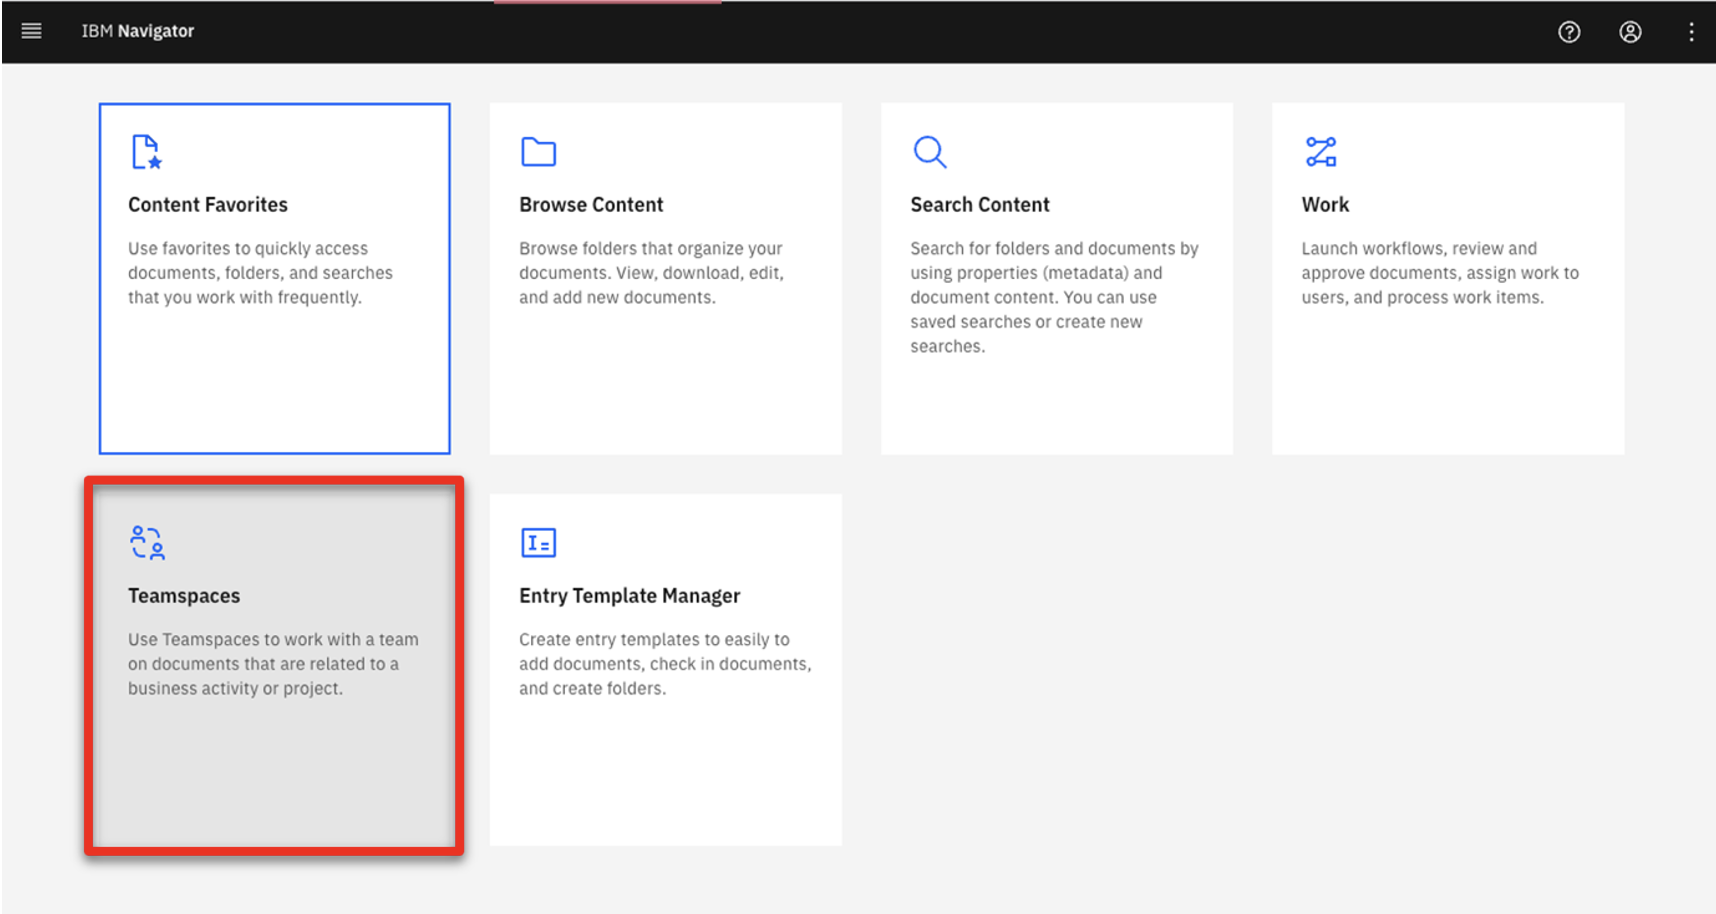 |
| Action 1.1.3 | Click New Teamspace.  |
| Action 1.1.4 | Enter ‘John Doe Demo Teamspace’ (1) as the Teamspace name. Make sure the Teamspace template is FC Hiring Teamspace Template (2) and then click Select Users (3). 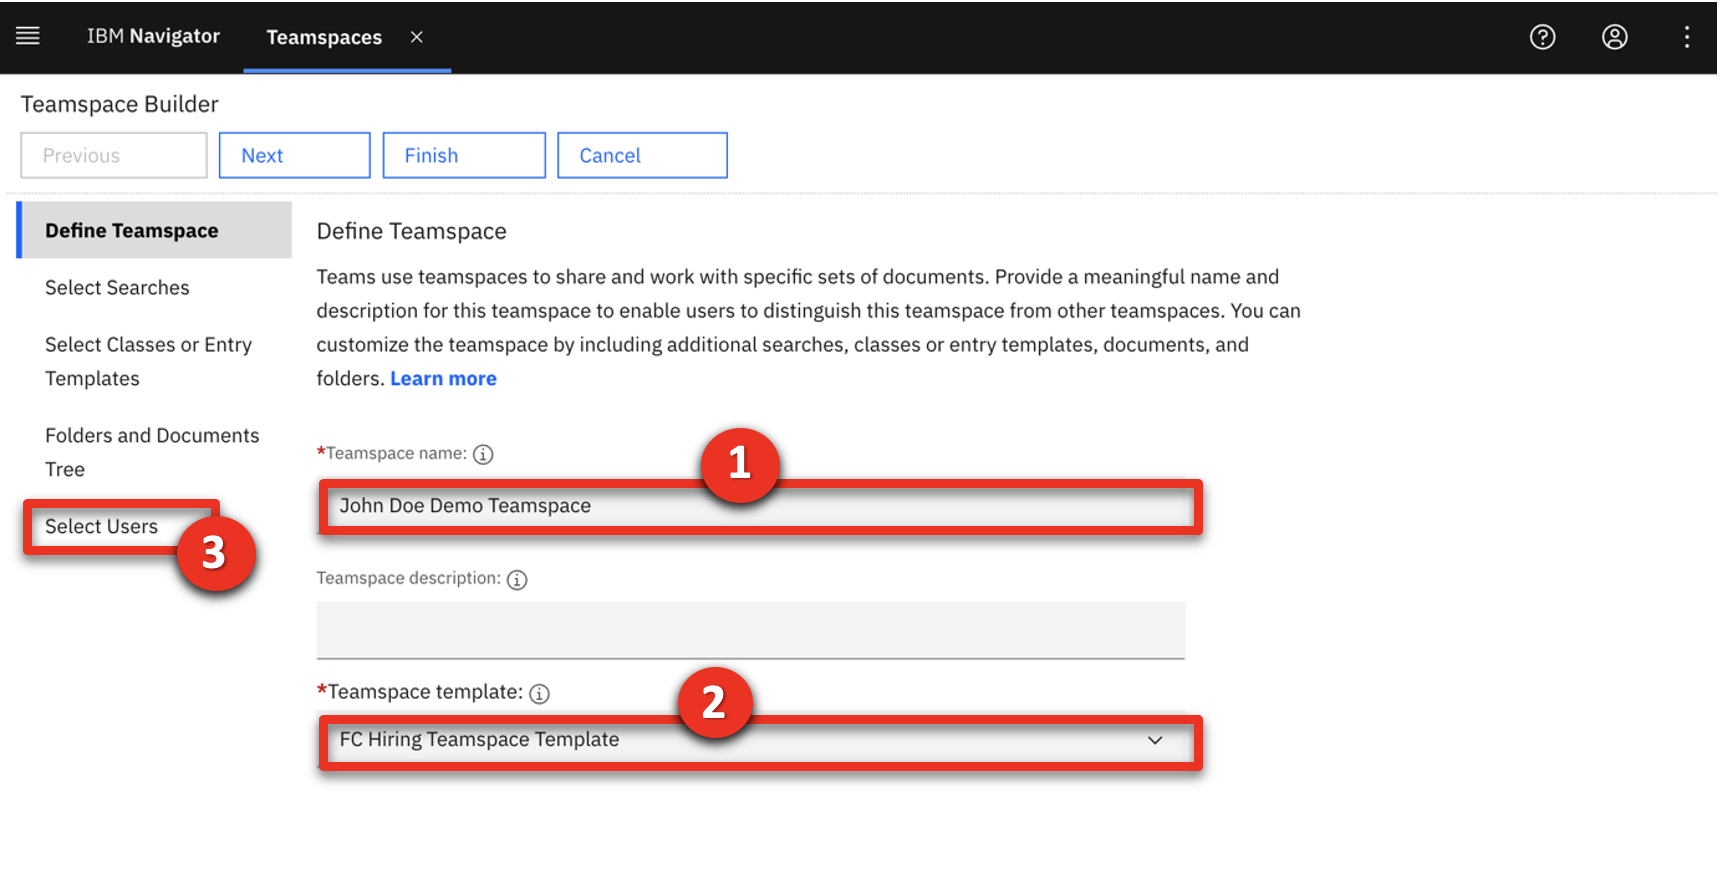 |
| Narration | Once it is created, the HR manager provides teamspace access to the hiring and payroll managers so they can collaborate during the candidate’s evaluation. |
| Action 1.1.5 | Click Add Users and Groups…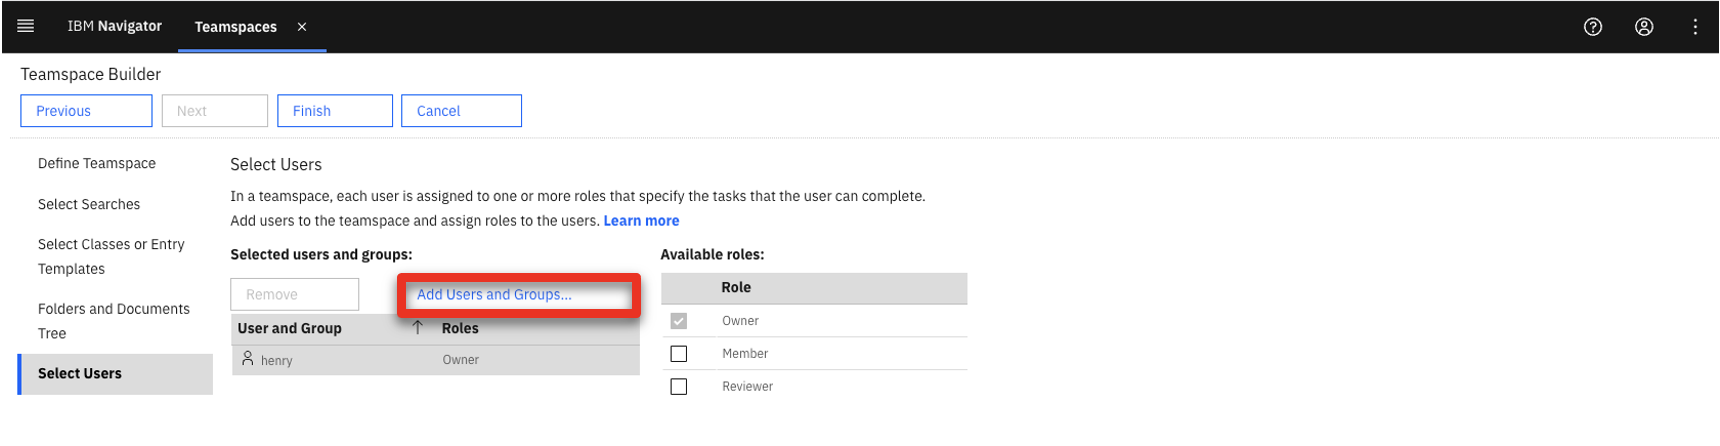 |
| Action 1.1.6 | Type debby in the search area (1) and click the magnifier icon (2). |
| Action 1.1.7 | Select debby (1), who is the hiring manager, and click the right-facing arrow (2) to move her from the Available list to the Selected list. |
| Action 1.1.8 | Repeat the previous steps to add patrick, the payroll manager, to the Selected list (1). Click OK (2).  |
| Action 1.1.9 | Select Member (1) in the Roles menu and click Add (2).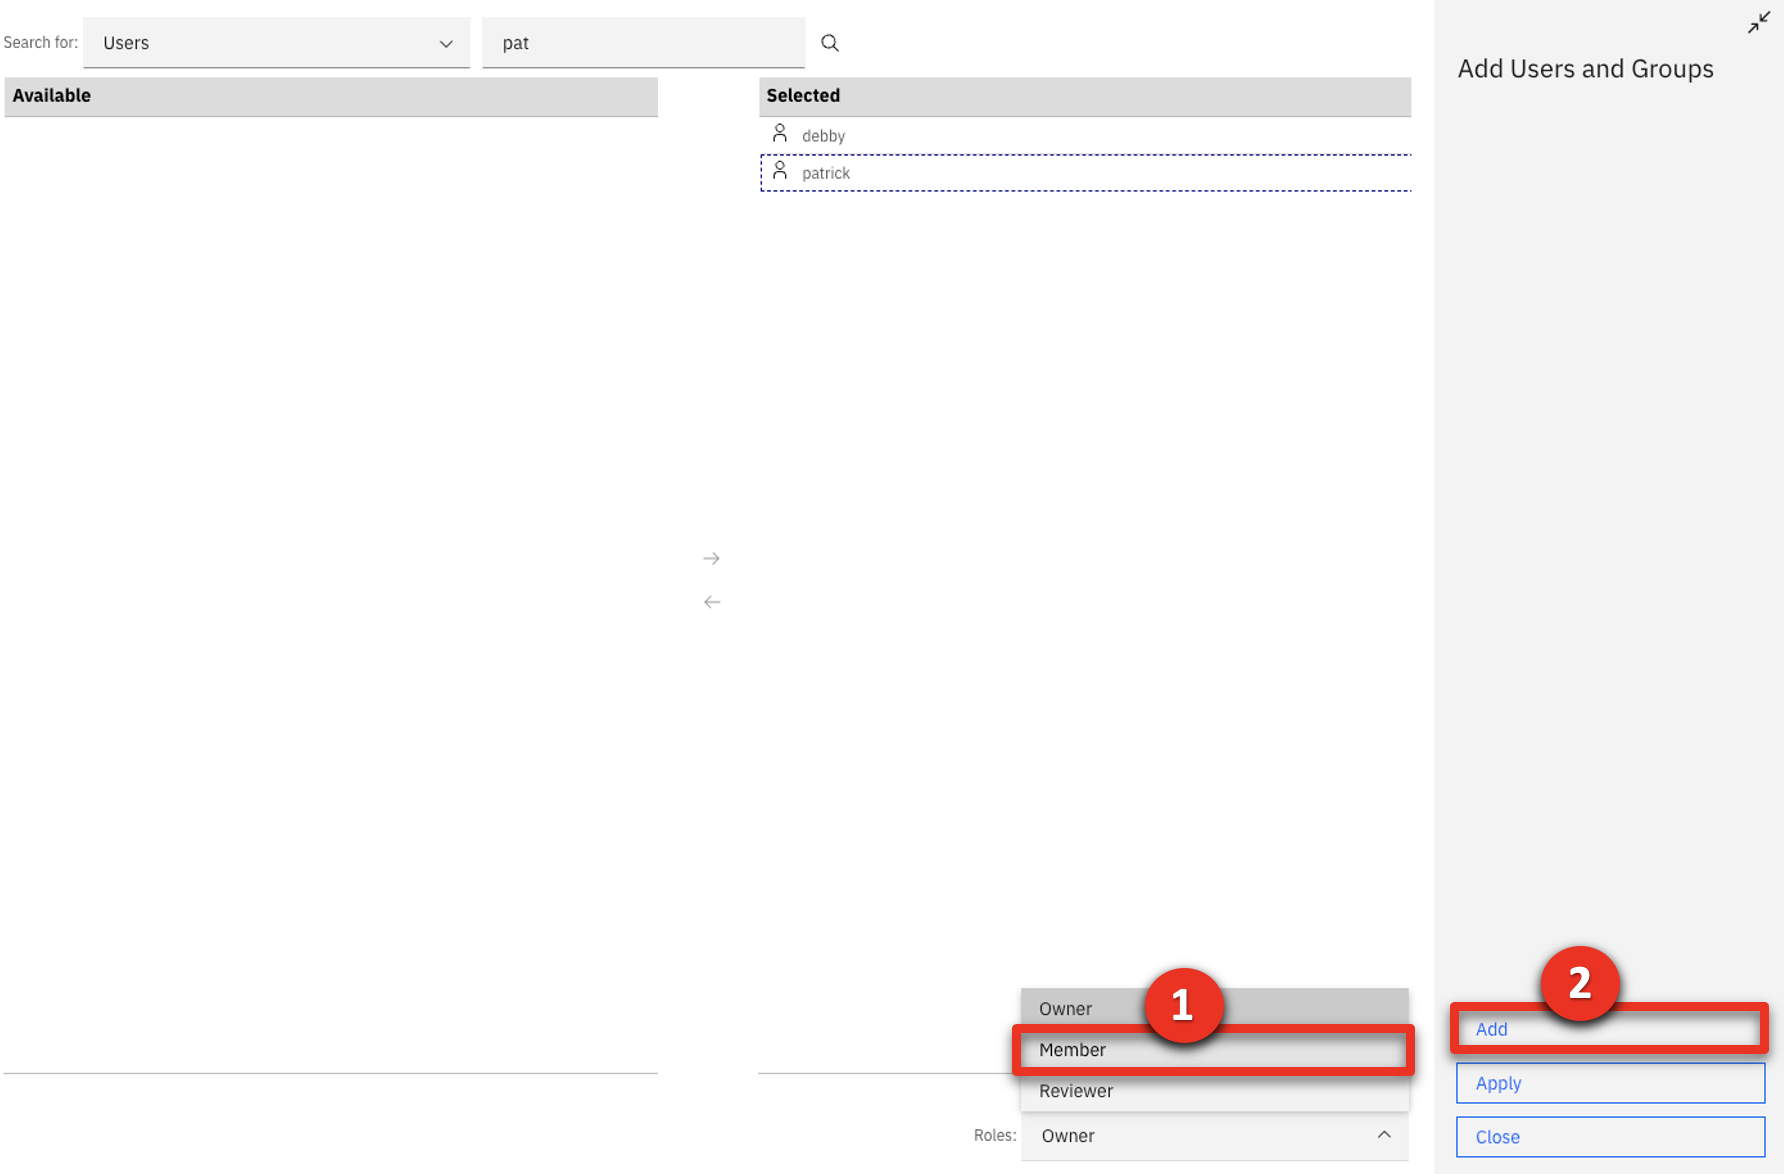 |
| Action 1.1.10 | Click Finish.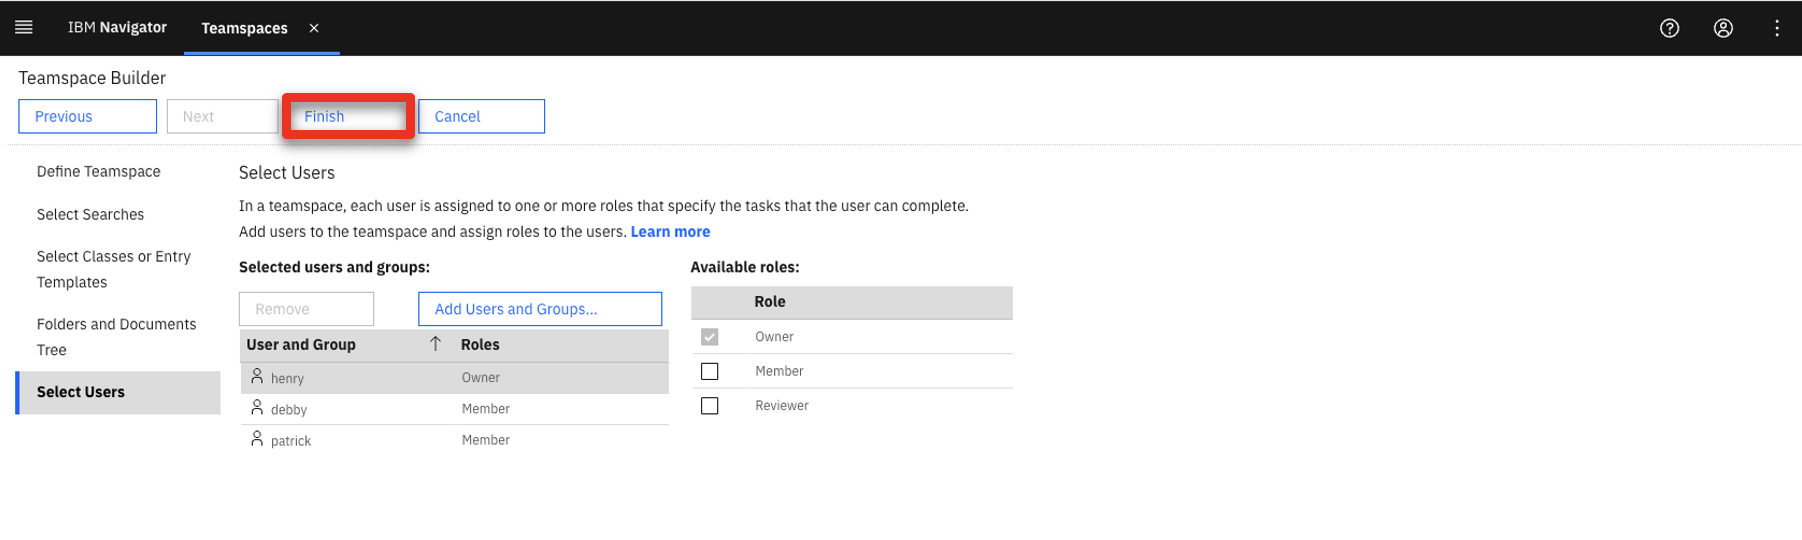 |
| 1.2 | Add files to share |
|---|---|
| Narration | The HR manager created the applicant’s new teamspace based on Focus Corp’s ‘FC Hiring Teamspace’ template. When a new teamspace is created using this template, it includes all the forms that need to be completed and submitted for each candidate. |
| Action 1.2.1 | Click the HR Documents folder. 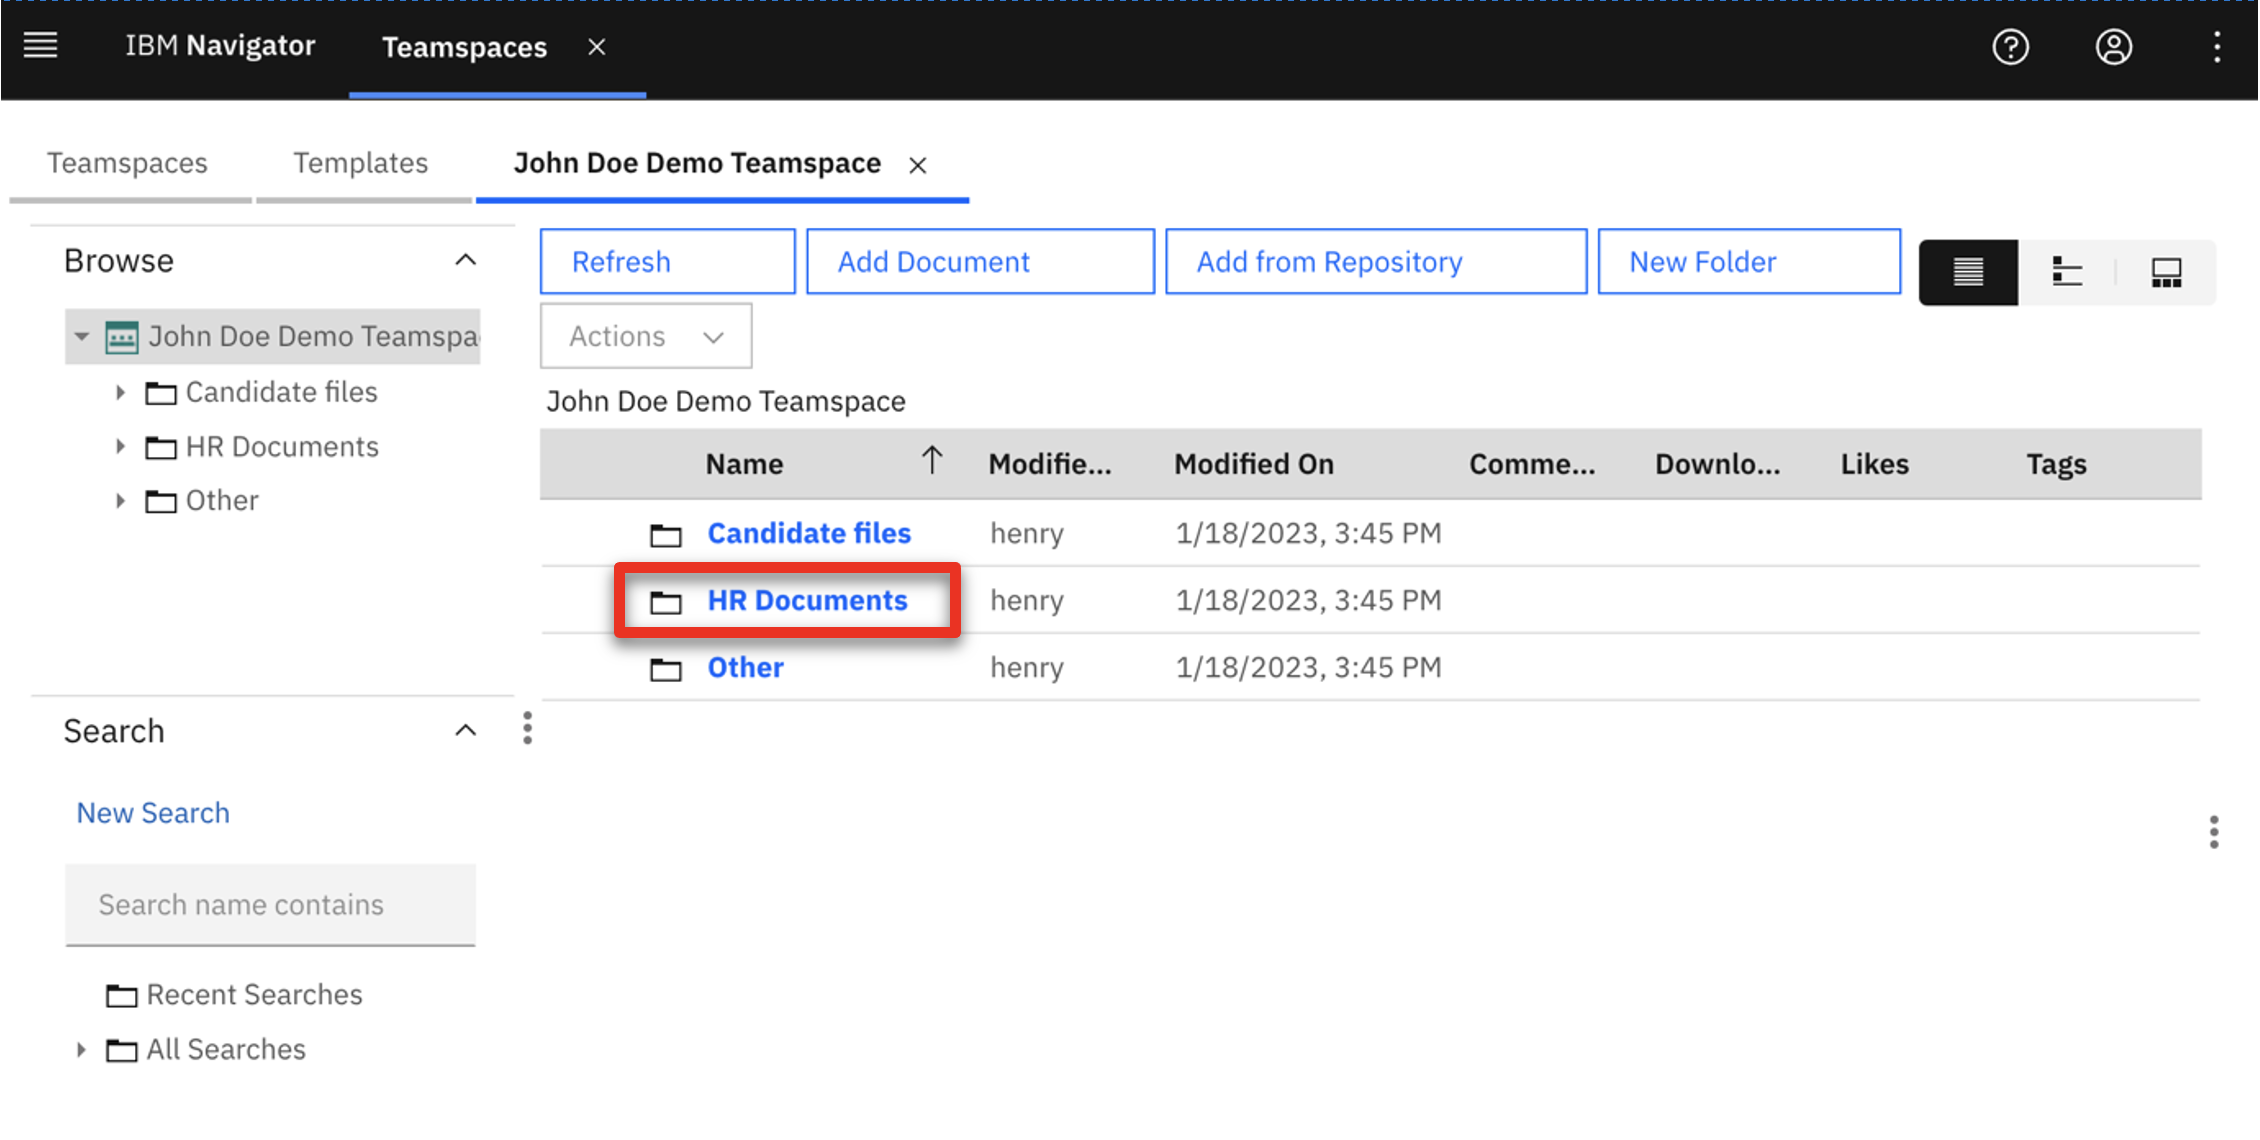 |
| Action 1.2.2 | Point out that the HR Documents folder is now open and the necessary documents are now available.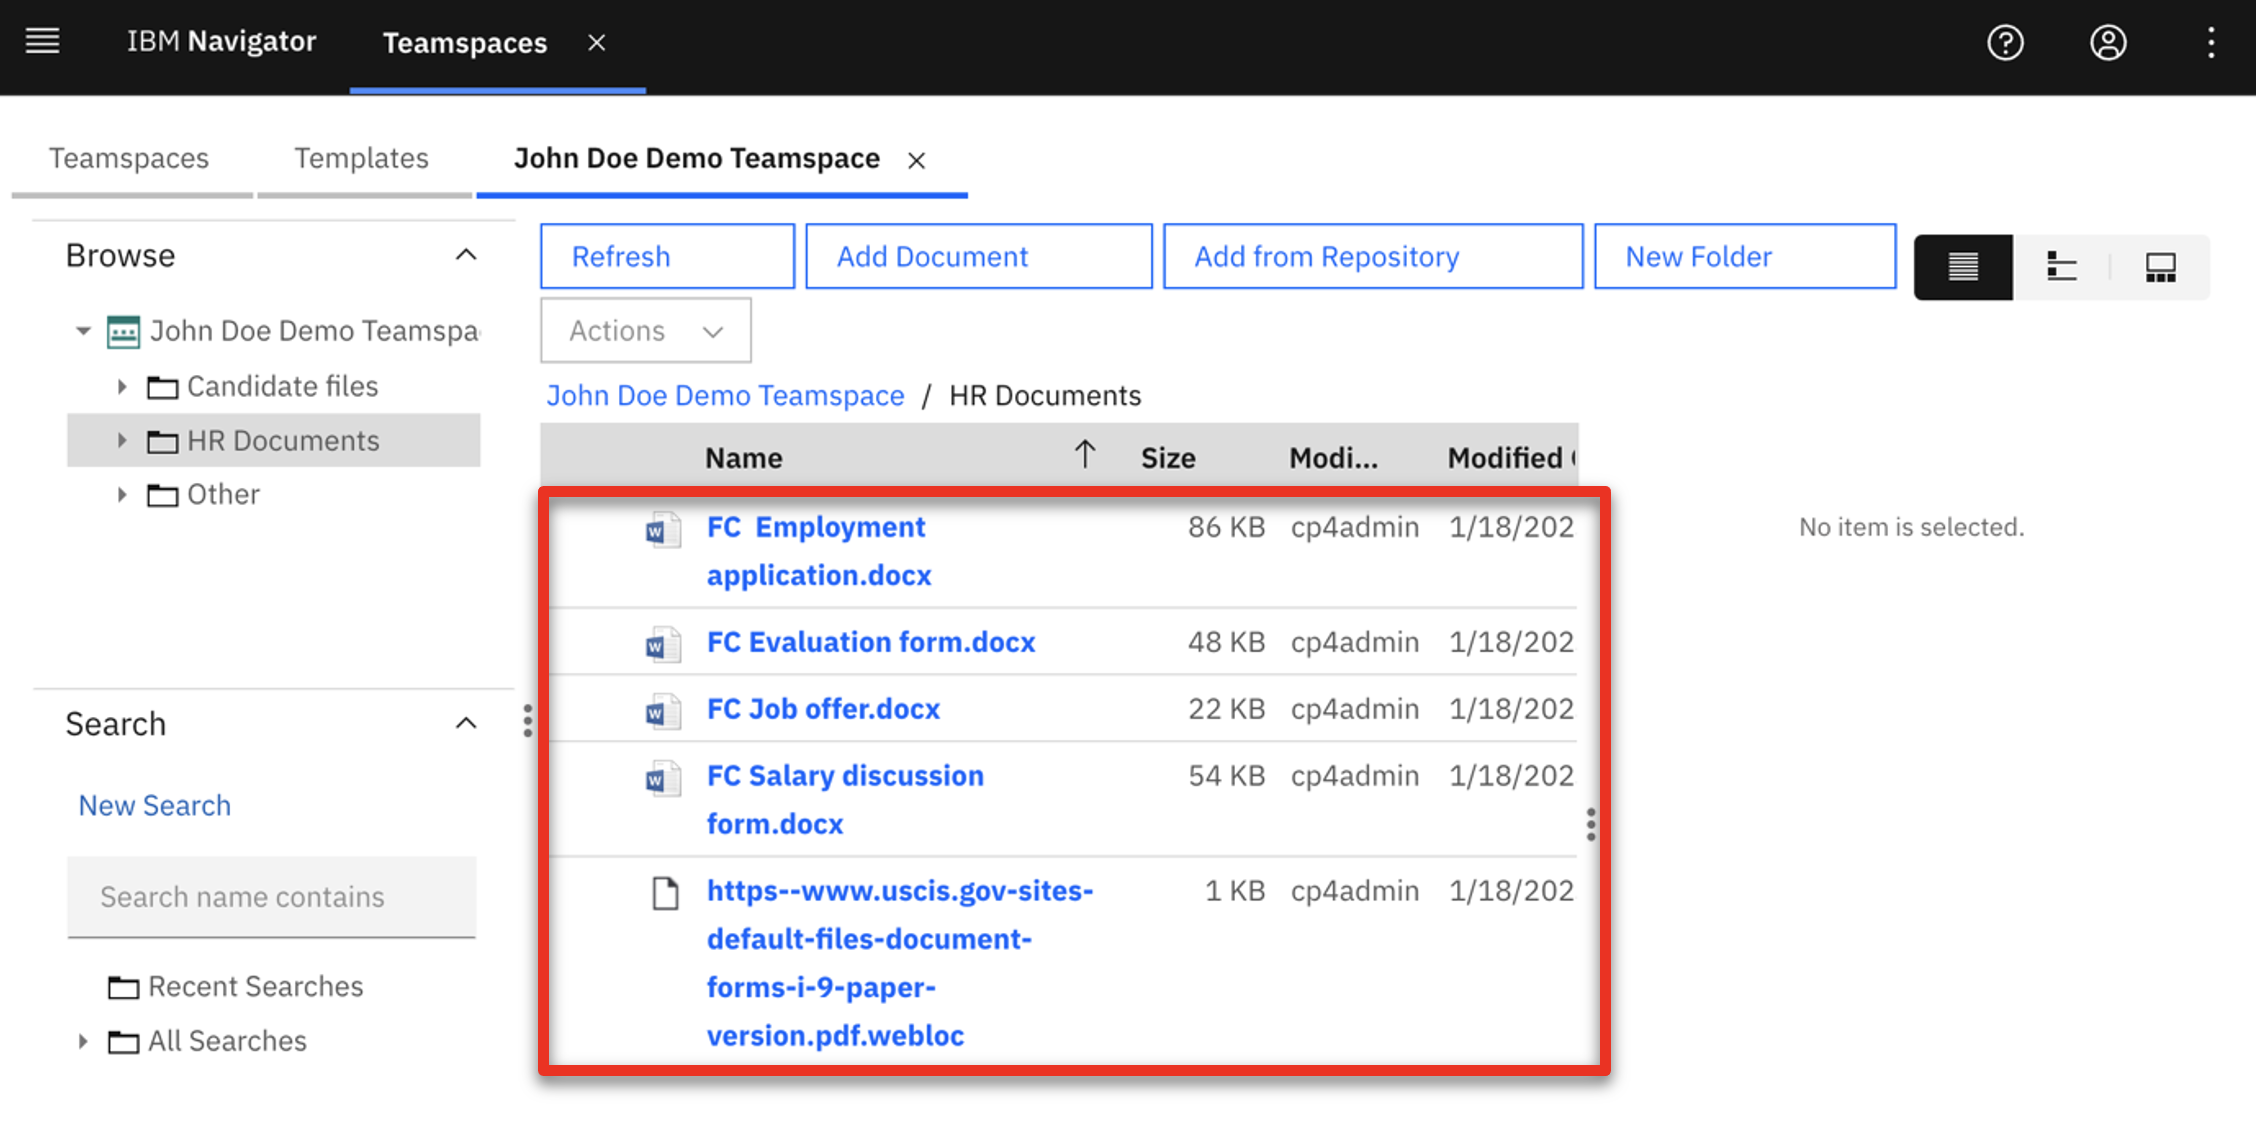 |
| Narration | The HR manager uses the HR document template to create copies that are specific to the applicant. When he does this in the teamspace, the documents are automatically shared with the rest of the hiring team. The content management software applies the role-based access restrictions configured in the FC Hiring Teamspace template, which specifies the permissions granted to each team member. |
| Action 1.2.3 | Click the Candidate files folder. 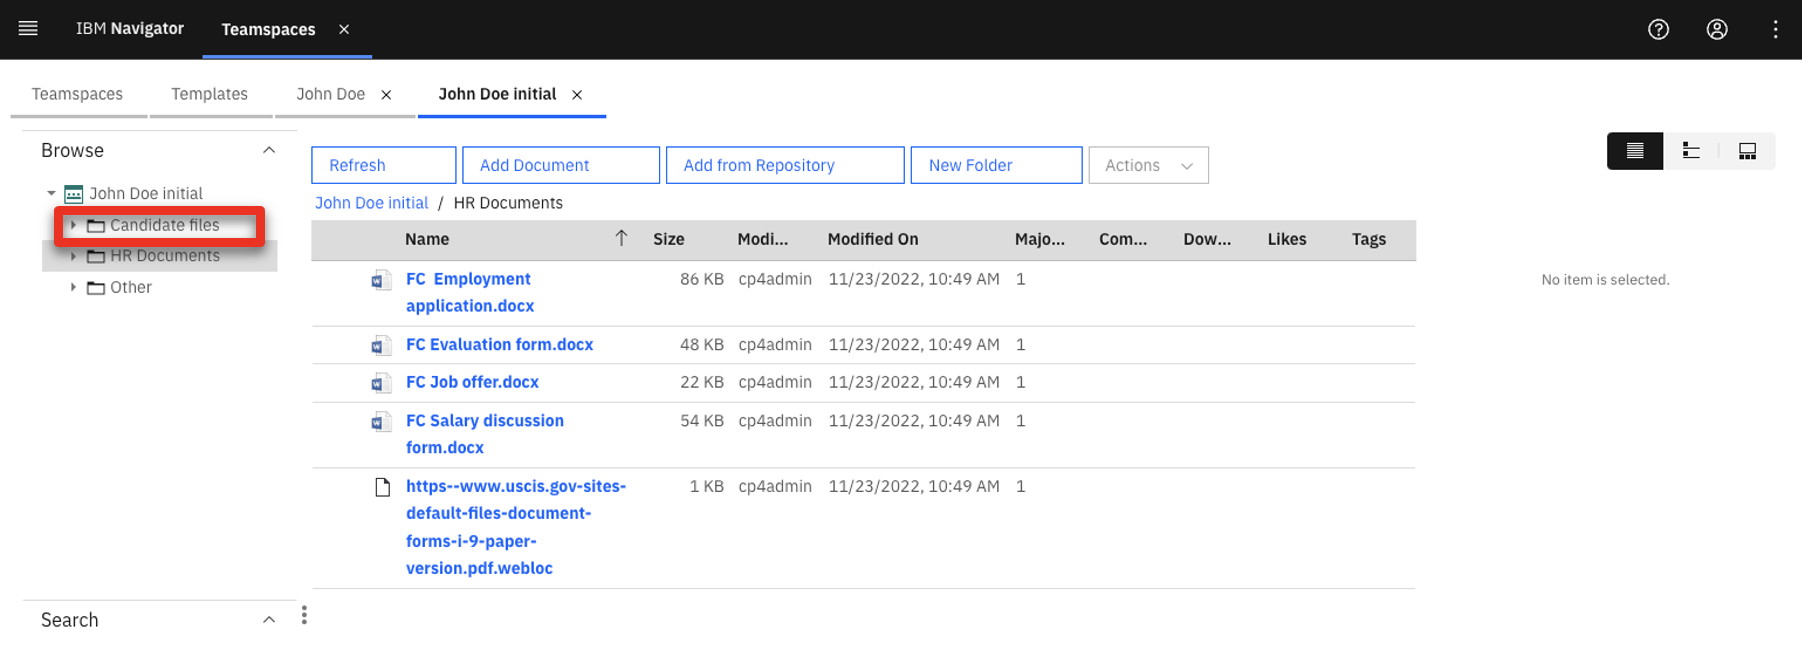 |
| Narration | The HR manager uploads the candidate’s documents to the ‘Candidate files’ folder. He moves the files from his computer to the ‘Candidate files’ folder with a simple drag-and-drop. |
| Action 1.2.4 | Click the John Doe Diploma.pdf document and drag it from your local Documents folder to the John Doe Demo Teamspace / Candidate files folder in IBM Navigator. 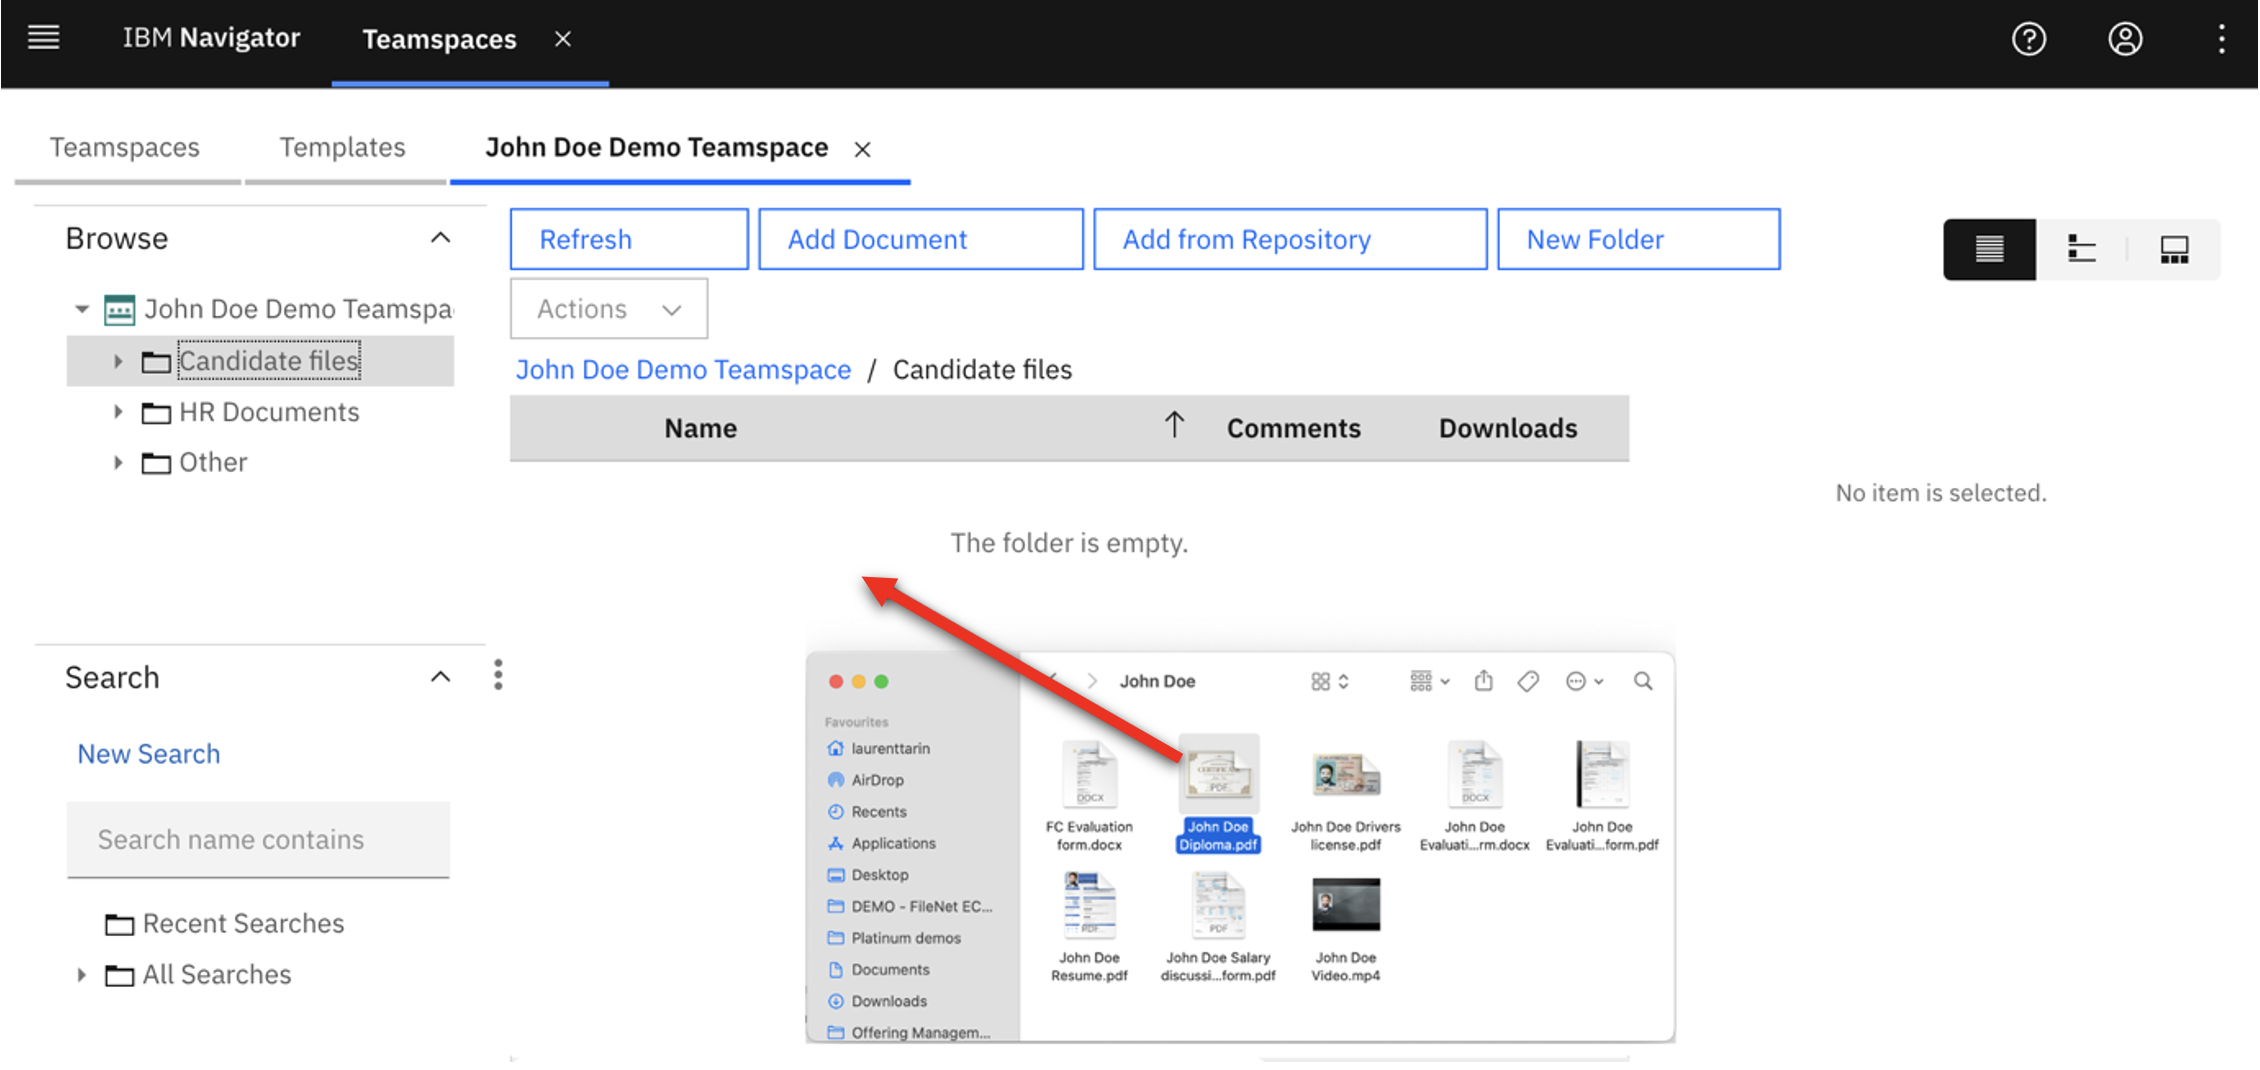 |
| Narration | When the HR manager moves the files, a document entry form enables him to enter the required metadata. Focus Corp’s content administrator had previously worked with HR to define the metadata to include with files that are added to the teamspace. This metadata can be used later to quickly identify, classify, or search for a document. |
| Action 1.2.5 | Enter ‘John Doe’ as the Candidate Name (1) and select Diploma as the Document Type (2). Select External for Document Source (3). This indicates that the document originated outside of Focus Corp. Select R&D for the Department Name (4) and set the Application date to the date 3 days in the future (5). Click Add (6). 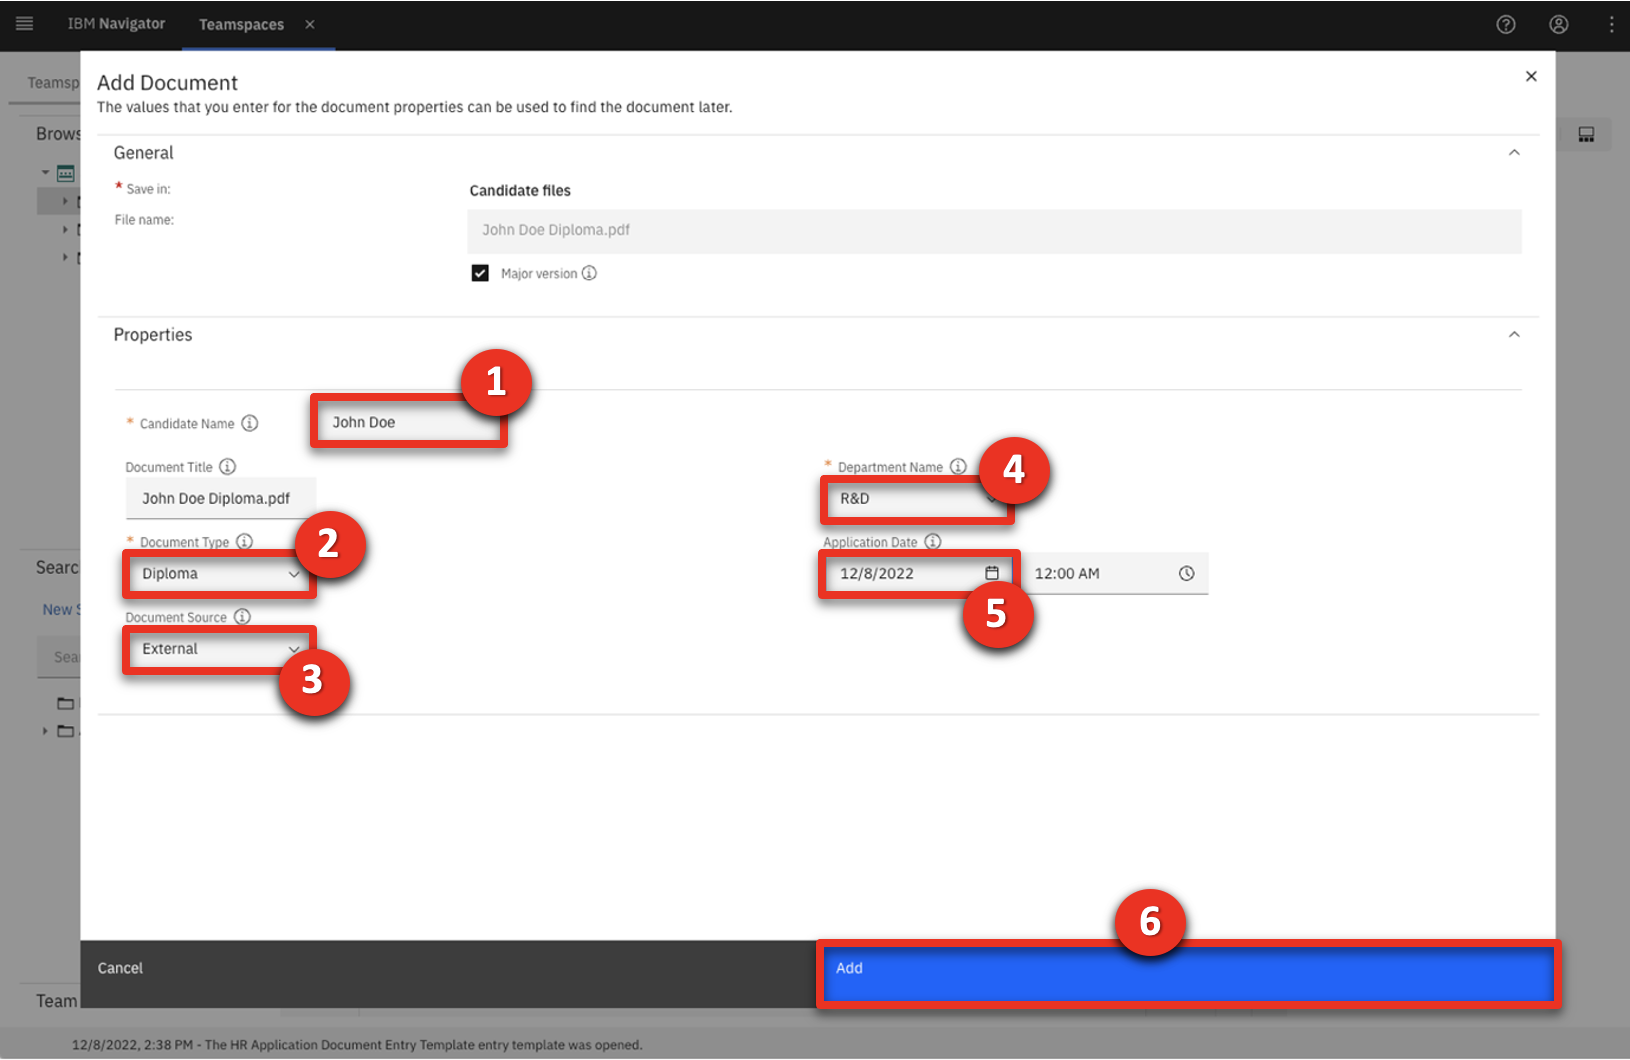 |
| Narration | In the navigate view, team members can now add comments to the file, ‘like’ the file, or add the file to their favorites. |
| Action 1.2.6 | Click the navigate view icon. 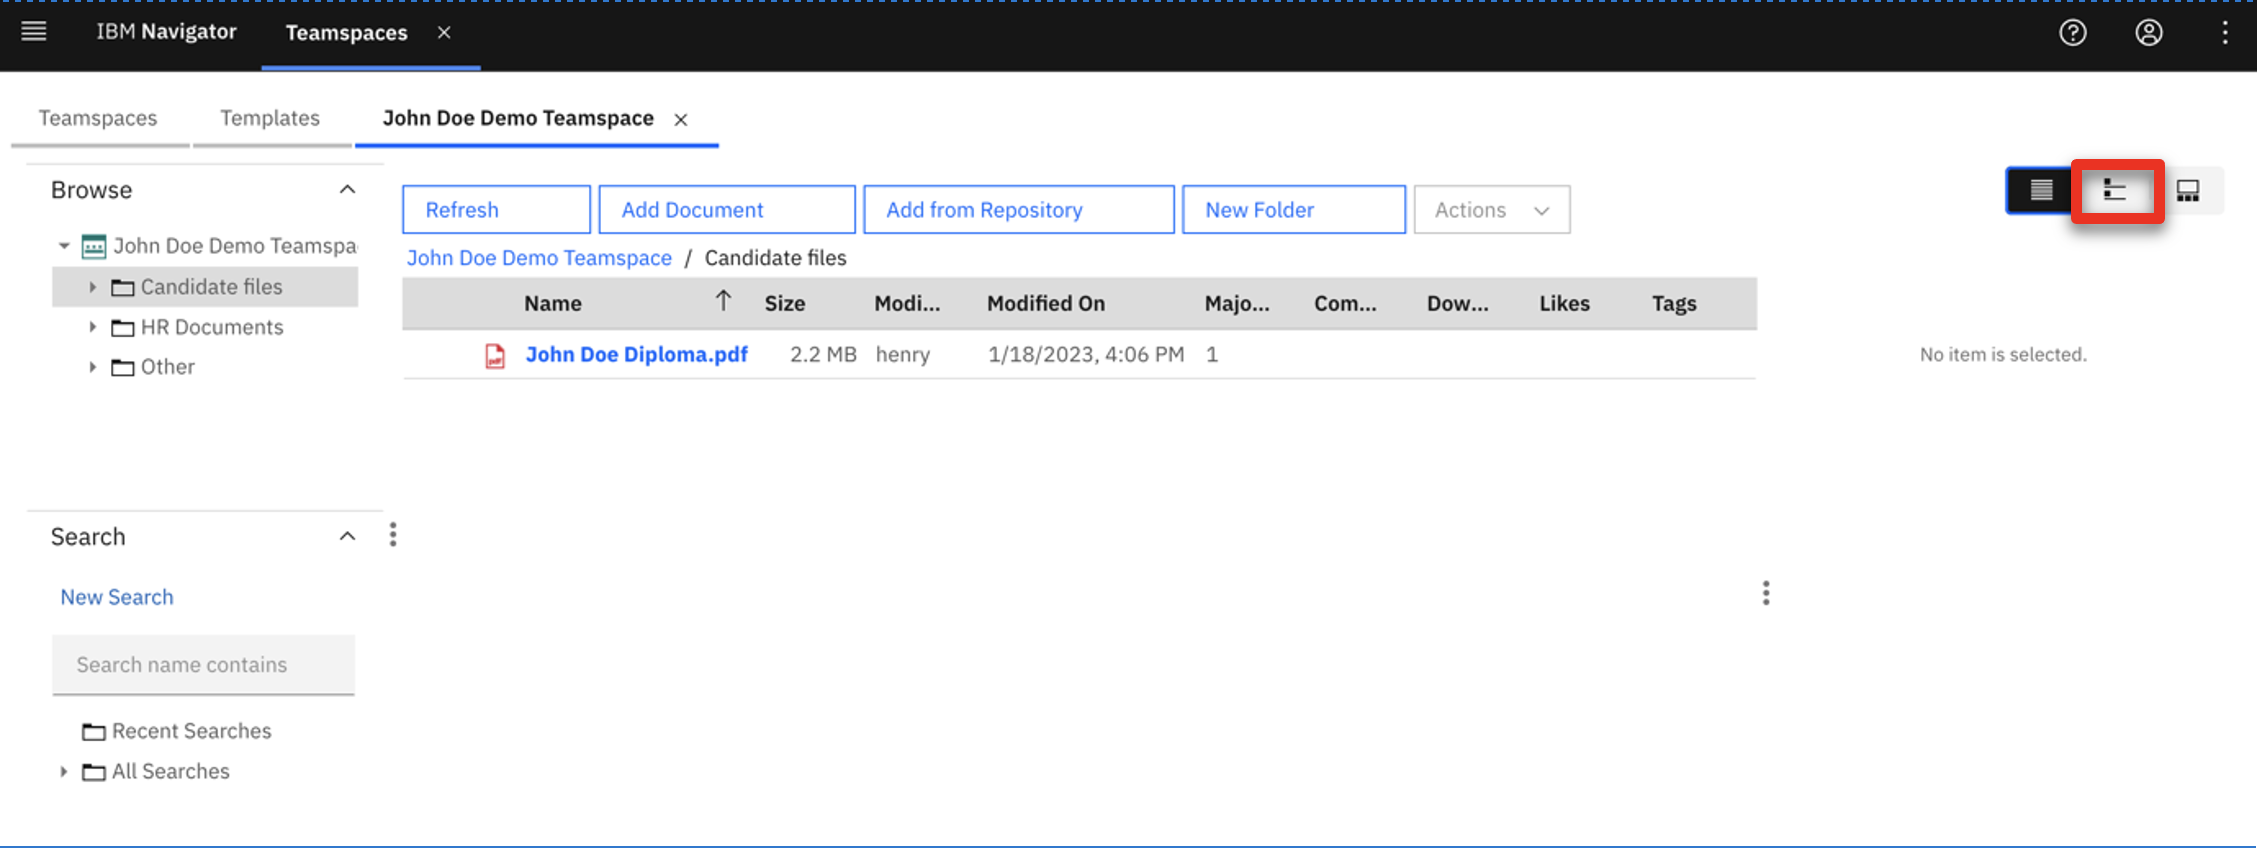 |
| Action 1.2.7 | Select the John Doe Diploma.pdf row. 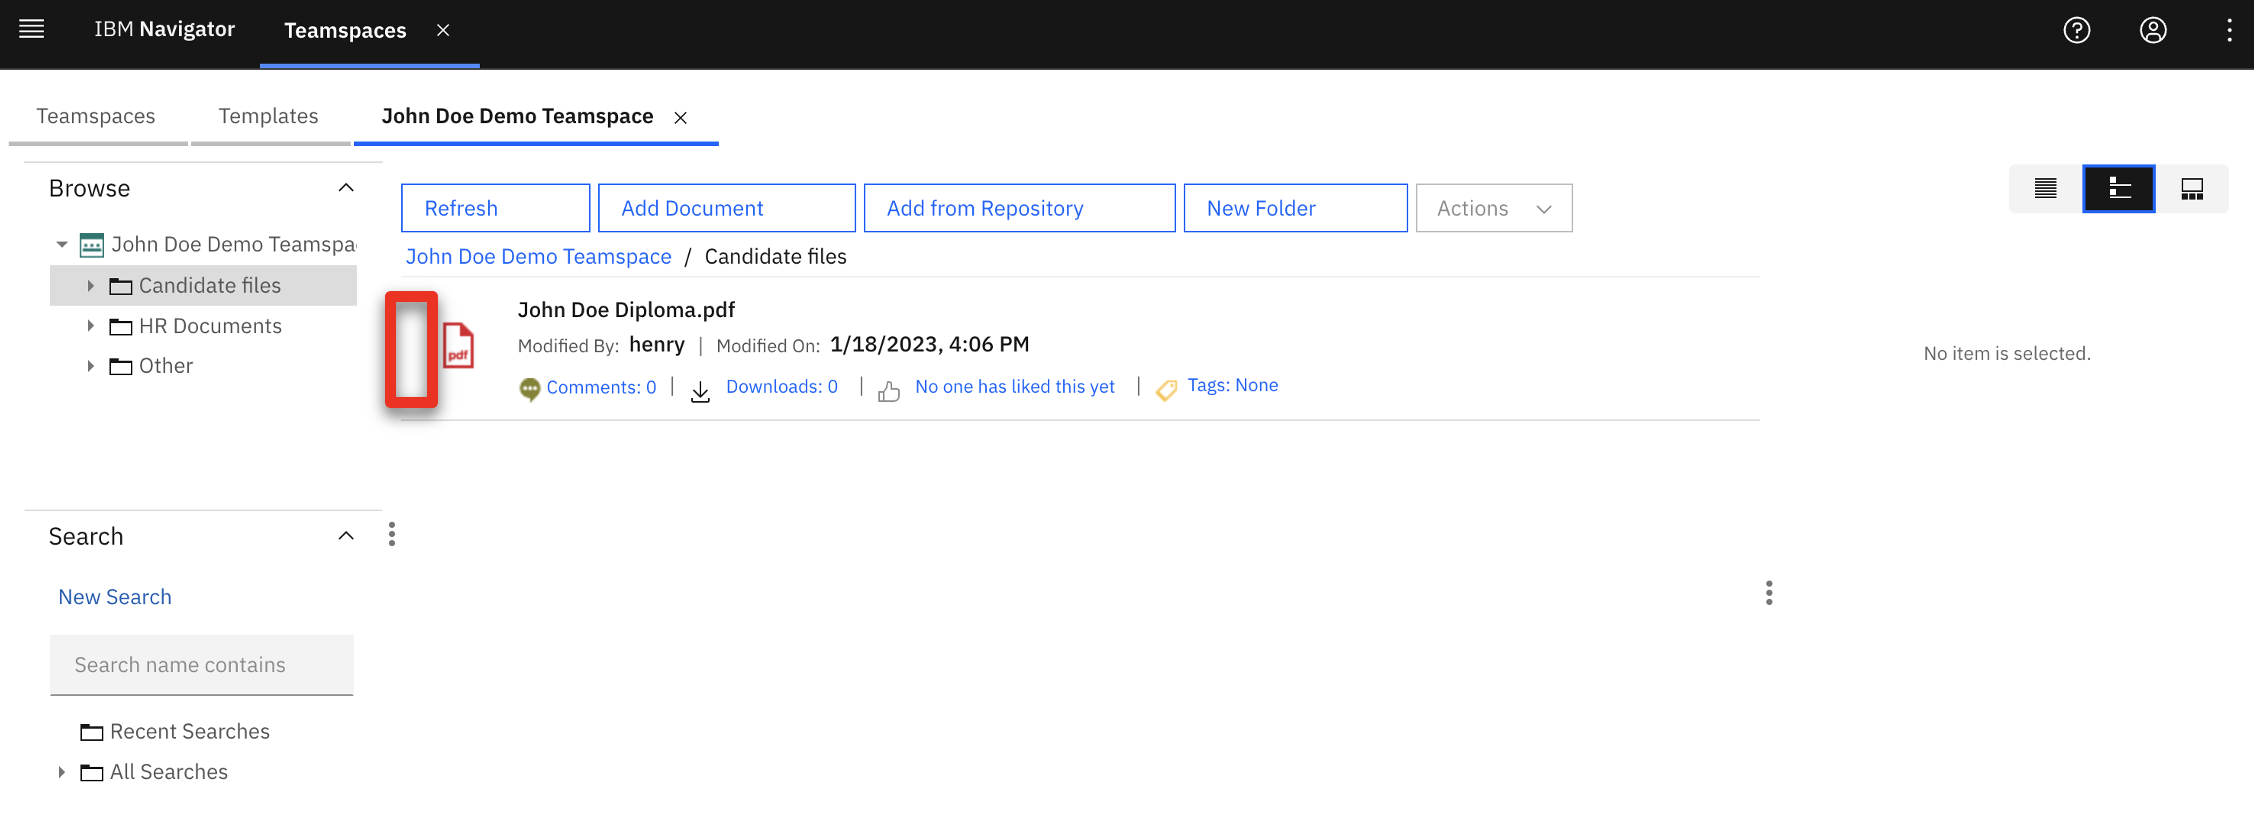 |
| Action 1.2.8 | Point out the document-related actions and information (1), pre-defined Properties (2), and the star icon that adds the file to favorites (3).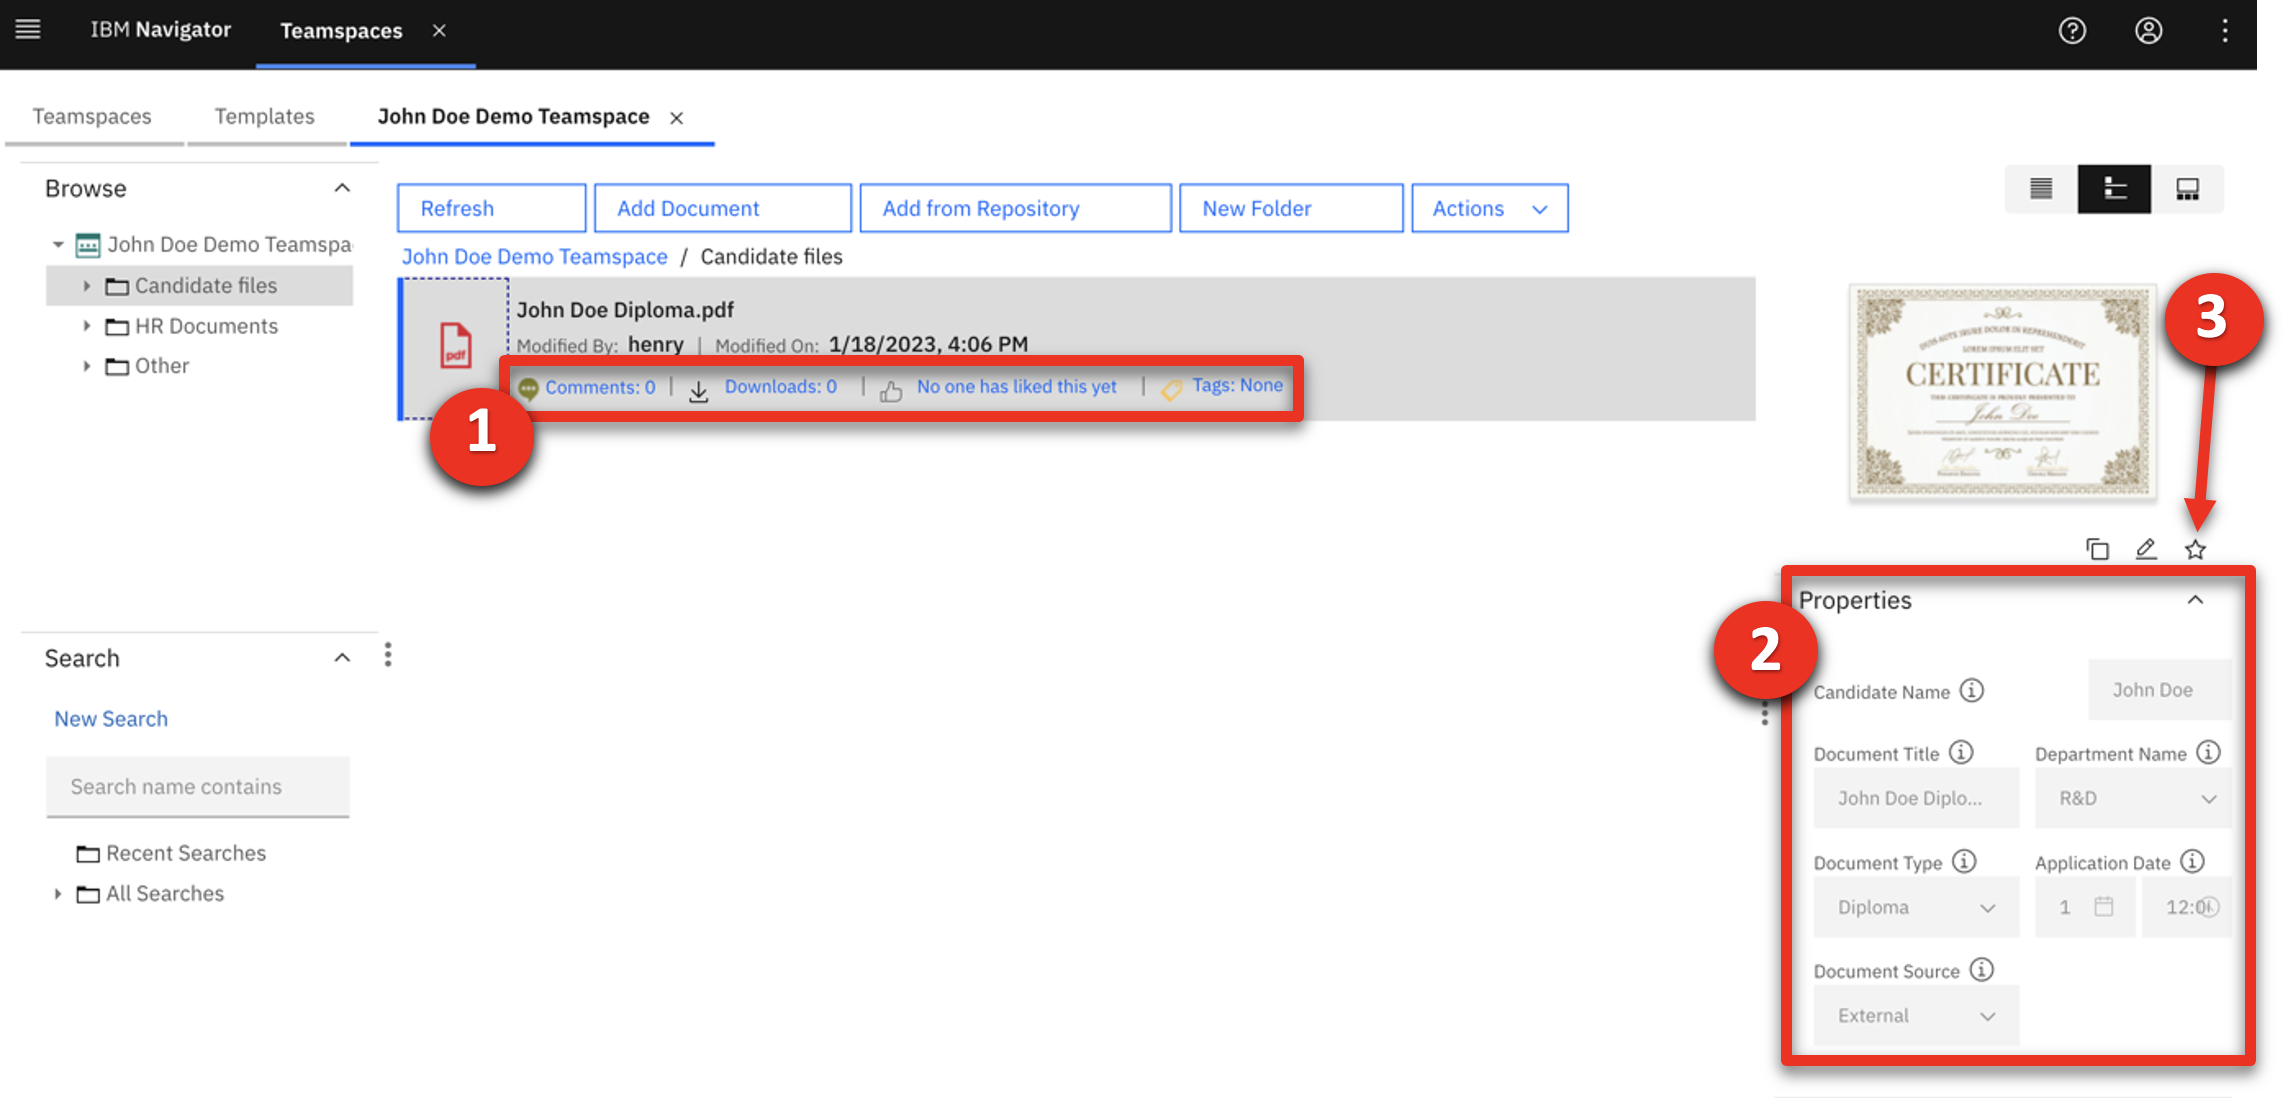 |
| Narration | The candidate had previously submitted a video detailing his professional qualifications, strengths and weaknesses. The HR manager adds the video to the content management system. |
| Action 1.2.9 | Move the John Doe Video.mp4 file to the Candidate files folder.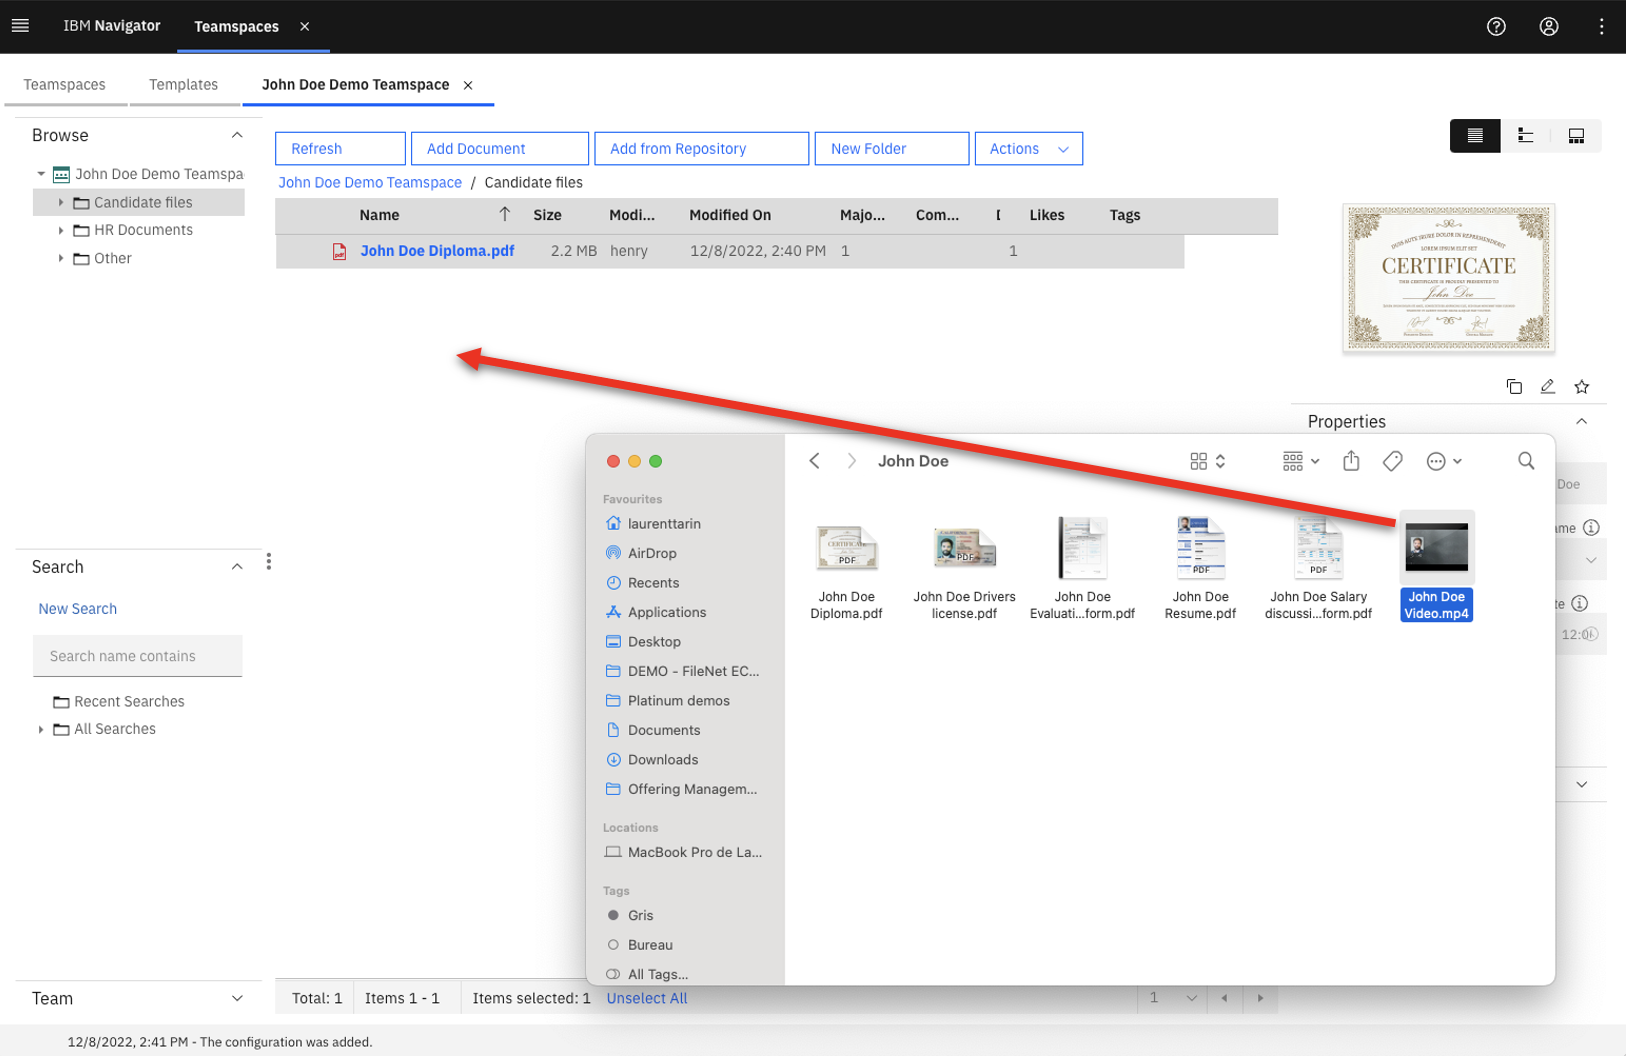 |
| Action 1.2.10 | Enter ‘John Doe’ as the Candidate Name (1) and select Candidate Video as the Document Type (2). Select External for Document Source (3). Select R&D for the Department Name (4) and set the Application date to the date 3 days in the future (5). Click Add (6). 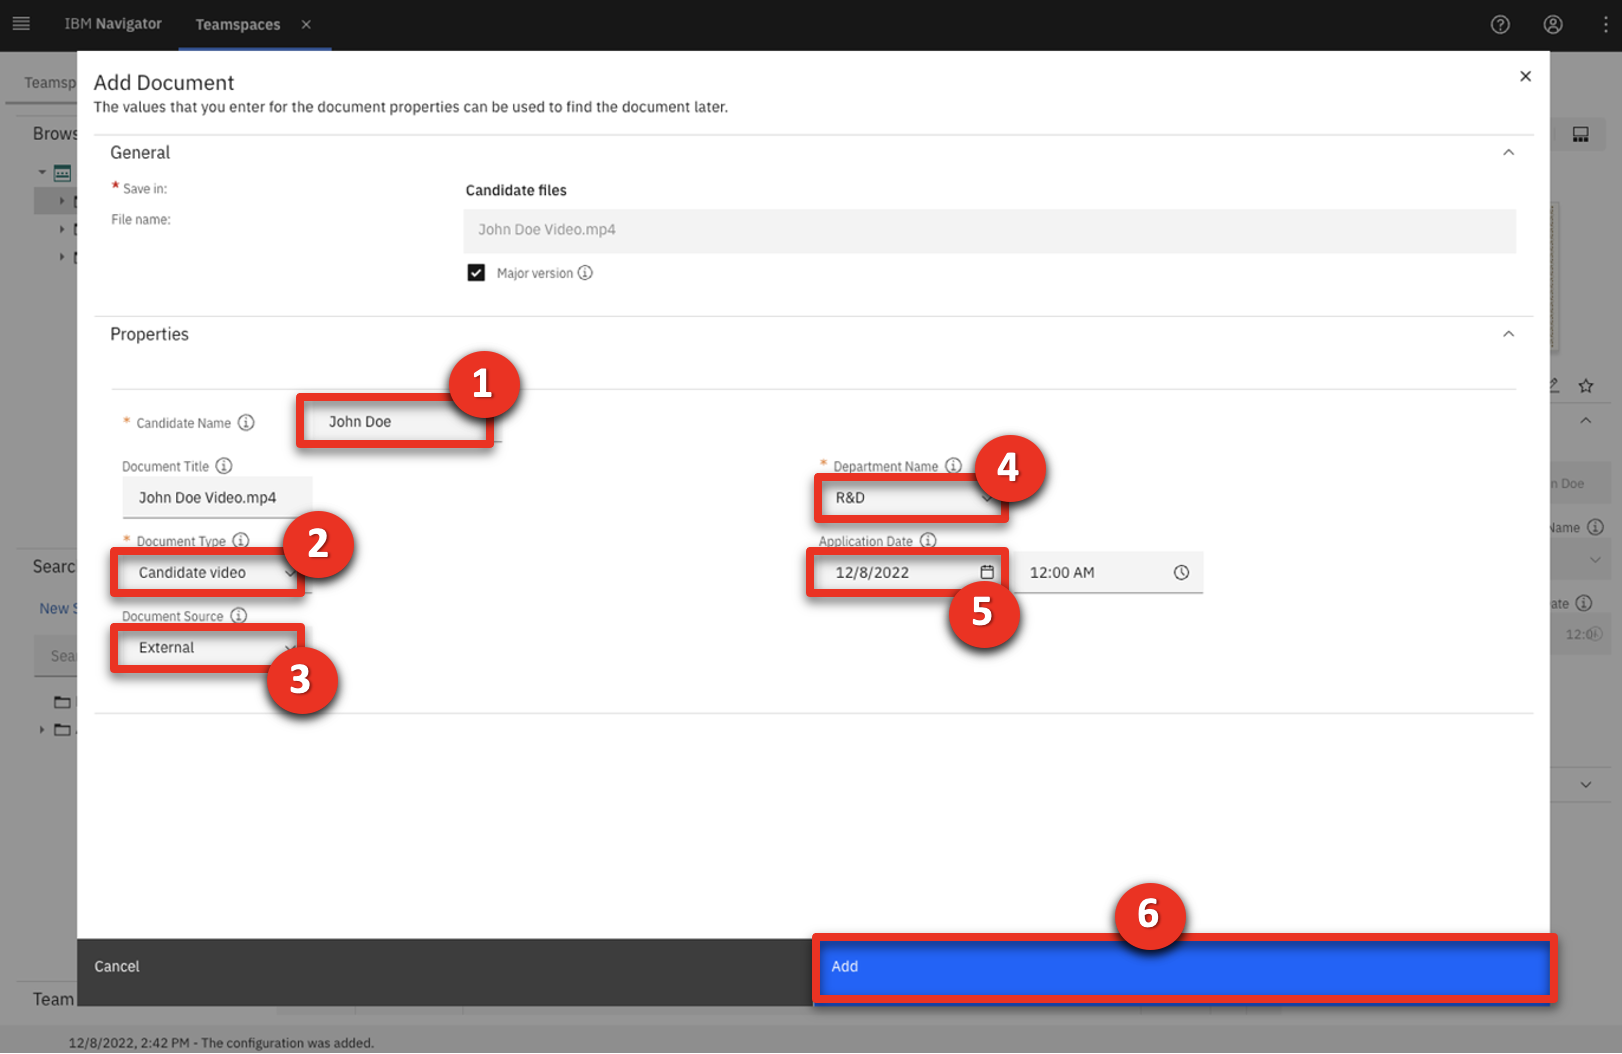 |
| Action 1.2.11 | Click John Doe Video.mp4.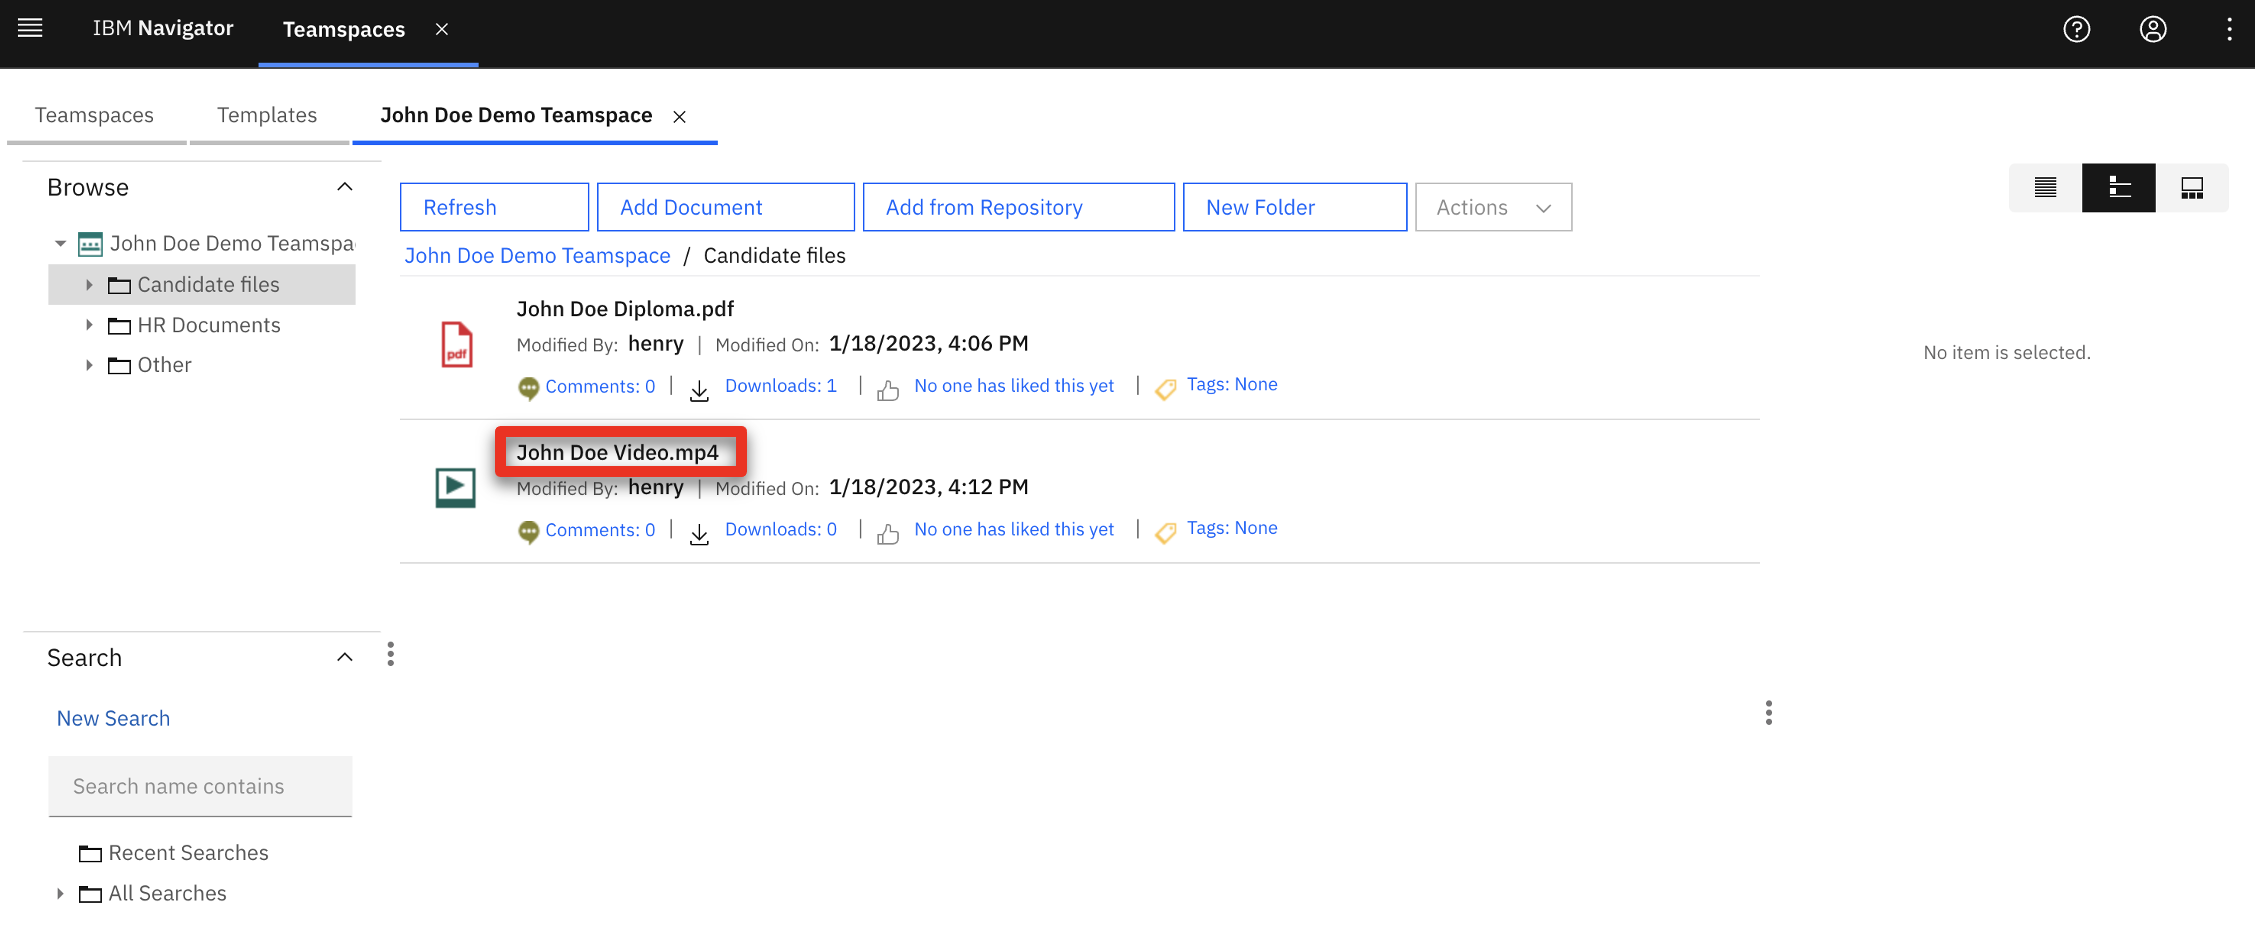 |
| Narration | The hiring team wanted to quickly review specific candidate responses within the submitted video. The HR manager bookmarks the video, which allows hiring team members to go directly to the sections of the video they would like to see. |
| Action 1.2.12 | Click Bookmarks.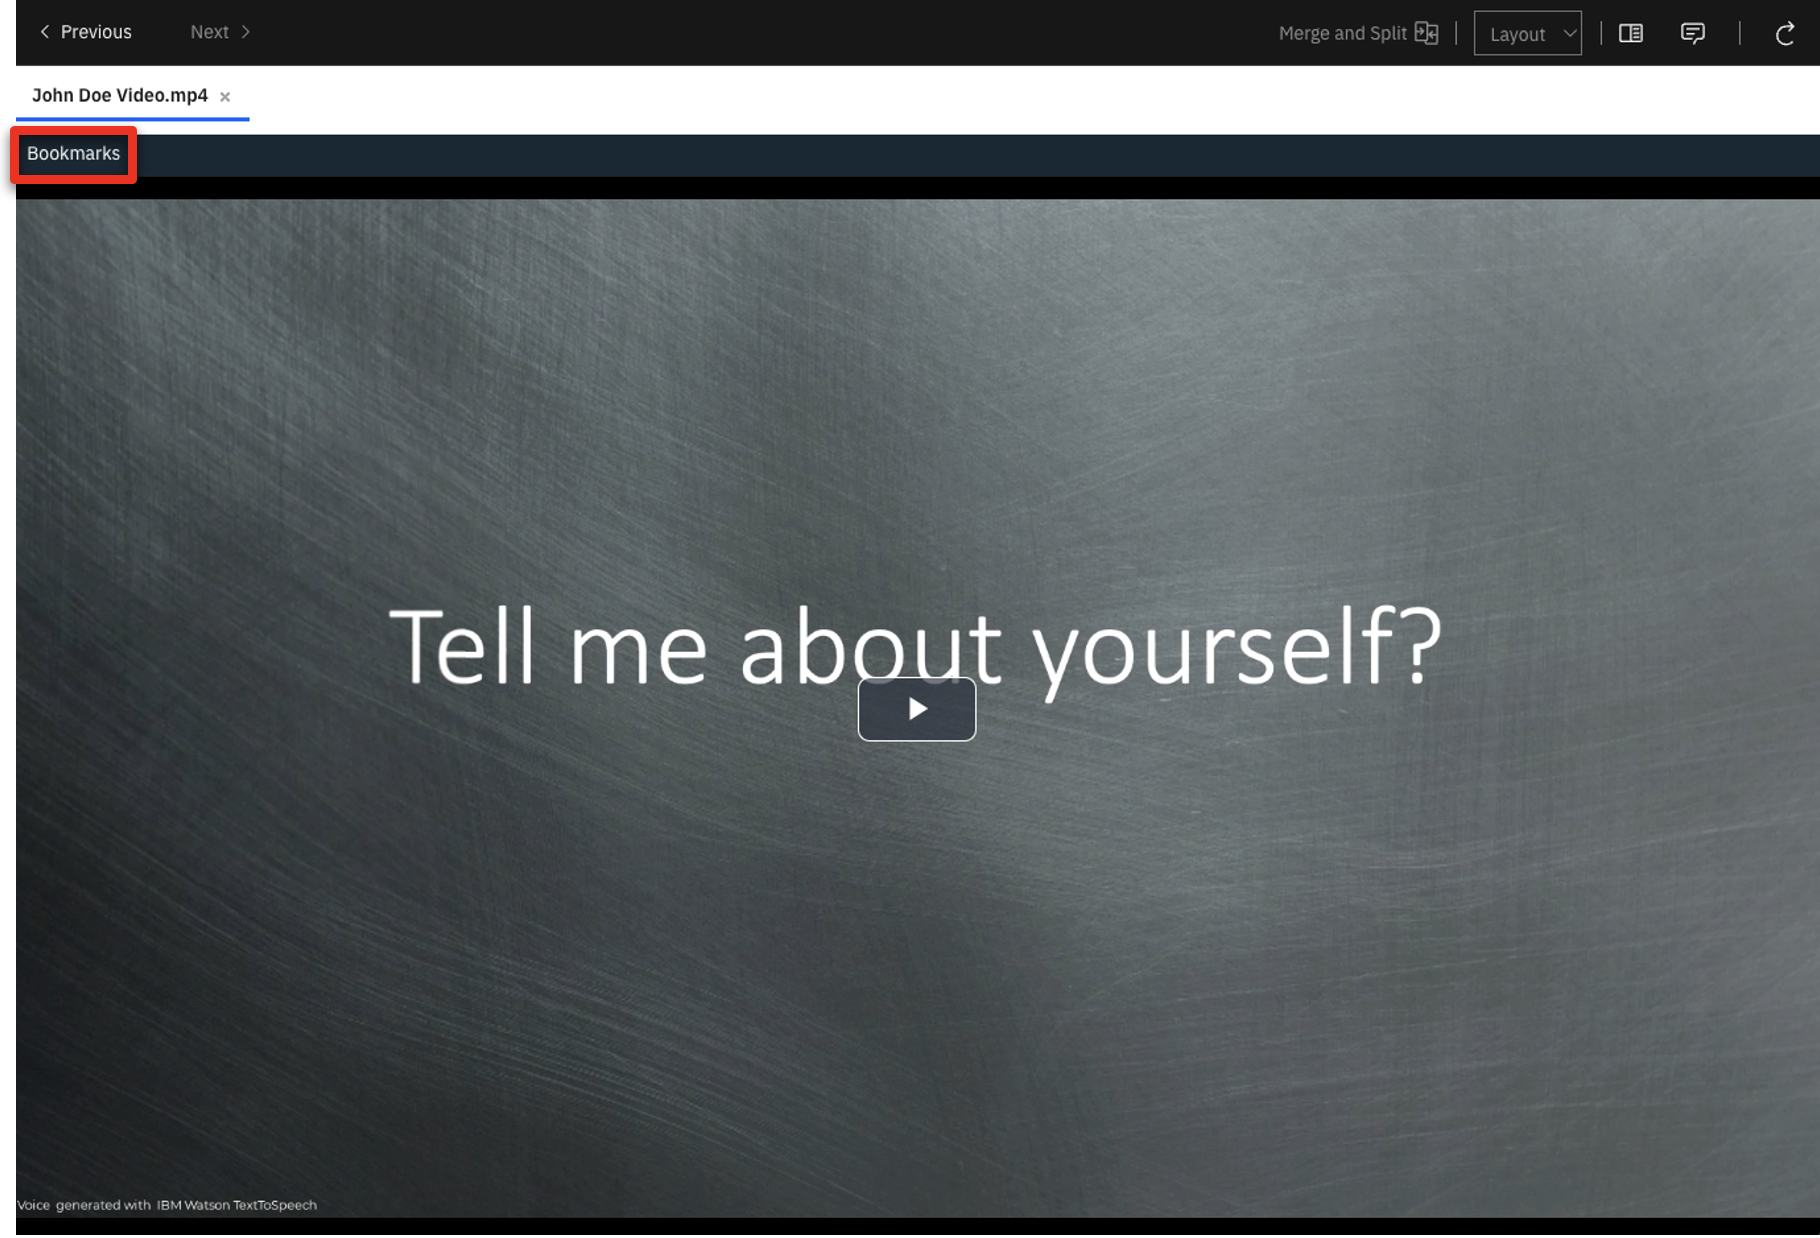 |
| Action 1.2.13 | Click New Bookmark.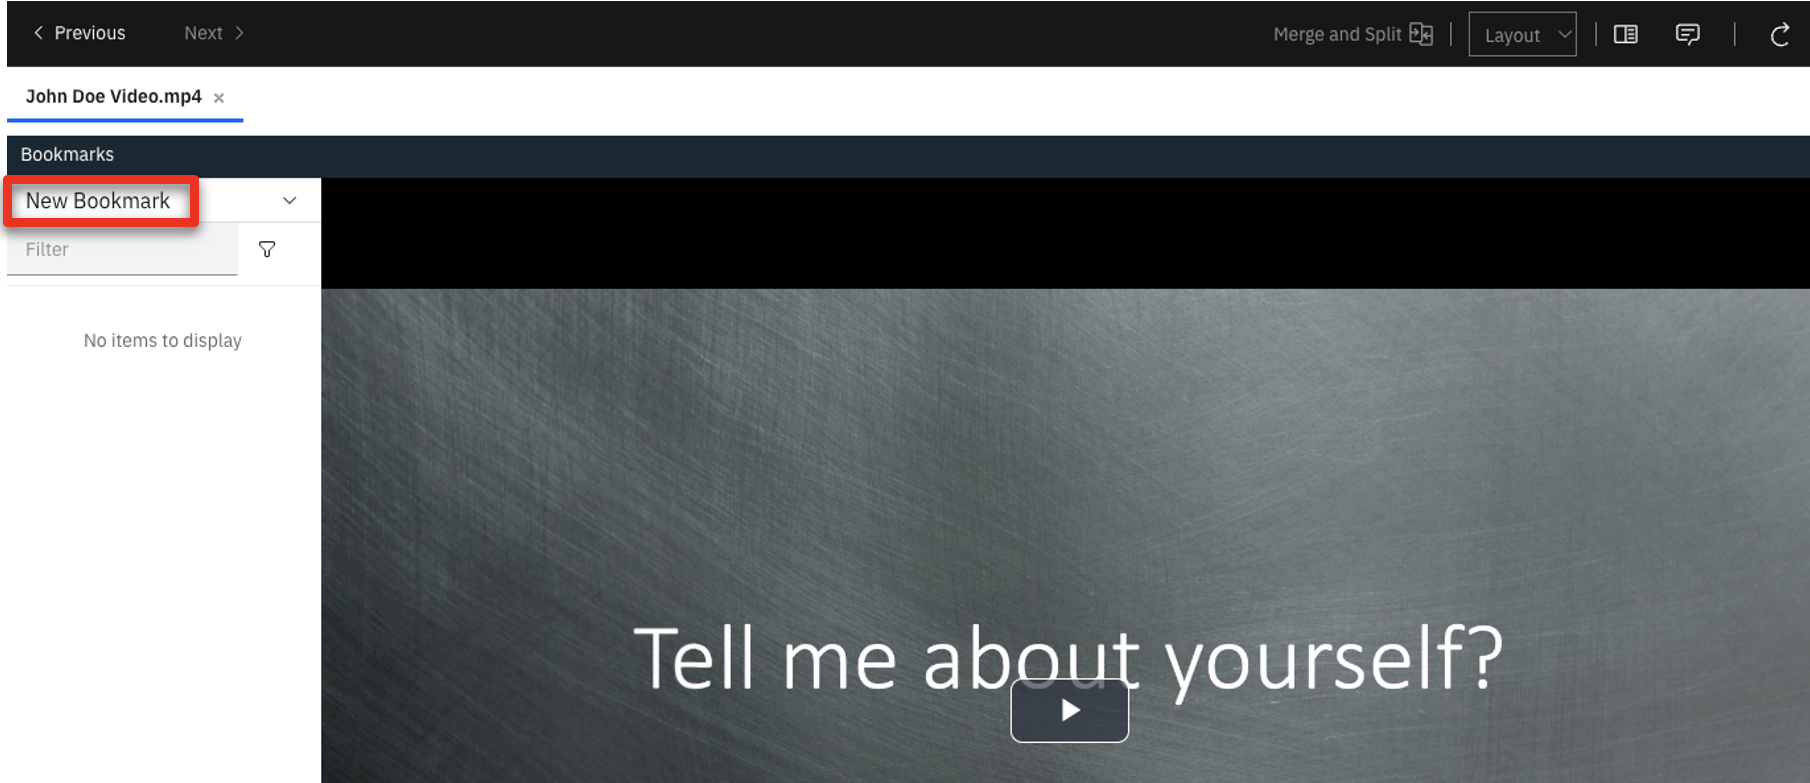 |
| Narration | The HR manager adds bookmarks to the video to make it easier to find the individual responses. |
| Action 1.2.14 | Enter Overview (1) as the bookmark name, enter ‘Tell me about yourself?’ (2) in the bookmark description and click OK (3).  |
| Action 1.2.15 | Close the IBM Navigator Viewer window. |
| Narration | The HR manager bookmarks the remaining sections of the video and adds the applicant’s other documents to his candidate file. Let’s jump ahead and see the teamspace with all the documents added. |
| Action 1.2.16 | Click x to close the John Doe Demo Teamspace. 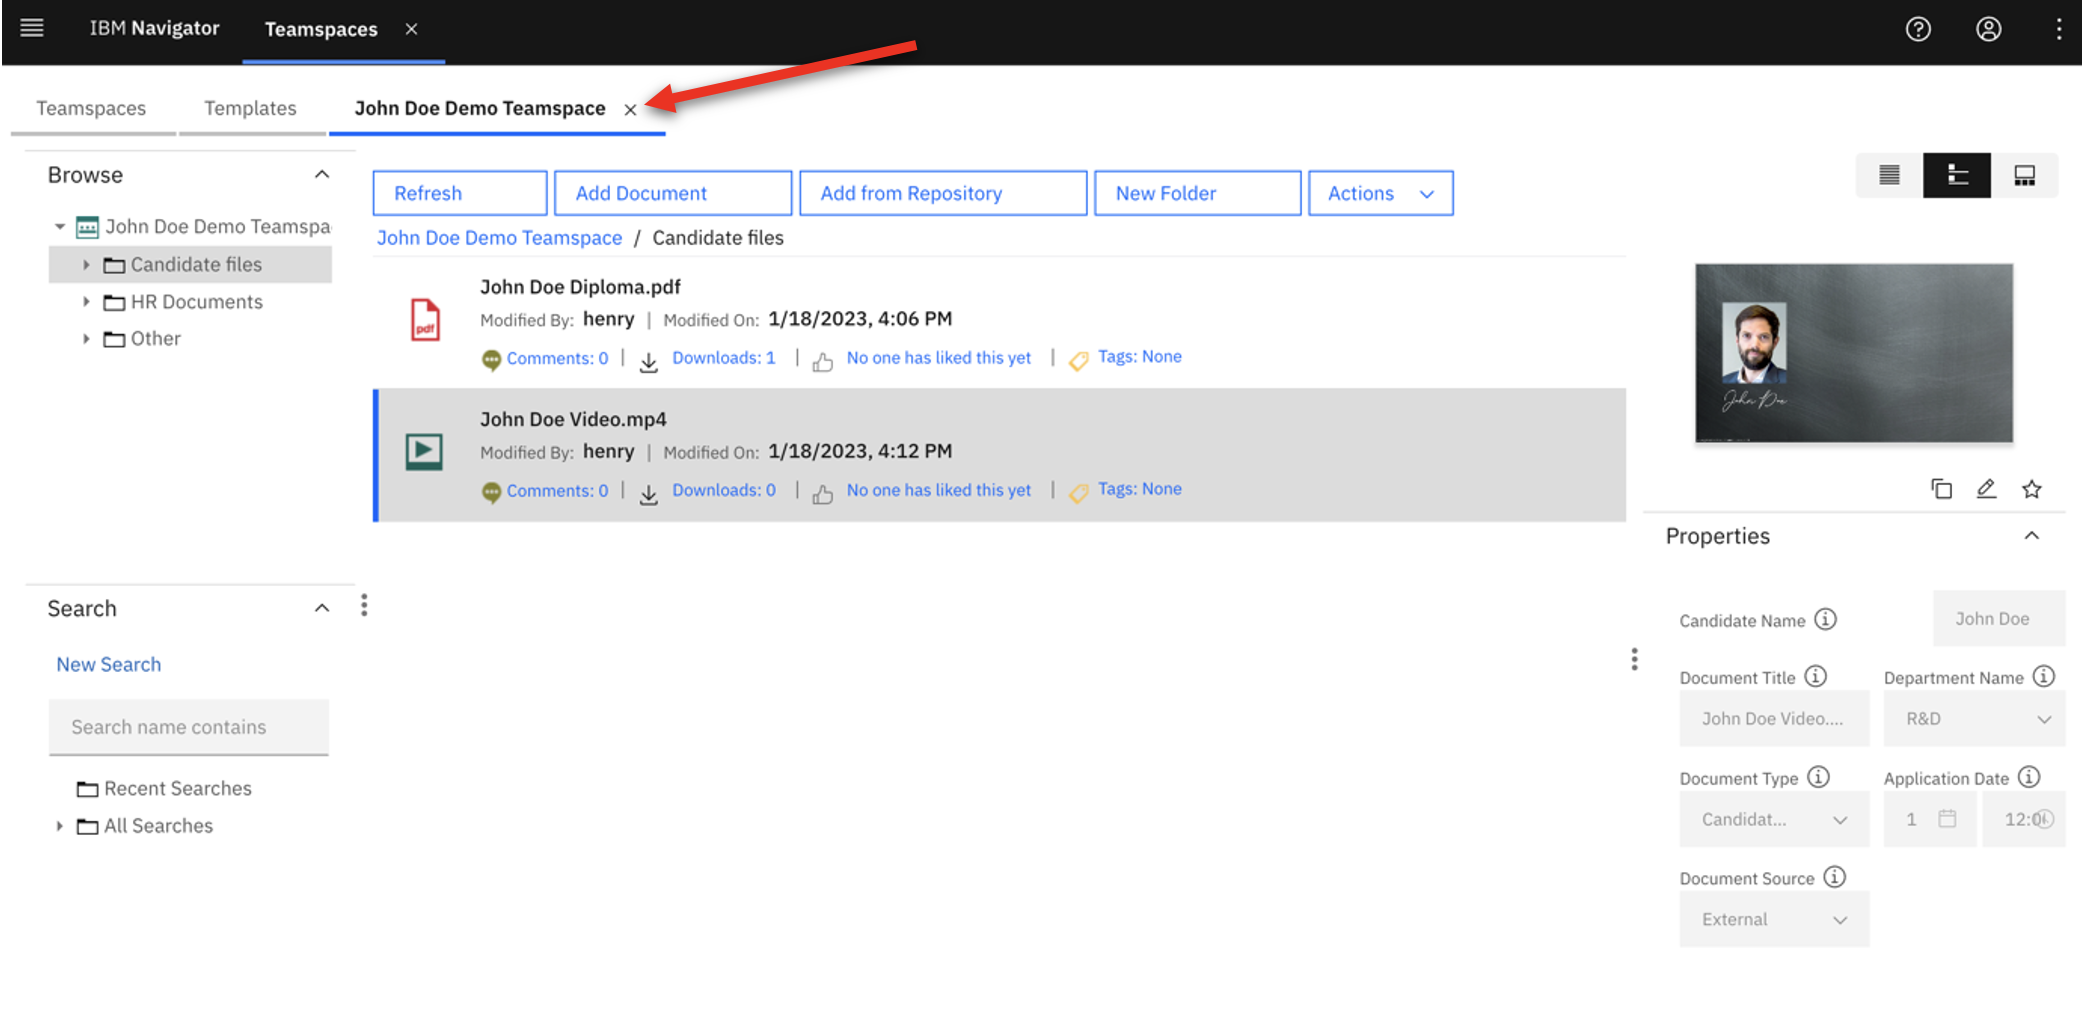 |
| Action 1.2.17 | Click John Doe. 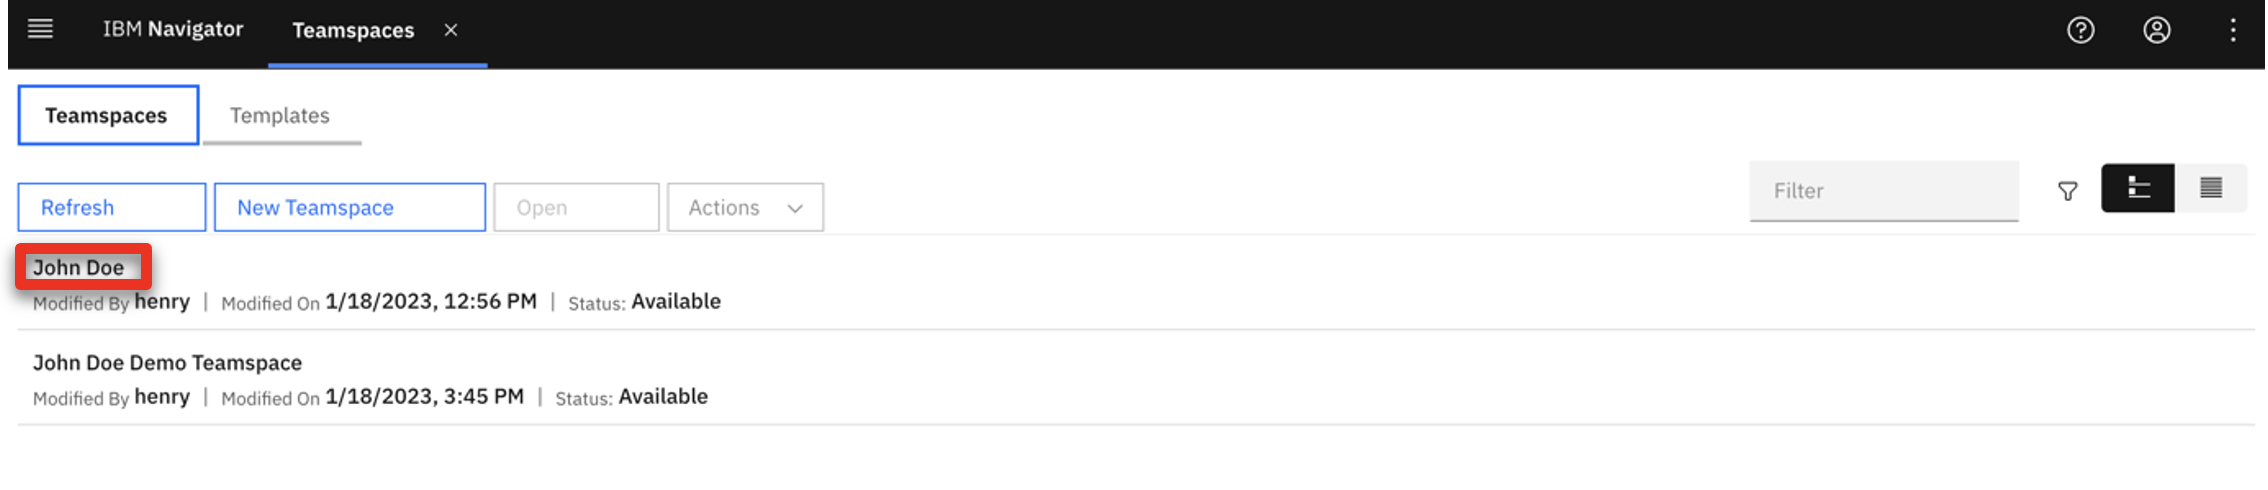 |
| Action 1.2.18 | Click Candidate files. |
| Action 1.2.19 | Click the Magazine view icon.  |
| Narration | Now the hiring team can collaborate on the applicant’s documents. |
| 1.3 | Manage role-based redactions |
|---|---|
| Narration | To adhere to Focus Corp’s privacy guidelines, HR must prevent unauthorized access to the applicant’s personal information, such as his home address. The HR manager uses role-based redactions to automatically mask sensitive information, based on each user’s role. The role-based access capabilities enable Focus Corp to explicitly define who has permission to see the redacted information. The HR manager starts by validating that the role-based redactions have been set correctly by the content administrator. |
| Action 1.3.1 | Click the hamburger icon to open the IBM Navigator menu. |
| Narration | The HR manager uses the Administration menu to review and update the role-based access. |
| Action 1.3.2 | Click Administration. 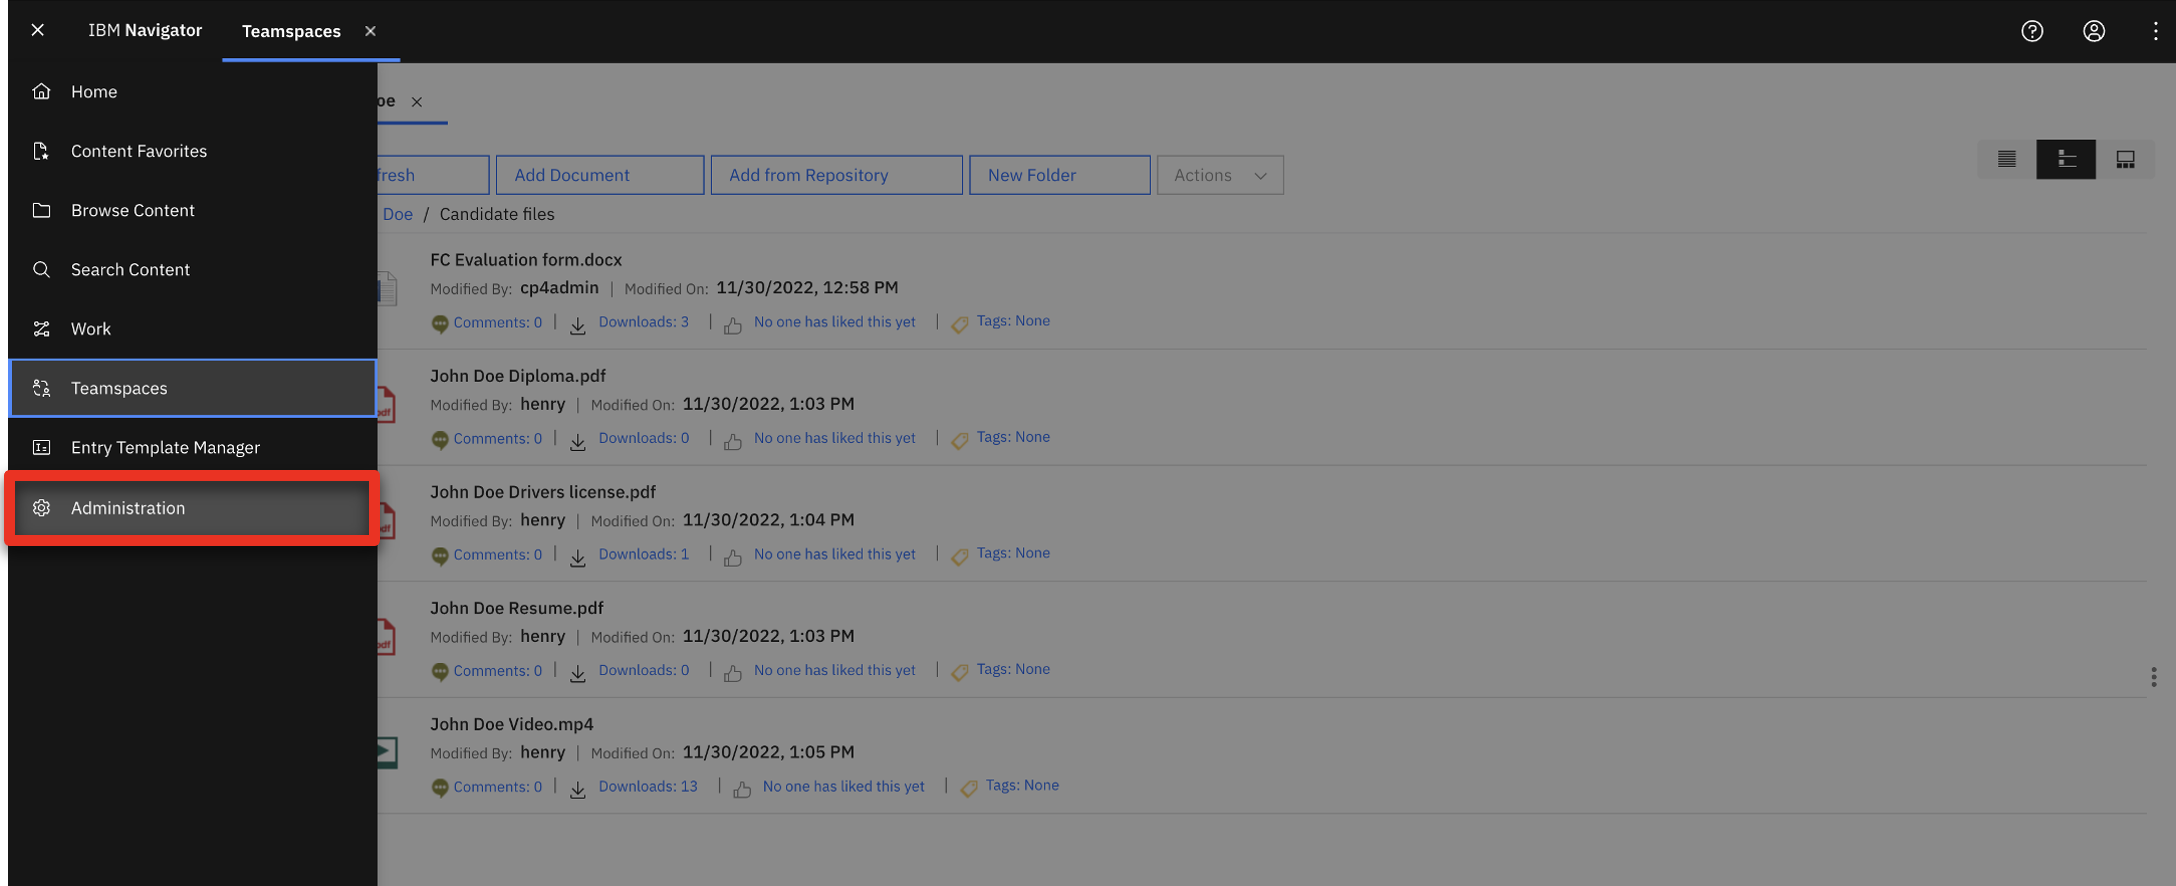 |
| Action 1.3.3 | Click Role-based Redactions. 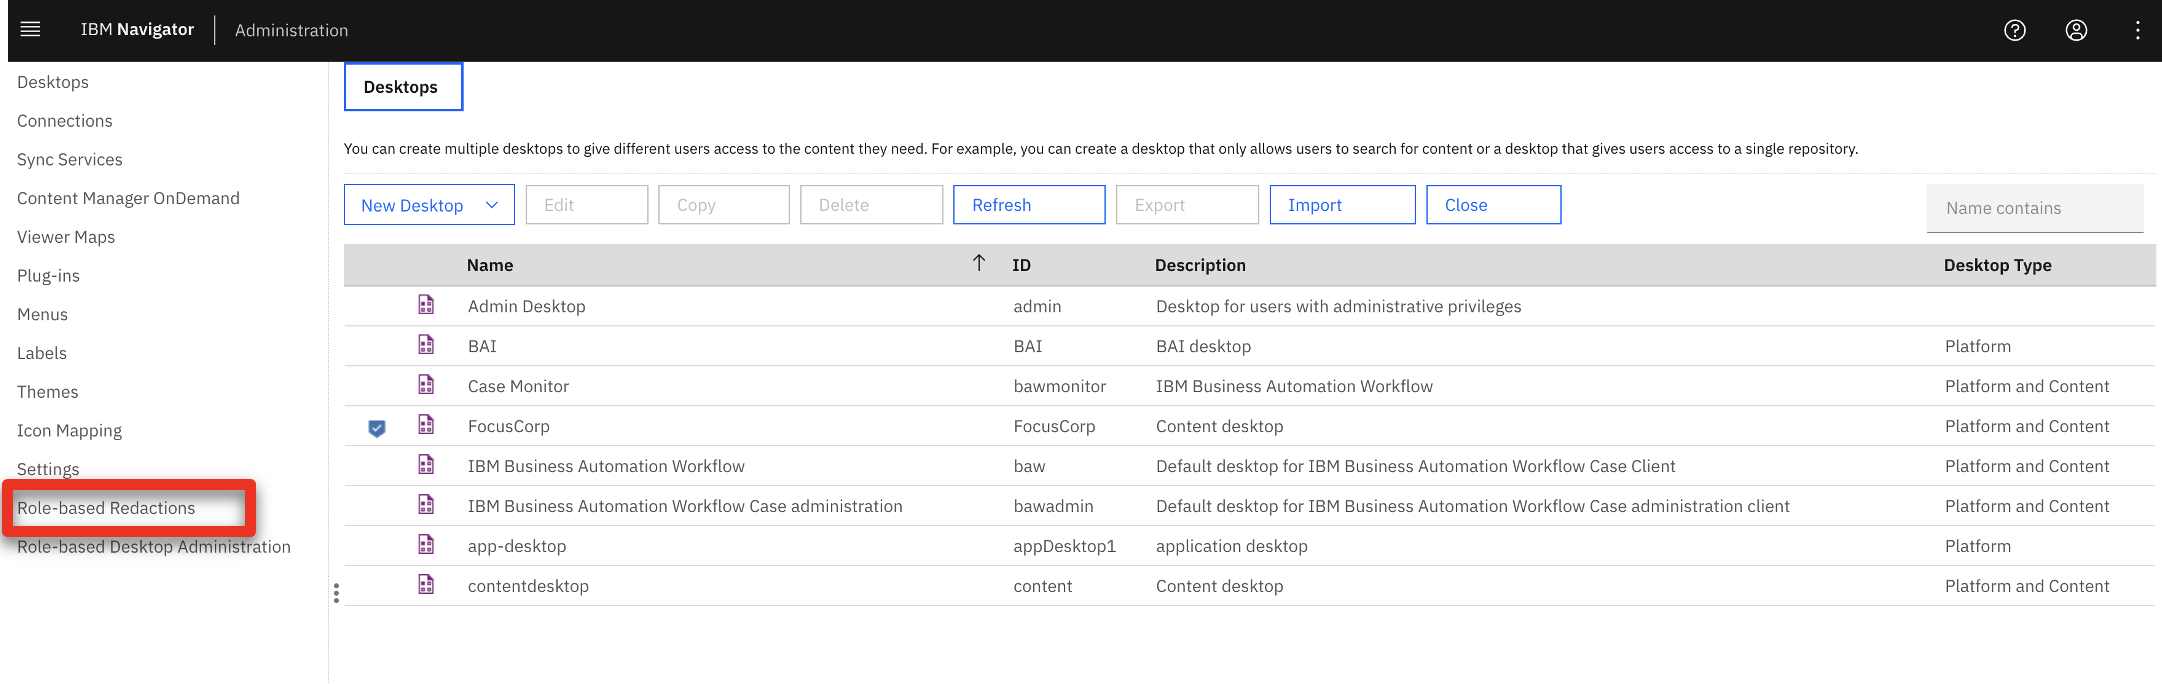 |
| Narration | The HR manager reads through the ‘Private Information’ redaction policy, which specifies who can see a candidate’s private information. |
| Action 1.3.4 | Double-click Private Information.  |
| Action 1.3.5 | Click Policies and Roles. 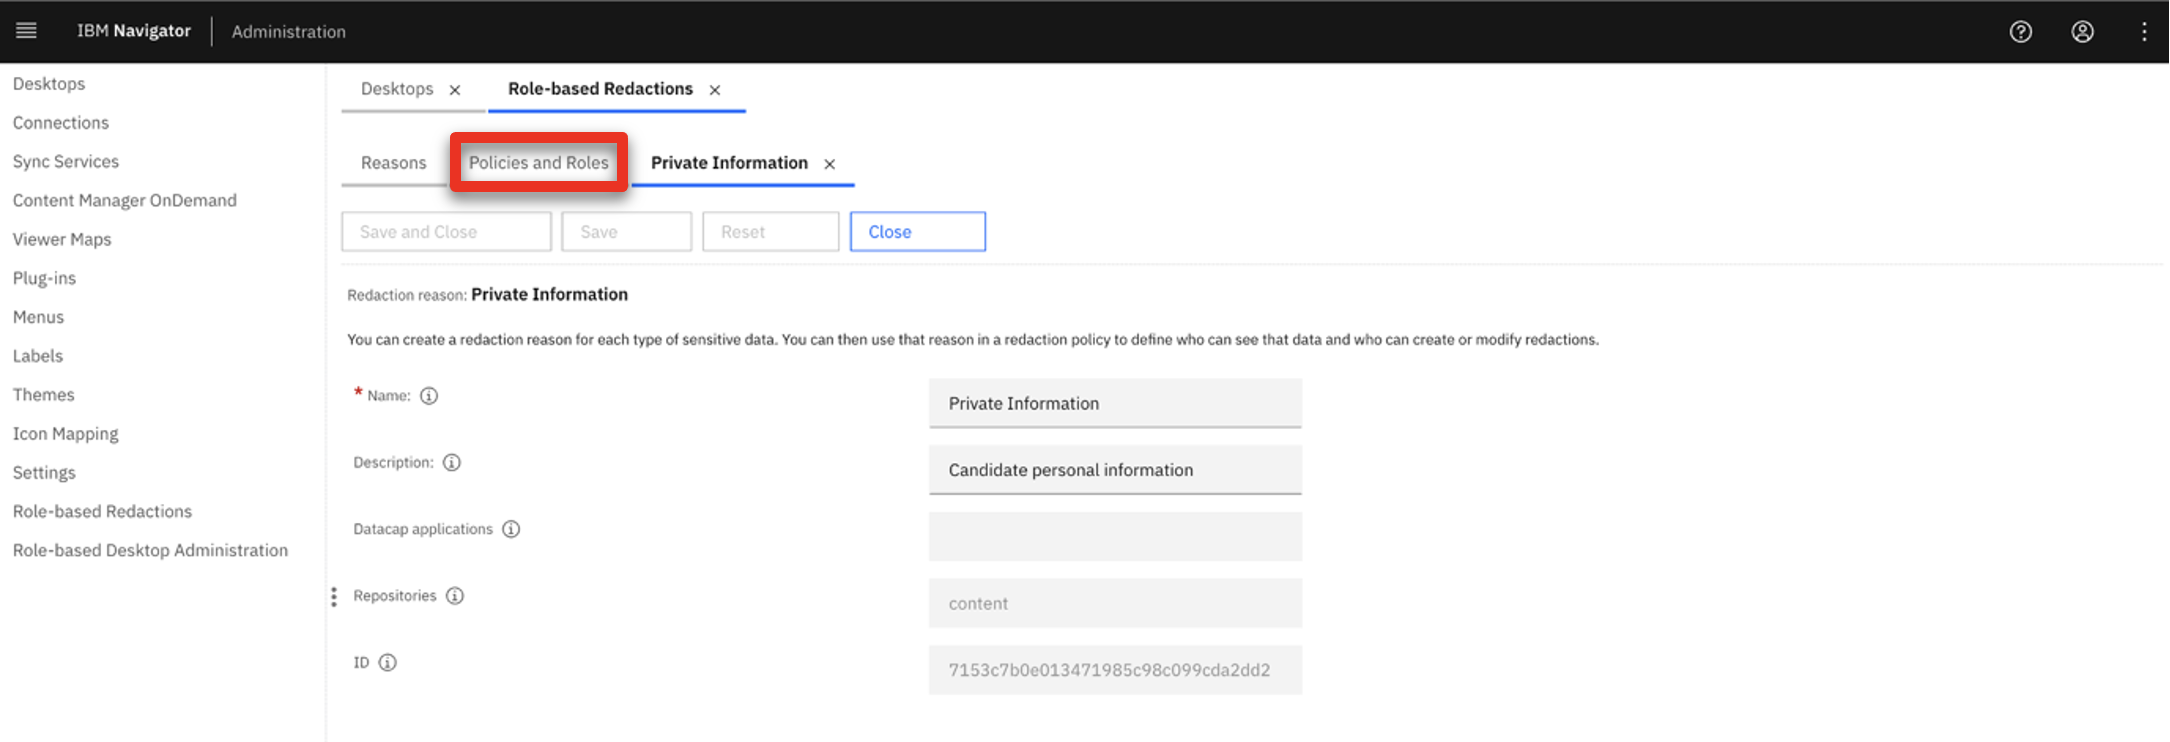 |
| Action 1.3.6 | If prompted, enter the User name ‘cp4admin’ and the Password (1) from your cheat sheet. Click Log In (2).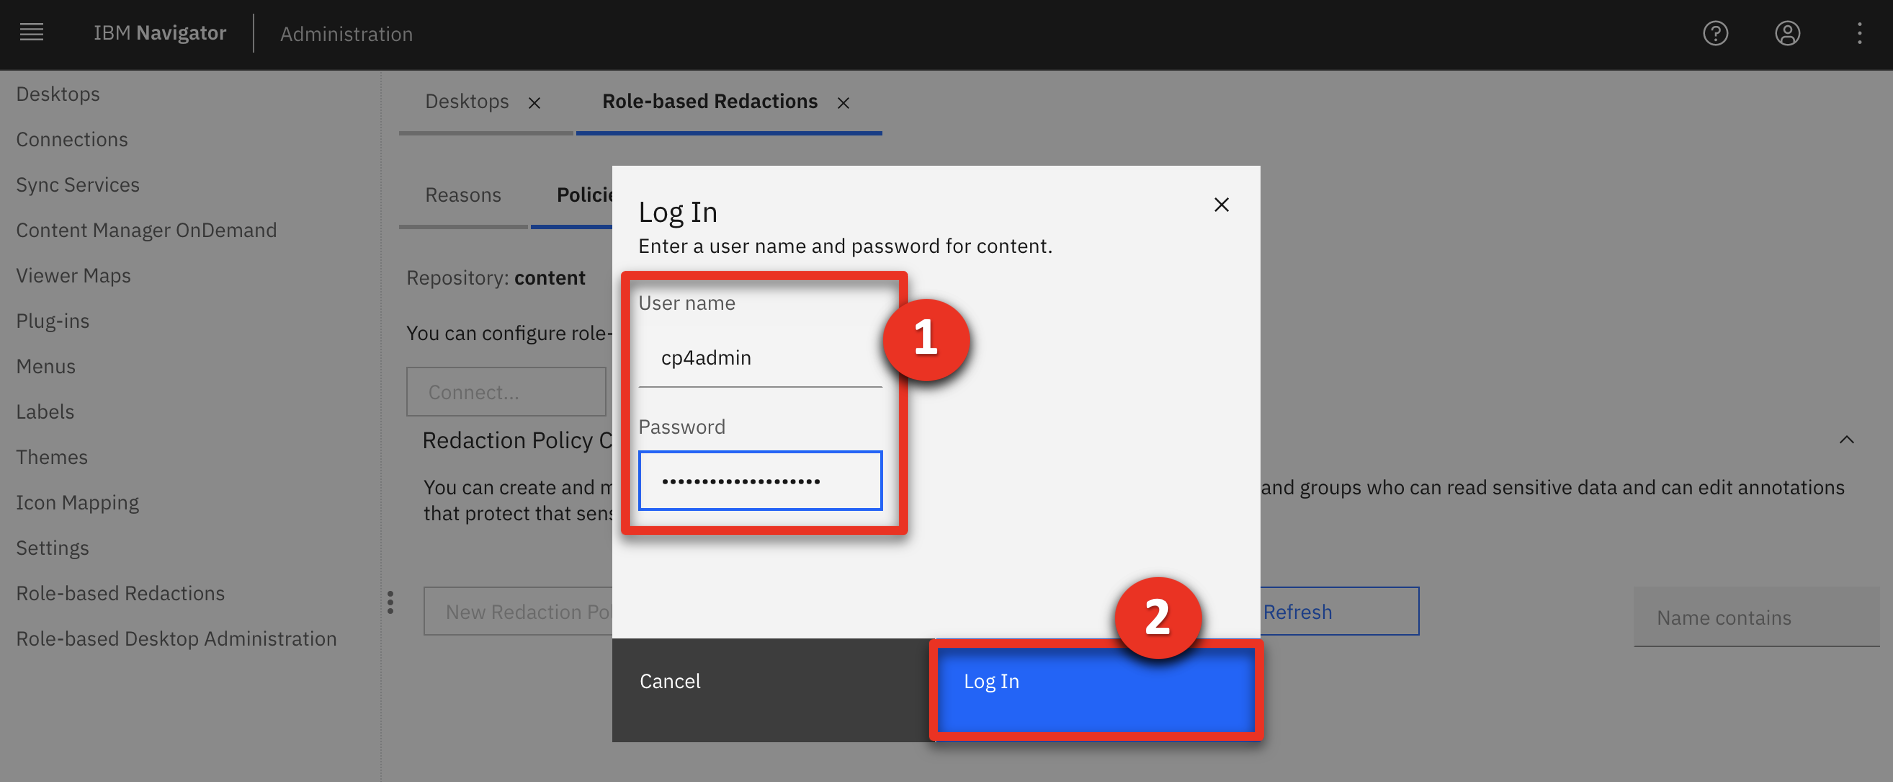 |
| Narration | The ‘Private Information’ reason contains two redaction roles: editors and viewers. Editors can add or remove redactions. Viewers can see redacted information but cannot change it. No other users can view redacted information. |
| Action 1.3.7 | Scroll down (1) and point out the payroll manager’s role as a FC Redaction viewer (2). 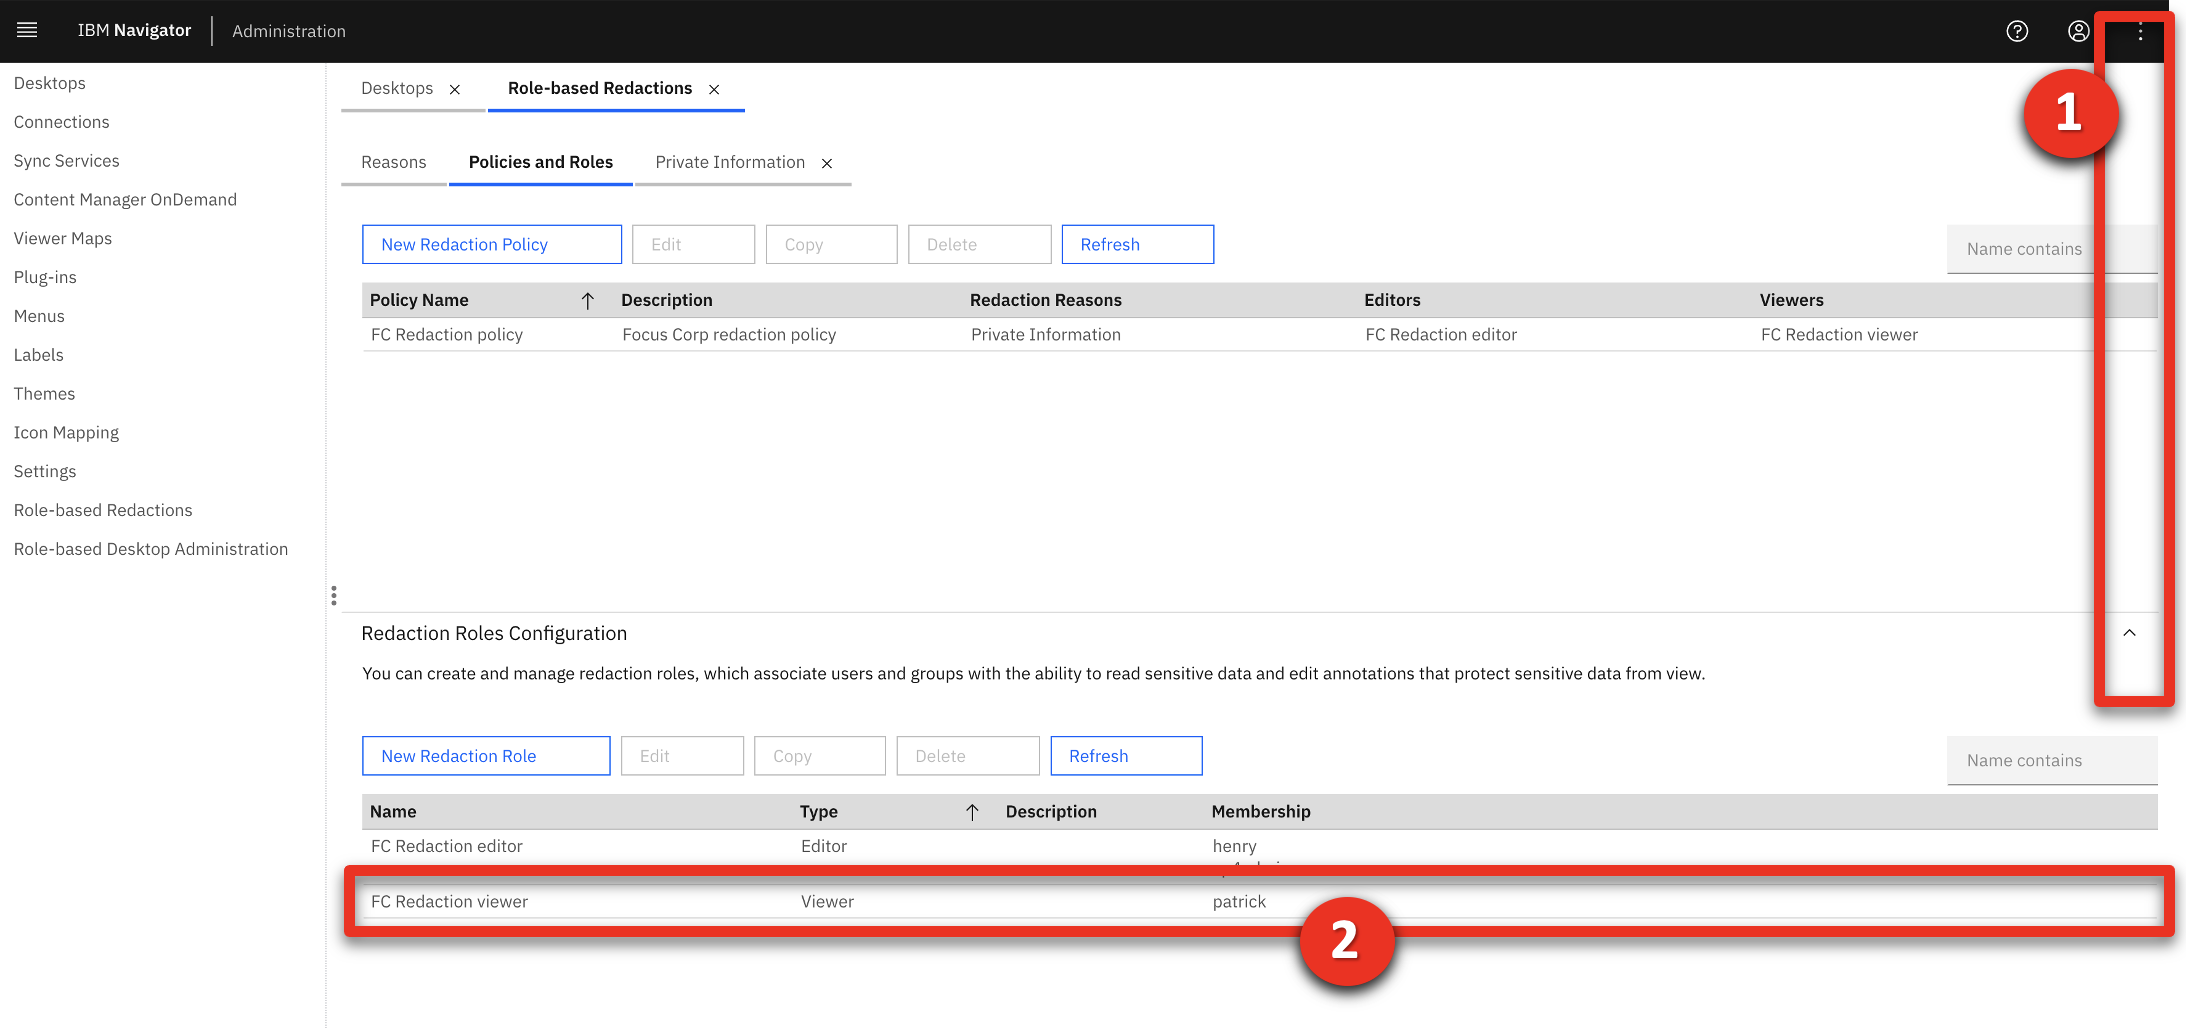 |
| Narration | The HR manager verifies that only Patrick, the payroll manager, can view private information. Other members of the hiring team, such as the hiring manager, will not be able to access the redacted information. Confident that these settings are correct, the HR manager is ready to redact the documents. |
| Action 1.3.8 | Click the hamburger icon.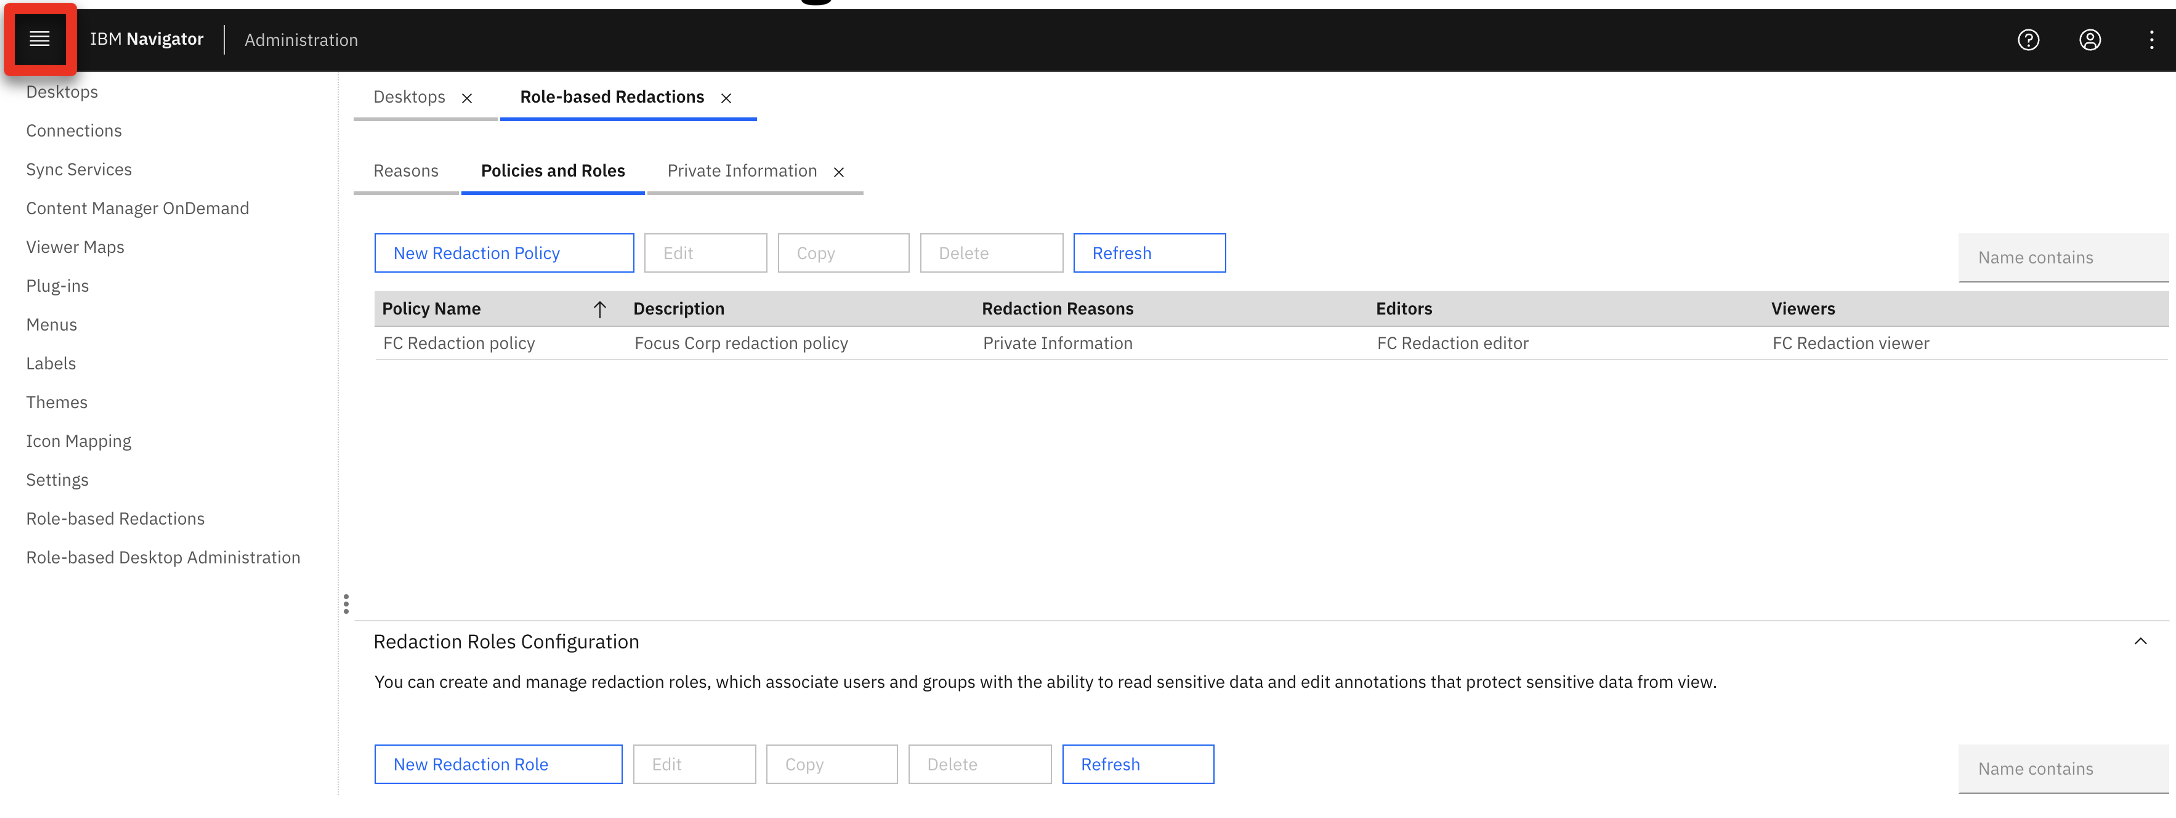 |
| Action 1.3.9 | Click Teamspaces.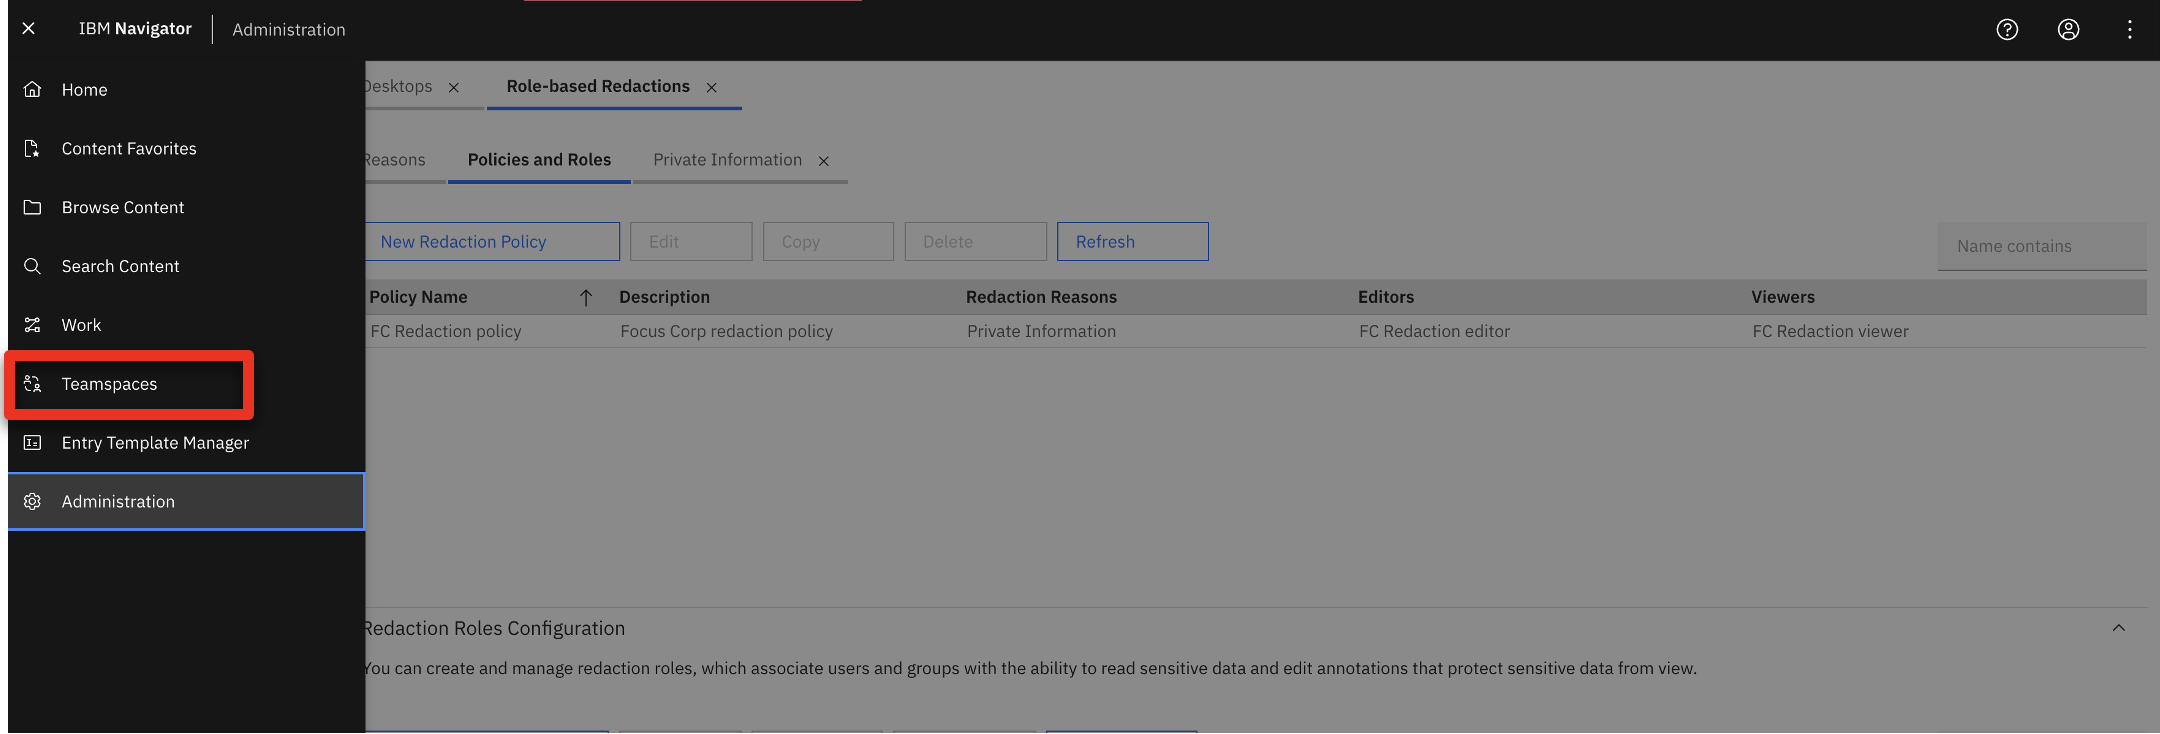 |
| Action 1.3.10 | Click John Doe. |
| Action 1.3.11 | Click Candidate files. |
| Narration | The HR manager opens the applicant’s resume, selects the information to redact, and indicates it is private information. |
| Action 1.3.12 | Click John Doe Resume.pdf to open it in the document viewer. 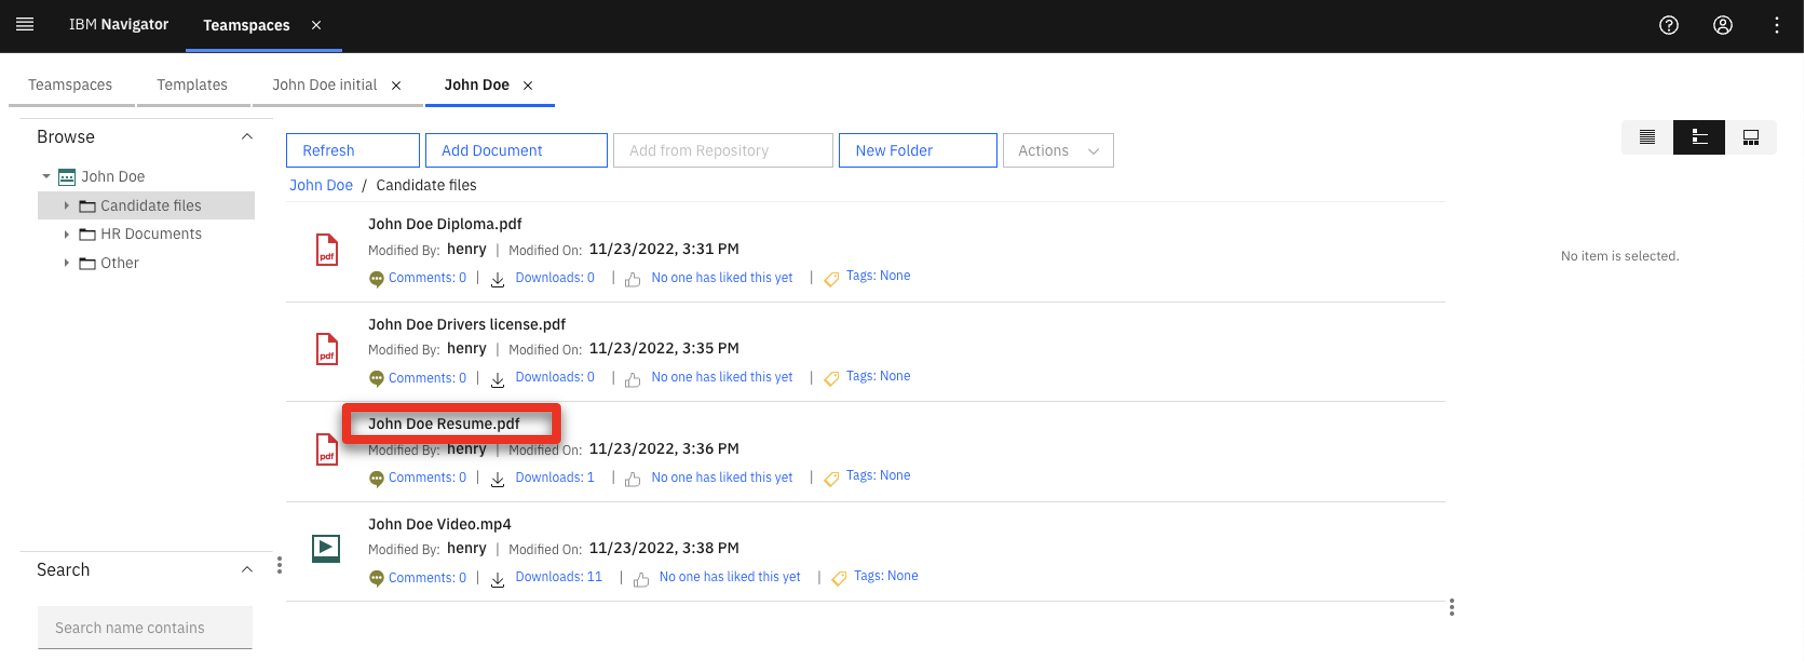 |
| Action 1.3.13 | Click the redaction icon, which is a darkened rectangle. 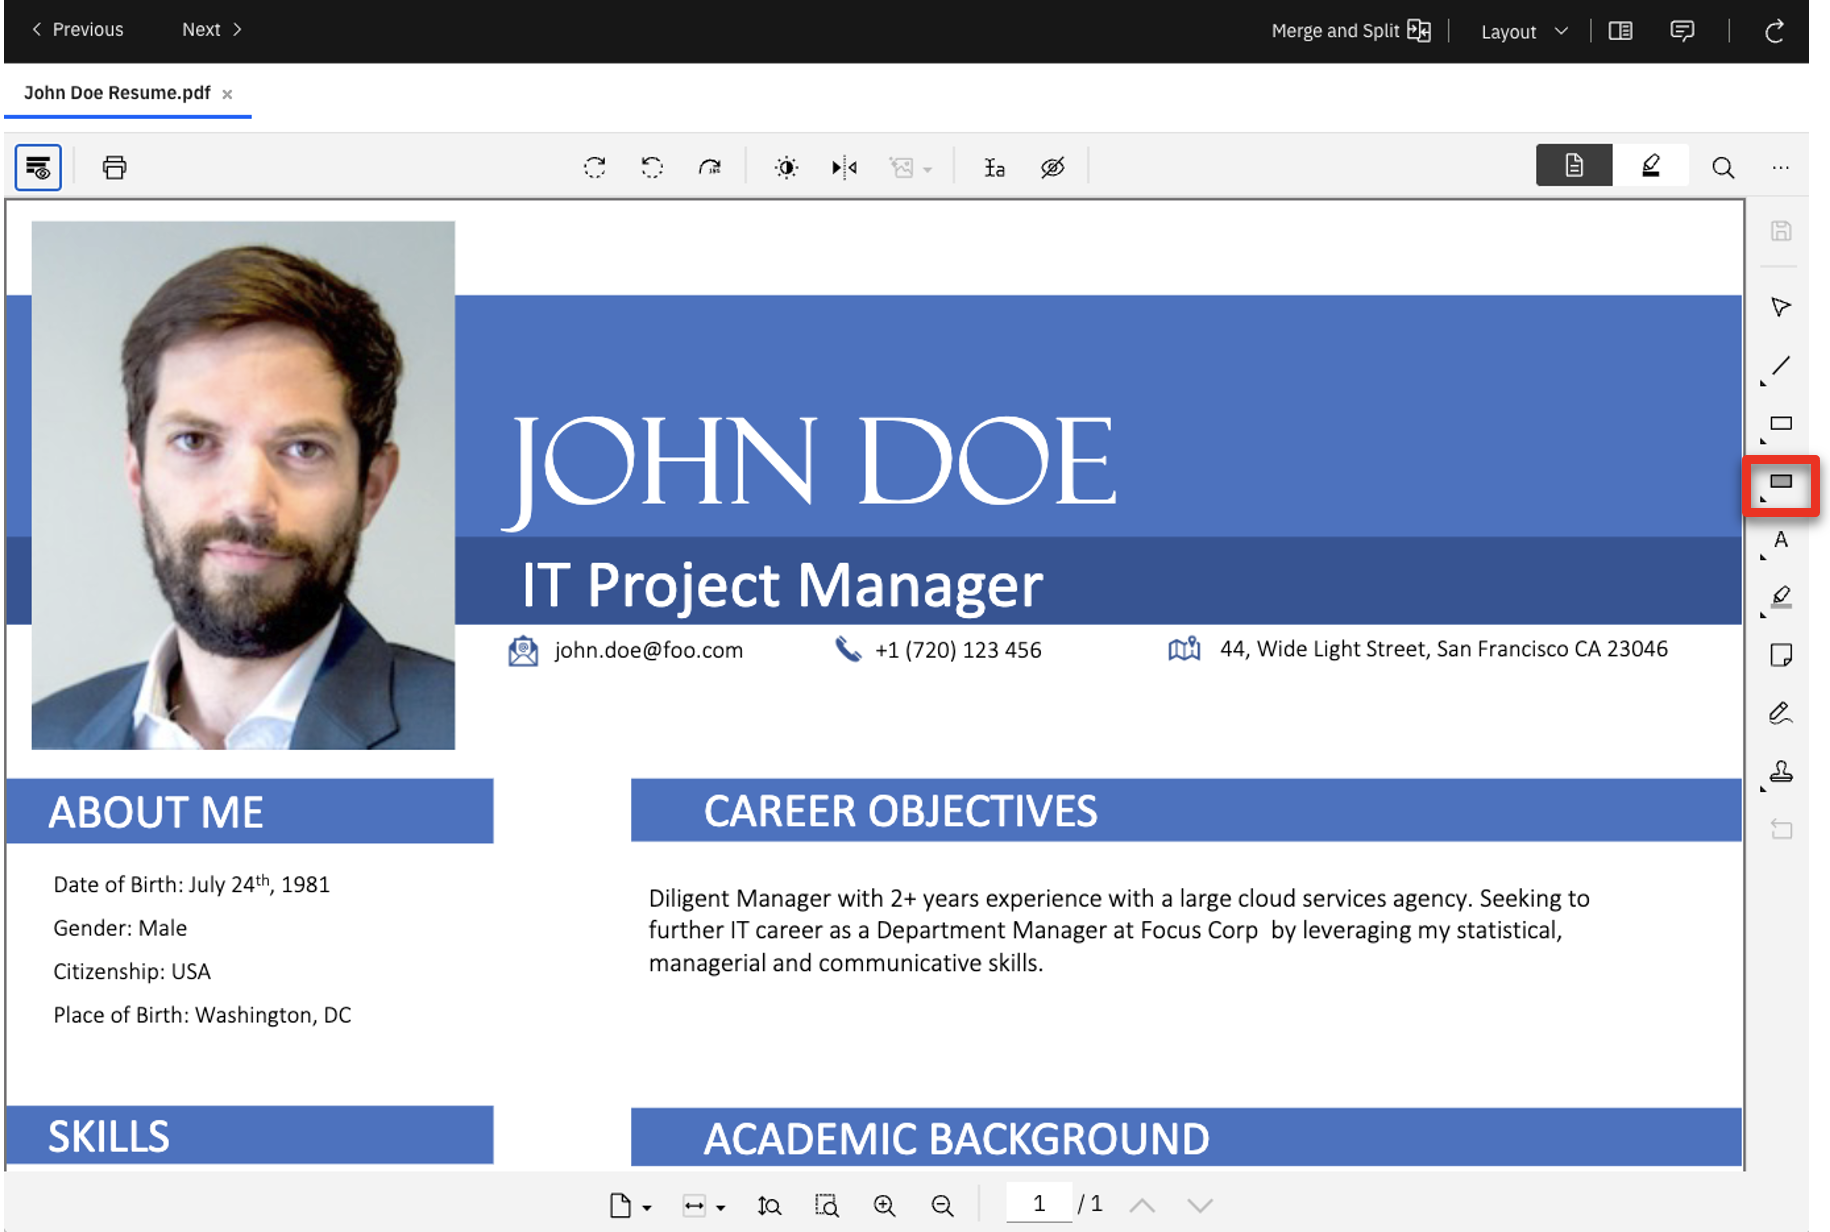 |
| Action 1.3.14 | Redact the applicant’s email address, phone number and home address by drawing a rectangle around them using the redaction tool. 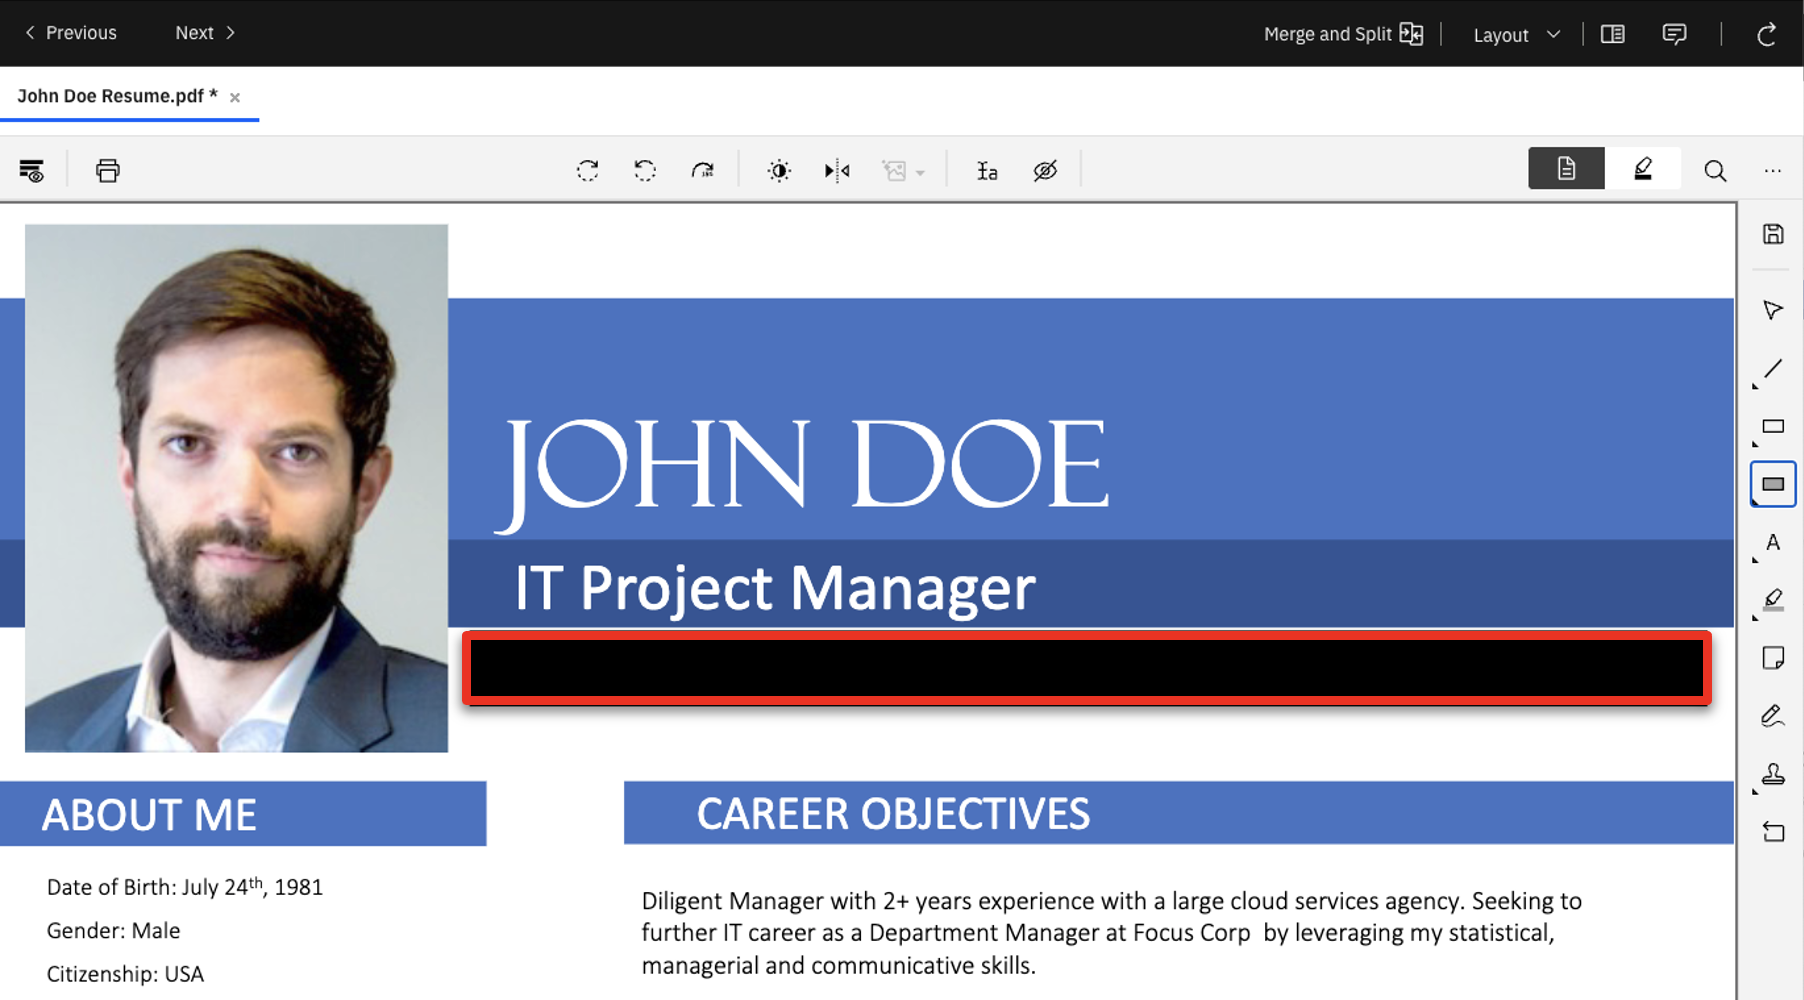 |
| Action 1.3.15 | Right-click the redaction rectangle (1) and click the document redaction reason icon (2). 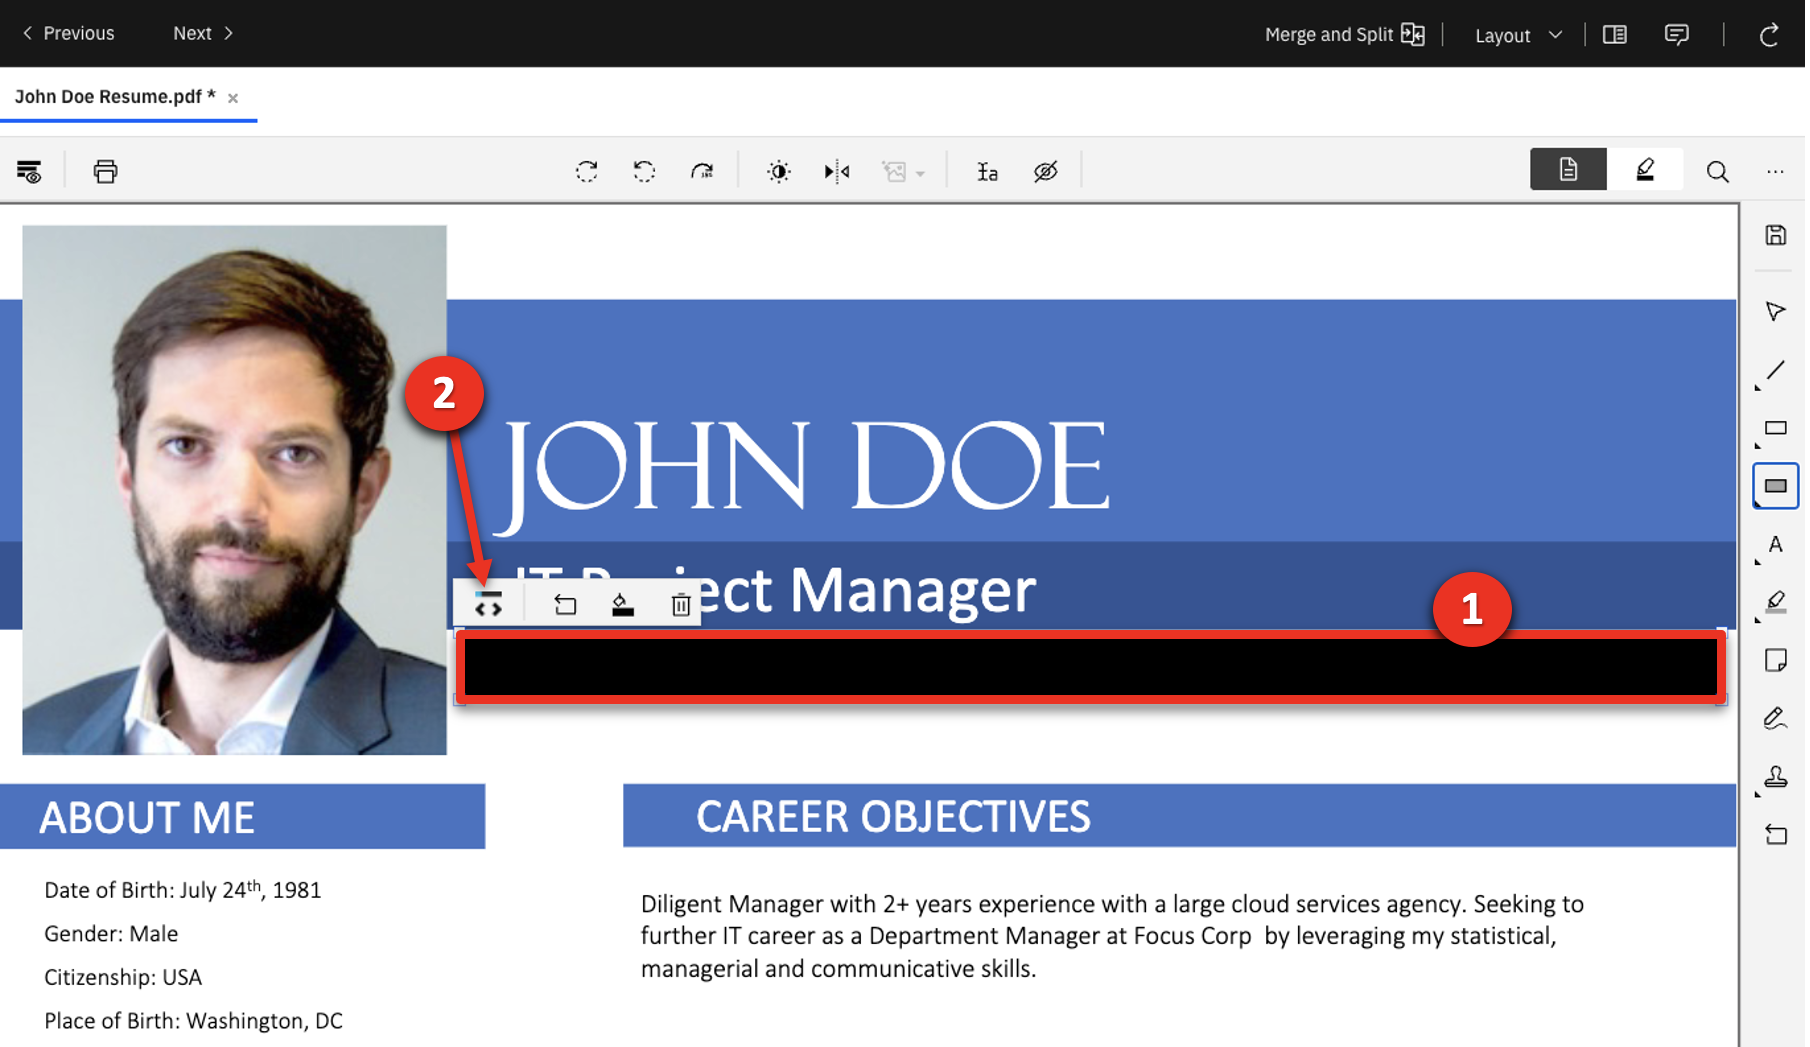 |
| Action 1.3.16 | Select Private Information as the redaction reason (1) and click OK (2). 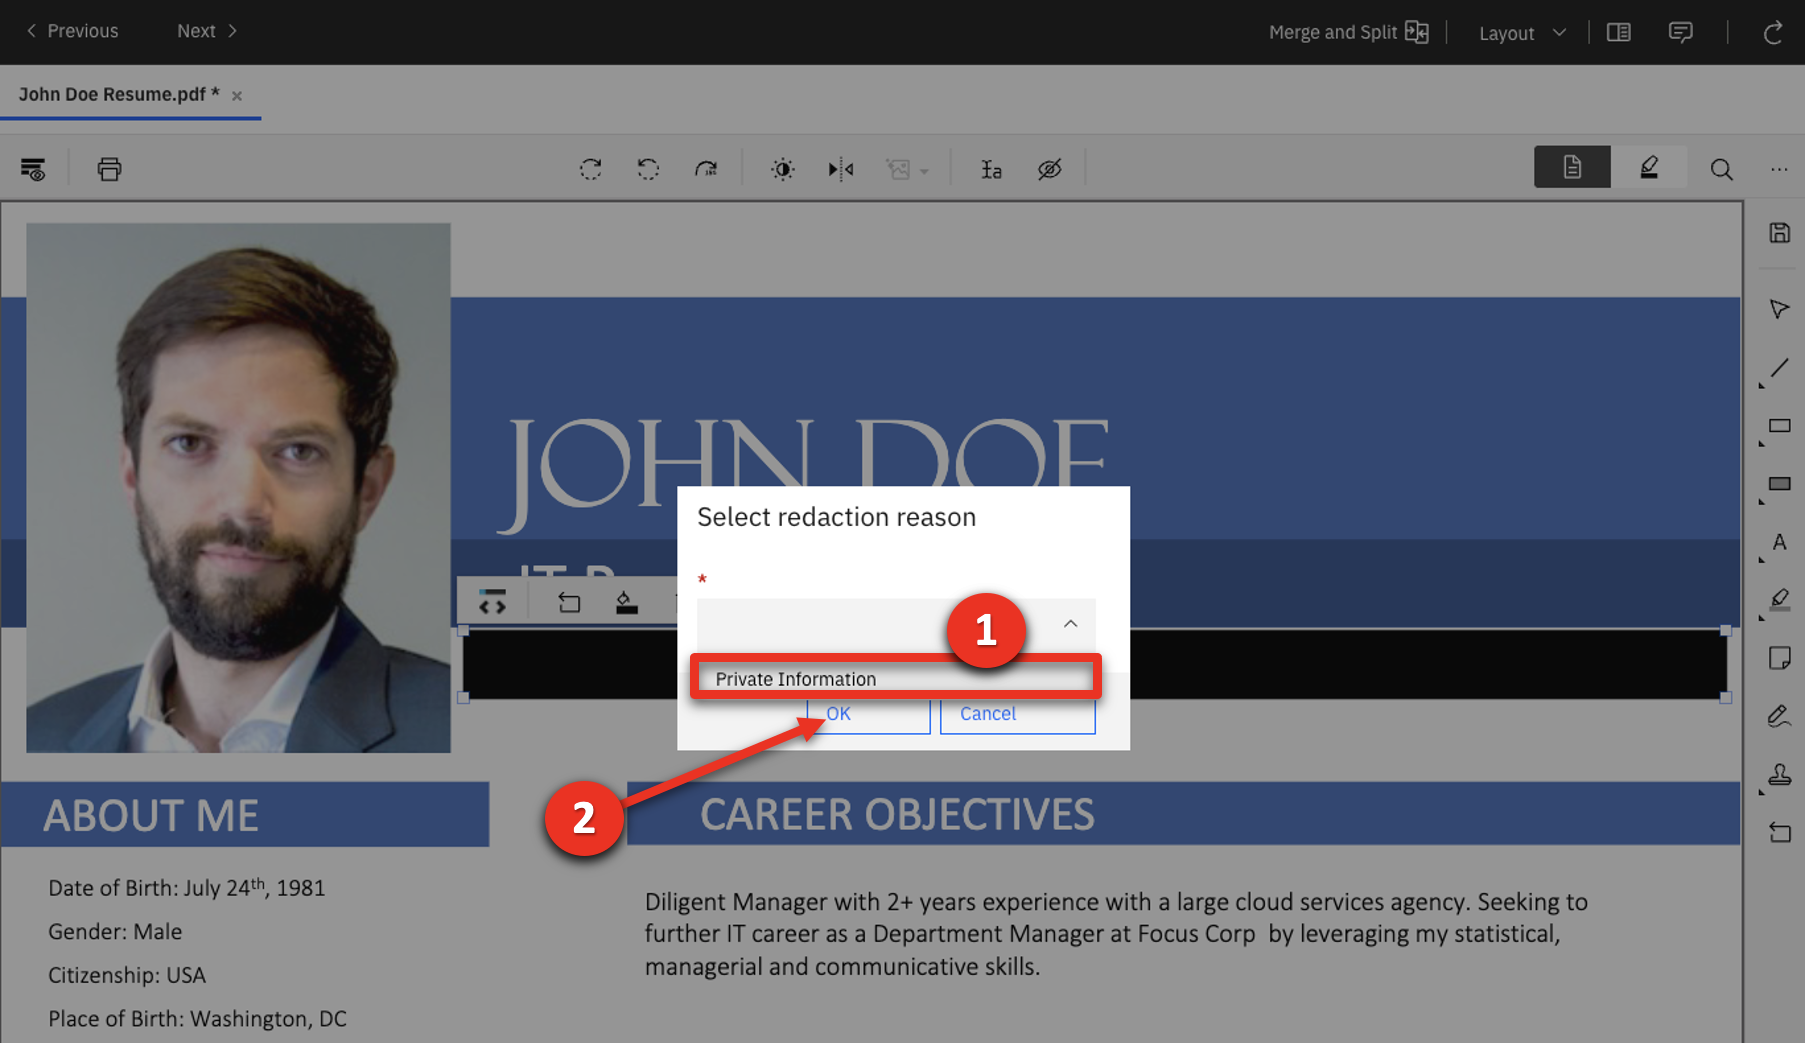 |
| Narration | This hides the applicant’s personal information from users who do not have viewing rights. The hiring manager does not have viewing rights to this information and will not be able to see it. The HR manager acknowledges they have reviewed and verified the applicant’s details by adding a notation on the document. |
| Action 1.3.17 | Click the stamp icon (1) and select the Approved user date stamp (2). 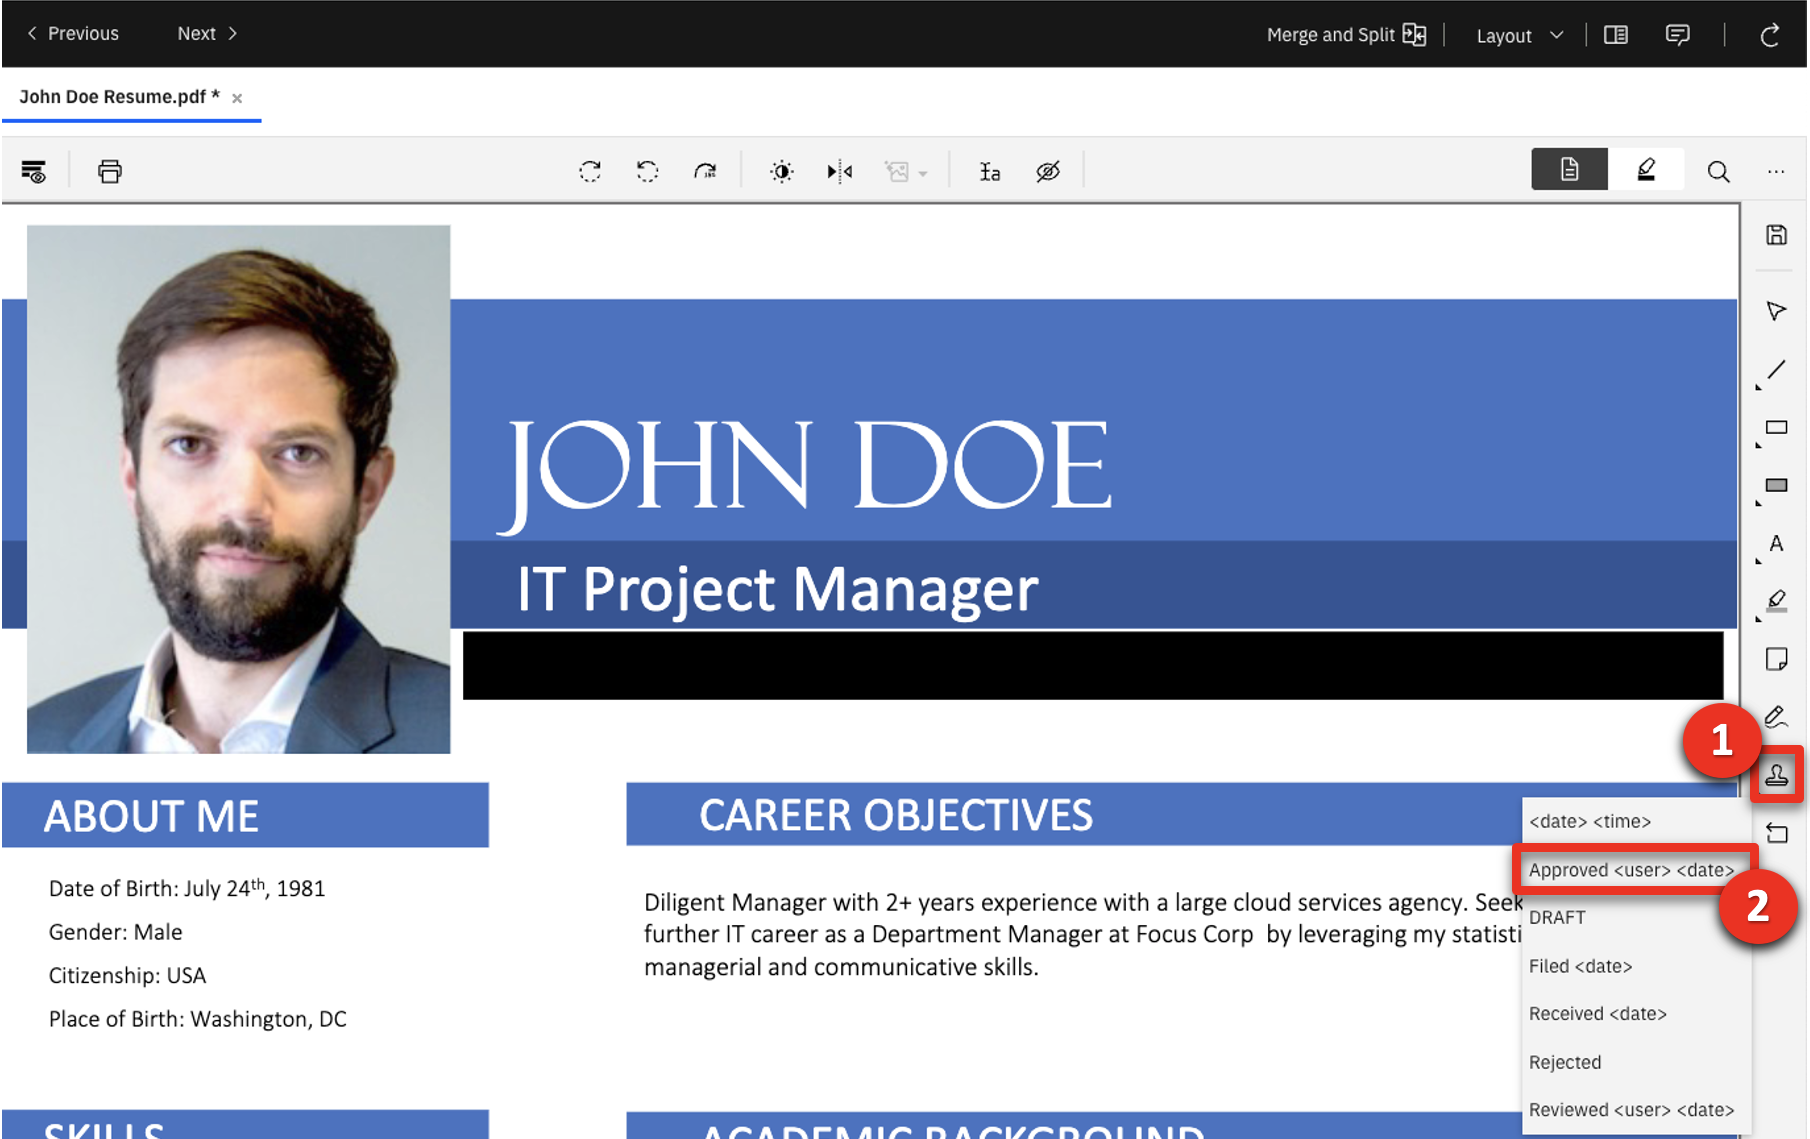 |
| Narration | The HR manager uses a pre-defined annotation to indicate he has verified the applicant meets specific job criteria. |
| Action 1.3.18 | Click above the name on the document to add the annotation. 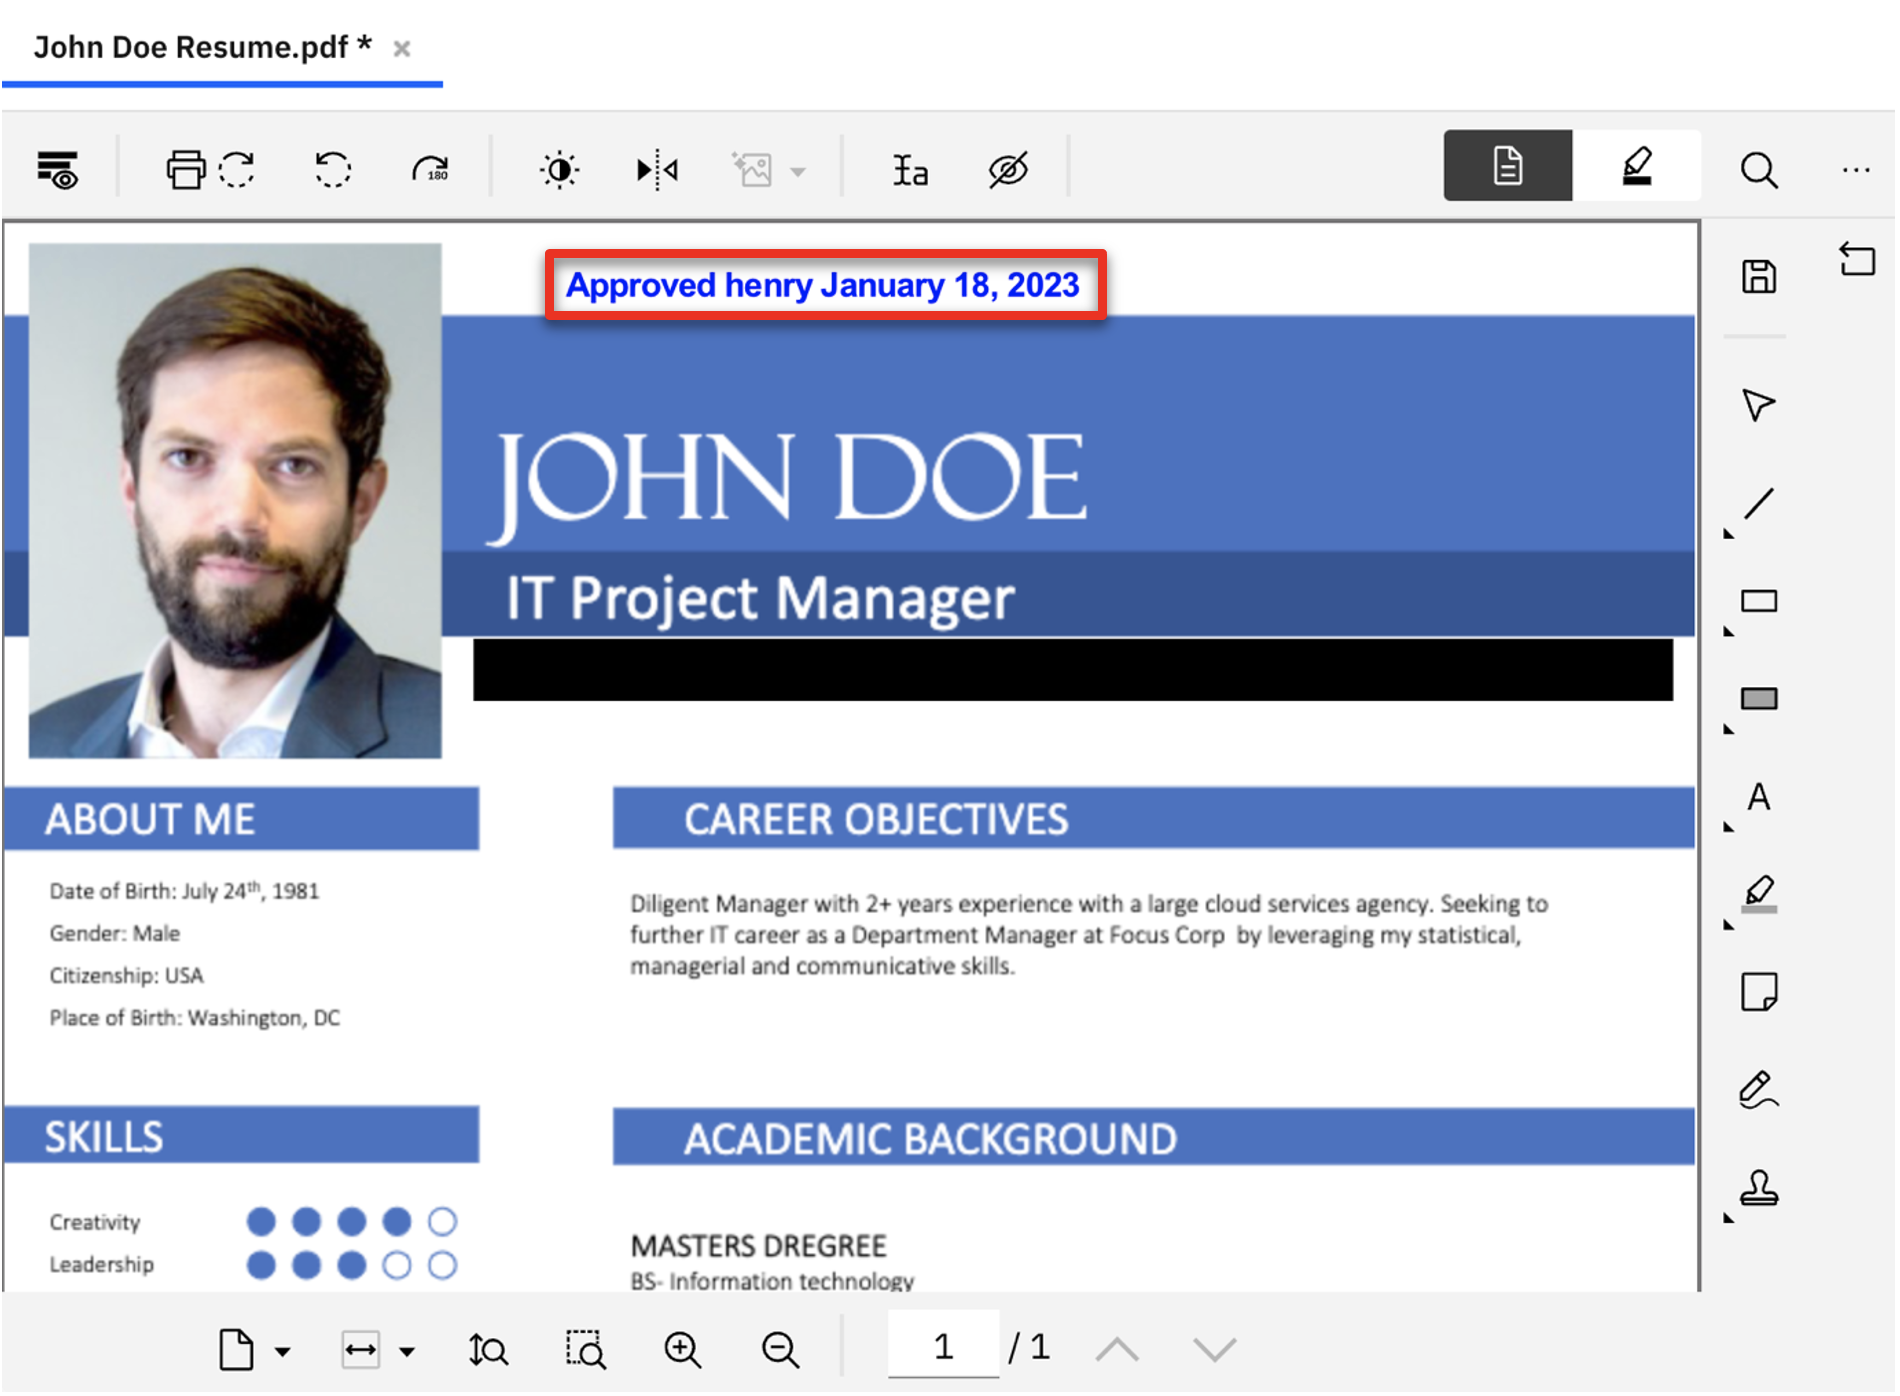 |
| Narration | The HR manager changes the notation color to indicate that the applicant is eligible for a face-to-face interview. |
| Action 1.3.19 | Right-click the annotation (1), select the text color icon (2), and select orange (3). |
| Action 1.3.20 | Click the x to close the color selector view (1) and click anywhere in the document to close the menu (2). 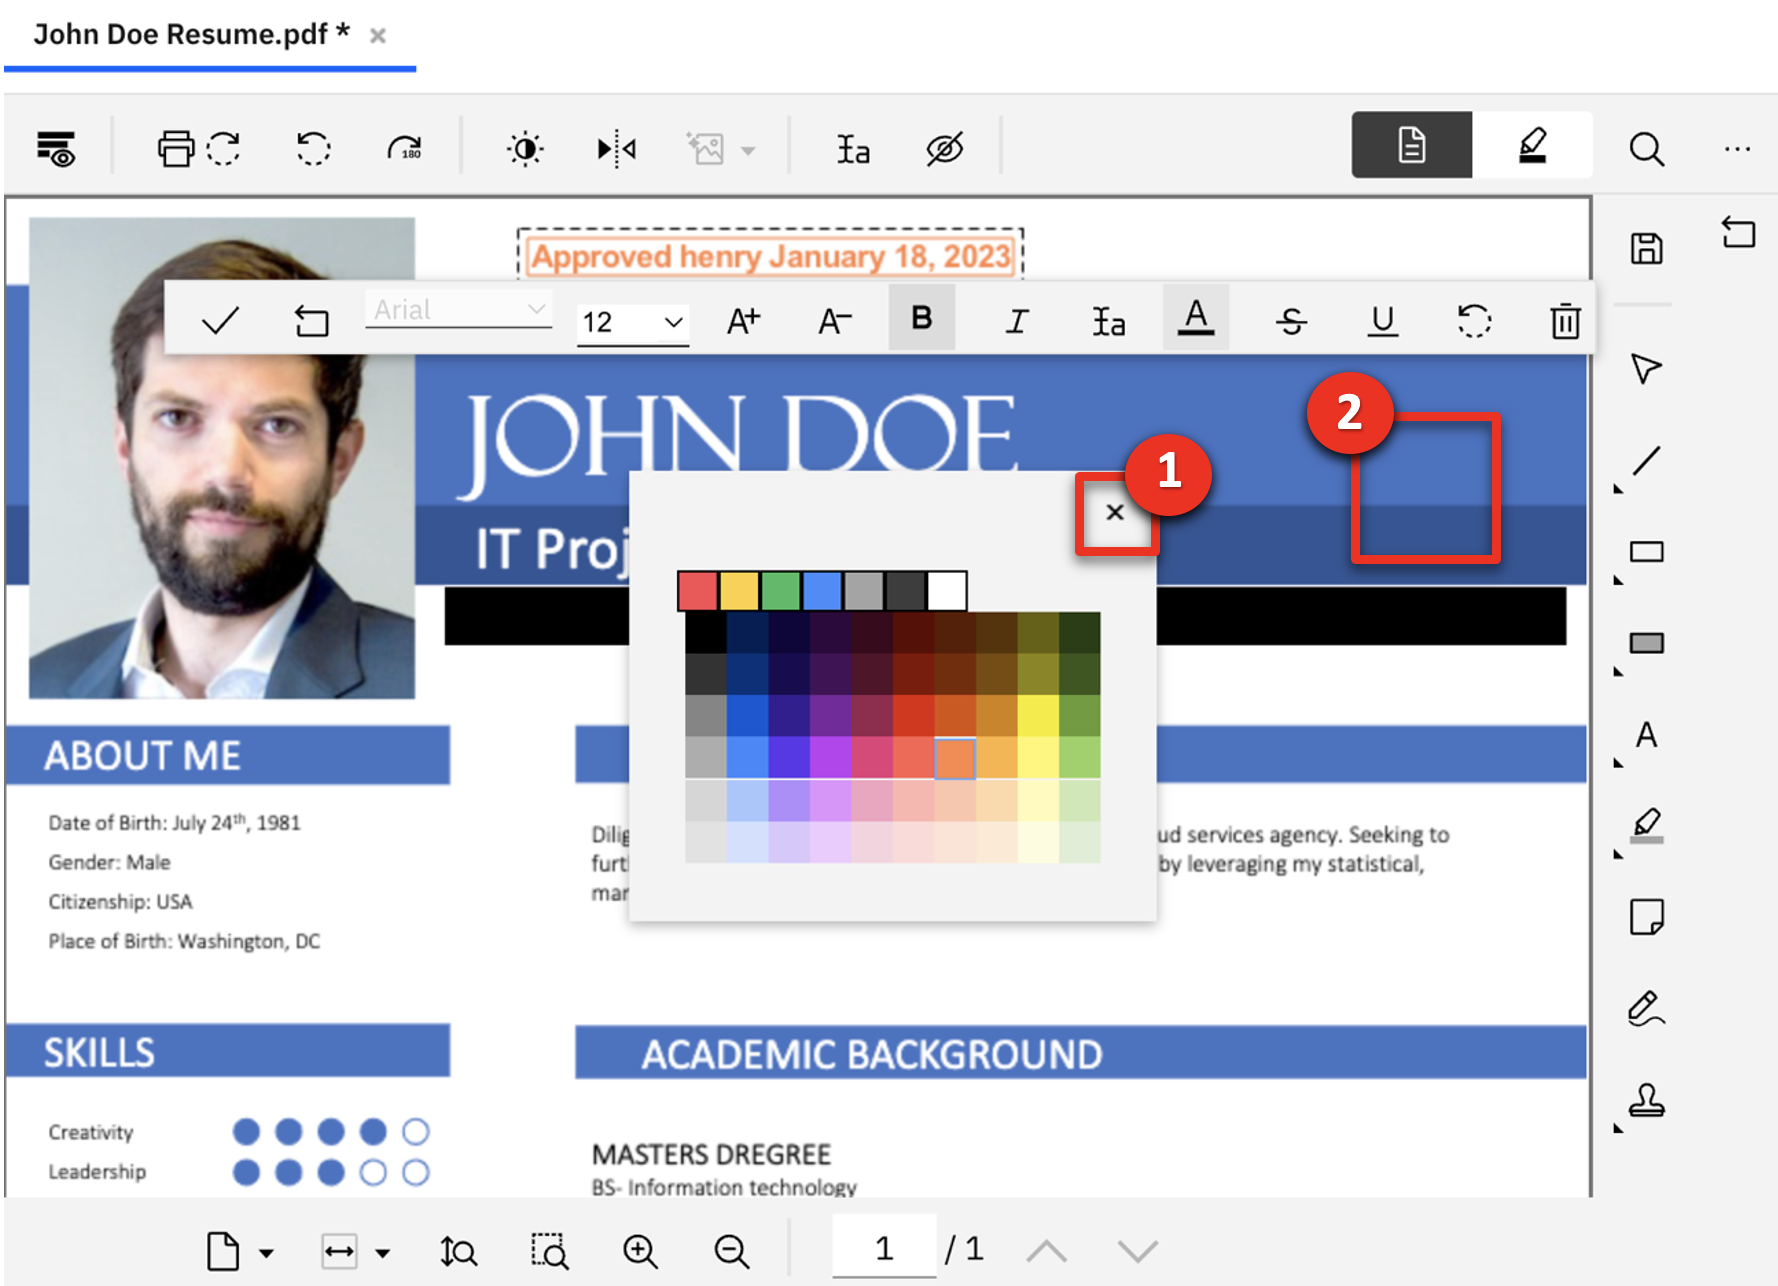 |
| Action 1.3.21 | Click the save icon and close the IBM Navigator Viewer window. 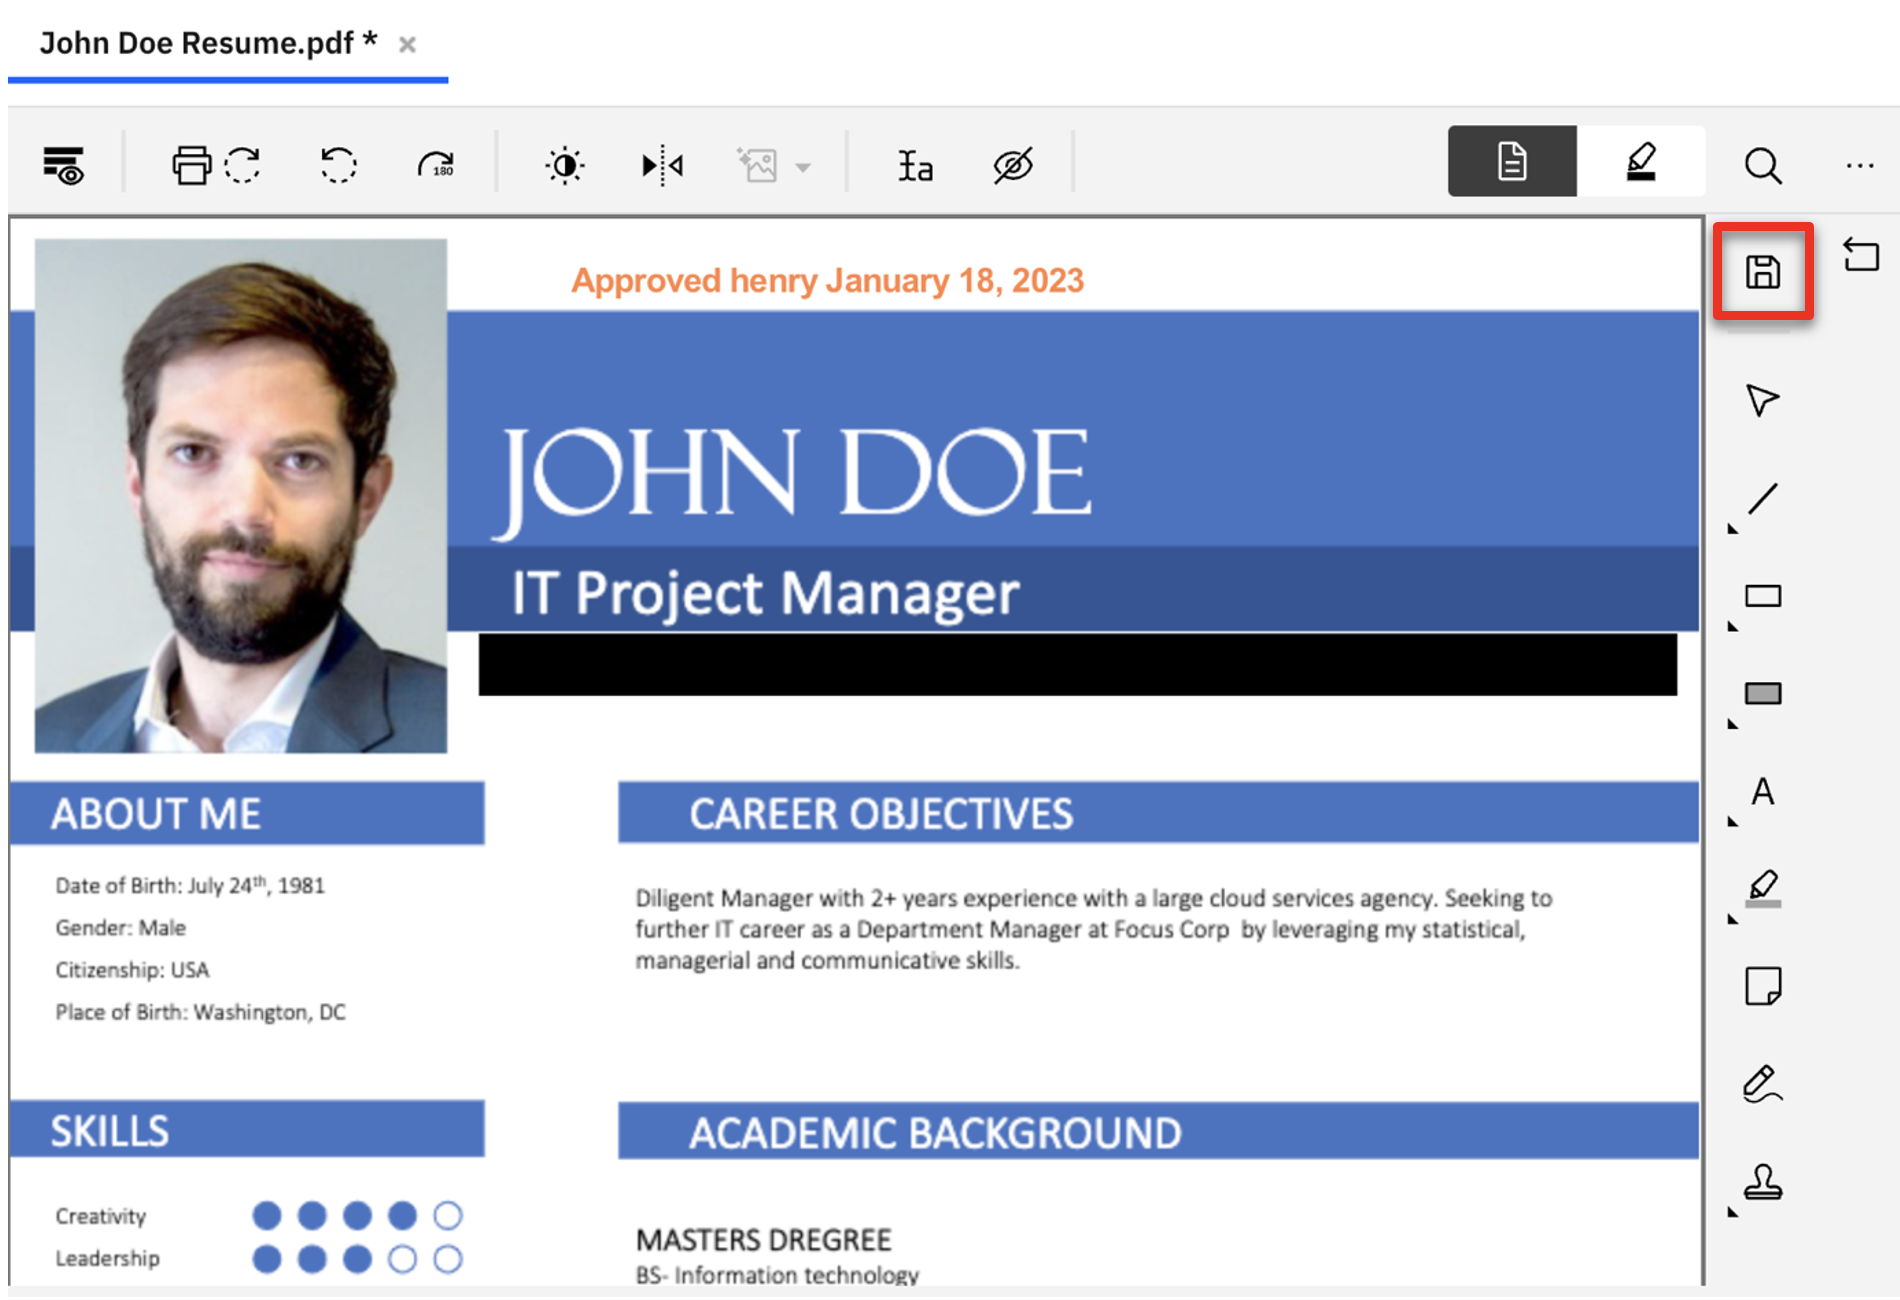 |
| Action 1.3.22 | Click the user icon (1) and click Log Out (2) to exit IBM Navigator.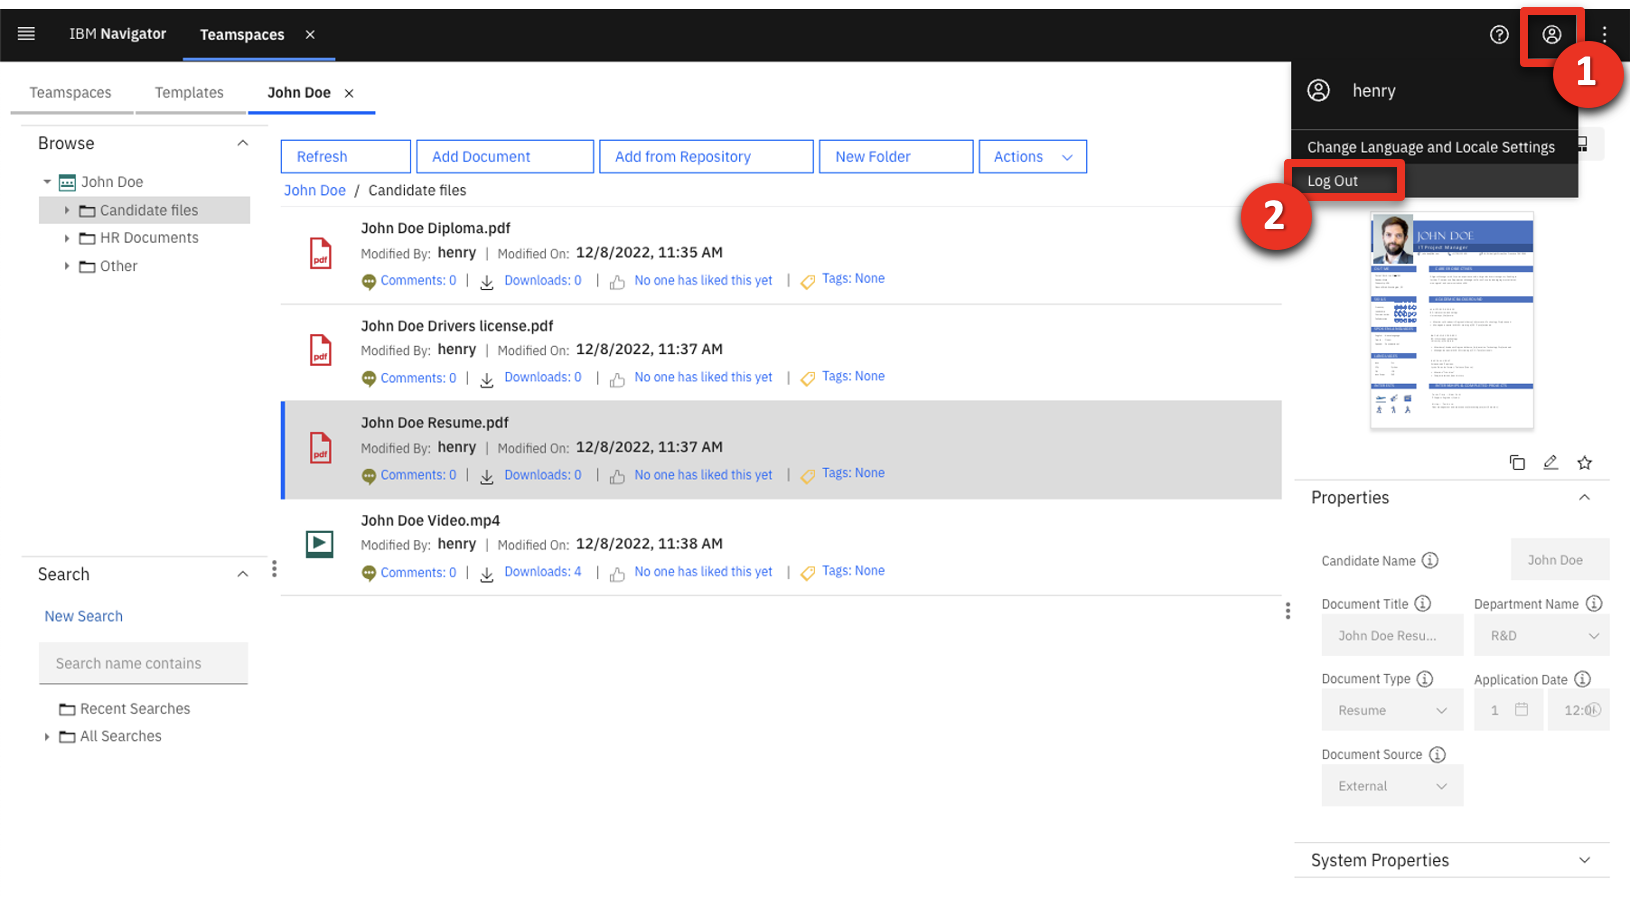 |
2 - Accessing and viewing content
| 2.1 | View documents in a teamspace |
|---|---|
| Narration | The hiring manager needs to learn more about the applicant. She reviews the documents shared by HR. |
| Action 2.1.1 | Sign into IBM Navigator using the hiring manager’s credentials: Username: debby and Password: debby (1). Click Log in (2). 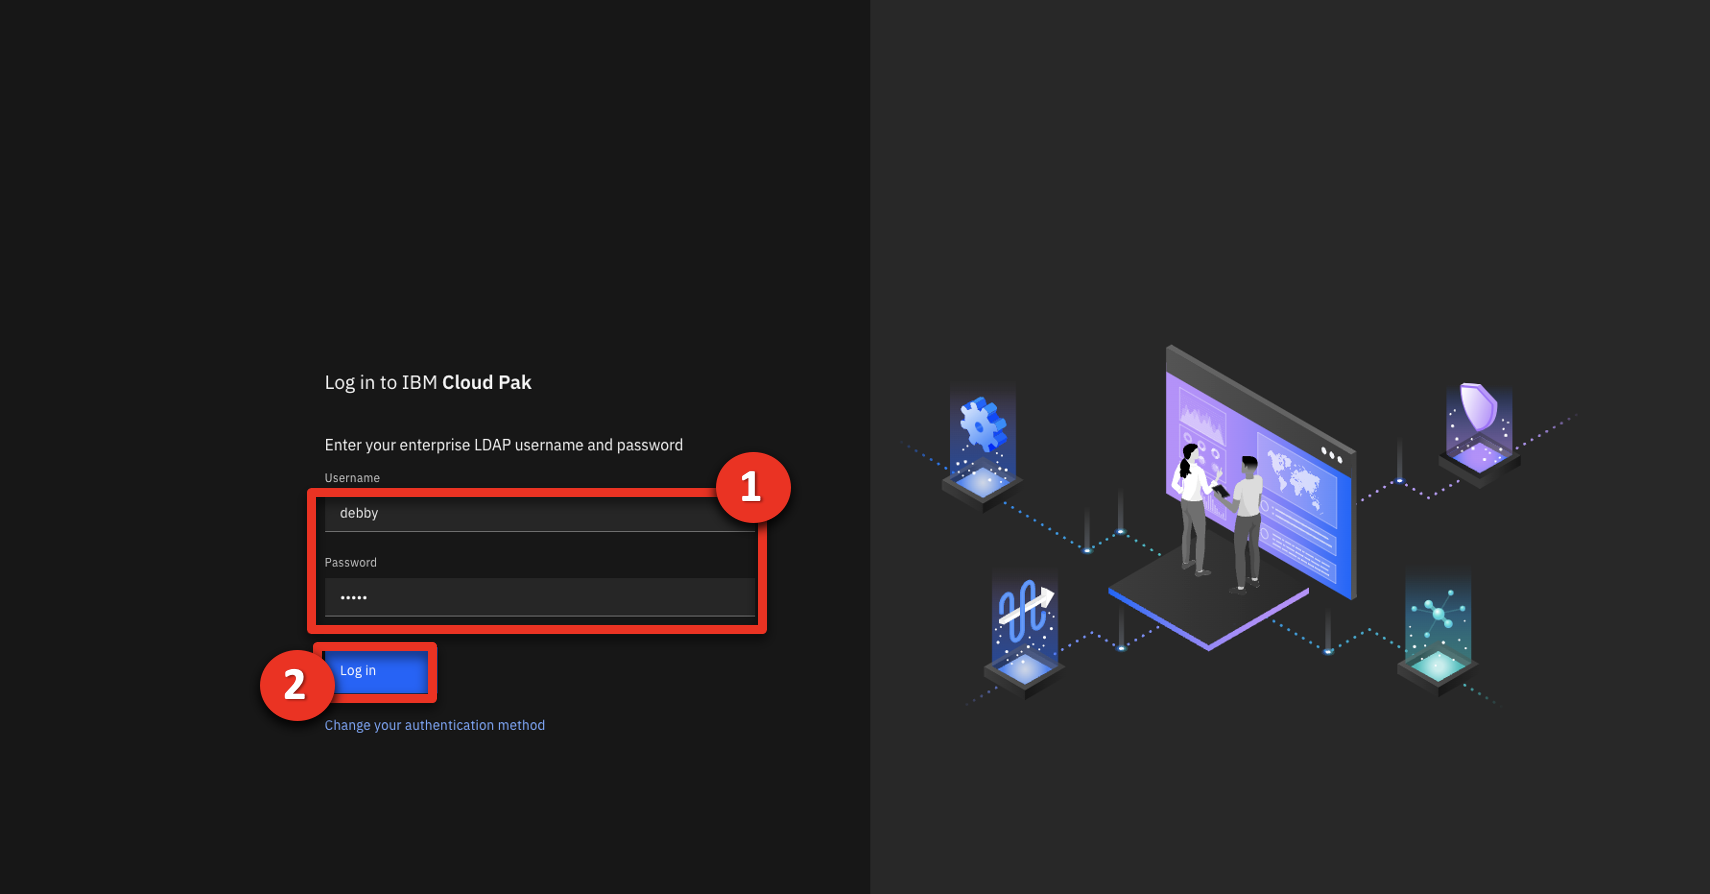 |
| Action 2.1.2 | Click the Teamspaces tile. |
| Action 2.1.3 | Select the John Doe teamspace. 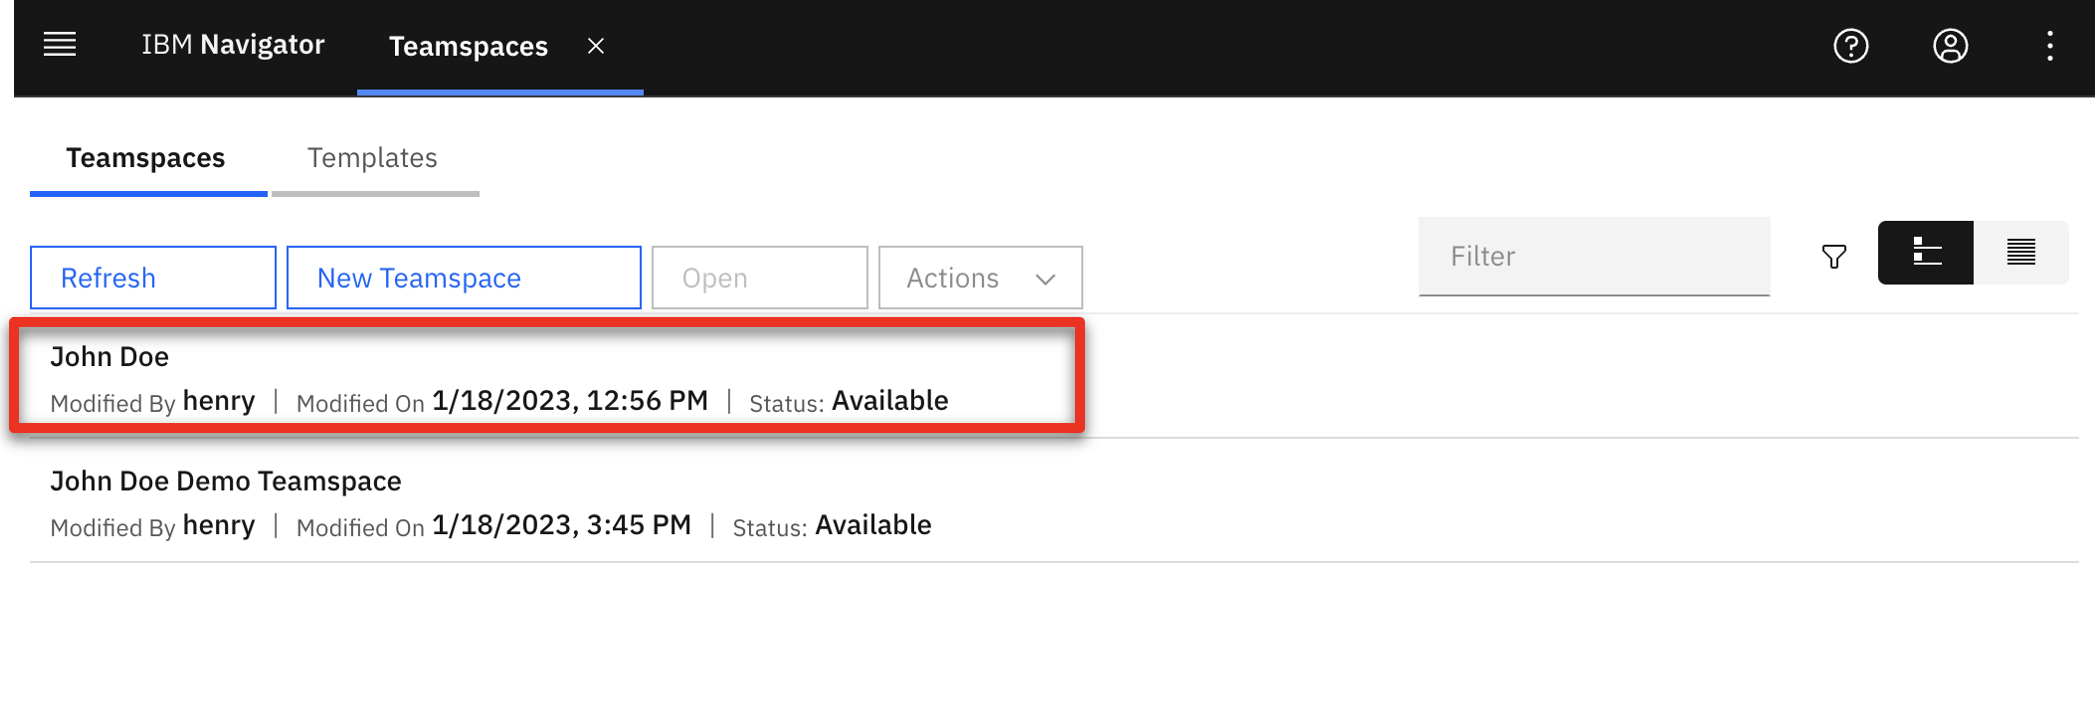 |
| Action 2.1.4 | Click Candidate files. 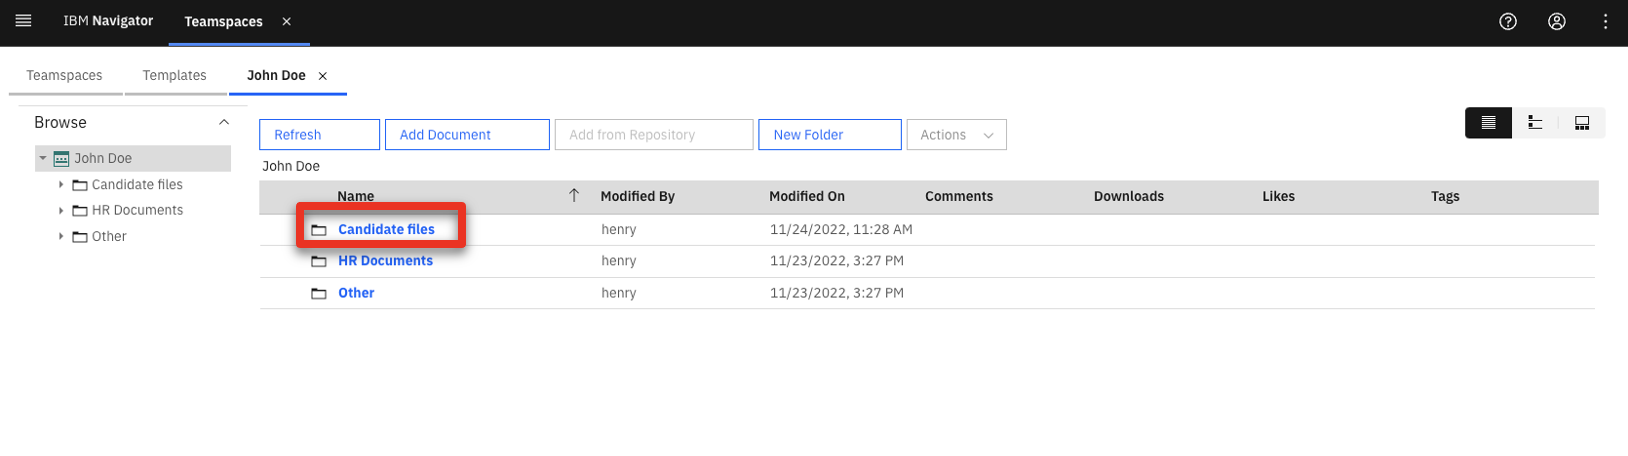 |
| Narration | The hiring manager reviews the applicant’s resume. |
| Action 2.1.5 | Click the Magazine view icon.  |
| Action 2.1.6 | Select the John Doe Resume.pdf row.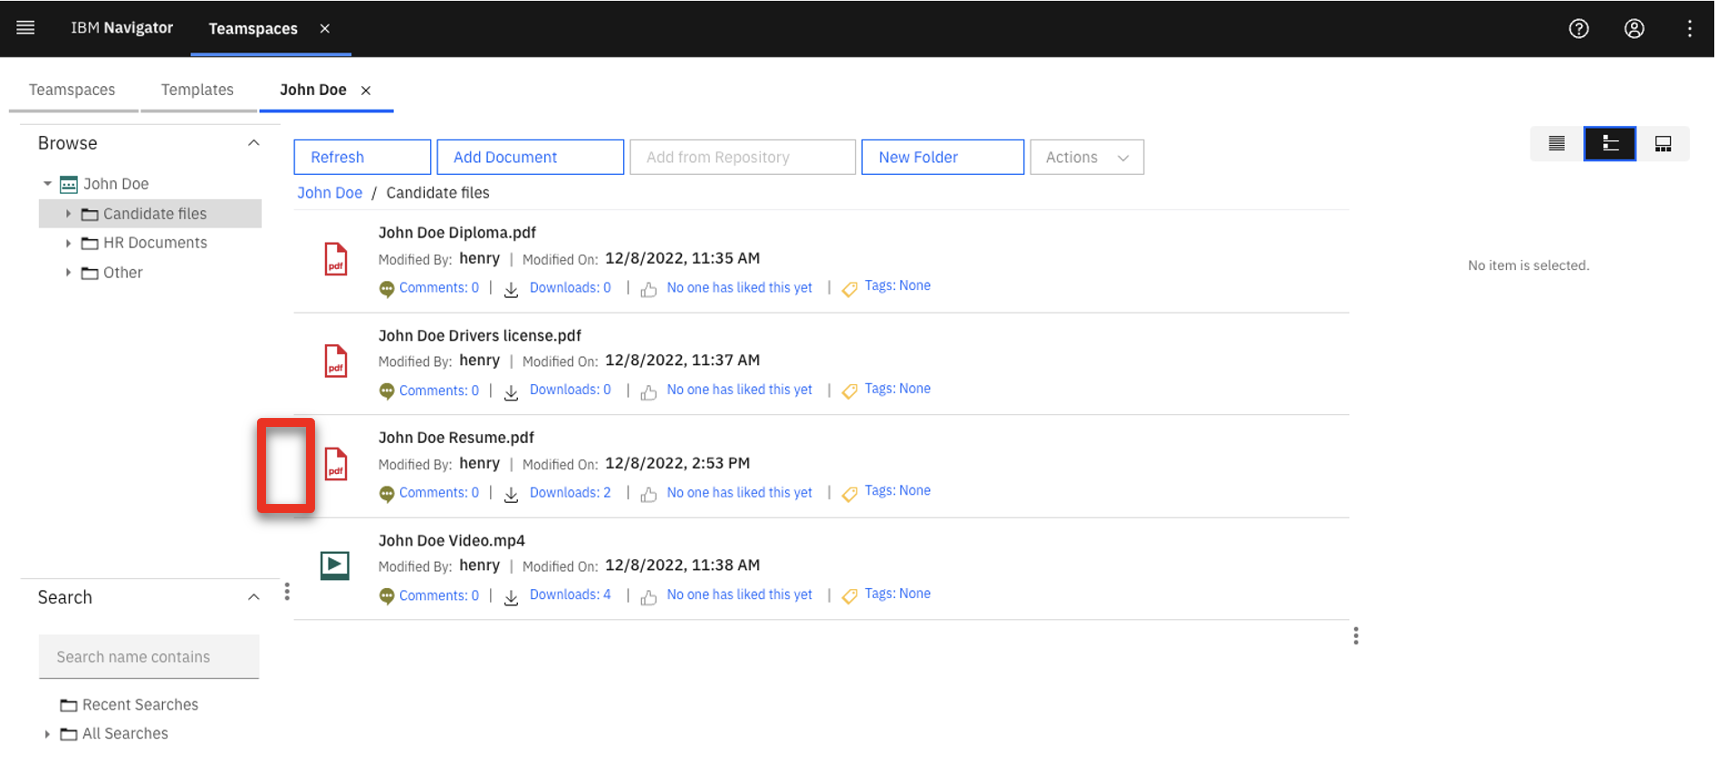 |
| Narration | The hiring manager confirms that the metadata required by her department is pre-populated in the properties section. She is not authorized to view the applicant’s personal information, so it is concealed in the document preview thumbnail. |
| Action 2.1.7 | Review the Properties section (1) and point out that the address information is redacted in the hiring manager’s thumbnail view (2). 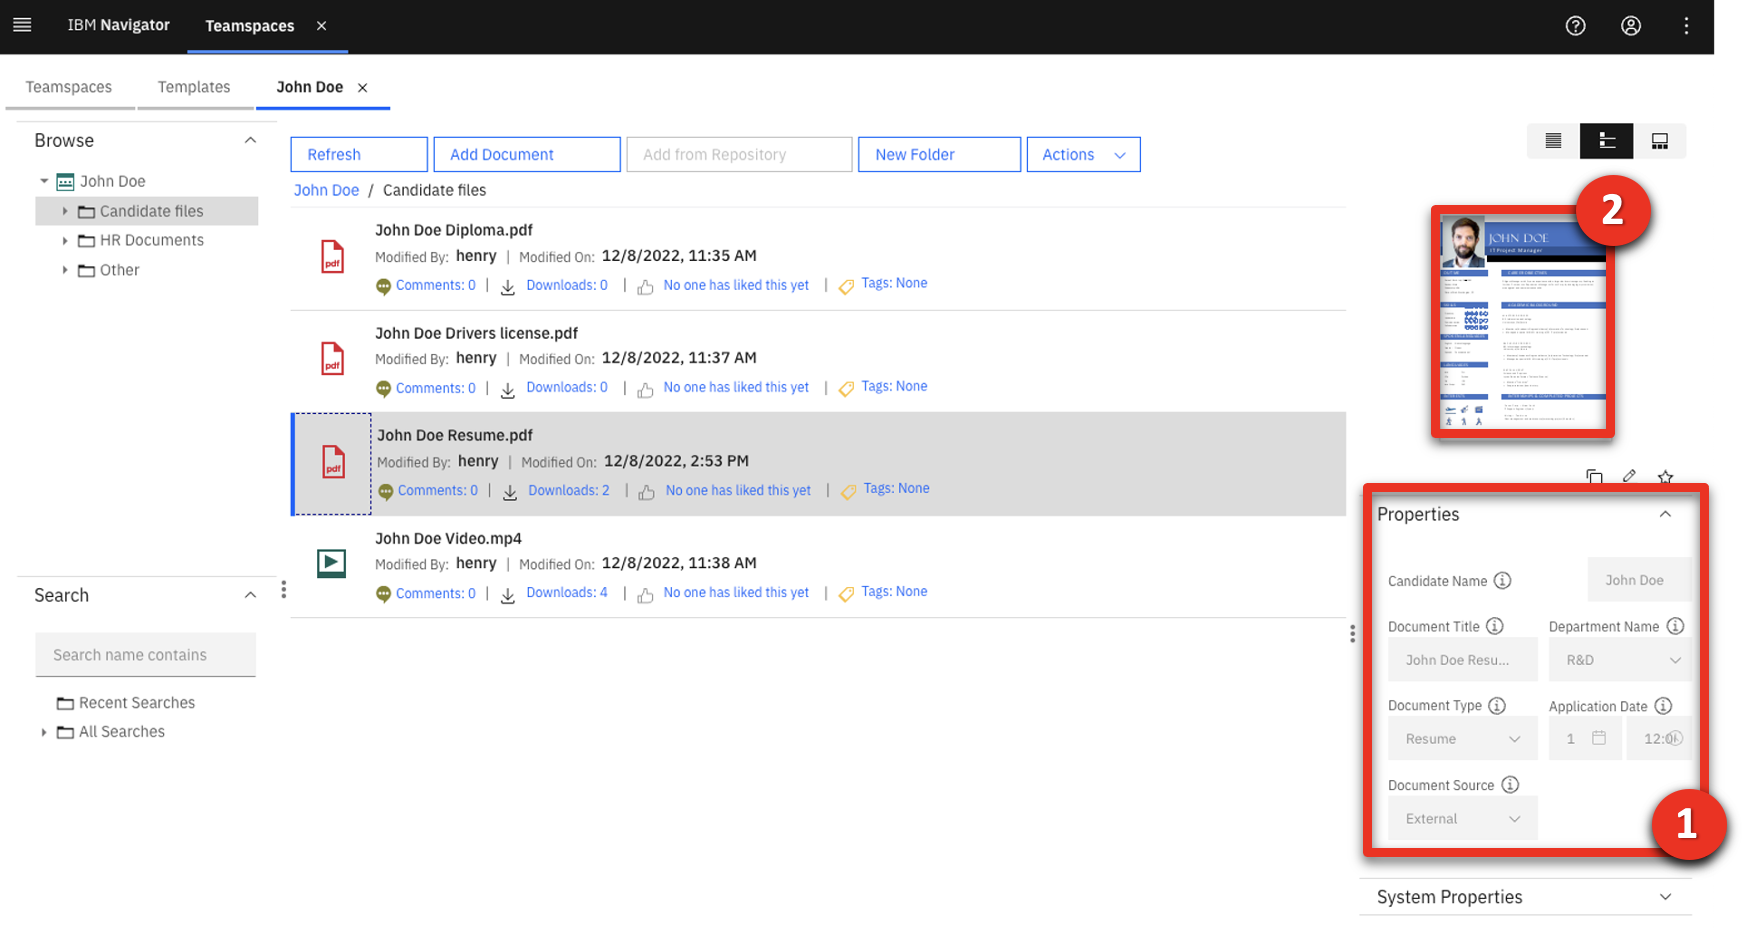 |
| Action 2.1.8 | Click John Doe Resume.pdf.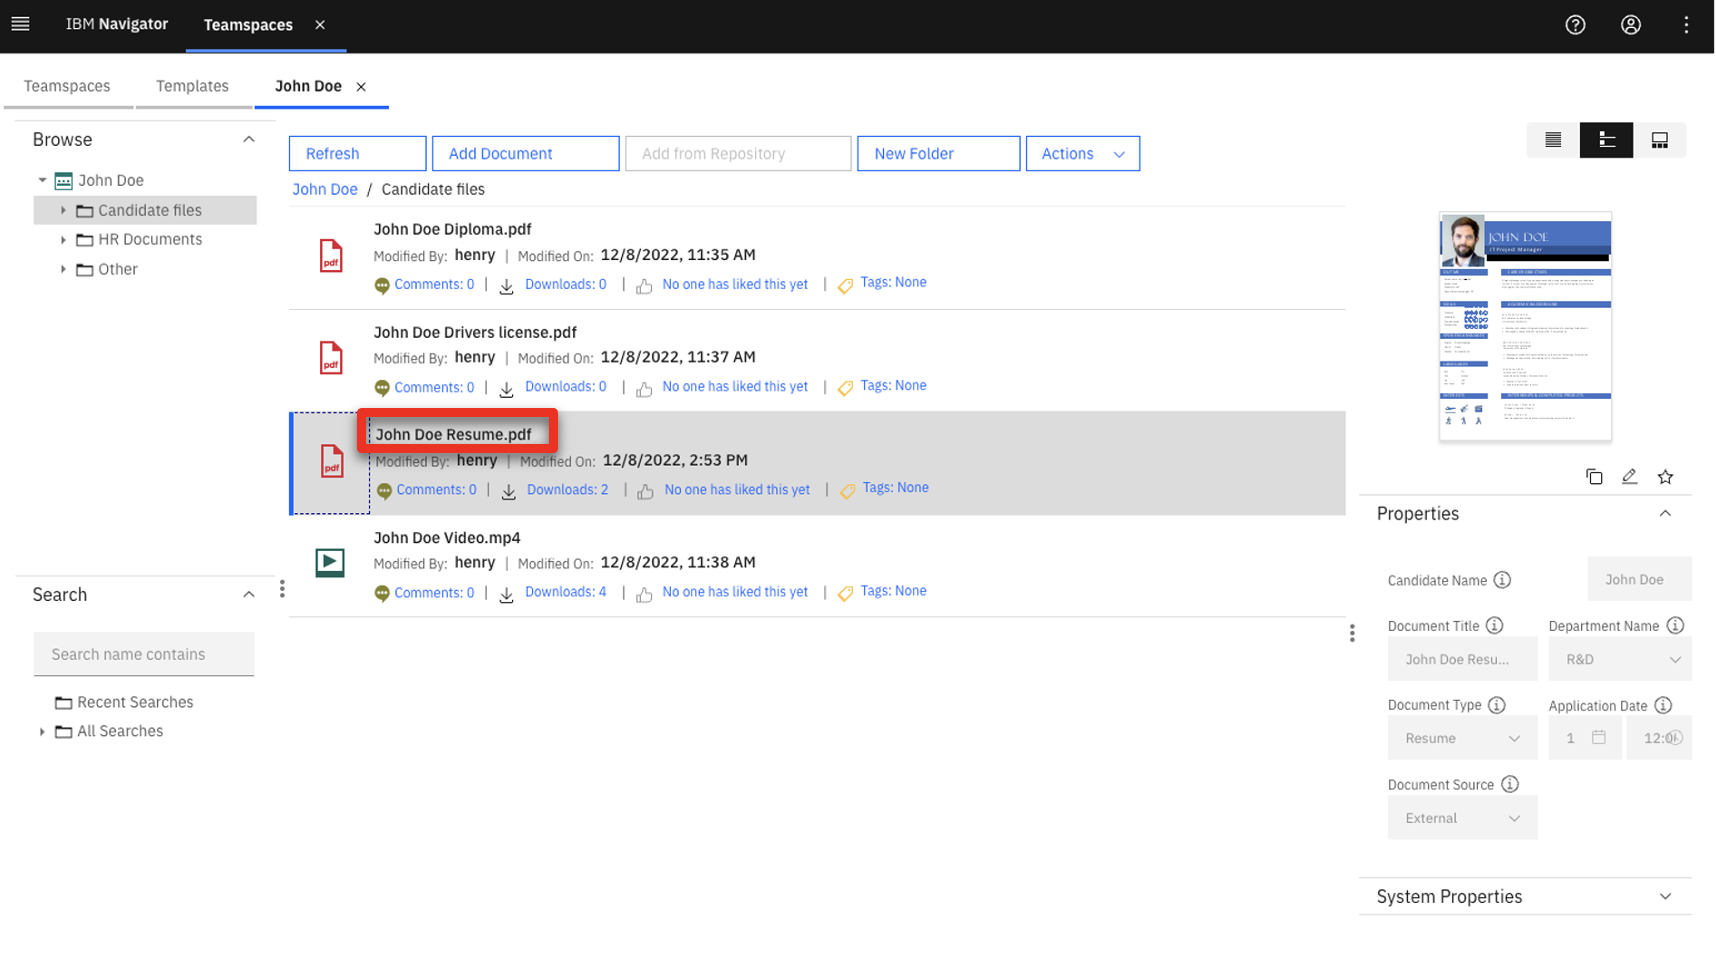 |
| Action 2.1.9 | Scroll down to show the resume.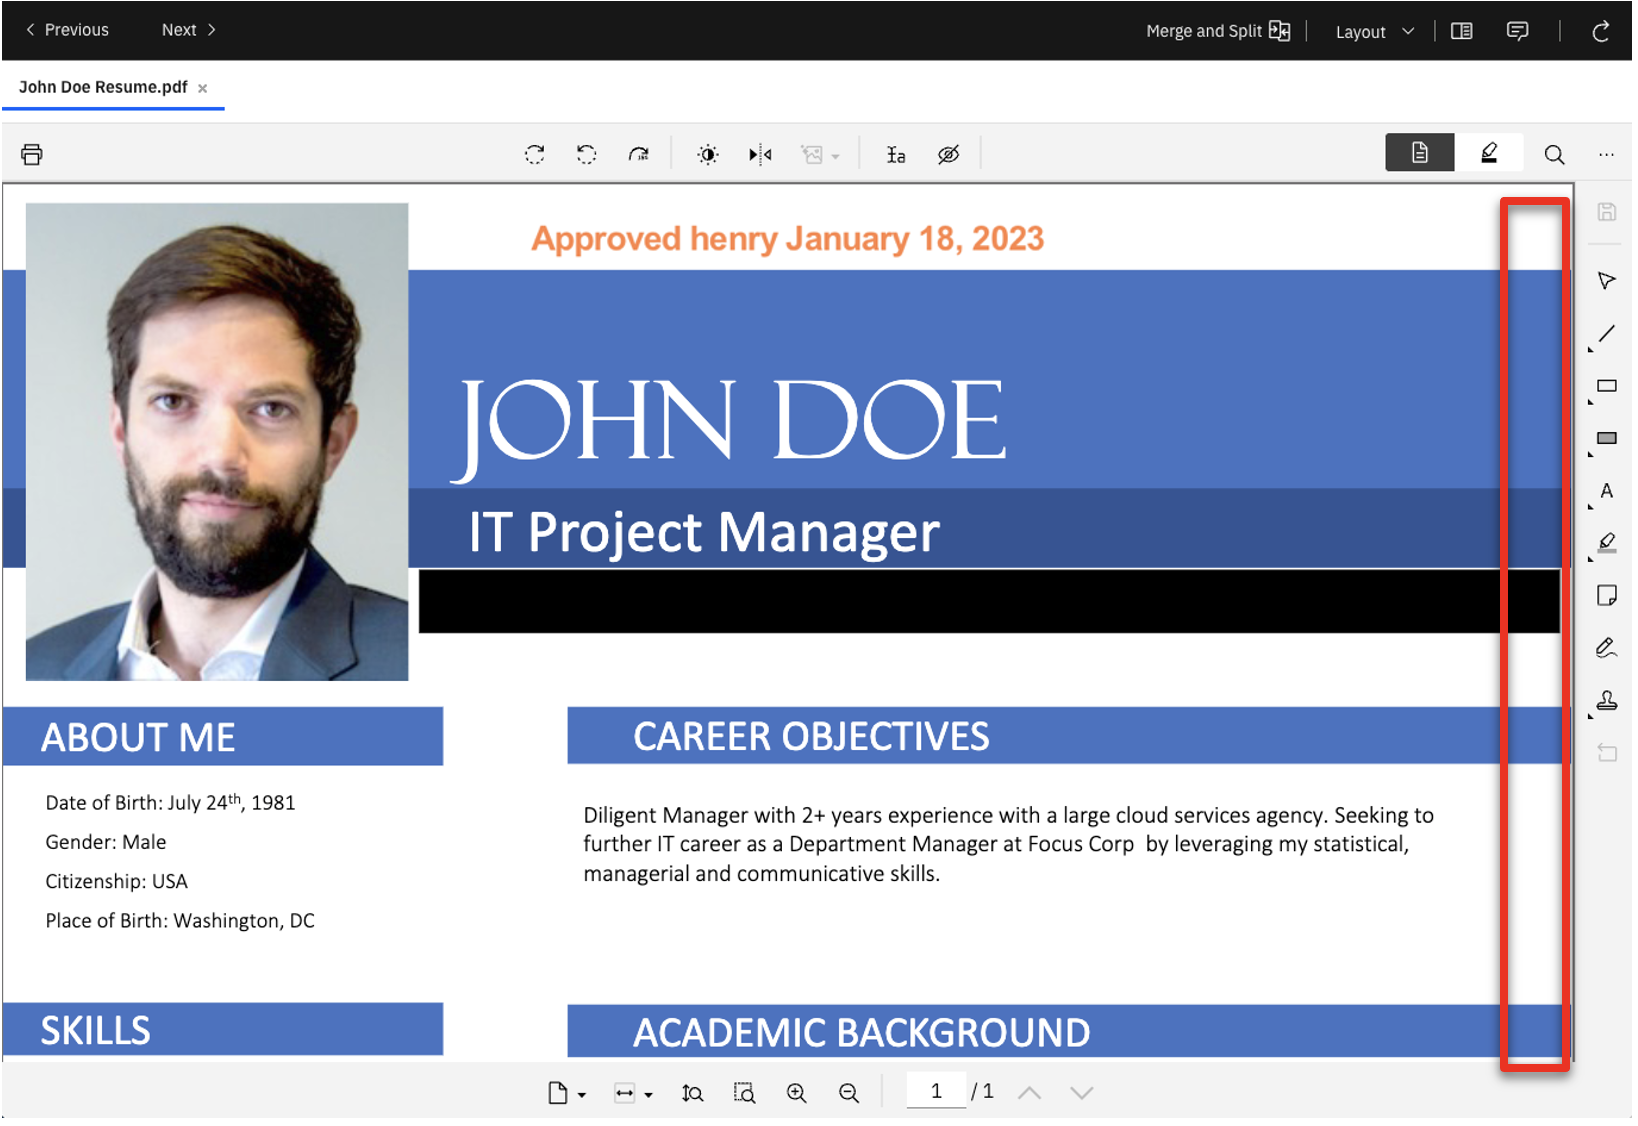 |
| Narration | The hiring manager reviews the details of the resume. The candidate is applying for a position that often works with a team in France. Therefore, a working knowledge of French is required for the job. She adds an annotation to assess the applicant’s French language skills. |
| Action 2.1.10 | Click the sticky note icon (1) and then click next to the SPOKEN LANGUAGES section (2).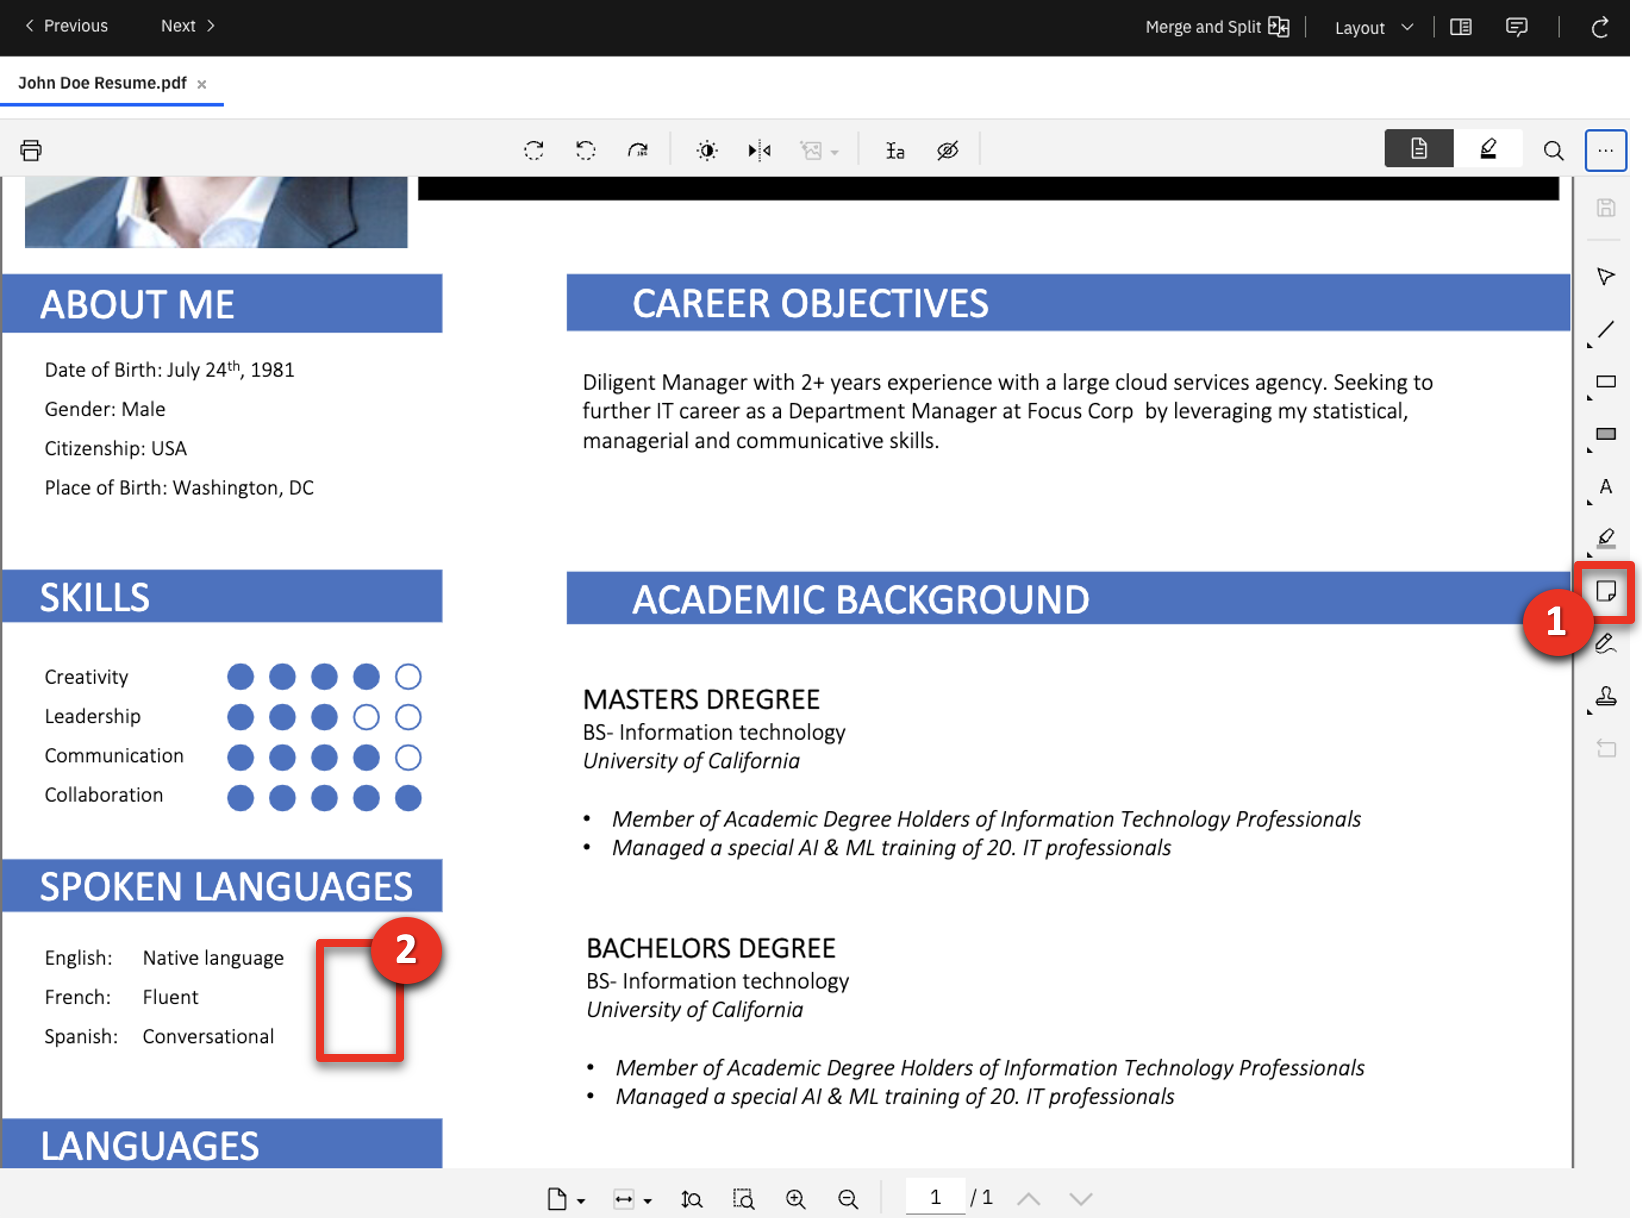 |
| Action 2.1.11 | Type ‘Evaluate the candidate’s French language skills.’ (1) and click Update (2).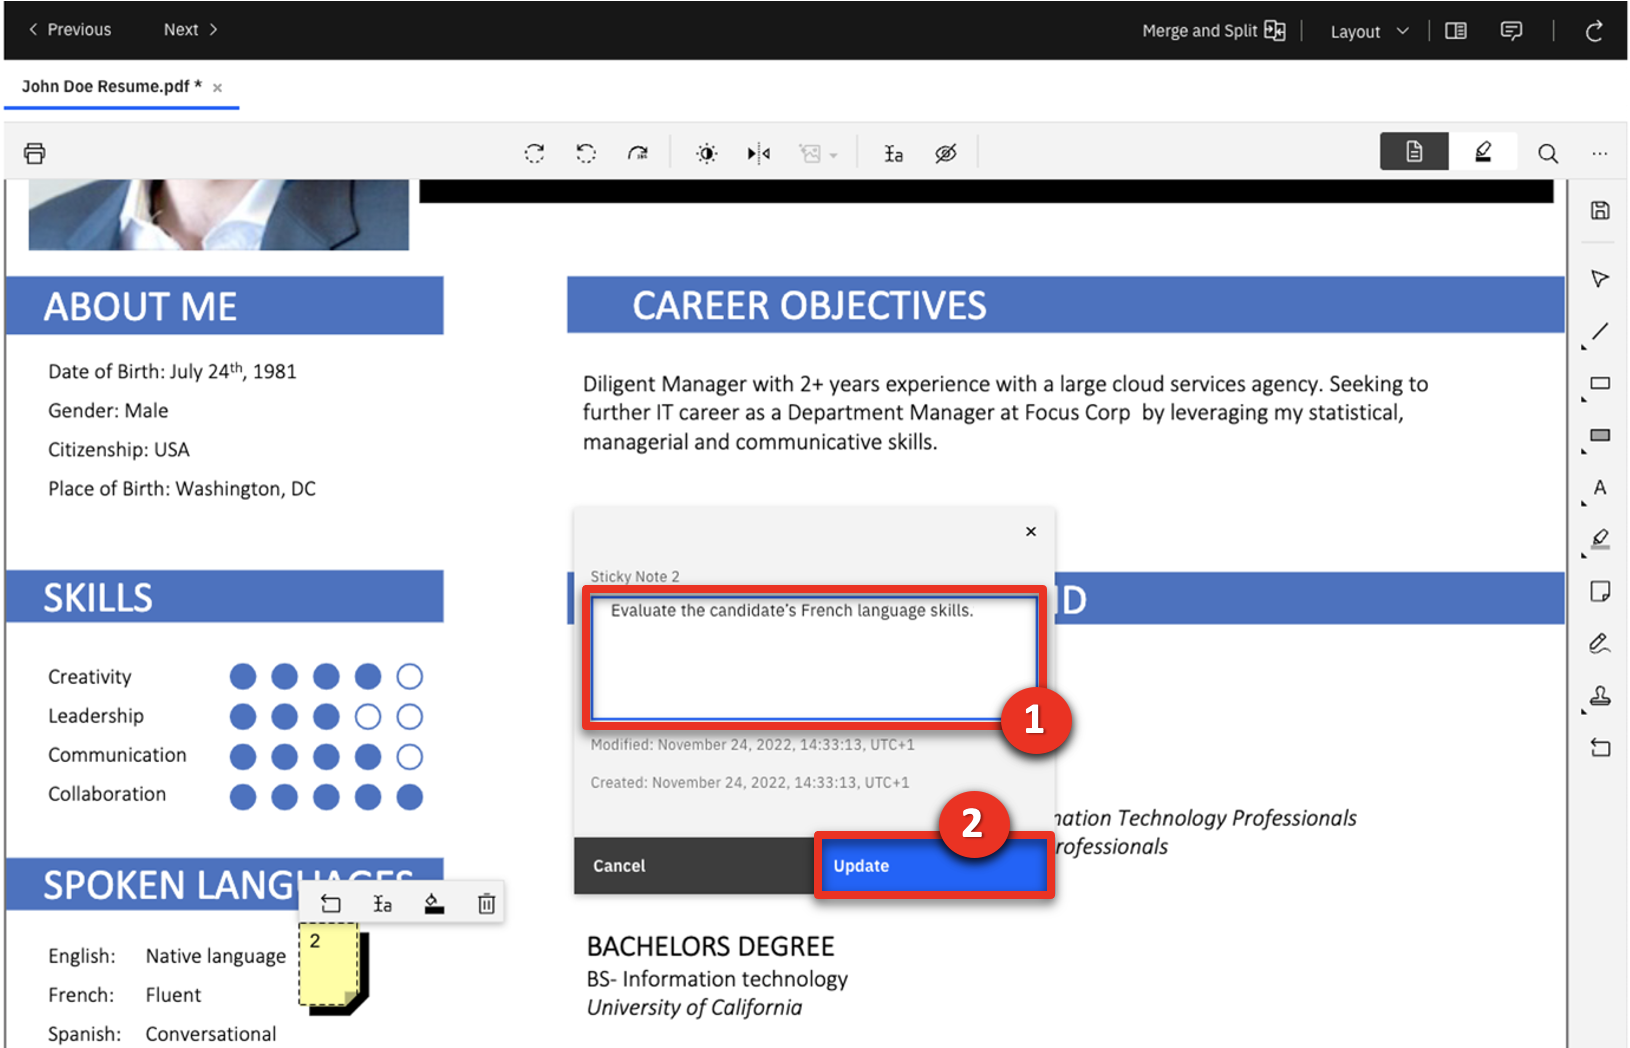 |
| Action 2.1.12 | Click the save icon.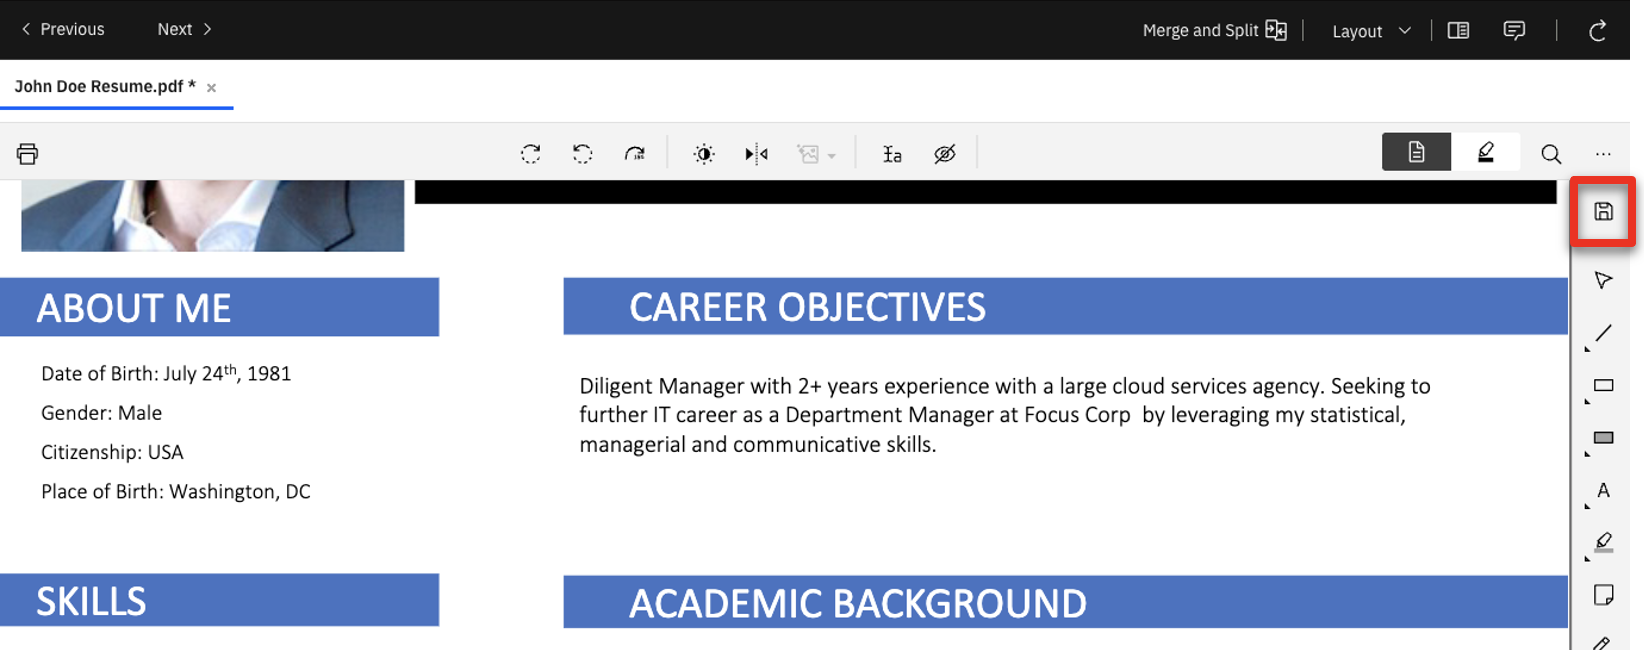 |
| Action 2.1.13 | Close the IBM Navigator Viewer window. |
| Narration | The hiring manager ‘likes’ the resume and adds it to her favorites so she can compare the finalists later. |
| Action 2.1.14 | Click the thumbs-up icon (1) to ‘like’ the file. Click the star icon (2) to add the resume to favorites. 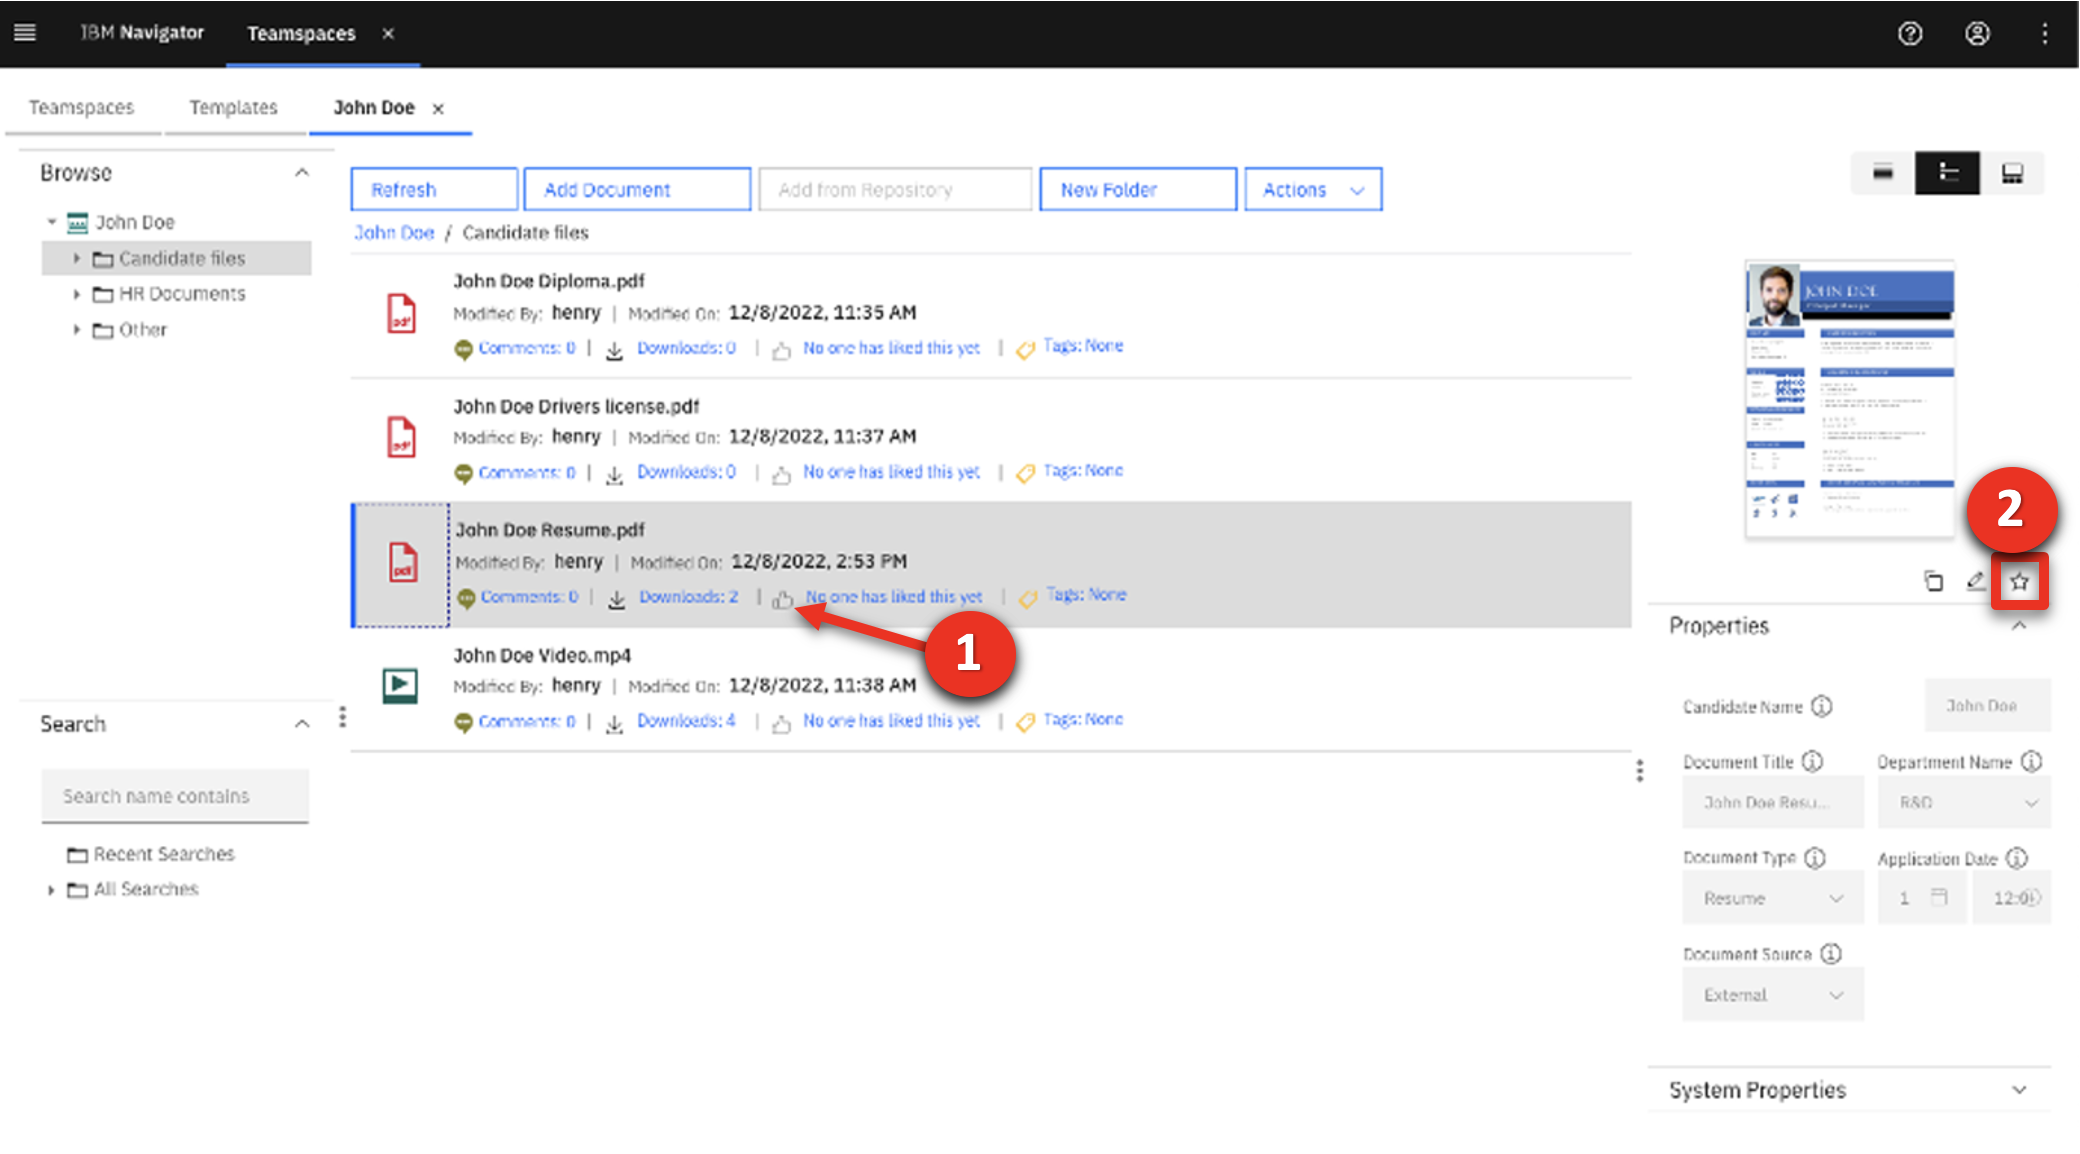 |
| Narration | To help decide whether to move forward with an interview, the hiring manager watches a few specific sections of the applicant’s video. |
| Action 2.1.15 | Click John Doe Video.mp4. 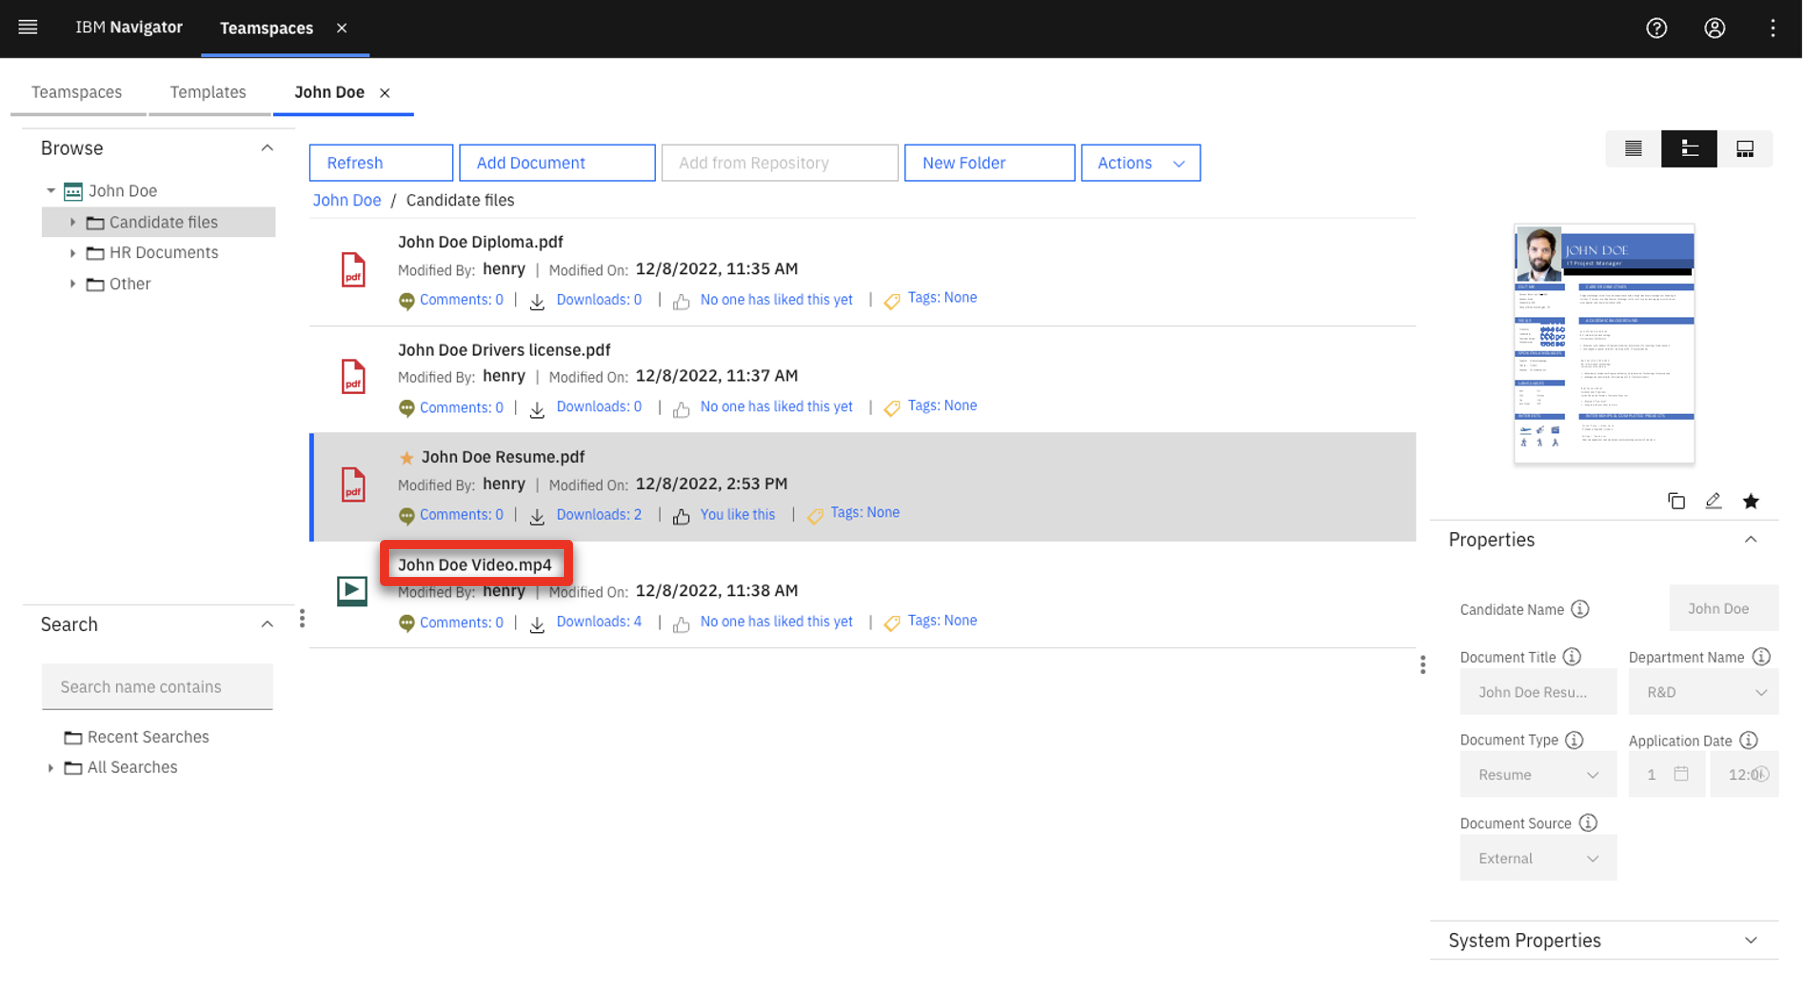 |
| Narration | She uses bookmarks in the applicant’s video to skip directly to responses she’s interested in. Many applicant videos are over 20 minutes. The bookmark feature saves her time by letting her focus on specific parts of the video. |
| Action 2.1.16 | Click Bookmarks to open the bookmarks menu. 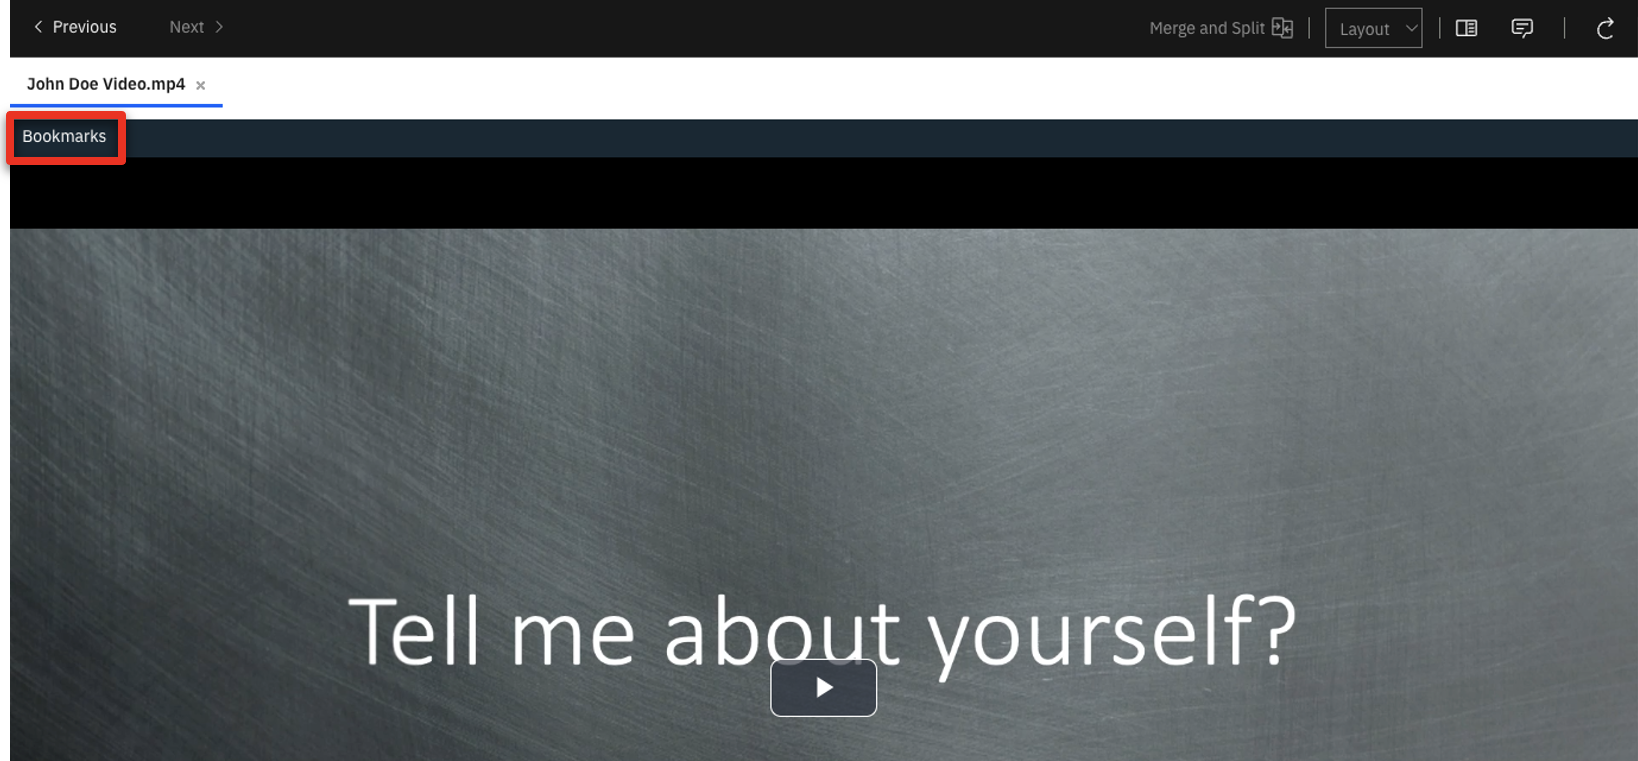 |
| Action 2.1.17 | Select the Weaknesses bookmark and wait for the video to load.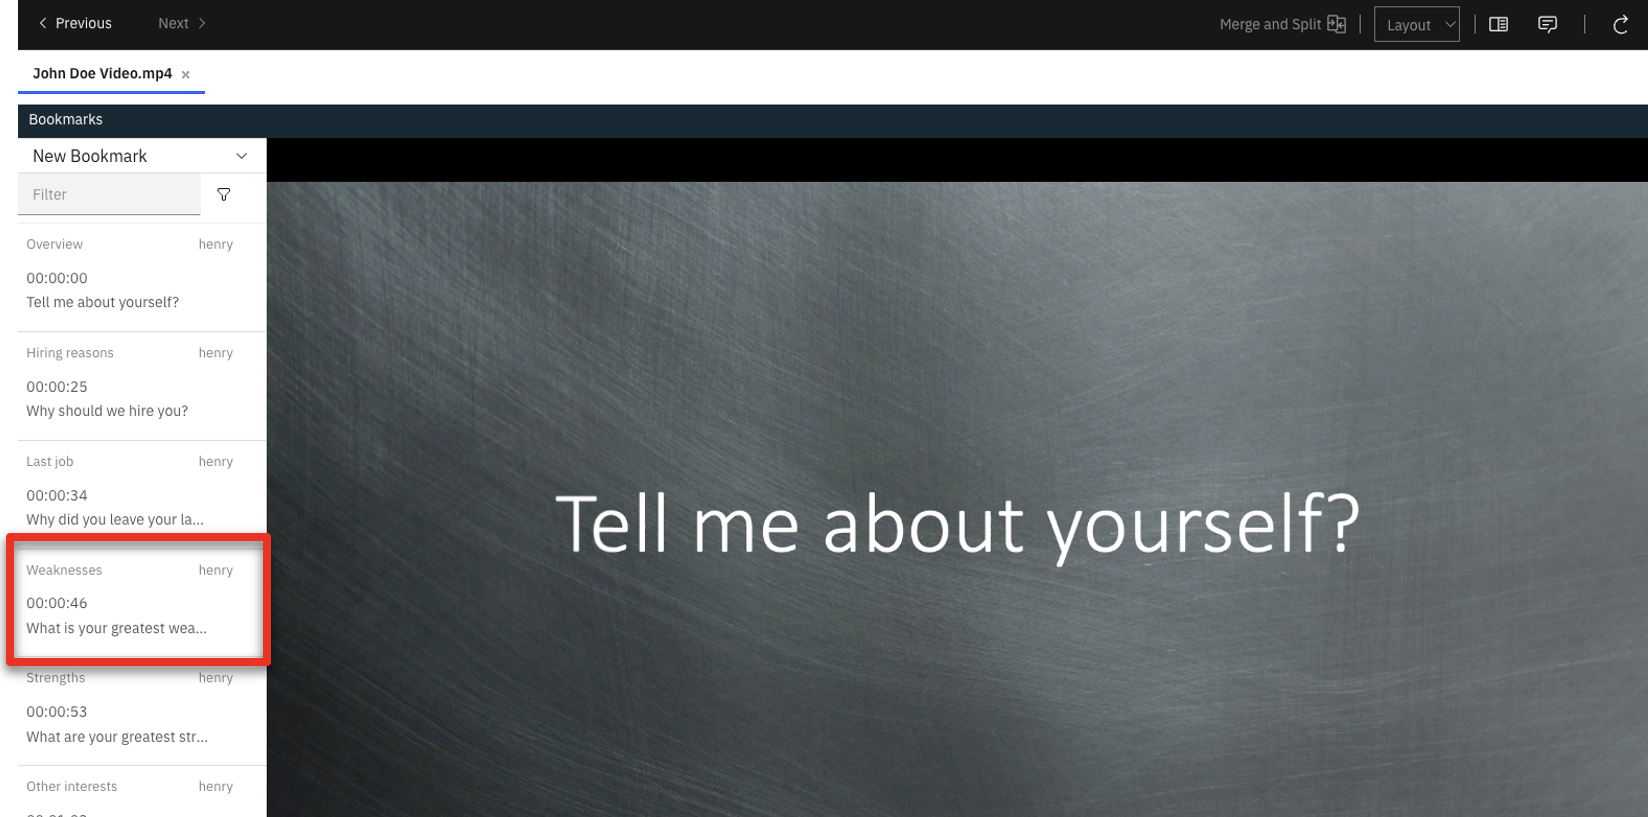 |
| Action 2.1.18 | Click the play icon and watch both the Weaknesses and Strengths sections. Close the IBM Navigator viewer when you are done.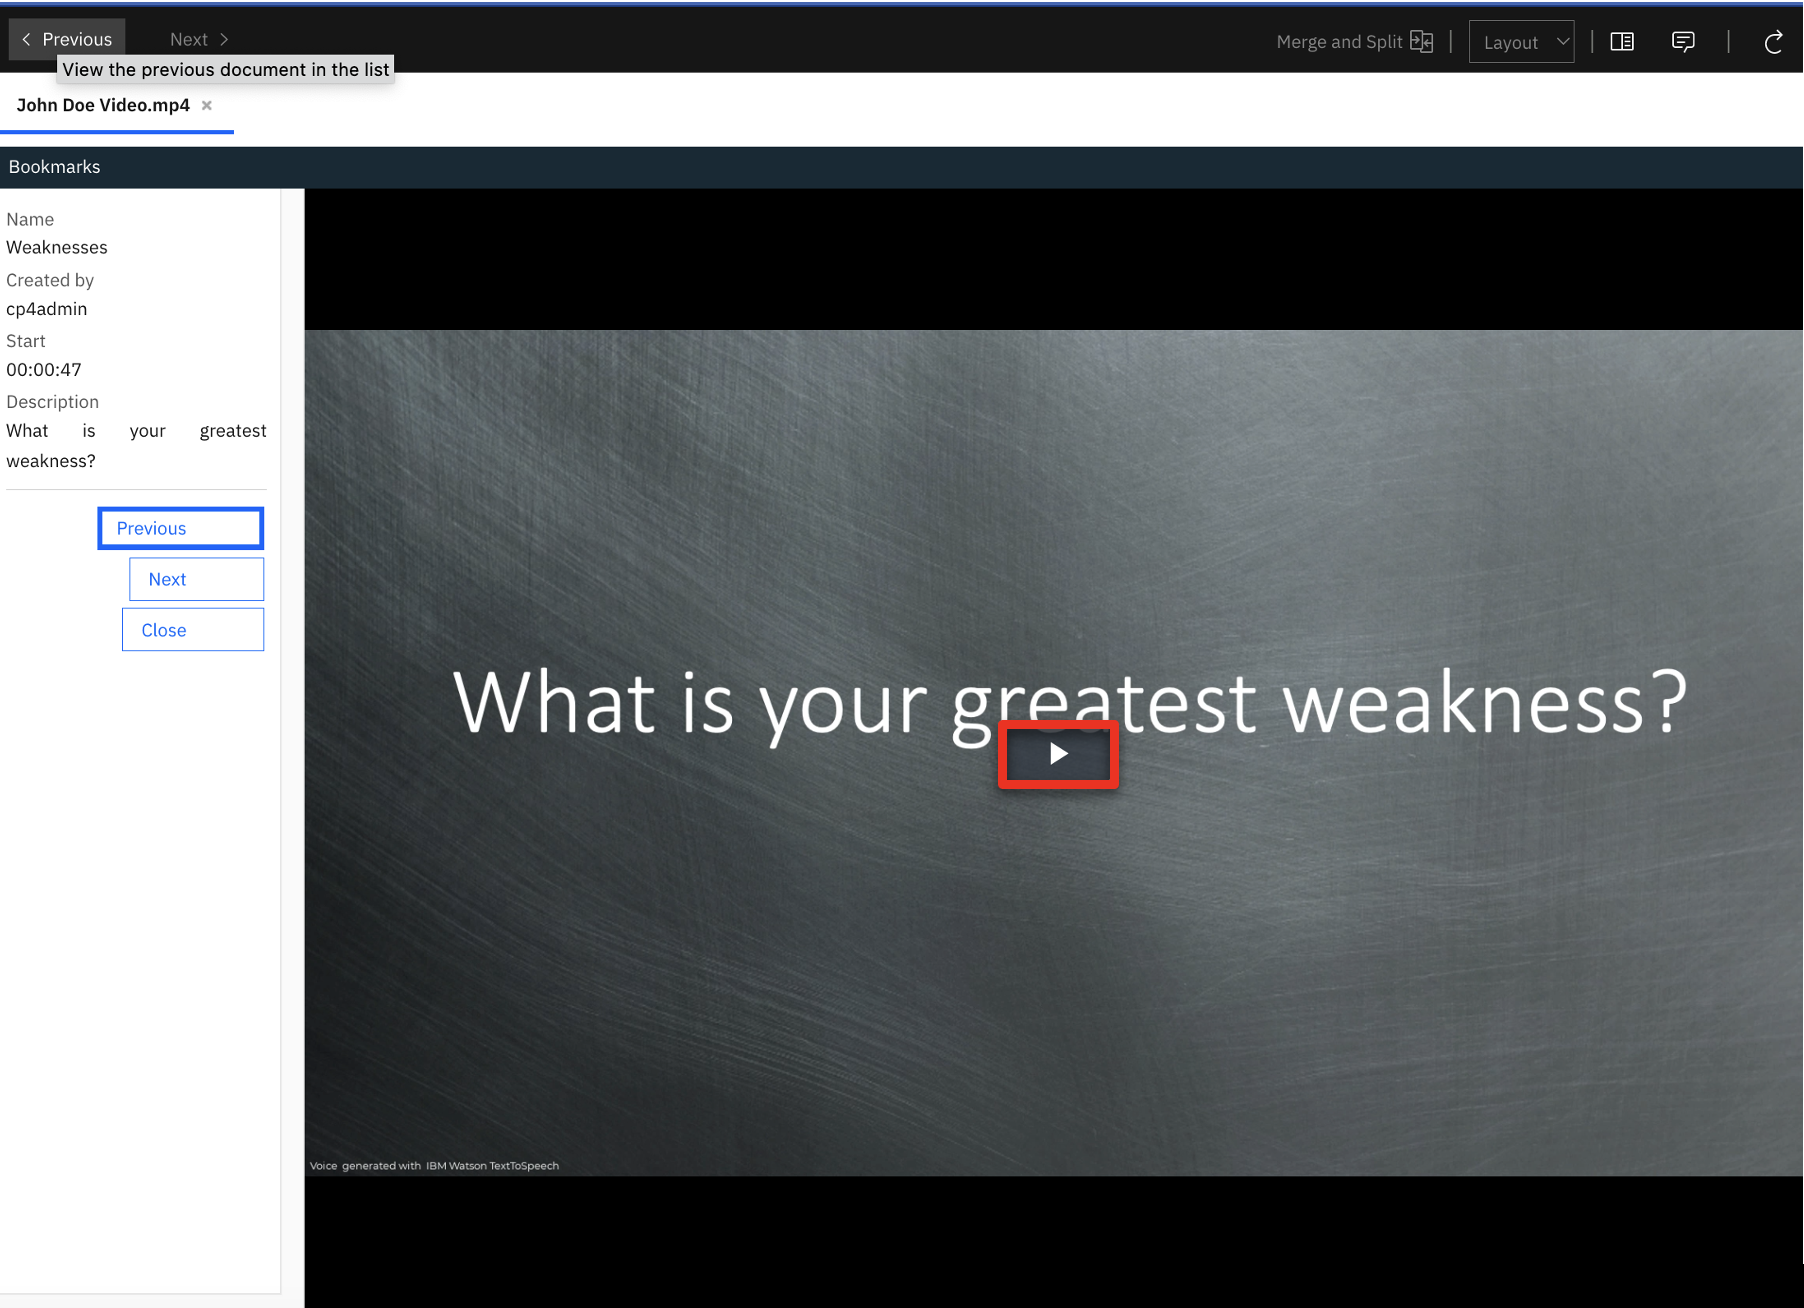 |
| Action 2.1.19 | Close the IBM Navigator Viewer window. |
| Narration | The hiring manager decides to interview the applicant. She lets the HR team know to schedule an interview by tagging the applicant’s resume with the word ‘selected’. |
| Action 2.1.20 | Click Tags in the **John Doe Resume.pdf **row. 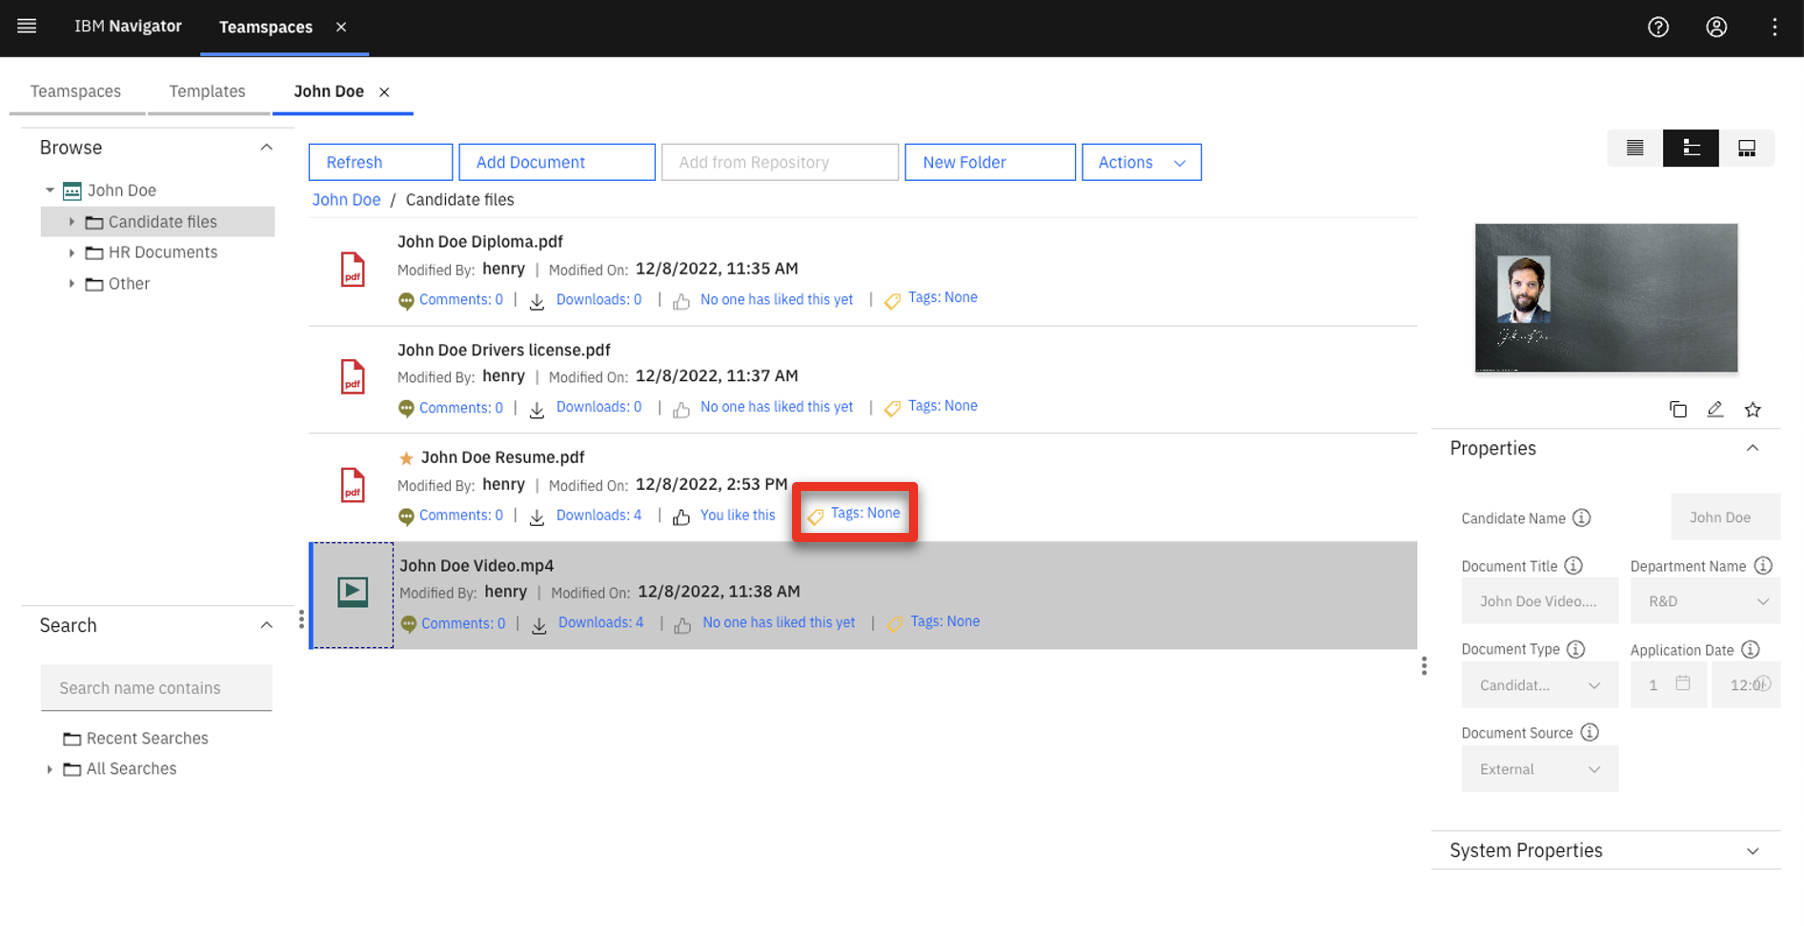 |
| Action 2.1.21 | Write ‘selected’ and hit enter on your keyboard.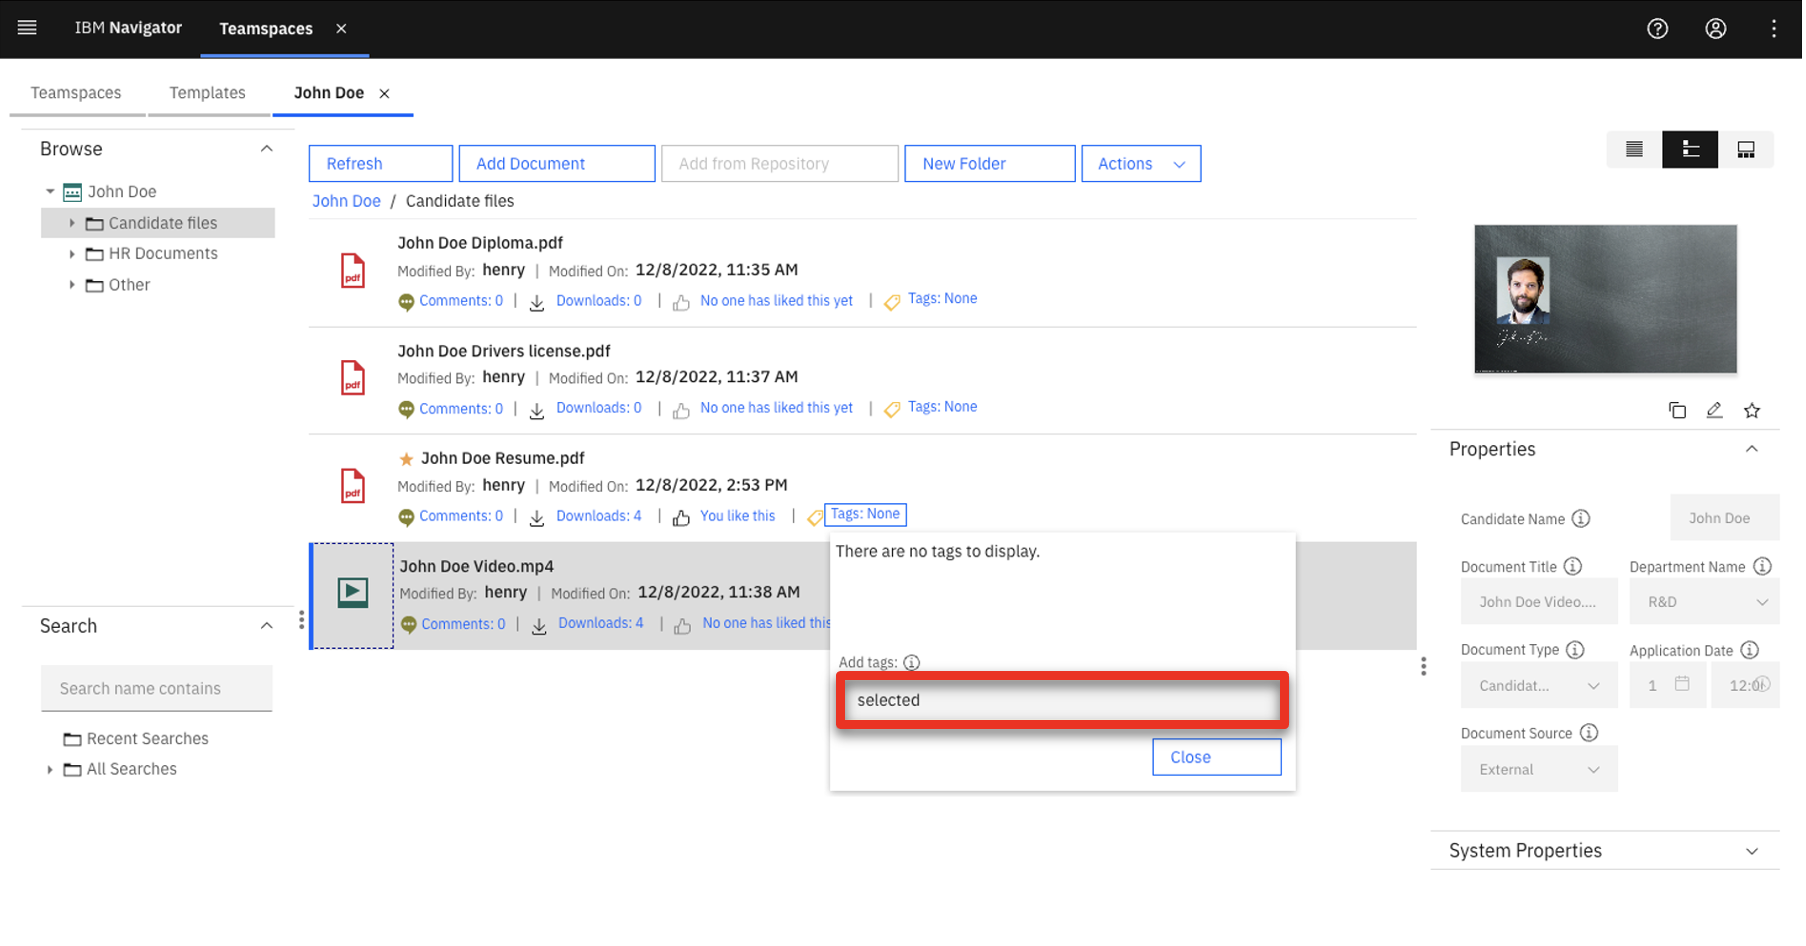 |
| Action 2.1.22 | Click Close. 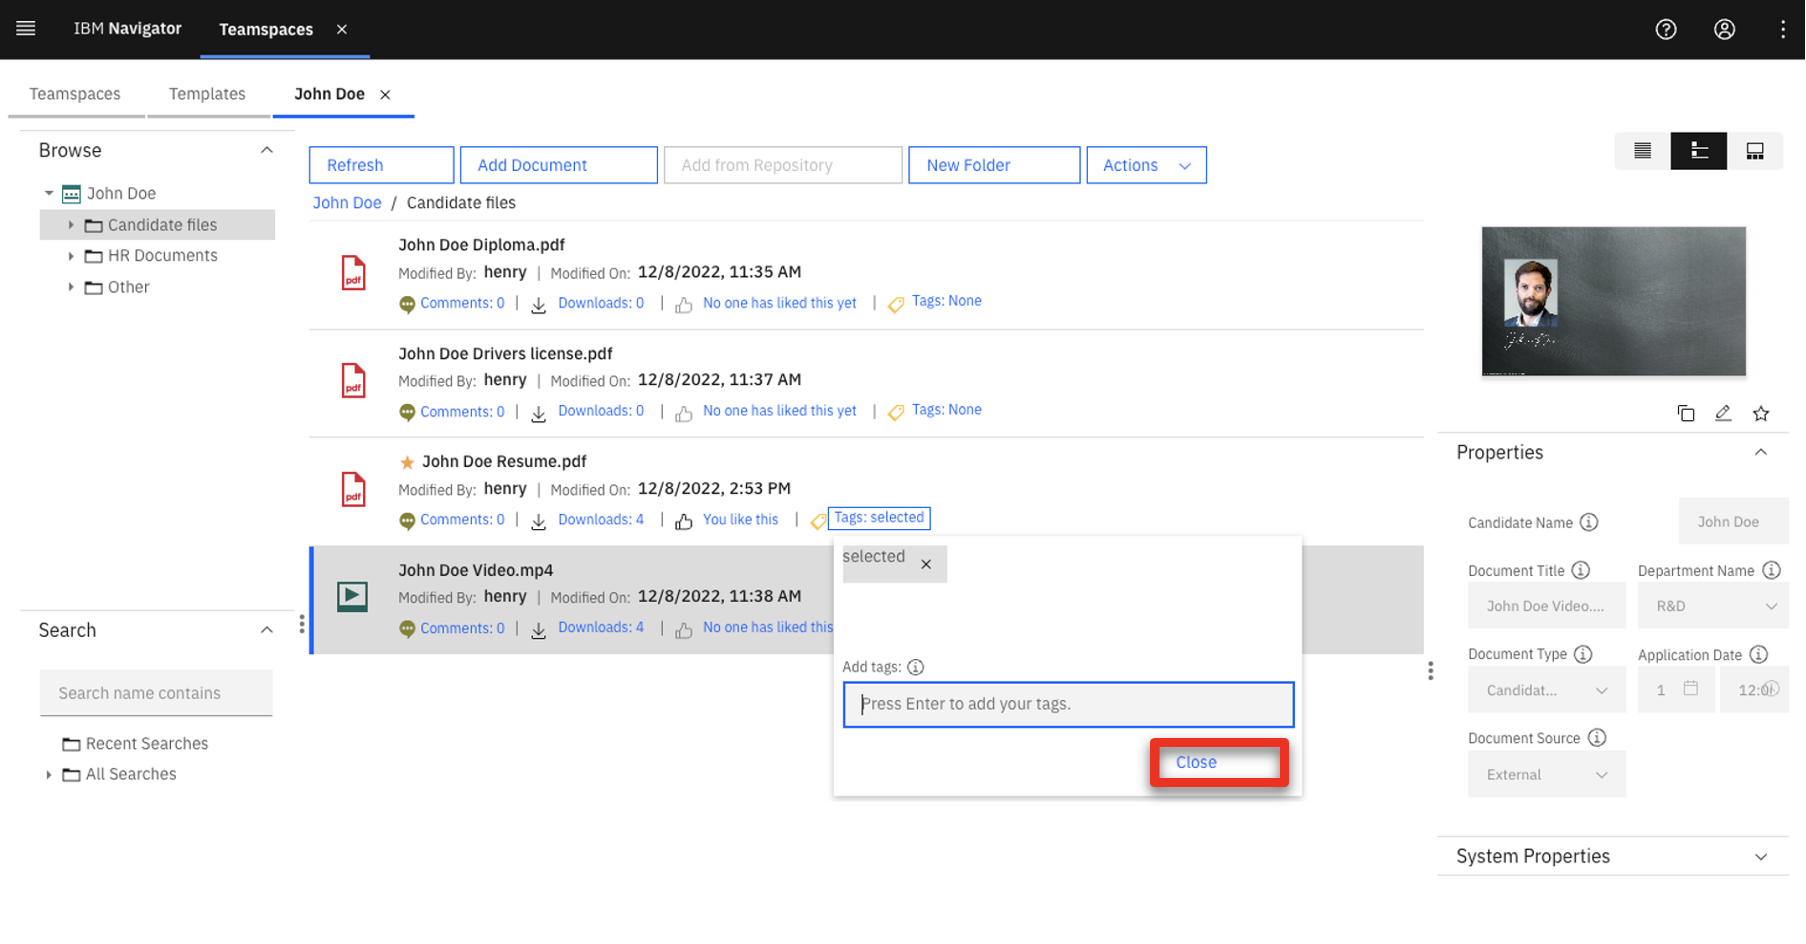 |
| Narration | The hiring team schedules the interview. To prepare, the hiring manager reviews the content she previously ‘favorited’. |
| Action 2.1.23 | Click IBM Navigator.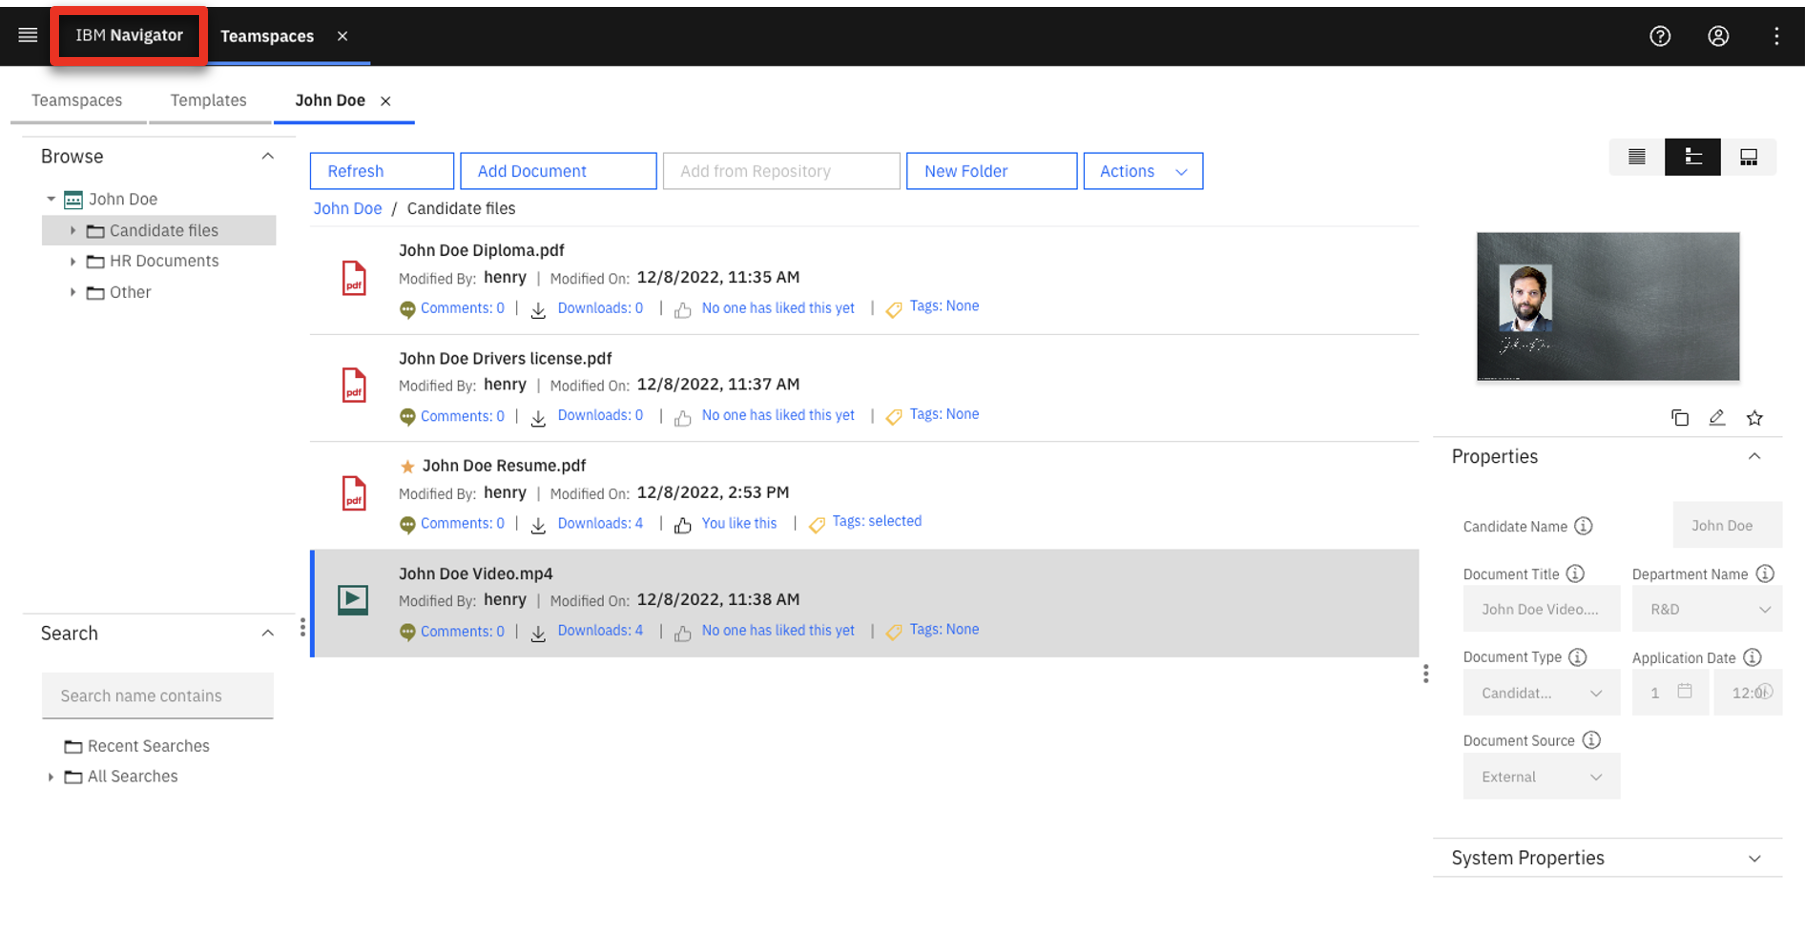 |
| Action 2.1.24 | Click the Content Favorites tile. |
| Action 2.1.25 | Double-click John Doe Resume.pdf.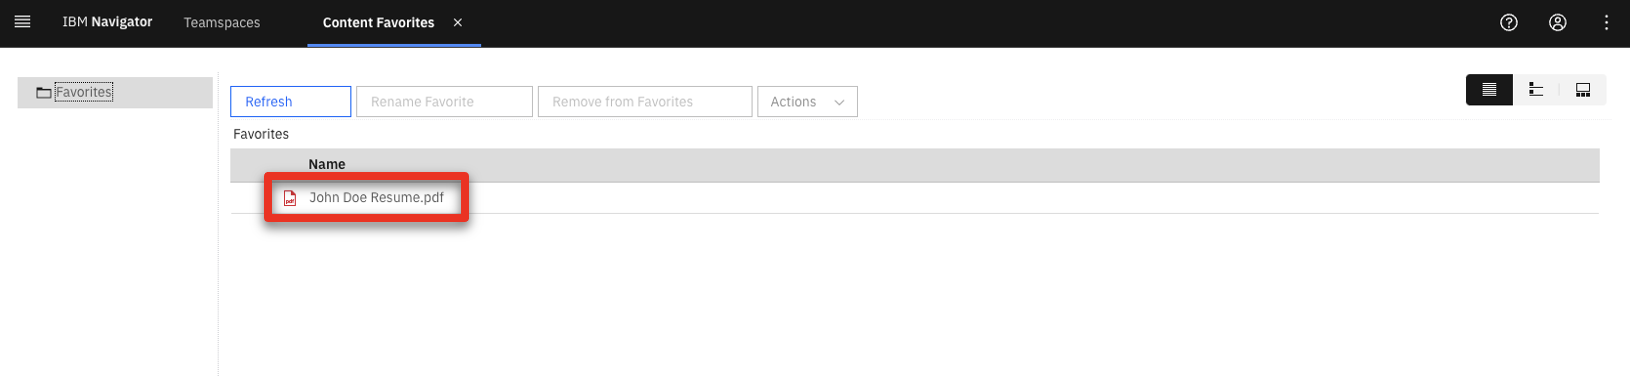 |
| Action 2.1.26 | Scroll down to the sticky note (1) and hover your mouse over the note (2).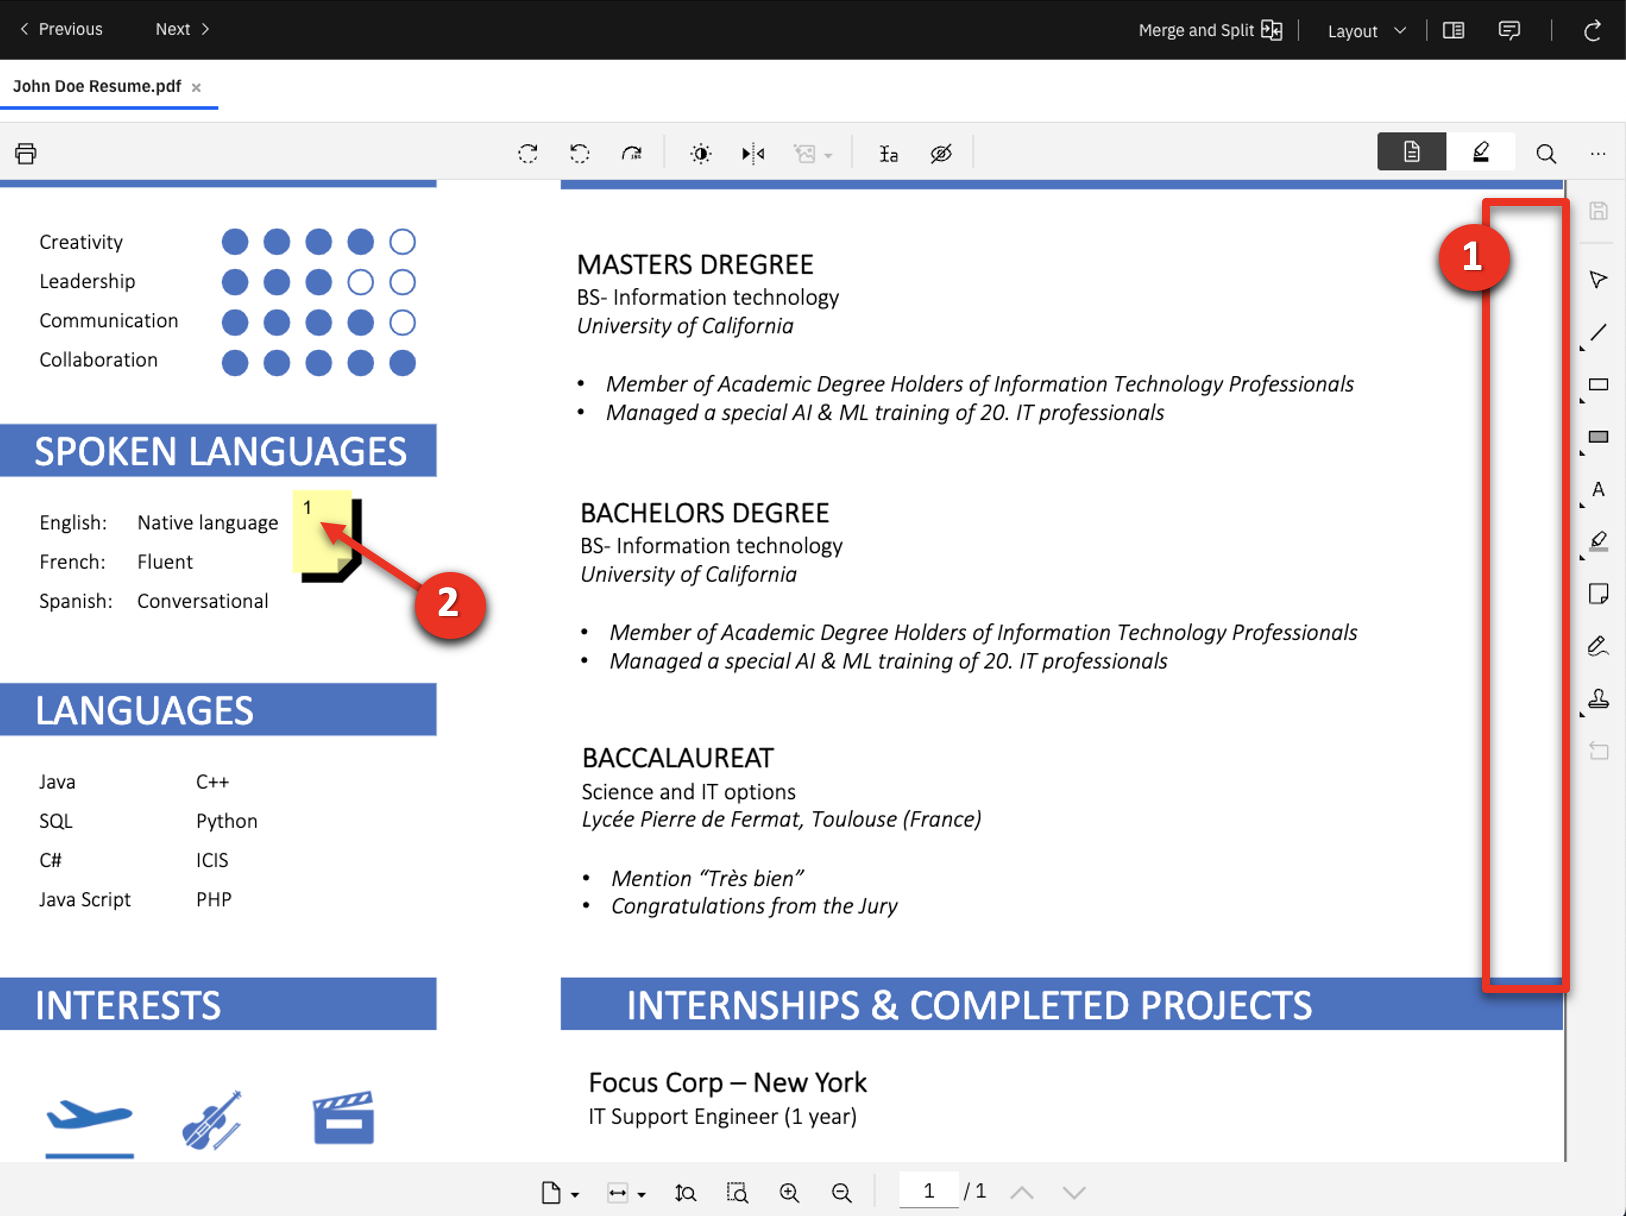 |
| Narration | She looks over the resume and annotations. The sticky note reminds her she must evaluate the candidate’s French language skills. |
| Action 2.1.27 | Point out the annotation.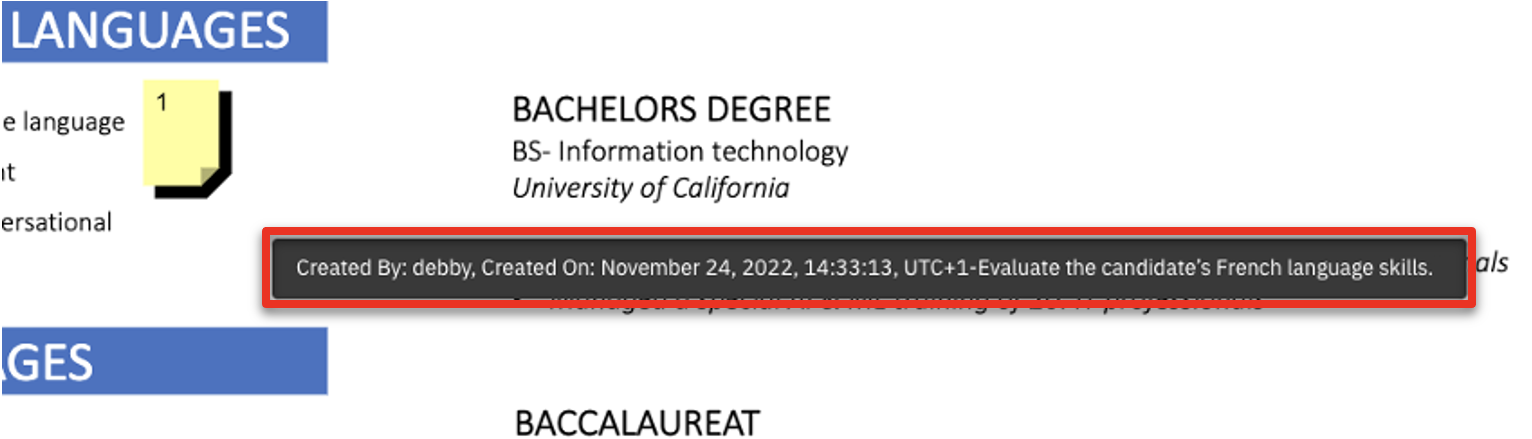 |
| Action 2.1.28 | Close the IBM Navigator Viewer window. |
3 - Annotating and merging documents
| 3.1 | Edit and add content |
|---|---|
| Narration | The hiring manager needs to capture interview feedback on the candidate evaluation form. She downloads the form from Teamspace’s document templates. |
| Action 3.1.1 | Click Teamspaces.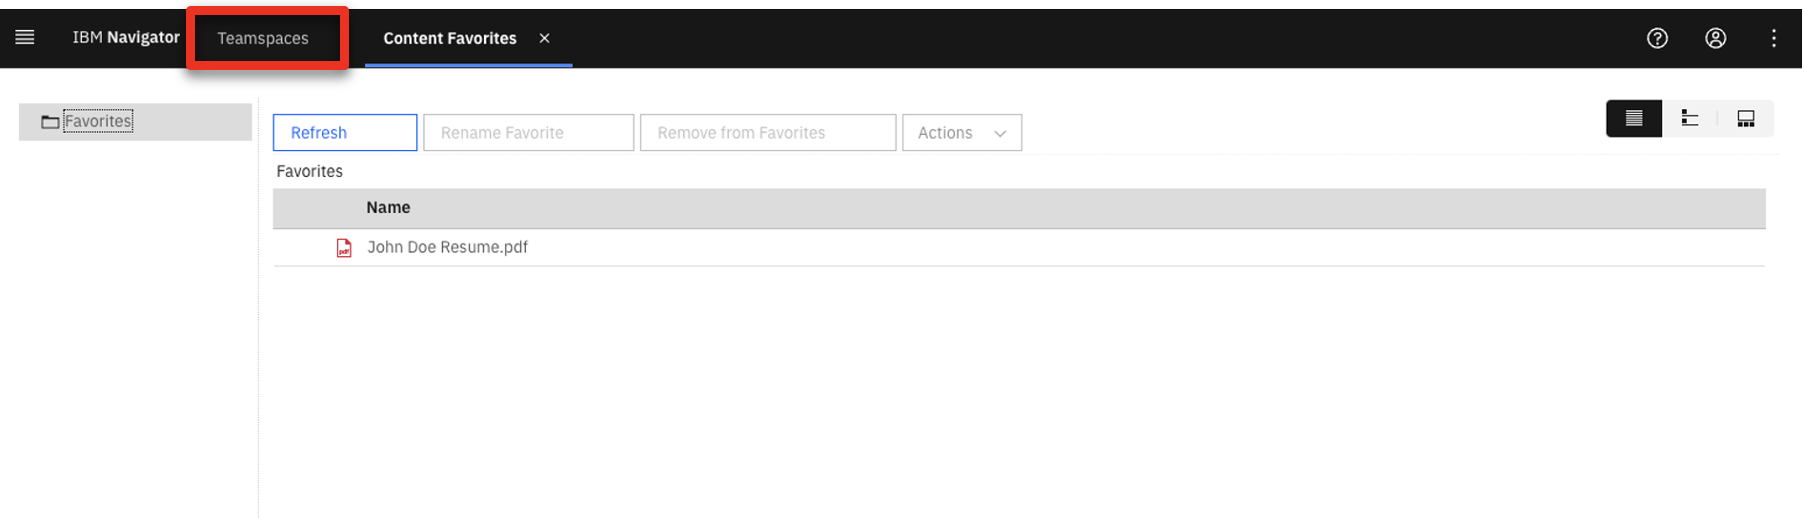 |
| Action 3.1.2 | Click HR Documents.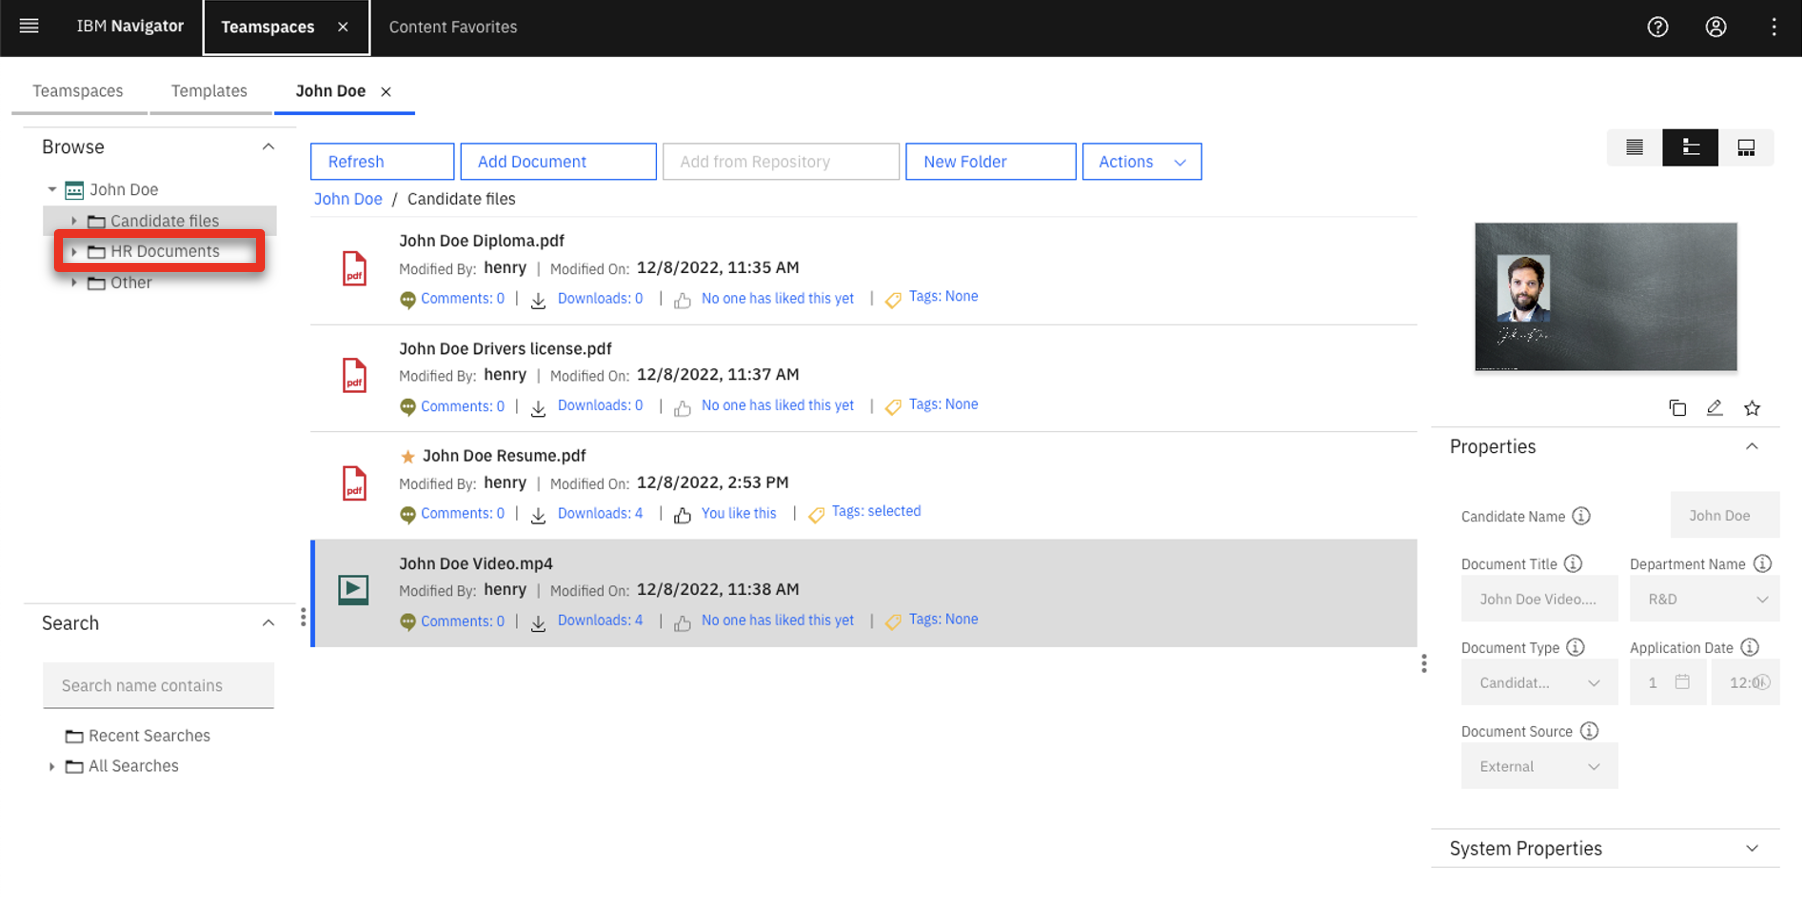 |
| Narration | The filmstrip view helps the hiring manager see the available HR documents. She chooses the ‘Evaluation form’ and creates a copy in the applicant’s Candidate files folder. |
| Action 3.1.3 | Click the Filmstrip view icon.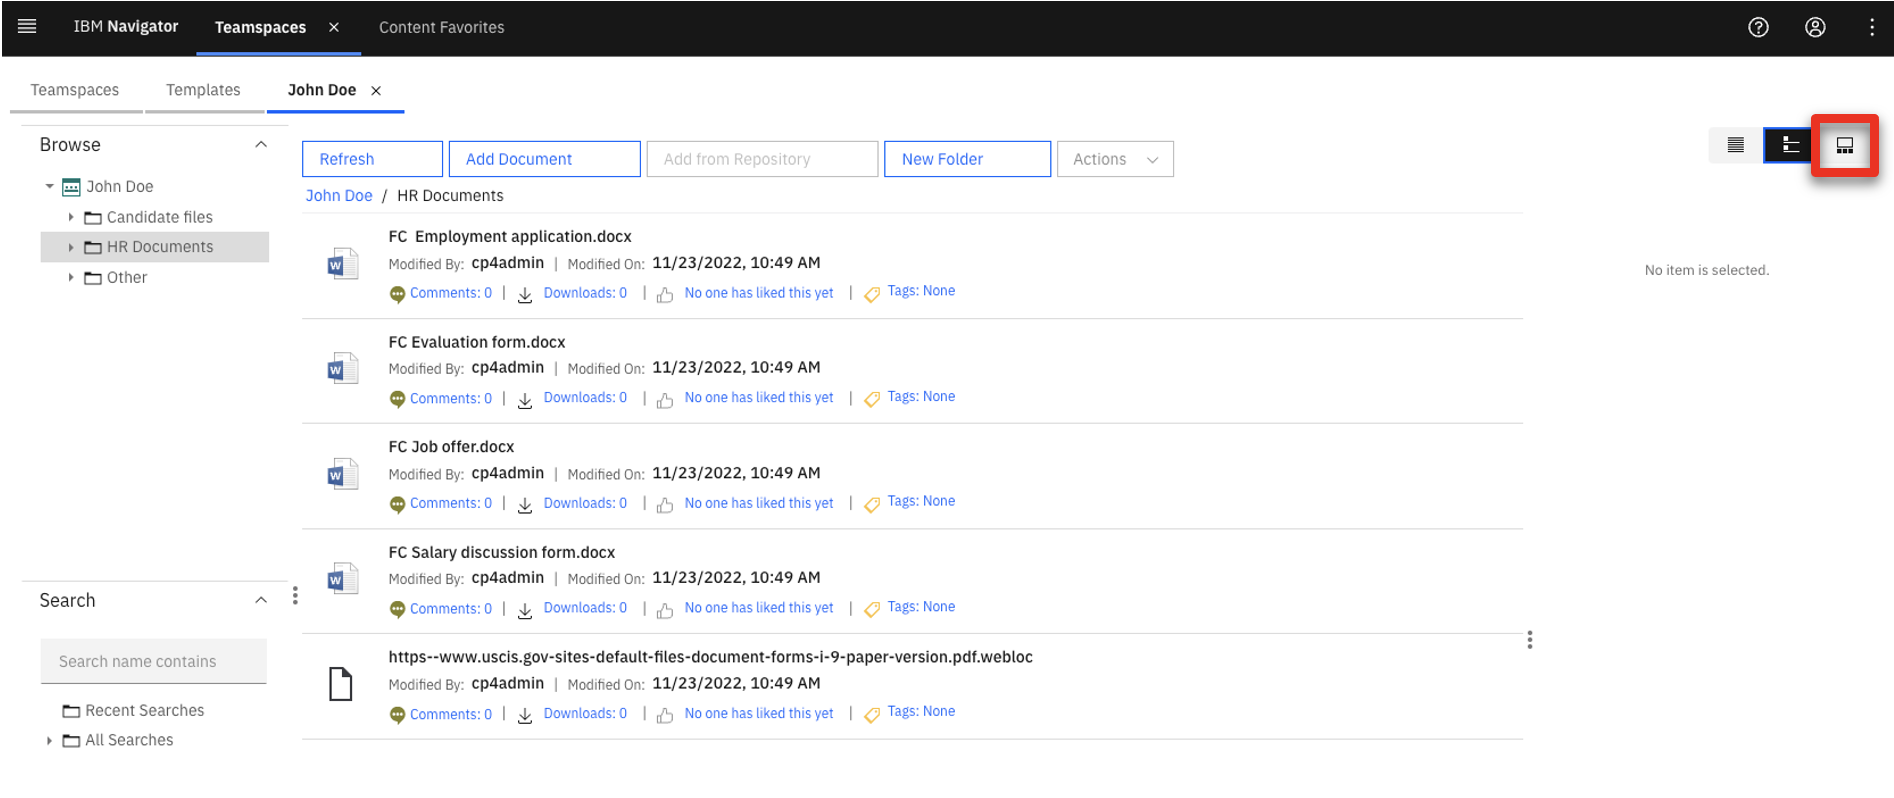 |
| Action 3.1.4 | Click the first document on the bottom left of the filmstrip viewer.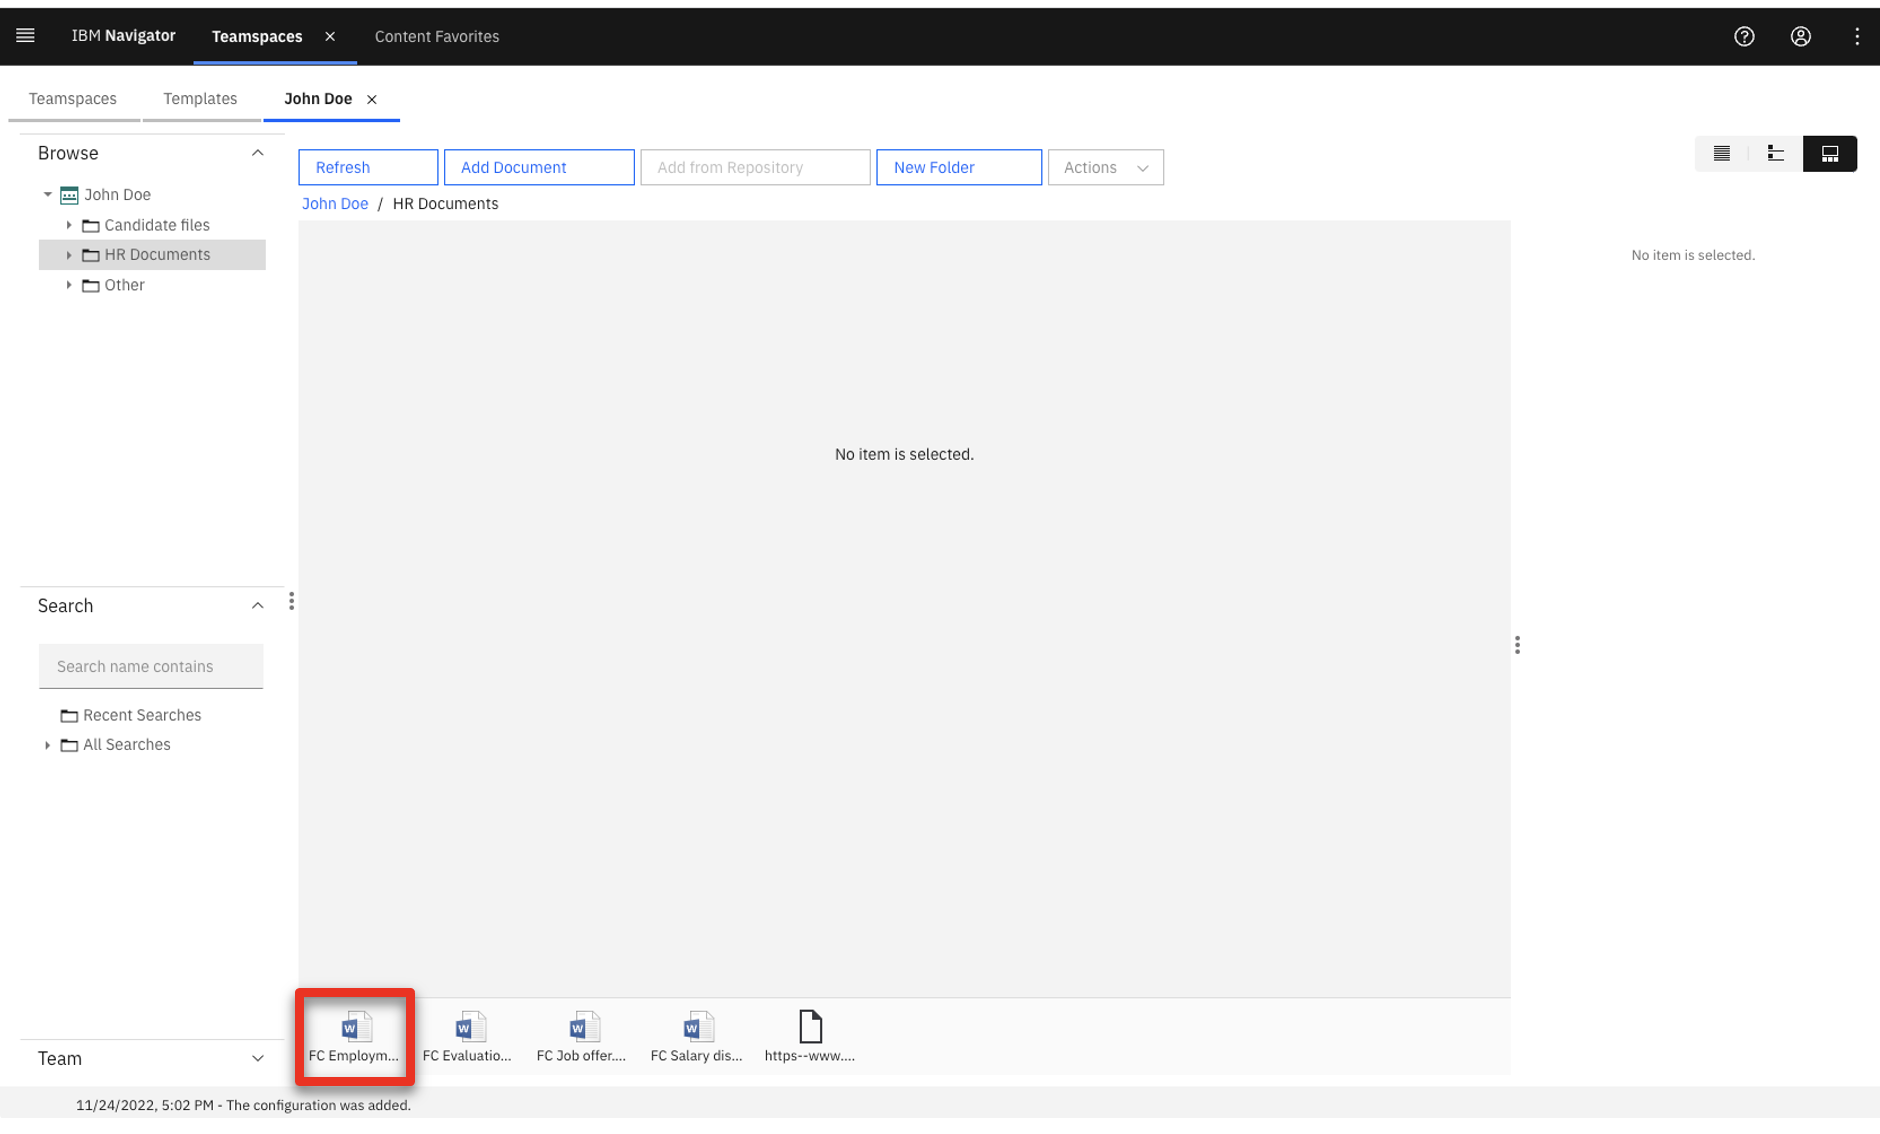 |
| Action 3.1.5 | Scroll right until you see the FC Evaluation form in the viewer.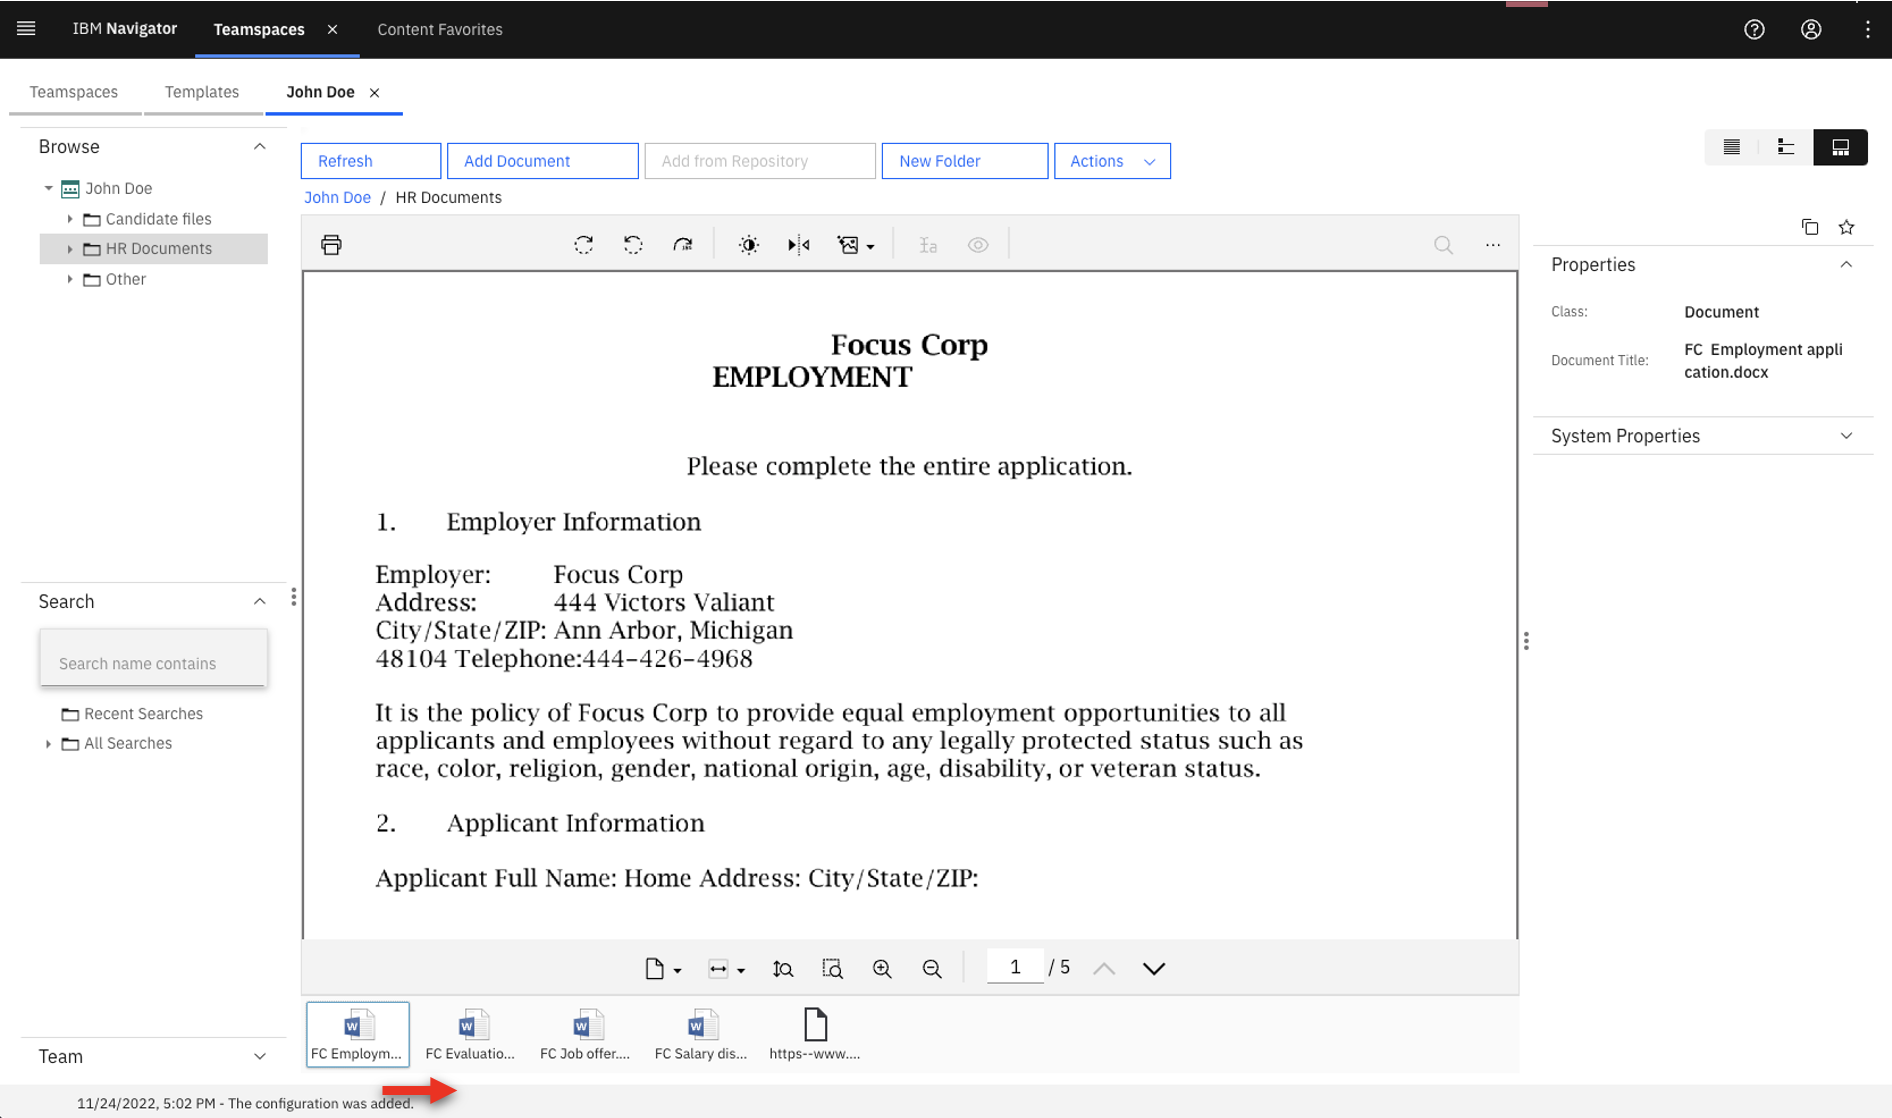 |
| Action 3.1.6 | Click Actions (1), then click Folders (2). Select Add to Folder (3).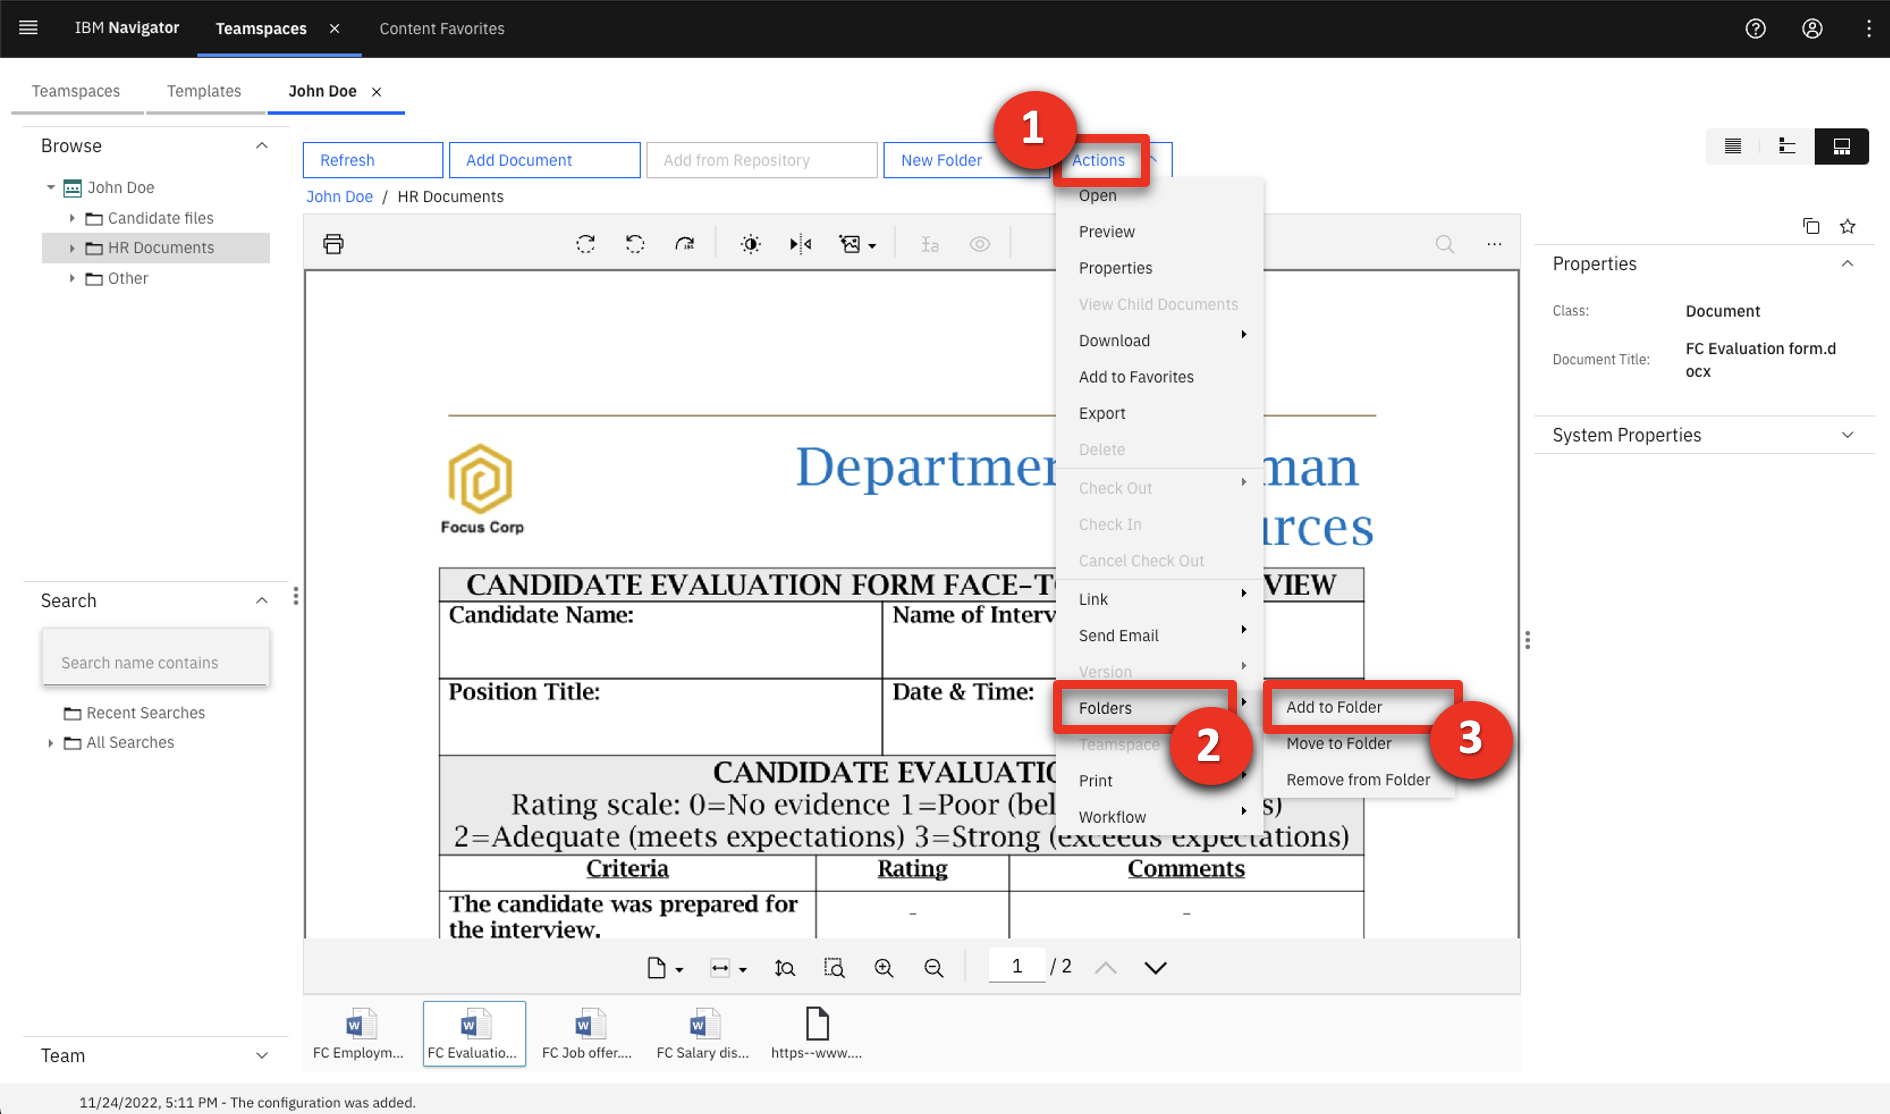 |
| Action 3.1.7 | Select Candidate files (1) and click Add (2).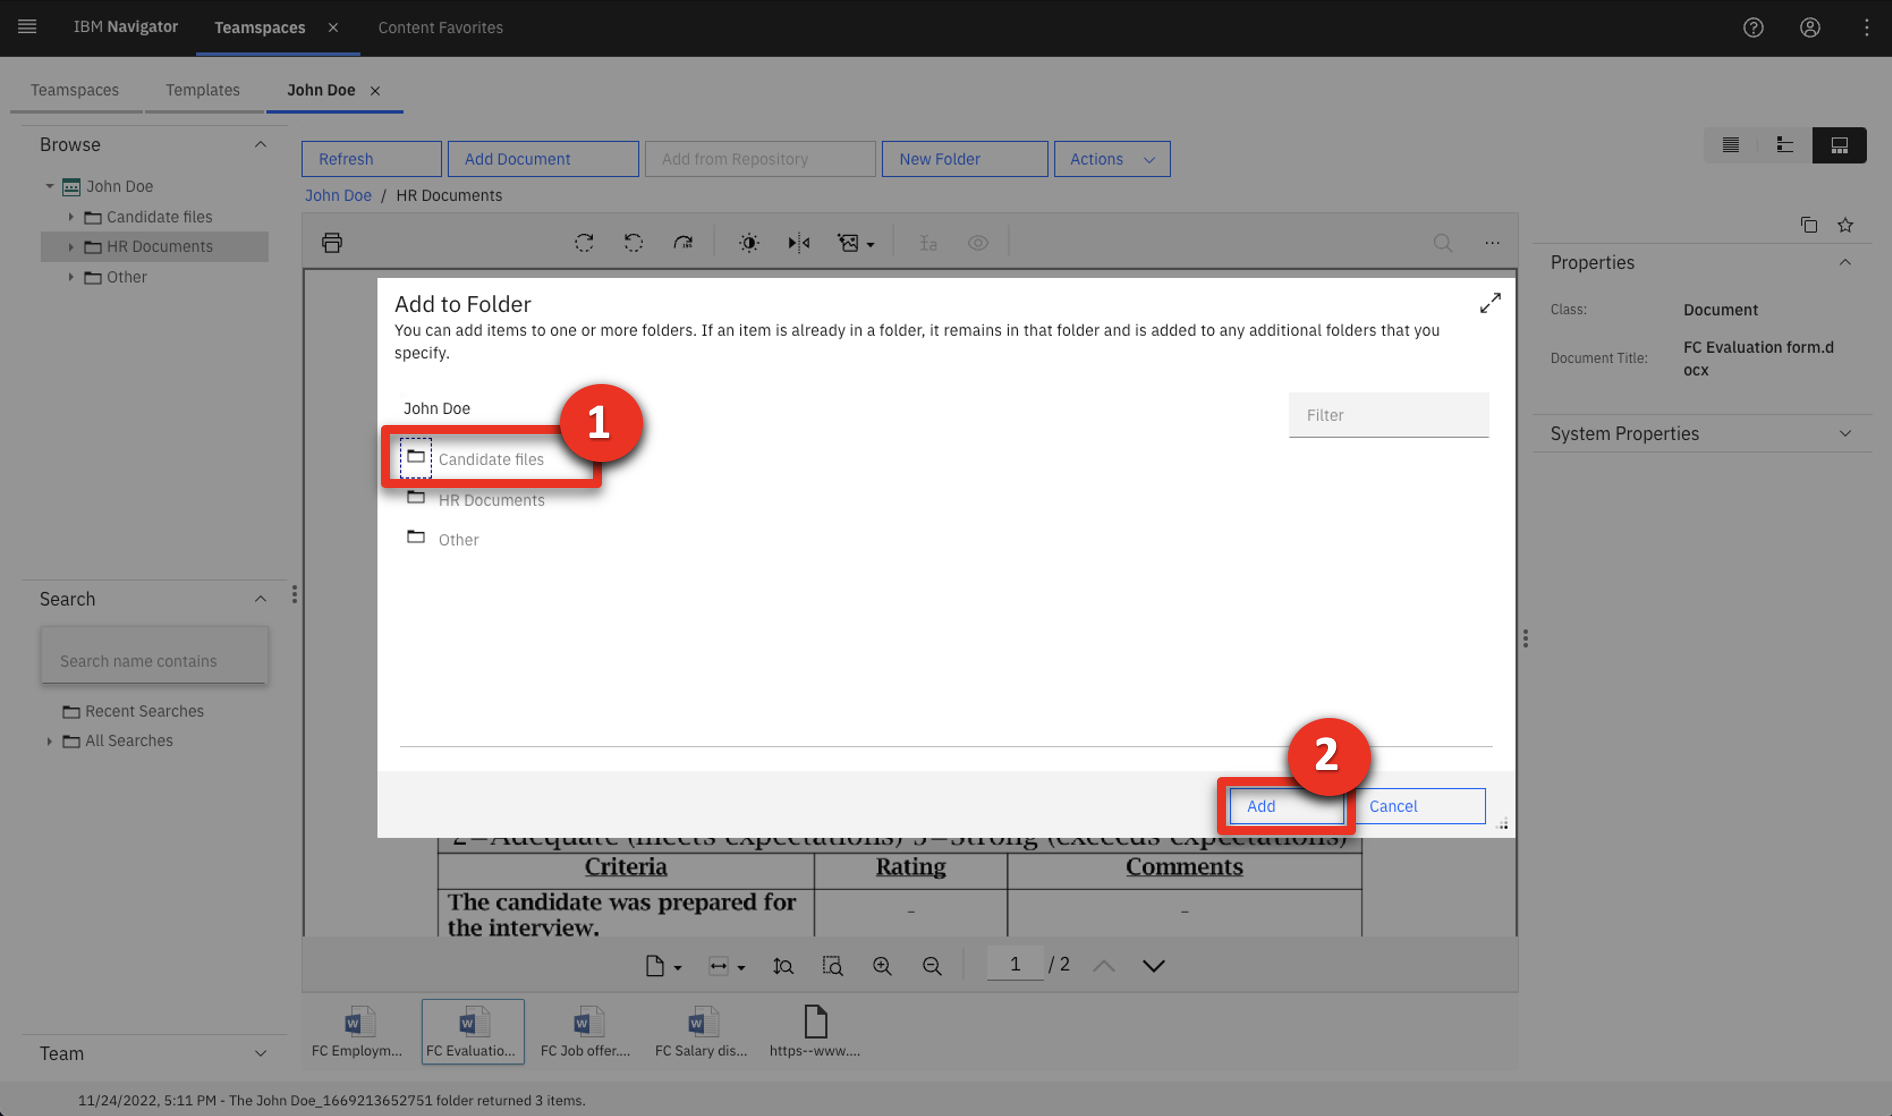 |
| Action 3.1.8 | Click the details view icon (1) and click Candidate files (2).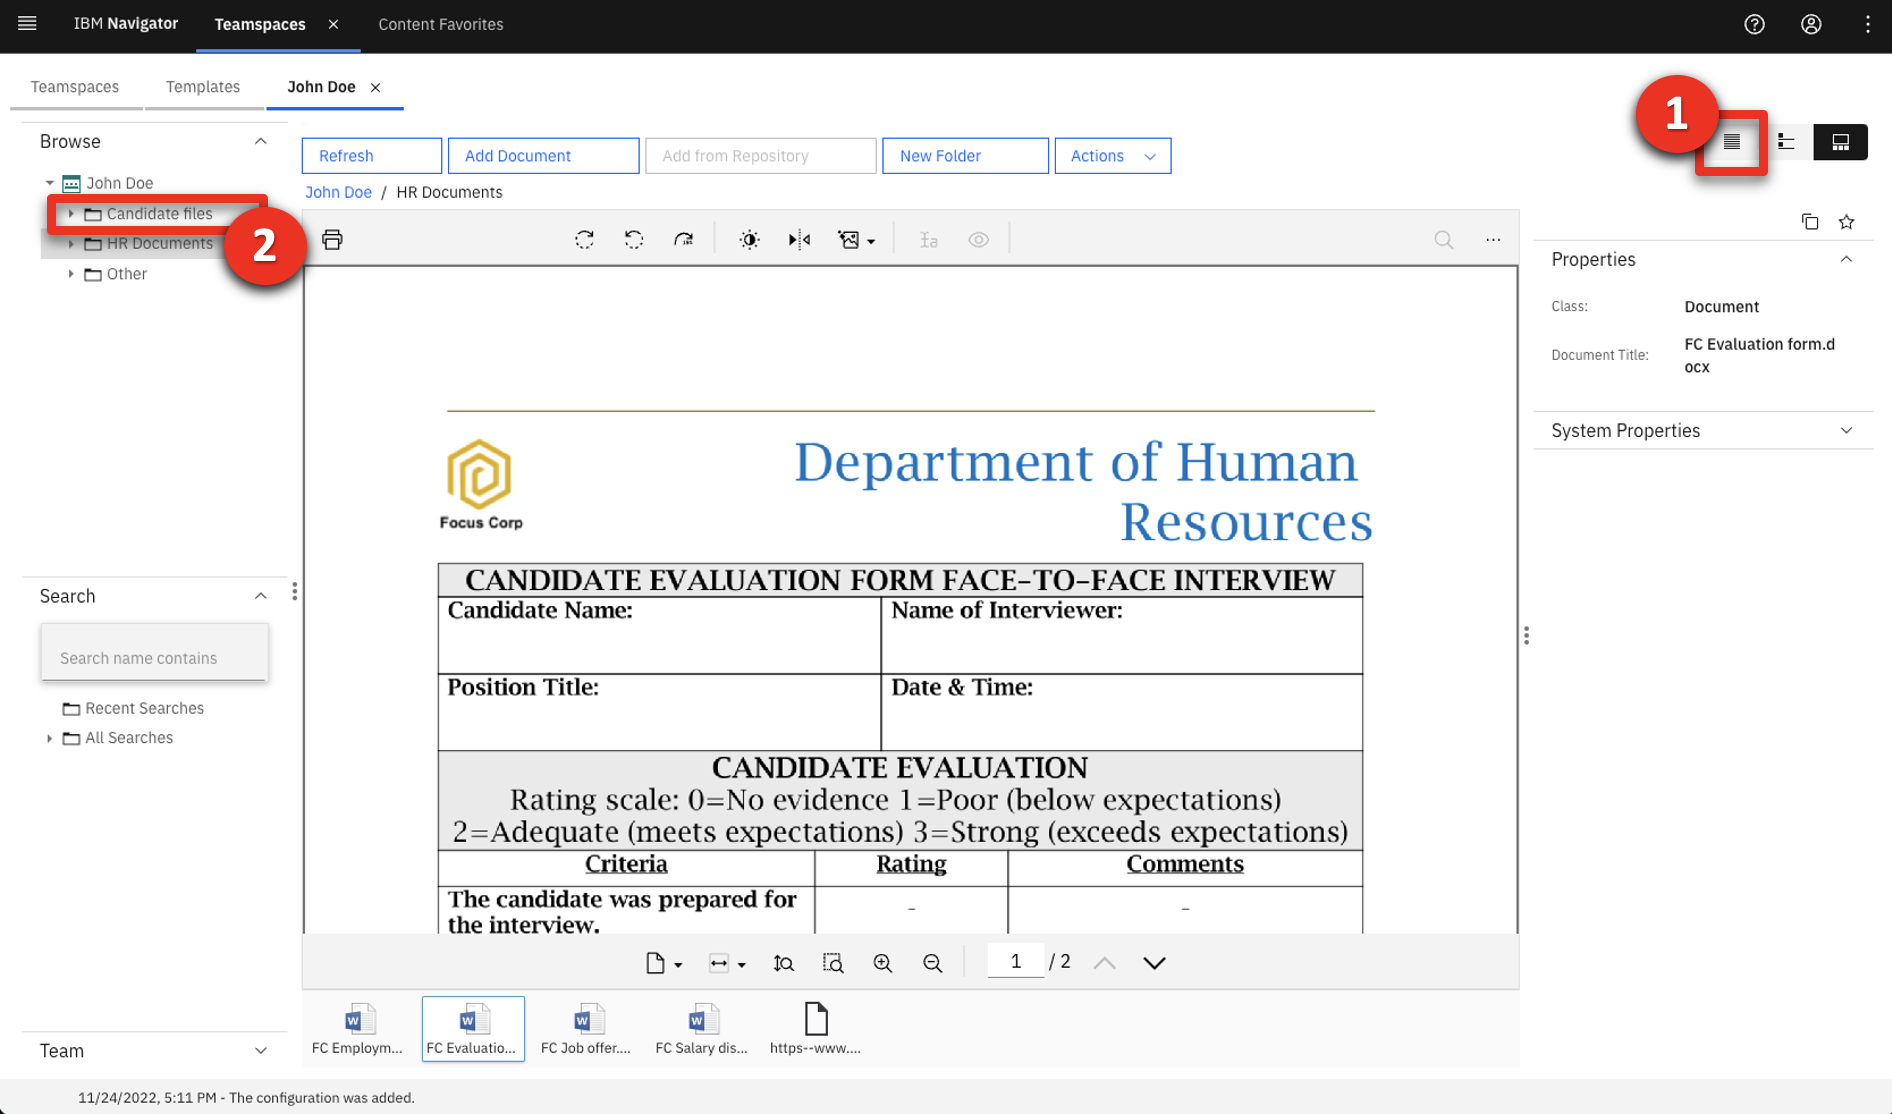 |
| Narration | The hiring manager opens the evaluation form directly from the applicant’s teamspace files so she can edit the form during the interview. |
| Action 3.1.9 | Click Refresh (1) and then Click FC Evaluation form.docx.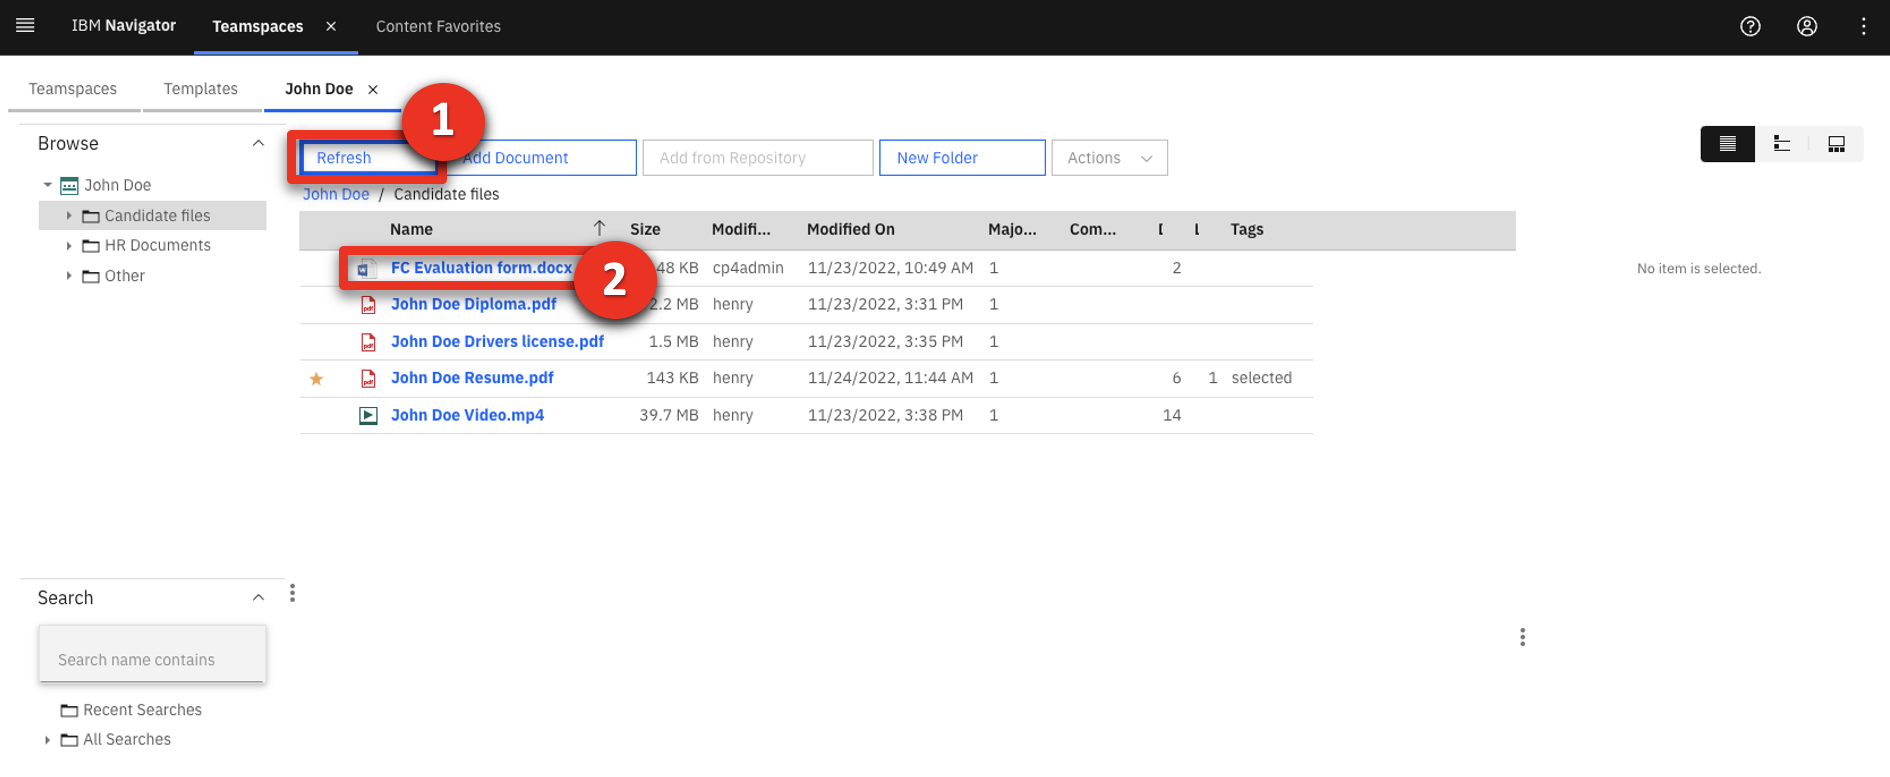 |
| Narration | The hiring manager switches to permanent redaction mode, which ‘hard codes’ her updates to the document for every subsequent viewer. |
| Action 3.1.10 | Click the permanent redaction mode marker icon.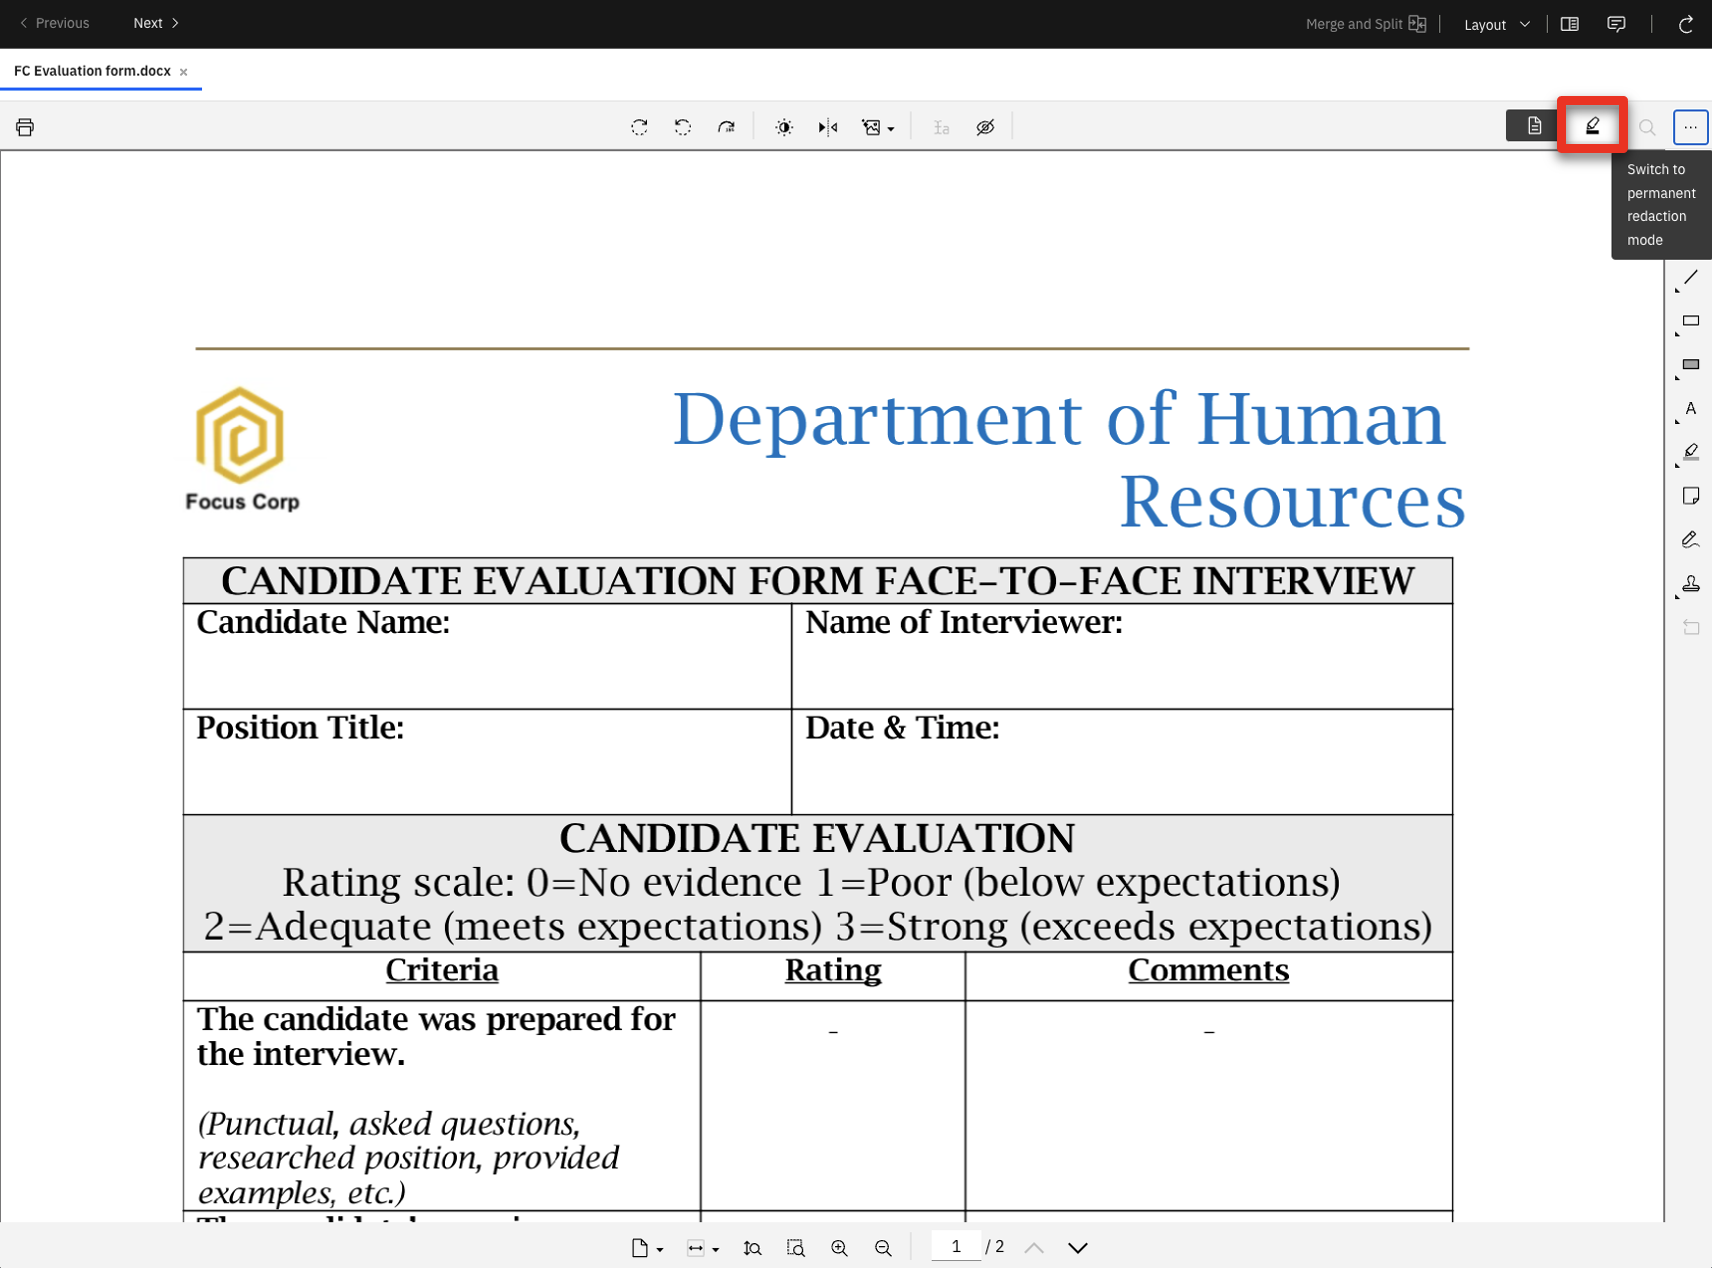 |
| Action 3.1.11 | Click New Version. 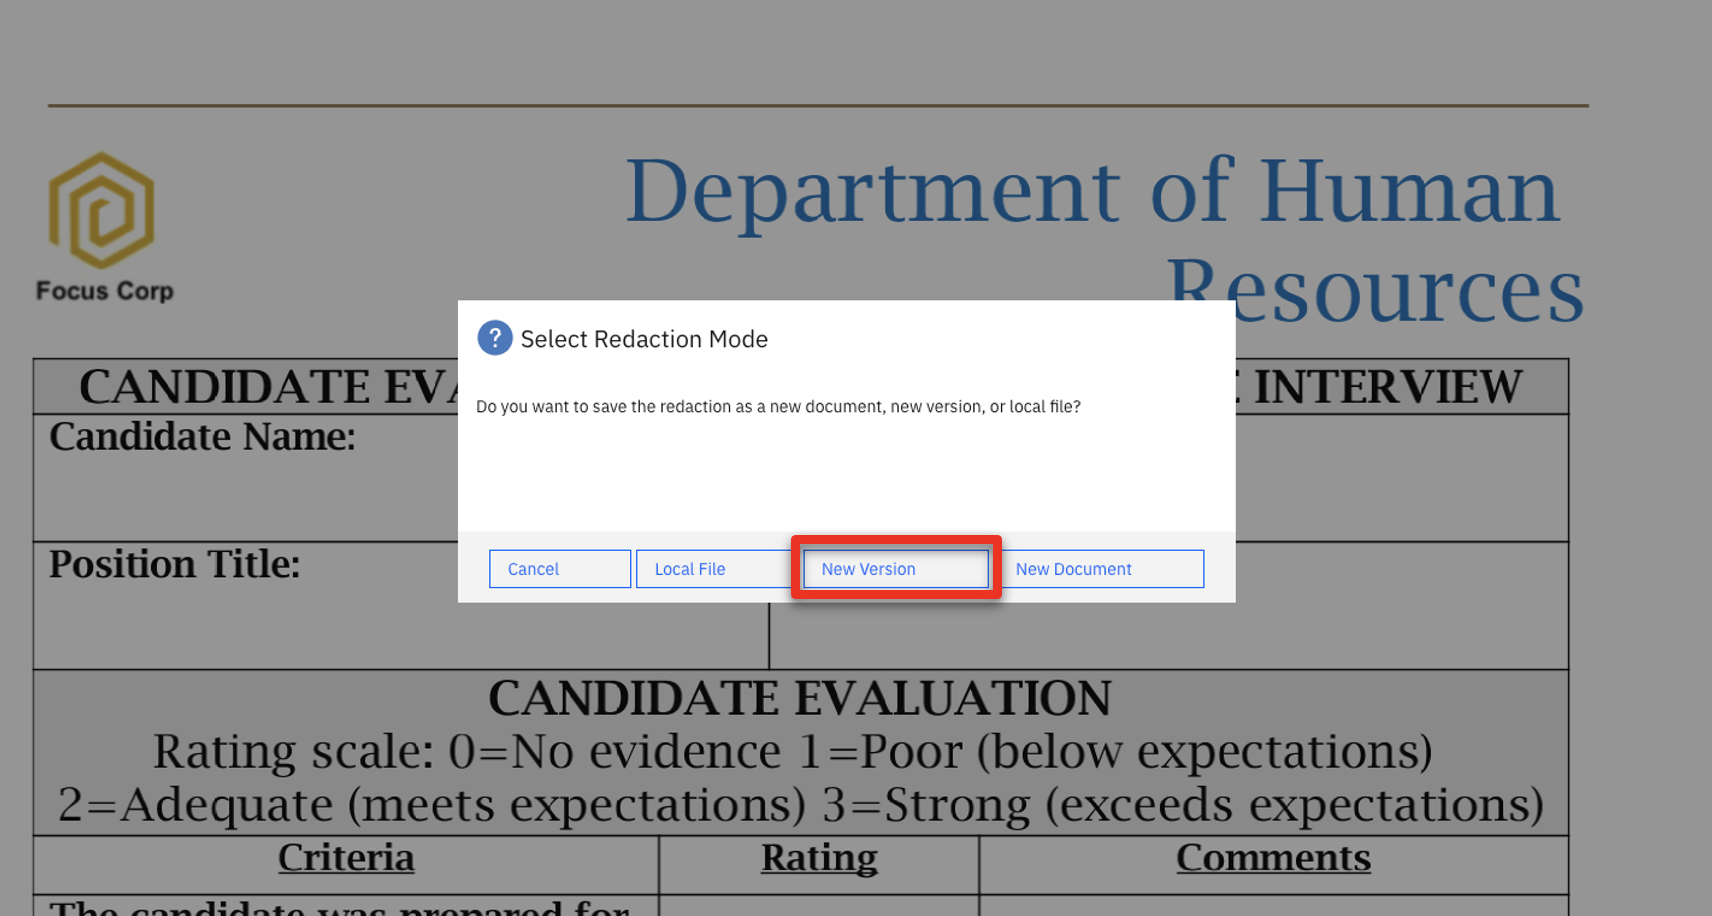 The fillable version of the candidate evaluation form displays. 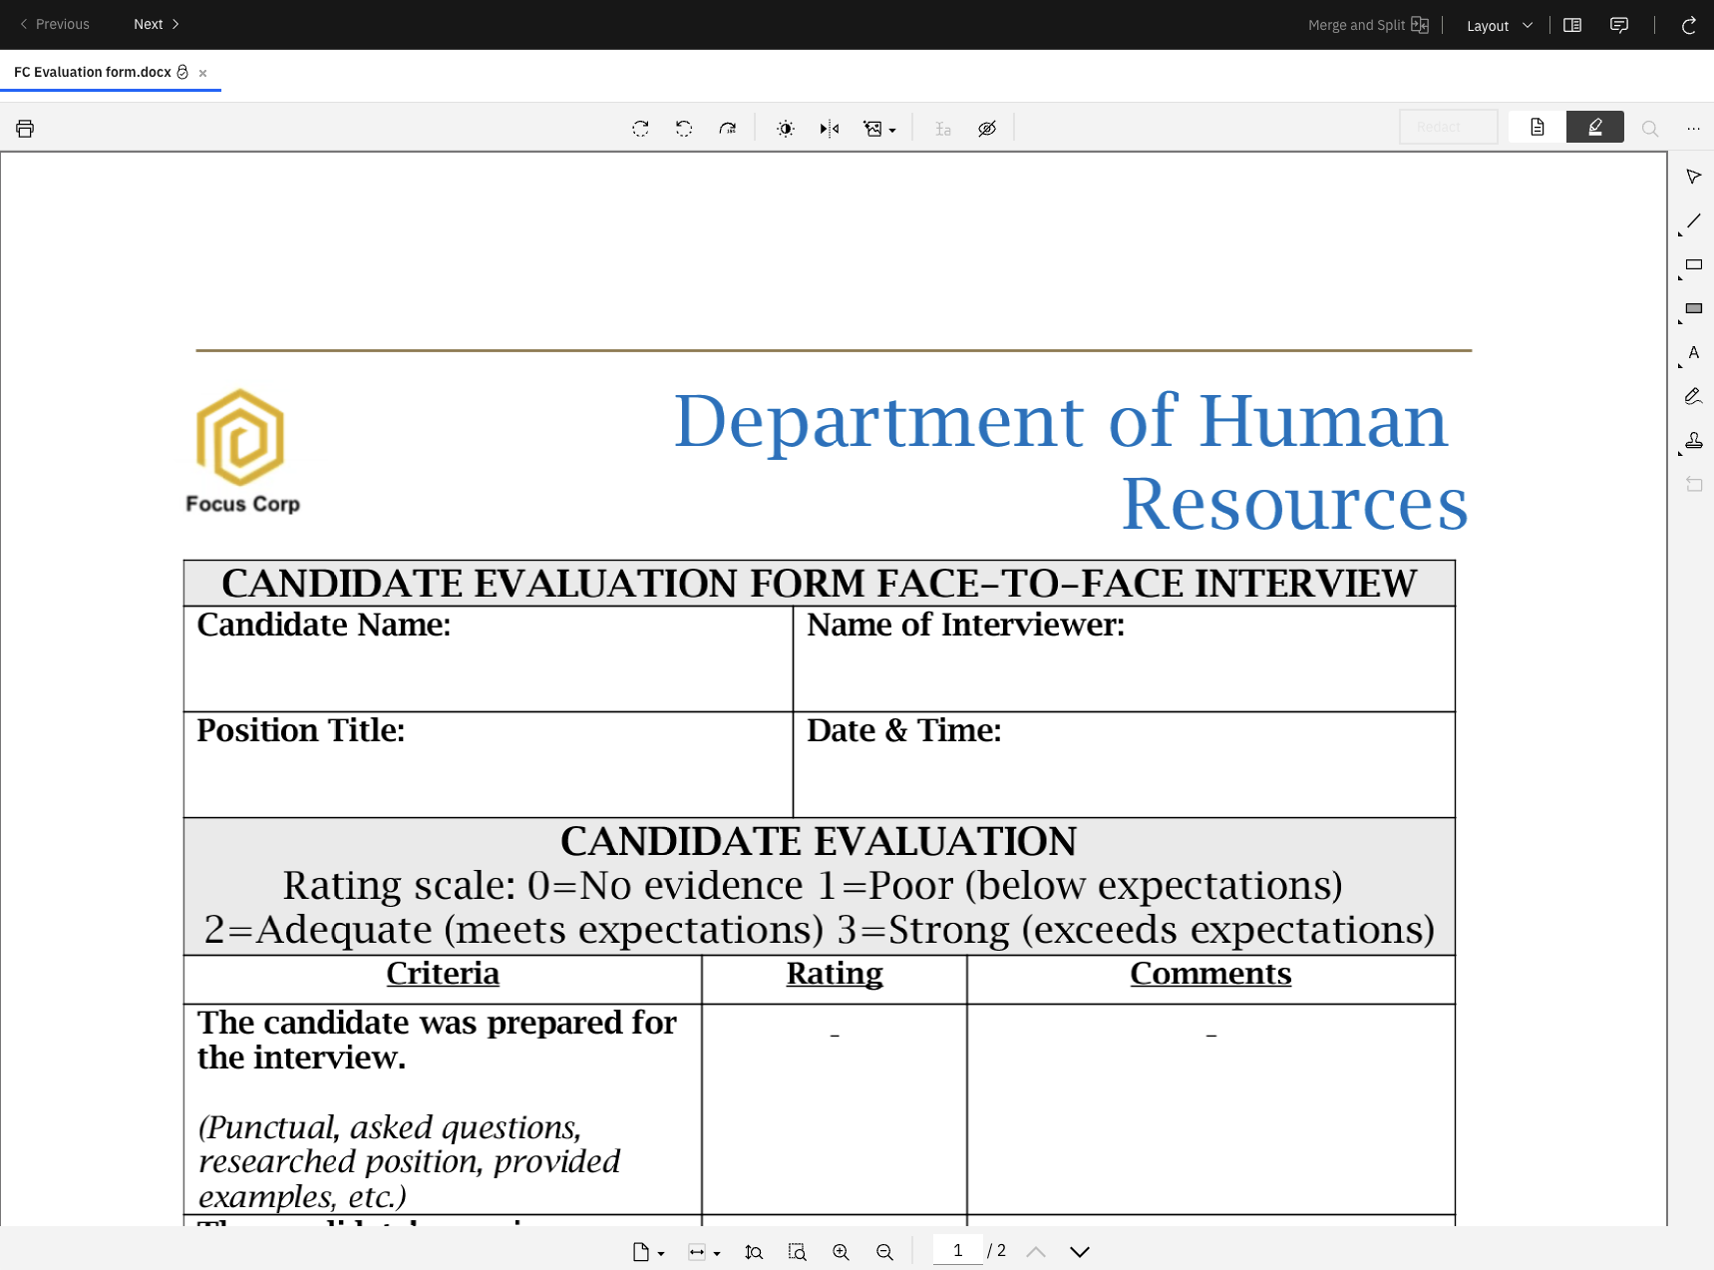 |
| Action 3.1.12 | Return to the IBM Navigator view window. Point out the lock icon. 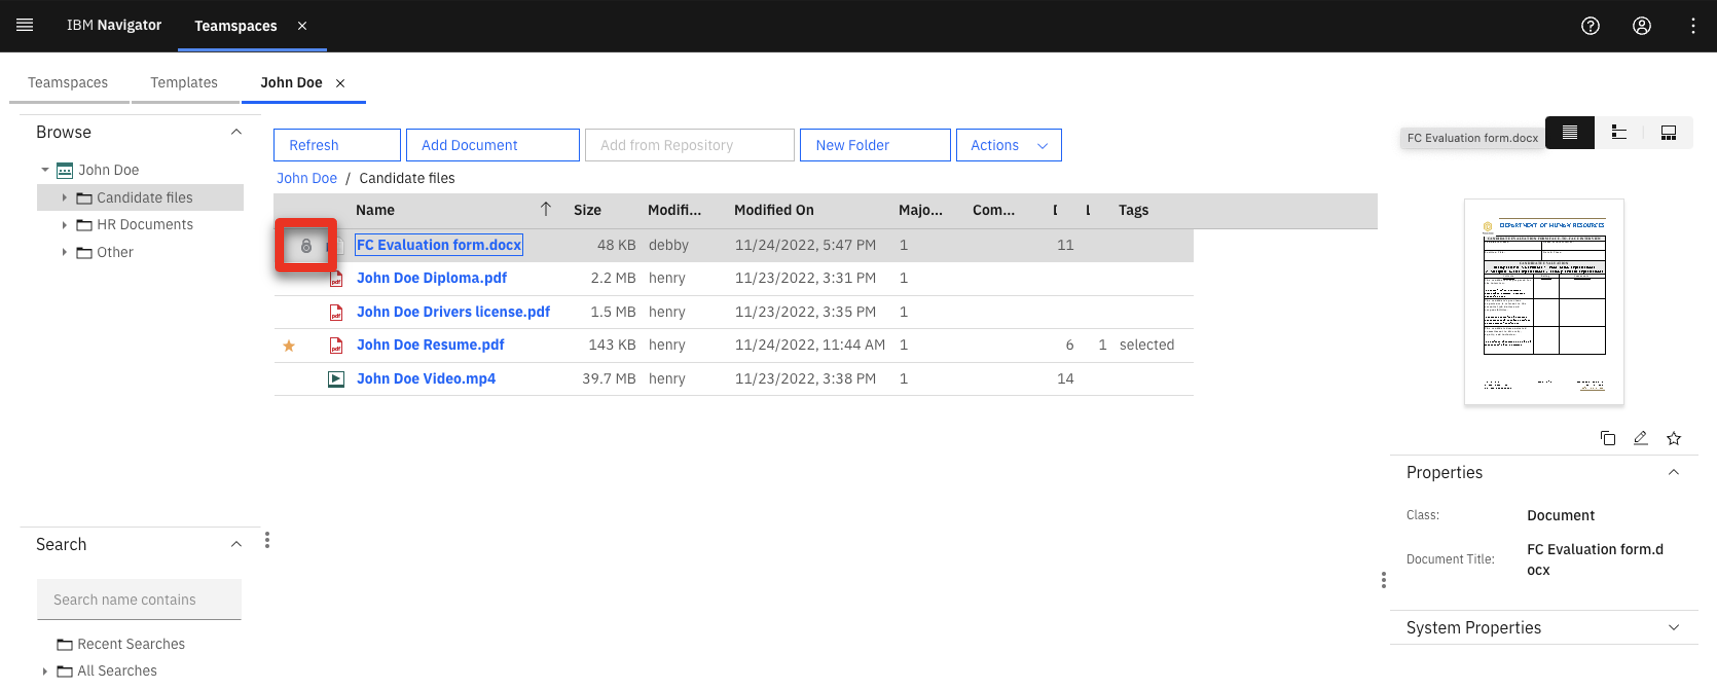 |
| Narration | While the hiring manager edits the document, it is locked to prevent anyone else from making edits. |
| Action 3.1.13 | Return to the candidate evaluation form, click the text icon (1), and then select the free text field under Candidate Name (2).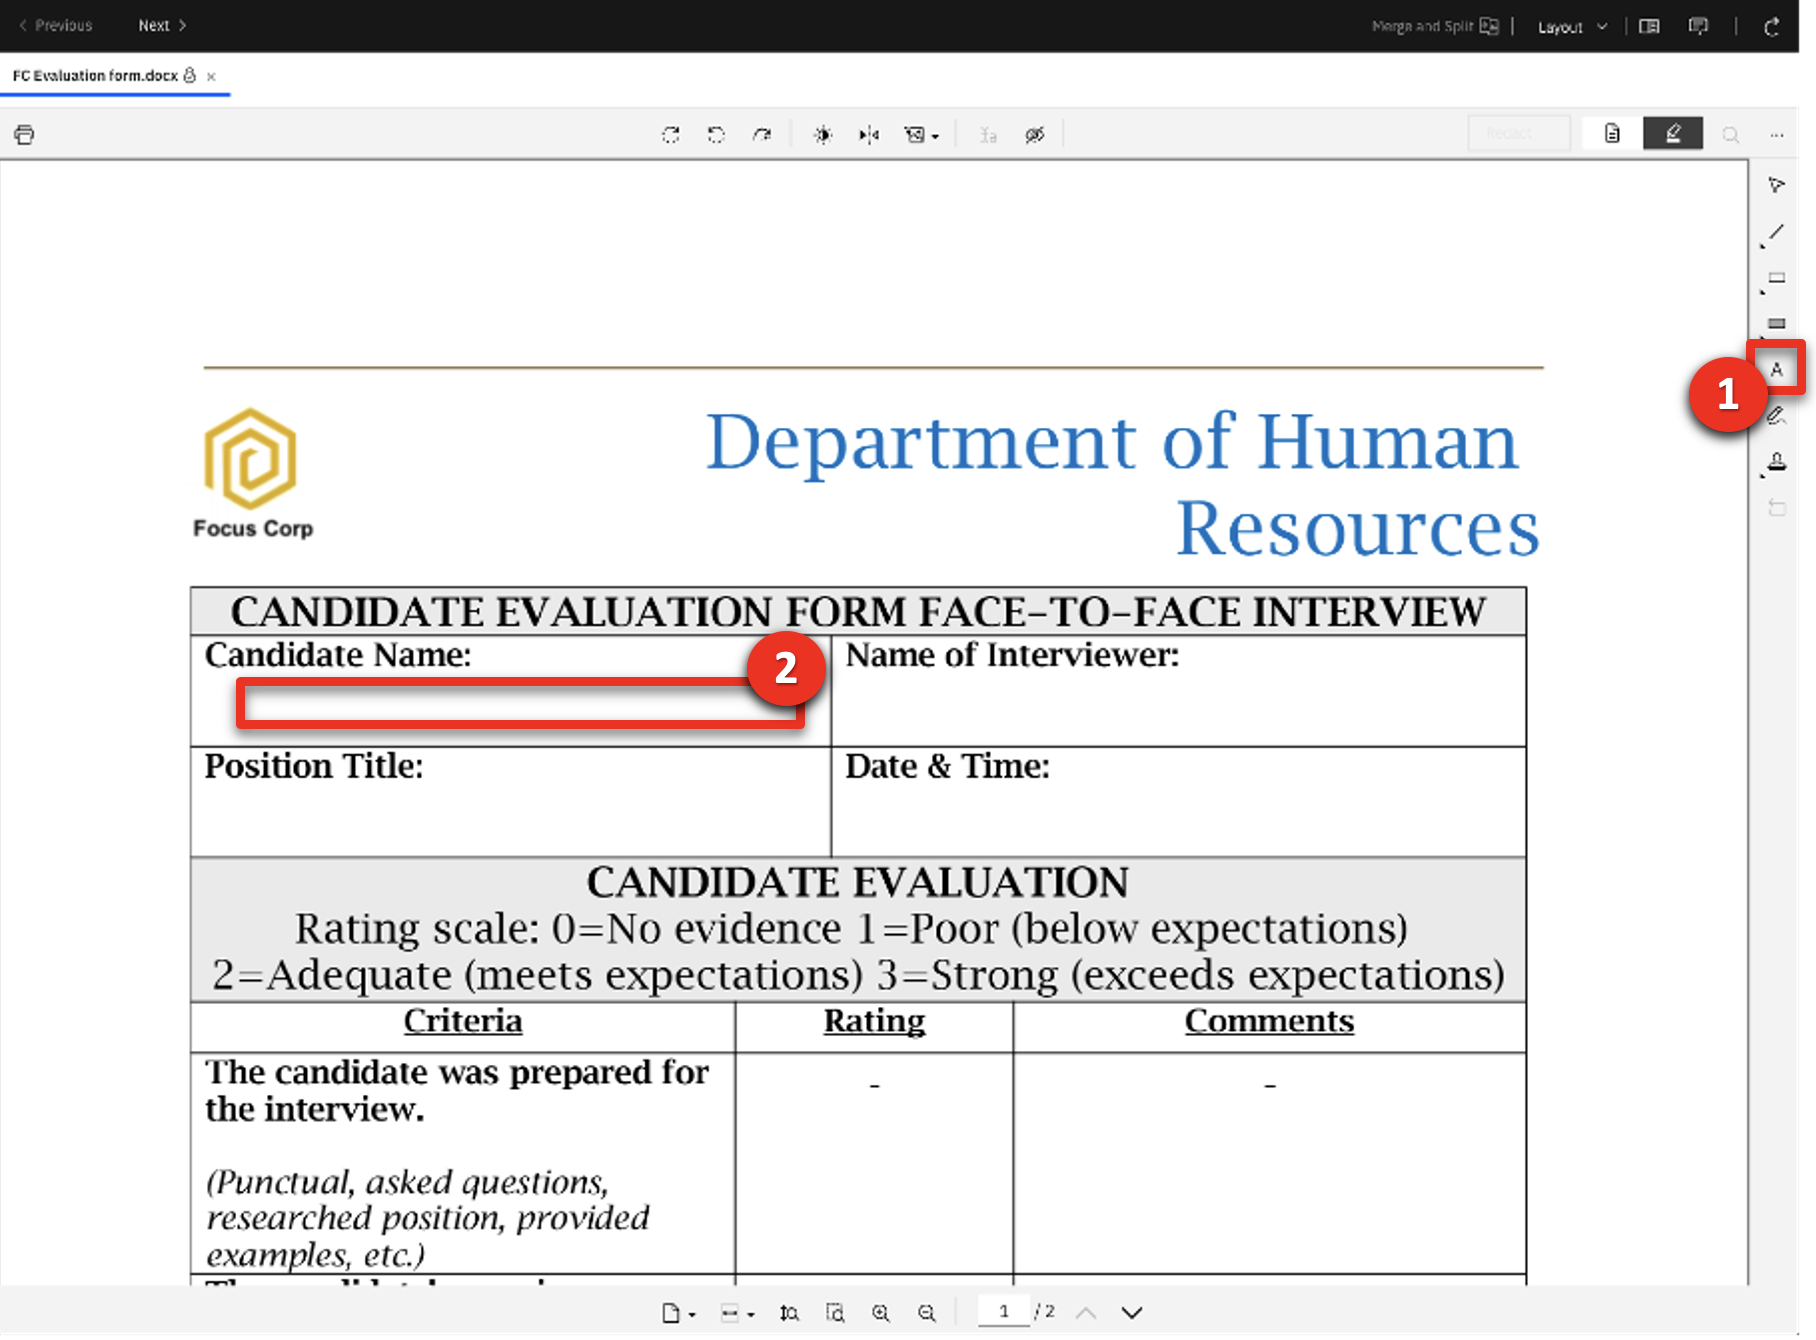 |
| Narration | She adds the candidate’s name and changes the text color to blue to highlight it. |
| Action 3.1.14 | Type ‘John Doe’ (1) and click the font color icon (2).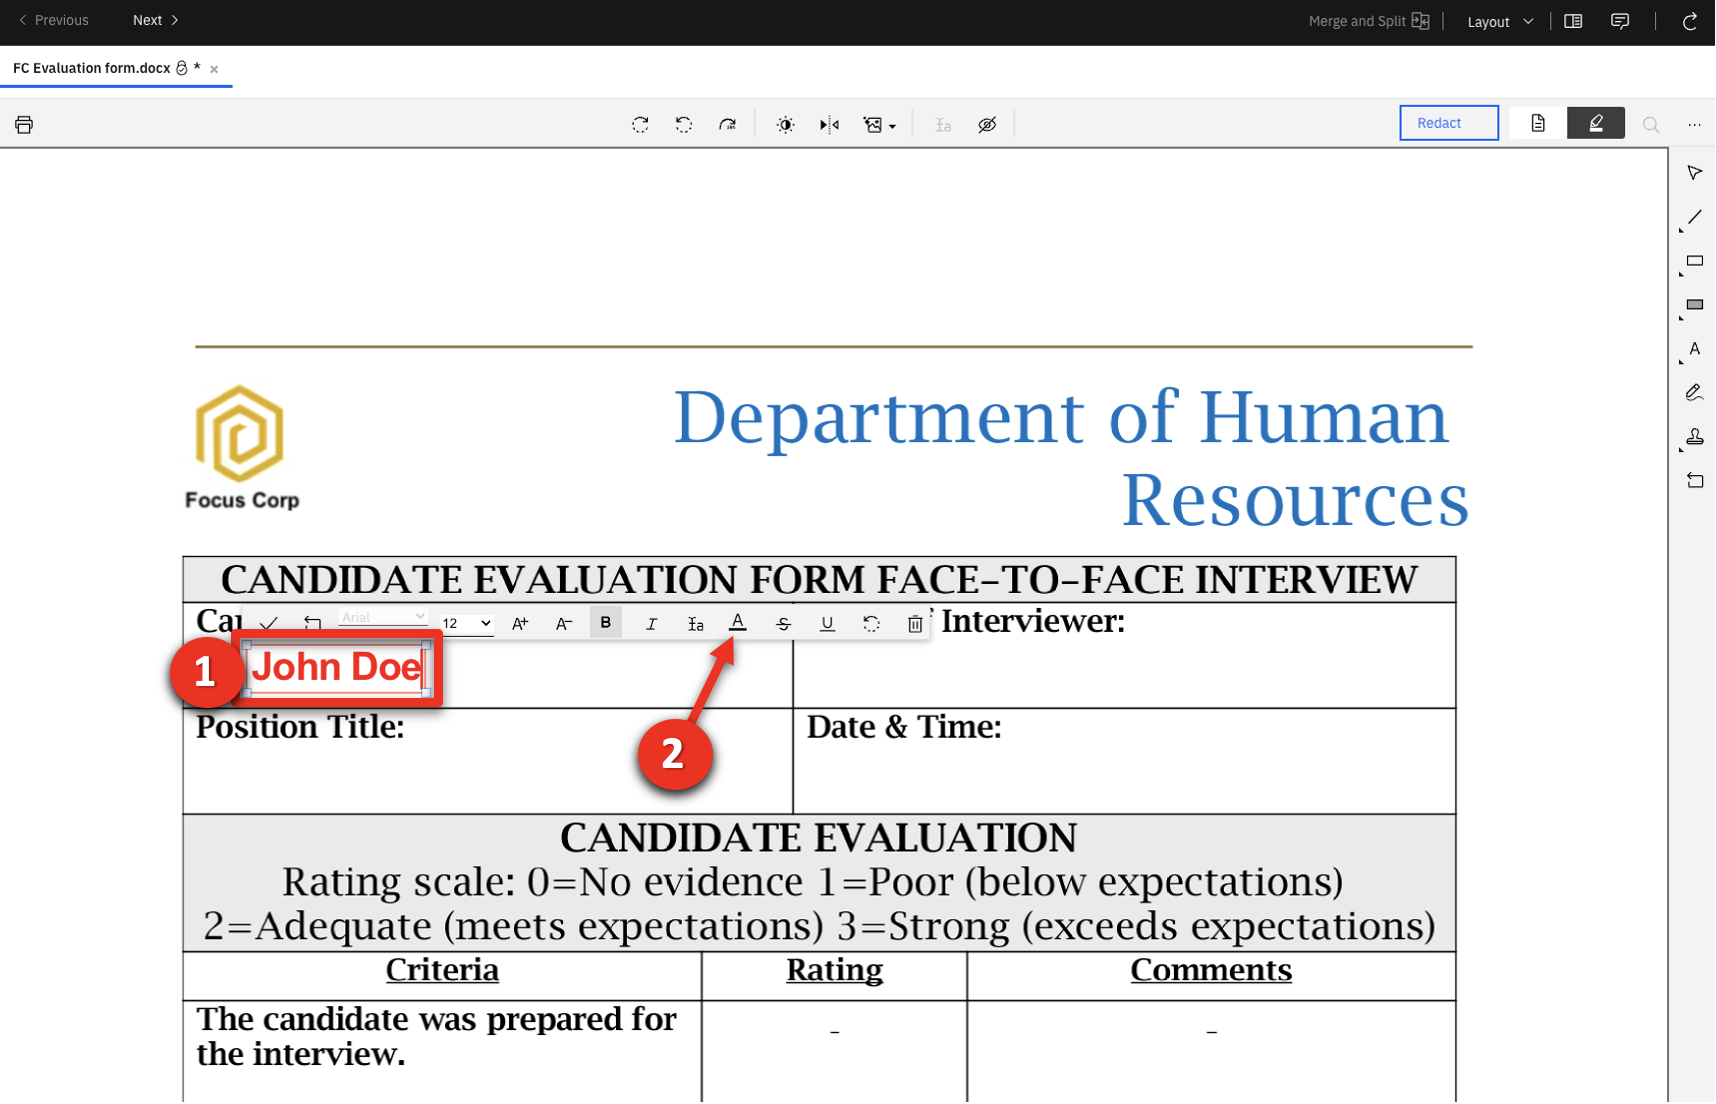 |
| Action 3.1.15 | Select blue.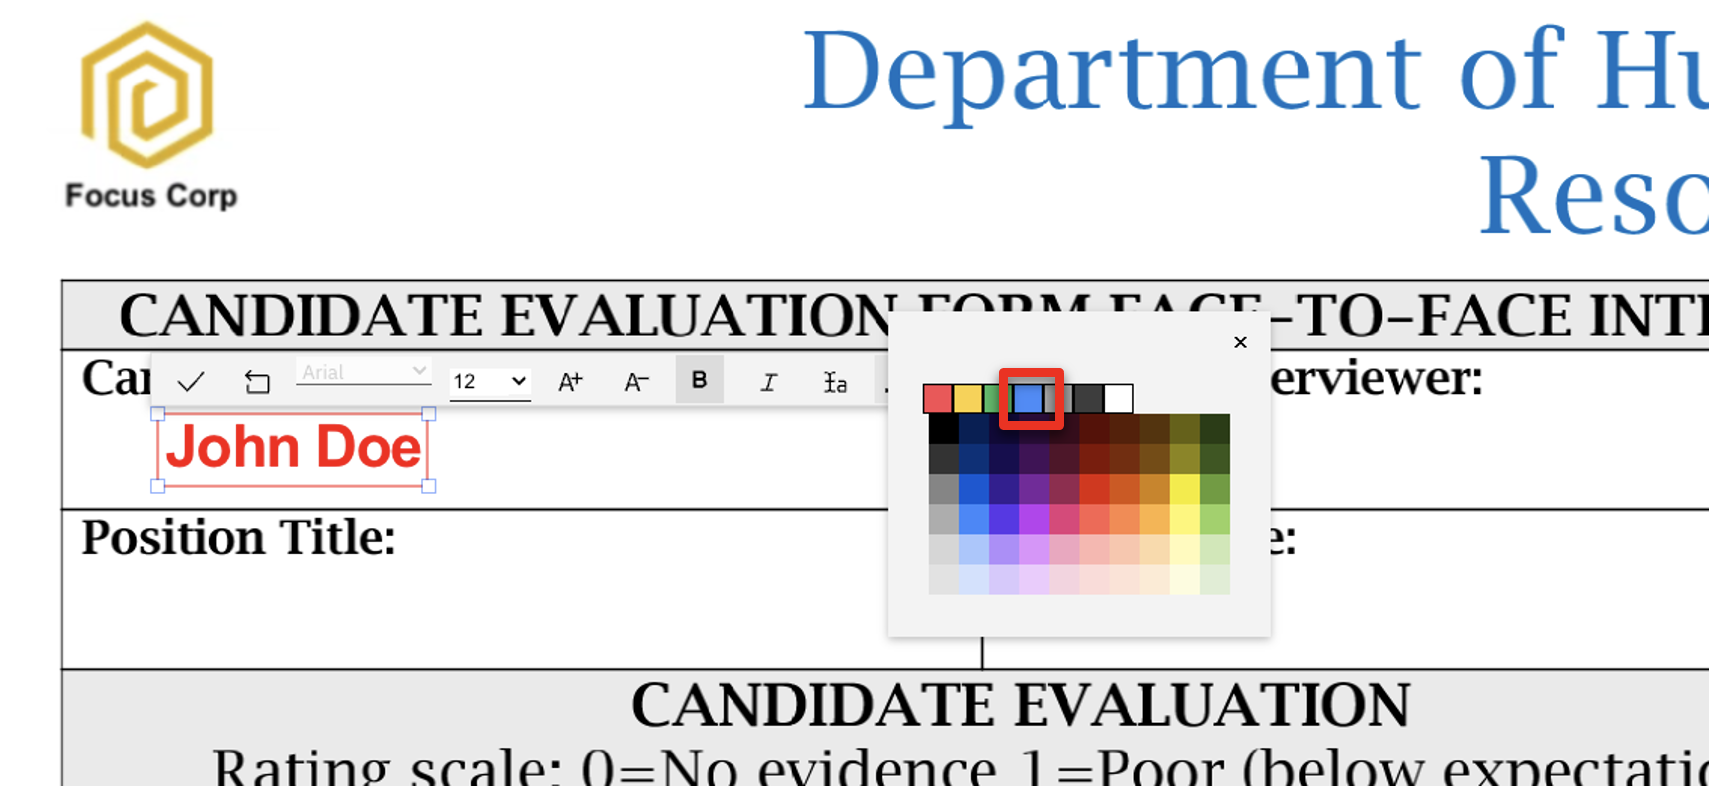 |
| Action 3.1.16 | Close the color selector view (1) and click the checkmark (2) to accept the annotation changes. 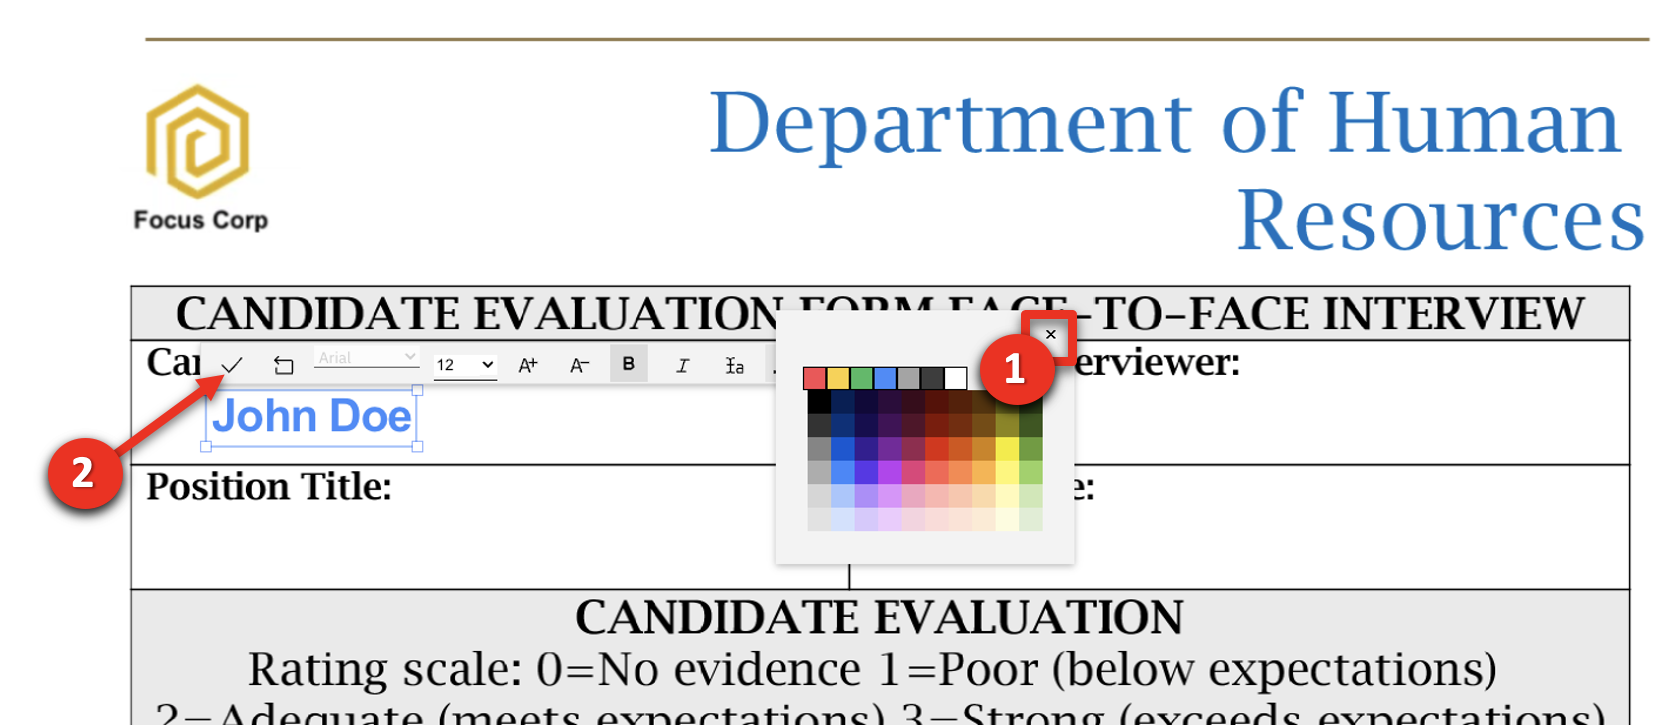 |
| Narration | The hiring manager needs to capture the date and time to ensure compliance with regulatory rules. She uses the annotation tools to add these details to the form. |
| Action 3.1.17 | Click the stamp icon (1), select date time (2), and click in the free text area under Date & Time (3). 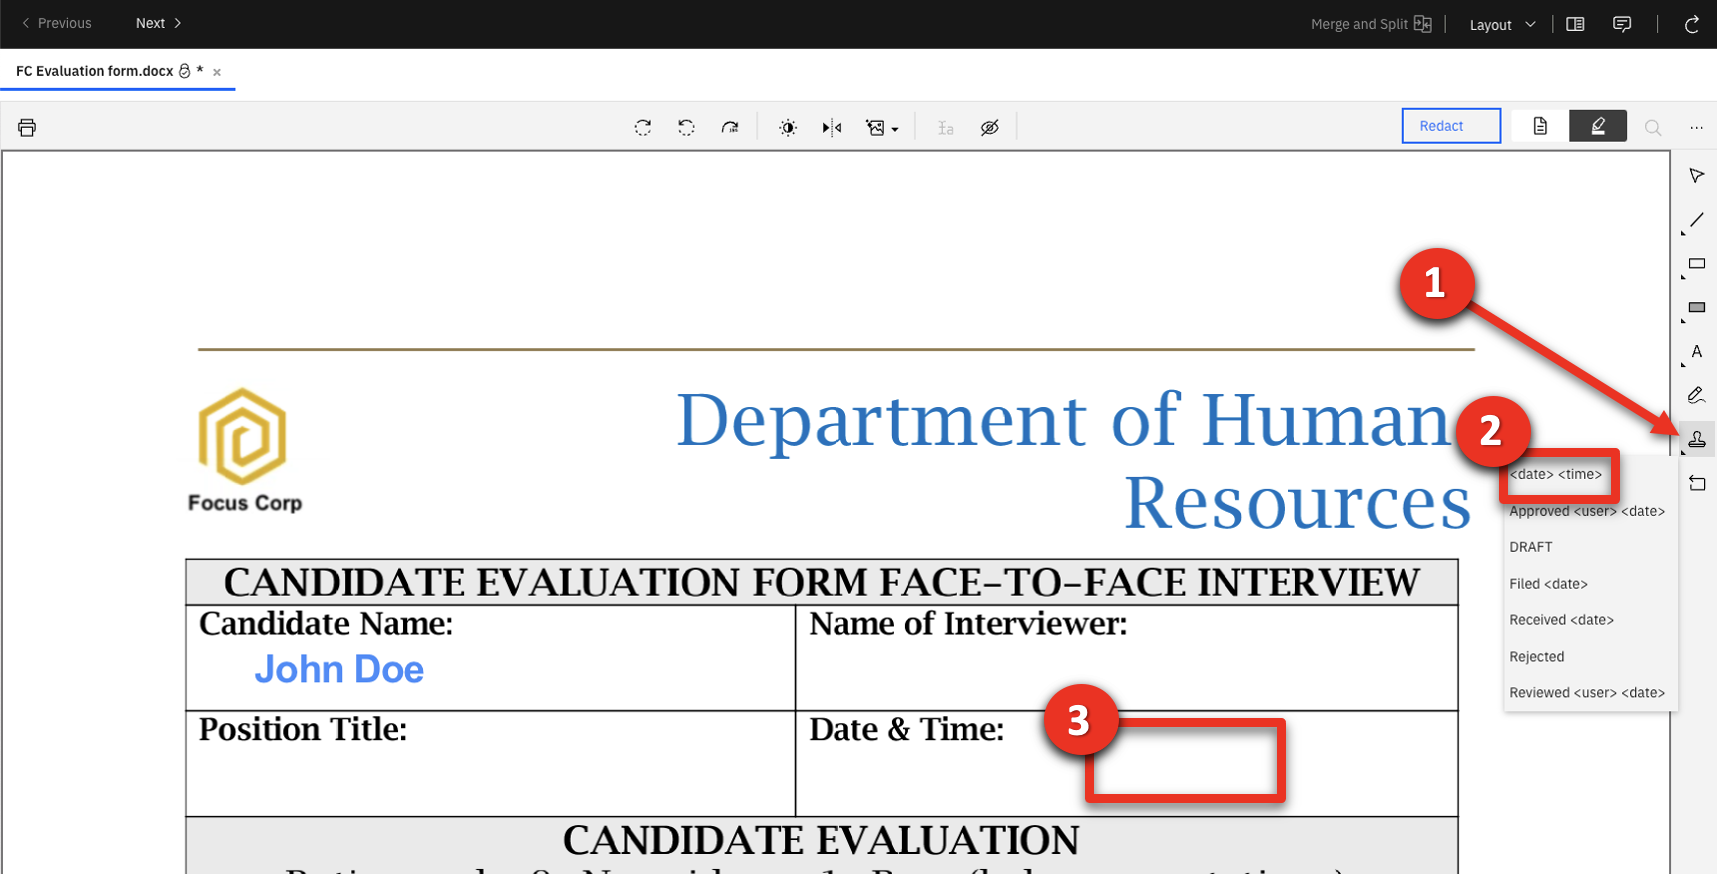 |
| Action 3.1.18 | Click the date annotation.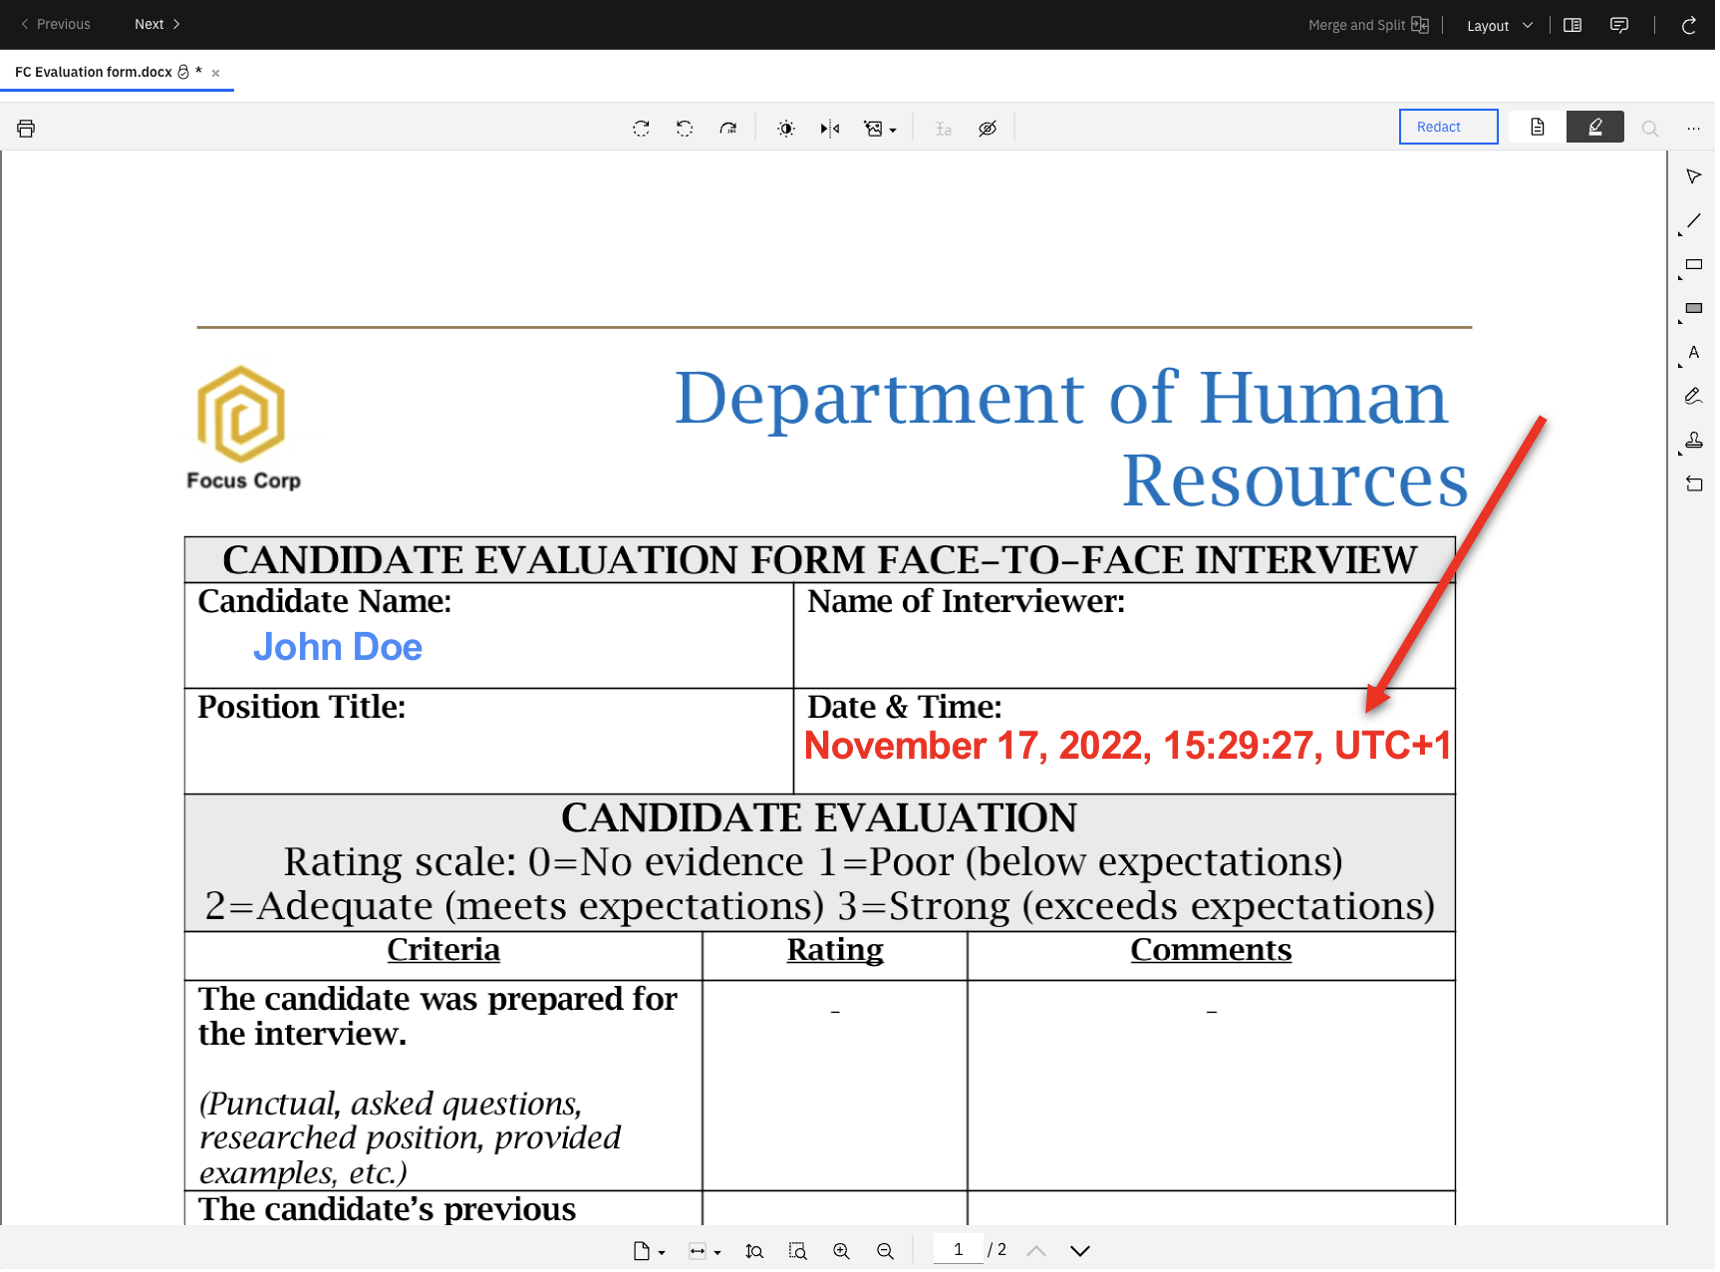 |
| Action 3.1.19 | Click the color icon, select blue, close the color selector and validate the update (as done previously in steps 3.1.14-16). |
| Narration | At the end of the interview, the hiring manager saves the document with her edits. |
| Action 3.1.20 | Click Redact. 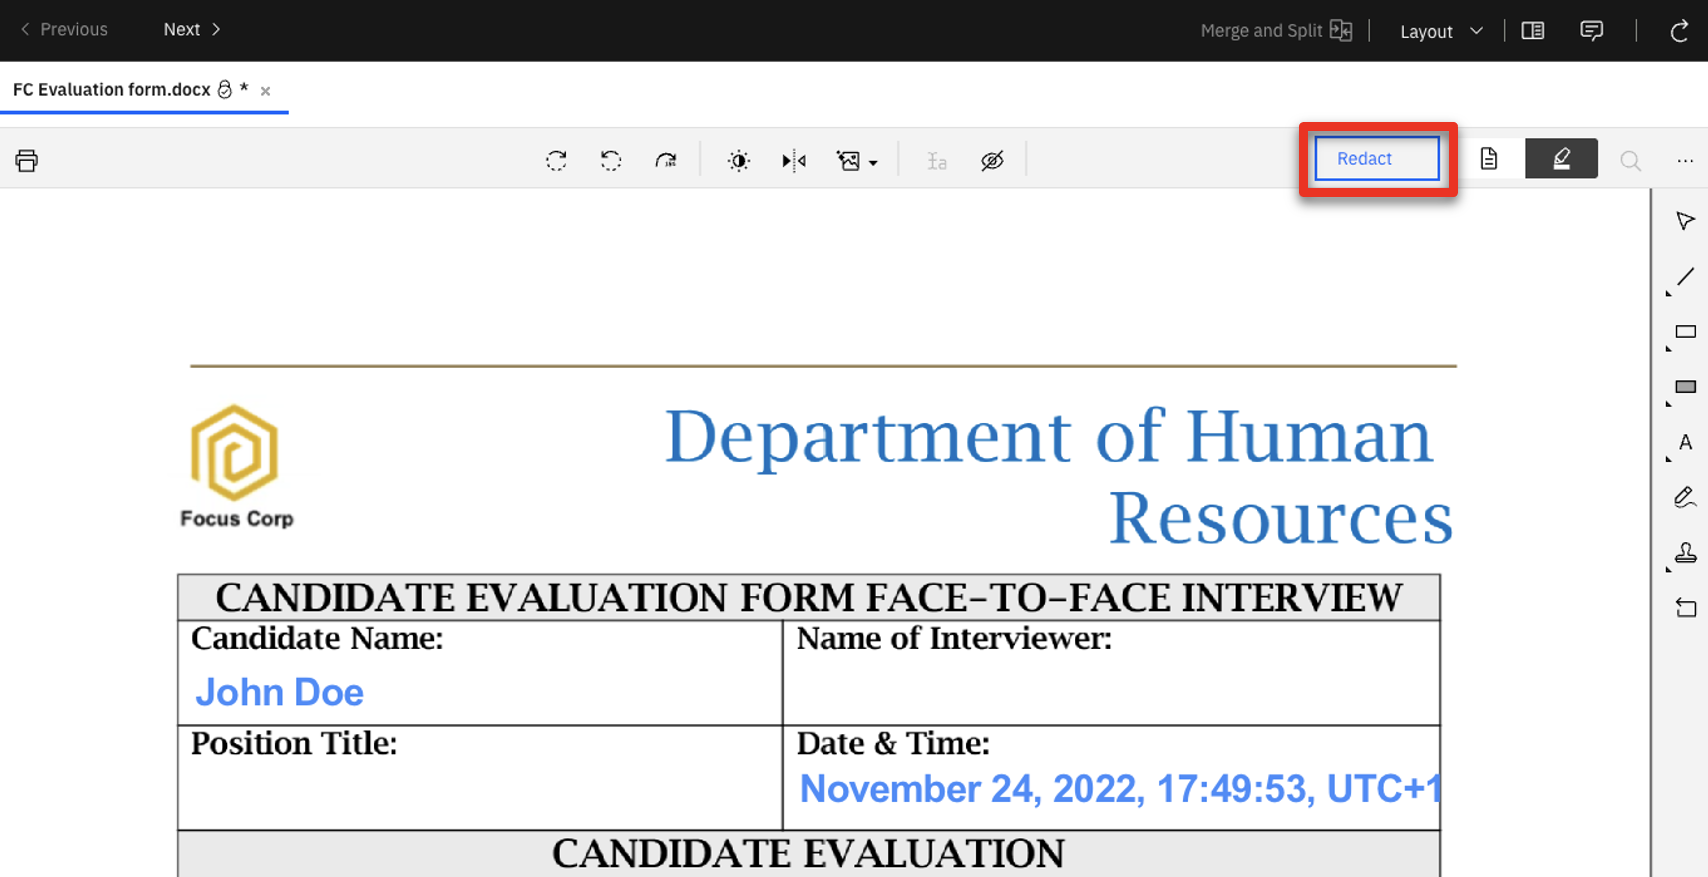 |
| Action 3.1.21 | Wait for the redaction to complete. Close IBM Navigator Viewer window. |
| Narration | The document thumbnail is updated to reflect the hiring manager’s changes. The document is automatically unlocked so other team members can now edit it. |
| Action 3.1.22 | Point out that the FC Evaluation form preview thumbnail is updated (1) and the document is no longer locked (2). 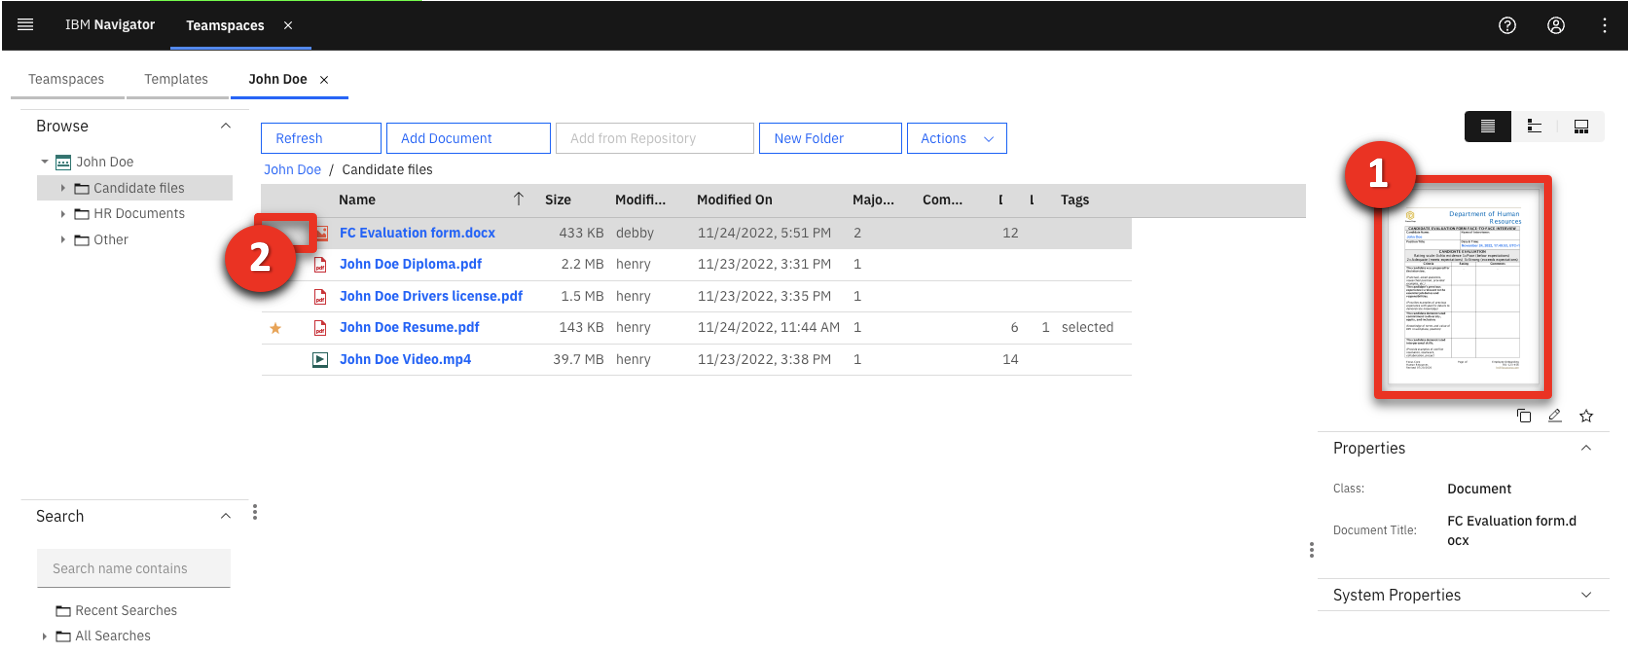 |
| Action 3.1.23 | Drag and drop John Doe evaluation form.pdf to the Candidate files folder.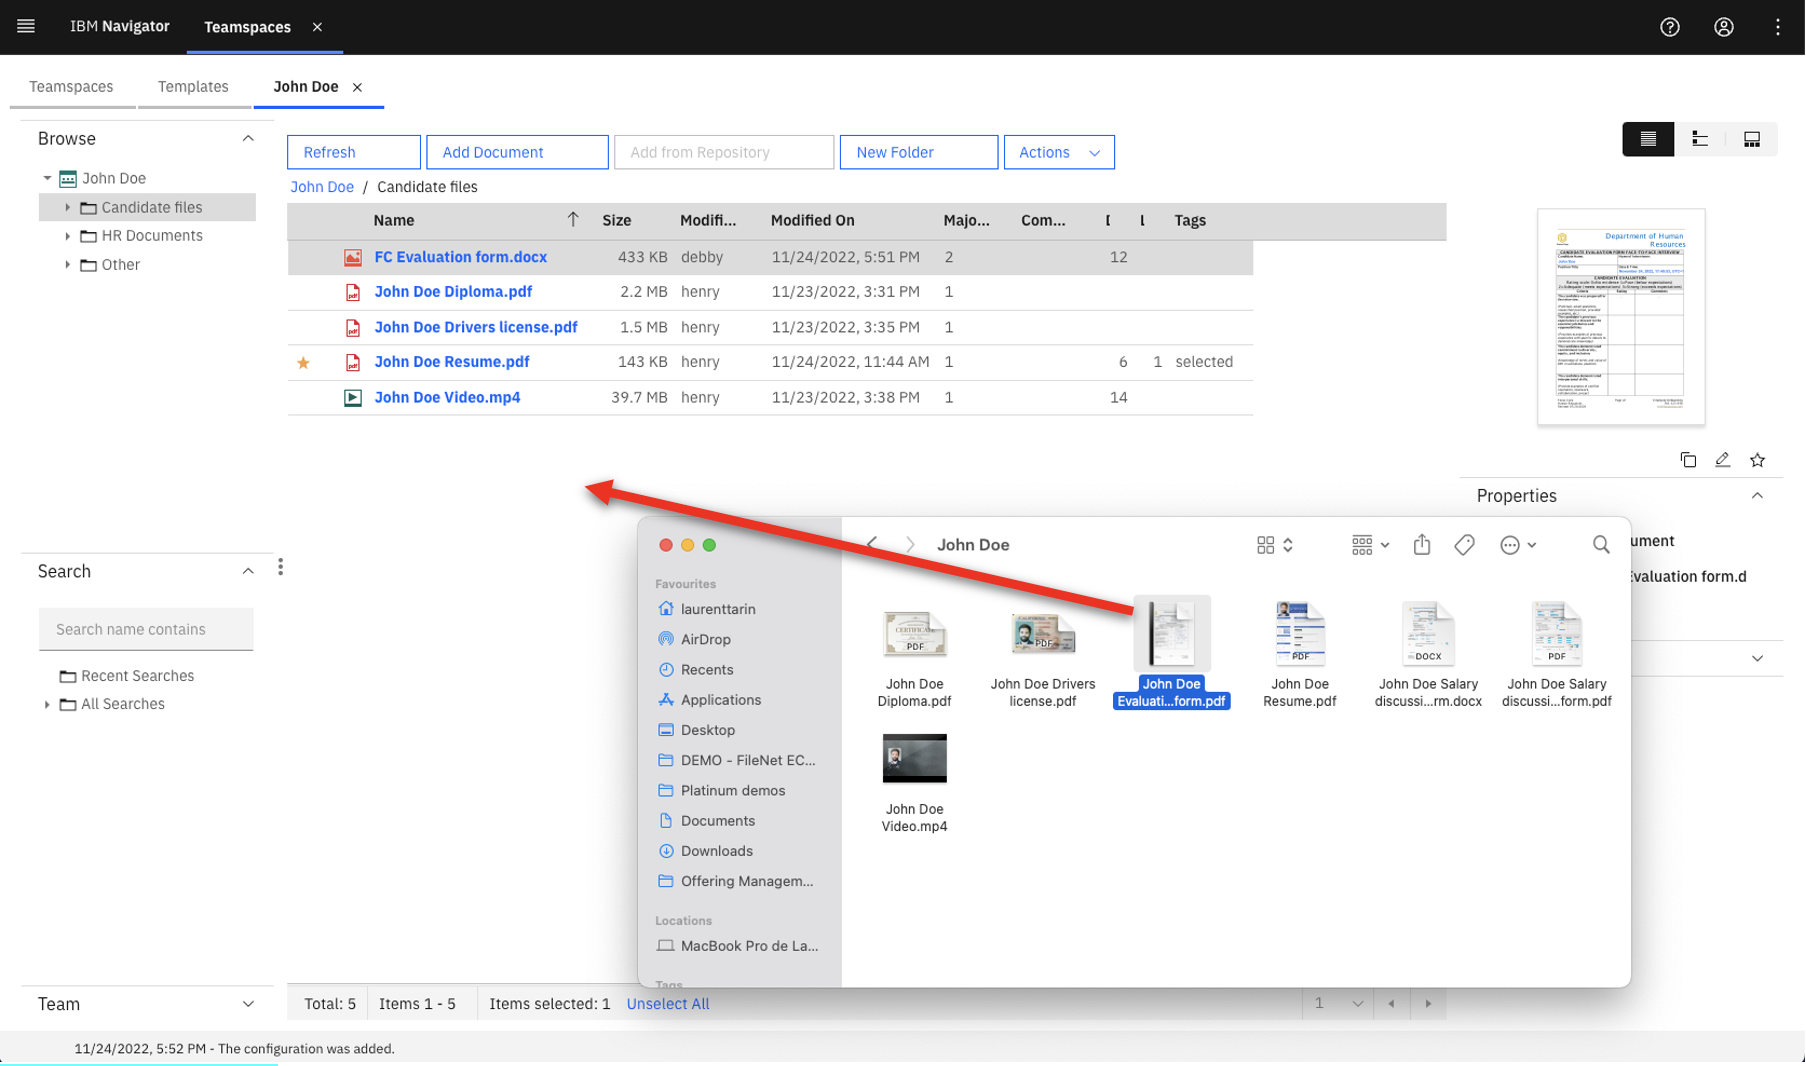 |
| Narration | The hiring manager must add the required metadata to meet departmental standards. |
| Action 3.1.24 | Enter ‘John Doe’ as the Candidate Name (1) and select Evaluation form ** as the **Document Type (2). Select R&D for the Department Name (3) and set the Application date to the current date (4). Click Add (5). 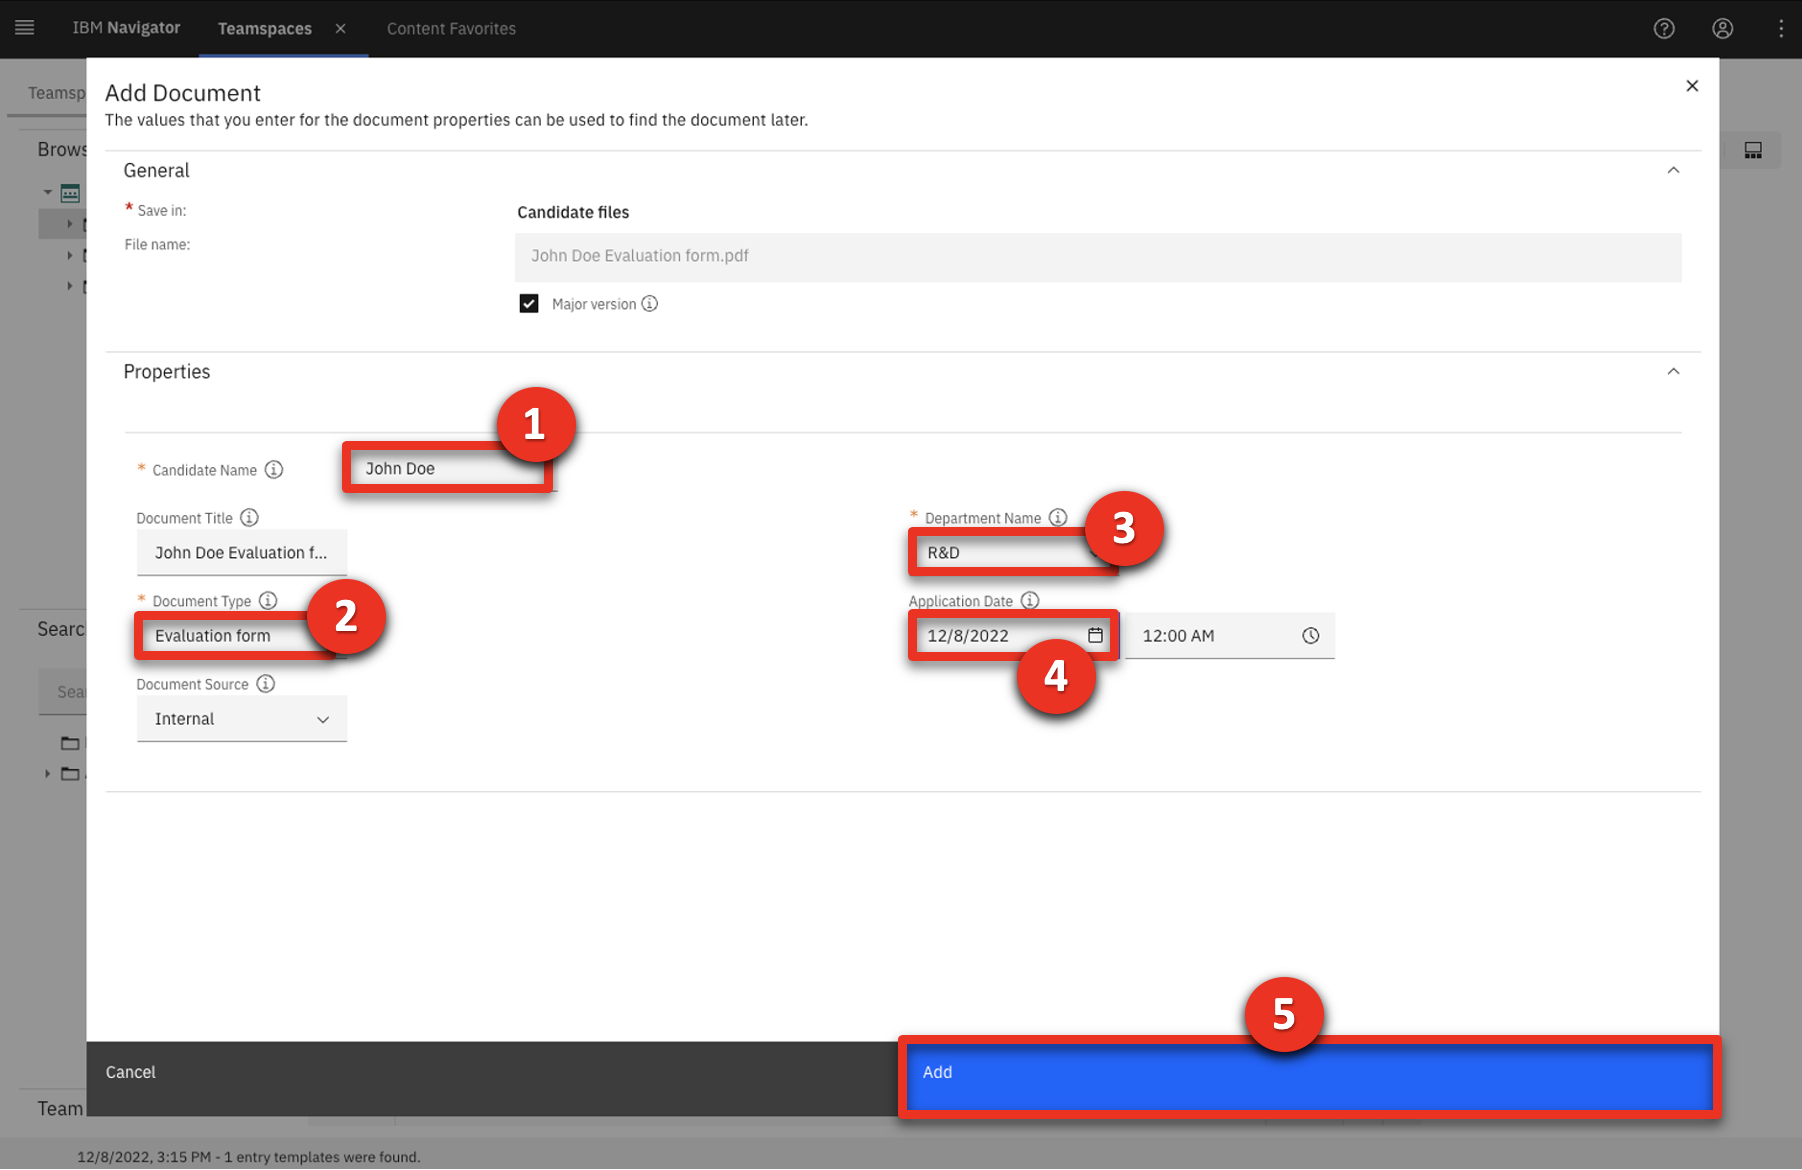 |
| Action 3.1.25 | Show that a copy of the Evaluation form is added (1). Log Out of IBM Navigator (2).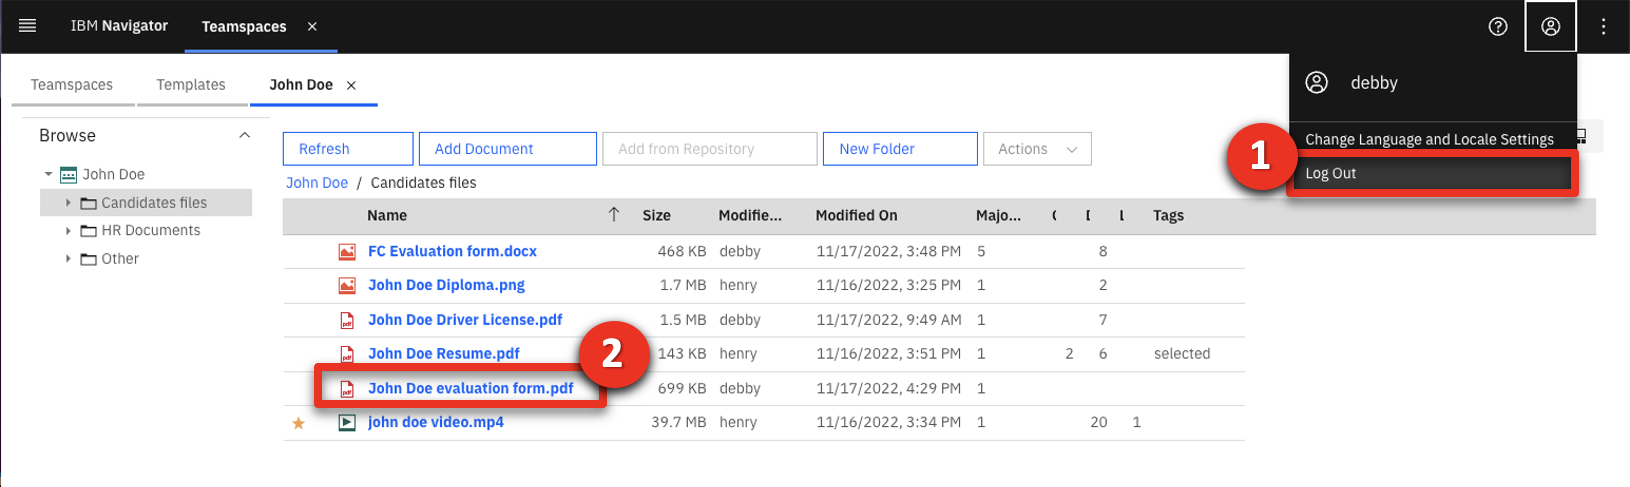 |
| 3.2 | Merge documents |
|---|---|
| Narration | The hiring manager has decided to make an offer to the applicant. The HR manager suggests a salary based on the feedback added to the salary discussion form. He needs to get approval for the salary from both the hiring and payroll managers. |
| Action 3.2.1 | Sign into IBM Navigator using Username: henry and Password: henry (1). Click Log in (2).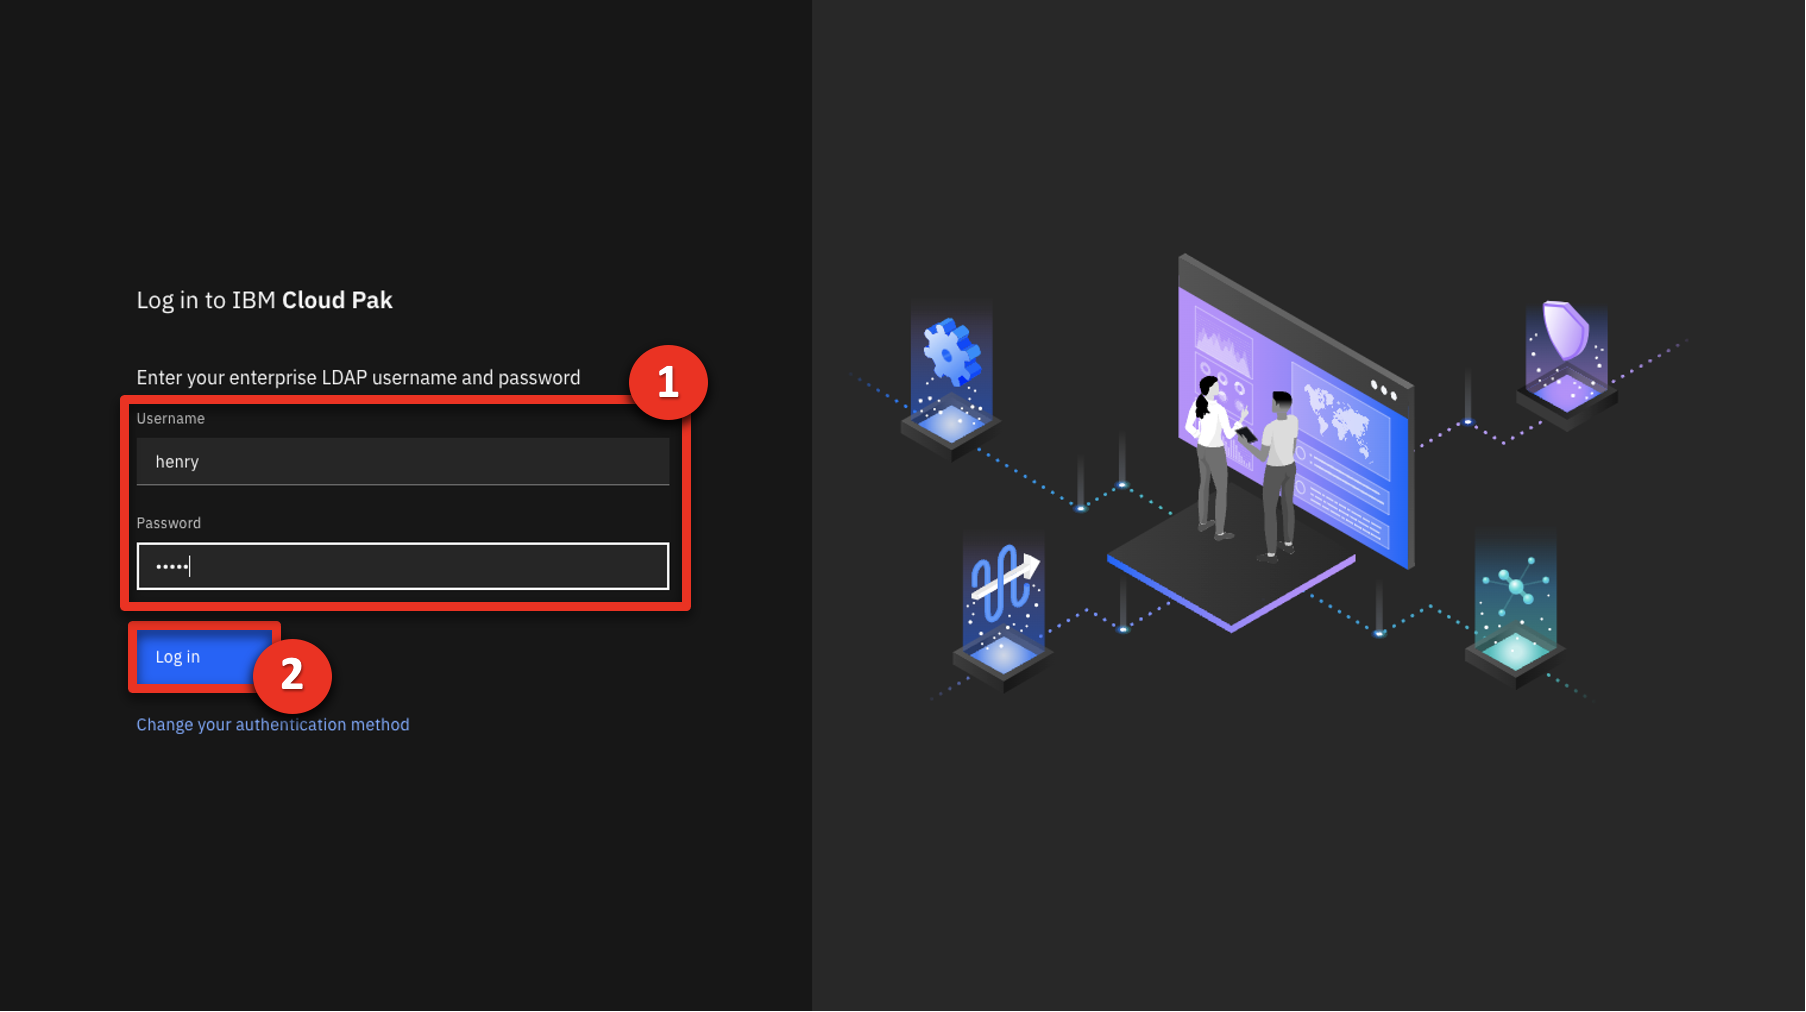 |
| Action 3.2.2 | Click the Teamspaces tile. |
| Action 3.2.3 | Select the John Doe Teamspace.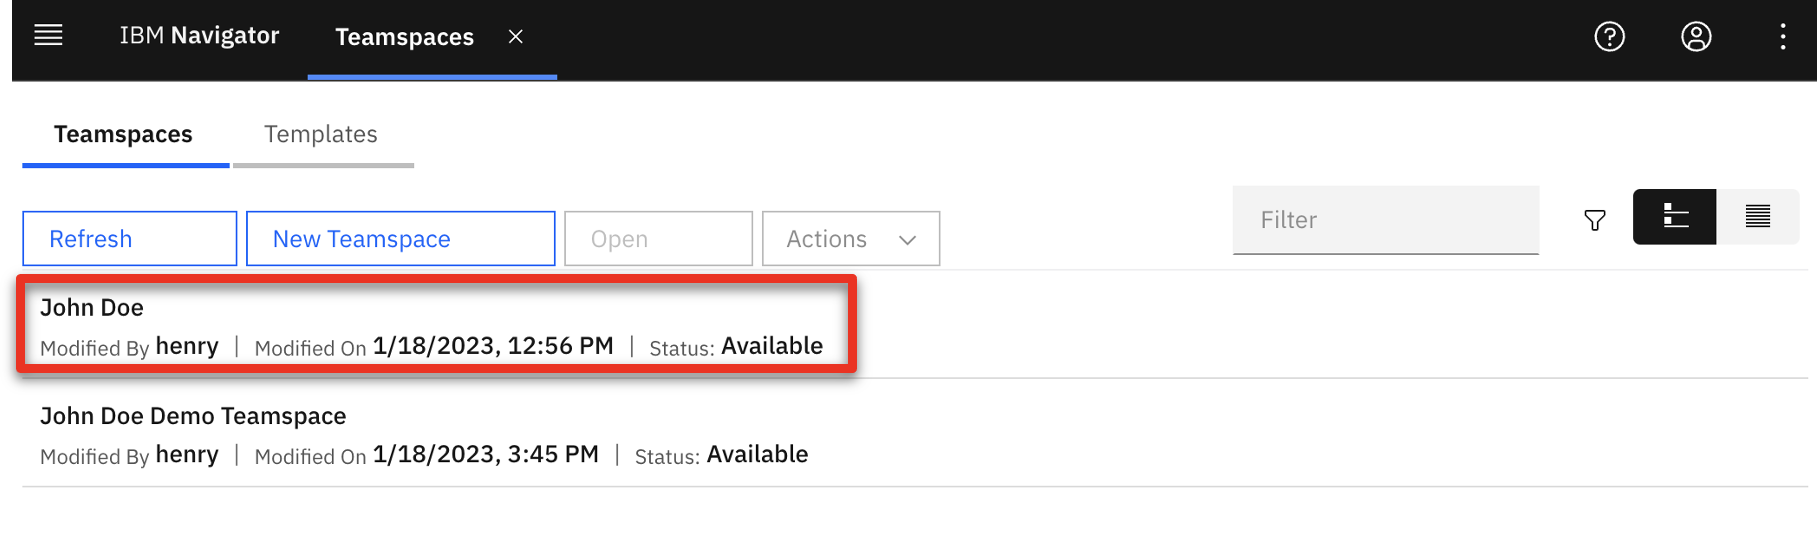 |
| Action 3.2.4 | Click Candidate files.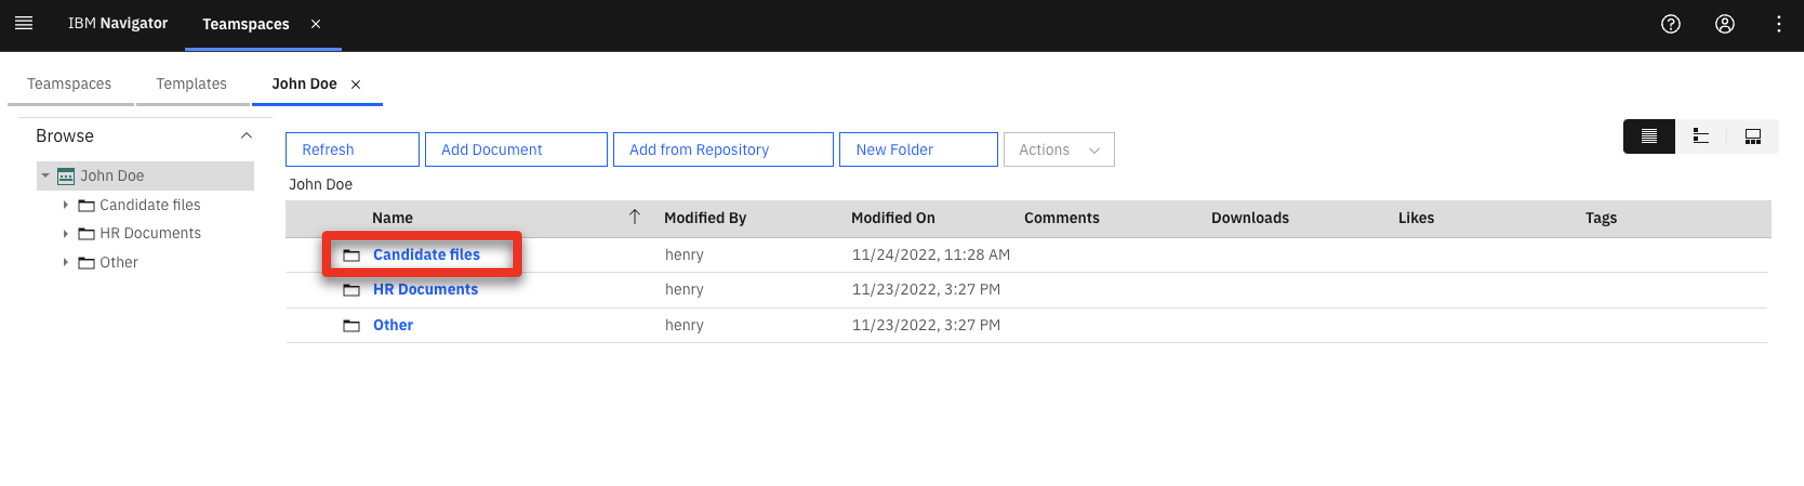 |
| Action 3.2.5 | Drag the John Doe salary discussion form.pdf from your local documents to the Candidates files folder in IBM Navigator.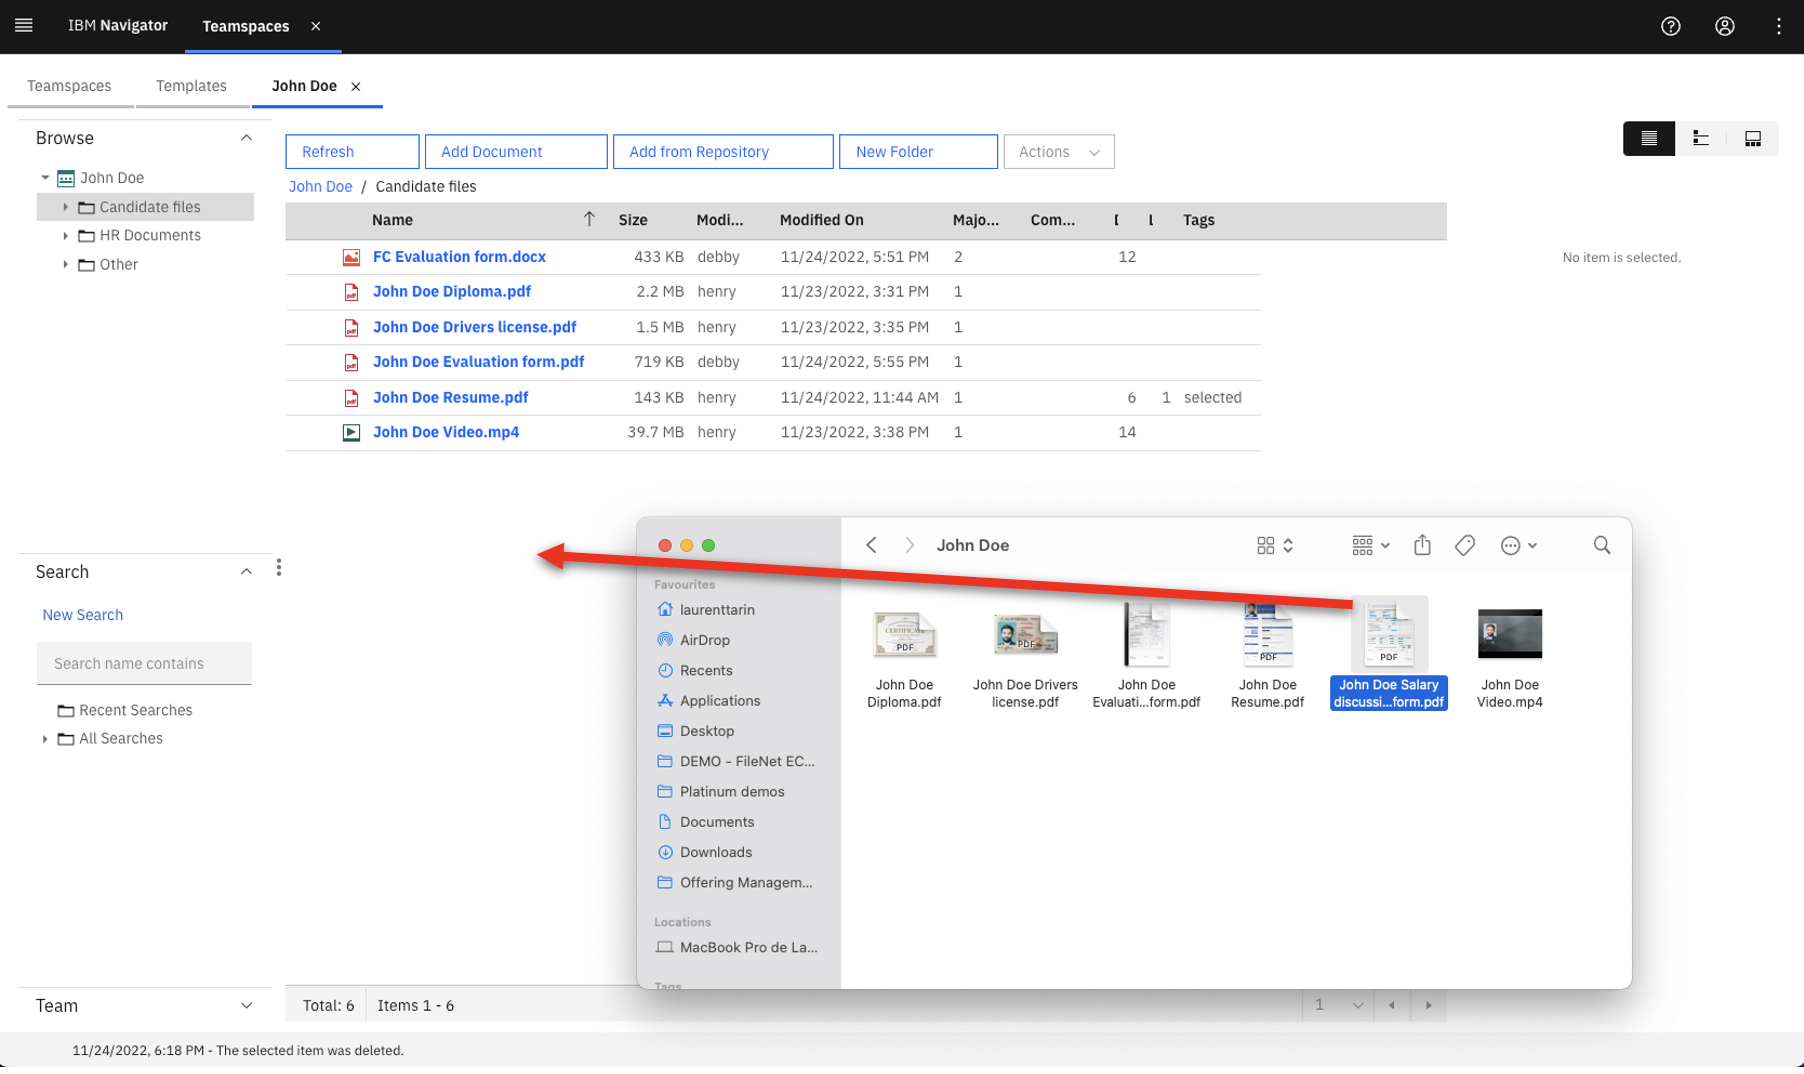 |
| Action 3.2.6 | Enter ‘John Doe’ as the Candidate Name (1) and select HR Process as the Document Type (2). Select R&D for the Department Name (3) and set the Application date to the current date (4). Click Add (5). 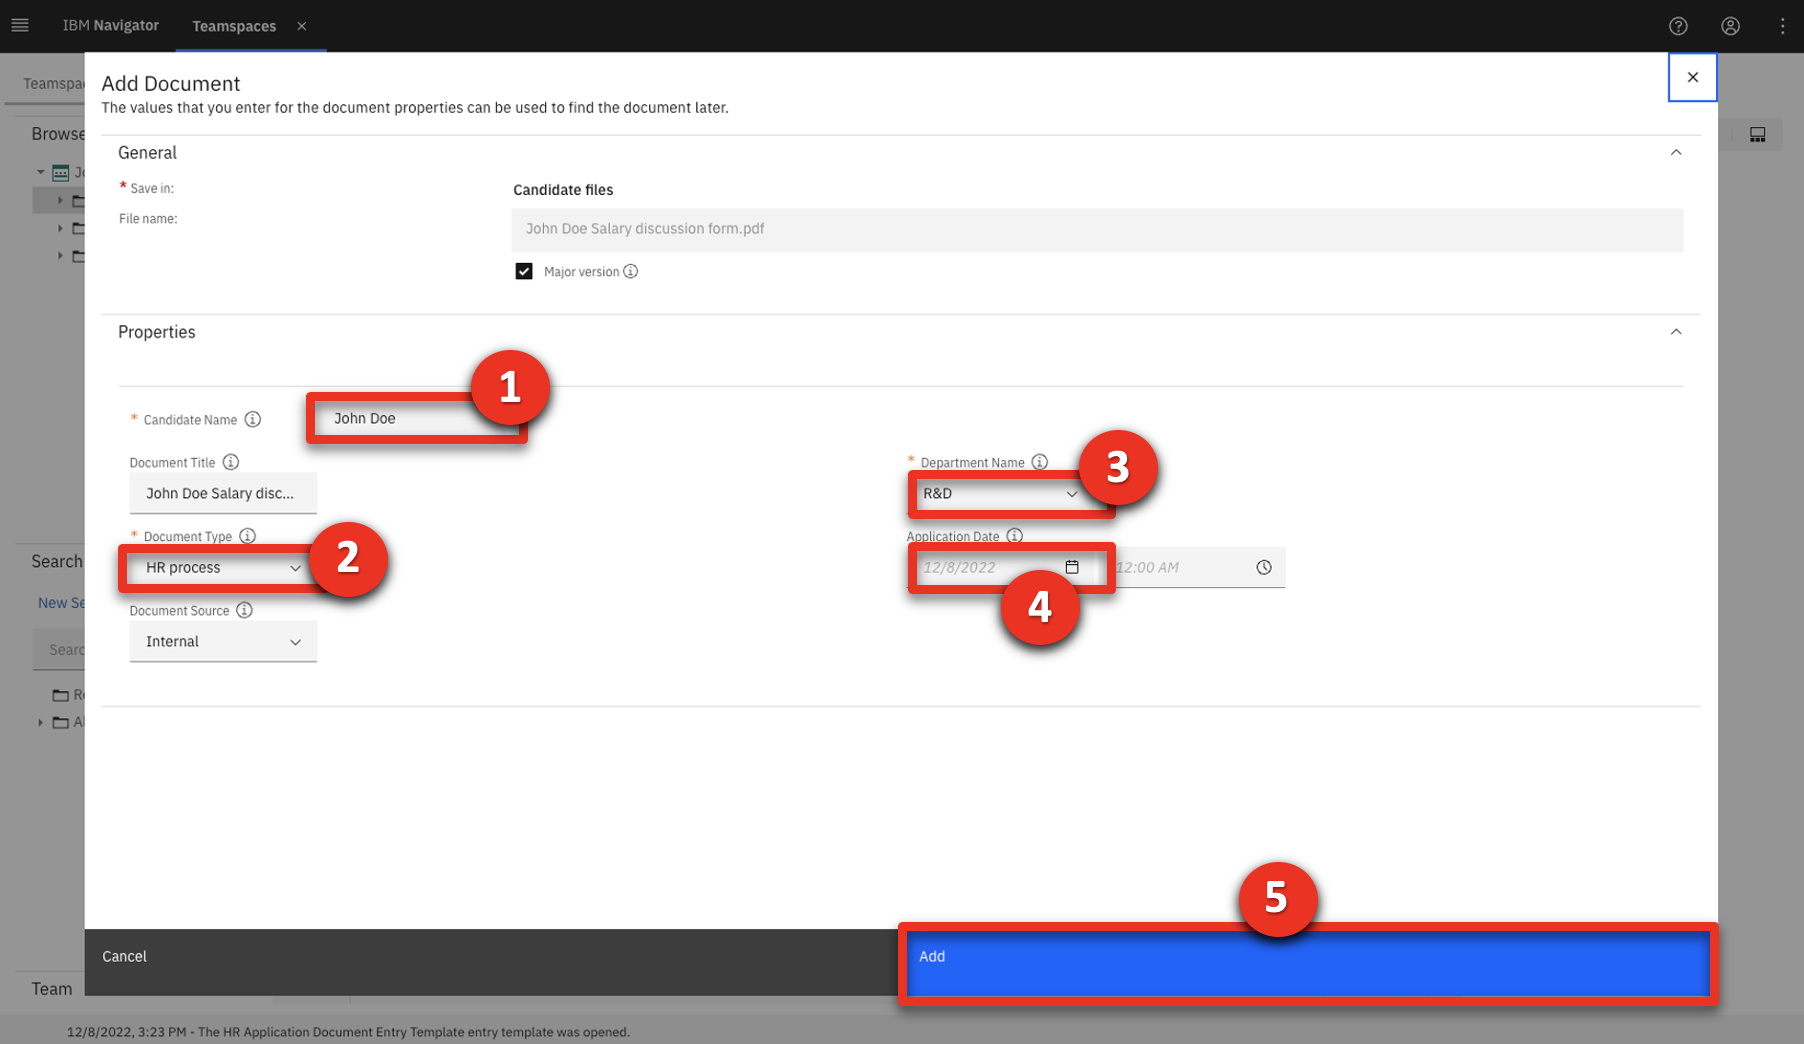 |
| Narration | The HR manager merges the second page from the evaluation form, and the salary discussion form, into a single document to simplify the salary approval. |
| Action 3.2.7 | Click John Doe Evaluation form.pdf. |
| Action 3.2.8 | Click Merge and Split at the top right of the viewer.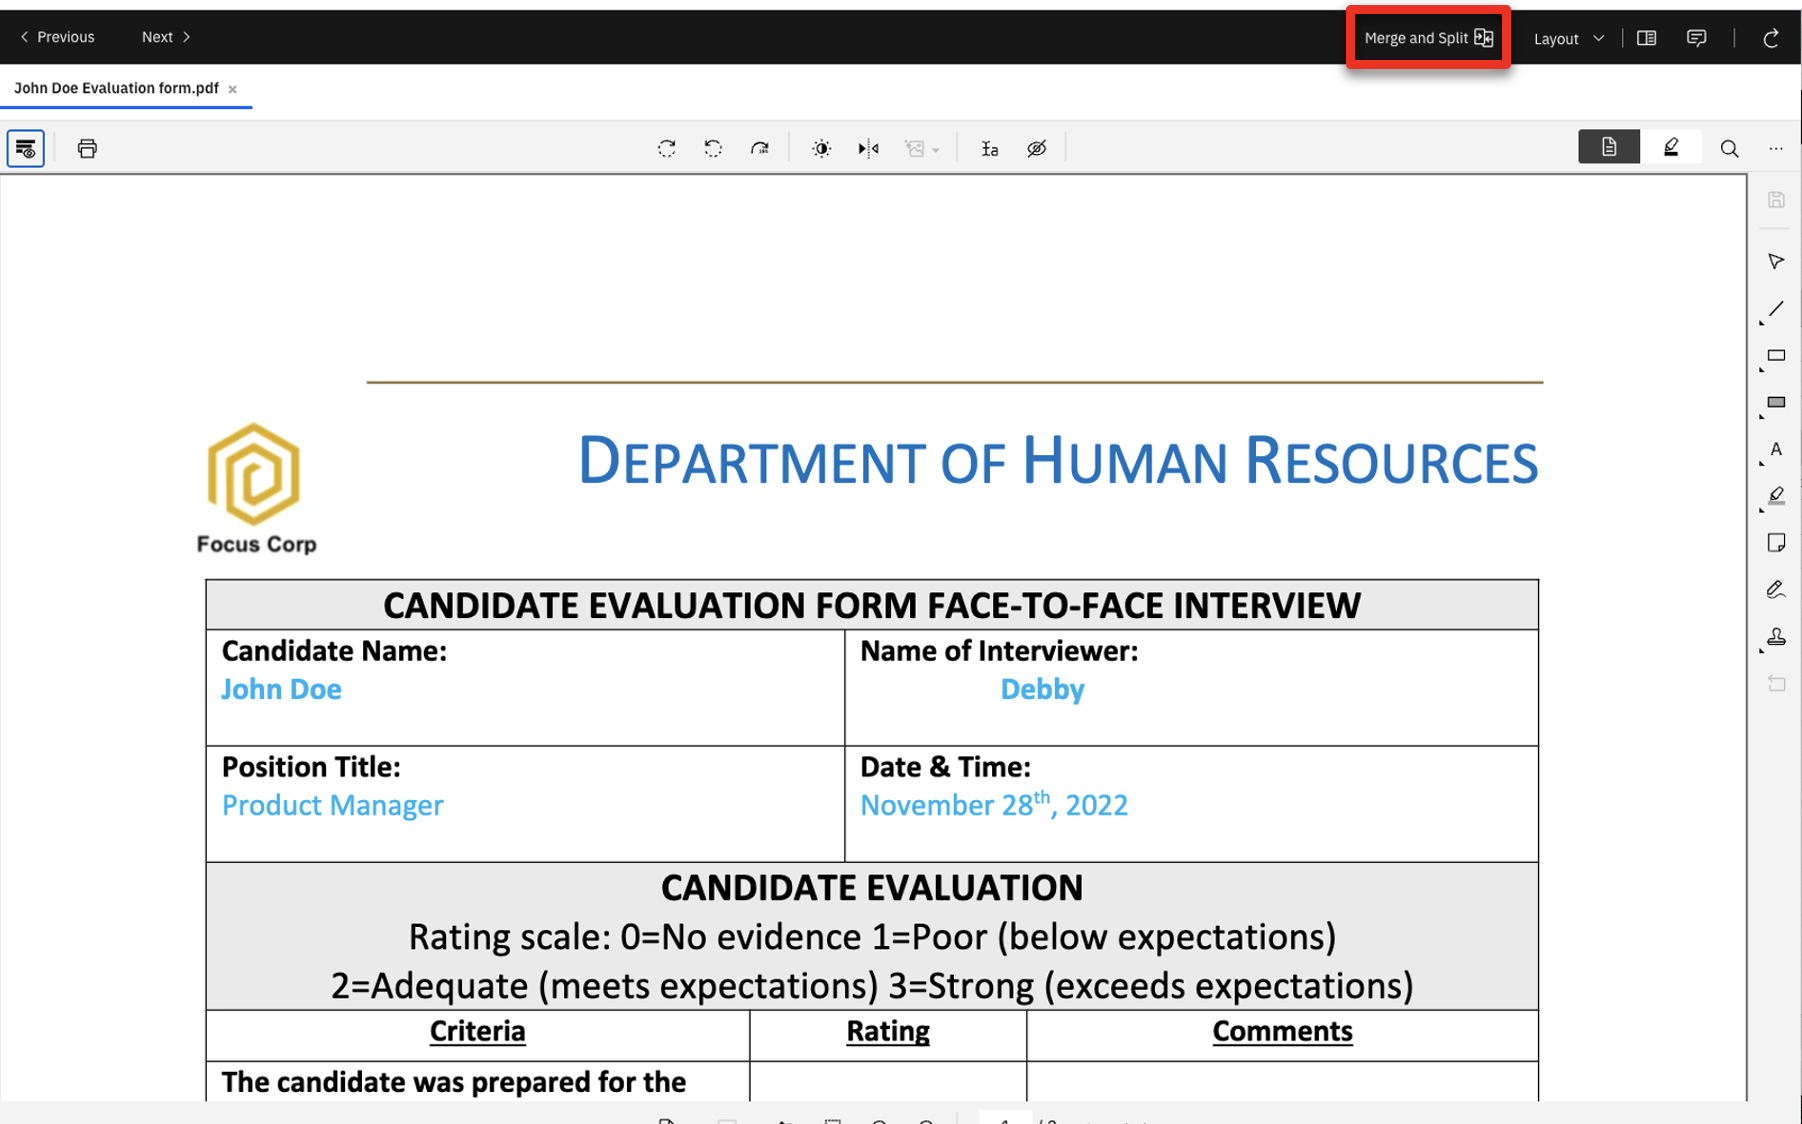 |
| Action 3.2.9 | Return to Candidate files and click John Doe Salary discussion form.pdf. 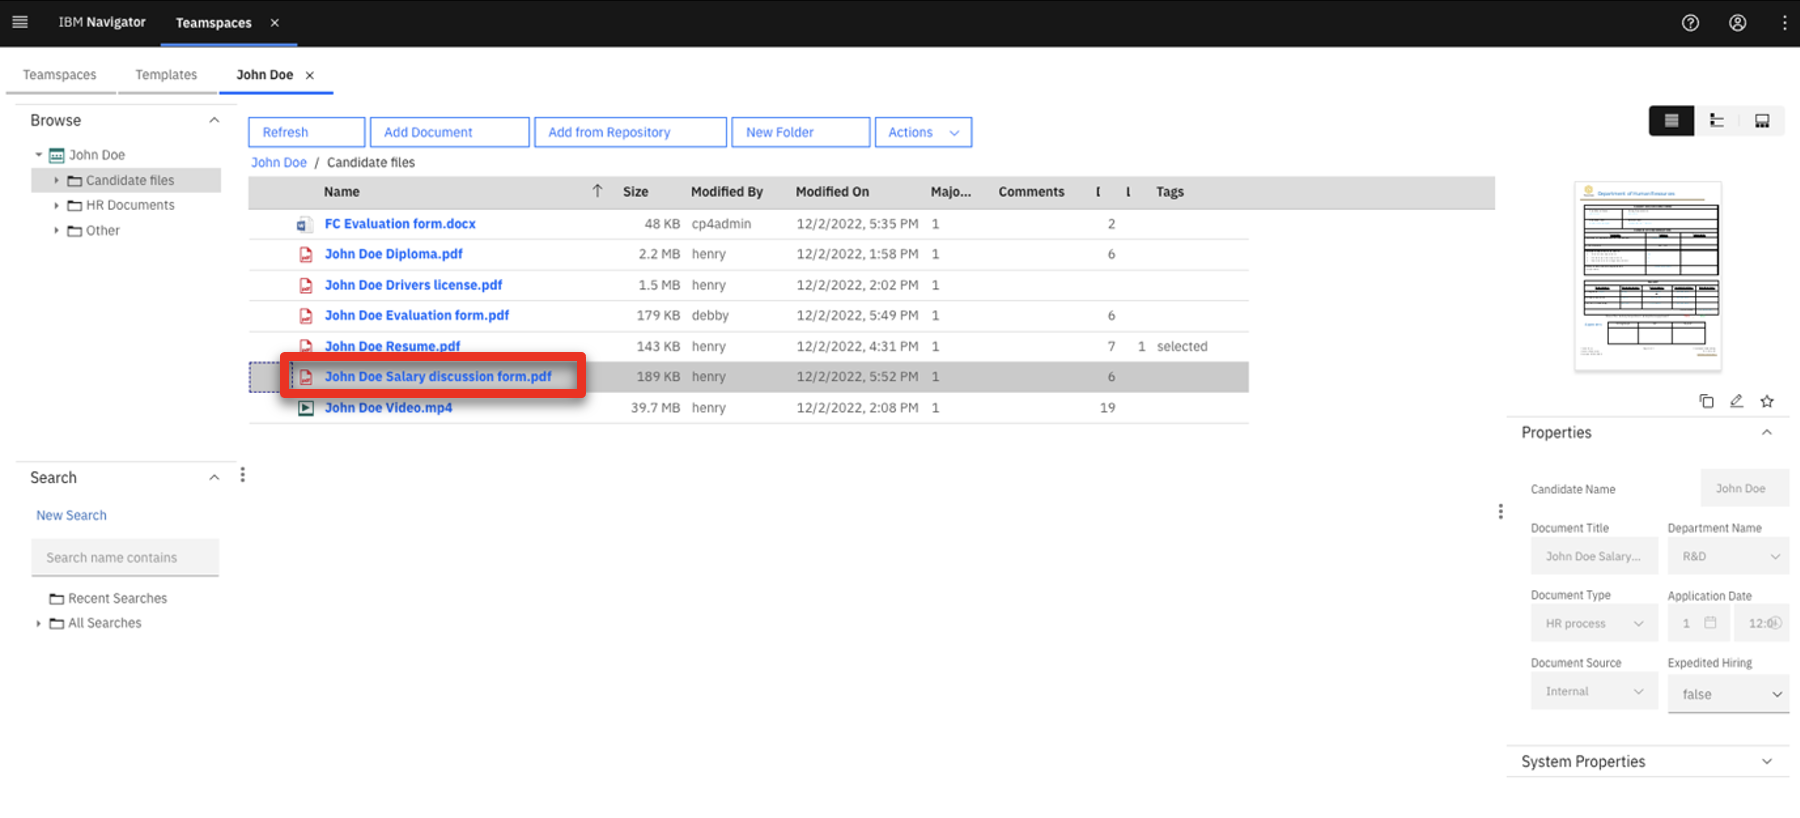 The final merge and split interface should match the view below: 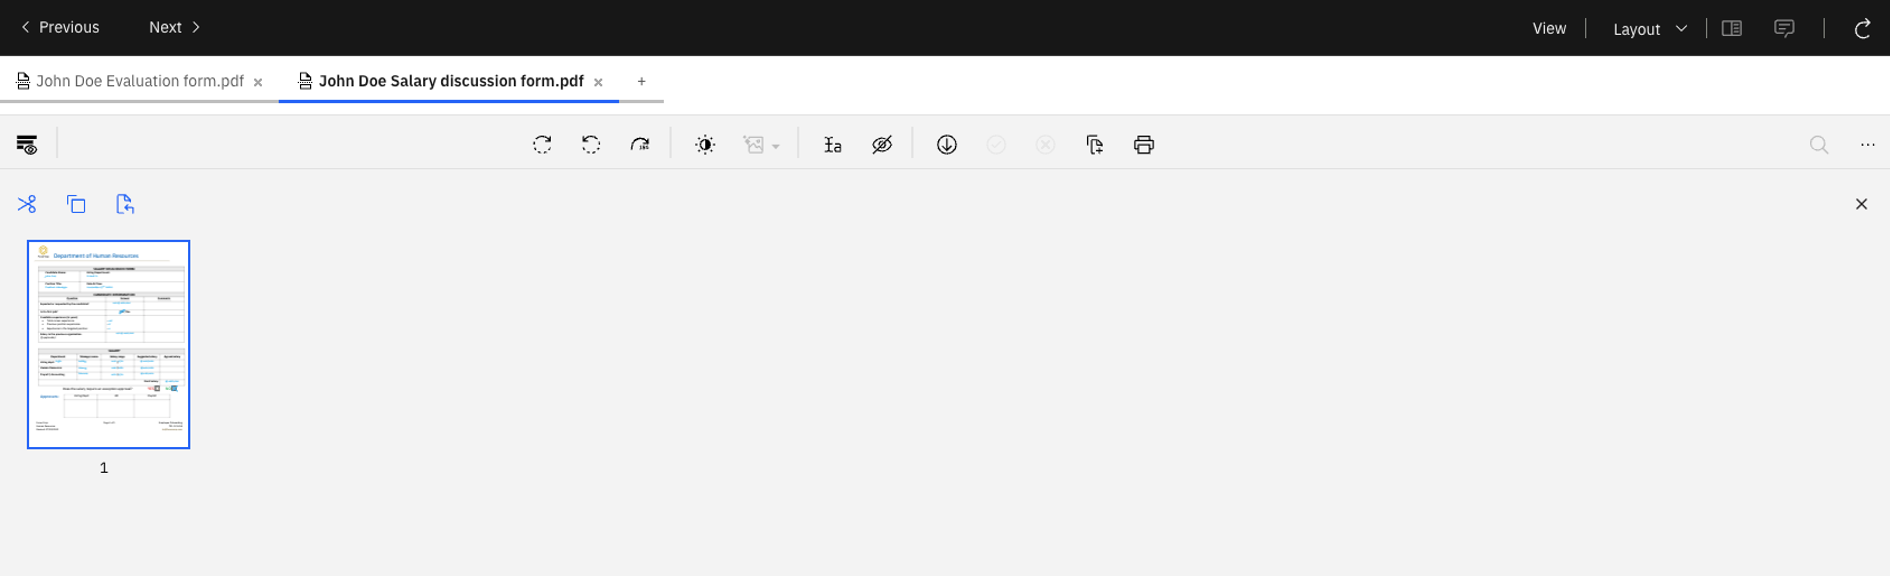 |
| Narration | Now that the documents are added to the ‘merge and split’ tool, the HR manager creates a summary document by merging the pages required for salary approval. |
| Action 3.2.10 | Click the + icon to create a new document.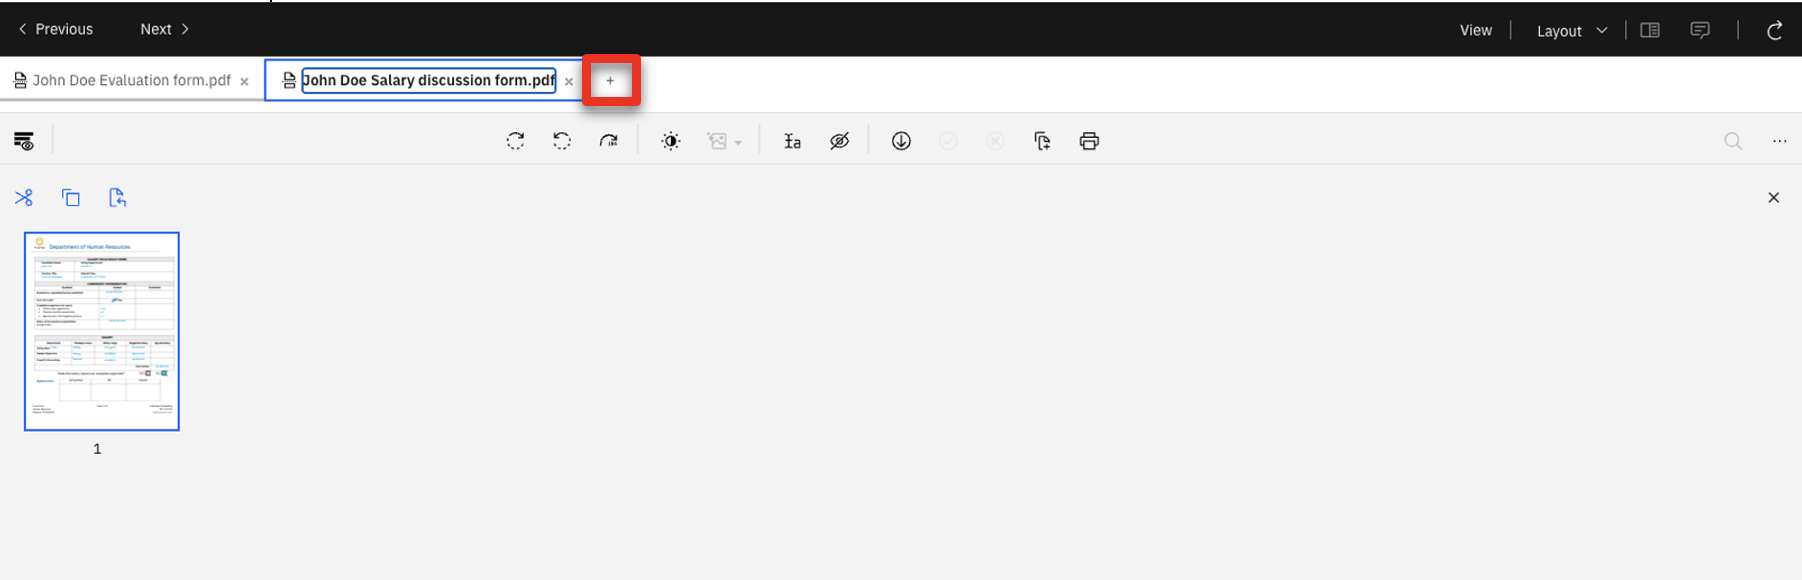 |
| Action 3.2.11 | Right-click on the New Document tab (1) and select Rename (2).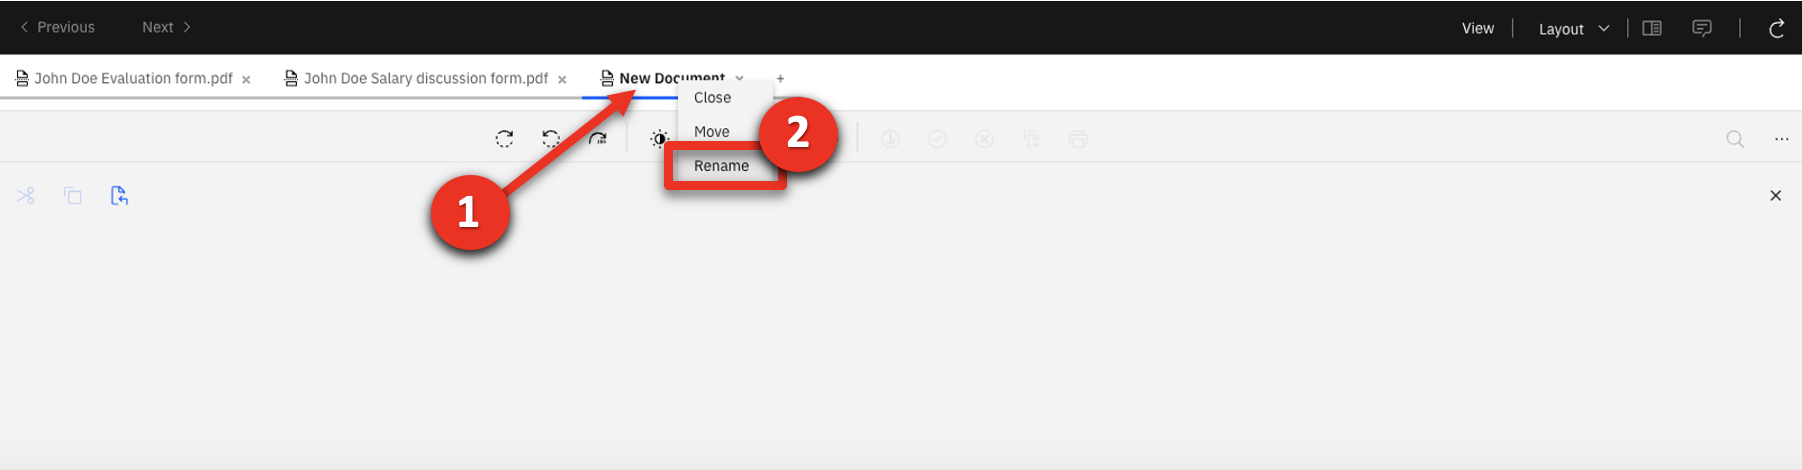 |
| Action 3.2.12 | Enter ‘John Doe Merged summary’.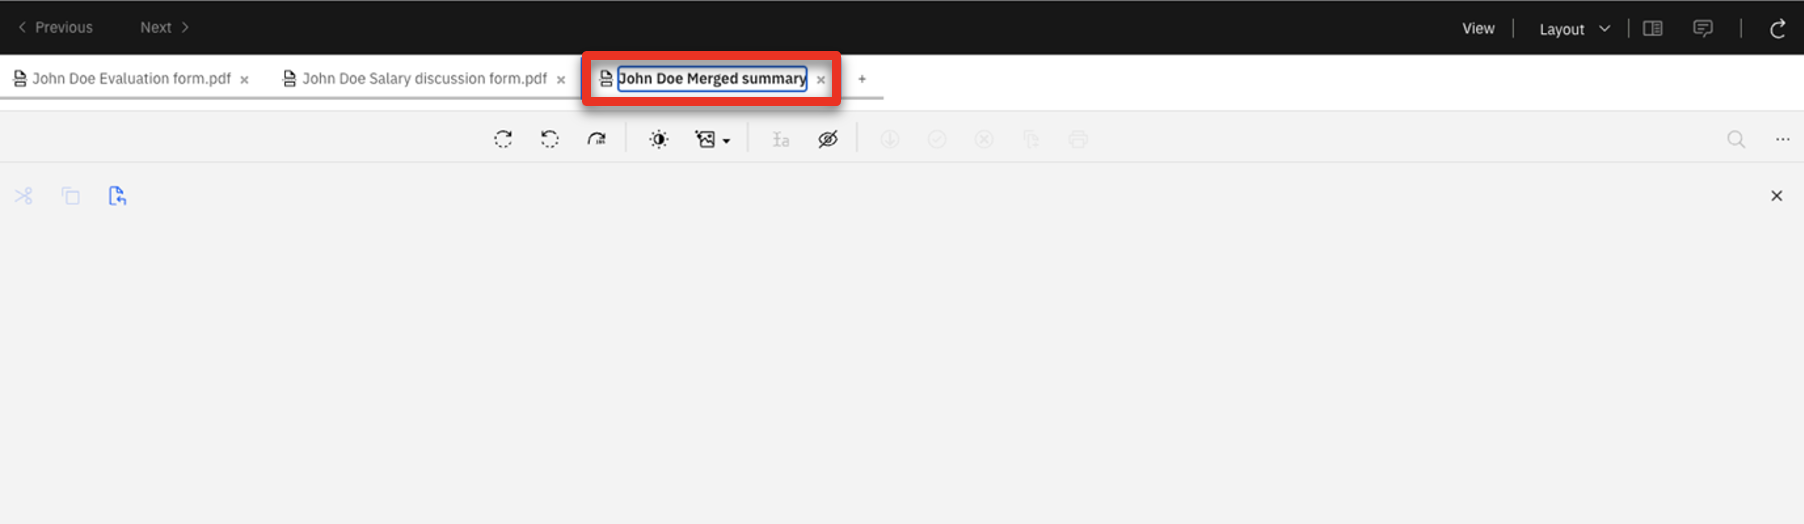 |
| Narration | First, he adds the second page of the evaluation form. |
| Action 3.2.13 | Click the John Doe Evaluation form.pdf tab.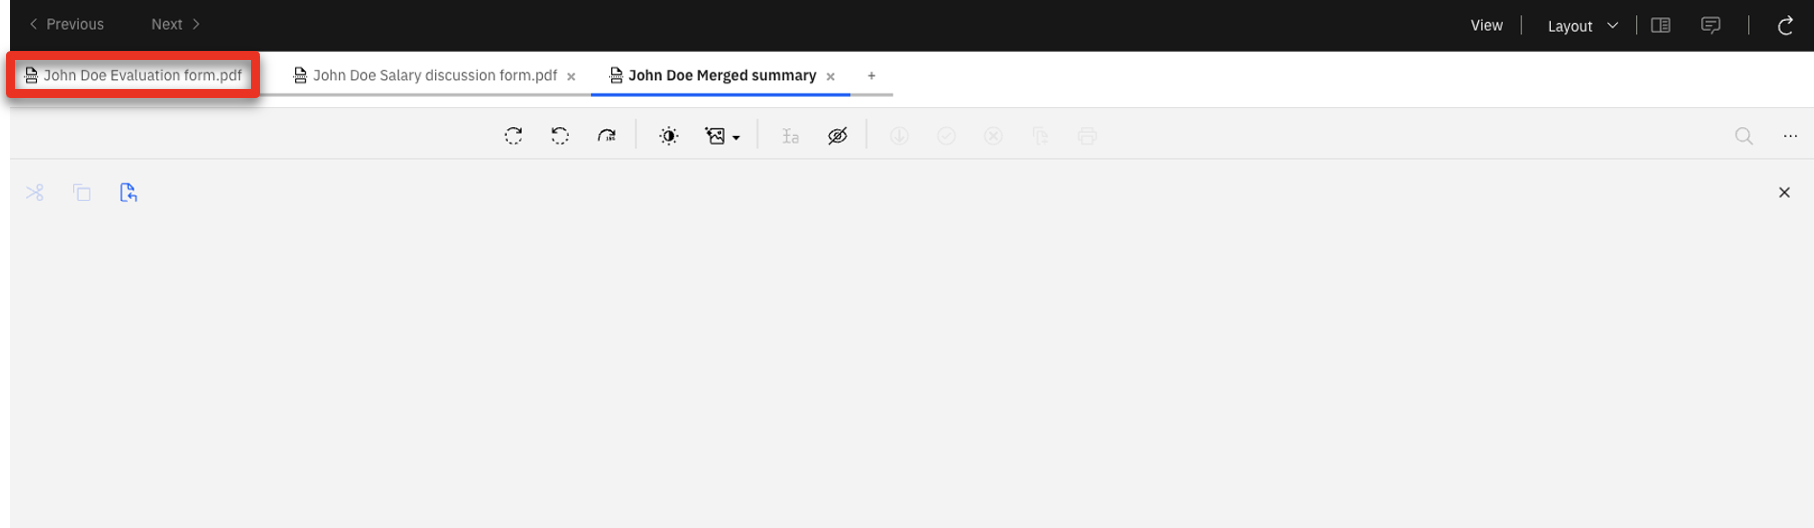 |
| Action 3.2.14 | Click the second page of the document (1) in the thumbnail viewer. Click the copy icon (2) and click the John Doe Merged summary.pdf tab (3) to return to the new document.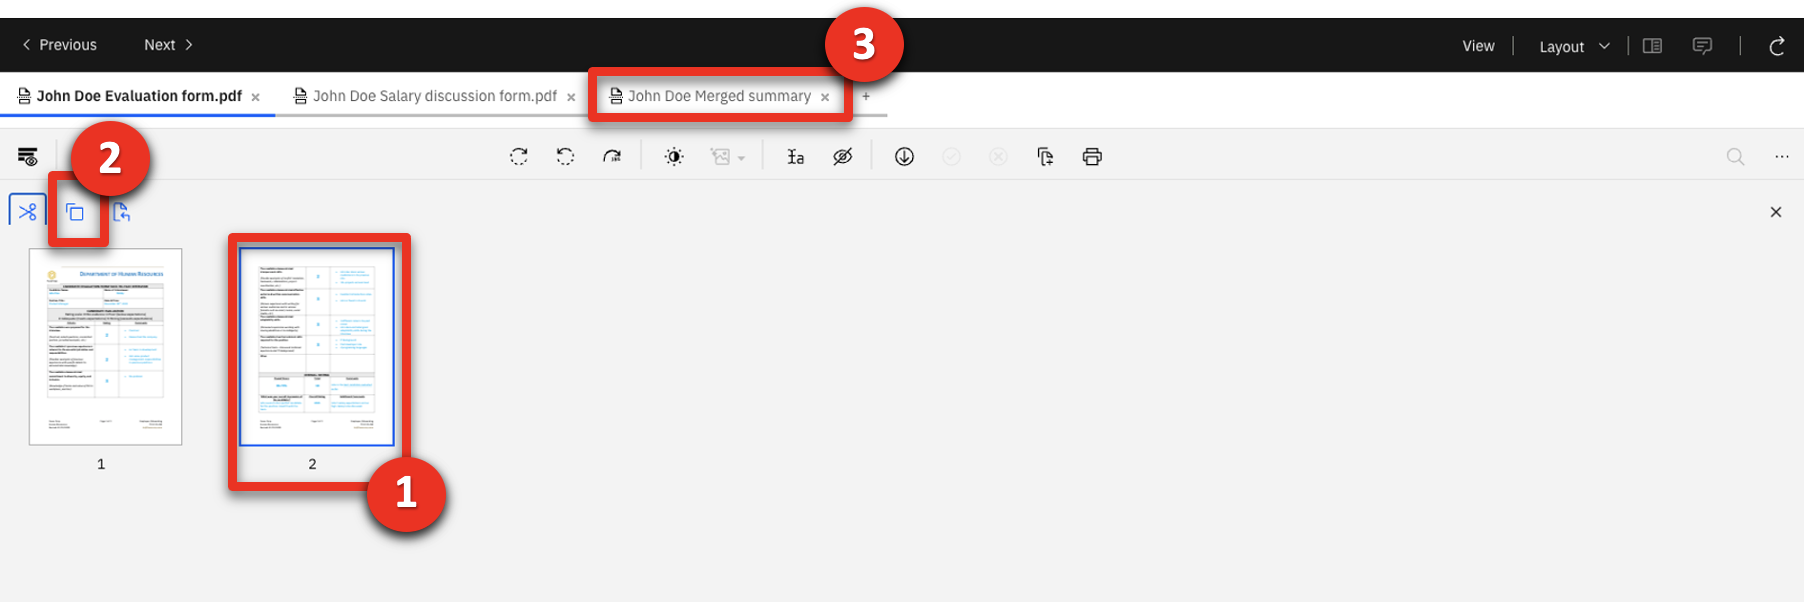 |
| Action 3.2.15 | Click the paste icon.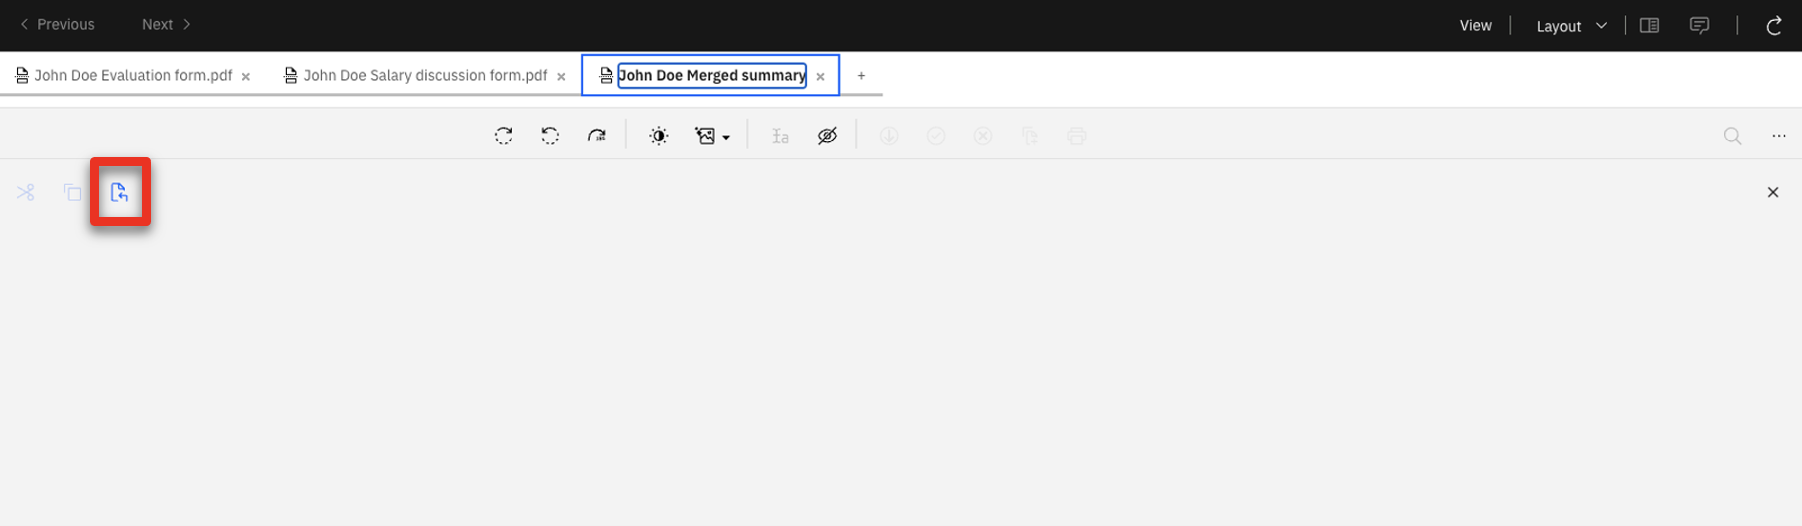 |
| Narration | Then he adds the salary discussion form. |
| Action 3.2.16 | Click the John Doe Salary discussion form.pdf tab.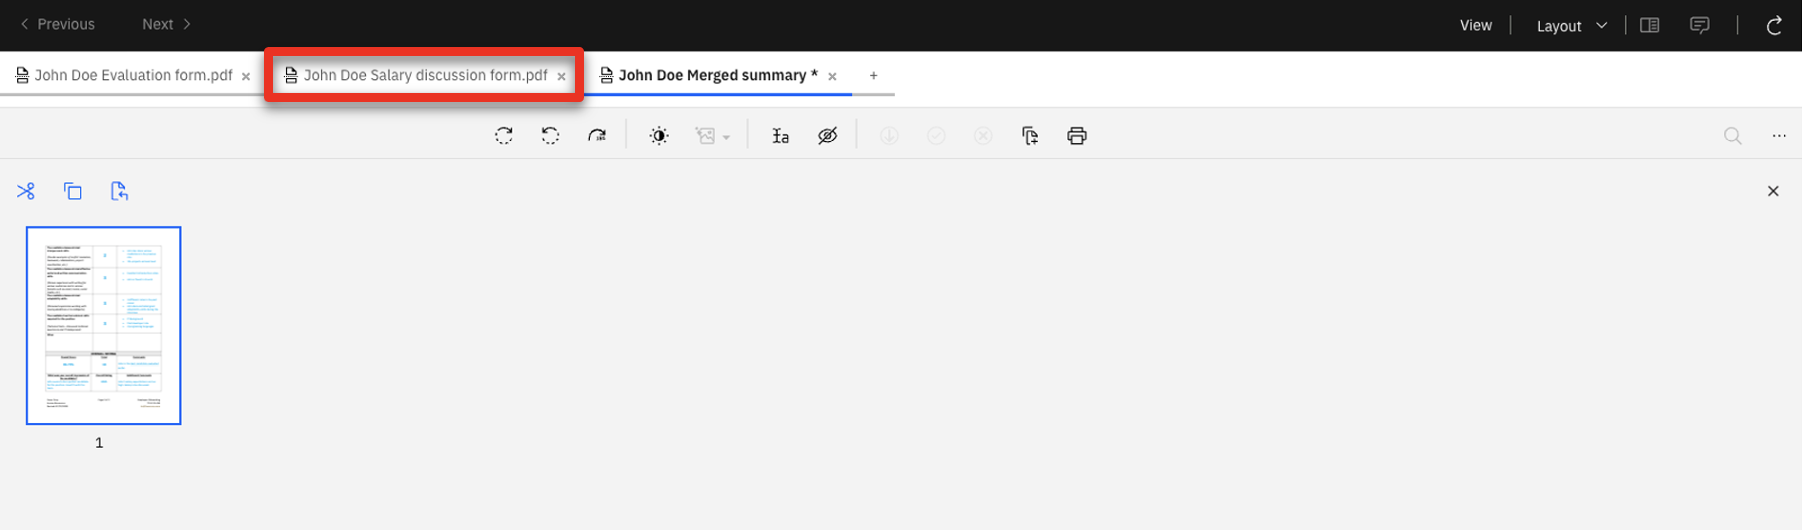 |
| Action 3.2.17 | Click the copy icon. |
| Action 3.2.18 | Click the John Doe Merged summary.pdf tab.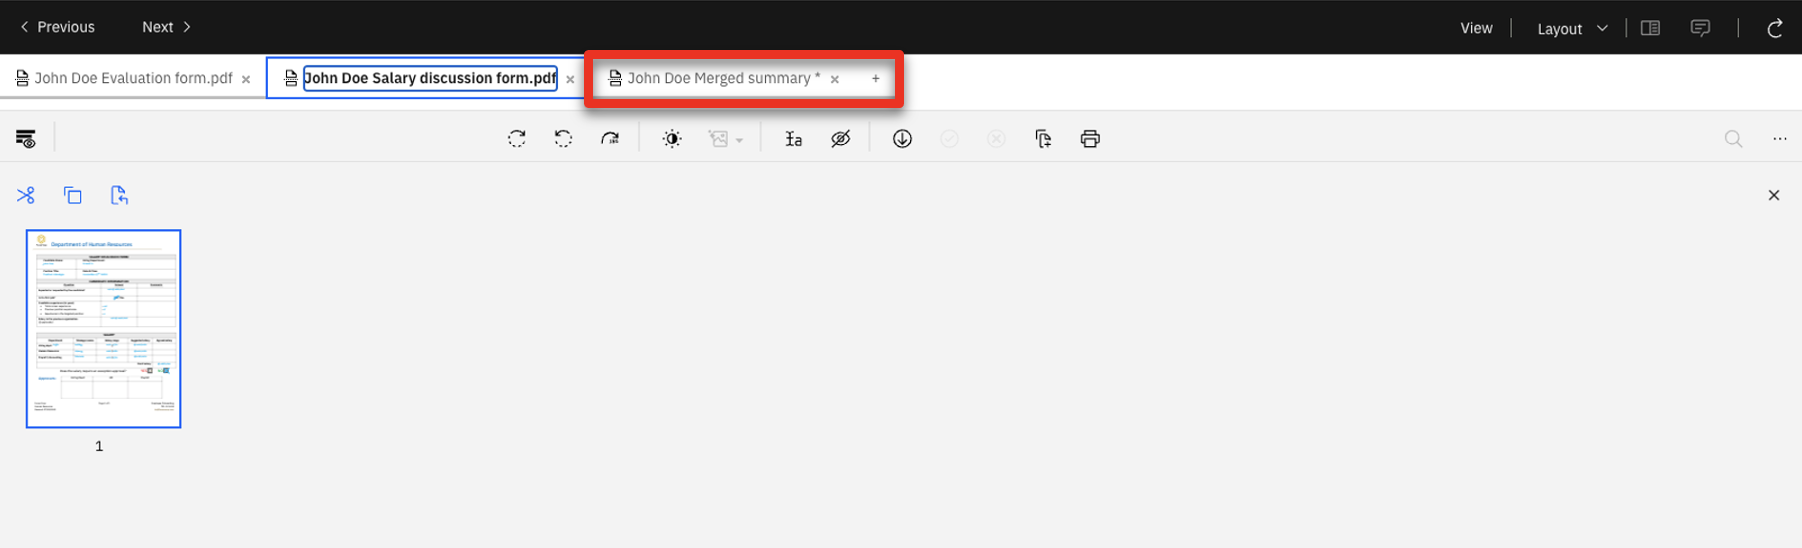 |
| Action 3.2.19 | Click the paste icon.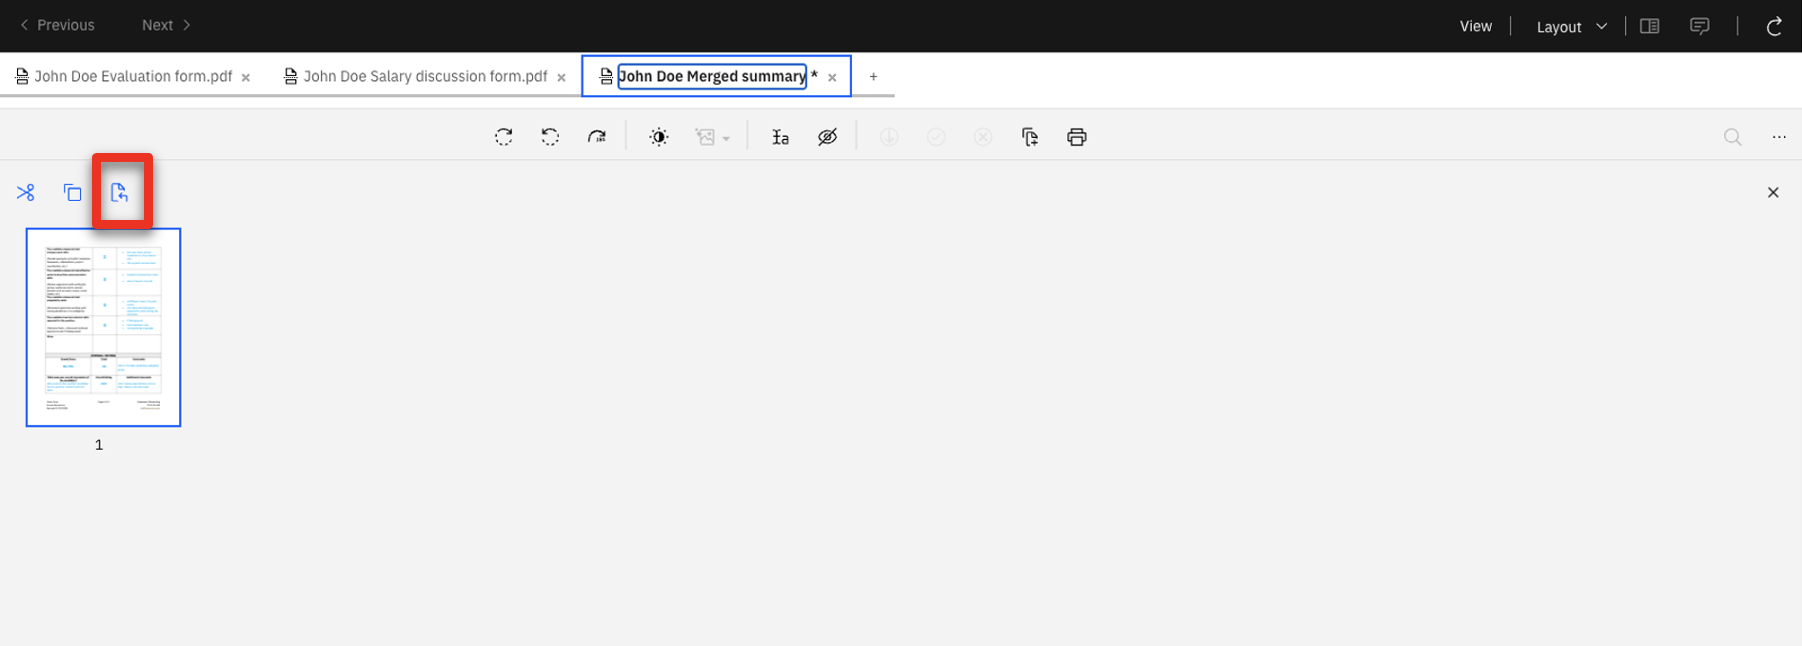 |
| Narration | He now saves the document and fills in the required properties to add it to the applicant’s candidate files folder. |
| Action 3.2.20 | Click the add document icon. |
| Action 3.2.21 | Enter ‘John Doe’ as the Candidate Name (1) and select HR process as the Document Type (2). Select R&D for the Department Name (3), set the Application date to the current date (4). Click Add (5). 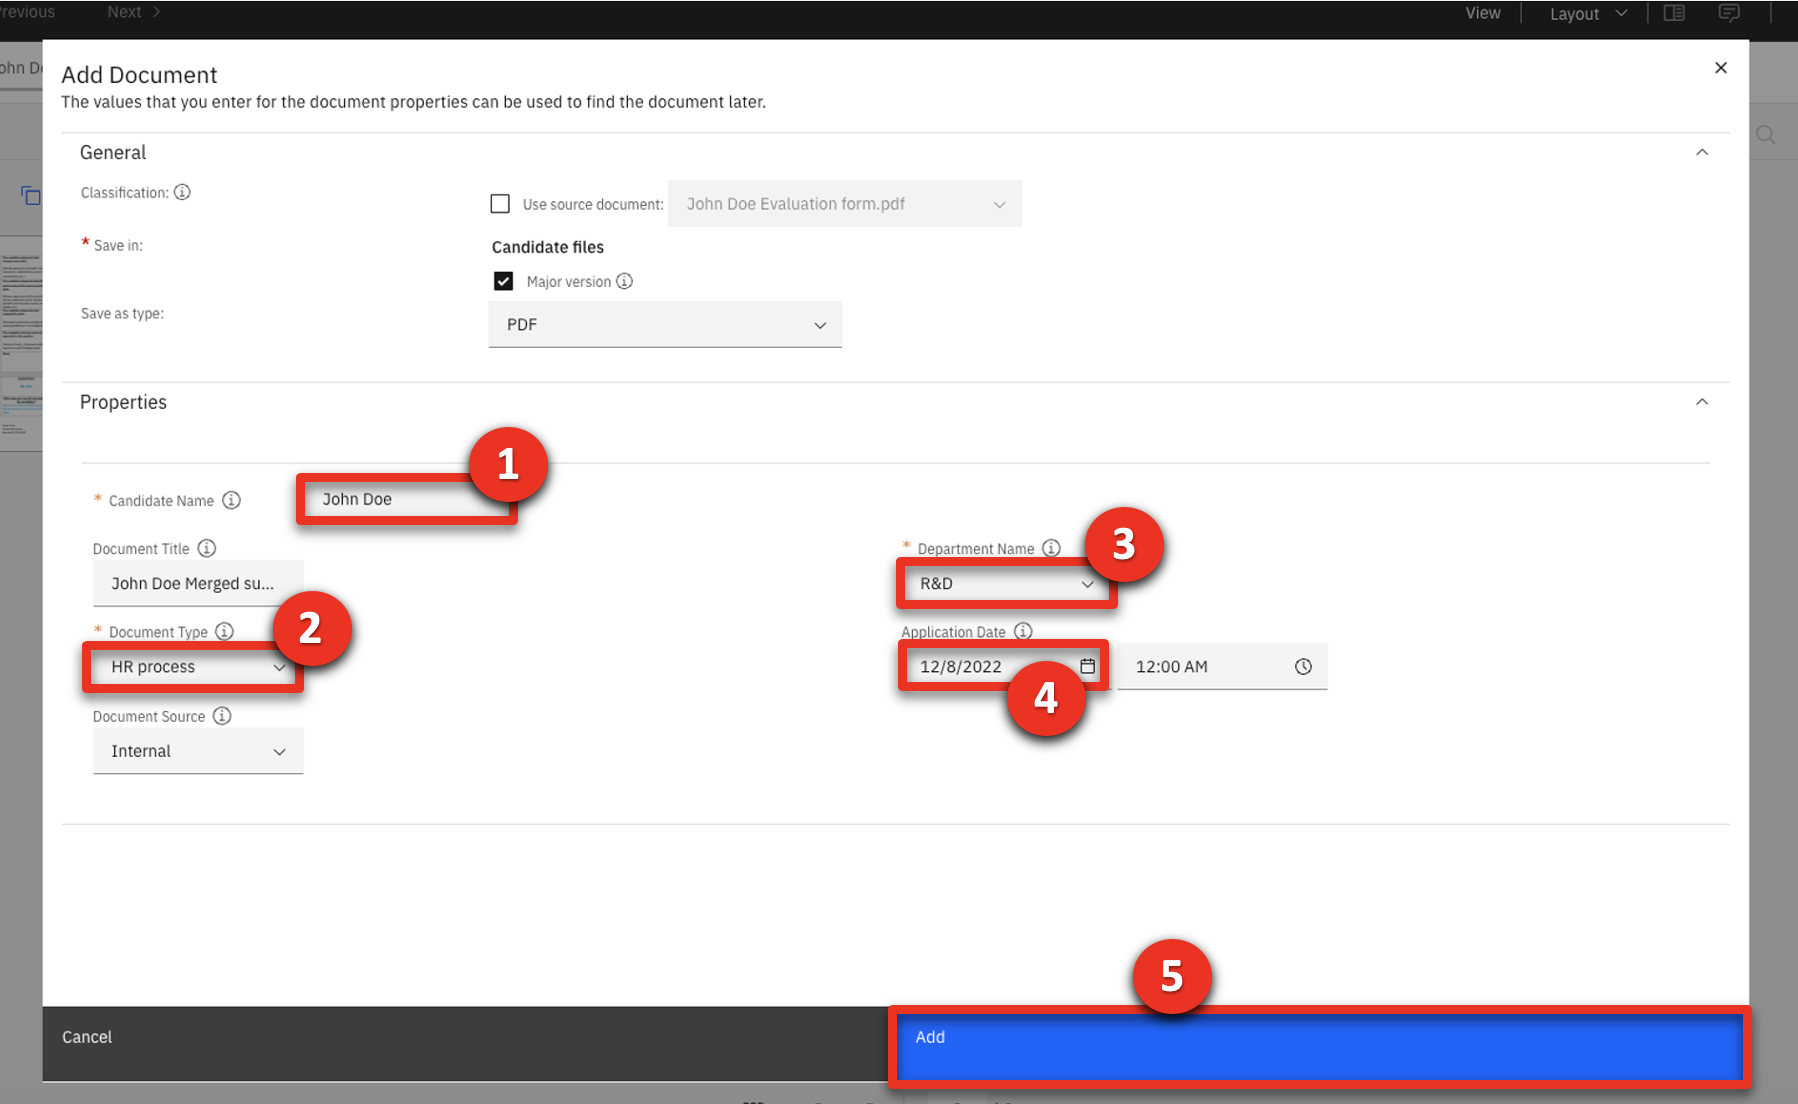 |
| Action 3.2.22 | Close the IBM Navigator Viewer. |
| Action 3.2.23 | Select the new John Doe Merged summary.pdf document.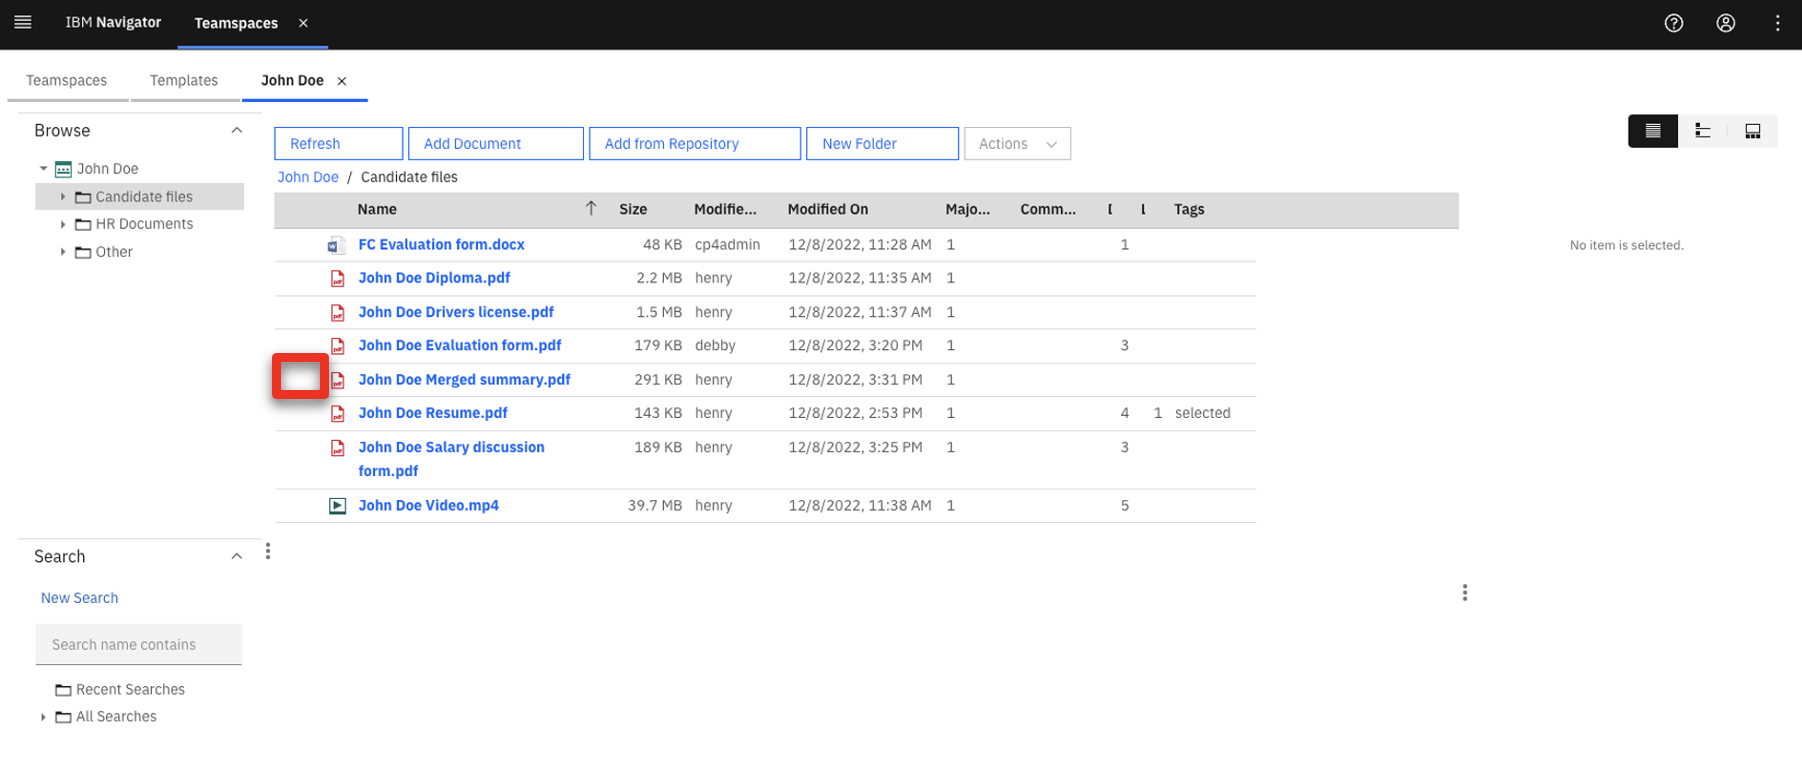 |
| Narration | The merged document is now ready to be approved by the stakeholders. |
4 - Managing the document approval process
| 4.1 | Launch a validation process |
|---|---|
| Narration | The HR manager needs hiring stakeholders to approve the salary offer. Using the built-in document approval workflow, he routes the salary request to the hiring manager for approval. Once she approves, the request will automatically proceed to the payroll manager for his final approval. |
| Action 4.1.1 | Select the John Doe Merged summary.pdf row (1). Then click Actions (2), select Workflow (3), and click Launch Workflow (4). 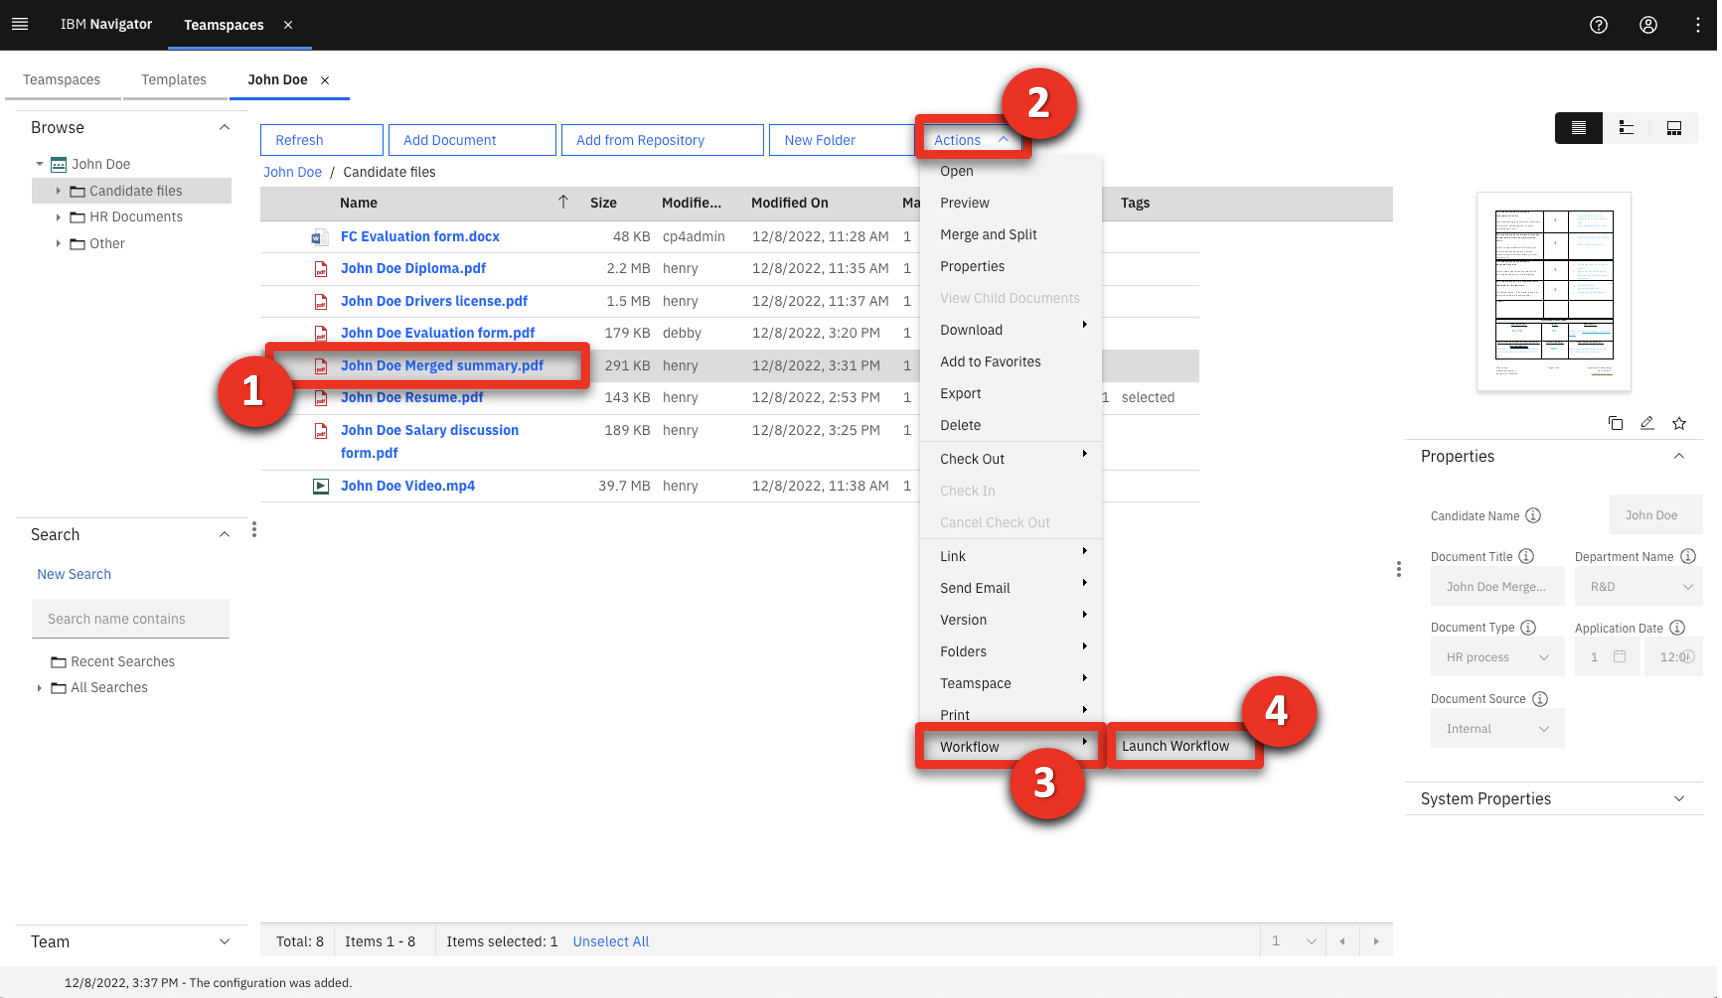 |
| Action 4.1.2 | Select Sequential review in the Name dropdown list (1) and click Launch (2).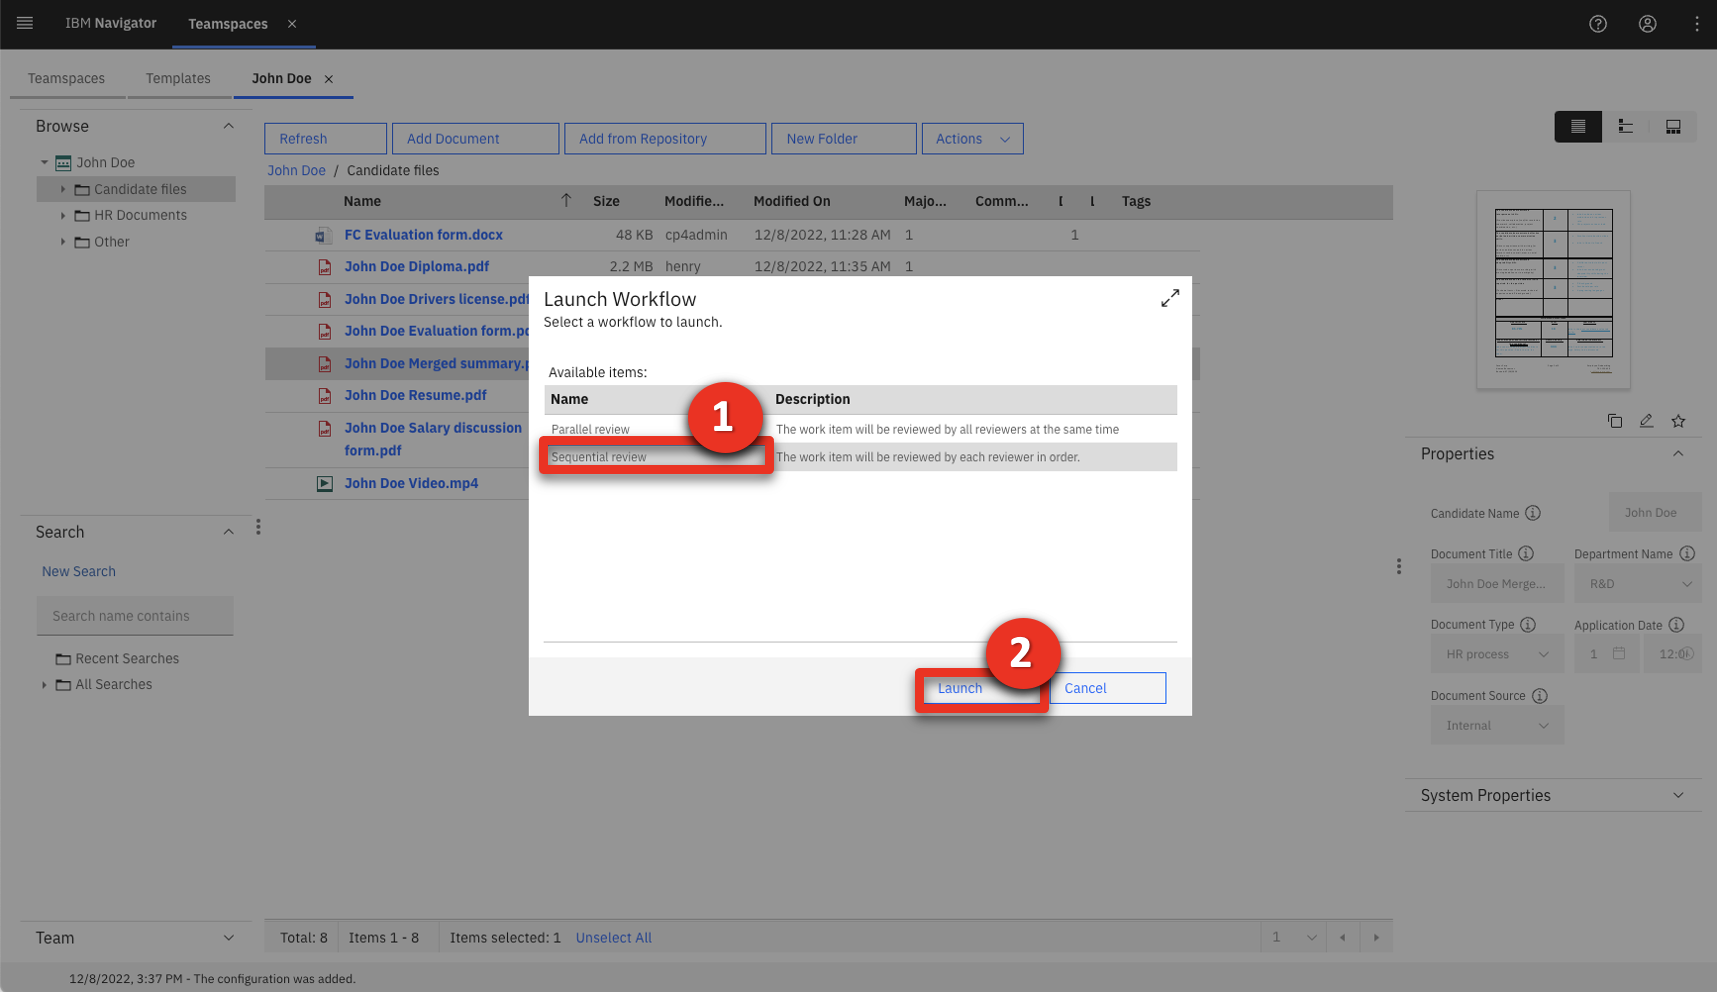 |
| Narration | The HR manager specifies Debby, the hiring manager, as the first approver. |
| Action 4.1.3 | Click the downward arrow to expand the Reviewers dropdown list.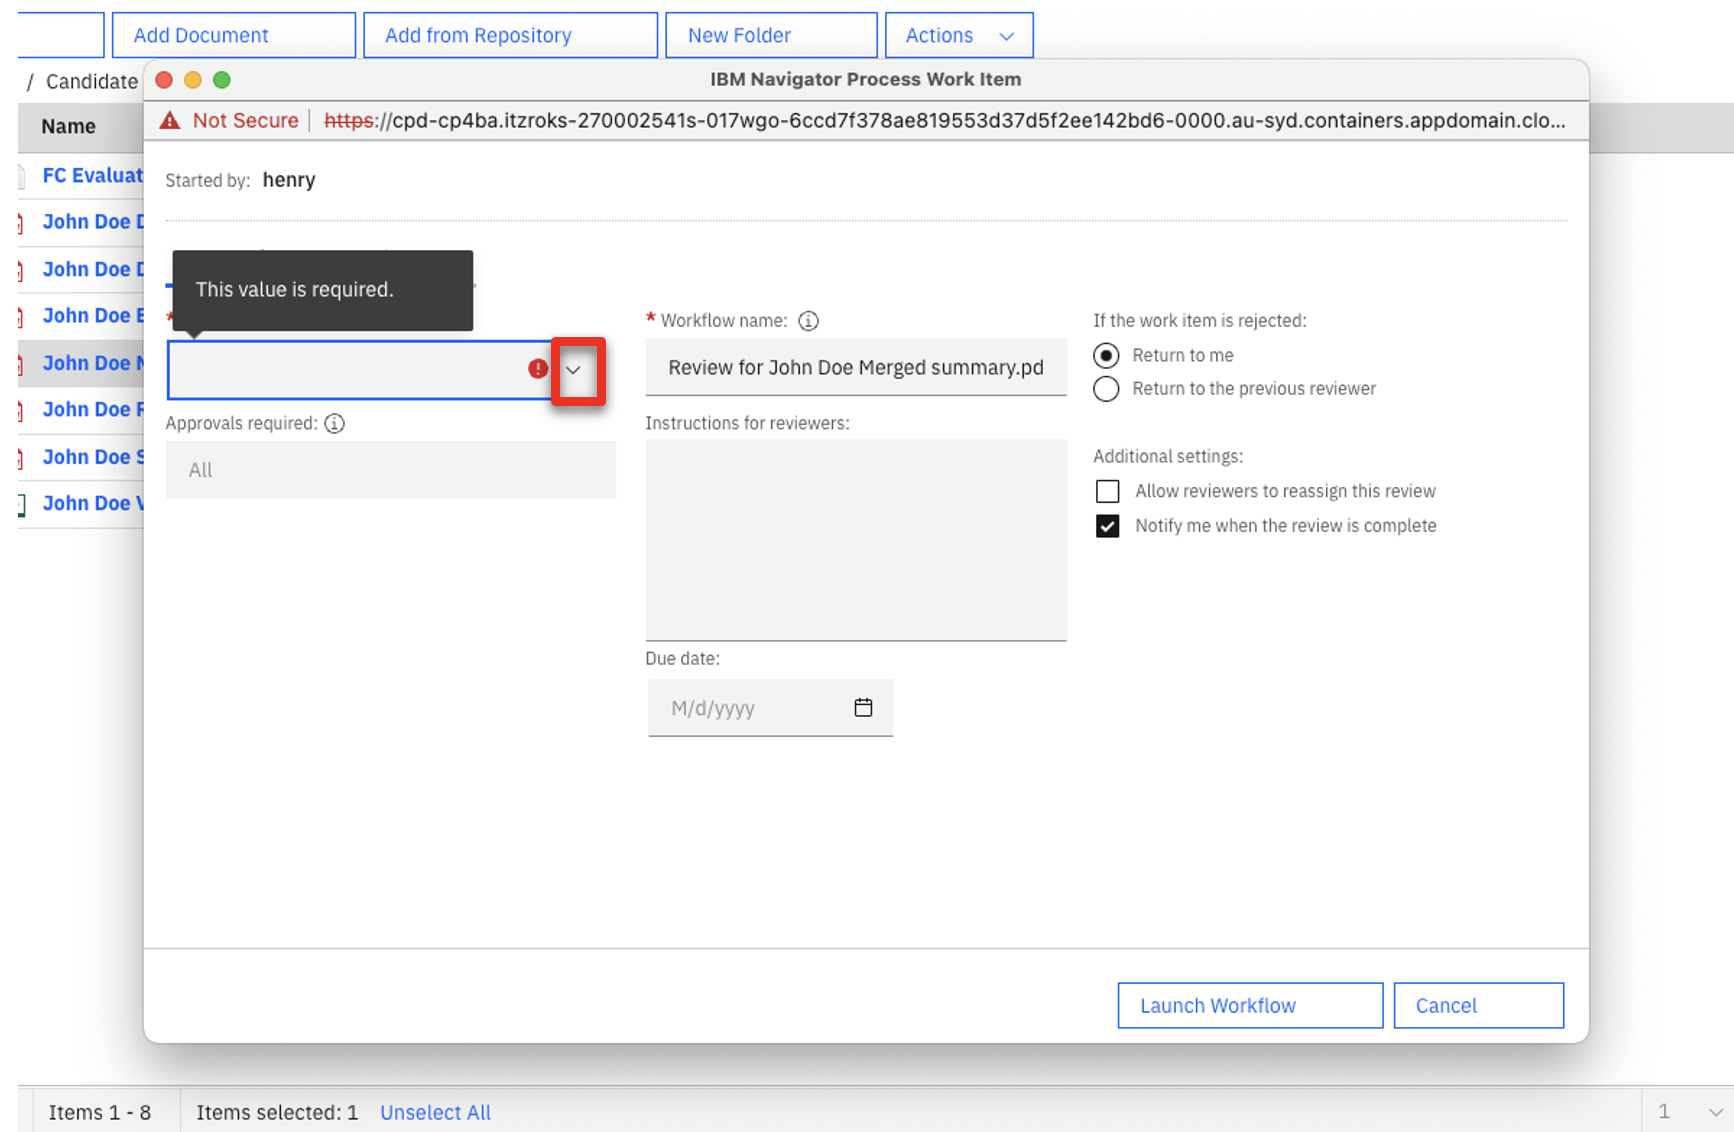 |
| Action 4.1.4 | Type ‘debby’ (1) and click the magnifier icon (2).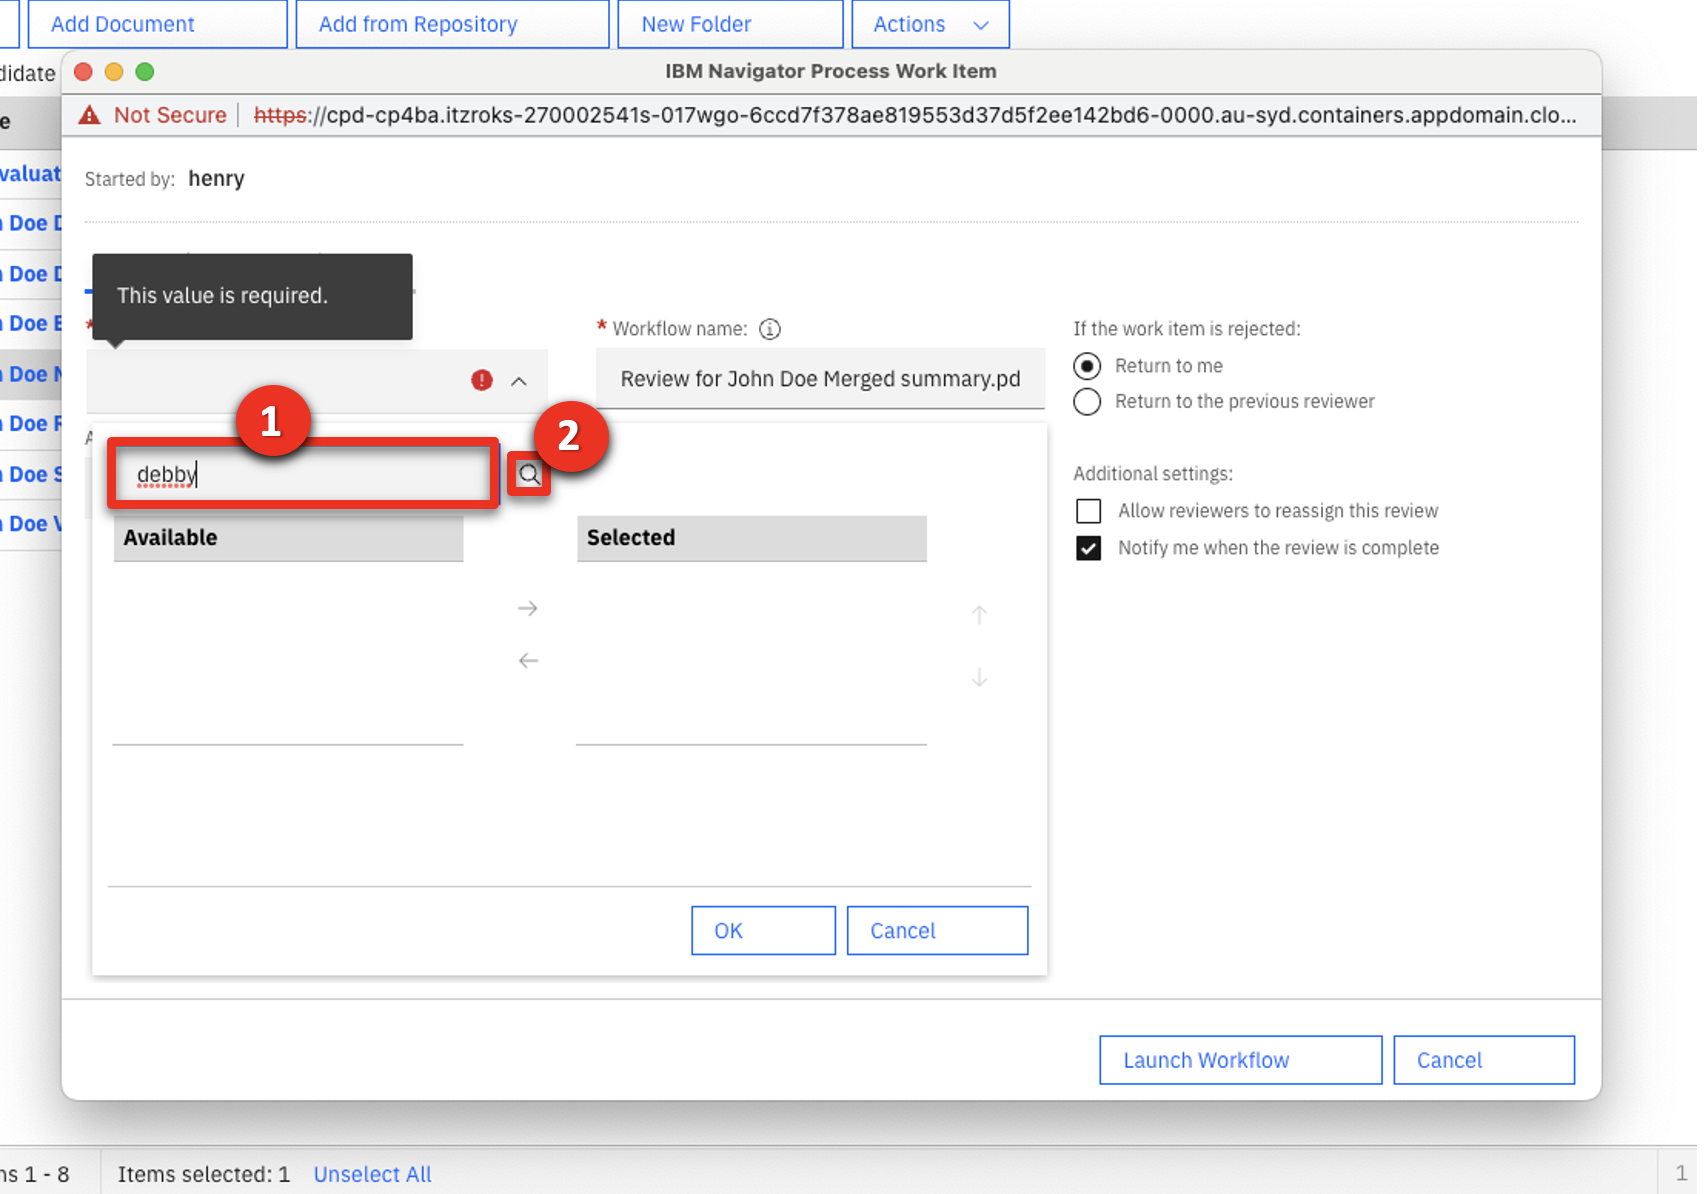 |
| Action 4.1.5 | Click the right-facing arrow to move the userid debby from the Available list to the Selected list. 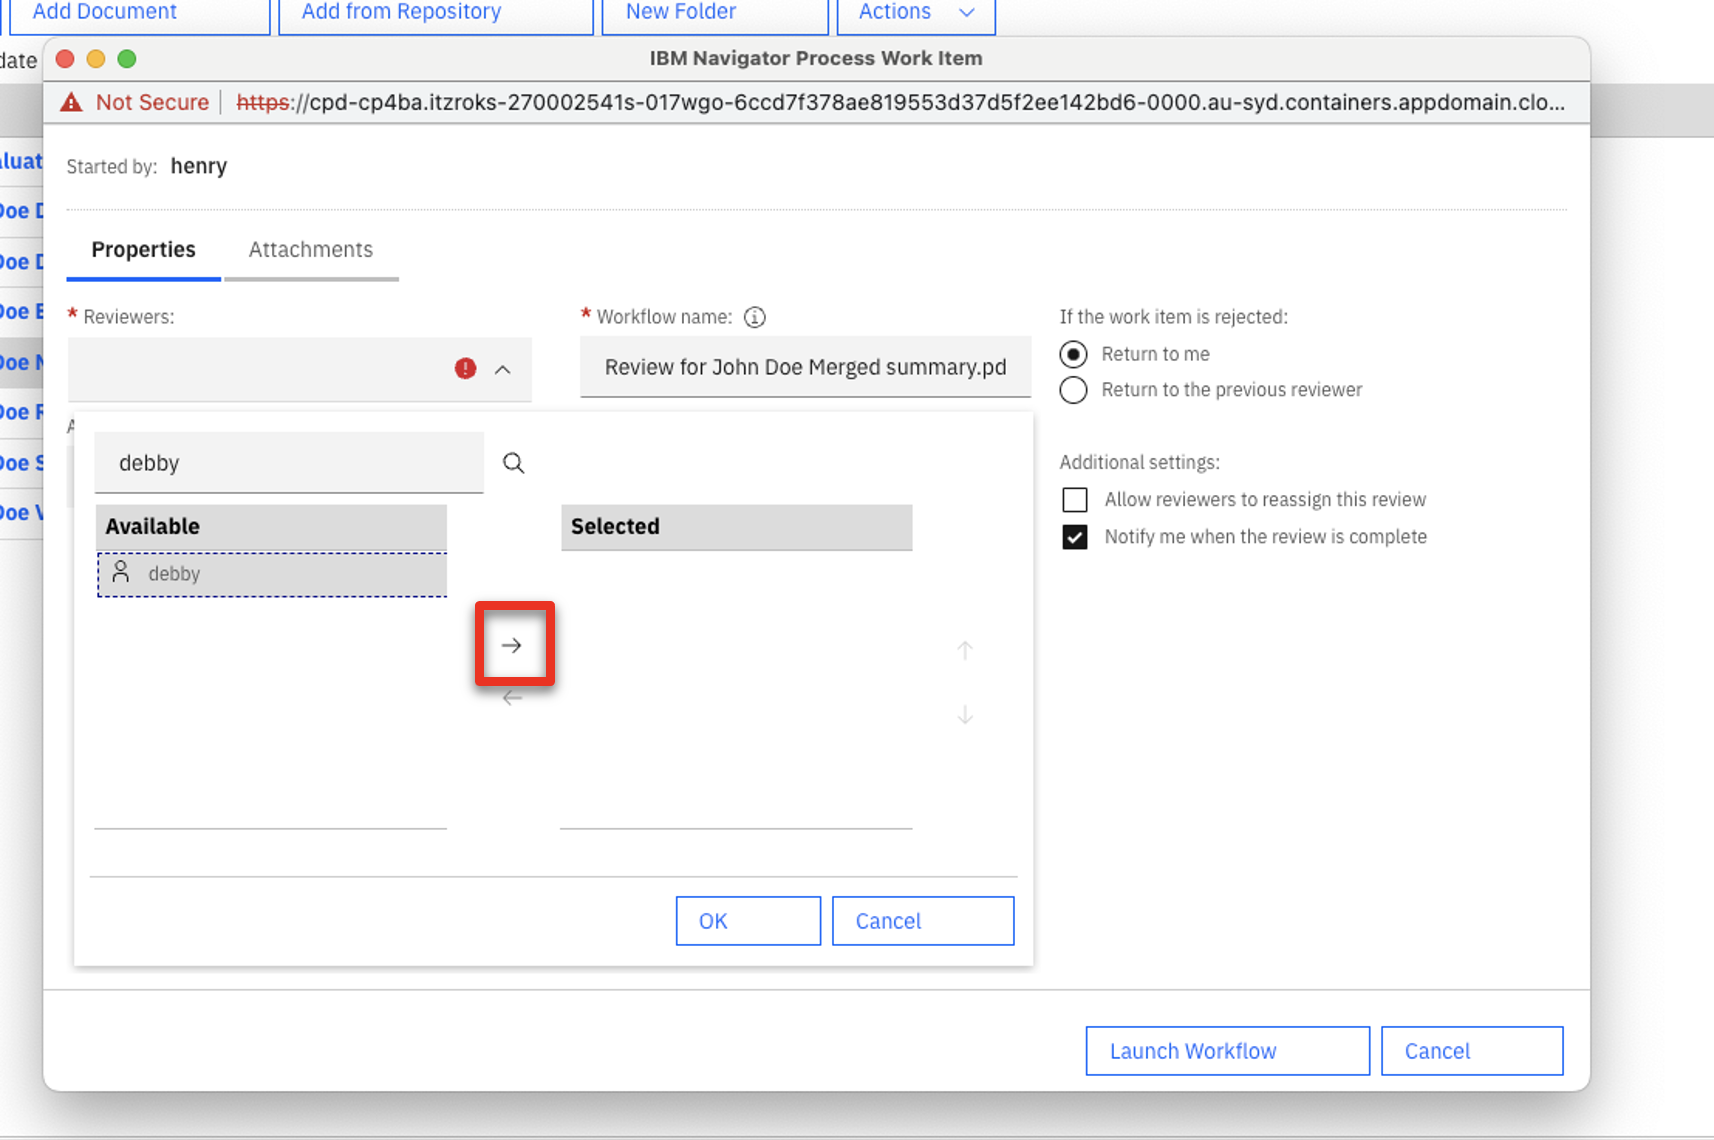 |
| Narration | Now the HR manager adds Patrick, the payroll manager, to the approval process. |
| Action 4.1.6 | Repeat the previous step to add patrick to the Selected list (1). Click OK (2). 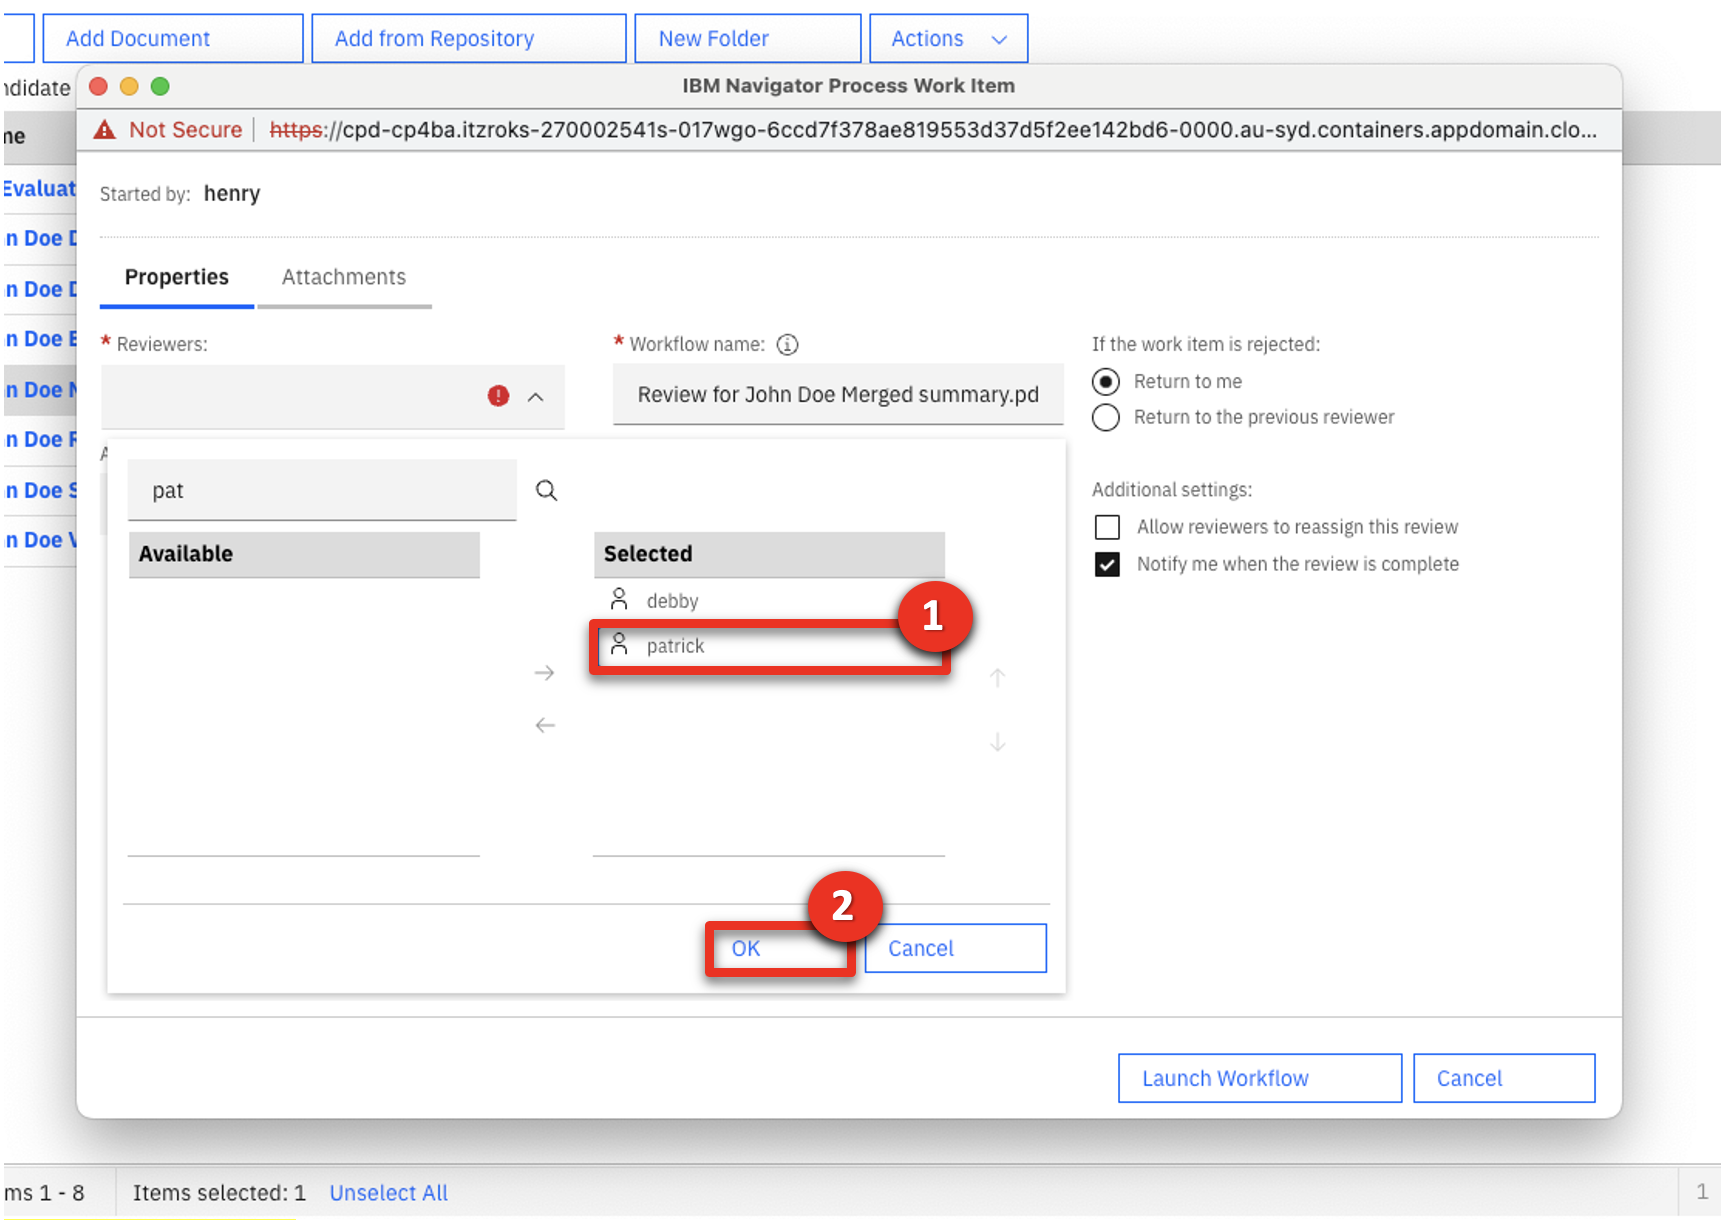 |
| Narration | Next, the HR manager sets a due date for the approvers to respond with their approvals. |
| Action 4.1.7 | Click the date selector to select a date approximately three business days from the current date. |
| Narration | The HR manager adds instructions for the approvers, validates that the salary discussion document is attached to the message, and launches the salary approval workflow. |
| Action 4.1.8 | Enter ‘Please approve or reject the attached salary request document, and add any comments.’ in the Instructions for reviewers field (1). Click the Attachments tab (2).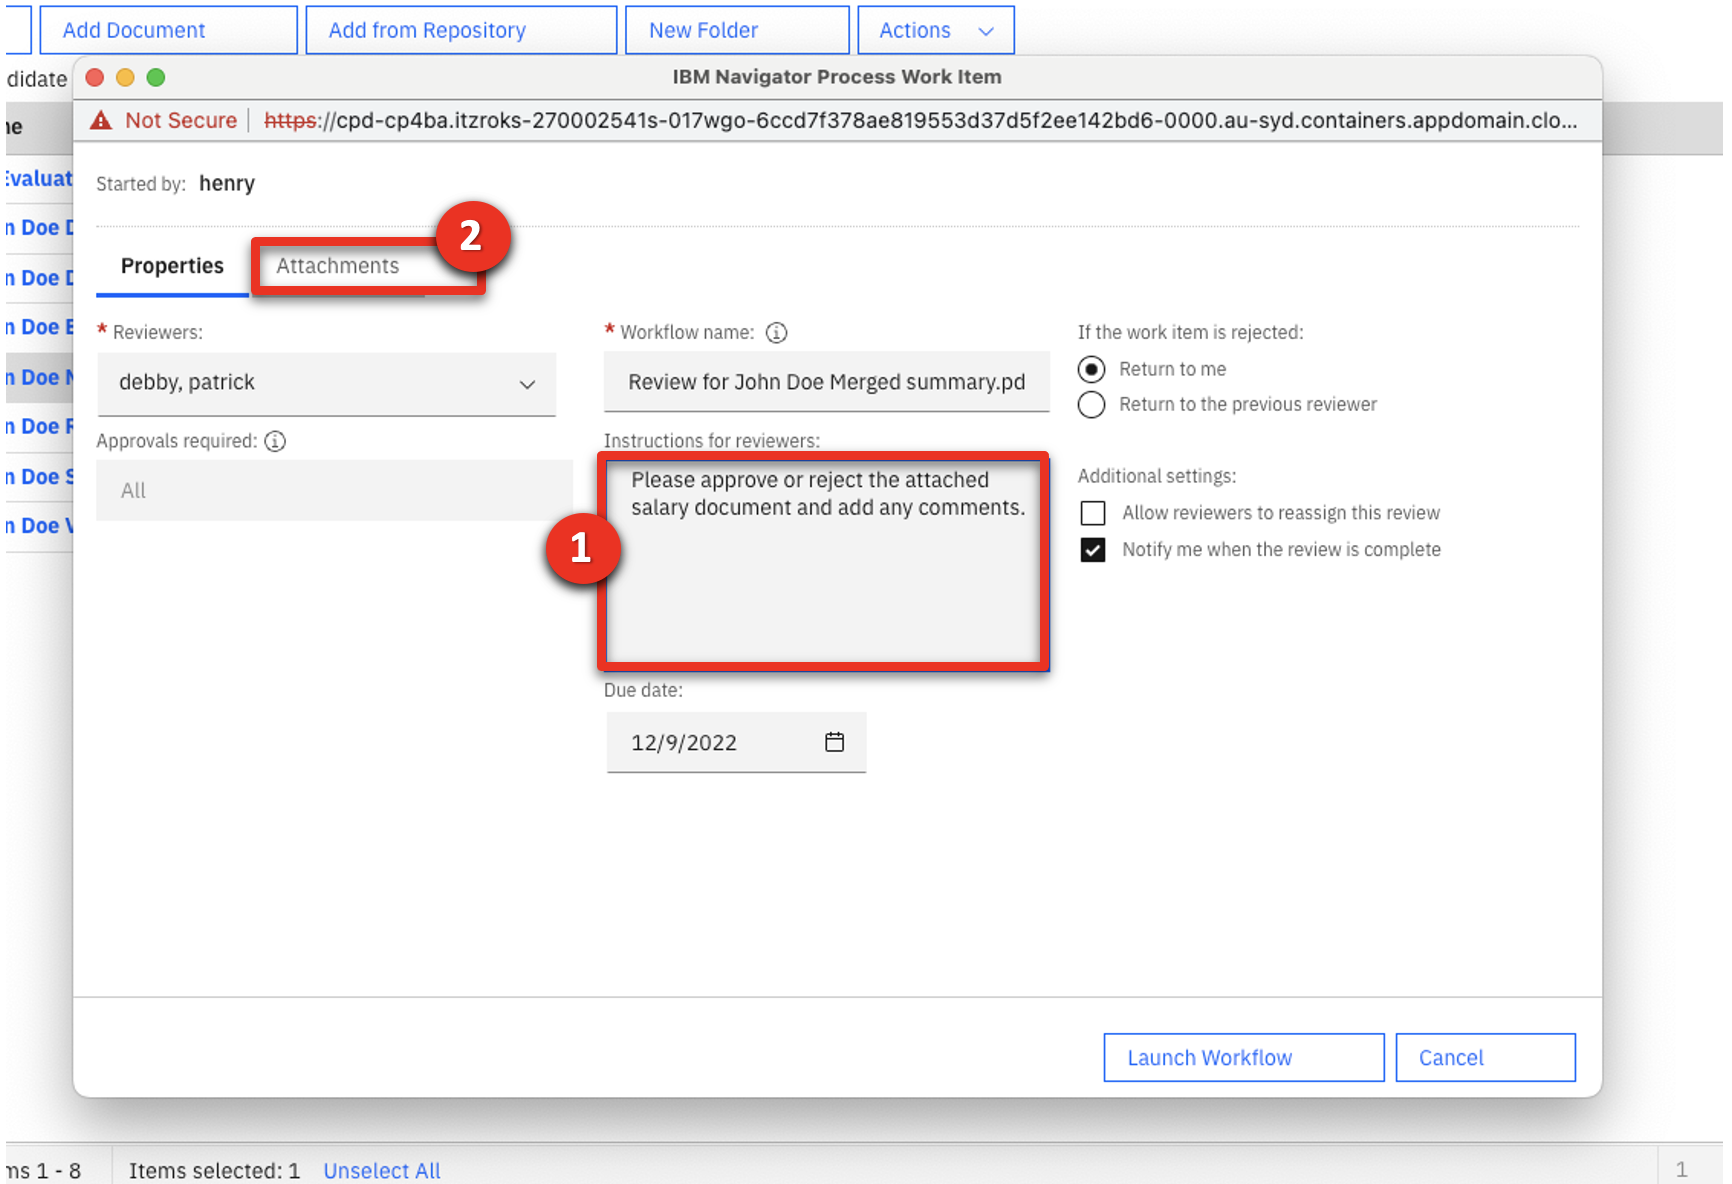 |
| Action 4.1.9 | Point out that the John Doe Merged summary.pdf is automatically attached (1). Click Launch Workflow (2).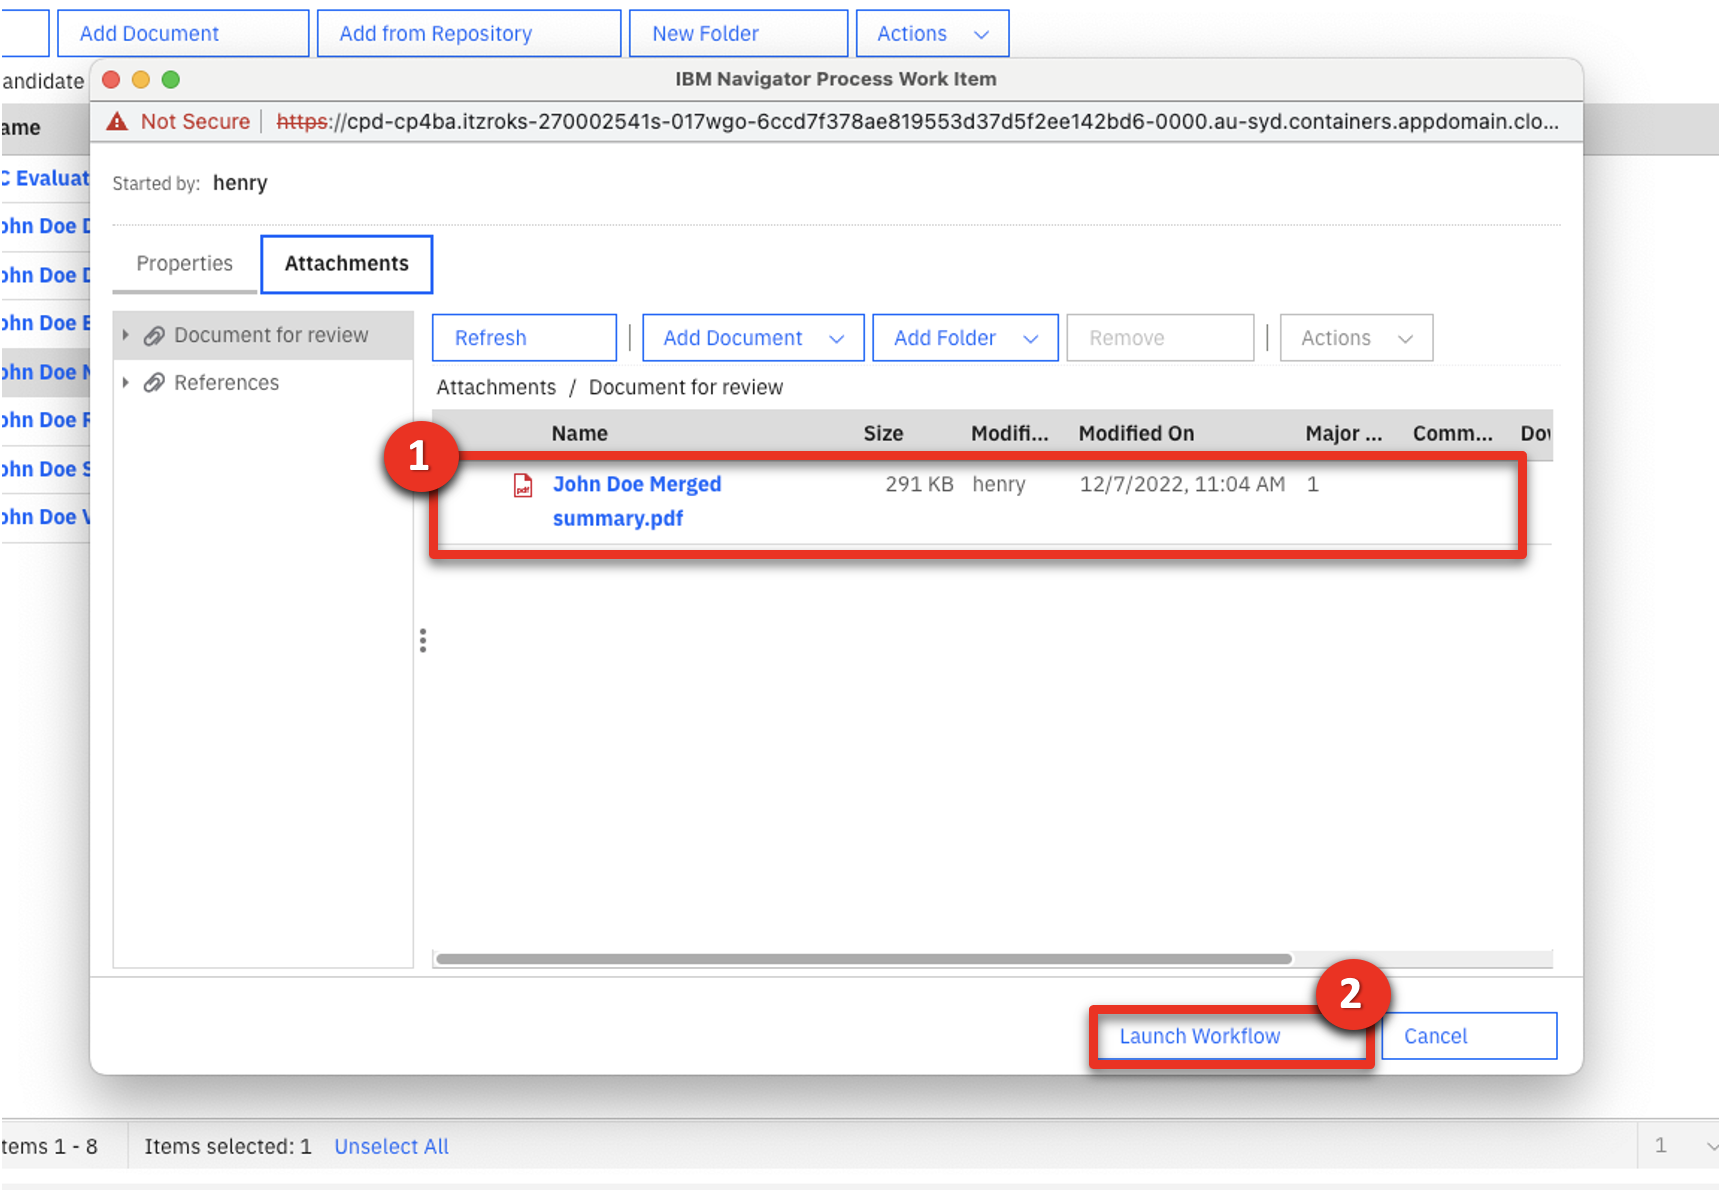 |
| Action 4.1.10 | Click the user icon (1) and click Log Out (2).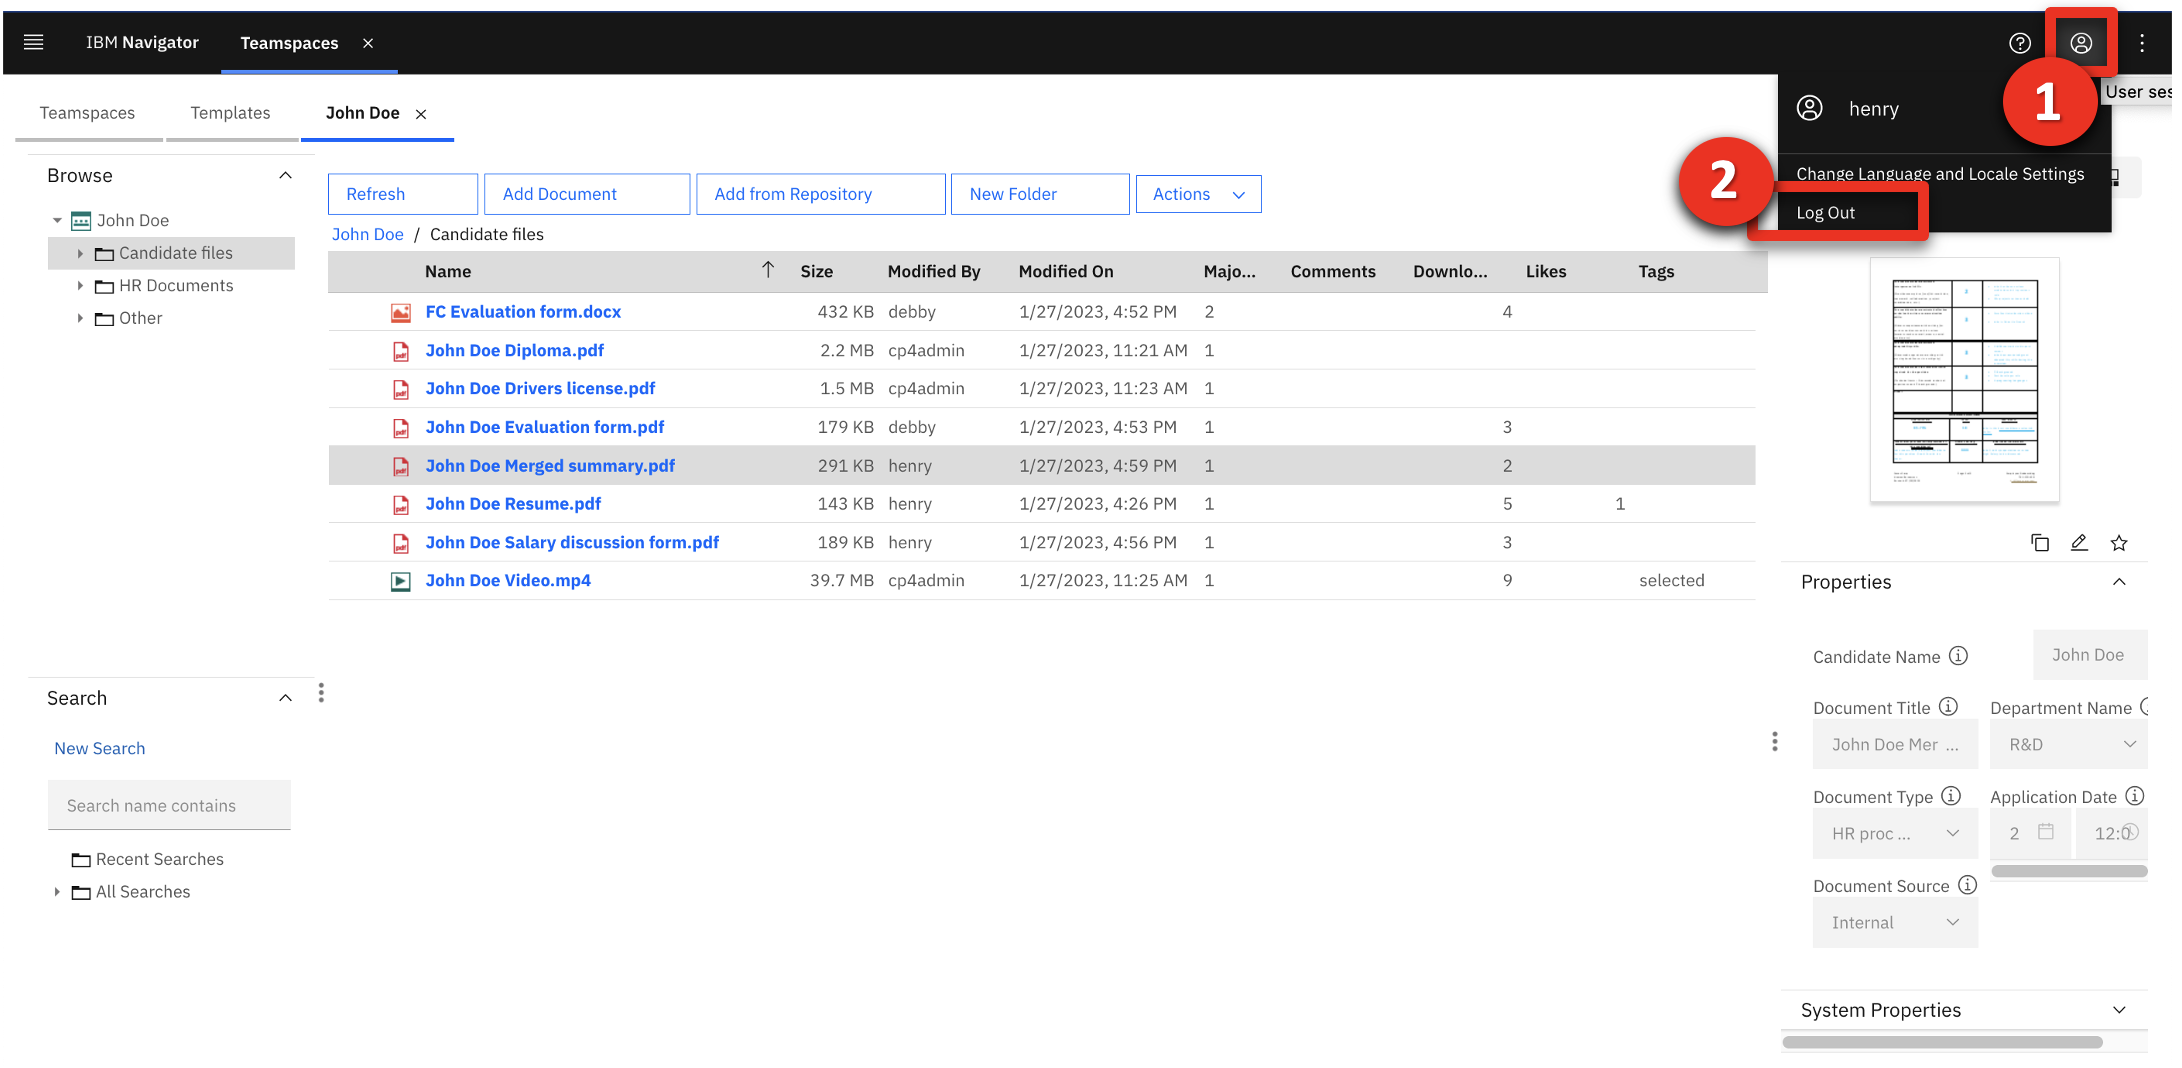 |
| 4.2 | Review work items |
|---|---|
| Narration | The hiring manager is notified that she needs to approve the salary request. She logs in to review the request. In a real implementation, the notification would include a link to access the approval form. For this demonstration, we are showing a version that does not require setting up outside email accounts to demonstrate this functionality. If she approves the request, a notification will automatically be sent to the payroll manager for his approval. |
| Action 4.2.1 | Sign into IBM Navigator using the hiring manager’s credentials: Username: debby and Password: debby (1). Click Log in (2).  |
| Action 4.2.2 | Click the Work tile.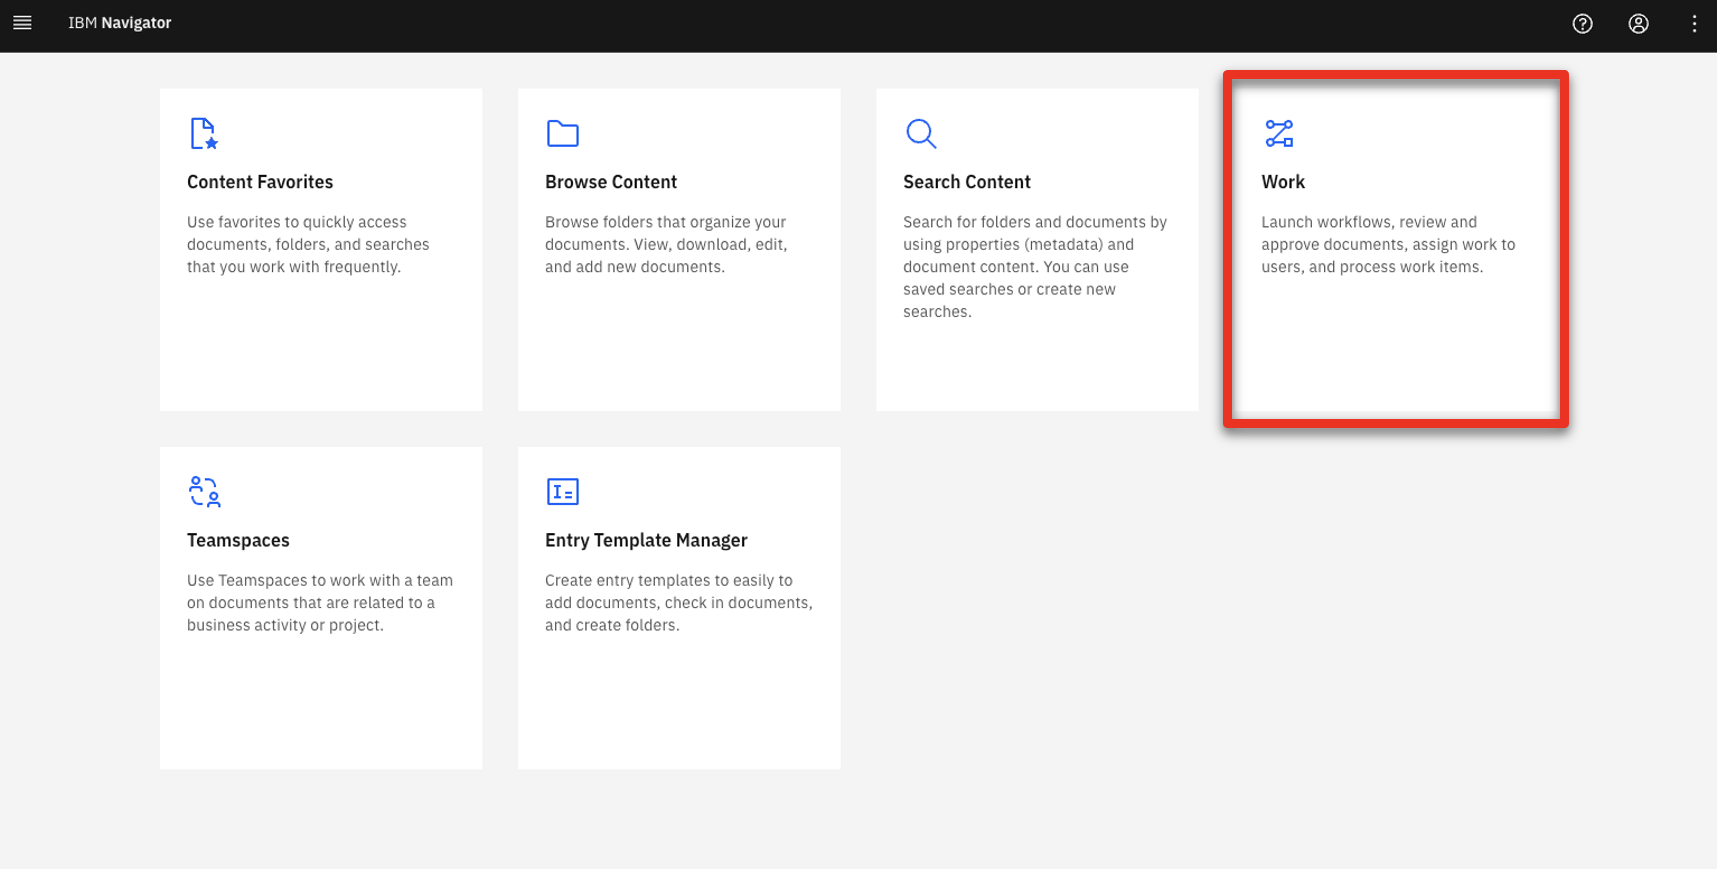 |
| Action 4.2.3 | Select the Review for John Doe Merged summary.pdf row (1) and click Open (2).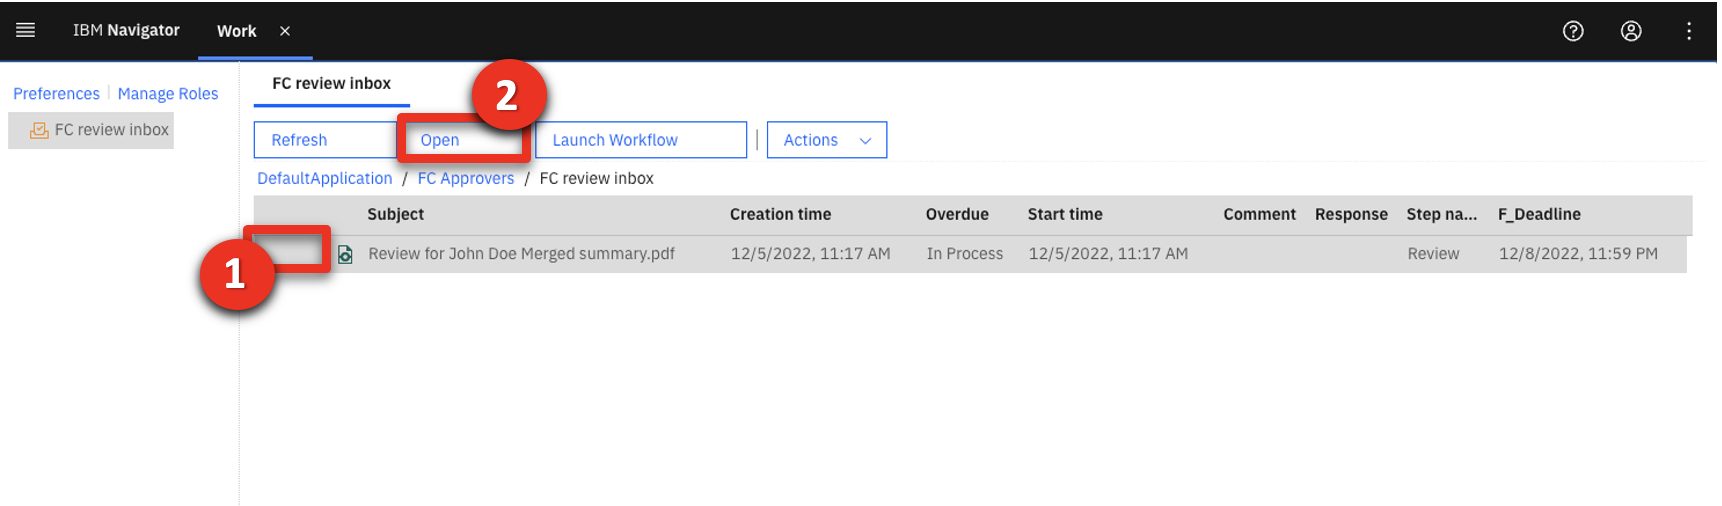 |
| Narration | The hiring manager opens the notification. She sees the request for salary approval, the requester name, and the due date. |
| Action 4.2.4 | Point out the process details (1) and click the Attachments tab (2). 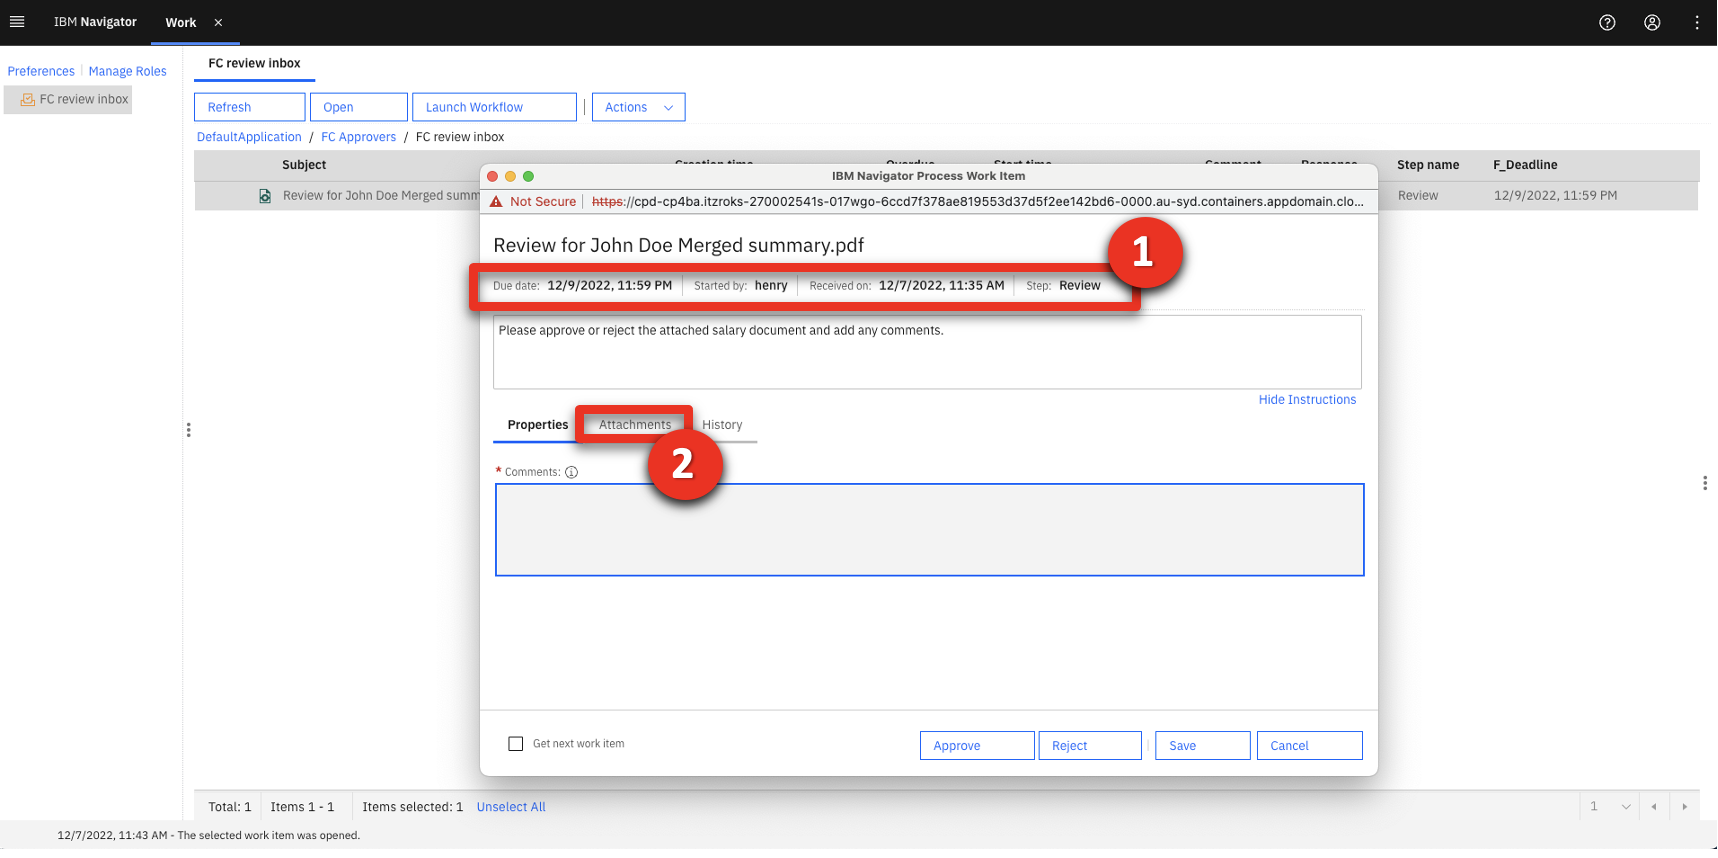 |
| Action 4.2.5 | Click the John Doe Merged summary.pdf.  |
| Narration | The hiring manager reviews all the documents pertinent to the salary decision. She approves the requested salary. |
| Action 4.2.6 | Scroll down to show that the merged document includes the second page of the applicant’s evaluation form and the salary discussion form. 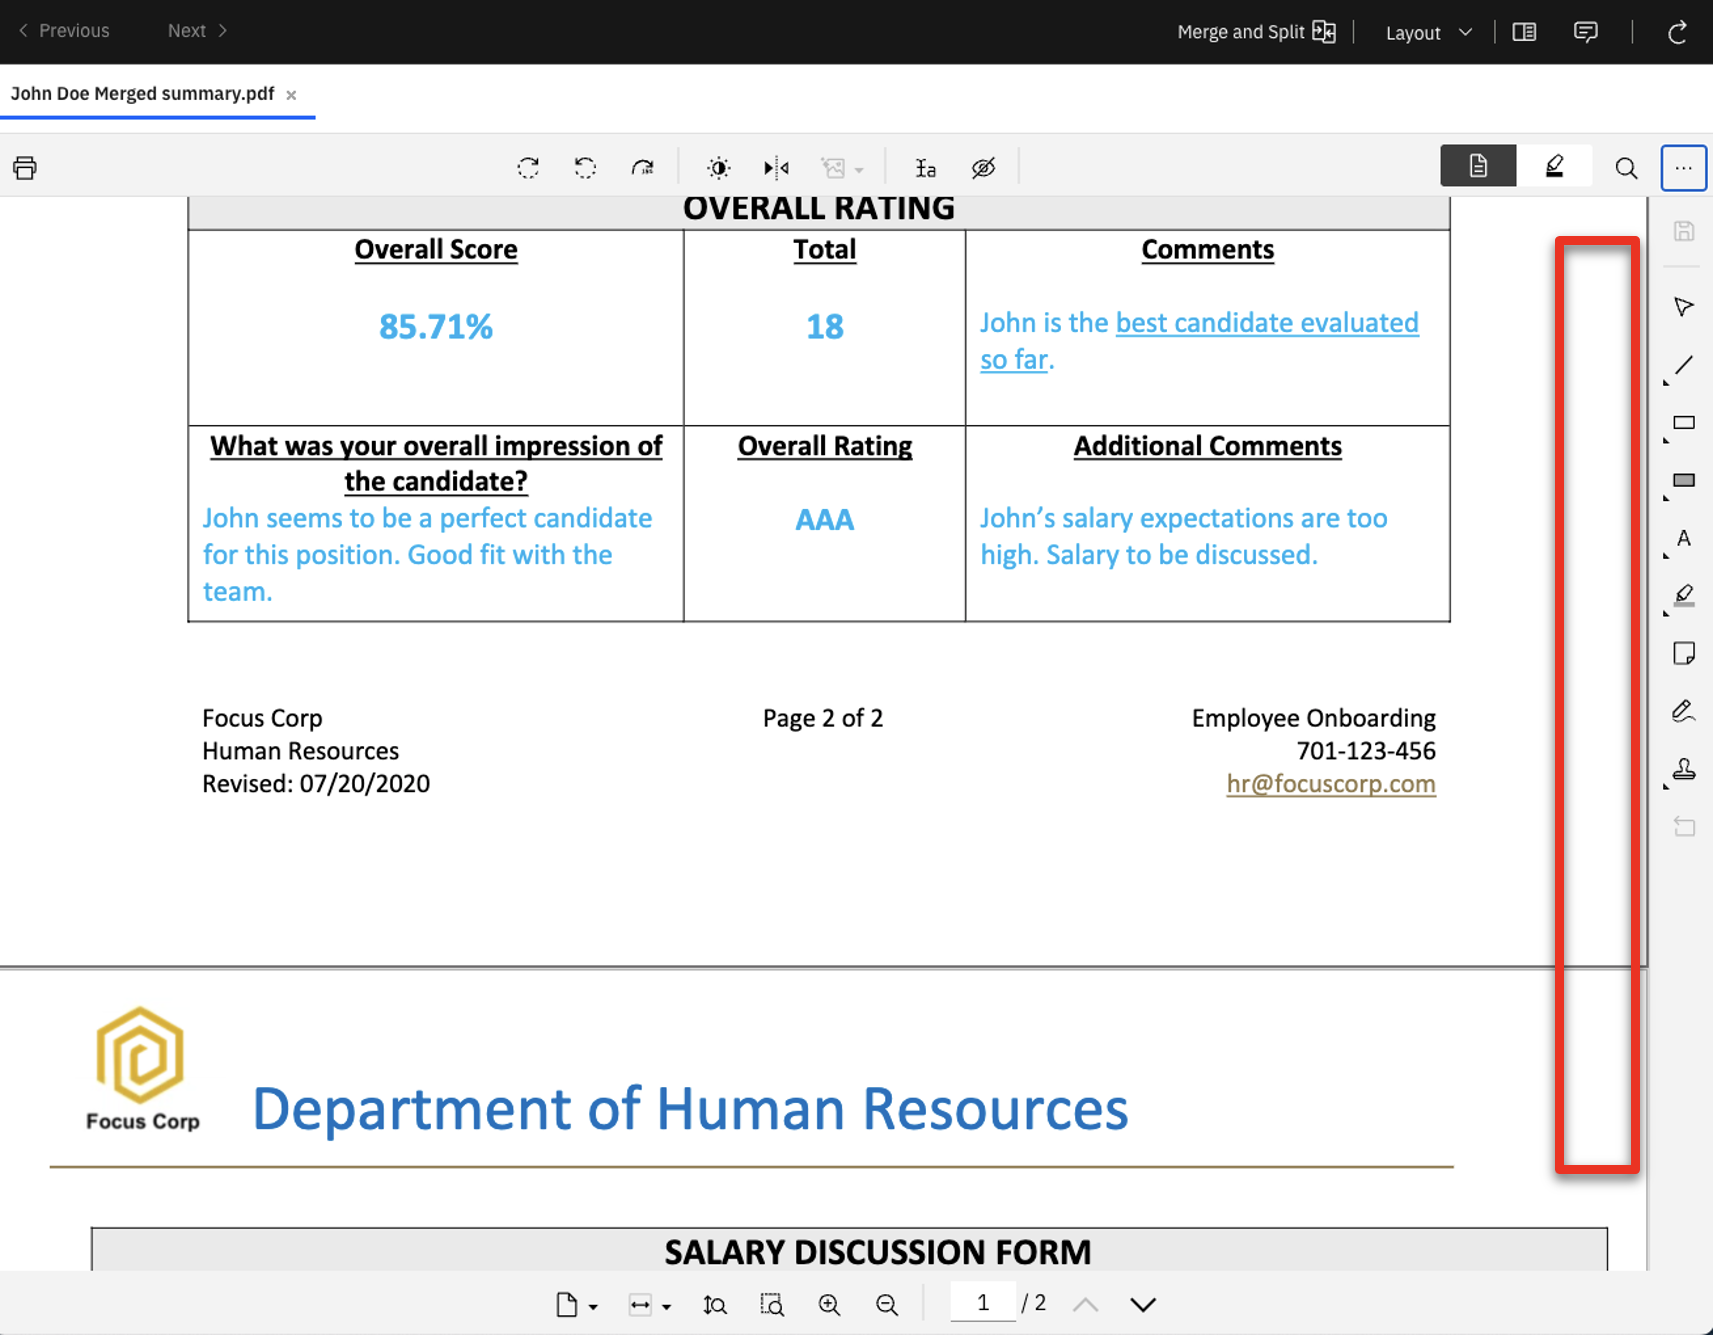 |
| Action 4.2.7 | Click the stamp icon (1) and select Approved user date (2). Click in the Hiring Dept box (3) to place the stamp. 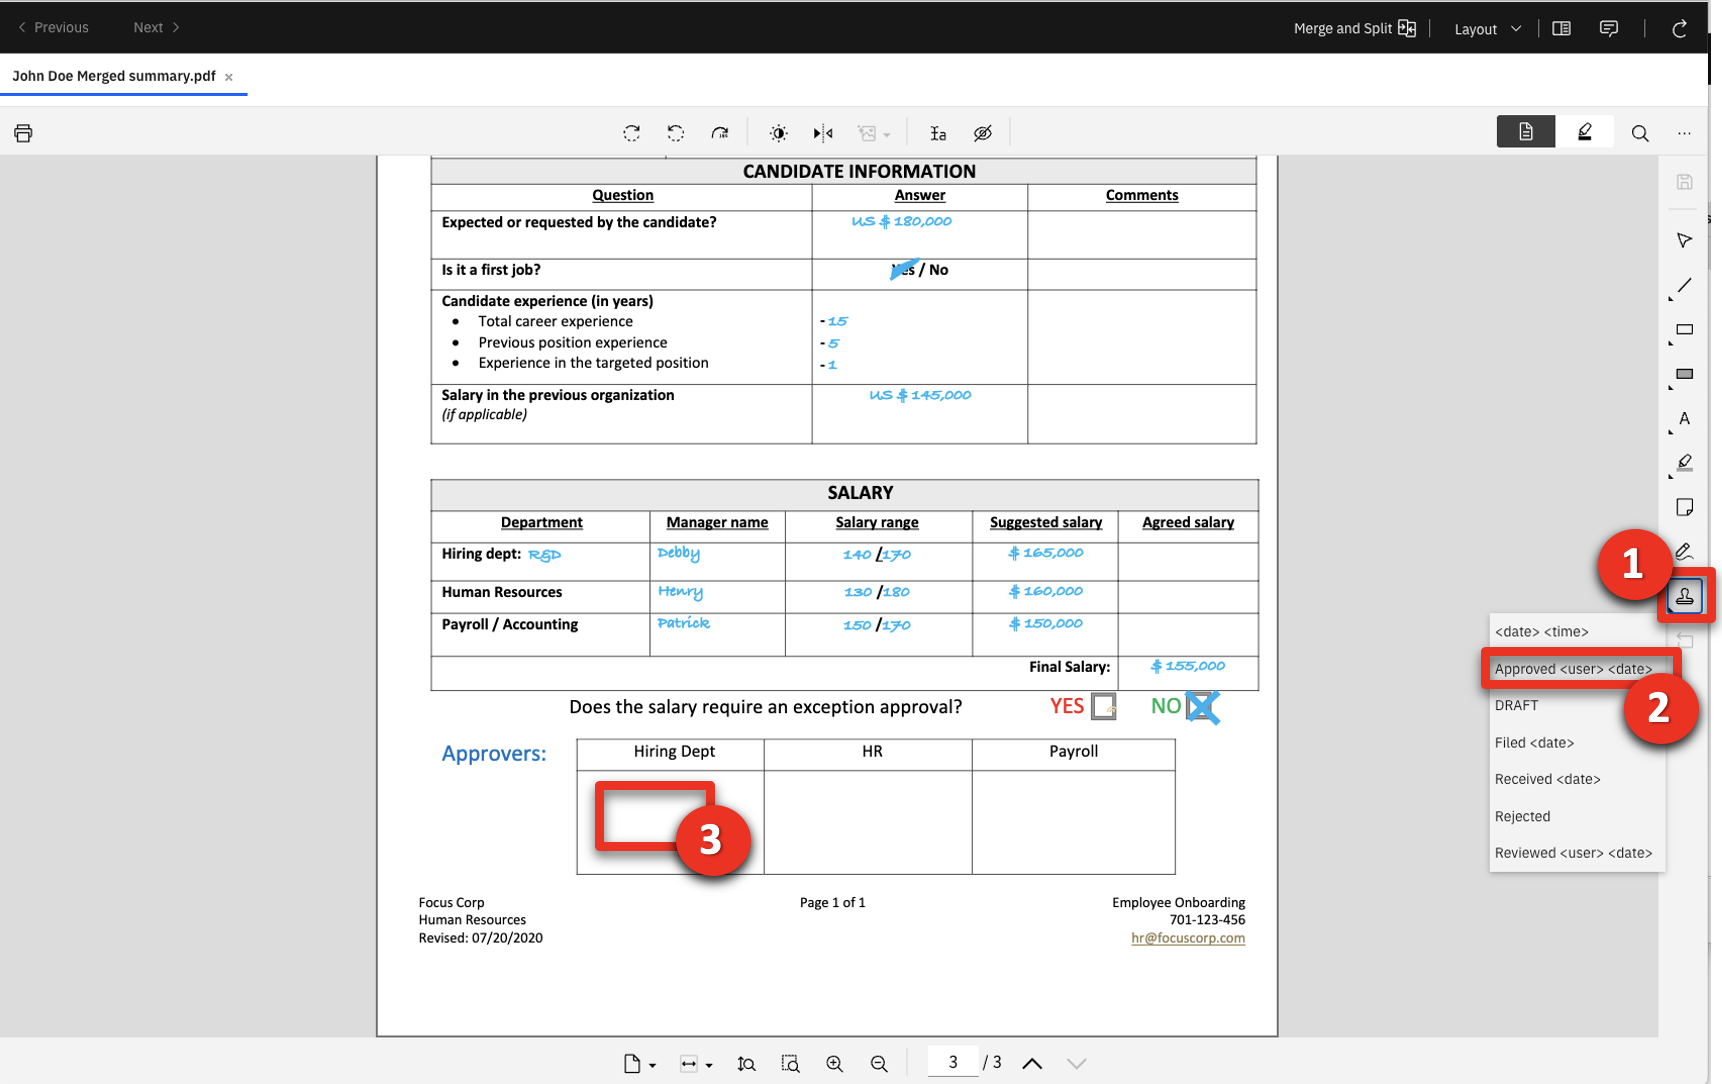 |
| Narration | When the hiring manager approves, the stamp automatically generates her name and the approval date. |
| Action 4.2.8 | Click the save icon.  |
| Action 4.2.9 | Close the IBM Navigator Viewer window. |
| Narration | Now the hiring manager adds her comments. |
| Action 4.2.10 | Click the Properties tab. 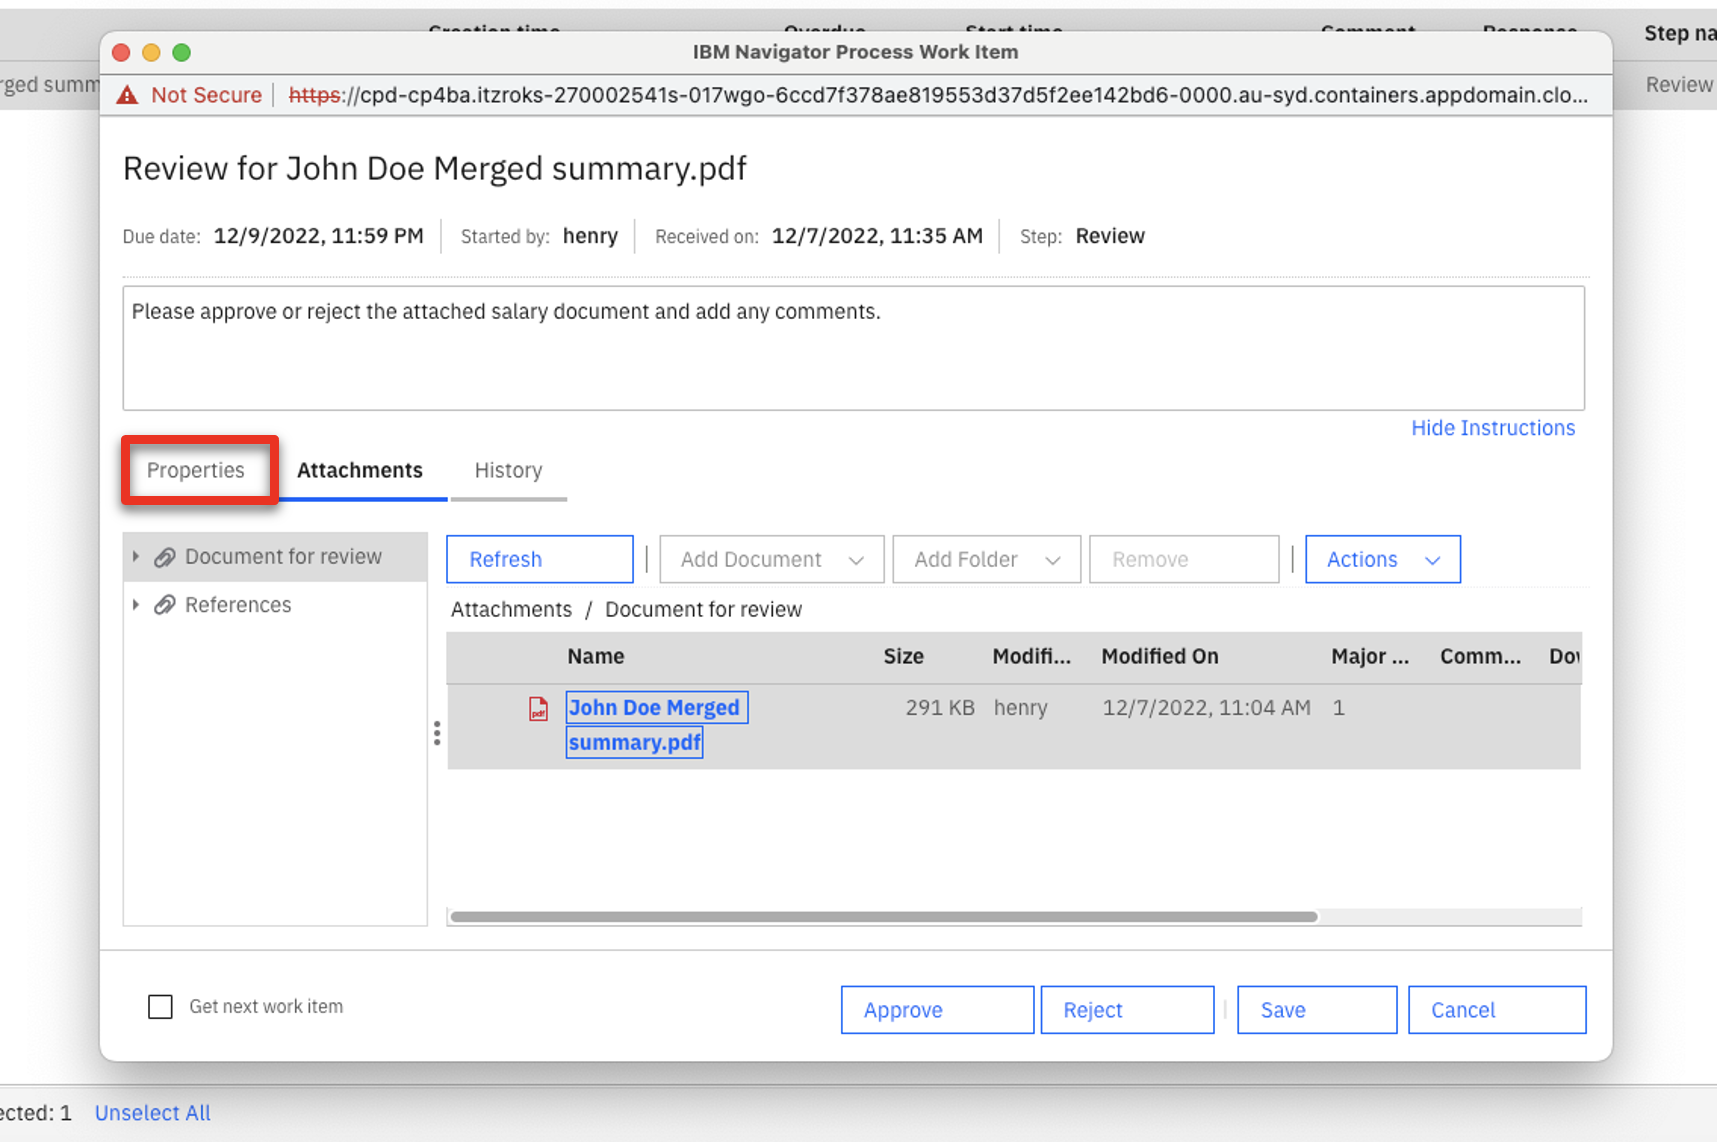 |
| Action 4.2.11 | In the Comments dialogue box, enter ‘Salary approved for John Doe.’ (1). Click Approve (2).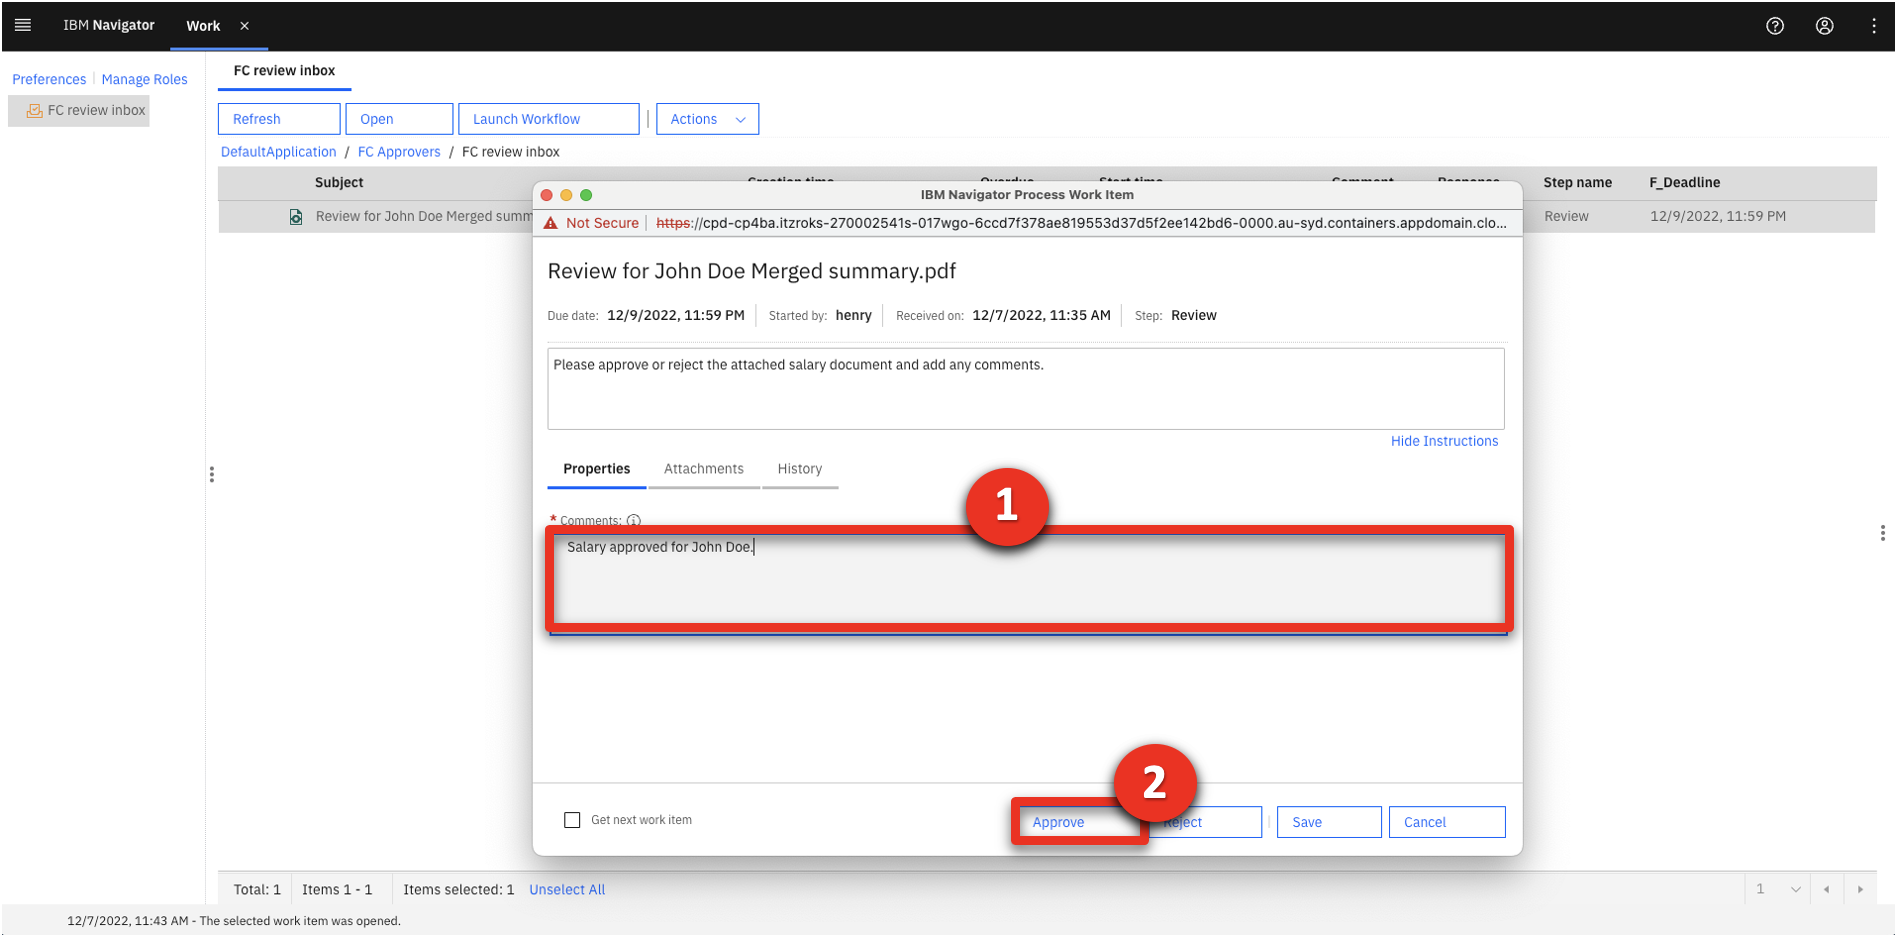 |
| Narration | After the hiring manager approves the salary, the request is automatically sent to the payroll manager. |
| Action 4.2.12 | Log out from IBM Navigator. |
| Action 4.2.13 | Sign back into IBM Navigator using the payroll manager’s credentials: Username: patrick and Password: patrick (1). Click Log in (2).  |
| Narration | When the payroll manager receives a notification to approve the salary request, he logs in to review the request. |
| Action 4.2.14 | Click the Work tile.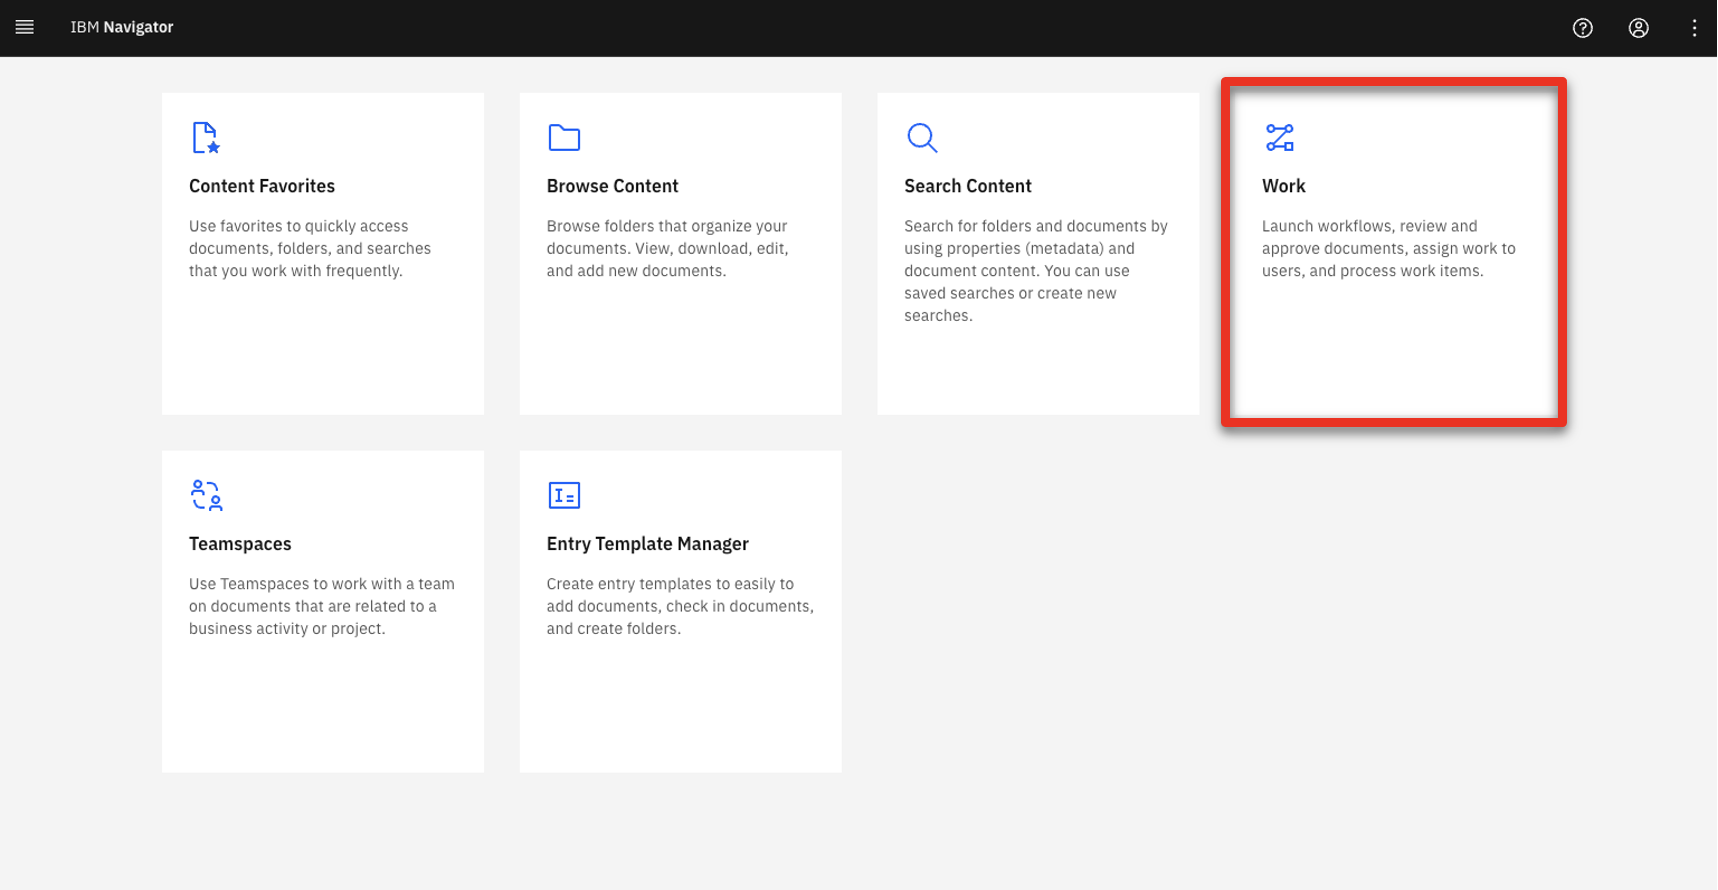 |
| Action 4.2.15 | Click Open. |
| Action 4.2.16 | Click the History tab. 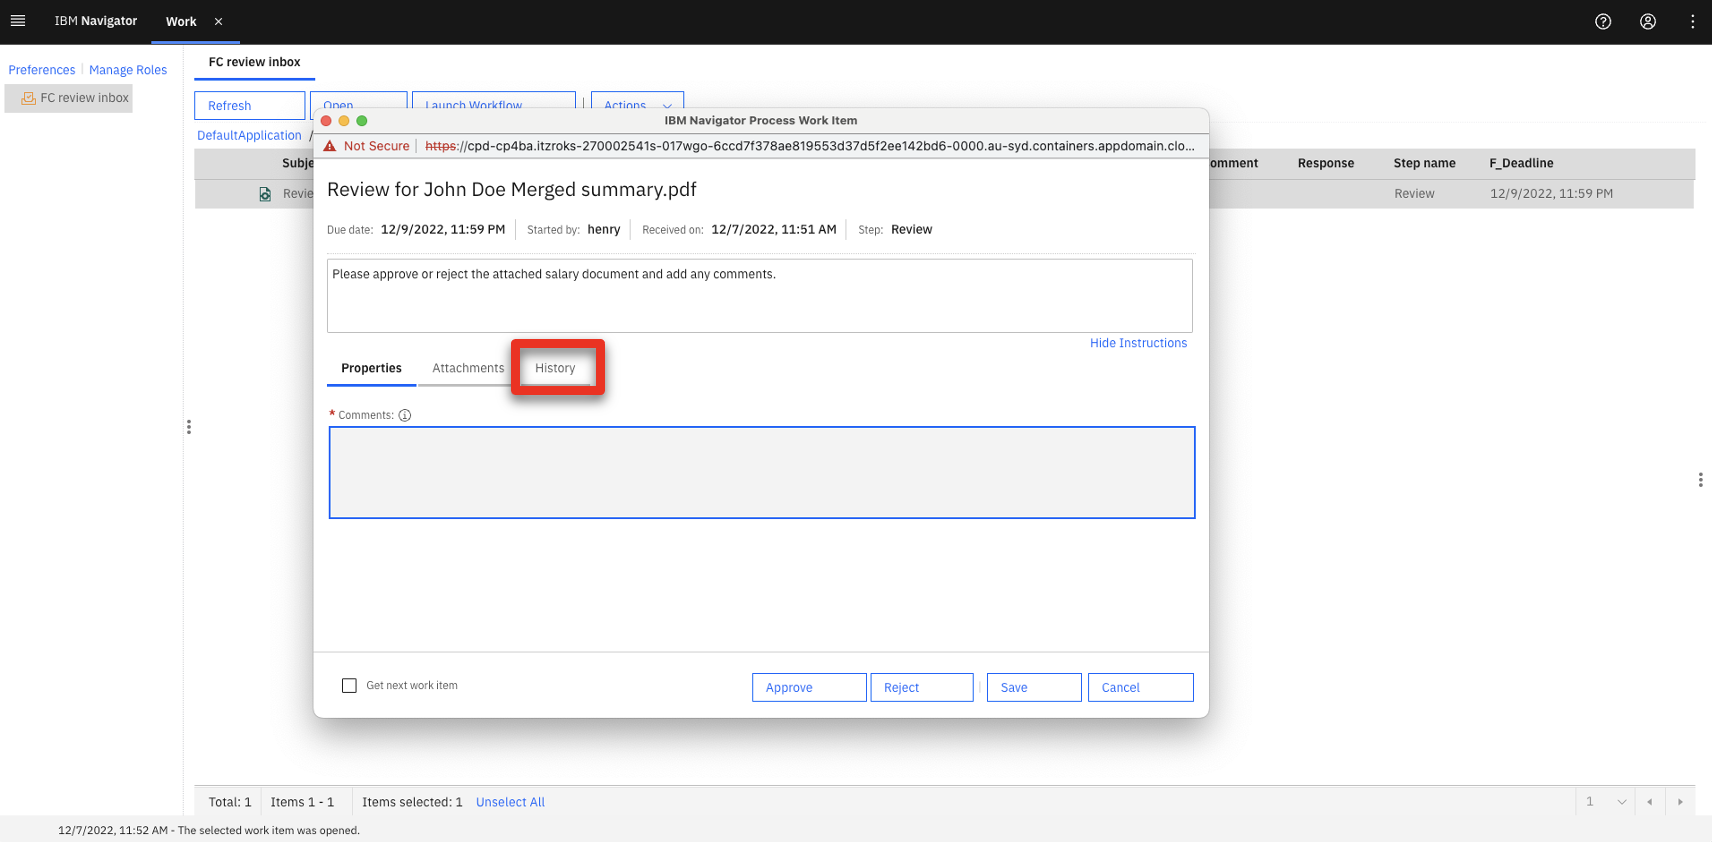 |
| Narration | The payroll manager sees that the hiring manager has approved the salary. He reviews the pertinent documents. |
| Action 4.2.17 | Click the Attachments tab.  |
| Action 4.2.18 | Click the John Doe Merged summary.pdf.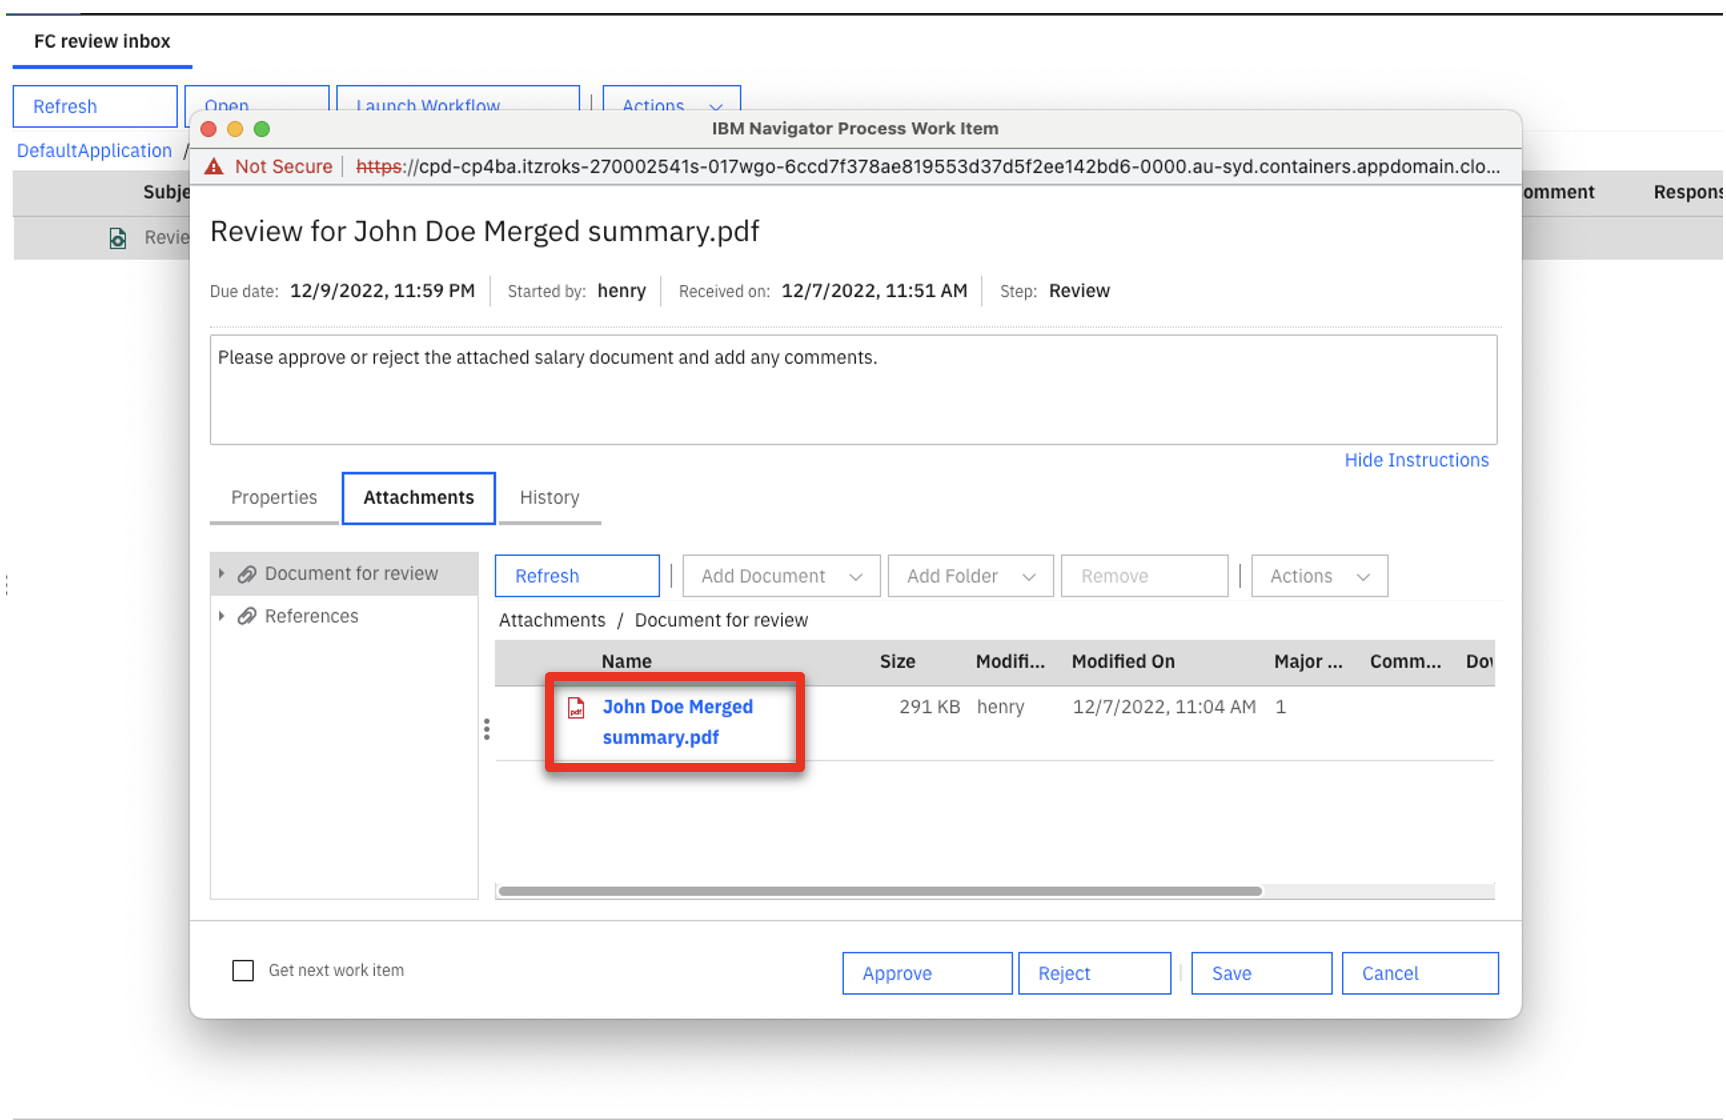 |
| Narration | The payroll manager adds his approval. |
| Action 4.2.19 | Scroll to the end of the document. Click the stamp icon (1) and select Approved user date (2). Click in the Payroll box (3) to add the stamp.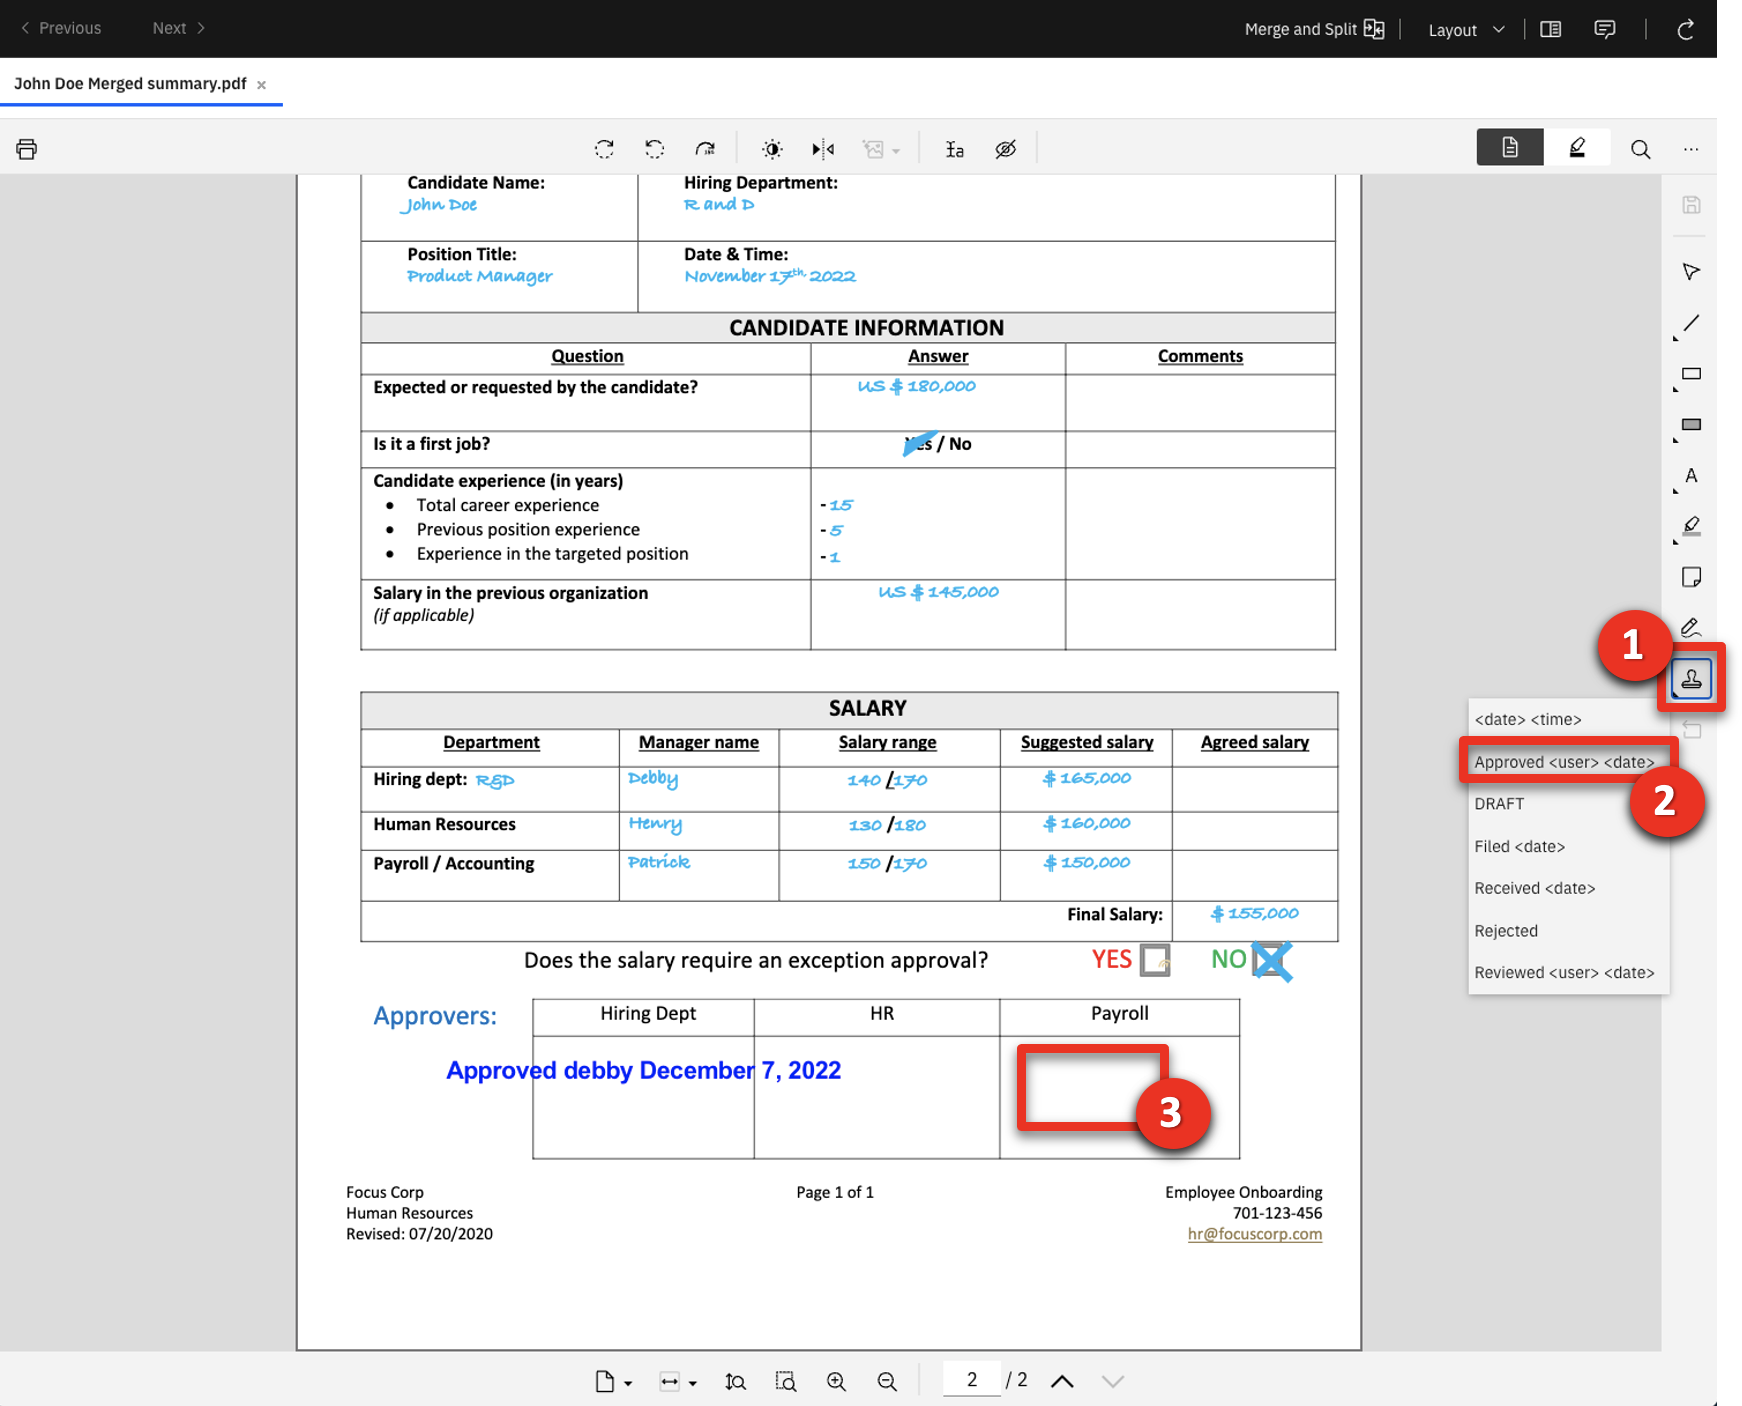 |
| Action 4.2.20 | Point out the payroll manager’s approval is added to the document.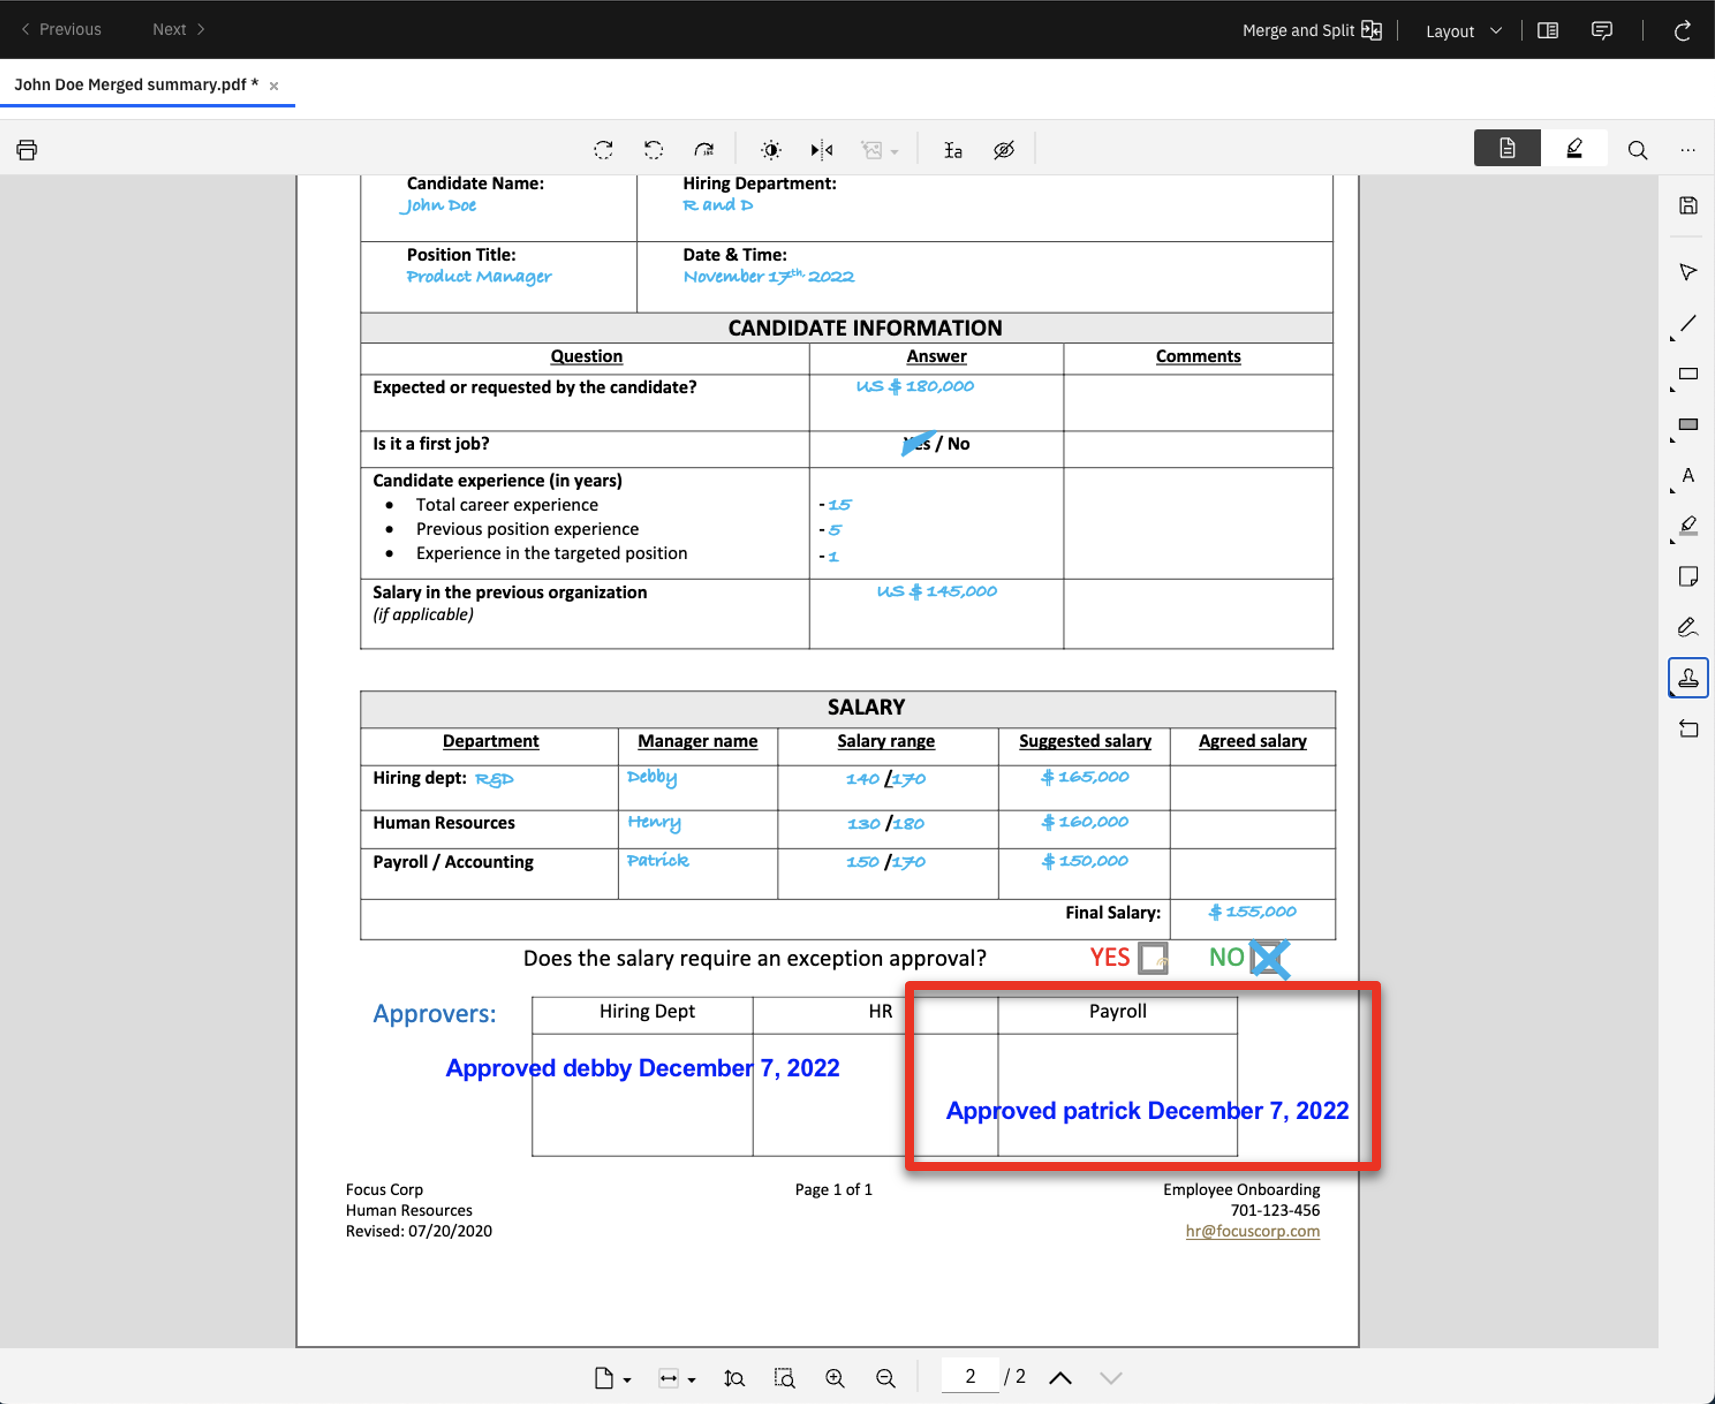 |
| Action 4.2.21 | Click the save icon.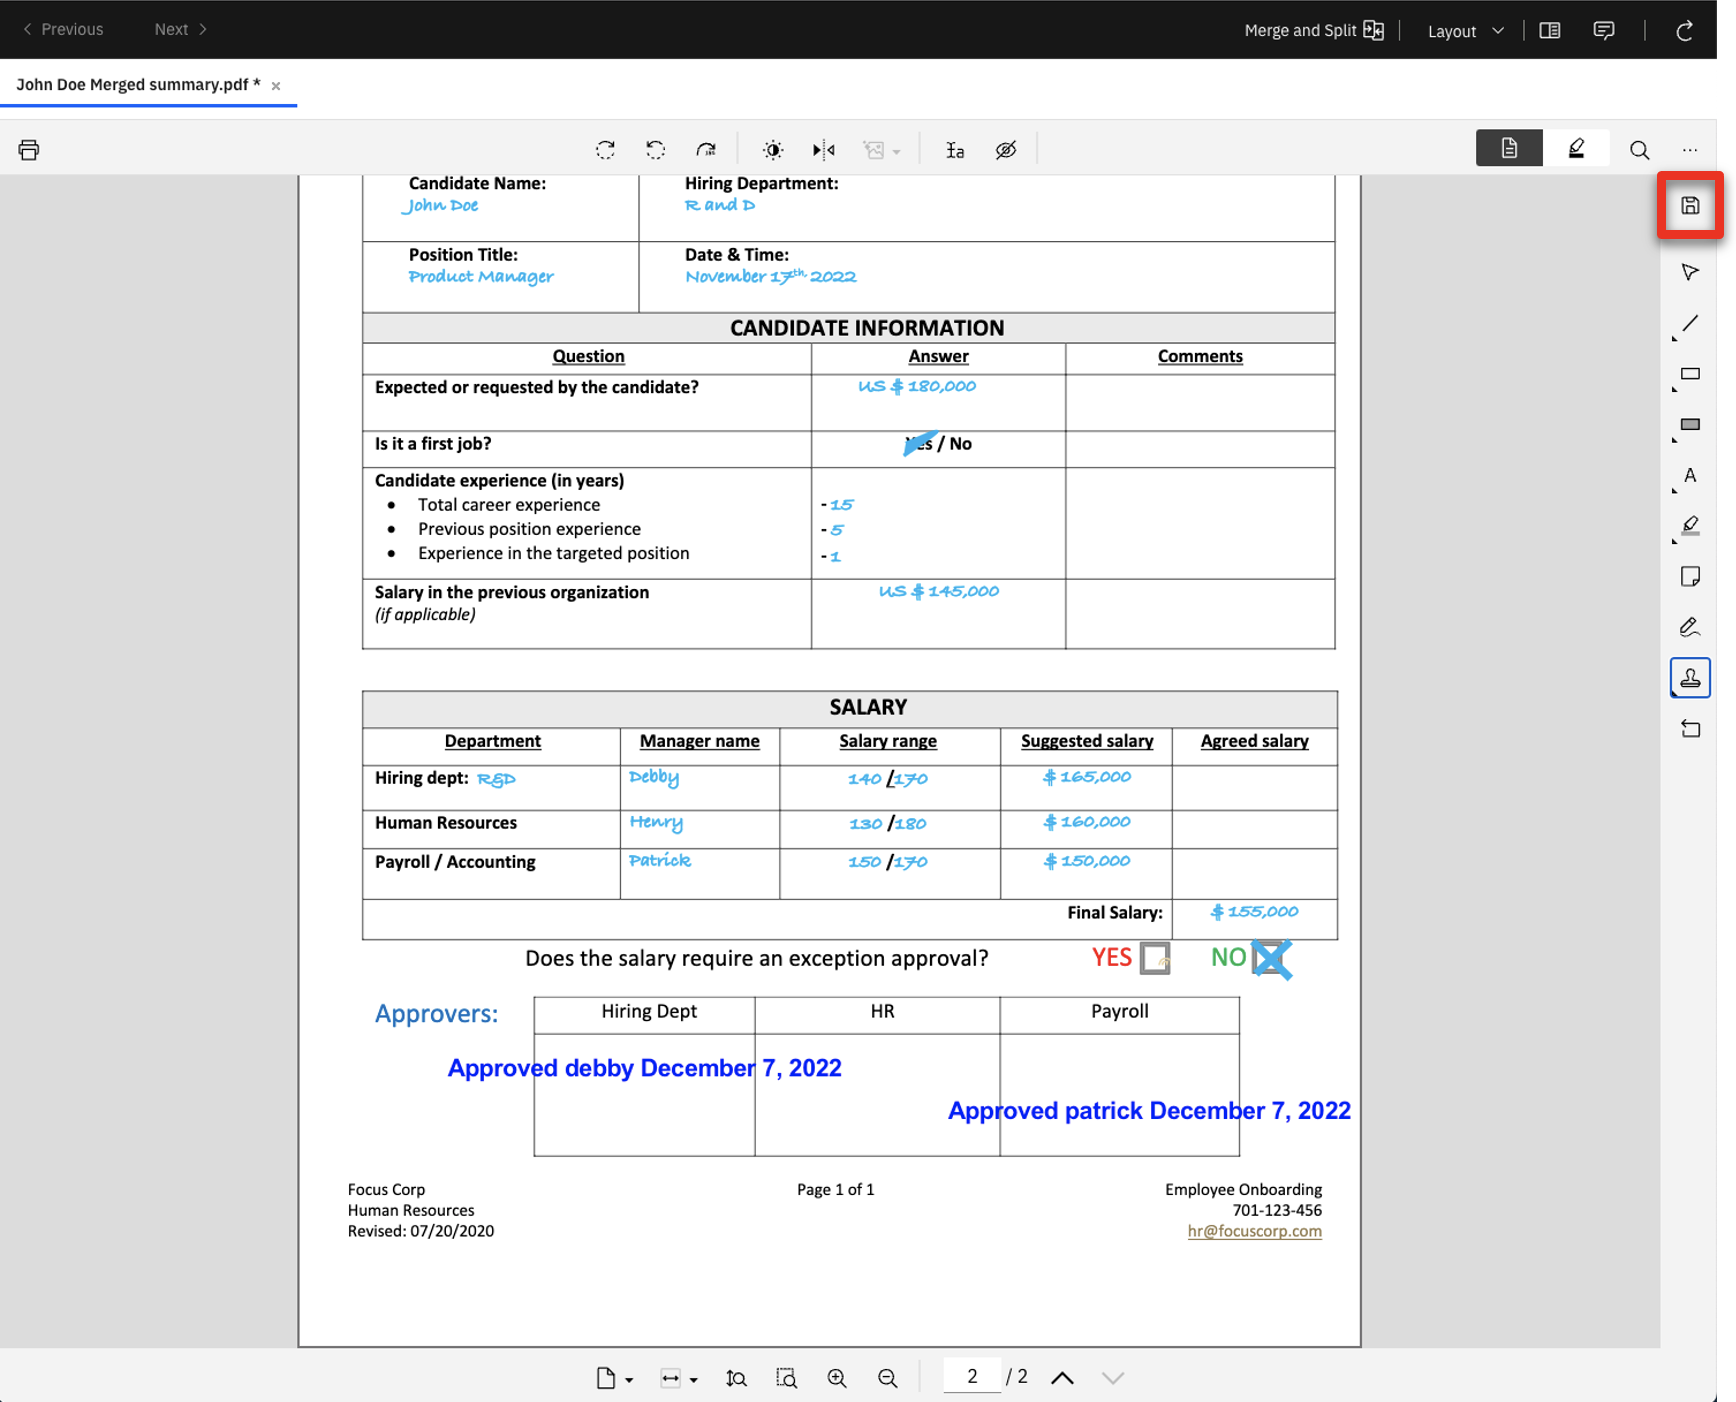 |
| Action 4.2.22 | Close the IBM Navigator Viewer. |
| Narration | The payroll manager adds his comments to the approval. |
| Action 4.2.23 | Click the Properties tab. 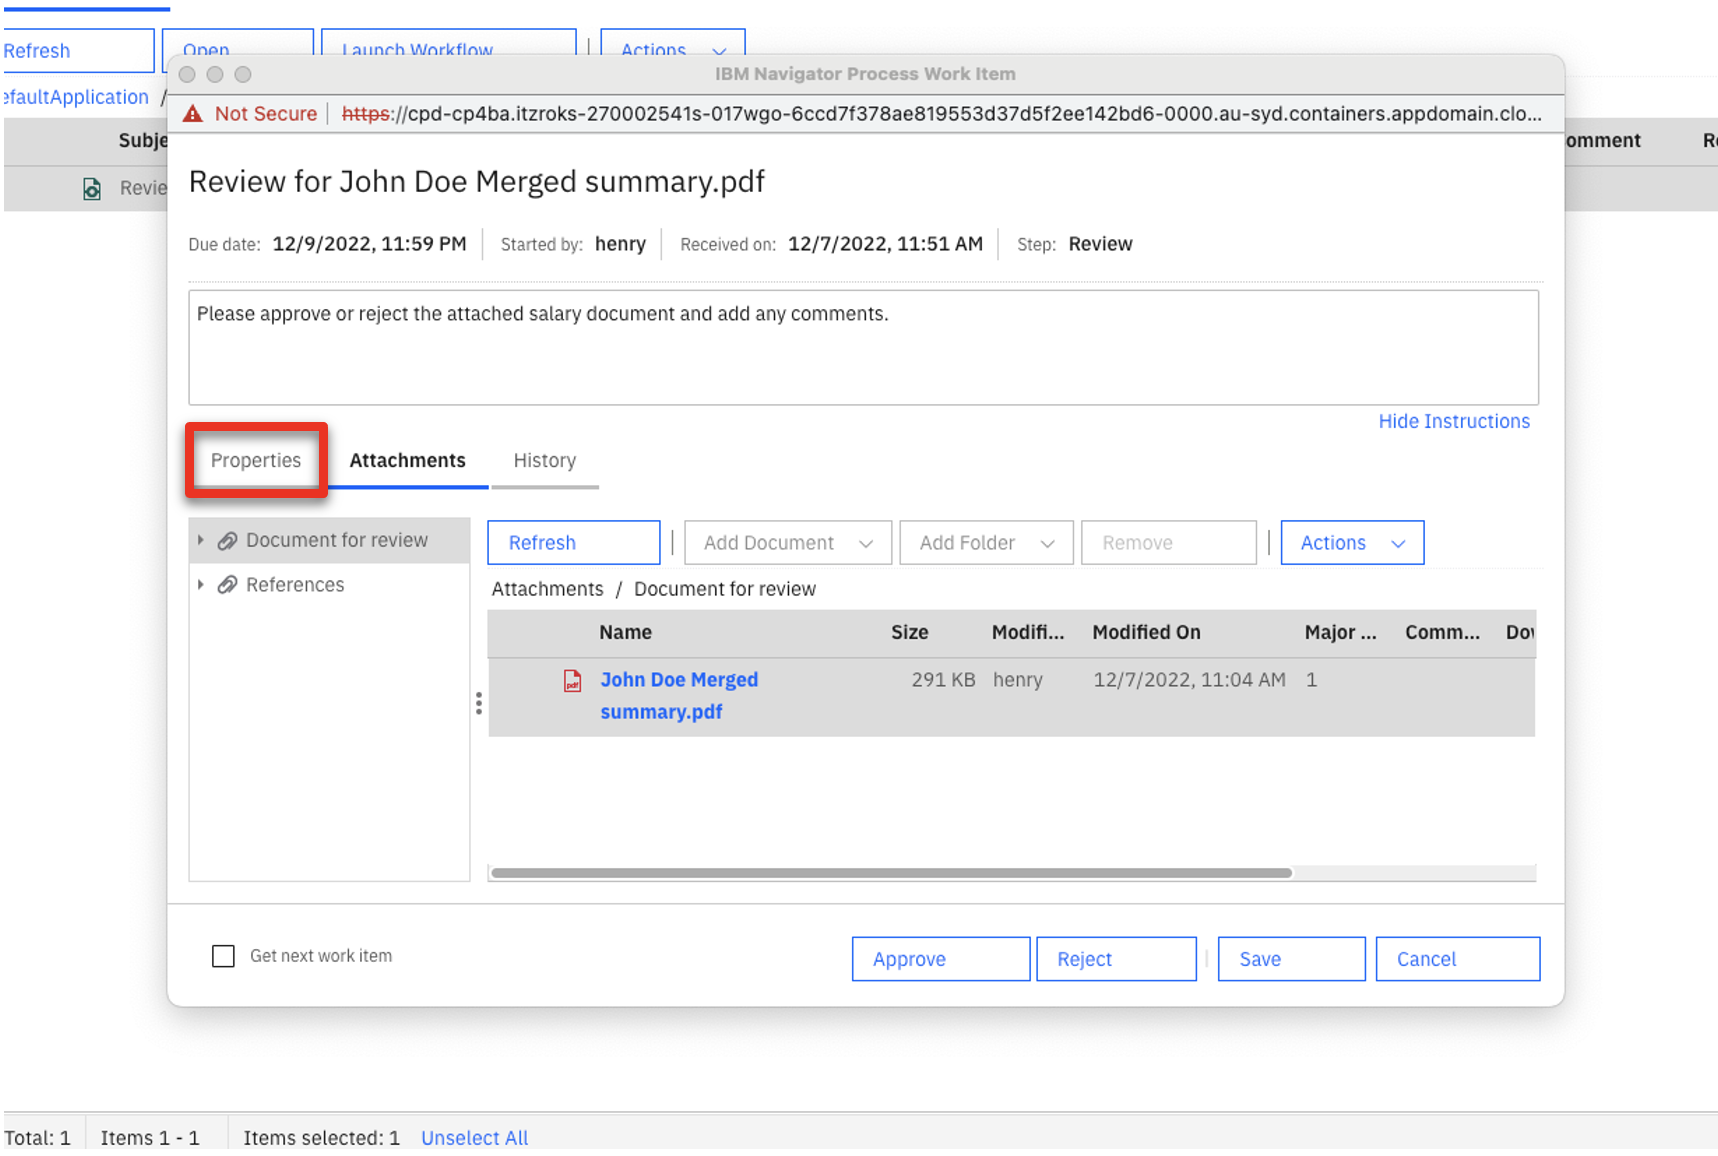 |
| Action 4.2.24 | Enter ‘Salary looks appropriate.’ in the Comments dialogue box (1). Click Approve (2). 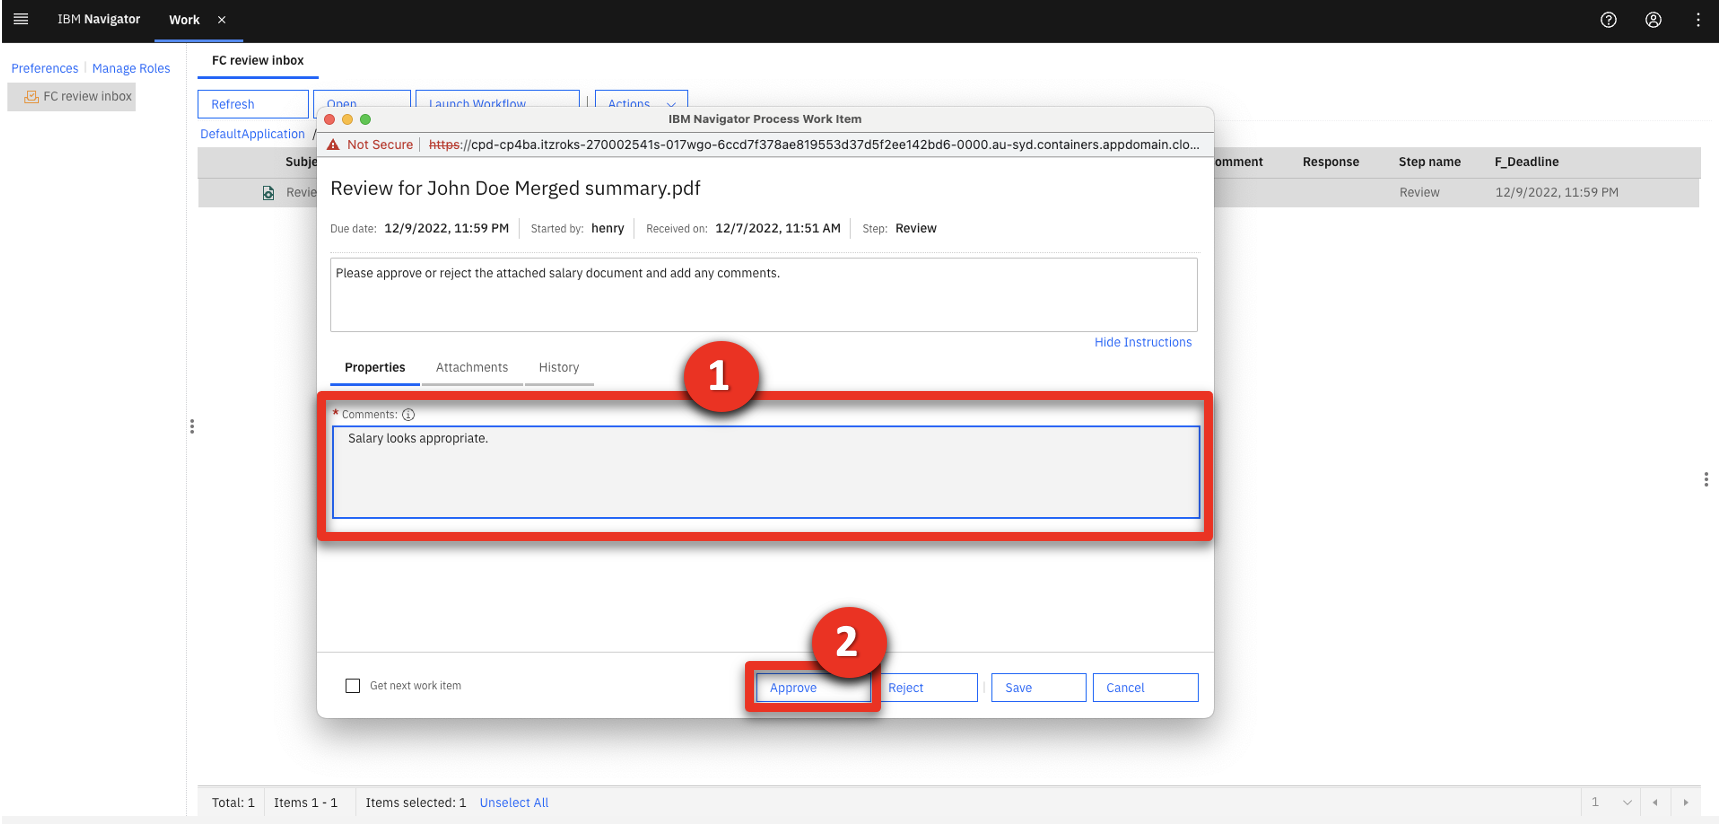 |
| Narration | A notification is automatically sent to the HR manager stating that the workflow tasks are complete. |
| Action 4.2.25 | Log out from IBM Navigator. |
| Narration | The notification to the HR manager indicates the salary has been approved. He logs in and reviews the hiring team’s comments. |
| Action 4.2.26 | Sign back in as the HR manager using Username: henry and Password: henry (1). Click Log in (2). 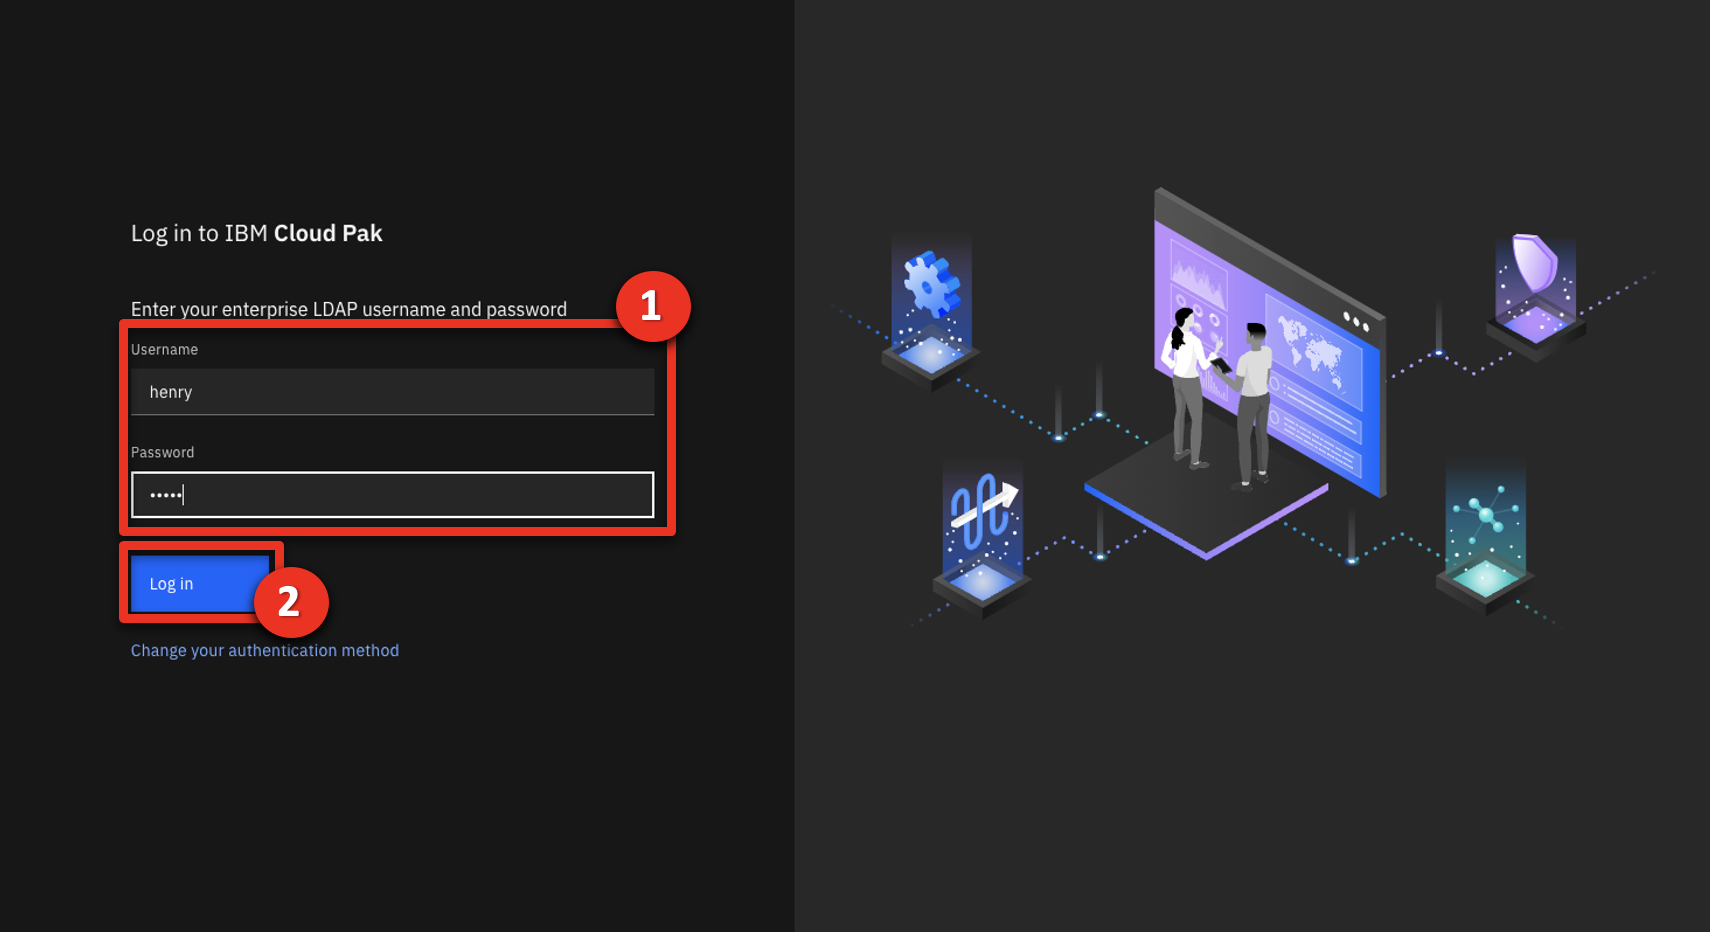 |
| Action 4.2.27 | Click Work.  |
| Action 4.2.28 | Click Open. 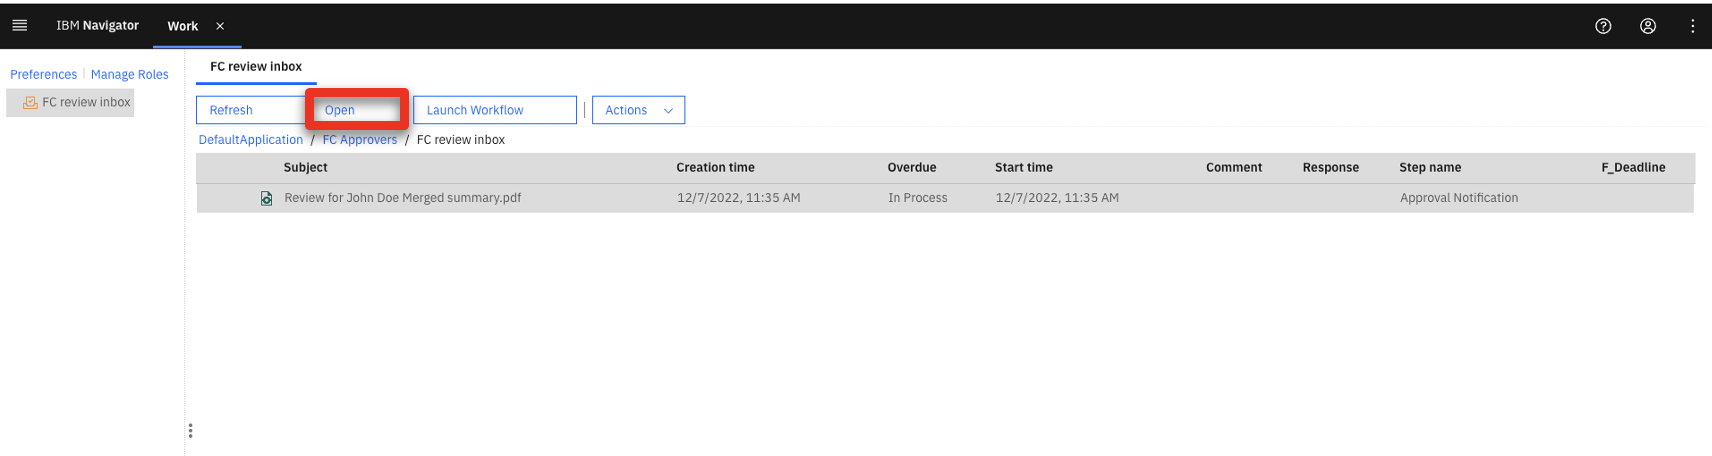 |
| Action 4.2.29 | Point out the sequential steps in the Summary tab (1) and the comments in the Comments column (2). Click Complete (2).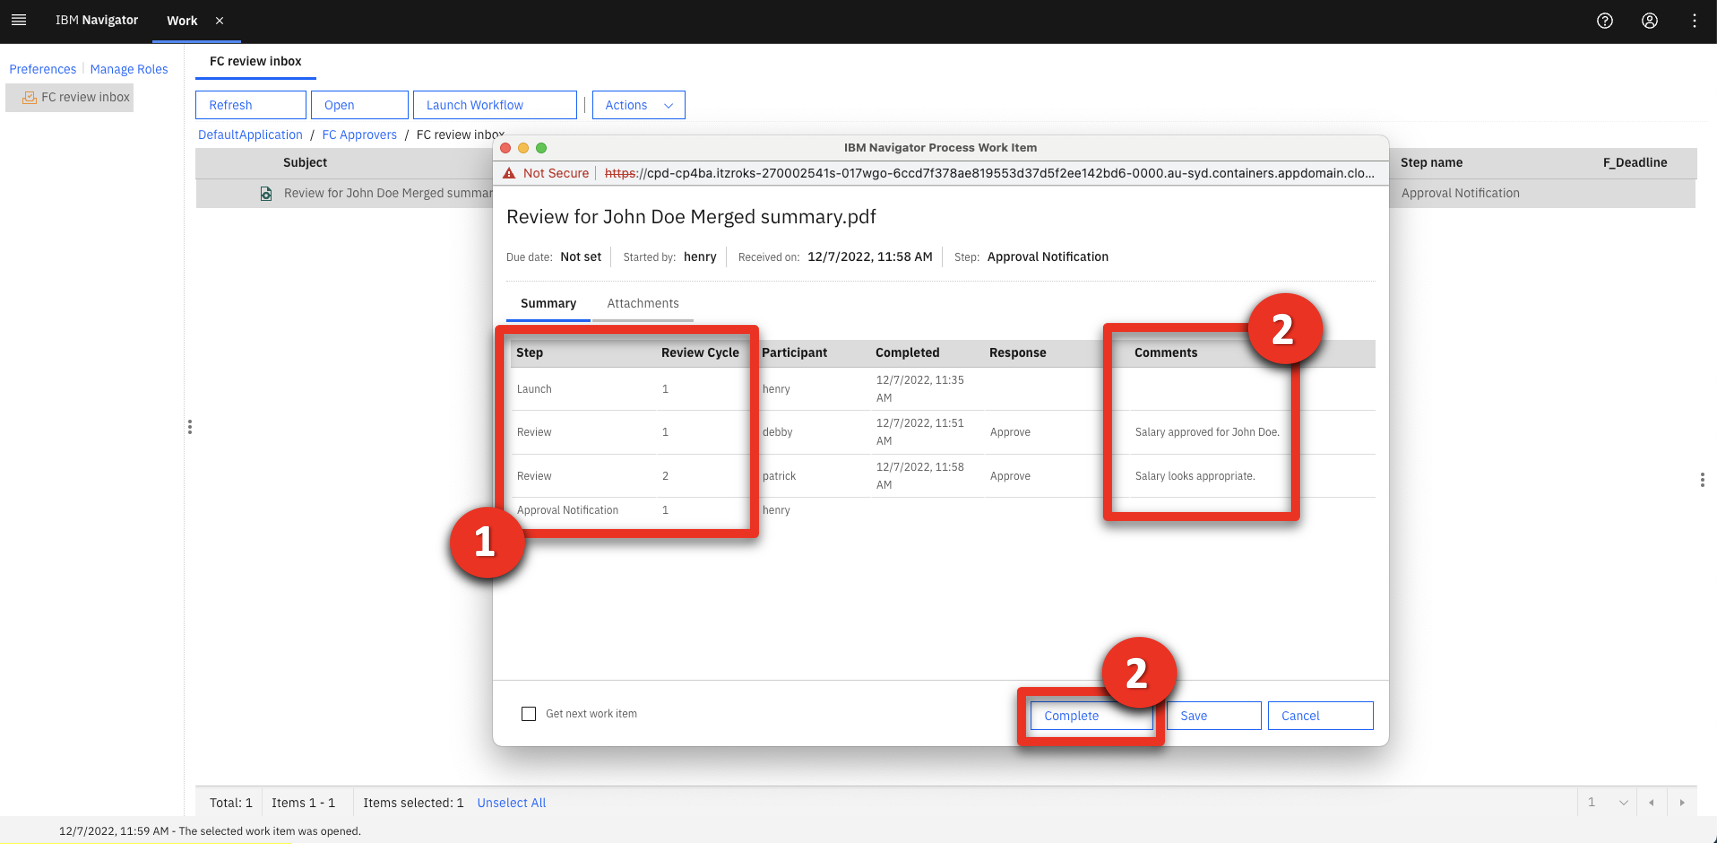 |
| Narration | The HR manager reviews the comments made by the hiring and payroll managers. He does not see any further actions needed from the hiring or payroll managers, so the salary approval workflow is complete. The company is ready to send an offer letter to the applicant. |
Summary
Today we saw how a company uses IBM’s enterprise content management platform to share and manage documents while maintaining security and adhering to regulations.
We used role-based capabilities to secure content by customizing document access. We used redaction to ensure compliance with privacy regulations. We saw how the platform’s integrated features, such as annotation, video bookmarking and document merging, helped make the team more productive.
IBM’s content management capabilities are used by our customers today to securely manage hundreds of thousands, or in some cases millions, of documents in their organizations.
Thank you for attending today’s presentation.