
| DEMO OVERVIEW | |
|---|---|
| Scenario overview | This demo shows how watsonx Orchestrate implements complex operations by combining individual skills together by using a skill flow. In this demo, you will create customized skills in watsonx Orchestrate and assemble them together to create a skill-flow that implements an upsell/cross-sell process to assist insurance sellers with their email marketing. |
| Demo products | watsonx Orchestrate |
| Demo capabilities | Automation builder, embedded decision engine; OpenAPI based skills. |
| Demo script | A complete demo script is on the second tab above. This demo script has multiple tasks that each have multiple steps. In each step, you have the details about what you need to do (Actions), what you can say while delivering this demo step (Narration), and what screenshots you will see. This demo script is a suggestion, and you are welcome to customize based in your sales opportunity. Most importantly, practice this demo in advance. If the demo seems easy for you to execute, the customer will focus on the content. If it seems difficult for you to execute, the customer will focus on your delivery. |
| Applicable learning plans and badges | This demo is used in the following learning plans: • watsonx Orchestrate Level 3 for Technical Sales IBM Use this demo as credit towards the watsonx Orchestrate Technical Sales Intermediate badge. |
| How to get support | • IBMers can use the #ba-techlcd-support Slack channel. • If you are a BP and require assistance, please open a support case at IBM Technology Zone Help. |
DEMO INSTALLATION AND SETUP
1 – Access the demo environment (IBMers)
Please note, this demo was removed from the L3 learning plan on the 17th January, 2025. The updated demo does not require builder access to a tenant. The onboarding process will remain active to enable completion of the previous release of the learning plan, but you will be contacted to confirm which version of the learning plan you are using.
After the 31st of January 2025 onboarding requests for this demo will only be processed in exceptional circumstances. Please unenroll from the learning plan to see the latest version. You may request access to the old demo by submitting a request here. You will be contacted to discuss your requirements.
Once you have received your onboarding email, use your IBM ID to log into your assigned tenant here.
2 – Access the demo environment (Business Partners)
Please note, this demo was removed from the L3 learning plan on the 17th January, 2025. The updated demo does not require builder access to a tenant. The onboarding process will remain active to enable completion of the previous release of the learning plan, but you will be contacted to confirm which version of the learning plan you are using.
After the 31st of January 2025 onboarding requests for this demo will only be processed in exceptional circumstances. You may request access to the old demo by submitting a request here. You will be contacted to discuss your requirements.
Once you have received your onboarding email, use your IBM ID to log into your assigned tenant here.
3 – Prepare the demo files
3.1 – macOS: prepare the decision model archive file
This demo uses a decision model and skills based on OpenAPI specifications. As the demo is performed on a shared tenant, you must import your own copied of the decision model and API’s that are required to complete it.
- Download the decision model file: L3_Upsell_Master.zip.
- Open a Terminal window at the download location.
- Enter the following command to unzip the decision model, this creates a directory called L3_Upsell_Master:
unzip L3_Upsell_Master.zip - Rename the top-level directory adding your initials combined with today’s date to ensure that your project name is unique as shown in this example:
mv L3_Upsell L3_Upsell_XXddmmyy
- Compress your renamed folder using the following command as an example.
zip -r L3_Upsell_XXddmmyy.zip L3_Upsell_XXddmmyy
3.2 – Windows: prepare the decision model archive file
Windows does not include a built-in utility for working with zip files. The examples below use 7-Zip, which is a free, open-source utility. Download and install 7-Zip, then add the executable (7z.exe) to your path so it can be used from a command prompt.
- Download the decision model file: L3_Upsell_Master.zip.
- Open a Command Prompt at the download location.
- Enter the following command to unzip the decision model, this creates a directory called L3_Upsell_Master
7z x L3_Upsell_Master.zip - Rename the top-level directory adding your initials combined with today’s date to ensure that your project name is unique as shown in this example:
ren L3_Upsell L3_Upsell_XXddmmyy - Compress your renamed folder using the following command as an example:
7z a -r L3_Upsell_XXddmmyy.zip L3_Upsell_XXddmmyy
3.3 – Prepare OpenAPI files
The OpenAPI file must be updated before it can be used to import a new skill because watsonx Orchestrate uses attributes from the OpenAPI file as the unique ID for the skill. Since other users have already imported the skill from the OpenAPI file, changes must be made to ensure uniqueness and prevent errors.
Use a code editor (Microsoft VSCode is recommended) to edit the OpenAPI file by performing the following steps:
- Download the OpenAPI file: L3_OpenAPI.yml and open it in your editor.
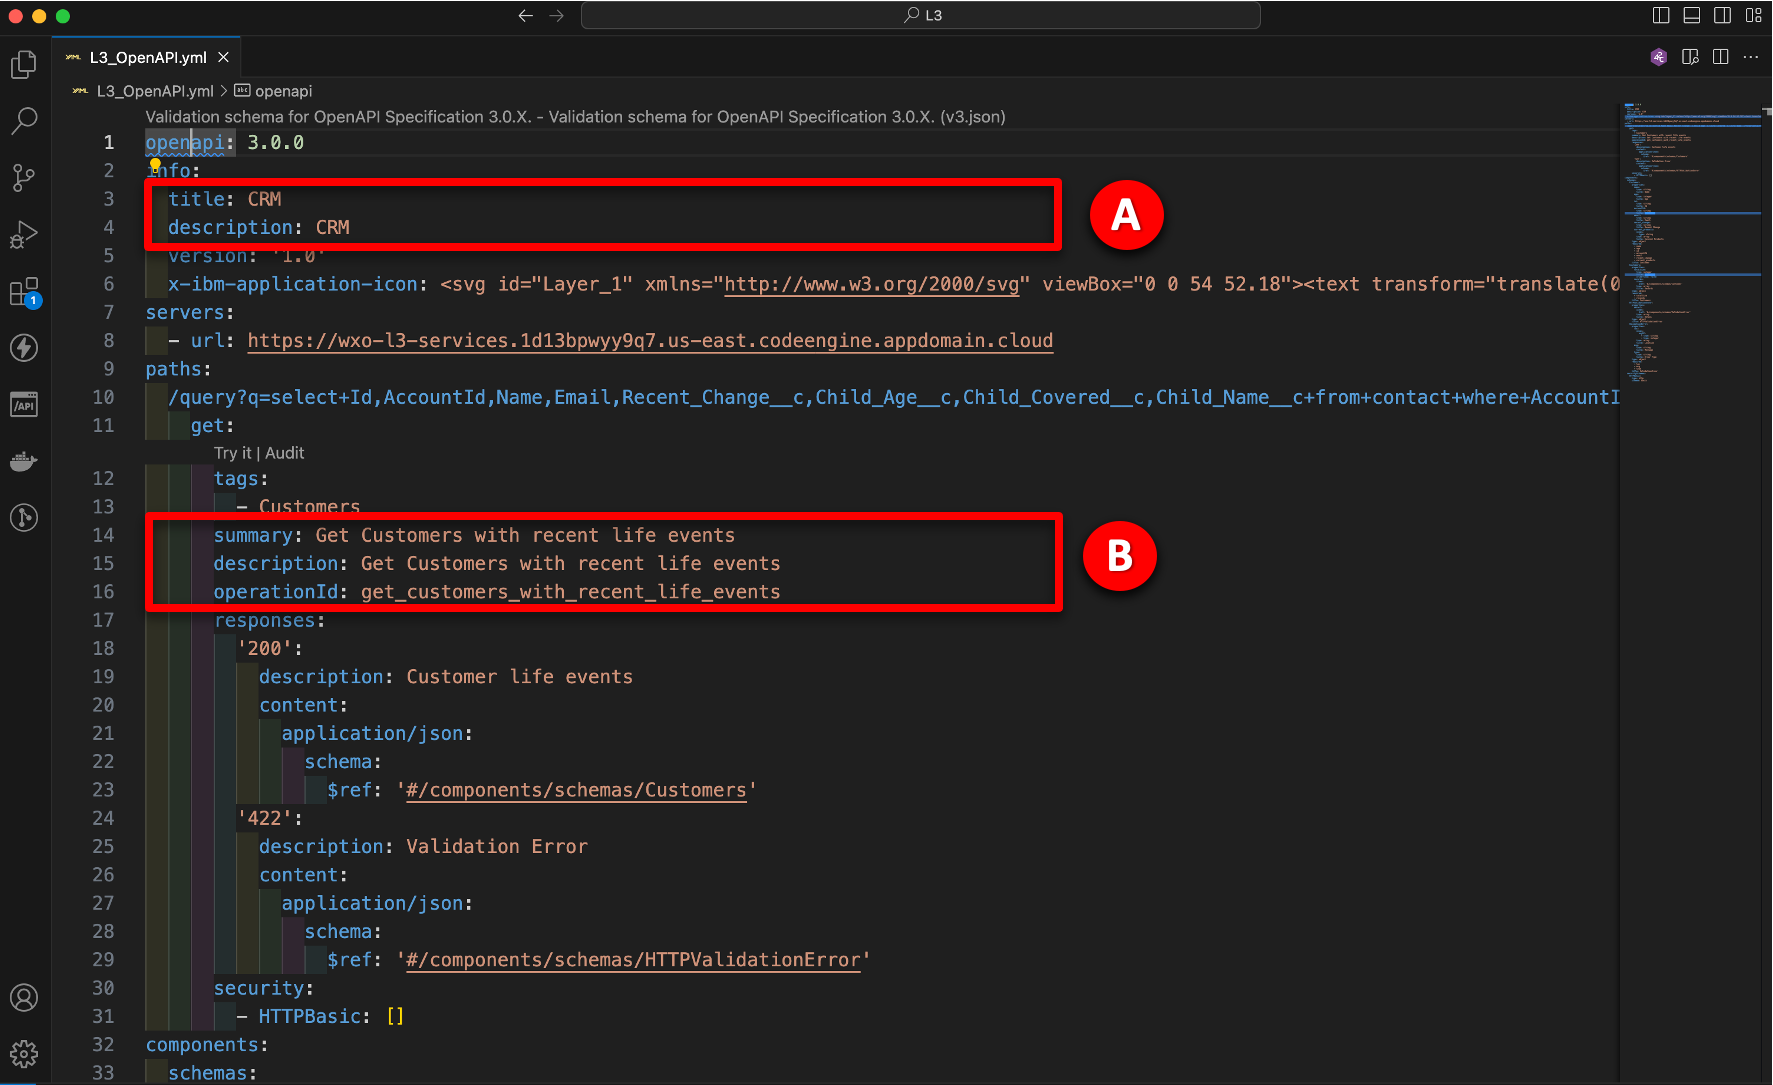
- In a multi-user environment, unique values for the API attributes must be provided. There are five attributes in two groups that must be updated: title and description in the info section (A) and description, summary and operationId in the paths section (B).
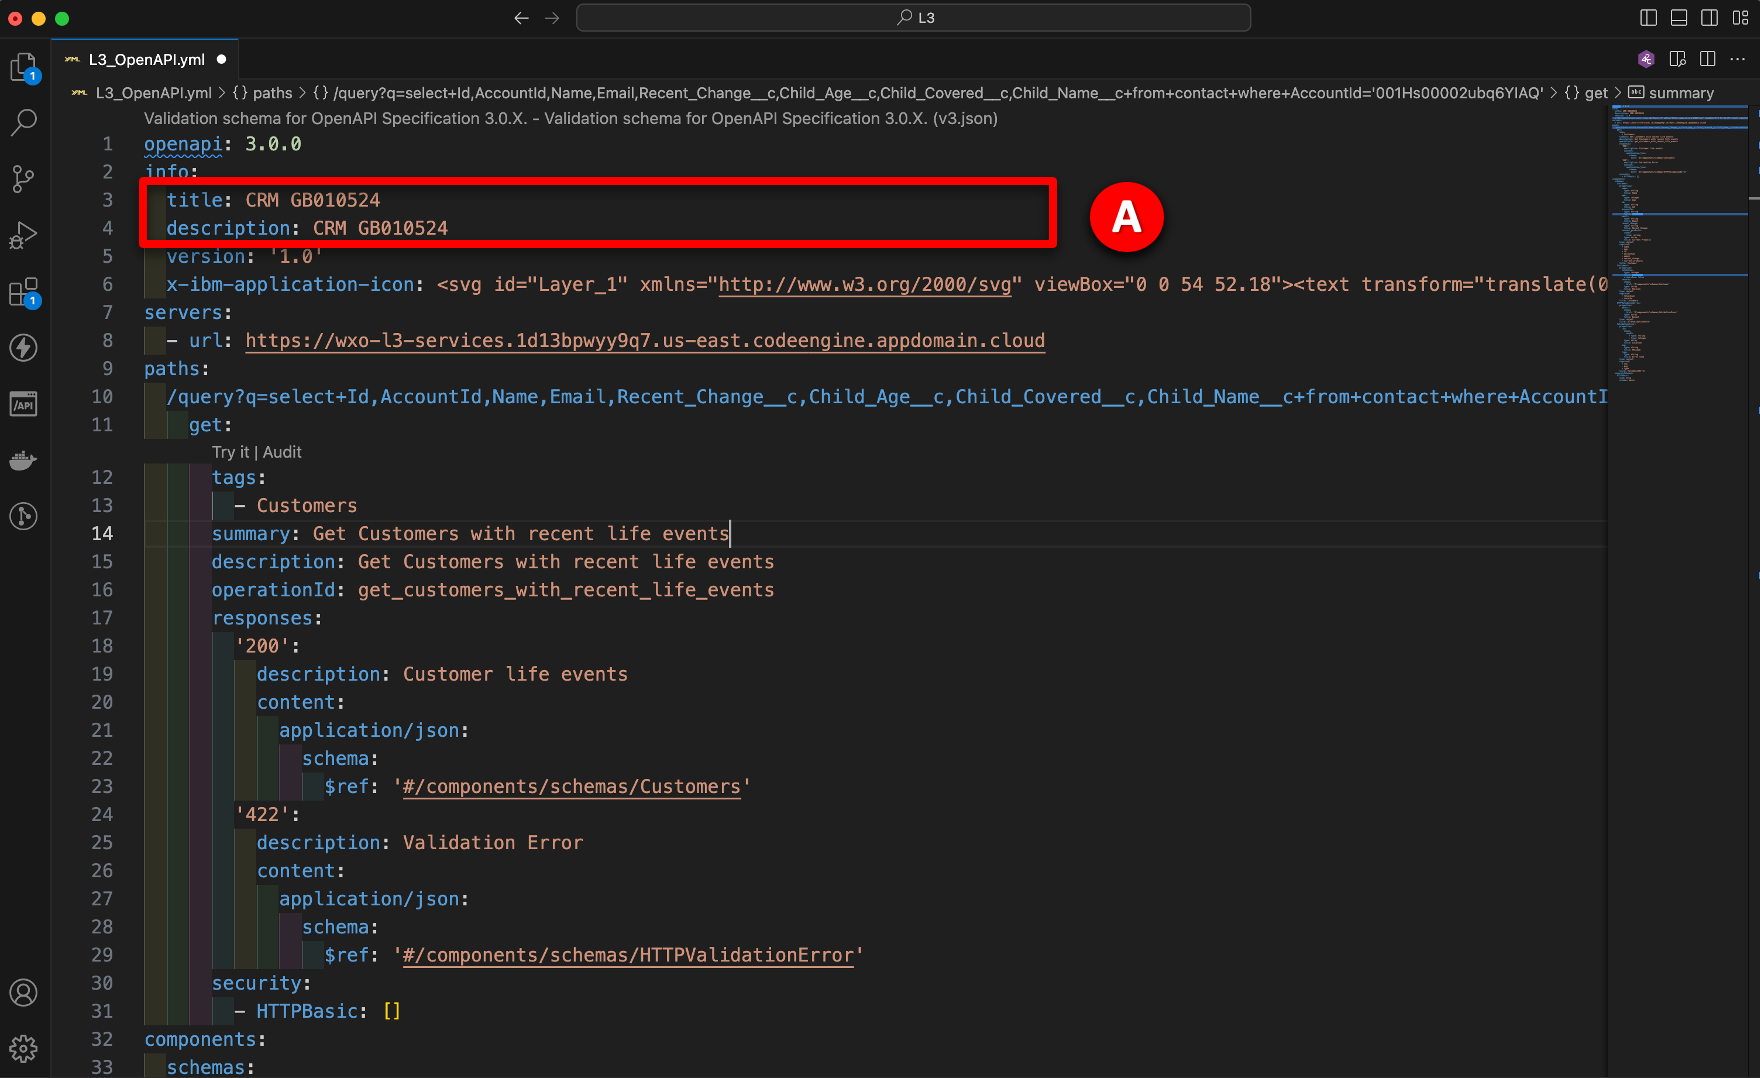
- Modify the title and description on lines 3 and 4 (A) by appending your initials and date as shown in the image below. In this example “GB010524” was used, but create your own reference based on your initial and today’s date. Take note of whatever reference you add, you will need it to use it to filter catalog search results later in the demonstration.
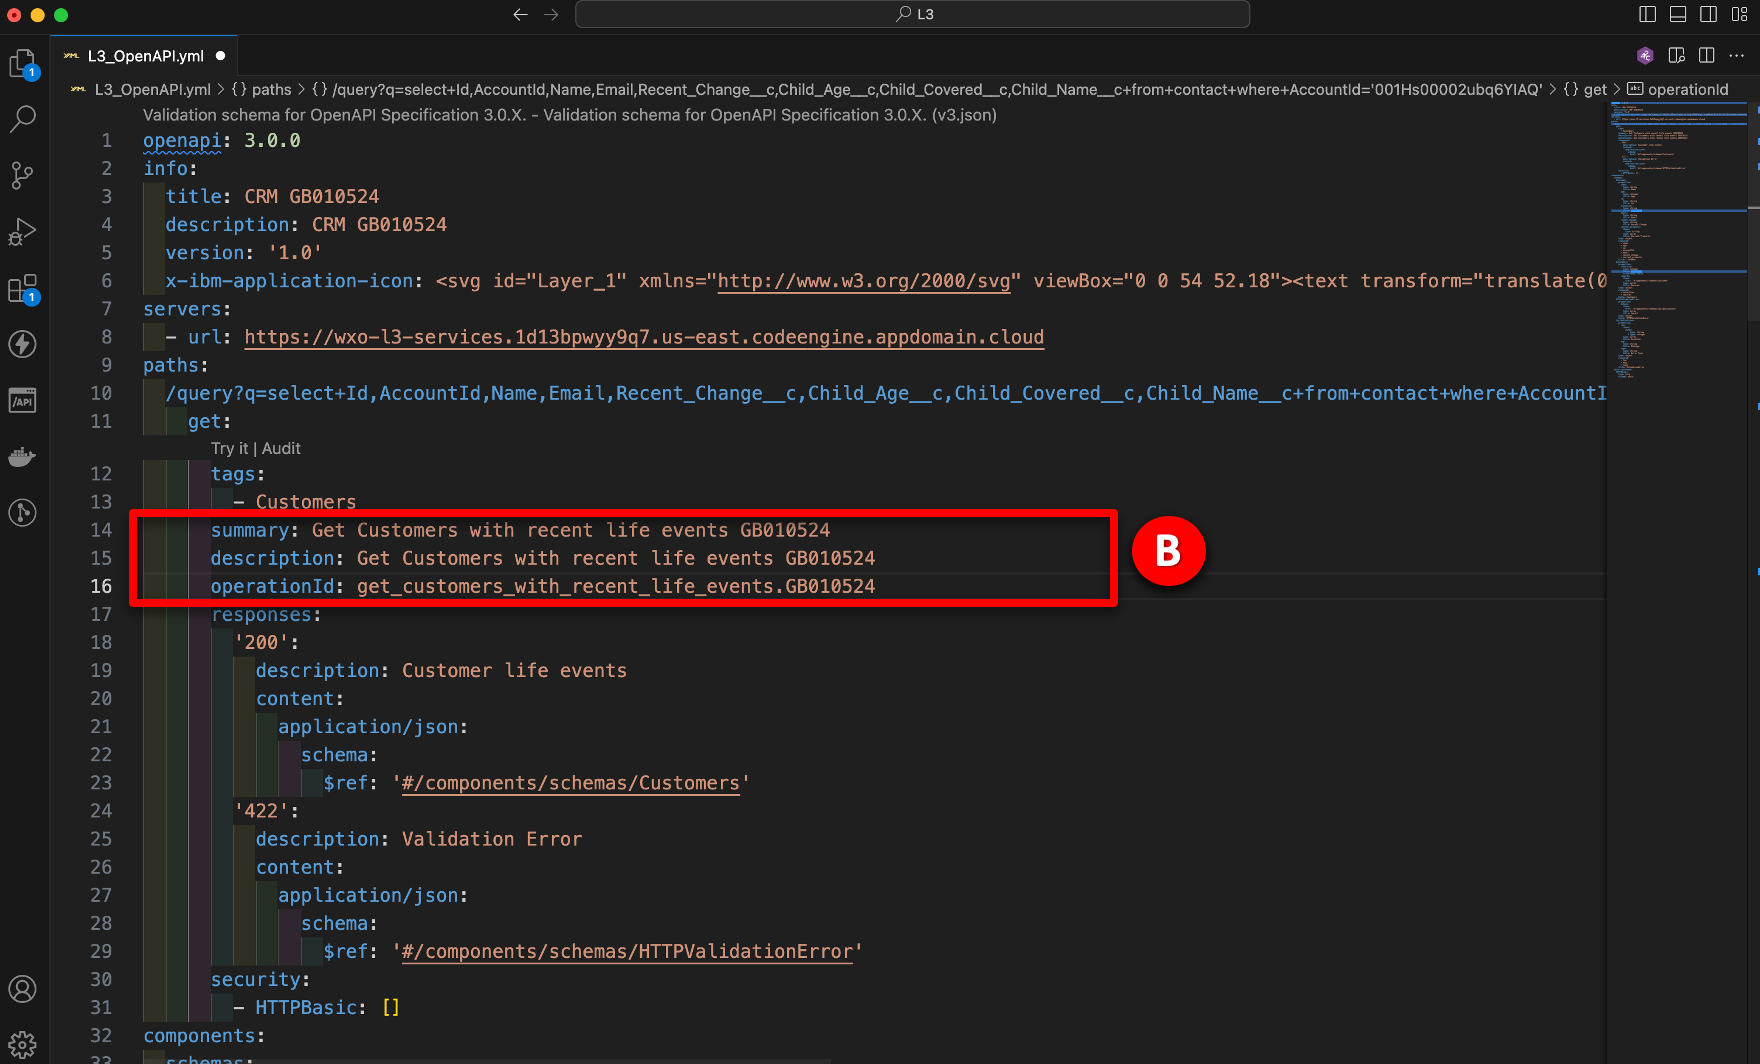
- Modify the summary, description and operationId fields on lines 14, 15 and 16 (B). For the summary and description fields, append your initials and date as shown. The operationId field cannot contain a space, so instead add a period (.) followed by your initials and date.
- Save the updated file.
4 – Import the decision model
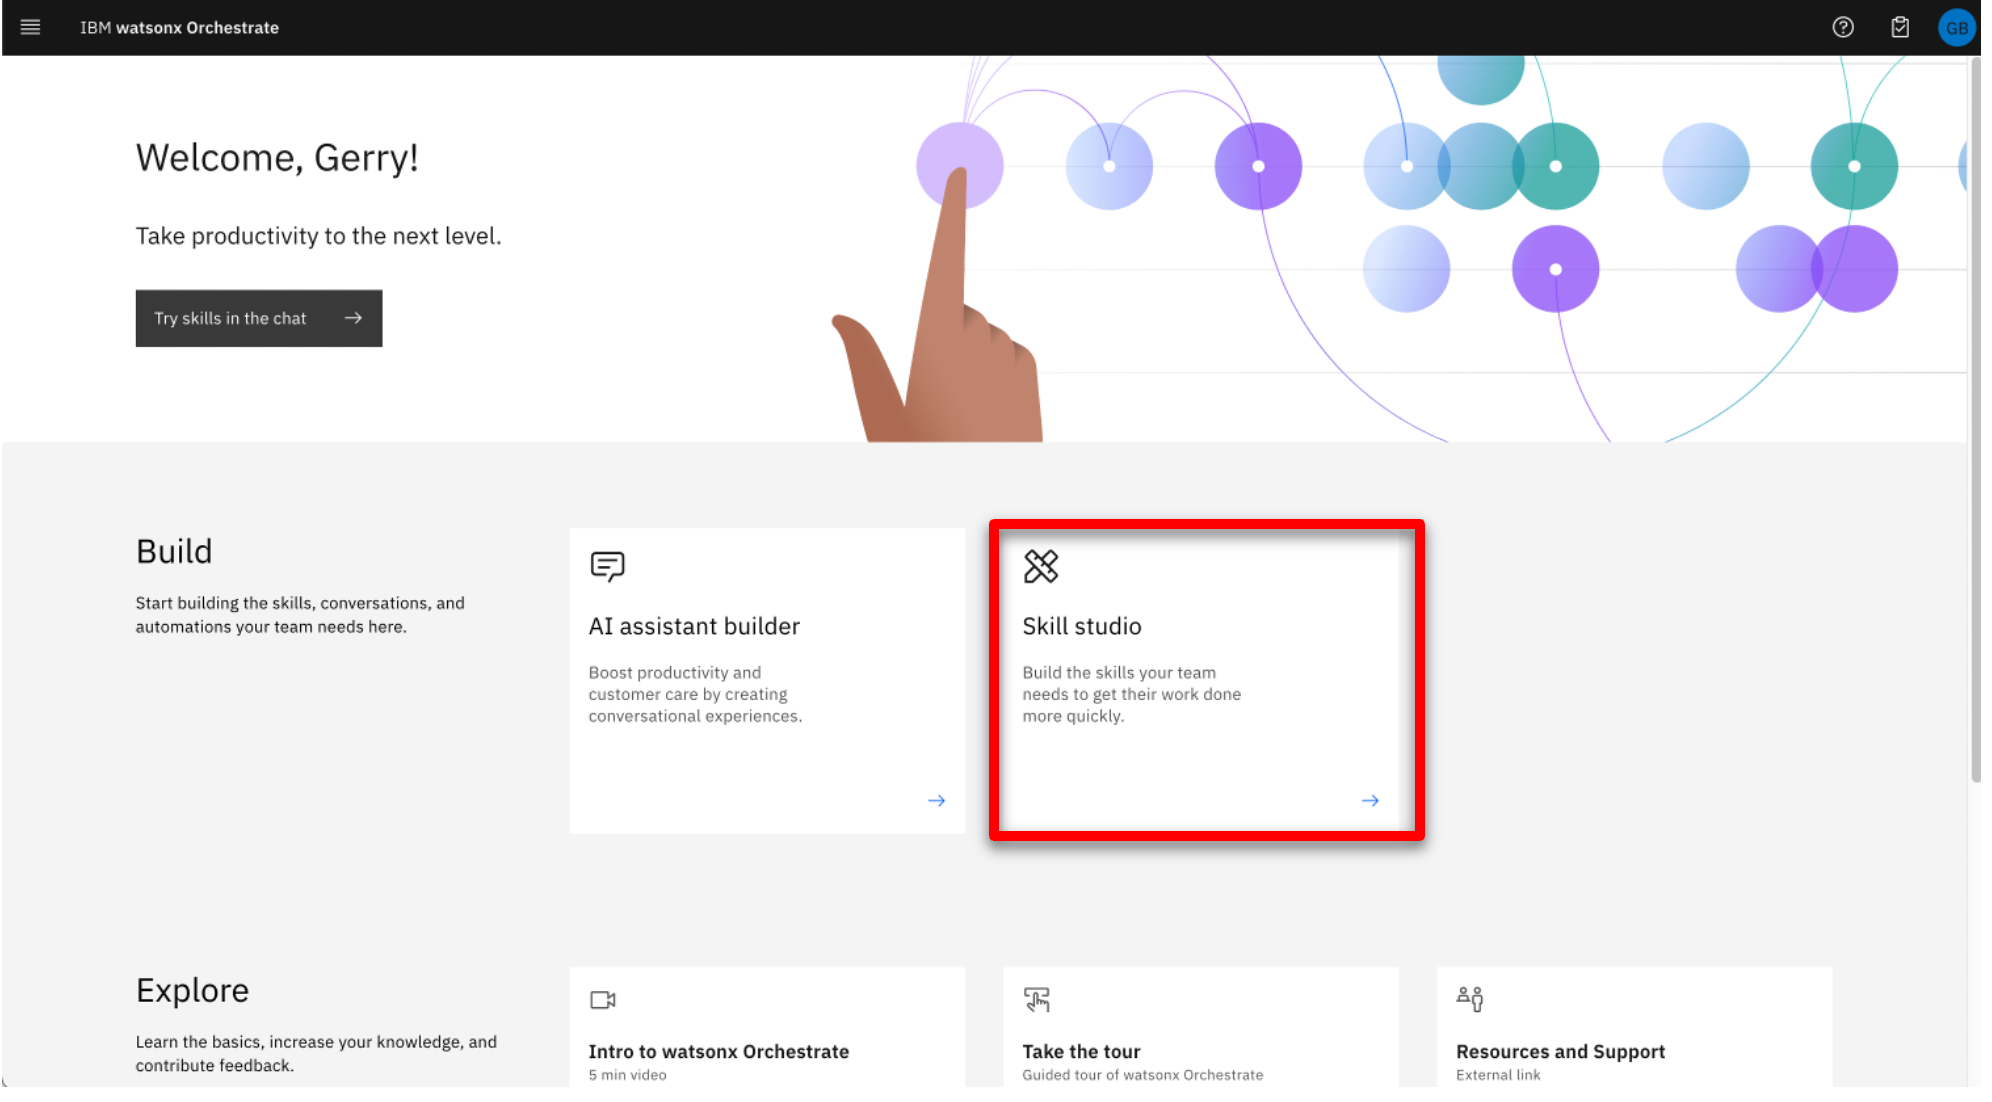
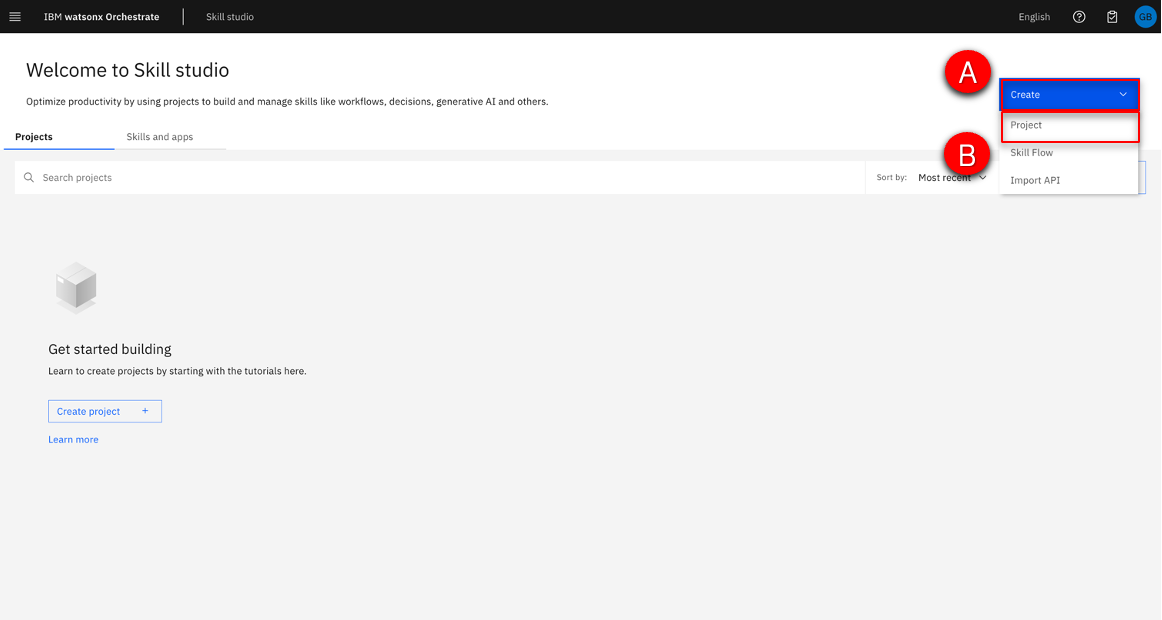
- From the watsonx Orchestrate home page click the Skill studio tile.
- Click Create (A) then click Project (B).
- Perform the following steps:
A. Select Import project,
B. Click Browse.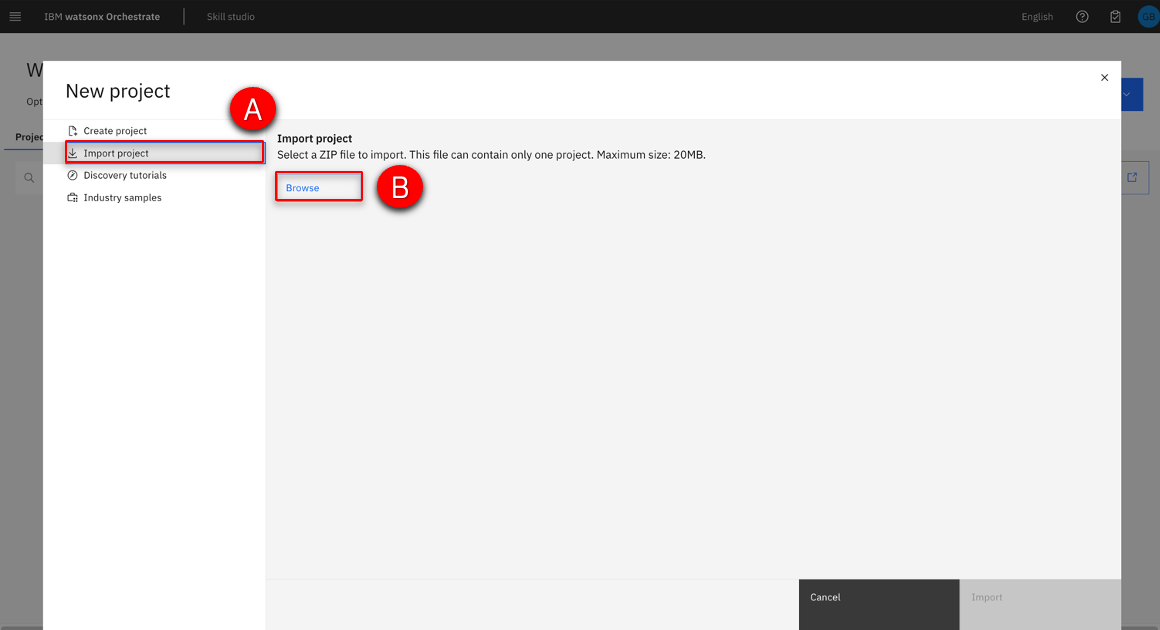
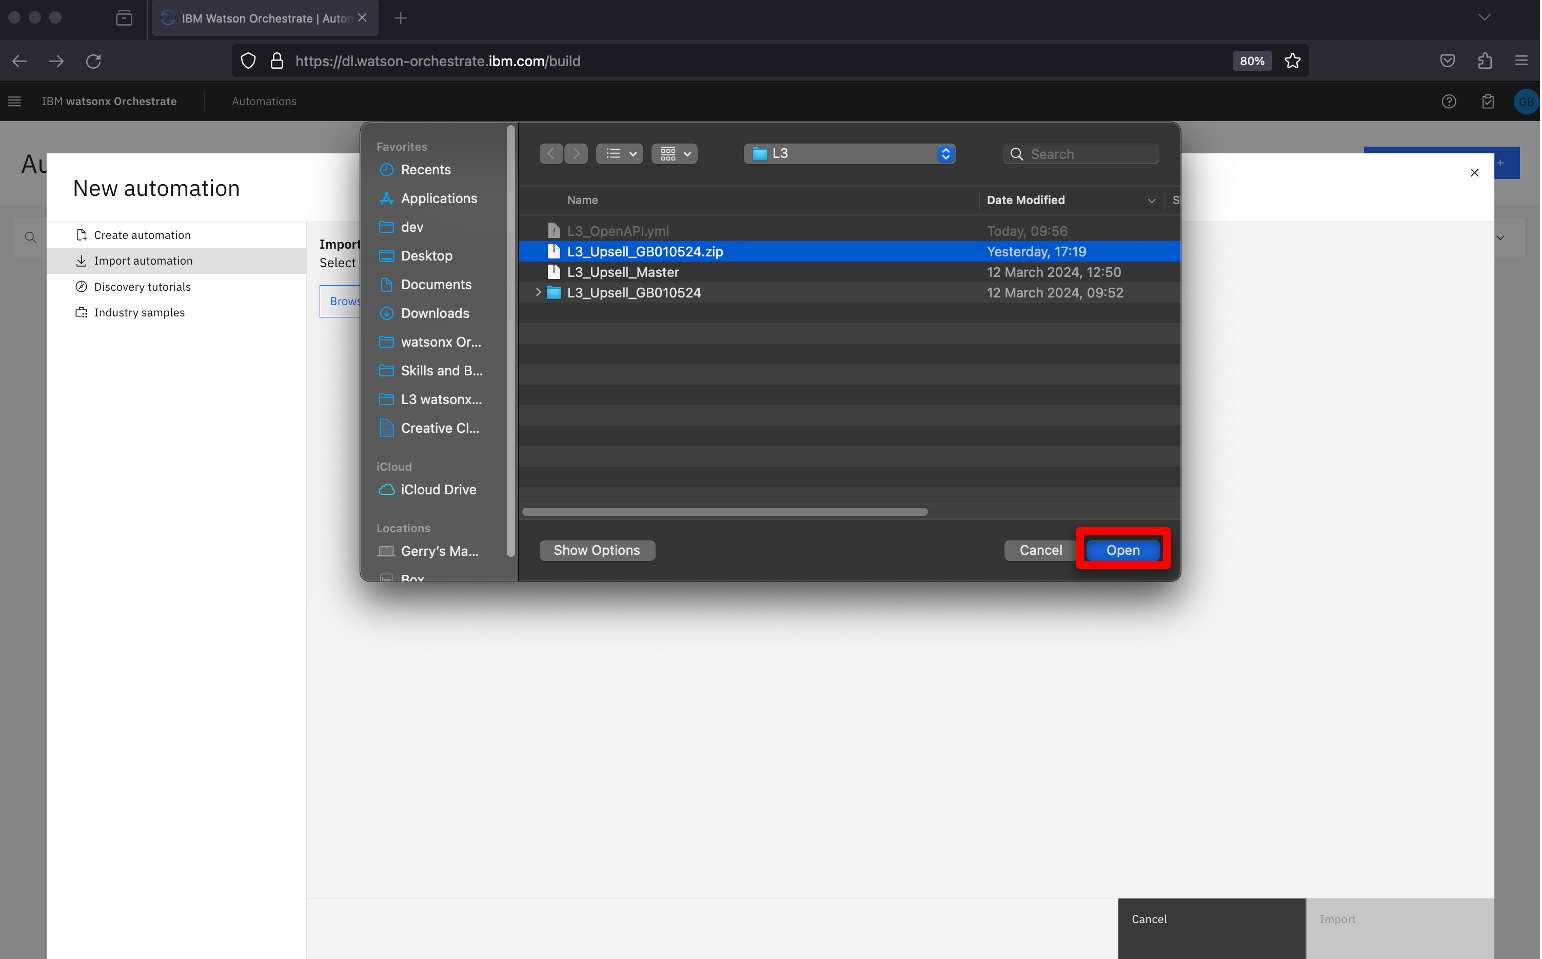
- Use the file browser to select the zip file L3_Upsell_XXddmmyy.zip that you created earlier and click Open.
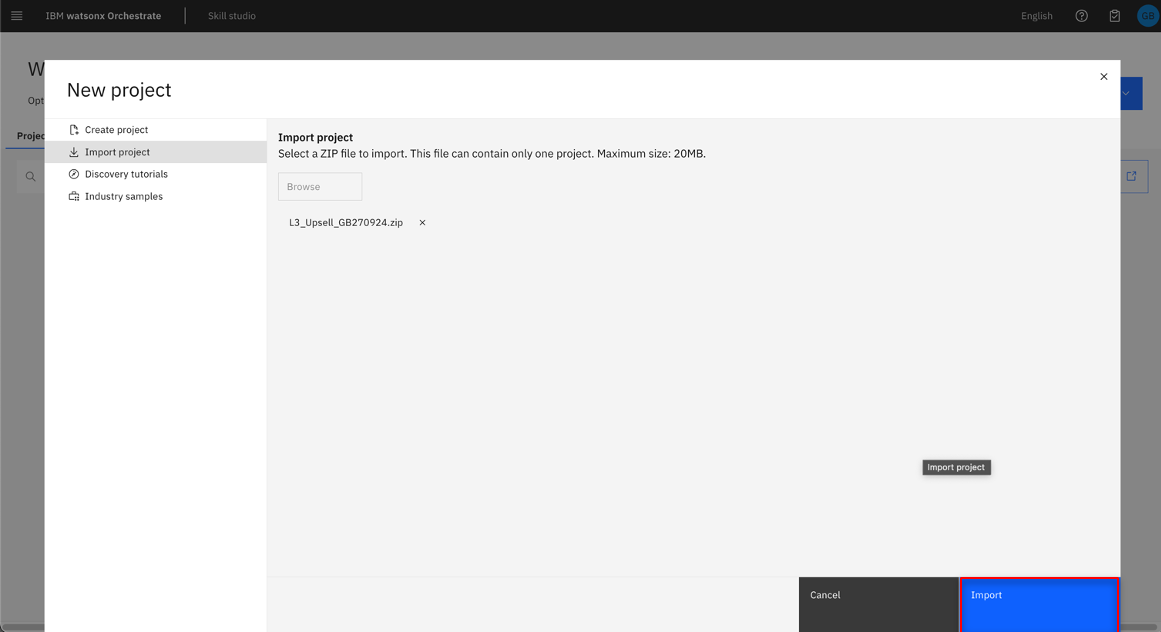
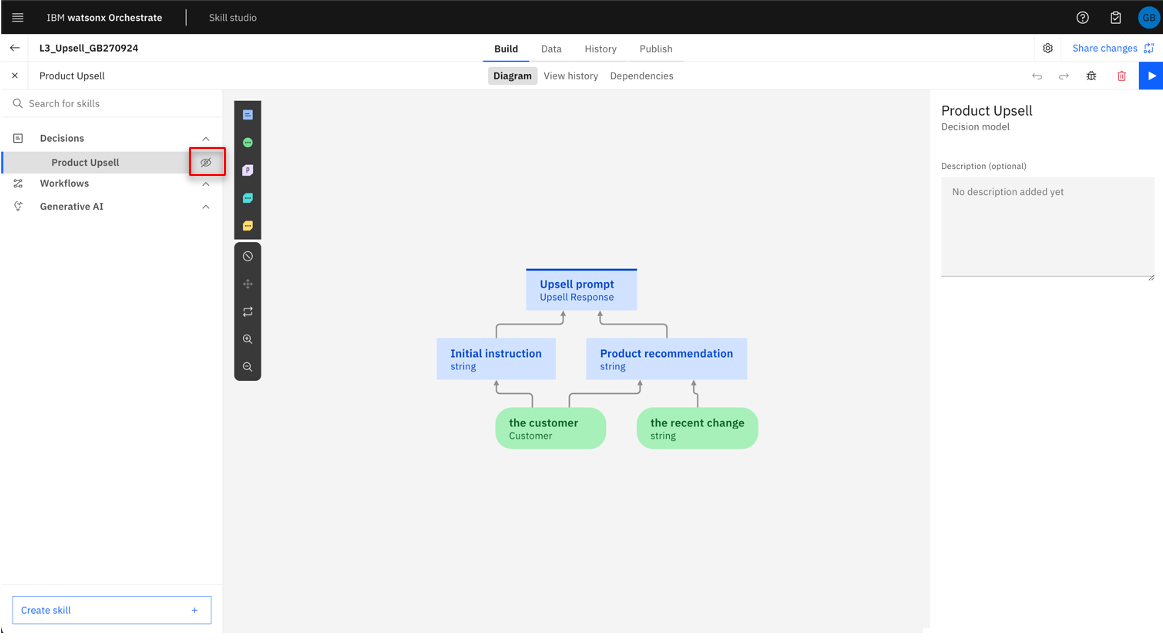
- Click Import to open the decision model.
- Click the eye icon to make the Product Upsell skill visible.
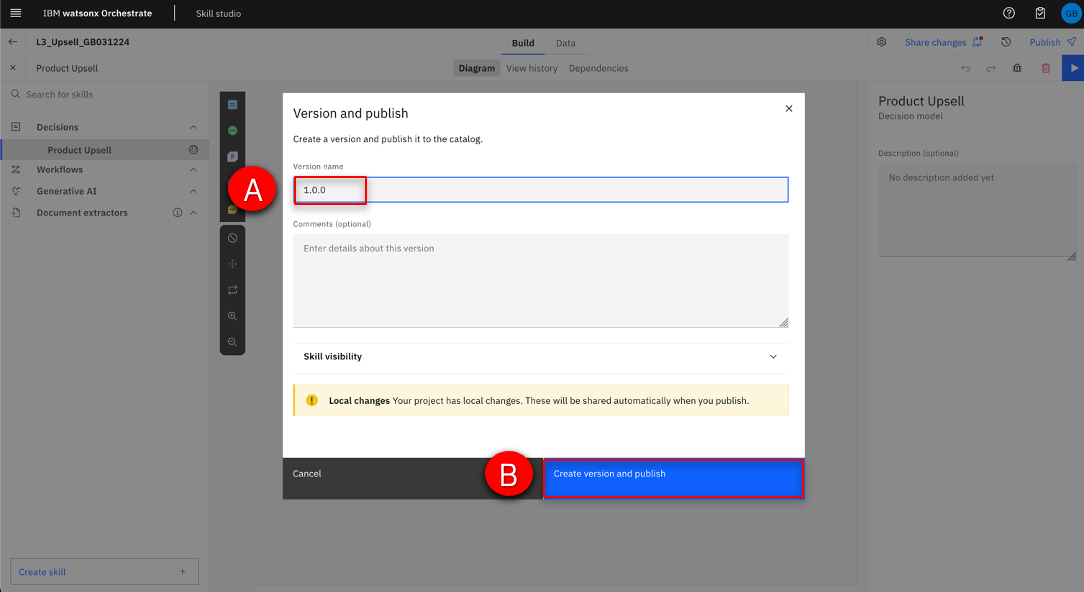
- Click Publish.

- When the Version and publish window opens, enter “1.0.0” in the Version name field (A), then click Create version and publish (B).
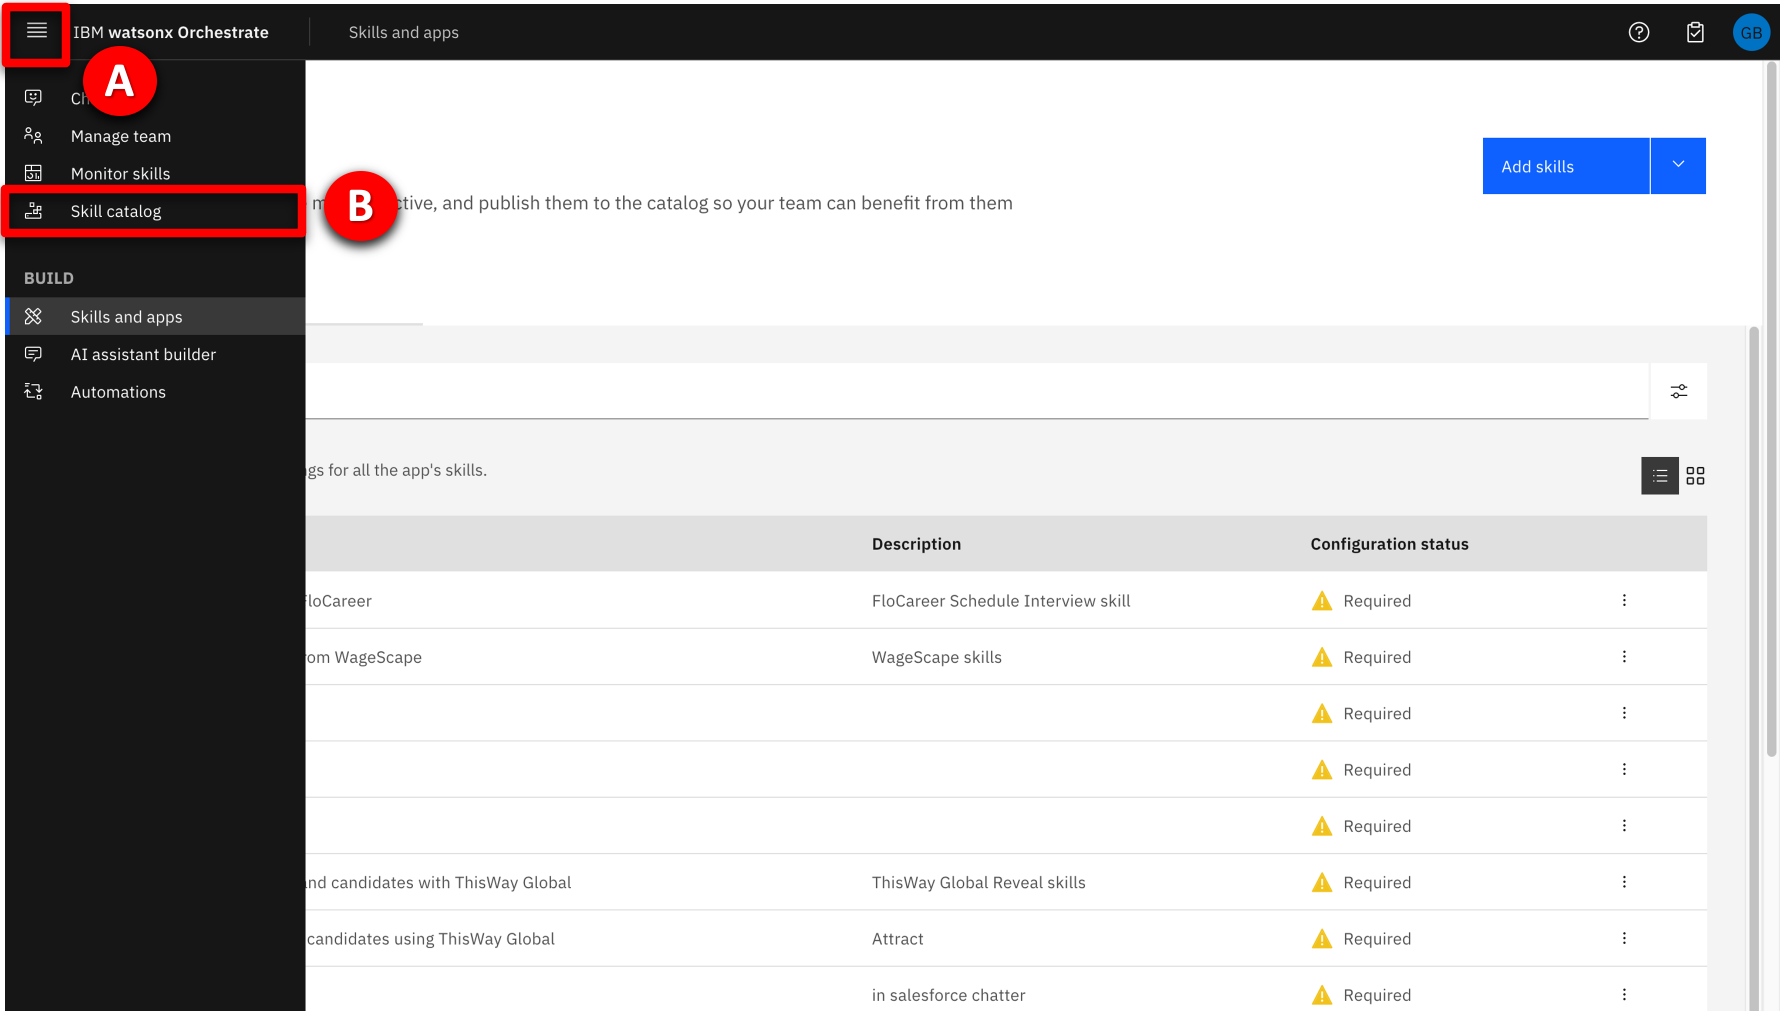
- Click the navigation hamburger menu icon (A), and then select Skills catalog (B) from the left menu.
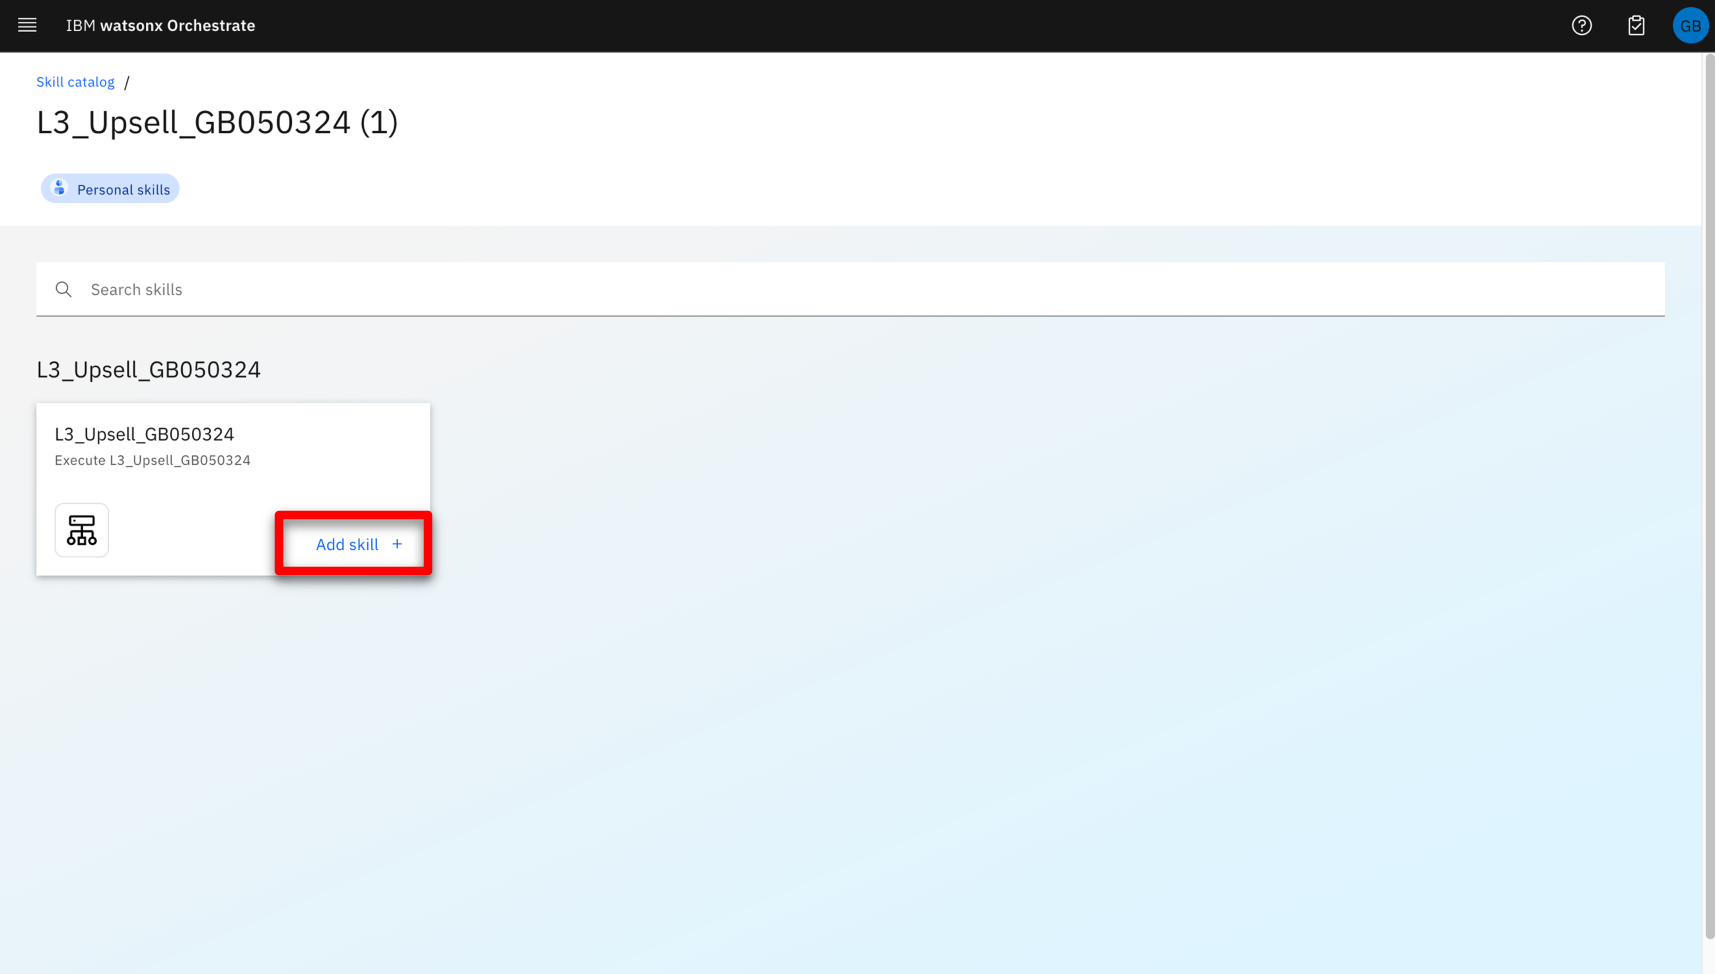
- Enter the unique name given to your decision model in the Search field (A) (the field with the magnifying glass), press Enter key, then click on the App tile (B).

- When your skill appears, click Add skill on the tile that corresponds to your decision model.
- Click the navigation hamburger menu icon (A) and select Chat (B) from the left menu.
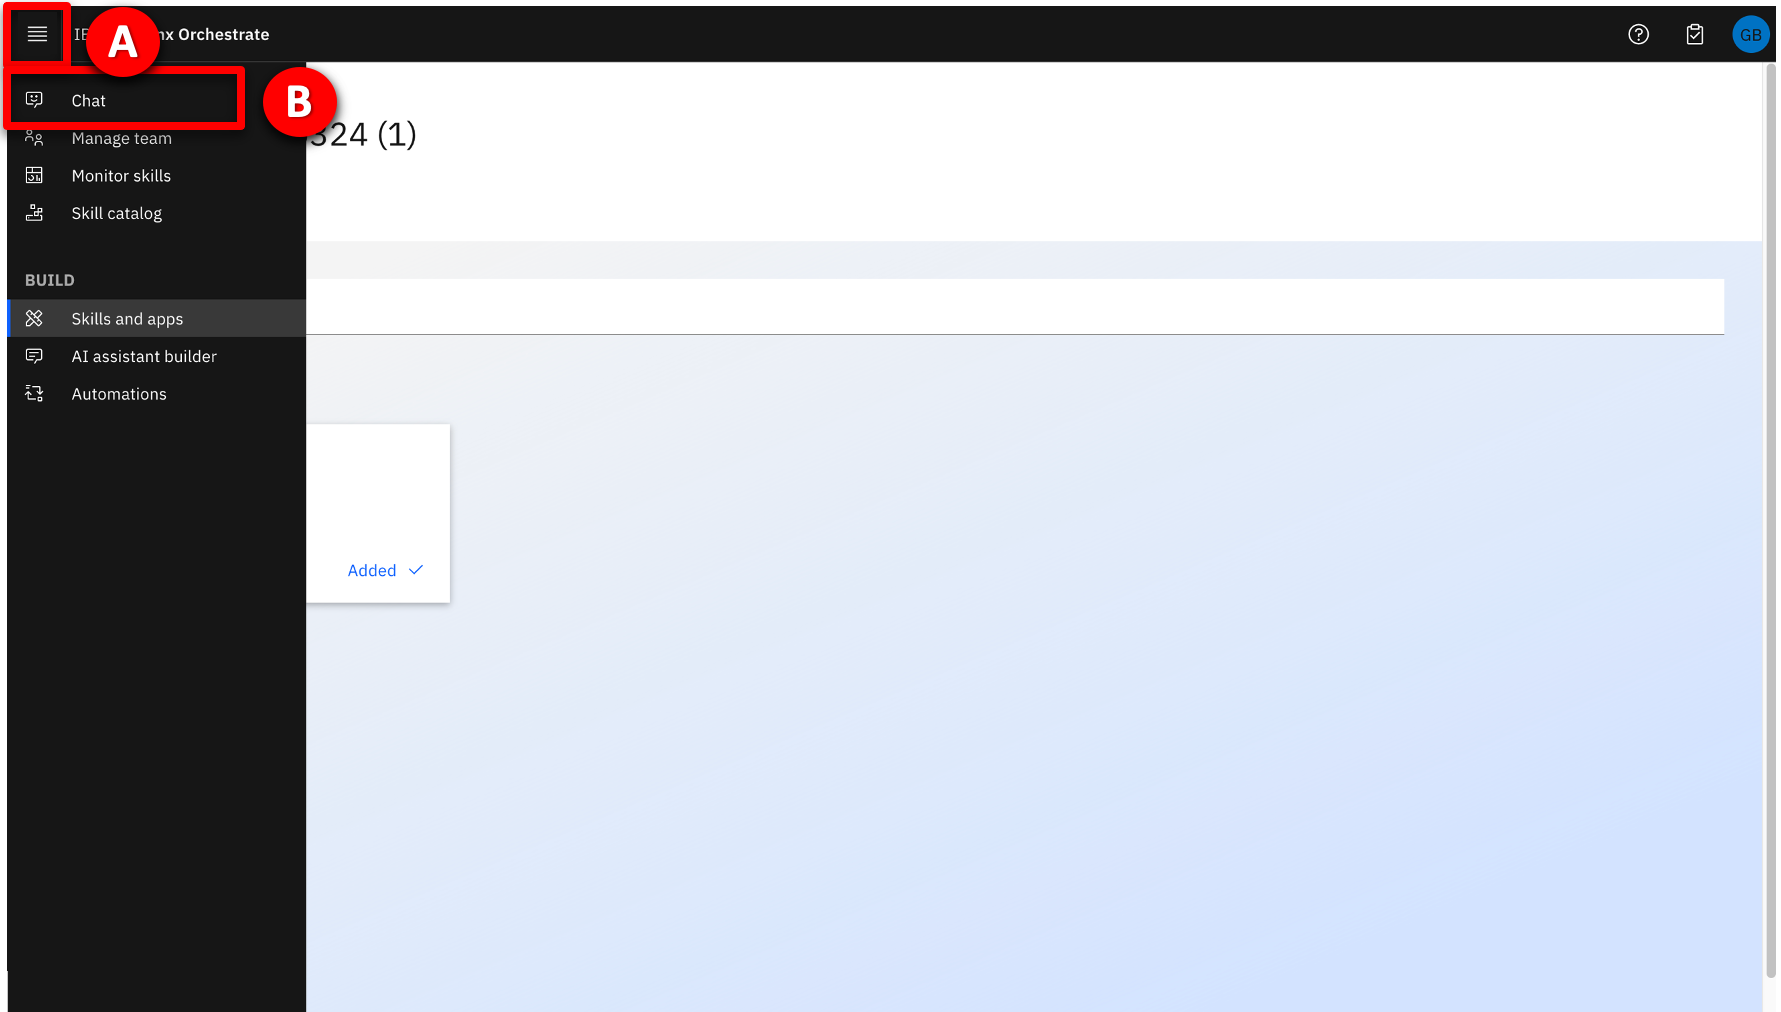
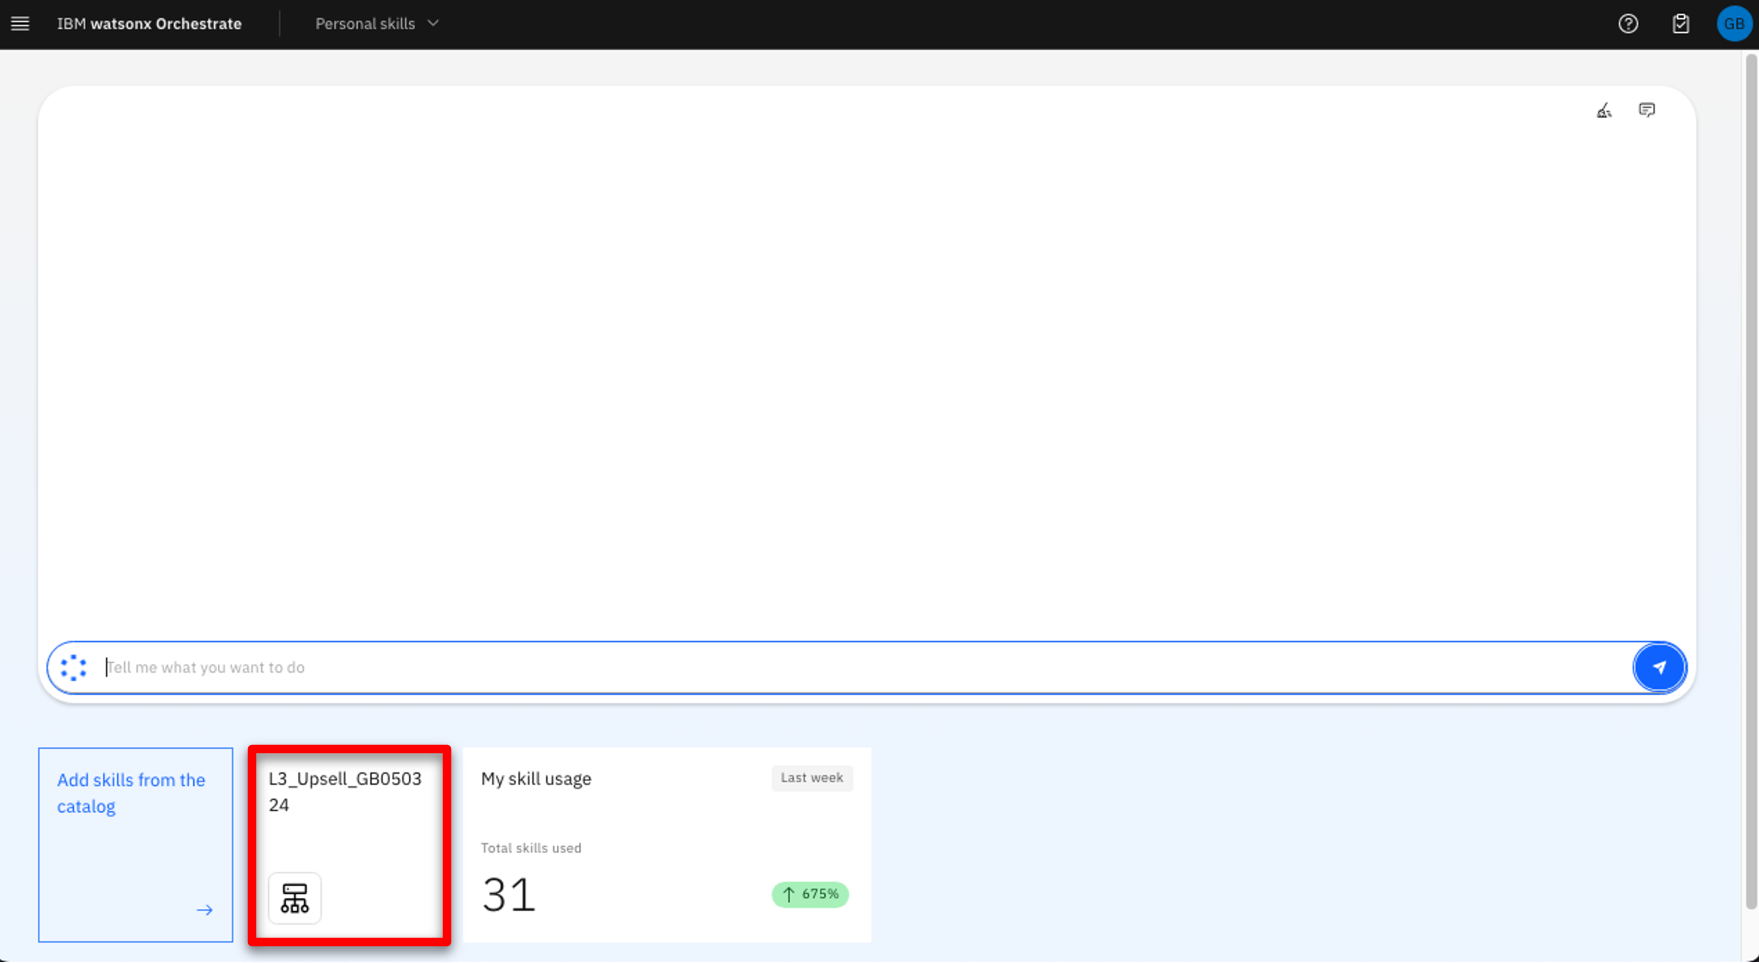
- Click on the tile corresponding to your recently added skill that contains your decision model name. For example, L3_Upsell_GB050324.
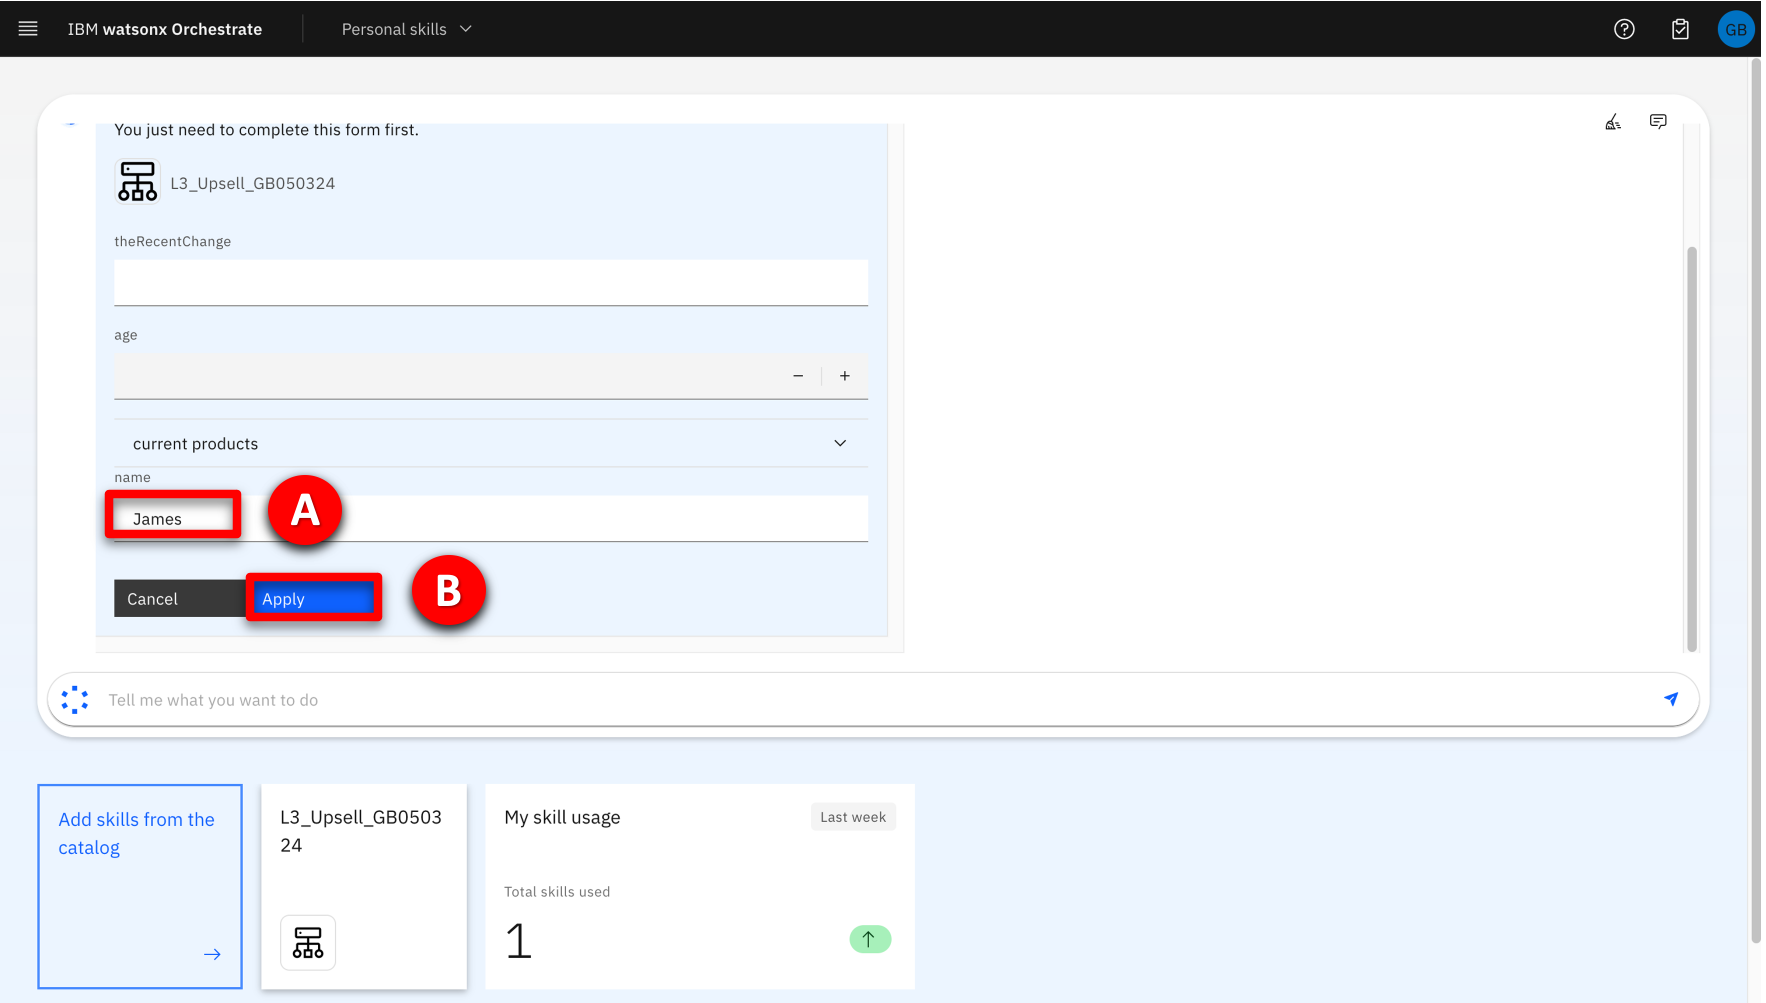
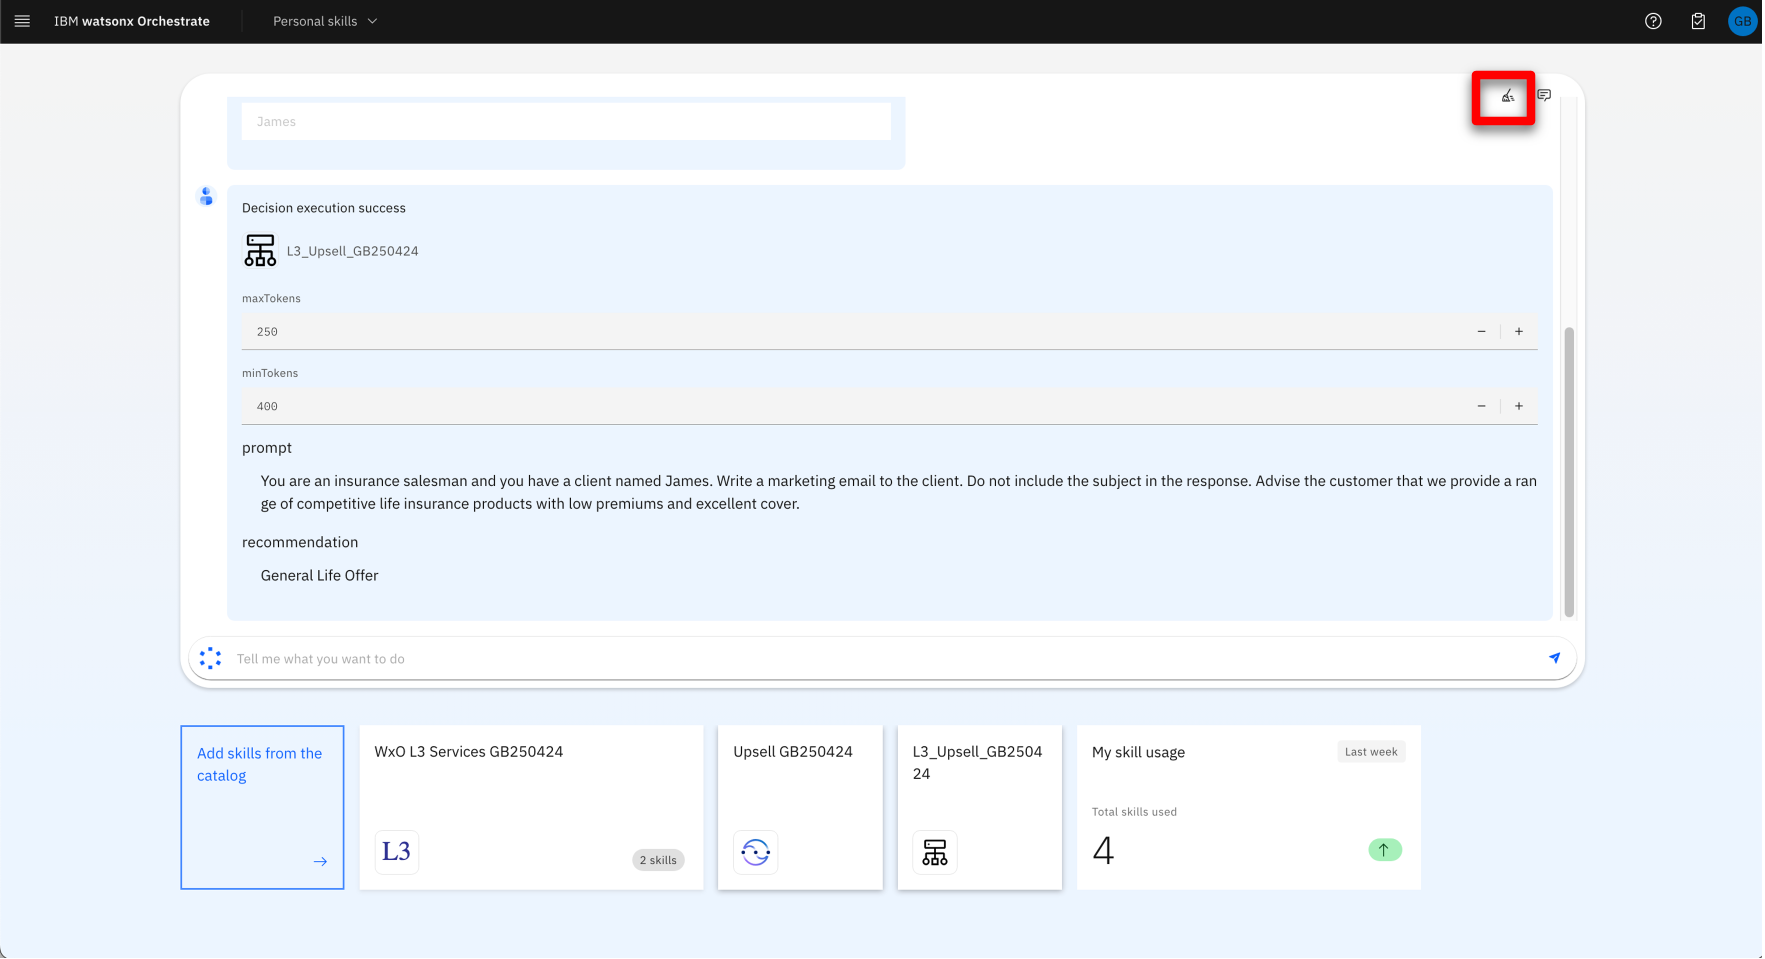
- Enter a name for the customer into the name field; for example, “James” (A), then click Apply (B) to submit the form for processing.
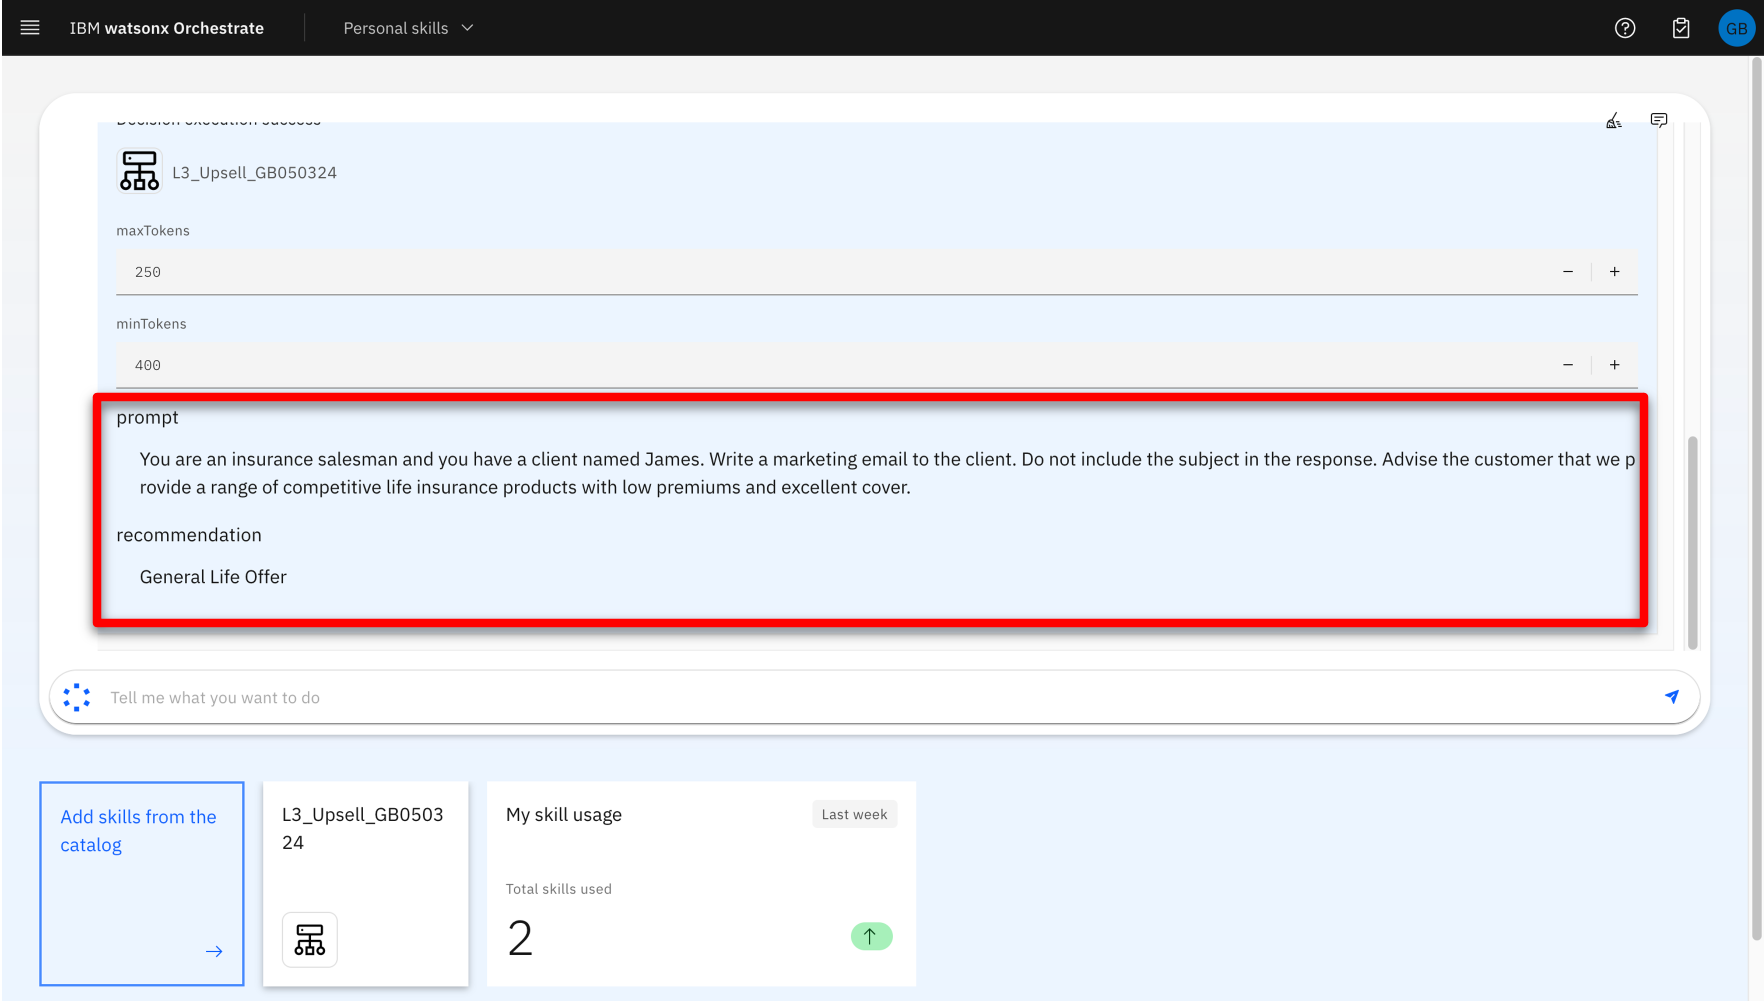
- The decision model returns the default prompt. Preparation for this decision model is now complete.
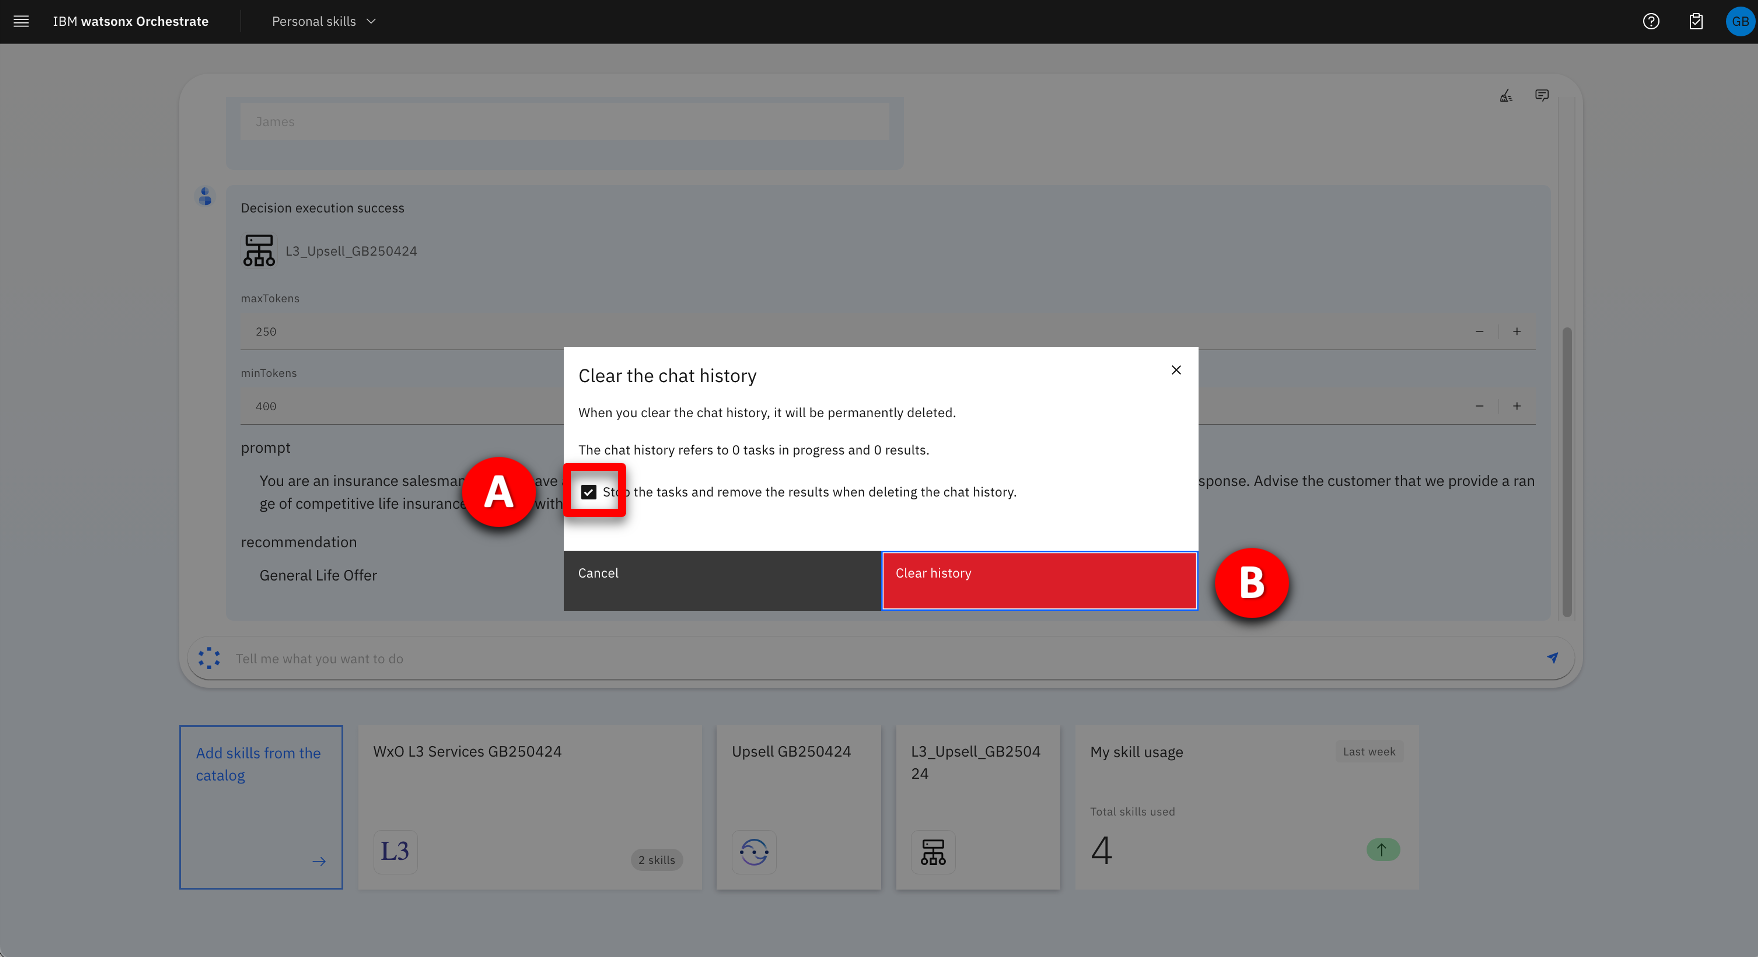
- Clear the output from the chat window by clicking the broom icon.
- Select the checkbox (A) then click Clear history (B).
5 – Create the OpenAPI CRM skill
Using the OpenAPI file that you previously updated, create the CRM skill required for this demo.
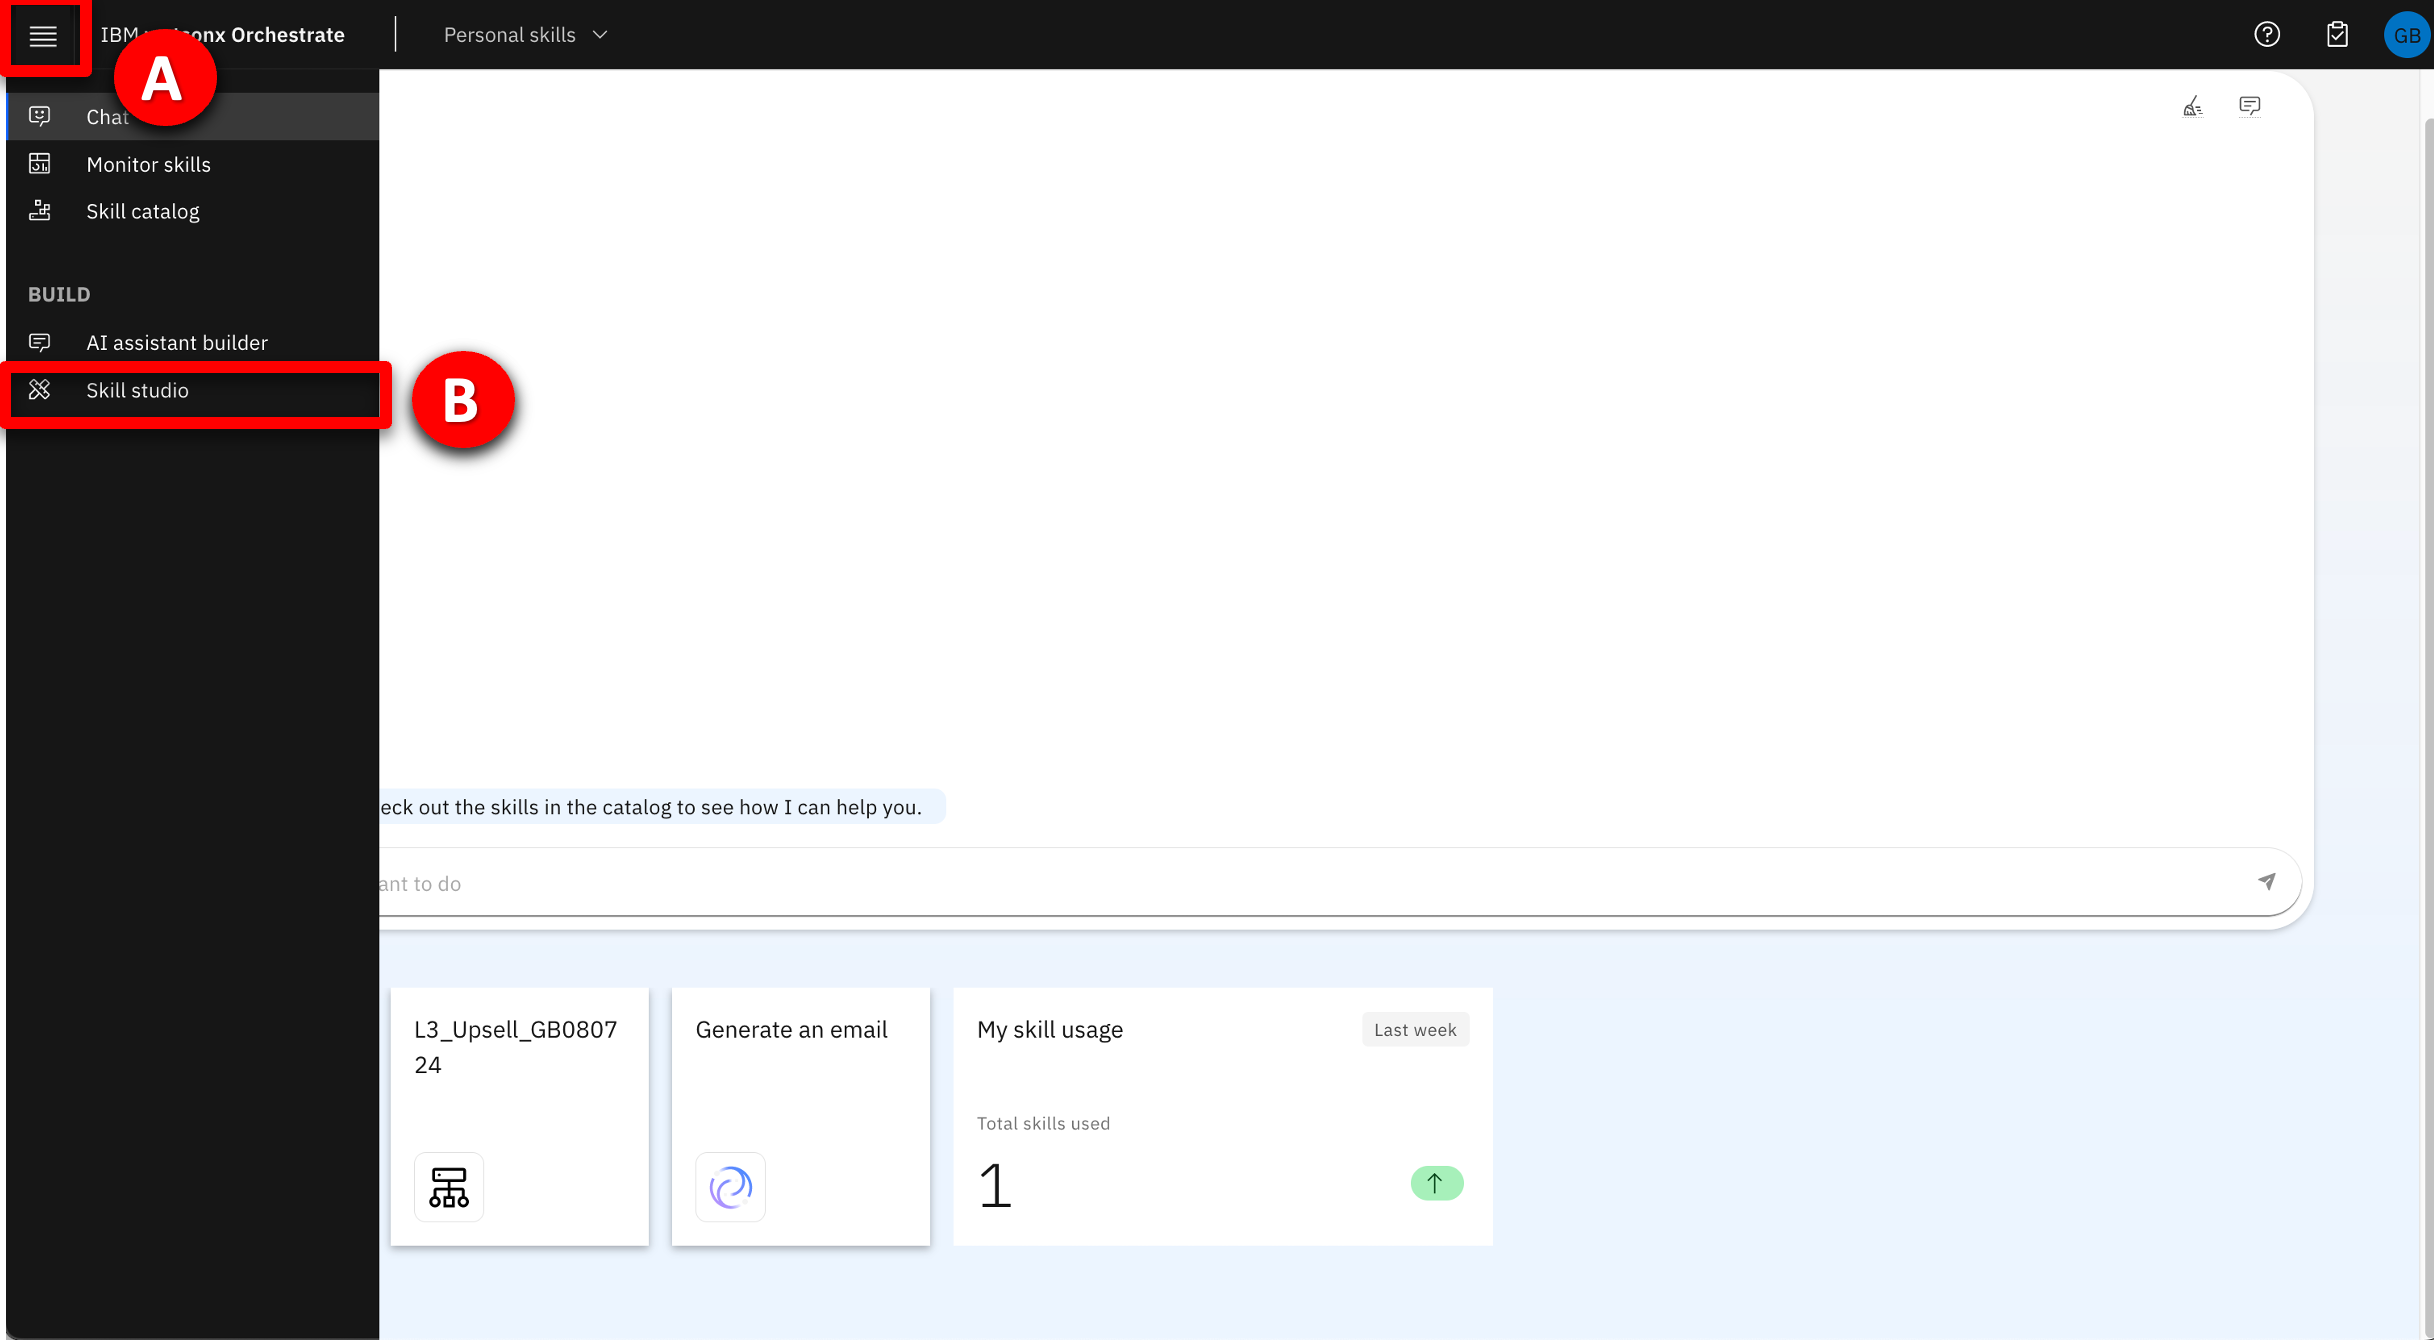
- Click the navigation hamburger menu icon (A), then select Skill studio (B) in the Build section from the left menu.
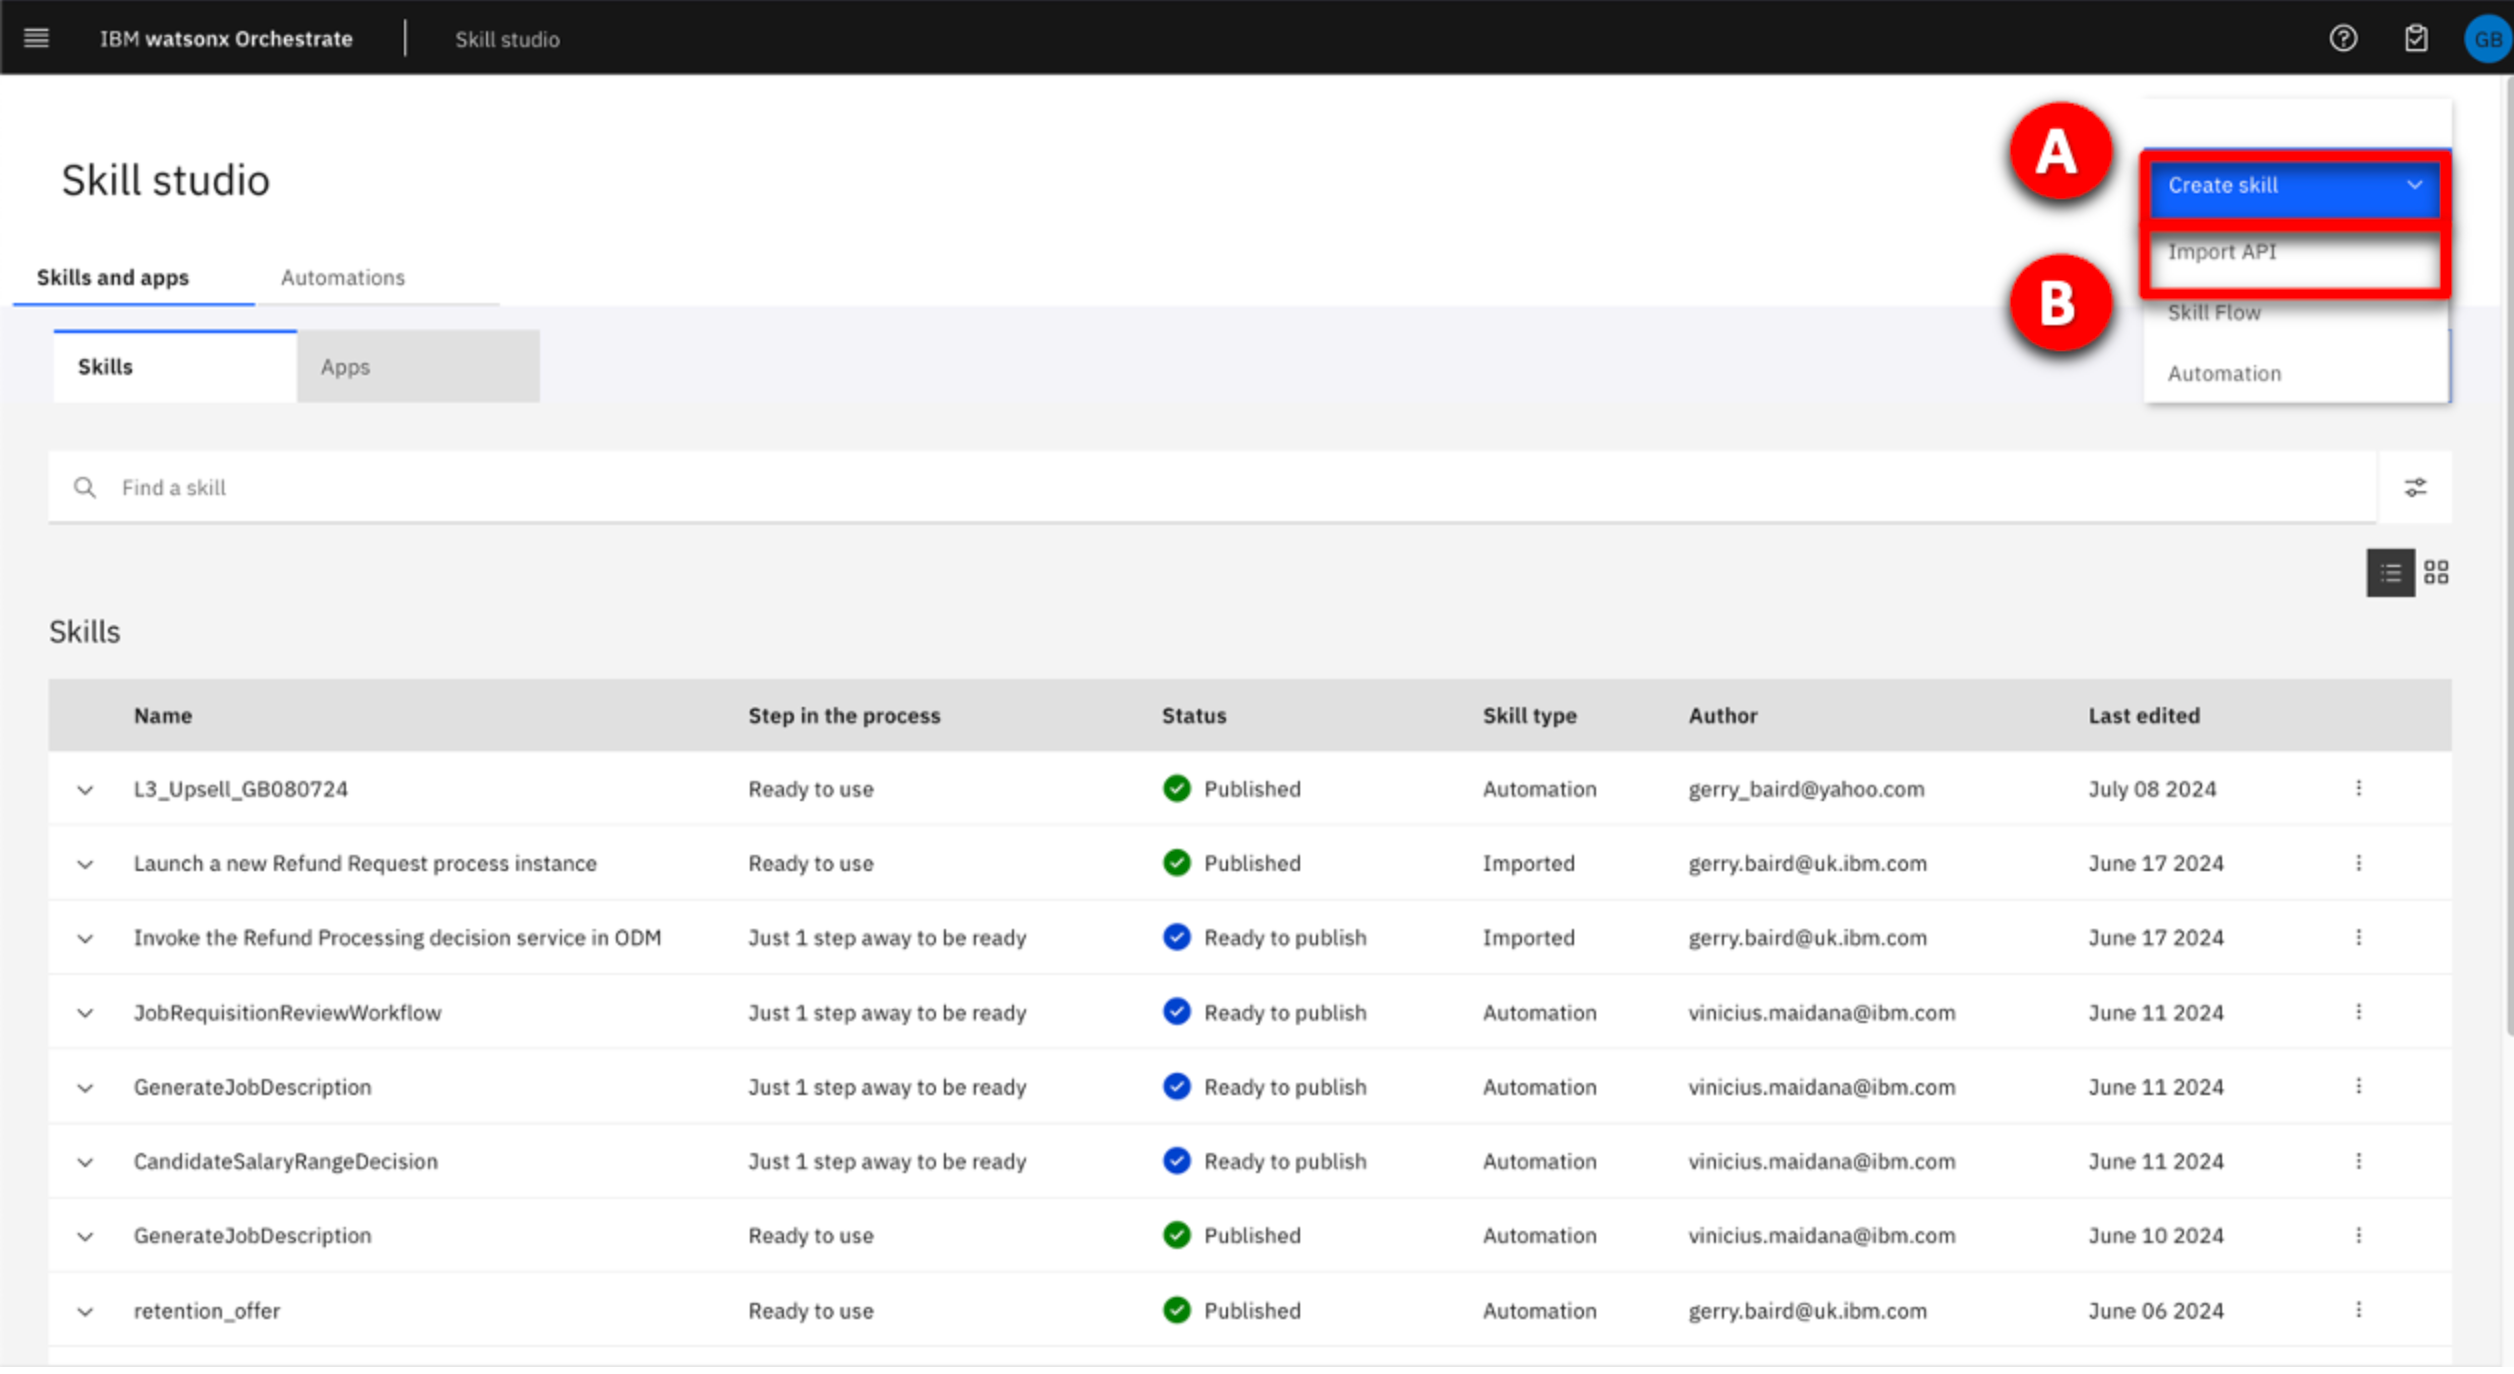
- Click Create (A), then click Import API (B).
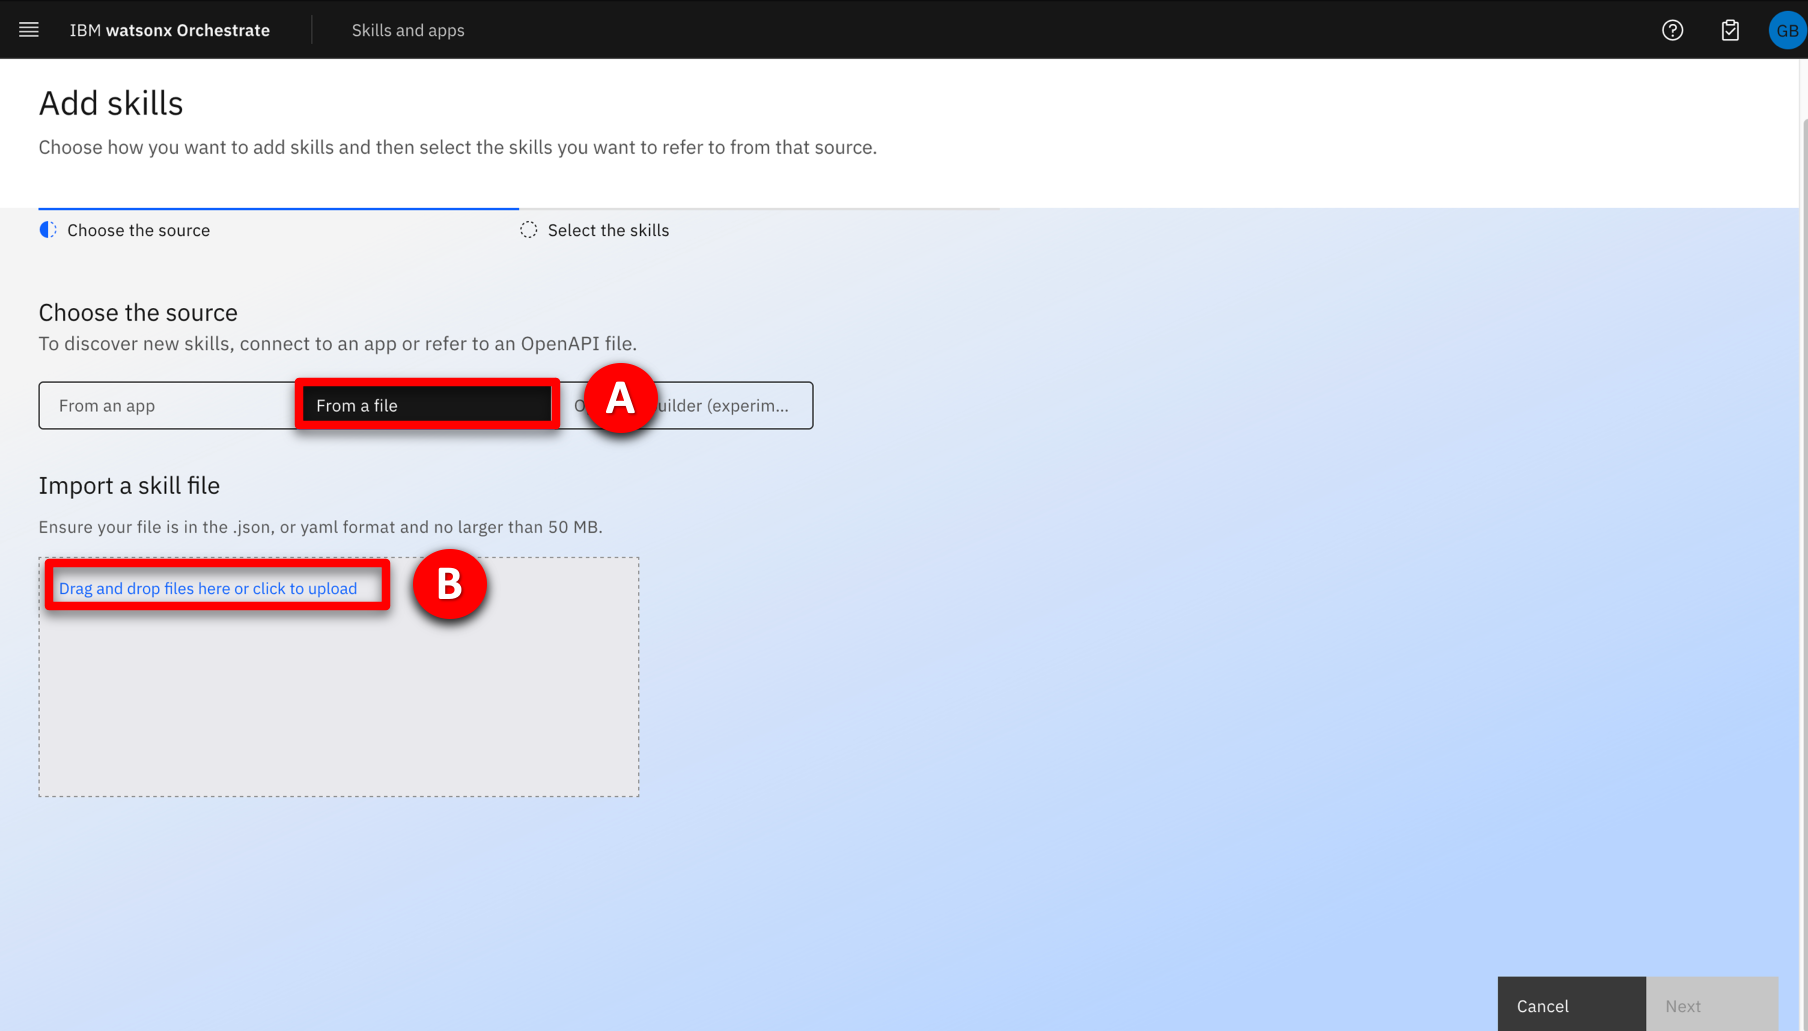
- Select the From file tab (A) and in the Import a skill file section, click on Drag and drop files here or click to upload link (B).
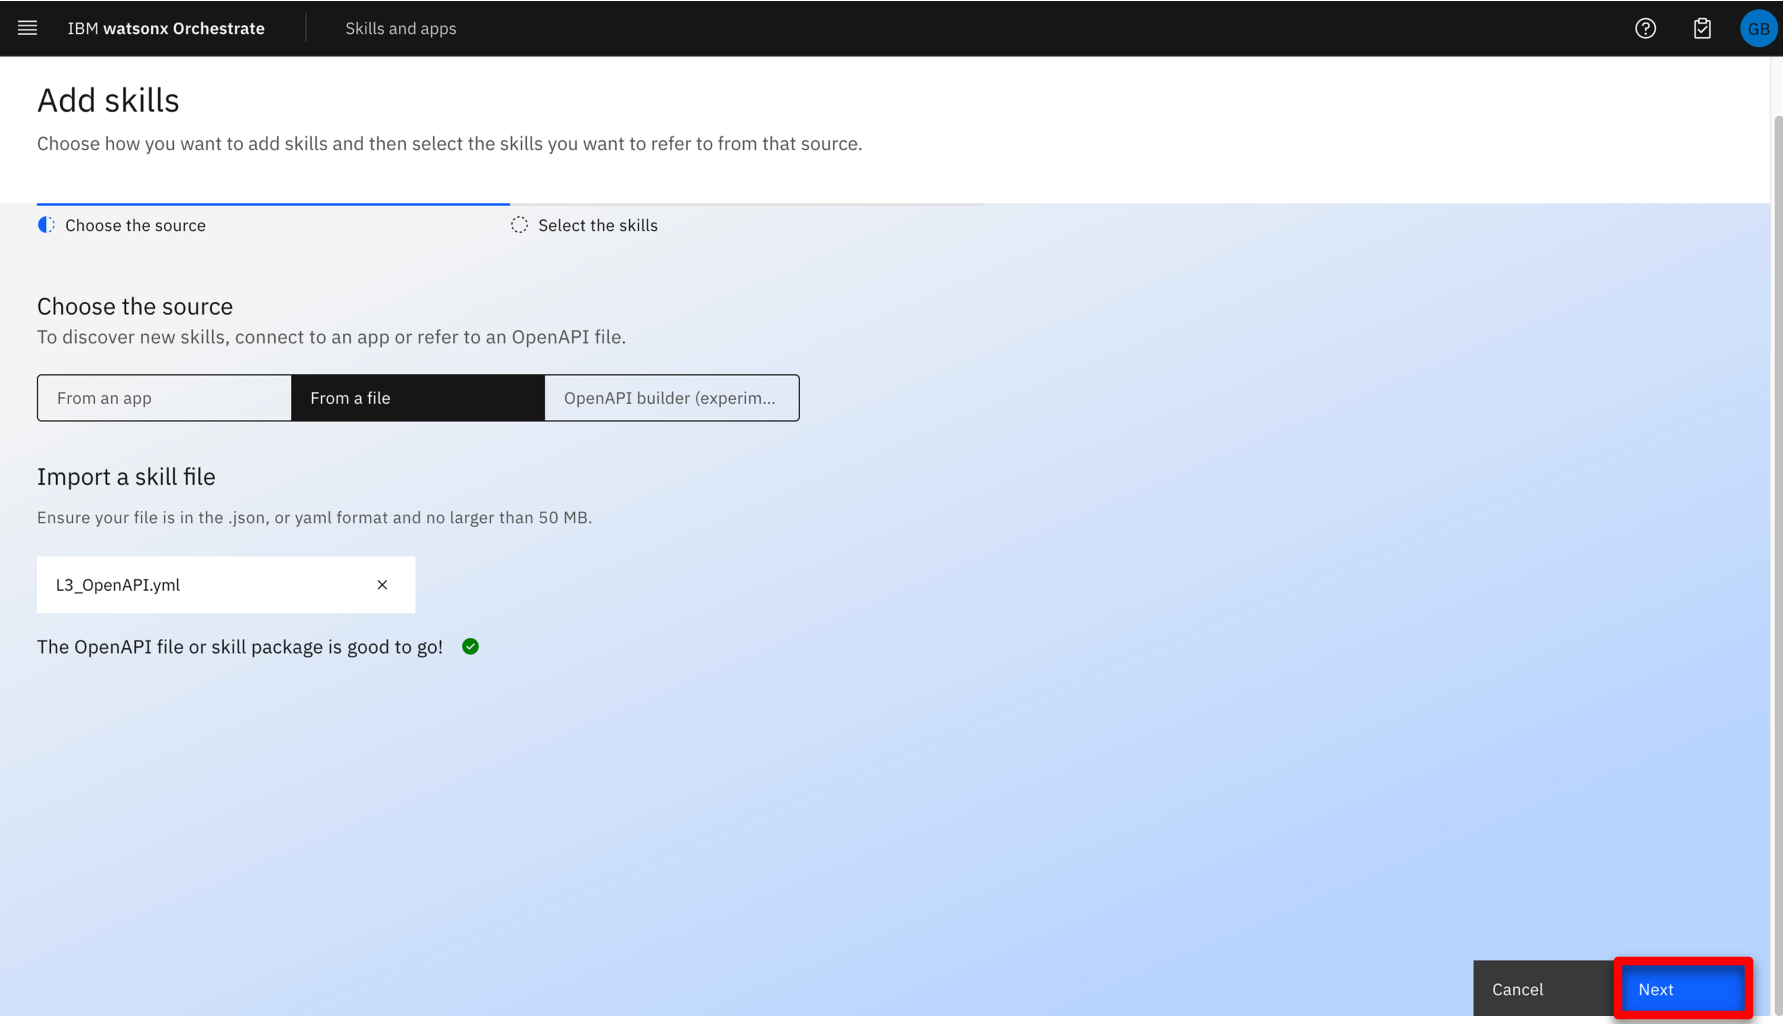
- Select your modified OpenAPI file and click Next.
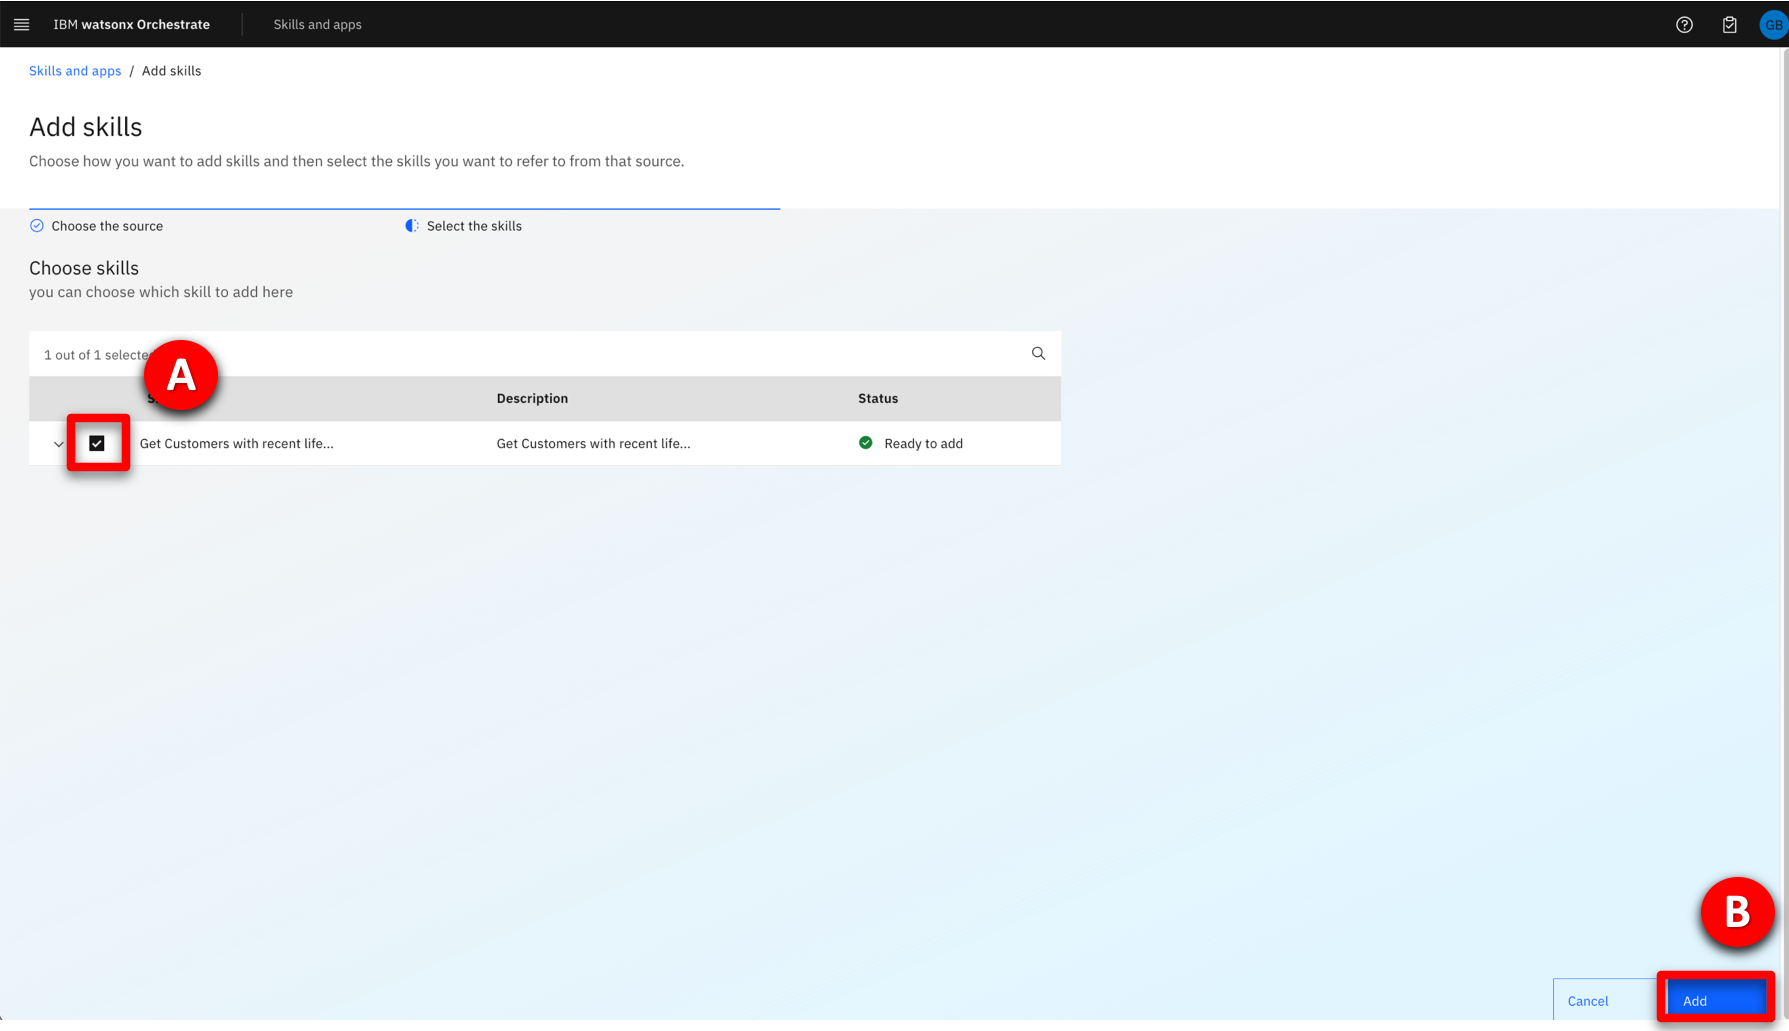
- In the Choose skills section, select the checkbox for the skill (A), then on the bottom-right corner of the screen, click Add (B).
- Select the Skills and apps tab (A), then select Skills (B).

- Perform the following steps:
A. Enter the unique reference given to your skill when you were updating the file into the filter panel, then press Enter.
B. Locate the skill Get Customers with recent life events and click the ellipsis (three vertical dots) in the right-hand column.
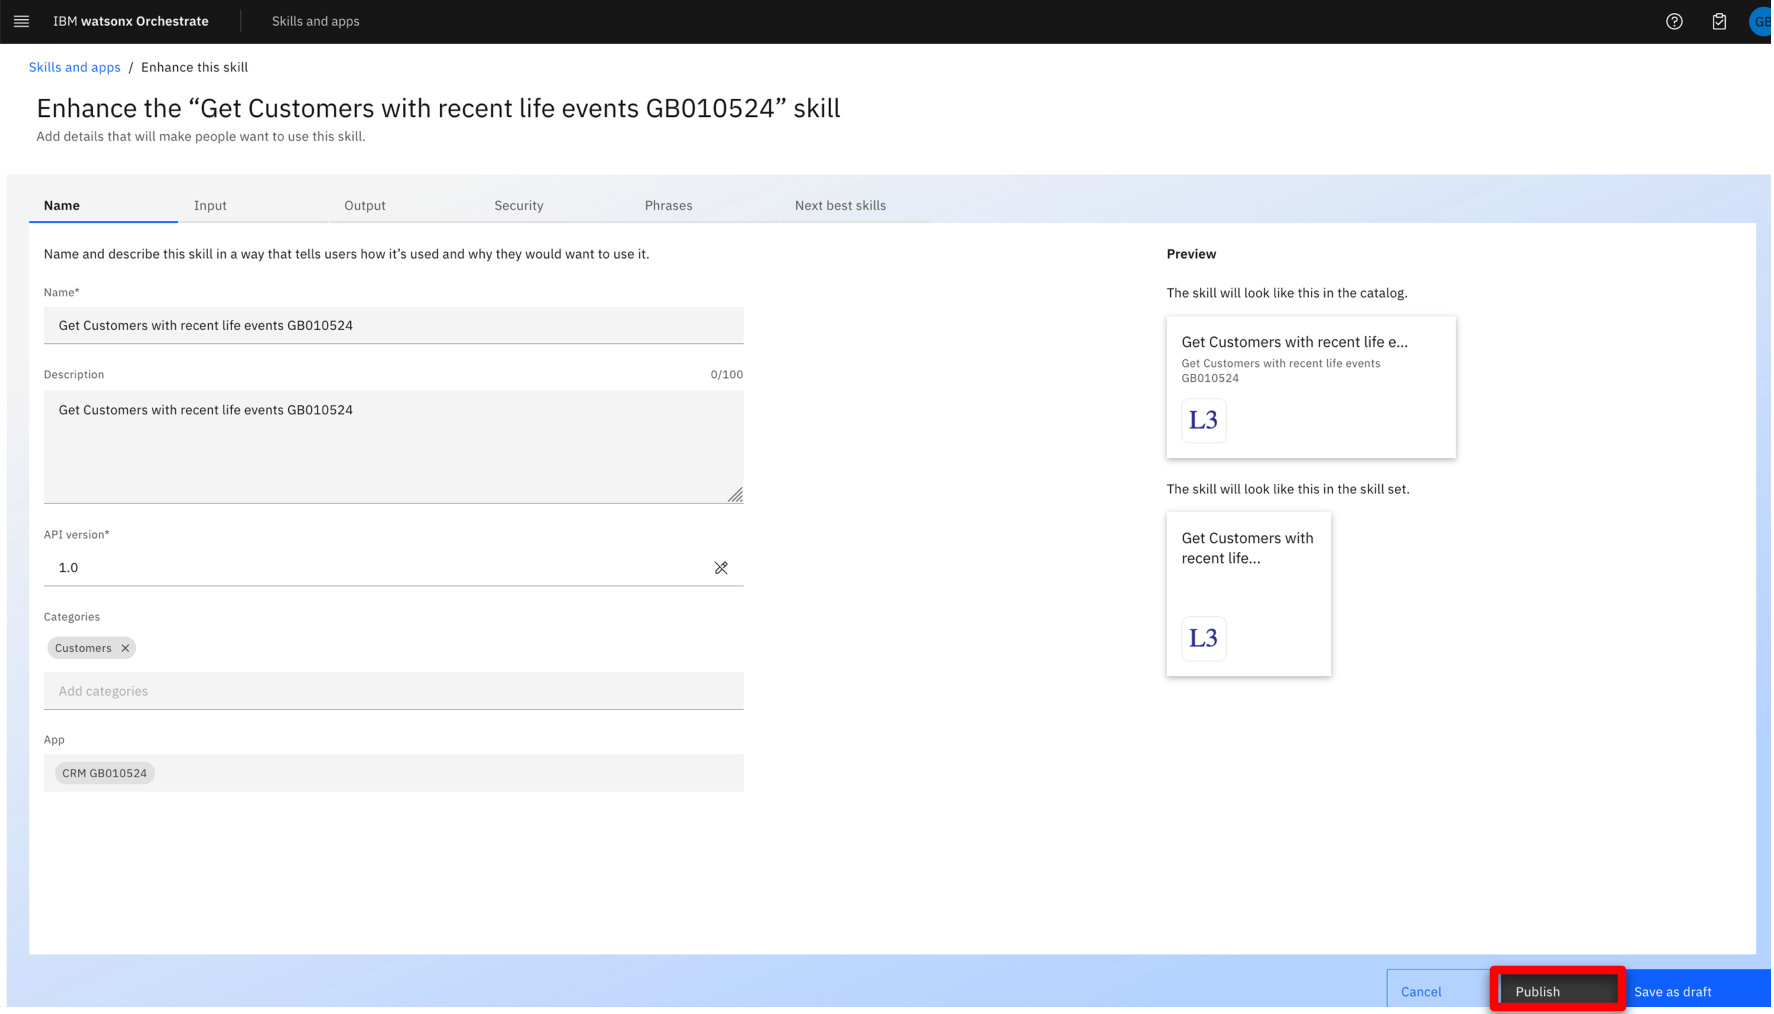
C. Click Enhance this skill.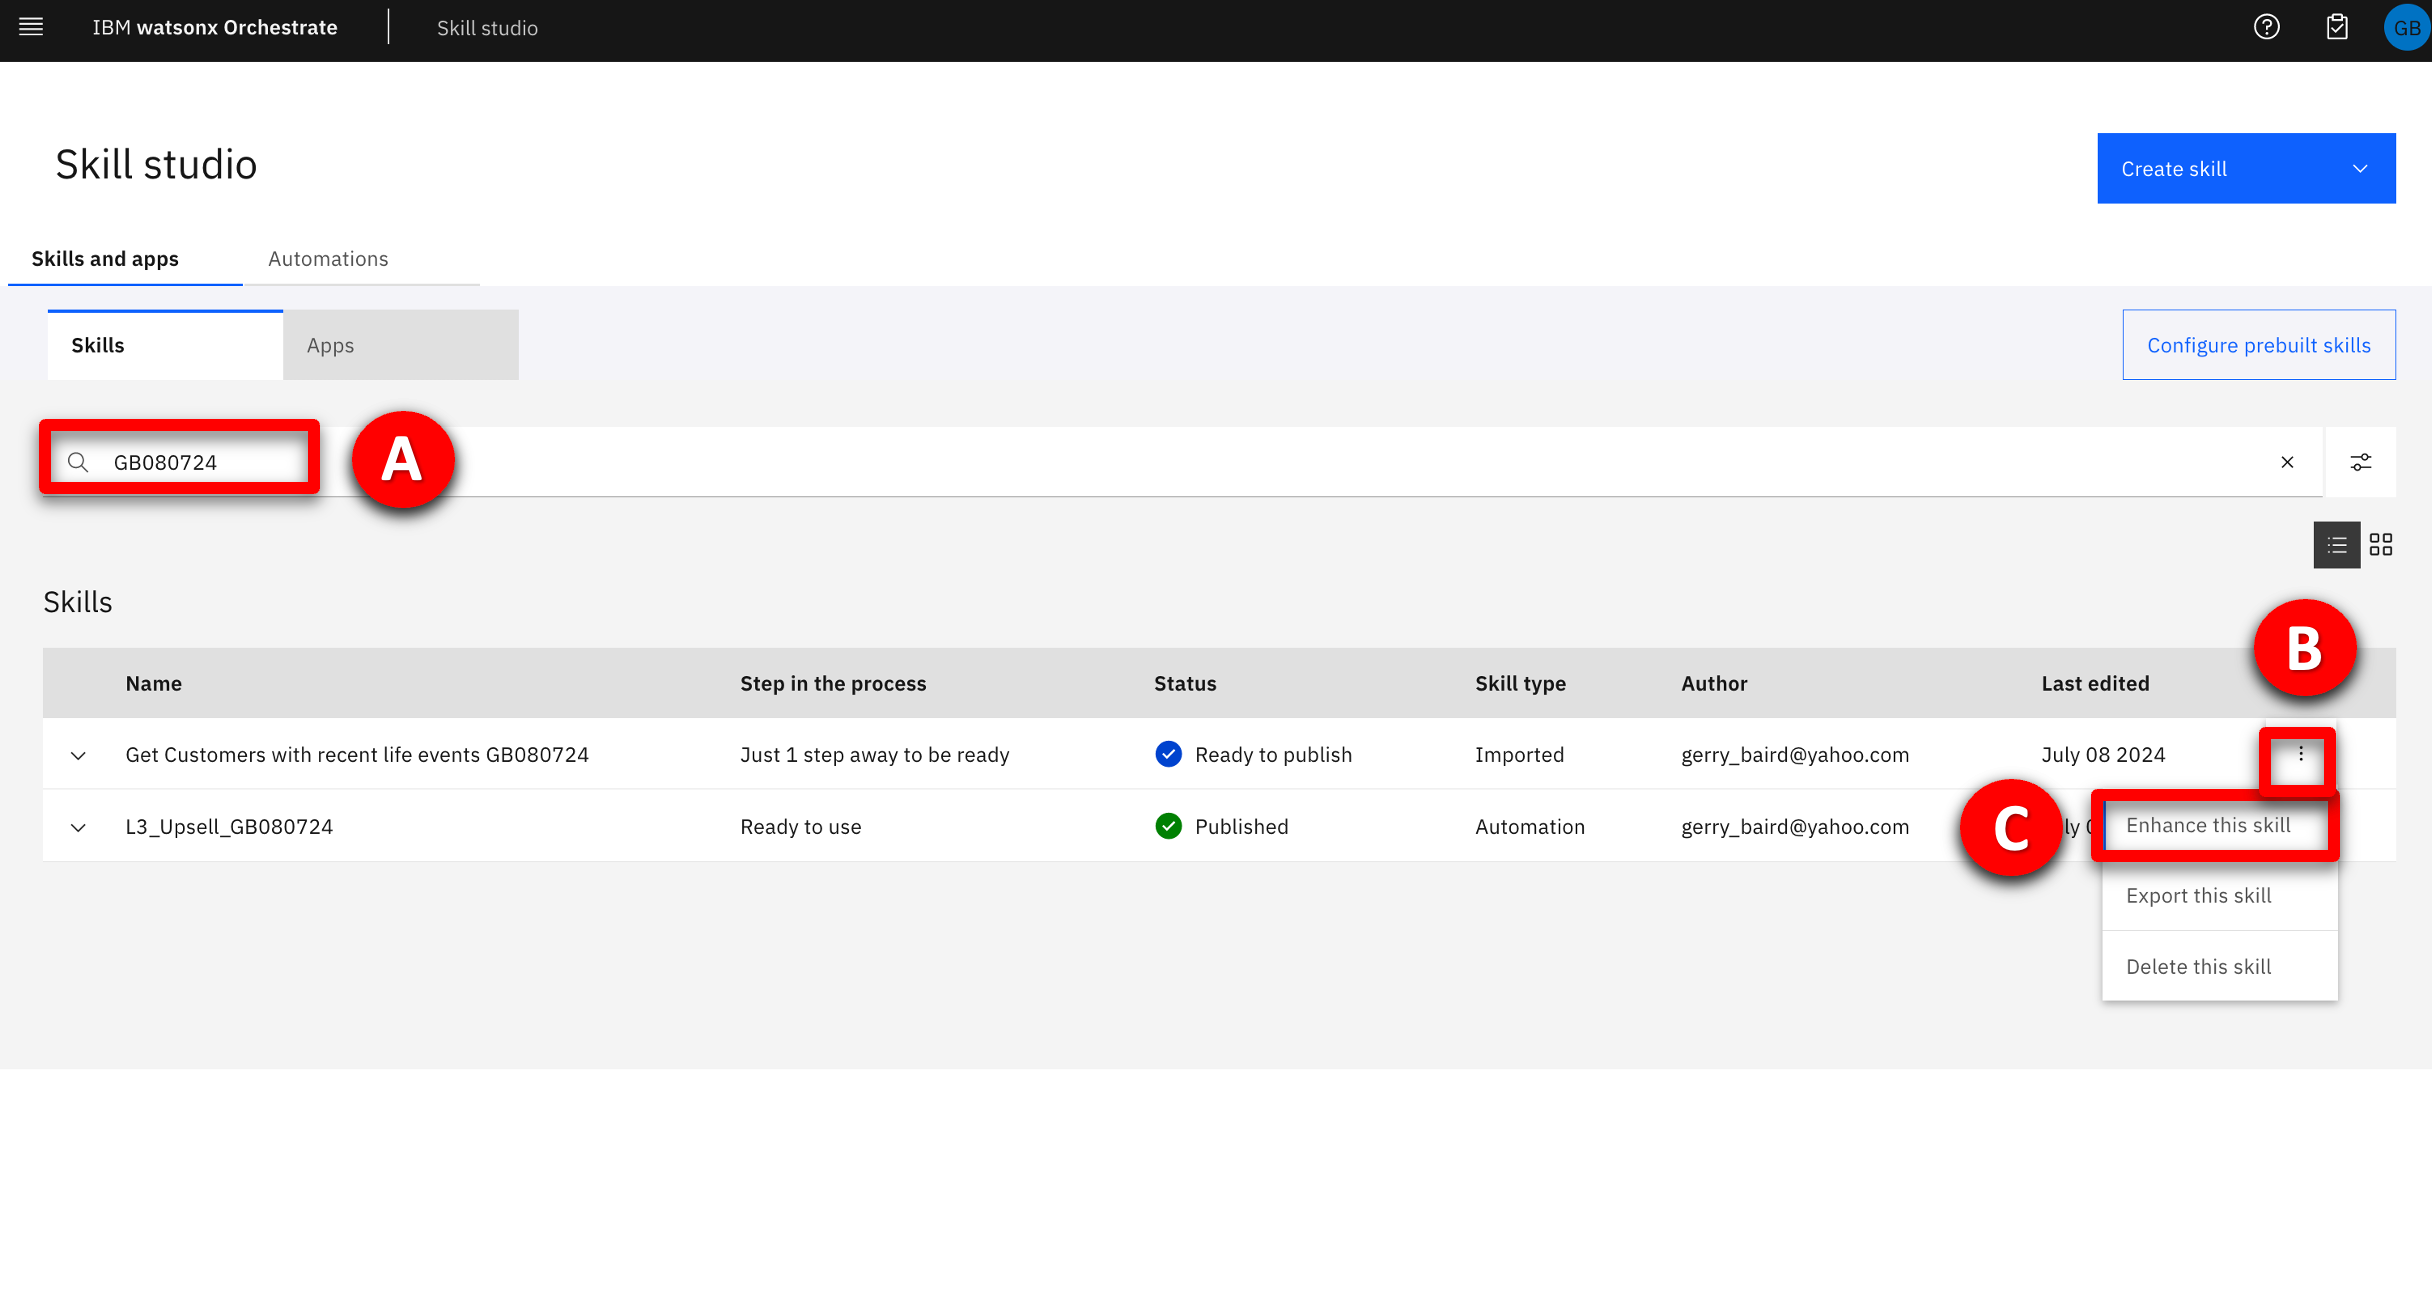
- At the bottom right-hand side of the screen, click Publish.
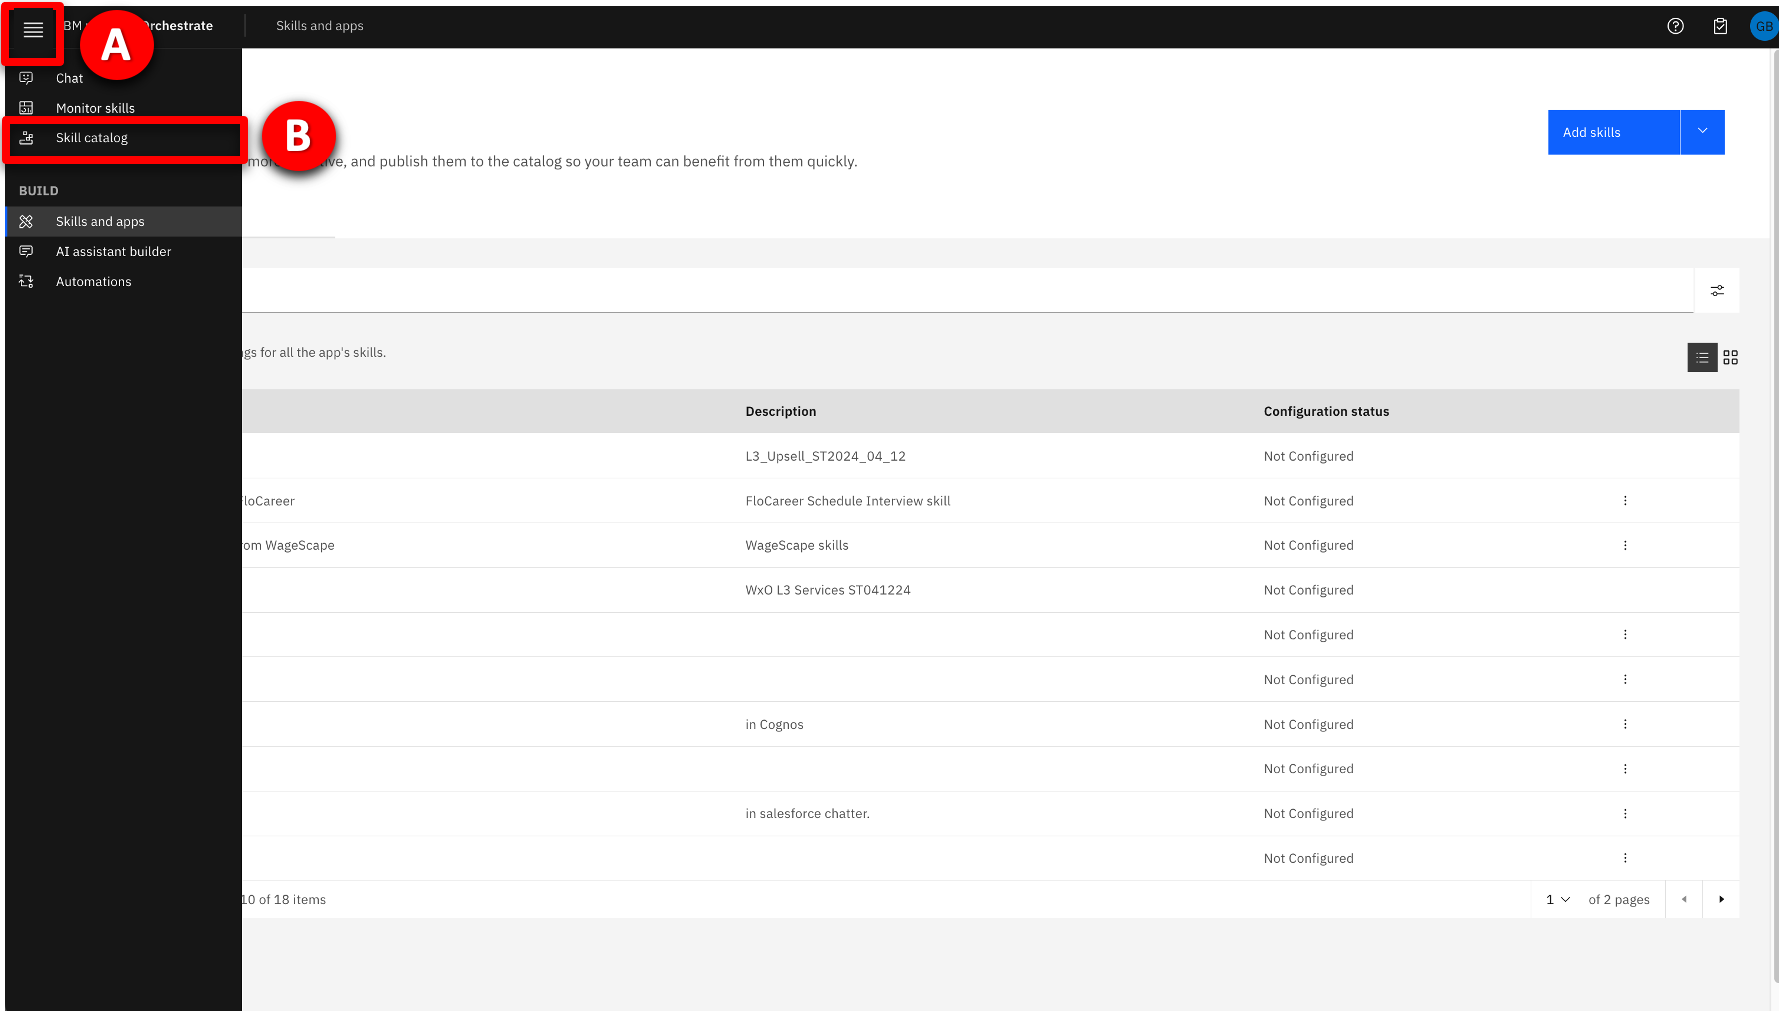
- Click the navigation hamburger menu icon (A), then select Skills catalog (B) from the left menu.
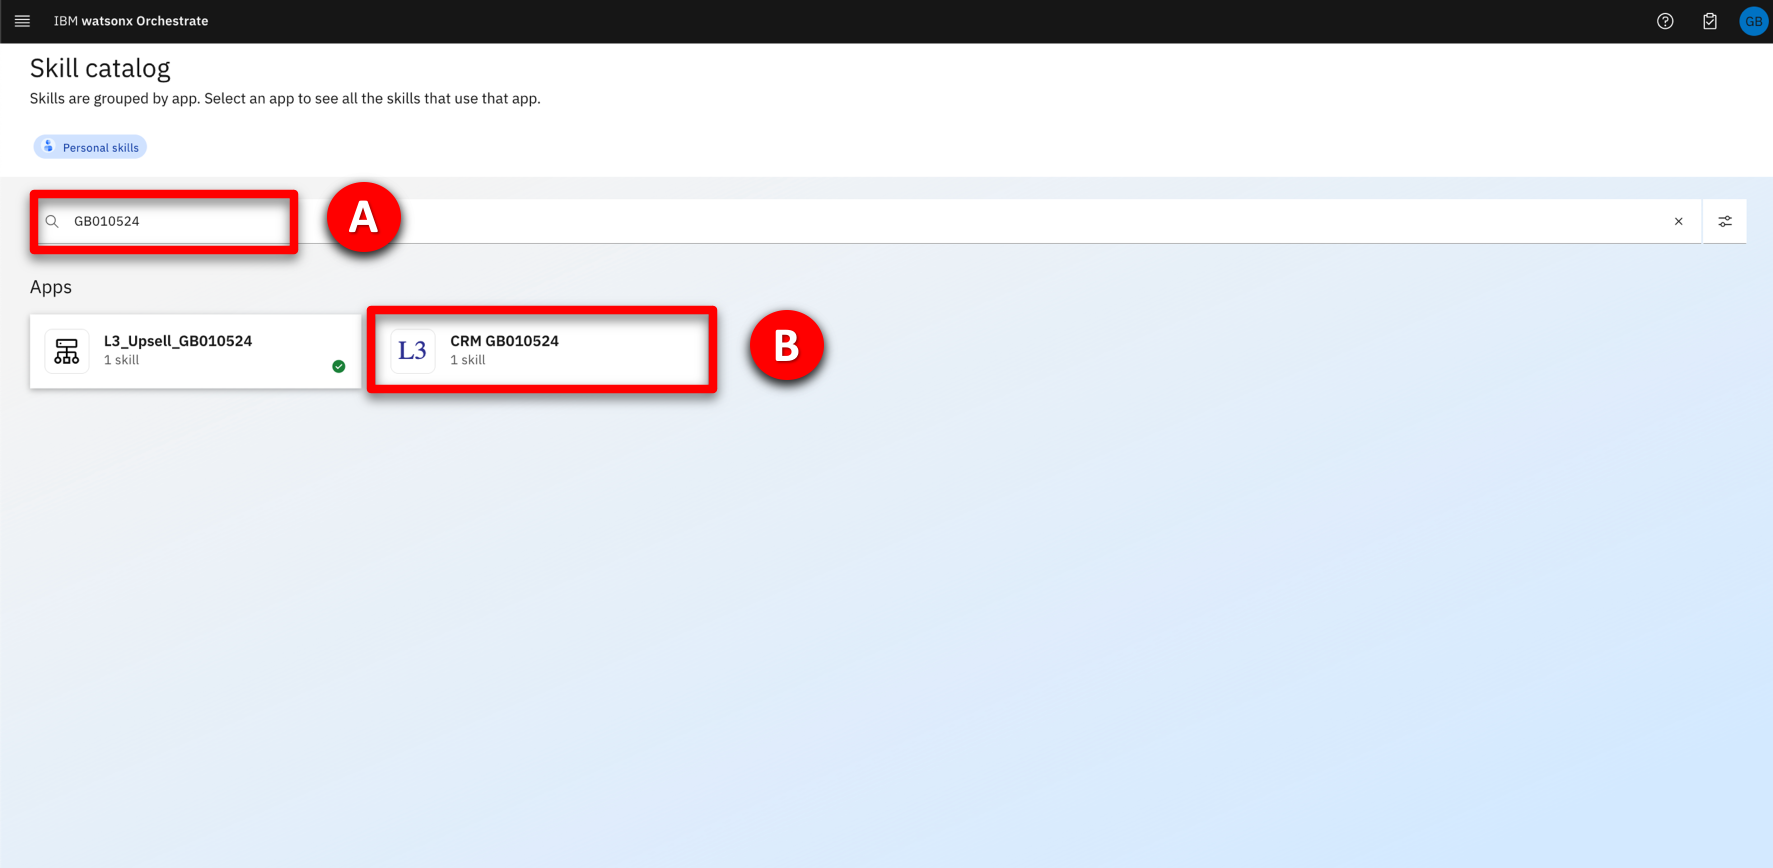
- Enter the unique reference that you used when updating the file into the search filed (A), and press Enter. When the results are filtered, click on the CRM tile that contains your unique identifier (B).
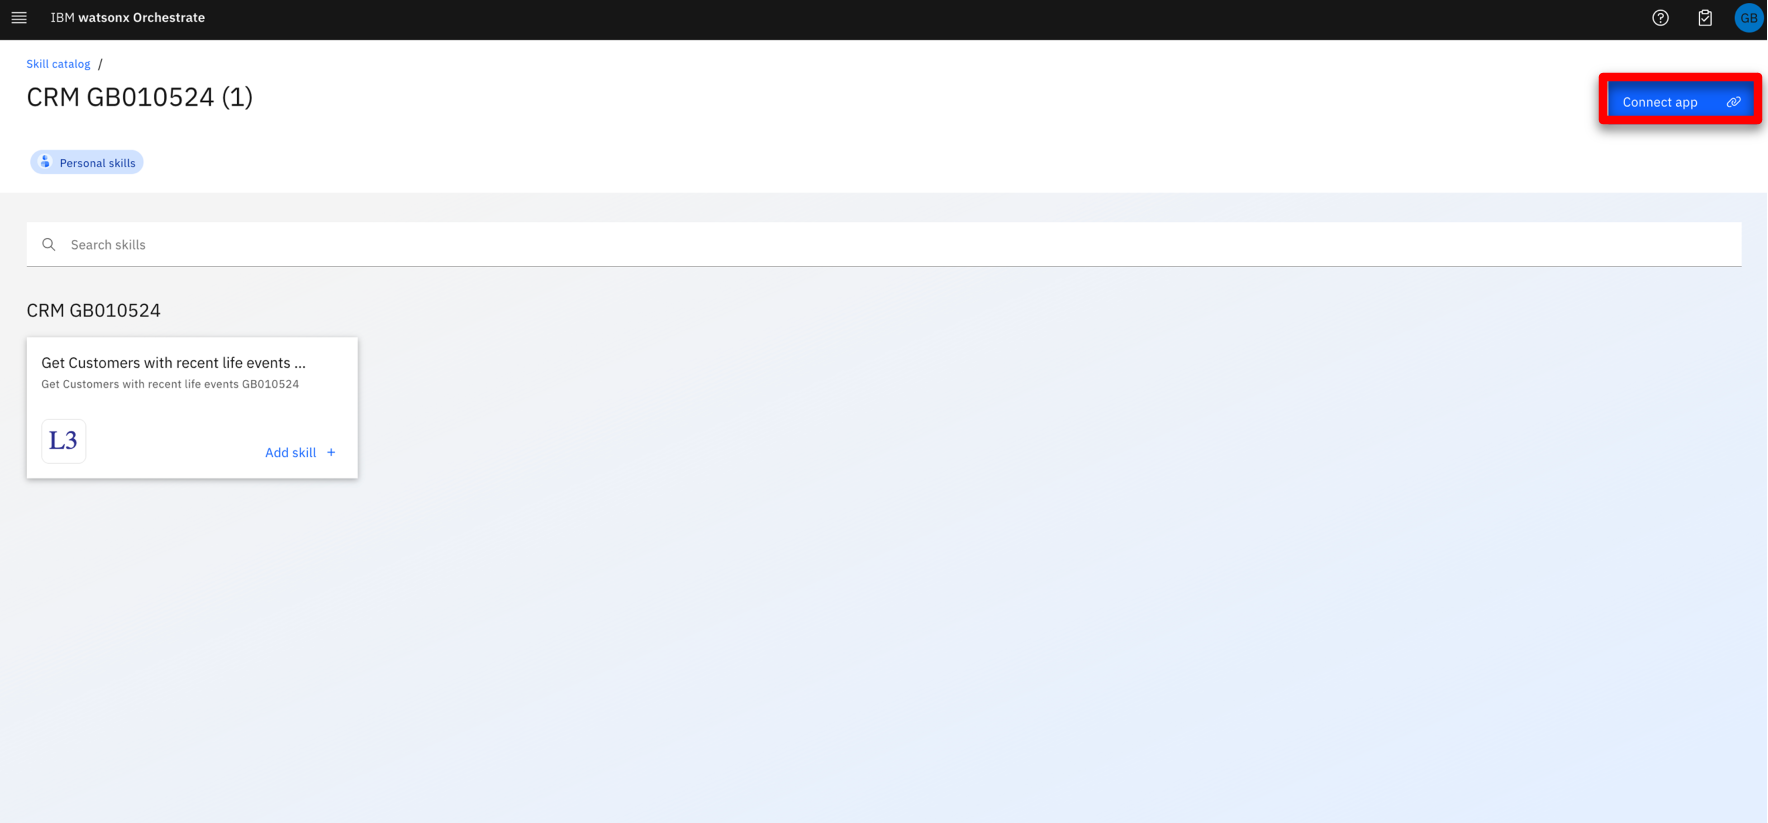
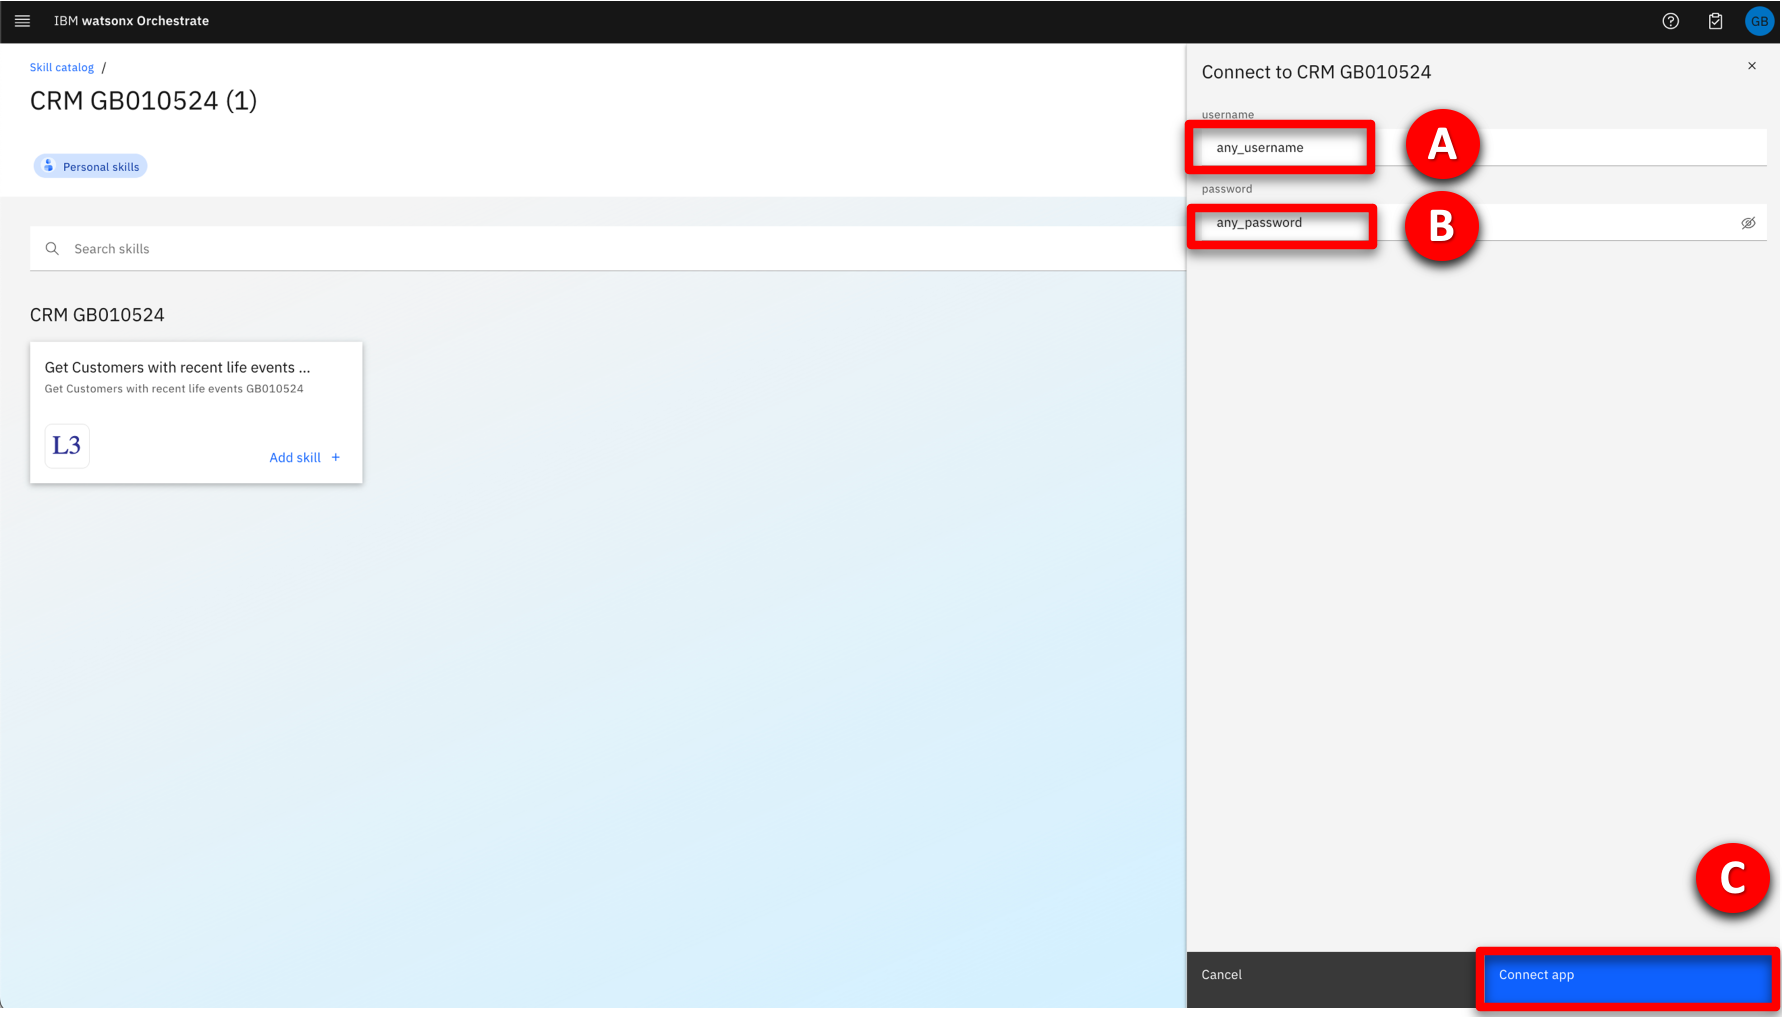
- In the top-right corner of the screen, click Connect app.
- Enter credentials (any combination of username (A) and password (B) will work) and click Connect app (C).
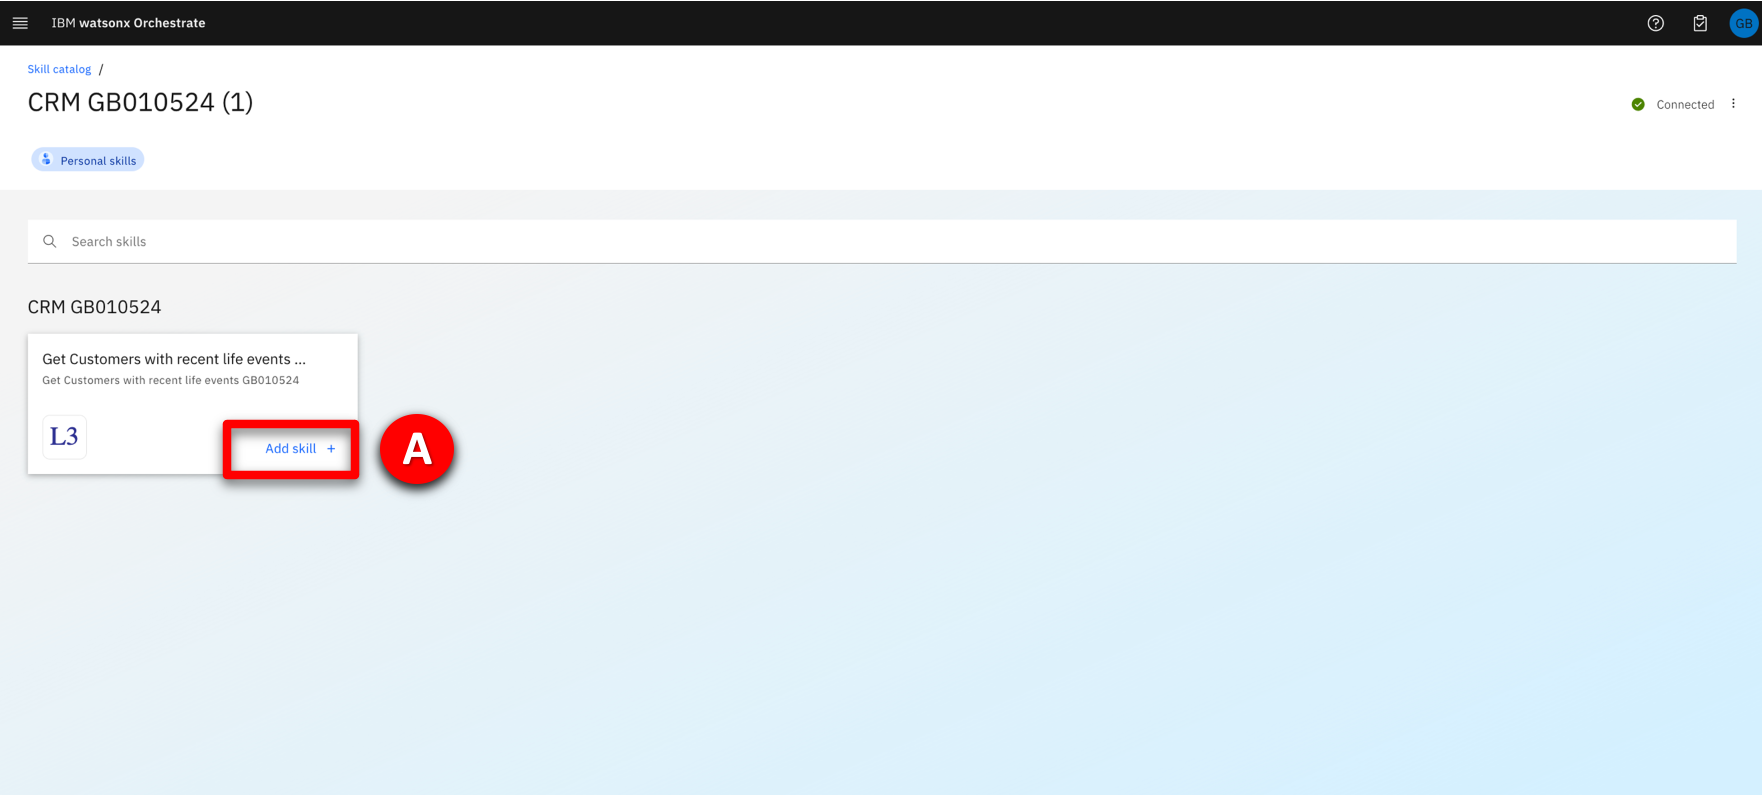
- Click Add skill+ on the Get Customers with recent life events … skill tile (A). A message will appear to confirm the skill has been added.
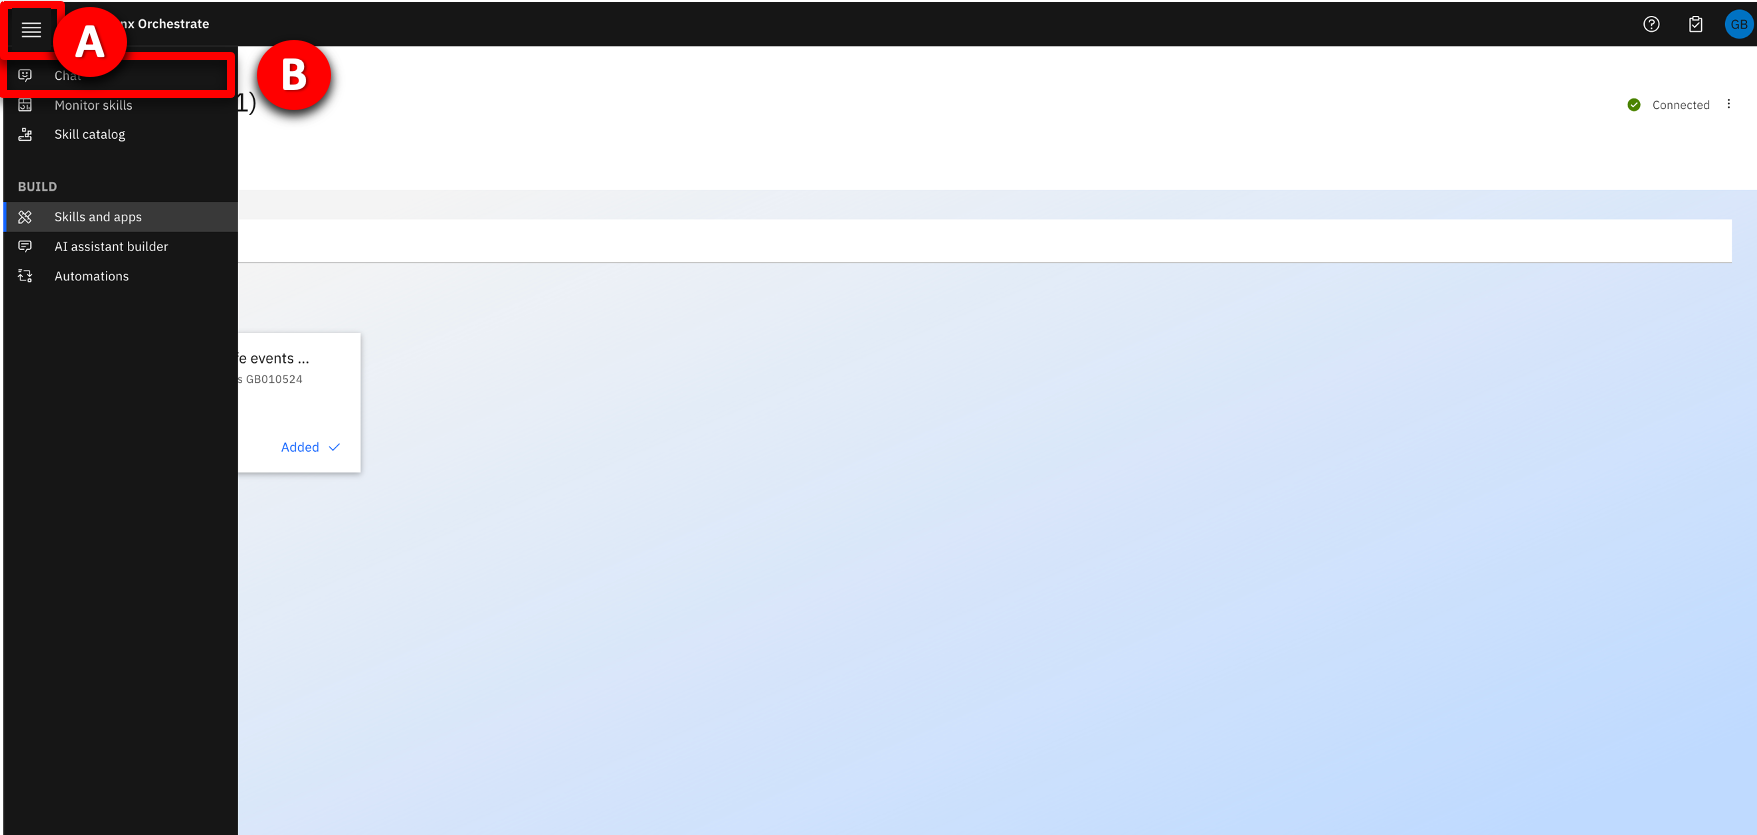
- Click the hamburger navigation menu icon (A), then select Chat (B) from the left menu.
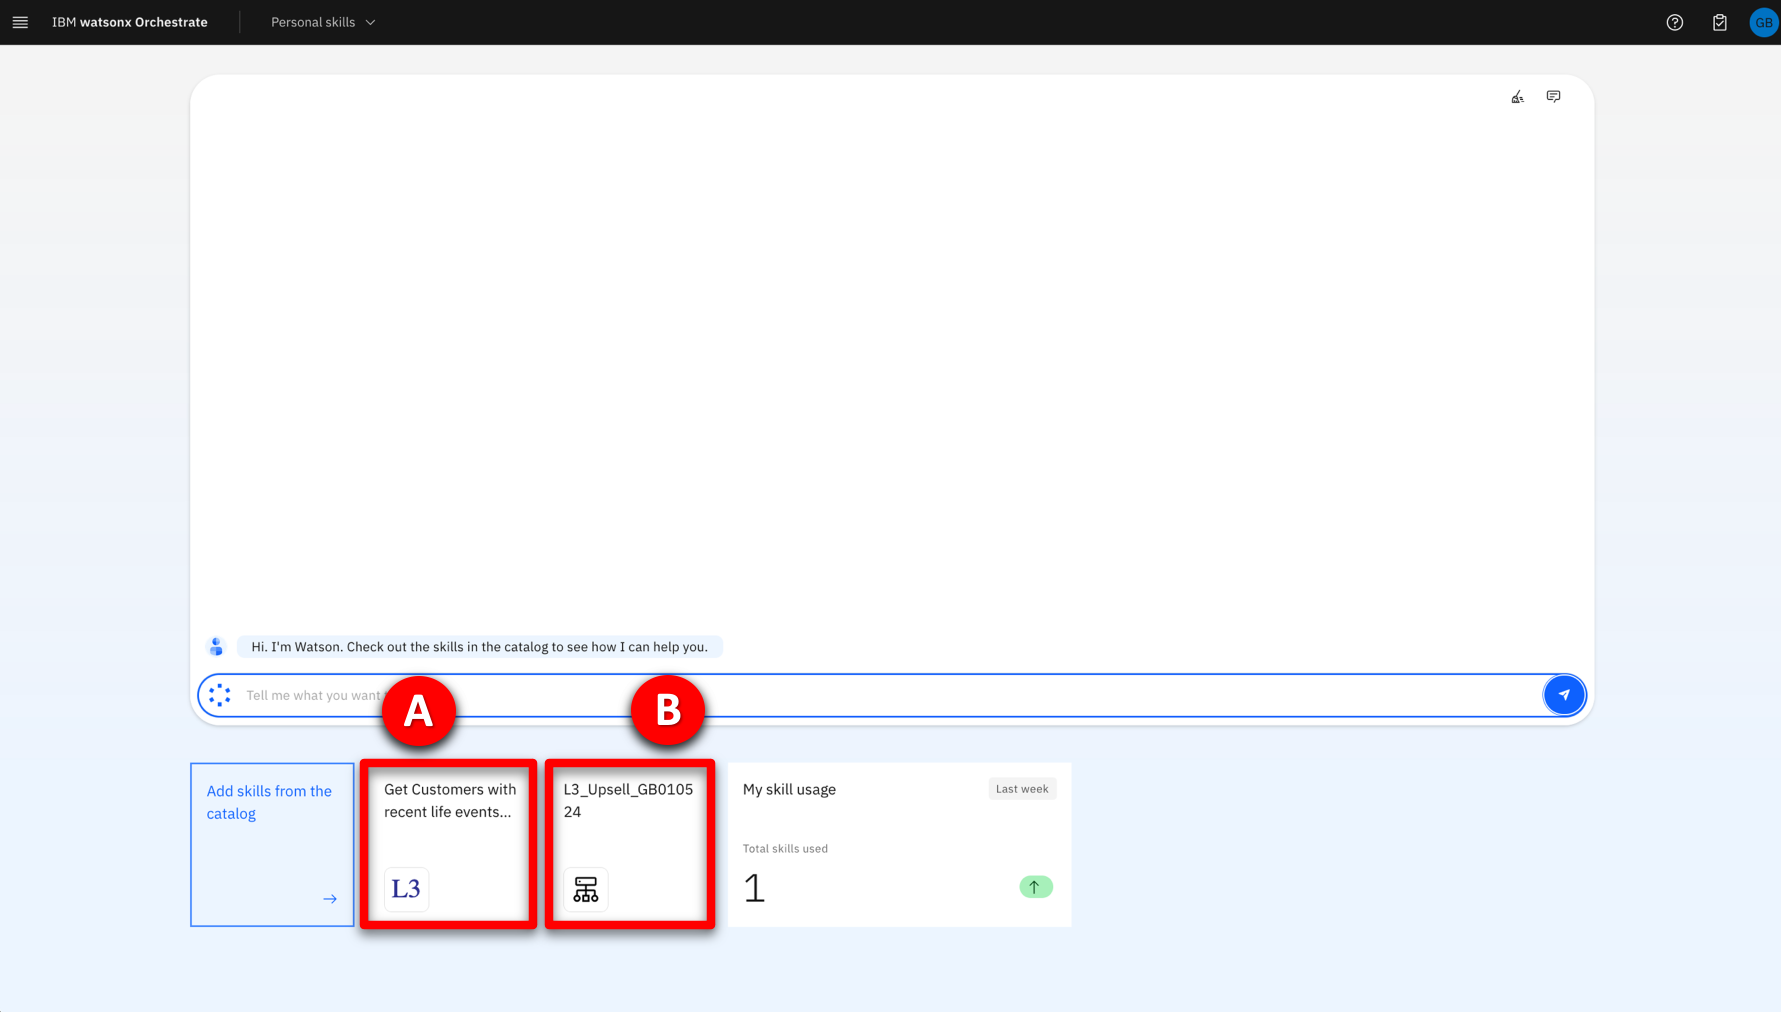
- Confirm that two tiles (A & B) are present below the watsonx Orchestrate chat window. The Get Customers with recent life events skill represents the OpenAPI skill, and L3_Upsell represents the decision model you previously imported.
6 – Add Generate Email skill
From the skills catalog, add the built in ‘Generate an email’ skill, required for this demo.
- Click the navigation hamburger menu icon (A), then select Skills catalog (B) from the left menu.
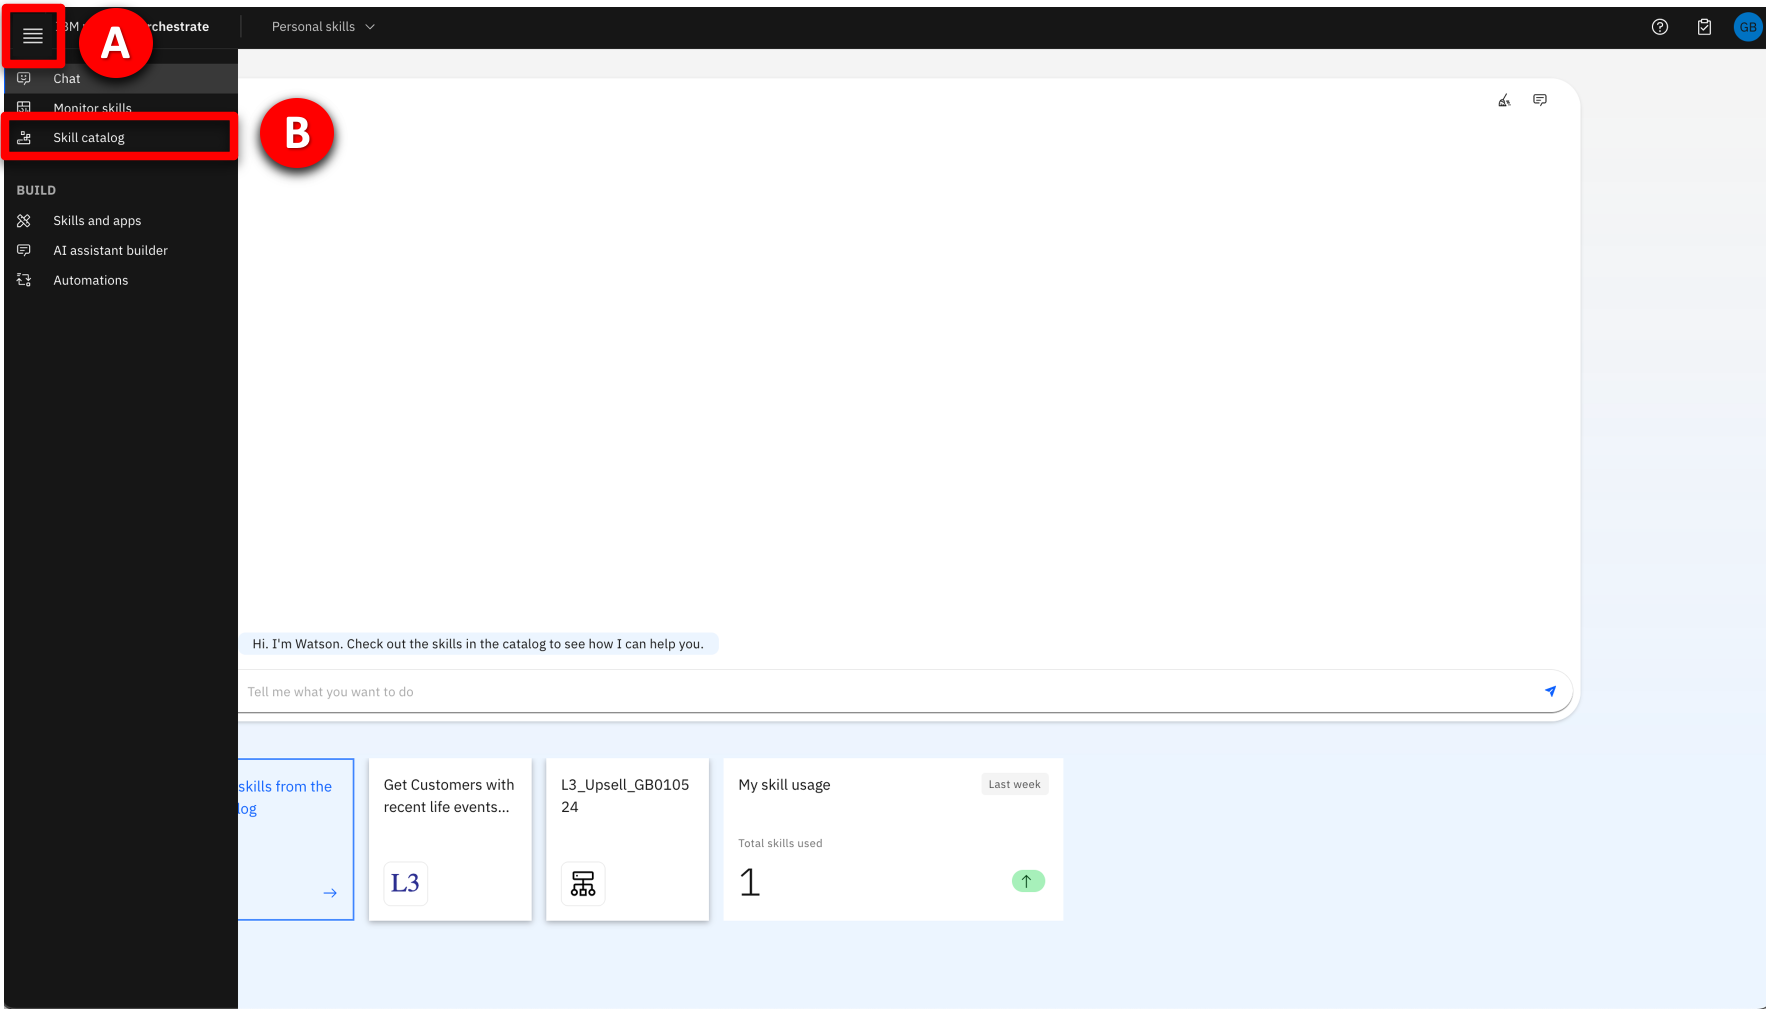
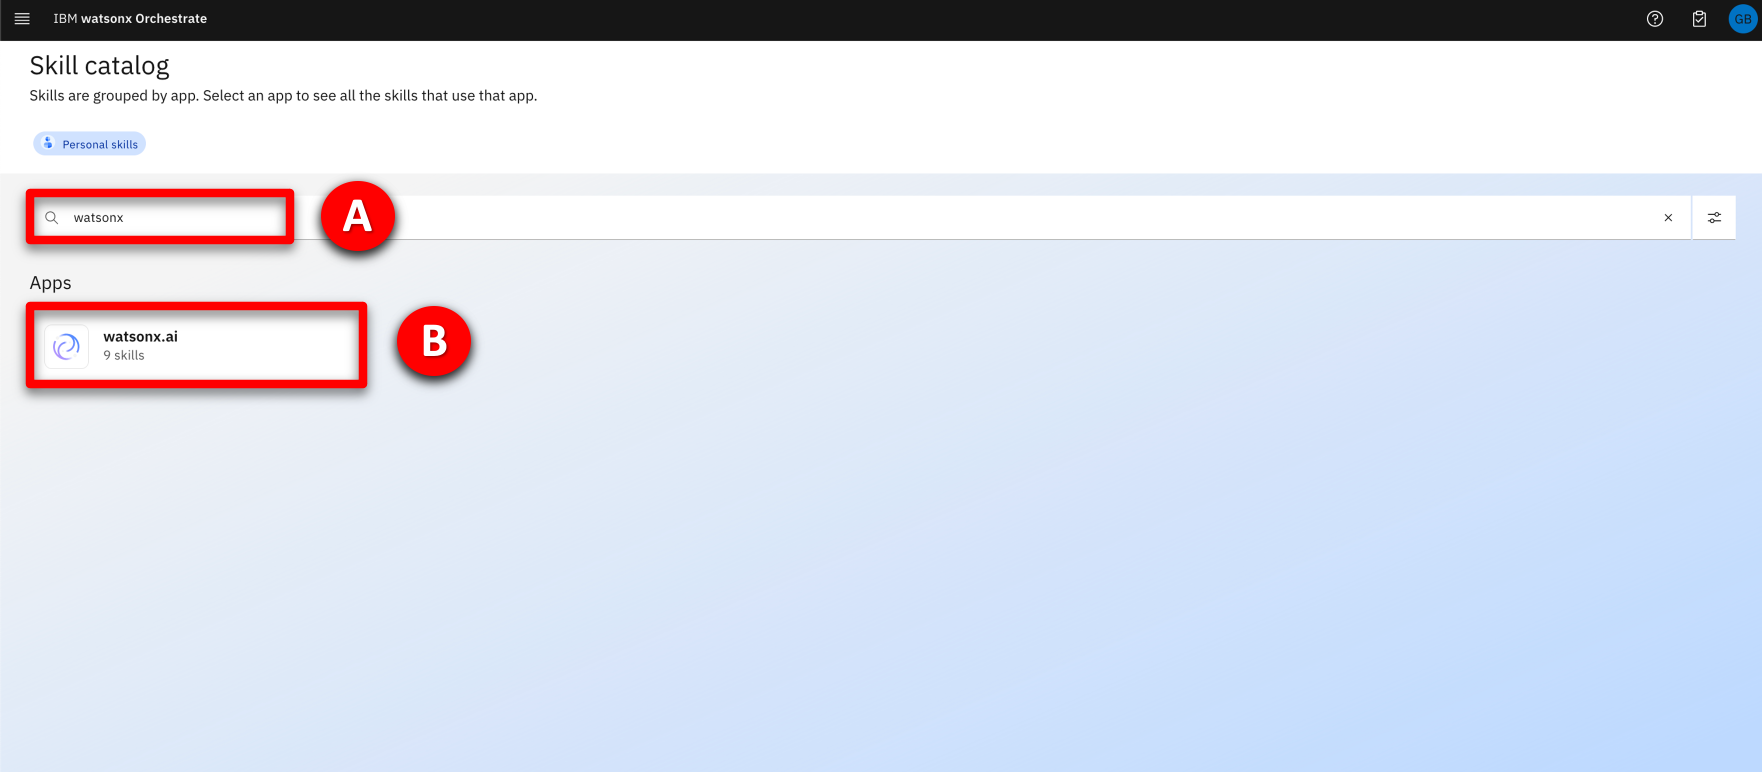
- Type “watsonx” into the Search field (A) (the field with the magnifying glass), press Enter key, then click on the App tile (B).
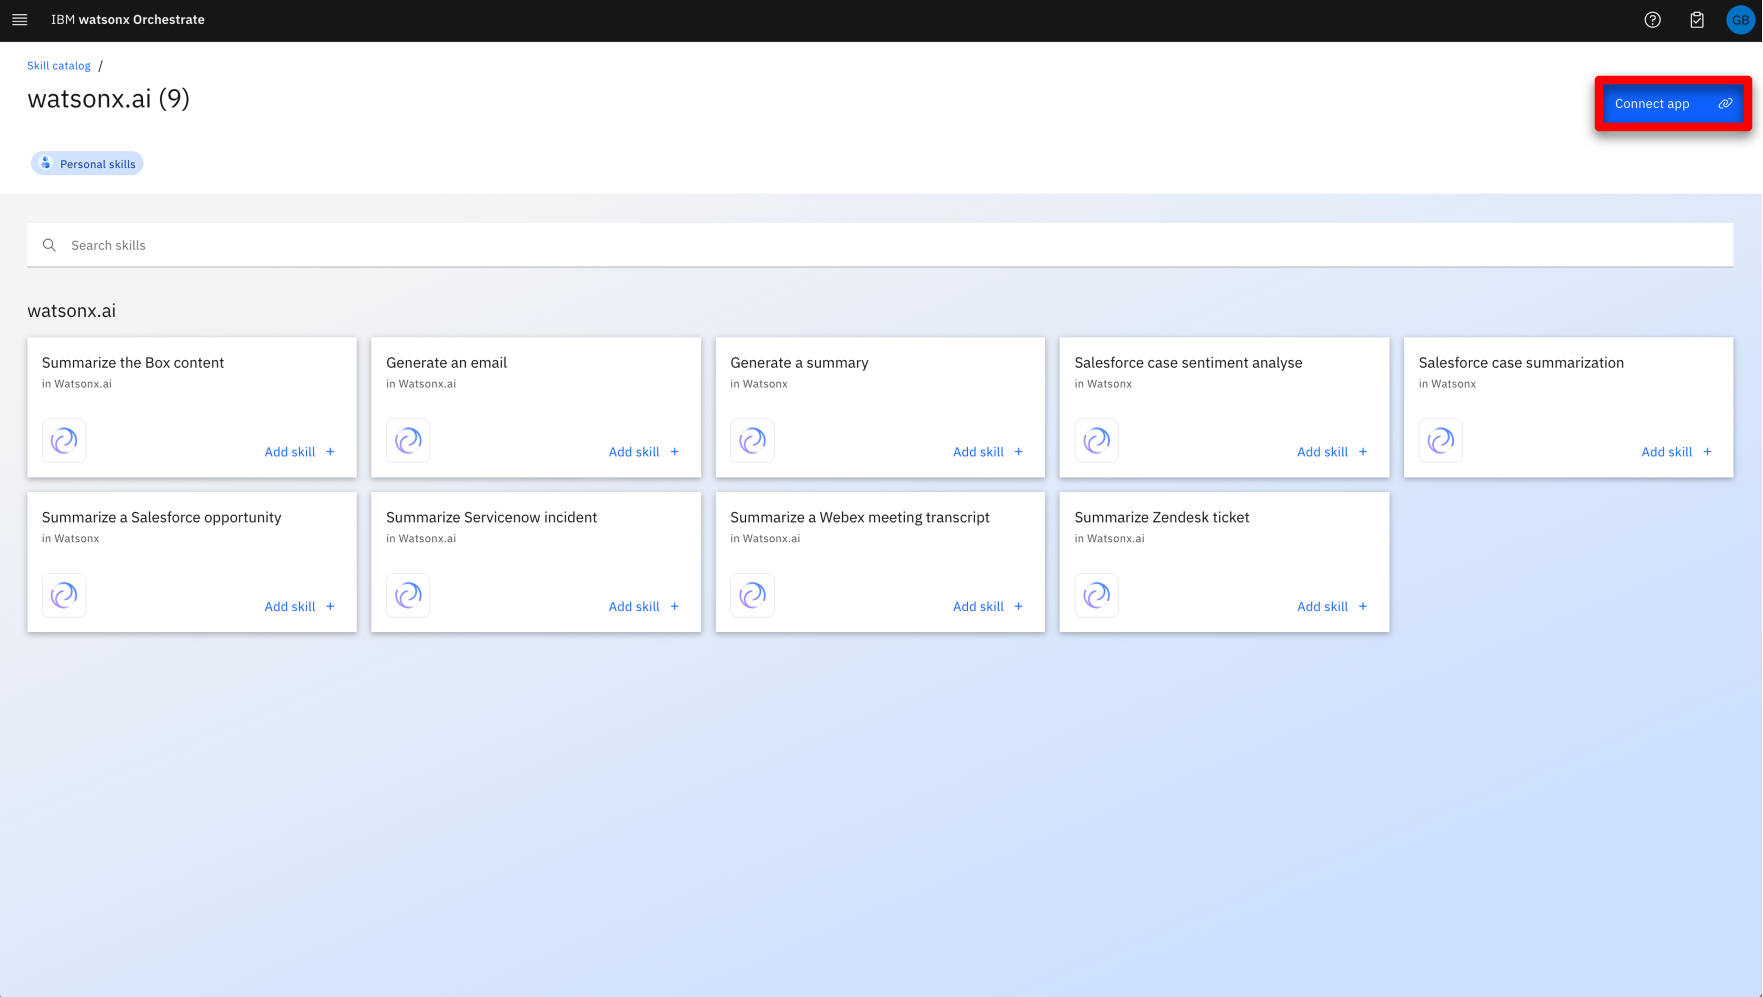
- In the top-right corner of the screen, click Connect app.
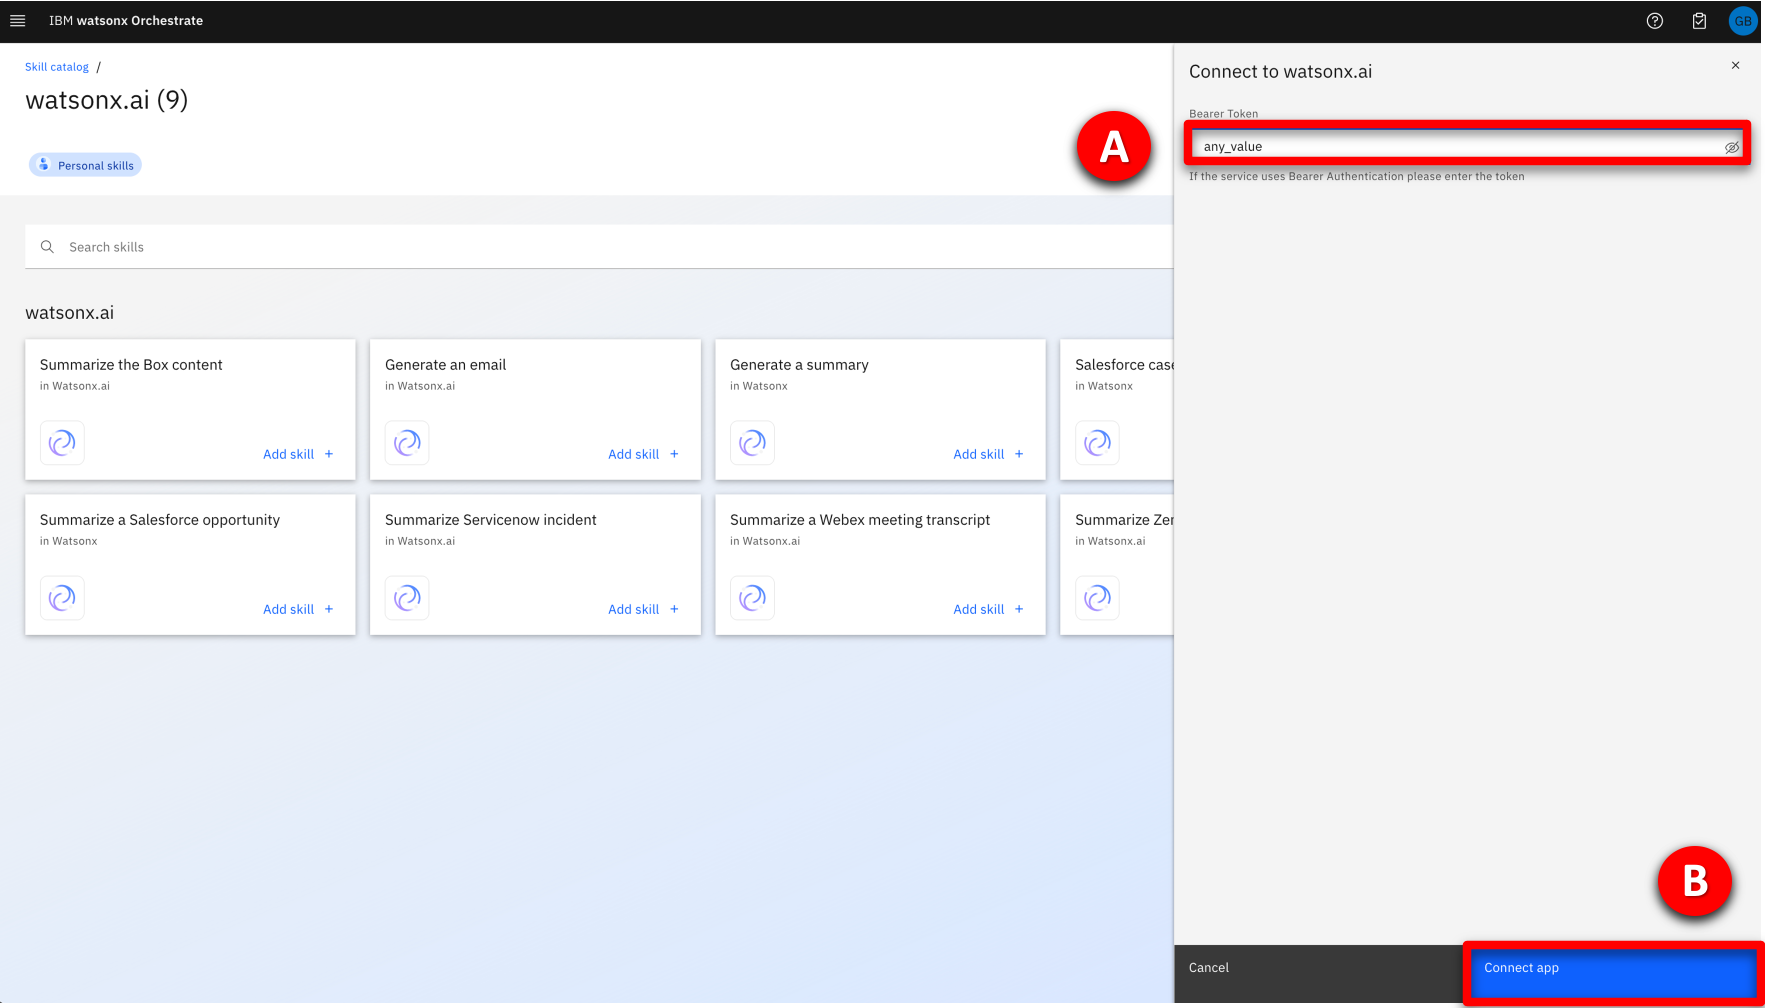
- Enter a Bearer Token (A) (any value will work), then click Connect app (B).
- Click Add skill + on the Generate an email tile (A). A message will appear to confirm the skill has been added.
7 – After your demo
The watsonx Orchestrate environment that is used for this demo is shared by many users. After completing your demo, please take a few minutes to remove any skills or automations you created during the demo. Full instructions to remove your skills are given at the end of these demo instructions.
Click here to go to the Demo script on the next tab.