| DEMO OVERVIEW | |
|---|---|
| Scenario overview | In this demo we will see how Focus Corp, an online retailer, uses real-time MQ transaction data to capitalize on time-sensitive revenue opportunities. This demo builds on Detecting time-critical situations using Event Automation adding steps that show the IBM MQ to Kafka connectivity. |
| Demo products | IBM Event Automation, Cloud Pak for Integration |
| Demo capabilities | Event Streaming, Event Endpoint Management, Event Processing and IBM MQ |
| Demo intro slides | Download the Introduction and Overview slides here. This is a short deck of customer-facing slides that sets the context for the demo. |
| Demo script | A complete demo script is on the second tab above. You can download a printer-ready PDF of the demo script here. This demo script has multiple tasks that each have multiple steps. In each step, you have the details about what you need to do (Actions), what you can say while delivering this demo step (Narration), and what diagrams and screenshots you will see. This demo script is a suggestion, and you are welcome to customize based in your sales opportunity. Most importantly, practice this demo in advance. If the demo seems easy for you to execute, the customer will focus on the content. If it seems difficult for you to execute, the customer will focus on your delivery. |
| Customer-ready demo video |
View the demo video here. This is a short, but detailed, hands-on walkthrough of the scenario. The video is customer-ready. Potential uses of this video are: 1. Familiarize yourself with the details of this scenario 2. Gain customer agreement that they would like to have a tech-seller do a deep-dive demo of this scenario 3. Use as a prospecting tool to generate customer interest in applying these capabilities |
| Required versions | Cloud Pak for Integration 2023.4.1 |
| How to get support | • Open a support case at IBM Technology Zone Help regarding issues with reserving and provisioning Tech Zone environments. • Contact #platinumdemos-automation-support regarding issues with setting up and running this demo. |
DEMO INSTALLATION AND SETUP
1 - Provision a Red Hat OpenShift cluster
To provision your own Red Hat OpenShift cluster for the Cloud Pak for Integration, follow these steps:
-
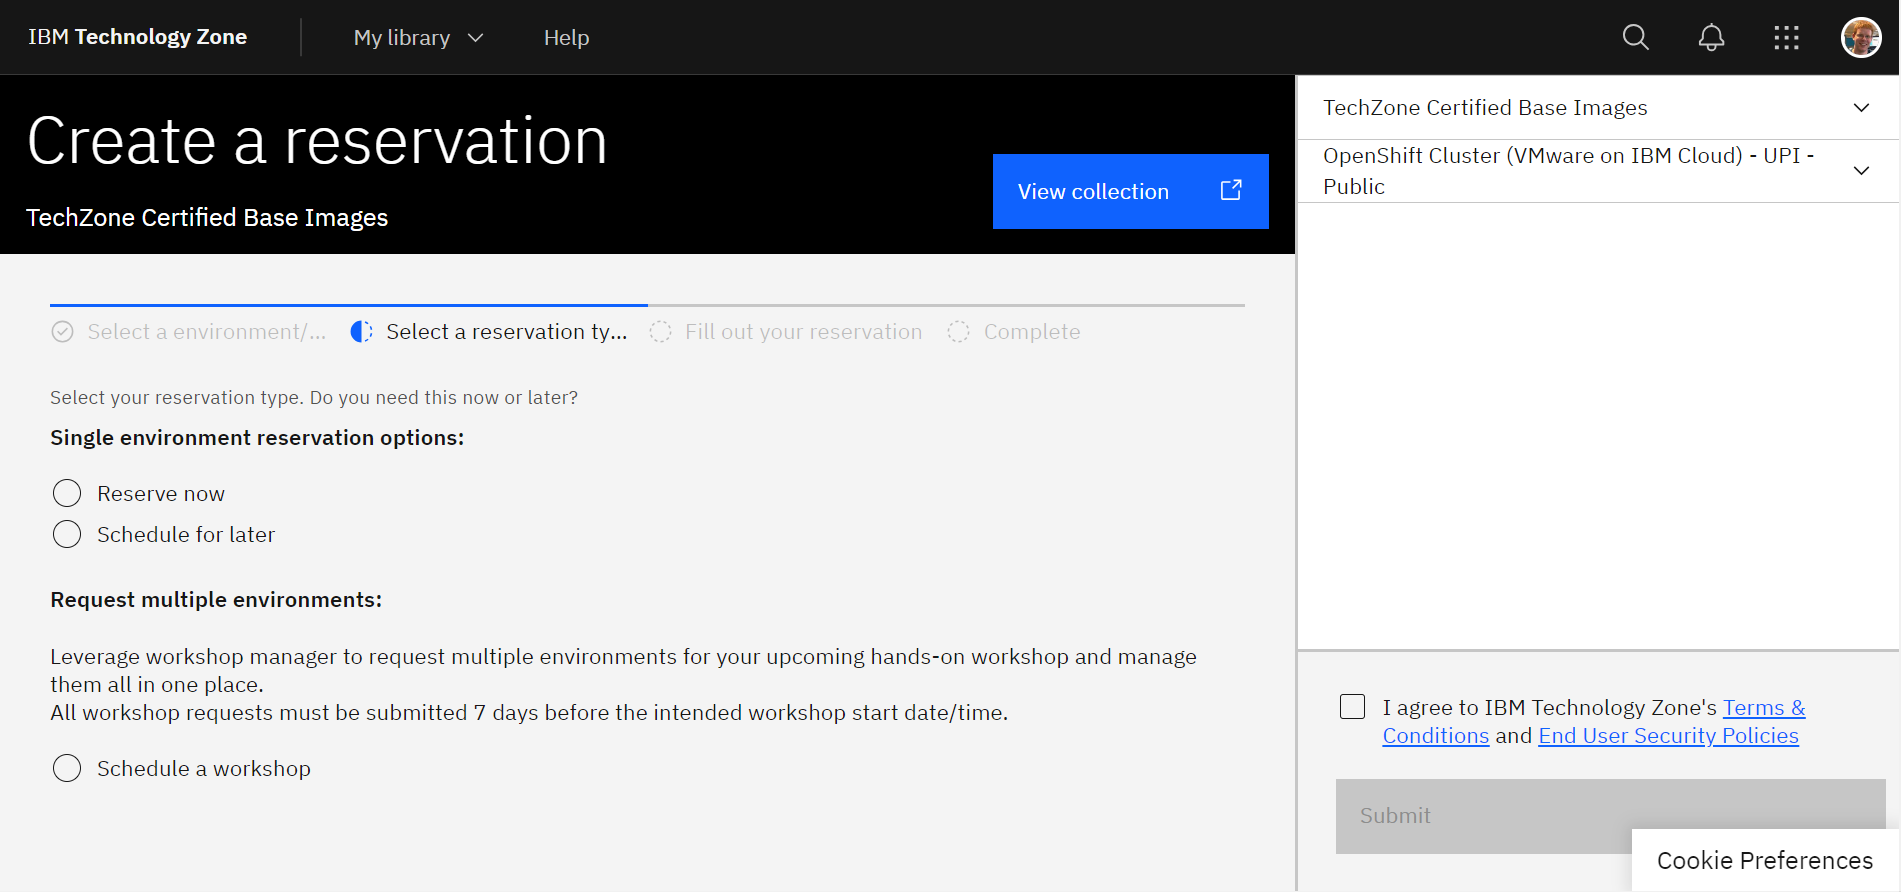
To deploy a Red Hat OpenShift cluster, go here. Select if you prefer to make a reservation now or schedule for later.
-
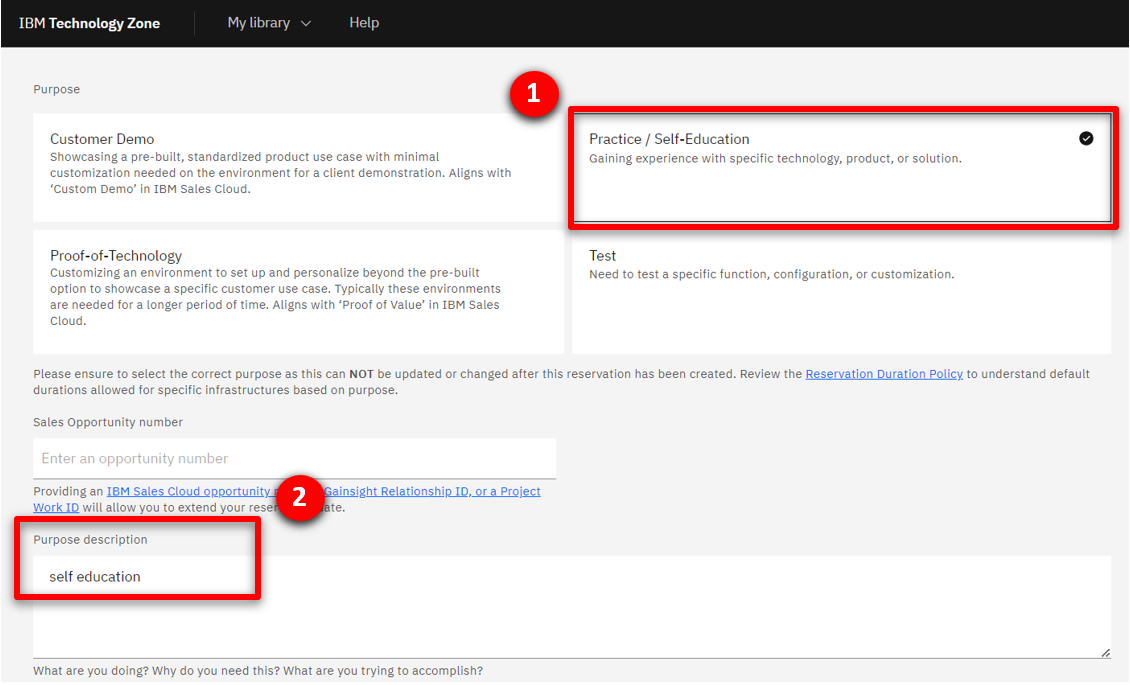
If you do not have a sales opportunity, select the purpose Practice / Self-Education (1) for a 2-day reservation (which can be extended without any approvals to 6 days) and fill in the Purpose description (2).
-
Select the Preferred Geography.

-
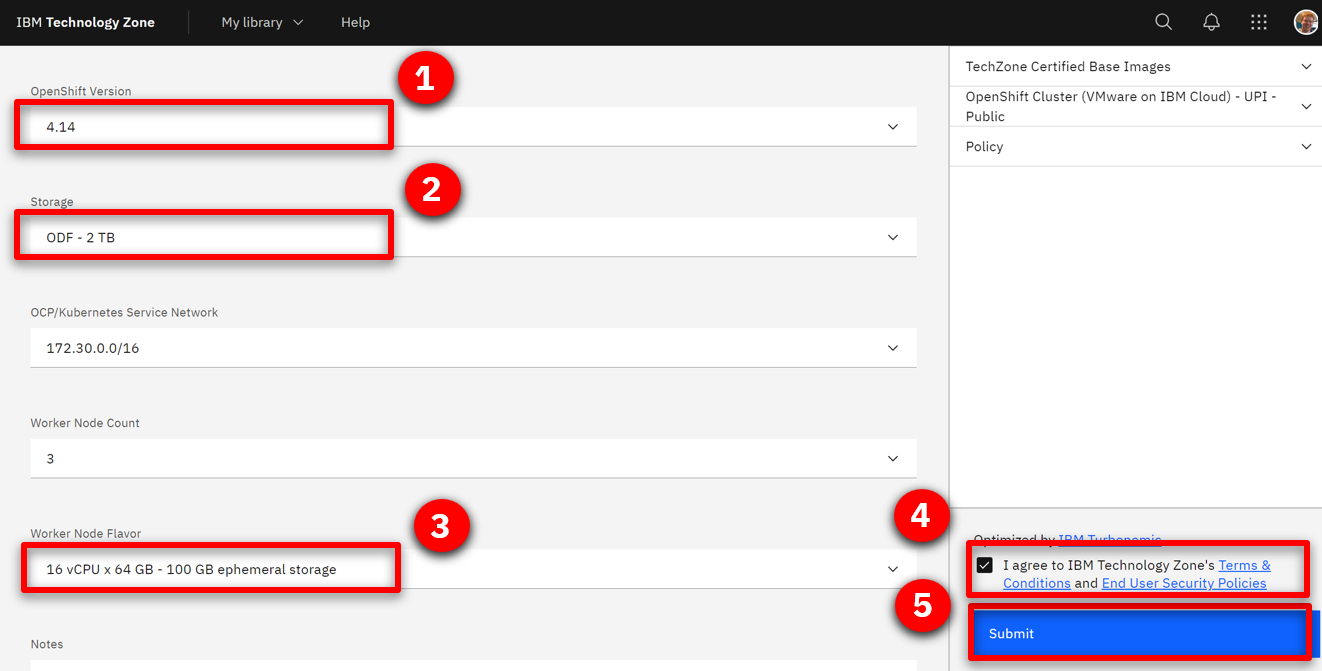
Several additional fields will appear. Select 4.14 (1) as the OpenShift version, ODF - 2TB (2) for the storage, 16 vCPU x 64 GB - 100 GB ephemeral storage (3) as the worker node flavor, accept the terms and conditions (4) and click Submit.
-
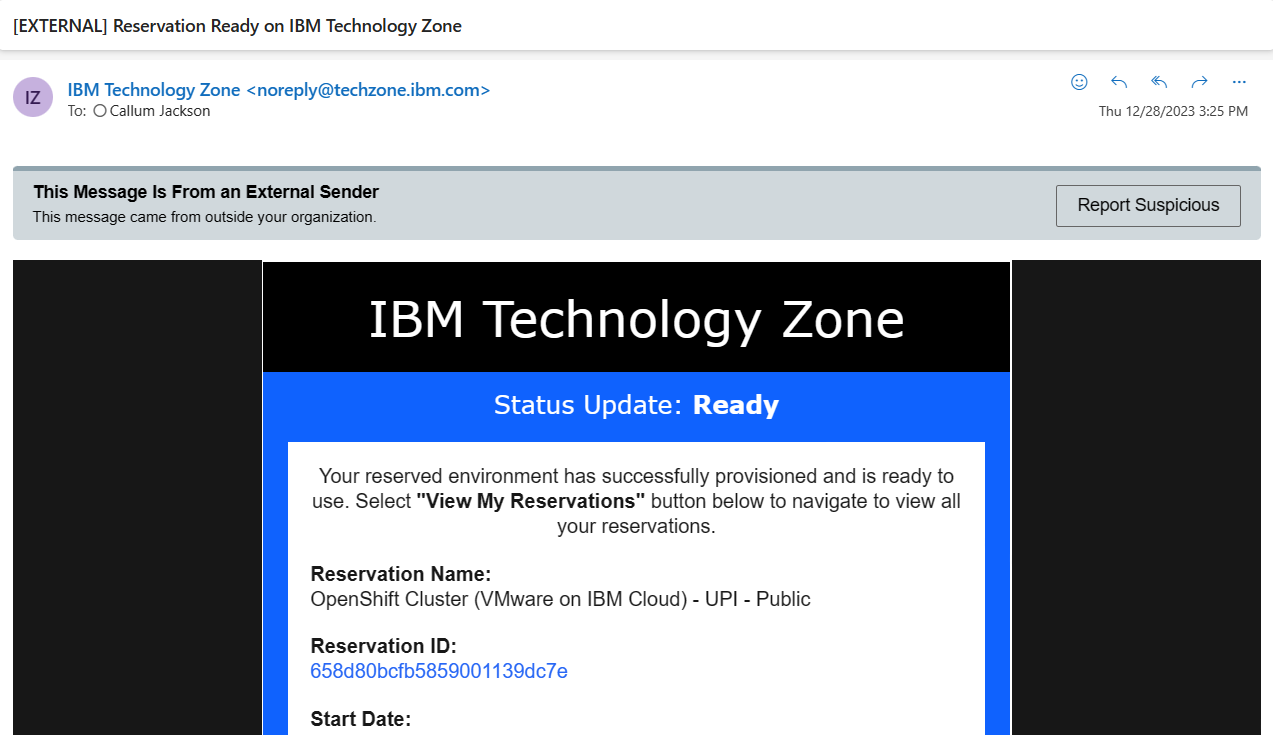
You will receive a few emails as the provisioning process continues. You should expect the final email to be sent after an hour. The final email should look similar to the following.
2 - Access your OpenShift cluster and install the command line
In this section, you access your OpenShift cluster and install the OpenShift command line tool.
-
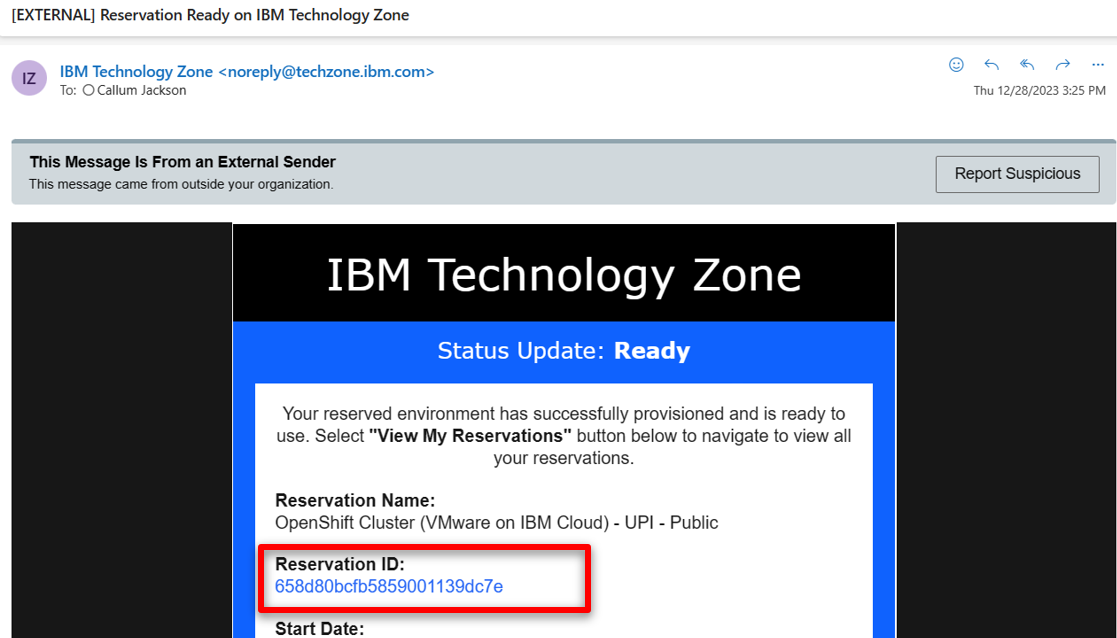
Open the Reservation ID link that was included in the “Reservation Ready on IBM Technology Zone” email.
-
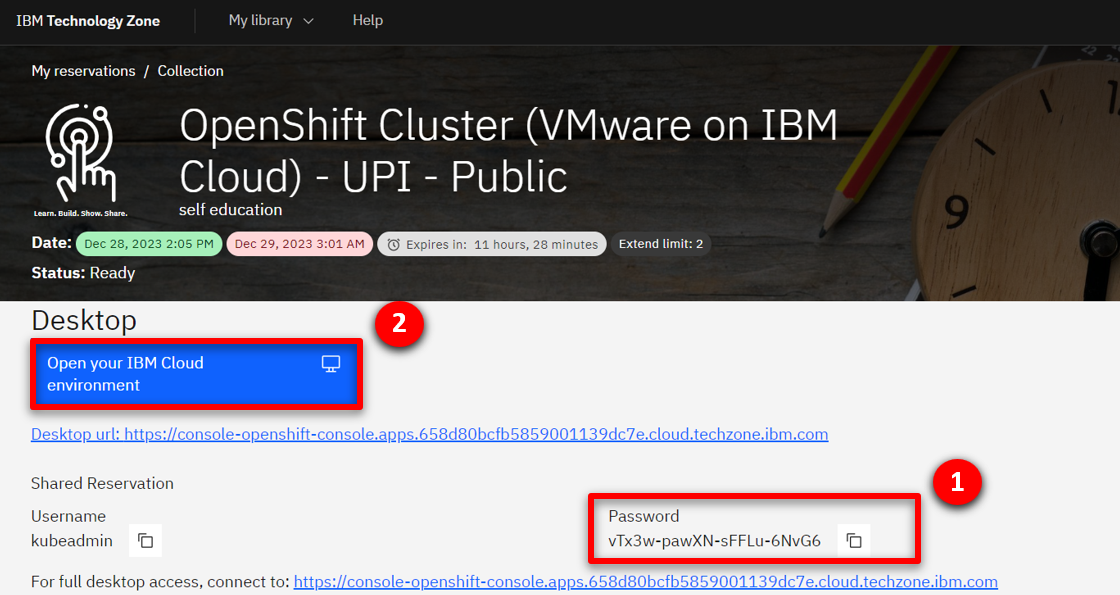
Copy the kubeadmin Password (1) and open the OpenShift console by clicking on Open your IBM Cloud environment (2).
-
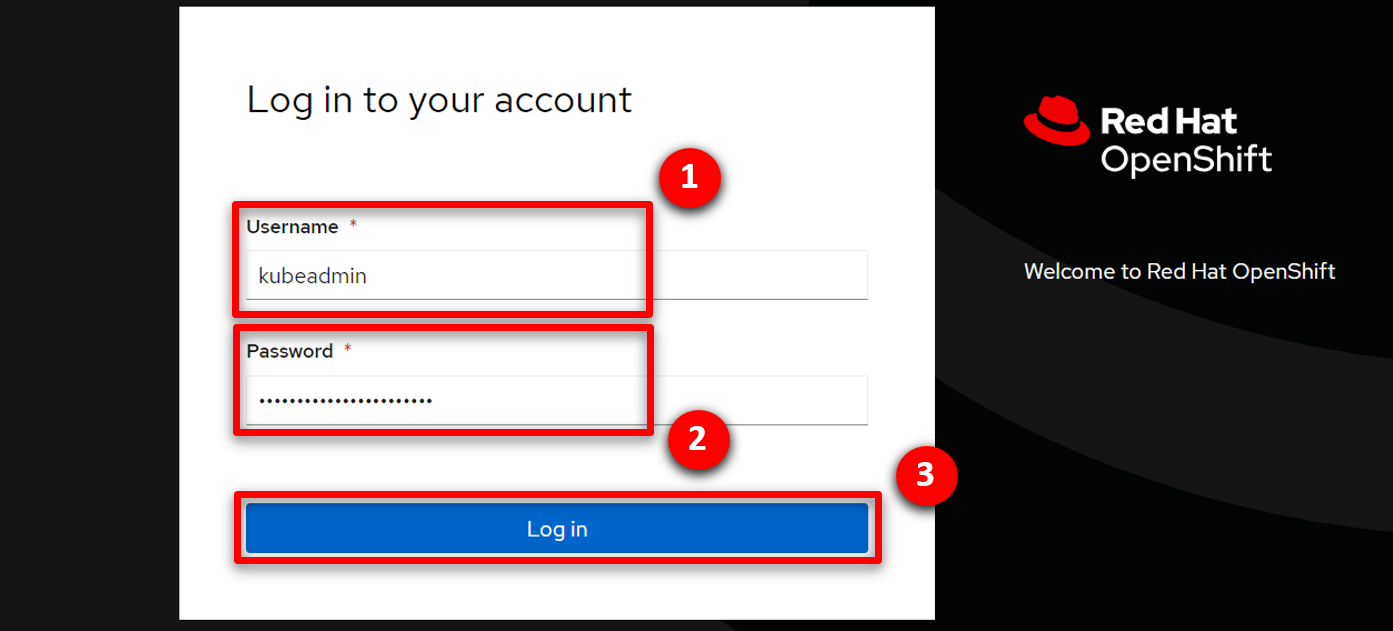
Use kubeadmin (1) as the user, paste the Password (2) and click Login (3).
-
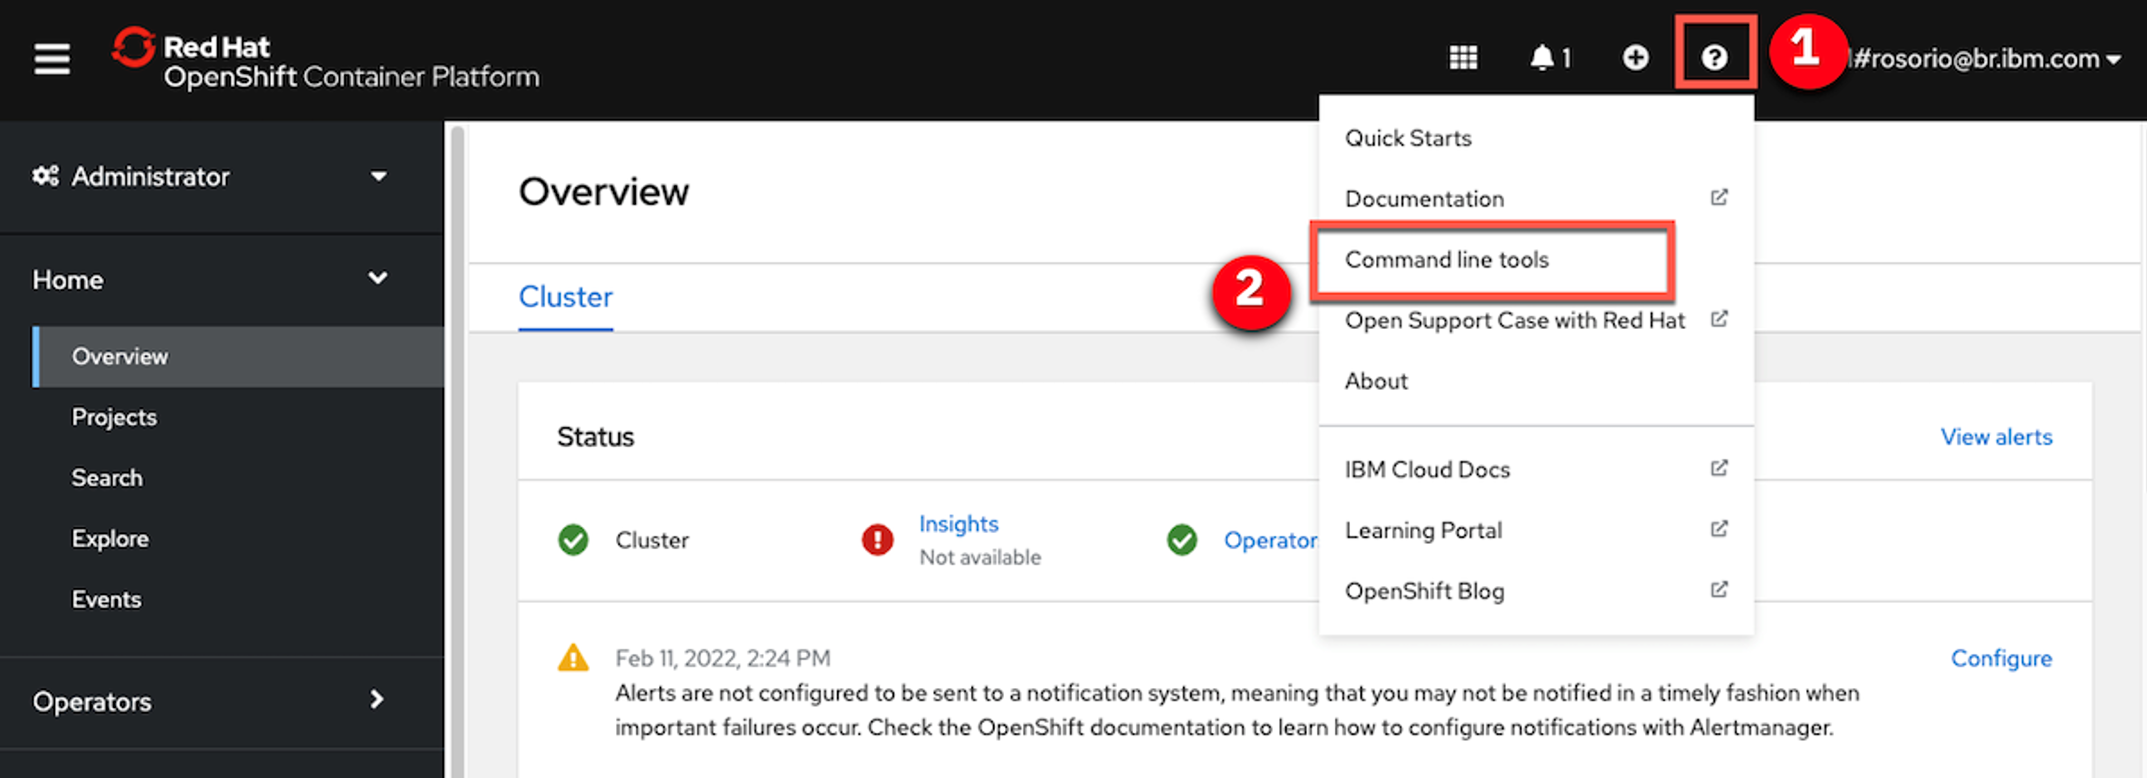
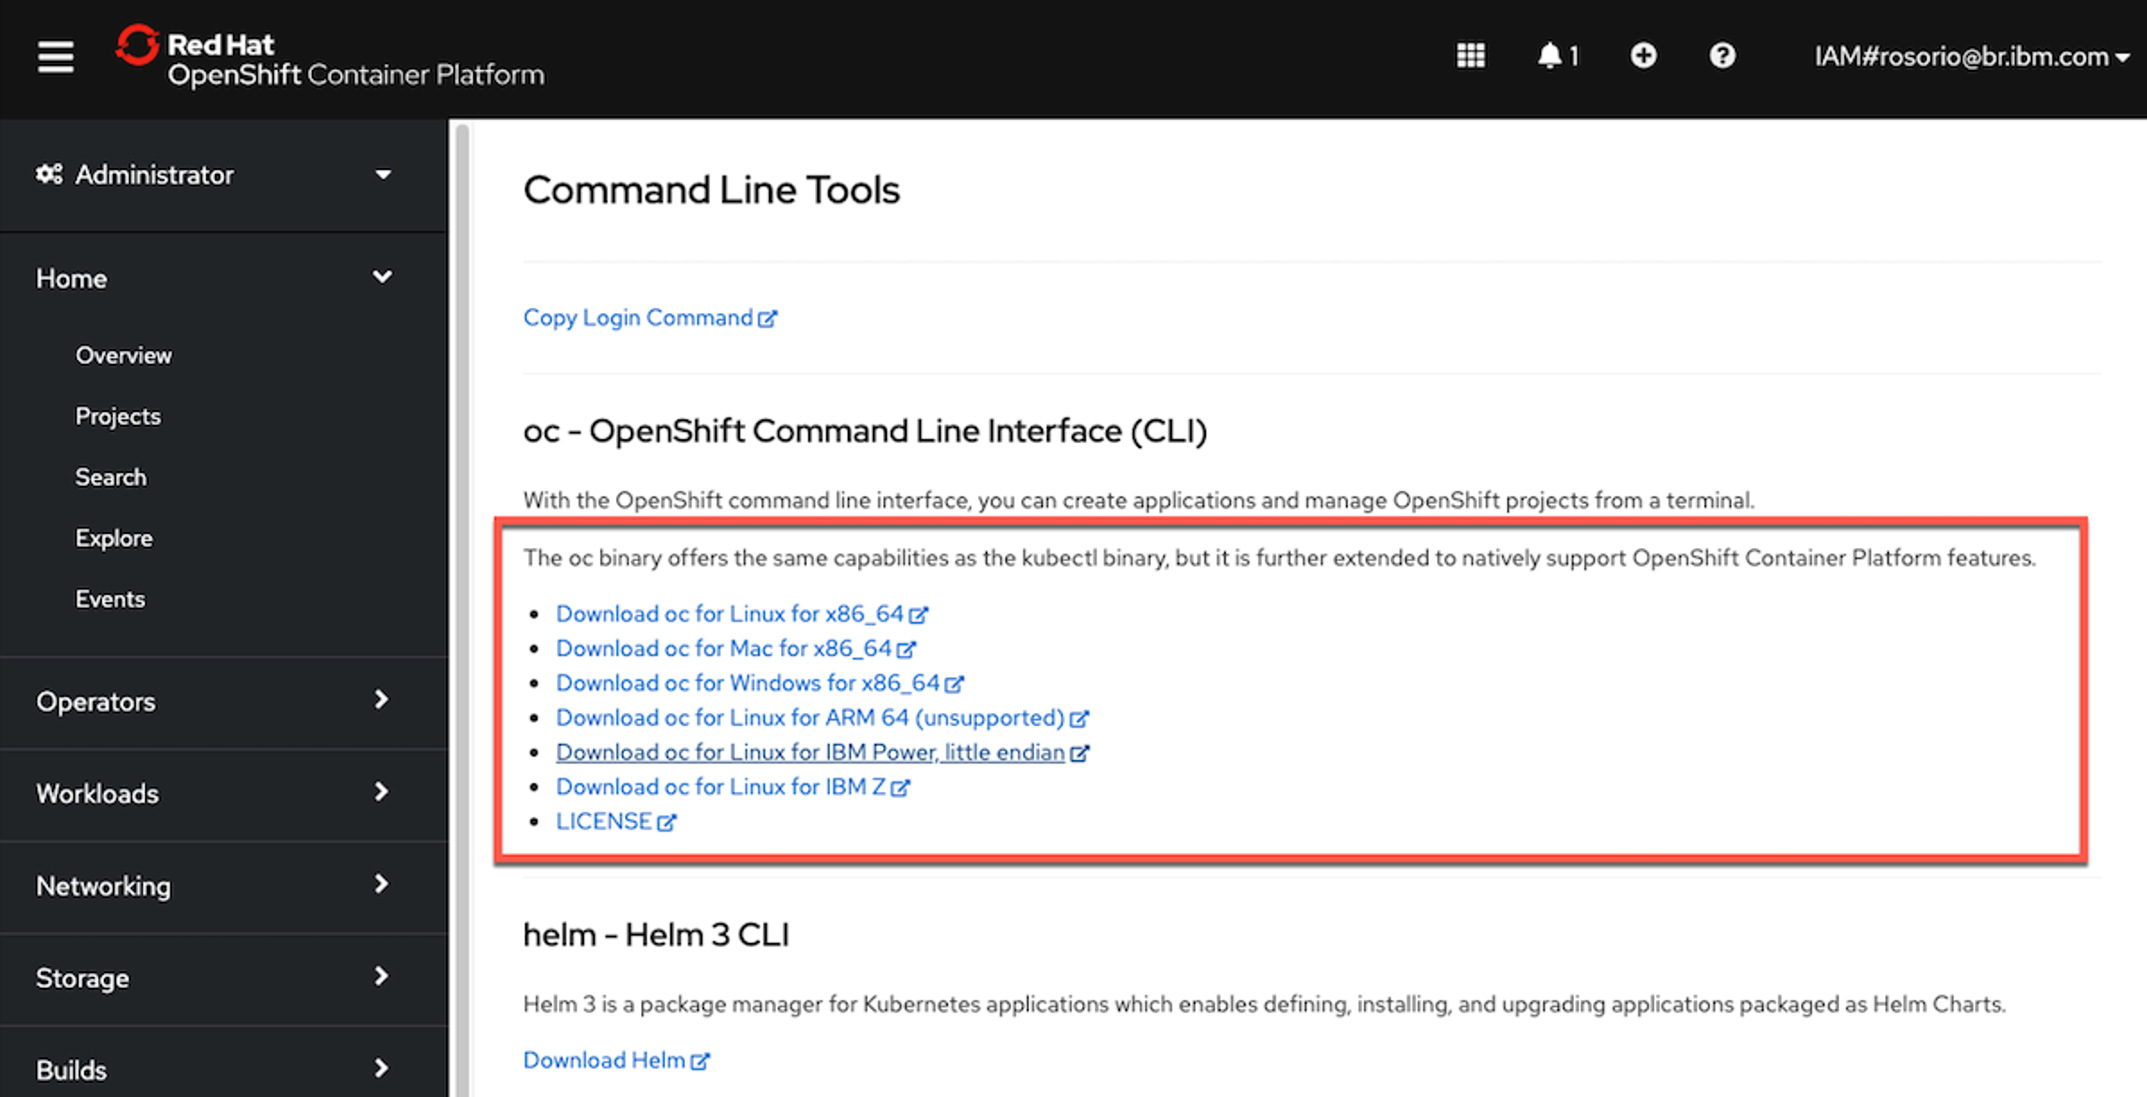
On the web console page, click ? (1), and select Command line tools (2).
-
Follow the links to install the OpenShift Command Line Interface (CLI) for your Operating System.
-
To configure the command line on your machine, click on the down arrow to the right of kubeadmin (1) and select Copy login command.
 </br>
</br> -
Click on Display token.
-
Copy the Login with this token and run in the command line.
 </br>
</br>
You have successfully configured the Openshift command line on your machine.
3 - Clone the demo assets from a GitHub repository
To copy the repository you will need to have the Git CLI on your machine. If you don’t have it, follow the installation steps described in this page, based on your operating system.
-
To download the scripts to install the demo, create a new directory, change to this newly created directory, and run the following command:
git clone https://github.com/IBM/platinum-demo-code-event-automation.git -
Change to the new platinum-demo-code-event-automation directory:
cd platinum-demo-code-event-automation
4 - Install the demo and access the Web UI
-
To deploy the demo run:
./deploy.shThis will automatically deploy the resources into the CP4I namespace.
-
The deployment will take approximately 20-45 minutes to install. Wait for the deployment to complete. The URL and credentials will be shown once the installation is complete.

If you need to recall this information please use the getURL.sh command:
getURL.sh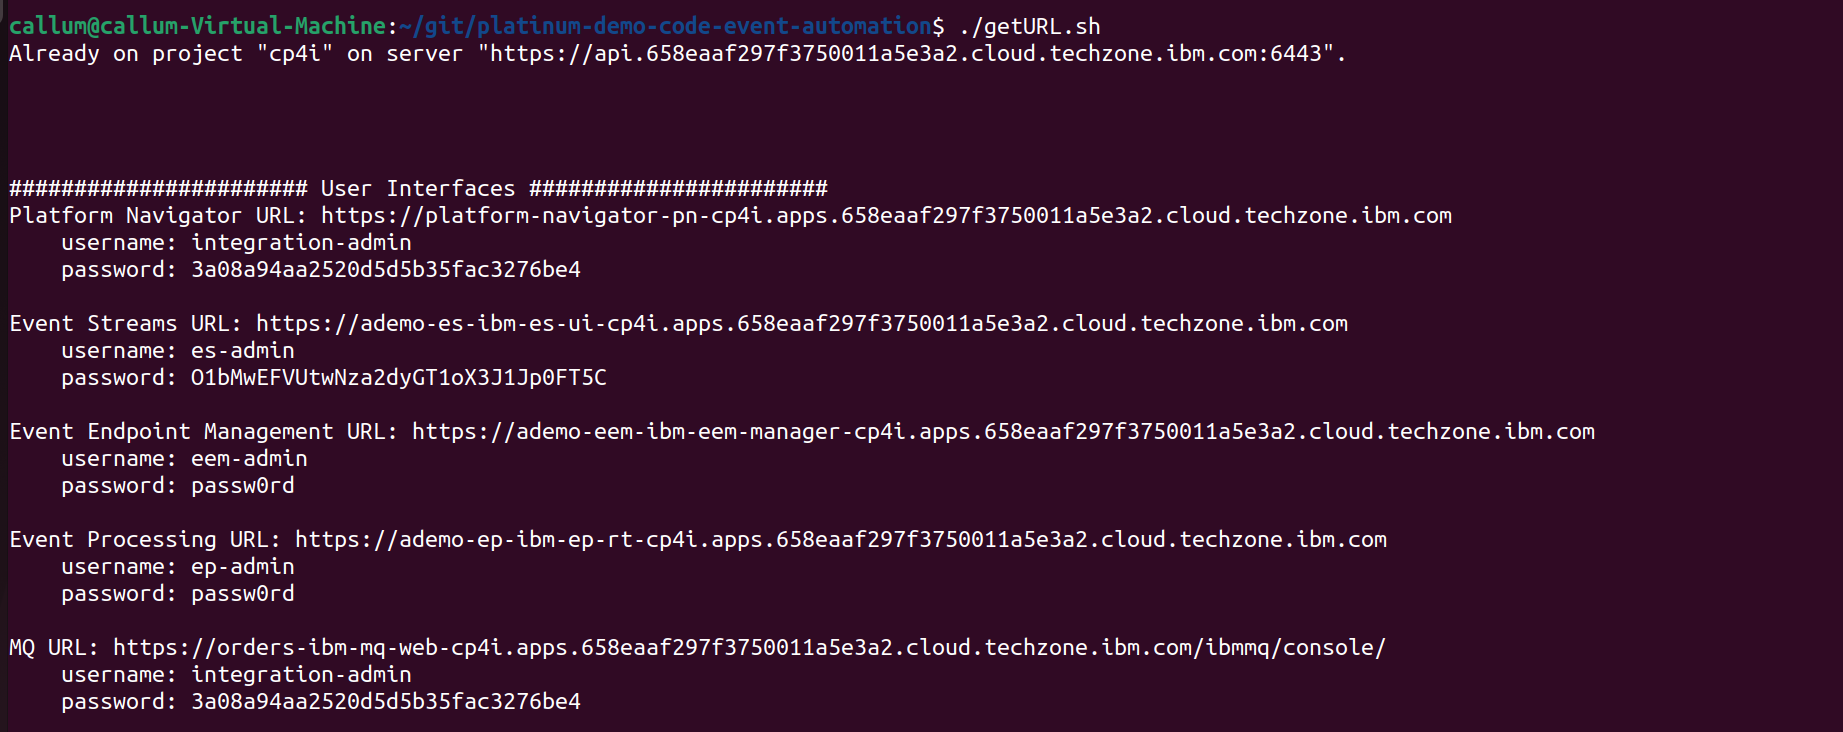
-
In preparation for running the demo open the IBM MQ, Event Streams, Event Endpoint Management and Event Processing consoles using the supplied credentials.
-
When opening the IBM MQ console for the first time you will be asked to provide a new password as you are using a temporary password. Provide a new password and click Submit. Once you have changed the password the
getURL.shscript will continue to output the out of date temporary password.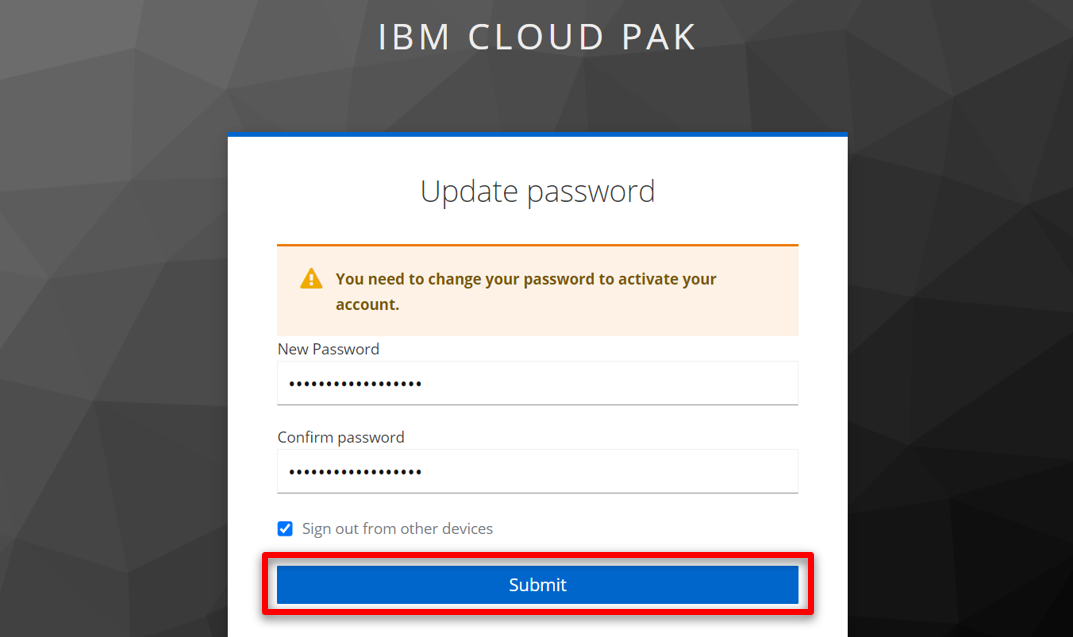
-
We have also created a scratch pad that you may find useful while running the demo. It contains space for all the username and passwords outputted above, and the text that you need to copy and paste within the demo. You can find this file here.
Your have completed the demo setup.
Click here to go to the Demo script on the next tab.
