Exercise - Create, deploy and test a new API using the API Connect Developer Toolkit
In this lab you will create a new API using the OpenAPI definition of an existing RESTful web-service that gets realtime stock quotes. You will then test the deployed API by deploying the IBM Trader Lite application which is a simple stock trading sample, written as a set of microservices. The app uses the API definition that you will create to get realtime stock quotes.
The architecture of the app is shown below:
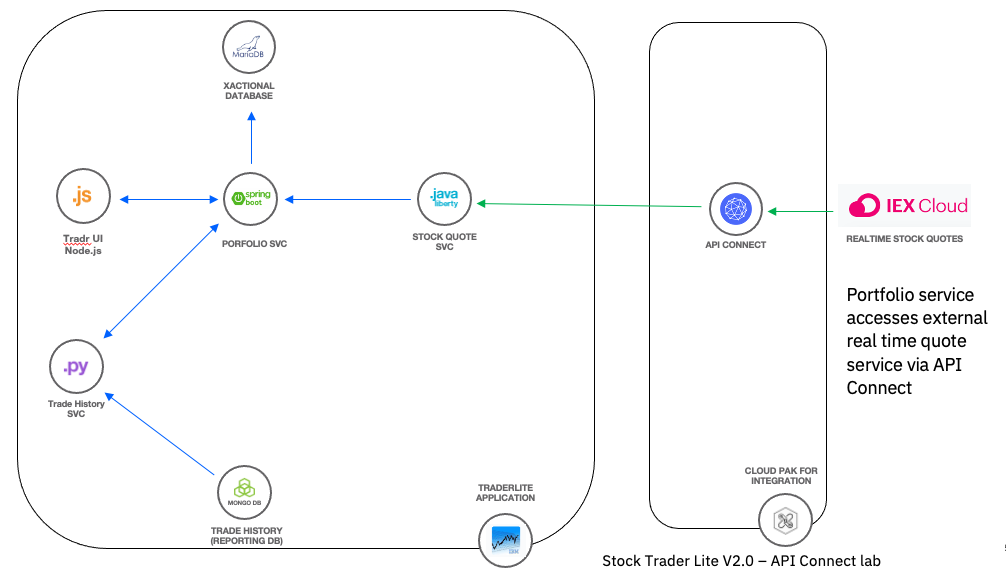
- Tradr is a Node.js UI for the portfolio service
- The portfolio microservice sits at the center of the application. This microservice:
- persists trade data using JDBC to a MariaDB database
- invokes the stock-quote service that invokes an API defined in API Connect in CP4I to get stock quotes
- calls the trade-history service to store trade data in a PostgreSQL database that can be queried for reporting purposes.
- calls the trade-history service to get aggregated historical trade data.
This lab is broken up into the following steps:
-
Download the OpenAPI definition file for the external Stock Quote service
-
Verify that the Trader Lite app is calling your API successfully
Prerequisites
The labs have been tested with recent versions of Firefox and Chrome so it is recommended that you complete this entire lab using one of these browsers.
Step 1: Download the OpenAPI definition file for the external Stock Quote service
Note: You can click on any image in the instructions below to zoom in and see more details. When you do that just click on your browser's back button to return to the previous state.
1.1 In your browser right click on the following link, right click and select Save Link As ... from the context menu. Save the file stock-quote-api.yaml to your local system.
Step 2: Import the OpenAPI definition file into API Manager
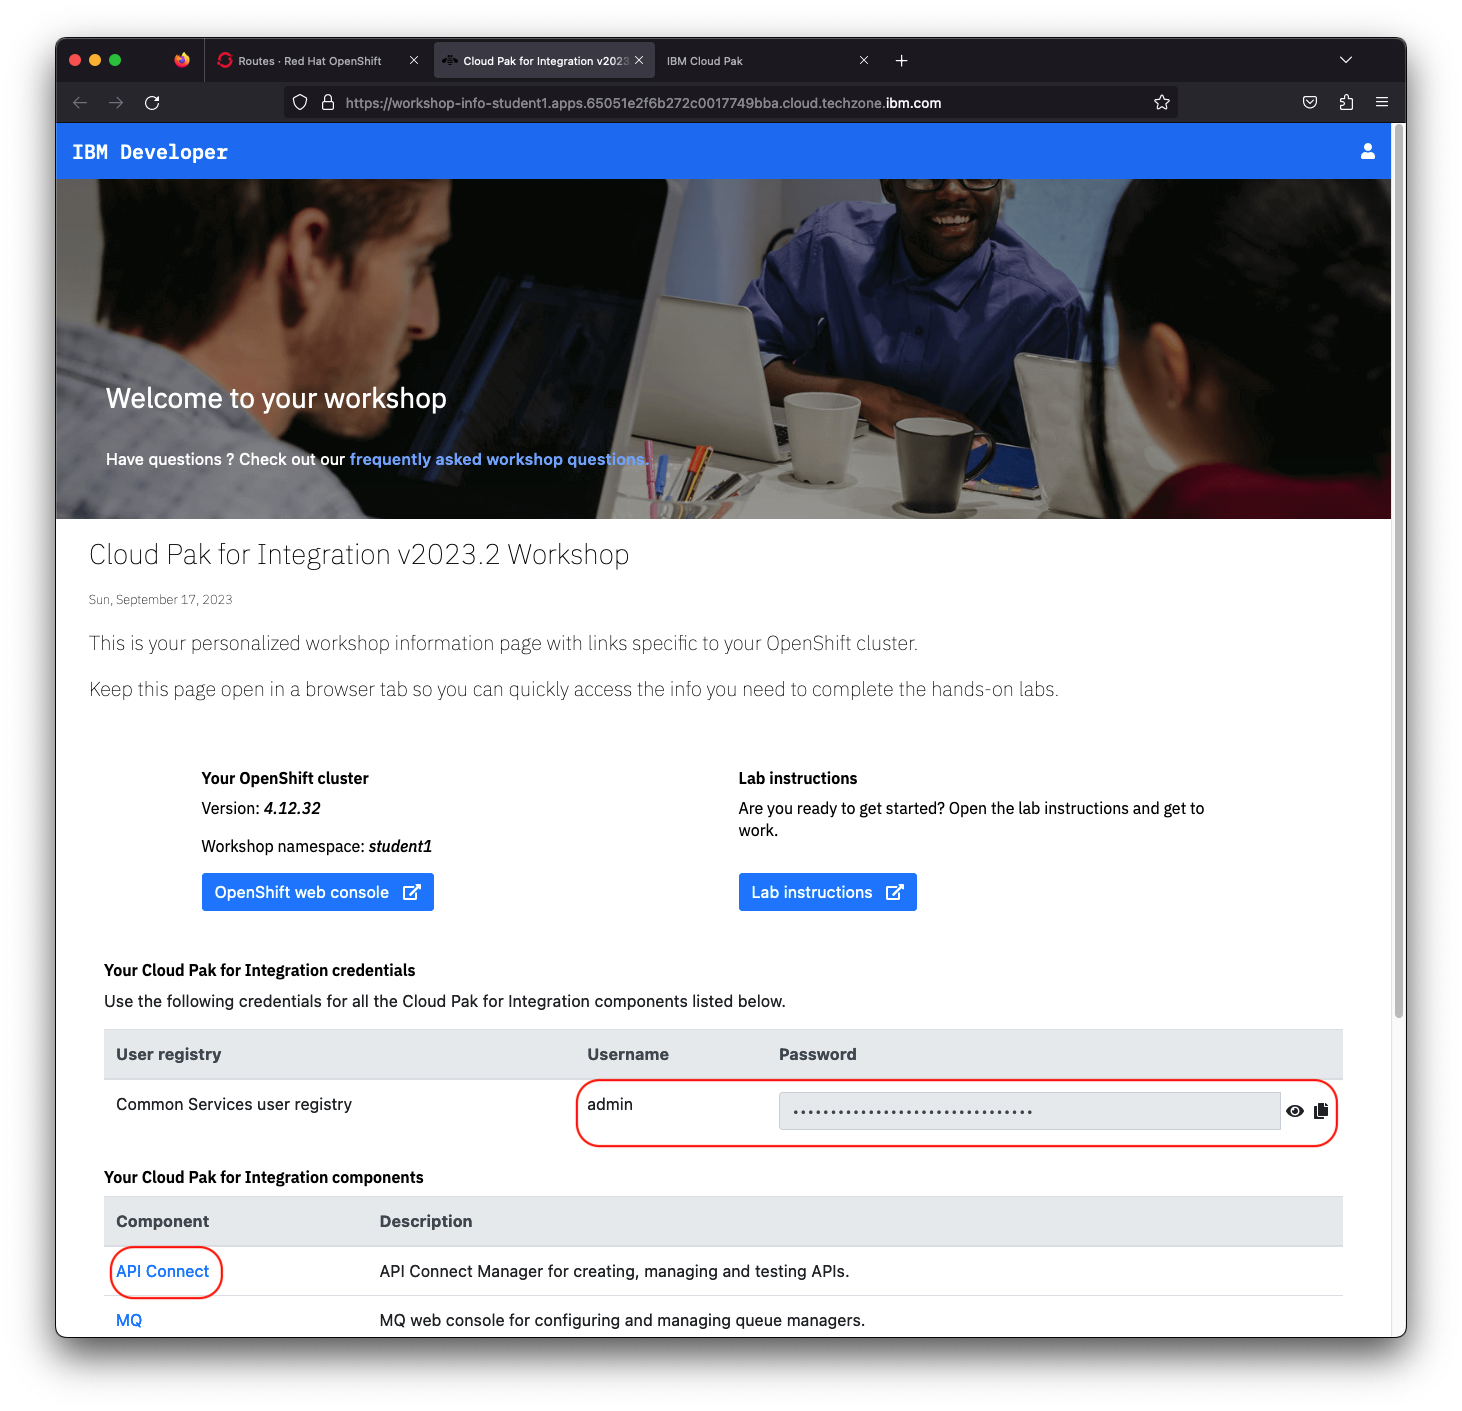
2.1 Go to the Workshop Information page using your Firefox browser
Note: Access your workshop cluster and the Workshop Information page by following the instructions in the FAQ.
2.2 Go to your Workshop Information page and click on the API Connect component link.
Note: This Cloud Pak for Integration installation use self-signed certificates so you will have to click through any browser warnings and continue to the URL.
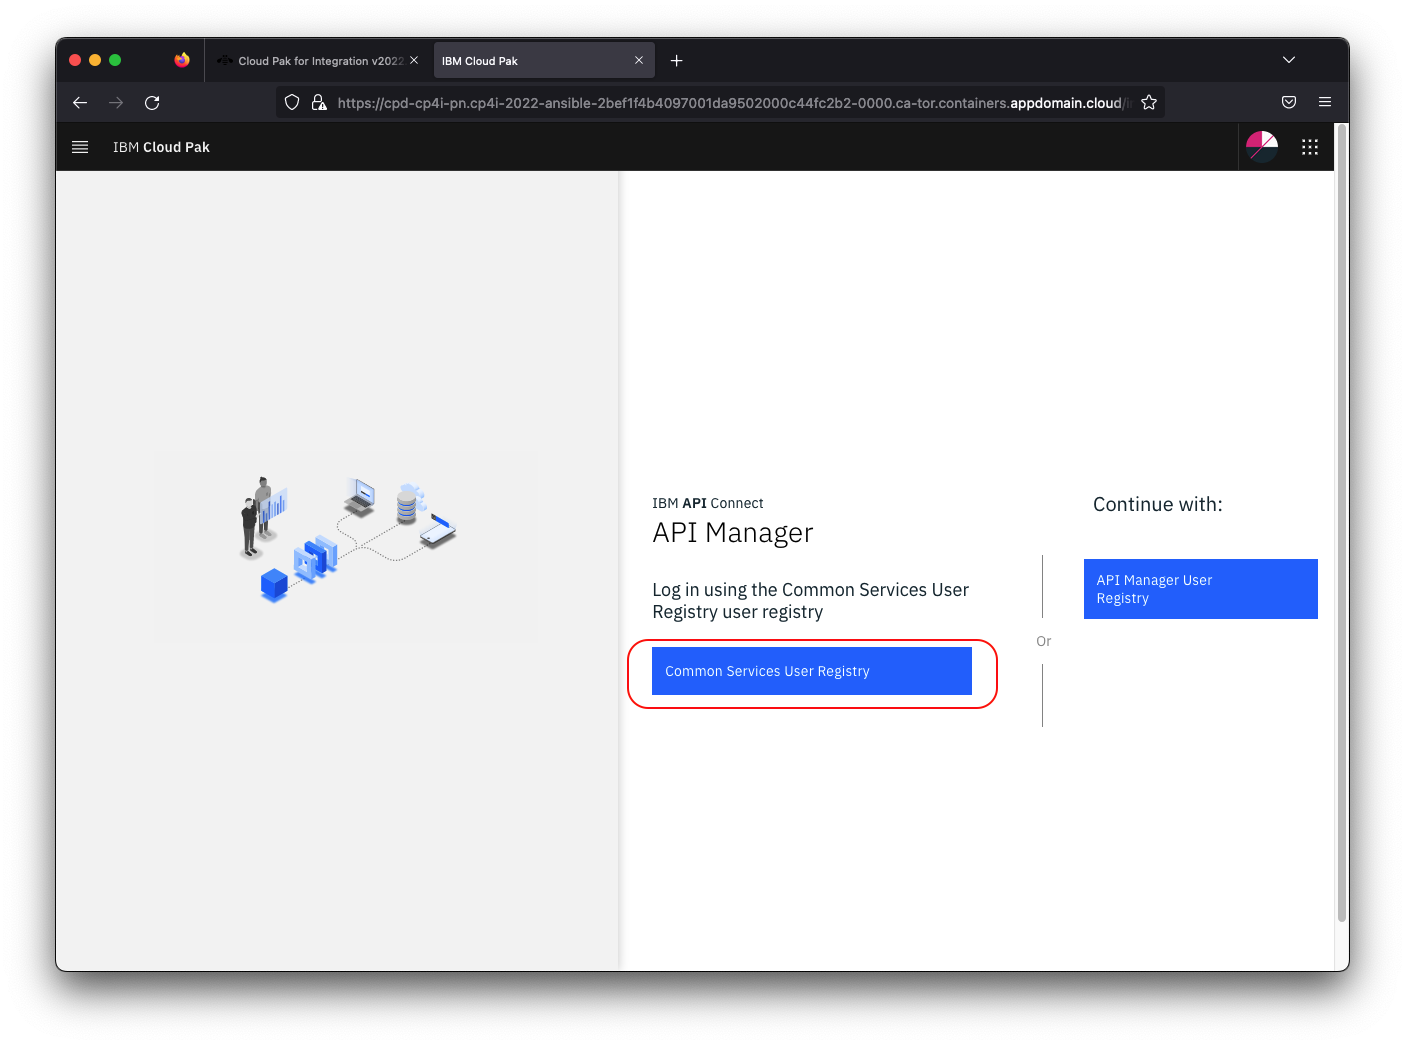
2.3 Select IBM provided credentials (admin only) from the Log in with drop down and then enter the credentials from your Workshop Information page.

2.4 Select the Common Services User Registry
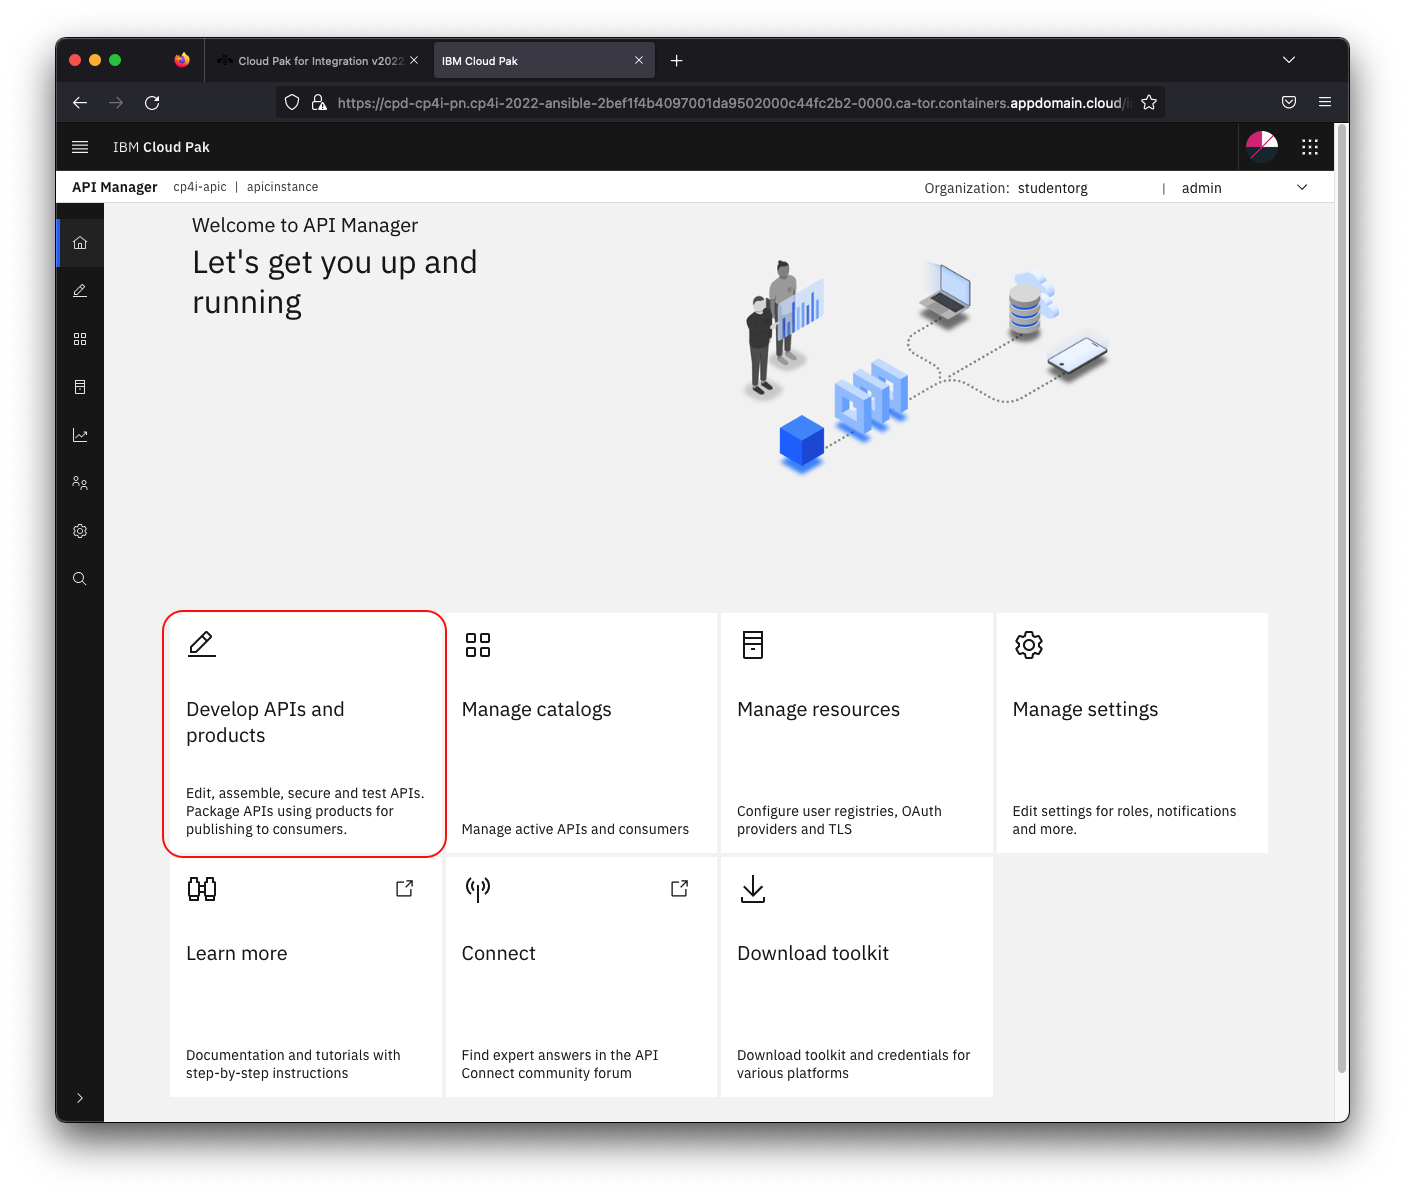
2.5 Click on the Develop APIs and Products tile
2.6 Click Add and select API from the context menu
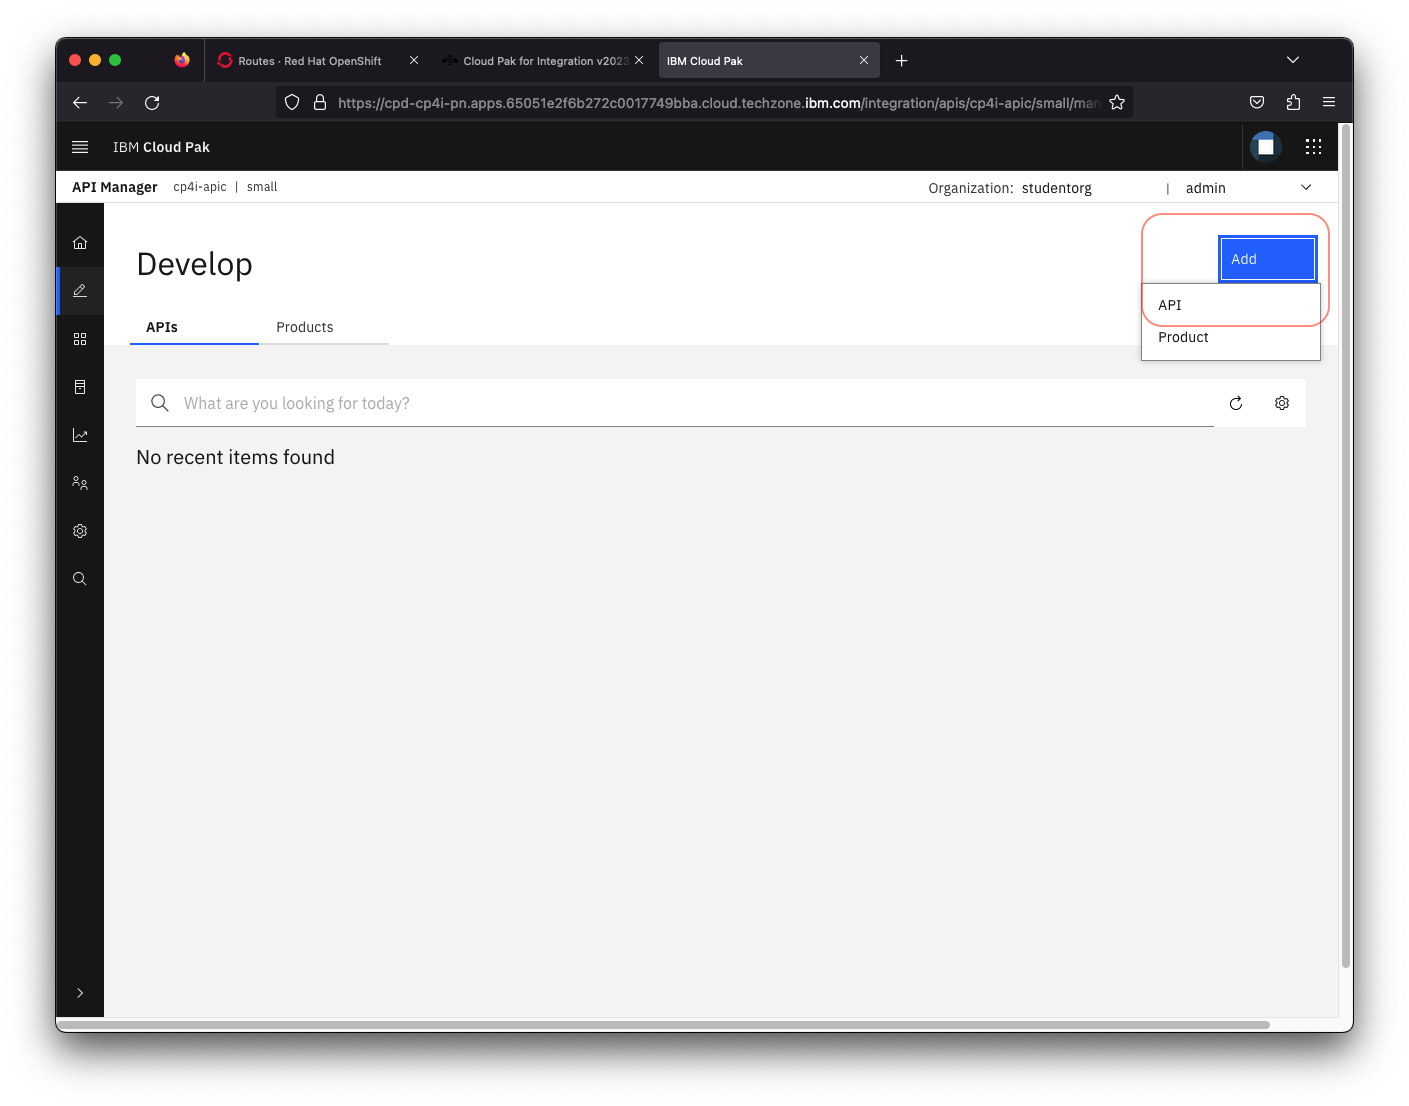
2.7 On the next screen select Existing OpenAPI under Import and then click Next.

2.8 Now choose stock-quote-api.yaml from your local file system and click Next.
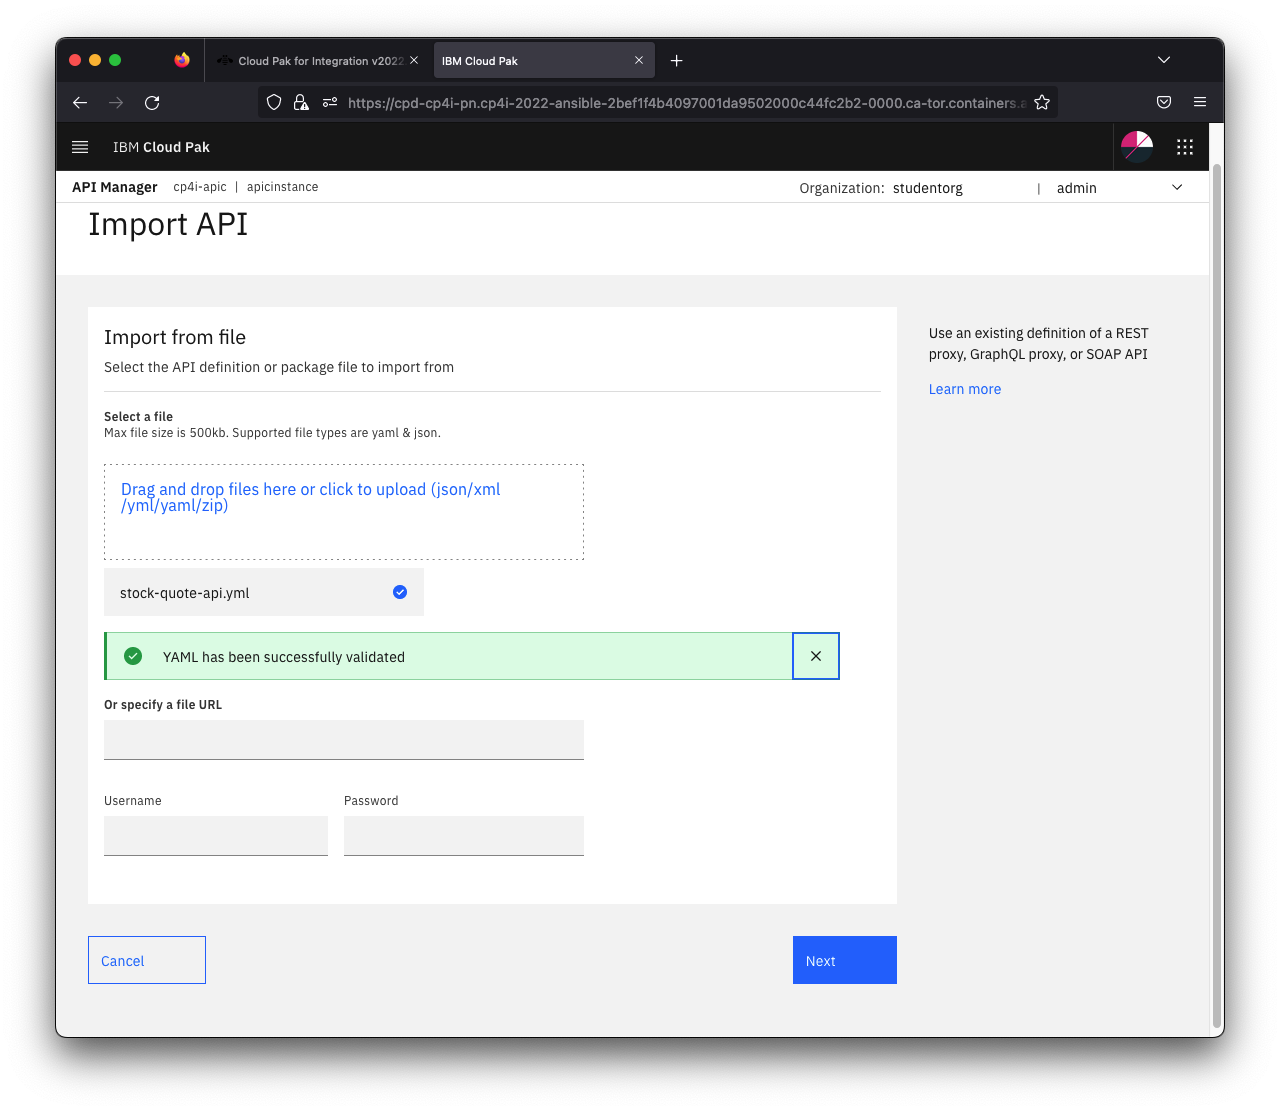
2.9 Do not select Activate API. Click Next
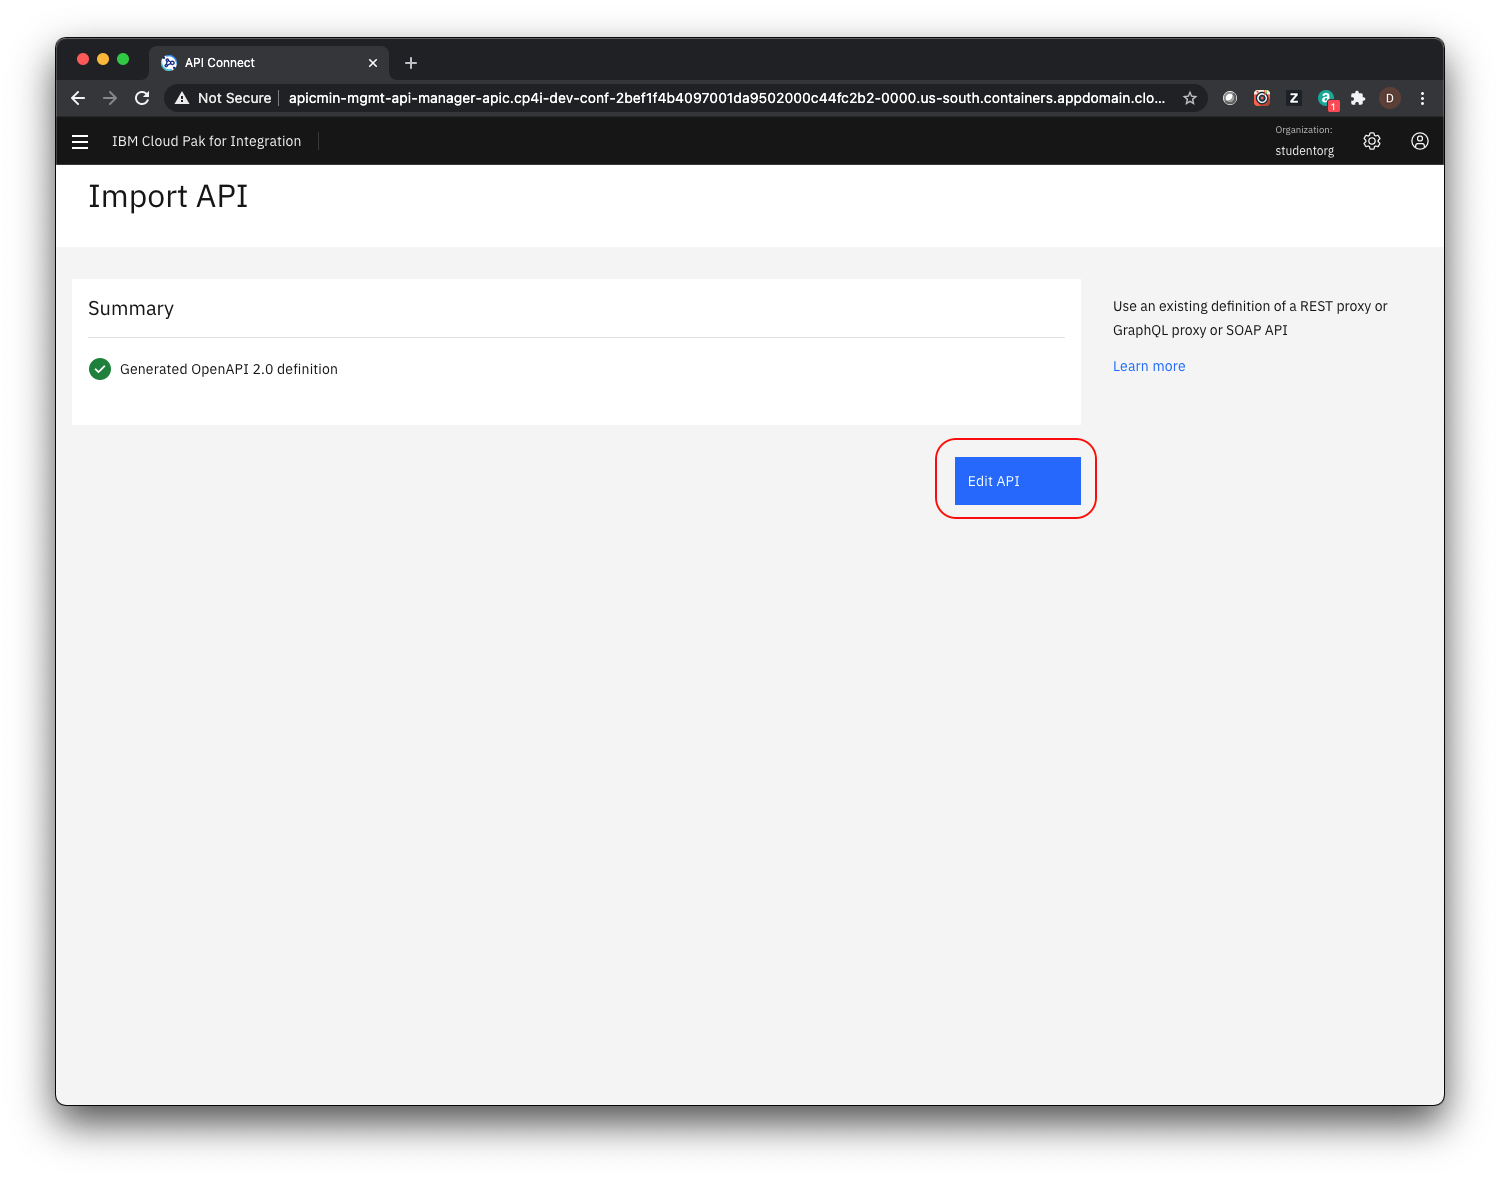
2.10 The API should be imported successfully as shown below. Click Edit API.
Step 3: Configure the API
After importing the existing API, the first step is to configure basic security before exposing it to other developers. By creating a client key you are able to identify the app using the services. Next, we will define the backend endpoints where the API is actually running. API Connect supports pointing to multiple backend endpoints to match your multiple build stage environments.
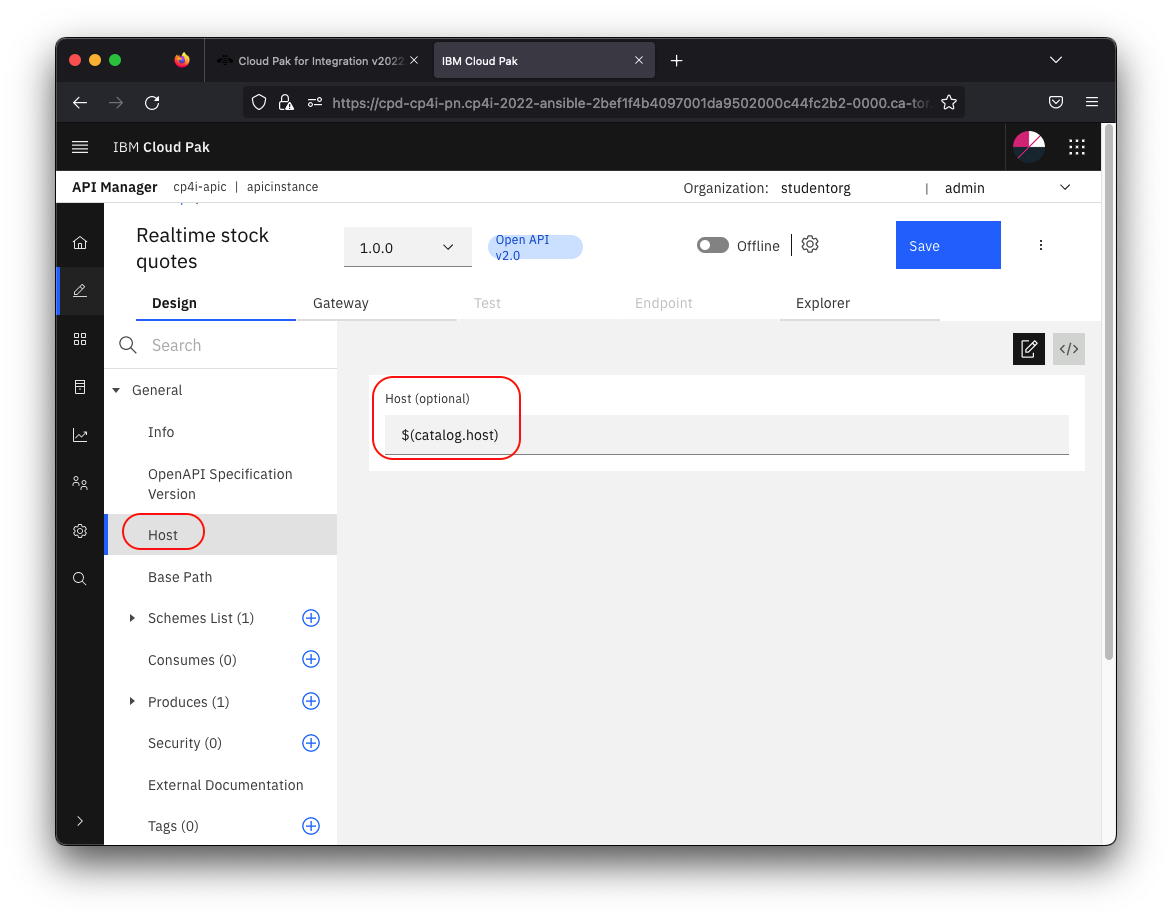
3.1 In the left navigation select Host and replace the hard coded endpoint address with $(catalog.host) to indicate that you want calls to the external API to go through API Connect.
3.2 Click Save
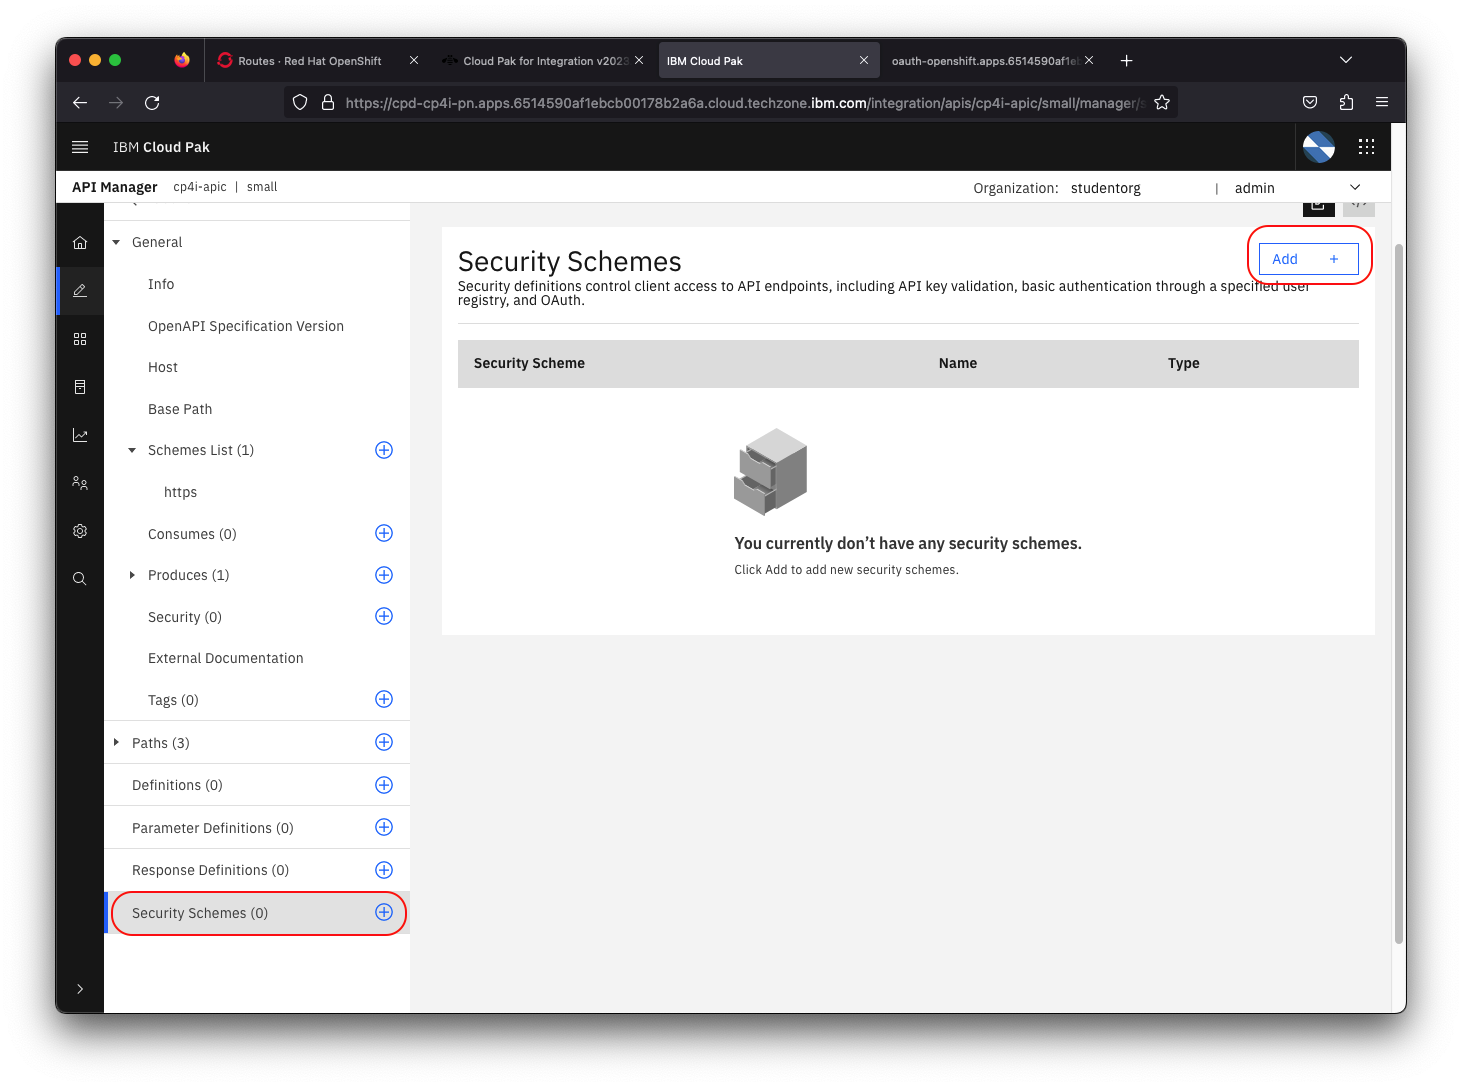
3.3 In the Edit API screen click Security Schemes(0) in the left navigation
3.4 Click the Add button on the right and then click on Create a security scheme.
3.5 In the Security Definition Name(Key) field, type client-id.
3.6 Under Security Definition Type, choose apiKey.
3.6 Under Key Type, choose client_id.
3.7 For Located In choose header. Your screen should now look like the image below.

3.8 Click the Create button and then click Save.
3.9 Next you'll require use of the Client Id to access your API. In the left Navigation select Security(0) and then click on Create a Security Requirement
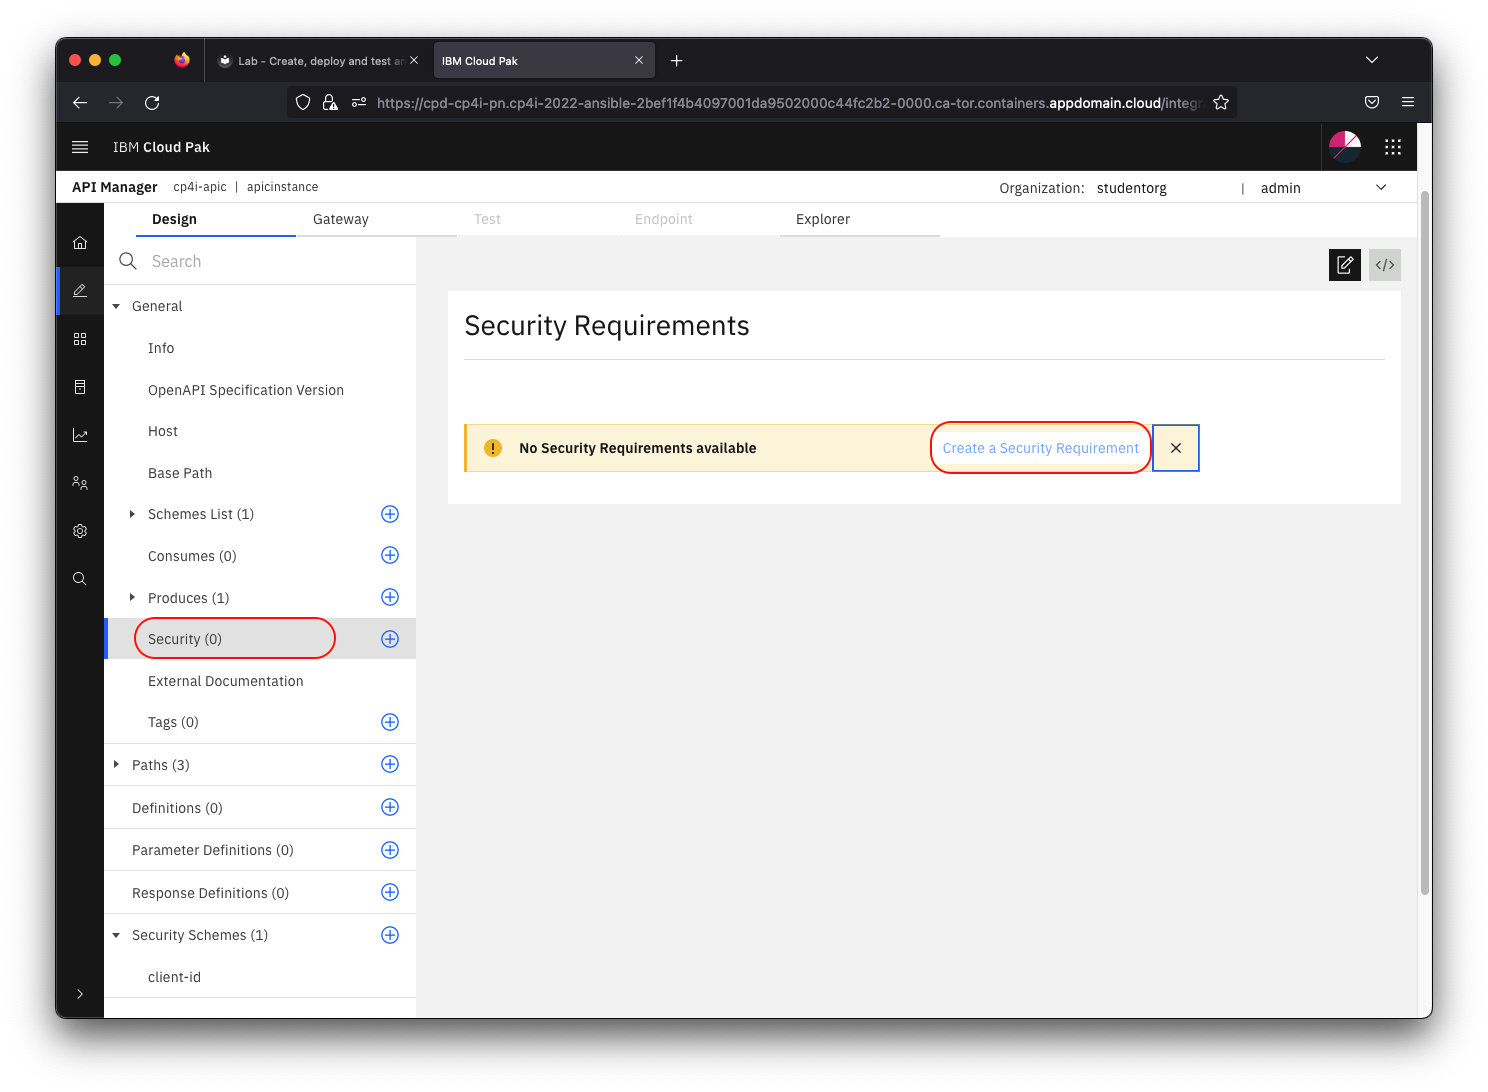
3.10 Select the Security Scheme you just created and the click Create.
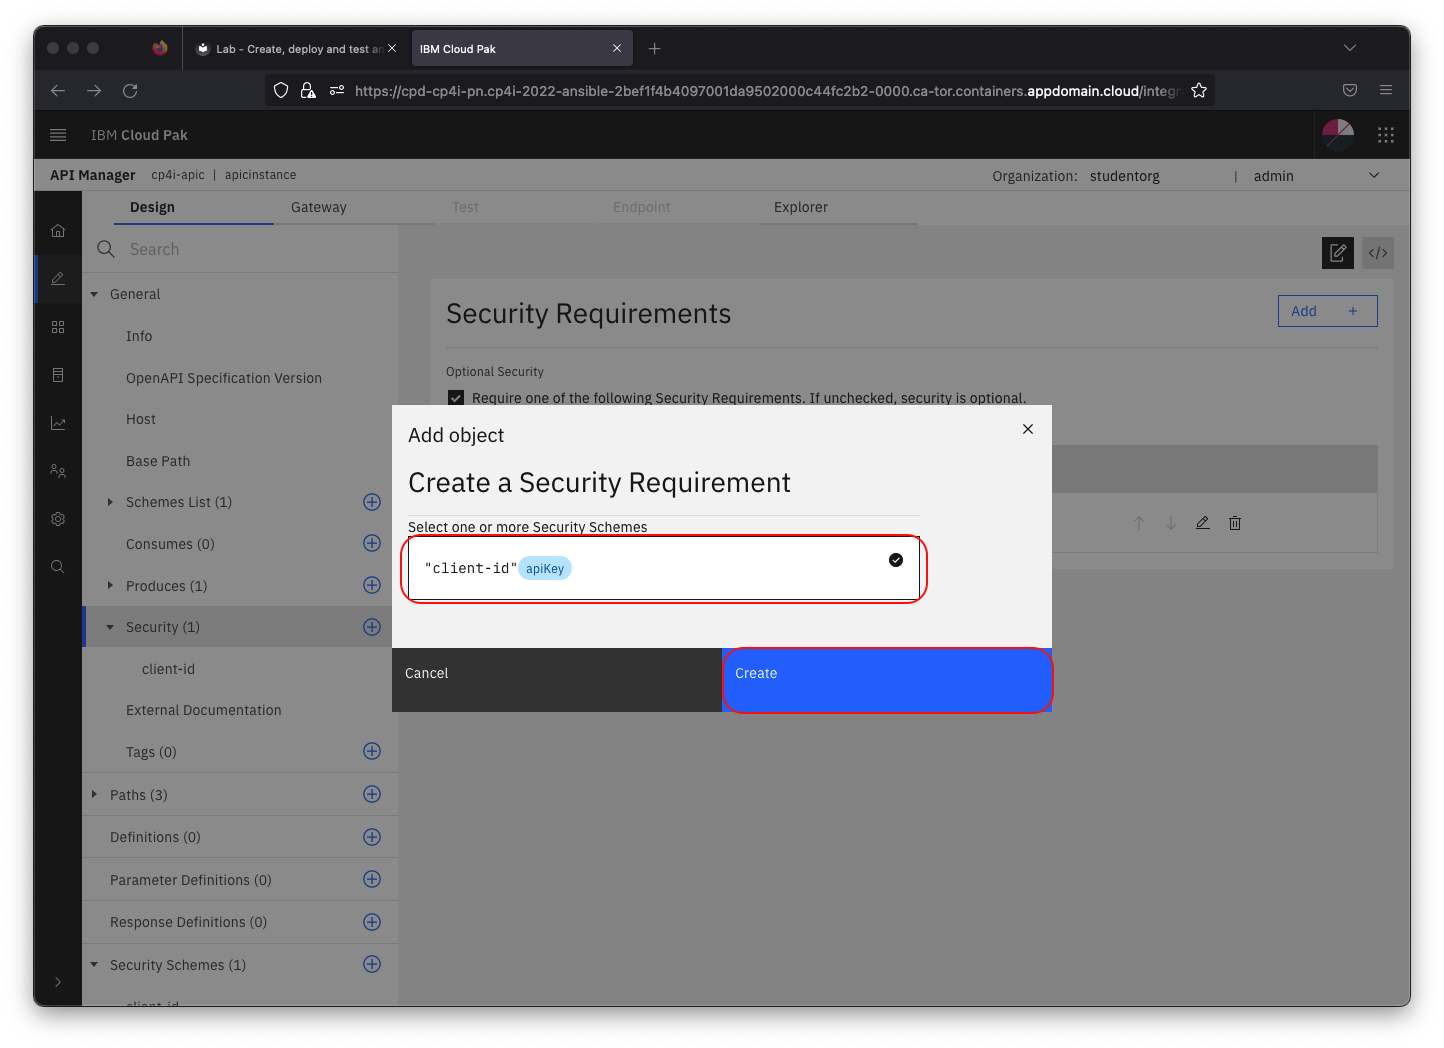
3.11 Click Save
3.12 Next you'll define the endpoint for the external API. Select the Gateway tab, expand Properties in the left navigation.
3.13 Click on the target-url property.
3.14 Copy then paste the following URL into the Property Value field:
https://stocktrader.ibmc.buildlab.cloud
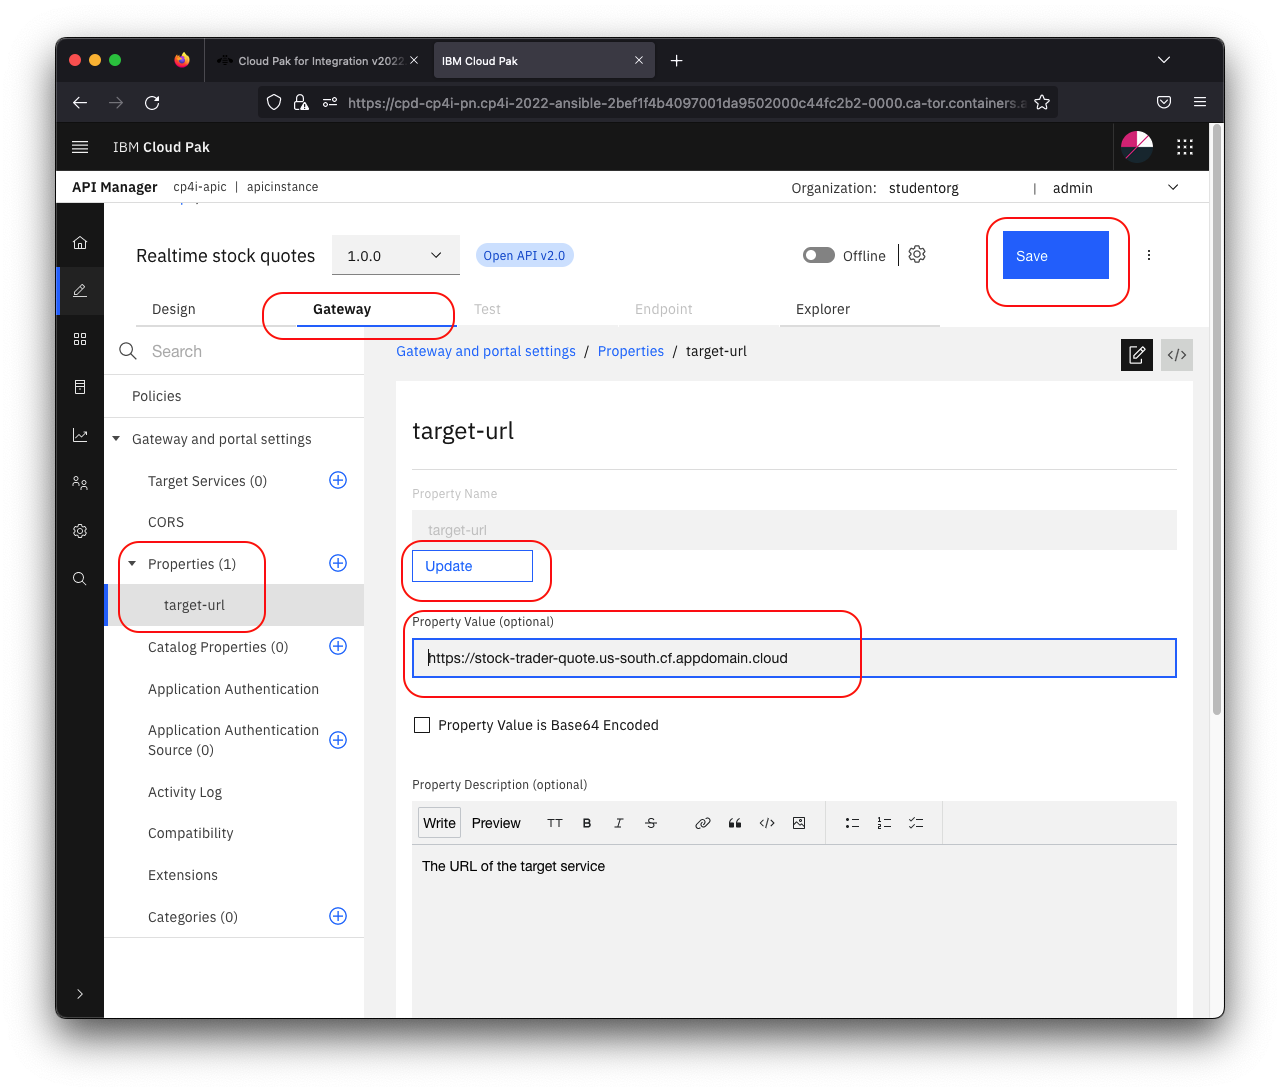
3.15 Click Save to complete the configuration.
Step 4: Test the API
In the API designer, you have the ability to test the API immediately after creation.
4.1 On the left Navigation, click Policies.
4.2 Click invoke in the flow designer. Note the window on the right with the configuration. The invoke node calls the target-url (ie the external service).
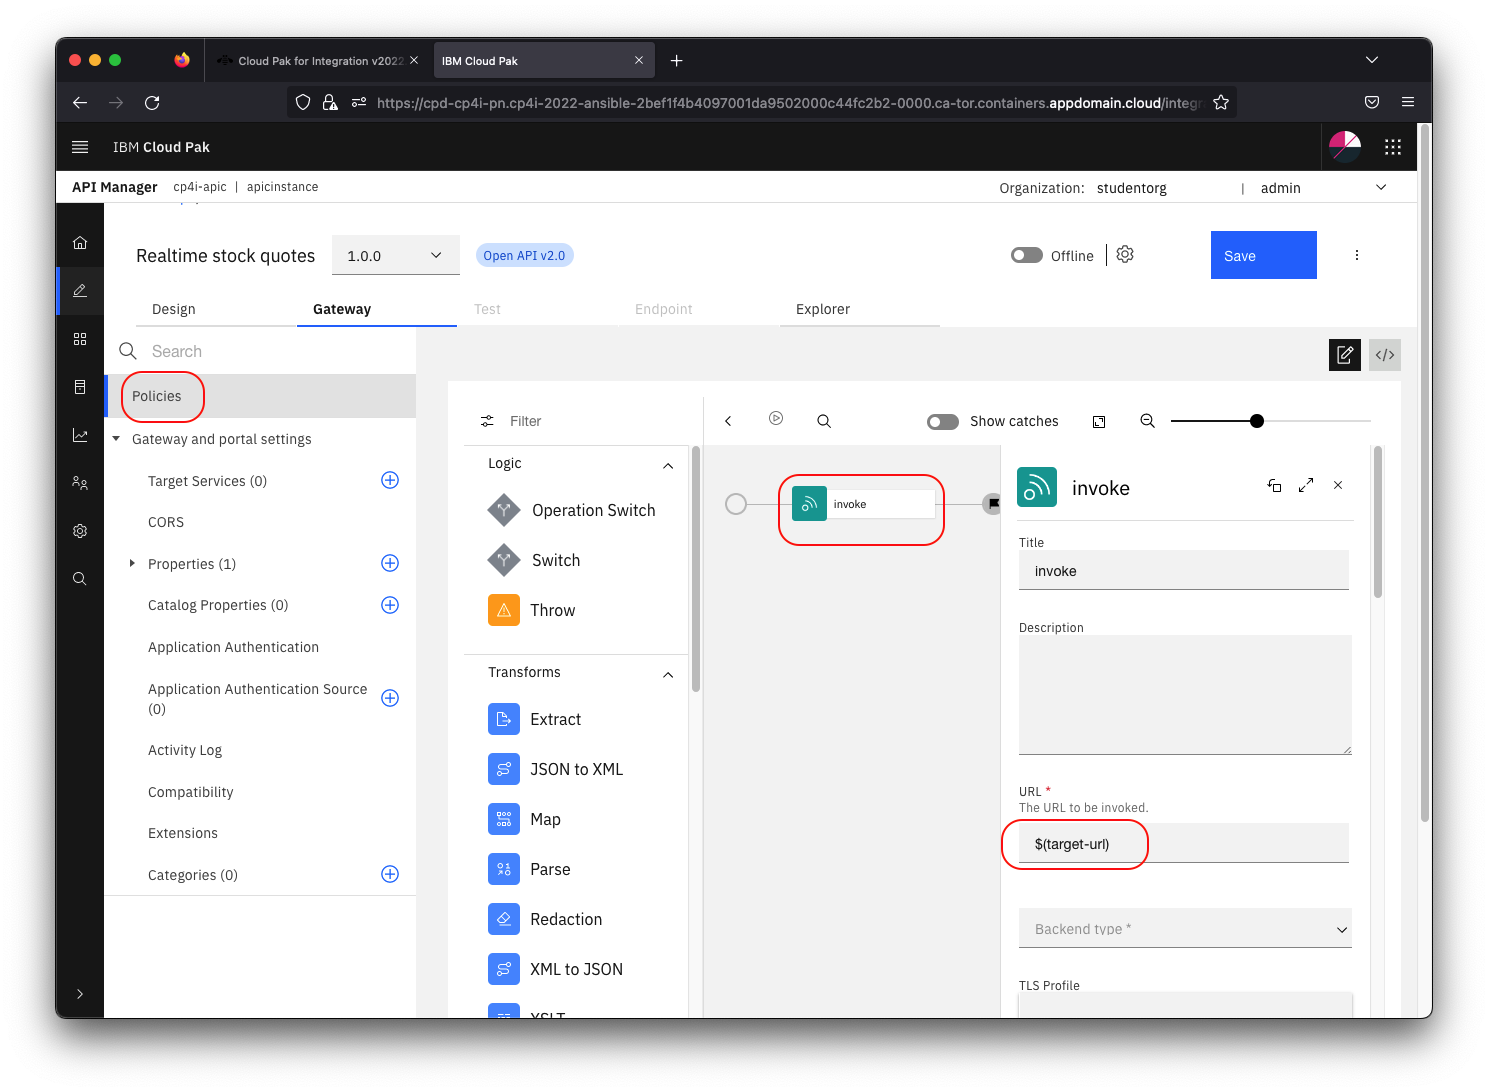
4.3 Modify the URL field to include the request path passed in by the caller as well by appending $(request.path) to the URL. When you're done the field should be set to:
$(target-url)$(request.path)

4.4 Click Save
4.5 Toggle the Offline switch and then click on the Test tab
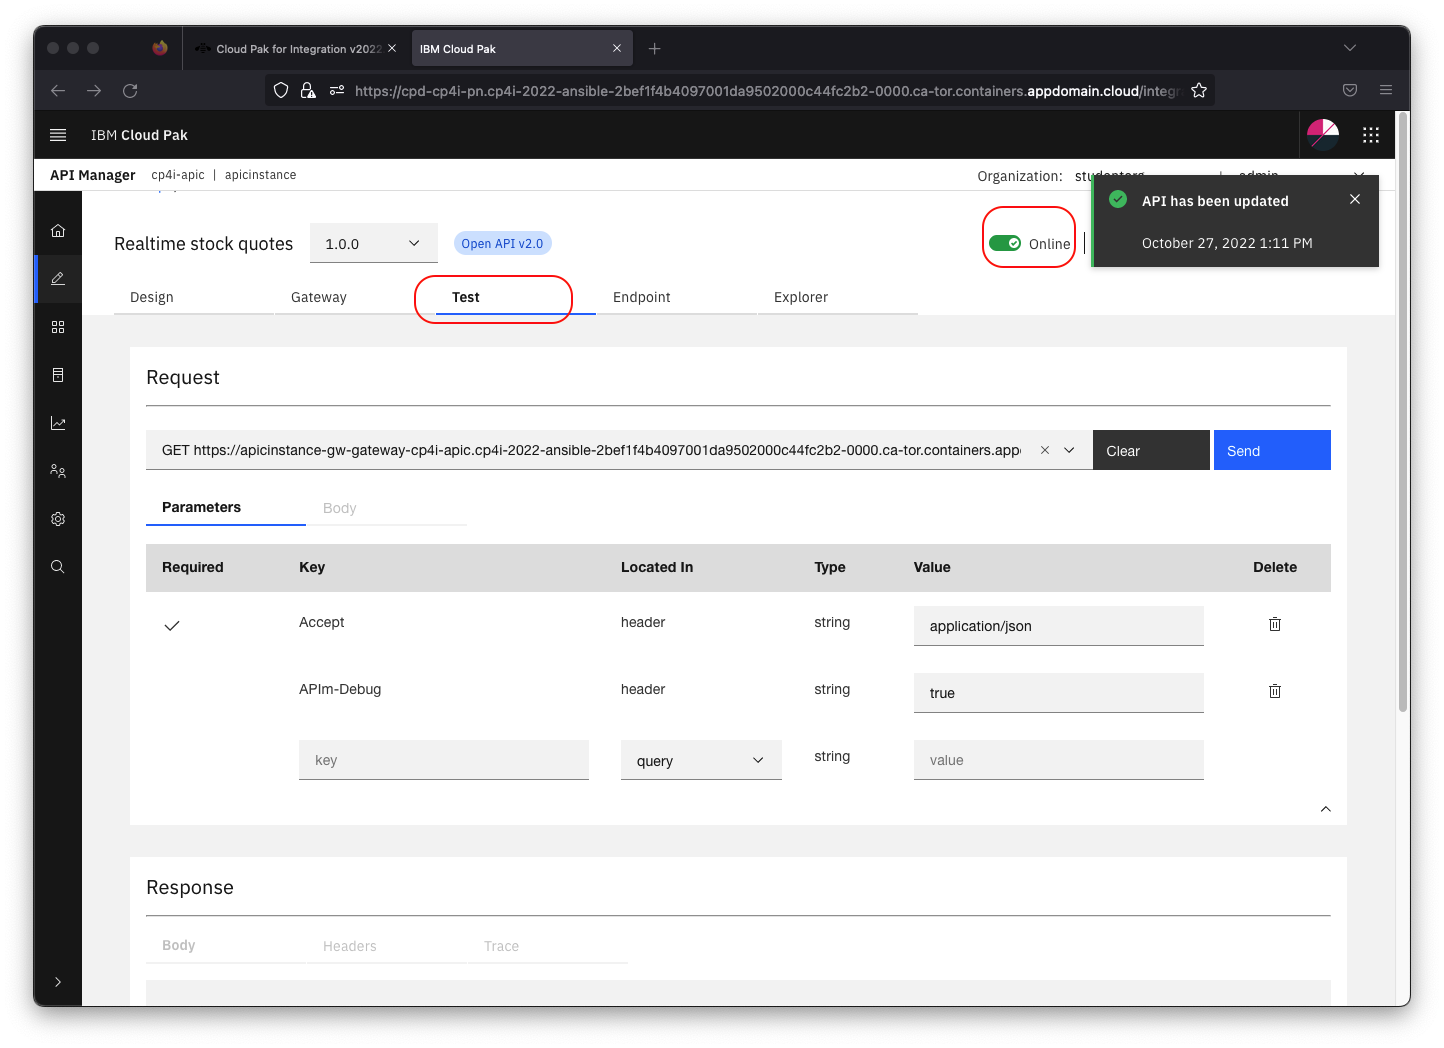
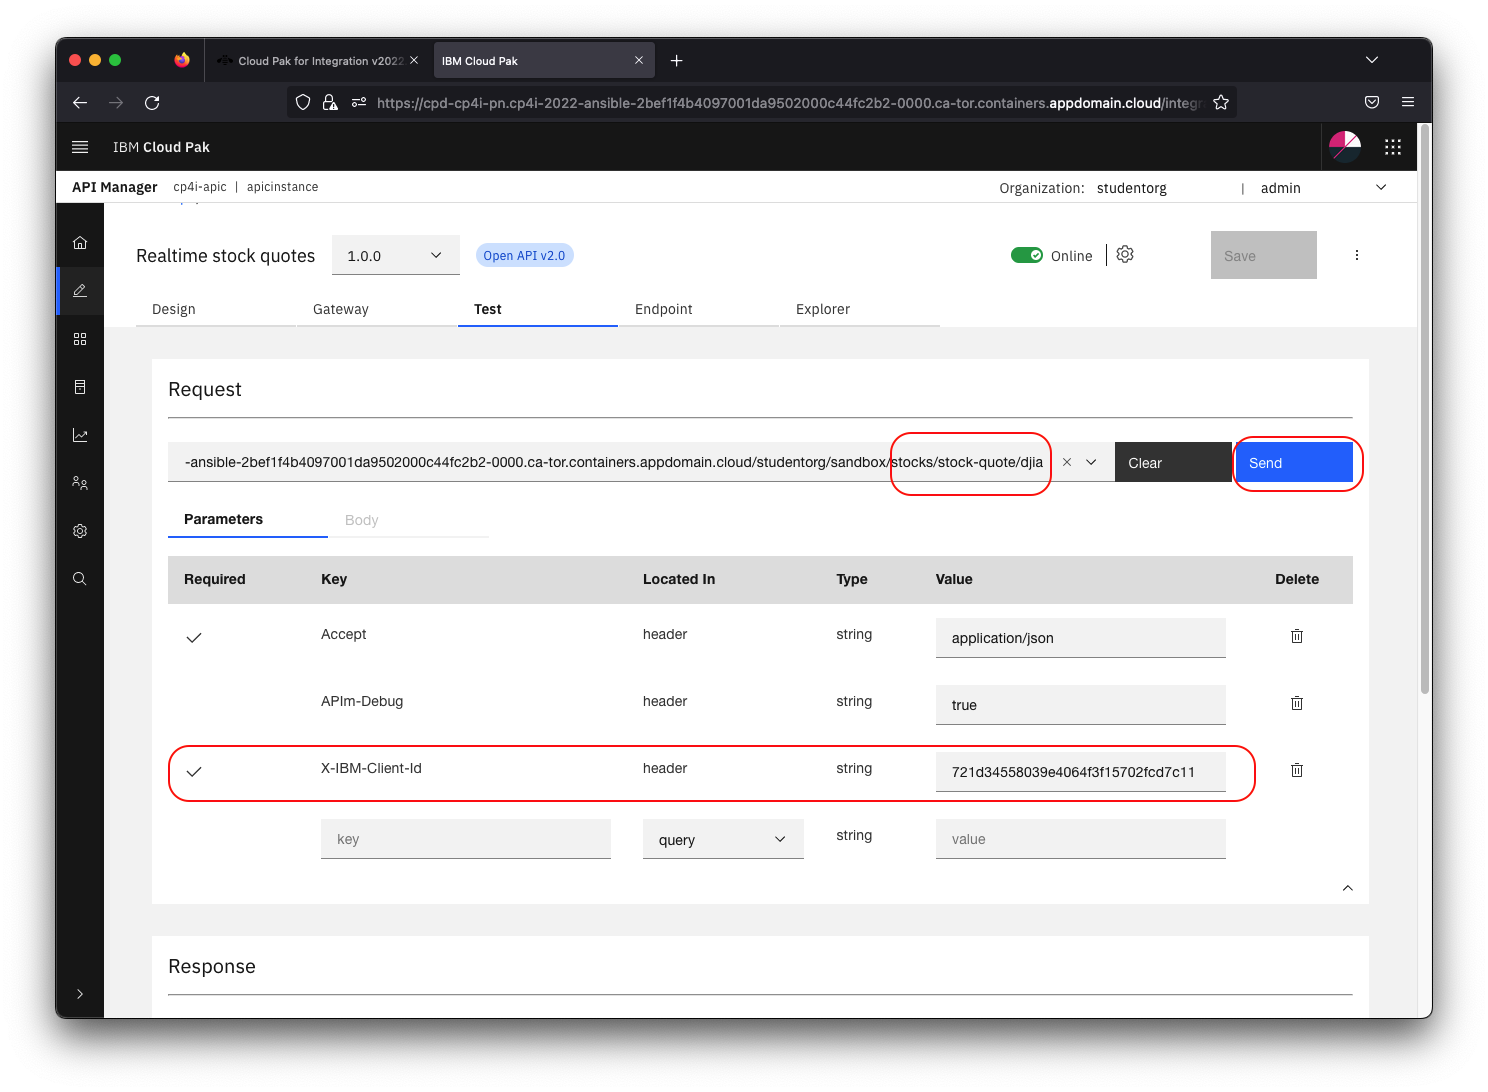
4.6 The Request should be prefilled with the GET request to /stock-quote/djia.
4.7 Note that your client-id is prefilled for you.
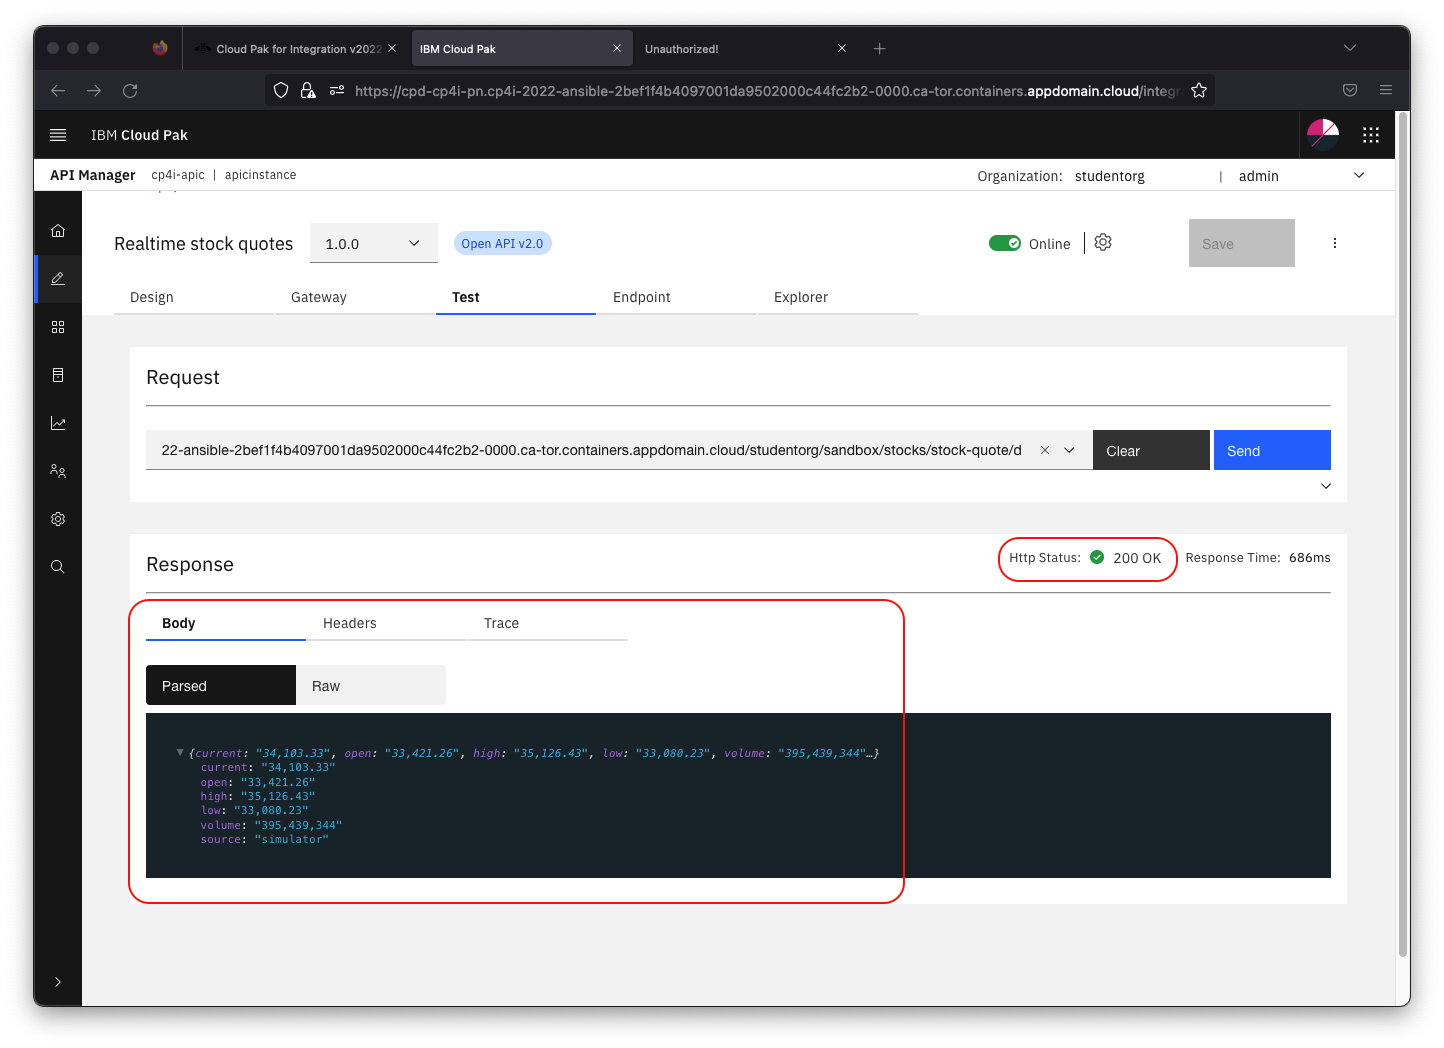
4.8 Click Send.
4.9 If this is the first test of the API, you may see a certificate exception. Simply click on the link provided. This will open a new tab and allow you to click through to accept the self signed certificate. Note: Stop when you get a 401 error code in the new tab.
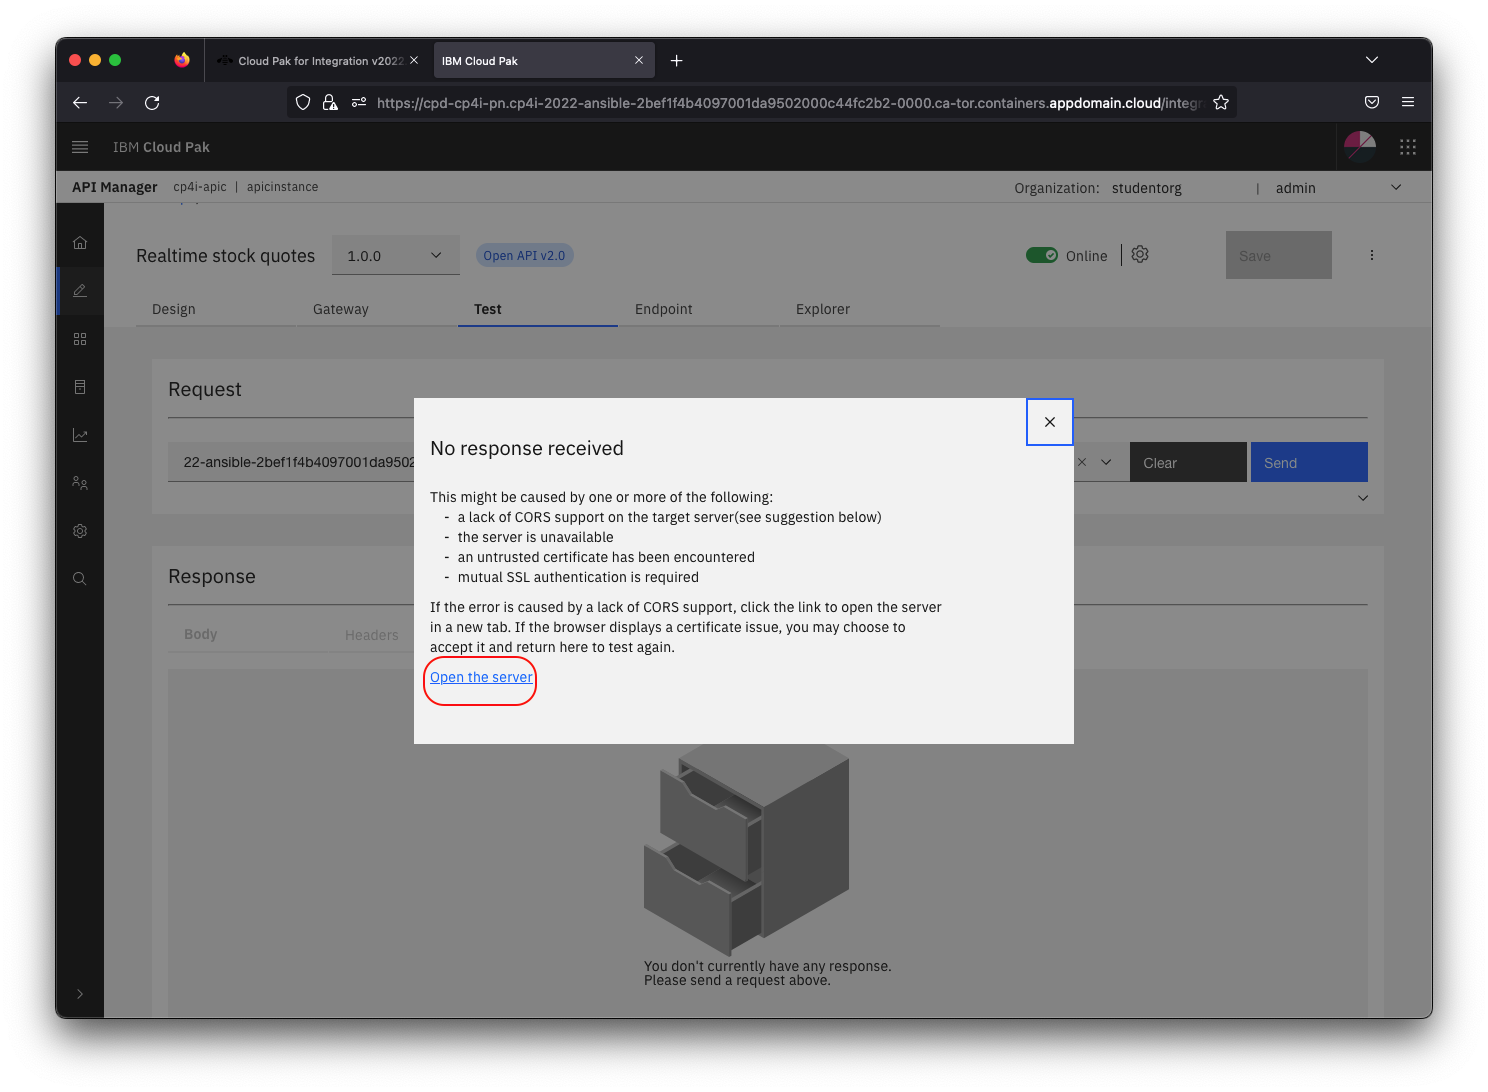
4.10 Go back to the previous tab and click Send again.
4.11 Now you should see a Response section with Status code 200 OK and the Body displaying the details of the simulated Dow Jones Industrial Average.
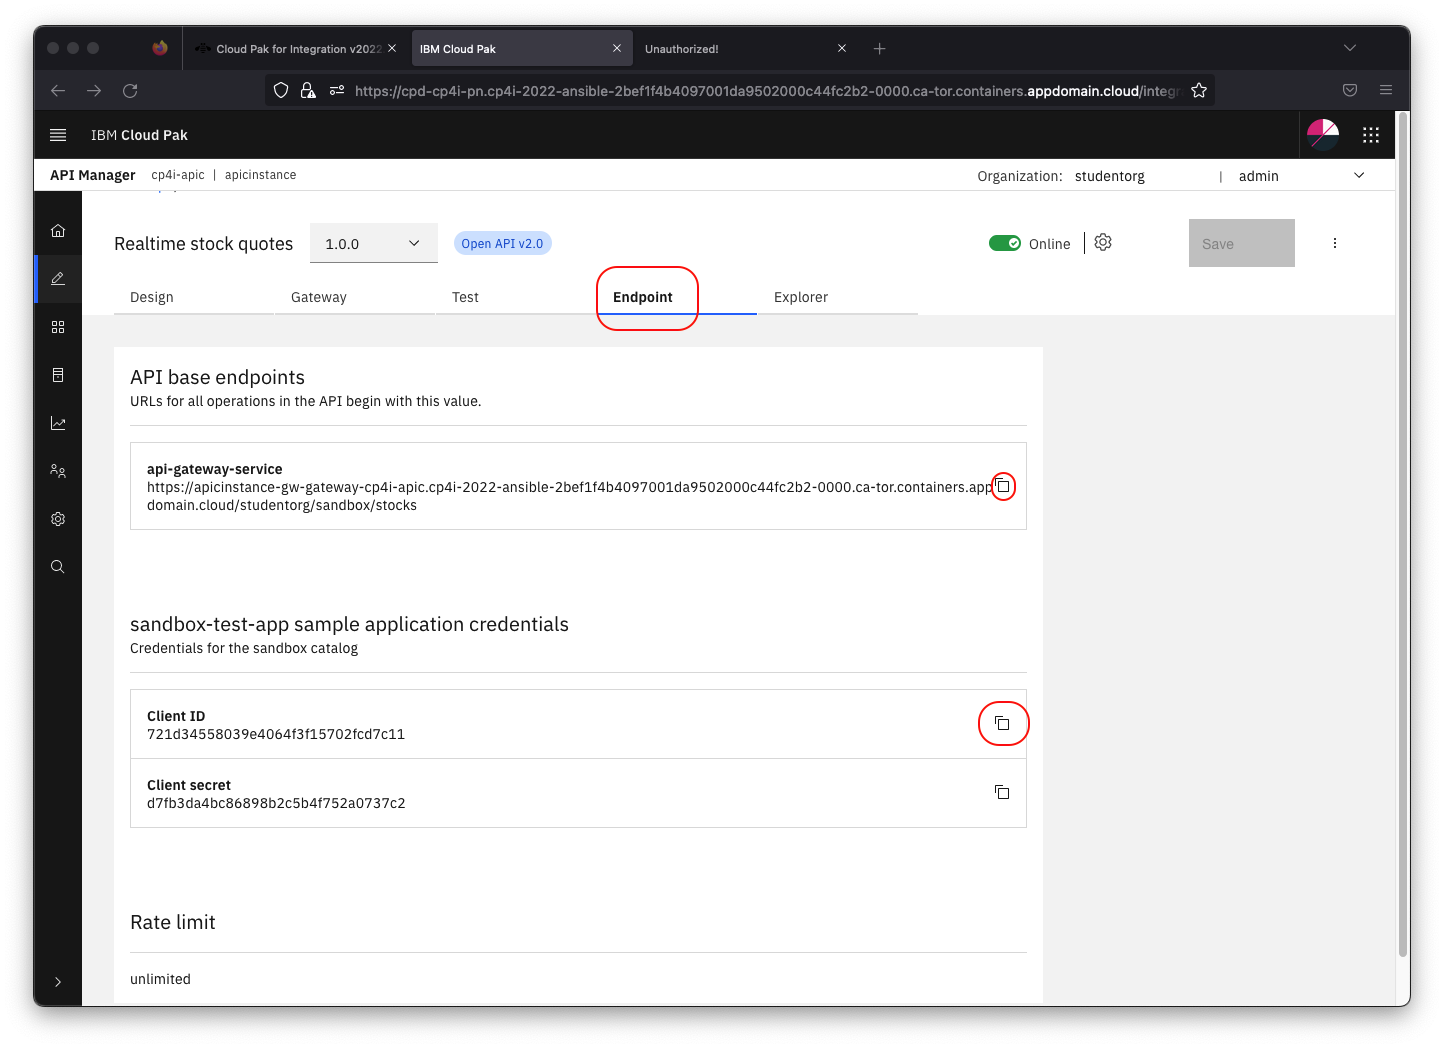
4.12 Next you'll get the Client Id and Gateway endpoint so you can test your API from the TraderLite app. Click on the Endpoint tab.
4.13 Copy the value of the api-gateway-service URL and the Client-Id to a local text file so it can be used in the Stock Trader application later (Note: this is a shortcut to the regular process of publishing the API and then subscribing to it as a consumer).
Step 5: Install the TraderLite app
5.1 In a separate browser tab go to the OpenShift console URL for the cluster assigned to you by for the workshop.
Note: There is a link to your assigned cluster's console on your Workshop Information page. If you have closed it, you can access it following the instructions in the FAQ.
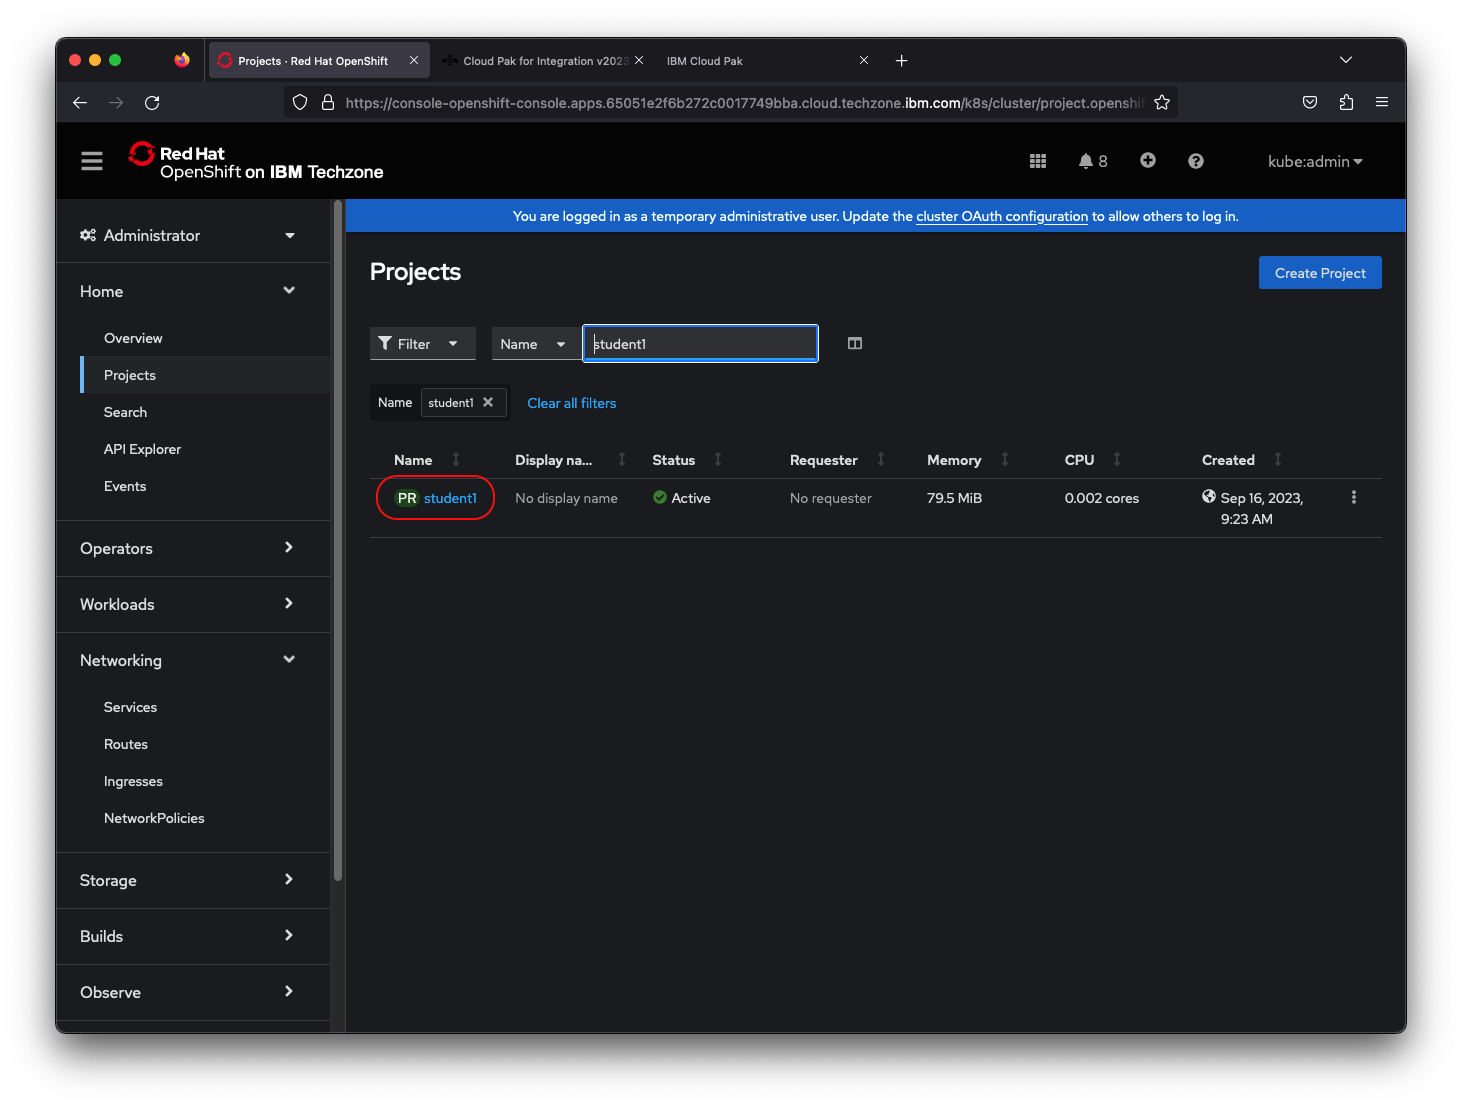
5.2 Click on Projects in the left navigation and then click on your student1 project in the list
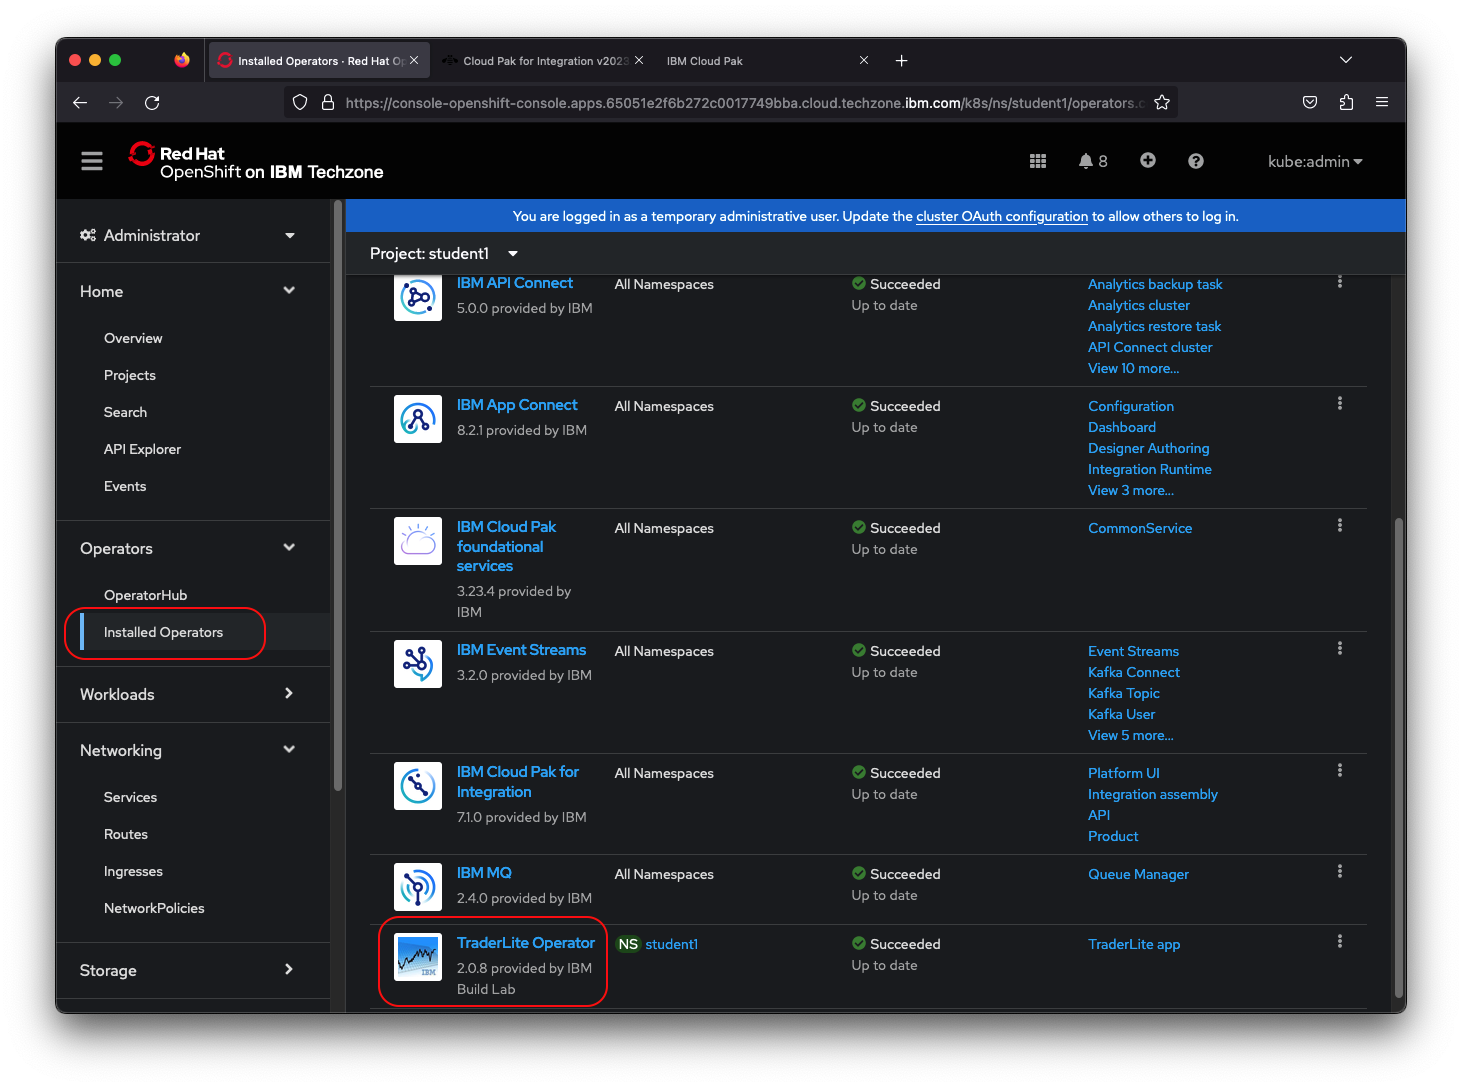
5.3 Click on Installed Operators (in the Operators section) in the left navigation and then click on the TraderLite Operator in the list.
5.4 Click the Create Instance to start the installation of the TraderLite app.
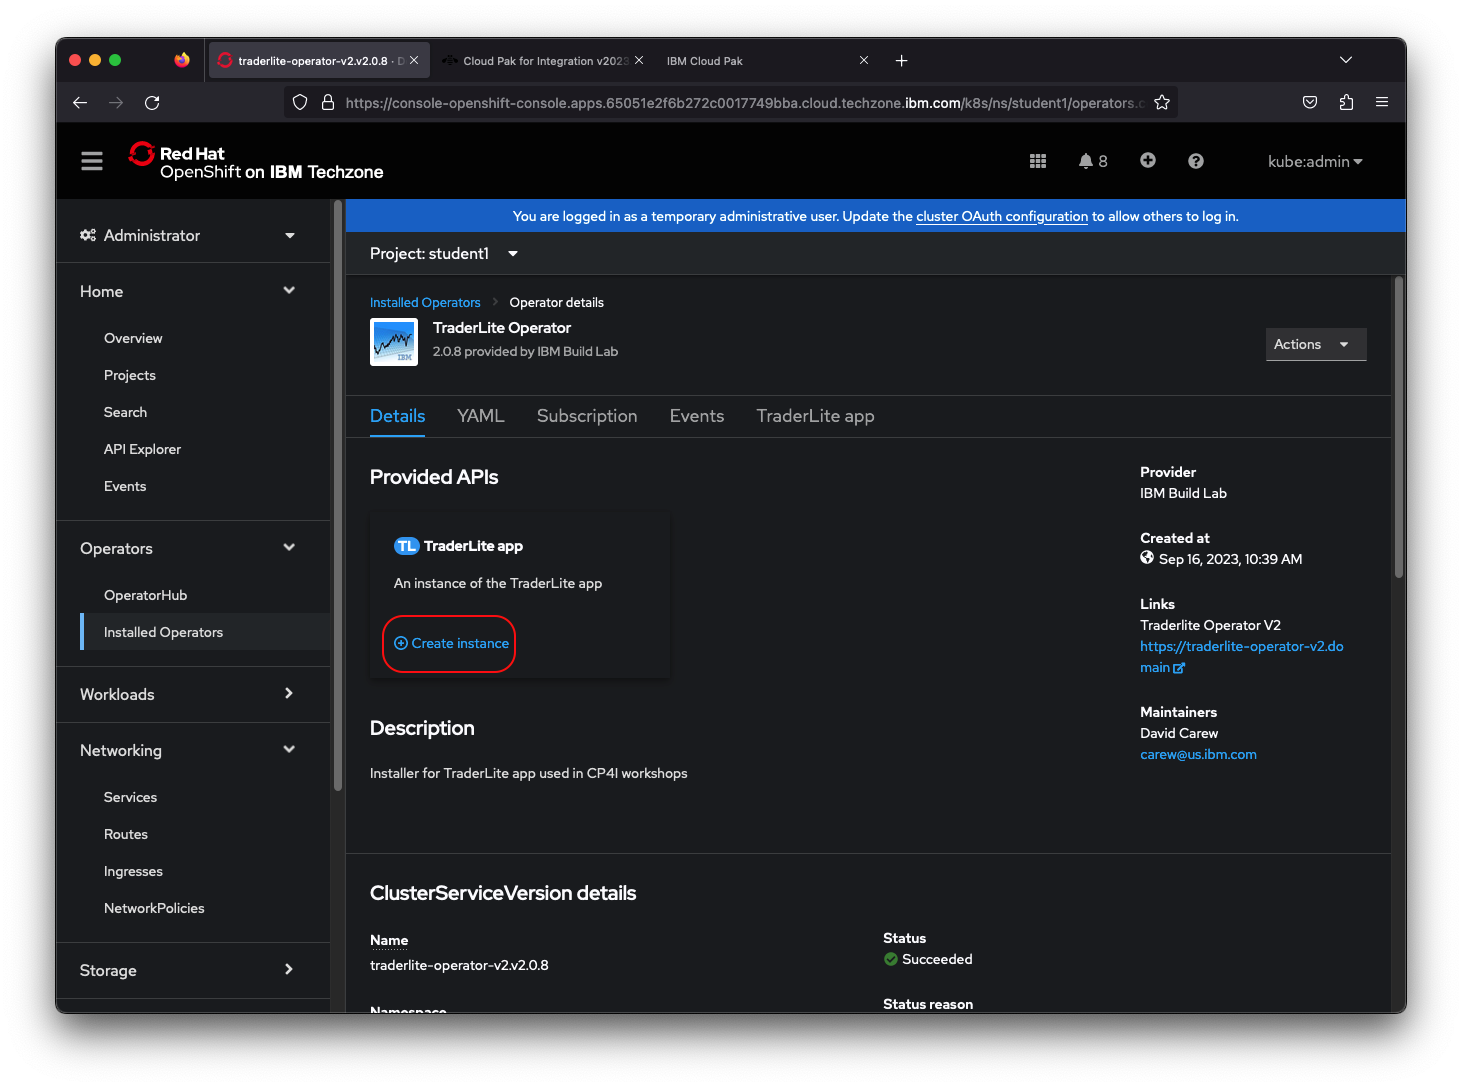
5.5 Name the instance traderlite
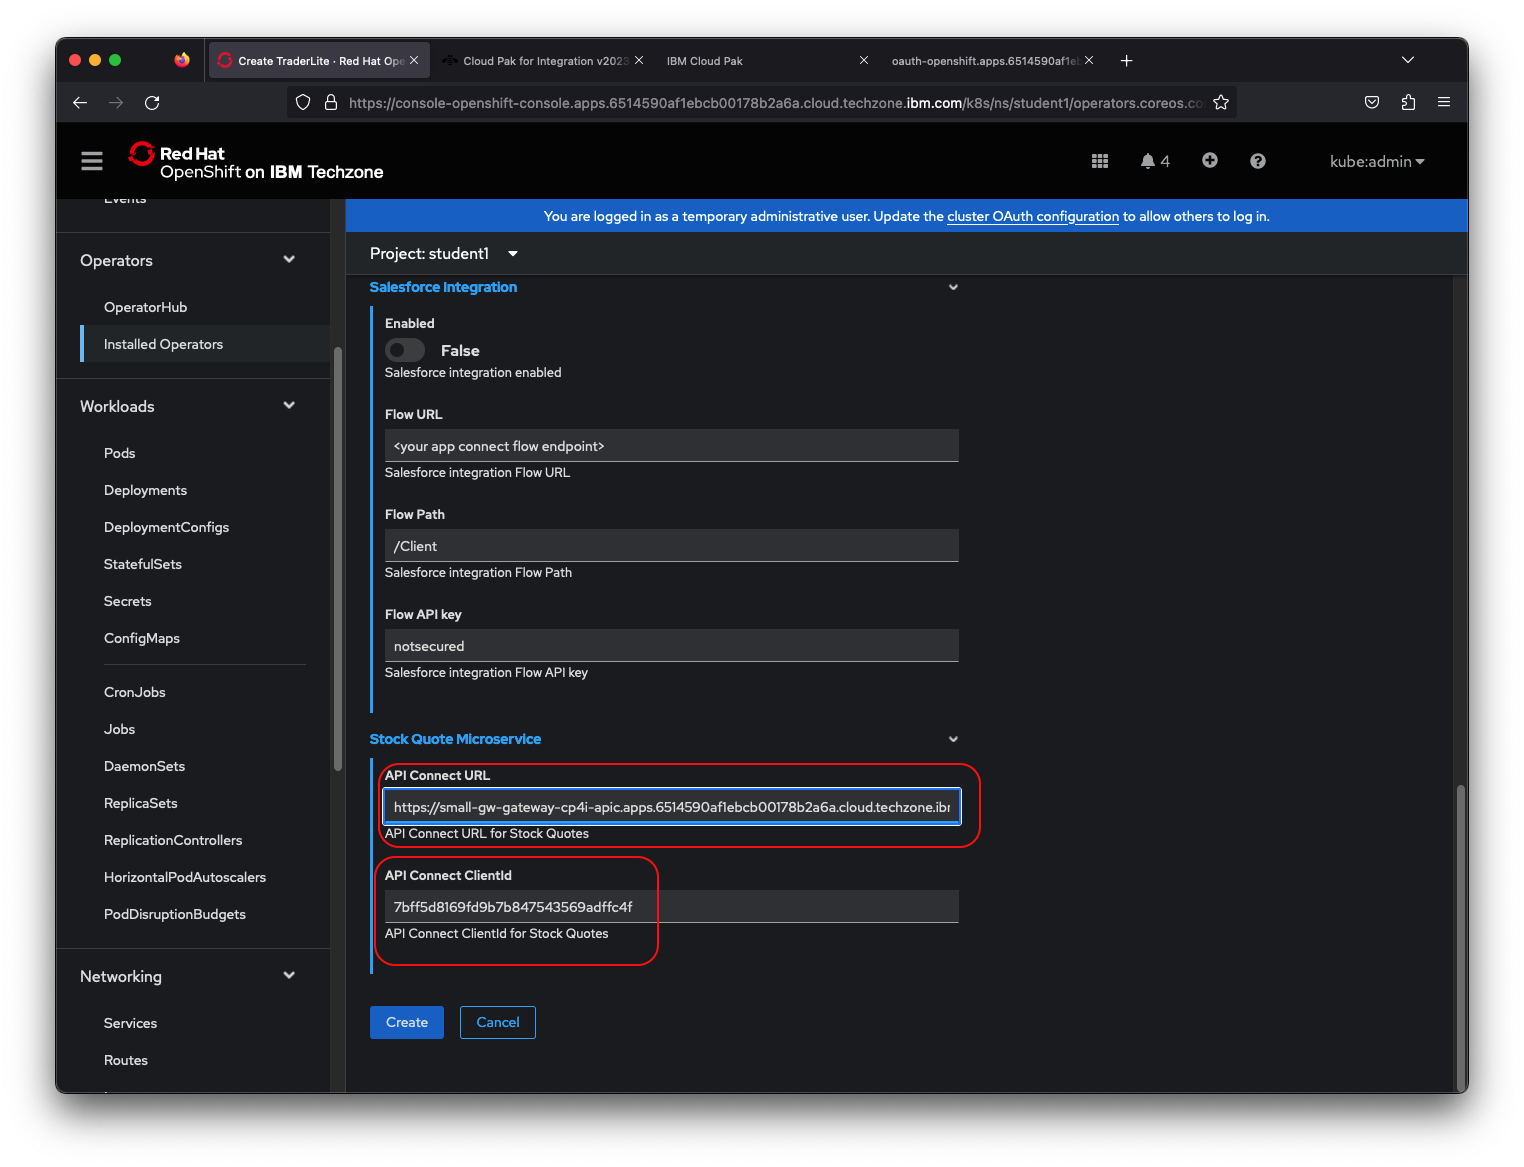
5.6 Scroll down the page to the Stock Quote Microservice and replace the API Connect URL and API Connect ClientId with the api-gateway-service URL and the Client-Id you saved in the previous section. Click Create
5.7 In the left navigation select Pods (in the Workloads section) and then wait for all the TraderLite pods to have a status of Running and be in the Ready state.
Note: You will know the traderlite-xxxxx pods are in a ready state when the
Readycolumn shows1/1.

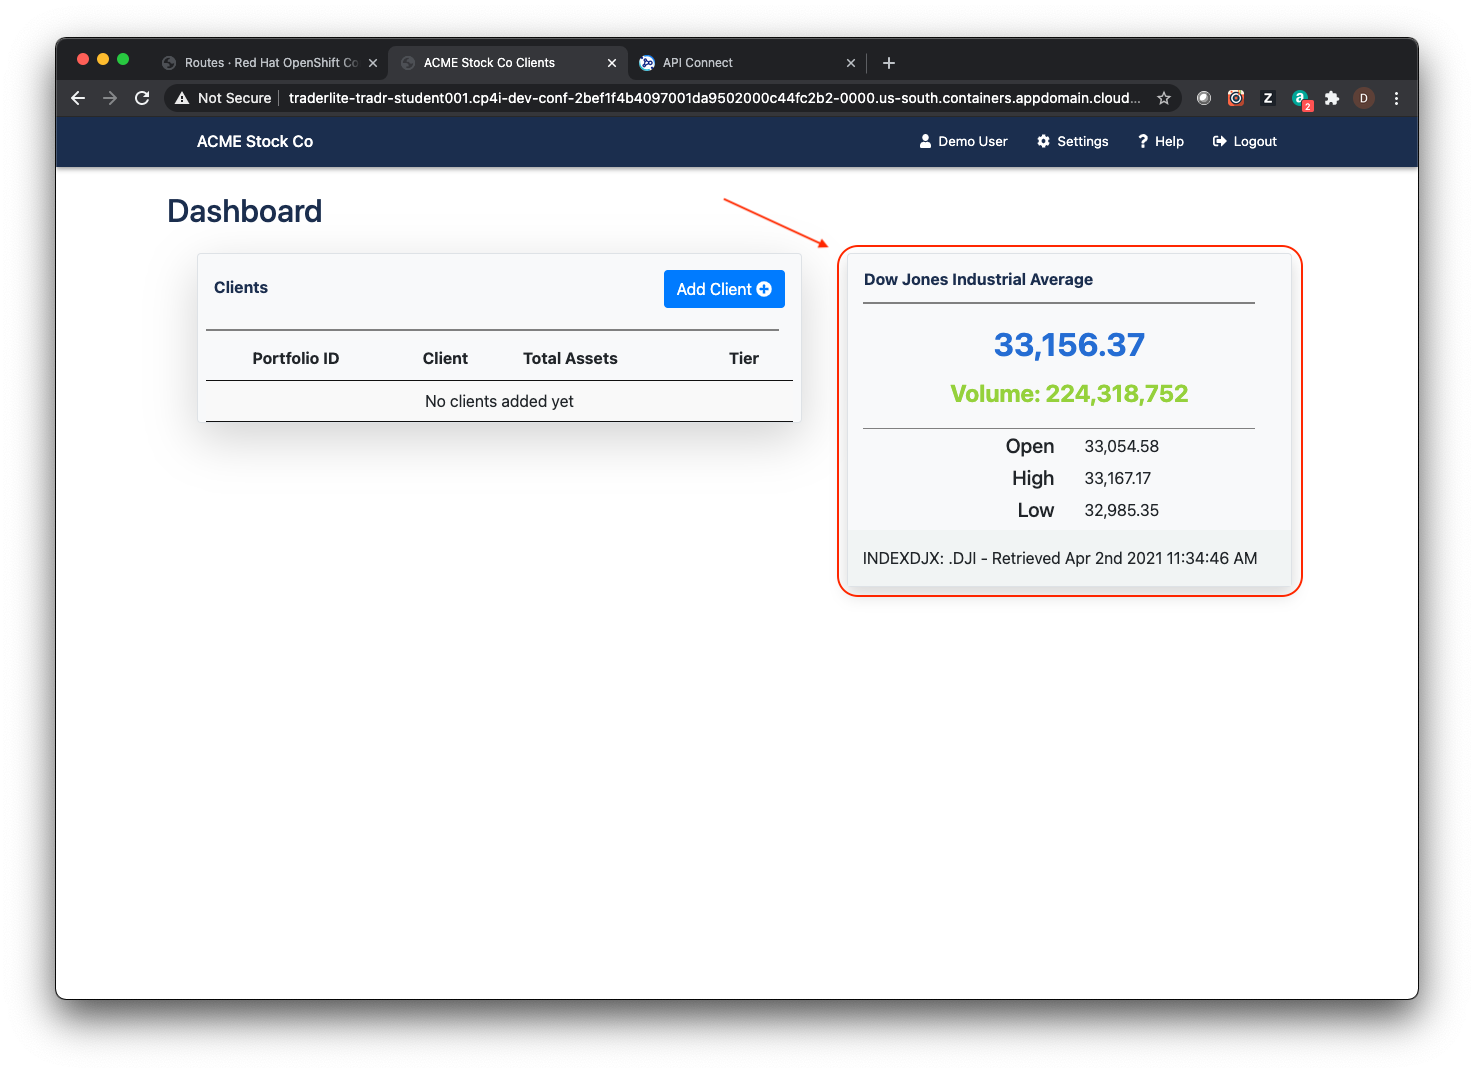
Step 6: Verify that the Trader Lite app is calling your API successfully
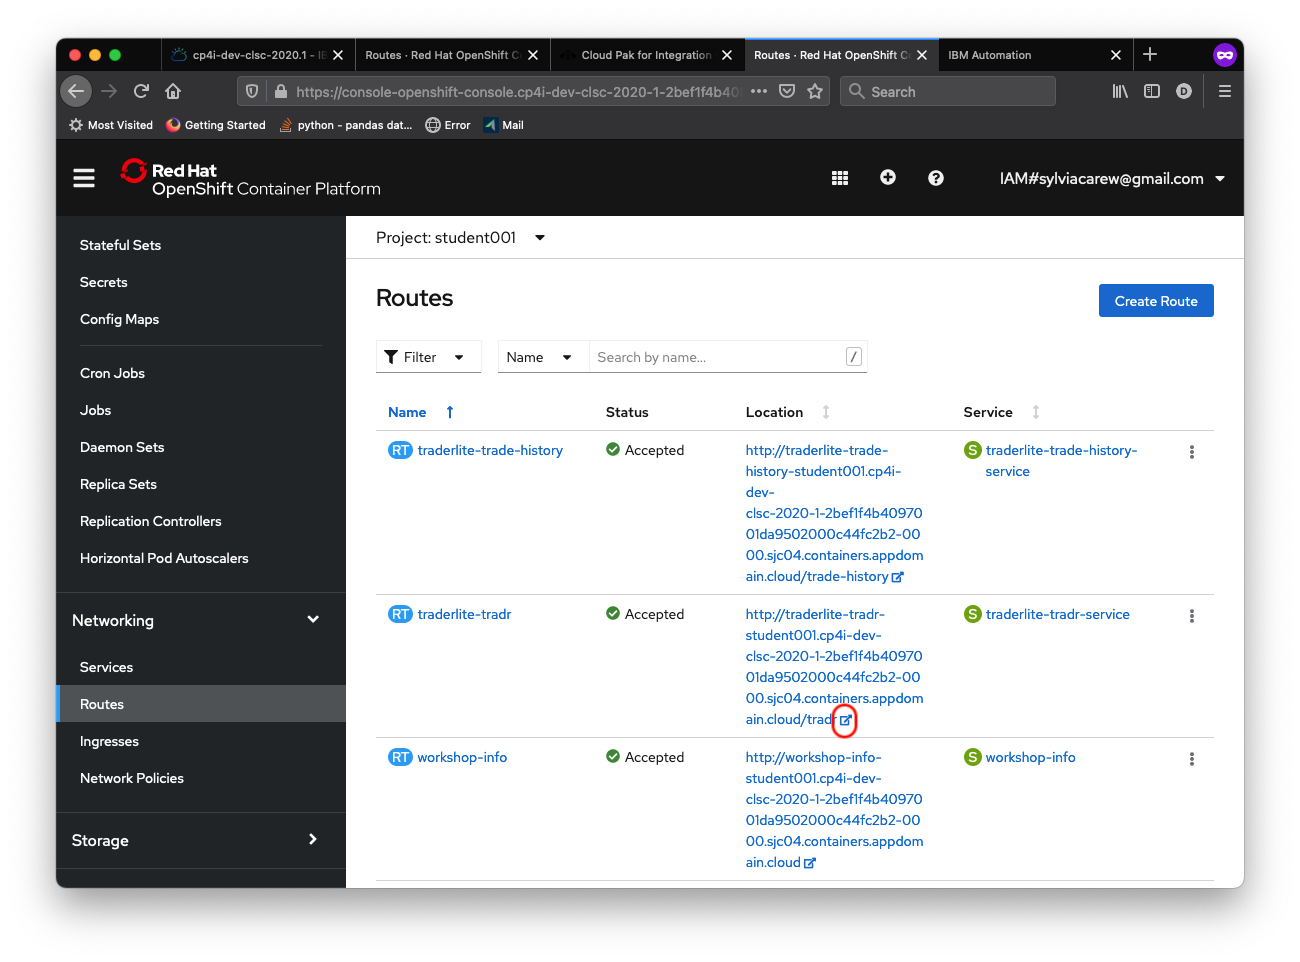
6.1 In your OpenShift console click on Routes (in the Networking section) in the left navigation and then click on the icon next to the url for the tradr app (the UI for TraderLite)
6.2 Log in using the username stock and the password trader
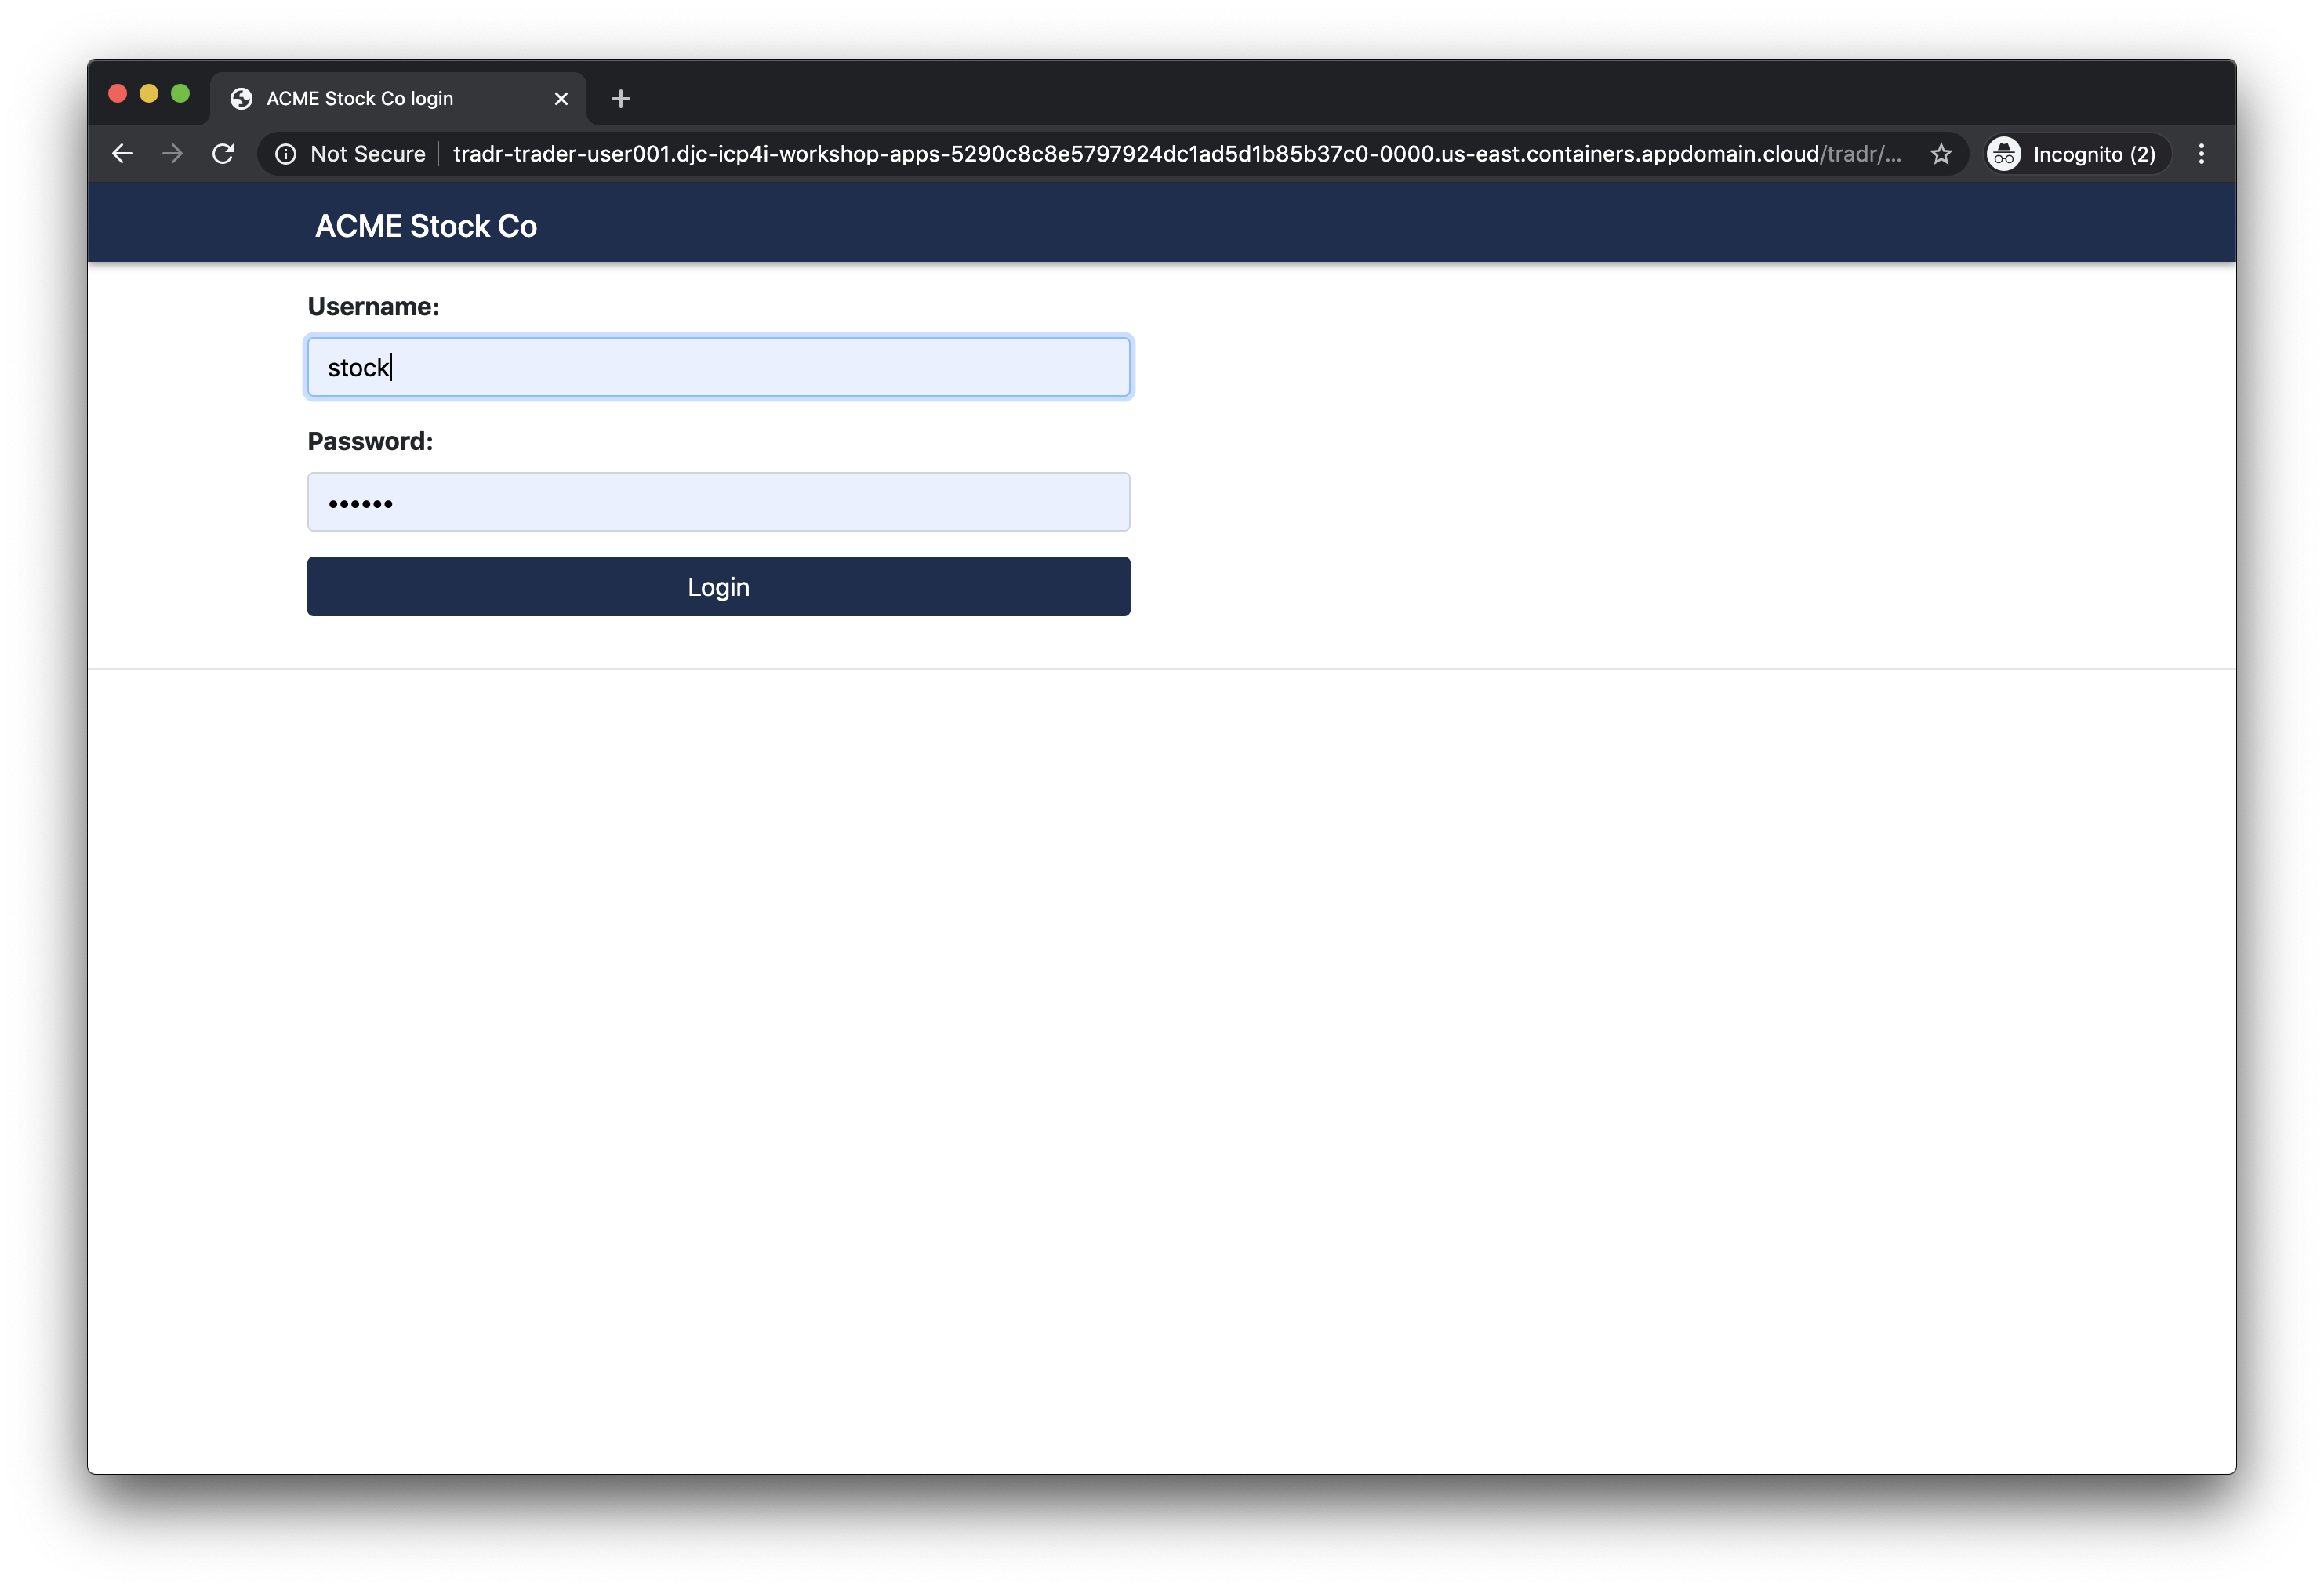
6.3 If the simulated DJIA summary has data then congratulations ! It means that the API you created in API Connect is working !
Summary
Congratulations ! You successfully completed the following key steps in this lab:
- Created an API by importing an OpenAPI definition for an existing REST service.
- Configured a ClientID/API Key for security set up a proxy to the existing API.
- Tested the API in the API Connect developer toolkit.
- Deployed the Trader Lite app and configured it to use the API you created.
- Tested the Trader Lite app to make sure it successfully uses your API.