Exercise - Sync Salesforce data using IBM App Connect Enterprise
In this lab you will create App Connect flows to sync client data in the IBM Trader Lite app to Salesforce. This will occur whenever a user of the IBM Trader Lite app creates a portfolio for a new client or accesses the data of an existing client.
In order to accomplishment this at a minimum 2 flows are needed:
-
A URL driven flow to push a new client to a Salesforce contact when the IBM Trader Lite app creates a portfolio for a new client
-
An Event driven flow to push changes to the IBM Trader Lite app whenever a contact's data is updated in Salesforce
The architecture of the app is shown below:
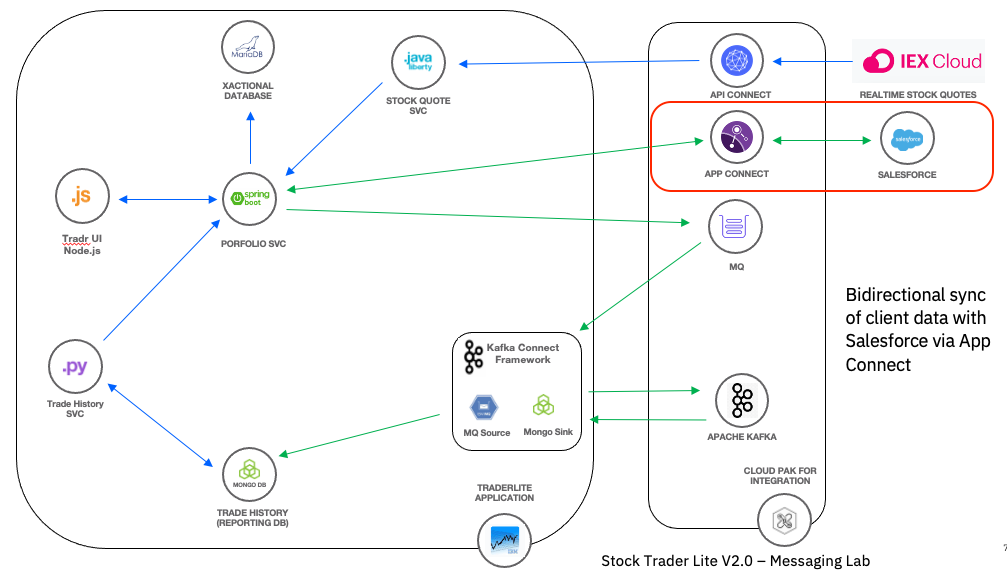
The portfolio microservice invokes the REST endpoint of the new flow whenever a new client is created or read by the app and this results in a new contact being created in, or read from Salesforce.
This lab is broken up into the following sections:
Note: You can click on any image in the instructions below to zoom in and see more details. When you do that just click on your browser's back button to return to the previous state.
Prerequisites
The TraderLite application needs to be up and running on your cluster. If you've completed the API Connect and/or the Salesforce integration labs then you will have the app running already. If you have not completed either of those labs, follow the installation instructions in this FAQ before continuing to step 1 below.
Section 1: Sign up for Salesforce Developer Edition
1.1 In your browser go to the following URL to sign up for Salesforce Developer Edition - a full featured version of the Salesforce Lightning Platform.
Note: If you already have access to the Salesforce Developer Edition or a paid version of Salesforce, skip to Step 1.2.
Salesforce Developer Edition signup
1.2 Enter the required information and follow the prompts to complete the signup process.
Section 2: Create a Salesforce Connected App
In this section you'll create a Connected App in Salesforce so that the App Connect flows that you create later will be able to access your Salesforce data.
2.1 Login to Salesforce
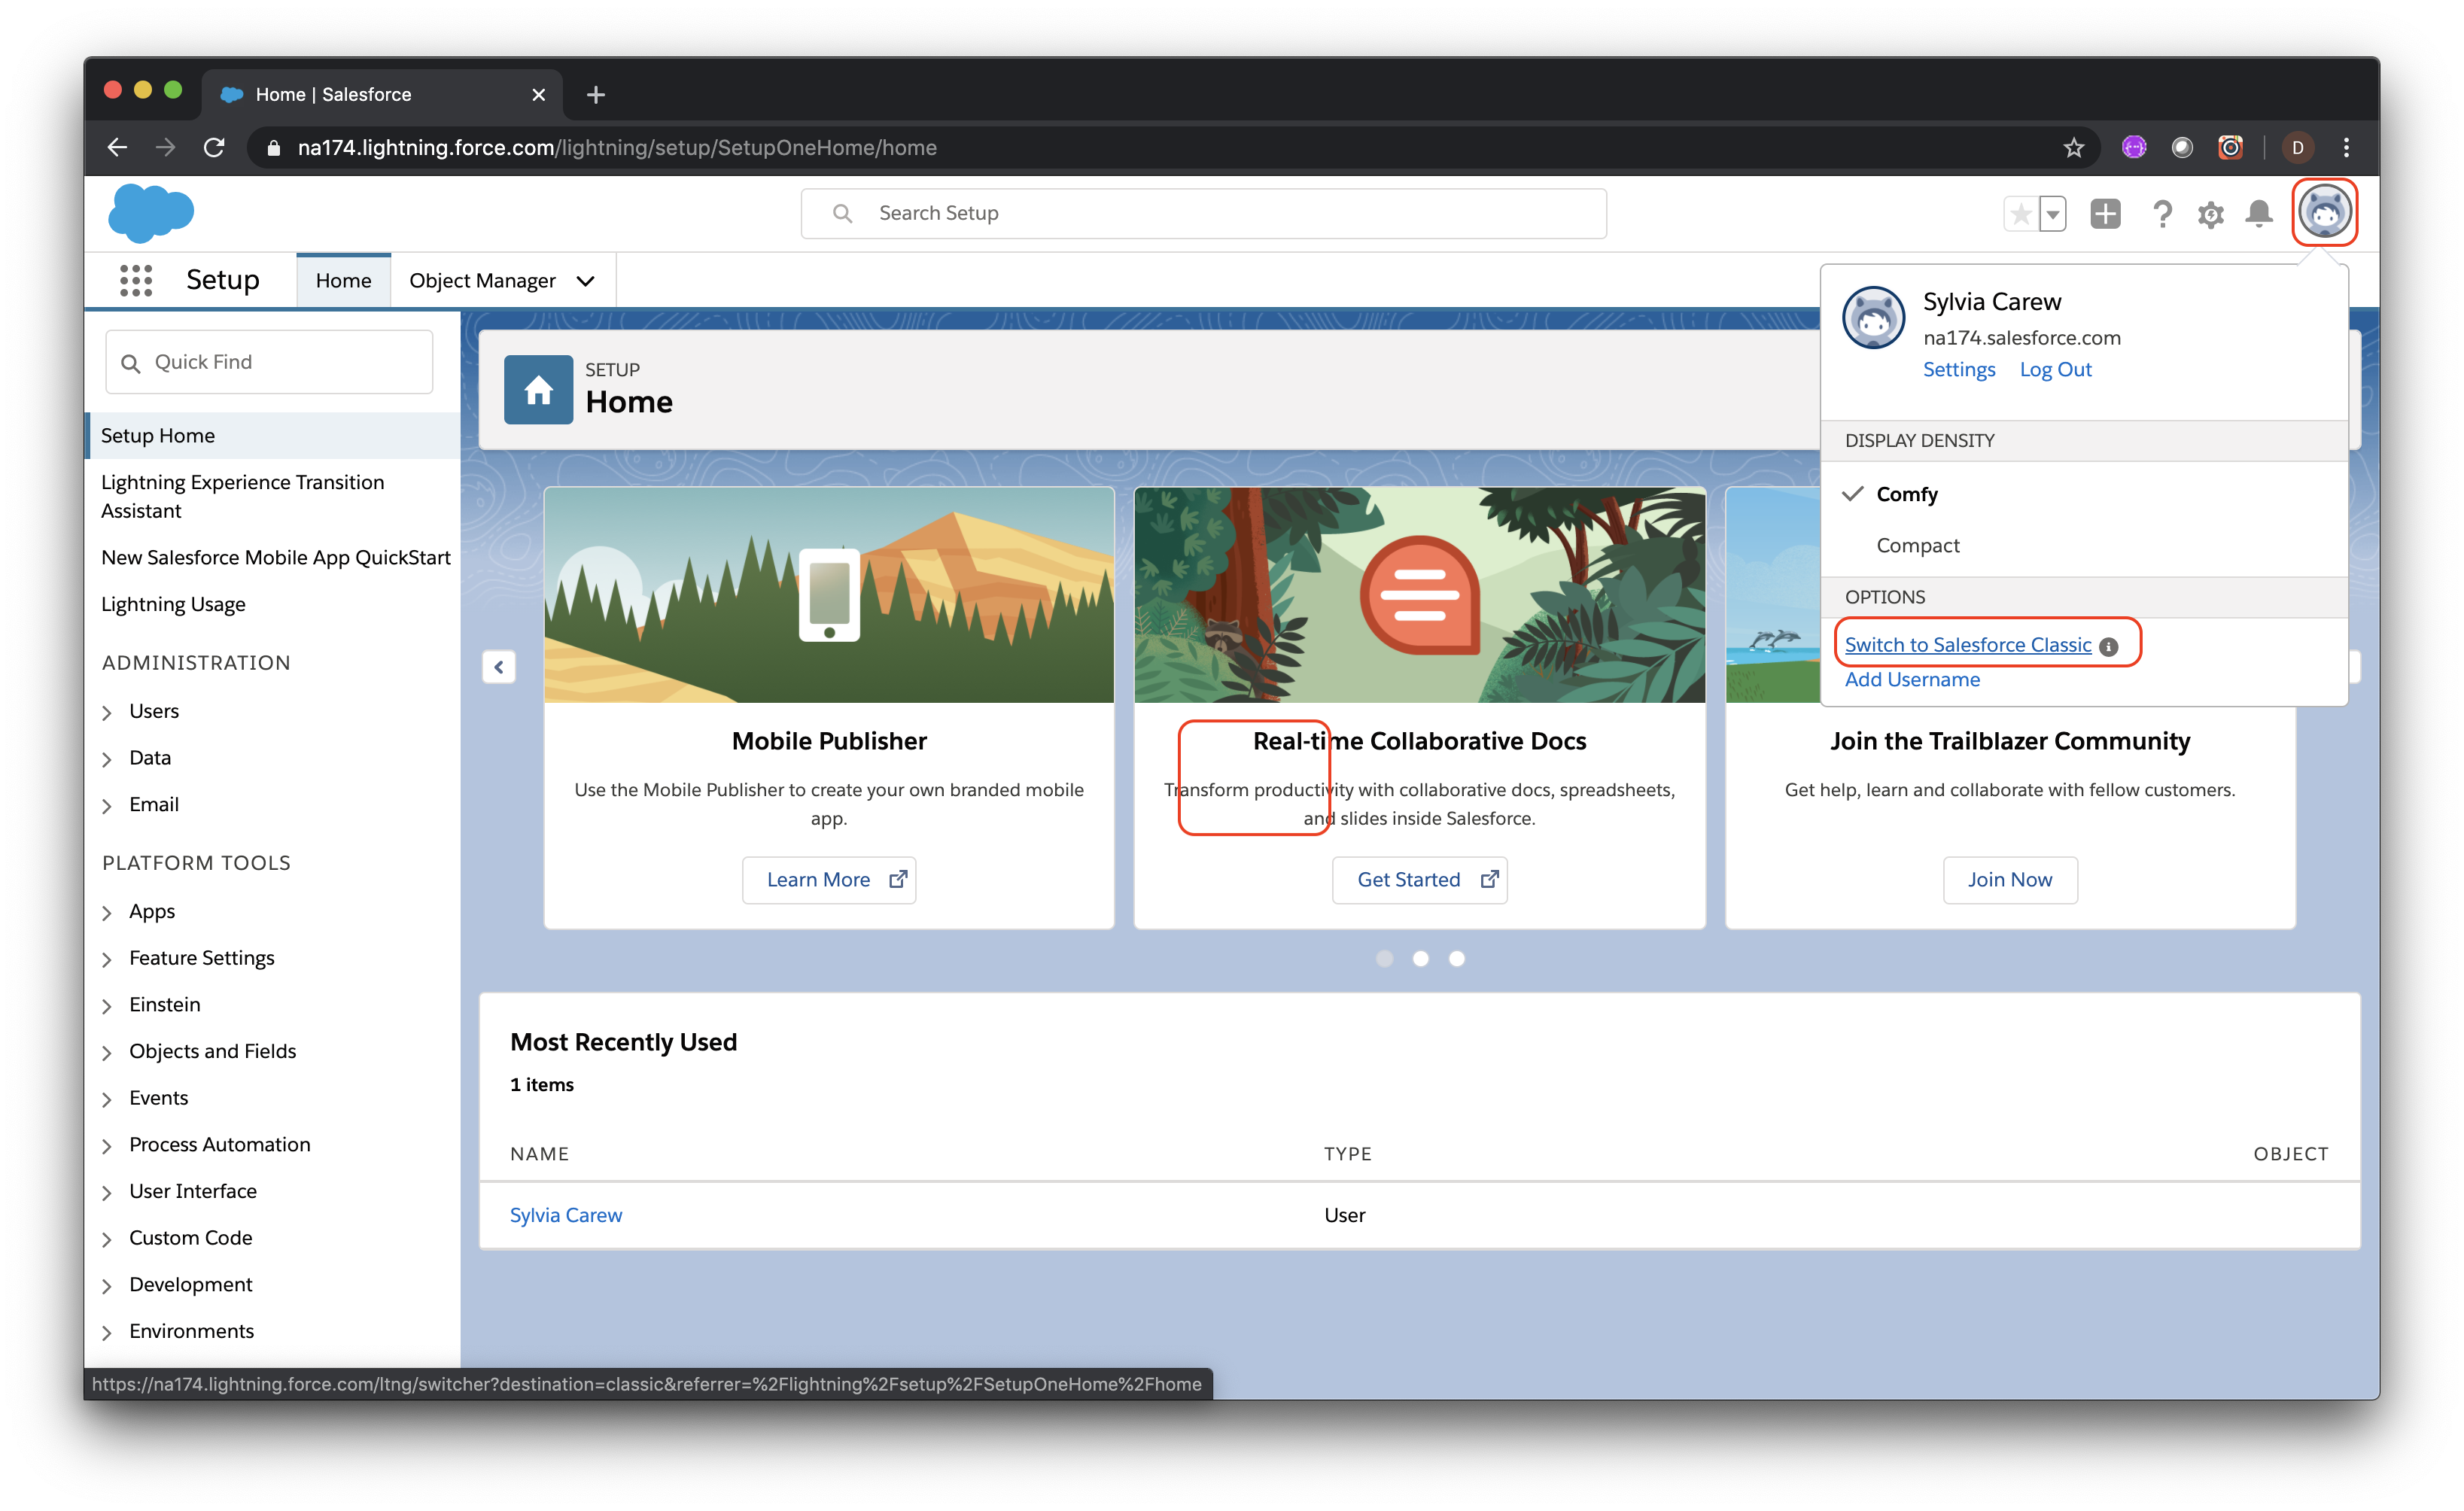
2.2 Click on your avatar (top right) and select Switch to Salesforce Classic from the context menu.
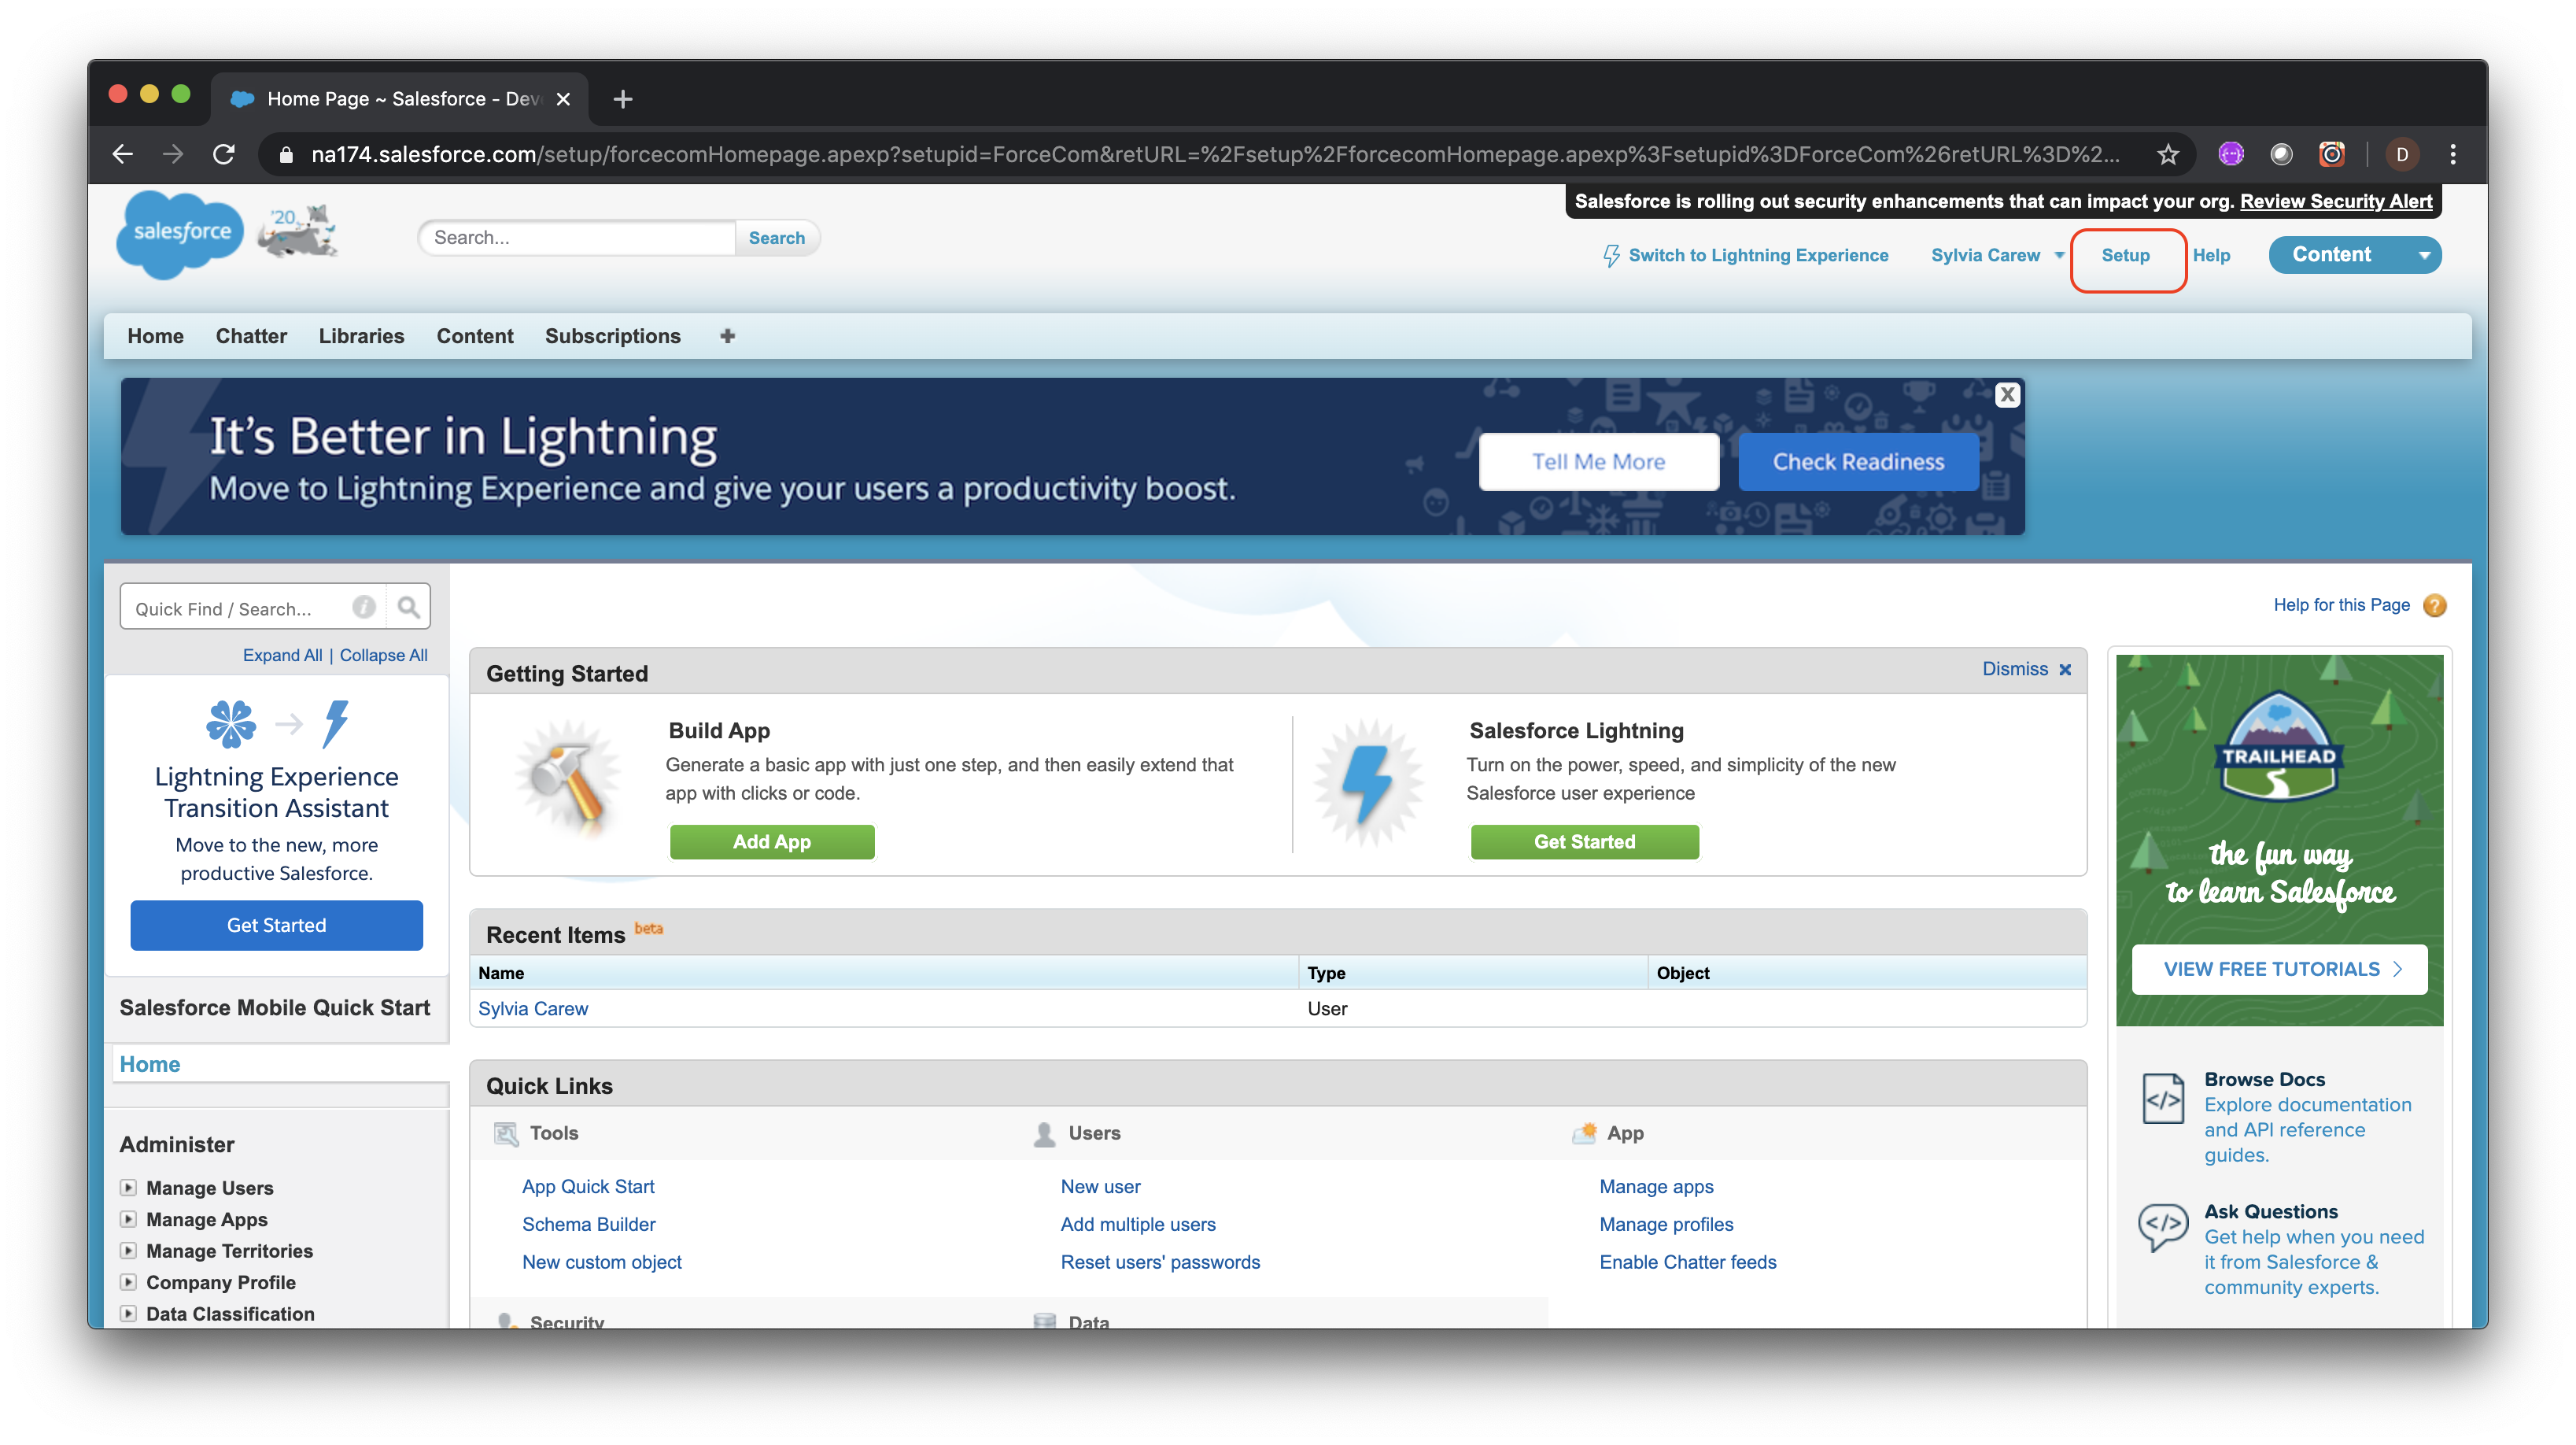
2.3 Click on Setup.
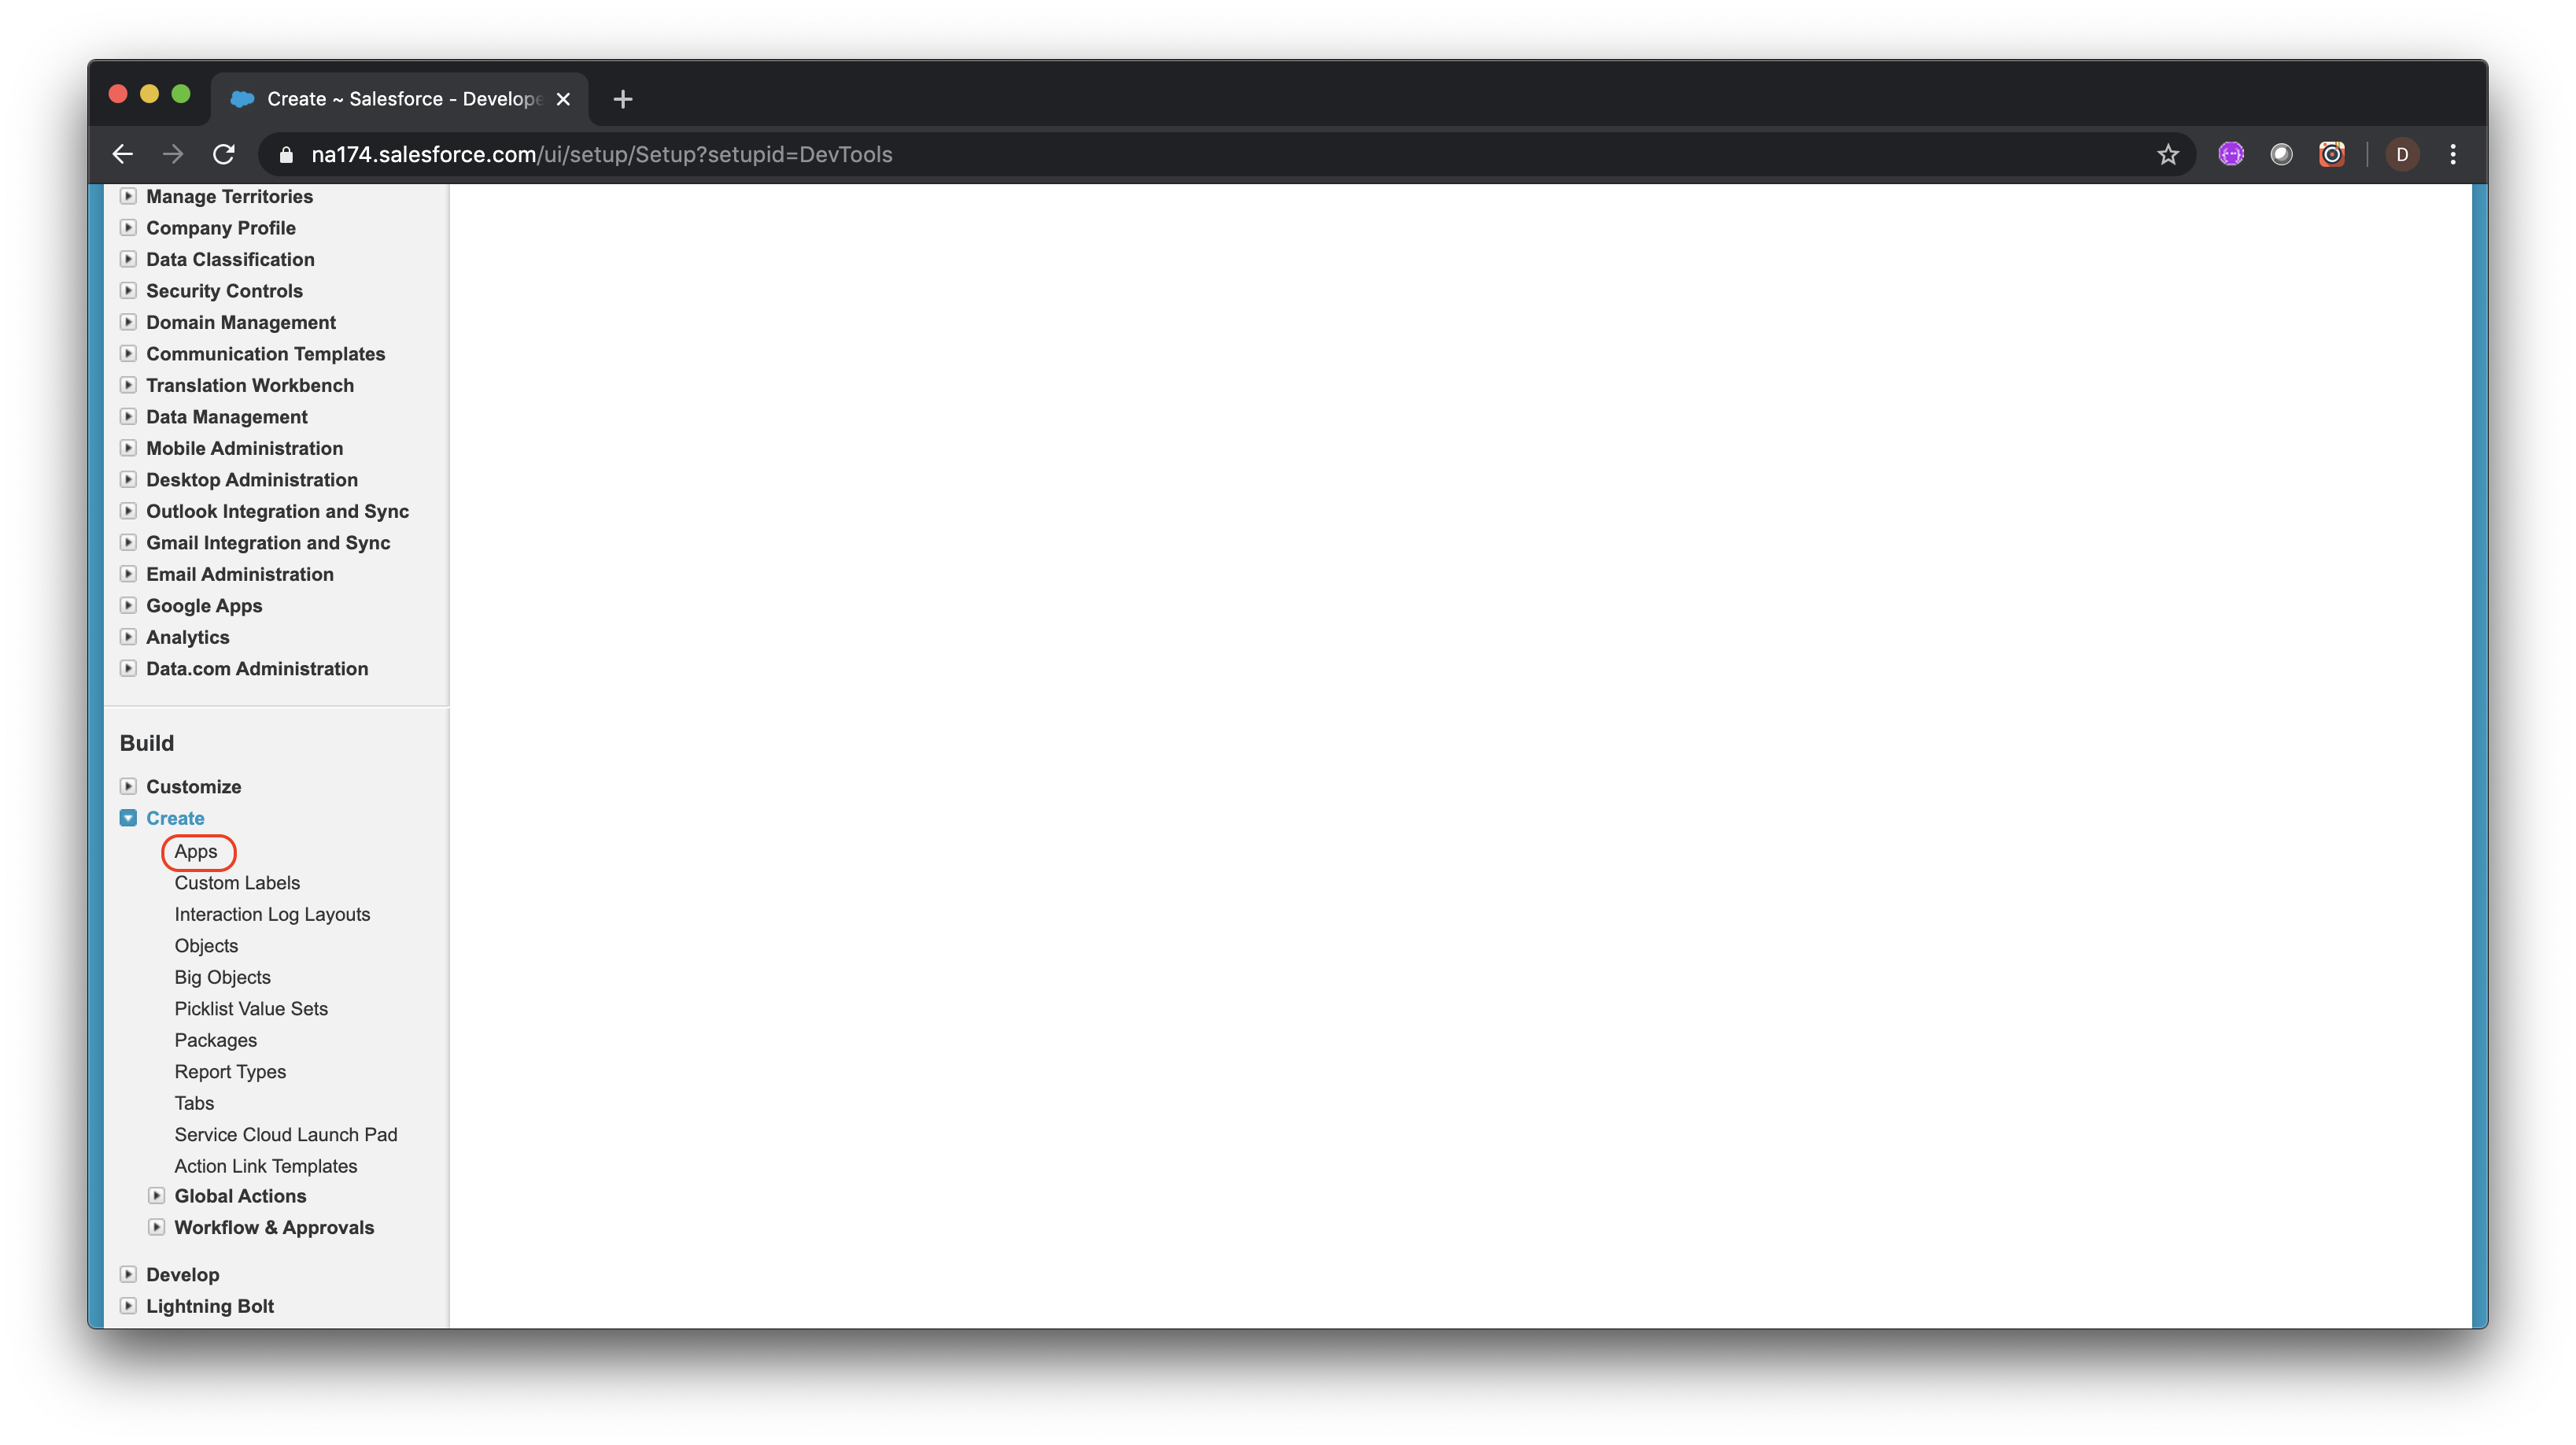
2.4 In the left navigation area, scroll down to the Build section, expand Create and click on Apps
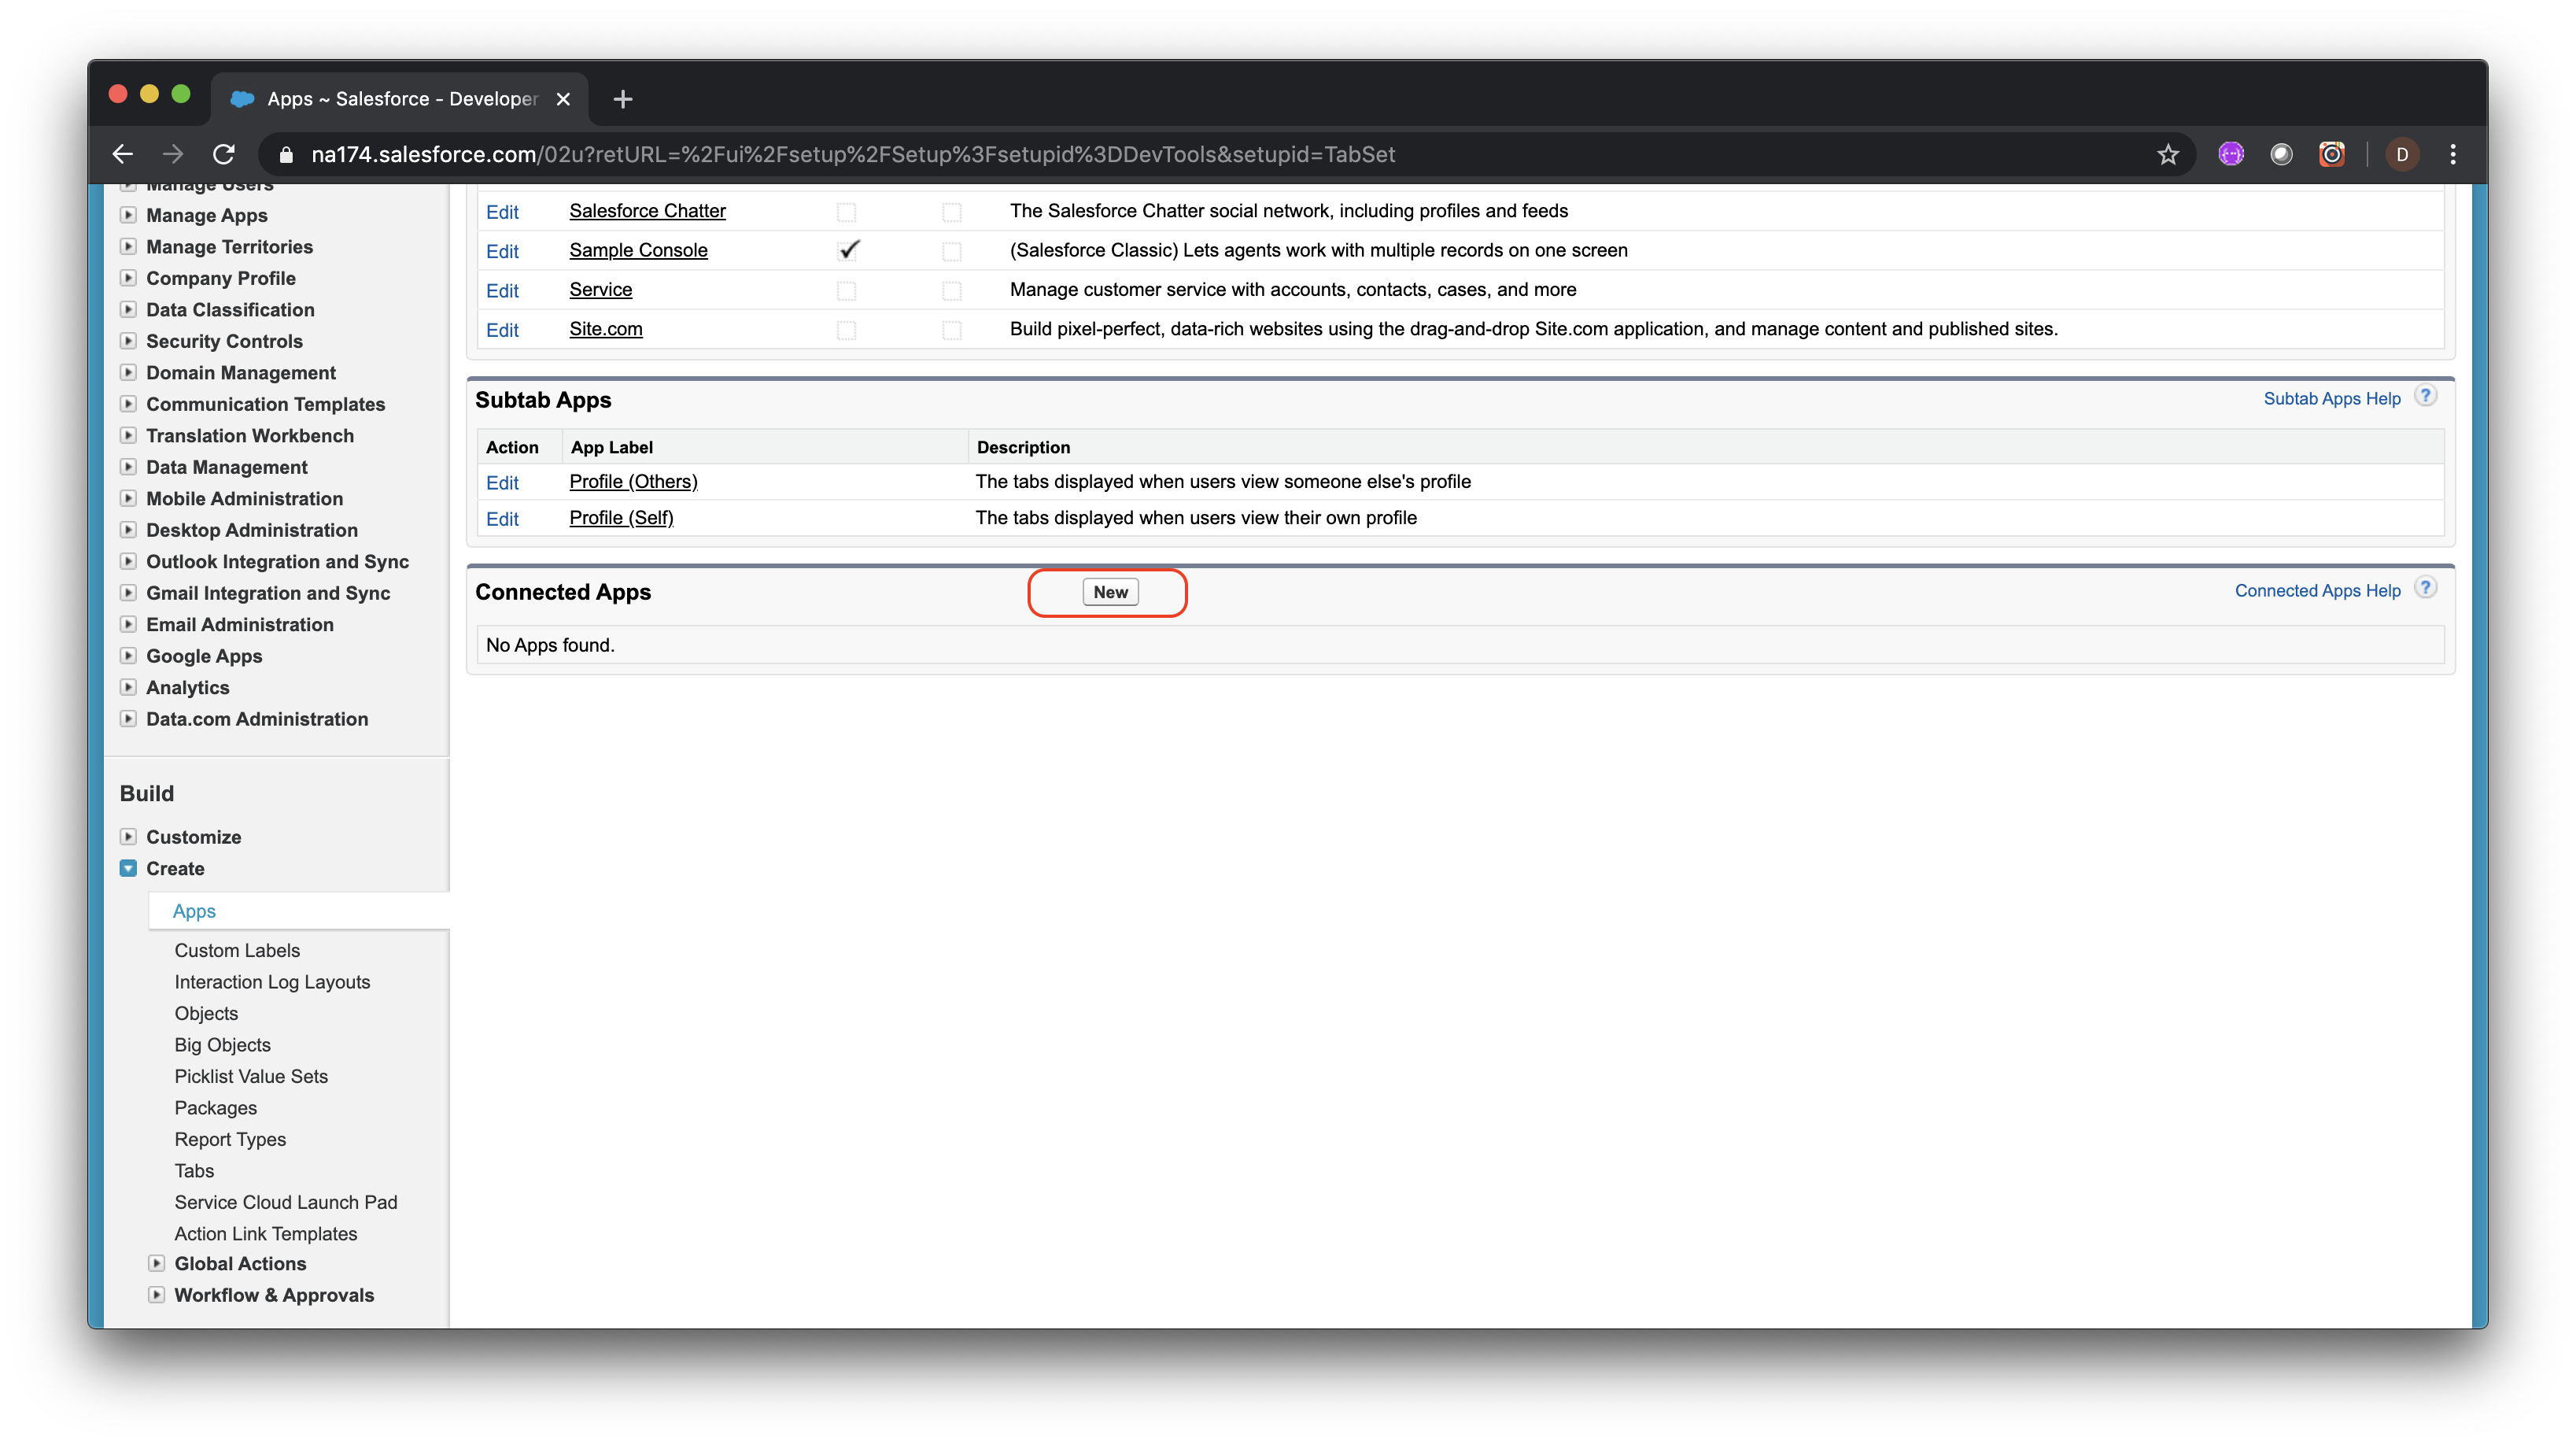
2.5 Scroll down to the Connected Apps section and click on New
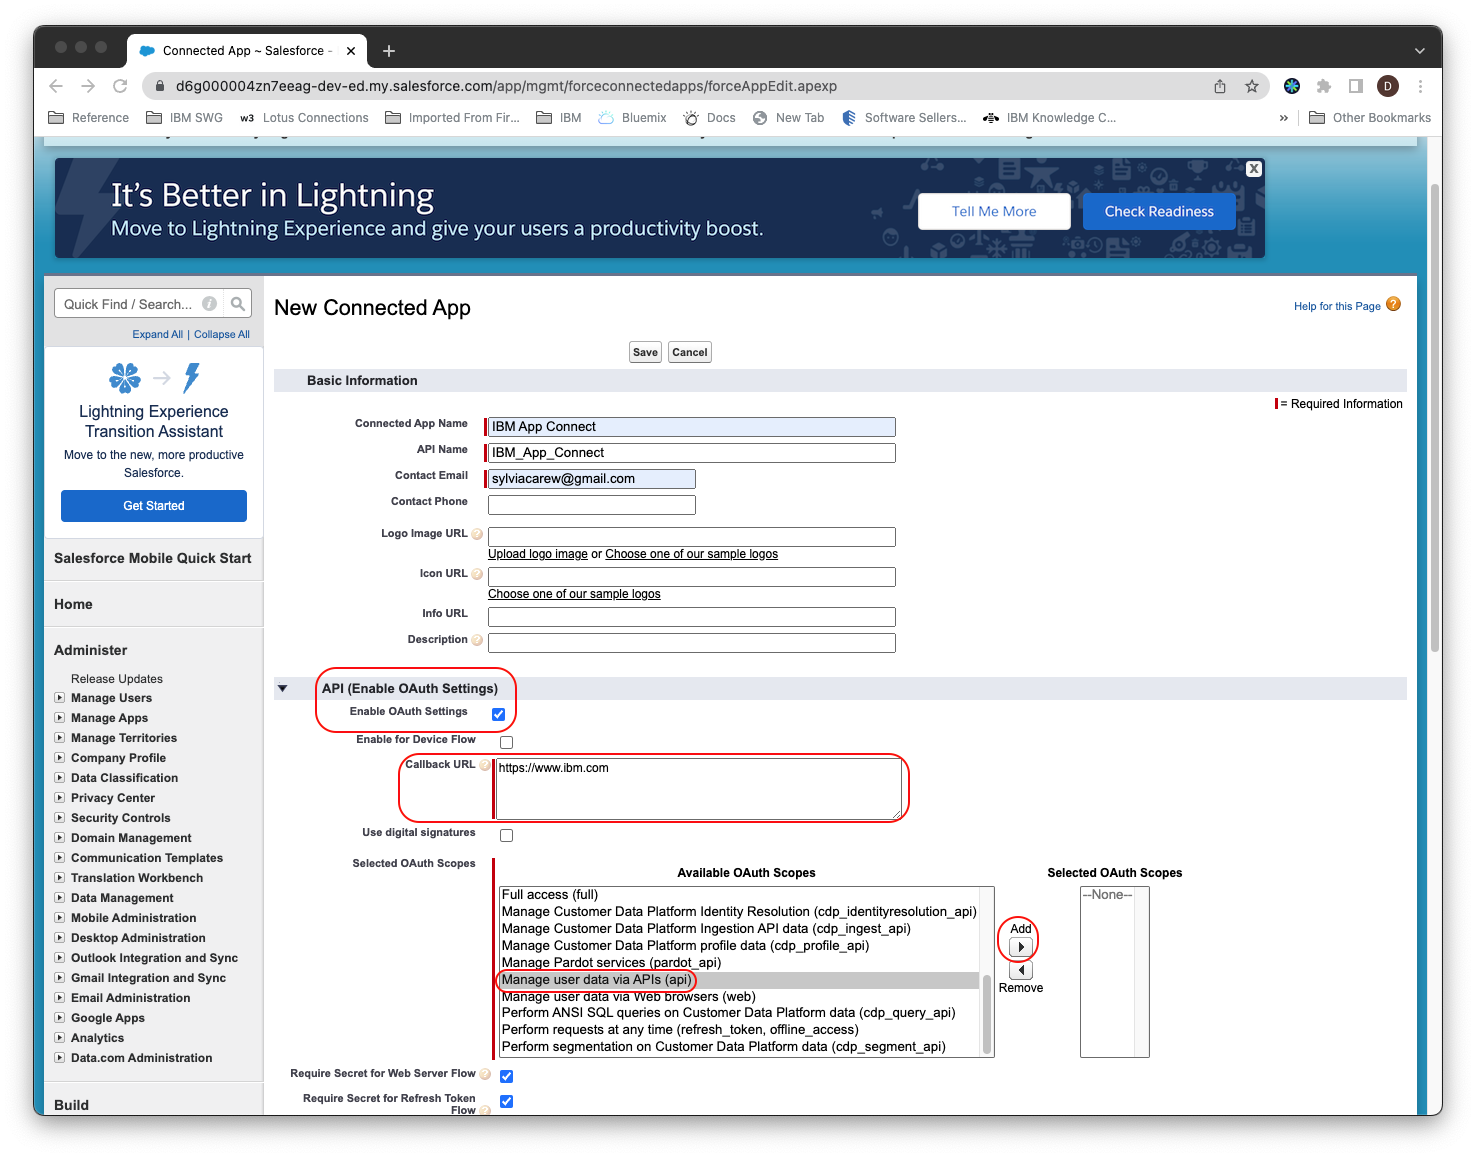
2.6 Fill in the required values for a new Connected App
a. Set the Connected App Name property to IBM App Connect
b. Set the API Name to IBM_App_Connect
c. Enter your email address as the Contact Email

2.7 Configure the OAuth settings
-
Select the Enable OAuth Setting check box.
-
Set the Callback URL to
https://www.ibm.com -
Under Selected OAuth Scopes select Manage user data via APIs (api) and click the arrow under the Add label
2.8 Scroll down to the bottom of the web page and click Save. You should see a message indicting that the Connected App can take up to 10 minutes to take effect. Click Continue.
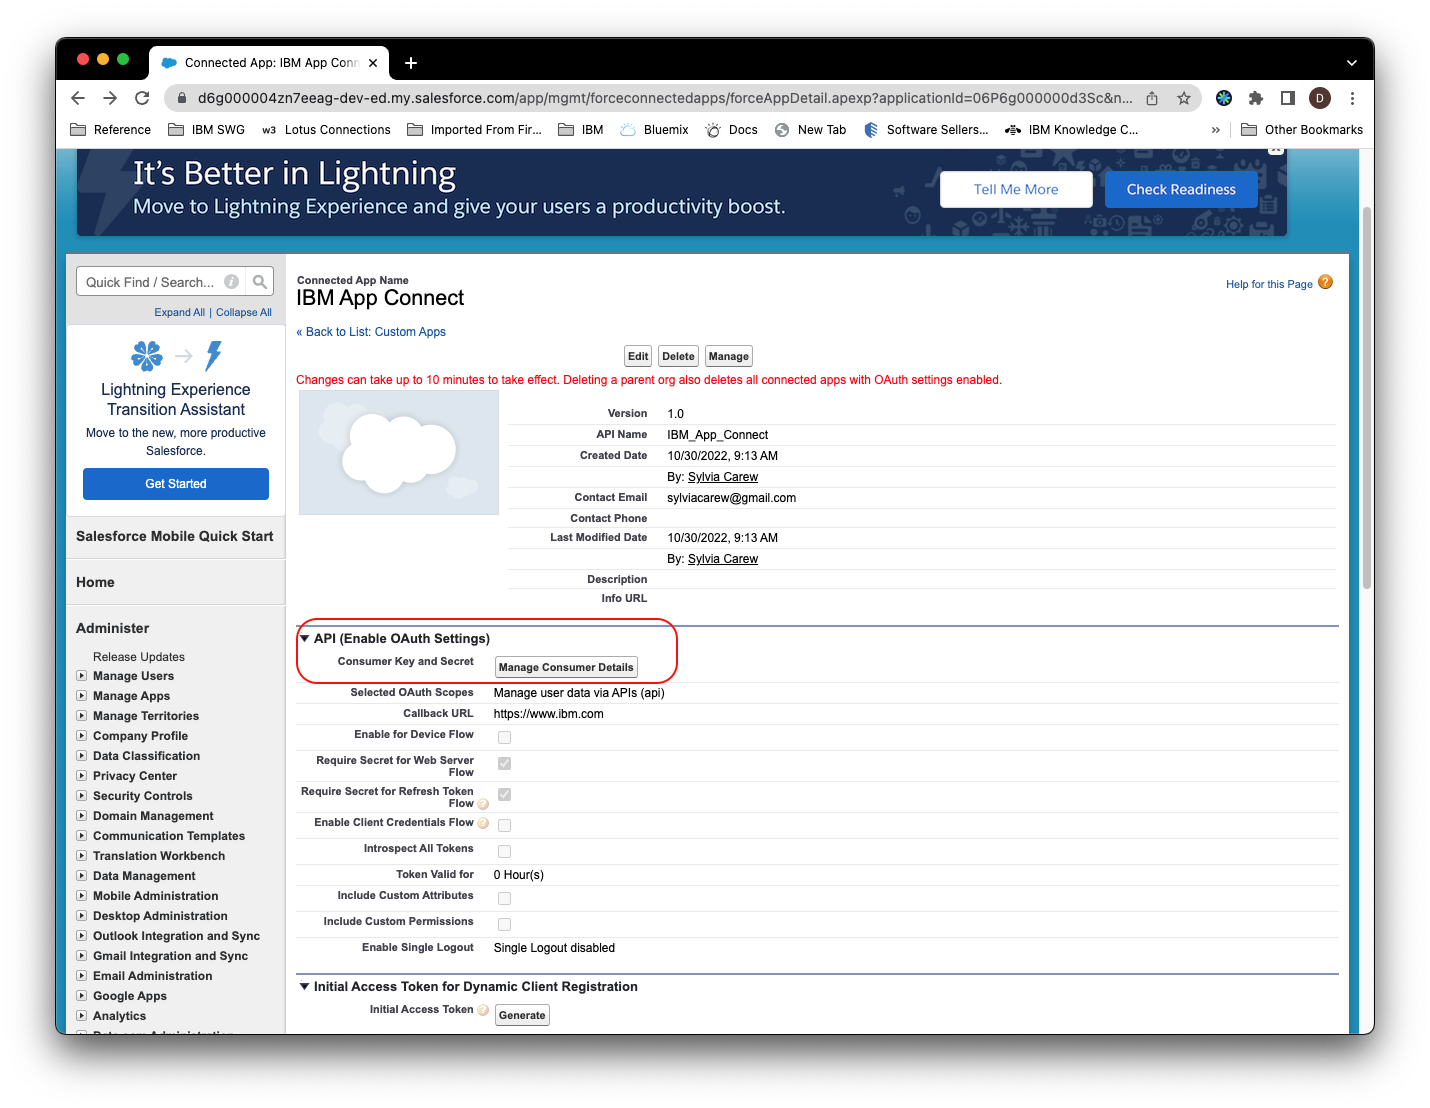
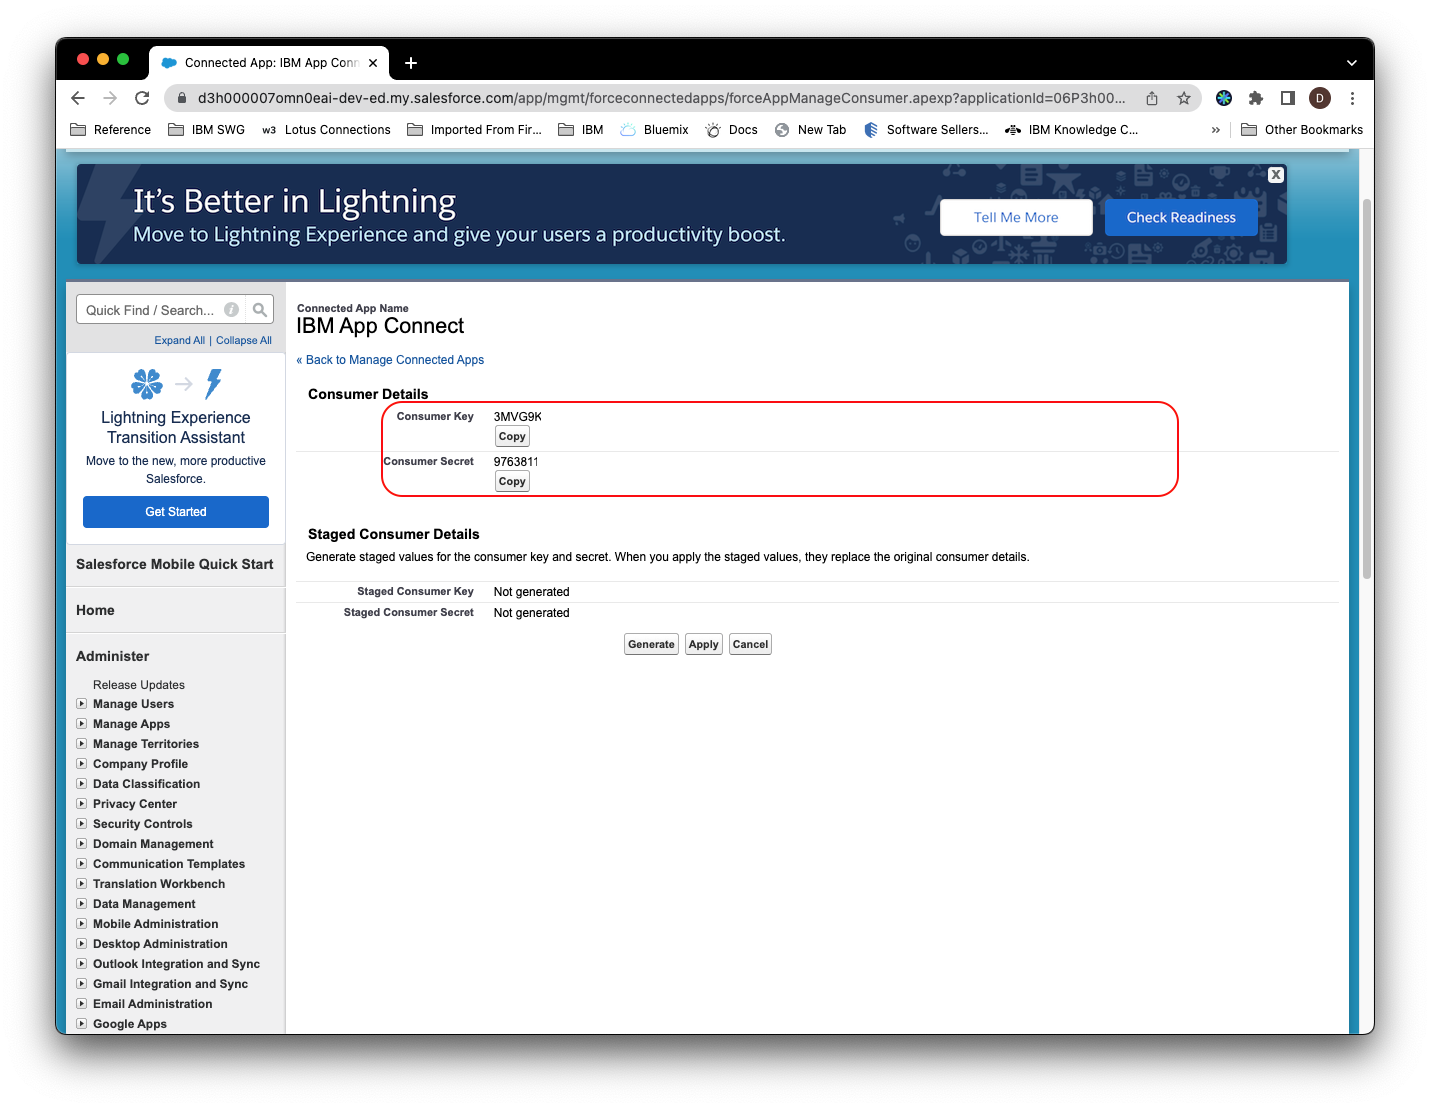
2.9 In the API (Enable OAuth Settings) section click on Manage Consumer Details
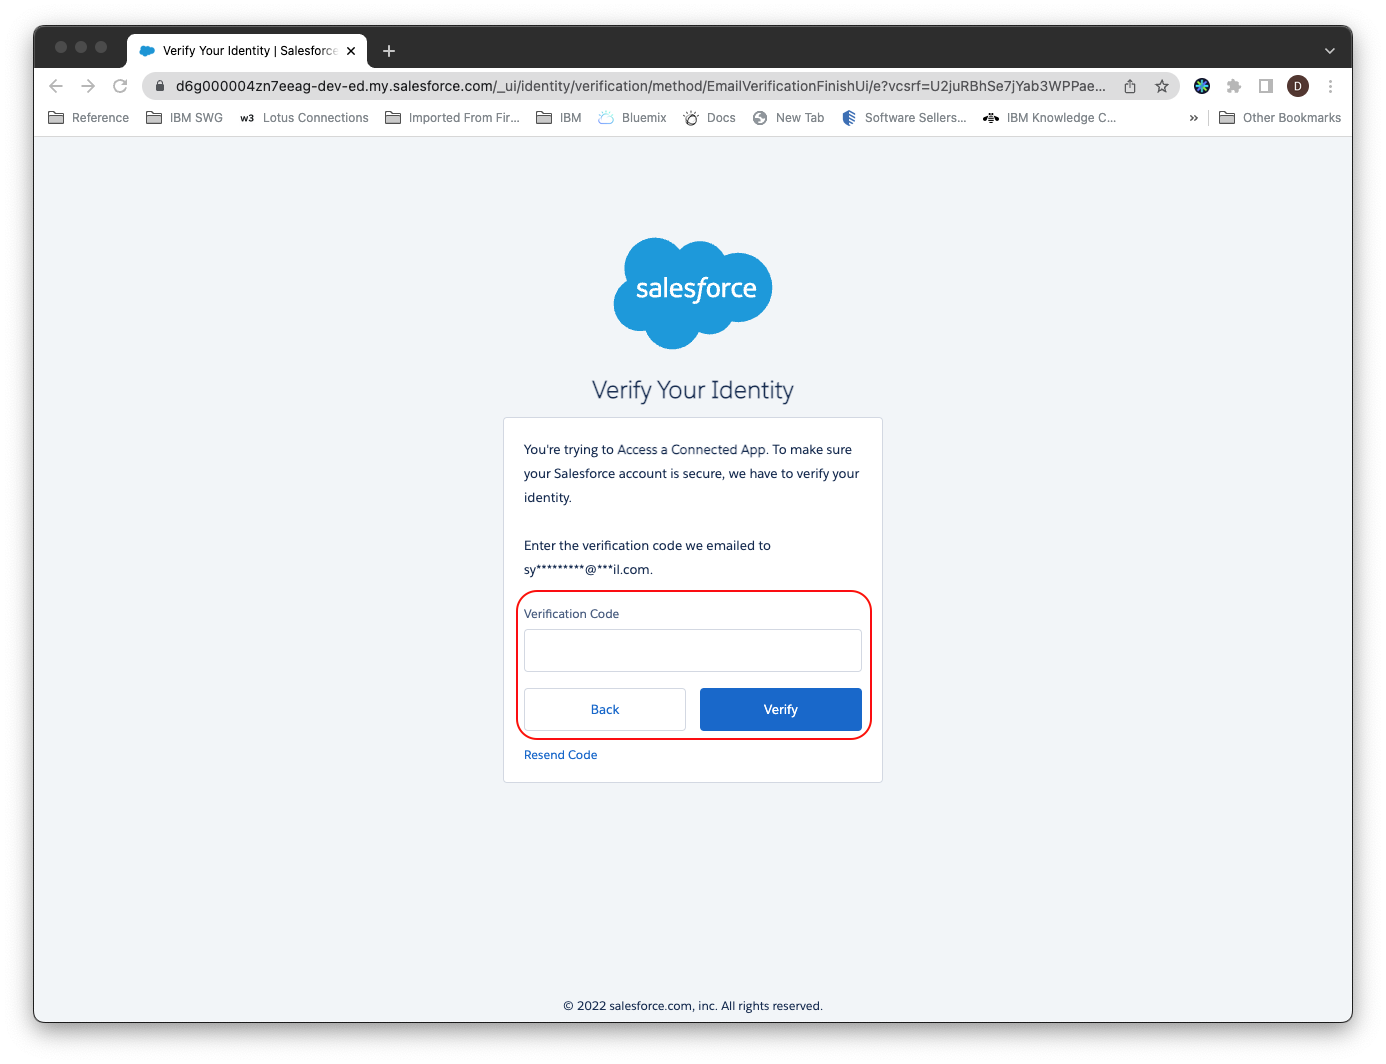
2.10 You should be prompted for a Two-Factor Authentication prompt for a Verification code. Ener the code you received and click Verify
2.11 Copy the Consumer Key and Consumer Secret to a text file. You will need them later to connect to Salesforce.
2.12 Click on your user name and select My Settings. On the left under the Personal section click on Reset My Security Token. Click on the Reset Security Token button.
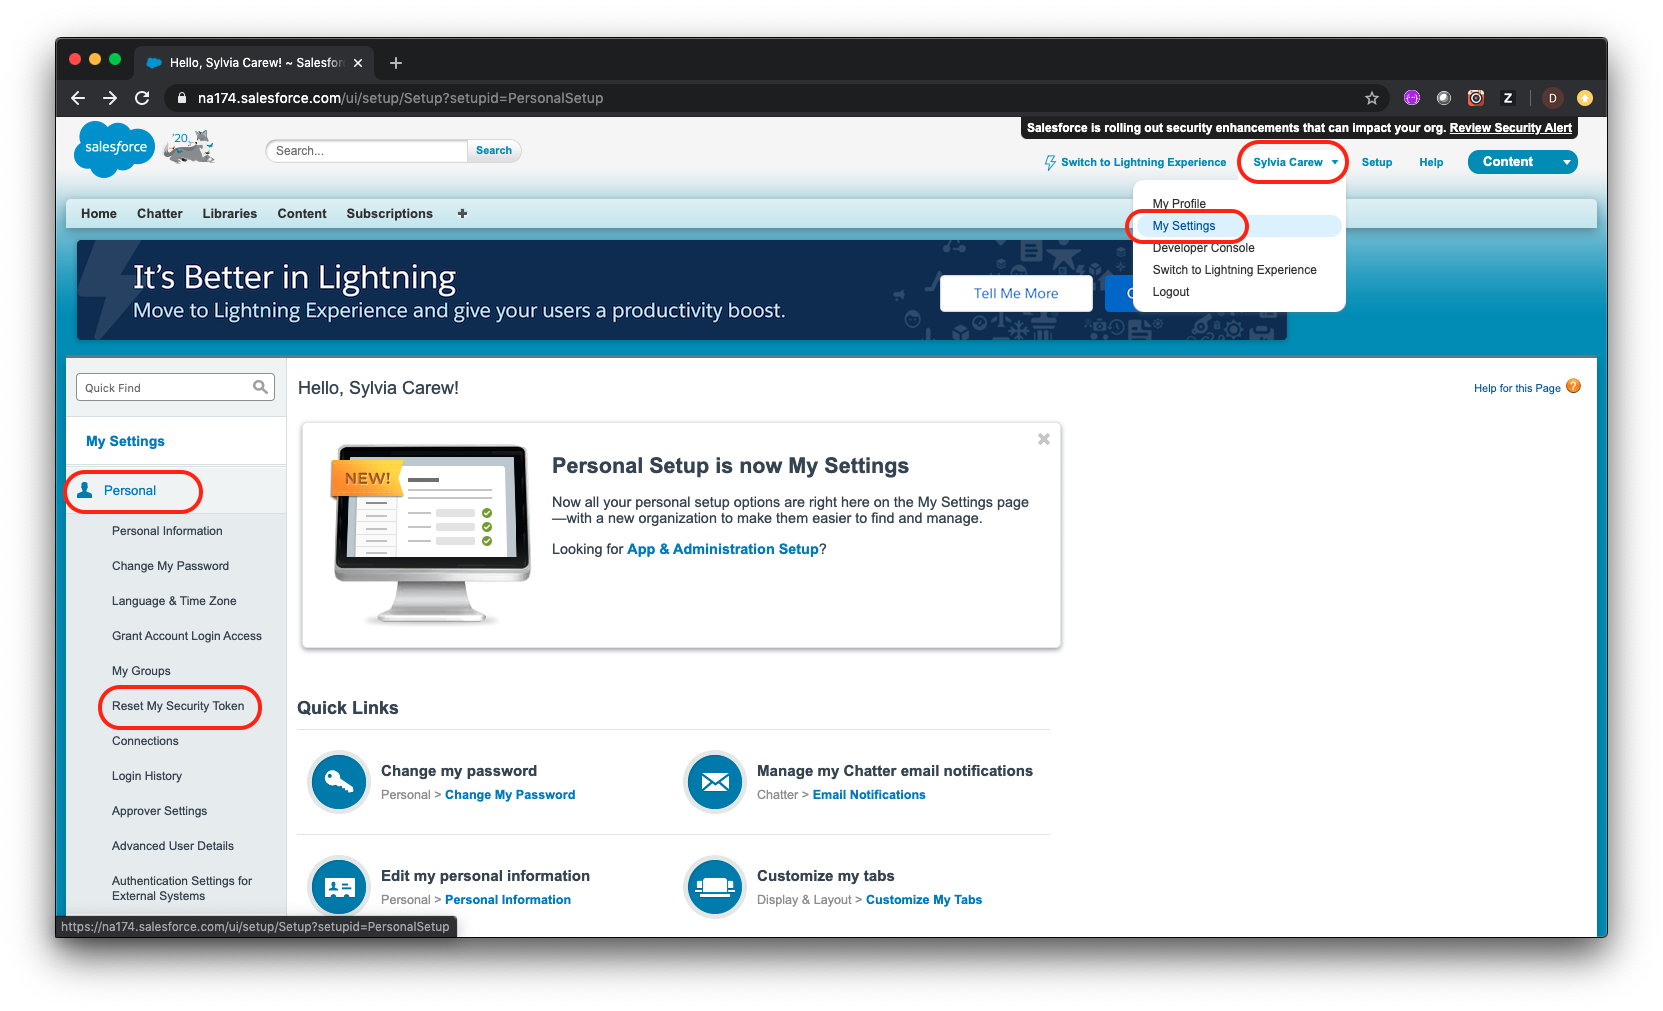
2.13 Check your email for the email address that you use as your Salesforce username. You should receive an email from Salesforce with the subject Your new Salesforce security token. Copy the Security Token to the same text file that you used for the Consumer Key and Consumer Secret

Note: Please wait 5-10 minutes before continuing to the next section.
Section 3: Setup connectivity to Salesforce in App Connect Designer
App Connect Designer is a component of Cloud Pak for Integration that provides an authoring environment in which you can create, test, and share flows for an API. You can share your flows by using the export and import functions, or by adding them to an Asset Repository for reuse.
3.1 Go to your Workshop Information page and click on the App Connect Designer component link. (Note: if you no longer have the Workshop Information page available see these instructions).
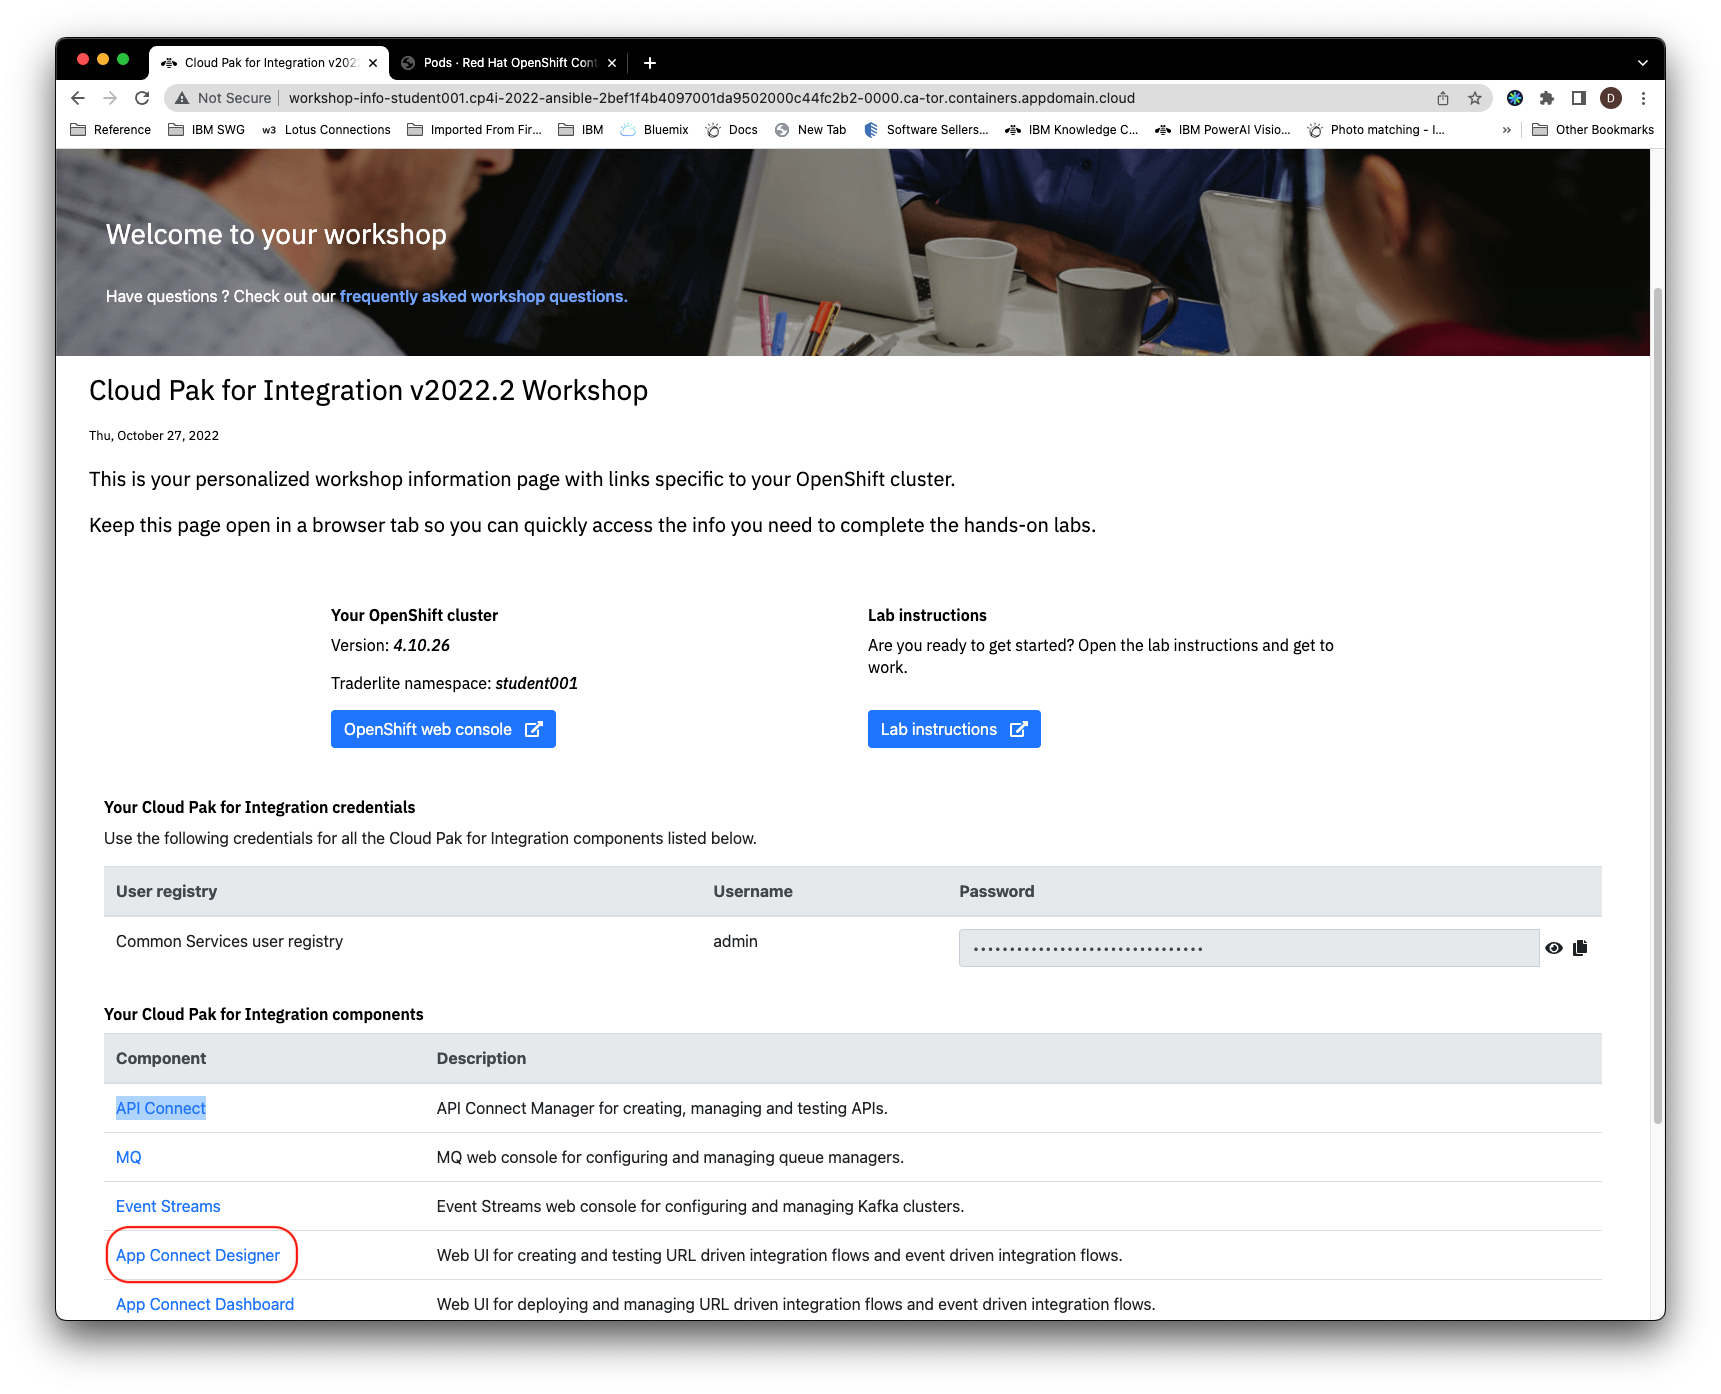
3.2 If prompted to login enter the credentials on the Workshop Information page
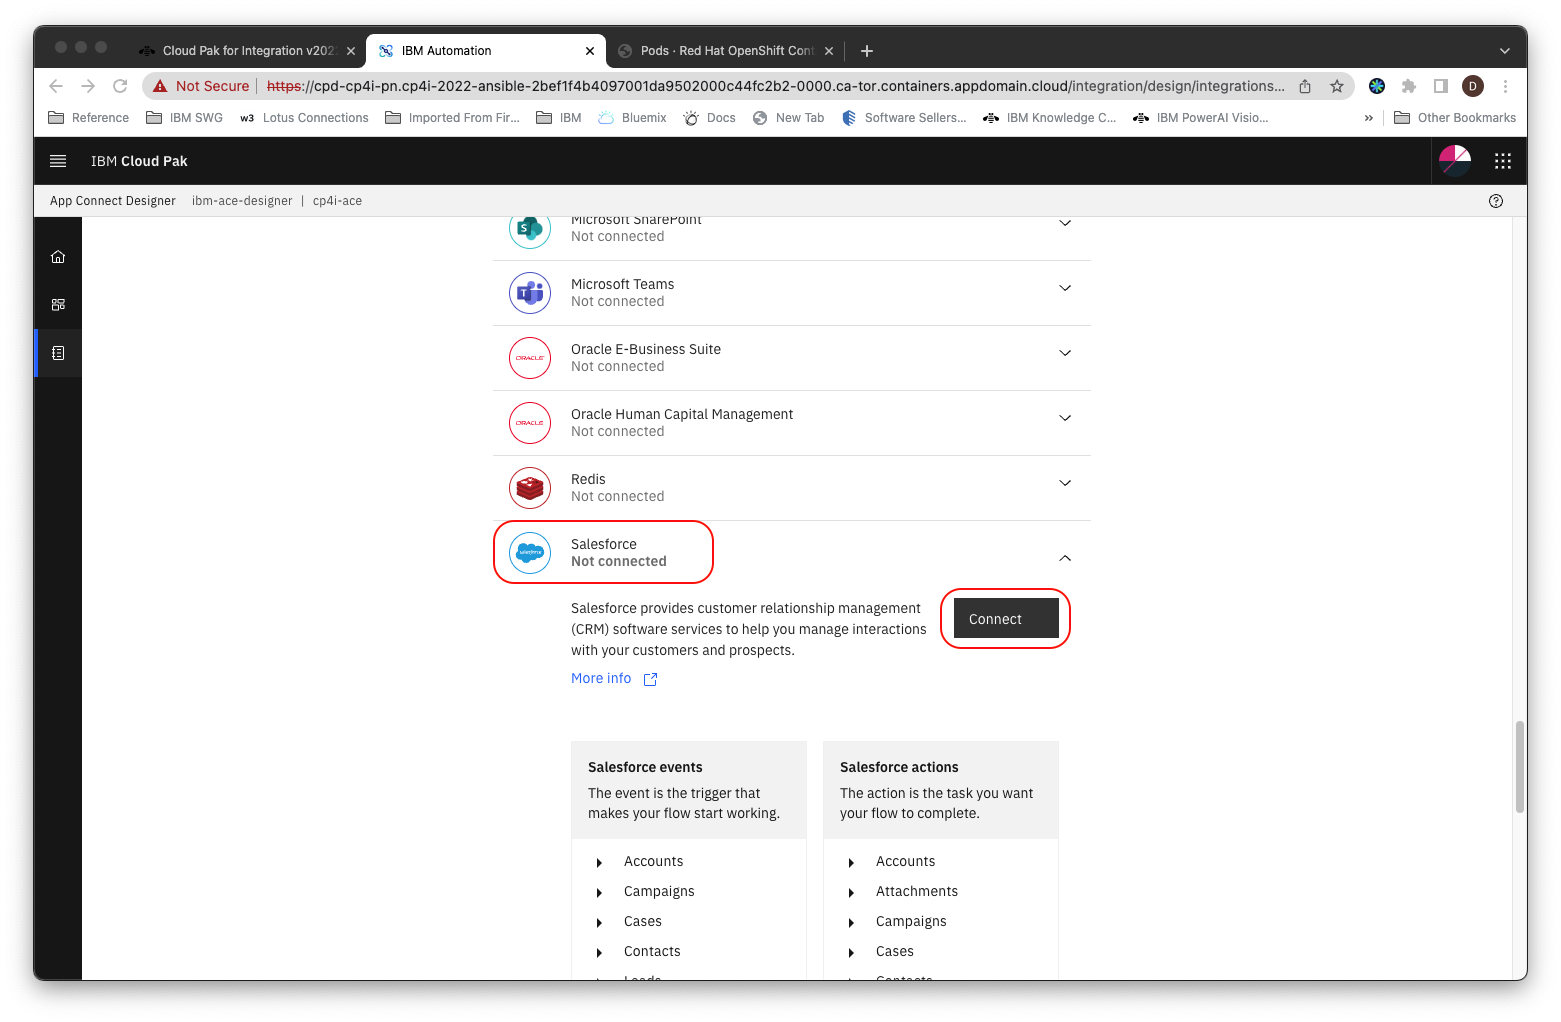
3.3 Click the Catalog icon
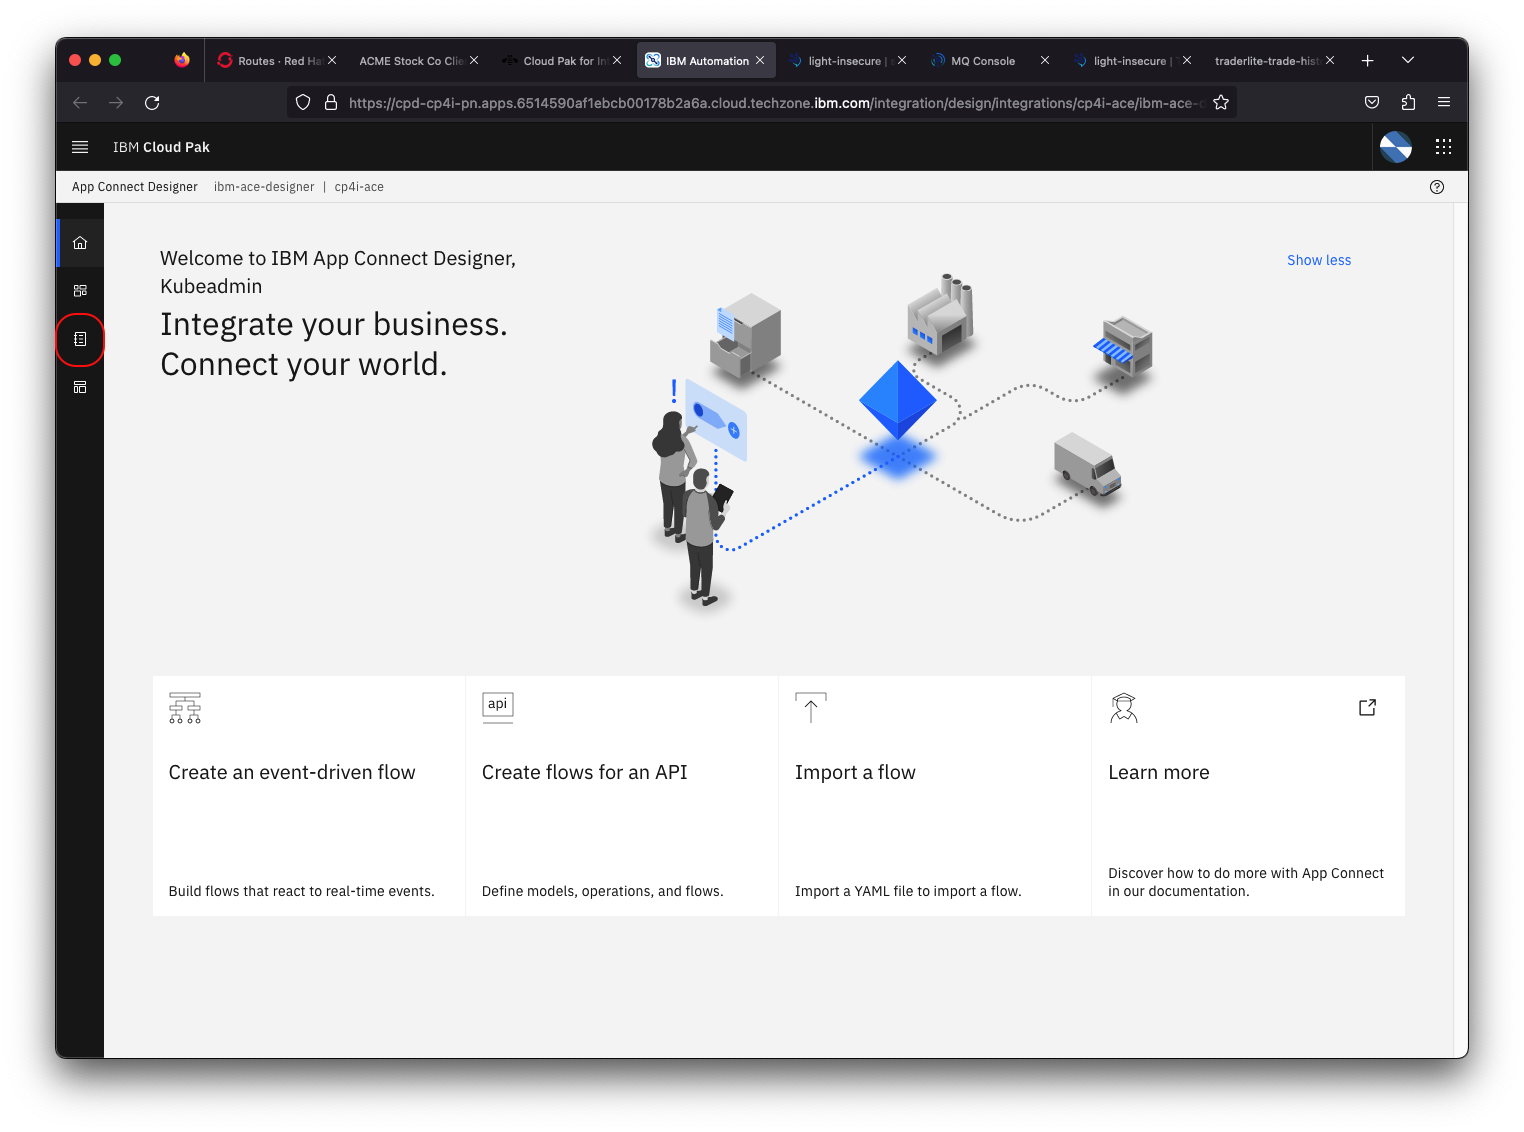
3.4 Expand Salesforce and then click Connect
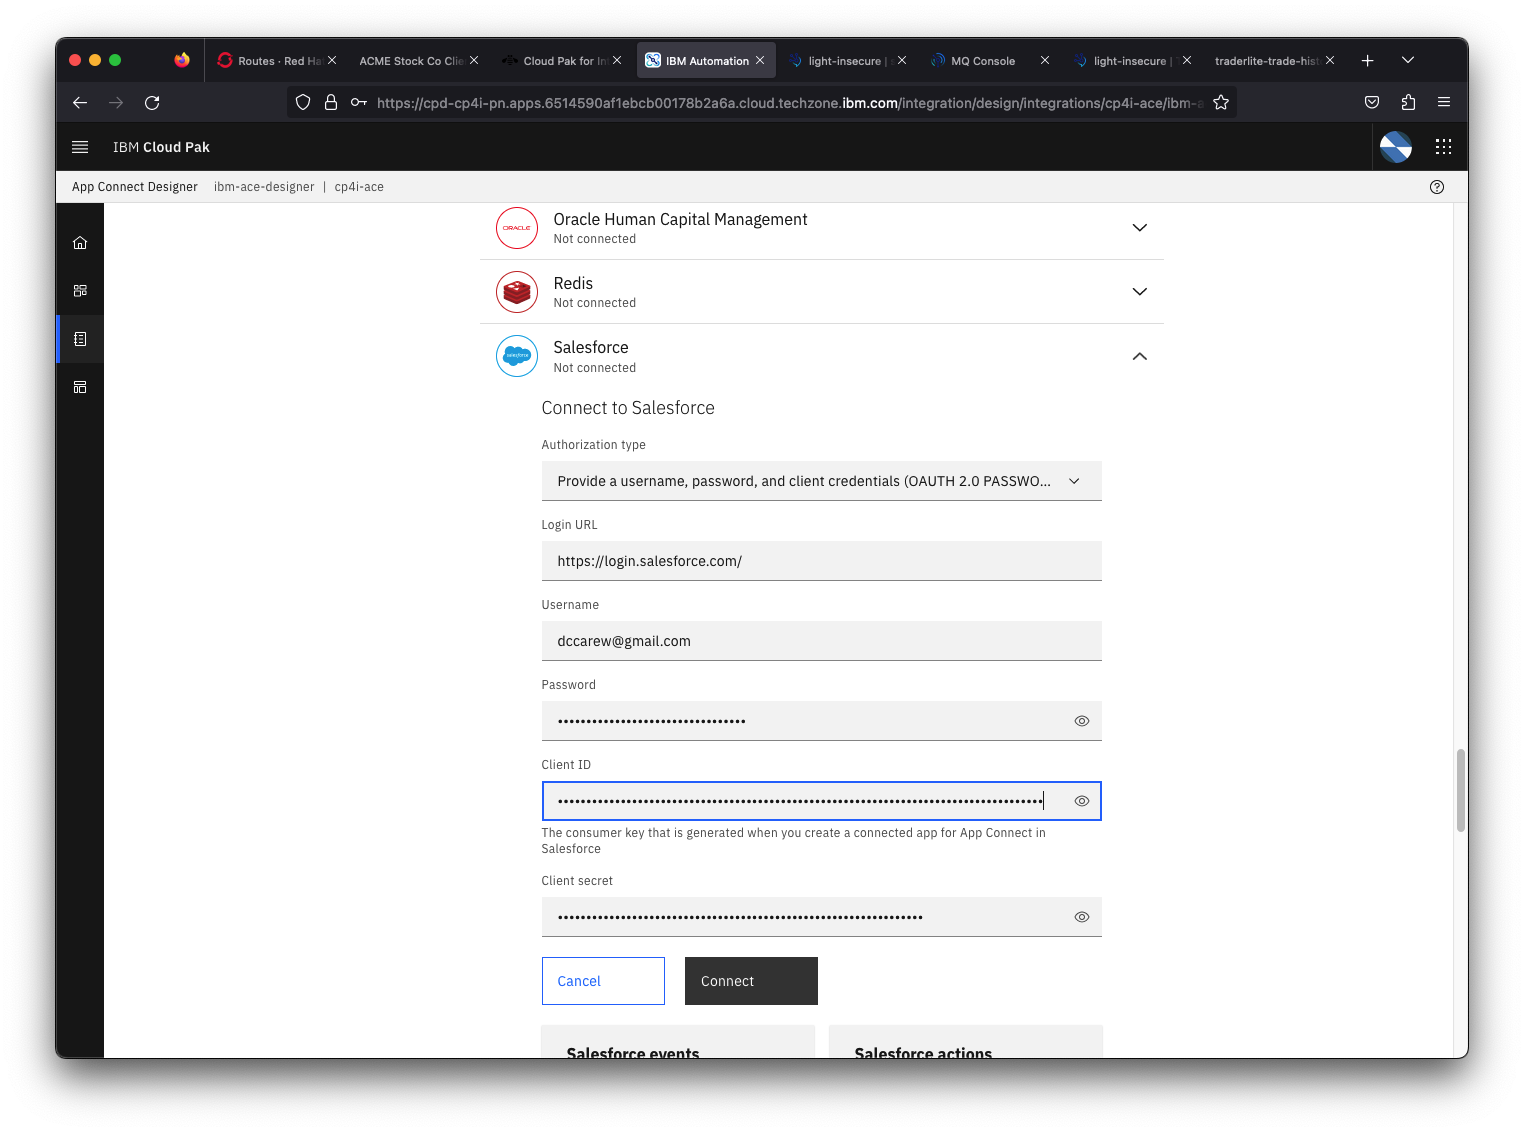
3.5 For Authorization method select Provide a username,password, and client credentials (OAUTH2... and click Continue
3.6 Enter the following values referring to the text file from the previous section where you saved your Salesforce credentials.
-
For the Login URL enter
https://login.salesforce.com -
For the Username enter the email you use to login to Salesforce
-
For the Password enter the password you use to login to Salesforce. Then append the value of the Security Token (that you saved in the previous section) to the password. For example if your password is
fooand your security token isbaryou would enterfoobarinto the password field. -
For the Client Id copy and past the value of the Consumer Key (that you saved in the previous section).
-
For the Client Secret copy and past the value of the Consumer Secret (that you saved in the previous section).
NOTE: If you receive an error that the connection to Salesforce failed, then it is recommended to re-check the credentials and try again. You can re-enter the credentials for this account by clicking on the three dots next to the account name and clicking Update Account from the subsequent menu. The previous details are cleared, so you will need to enter them all again.
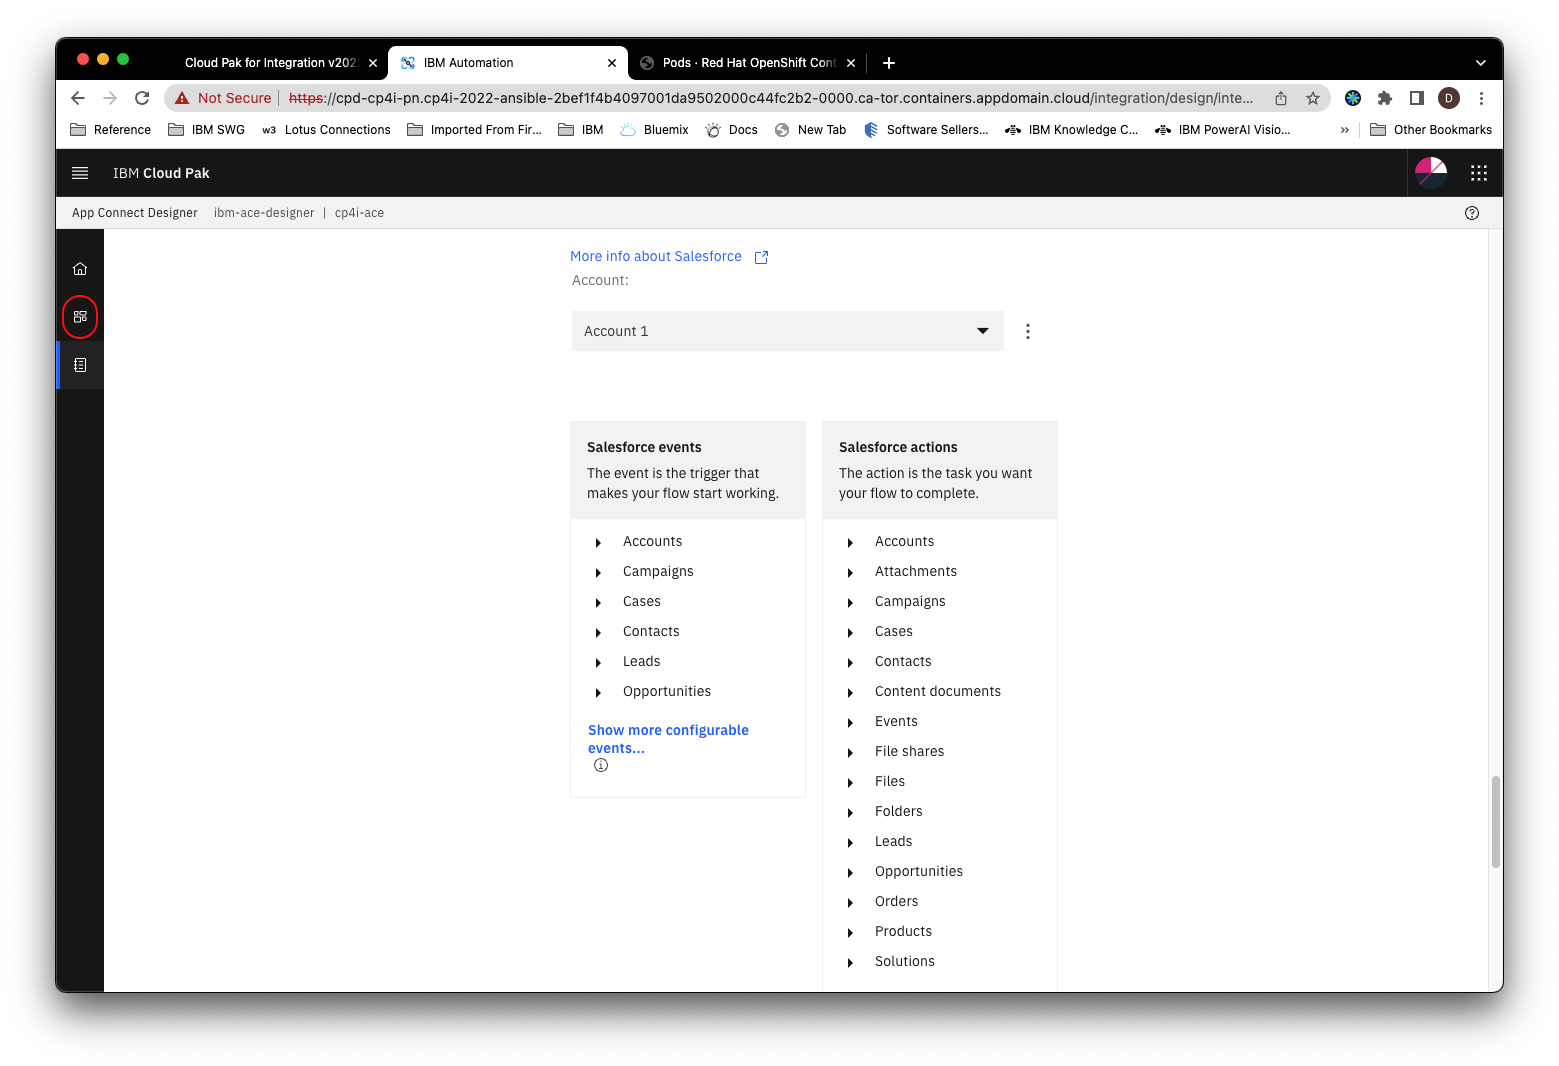
3.7 Click on Connect.
Section 4: Create the flows in App Connect Designer
4.1 In App Connect Designer, click the Dashboard icon.
4.2 Click New and select Flows for an API

4.3 Name the flow sfpush1. Name the model Client
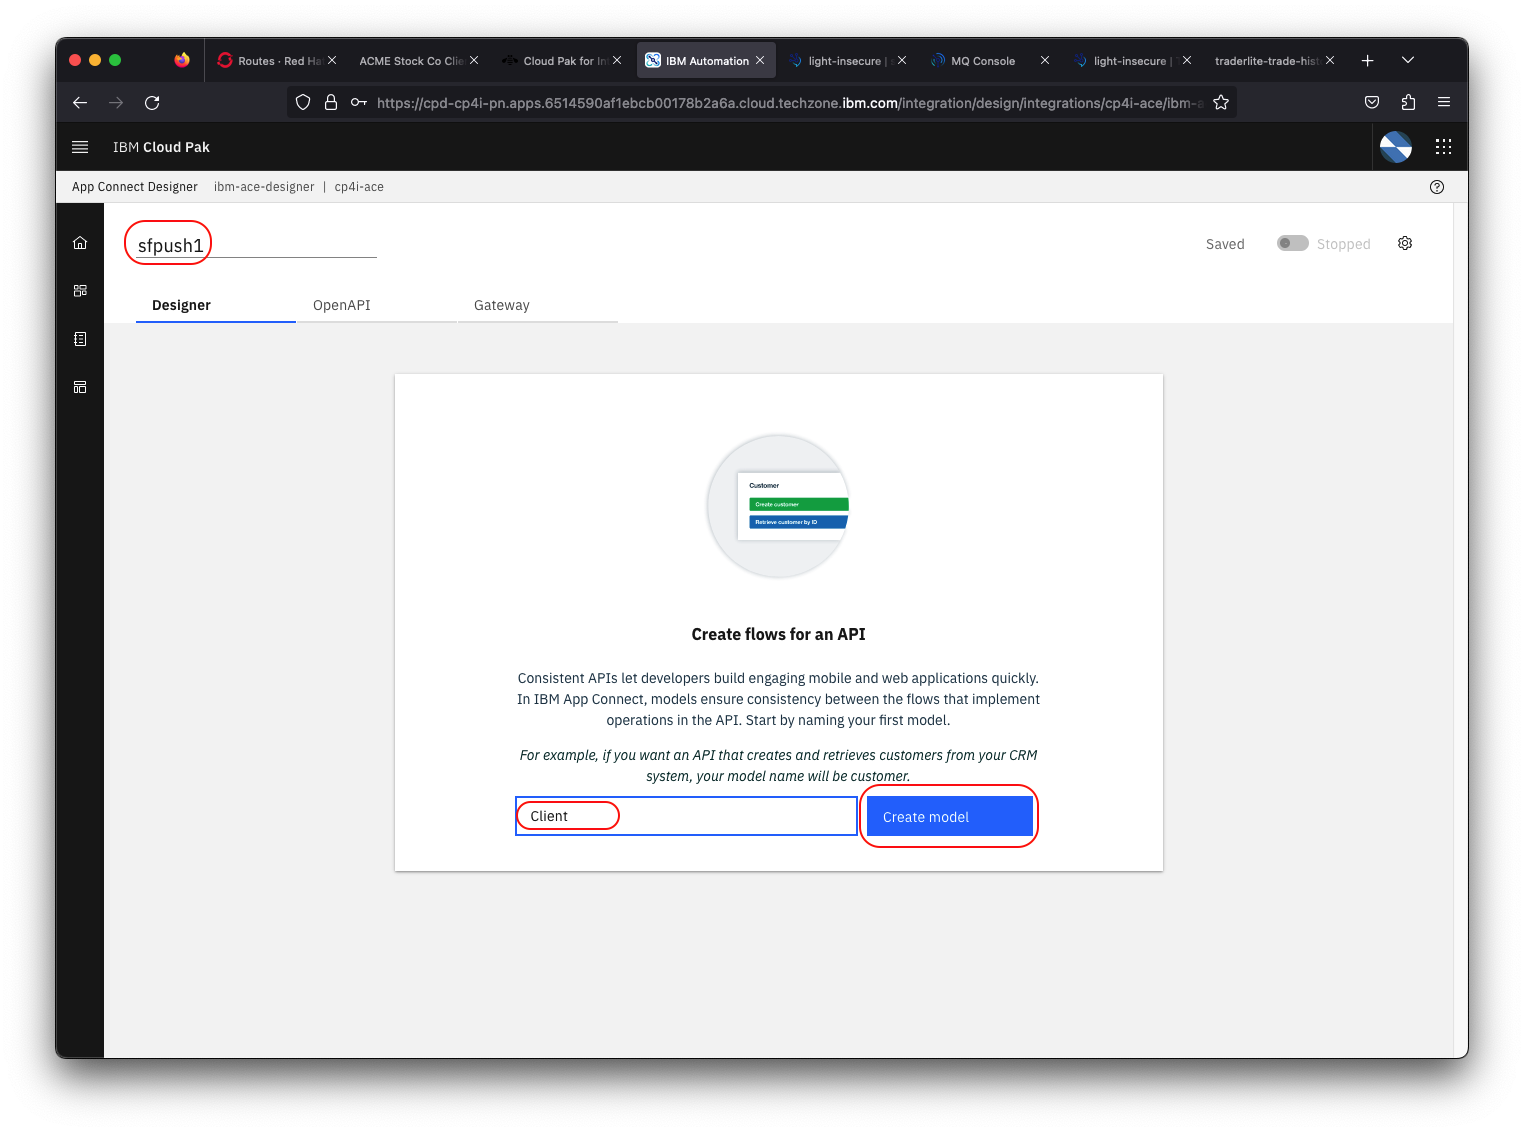
4.4 Click Create Model
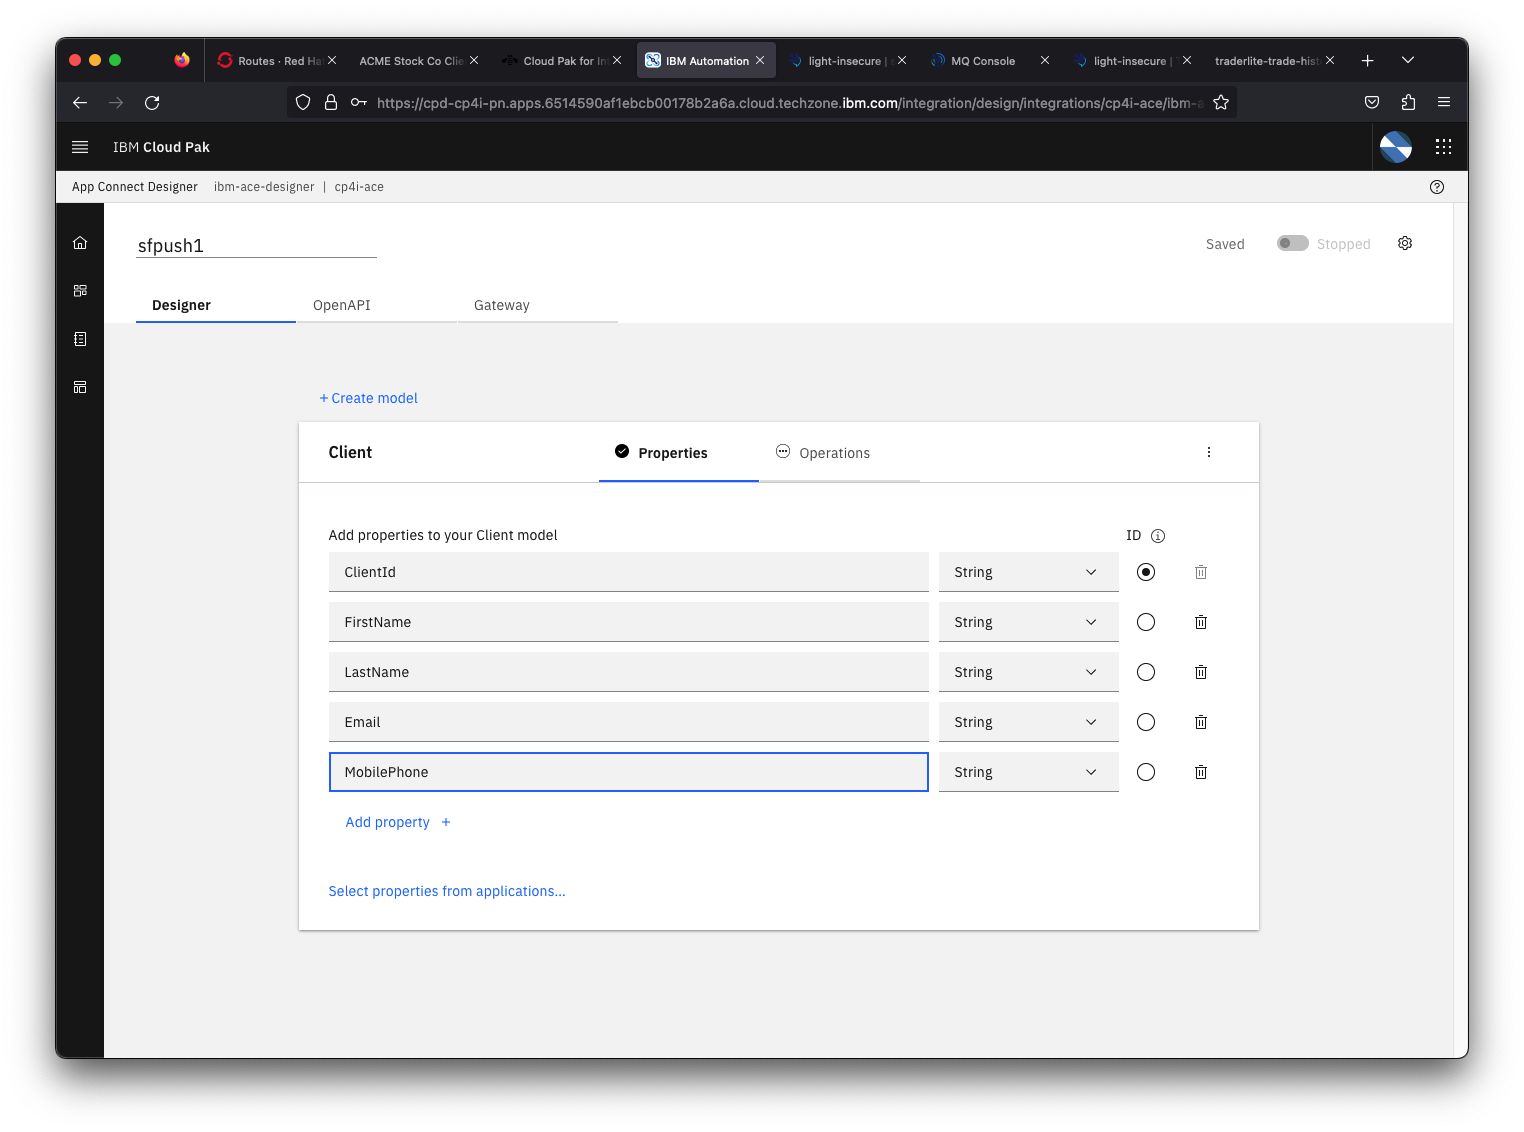
4.5 Next you will add the properties of the input data for your flow.
Note: Name them exactly as instructed (including matching case) so that your flow will work with the TraderLite app.
-
Enter
ClientIdas the first property and then click Add property + -
Enter
FirstNameas the next property and then click Add property + -
Enter
LastNameas the next property and then click Add property + -
Enter
Emailas the next property and then click Add property + -
Enter
MobilePhoneas the next property
When you're done the screen should look like the following:
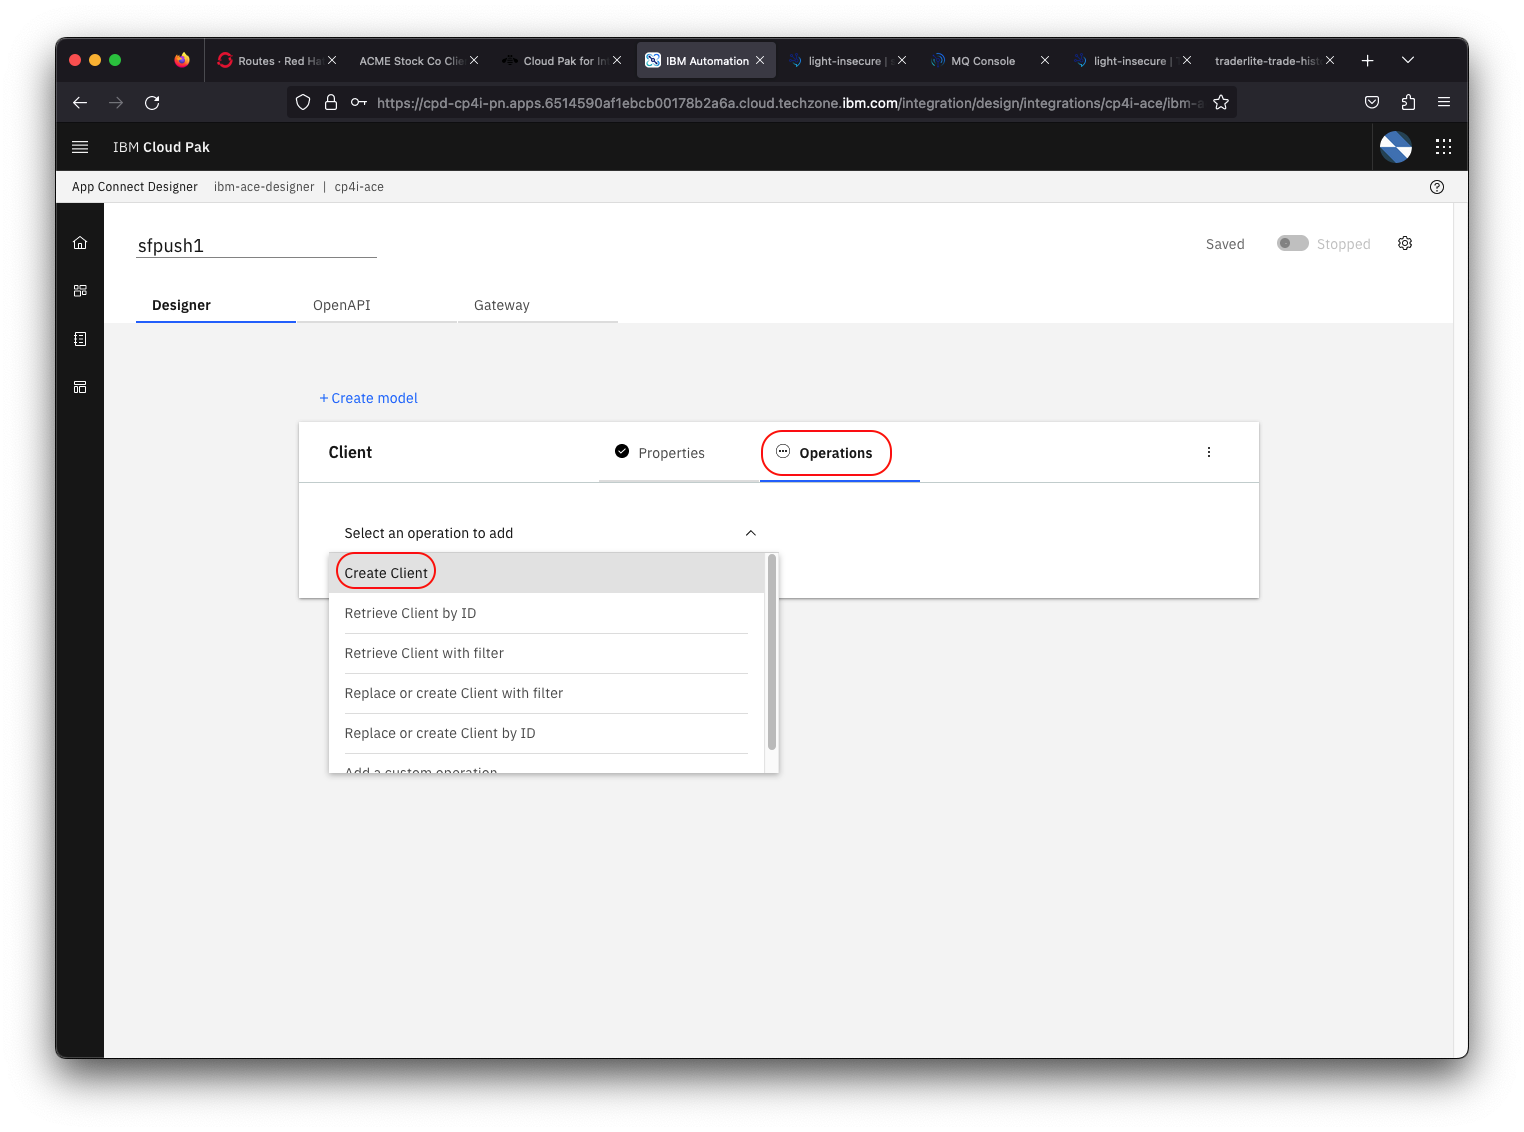
4.6 Click Operations and then select Create Client
4.7 Click Implement flow
4.8 Click on the + icon.
-
Scroll down to Salesforce
-
Select your account from the dropdown
-
Expand Contacts
-
Click Create Contact

4.9 Next you'll map the properties from your model to the Salesforce Contact properties. The properties have the same names as their Salesforce equivalents so click on Preview 6 mapping suggestions and then Apply suggestions to complete the mapping.

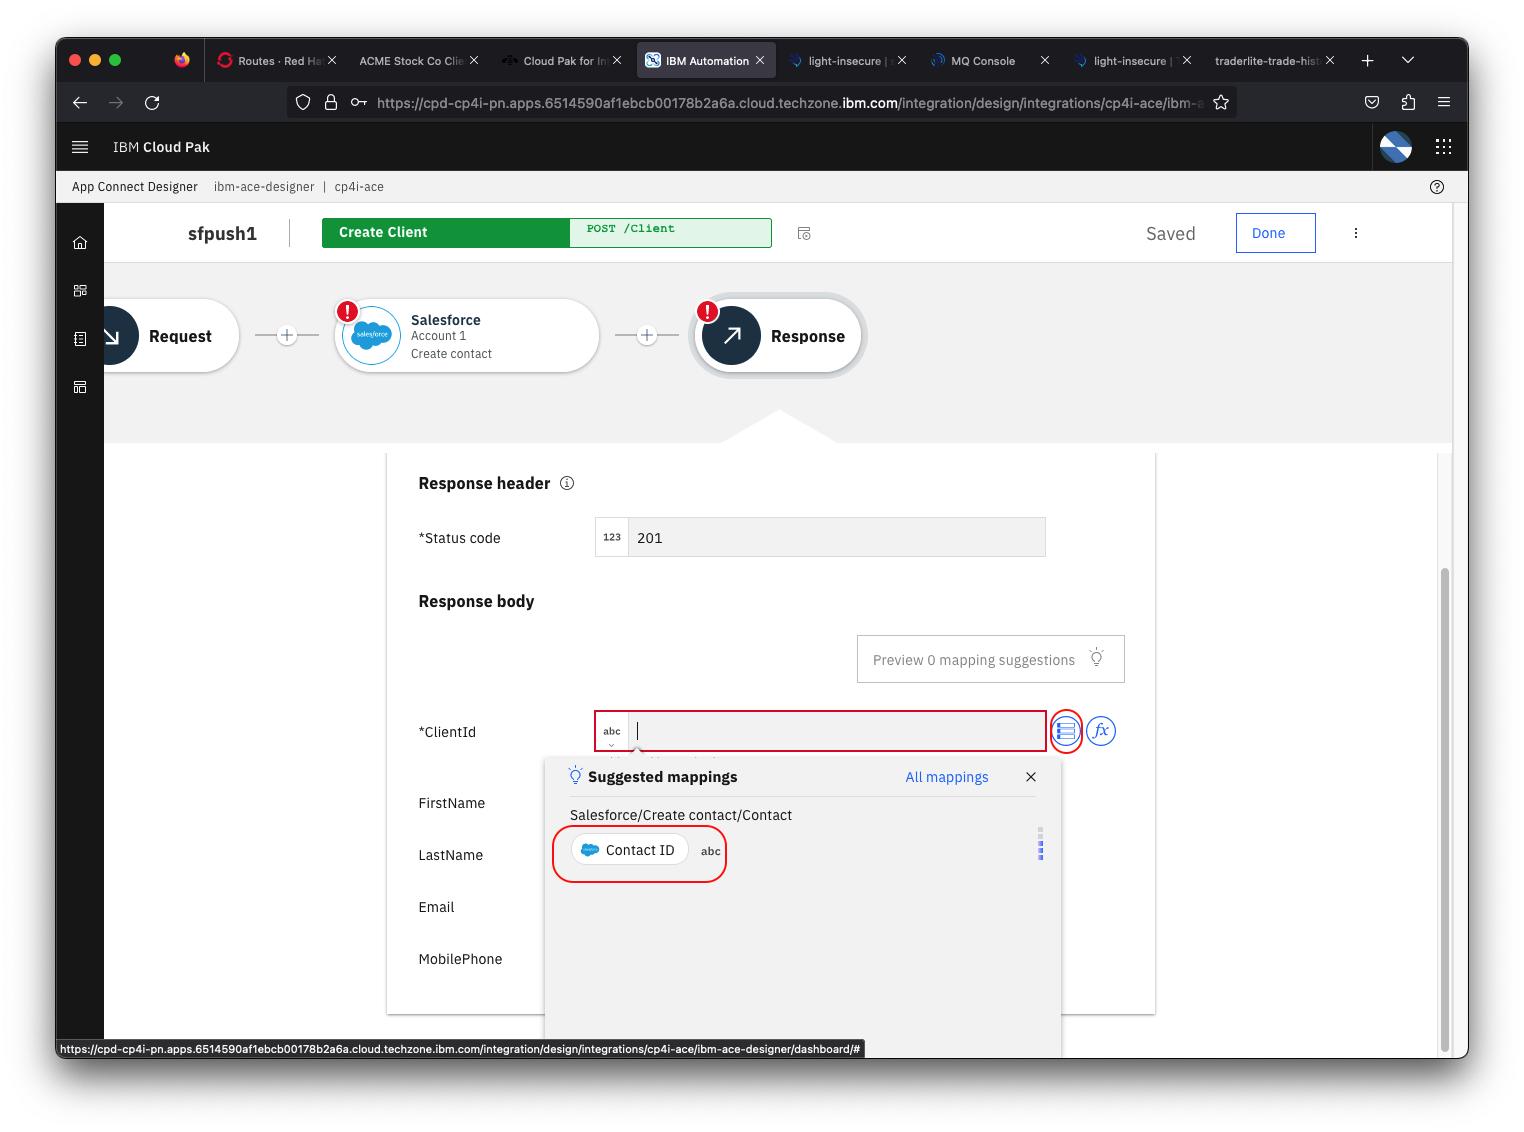
4.10 Click on Response to configure what will be returned by the flow. Click in the text box for the Client Id property and then click on icon to the right of the text field. Select Contact ID as the mapping.
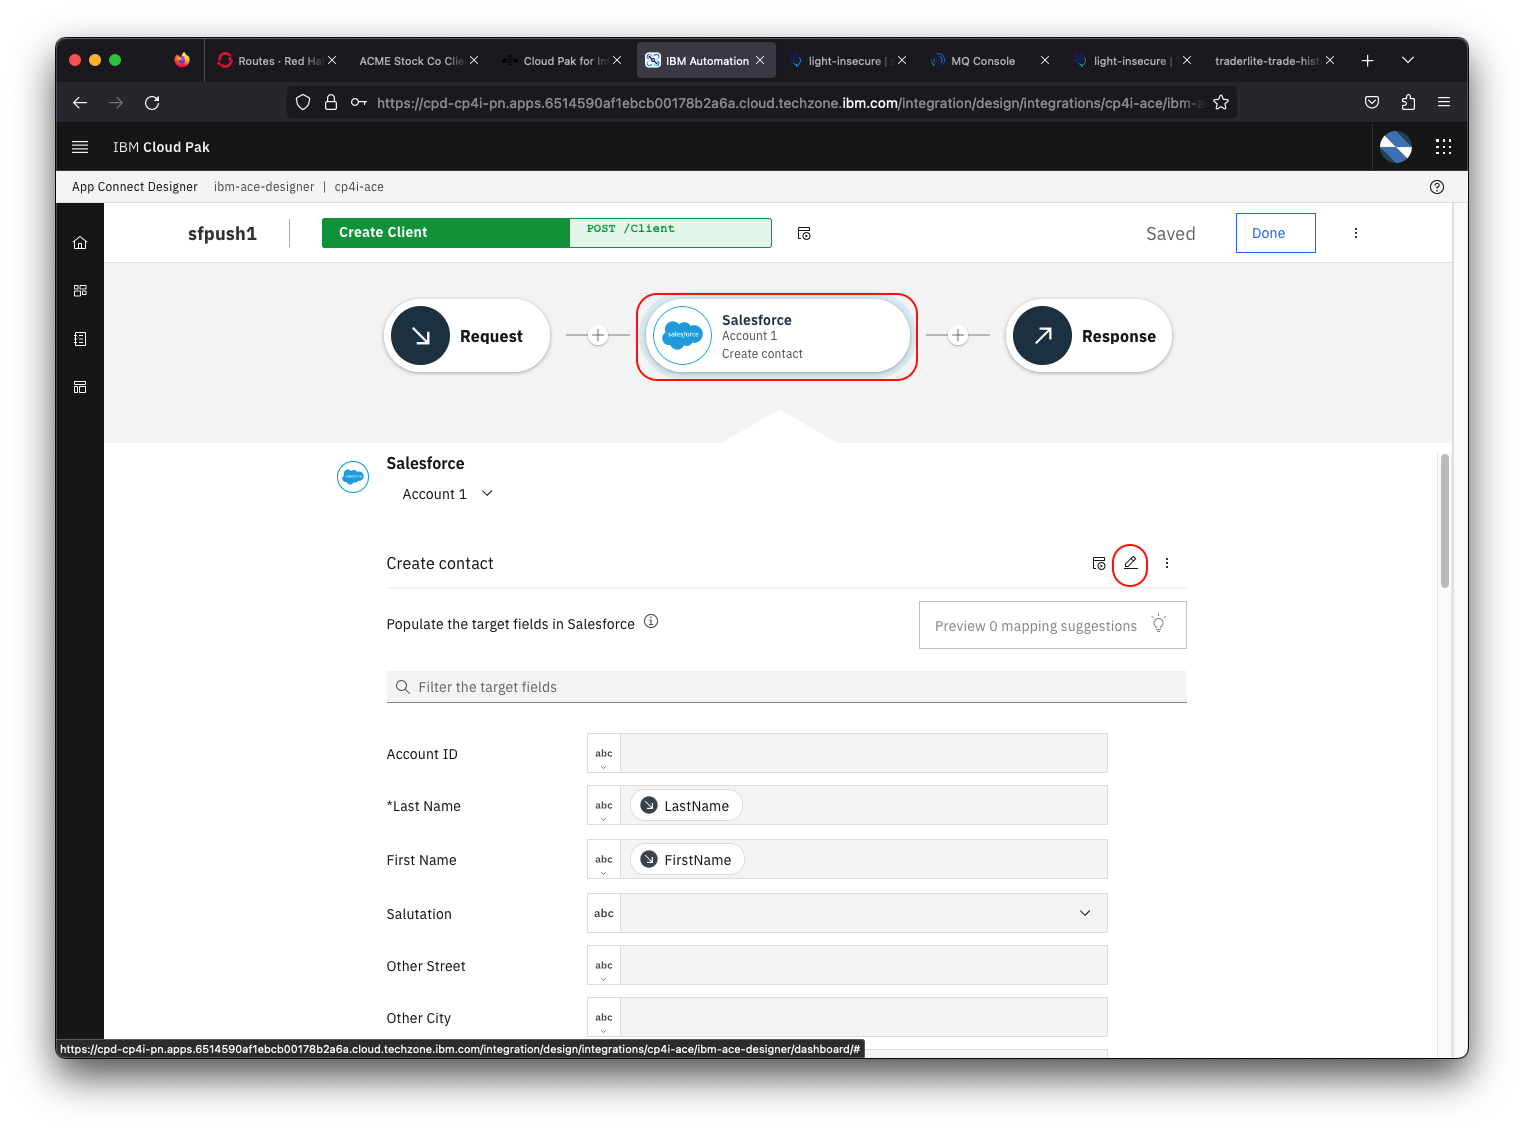
4.11 Next you'll test the flow to make sure it works. Click on Salesforce icon (the middle part of the flow) and then click on the edit icon.
4.12 Click on Request body parameters and then expand the Object below it
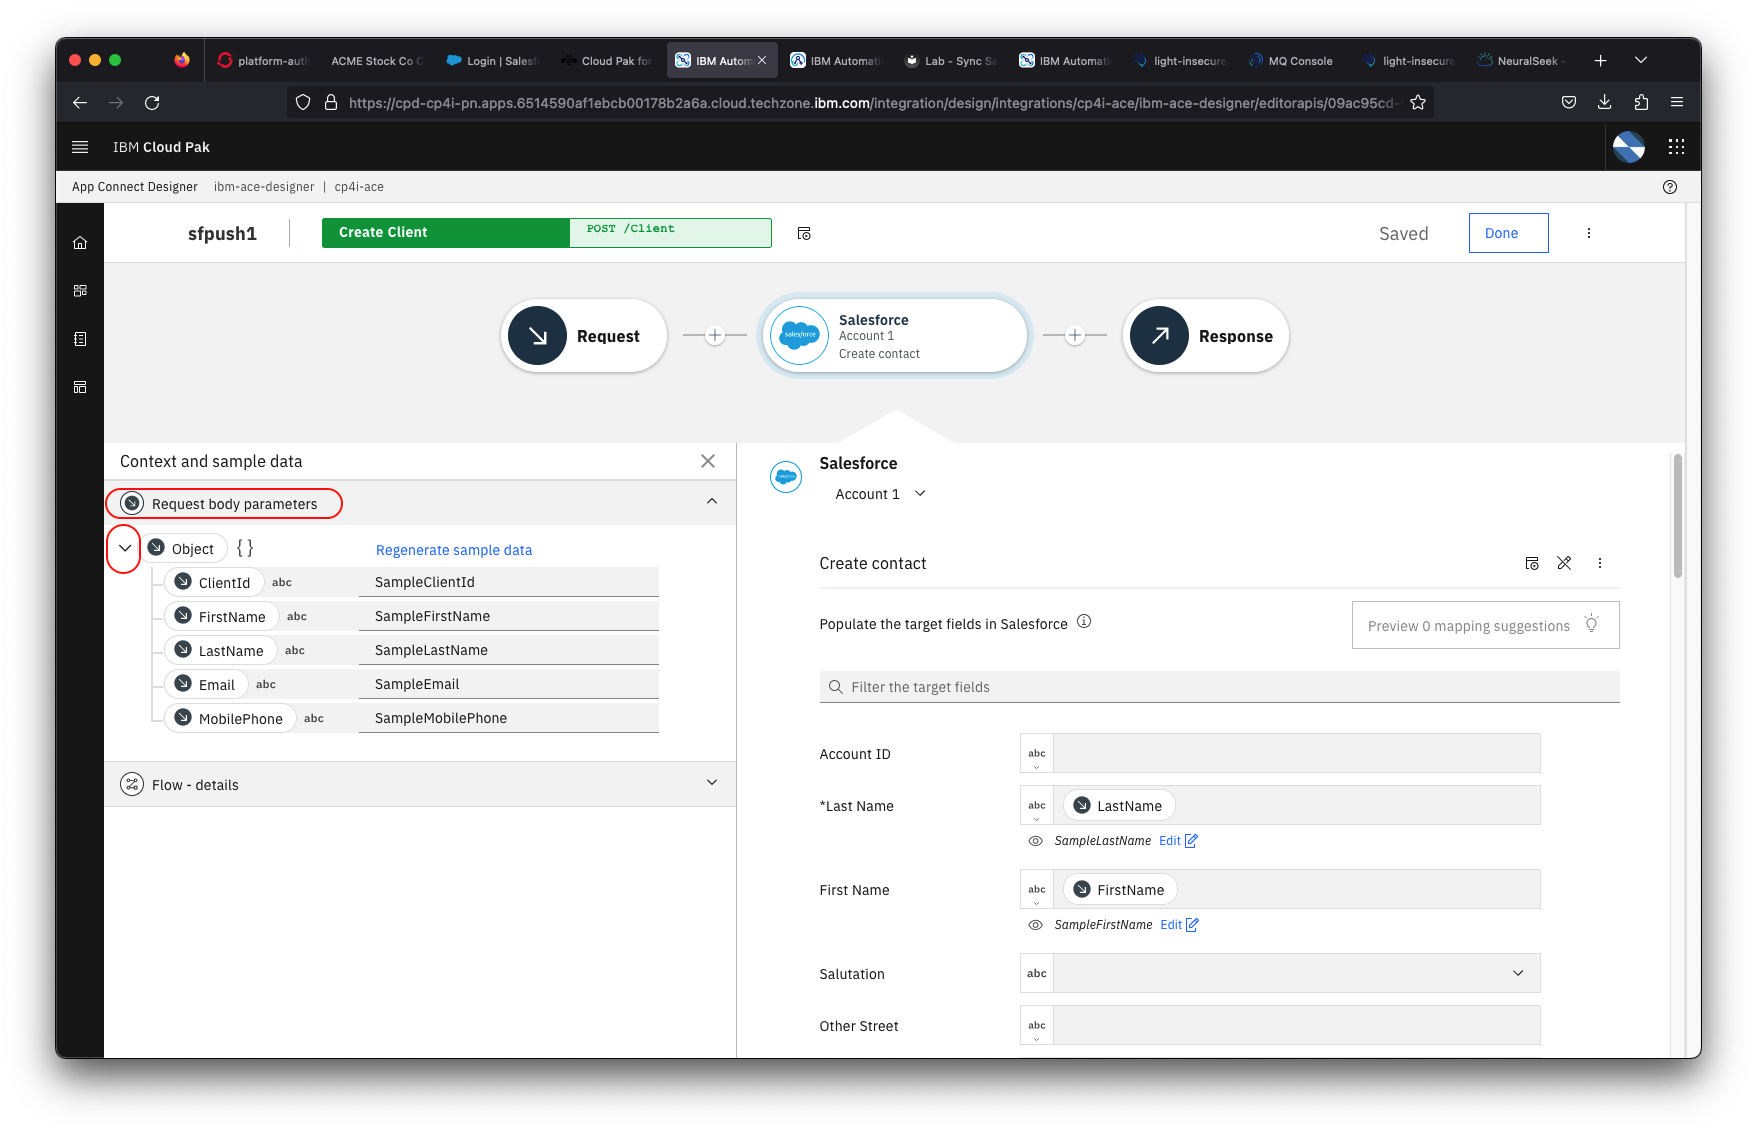
4.13 Click on Regenerate sample data and then set the Client Id to blank. This value will be generated by Salesforce and returned.
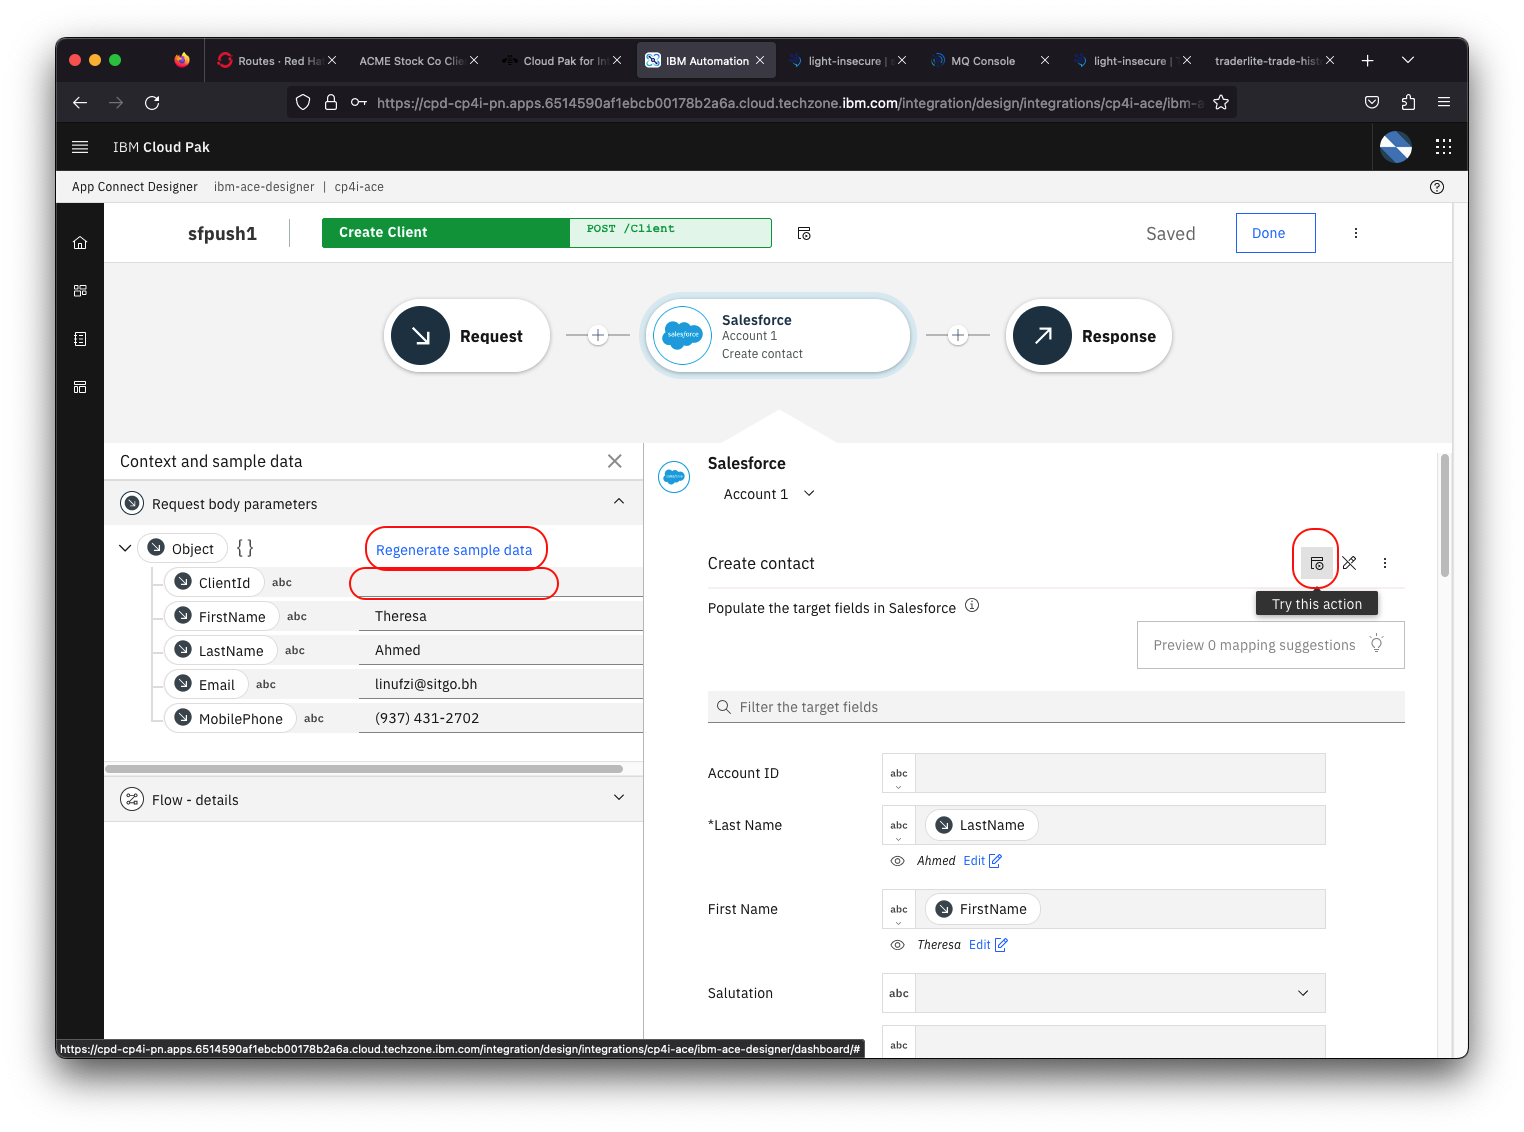
4.14 Click the "Try It" icon shown in the above screenshot. Click Continue when prompted and then verify that the operation returns a 200 HTTP status code.
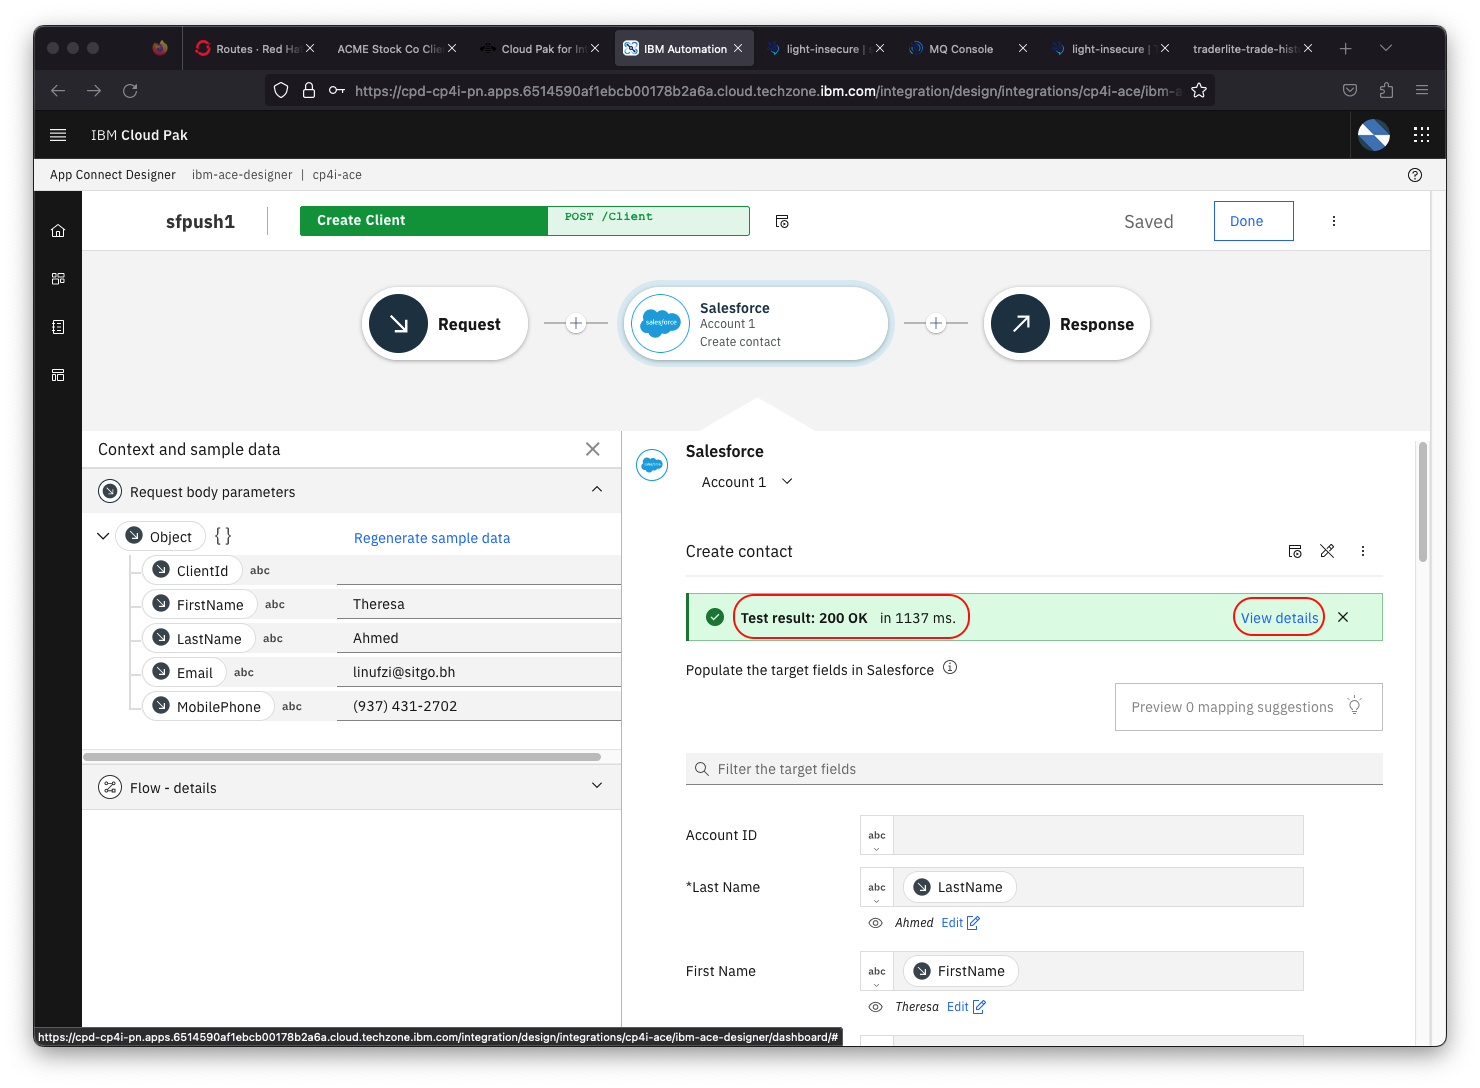
4.15 Click View details to see the raw data returned from the call to Salesforce. Click Done (top of screen)
4.16 Next you'll build a reverse flow. One that will call an API in the TraderLite app whenever a Salesforce contact is updated. In your browser right click on the following link, right click and select Save Link As ... from the context menu. Save the file sfsync.json to your local system. This is an OpenAPI definition of the API in TraderLite that will update client data.
4.17 back in App Connect Designer click on the Catalog icon and then click on + to add your API.

4.18 Select OpenAPI as the Document type and drag or select the sfsync.json file you just downloaded
![]()
4.19 Click Next and then click Import API
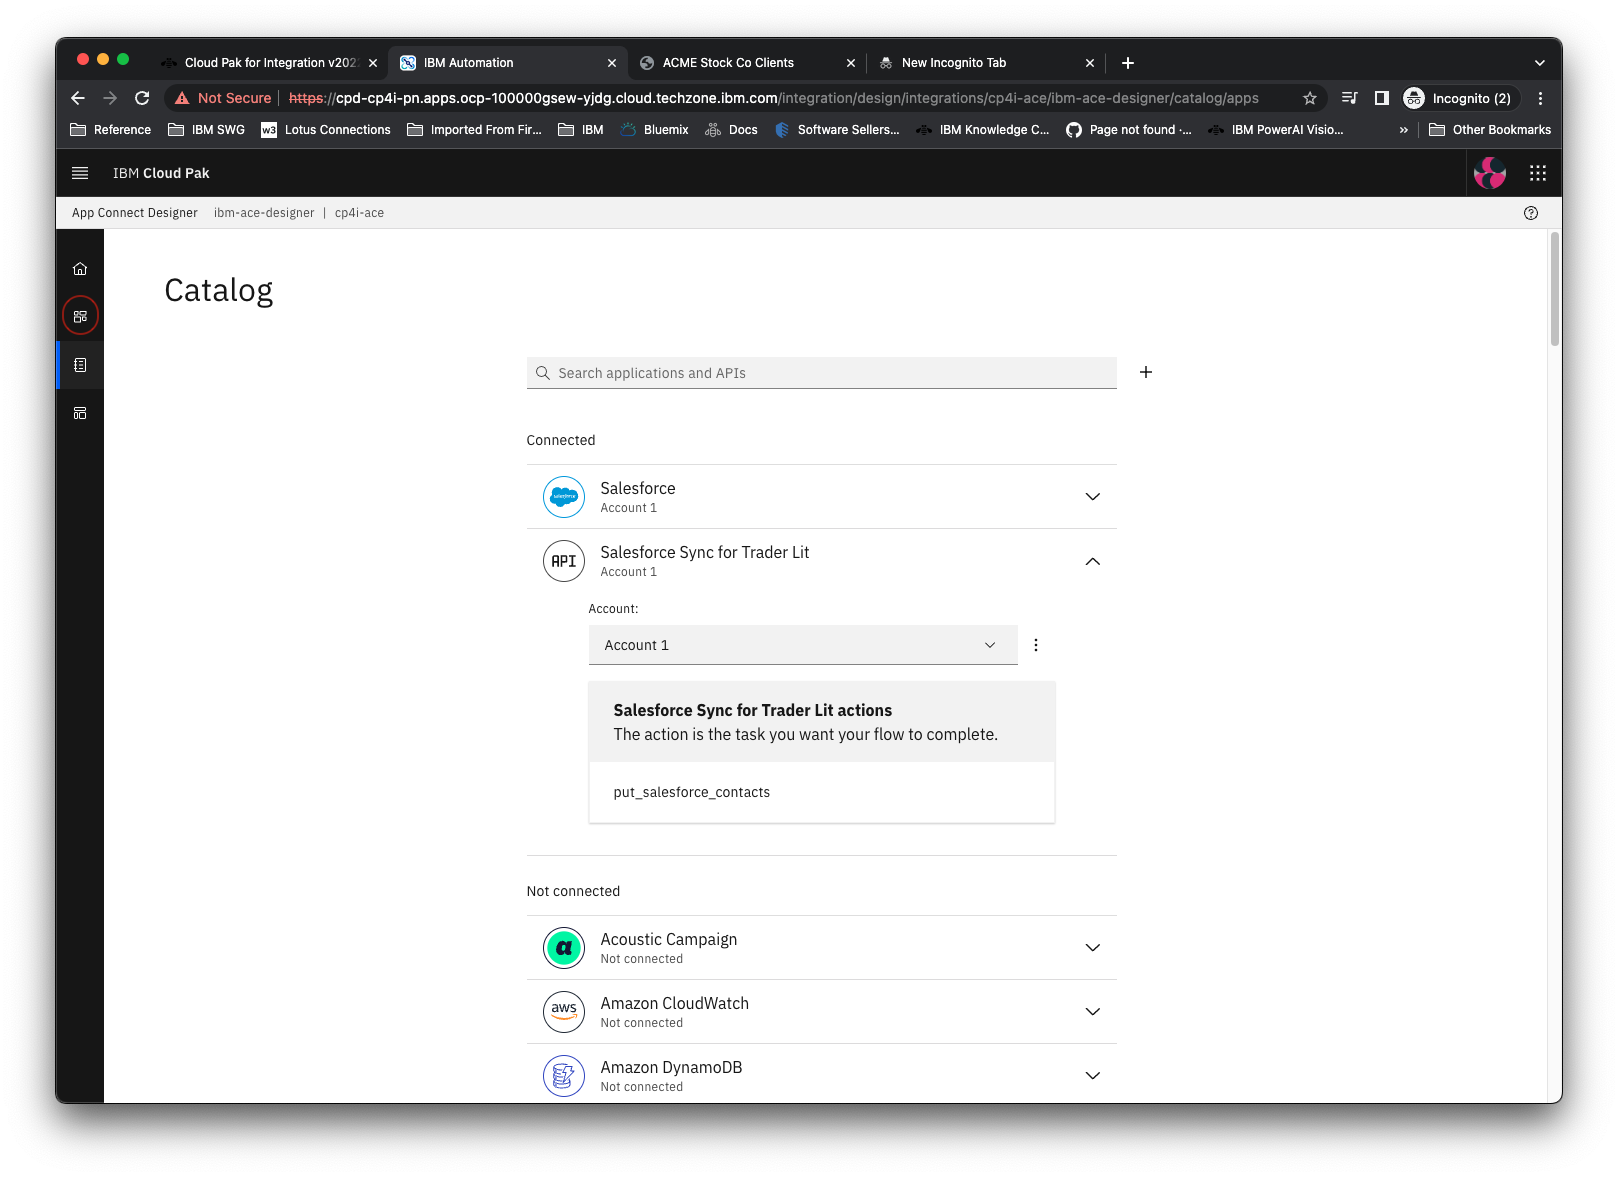
4.20 Scroll down to your imported API (Salesforce Sync for Trader Lit), click on the down arrow and then on Connect
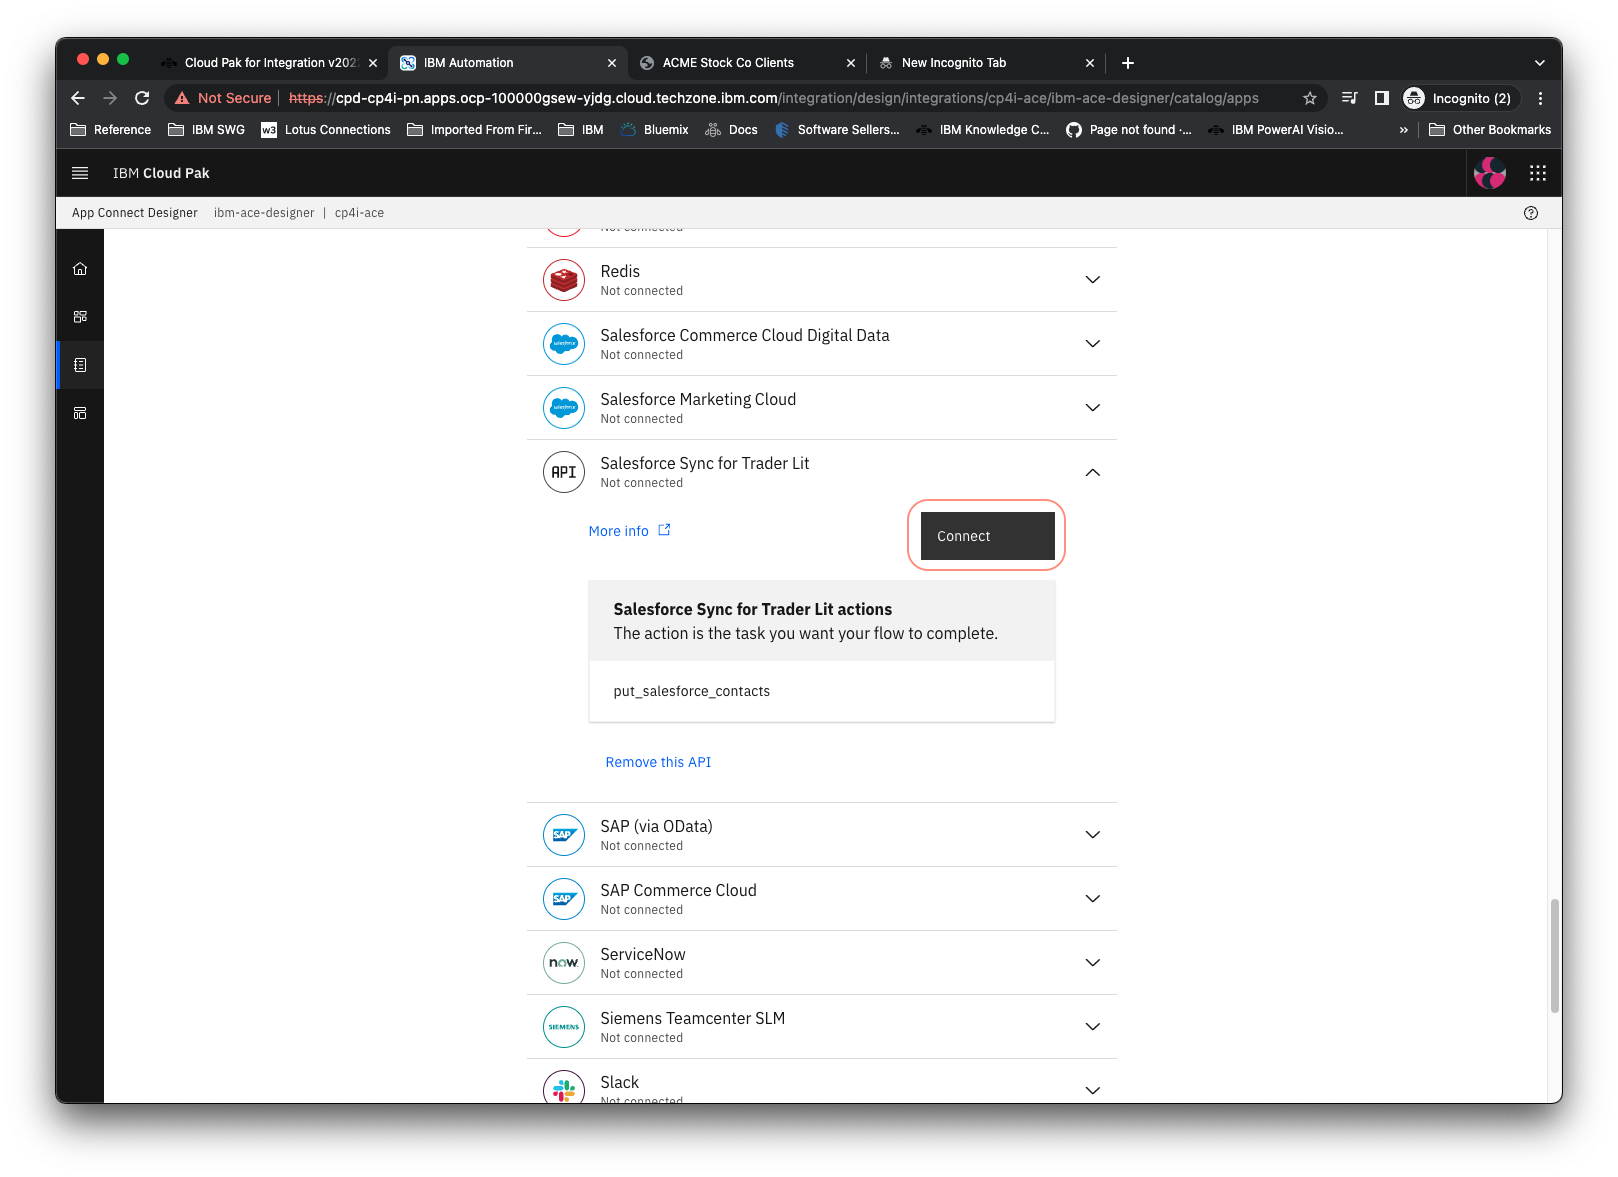
4.21 Accept the default values and click Connect again
4.22 Click on the Dashboard icon
4.23 Click New and select Event-driven flow
4.24 Name the flow sfevent1,
4.25 Expand the Salesforce section and select your specific account (e.g. Account 1). Under Contacts select Updated contact

4.26 Click the + icon. Expand your Salesforce Sync for Trader Lit API and click on PUT /salesforce/contacts

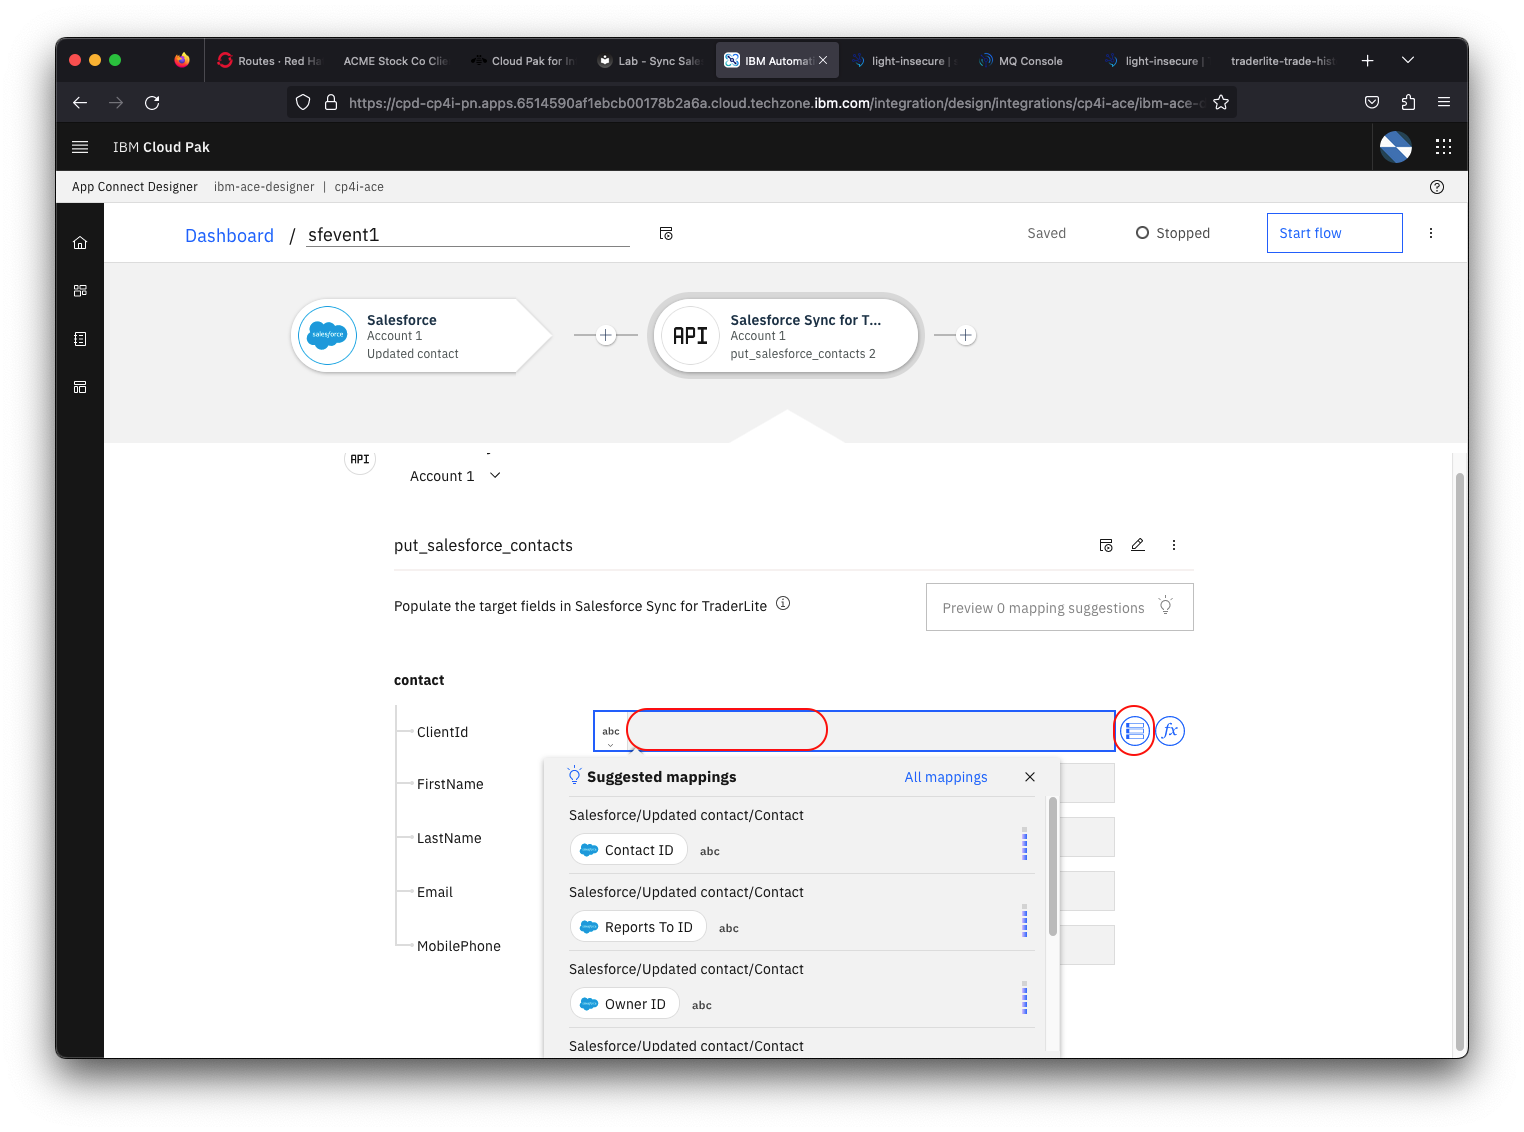
4.27 Click Preview 4 mapping suggestions to start the field mappings between the Salesforce contact and your API. Click Apply suggestions.
4.28 Place your cursor in the ClientId field and then click the icon right next to the field. Select the Salesforce Contact ID field
4.29 Click on the Dashboard icon at the left
4.30 Export your sfevent1 flow by clicking on the 3 period icon and selecting Export.. from the context menu.

4.31 Select Runtime flow asset (BAR) and click Export
4.32 Click Save
4.33 Repeat for your sfpush1 flow, also selecting Runtime flow asset (BAR) and saving to your local system.
Section 5: Create an Integration Server instance and deploy your flows
In this step you'll create an Integration Server instance and deploy your flows to it.
5.1 Go to your Workshop Information page and click on the App Connect Dashboard component link. (Note: if you no longer have the Workshop Information page available see these instructions).
5.2 If prompted to login enter the credentials on the Workshop Information page.
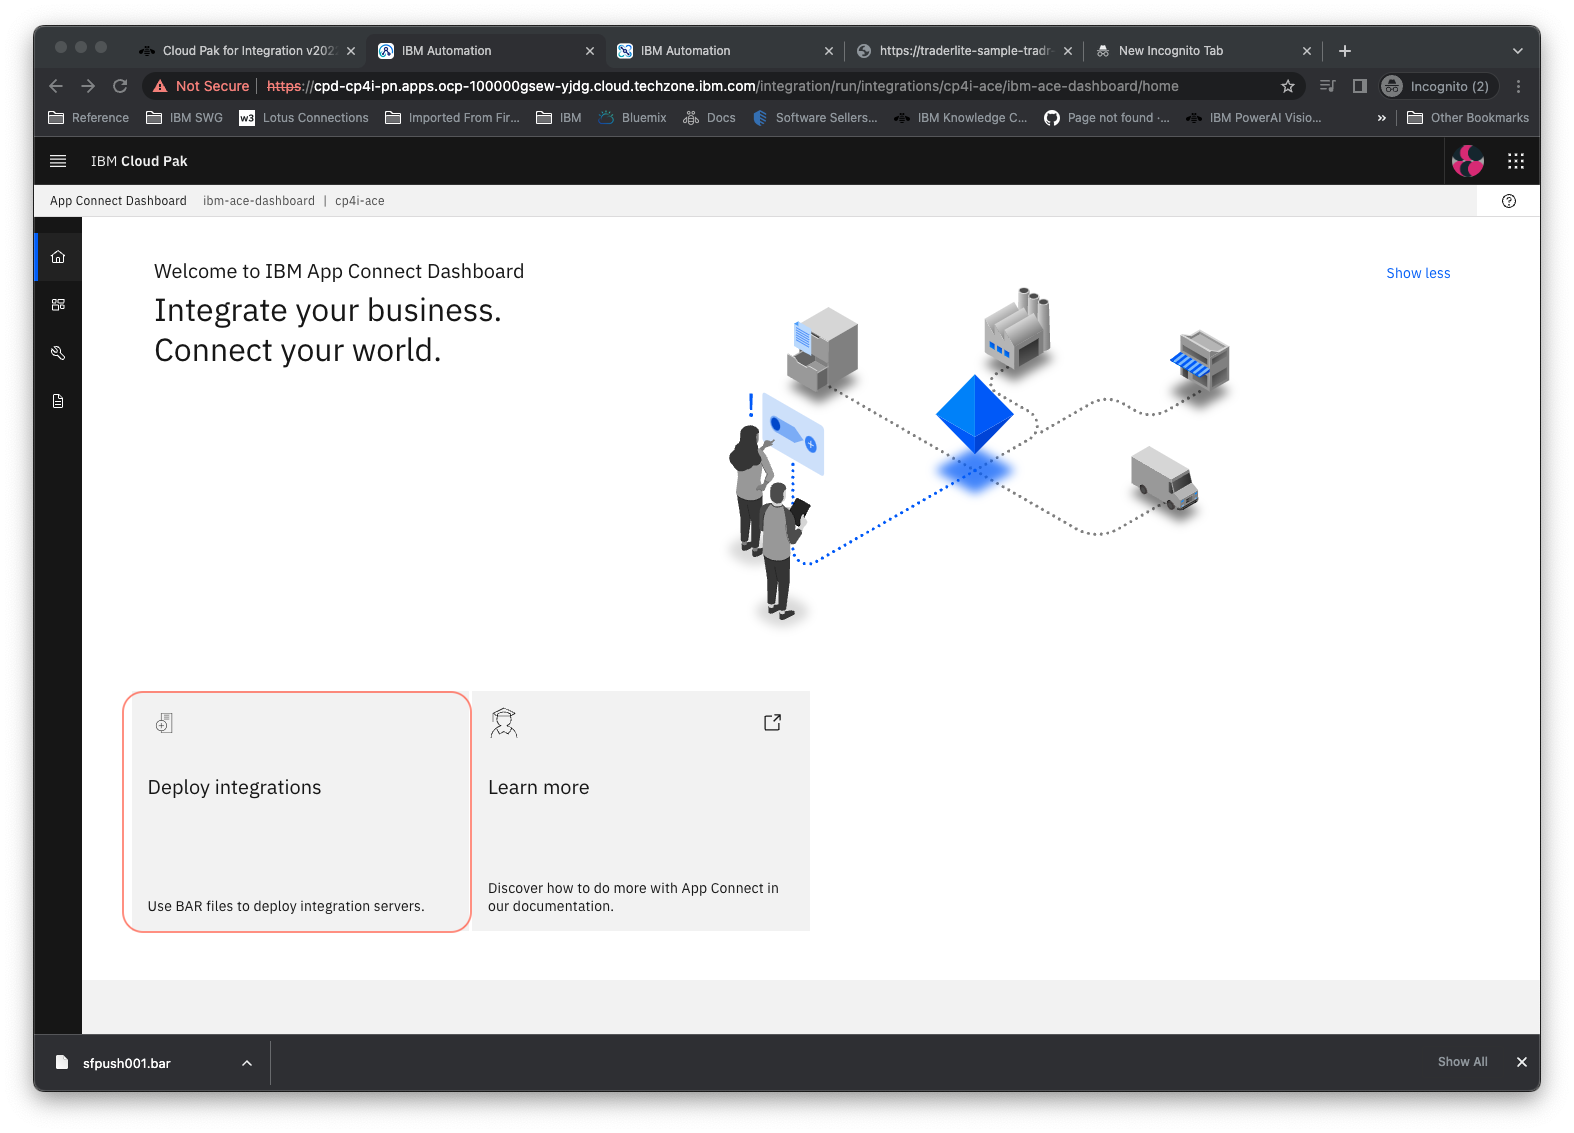
5.3 Click Deploy integrations
5.4 Select the Quick start integration tile and click Next

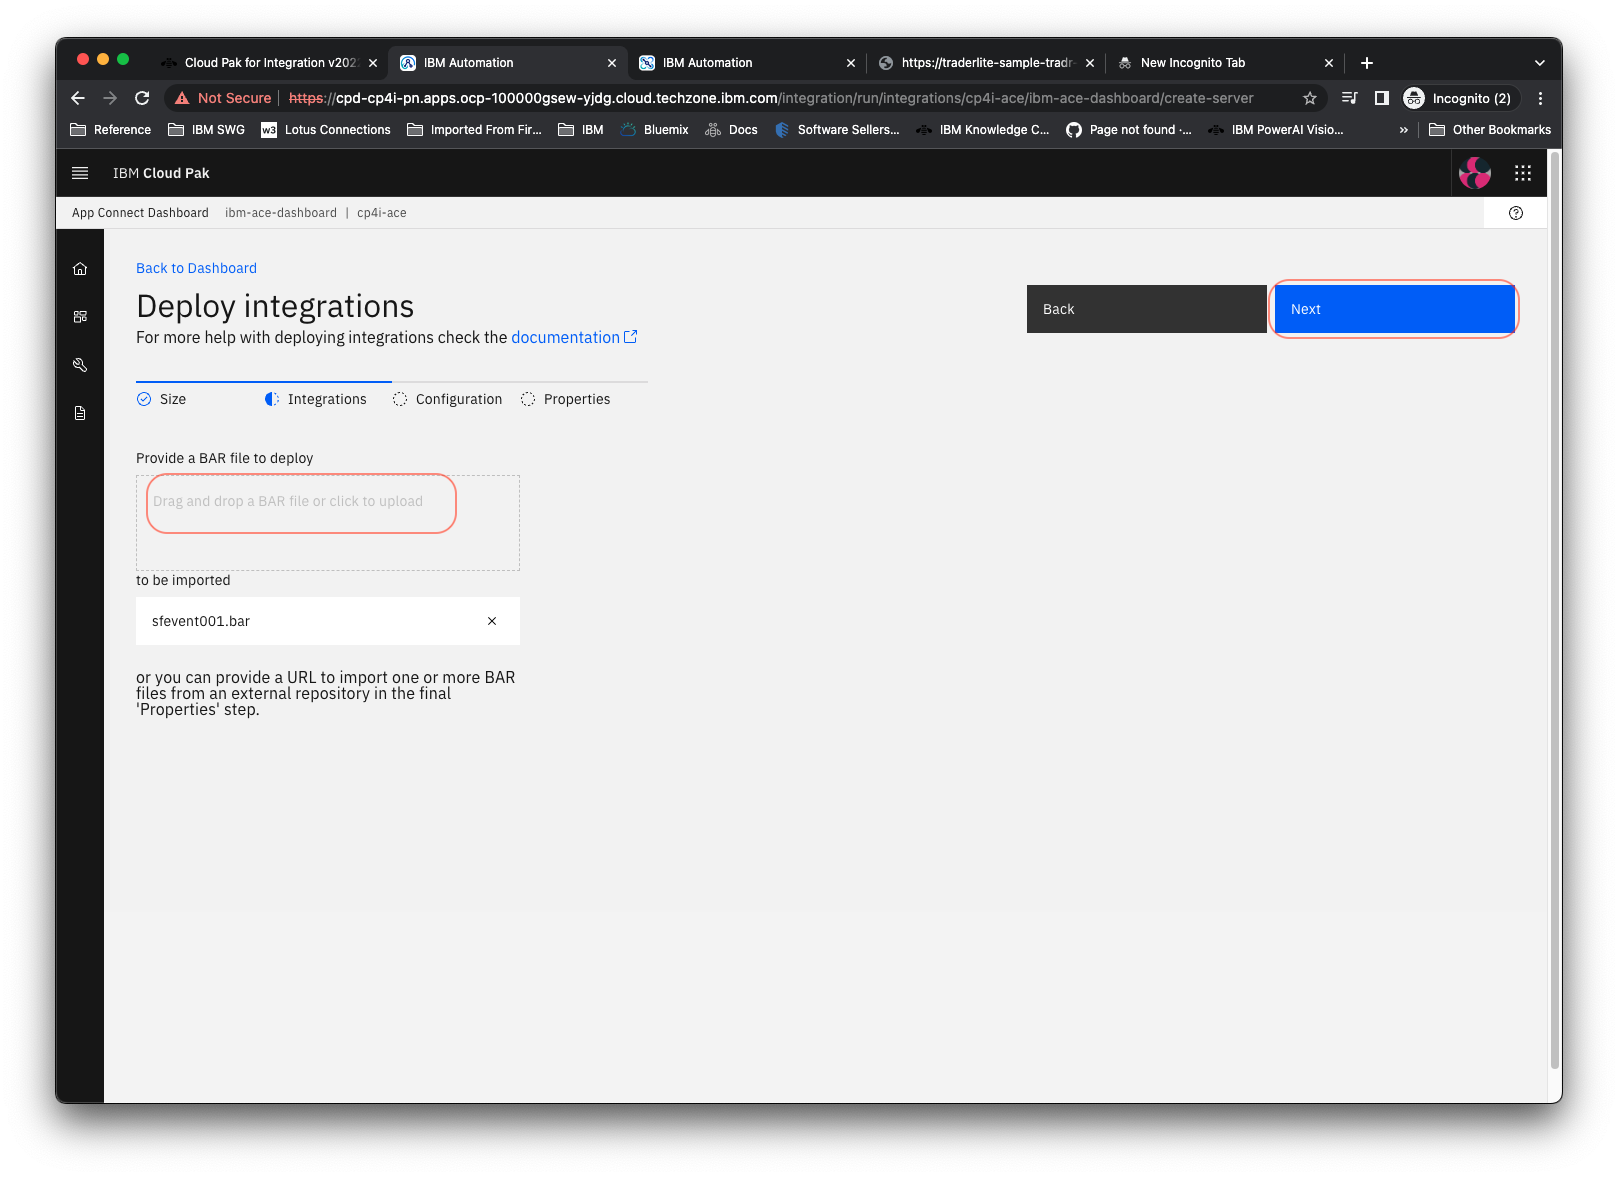
5.5 Upload your sfevent1.bar file and click Next
5.6 Wait until you see an existing configuration loaded (it can take a few seconds during which time it asks you to create a new config - ignore that) . Once the config loads, select the Accounts type and leave the others unchecked. Click Next
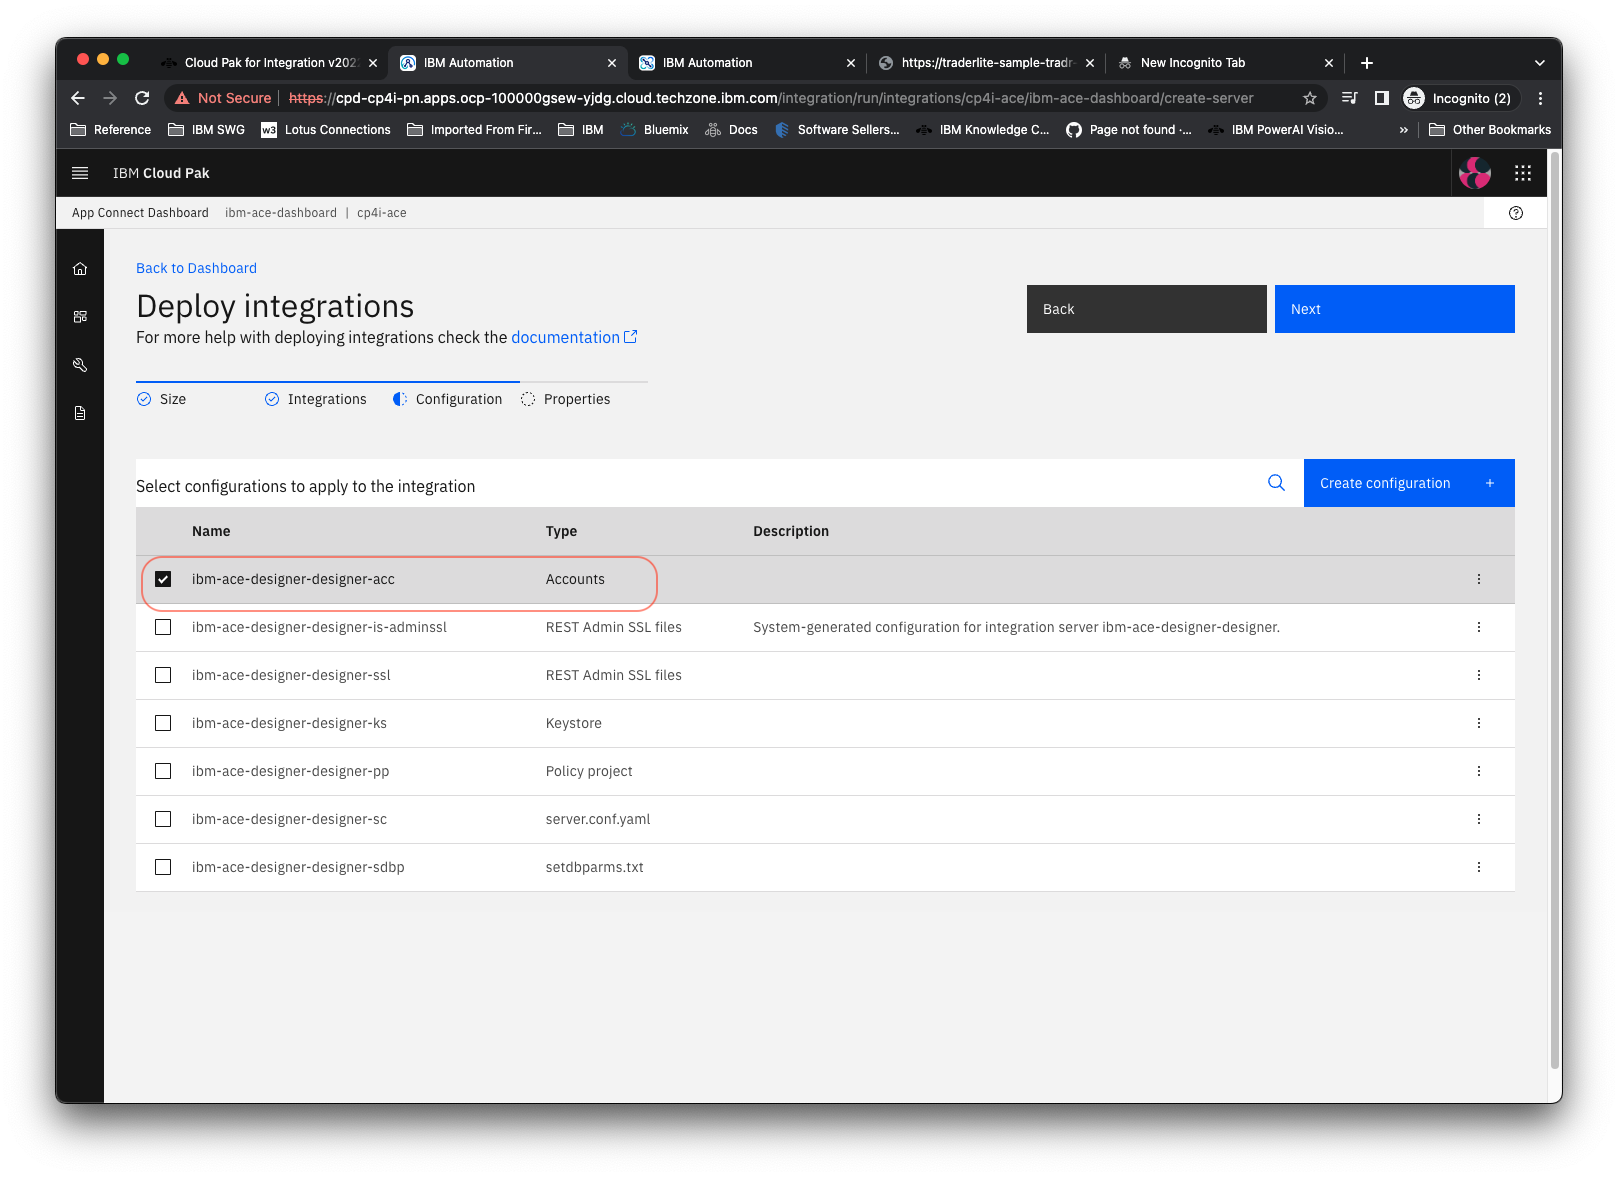
Note: Without Accounts checked, your flow will not work when deployed . This allows the secret with your Salesforce credentials to be accessible to the deployed flow.
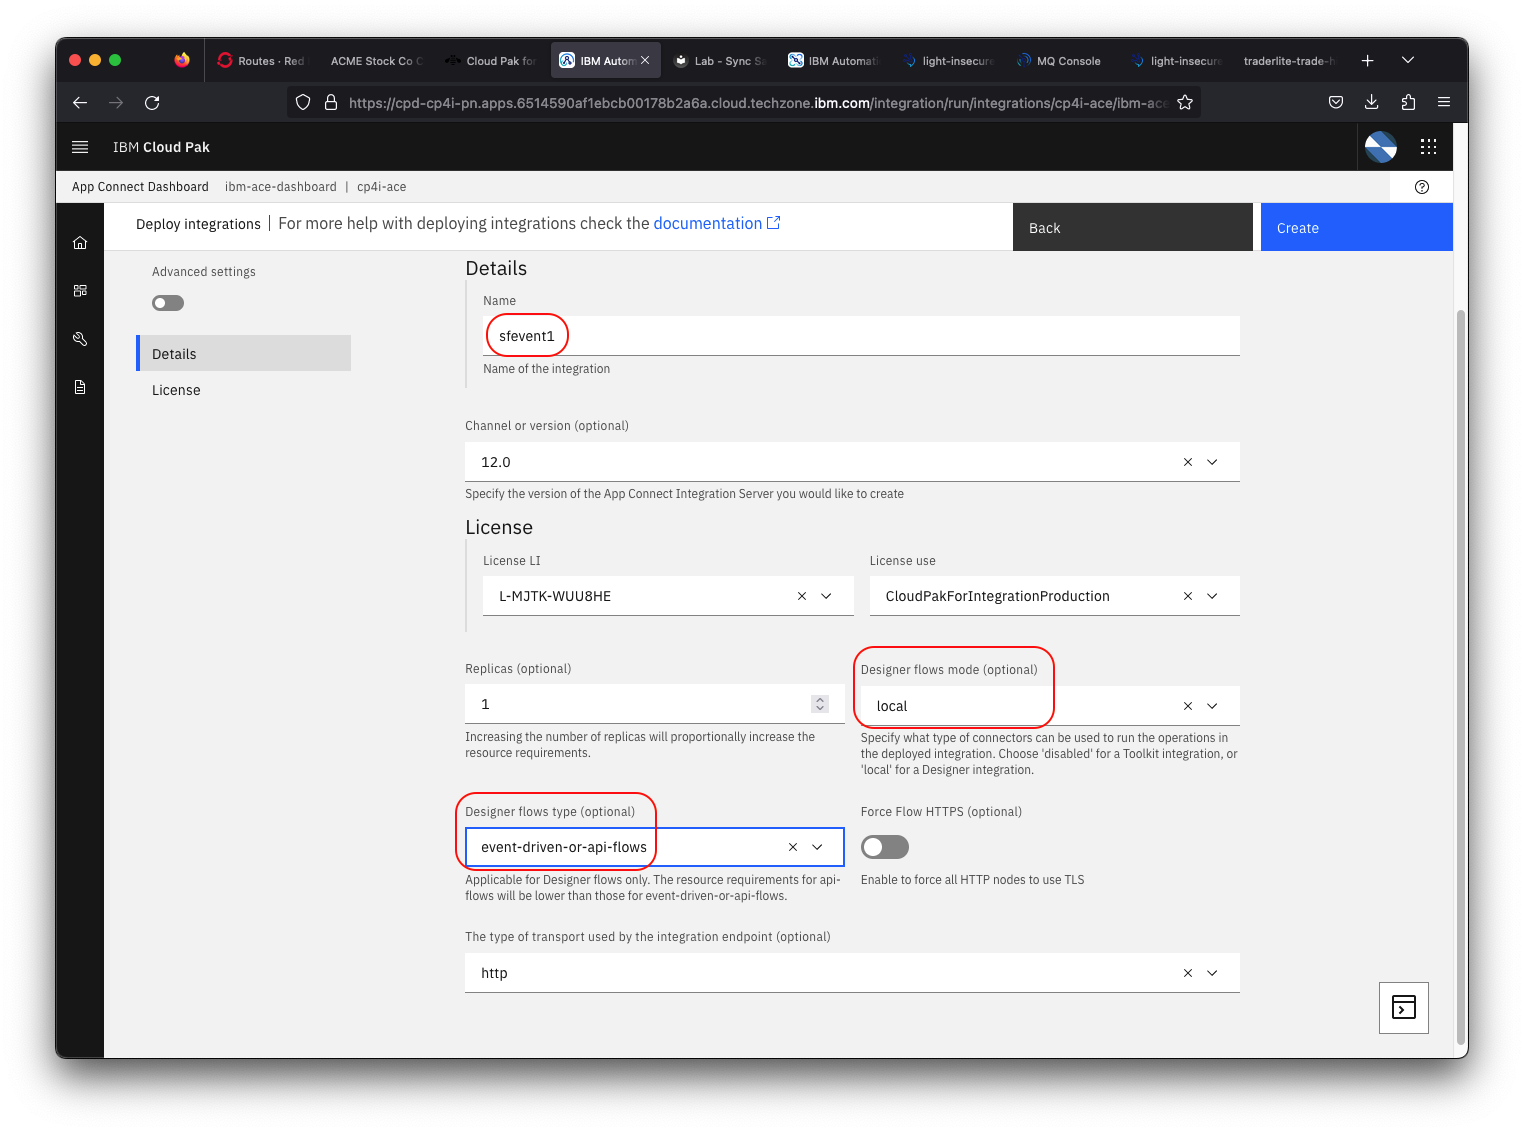
5.7 Name the server sfevent1.
5.8 Ensure that the Designer flows mode is set to local, the Designer flows type is set to event-driven-or-api-flows and click Create .
5.9 It will take a while for the server to provision so you can continue deploying the other flow. Click Deploy integrations

5.10 Select the Quick start integration tile and click Next
5.11 Upload your sfpush1.bar file and click Next
5.12 Select the Accounts type and leave the others unchecked. Click Next
Note: Without Accounts checked, your flow will not work when deployed . This allows the secret with your Salesforce credentials to be accessible to the deployed flow.
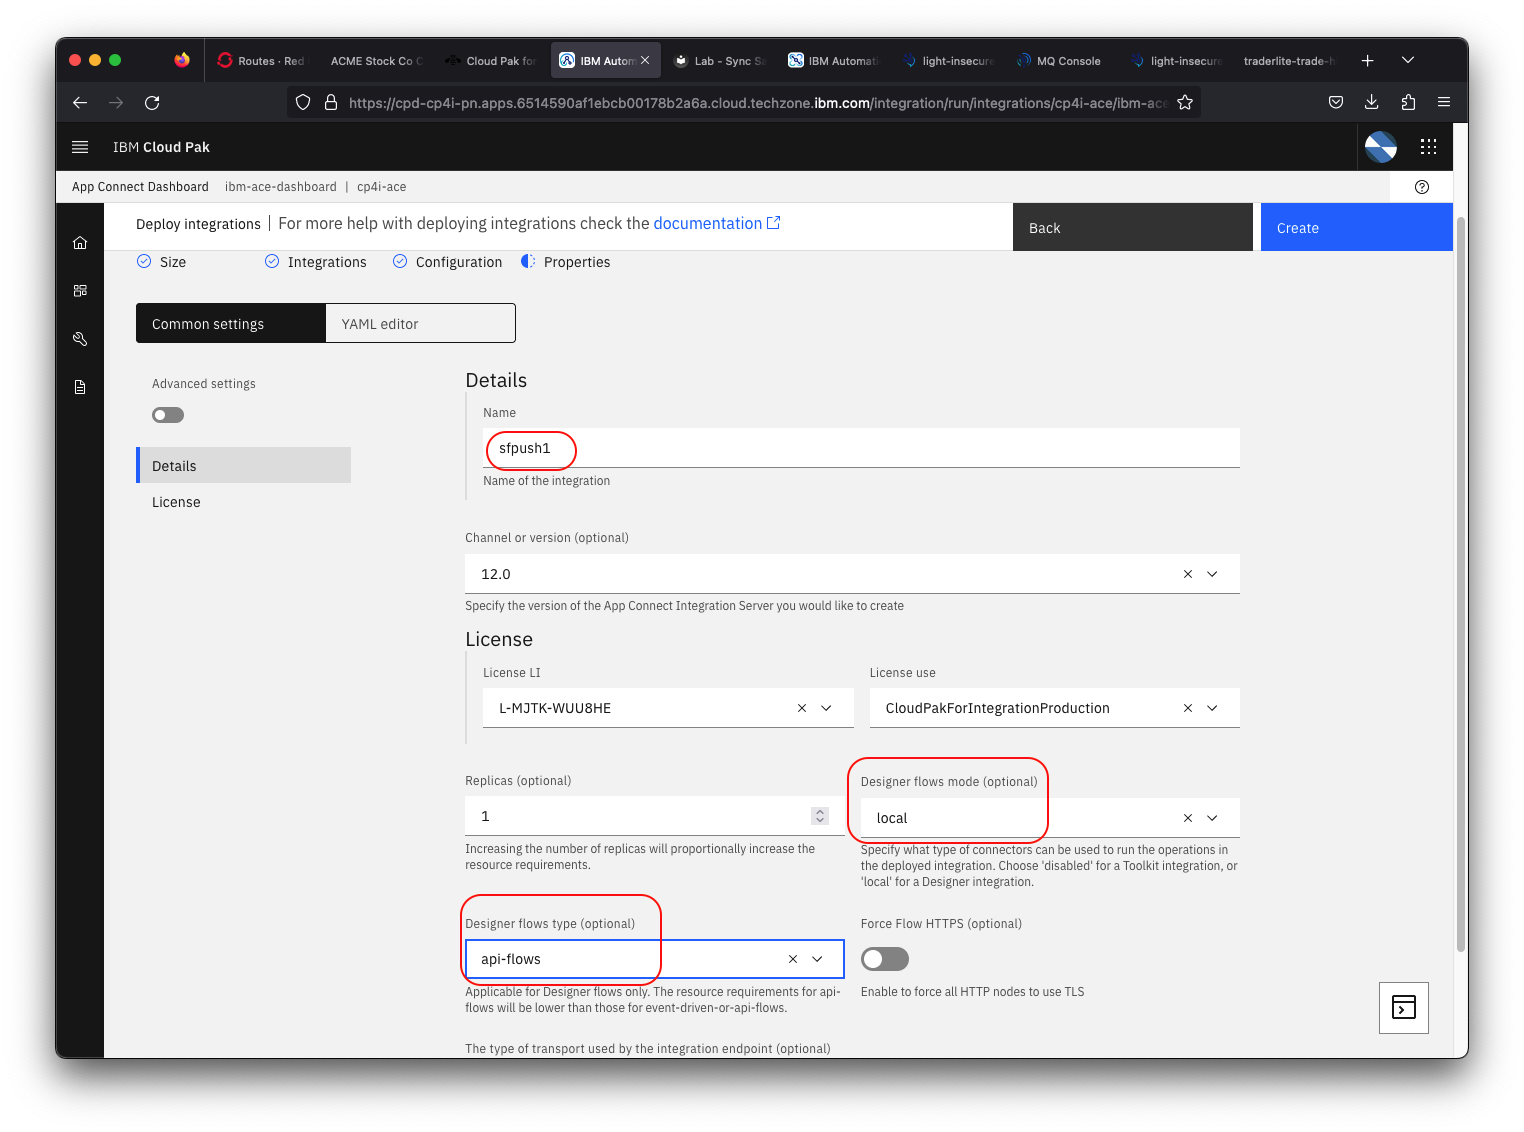
5.13 Name the server sfpush1.
5.14 Ensure that the Designer flows mode is set to local, the Designer flows type is set to api-flows and click Create .
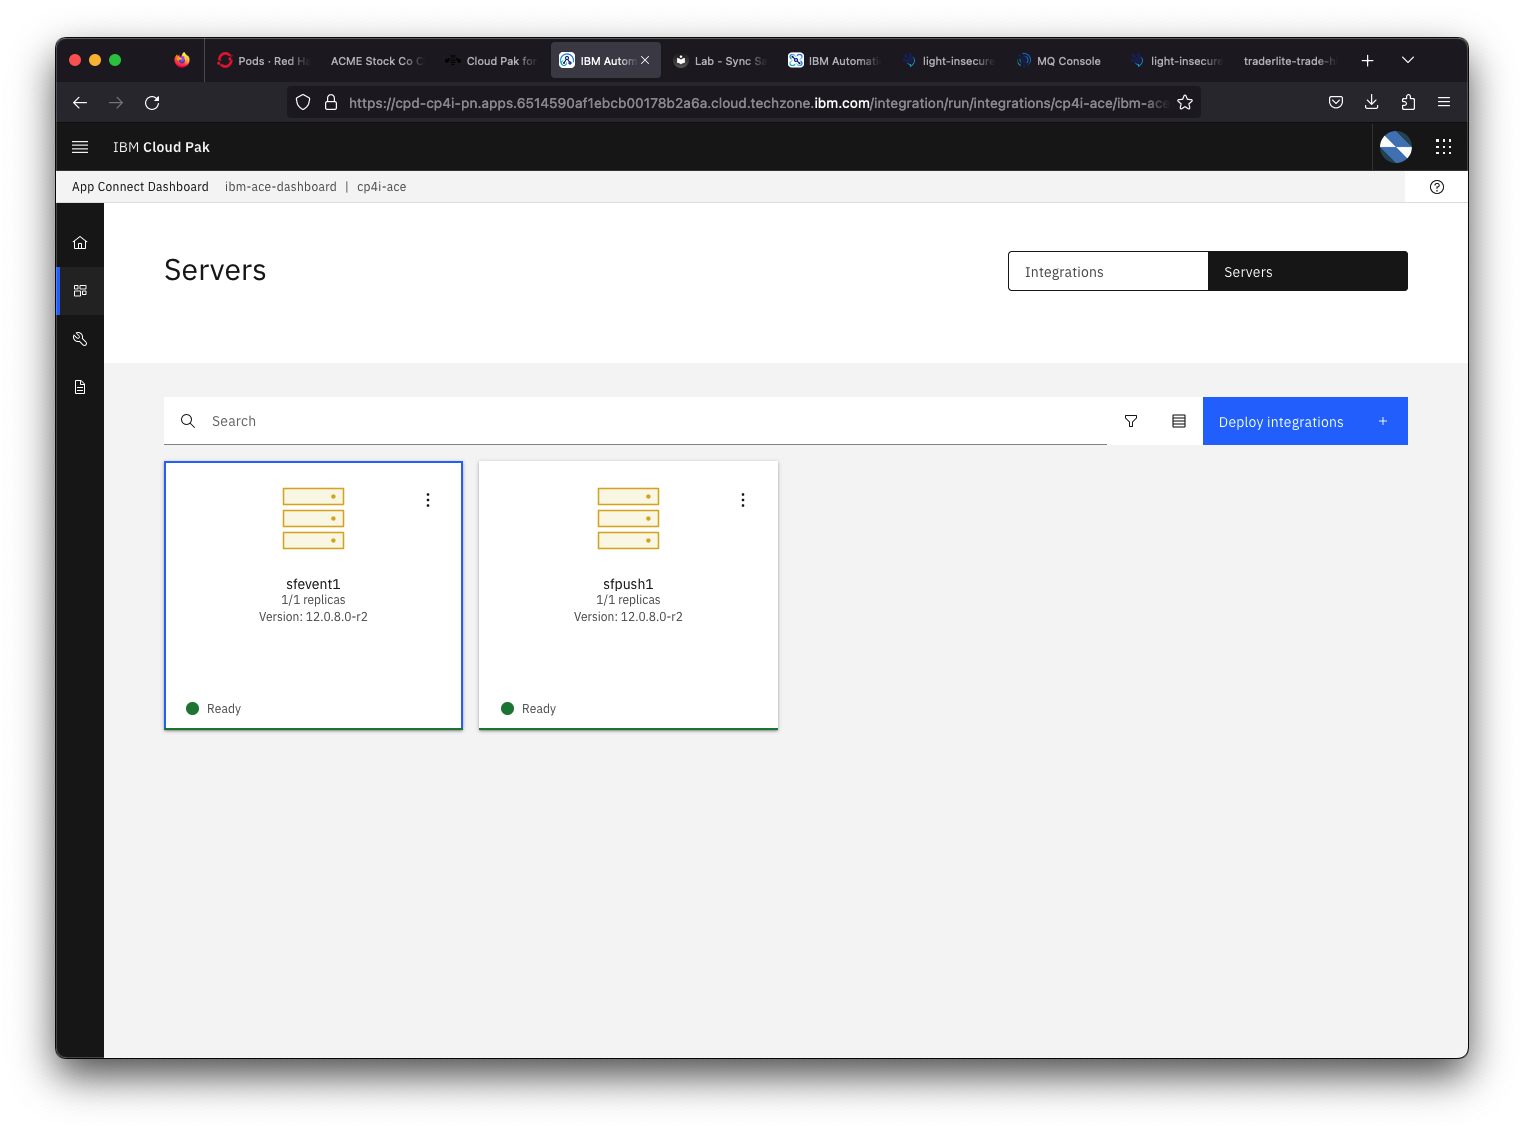
5.15 Wait for both servers be in the Ready state. They will take about 2 or 3 minutes.
Note: You may have to refresh the page to get the latest server status
Section 6: Get the REST endpoint of your App Connect Flow
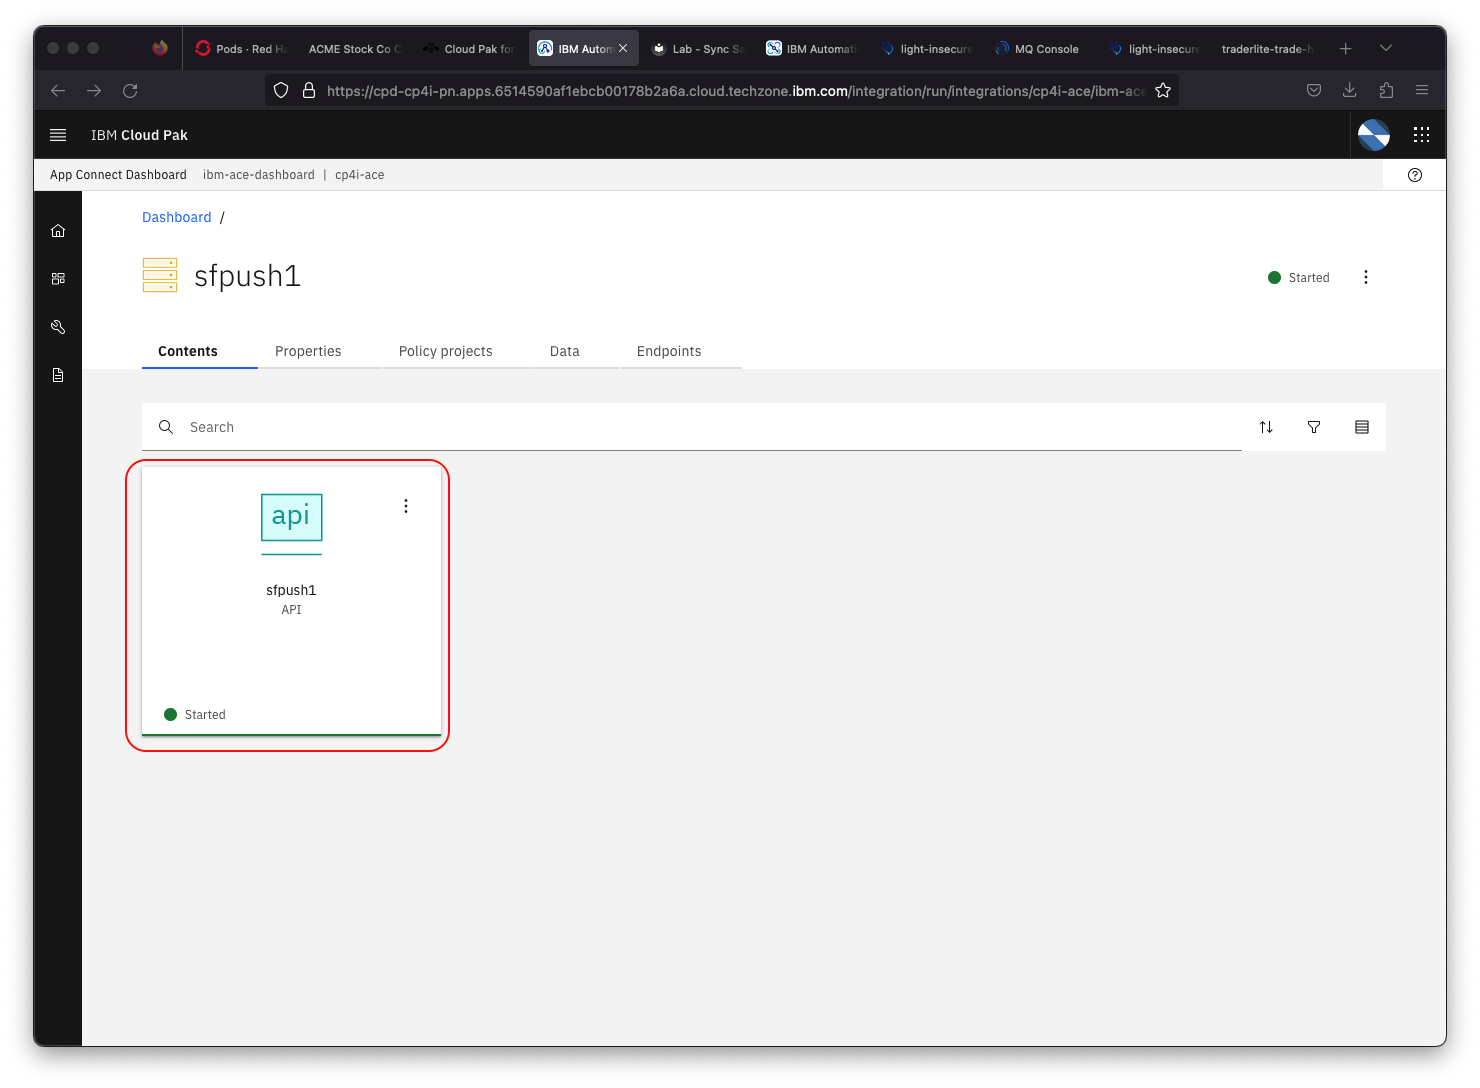
6.1 In the App Connect Dashboard click on the tile for your sfpush1 server
6.2 Click on the API tile to see the details of the flow's API
6.3 You should see the details of your flow's API
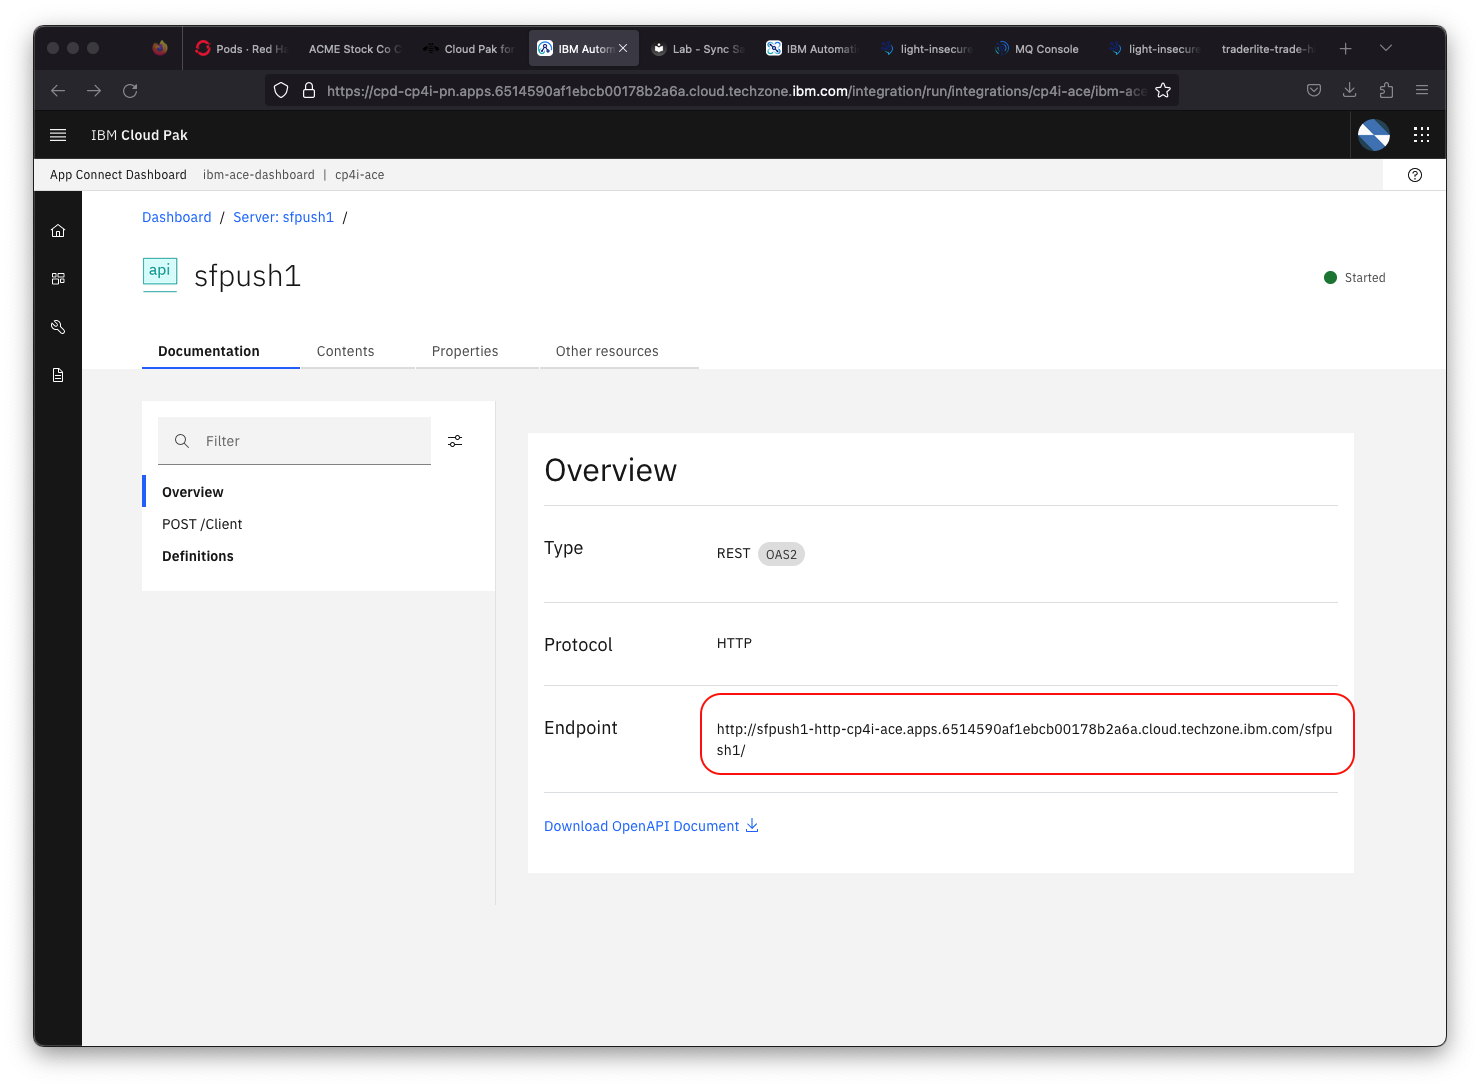
6.4 Copy the Endpoint and save it in a text file.
Section 7: Test your App Connect Flows with Trader Lite
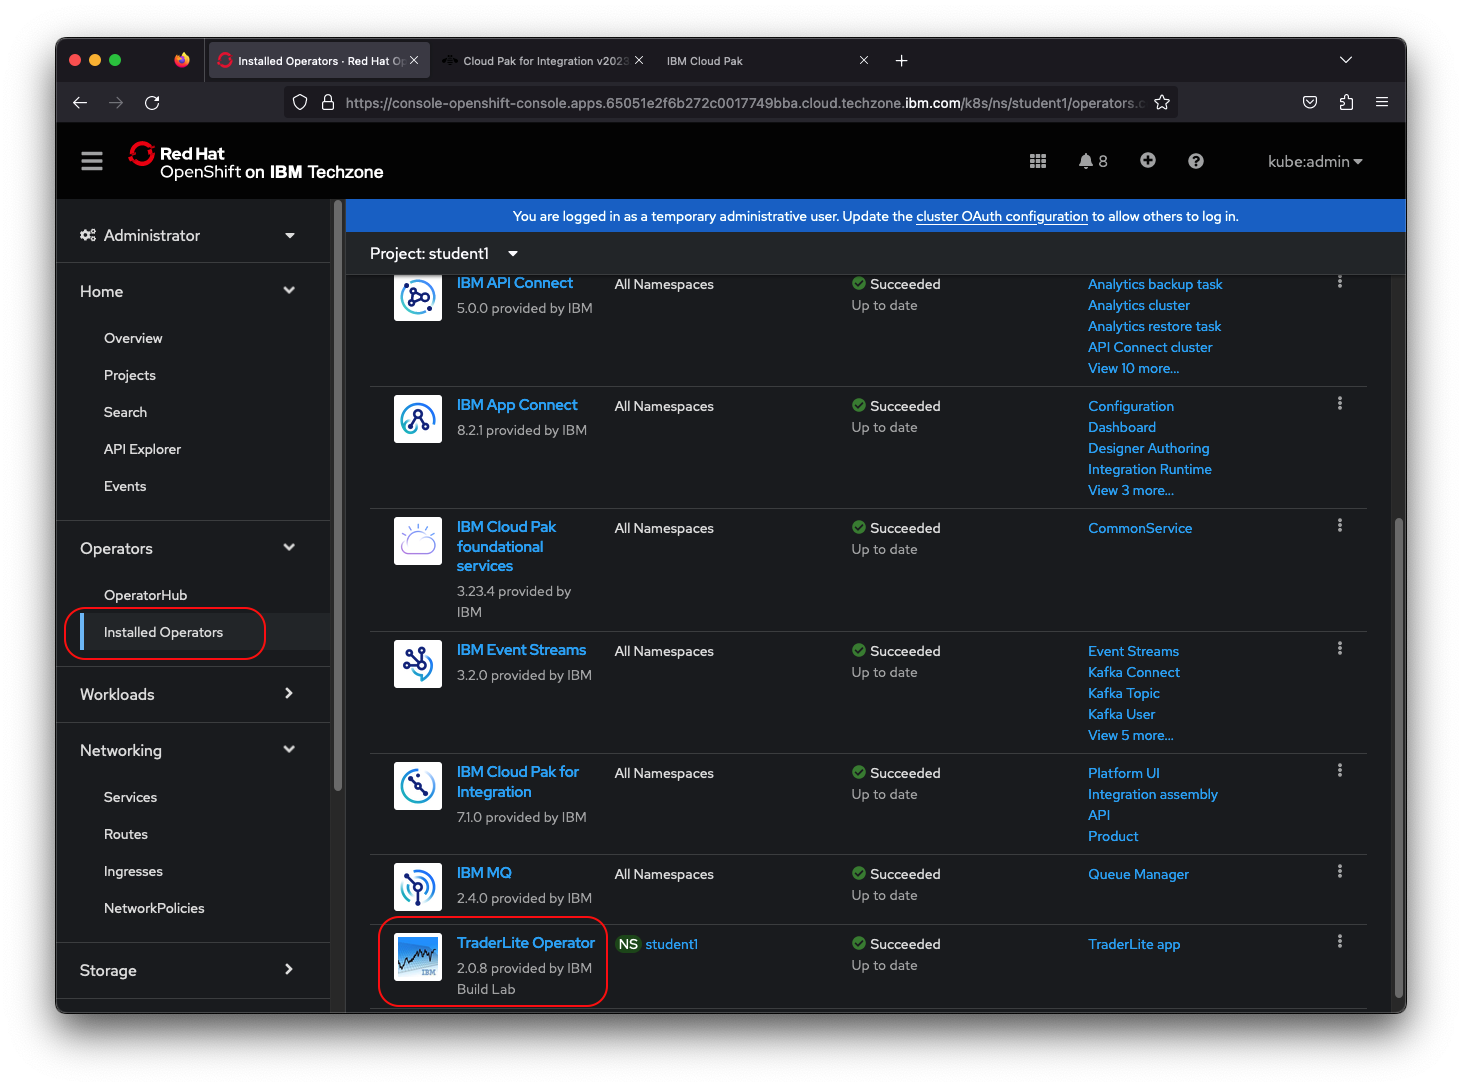
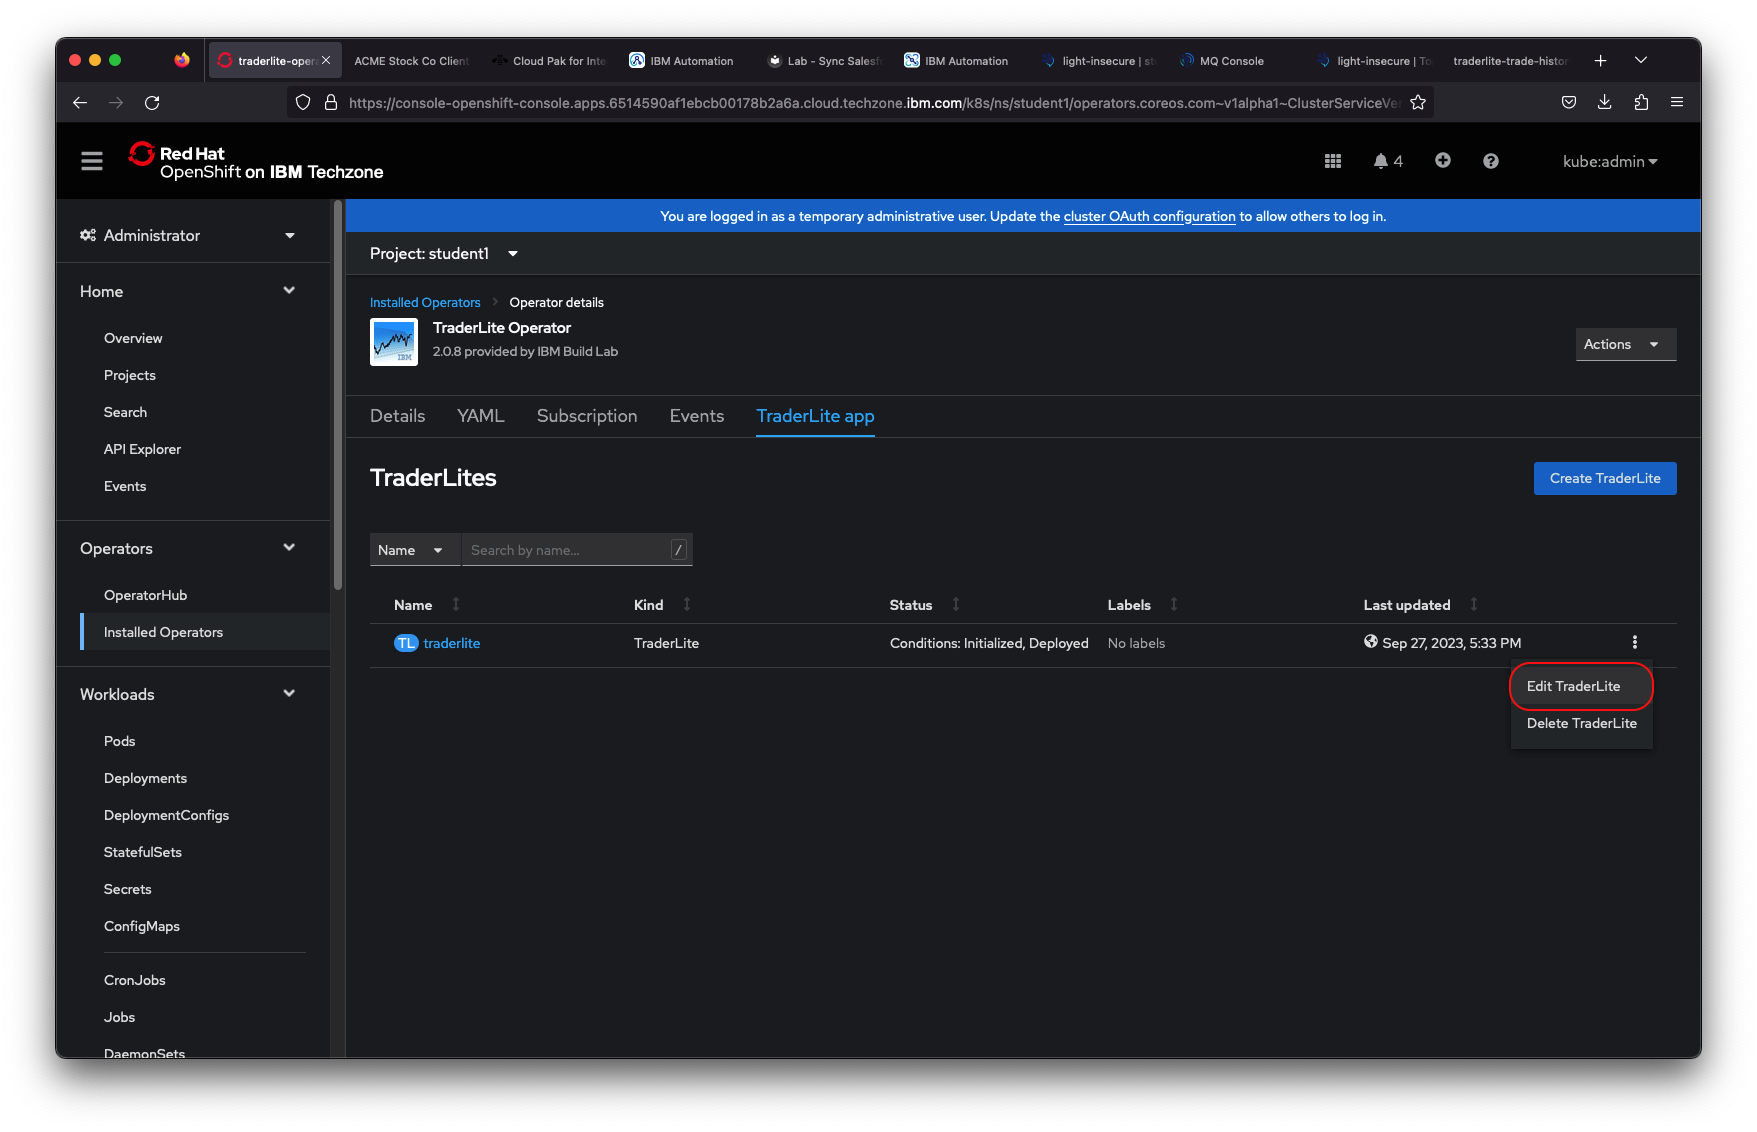
7.1 Go to the OpenShift console of your assigned cluster. Select the student1 project. In the navigation on the left select Installed Operators and select the TraderLite Operator
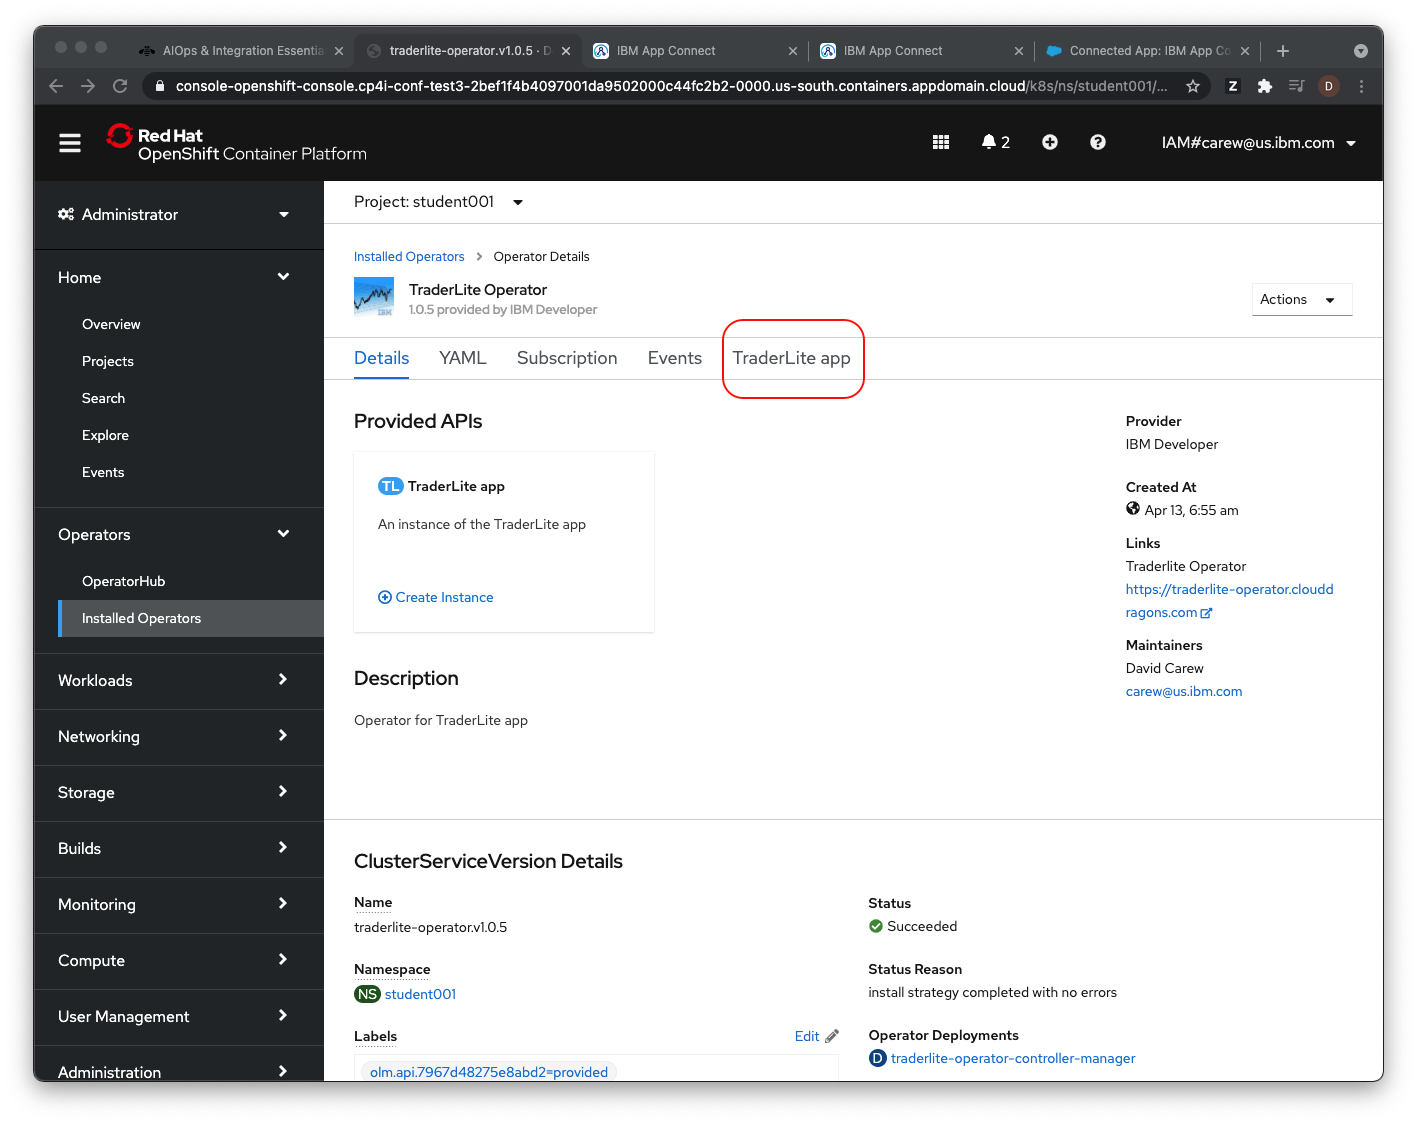
7.2 Click on the TraderLite app tab
7.3 Click on the 3 periods to the right of the existing TraderLite CRD and select Edit TraderLite from the context menu.
7.4 Scroll down to line 211 and change the enabled field value to true and paste the endpoint of your API flow that you saved earlier as the url value on line 215.

7.5 Click Save.
7.6 In the navigation area on the left select Pods in the Workloads section. You should see that a new instance of the Portfolio pod has been started.
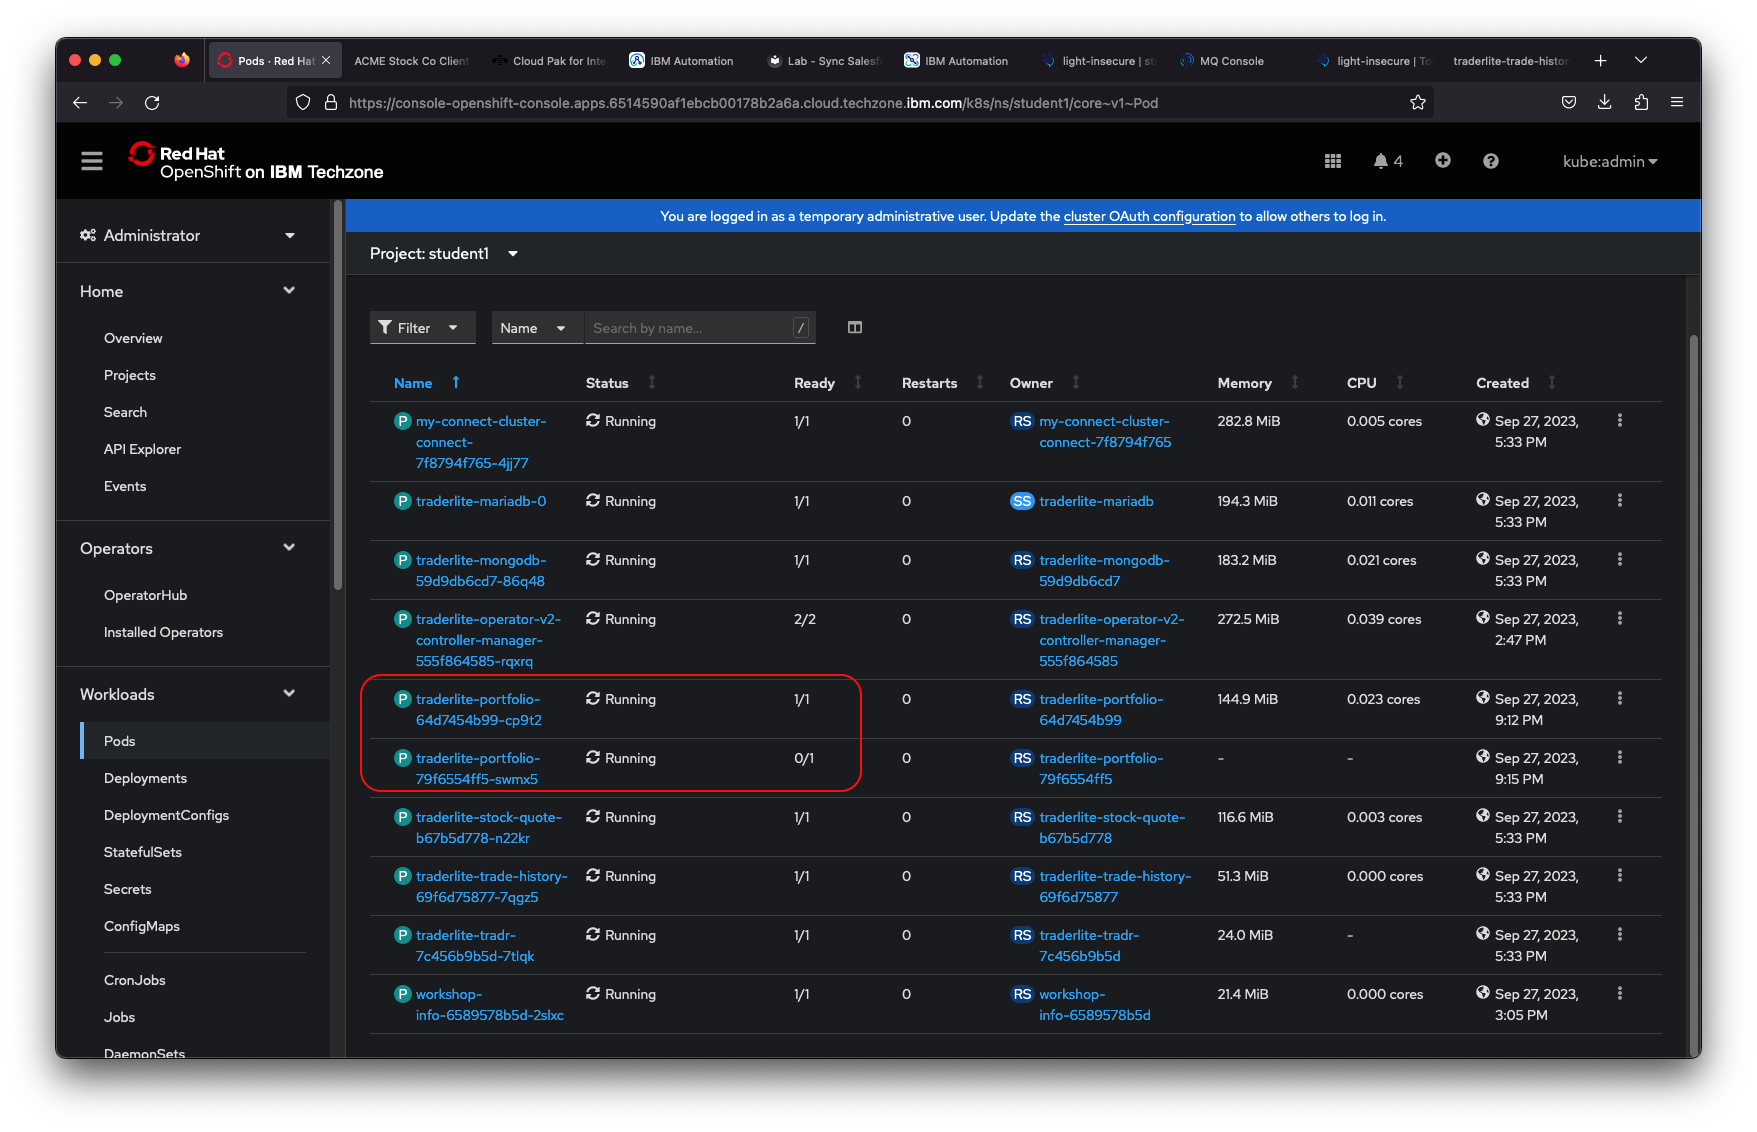
7.7 Wait until the new pod is in the Ready state and the previous pod has terminated before continuing.
Note: You will know the traderlite-portfolio-xxxxx pod is in a ready state when the
Readycolumn shows1/1. You will also see that the created column will have a recent timestamp value.
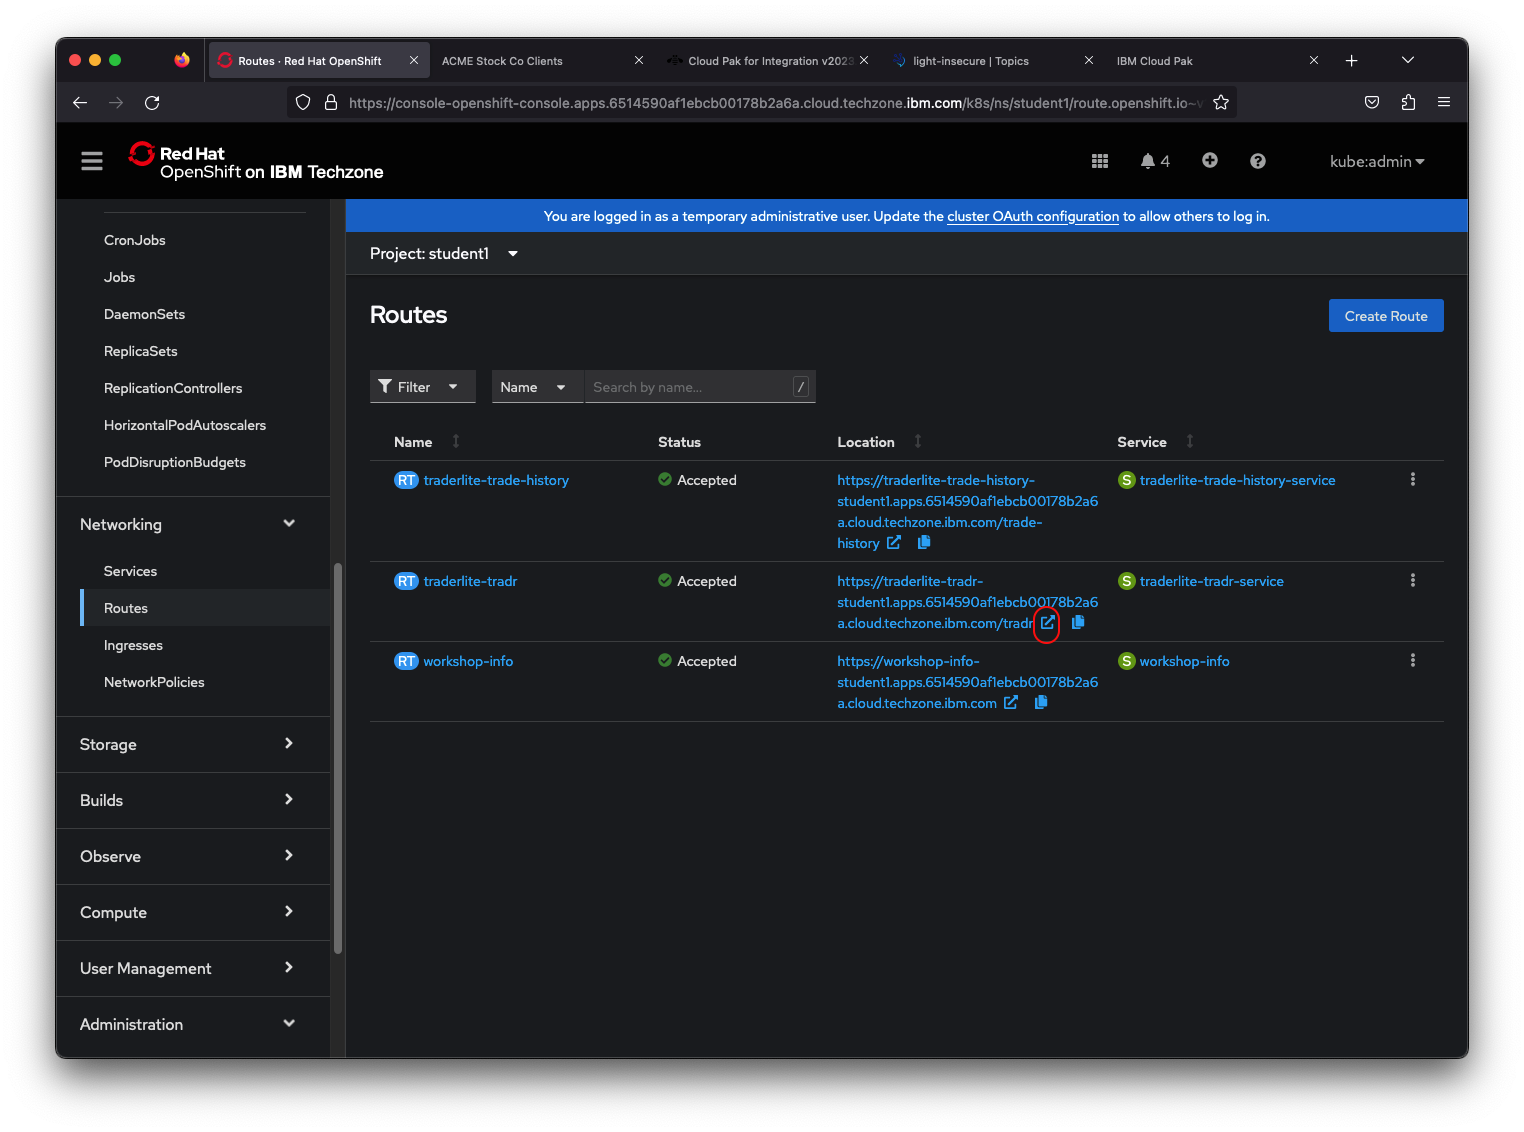
7.8 In the left navigation click on Routes (in the Networking category) and then click on the icon next to the url for the tradr app (the UI for TraderLite)
7.9 Log in using the username stock and the password trader

7.10 Click Add Client and fill in the form. You must use valid email and phone number formats to avoid errors.

7.11 Click Save
7.12 Click on the Portfolio ID of the new client to see the details of the portfolio
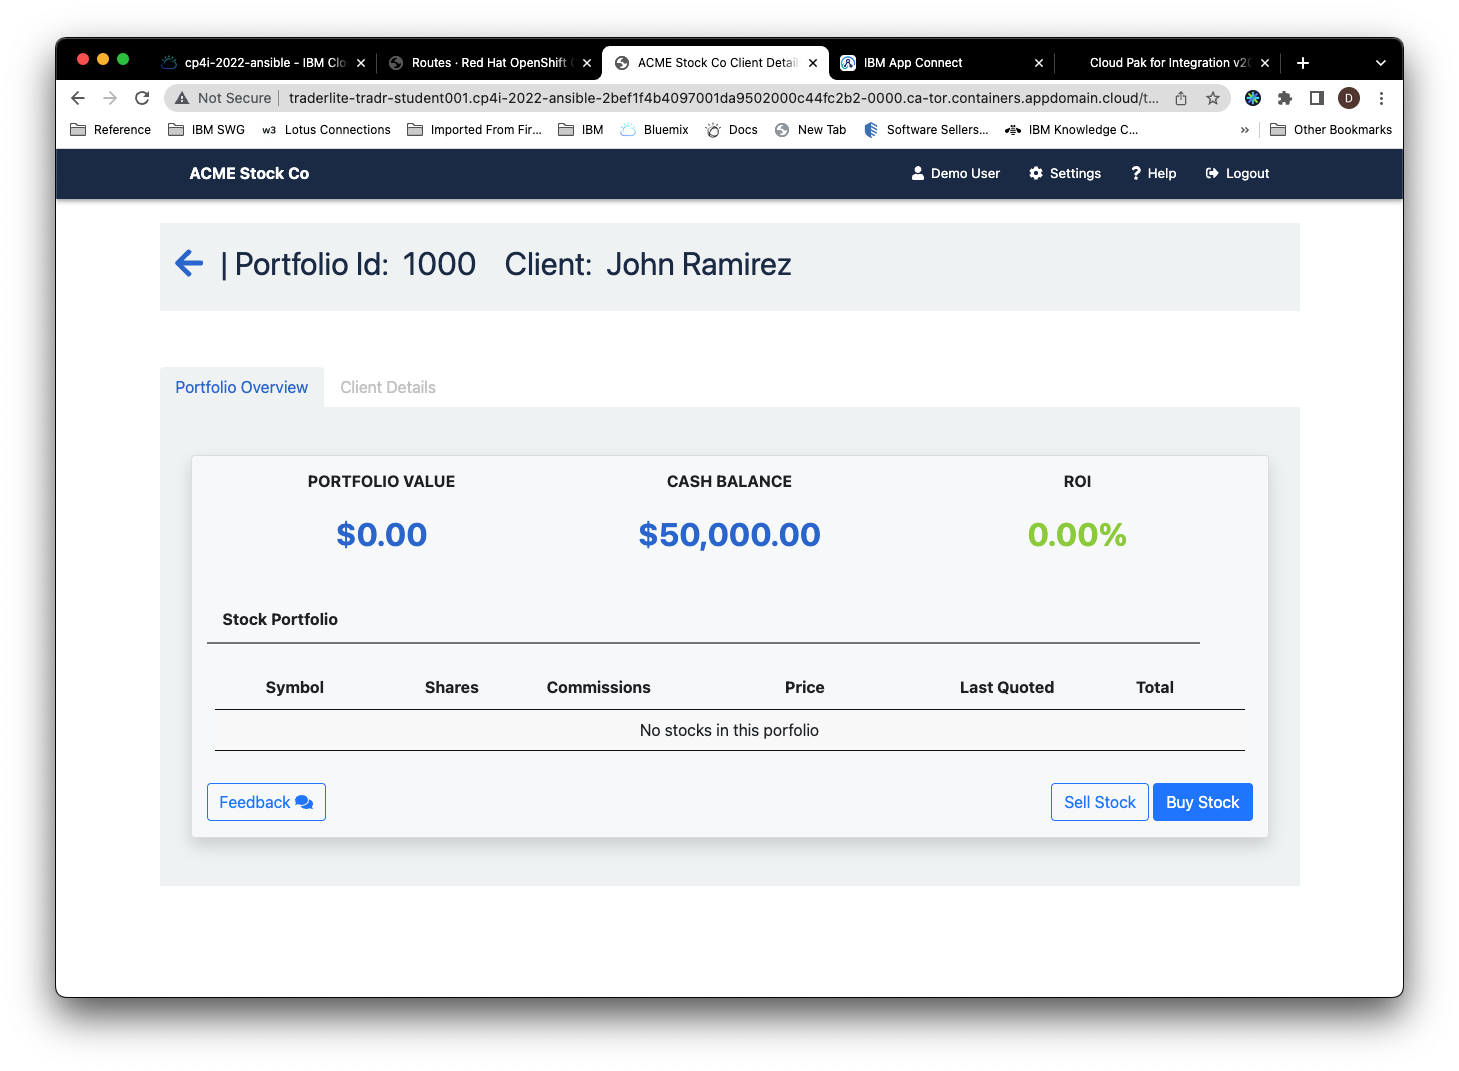
7.13 Click on the Client Details tab. Because the TraderLite app is now calling your sfpushnnn flow whenever a new client is created, you should see a Salesforce Contact Id in the form of a link.
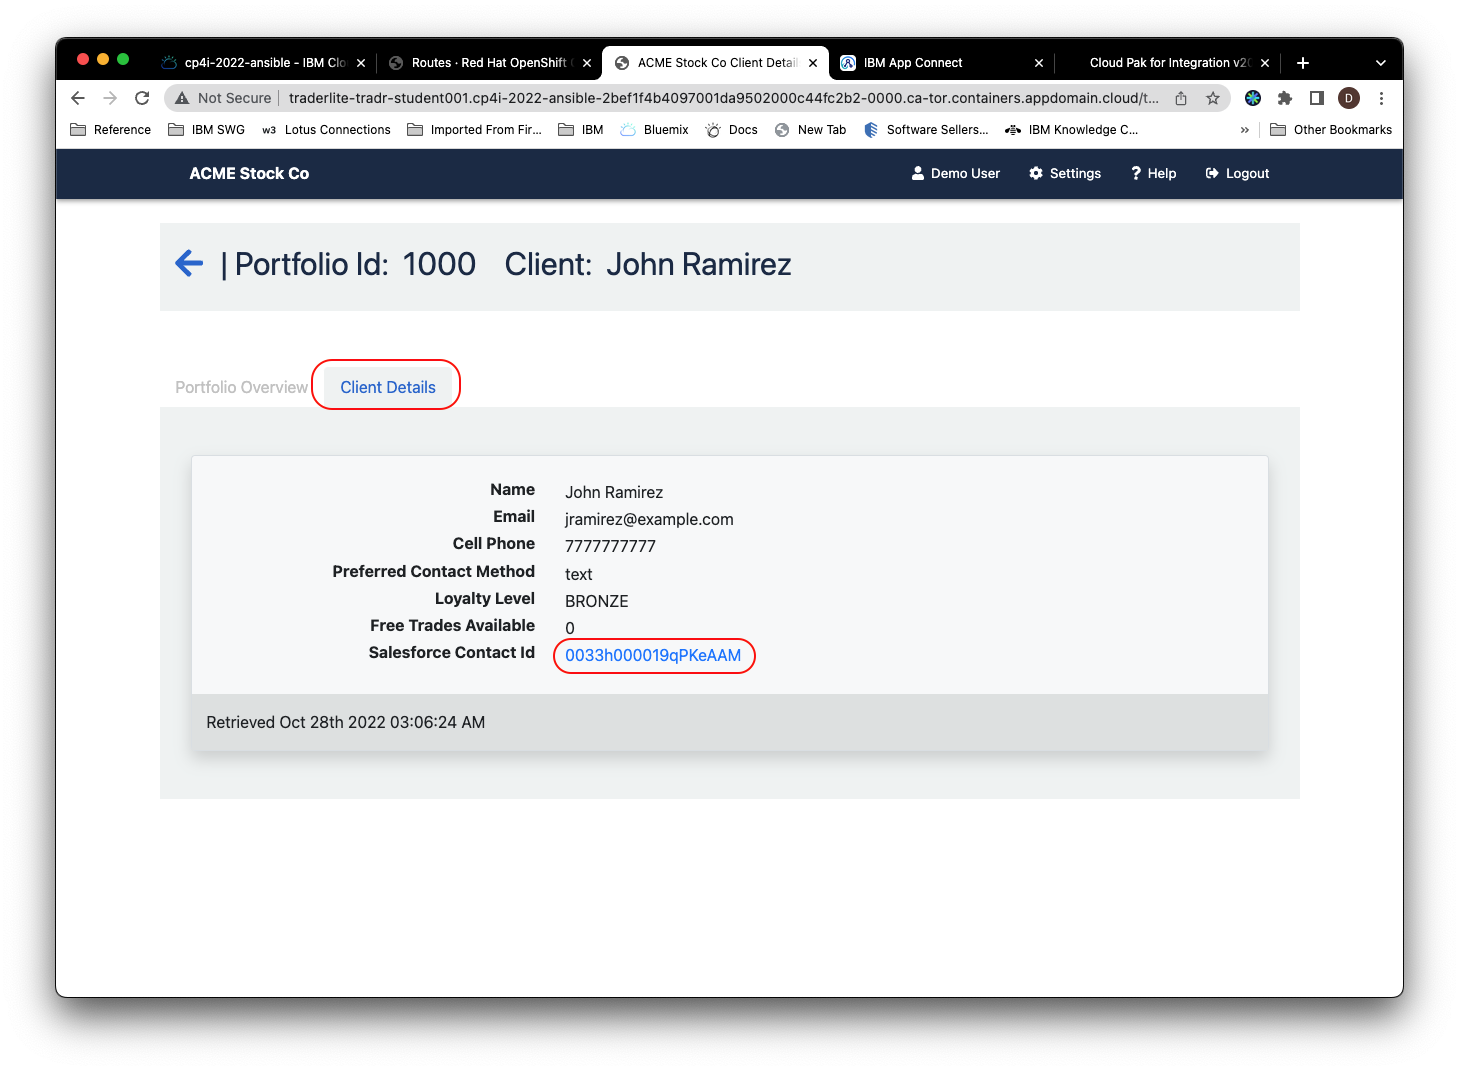
7.14 Right click on the Contact Id link and select Open Link in New Tab to see the contact in Salesforce (you may be prompted for your Salesforce credentials)
Note: If the link does not work because of geo specific URLs for Salesforce, login in to Salesforce by yourself and look at the new contact. The easiest way to find the new contact is to enter the first and last name in the search bar in Salesforce.
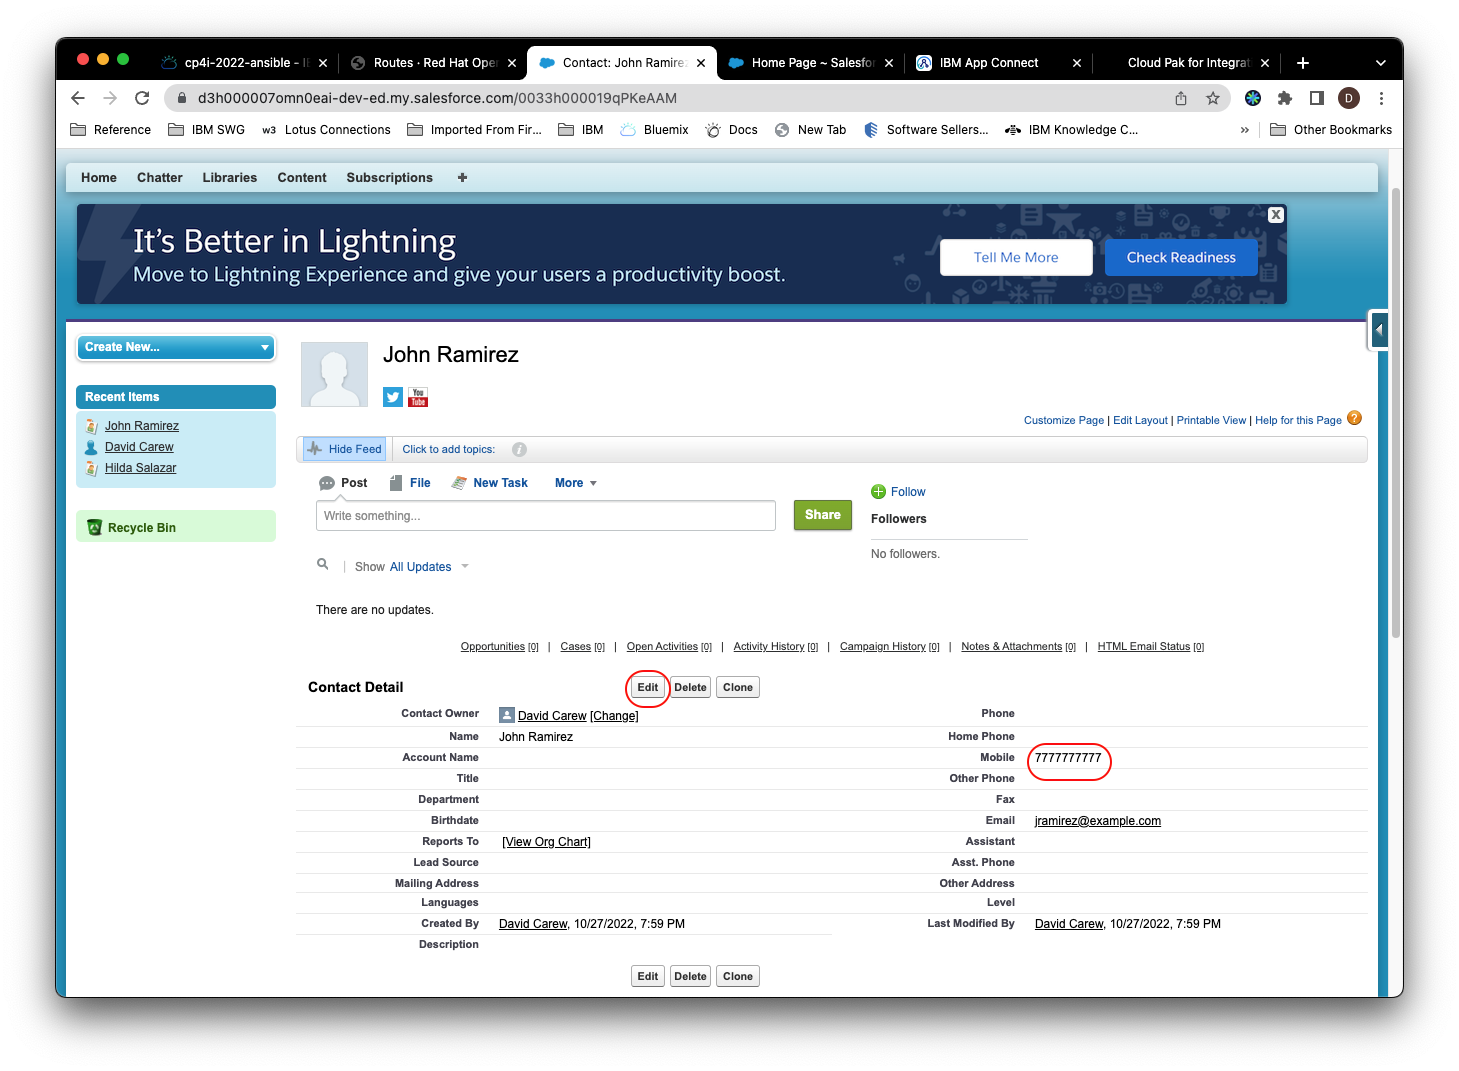
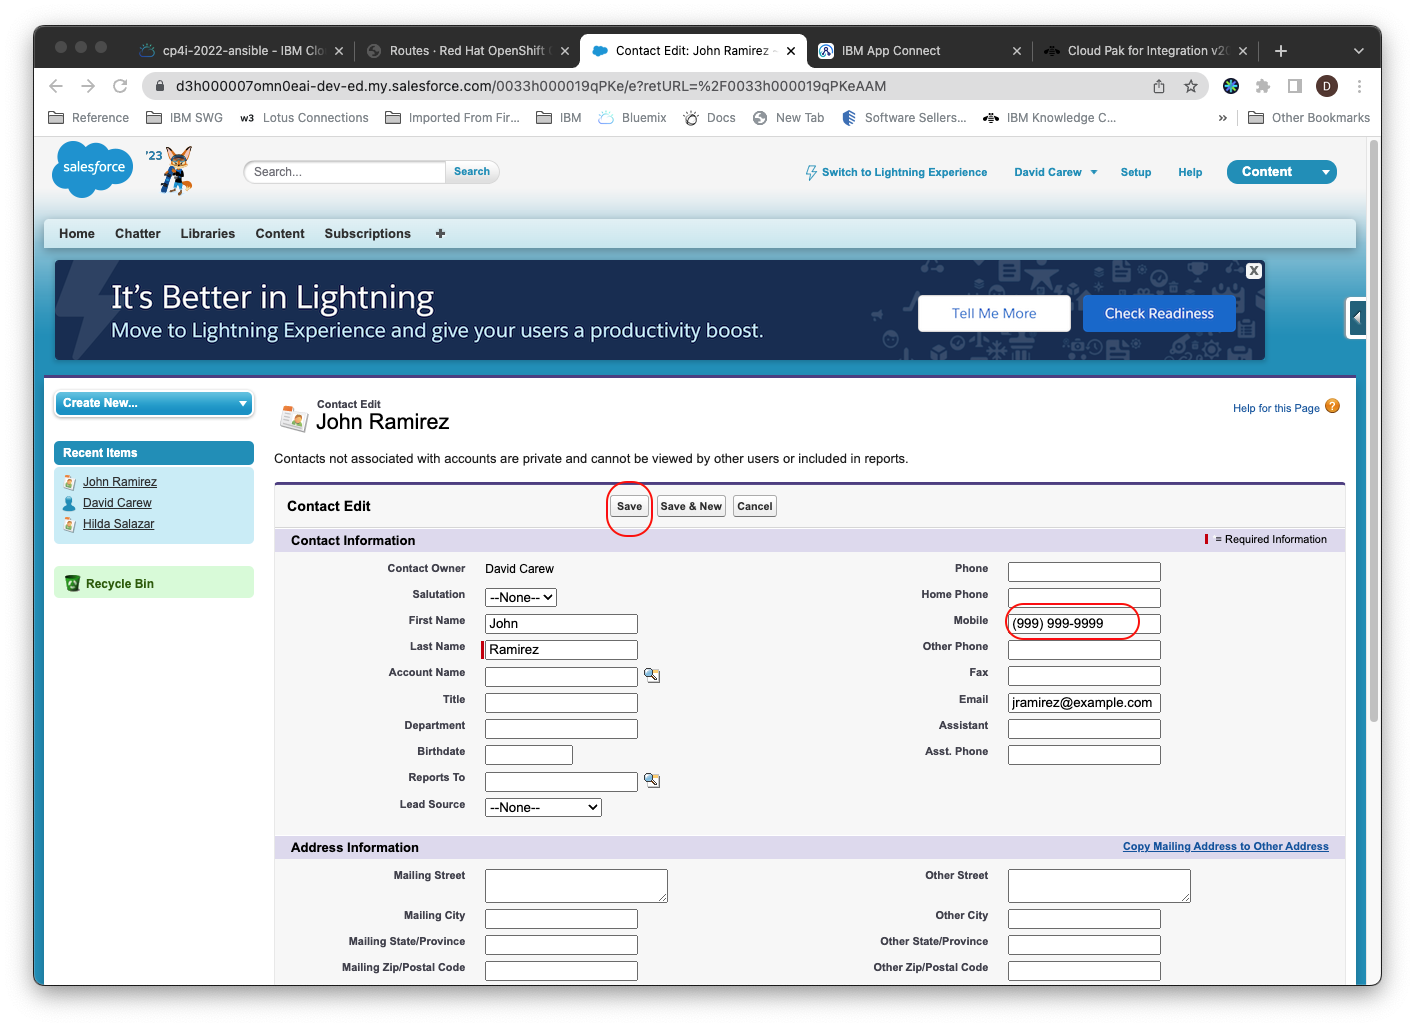
7.15 Now test your reverse flow (i.e. when a contact is modified in Salesforce). Click on the Edit button for the contact and change the mobile number. Click Save.
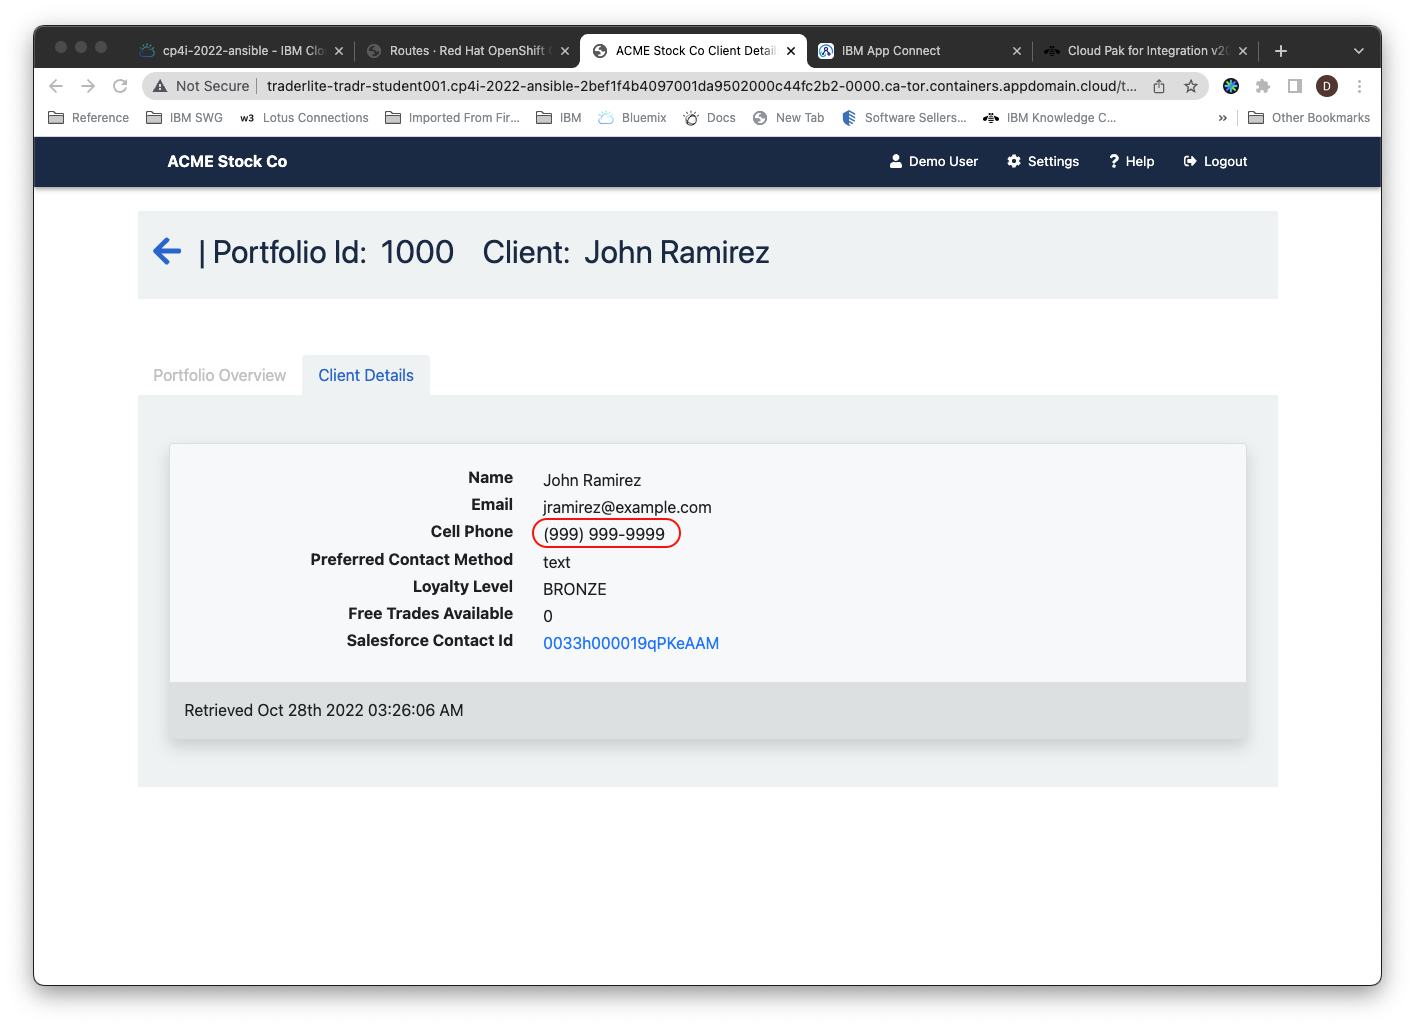
7.16 Go back to the tab with the TraderLite app and refresh the page with the Client Details. Click on the Client Details tab and verify that the phone number has been updated with the new value you added in Salesforce.
Summary
Congratulations ! You successfully completed the following key tasks in this lab:
- Connected to Salesforce
- Created an App Connect designer flow to push client data to Salesforce contacts.
- Created an Event Driven flow to push Salesforce contact updates to the TraderLite App via an API call
- Deployed the flows as Integration Servers in App Connect Dashboard
- Tested the flow with the Trader Lite app.