Machine Learning Model Batch Deployment and Scoring
In this module, we will learn how to deploy our Machine Learning models. By doing so, we make them available for use in production such that applications and business processes can derive insights from them. There are several types of deployments available (depending on the model framework used). In this lab, we will explore:
- Batch Deployments - Allows you to run the model against data as a batch process.
This lab will build a batch deployment and test the model endpoint by submitting a job to score a batch set of inputs.
Note: You can click on any image in the instructions below to zoom in and see more details. When you do that just click on your browser's back button to return to the previous page.
Note: The lab instructions below assume you have completed the setup section already, if not, be sure to complete the setup first to create a project and a deployment space. If you would have any issues, check the FAQ section.
Creating Batch Model Deployment
Another approach to expose the model to be consumed by other users/applications is to create a batch deployment. This type of deployment will make an instance of the model available to make predictions against data assets or groups of records. The model prediction requests are scheduled as jobs, which are executed asynchronously. Lets start by creating the deployment:
-
Navigate to the left-hand (☰) hamburger menu, expand the
Deploymentssection and click onView all spaces.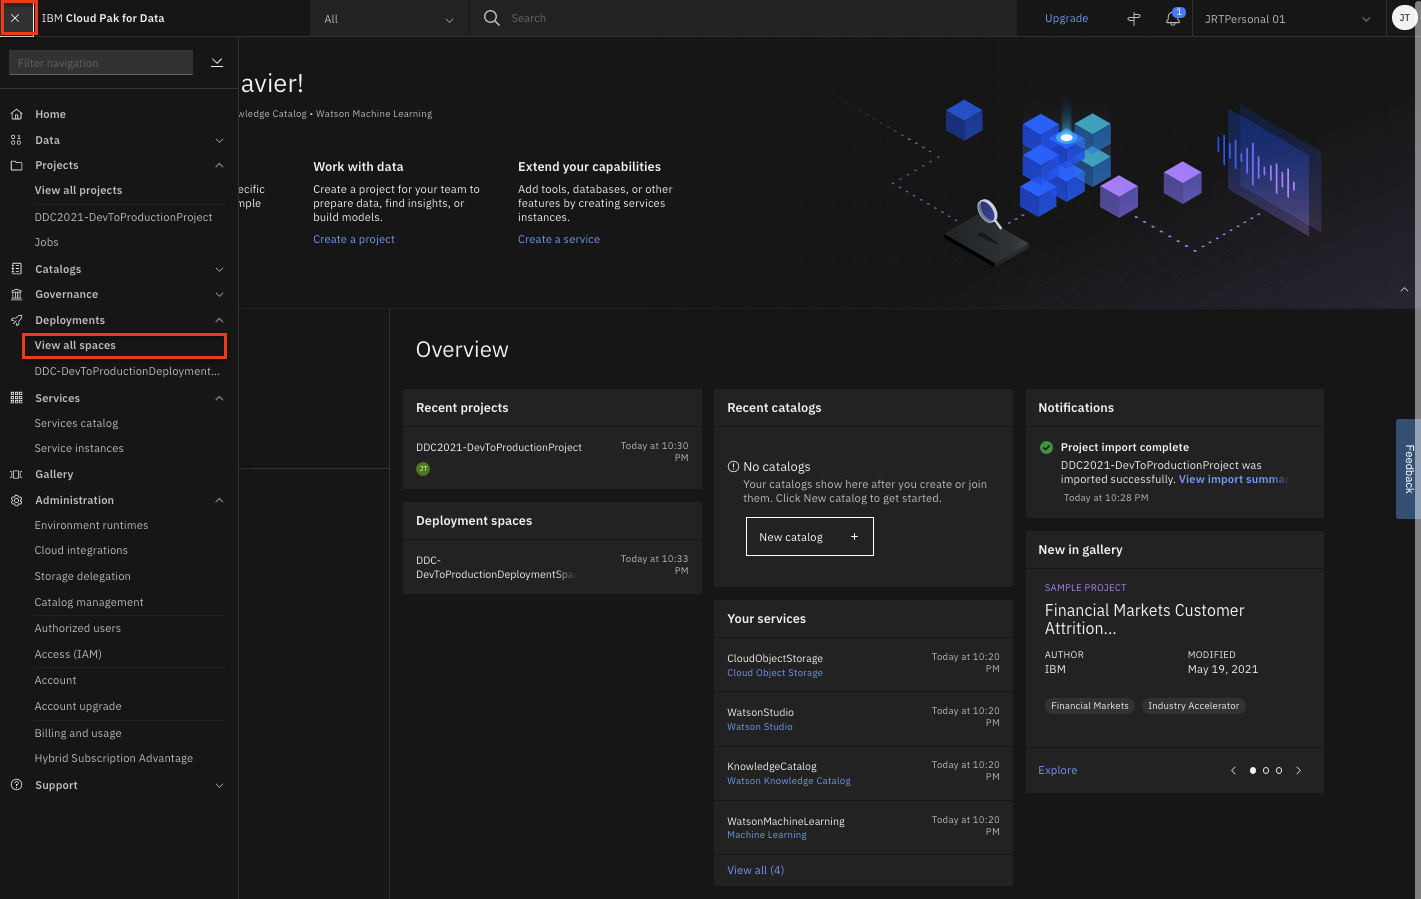
-
Click on the
Spacestab and then choose the deployment space you setup previously by clicking on the name of your space. -
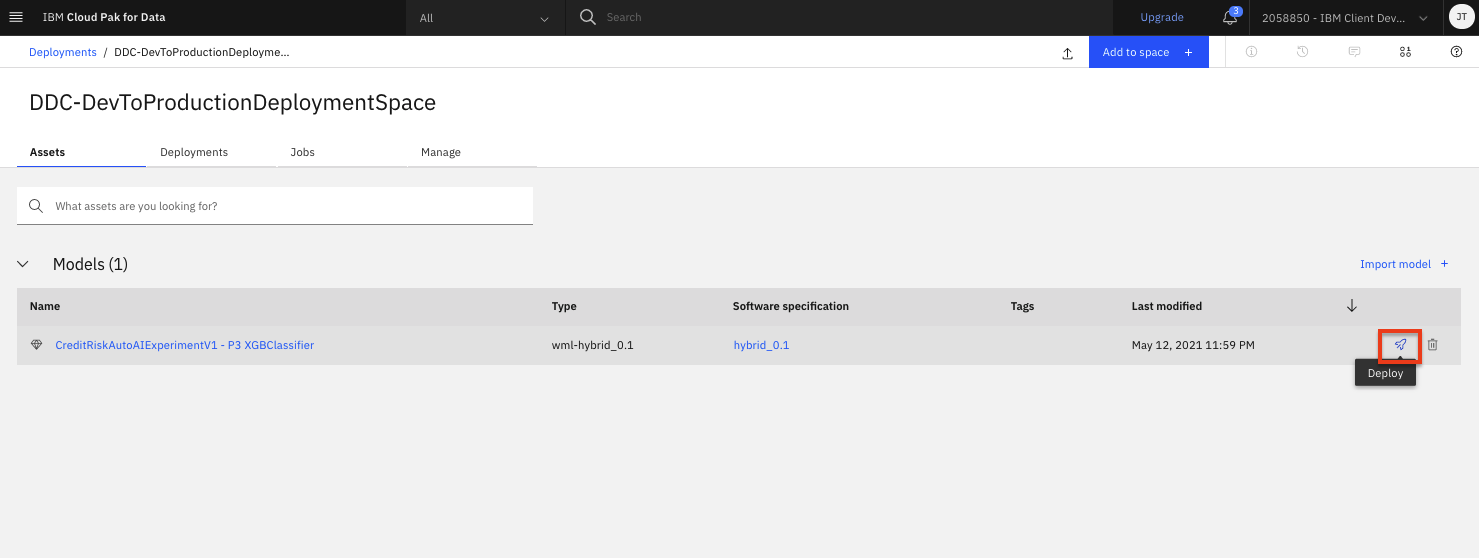
From your deployment space overview, click on the
Assetstab and in the 'Model' table, find the model name for the model you previously built and now want to create a deployment against. Use your mouse to hover over the right side of that table row and click theDeployrocket icon (the icons are not visible by default until you hover over them).Note: There may be more than one model listed in them 'Models' section. This can happen if you have run the Jupyter notebook that creates SparkML models more than once or if you have run through both the Jupyter notebook and AutoAI modules to create models.
-
On the 'Create a deployment' screen: choose
Batchfor the Deployment Type, give the deployment a name and optional description. From the 'Hardware definition' drop down, select the smallest option (2 CPU, 8GB RAMin this case though for large or frequent batch jobs, you might choose to scale the hardware up depending on what is available to your account/plan). Click theCreatebutton.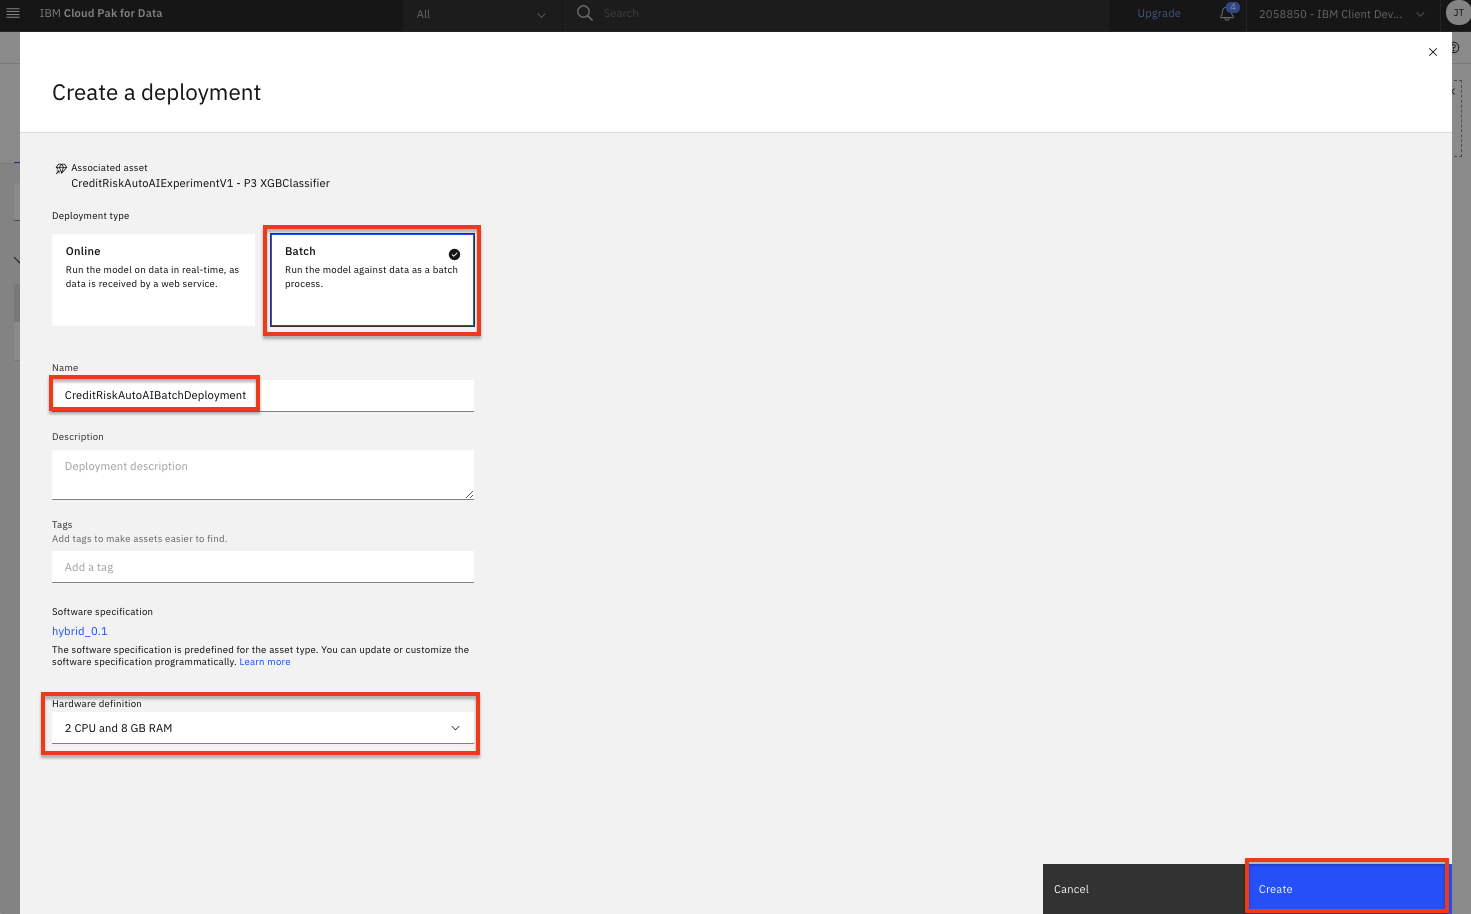
-
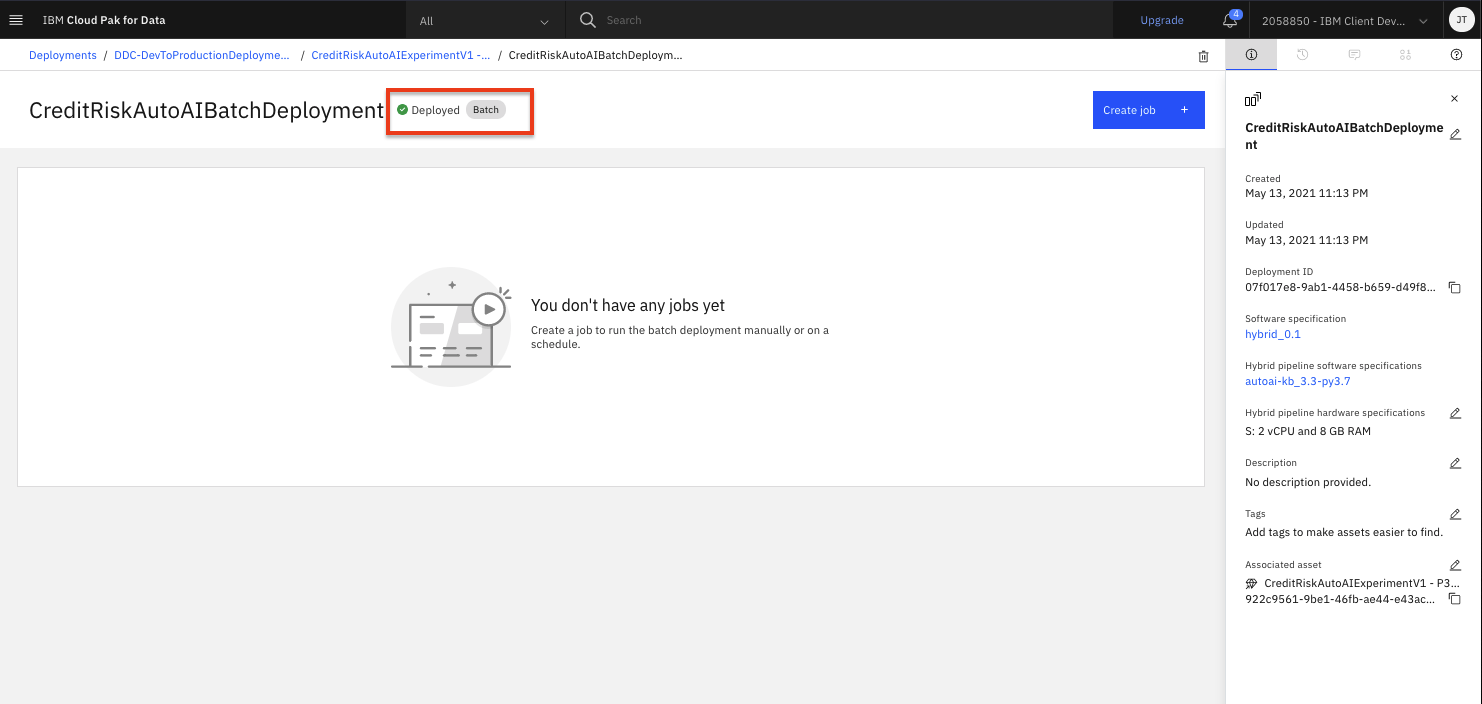
Once the status shows as Deployed you will be able to start submitting jobs to the deployment.
Create and Schedule a Job
Next we can schedule a job to run against our batch deployment. We could create a job, with specific input data (or data asset) and schedule, either programmatically or through the UI (i.e the "Create Job" button on the deployment page). For this lab, we are going to do this programmatically using the Python client SDK. For this part of the exercise we're going to use a Jupyter notebook to create and submit a batch job to our model deployment.
Note: The batch job input is impacted by the machine learning framework used to build the model. Currently, SparkML based model batch jobs require inline payload to be used. For other frameworks, we can use data assets (i.e CSV files) as the input payload.
Run the Batch Notebook
The Jupyter notebook is already included as an asset in the project you imported during the setup module.
-
Go the (☰) navigation menu and click on the
Projectslink and then click on the project you created during the setup.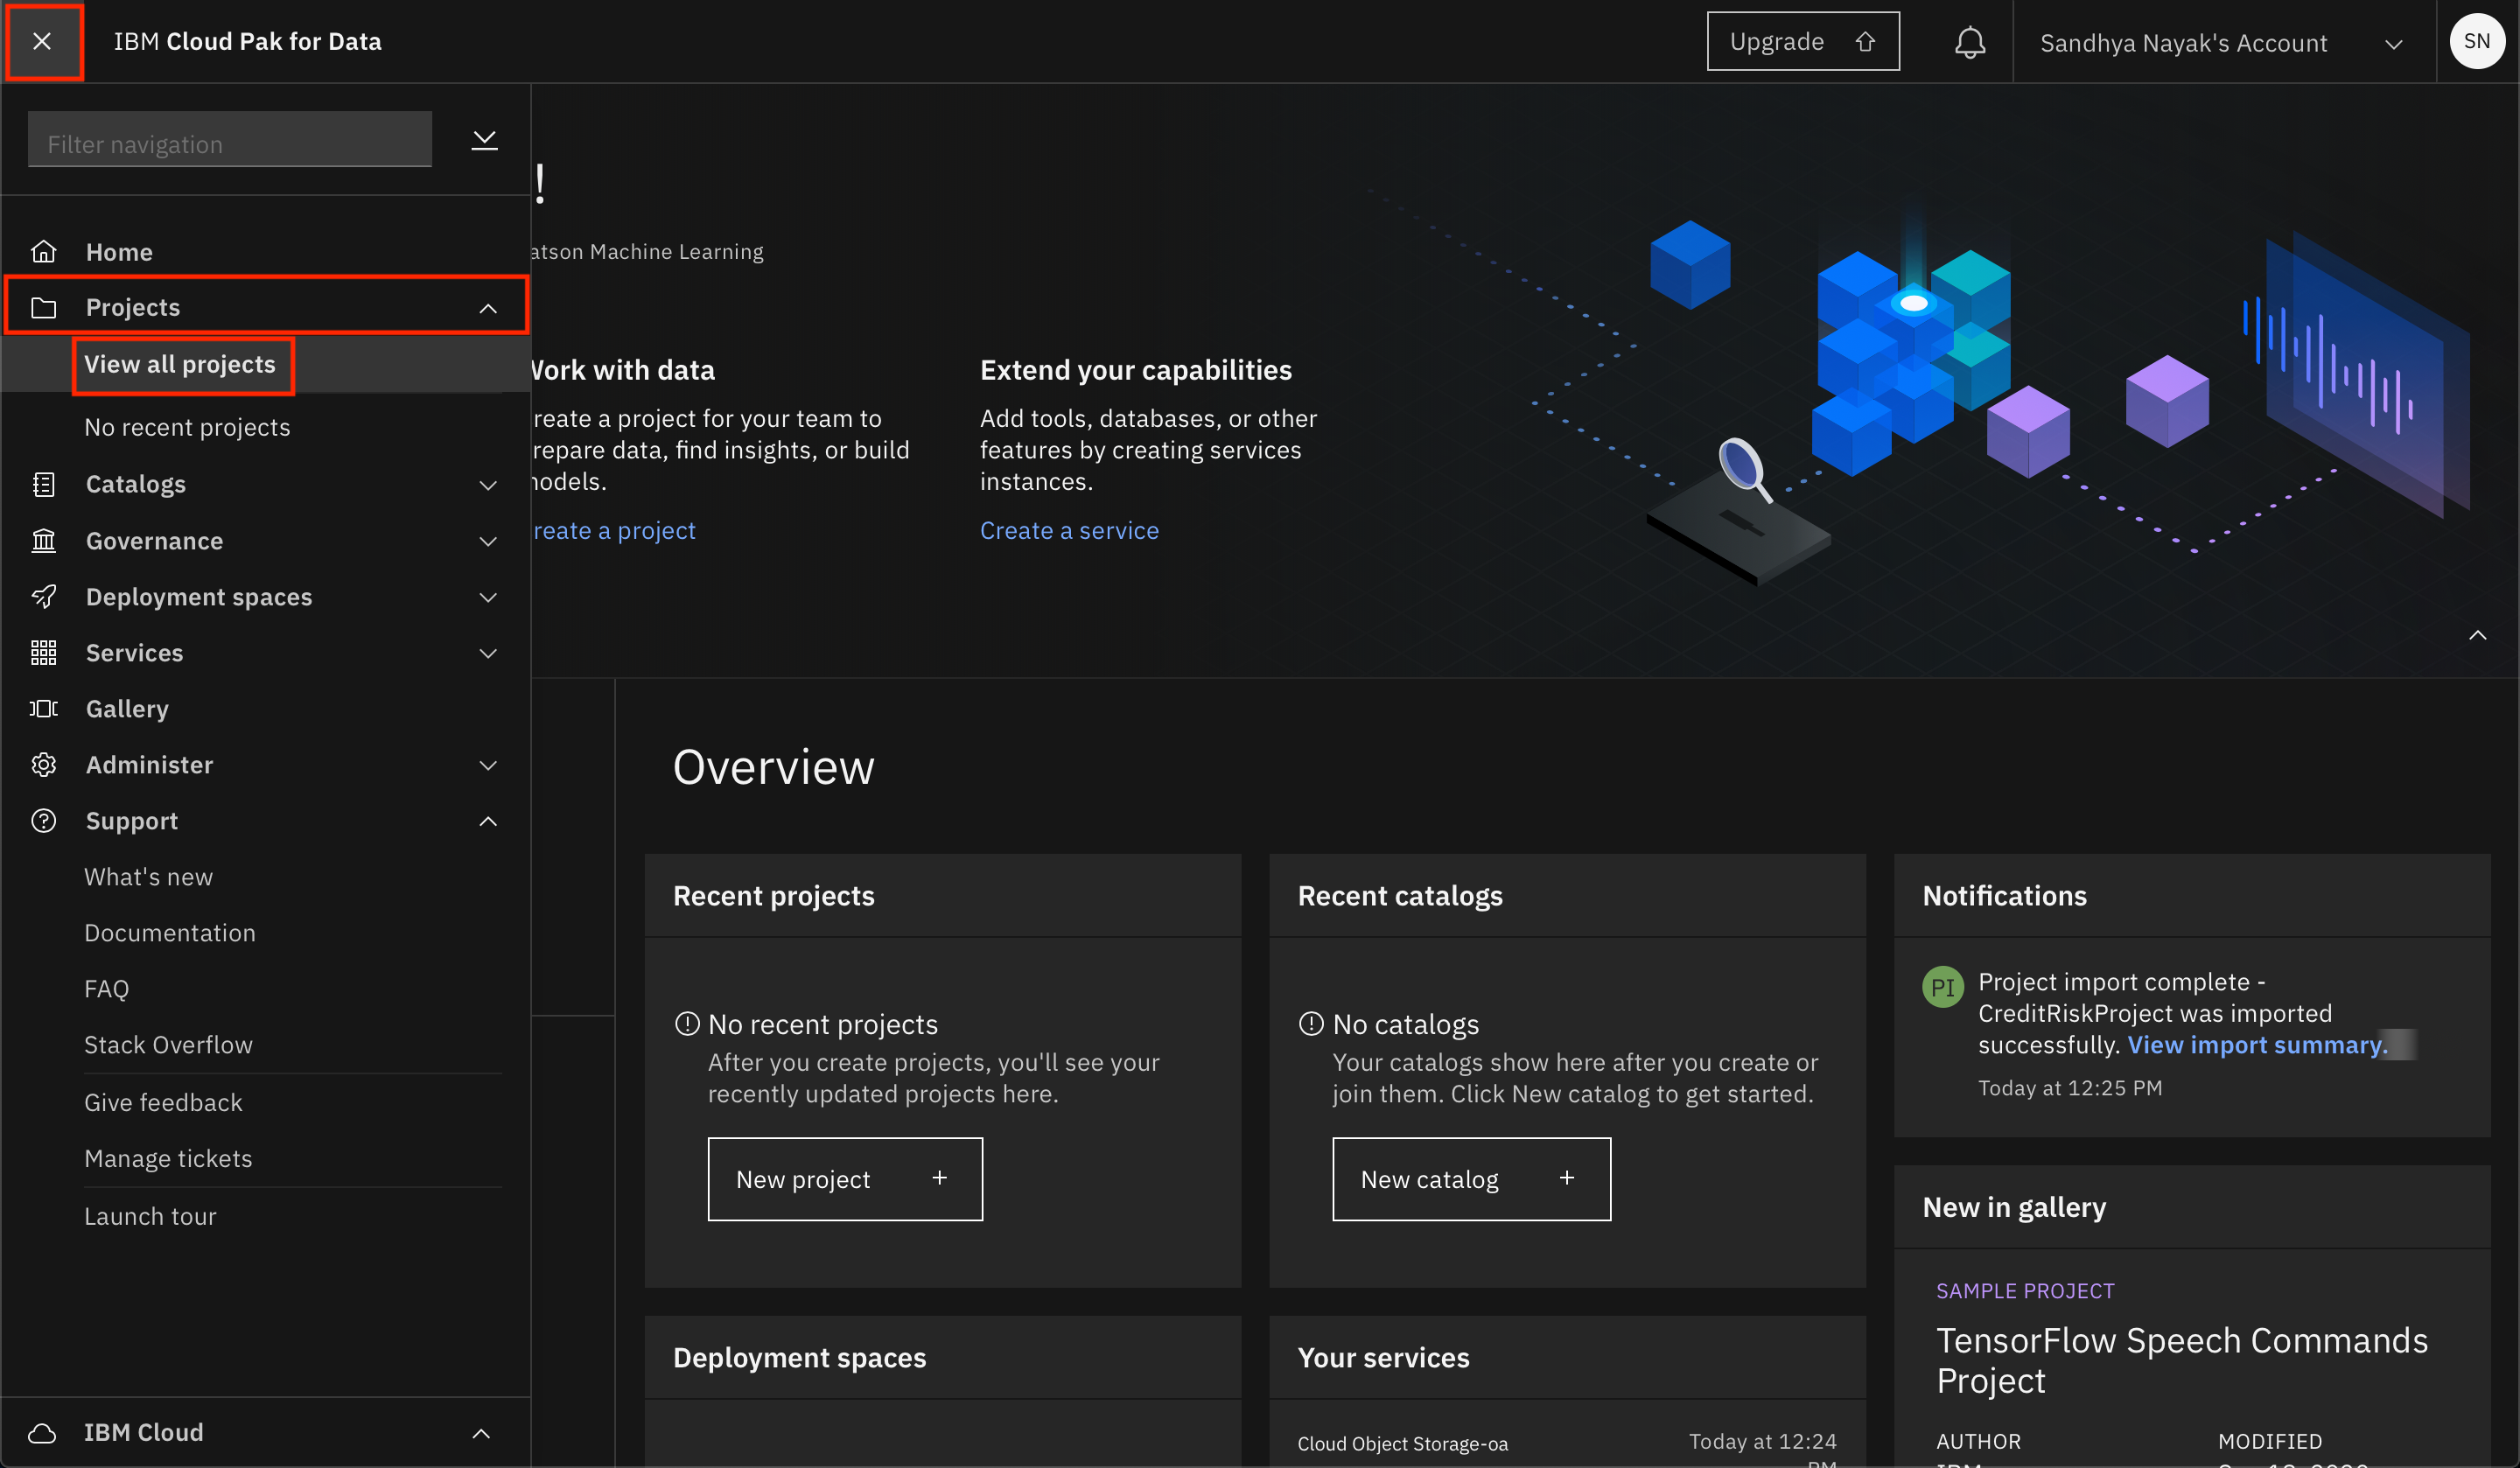
-
From the project overview page, click on the
Assetstab to open the assets page where your project assets are stored and organized. -
Scroll down to the
Notebookssection of the page and click on the pencil icon at the right of themachinelearning-creditrisk-batchscoringnotebook.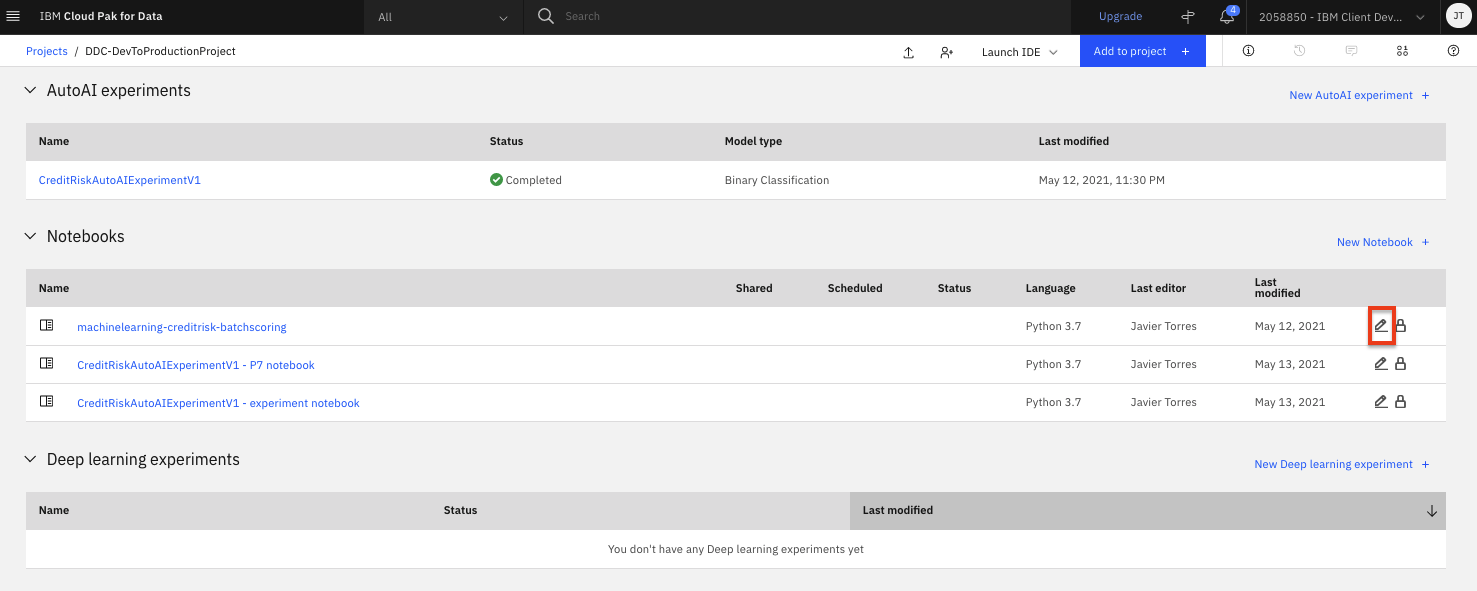
-
When the Jupyter notebook is loaded and the kernel is ready, we will be ready to start executing it in the next section.
Notebook sections
With the notebook open, spend a minute looking through the sections of the notebook to get an overview. A notebook is composed of text (markdown or heading) cells and code cells. The markdown cells provide comments on what the code is designed to do. You will run cells individually by highlighting each cell, then either click the Run button at the top of the notebook or hitting the keyboard short cut to run the cell (Shift + Enter but can vary based on platform). While the cell is running, an asterisk ([*]) will show up to the left of the cell. When that cell has finished executing a sequential number will show up (i.e. [17]).
Note: Please note that some of the comments in the notebook are directions for you to modify specific sections of the code. These are written in red. Perform any changes necessary, as indicated in the cells, before executing them.
-
Execute the cells one at a time.
-
Section
1.0 Install required packageswill install some of the libraries we are going to use in the notebook. Note that we upgrade the installed version of Watson Machine Learning Python Client. Ensure the output of the first code cell is that the python packages were successfully installed.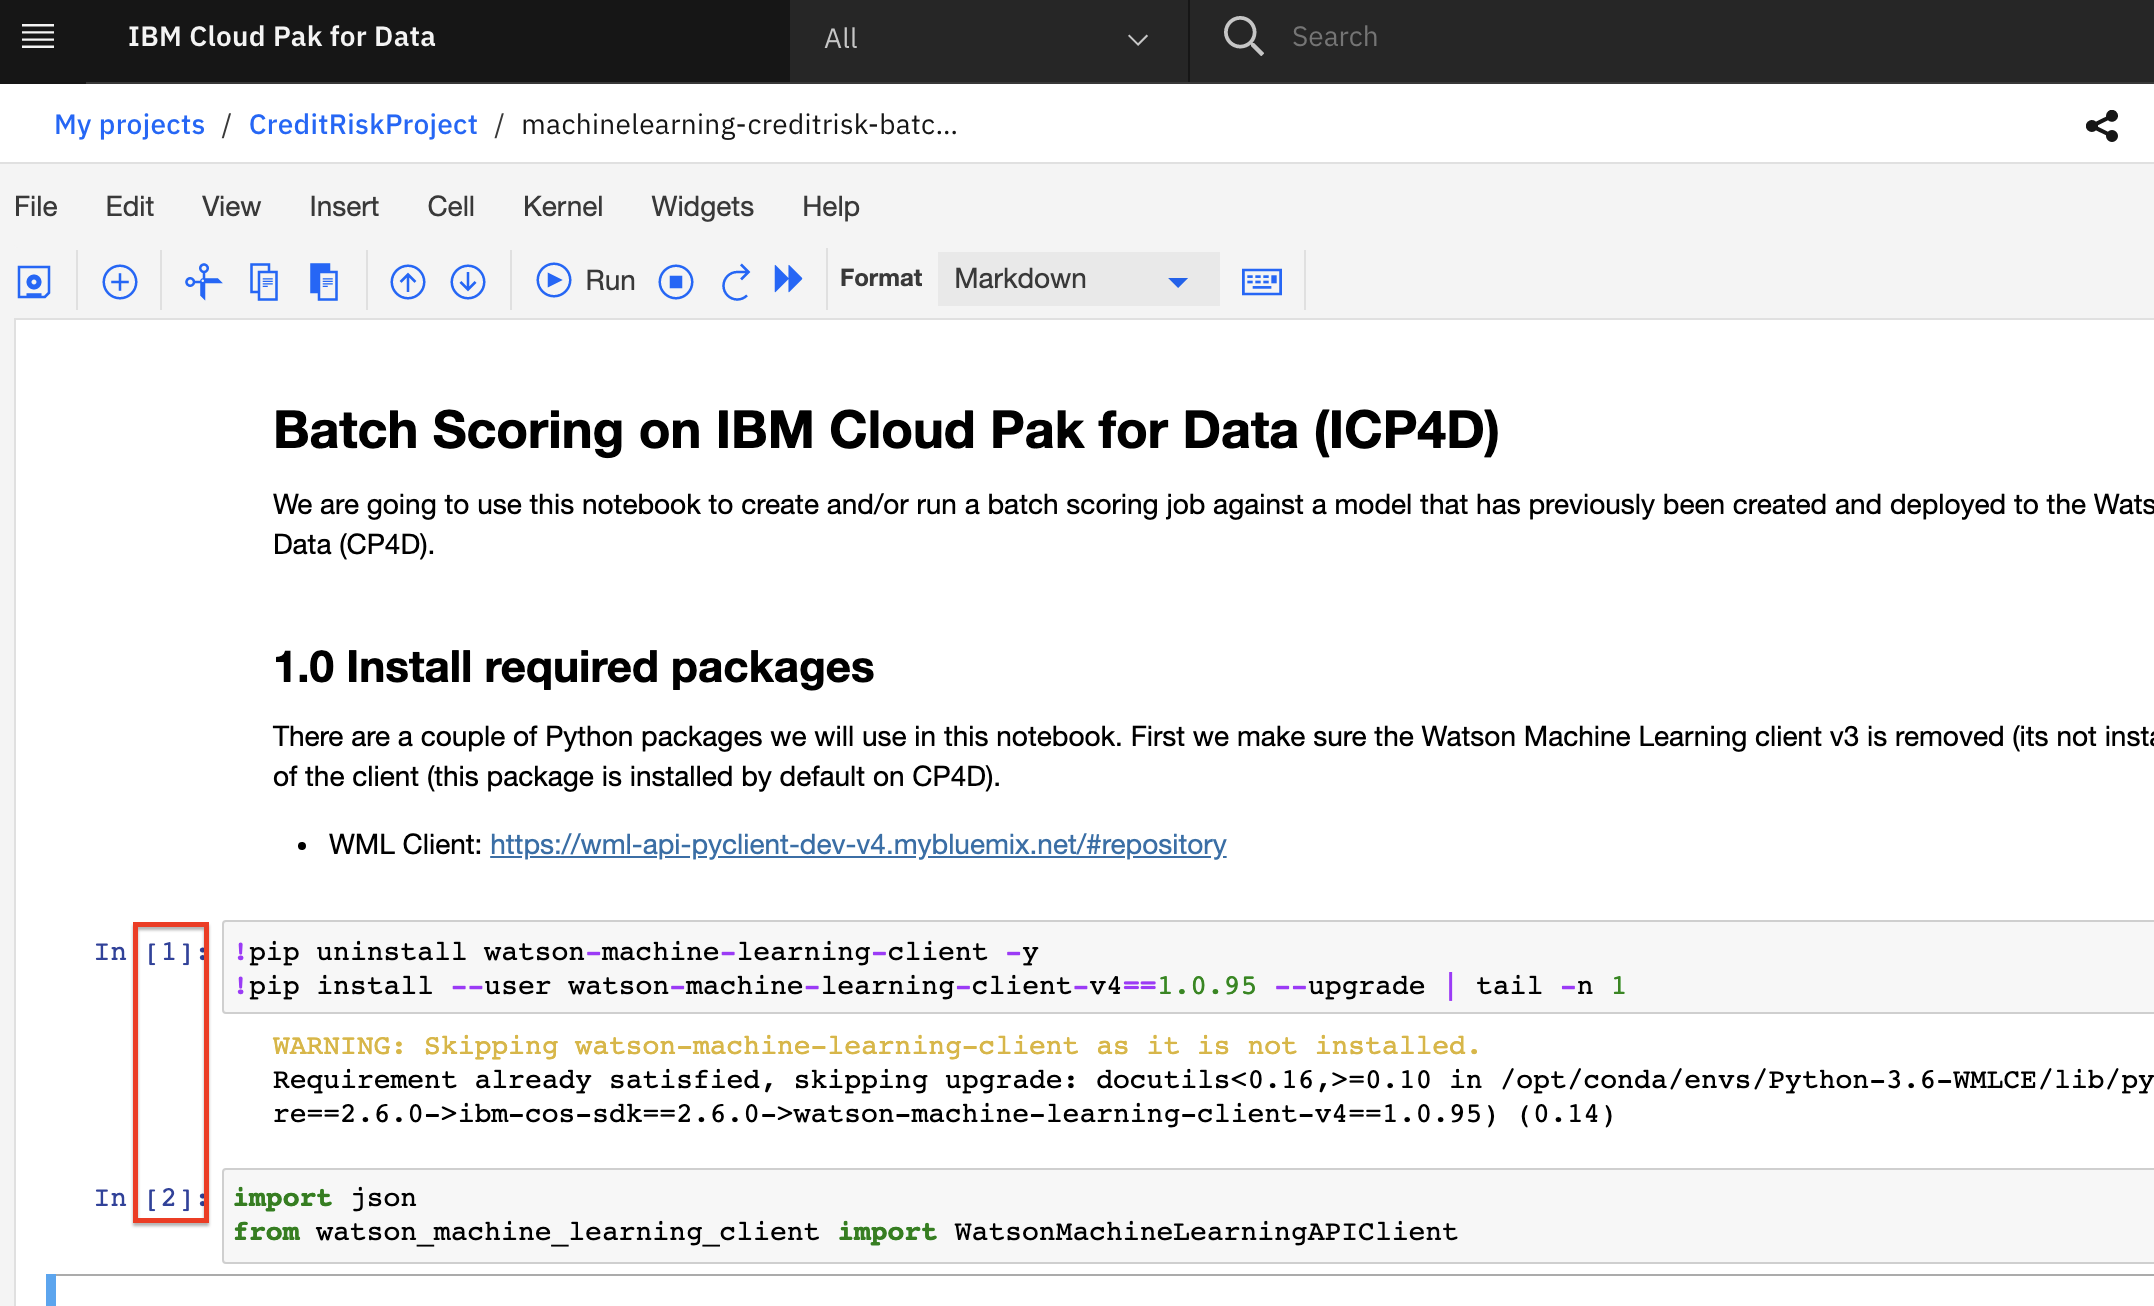
-
Section
2.0 Create Batch Deployment Jobwill create a job for the batch deployment. To do that, we will use the Watson Machine Learning client to get our deployment and create a job.-
In the first code cell for
Section2.1, you will need to provide your IBM Cloud API key and Machine learning service location, which you should have from the setup module. -
In section 2.2, be sure to update the
DEPLOYMENT_SPACE_NAMEvariable with your deployment space name (copy and past the name which is within the output of the previous code cell). -
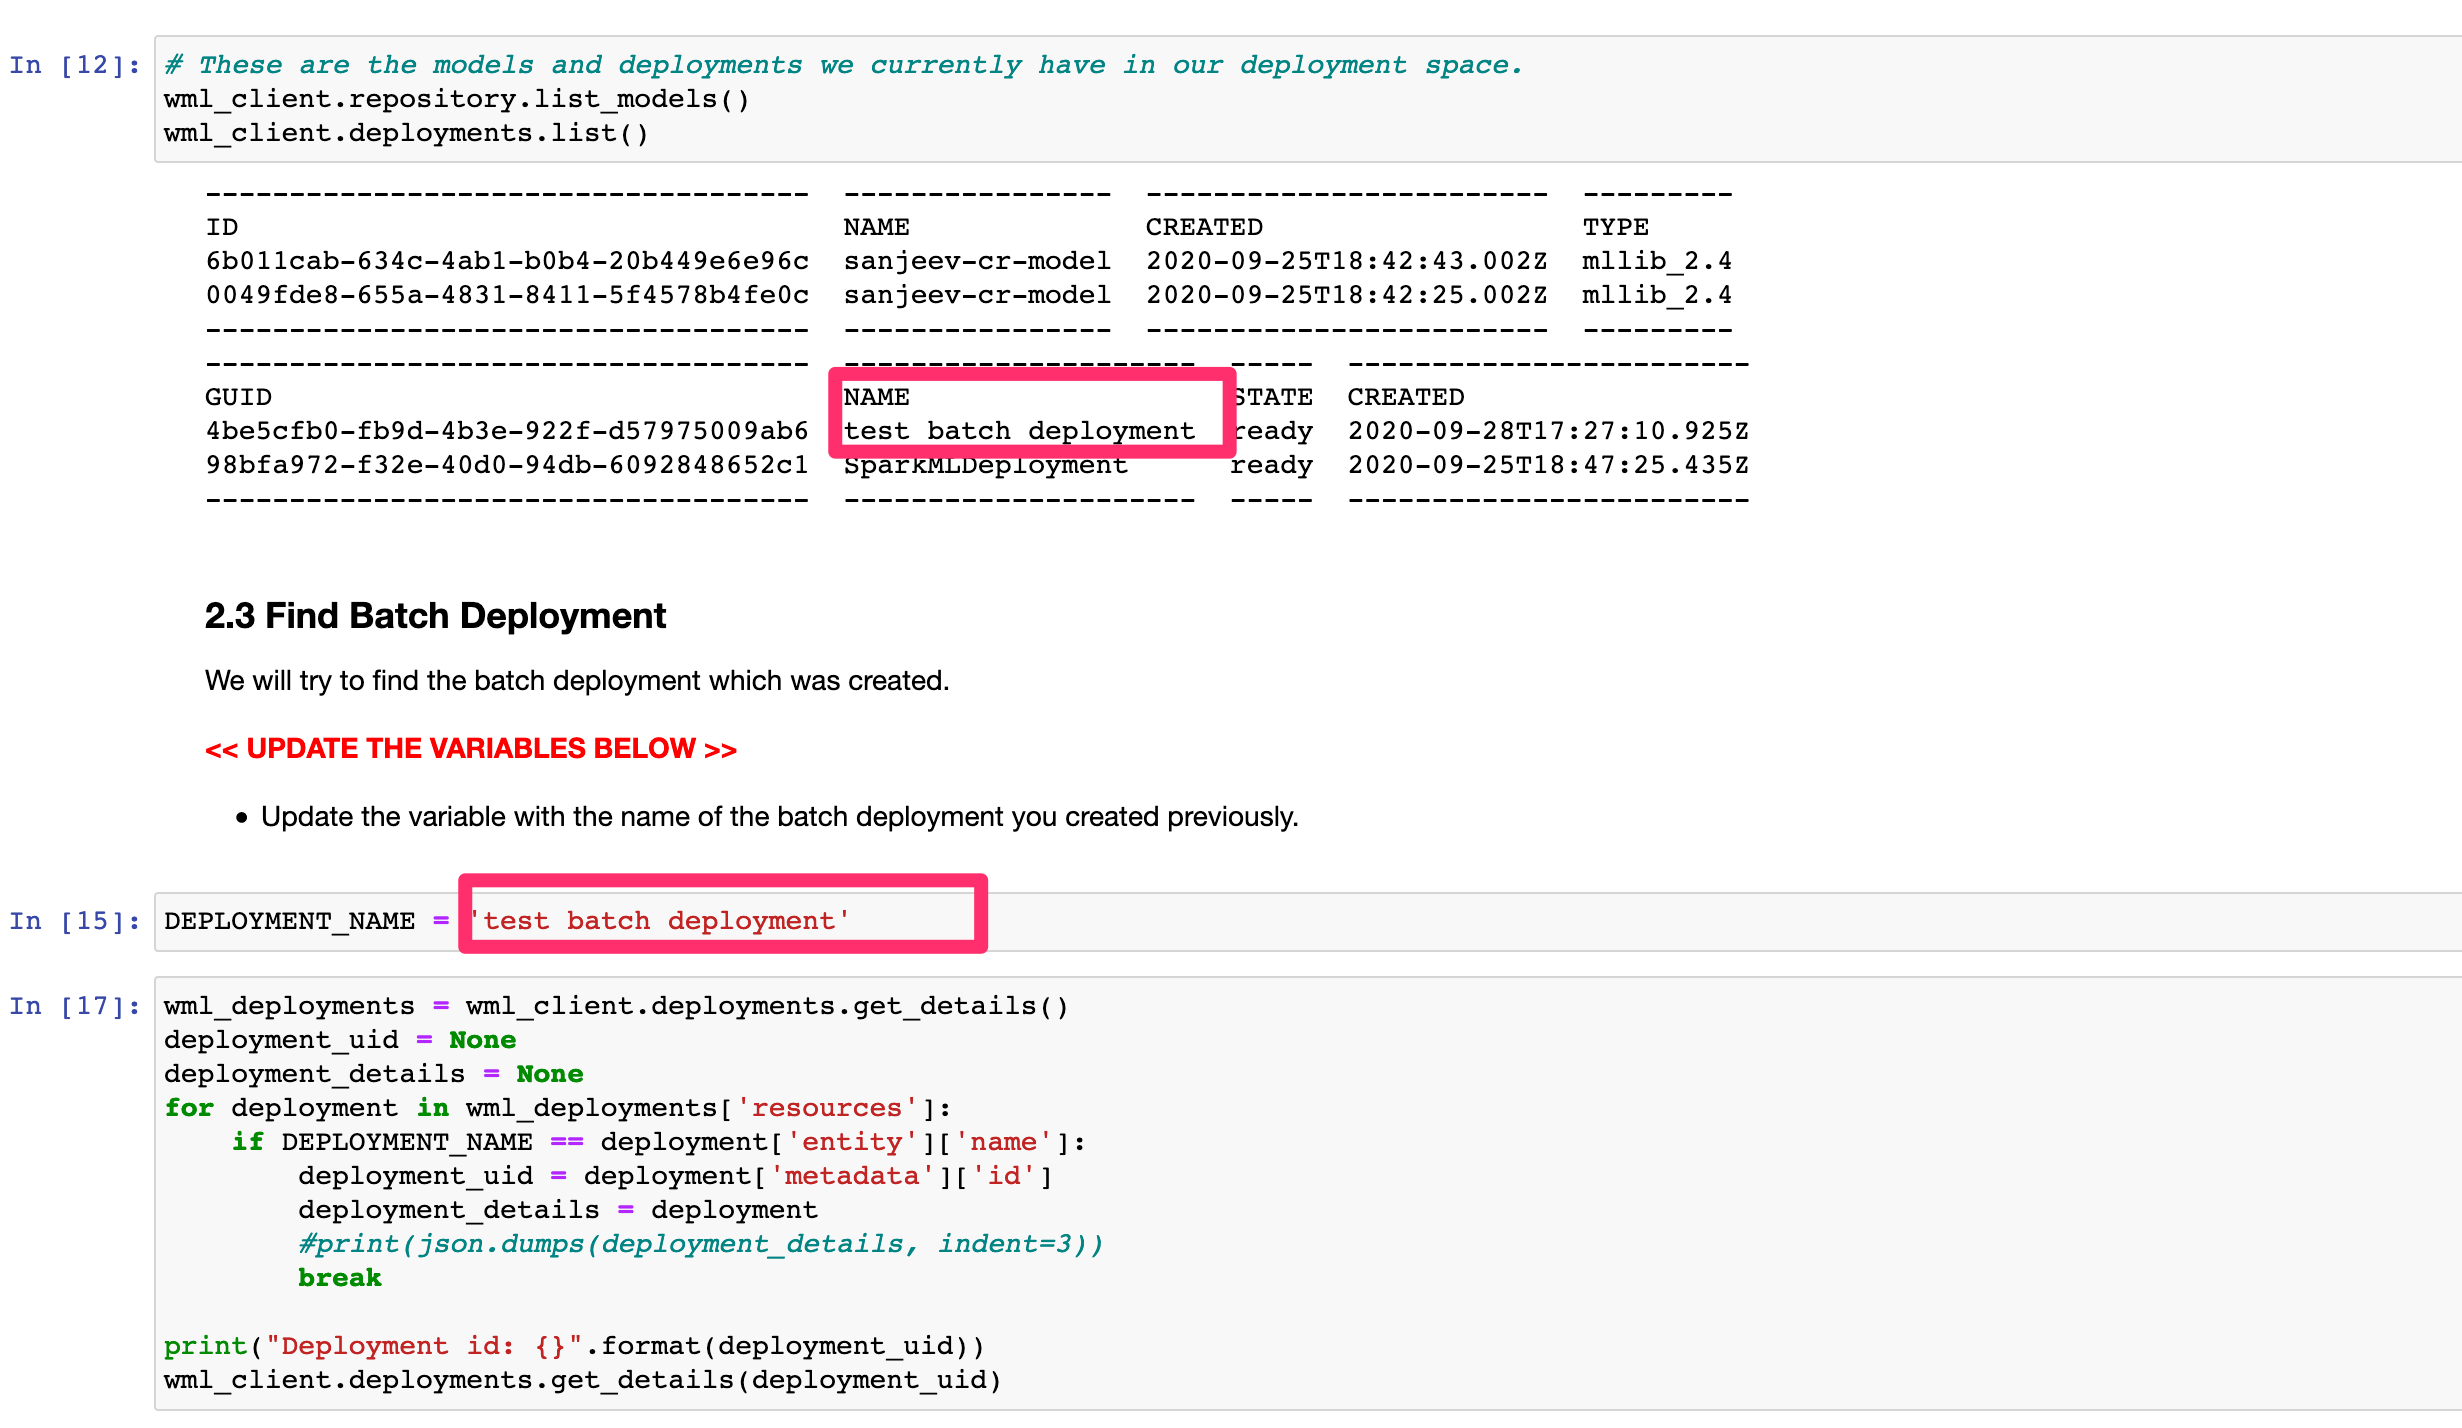
In section 2.3, be sure to update the
DEPLOYMENT_NAMEvariable with the name of the batch deployment you created previously (copy and past the name which is within the output of the previous code cell).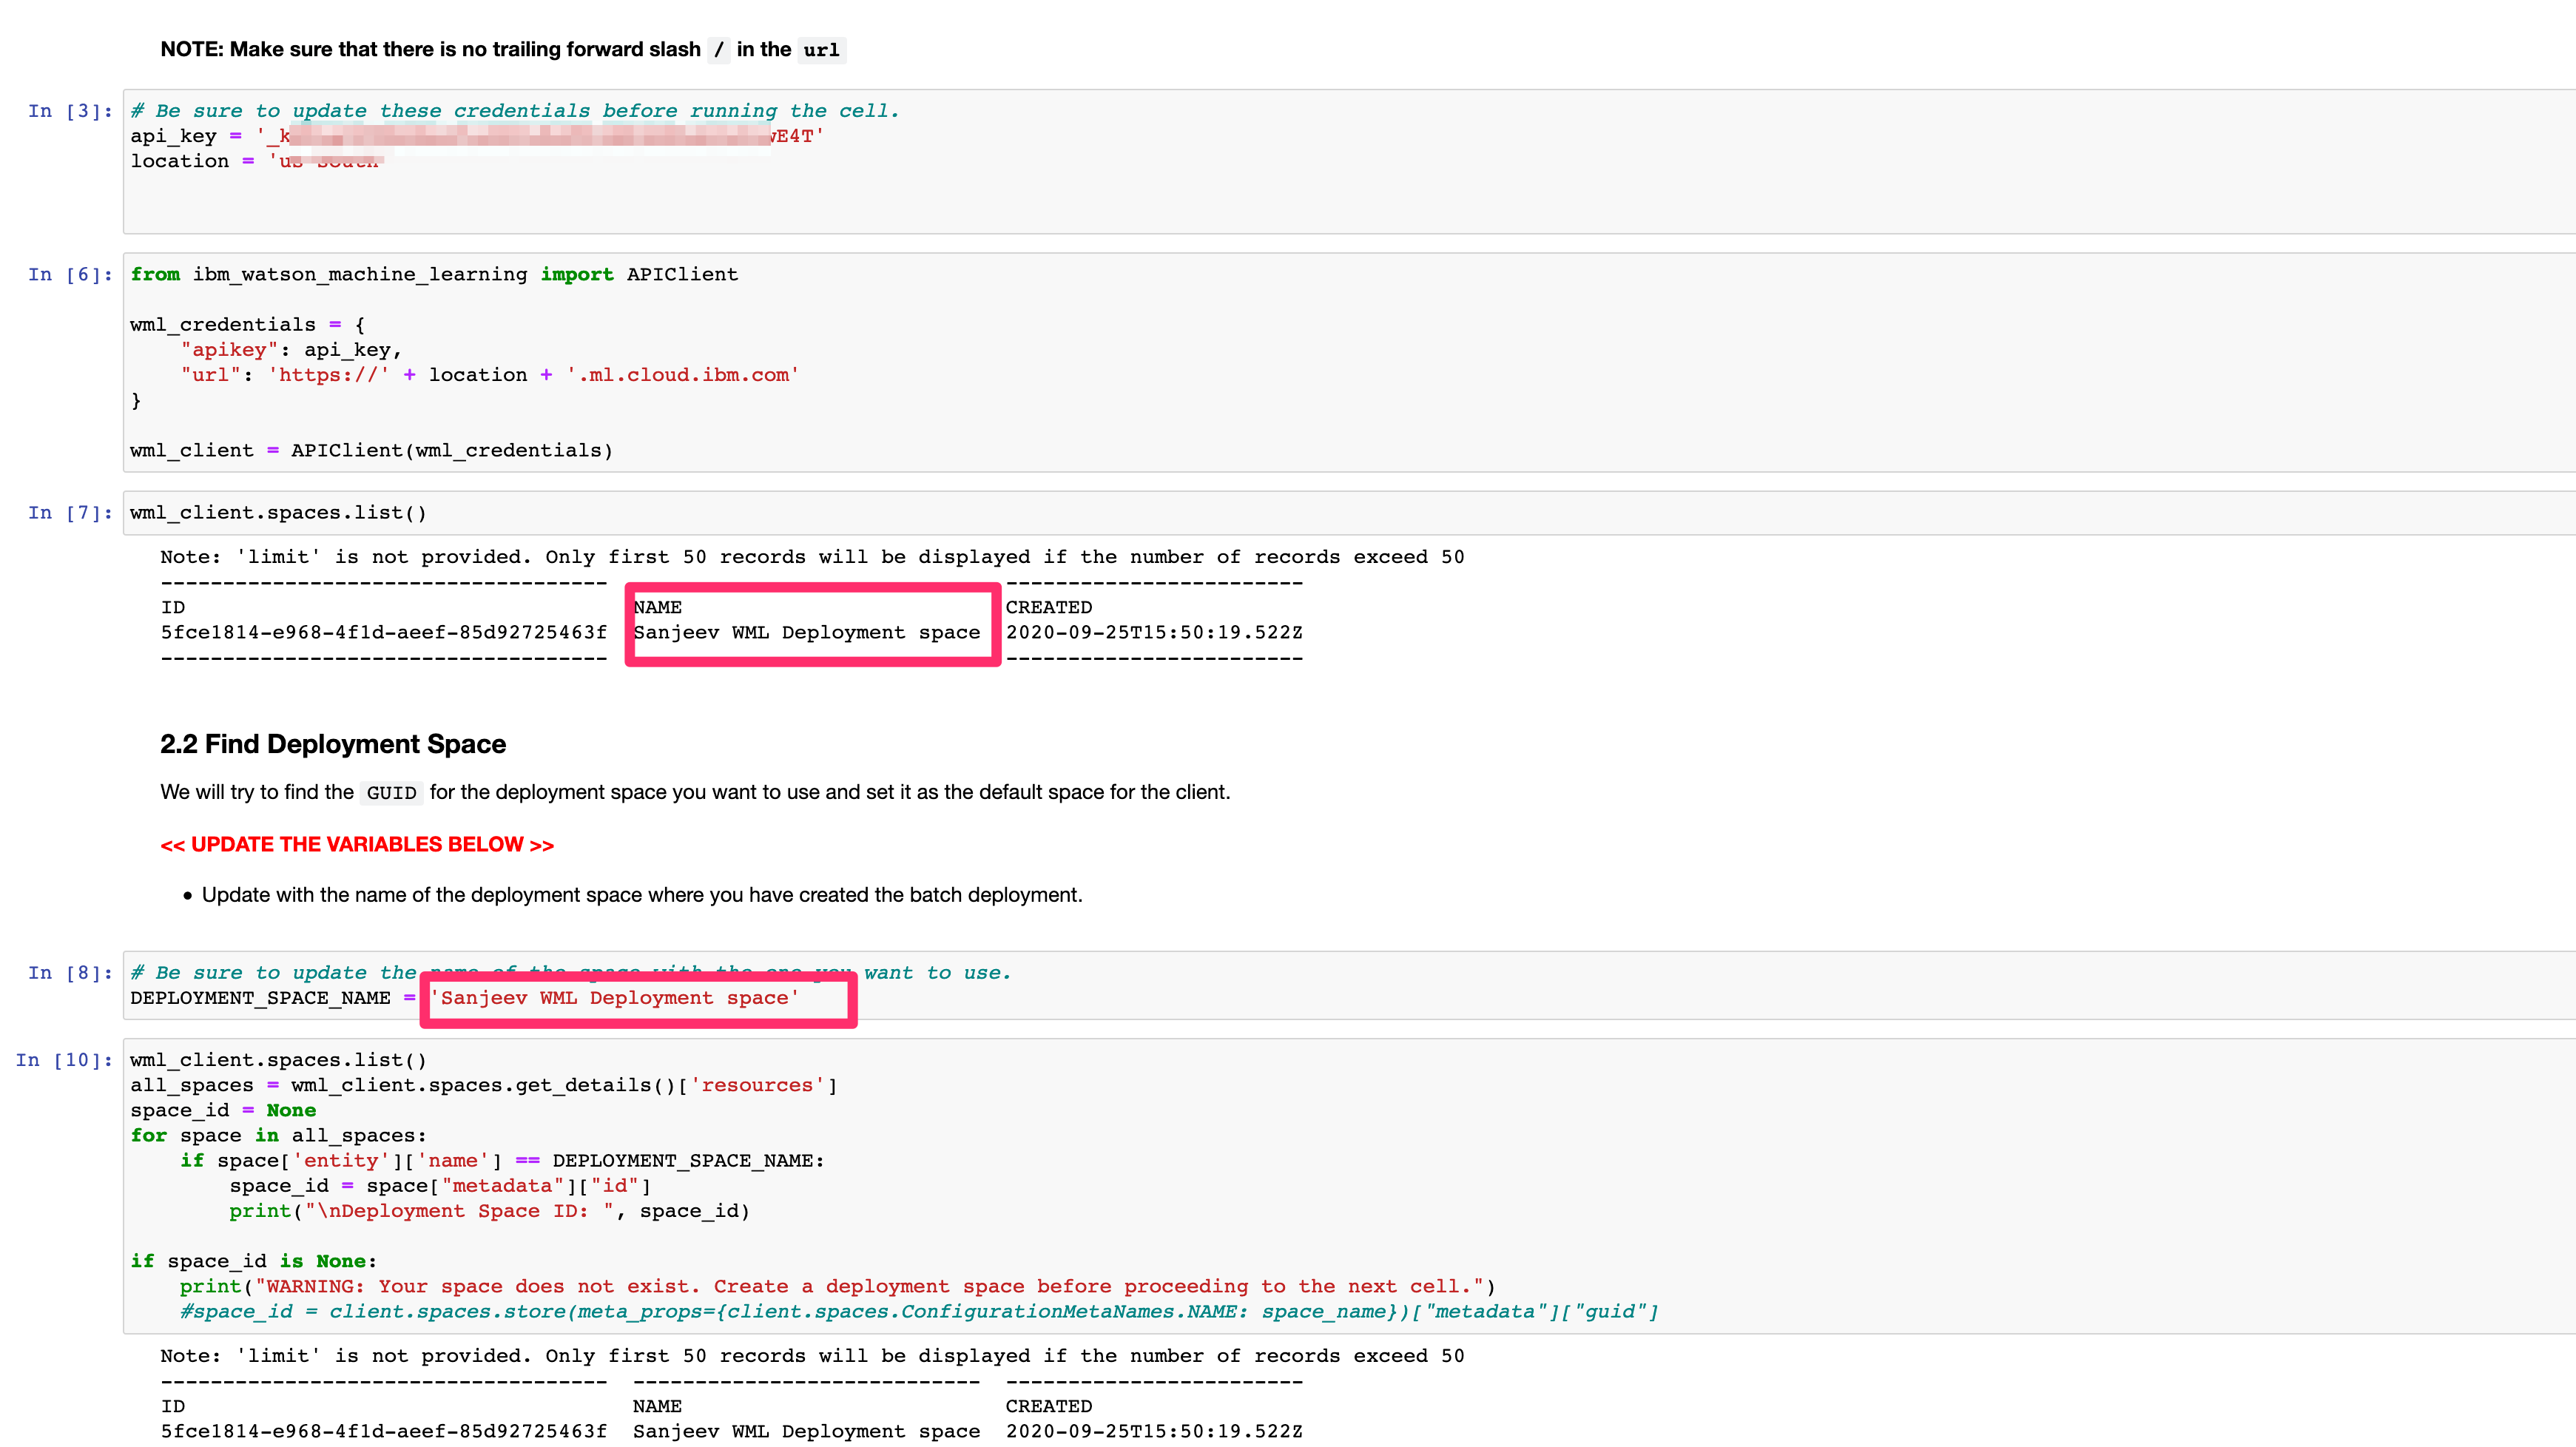
-
-
Continue to run the rest of the cells in section 2 which will load the batch input data set and create the job. The last code cell in section 2 will show that the job is in a queued state.
-
Section
3.0 Monitor Batch Job Statuswill start polling the job status until it completes or fails. The code cell will output the status every 5 seconds as the job goes from queued to running to completed or failed.
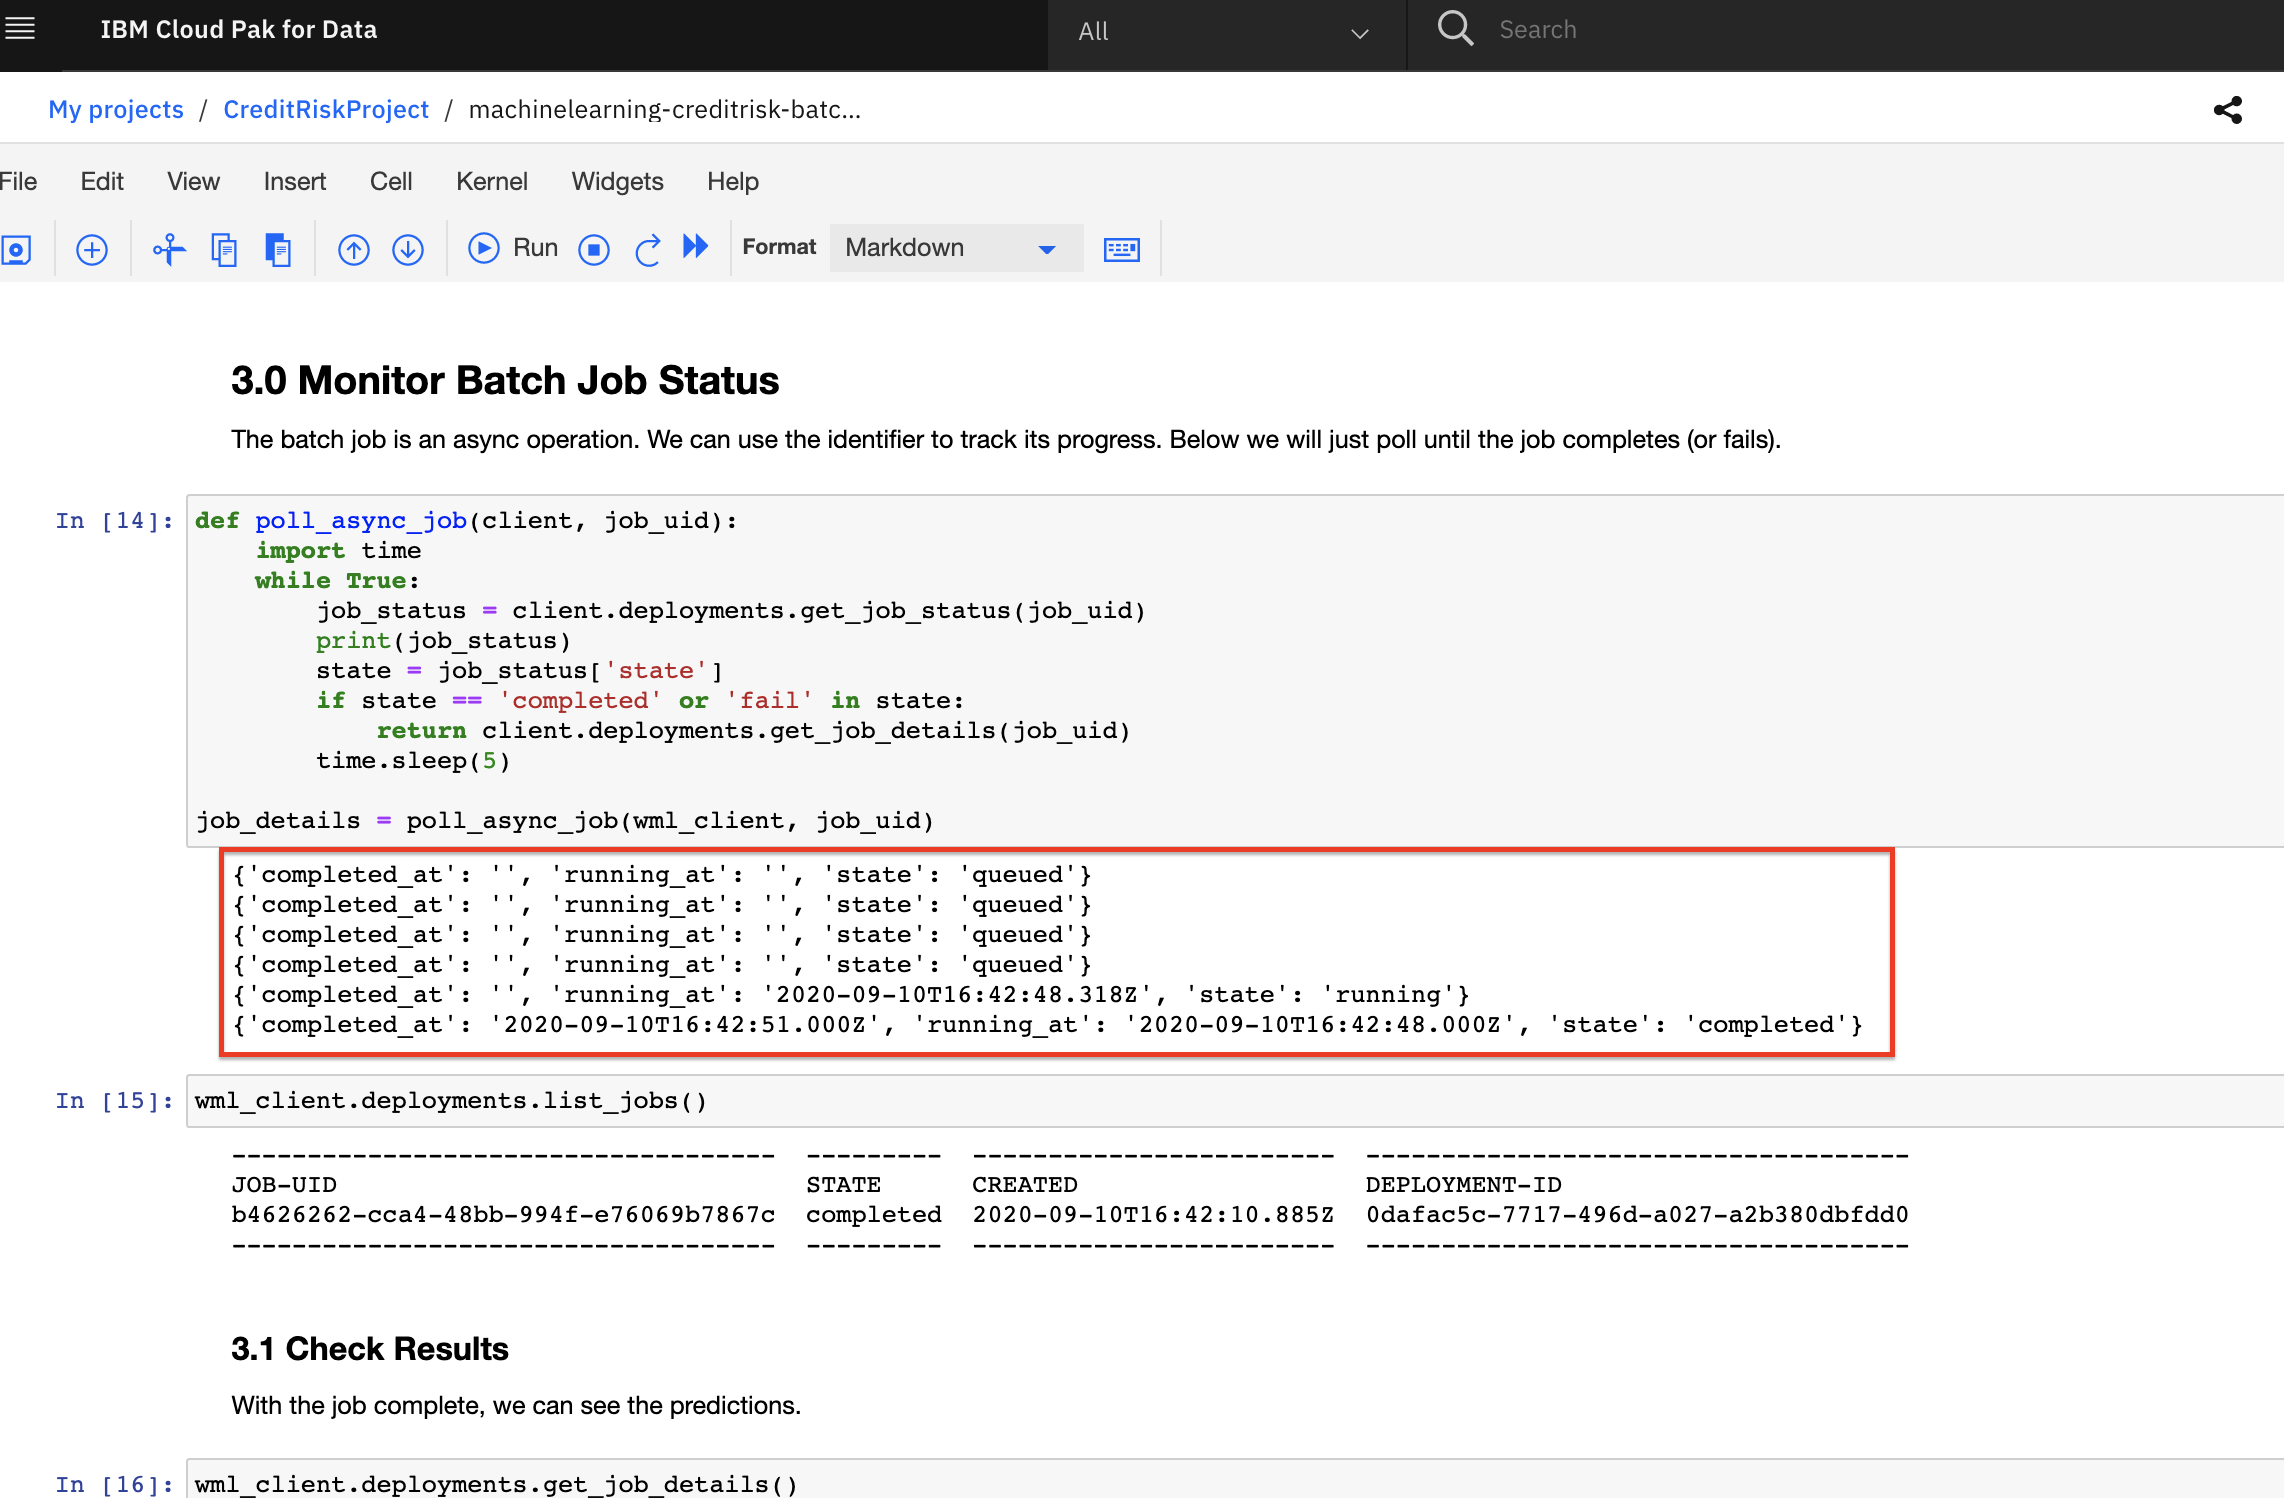
- Once the job completes, continue to run the cells until the end of the notebook.
Stop the Environment
In order to conserve resources, make sure that you stop the environment used by your notebook(s) when you are done.
-
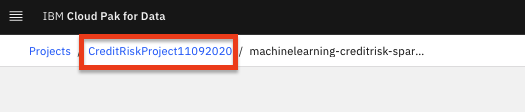
Navigate back to your project information page by clicking on your project name from the navigation drill down on the top left of the page.
-
Click on the 'Environments' tab near the top of the page. Then in the 'Active environment runtimes' section, you will see the environment used by your notebook (i.e the
Toolvalue isNotebook). Click on the three vertical dots at the right of that row and select theStopoption from the menu.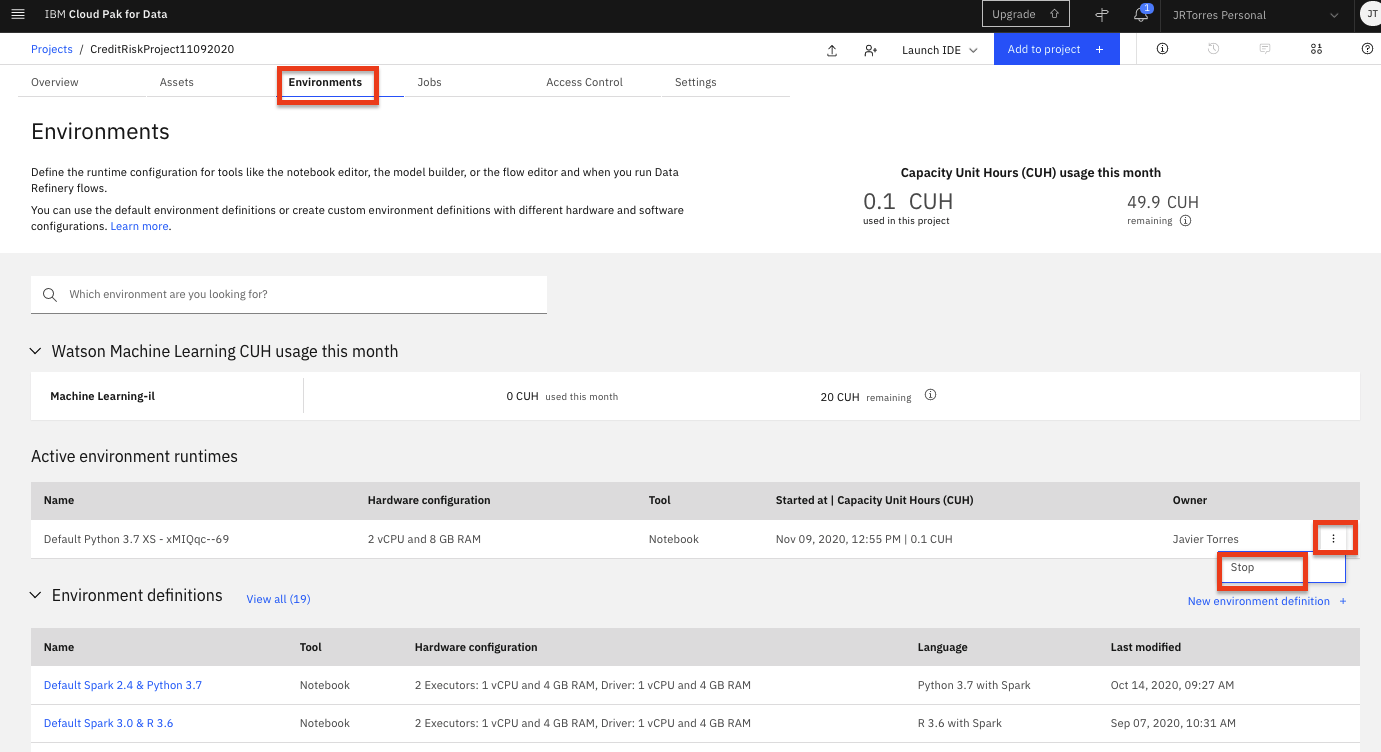
-
Click the
Stopbutton on the subsequent pop up window.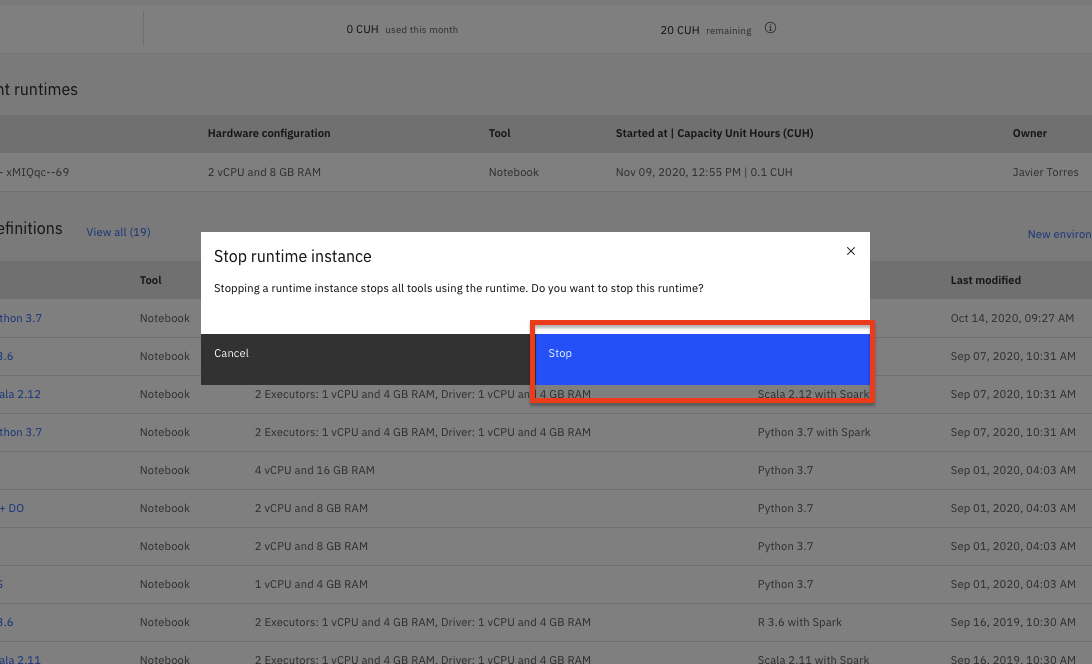
-
Important: If you have completed this section and do not plan on completing the other optional deployment approaches, please go ahead and cleanup your deployment. Follow the Cleanup Deployment instructions.
Conclusion
Congratulations. You've completed this lab and seen how to create and test batch deployments for your machine learning models.