Scenario
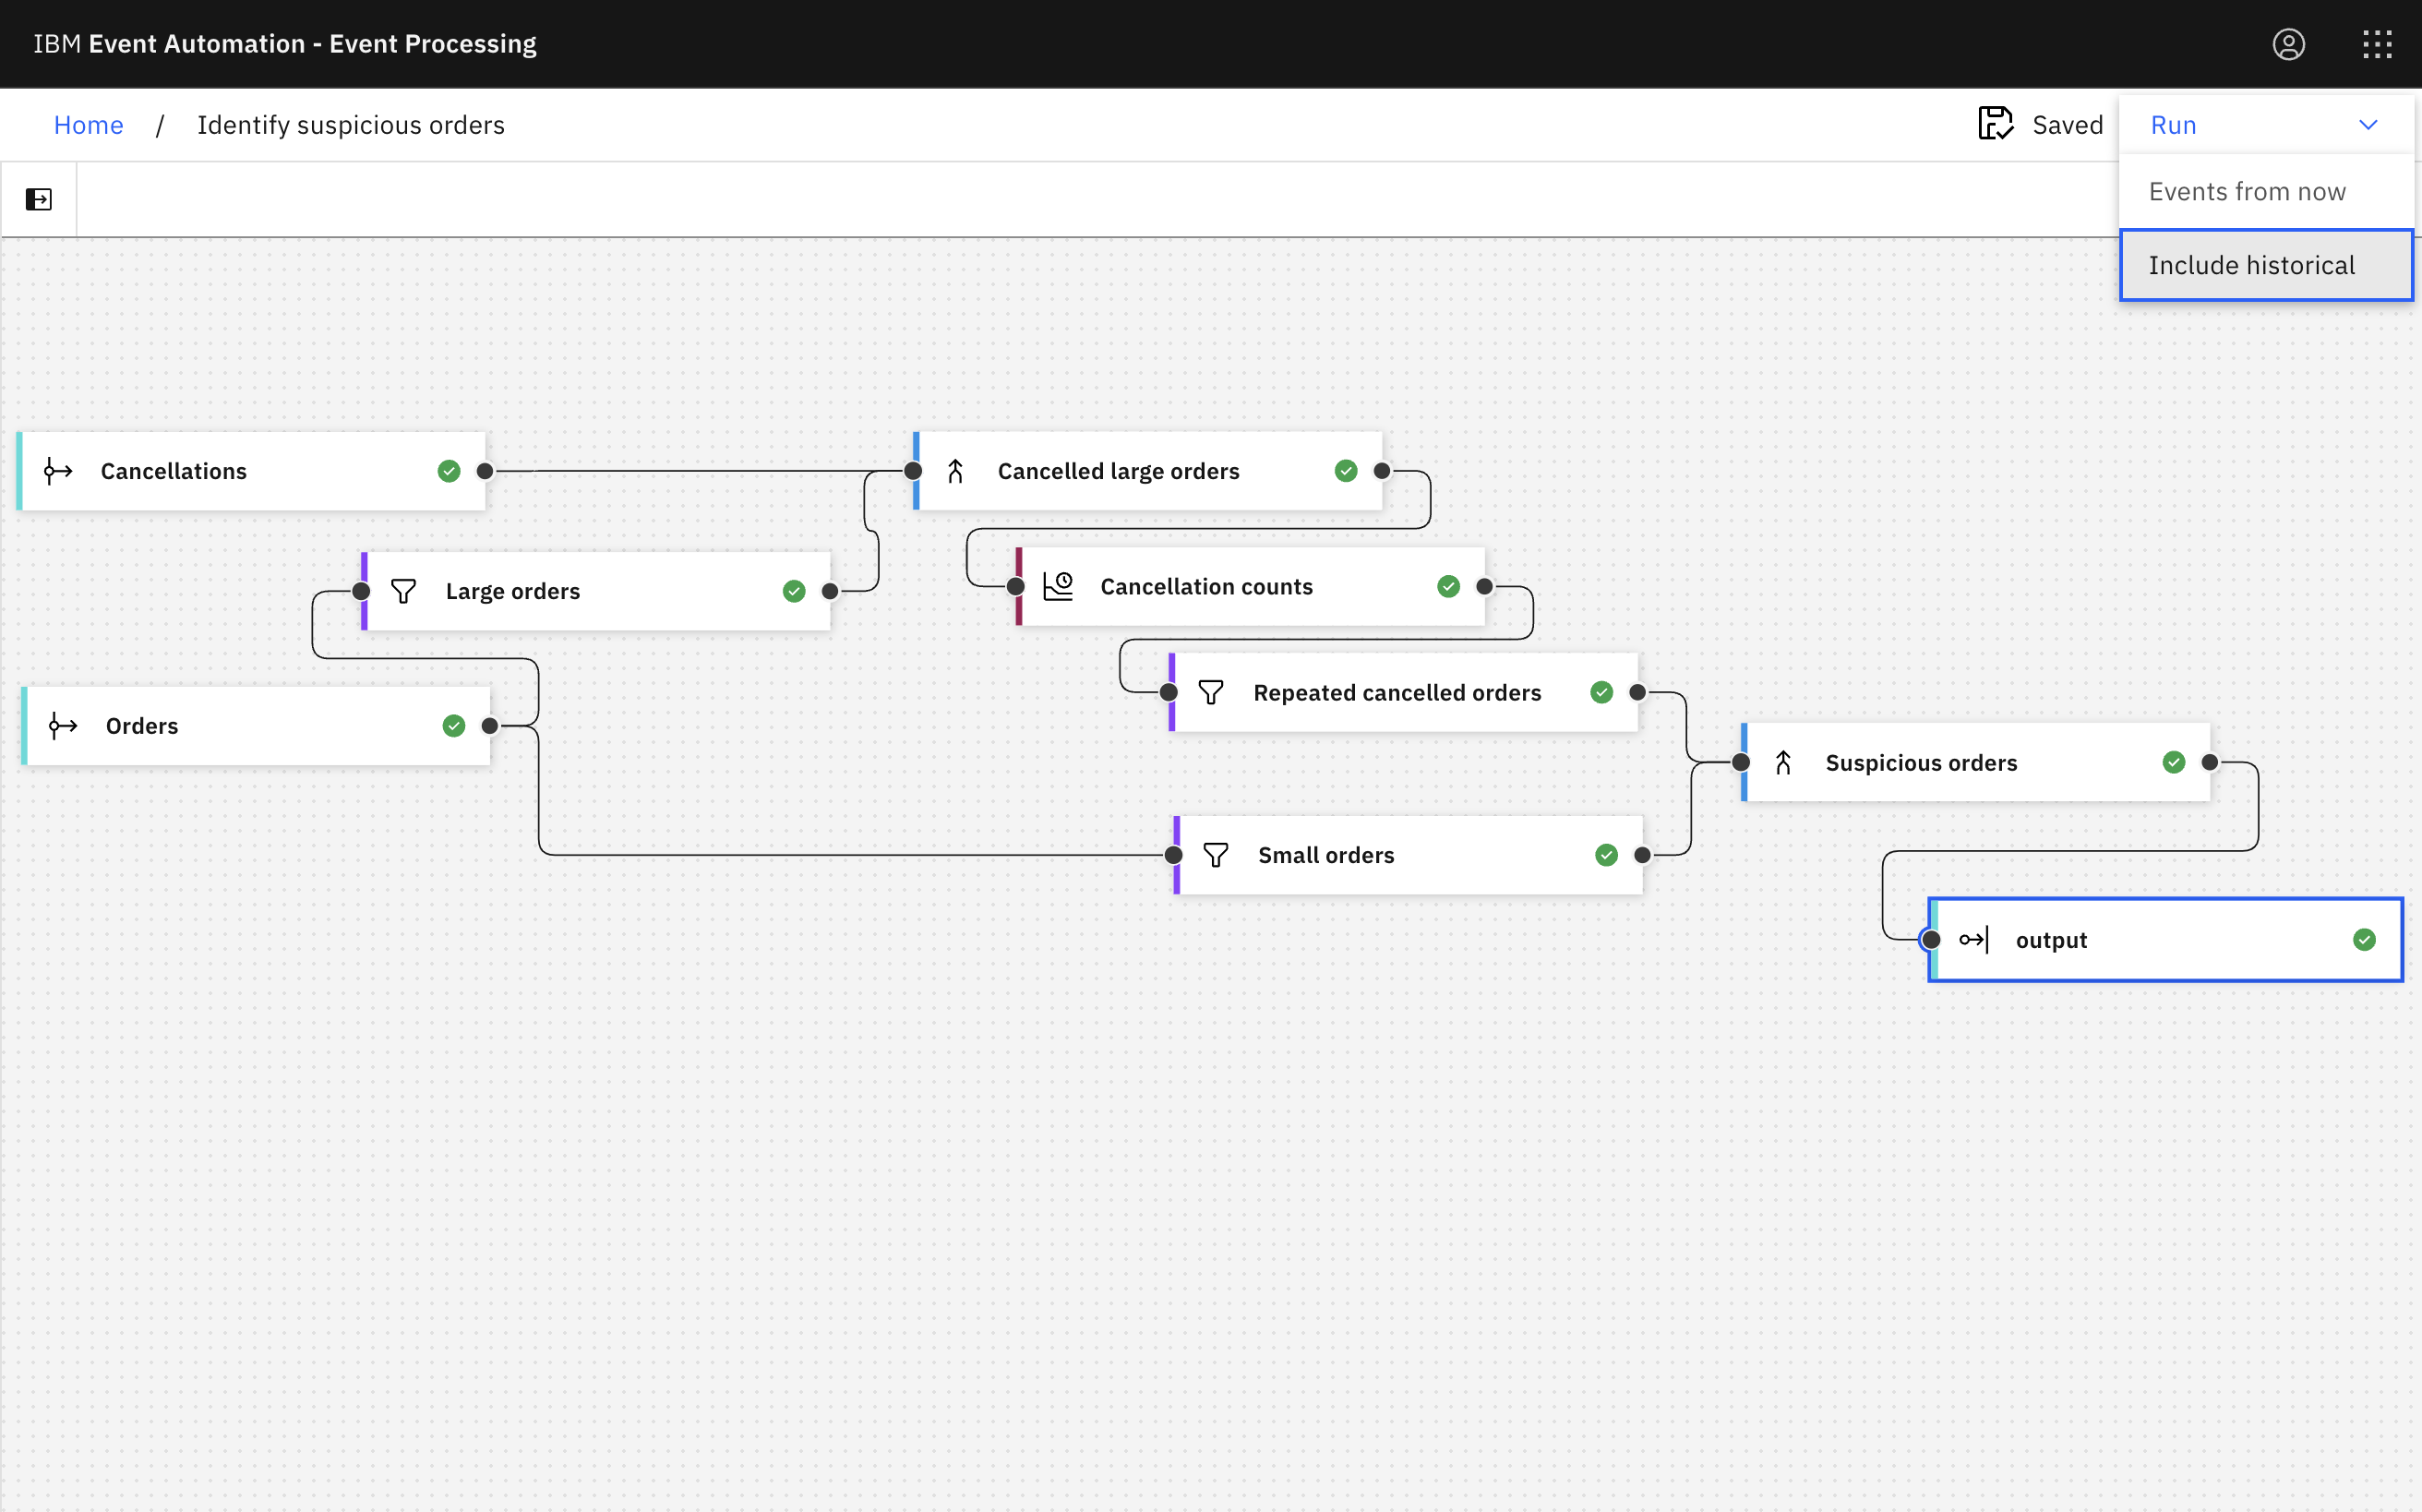
In this scenario, we look for suspicious orders.
This tutorial is an extension to the Identify suspicious orders tutorial. In that tutorial, we looked for a single incidence of a large order being made (to influence a dynamic pricing algorithm) followed by a small order of the same item, with the large order later cancelled.
That approach identified suspicious orders, however it also identified several false positives. Looking at these false positives in more detail, what many of them have in common is that the dynamic price was manipulated by making multiple large orders, not just one.
To refine that approach, this tutorial shows how to combine the join with an aggregate, to identify where repeated large orders were made and then cancelled. This allows you to identify repeated attempts to manipulate dynamic pricing.
Before you begin
The instructions in this tutorial use the Tutorial environment, which includes a selection of topics each with a live stream of events, created to allow you to explore features in IBM Event Automation. Following the setup instructions to deploy the demo environment gives you a complete instance of IBM Event Automation that you can use to follow this tutorial for yourself.
Versions
This tutorial uses the following versions of Event Automation capabilities. Screenshots may differ from the current interface if you are using a newer version.
- Event Streams 12.1.0
- Event Endpoint Management 11.6.4
- Event Processing 1.4.6
Instructions
Step 1: Discover the topics to use
For this scenario, you need a source of order events and new customer signup events.
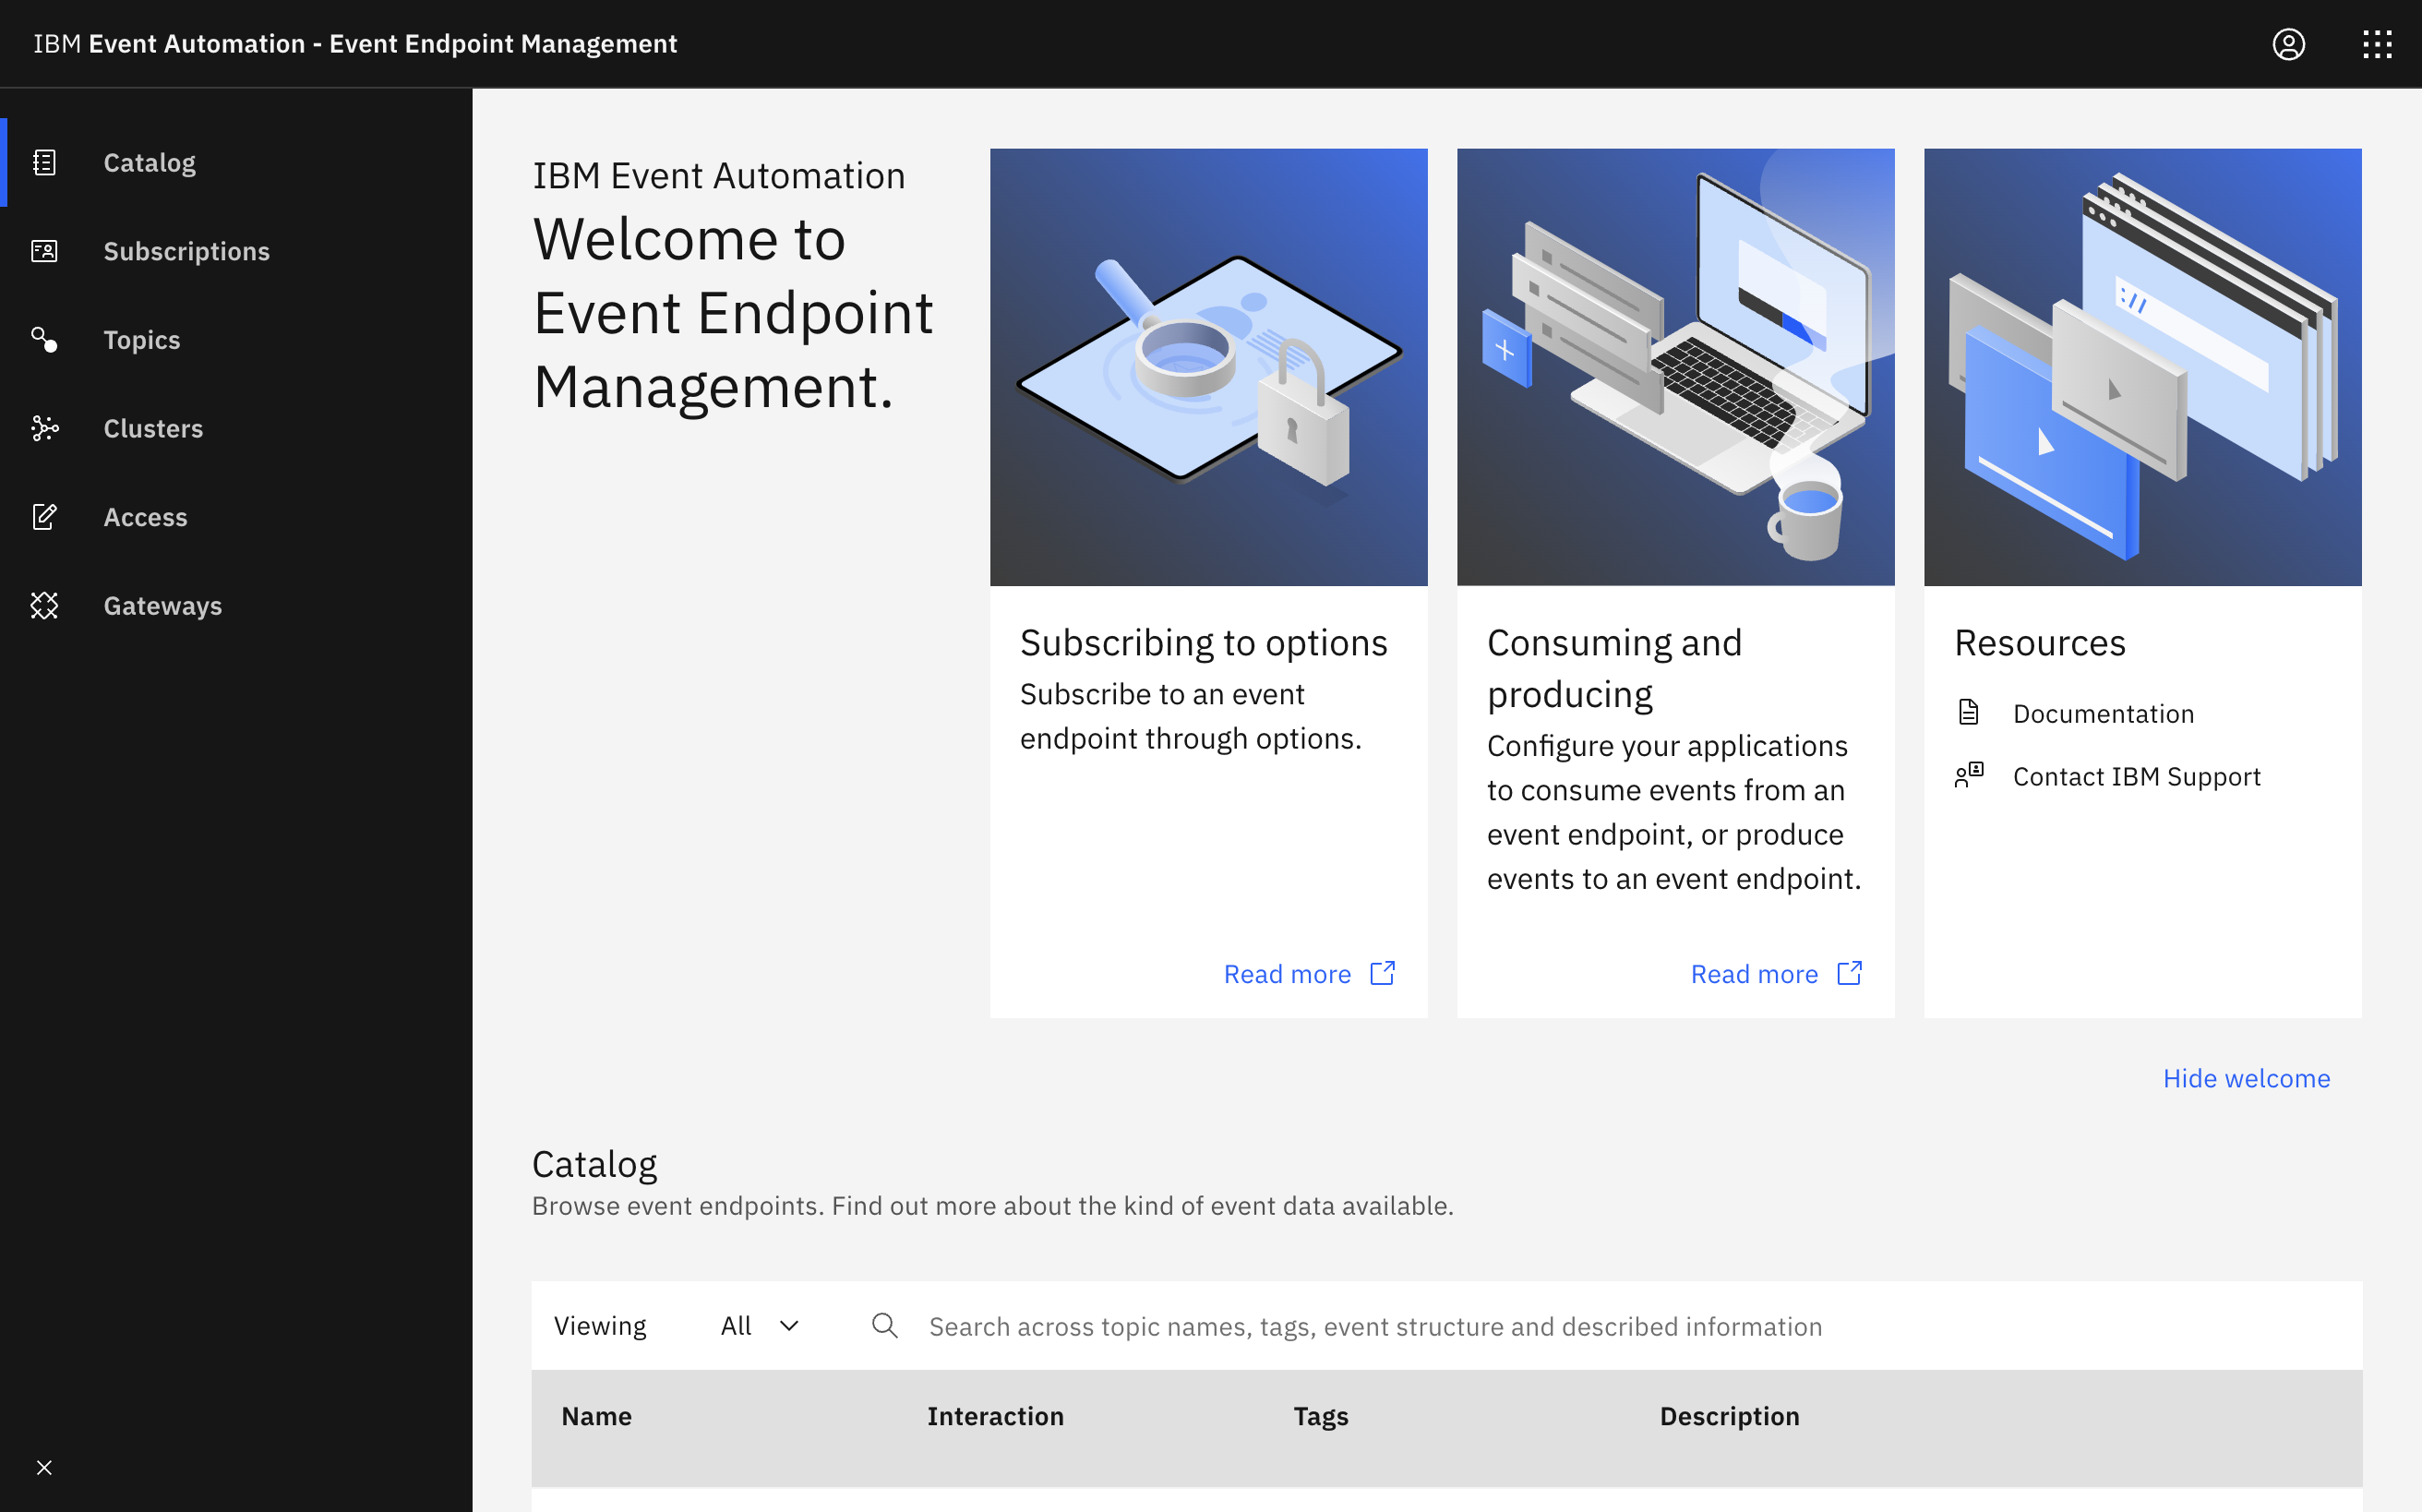
A good place to discover sources of event streams to process is in the catalog, so start there.
-
Go to the Event Endpoint Management catalog.
If you need a reminder of how to access the Event Endpoint Management catalog you can review Accessing the tutorial environment.
If there are no topics in the catalog, you may need to complete the tutorial setup step to populate the catalog.
-
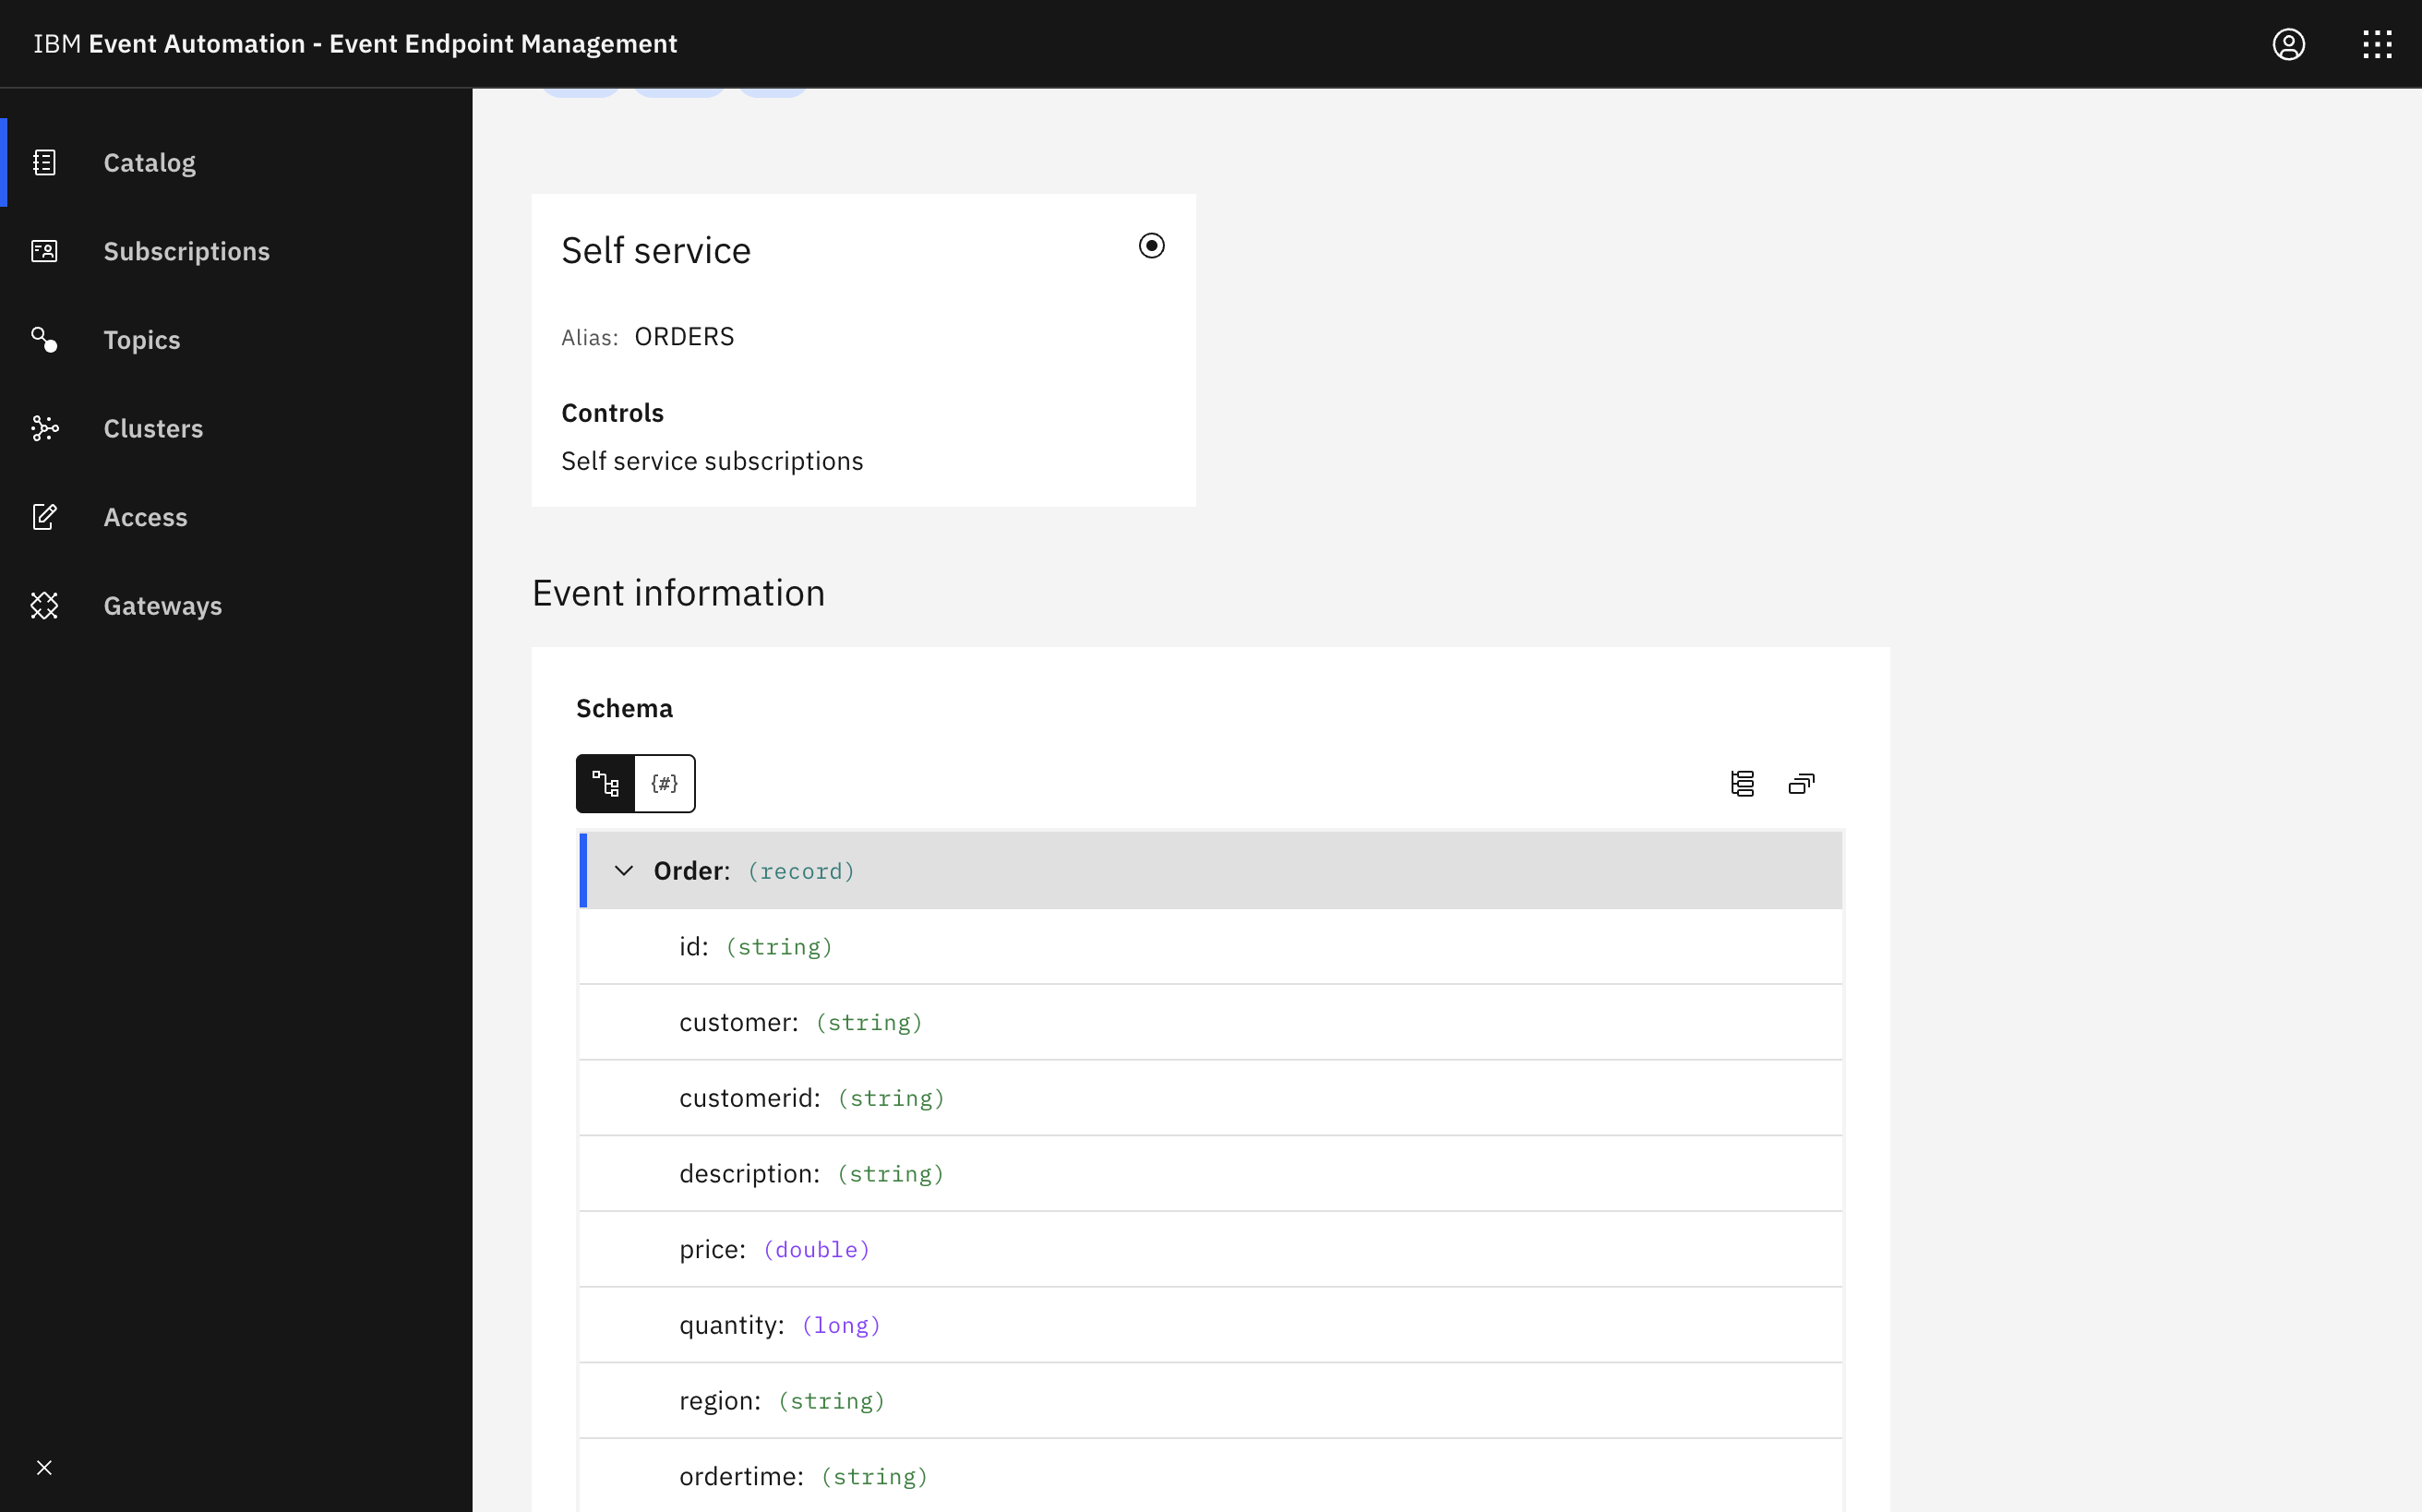
The
Orderstopic contains events about orders that are made. -
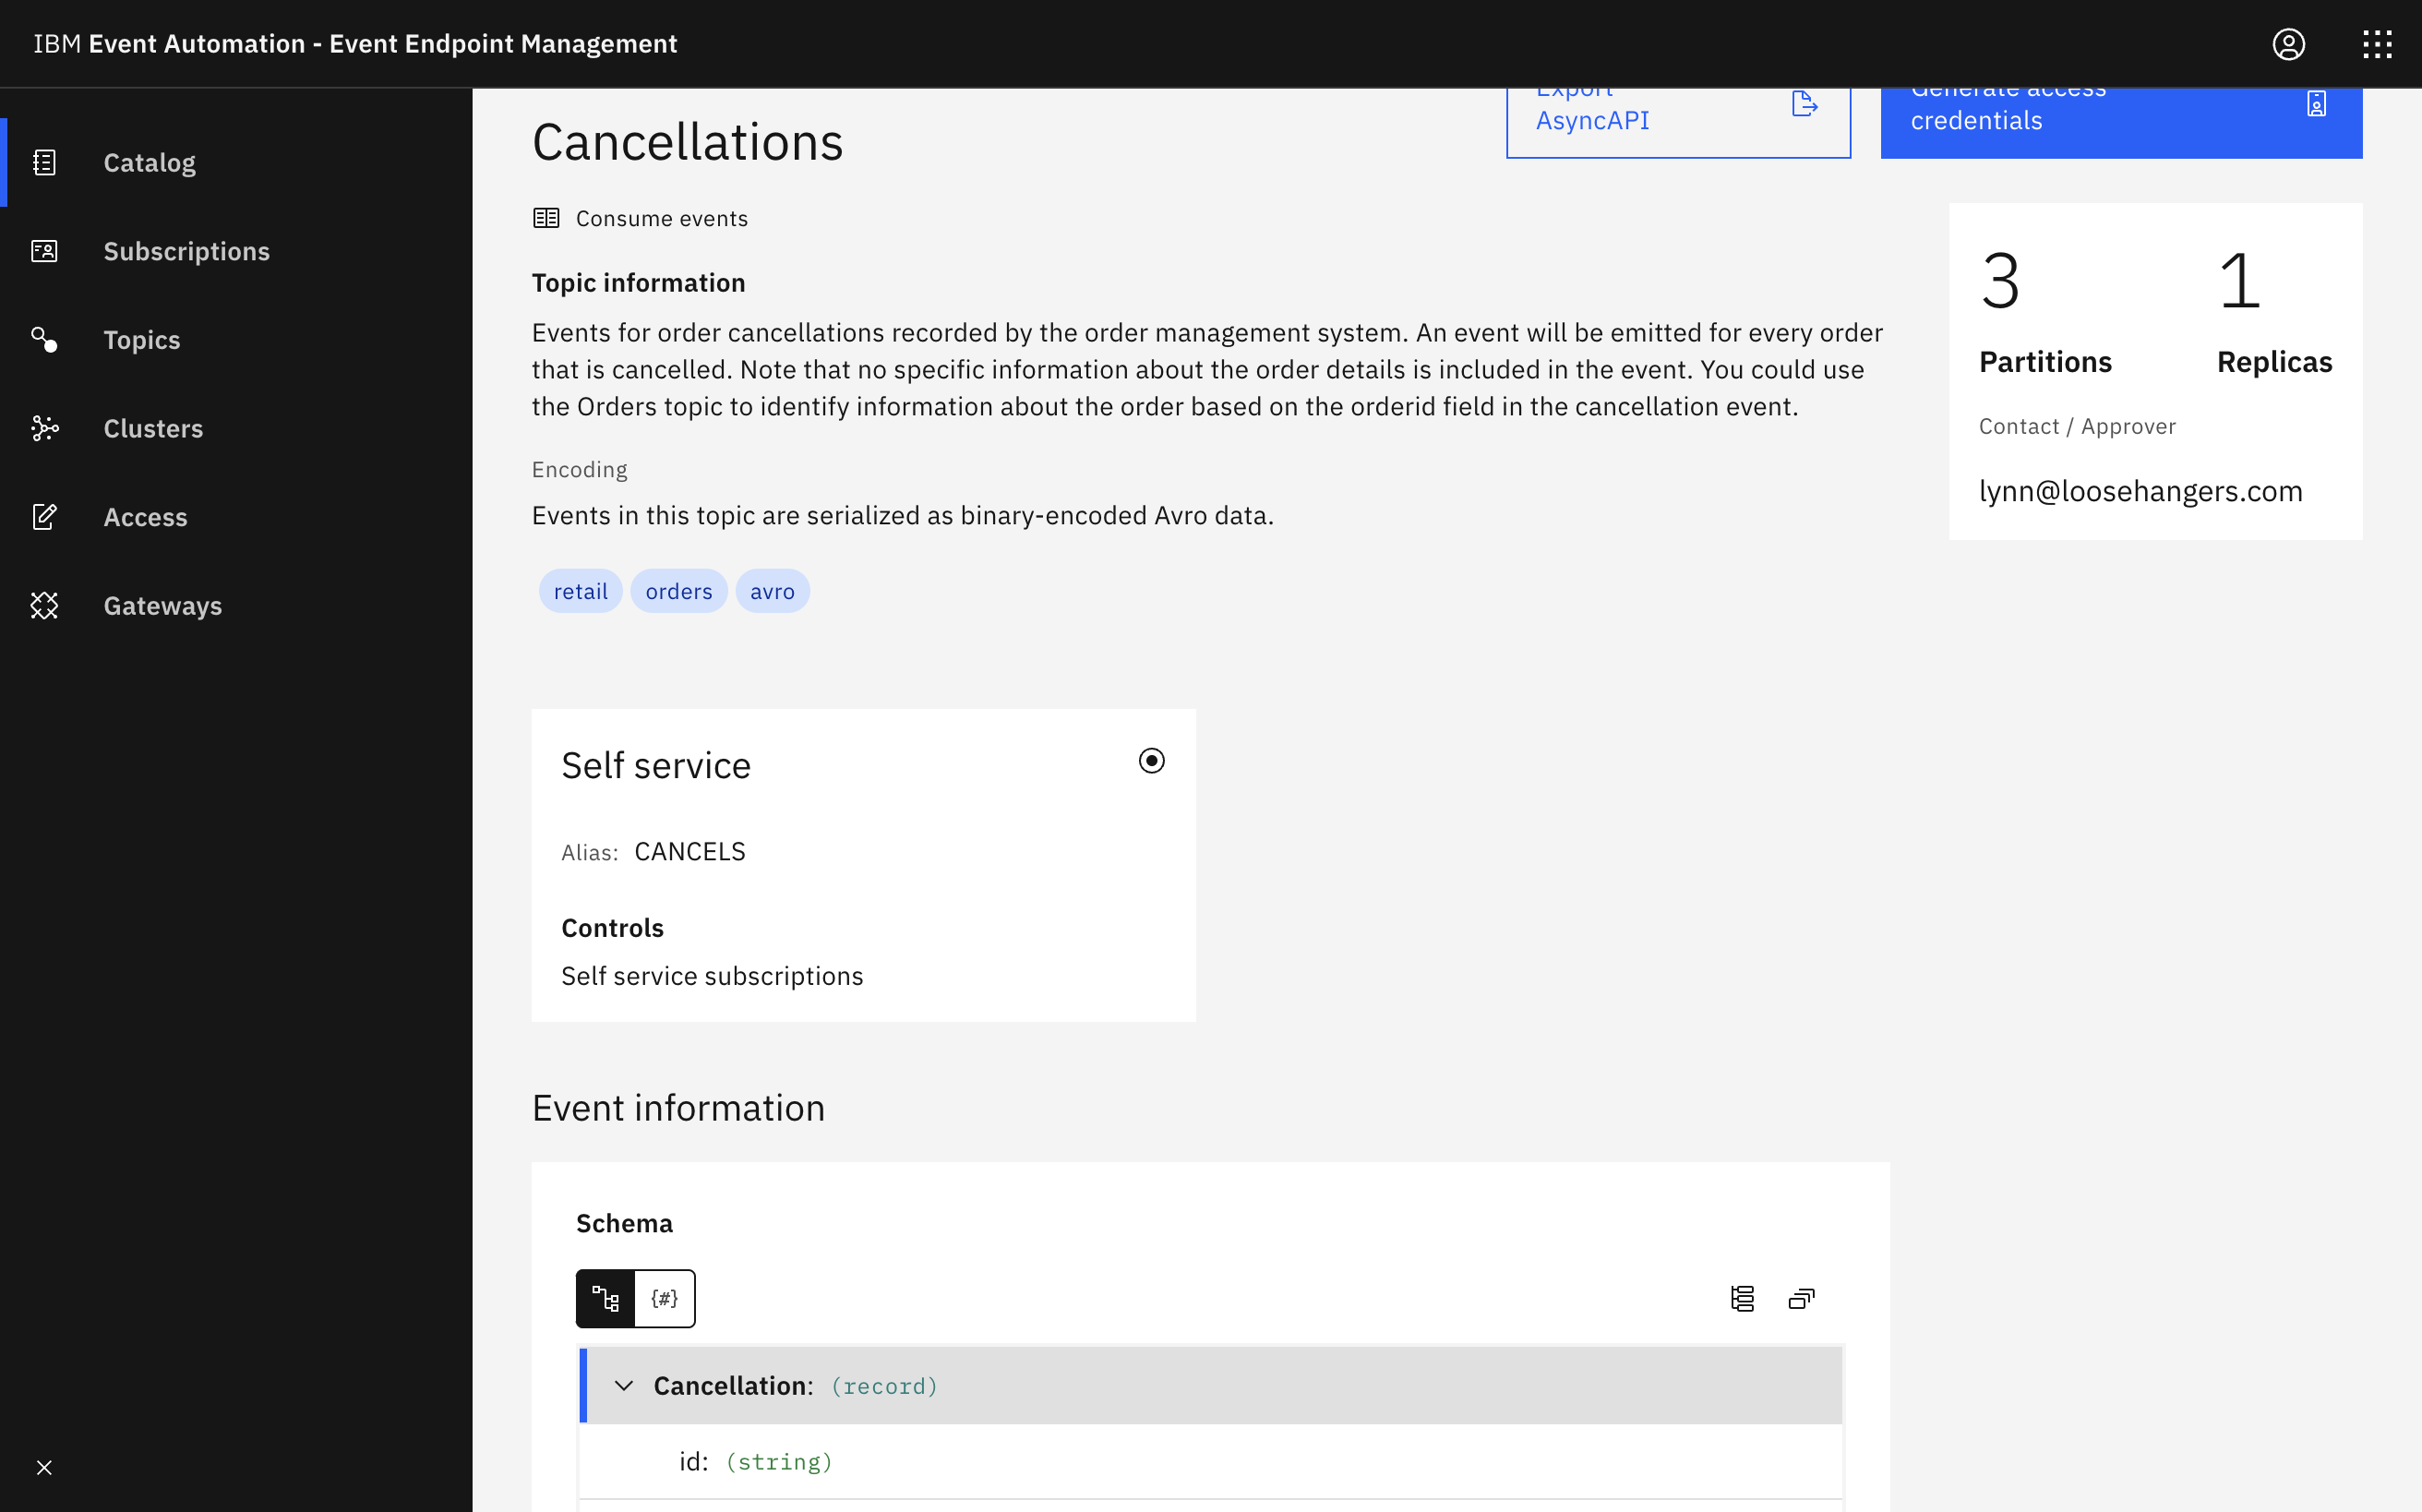
The
Cancellationstopic contains events about orders that are cancelled.
Step 2: Provide sources of events
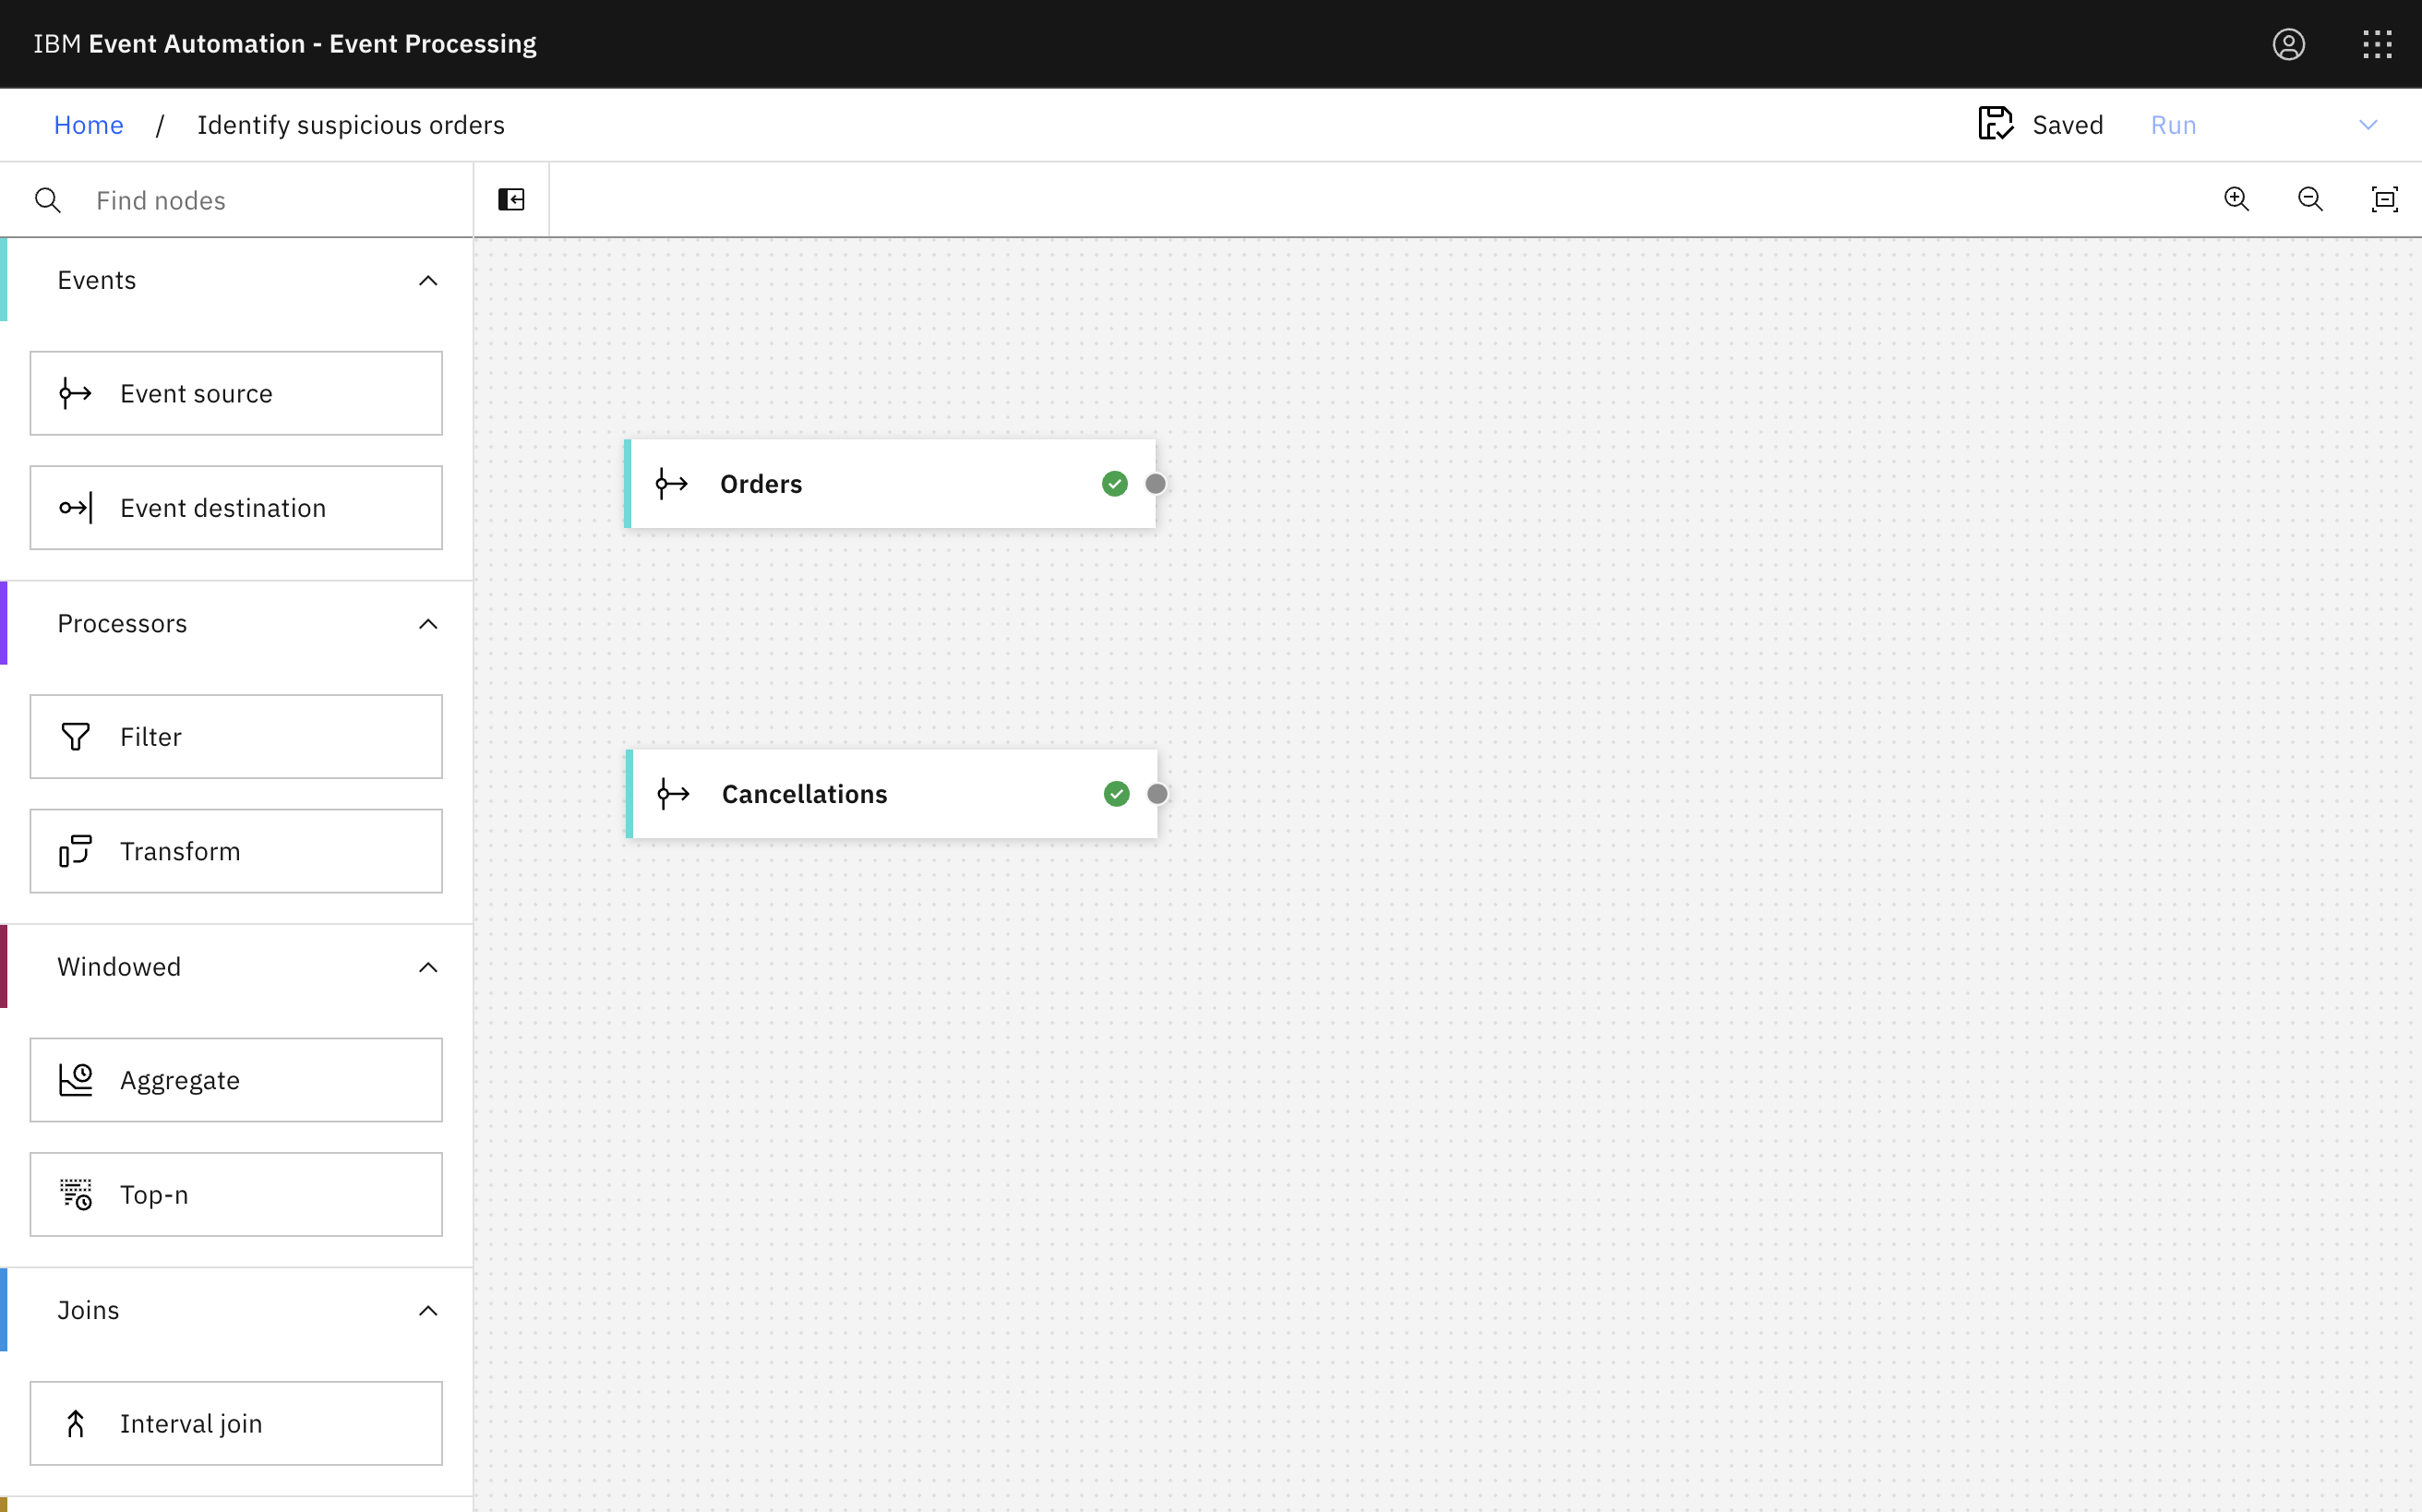
The next step is to create event sources in Event Processing for each of the topics to use in the flow.
Use the server address information and Generate access credentials button on each topic page in the catalog to define an event source node for each topic.
Tip: If you need a reminder about how to create an event source node, you can follow the Identify orders from a specific region tutorial.
Step 3: Identify large orders
In this scenario, you suspect that people may be attempting to manipulate prices by making multiple large orders (that are all later cancelled). The next step is to identify the large orders.
-
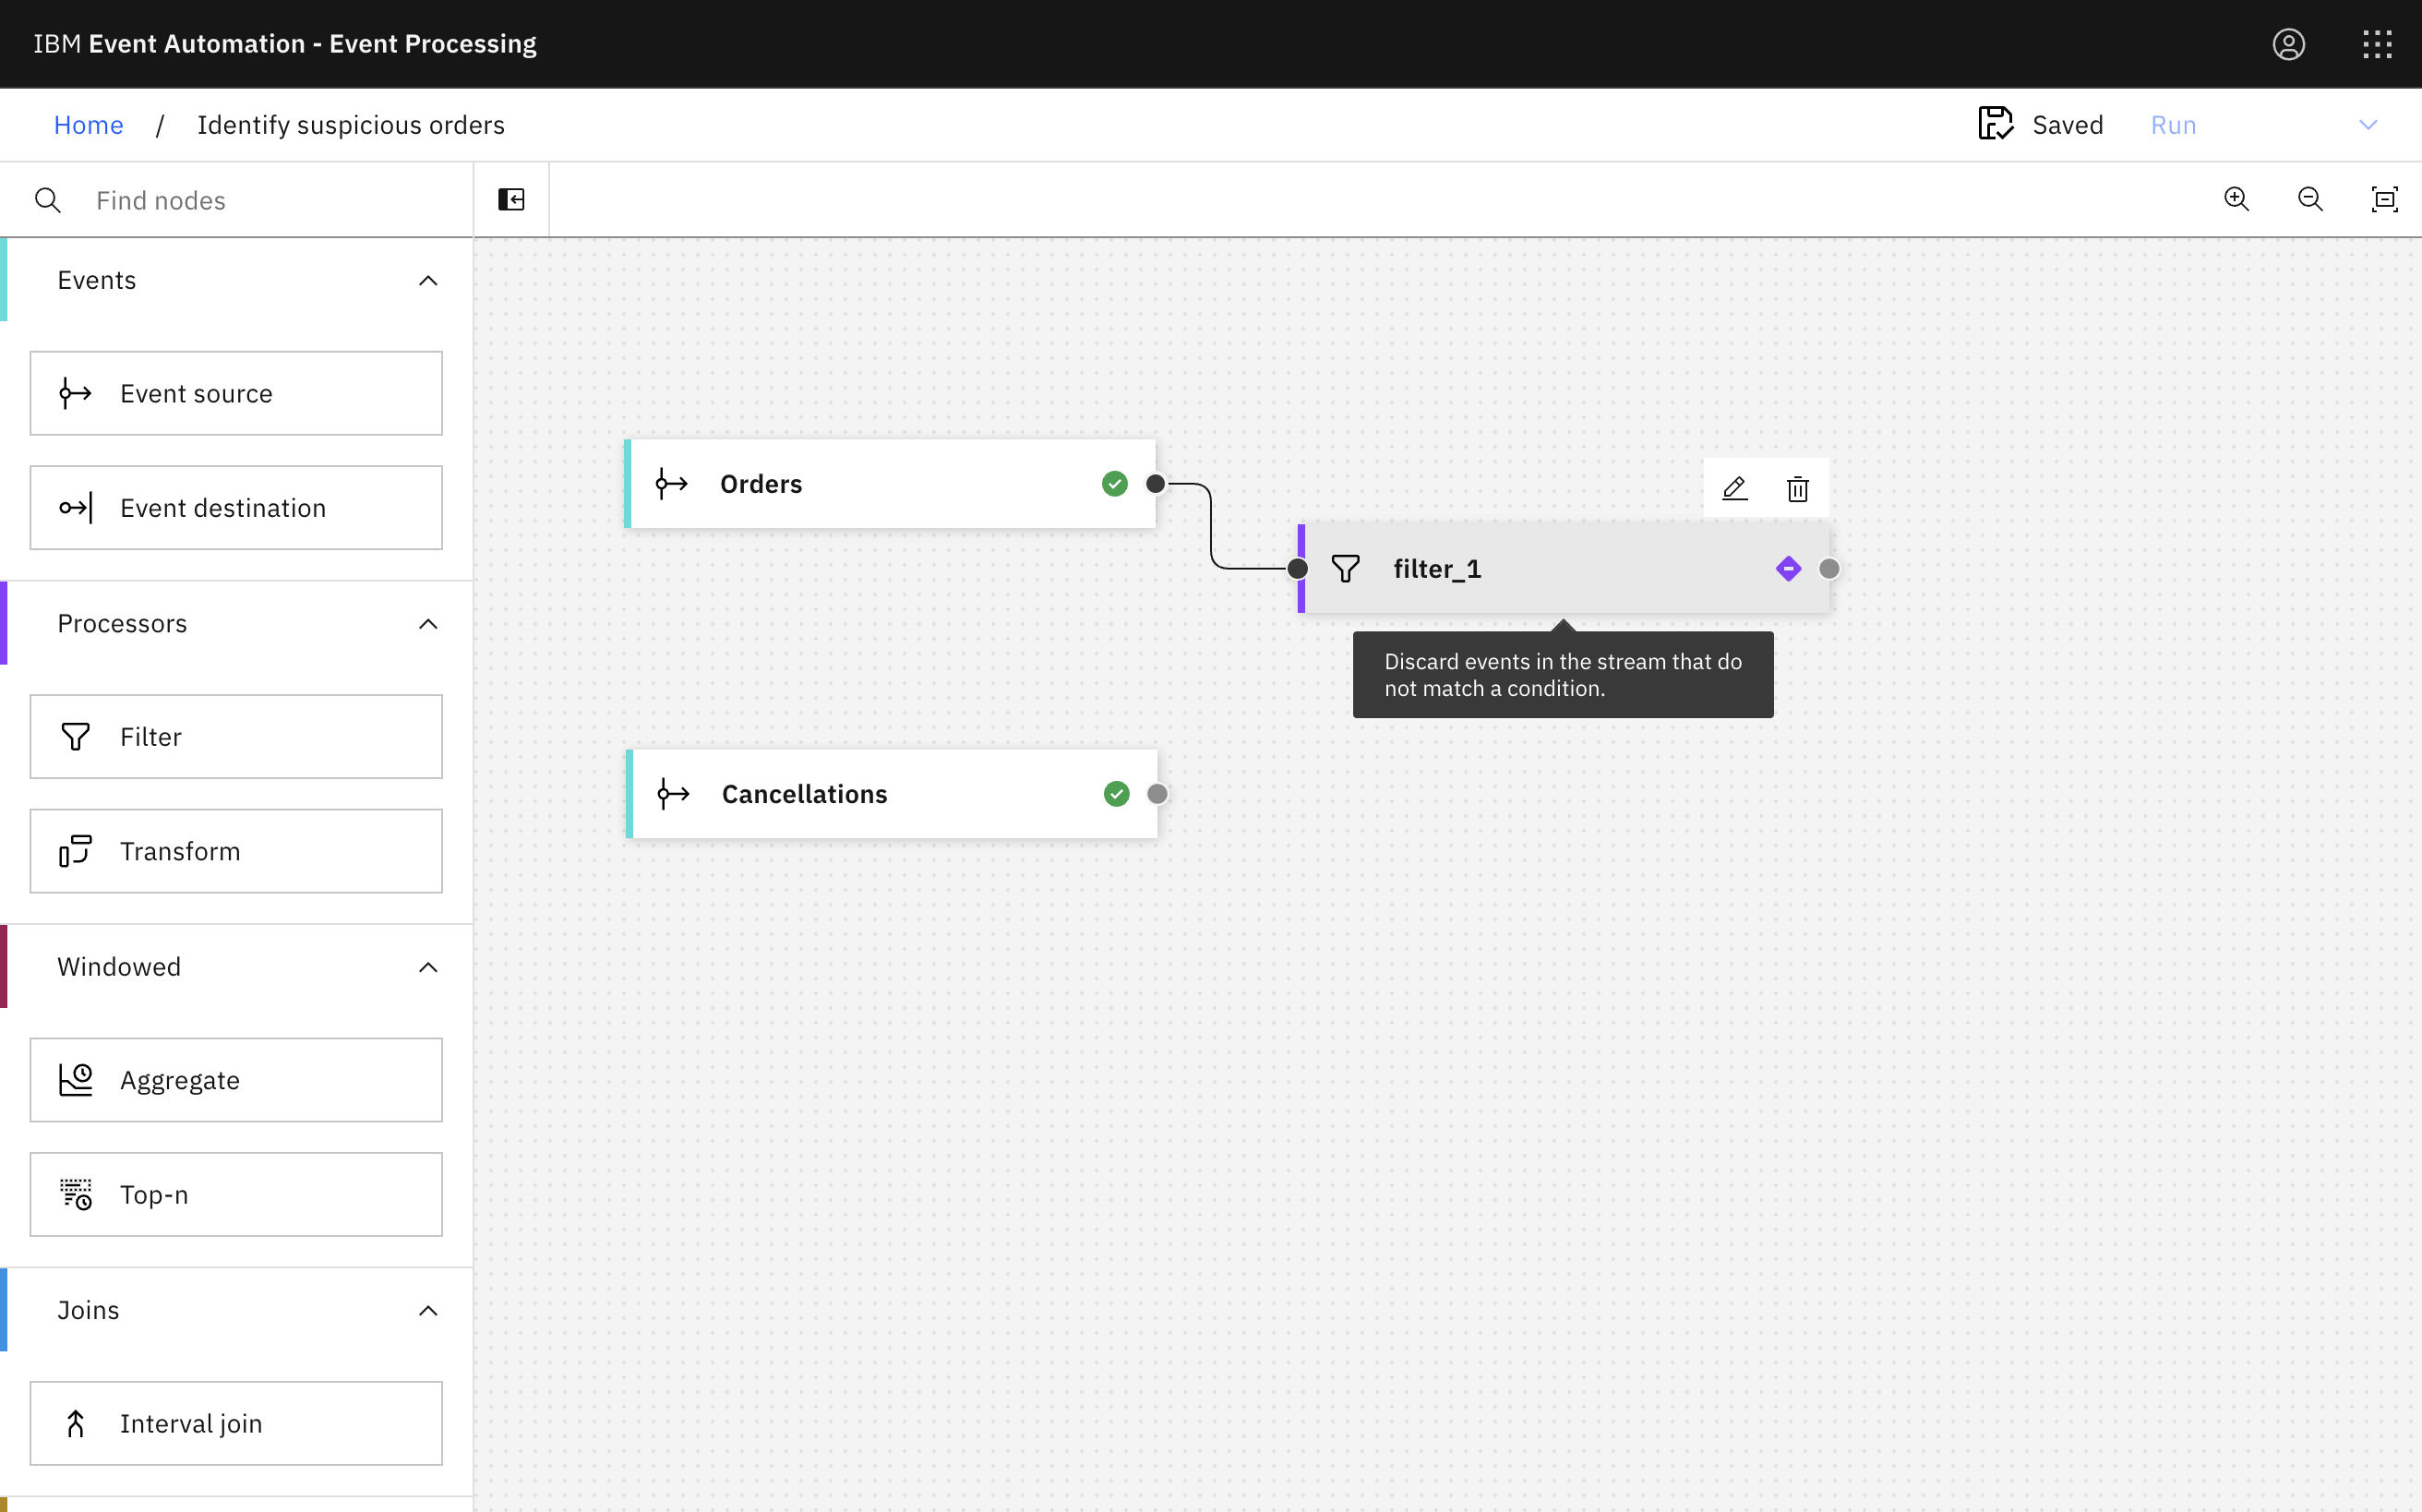
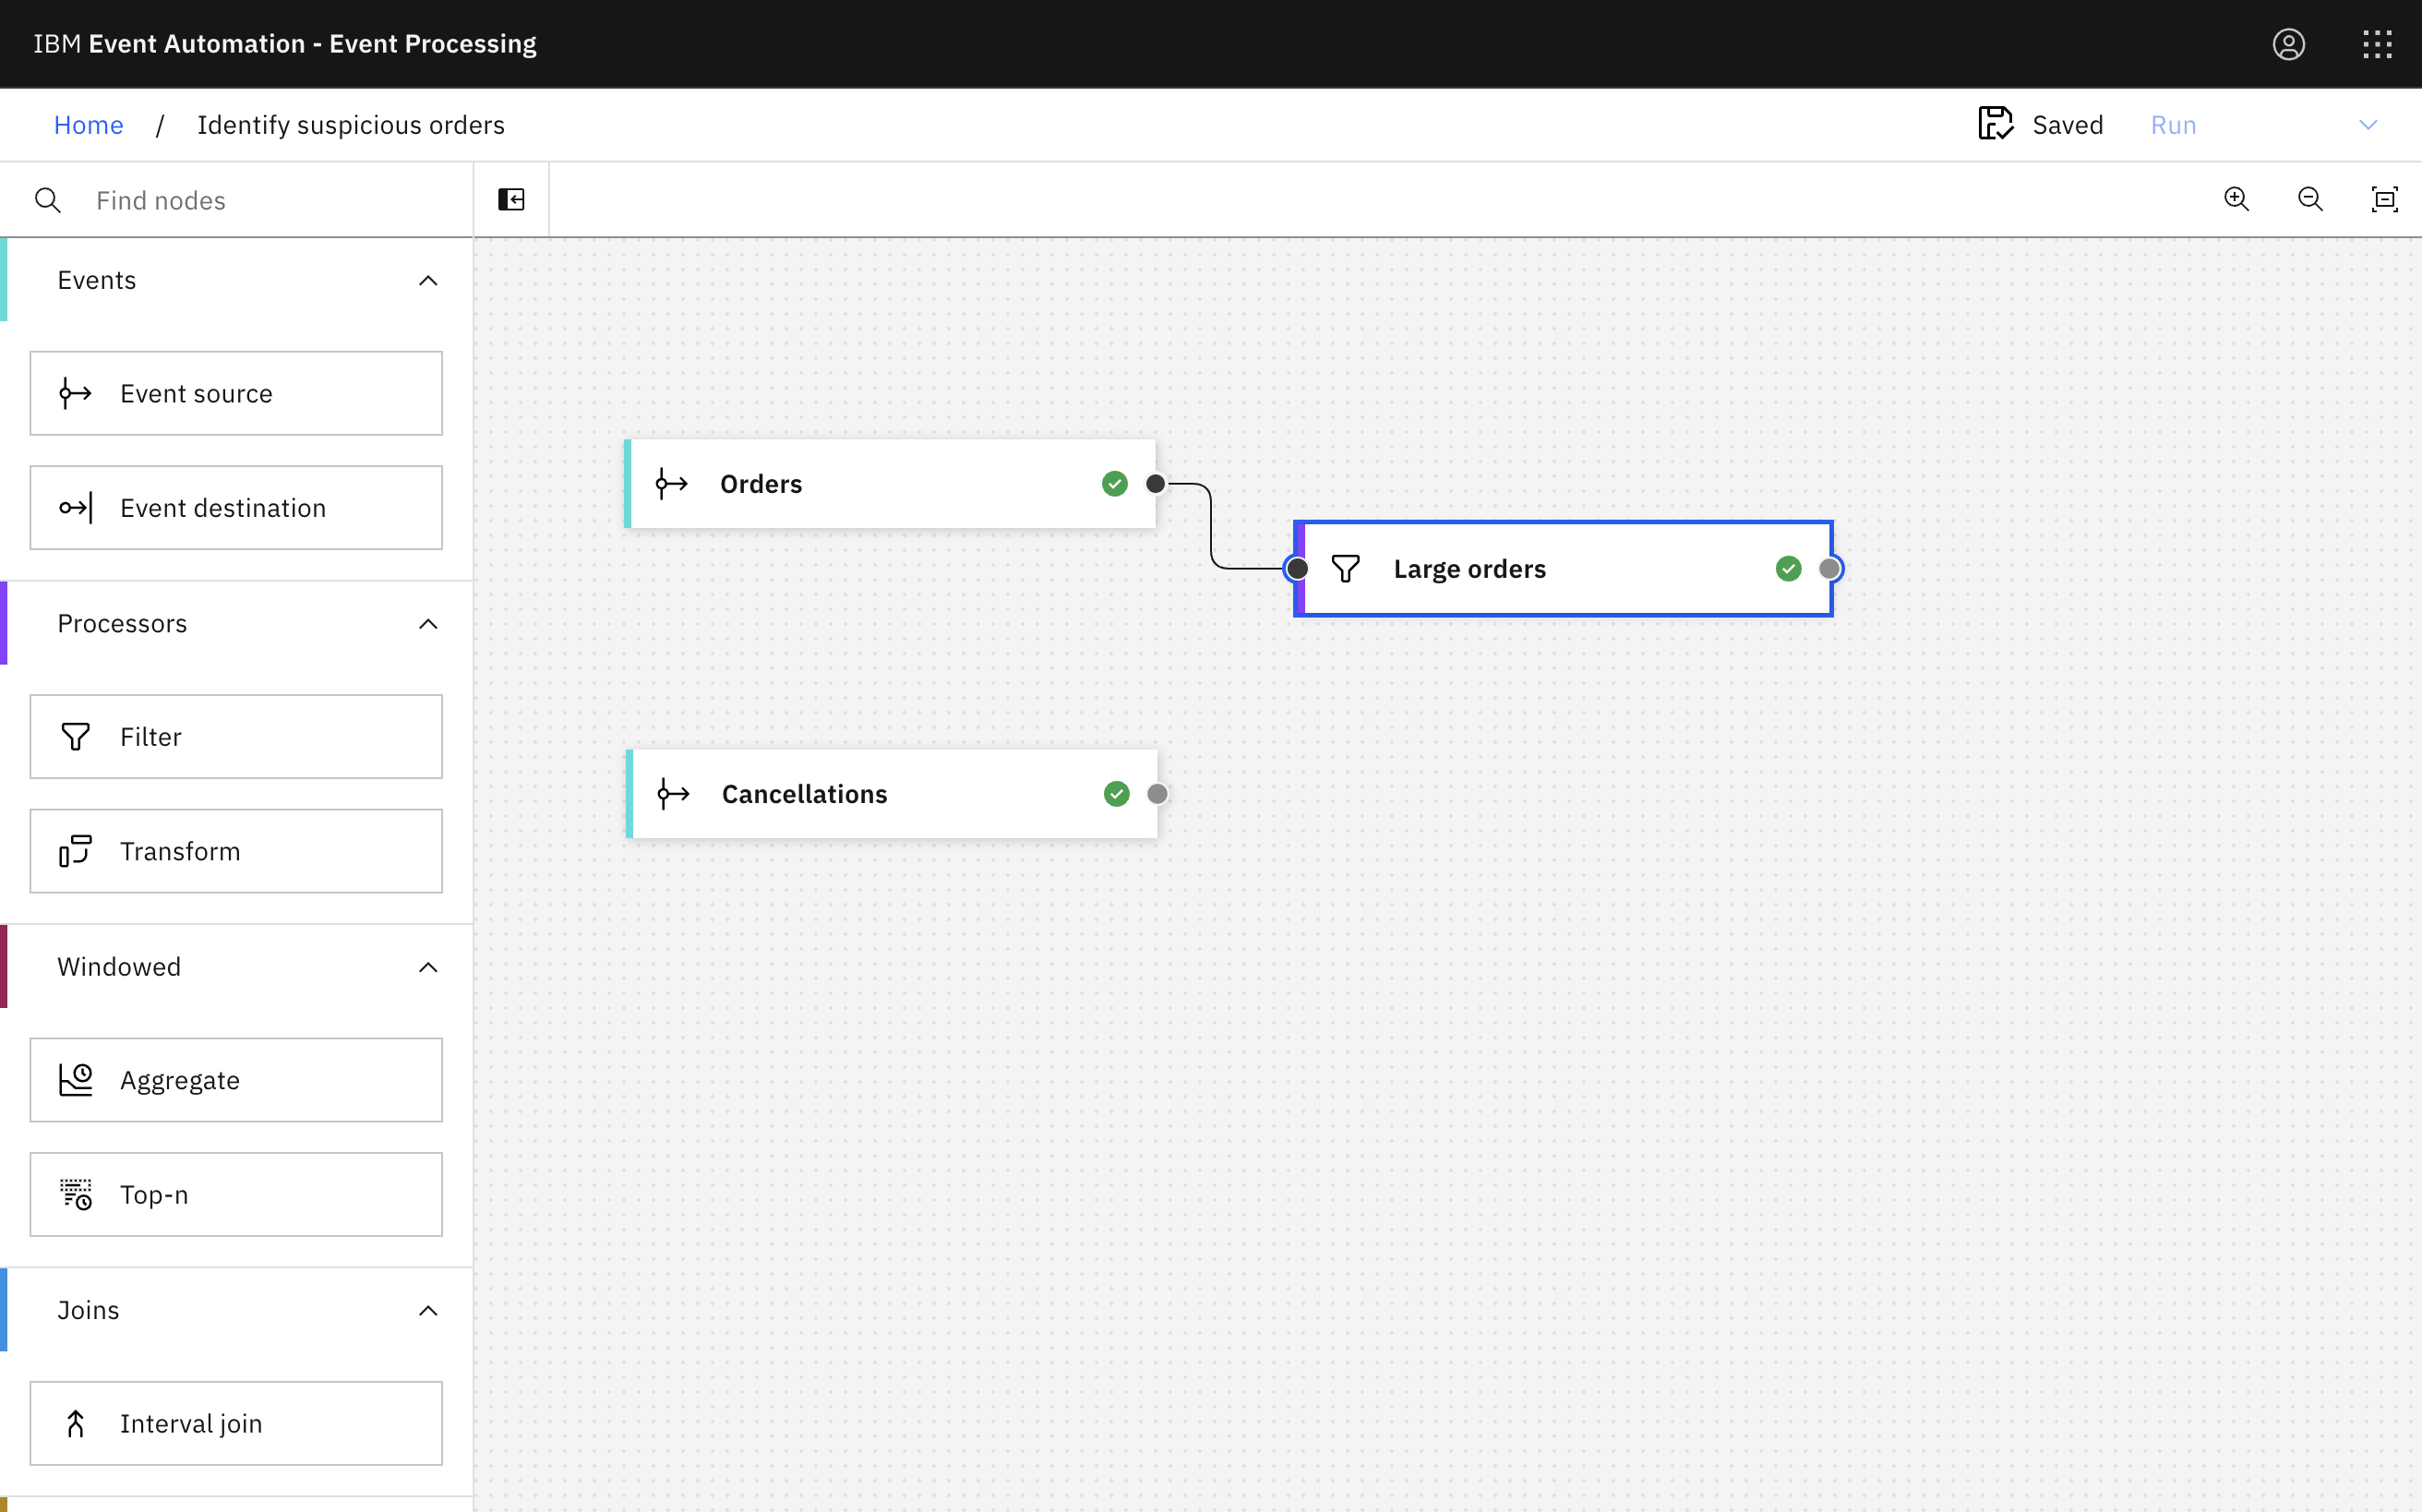
Create a Filter node and attach it to the orders event source.
-
Call the filter node
Large orders.Suggested value for the filter expression:
`quantity` > 5 -
Click Next to open the Output properties pane. Choose the properties to output.
-
Click Configure to finalize the filter.
Step 4: Identify large cancelled orders
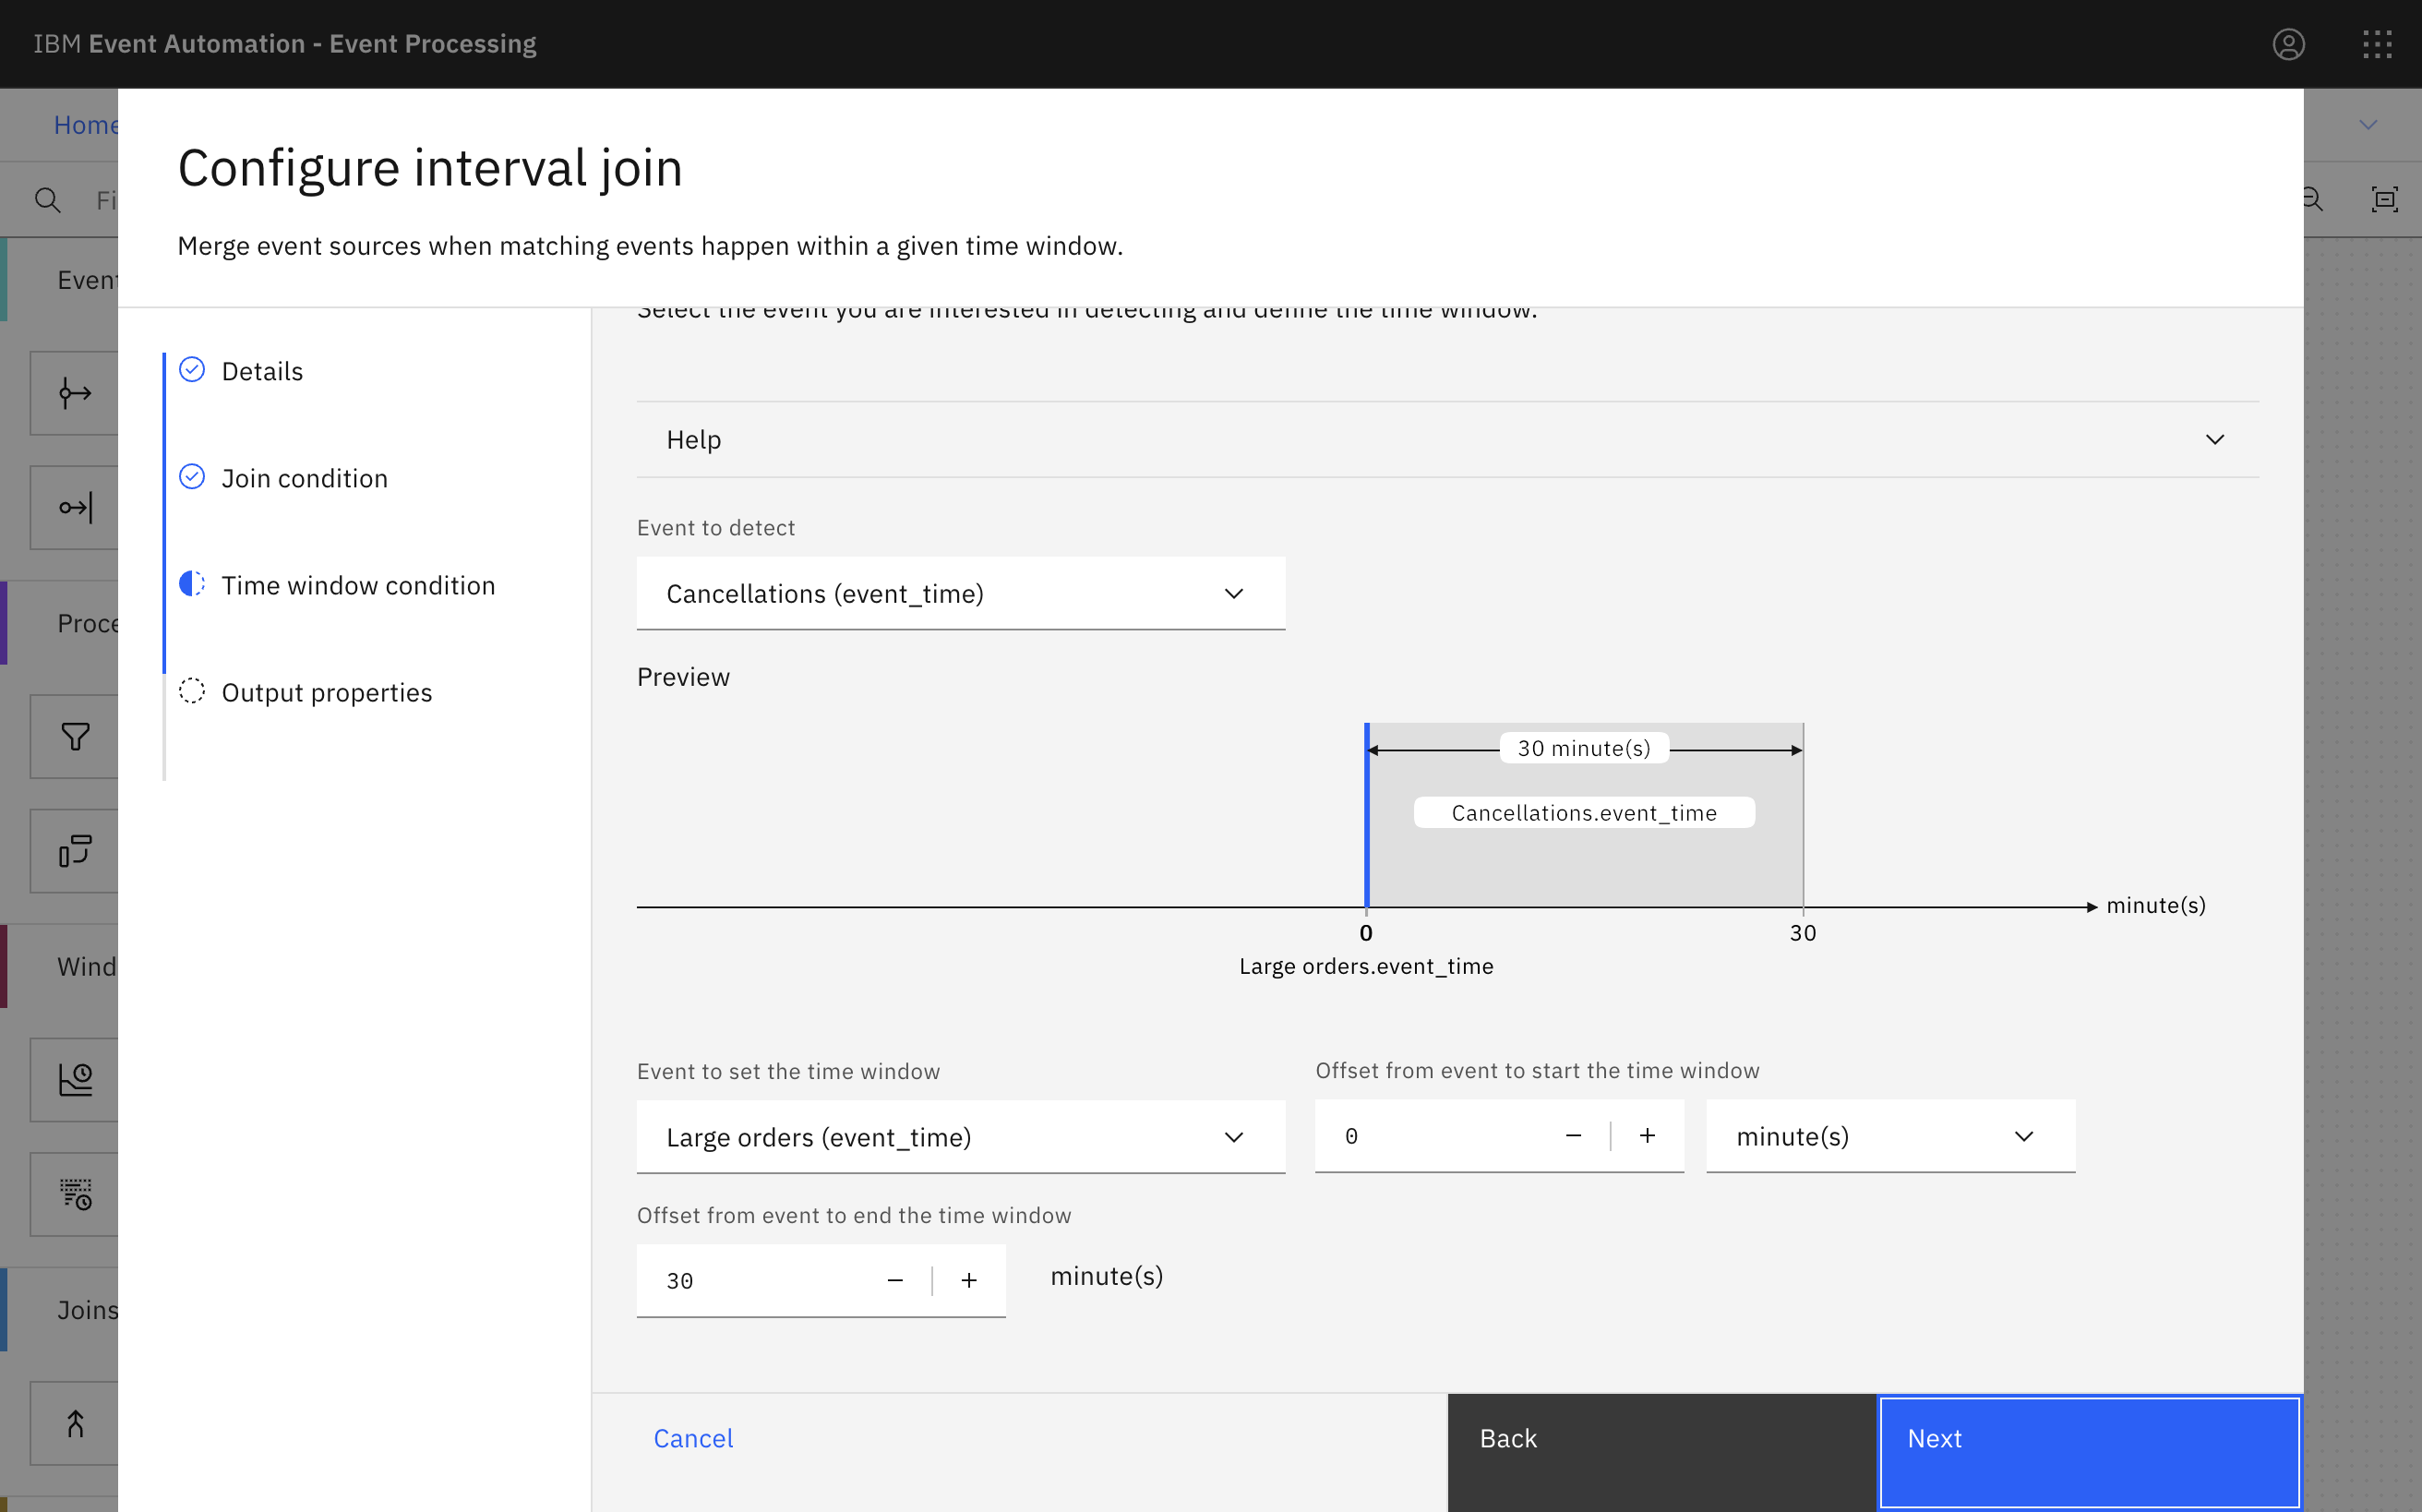
For this scenario, you want to identify which of these large orders are cancelled within 30 minutes of being made.
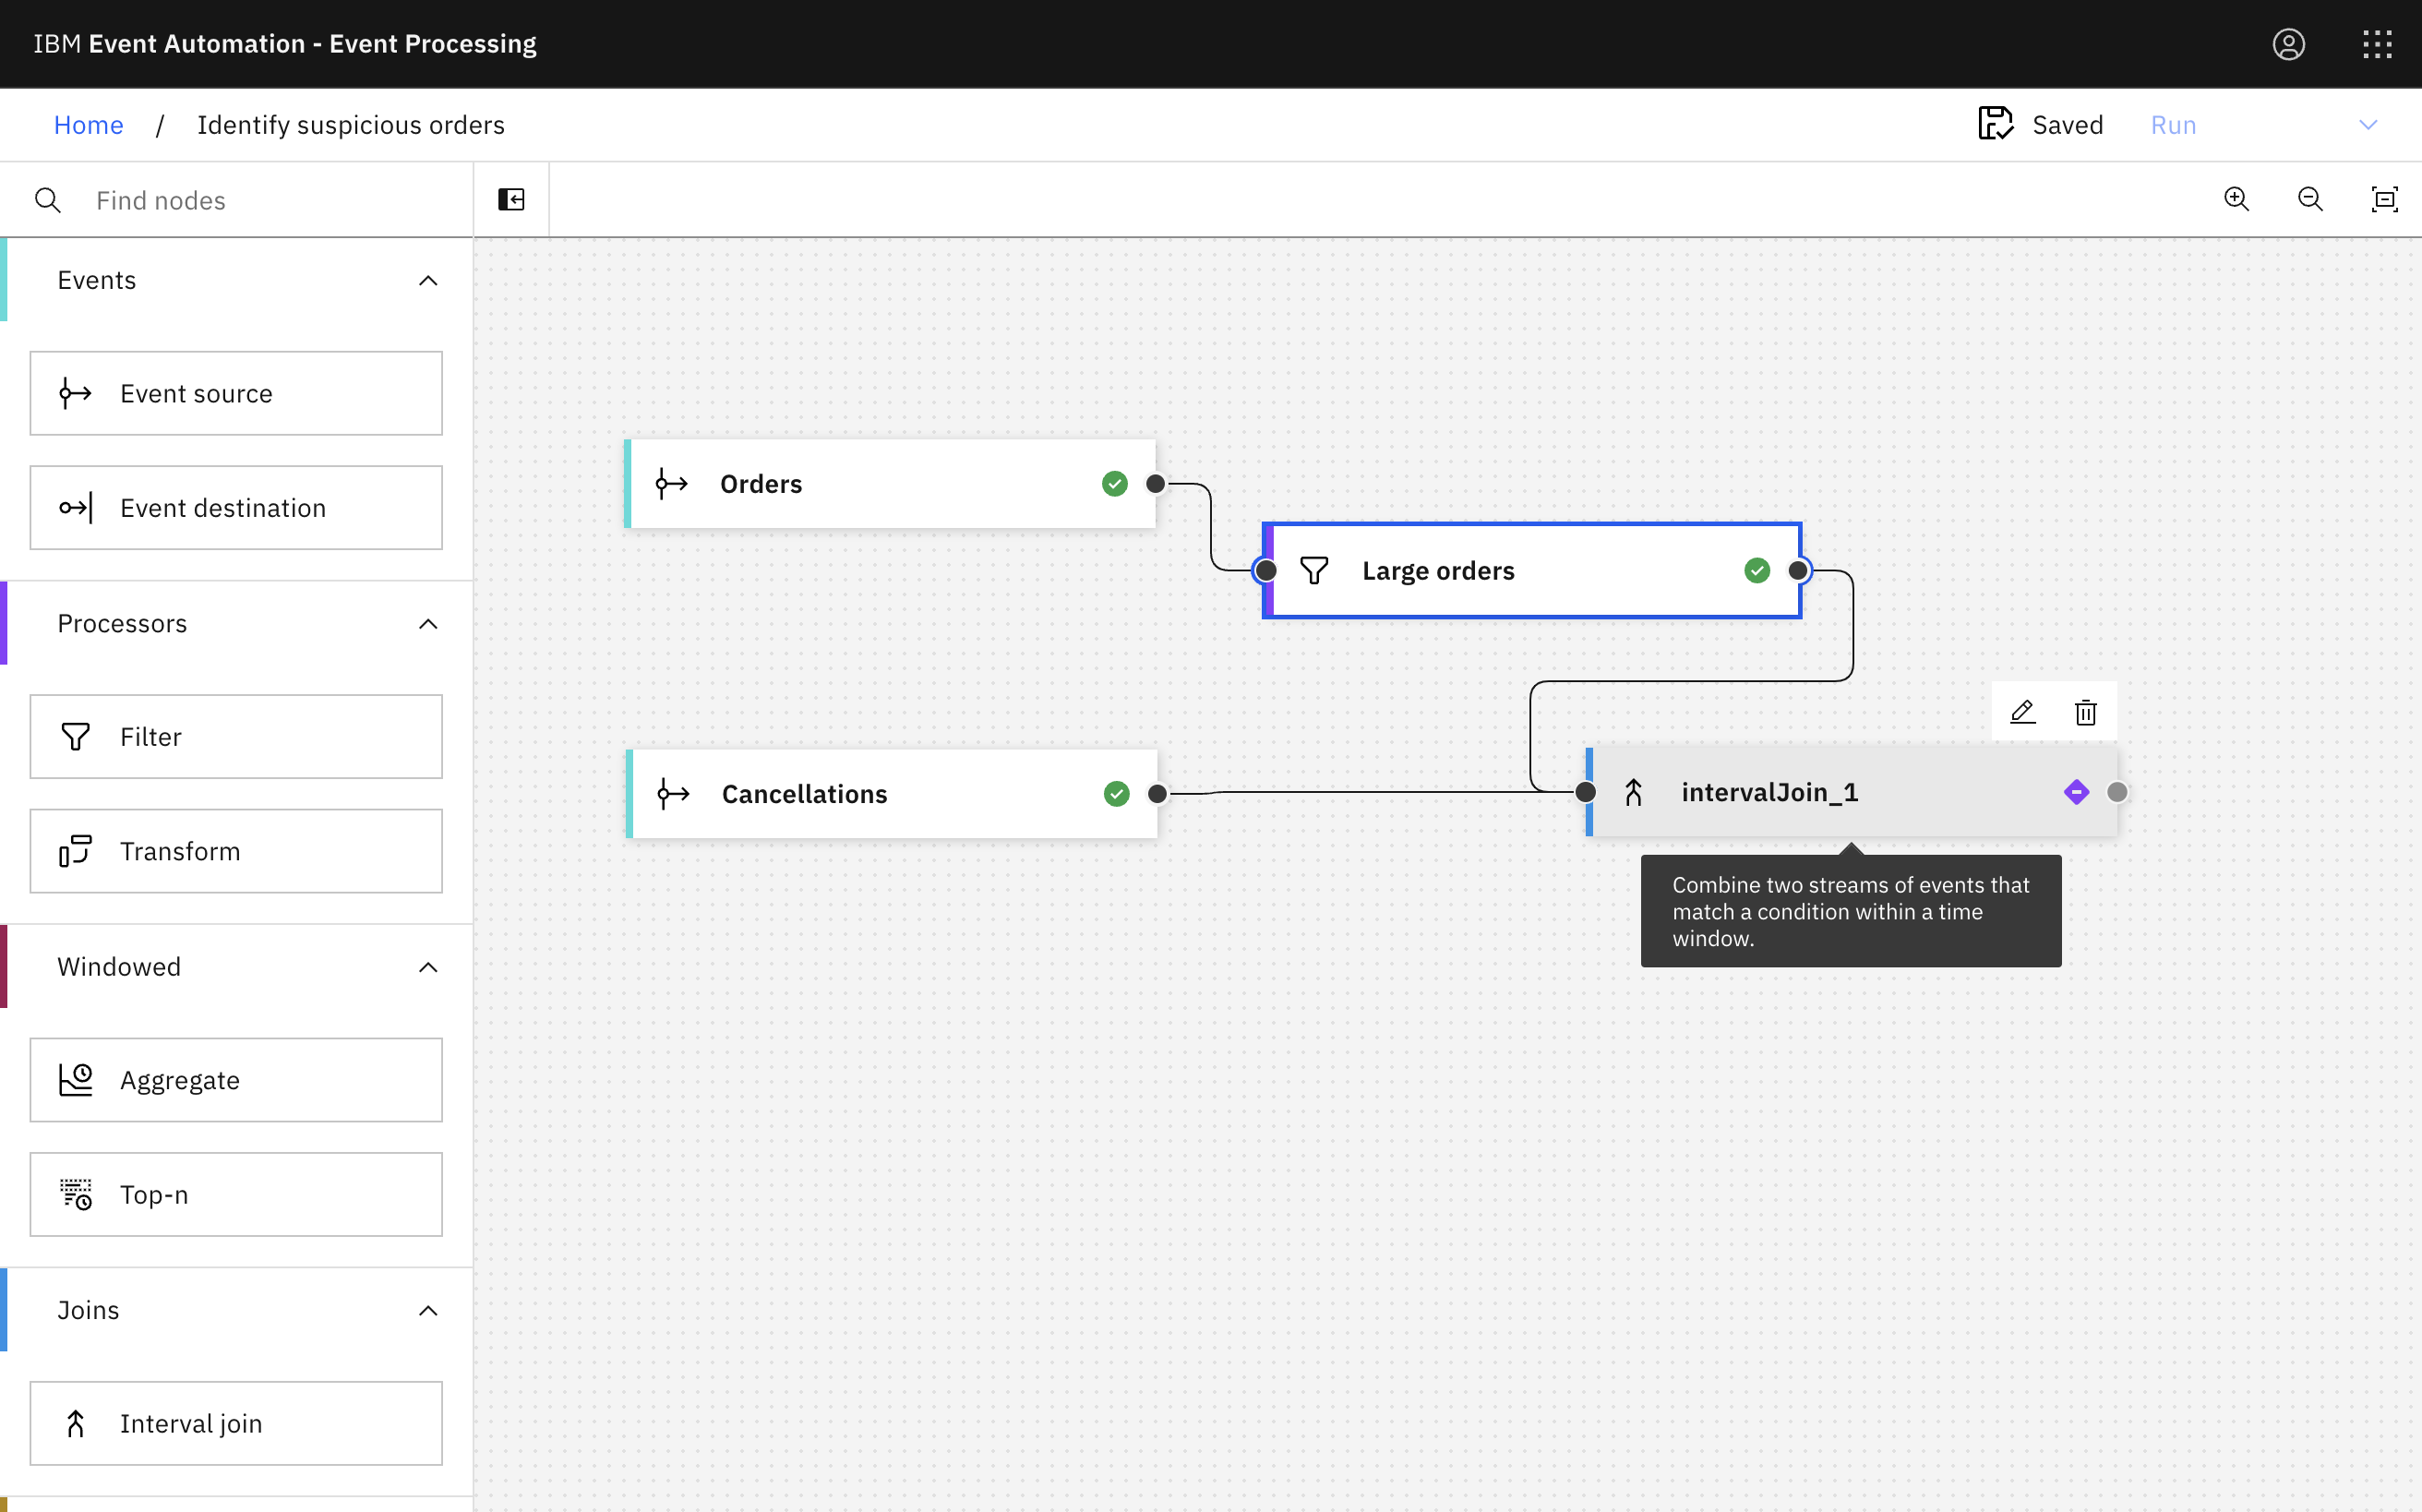
The next step is find large cancelled orders, by joining our “large orders” stream to the stream of “cancellations” where the order ID is the same in both streams.
-
Add an Interval join node and link it to the two streams.
-
Give the join node a name that describes the events it should identify:
Cancelled large orders. -
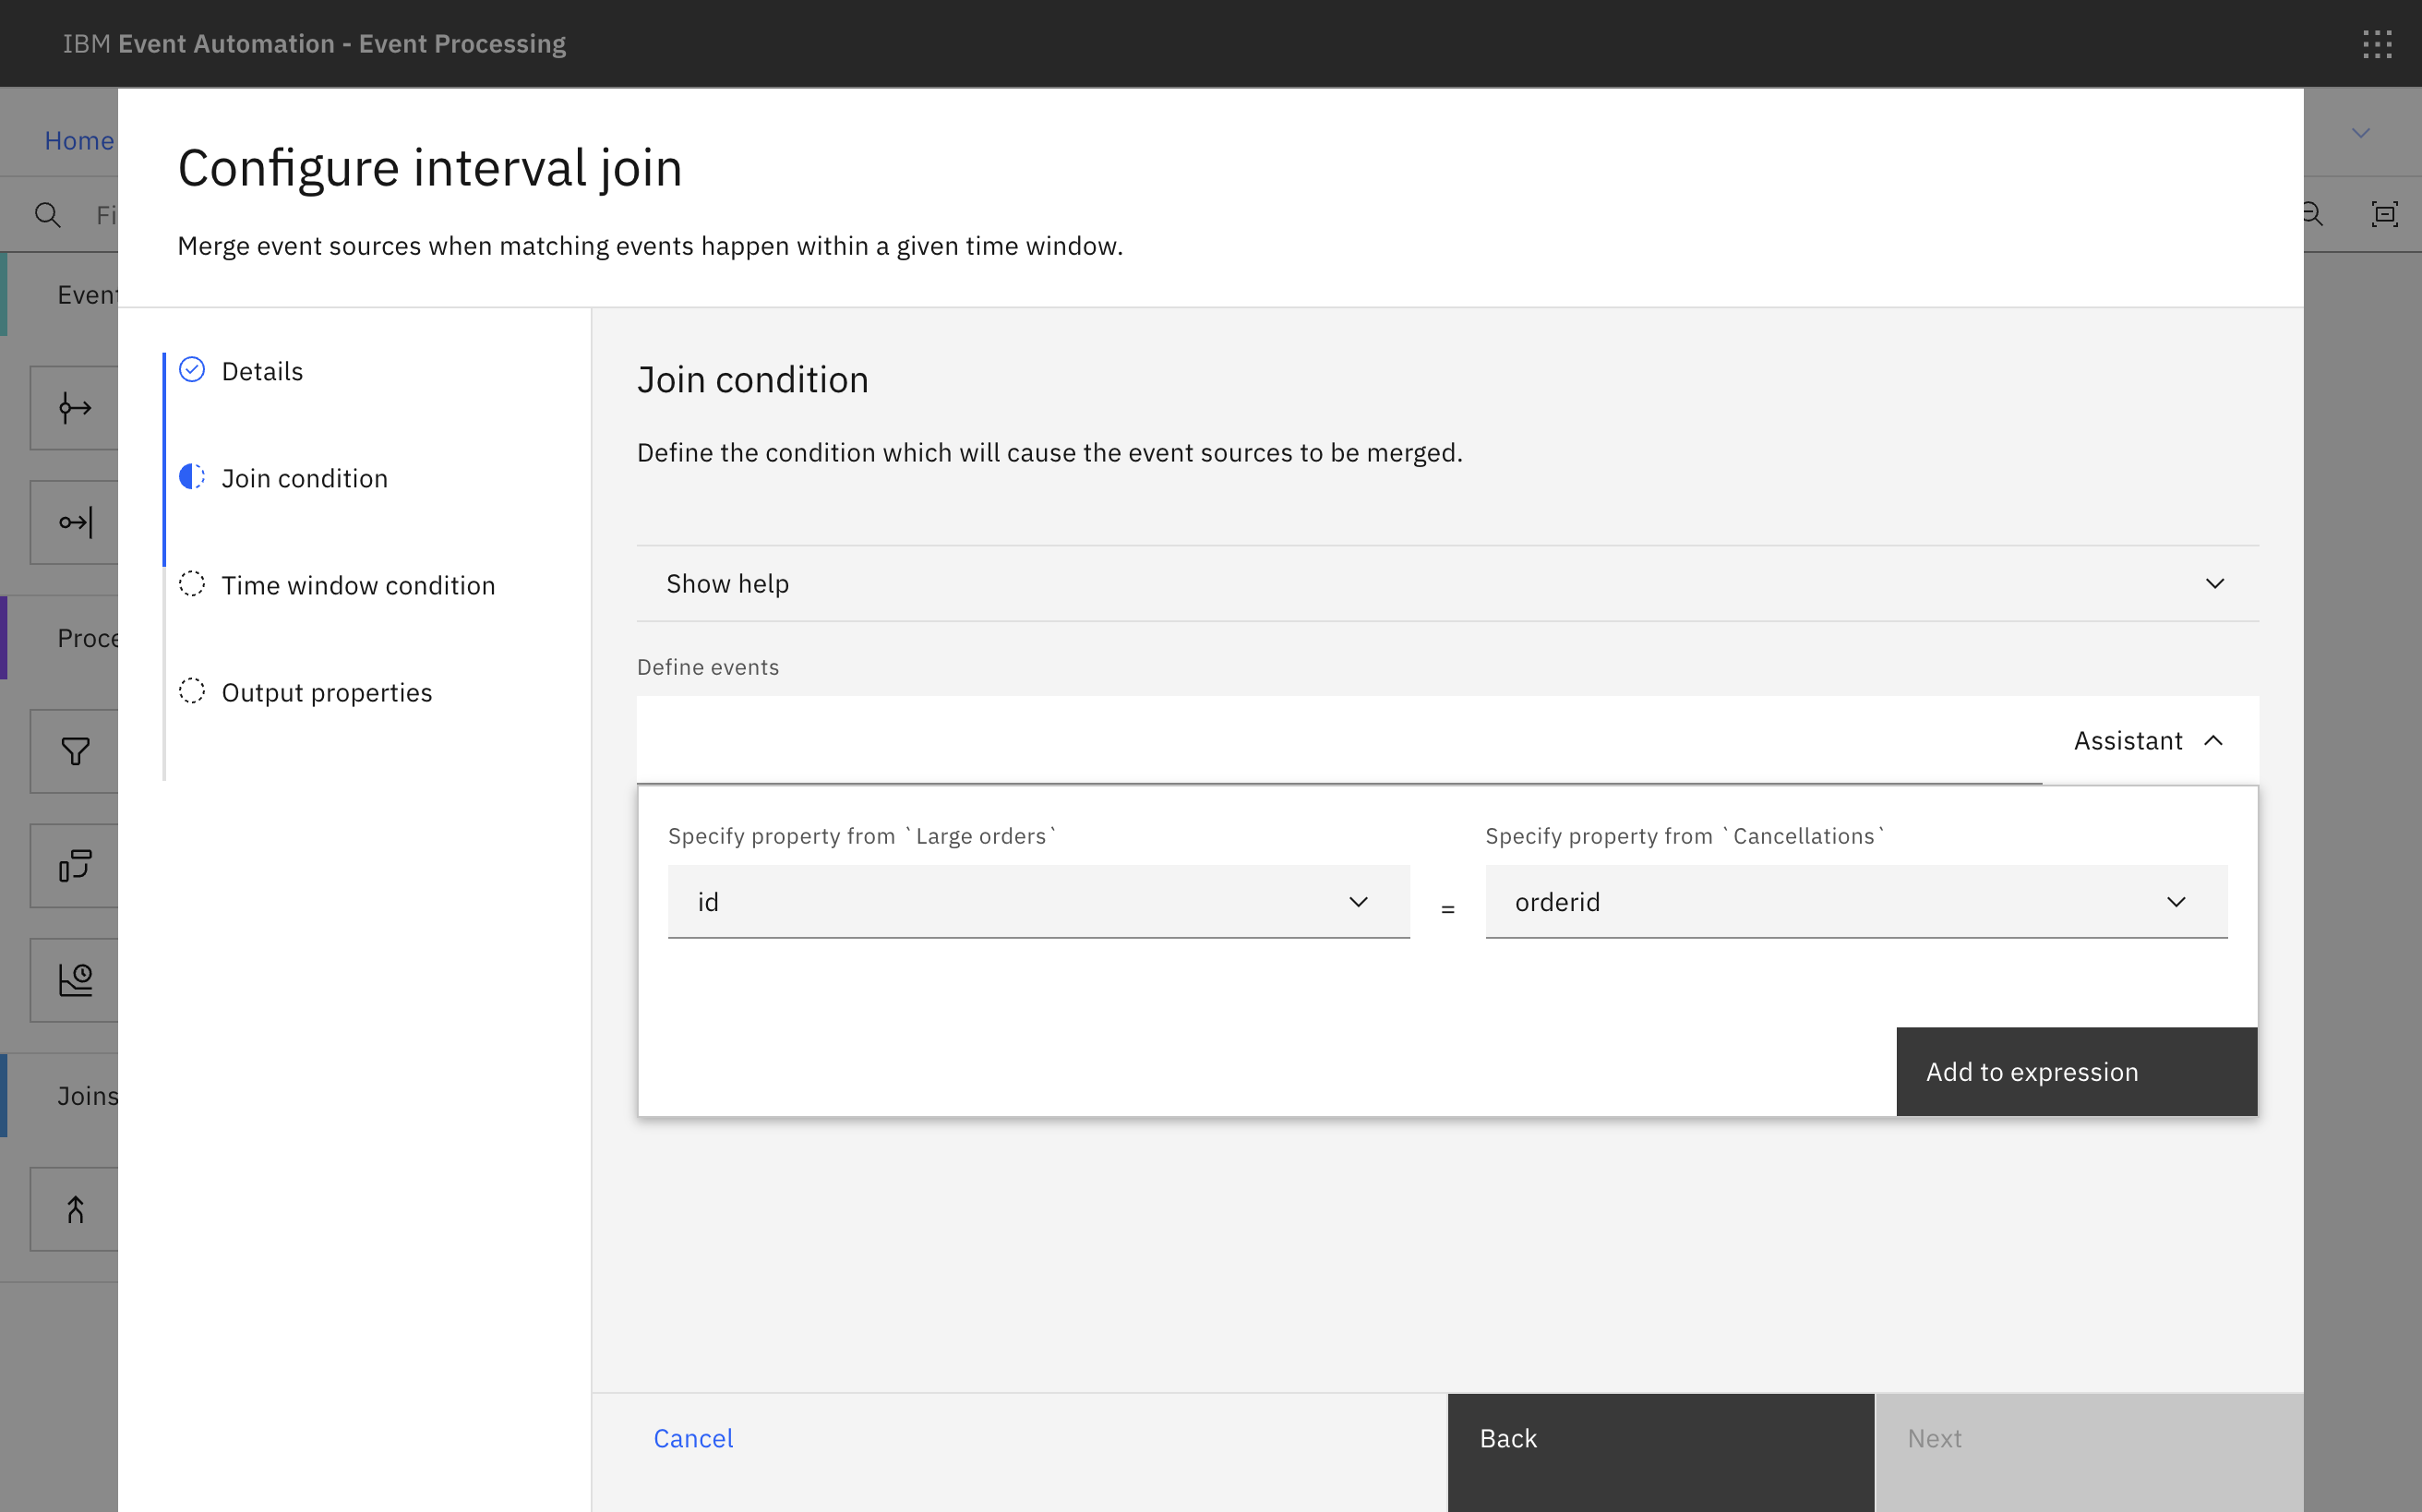
Define the join by matching the
orderidfrom cancellation events with theidfrom order events. -
Specify that you are interested in detecting cancellations that are made within 30 minutes of the (large) order.
-
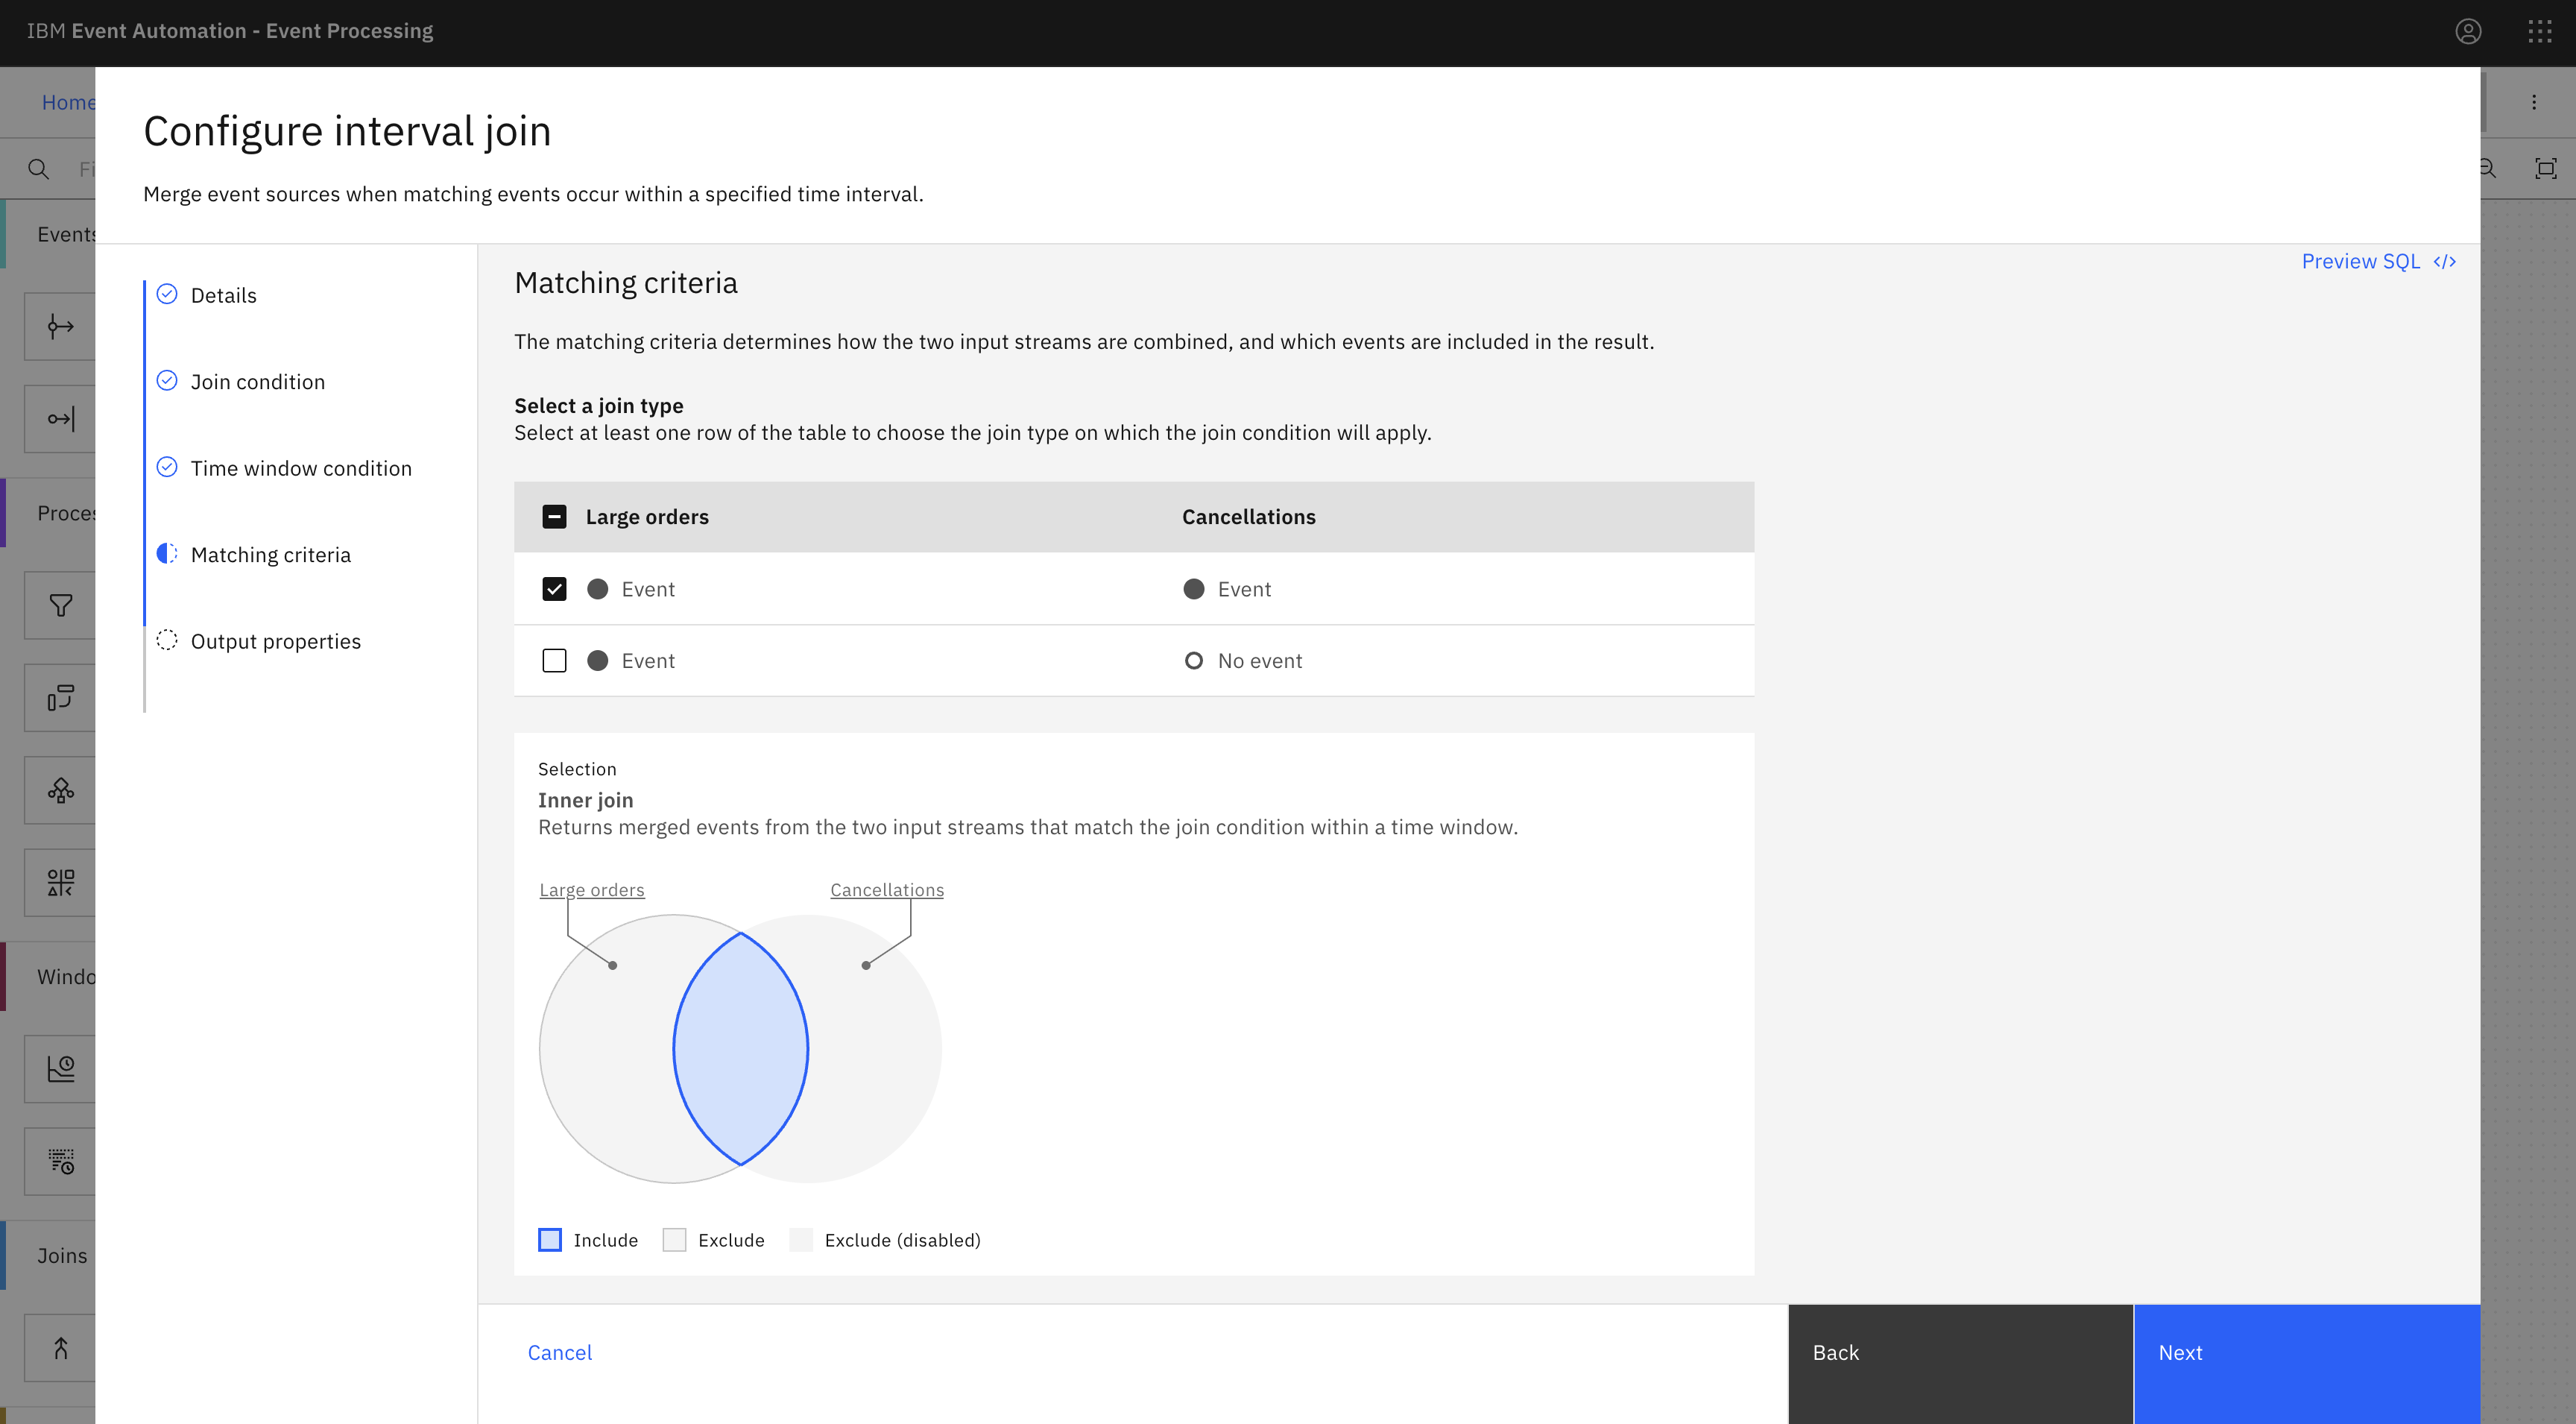
Keep the default selection to use an inner join to merge the large orders events and the cancellations orders events that match the join condition (that is, with the same order ID).
-
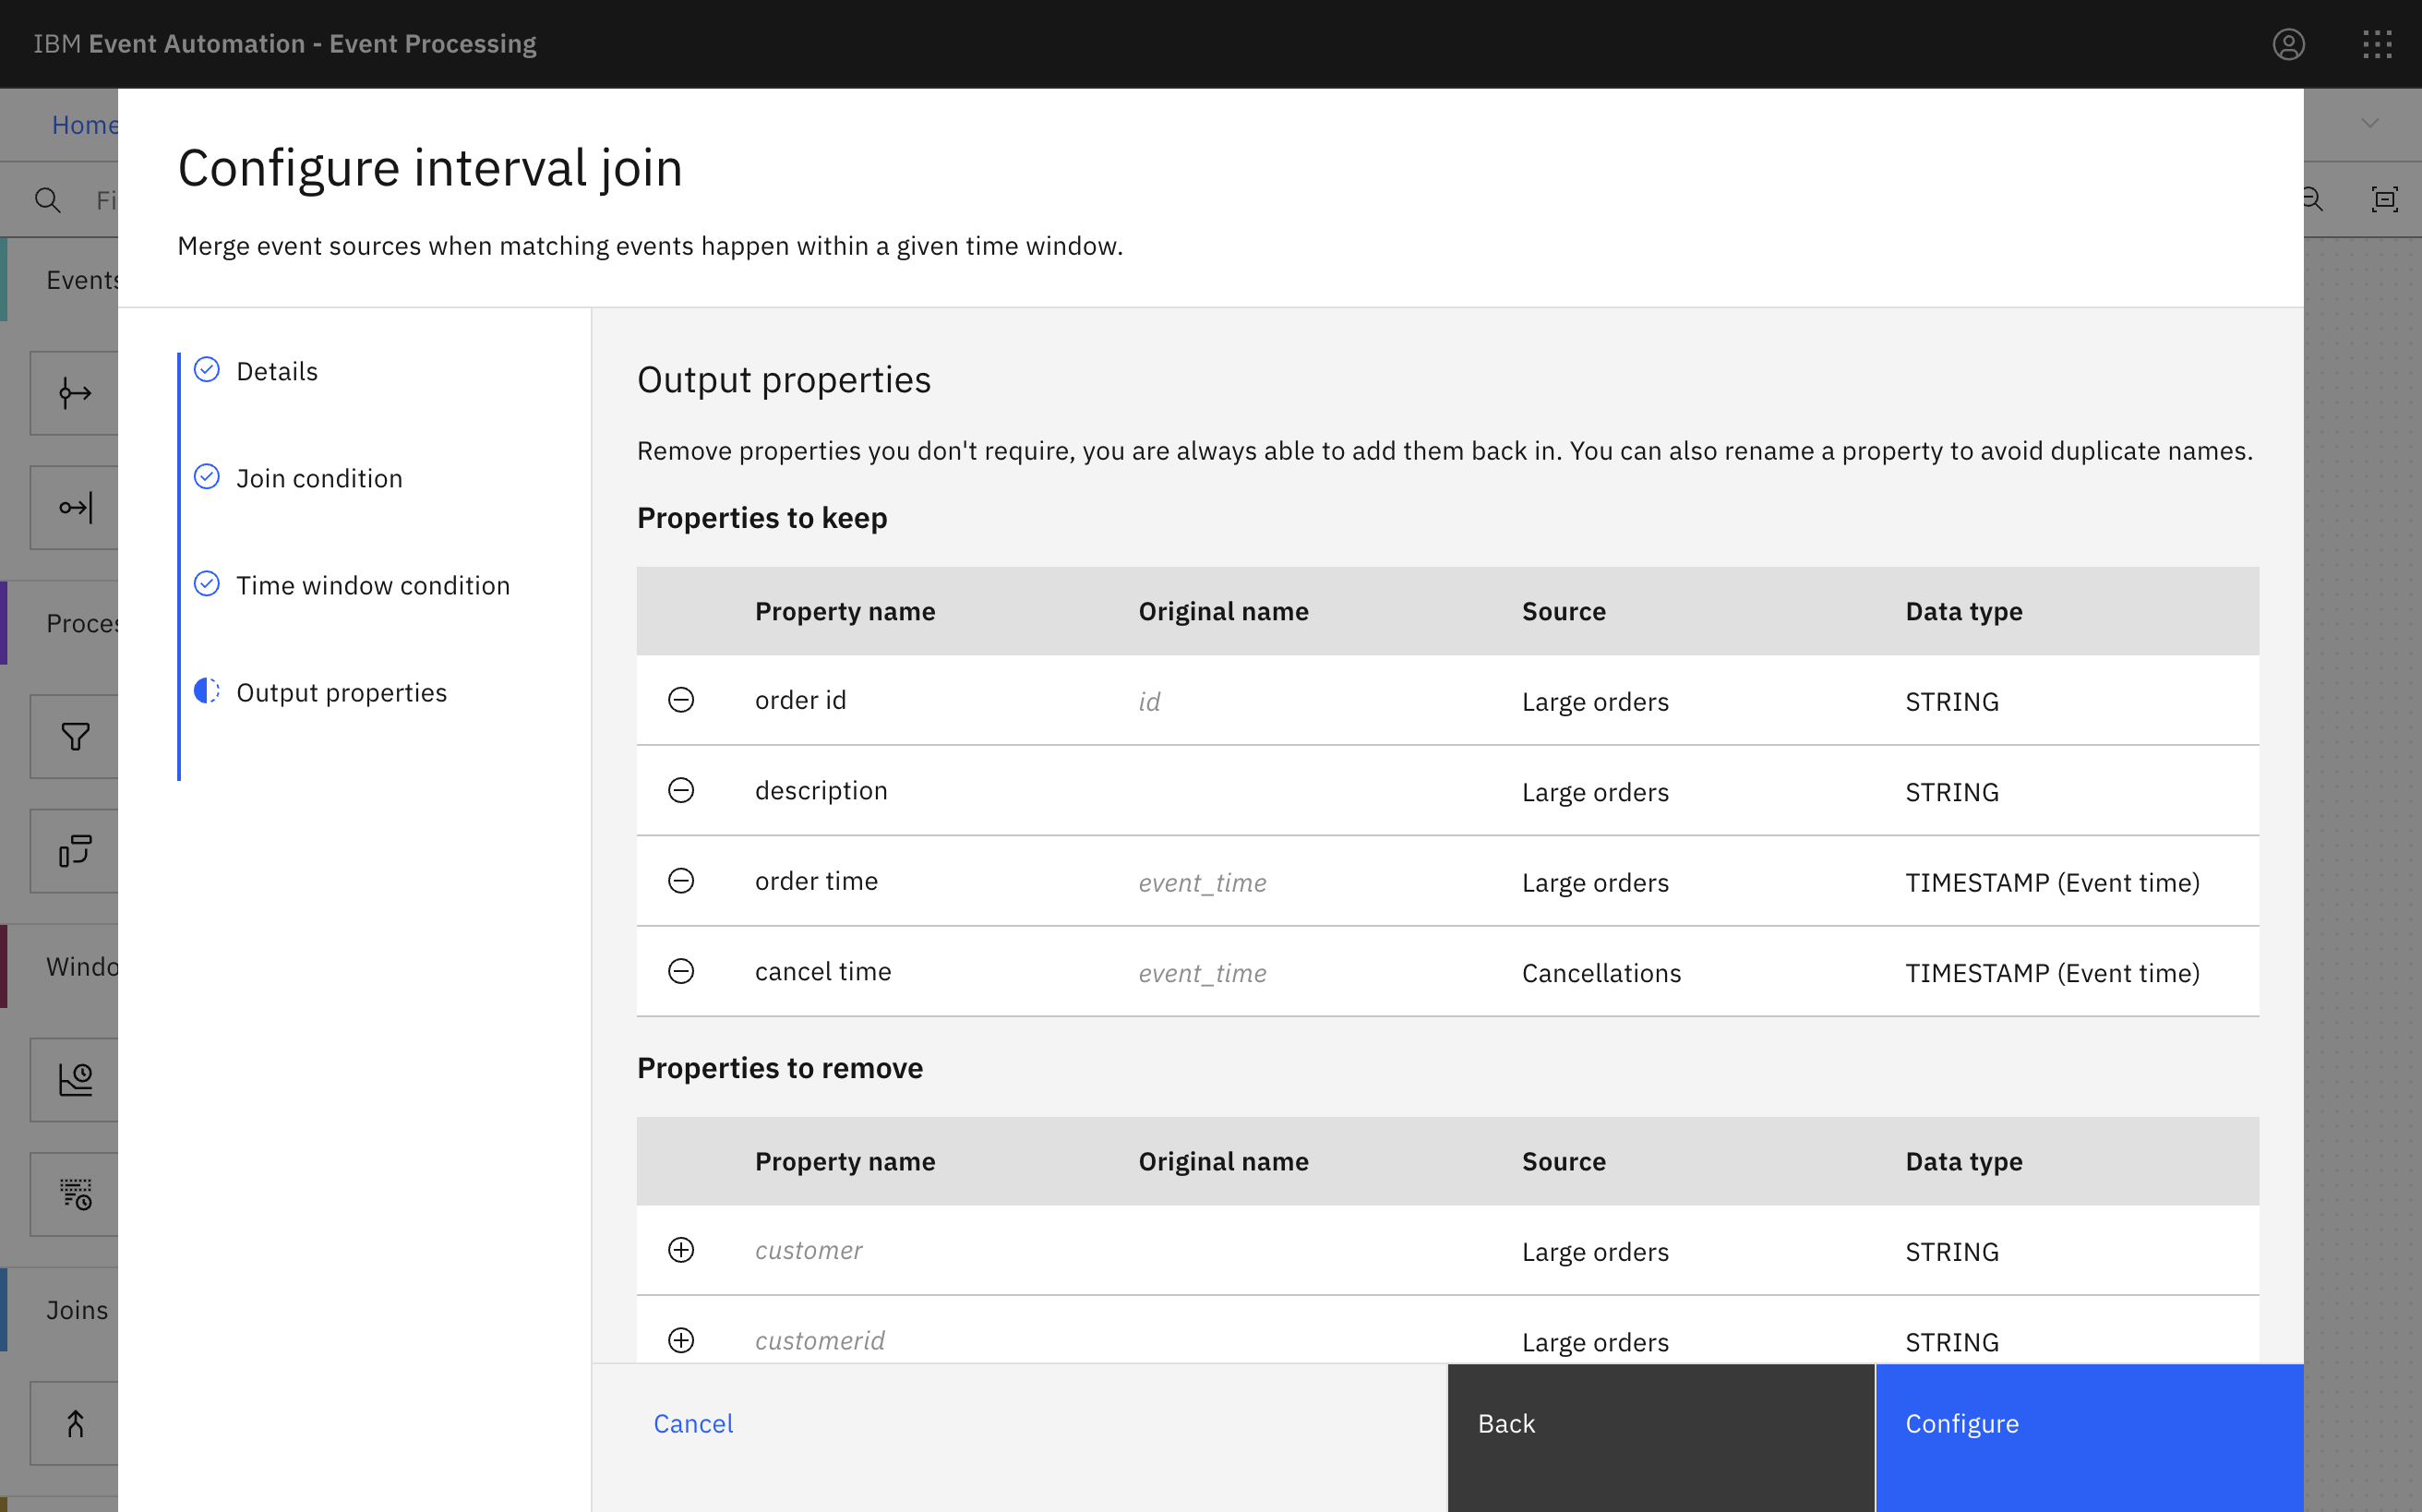
Remove the properties that we do not need to simplify the output.
You need something unique about the order that we can count (the order ID), when it happened (order time and cancel time), and what product that was ordered and cancelled.
Tip: Renaming properties to explain what they mean in your joined stream makes the output easier to use. For this join, instead of having two properties that are called “event_time”, naming them “order time” and “cancel time” makes the meaning clearer.
Step 5: Test the flow
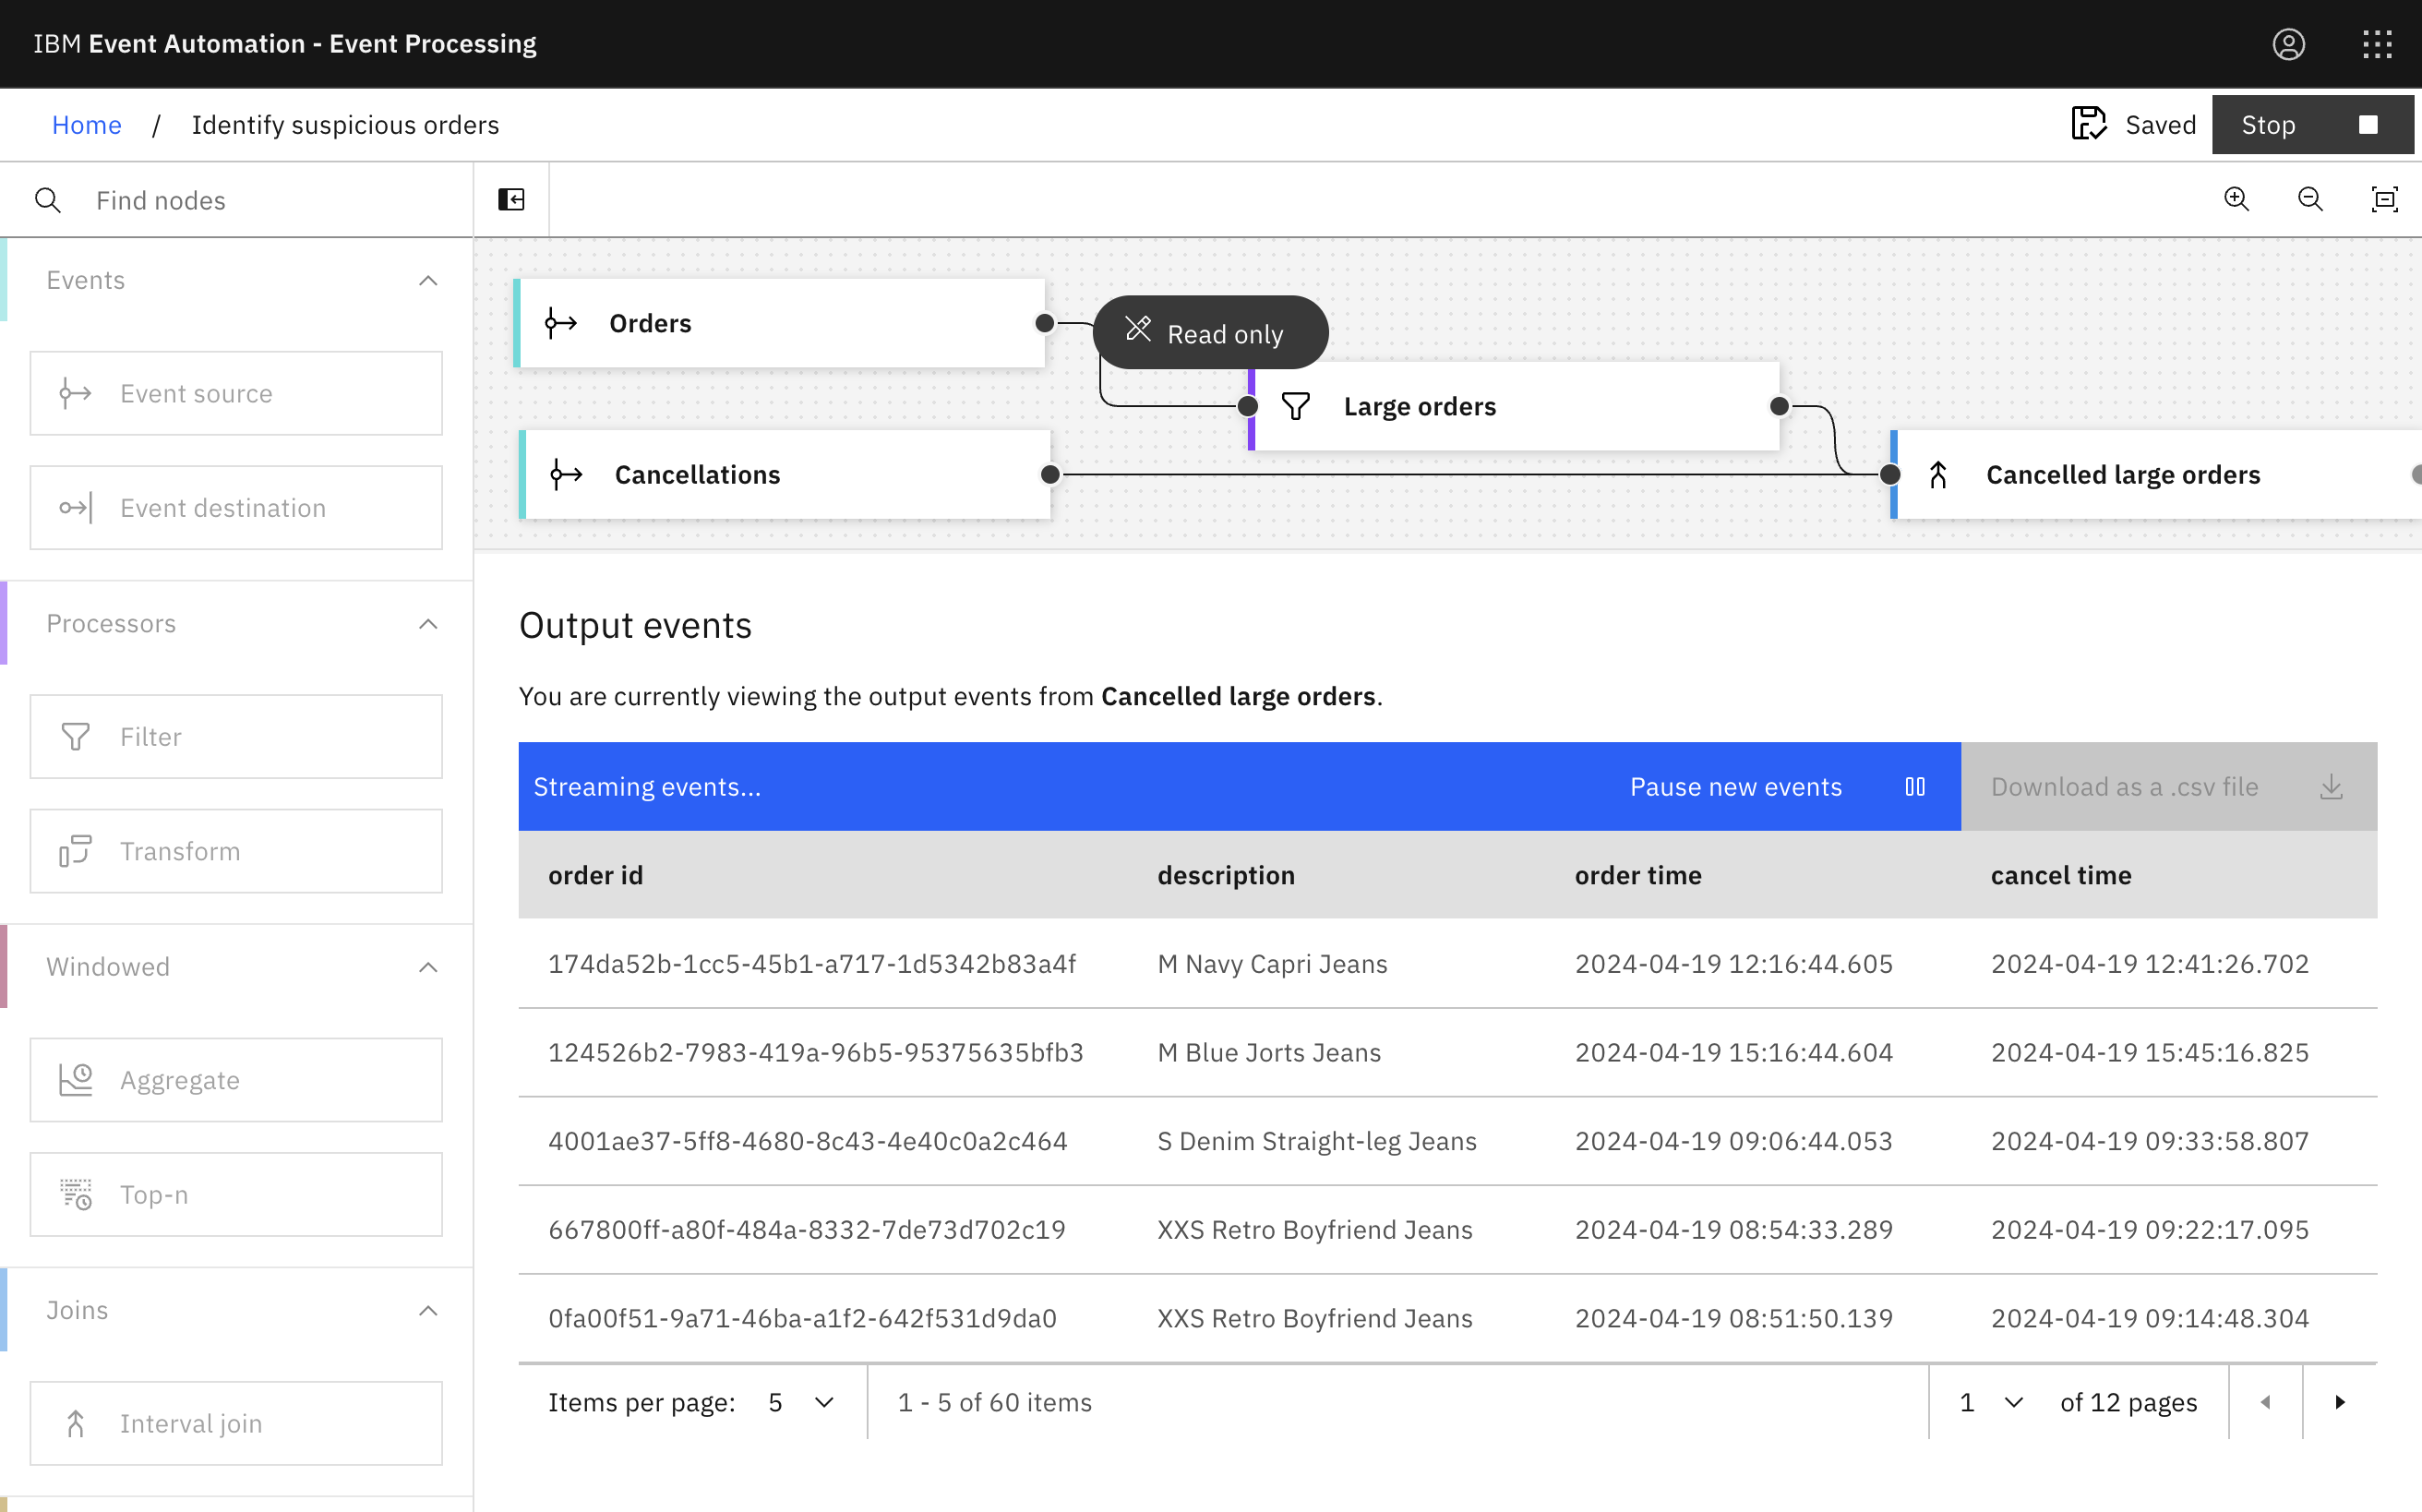
The next step is to test your event processing flow and view the results.
-
Use the Run menu, and select Include historical to run your filter on the history of order events available on this Kafka topic.
Tip: It is good to regularly test as you develop your event processing flow to confirm that the last node you have added is doing what you expected.
Step 6: Counting large order cancellations
The next step is to count the number of times within a 1-hour window that a large order for the same product is made and then cancelled.
-
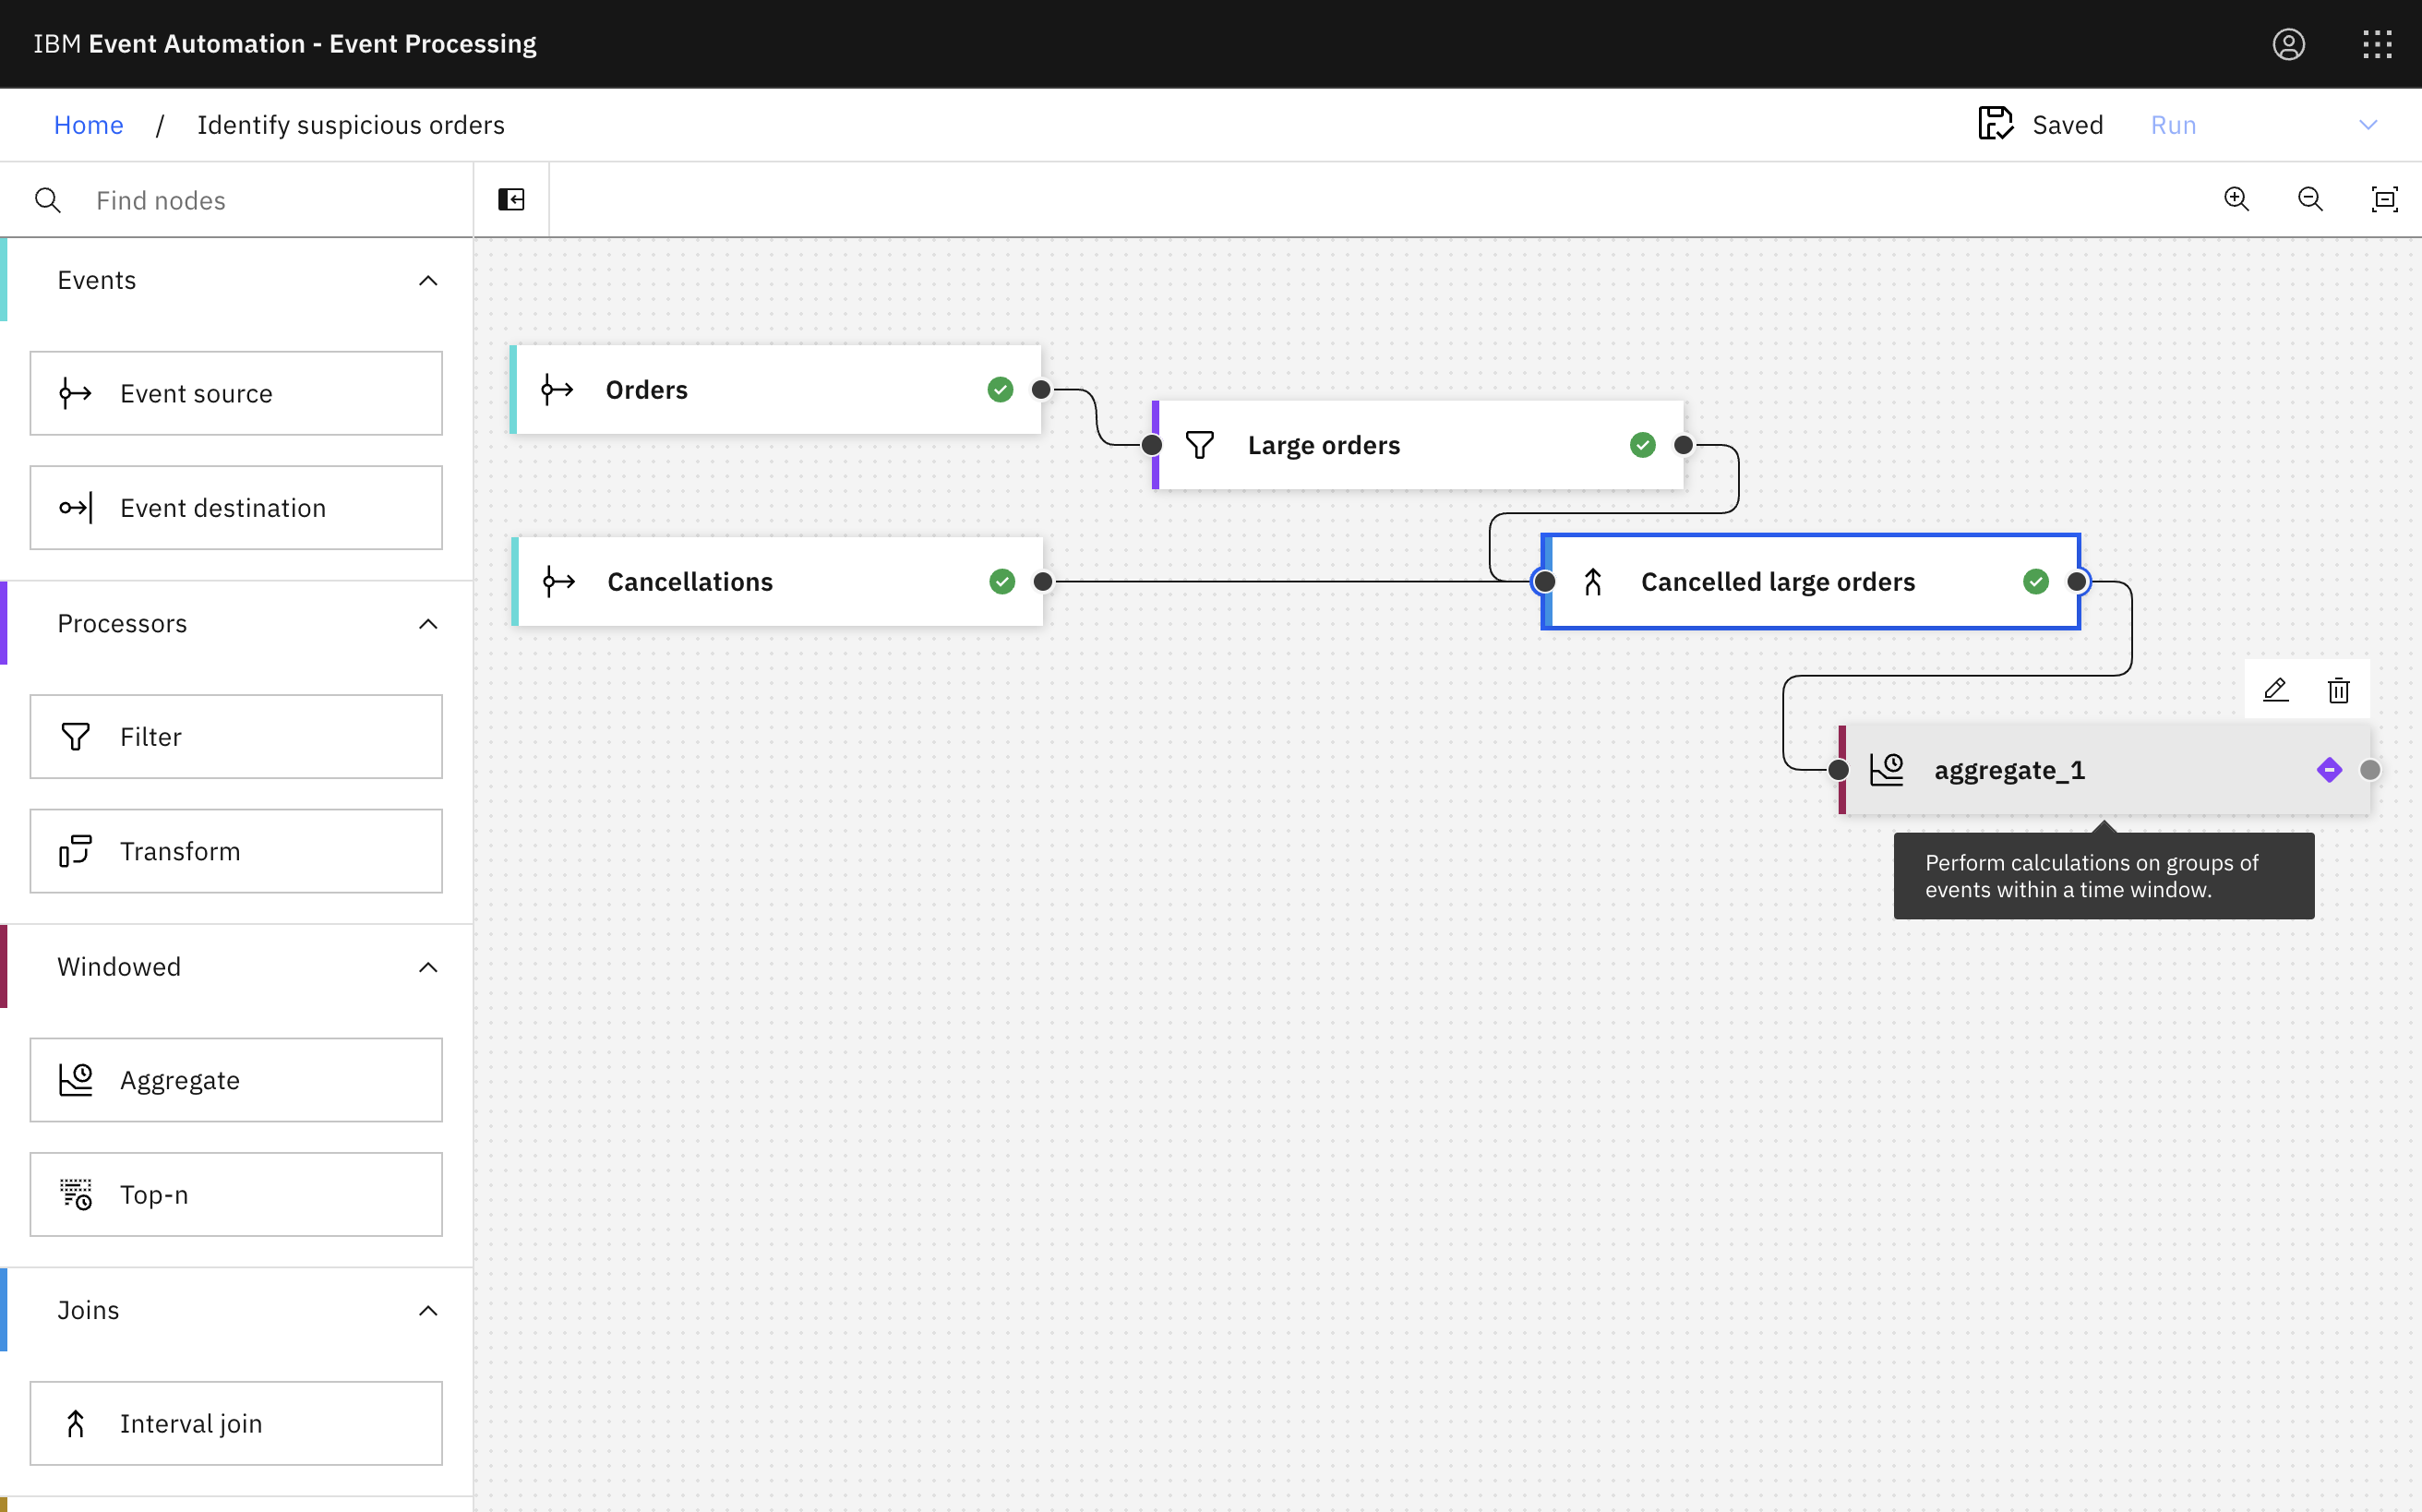
Add an Aggregate node to the flow.
-
Call the node
Cancellation counts. -
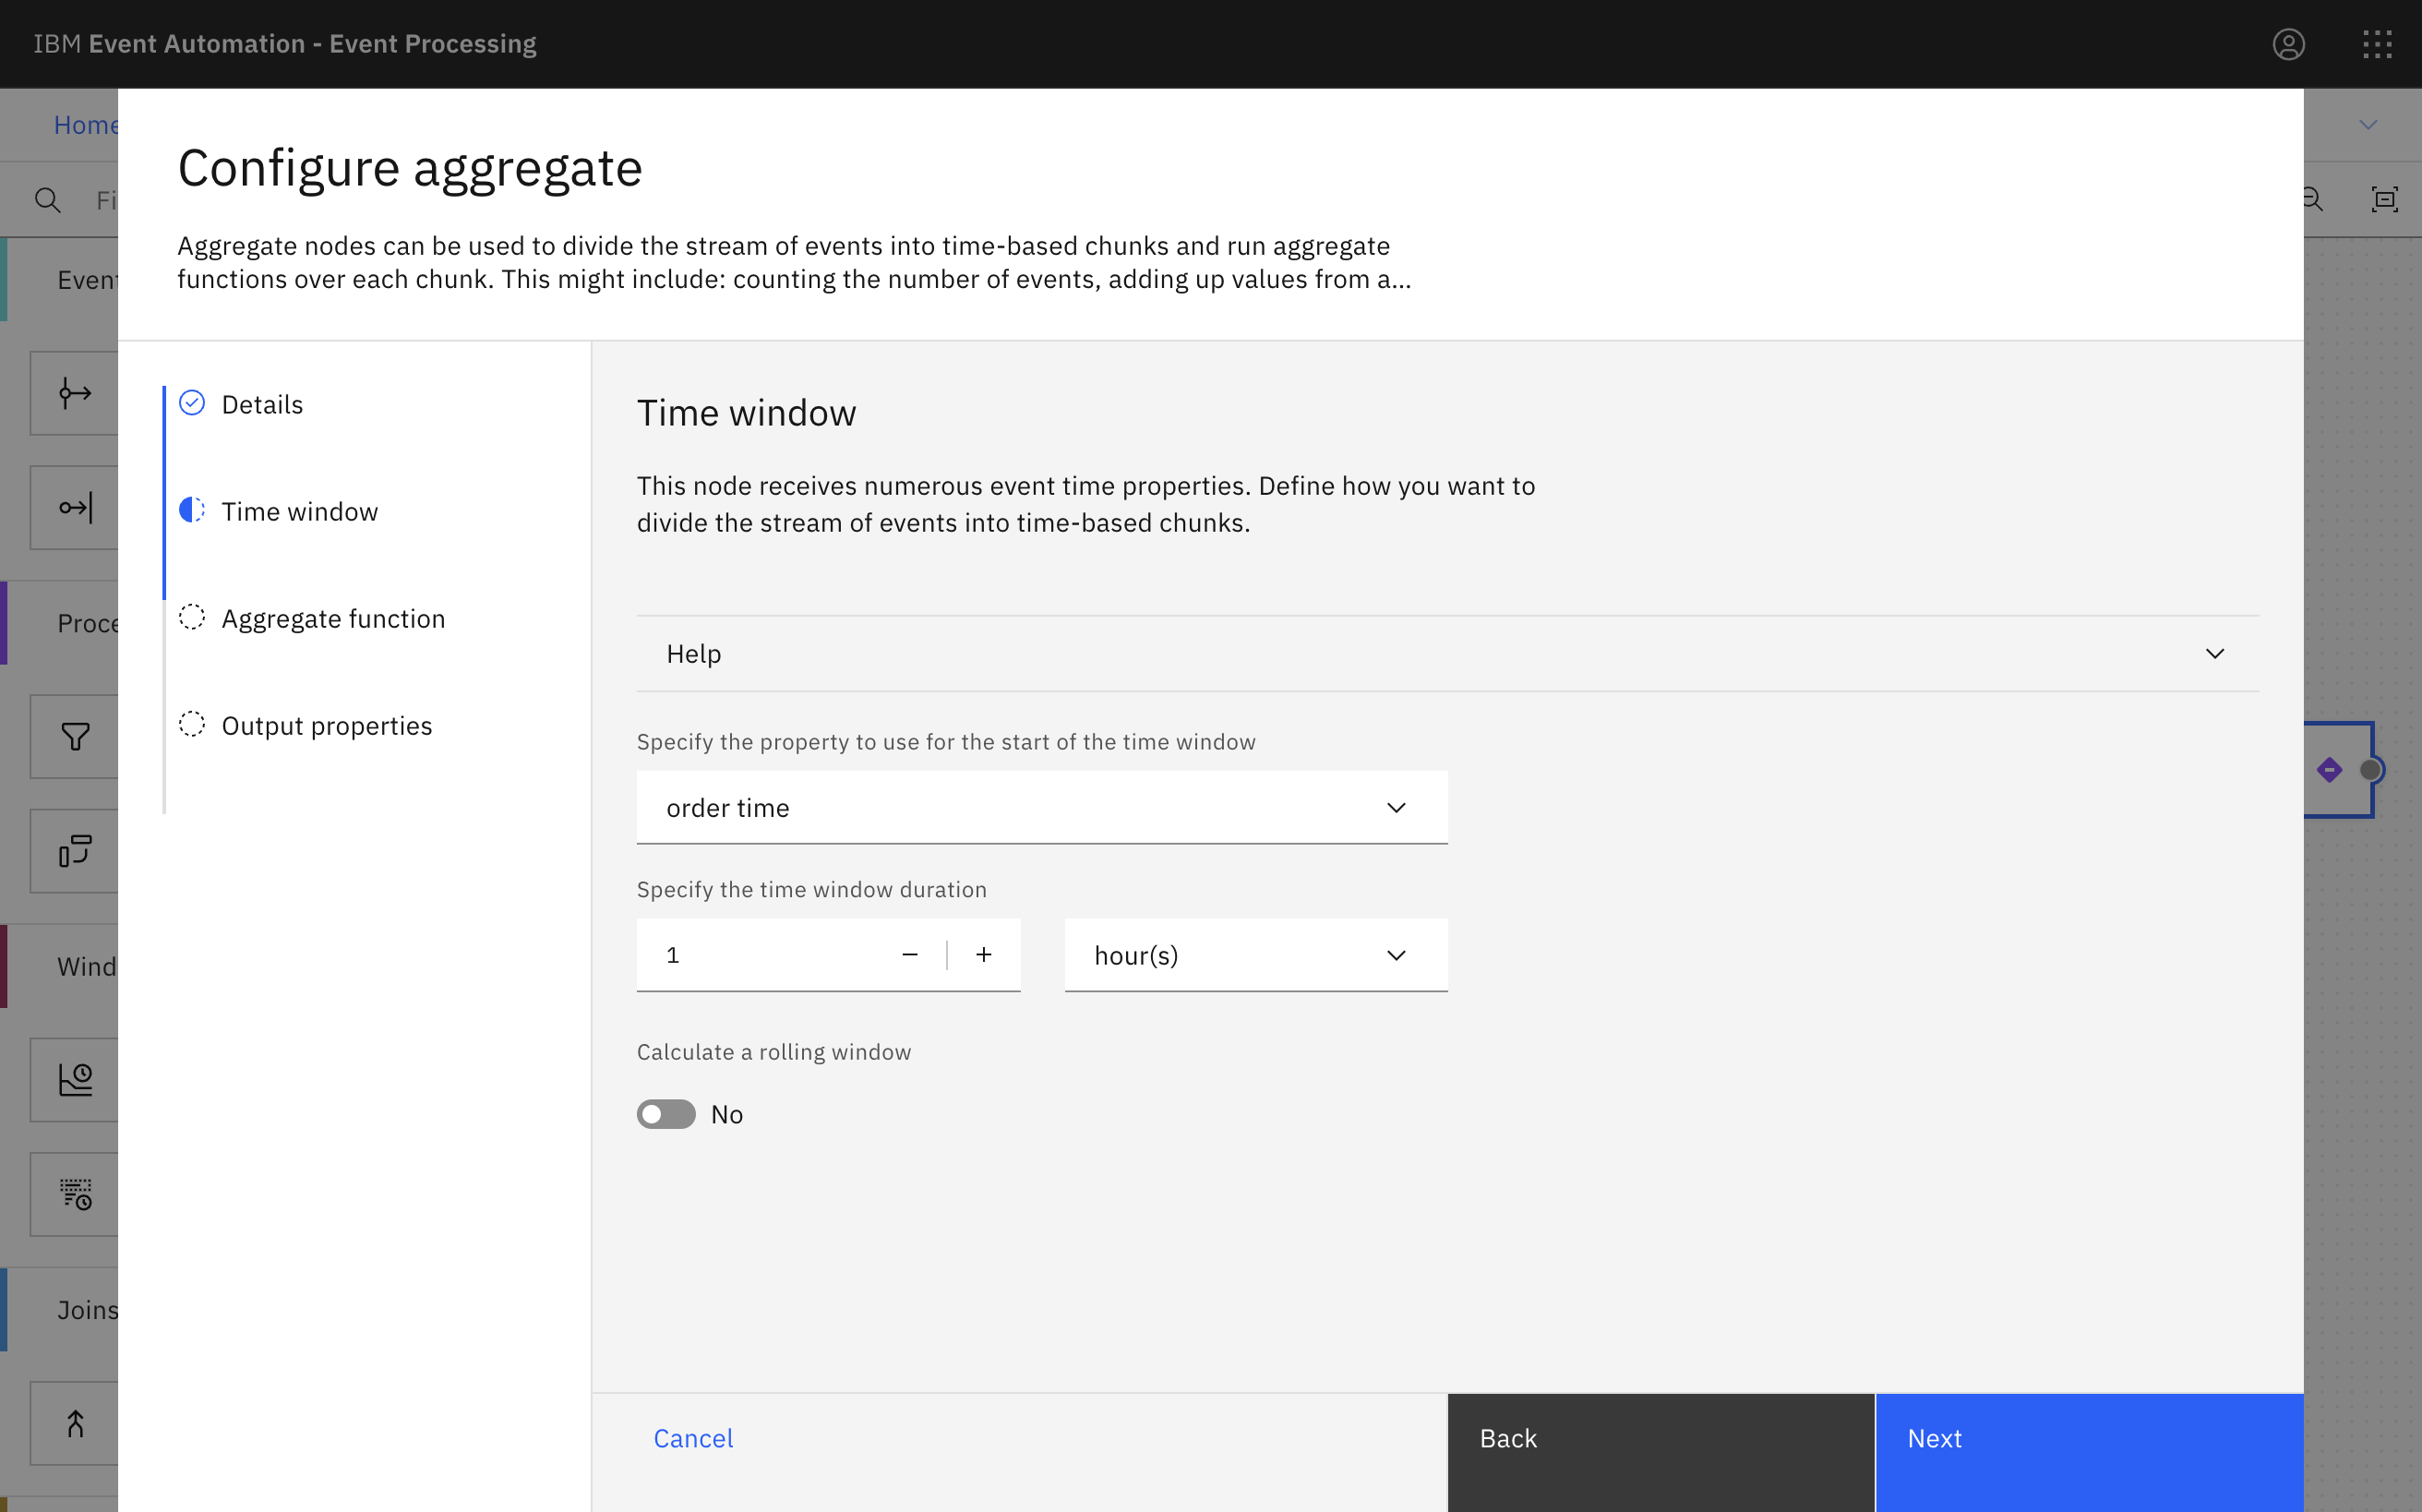
Specify that you want to count cancellations of large orders that are made within a 1-hour window time-frame.
-
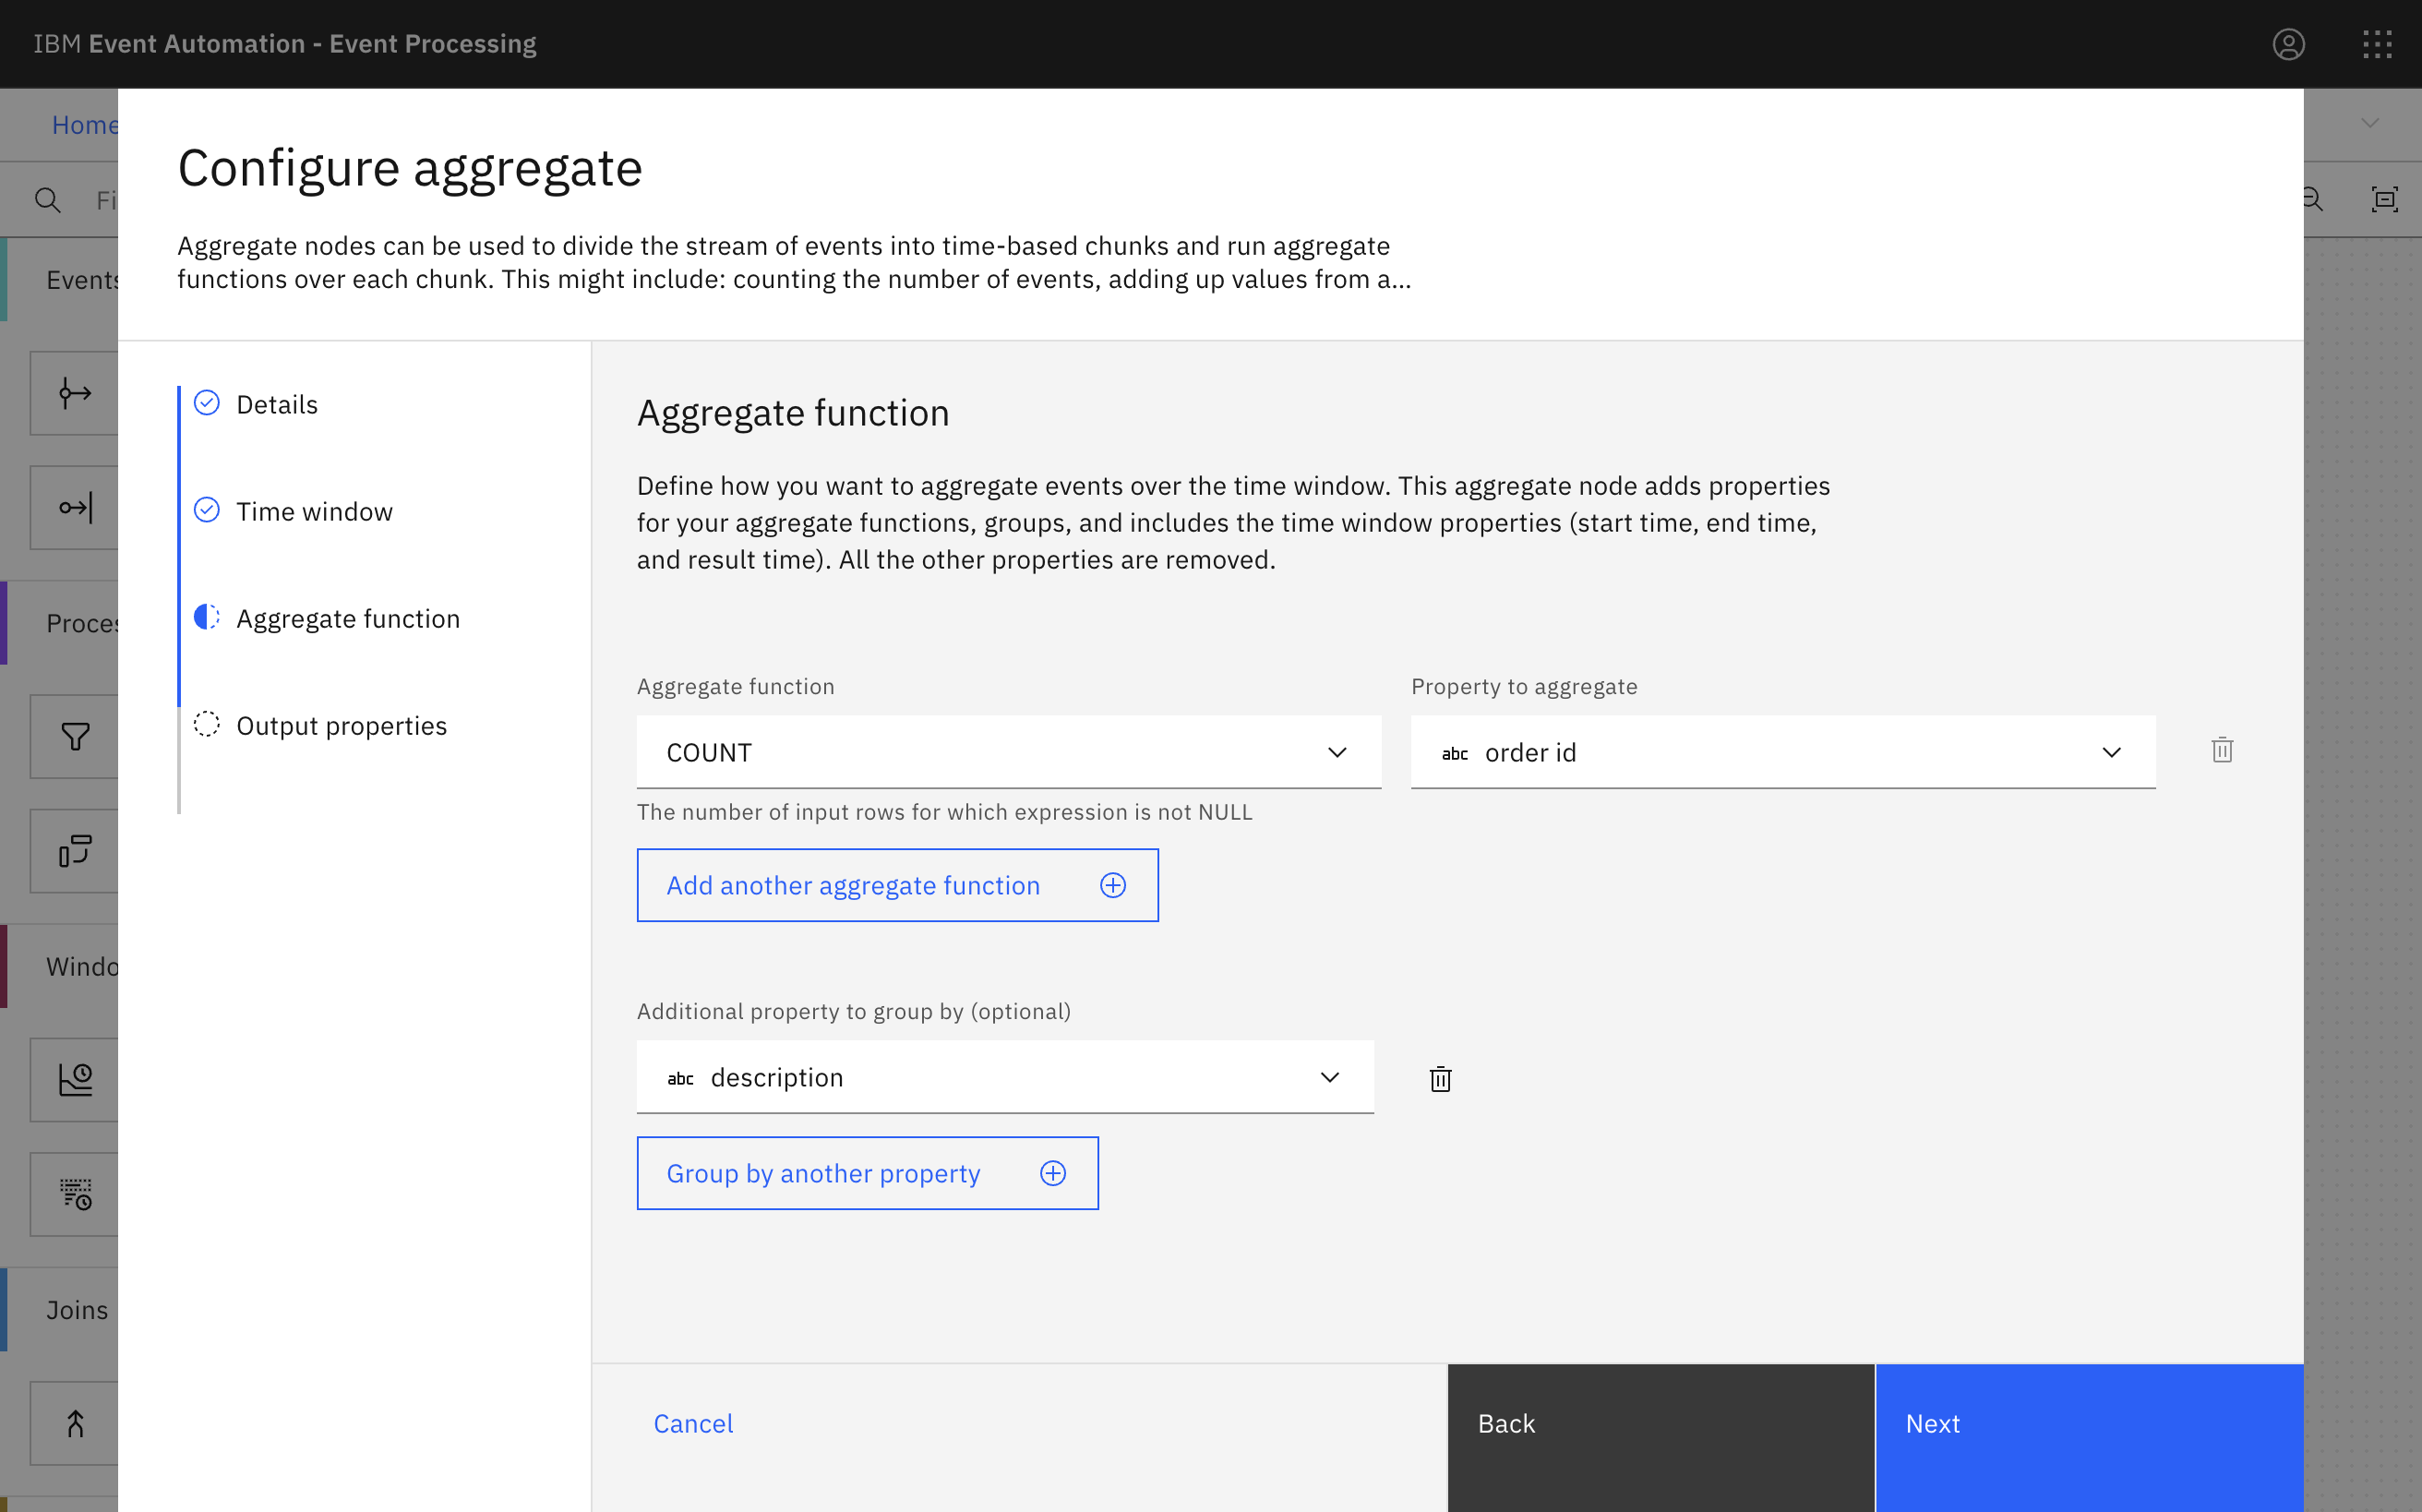
Count the number of orders in each 1-hour window, grouped by the product description.
-
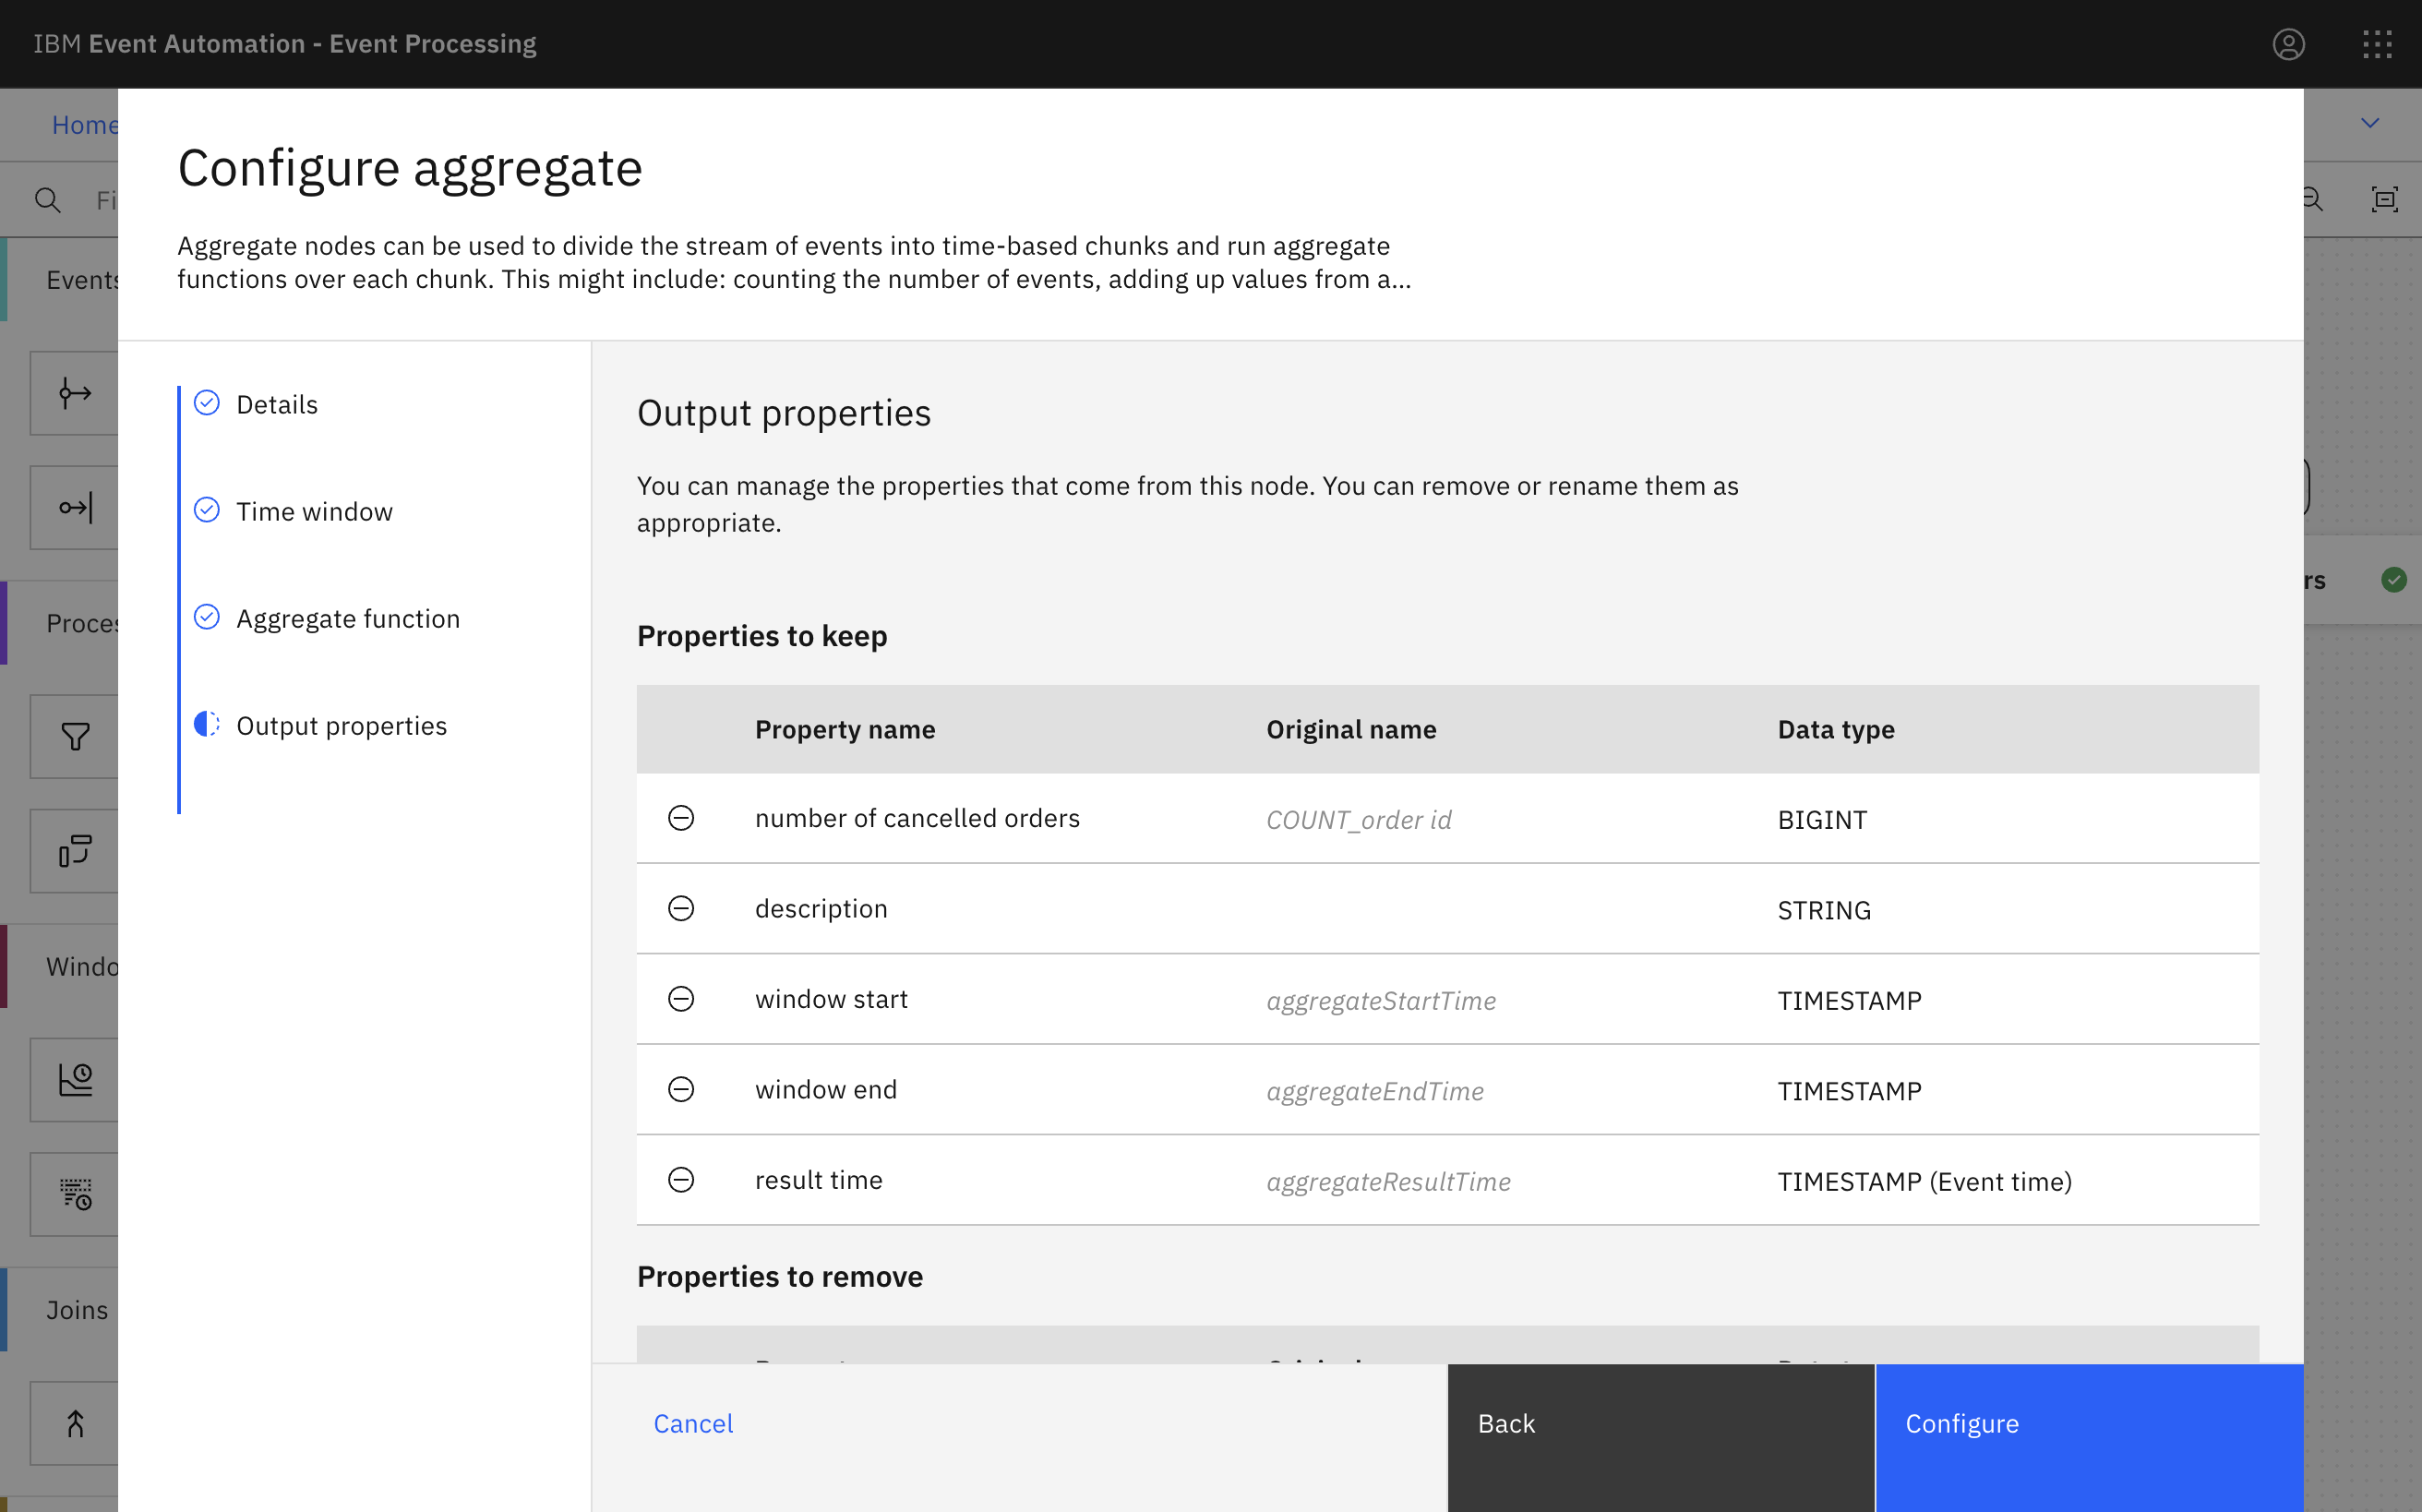
Rename the output fields.
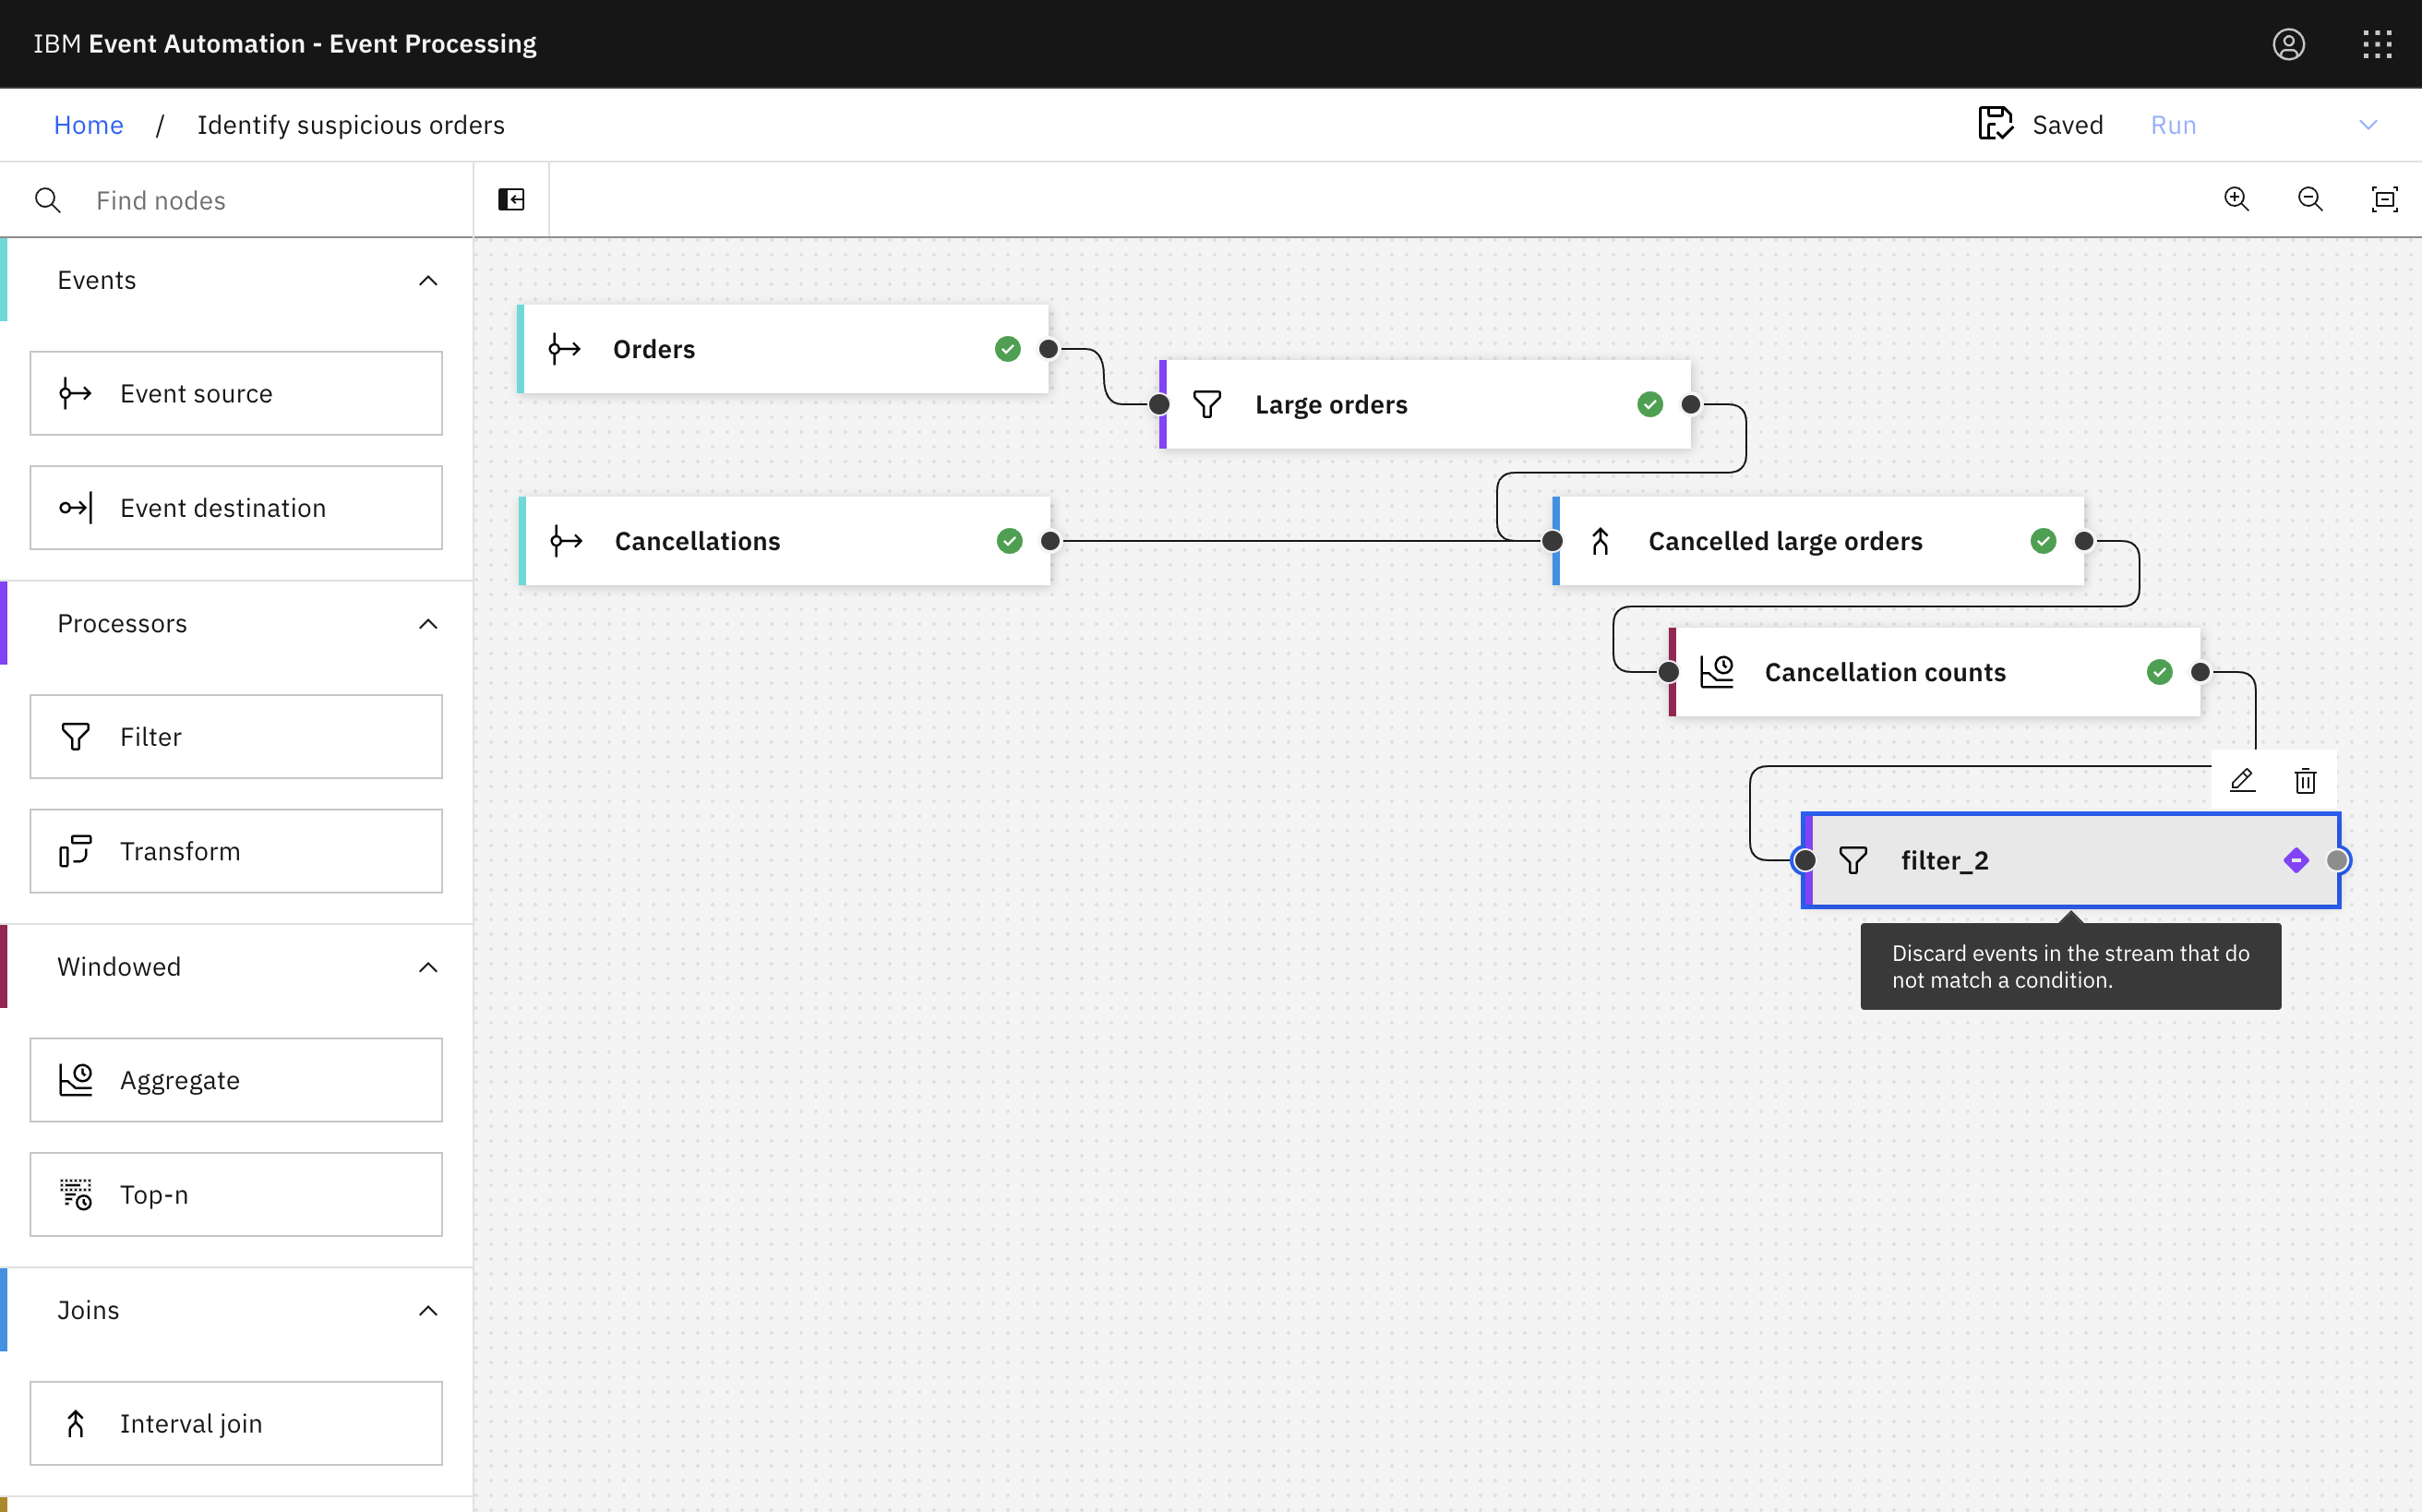
Step 7: Identify repeated cancellations
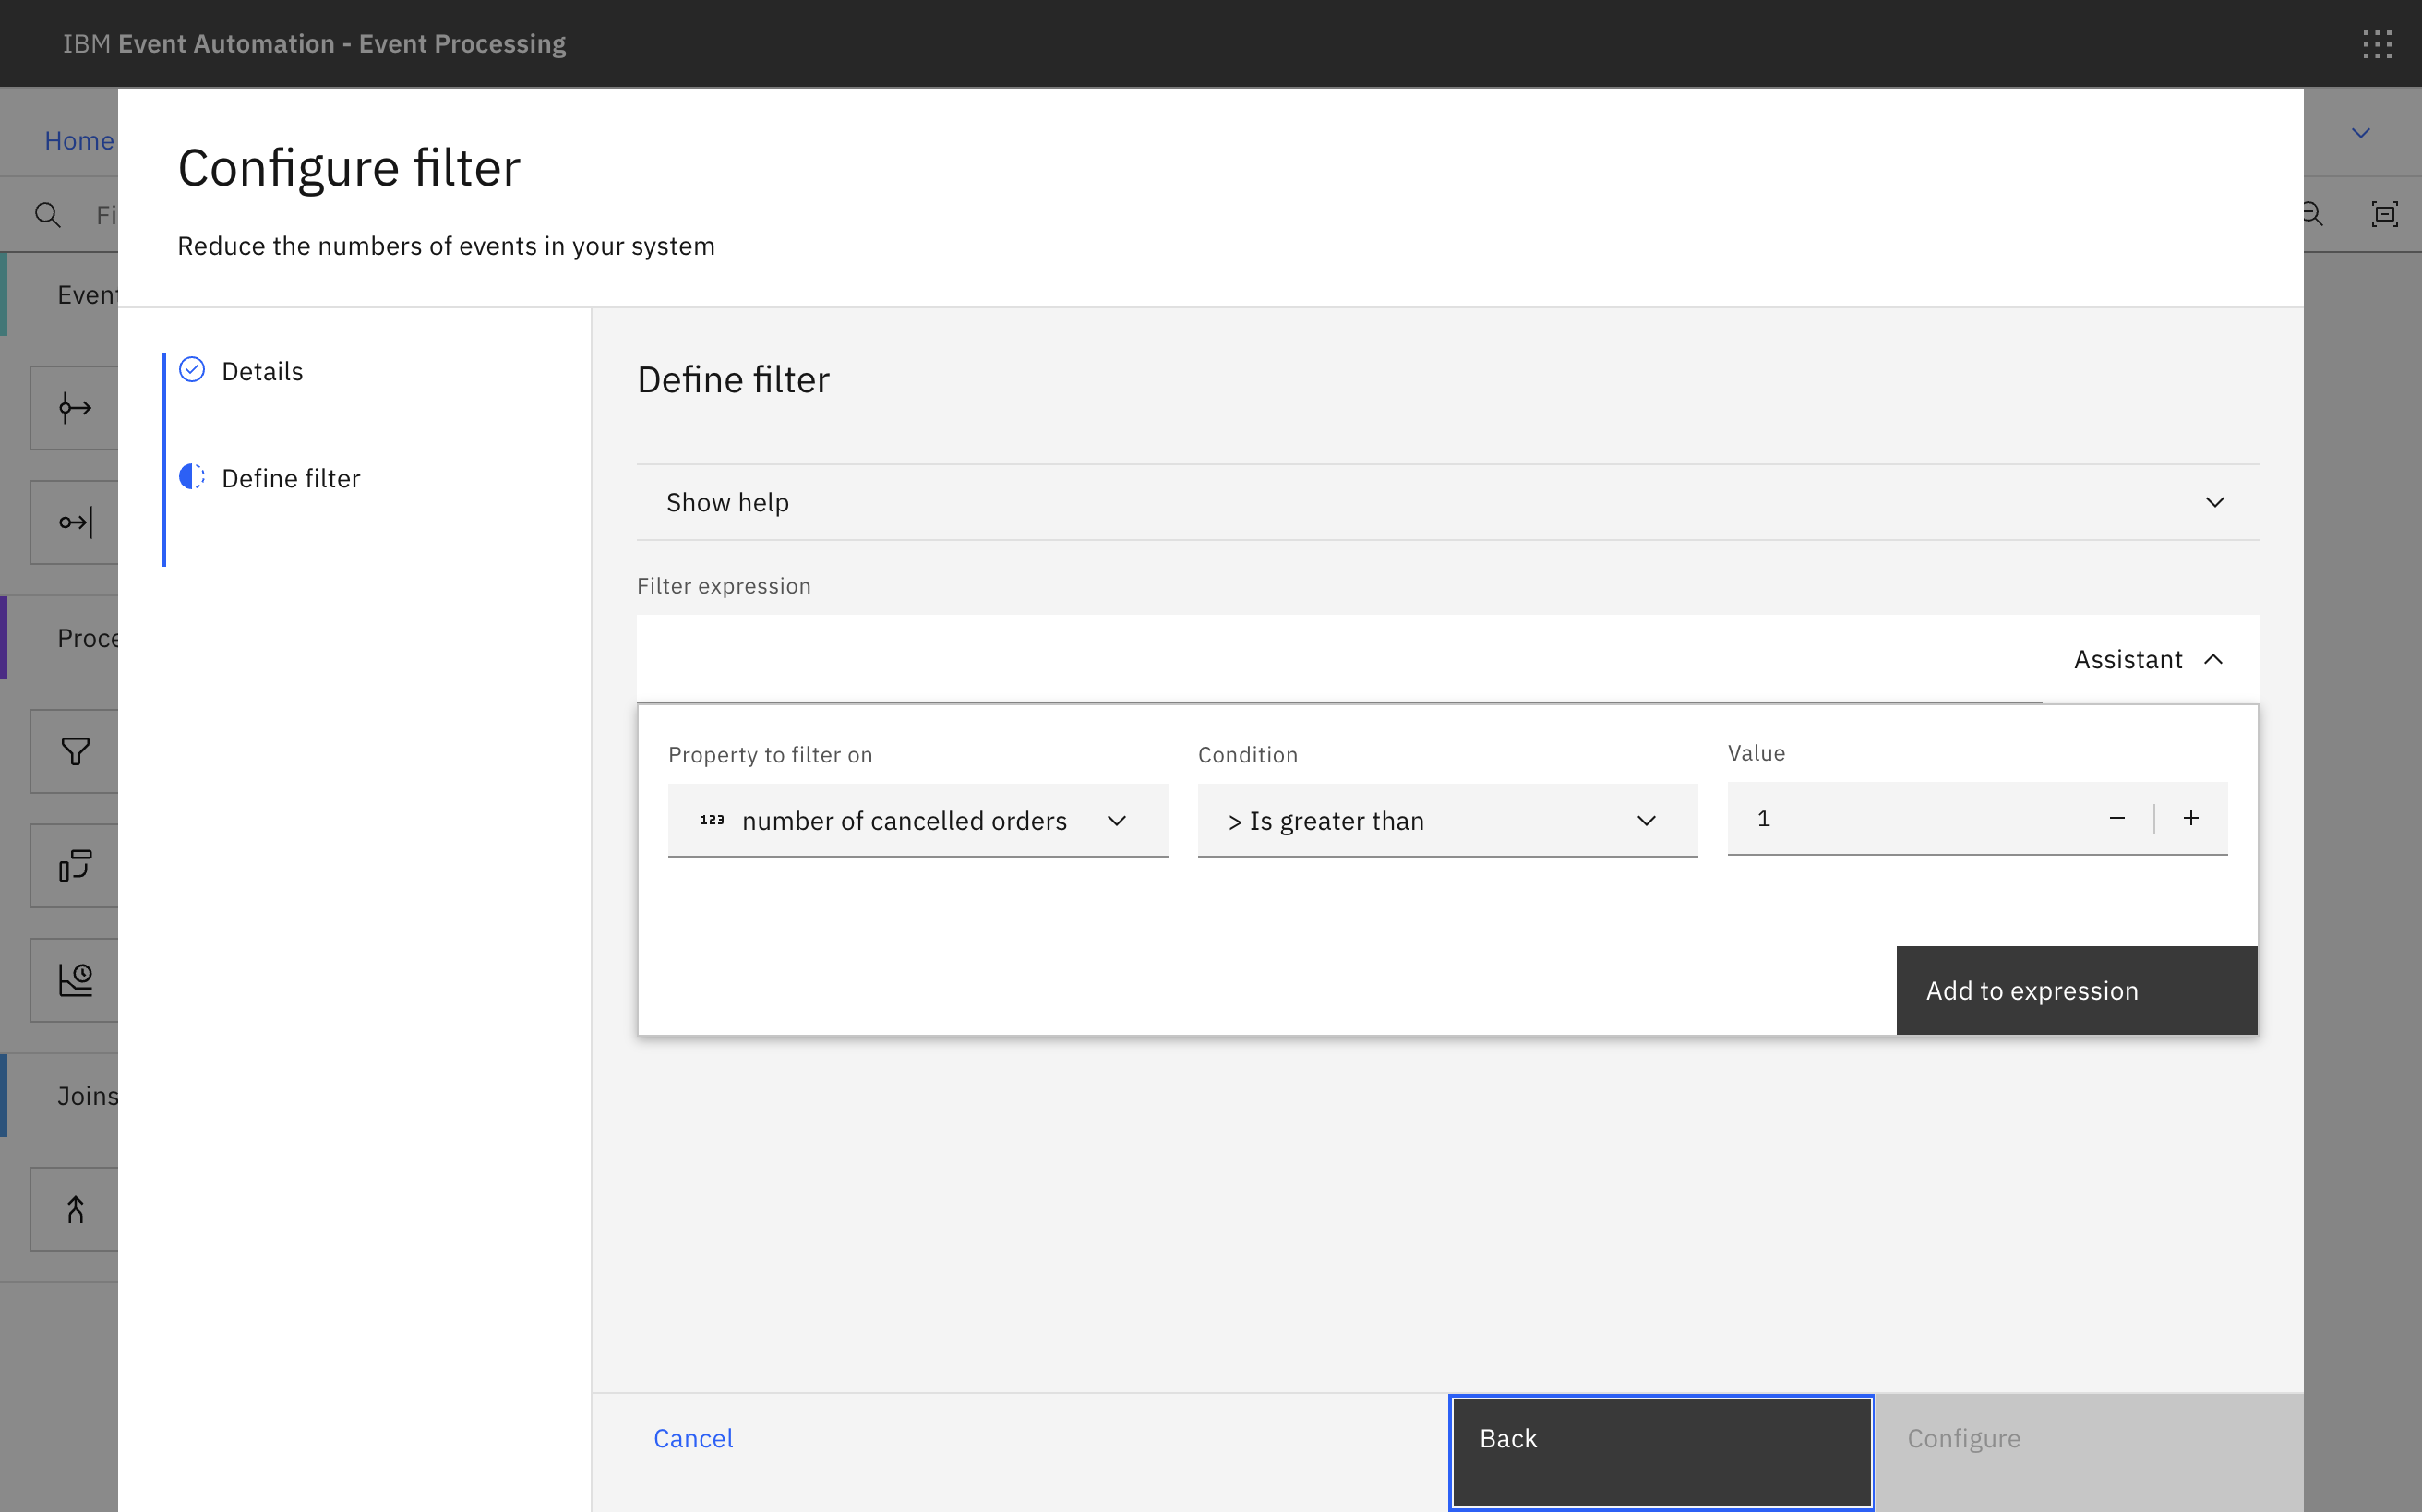
The next step is to filter out cancelled large orders for a product where they only occur once within a one-hour window, leaving only repeated cancelled large orders.
-
Add a Filter node to the flow.
-
Call the node
Repeated cancelled orders. -
Define a filter that matches where that has been more than one large cancelled order of a product within a one-hour window.
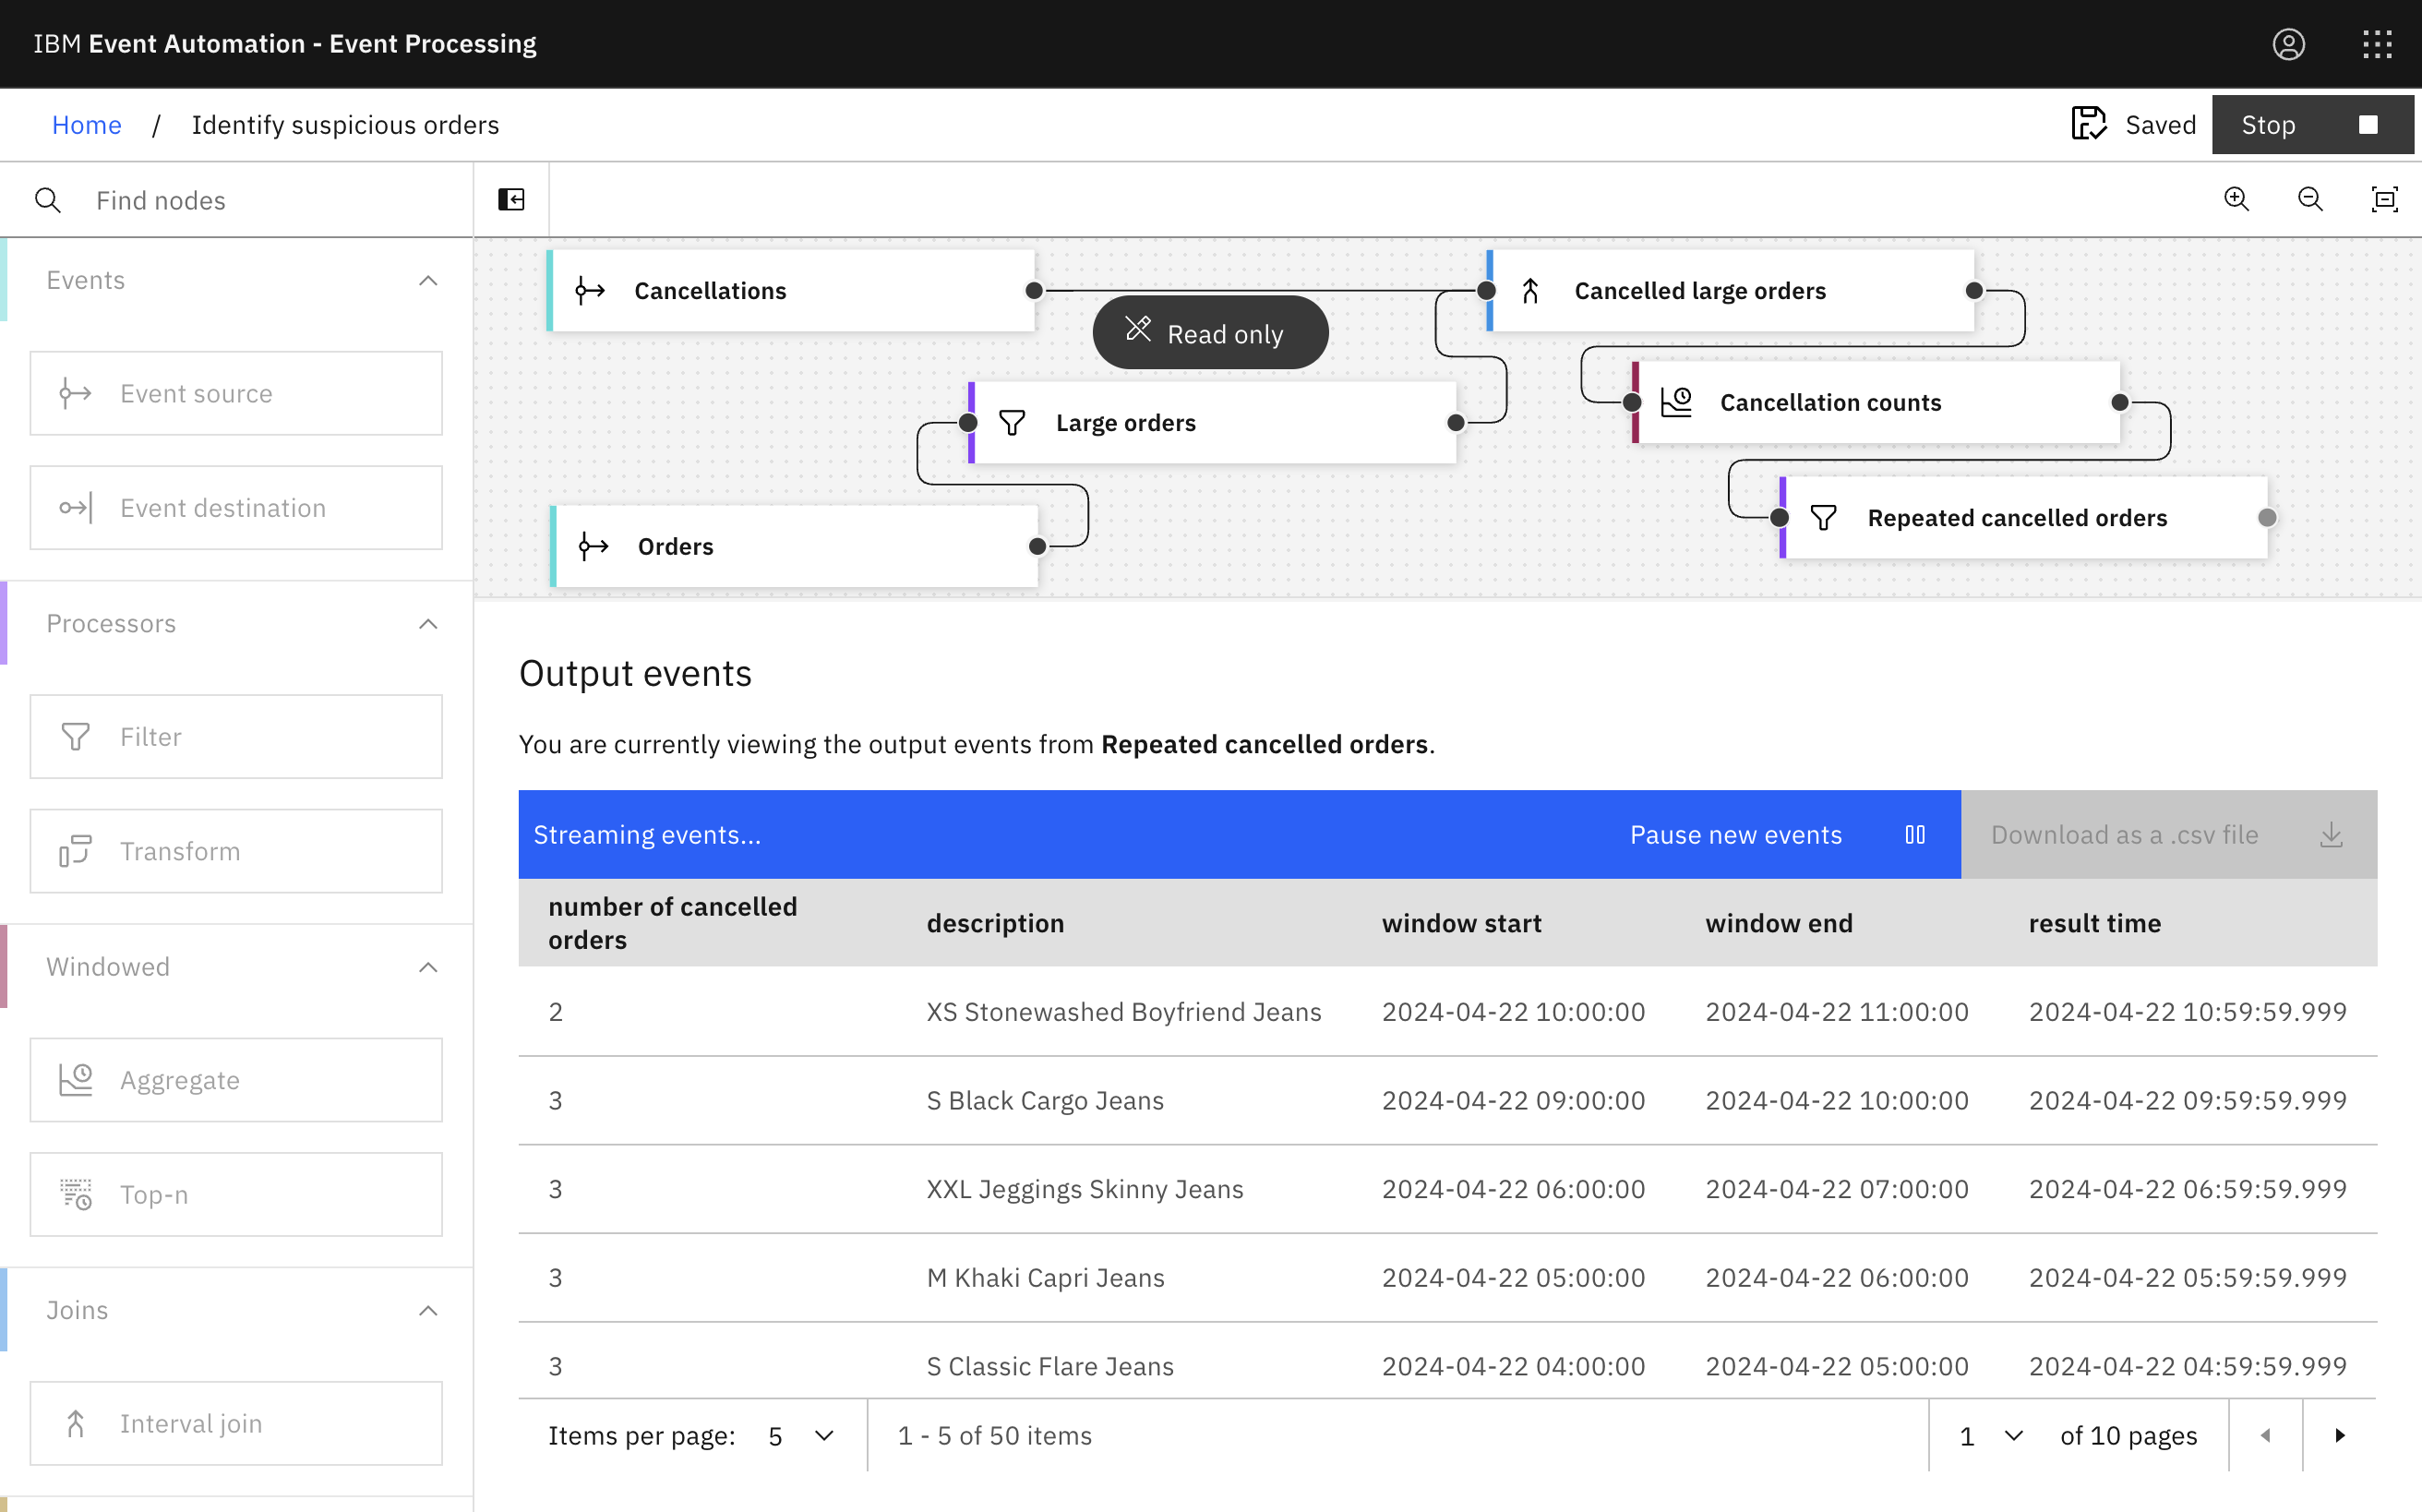
Step 8: Test the flow
The next step is to test your event processing flow and view the results.
-
Use the Run menu, and select Include historical to run your filter on the history of order events available on this Kafka topic.
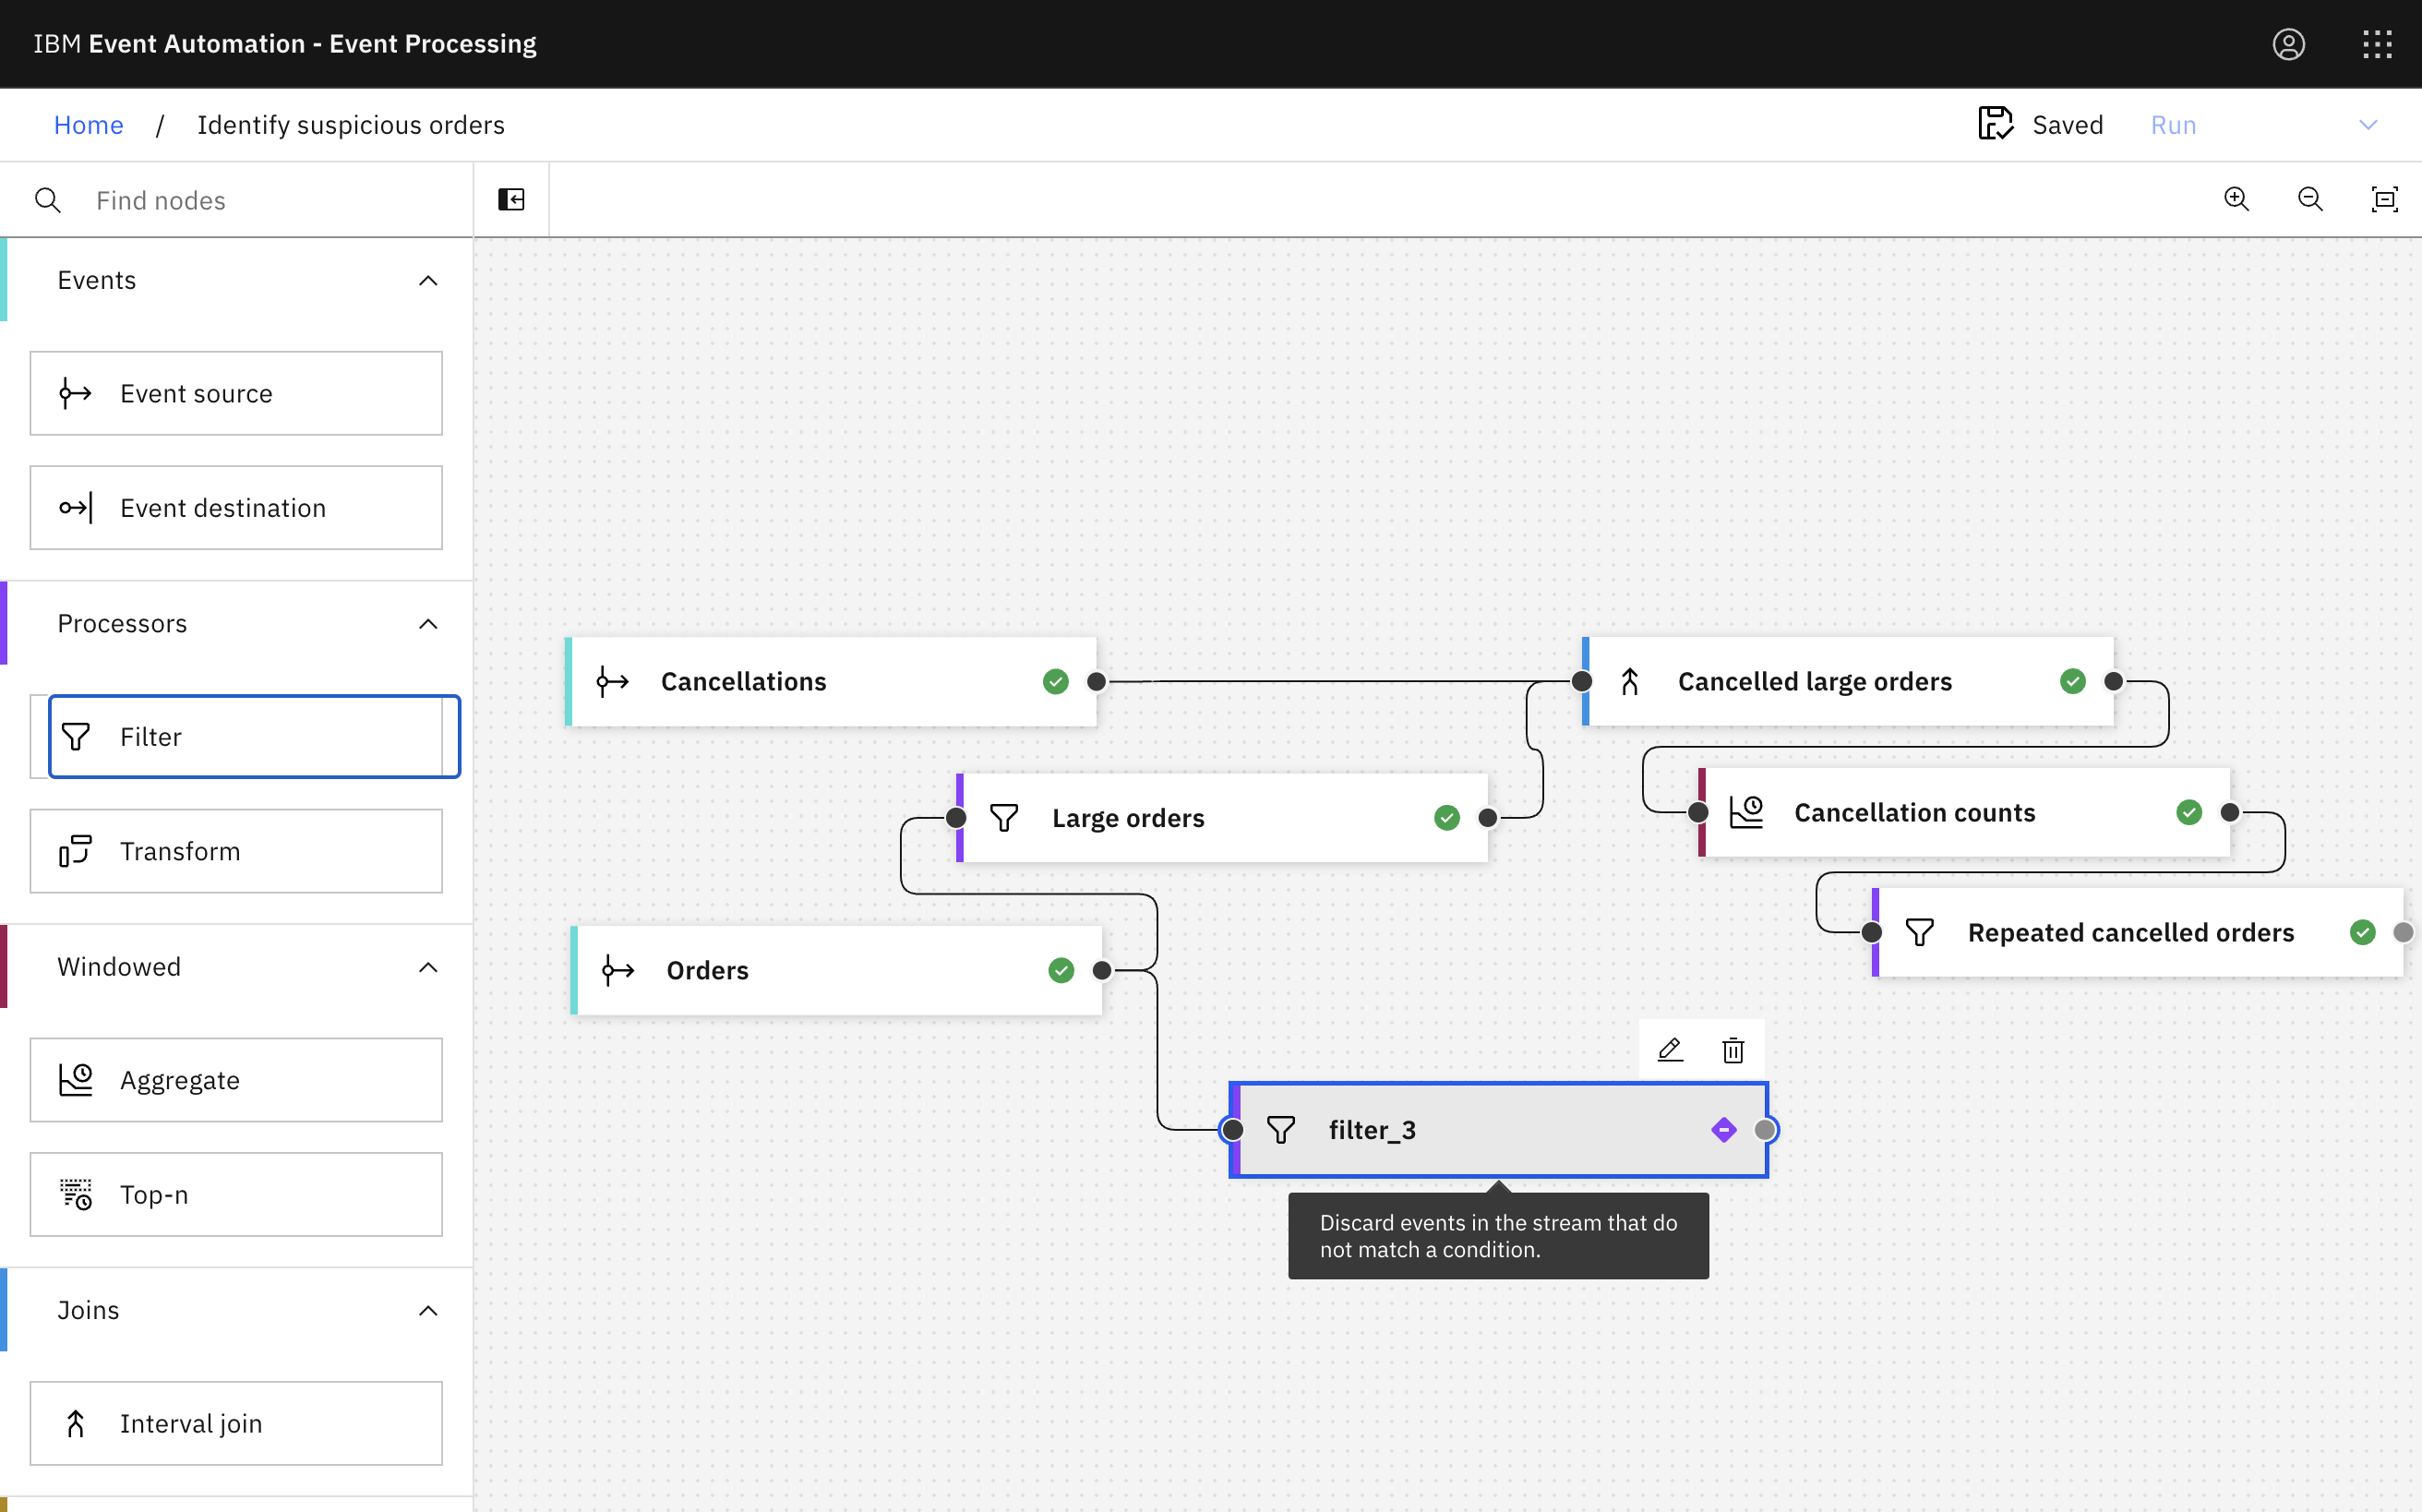
Step 9: Identify small orders
The next step is to identify small orders.
-
Add a Filter node to the orders events.
-
Give the filter node a name that describes the results:
Small orders. -
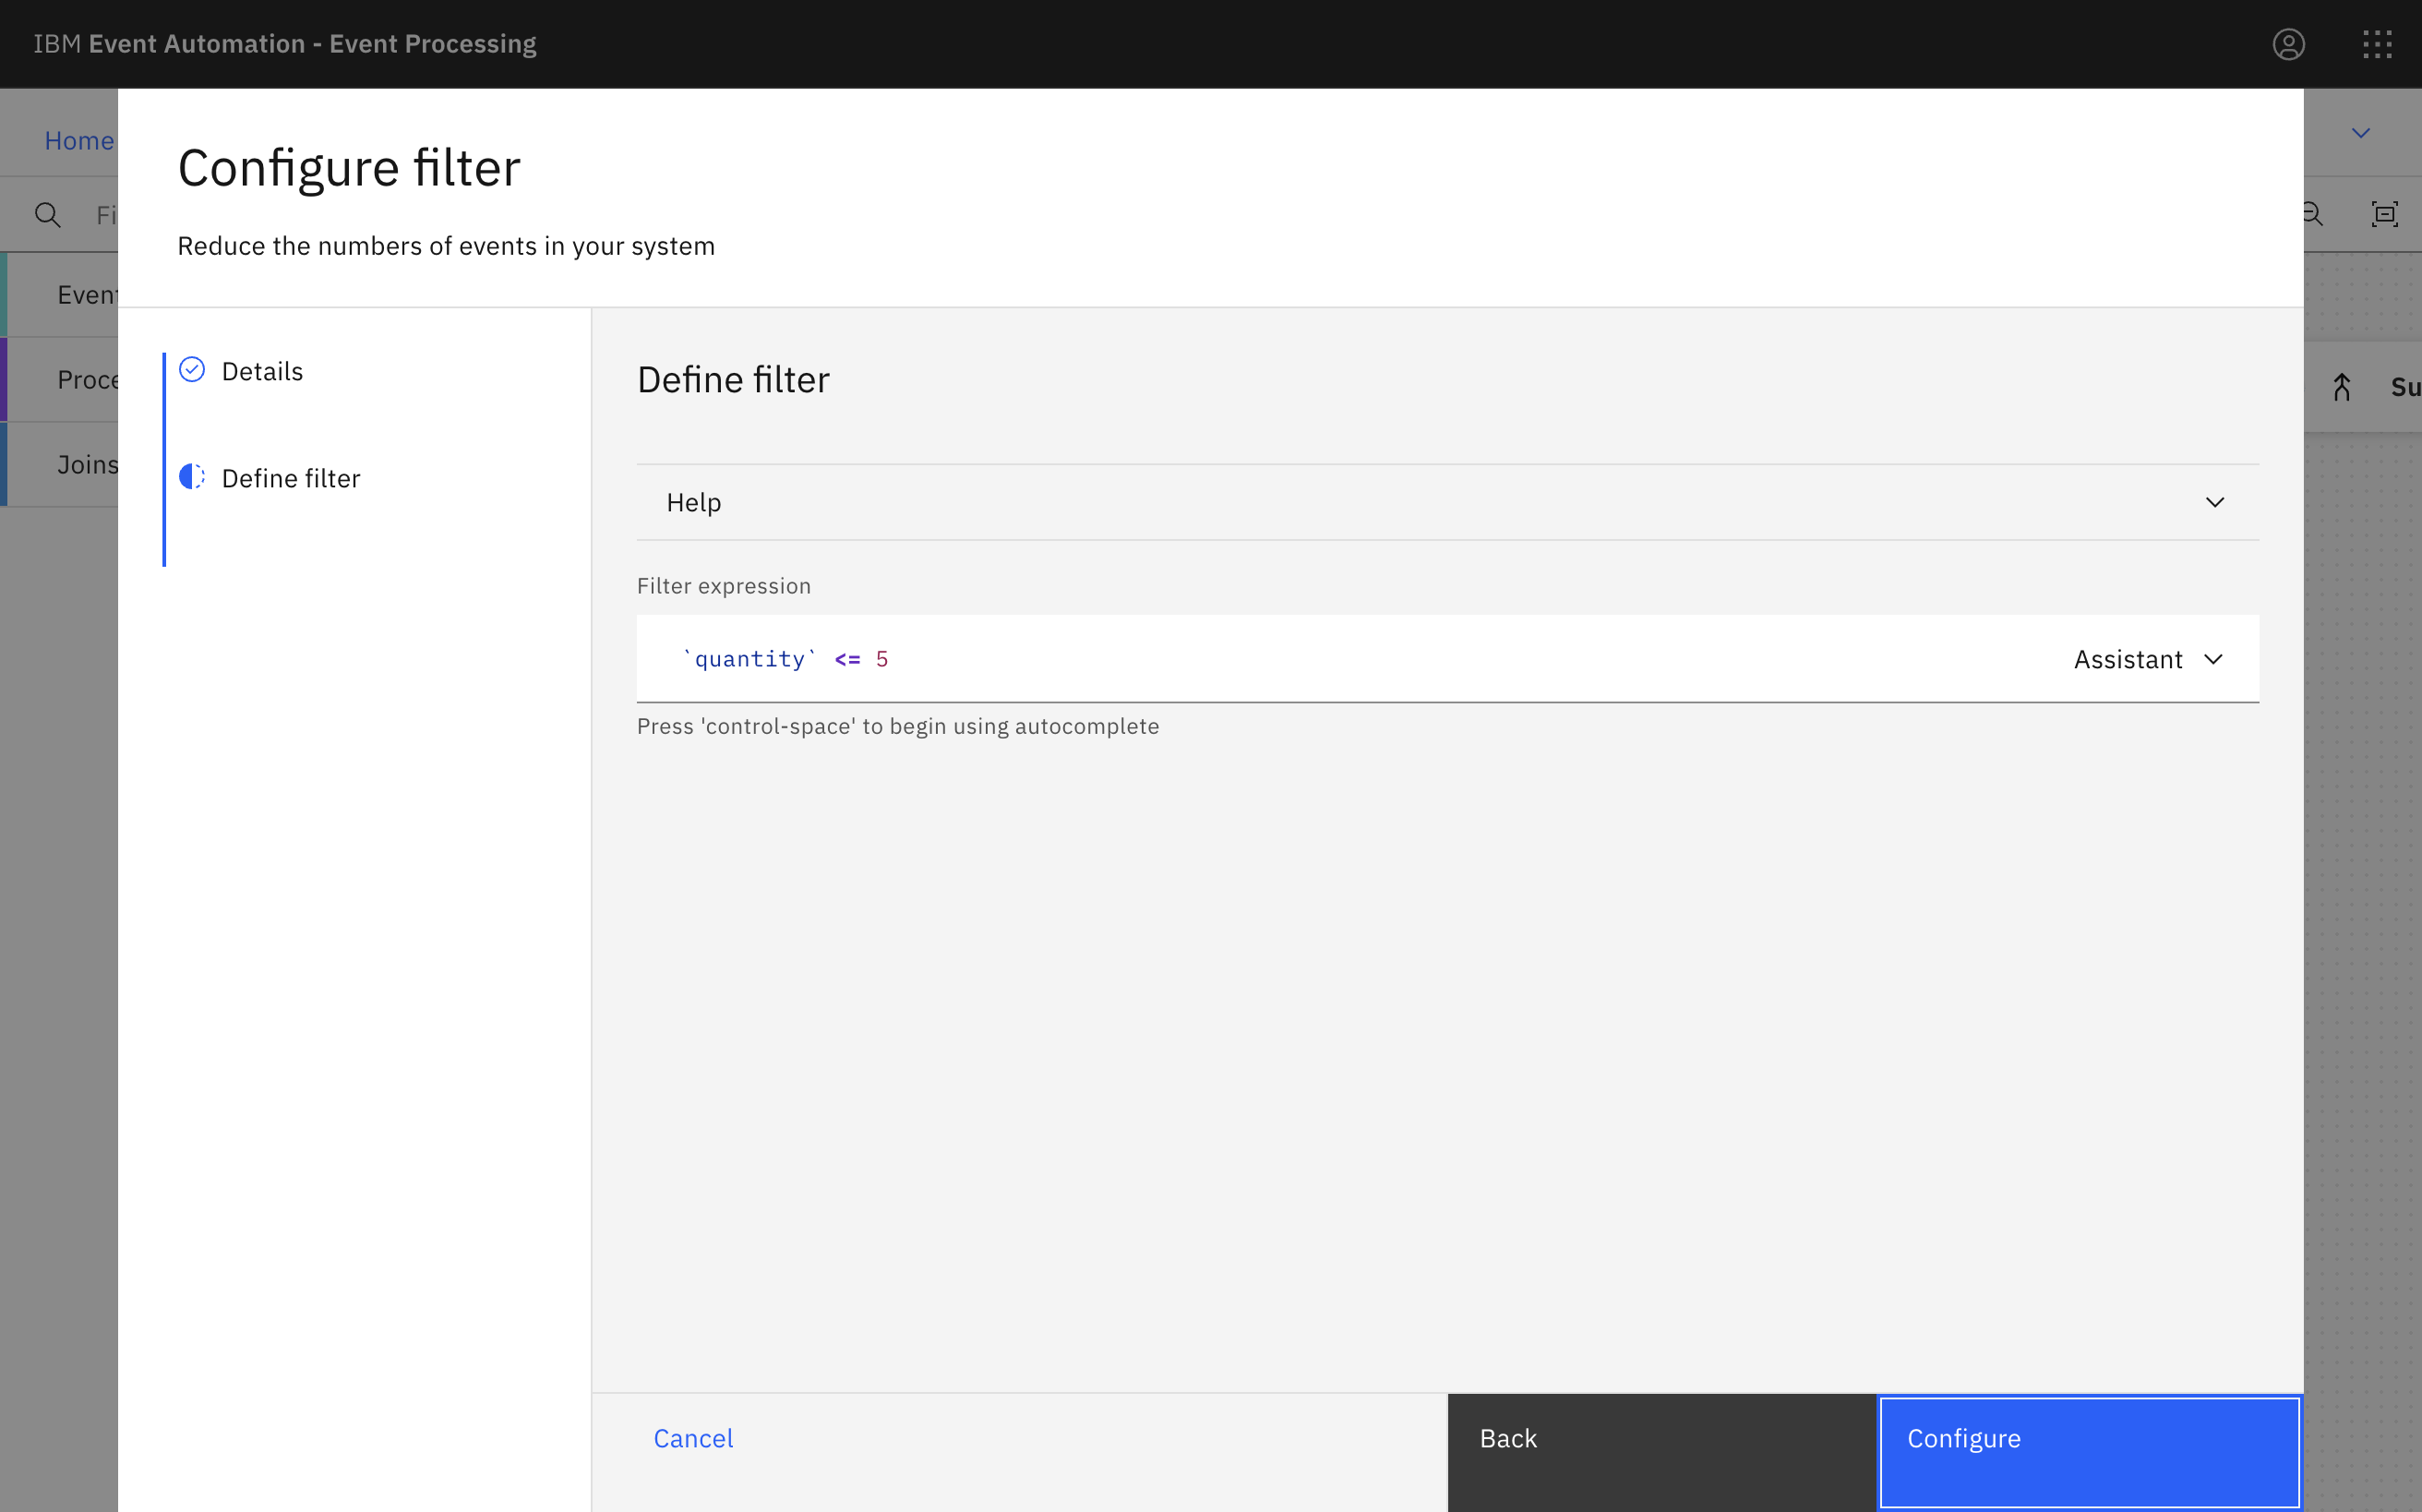
Create a filter that selects orders for five or fewer items.
Step 10: Identify suspicious orders
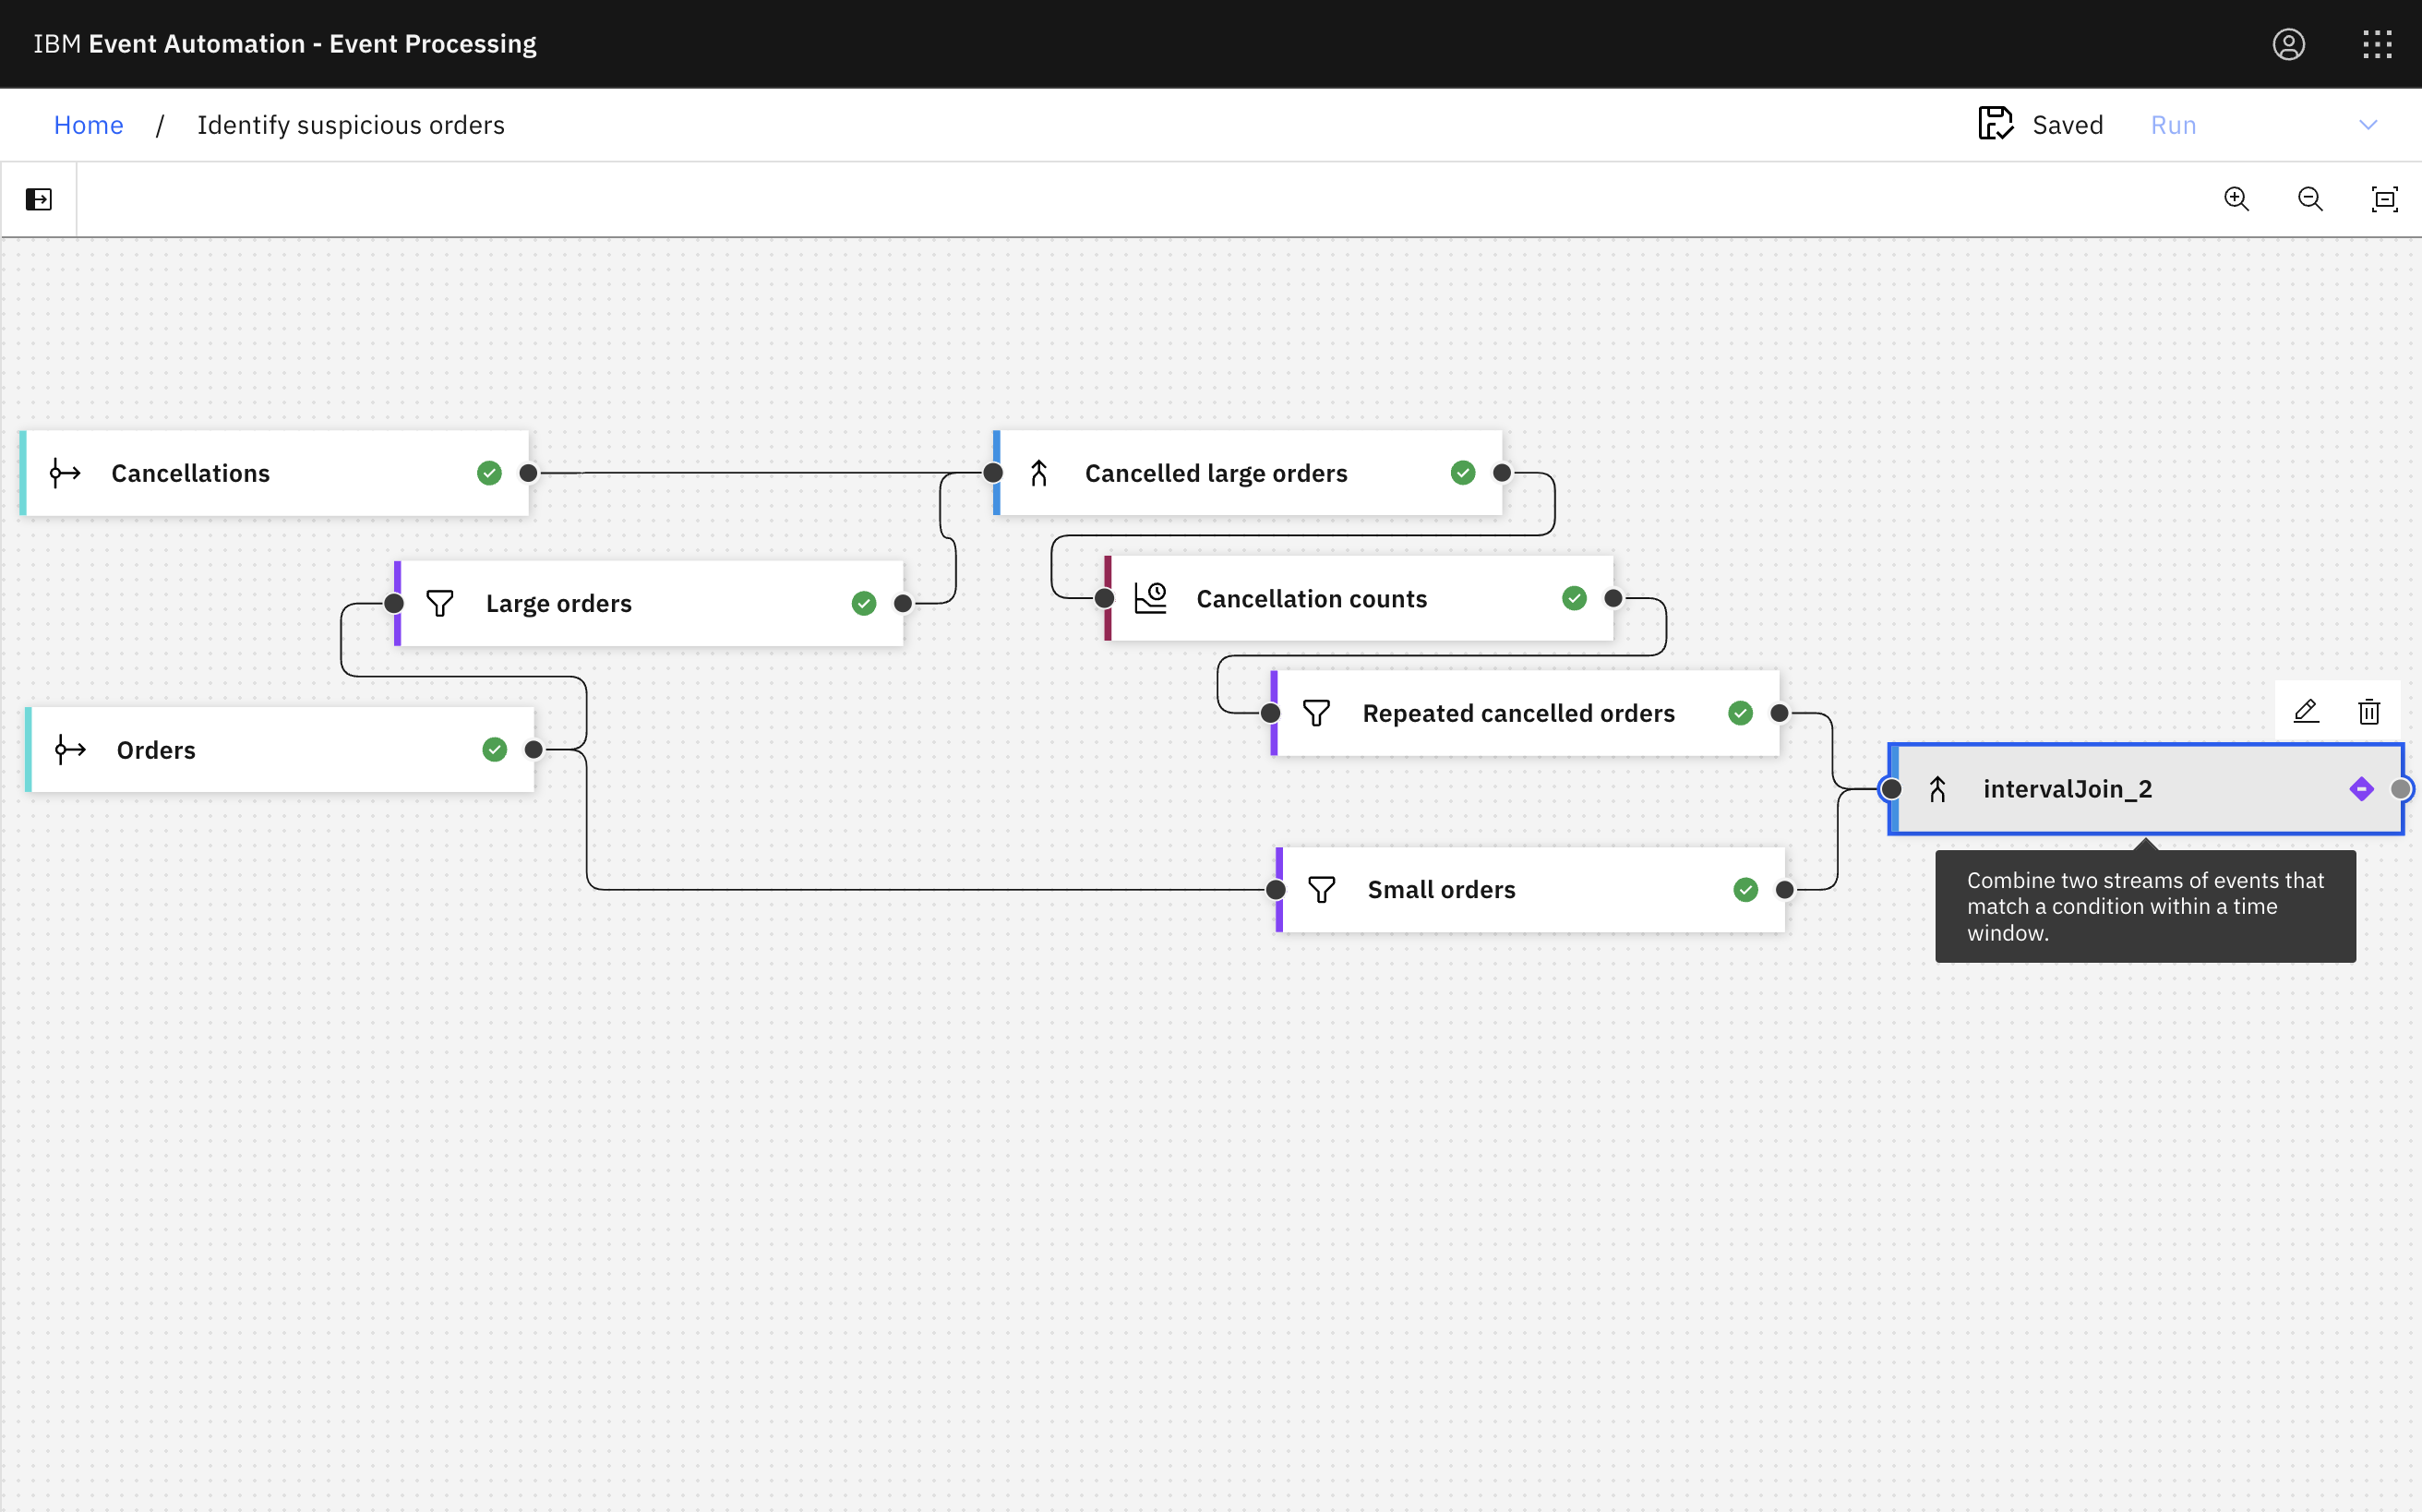
The next step is to identify small orders of the same product as the repeated cancelled large orders, where they are made within a short time window of the cancelled order.
-
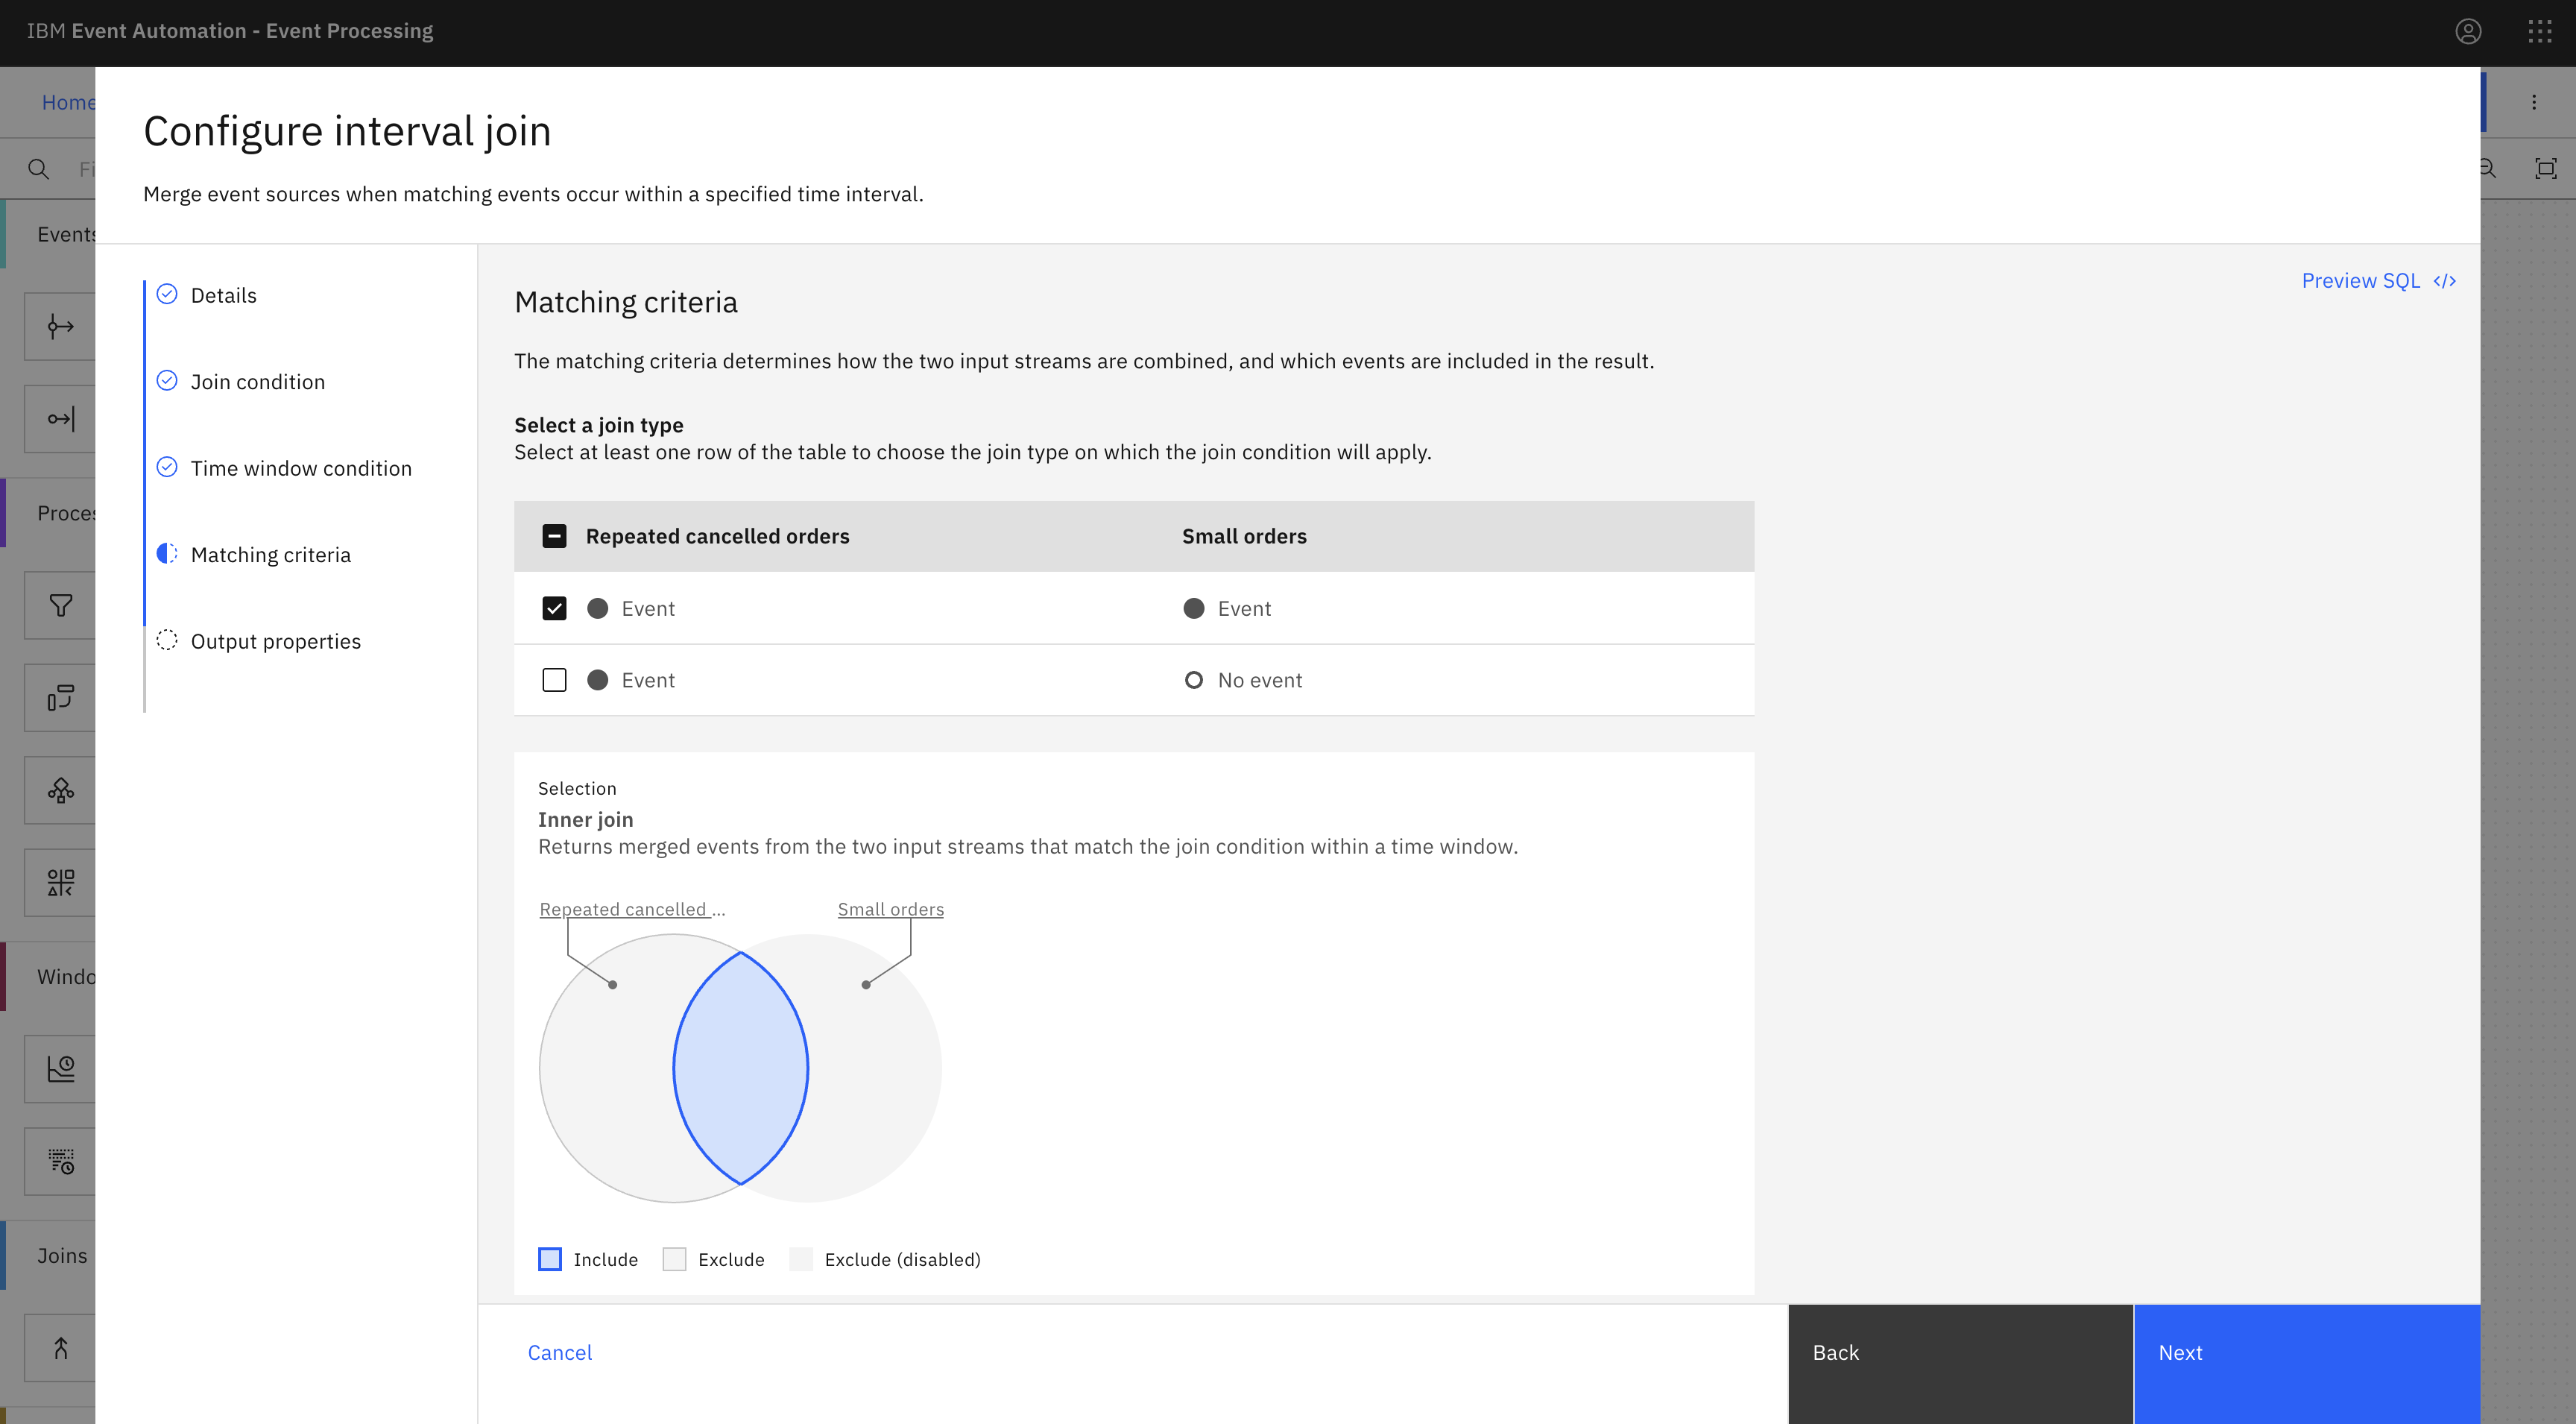
Add an Interval join node to combine the small order events with the cancelled large order events.
-
Give the join node a name that describes the results that it produces:
Suspicious orders. -
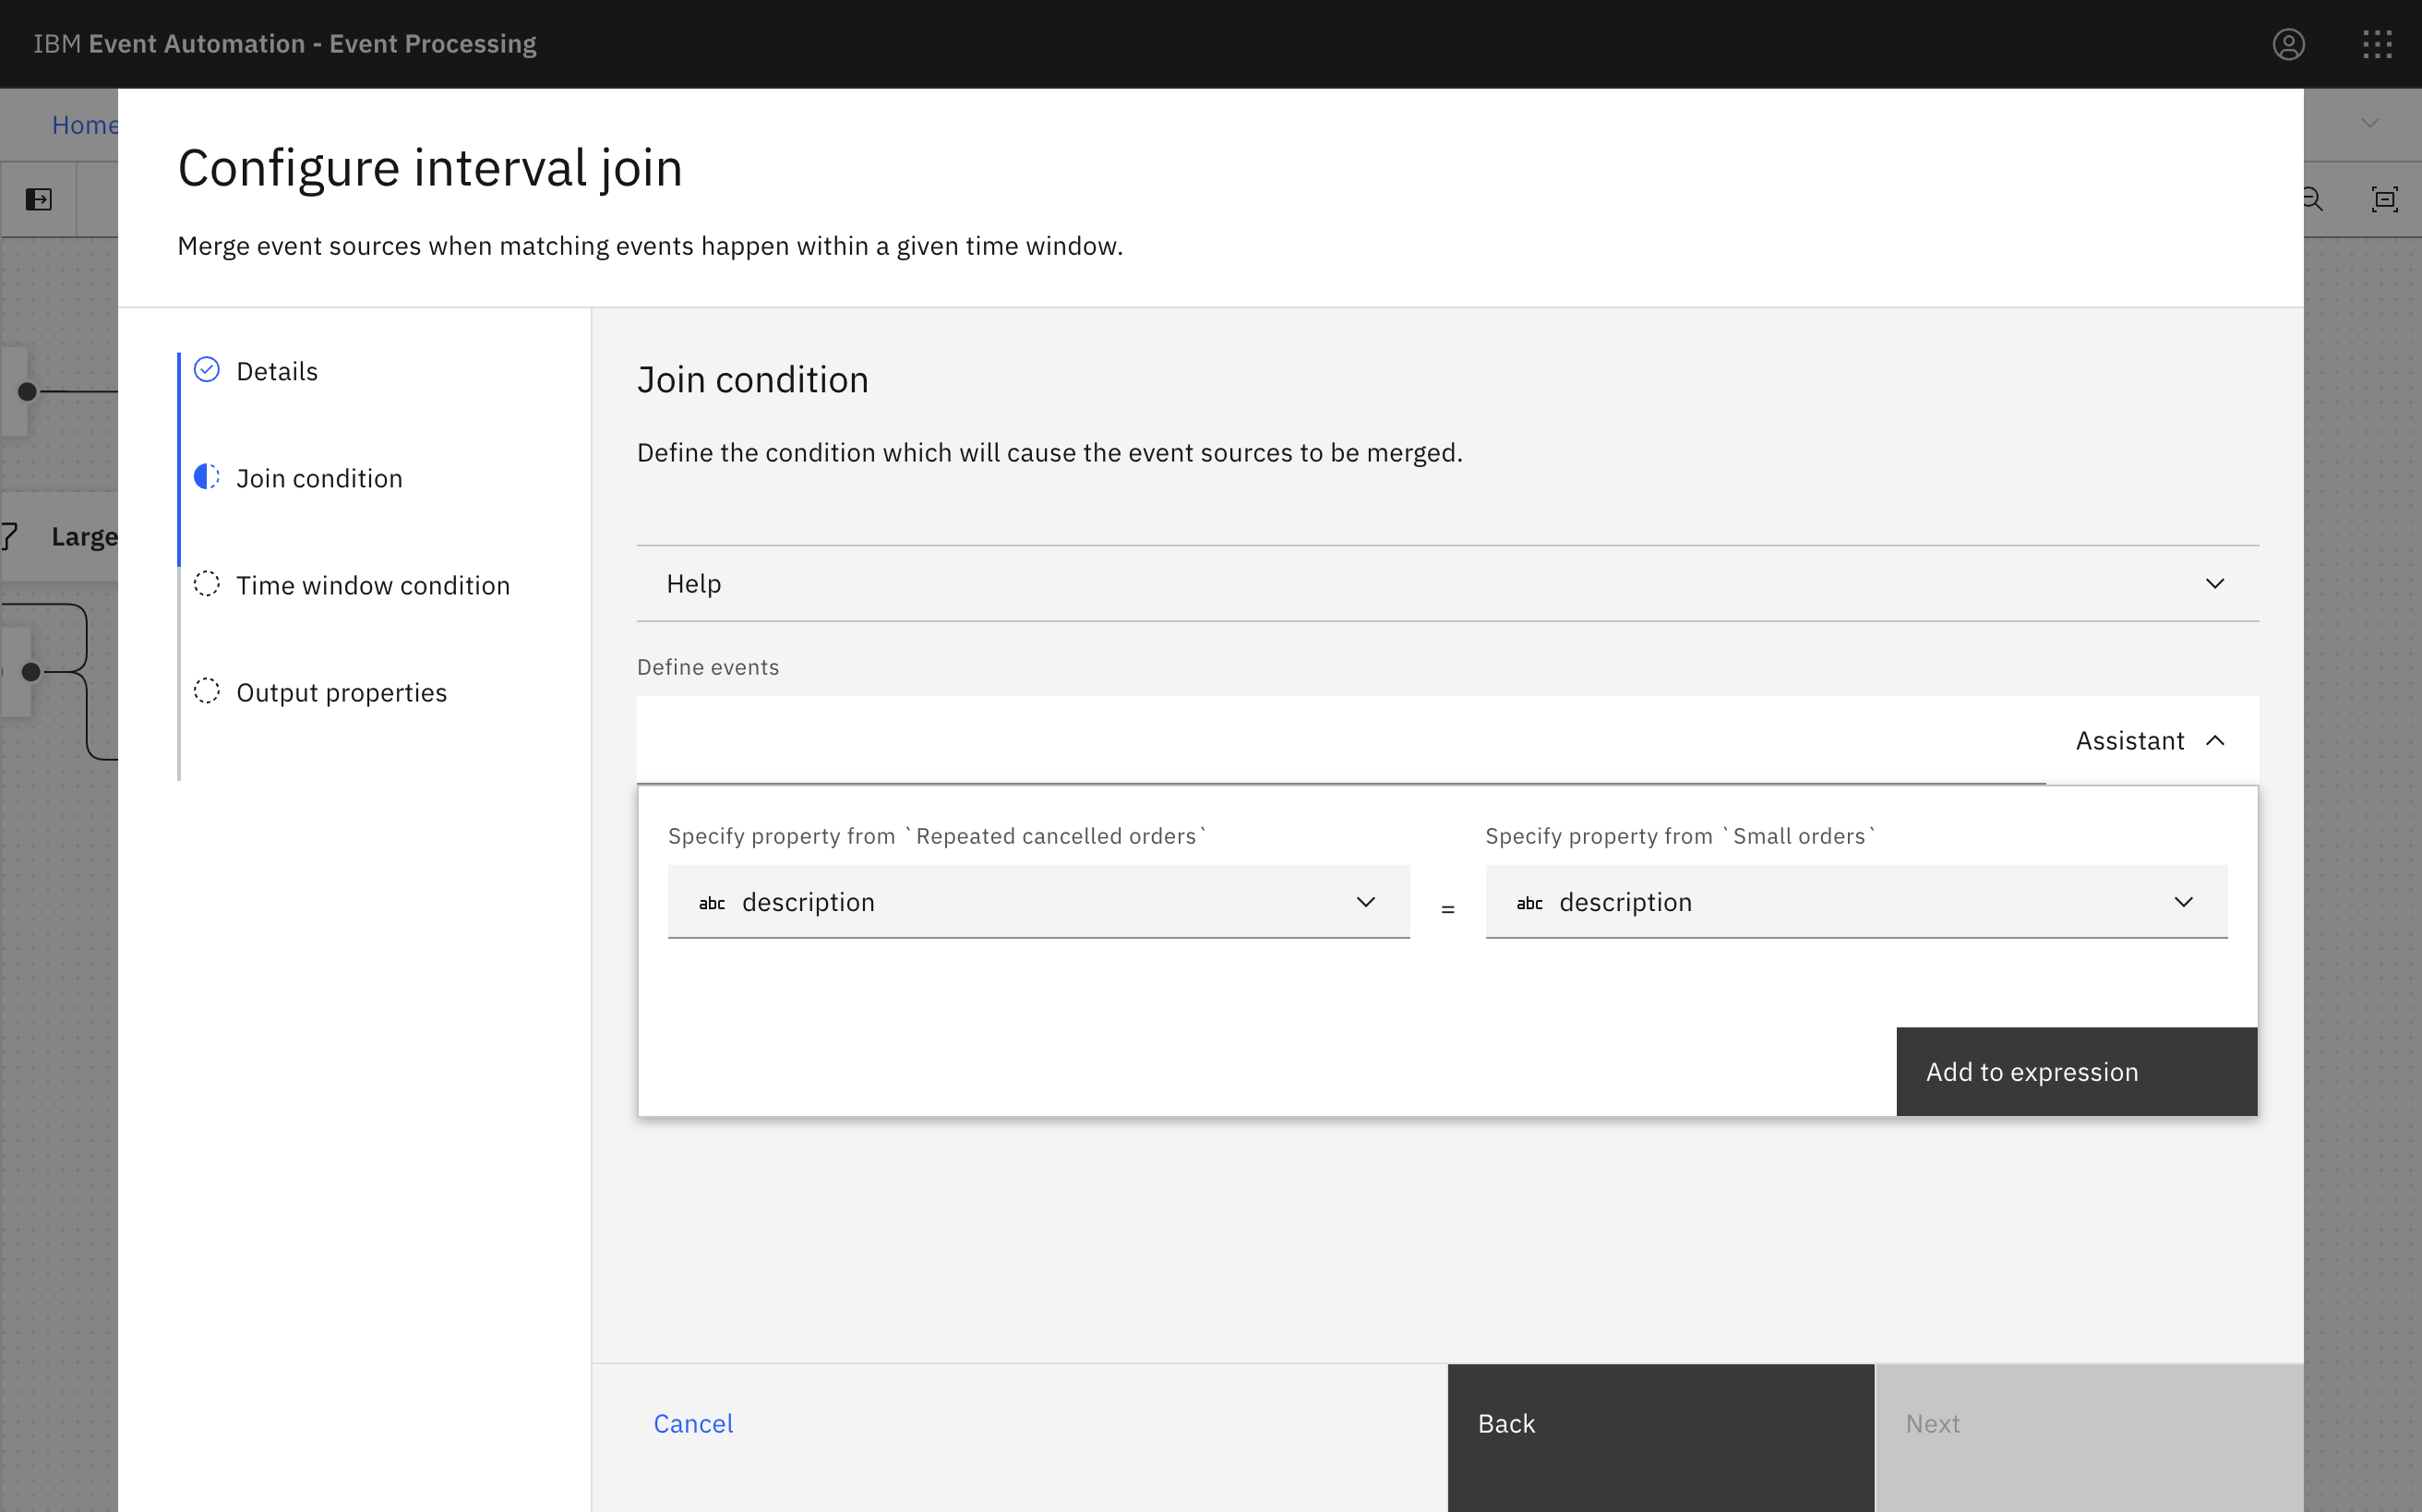
Join the two streams based on the description of the product that was ordered.
-
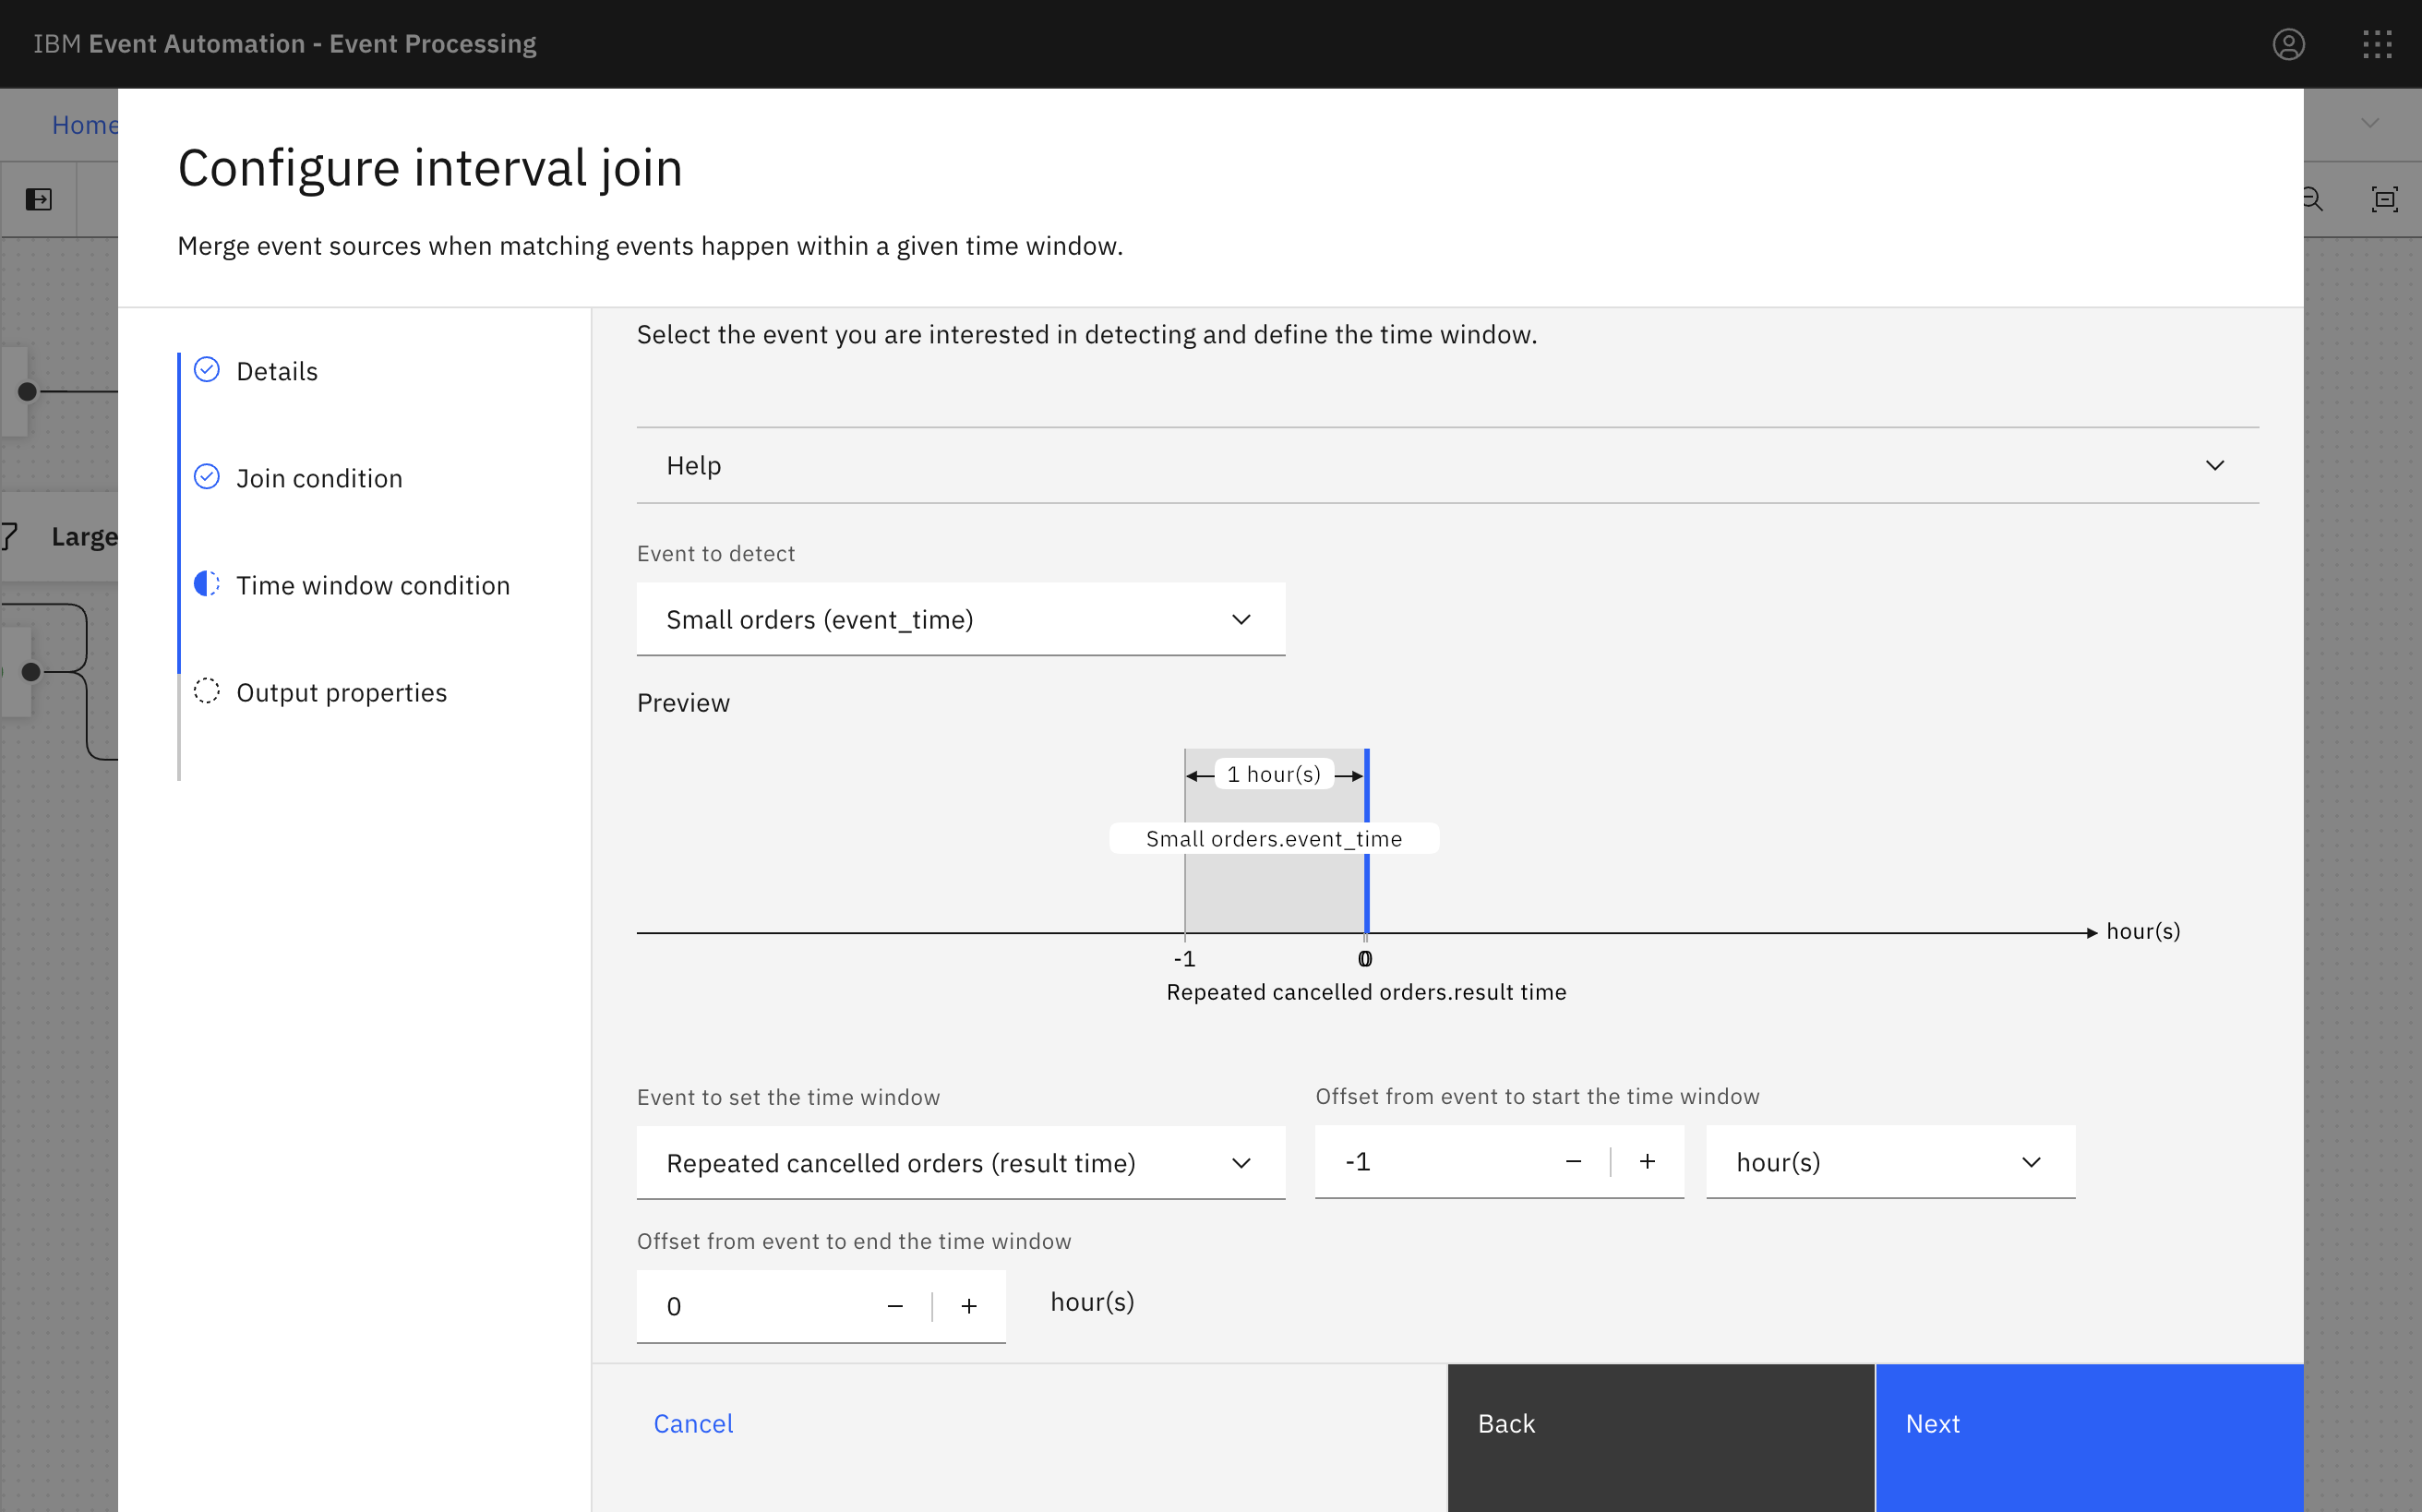
Specify the time window that you want to use for the join.
Look again at the results that you saw before from the repeated cancelled orders flow. The result time is the end of the one-hour window where repeated large order cancellations were observed.
Define a join window that identifies small orders of the same product in the 1-hour window, ending at the result time.
-
Keep the default selection to use an inner join to merge the large orders events and the cancellations orders events that match the join condition (that is, with the same order ID).
-
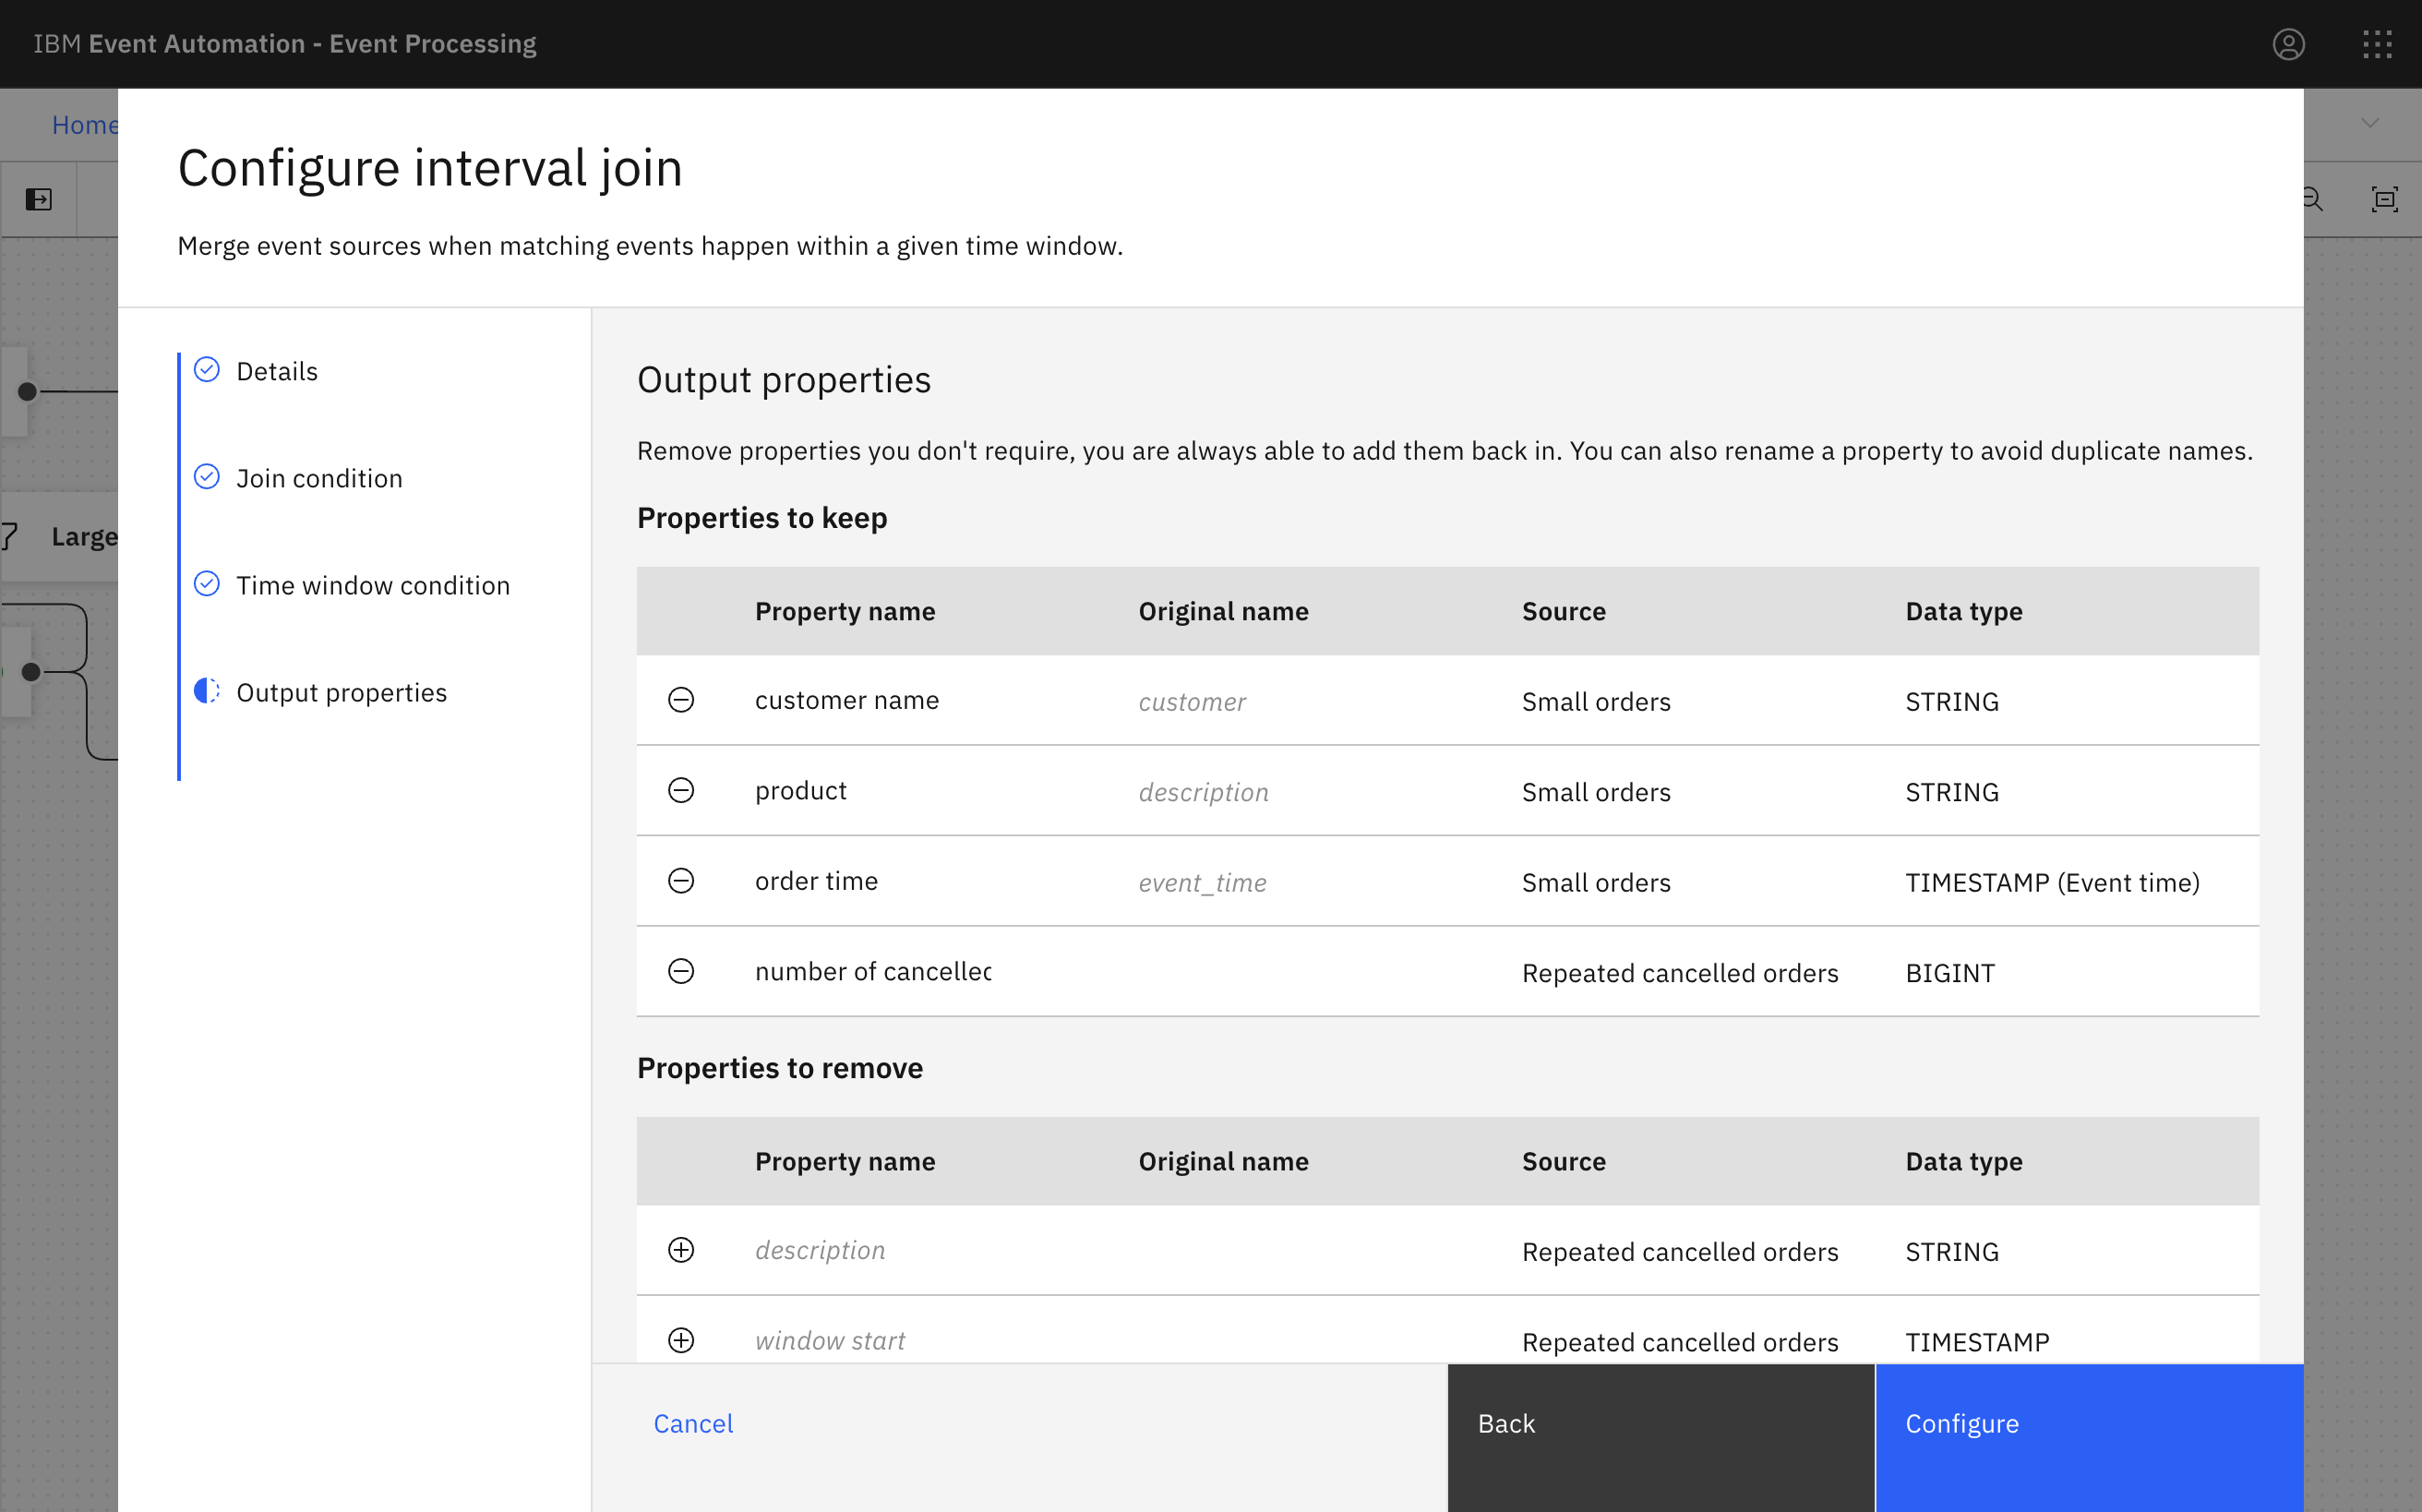
Choose the output properties that will be useful to return.
Step 11: Test the flow
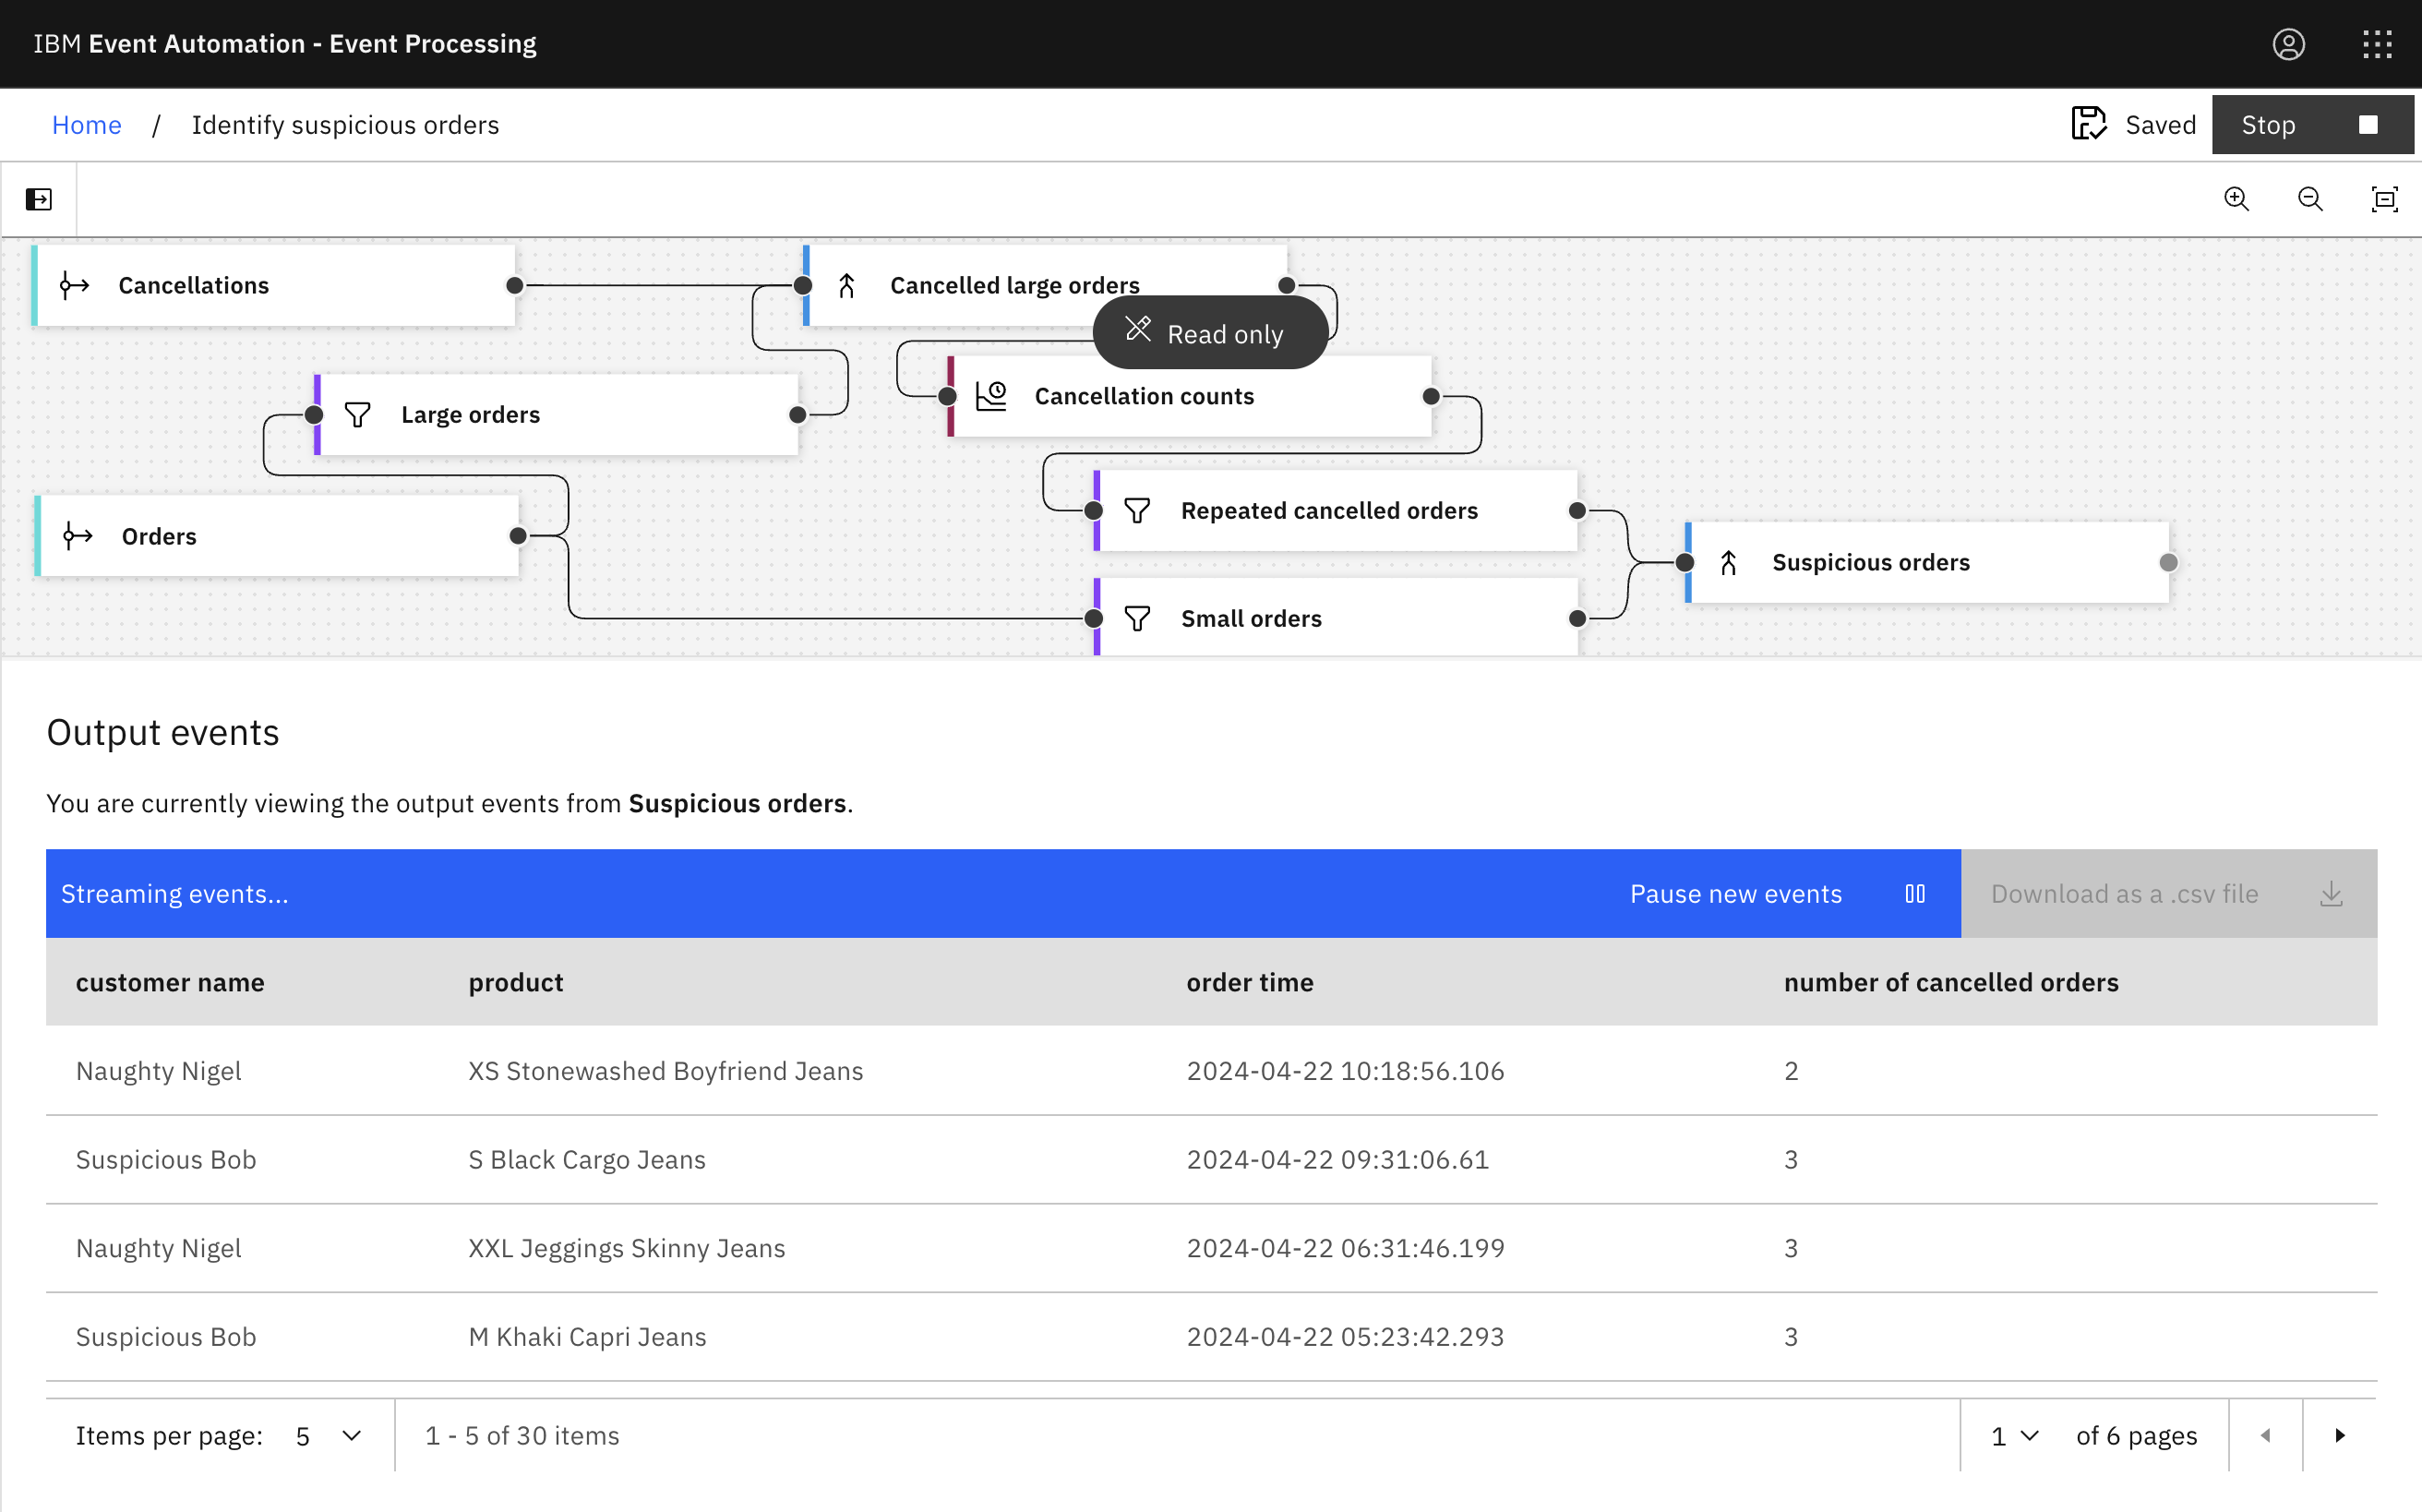
Test the flow again to confirm that it is identifying orders that could be investigated.
-
Use the Run menu, and select Include historical to run your filter on the history of order events available on this Kafka topic.
Step 12: Create a destination Kafka topic
The next step is to create a topic that you will use for the results from this flow.
-
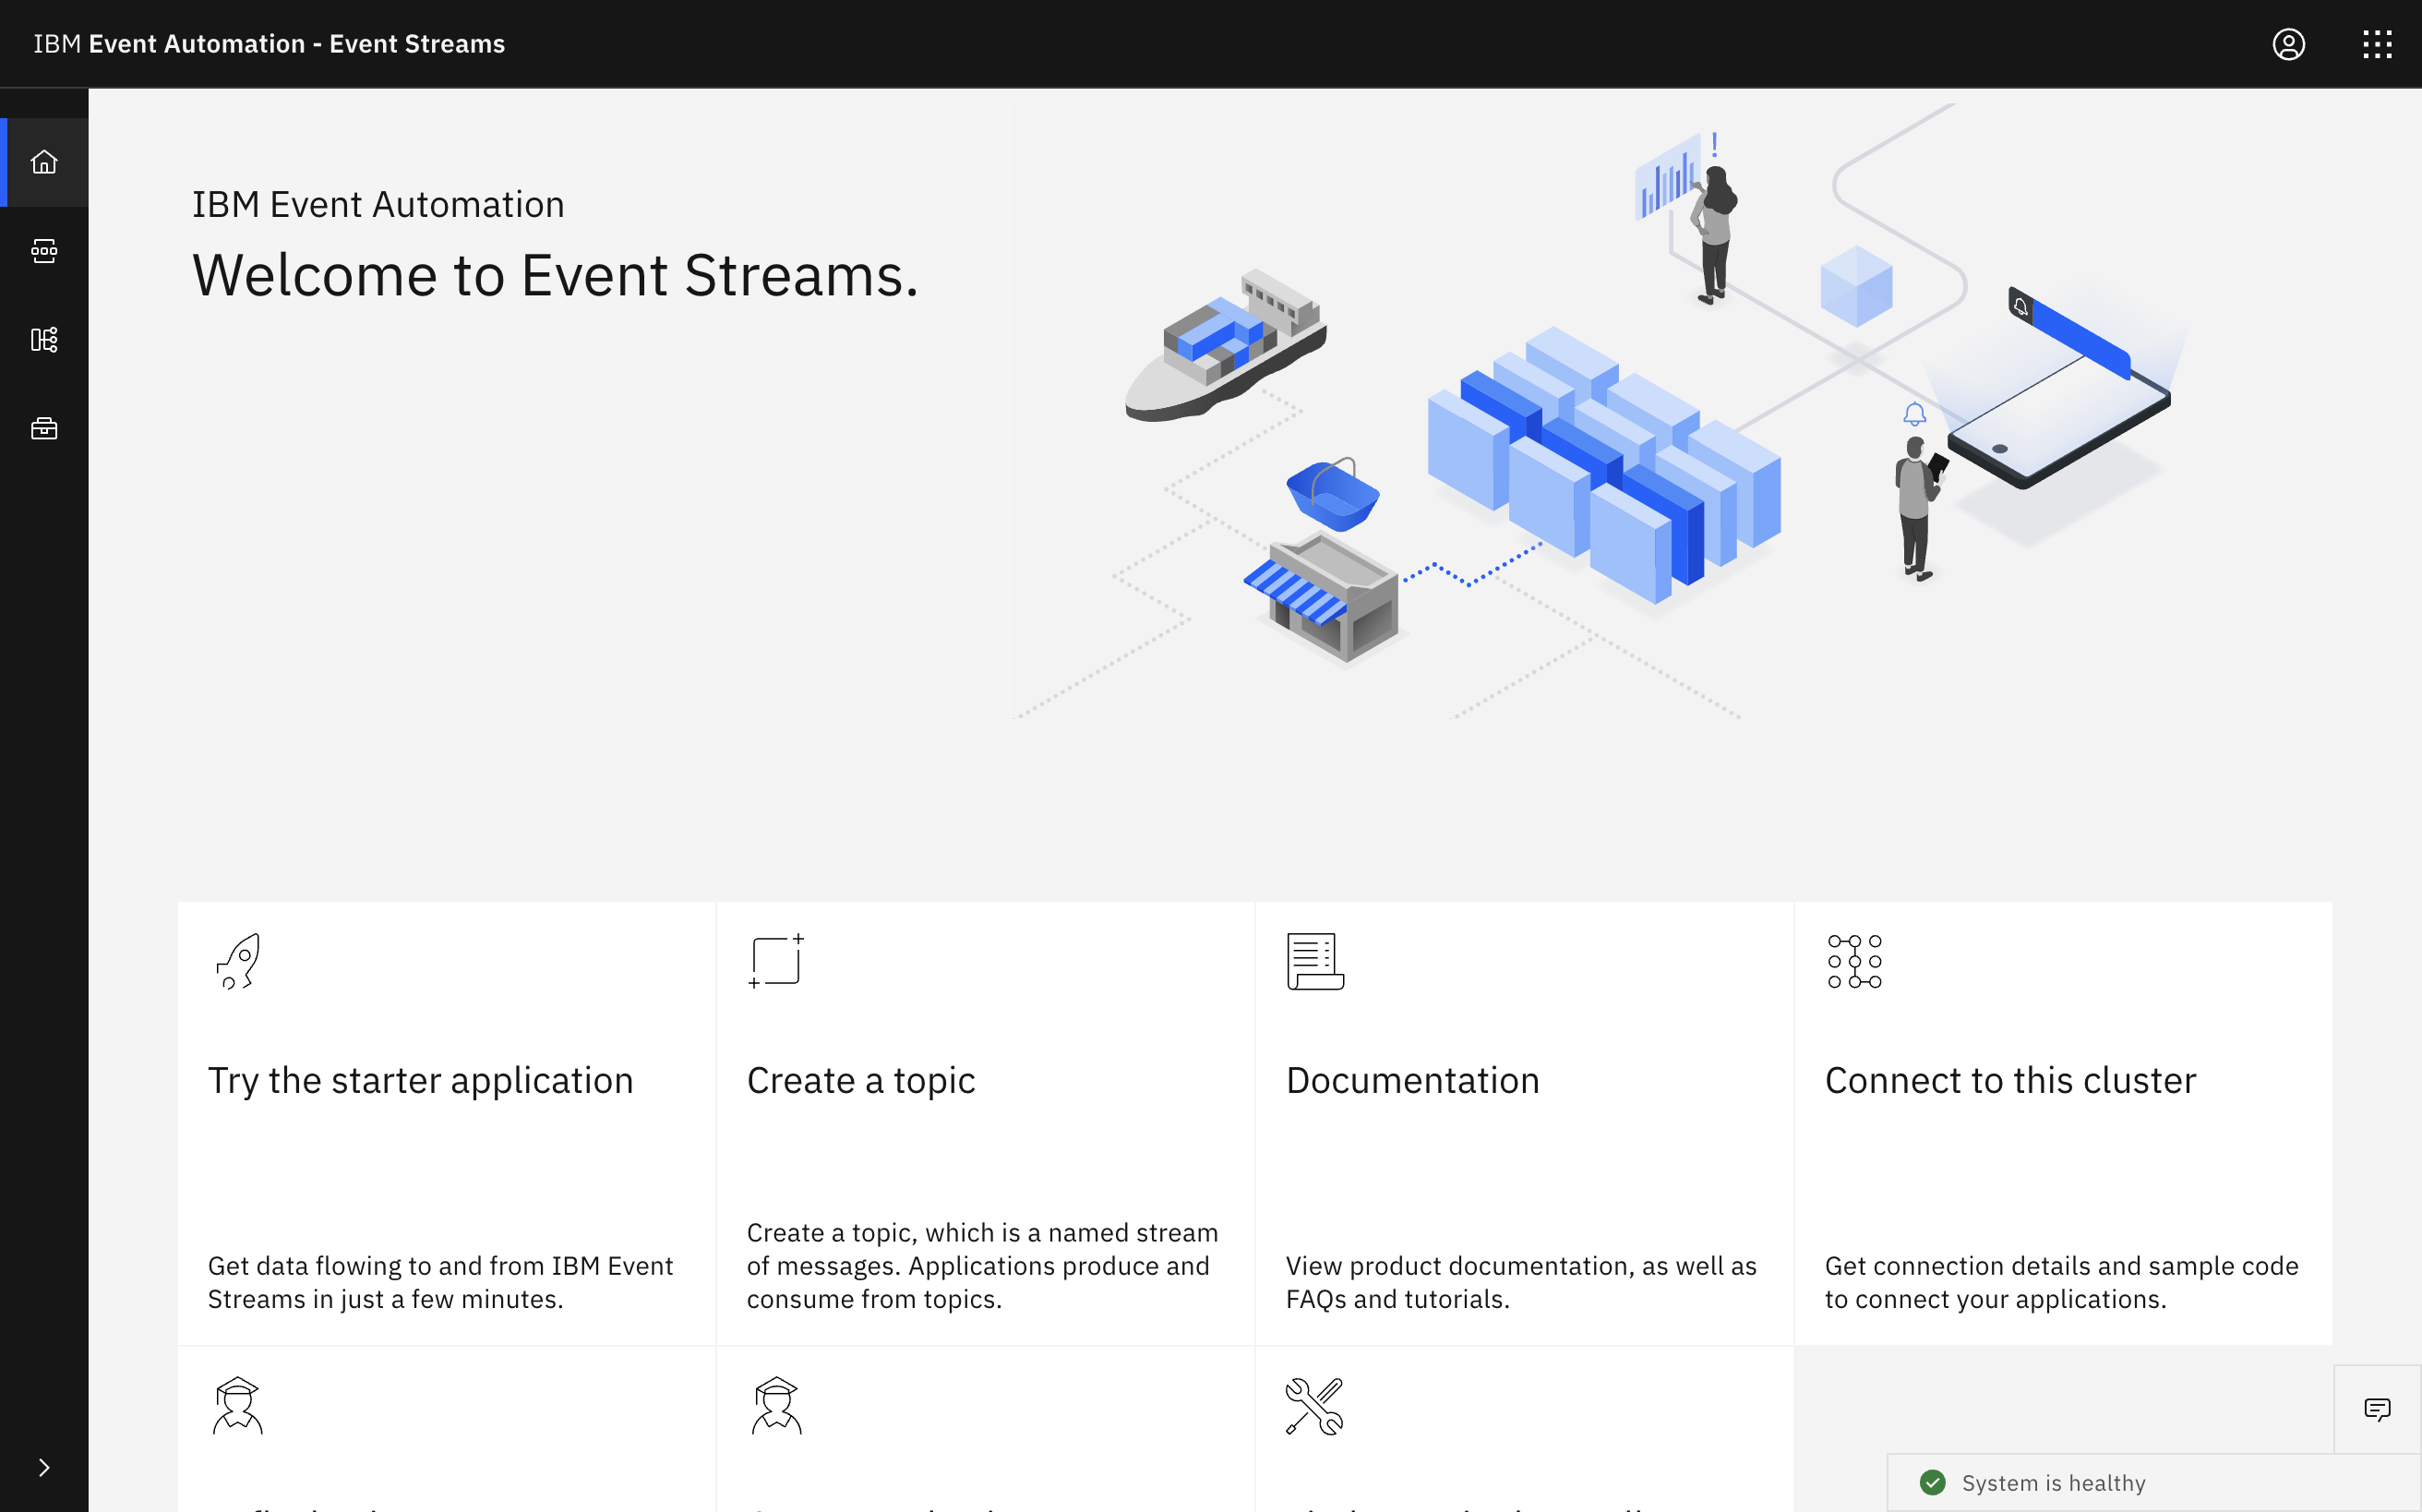
Go to the Event Streams home page.
If you need a reminder of how to access the Event Streams web UI, you can review Accessing the tutorial environment.
-
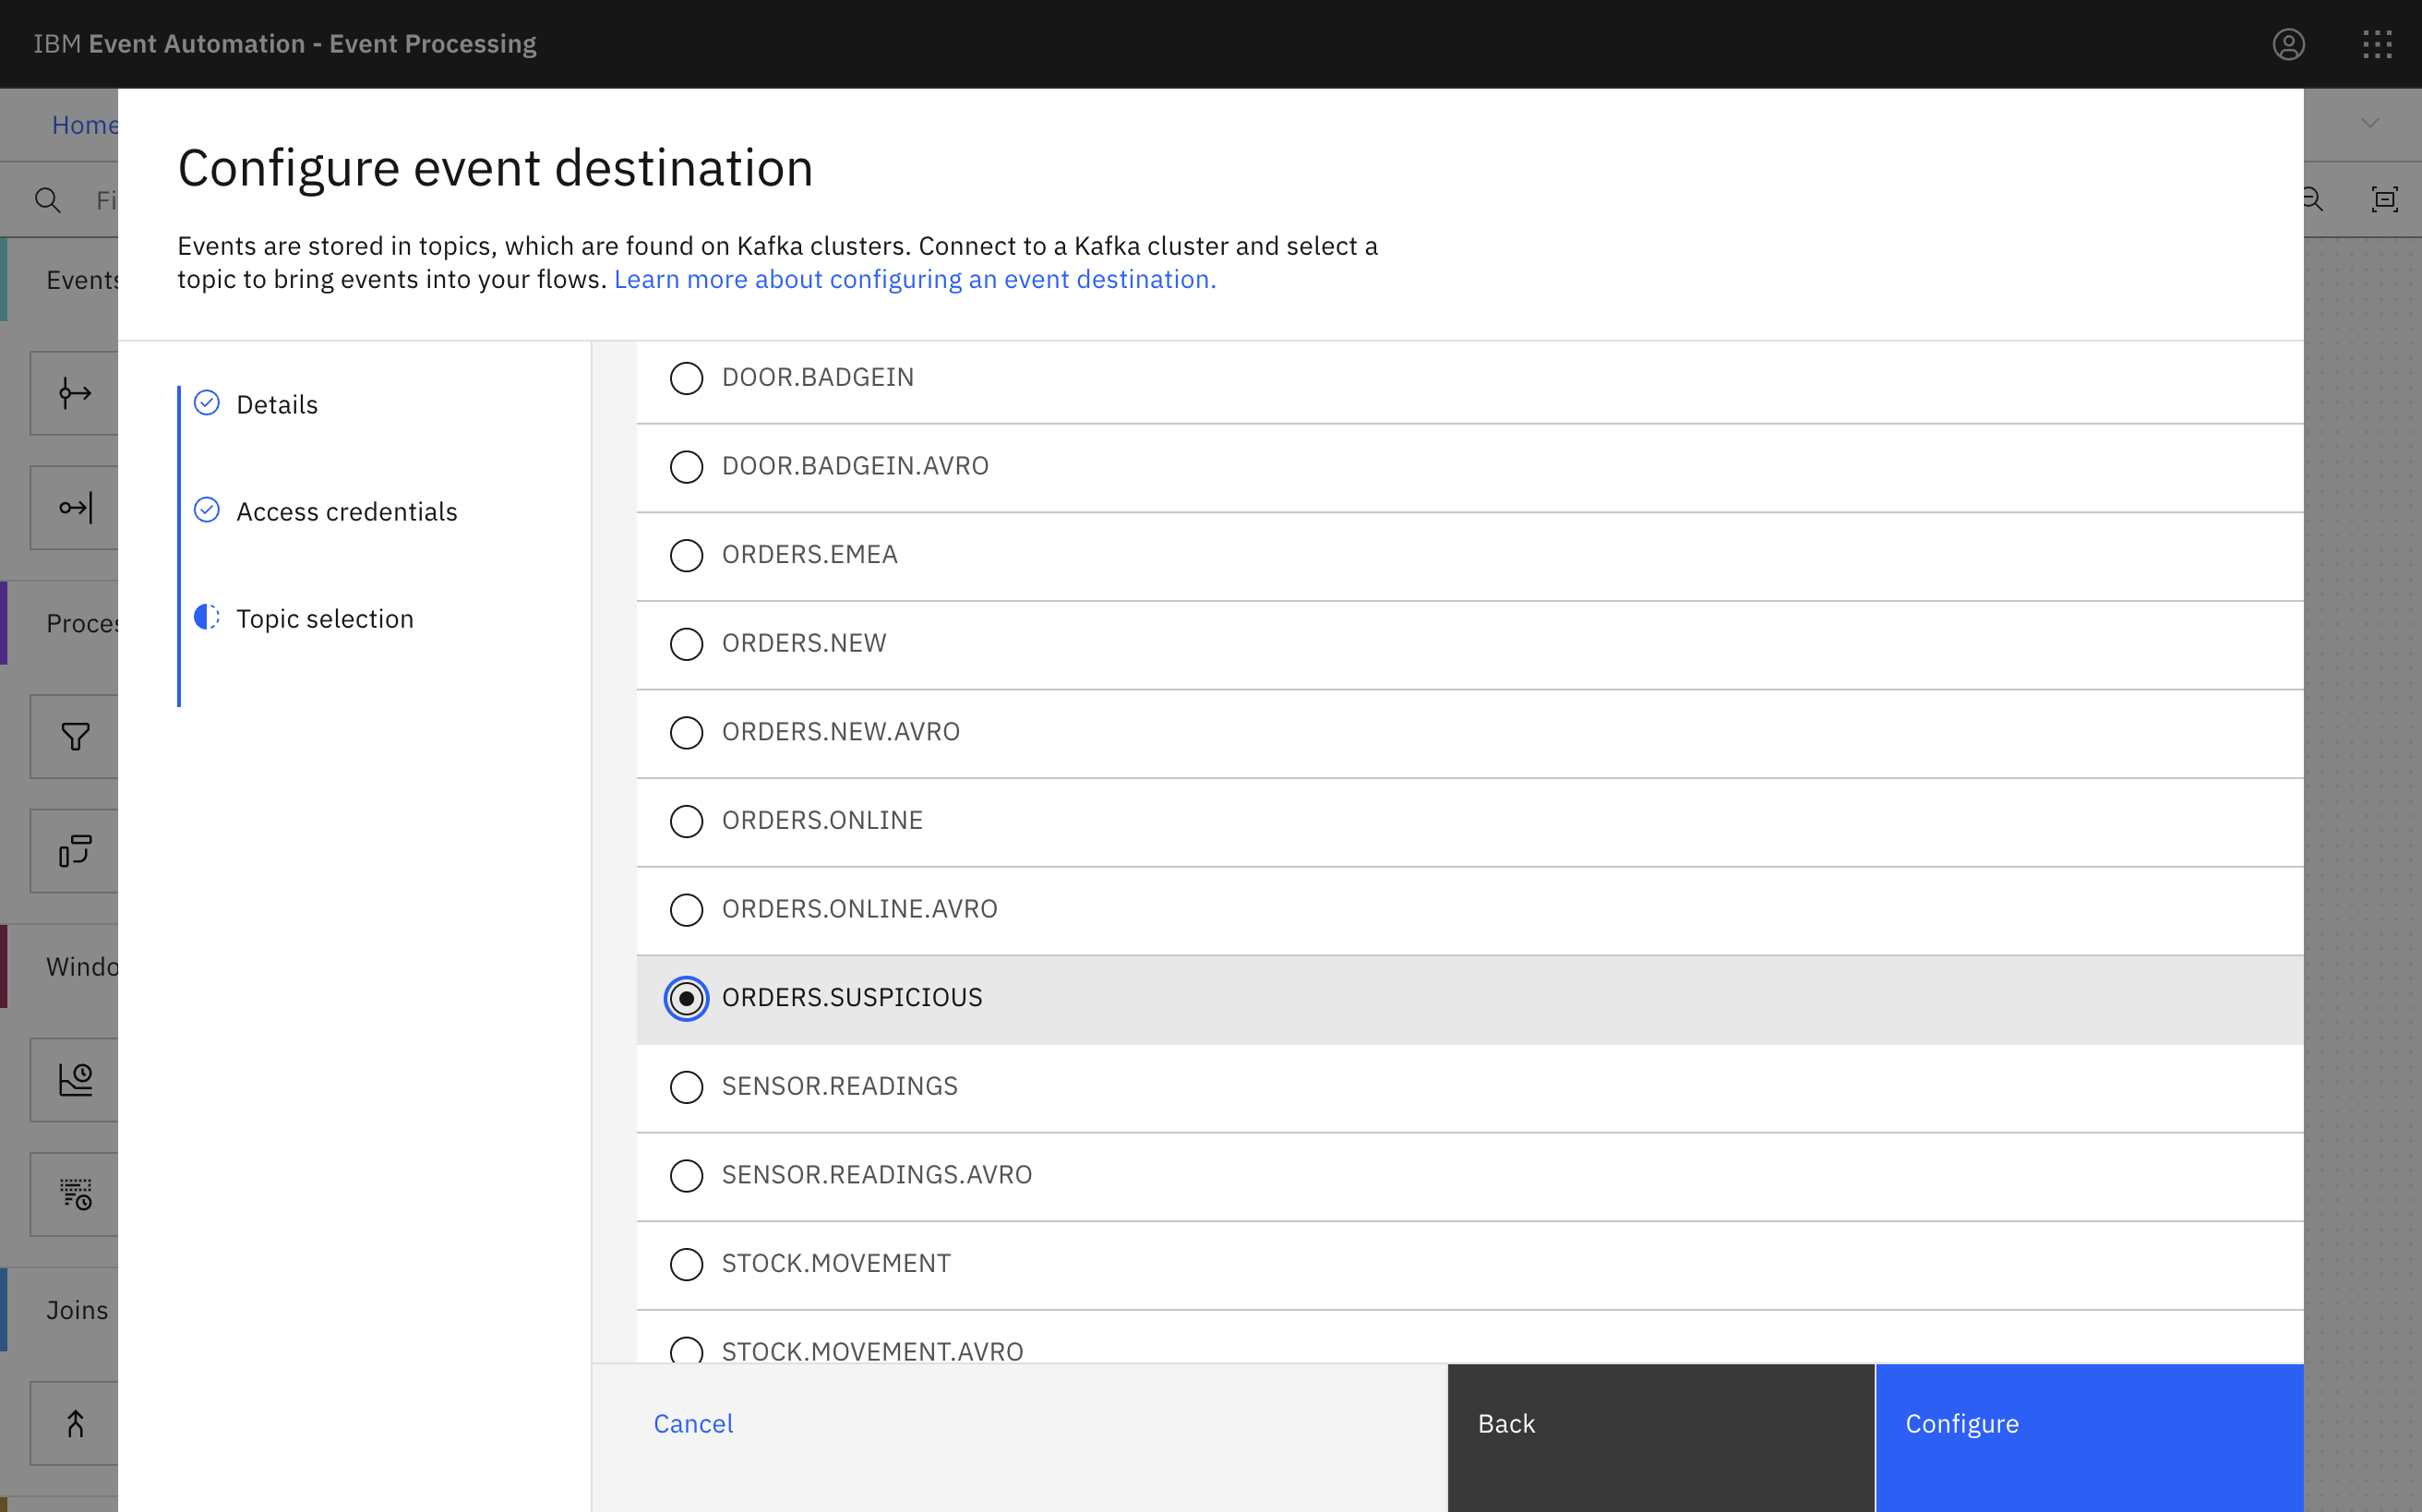
Create a topic called
ORDERS.SUSPICIOUS.
Step 13: Provide a destination for results
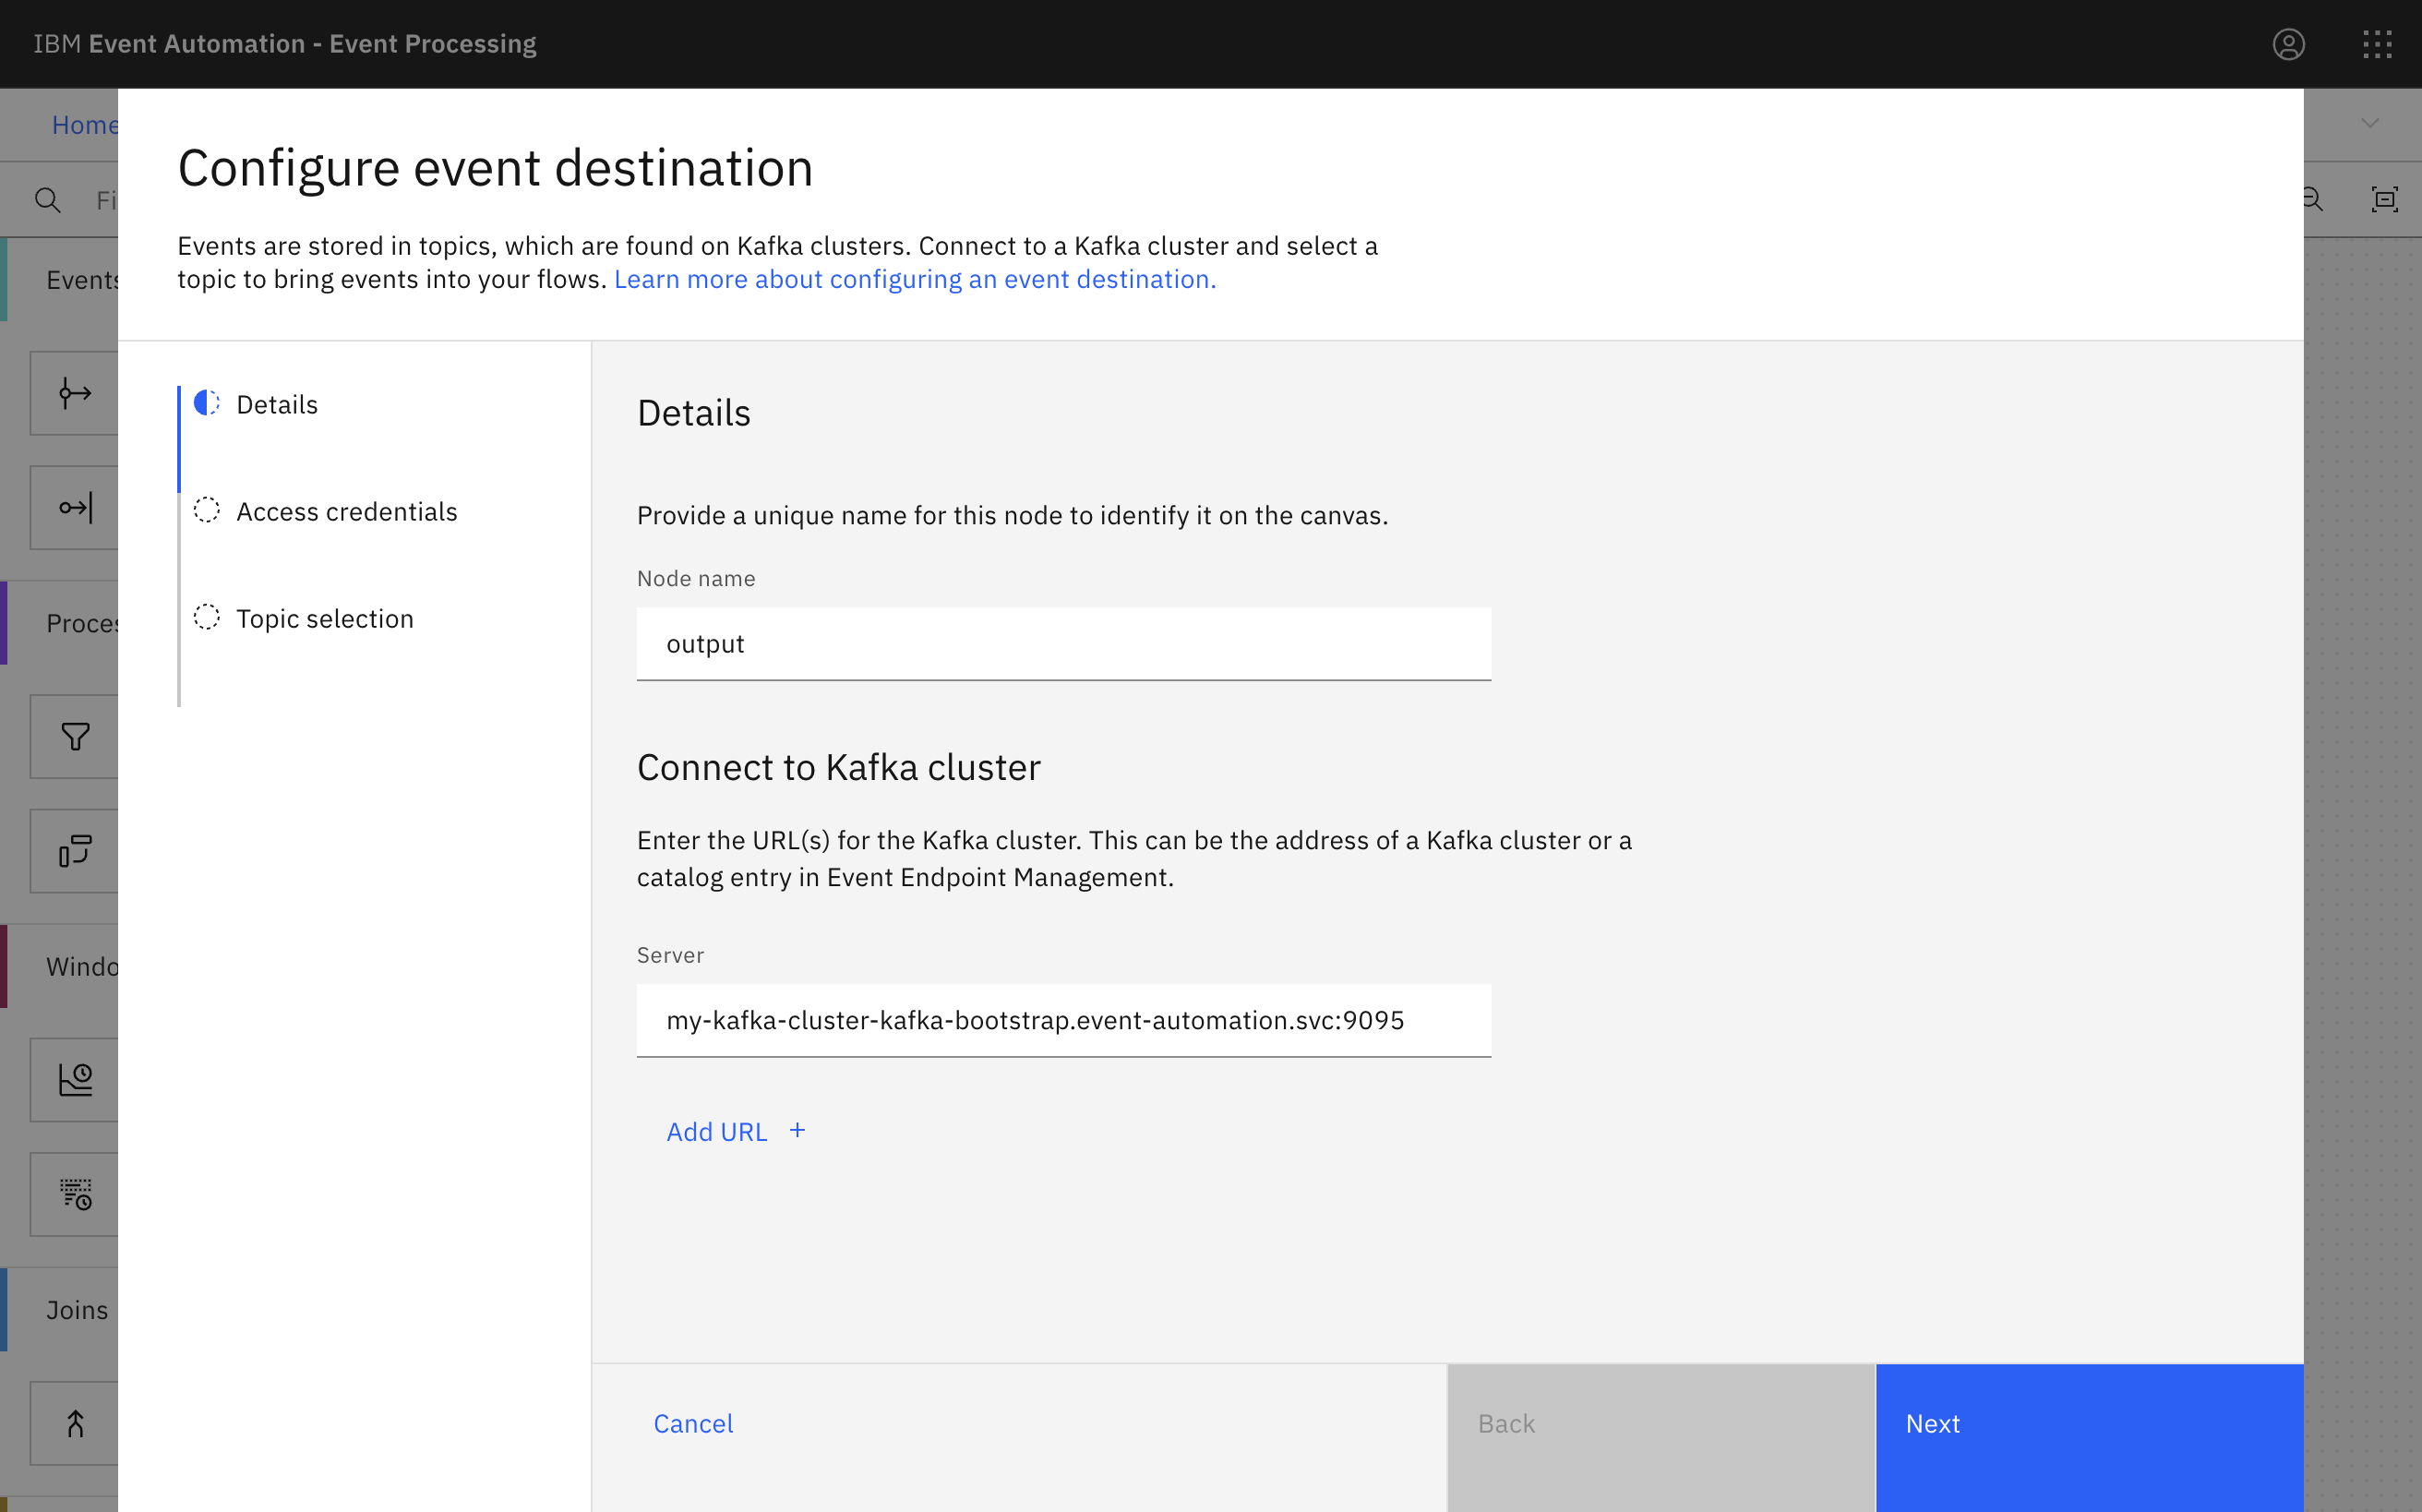
The next step is to define the event destination for your flow.
-
Create an Event destination node.
-
Use the server address from Event Streams.
-
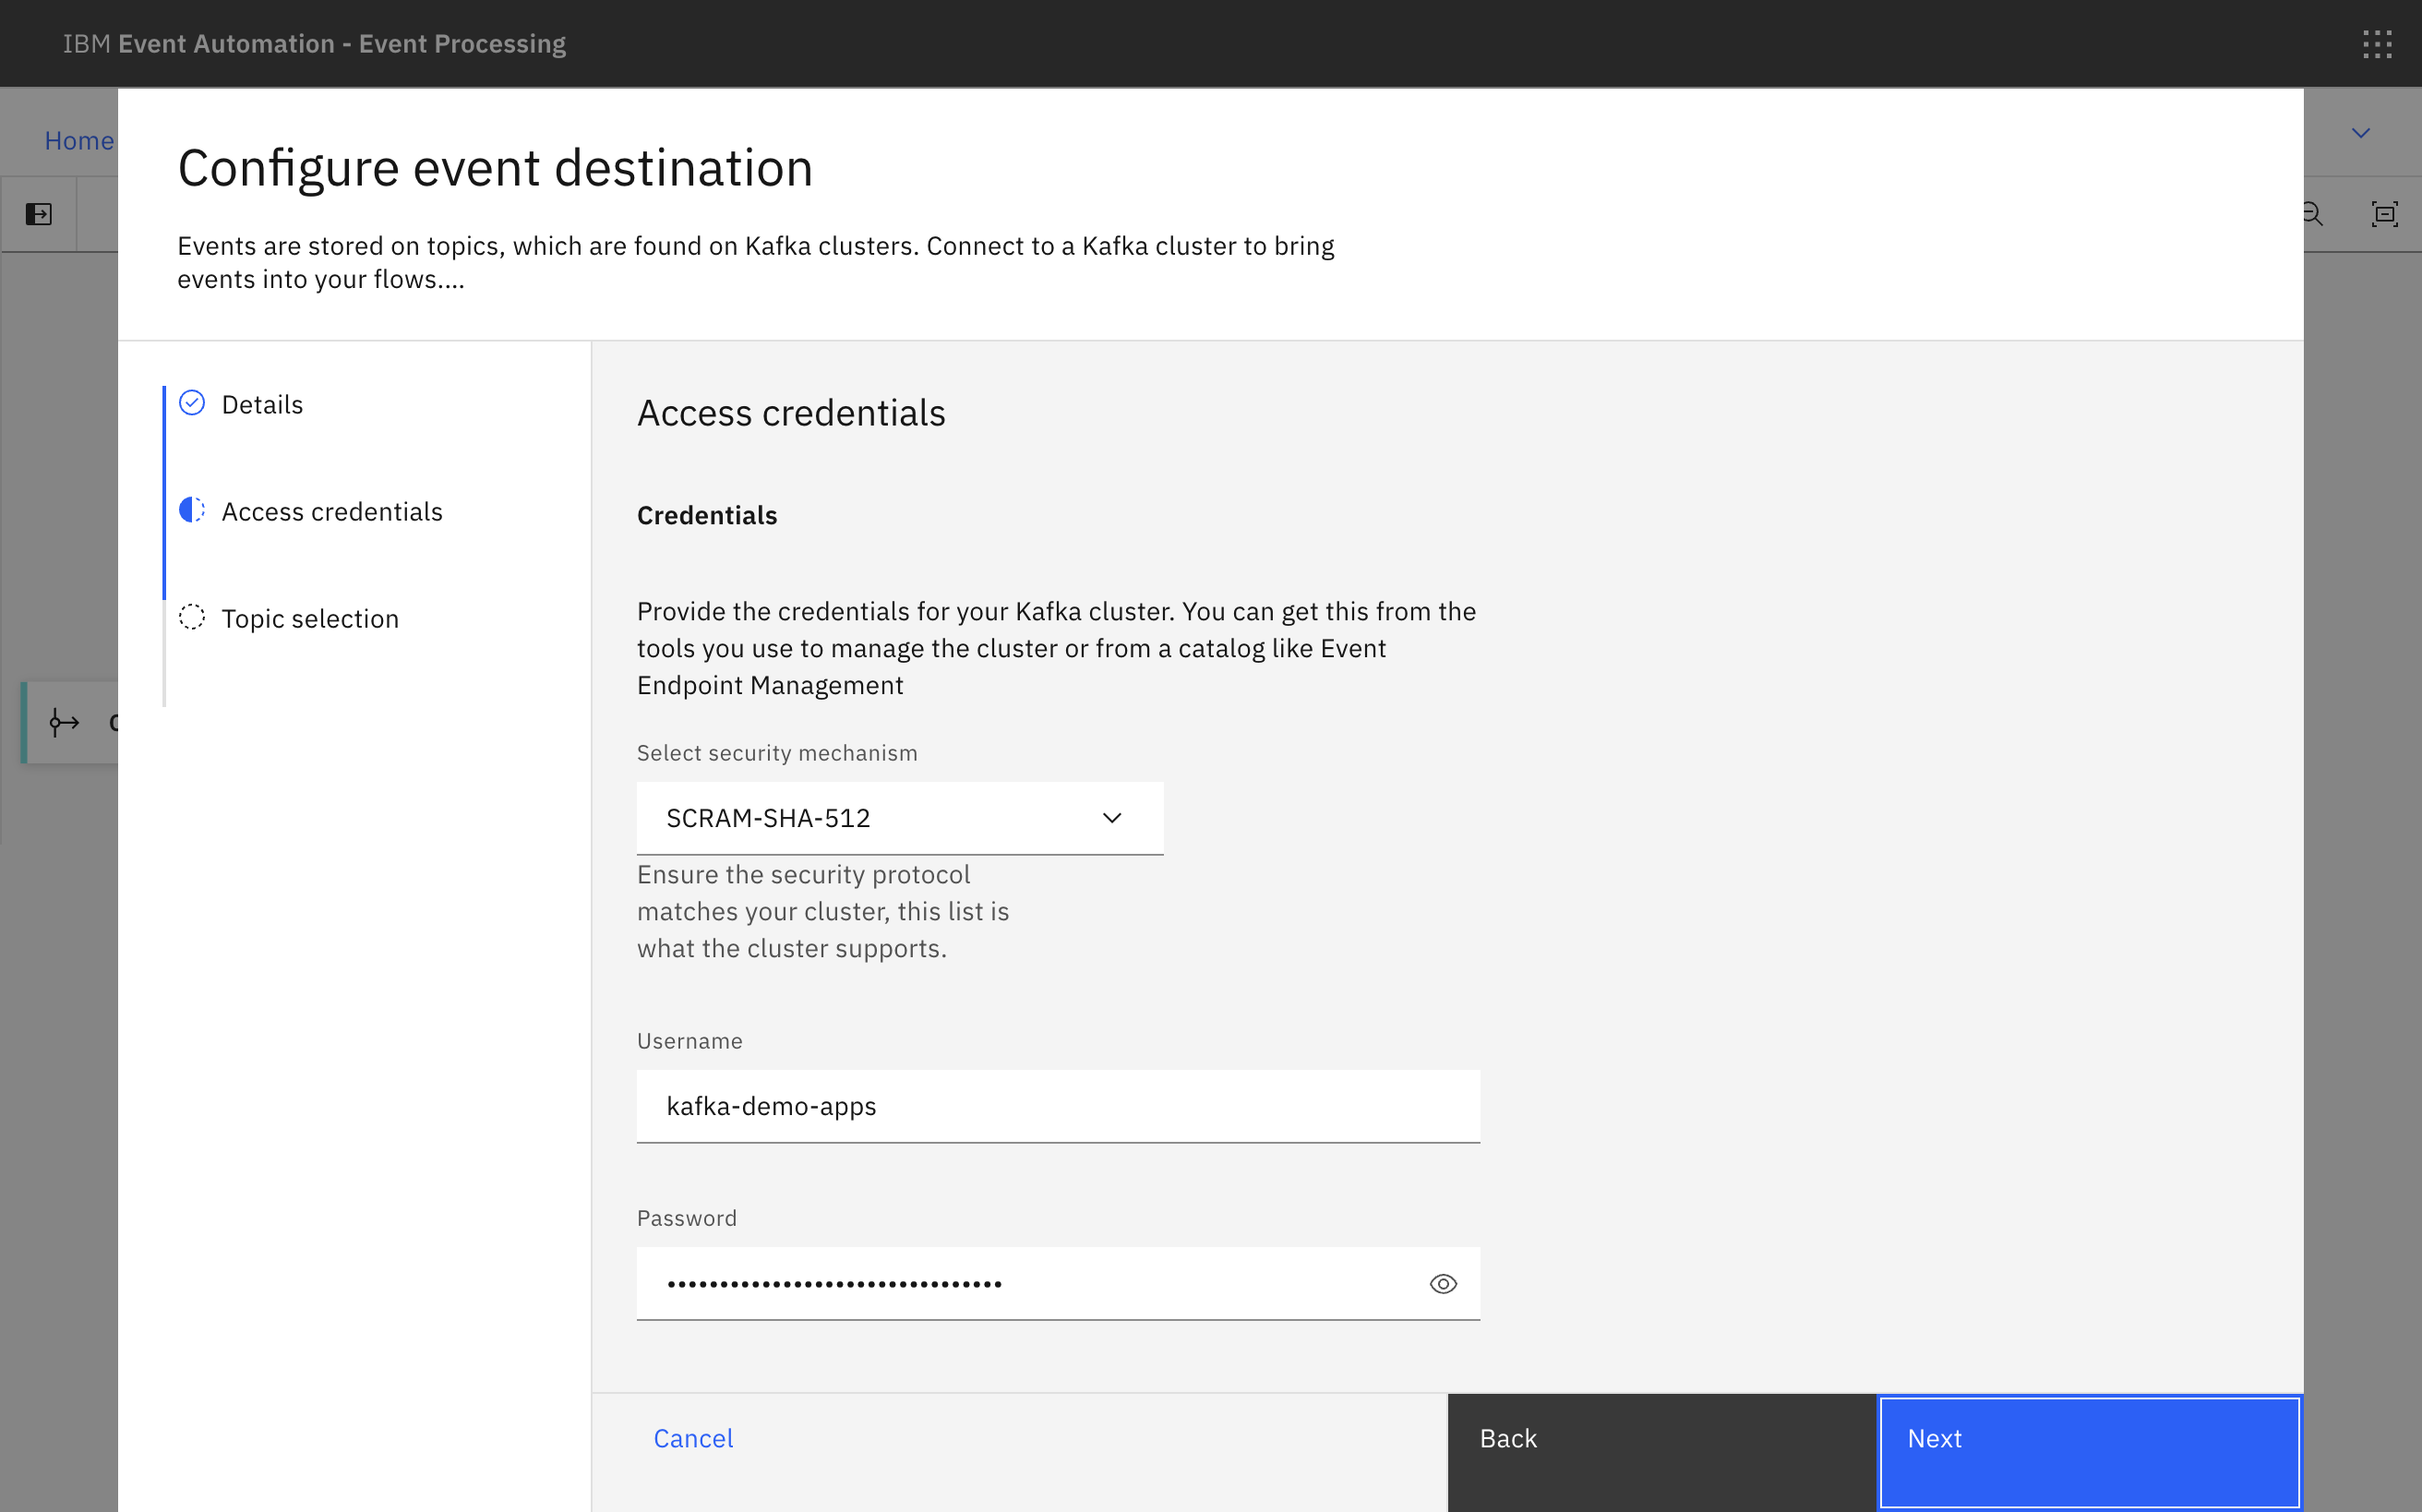
Use the username and password for the
kafka-demo-appsuser for accessing the new topic.If you need a reminder of the password for the
kafka-demo-appsuser, you can review the Accessing Kafka topics section of the Tutorial Setup instructions. -
Choose the new
ORDERS.SUSPICIOUStopic.
Step 14: Test the flow
The final step is to run the flow and confirm that the notifications about suspicious orders are produced to the new topic.
-
Run the flow as before.
-
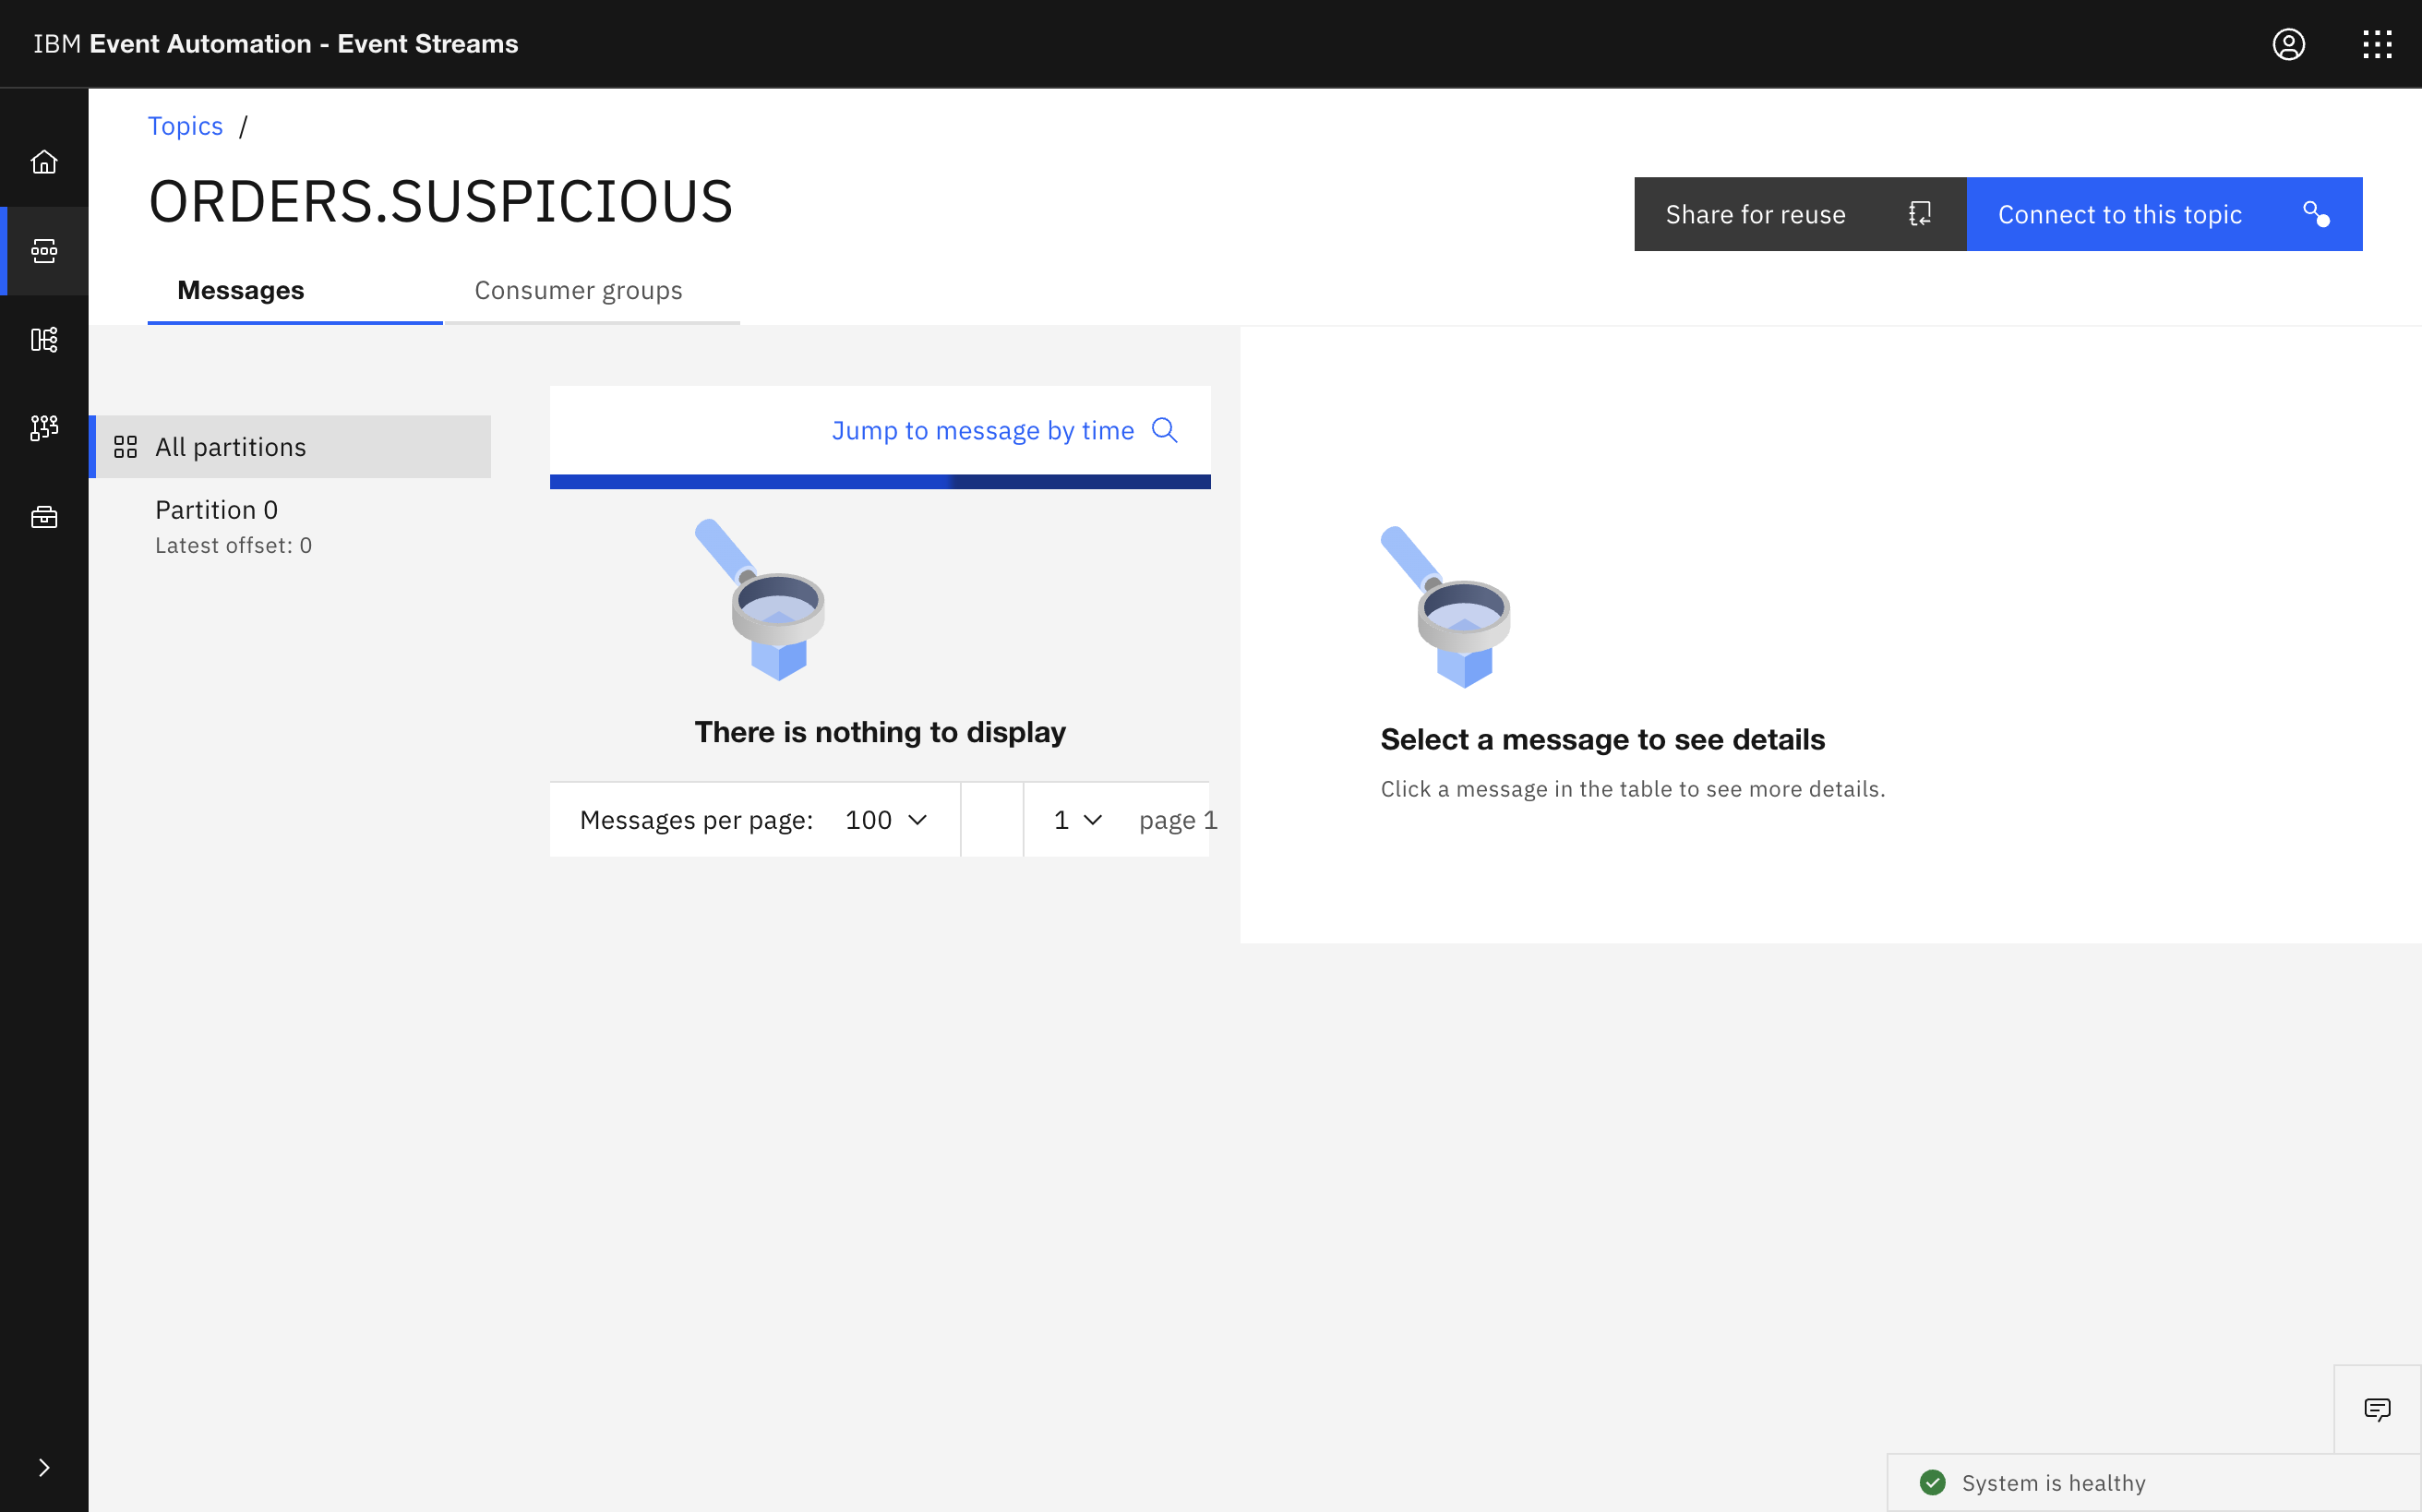
Confirm that the events are being produced to the destination Kafka topic from the Event Streams UI.
There might still be a few false positives: innocent customers who coincidentally made a small order for the same product that a suspicious person was currently manipulating the price of - maybe because they noticed that the price had dropped!
However, you should notice that most of the events on the
ORDERS.SUSPICIOUStopic are for orders that are made by customers such as “Suspicious Bob”, “Naughty Nigel”, “Criminal Clive”, and “Dastardly Derek”.
Recap
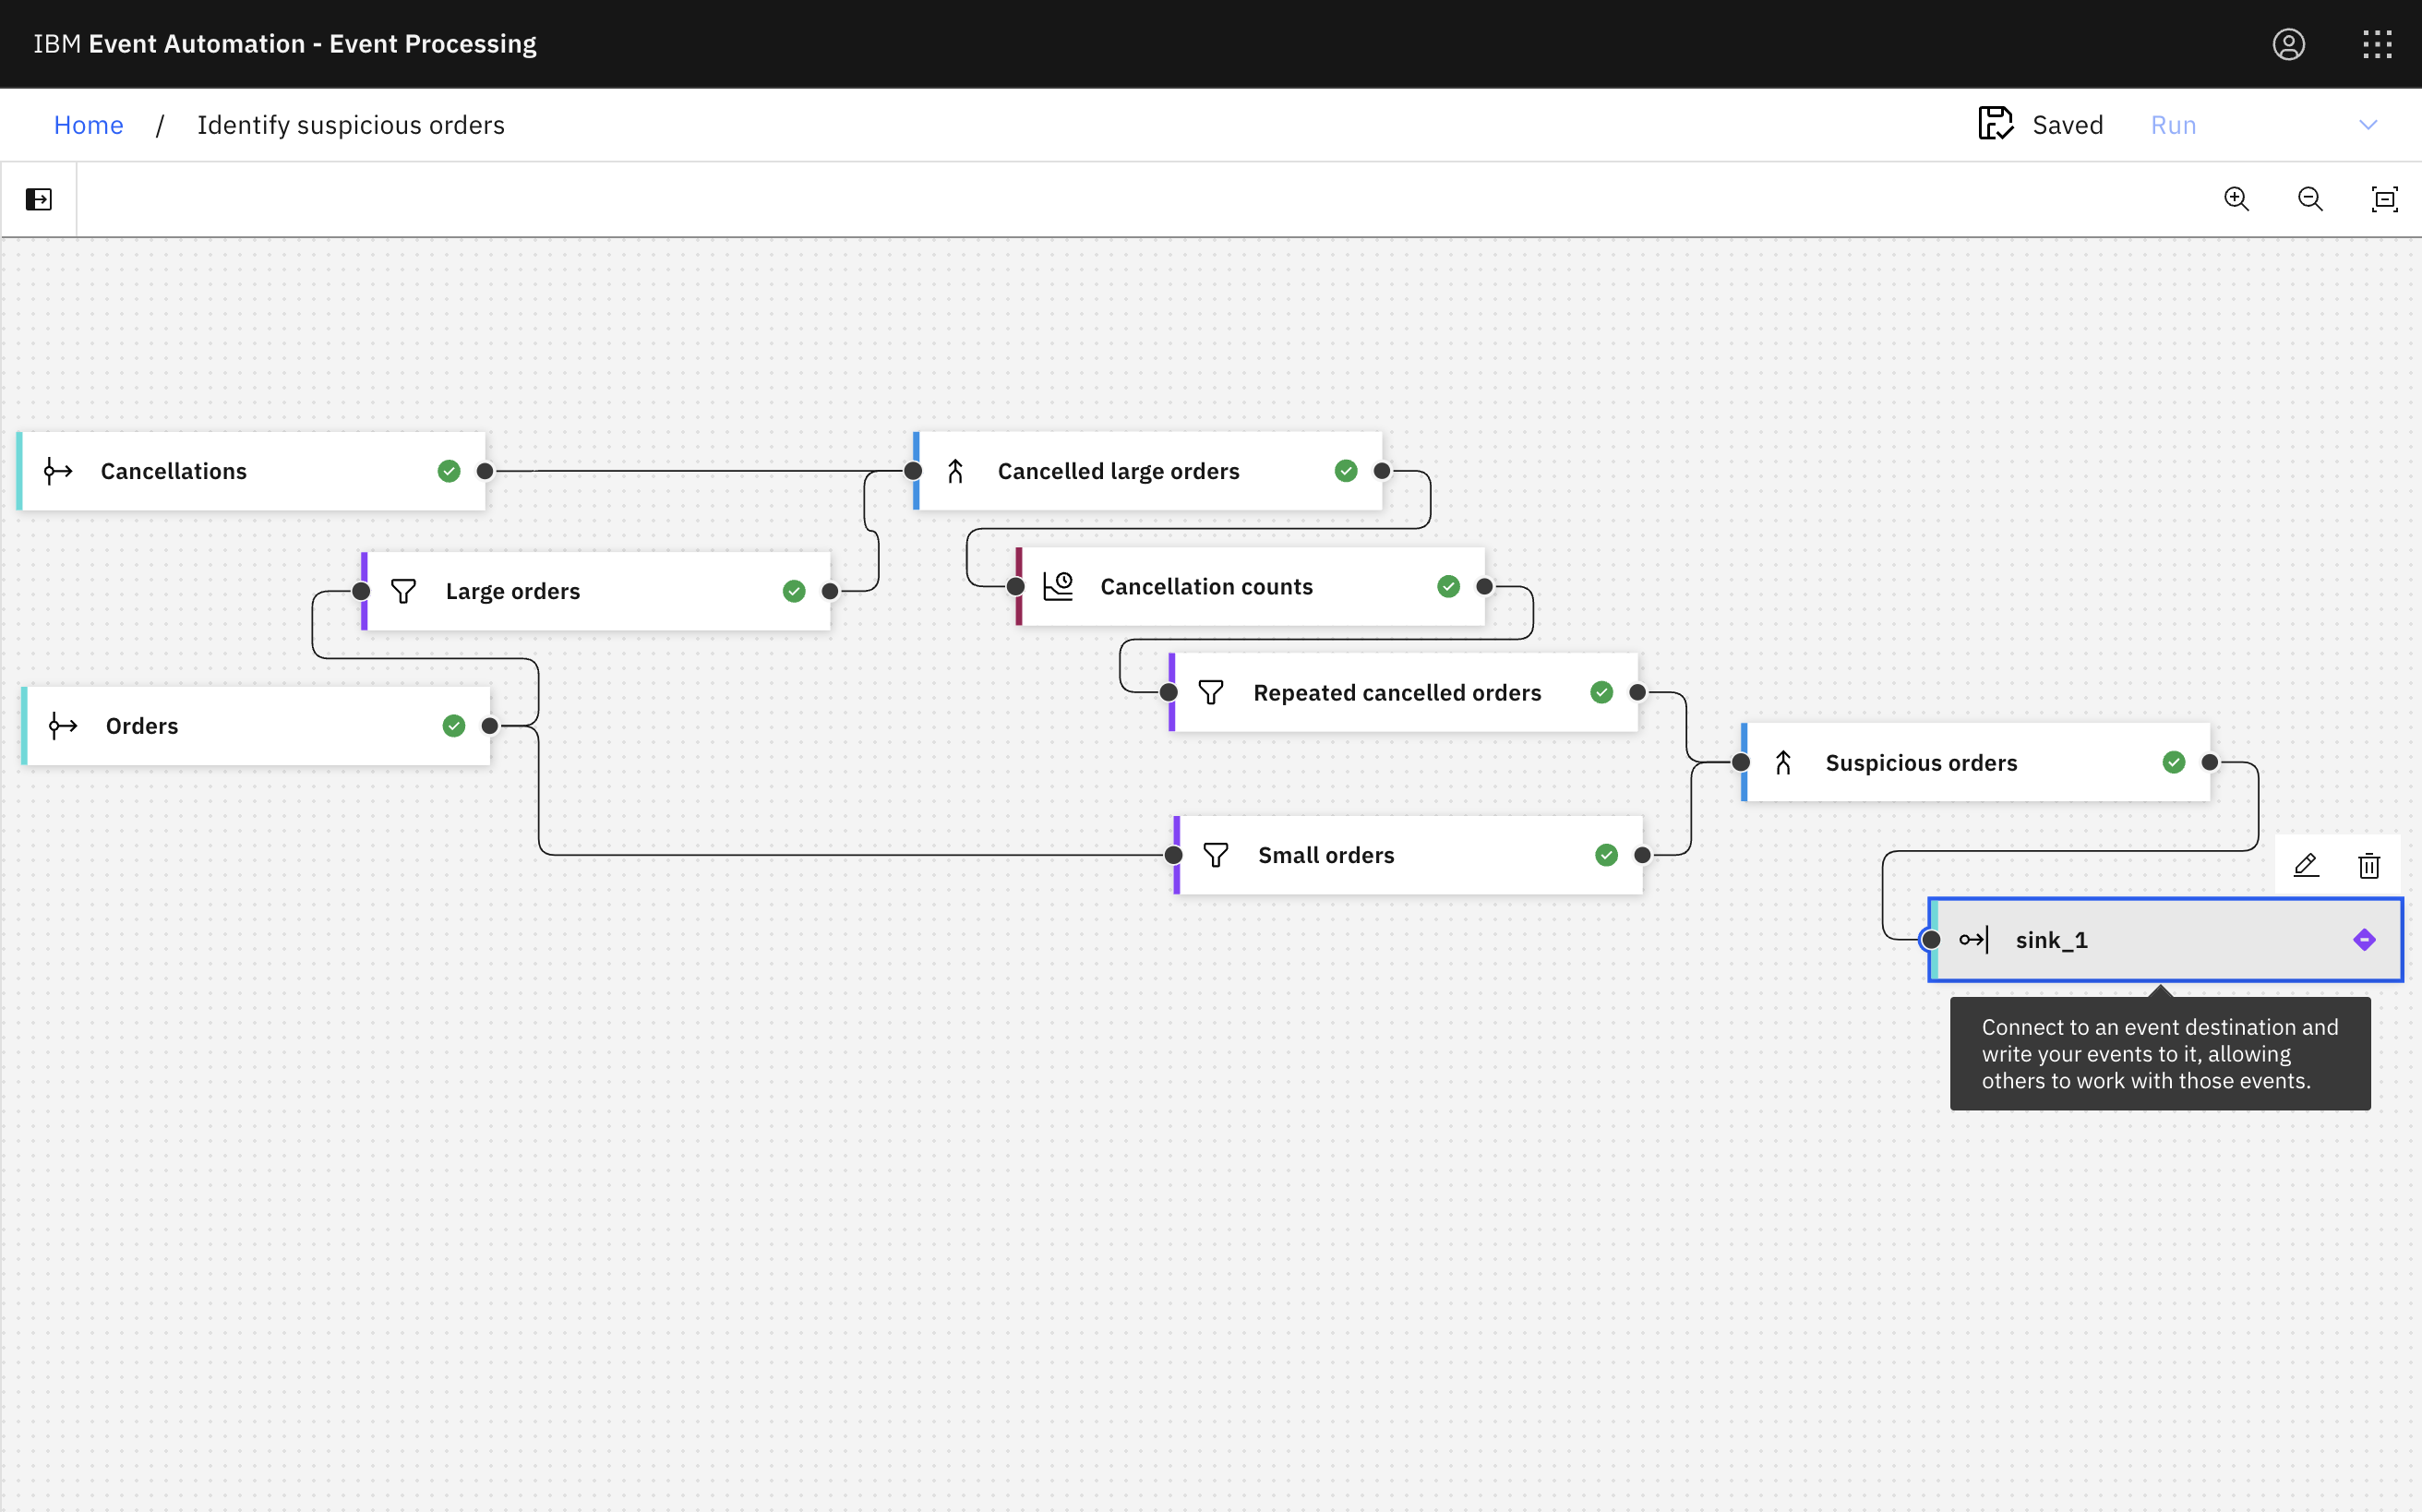
You used filter nodes to divide the stream of orders into separate subsets of large and small orders.
You used a join node to combine the orders events with the corresponding cancellation events.
You used an aggregate node to look for situations where a large order was made and cancelled for the same product multiple times within a short time.
Finally, you used another join node to look for small orders in the context of those repeated large cancelled orders.
