5. Vulnerability Patch Workflow
5.1: Overview
In the previous section, you reviewed the remediation actions that Concert has identified for the vulnerabilities discovered. Now you will set up the necessary authentications and workflows to automatically apply patches to our target VM called demo-apps. For each Action, Concert can create change requests in various ITSM (Information Technology Service Management) systems such as ServiceNow. Application or Infrastructure owners can approve or reject these change requests based on environmental needs. If the change request is approved, Concert will proceed to apply the vulnerability patching. For the purpose of this Lab, we will manage approvals entirely within Concert, without external ITSM dependencies.
This end-to-end remediation process is orchestrated through these two Workflows:
- Monitor_Remediation_Action_Status – Tracks approvals and schedules execution.
- Remediation_Master – Applies patches across supported platforms (Linux, Windows, Tomcat, Docker).
5.2 Approve Remediation Actions
Concert automatically analyzes the scan results and generates remediation actions, such as installing patches or updating vulnerable components. We will approve the action of applying OS patches to our target host demo-apps.
To review and approve actions:
- On the left side menu, select the Action center tab
- Review the list of recommended remediation actions. In this case there will be only one action with Action type = OS and Status = Approval pending.
- Click on Review and approve to view the security advisories. Concert automatically ingests the security advisories and correlates them with the VM scan to understand which security advisories need to be applied.
- Select the Approve button on the top right and select again Approve in the confirm approval window.
5.3 Setting up Authentications for the Patch Workflows
In this section we will create the authentication definitions required by the patching workflows. We will do this from Concert Workflows → Authentications tab.
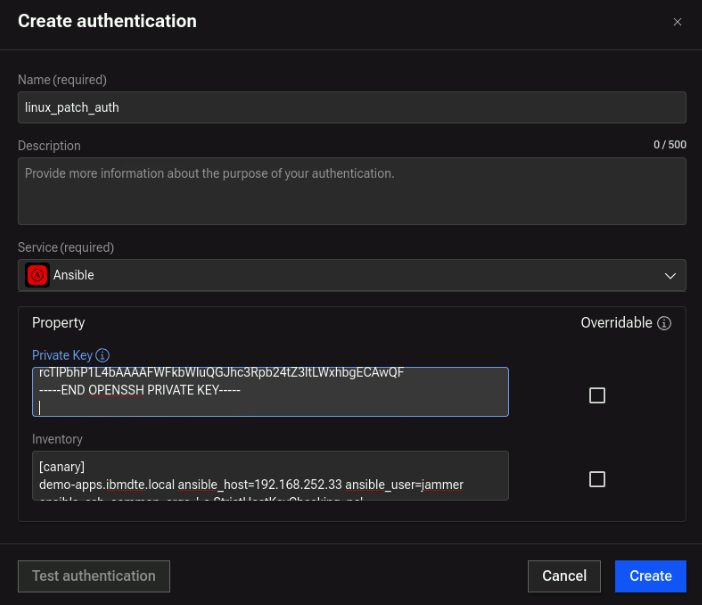
5.3.1 Create Ansible authentication (linux_patch_auth)
-
From the Authentications tab, click Create Authentication.
-
Configure the following fields:
-
Name:
linux_patch_auth -
Service:
Ansible -
Private Key: Copy and paste the full private key from the credentials file, beginning with
-----BEGIN OPENSSH PRIVATE KEY-----
and ending with
-----END OPENSSH PRIVATE KEY-----warningThis time, ensure a newline is added after
-----END OPENSSH PRIVATE KEY-----warningAgain, ensure a newline is added after
-----END OPENSSH PRIVATE KEY-----, otherwise Ansible will fail to connect to the host. -
Inventory: Enter the following content. This follows the Ansible hosts format:
As Is[canary]demo-apps.ibmdte.local ansible_host=192.168.252.33 ansible_user=jammer ansible_ssh_common_args='-o StrictHostKeyChecking=no'
-
-
Click Create to save the authentication.
5.3.2 Create a ConfigData Auth for Linux patching (config_patch_data)
-
From the Authentications tab, click Create Authentication.
-
Configure the following fields:
-
Name:
config_patch_data -
Service: Config Data
-
Data (required): Enter the following JSON:
As Is{"config": [{"auth": "ibmconcert/linux_patch_auth","host": ["demo-apps.ibmdte.local"]}]}
-
-
Click Create to save the authentication.
5.4 Import the Patch Workflows
- From credentials.txt, open the link for Concert Workflows URL in a new browser tab.
- Download the
.zipfile to the VM called Monitor_Remediation_Action_Status.zip. - Download the
.zipfile to the VM called Remediation_Master.zip. - Select the top Workflows tab and select the Workflows tile.
- From the top-right corner, click on the 3-dot icon and select
Create folder. Name the folder
PATCH_WORKFLOWSand click Create. - Click on the newly created PATCH_WORKFLOWS folder to open it and click Import → select Monitor_Remediation_Action_Status.zip.
- Click Import again and select Remediation_Master.zip.
5.4.1 Workflow 1: Monitor_Remediation_Action_Status
This Concert Workflow monitors the status of actions that are in Approved state. Once it detects that the change request has been approved, it updates the action status to Scheduled and sets the date for when the Remediation_Master workflow will run to apply the patch.
-
Open Monitor_Remediation_Action_Status folder and click on the Monitor_Remediation_Action_Status workflow.
-
In the Start block of the workflow, update the following field mappings:
- workflow_auth →
ibmconcert/hub_self - wf_to_schedule →
ibmconcert/User/PATCH_WORKFLOWS/Remediation_Master/Remediation_Master - workflow_user →
ibmconcert - linux_auth →
ibmconcert/config_patch_data - concert_auth →
ibmconcert/hub_self
- workflow_auth →
-
Save the workflow and click Run to execute it.
After running the workflow:
- You should see in the workflow logs the status_updated: "scheduled" message.
- On the Workflows page, select Jobs on the left side menu. You see that there is a new workflow job run scheduled in 24 hrs.
- Select the Resilience tab on top and select Action center on the left side menu. The Concert Action status changed from Approved to Scheduled.
Concert can integrate with customer-defined maintenance windows to ensure patches are applied only during approved maintenance periods. We will bypass the scheduled job and manually trigger the Remediation_Master workflow to apply the patches.
5.4.2 Workflow 2: Remediation_Master
This Concert Workflows applies patches to VMs. It supports patching for Red Hat Linux, Amazon Linux, Oracle Linux, Ubuntu and Windows servers. As we are patching a RHEL server in this lab, we will focus on the Linux patching section of the workflow, which uses Ansible to apply the necessary patches.
-
Select the top Workflows tab and select the Workflows tile.
-
Click on the PATCH_WORKFLOWS folder -> Remediation_Master folder and open the Remediation_Master workflow.
-
In the Start block of the workflow, update the following field mappings:
- linux_auth →
ibmconcert/config_patch_data
- linux_auth →
-
Save the workflow and click Run to execute it.
This workflow should take approximately 4 minutes to run.
5.5 Verify that security advisories have been applied
To verify that the security advisories have been applied, follow these steps:
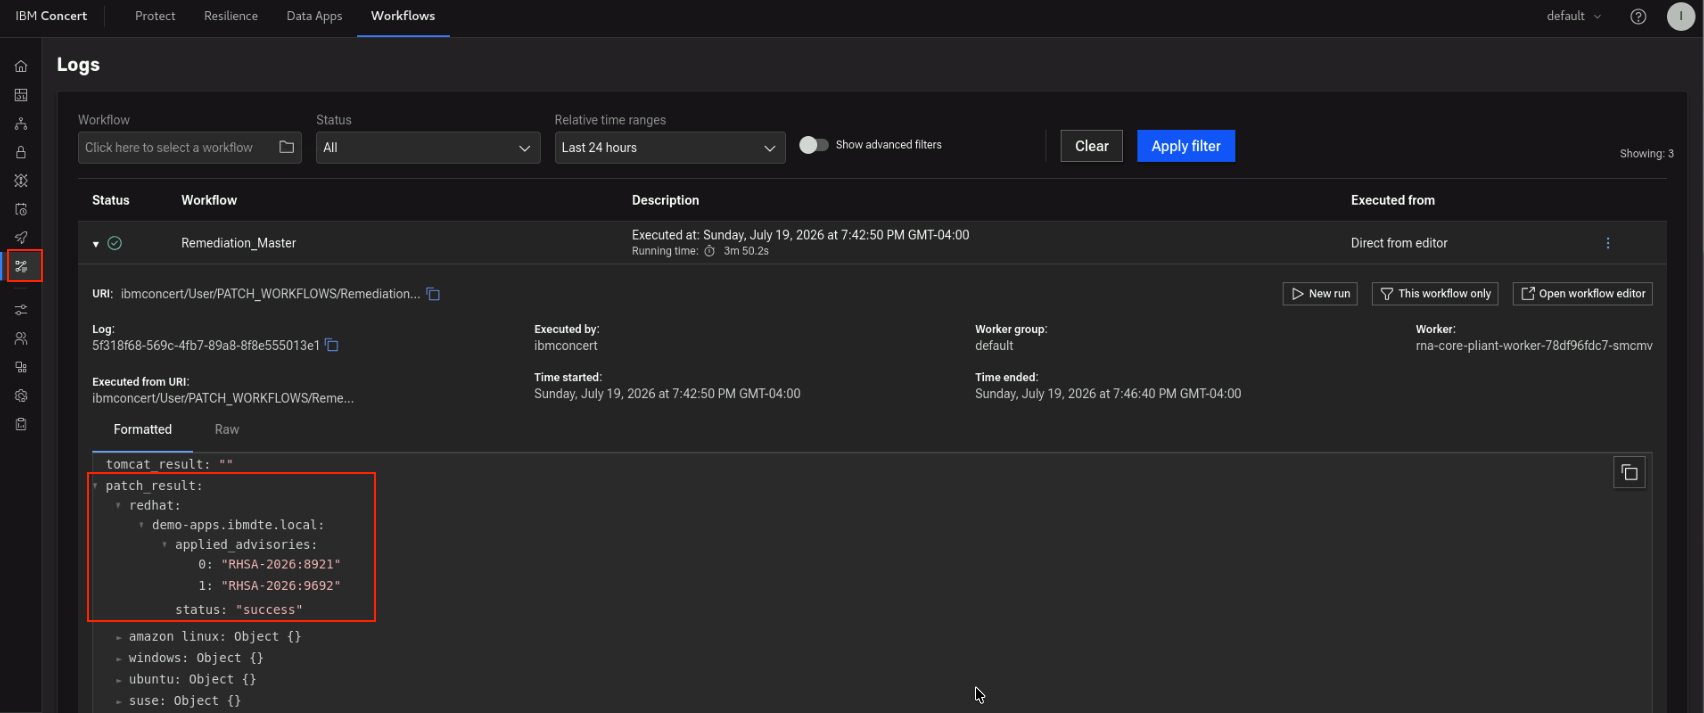
- Select the top Workflows tab and on the left side menu, click on the Logs tab.
- Open the Remediation_Master workflow that you just ran.
- Review the following logs to see which security advisories were applied to the specific server: patch_result → redhat → serverIP → applied_advisories
Example
Additionally, you can verify this on the demo-apps server.
Run the following command on the Bastion host to connect to the RHEL VM:
ssh jammer@demo-apps
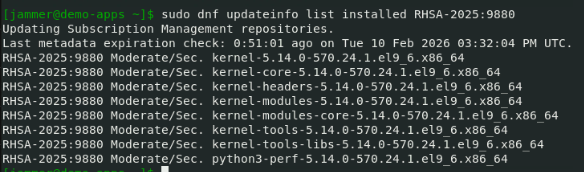
After connecting, run the following command, substituting one of the RHSA values that was reported as applied in the previous step:
sudo dnf updateinfo list installed RHSA-XXXX:XXXX
If the output shows multiple packages associated with that specific advisory, then the RHSA has been successfully installed on the system.
Example
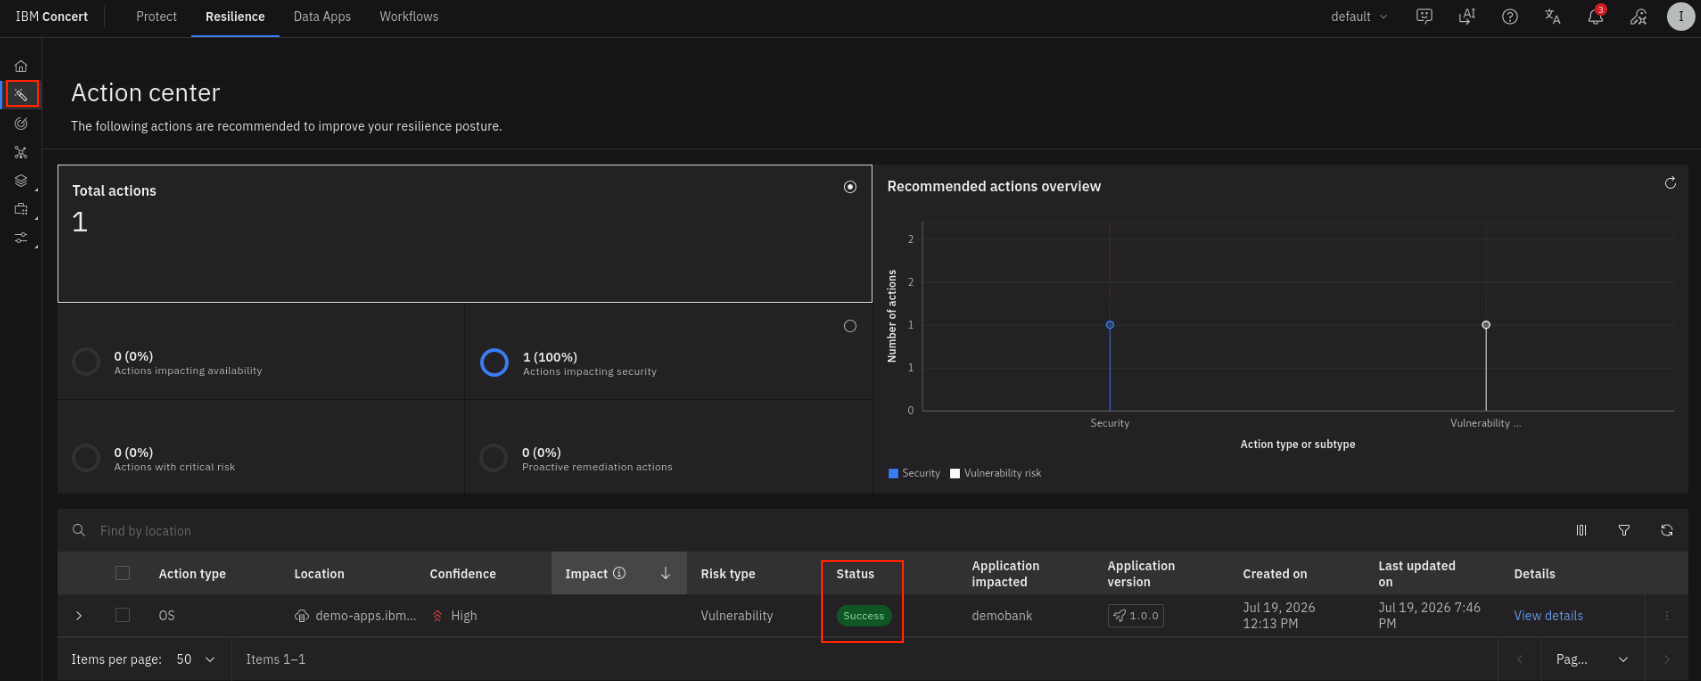
Finally, lets check the final status of of the OS Action:
- Select the Resilience tab on top and click on Action center tab on the left side menu.
- Note that the current Action Status is Success.