4. Vulnerability Scan Workflow
4.1: Overview
In this section, we will import a Concert Workflow, create workflow authentications, configure the workflow with the authentications created and finally run the workflow. This workflow will do the following:
- It will run the the open-source vulnerability scanner OpenSCAP on the demo-apps host and create a CVE vulnerability scan file.
- It will create a host deploy SBOM (Software Bill of Material) that contains application and demo-apps host information.
- It wil load the deploy SBOM and the vulnerability scan (in this order) into Concert.
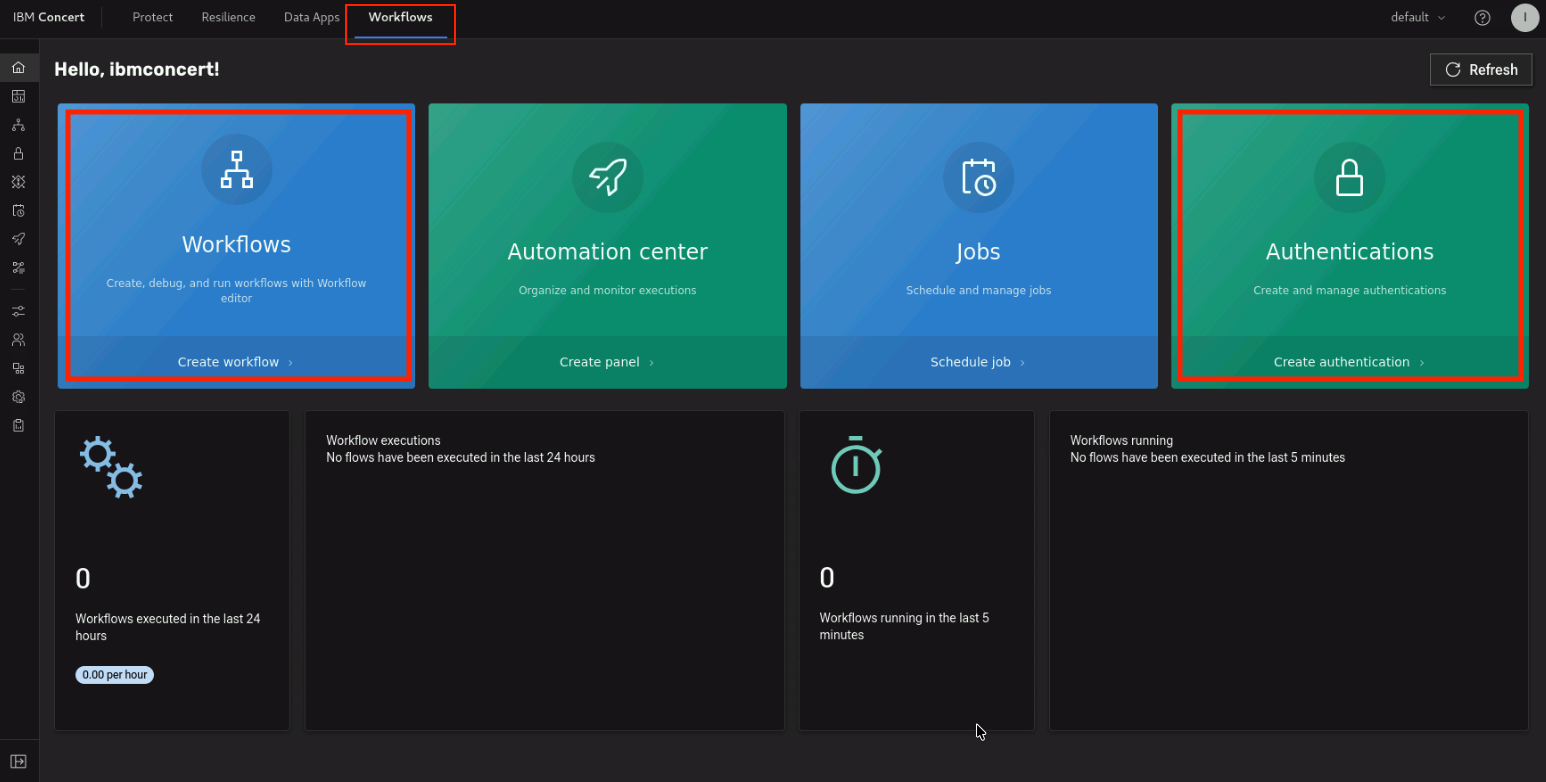
Concert Workflows Menu Navigation
You can access the Concert Workflows features by selecting the Workflows menu on the top. From here you will be using
the Workflows tile to create new Workflows and the Authentications tile to create new Authentications.
4.2 Setting up Authentications for Scan Workflow
4.2.1 RHEL VM Authentication (rhel_vm)
This authentication allows Concert Workflows to connect to the RHEL demo-apps VM via SSH to perform vulnerability scans and gather system information.
-
From the Concert Workflows page, select the Authentications tile.
-
Click Create authentication.
-
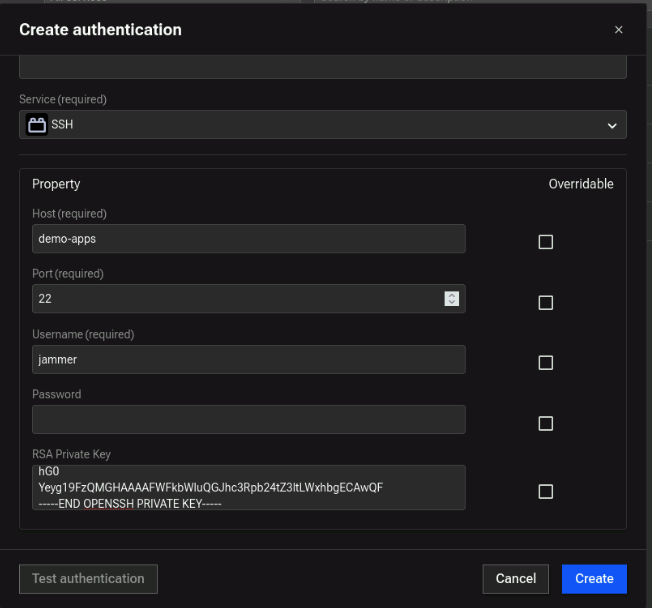
On the Create Authentication window:
- Name:
rhel_vm - Service: Search for SSH
- Host: (copy/paste the demo-apps-ip from credentials file)
- Port:
22 - Username:
jammer - Password: Leave blank
- Private Key: Copy full private key from
rhel_vm_private_keyin credentials file.- DO NOT copy any extra spaces at the beginning or end.
- DO NOT add a new line after -----END OPENSSH PRIVATE KEY-----
- Name:
-
Click Create.
Example of RHEL VM Authentication:
4.2.2 VM Configuration Data (configuration_data)
This authentication is used to provide Concert Workflows with necessary configuration data about the VM(s) to be scanned, such as IP address and authentication reference.
- From the same Authentications page, click Create authentication again.
- On the Create Authentication screen:
-
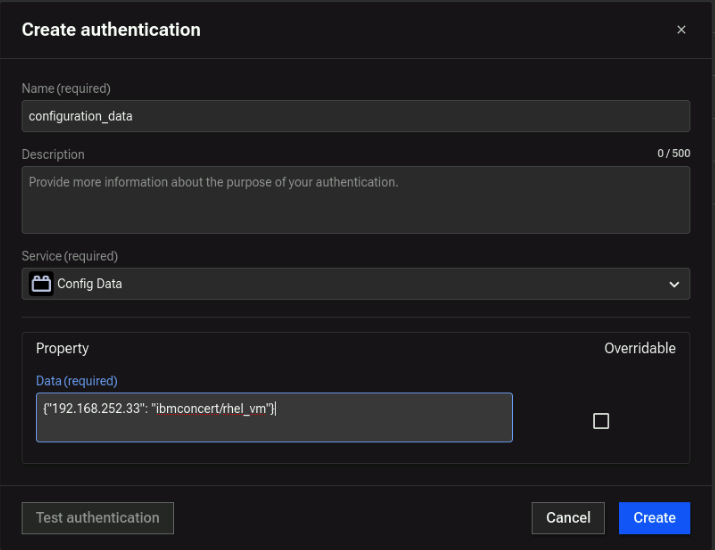
Name:
configuration_data -
Service: Config Data
-
Data: copy this JSON construct that includes the IP address of the demo-apps VM and a fully qualified reference to the
rhel_vmauthentication created in the previous step, as shown below:{"192.168.252.33": "ibmconcert/rhel_vm"}
-
For multiple servers, add additional VMs in JSON array format.
Configuration Data example:
- Finally, click Create.
4.2.3 Platform API Authentication (hub_self)
IBM Hub - Self is a special type of authentication that allows connection between Concert Workflows (executions) and other capabilities on the platform. At this point of time, it can be used to authenticate with Concert APIs and Concert Workflows APIs as it integrates with itself.
- From the same Authentications page, click Create authentication again.
- Configure the following fields:
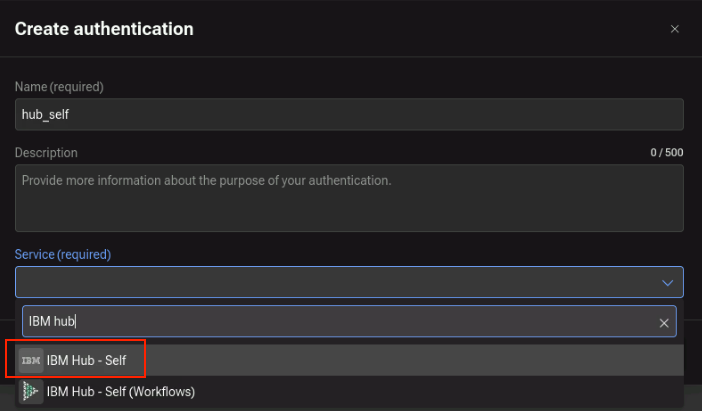
- Name:
hub_self - Service: search for IBM Hub - Self. Make sure to select the Hub Self that has the IBM icon, as shown below:
- Name:
- Click Create.
4.3 Import, Configure and Run Workflow
Now that you have the necessary workflows authentications set up, you can import the vulnerability scan workflow, configure it to use the authentications you created, and run it to perform a vulnerability scan on the demo-apps RHEL VM.
4.3.1 Import Workflow
- From credentials.txt, open the link for Concert Workflows URL in a new browser tab.
- Download the
.zipfile to the VM called Vulnerability_Scan.zip. - Select the top Workflows tab and select the Workflows tile.
- From the top-right corner, click on the 3-dot icon and select
Create folder. Name the folder
SCAN_WORKFLOWSand click Create. - Click on the newly created SCAN_WORKFLOWS folder to open it and click Import → select
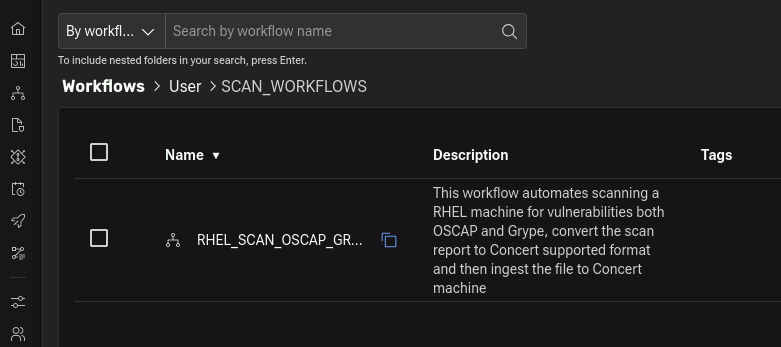
Vulnerability_Scan.zip. - Verify the new workflow appears as
RHEL_SCAN_OSCAP_GRYPE.
It should look like this:
4.3.2 Configure Workflow
- Click on the
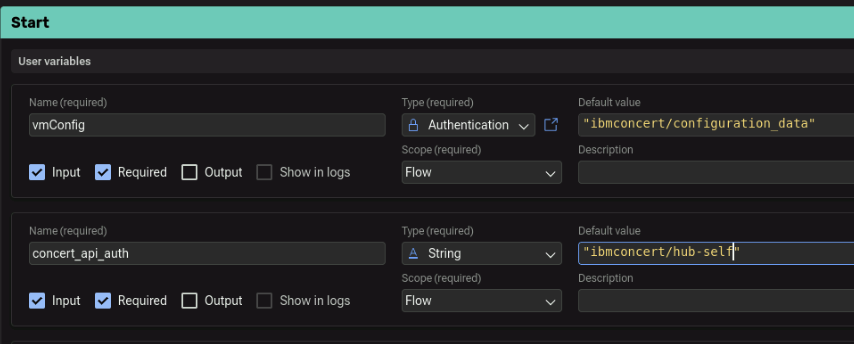
RHEL_SCAN_OSCAP_GRYPEworkflow to open it. - In the Start block we will add the authentications defined previously as input parameters:
- set vmConfig parameter to
ibmconcert/configuration_data(as defined in section 4.2.2) - set concert_api_auth parameter to
ibmconcert/hub_self(as defined in section 4.2.3)
The configured parameters should look like this:
- Click Save.
4.3.3 Run Workflow
- Click Run to execute the workflow (it should take about two minutes).
- No authentication errors in the Logs.
- VM scan results in the Log with CVEs discovered from the scan
- Deploy and Application SBOMs visible in the log (you need to expand the log details to see these)
4.4 Review Vulnerability Scan Findings in Concert
From the Concert UI, click on the top Resilience tab. From the left menu, navigate to Inventory → Environment inventory as shown below
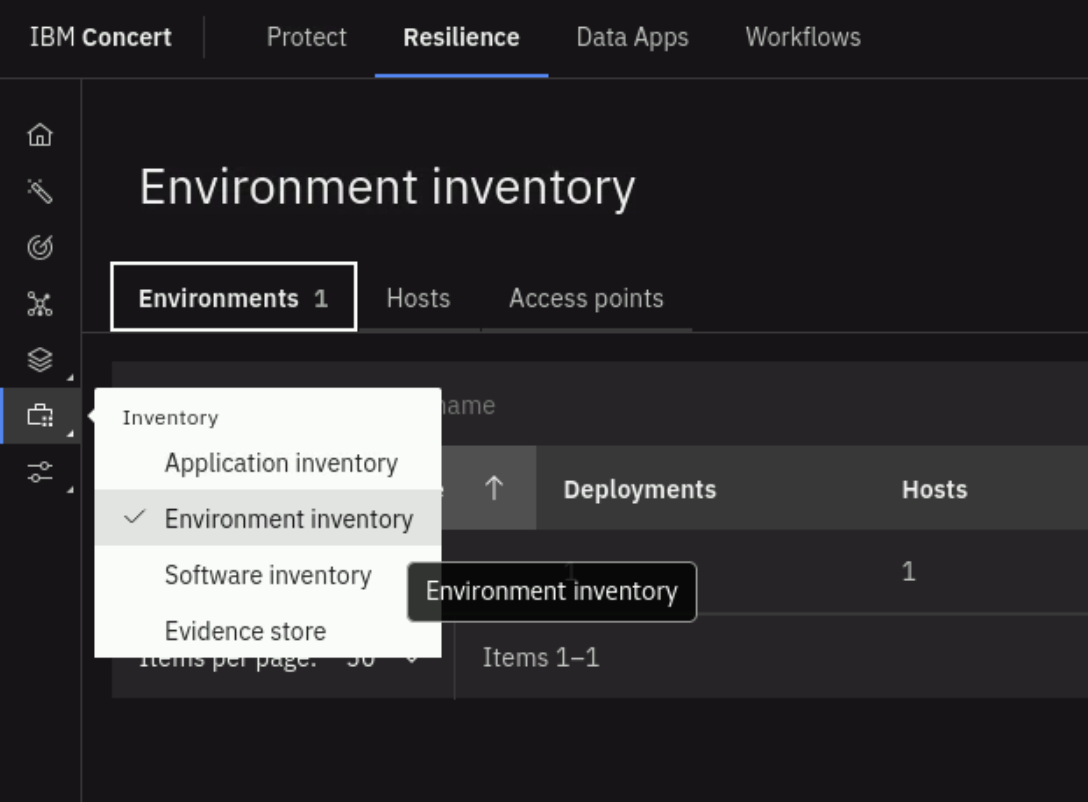
Note that there is a new environment called staging (click the refresh icon if necessary)
Click on the Hosts tab (click on the Refresh icon) and note that there is a new host called demo-apps.ibmdte.local of Type host. Click on demo-apps.ibmdte.local host and note the IPv4 address 192.168.252.33. Click on the CVE findings tab and scroll down to view the vulnerabilities found by the workflow you just ran.
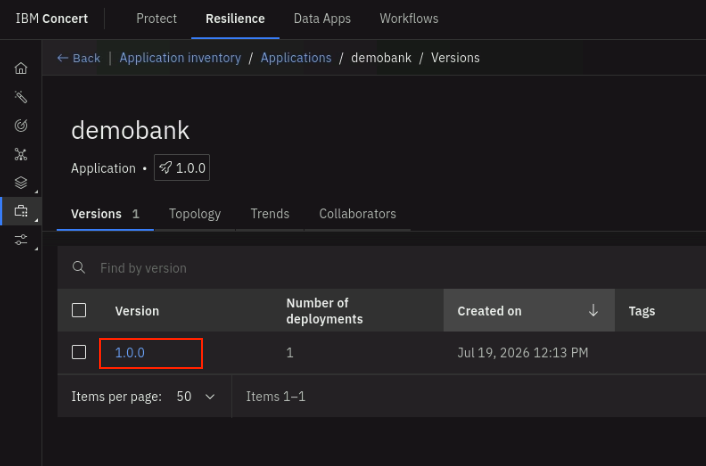
On the left side menu, navigate to Inventory → Application Inventory (click on the Refresh icon) and note that there is a new application called demobank. We will define the criticality settings for this application. This is context information That Concert
- Click on the demobank application, and on the Versions tab, select the 1.0.0 version.
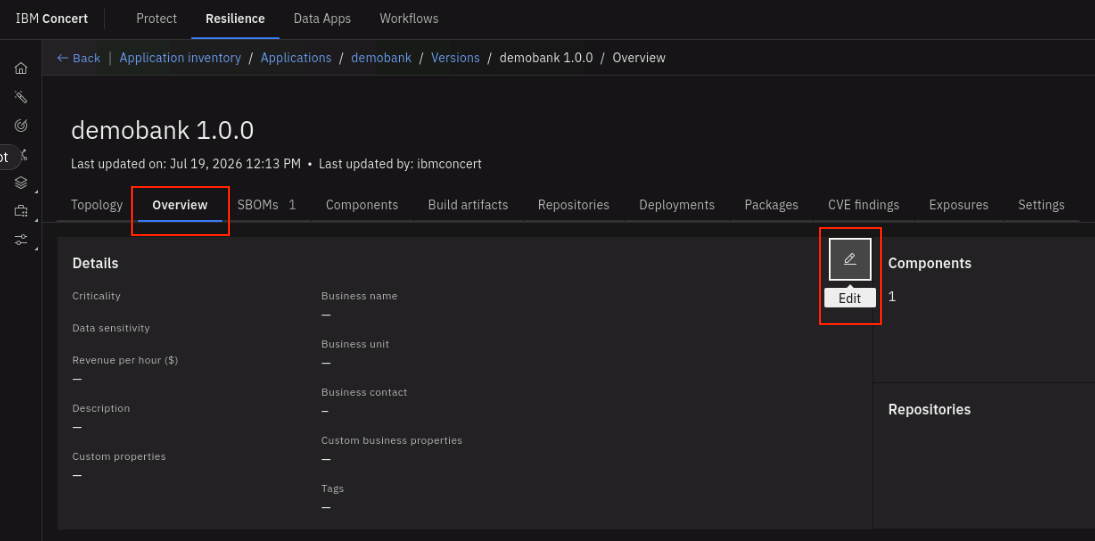
- On the demobank 1.0.0 page, select the Overview tab and click on the Edit pencil icon.
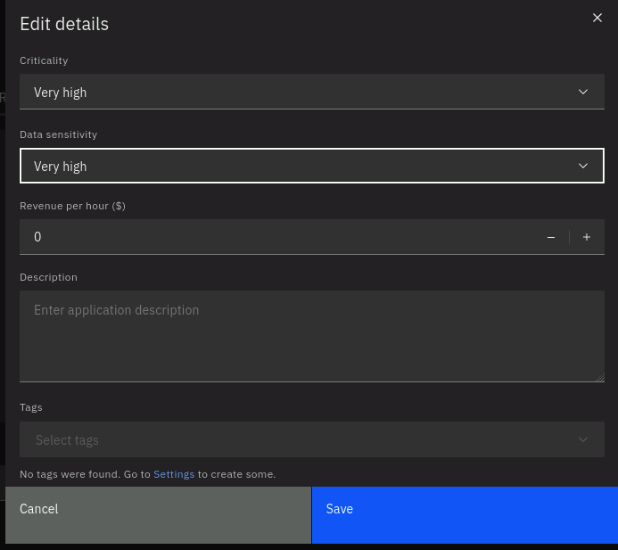
- On the Edit details window, set both Criticality and Data sensitivity to Very high and click on Save.
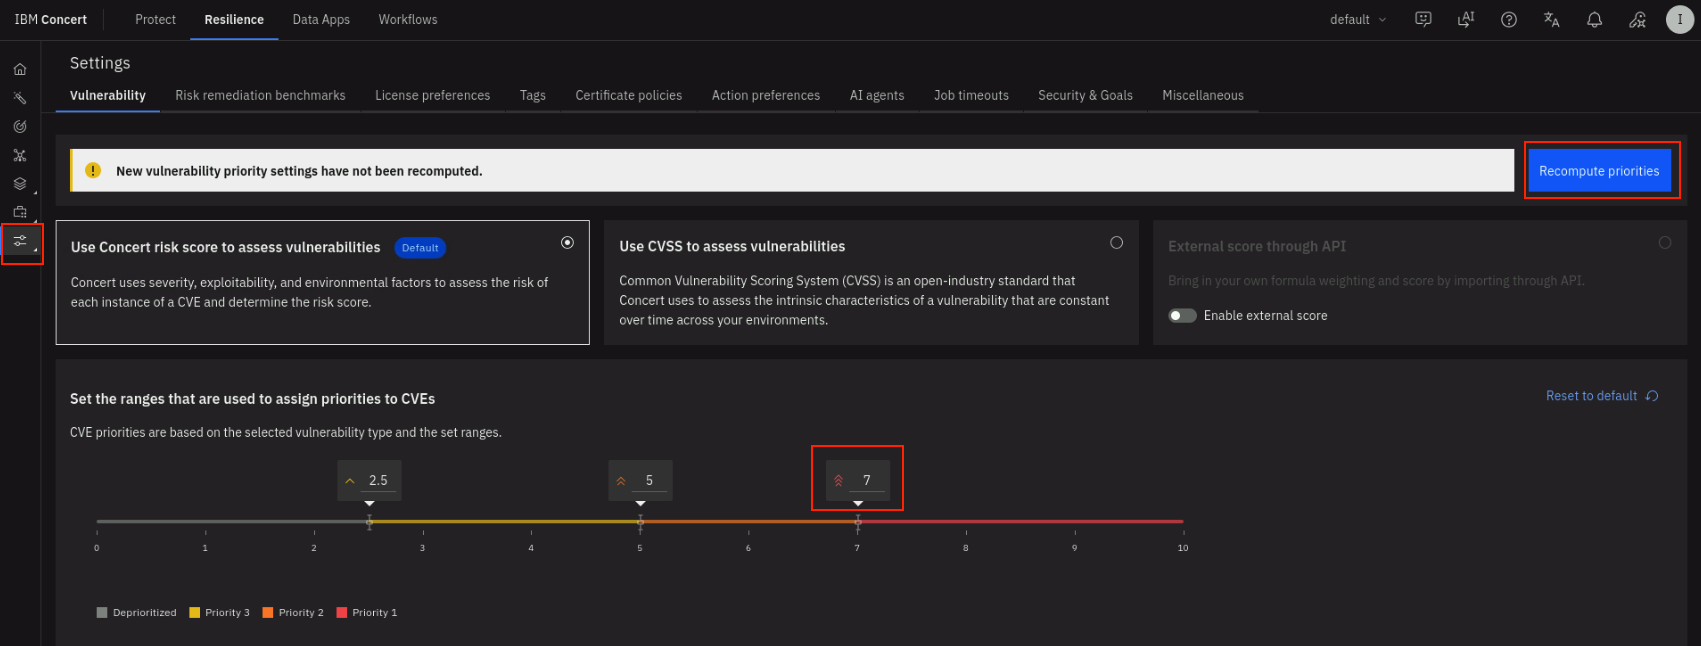
Now that we have changed the criticality of the application, we will ask Concert to recompute the Risk score based on this new information.
- On the left side menu, select Administration -> Settings.
- On the Settings page, change the Priority 1 (red) slider from 7.5 to 7. This change will enable the Recompute priorities button. Click on the Recompute priorities button and on the pop-up window confirm the action by clicking on Recompute and save.
Lets review the list of vulnerabilities. On the left side menu, navigate to Dimensions → Vulnerability (click on the Refresh icon) and note that there are Host CVEs vulnerabilities discovered from the scan. Concert provides a unified dashboard where you can monitor vulnerabilities, review remediation actions, and track progress across different environments.
On the left side menu, select the Action center tab and click on the Refresh icon. Note that there is a new remediation action with Action type OS with Location as the demo-apps.ibmdte.local host. Concert’s auto-remediation feature automatically detects and fixes security vulnerabilities across operating systems, web servers, and container images. It identifies applicable fixes, creates remediation actions, and triggers patching workflows after receiving the required approvals.
By leveraging auto-remediation, you can proactively manage vulnerabilities, reduce the risk of security breaches, and strengthen your overall security posture. Concert displays newly discovered vulnerabilities from loaded scan files along with their associated impacts.
Concert also supports mitigation planning for new vulnerabilities using generative AI powered by watsonx.ai, helping you design data-driven remediation strategies.
After you upload a scan report (for example, from a Red Hat Enterprise Linux (RHEL) virtual machine), Concert analyzes the scan results and generates recommended remediation actions—such as installing specific OS patches.
These actions follow the approval flow shown below:
Approval pending -> Approved -> Scheduled -> In Progress -> Success/Failure