Navigator:
- Workshop Description
- Lab 1: Create your Cloud Environment
- Lab 2: Deploy Kafka via Script
- Lab 3: Deploy Postgres via Operator
- Lab 4: Deploy Sample Application
- Lab 5: Reactive Messaging with MicroProfile
- Lab 6: Server Sent Events
- Lab 7: Vert.x Event Bus
- Lab 8 (optional): Use distributed Logging
Lab 5: Reactive Messaging with MicroProfile
In this lab you’ll learn how to use reactive messaging with MicroProfile Messaging. With simple Java annotations messages can be sent and received in memory as well as via Apache Kafka.
MicroProfile Messaging implements the Reactive Streams standard which defines how to do asynchronous stream processing for different programming languages independently from specific libraries.
The interfaces of the main Reactive Streams components Subscriber, Publisher and Processor have been available since JDK 9. The implementation of these interfaces is provided by MicroProfile.
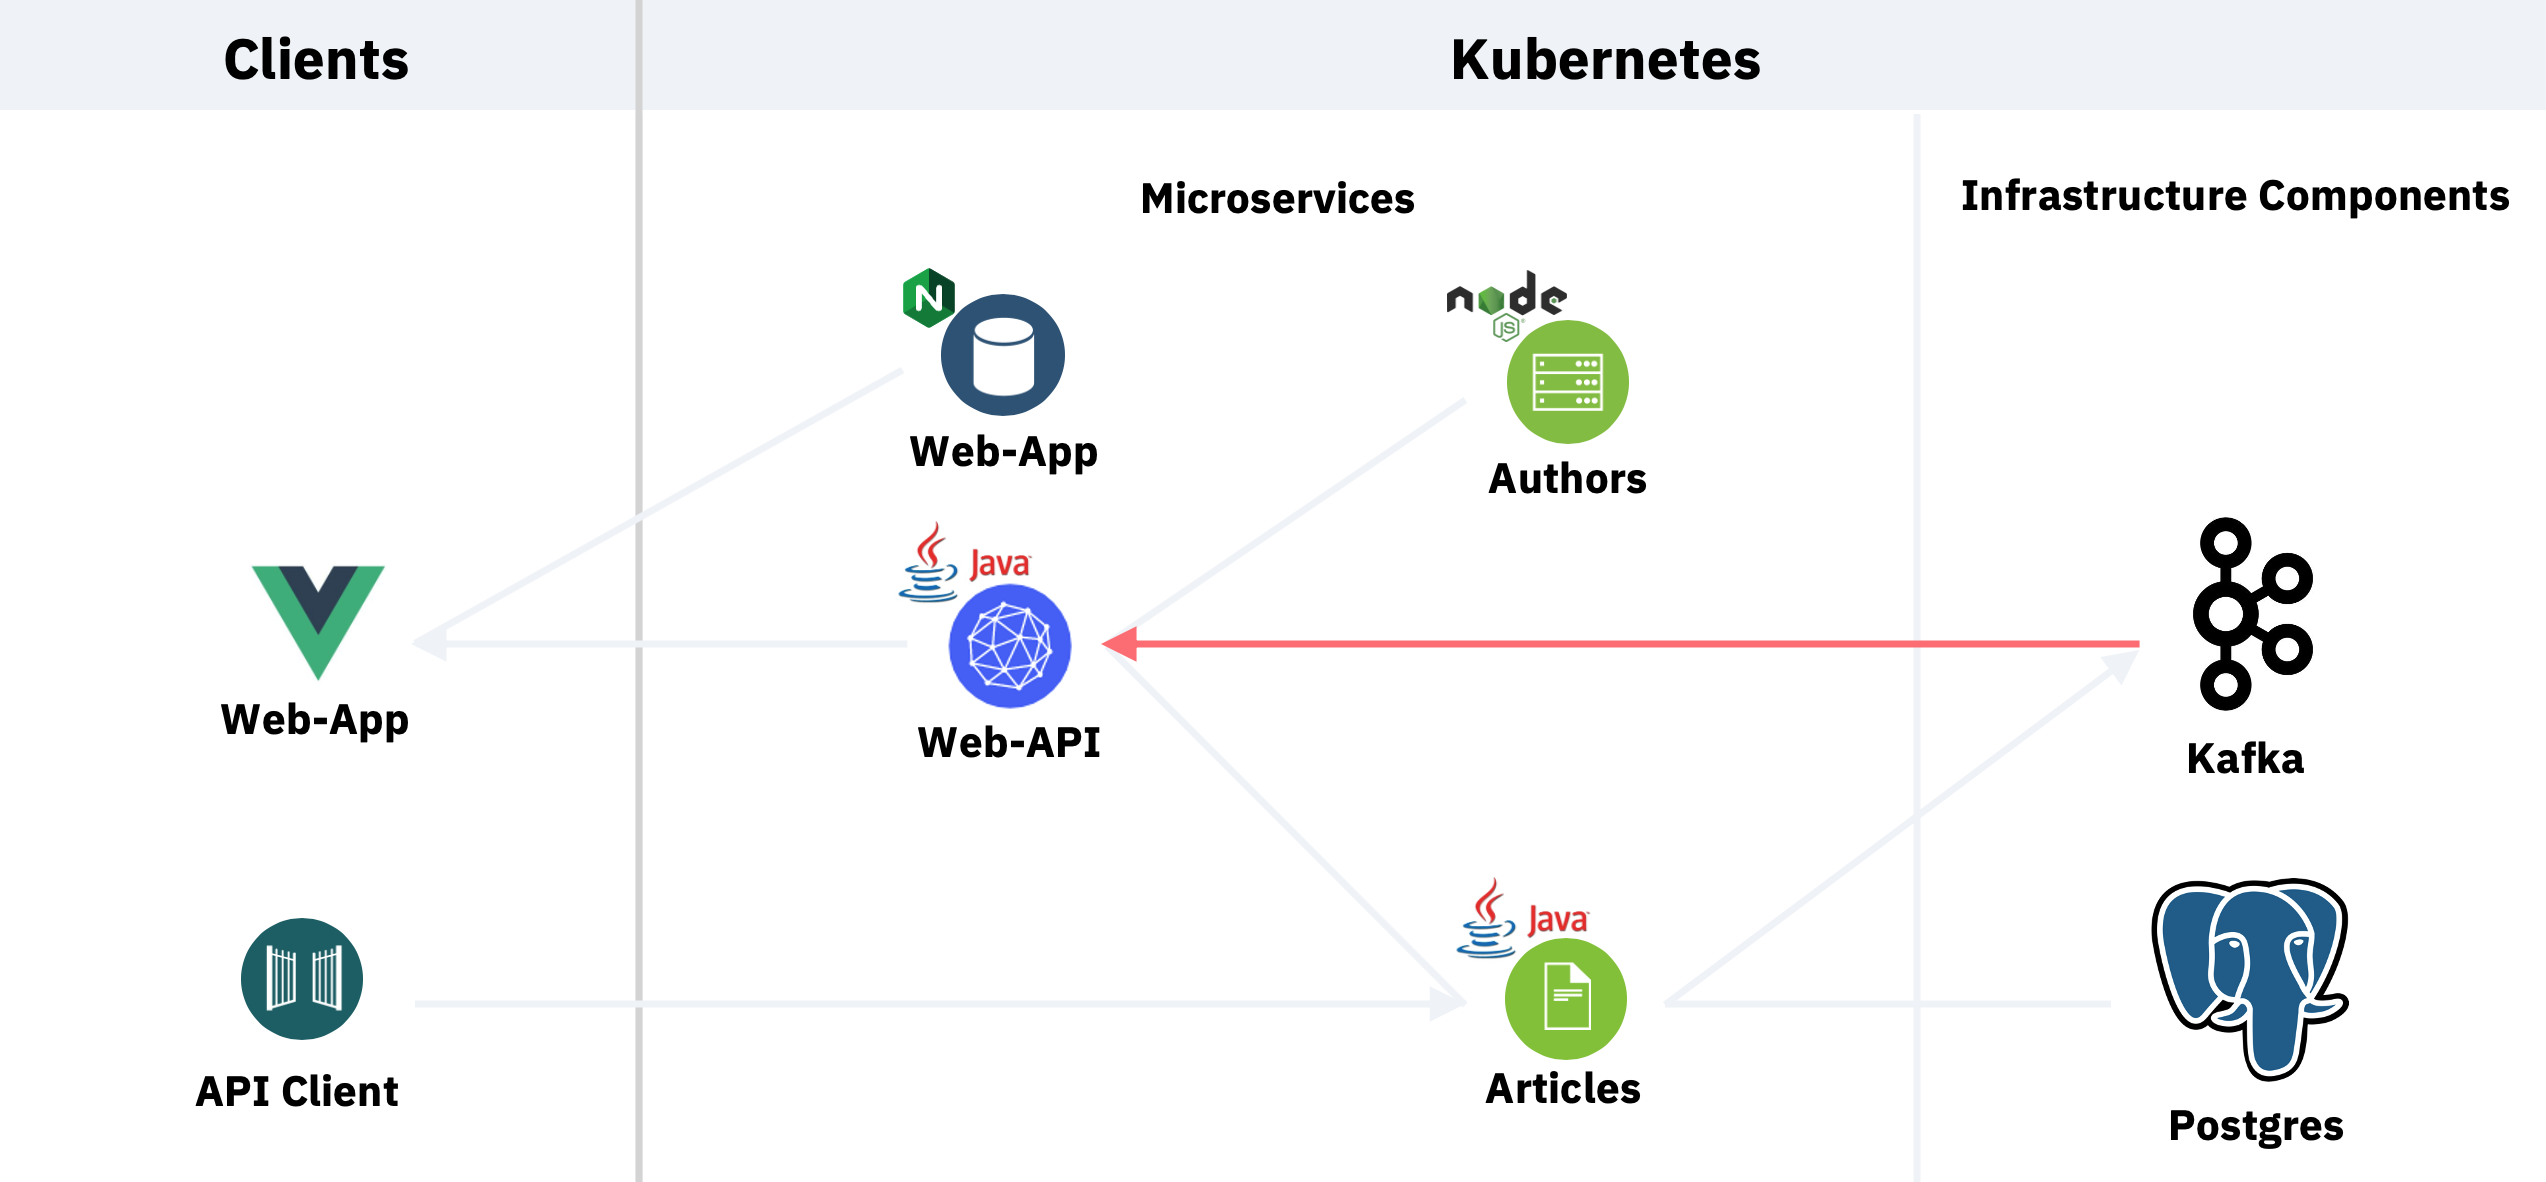
The ‘Articles’ service writes messages to Kafka after new articles have been created. In this lab we’ll take a look how these messages can be read from the ‘Web-API’ service.
Step 1: Modify Subscriber, Publisher and Processor Class
Let’s take a look at a Java class which receives incomping messages from Kafka and sends outgoing in-memory messages.
Invoke the following command in the Cloud Shell.
$ cd ~/cloud-native-starter/reactive/web-api-reactive/src/main/java/com/ibm/webapi/apis
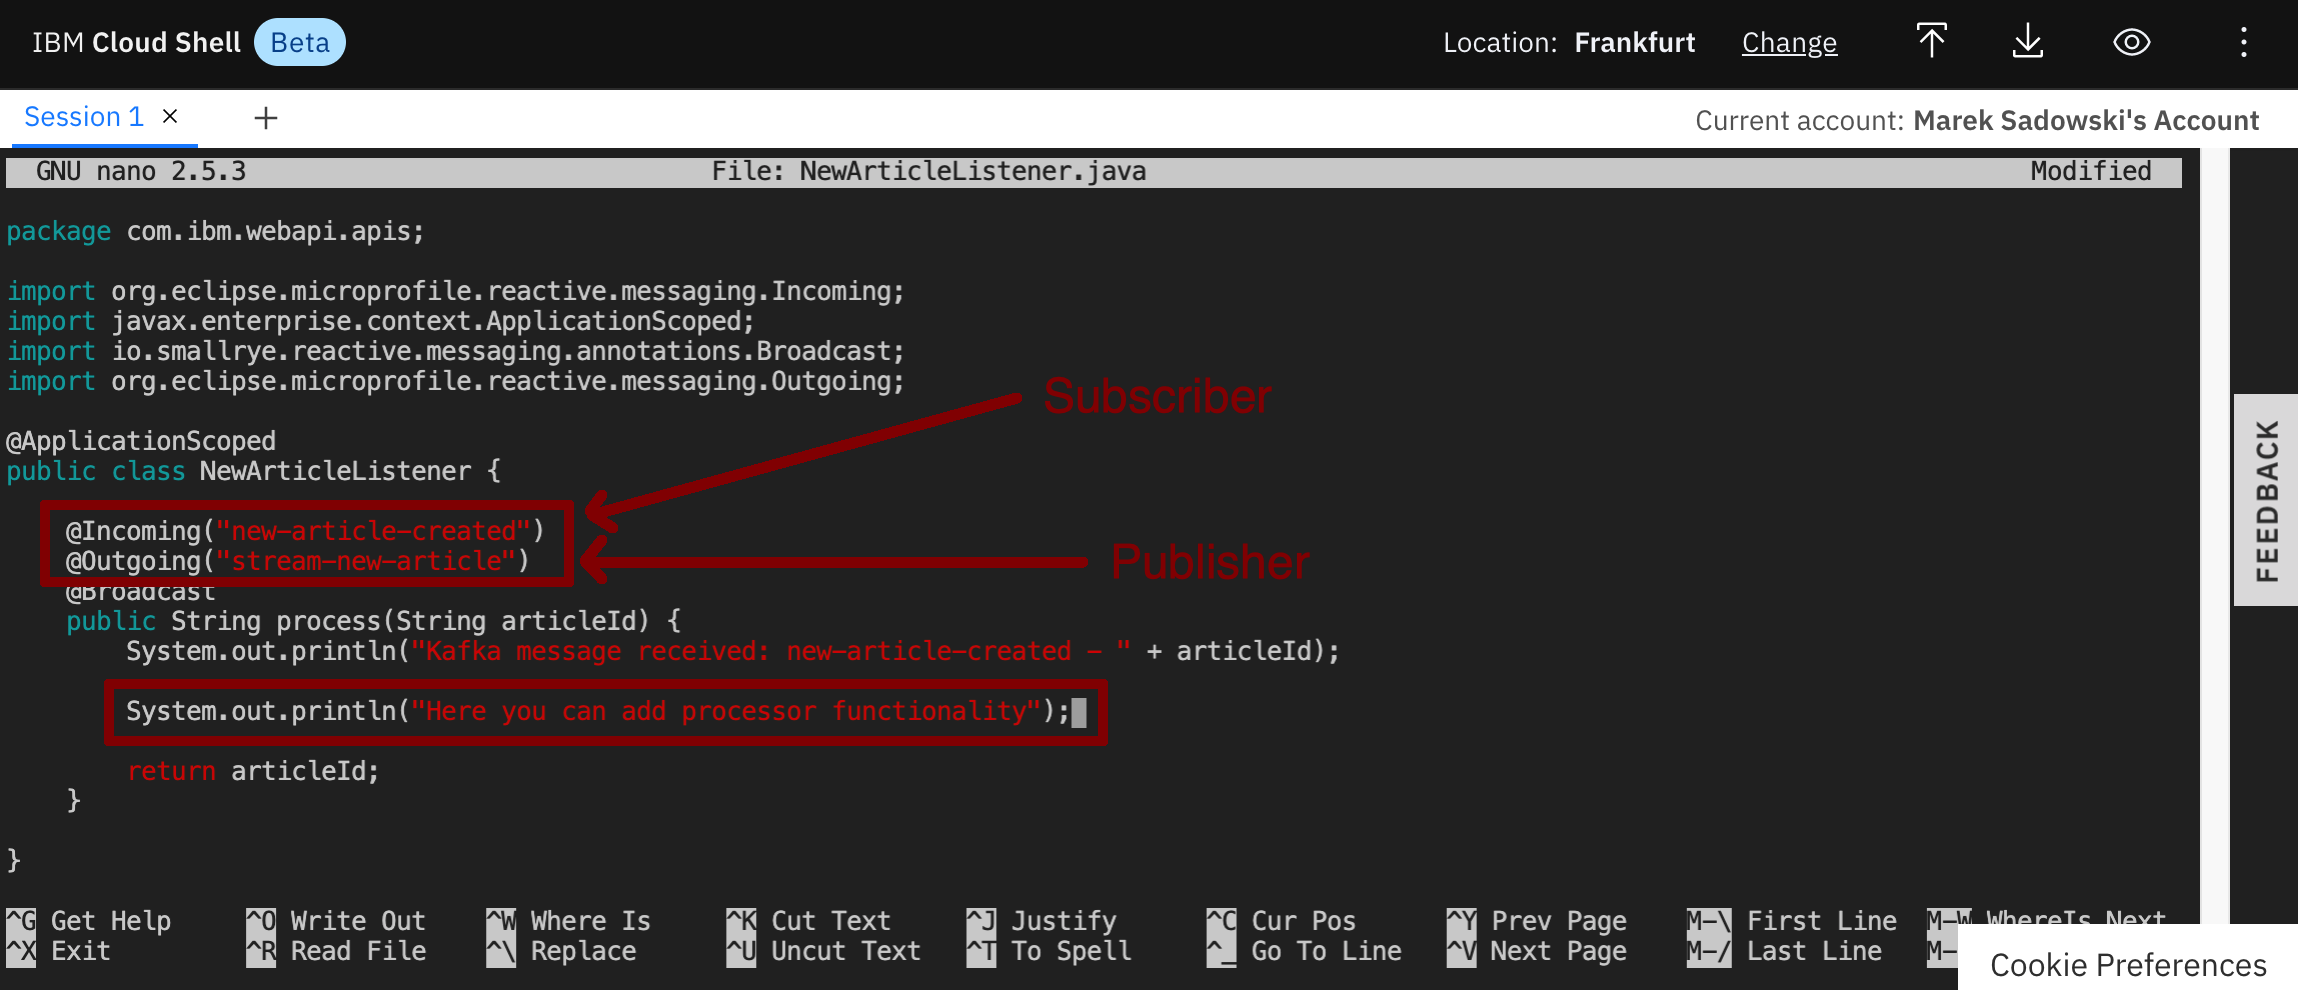
$ nano NewArticleListener.java

The @Incoming annotation indicates that the method consumes the items from the topic ‘new-article-created’. The @Outgoing annotation indicates that the objects returned by the method are sent to the stream ‘stream-new-article’. @Broadcast indicates that the item are dispatched to all subscribers.
The snippet is a Subscriber as well as a Publisher which means that it is automatically also a Processor which can, for example, convert incoming messages and forward them.
Let’s make a simple change and redeploy the microservice by adding this line.
System.out.println("Here you can add process functionality");
Exit the Editor via ‘Ctrl-X’, ‘y’ and ‘Enter’.
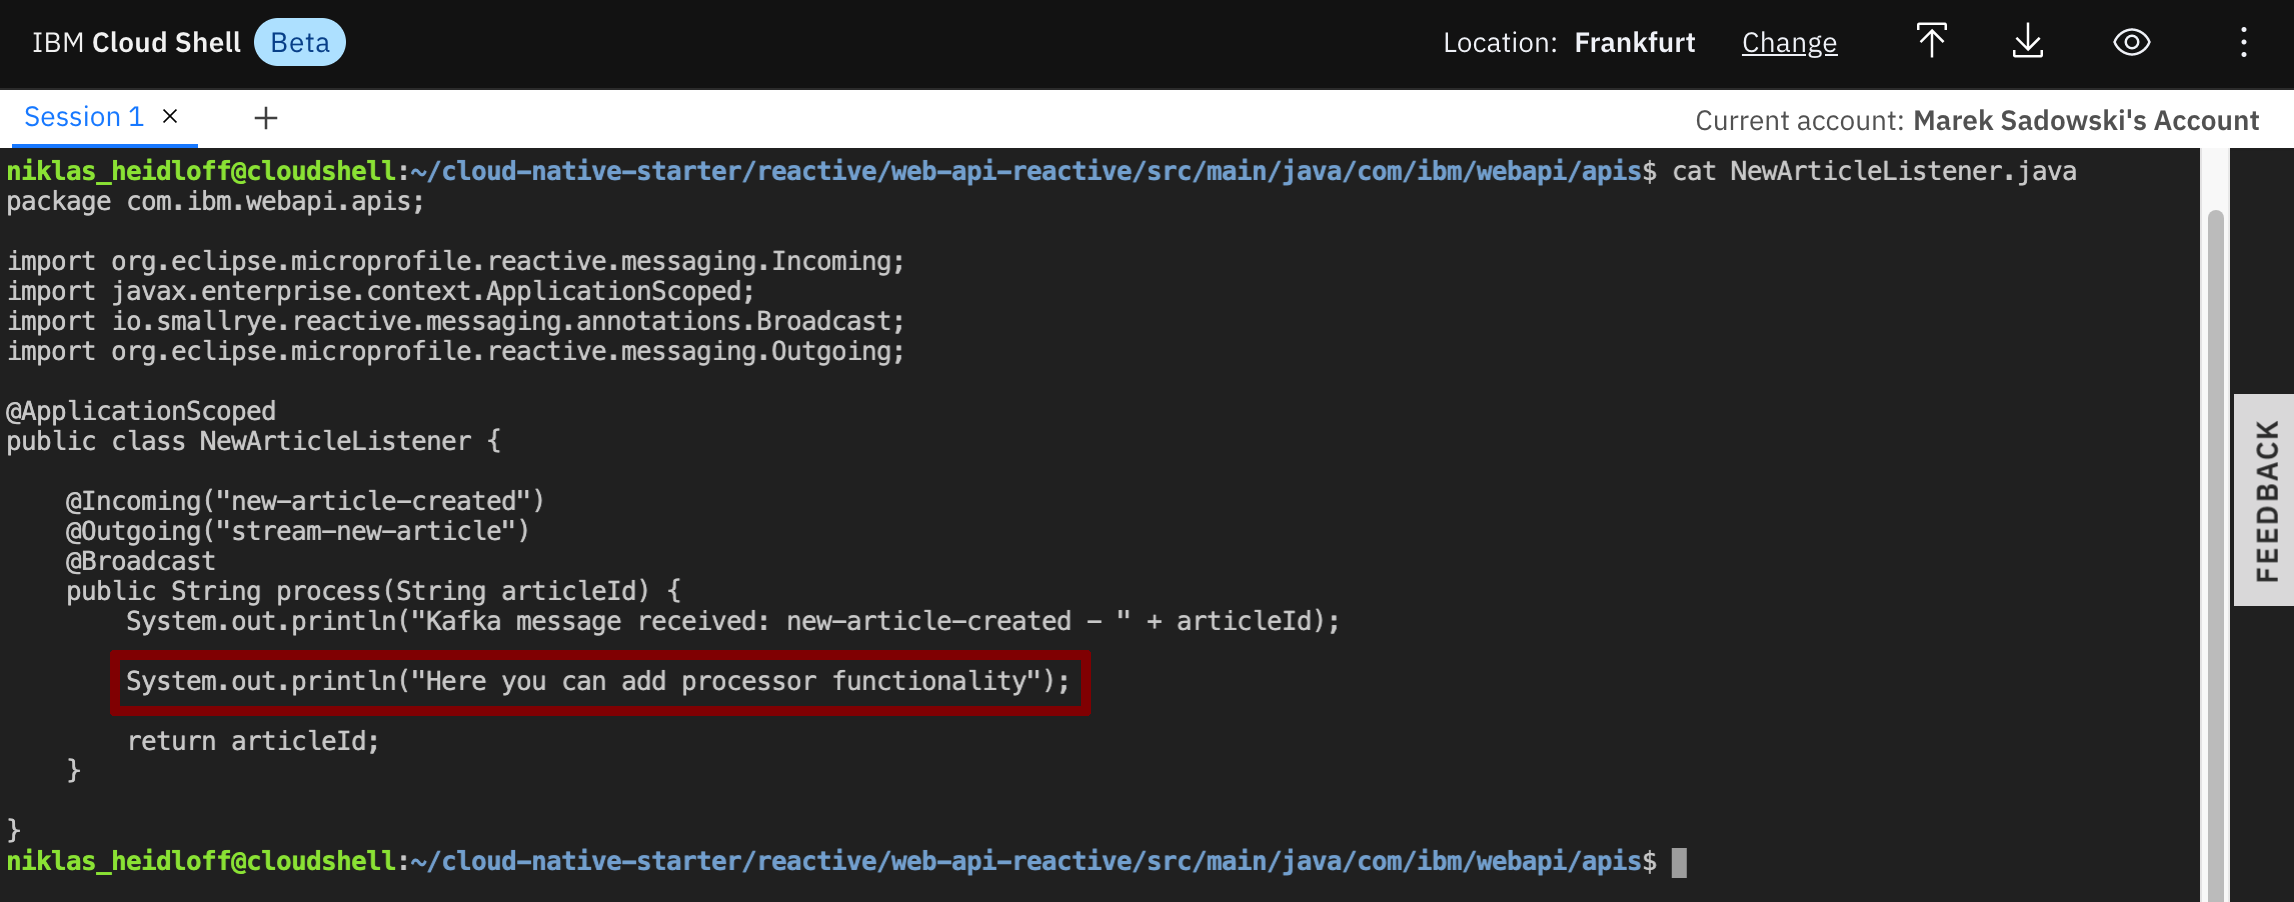
Confirm that the changes have been saved.
$ cd ~/cloud-native-starter/reactive/web-api-reactive/src/main/java/com/ibm/webapi/apis
$ cat NewArticleListener.java
Step 2: Configure Kafka
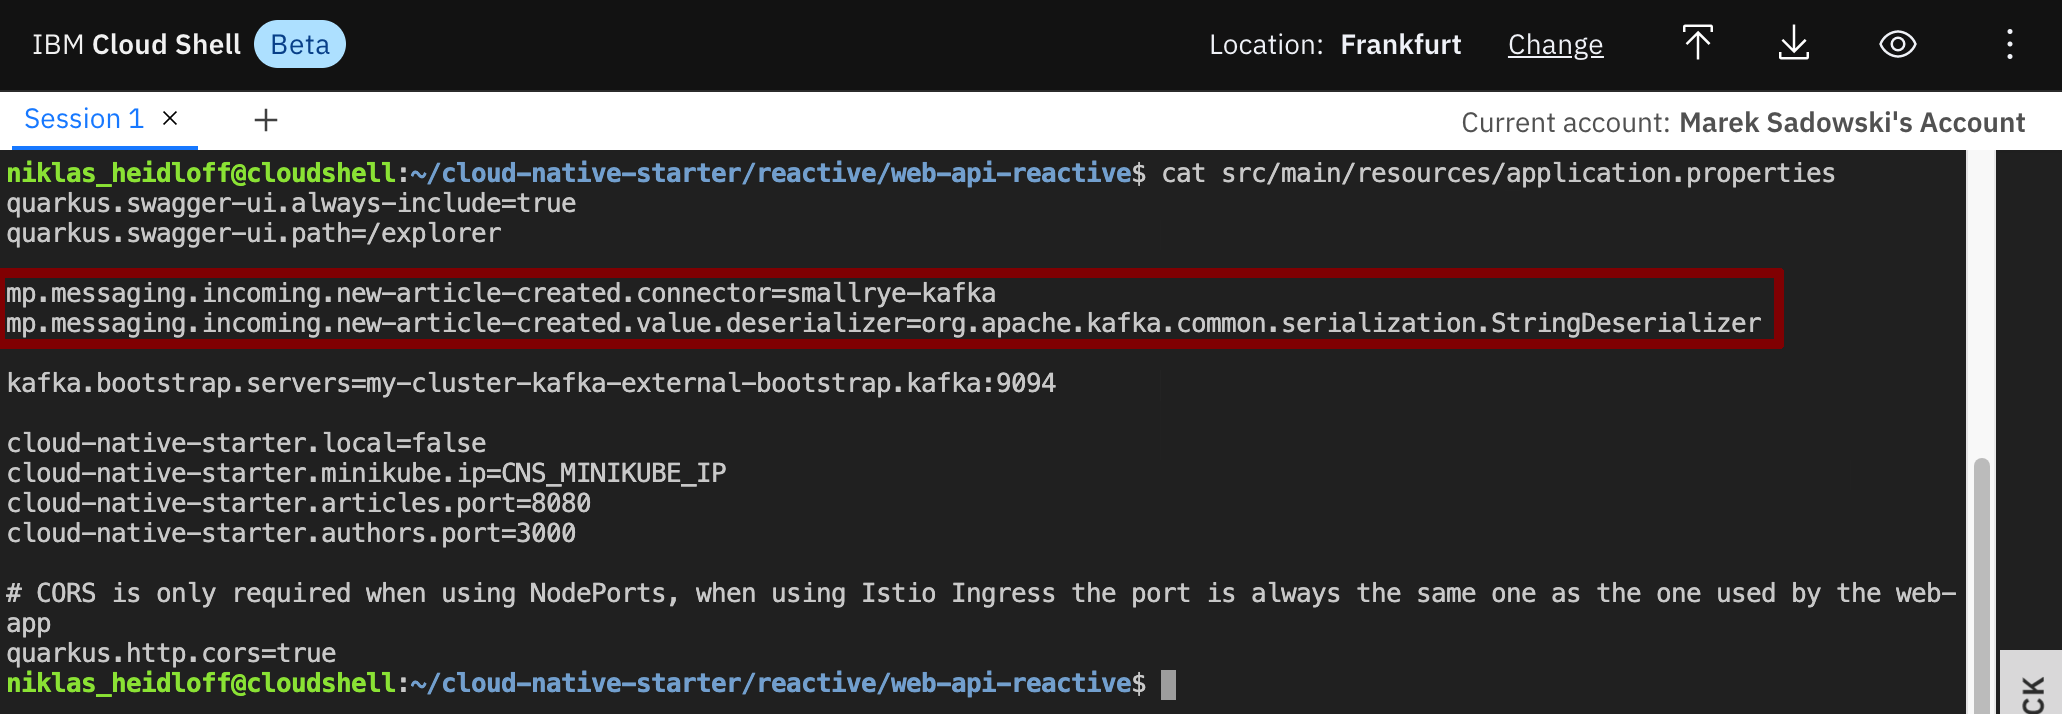
The incoming messages in the snippet above are received from Kafka. The ‘Articles’ service writes these messages to Kafka after new articles have been created.
In order to subscribe to these Kafka messages in Quarkus, the topic needs to be configured in application.properties.
$ cd ~/cloud-native-starter/reactive/web-api-reactive/src/main/resources
$ cat application.properties
$ cd ~/cloud-native-starter/reactive/web-api-reactive/src/main/java/com/ibm/webapi/apis
$ cat NewArticleListener.java
Step 3: Deploy new Version
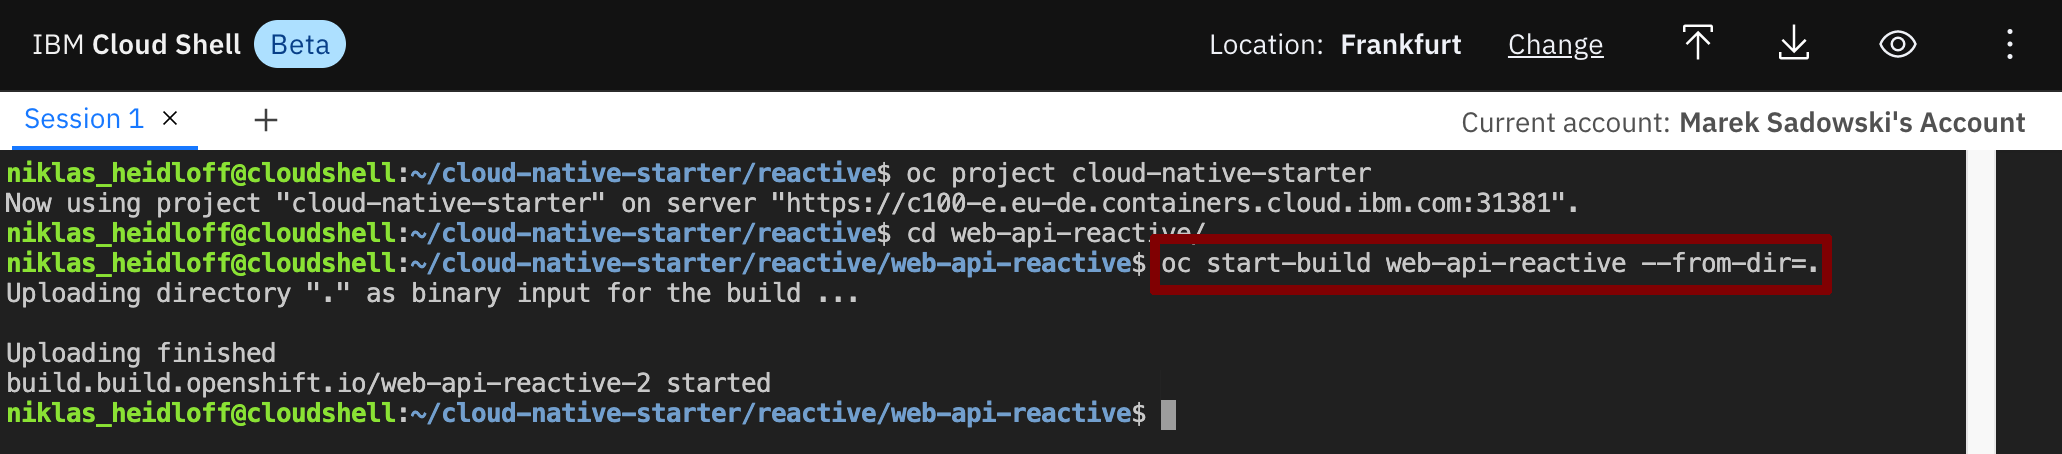
$ cd ~/cloud-native-starter/reactive/web-api-reactive
$ oc start-build web-api-reactive --from-dir=.
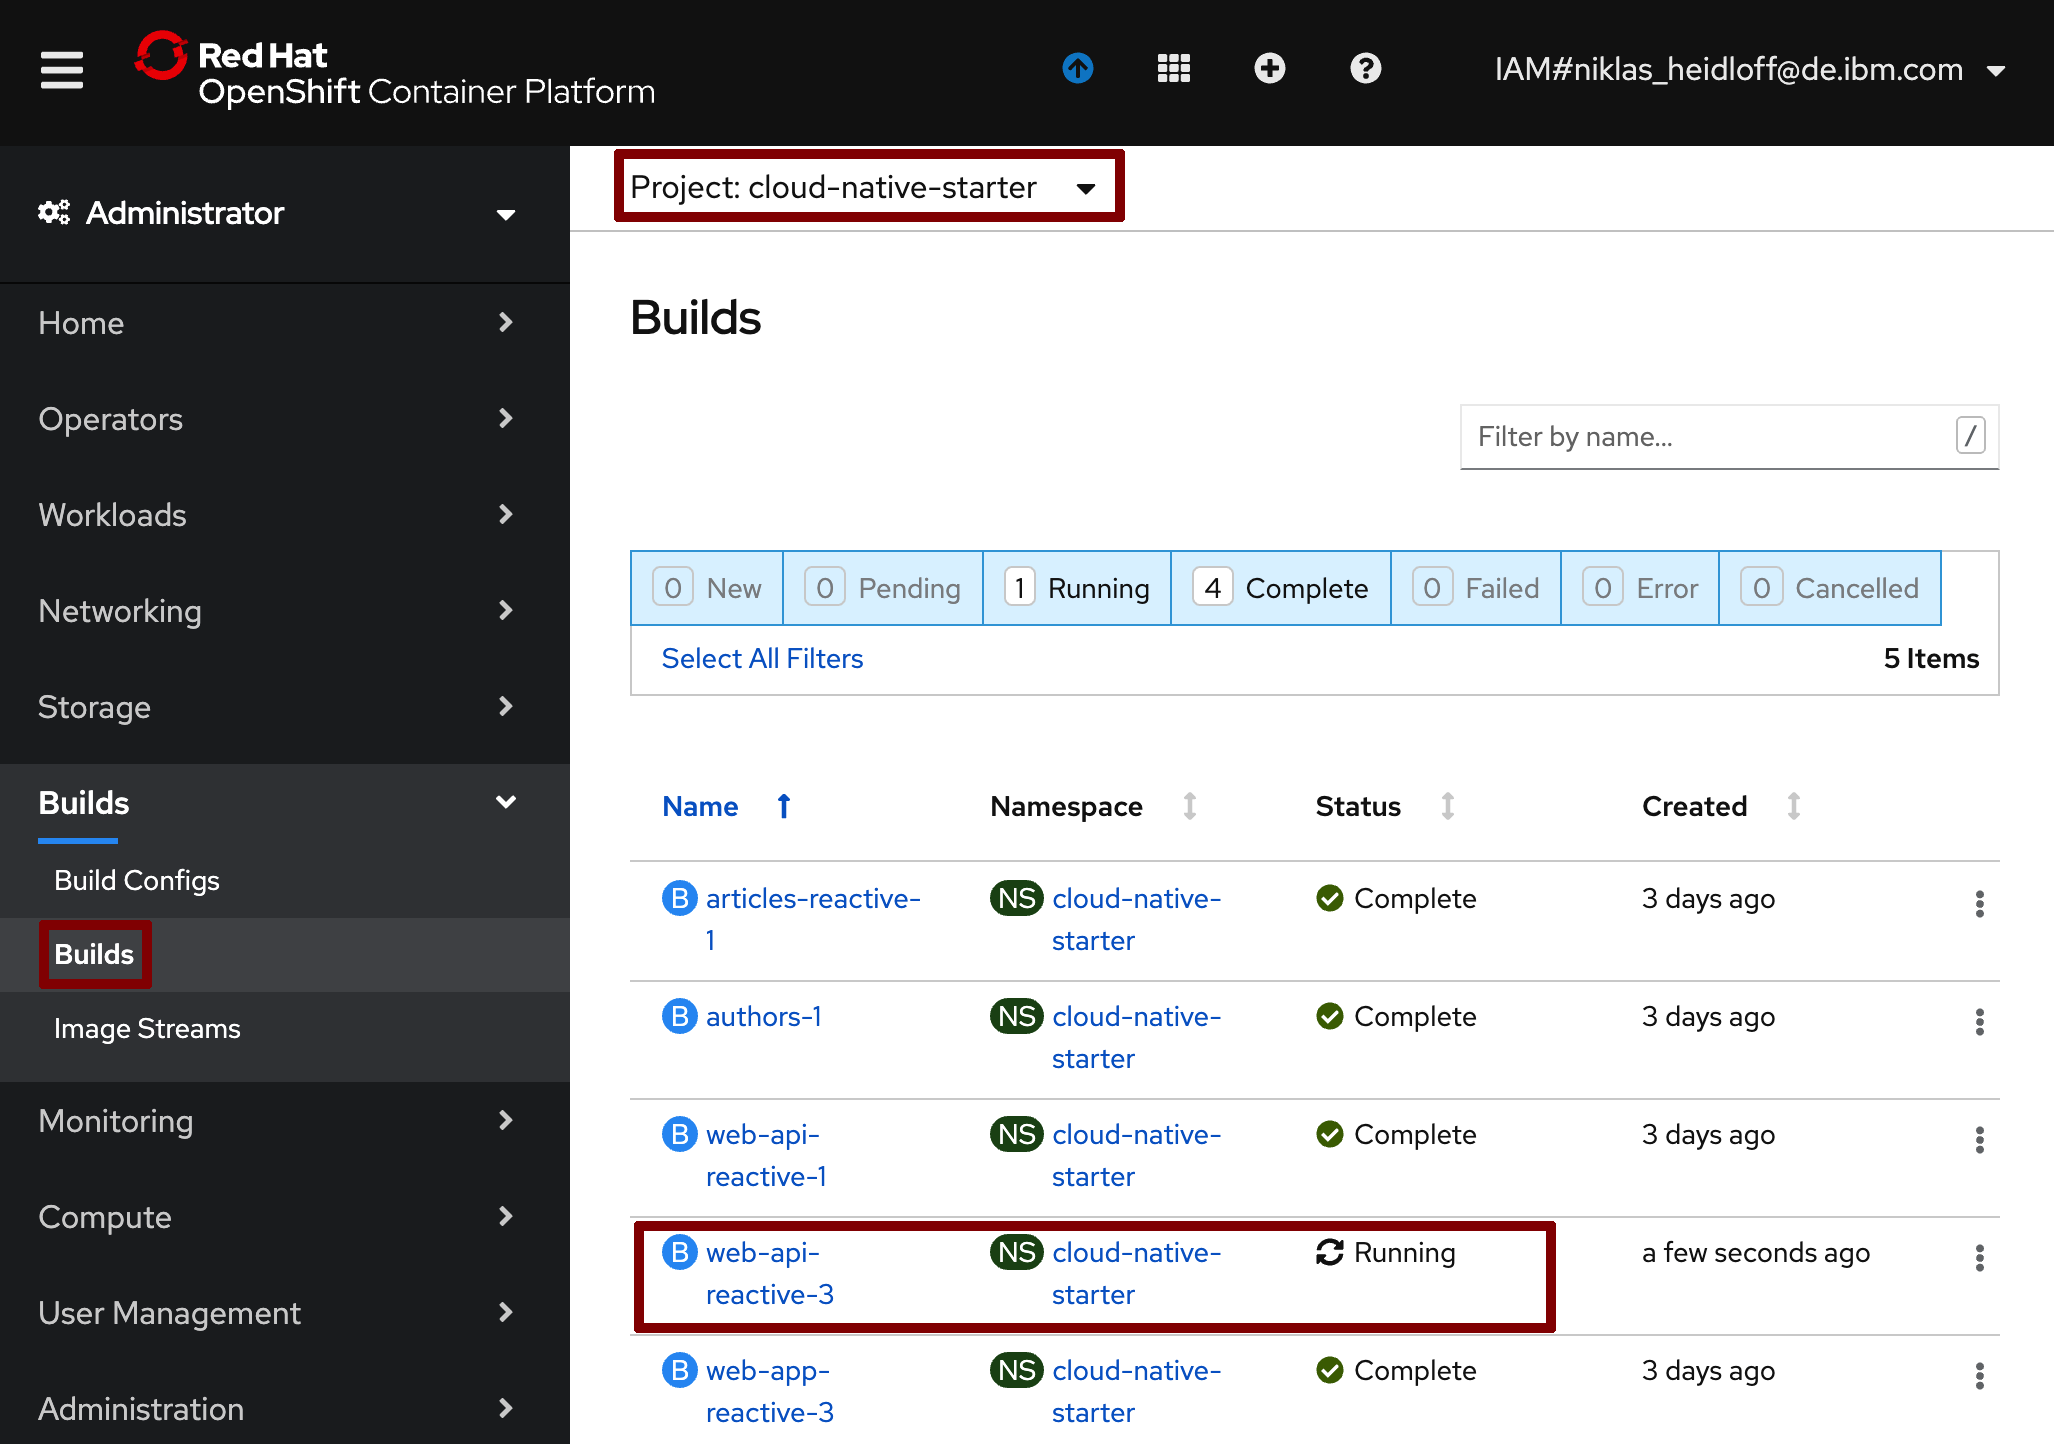
On the ‘Builds’ page wait until the new build has been completed.
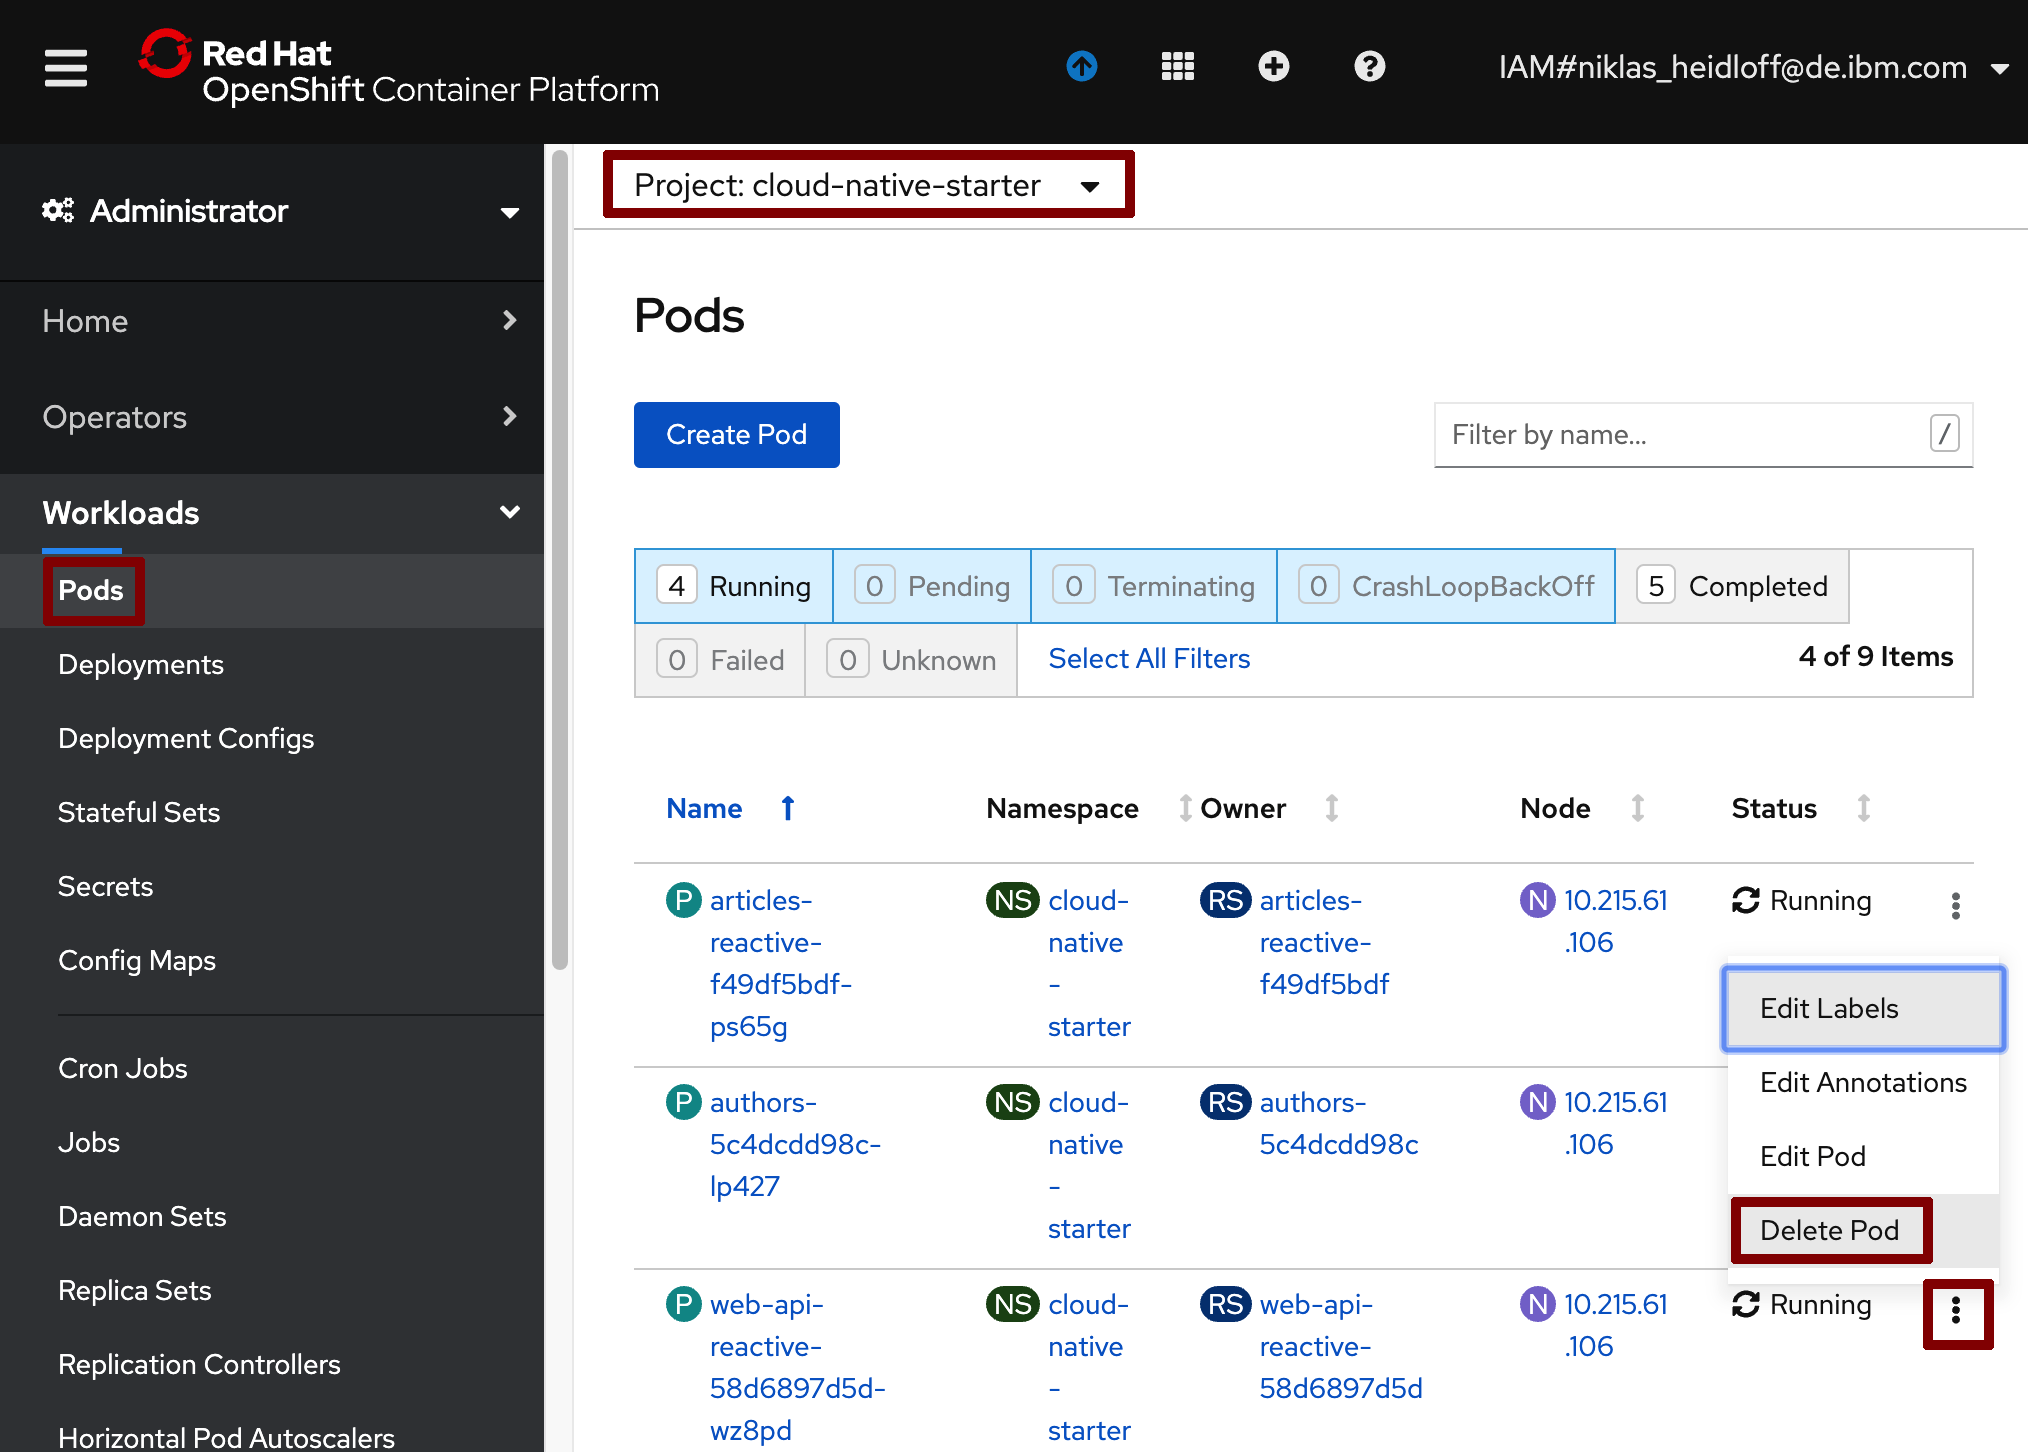
Once completed, delete the ‘Web-API’ pod which causes a new pod with the latest image to be started.
Step 4: Verify the new Version
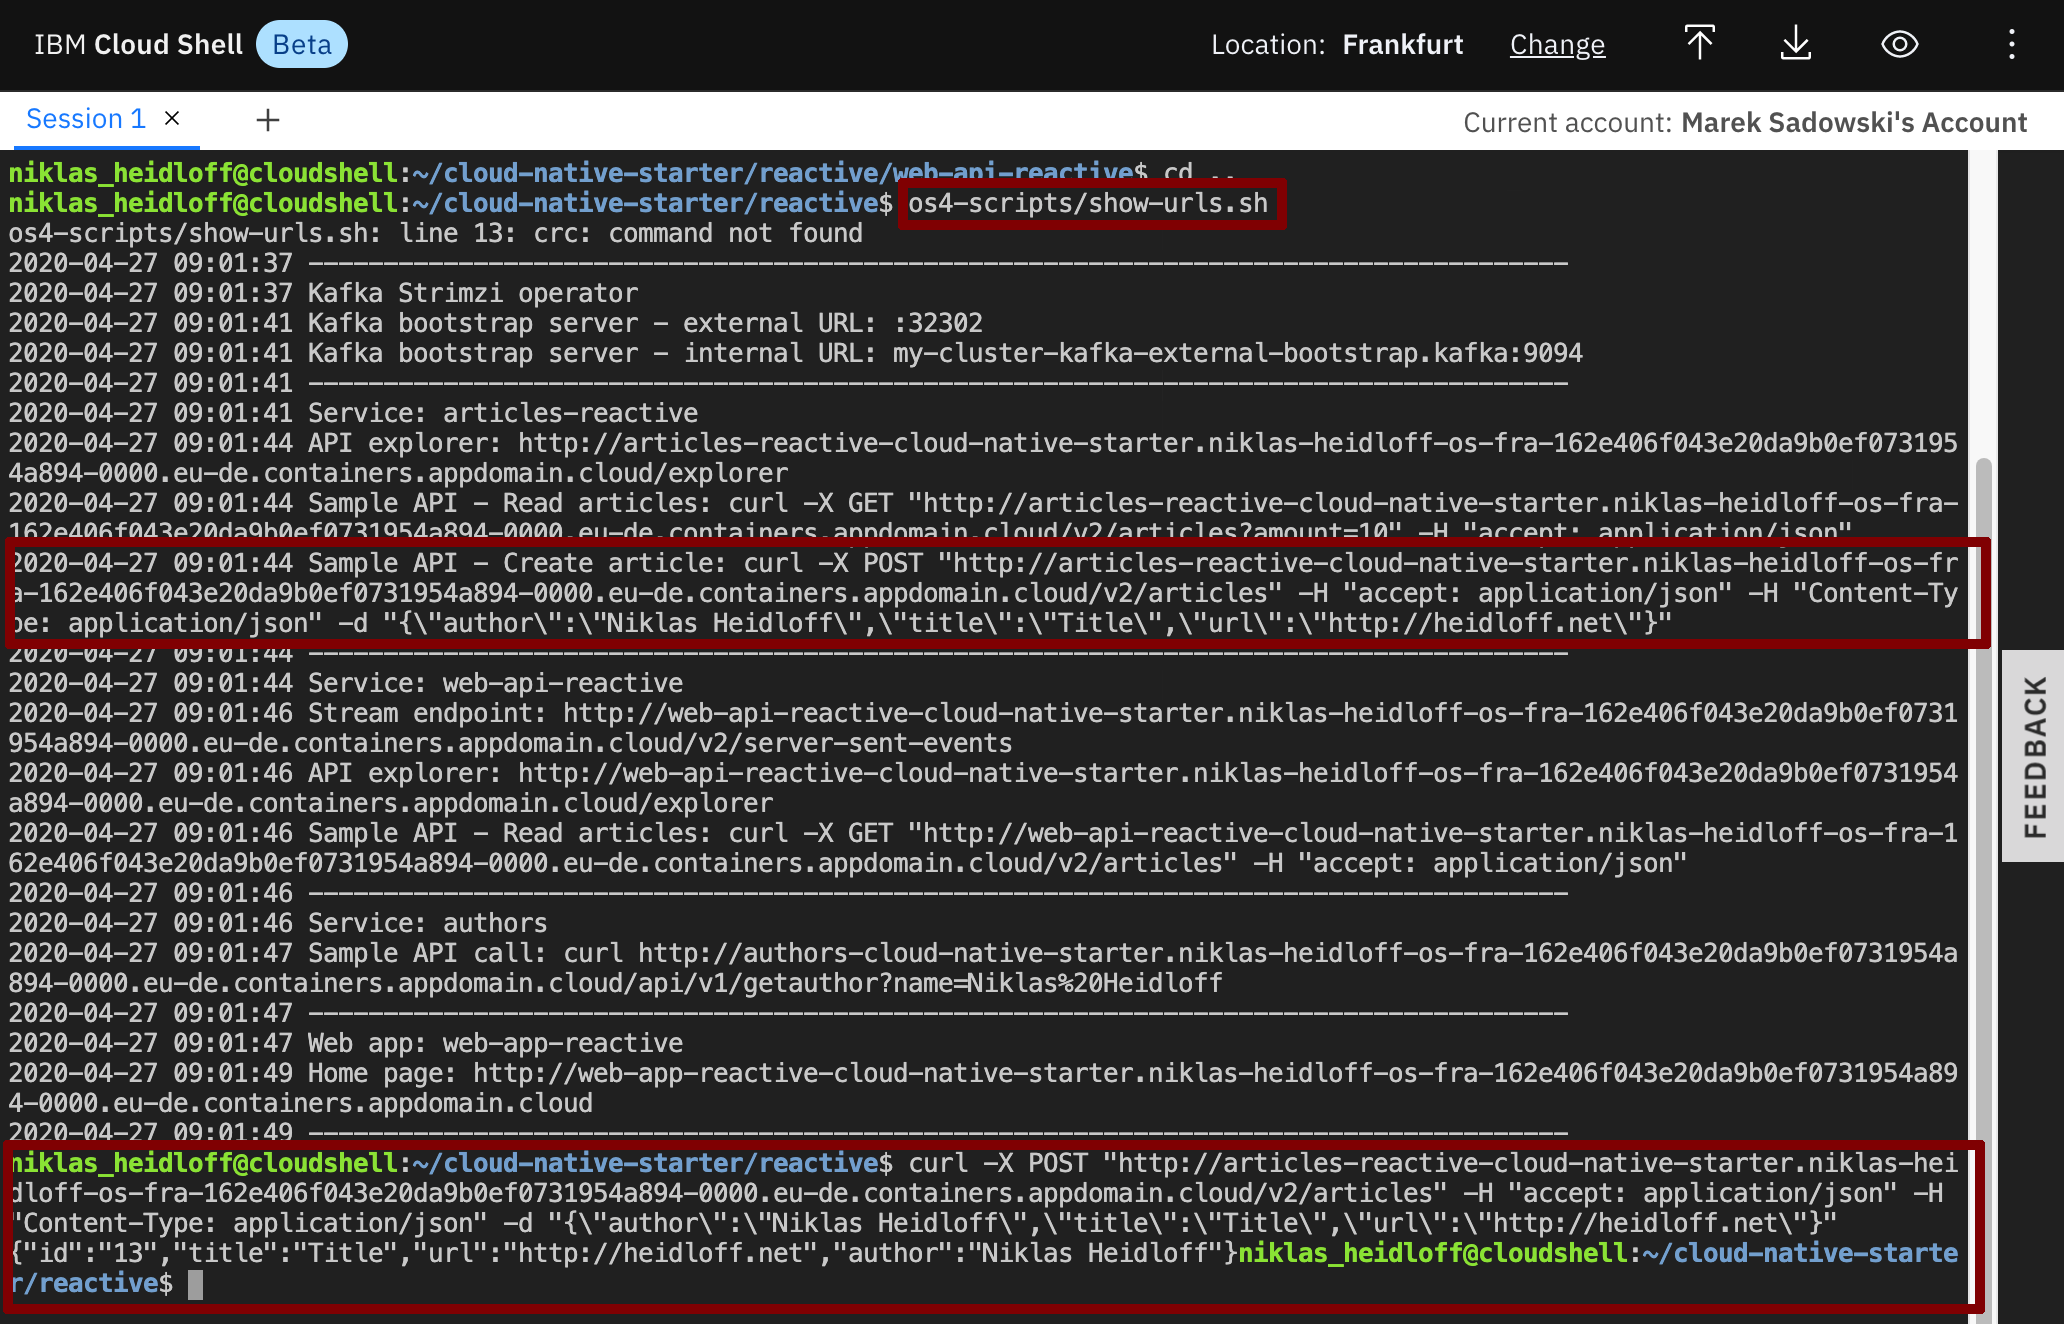
Create a new article by invoking a curl post command. You can get the URL from the script show-urls.
$ ~/cloud-native-starter/reactive/os4-scripts/show-urls.sh
In order to see the logs, you can do two things:
- Use the following instructions which leverage a terminal
- Use distributed logging as documented in lab 8
In the terminal get the pod name:
$ oc get pods
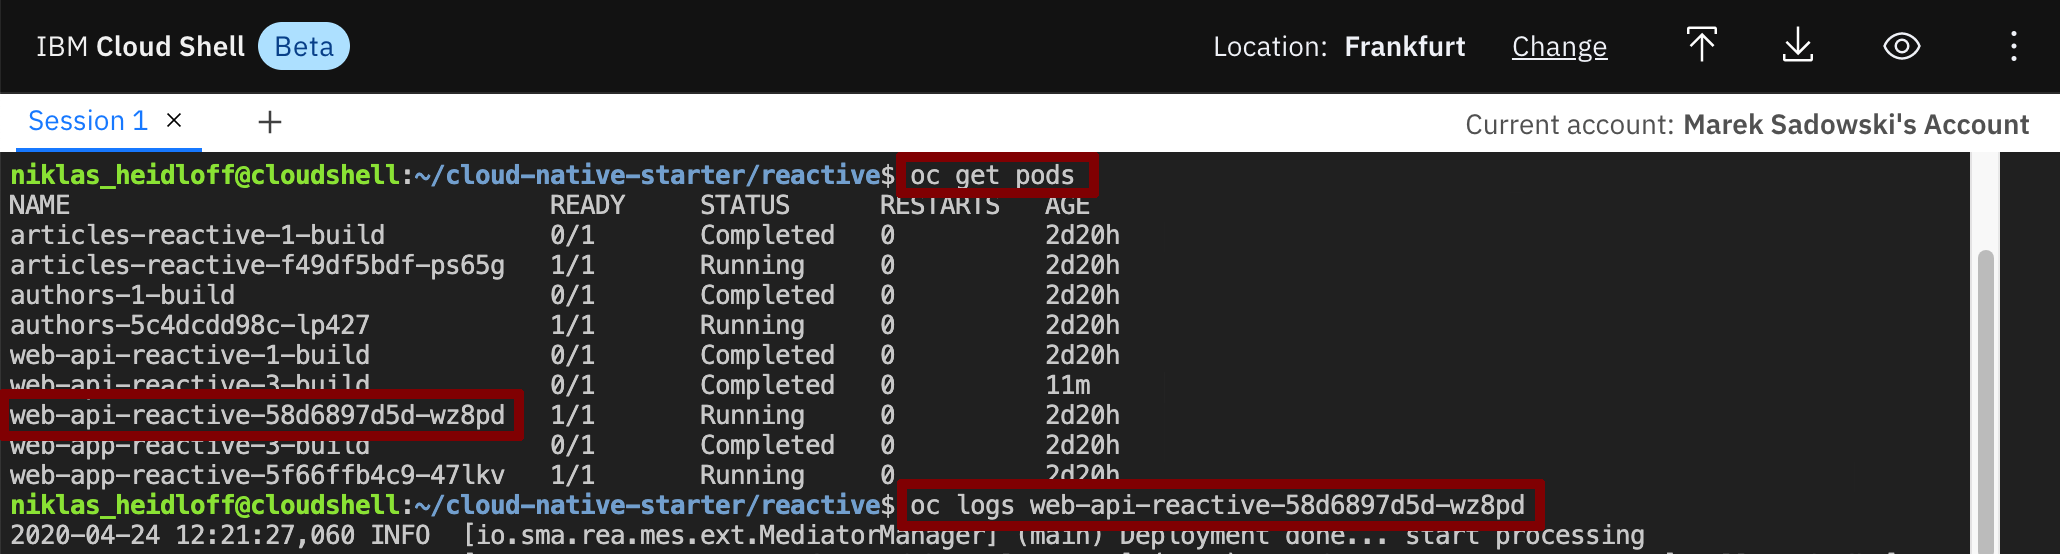
After this invoke this command to display the logs of the pod.
$ oc logs web-api-reactive-xxxxxxxxxxx-xxxxx

Your added line shows up in the logs now.
Continue with Lab 6: Server Sent Events