Microsoft Marketplace
This guide explains how to install the IBM Envizi Emissions API add-in from the Microsoft Marketplace on macOS.
The IBM Envizi Emissions API add-in is now available on the Microsoft Marketplace. This is the recommended installation method as it provides automatic updates and simplified installation.
Step 1: Locate Add-ins in Excel
Launch Microsoft Excel on your Mac.
Look for Add-ins in the Excel ribbon (typically under the Home tab).
Click the Add-ins button in the toolbar.

Note
The button may be labeled as Get Add-ins or Add-ins depending on your Excel version.
Step 2: Install the Add-in
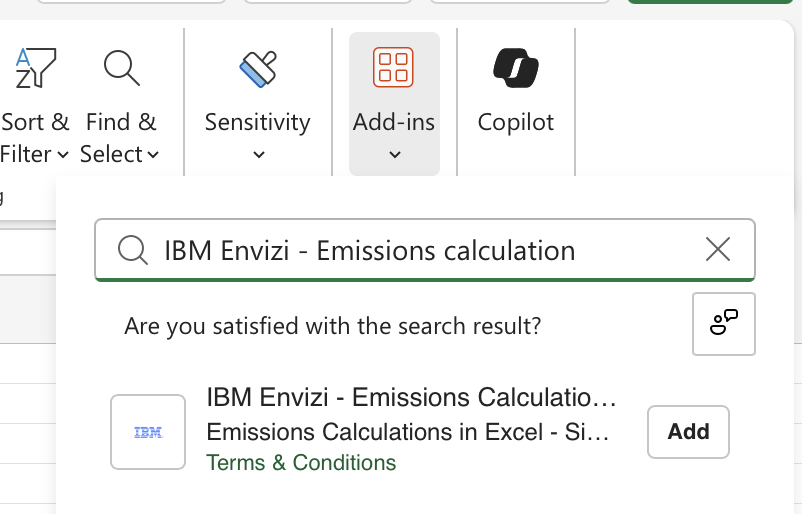
In the search box of the Add-ins dialog box, type IBM Envizi - Emissions calculation and press Enter.
Locate IBM Envizi - Emissions Calculation in Excel in the search results.
Click on the add-in to view its details, then click the Add button to install the add-in.
Step 3: Verify Installation
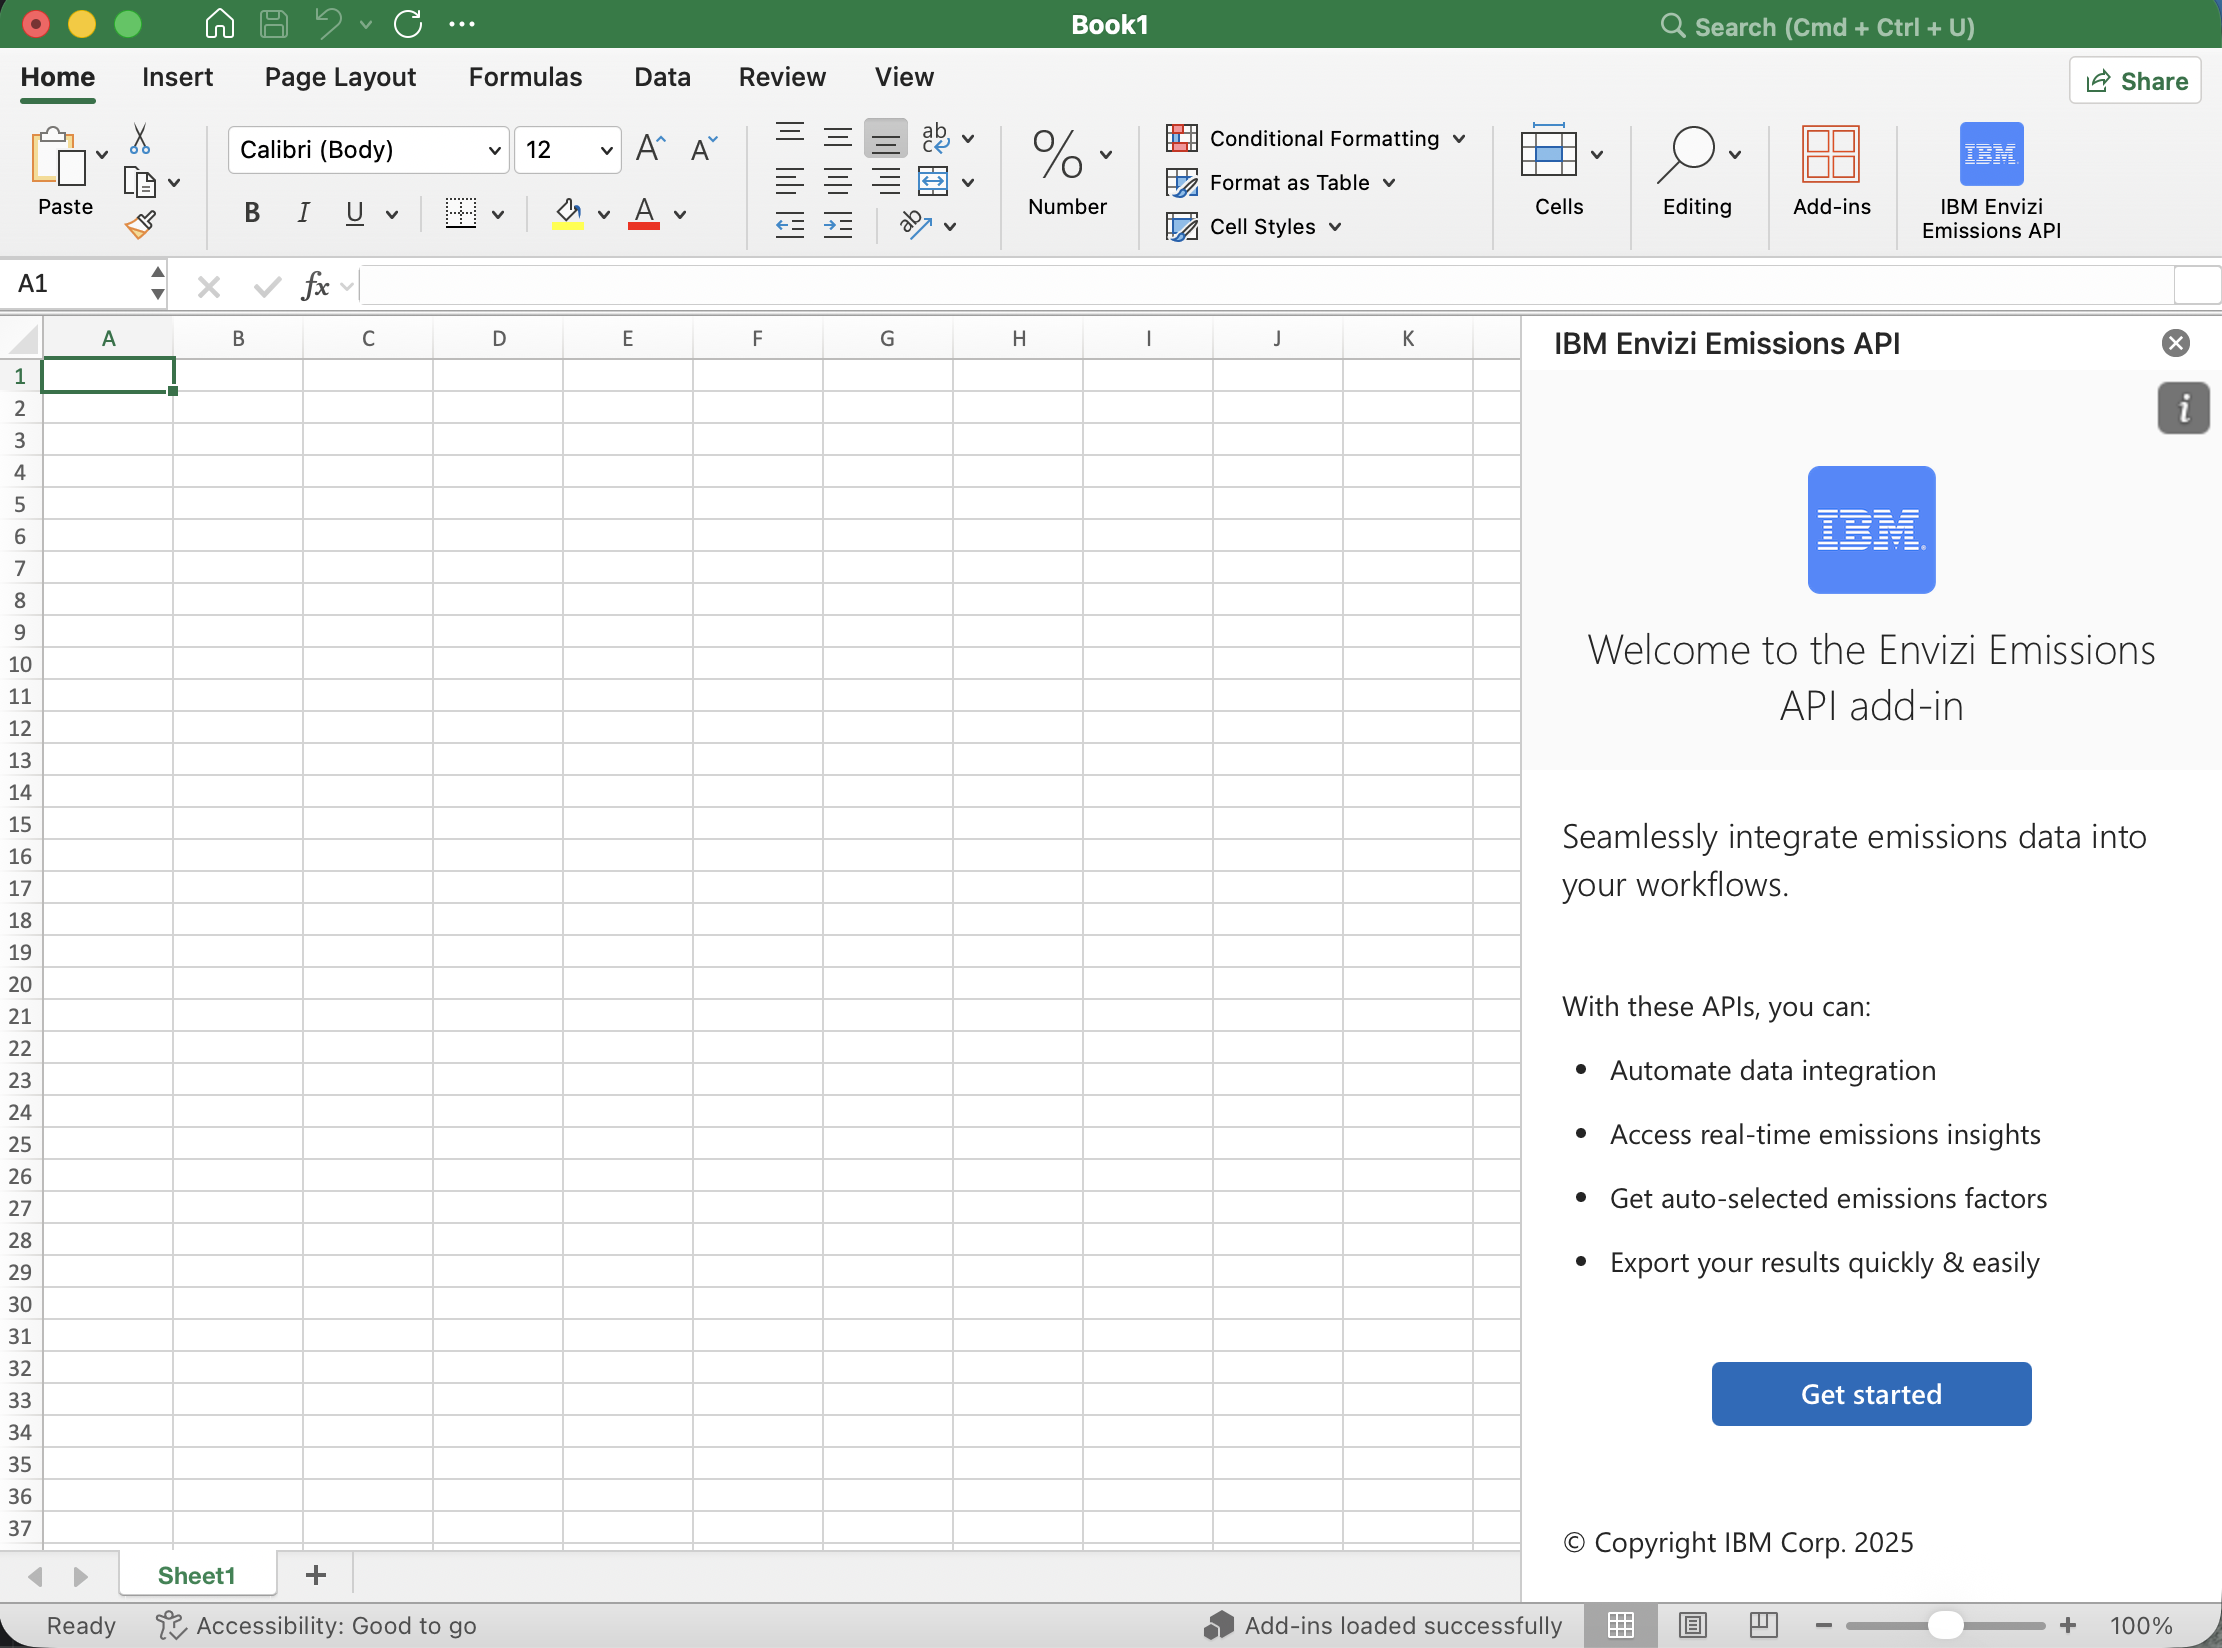
Once installed, the IBM Envizi Emissions API button will appear in the Excel ribbon (typically under the Home tab).
Click the button to open the add-in task pane and start using it.
Troubleshooting
- Add-in not appearing in search results
Ensure you have an active internet connection.
Check that you are signed in to your Microsoft account.
- Installation fails
Verify that you have the necessary permissions to install add-ins.
Contact your IT administrator if you are on a managed device.
- Add-in button not visible after installation
Restart Excel.
Check the Home tab or Insert tab for the add-in button.
Next Steps
After installation, please refer to the Calculation Mode Tip section for optimizing your Excel configuration.
Follow Usage documentation for next steps.