Appearance
Continuous Flow Experiment Tutorial
Introduction
Continuous flow experiments conducted using continuous flow reactors have special treatment within the IBM Materials Notebook. Here we define special group types to encapsulate flow reactors, stock solutions, and the flow reaction itself. Reaction products, samples, and characterization groups all operate the same way in flow experiments as in batch experiments.
In following tutorial we'll go through how to setup and execute a flow experiment using the IBM Materials Notebook.
Experiment Setup
Setup a new workspace and copy the JSON files from the /examples/flow_tutorial/lib into your own /lib directory. Once complete, create a new notebook entitled flow_tutorial.cmdnb.
In a new cell in the notebook add the following imports, metadata, and polymer reference definition:
cmdl
import tetrahydrofuran as THF from "./lib/chemicals.cmdl";
import bis-3-5-bistrifluoromethylphenylurea from "./lib/chemicals.cmdl";
import potassium_methoxide as KOMe from "./lib/chemicals.cmdl";
import benzoic_acid as BzOH from "./lib/chemicals.cmdl";
import benzyl_5-methyl-2-oxo-1_3-dioxane-5-carboxylate as TMC-Bn from "./lib/chemicals.cmdl";
import egMeO-pTMC-Bn from "./lib/polymerGraphs.cmdl";

polymer MeO-pTMC-Bn {
    structure: @egMeO-pTMC-Bn;
}
Running this cell will set both the metadata an all the reference imports necessary to define the remainder of the flow experiment.
Reactor Definition
With all the chemical references set, we will next define the flow reactor itself. For this tutorial we will define more simple flow reactors, but the examples folder has sample reactors for more complex ones. Like other references, flow reactors can be defined separately and imported. For this tutorial, we will define one explicitly within the notebook document itself.
Like polymers, flow reactors are represented by default in CMDL as graphs. This makes it straightforward to compute stoichiometry and estimate residence times in the CMDL interpreter.
In a new cell we can define the reactor graph itself:
cmdl
reactor_graph ReactorTest {

}
Inside the reactor_graph group we can add specific components of the reactor using the component group. To the reactor_graph group add the following components.
cmdl
reactor_graph ReactorTest {
	component Monomer_Syringe {

	};

	component Catalyst_Syringe {

	};

	component Quench_Syringe {

	};

	component Monomer_Pump {

	};

	component Catalyst_Pump {

	};

	component Quench_Pump {

	};

	component Mixer {

	};

    component Reactor_Tubing {

    };

	component Quench_Mixer {

	};

    component Quench_Reactor {

    };

	component Collection {

	};
}
These component groups represent each of the key physical components of the flow reactor. The flow reactor in this demo will consist of two sub-reactors where the the reactions will take place. One reactor for the polymerization reaction and another reactor for the quenching the polymerization. In the reactor_graph groups of components belonging to a specific reactor can be grouped under a reactor group.
cmdl
reactor_graph ReactorTest {
	component Monomer_Syringe {

	};

	component Catalyst_Syringe {

	};

	component Quench_Syringe {

	};

	component Monomer_Pump {

	};

	component Catalyst_Pump {

	};

	component Quench_Pump {

	};

    reactor PolymerizationReactor {
        component Mixer {

        };

        component Reactor_Tubing {

        };
    };

    reactor QuenchReactor {
        component Quench_Mixer {

        };

        component Quench_Reactor {

        };
    };

	component Collection {

	};
}
For each component, we can add additional properties such as description, volume, inner_diameter, or length to provide additional details about each component. The volume property on components within a reactor group will use the volume property to estimate stoichiometry and residence time.
cmdl
reactor_graph ReactorTest {
	component Monomer_Syringe {
		description: "NormJect Syringe (10 mL)";
		volume: 10 ml;
	};
	component Catalyst_Syringe {
		description: "NormJect Syringe (10 mL)";
		volume: 10 ml;
	};
	component Quench_Syringe {
		description: "NormJect Syringe (10 mL)";
		volume: 10 ml;
	};

	component Monomer_Pump {
		description: "PhD Ultra Havard Syringe Pump";
	};

	component Catalyst_Pump {
		description: "PhD Ultra Havard Syringe Pump";
	};

	component Quench_Pump {
		description: "PhD Ultra Havard Syringe Pump";
	};

	reactor PolymerizationReactor {
		component Mixer {
			description: "PEEK T-Mixer (0.05 cm ID)";
			inner_diameter: 0.05 cm;
		};

		component Reactor_Tubing {
			description: "PFA Reactor Tubing (14 cm, 0.05 cm ID)";
			inner_diameter: 0.05 cm;
			length: 14 cm;
			volume: 0.02749 ml;
		};
	};

	reactor QuenchReactor {
		component Quench_Mixer {
			description: "PEEK T-Mixer (0.1 cm ID) ";
			inner_diameter: 0.1 cm;
		};

		component Quench_Reactor {
			description: "PFA Reactor Tubing (2 cm, 0.1 cm ID)";
			inner_diameter: 0.1 cm;
			length: 2 cm;
			volume: 0.0157 ml;
		};
	};


	component Collection {
		description: "Scintillation Vial (20 mL)";
		volume: 20 ml;

	};
}
Unlike polymer graphs, reactor graphs are unidirectional and should have a single terminus node. In this case the edges between components can be defined by the target property on the component group. The final reactor_graph group should look as follows:
cmdl
reactor_graph ReactorTest {
	component Monomer_Syringe {
		description: "NormJect Syringe (10 mL)";
		volume: 10 ml;
		target: @Monomer_Pump;
	};
	component Catalyst_Syringe {
		description: "NormJect Syringe (10 mL)";
		volume: 10 ml;
		target: @Catalyst_Pump;
	};
	component Quench_Syringe {
		description: "NormJect Syringe (10 mL)";
		volume: 10 ml;
		target: @Quench_Pump;
	};
	component Monomer_Pump {
		description: "PhD Ultra Havard Syringe Pump";
		target: @PolymerizationReactor.Mixer;
	};
	component Catalyst_Pump {
		description: "PhD Ultra Havard Syringe Pump";
		target: @PolymerizationReactor.Mixer;
	};
	component Quench_Pump {
		description: "PhD Ultra Havard Syringe Pump";
		target: @QuenchReactor.Quench_Mixer;
	};

	reactor PolymerizationReactor {
		component Mixer {
			description: "PEEK T-Mixer (0.05 cm ID)";
			inner_diameter: 0.05 cm;
			target: @Reactor_Tubing;
		};
		component Reactor_Tubing {
			description: "PFA Reactor Tubing (14 cm, 0.05 cm ID)";
			inner_diameter: 0.05 cm;
			length: 14 cm;
			volume: 0.02749 ml;
			target: @QuenchReactor.Quench_Mixer;
		};
	};

	reactor QuenchReactor {
		component Quench_Mixer {
			description: "PEEK T-Mixer (0.1 cm ID) ";
			inner_diameter: 0.1 cm;
			target: @Quench_Reactor;
		};
		component Quench_Reactor {
			description: "PFA Reactor Tubing (2 cm, 0.1 cm ID)";
			inner_diameter: 0.1 cm;
			length: 2 cm;
			volume: 0.0157 ml;
			target: @Collection;
		};
	};

	component Collection {
		description: "Scintillation Vial (20 mL)";
		volume: 20 ml;
	};
}
Running the cell should produce a text JSON output.
Stock Solutions
Before creating the flow_reaction group we will first create the different stock solution references through creating the solution group. In a new cell, create three solution groups, one for the monomer stock solution, one for the catalyst stock solution, and one for the quench stock solution.
cmdl
solution Monomer_Solution {

}

solution Catalyst_Solution {

}

solution Quench_Solution {

}
Similar to batch reactions, we can reference different chemicals and their quantities on each solution, giving us the following solutions:
cmdl
solution Monomer_Solution {
    @TMC-Bn {
        mass: 2 g;
        roles: [ "monomer" ];
    };

    @THF {
        volume: 6 ml;
        roles: [ "solvent" ];
    };
}

solution Catalyst_Solution {
    @KOMe {
        mass: 144 mg;
        roles: [ "catalyst" ];
    };

    @bis-3-5-bistrifluoromethylphenylurea {
        mass: 500 mg;
        roles: [ "catalyst" ];
    };

    @THF {
        volume: 8 ml;
        roles: [ "solvent" ];
    };
}

solution Quench_Solution {
    @BzOH {
        mass: 2 g;
        roles: [ "reagent" ];
    };

    @THF {
        volume: 8 ml;
        roles: [ "solvent" ];
    };
}
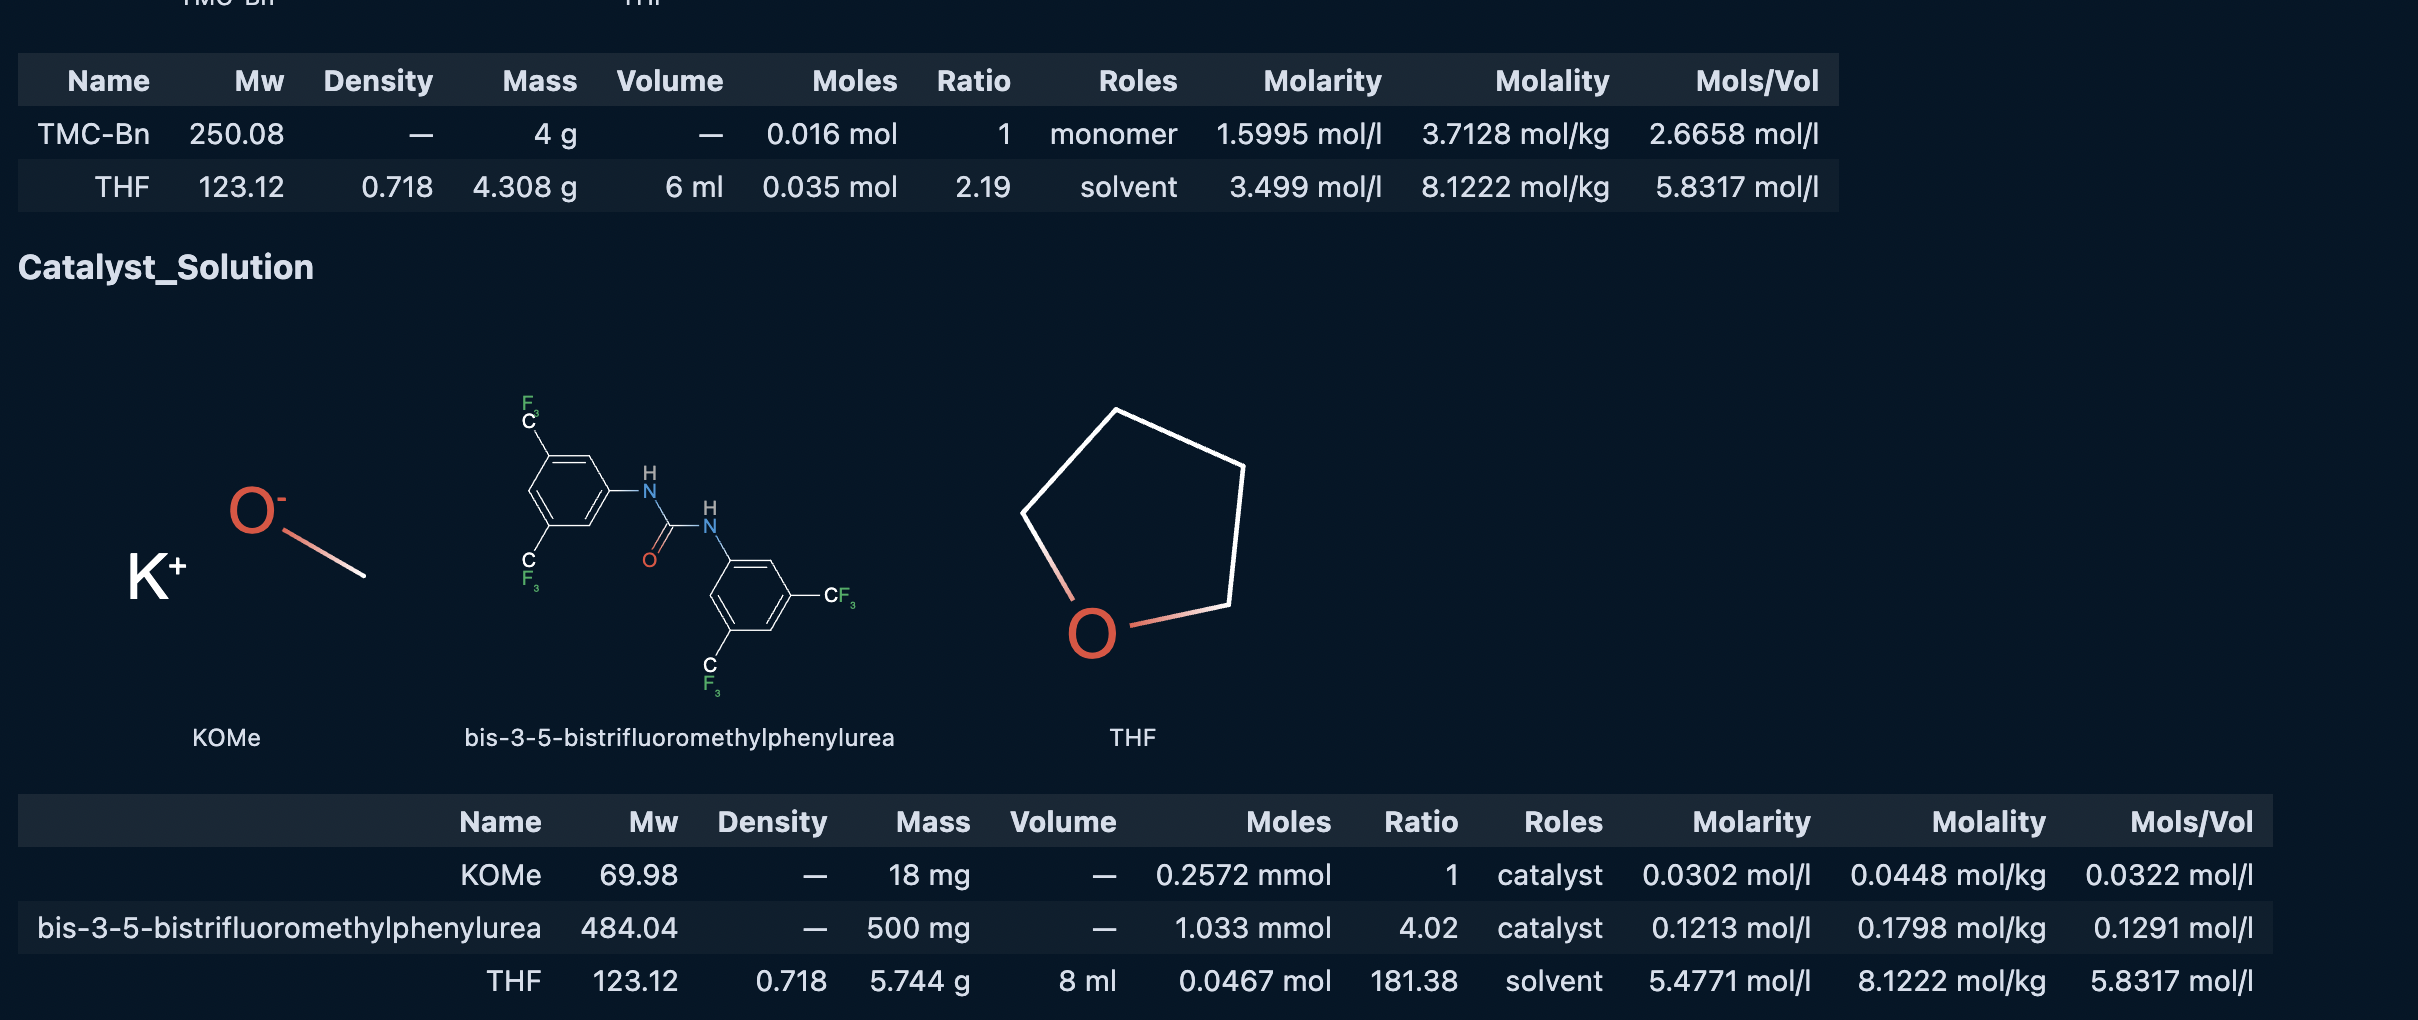
Running the cell will compute the stoichiometry for each stock solution and provide an output similar to the following:

Flow Reaction
Now we are able define the flow reaction itself. In a new cell create a flow_reaction group as follows:
cmdl
flow_reaction FlowTest {

}
We can set which reactor the flow reaction uses by adding a reactor property.
cmdl
flow_reaction FlowTest {
    reactor: @ReactorTest;

}
Each flow reaction specifies a single snapshot of the reactor run under constant conditions such as temperature and flow rates. We can add reference groups for each stock solution and specify their individual flow rates. For this example we'll give them all the same flow_rate property. We can also add the temperature property to the flow reaction group.
cmdl
flow_reaction FlowTest {
    reactor: @ReactorTest;
    temperature: 22 degC;

    @Monomer_Solution {
        flow_rate: 10 ml/min;
    };

    @Catalyst_Solution {
        flow_rate: 10 ml/min;
    };

    @Quench_Solution {
        flow_rate: 10 ml/min;
    };
}
For the CMDL interpreter to compute the reaction stoichiometry, each stock solution must be assinged to a input on the reactor. On the reactor ReactorTest we have three input nodes, namely: Monomer_Syringe, Catalyst_Syringe, and Quench_Syringe. We can add a input property to each stock solution reference group to assign them to the proper reactor graph node. Finally, we can also add the product of the flow reaction, MeO-pTMC-Bn as well.
cmdl
flow_reaction FlowTest {
    reactor: @ReactorTest;
    temperature: 22 degC;

    @Monomer_Solution {
        flow_rate: 10 ml/min;
        input: @ReactorTest.Monomer_Syringe;
    };

    @Catalyst_Solution {
        flow_rate: 10 ml/min;
        input: @ReactorTest.Catalyst_Syringe;
    };

    @Quench_Solution {
        flow_rate: 10 ml/min;
        input: @ReactorTest.Quench_Syringe;
    };

	@MeO-pTMC-Bn {
		roles: ["product"];
	};
}
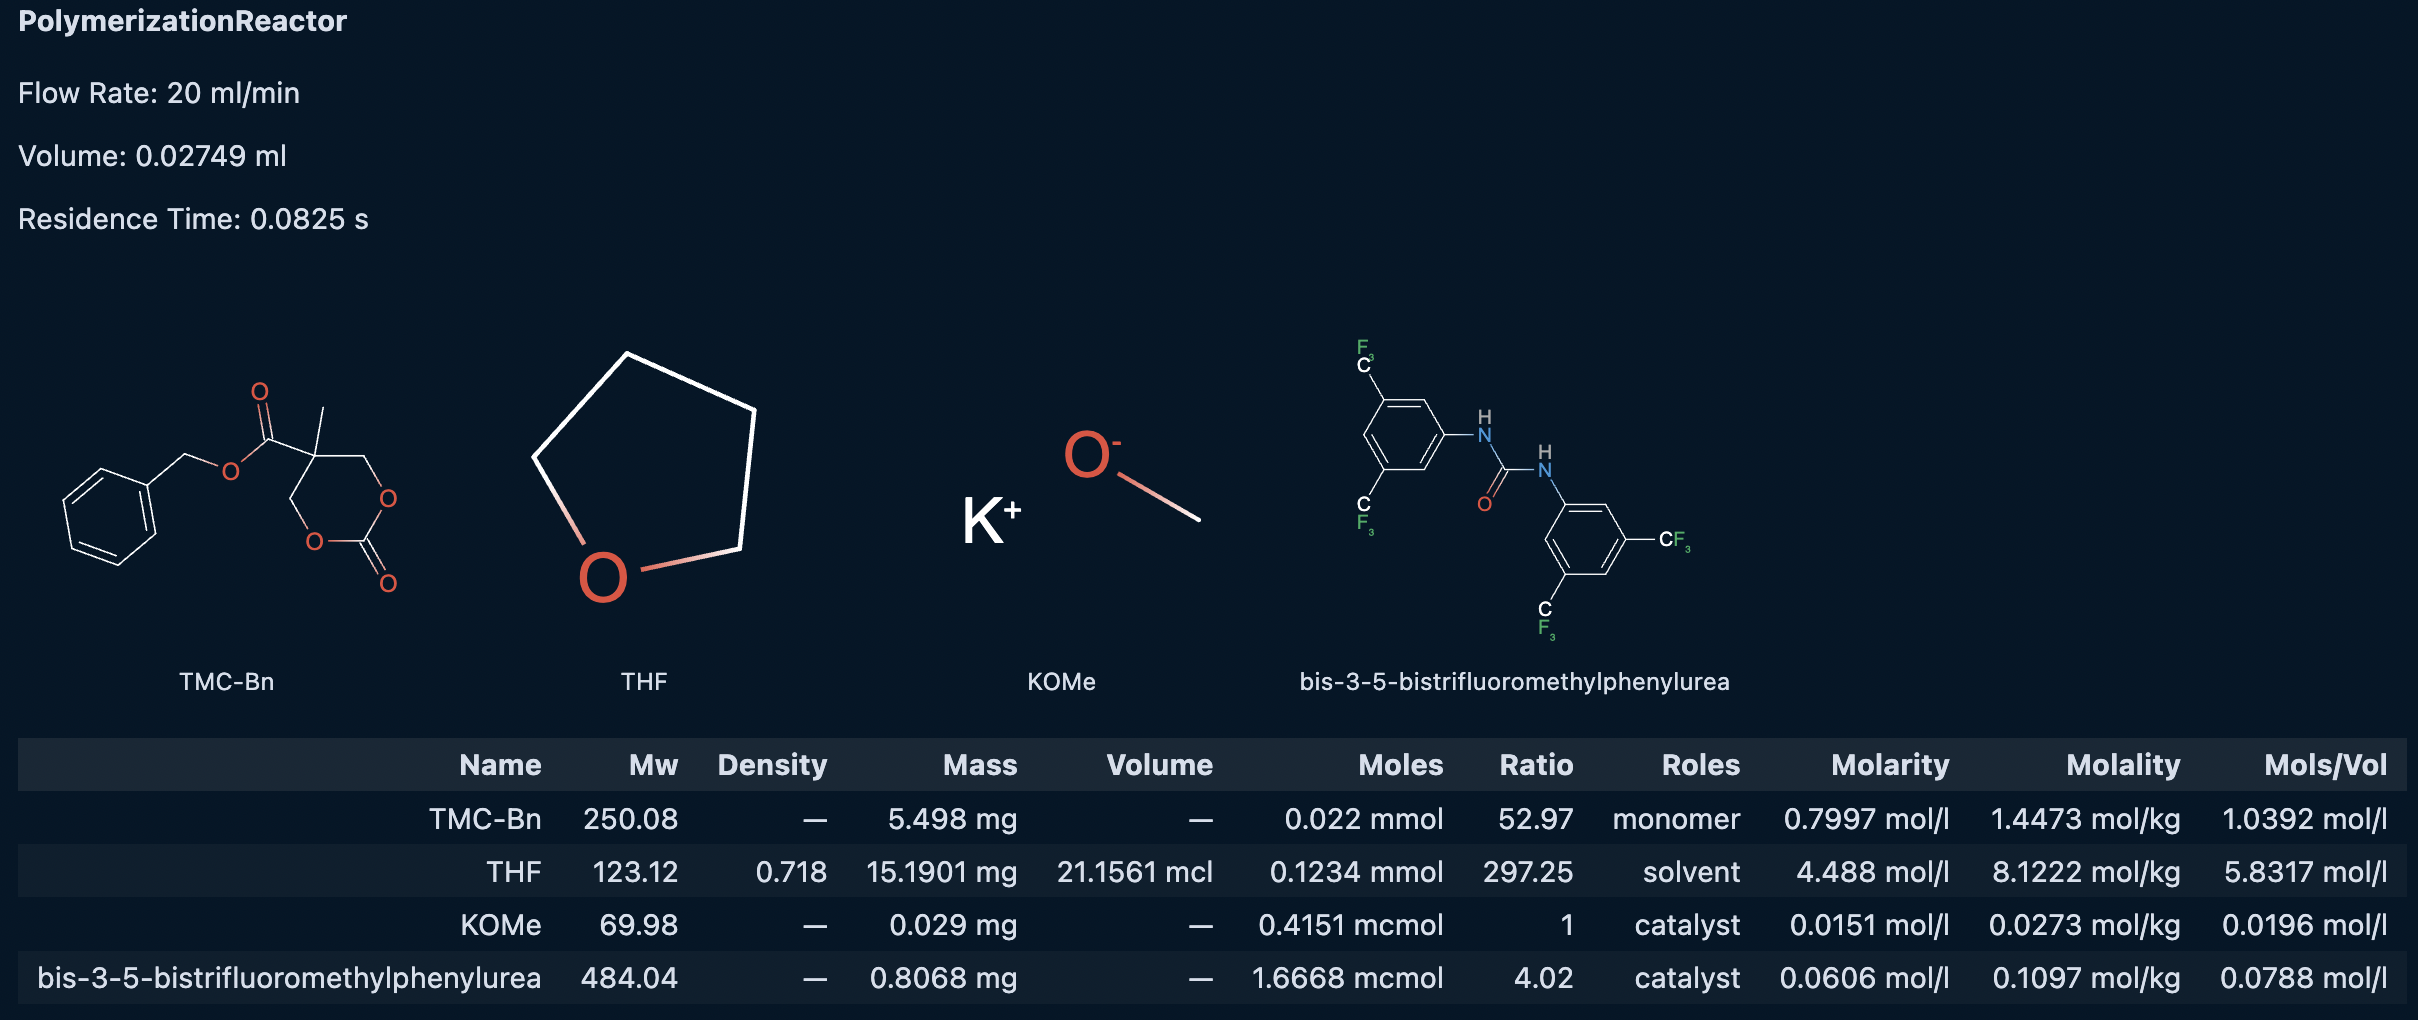
With this we can run the flow reaction cell and see an cell output similar to the following:

Defining the Samples and Results
As with the batch experiment tutorials, we can create sample groups to assign characterization values to chemical inputs and outputs from the reaction.
cmdl
char_data Flow-Rxn-I-123-nmr {
	time_point: 2 s;
	sample_id: Rxn-I-123A;
	technique: "nmr";

	@TMC-Bn {
        conversion: 99%;
    };

	@MeO-pTMC-Bn.Carbonate_Block.p_TMCBn {
		degree_poly: 53;
	};
}

char_data Flow-Rxn-I-123-gpc {
	time_point: 2 s;
	sample_id: Rxn-I-123A;
	technique: "gpc";

	@MeO-pTMC-Bn {
		dispersity: 1.12;
		mn_avg: 12000 g/mol;
	};
}
Next Steps
Now that you've completed all the tutorials, you can check out the CMDL language guide for more information on groups, properties and syntax. The GitHub repository for the IBM Materials Notebook has many examples of more complex polymers and flow reactors and others.