Lab 3. Using IBM Cloud Block Storage with Kubernetes
Introduction
When looking at what kind of storage class you would like to use in Kubernetes, there are are a few choices such as file storage, block storage, object storage, etc. If your use case requires fast and reliable data access then consider block storage.
Block storage is a storage option that breaks data into "blocks" and stores those blocks across a Storage Area Network (SAN). These smaller blocks are faster to store and retrieve than large data objects. For this reason, block storage is primarily used as a backing storage for databases.
In this lab we will deploy a Mongo database on top of block storage on Kubernetes.
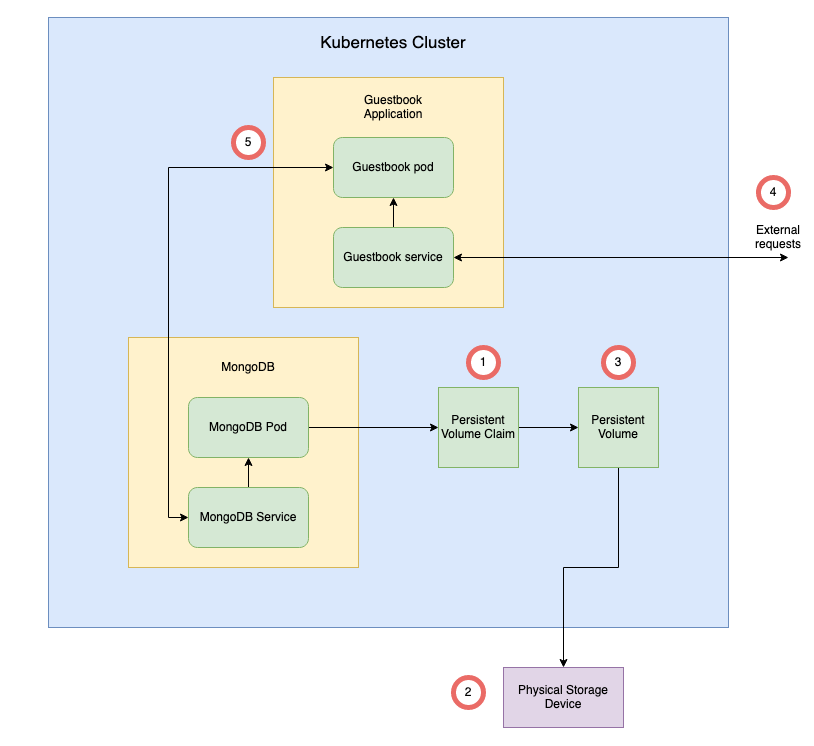
The basic architecture is as follows
-
When we install MongoDB with the helm chart, a
Persistent Volume Claim(PVC) is created on the cluster. This PVC is a request for storage to be used by the application. -
In IBM Cloud, the request goes to the IBM Cloud storage provider which then provisions a physical storage device within IBM Cloud.
-
A
Persistent Volume(PV) is then created which acts as a reference to the physical storage device created earlier. This PV is then mounted as a directory in a container's file system. -
The guestbook application receives requests to store guestbook entries from the user which the guestbook pod then sends to the MongoDB pod to store.
-
The MongoDB pod receives the request to store information and persists the data to the mounted directory from the Persistent Volume.
Setup
Before we get into the lab we first need to do some setup to ensure that the lab will flow smoothly.
<!-- 1. Replace <docker username> with your DockerHub username and run the following command (be sure to replace the < > too!).
DOCKERUSER=<docker username>
``` -->

1. In your terminal, navigate to where you would like to store the files used in this lab and run the following.

```bash
WORK_DIR=`pwd`
- Ensure that you have run through the prerequistes in Lab0
Using IBM Cloud Block Storage with Kubernetes
Log into the Kubernetes cluster and create a project where we want to deploy our application.
kubectl create namespace mongo
Install Block Storage Plugin
By default IBM Kubernetes Service Clusters don't have the option to deploy block storage persistent volumes. However, there is an easy process to add the block storage storageClass to your cluster through the use of an automated helm chart install.
-
Follow the steps outlined here to install the block storage
storageClass. -
First you need to add the
iks-chartshelm repo to your local helm repos. This will allow you to utilize a variety of charts to install software on the IBM Kubernetes Service.helm repo add iks-charts https://icr.io/helm/iks-charts -
Then, we need to update the repo to ensure that we have the latest charts:
helm repo update -
Install the block storage plugin from the
iks-chartsrepo:helm install block-storage-plugin iks-charts/ibmcloud-block-storage-plugin -
Lastly, verify that the plugin installation was successful by retrieving the list of storage classes in the cluster:
kubectl get storageclassesYou should notice a few options that start with
ibmc-blockas seen below.NAME PROVISIONER RECLAIMPOLICY VOLUMEBINDINGMODE ALLOWVOLUMEEXPANSION AGE ibmc-block-bronze ibm.io/ibmc-block Delete Immediate true 62s ibmc-block-custom ibm.io/ibmc-block Delete Immediate true 62s ibmc-block-gold ibm.io/ibmc-block Delete Immediate true 62s
Helm Repo setup
The lab uses Bitnami's Mongodb Helm chart to show case the use of block storage. Set the Bitnami helm repo prior to installing mongodb.
helm repo add bitnami https://charts.bitnami.com/bitnami
Expected output:
$ helm repo add bitnami https://charts.bitnami.com/bitnami

"bitnami" has been added to your repositories
Validate the repo is available in the list.
helm repo list
You should see a list of repos available to you as seen below:
NAME       URL
bitnami    https://charts.bitnami.com/bitnami
iks-charts https://icr.io/helm/iks-charts
Mongodb with block storage
Installation Dry Run
Before we install MongoDB, let's do a test of the installation to see what the chart will create. Since we are using Helm to install MongoDB, we can make use of the --dry-run flag in our helm install command to show us the manifest files that Helm will apply on the cluster.
Dryrun:
helm install mongo bitnami/mongodb --set global.storageClass=ibmc-block-gold,auth.password=testing,auth.username=guestbookAdmin,auth.database=guestbook -n mongo --dry-run > mongdb-install-dryrun.yaml
There is a detailed breakdown of this command in the next section titled
Installing MongoDBif you would like to understand what this helm command is doing.
This command will test out our helm install command and save the output manifests in a file called mongodb-install-dryrun.yaml. You can then examine this manifest file so that you know exactly what will be installed on your cluster.
Check out the file in your code editor and take a look at the PersistentVolumeClaim object. There should be a property named storageClassName in the spec and the value should be ibmc-block-gold to signify that we will be using block storage for our database.
Below is what that PersistentVolumeClaim object should look like.
kind: PersistentVolumeClaim
apiVersion: v1
metadata:
  name: mongo-mongodb
  namespace: mongo
  labels:
    app.kubernetes.io/name: mongodb
    helm.sh/chart: mongodb-10.0.4
    app.kubernetes.io/instance: mongo
    app.kubernetes.io/managed-by: Helm
    app.kubernetes.io/component: mongodb
spec:
  accessModes:
    - "ReadWriteOnce"
  resources:
    requests:
      storage: "8Gi"
  storageClassName: ibmc-block-gold
Install Mongodb
Before we install MongoDB we need to generate a password for our database credentials. These credentials will be used in the application to authenticate with the database.
For this lab, will be using the openssl tool to generate the password as this is a common open source cryptographic library. The rest of the command will strip out any characters that could cause issues with the password.
USER_PASS=`openssl rand -base64 12 | tr -d "=+/"`
Now we can install MongoDB and supply the password that we just generated.
helm install mongo bitnami/mongodb --set global.storageClass=ibmc-block-gold,auth.password=$USER_PASS,auth.username=guestbook-admin,auth.database=guestbook -n mongo
Here's an explanation of the above command:
helm install mongo bitnami/mongo: Install the MongoDB bitnami helm chart and name the release "mongo".--set global.storageClass=ibmc-block-gold: Set the storage class to block storage rather than the default file storage.- ...
auth.password=$USER_PASS: Create a custom user with this password (Which we generated earlier). - ...
auth.username=guestbook-admin: Create a custom user with this username. - ...
auth.database=guestbook: Create a database namedguestbookthat the custom user can authenticate to. -n mongo: Install this release in themongonamespace.
Expected output:
NAME: mongo
LAST DEPLOYED: Tue Nov 24 10:41:15 2020
NAMESPACE: mongo
STATUS: deployed
REVISION: 1
TEST SUITE: None
NOTES:
...
View the objects being created by the helm chart.
kubectl get all -n mongo
NAME                    TYPE        CLUSTER-IP      EXTERNAL-IP   PORT(S)     AGE
service/mongo-mongodb   ClusterIP   172.21.242.70   <none>        27017/TCP   17s

NAME                            READY   UP-TO-DATE   AVAILABLE   AGE
deployment.apps/mongo-mongodb   0/1     0            0           17s

NAME                                       DESIRED   CURRENT   READY   AGE
replicaset.apps/mongo-mongodb-6f8f7cd789   1         0         0       17s
View the list of persistence volume claims. Note that the mongo-mongodb is pending volume allocation.
kubectl get pvc -n mongo
NAME            STATUS    VOLUME   CAPACITY   ACCESS MODES   STORAGECLASS      AGE
mongo-mongodb   Pending                                      ibmc-block-gold   21s
After waiting for some time. The pod supporting Mongodb should have a Running status.
$ kubectl get all -n mongo
NAME                                 READY   STATUS    RESTARTS   AGE
pod/mongo-mongodb-66d7bcd7cf-vqvbj   1/1     Running   0          8m37s

NAME                    TYPE        CLUSTER-IP      EXTERNAL-IP   PORT(S)     AGE
service/mongo-mongodb   ClusterIP   172.21.242.70   <none>        27017/TCP   12m

NAME                            READY   UP-TO-DATE   AVAILABLE   AGE
deployment.apps/mongo-mongodb   1/1     1            1           12m

NAME                                       DESIRED   CURRENT   READY   AGE
replicaset.apps/mongo-mongodb-66d7bcd7cf   1         1         1       8m37s
replicaset.apps/mongo-mongodb-6f8f7cd789   0         0         0       12m
And the PVC mongo-mongodb is now bound to volume pvc-2f423668-4f87-4ae4-8edf-8c892188b645
$ kubectl get pvc -n mongo
NAME            STATUS   VOLUME                                     CAPACITY   ACCESS MODES   STORAGECLASS      AGE
mongo-mongodb   Bound    pvc-2f423668-4f87-4ae4-8edf-8c892188b645   20Gi       RWO            ibmc-block-gold   2m26s
With MongoDB deployed now we need to deploy an application that will utilize it as a datastore.
Building Guestbook
For this lab we will be using the guestbook application which is a common sample kubernetes application. However, the version that we are using has been refactored as a loopback application.
- Clone the application repo and the configuration repo. In your terminal, run the following:
cd $WORK_DIR
git clone https://github.com/IBM/guestbook-nodejs.git
git clone https://github.com/IBM/guestbook-nodejs-config/ --branch mongo
- Then, navigate into the
guestbook-nodejsdirectory.
cd $WORK_DIR/guestbook-nodejs/src
- Replace the code in the
server/datasources.jsonfile with the following:
{
  "in-memory": {
    "name": "in-memory",
    "localStorage": "",
    "file": "",
    "connector": "memory"
  },
  "mongo": {
    "host": "${MONGO_HOST}",
    "port": "${MONGO_PORT}",
    "url": "",
    "database": "${MONGO_DB}",
    "password": "${MONGO_PASS}",
    "name": "mongo",
    "user": "${MONGO_USER}",
    "useNewUrlParser": true,
    "connector": "mongodb"
  }
}
This file will contain the connection information to our MongoDB instance. These variables will be passed into the environment from ConfigMaps and Secrets that we will create.
- Open the
server/model-config.jsonfile and change theentry.datasourcevalue tomongoas seen below:
...
"entry": {
    "dataSource": "mongo",
    "public": true
  }
}
In this file we are telling the application which datasource we should use; in-memory or MongoDB. By default the application comes with an in-memory datastore for storing information but this data does not persist after the application crashes or if the pod goes down for any reason. We are changing in-memory to mongo so that the data will persist in our MongoDB instance external to the application so that the data will remain even after the application crashes.
- Now we need to build our application image and push it to DockerHub.
cd $WORK_DIR/guestbook-nodejs/src
IMAGE_NAME=$DOCKERUSER/guestbook-nodejs:mongo
docker build -t $IMAGE_NAME .
docker login -u $DOCKERUSER
docker push $IMAGE_NAME
Deploying Guestbook
Now that we have built our application, let's check out the manifest files needed to deploy it to Kubernetes.
- Navigate to the configuration repo that we cloned earlier.
cd $WORK_DIR/guestbook-nodejs-config
This repo contains 3 manifests that we will be deploying to our cluster today:
- A deployment manifest
- A service manifest
- A configMap manifest
These manifests will create their respective kubernetes objects on our cluster.
The deployment will deploy our application image that we built earlier while the service will expose that application to external traffic. The configMap will contain connection information for our database such as database hostname and port.
- Open the
guestbook-deployment.yamlfile and edit line 25 to point to the image that you built and pushed earlier. Do this by replacing<DockerUsername>with your docker username. (Don't forget to replace the< >too!)
For example, my Docker username is odrodrig so line 25 in my guestbook-deployment.yaml file would look like this:
...
  image: odrodrig/guestbook-nodejs:mongo
...
As part of the deployment, kubernetes will copy the database connection information from the configMap into the environment of the application. You can see where this is specified in the env section of the deployment manifest as seen below:
...
env:
  - name: MONGO_HOST
    valueFrom:
      configMapKeyRef:
        name: mongo-config
        key: mongo_host
  - name: MONGO_PORT
    valueFrom:
      configMapKeyRef:
        name: mongo-config
        key: mongo_port
  - name: MONGO_USER
    valueFrom:
      secretKeyRef:
        name: mongodb
        key: username
  - name: MONGO_PASS
    valueFrom:
      secretKeyRef:
        name: mongodb
        key: password
  - name: MONGO_DB
    valueFrom:
      configMapKeyRef:
        name: mongo-config
        key: mongo_db_name
You might also notice that we are getting our database username (MONGO_USER) and password (MONGO_PASS) from a kubernetes secret. We haven't defined that secret yet so let's do it now.
kubectl create secret generic mongodb --from-literal=username=guestbook-admin --from-literal=password=$USER_PASS -n mongo
- Now we are ready to deploy the application. Run the following commands:
cd $WORK_DIR/guestbook-nodejs-config/
kubectl apply -f . -n mongo
Ensure that the application pod is running:
kubectl get pods -n mongo
You should see both the mongo pod and the guestbook pod running now:
NAME                             READY   STATUS    RESTARTS   AGE
guestbook-v1-9465dcbb4-zdhqv     1/1     Running   0          19s
mongo-mongodb-757d9777d7-j4759   1/1     Running   0          27m
Test out the application
Now that we have deployed the application, let's test it out.
- Find the URL for the guestbook application by joining the worker node external IP and service node port. Run the following to get the IP and service node port of the application:
HOSTNAME=`kubectl get nodes -ojsonpath='{.items[0].metadata.labels.ibm-cloud\.kubernetes\.io\/external-ip}'`
SERVICEPORT=`kubectl get svc guestbook -n mongo -o=jsonpath='{.spec.ports[0].nodePort}'`
echo "http://$HOSTNAME:$SERVICEPORT"
-
In your browser, open up the address that was output as part of the previous command.
-
Type in a few test entries in the text box and press enter to submit them.
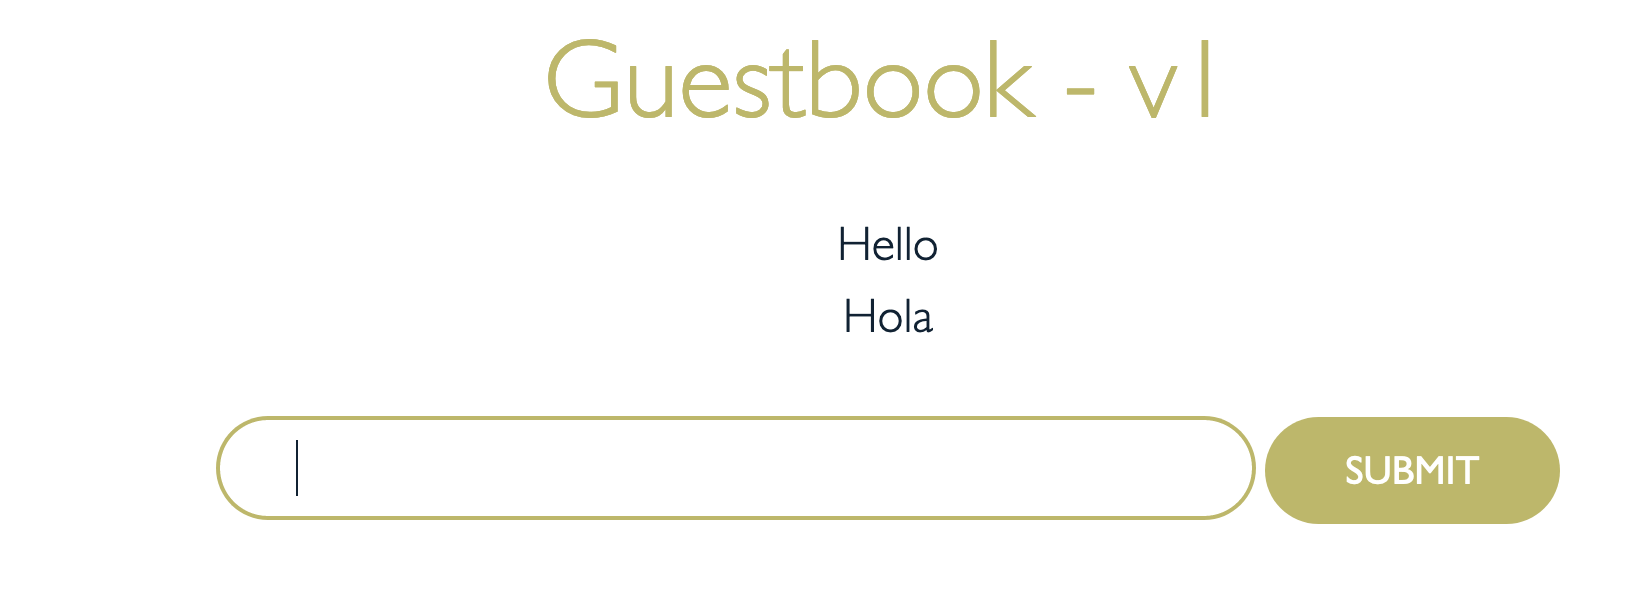
These entries are now saved in the Mongo database. Let's take down the application and see if the data will truly persist.
- Find the name of the pod that is running our application:
kubectl get pods -n mongo
Copy the name of the pod that starts with guestbook. For me, the pod is named guestbook-v1-9465dcbb4-f6s9h.
NAME                             READY   STATUS    RESTARTS   AGE
guestbook-v1-9465dcbb4-f6s9h     1/1     Running   0          4m7s
mongo-mongodb-757d9777d7-q64lg   1/1     Running   0          5m47s
- Then, run the following command, replacing
<pod name>with pod name that you just copied.
kubectl delete pod -n mongo <pod name>
You should then see a message saying that your pod has been deleted.
$ kubectl delete pod -n mongo guestbook-v1-9465dcbb4-f6s9h
pod "guestbook-v1-9465dcbb4-f6s9h" deleted
- Now, view your pods again:
kubectl get pods -n mongo
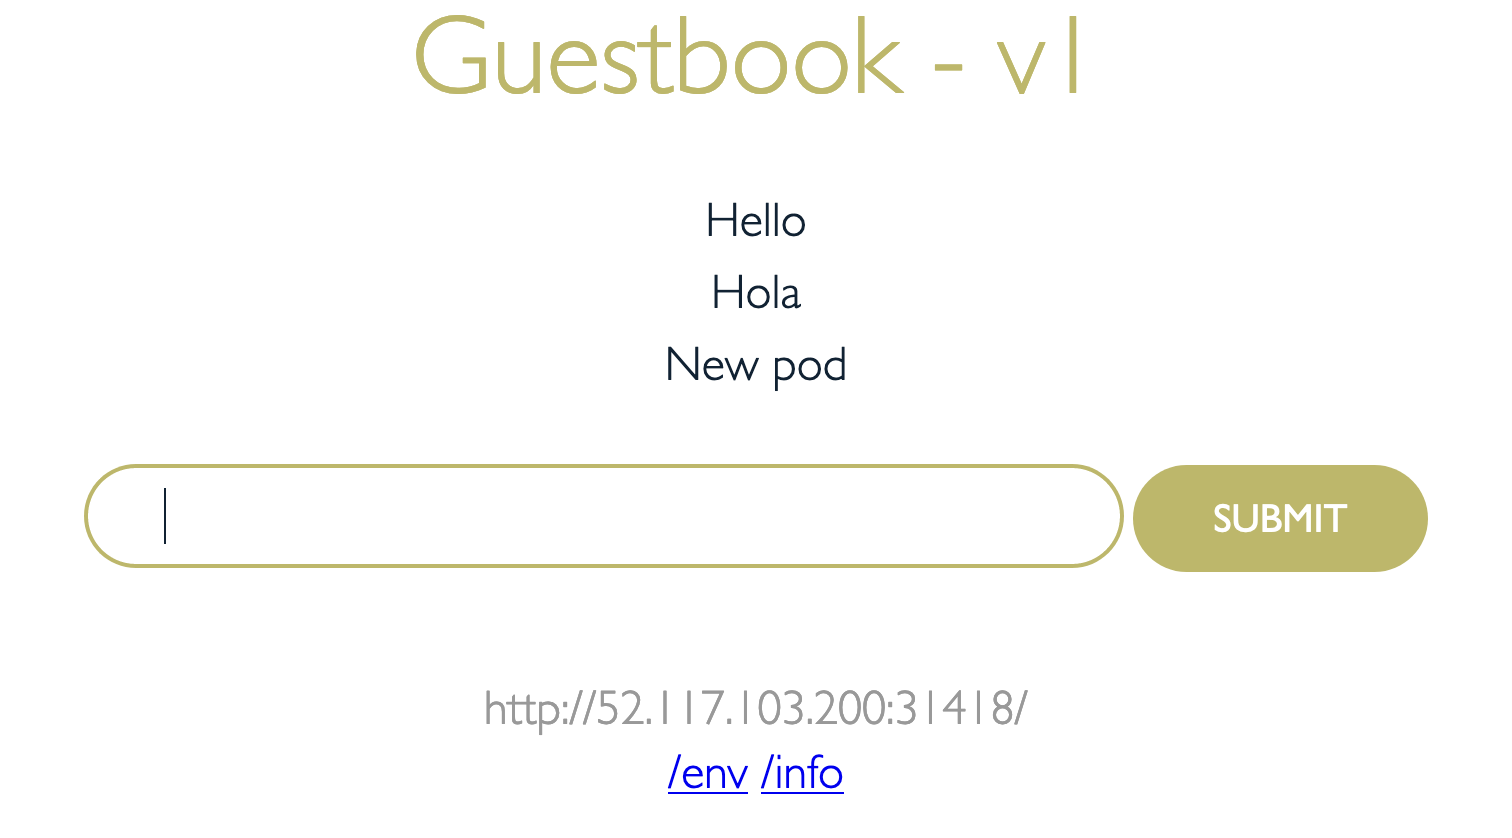
You should see the guestbook pod is back now with and the age has been reset. This means that it is a brand new pod that kubernetes has deployed automatically after our previous pod was deleted.
NAME                             READY   STATUS    RESTARTS   AGE
guestbook-v1-9465dcbb4-8z8bt     1/1     Running   0          87s
mongo-mongodb-757d9777d7-q64lg   1/1     Running   0          9m13s
- Refresh your browser tab that had the guestbook application and you will see that your data has indeed persisted after our pod went down.
Summary
In this lab we used block storage to run our own database on Kubernetes. Block storage allows for fast I/O operations making it ideal for our application database. We utilized configMaps and secrets to store the database configuration making it easy to use this application with different database configurations without making code changes.
Cleanup (Optional)
This part of the lab desrcibes the steps to delete what was built in the lab.
Deleting the application
cd $WORK_DIR/guestbook-nodejs-config
kubectl delete -f . -n mongo
Uninstalling Mongo
helm uninstall mongo -n mongo
Remove namespace
kubectl delete namespace mongo