7. Deploy MongoDB using Object Storage
Deploy MongoDB to Cluster and Persist its Datastore in IBM Cloud Object Storage
In this section, you are going to deploy an instance of MongoDB to your OpenShift cluster and store data on the IBM Cloud Object Storage.
-
[Optional] If you want to configure the MongoDB via a
values.yamlfile, or want to review the default values of the Helm chart, in theCloud Shell, you can download the defaultvalues.yamlfile from the bitnami/mongodb Helm chart, which is used to configure and deploy the MongoDB Helm chart. In this lab we will overwrite the values from the commandline when we install the chart.wget https://raw.githubusercontent.com/bitnami/charts/master/bitnami/mongodb/values.yaml -
[Optional] To review the available configuration options, open the
values.yamlfile in a file editor and review the parameters that can be modified during mongdb deployment. In this exercise however, you'll overwrite the default values using Helm command parameters instead of avalues.yamlfile. -
Add the bitnami Helm repository.
helm repo add bitnami https://charts.bitnami.com/bitnami
helm repo update
outputs,
$ helm repo add bitnami https://charts.bitnami.com/bitnami "bitnami" has been added to your repositories $ helm repo update Hang tight while we grab the latest from your chart repositories... ...Successfully got an update from the "ibm-charts" chart repository ...Successfully got an update from the "bitnami" chart repository Update Complete. ⎈ Happy Helming!⎈ -
The
NAMESPACEenvironment variable should already be set, if not set it using the value fromoc project,export NAMESPACE=<your project> echo $NAMESPACE -
Install MongoDB using helm with parameters, the flag
persistence.enabled=truewill enable storing your data to a PersistentVolume.oc get project $NAMESPACE -o yamloutputs
$ oc get project $NAMESPACE -o yaml
apiVersion: project.openshift.io/v1
kind: Project
metadata:
annotations:
    openshift.io/description: ""
    openshift.io/display-name: ""
    openshift.io/requester: IAM#remkohdev@us.ibm.com
    openshift.io/sa.scc.mcs: s0:c25,c15
    openshift.io/sa.scc.supplemental-groups: 1000630000/10000
    openshift.io/sa.scc.uid-range: 1000630000/10000
creationTimestamp: "2020-11-23T18:52:49Z"
managedFields:
- apiVersion: v1
    fieldsType: FieldsV1
    fieldsV1:
    f:metadata:
        f:annotations:
        f:openshift.io/sa.scc.mcs: {}
        f:openshift.io/sa.scc.supplemental-groups: {}
        f:openshift.io/sa.scc.uid-range: {}
    manager: cluster-policy-controller
    operation: Update
    time: "2020-11-23T18:52:49Z"
...
or
oc get project $NAMESPACE -o yaml | grep 'sa.scc.'Which defines that the
sa.scc.supplemental-groupsallowed are1000630000/10000, thesa.scc.uid-rangefor the project is1000630000/10000in format M/N, where M is the starting ID and N is the count.Using the fsGroup and user ids, create two environment variables,
export SA_SCC_FSGROUP=<value of sa.scc.supplemental-groups>
export SA_SCC_RUNASUSER=<value of sa.scc.uid-range>
to deploy the bitnami Helm chart,
helm install mongodb bitnami/mongodb --set persistence.enabled=true --set persistence.existingClaim=my-iks-pvc --set livenessProbe.initialDelaySeconds=180 --set auth.rootPassword=passw0rd --set auth.username=user1 --set auth.password=passw0rd --set auth.database=mydb --set service.type=ClusterIP --set podSecurityContext.enabled=true,podSecurityContext.fsGroup=$SA_SCC_FSGROUP,containerSecurityContext.enabled=true,containerSecurityContext.runAsUser=$SA_SCC_RUNASUSERoutputs,
$ helm install mongodb bitnami/mongodb --set persistence.enabled=true --set persistence.existingClaim=my-iks-pvc --set livenessProbe.initialDelaySeconds=180 --set auth.rootPassword=passw0rd --set auth.username=user1 --set auth.password=passw0rd --set auth.database=mydb --set service.type=ClusterIP --set podSecurityContext.enabled=true,podSecurityContext.fsGroup=1000630000,containerSecurityContext.enabled=true,containerSecurityContext.runAsUser=1000630000

NAME: mongodb
LAST DEPLOYED: Sat May 23 21:04:44 2020
NAMESPACE: <your-namespace>
STATUS: deployed
REVISION: 1
TEST SUITE: None
NOTES:
** Please be patient while the chart is being deployed **

MongoDB can be accessed via port 27017 on the following DNS name from within your cluster:
    mongodb.<your-namespace>.svc.cluster.local

To get the root password run:

    export MONGODB_ROOT_PASSWORD=$(kubectl get secret --namespace <your-namespace> mongodb -o jsonpath="{.data.mongodb-root-password}" | base64 --decode)

To get the password for "my-user" run:

    export MONGODB_PASSWORD=$(kubectl get secret --namespace <your-namespace> mongodb -o jsonpath="{.data.mongodb-password}" | base64 --decode)

To connect to your database run the following command:

    kubectl run --namespace <your-namespace> mongodb-client --rm --tty -i --restart='Never' --image docker.io/bitnami/mongodb:4.2.7-debian-10-r0 --command -- mongo admin --host mongodb --authenticationDatabase admin -u root -p $MONGODB_ROOT_PASSWORD

To connect to your database from outside the cluster execute the following commands:

    kubectl port-forward --namespace <your-namespace> svc/mongodb 27017:27017 & mongo --host 127.0.0.1 --authenticationDatabase admin -p $MONGODB_ROOT_PASSWORD
Wait until the mongodb pods are running,
oc get podoutputs,
$ oc get pod NAME READY STATUS RESTARTS AGE mongodb-c4b99b975-l2k7n 1/1 Running 0 81s -
Verify the MongoDB deployment.
$ oc get deployment

NAME      READY   UP-TO-DATE   AVAILABLE   AGE
mongodb   1/1     1            1           6m30s
Note: It may take several minutes until the deployment is completed and the container initialized, wait till the
READYstate is1/1. -
Verify that pods are running.
$ oc get pod

NAME                      READY   STATUS    RESTARTS   AGE
mongodb-9f76c9485-sjtqx   1/1     Running   0          5m40s
Note: It may take a few minutes until the deployment is completed and pod turns to
Runningstate. -
Knowing the pod identifier now, you can verify the assigned fsGroup and uid of the SCC.
oc get pod -o jsonpath='{range .items[*]}{@.metadata.name}{" runAsUser: "}{@.spec.containers[*].securityContext.runAsUser}{" fsGroup: "}{@.spec.securityContext.fsGroup}{" seLinuxOptions: "}{@.spec.securityContext.seLinuxOptions.level}{"\n"}{end}'outputs,
$ oc get pod -o jsonpath='{range .items[*]}{@.metadata.name}{" runAsUser: "}{@.spec.containers[*].securityContext.runAsUser}{" fsGroup: "}{@.spec.securityContext.fsGroup}{" seLinuxOptions: "}{@.spec.securityContext.seLinuxOptions.level}{"\n"}{end}' mongodb-c4b99b975-l2k7n runAsUser: 1000630000 fsGroup: 1000630000 seLinuxOptions: s0:c25,c15 -
Note, the service type for MongoDB is set to
ClusterIPwith the Helm parameter--set service.type=ClusterIP, so that MongoDB can only be accessed within the cluster. -
Retrieve and save MongoDB passwords in environment variables.
export MONGODB_ROOT_PASSWORD=$(kubectl get secret --namespace $NAMESPACE mongodb -o jsonpath="{.data.mongodb-root-password}" | base64 --decode) export MONGODB_PASSWORD=$(kubectl get secret --namespace $NAMESPACE mongodb -o jsonpath="{.data.mongodb-password}" | base64 --decode) echo $MONGODB_ROOT_PASSWORD echo $MONGODB_PASSWORD -
Verify that the internal MongoDB port 27017 within the container is not exposed externally,
$  oc get svc mongodb
NAME    TYPE    CLUSTER-IP    EXTERNAL-IP    PORT(S)    AGE
mongodb    ClusterIP    172.21.131.154   <none>    27017/TCP    41s
Verify MongoDB Deployment
To verify MongoDB deployment,
-
In the terminal, retrieve pod ID.
oc get podoutputs,
$ oc get pod NAME READY STATUS RESTARTS AGE mongodb-c4b99b975-l2k7n 1/1 Running 0 5m44s -
Start an interactive terminal to the pod, you need to use your own unique pod name with the hashes.
oc exec -it <your pod name> bashoutputs,
$ oc exec -it <your pod name> bash 1000630000@mongodb-9f76c9485-sjtqx:/$ -
Start a MongoDB CLI session.
```console $ mongo --host 127.0.0.1 --authenticationDatabase admin -p $MONGODB_ROOT_PASSWORD
connecting to: mongodb://127.0.0.1:27017/?authSource=admin&compressors=disabled&gssapiServiceName=mongodb Implicit session: session { "id" : UUID("80b52ae7-b35a-4da9-827e-9daad510aadf") } MongoDB server version: 4.4.2 > ```
-
Switch to your database.
> use mydb switched to db mydb -
Authenticate a MongoDB connection.
> db.auth("user1", "passw0rd") 1 -
Create a
collection.> db.createCollection("customer") { "ok" : 1 } -
Verify the collection creation.
> db.getCollection('customer') mydb.customer -
Create one data entry in MongoDB.
> db.customer.insertOne( { firstName: "John", lastName: "Smith" } ) { "acknowledged" : true, "insertedId" : ObjectId("5ed1e4319bdb52022d624bdf") } -
Retrieve the data entry in the MongoDB.
> db.customer.find({ lastName: "Smith" }) { "_id" : ObjectId("5ed1e4319bdb52022d624bdf"), "firstName" : "John", "lastName" : "Smith" } -
Type
exittwice to back to the terminal. -
Your mongodb is now saving values, and if your Cloud Object Storage and bucket were configured correctly, your customer information is now securely stored.
-
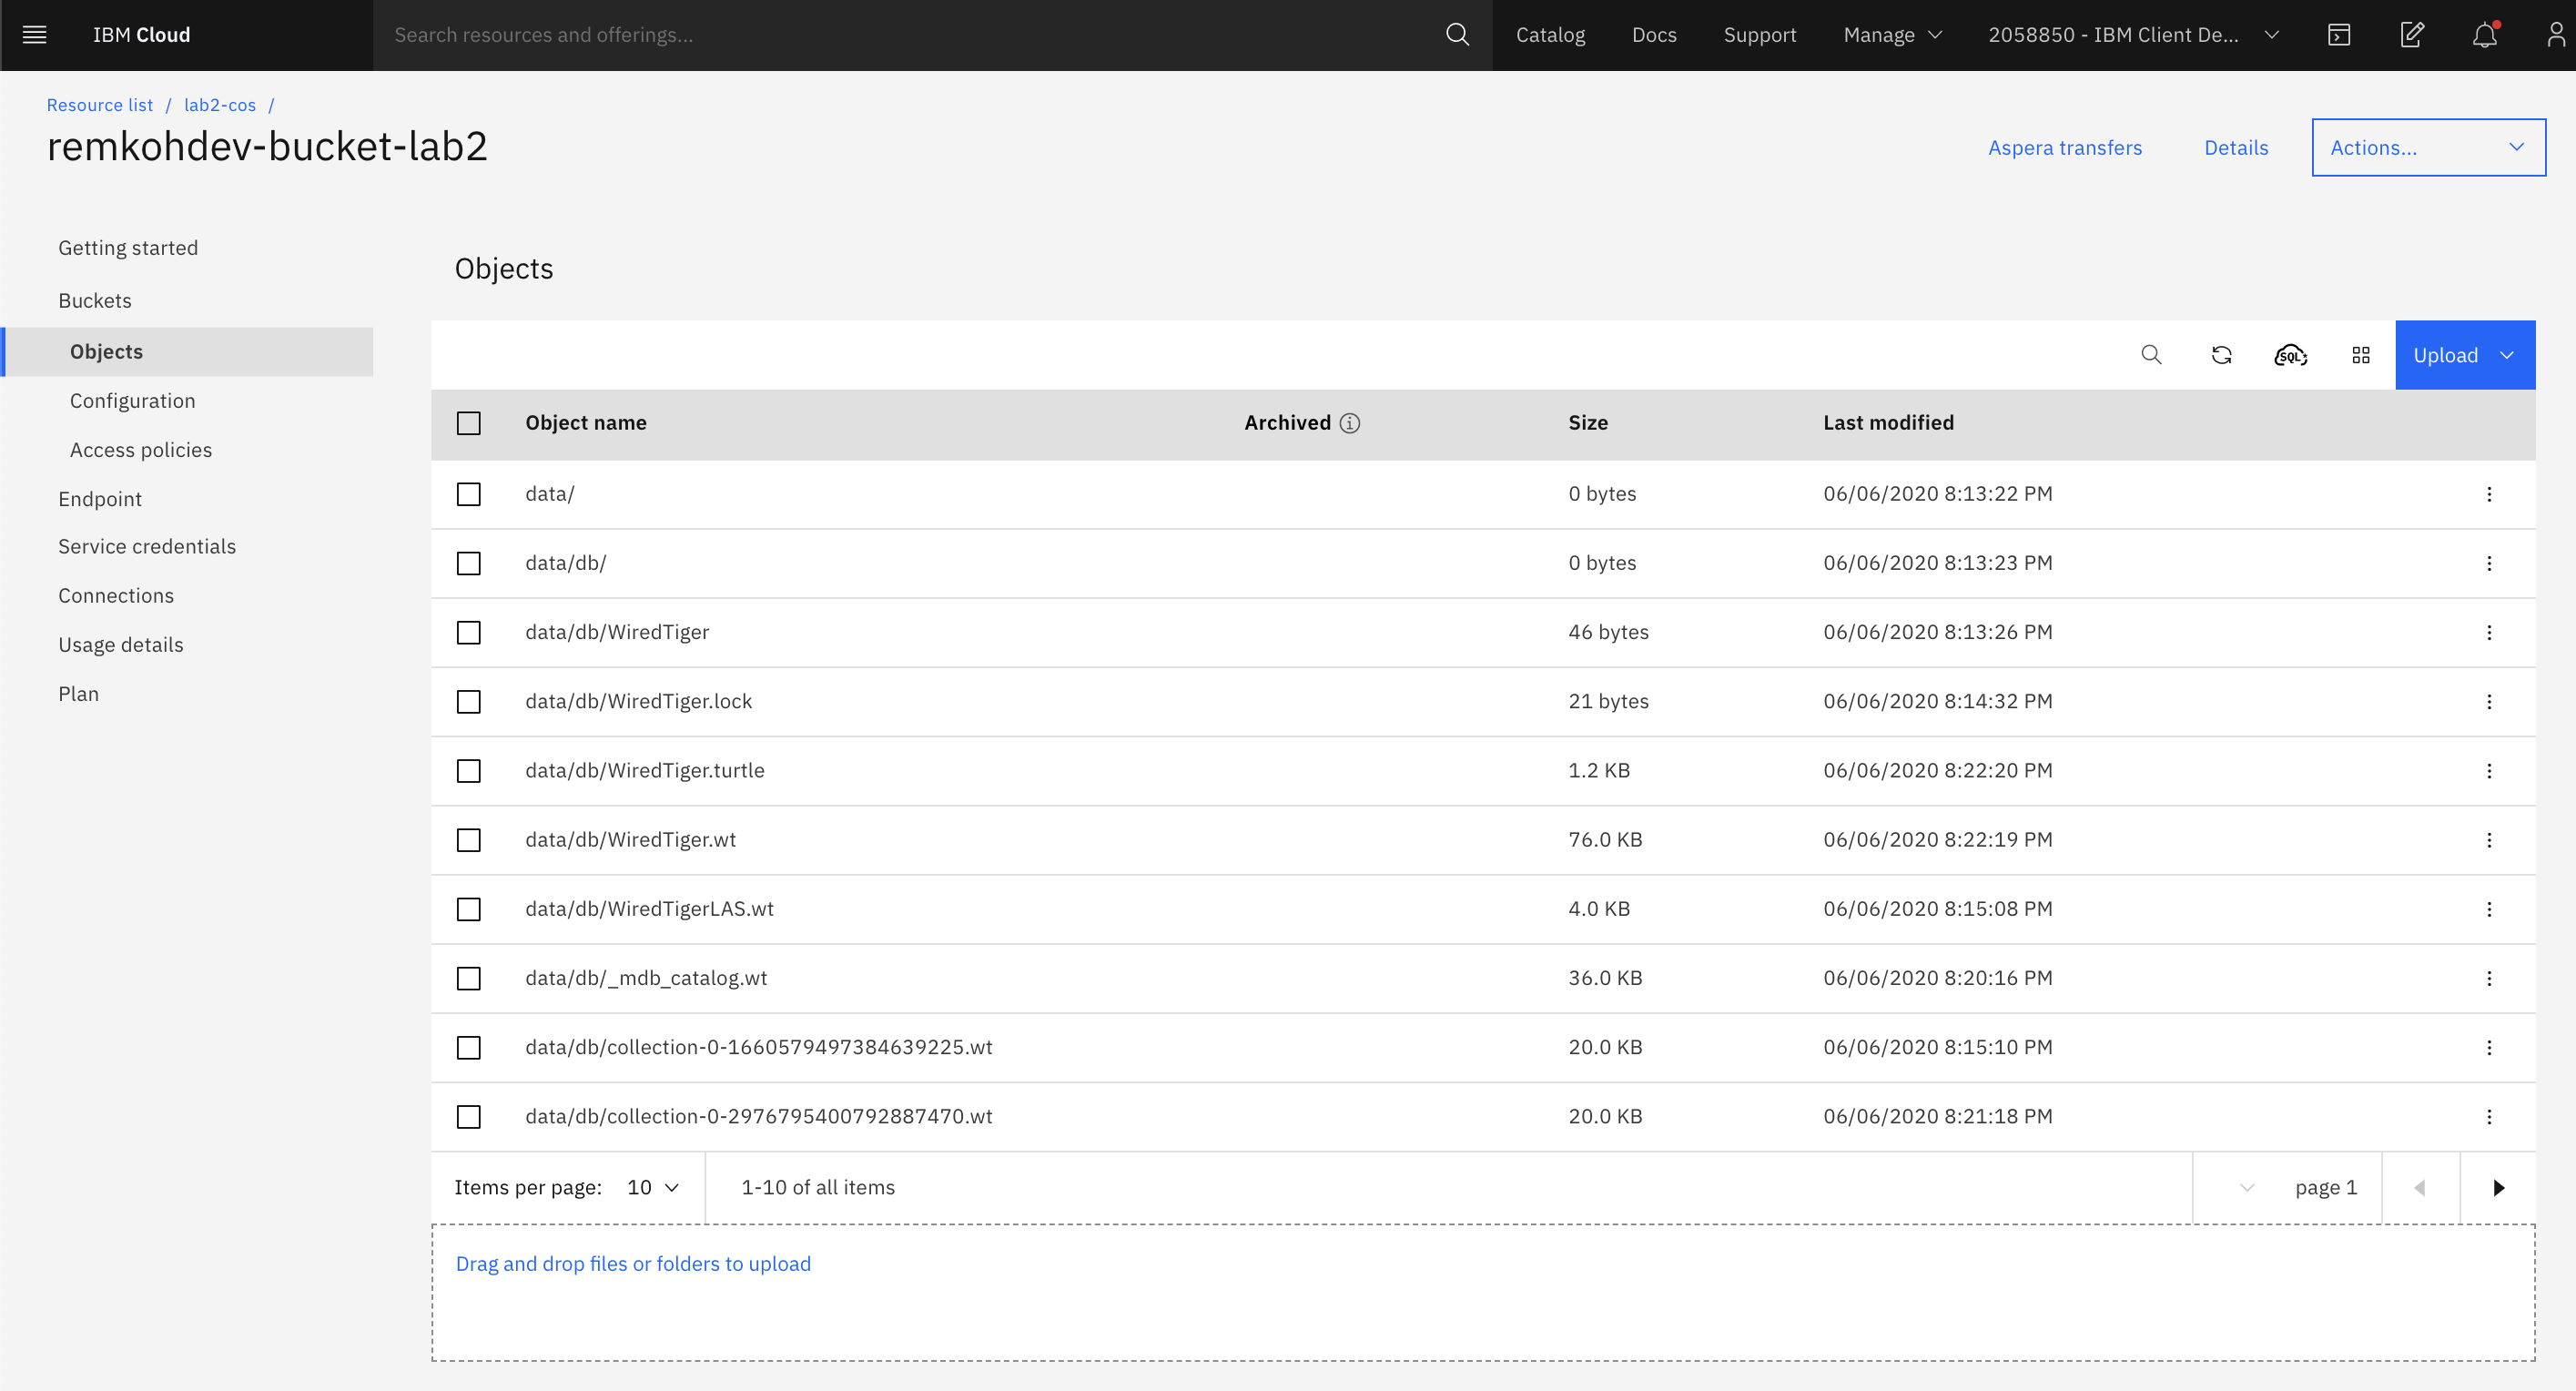
If you review the bucket in your Object Storage, MongoDB should now be writing its data files to the object storage.
Conclusion
You are awesome! You have now added IBM Cloud Object Storage persistent storage to your MongoDB database using dynamic provisioning the IBM Cloud Object Storage plugin based on s3fs-fuse. What remains is configuring your application to use the MongoDB service.
You can use the instructions in the FUSE lab to mount a local filesystem to the remote Object Storage and inspect the documents.