4. Configure your Kubernetes Cluster
You now have an Object Storage instance with a bucket, and have found the corresponding private endpoint for your Object Storage. Next, we can configure a Kubernetes cluster:
- Create a New Namespace in your Cluster,
- Create a Secret to Access the Object Storage,
Create a New Namespace in your Cluster
-
Previously, you logged in to your personal account to create a free instance of IBM Cloud Object Storage (COS). If the cluster exists in a different account, make sure to to switch accounts and log in to the IBM Cloud where your cluster exists.
ibmcloud login -u $IBM_IDNote: if you use a single-sign-on provider, use the
-ssoflag. -
If you needed to switch accounts, you will have logged in again, and when prompted to
Select an account, this time, choose the account with your cluster. In the example below, I have to choose account number 2 from the list,2. IBM Client Developer Advocacy (e65910fa61) <-> 1234567,ibmcloud login -u b.newell2@remkoh.dev API endpoint: https://cloud.ibm.com Region: us-south Password> Authenticating... OK Select an account: 1. B Newell's Account (31296e3a285) 2. IBM Client Developer Advocacy (e65910fa61) <-> 1234567 Enter a number> **2** Targeted account IBM Client Developer Advocacy (e65910fa61) <-> 1234567 -
Retrieve your cluster information.
ibmcloud ks clustersoutputs,
$ ibmcloud ks clusters Name ID State Created Workers Location Version Resource Group Name Provider <yourcluster> br78vuhd069a00er8s9g normal 1 day ago 1 Dallas 1.16.10_1533 default classic -
Retrieve the name of your cluster, in this example, I set the name of the first cluster with index
0,CLUSTER_NAME=$(ibmcloud ks clusters --output json | jq -r '.[0].name') echo $CLUSTER_NAME -
In your browser: get the login command for your cluster:
- Go to the IBM Cloud resources page at https://cloud.ibm.com/resources,
Under
Clustersfind and select your cluster, and load the cluster overview page. There are two ways to retrieve the login command with token: - Click the
Actionsdrop down next to theOpenShift web consolebutton, and selectConnect via CLI, in the pop-up window, click theoauth token request pagelink, or - Click
OpenShift web consolebutton, in theOpenShift web console, click your profile name, such asIAM#name@email.com, and then clickCopy Login Command.
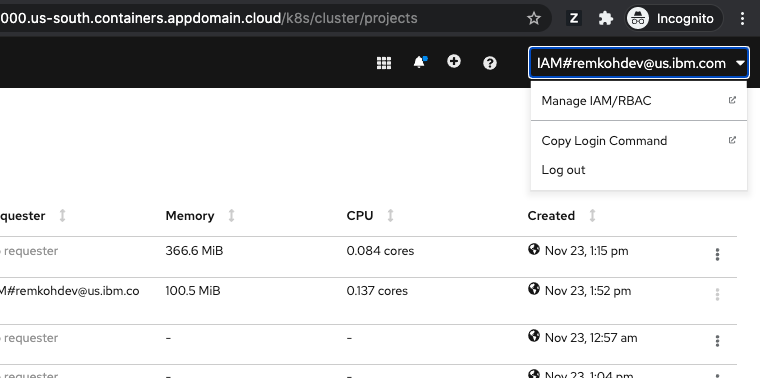
In the new page that opens for both options, click
Display Token,
Copy the
oc logincommand,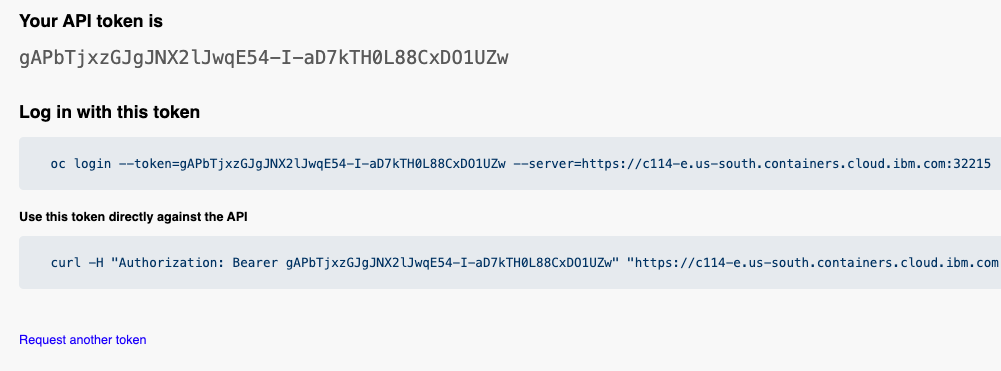
and paste the command into your terminal.
$ oc login --token=HjXc6nNGyCB1imhqtc9csTmGQ5obrPcoe4SRJqTnnT8 --server=https://c100-e.us-south.containers.cloud.ibm.com:30712 Logged into "https://c100-e.us-south.containers.cloud.ibm.com:30712" as "IAM#b.newell2@remkoh.dev" using the token provided. You have one project on this server: "<your-project>" Using project "<your-project>". Welcome! See 'oc help' to get started. - Go to the IBM Cloud resources page at https://cloud.ibm.com/resources,
Under
-
Create a new project
cos-with-s3fs,oc new-project $NAMESPACE -
Make sure you're still logged in to your cluster and namespace,
oc project

Using project "cos-with-s3fs"
Create a Secret to Access the Object Storage
Create a Kubernetes Secret to store the COS service credentials named cos-write-access.
oc create secret generic cos-write-access --type=ibm/ibmc-s3fs --from-literal=api-key=$COS_APIKEY --from-literal=service-instance-id=$COS_GUID
outputs,
$ oc create secret generic cos-write-access --type=ibm/ibmc-s3fs --from-literal=api-key=$COS_APIKEY --from-literal=service-instance-id=$COS_GUID

secret/cos-write-access created