(BONUS) AutoAI
Now that we have built our own model and uderstand the full lifecycle of an ML model, we can improve on the process. One factor that is often overlooked in machine learning is the experimentation factor. By changing which features (columns) we use from our dataset, tuning the hyperparameters of our training algorithms (changing the value of n_estimators in our random forest model for example), or even engineering new features (creating new features from existing features, LOTAREA*BEDROOMABVGR to create a new feature), we can potentially improve the accuracy of our models. As we saw in the example, the different algorithms perform at different levels of accuracy, and experimentation is incredibly important.
But this is time consuming to do by hand! Here I will demonstrate how to utilize a tool called AutoAI to autmate a lot of this process.
Using AutoAI
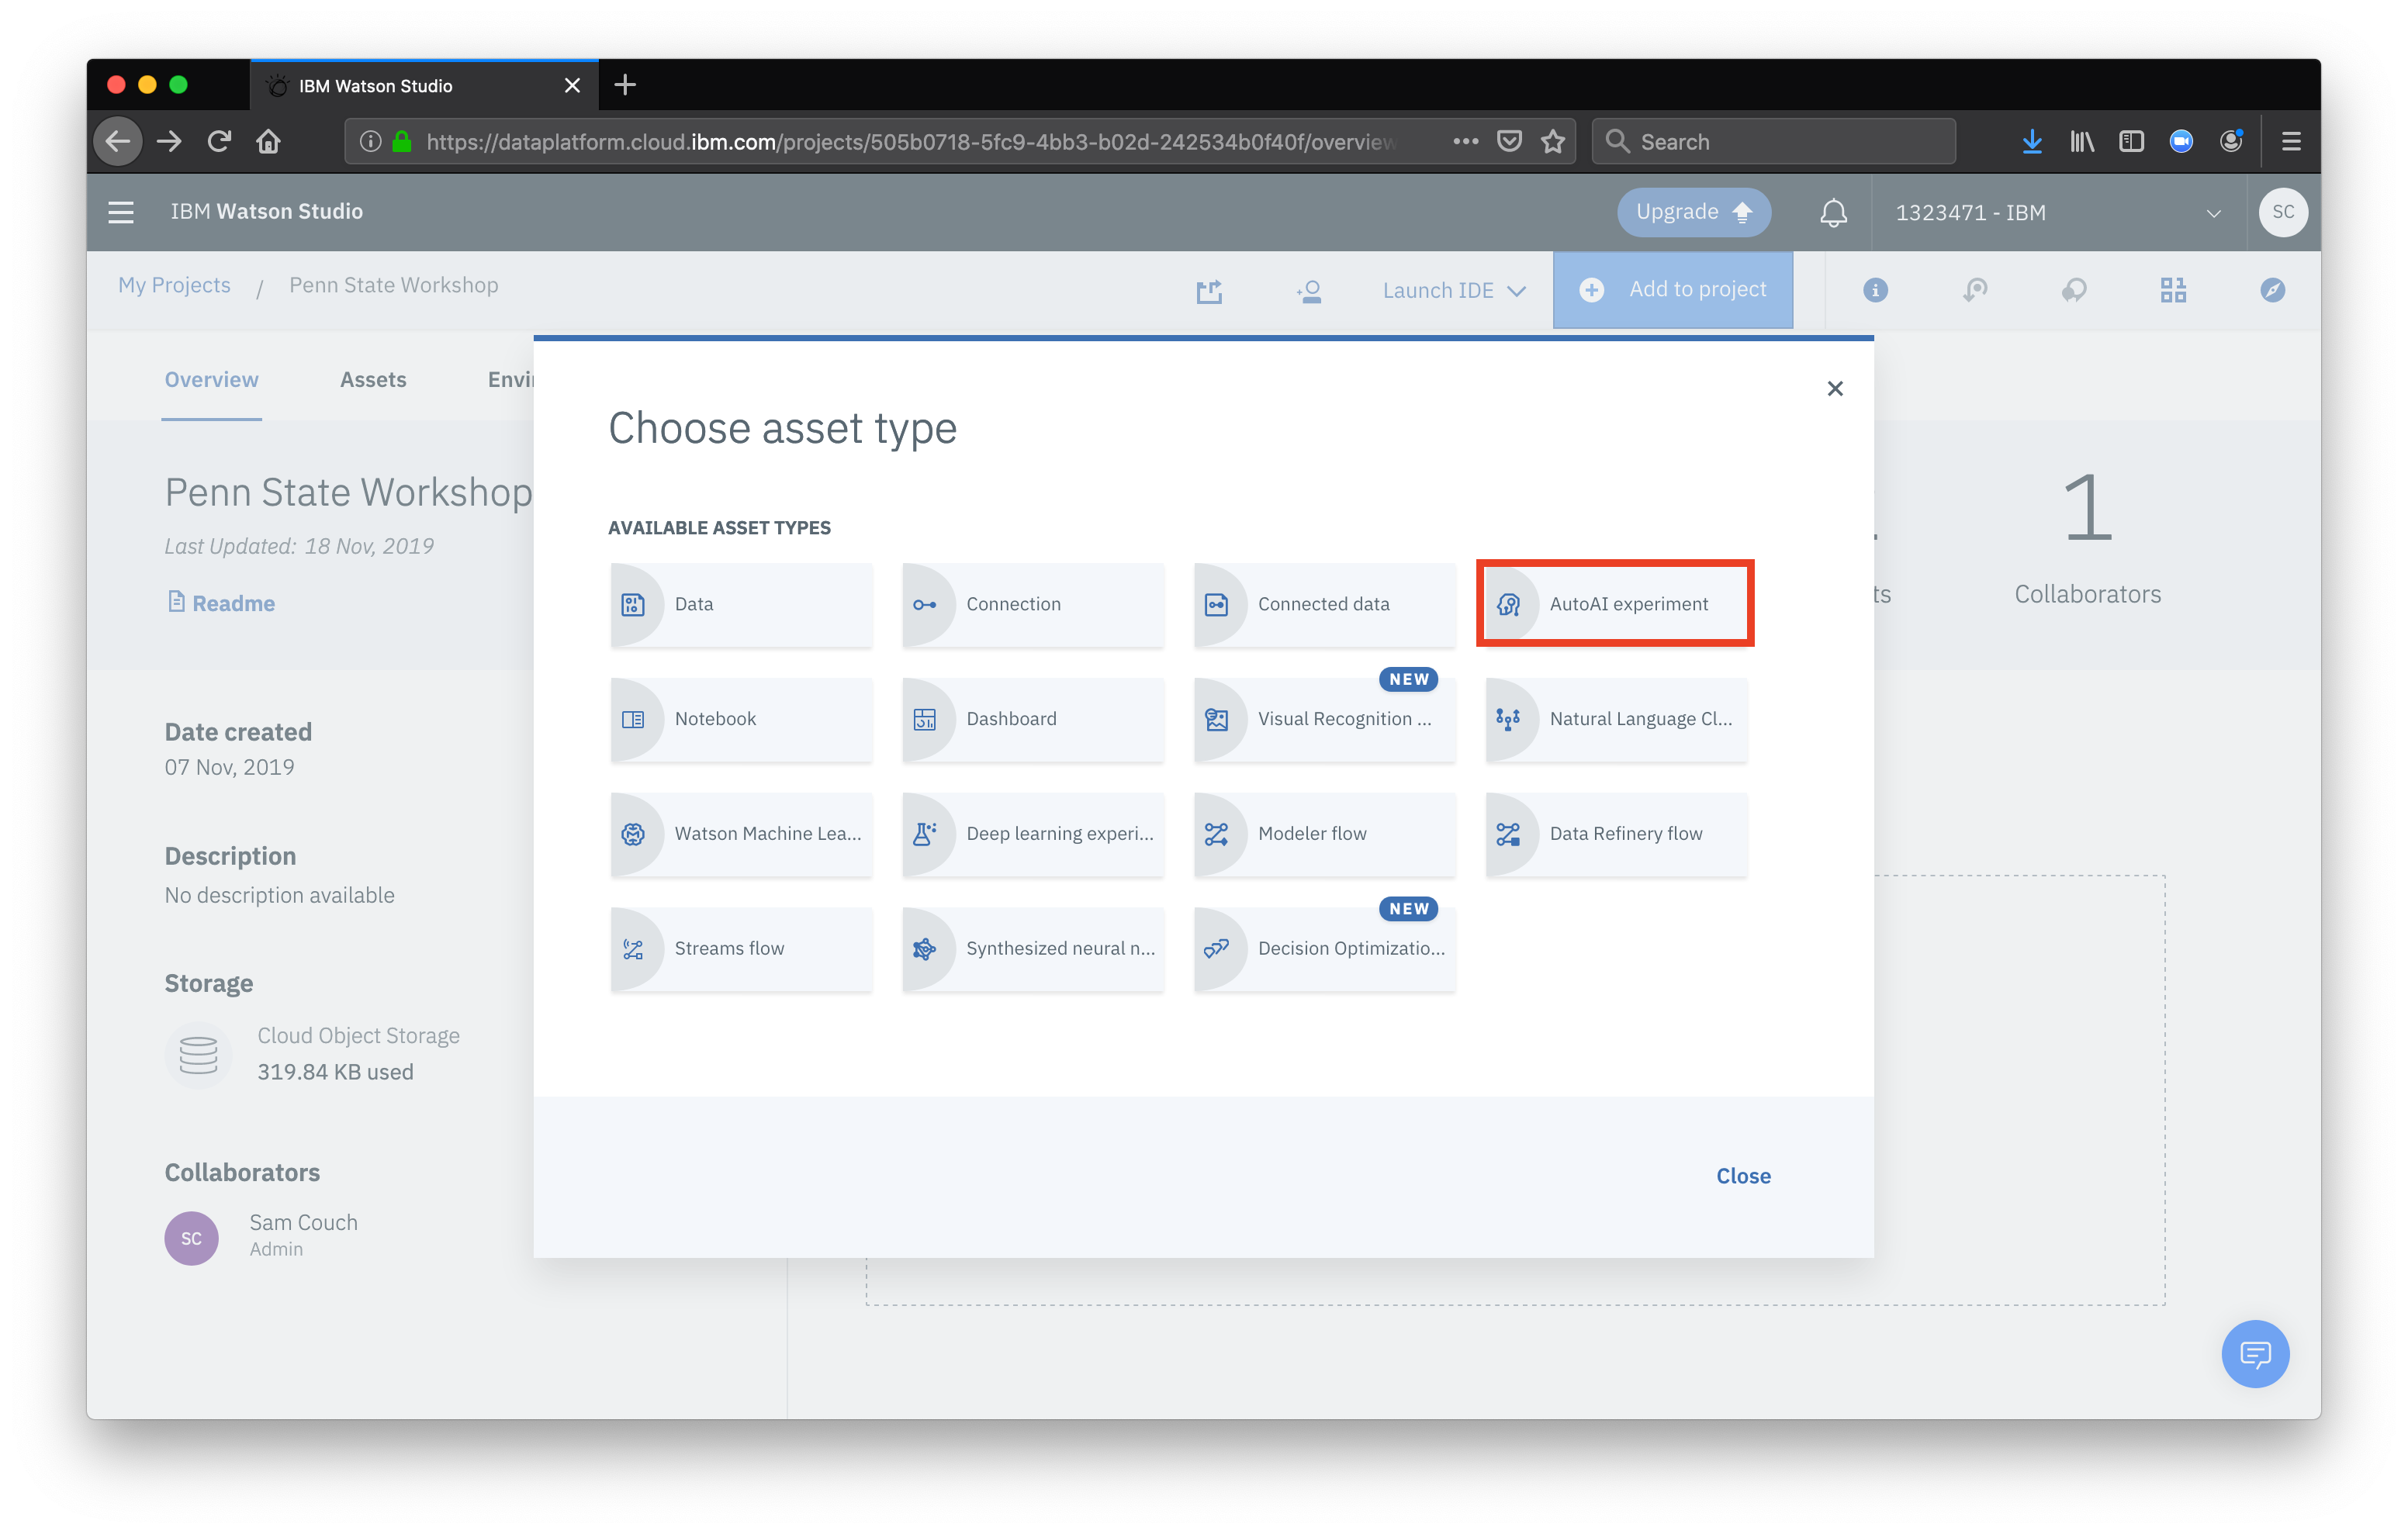
Navigate to the project overview page and select Add to project, this time select AutoAI experiment
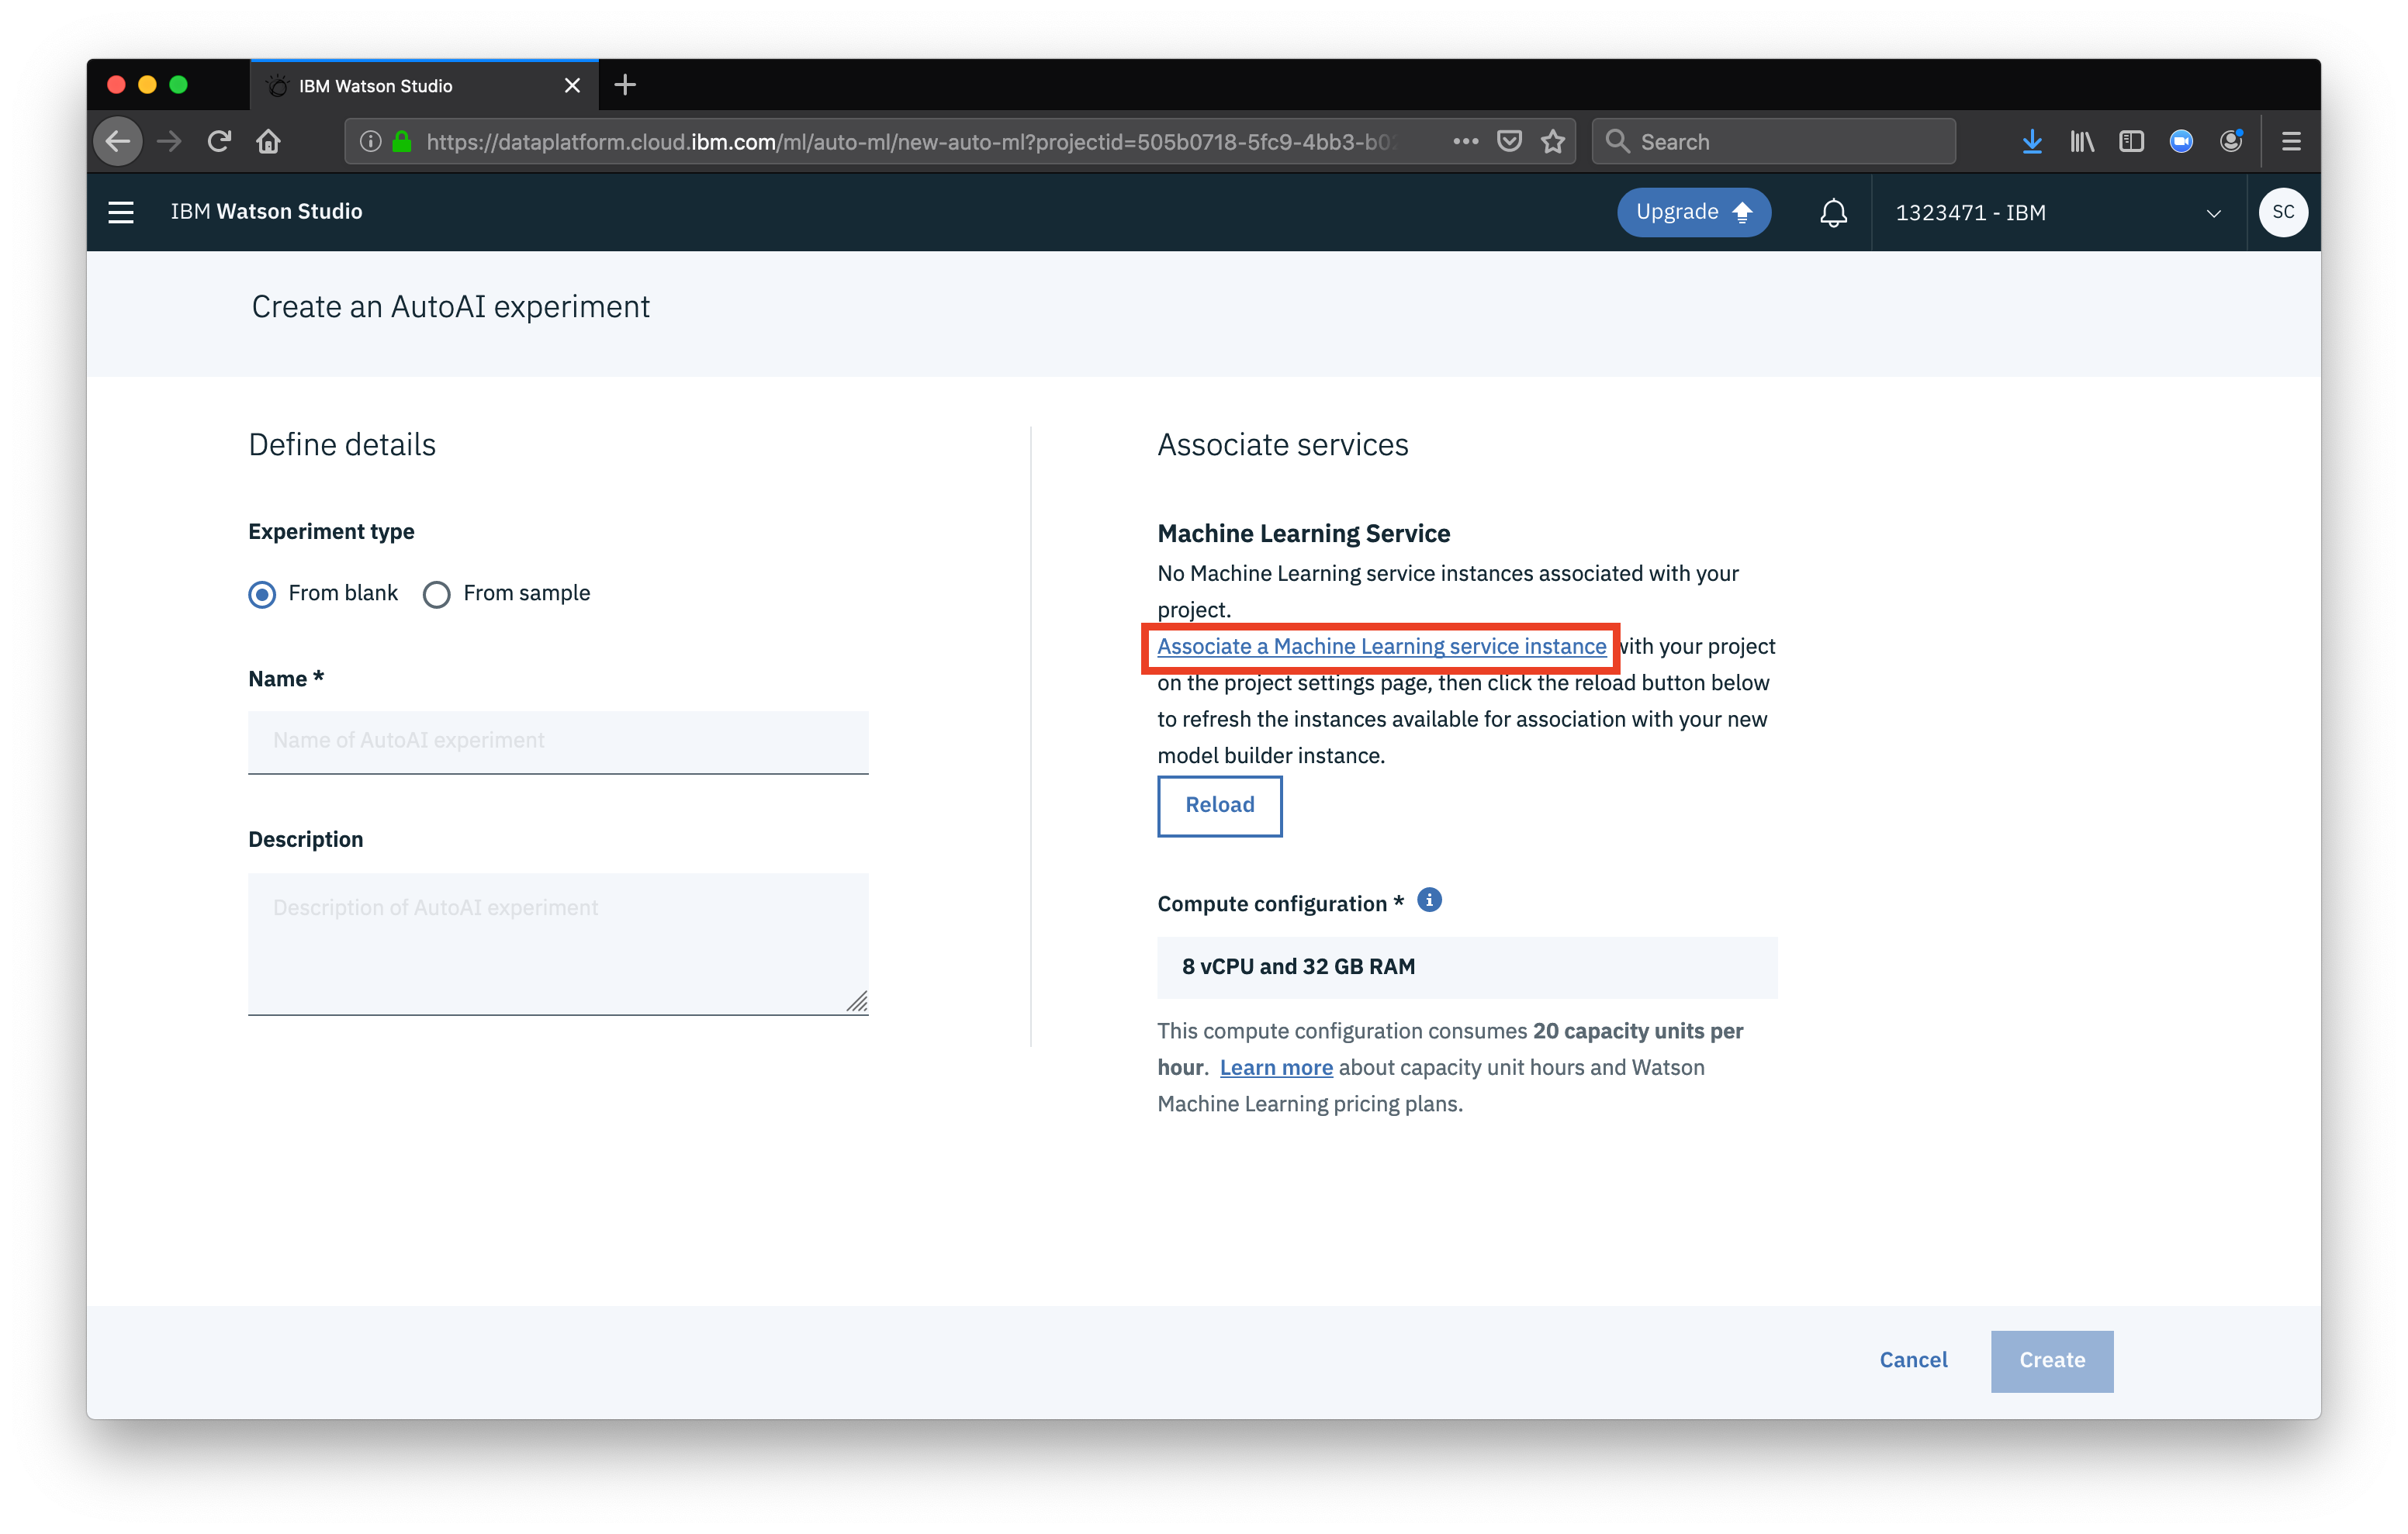
 Next we need to add our Watson Machine Learning instance as a service for our project. Click Associate a Watson Machine Learning service instance
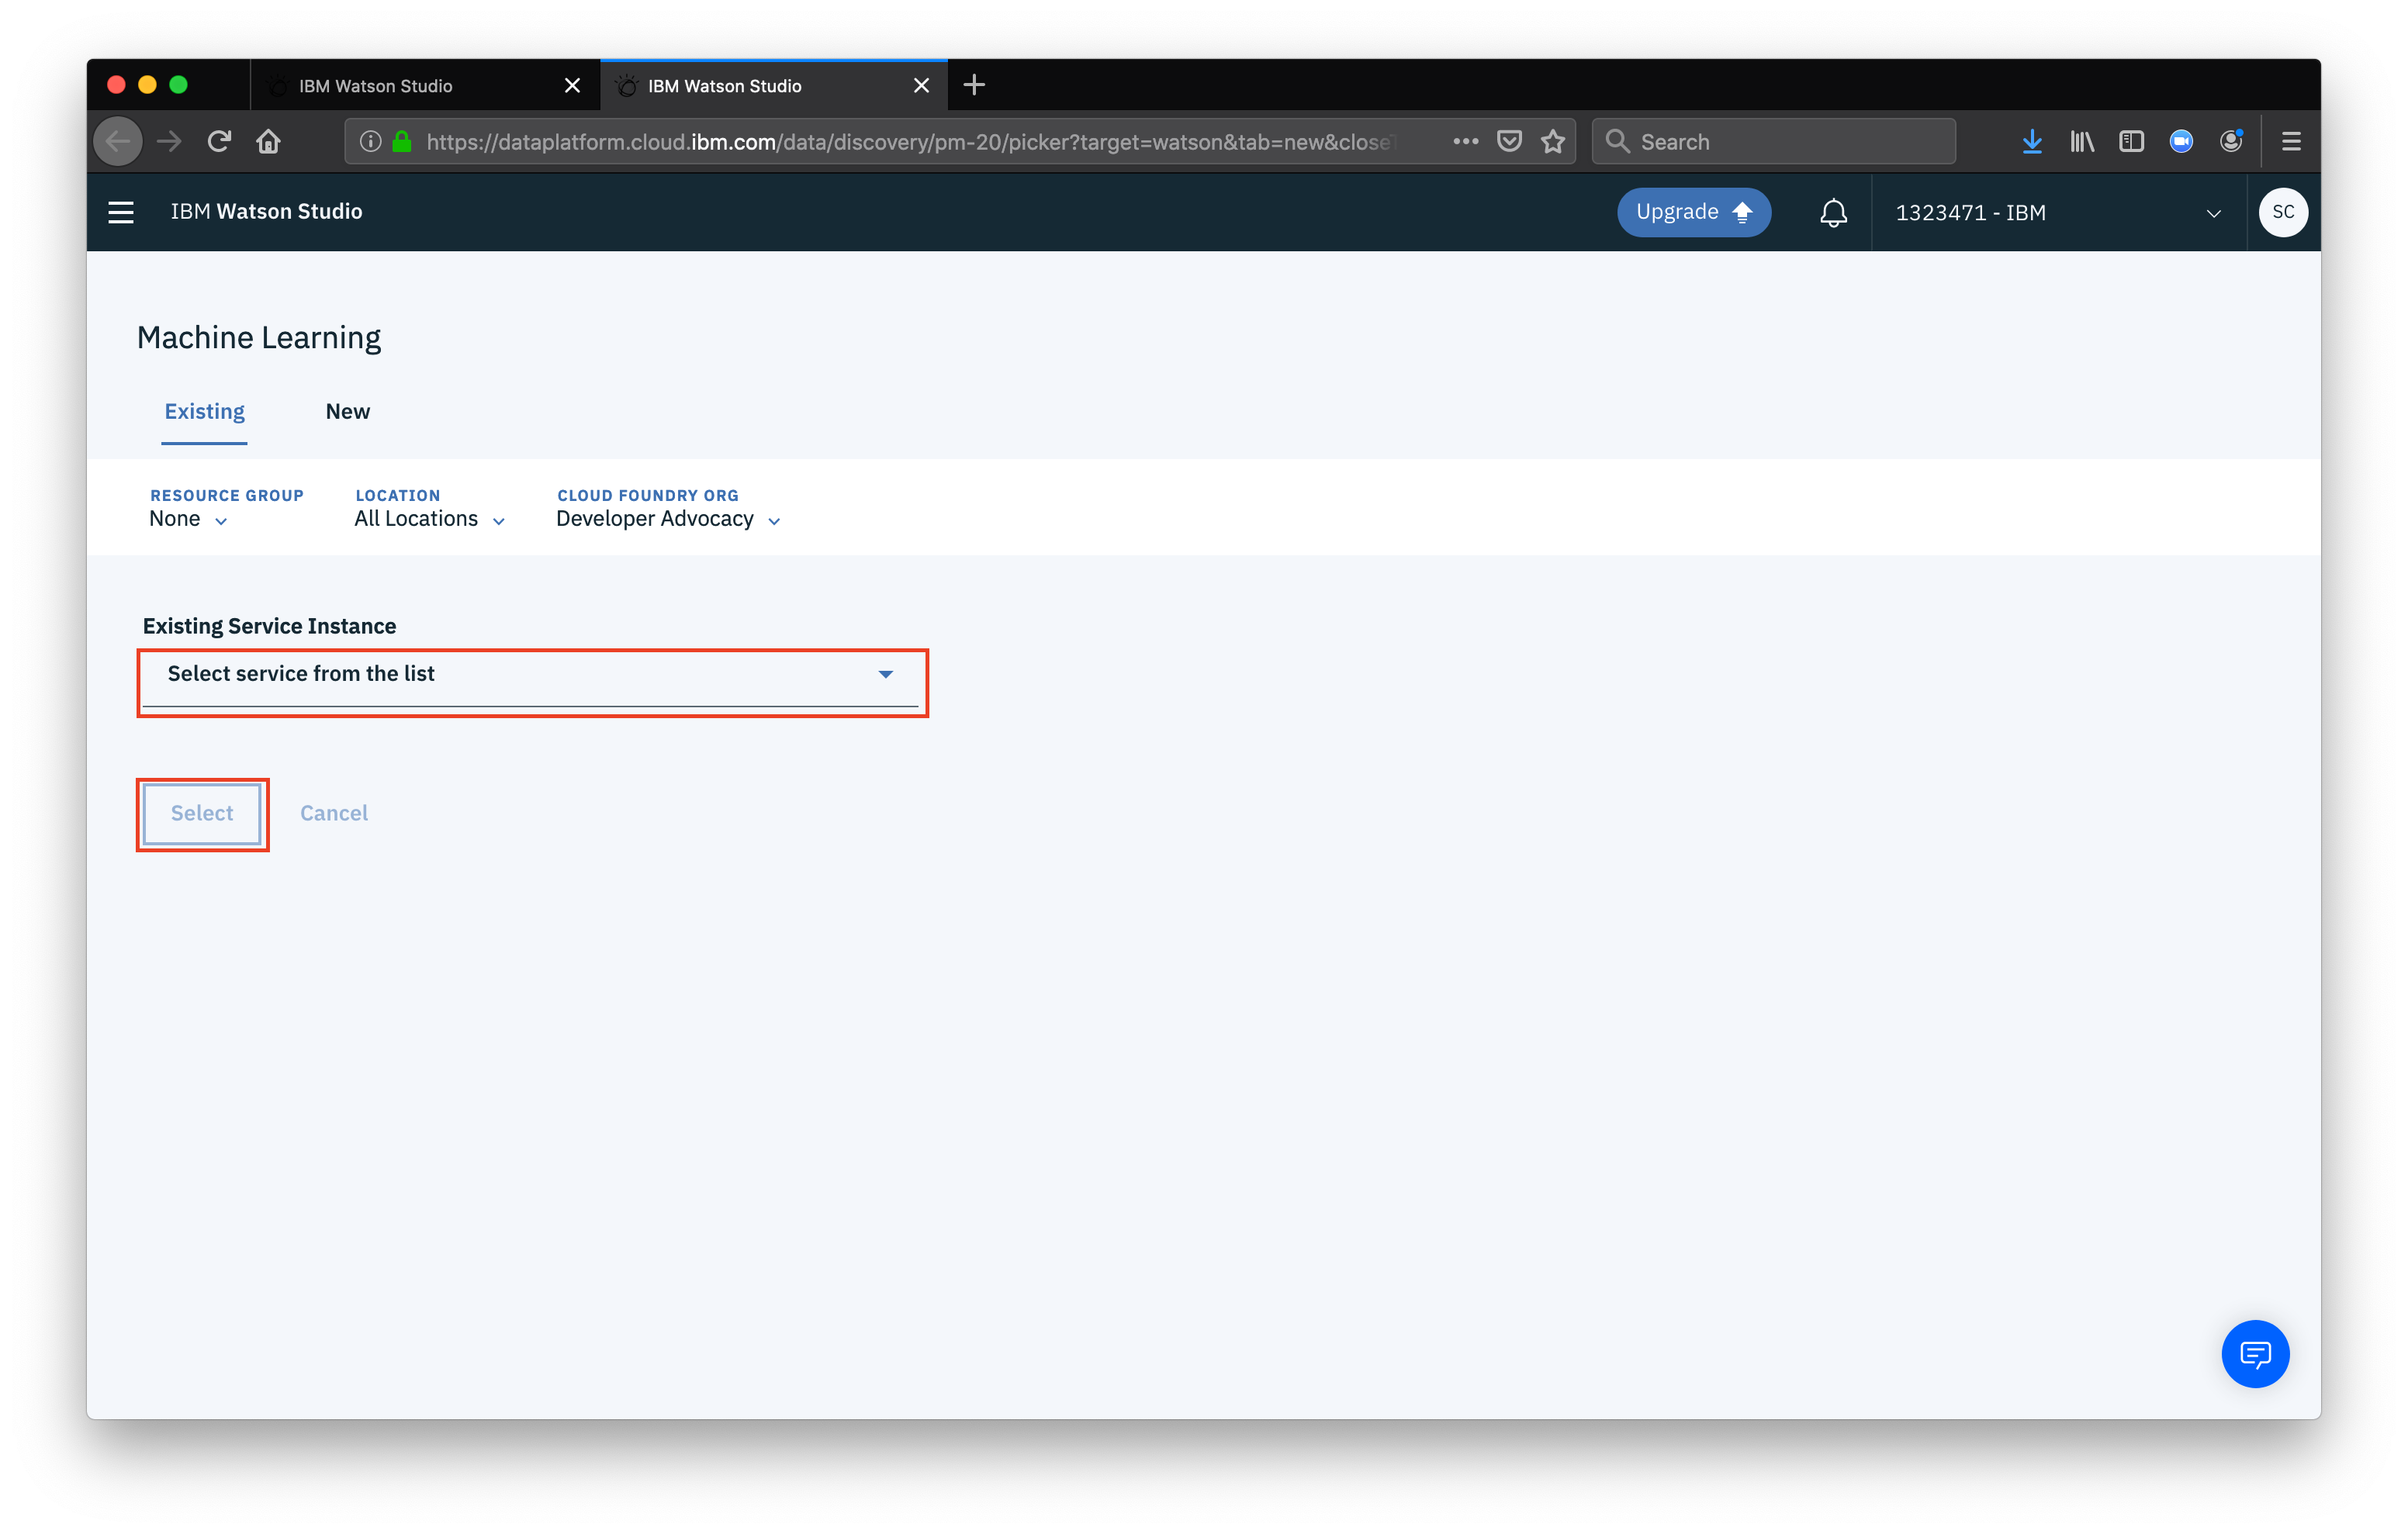
 From this page, select your instance from the dropdown, them click Select
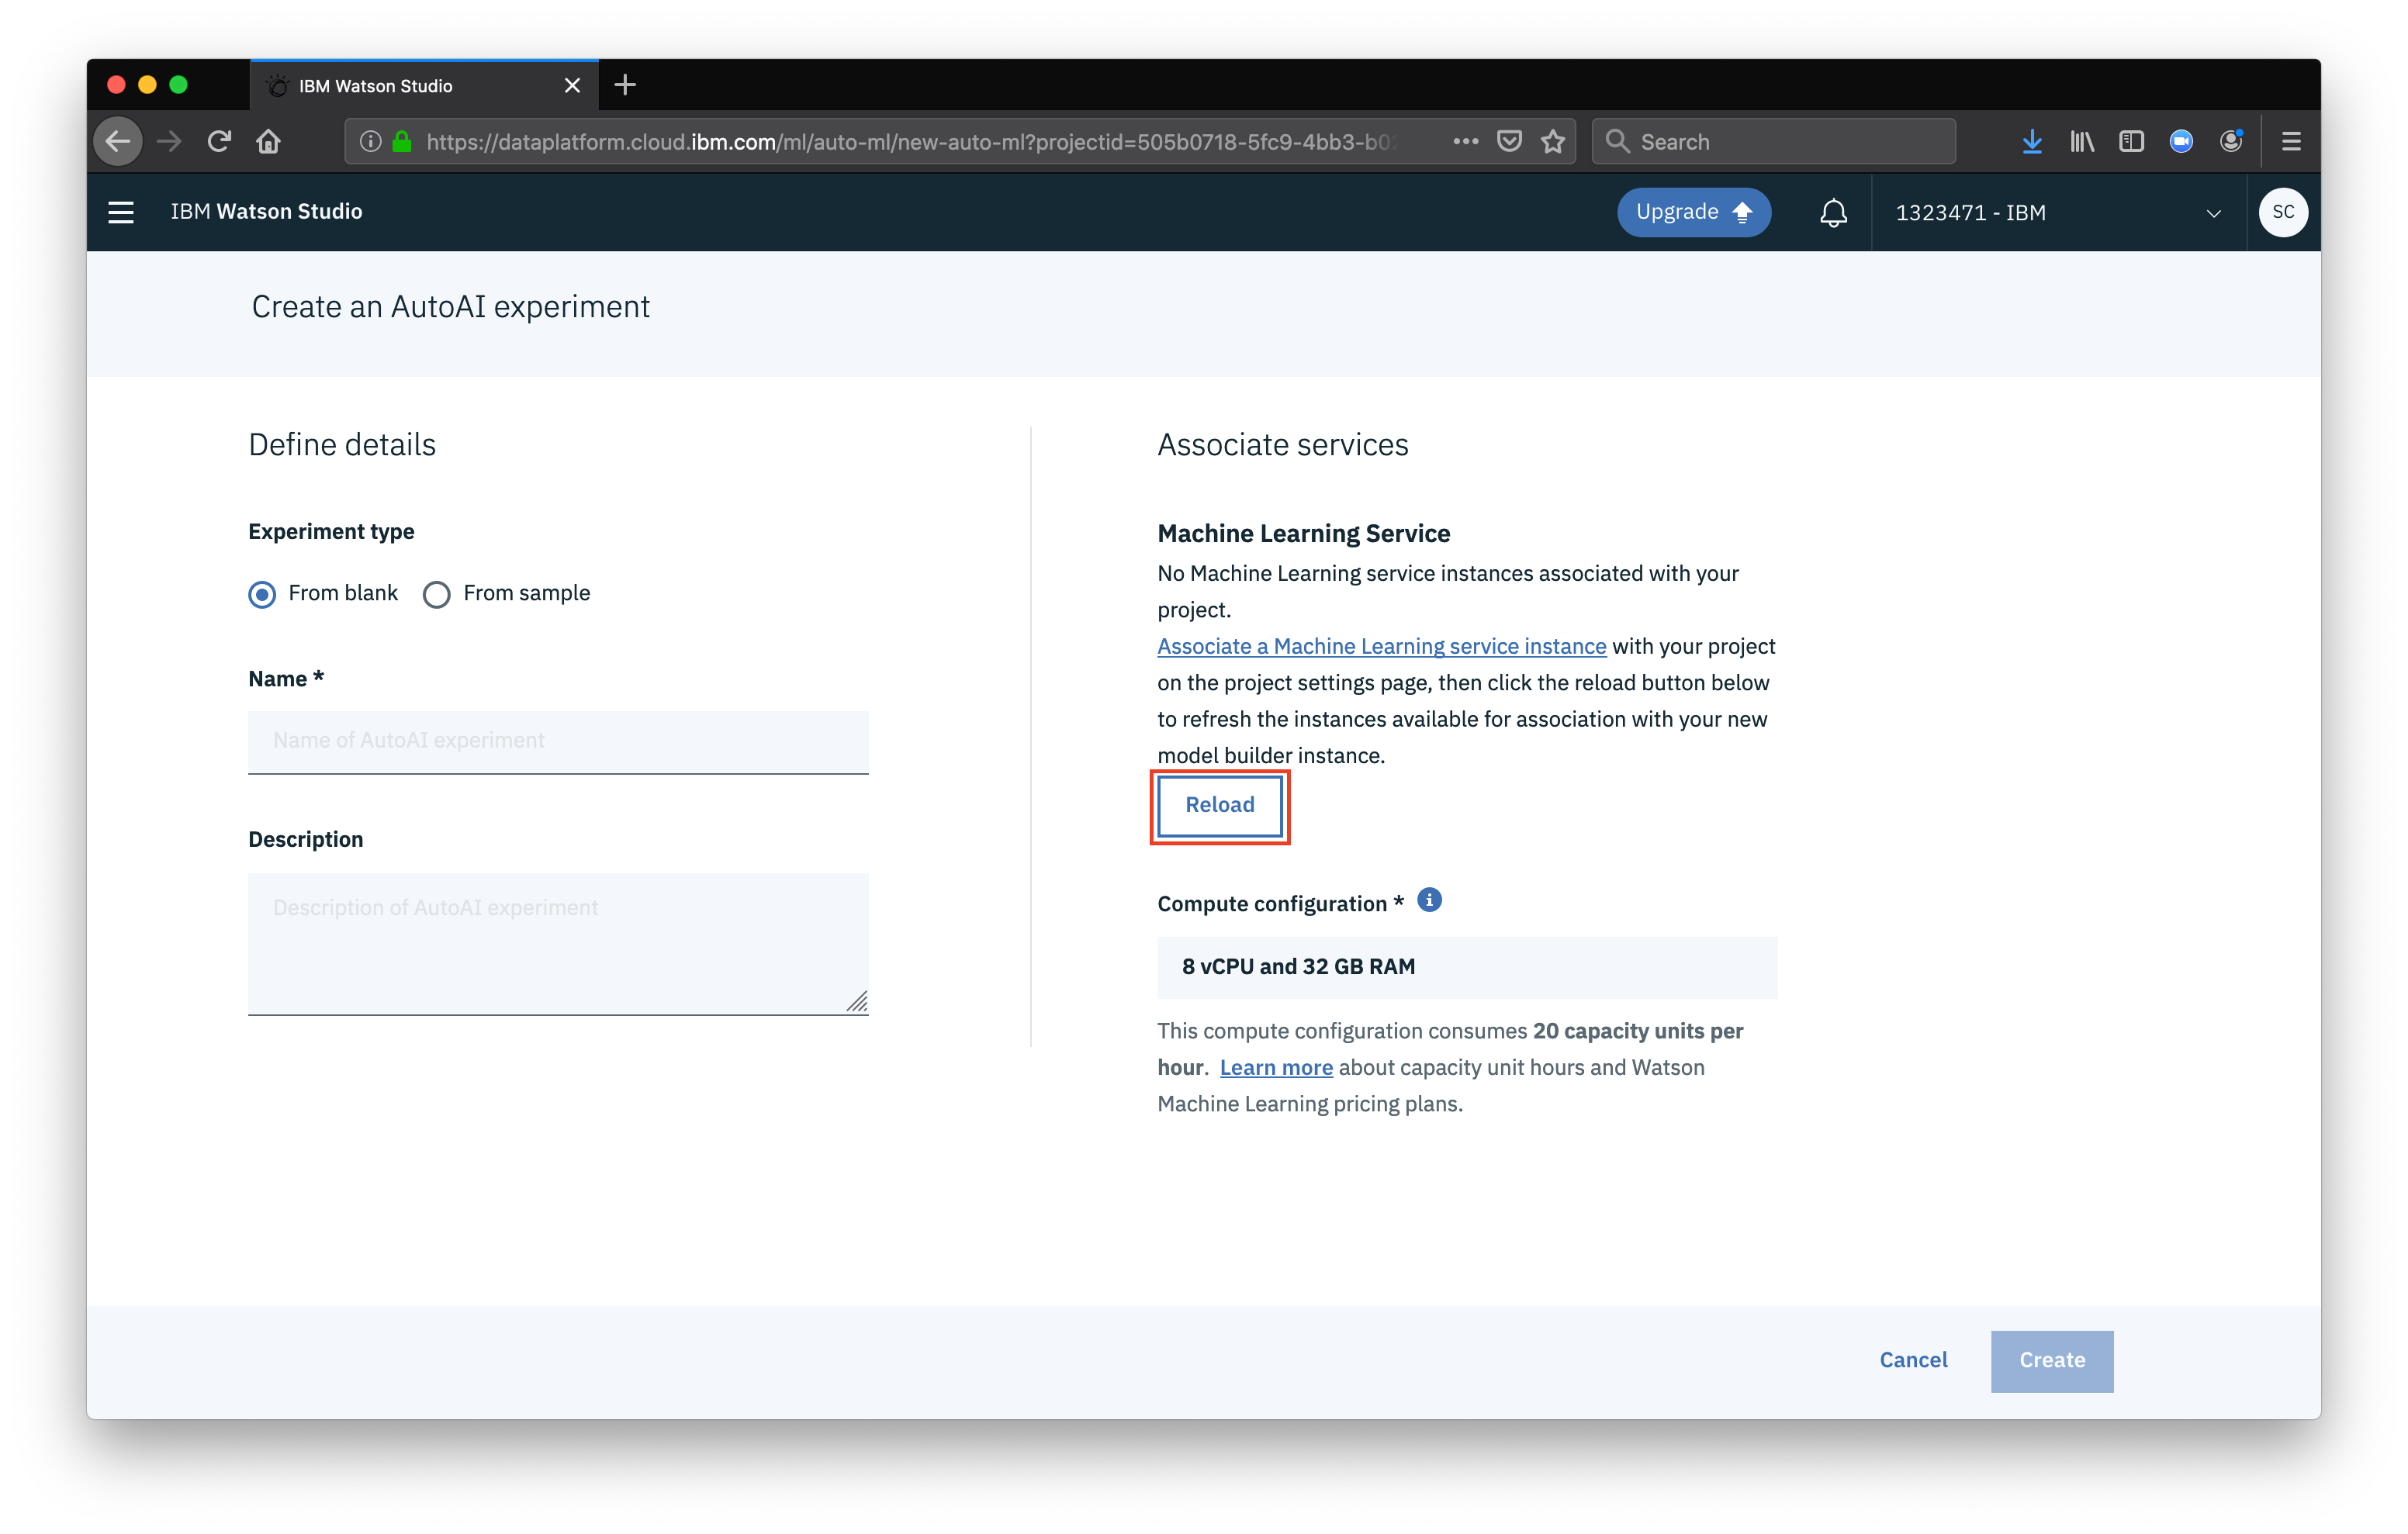
 Once associated, click Reload to make sure the WML service is properly associated.
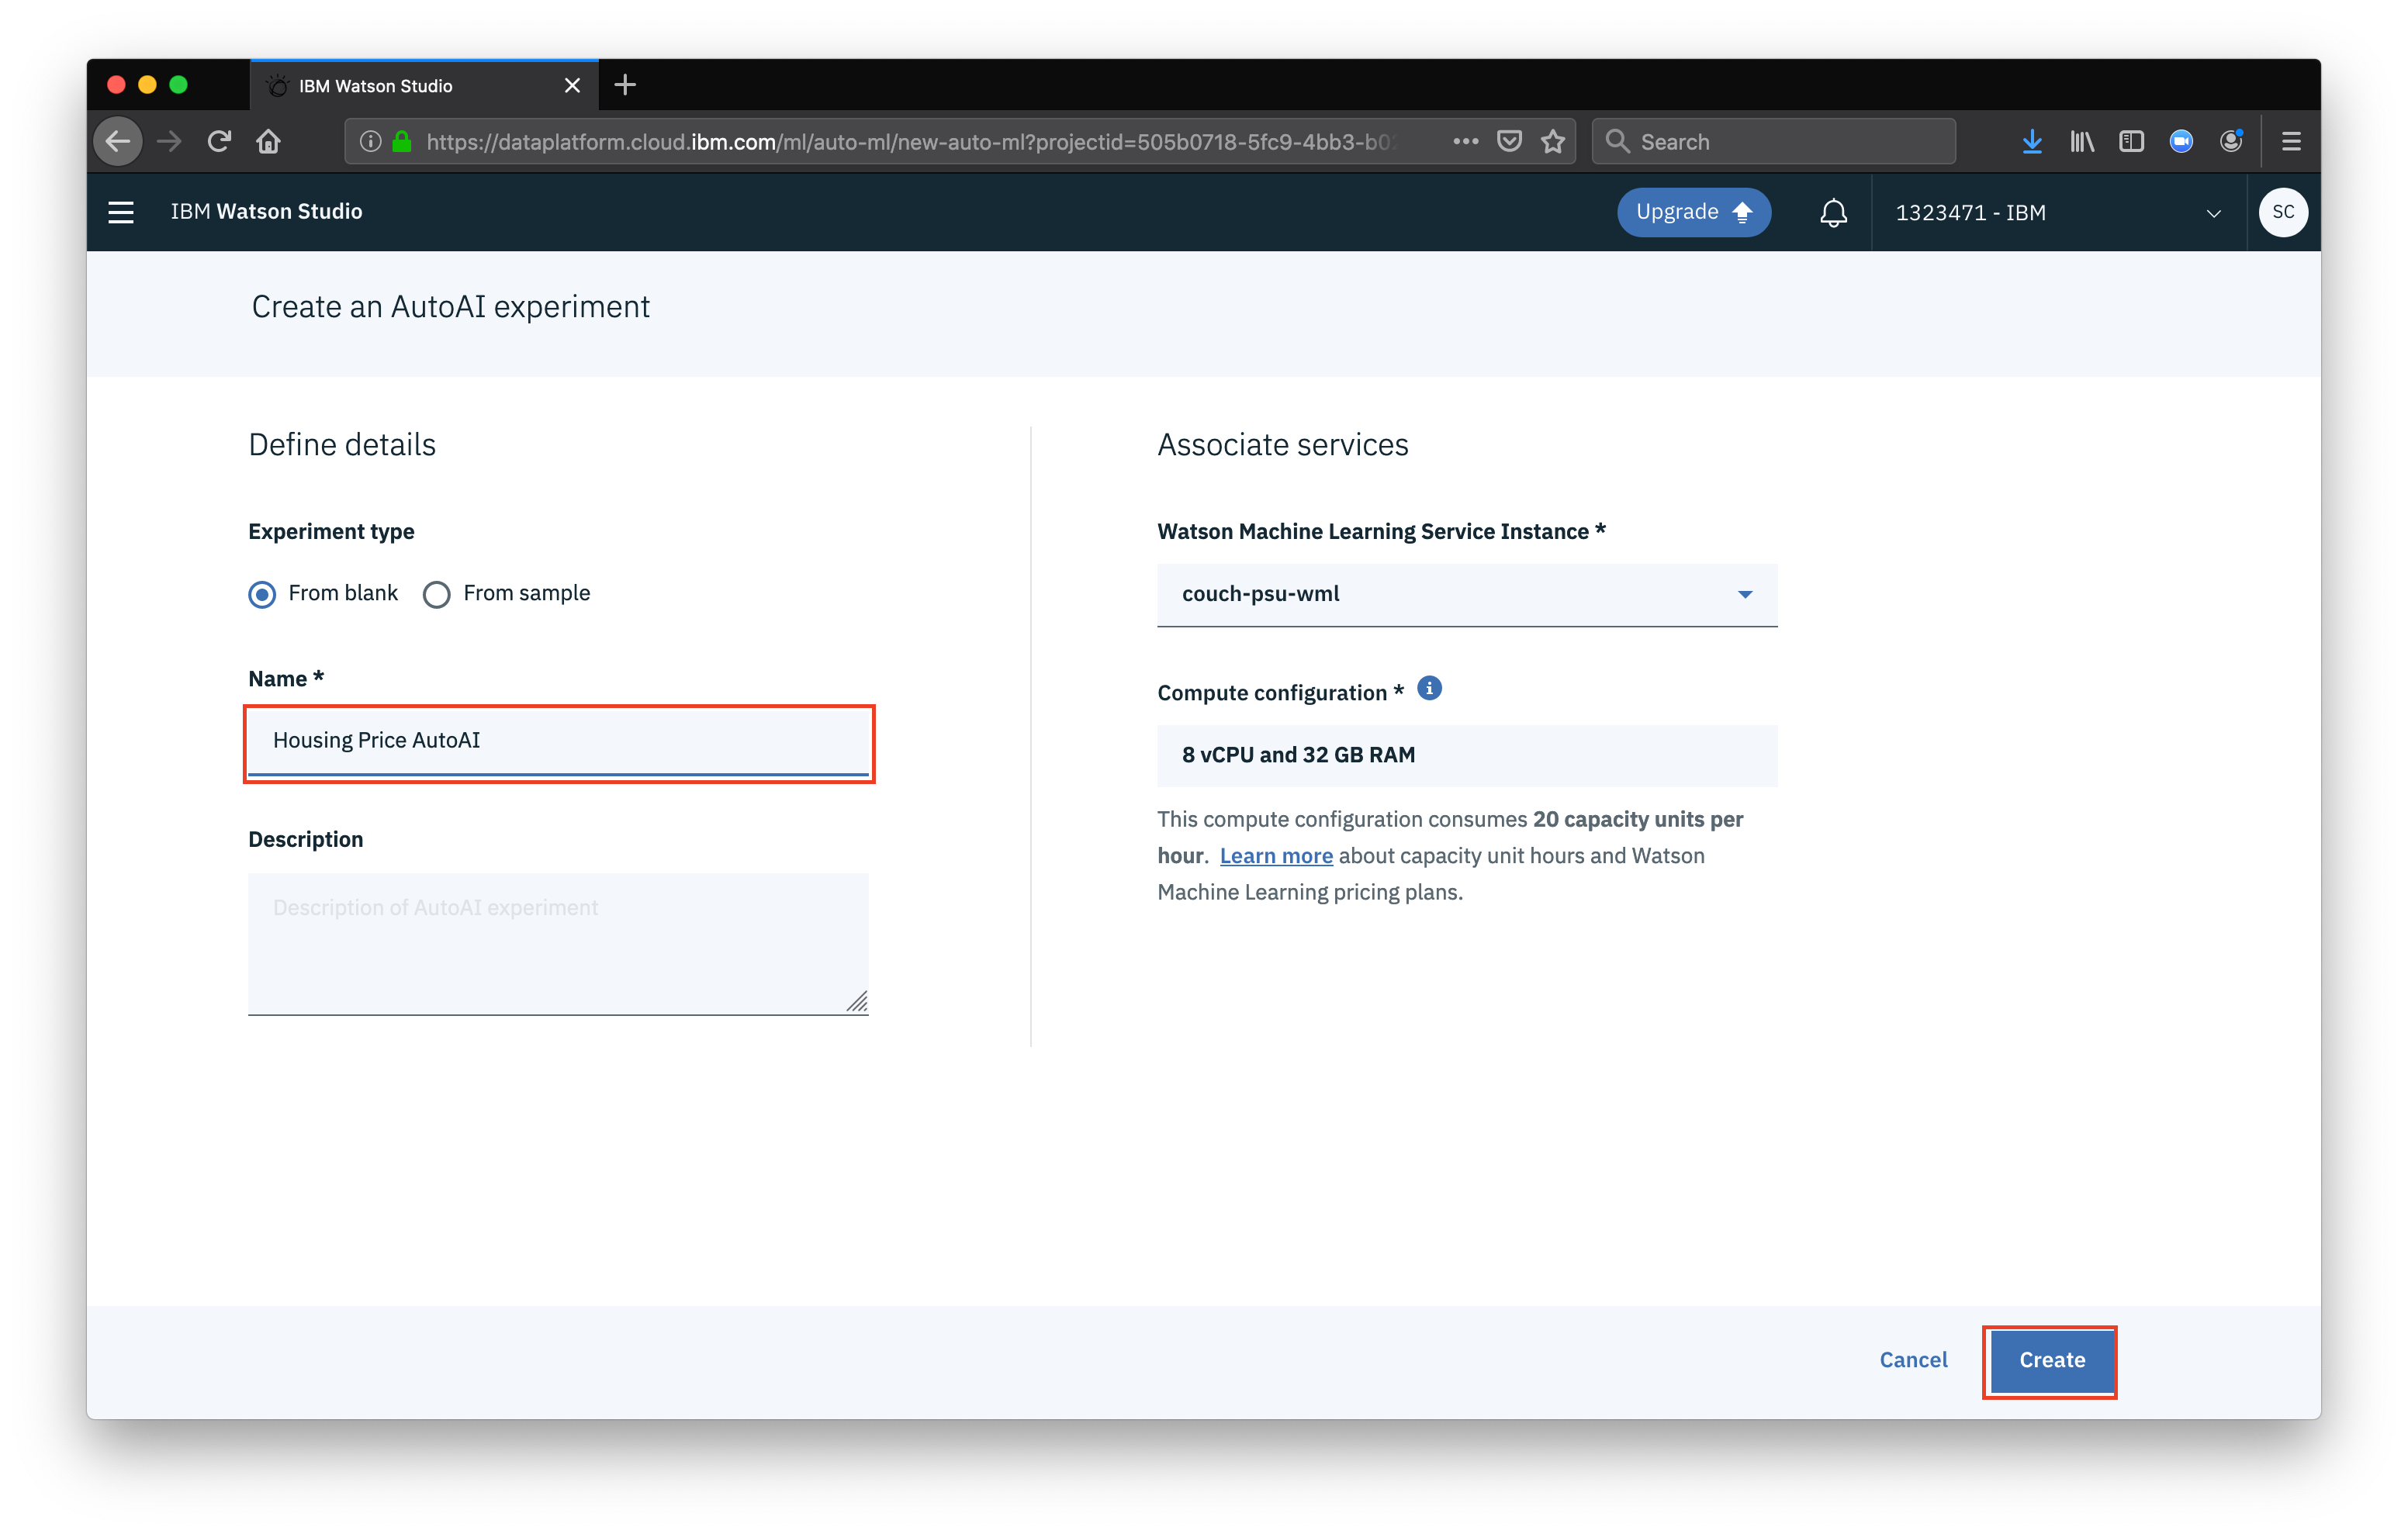
 Finally give your AutoAI Experiment a name and click Create
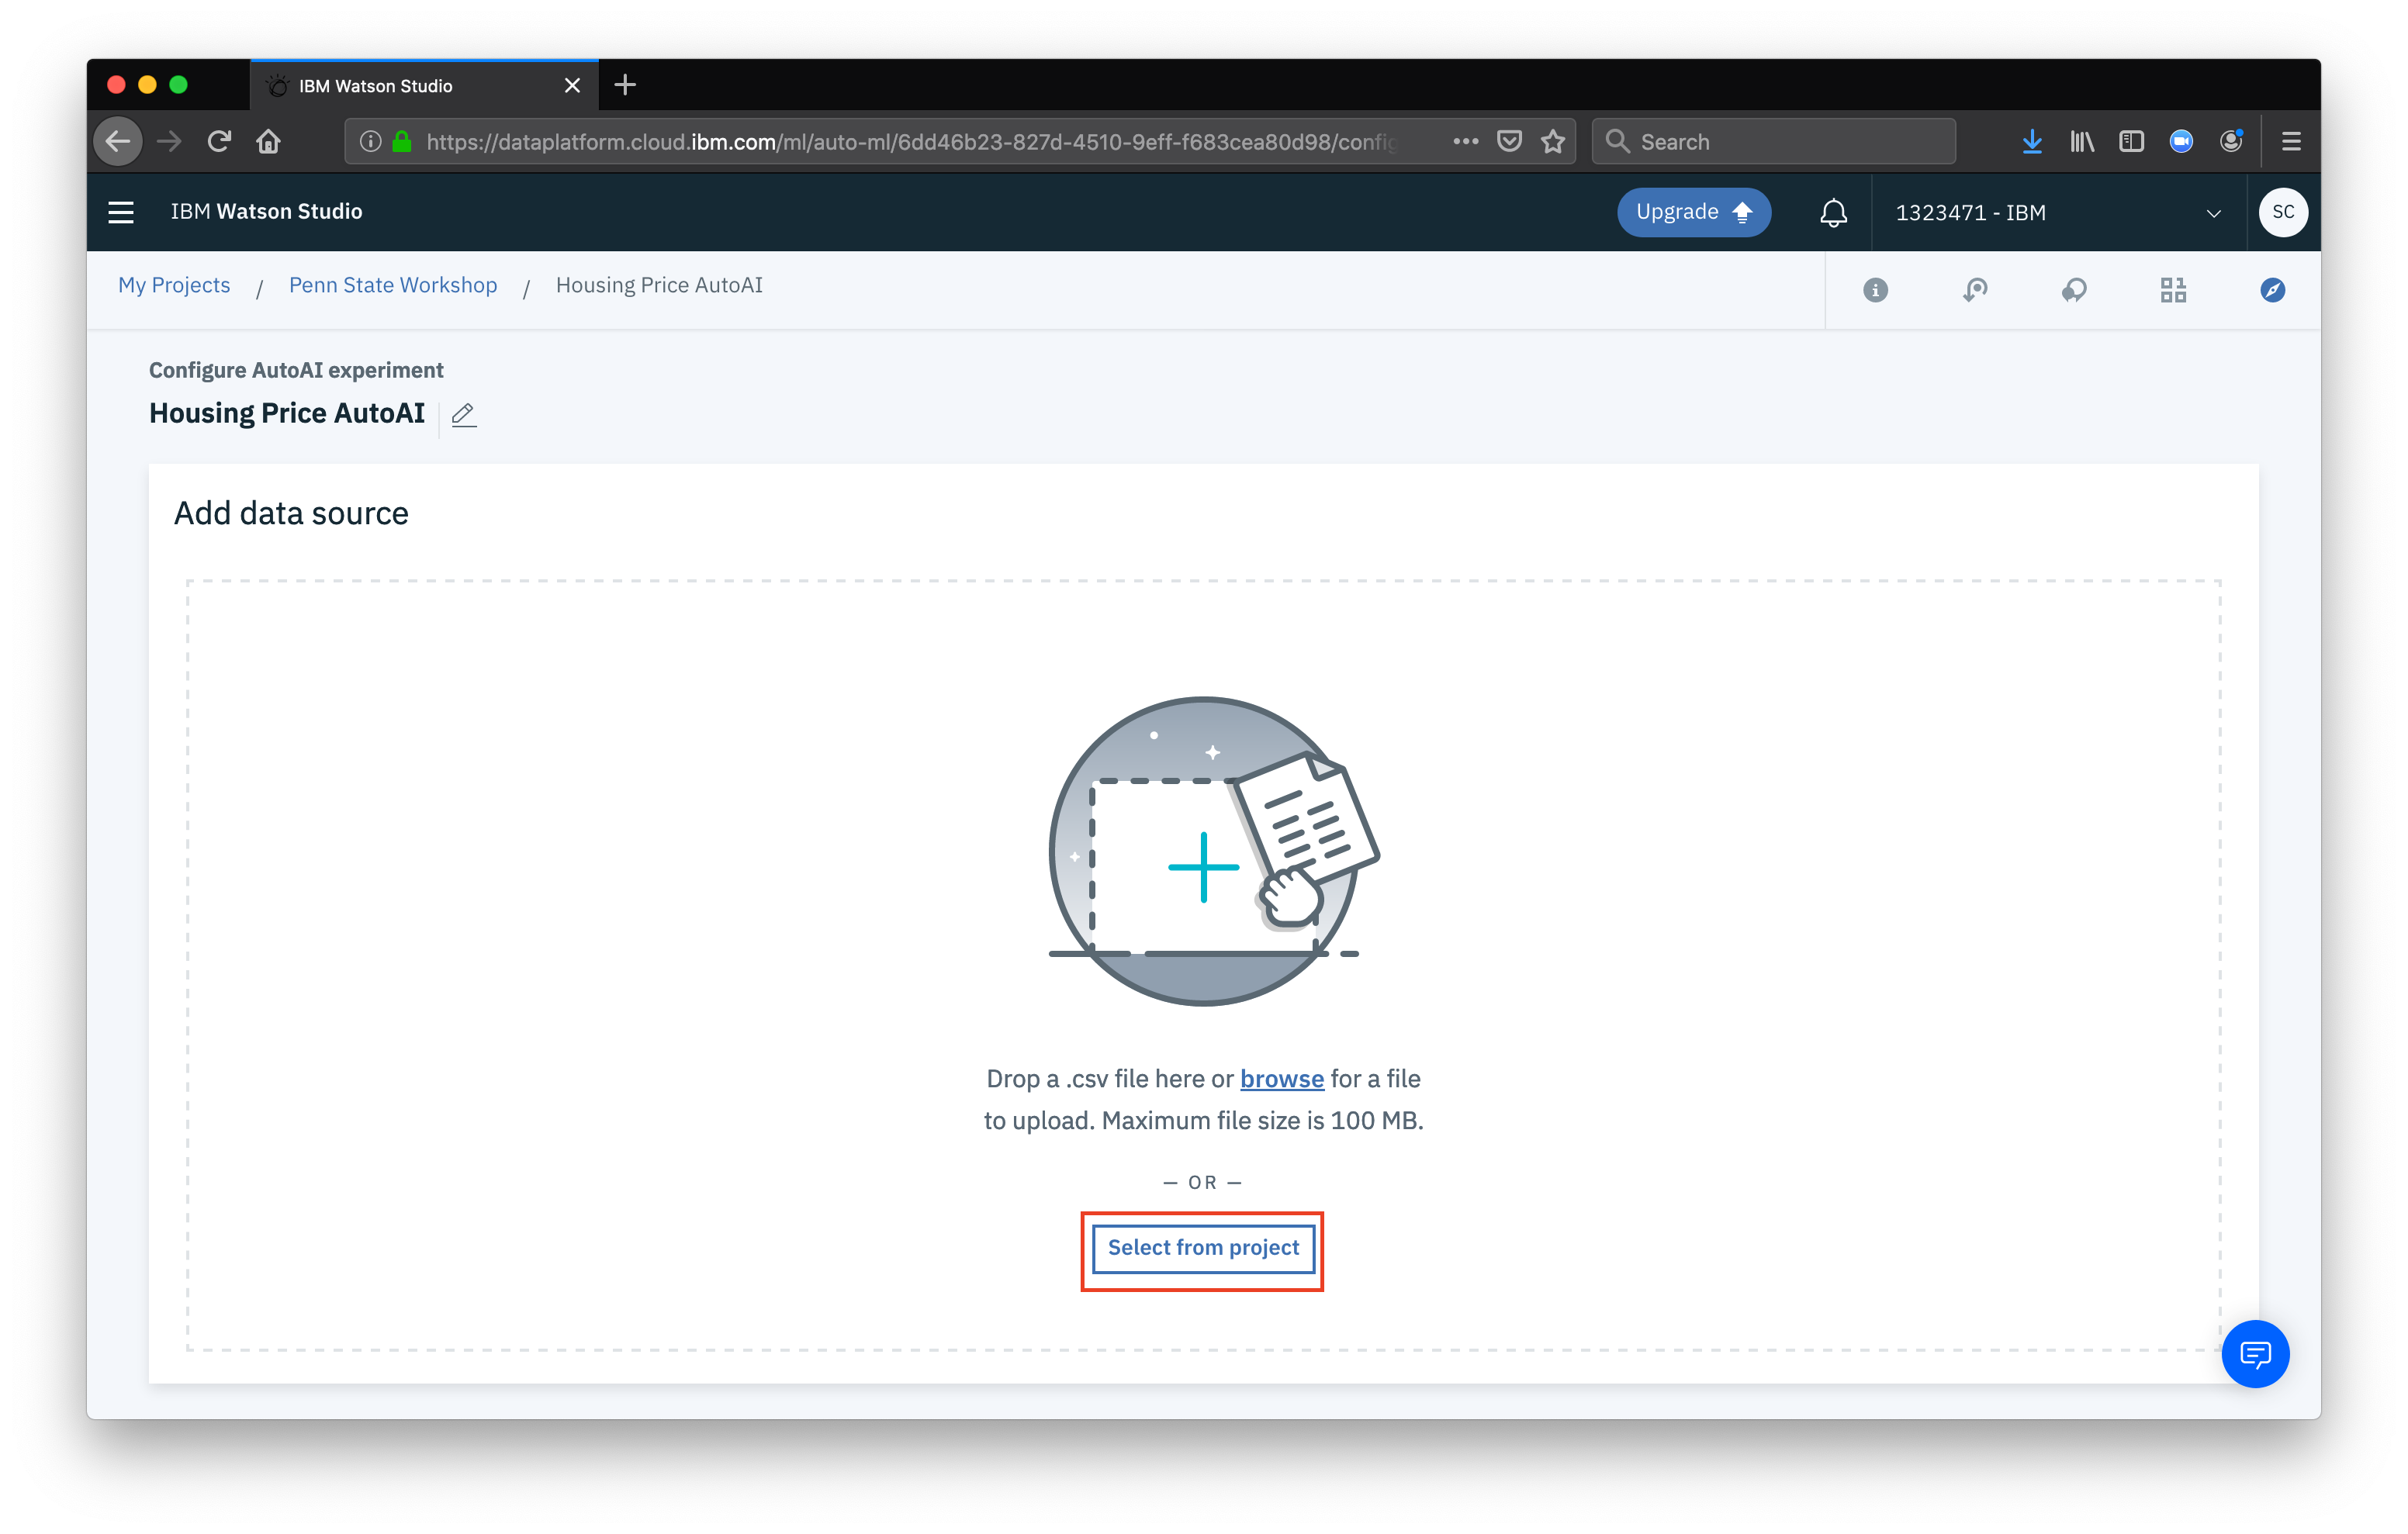
 Now we need to add a data source for our AutoAI exeriment. Click Select from project (or from file, if you want).
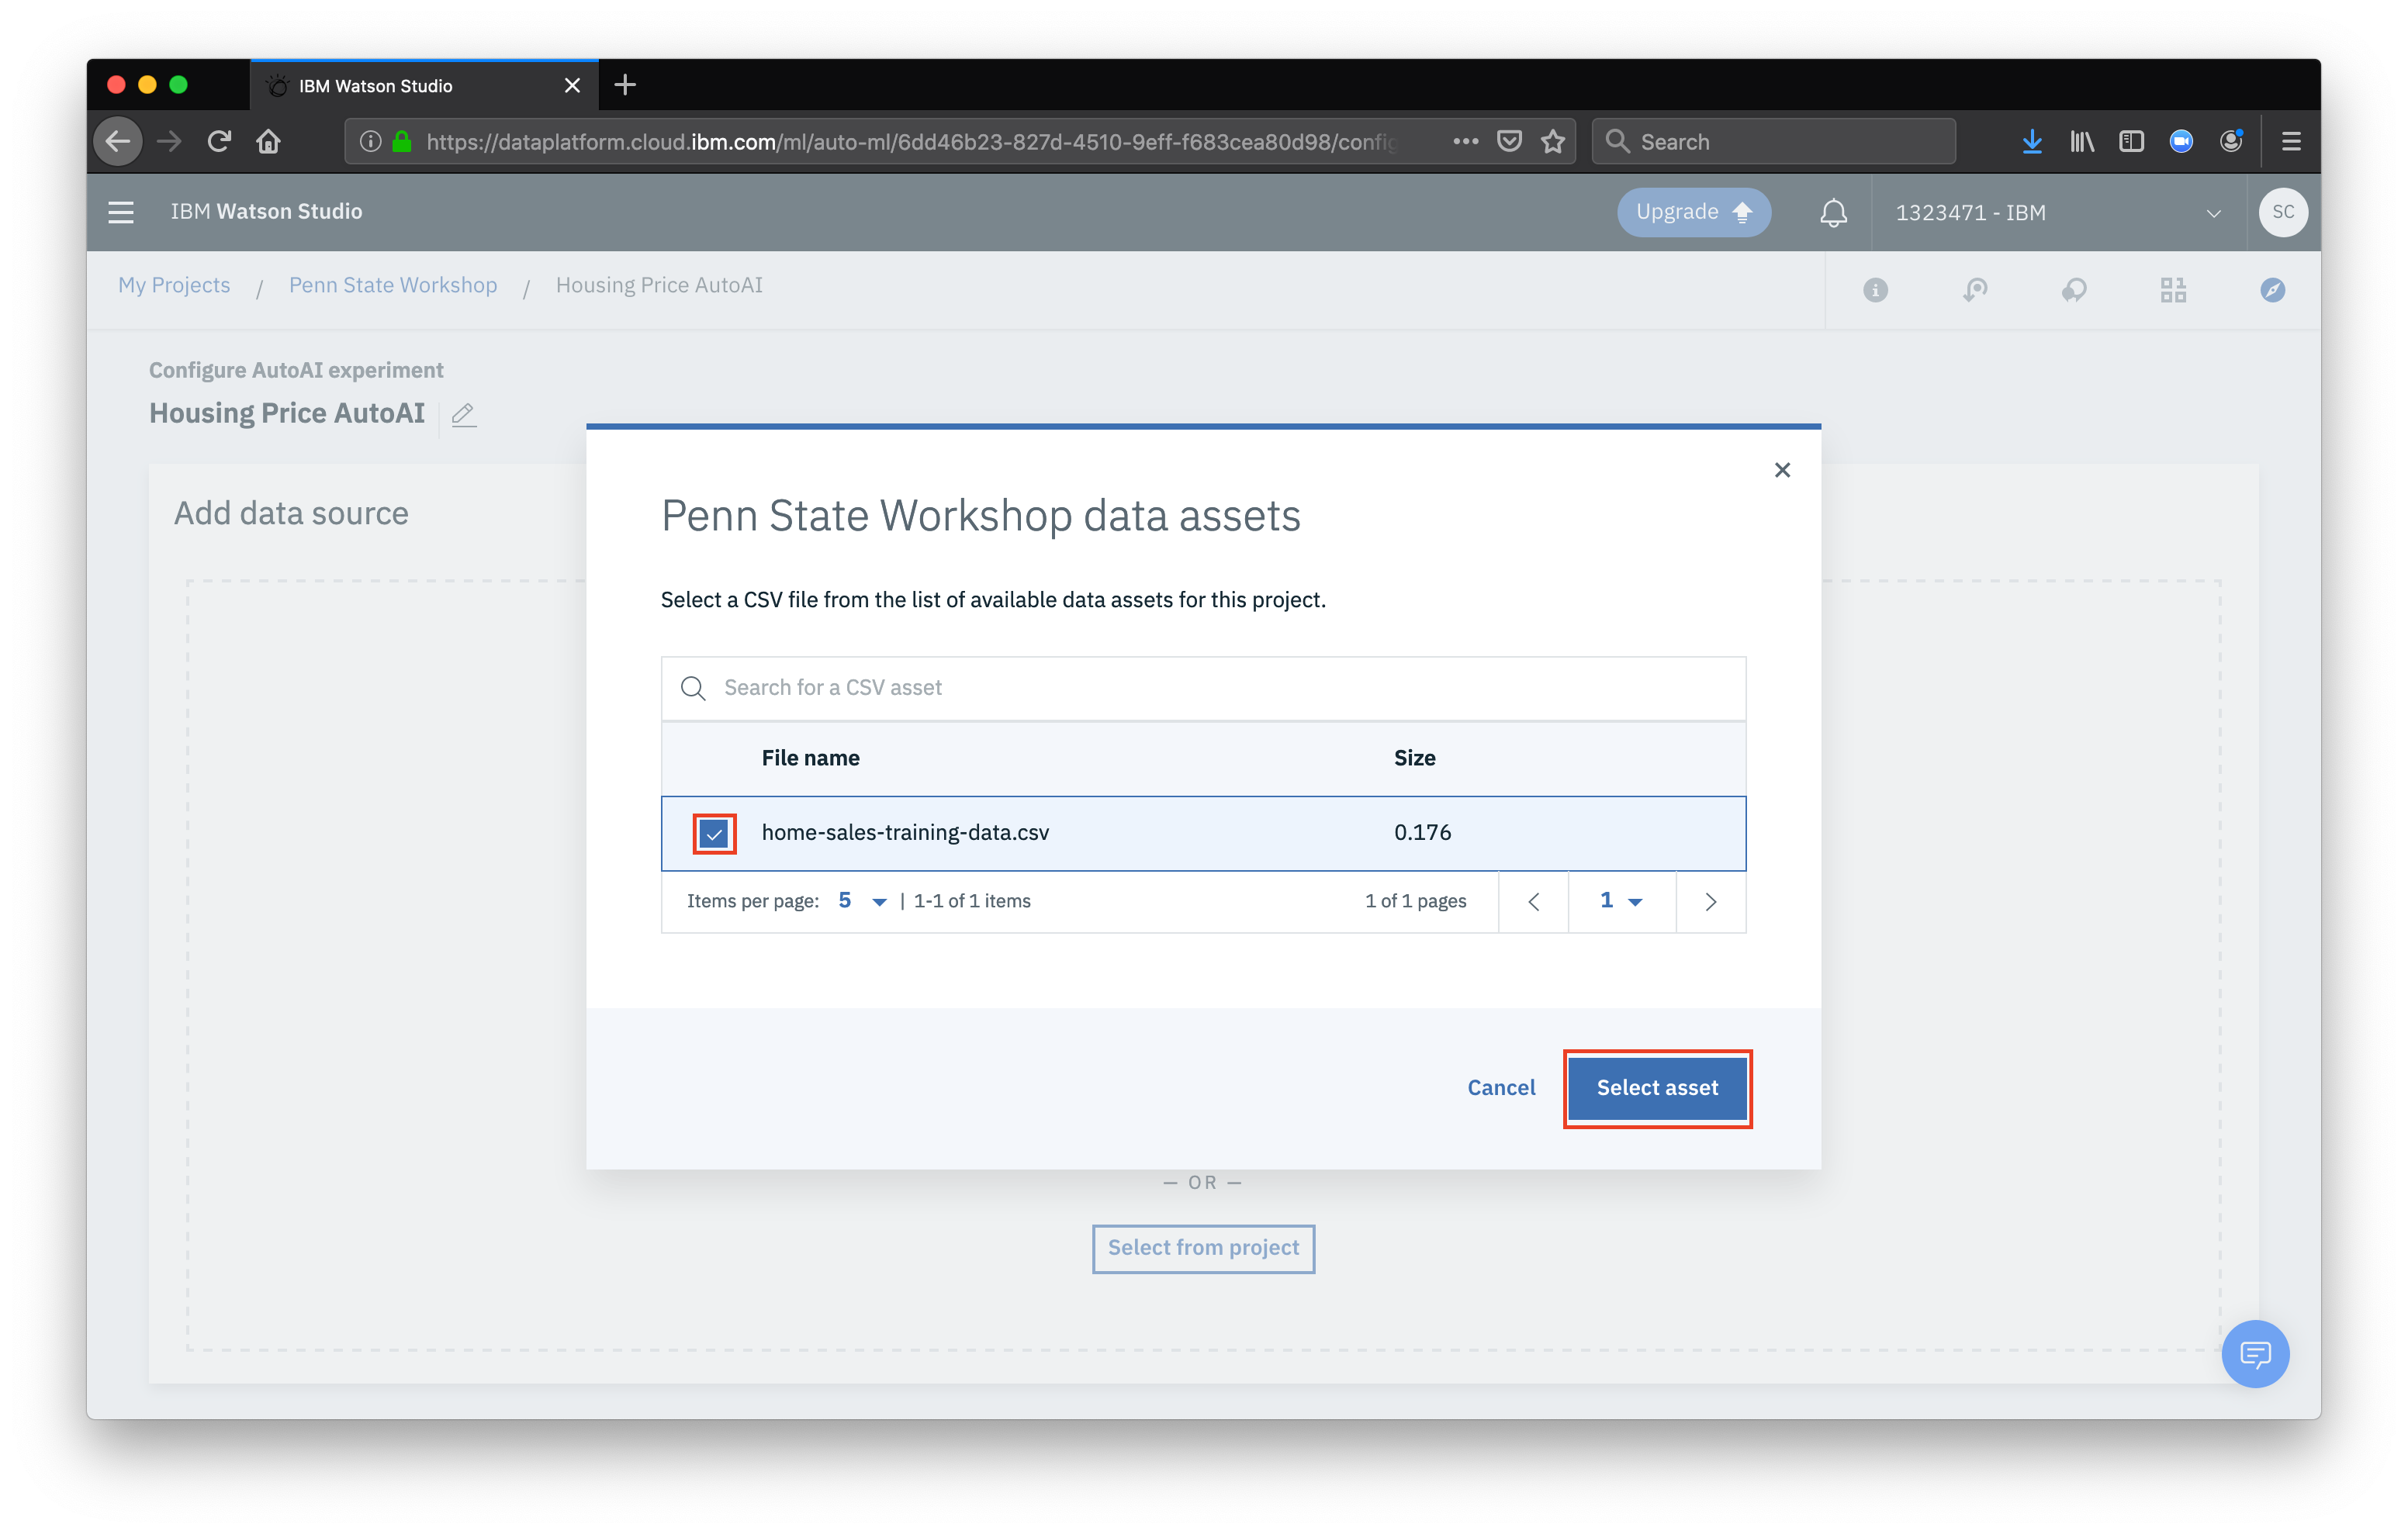
 Make sure our data asset is checked and click Select asset
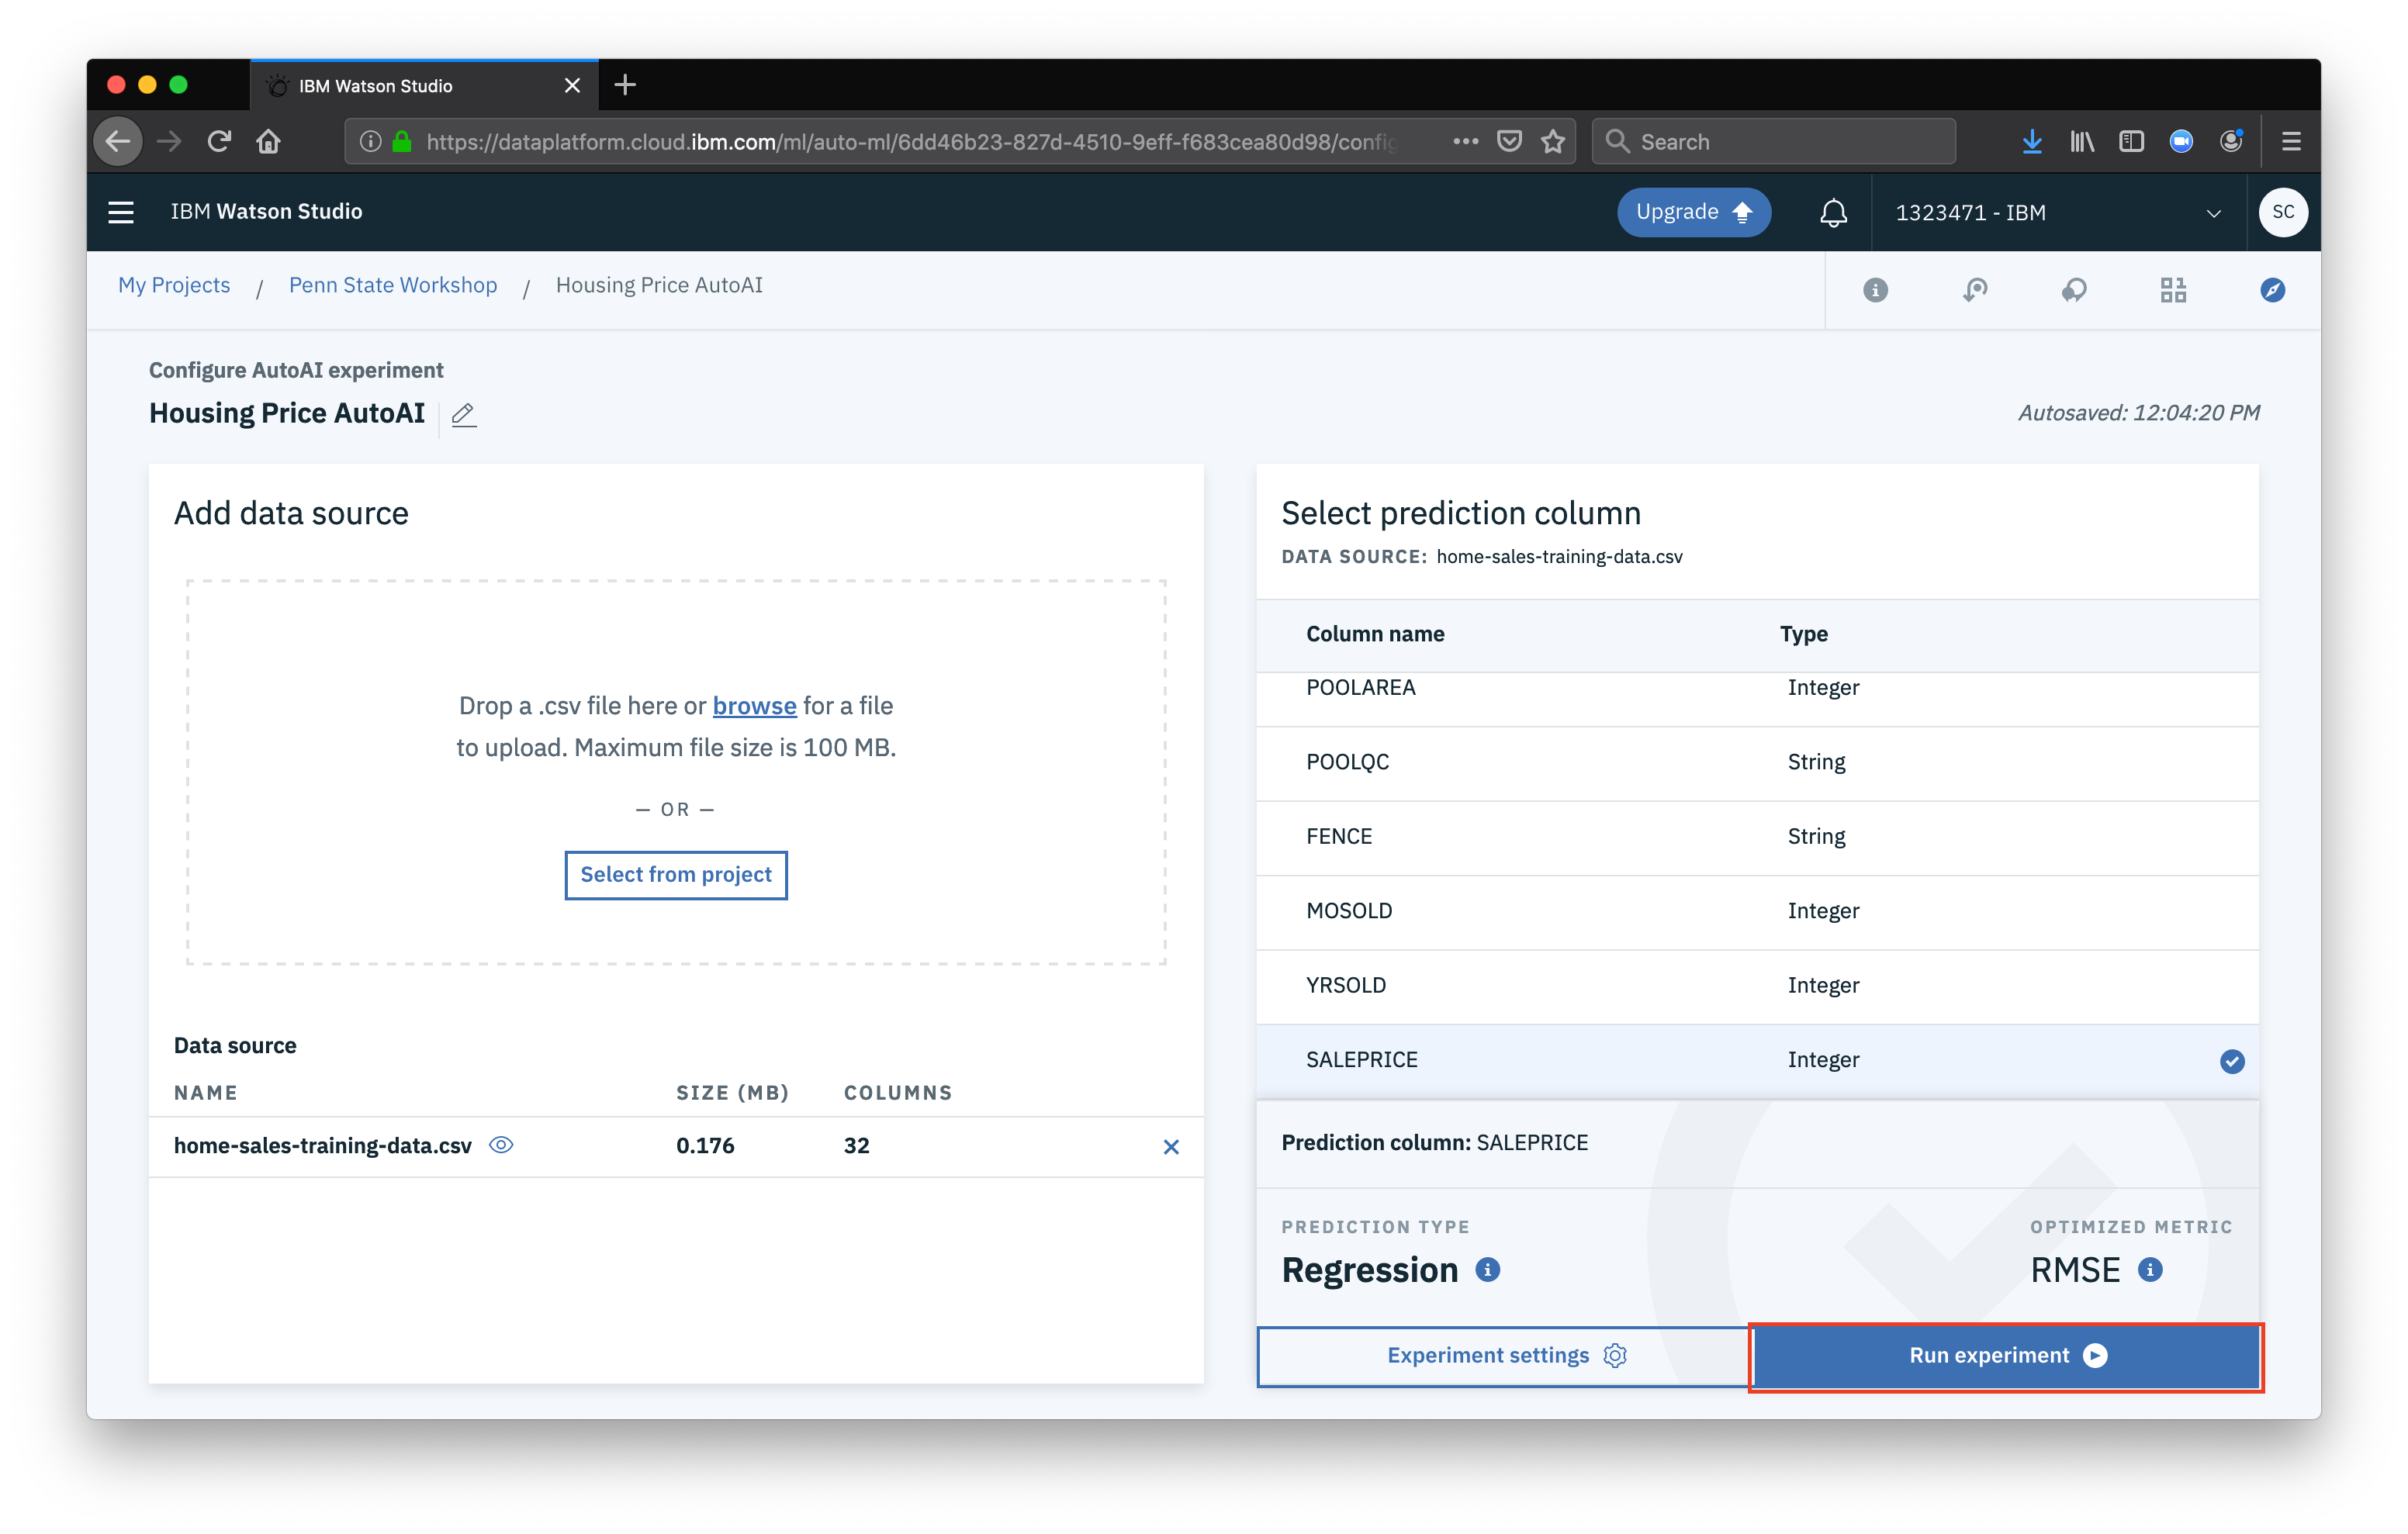
 Now that our dataset is loaded, the first thing we want to do is select the feature (column) that we want to predict for, in this case
 SALEPRICE will be used. Once you select the prediction column, click Experiment settings
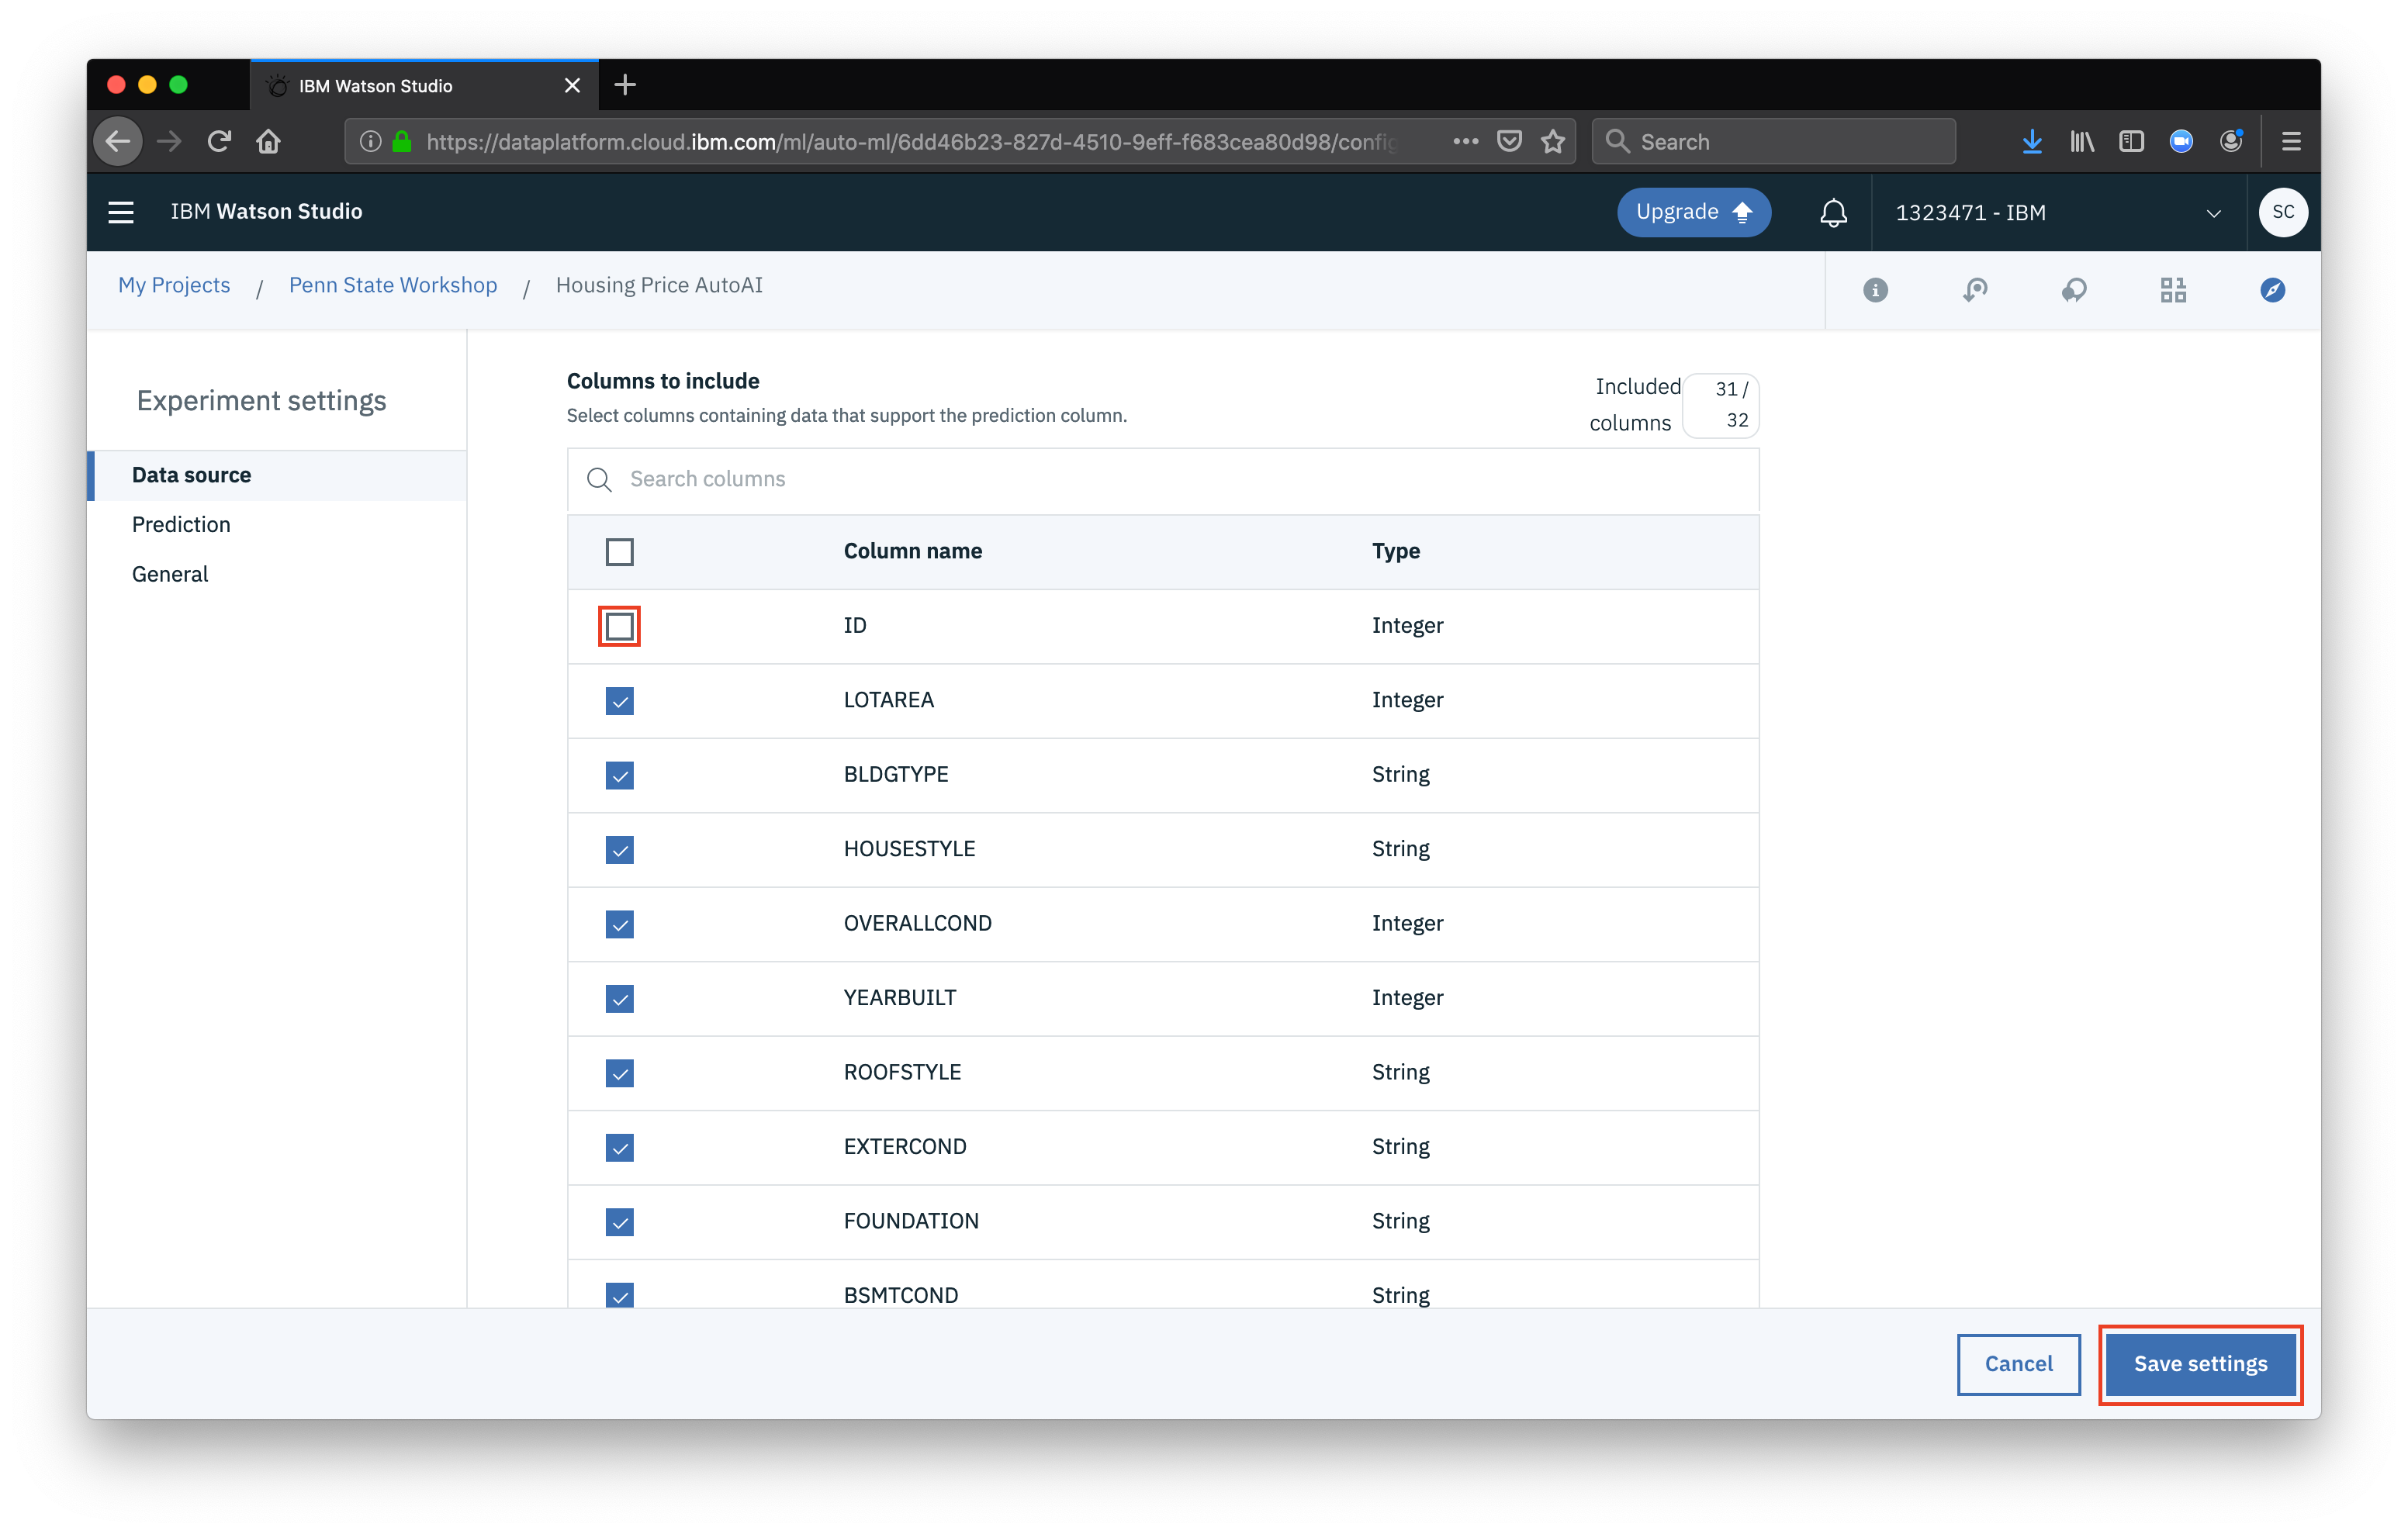
 Feel free to explore some of the settings, the main thing we want to do is remove the
 ID column from being included in our model (since the ID doesn’t tell us anything meaningful). Then click Save settings
 Now that everything is configured, click Run experiment
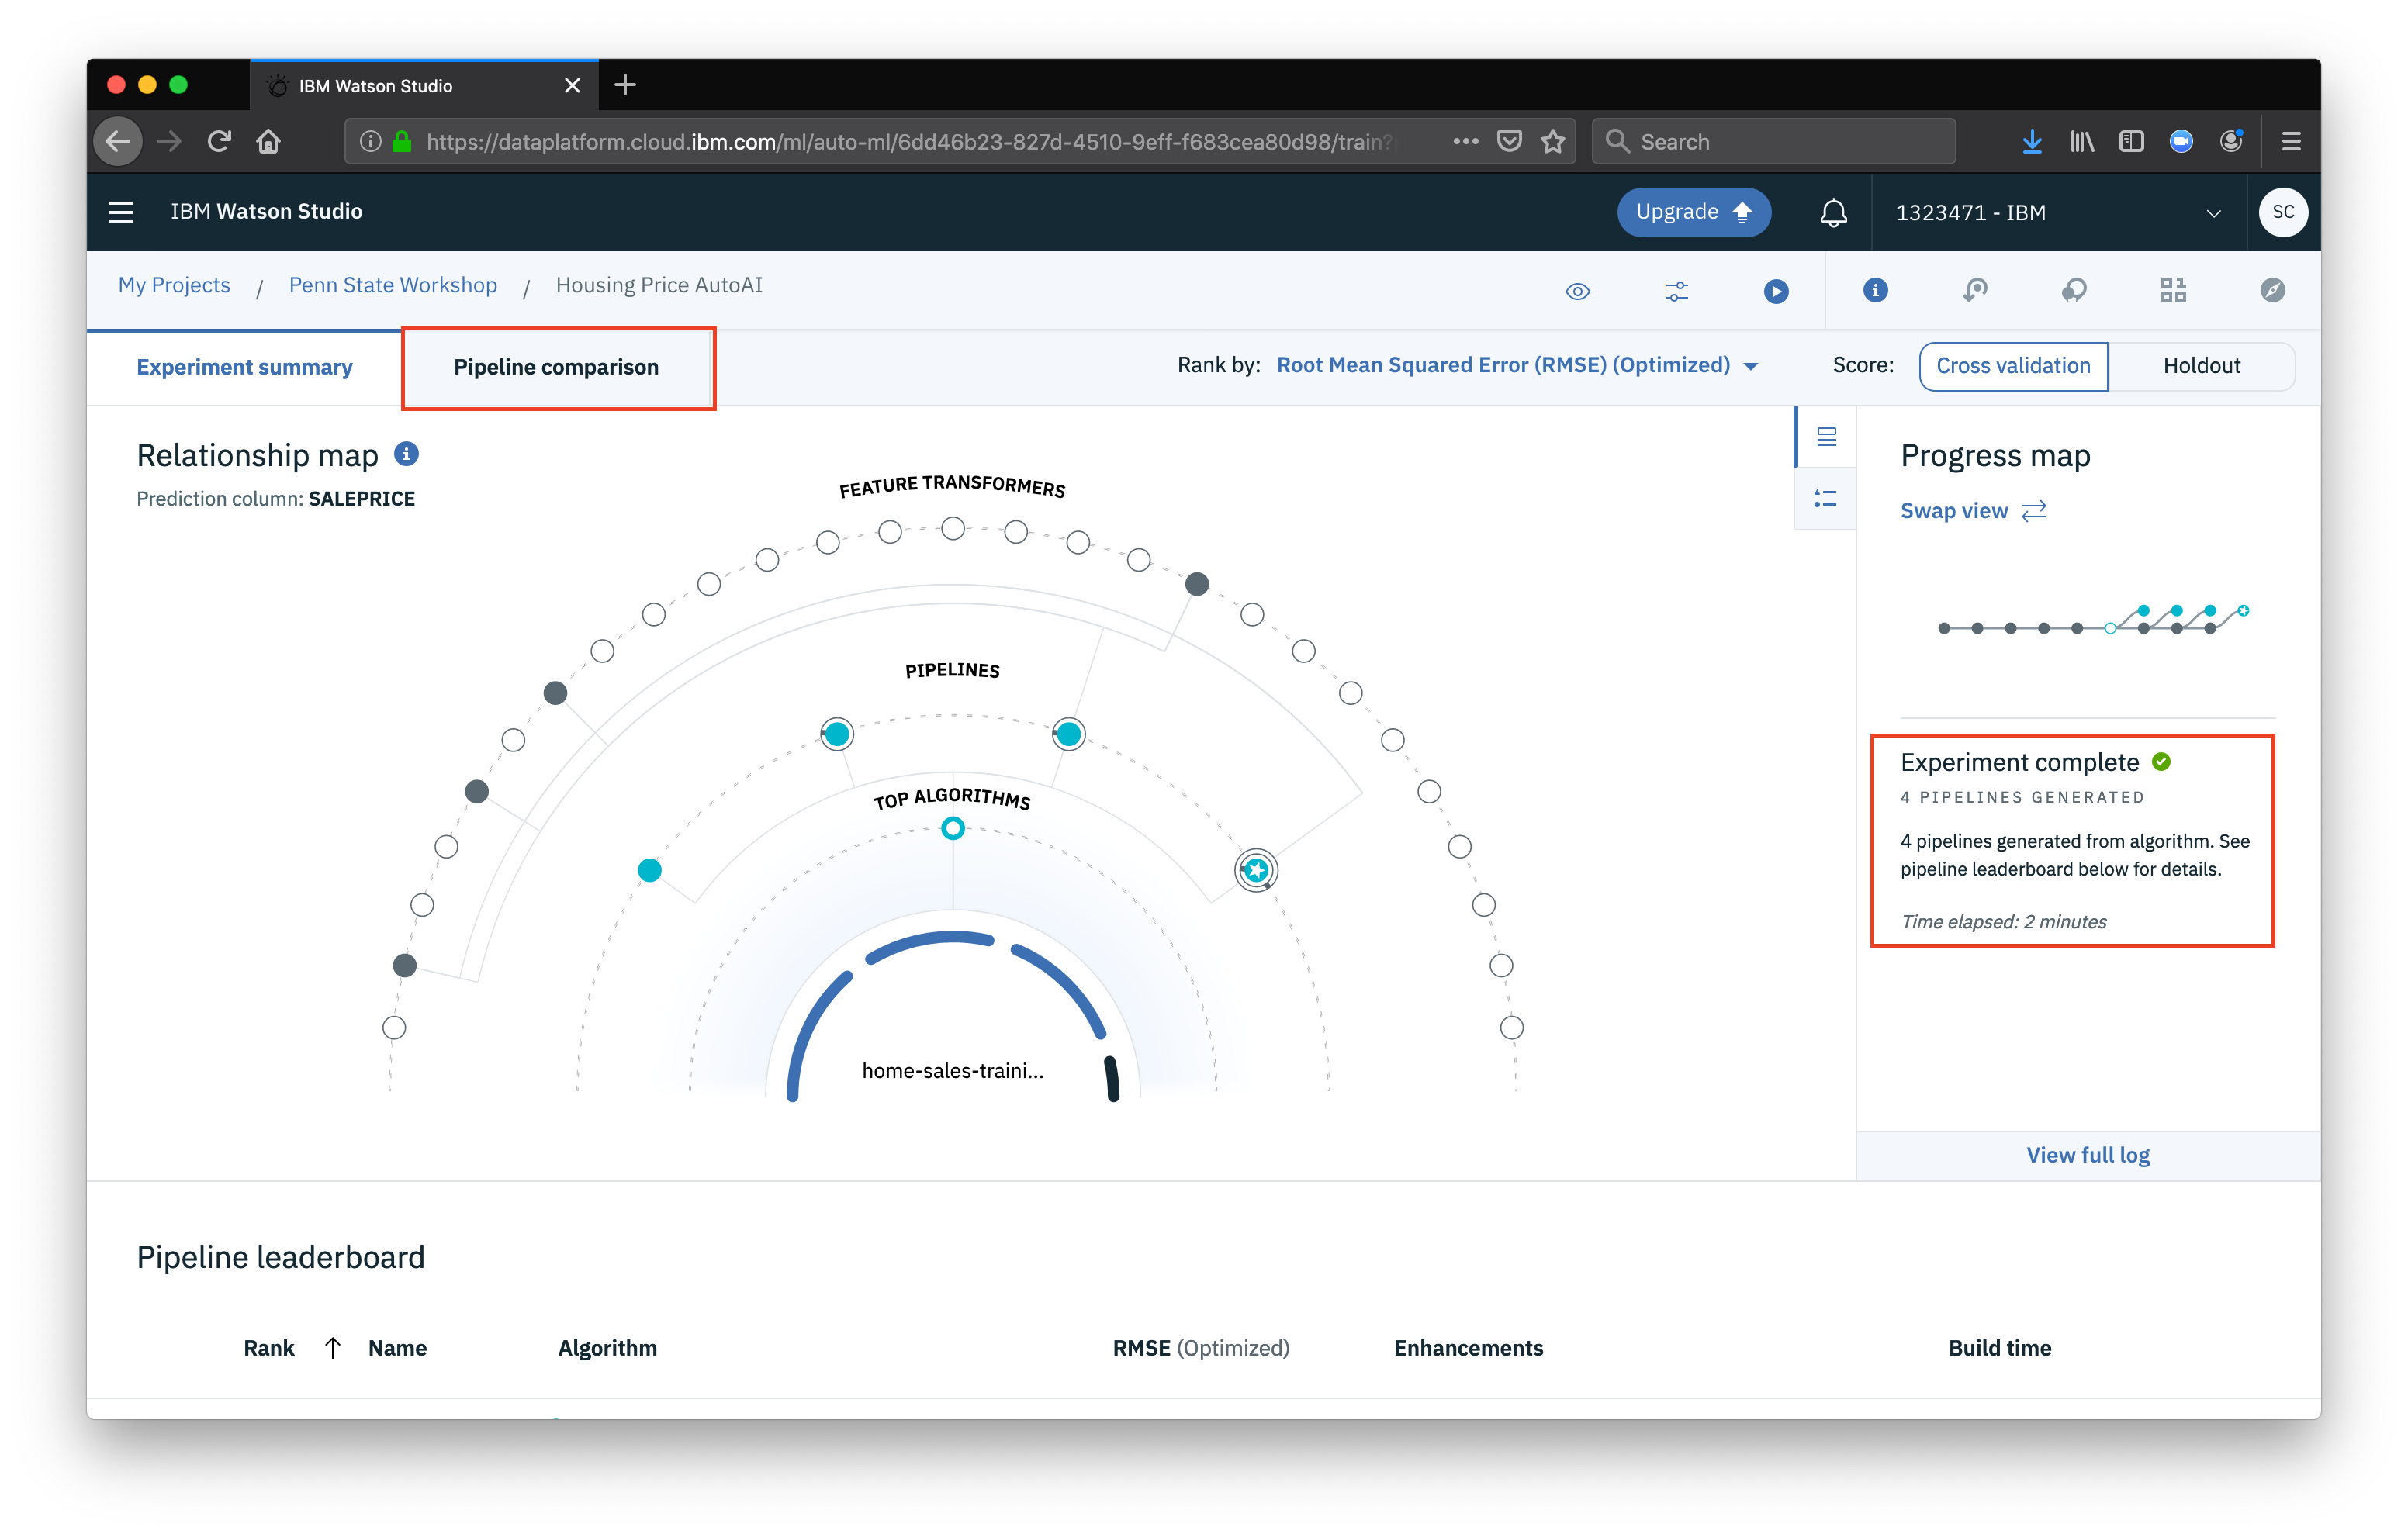
 At this point our job has kicked off and the tool is running various experiments. Once it is completed, you will see it displayed as complete under the progress map. We can then look at the experiment results by clicking the Pipeline comparison tab
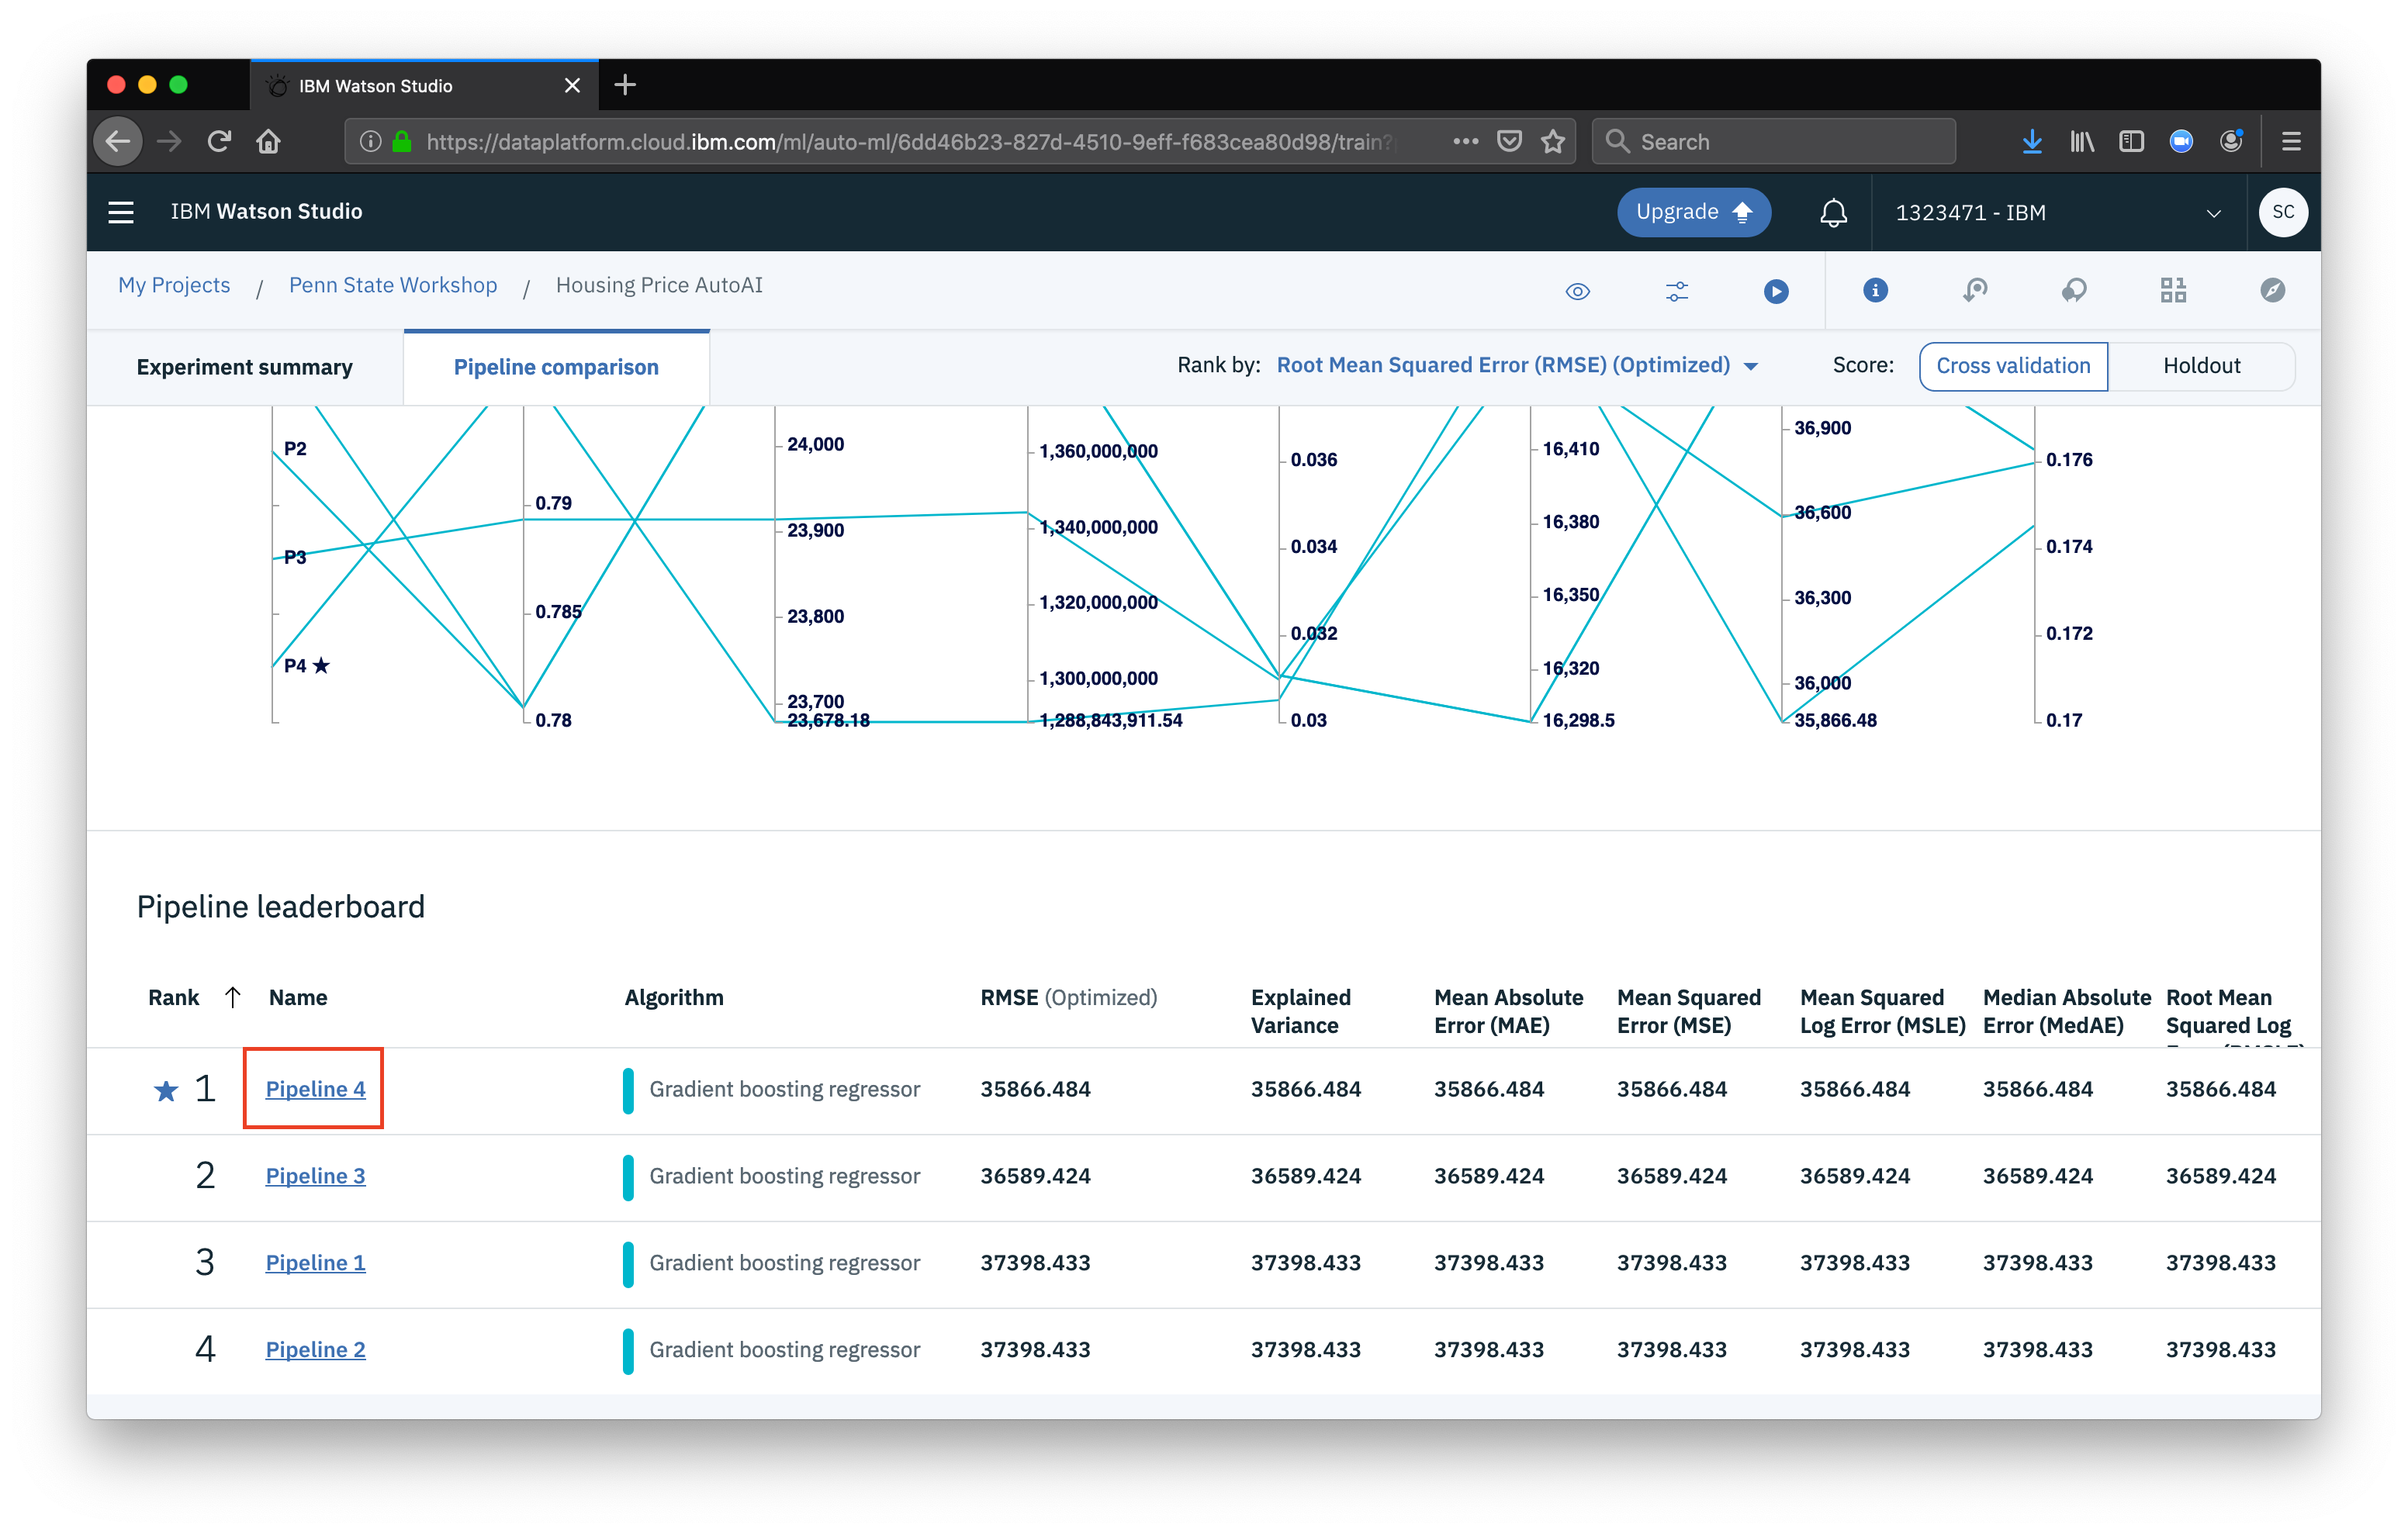
 Each pipeline we can think of as an individual model, where we are testing an algorithm, with various parameters and features being used. The pipelines are ranked based on performance. You can select an indivudal pipeline to see more info about the model created. For now, let’s look at the one that performed the best.
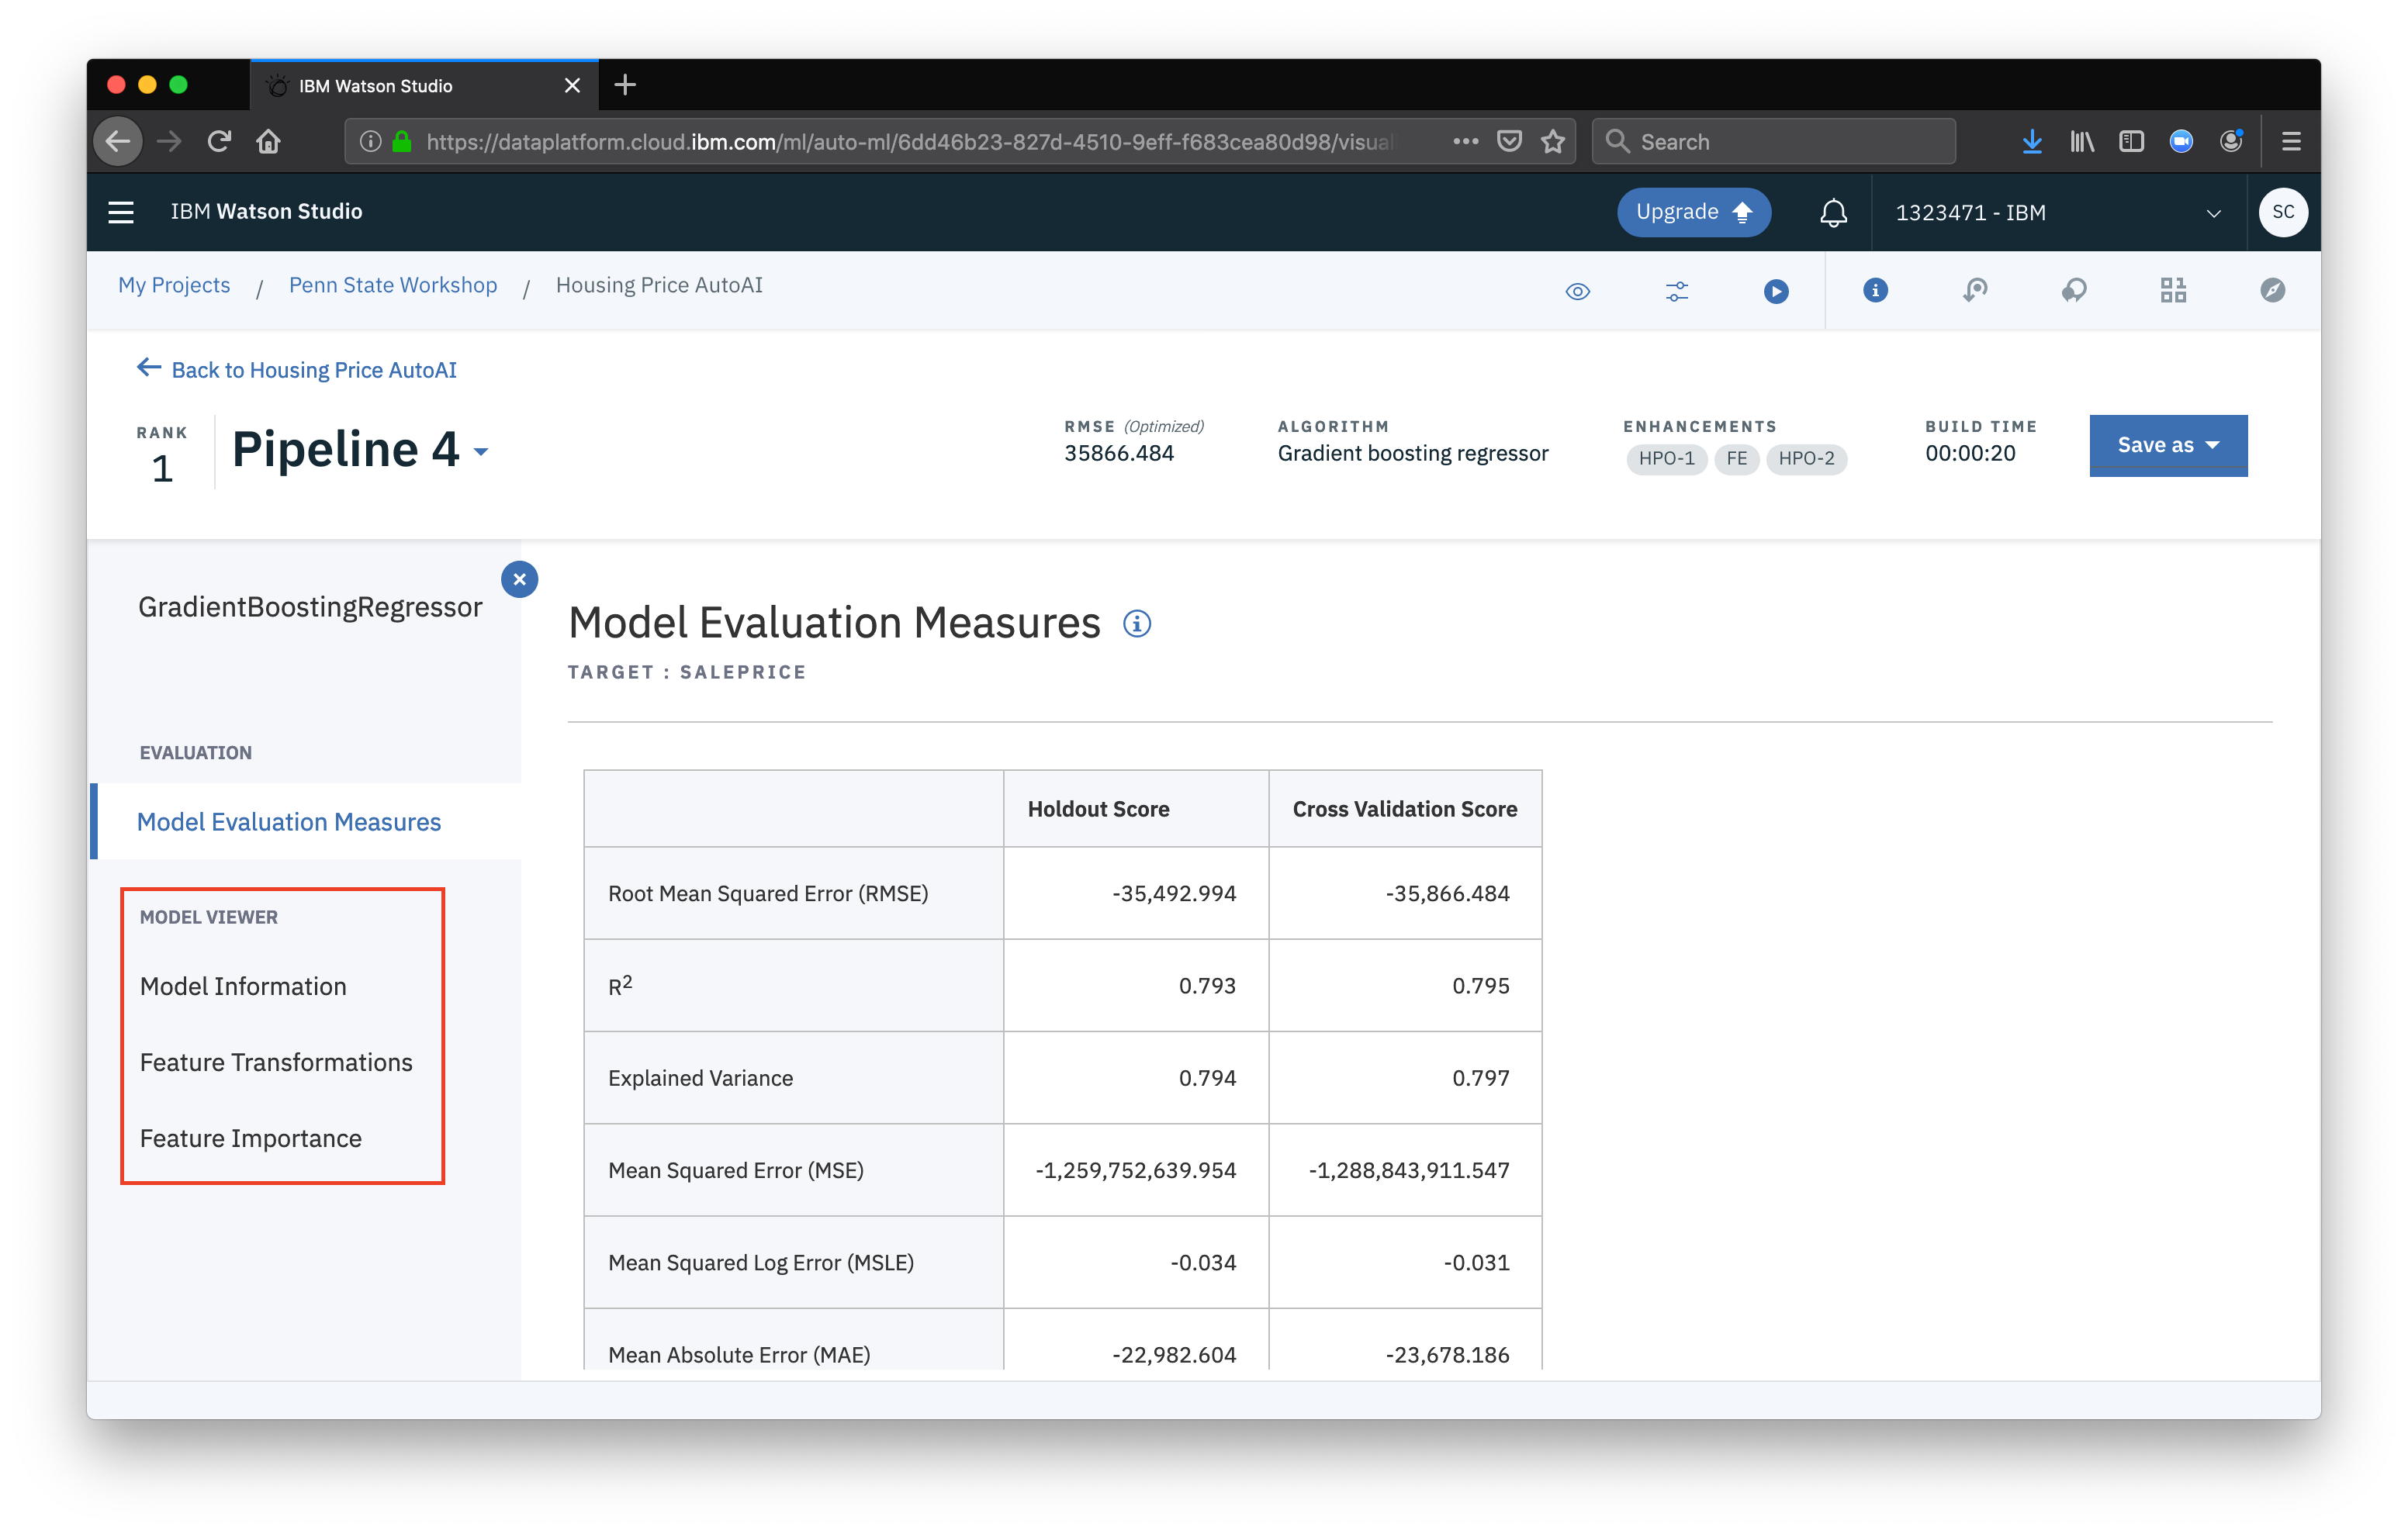
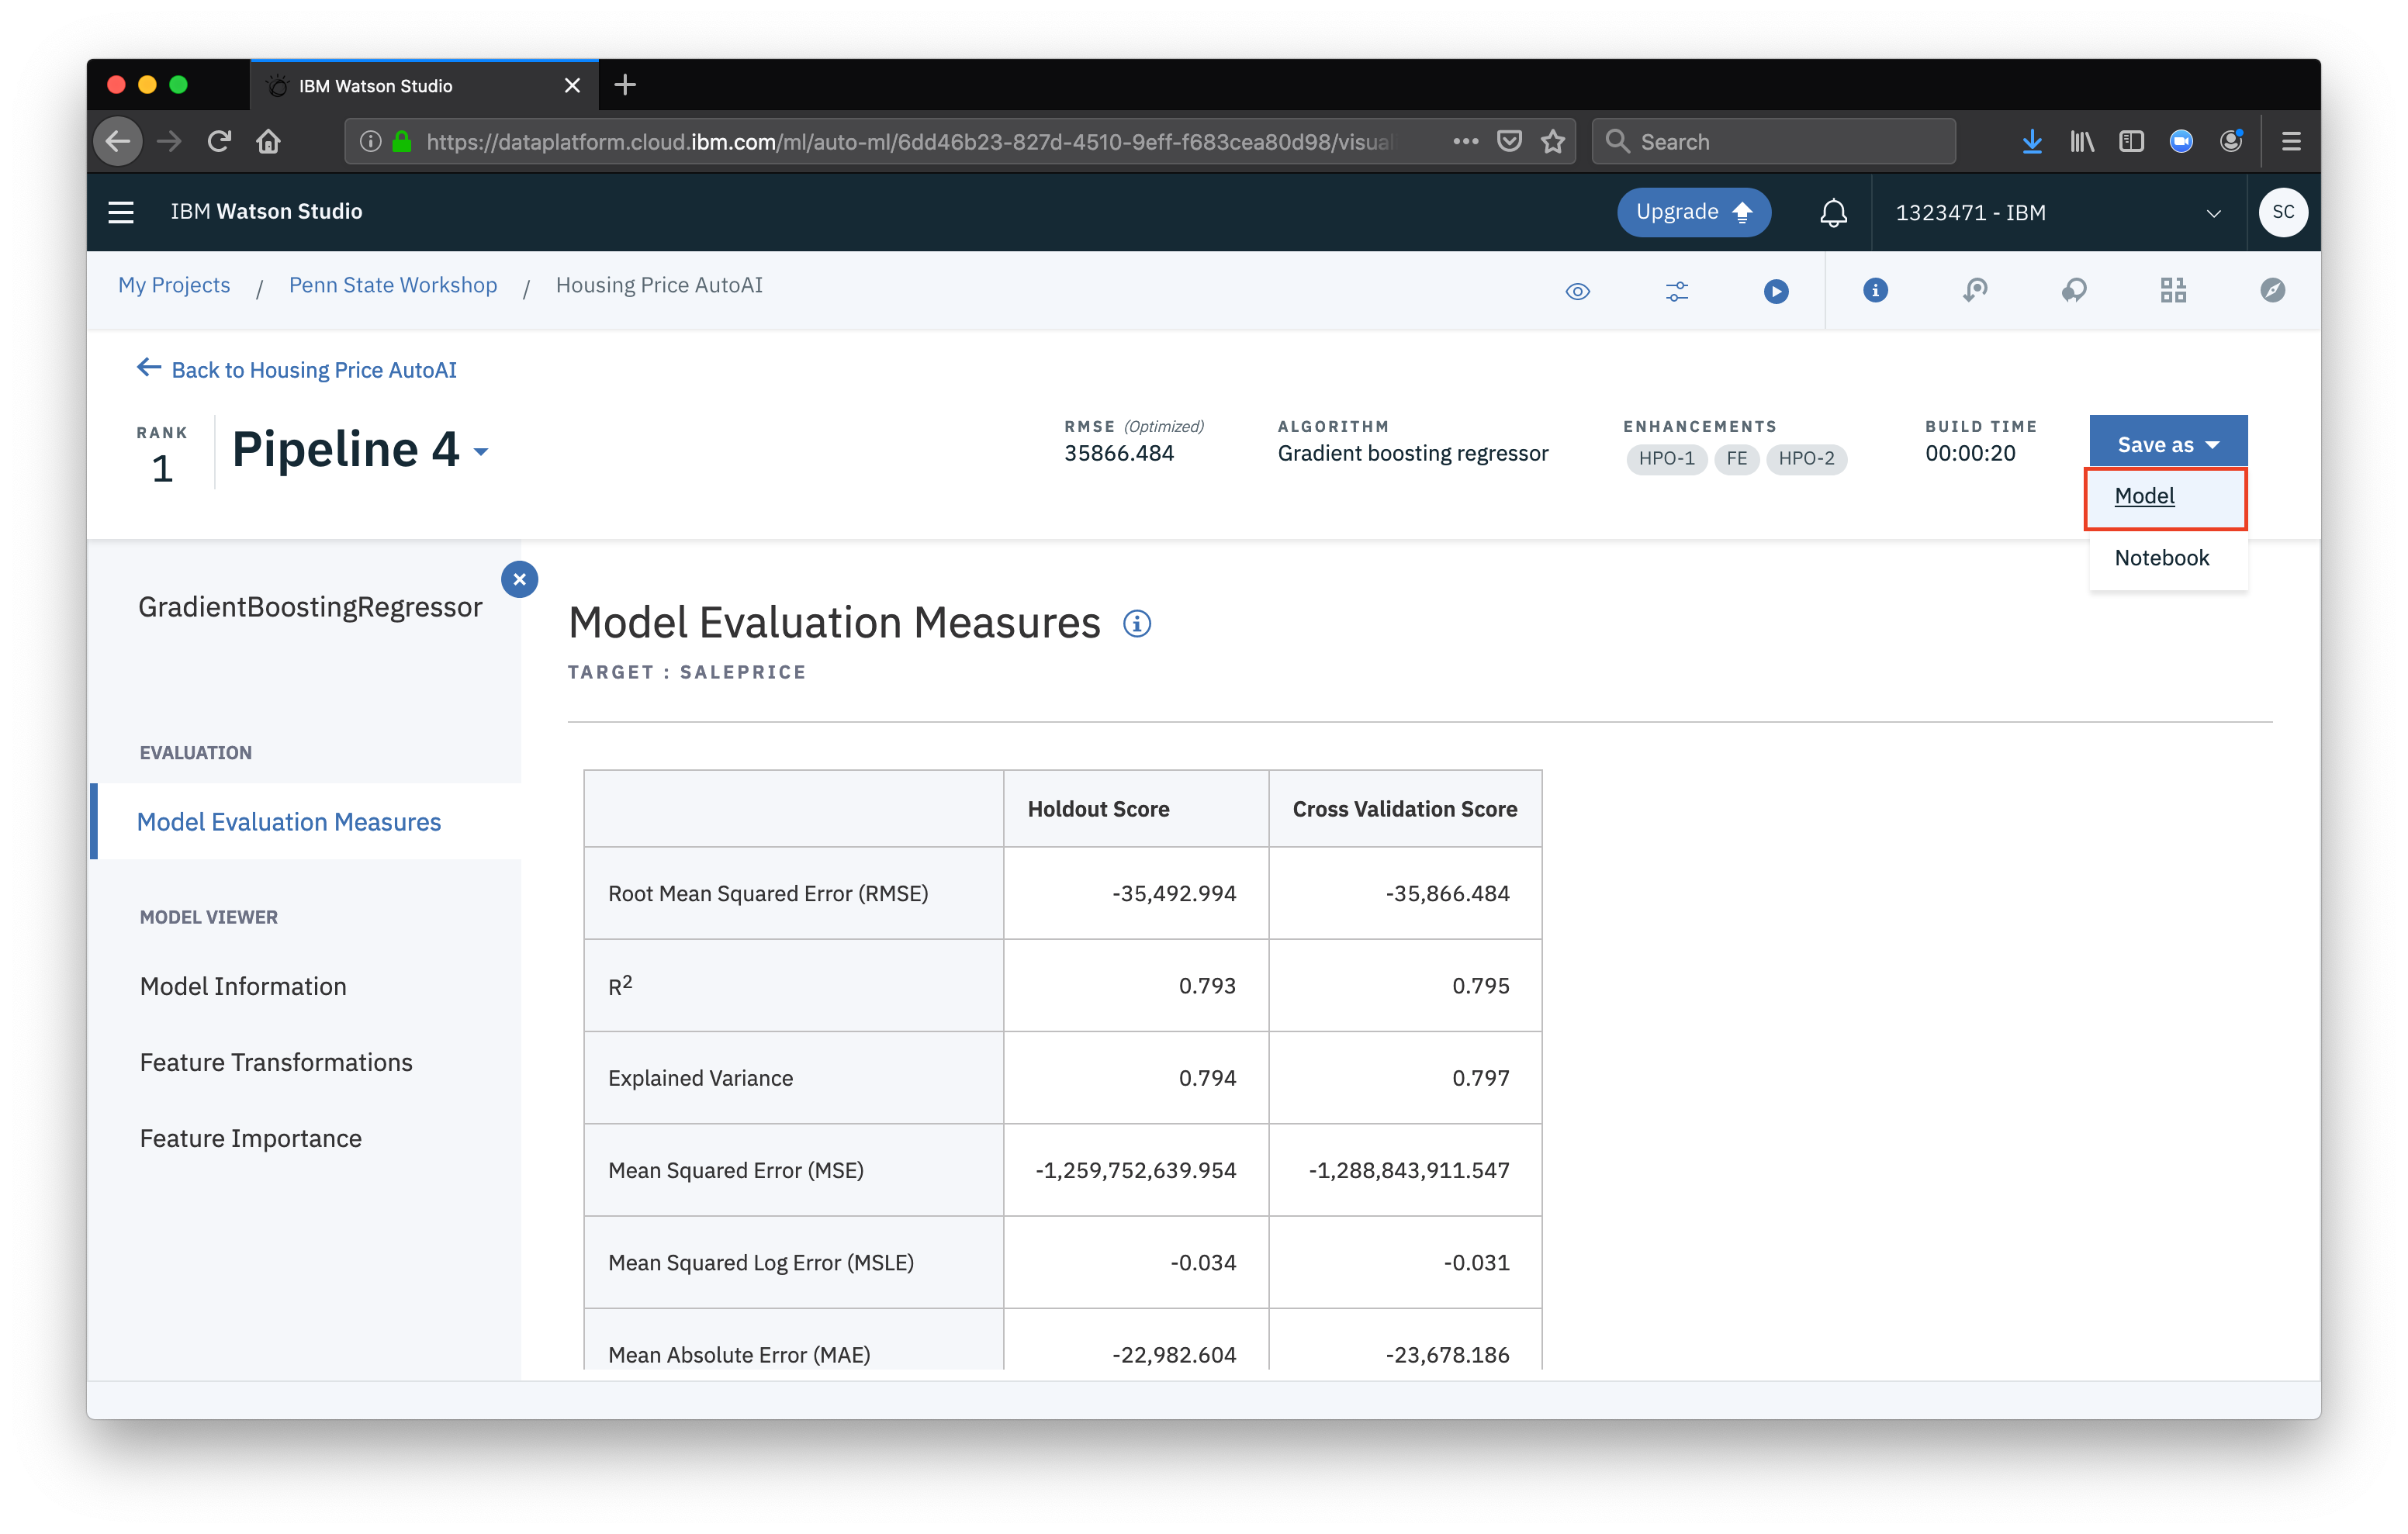
 From the pipeline viewer we can see all sorts of information about the configuration used for the model as well as the evaluation measures.
 Once satisfied with a model, we can prepare to deploy it. First, select Save as then select Model
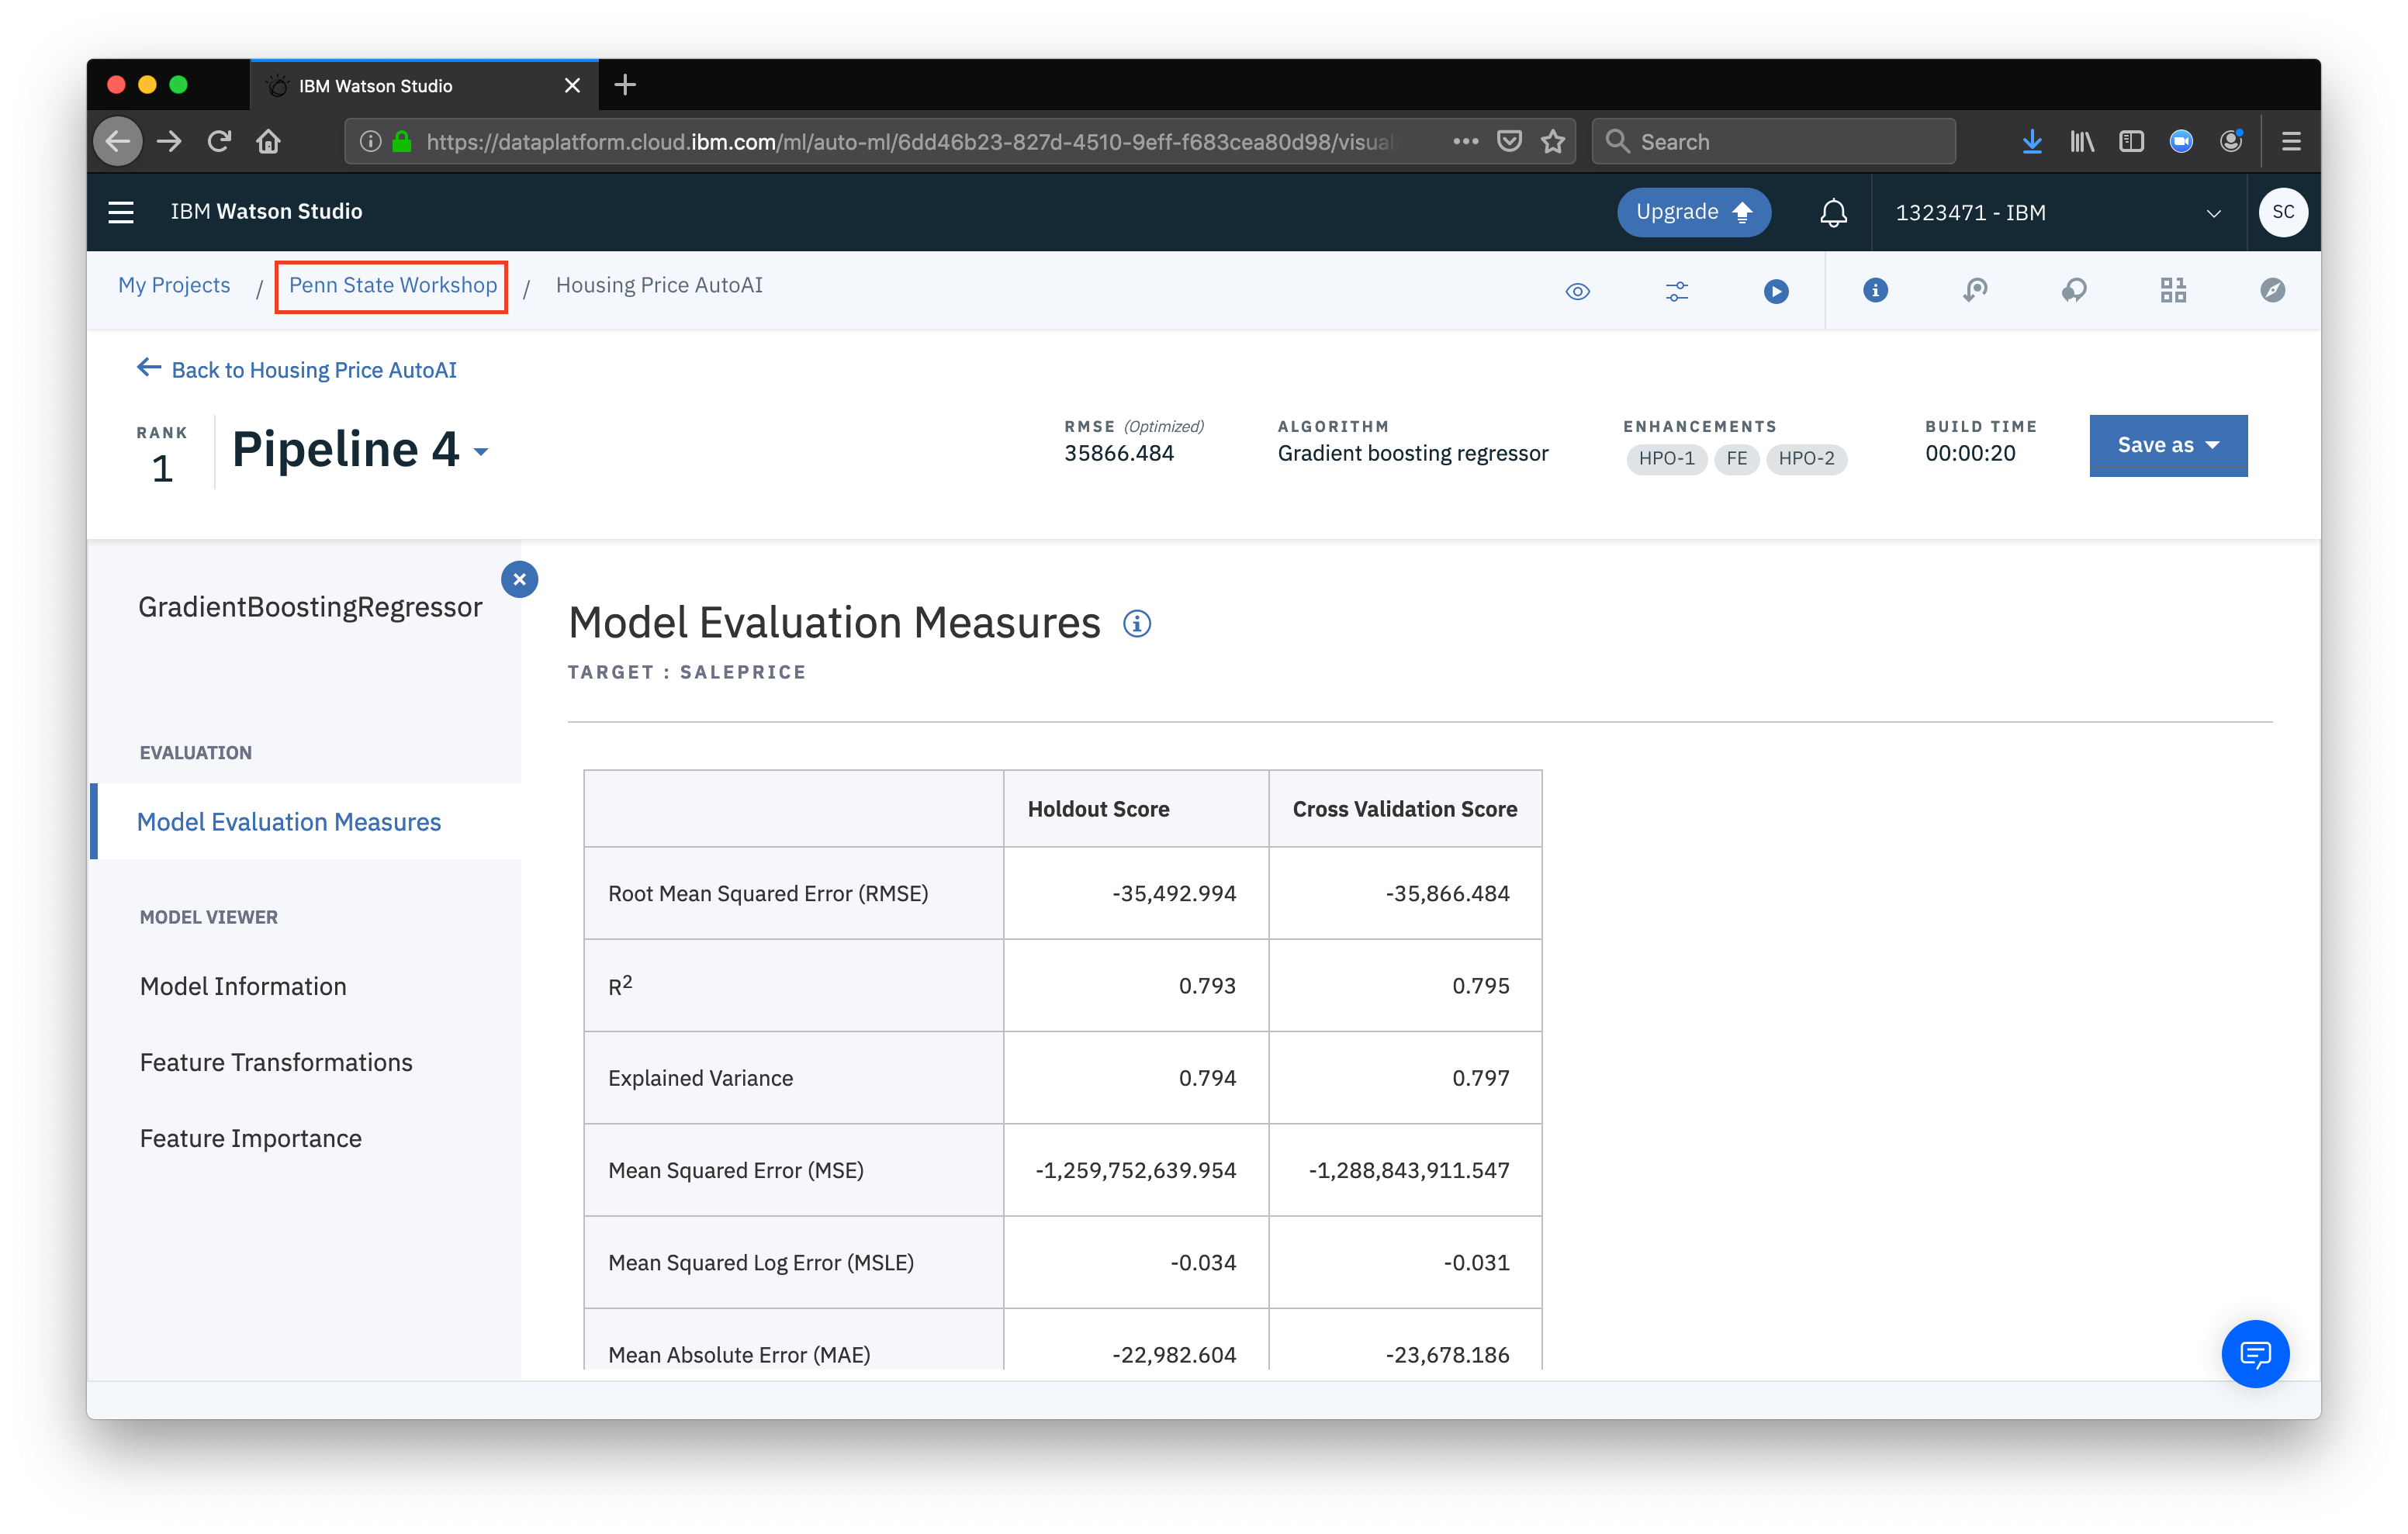
 Now, navigate back to the project overview
 Go to the Assets tab and scroll down to the Models section
 In the Models section, find the model created by AutoAI, click the more button (the three vertical dots) and click Deploy
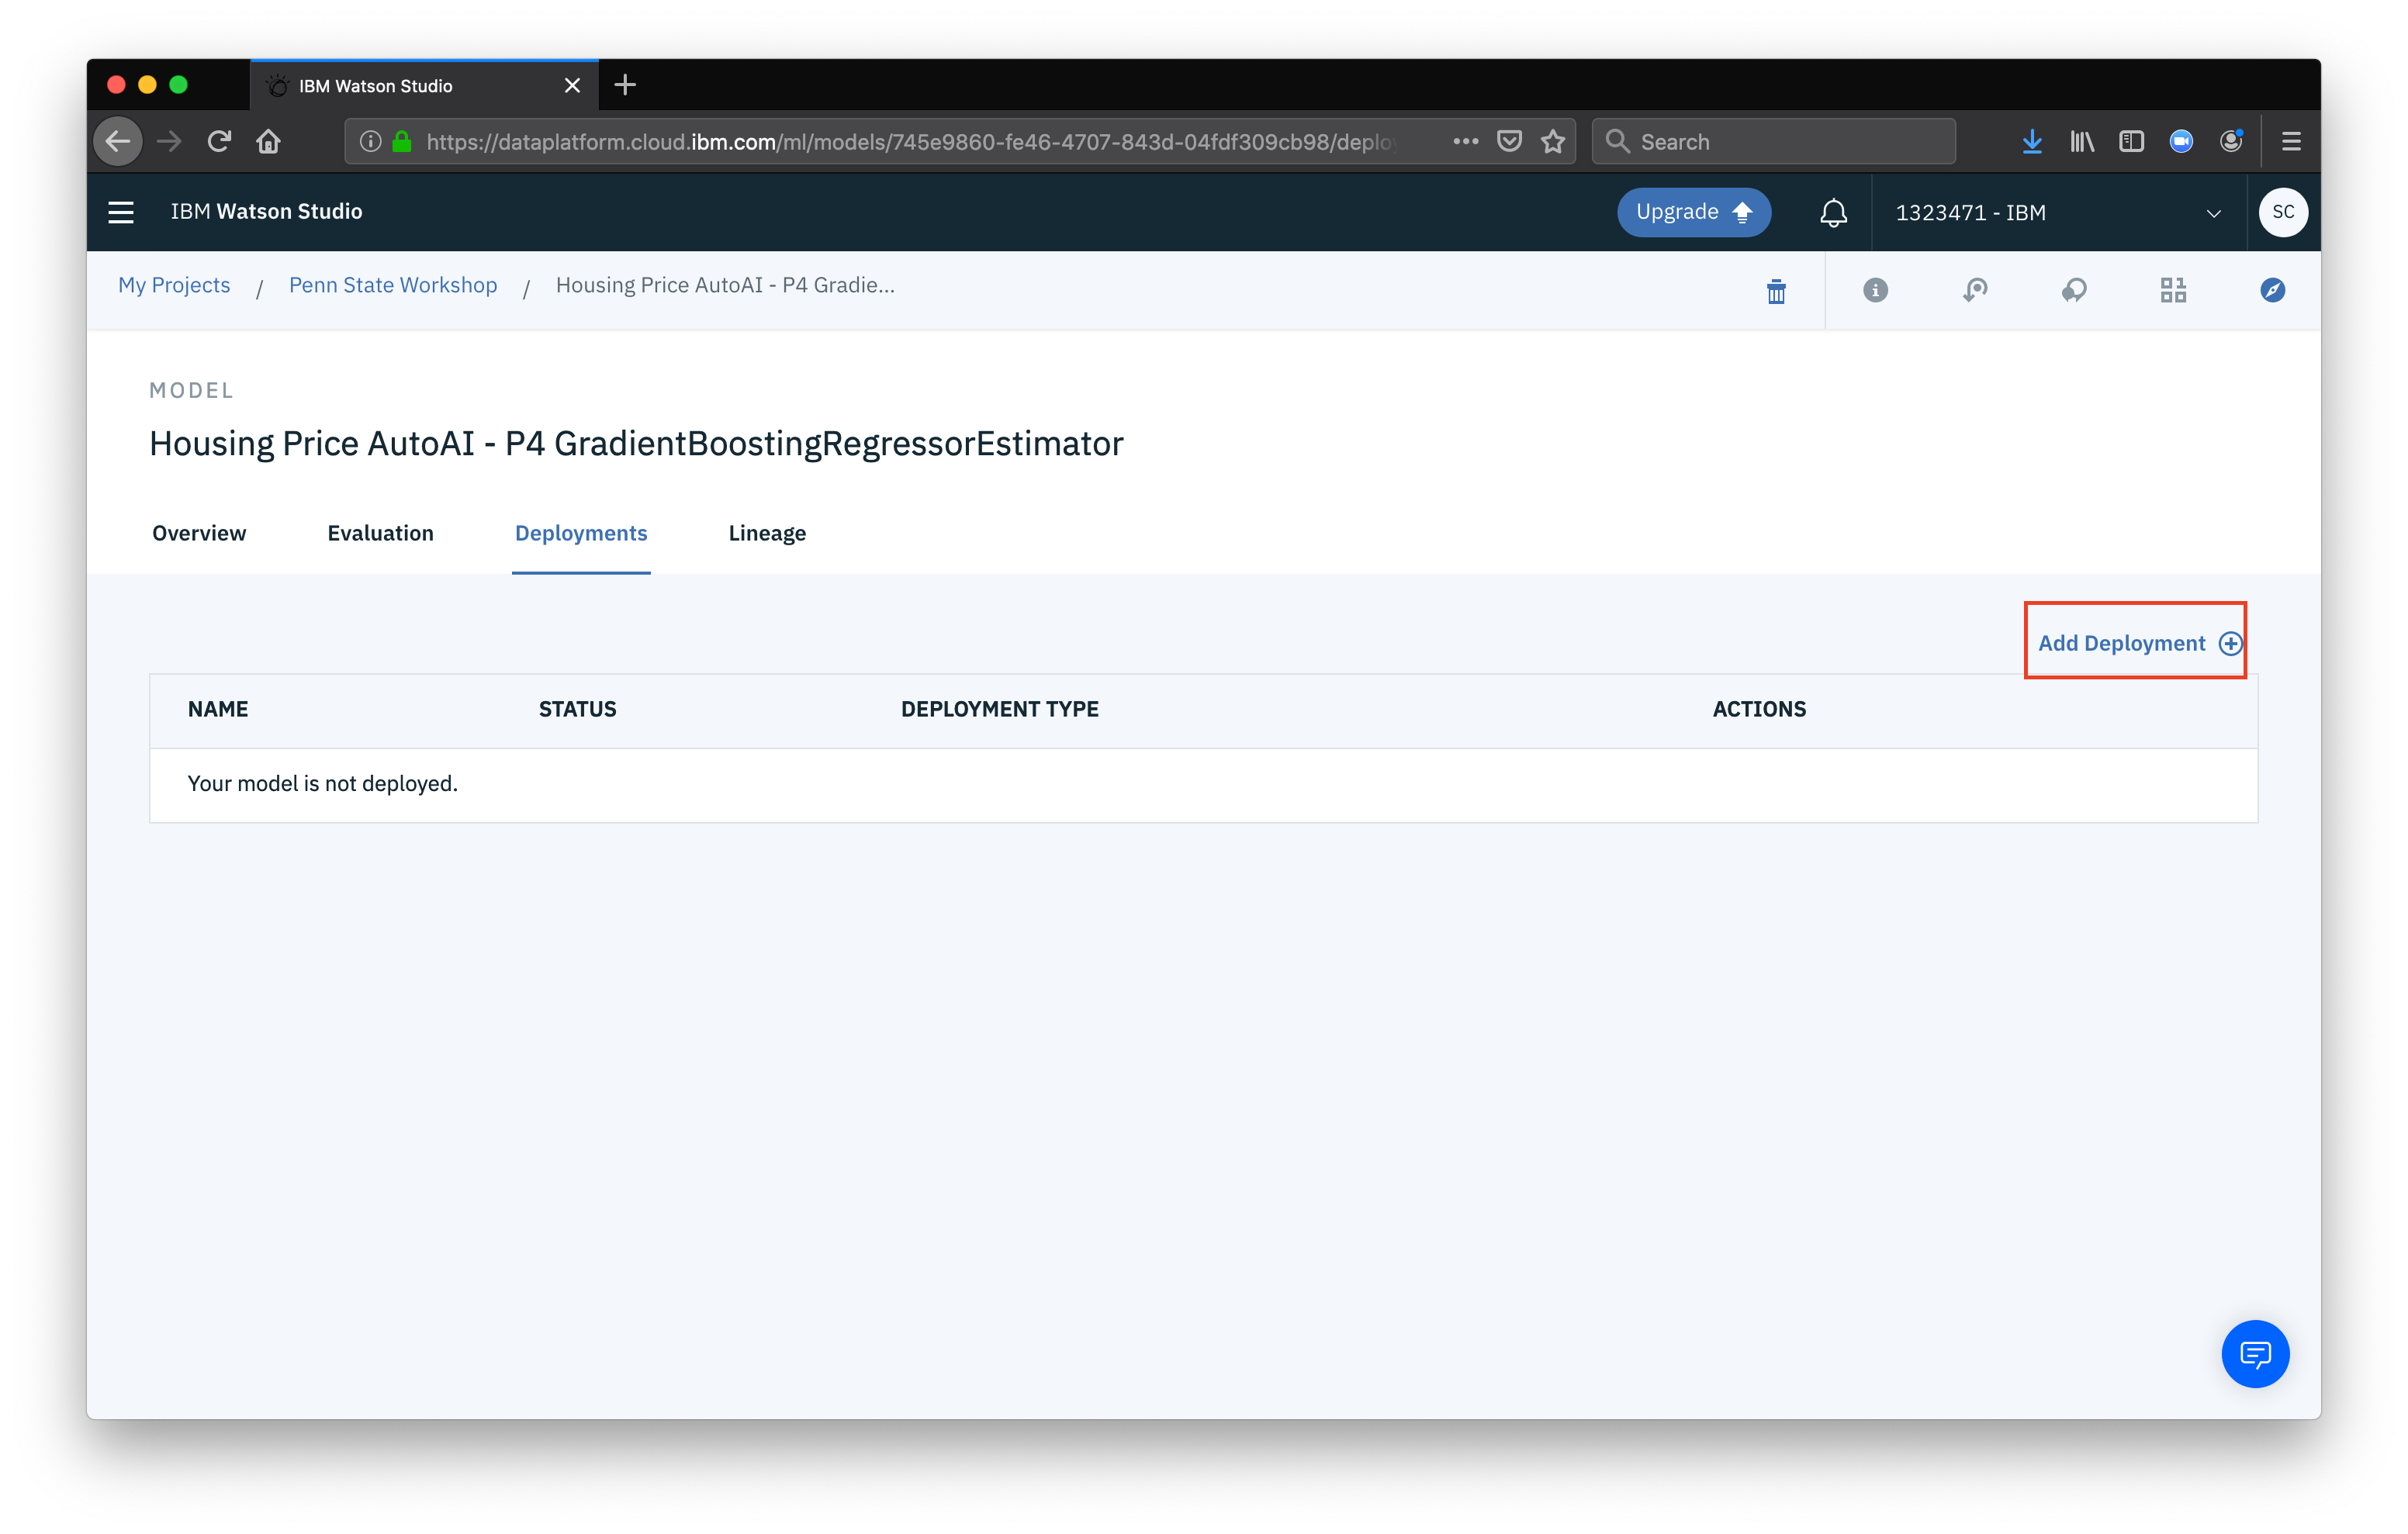
 Next click Add deployment
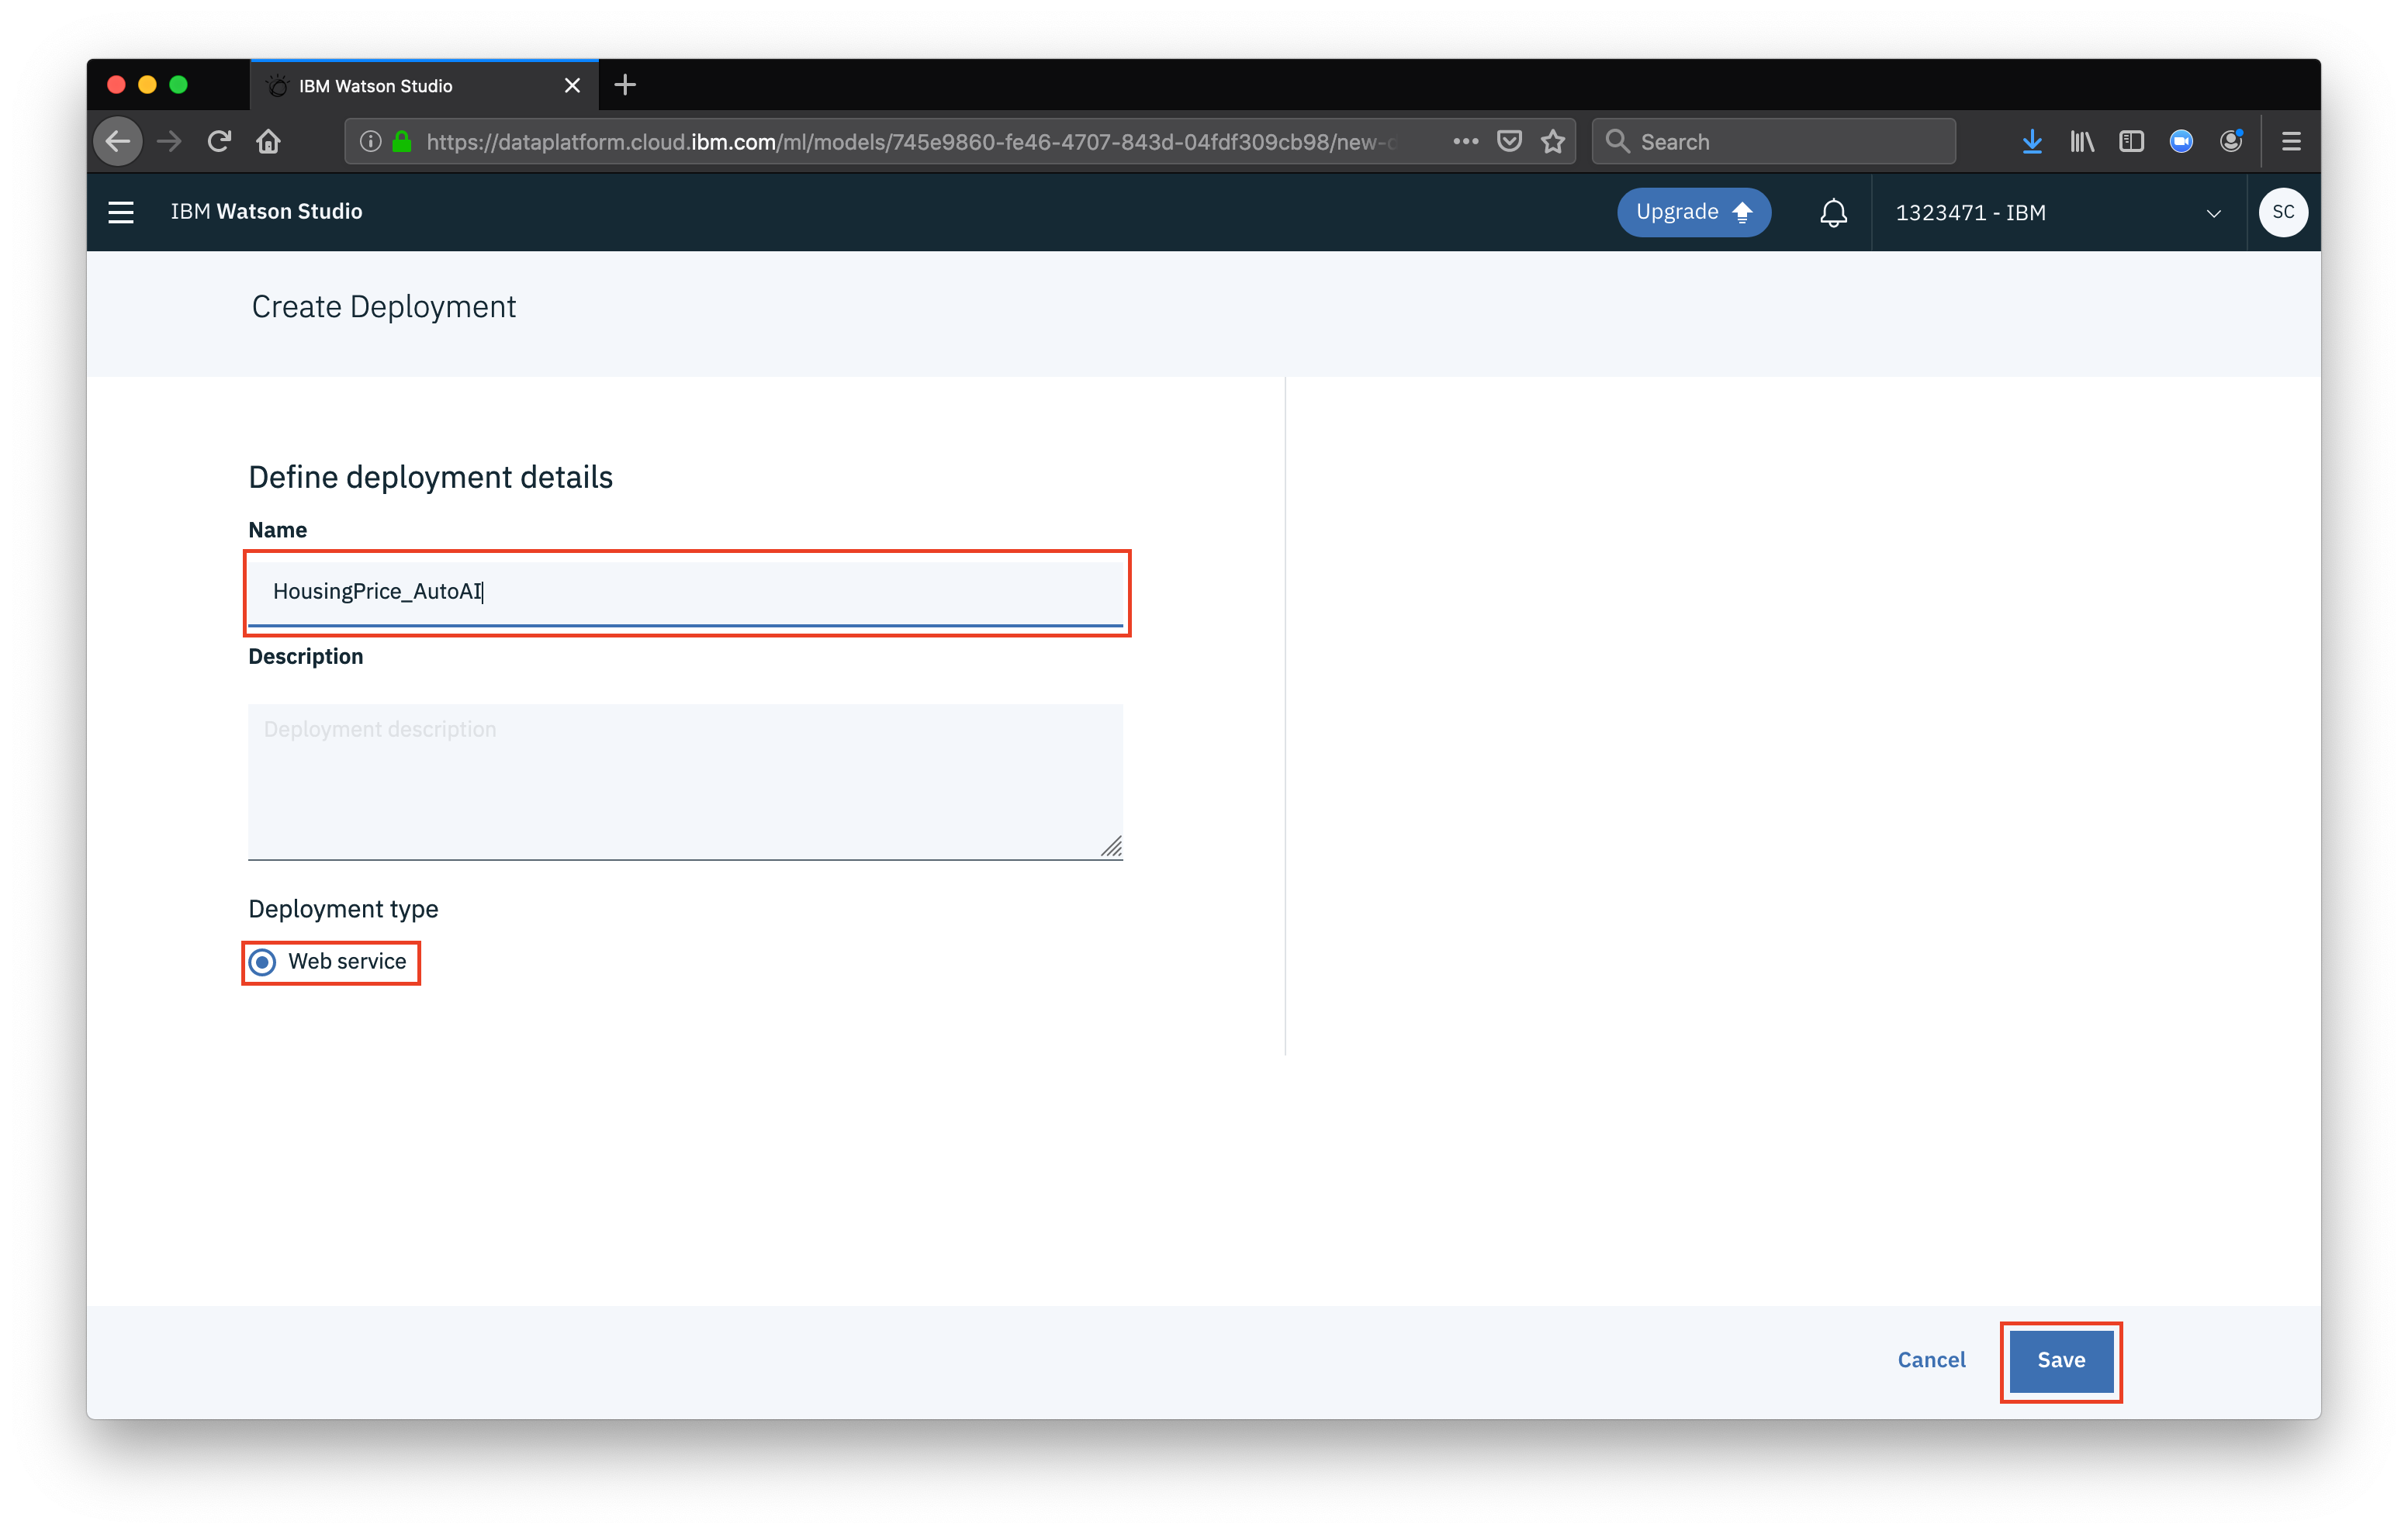
 Give your deployment a name, ensure that Web service is selected and click Save
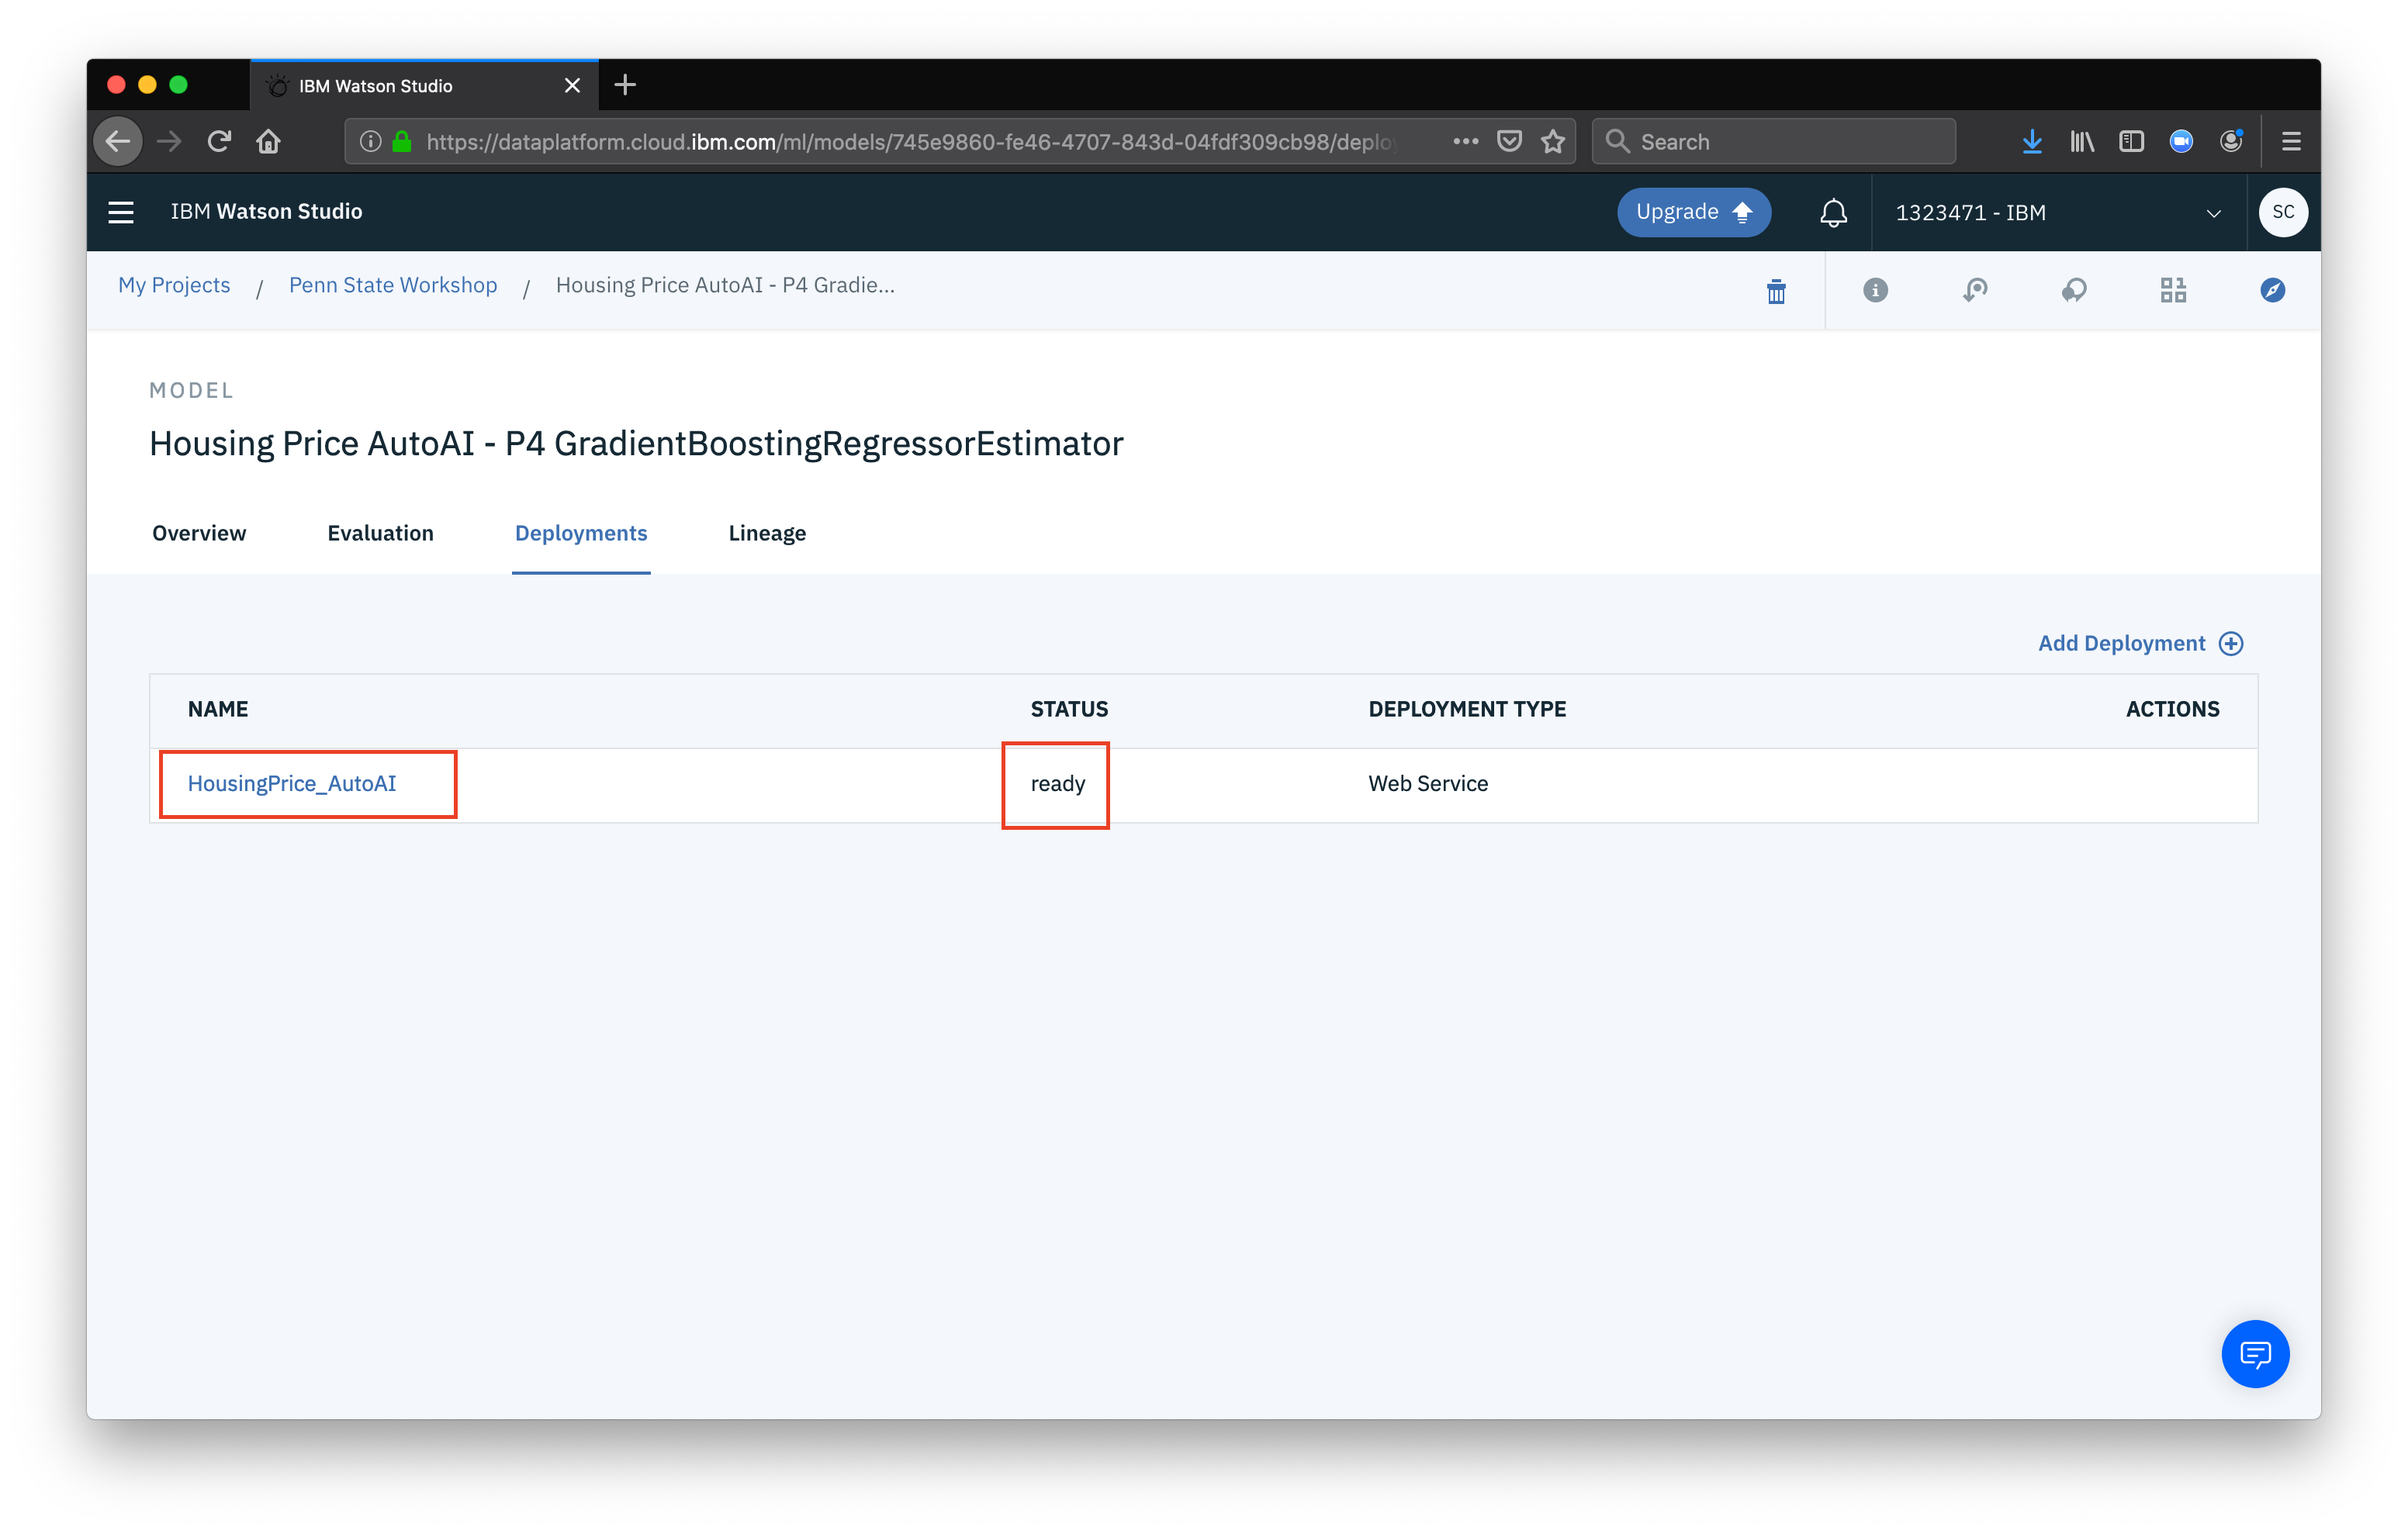
 Once the deplpyment is done, the status will change to ready and we can click on the deployment name to see some details
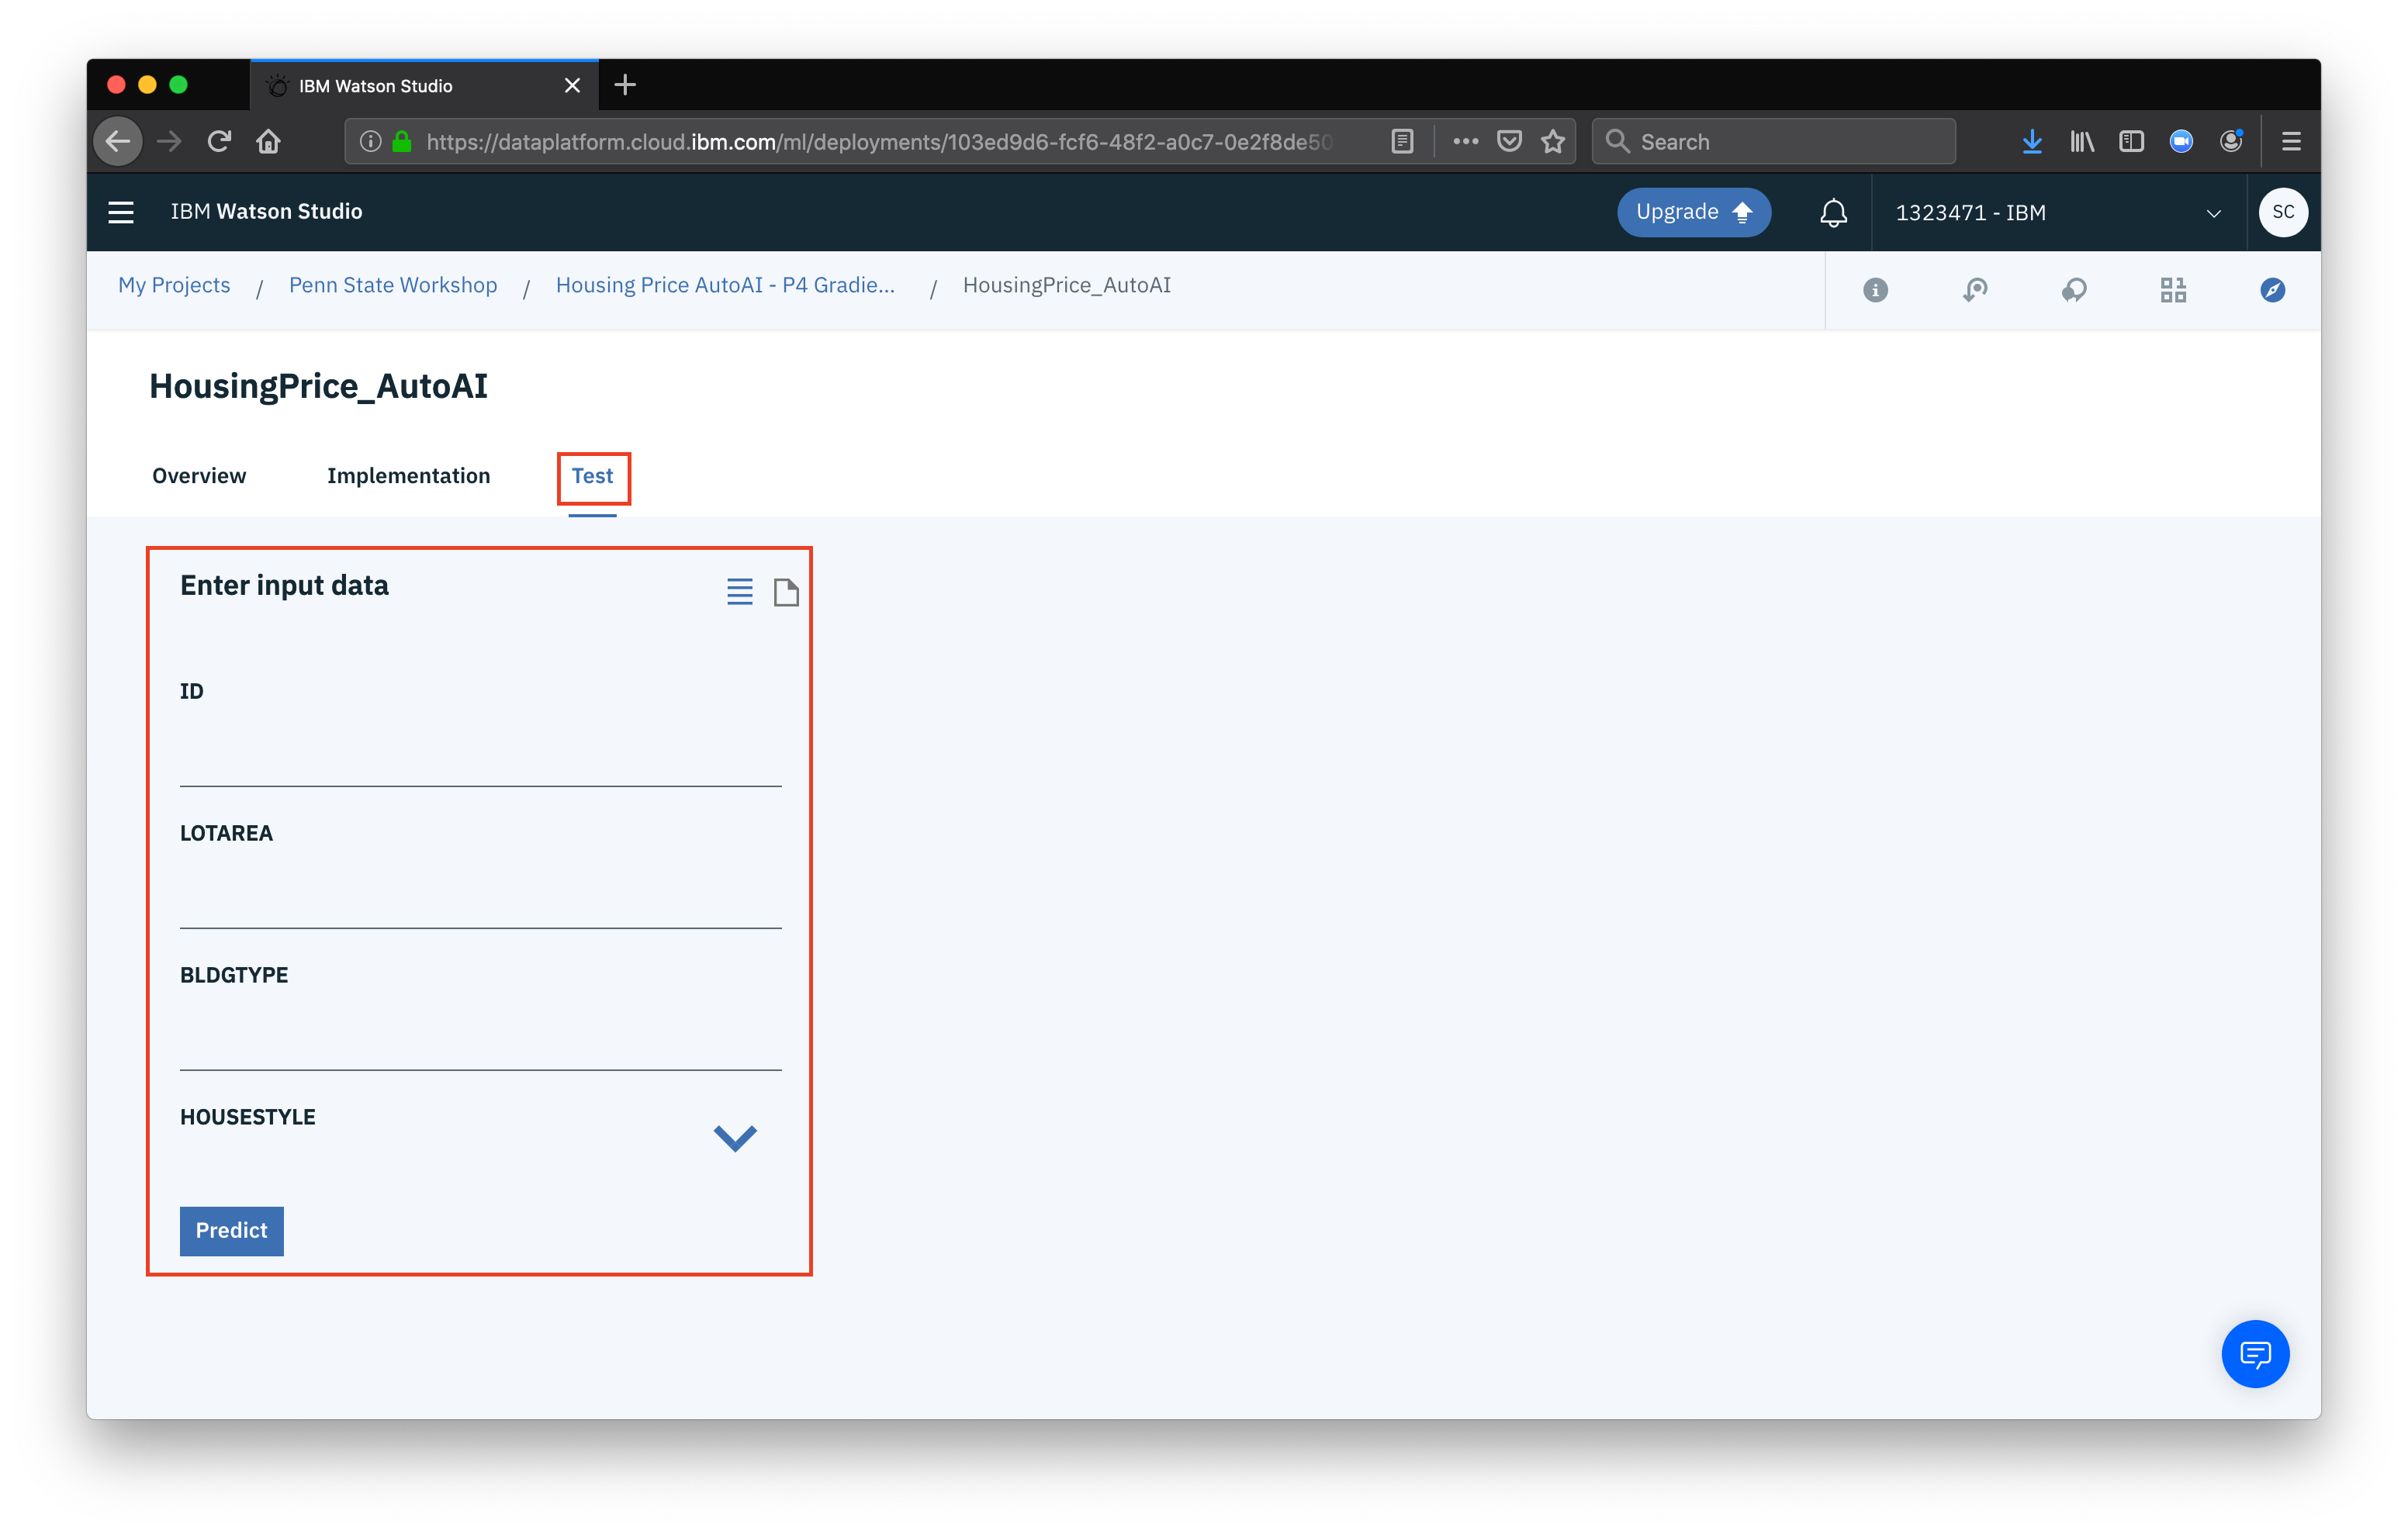
 Finally, we can test the model from the Test tab. You can test by either filling in the fields and clickinhg Predict or, change the input to JSON (by clicking the small document icon)
 Now to use the model in an application, we can get the scoring URL by clicking the Implementation tab and copying the scoring endpoint
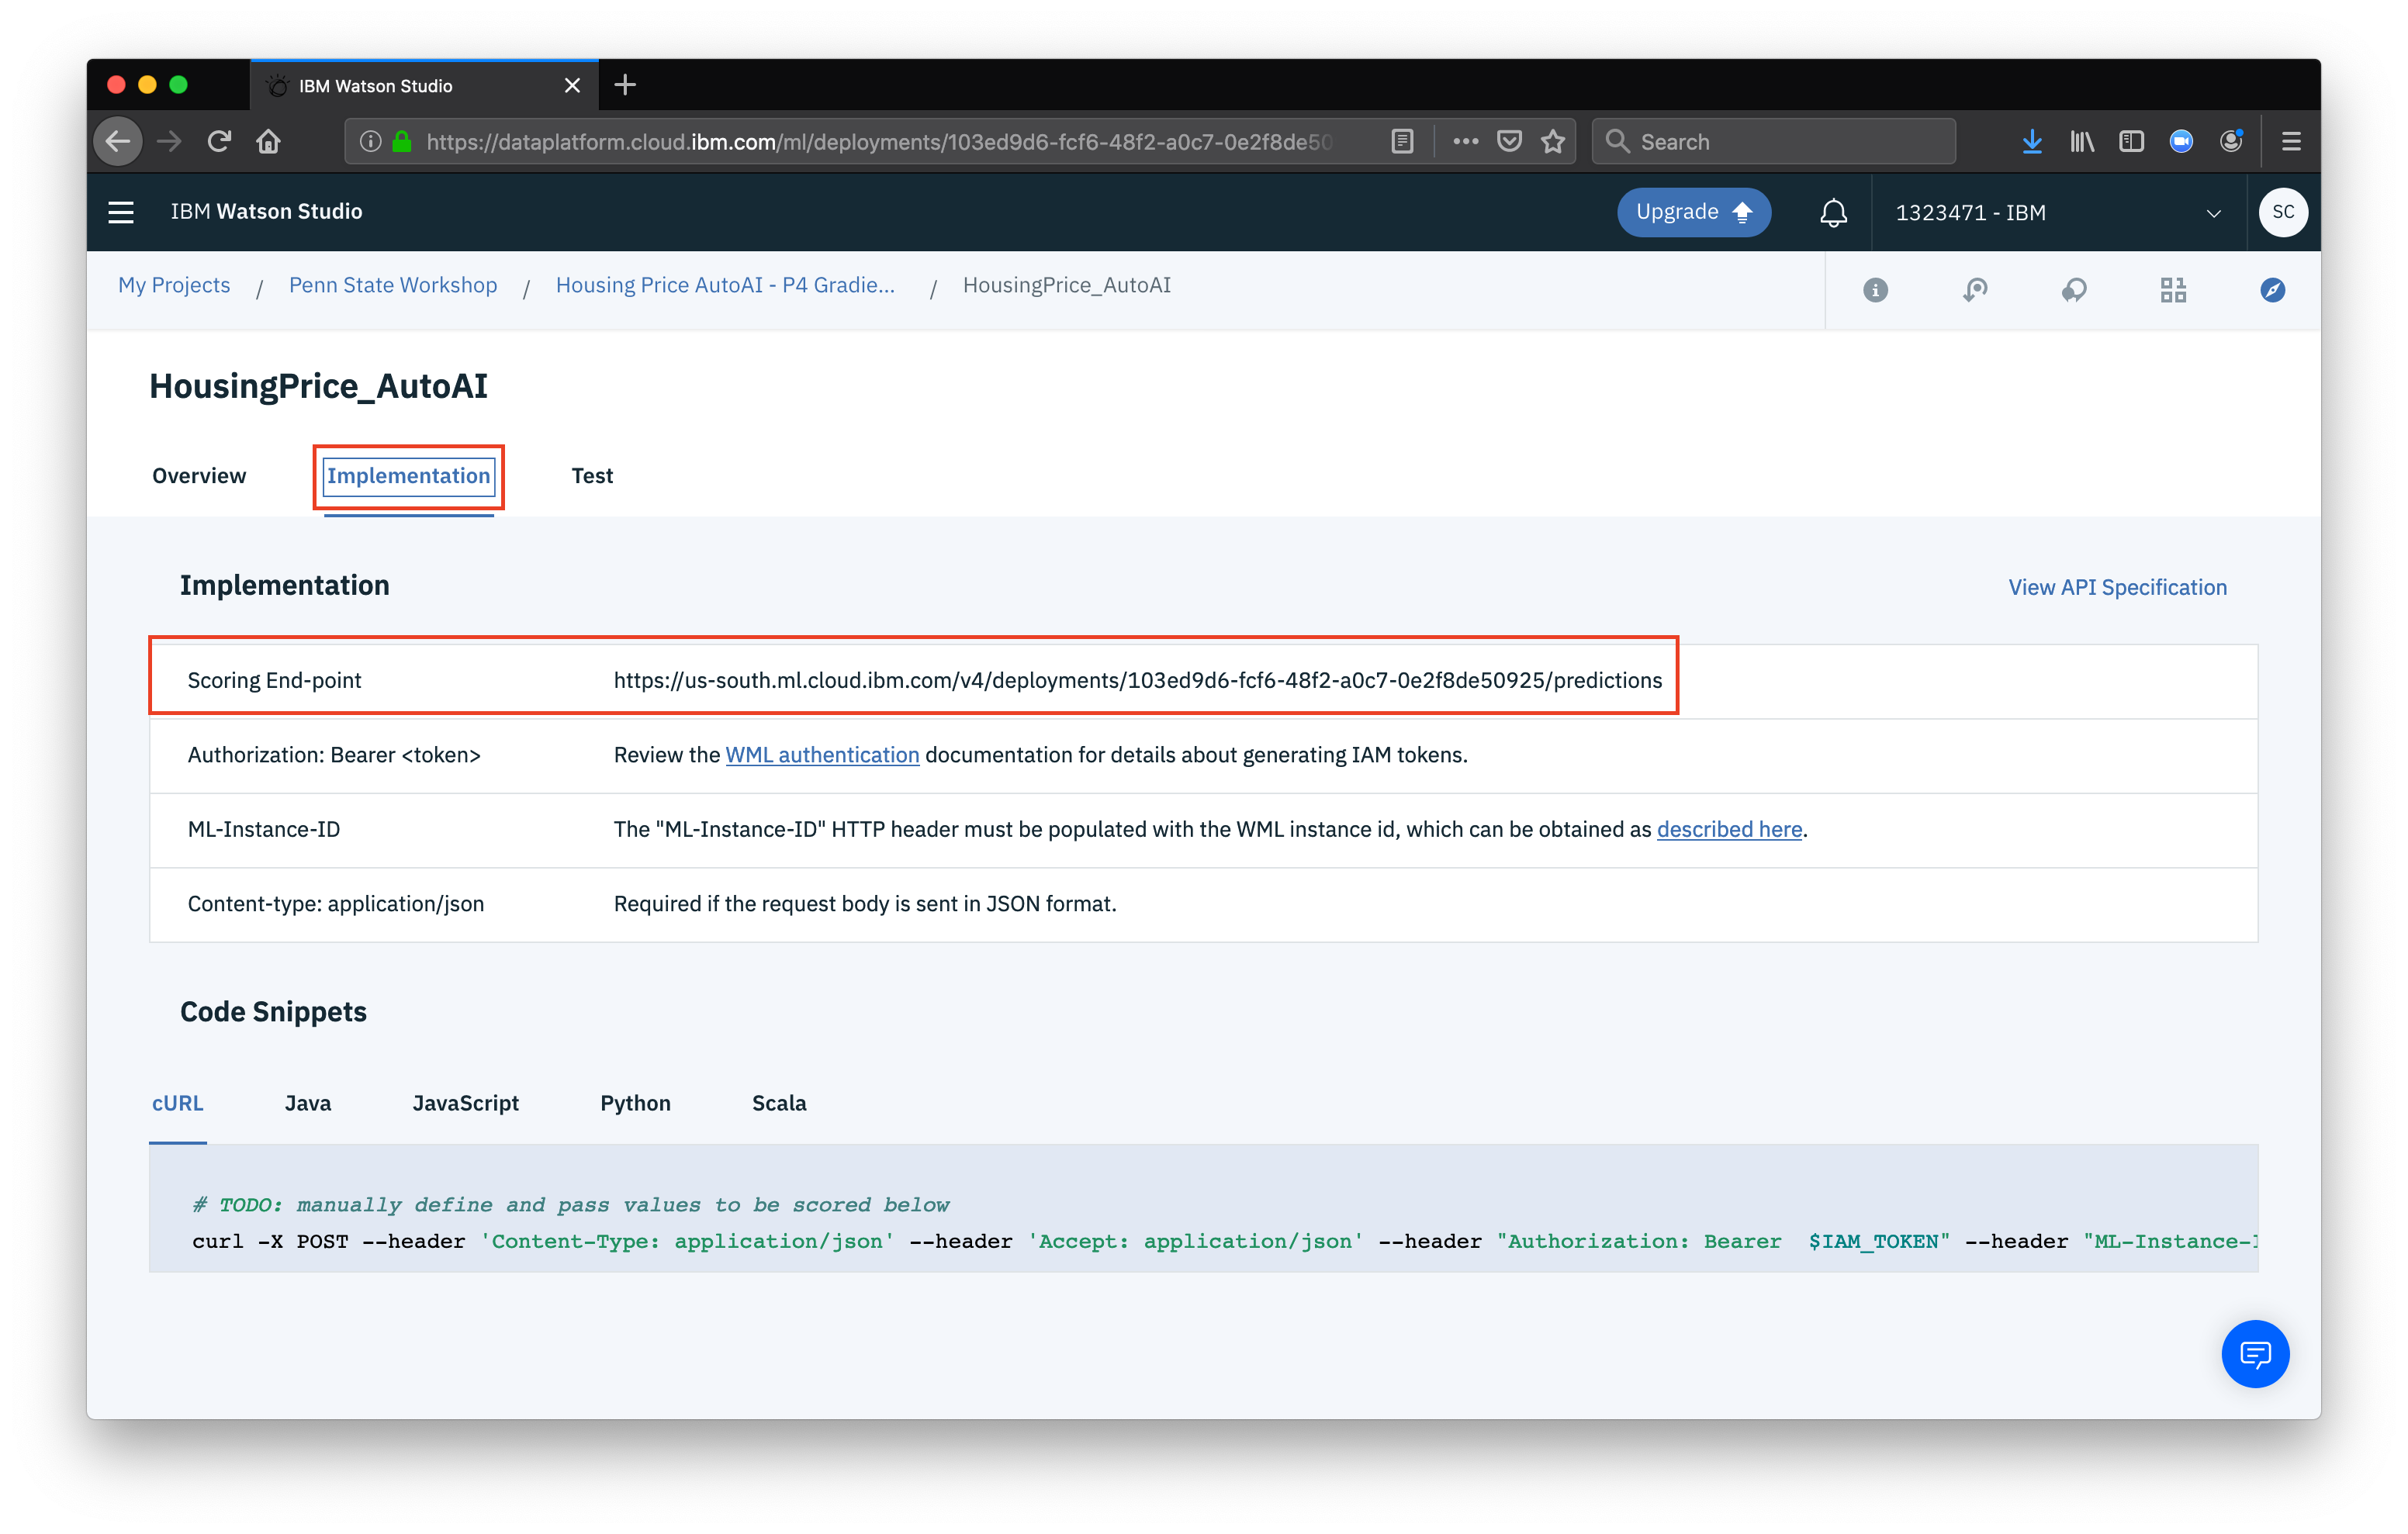
You can use the scoring endpoint just like any other Watson service or generic REST API. Clicking on the API Specification link will take you to more details on how to use your new API endpoint, including authentication details.