Sign, notarize & distribute
To distribute the app you need to:
- Change the app bundle identifier
- Archive it
- Sign it
- Send it to the Apple notarization service
- Export it for distribution
Xcode makes this process quick. Here is how it looks.
What you need
- An Apple ID enrolled in your company’s Apple Developer Enterprise Program
- The latest Xcode (available on the App Store)
- Your team’s Developer ID Application certificate installed in your Keychain
The steps
- If you haven’t yet, rebrand the app. This is mandatory.
-
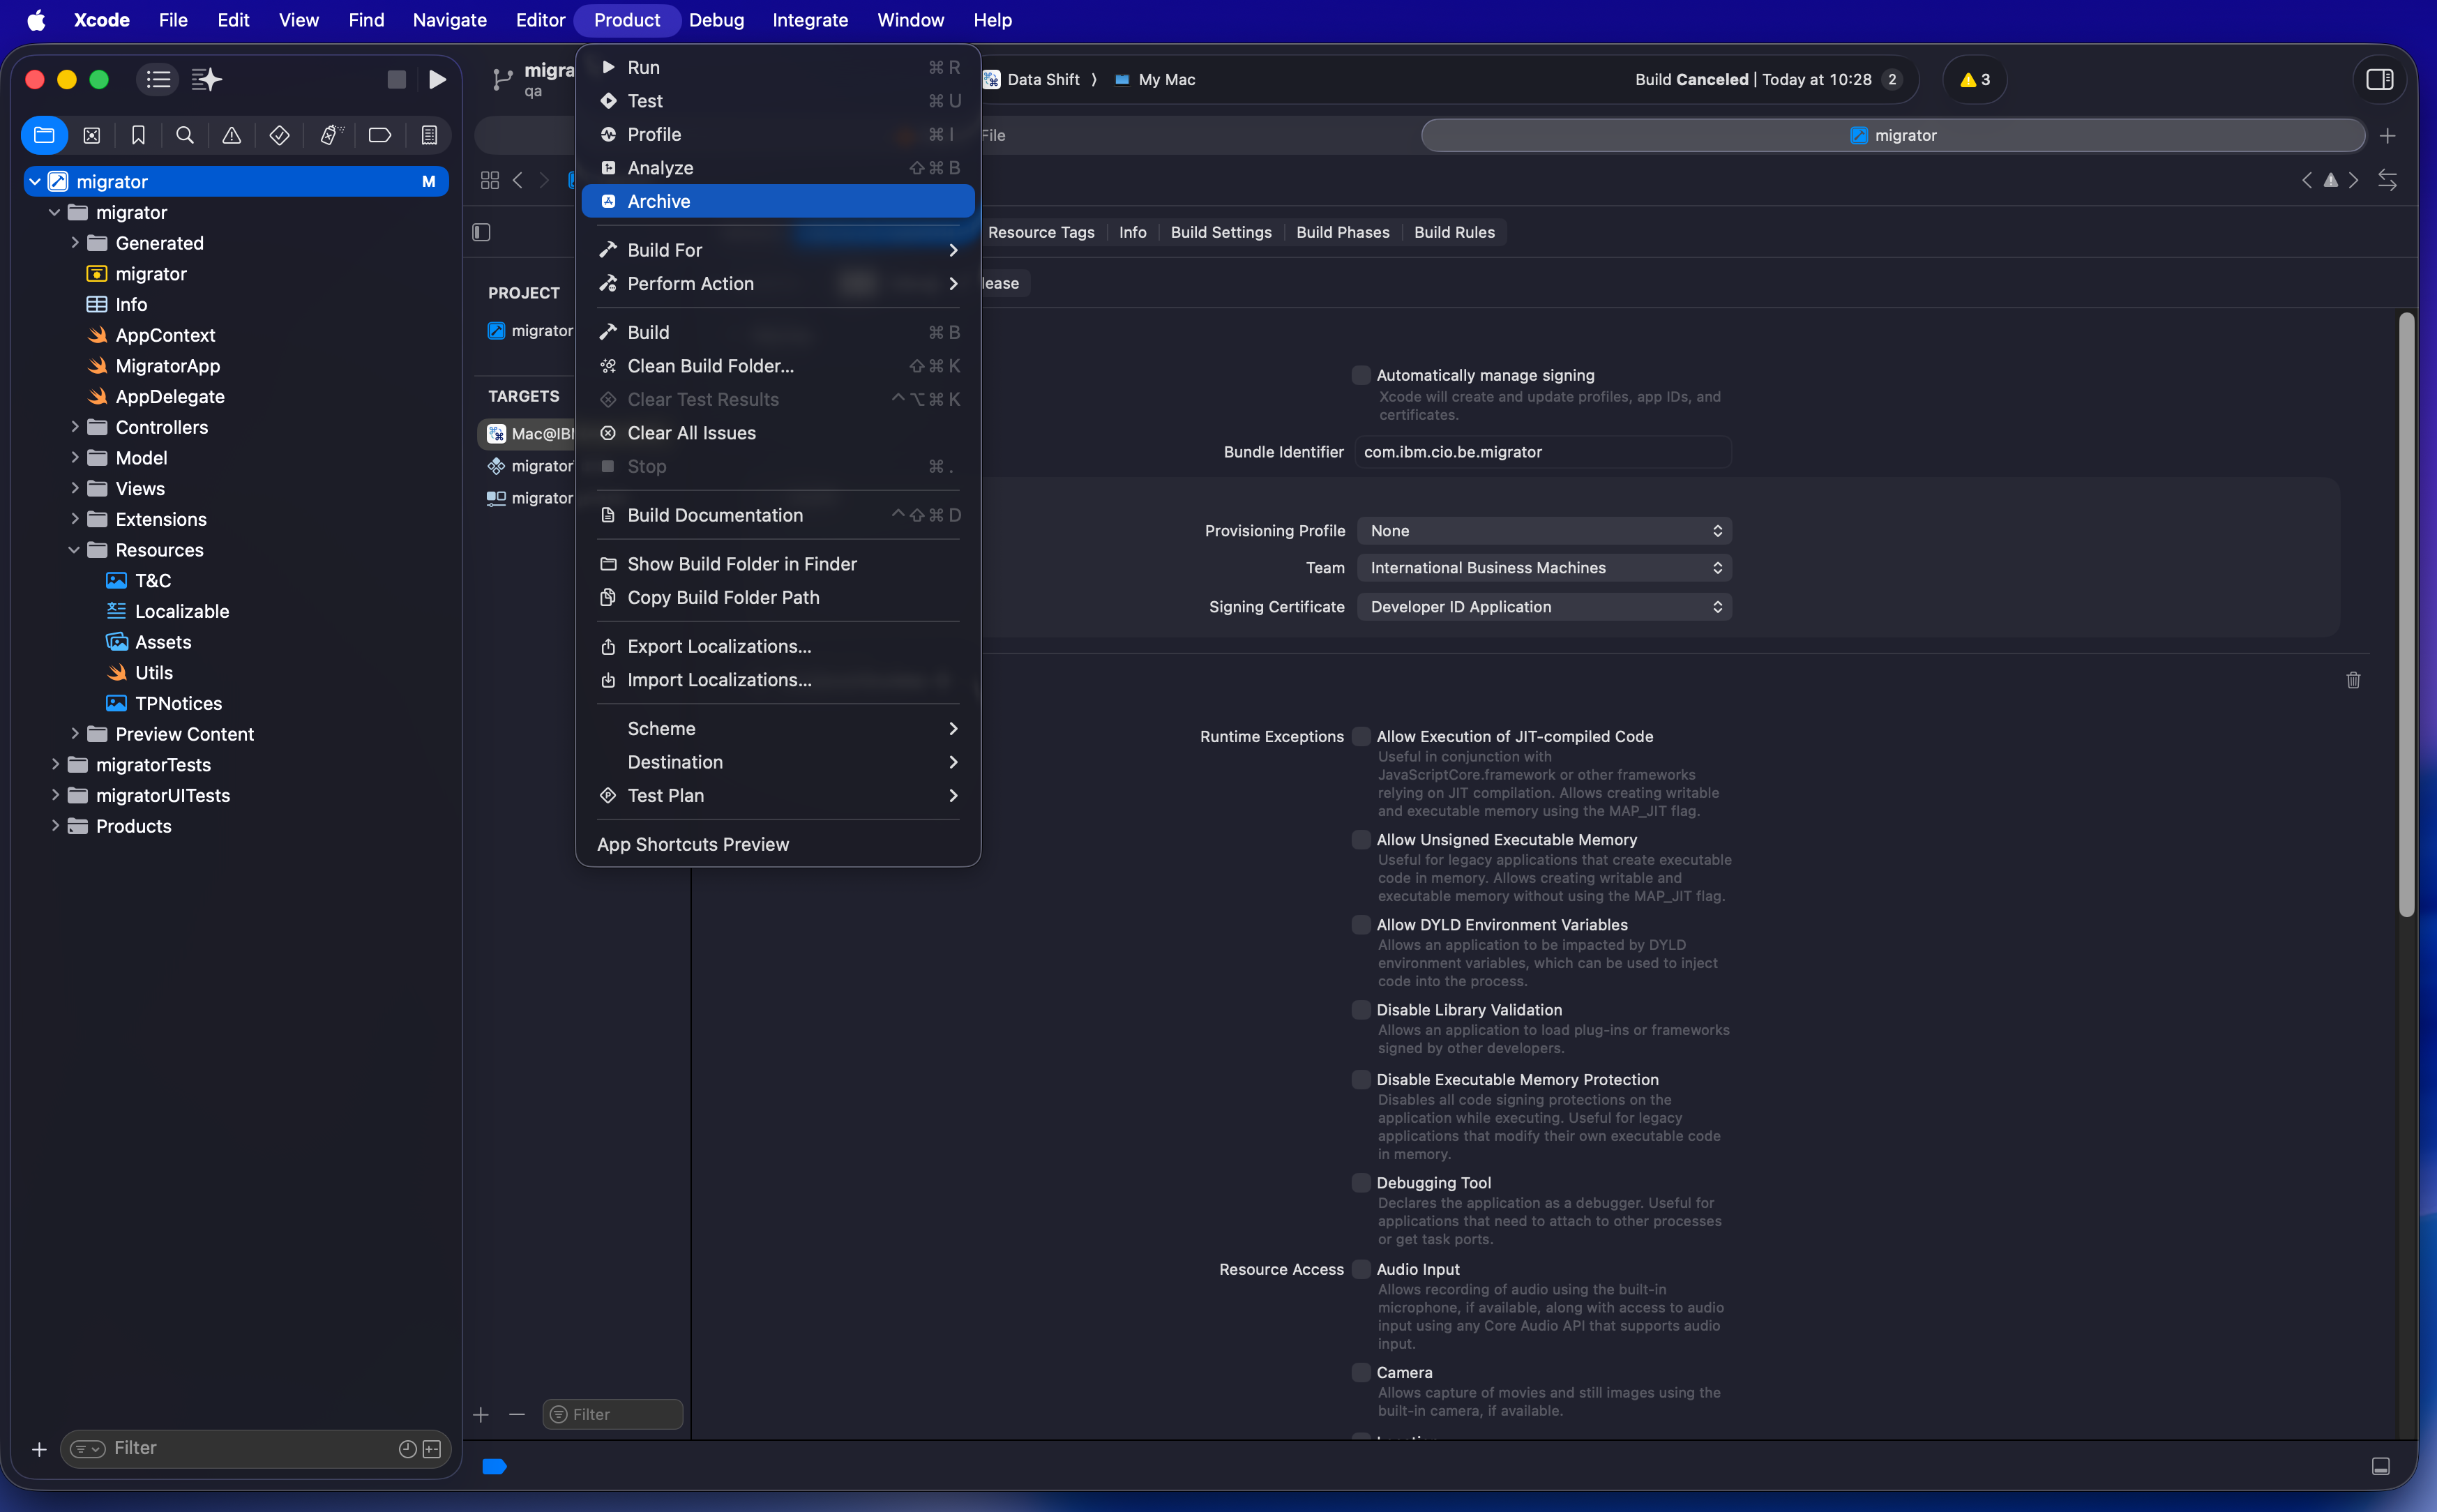
Archive the app: Product → Archive.
-
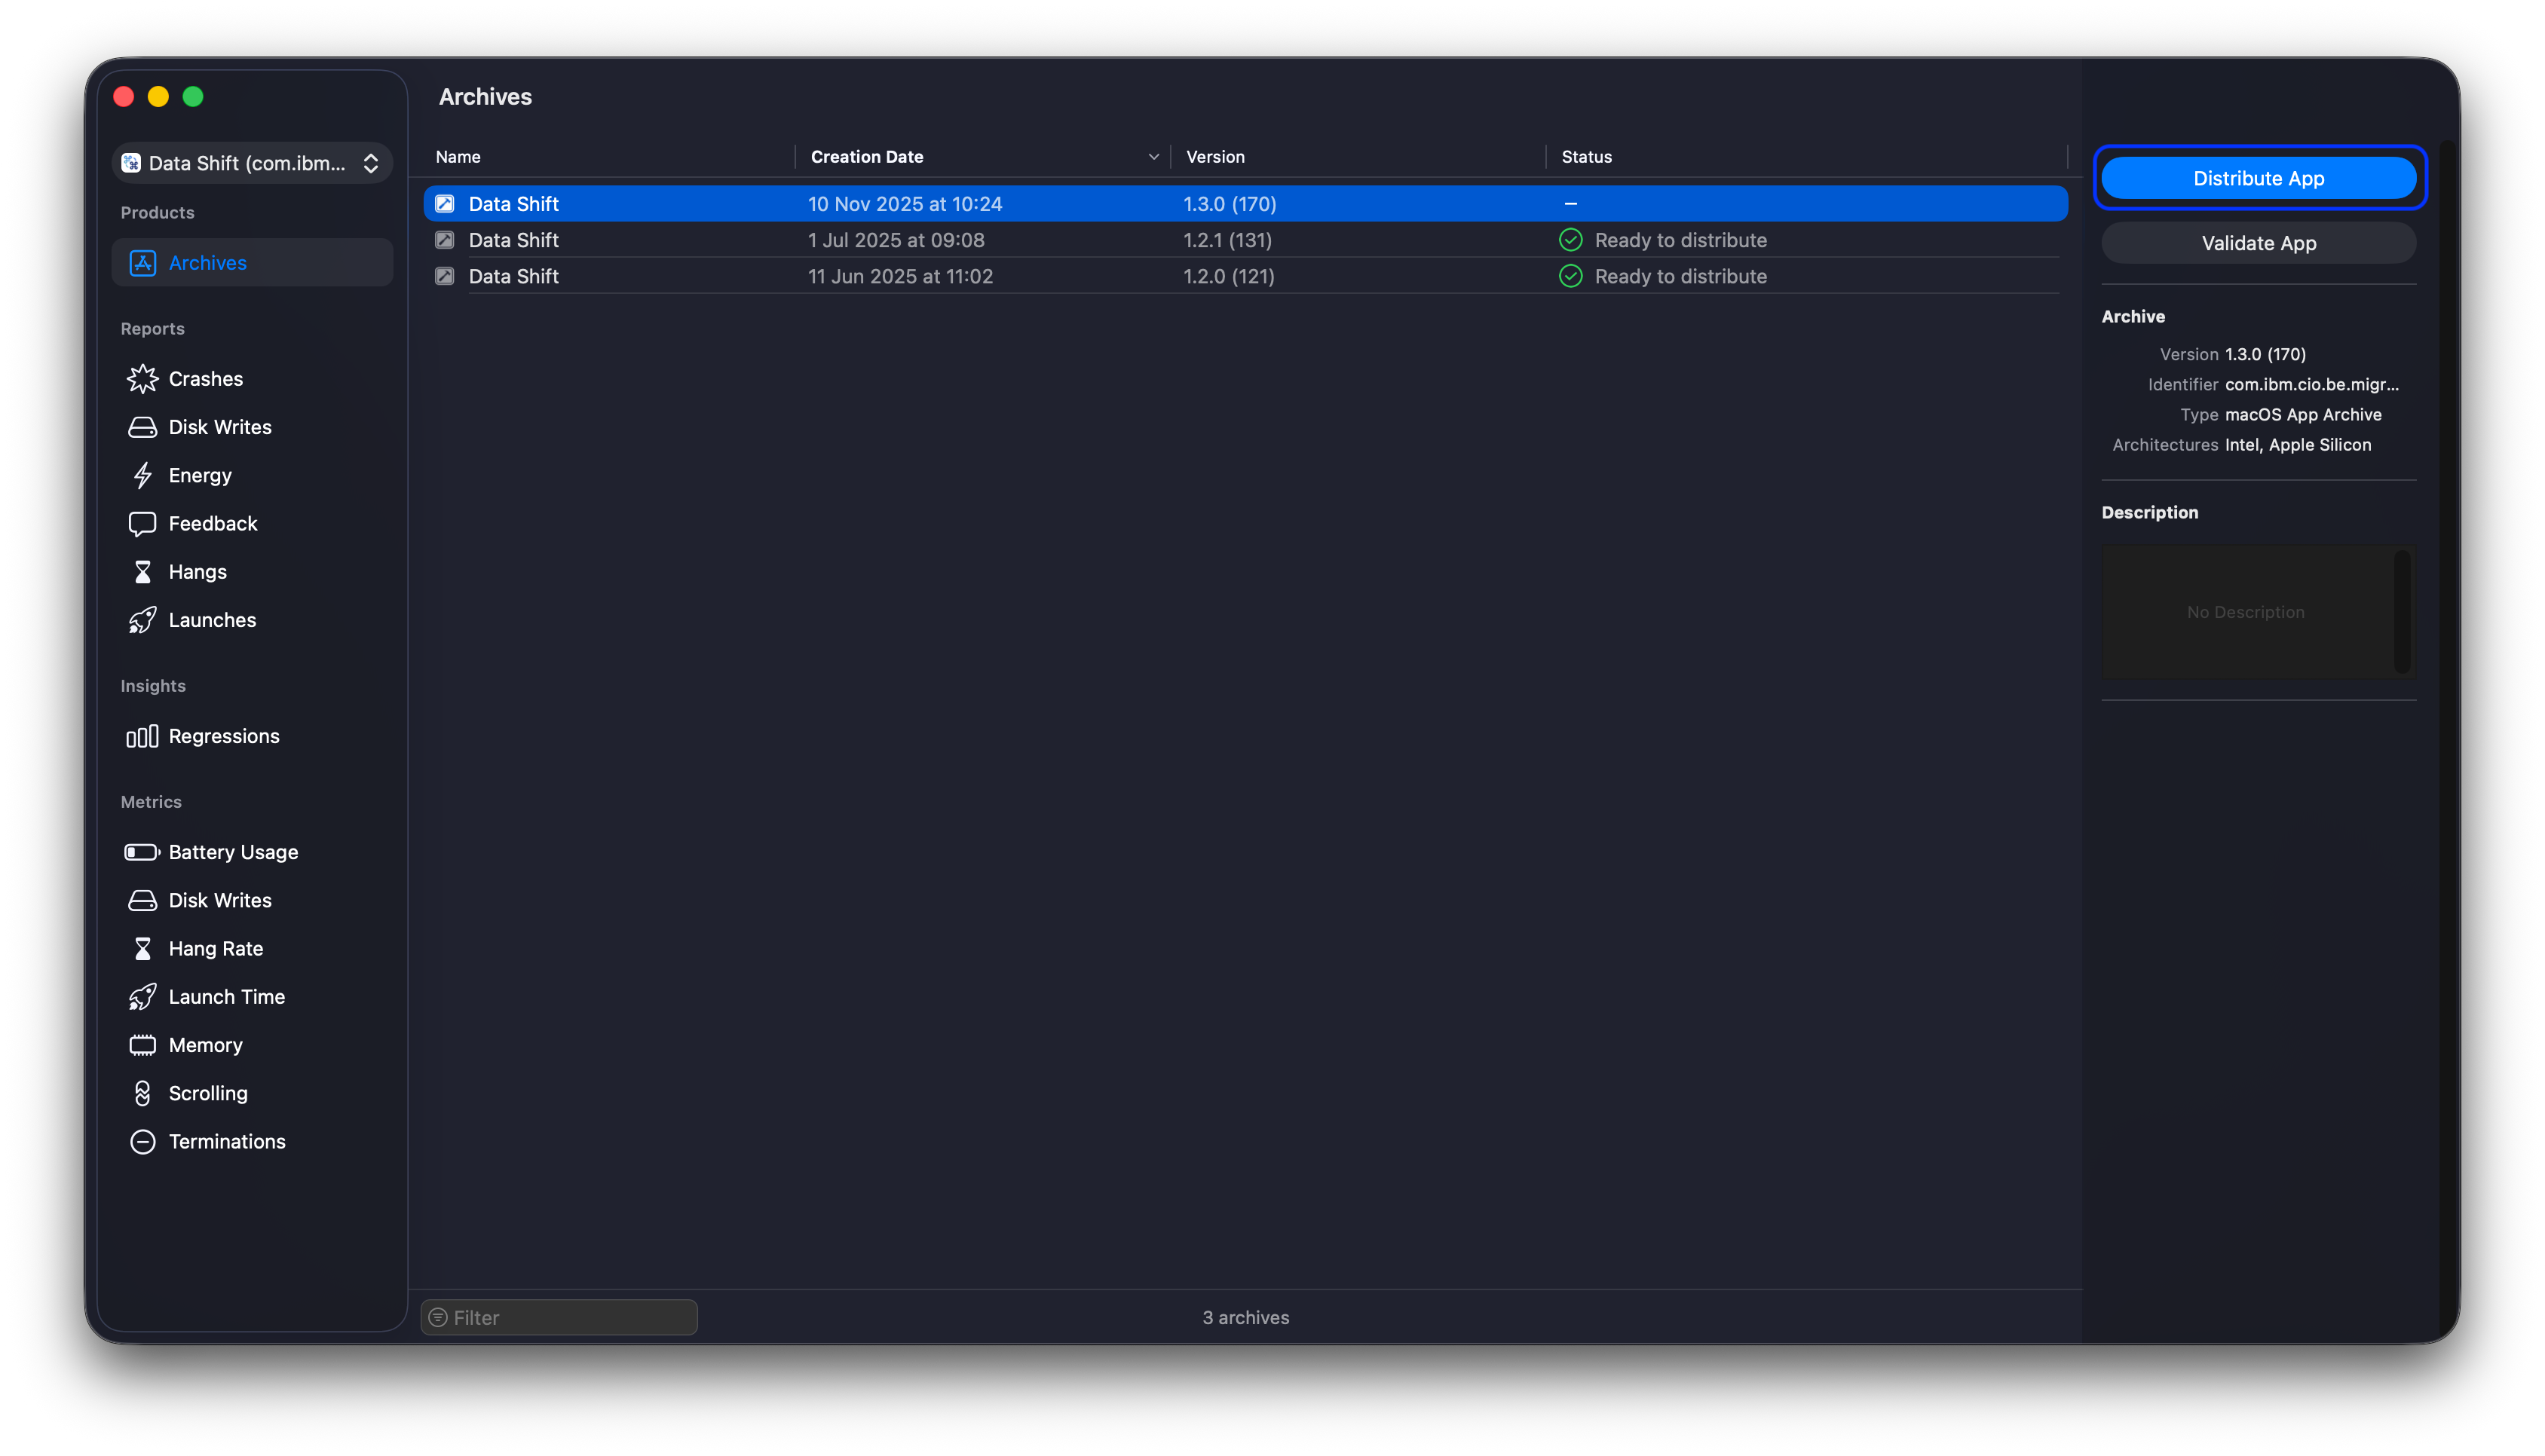
When the archive completes, the Organizer window lists the archives of your app. Select the latest one and click Distribute App.
-
Choose Direct Distribution.
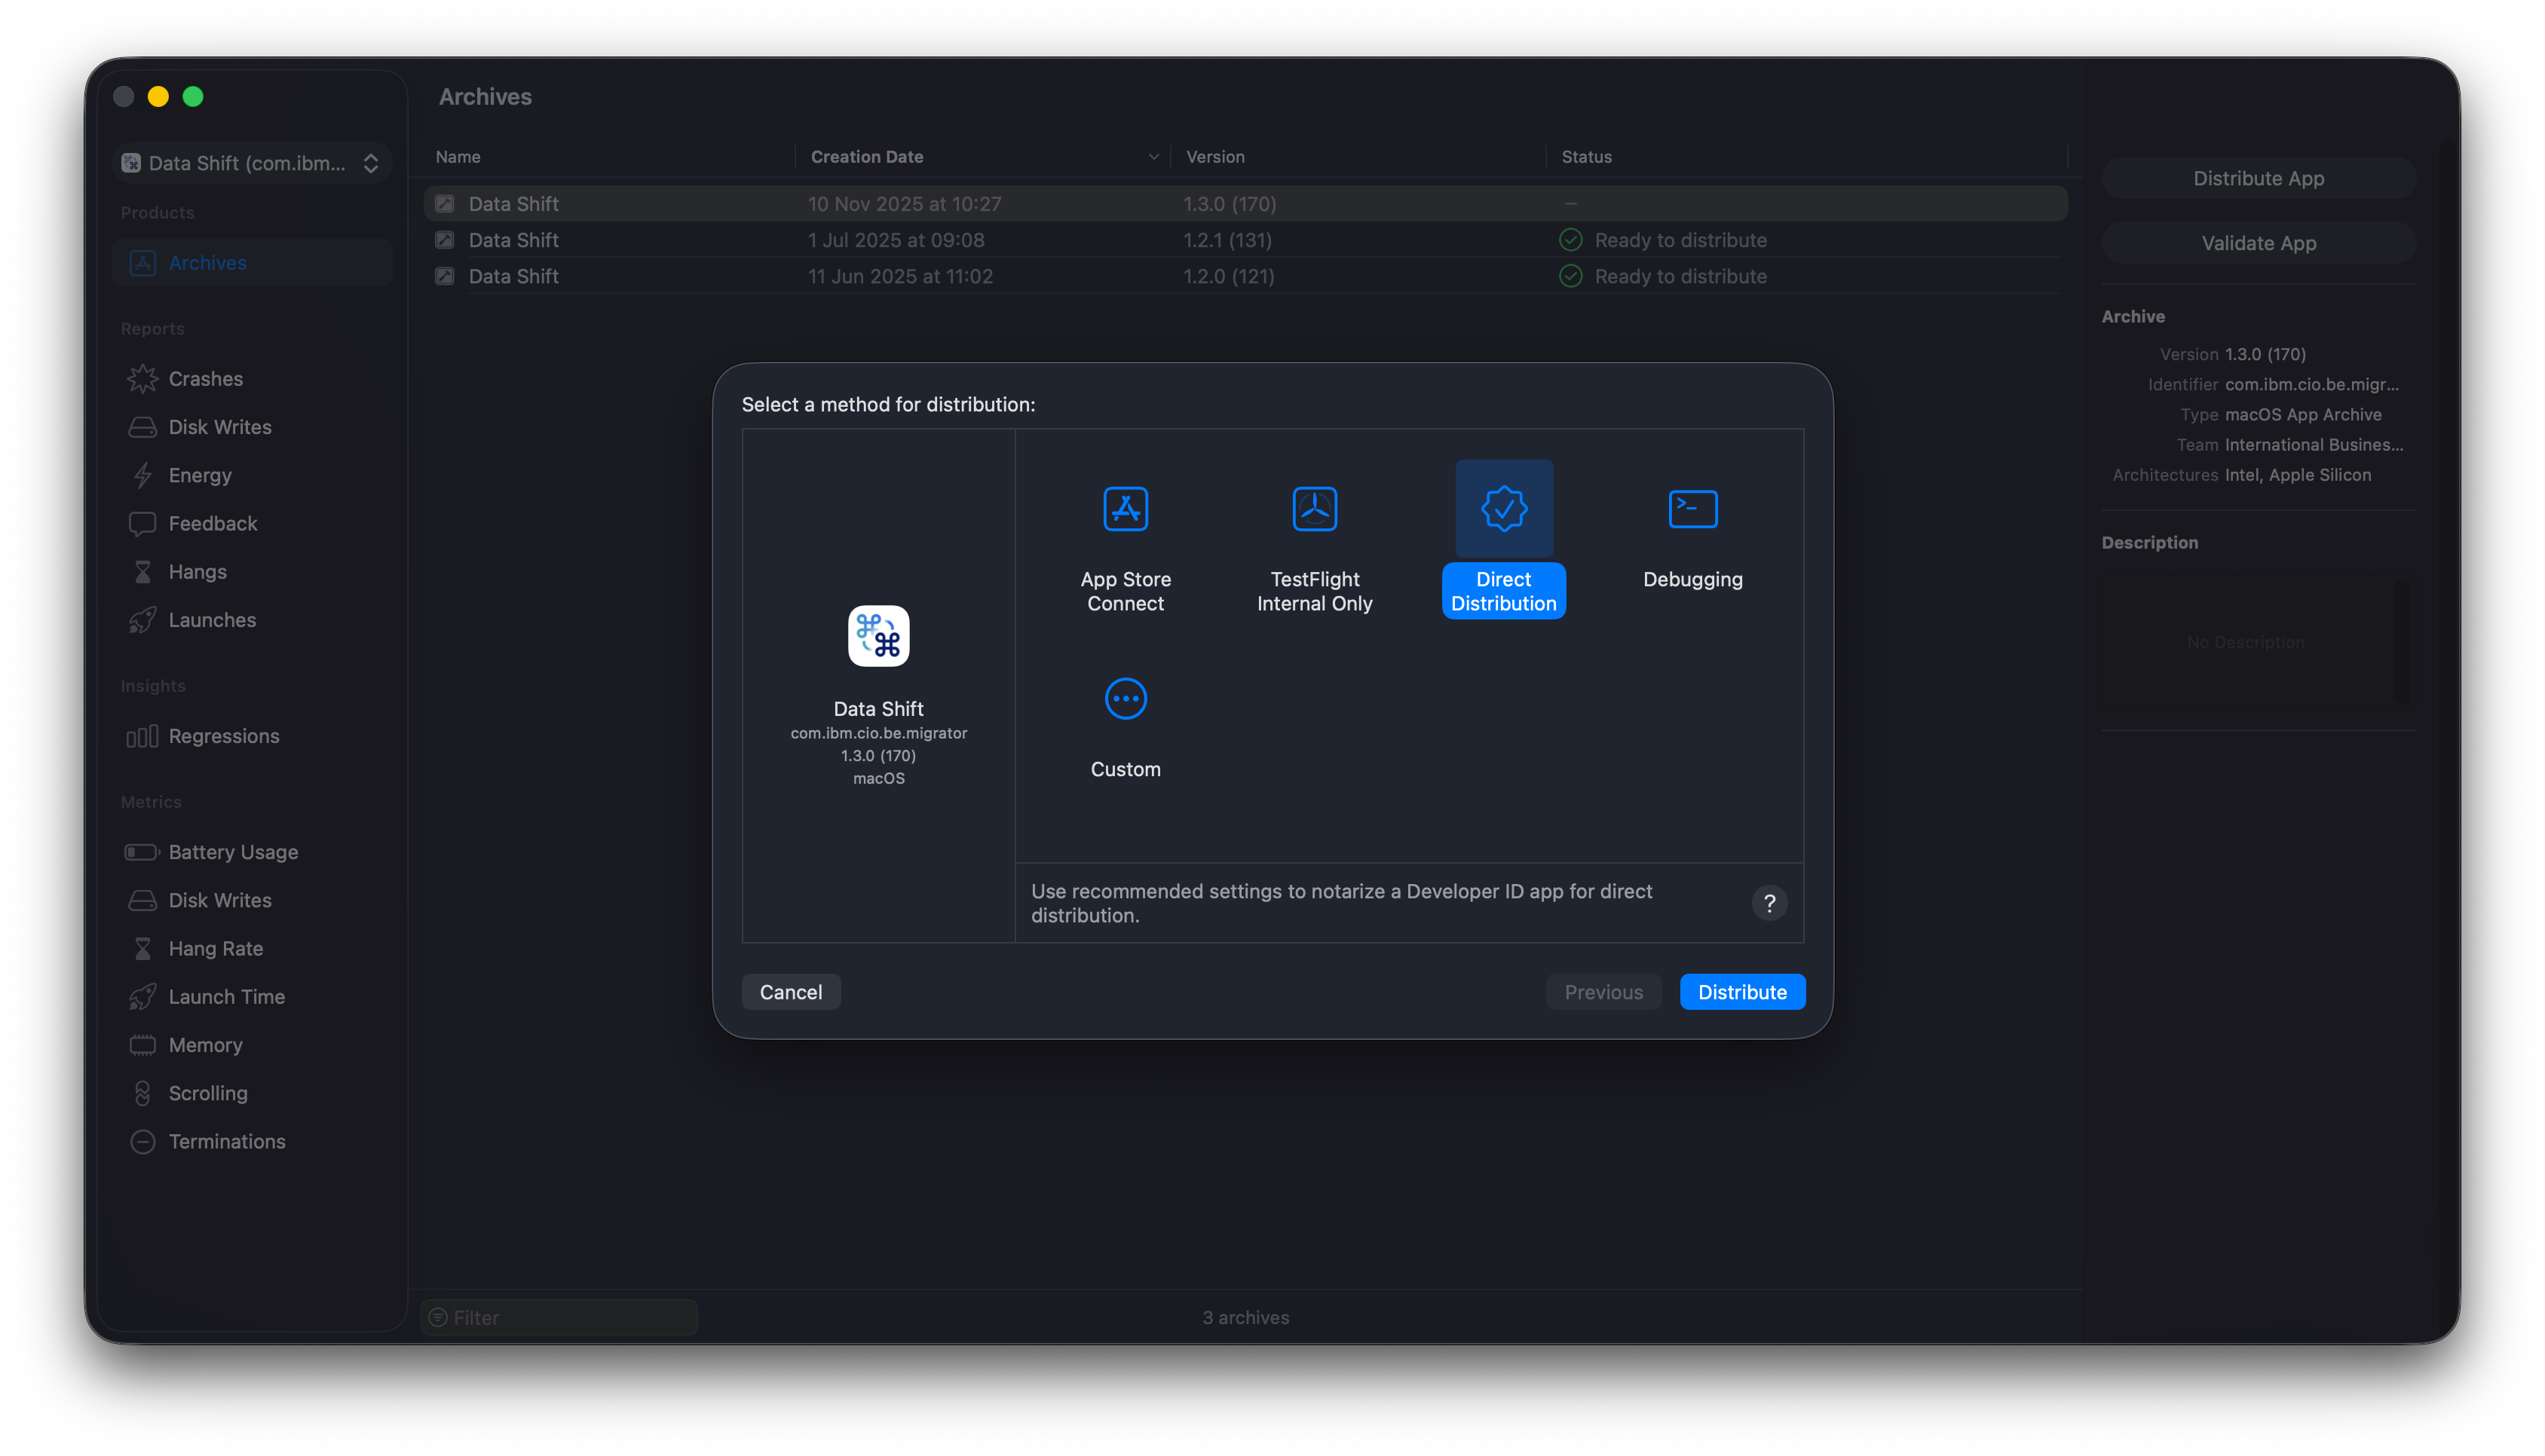
- Click Distribute and wait until it finishes.
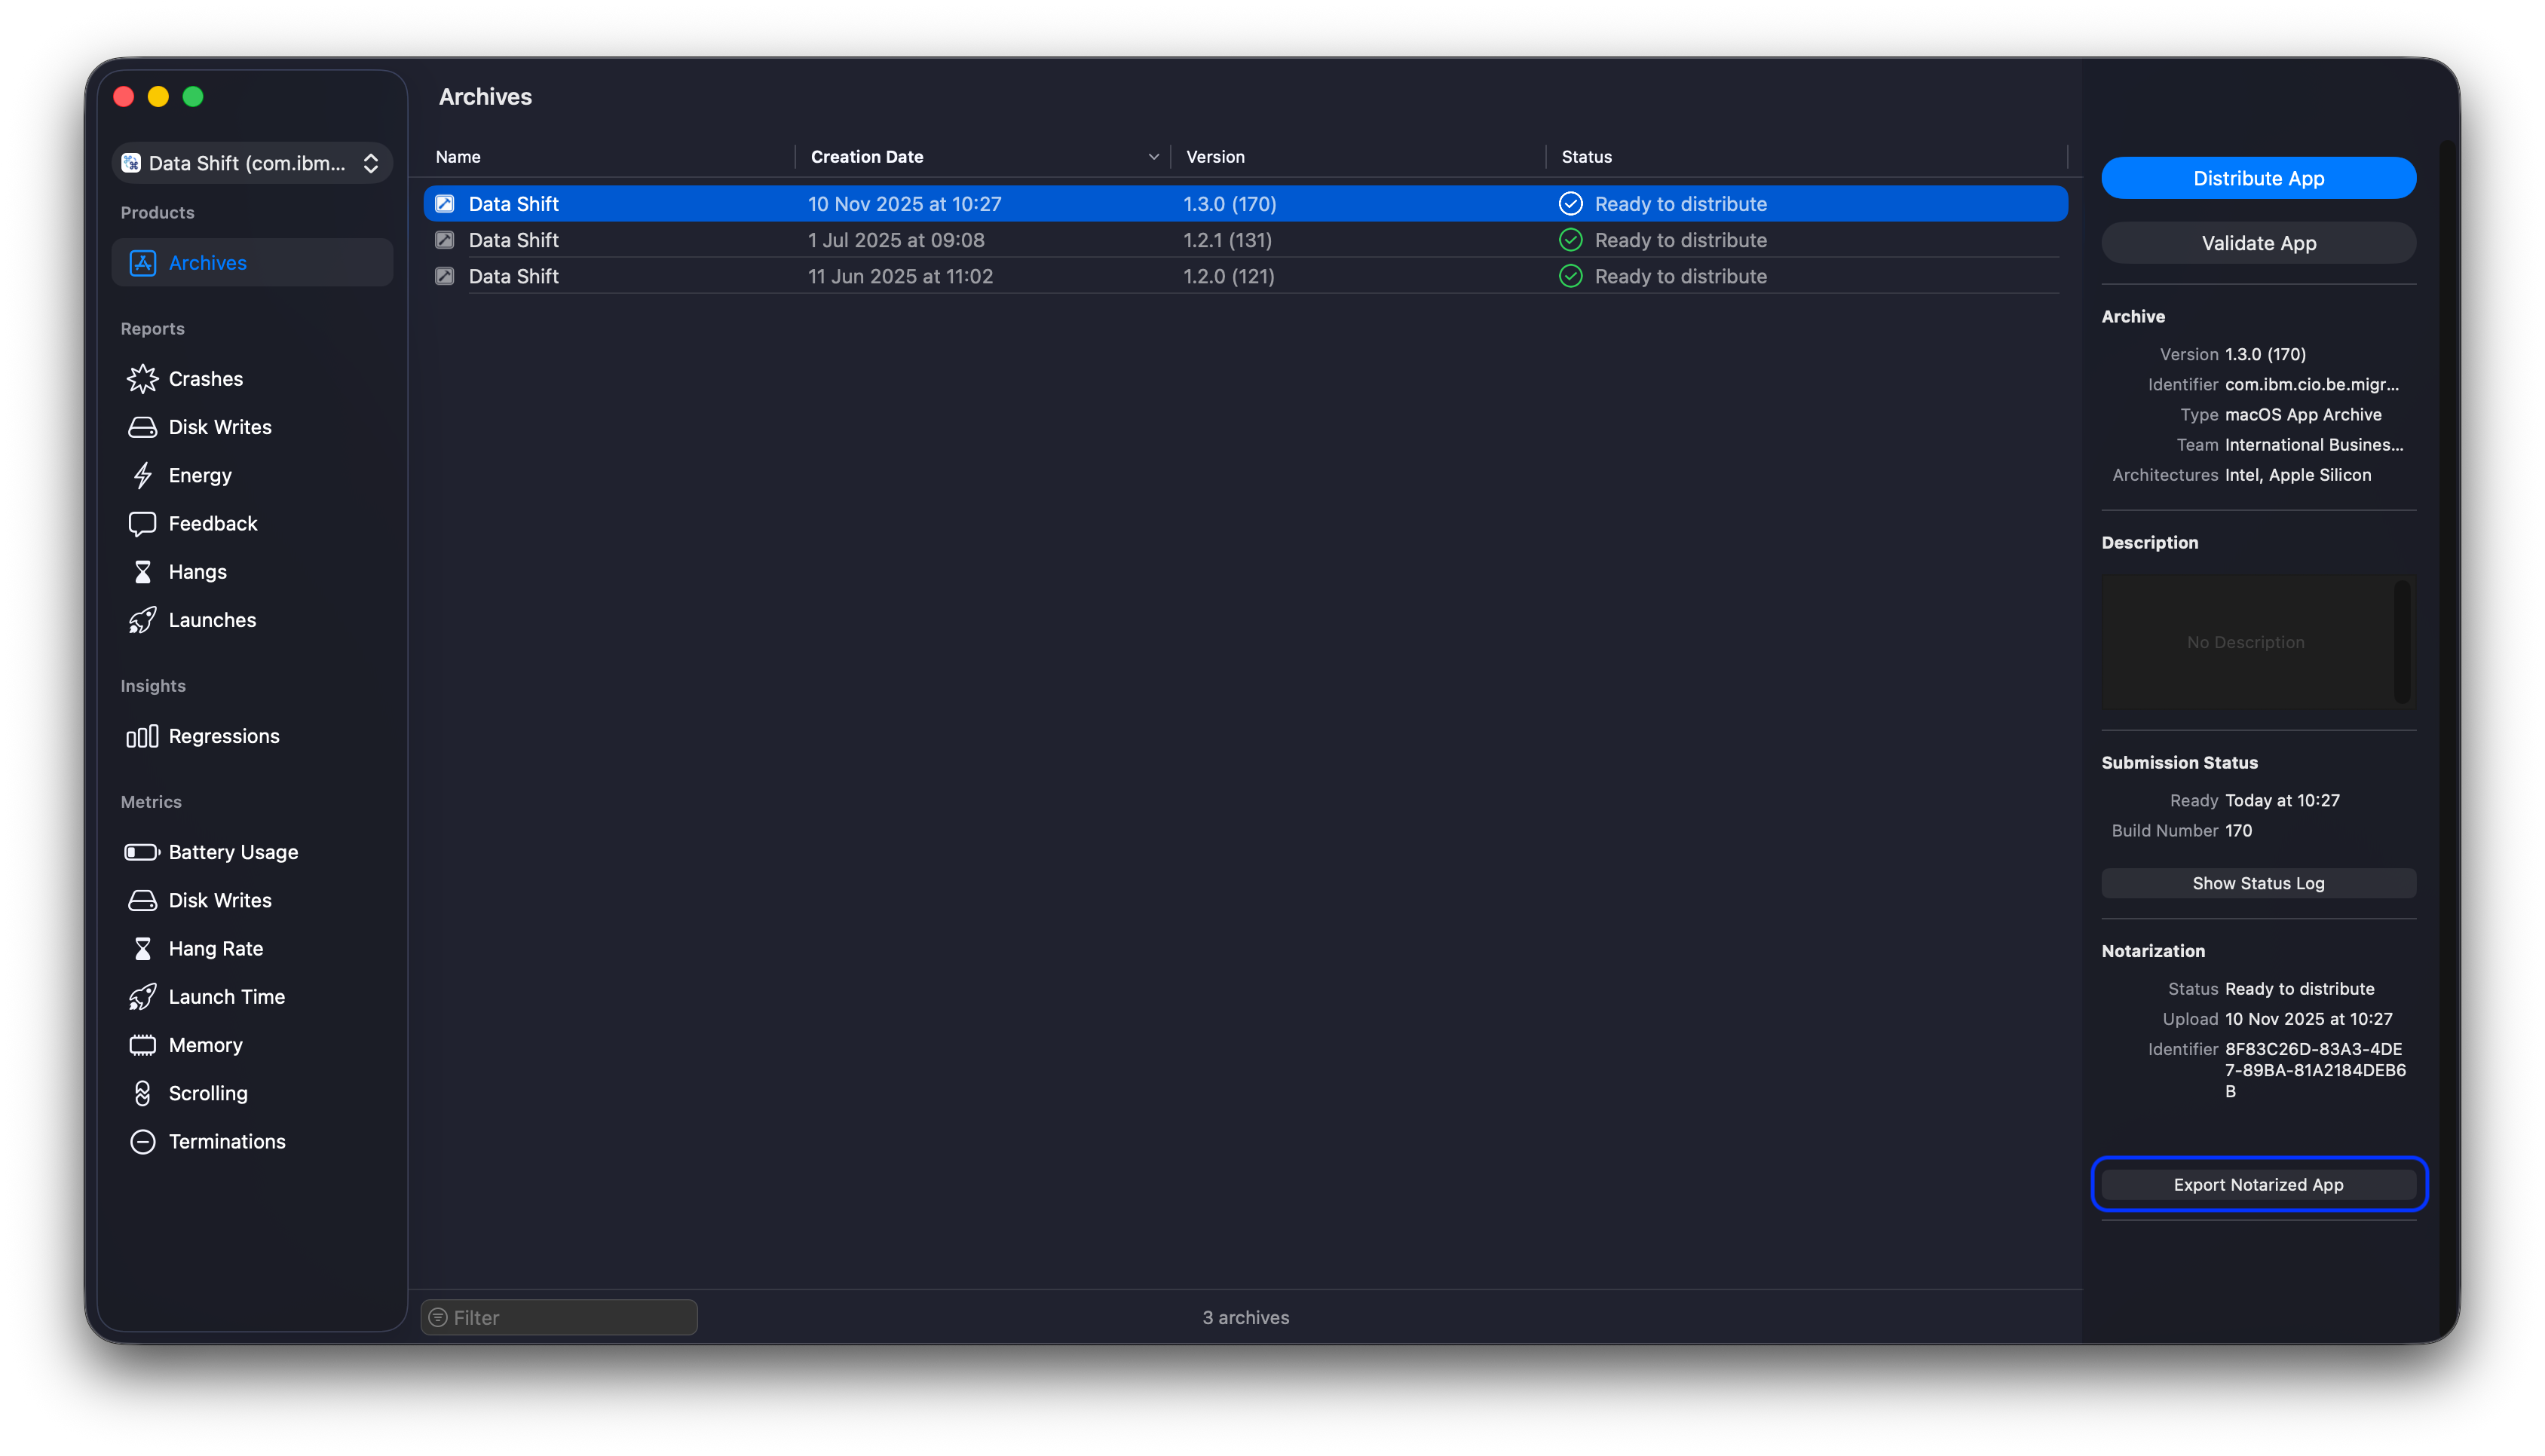
- Wait for the Apple notarization service to complete its checks. When done, the archive in the Organizer shows the Ready to distribute status.
-
Click Export Notarized App to save the signed and notarized app locally. It is now ready to distribute.
After distributing, deploy a PPPC profile so users aren’t prompted for file access.