MODULE 2 | DELEGATE
APPLYING AGENTIC MODES
i. Why this matters
It's now time to apply the full Plan → review → new conversation → Agent workflow towards a set of Galaxium Travels features that cut across the frontend, the backend, and the database of the application. A truly comprehensive cross-section of the application architecture will need to be modified — and thankfully, IBM Bob is up to the challenge.
You are going to give Galaxium Travels end-users three tiers of seating options to select from with booking their extraplanetary tours: Economy, Business, and Galaxium class. Throughout this process, take note of two things: first, the increased weighting placed on IBM Bob for execution of the requested tasks; and second, the heightened importance for the user (you) in understanding and reviewing the plan of action that Bob's agentic AI processes will act upon.
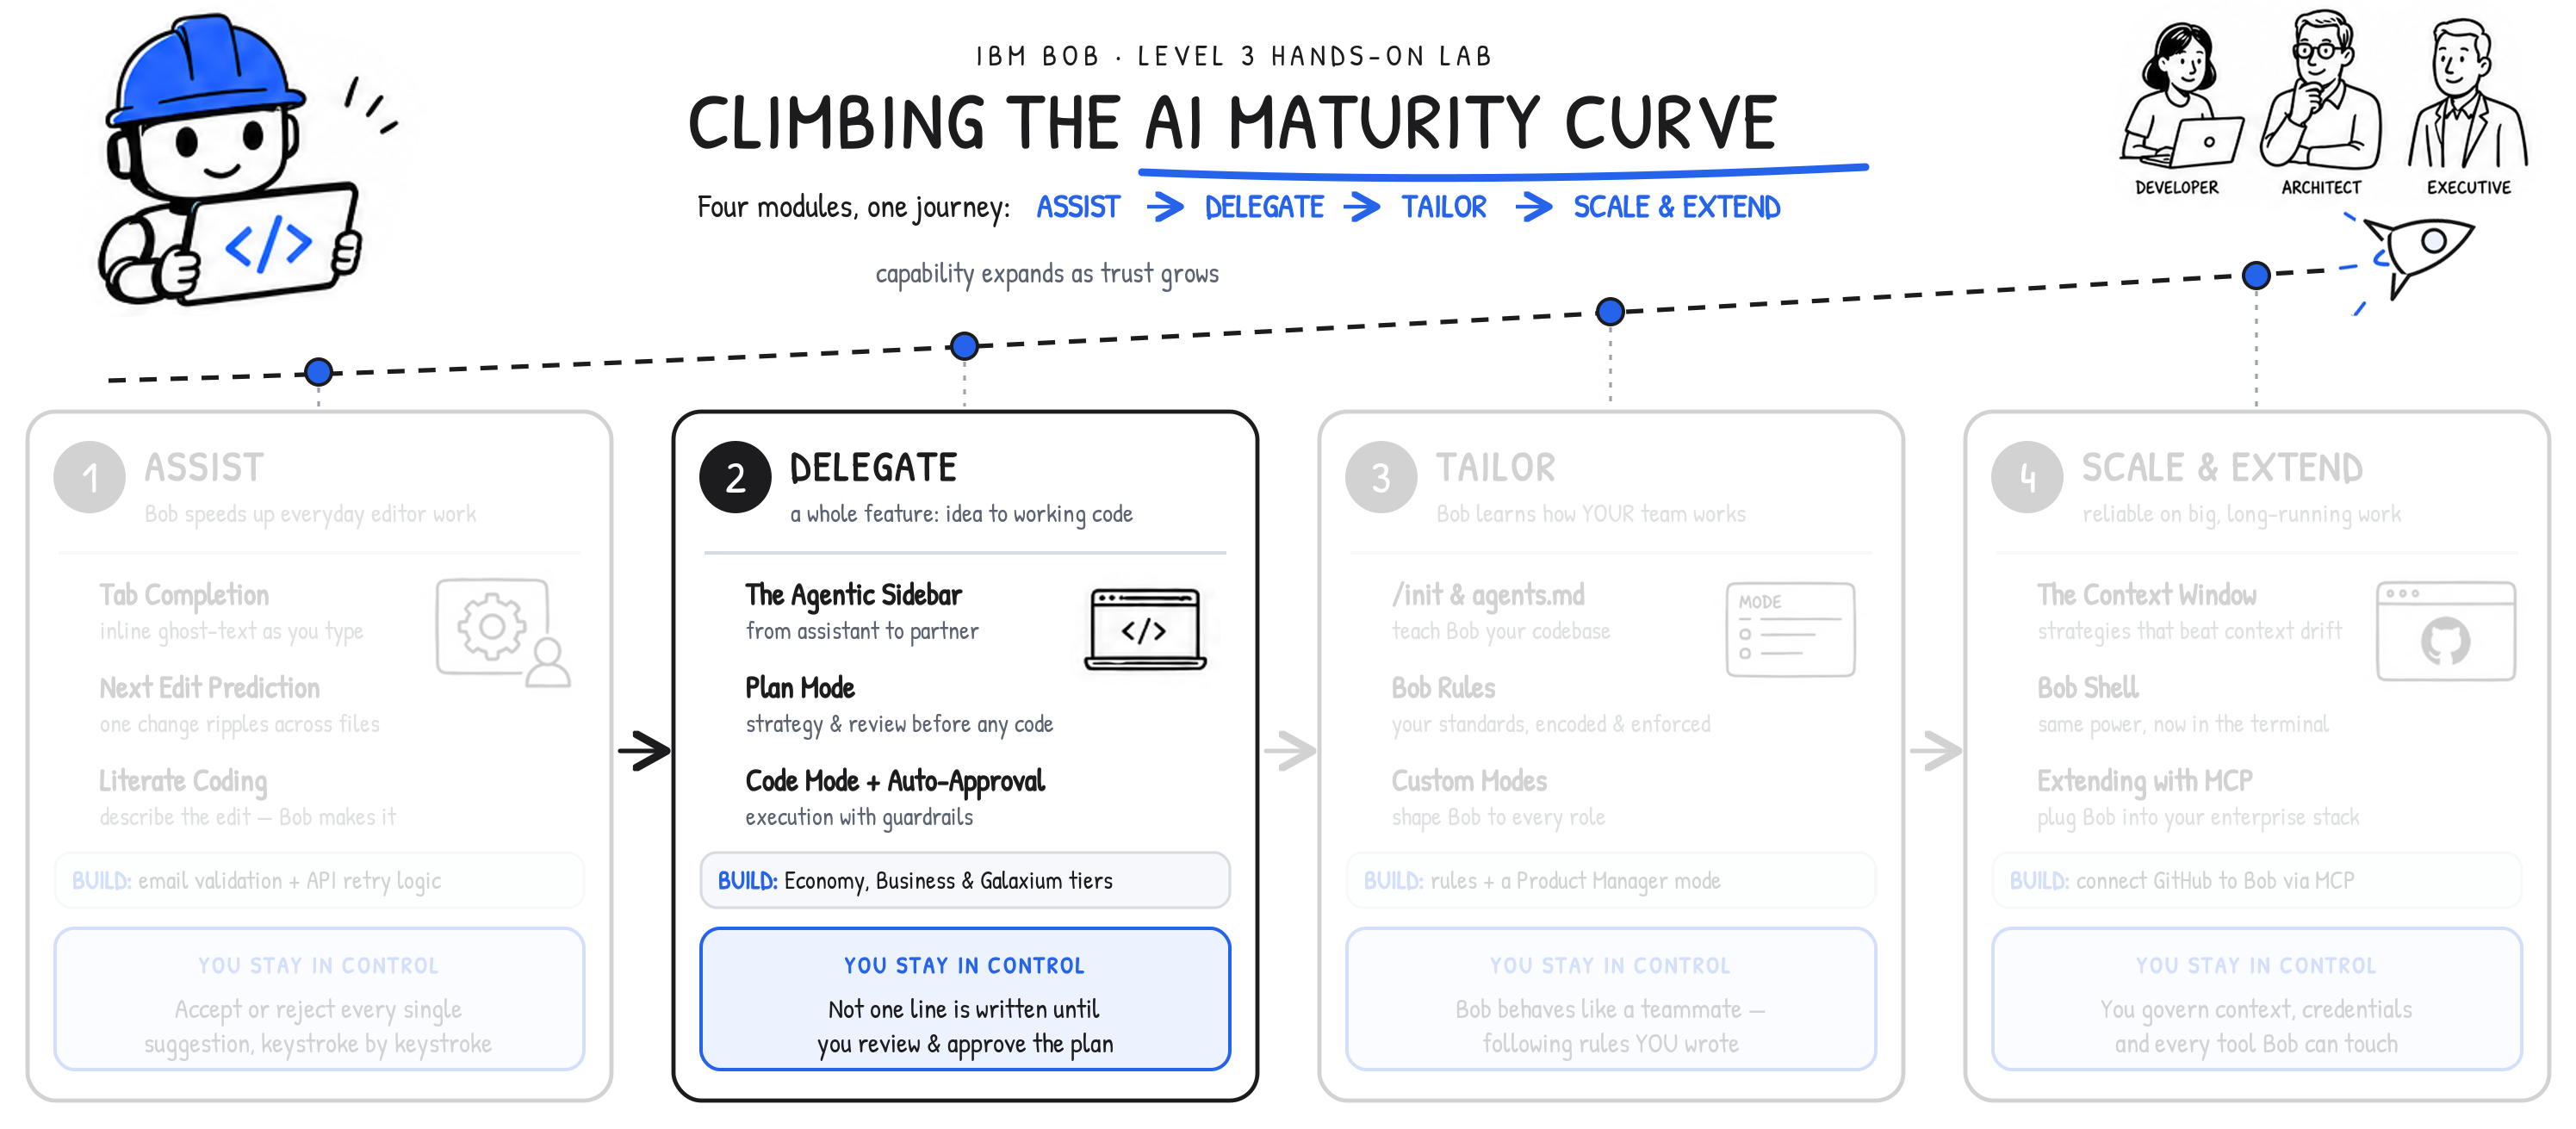
This mirrors where you are along your journeing in shifting right along the AI Maturity Curve. By the Delegate phase, your trust in the capacity of these AI systems to carry out work as asked will have increased from the nascent Assist entrypoint. Nevertheless, human-in-the-loop review and unambiguous execution plans remain of paramount importance as planned jobs become more automated (and sophisticated.)
ii. Hands-on: Scoping work for Galaxium Travels modifications (Plan Mode)
-
As discussed already, the Agentic Sidebar is Bob's most capable interface: the place it can read files, reason across the whole codebase, ask clarifying questions, and implement a new feature end-to-end.
You will use multiple modes when creating new features in the Galaxium Travels application. Each mode is designed for a specific phase of development. Let's put it to work adding seat classes to Galaxium Travels.
- Begin, as always, by planning: letting Bob draft the implementation plan with us before any code is written
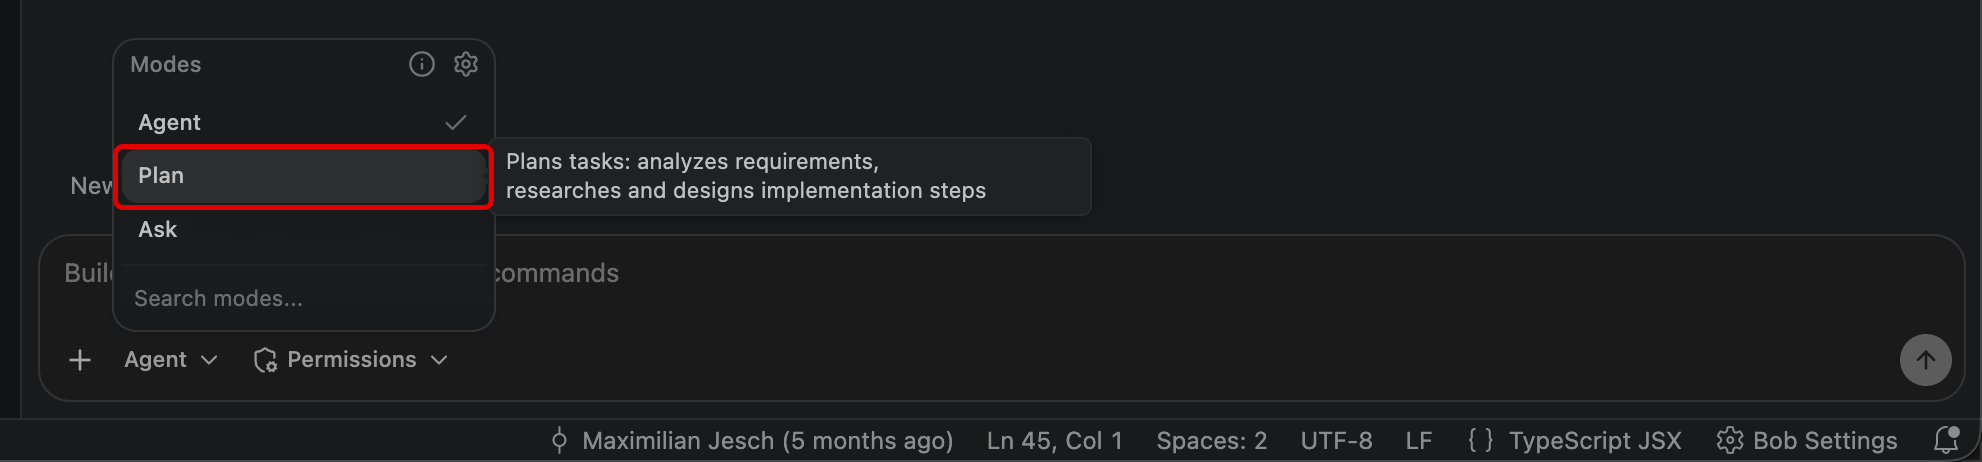
- Near the bottom of the agentic sidebar, expand the mode pop-up by pressing the Mode toggle
HOW TO: OPEN THE AGENTIC SIDEBAR
If the Agentic Sidebar is not automatically open within the Bob IDE, or if you close it and need to re-open the panel, click the Open Bob icon located to the right of the search bar in the top-center portion of the interface.

HOW TO: SWITCH BETWEEN DIFFERENT AGENTIC MODES
The label assigned to the Mode toggle button will change to reflect the name of the mode that the Agentic Sidebar currently has active. For example, if in the Agent mode, the toggle button will read as Agent. For the sake of clarity, when instructing you to change the Agentic Mode type, this documentation will refer to this toggle button as the Mode toggle.

-
Bob's modes tailor its level (and forms of) assistance to the task at hand: planning, implementing, debugging, or learning.
Click on Plan from the selected of Modes inside the agentic sidebar panel.
-
The IDE will automatically engage Plan mode, which can be confirmed by inspecting the bottom of the screen.
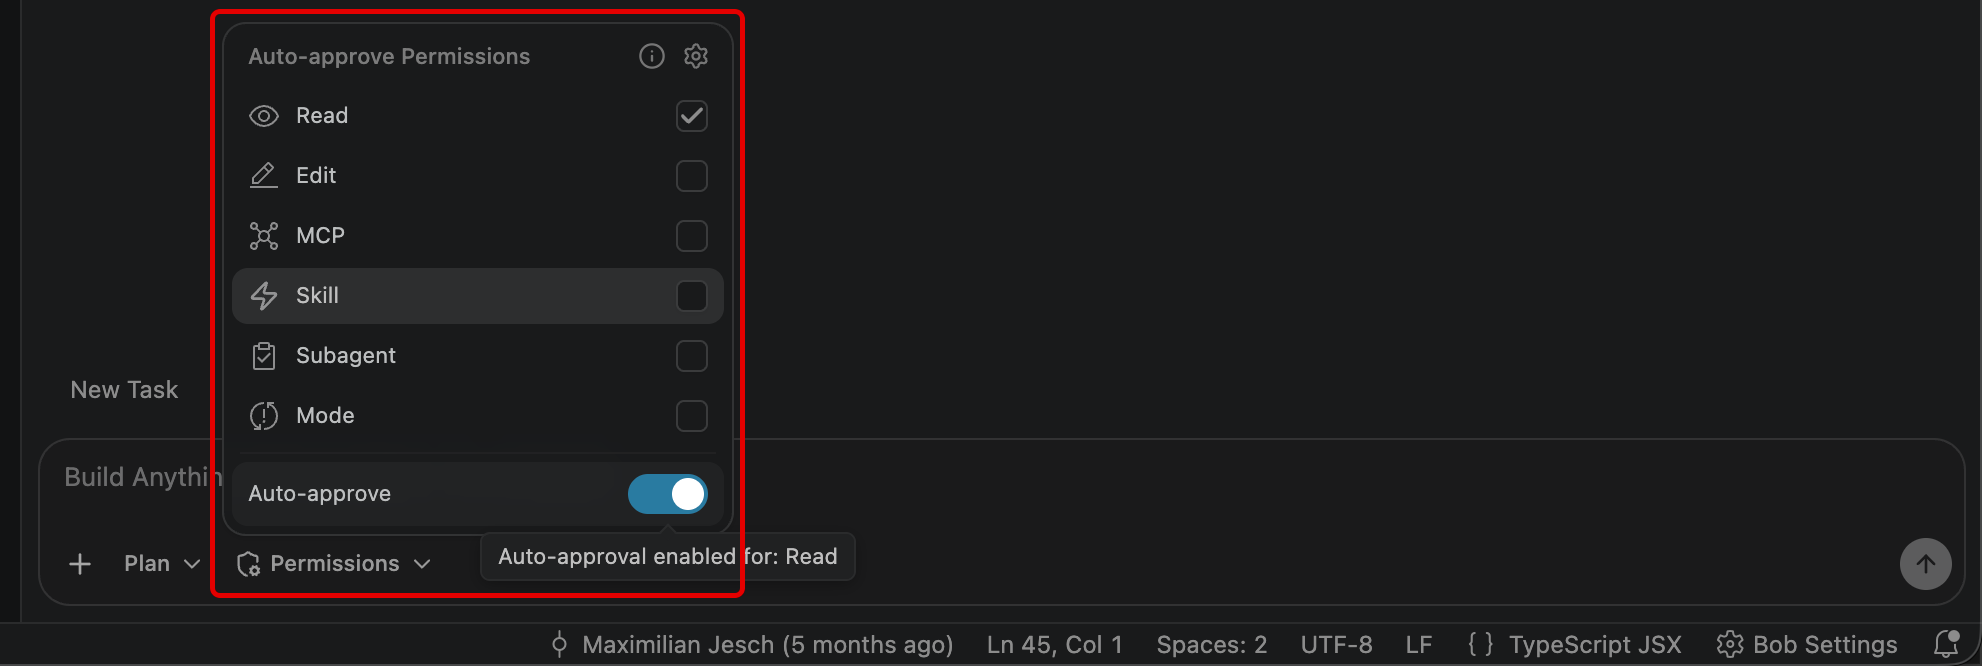
Next, you will need to determine the level of autonomy granted to the mode's ability to perform tasks with (or without) human input. Click the Permissions toggle to expose these details.

-
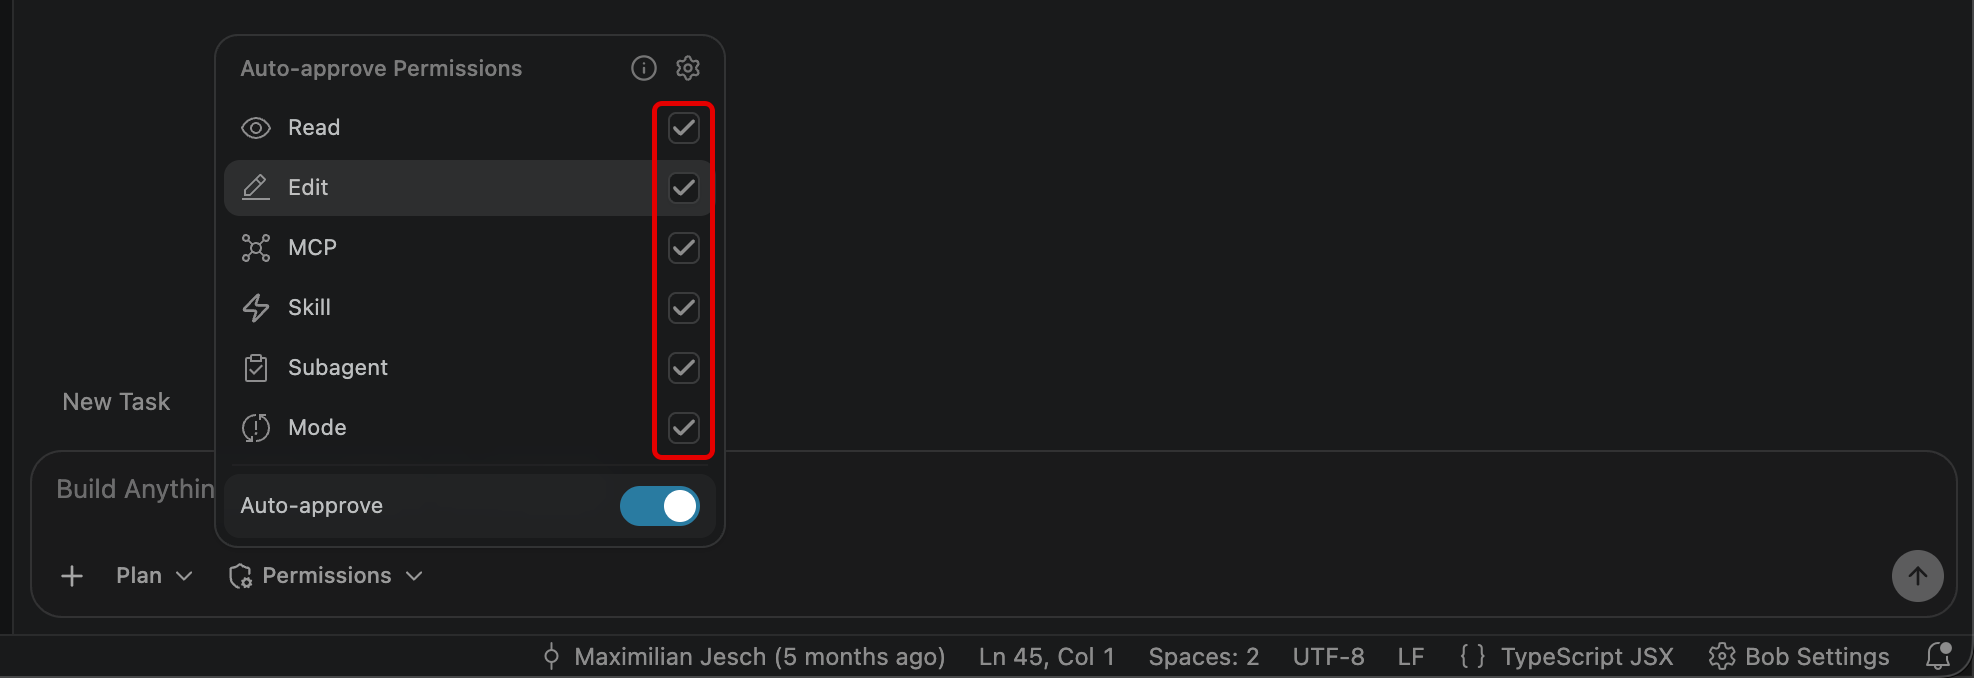
For now, allow every action to be executed by Bob automatically by toggling on (checking) all available options within the panel.
Click anywhere else within the Agentic Sidebar to save & close the toggle options.
For real-world projects, set auto-approval deliberately, according to how much control you're willing to delegate directly over to Bob.
-
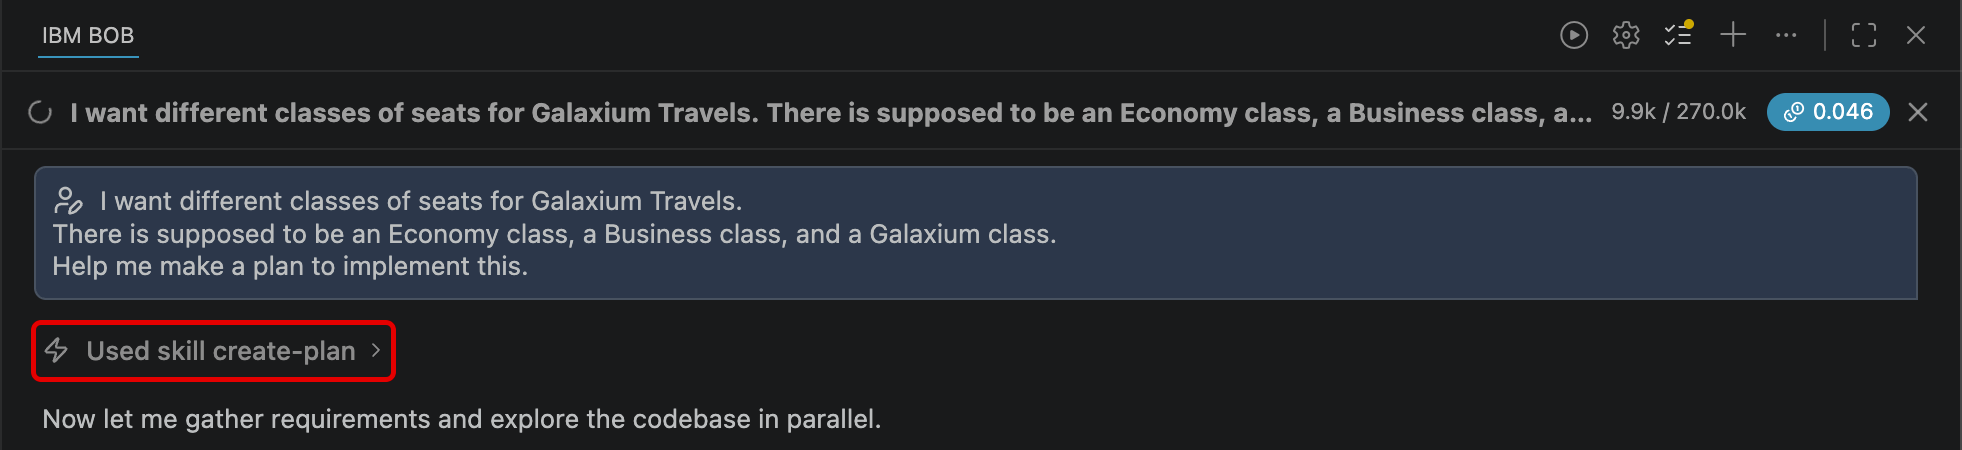
With Plan mode active and auto-approval enabled, copy and paste the following task into the Agentic Sidebar session window:
I want different classes of seats for Galaxium Travels.
There is supposed to be an Economy class, a Business class, and a Galaxium class.
Help me make a plan to implement this.
-
With the prompt entered, hit Enter or press the Send button to the right of the chat interface.
-
Bob will first execute the
create-planSkill and begin to research the codebase to understand the existing structure, before asking clarifying questions of the user (you).QUIZ QUESTION - IBM BOB LEVEL 4
If you are planning to pursue IBM Bob Level 4 accreditation, what is rendered on-screen or returned within a console as a result of this step are likely referenced as part of a multiple-choice question. It is strongly recommend that you record to a notebook (for reference later) details about which Skill that Bob executes first.
ATTENTION: NON-DETERMINISTIC WORK AHEAD
Bob's responses are non-deterministic, so questions posed to you within your Bob IDE may differ from those shown here. It's also possible you may receive no clarifying questions at all.
IBM Bob is powered by generative AI and LLMs, and a defining trait of these systems is that they are non-deterministic — unlike the deterministic tools most developers are accustomed to. In practice, that means the same prompt can produce different code from one run to the next. This is both a strength and a quirk of the technology, and it is something to work with rather than against.
All this is to say: Your results ahead may vary. The key takeaway from these workflows is that you understand how to effectively utilize each of Bob's Modes and where their strengths are best applied. Whether or not you arrive at the exact same codebase at the end is of less importance. Bob will ensure either way that your application works and delivers more-or-less what you asked for. The exact implementation and steps that Bob takes to arrive at that result, however, may differ from the steps documented here.
-
The first point of clarification asked for by Bob: Should the three seat classes (Economy, Business, Galaxium) have different pricing, and if so, how should prices be calculated — a fixed price per class per flight, or a multiplier on the base flight price?
- This questioning is accompanied by three recommended (and click-able) responses
- You can always enter your own response at the bottom of the chat session, as well
- Select the "Use a multiplier on the base price (e.g. Economy = 1x, Business = 1.5x, Galaxium = 2.5x)" option to construct a range of seat classes with varying associated price rates
QUIZ QUESTION - IBM BOB LEVEL 4
If you are planning to pursue IBM Bob Level 4 accreditation, what is rendered on-screen or returned within a console as a result of this step are likely referenced as part of a multiple-choice question. It is strongly recommend that you record to a notebook (for reference later) details about which multipliers you selected on the base price.
-
A second follow-up question: "Should each seat class have its own separate seat availability count per flight (e.g. 10 economy seats, 5 business seats, 2 Galaxium seats), or should all classes draw from one shared pool of seats?"
Select the "Each class has its own seat count per flight (separate availability tracking per class)" option.
-
A third follow-up question: "Where in the UI should the user choose their seat class? Should they pick it when browsing flights (on the FlightCard), or when they confirm the booking (inside the BookingModal)?"
Select the "In the BookingModal — the user picks a class as part of confirming the booking" option.
-
A fourth follow-up question: "Should the booked seat class be visible in the user's booking history (MyBookings page and BookingCard)?"
Select the "Yes — show the seat class on each booking in the history" option.
-
A fifth follow-up question: "Should the FlightCard display per-class seat availability (e.g. "Economy: 8 seats, Business: 4 seats, Galaxium: 2 seats"), or just show the lowest/most relevant availability as it does now?"
Select the "Show per-class availability on the FlightCard (e.g. a small breakdown for each class)" option.
WRAPPING UP THE PLAN PHASE
Bob will then confirm it has all the clarifying details it requires of the user, and will begin carrying on the remainder of the work. It begins by exploring the various directories and files of the project in order to understand the full picture of the front-end and back-end components.
Recall that IBM Bob's Plan Mode is a read-only mode. It is intended for design tasks, architecture analysis, technical specifications, and breaking down problems into sequential workflows — all performed without making any code changes.
Bob will potentially follow-up the summary of the Plan Mode actions with additional clarifying questions, which you can answer or ignore for now (recommended).
Bob can generate one or more Markdown (.md) plan files, with various potential names that will be specific to your project. For example, Bob might generate Markdown files such as SEAT_CLASSES_IMPLEMENTATION_PLAN.md, implementation-checklist.md, seat-classes-architecture.md, or seat-classes-implementation-plan.md.
QUIZ QUESTION - IBM BOB LEVEL 4
If you are planning to pursue IBM Bob Level 4 accreditation, what is rendered on-screen or returned within a console as a result of this step are likely referenced as part of a multiple-choice question. It is strongly recommend that you record to a notebook (for reference later) details about the names of the two documents saved to the project that the implementation conversation then referenced.
The plan includes a complete summary of proposed changes to the application stack, including:
- Database
- Backend service
- API schema
- Frontend types
- UI components
Additionally, the Plan Mode outlines the key decisions baked into the plan itself: pricing, seat availability, where Class is chosen, FlightCard display, DB migration, and more.
iii. Hands-on: Implementing seat class changes (Agent Mode)
Once the implementation plan document(s) appear, the Plan mode phase is essentially complete. Inspect and review the plans that Bob has created based on your requested workflow. Bob will have generated a seat-classes-plan.md Markdown file which can be inspected in-line within the chat session, or double-clicked to open within the Bob IDE editor (center panel).
ATTENTION: NON-DETERMINISTIC WORK AHEAD
Bob's responses are non-deterministic, so questions posed to you within your Bob IDE may differ from those shown here. It's also possible you may receive no clarifying questions at all.
IBM Bob is powered by generative AI and LLMs, and a defining trait of these systems is that they are non-deterministic — unlike the deterministic tools most developers are accustomed to. In practice, that means the same prompt can produce different code from one run to the next. This is both a strength and a quirk of the technology, and it is something to work with rather than against.
All this is to say: Your results ahead may vary. The key takeaway from these workflows is that you understand how to effectively utilize each of Bob's Modes and where their strengths are best applied. Whether or not you arrive at the exact same codebase at the end is of less importance. Bob will ensure either way that your application works and delivers more-or-less what you asked for. The exact implementation and steps that Bob takes to arrive at that result, however, may differ from the steps documented here.
-
When ready to move from planning (Plan mode) to implementation (Agent mode), copy and paste the following statement into the chat window and press Enter to execute:

-
Bob will automatically switch into Agent mode at your request, which you can visually confirm by looking at the Mode toggle button and also see expressed in written form within the Agentic Sidebar chat window.
HOW TO TOGGLE DIFFERENT AGENTIC MODES
The label assigned to the Mode toggle button will change to reflect the name of the mode that the Agentic Sidebar currently has active. For example, if in the Agent mode, the toggle button will read as Agent. For the sake of clarity, when instructing you to change the Agentic Mode type, this documentation will refer to this toggle button as the Mode toggle.

CHANGES AWAITING APPROVAL
You may have noticed that with the change to Agent mode, Bob is once again providing more permission "checkpoints" in the process — asking for your direct approval of actions before carrying them out, keeping you in control of the process. If you had set the previous Plan mode permissions to auto-approval (which this lab guide had recommended), this will be particularly evident. This is partly because of the switch within the Agentic Sidebar Mode from Plan to Agent — previous permission settings that were applied to Plan mode do not carry over automatically (by design) to Agent mode. However, this is also owing to the need for greater scrutiny and permissions-awareness when graduating from a read-only agent (Plan) to an agent with write and execute capabilities (Agent).
-
Once Bob has activated Agent mode, it will generate an Update Todo List with the following (or similar) sub-tasks:
| TASK | OBJECTIVES |
|---|---|
| Sub-Task 1 | Extend the backend data model (models.py, seed.py) |
| Sub-Task 2 | Update backend schemas and booking service (schemas.py, services/booking.py, server.py) |
| Sub-Task 3 | Update frontend types and API service (types/index.ts, utils/seatClasses.ts, services/api.ts) |
| Sub-Task 4 | Add seat class selector to BookingModal |
| Sub-Task 5 | Update FlightCard to show per-class availability |
| Sub-Task 6 | Show seat class in booking history (BookingCard.tsx) |
SEQUENCING THE SUB-TASKS
In the steps ahead, you will examine in detail what each Sub-Task is performing and understand the rationale for the change. With your approval, Bob will then go ahead and implement the work on your behalf.
Sub-Task 1: Extend the backend data model (models.py, seed.py)
The current database schema stores a single integer seats_available on the Flight table, which treats all seats as interchangeable. To support three distinct seat classes, we need to split this into three independent columns — economy_seats, business_seats, and galaxium_seats — each tracking its own count. This is a deliberate database design choice: storing them as separate columns (rather than a related table) keeps queries simple, since we always need all three counts together and they have a fixed, known set.
On the Booking side, we add a seat_class string column so every booking permanently records which class was reserved. This is critical for the cancel flow — when a booking is cancelled, the system needs to know which column to increment back.
In models.py we swap out the old seats_available column for the three new ones on the Flight ORM class, and add seat_class to Booking.
In seed.py we update all 10 demo flight records to use the new column names with realistic space-travel seat counts (Economy: 5–10, Business: 3–5, Galaxium: 1–2), and update the 20 demo bookings to each include a randomly assigned seat_class. Because the app uses SQLite and recreates the schema from scratch on every server start via init_db + seed, no migration tooling is needed — the old booking.db is simply dropped and rebuilt.
-
Within the Agentic Sidebar, you will be prompted with the following:
Ready to implement Sub-Task 1. Shall I go ahead?If you agree with the changes, type
Yesand Enter to approve Sub-Task 1 execution.
-
Continue approving any additional requests related to Sub-Task 1 until the Agentic Sidebar chat has reported back with a summary of
Sub-Task 1 is done. Here's what has changed.models.py: seats_available replaced witheconomy_seats,business_seats,galaxium_seatsonFlight;seat_classadded toBookingseed.py: All 10 demo flights now carry per-class seat counts. The booking loop picks a randomseat_classfor each of the 20 demo bookings
Sub-Task 2: Update backend schemas and booking service (schemas.py, services/booking.py, server.py)
The database model is now correct, but the three layers above it — Pydantic schemas, the booking service, and the FastAPI/MCP server — still reference the old seats_available field and know nothing about seat_class. This sub-task threads the new fields all the way up to the API boundary.
In schemas.py we swap seats_available for the three new seat fields on FlightOut (so the API response carries per-class counts), and add seat_class to both BookingRequest (what the client sends) and BookingOut (what the server returns).
In services/booking.py we update book_flight to accept seat_class, validate it against the three allowed values, look up the correct column (using a small SEAT_CLASS_MAP dict), check that class has seats, decrement only that column, and store seat_class on the new Booking record. We also update cancel_booking to read the booking's seat_class and increment the matching column — without this, cancellations would silently not restore the right class's count.
In server.py we pass request.seat_class through to the service on the REST endpoint, and add seat_class: str to the MCP tool signature so AI agents can also book with a class.
-
Within the Agentic Sidebar, you will be prompted with the following:
Ready to implement Sub-Task 2. Shall I go ahead?If you agree with the changes, type
Yesand Enter to approve Sub-Task 2 execution.
-
Continue approving any additional requests related to Sub-Task 2 until the Agentic Sidebar chat has reported back with a summary of
Sub-Task 2 is done. Here's what has changed.schemas.py:FlightOutnow exposeseconomy_seats,business_seats,galaxium_seats;BookingRequestandBookingOutboth carryseat_classservices/booking.py:book_flightnow acceptsseat_class, validates it againstVALID_SEAT_CLASSES, checks the right column for availability, decrements that column, and storesseat_classon the booking.cancel_bookingusesSEAT_CLASS_MAPto restore the correct columnserver.py: Both the REST endpoint and MCP tool passseat_classthrough to the service. The MCP docstring is updated to document the new parameter
Sub-Task 3: Update frontend types and API service (types/index.ts, utils/seatClasses.ts, services/api.ts)
The backend now speaks a new contract — three seat columns on flights, seat_class on bookings — but the frontend's TypeScript types still describe the old world. Until we fix that, every component that references flight.seats_available or booking.seat_class will have a type error, and nothing will compile correctly.
In types/index.ts we replace seats_available: number with economy_seats, business_seats, and galaxium_seats on the Flight interface, and add seat_class to both Booking and BookingRequest. This makes the type system enforce the new shape everywhere downstream — any component that hasn't been updated yet will immediately surface a compile error rather than a silent runtime bug.
We then create a brand-new utility file, utils/seatClasses.ts. This file is the single source of truth for all seat-class logic on the frontend: the SeatClass type alias, human-readable labels (SEAT_CLASS_LABELS), price multipliers (SEAT_CLASS_MULTIPLIERS), an ordered array (SEAT_CLASSES) for rendering options in a consistent sequence, and a getSeatClassPrice(basePrice, seatClass) helper that applies the multiplier. Centralising this means Sub-Tasks 4, 5, and 6 all import from one place — there's no risk of the multipliers drifting out of sync between components.
Finally, we verify services/api.ts — the bookFlight call already spreads the full BookingRequest object into the POST body, so once BookingRequest gains seat_class in the type definition, the API call will automatically include it with no code change needed.
-
Within the Agentic Sidebar, you will be prompted with the following:
Ready to implement Sub-Task 3. Shall I go ahead?If you agree with the changes, type
Yesand Enter to approve Sub-Task 3 execution.
-
Continue approving any additional requests related to Sub-Task 3 until the Agentic Sidebar chat has reported back with a summary of
Sub-Task 3 is done. Here's what has changed.types/index.ts: Flight now haseconomy_seats,business_seats,galaxium_seatsinstead ofseats_available.BookingandBookingRequestboth carryseat_classas a typed literal unionutils/seatClasses.ts: New utility file — the single source of truth for all seat-class logic. ExportsSeatClasstype,SEAT_CLASSESordering array,SEAT_CLASS_LABELS,SEAT_CLASS_MULTIPLIERS,getSeatClassPrice(), andgetSeatCount()services/api.ts: No changes needed —bookFlightalready posts the fullBookingRequestobject, soseat_classwill flow through automatically now that the type is updated
Sub-Task 4: Add seat class selector to BookingModal
This is the core user-facing change. Right now the BookingModal shows a static price and a single "Confirm Booking" button — there's no concept of class. We need to insert a class selector so the user can choose Economy, Business, or Galaxium before confirming.
We'll add a selectedClass state variable (defaulting to 'economy') and render three clickable option cards — one per class — in a "Select Seat Class" section above the price summary. Each card shows the class label, the number of seats remaining for that class (pulled from flight.economy_seats etc.), and the calculated price using getSeatClassPrice. Cards where that class has 0 seats will be visually dimmed and pointer-events disabled so they can't be selected. The "Total Price" display will reactively update as the user switches class. When the user hits "Confirm Booking", the bookFlight call will include seat_class: selectedClass.
The default selection logic also needs one nuance: if Economy is sold out on open, we should default to the first available class rather than leaving the user on a disabled option. We'll handle this with a useMemo that picks the first class with seats when the modal opens.
-
Within the Agentic Sidebar, you will be prompted with the following:
Ready to implement Sub-Task 4. Shall I go ahead?If you agree with the changes, type
Yesand Enter to approve Sub-Task 4 execution.
-
Continue approving any additional requests related to Sub-Task 4 until the Agentic Sidebar chat has reported back with a summary of
Sub-Task 4 is done. Here's what has changed.- The following changes were implemented within
BookingModal.tsx - Imports
useMemo,SEAT_CLASSES,SEAT_CLASS_LABELS,getSeatClassPrice,getSeatCount, and theSeatClasstype from the new utility - A
defaultClassmemo picks the first class with seats when the flight changes (falls back to'economy') selectedClassstate drives the UI, and resets whenever a new flight is passed in- A new "Select Seat Class" section renders three buttons — each showing the label, seat count, and per-class price Zero-seat options are dimmed and disabled
- The Total Price banner now shows
getSeatClassPrice(flight.price, selectedClass)so it updates in real time as the user toggles - The
bookFlightcall includesseat_class: selectedClass
- The following changes were implemented within
Sub-Task 5: Update FlightCard to show per-class availability
The FlightCard is currently built around a single seats_available field that no longer exists on the Flight type — so right now it would fail to compile. We need to replace it with a compact three-row breakdown showing how many seats each class has on that flight.
The key design decisions here are: (1) "Sold Out" should only apply when all three classes are at zero, not just one; (2) the low-seat warning (the solar-orange colour) should apply per-class so users can see at a glance when a particular class is nearly full; and (3) the displayed price should gain a "from" label, since the actual price depends on the class selected during booking.
We'll import SEAT_CLASSES, SEAT_CLASS_LABELS, and getSeatClassPrice from utils/seatClasses.ts and render the availability rows as a small loop rather than hardcoding each one, keeping the component clean.
-
Within the Agentic Sidebar, you will be prompted with the following:
Ready to implement Sub-Task 5. Shall I go ahead?If you agree with the changes, type
Yesand Enter to approve Sub-Task 5 execution.
-
Continue approving any additional requests related to Sub-Task 5 until the Agentic Sidebar chat has reported back with a summary of
Sub-Task 5 is done. Here's what has changed.- The following changes were implemented within
FlightCard.tsx - Imports
SEAT_CLASSES,SEAT_CLASS_LABELS,getSeatClassPrice, andgetSeatCountfromutils/seatClasses.ts isLowSeats/isSoldOutbased on the oldseats_availablefield removed,isSoldOutnow only triggers when all three class counts are zero- The price label changes from "per seat" to "from", since Economy is always the lowest multiplier (1×), the displayed base price is the true minimum
- The single seats row is replaced by a three-row loop— one per class —with per-class low-seat warnings in
solar-orangeand faded text for sold-out classes
- The following changes were implemented within
Sub-Task 6 Show seat class in booking history (BookingCard.tsx)
This is the final piece. Once a booking is made with a seat class, users visiting the "My Bookings" page should be able to see which class they booked, and the price shown should reflect what they actually paid (base price × multiplier) rather than the raw base price.
In BookingCard.tsx we'll import SEAT_CLASS_LABELS and getSeatClassPrice from utils/seatClasses.ts. We'll add a small coloured badge next to the booking status showing the seat class label (e.g. "Business", "Galaxium Class"). Where the price row is rendered, we'll replace flight.price with getSeatClassPrice(flight.price, booking.seat_class) — guarded by the existing flight optional check — so the history accurately reflects the class-adjusted price.
-
Within the Agentic Sidebar, you will be prompted with the following:
Ready to implement Sub-Task 6. Shall I go ahead?If you agree with the changes, type
Yesand Enter to approve Sub-Task 6 execution.
-
Continue approving any additional requests related to Sub-Task 6 until the Agentic Sidebar chat has reported back with a summary of
Sub-Task 6 is done. Here's what has changed.- The following changes were implemented within
BookingCard.tsx - Imports
SEAT_CLASS_LABELSandgetSeatClassPricefromutils/seatClasses.ts - A small pill badge (purple, matching the app's cosmic palette) now sits next to the booking status showing "Economy", "Business", or "Galaxium Class"
- The price row uses
getSeatClassPrice(flight.price, booking.seat_class)so it shows the actual class-adjusted price the passenger paid, not the base
- The following changes were implemented within
-
That concludes the execution of all six Sub-Tasks, originally outlined in Bob's Plan mode and implemented via Agent mode. Within the Agentic Sidebar, you should see a similar summary report of the full surface area modified across the Project codebase:
FILE WHAT CHANGED models.pyseats_available→ 3 seat columns;seat_classonBookingseed.pyAll flights use 3-column seats; bookings get a random seat_classschemas.pyFlightOut,BookingRequest,BookingOutall updatedservices/booking.pyValidates class, decrements/increments the right column, stores seat_classserver.pyREST endpoint + MCP tool both thread seat_classthroughtypes/index.tsFlight,Booking,BookingRequestall updatedutils/seatClasses.tsNew SeatClasstype, labels, multipliers,getSeatClassPrice,getSeatCountBookingModal.tsx3-option class selector; dynamic price; seat_classin API callFlightCard.tsxPer-class seat breakdown; "from" price label; sold-out only when all 3 are 0 BookingCard.tsxSeat class badge; class-adjusted price in history seat-classes-plan.mdAll 6 sub-tasks marked doneQUIZ QUESTION - IBM BOB LEVEL 4
If you are planning to pursue IBM Bob Level 4 accreditation, what is rendered on-screen or returned within a console as a result of this step are likely referenced as part of a multiple-choice question. It is strongly recommend that you record to a notebook (for reference later) details about how many (and which) Sub-Tasks that Bob outlined in Plan mode and implemented in Agent mode.
-
Time to test the new application.
Before doing so, close any previously opened Terminal consoles which are running the
galaxium-travels(start.sh) service.
-
Open a new Terminal console (Terminal > New Terminal or press Ctrl + Shift + ~).
From the expandable options below, follow and execute the instructions aligned to your machine's OS (either Mac/Linux or Windows) in order to redeploy the Galaxium Travels application. After completing the instructions within the appropriate tab, proceed to the next step in the lab guide.
MAC OR LINUX
On macOS or Linux, run the following commands one at a time.
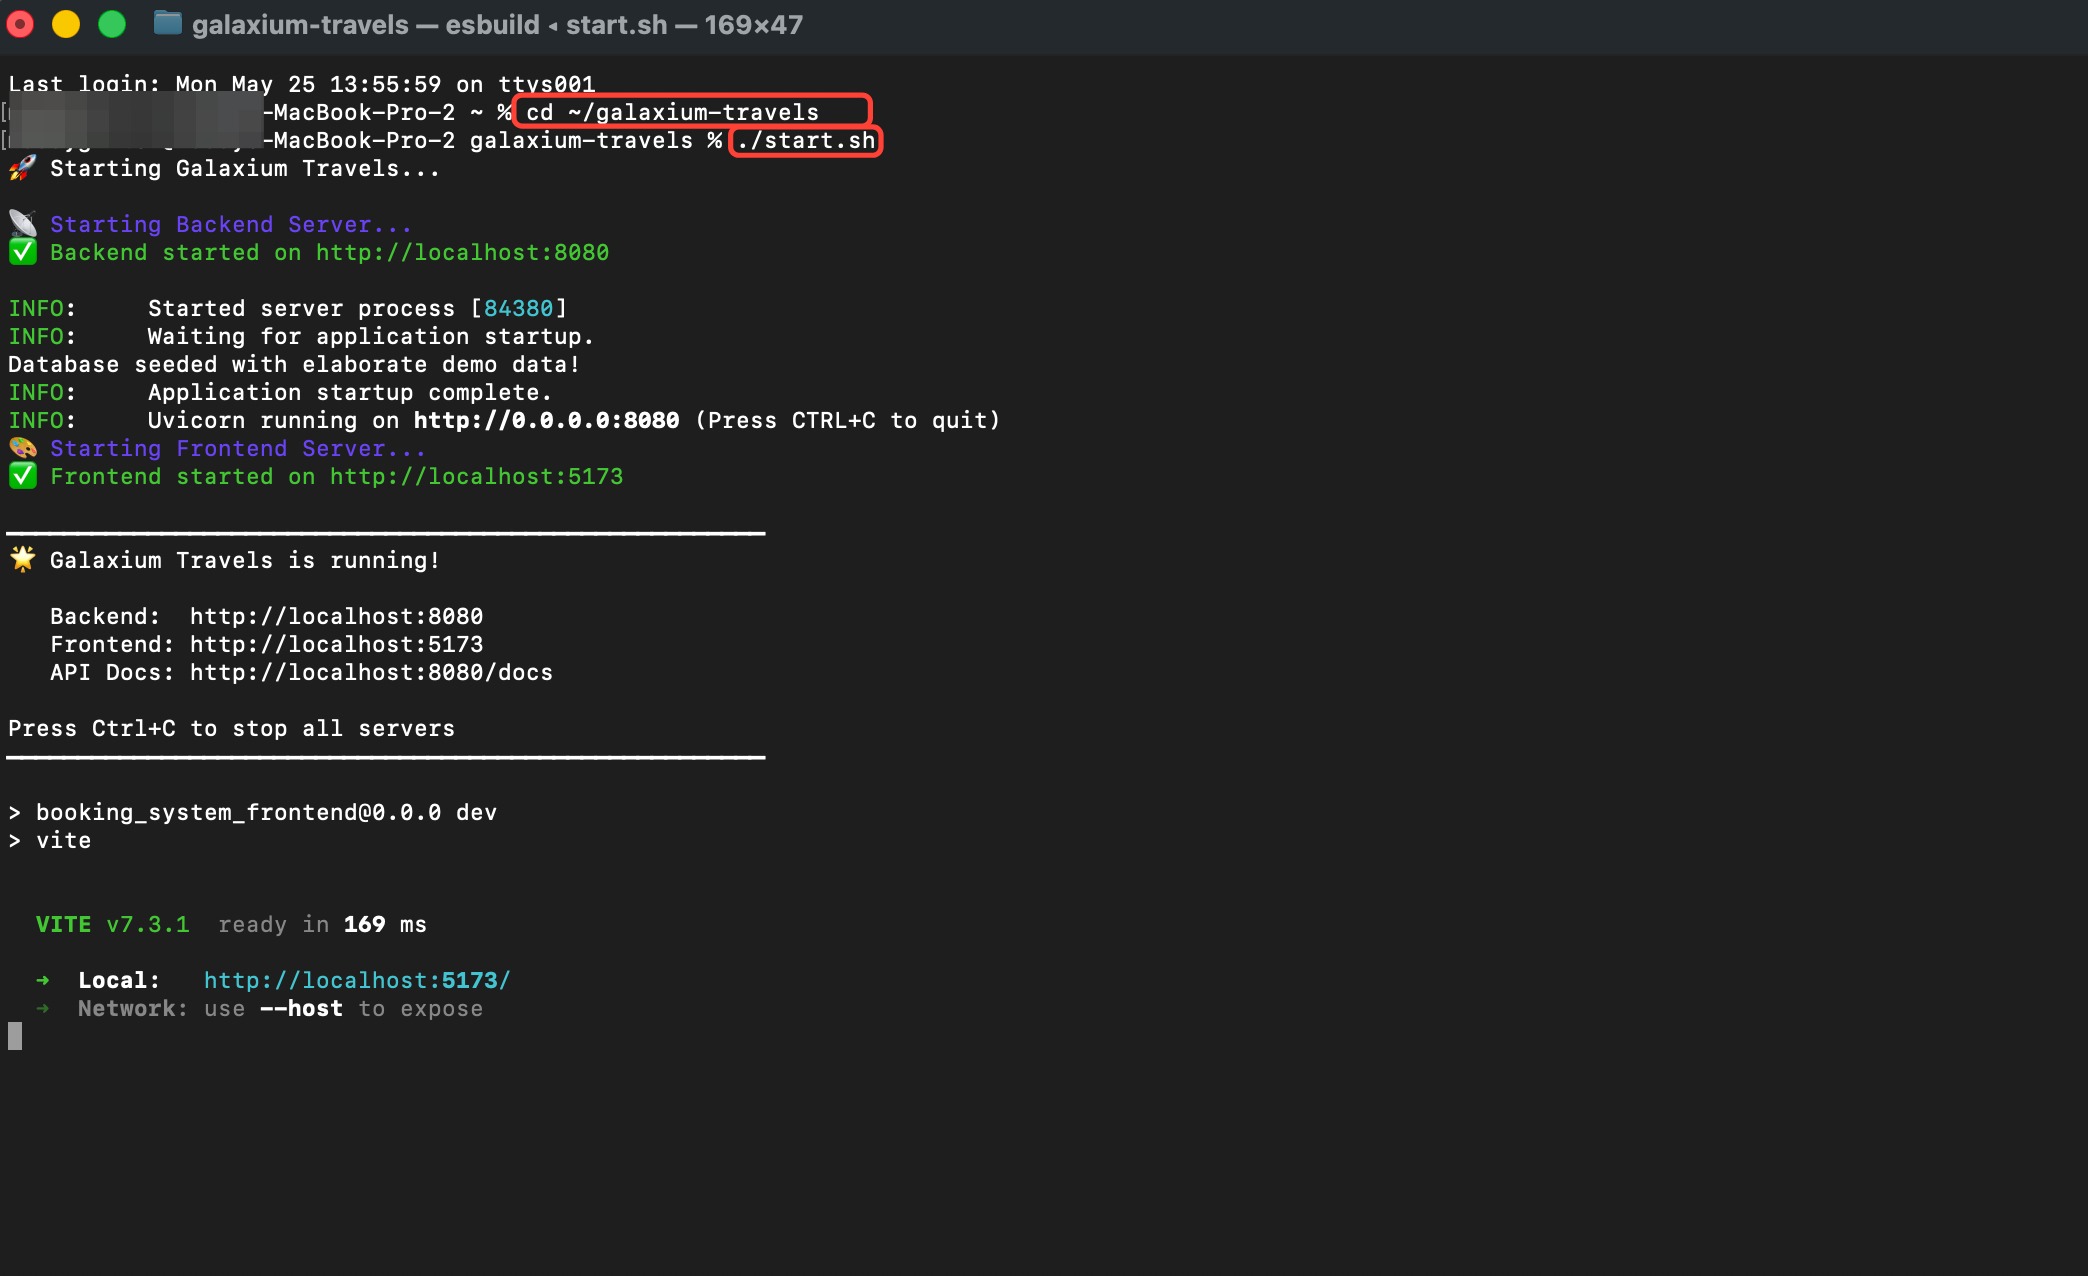
Step 1:
Step 2:
You should see a "Galaxium Travels is running!" prompt returned to the console (amongst other messages) once the application has deployed successfully.
WINDOWS OS
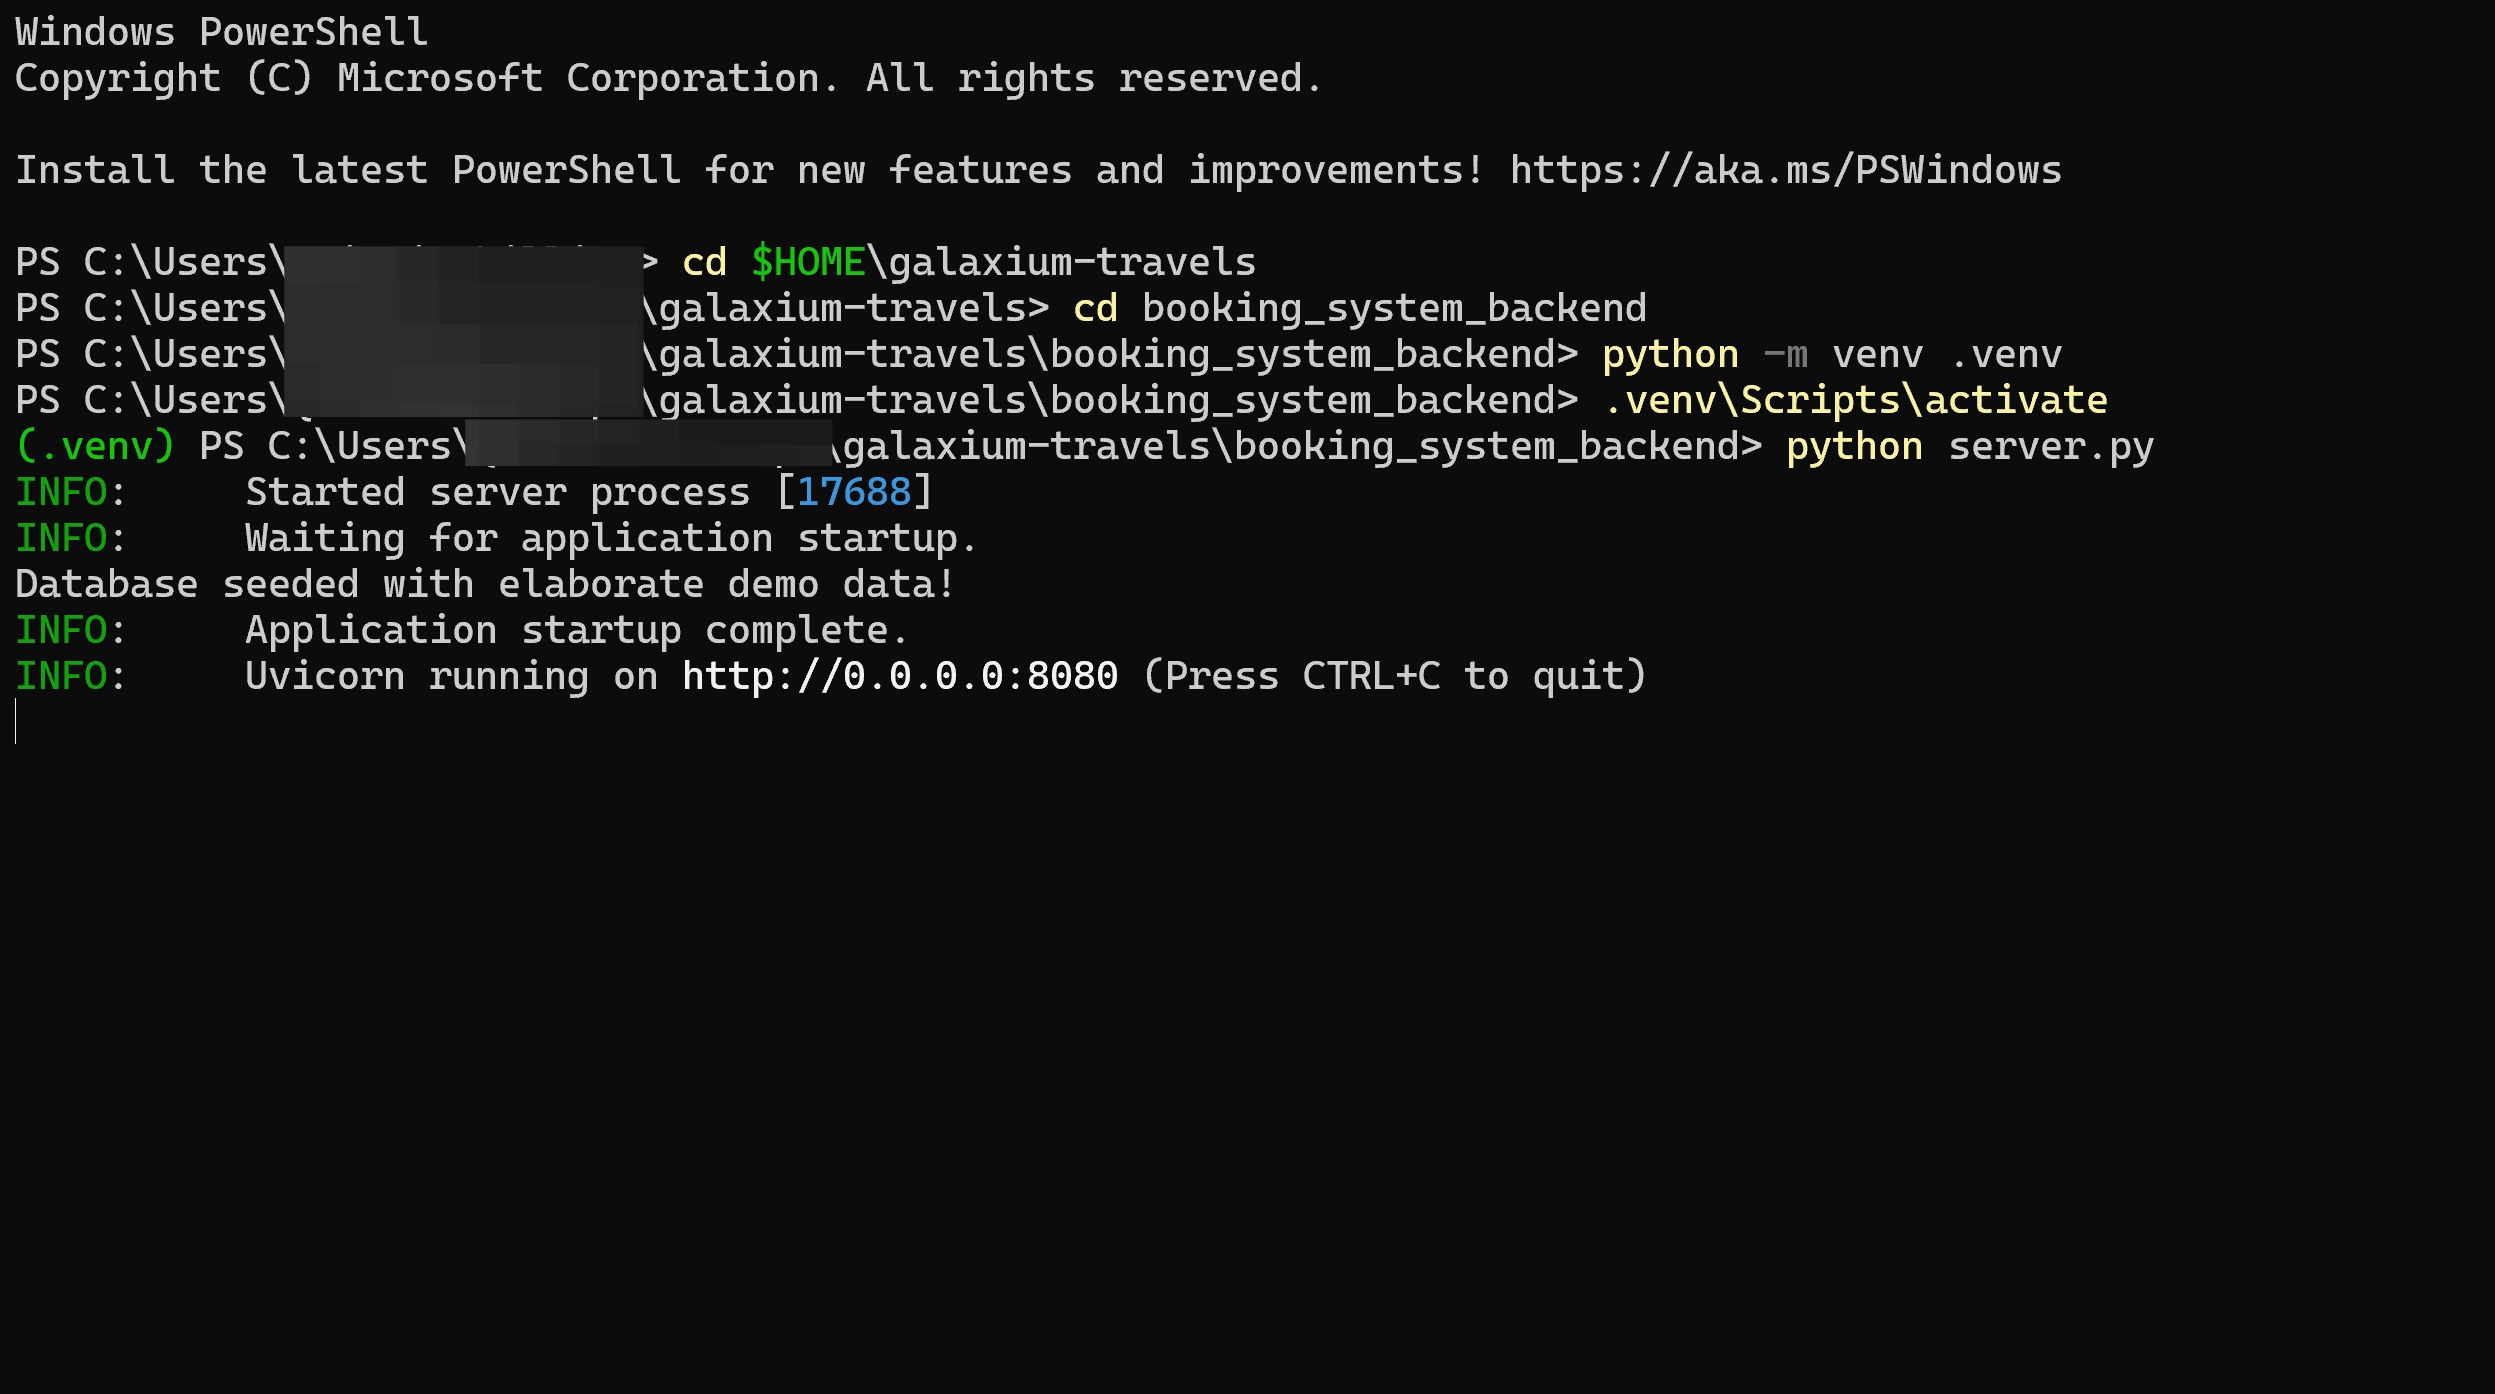
On Windows, run the following commands one at a time.
Step 1:
Step 2:
Step 3:
Step 4:
Step 5:
TROUBLESHOOTING:
error: .venv\Scripts\activate : File C:\Users\DeanMussari\galaxium-travels\booking_system_backend\.venv\Scripts\Activate.ps1 cannot be loadedIf execution of the
python server.pyinstruction for Step 5 produces this error on a Windows operating system machine, try copy and pasting (then Enter) the following command within the same Terminal window as before:Afterwards, repeat the same instruction from Step 5 before advancing with the lab documentation:
DO NOT CLOSE THE TERMINAL WINDOW
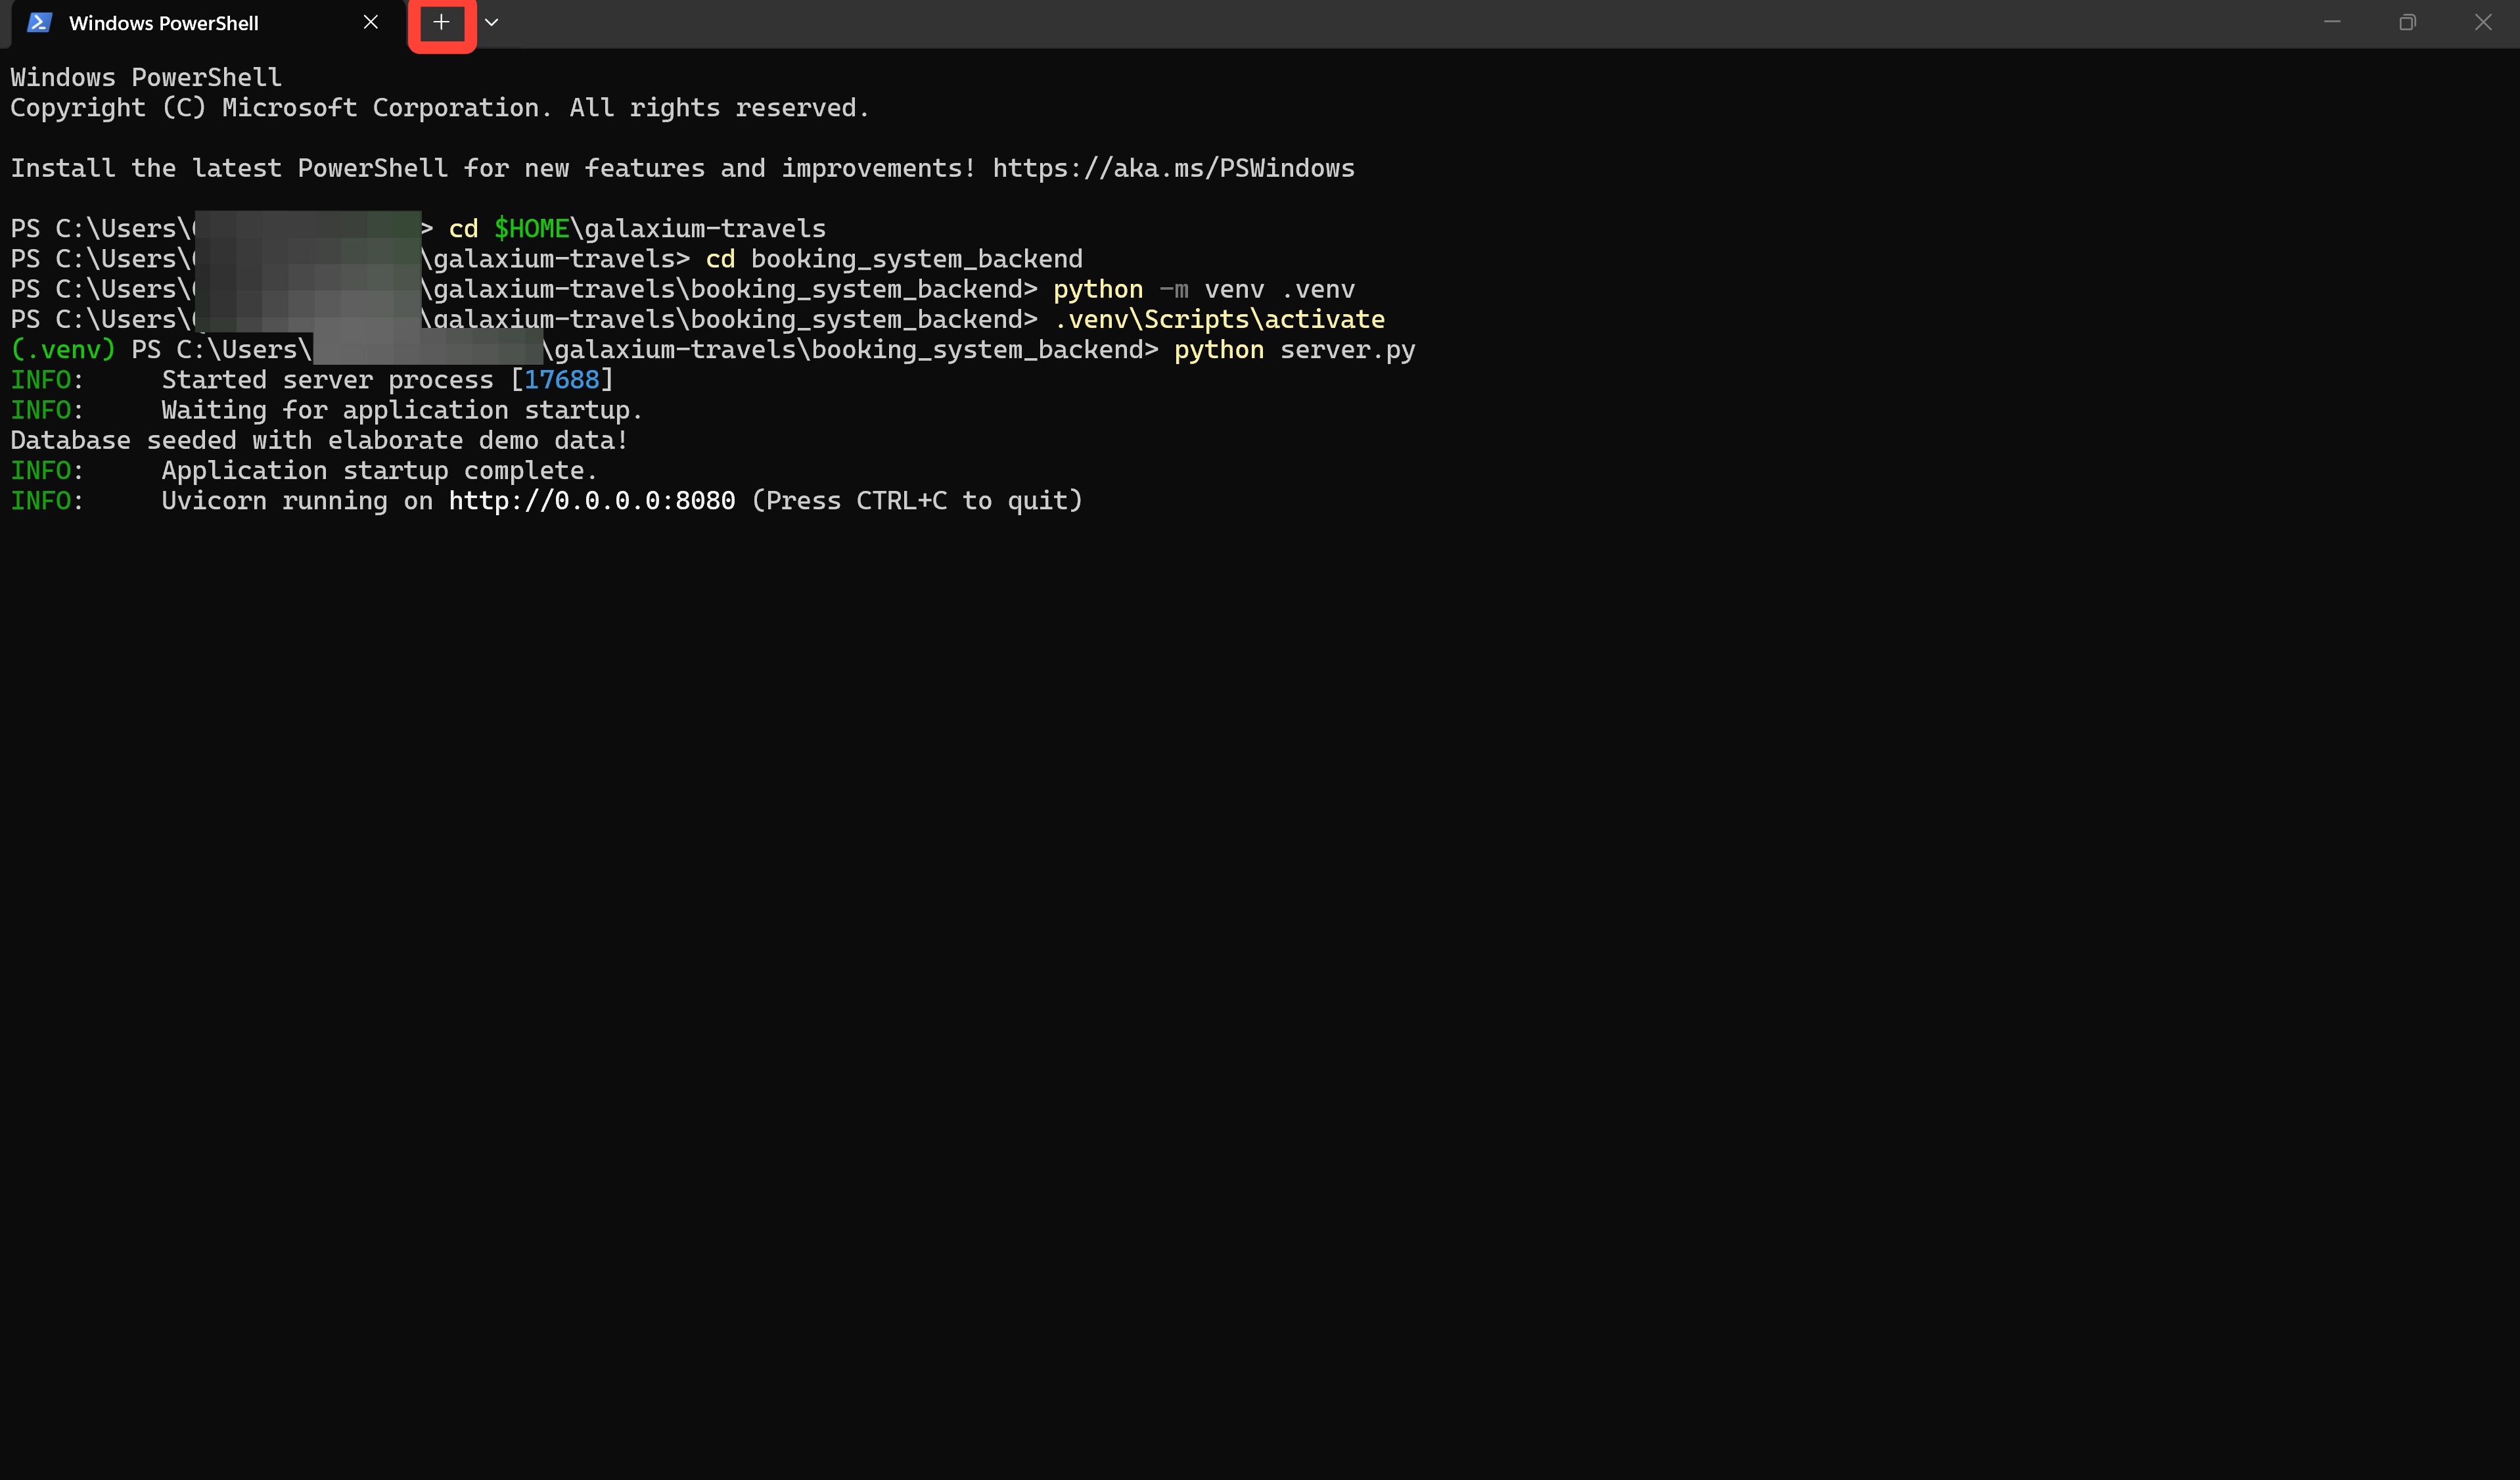
For the following Steps 6-9, you will be required to open a second Terminal window. Do not close the Terminal previously used for Steps 1-5. This window will need to remain open and active for the duration of the lab.
Step 6: After having completed all of Steps 1-5, open a new Terminal window by pressing the Plus button.
Step 7: Within the new Terminal window, execute the following commands one-by-one in sequence:
Step 8:
Step 9:
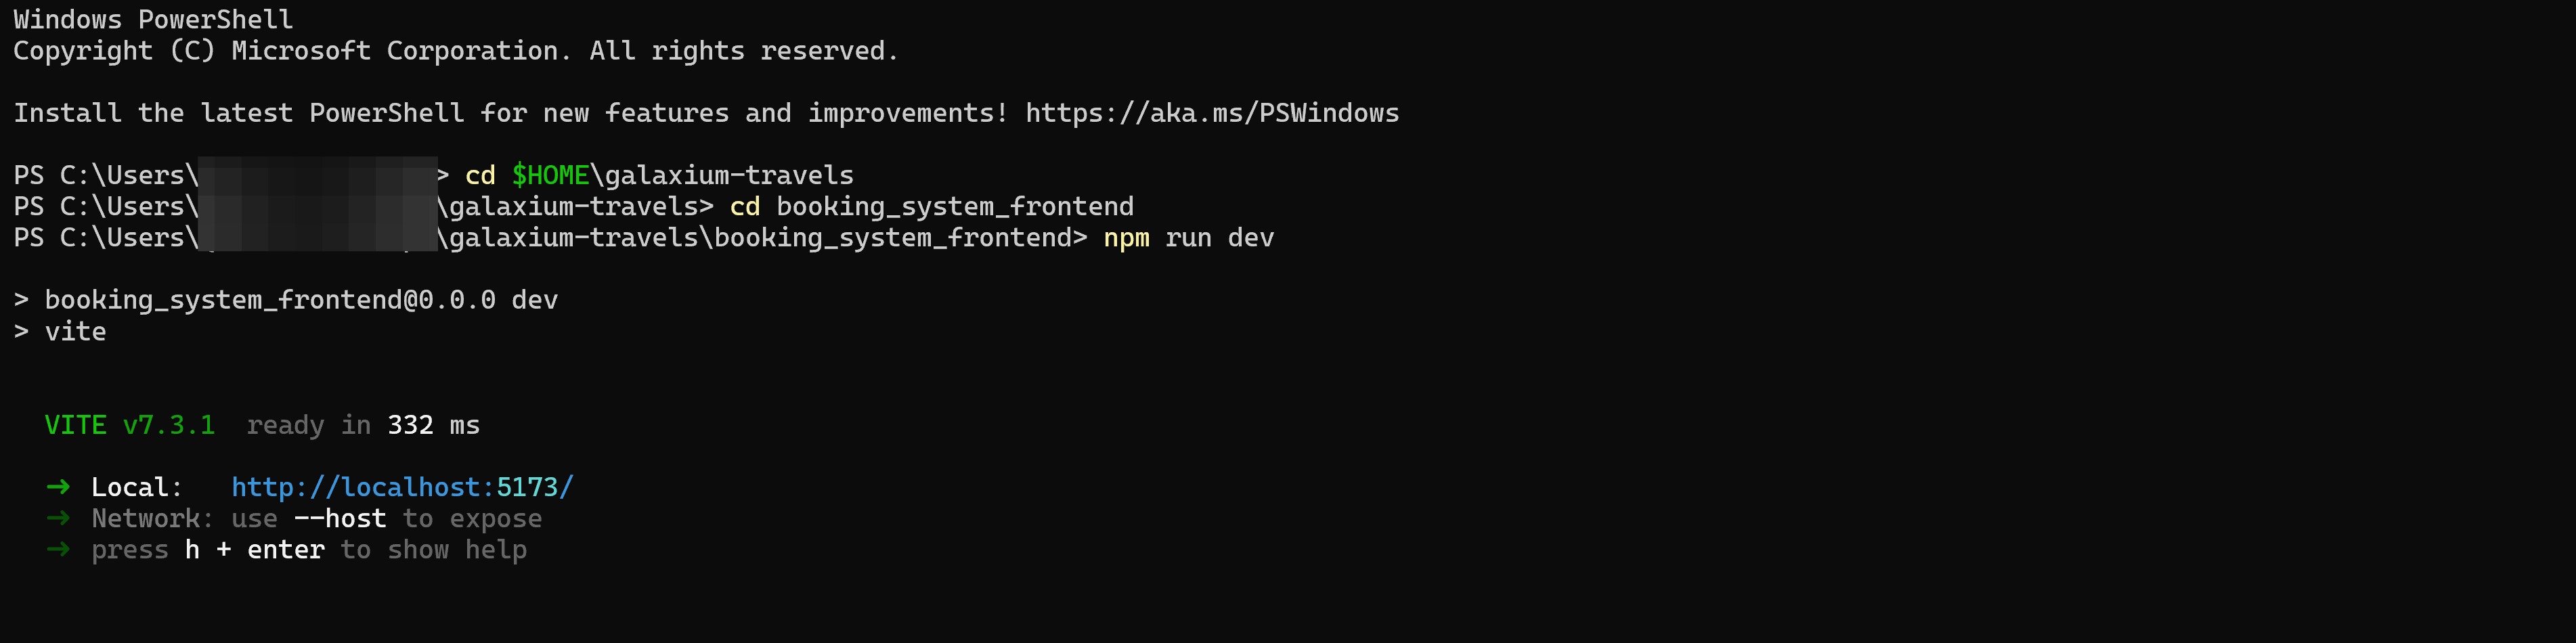
You should see a "Galaxium Travels is running!" prompt returned to the console (amongst other messages) once the application has deployed successfully.
DEBUGGING WITH IBM BOB
You may discover that your application fails to start, owing to an error! Ours did.
The web service will still launch on localhost, but you may find features that were just adjusted (like Seat Classes) are failing to render. One tremendously useful feature of IBM Bob is being able to diagnose and remedy application troubles directly within the Agentic Sidebar, much in the same way that you previously asked Bob to generate new code.
In our example, we copied the full log from the Terminal console (143 lines) after attempting to run the ./start.sh script along with the statement: I got an error! Here's the log from console.
Bob, in turn, replied back with the following details about the source of the error and its plan (pending user approval) to rectify it:
The problem is a stale booking.db file on disk. SQLAlchemy's create_all only adds missing tables. It never alters existing ones. So the old flights table (with seats_available) is still there from a previous run, and the new columns don't exist in it.
The fix is to drop the old database file before the server starts. Let me do that now.
The recommendation from Bob is to execute the following command, which you can approve via the Agentic Sidebar by clicking the Approve once button (or execute yourself within the Terminal console):
If you applied this fix (or other fixes), close your Terminal and follow Step 18 again. Then proceed to Step 19 below.
With the fix in place, all future executions of ./start.sh will instruct init_db to call create_all against a clean slate, building the correct schema with economy_seats, business_seats, galaxium_seats, and seat_class from scratch. It will subsequently apply the seed() function to populate it with fresh demo data.
-
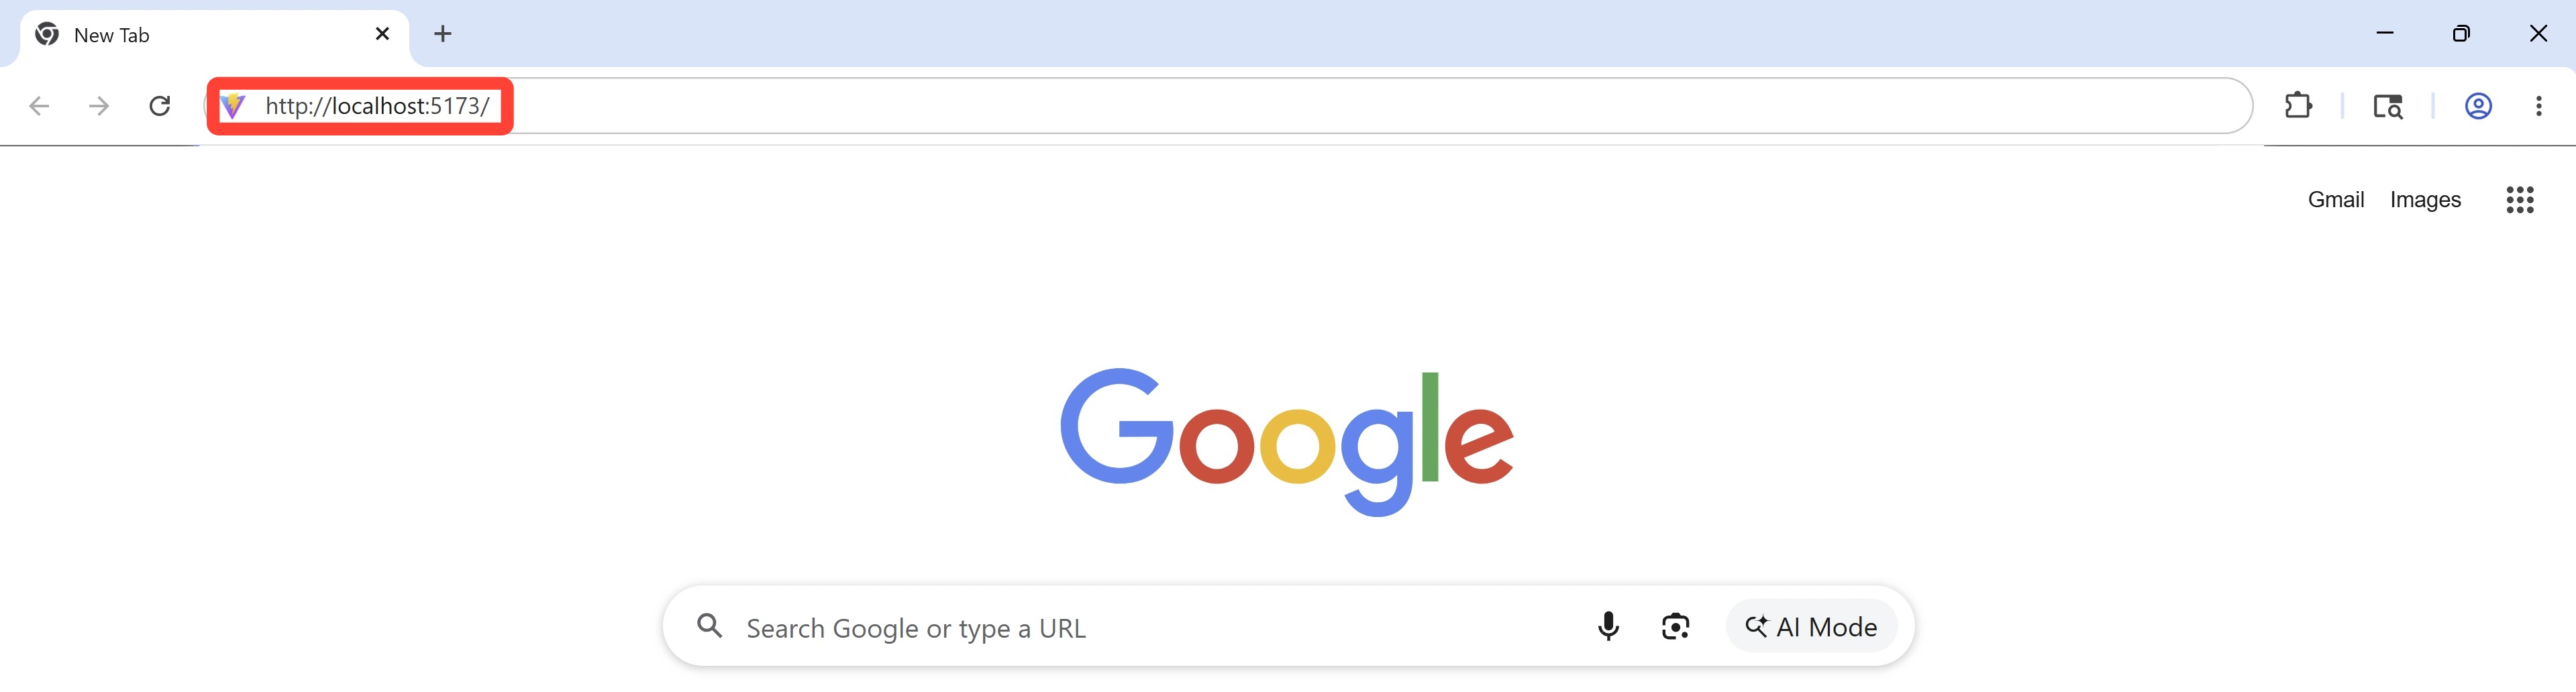
Open a web browser on your local machine and visit the following URL to access the Galaxium Travels application:
WEB BROWSER
http://localhost:5173/
-
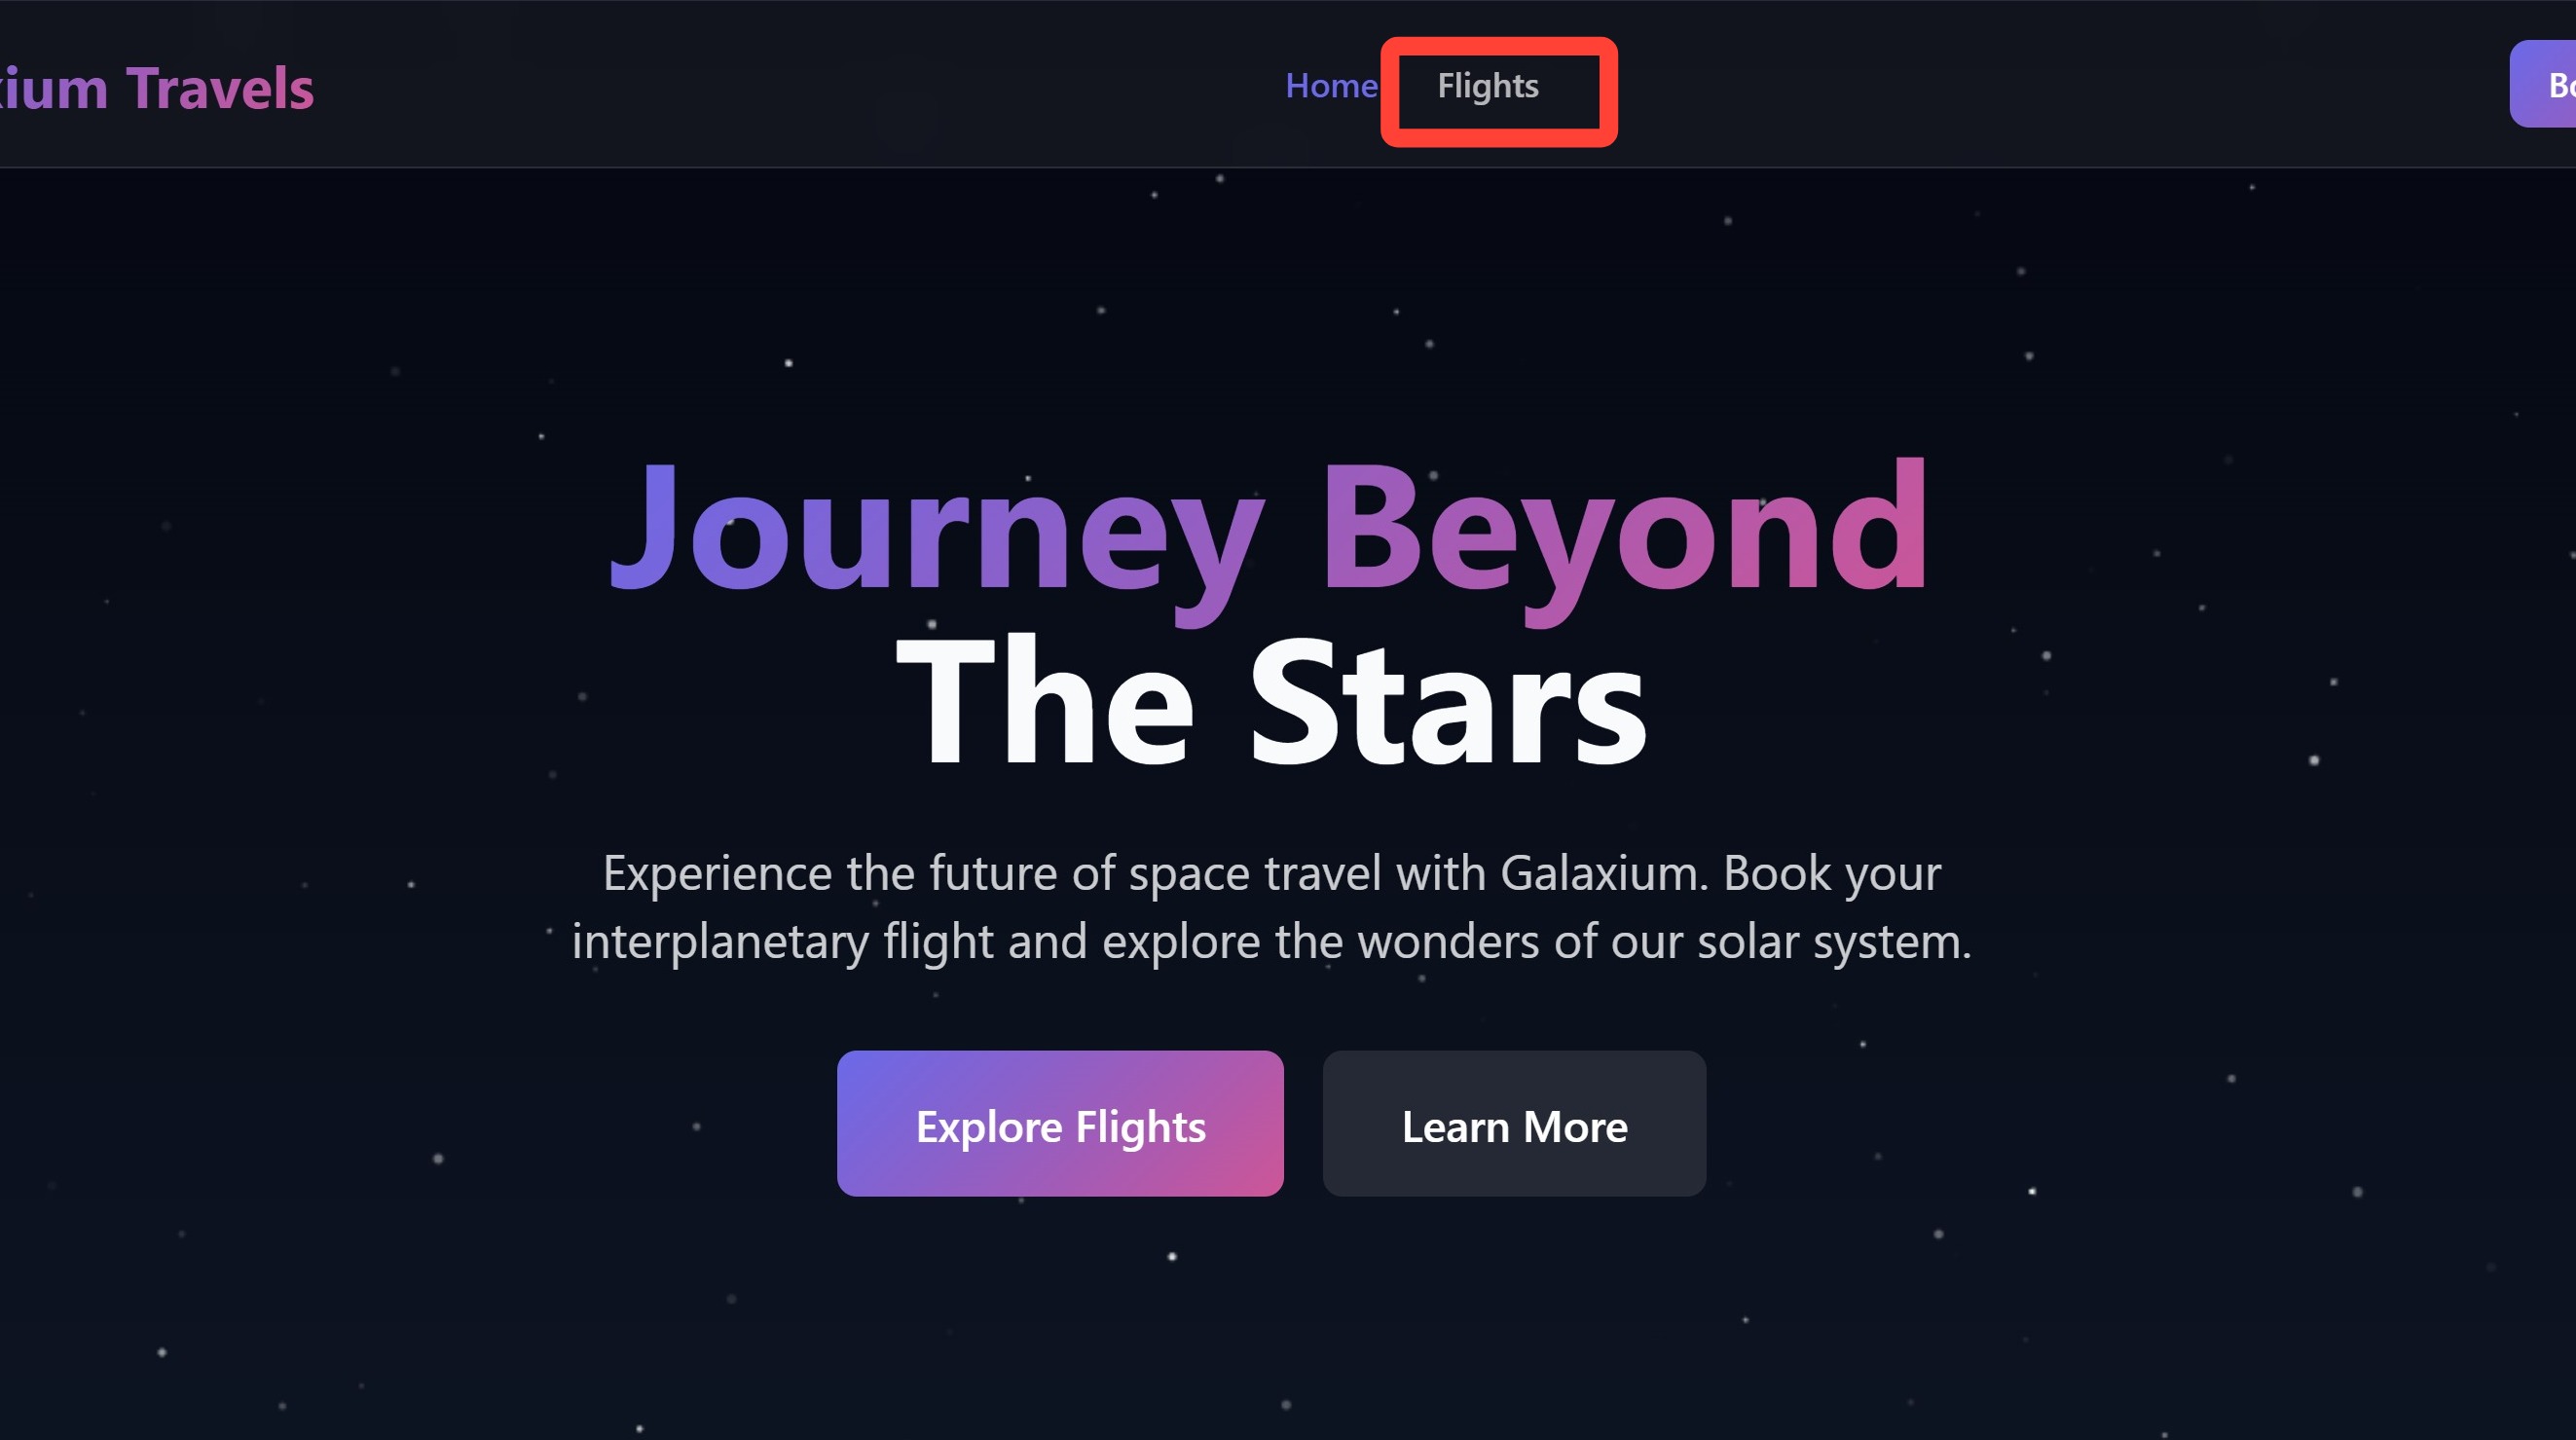
On the Galaxium Travels page, click Flights.
-
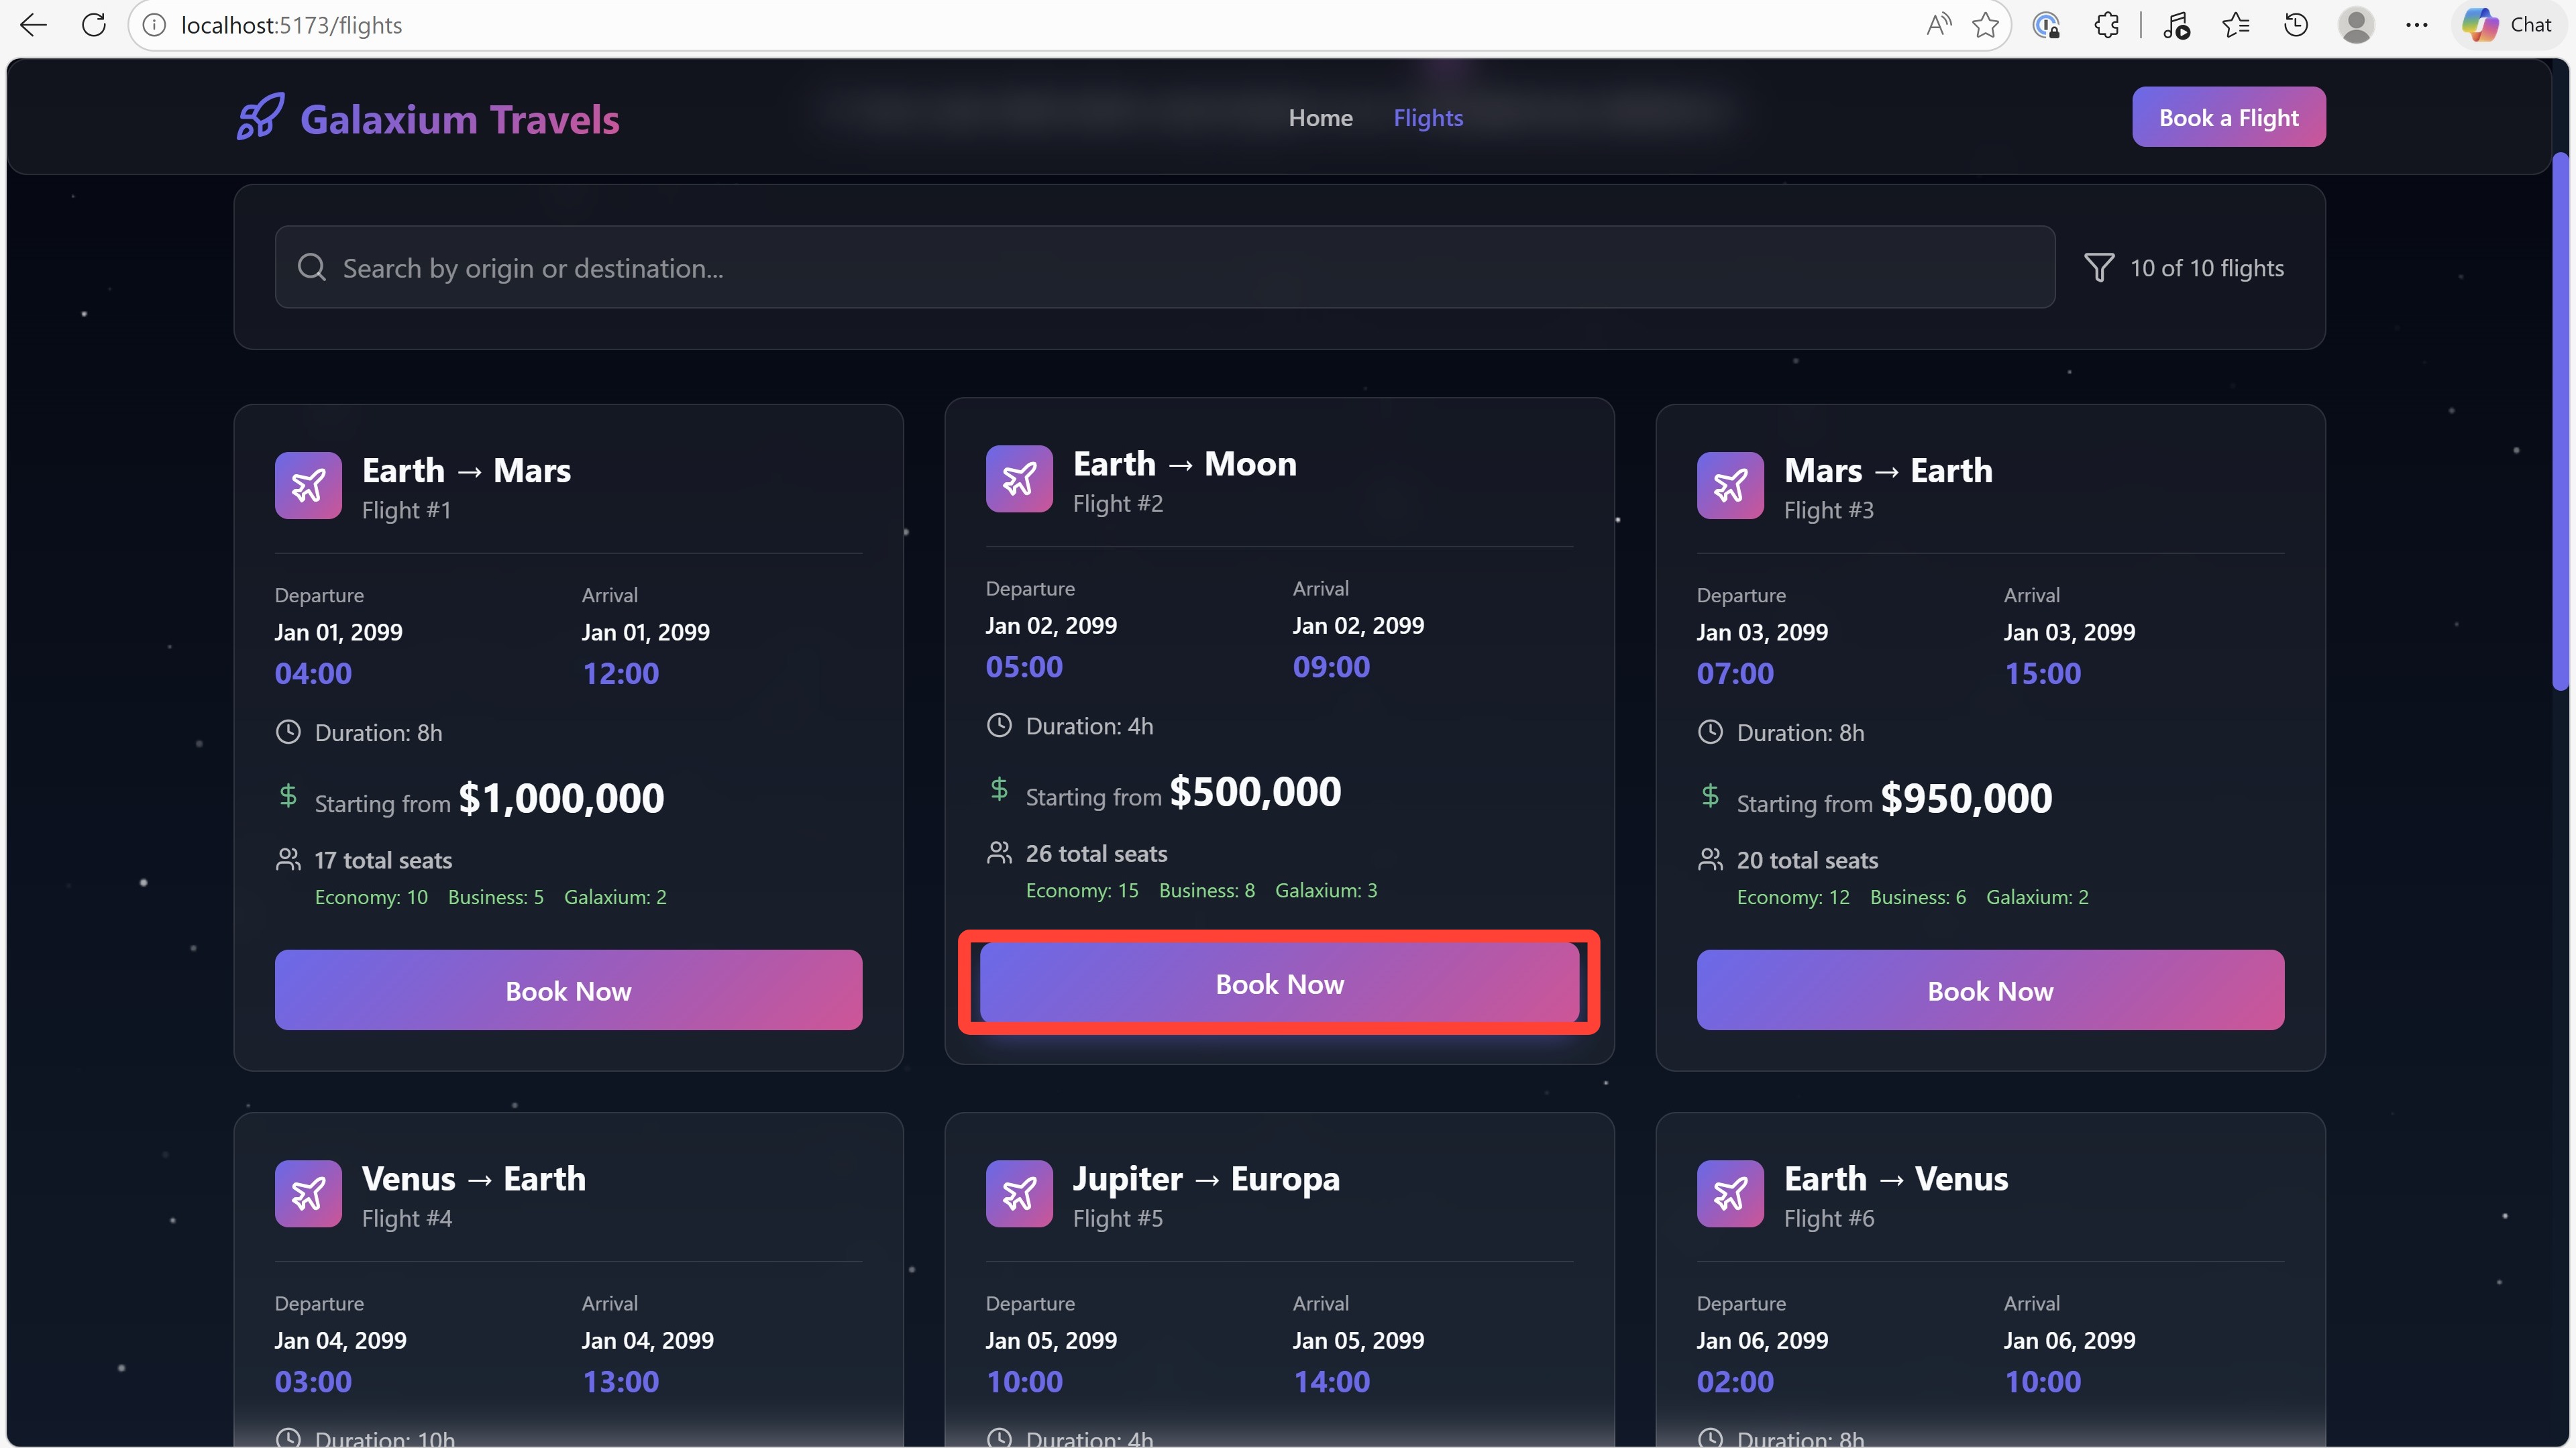
Notice that each flight now shows Seat Counts for the respective Seating Class.
To test further, click the Book Now button under any listed flight.
-
Let's further test out the process of creating a new account.
Click the "Don't have an account? Register" button to continue.
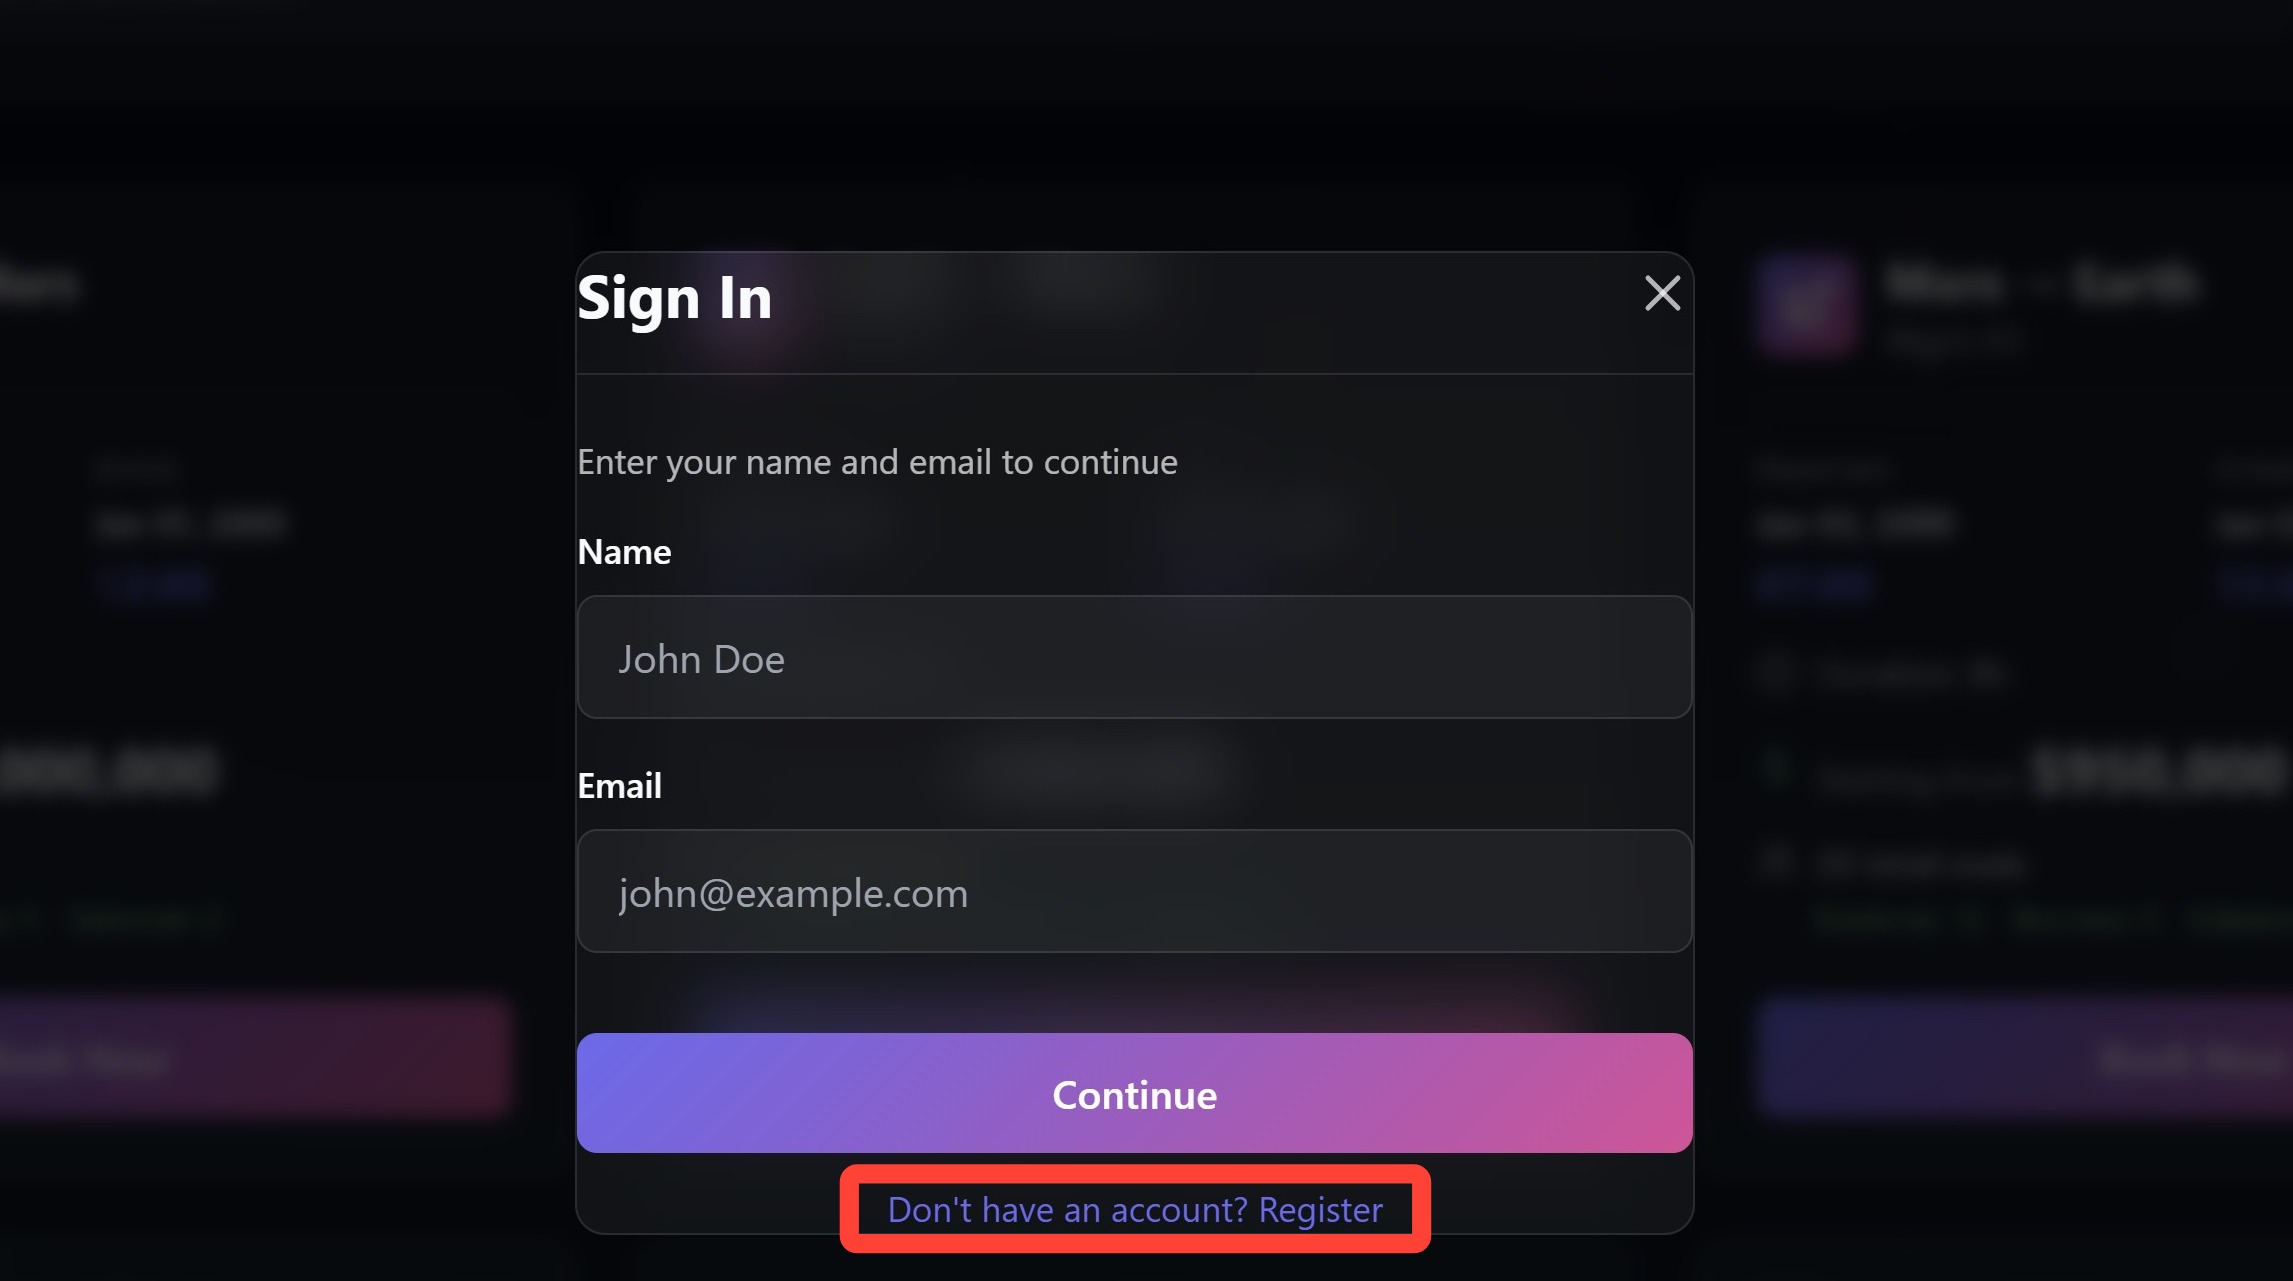
-
Register for a new account using placeholder details. For example, under Name input
IBM Boband for Email inputtest@email.com, or other variables of your choosing. It should work so long as it respects the valid email address formatting rule that Bob generated in Module 1.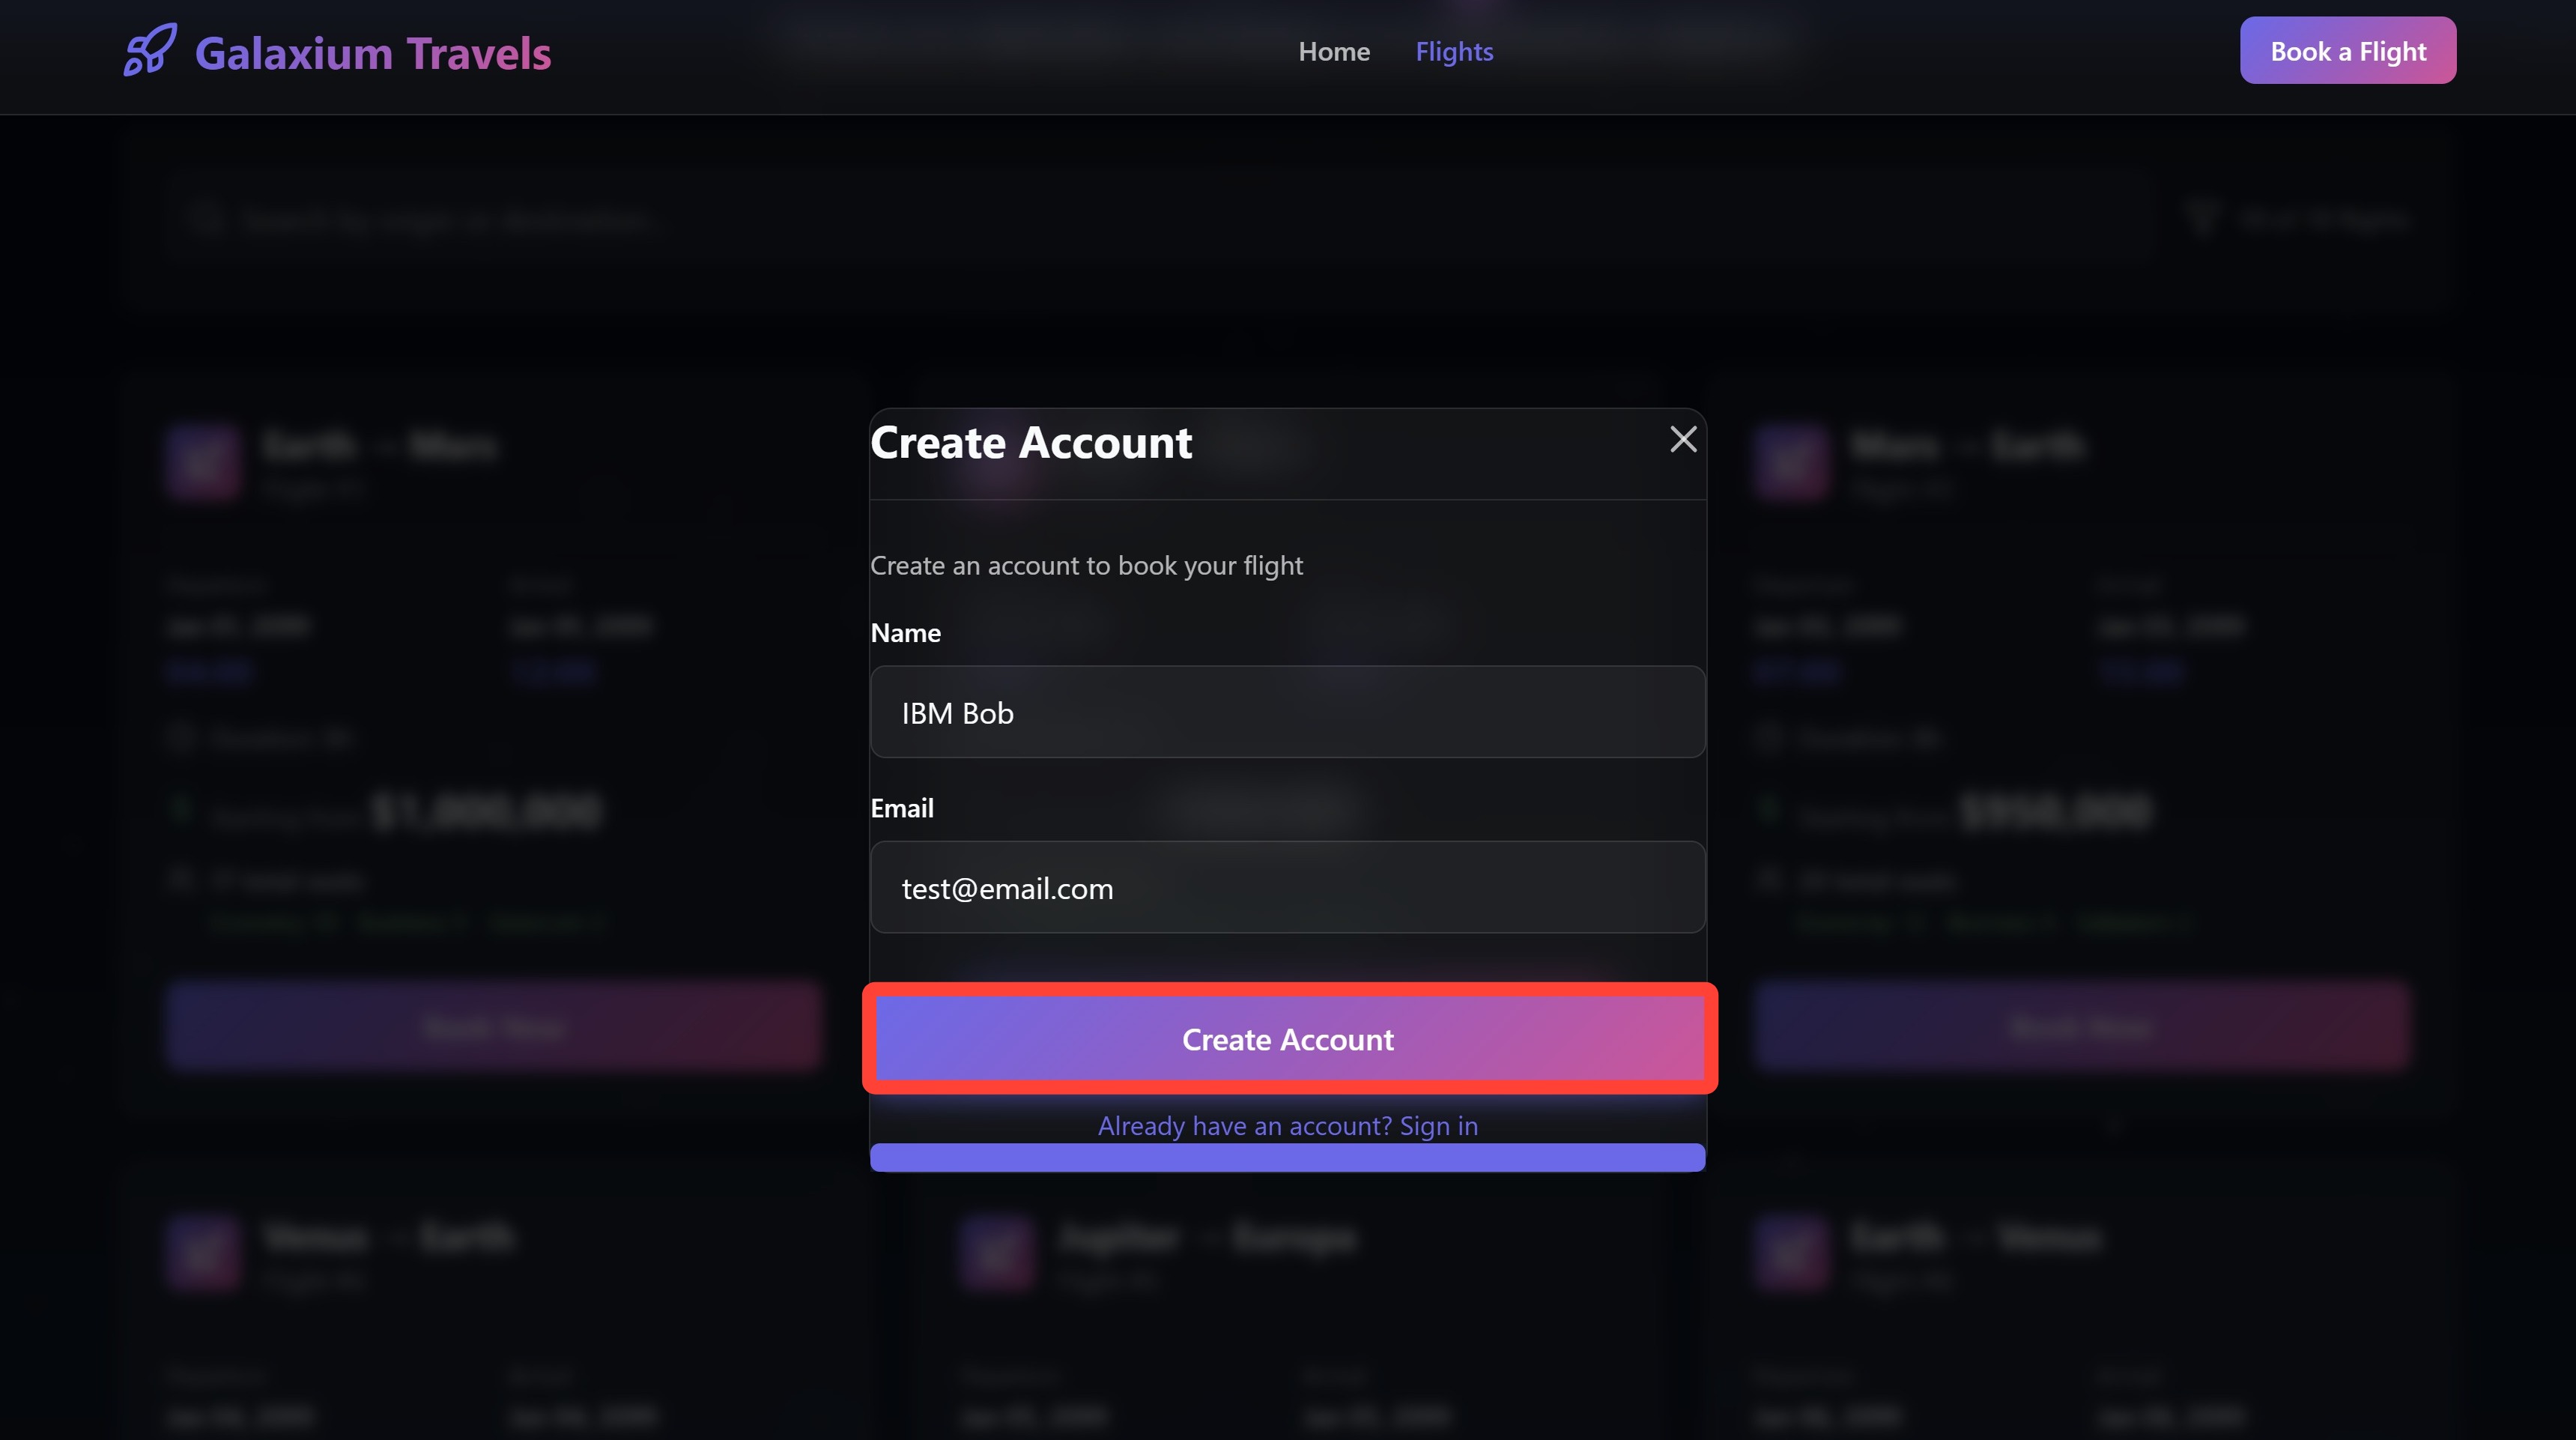
-
The seat class selector is now in place and Bob has styled it to match the rest of the application. To test, try picking any seat class from the options presented. Note that your version may differ slightly in terms of pricing numbers and so on.
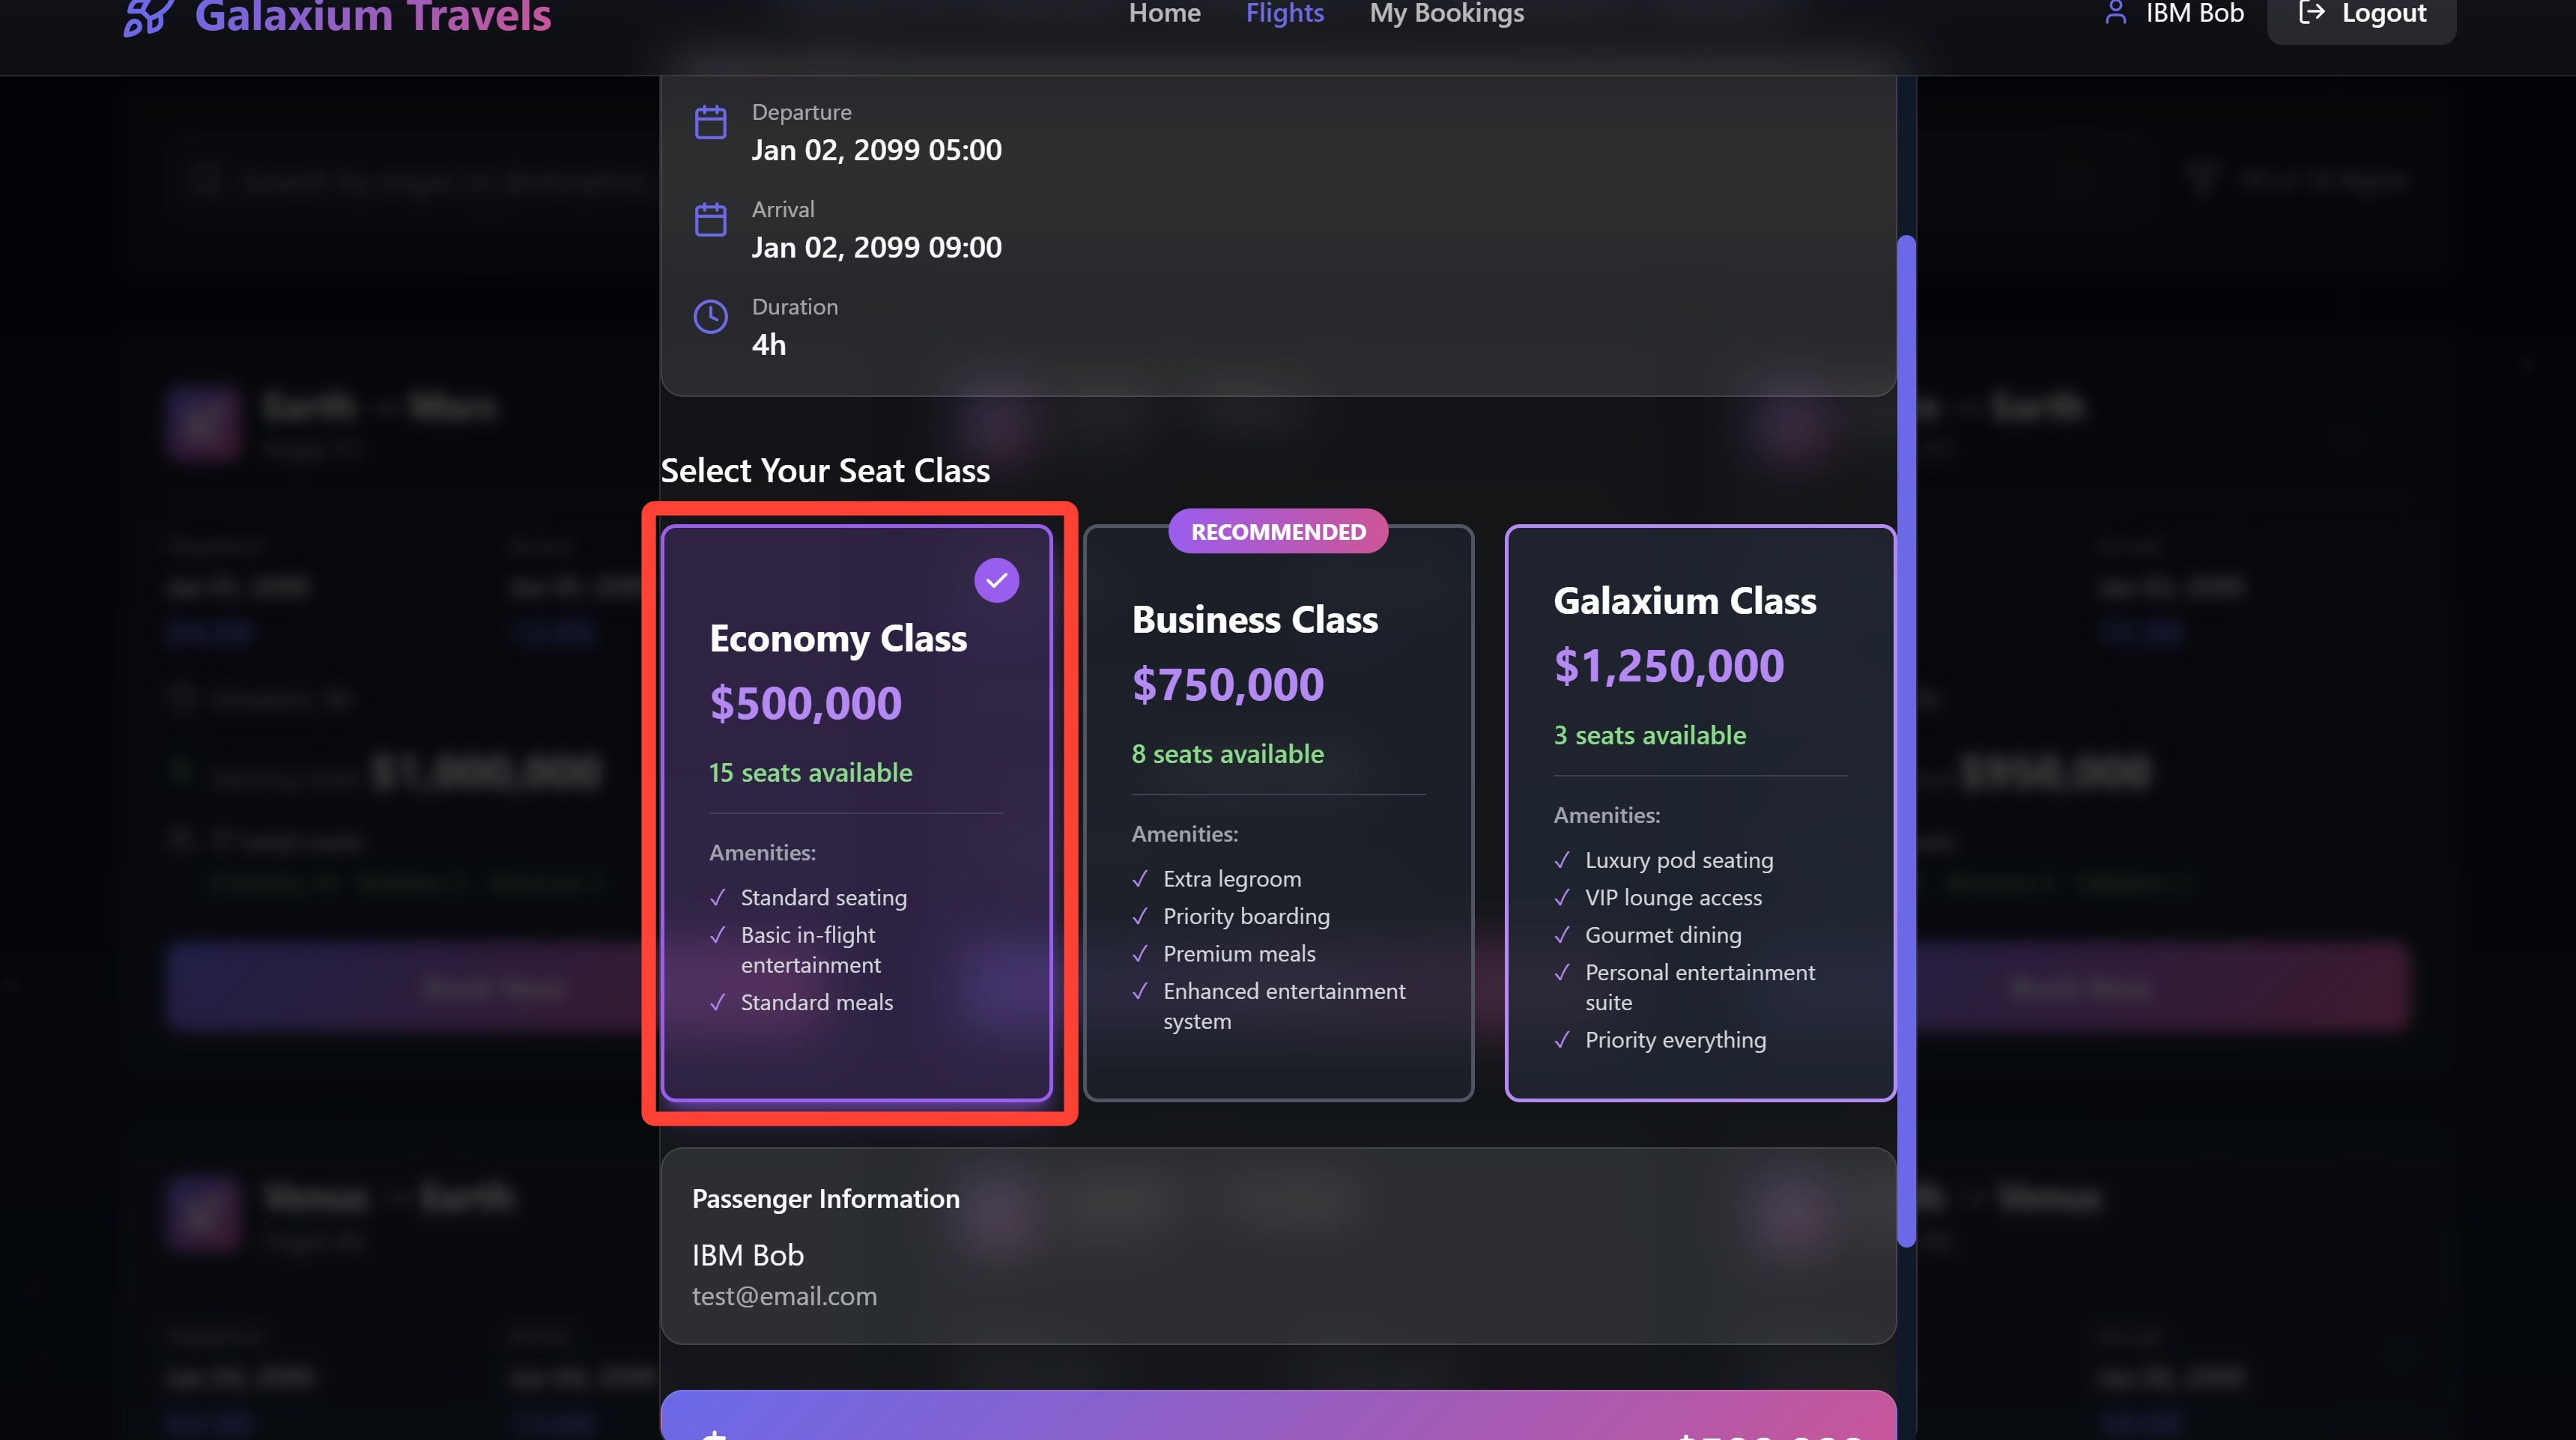
-
With a seat selected, press the confirmation button. For example, this might be a "Confirm Booking" button or something similar. Your results may vary.
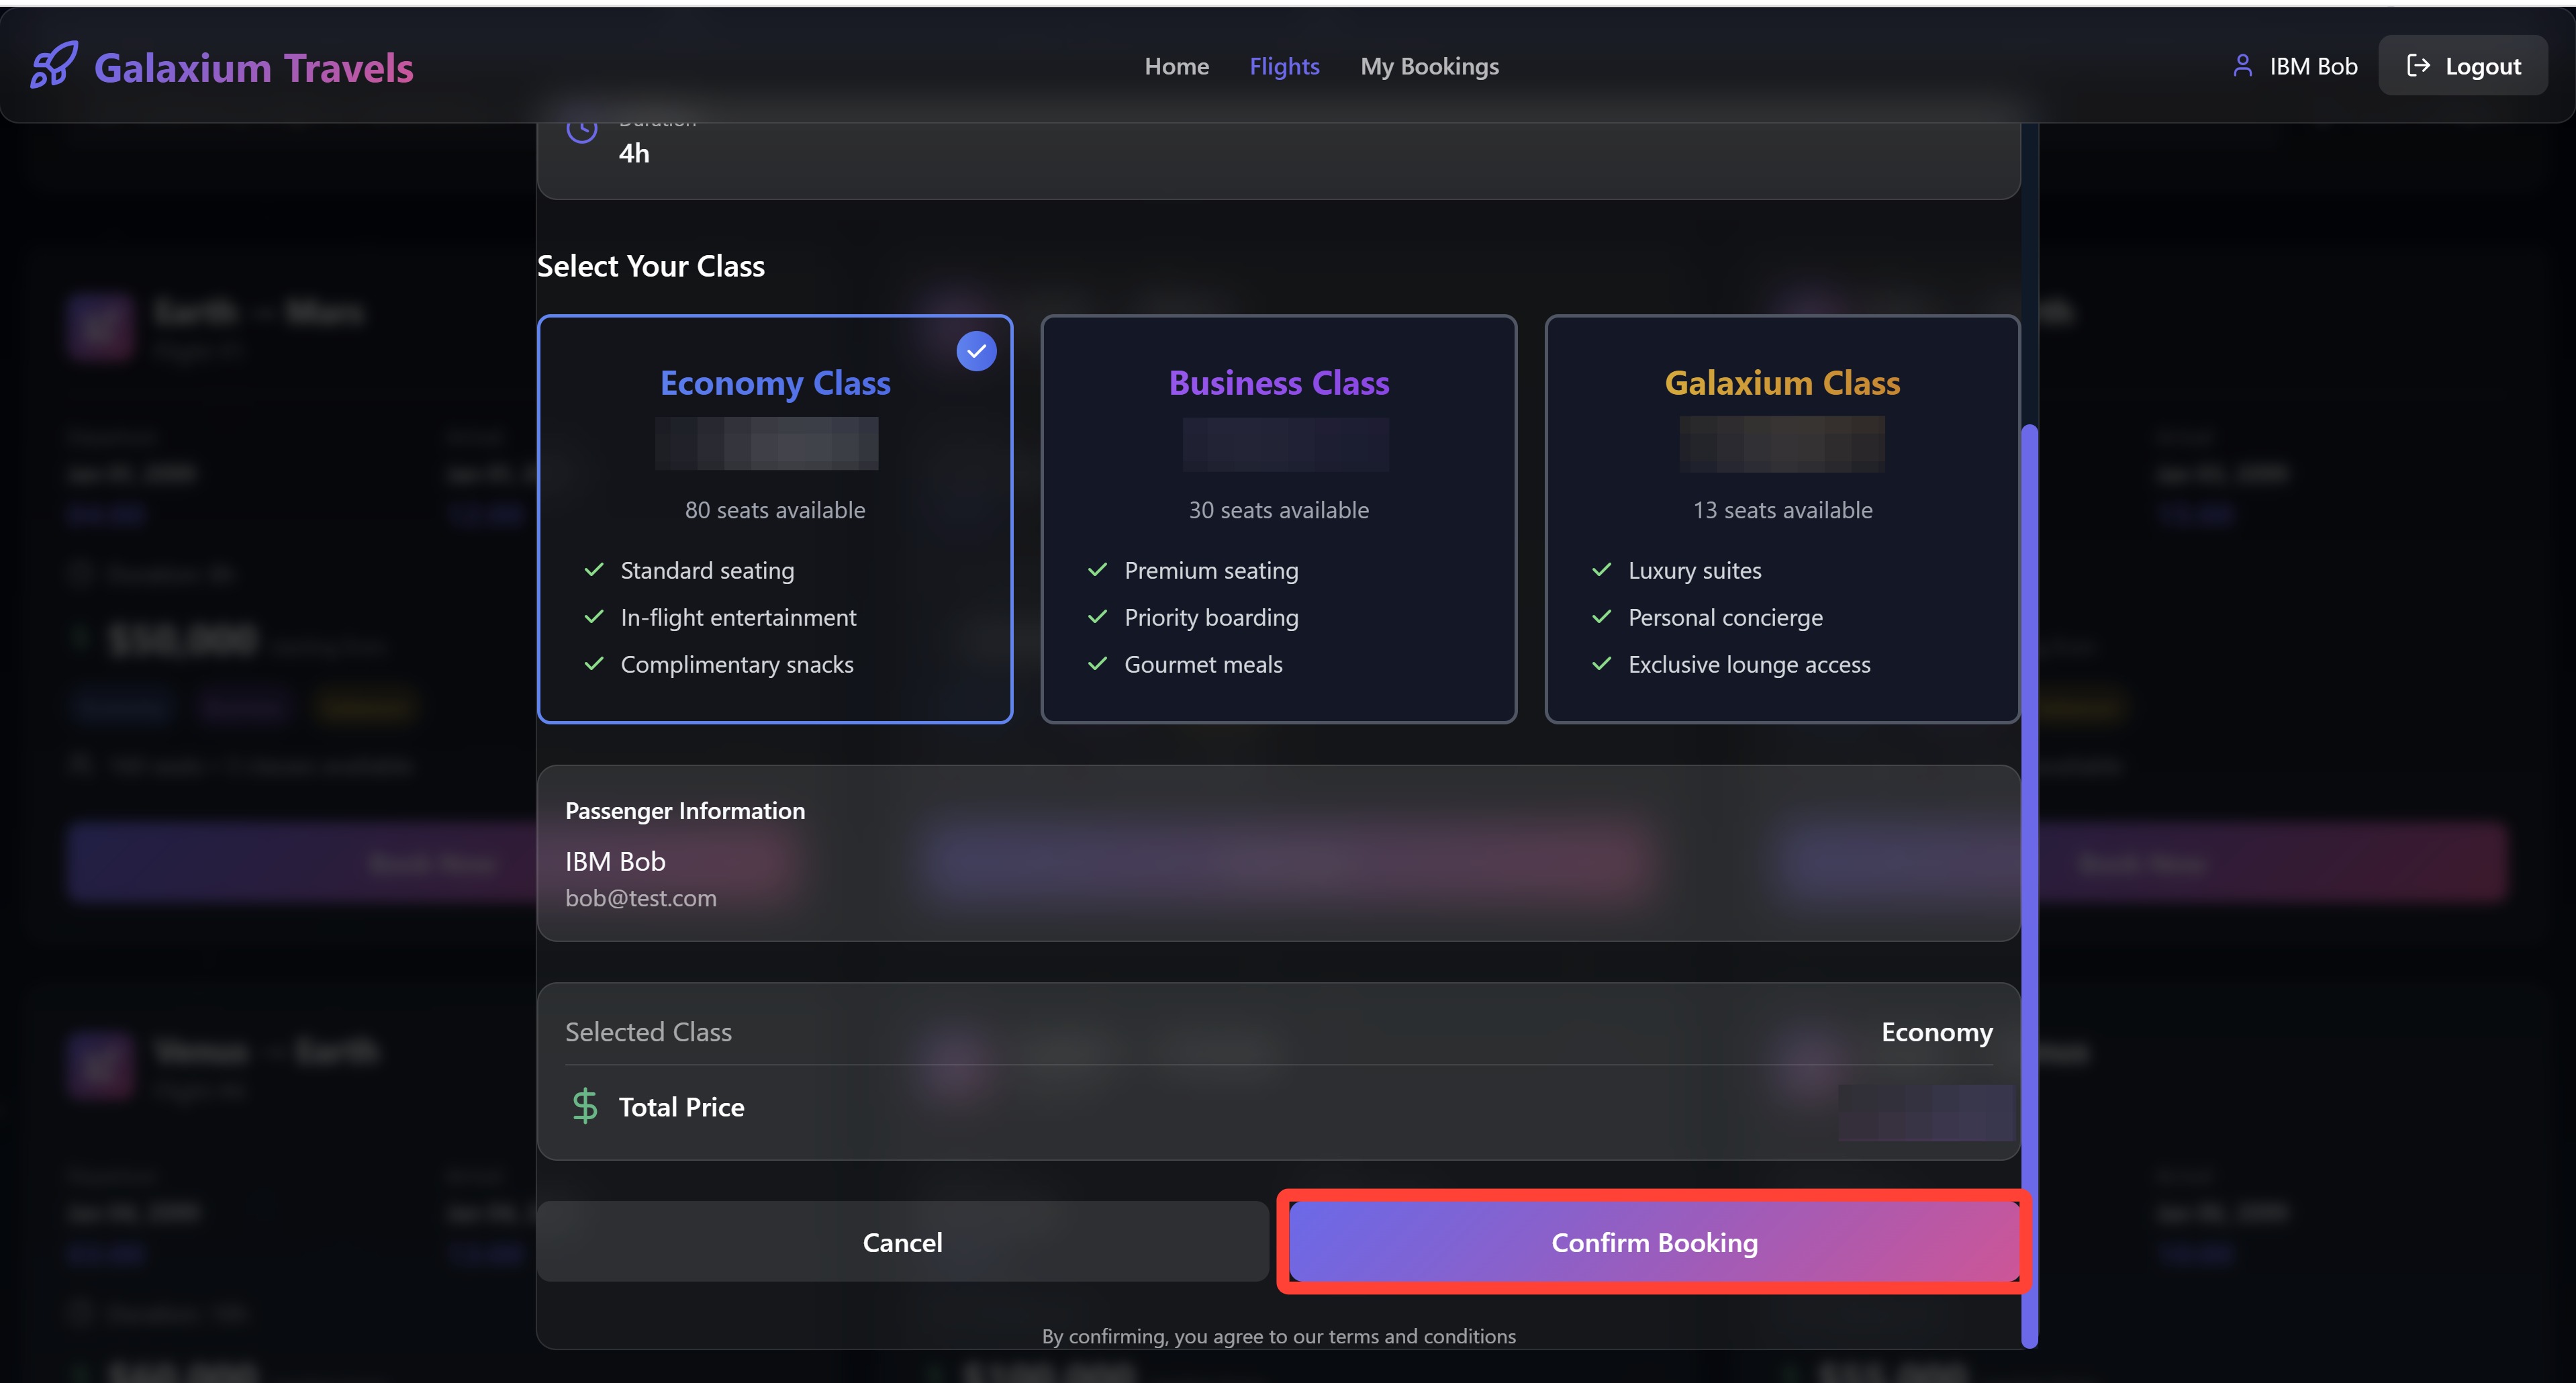
-
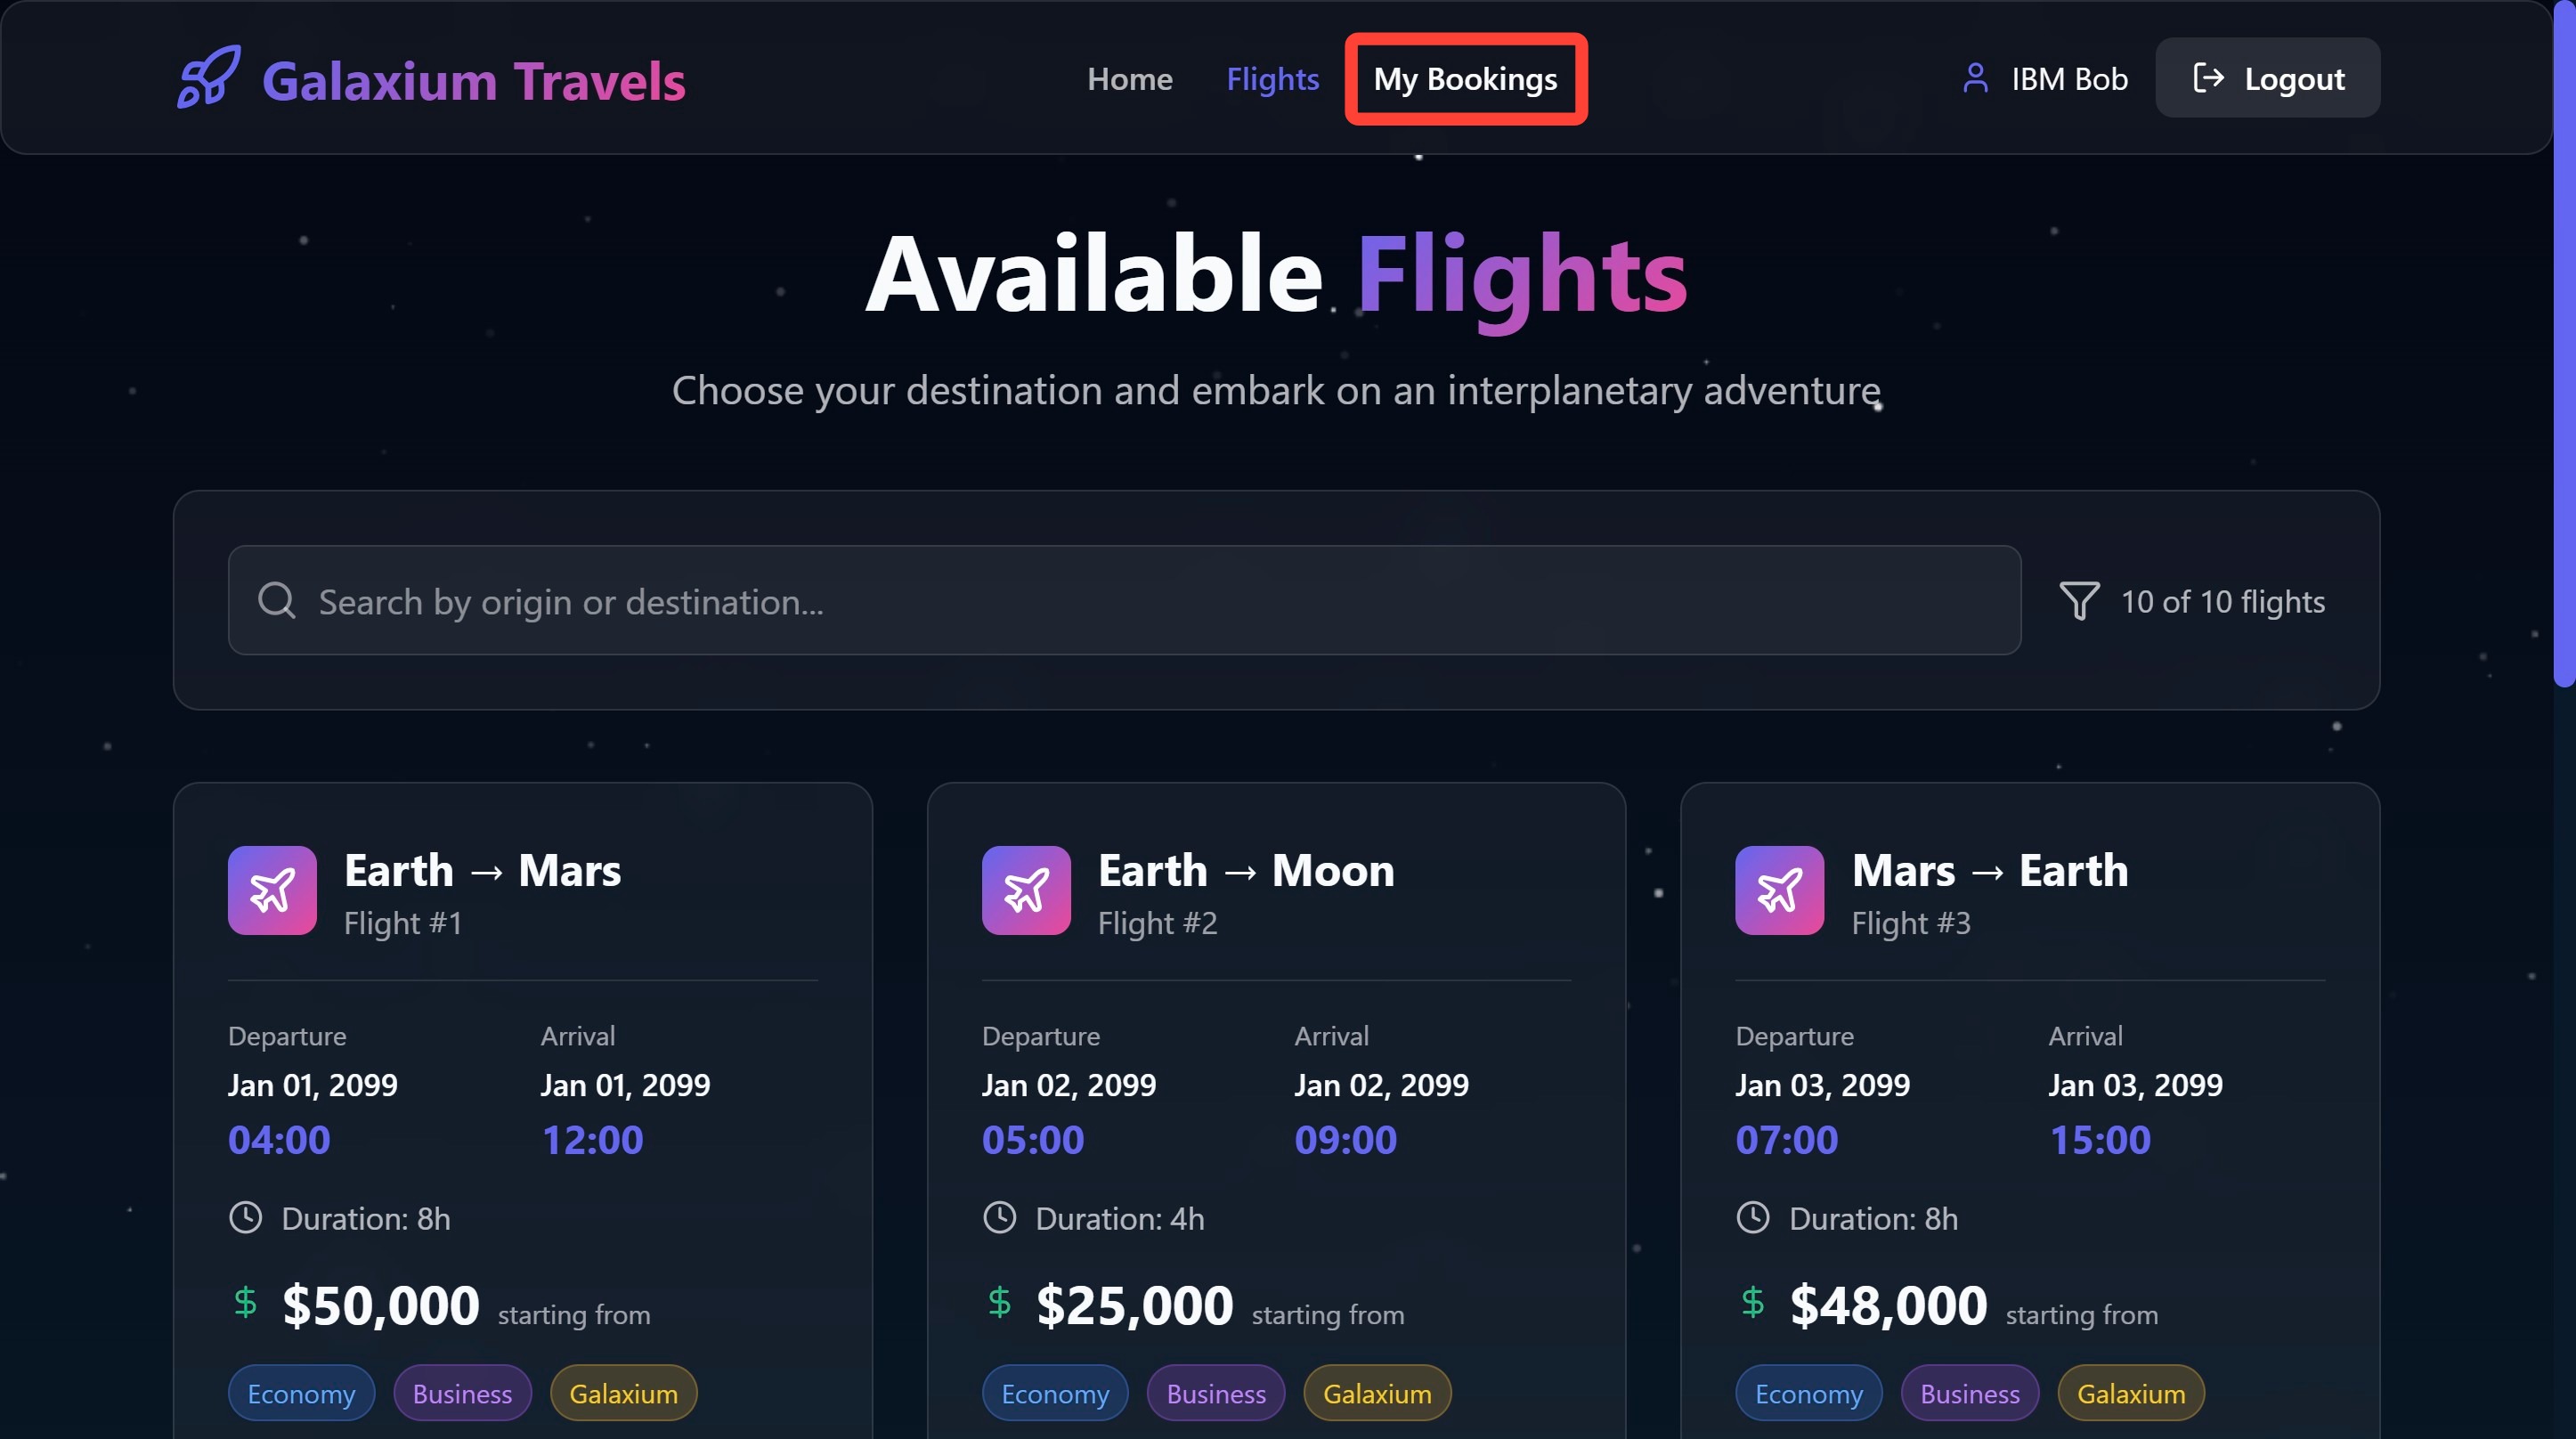
Once the booking is placed, a new tab will appear at the top of the website. In the documented case here, it reads "My Bookings". Click to drill down into more details.
-
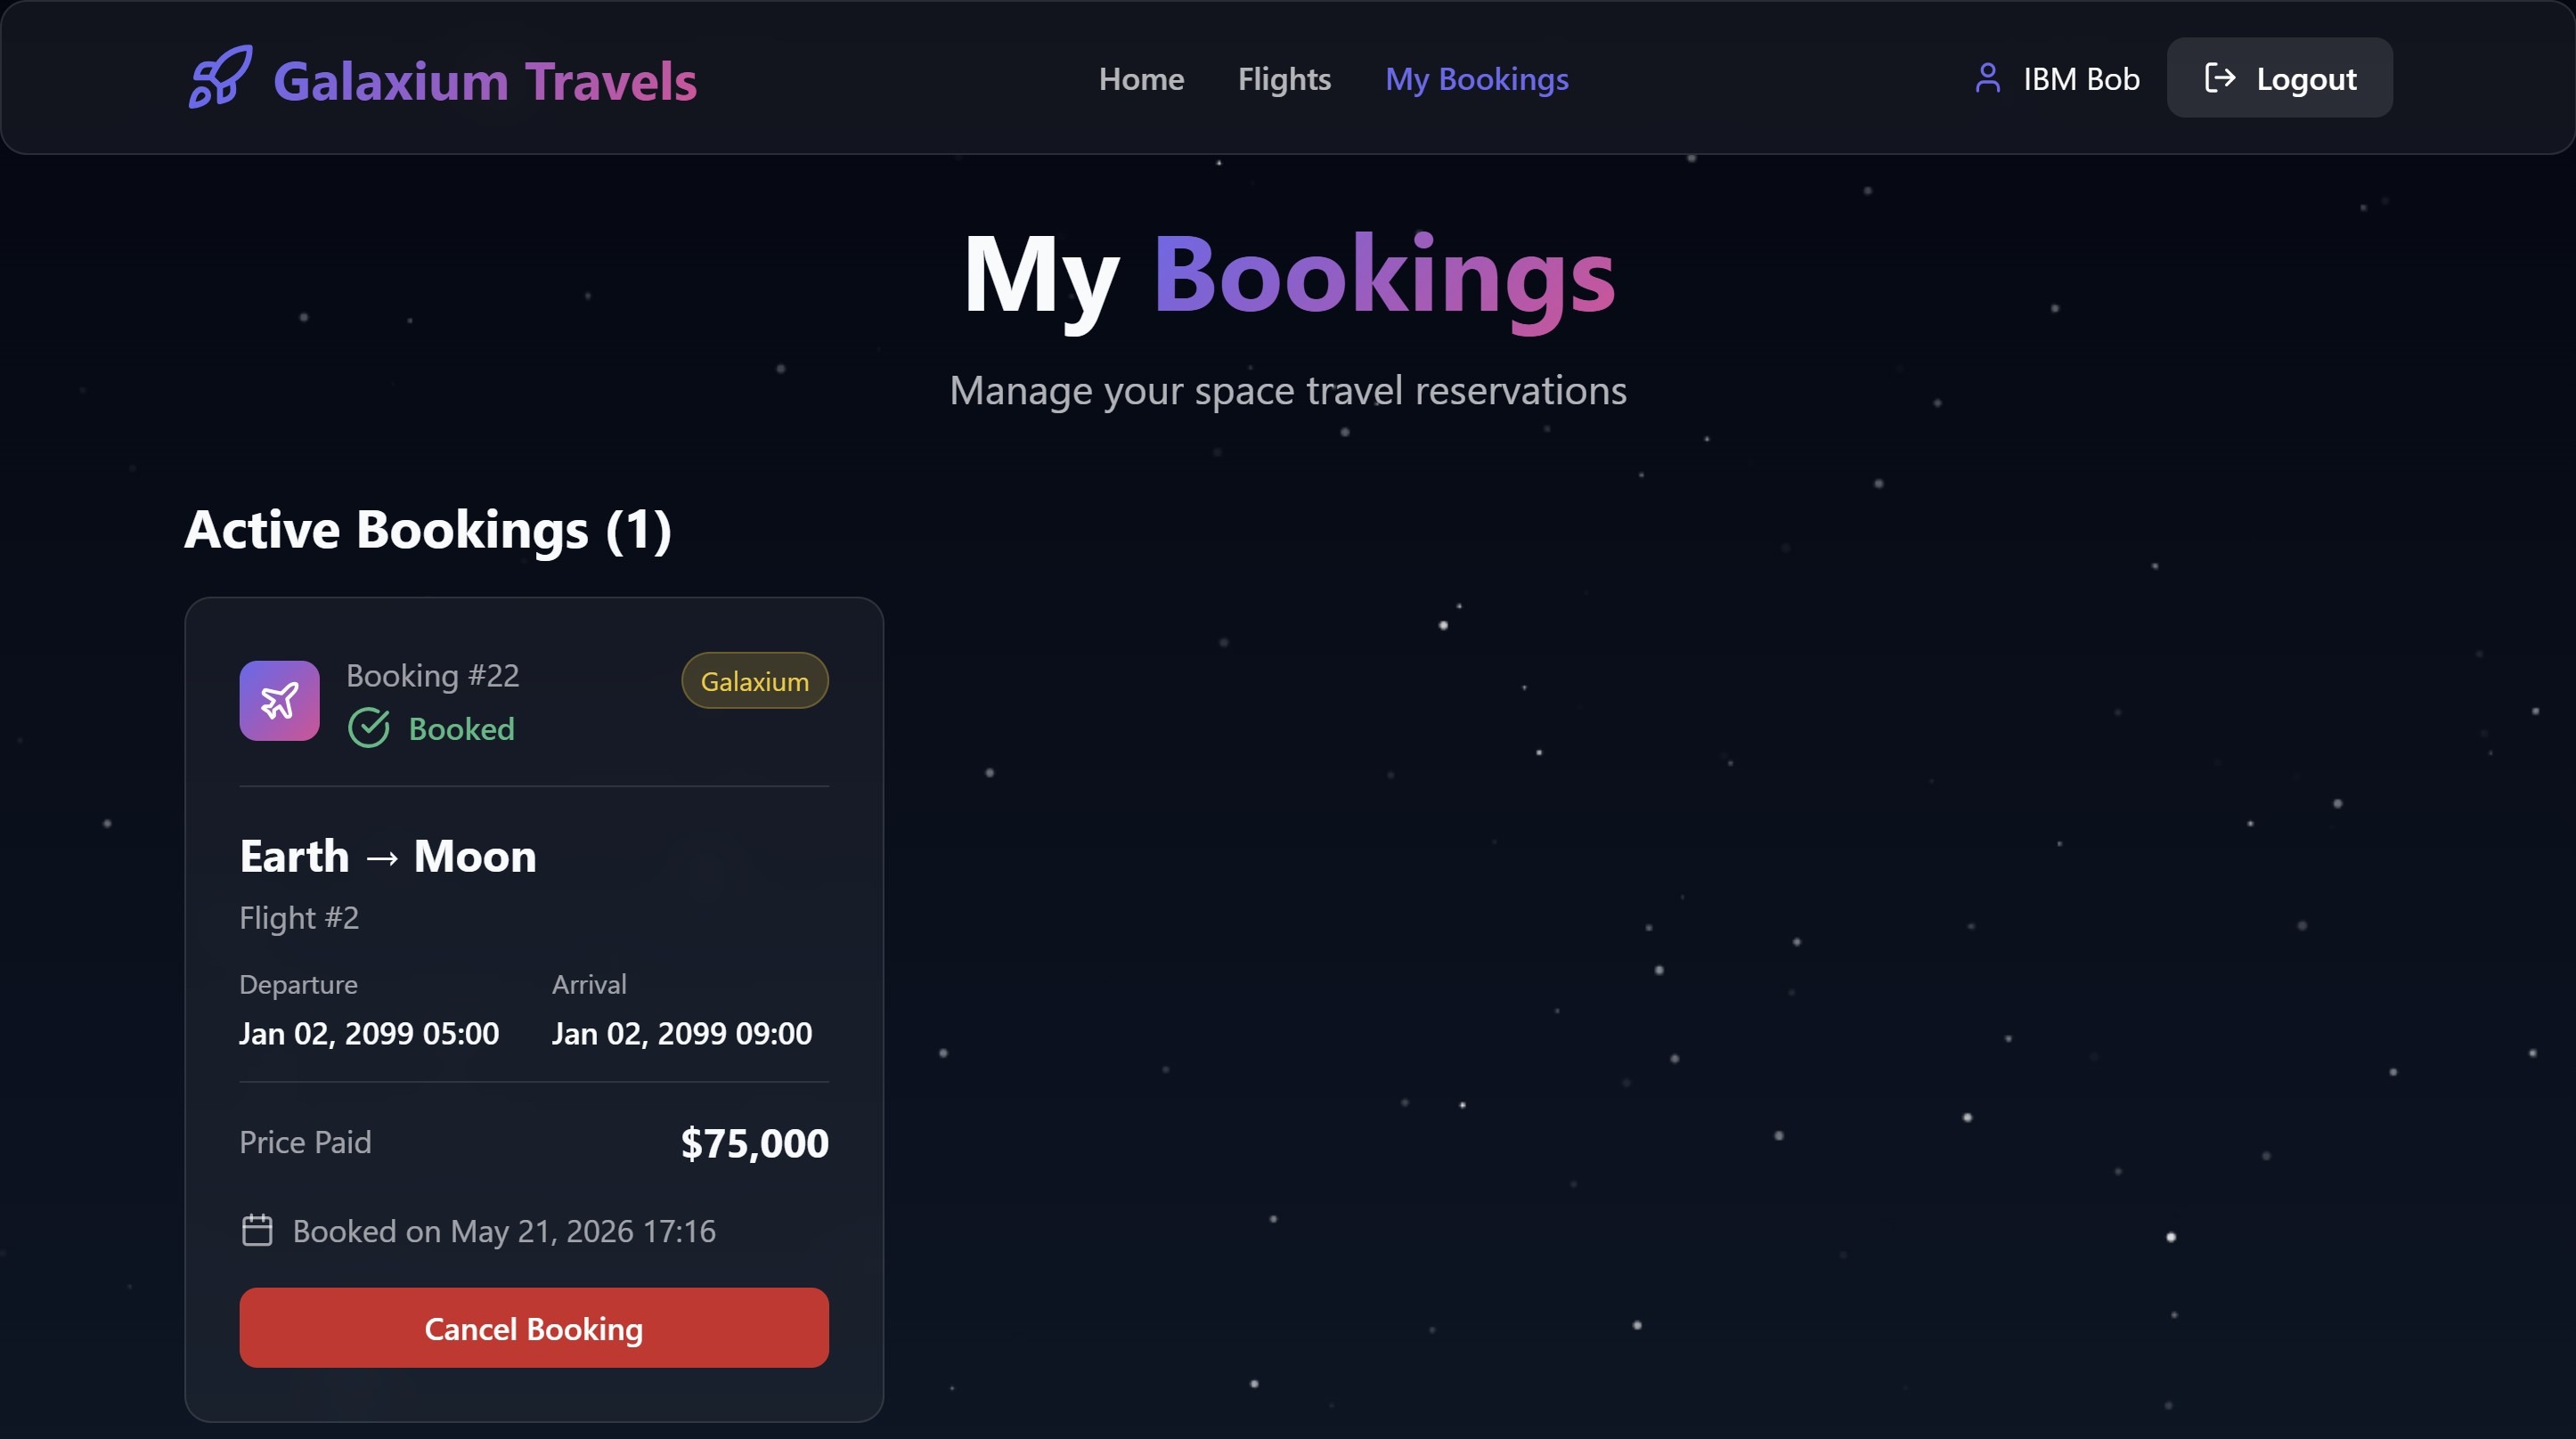
A summary should render with details about the booked flight and— most critically —new key details on seat class, pricing, location, and dates.
iii. Key takeaways
It appears like the new feature implementations were successfully implemented by Bob's agentic sidebar! Fully in accordance with the full Plan → review → new conversation → Agent workflow best practices we established earlier.
In the following section (Module 3 | Tailor), you will explore and go hands-on with topics covering ways to "teach" Bob your organization's particular codebase, encode that understanding with an organization's standards and rules, and shape Bob's behavior using Custom Modes.