Managing Db2 instances and database connections
IBM Db2 Developer Extension provides a streamlined way to set up and manage Db2 environments all within your VS Code Editor. Before you can start writing queries or exploring schemas, you need a Db2 instance.
If you have a Db2 instance, create a database connection to work with your databases. For users who do not have a Db2 instance, get started by using IBM Db2 Community Edition to create the instance, which offers a free and fully functional environment for development and testing.
When you create a new Db2 instance, the extension automatically handles the following actions:
-
Creates two databases testdb (or your chosen name) and SAMPLE.
-
Creates corresponding database connections and connects to testdb and SAMPLE databases.
You can immediately start working with the databases—running queries, browsing schemas, and managing objects—without any additional configuration.
Managing an existing Db2 instance
If a Db2 instance is already installed on your system, you can see the Db2 instance already exists workflow opens in a new editor tab when you try to create a new Db2 instance. You can have only one Db2 instance at a time.
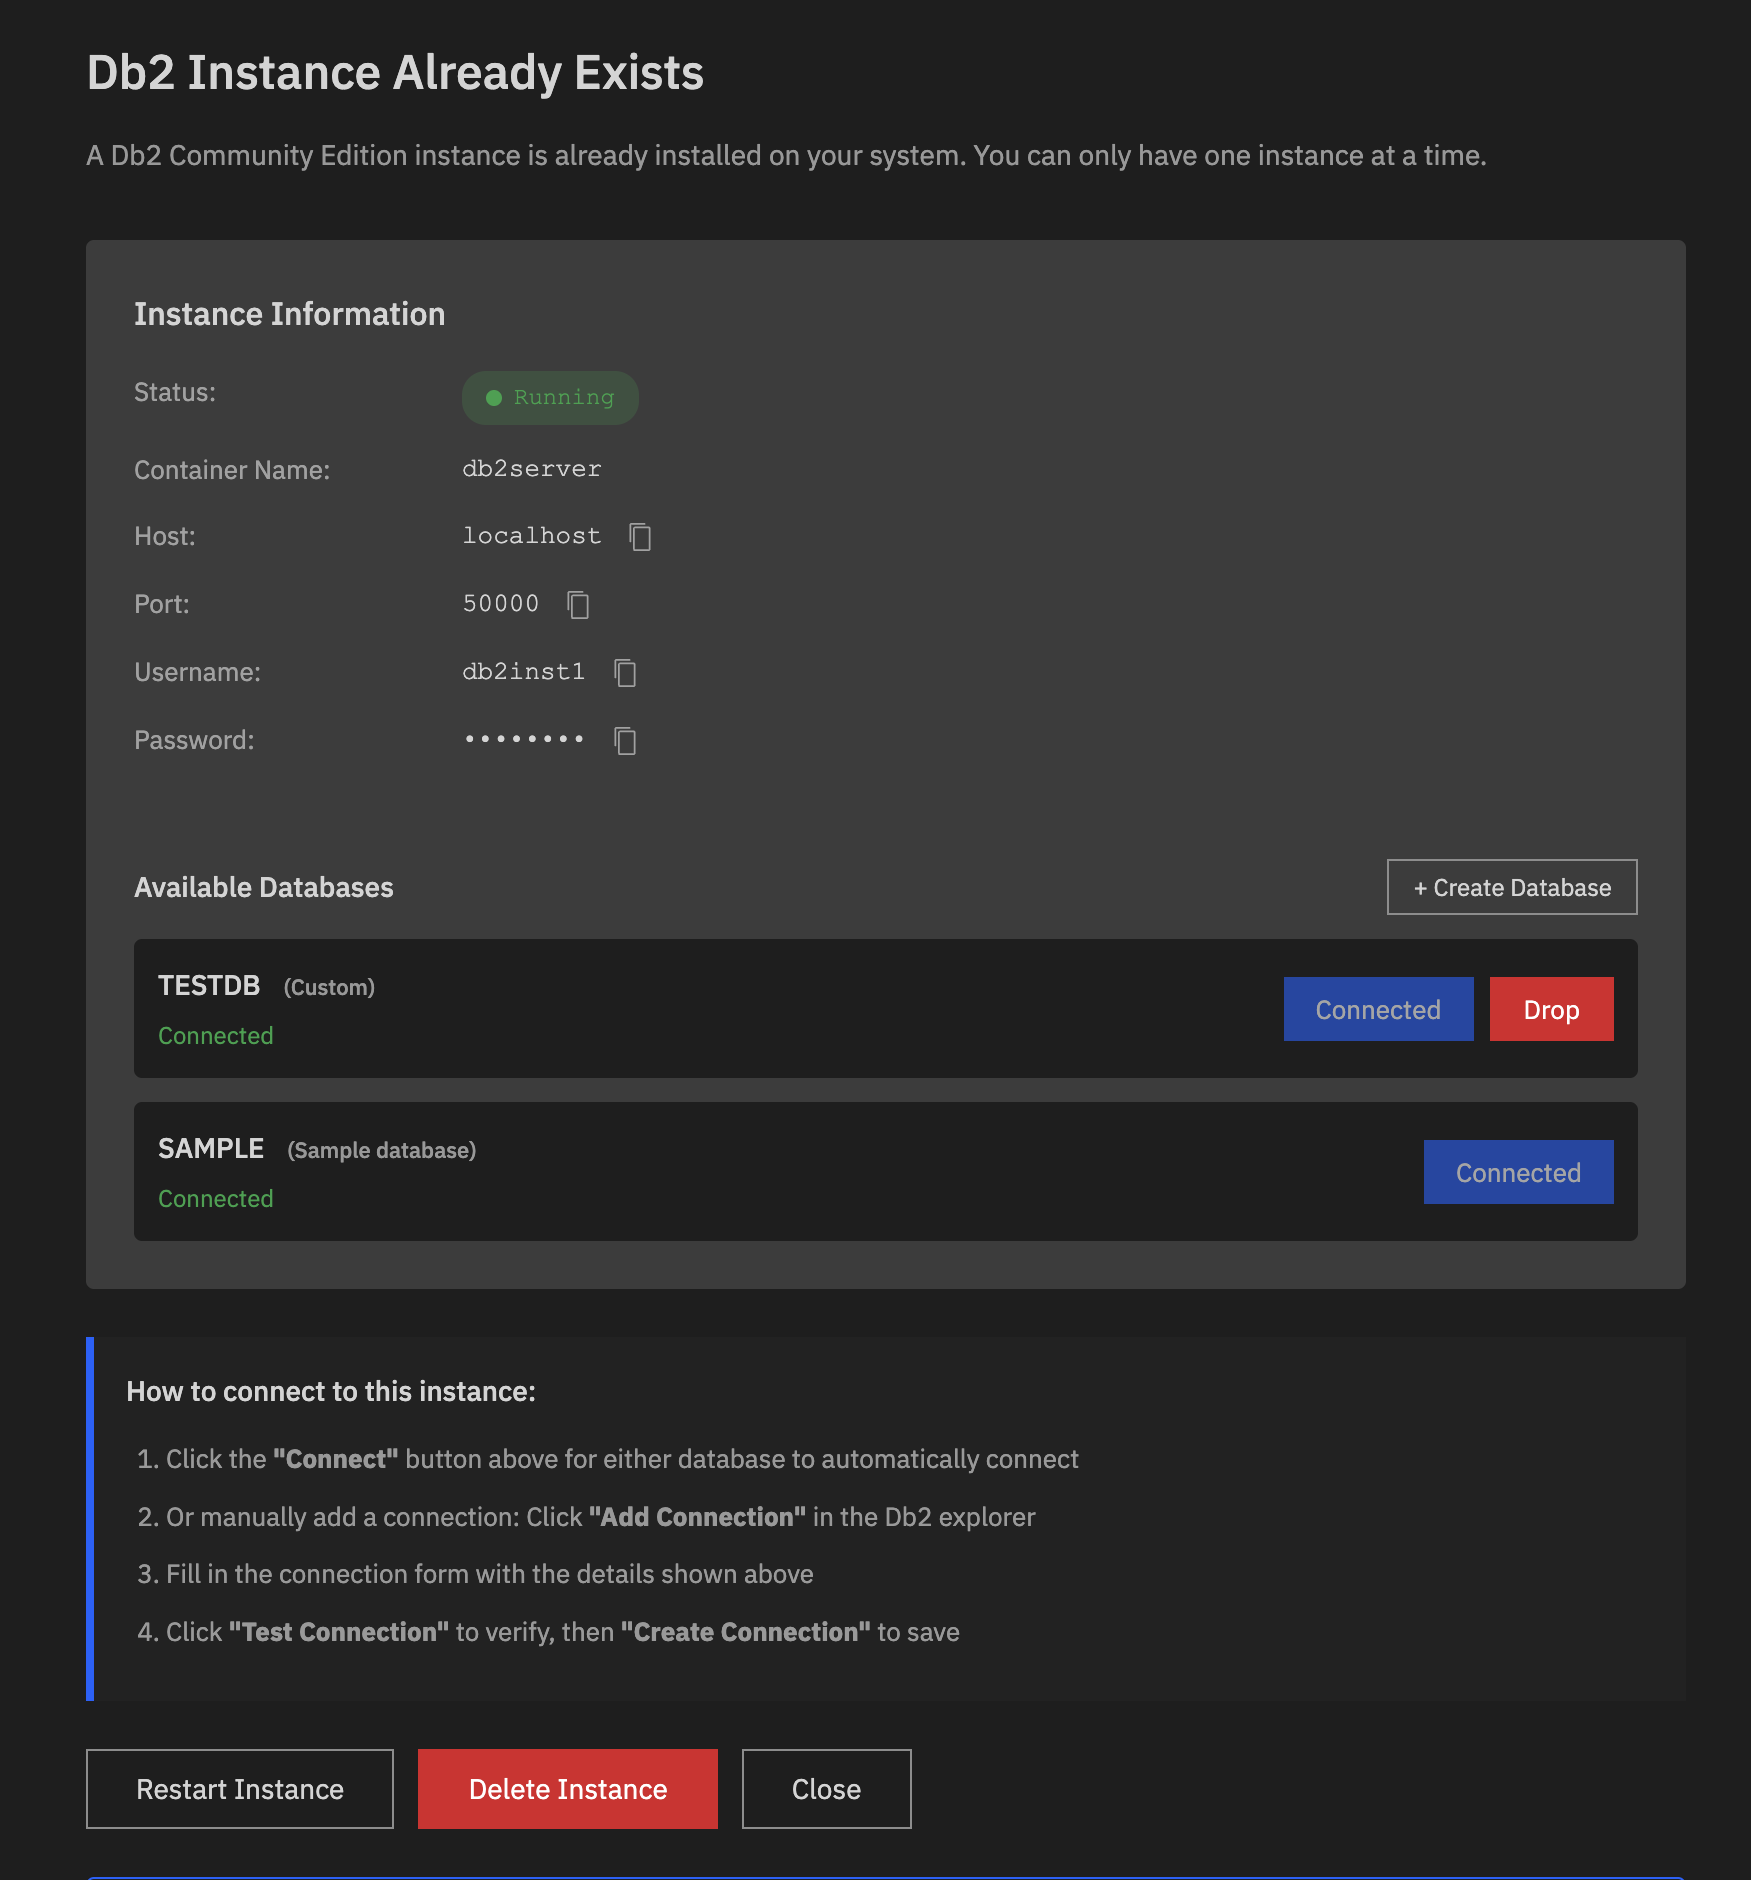
You can see the following information about the instance:
- Status: Indicates the current state of the Db2 Community Edition instance. If the status is Running, it means that the instance is active and ready for use.
- Container name: Container name that runs the Db2 instance.
- Host: Hostname or IP address where the Db2 instance is accessible.
- Port: Port number used for database connection.
- Username: Username for accessing the Db2 instance.
- Password: Password for accessing the Db2 instance.
-
Available databases: Lists the databases within the instance. The Connect button is used to establish a connection to the database and the Drop button is used to delete the database
Note: You can also connect to the database by manually adding the database connection from the DB2 CONNECTIONS pane.
- Action Buttons
-
+ Create database: When you click + Create database, a Create New Database dialog appears. Enter the database name in the Database Name field, then click Create & Connect.
This action will:
- Create a new database.
- Create a connection profile for it.
- Automatically connects the database to the instance by using the newly created database connection.
- Restart instance: Restarts the Db2 instance by using a tiered restart process:
- Soft restart (default): Attempts a soft restart by running
db2stopfollowed bydb2startto refresh the Db2 engine without disrupting the underlying container. - Full restart (fallback): If issues occur with
db2stopordb2start(for example, due to locked resources or connection problems), the process switches to a full restart. On macOS, this includes restarting Colima, along with Docker services and the Db2 container. On Linux, only Docker services and the Db2 container are restarted. After the container restarts,db2startruns automatically.
Click Restart instance when you experience connection timeouts, slow query performance, database lock issues, or unexpected errors after configuration changes.
- Soft restart (default): Attempts a soft restart by running
- Delete instance: Removes the Db2 instance completely.
- Close: Closes the editor tab without making the changes.
-
Creating a database connection
To work with IBM Db2 databases, you need to create a database connection to connect to the required database within the Db2 instance.
-
In the DB2 CONNECTIONS pane, click Add connection button or Add connection
 to open the Db2 Connection workflow in a new editor tab.
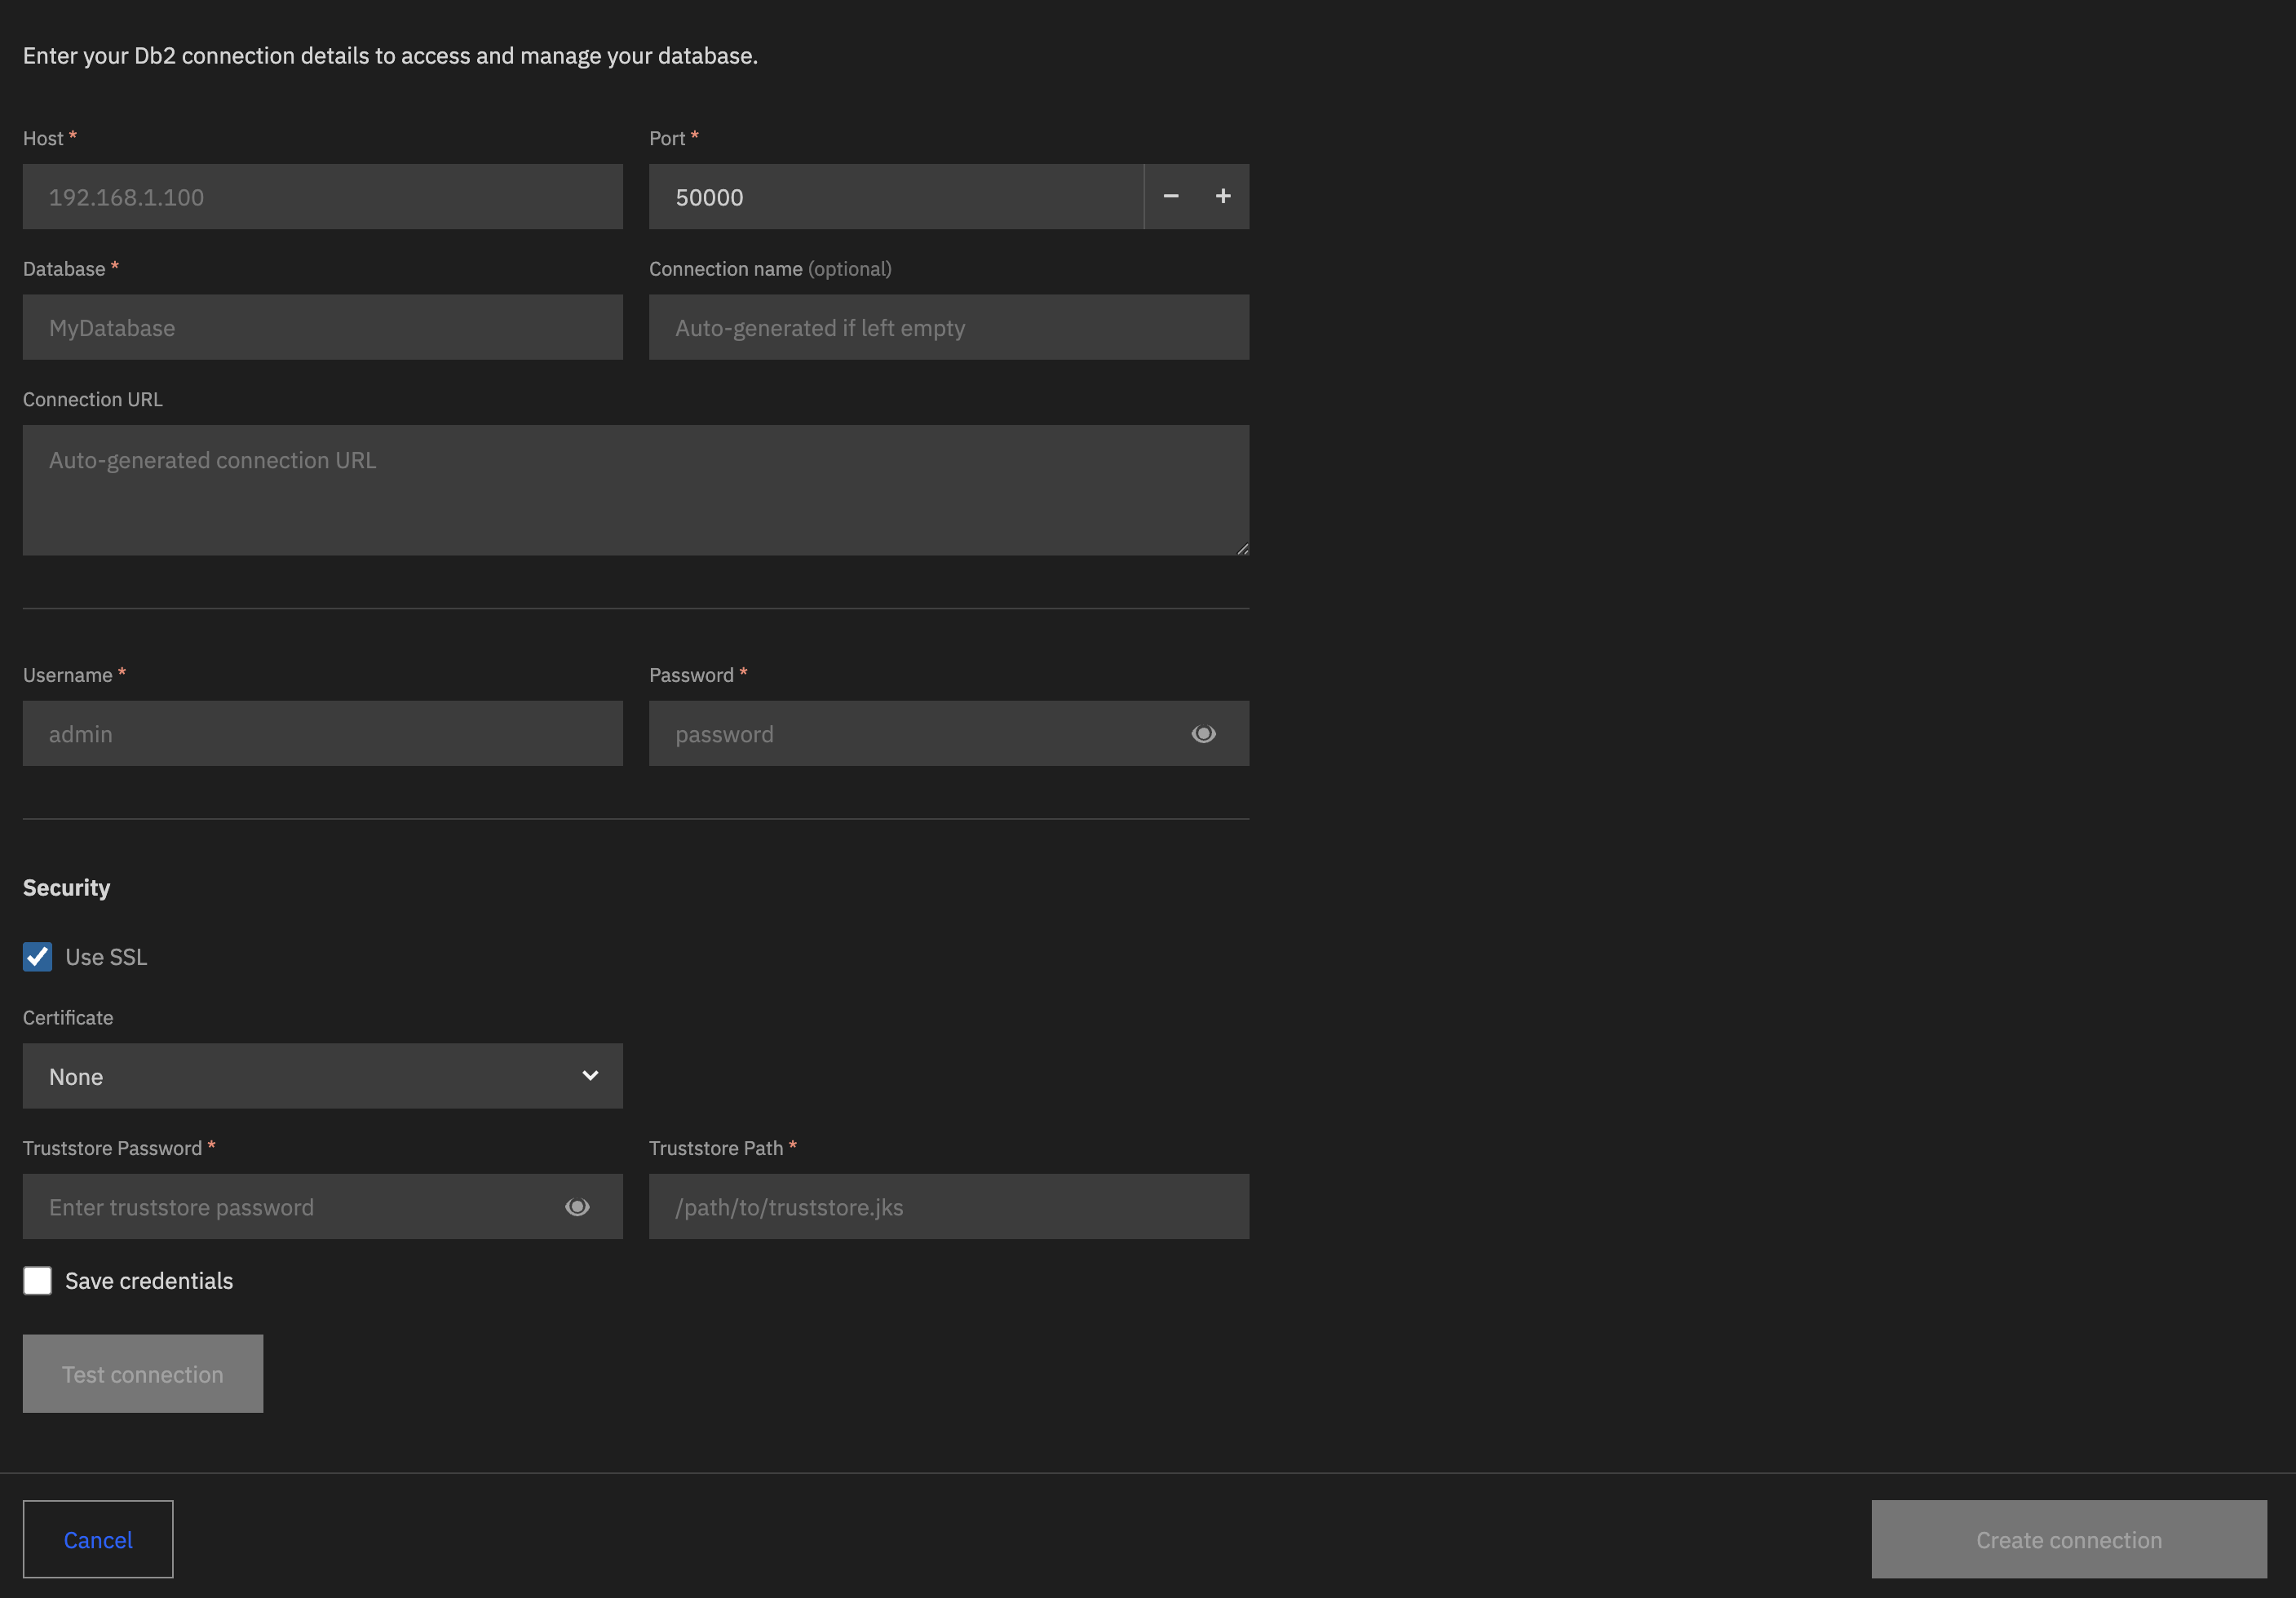
- Enter the following details:
- Host: IP address or hostname of the Db2 server you want to connect to.
- Port: Port number used by the Db2 server for the database connection.
- Database: Name of the Db2 database you want to connect to.
- Connection name: Name of the database connection.
- Connection URL: Auto-generated JDBC (Java Database Connectivity) URL for the database connection.
- Username: Username to access the Db2 instance.
- Password: Password to access the Db2 instance.
- Under the Security section, the checkbox Use SSL is selected by default. This option is used to enable SSL encryption for the database connection.
- Certificate: Select the appropriate SSL certificate from the list, or select None if SSL is not required.
- Truststore path: Provide the path to your truststore file.
- Truststore password: Enter the truststore password.
- (Optional) Select the Save credentials checkbox to save your credentials.
- Click Test connection to verify the credentials are correct.
You receive a Test connection successful notification if the credentials are correct. - Click Create connection.
If your connection was created successfully, you can see it on the DB2 CONNECTIONS pane.
Note: If your database connection gets disconnected, click the Connect icon (
) on the specific database connection. When prompted, enter the password in the input field of the extension and press Enter to connect to the database again.
Editing a database connection
To edit a database connection:
- Click Edit connection (
 ) on the connection. The Db2 Connection workflow opens.
 - Update the details as required.
- Click Update connection to update the database connection details.
Deleting an unused database connection
To delete a database connection, click Delete connection (![]() ) on the specific database connection.
) on the specific database connection.