Generating and running SQL statements
You can generate SQL statements by multiple methods:
- Using the Open SQL Editor icon (
 ) in the DB2 CONNECTIONS pane.
 - Using the Create new SQL file icon (
 ) in the DB2 CONNECTIONS pane.
 - Right-clicking the object in a schema and selecting an option to generate the SQL statements.
Generating and running SQL statements by using the open SQL Editor icon
-
Click Open SQL Editor (
) in the DB2 CONNECTIONS pane. Db2 SQL Editor opens.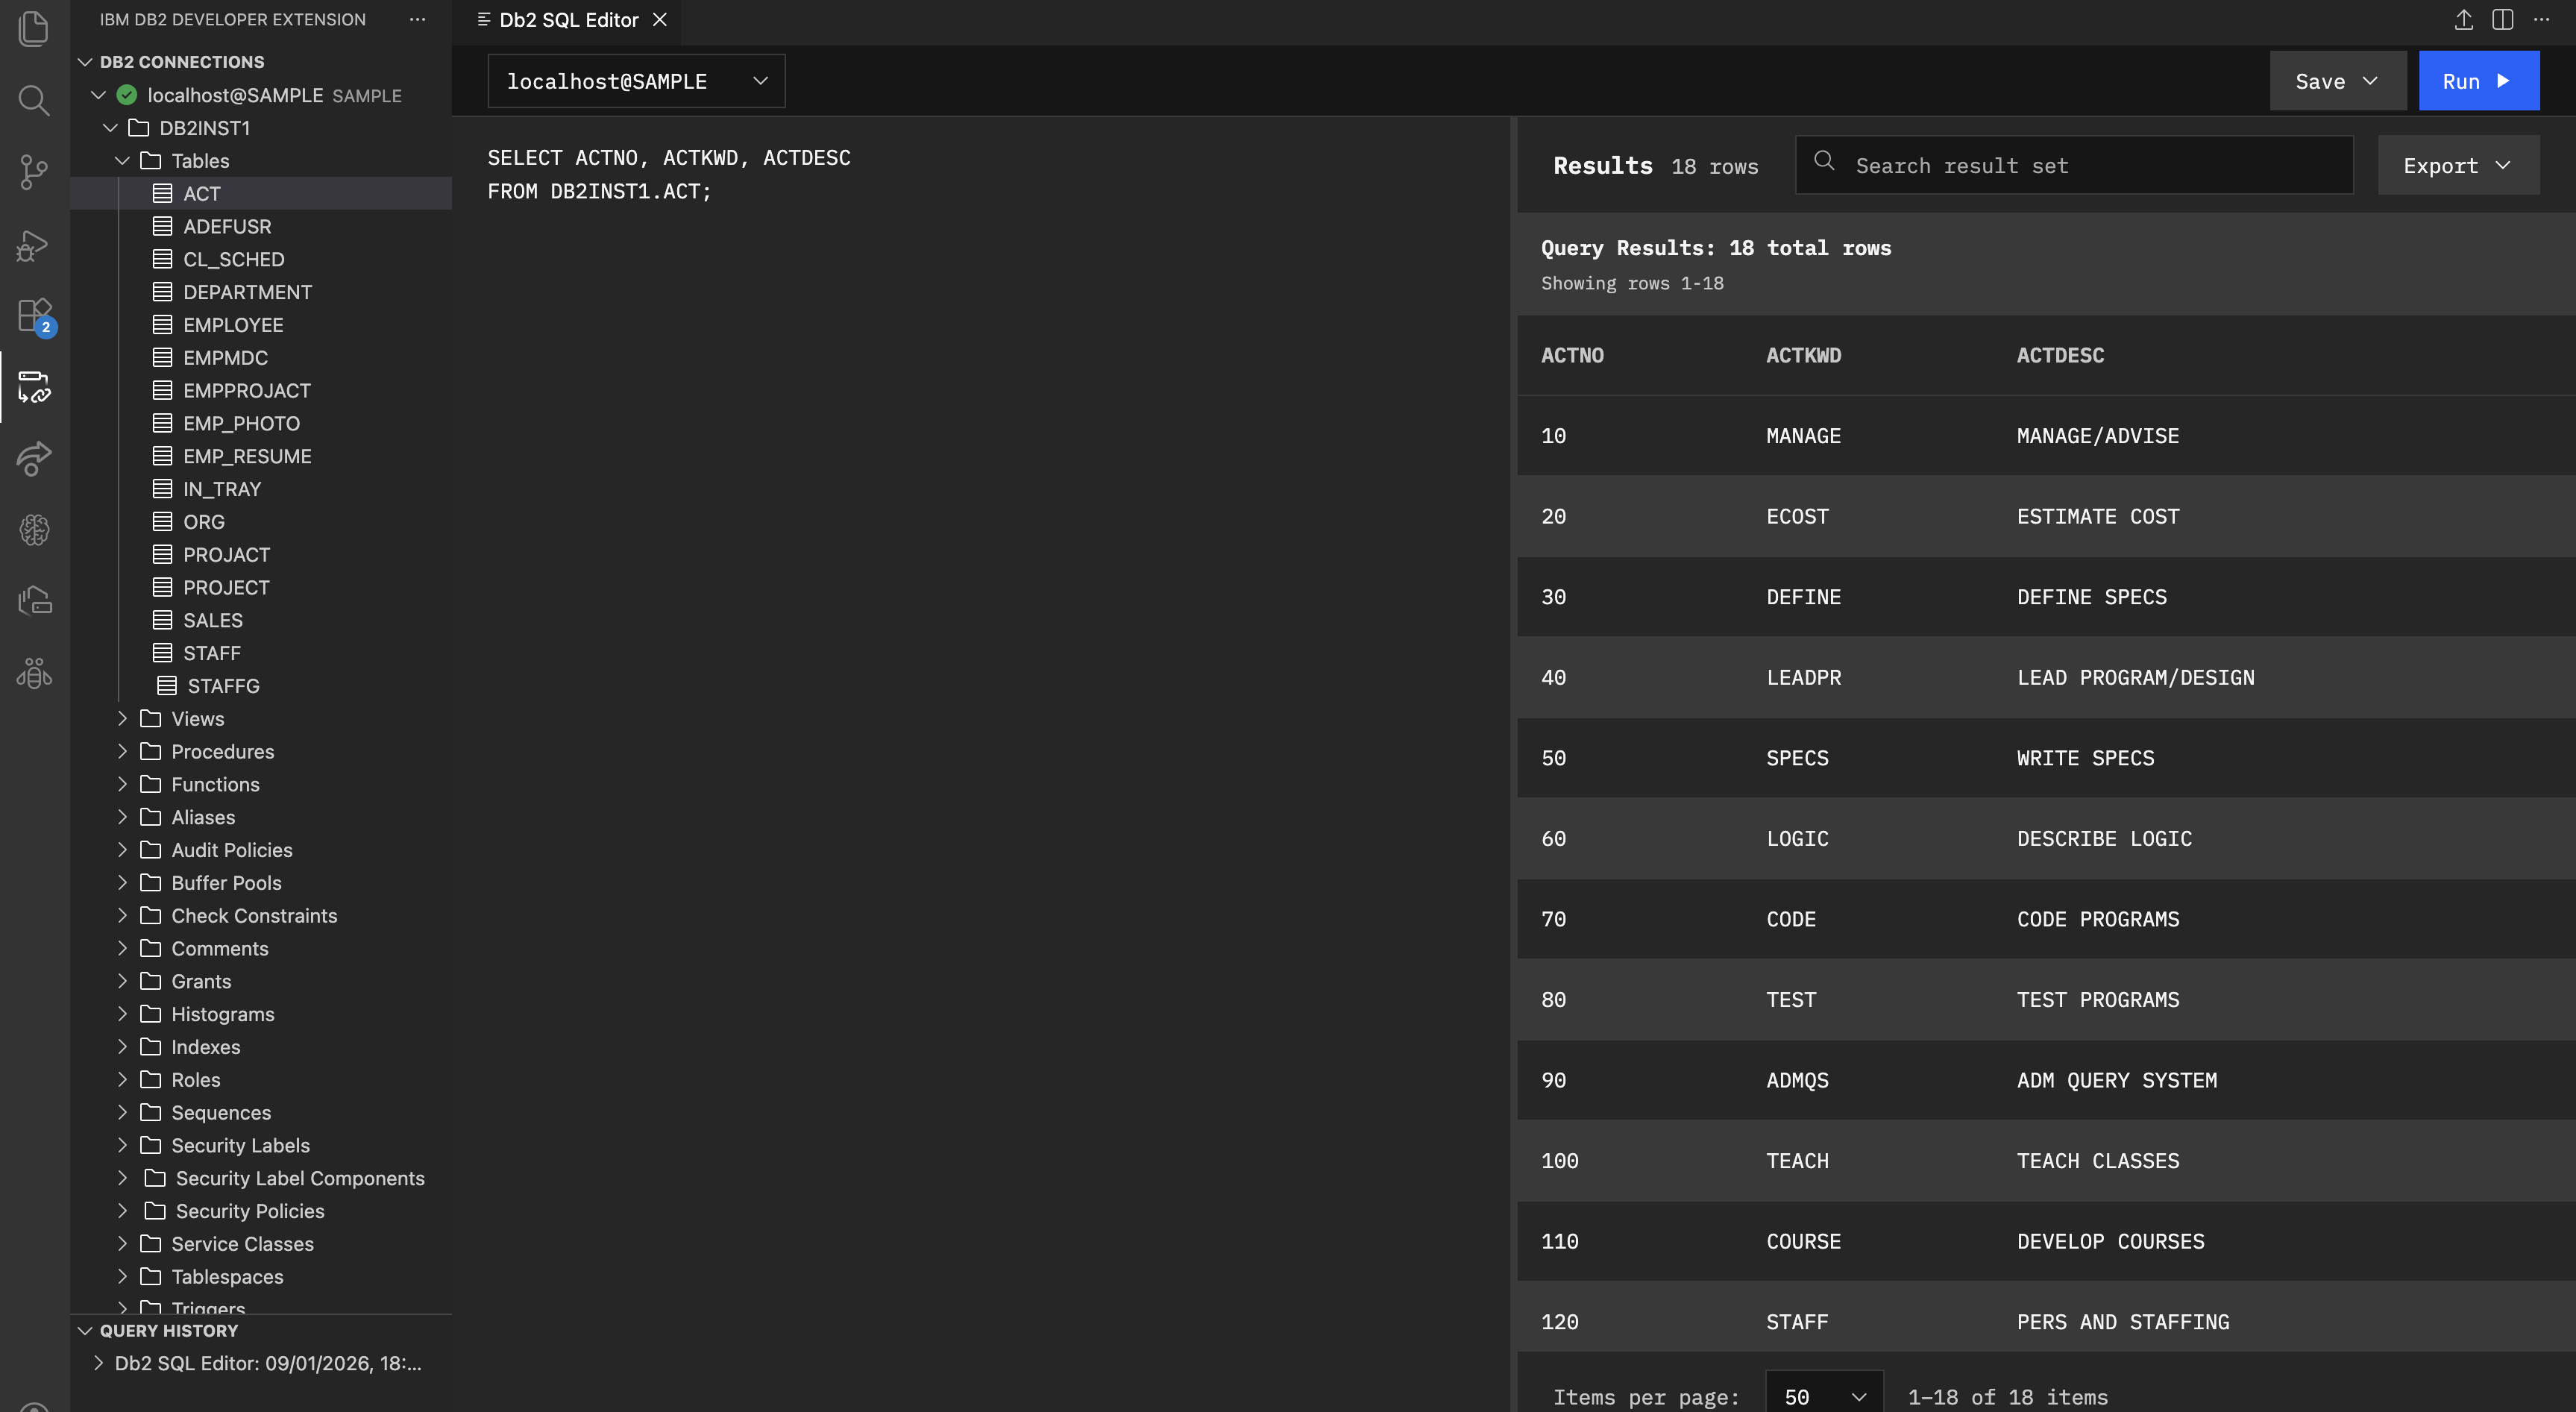
- Select the connection from the dropdown menu.
- In the editor, write your SQL statements.
- Click Run to run the SQL statement. Your results appear in the Results pane.
- Click Export to download the results in CSV or JSON format.
Note: You can save your SQL statements in .sql or .db2.sql format by clicking Save.
Generating SQL statements by using the Create new SQL file icon
- Click Create new SQL file () in the DB2 CONNECTIONS pane.
-
A new editor tab opens with the name Untitled. Save the file with a .sql extension.
Note: You can also create a new SQL file by clicking File > New File and then save it as anyname.sql to enable SQL editing features.
-
In the editor, type your SQL statement. For example, type the first letters of SELECT. The SELECT statement appears in the list of available SQL elements. Click SELECT statement to insert a code snippet with the basic structure.

- Click Check SQL Syntax to validate the syntax of the SQL statement without running the statement.
- Click Format SQL to reformat your SQL code to make it more readable and consistent.
- Click Show SQL Snippet to see predefined SQL templates or code snippets you can insert into the editor.
Common snippets include:
- SELECT TOP N – Select the top N rows from a table
- GROUP BY with HAVING
- CREATE TABLE
- INSERT statement
- JOIN examples
- MERGE statement
When you select a snippet, the editor inserts the corresponding SQL template into your current SQL editor.
-
Click Run SQL and the system prompts you to select the database connection to run your query. Select the required connection and click Enter to run the queries.
 The Query Status tab opens, showing execution details such as timestamp, SQL statement, return code, and elapsed time.
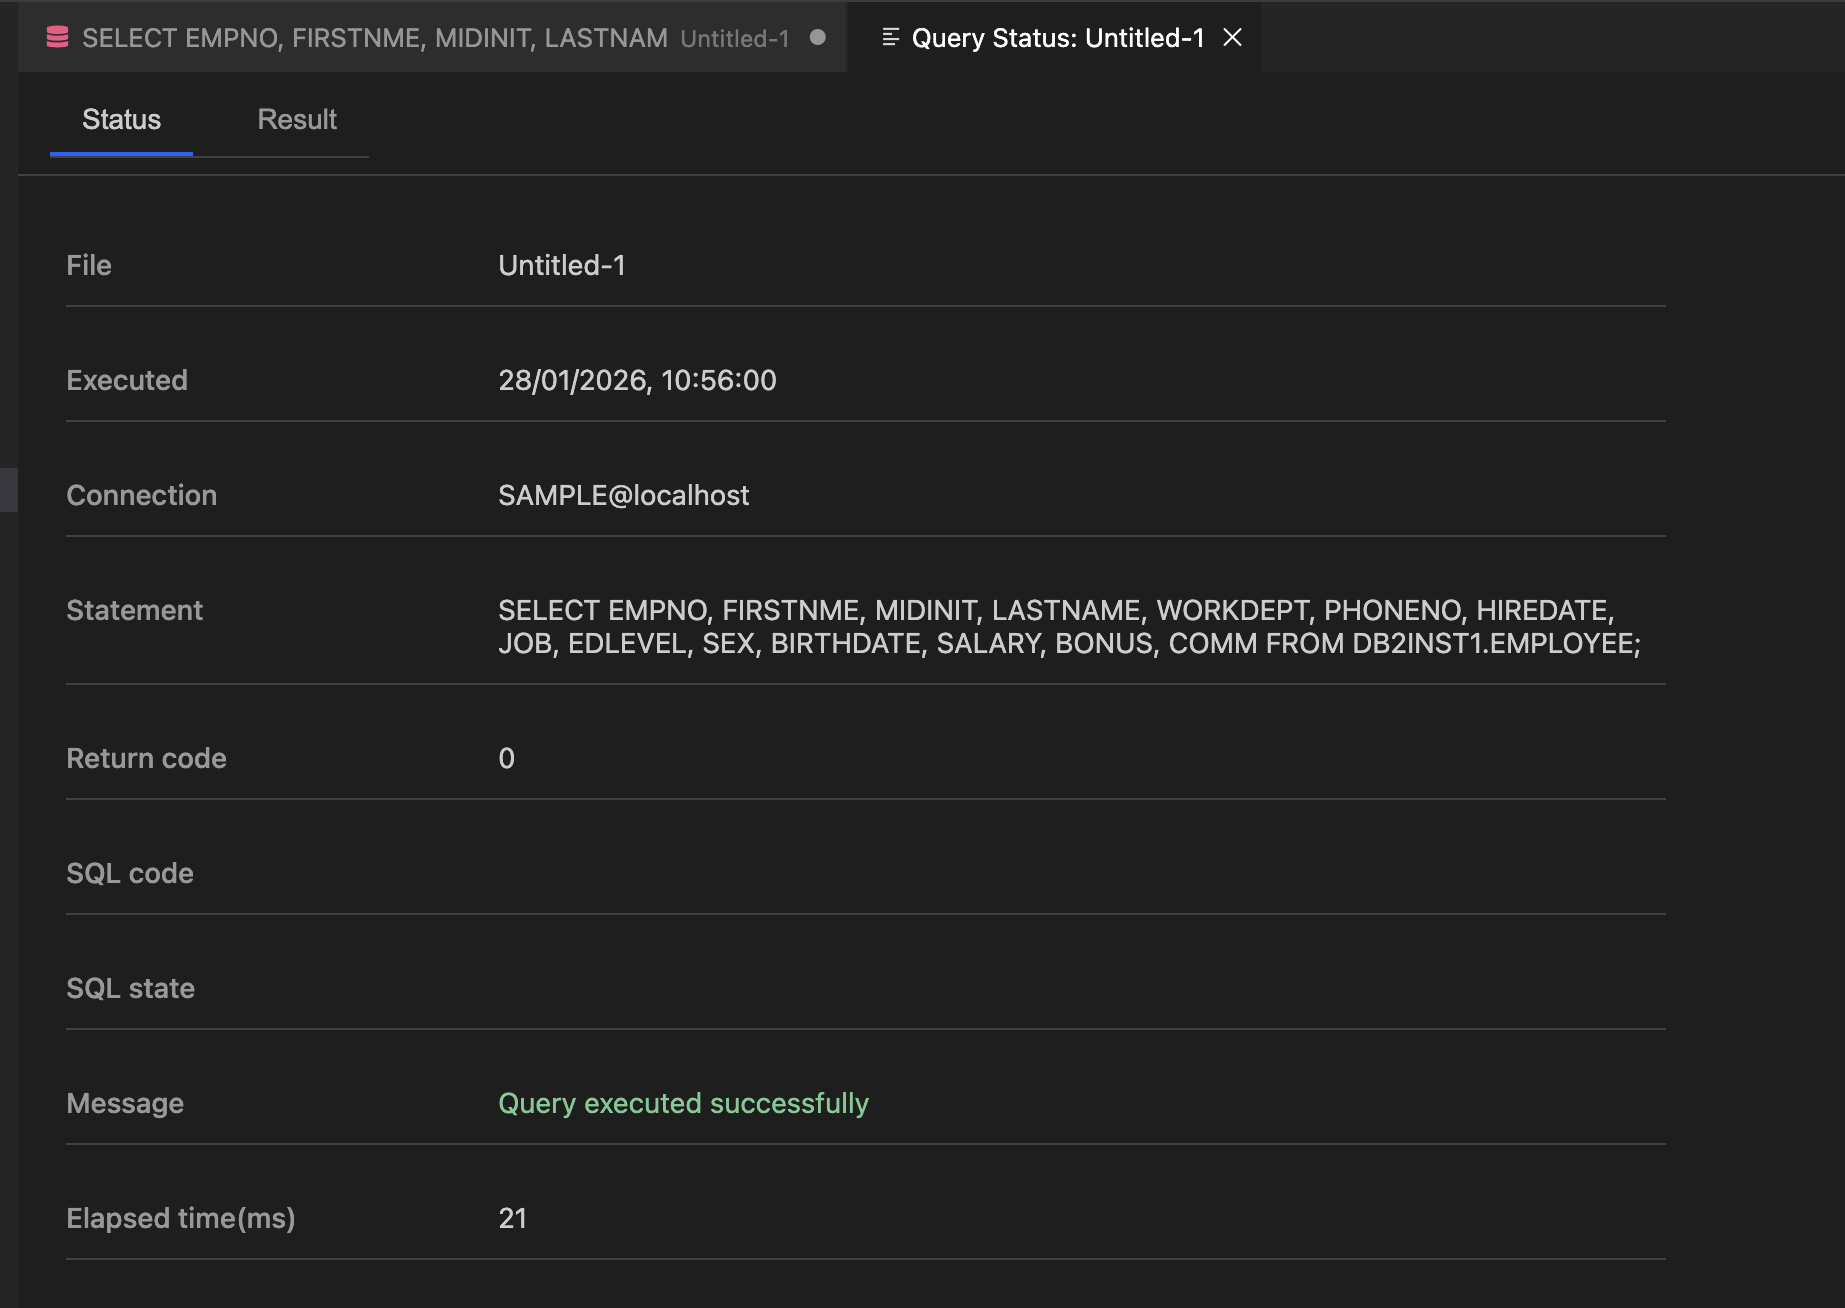
Switch to the Result tab to view the query output in a table format.
Generating and running SQL statements for a table
To generate SQL statements for a table, do the following steps:
- On the DB2 CONNECTIONS pane, click the database connection and then the schema that you want. Expand the Tables section. Right-click the required table that you want.
- From the menu, select the object-specific actions such as:
- Generate DDL: Generates the Data Definition Language (DDL) to re-create that table’s structure, including columns and constraints.
- Generate DELETE: Generates a template for deleting the rows from the table.
- Generate INSERT: Generates a template for inserting the rows into the table.
- Generate SELECT: Generates a template for retrieving the data from the table.
- Generate UPDATE: Generates a template for updating the rows in the table.
The DELETE, SELECT, INSERT, and UPDATE statements open in a new Db2 SQL Editor tab with the Results pane on the right.
The DDL script opens in a read-only editor tab. You can copy the script, not run it directly in the editor. For more information, see Generating DDL for a Db2 object.
- Run your SQL statements by clicking Run.
- View the results in the Results pane.
You can follow the same steps to generate SQL statements for other object types, such as views.
Note: If you get errors while writing SQL statements, see Db2-specific commands.