Creating a Db2 instance by using Community Edition
Note: Skip this step if you already have a Db2 instance.
Prerequisites
Before you create a Db2 instance, ensure that your system meets the following requirements:
MacOS
-
Homebrew: Homebrew is required for installing dependencies such as Colima and Docker CLI. If Homebrew is not installed on your system, the extension shows a prompt to install it during the Db2 instance setup. The prompt opens a terminal window where you can enter your system password and interact as needed. The installation script runs automatically. Monitor the terminal for any errors. After Homebrew is installed, the Db2 instance creation resumes automatically.
-
System resources: Ensure that your system has a minimum of 4 GB of available RAM and sufficient disk space for the Db2 container.
Windows Subsystem for Linux (WSL)
If you use the extension within WSL on Windows, ensure that the following prerequisites are met:
- WSL 2 is installed and set as the default version.
- Docker Desktop for Windows is installed with WSL integration enabled. In Docker Settings, go to Resources > WSL Integration and enable it.
- Ubuntu or another supported Linux distribution is configured as your WSL environment.
- A minimum of 4 GB of RAM is allocated to WSL.
Without these prerequisites, the Db2 container setup might fail. For more information about WSL setup, see the Microsoft WSL documentation.
Setting up WSL2 and Docker for Db2 Community Edition
This procedure describes how to prepare a Windows 10 or Windows 11 system to run IBM Db2 Community Edition by using WSL2 (Ubuntu 22.04) and Docker Engine.
System requirements
Ensure that your system meets the following requirements:
- Windows 10 or Windows 11 with administrator privileges
- Virtualization enabled in BIOS
- Latest version of Visual Studio Code
1. Enable and update WSL2
a. Open Windows PowerShell as administrator.
b. (Optional) Download and install WSL2 kernel update only if WSL is not installed:
      curl.exe -L -o wsl_update_x64.msi https://wslstorestorage.blob.core.windows.net/wslblob/wsl_update_x64.msi
      msiexec /i wsl_update_x64.msi /quiet /norestart
c. Set WSL2 as the default version:
wsl --set-default-version 2
d. Update WSL:
wsl --update
2. Install Ubuntu 22.04 on WSL
Note: The
wsl --install -d Ubuntu-22.04command fails if WSL is not updated. Complete Step 1d before proceeding.
a. Install Ubuntu 22.04:
wsl --install -d Ubuntu-22.04
b. When Ubuntu starts for the first time, enter a Linux username and set a password.
3. Set Ubuntu as the default WSL distribution
a. Set Ubuntu as the default distribution:
wsl --set-default Ubuntu-22.04
After completing the previous step, restart your system.
b. Launch WSL:
wsl
c. Verify that you are in the correct Ubuntu home directory by running the following command:
pwd
Expected output:
/home/<username>
After completing these steps, the Db2 Developer Extension automatically handles the following actions:
- Detects the WSL environment.
- Installs Docker Engine inside WSL.
- Configures Docker permissions.
- Downloads the Db2 Community Edition image.
- Creates and starts the Db2 container.
- Initializes the Db2 instance.
- Creates the database.
- Loads sample data.
- Verifies connectivity.
4. Verify Db2 container status
a. Run the following command to verify that the Db2 container is running. The sudo prefix is required for Docker commands until you log out and log back in to apply Docker group permissions:
sudo docker ps
Expected output:
- Db2 container status is running.
- Port
50001is exposed and accessible from your Windows system.
Installed dependencies
During the Db2 instance creation, the extension automatically installs the necessary libraries and tools.
MacOS
- Colima: A lightweight Docker‑compatible runtime used to run the Db2 Community Edition container without Docker Desktop.
- Docker CLI: The Docker command‑line interface, installed using Homebrew alongside Colima. Docker CLI is used to manage the container operations.
Linux
- Docker Engine or Docker CLI: Installed using the system package manager (for example, apt-get) if they are not already available.
These dependencies are installed on your system to support the Db2 Community Edition container.
Procedure
To create a Db2 instance by using IBM Db2 Community Edition, complete the following steps:
-
In the DB2 CONNECTIONS pane, click the Create Db2 instance button or the Create Db2 Instance icon
 .
.The extension checks for an existing Db2 instance on your system. If an instance exists, the Db2 Instance Already Exists workflow opens in a new editor tab. For more information, see Managing an existing Db2 instance.
-
When no Db2 instance exists, the Add Db2 instance workflow opens in a new editor tab. Enter the following details:
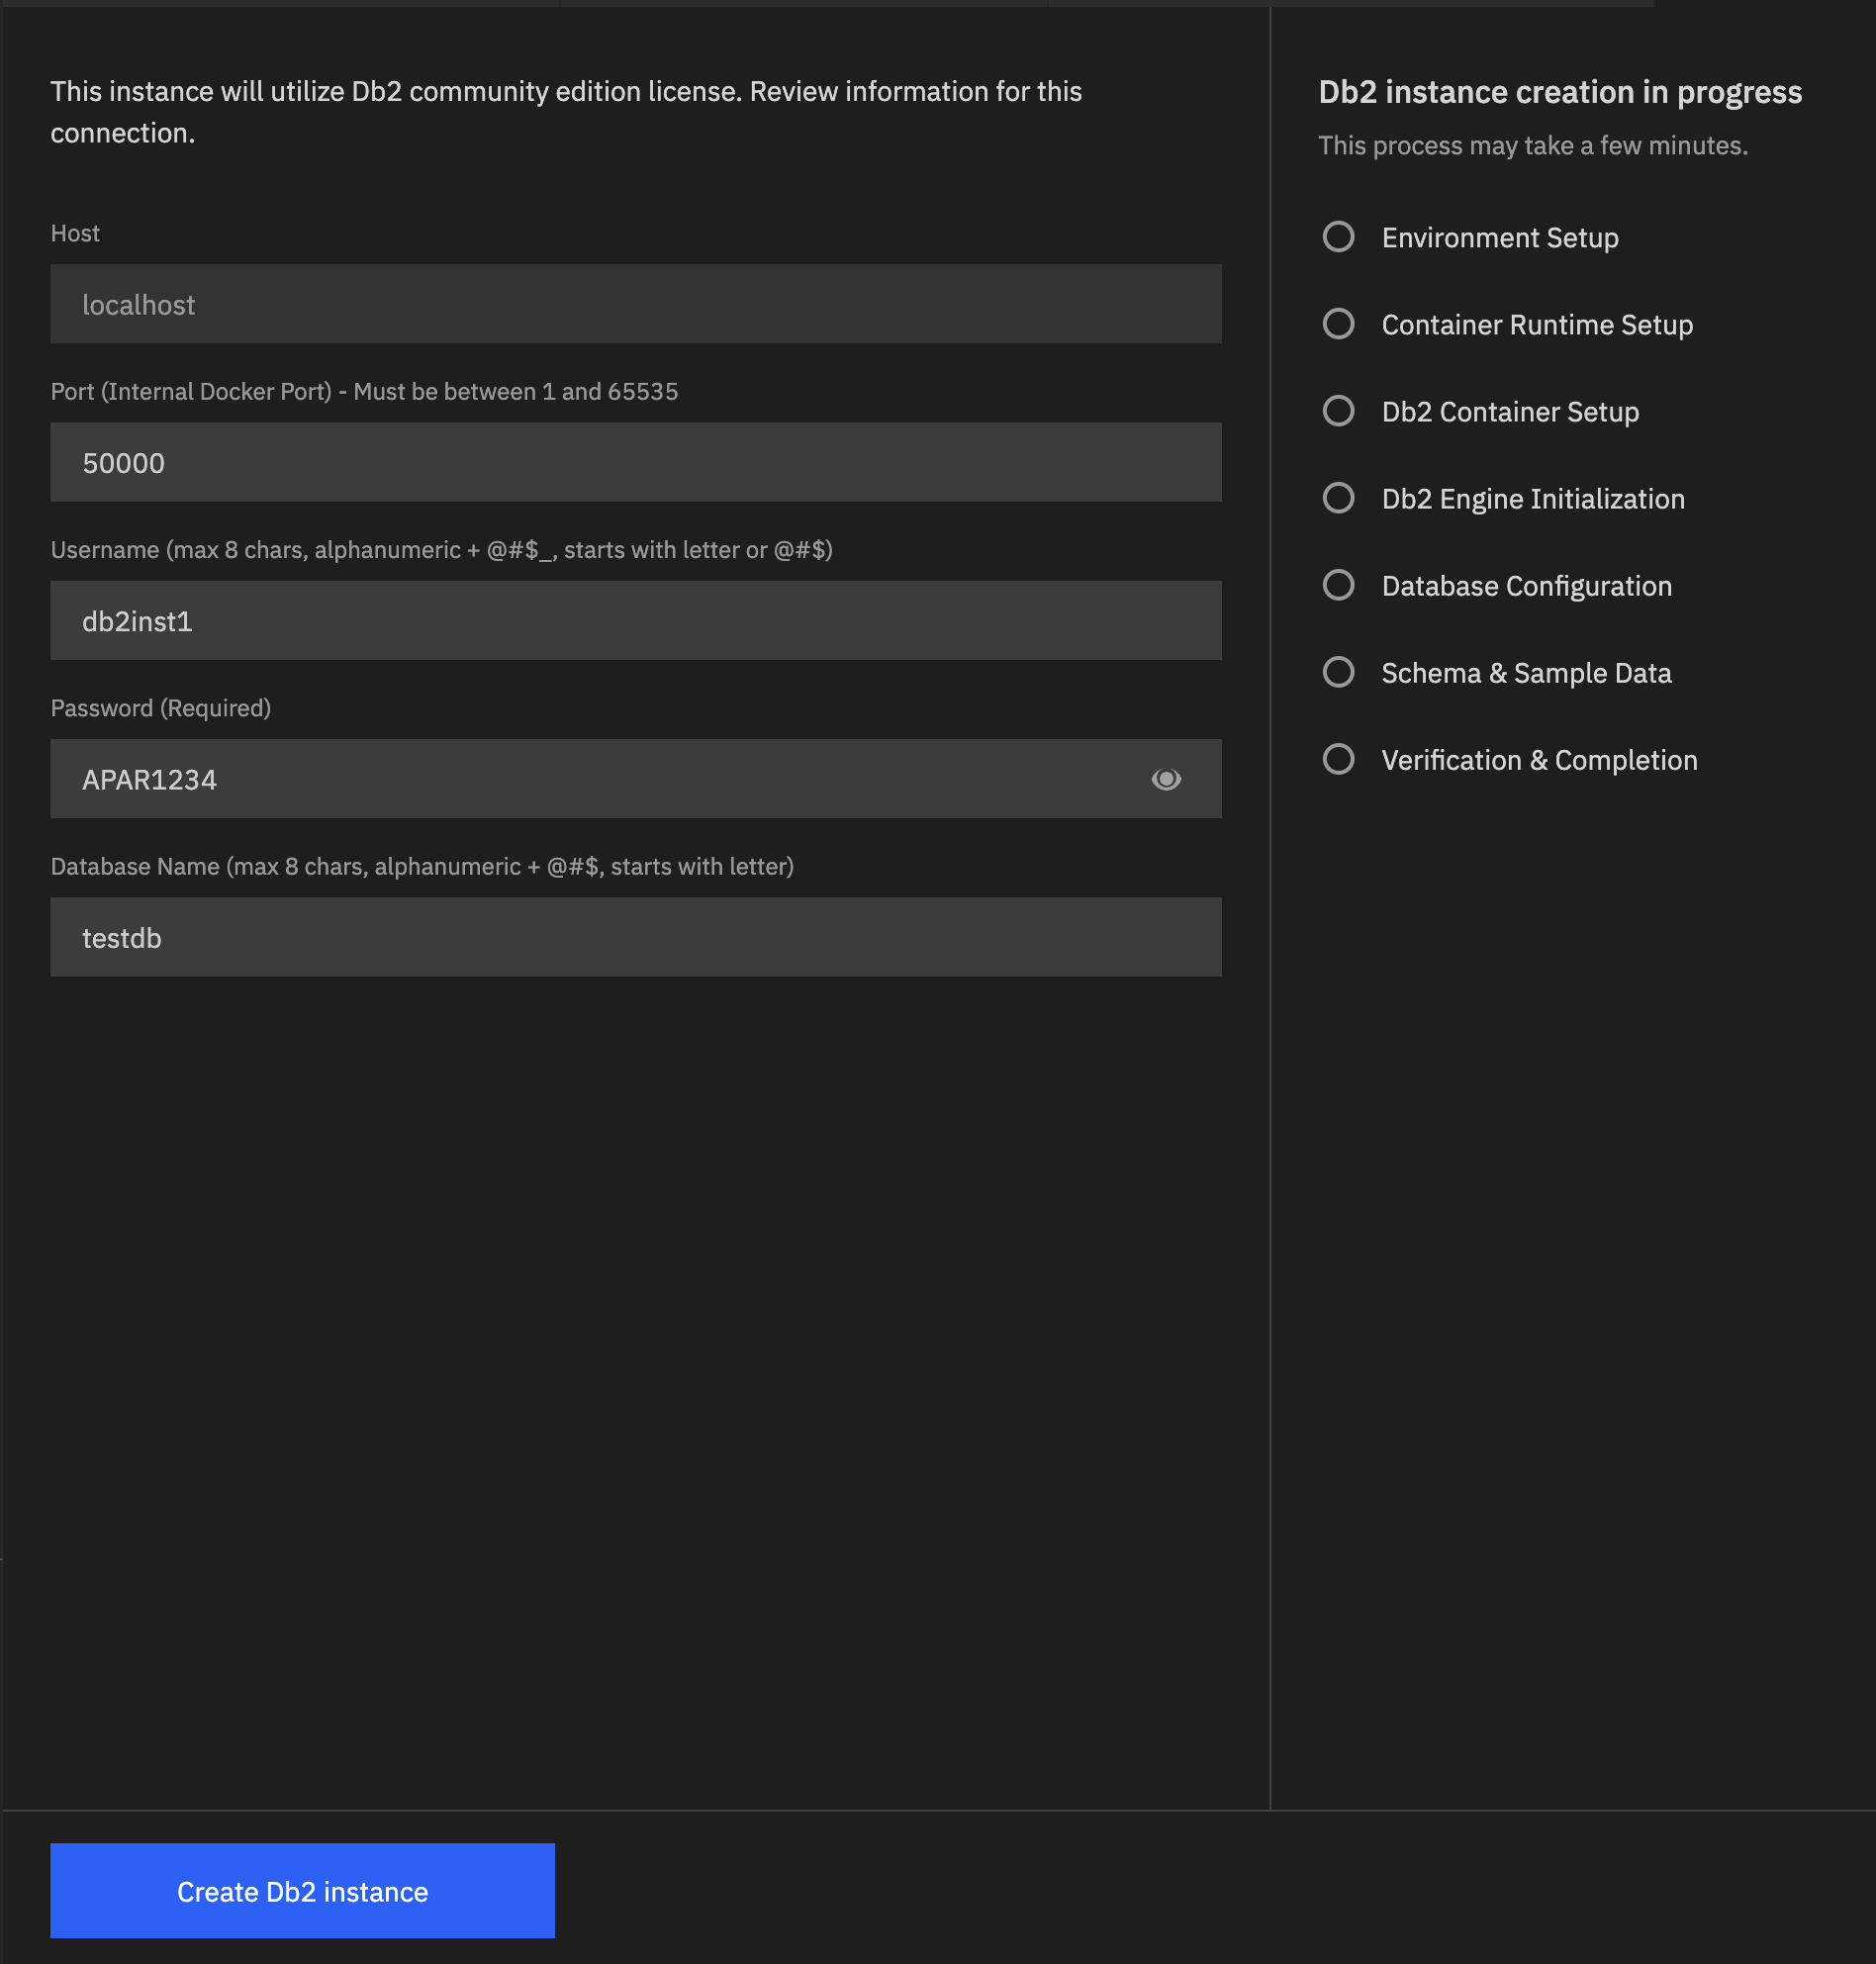
- Host: Hostname or IP address that hosts the instance.
- Port: Internal Docker port number (between 1 and 65535) for the instance.
- Username: Username for accessing the instance. The username is automatically converted to lowercase.
- Password: Password for accessing the instance.
- Database Name: Name of the database that you want to create. By default, the database name is set to
testdb.
When you create a Db2 instance, Db2 Developer Extension automatically creates two databases:
- testdb: Default database that you specify during instance setup.
- SAMPLE: Sample database for testing and learning purposes.
-
Click Create Db2 instance.
-
Review the Db2 instance creation checklist. The checklist verifies that your environment meets the prerequisites.
The checklist runs automatically. When all checks are complete, the Db2 instance is created successfully.
During the Db2 instance creation process, the extension:
- Creates the
testdb(or your chosen name) andSAMPLEdatabases. - Creates corresponding database connections for both databases.
- Automatically connects to the
testdb(or your chosen name) andSAMPLEdatabases.
The database connections are listed in the DB2 CONNECTIONS pane.
Note: If you prefer to install Db2 Community Edition manually, see Installing Db2 Community Edition manually.
- Creates the
What’s next
After successfully creating your Db2 instance, you can:
For troubleshooting assistance, see Db2 instance creation errors.