Examples#
This section provides practical, end-to-end examples demonstrating how to create and run data integration flows using the SDK. Each example walks through the complete workflow, from authentication to job execution, helping you understand how different components work together in real-world scenarios.
Creating and Running a Batch Flow#
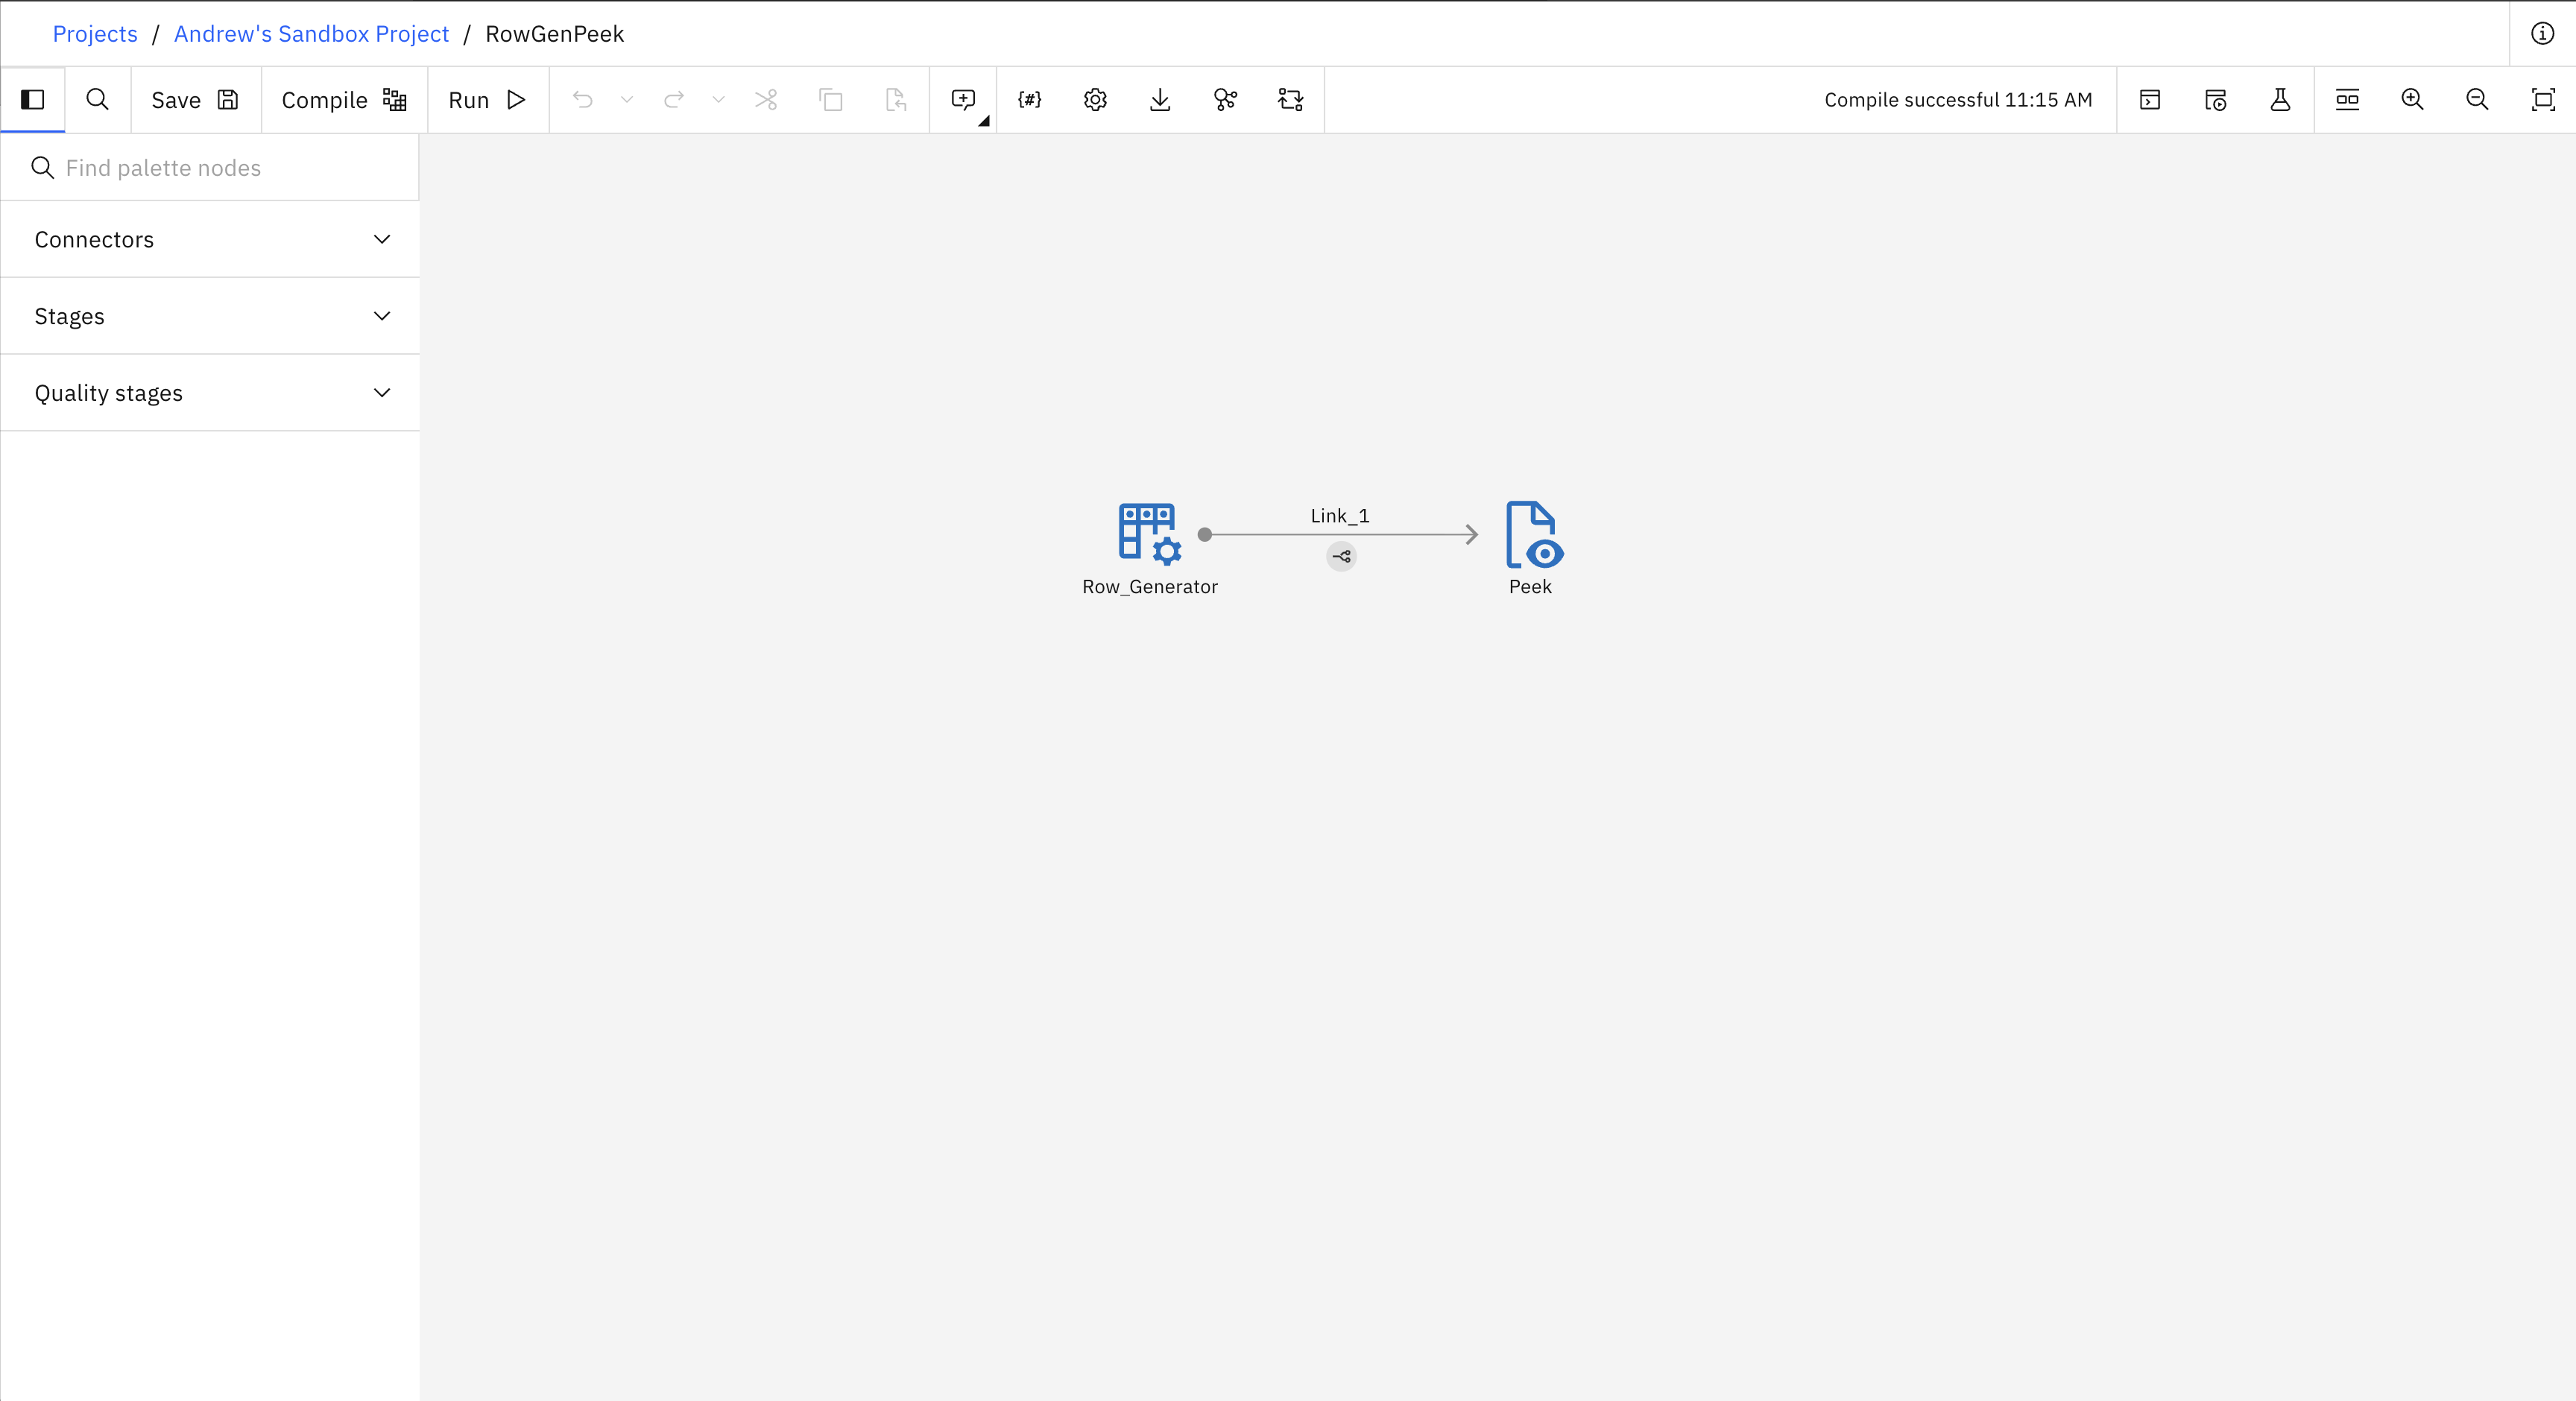
Here is an example of how to create and run a simple batch flow. The flow contains a Row Generator stage connected to a Peek stage. The following image shows what the flow looks like in the UI.
- This example covers four steps:
Set up authentication
Create a new project
Create and save a new flow
Create and run a job for the flow
from ibm_watsonx_data_integration.common.auth import IAMAuthenticator
from ibm_watsonx_data_integration import Platform
from ibm_watsonx_data_integration.services.datastage import *

# 1. Set up authentication
api_key = 'API_KEY'
auth = IAMAuthenticator(api_key=api_key)
platform = Platform(auth, base_api_url='https://api.ca-tor.dai.cloud.ibm.com')

# 2. Create a new project
project = platform.create_project(
   name='My first project',
   description='Building sample batch flows',
   tags=['flow_test_project'],
   public=True,
   project_type='wx'
)
project

# 3. Create and save a new flow
# Flow
flow = project.create_flow(
   name='RowGenPeek',
   environment=None,
   flow_type='batch'
)
# Stages
row_generator = flow.add_stage('Row Generator', 'Row_Generator')
peek = flow.add_stage('Peek', 'Peek')
# Links
link_1 = row_generator.connect_output_to(peek)
link_1.name = 'Link_1'
row_generator_schema = link_1.create_schema()
row_generator_schema.add_field('VARCHAR', 'COLUMN_1', length=100)

project.update_flow(flow)

# 4. Run a job for the flow
row_gen_peek_job = project.create_job(name='RowGenPeek_job', flow=flow)
job_start = row_gen_peek_job.start(name='RowGenPeek_job_run', description='')
Note
Important for all streaming flow examples: Before any streaming flow can be run, you must retrieve the installation command for the engine of the environment by calling the Environment.get_installation_command() method.
Then, replace the SSET_API_KEY variable in the command with your api_key and run the command.
# Replace the returned command's SSET_API_KEY with your api_key, then run the command.
environment.get_installation_command()
Creating and Running a Streaming Flow#
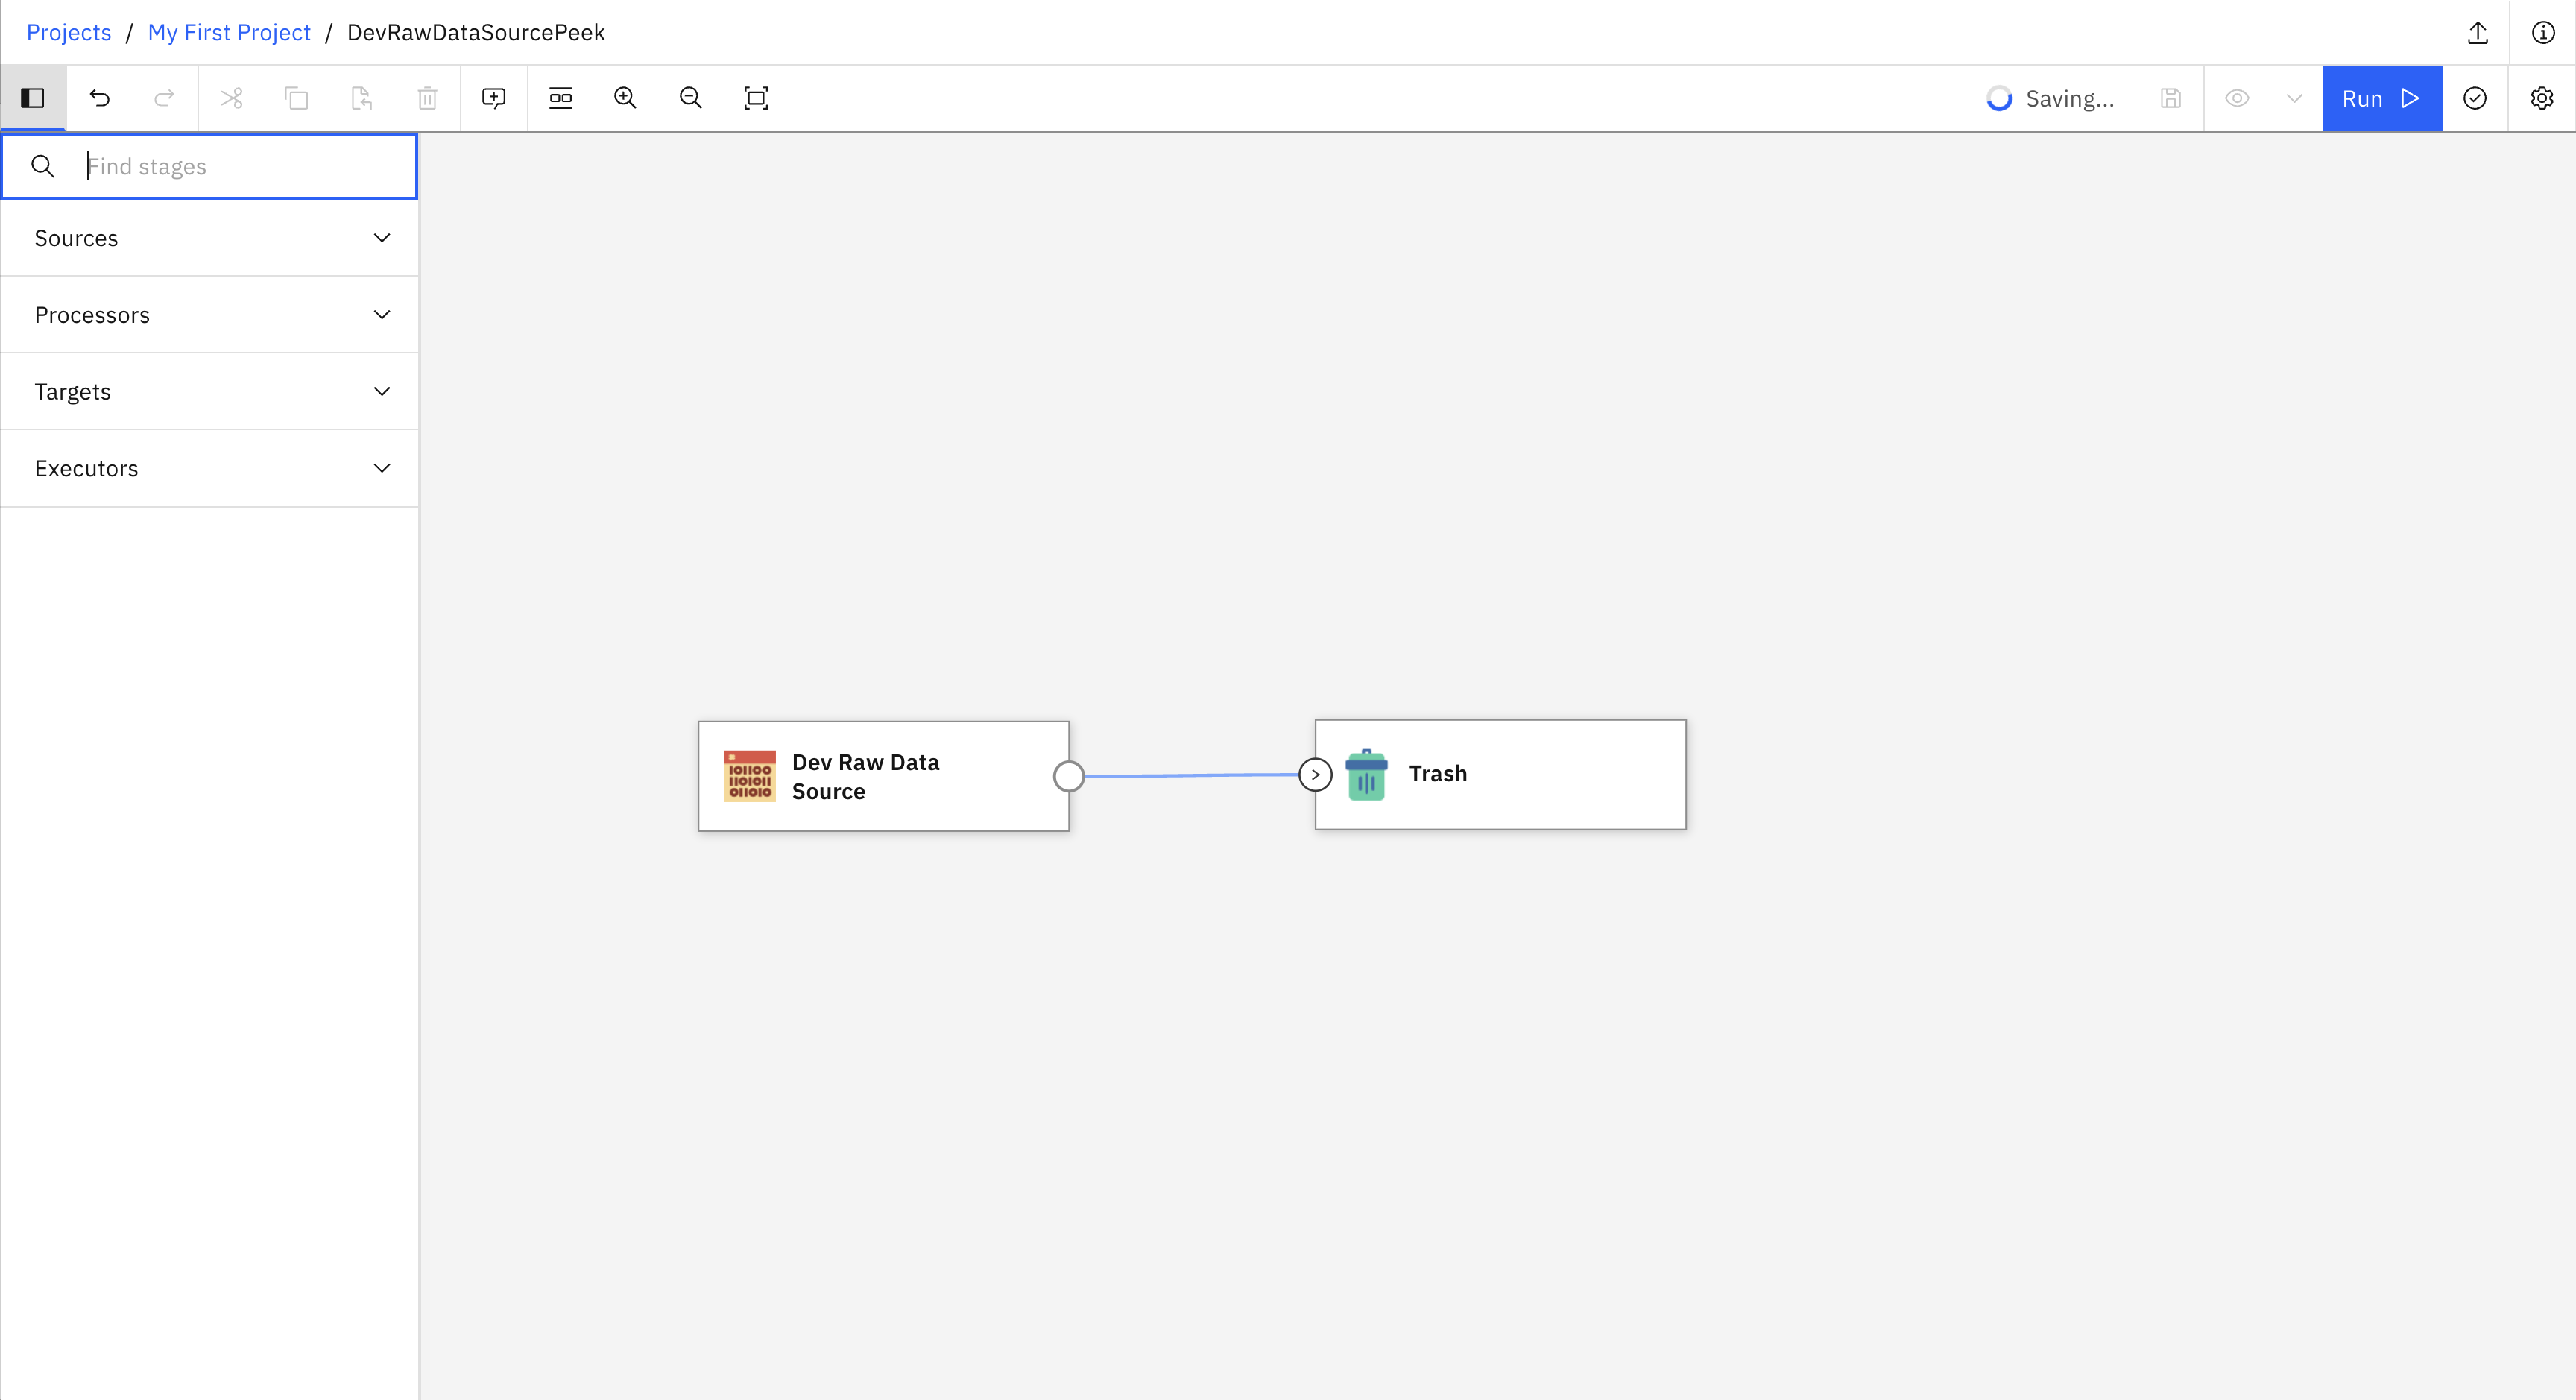
Here is an example of how to create and run a simple streaming flow. The flow contains a Dev Raw Data Source connected to a Trash stage. The following image shows what the flow looks like in the UI.
- This example covers six steps:
Set up authentication
Create a new project
Create a new environment
Create and save a new flow
Create and run a job for the flow
Retrieve and run the engine installation command
from ibm_watsonx_data_integration.common.auth import IAMAuthenticator
from ibm_watsonx_data_integration import Platform
from ibm_watsonx_data_integration.services.datastage import *

# 1. Set up authentication
api_key = 'API_KEY'
auth = IAMAuthenticator(api_key=api_key)
platform = Platform(auth, base_api_url='https://api.ca-tor.dai.cloud.ibm.com')

# 2. Create a new project
project = platform.create_project(
   name='My first project',
   description='Building sample streaming flows',
   tags=['flow_test_project'],
   public=True,
   project_type='wx'
)

# 3. Create a new environment
environment = project.create_environment(
     name='My first environment',
     engine_version=platform.available_engine_versions[0],
 )

# 4. Create and save a new flow
# Flow
flow = project.create_flow(
   name='DevRawDataSourceTrash',
   environment=environment,
   flow_type='streaming'
)
# Stages
dev = flow.add_stage('Dev Raw Data Source')
trash = flow.add_stage('Trash')

# Links
dev.connect_output_to(trash)

project.update_flow(flow)

# 5. Run a job for the flow
dev_trash_job = project.create_job(name='DevRawDataSourceTrash_job', flow=flow)
job_start = dev_trash_job.start(name='DevRawDataSourceTrash_job_run', description='')
Creating a Streaming Flow with Parameter Sets#
Here is an example of how to create a streaming flow that uses parameter sets to make the flow more flexible and reusable. The flow contains a Dev Raw Data Source connected to a Delay stage, which is then connected to a Trash stage. The Dev Raw Data Source stage is configured using multiple parameters from a parameter set.
Note
Parameter sets make your flows more flexible by allowing you to change configuration values without modifying the flow itself. For more information about parameter sets, see Parameter Sets.
- This example covers seven steps:
Set up authentication
Retrieve an existing project
Create a parameter set with multiple parameters
Create a new environment
Create and save a new flow with a parameter set
Configure stages using multiple parameters
Create and run a job for the flow
from ibm_watsonx_data_integration.common.auth import IAMAuthenticator
from ibm_watsonx_data_integration import Platform
from ibm_watsonx_data_integration.cpd_models.parameter_set_model import ParameterType

# 1. Set up authentication
api_key = 'API_KEY'
auth = IAMAuthenticator(api_key=api_key)
platform = Platform(auth, base_api_url='https://api.ca-tor.dai.cloud.ibm.com')

# 2. Retrieve an existing project
project = platform.projects.get(name='My first project')

# 3. Create a parameter set with multiple parameters
paramset = project.create_parameter_set('streaming_config')
paramset.add_parameter(parameter_type=ParameterType.String, name='data_format', value='JSON')
paramset.add_parameter(parameter_type=ParameterType.String, name='number_of_threads', value='1')
paramset.add_parameter(parameter_type=ParameterType.String, name='stop_after_first_batch', value='false')
project.update_parameter_set(paramset)

# 4. Create a new environment
environment = project.create_environment(
    name='My parameter set environment',
    engine_version=platform.available_engine_versions[0],
)

# 5. Create and save a new flow with parameter set
flow = project.create_flow(
    name='DevDelayTrash',
    environment=environment,
    flow_type='streaming'
)
dev = flow.add_stage('Dev Raw Data Source')
delay = flow.add_stage('Delay')
trash = flow.add_stage('Trash')
dev.connect_output_to(delay)
delay.connect_output_to(trash)

# 6. Configure stages using multiple parameters
flow.use_parameter_set(paramset)
dev.data_format = '${streaming_config__data_format}'
dev.number_of_threads = '${streaming_config__number_of_threads}'
dev.stop_after_first_batch = '${streaming_config__stop_after_first_batch}'
project.update_flow(flow)

# 7. Create and run a job for the flow
dev_delay_job = project.create_job(name='DevDelayTrash_job', flow=flow)
job_start = dev_delay_job.start(name='DevDelayTrash_job_run', description='')

# Override parameters at job run level (applies only to this specific run)
job_start_custom = dev_delay_job.start(
    name='DevDelayTrash_job_run_custom',
    description='',
    runtime_parameters={
        'streaming_config.data_format': 'TEXT',
        'streaming_config.number_of_threads': '2',
        'streaming_config.stop_after_first_batch': 'true'
    }
)