Optional Lab 3: Run the example application with App ID
Attention: Outdated! Doesn't work fully correctly anymore!
In this optional lab, we use an IBM Cloud App ID service instance for authentication and authorization.
We will create an IBM Cloud App ID service instance using a "lite" plan, this plan type does not create additional costs for us.
Currently this lab is not documented very detailed. It's designed to be a part of a live session. You find the source code here.
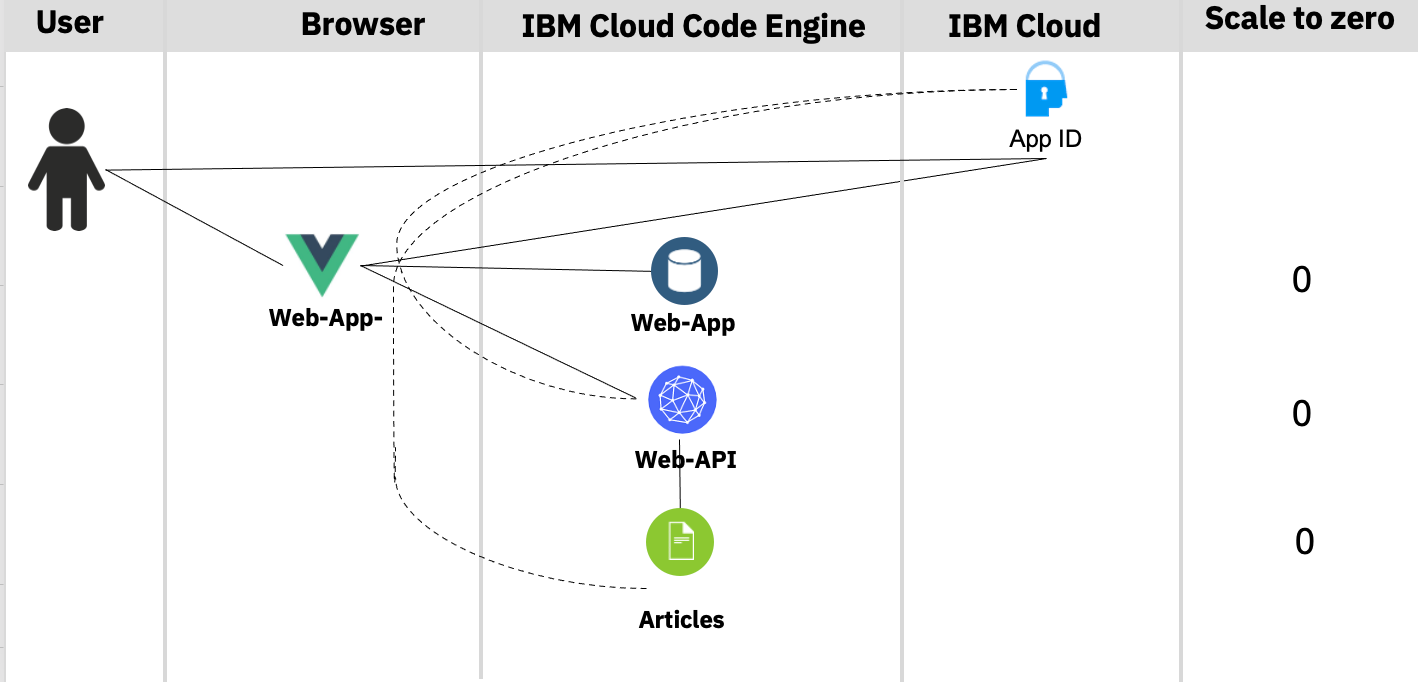
Architecture
Here is a simplified architecture diagram which shows the Web-App and the two microservices Web-API and Articles and App ID are running on IBM Cloud.
-
Code Engine applications
- Web-App
- Web-API
- Articles
-
IBM Cloud services
- App ID
Deploy the example application with App ID
(optional) Step 1: Clone the GitHub project to the IBM Cloud Shell
Only needed, if you haven't done it before.
Insert these commands to clone the GitHub project to the IBM Cloud Shell.
git clone https://github.com/ibm/ce-cns.git
cd ce-cns
ROOT_FOLDER=$(pwd)
(optional) Step 2: Now set the environment variable for later usage
Only needed, if you haven't done it before.
REMEMBER! Your Code Engine project name is
cloud-native-starter-[YOUR-EXTENTION]
export MYPROJECT=cloud-native-starter-[YOUR-EXTENTION]
Optional setting:
export RESOURCE_GROUP=[YOUR-GROUP]
export REGION=[YOUR-REGION]
Log on to IBM Cloud!
ibmcloud login -g $RESOURCE_GROUP -r $REGION (-sso Optional)
Step 3: Execute following bash automation
Be patient, because the script may take several minutes (up to 10 min).
cd $ROOT_FOLDER/CE
bash appid-ce-deploy-apps.sh
Step 4: Simplified steps of the bash script
Here are the simplified steps that are carried out in the bash script using mainly the IBM Cloud Code Engine CLI:
- Connect to the
Code Engine projectwith the Code Engine CLI and get the namespace for later usage to define the internal route. - Create an
App IDinstance - Configure the
App IDinstance - Deploy
articlesmicroservice which is defined aslocal clusterhere, we need to know thenamespace. (details are related to Knative) - Deploy
web-apiwith the neededApp IDandarticlesurls as environment variables. - Deploy
web-appwith the neededApp IDandweb-apiurls as environment variables.
Step 5: Inspect the output
The relevant URLs will be listed.
************************************
 URLs
************************************
 - oAuthServerUrl   : https://us-south.appid.cloud.ibm.com/oauth/v4/40874513-becf-48ed-802d-19dc2188e156
 - discoveryEndpoint: https://us-south.appid.cloud.ibm.com/oauth/v4/40874513-becf-48ed-802d-19dc2188e156/.well-known/openid-configuration
 - Web-API          : https://web-api-appid.eqiatmmvvti.us-south.codeengine.appdomain.cloud/articlesA
 - Articles         : http://articles-appid.eqiatmmvvti.svc.cluster.local/articlesA
 - Web-App          : https://web-app-appid.eqiatmmvvti.us-south.codeengine.appdomain.cloud
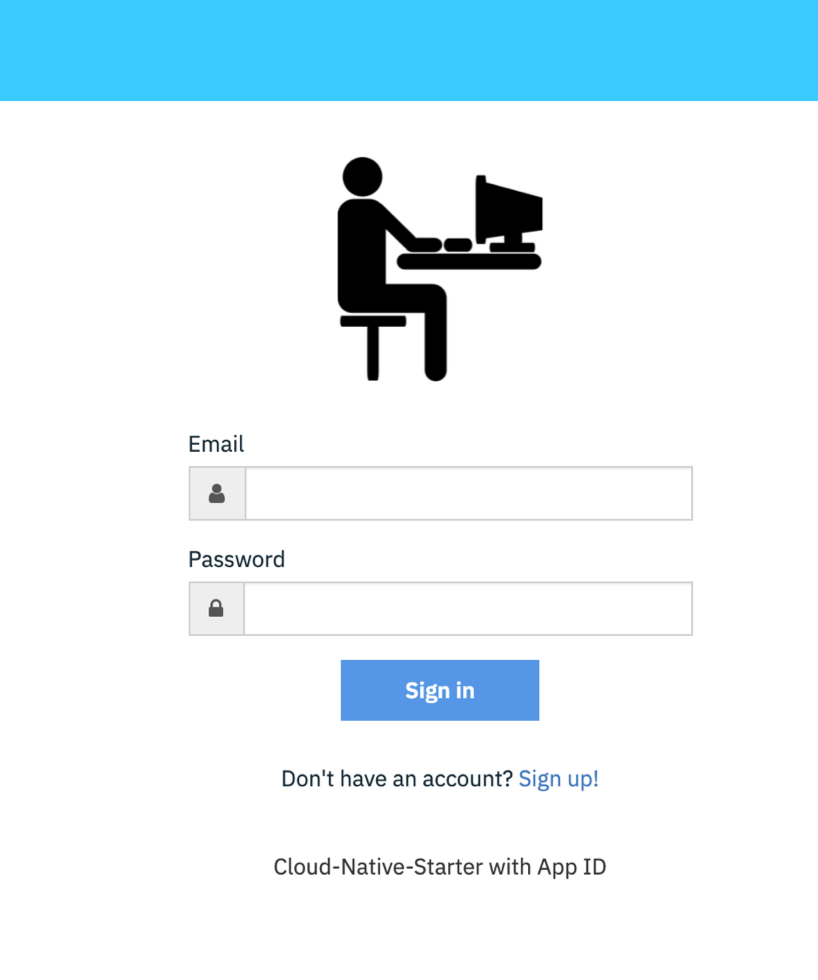
Step 6: Open the example web-app application in your browser
Use user: thomas@example.com and password: thomas4appid for the logon.
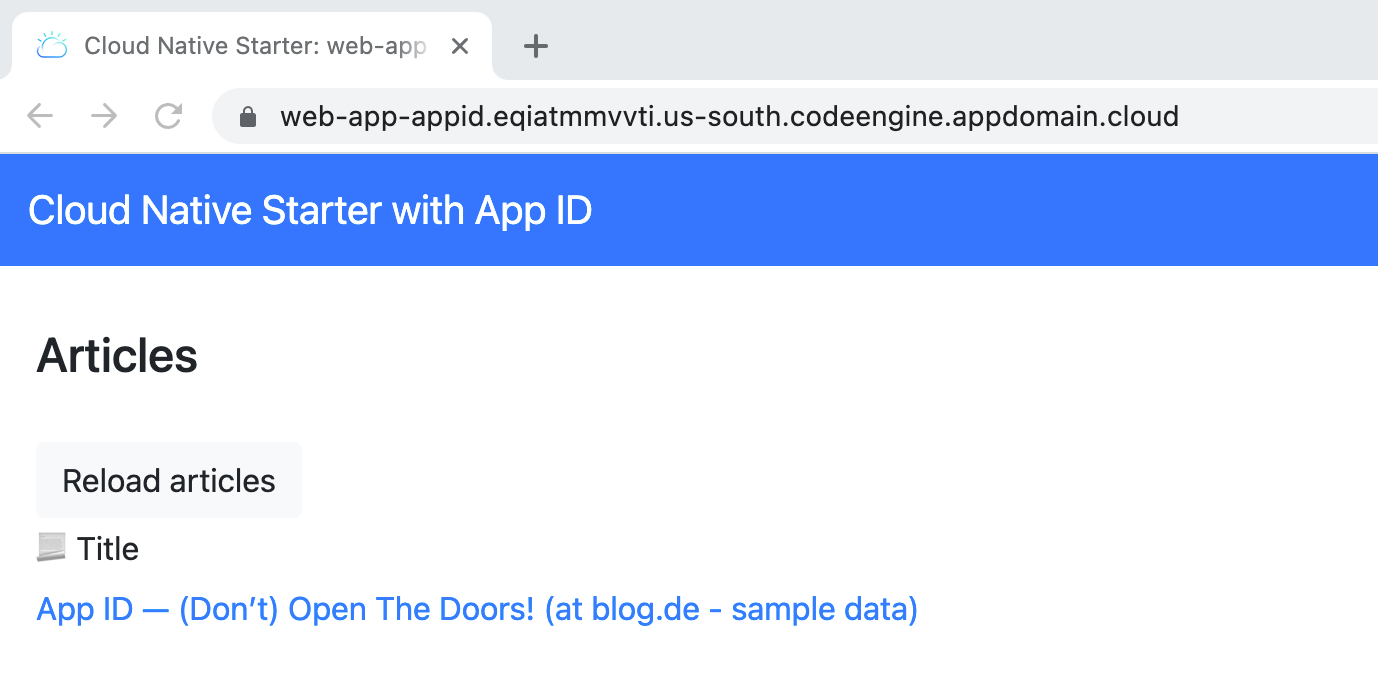
Step 7: Show the sample articles
Maybe you need to reload or log on again, to get all applications up and running in Code Engine.
Step 8: Clean-up
cd $ROOT_FOLDER/CE
bash appid-ce-clean-up.sh
Congratulations, you have successfully completed this optional hands-on lab tasks for
Run the example application with App IDsection of the workshop. Awesome
