Lab 2: Inspect the Code Engine project
Step 1: Open the Code Engine project
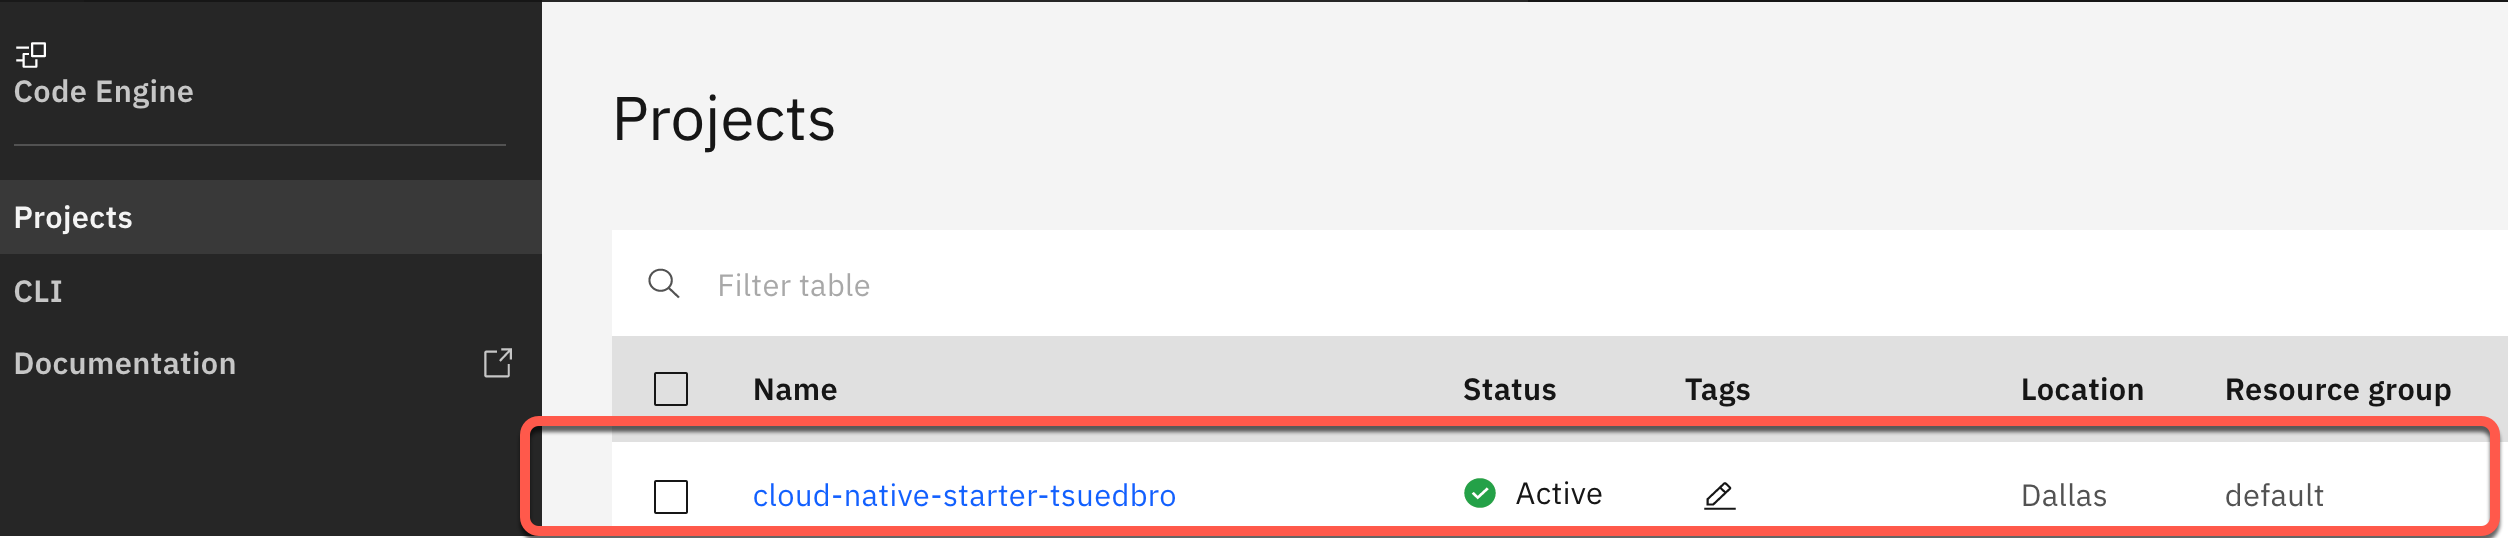
Use the following link to directly navigate to the Code Engine projects and open the created project.
https://cloud.ibm.com/codeengine/projects
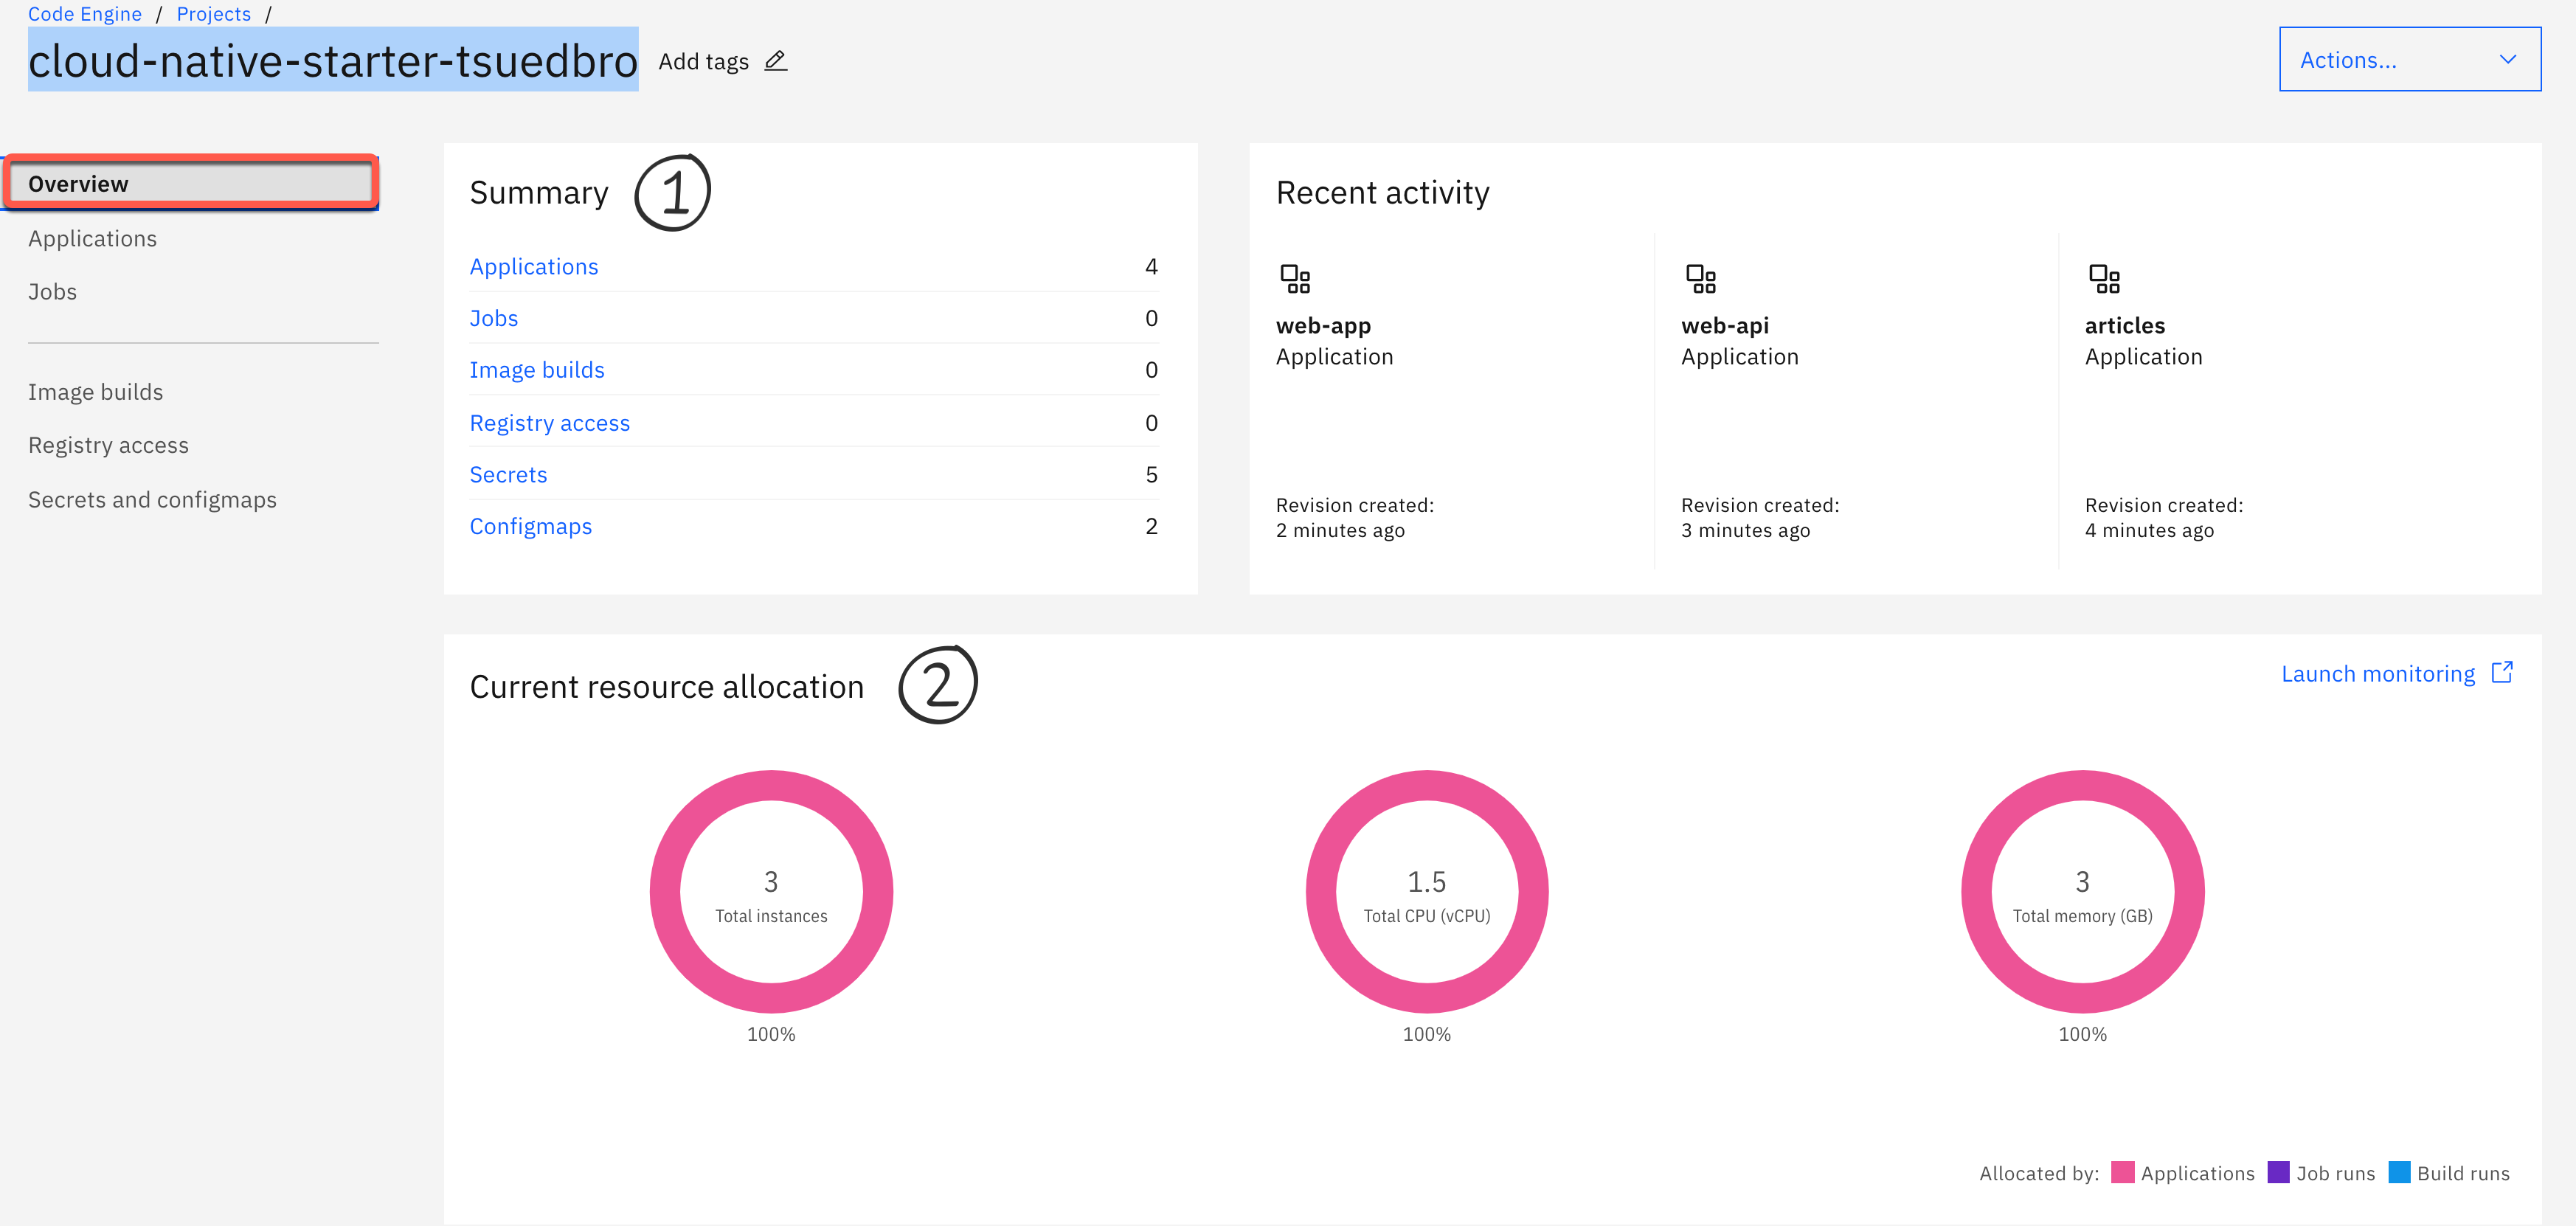
Step 2: Select Overview
In the following image, you see: The summary contains the Applications, Jobs, Image builds, Registry access, Secrets and Configmaps. In our case only the four applications are relevant. 2. The current usage of our application.
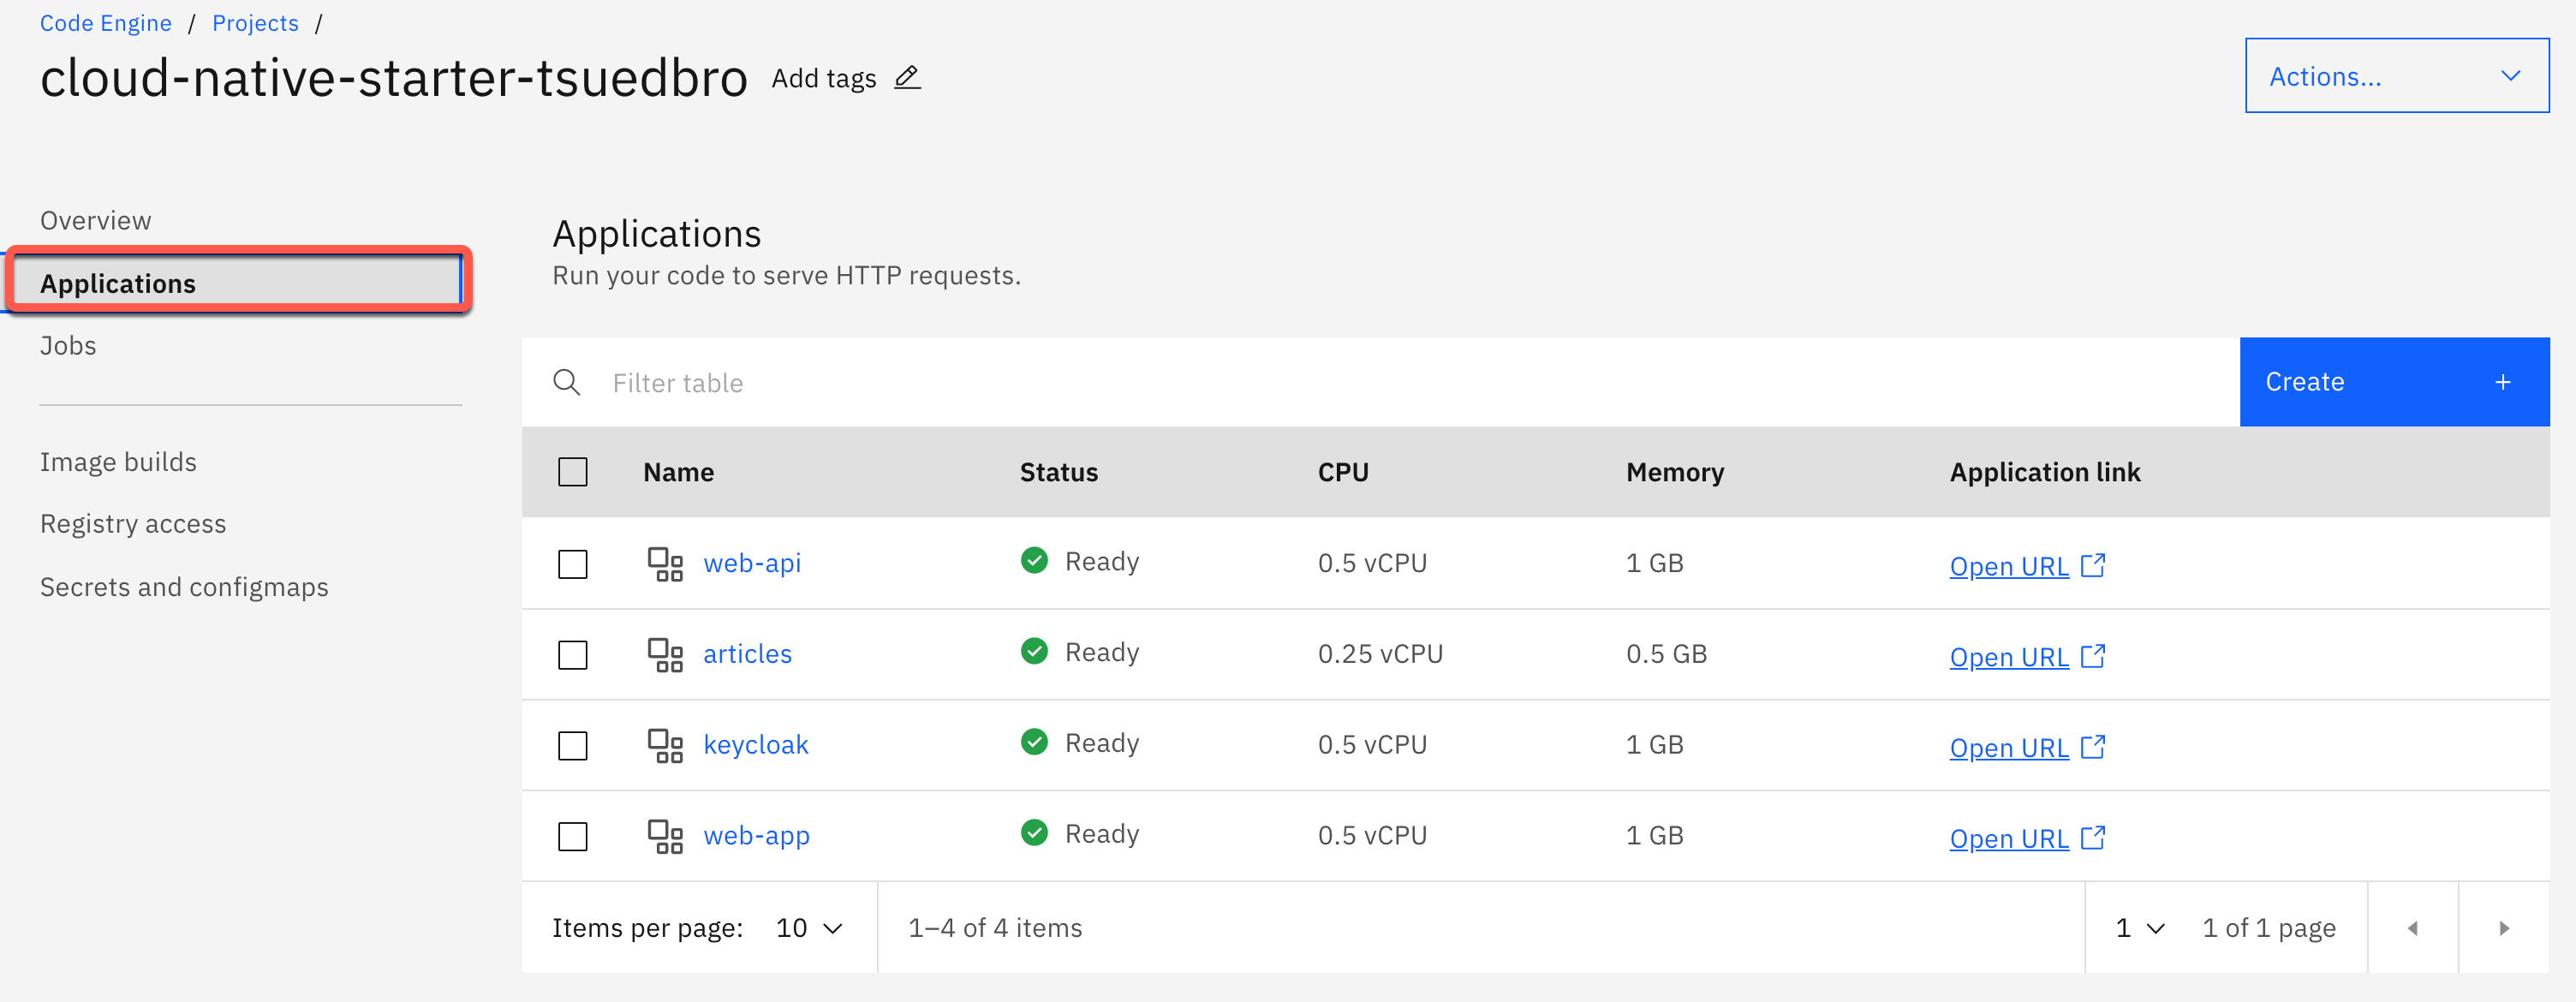
Step 3: Select Applications
Here you find an overview of the currently running applications. (FYI The Code Engine definition for an application: A program that serves HTTP requests)
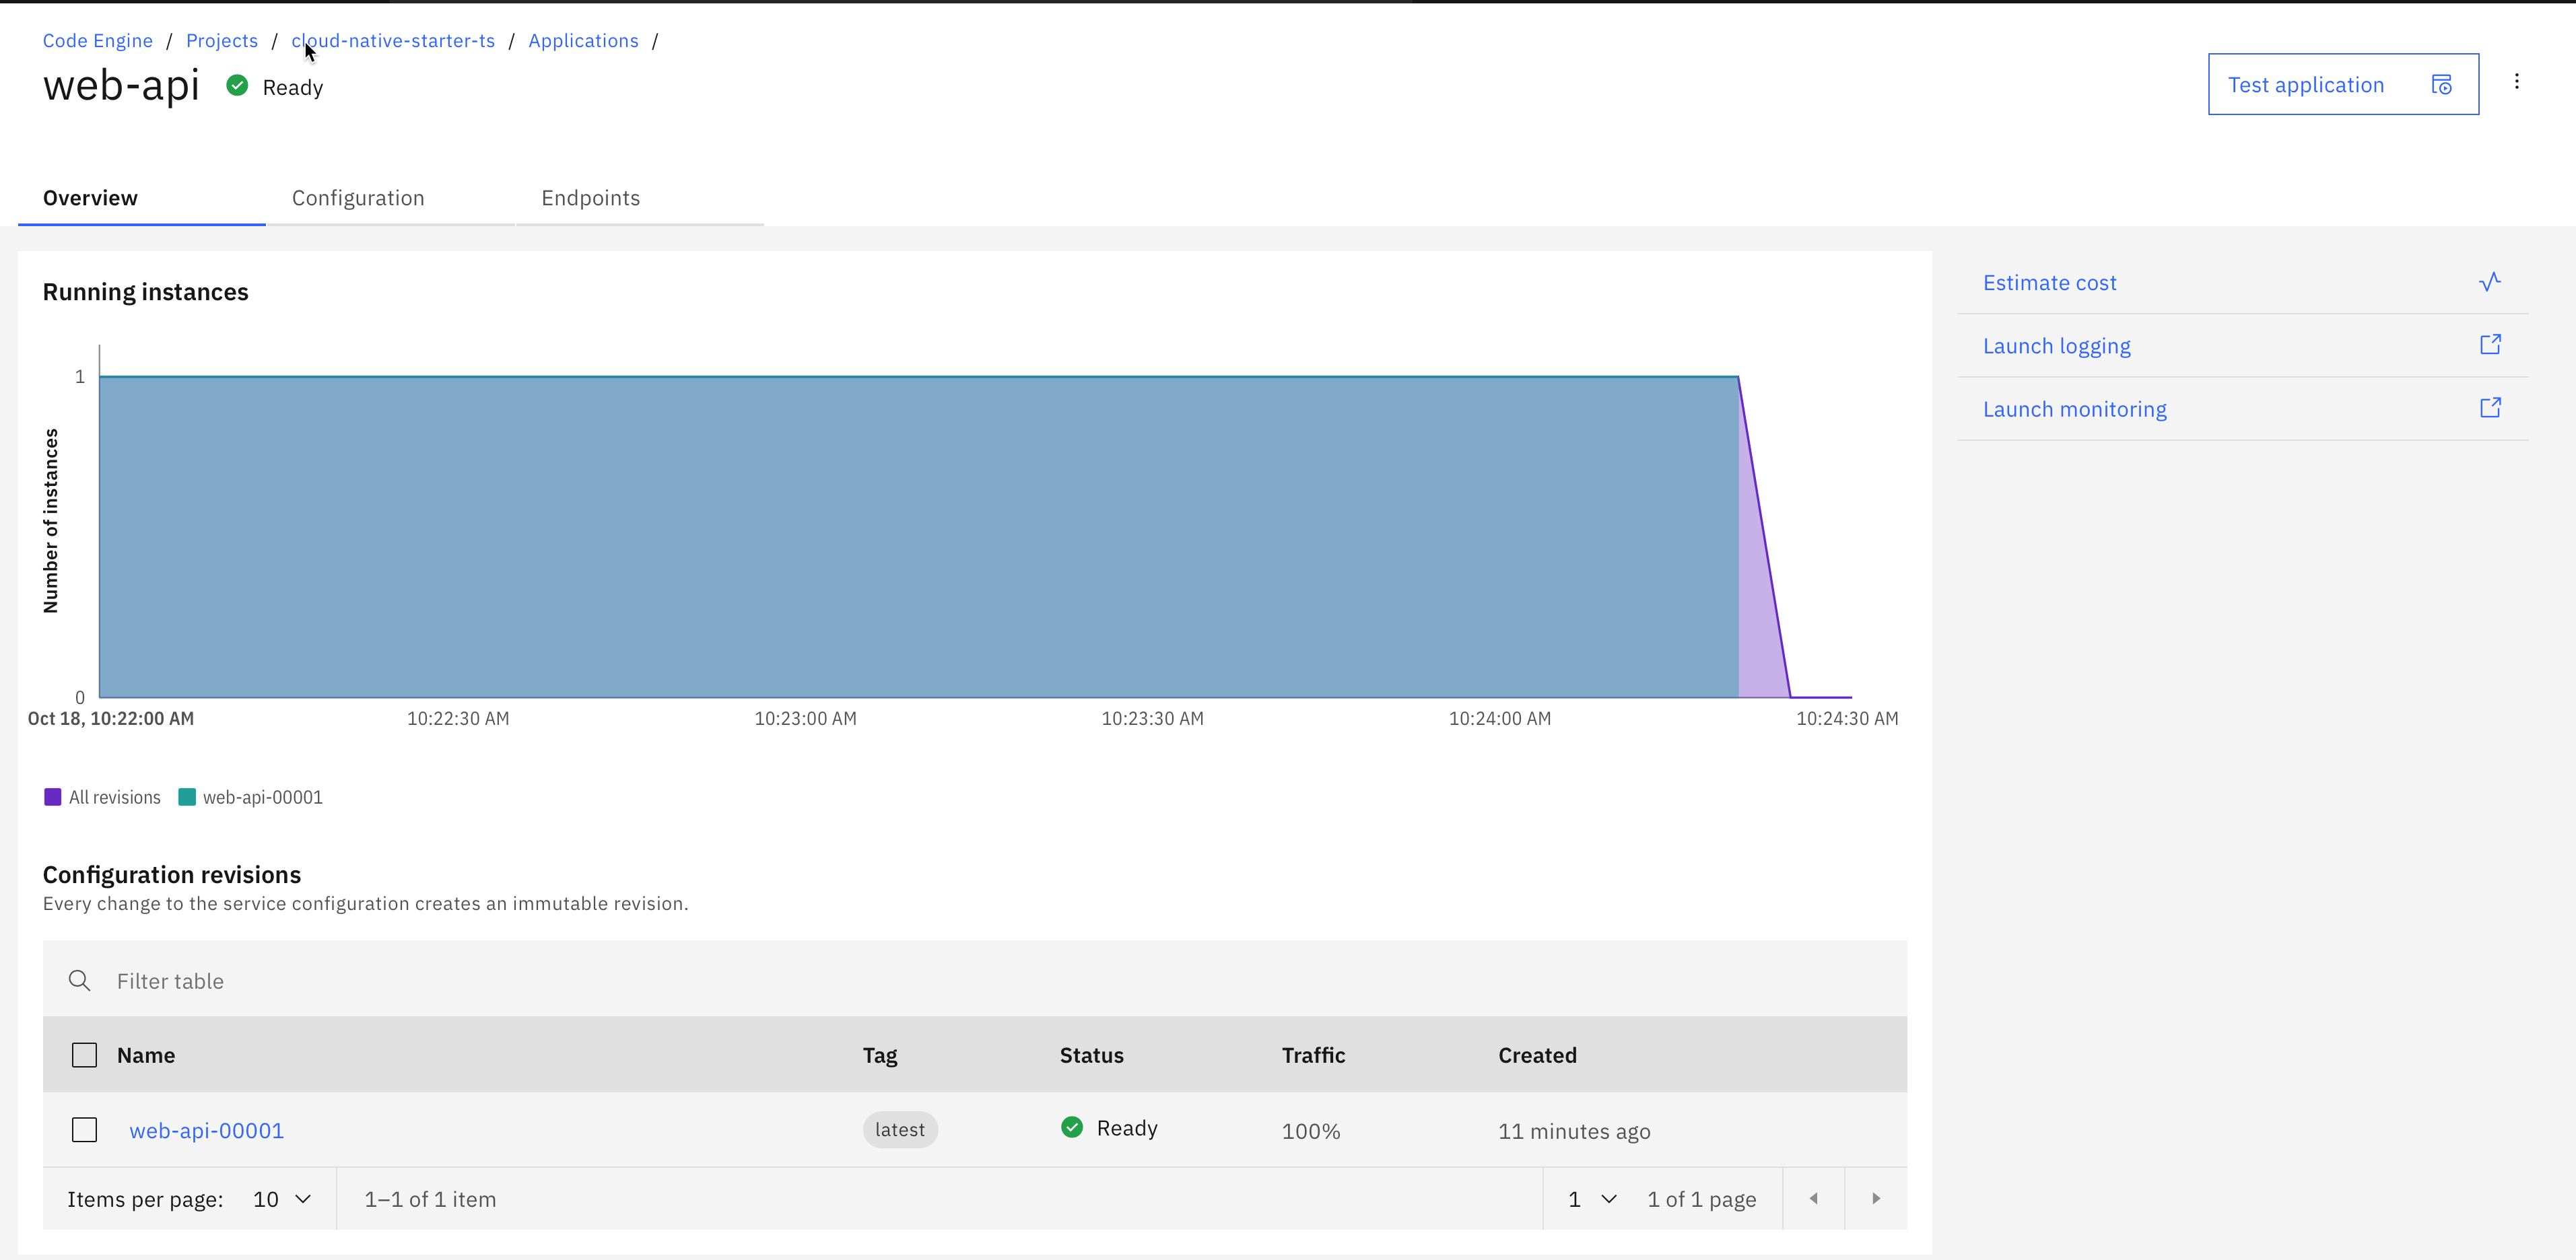
Step 4: Open the web-api application
Here we see three tabs for the application.
- Overview
- Configuration
- Endpoints
The overview tab shows the number of the running instances and the revisons of the configuration for those instances.
Step 5: Inspect the configurations tab
Here we find four tabs used to configure the application instance on Code Engine.
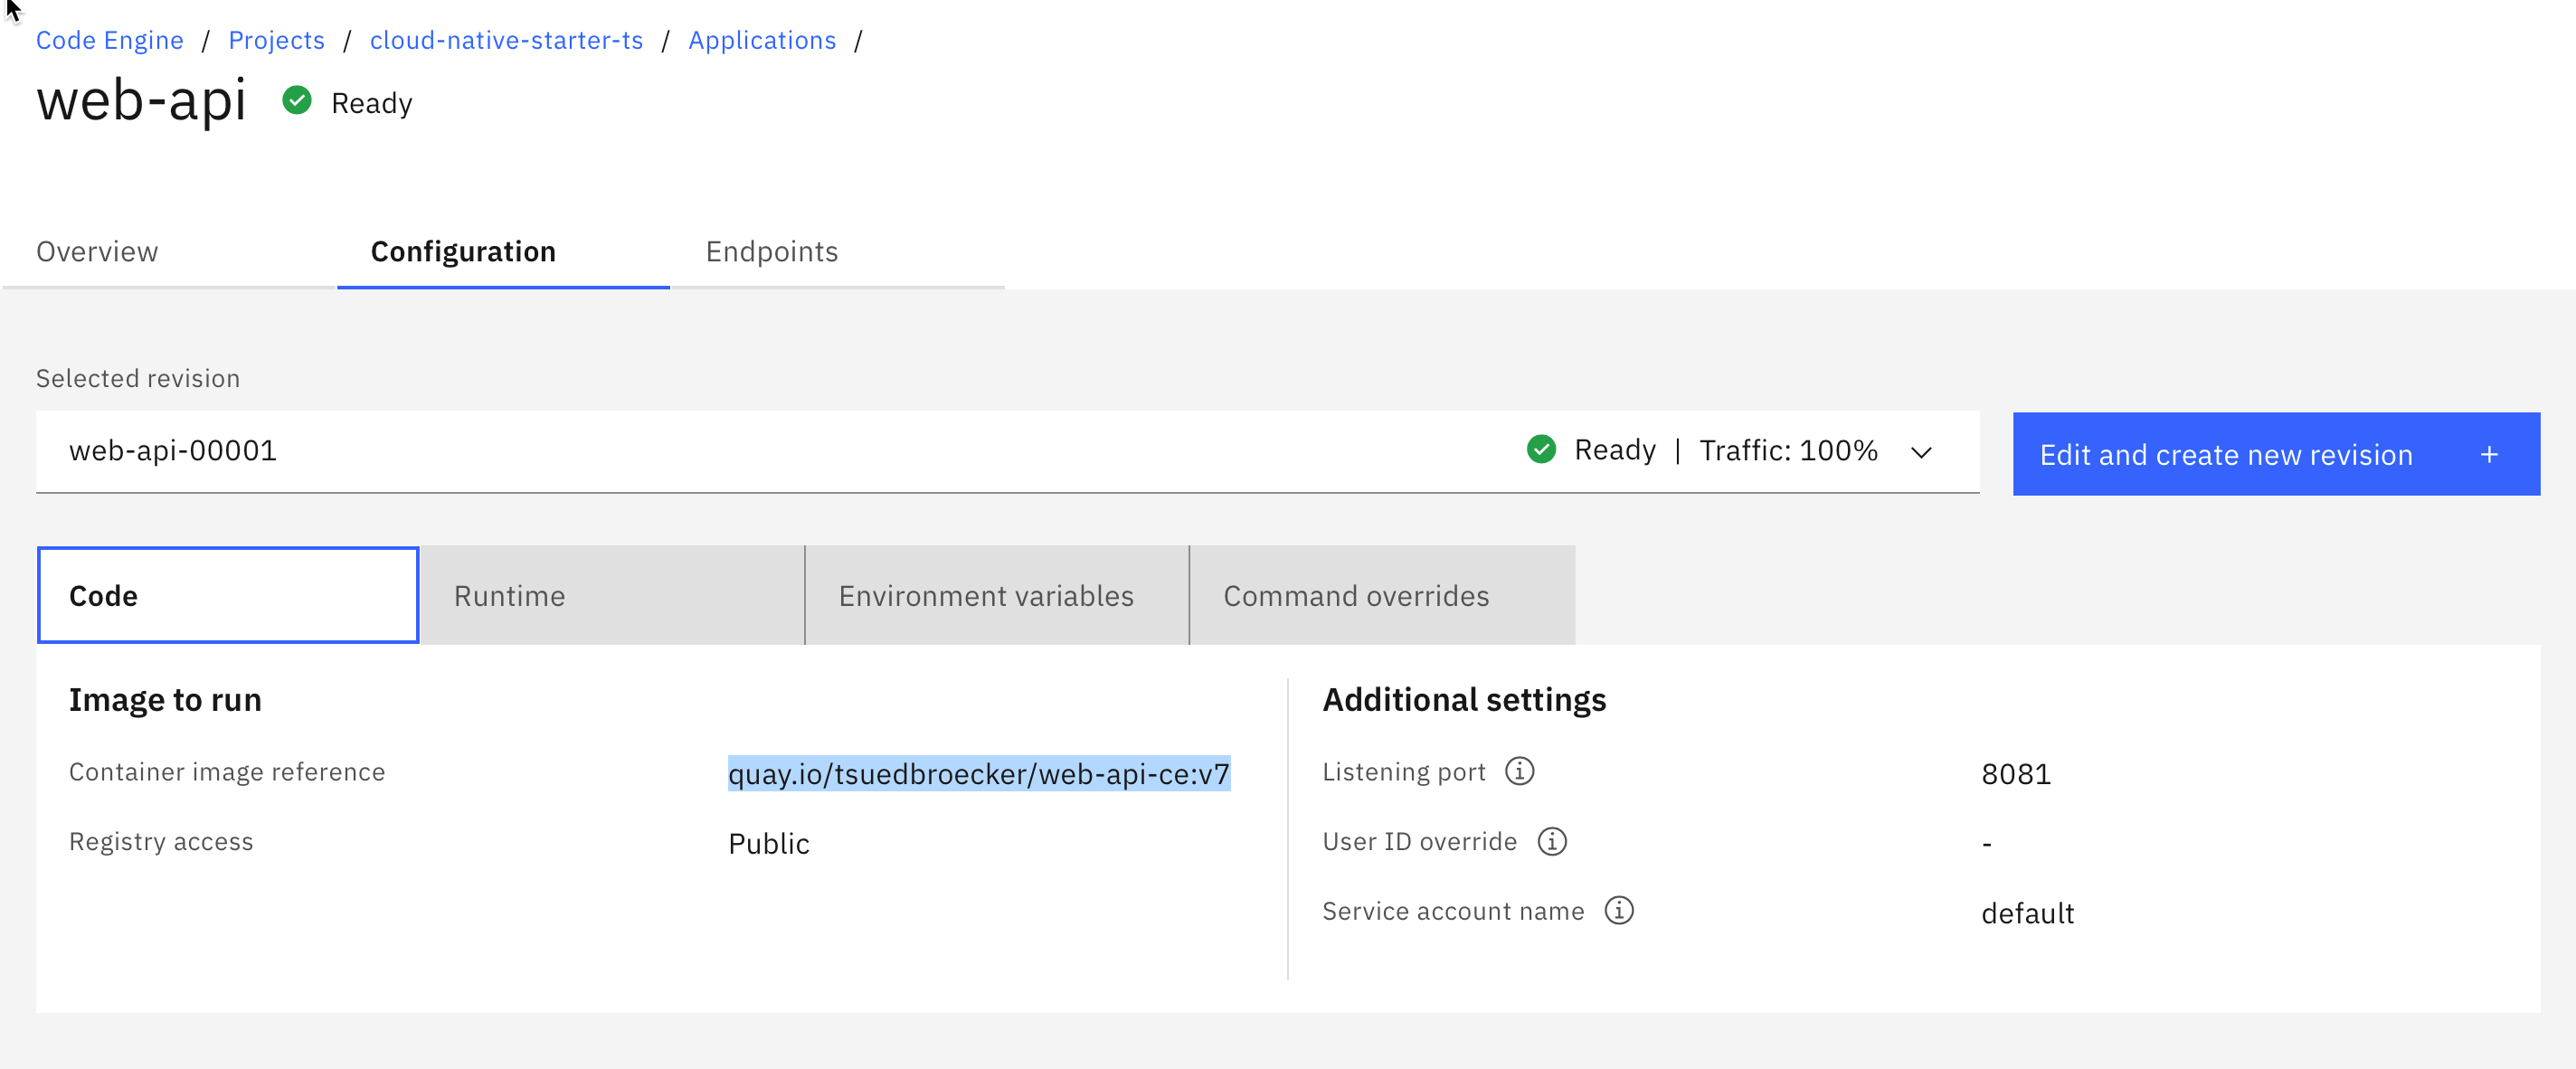
- First, select the
Codetab. Here you see our container image reference to the Quay container registry.
- Then select the
Runtimetab. It displays the configuration for the instances, vCPU, memory and requests.
Note: The maximum number of requests that can be processed concurrently per instance. This value is optional. The default value is 100.
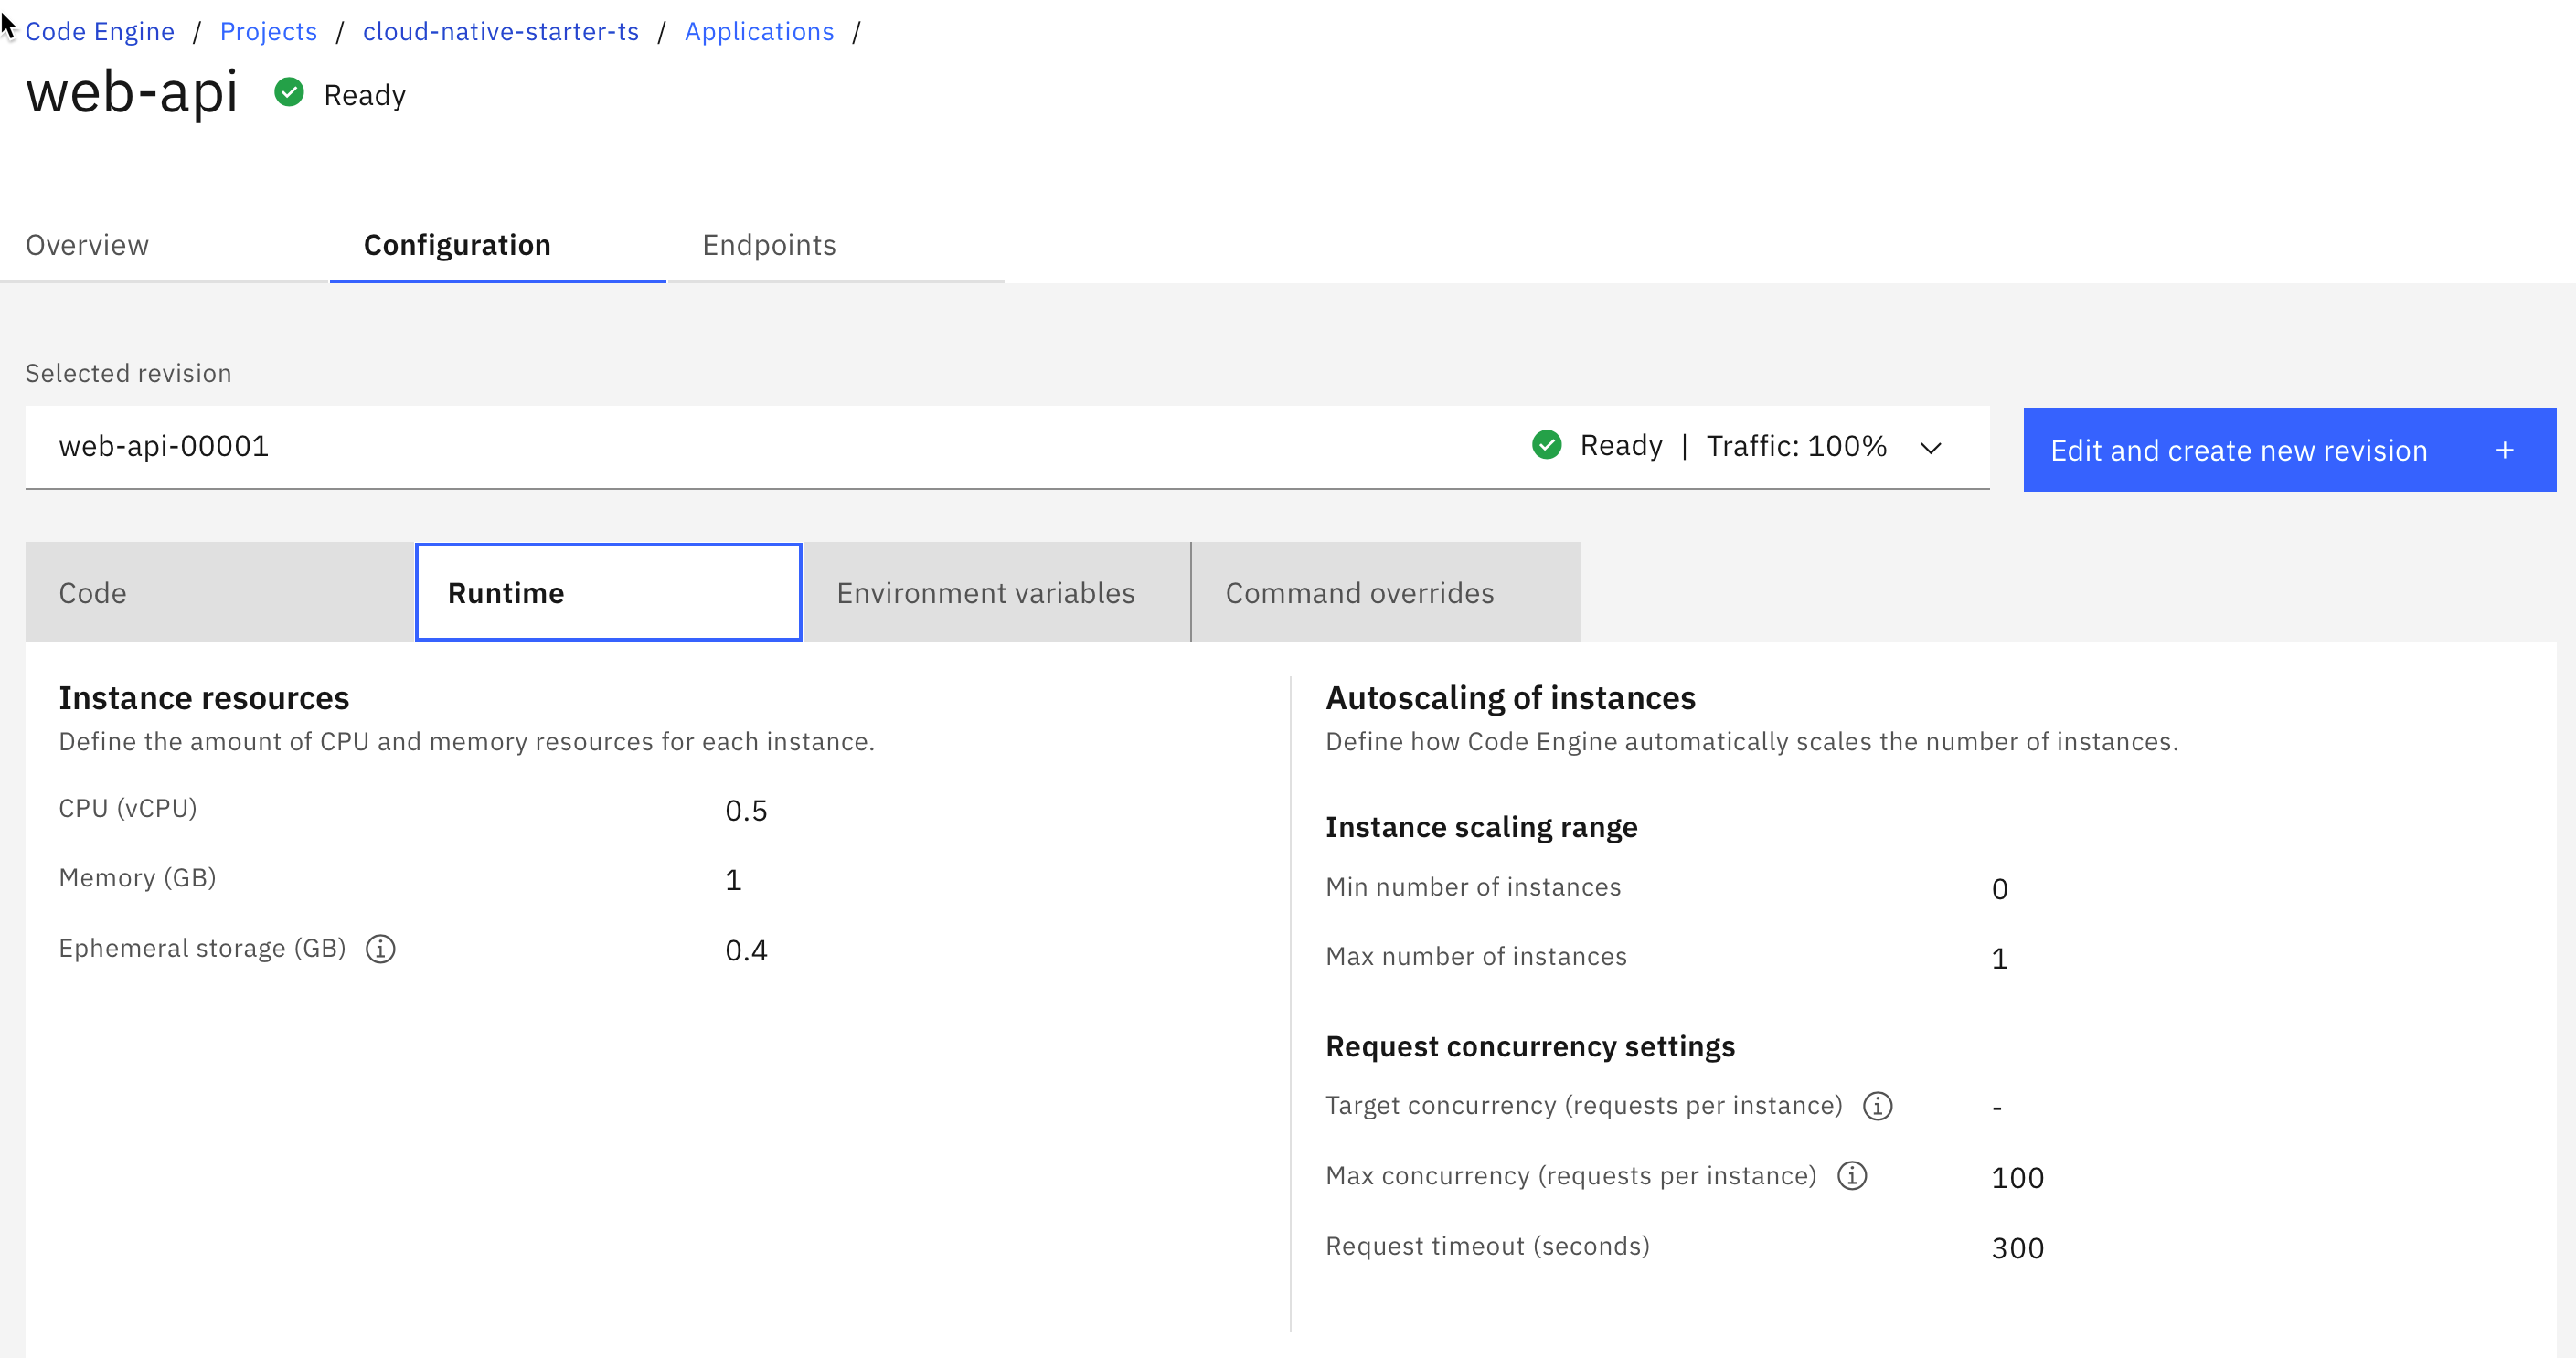
Note: For more details about valid vCPU and Memory combinations please visit the documentation here .
- Now select the
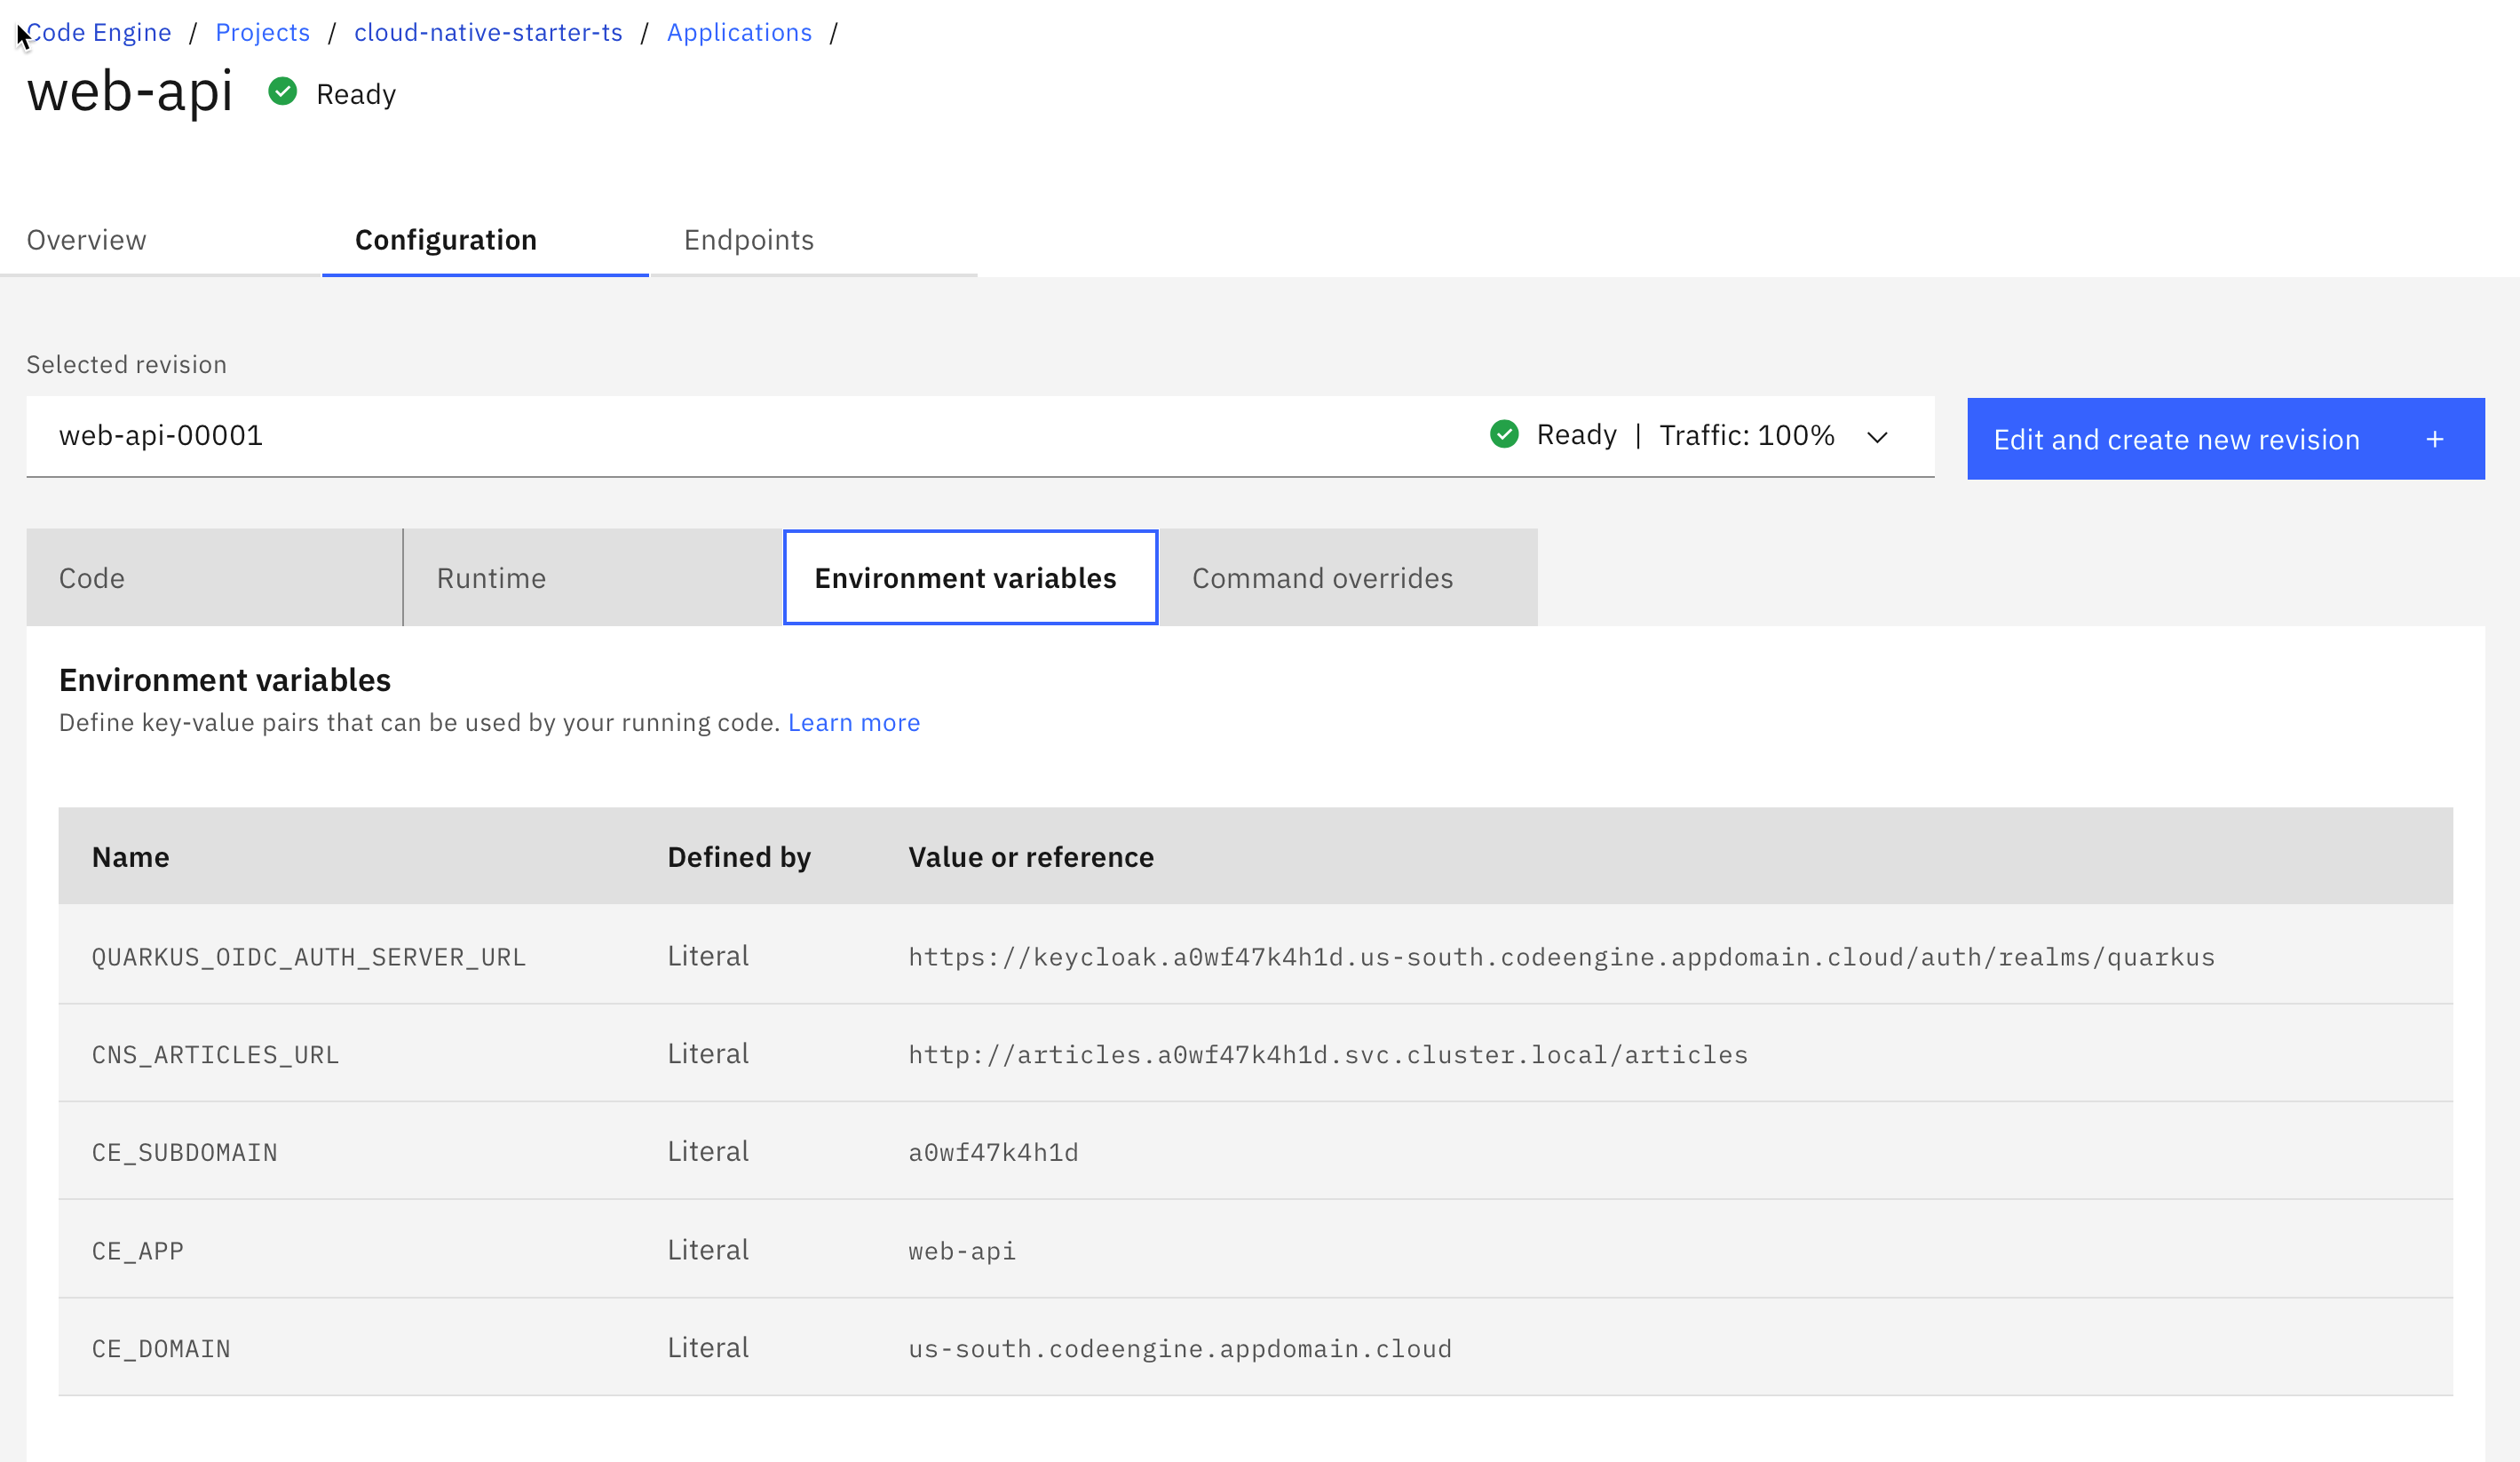
Environment variablestab.
Here you see the routes for the wep-api microservice to set up the connections internal articels microservice and the external Keycloak application.
- In the
Command overridestab.
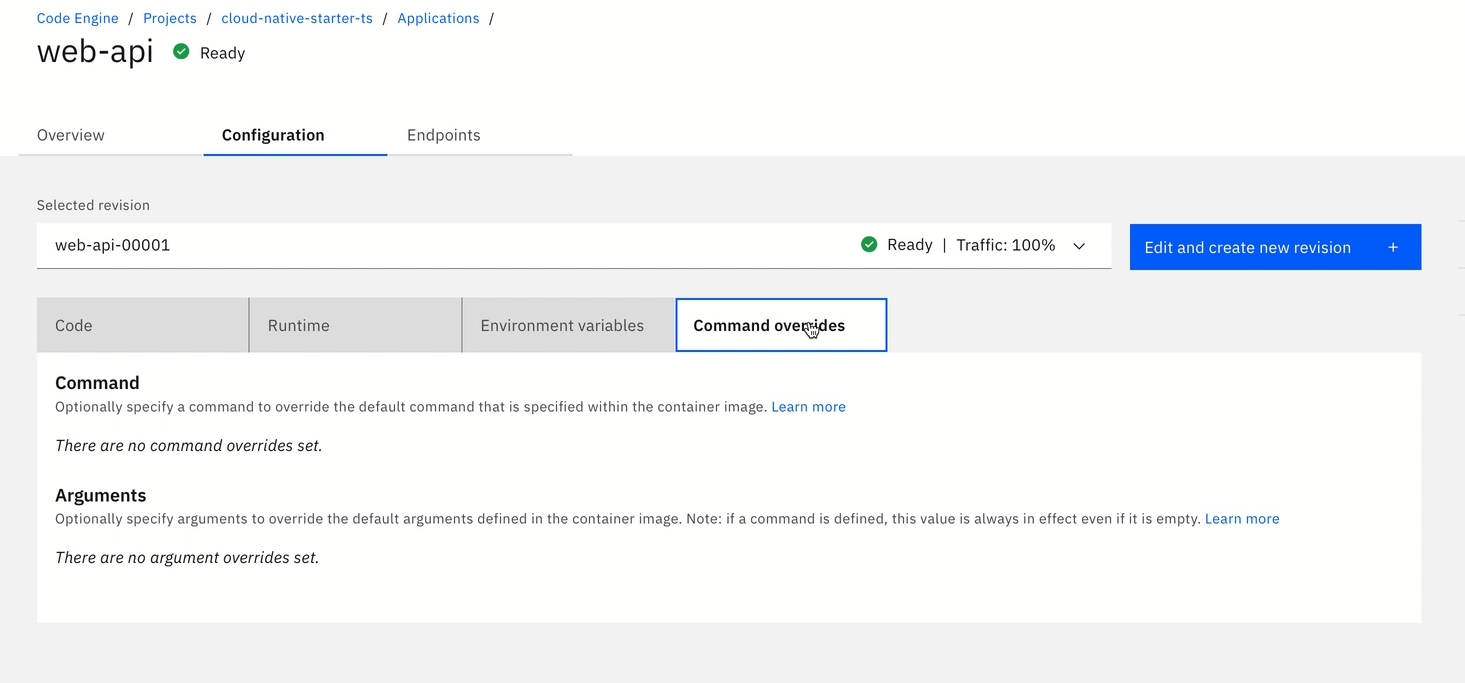
A short extract of the Code Engine documentation:
"These metadata fields are called Entrypoint and Command. For those users who are familiar with Dockerfile, the fields equate to the ENTRYPOINT and CMD commands. These two fields contain arrays of strings that are combined to create the command line that is used when you run your container."
For details visit the IBM Cloud documentation.
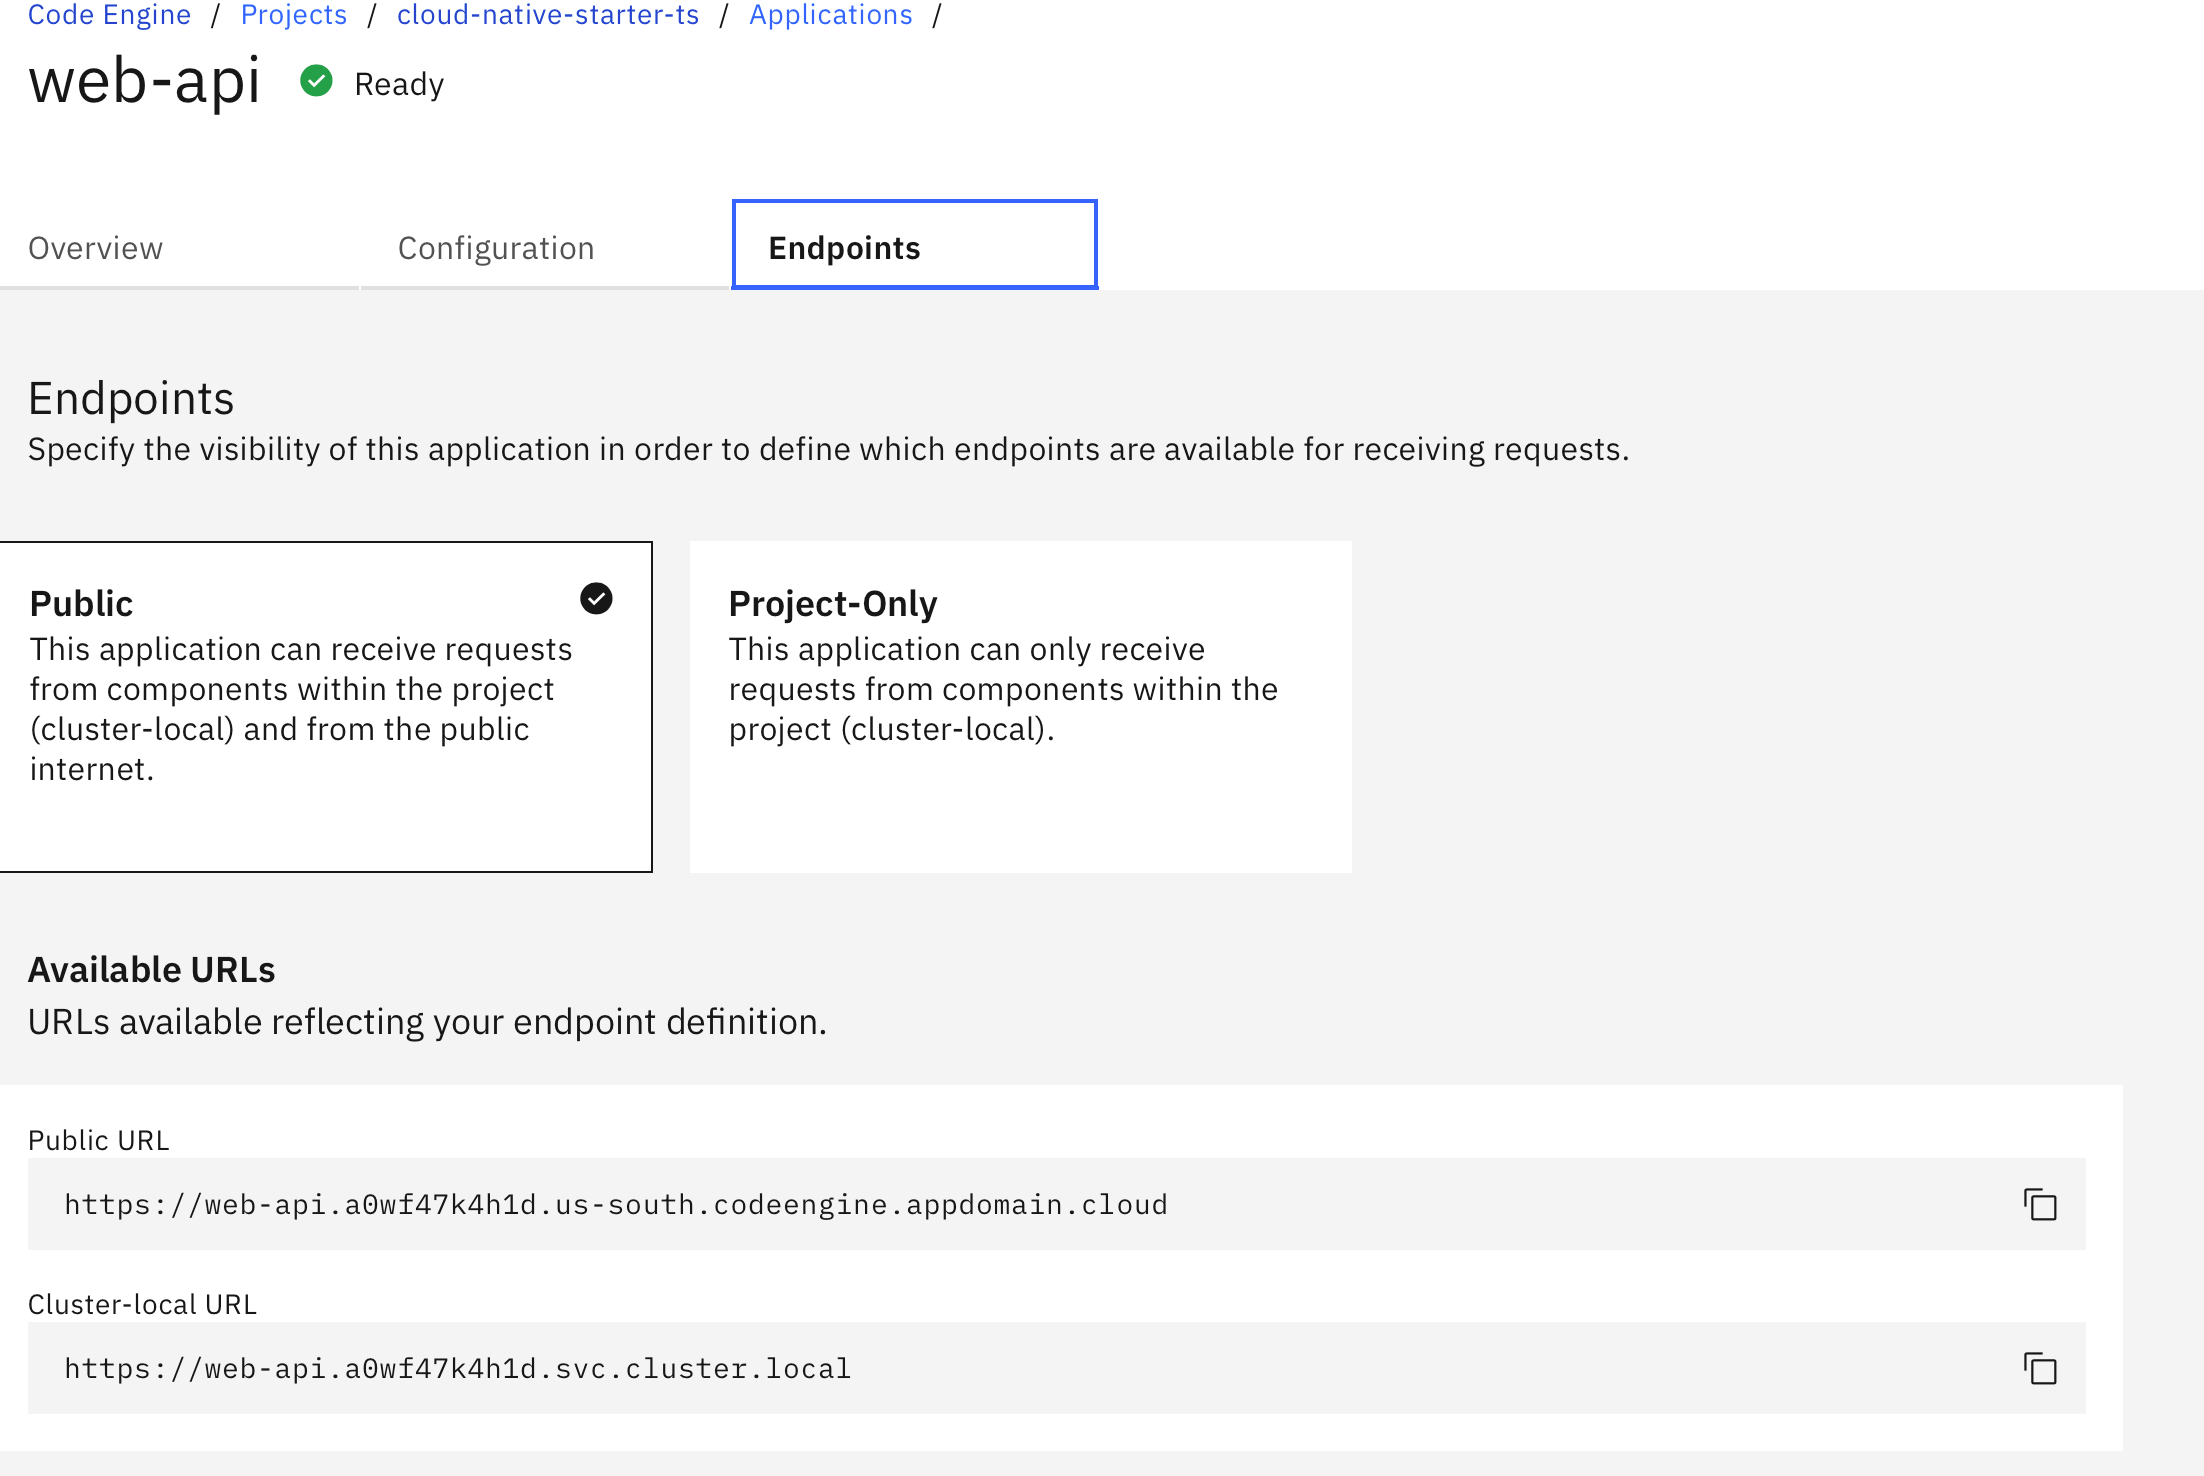
Step 6: Endpoints tab
Here you can change the endpoint visibility. For our web-api application, we need public visibility because the application is invoked by our web-app frontend.
Step 7: Verify the Code Engine CLI application instance configuration
In the following code you see the Code Engine CLI invocation for the web-api microservice, this code is used in the bash script to create a Code Engine application instance. It reflects what you have seen in the Code Engine UI.
Note: The only difference is the threshold of concurrent requests per instance at which one or more additional instances are created is defined. Use this value to scale up instances based on concurrent number of requests. If
--concurrency-targetis not specified, this option defaults to the value of the--concurrencyoption. This value is optional. The default value is0.
# Valid vCPU and memory combinations: https://cloud.ibm.com/docs/codeengine?topic=codeengine-mem-cpu-combo
    ibmcloud ce application create --name web-api \
                                --image "quay.io/$REPOSITORY/web-api-ce:v7" \
                                --cpu "0.5" \
                                --memory "1G" \
                                --env QUARKUS_OIDC_AUTH_SERVER_URL="$KEYCLOAK_URL/auth/realms/quarkus" \
                                --env CNS_ARTICLES_URL="http://articles.$PROJECT_NAMESPACE.svc.cluster.local/articles" \
                                --max-scale 1 \
                                --min-scale 0 \
                        --concurrency-target 100 \
                                --port 8081
Step 8: Estimate cost
You can easily estimate the cost for your Code Engine application.
Just select estimate cost and configure your region, cpu and storage, estimated monthly runtime for your application and the number of application instances. For more details visit the IBM Cloud documentation.

Congratulations, you have successfully completed this hands-on lab
Inspect the Code Engine projectof the workshop. Awesome
