Advanced options for setting up an SQL tuning environment
Use the instructions in this article if you need to create a new tuning connection profile or if you need to create the EXPLAIN tables that are required by the tuning features of Db2 Developer Extension.
Creating a tuning connection profile
If you haven’t already created a tuning connection profile, you need to create one now. A tuning connection profile is required to perform tuning actions.
-
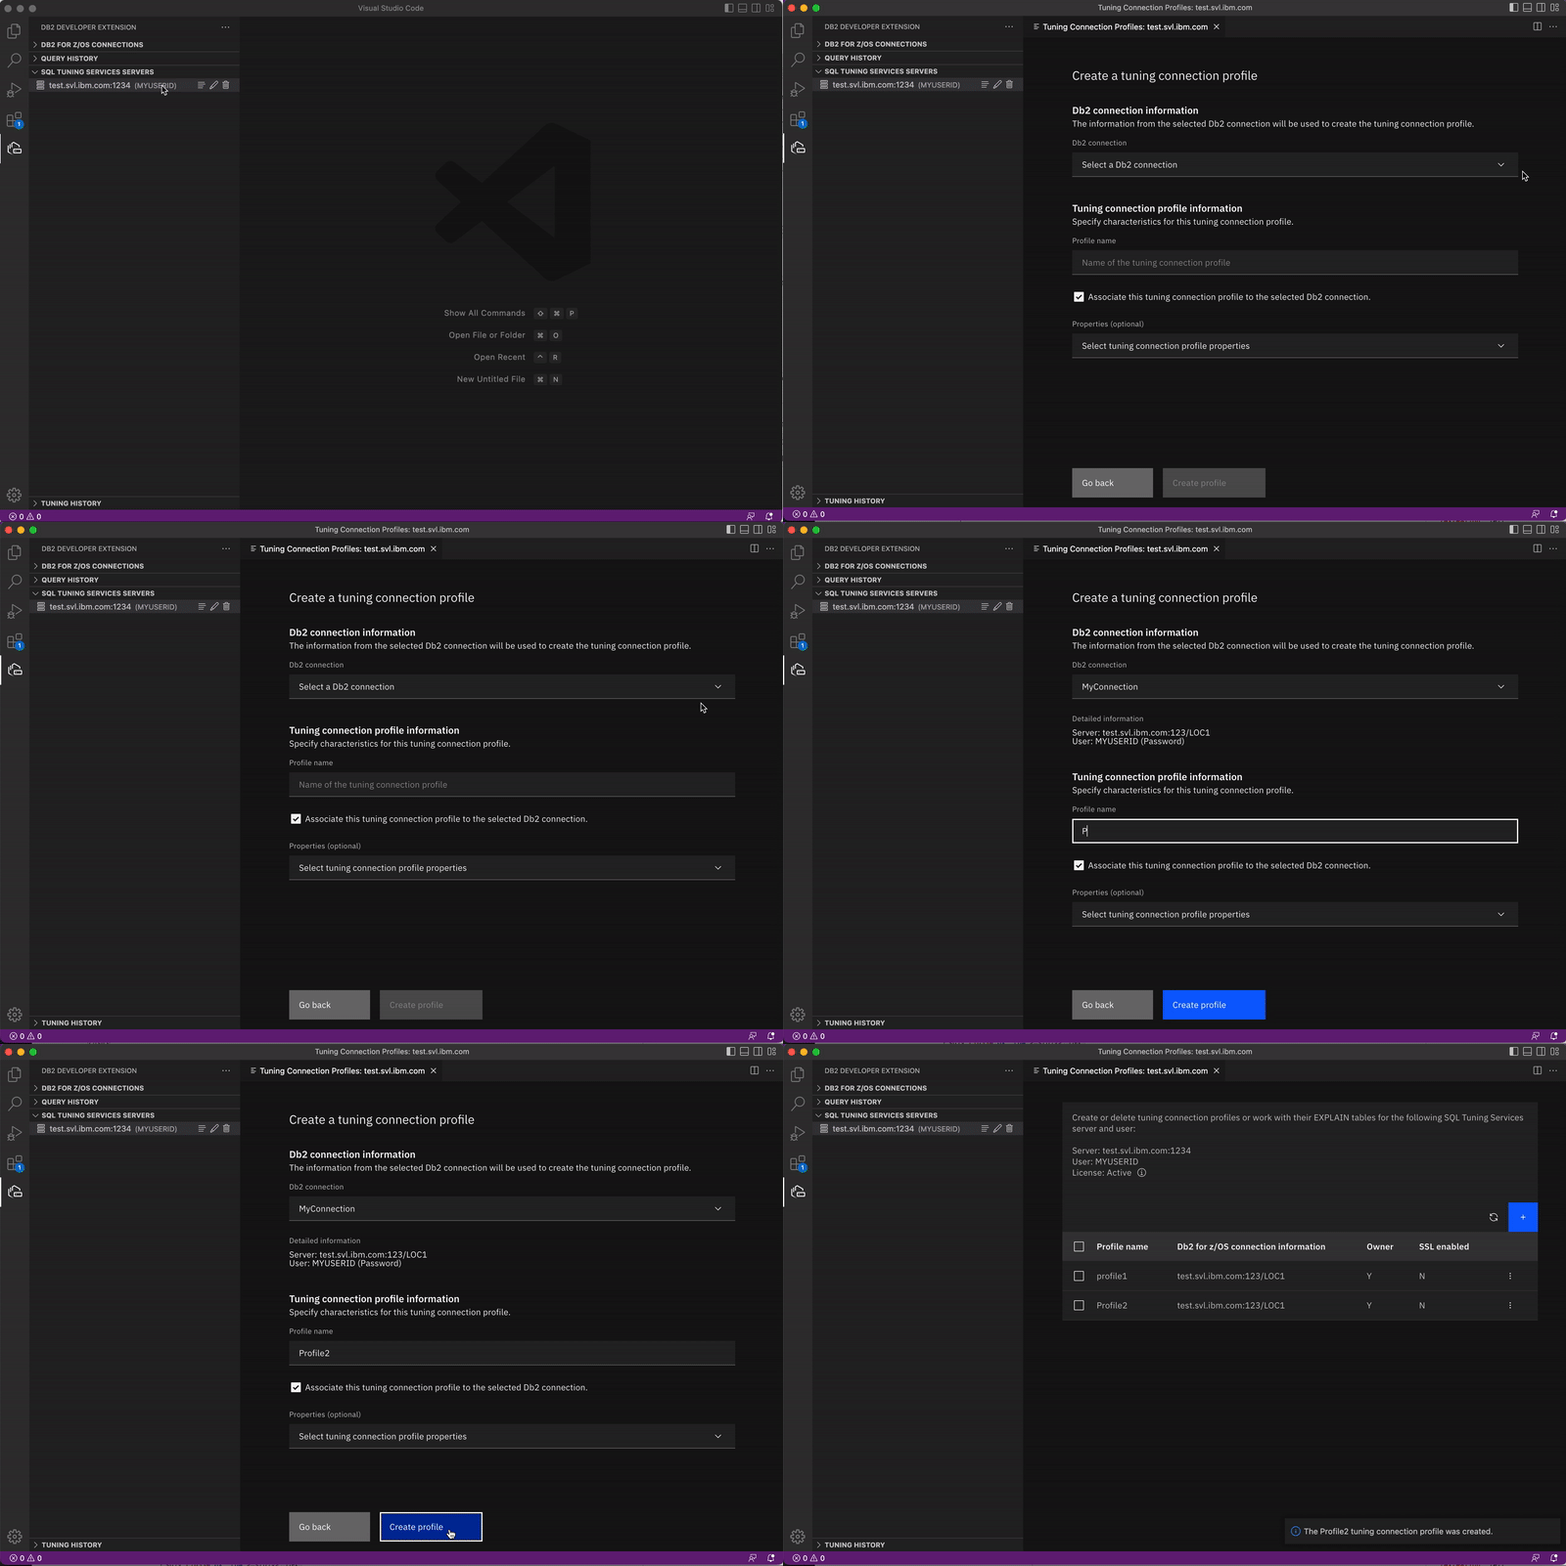
From the SQL TUNING SERVICES SERVERS view, right-click an SQL Tuning Services server and click Show Tuning Connection Profiles. The Tuning Connection Profiles window opens for the server you selected.
-
Click the blue plus sign on the right side of the dialog. The Create a tuning profile window opens.
-
Select a Db2 connection to associate with the tuning connection profile and assign a name. Optionally, you can specify additional properties such as the type of security mechanism to use and SSL properties.
-
Leave the Associate this tuning connection profile to the selected Db2 connection check box selected.
Important: Clear this checkbox only if you don’t intend to use this profile to start tuning your SQL right away. If you clear this checkbox now, you’ll need to associate this profile to a Db2 connection before you can use it to tune your SQL.
-
Click Create profile. A list of existing profiles is displayed, including the profile you just created. Keep this window open. You’ll need it for the next task.

Creating EXPLAIN tables
Db2 uses EXPLAIN tables to store information about SQL statements, access paths, and other elements that can affect SQL performance. The tuning connection profile needs its own set of EXPLAIN tables.
-
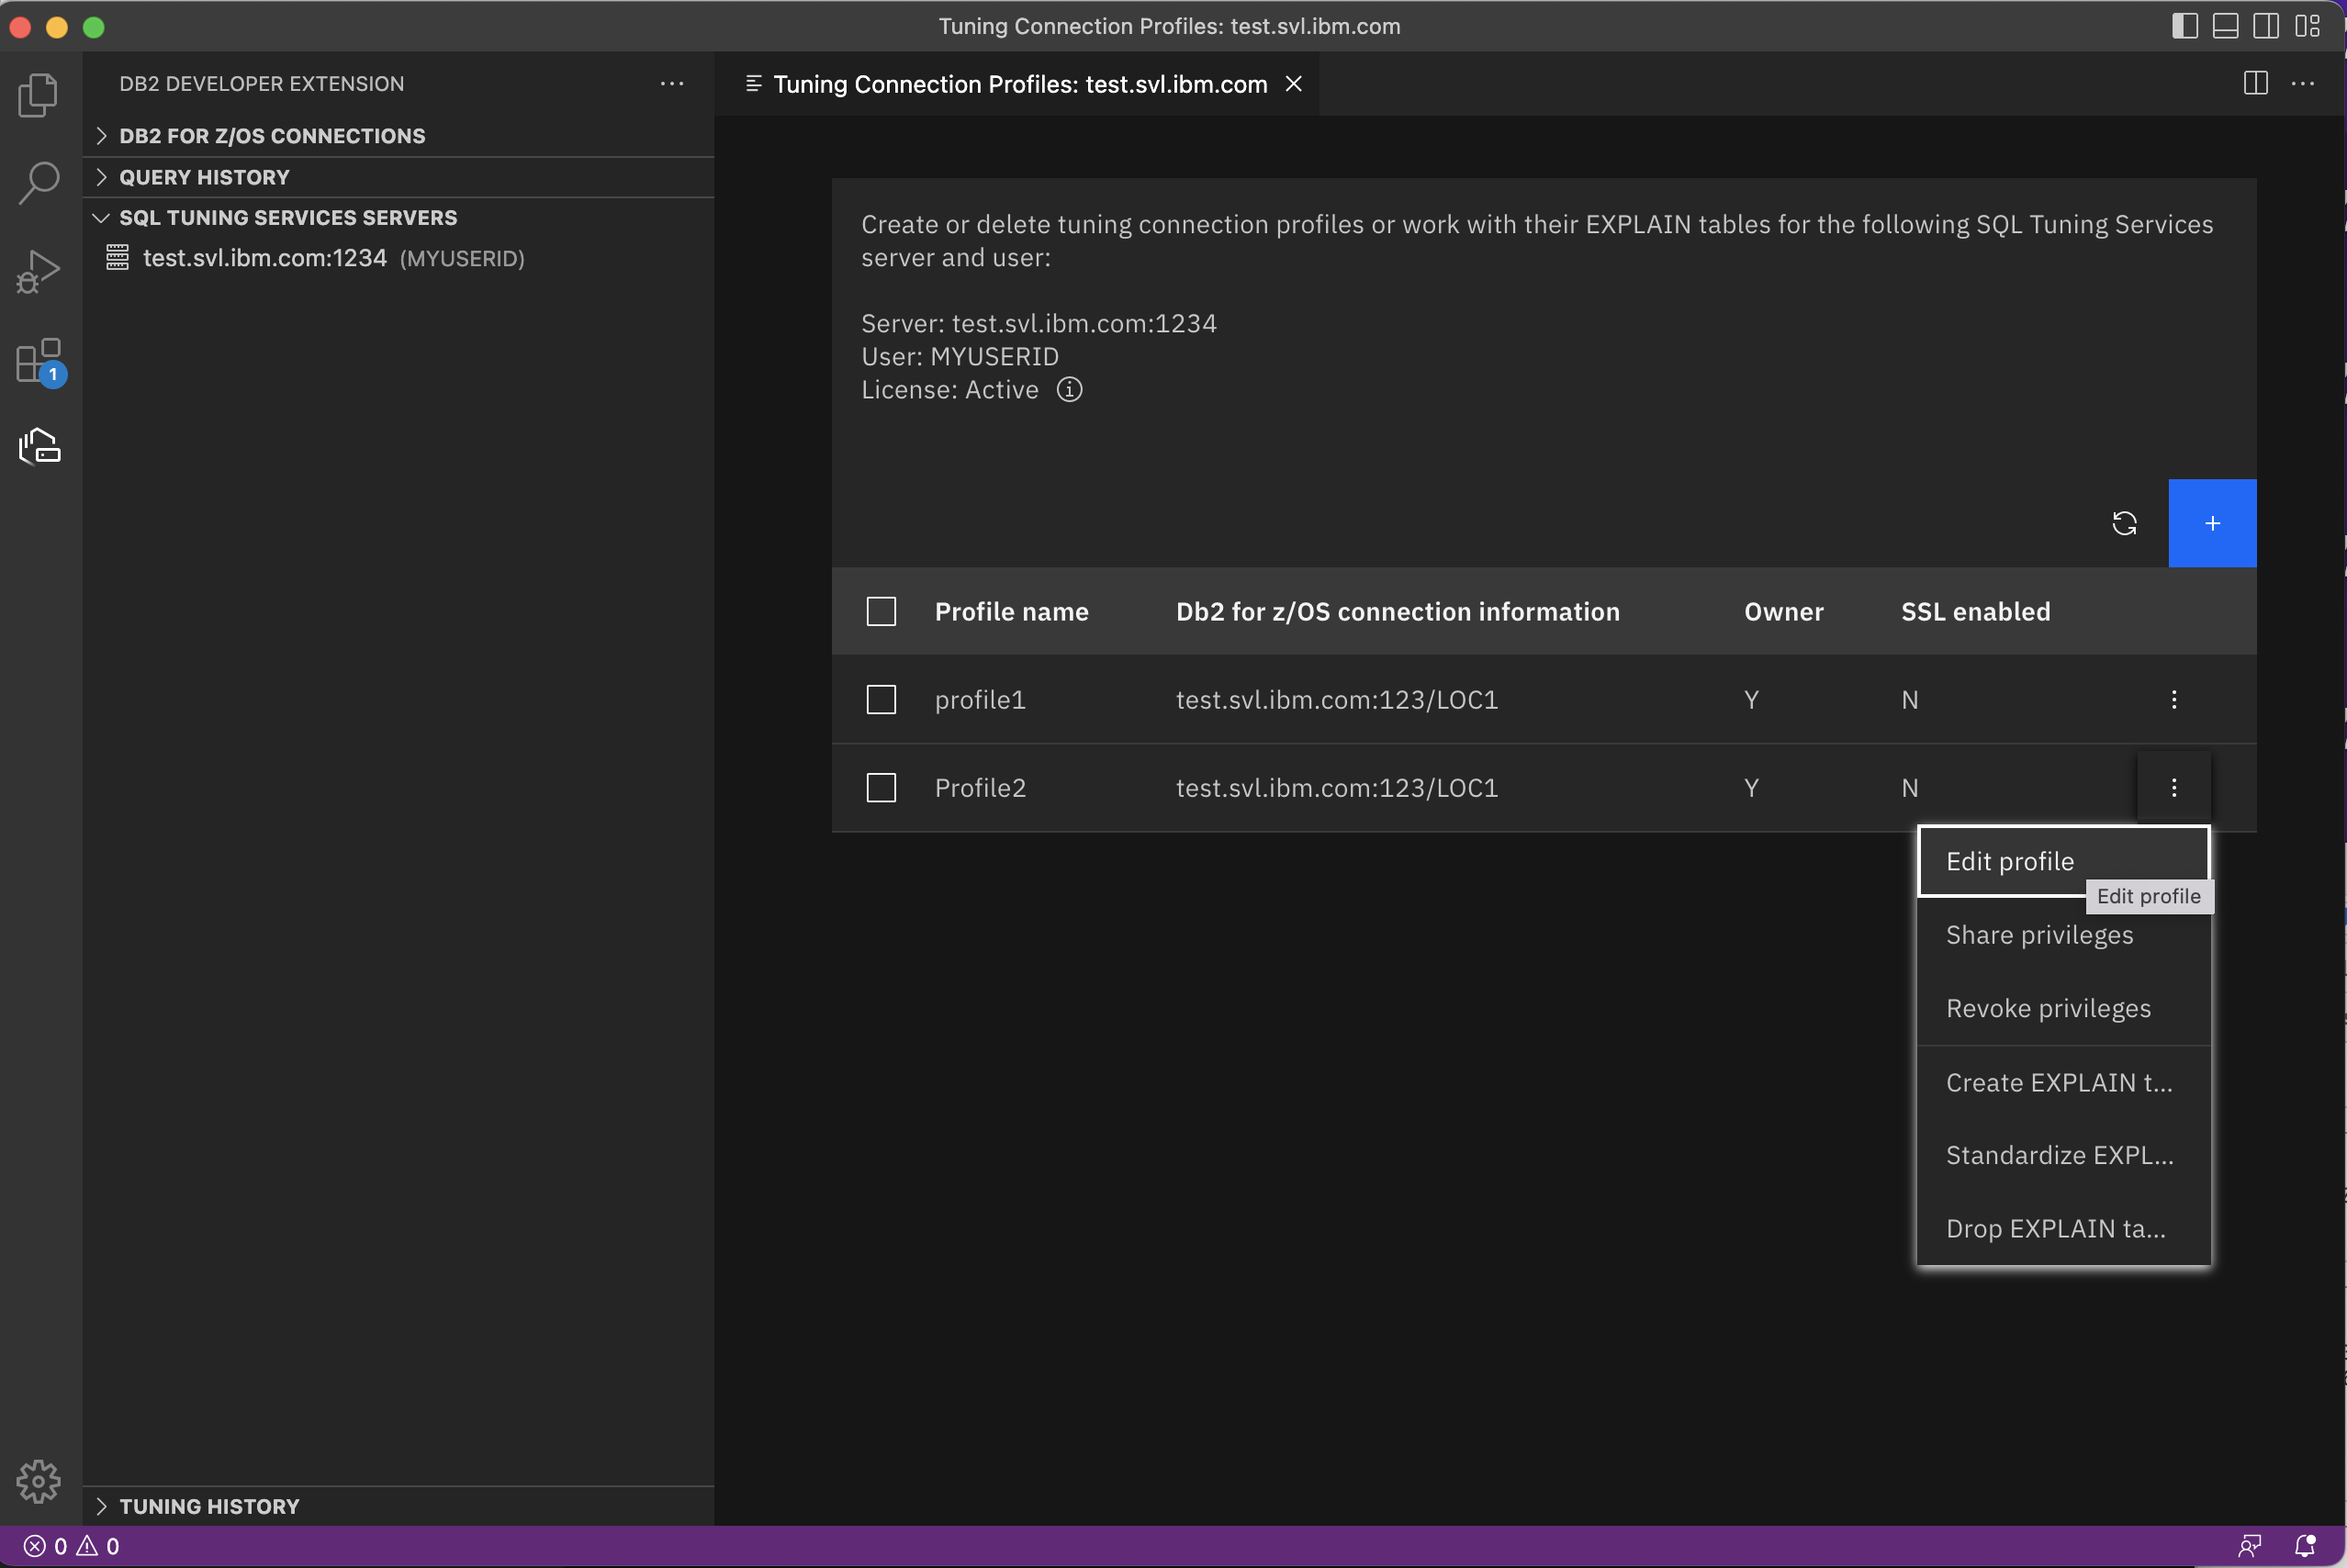
Click three vertical dots at the end of the tuning connection profile you just created, and select Create EXPLAIN tables. The Create EXPLAIN tables window opens.
-
Although all of the fields are optional, you’ll typically want to provide at least a schema name and SQL ID.
-
Click Create. A status message indicates that the EXPLAIN tables are being created.

You can also standardize and drop EXPLAIN tables by clicking the three vertical dots.