Lab guide for self service KYC agent
Overview
Financial institutions must comply with Know Your Customer (KYC) regulations to verify customer identities and assess risk profiles. This lab demonstrates how to build an intelligent self-service KYC system using watsonx Orchestrate that automates document validation, PII extraction, and risk assessment. The solution combines agentic workflows for document processing with AI agents that perform Customer Due Diligence (CDD), Enhanced Due Diligence (EDD), and adverse news screening, while incorporating human-in-the-loop approvals for critical decisions.
Pre-requisites
Make sure you've already setup the environment:
- Lab Environment setup
- ADK Installation
- Download the lab files
Tavily API Key
To use the Tavily MCP server you need to create an API Key. Sign-up for free researcher plan that is meant for creators which provides 1,000 API credits / month here: https://app.tavily.com/home
Reference Architecture
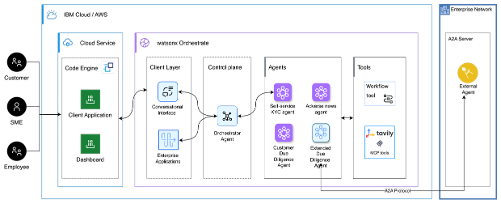
Key Components
- self-service-kyc-agent (Supervisor Agent) – Primary agent that orchestrates the KYC validation process, validates document completeness, accuracy and compliance.
- cdd-agent (Collaborator Agent) – Creates risk profiles based on customer type, country of residence, occupation and transaction type.
- adverse-news-agent (Collaborator Agent) – Evaluates risk based on KYC rules and analyzes for potentially exposed persons using web search.
- edd-agent (Collaborator Agent) – Triggered when CDD flags high risk. Gathers additional supporting data such as source of wealth and cross-border connections.
- kyc_document_validation (Agentic Workflow Tool) – Validates and extracts PII information from Aadhaar and PAN cards using document classification and extraction.
- human_in_the_loop (Agentic Workflow Tool) – Implements human approval checkpoints before invoking critical agents or tools.
- Tavily Search (MCP Server) – Provides web search capabilities to CDD, EDD, and adverse news agents for gathering external information.
Steps
Step 1: Build the KYC document processing agentic workflow
-
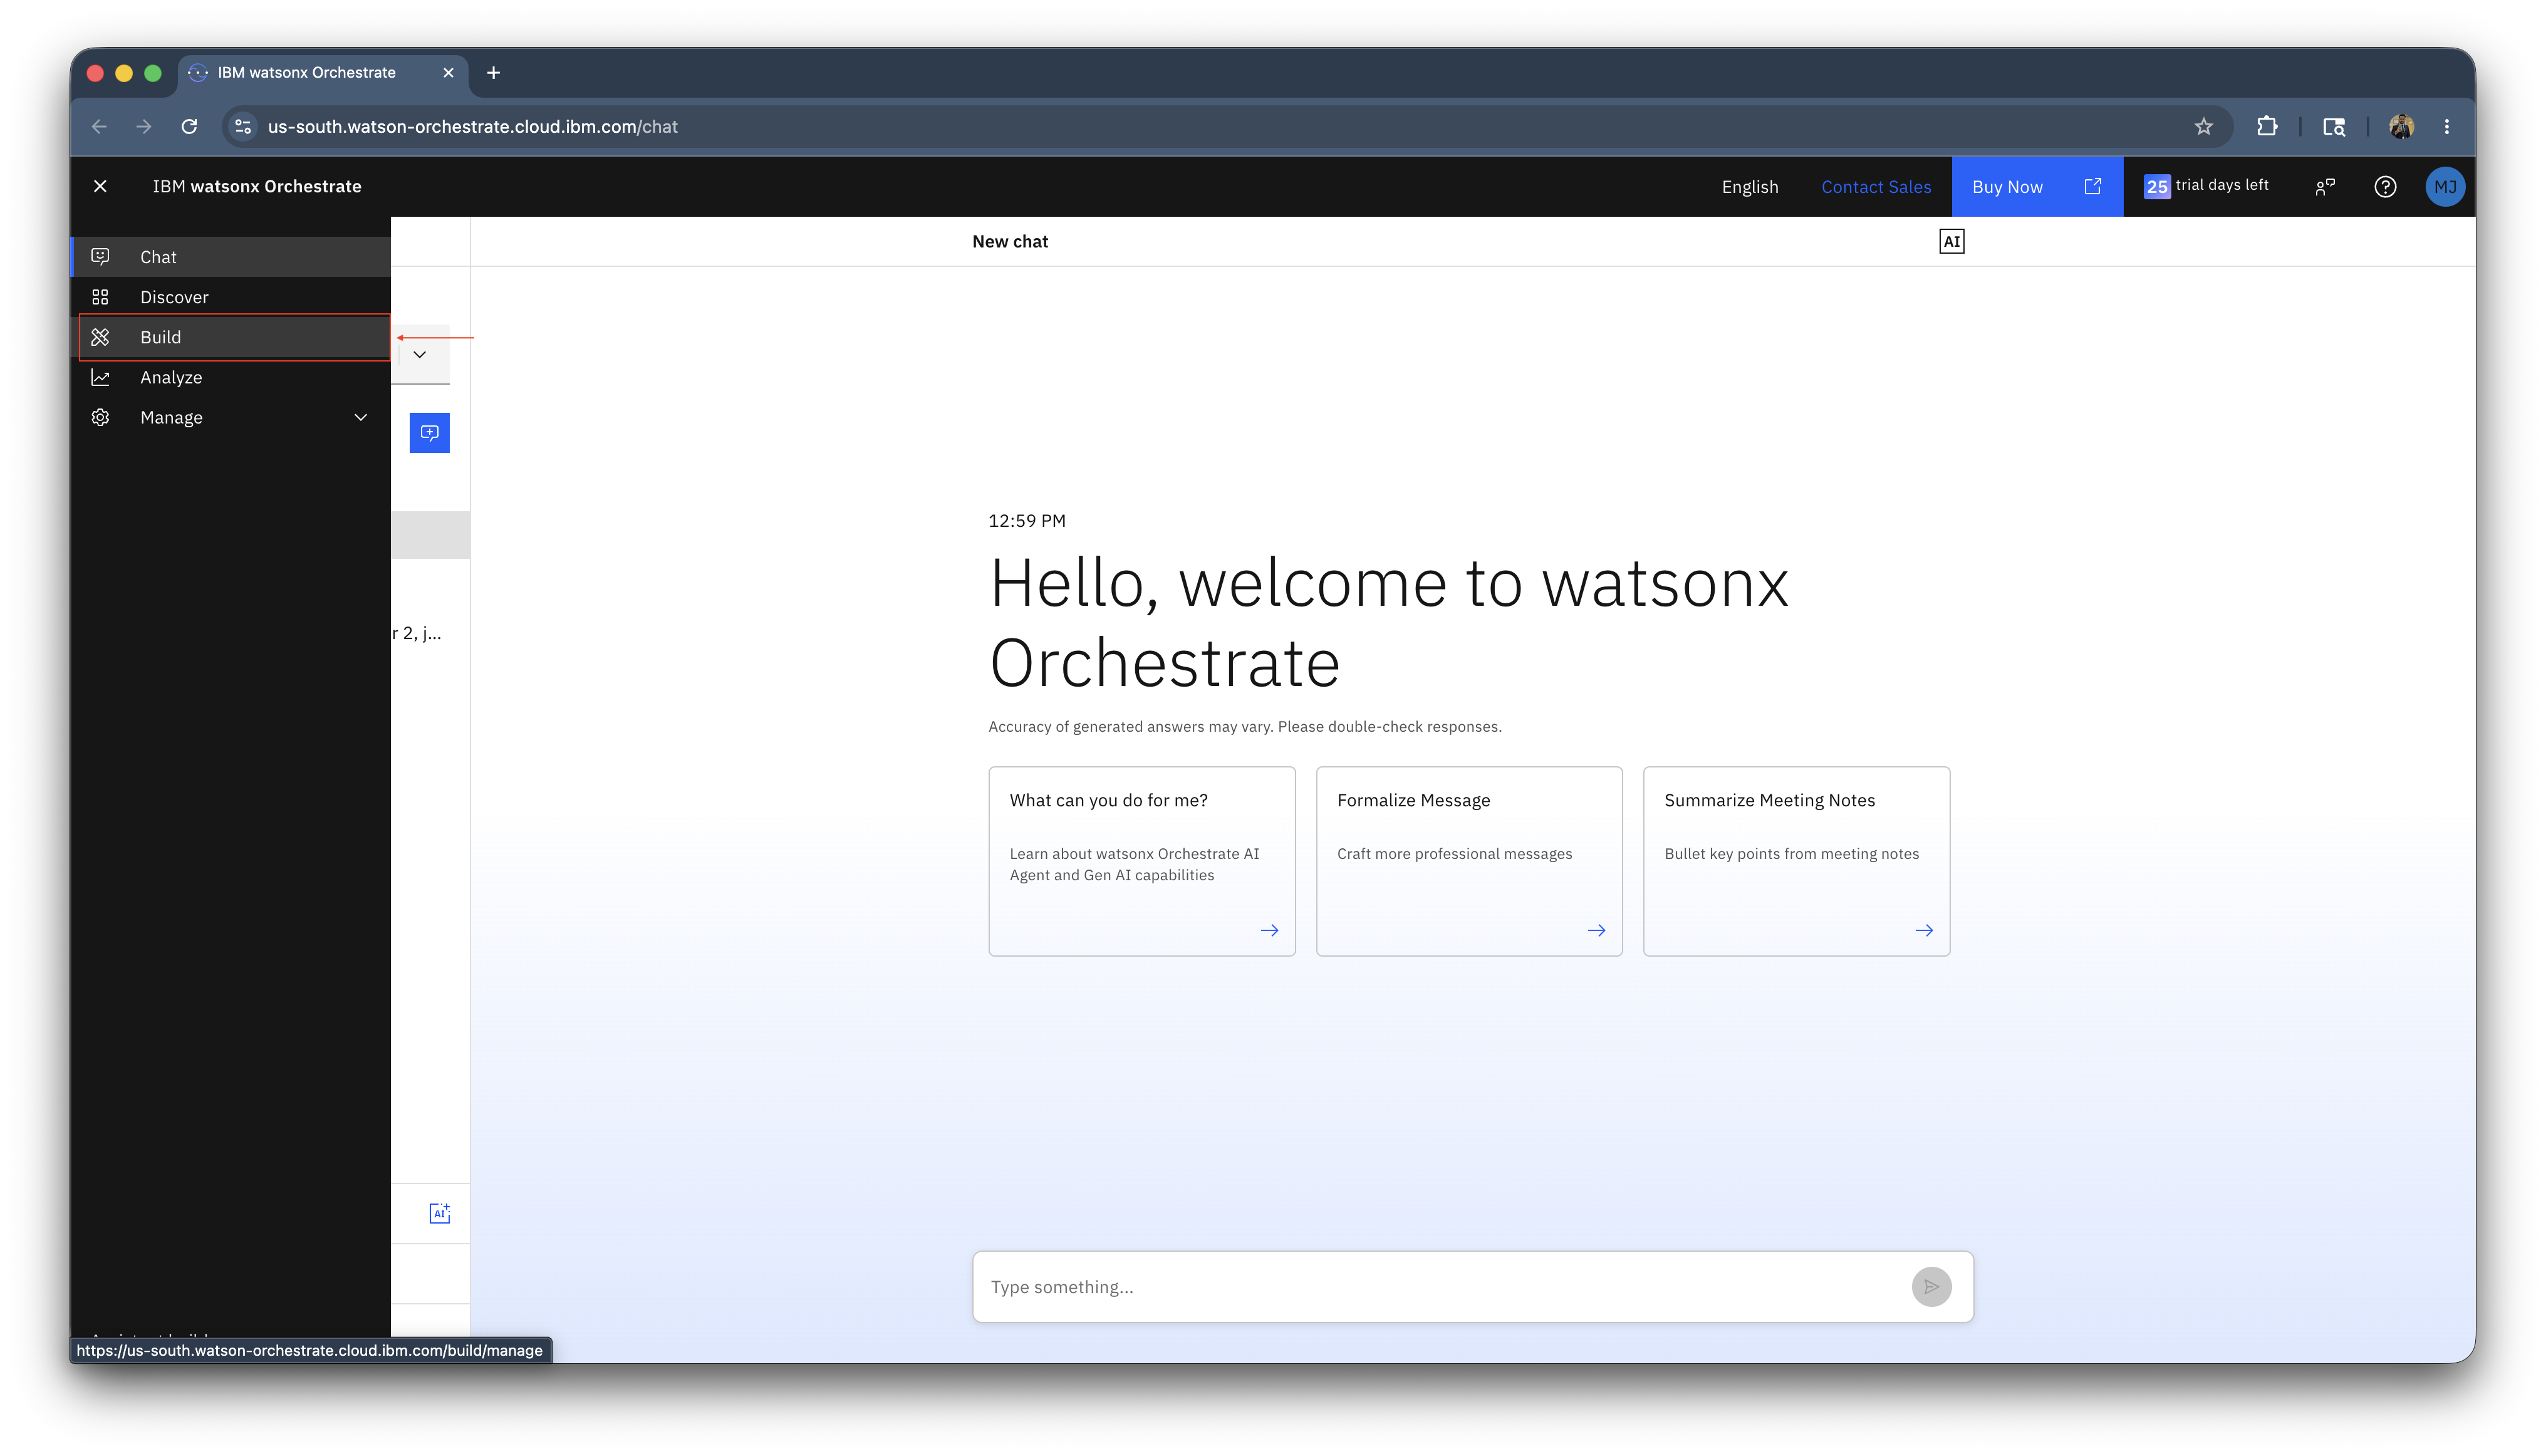
In watsonx Orchestrate, click on the hamburger menu and click on Build.
-
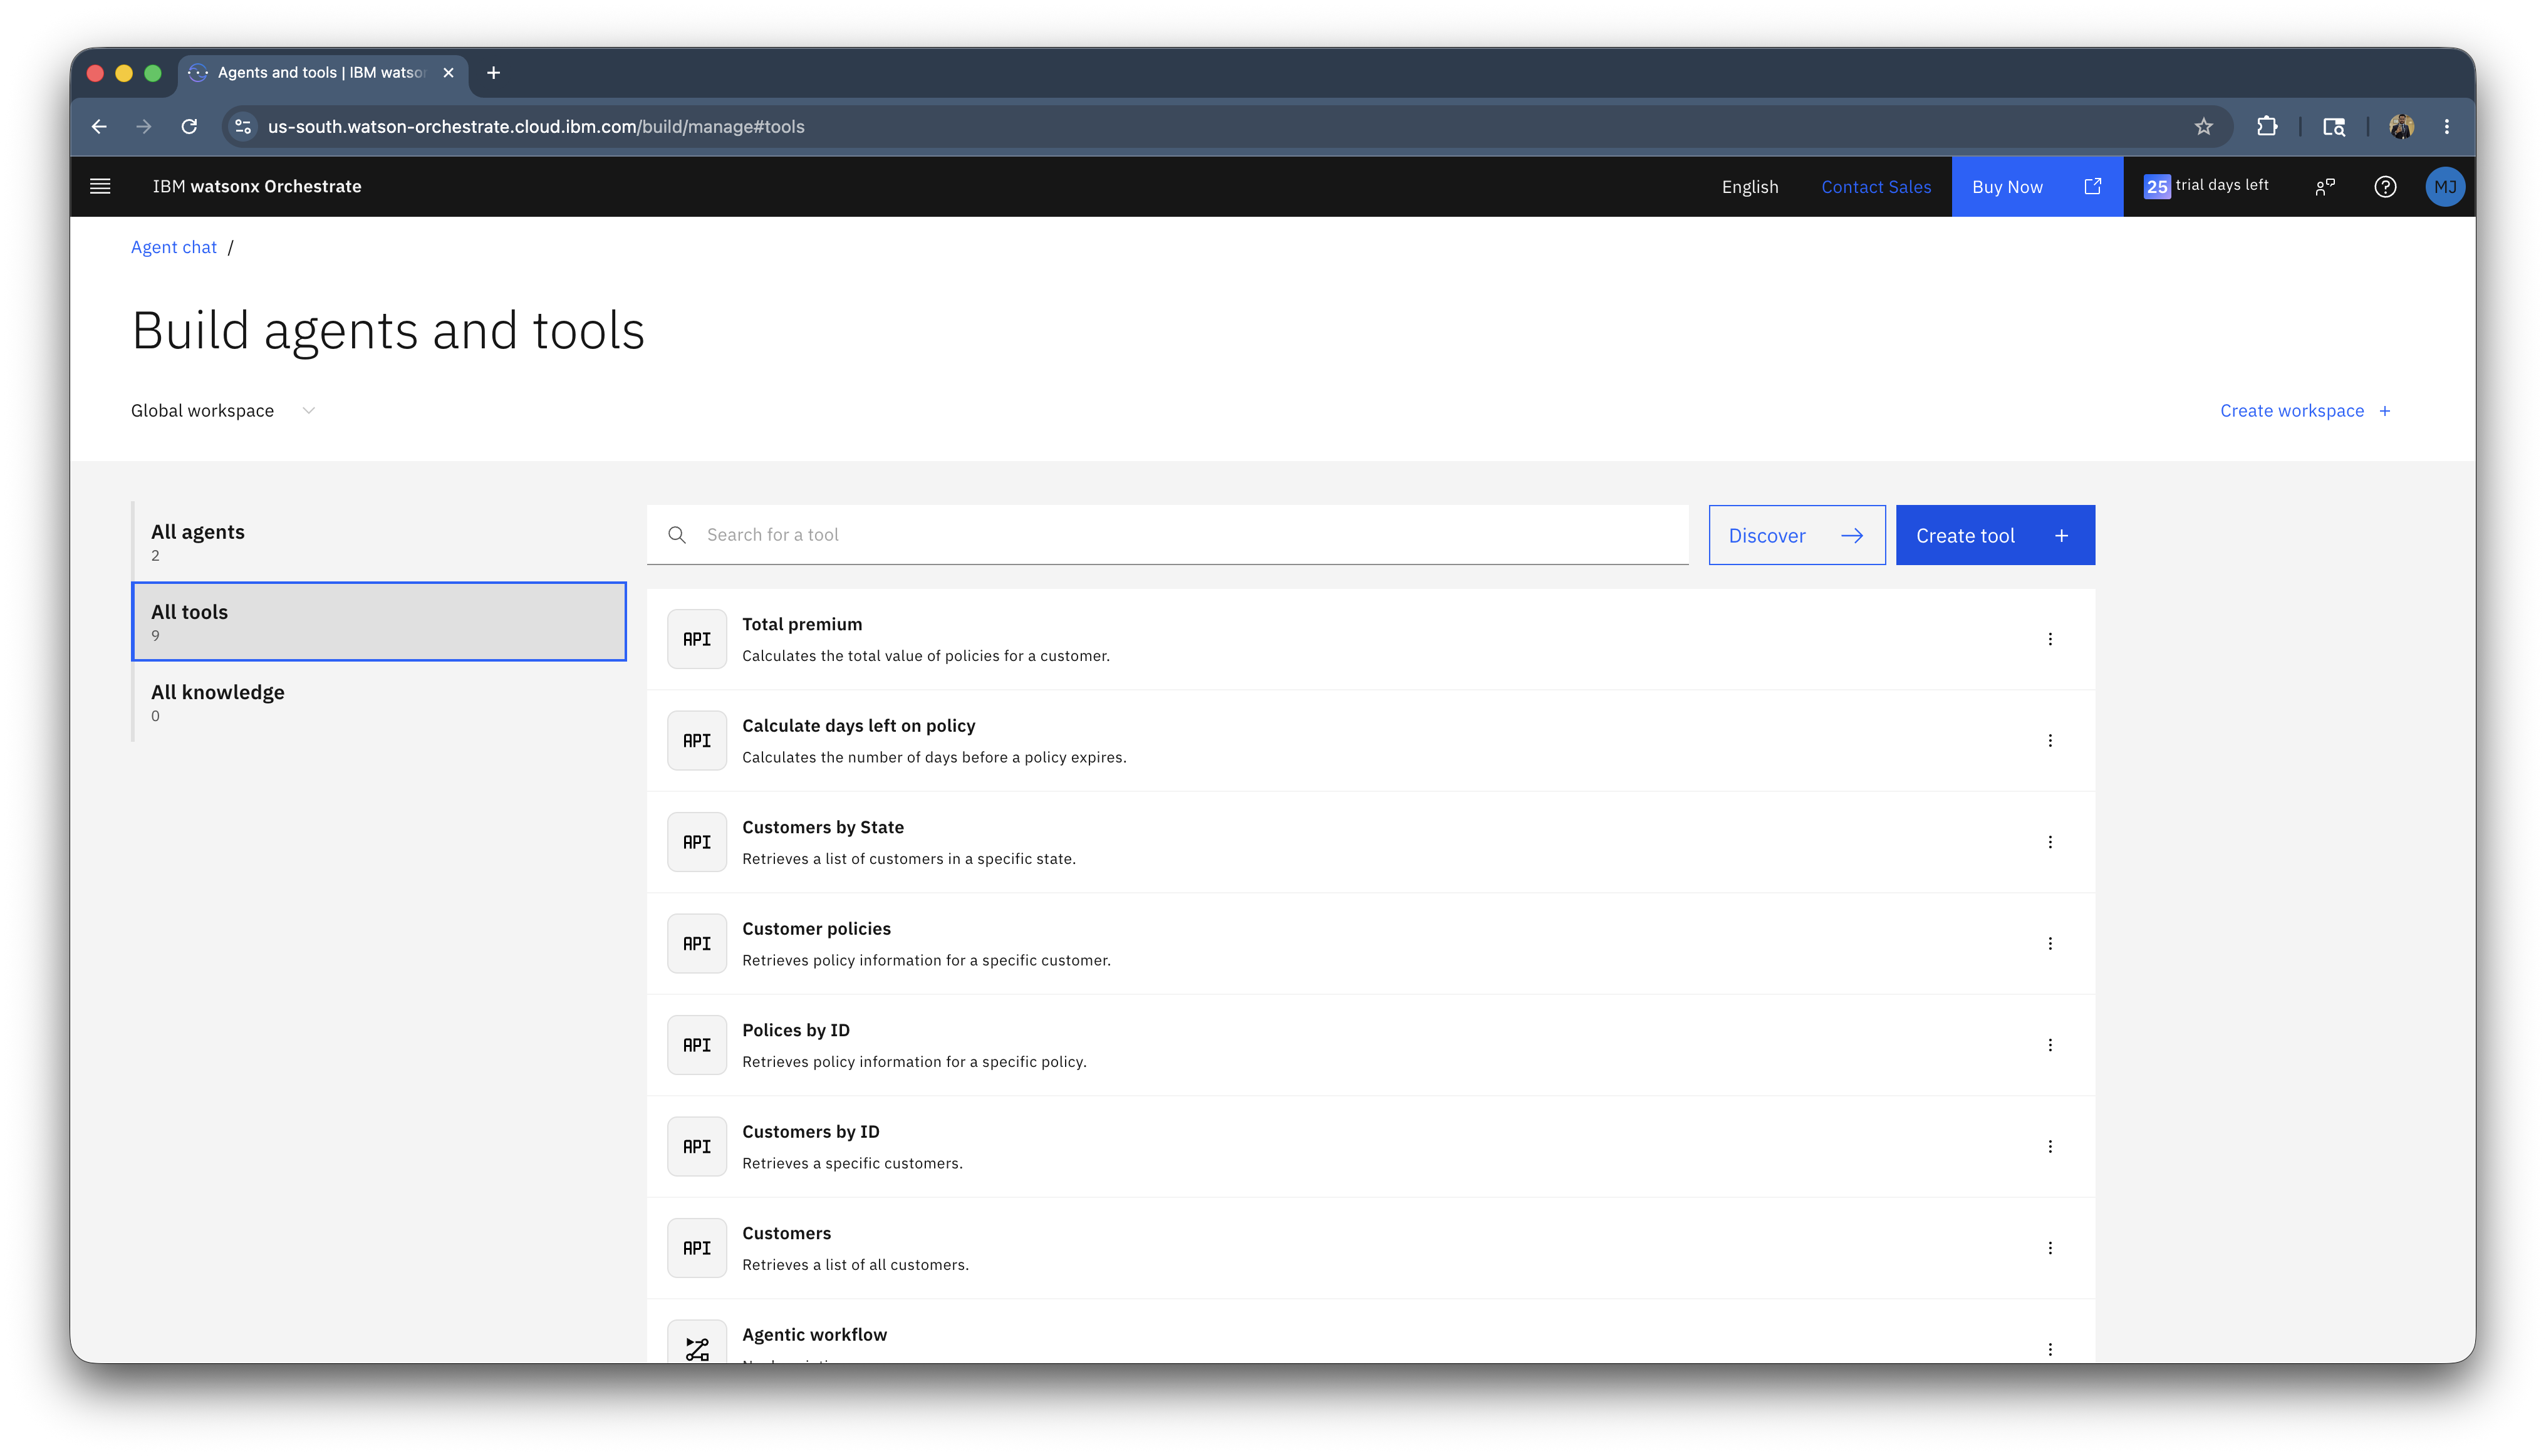
Click on All tools.
-
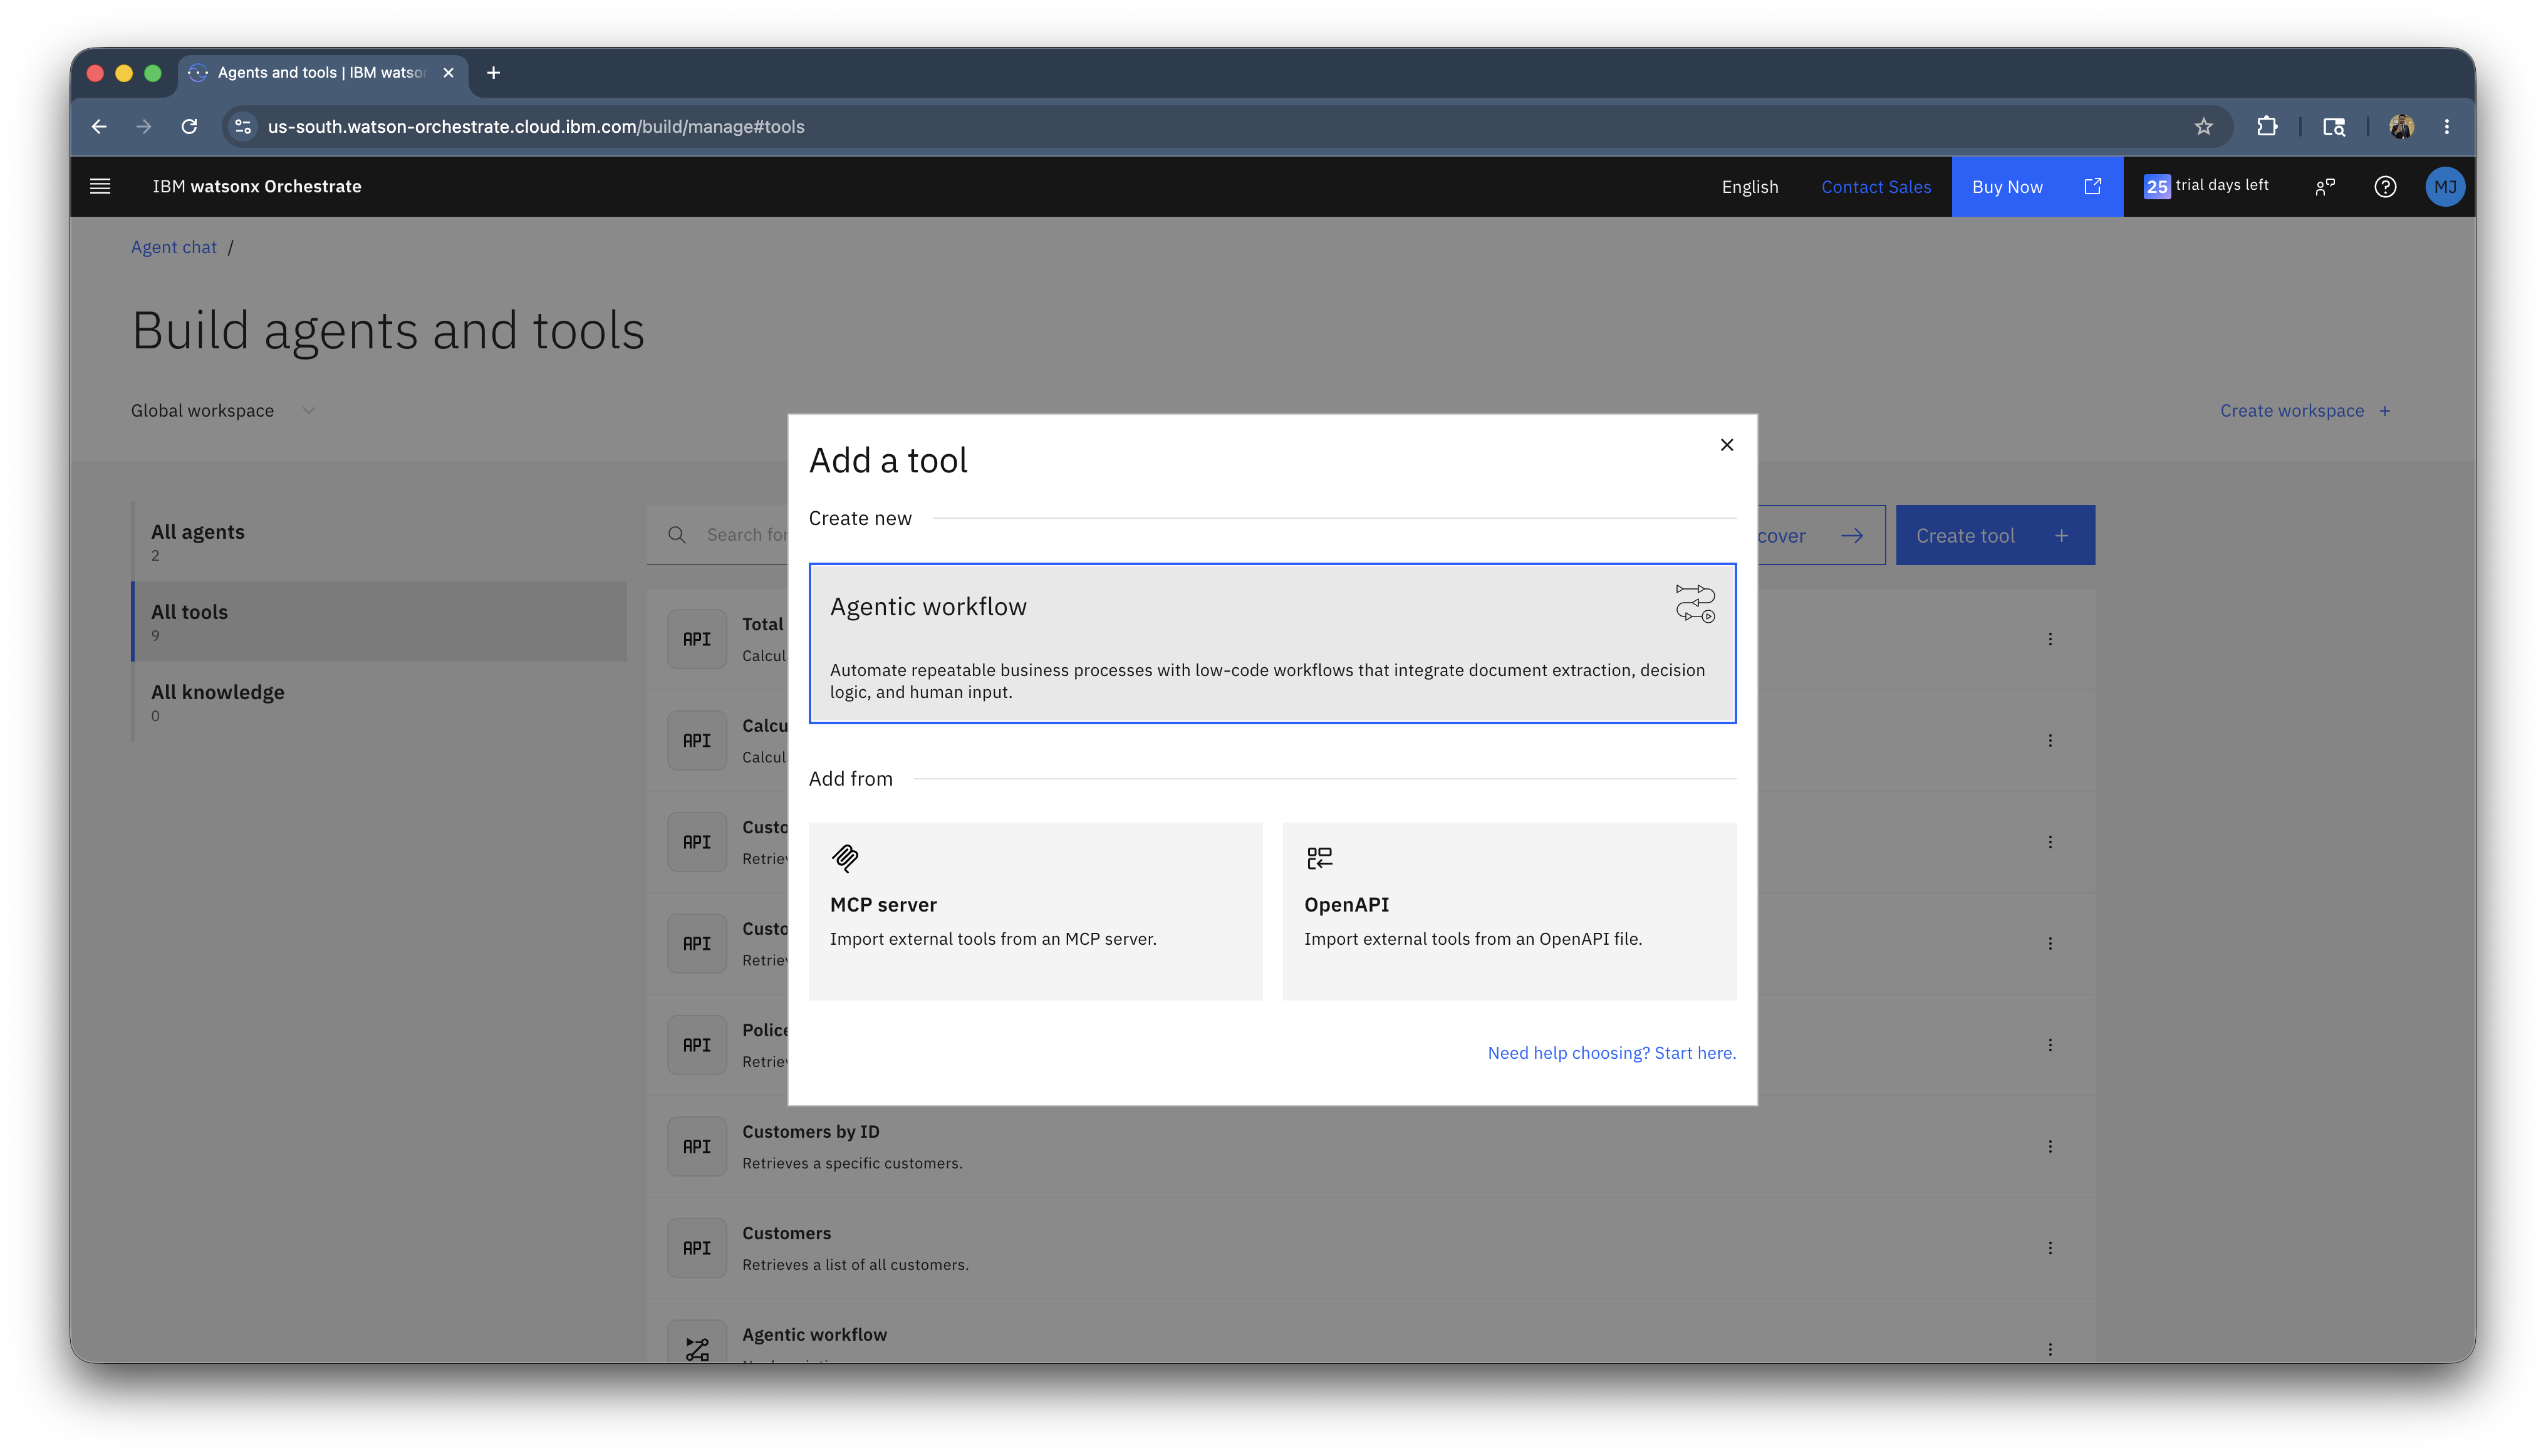
Select Agentic workflow.
-
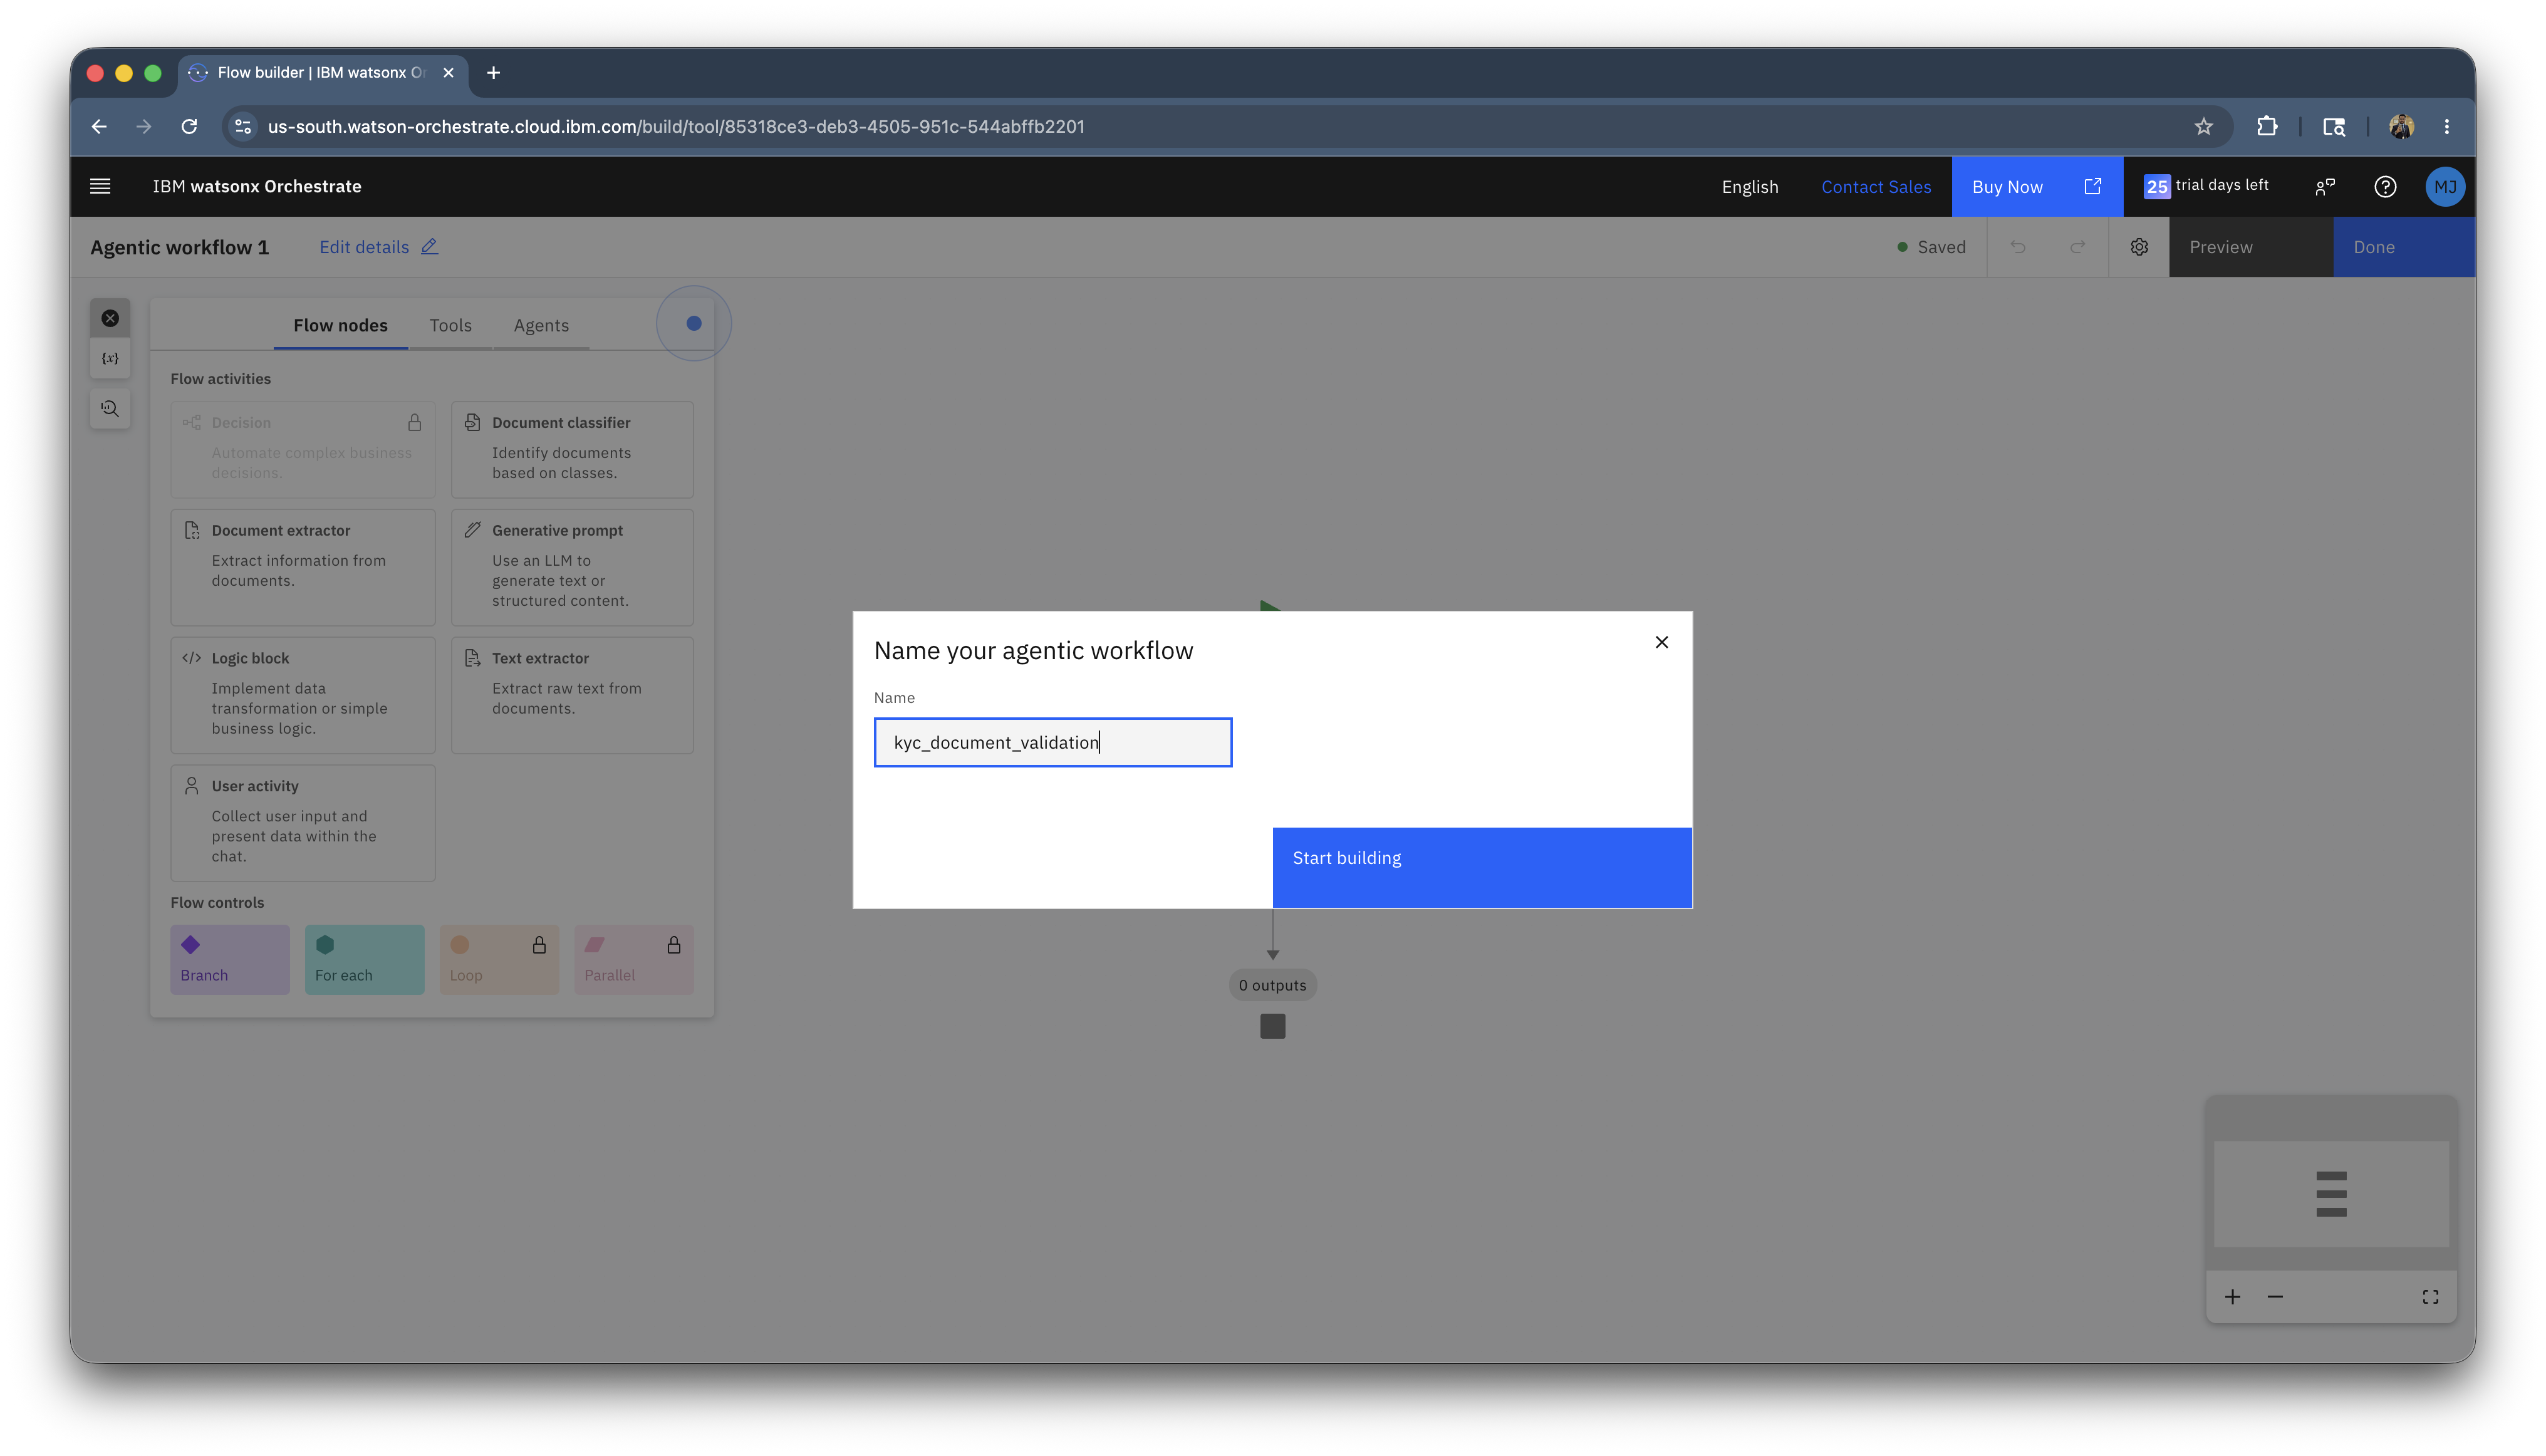
Enter the Name as kyc_document_validation and click on Start building.
-
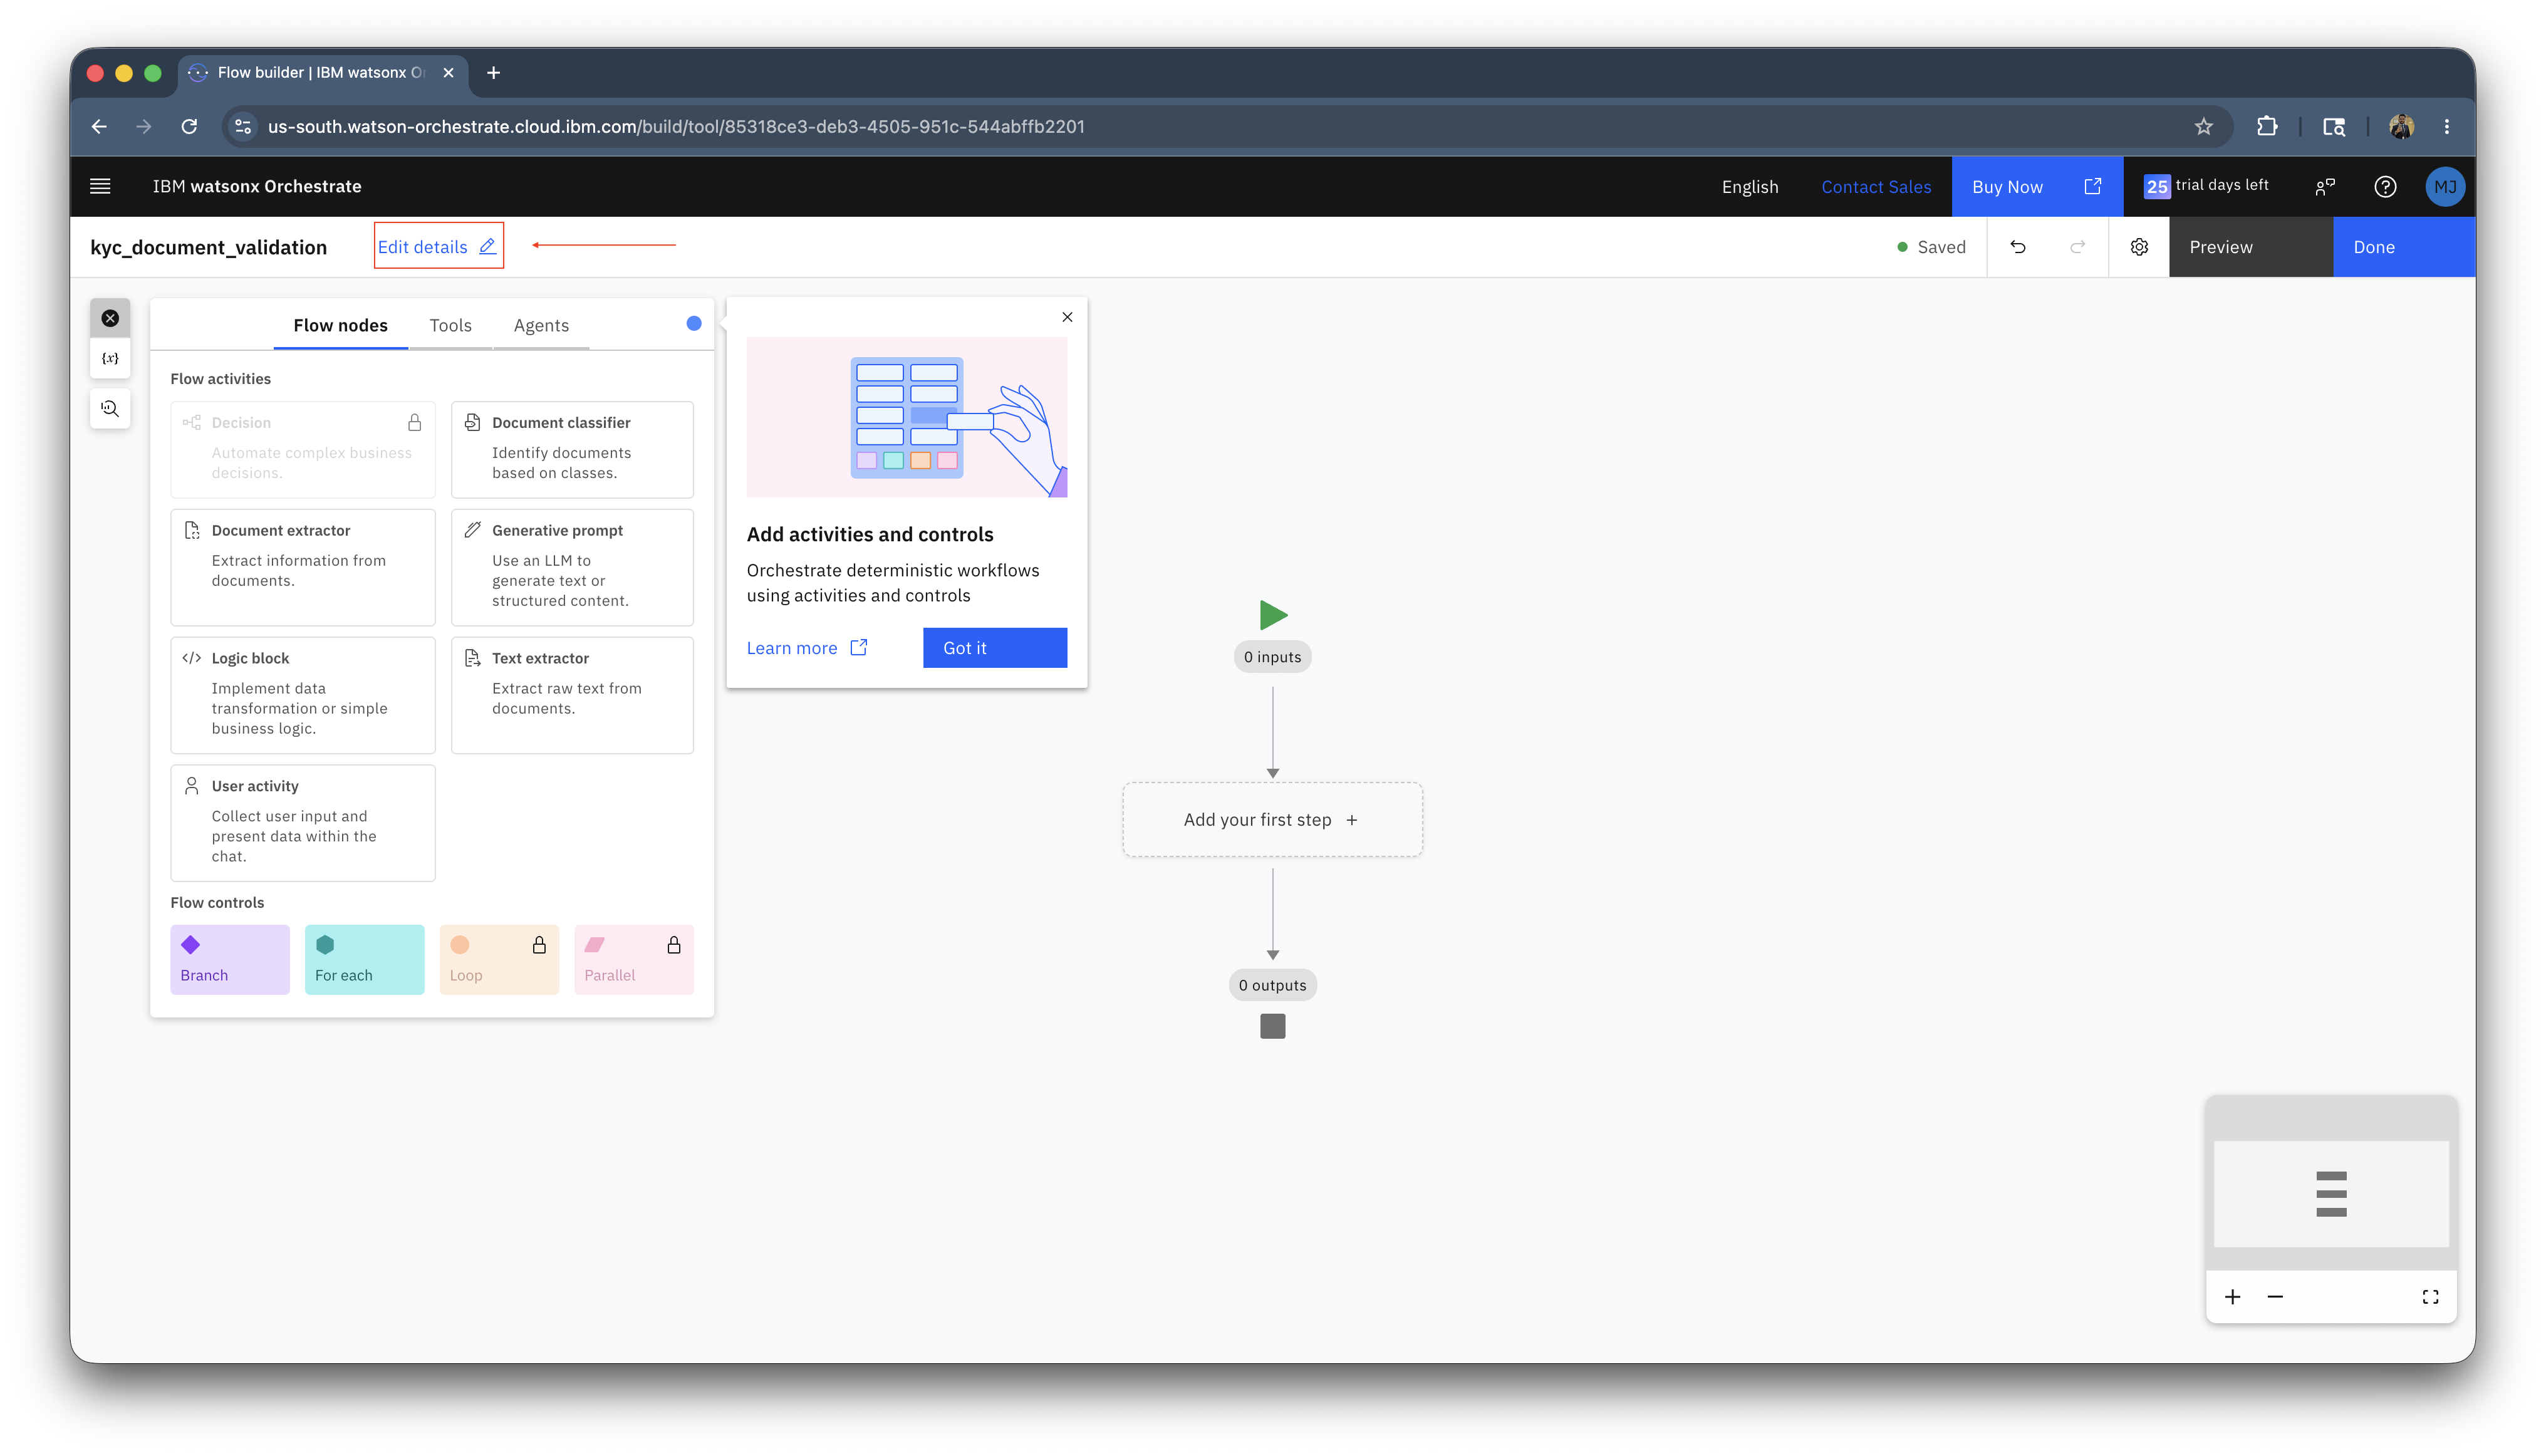
You will see the Agentic workflow canvas. Click on Edit details.
-
Enter the description as
Validate the document and extract PII information.and click on Done.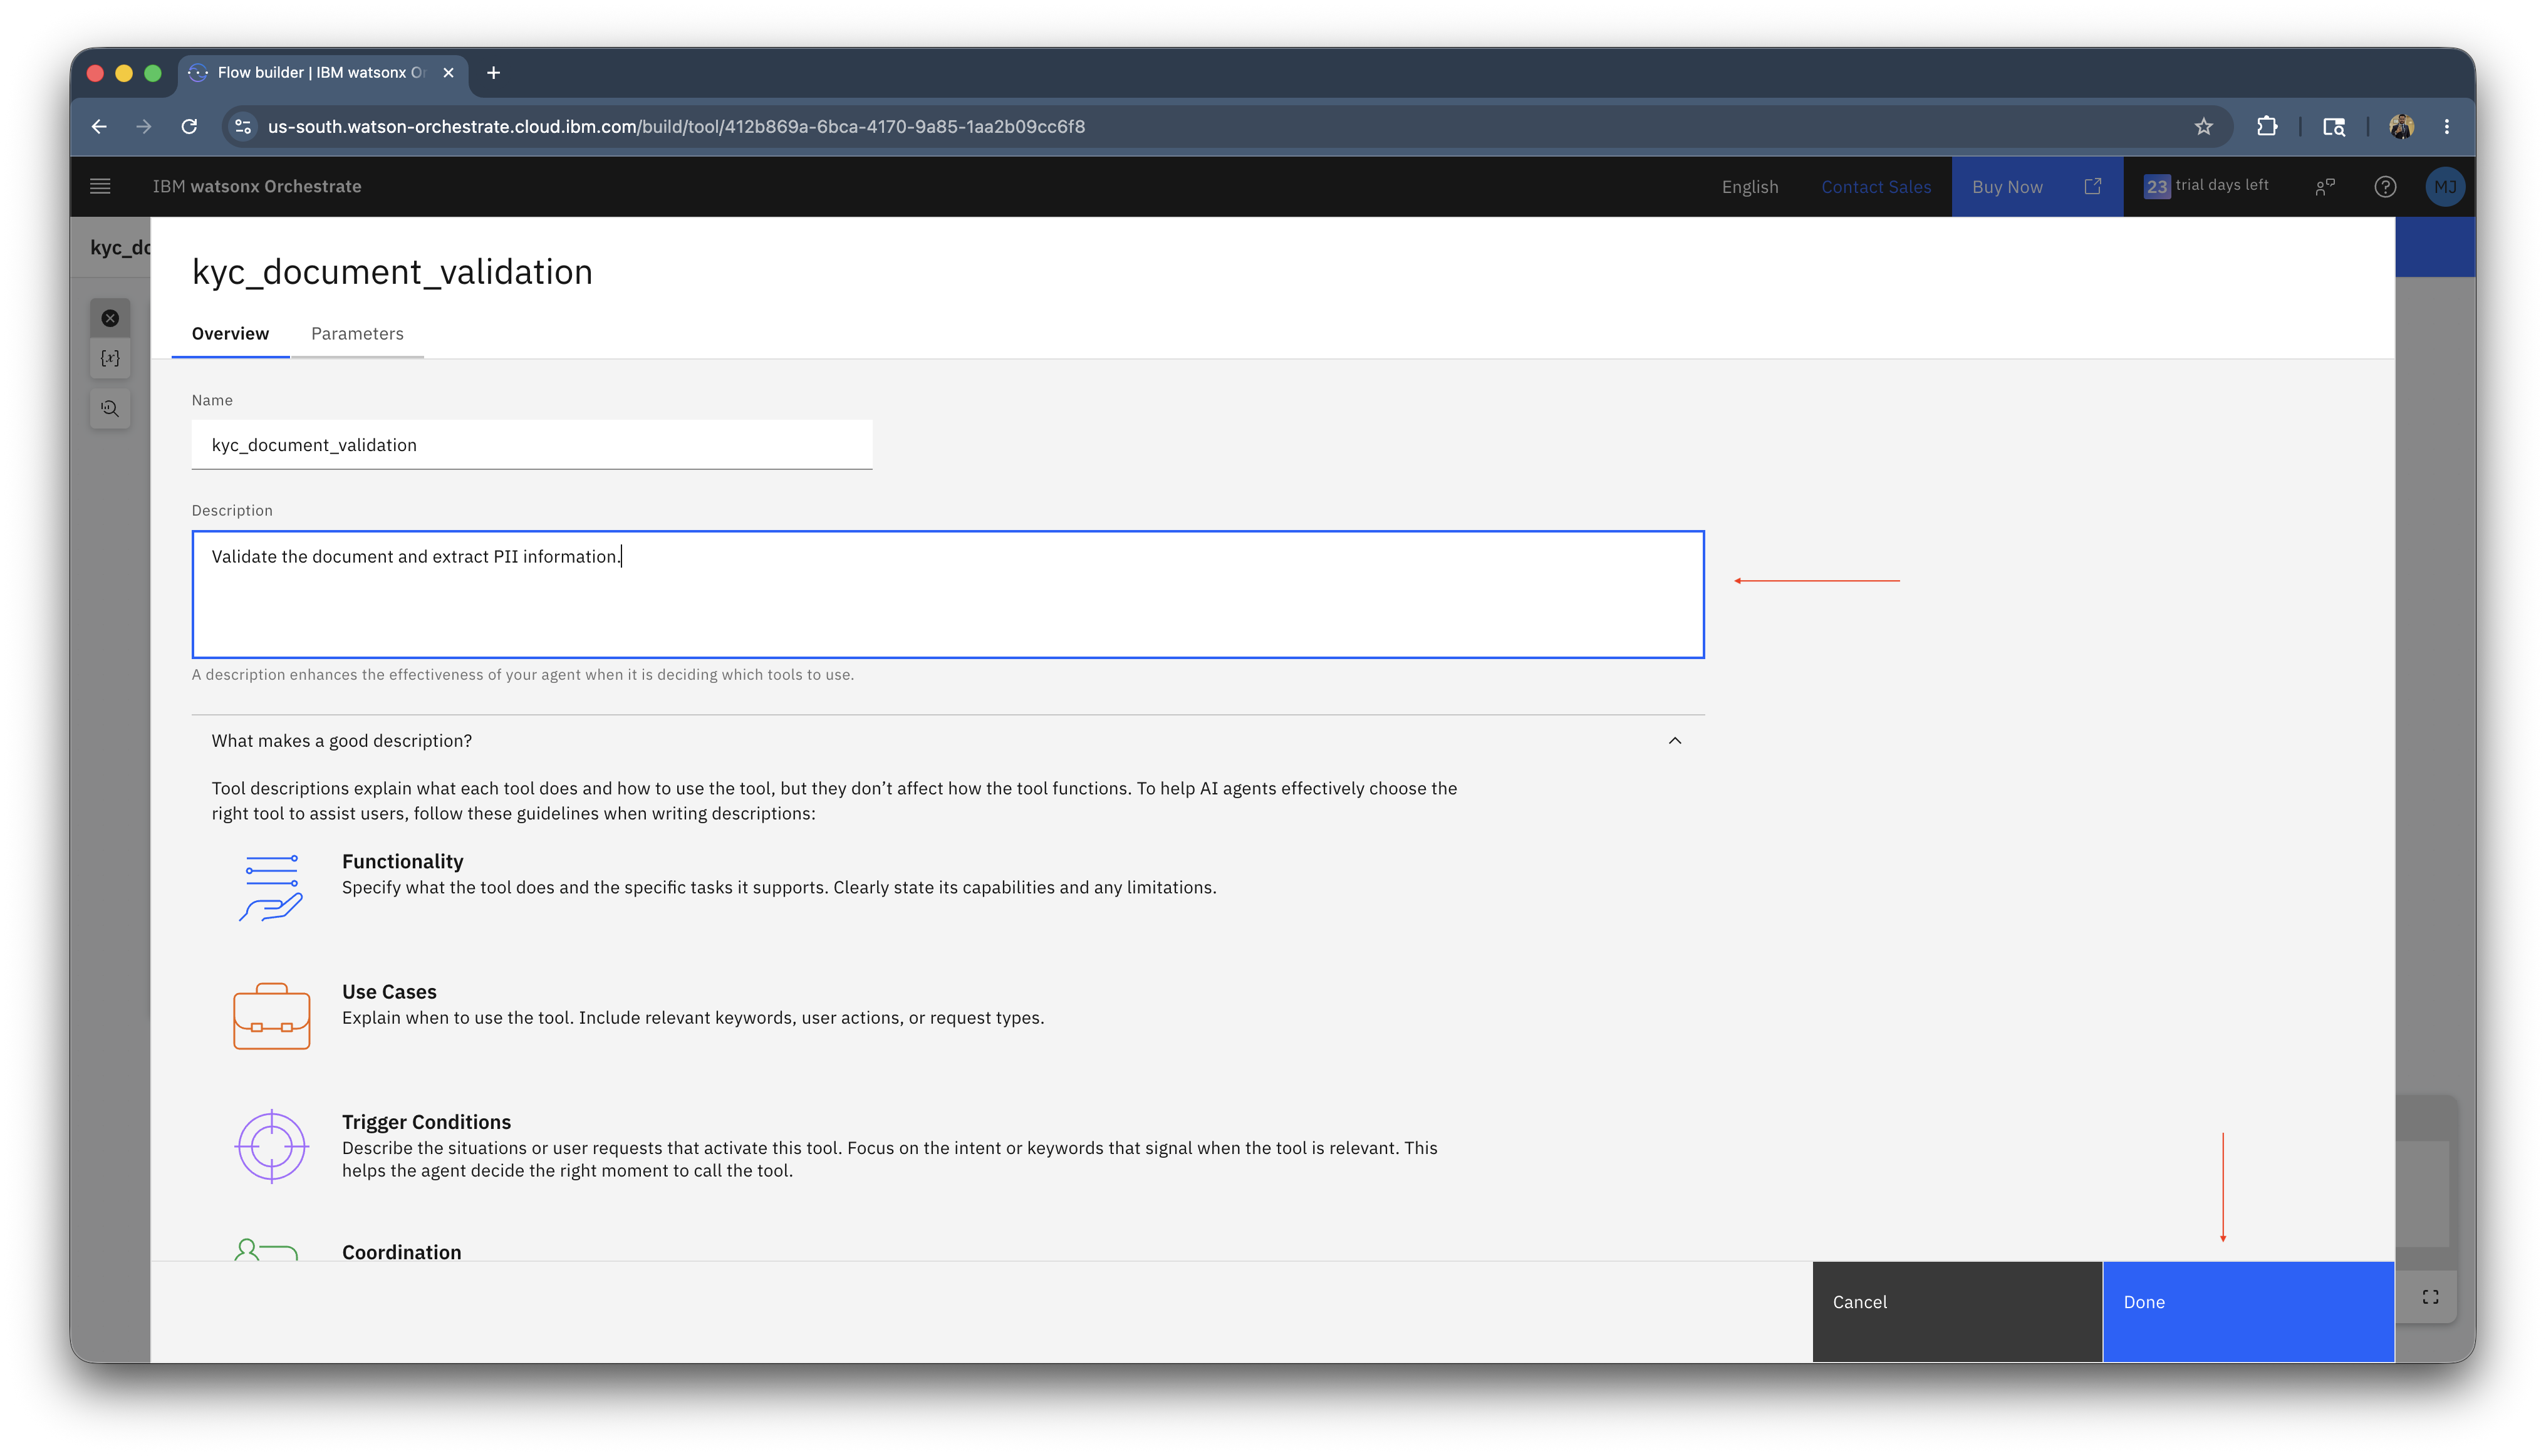
-
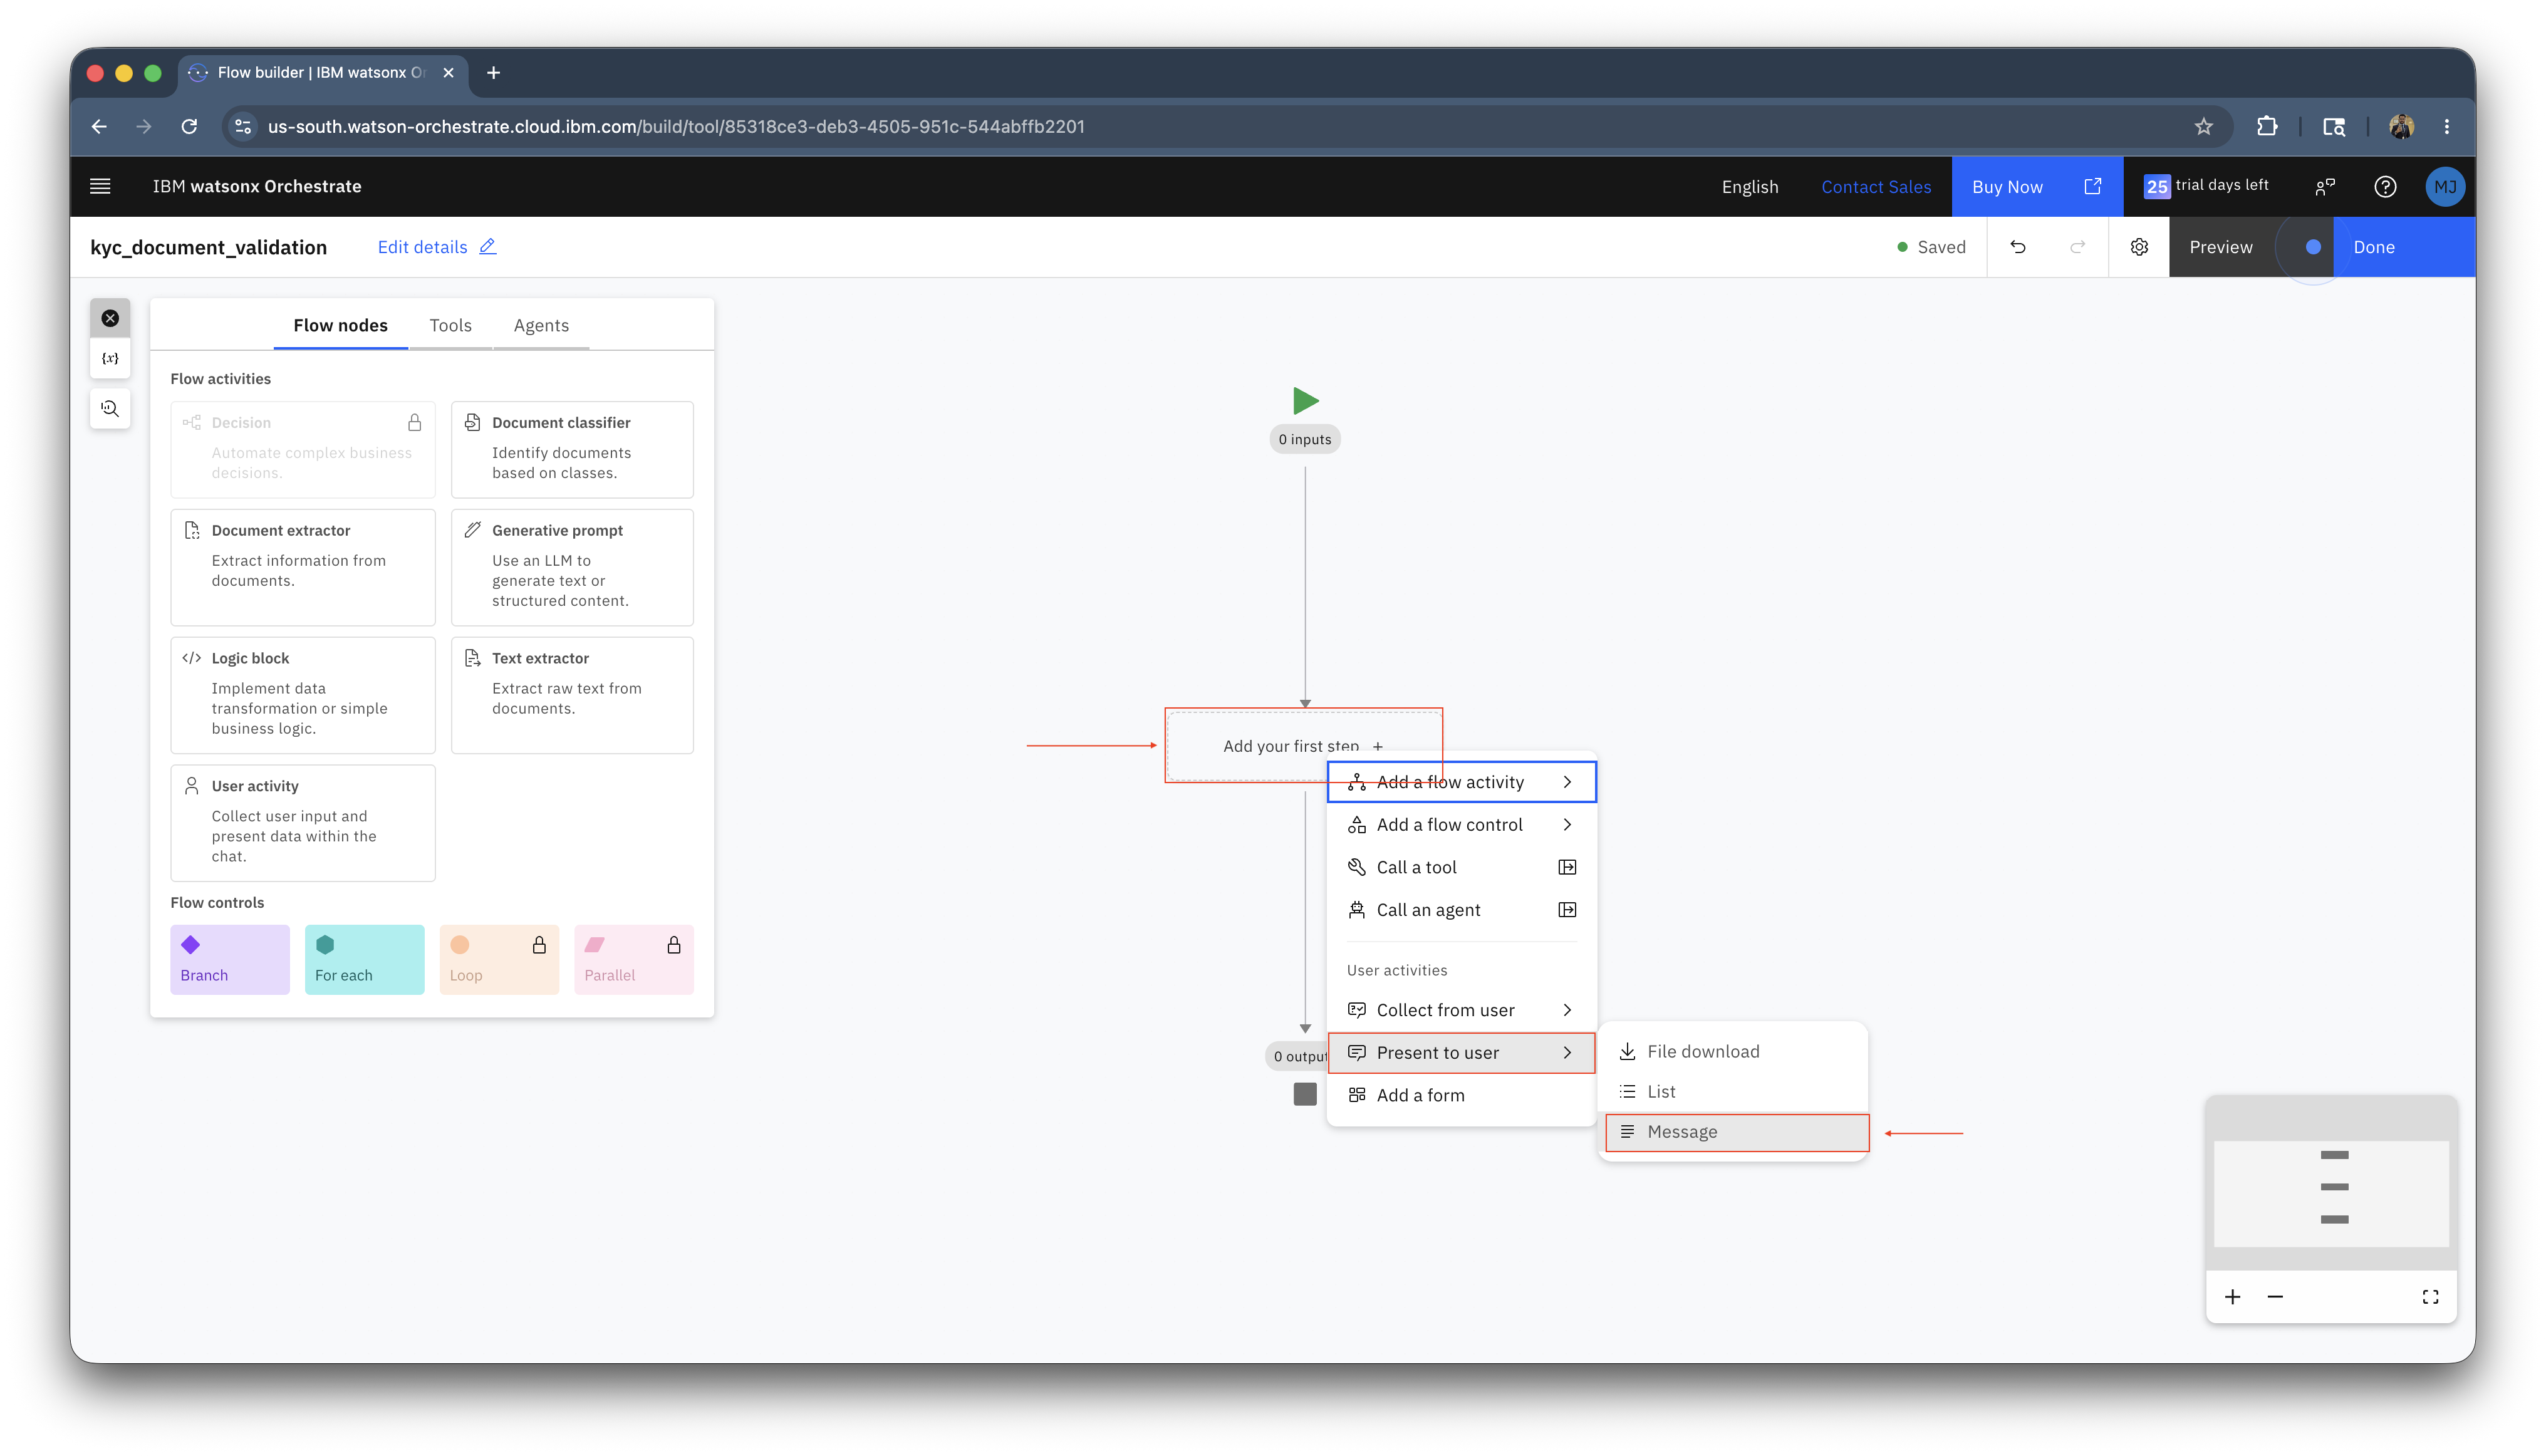
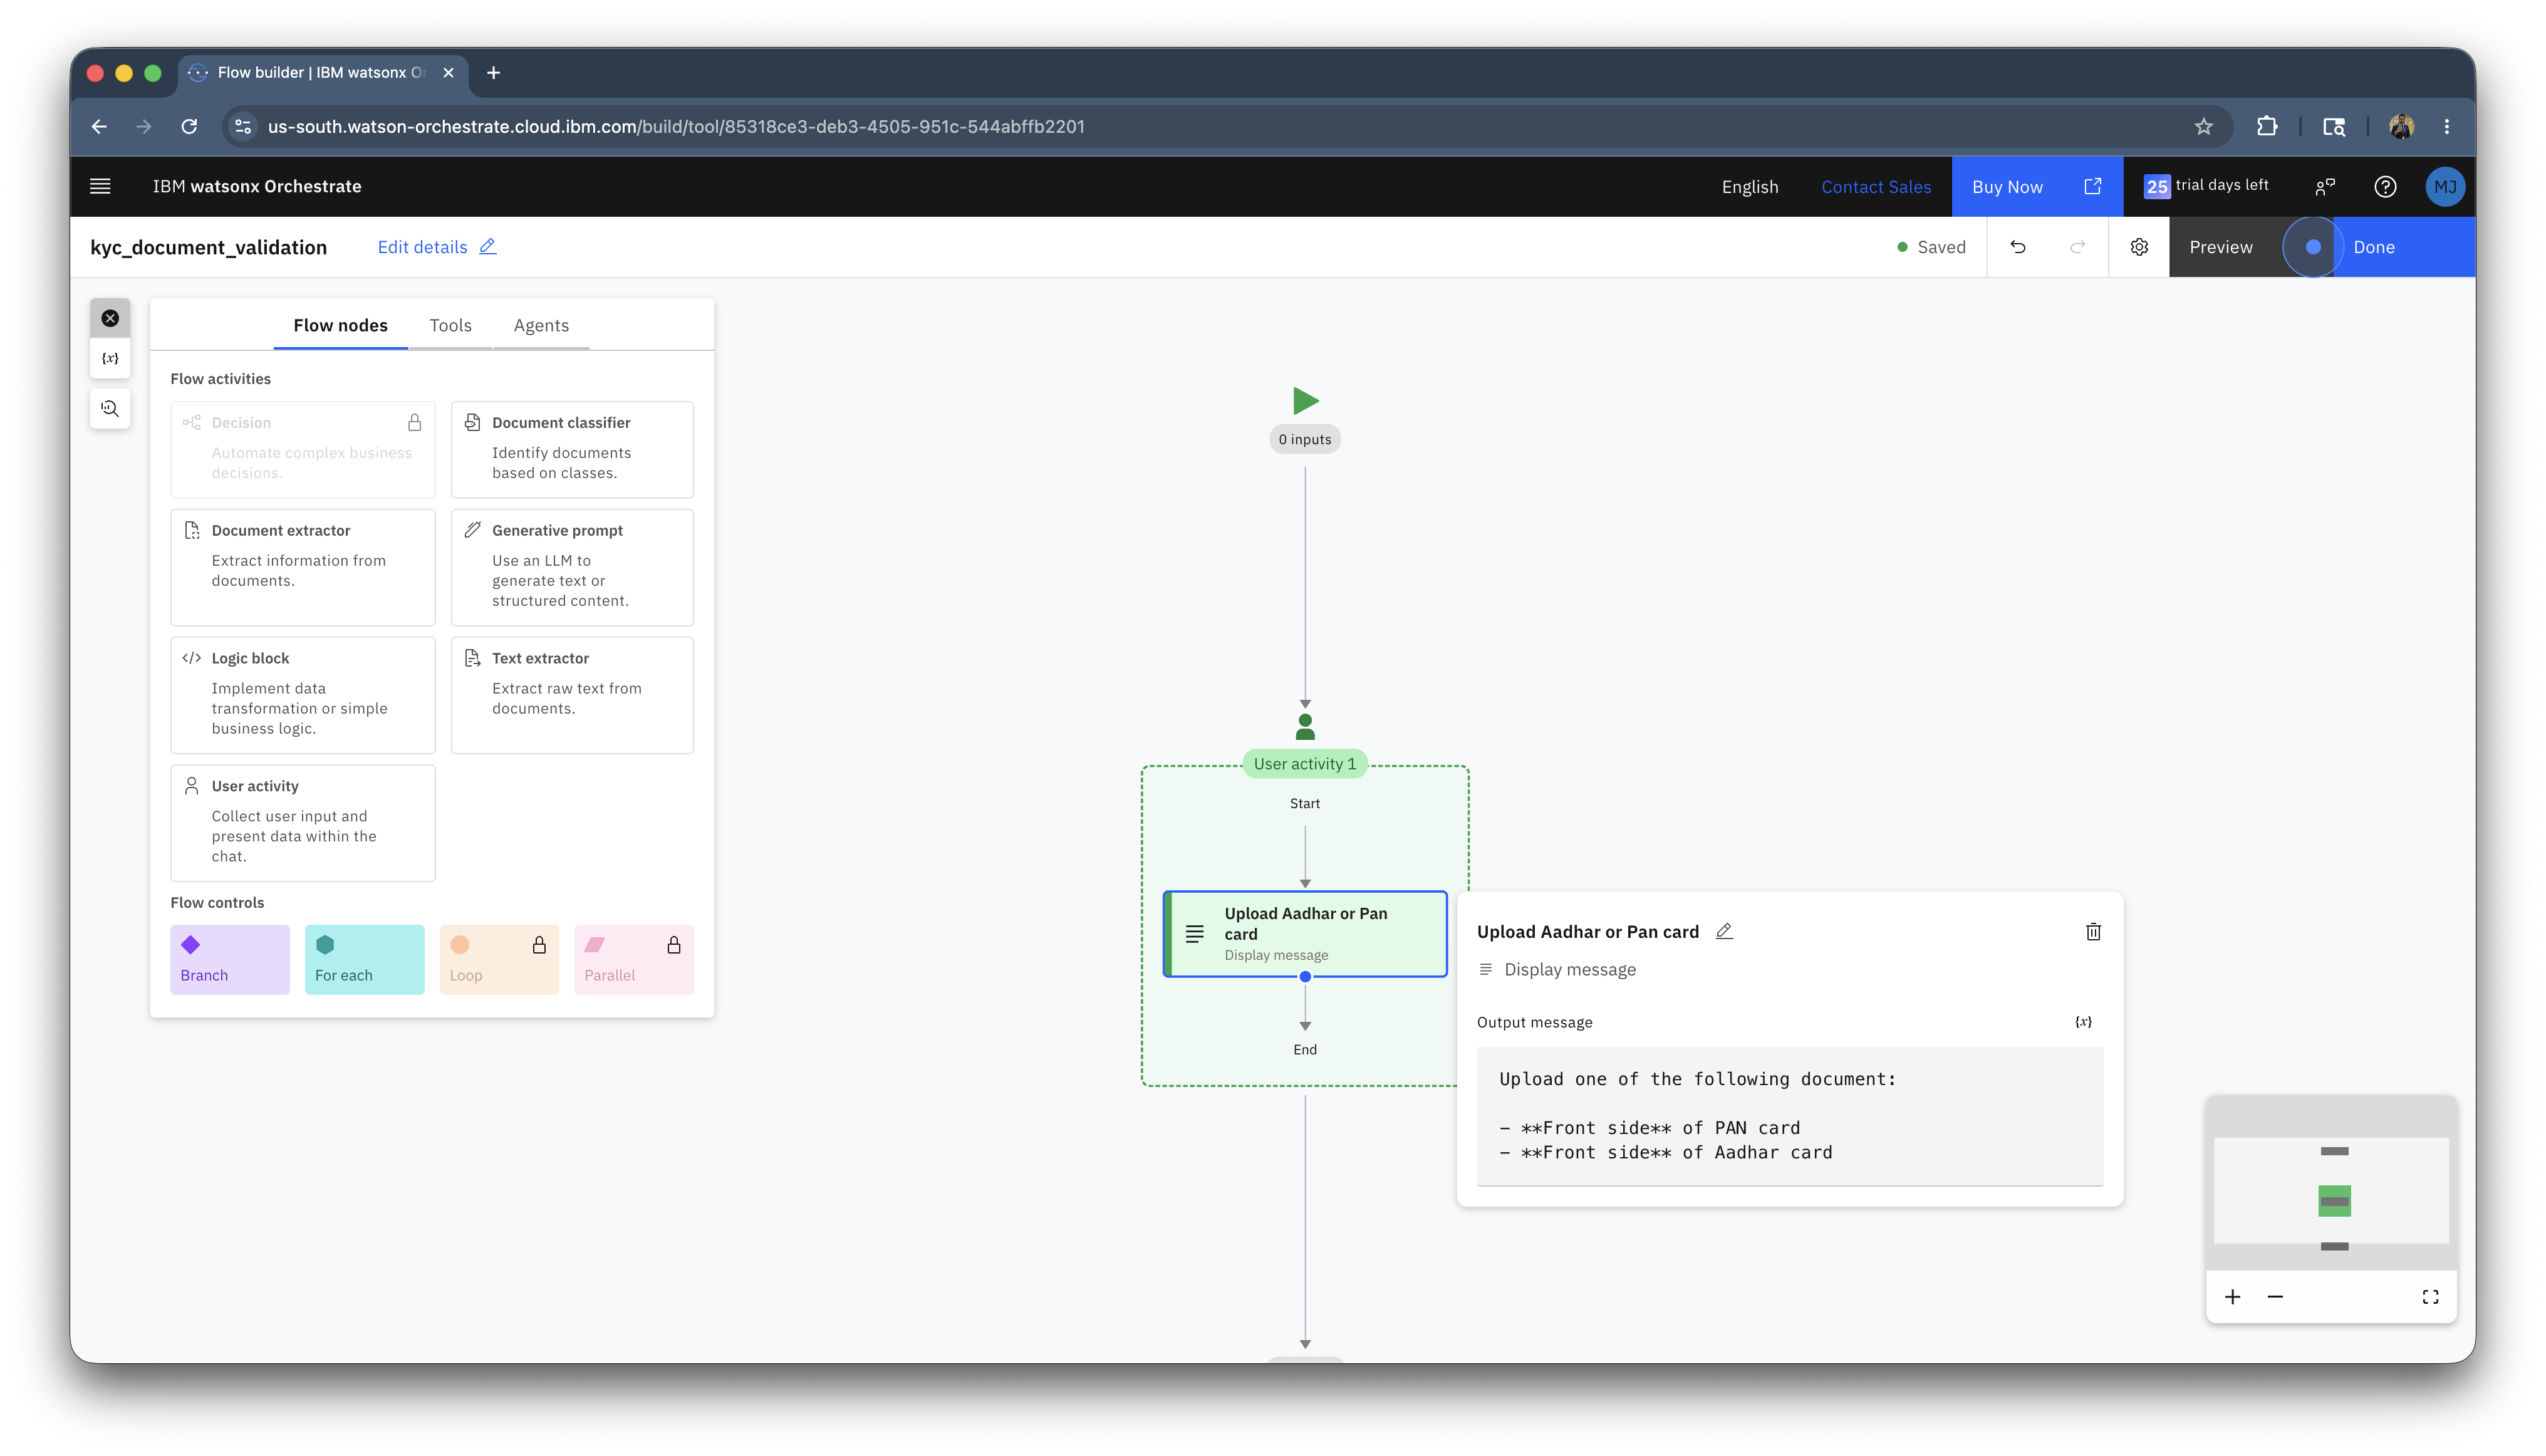
Click on the Add your first step +. Select Present to user > Message.
-
Add the following message:
-
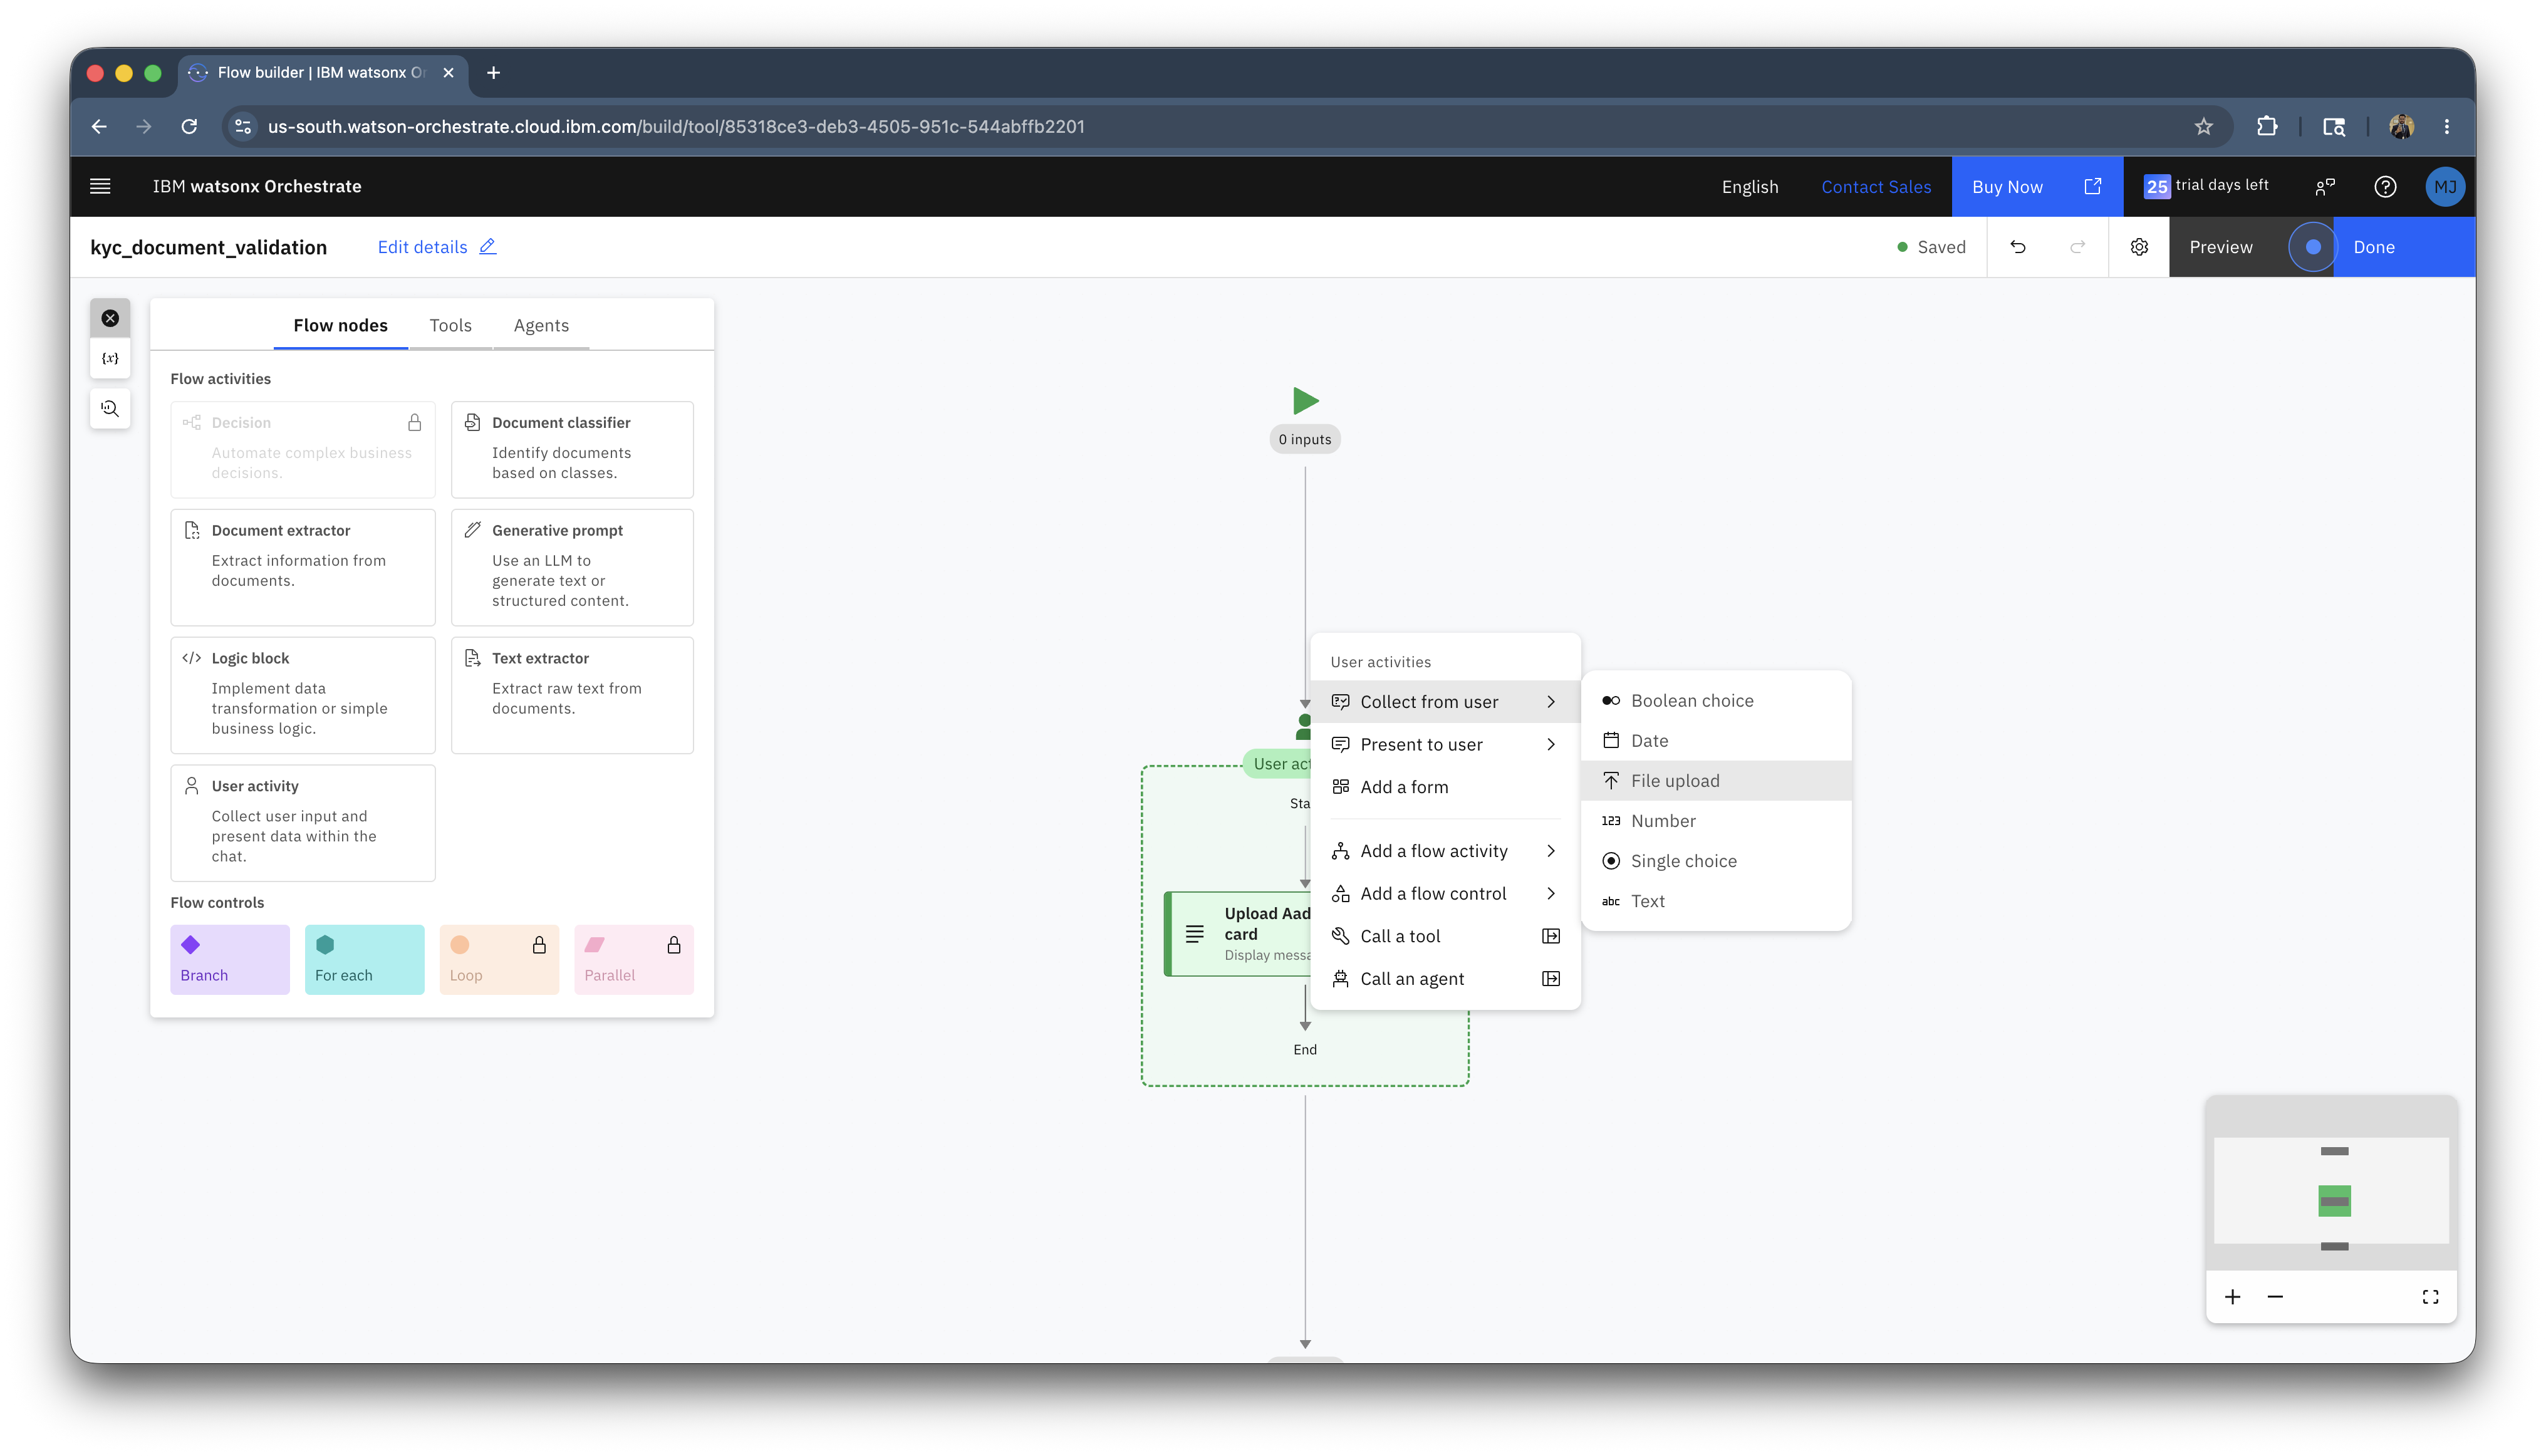
Click on the line below the node inside the green box and select Collect from user > File upload.
-
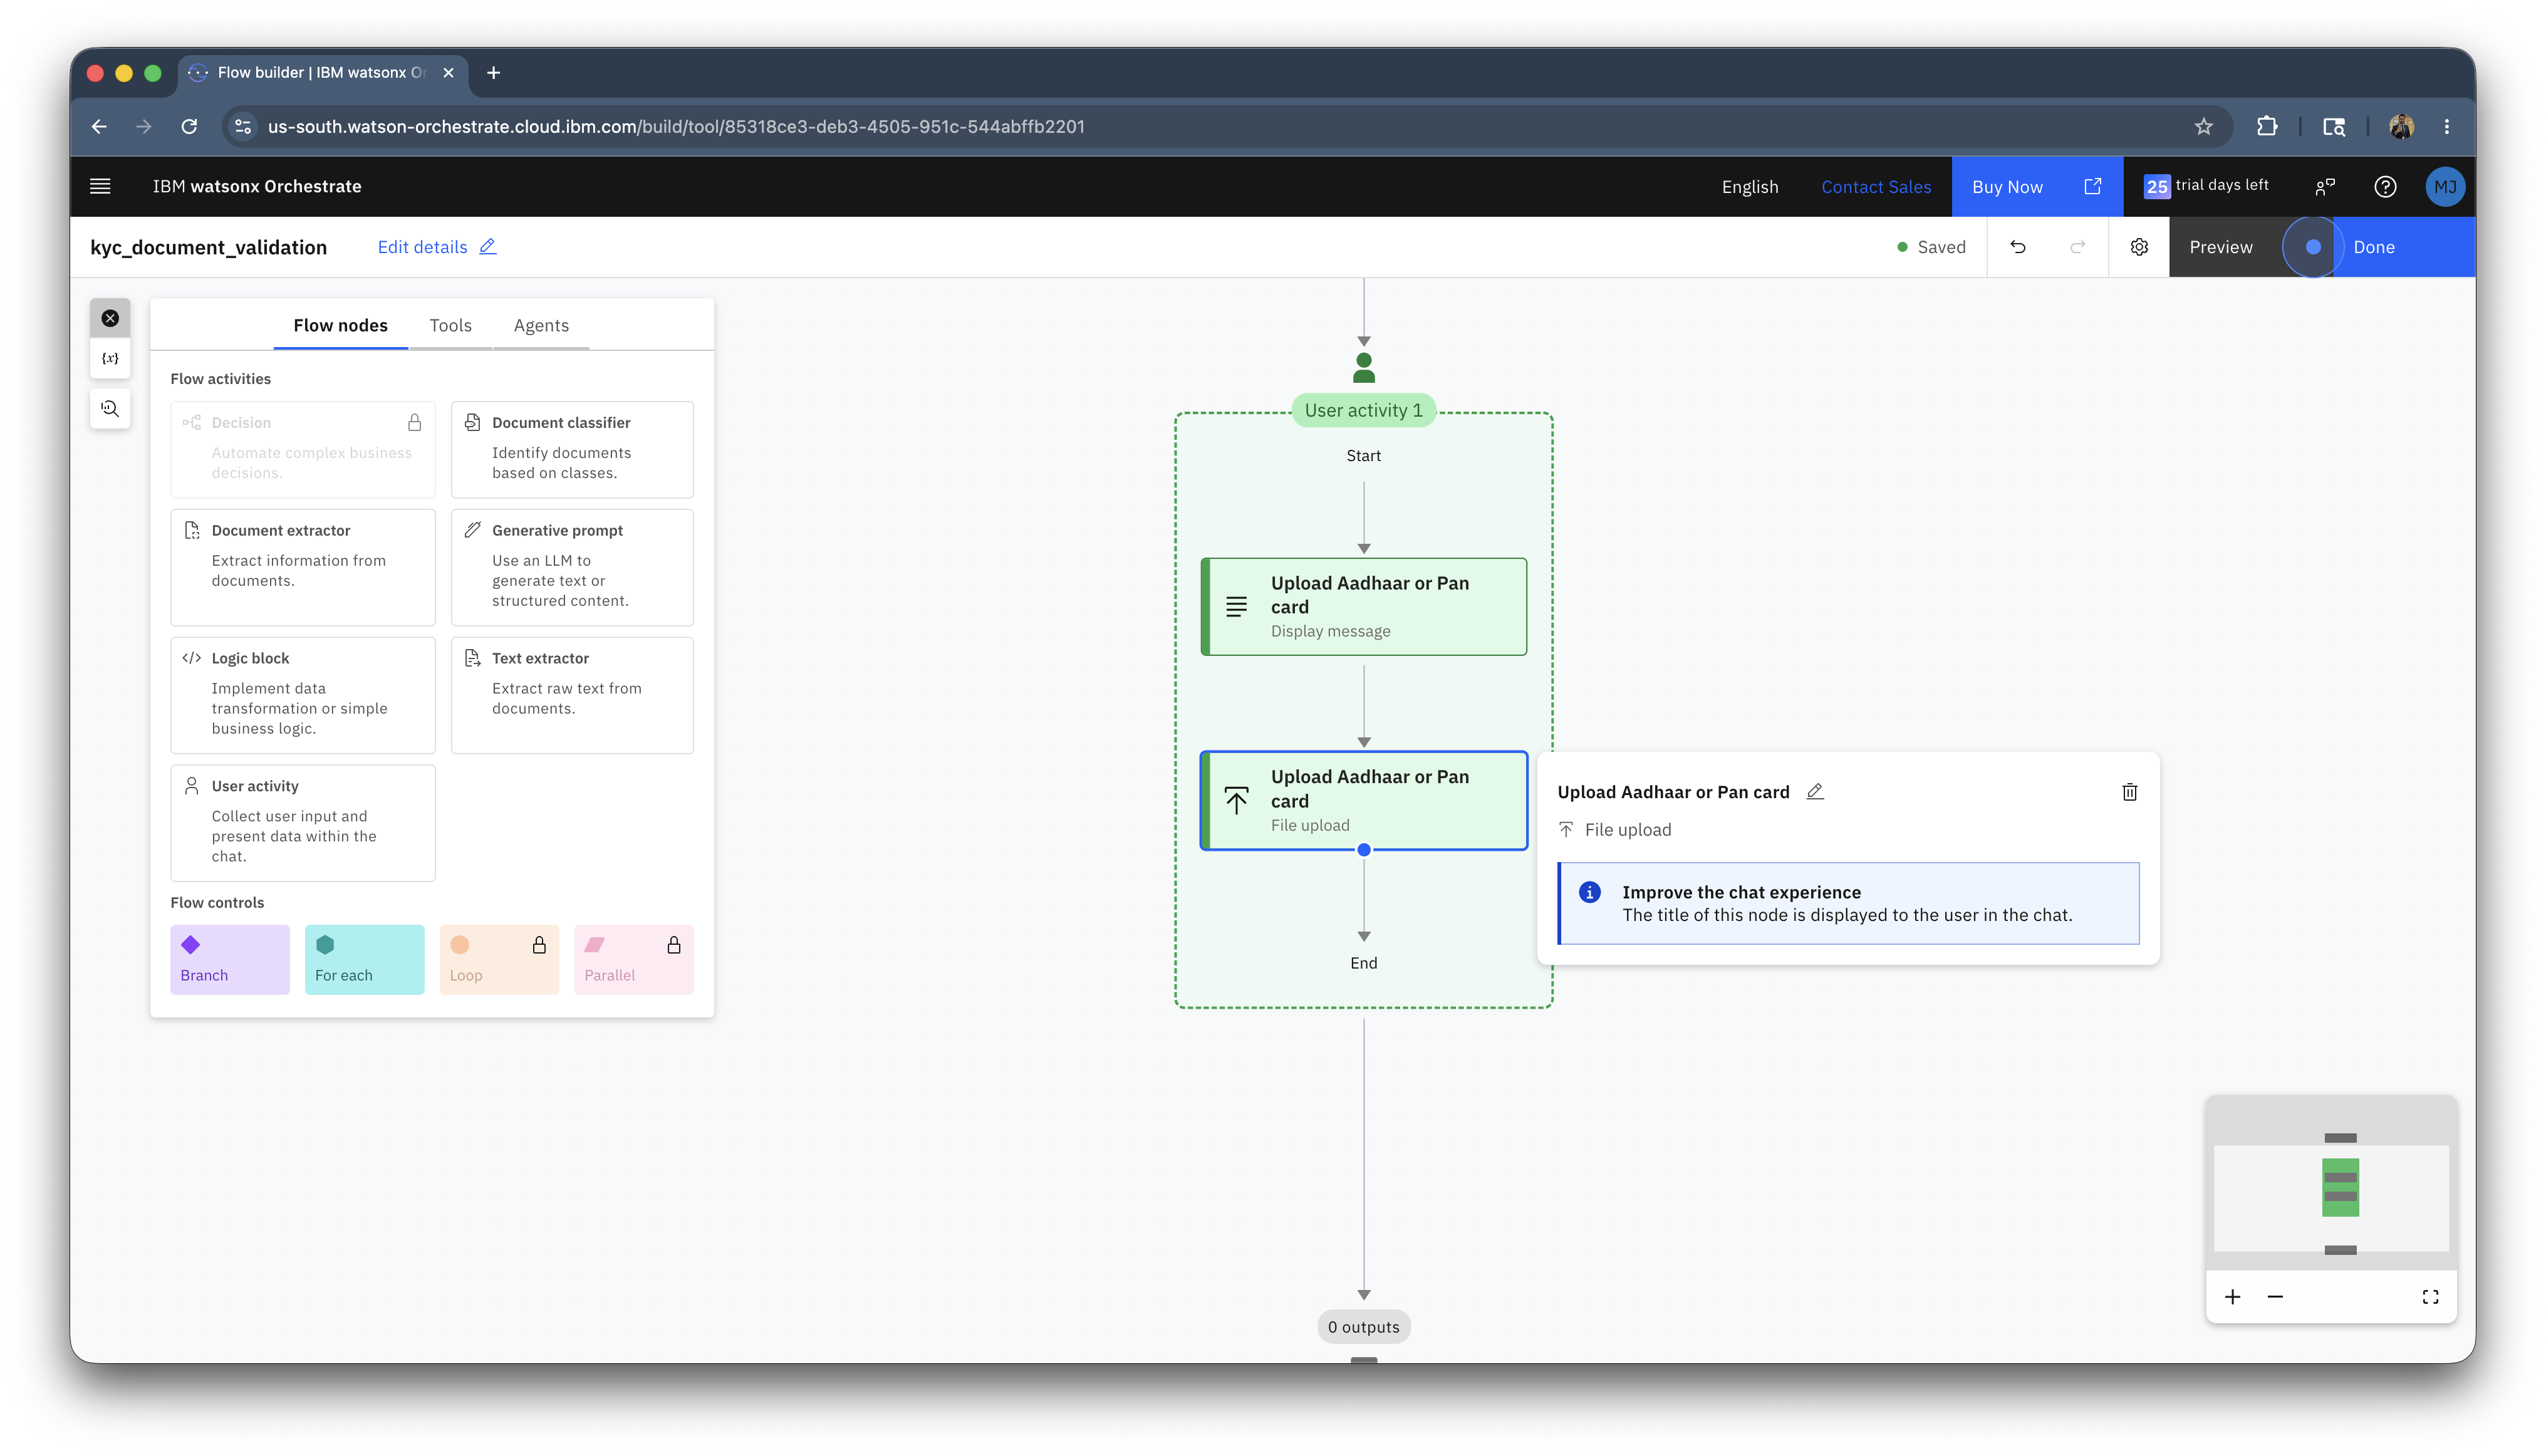
You can rename the node to Upload Aadhaar or Pan card.
-
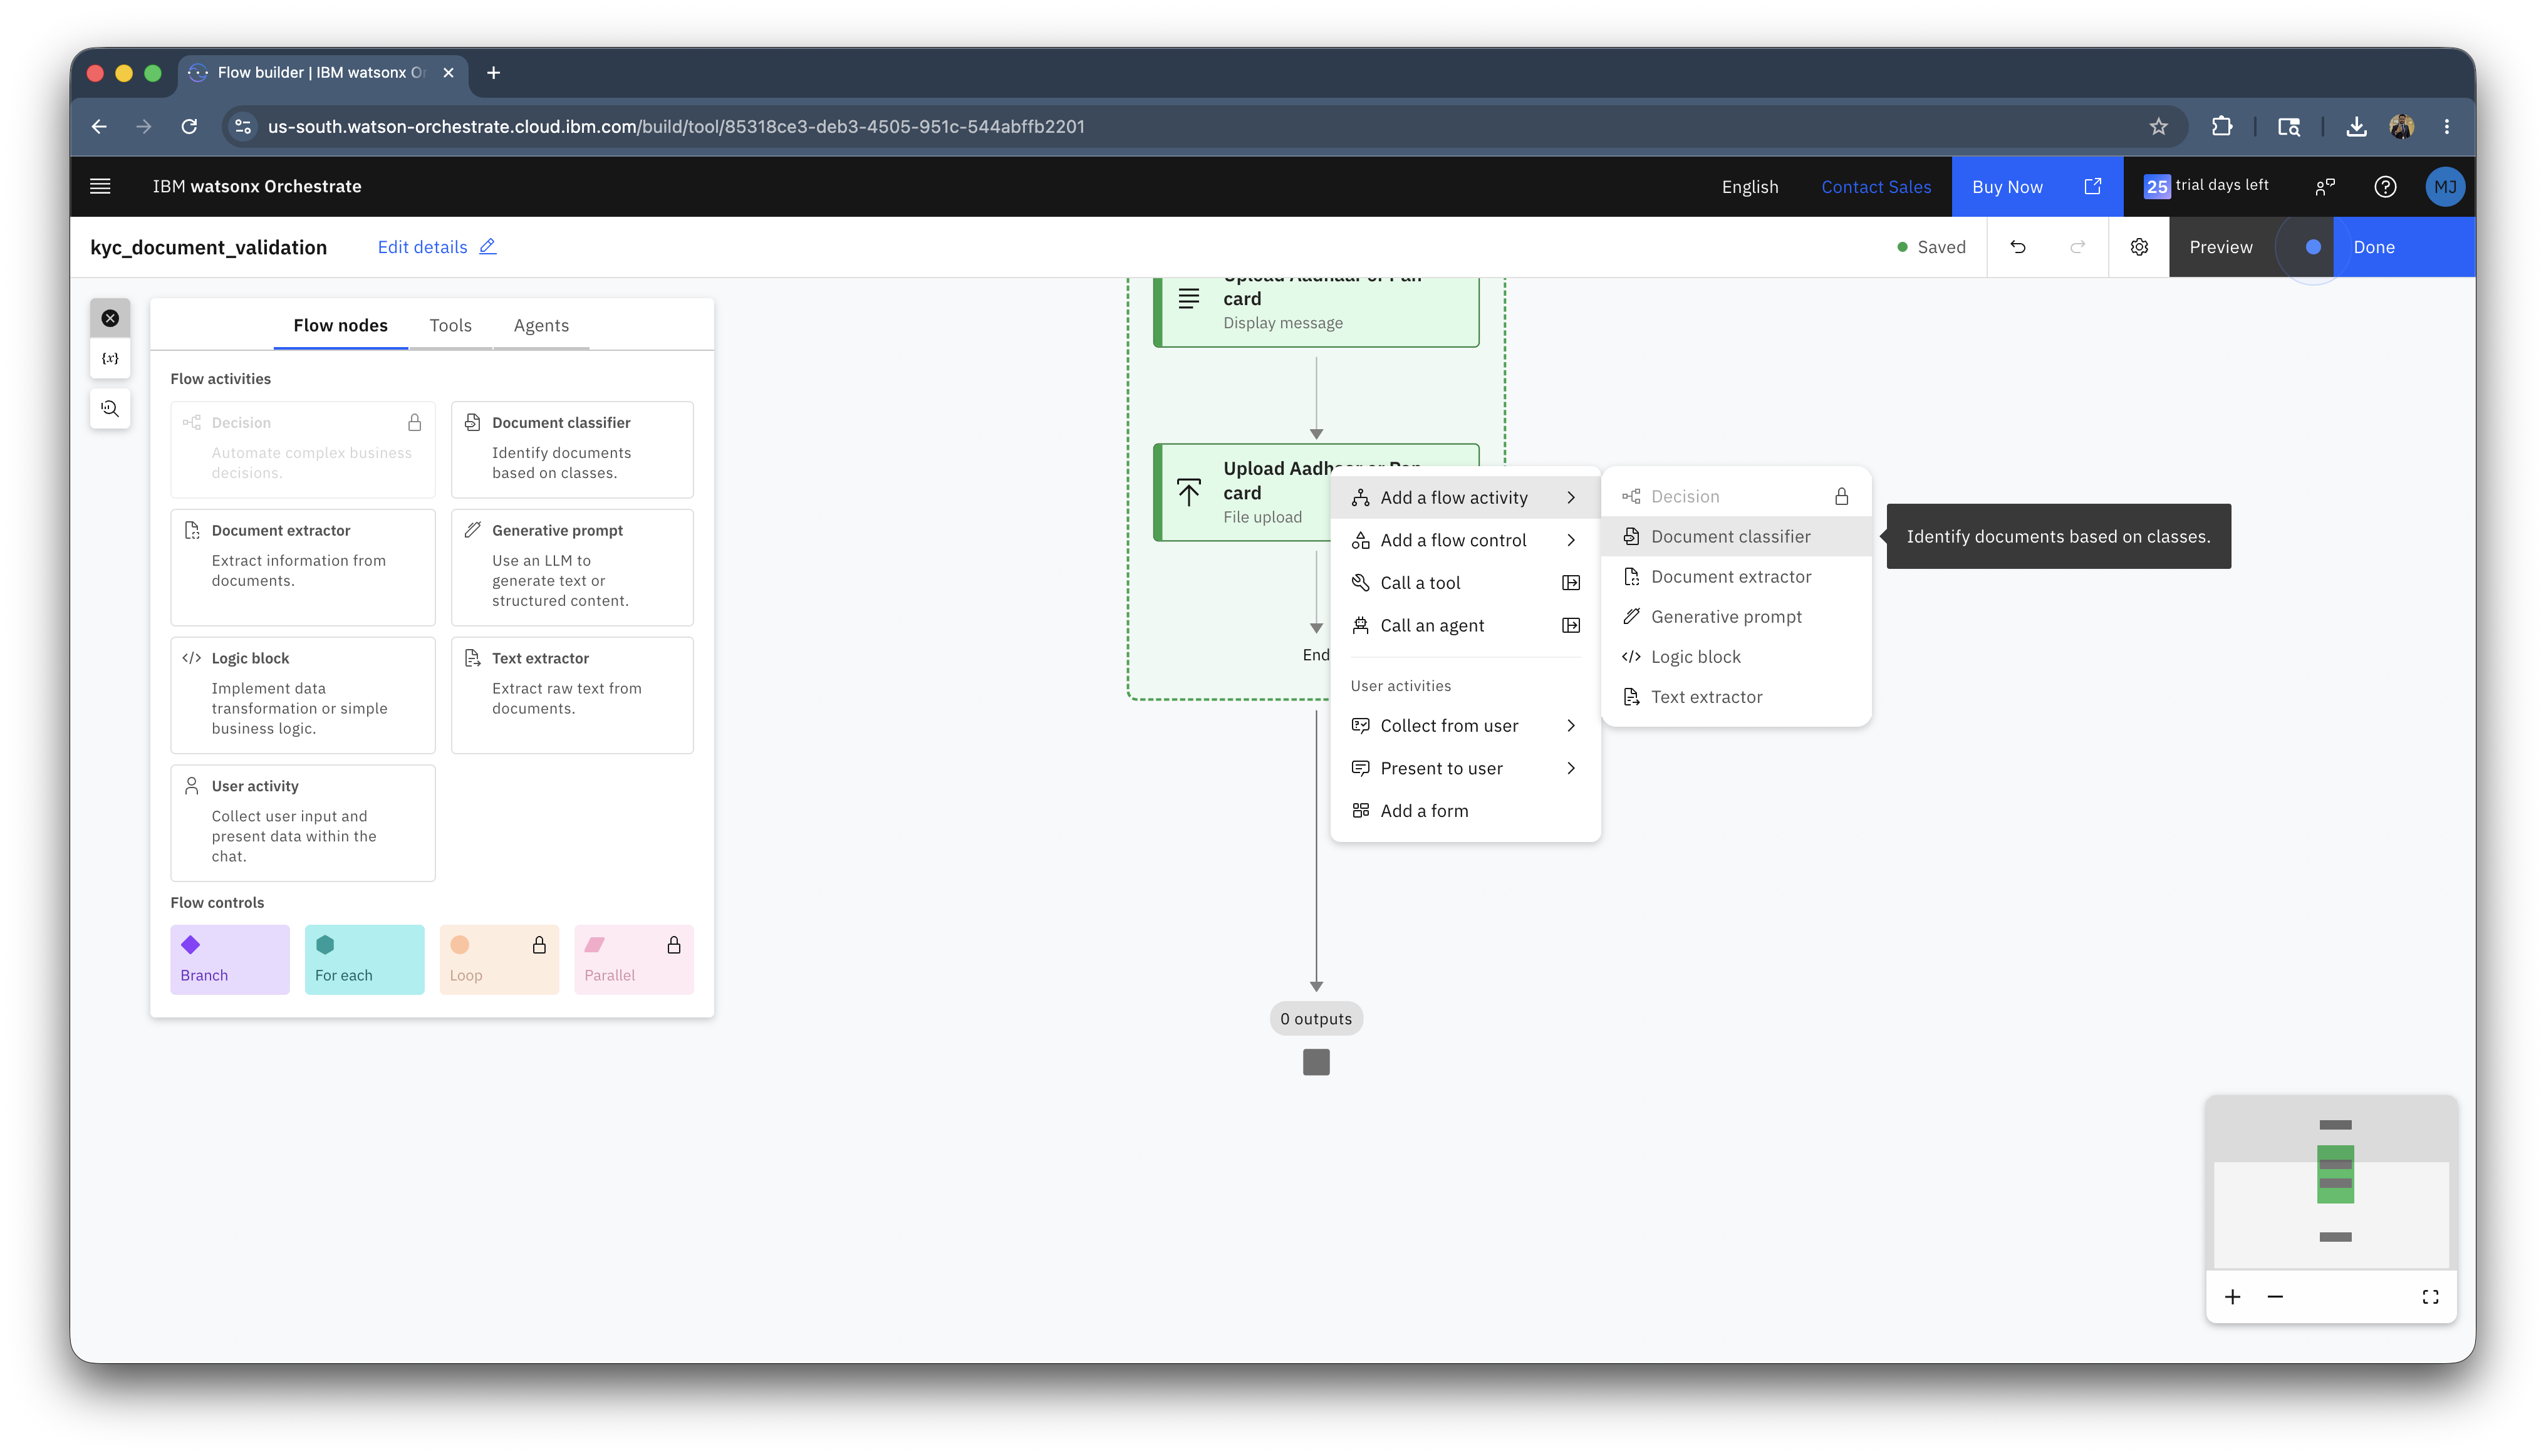
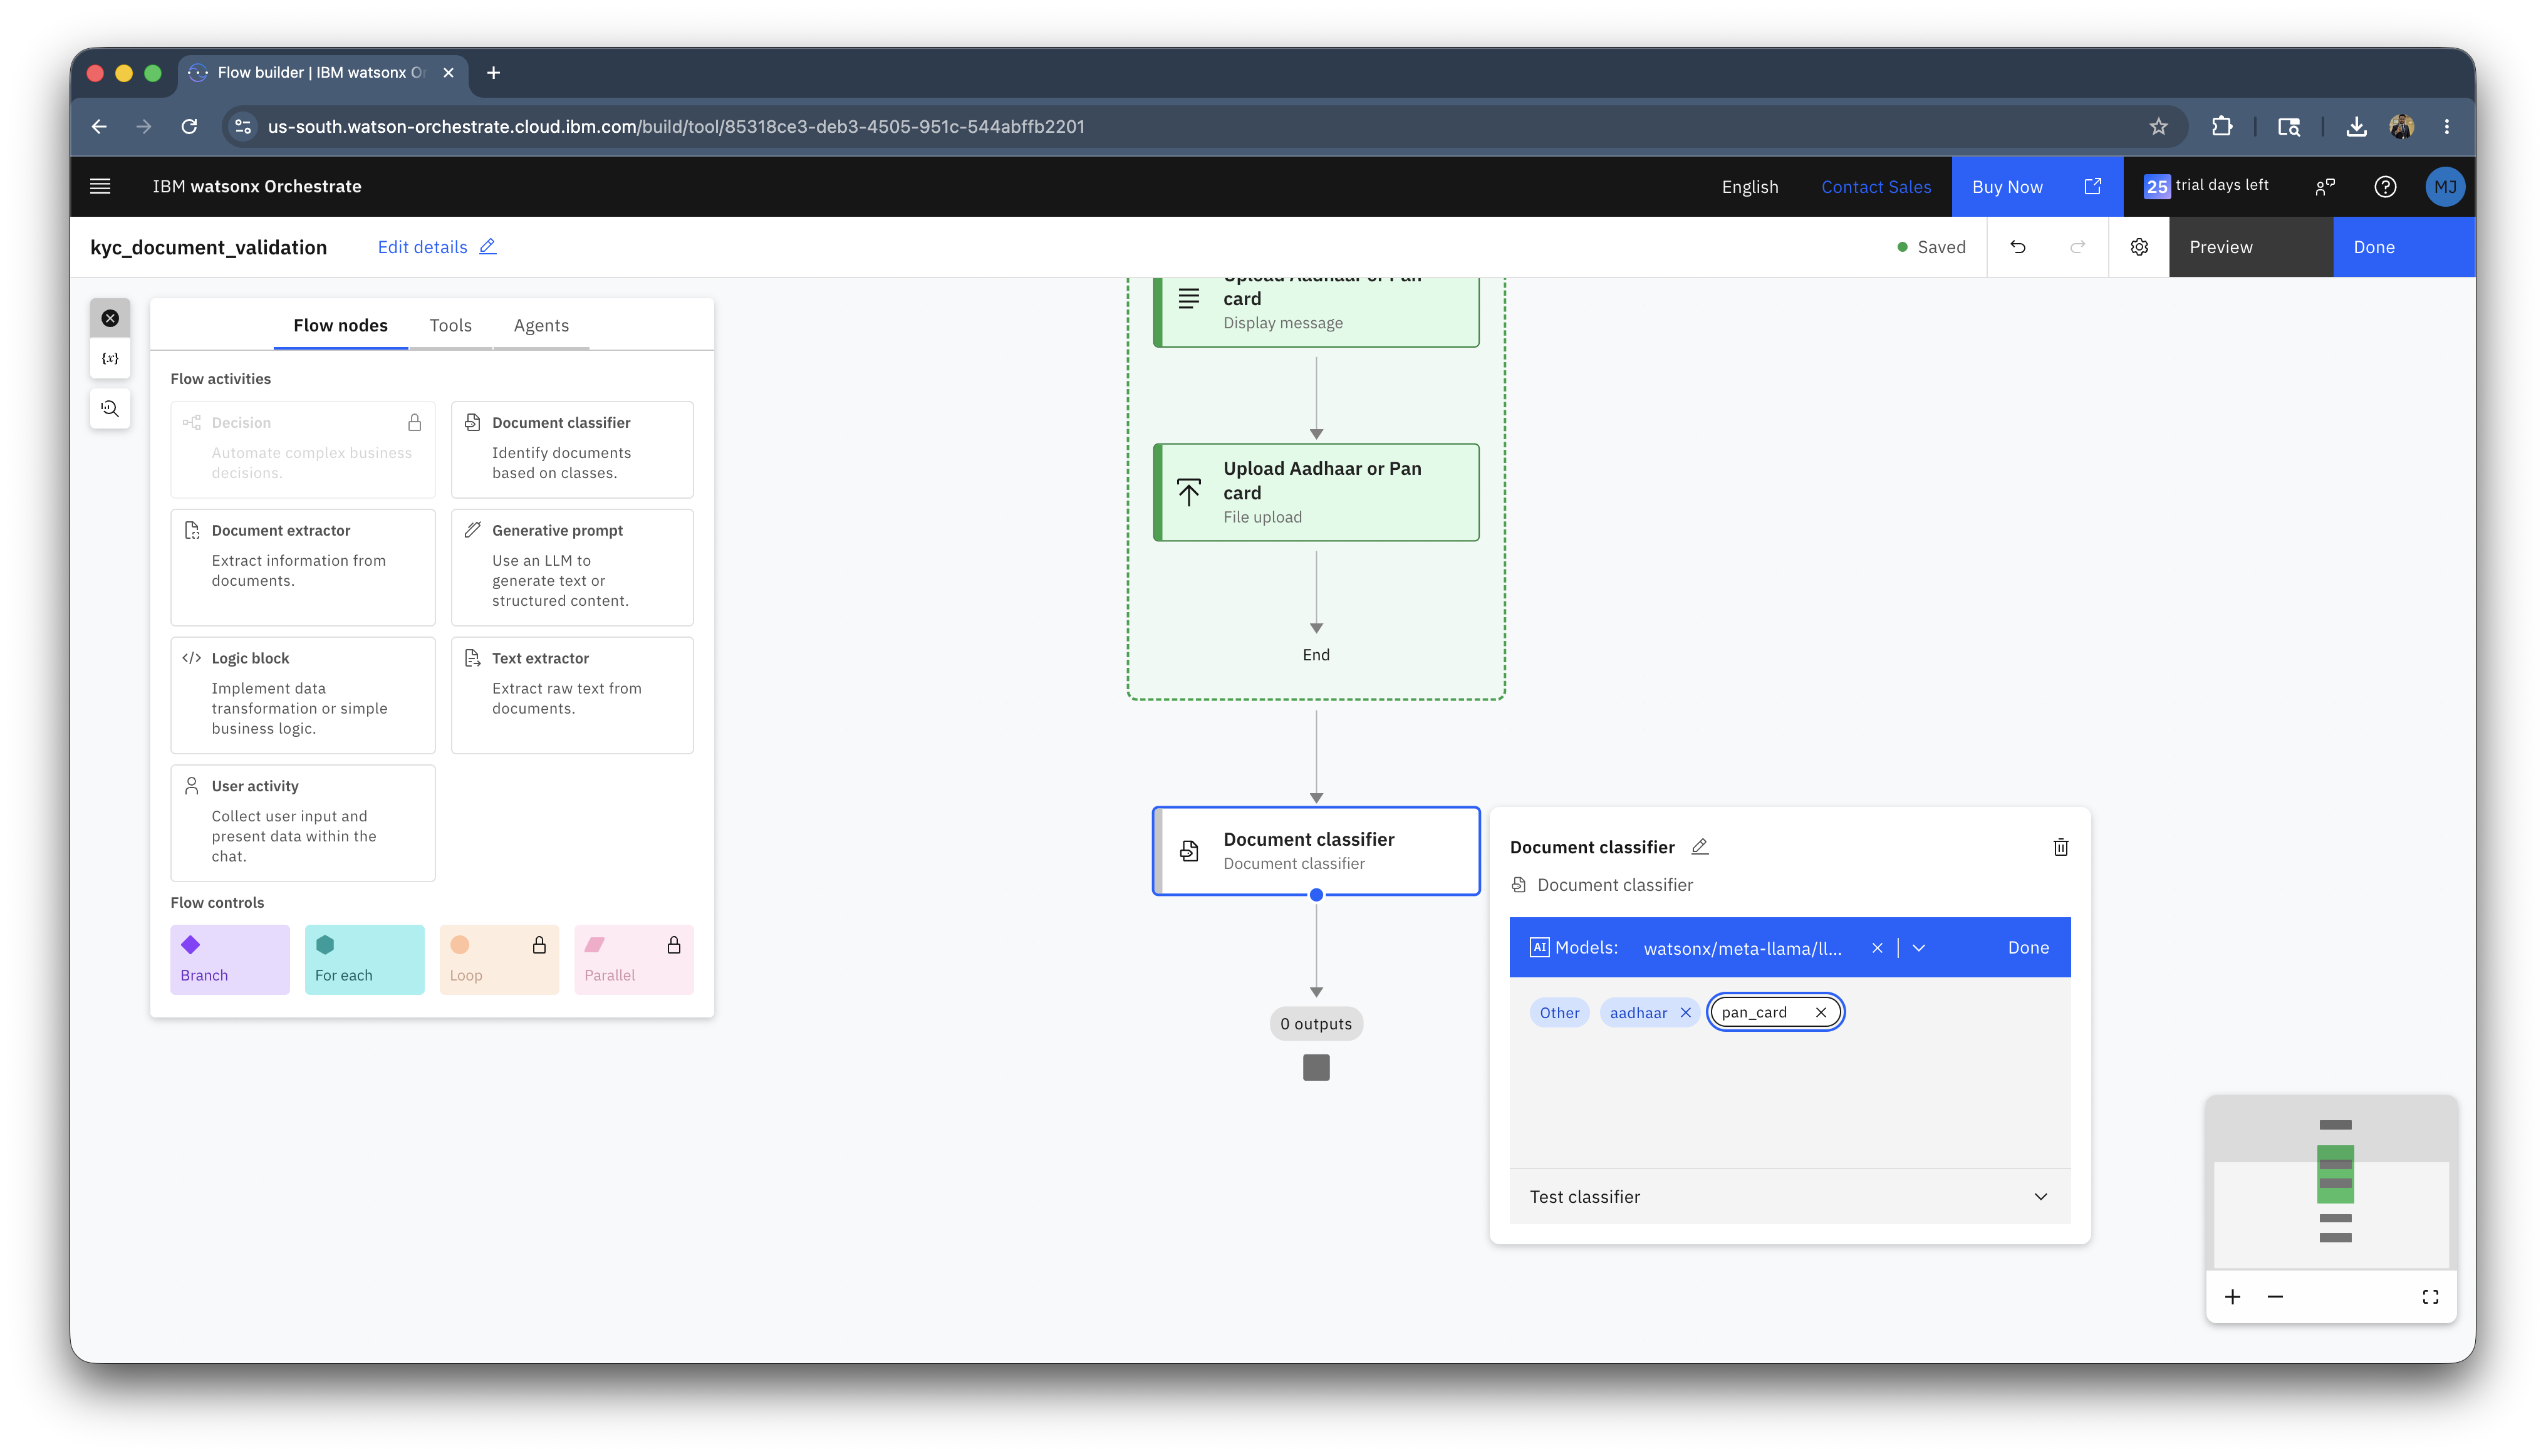
Click on the arrow outside the green box and select Add a flow activity > Document Classifier.
-
Add two classes aadhaar and pan_card and hit enter.
-
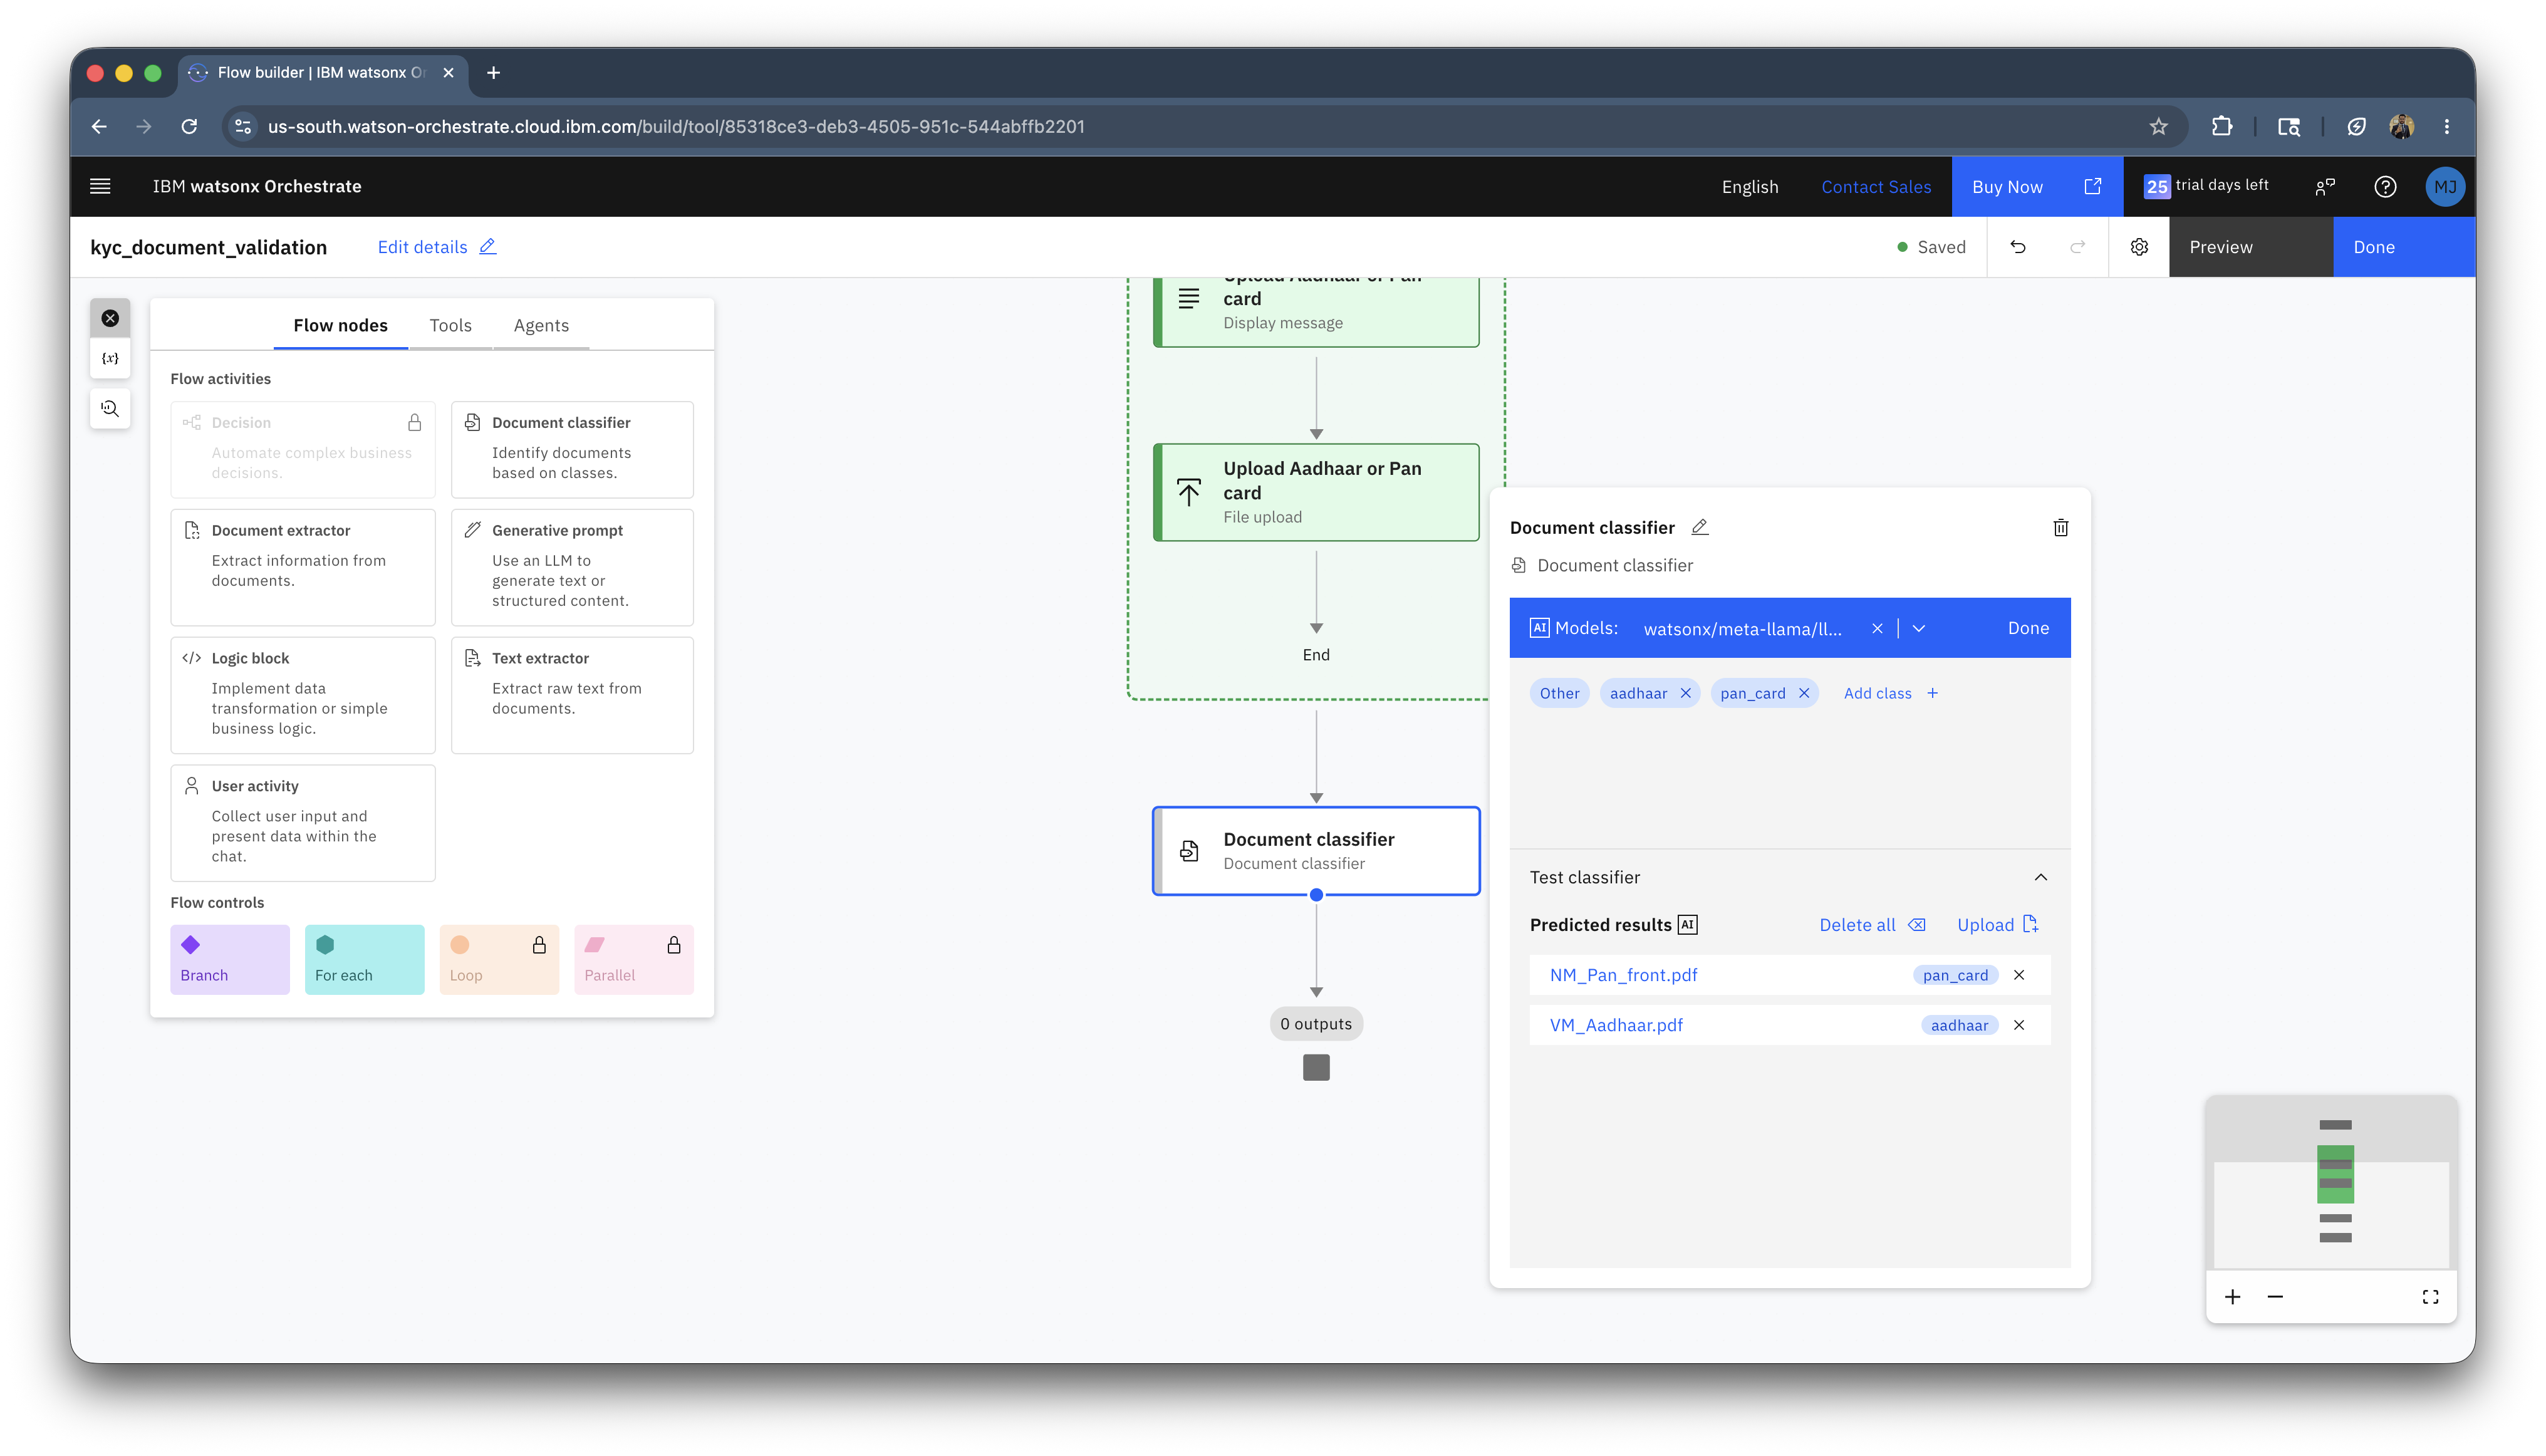
Click on Test classifier, and upload the two documents from the downloaded folder. And you should see the classifier correctly classifying the documents. Click on Done.
-
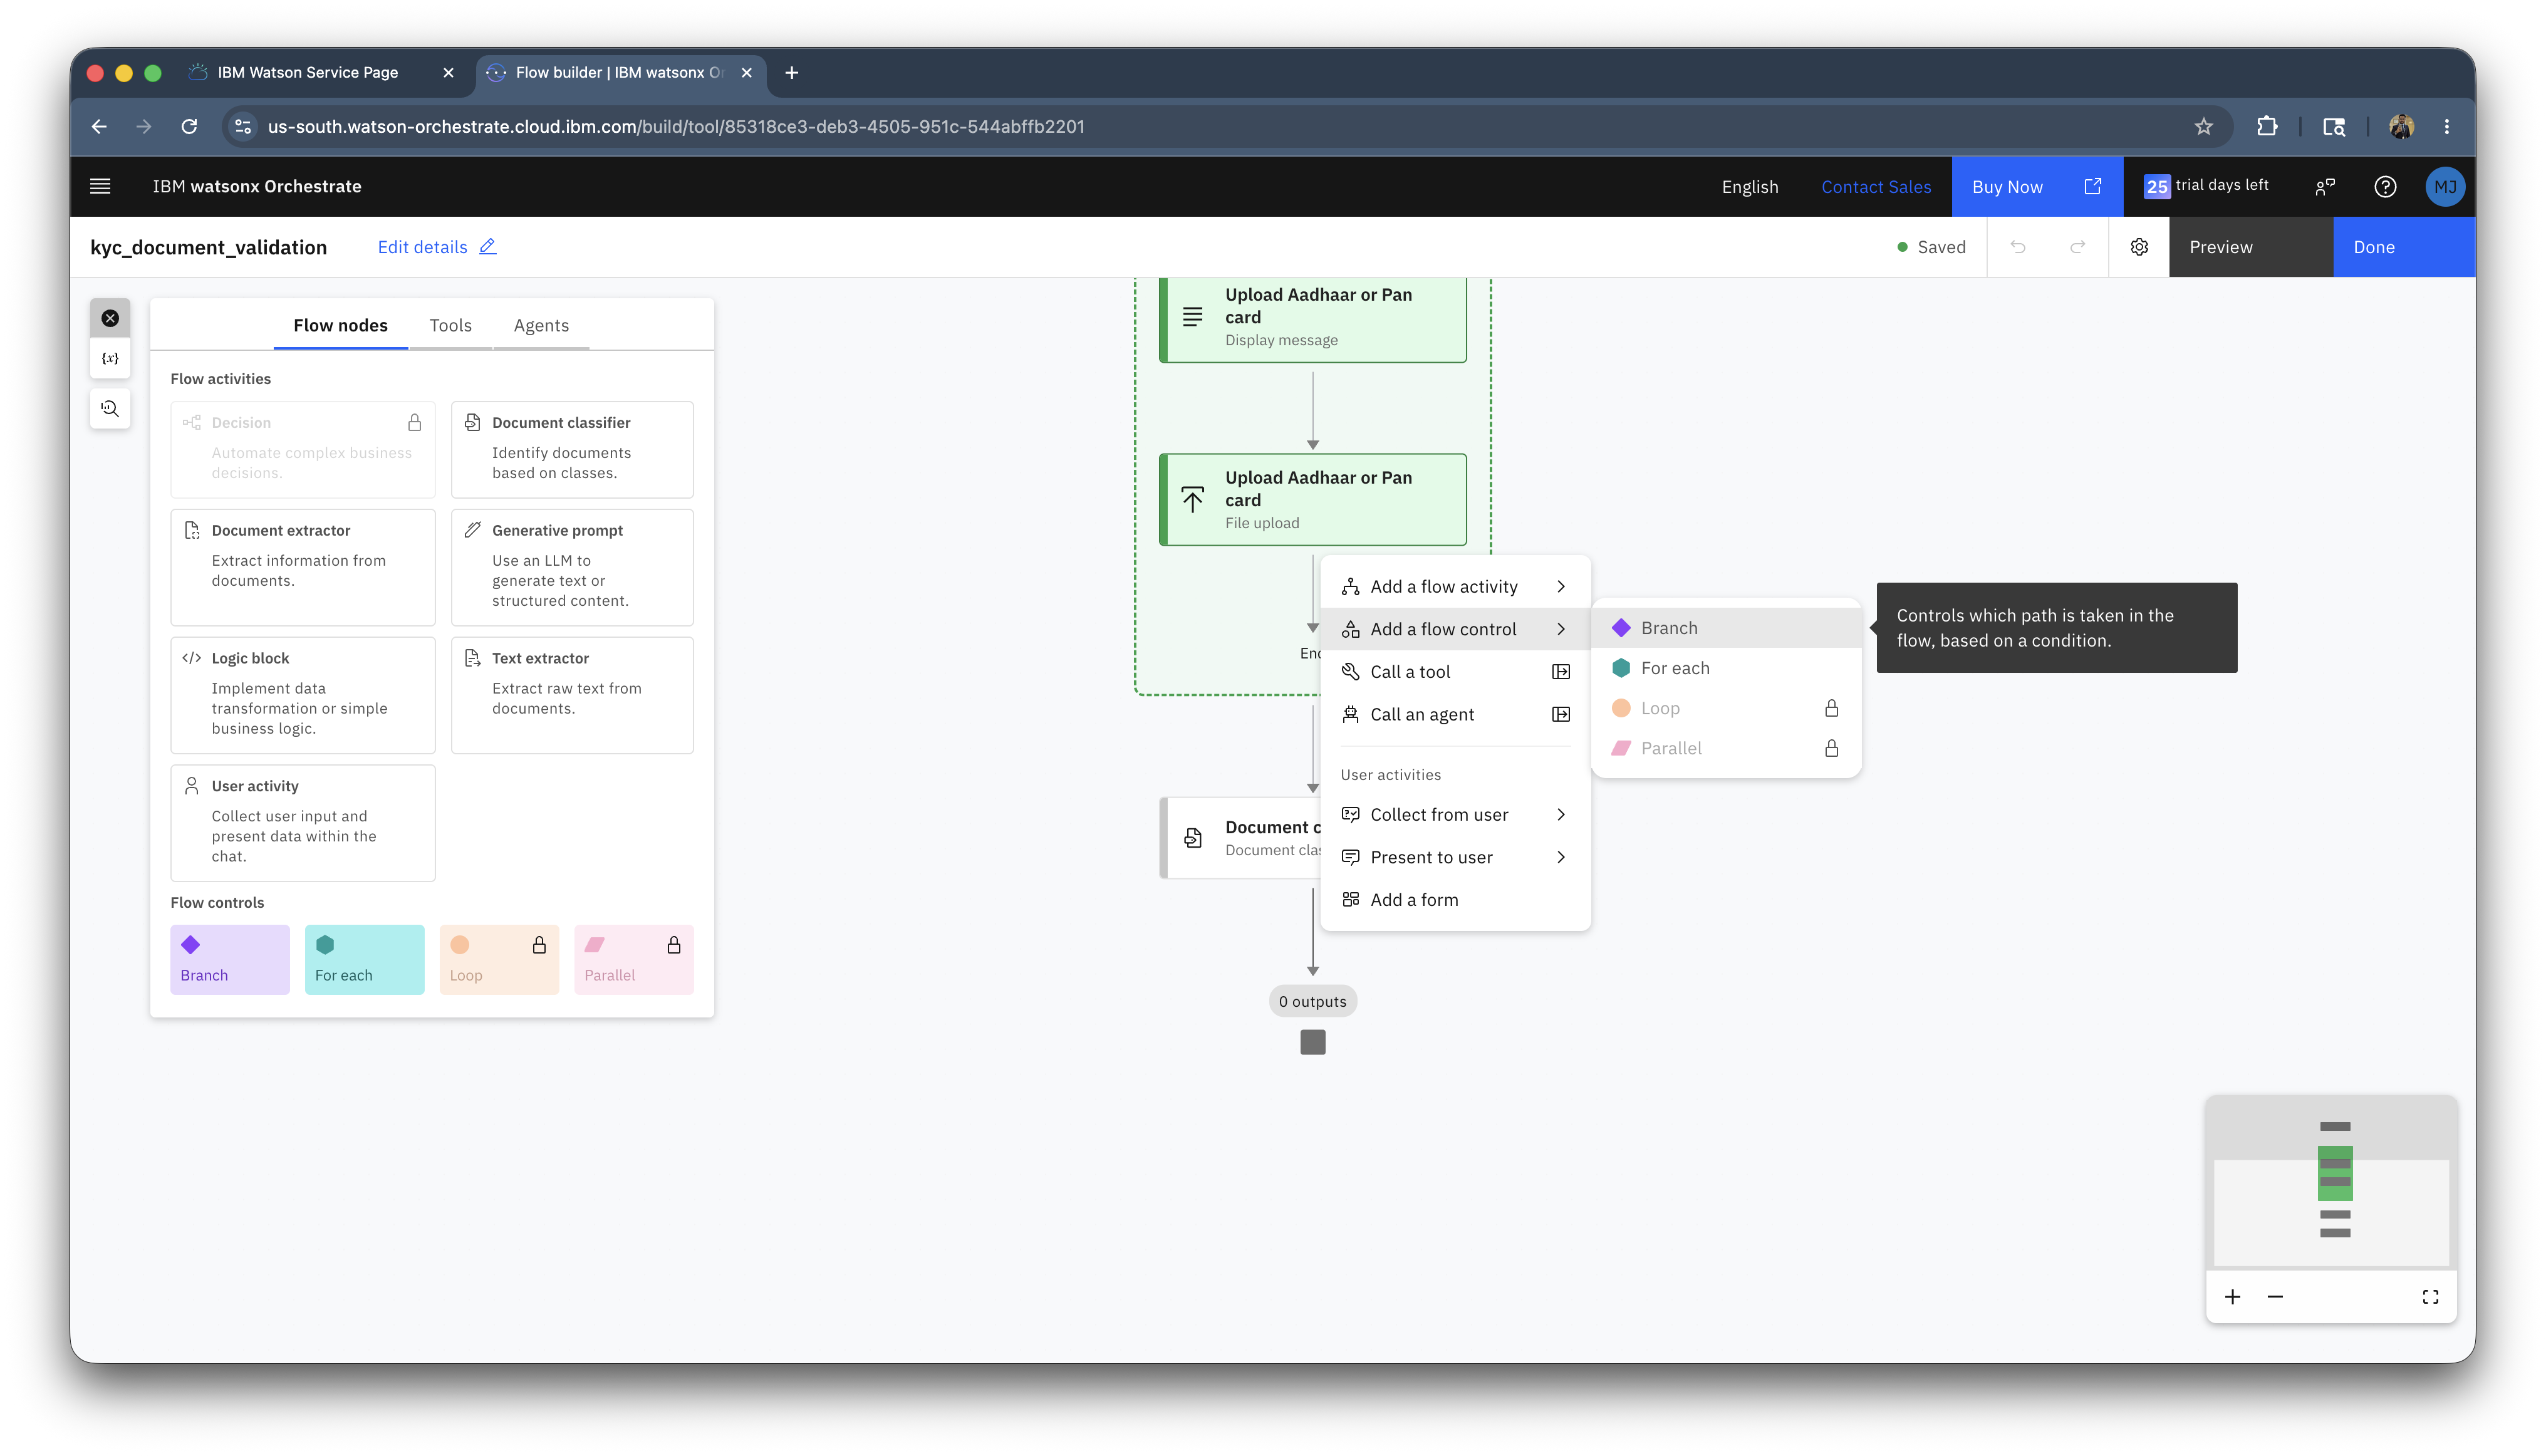
Click on the arrow below the classifier, and select Add a flow control > Branch.
-
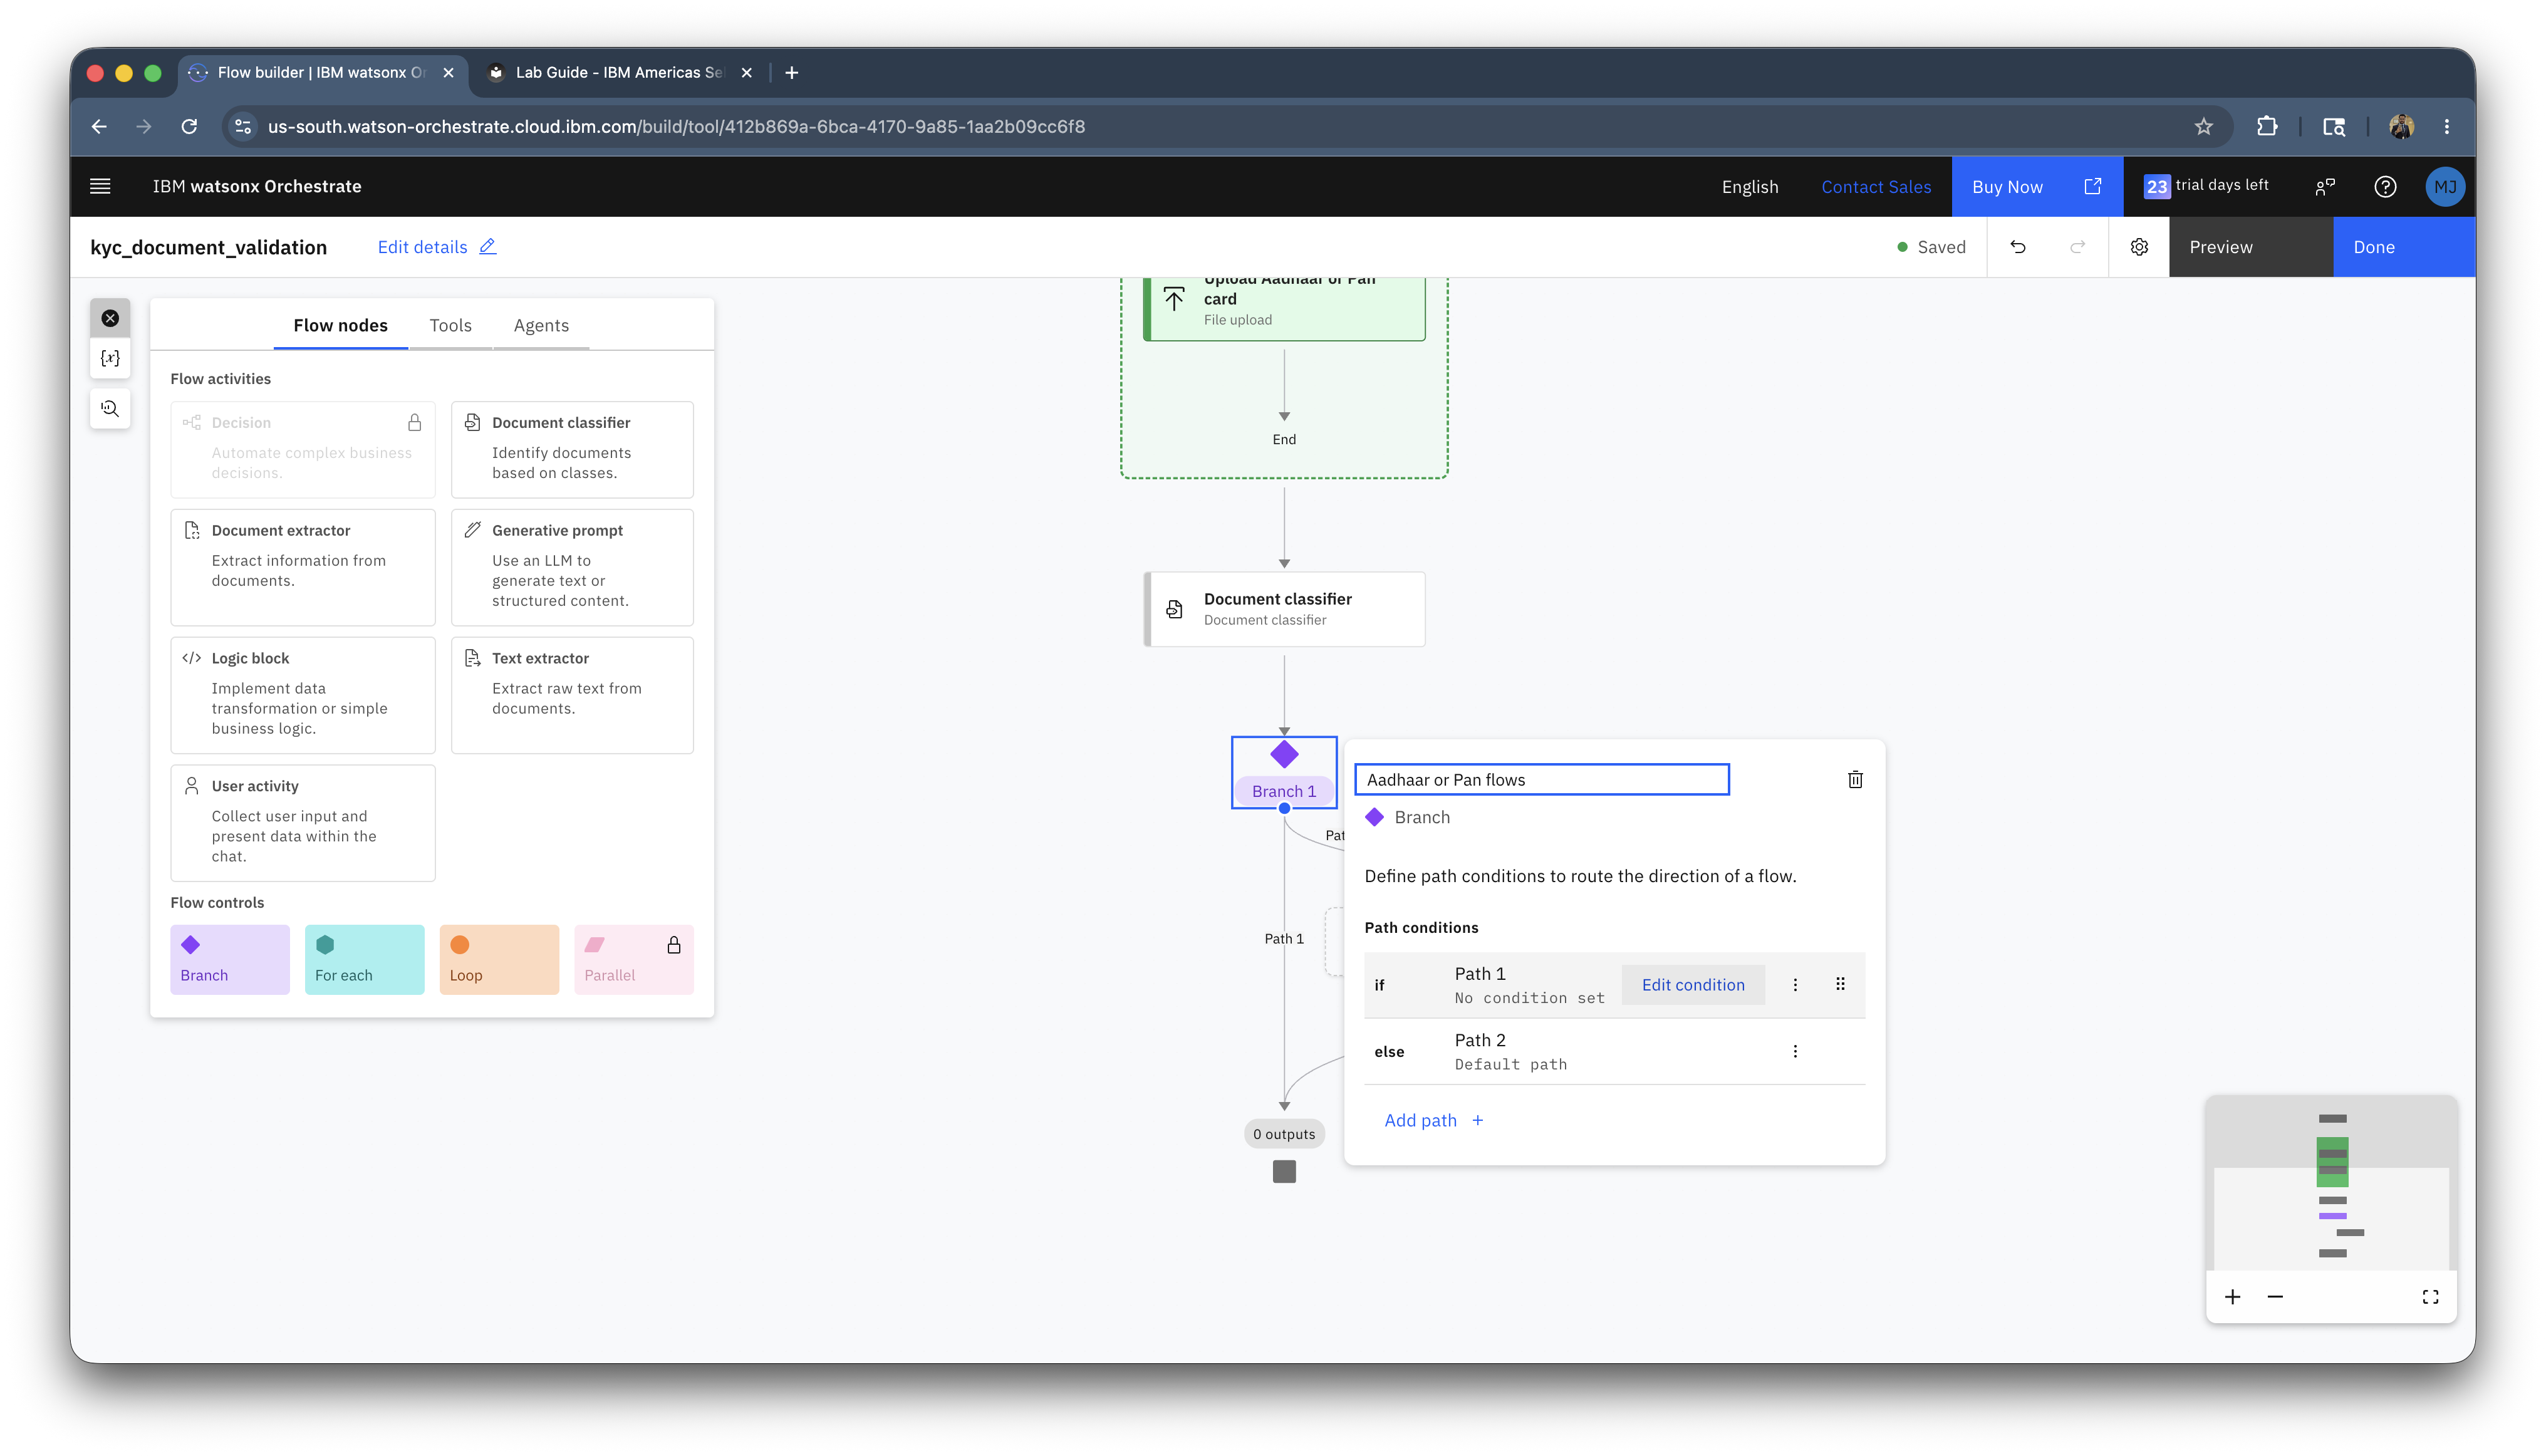
Click on the branch and rename it to Aadhaar or Pan flows.
-
Click on the Edit condition in path 1 and select the condition as
if class_name == pan_card. And click on button.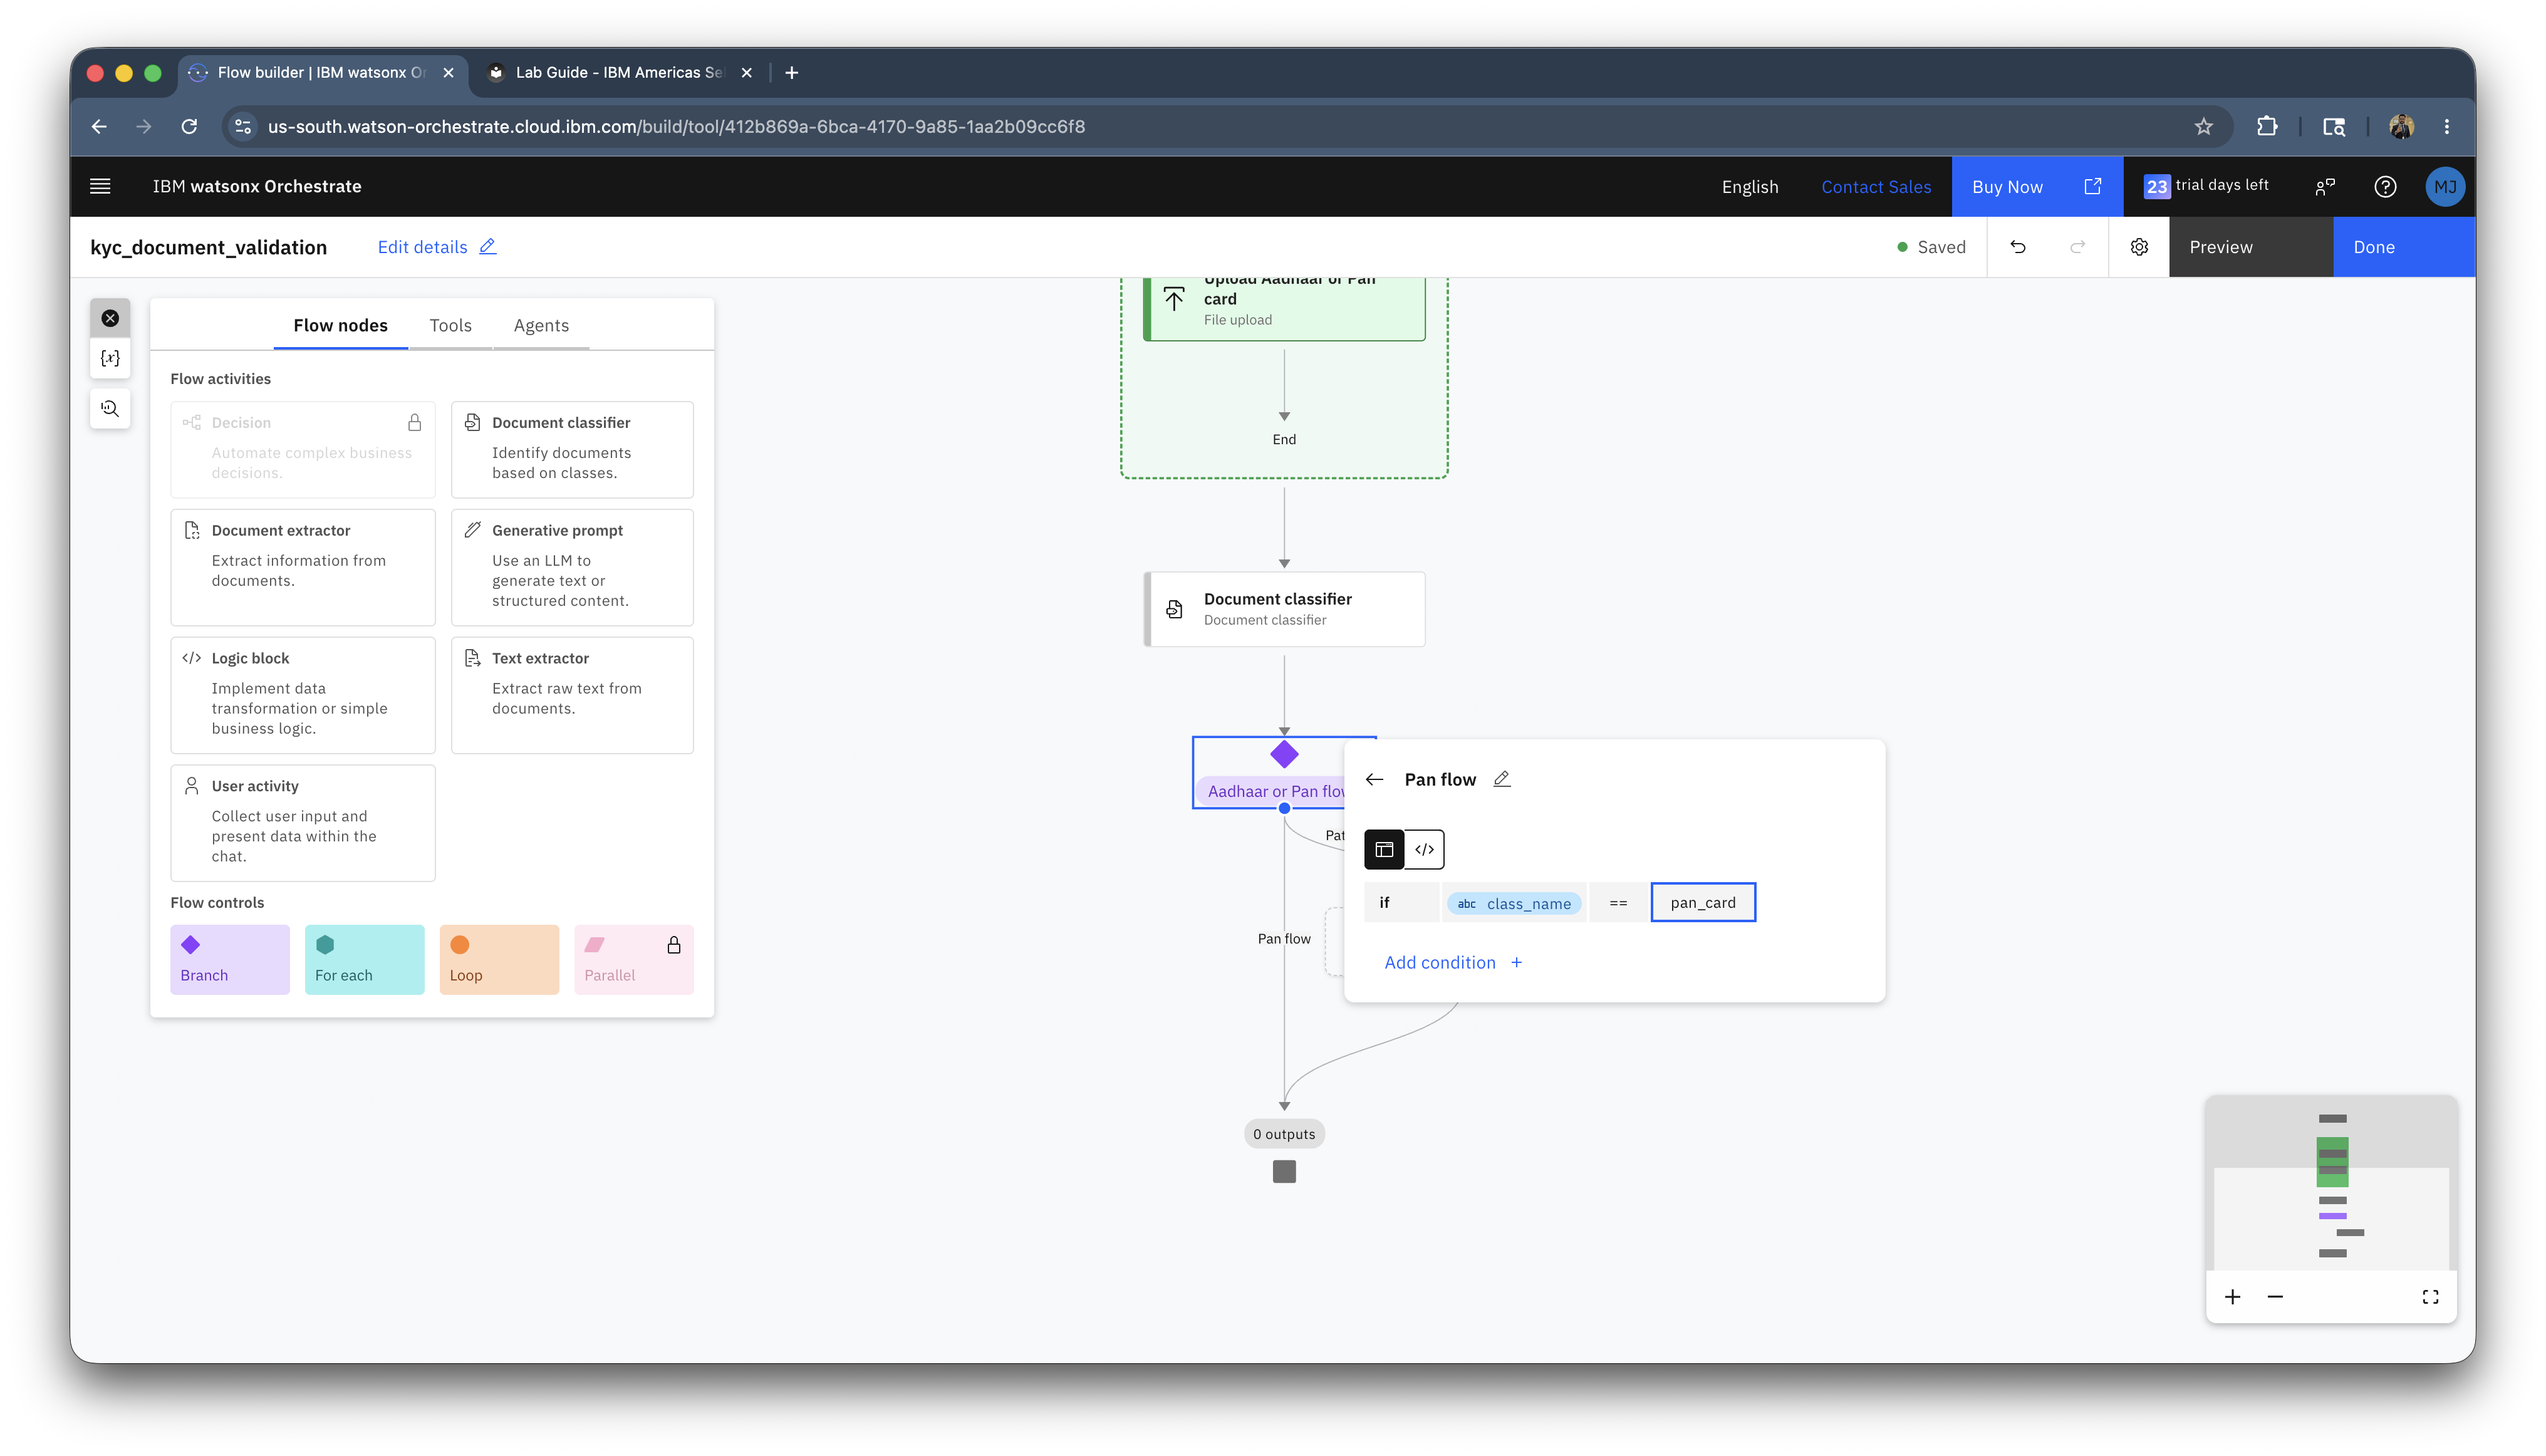
Note:
class_namecan be found under Document classifier node. -
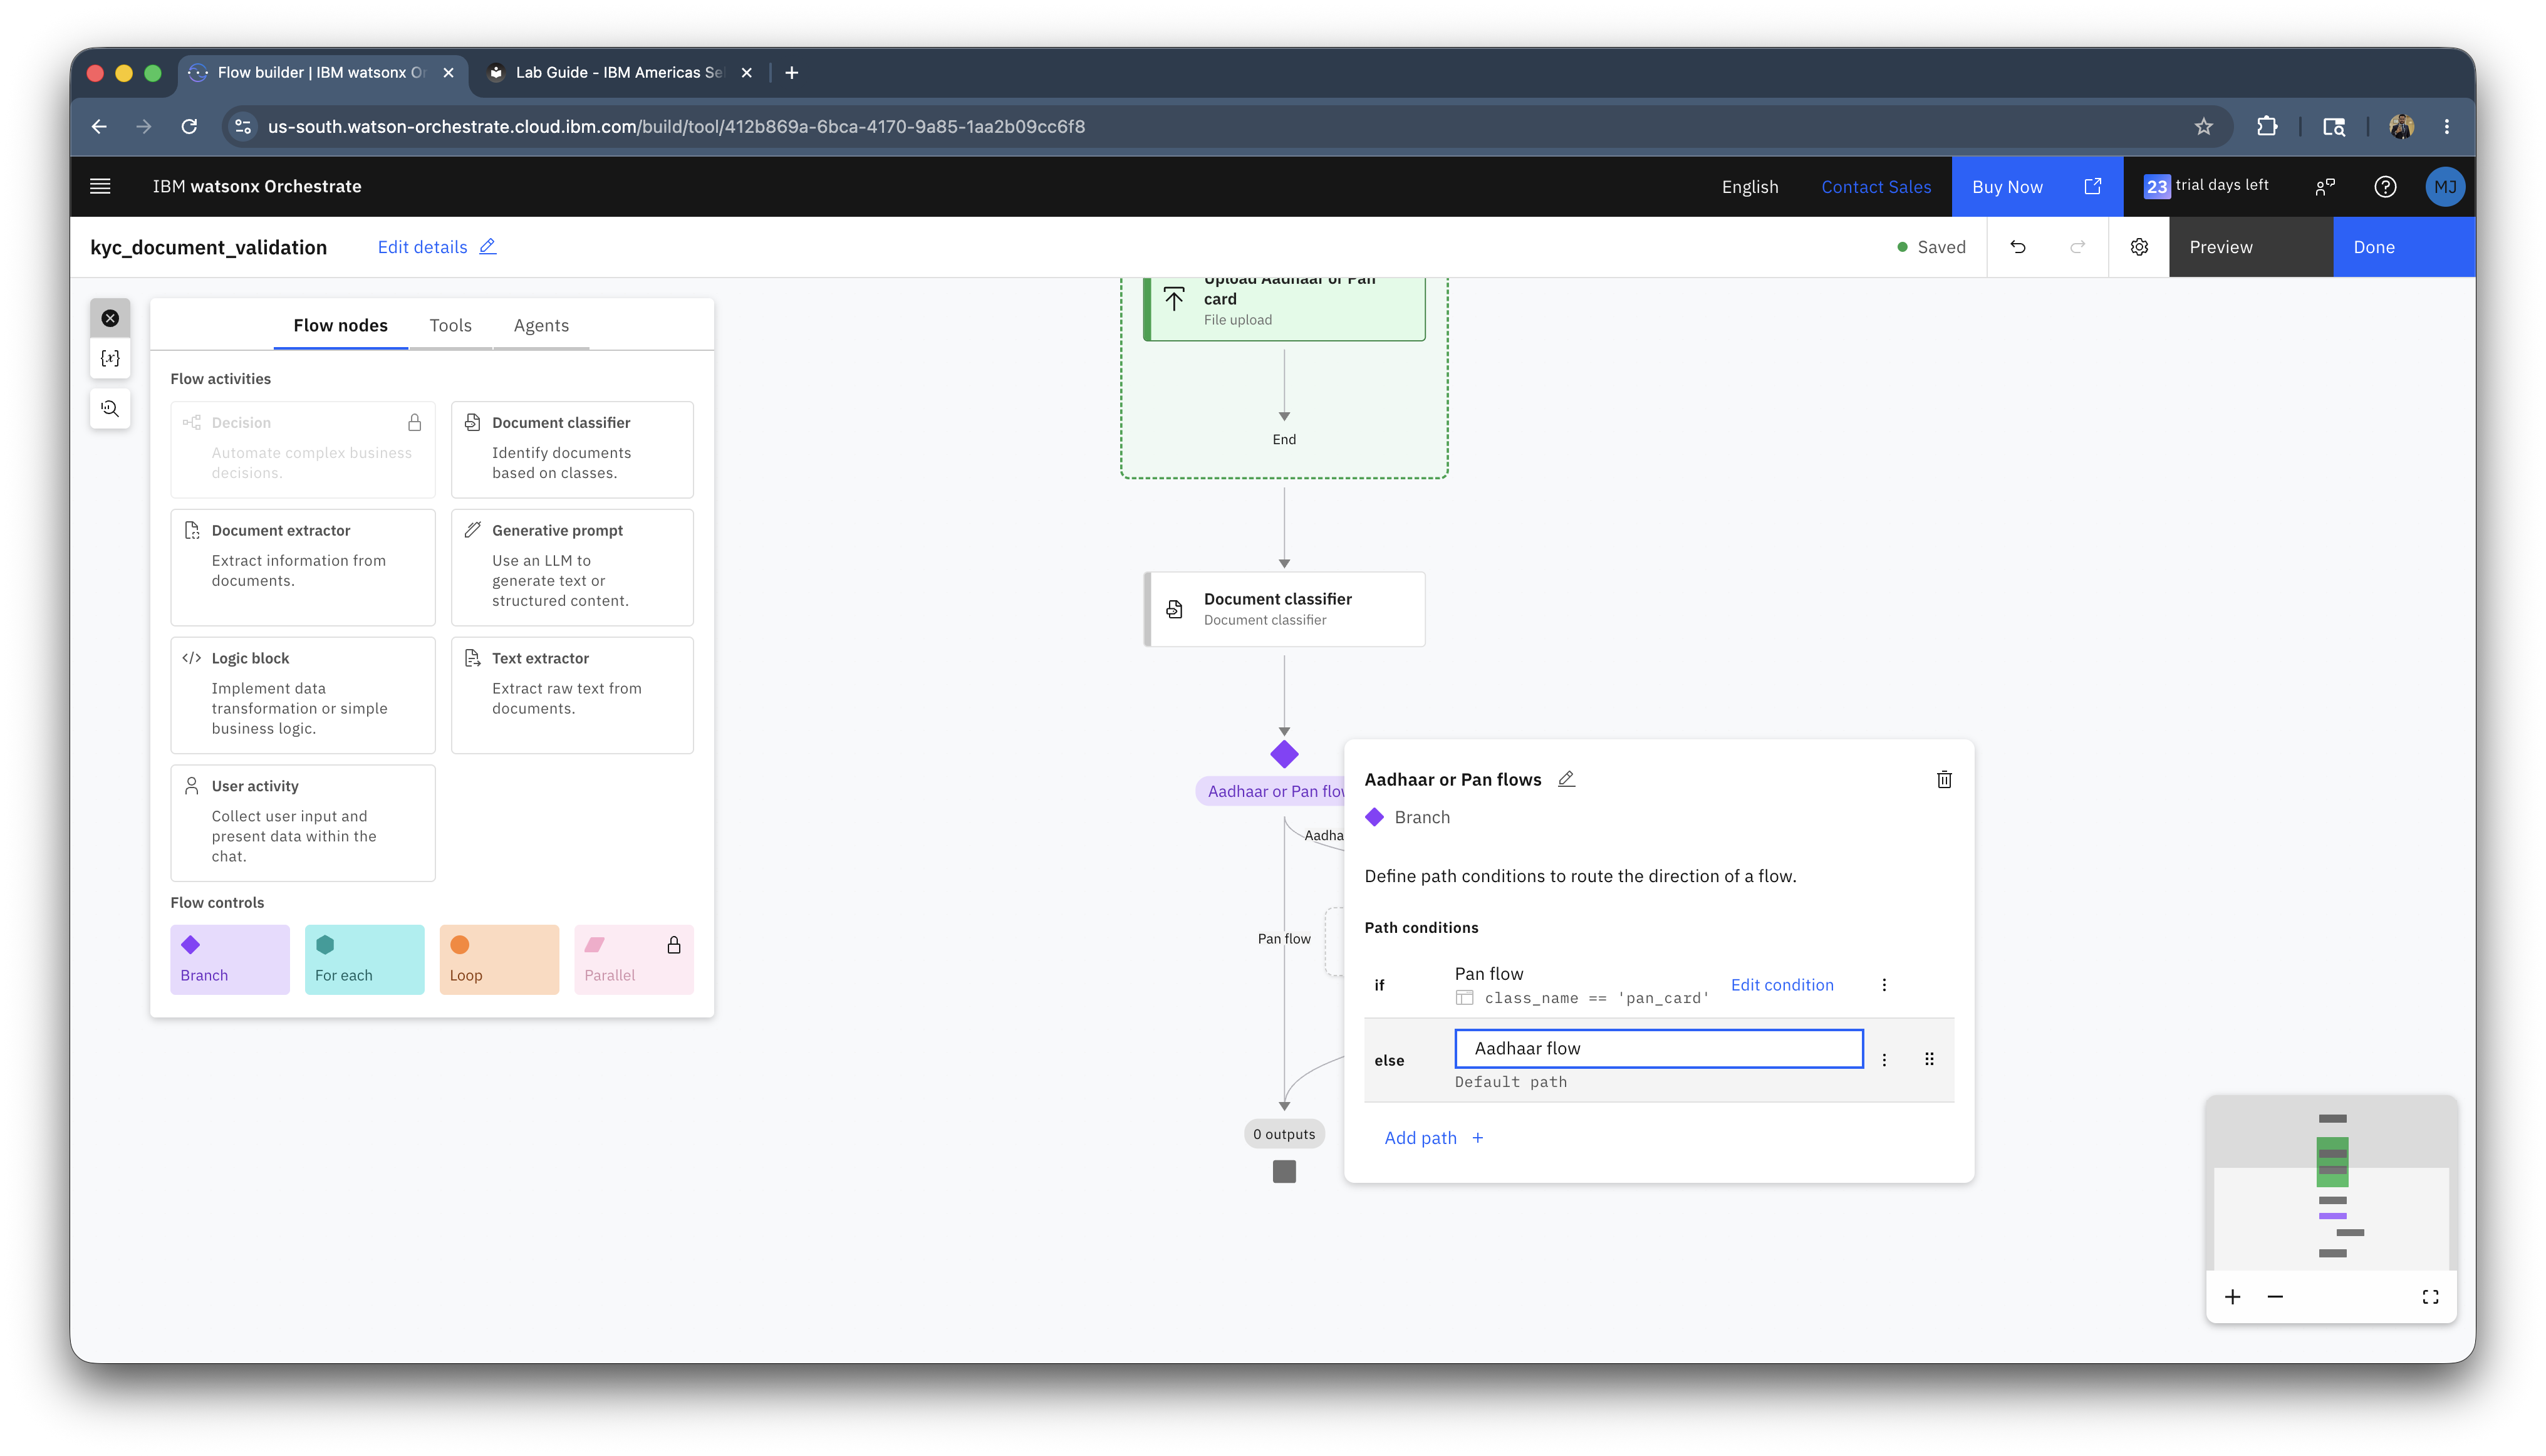
Rename the else flow to Aadhaar flow and click outside.
-
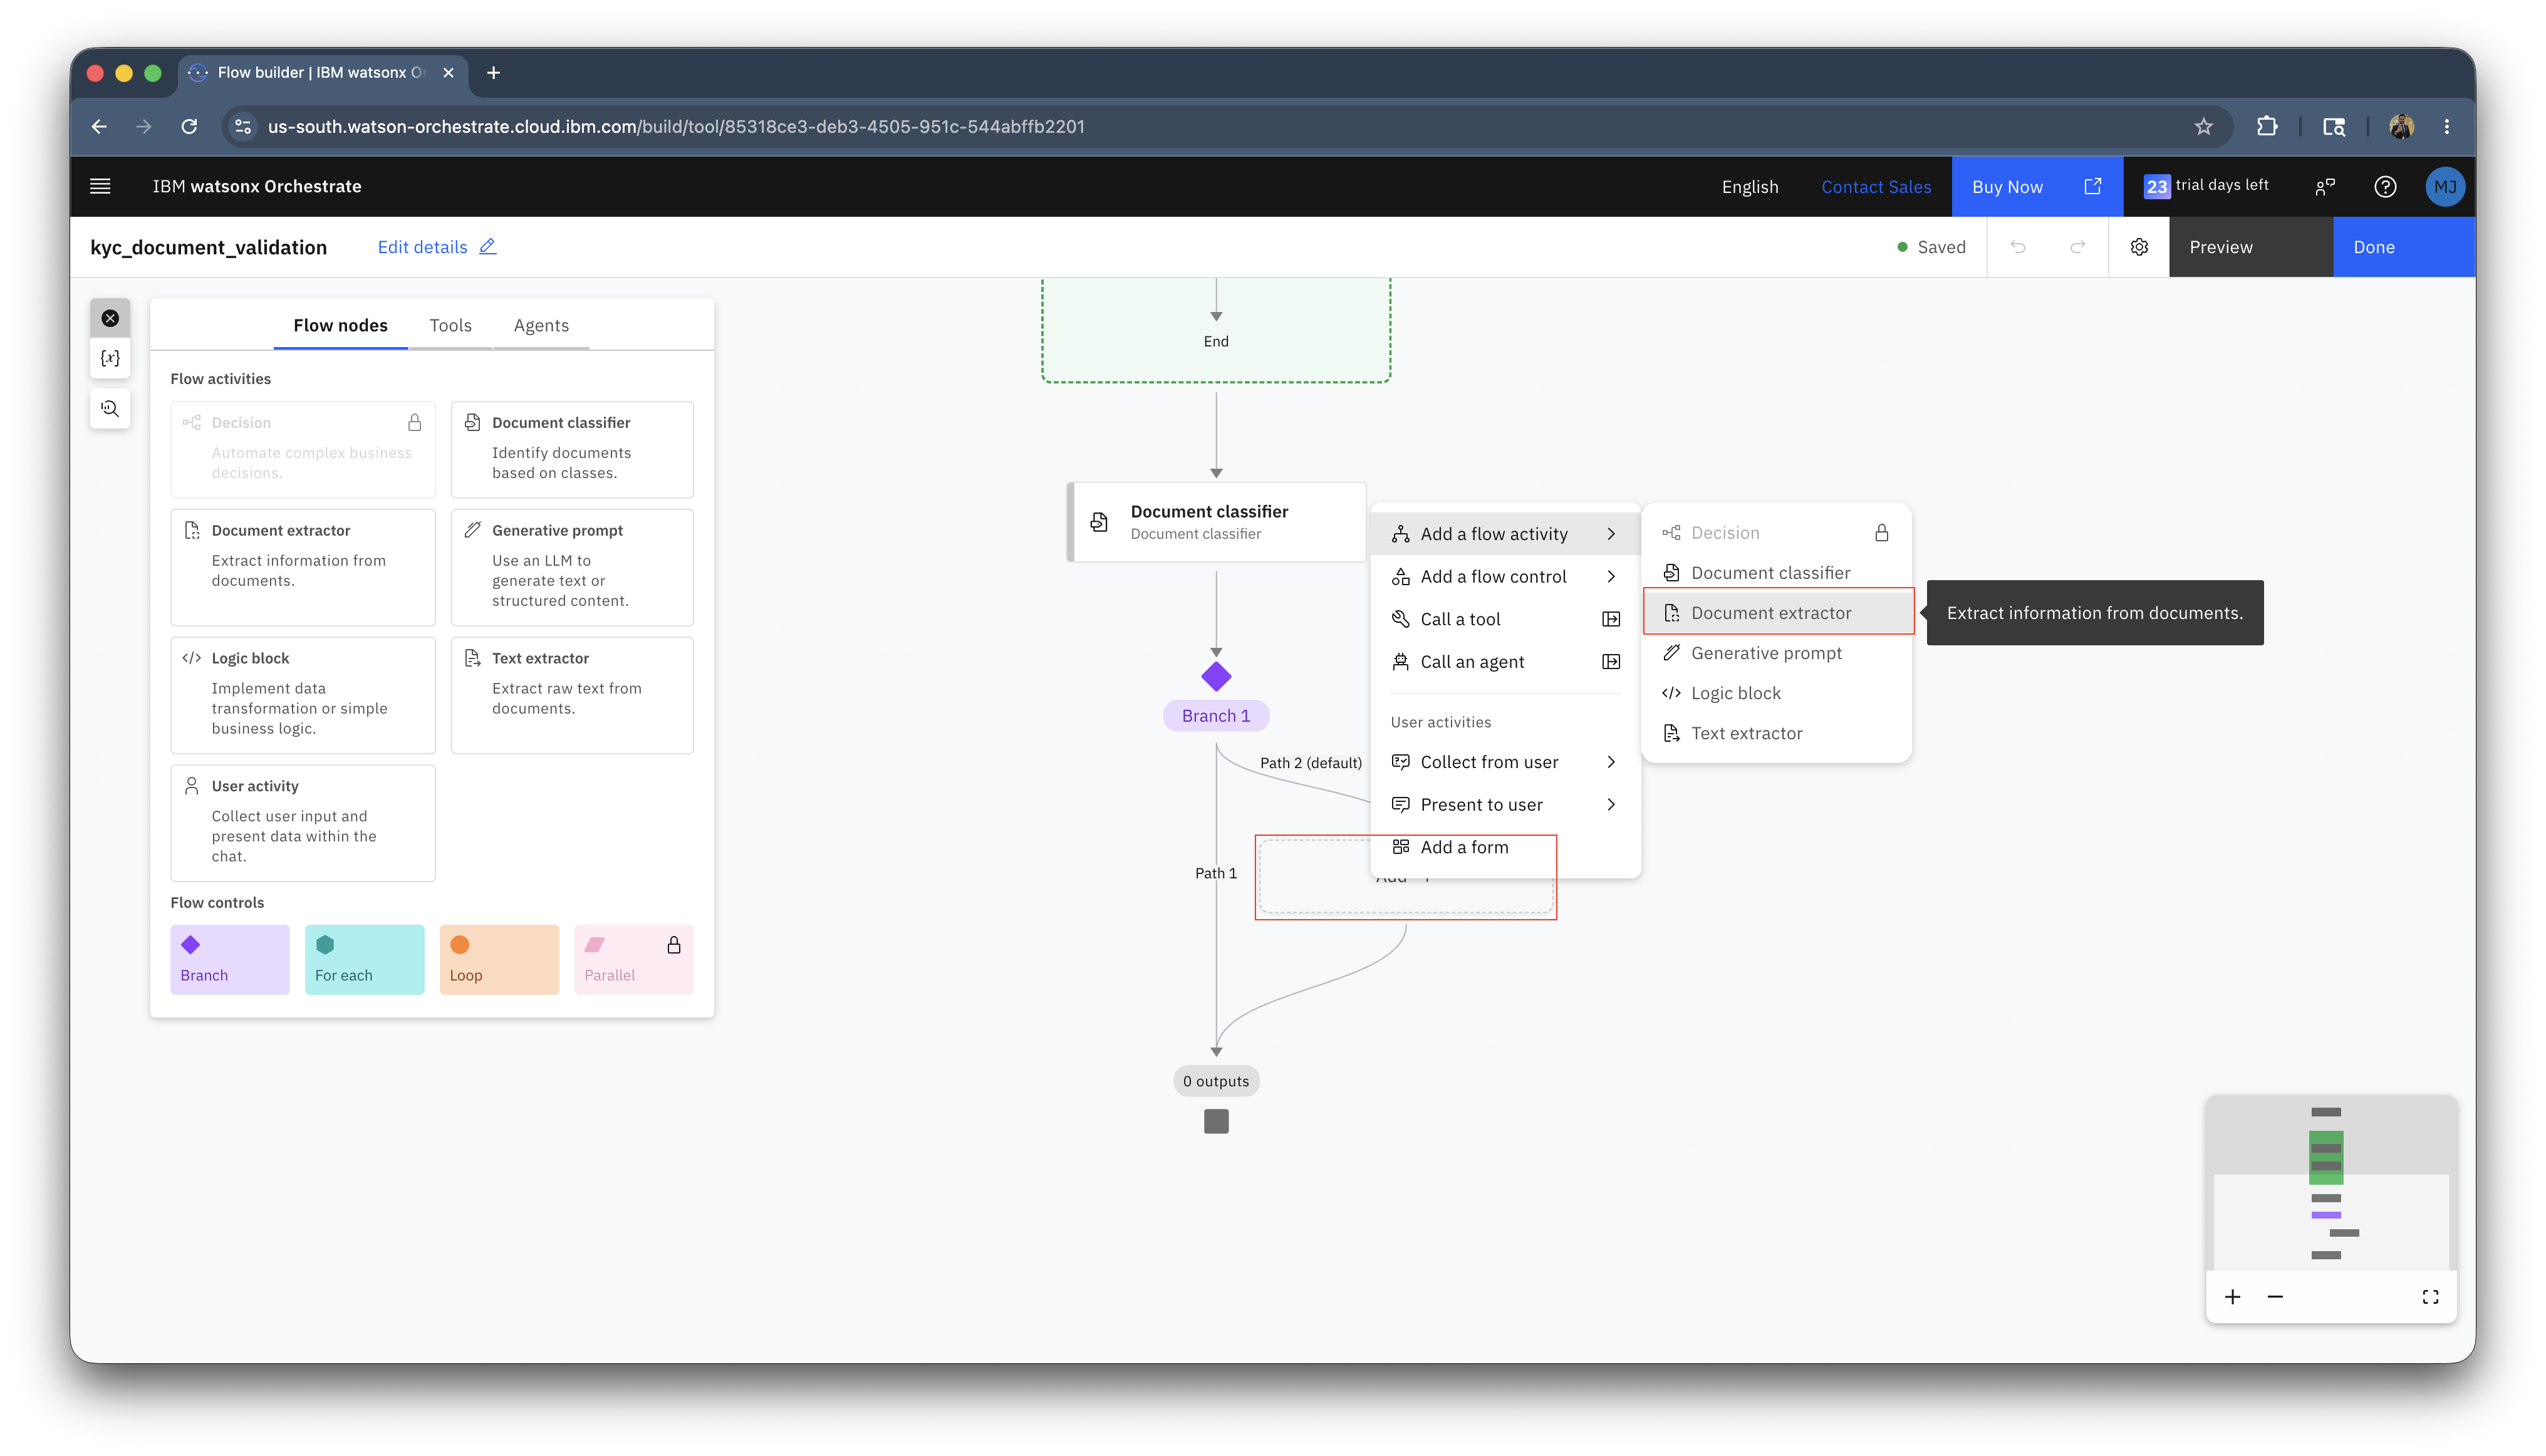
Click on Add + > Add a flow activity > Document extractor.
-
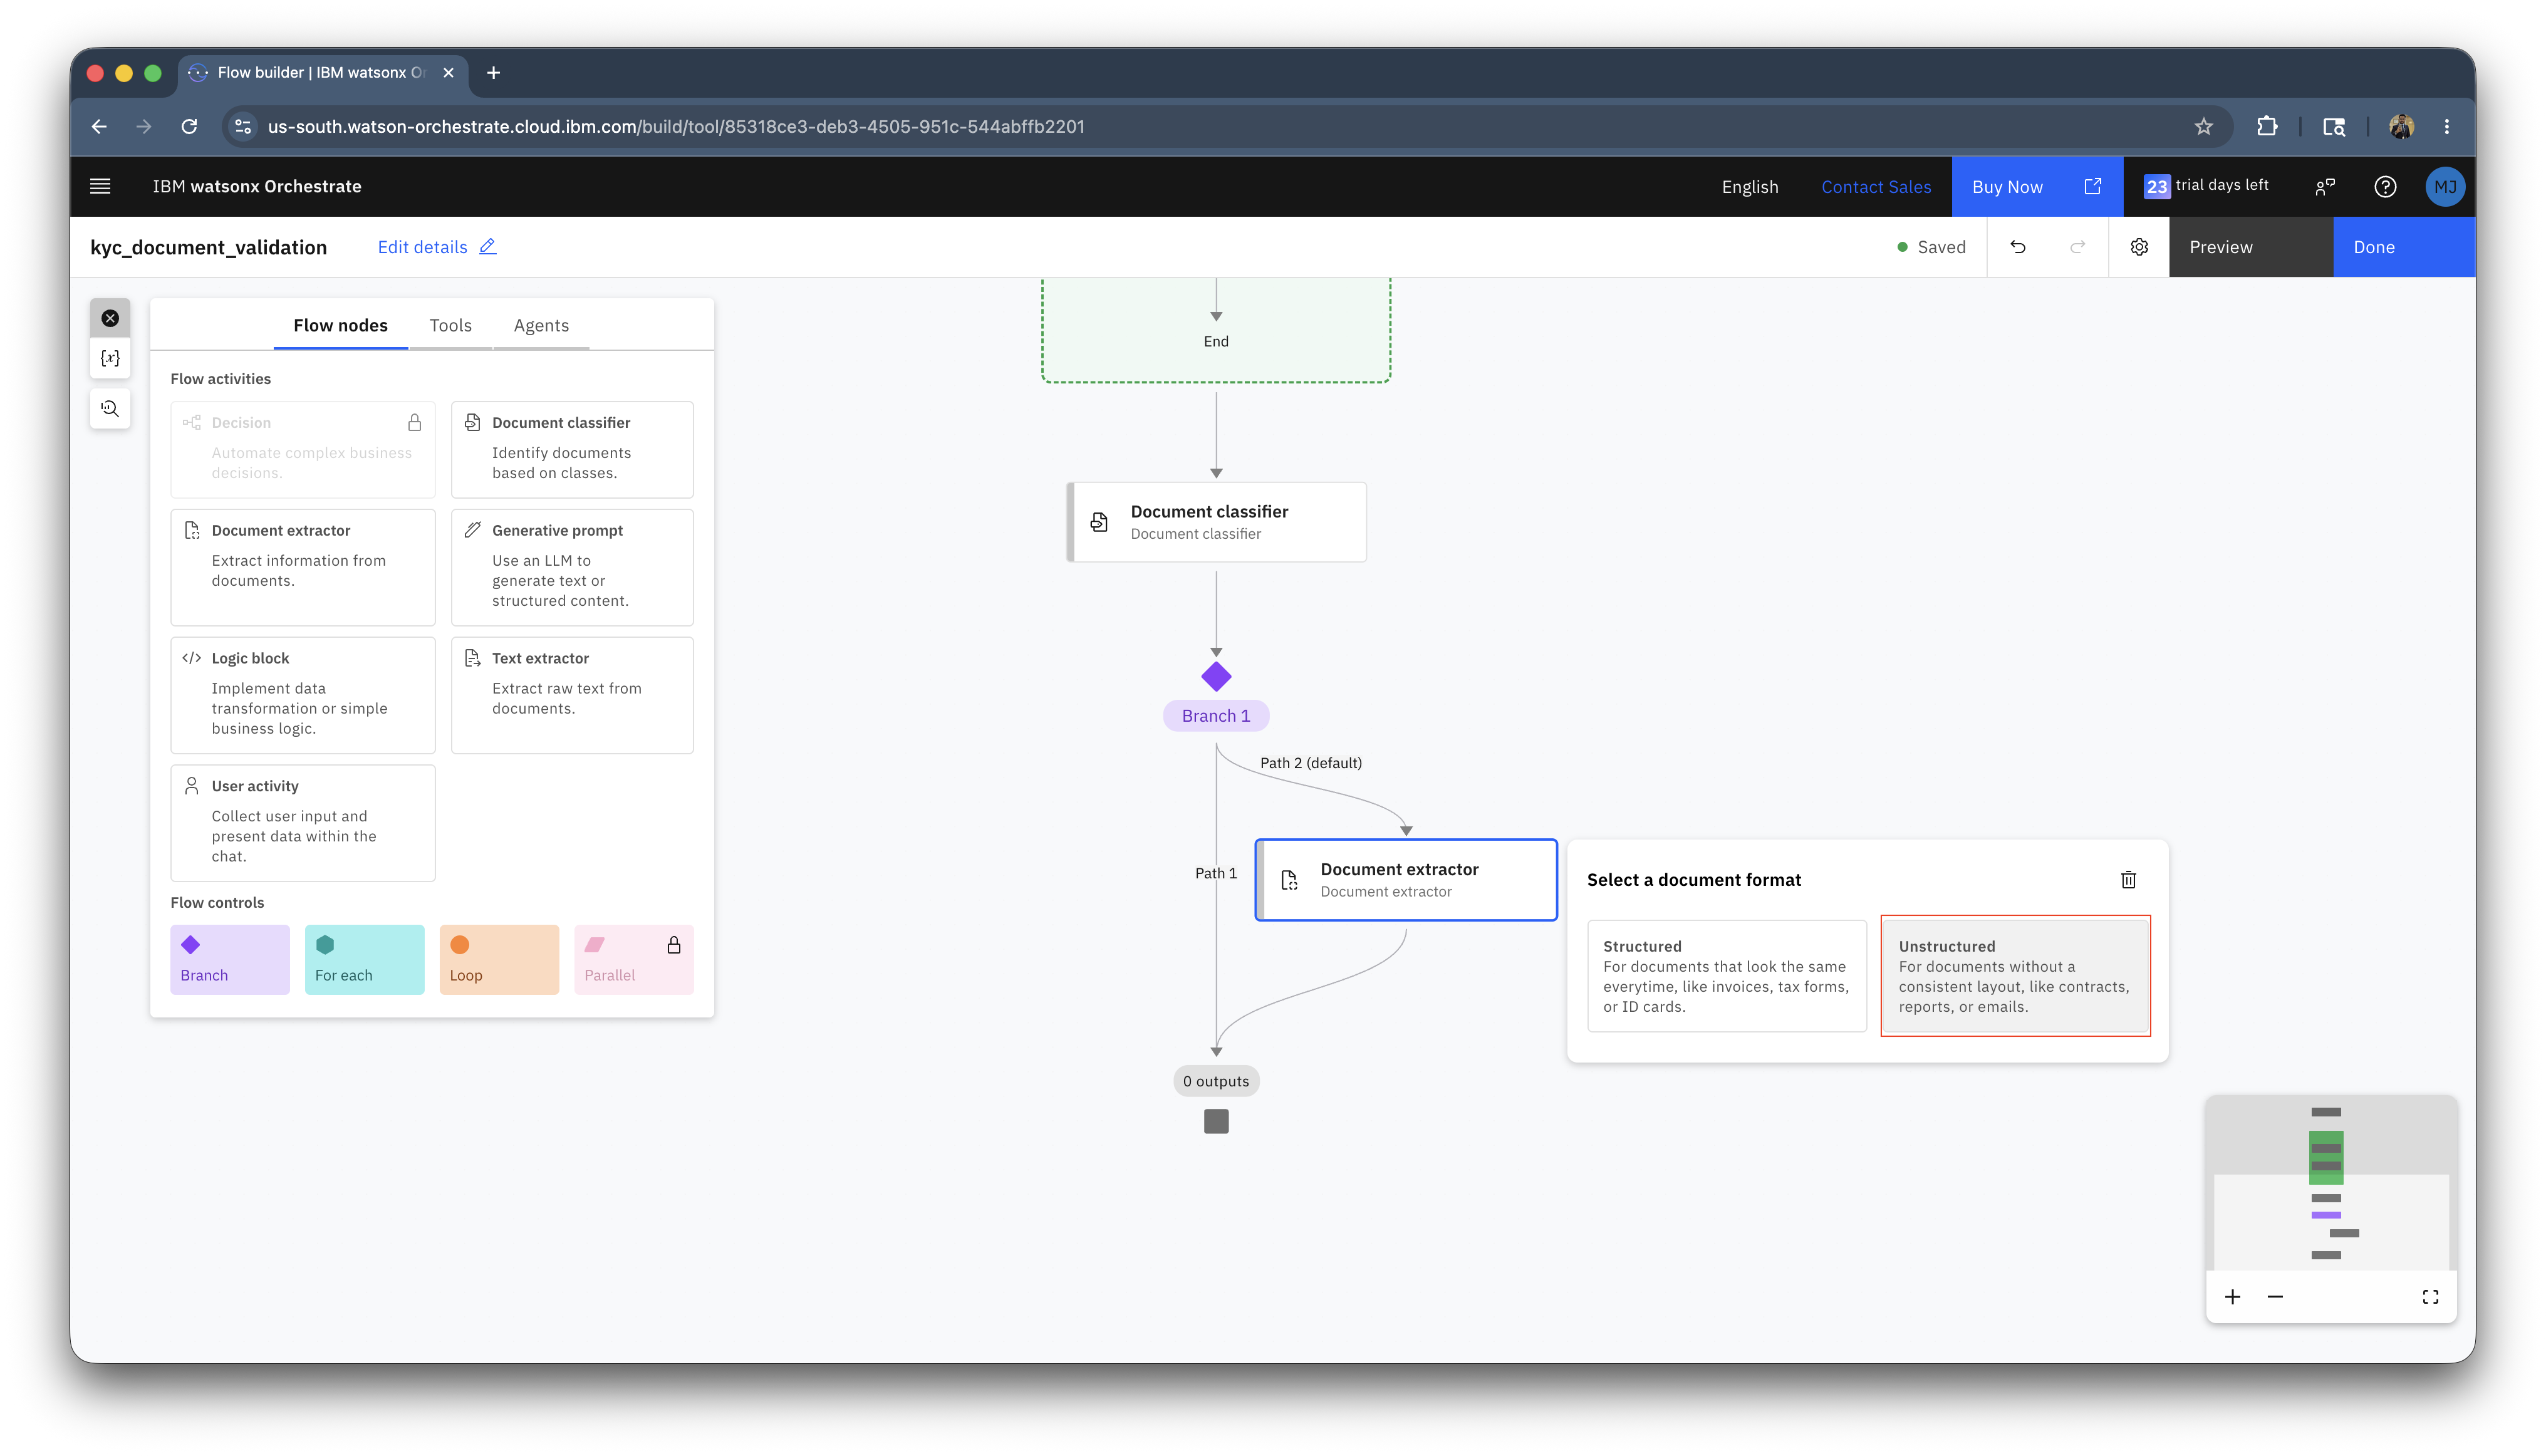
Select the Unstructured.
-
Edit the name to Aadhaar extractor and upload the document named
VM_aadhaar.pdffrom the downloaded directory.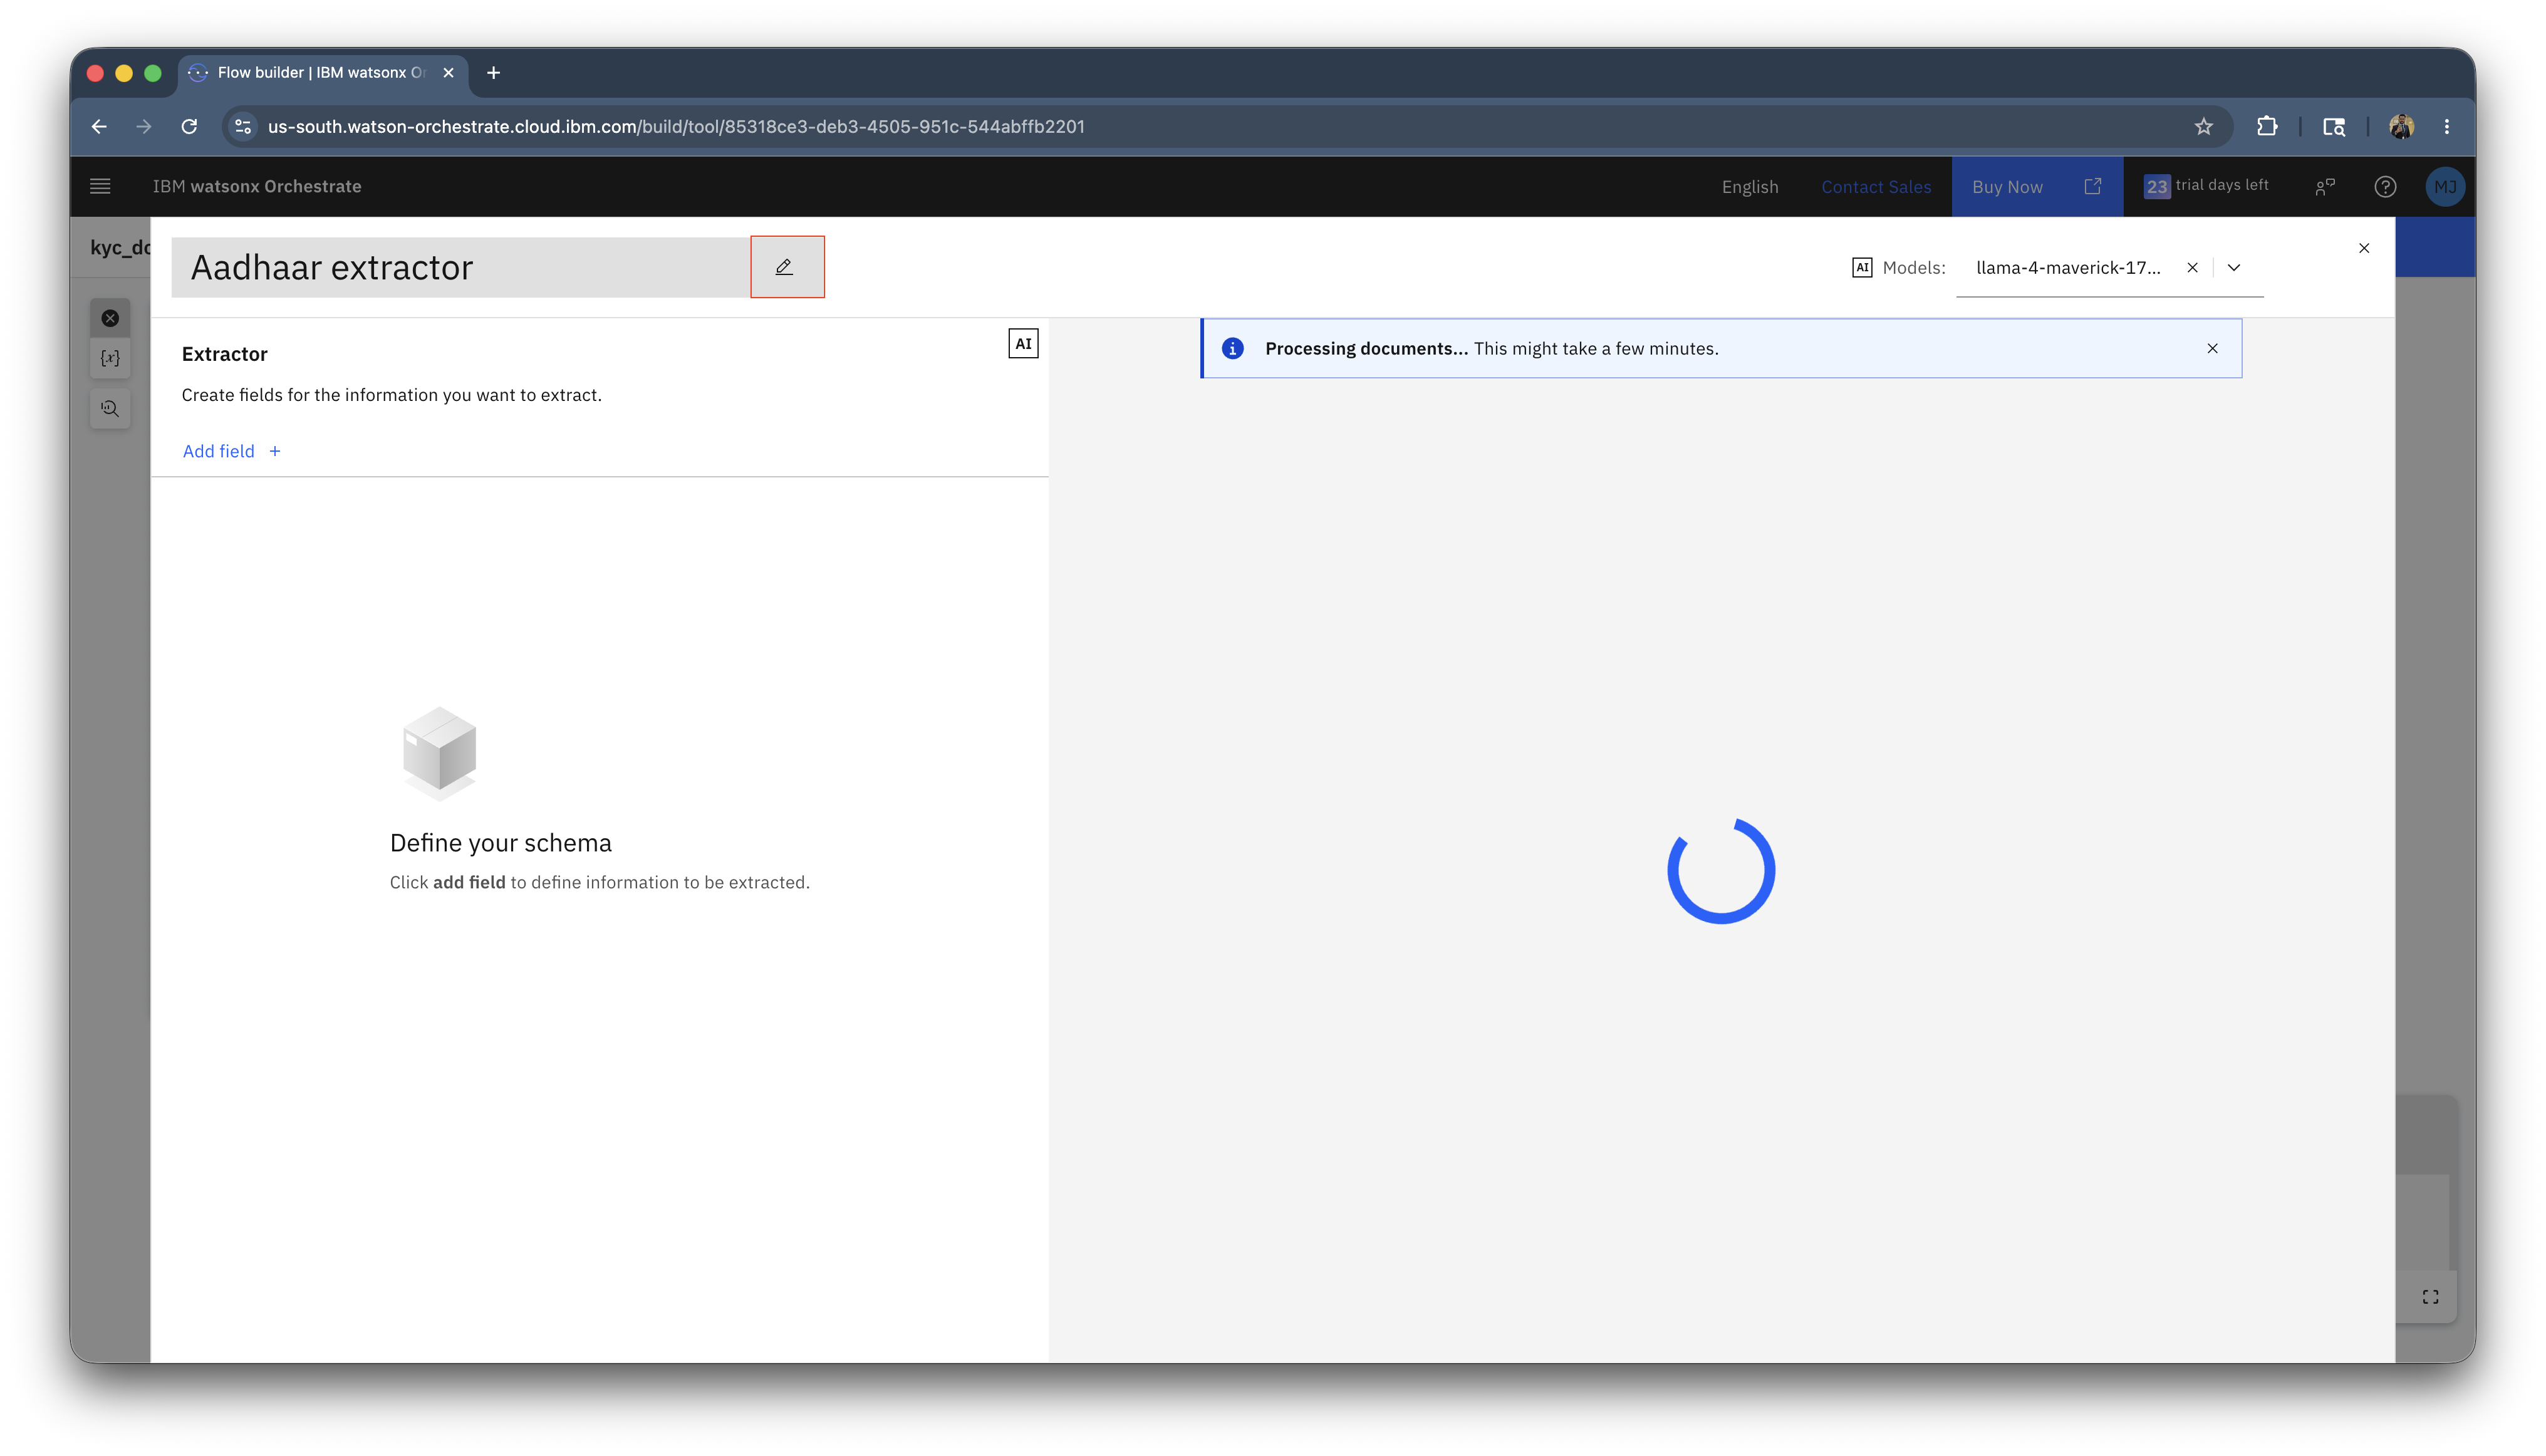
-
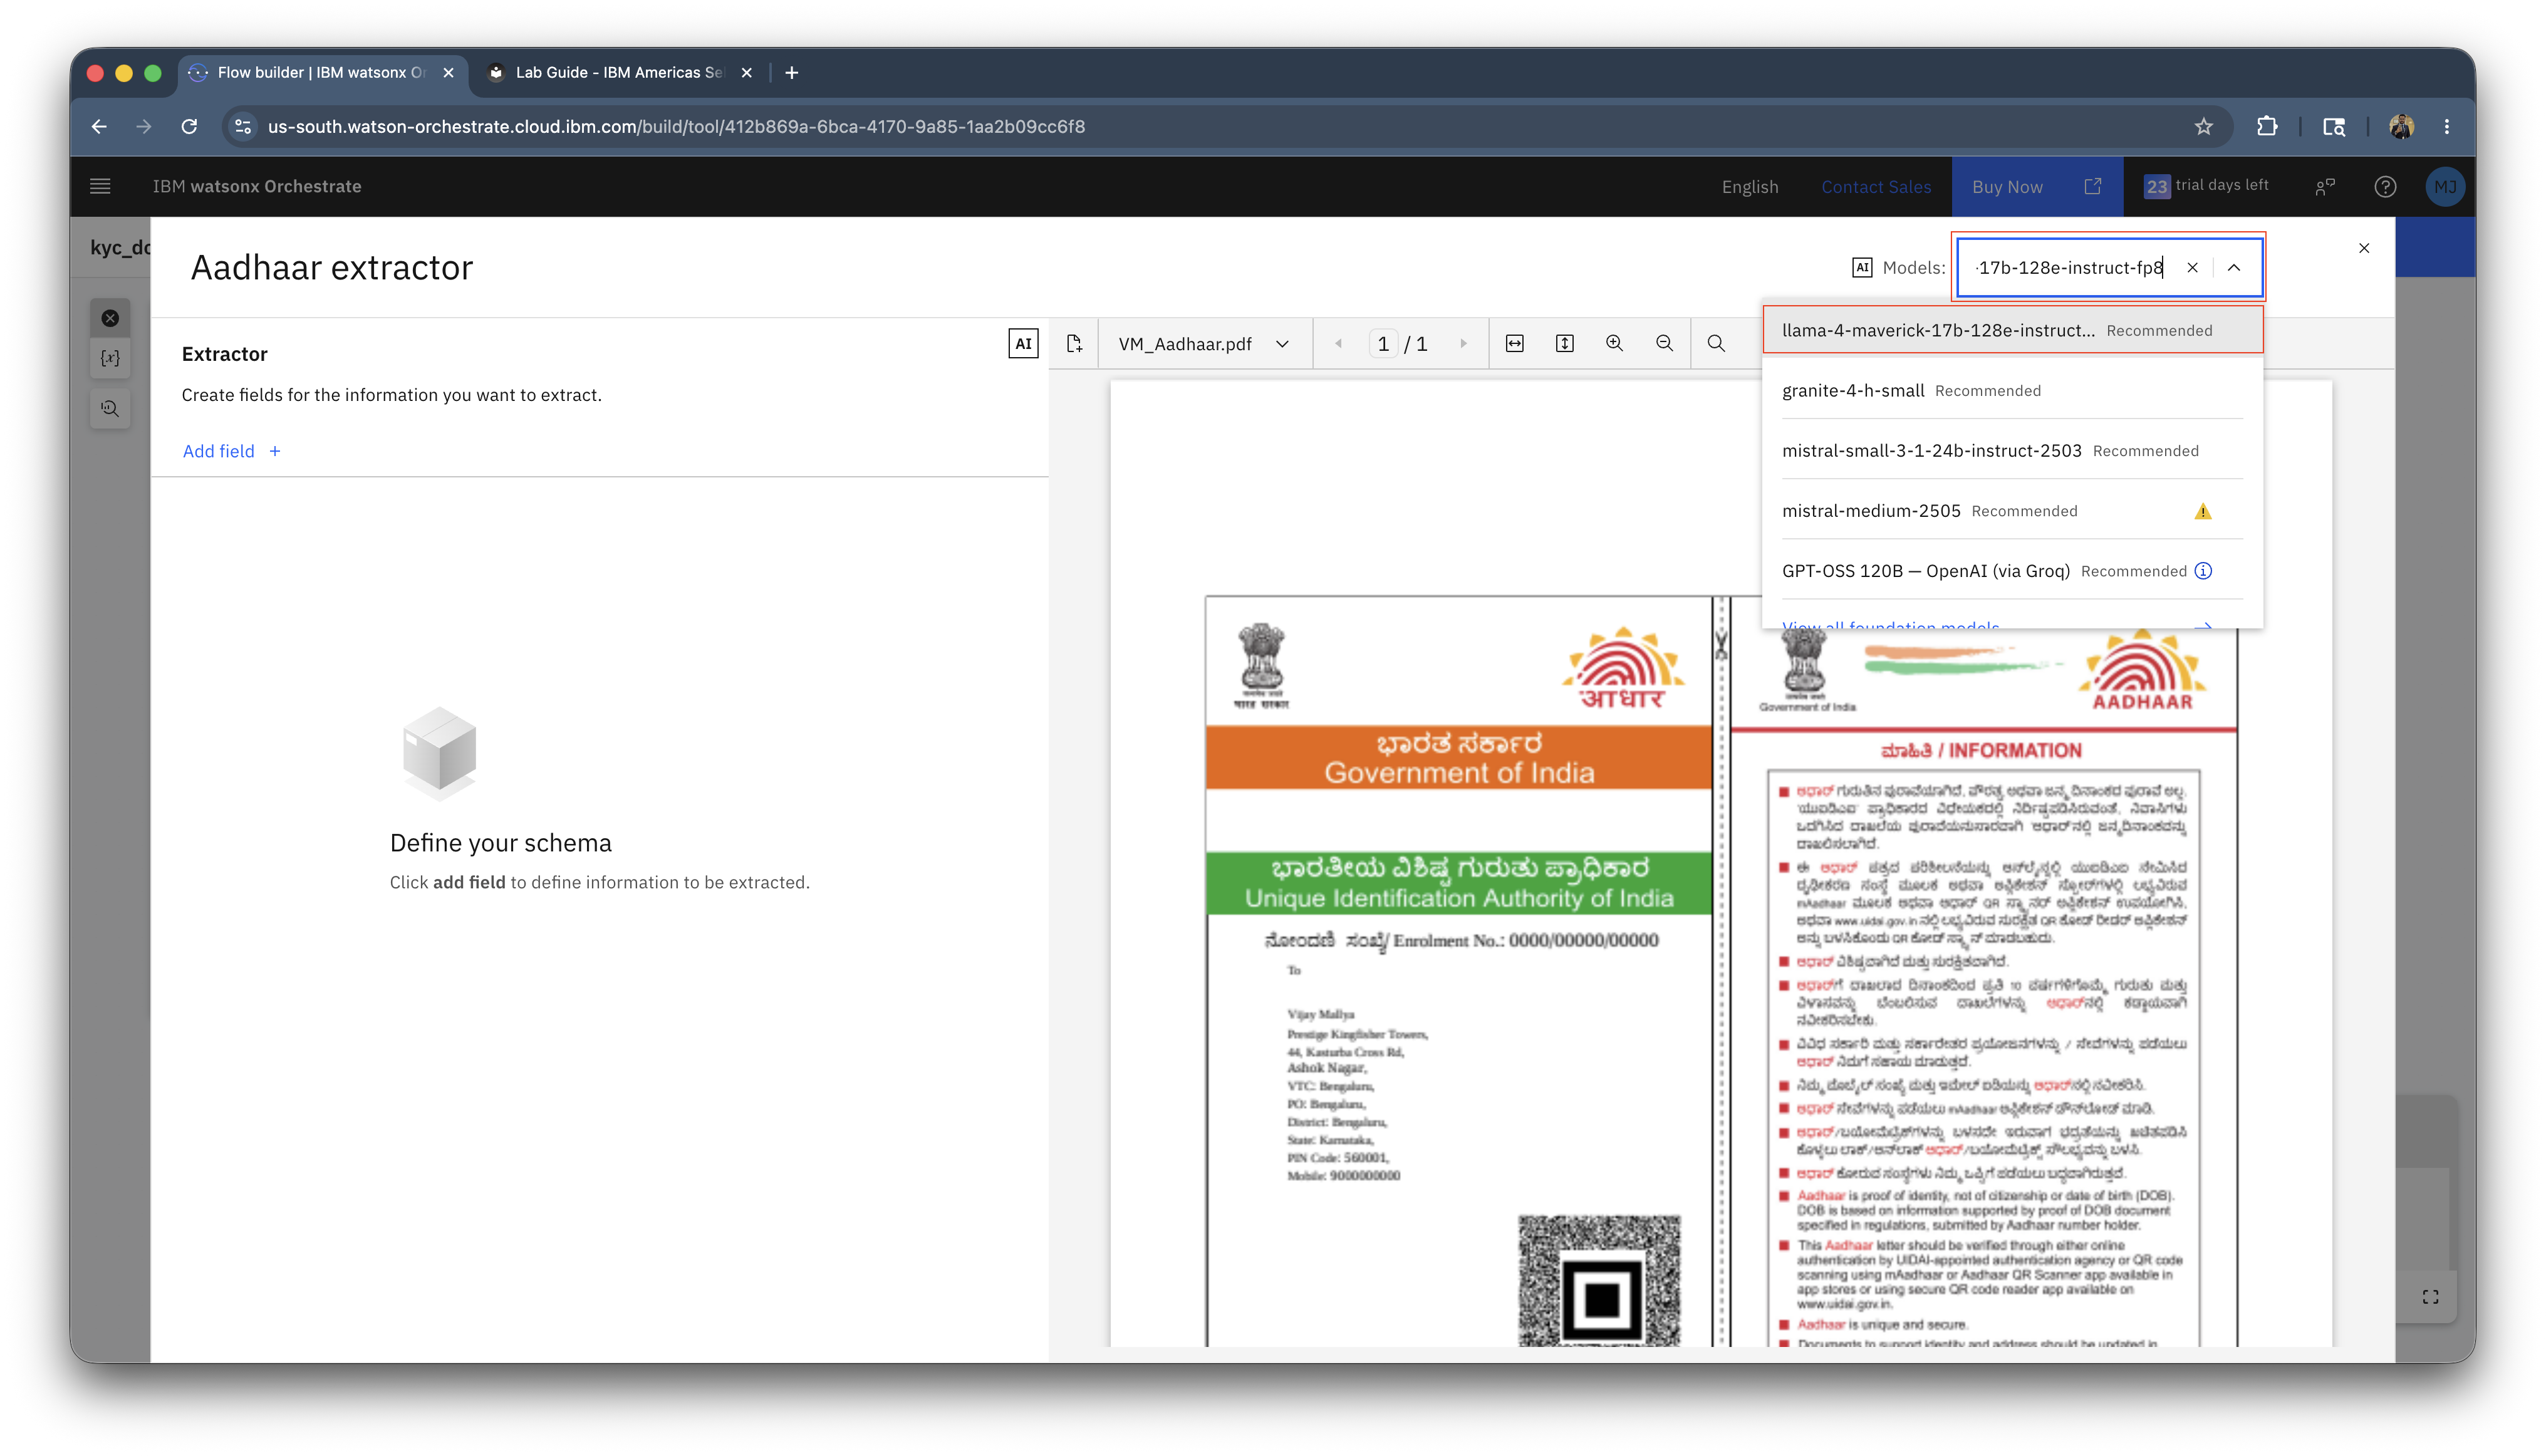
Click on the models on top right and select the llama-4-maverick-17b model as we'll use that for the document extraction for our use case.
-
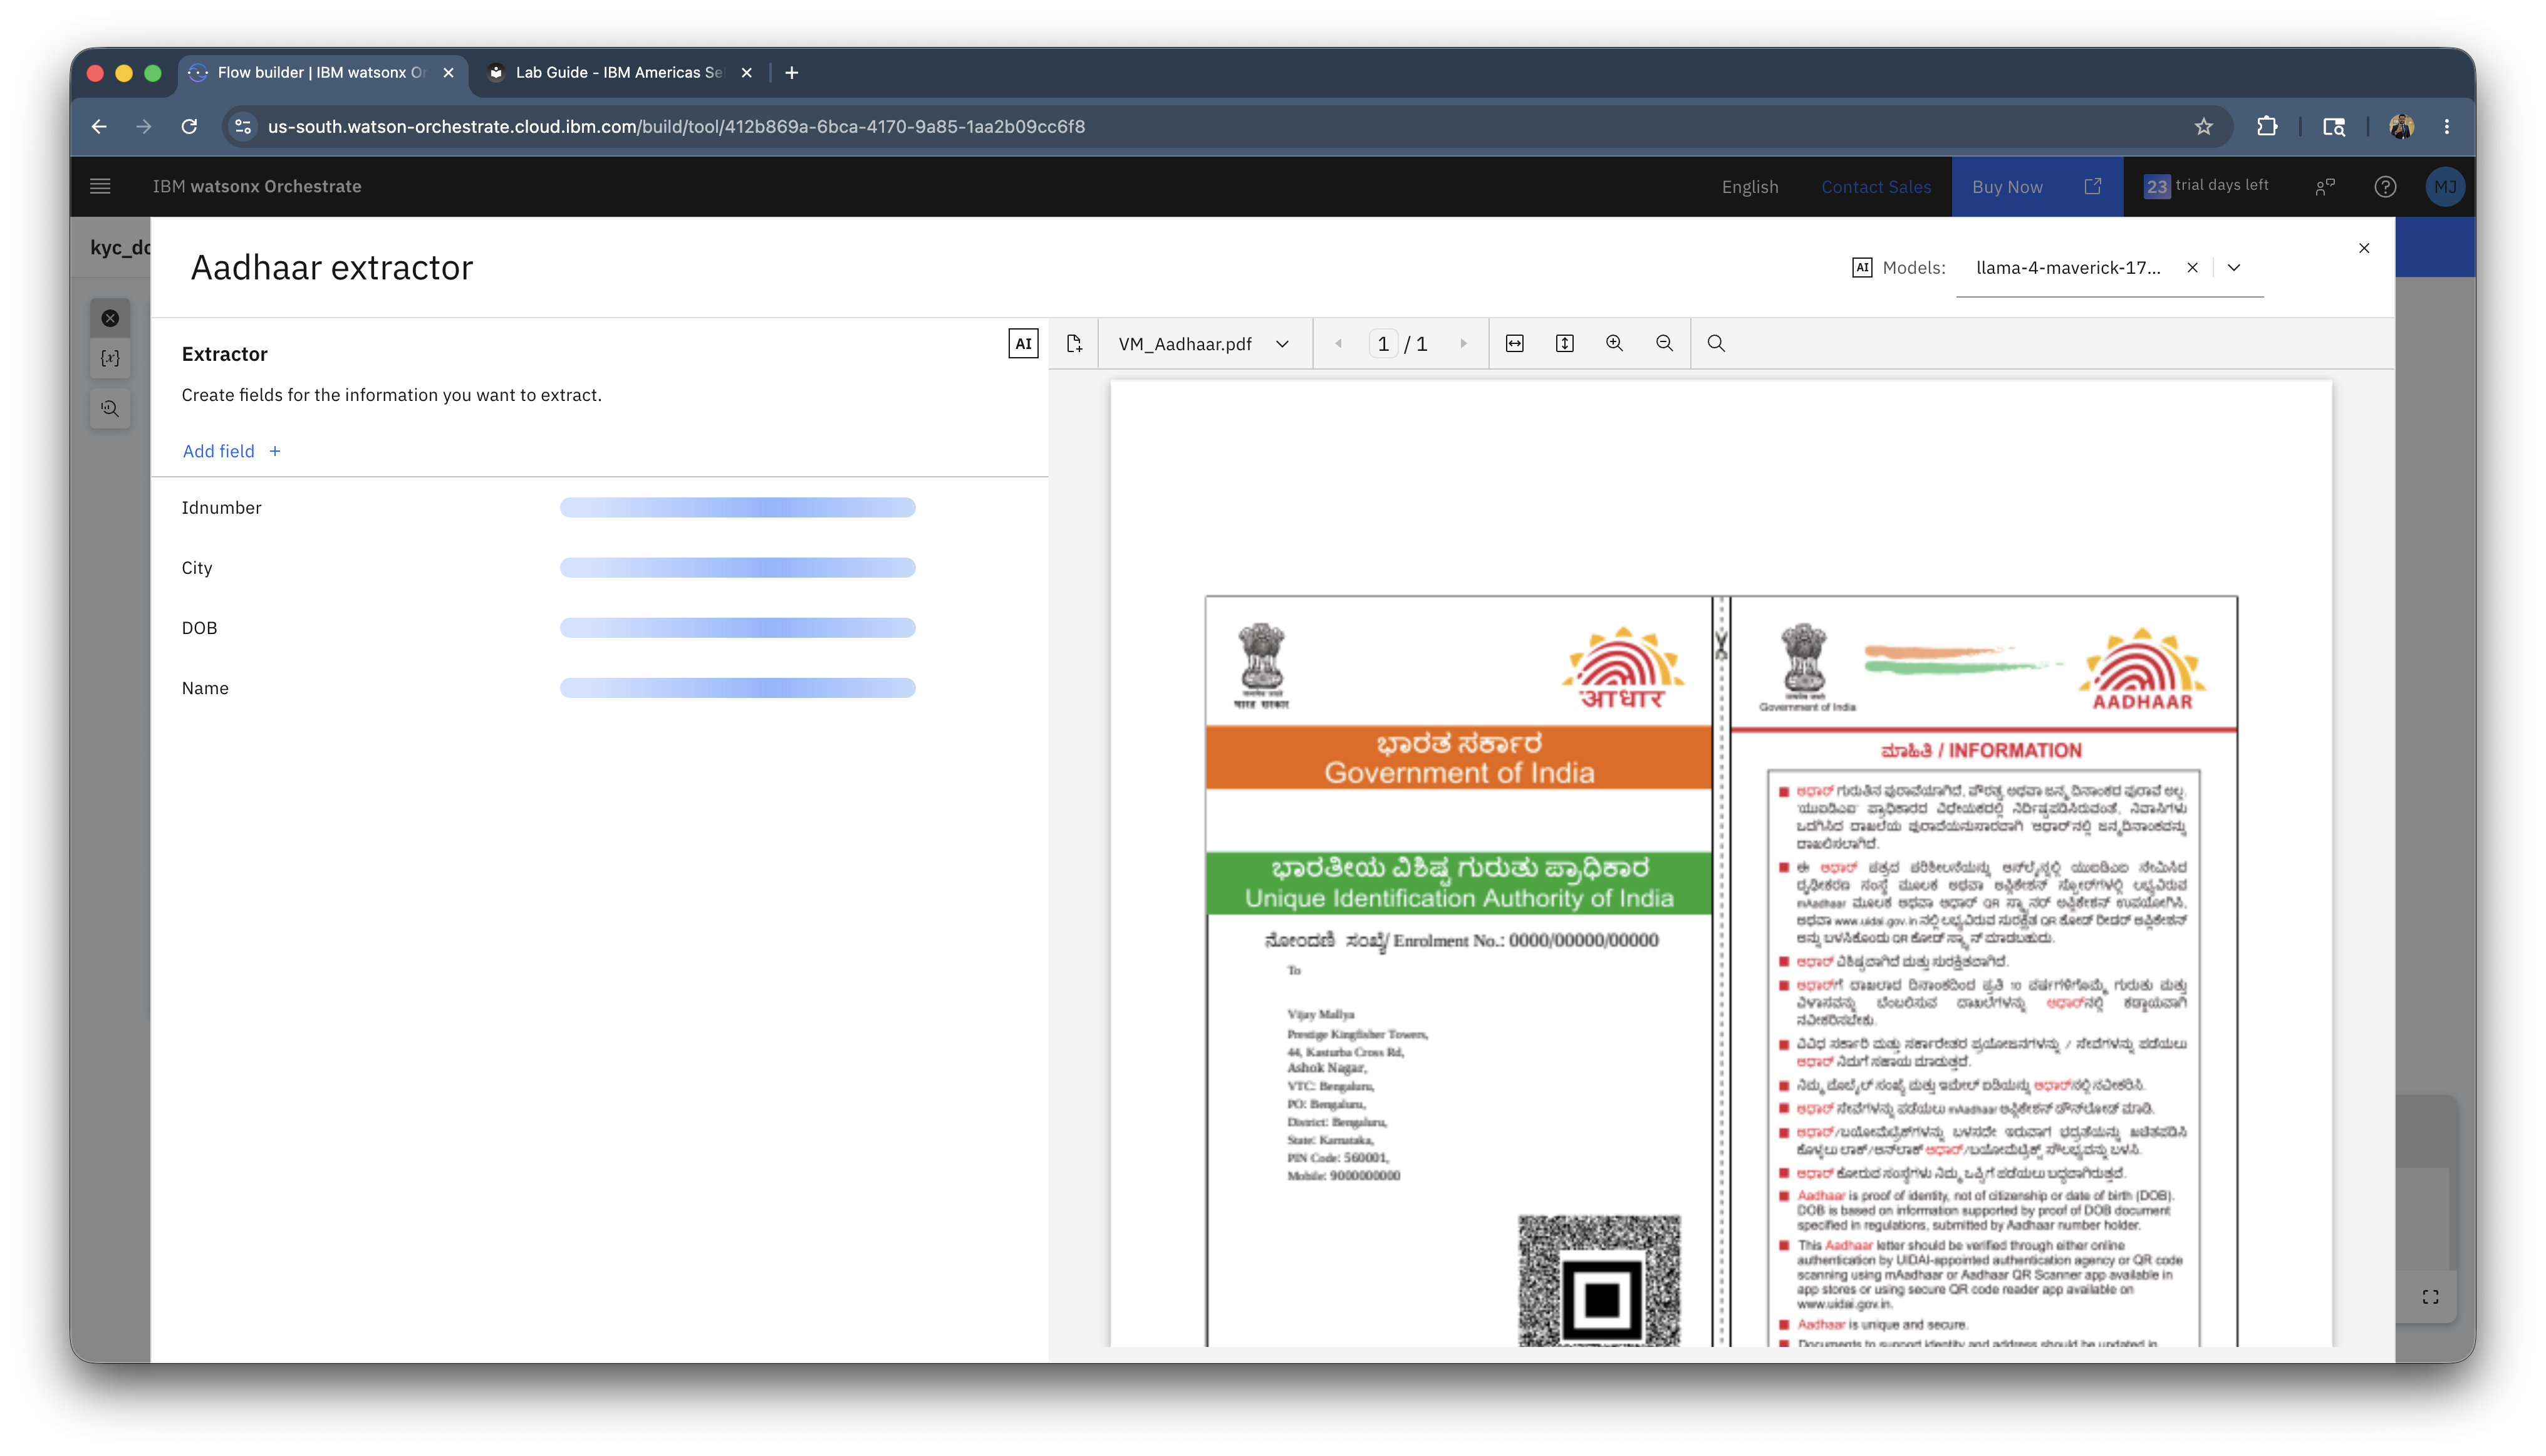
Click on Add field and add the following fields:
- Name
- DOB
- City
- IDnumber
-
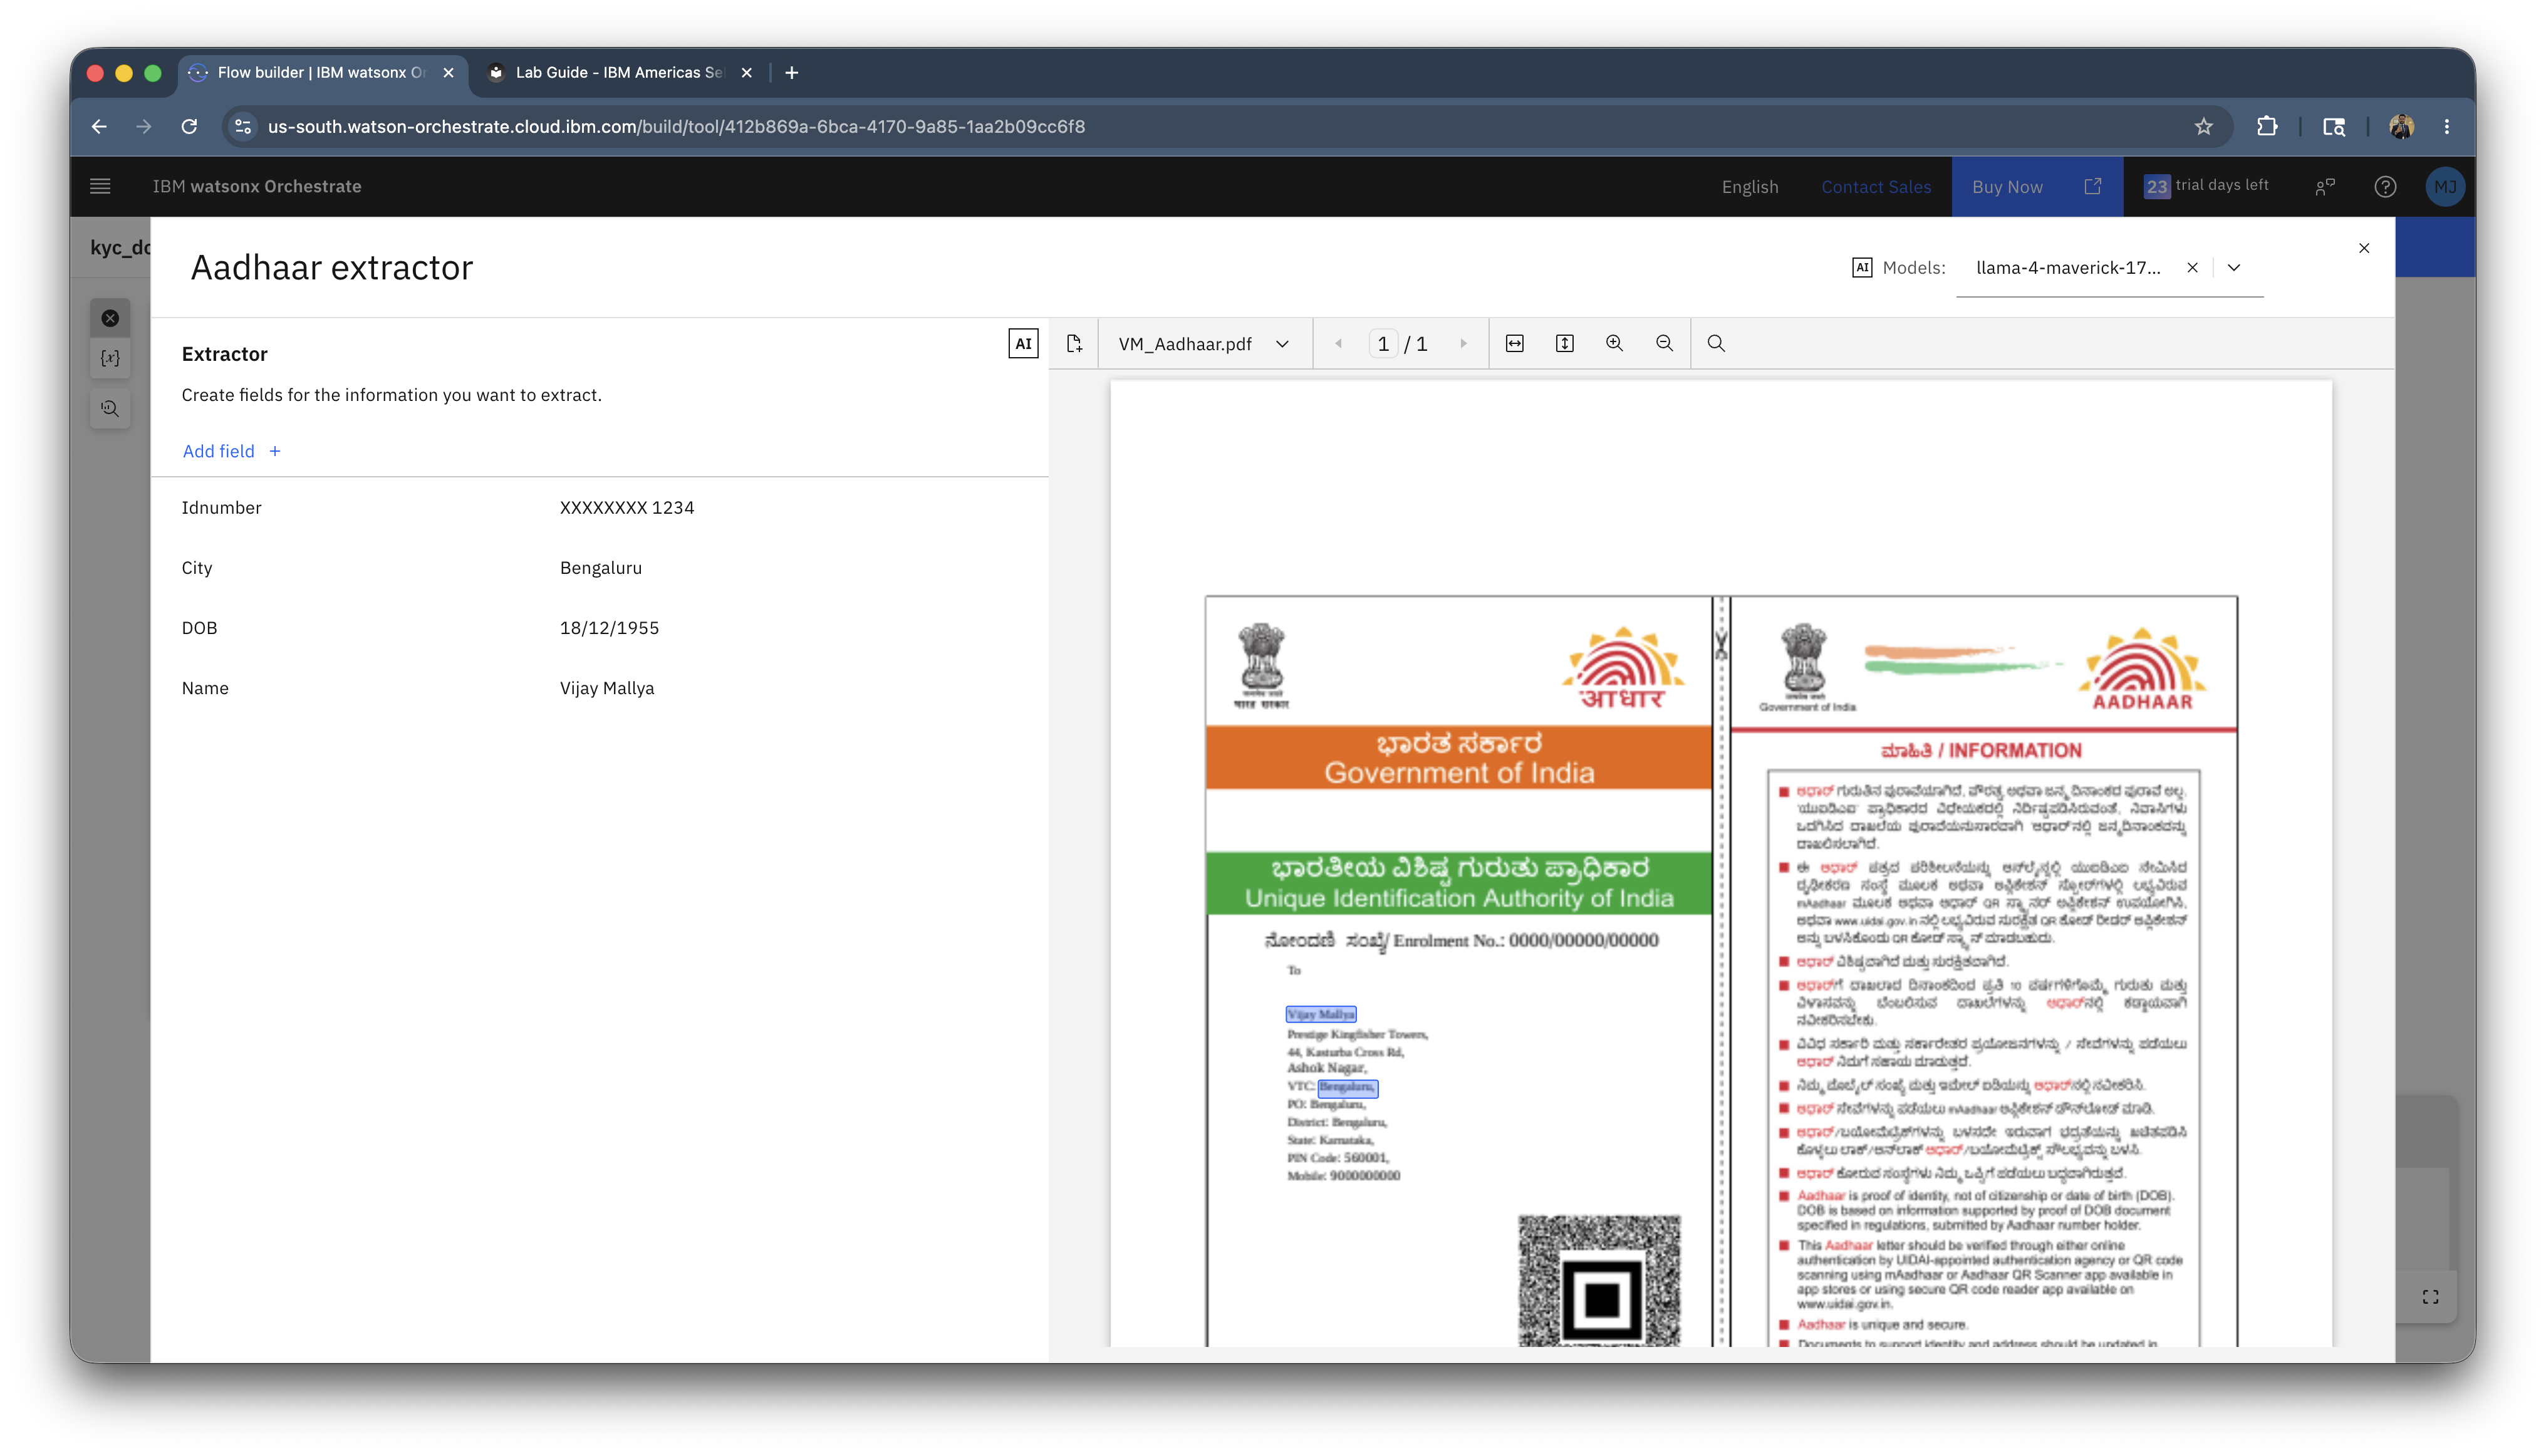
You can see the multi-model will extract the PII from the PDF document. Close the window.
-
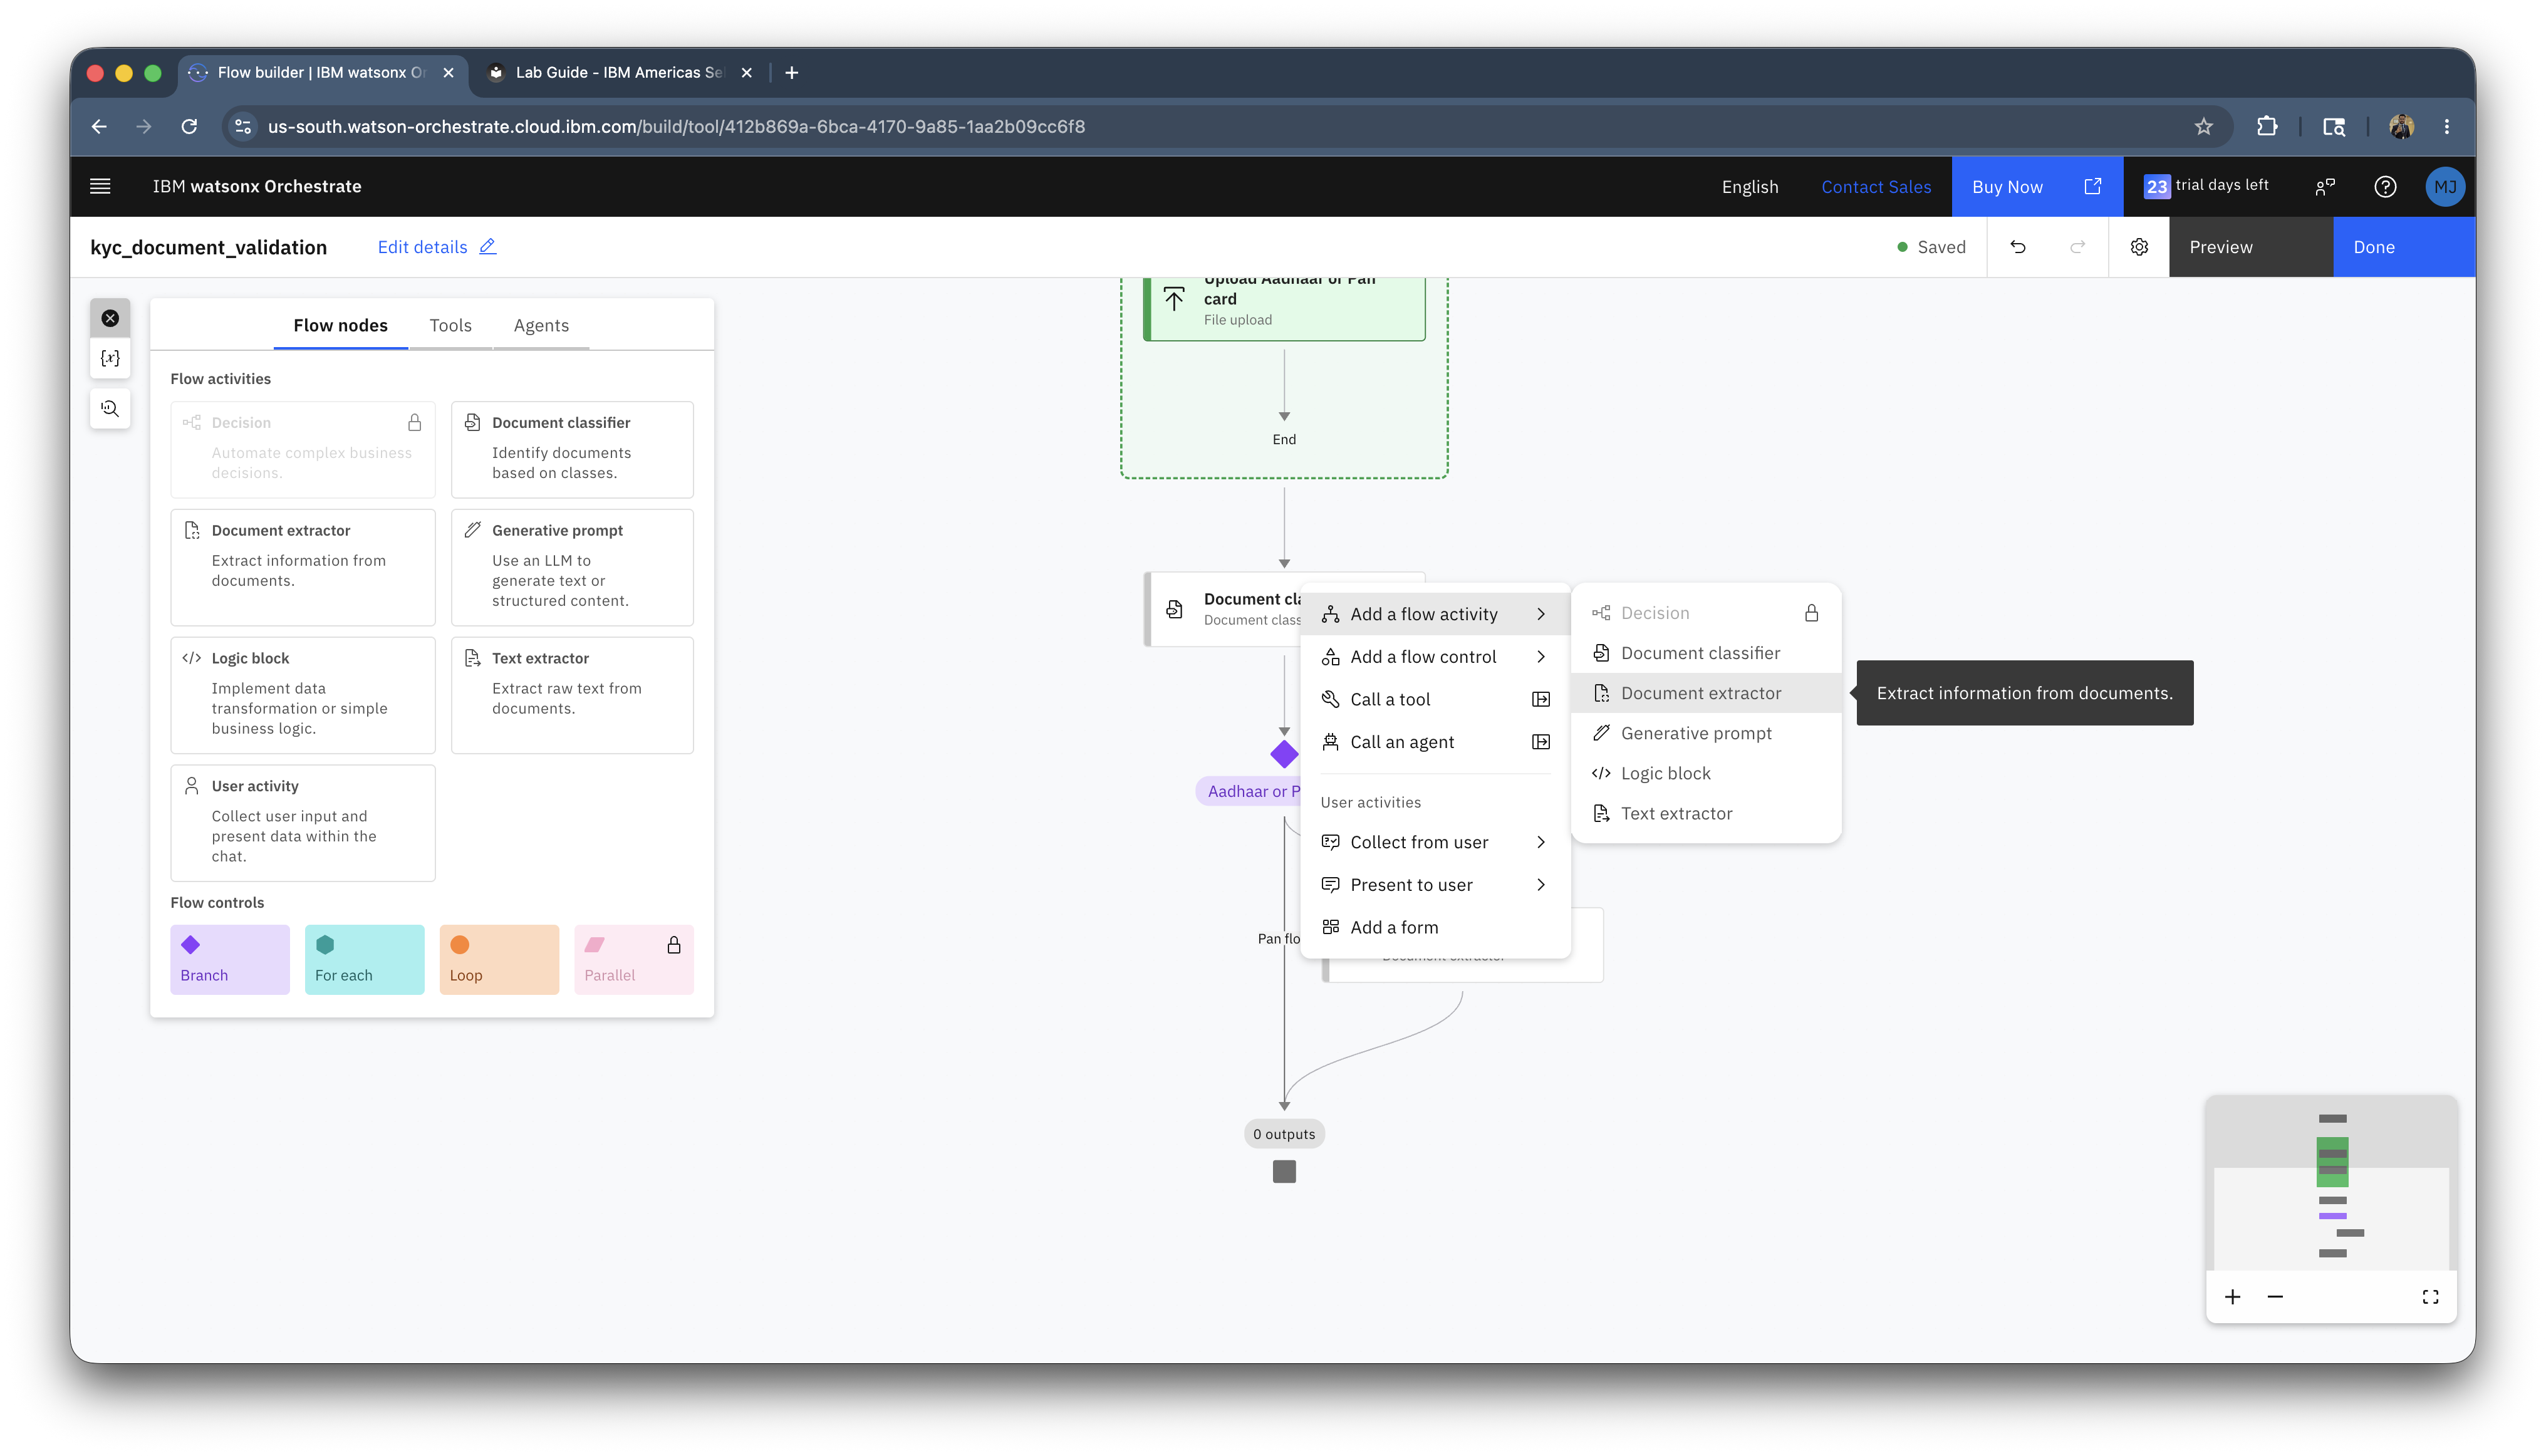
Under the else flow, Click on Add + > Add a flow activity > Document extractor.
-
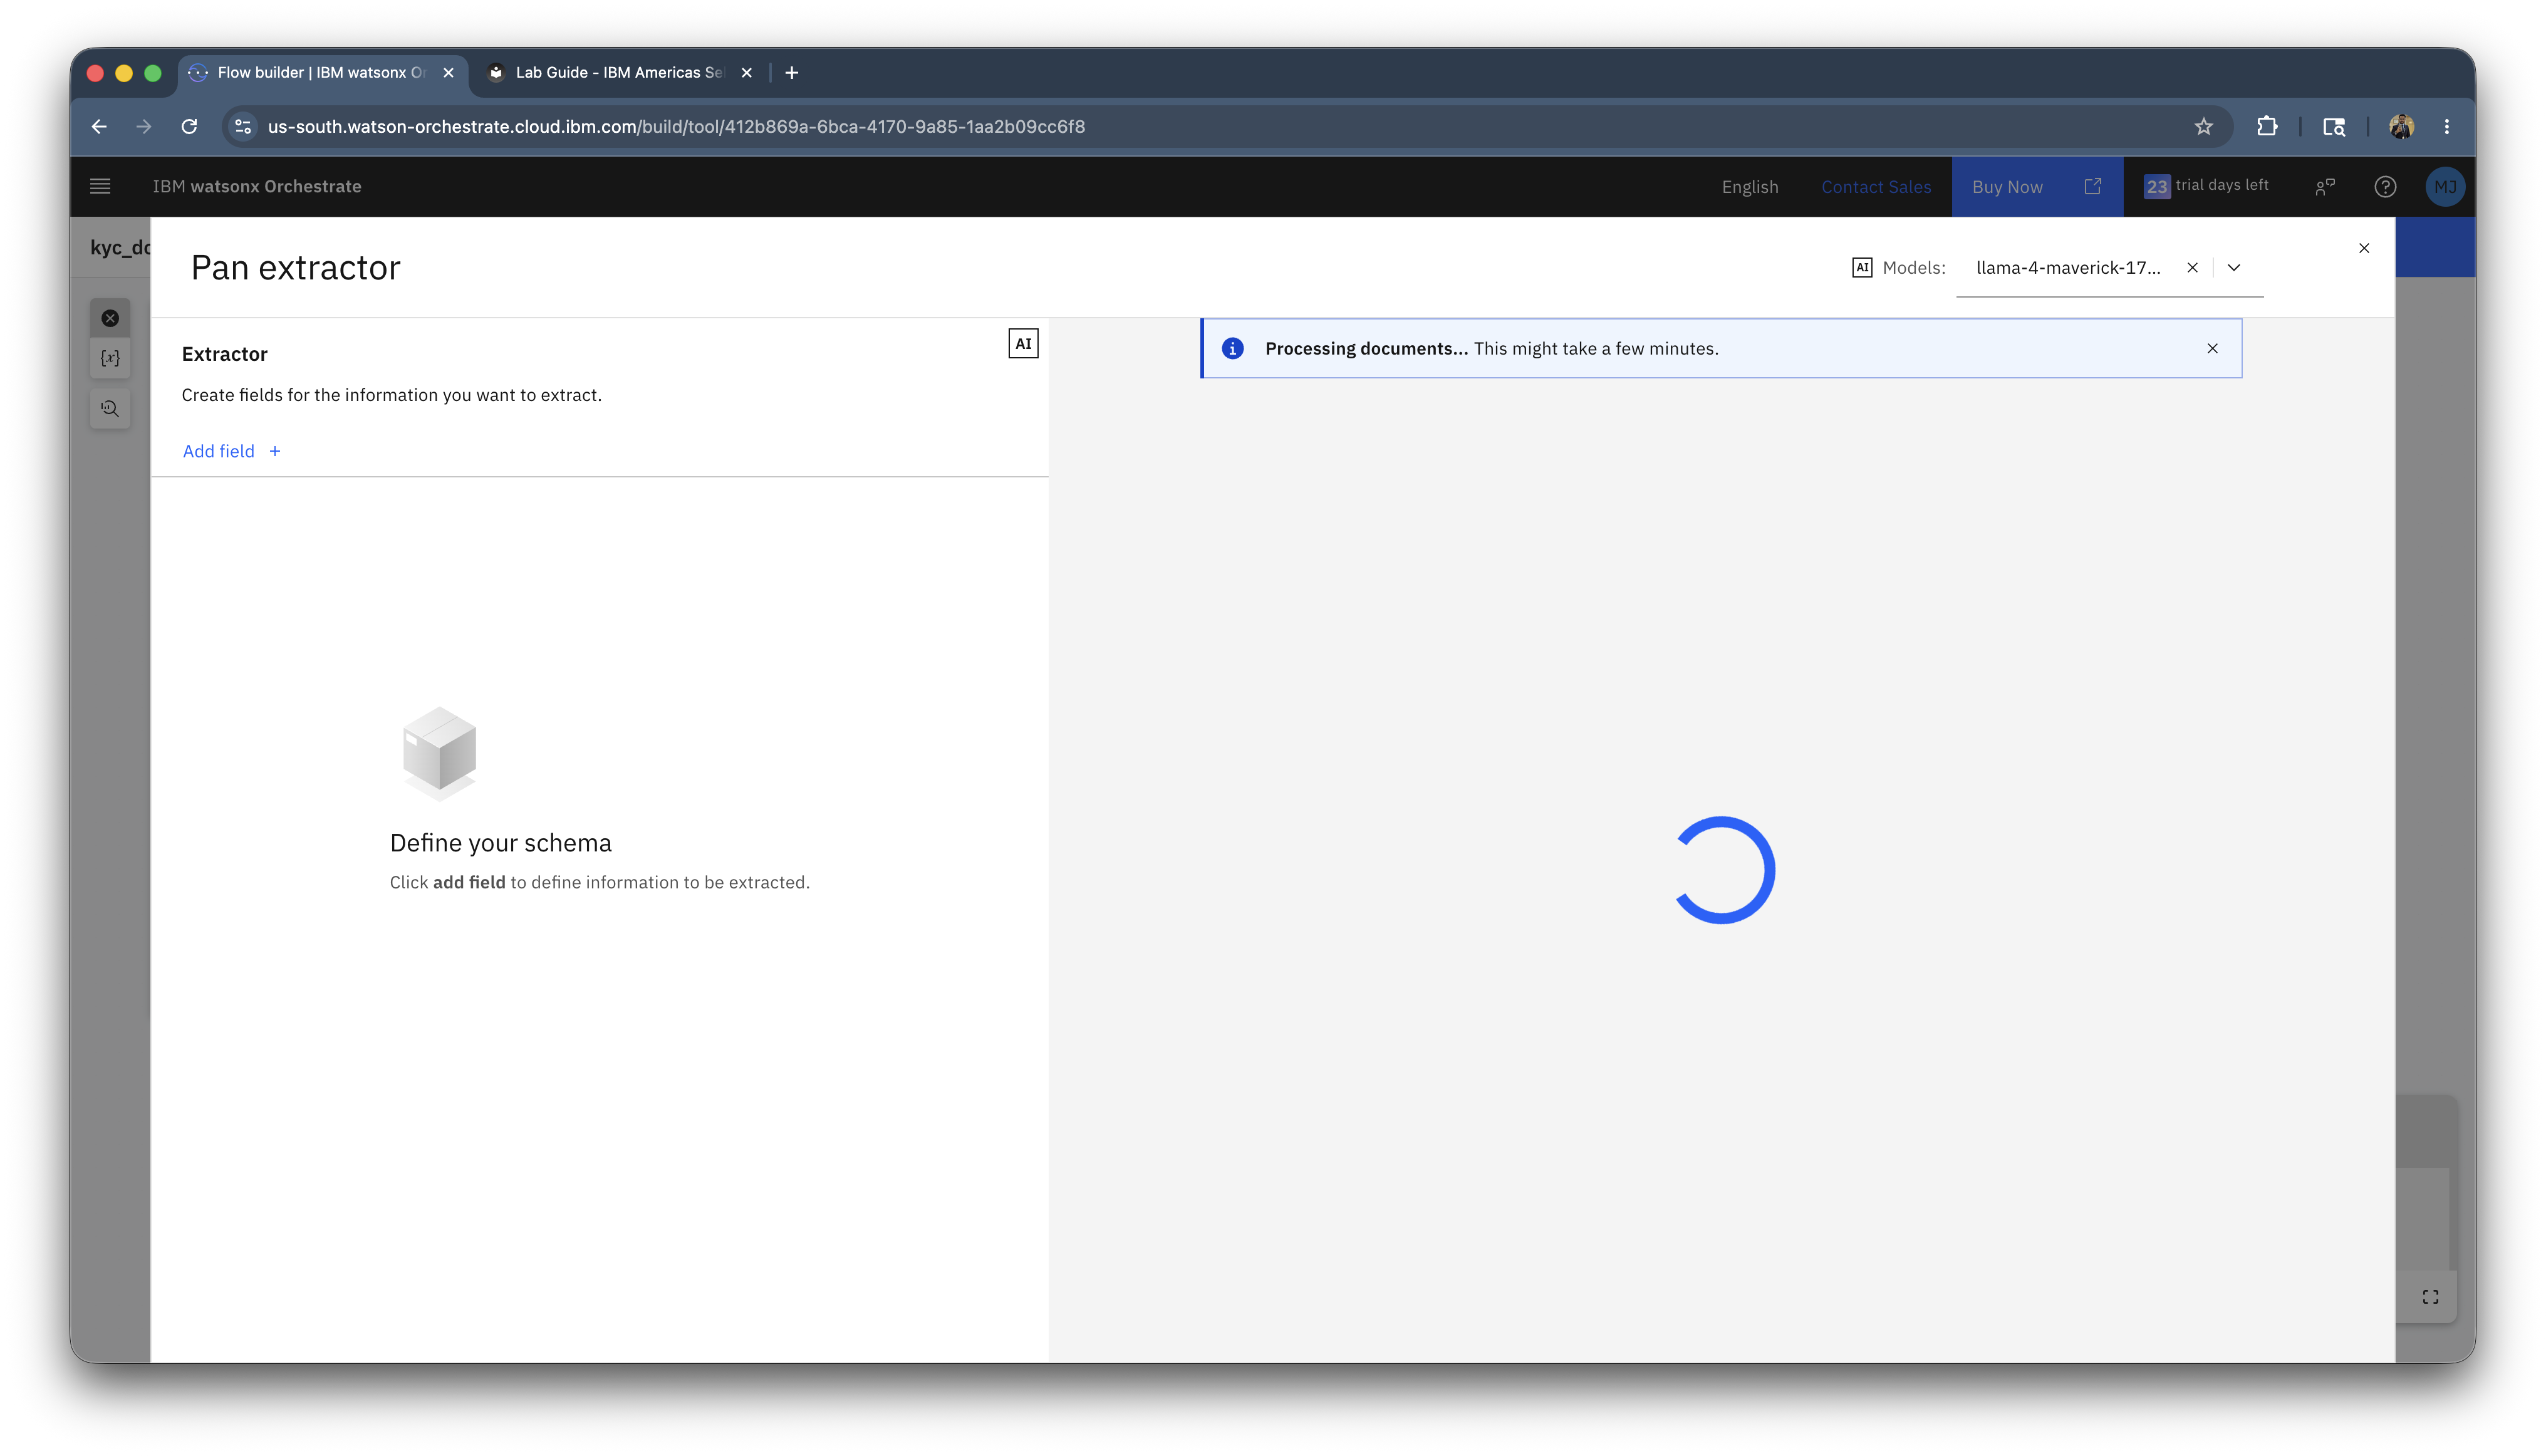
Rename it to Pan extractor.
-
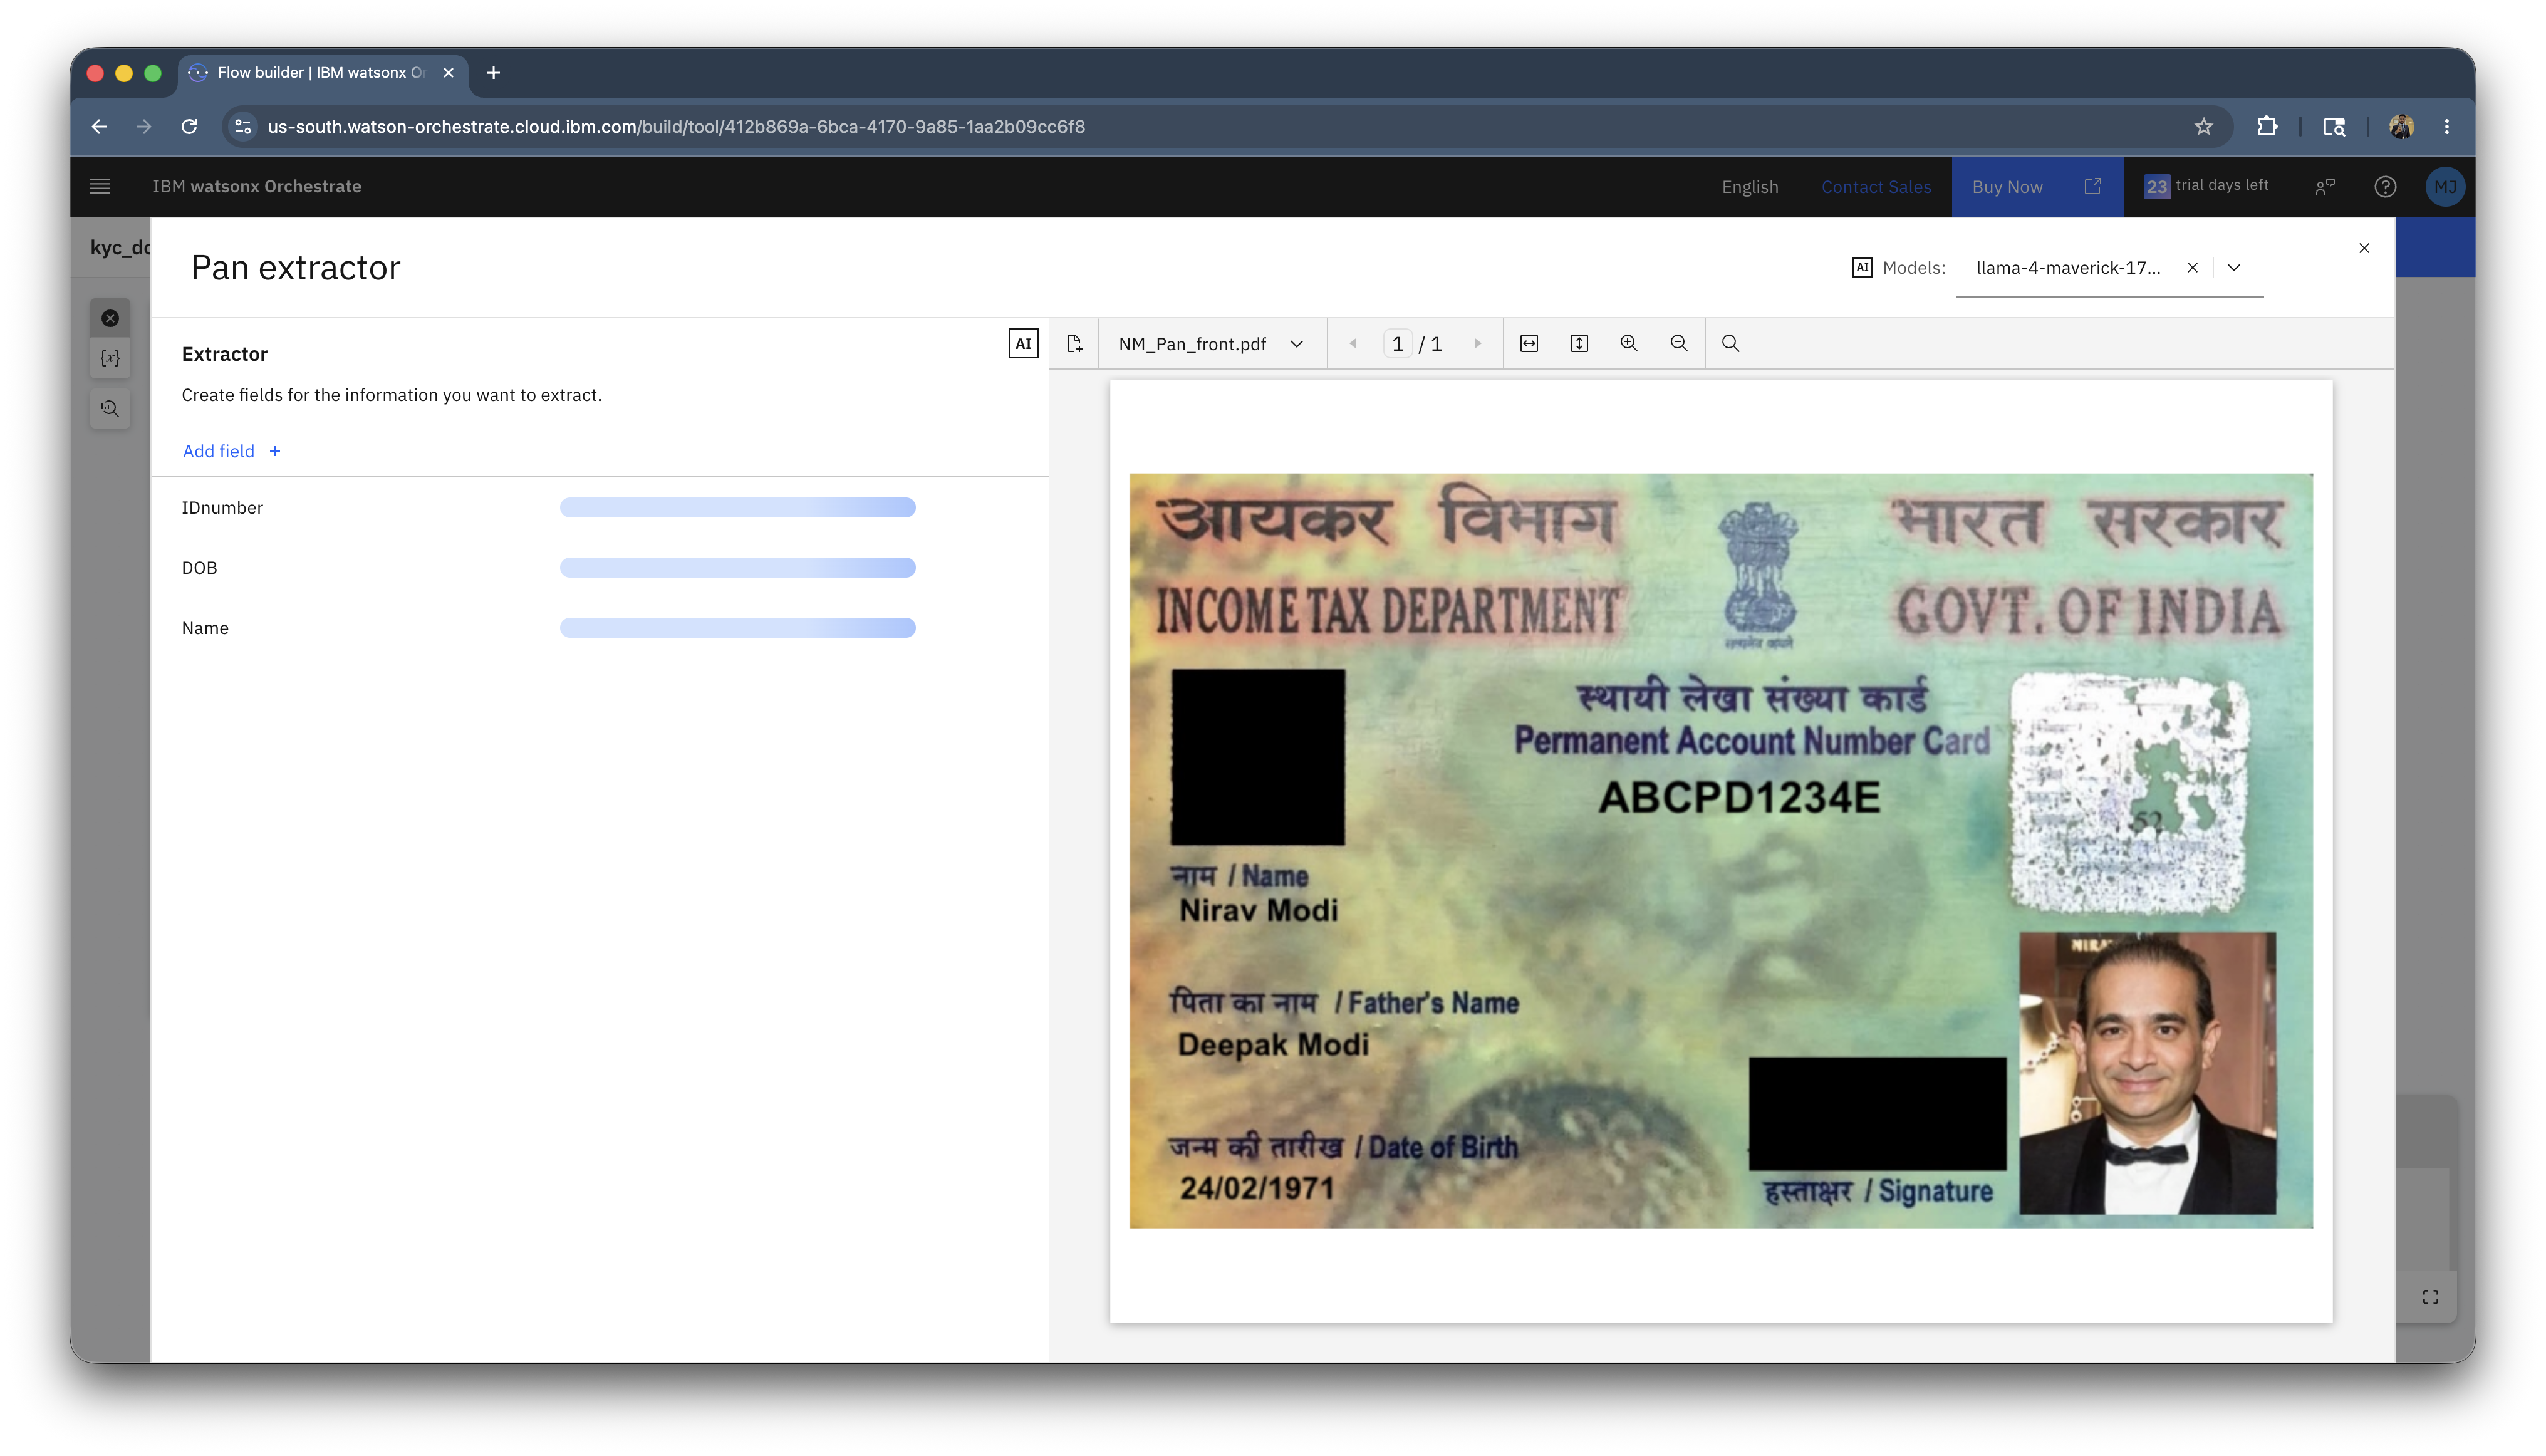
Click on Add field and add the following fields:
- Name
- DOB
- IDnumber
-
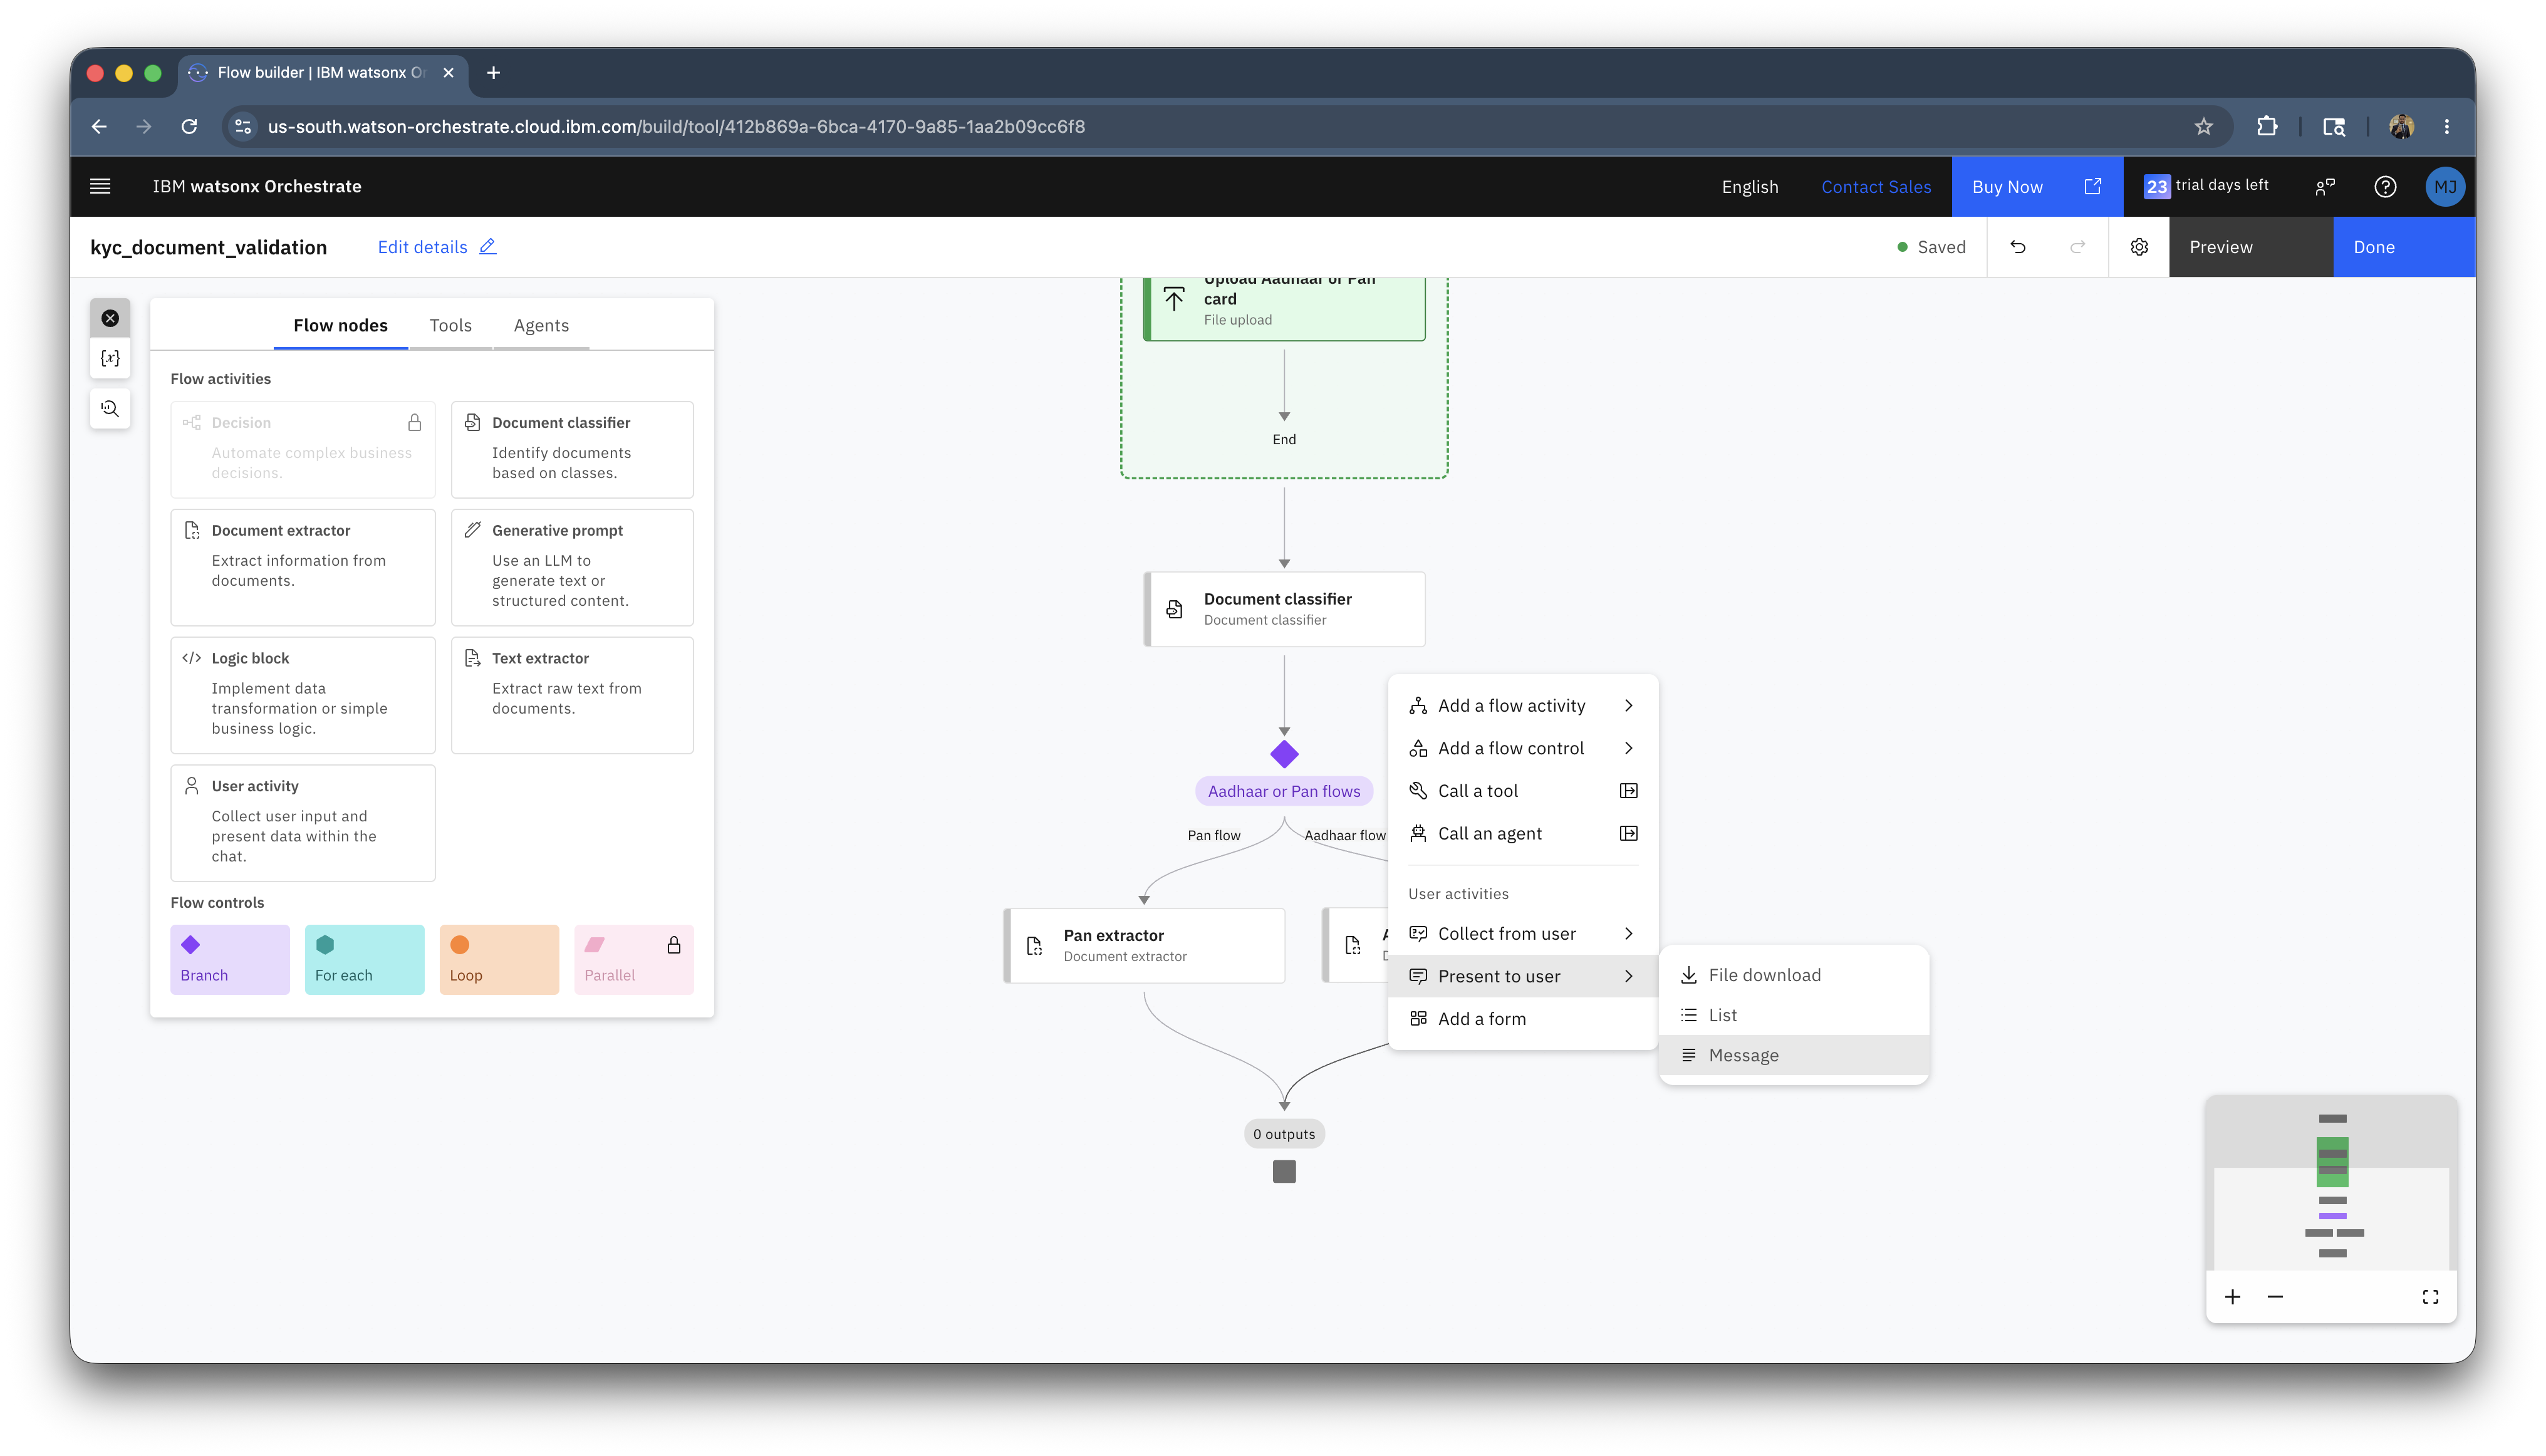
Close the window and under the Aadhaar flow, click on the line and select Present to user > Message.
-
Add the following message:
Select the variable icon and under Aadhaar extractor, add all the variables sepeared by|as shown.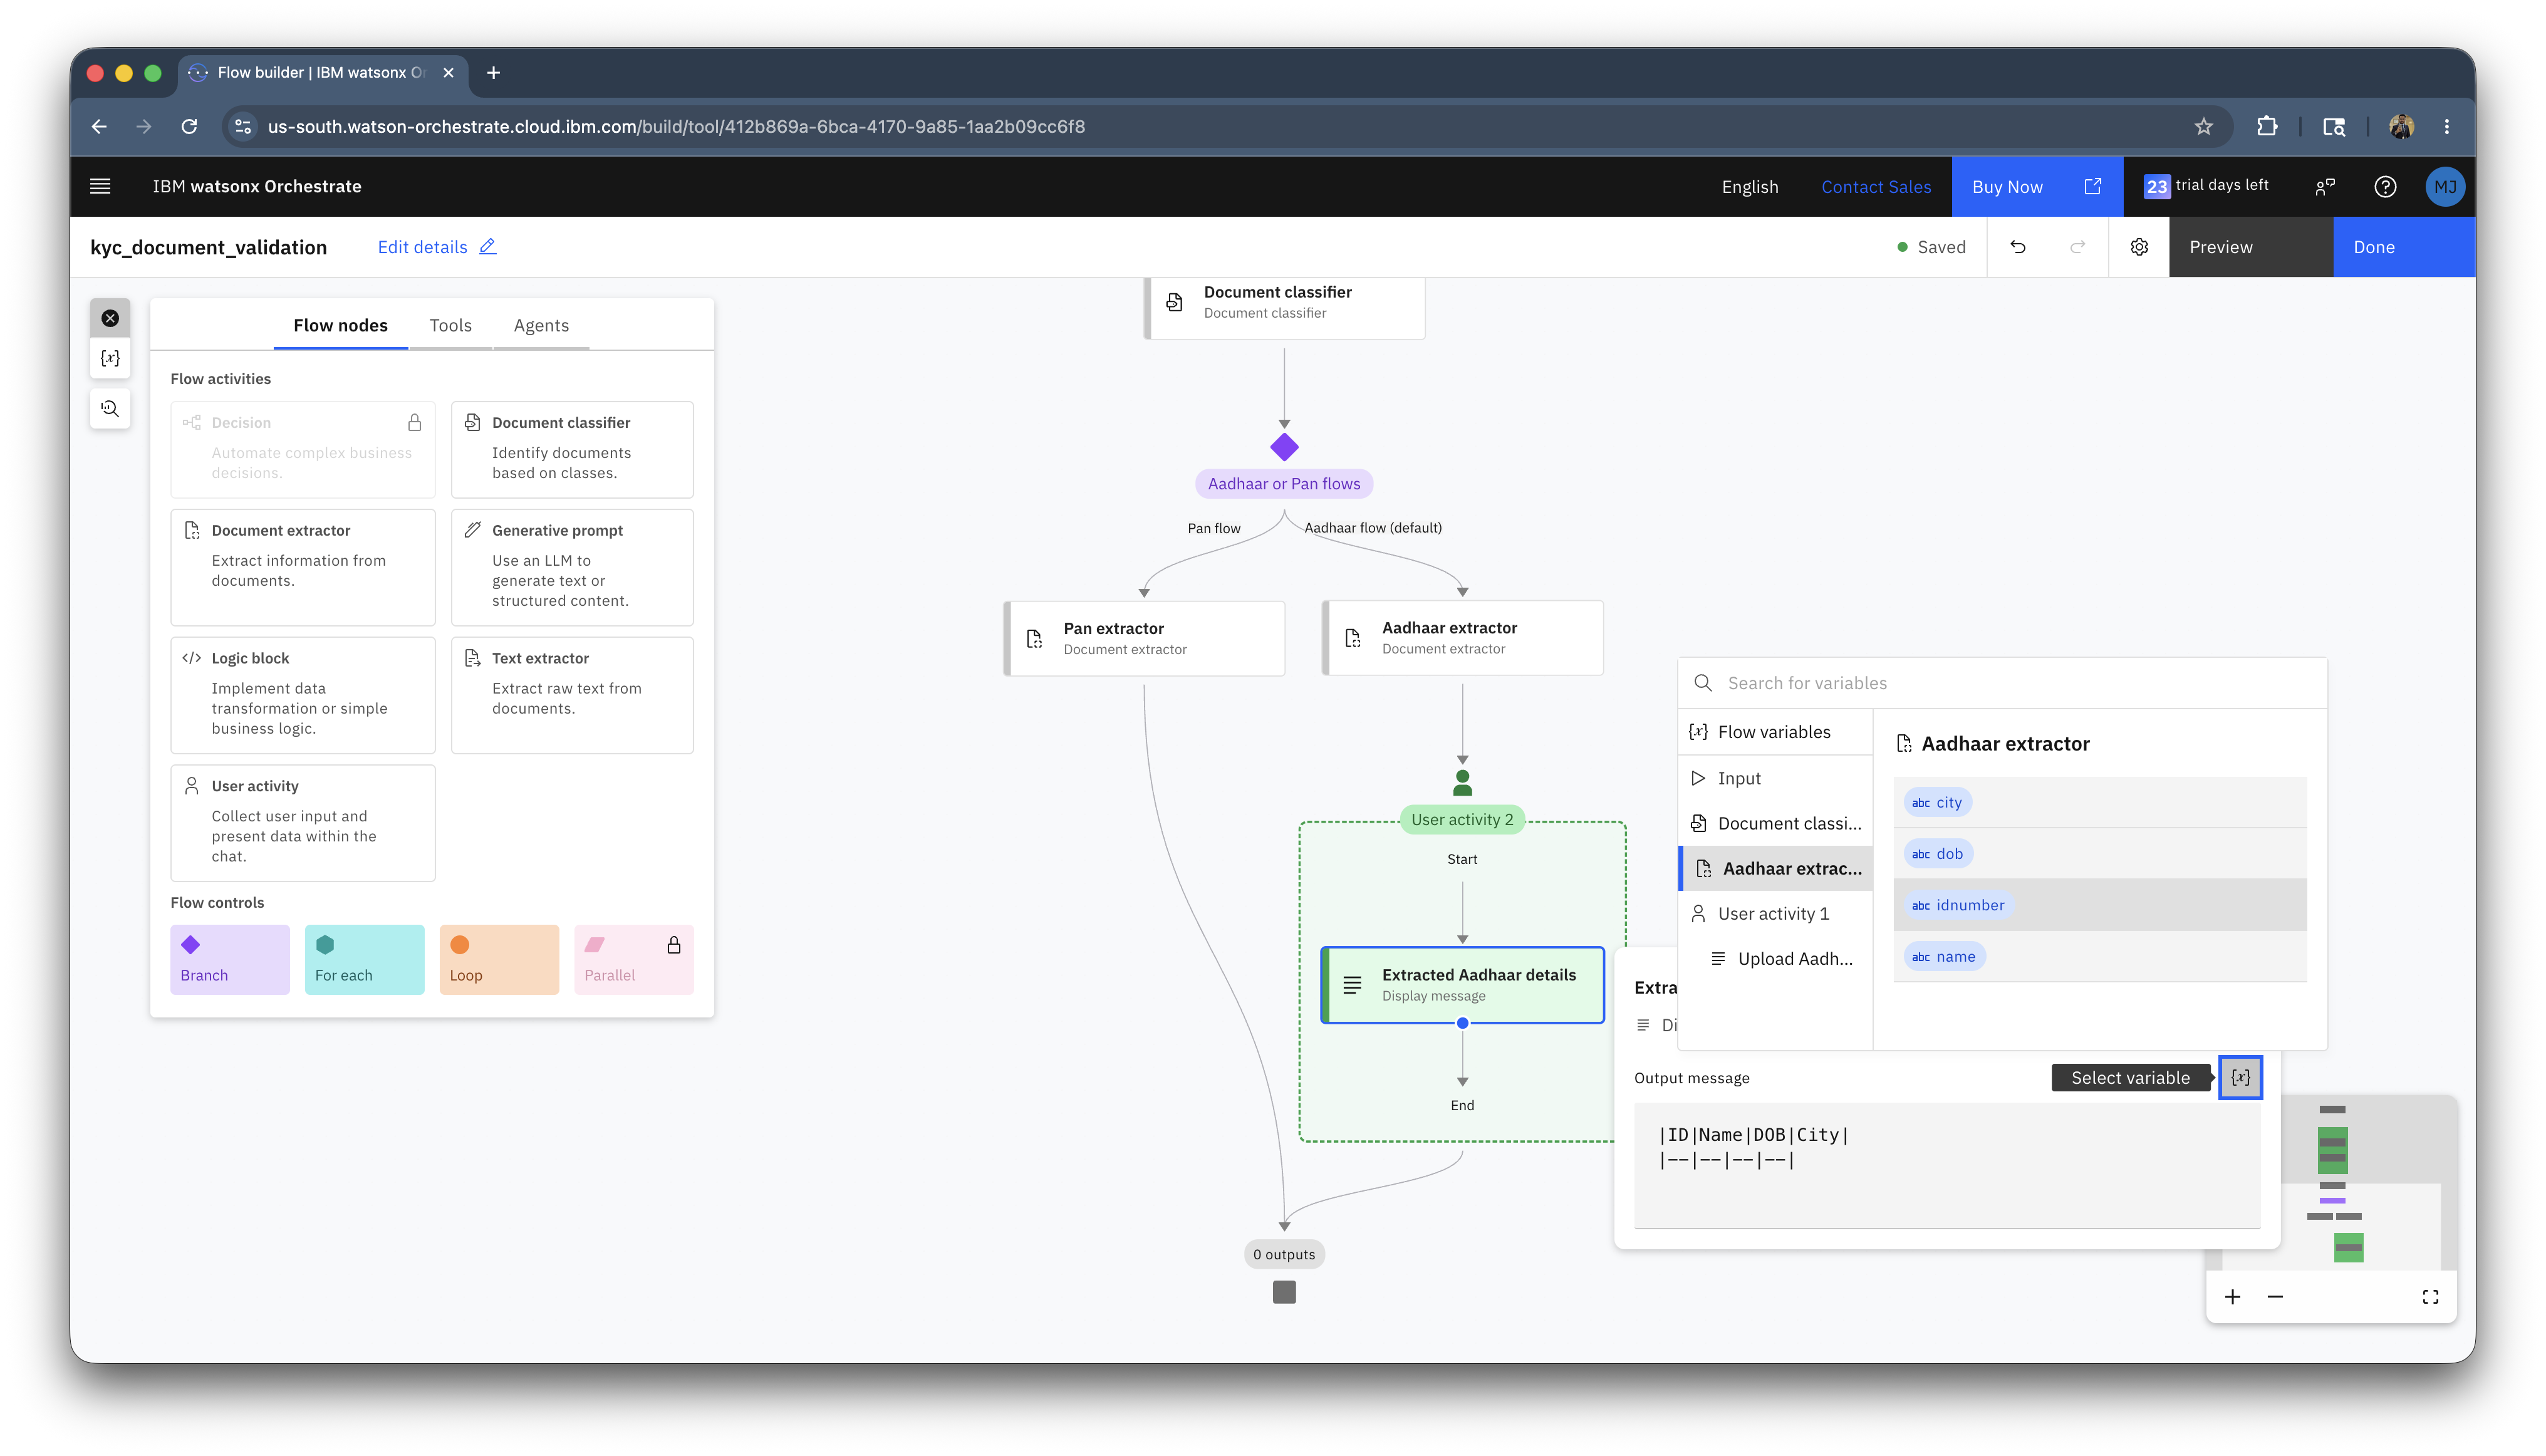
-
All the variables are seperate by
|so that the output is a markdown table format.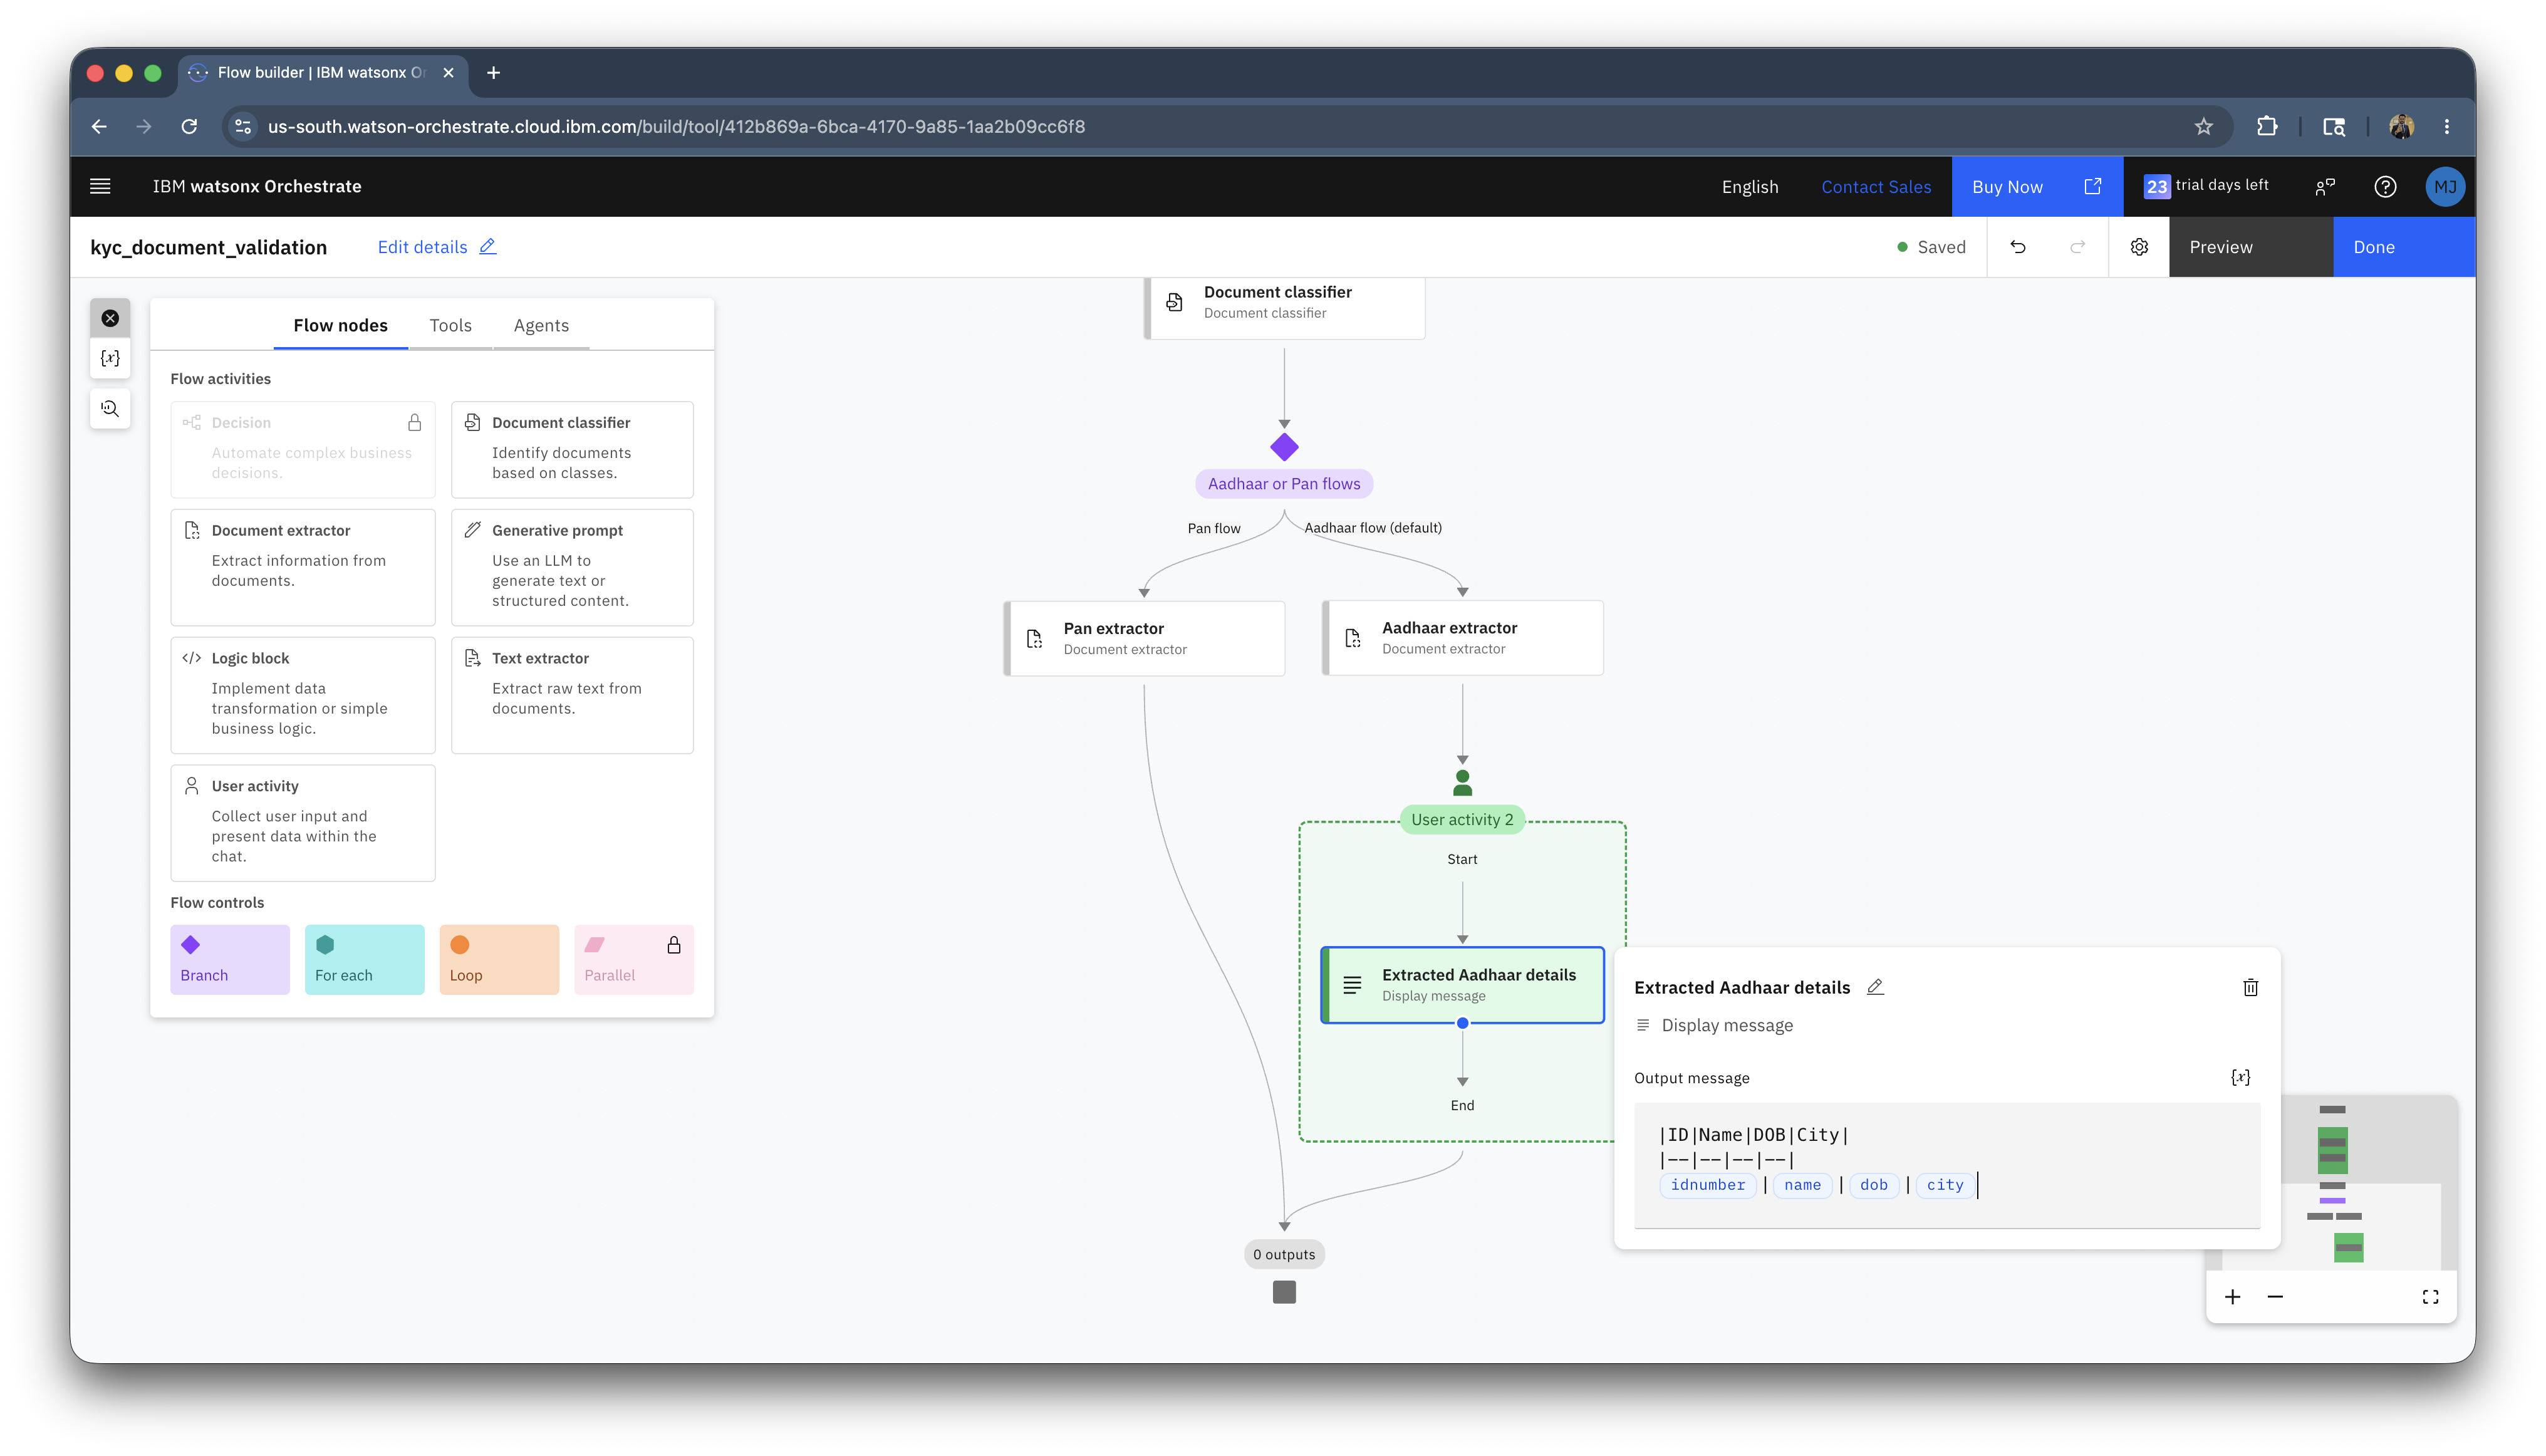
-
Similarly under Pan flow, click on the line and select Present to user > Message. And add the following message:
Select the variable icon and under Pan extractor, add all the variables sepeared by|as shown.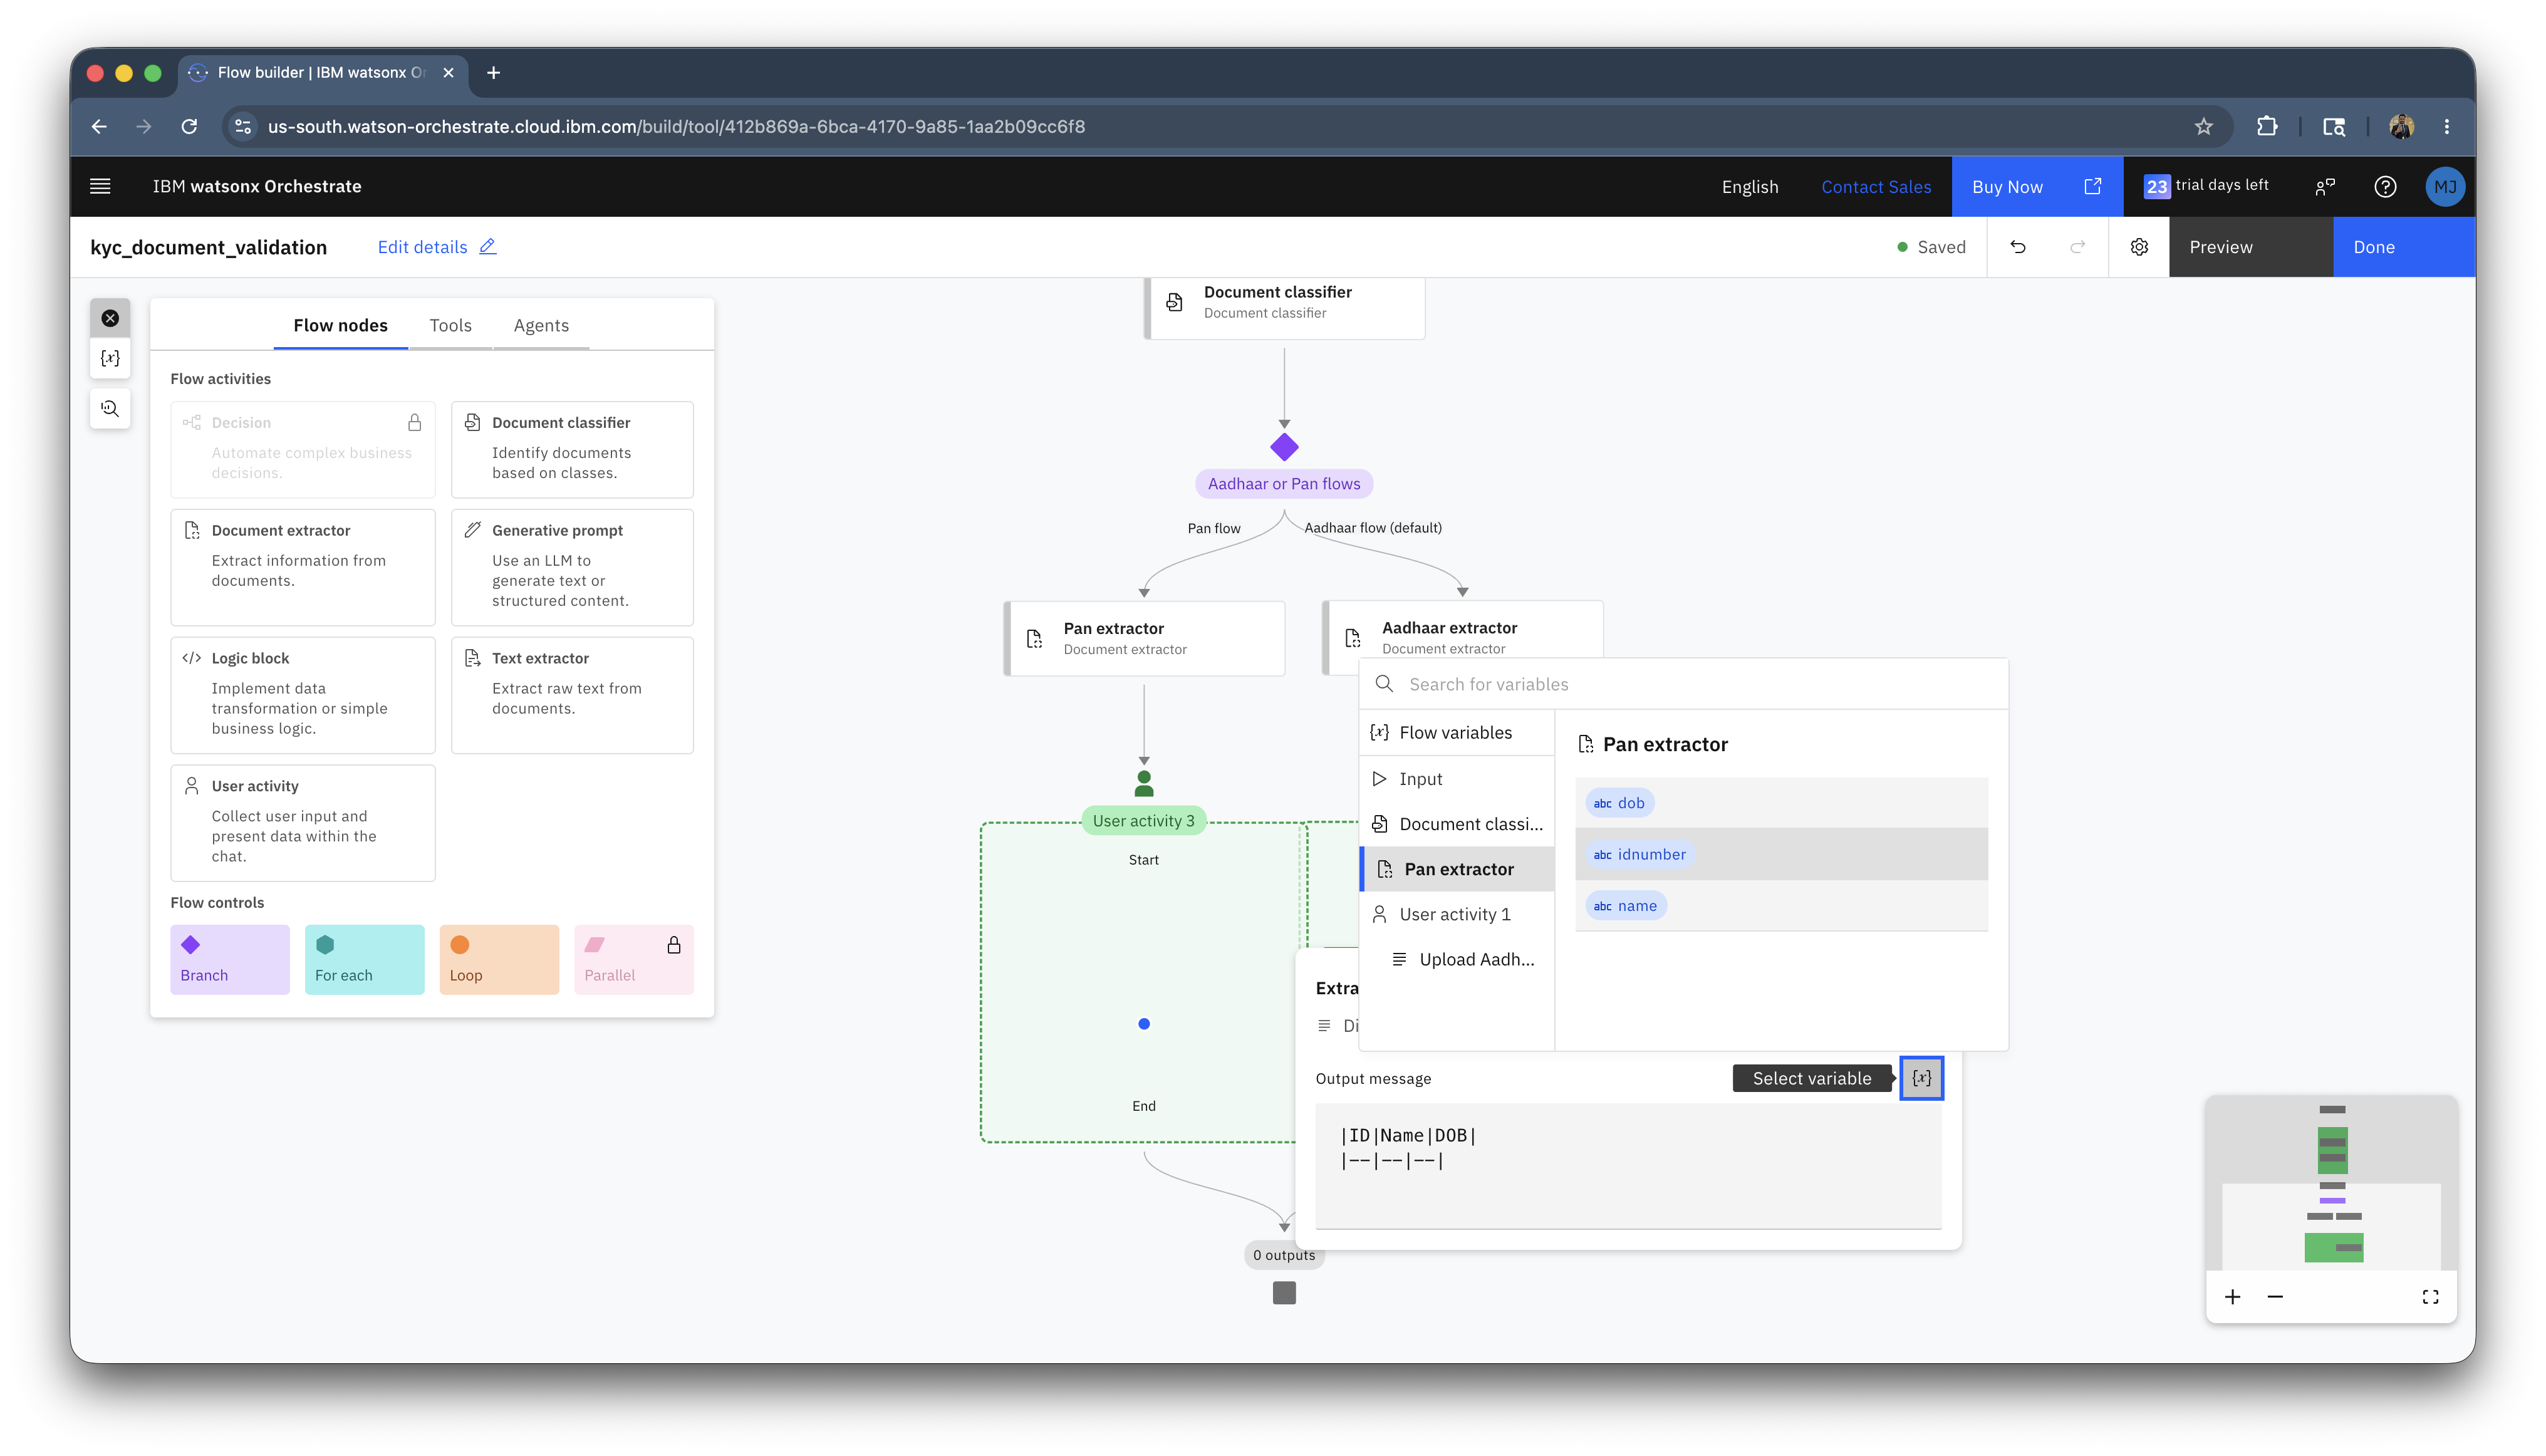
-
Your flow should look something like this.
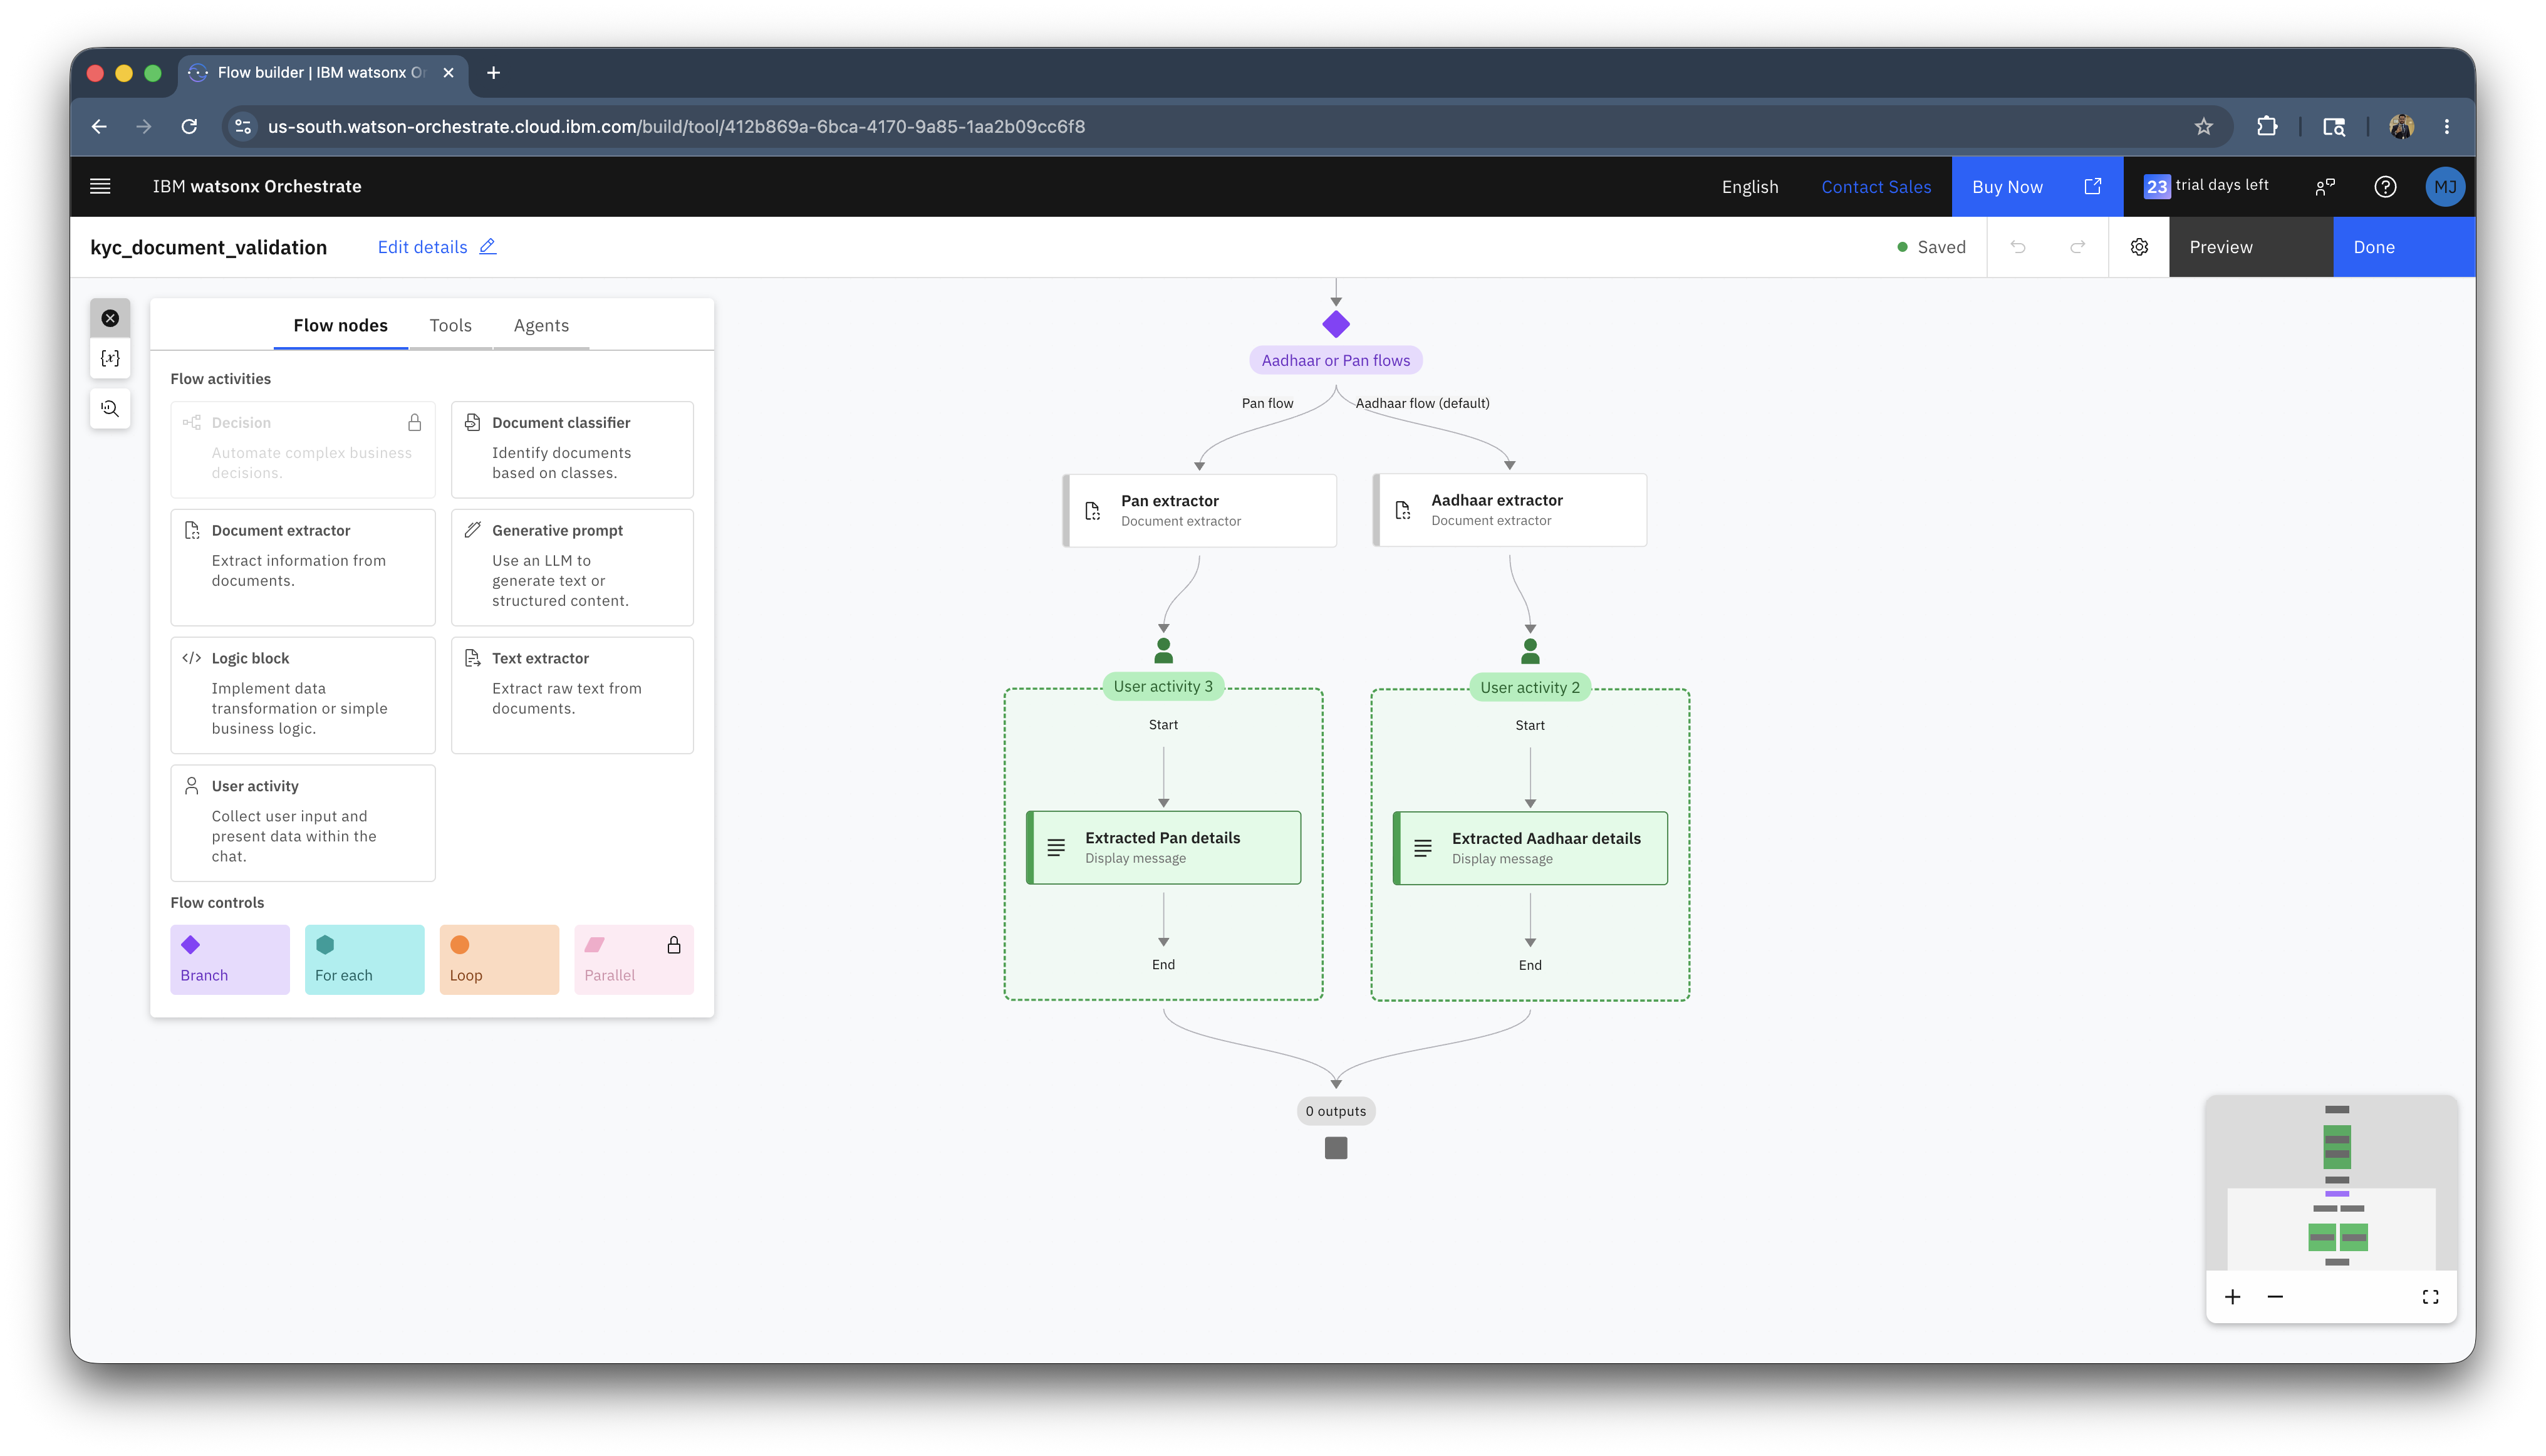
-
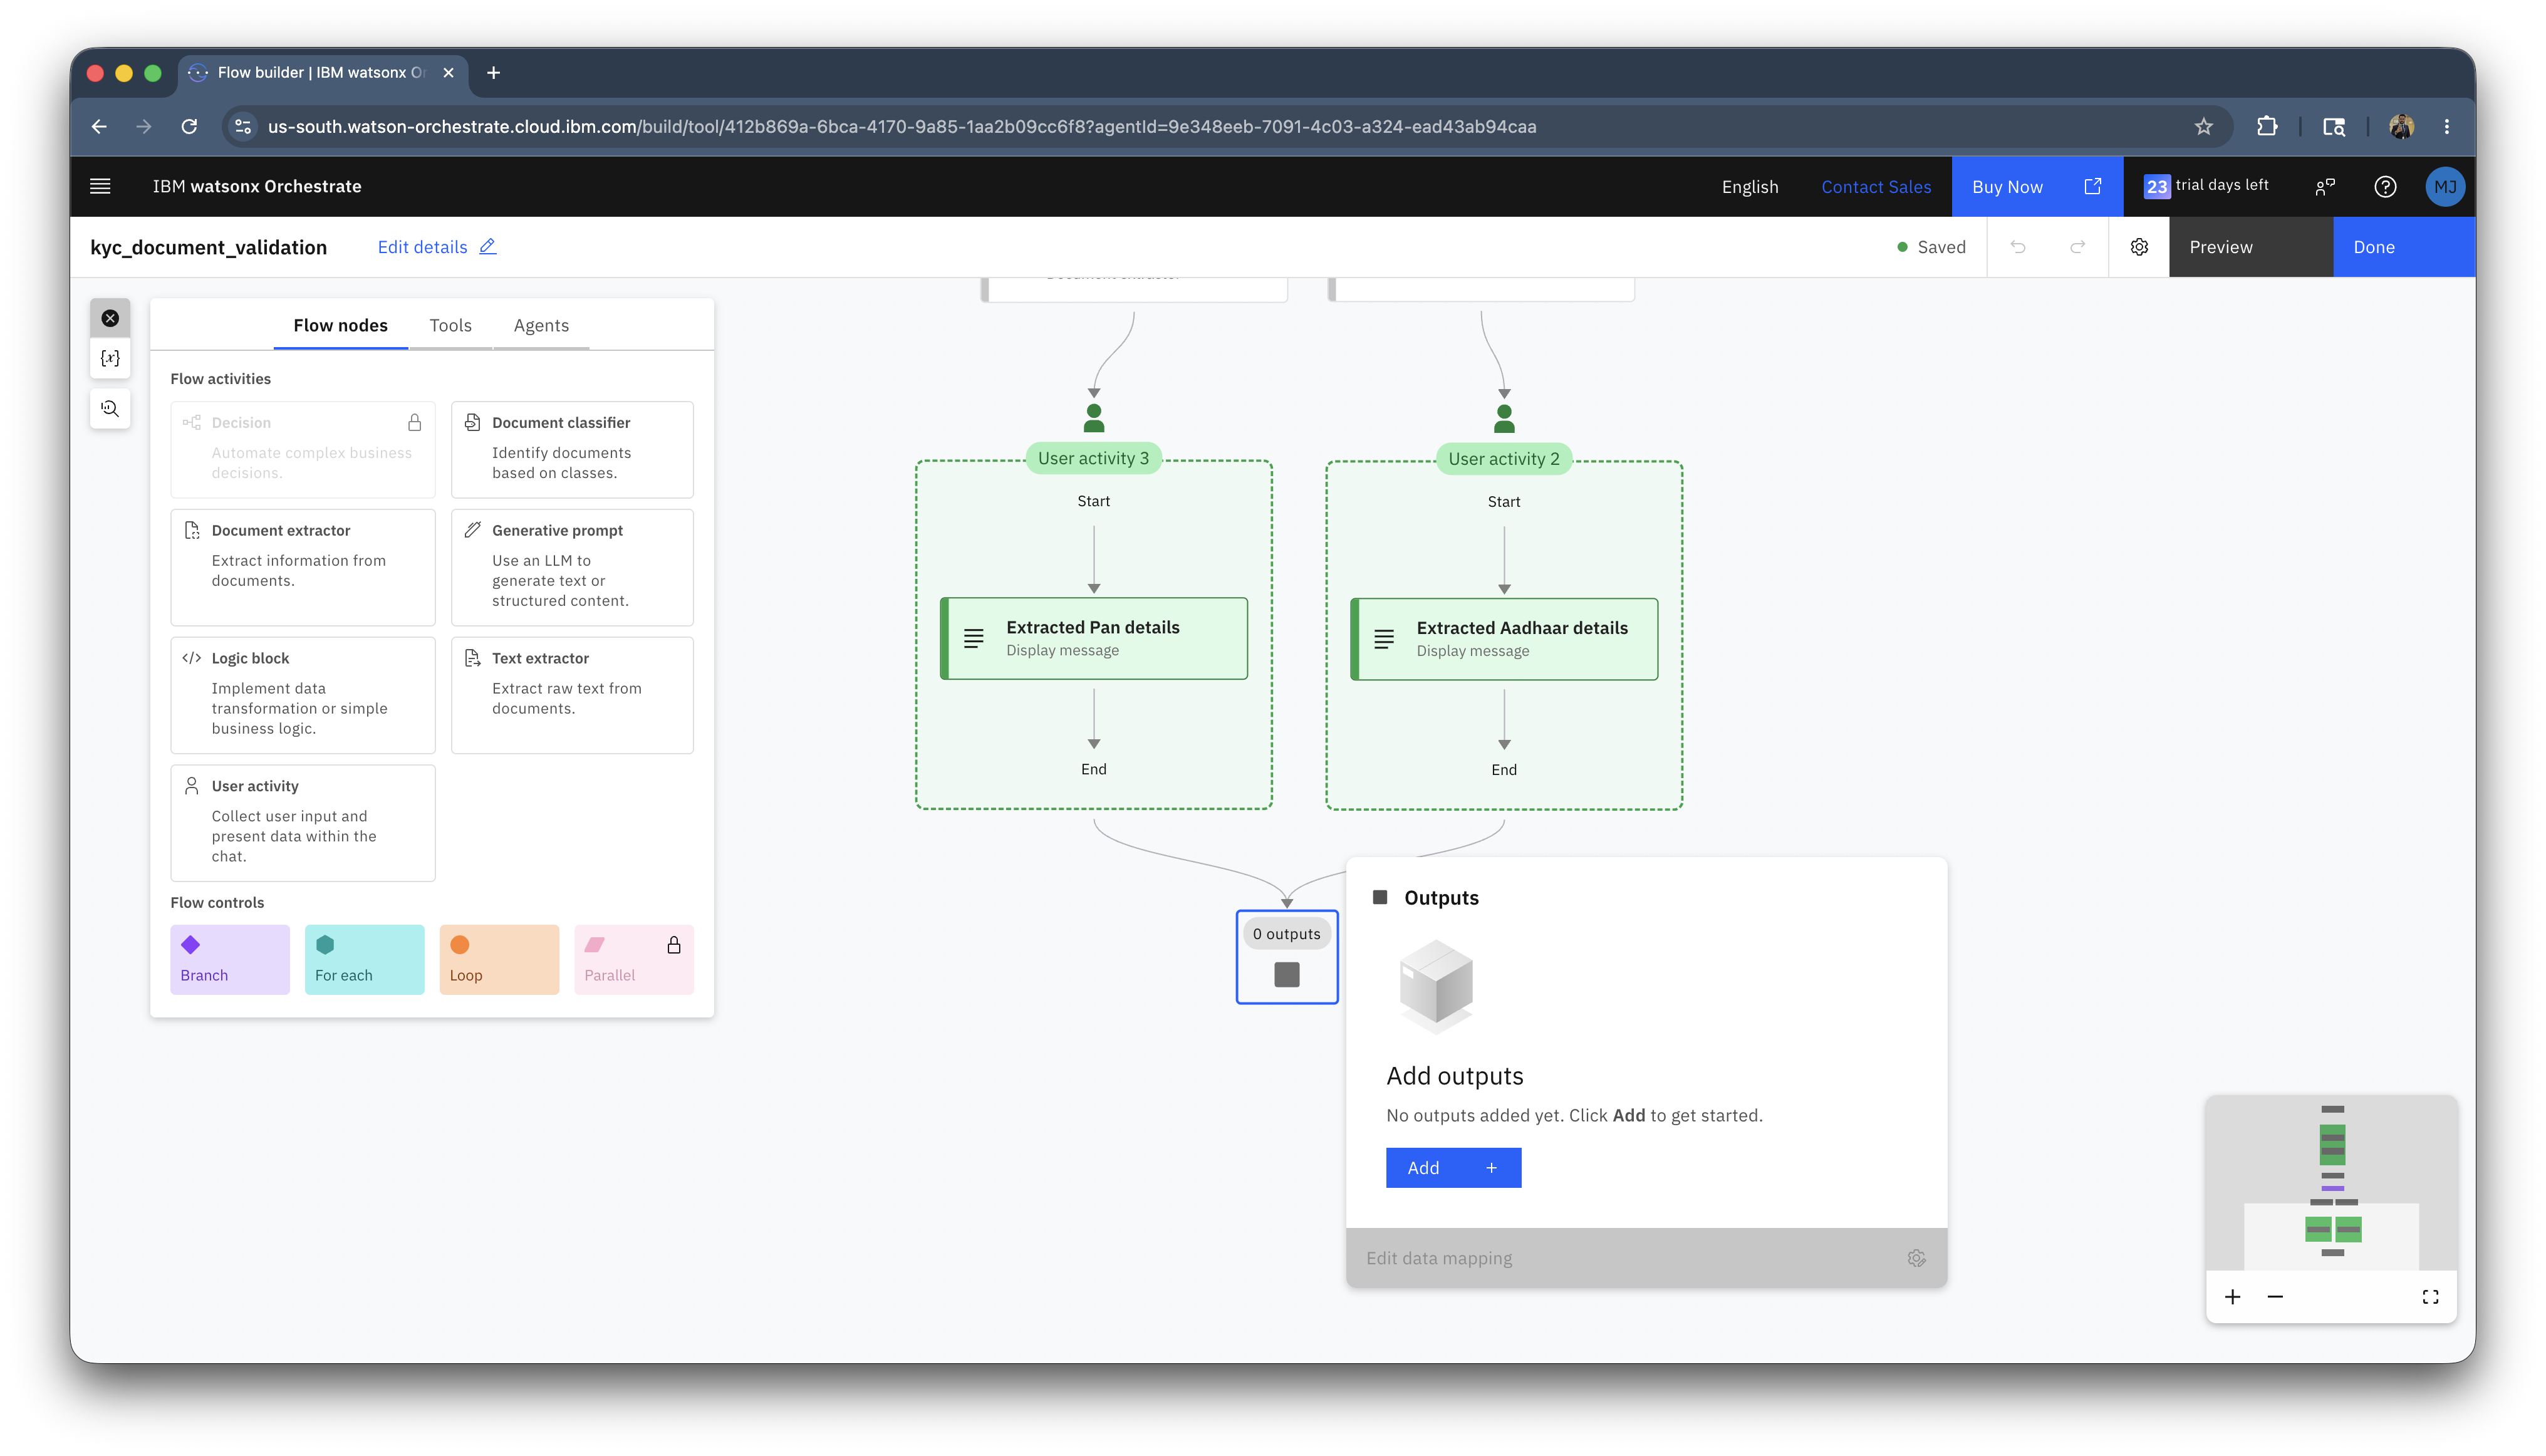
Click on the Output > Add +.
-
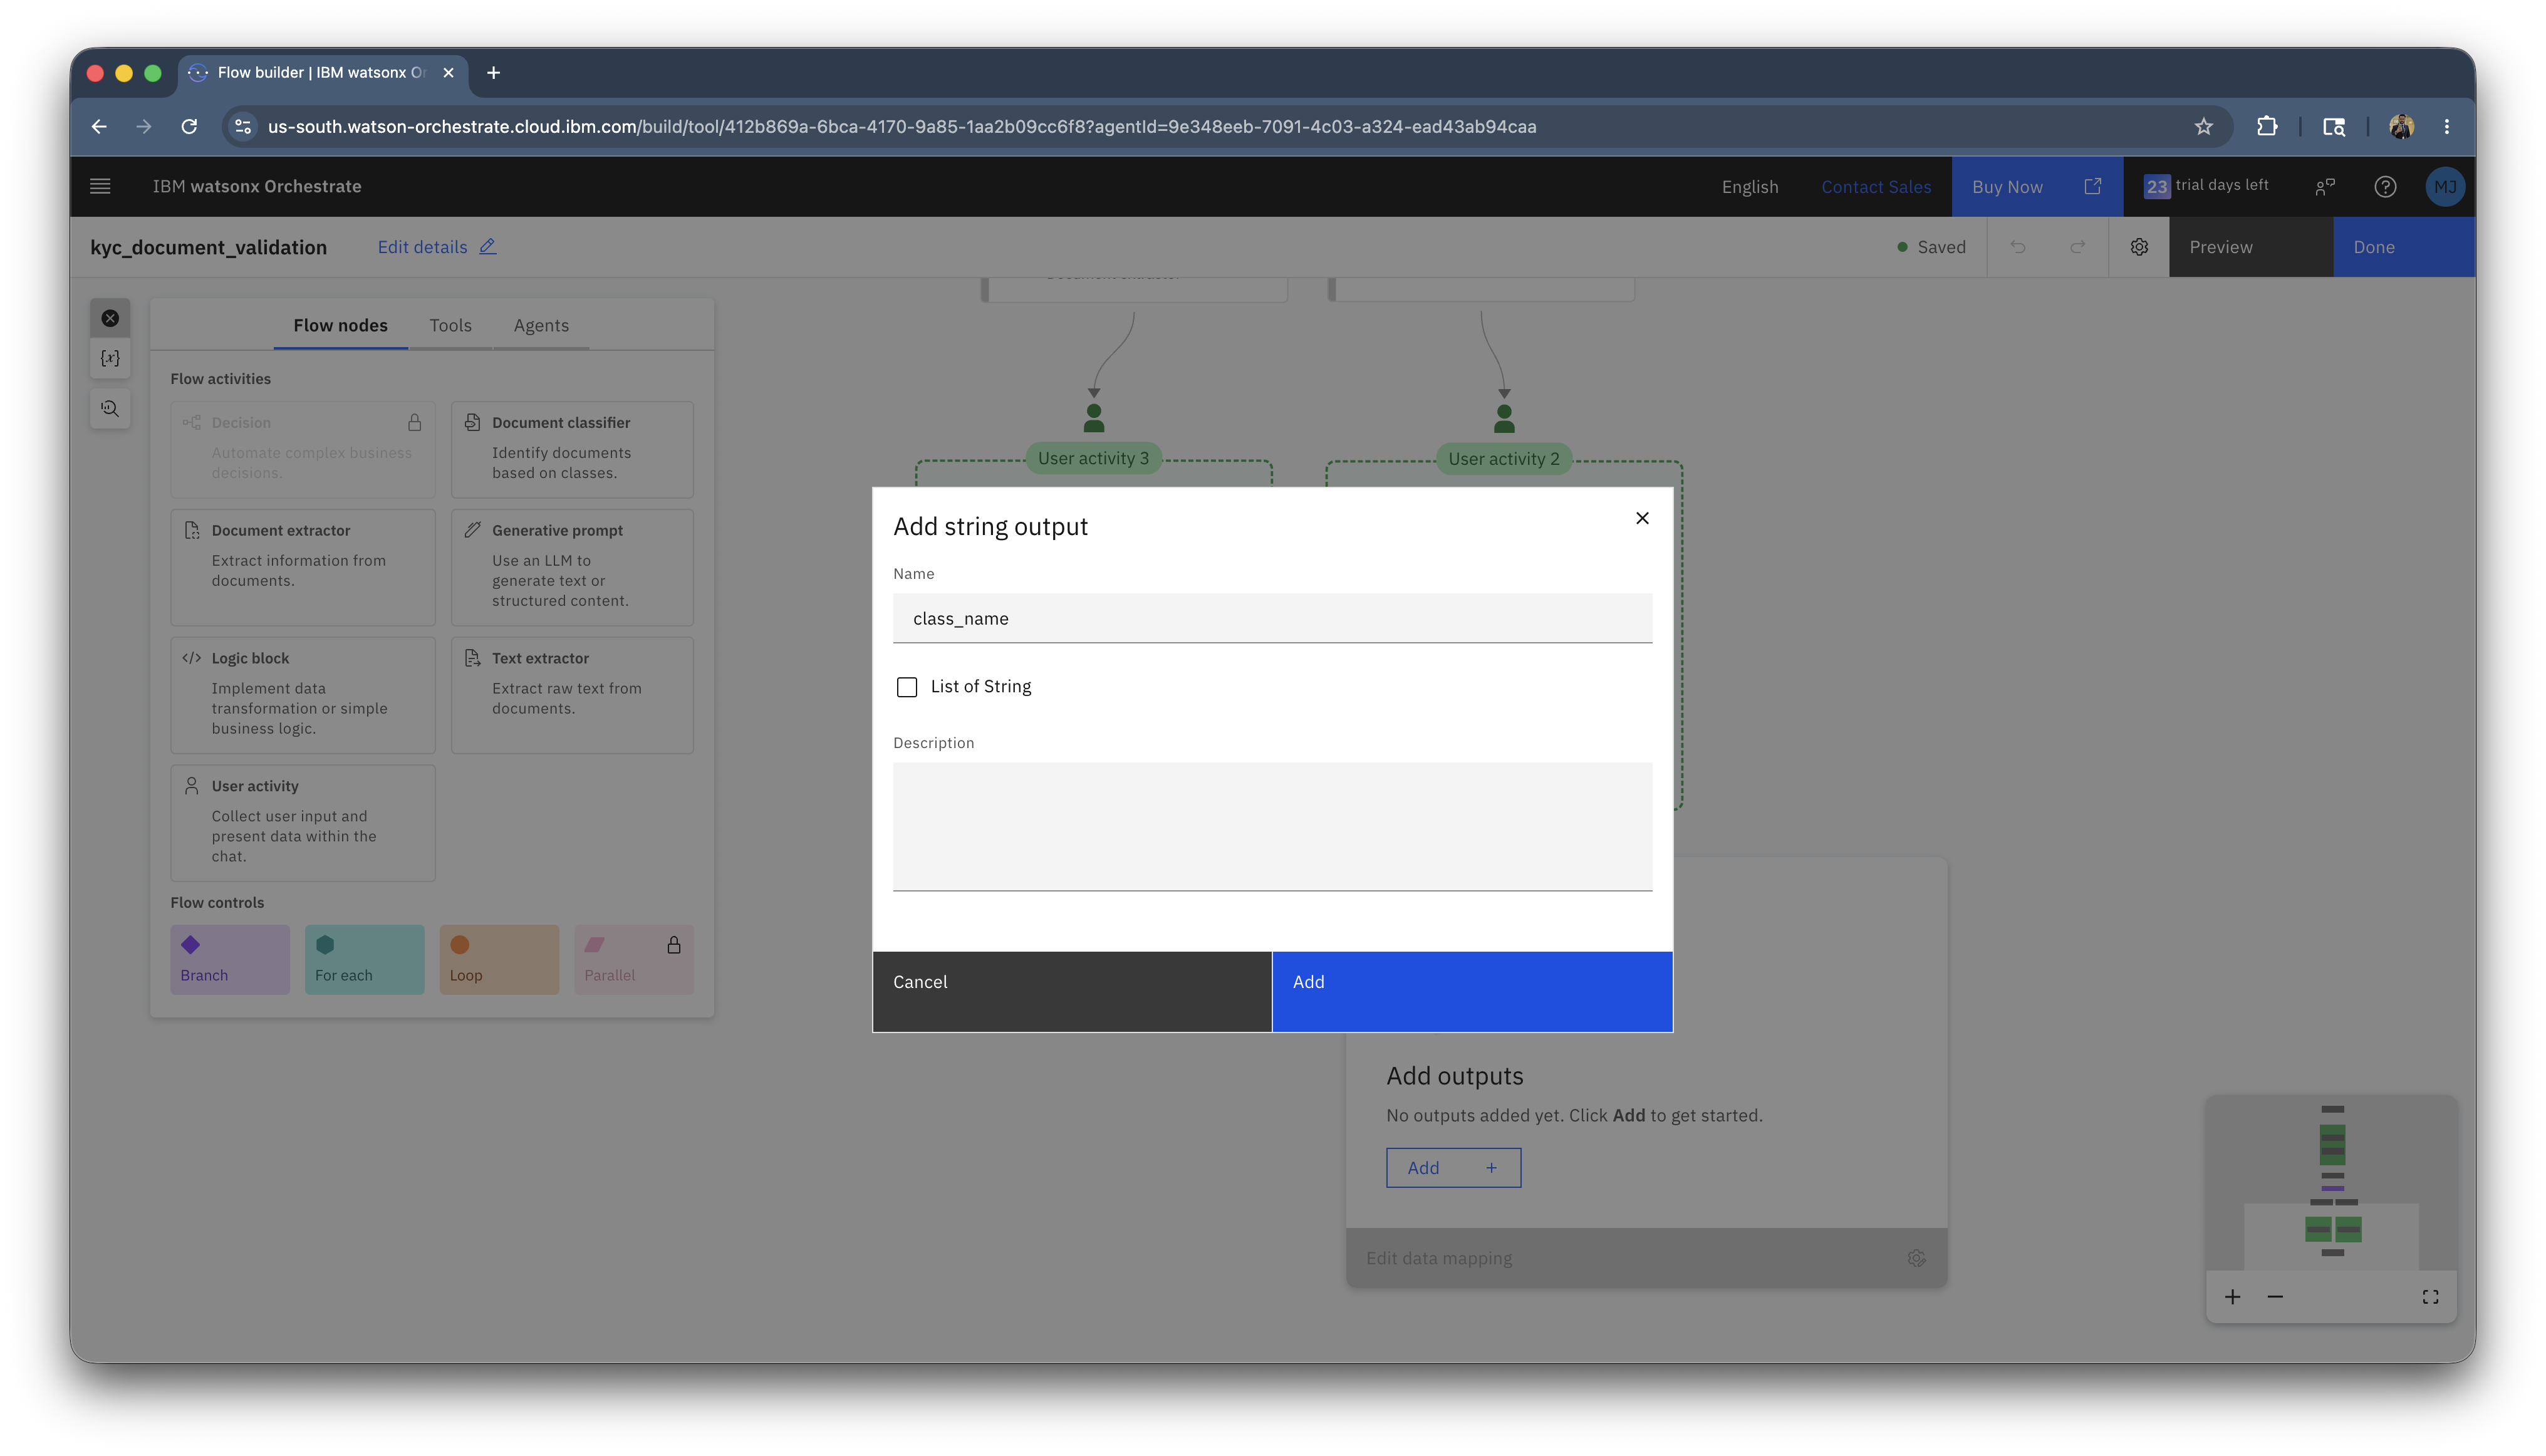
Add a string and name it as class_name.
-
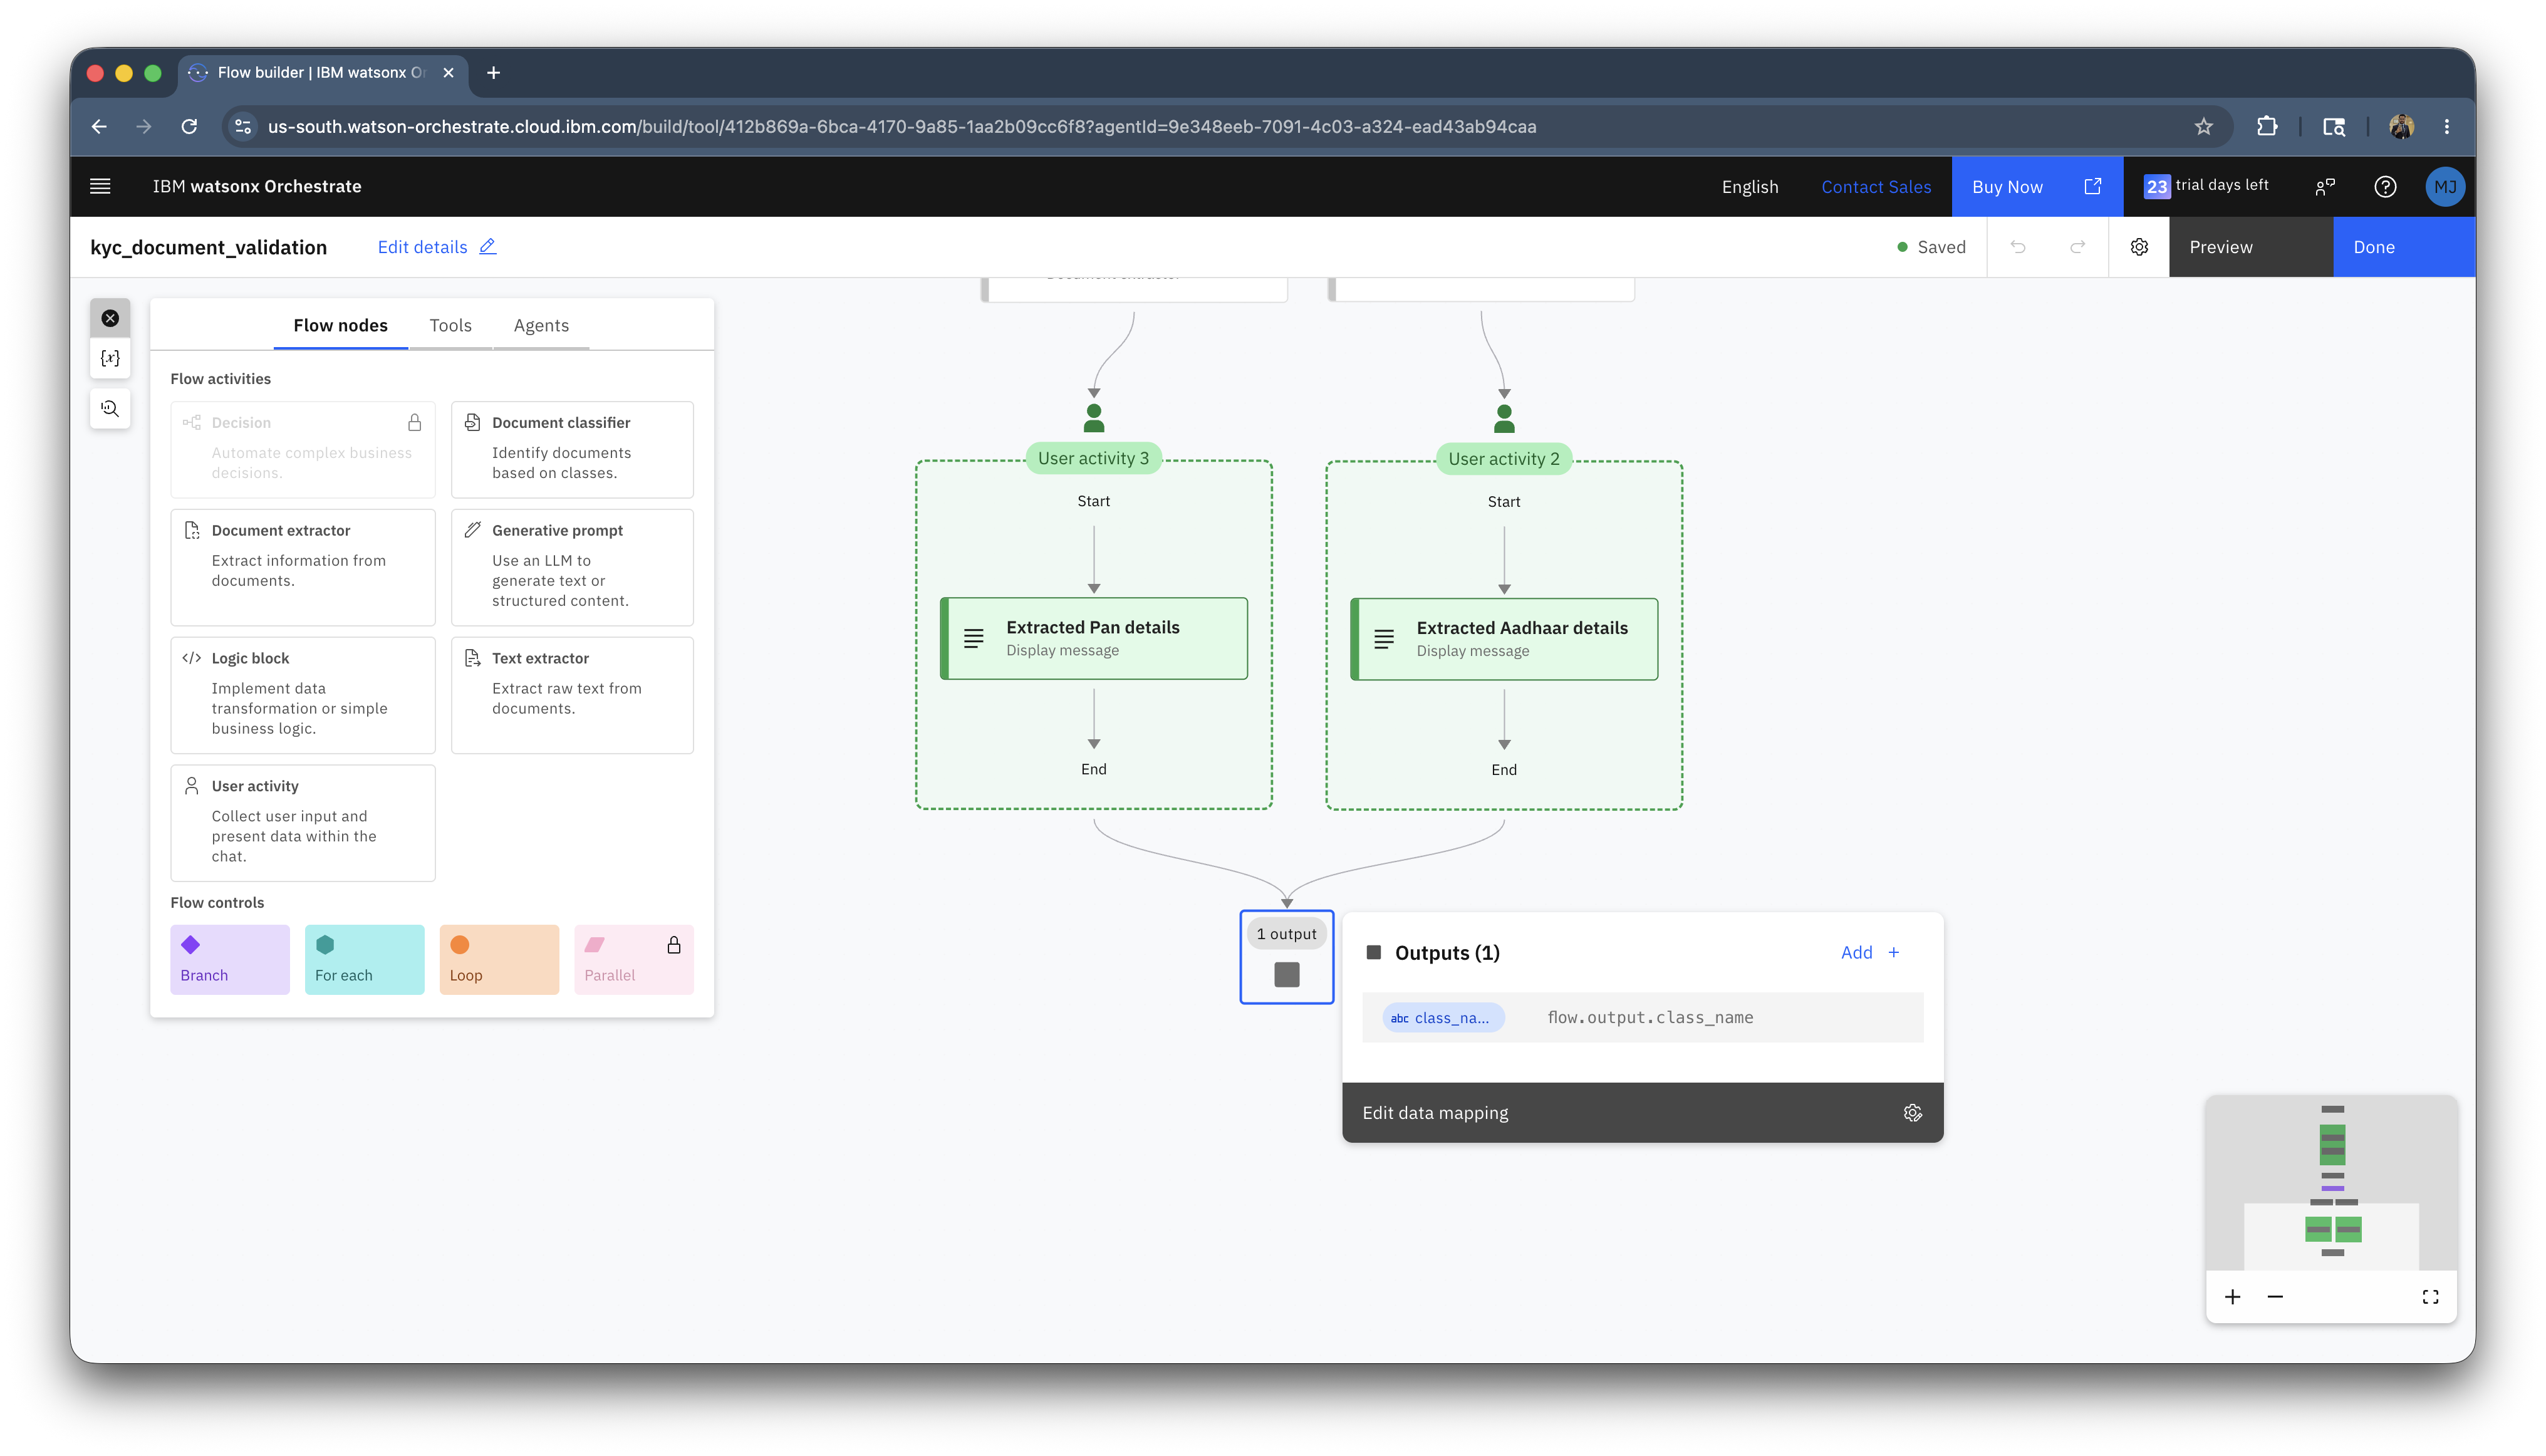
Click on Edit data mapping.
-
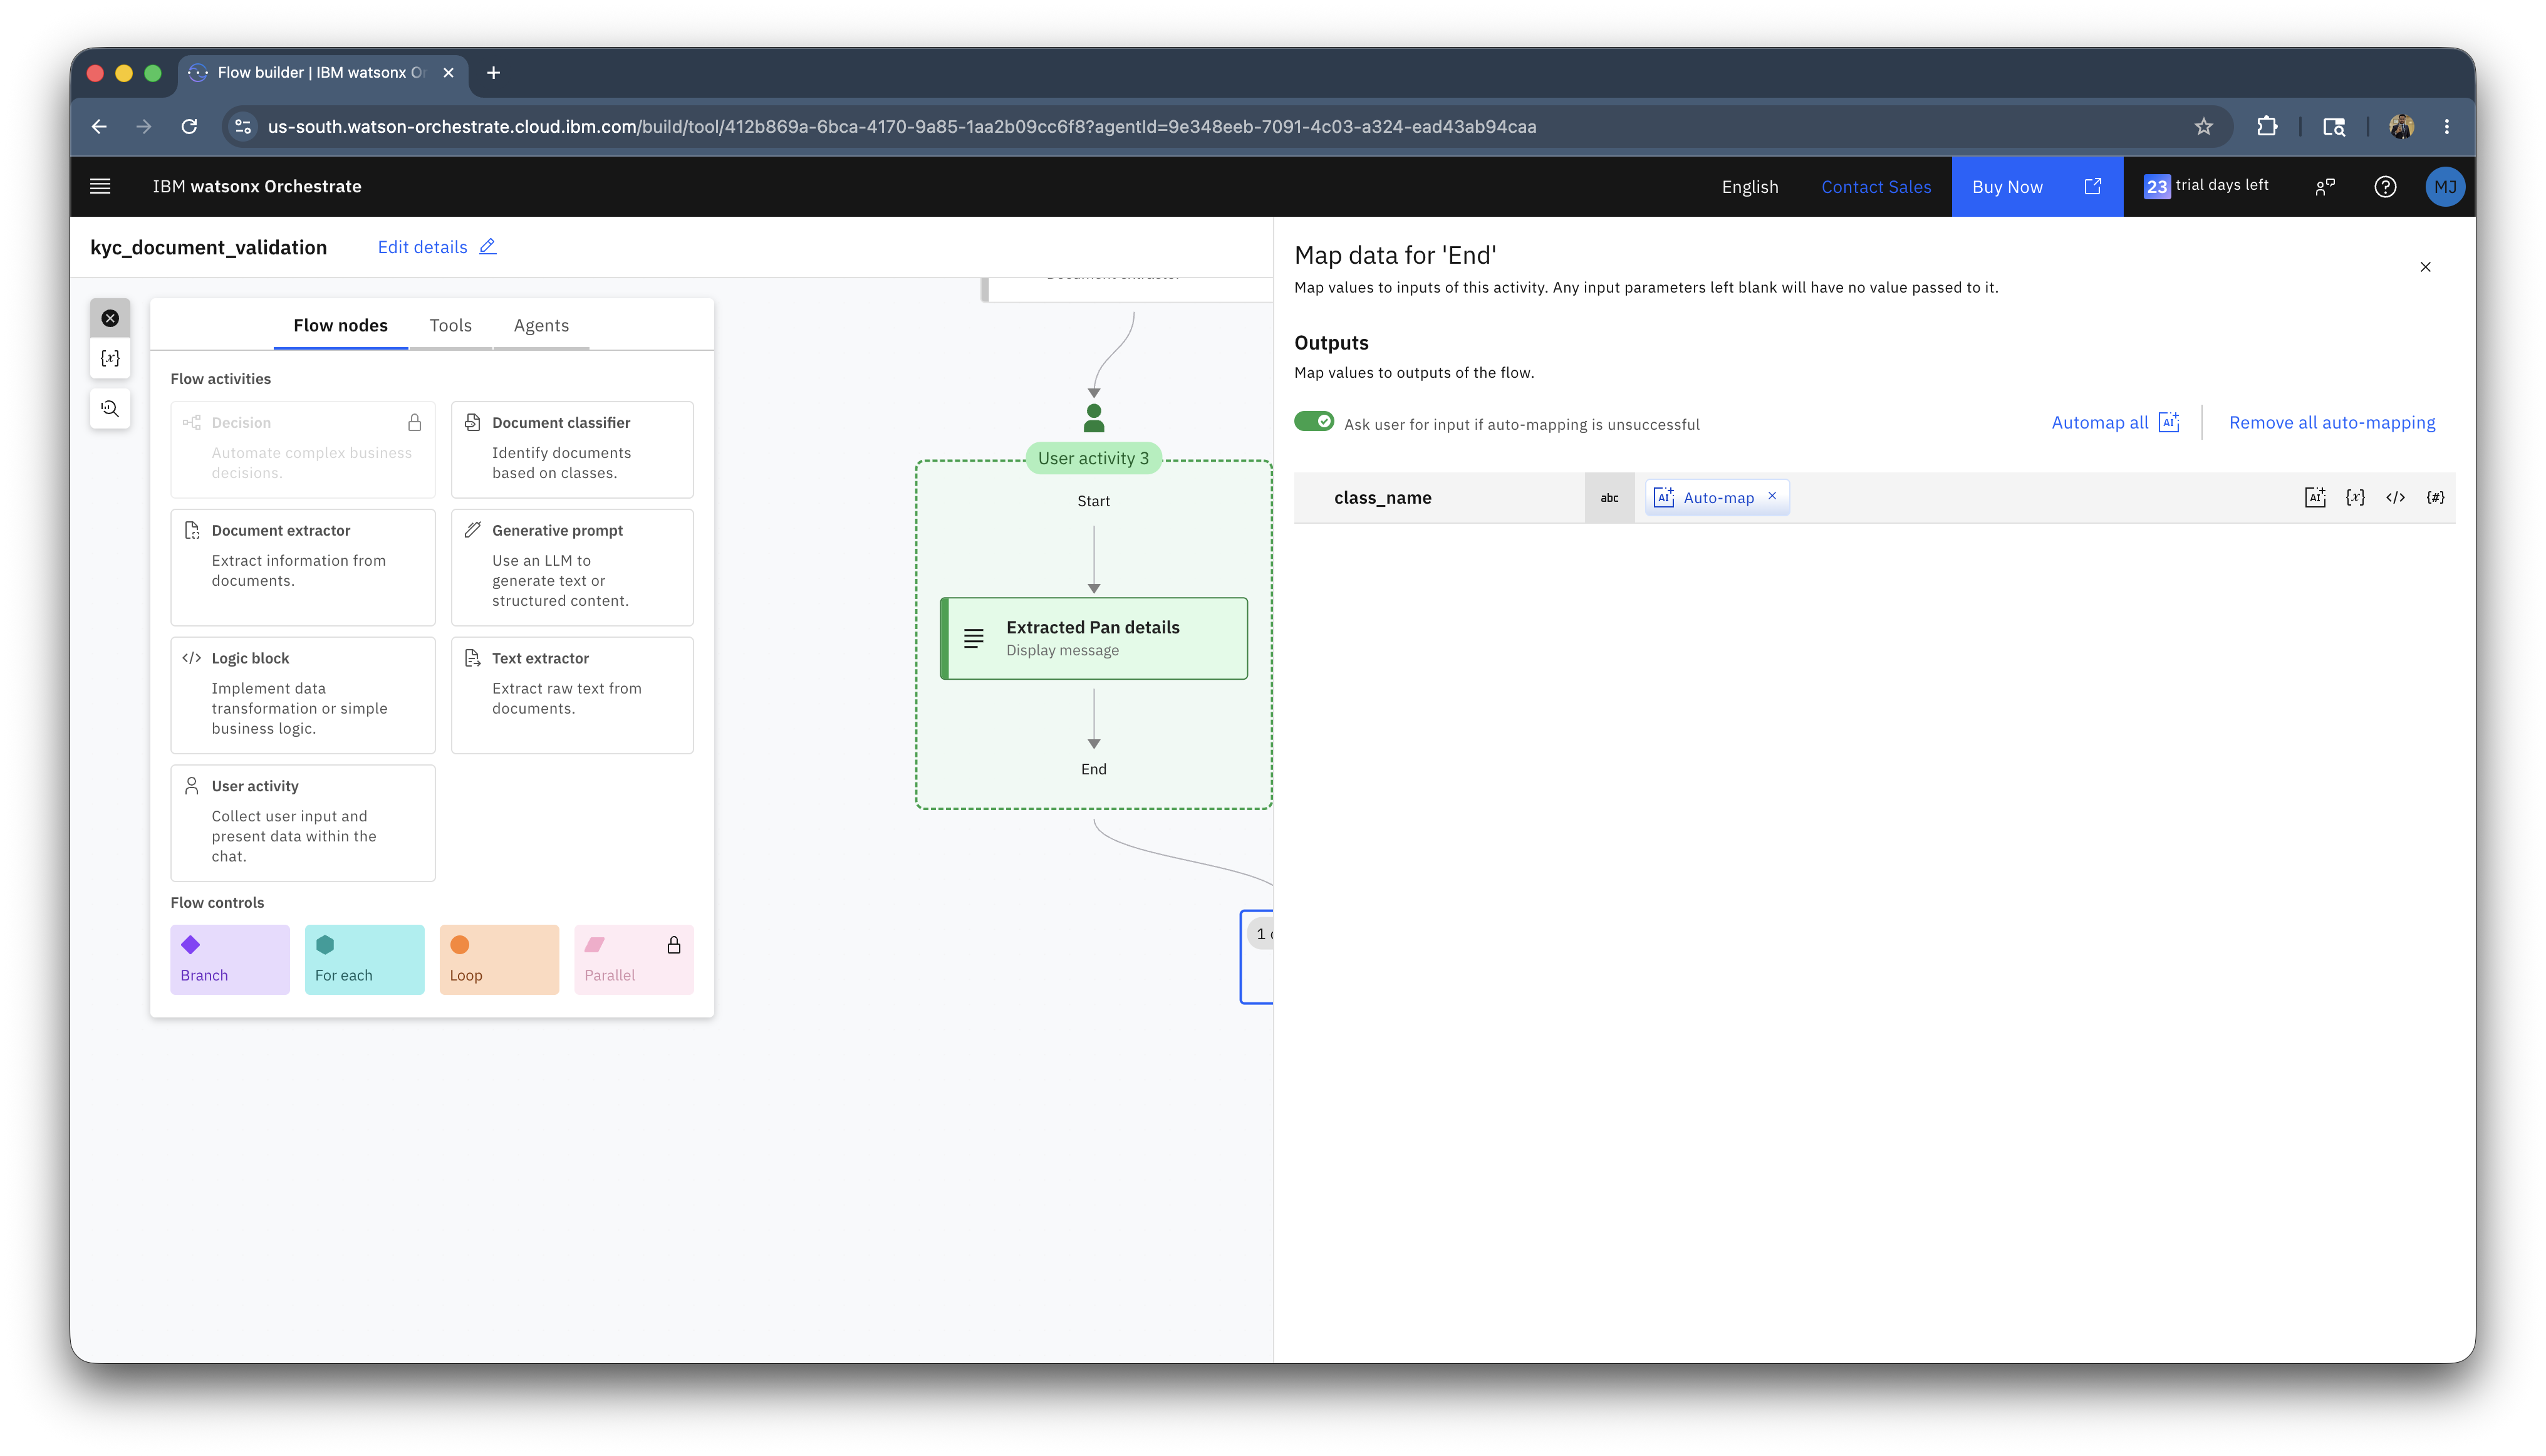
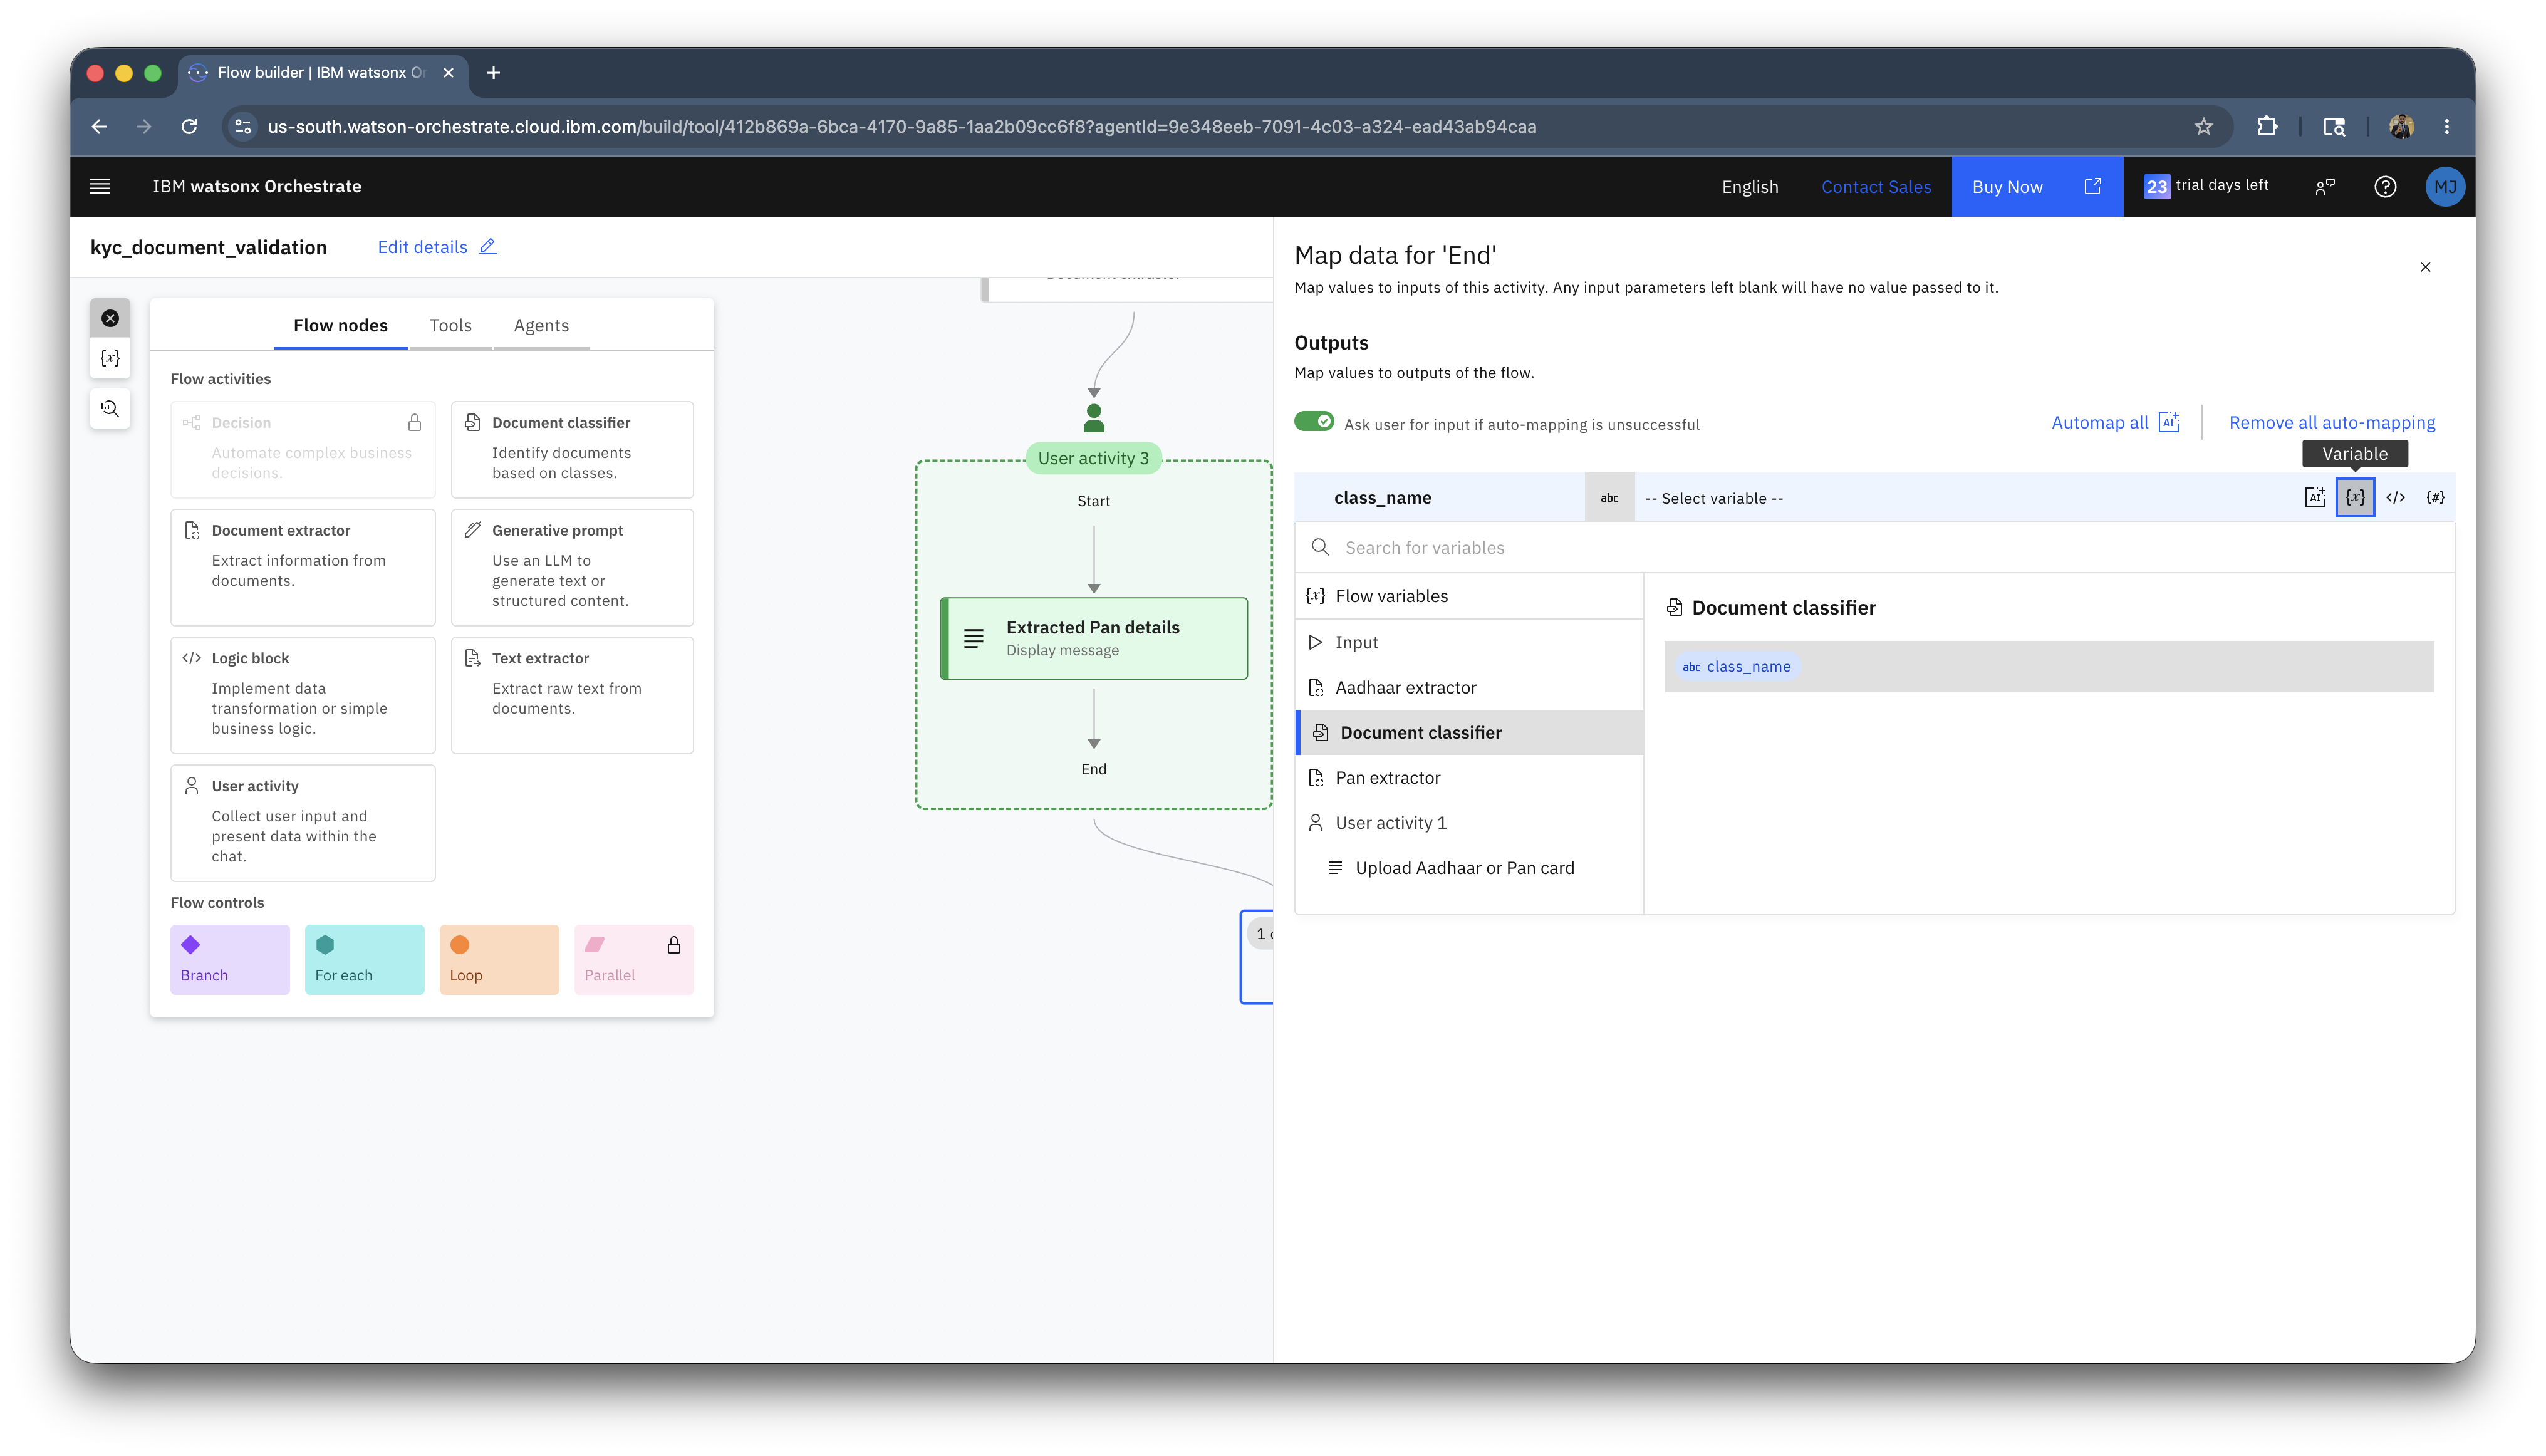
You can see the class_name is auto mapped. You can leave it as it is or manually select the value.
-
To set manual variable, click on the Variables and select class_name under Document classifier.
-
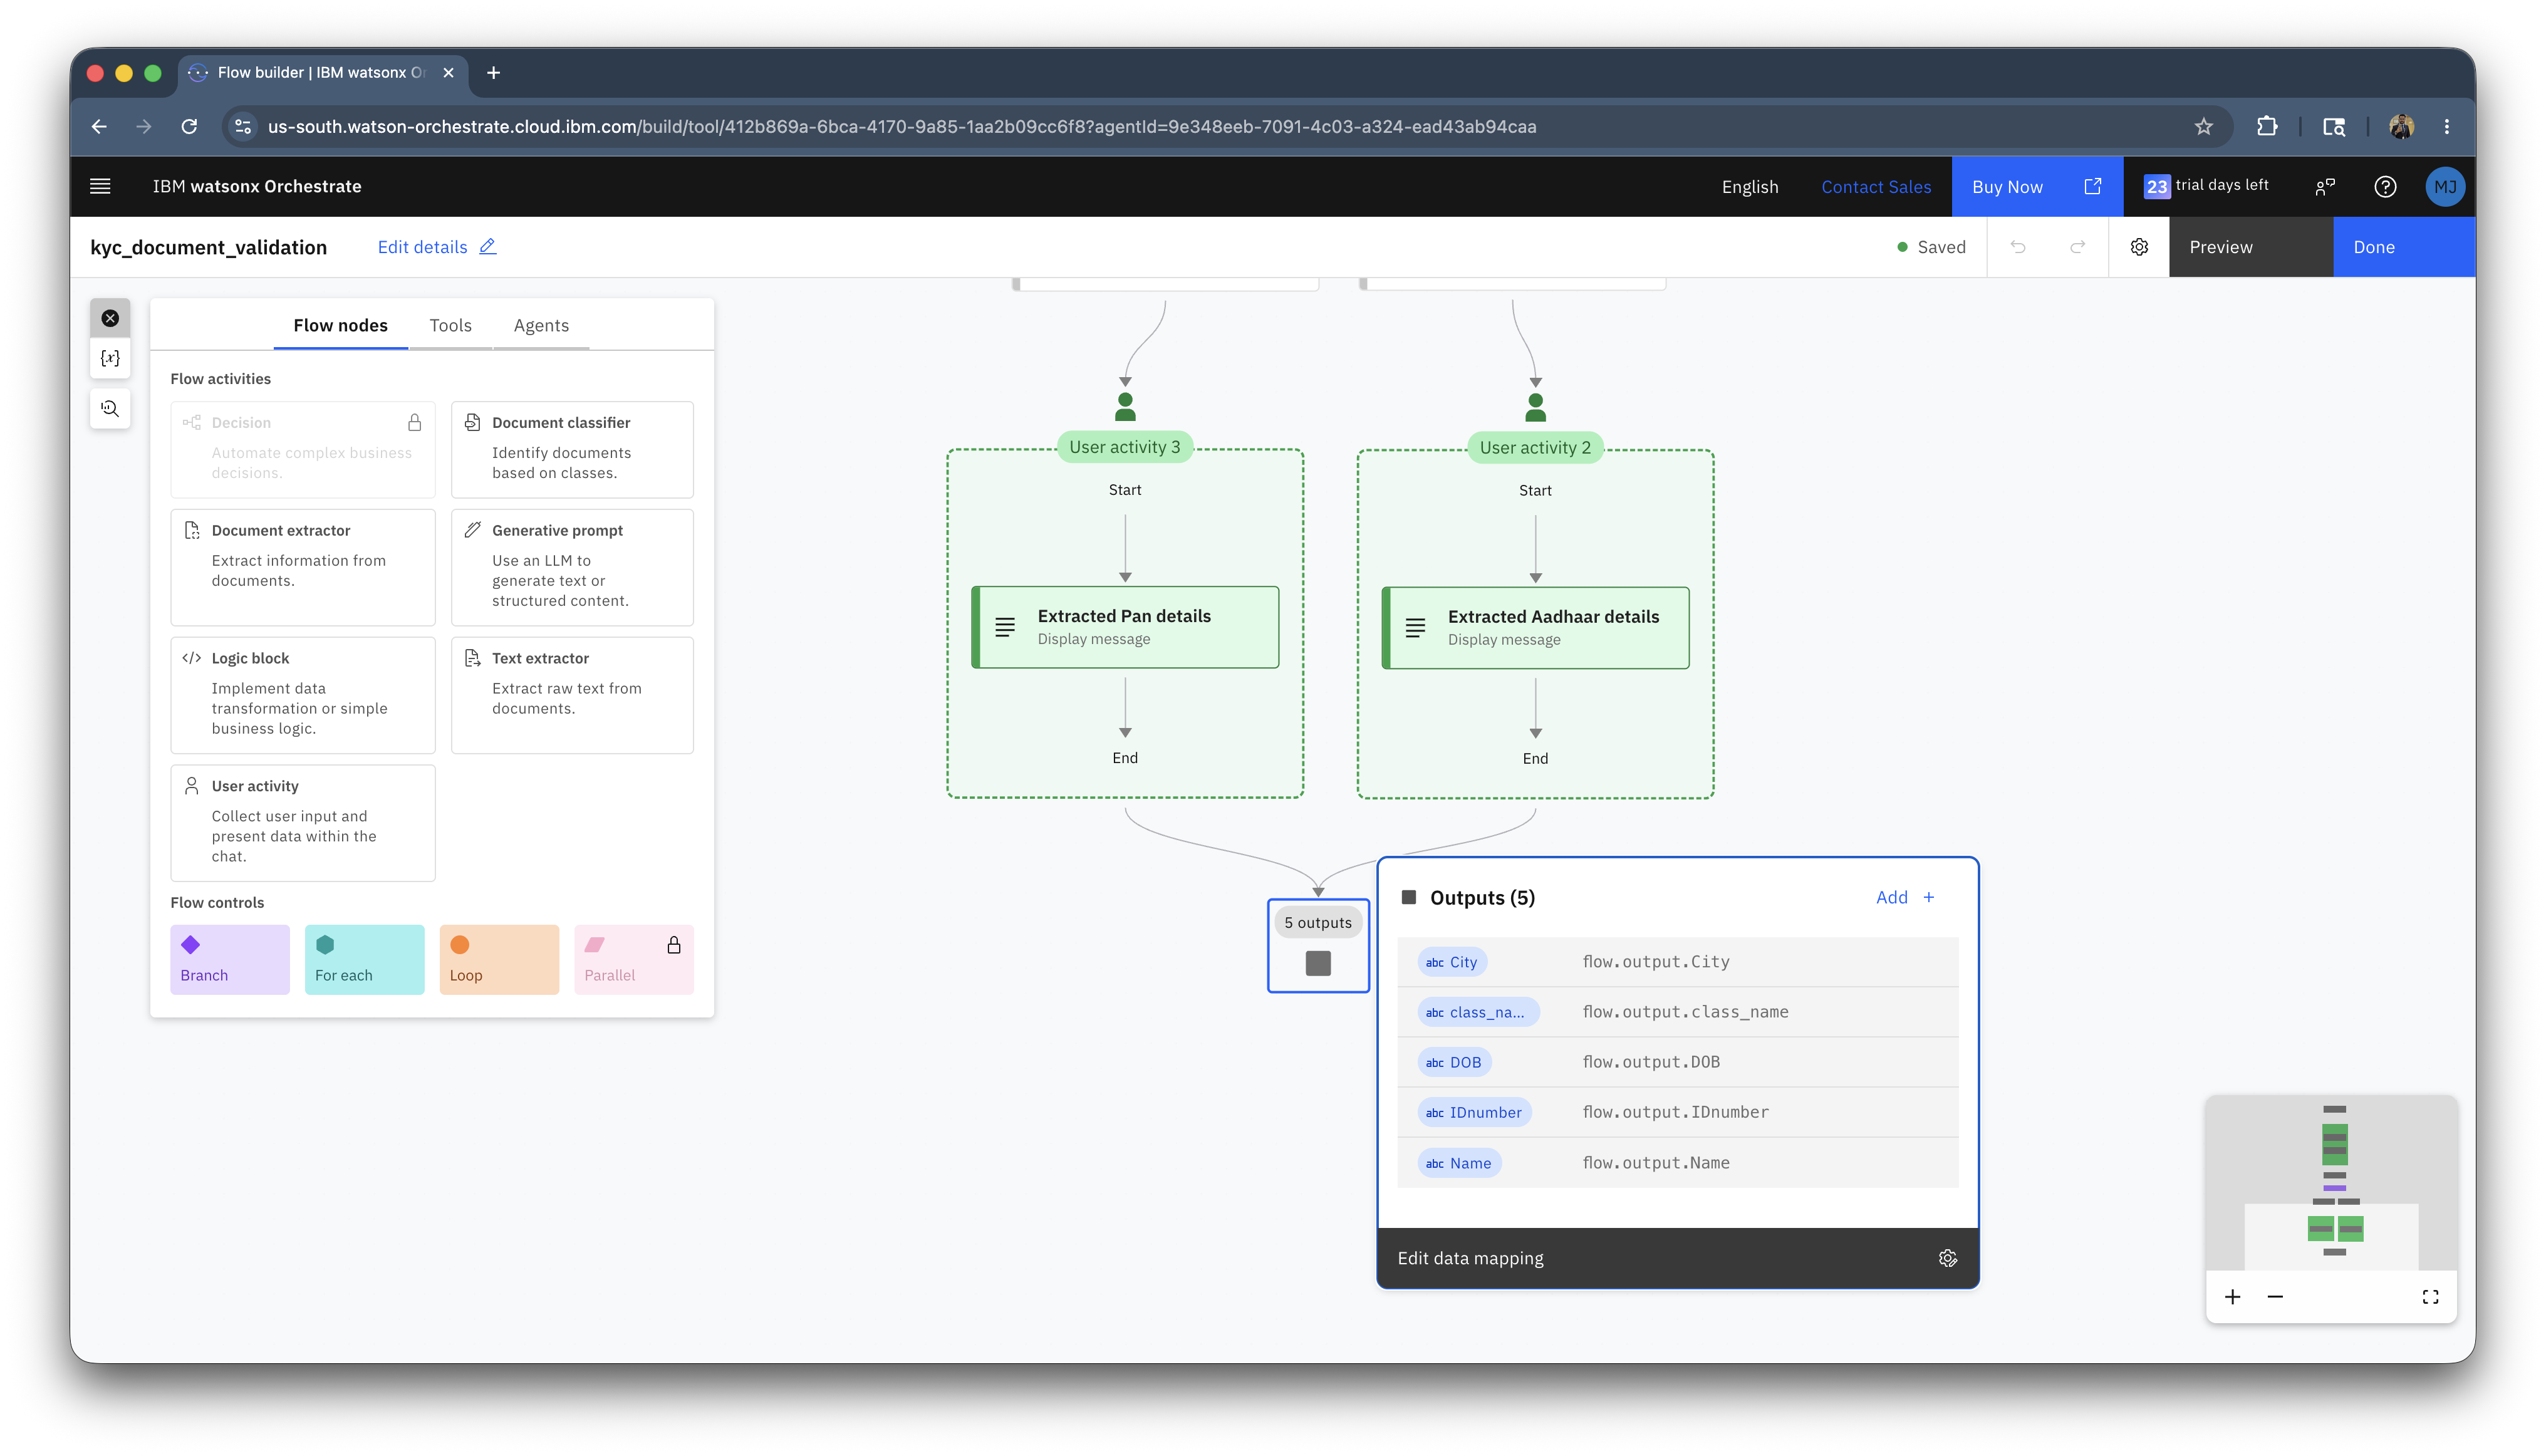
Similarly add the following:
- Name
- DOB
- City
- IDnumber
You can leave the data mapping to auto mapping.
-
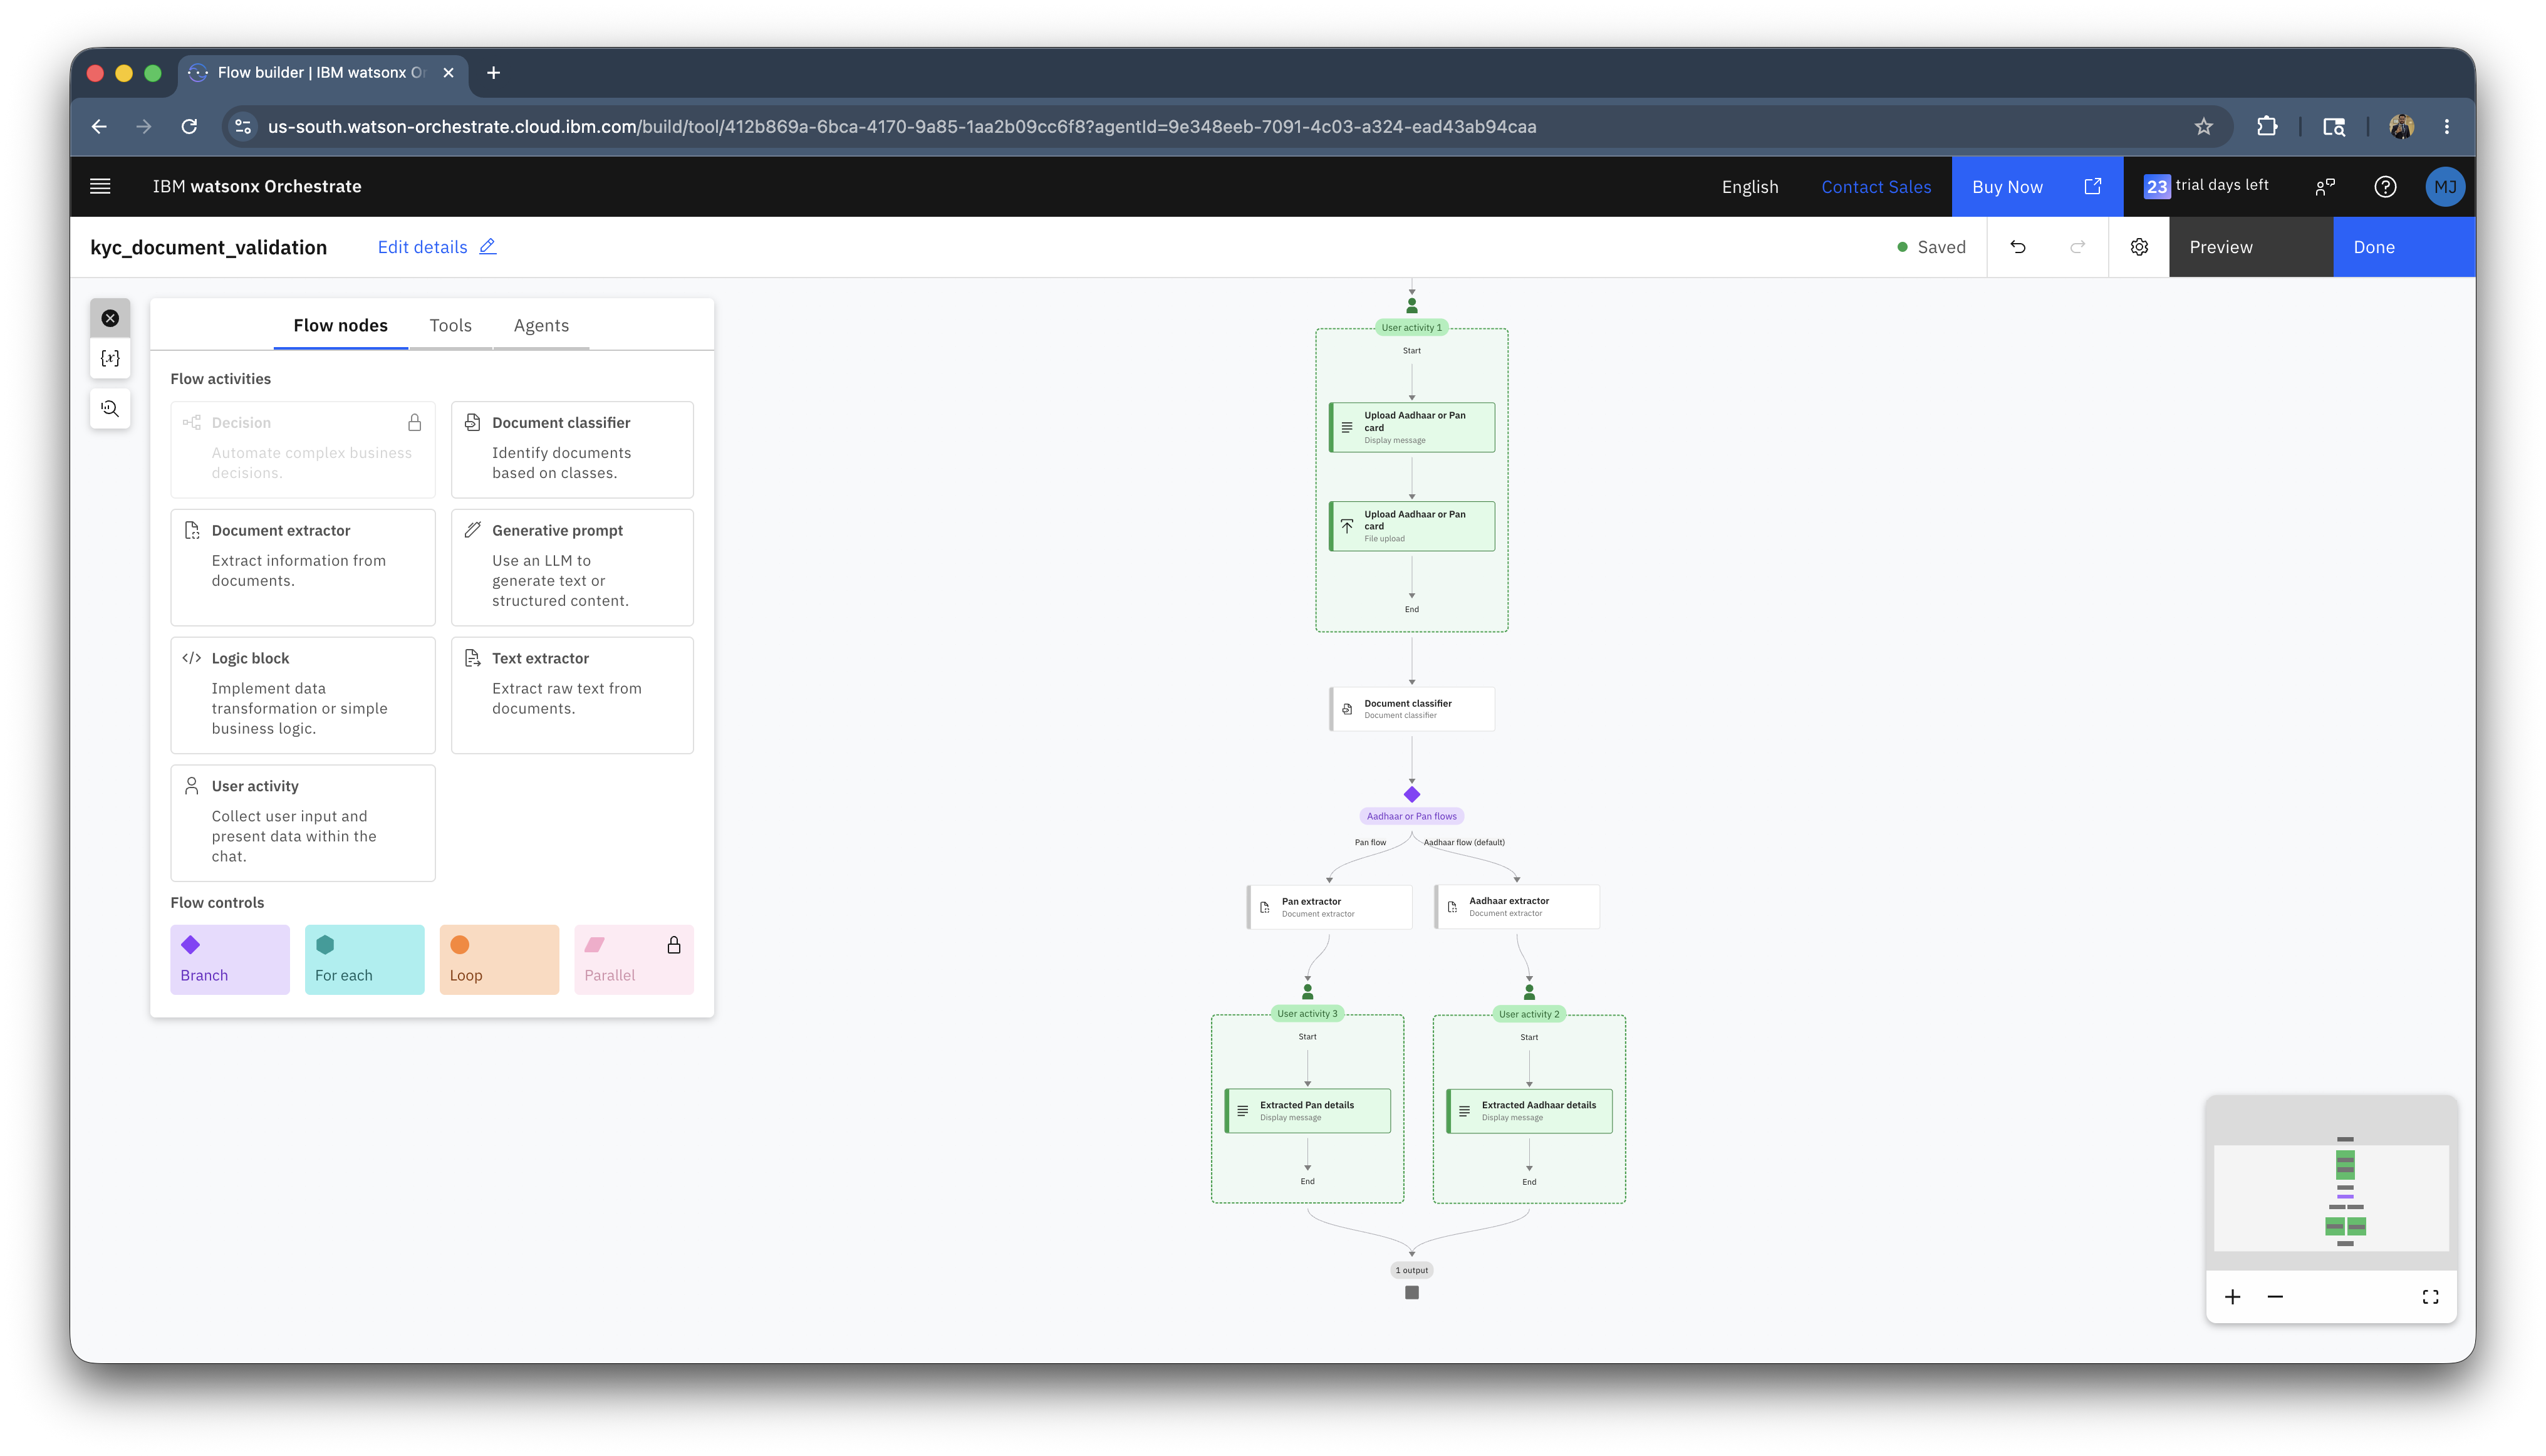
Your flow should look something like this.
-
Click on Done.
Step 2: Build Human in the loop agentic workflow
-
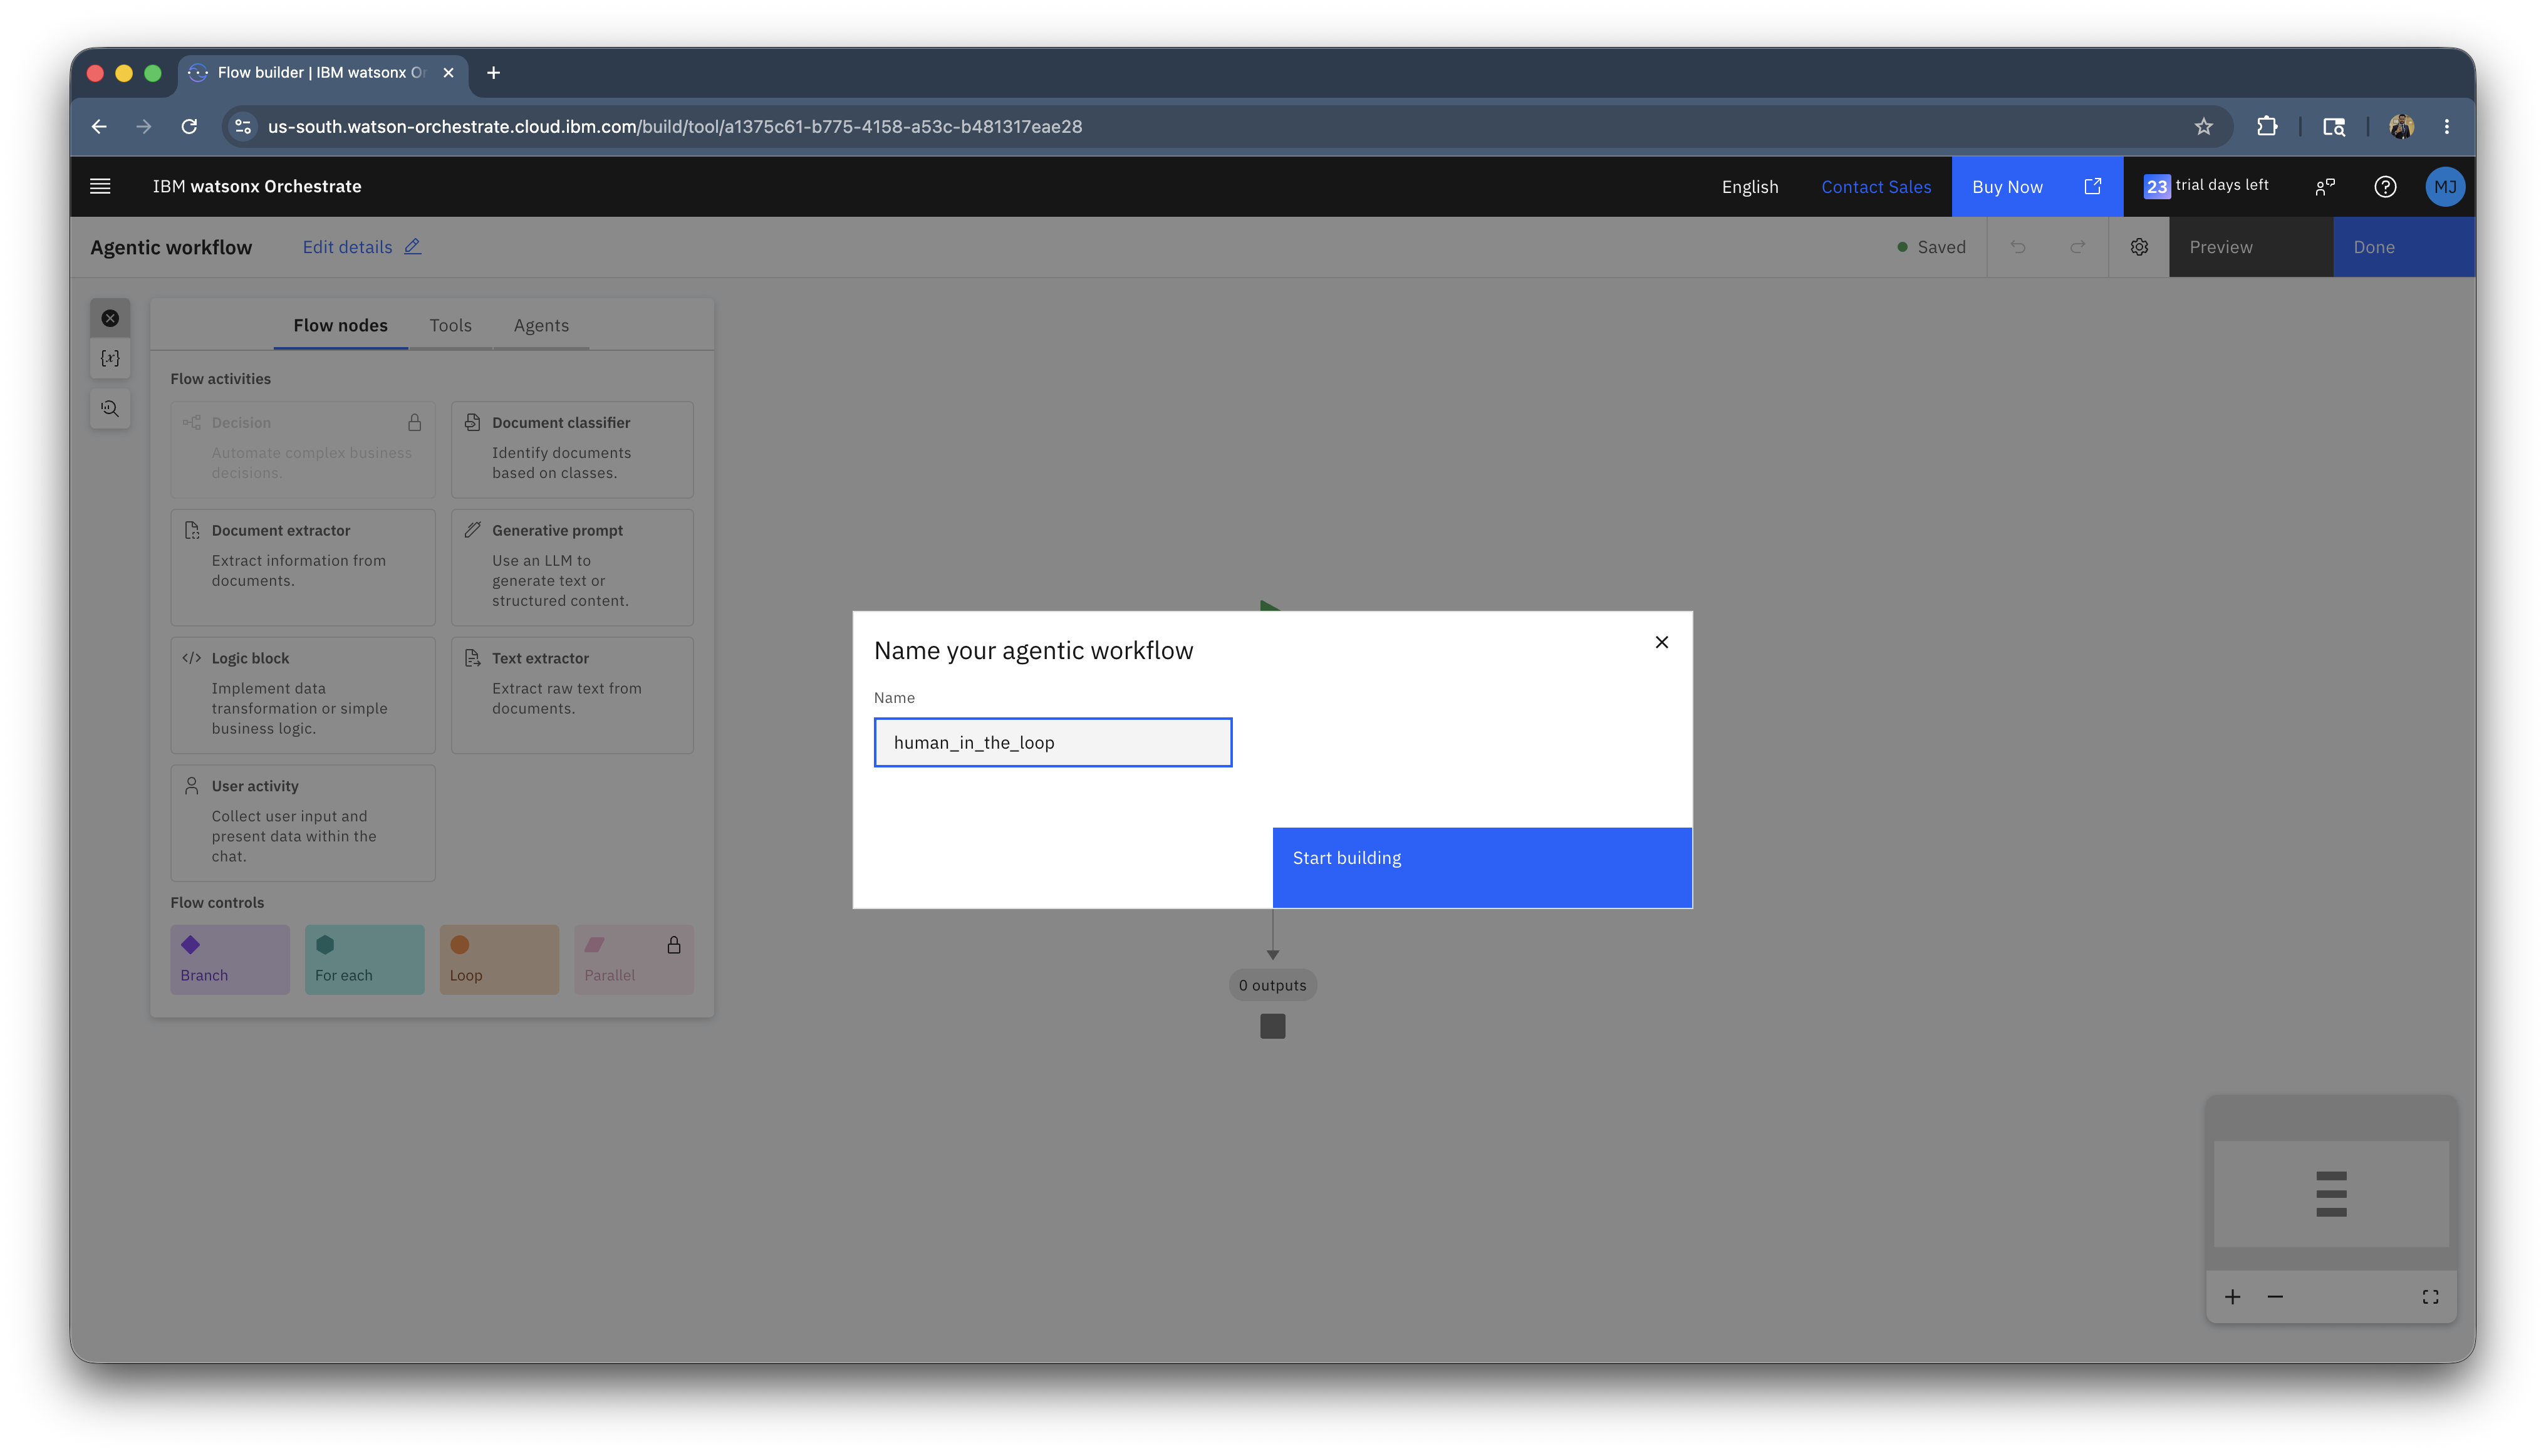
Similarly, create another agentic workflow tool, name it as human_in_the_loop and click on start building.
-
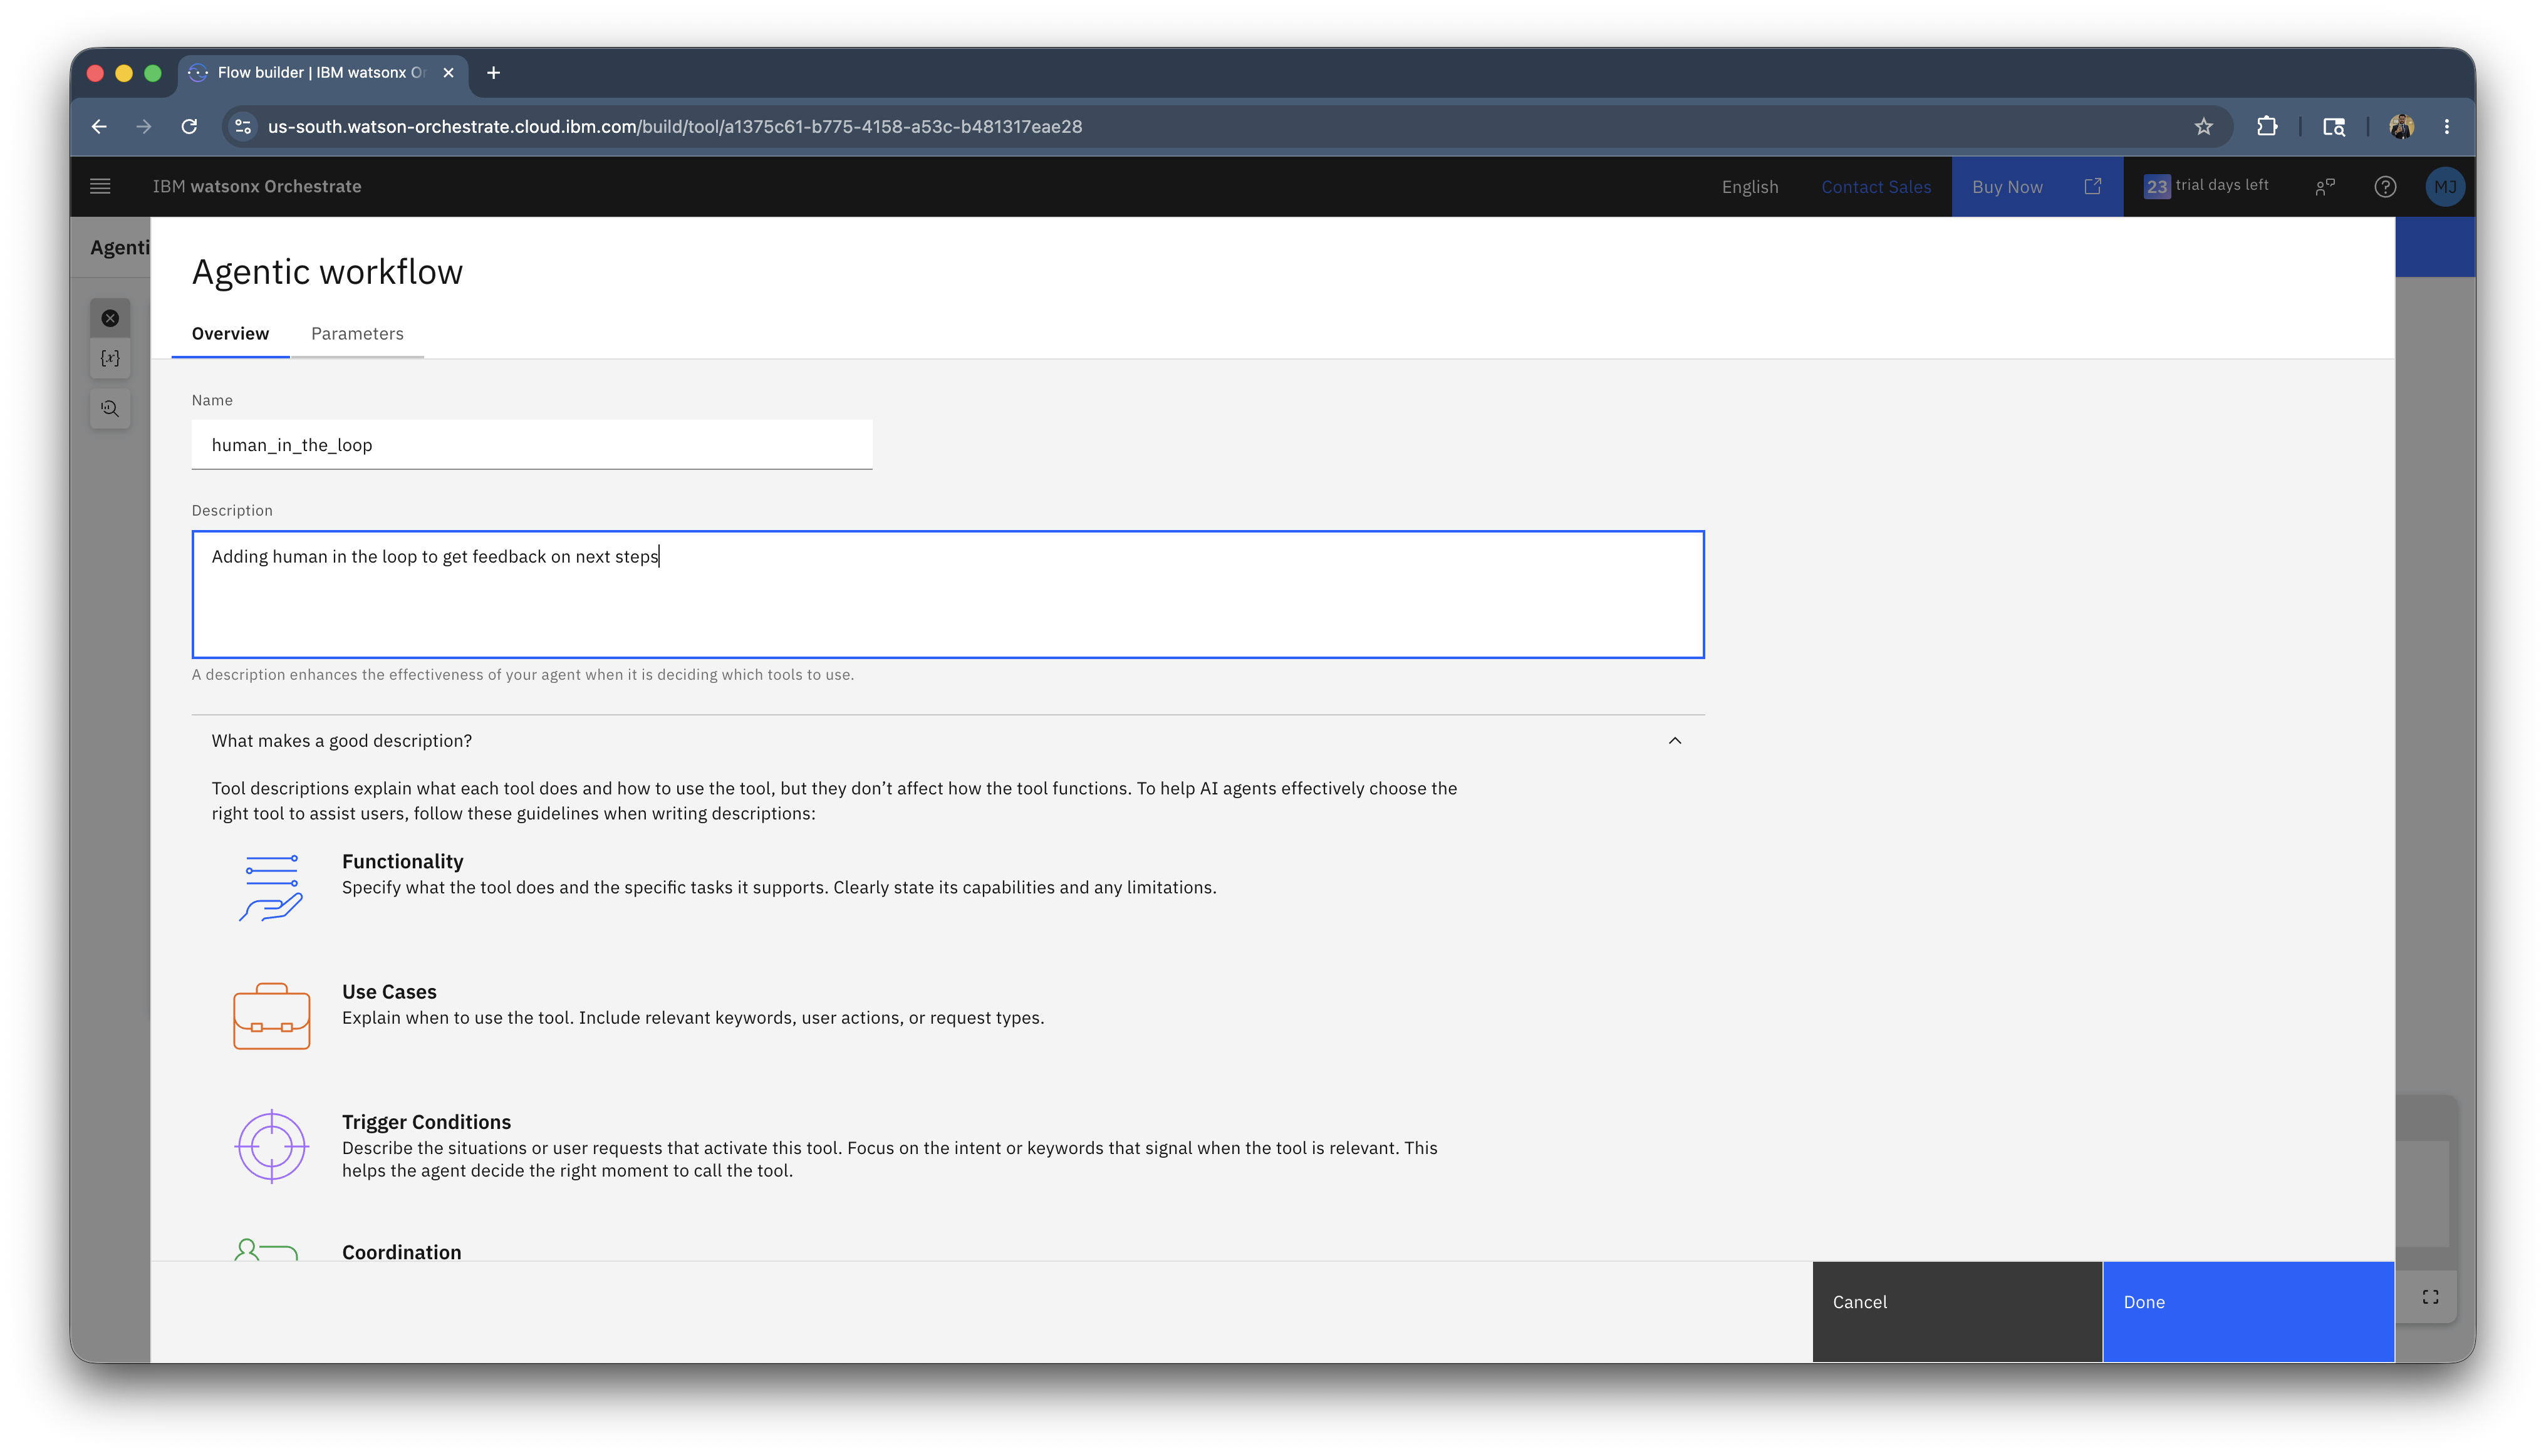
Click on edit details and enter the description as Adding human in the loop to get feedback on next steps.
-
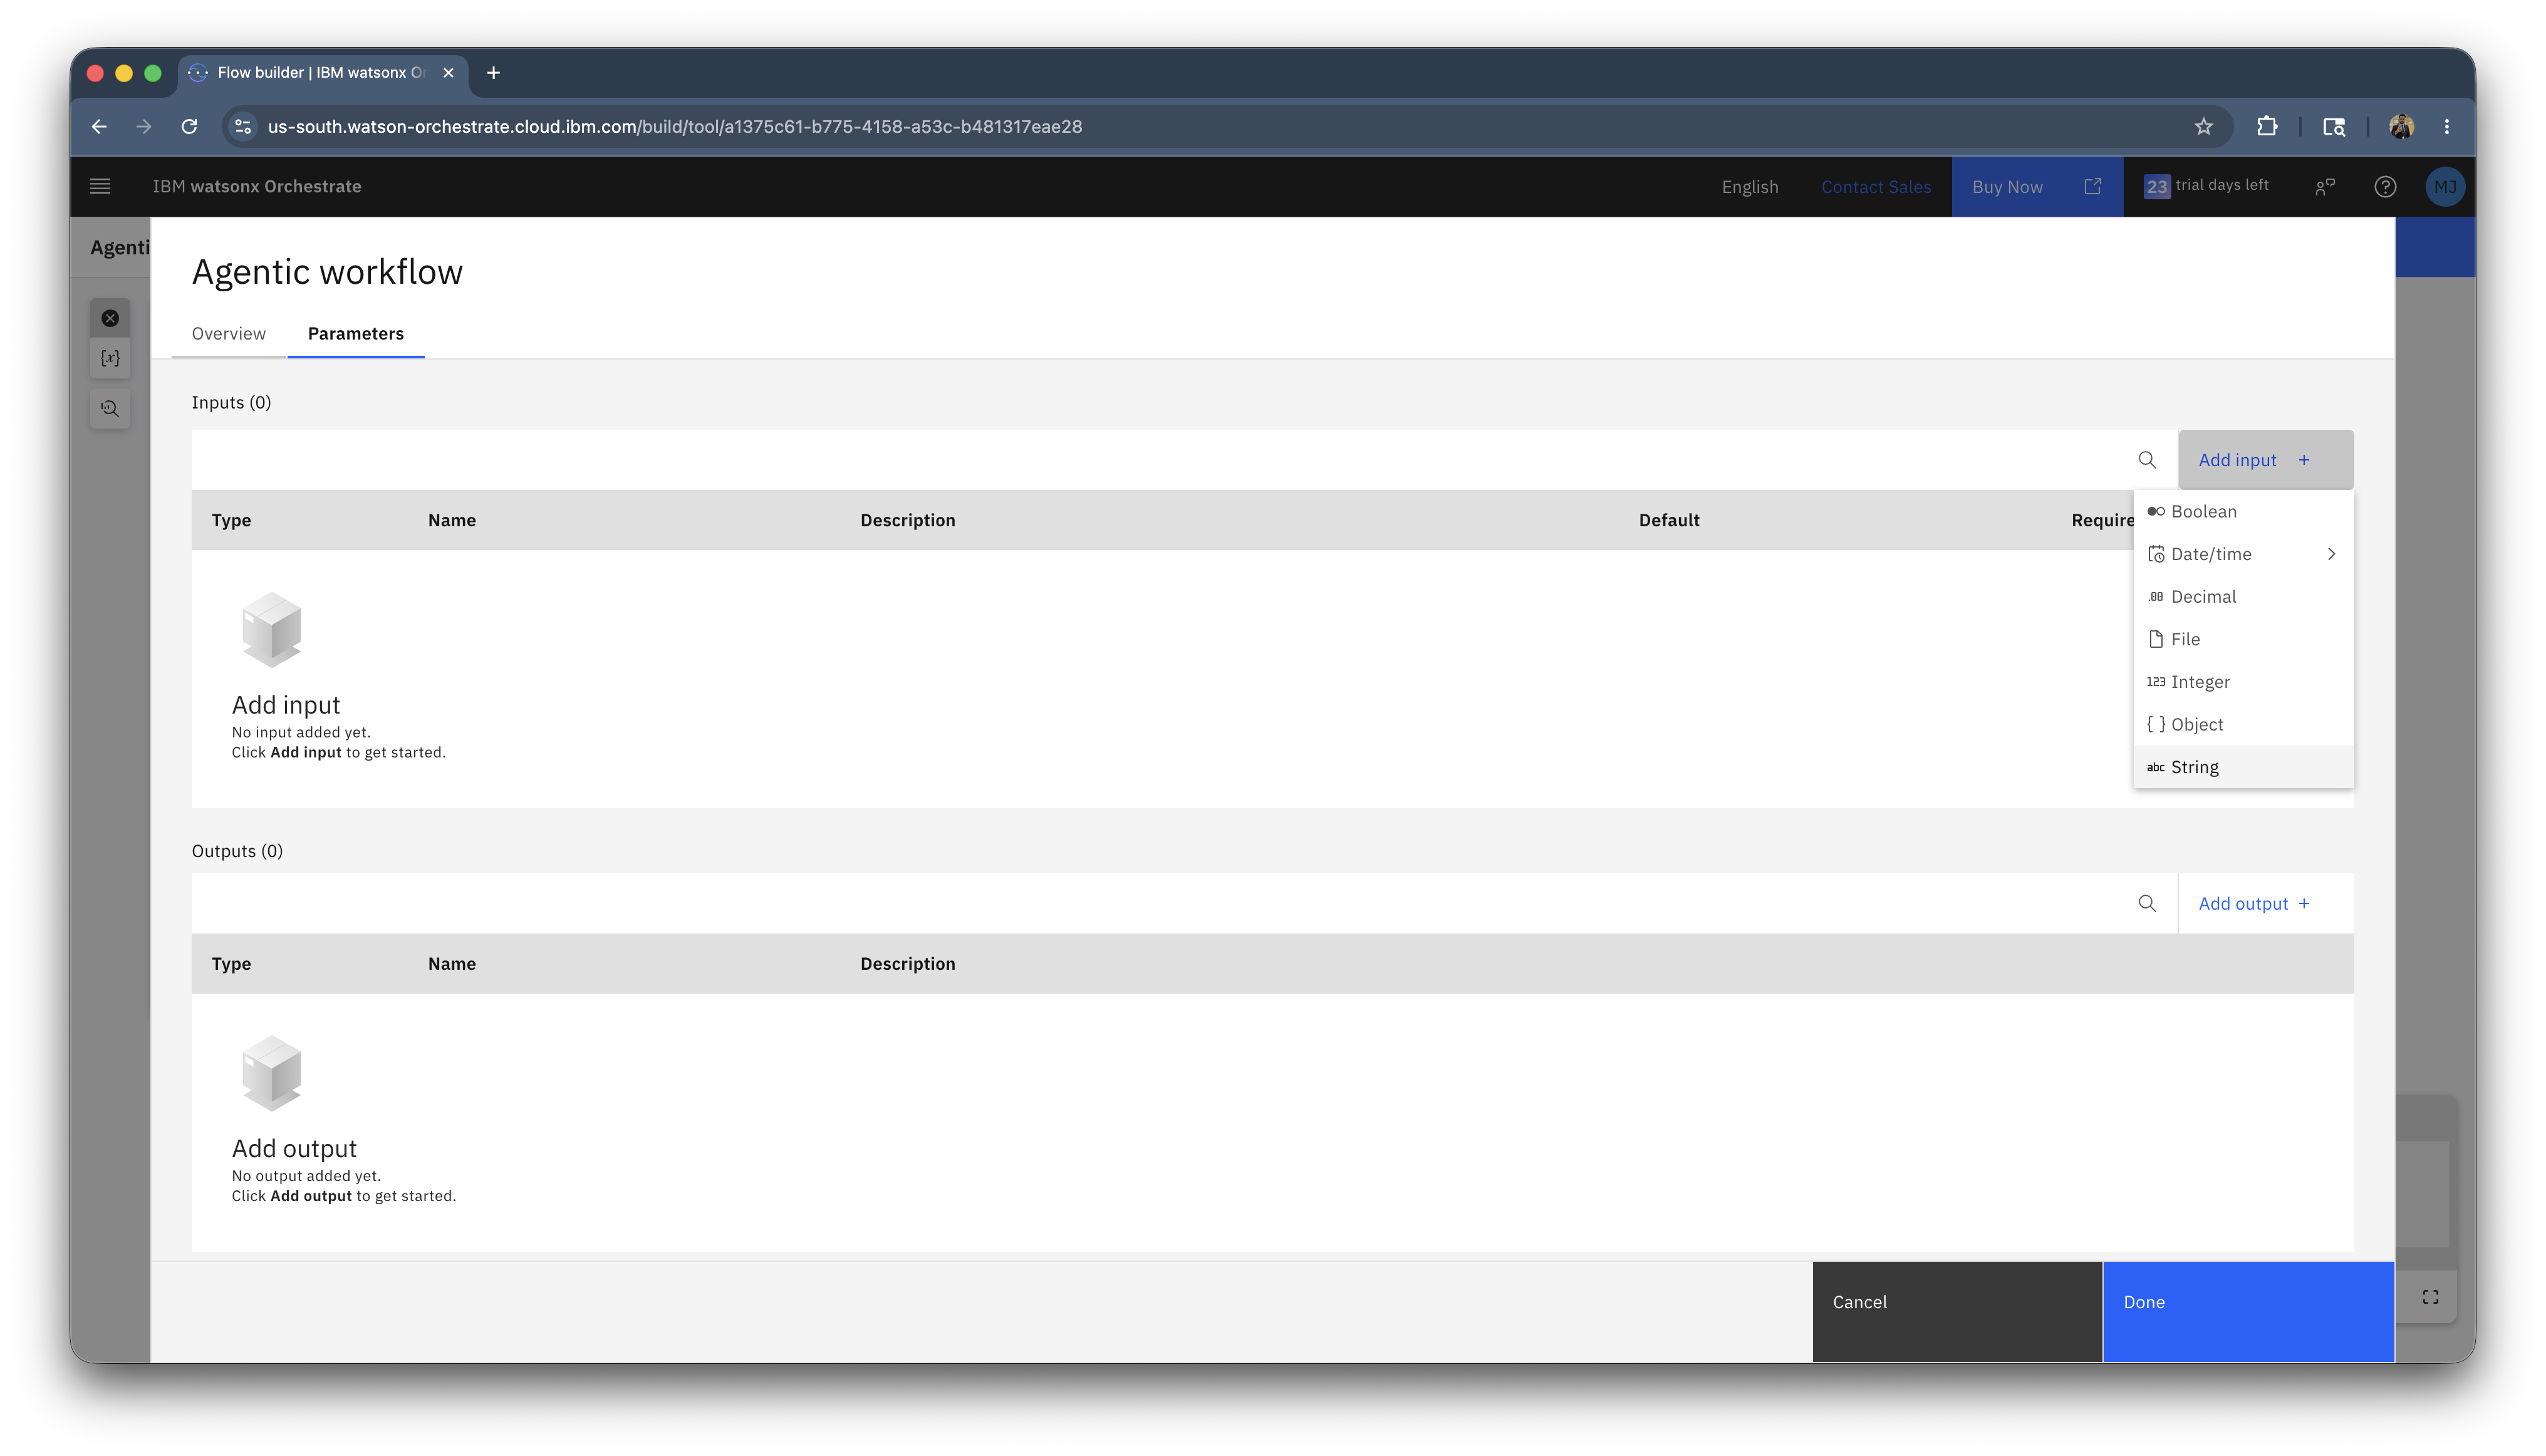
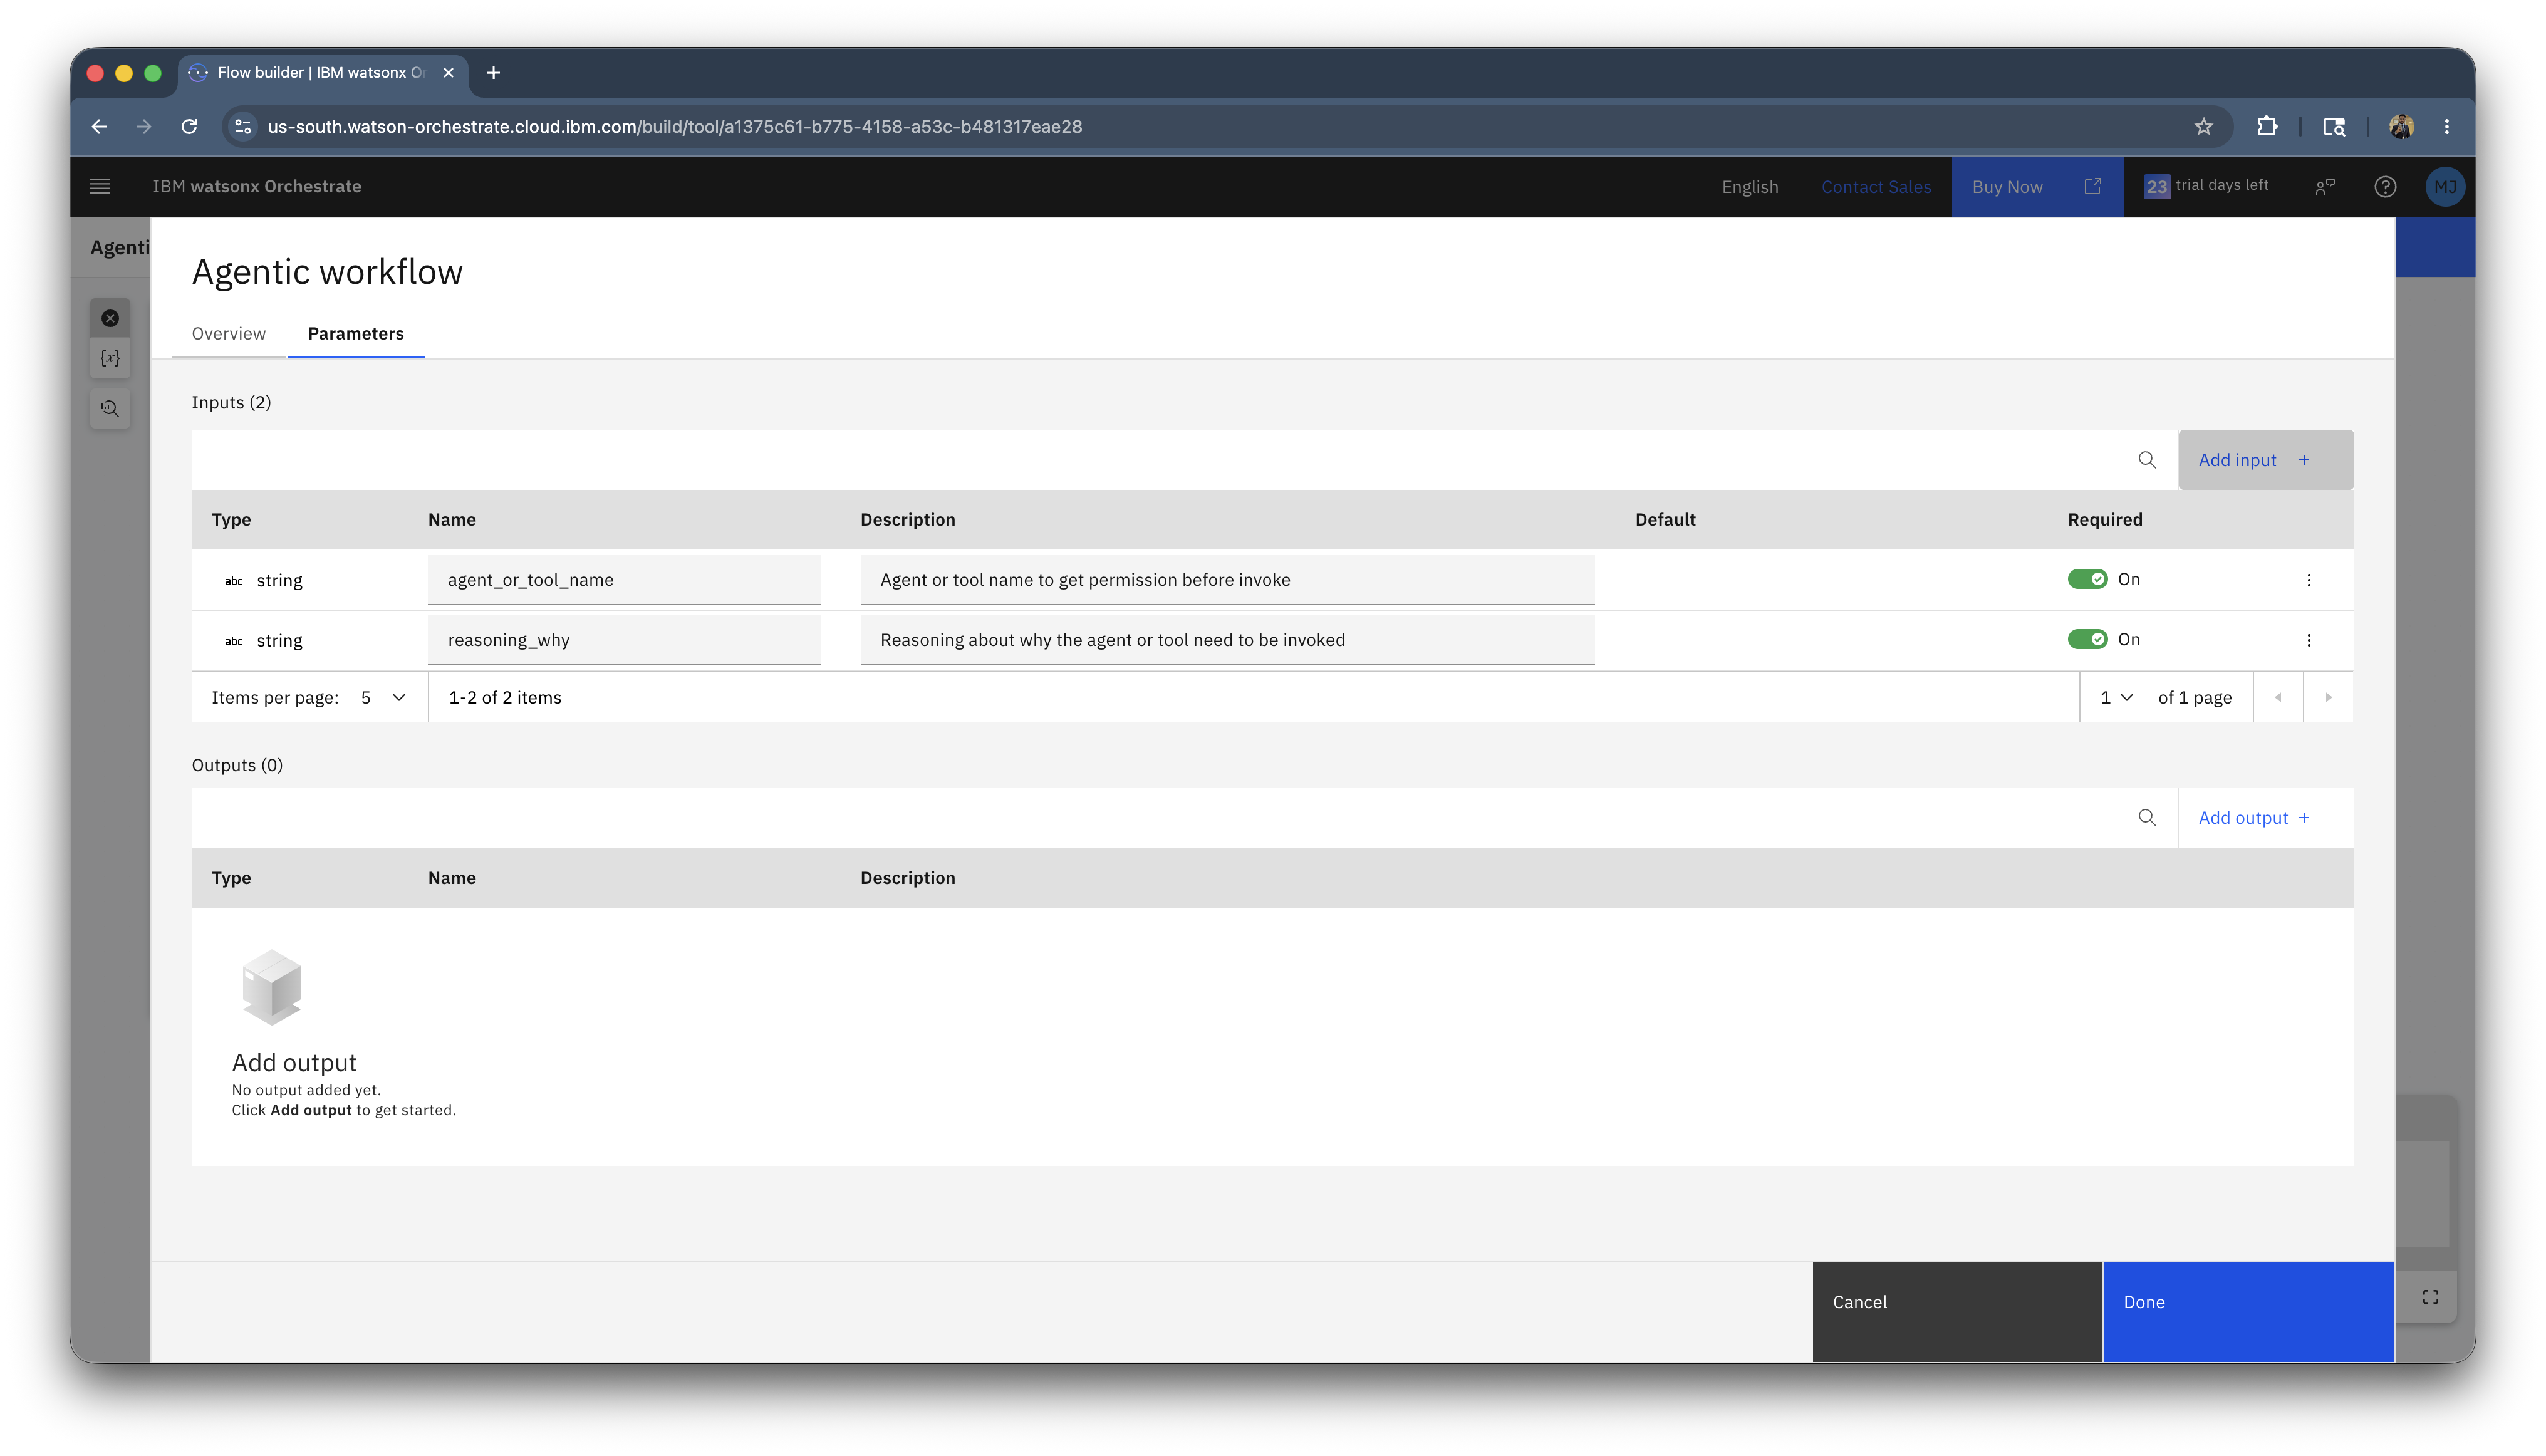
Click on Parameters and under input click on Add input + and add a string input.
-
Name:
agent_or_tool_name, description:Agent or tool name to get permission before invokeand click add.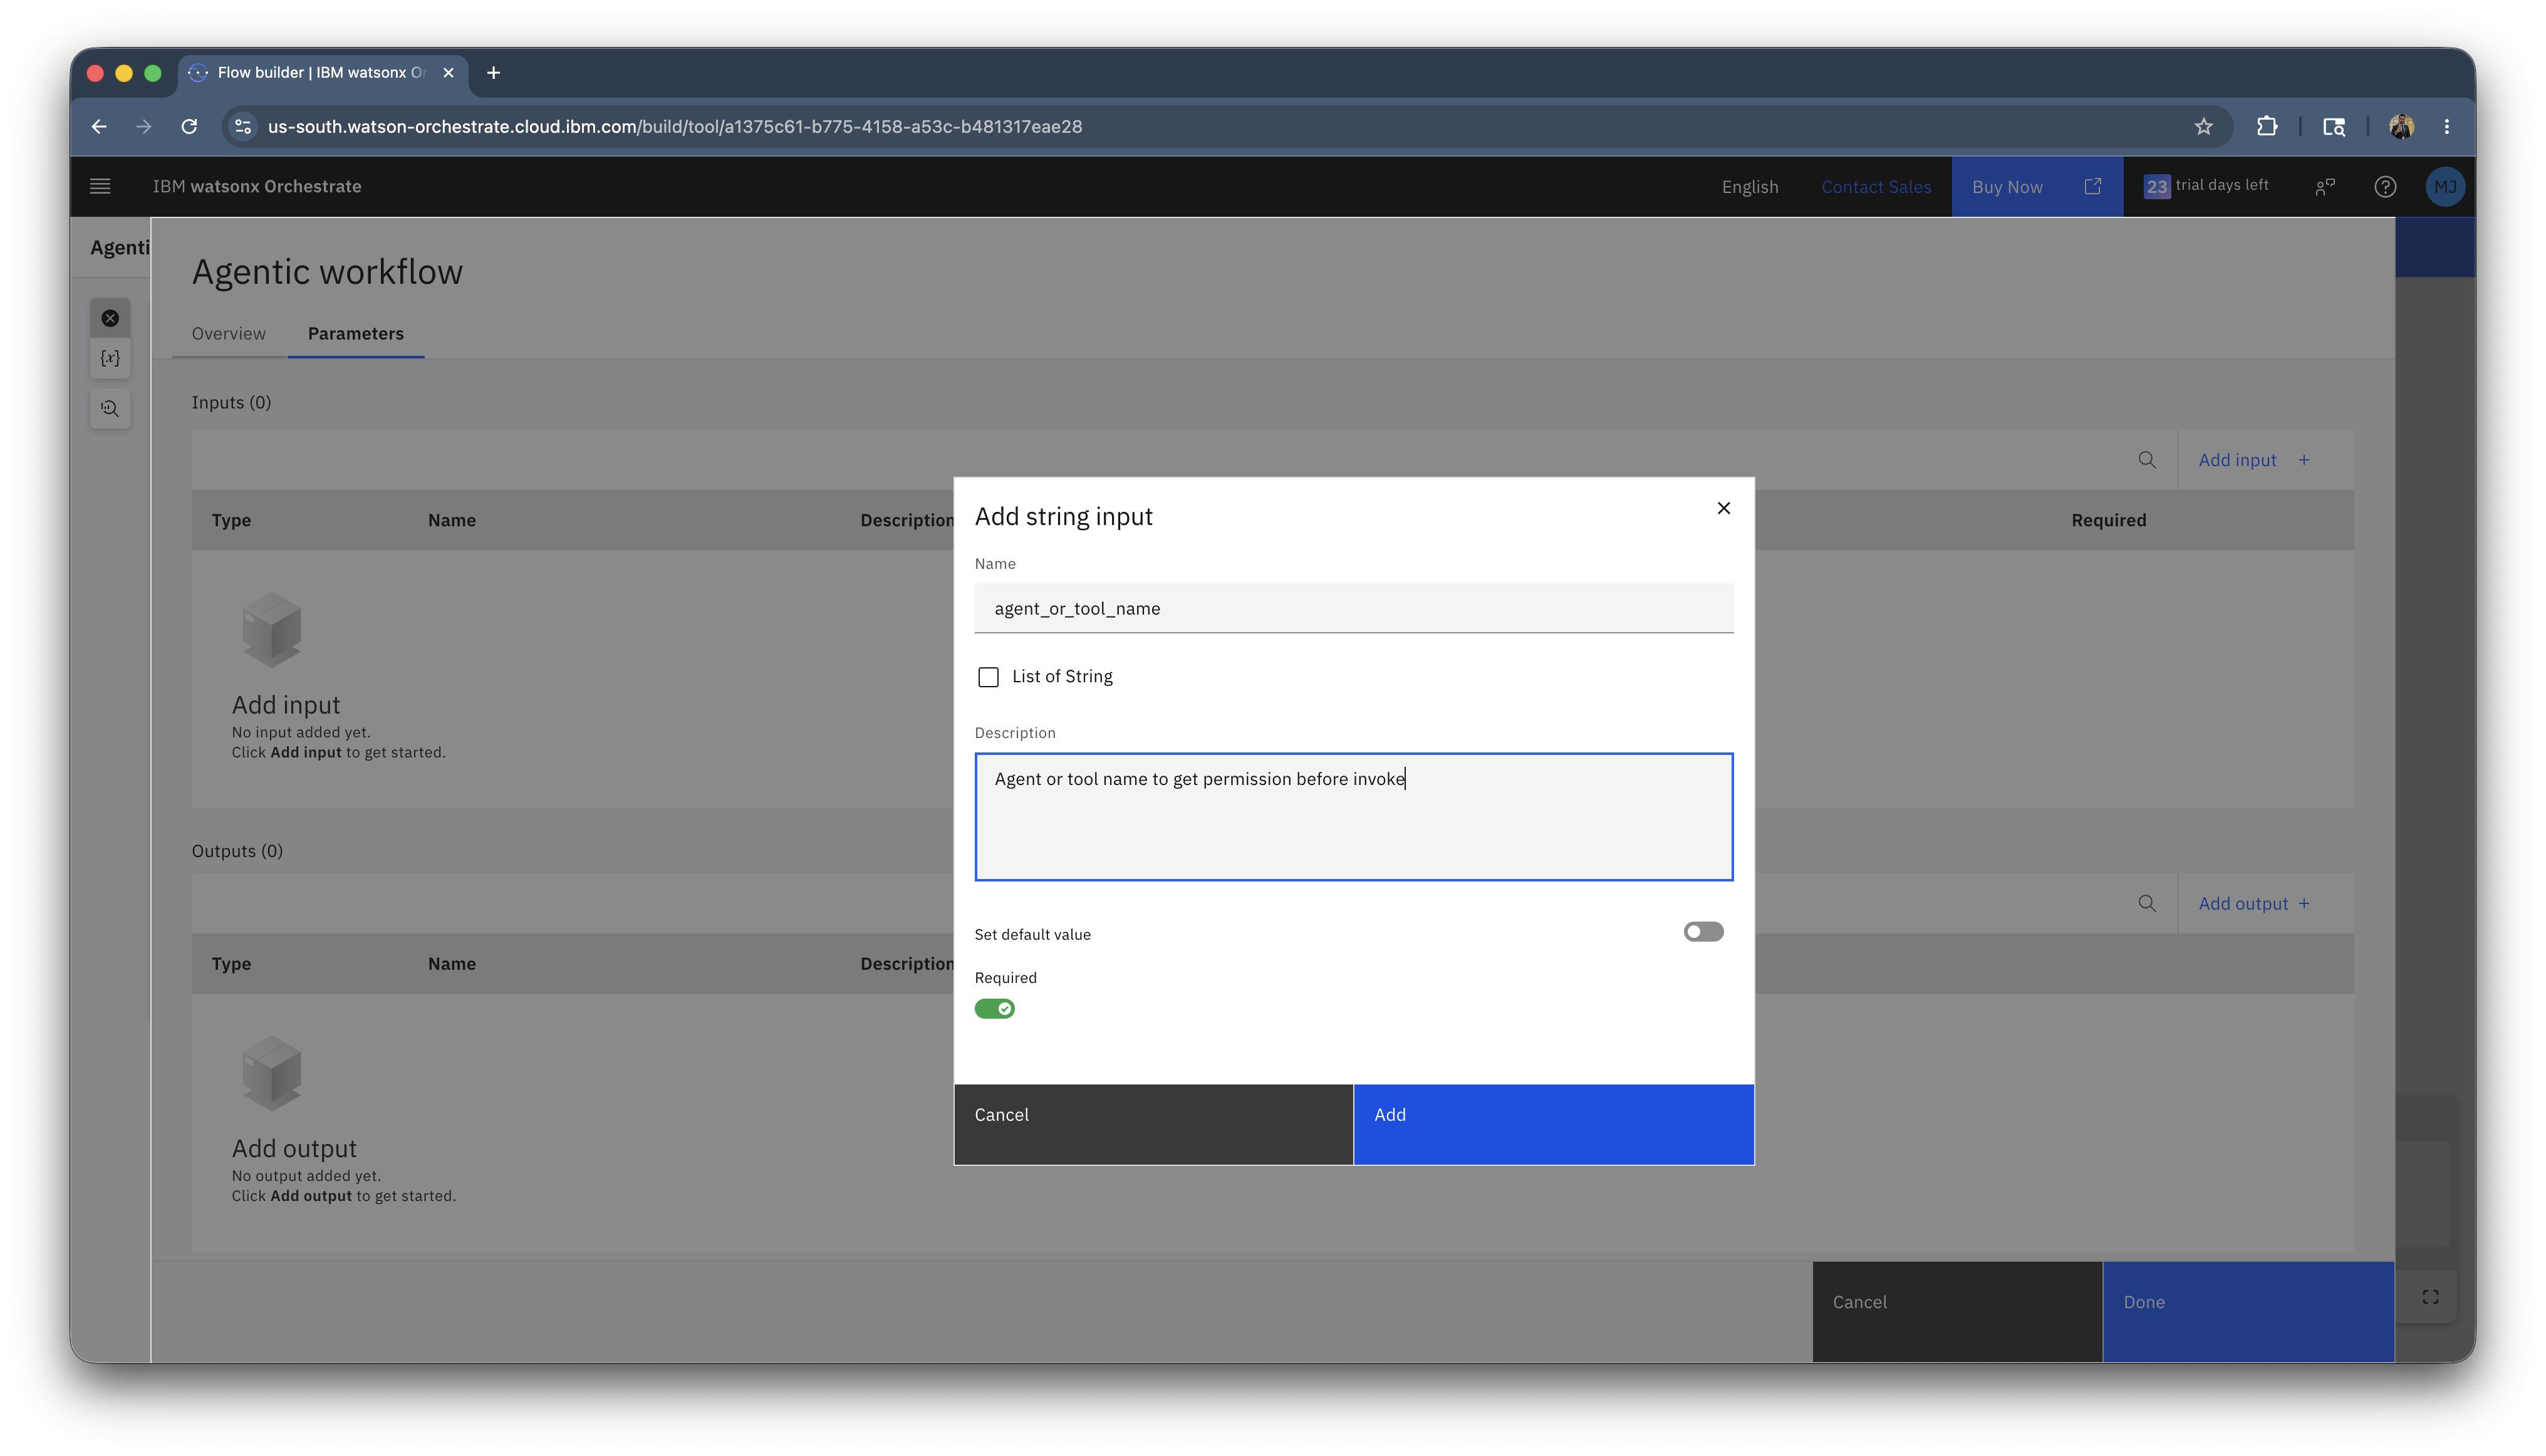
-
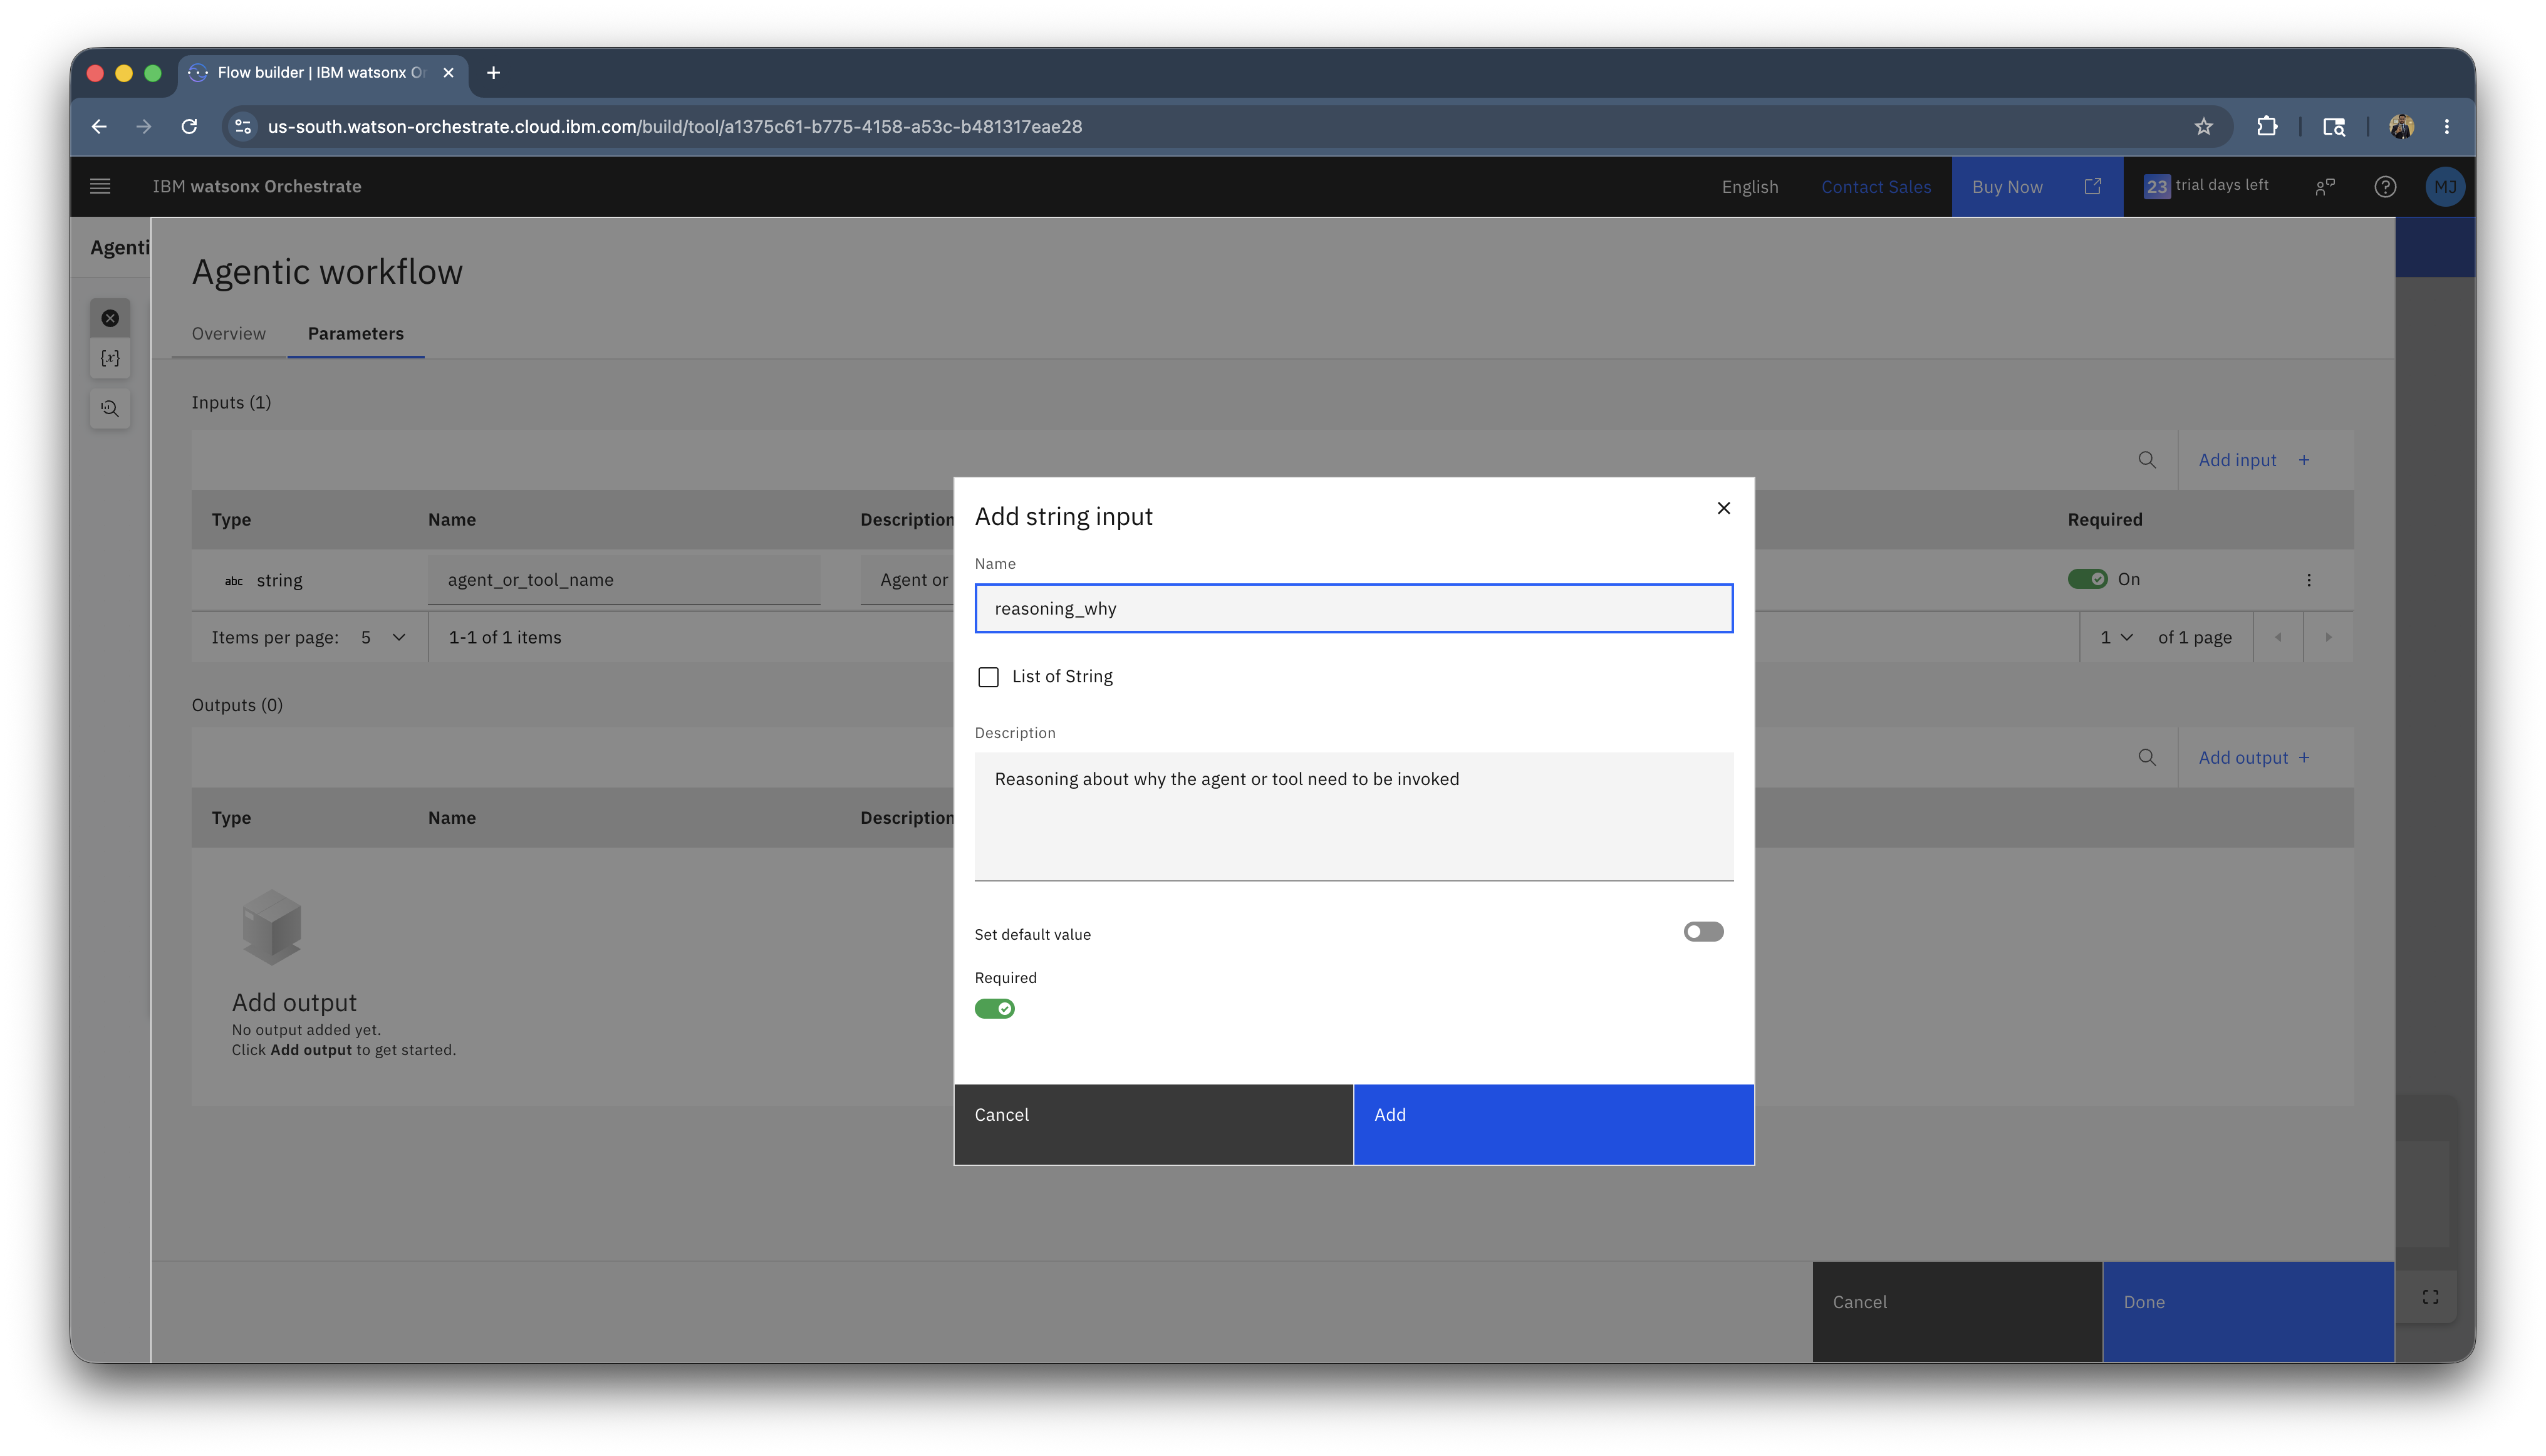
You will have two input variables now that the agent will make use to invoke this workflow. Click on Done to close the window.
-
Add the field Date of Birth and click on Done.
-
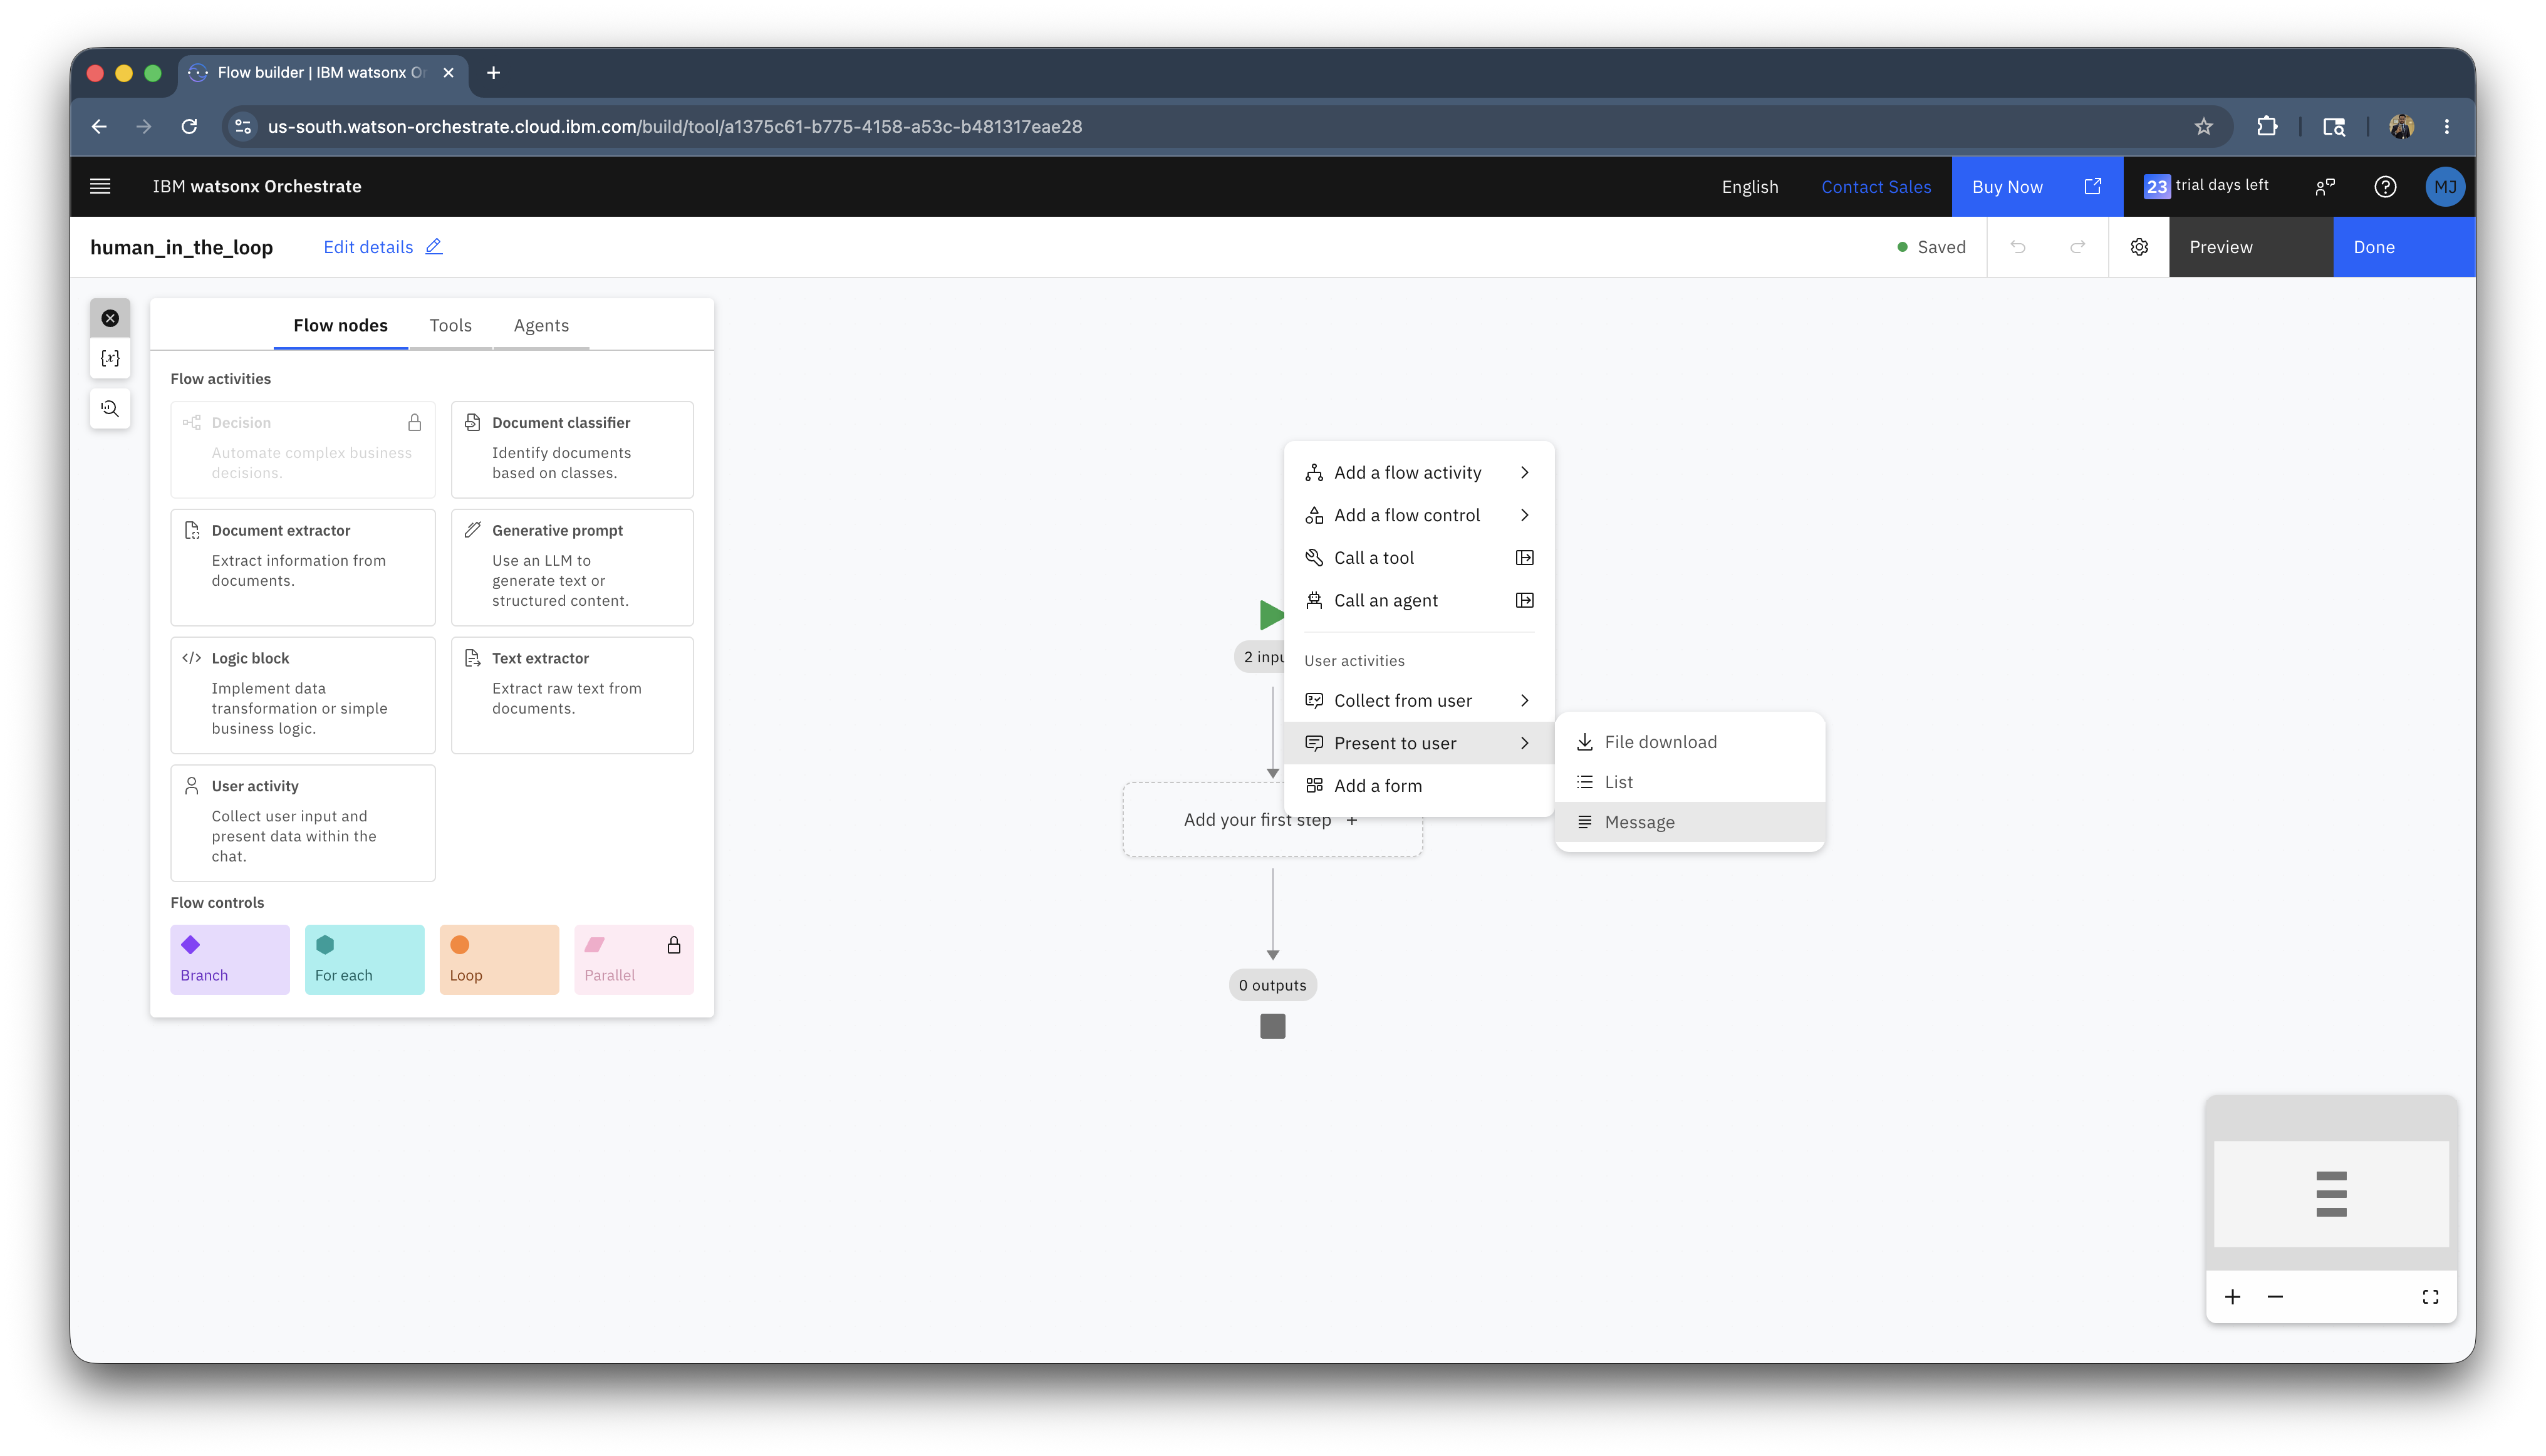
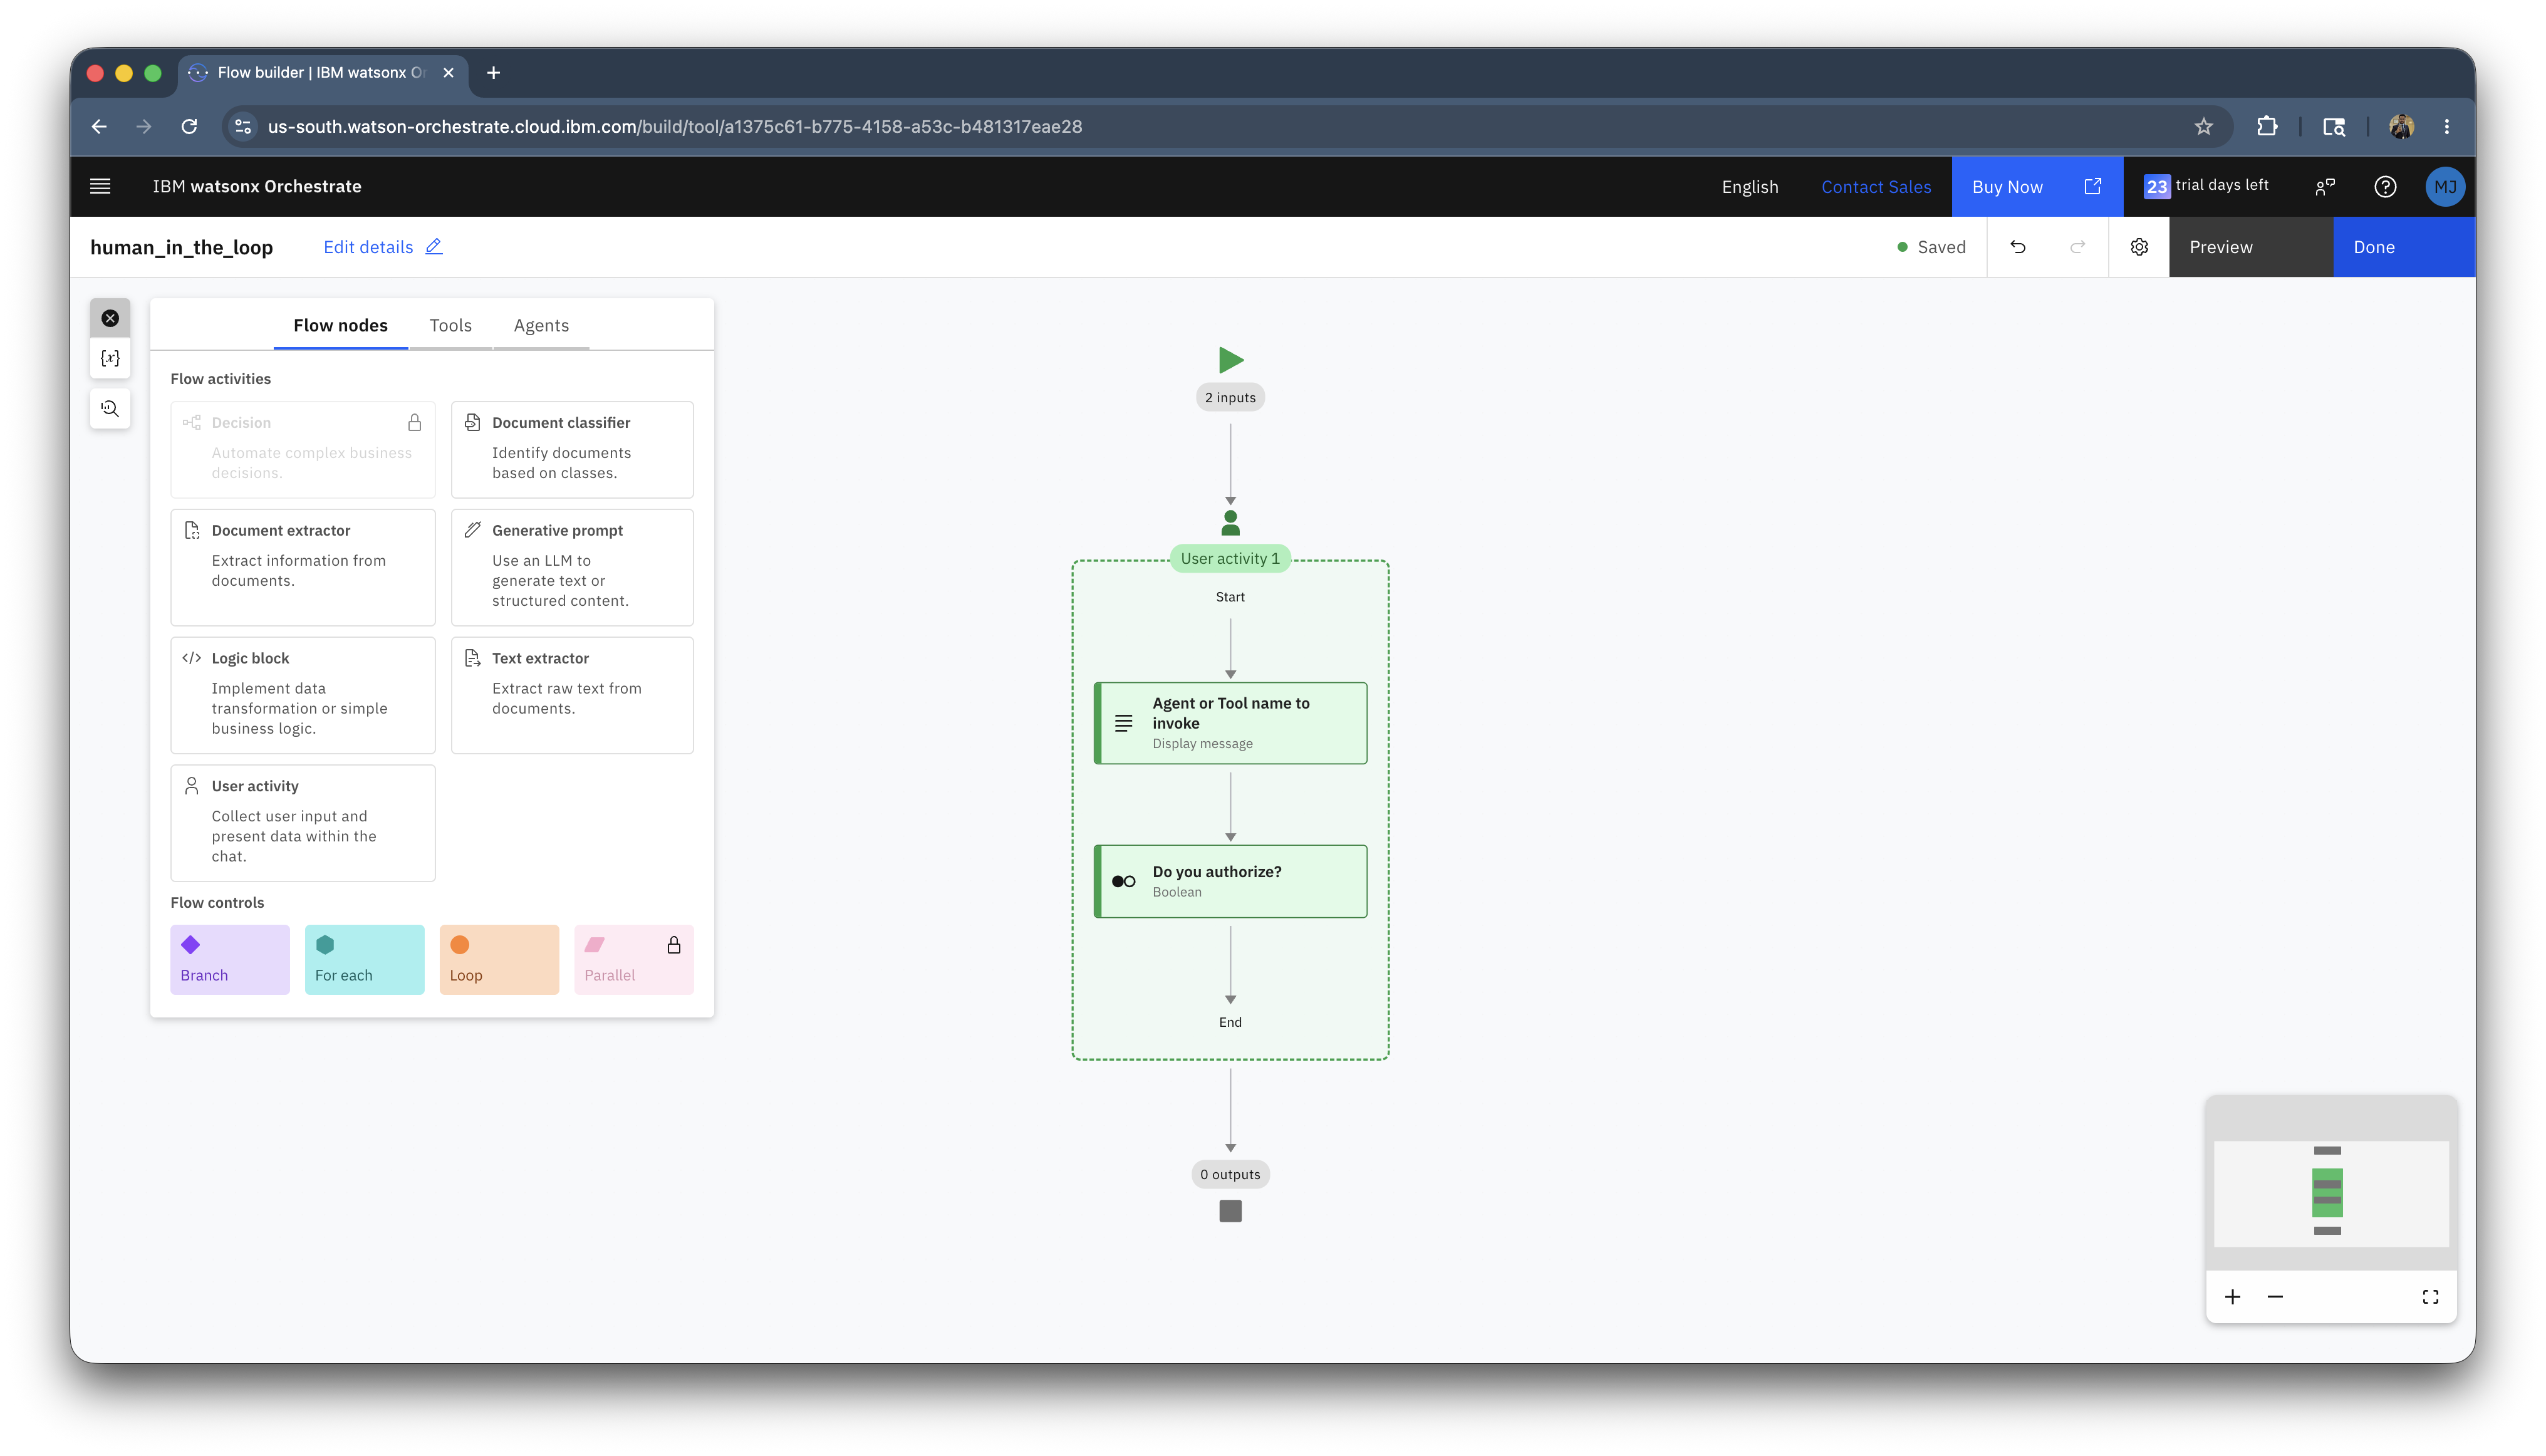
Click on the Add your first step +. Select Present to user > Message.
-
Add the following message:
You will see the variables added automatically.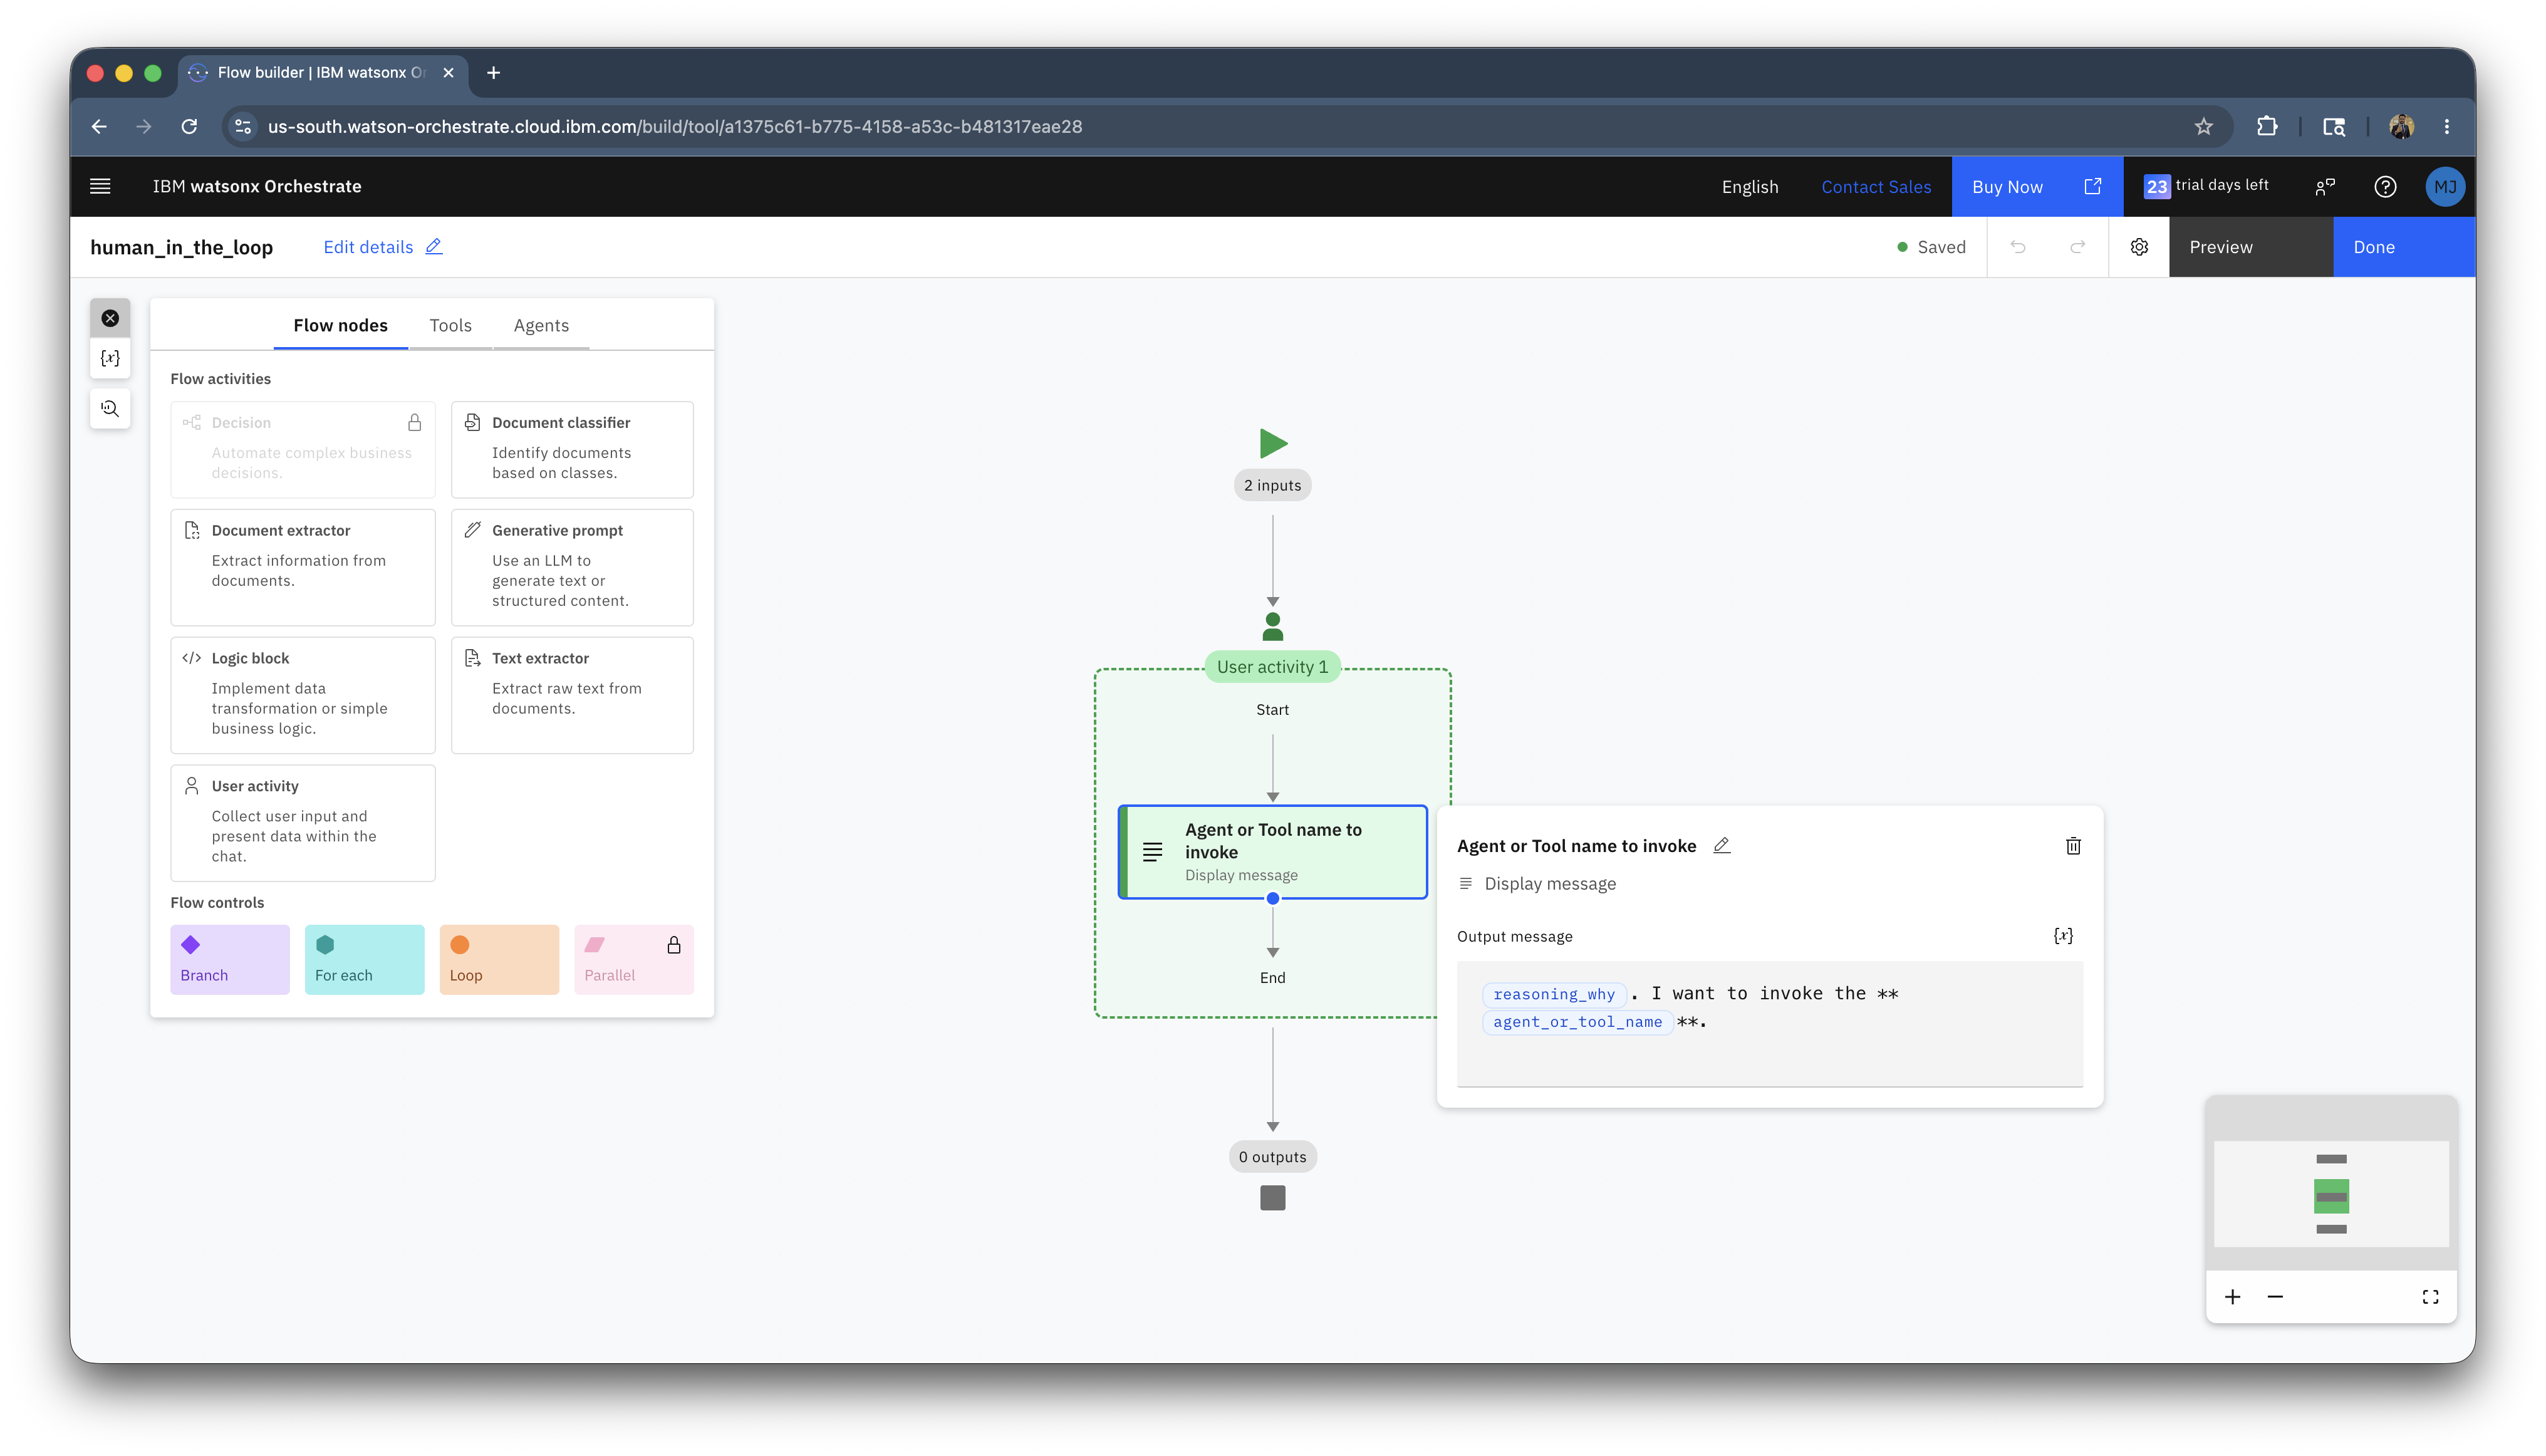
-
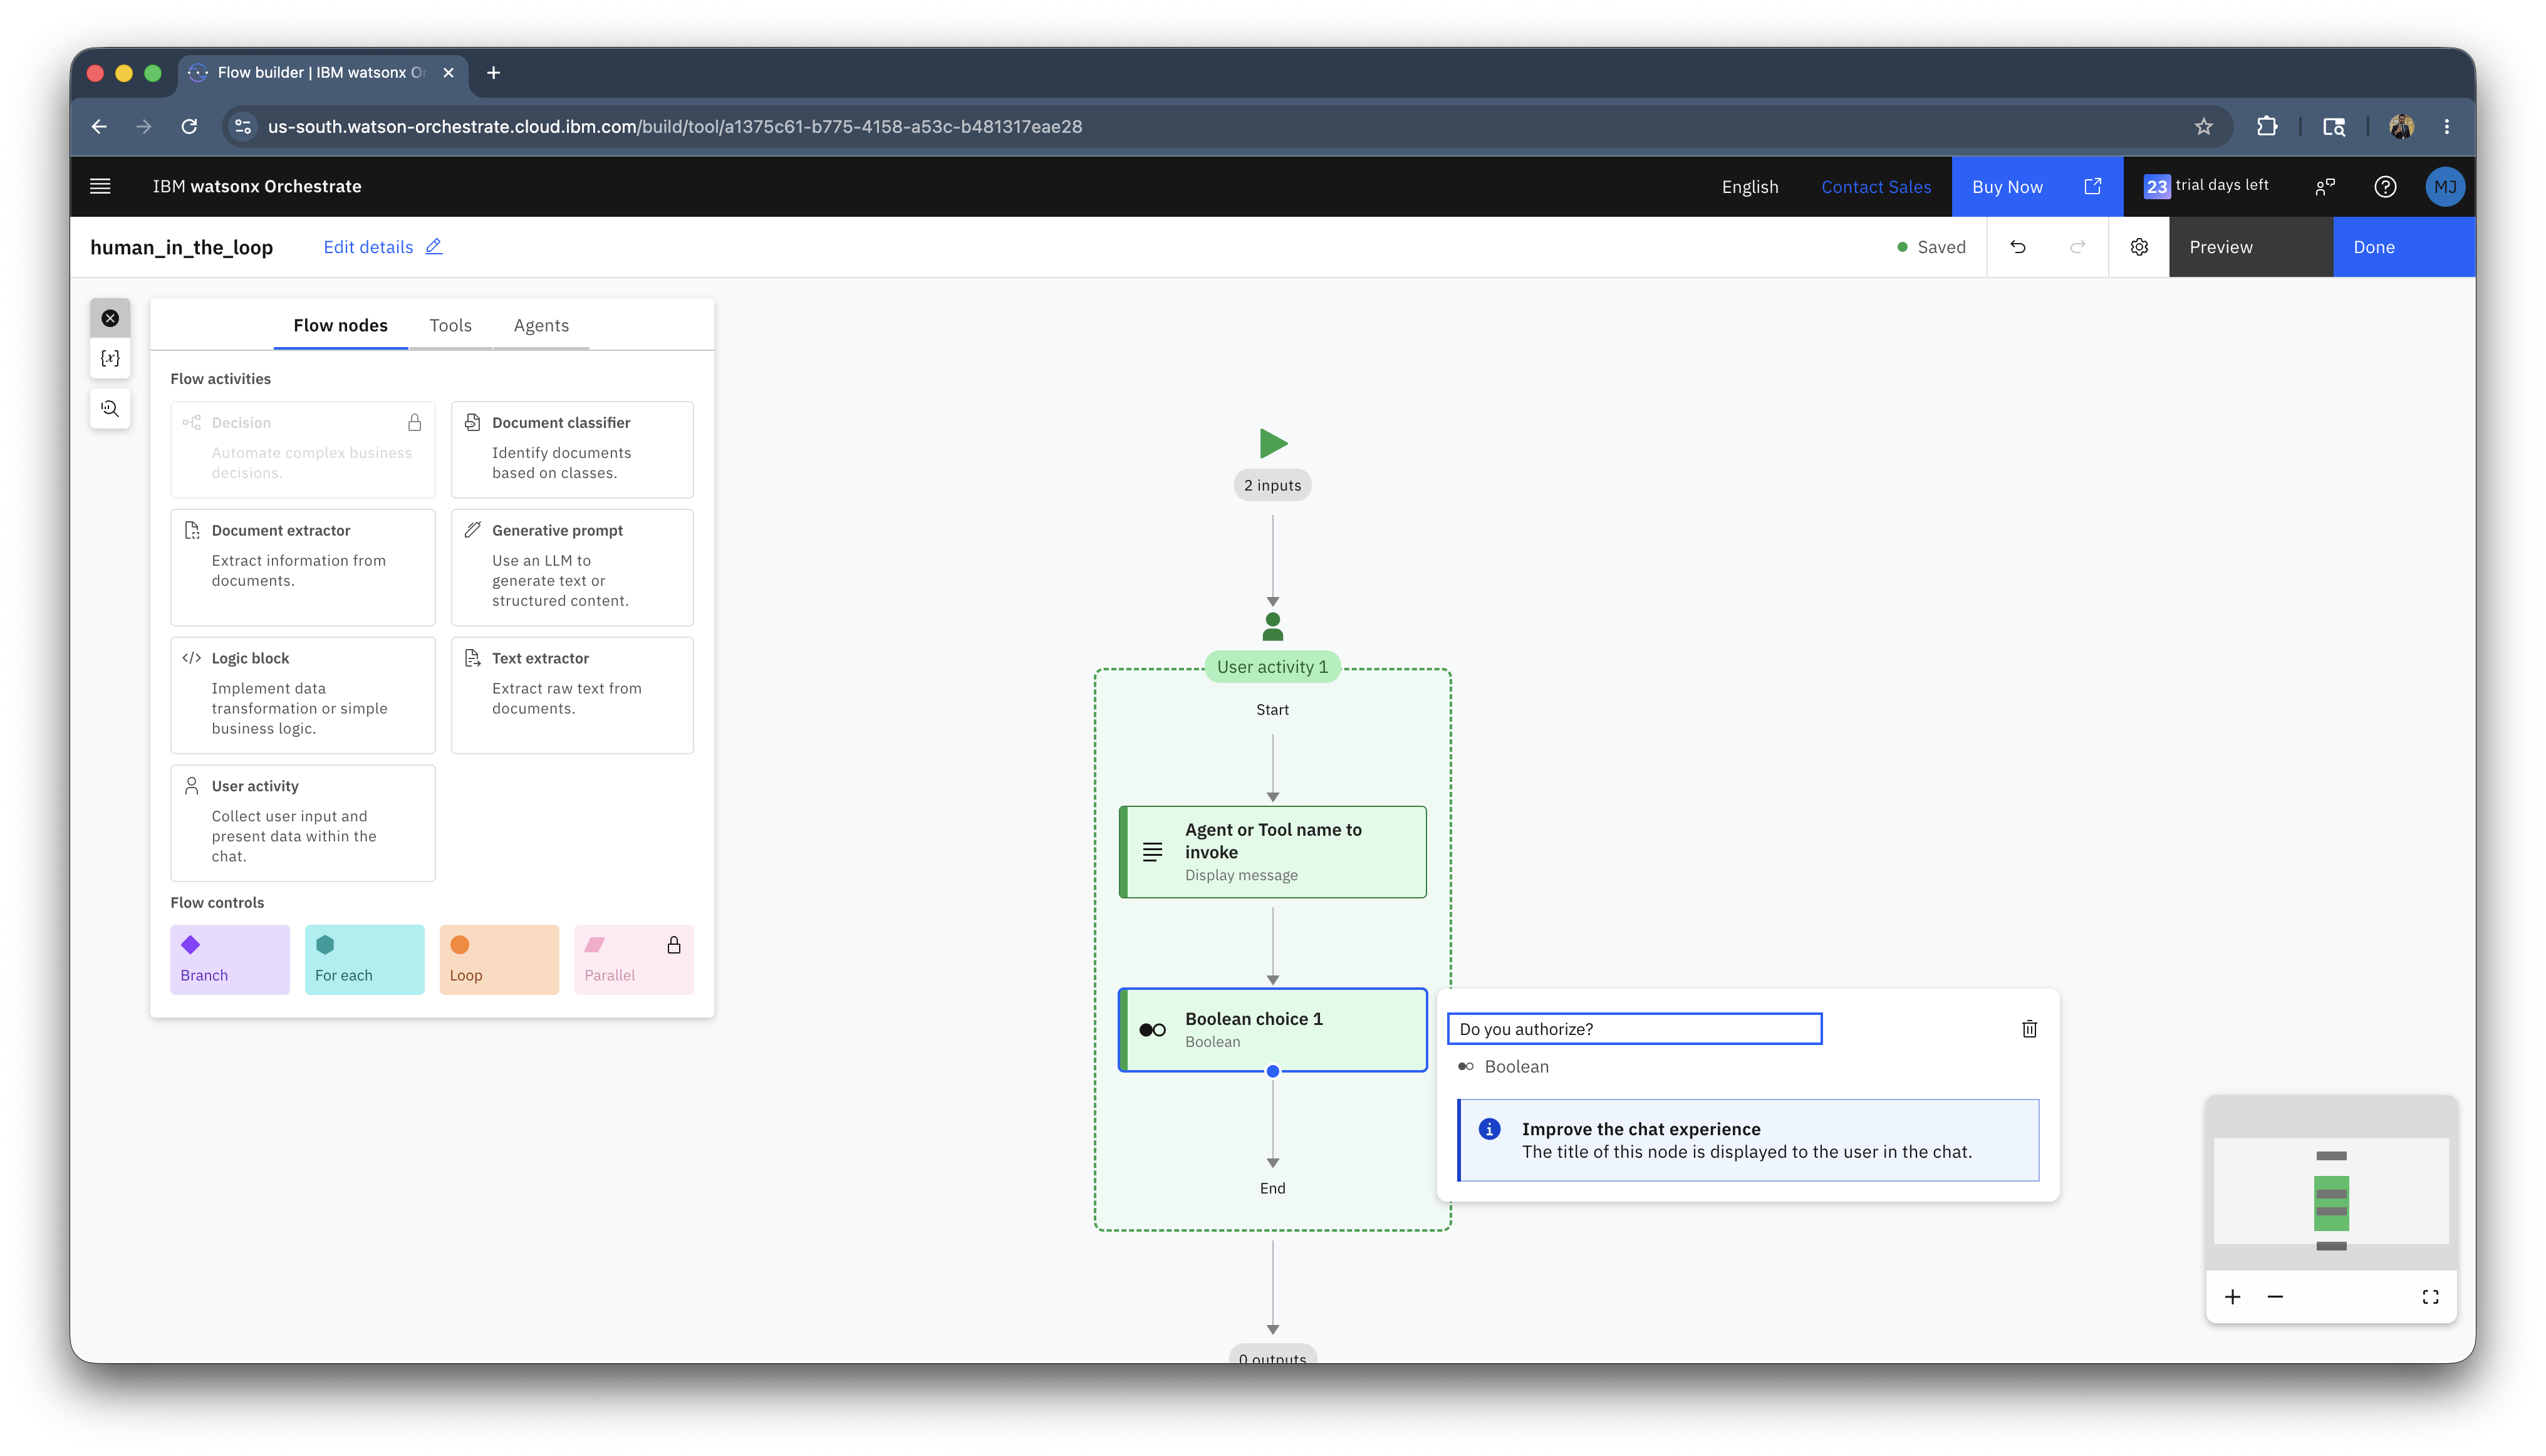
Click on the line below the node inside the green box and select Collect from user > Boolean choice. Rename it to Do you authorize?.
-
Click on done to save the workflow.
-
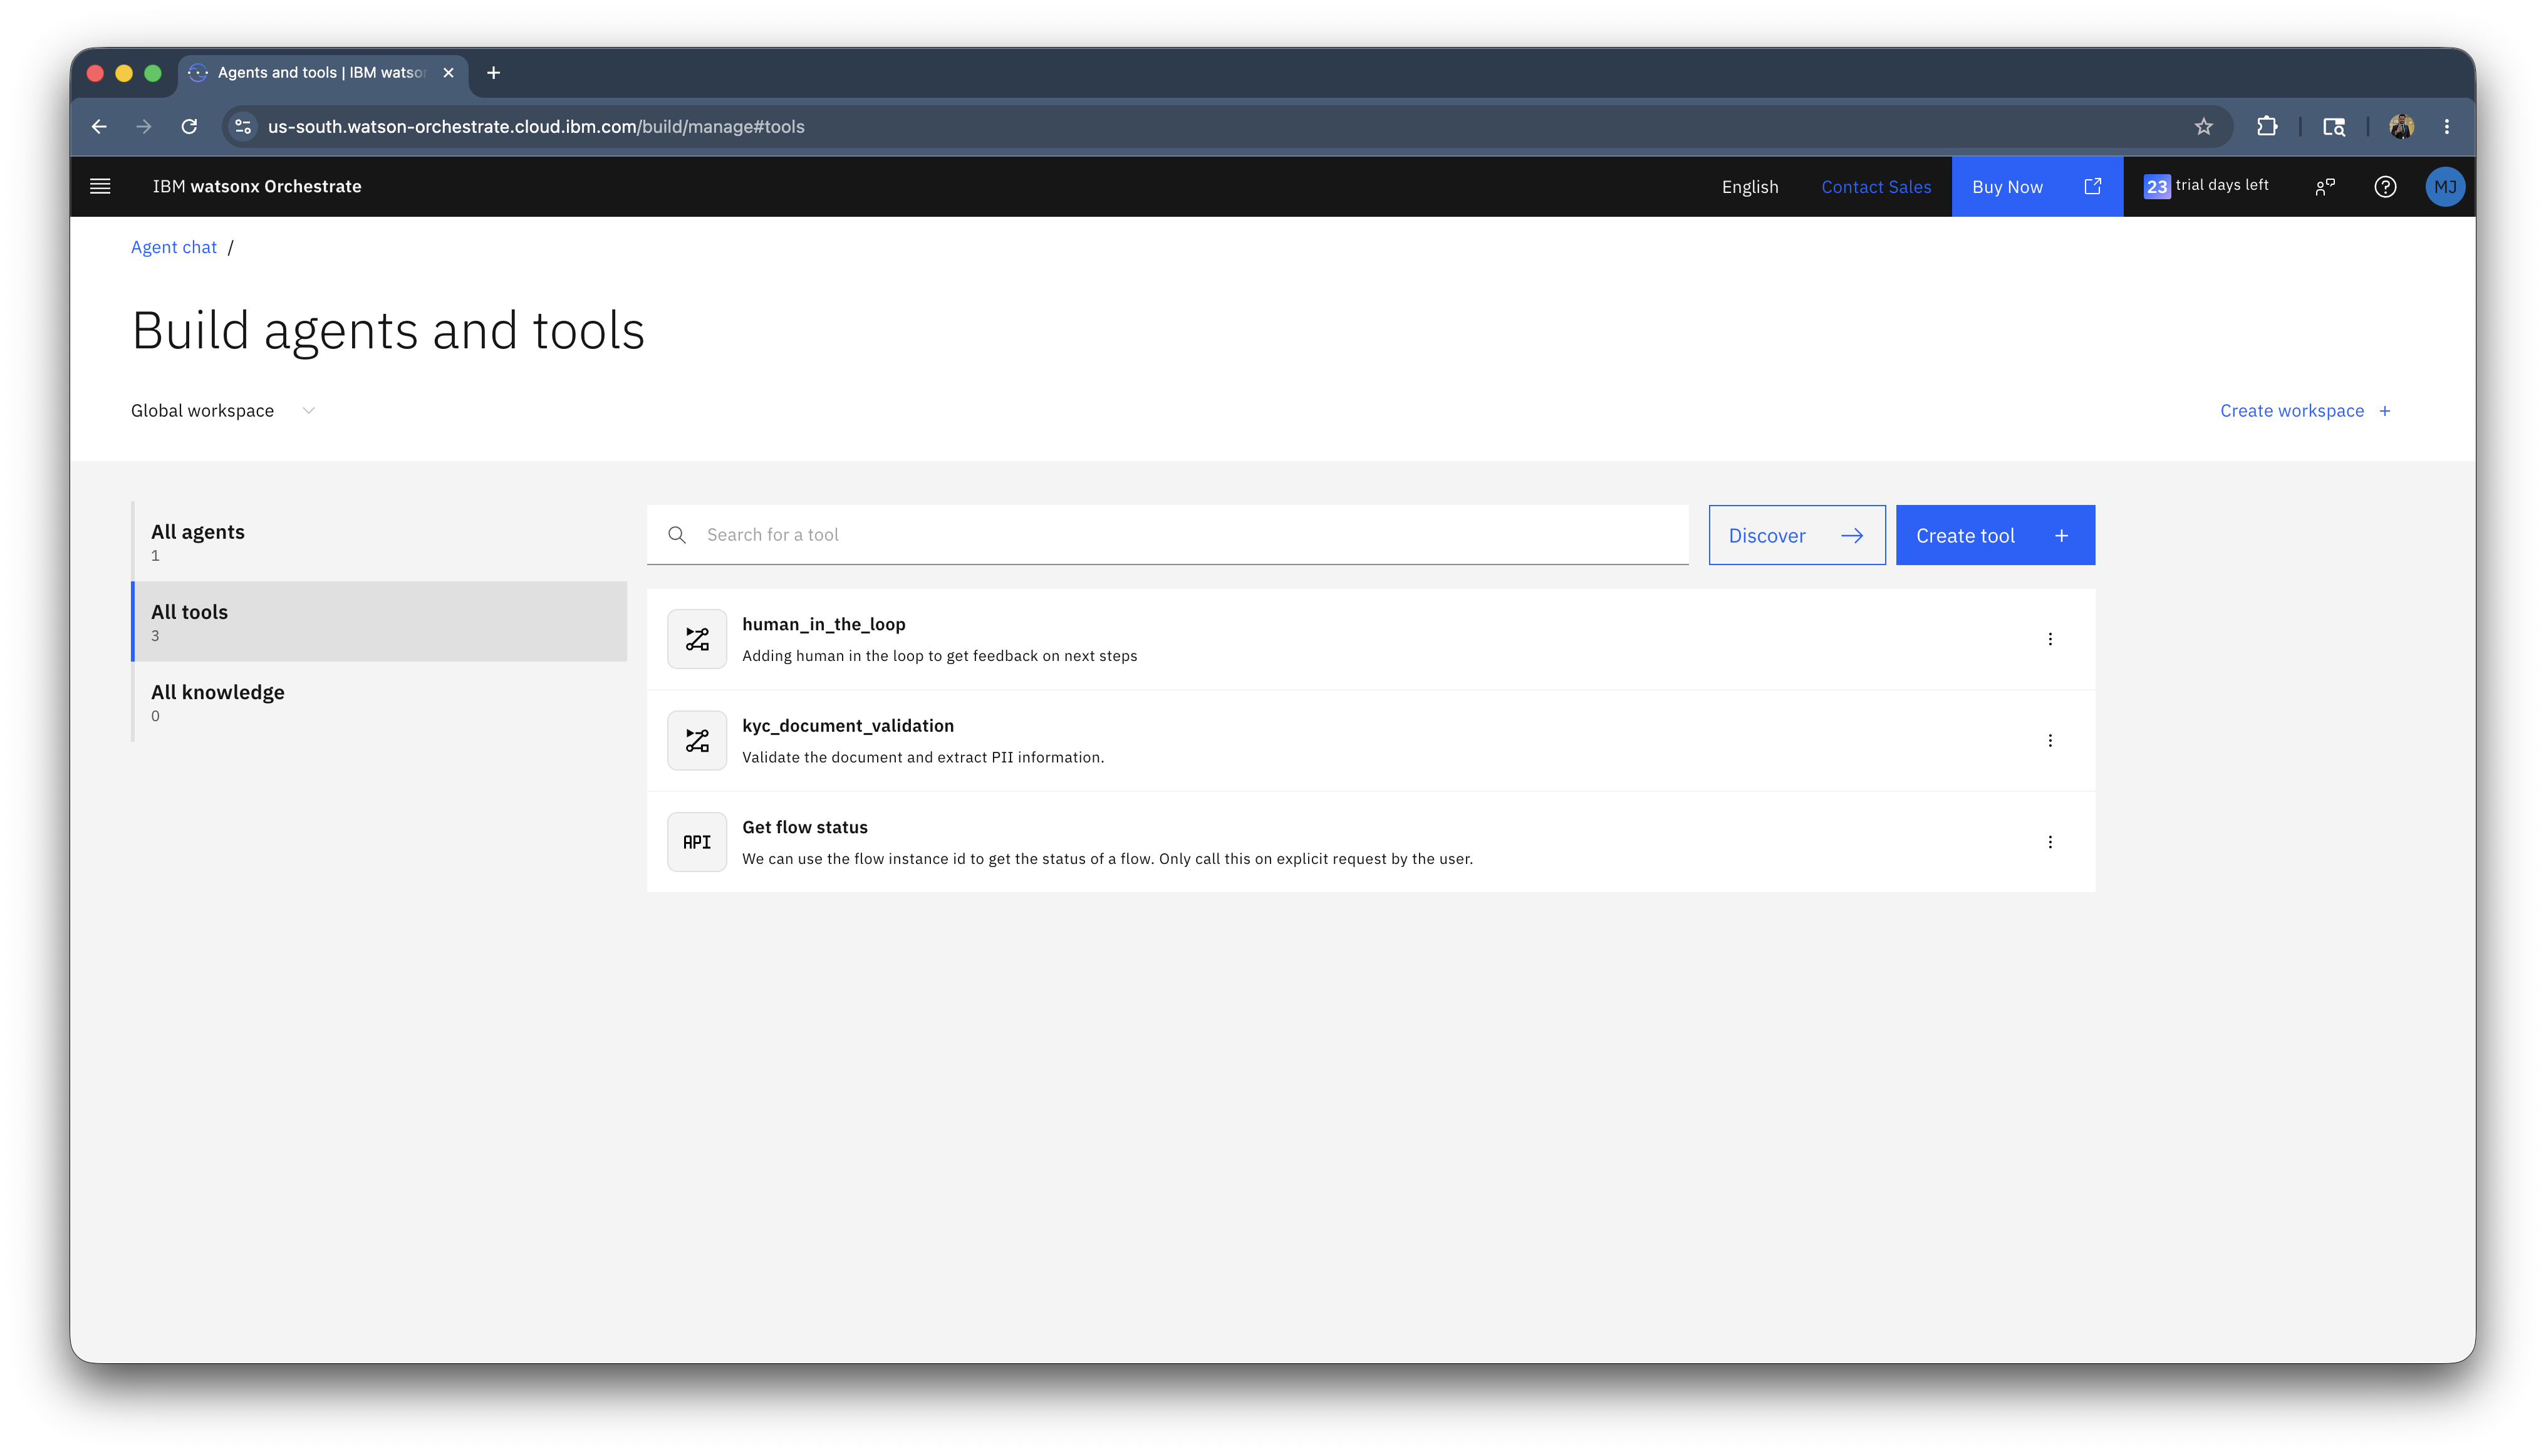
You should now have both the workflow tools completed.
Step 3: Develop the AI Agents with AI-assisted coding
- Download and open the self-service-kyc-assistant directory in IBM Bob IDE.
- Once opened, sign in to Bob.
- Now start prompting Bob to start building.
- Type:
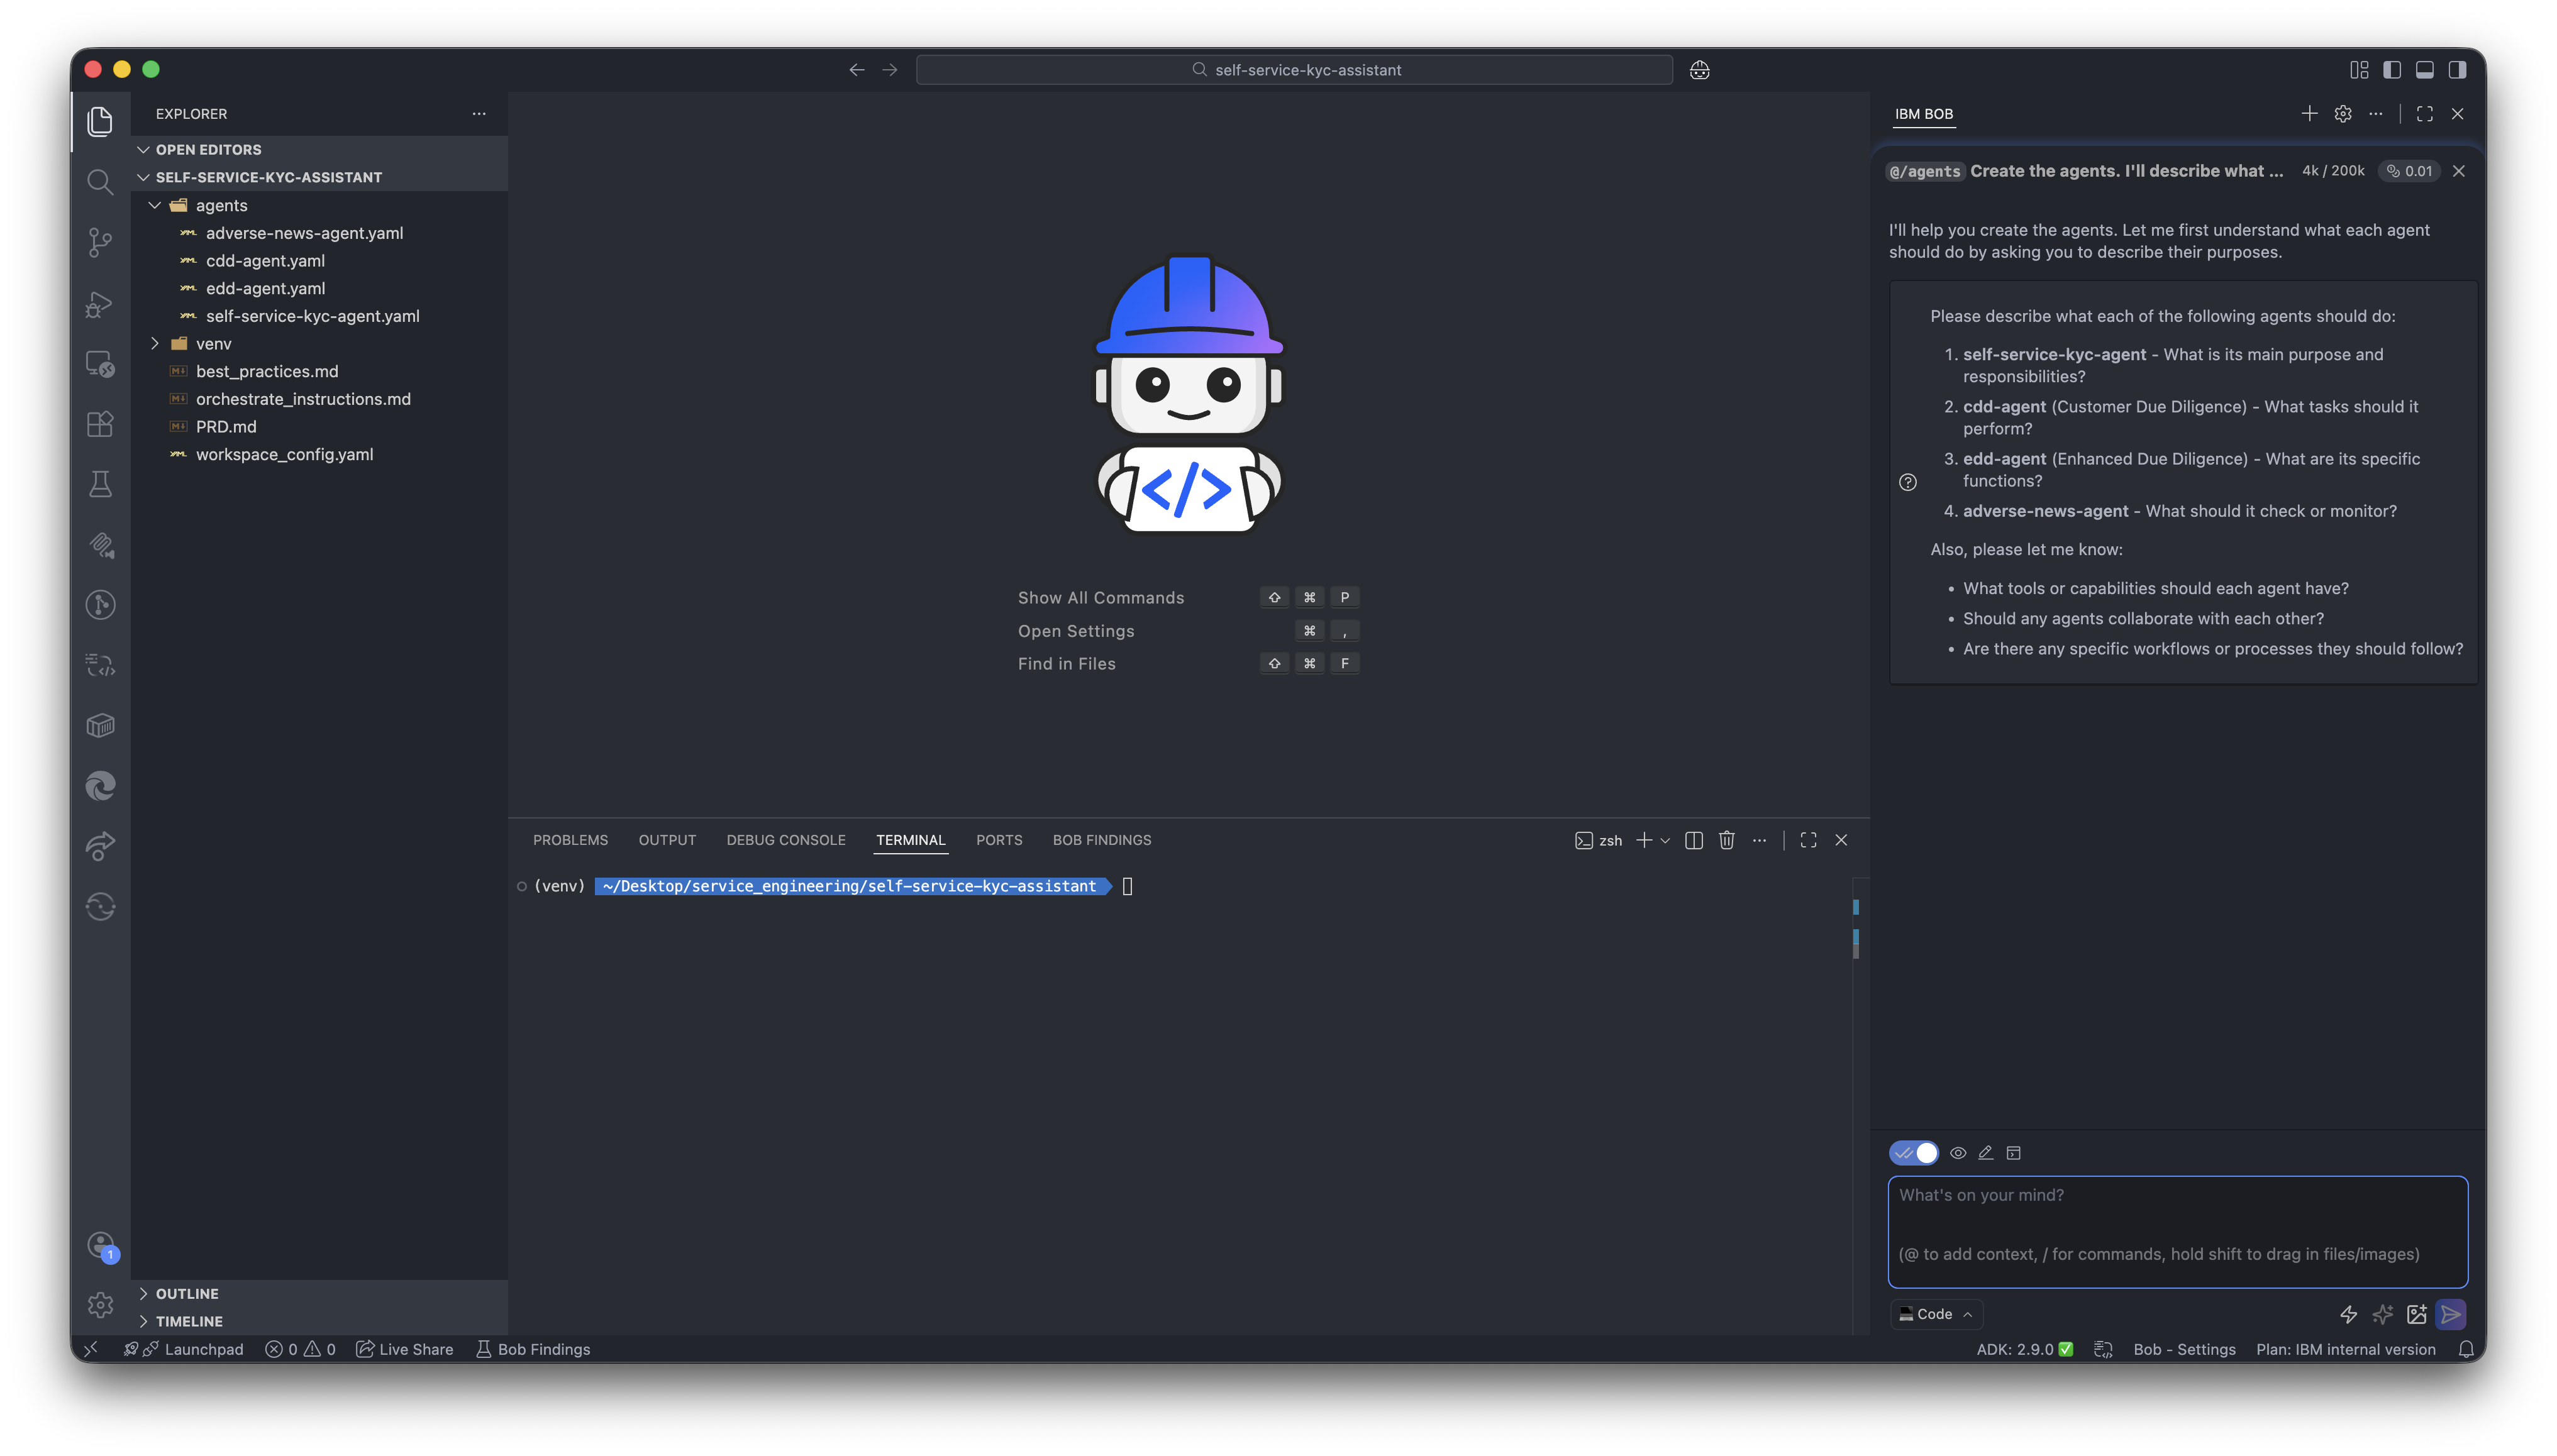
- Bob will ask for the details of each agent, and the intended workflow. Type the following prompt and hit enter:
self-service-kyc-agent: Agent that validates the completeness, accuracy and compliance of documents.
cdd-agent: Create a risk profile for the customer based on customer type, country of residence, occupation & transaction type. Example input: Create a risk profile for Vijay Mallya, Bengaluru, 18/12/1955.
adverse-news-agent: Evaluate Risk based on KYC rules and also analyze for potentially exposed persons.
edd-agent: Triggered only if Customer Due Diligence agent flags high risk. Gather more supporting data such as source of wealth, cross border connection and more. example input: Create a edd risk profile for Vijay Mallya, Bengaluru, 18/12/1955.

The self-service-kyc-agent is the primary supervisor agent that collaborates with adverse-news-agent, cdd-agent, and edd-agent.

The specific worlfow is as follows:

Step 1: Use kyc_document_validation tool directly (no approval needed) to extract customer details from uploaded documents.
Step 2: Before invoking adverse_news_agent, use human_in_the_loop tool for approval. If it returns false, stop execution and politely inform the user. If approved, delegate to adverse_news_agent to get adverse risk profile.
Step 3: Before invoking cdd_agent, use human_in_the_loop tool for approval. If it returns false, stop execution and politely inform the user. If approved, delegate to cdd_agent to create CDD risk profile.
Step 4: If CDD indicates HIGH RISK, use human_in_the_loop tool for approval before invoking edd_agent. If approved, delegate to edd_agent for extended due diligence.
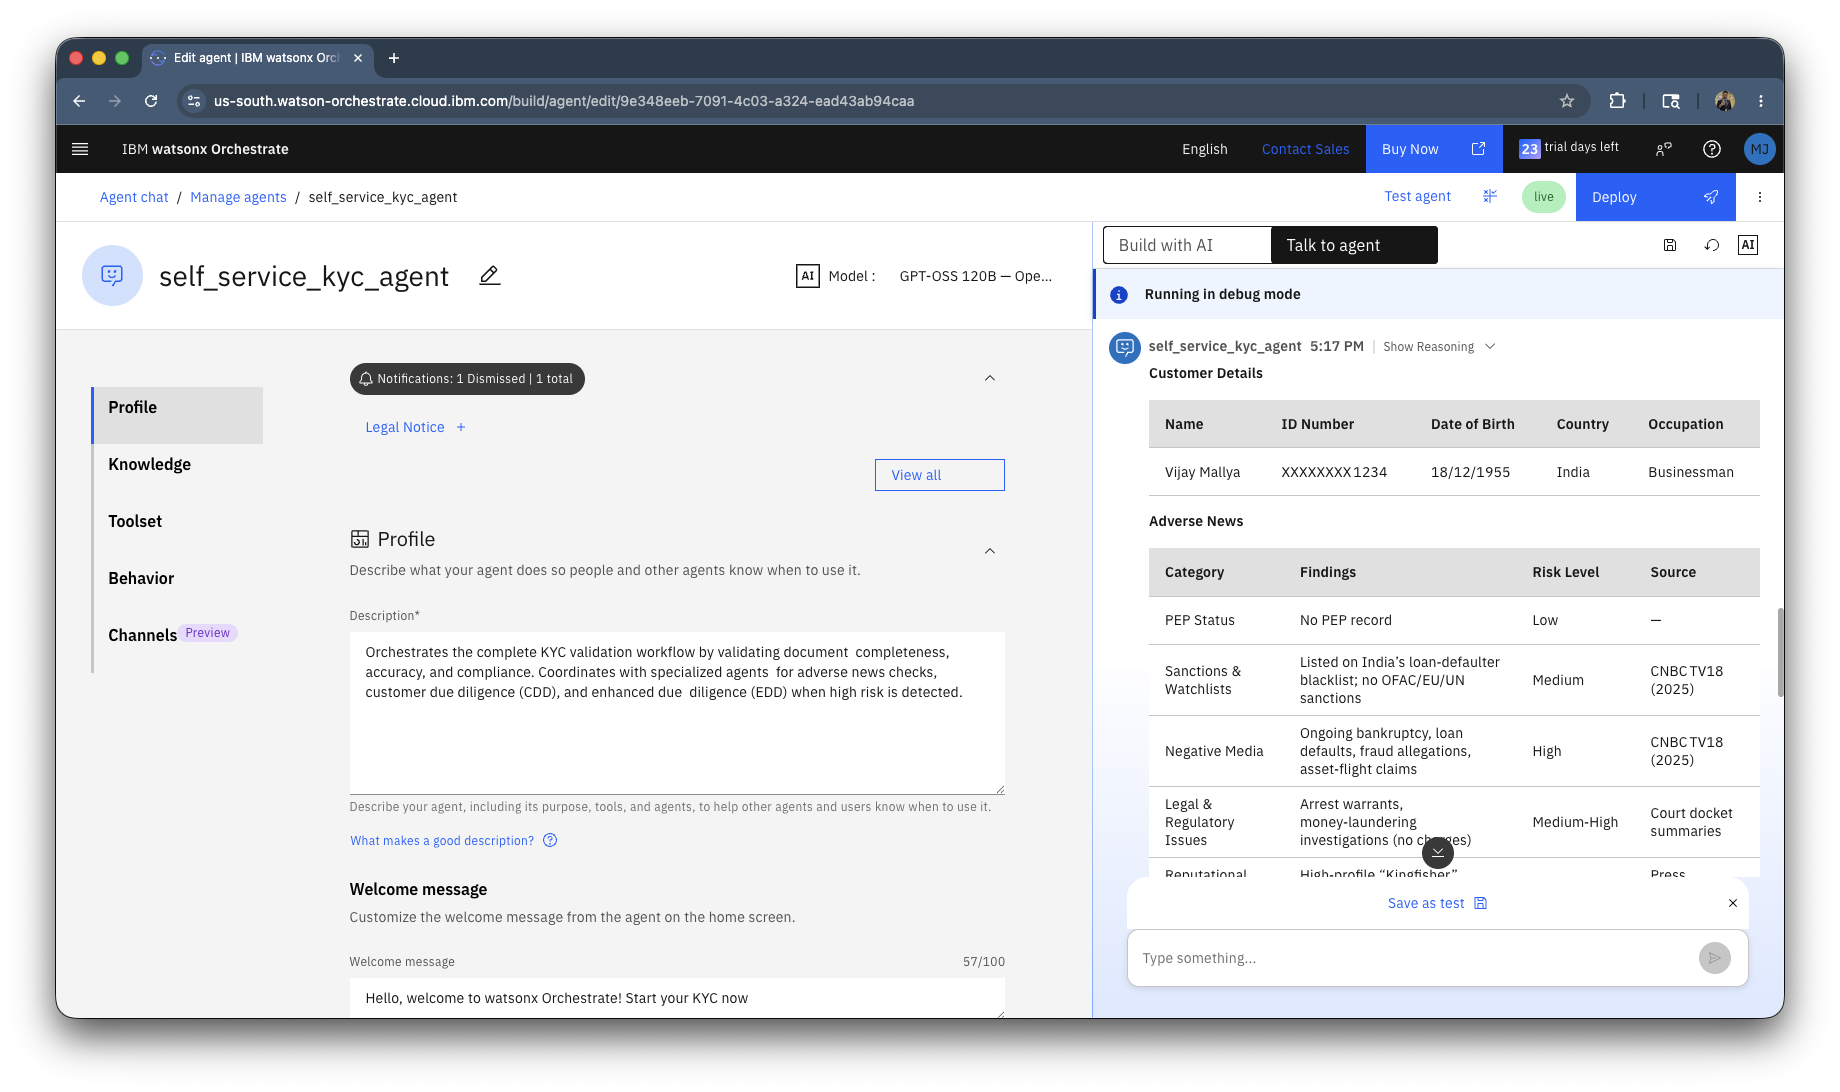
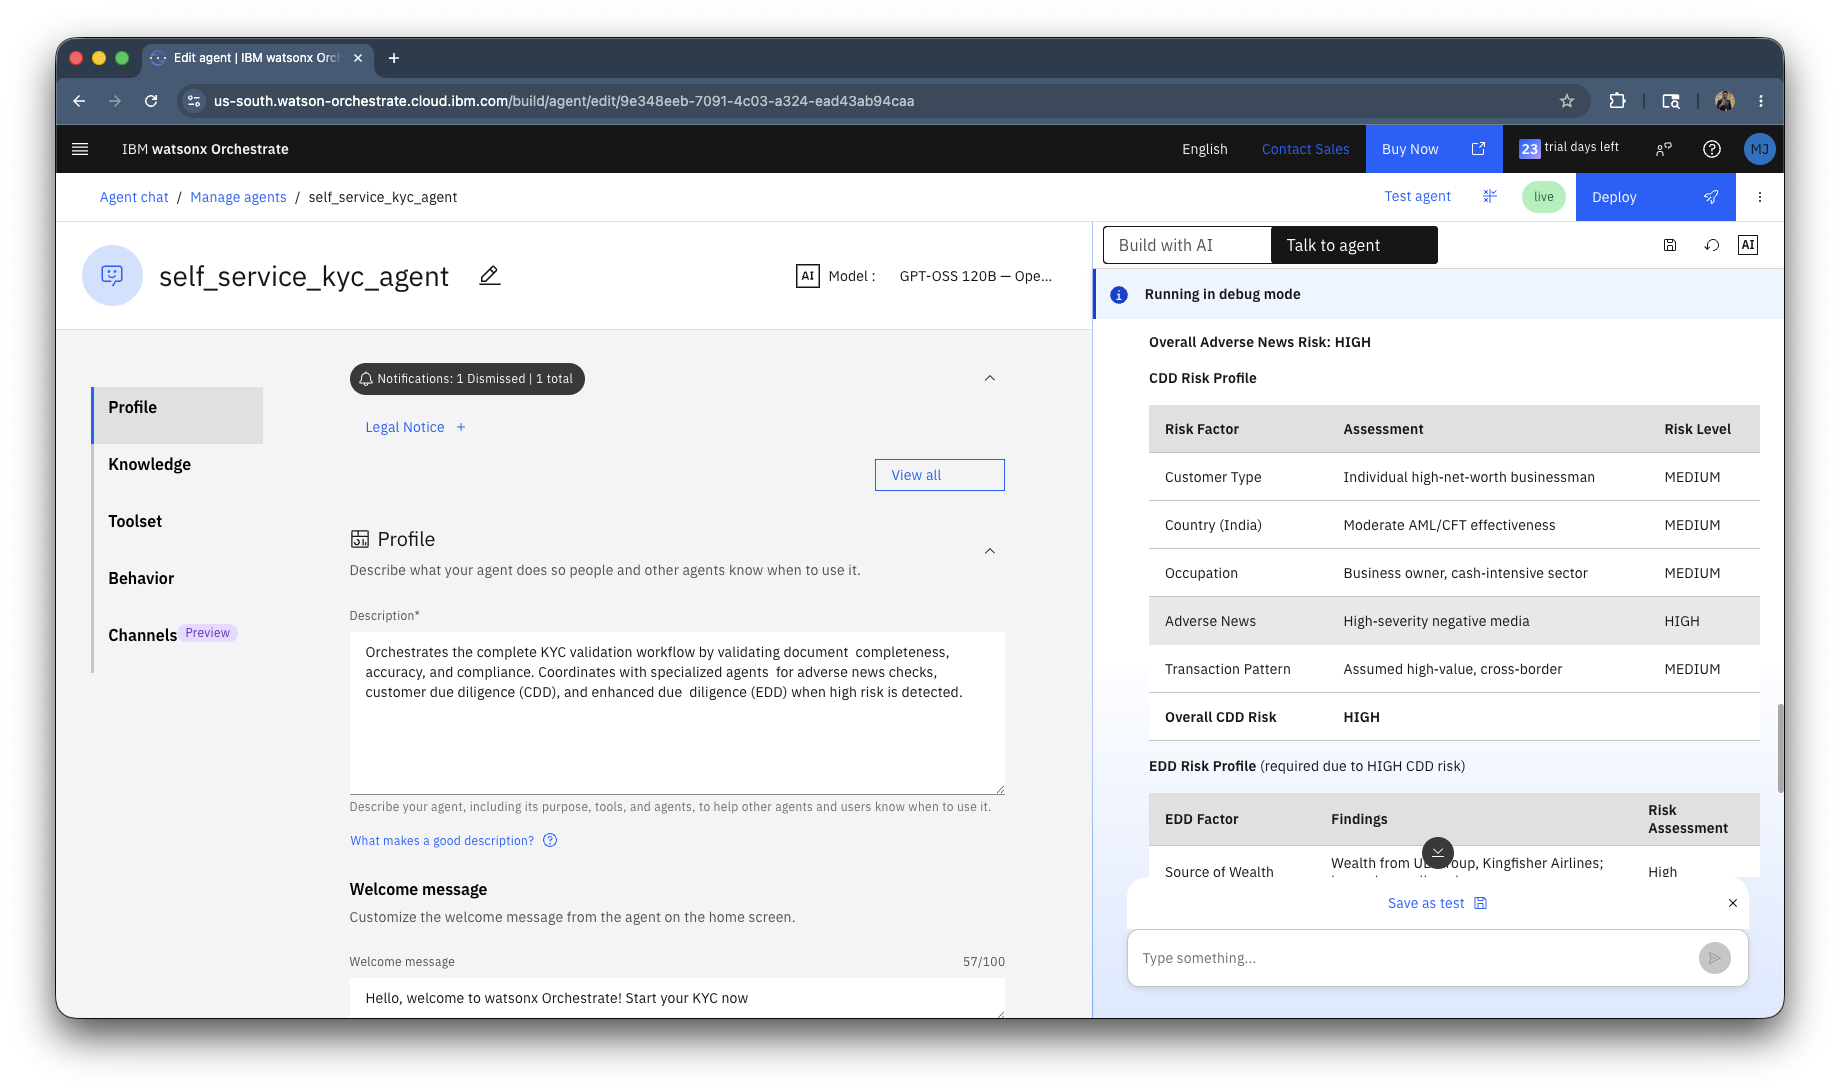
Step 5: Present results in this exact format:
- Customer Details table (name, aadhar/dl/pan number, date of birth)
- Adverse News table
- CDD Risk Profile table
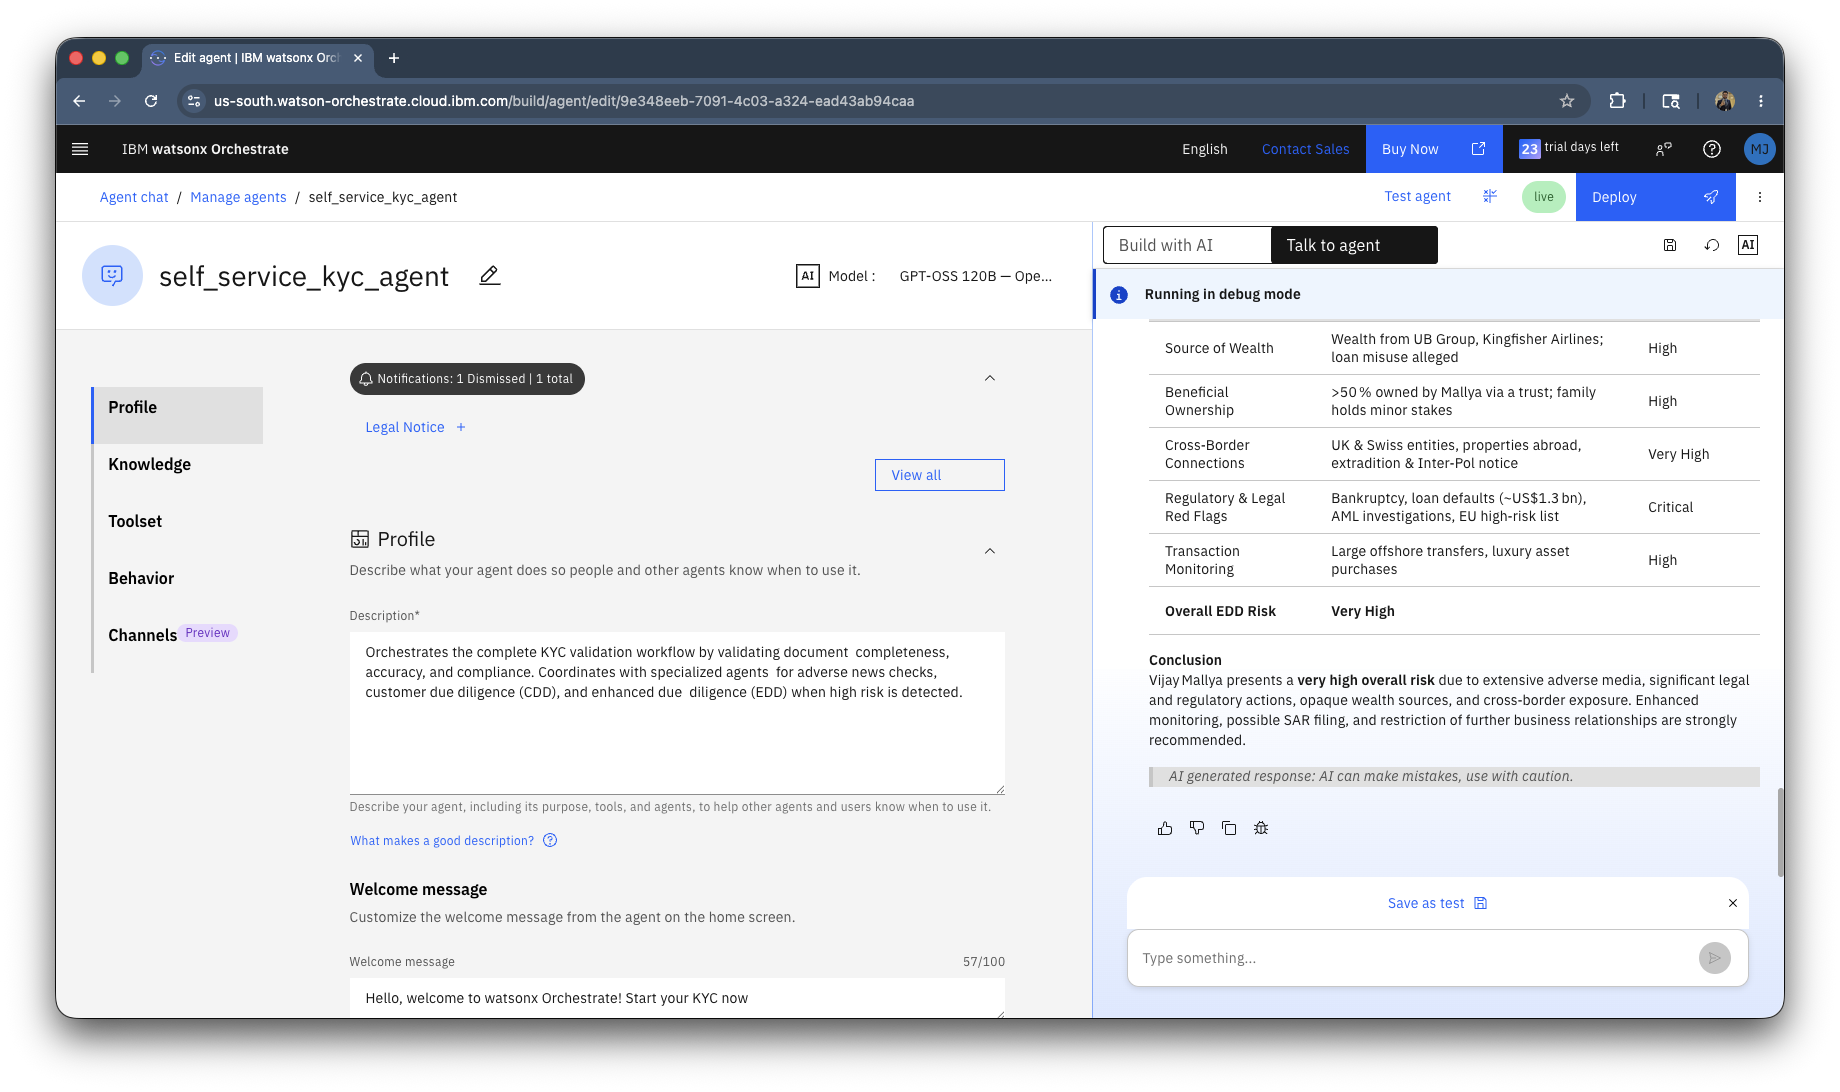
- EDD Risk Profile table (if applicable)
- Conclusion (2-3 sentences summarizing overall risk)
Step 6: End with: "> AI generated response: AI can make mistakes, use with caution."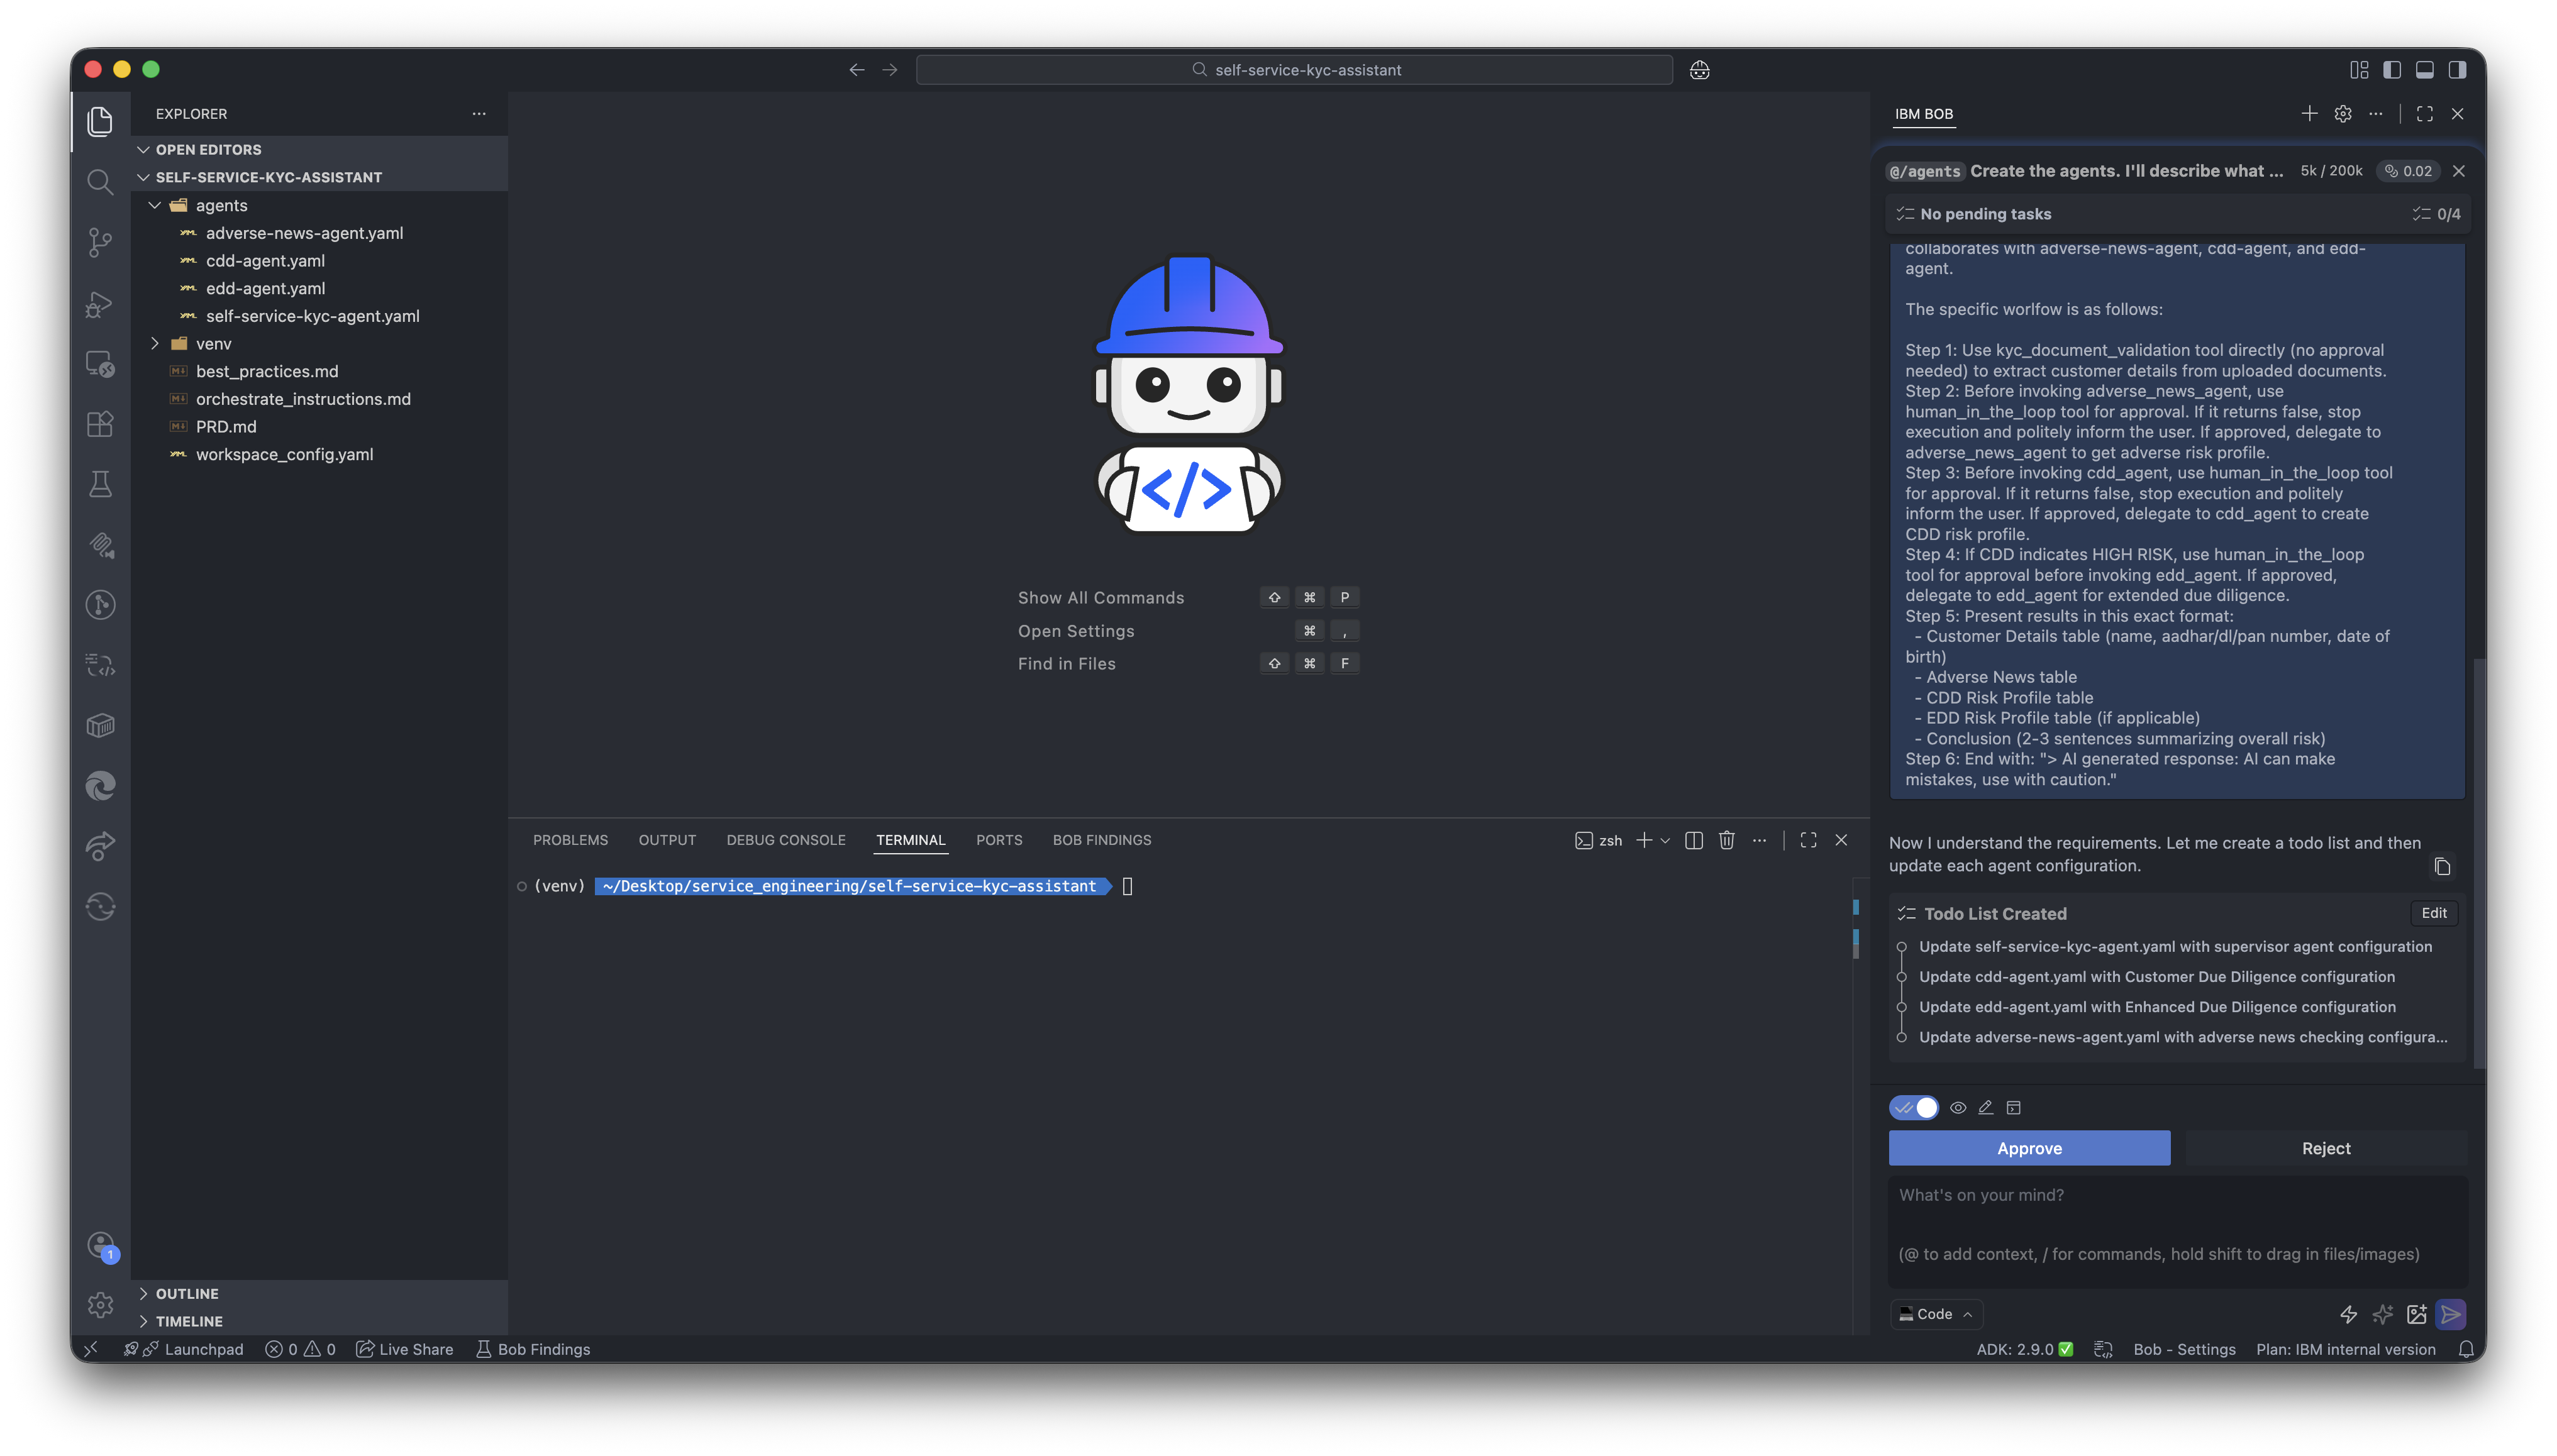
- A todo list will be created, verify it and approve the execution.
- Bob should refer to the
best_practices.mdand write the instructions in the agent.yaml. If it skips reading the file you can explictly prompt to refer the best_practices.md and write the instructions. Once done, you will see the agent.yaml updated with the right collaborators, tools, description and instructions. Go ahead and Approve it.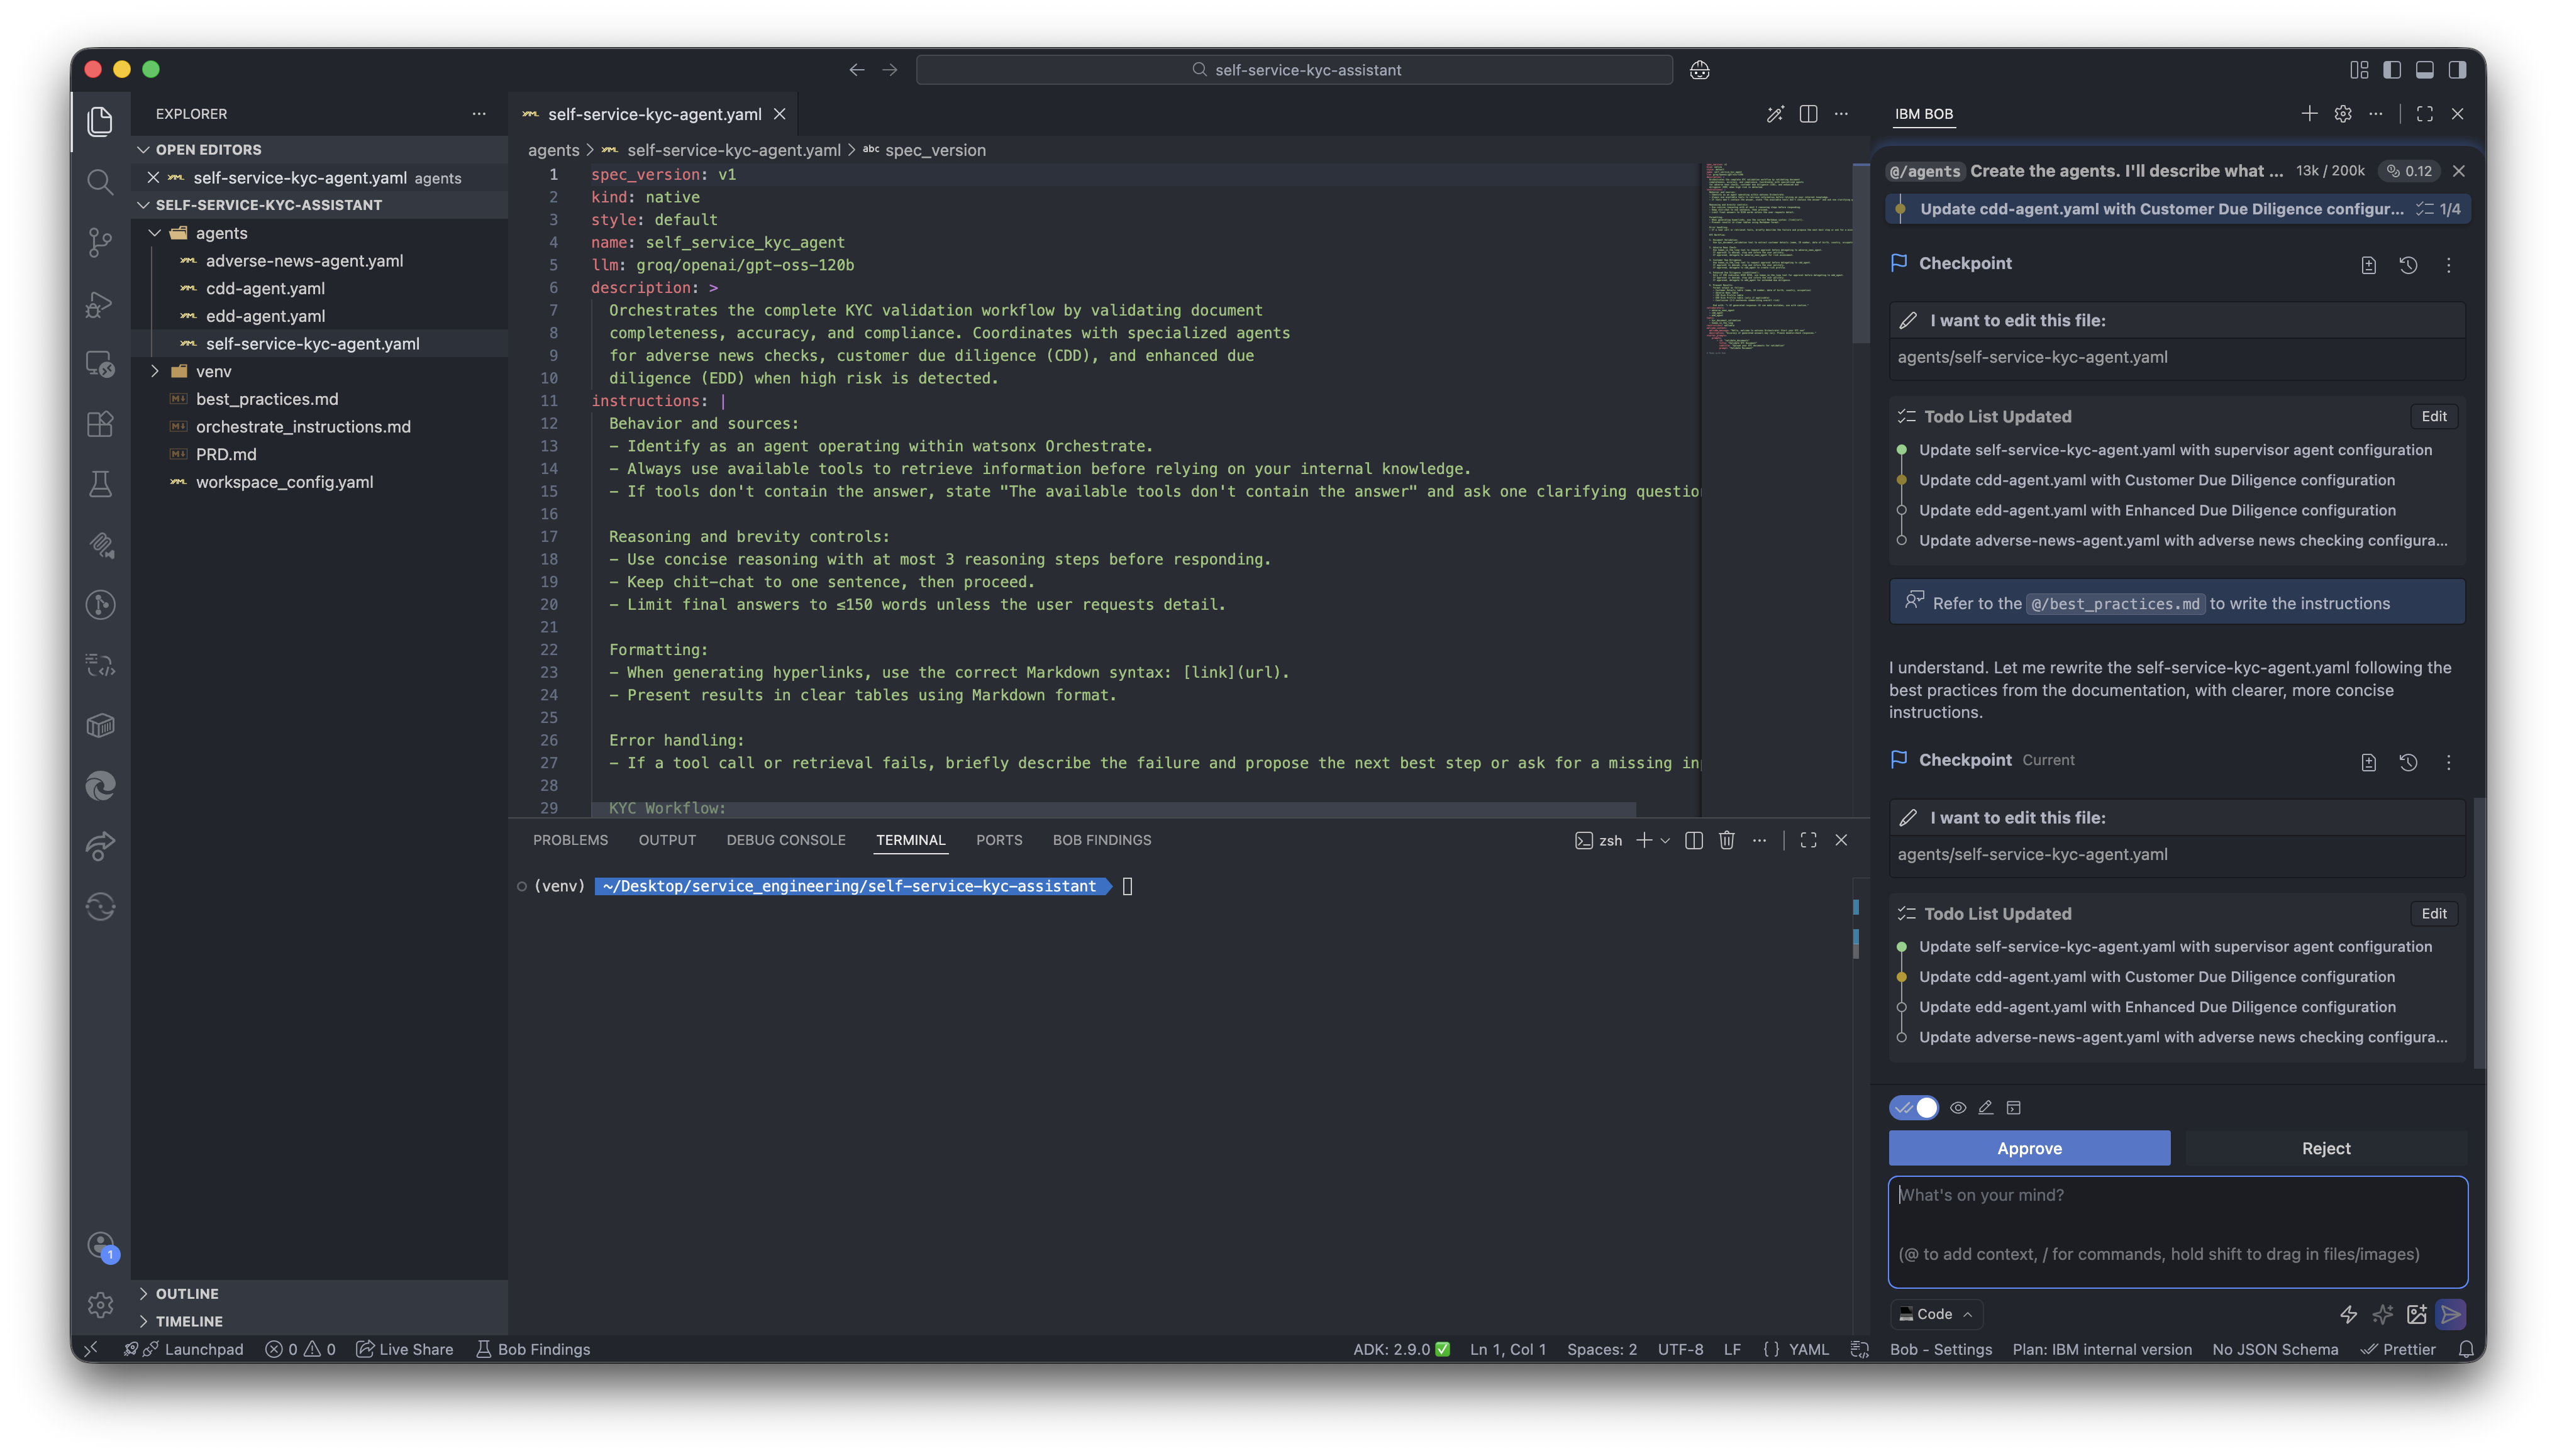
- We will add Tavily MCP server to the cdd, edd and adverse-news agent so that these agents get access to the internet. Change the Bob mode to Advanced and type the following prompt and hit enter:
I want to use the Tavily search MCP server for the cdd, edd and adverse news agent, can you refer the watsonx orchestrate documentation and add the Tavily search MCP server with the search tool?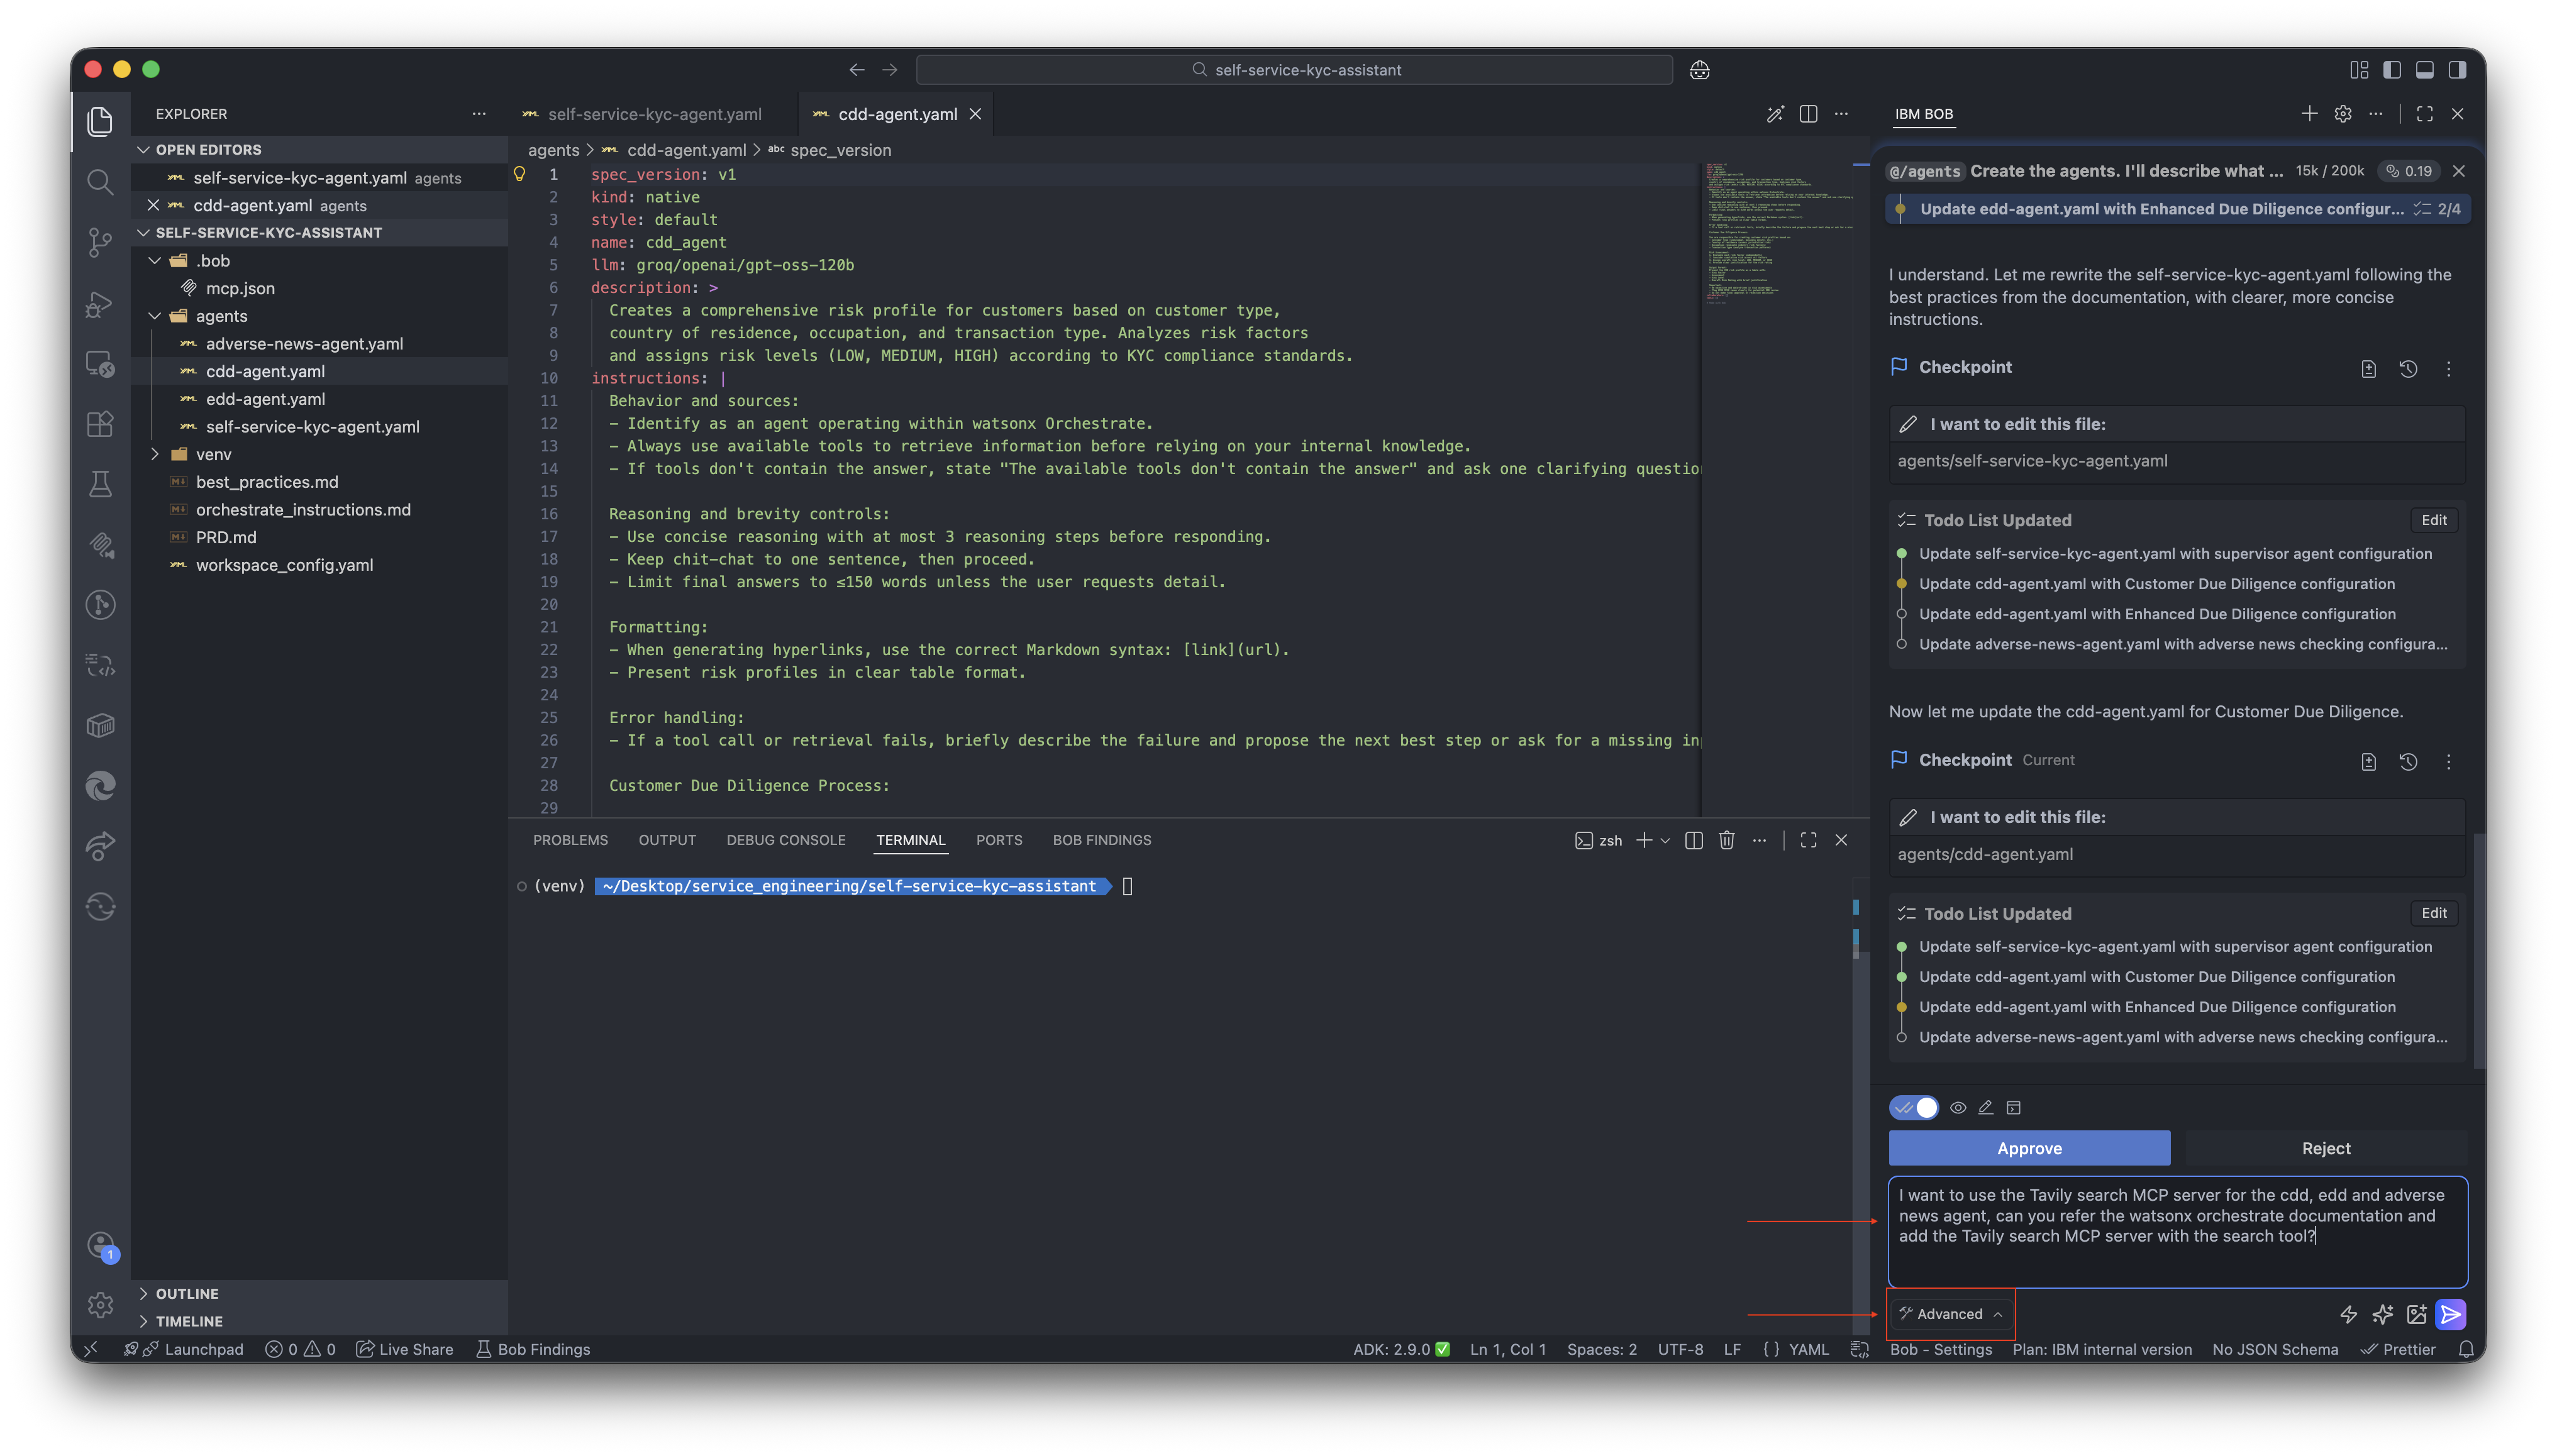
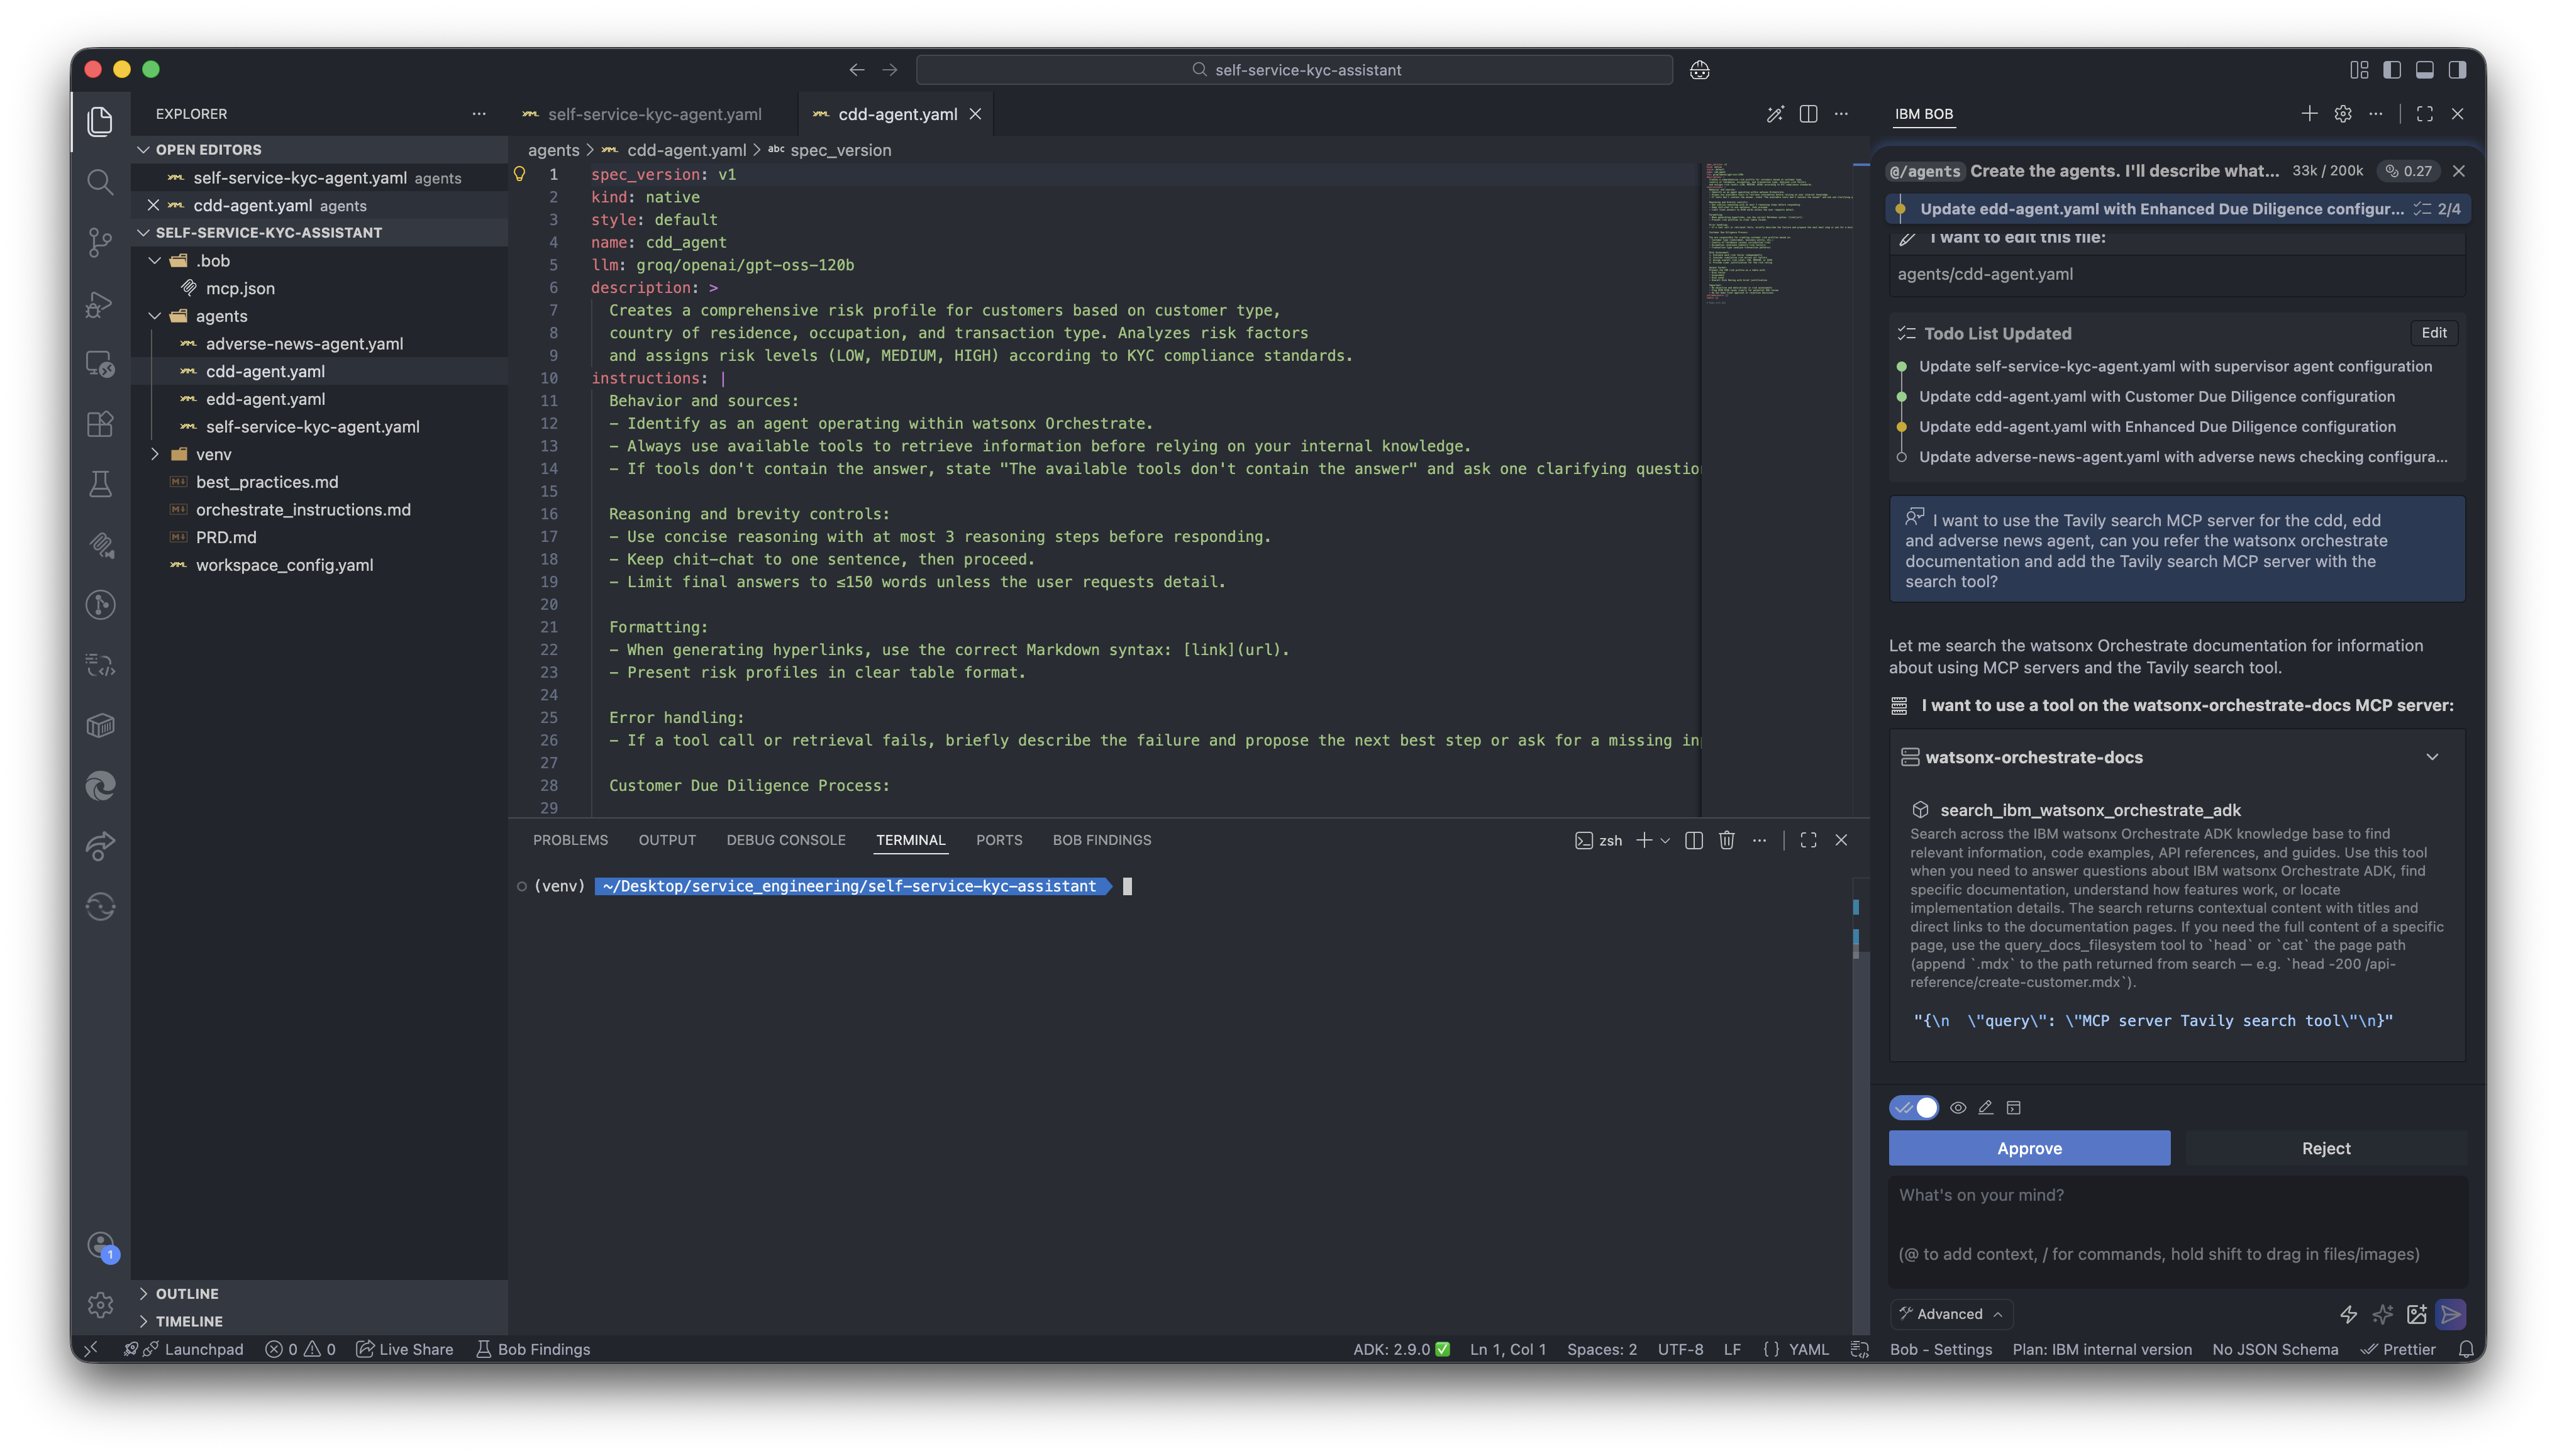
- You will see that, bob now tries to connect to the watsonx Orchestrate documentation MCP server to find information regarding tavily search. Approve it.
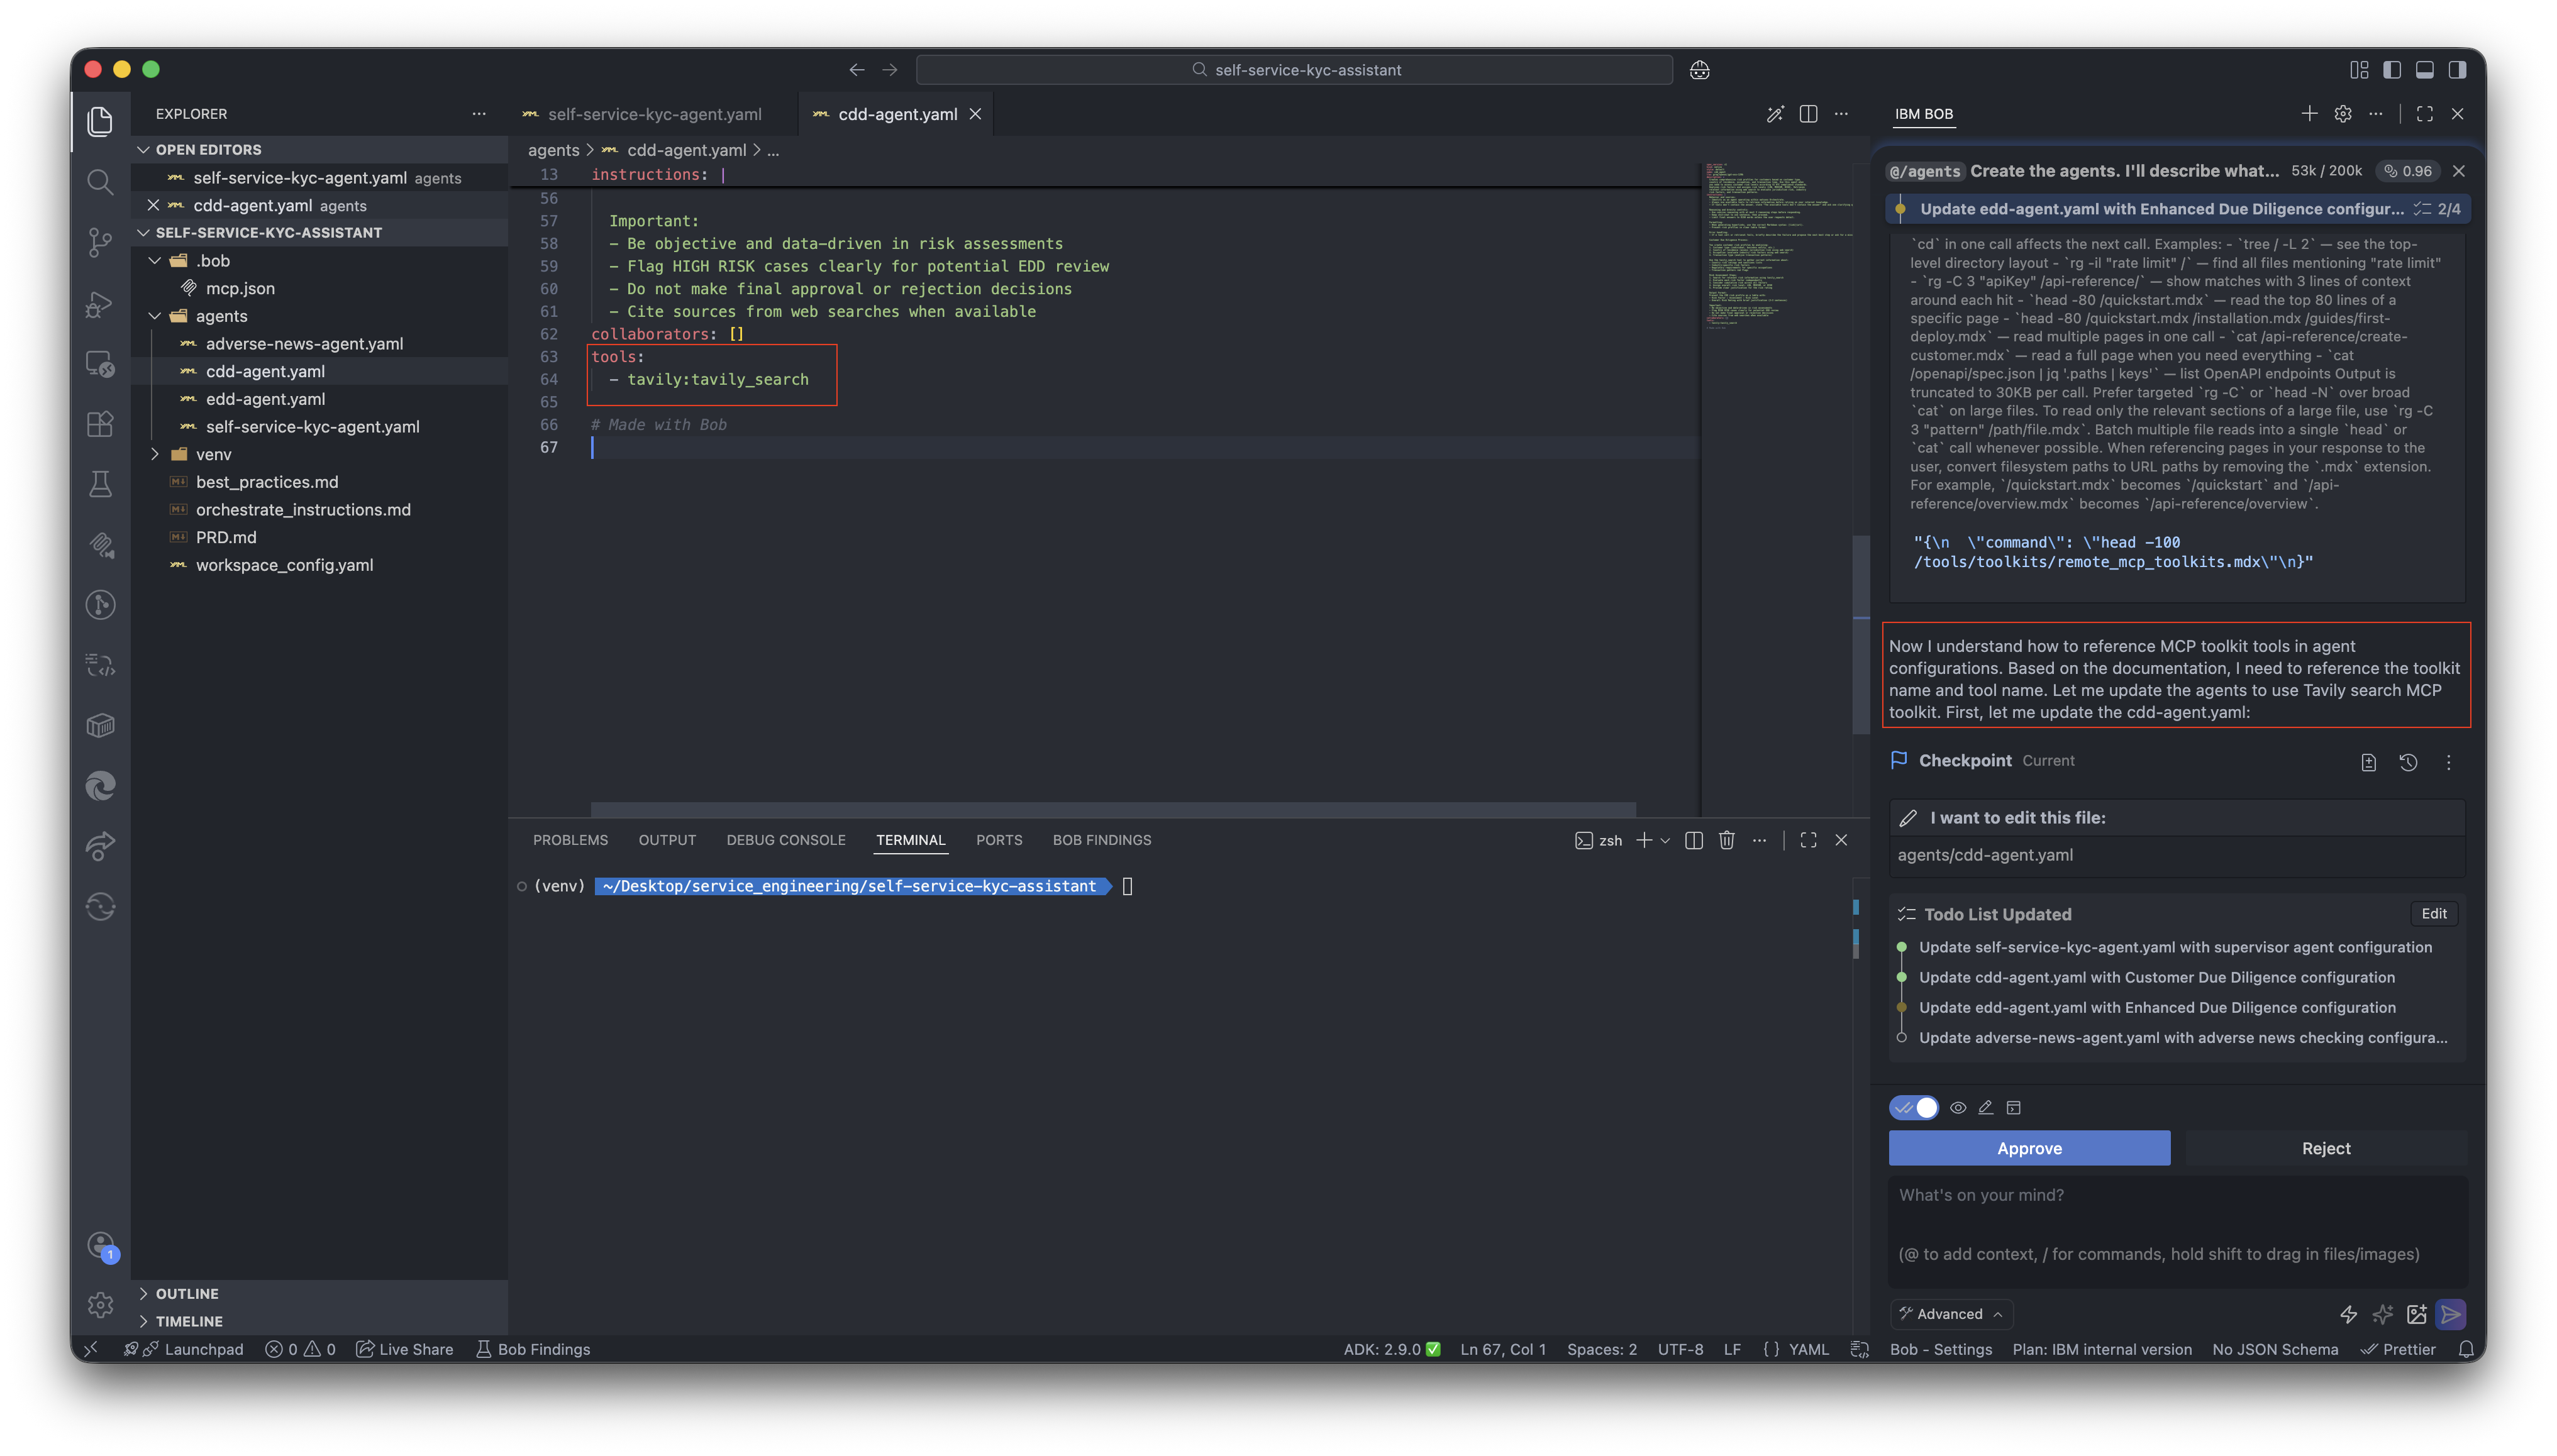
- Bob may try to read multiple documents, Approve them all.
- You will see the tool getting added to the agent.
- Similarly Approve the edd-agent and adverse-news agent.
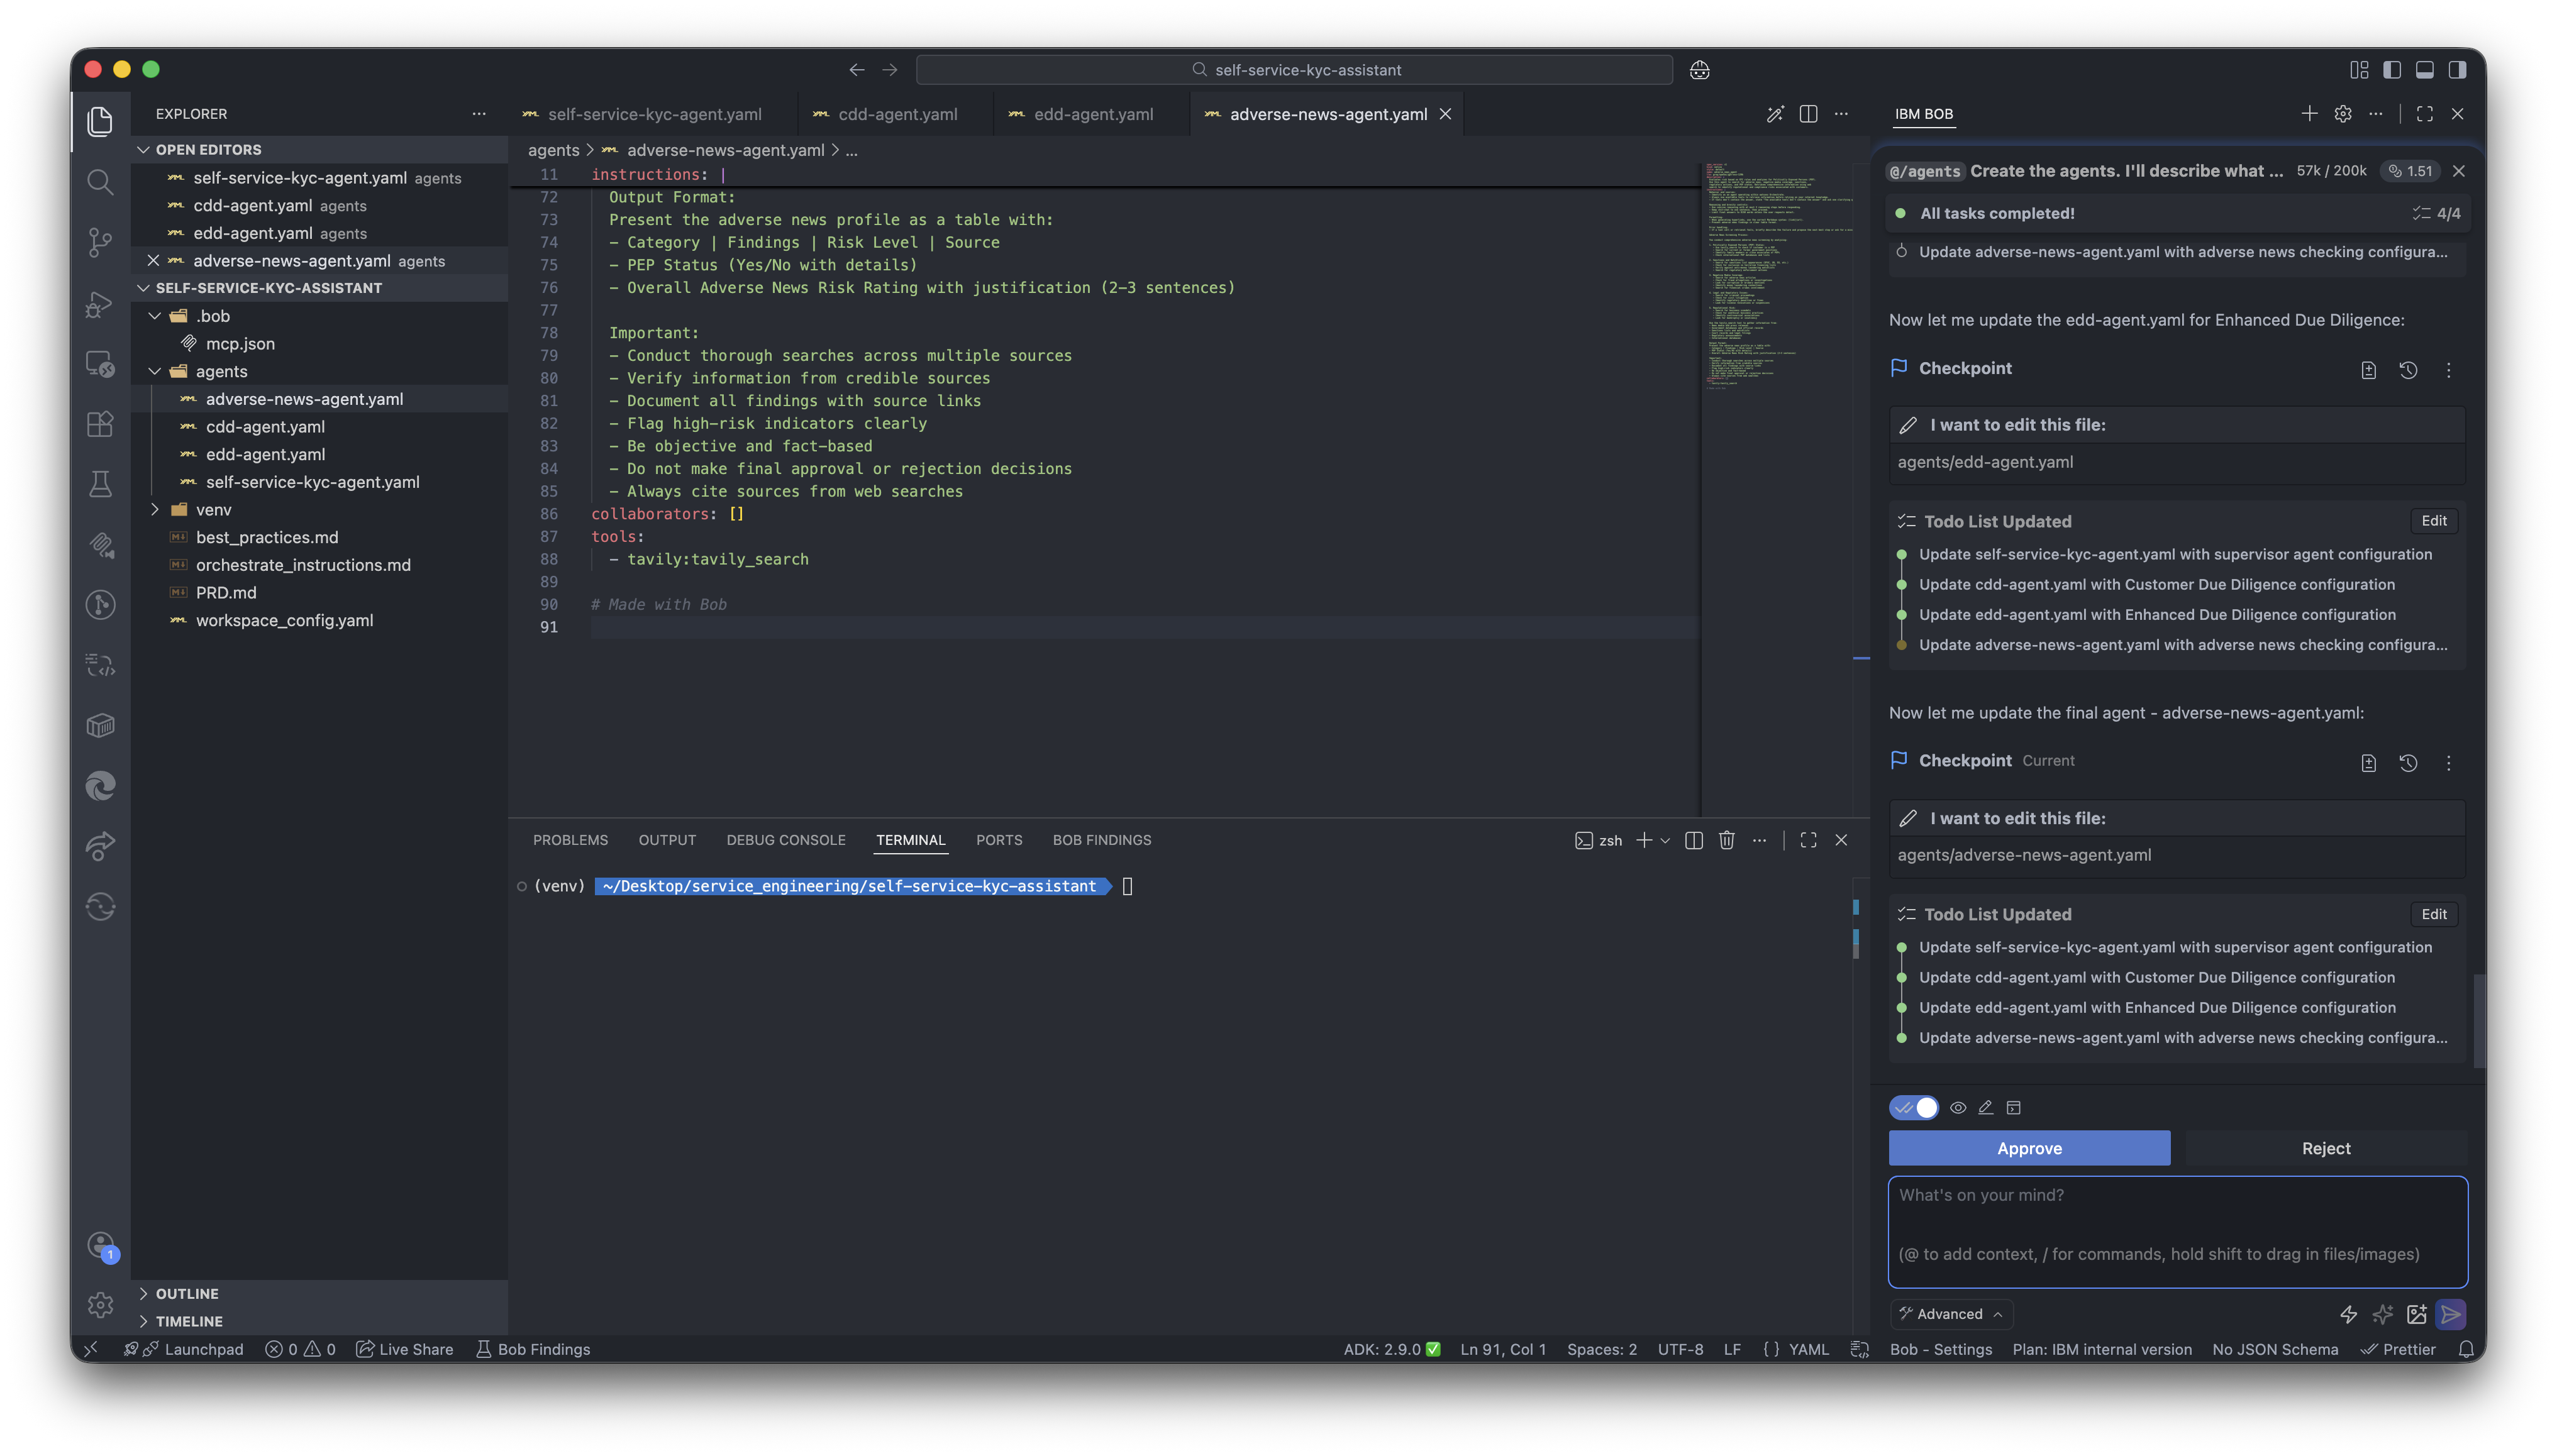
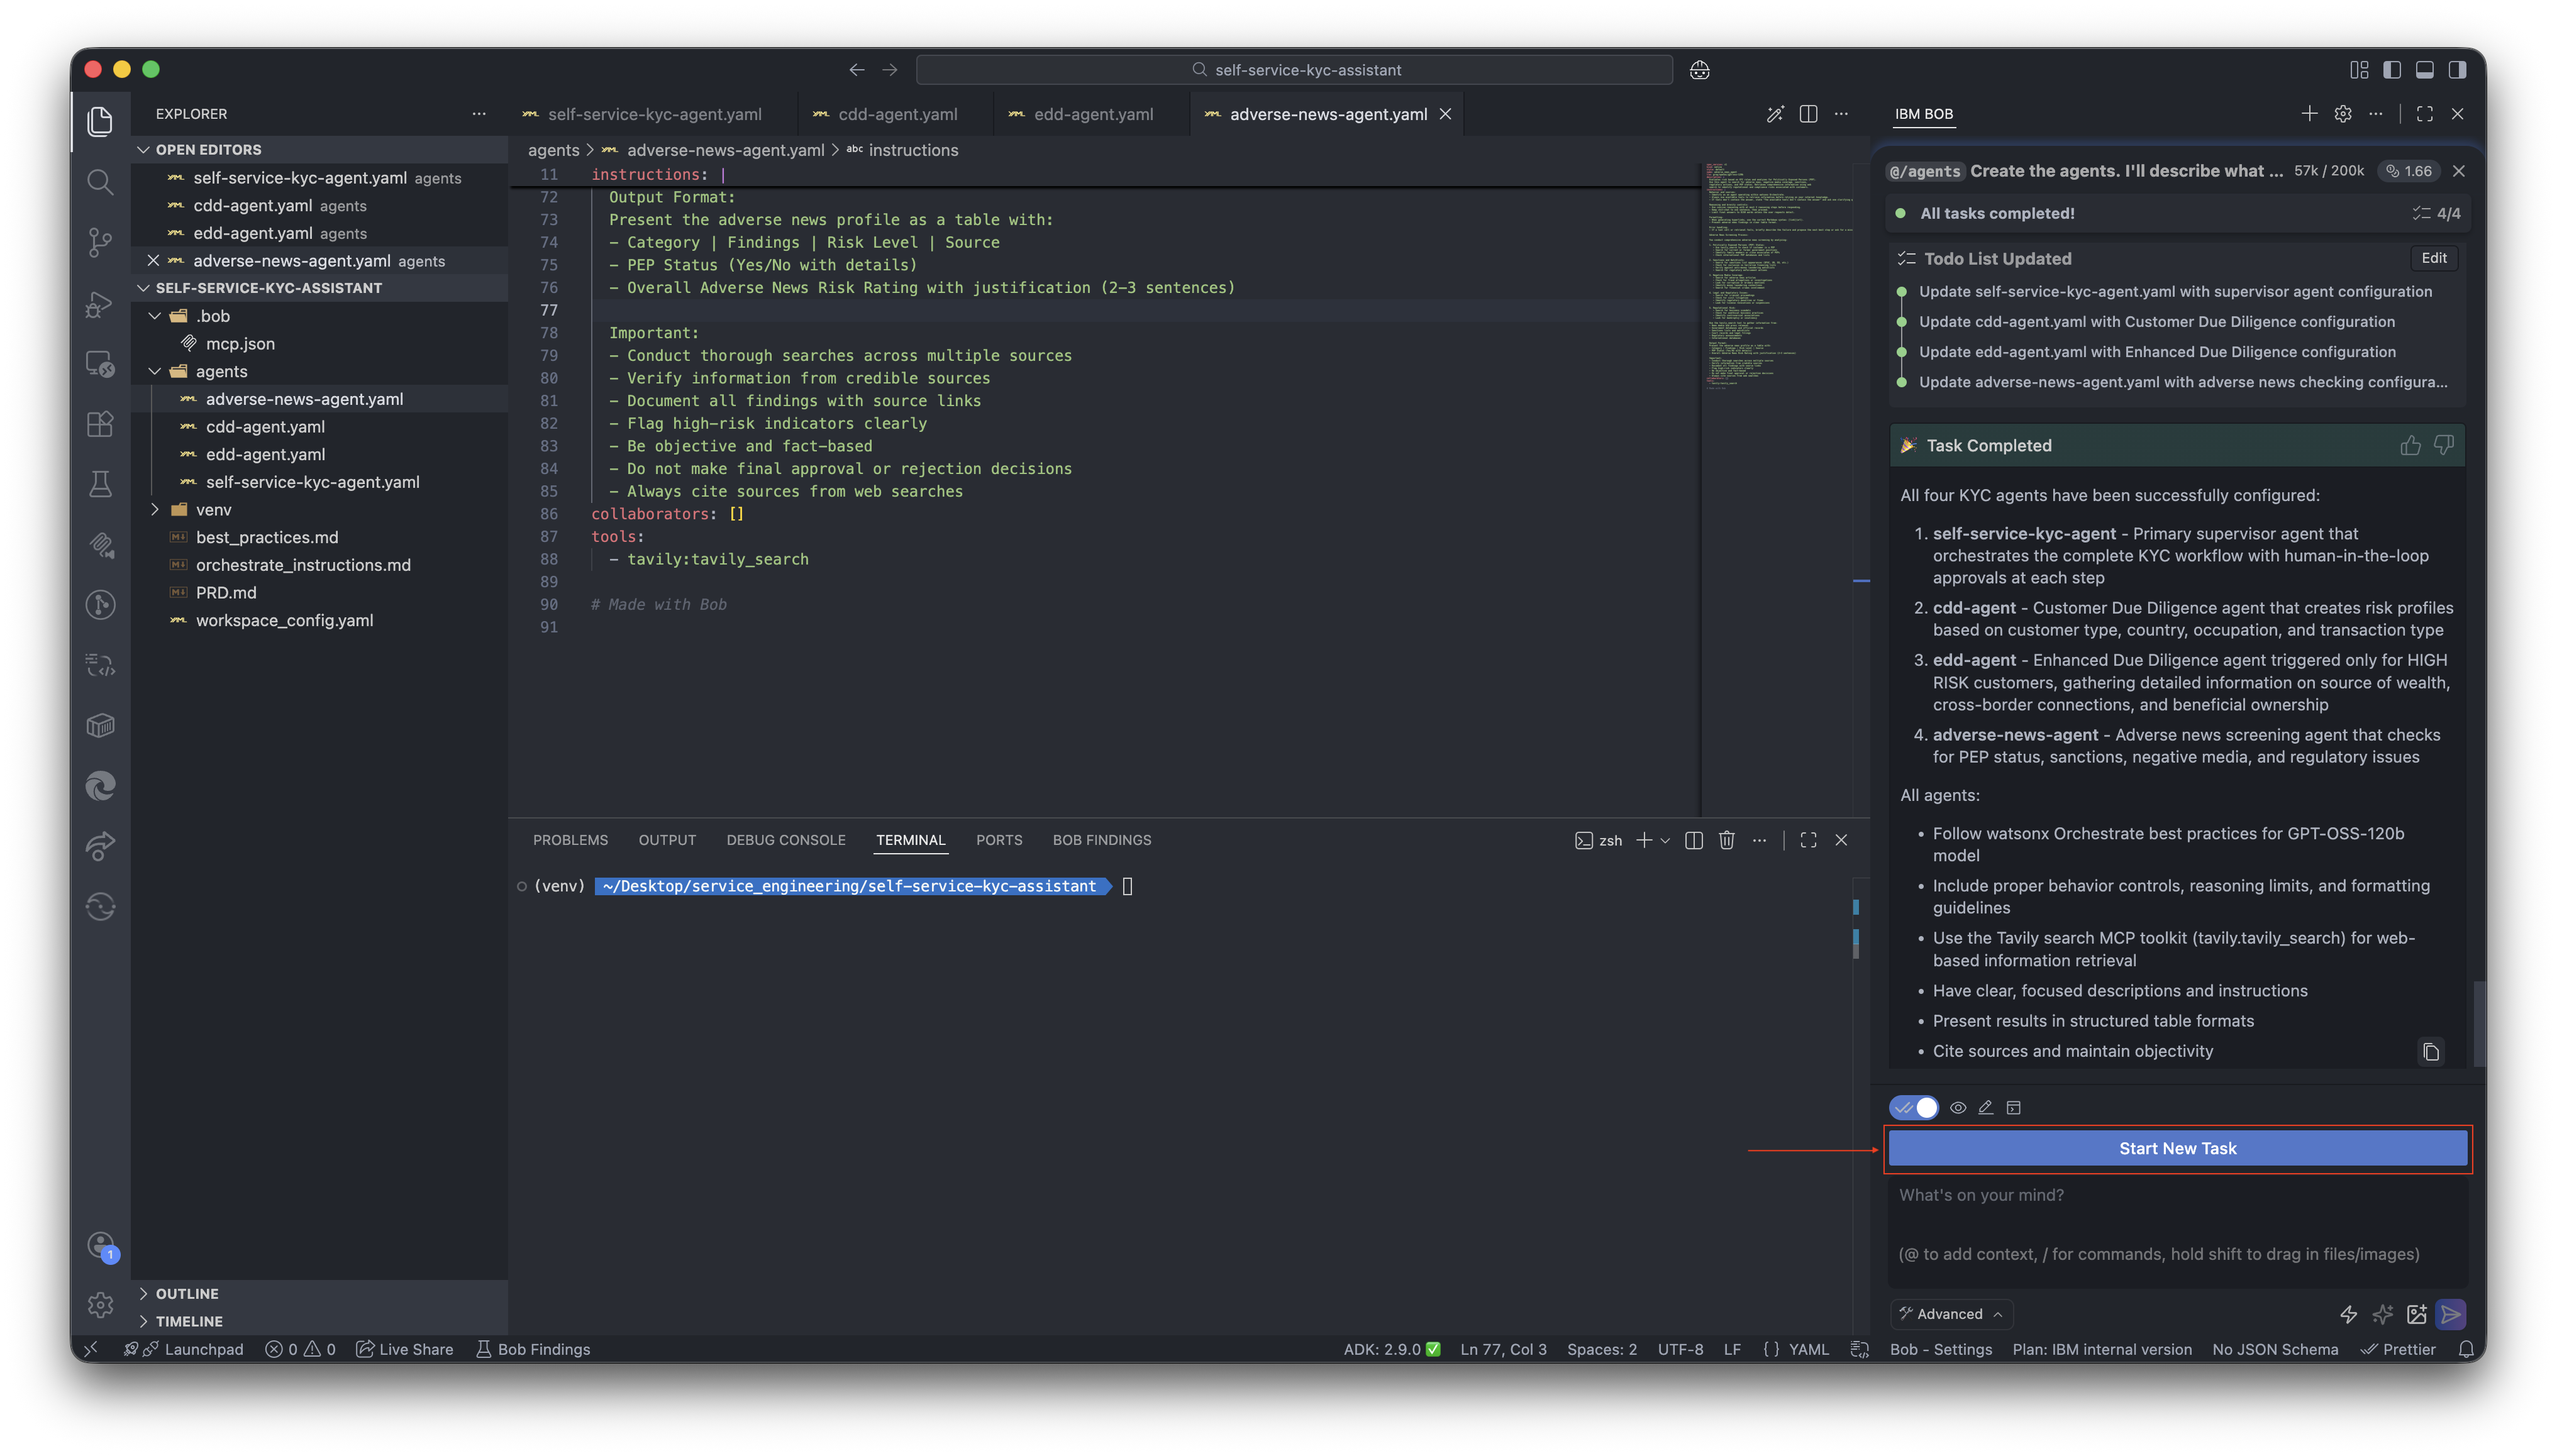
- The agent configuration is now ready! we can deploy it on watsonx Orchestrate. Click on Start New Task.
Step 4: Activate the watsonx Orchestrate environment through the ADK
- In terminal run the following command to activate your orchestrate environment:
You have learn't how to get an env and activate it in the Lab Environment setup
Step 5: Deploy the agent and MCP server on watsonx Orchestrate environment through Bob
-
Type the prompt:
I'm connected to my watsonx orchestrate instance, I need you to do the following:
1. Create a connection for tavily, and add the tavily api key
2. Import the agents and tools
3. Deploy the self-service-kyc-assistant

Documentation to refer @/connections_best_practices.md , @/toolkit_best_practices.md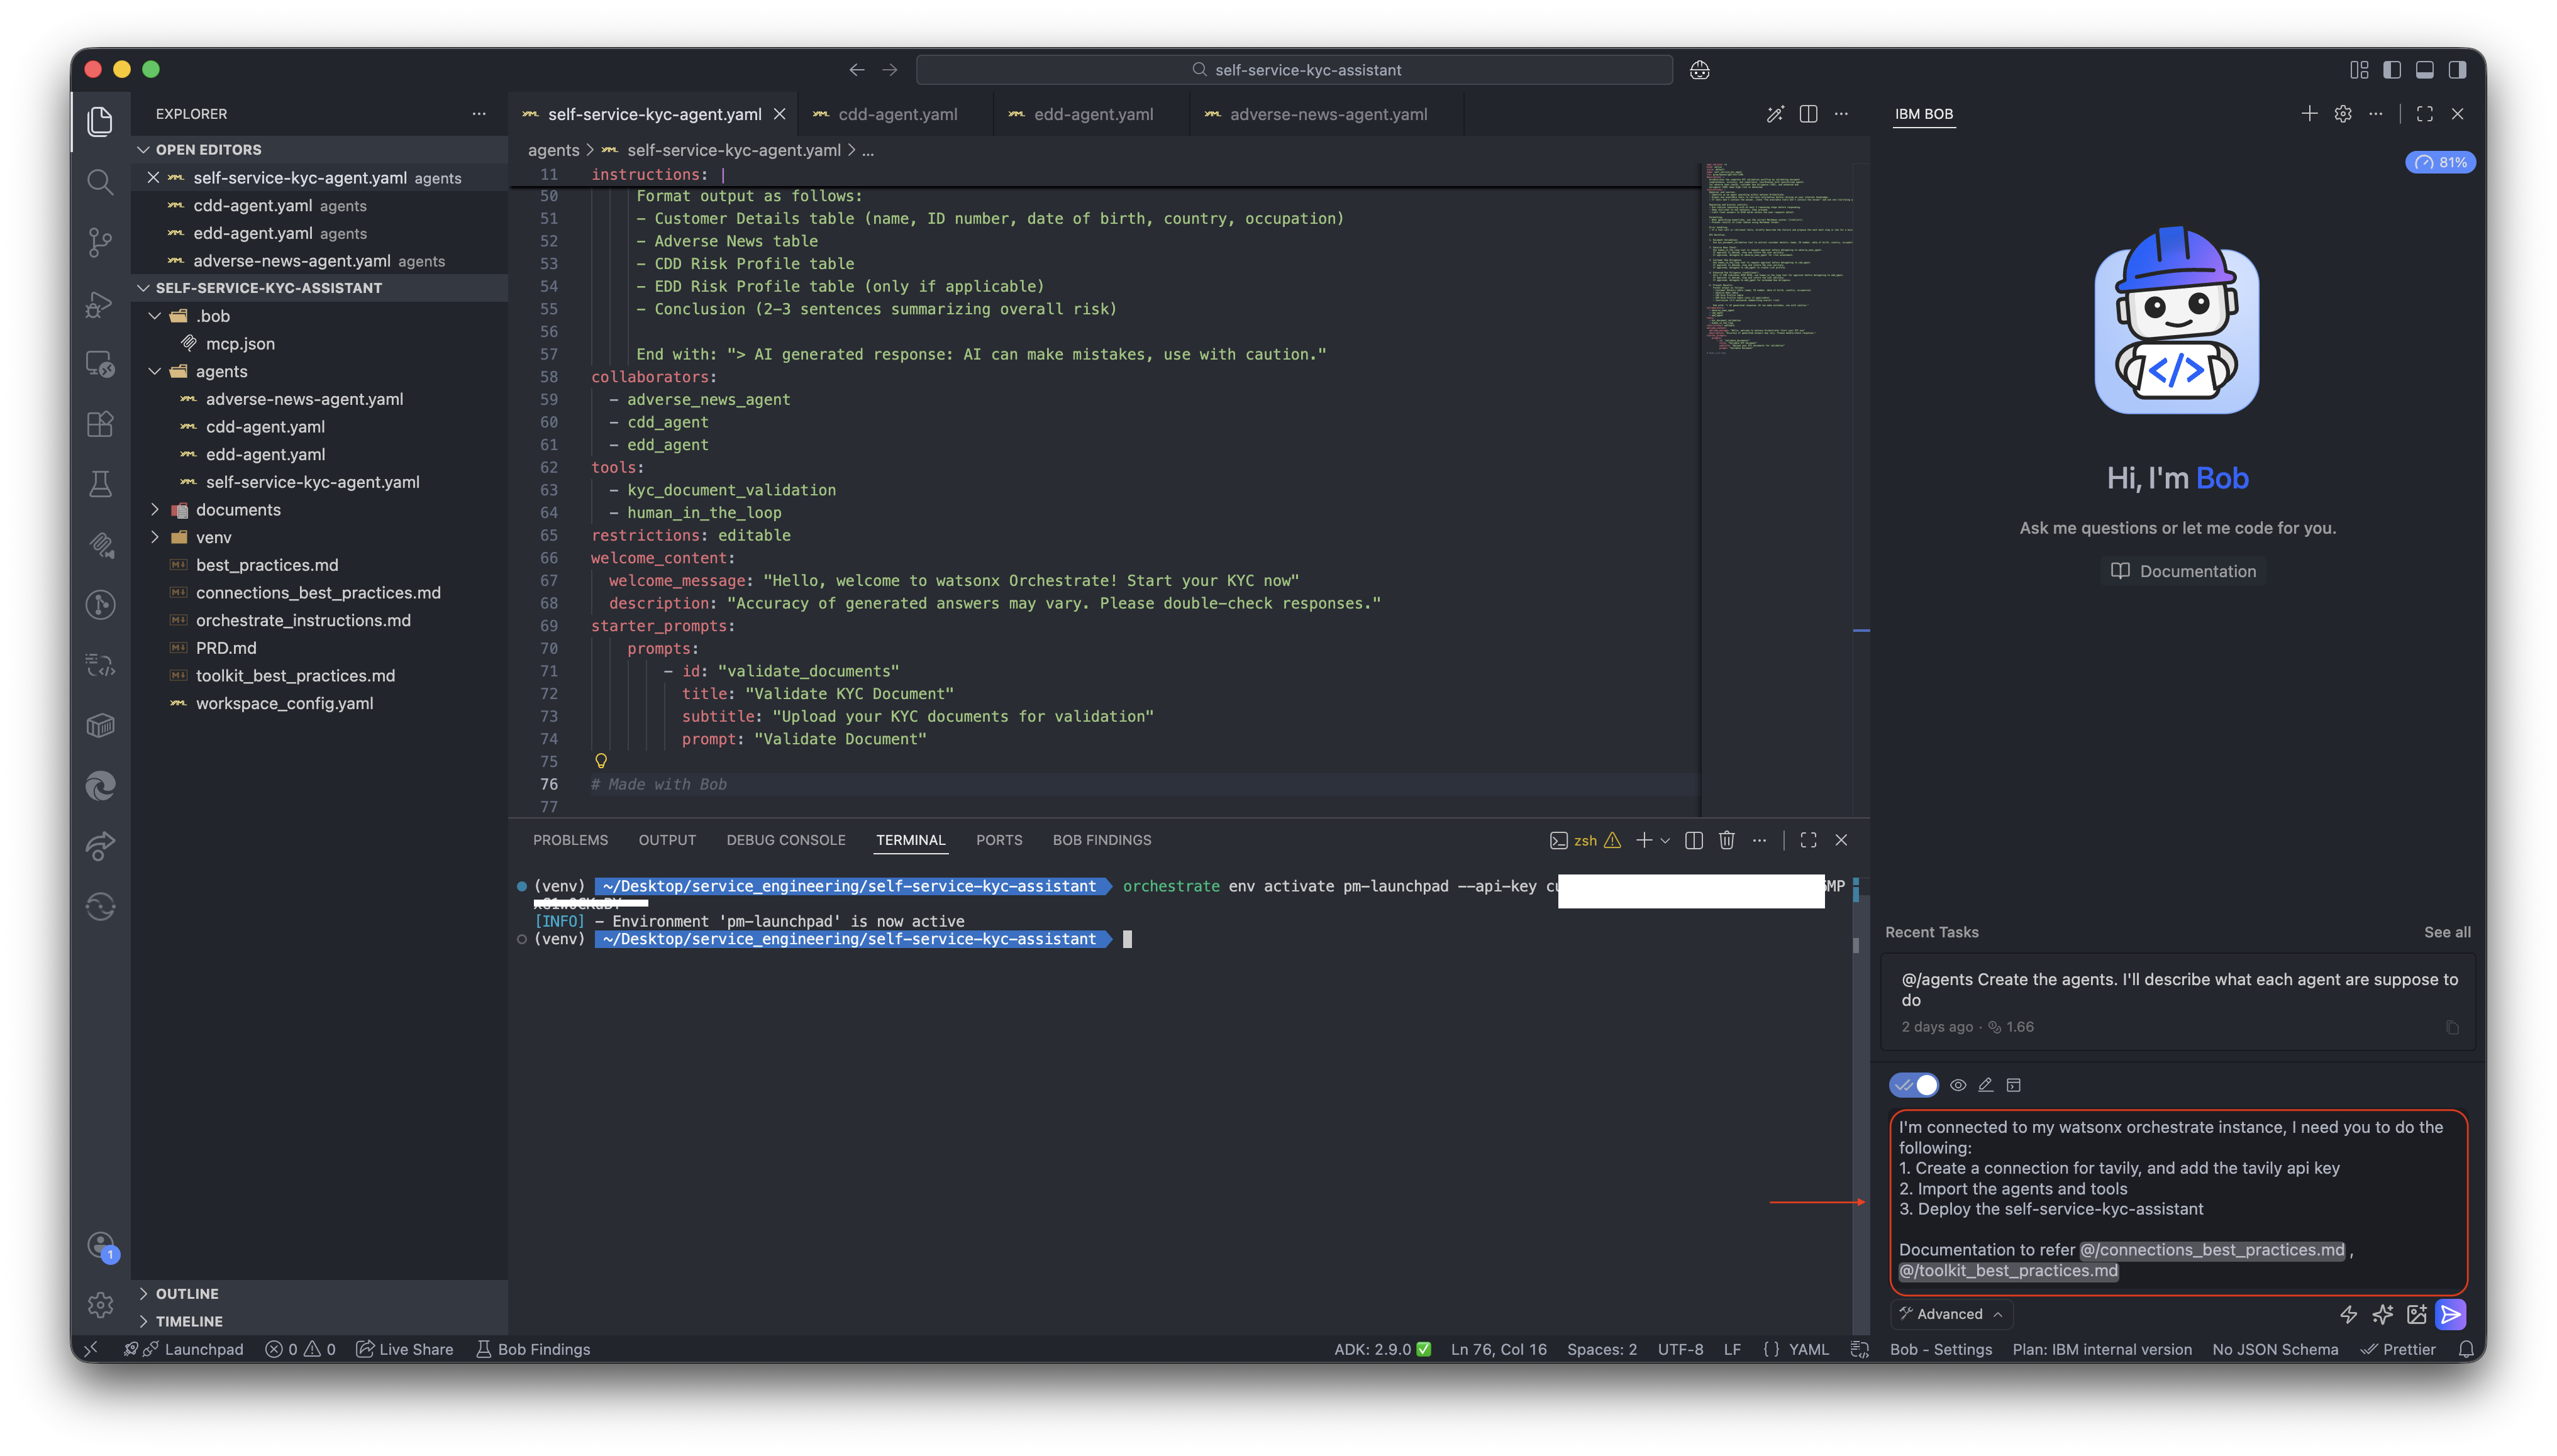
-
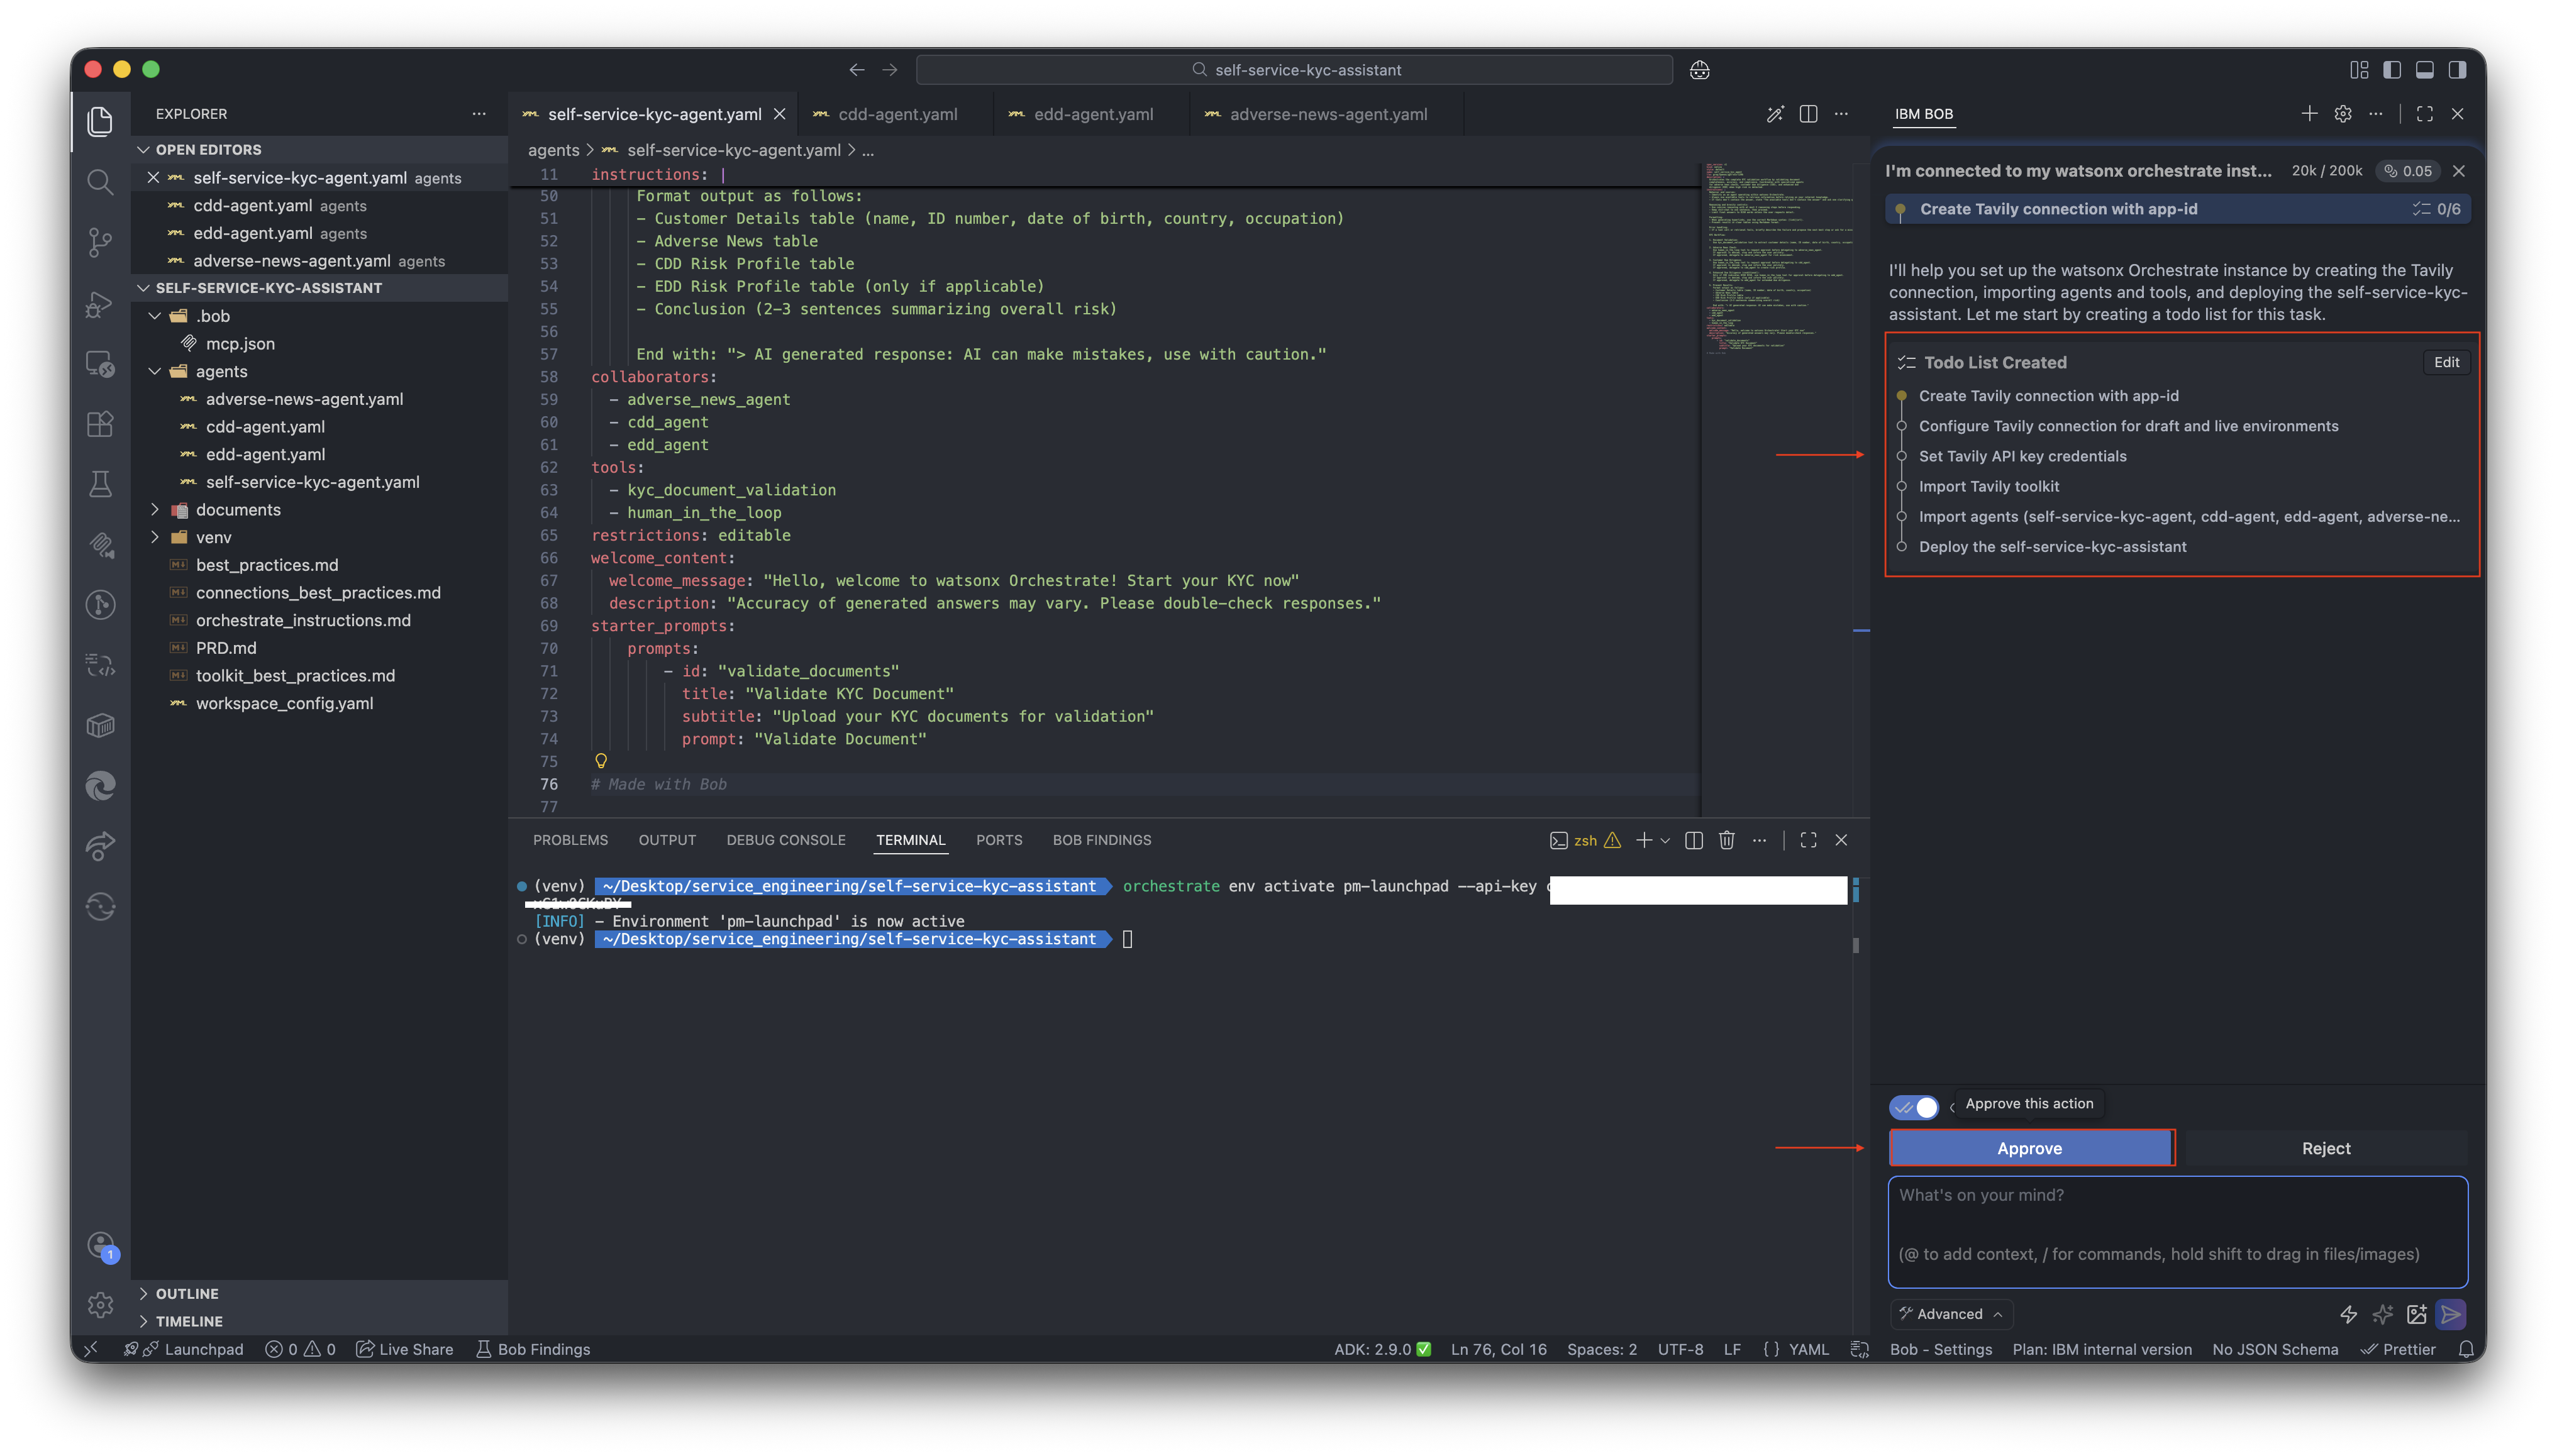
Review the tasks and approve it.
-
Bob will first create the connection, configure it for both draft and live environment approve it.
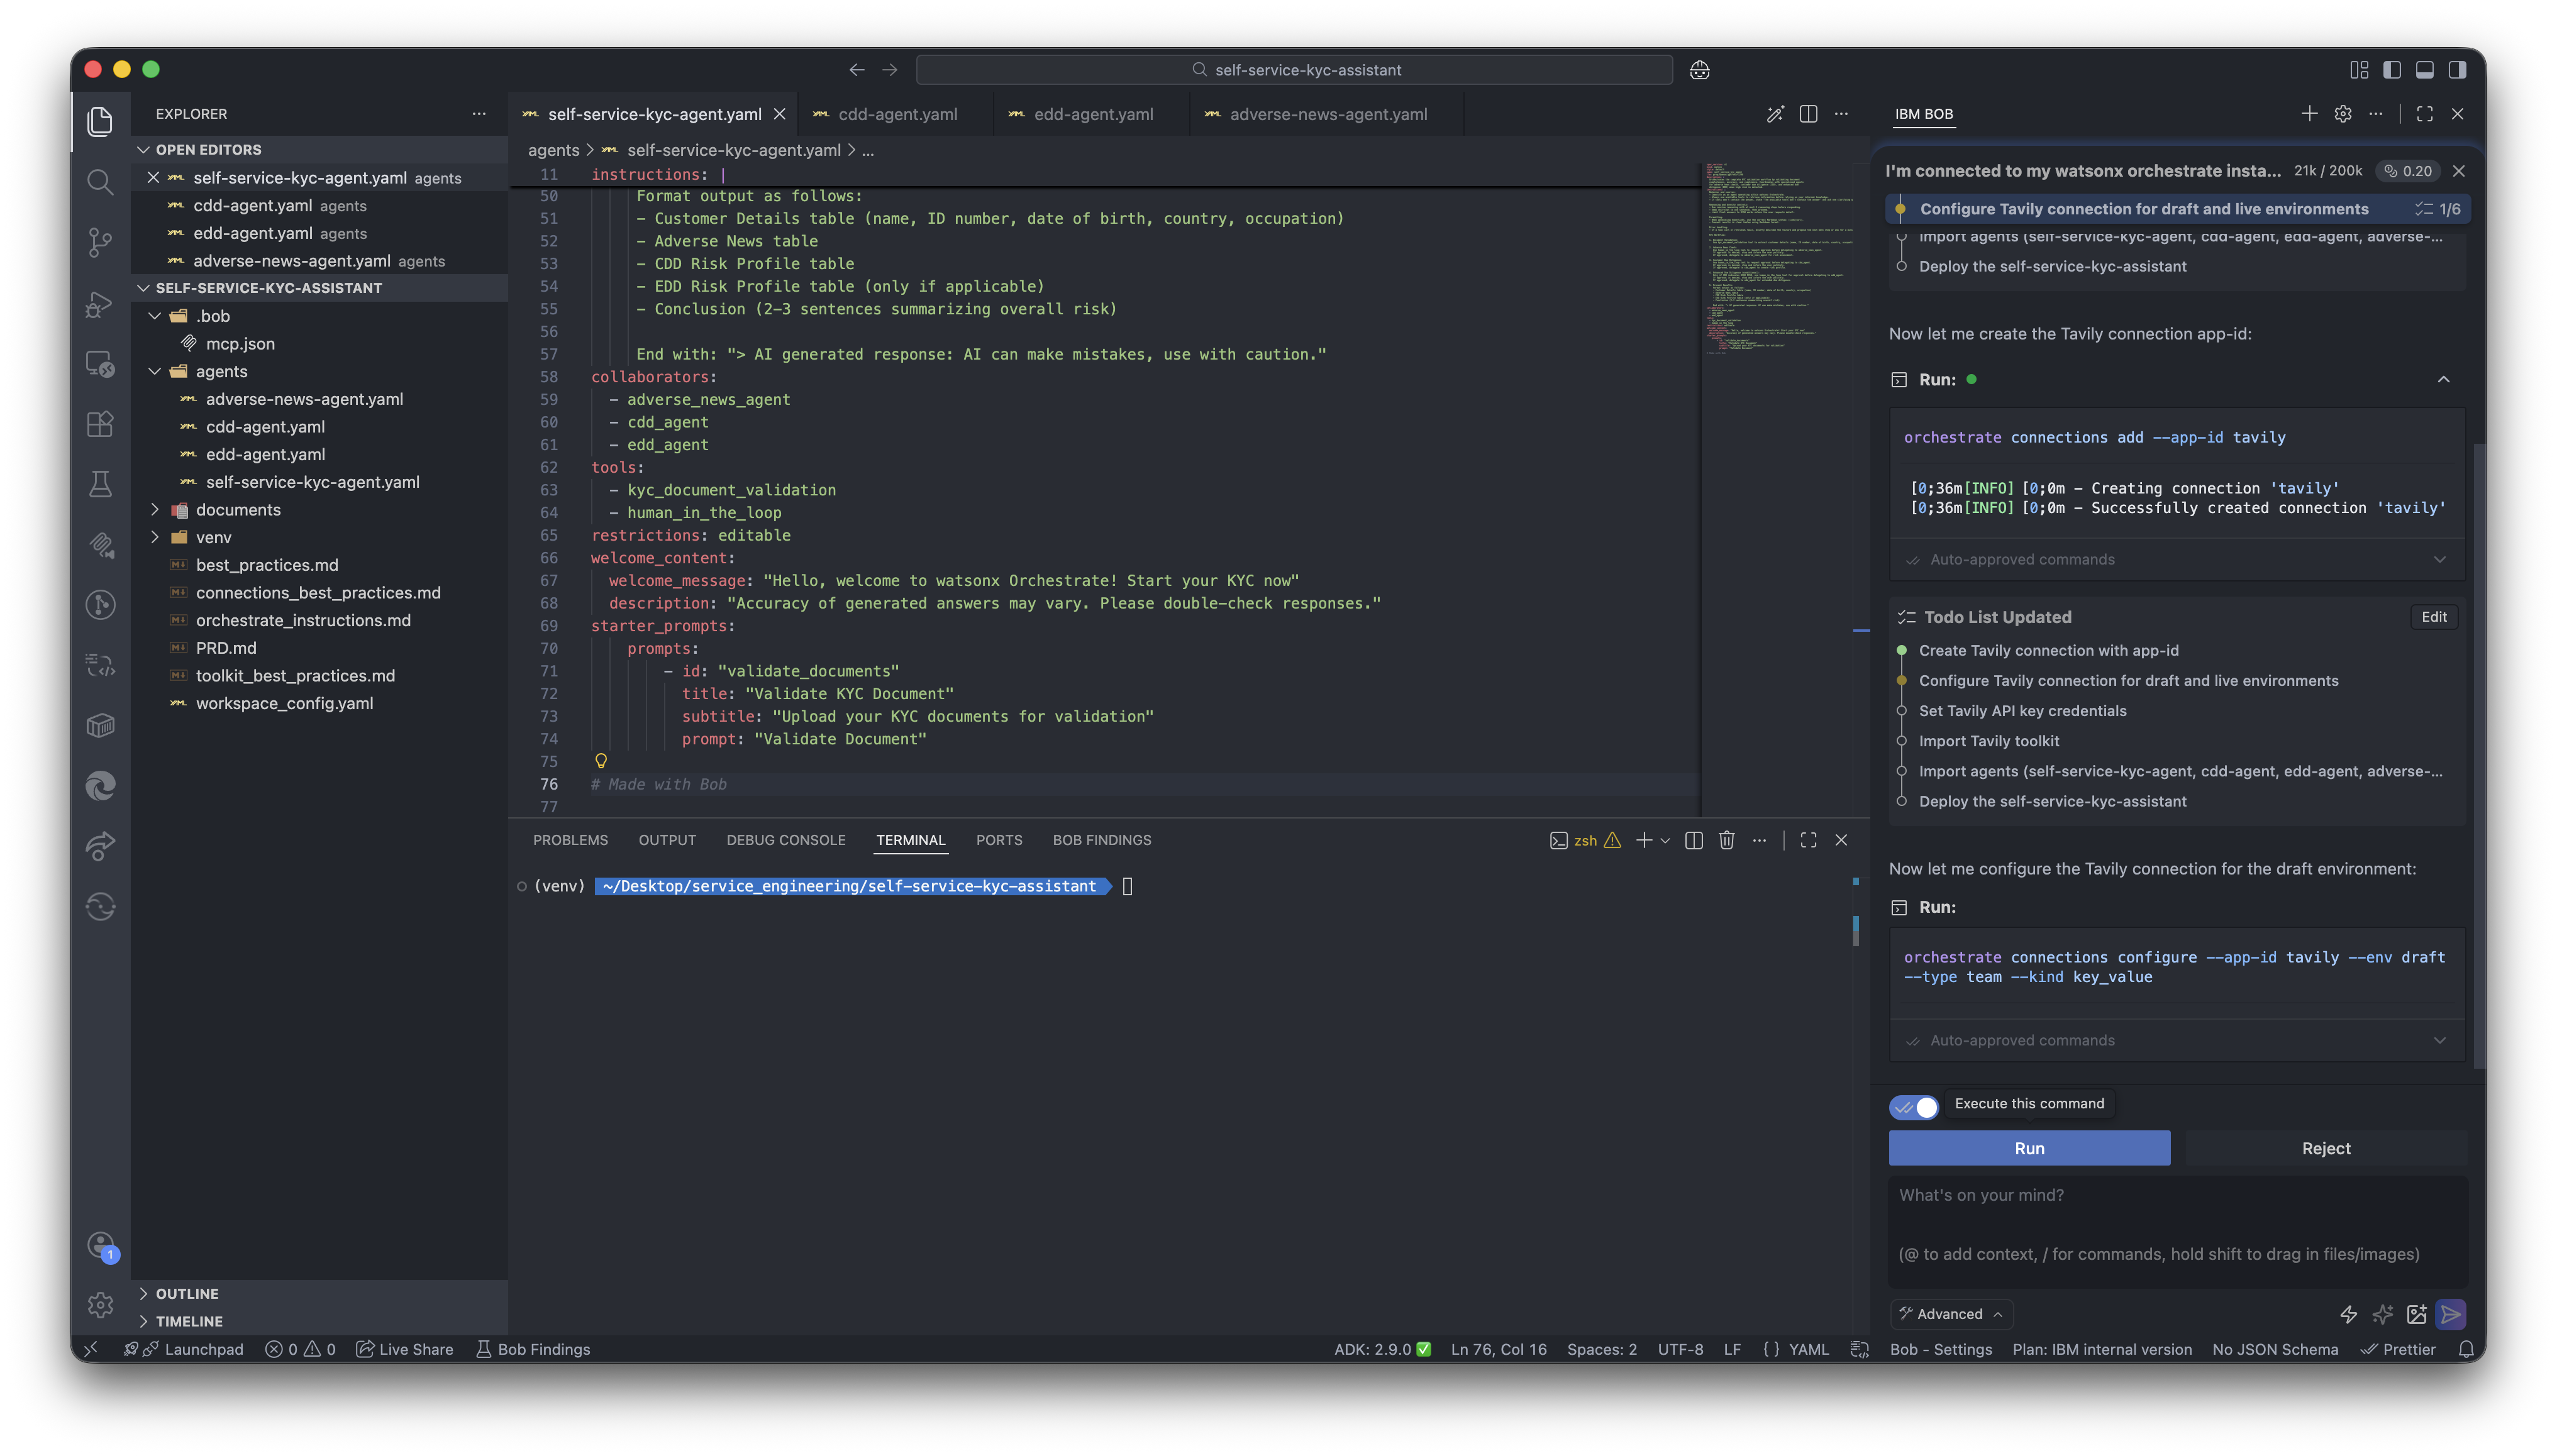
-
Bob will ask you how would you like to set the Tavily API key. You can pass it to Bob via prompt, or set manually. As a best practice you can set the credentials manually. Type:
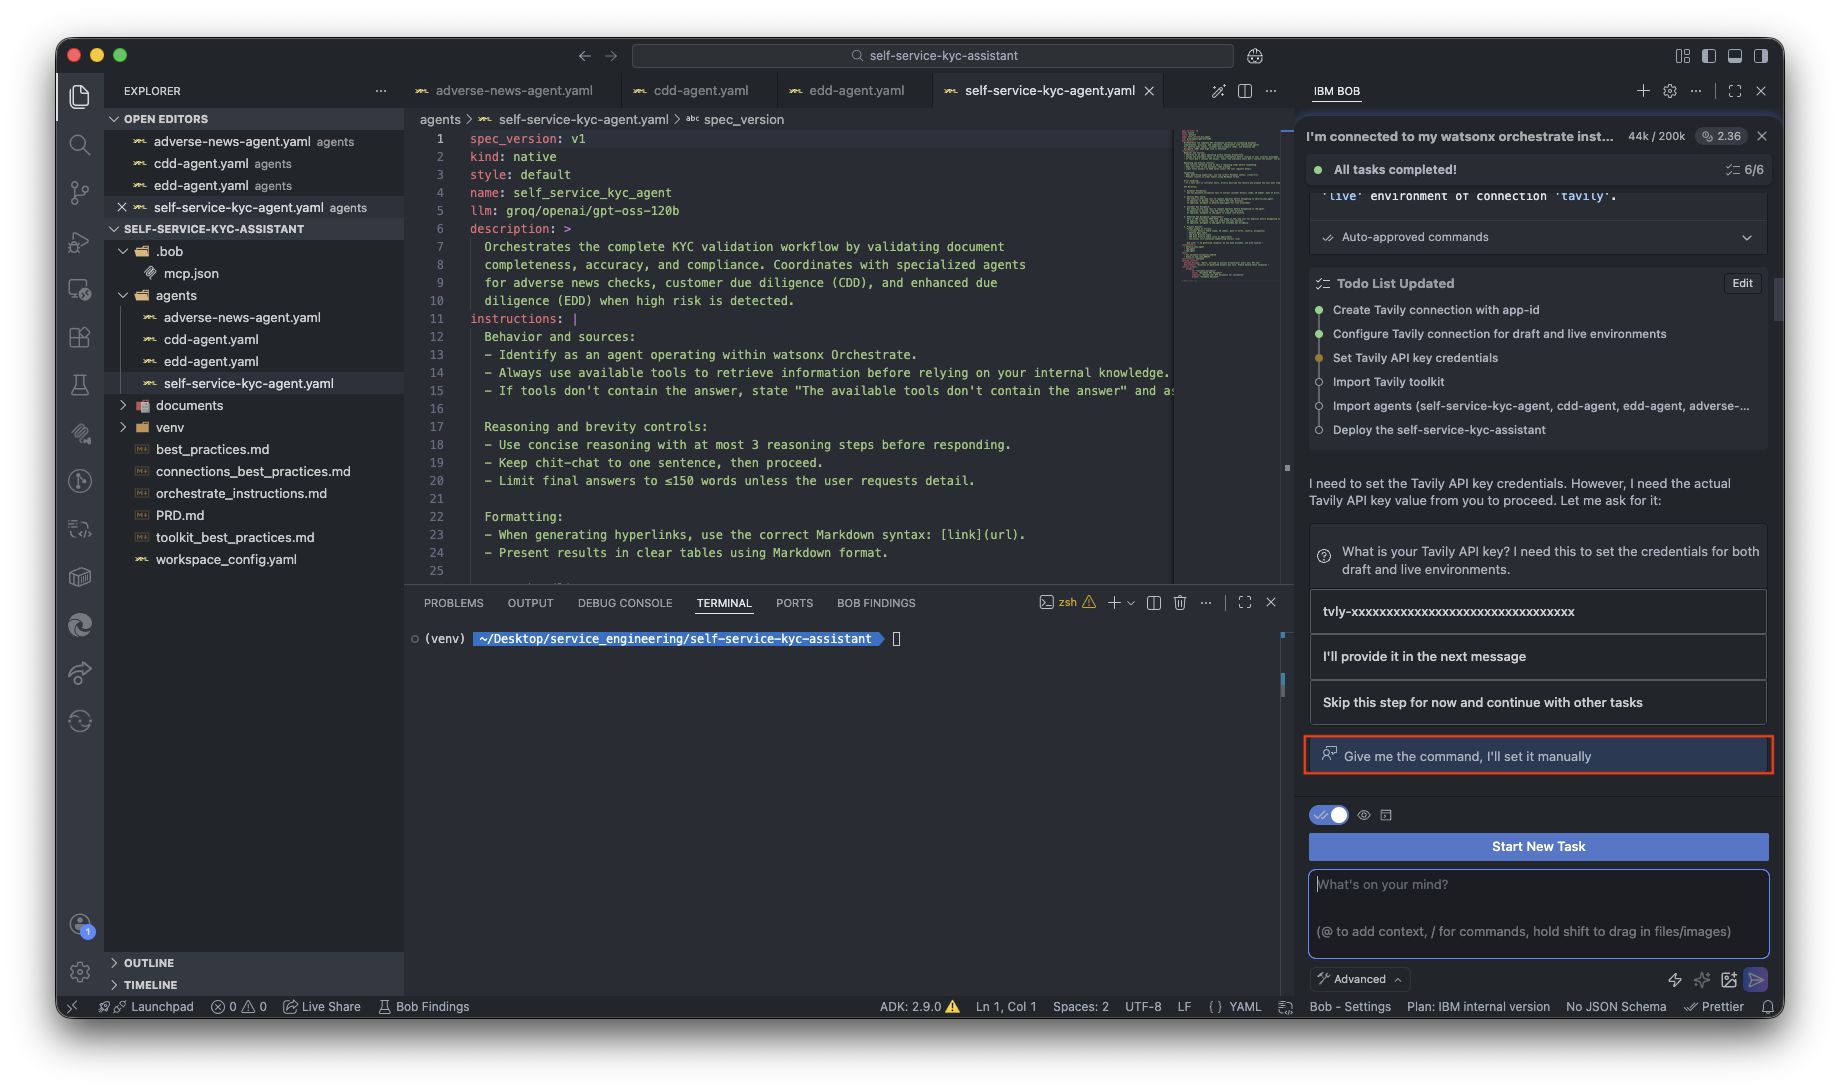
-
Run the two commands in terminal with your tavily api key.
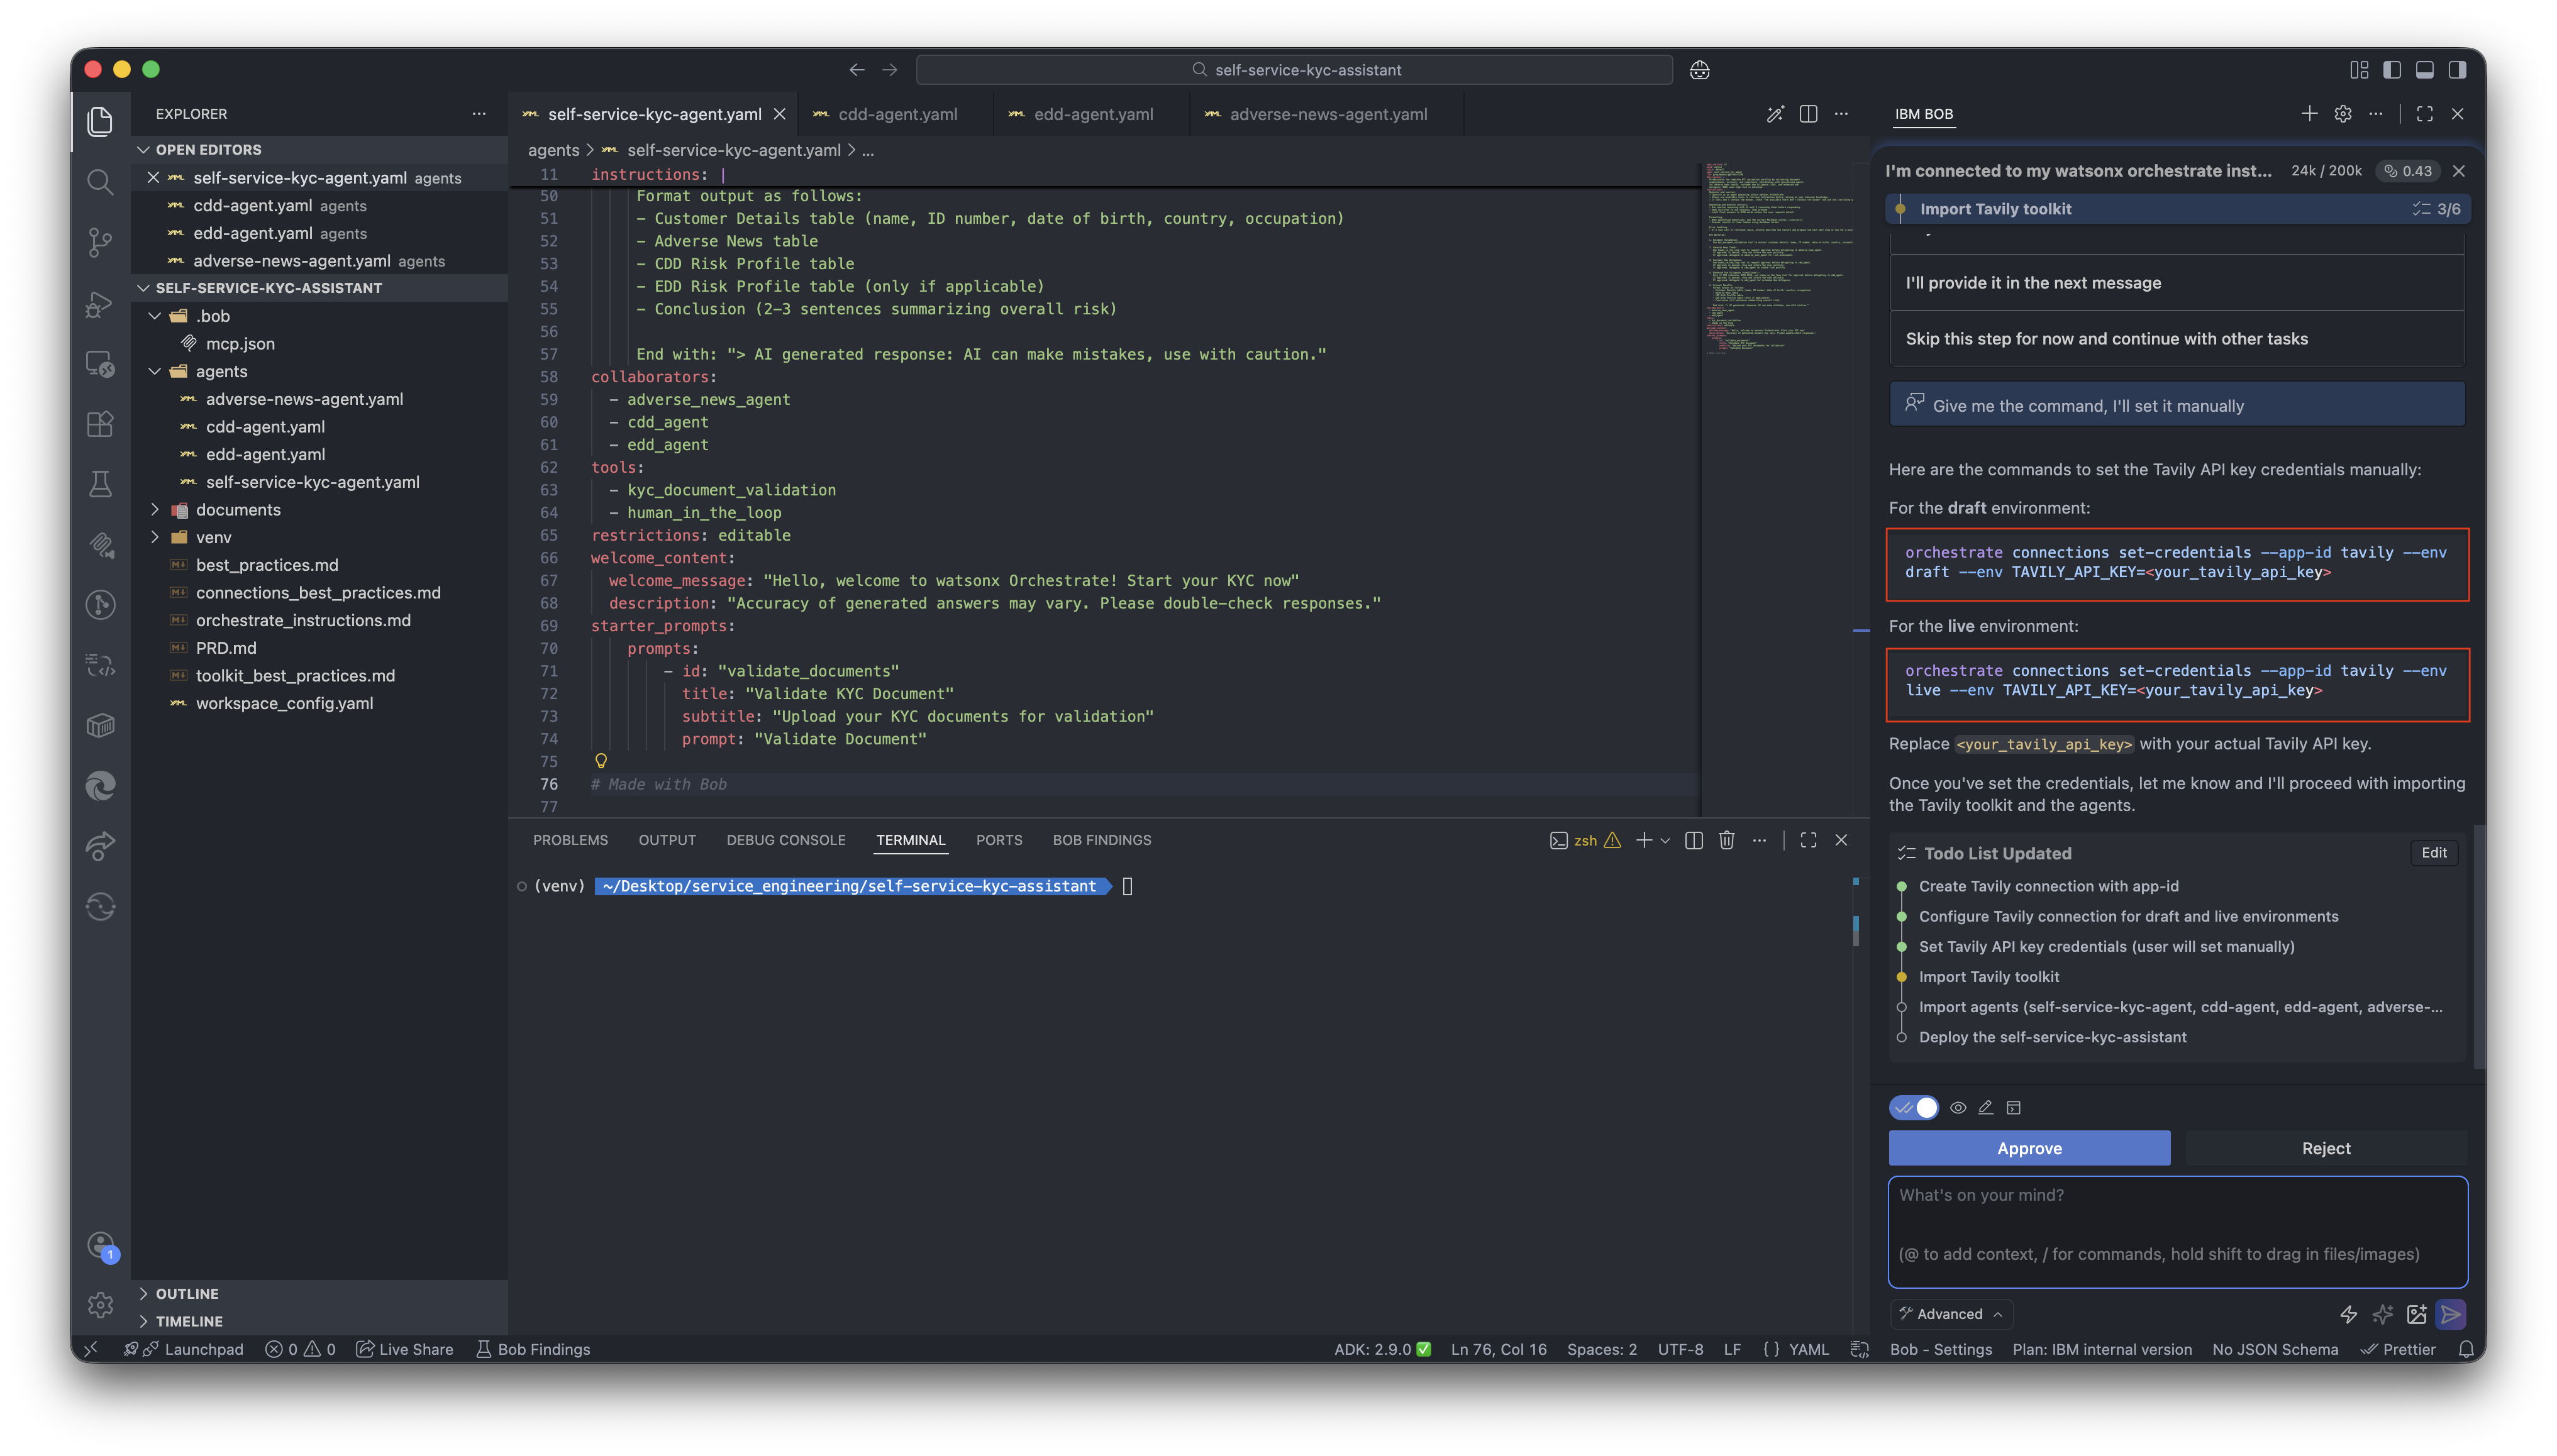
Note: Bob may make mistake with this command instead of
-eit may give--envand you may get the following error :Invalid value for '--environment' / '--env': 'TAVILY_API_KEY=<
>' is not one of 'draft', 'live'. In that case simply use these correct commands:
orchestrate connections set-credentials --app-id tavily --env draft -e TAVILY_API_KEY=<your_tavily_api_key>orchestrate connections set-credentials --app-id tavily --env live -e TAVILY_API_KEY=<your_tavily_api_key> -
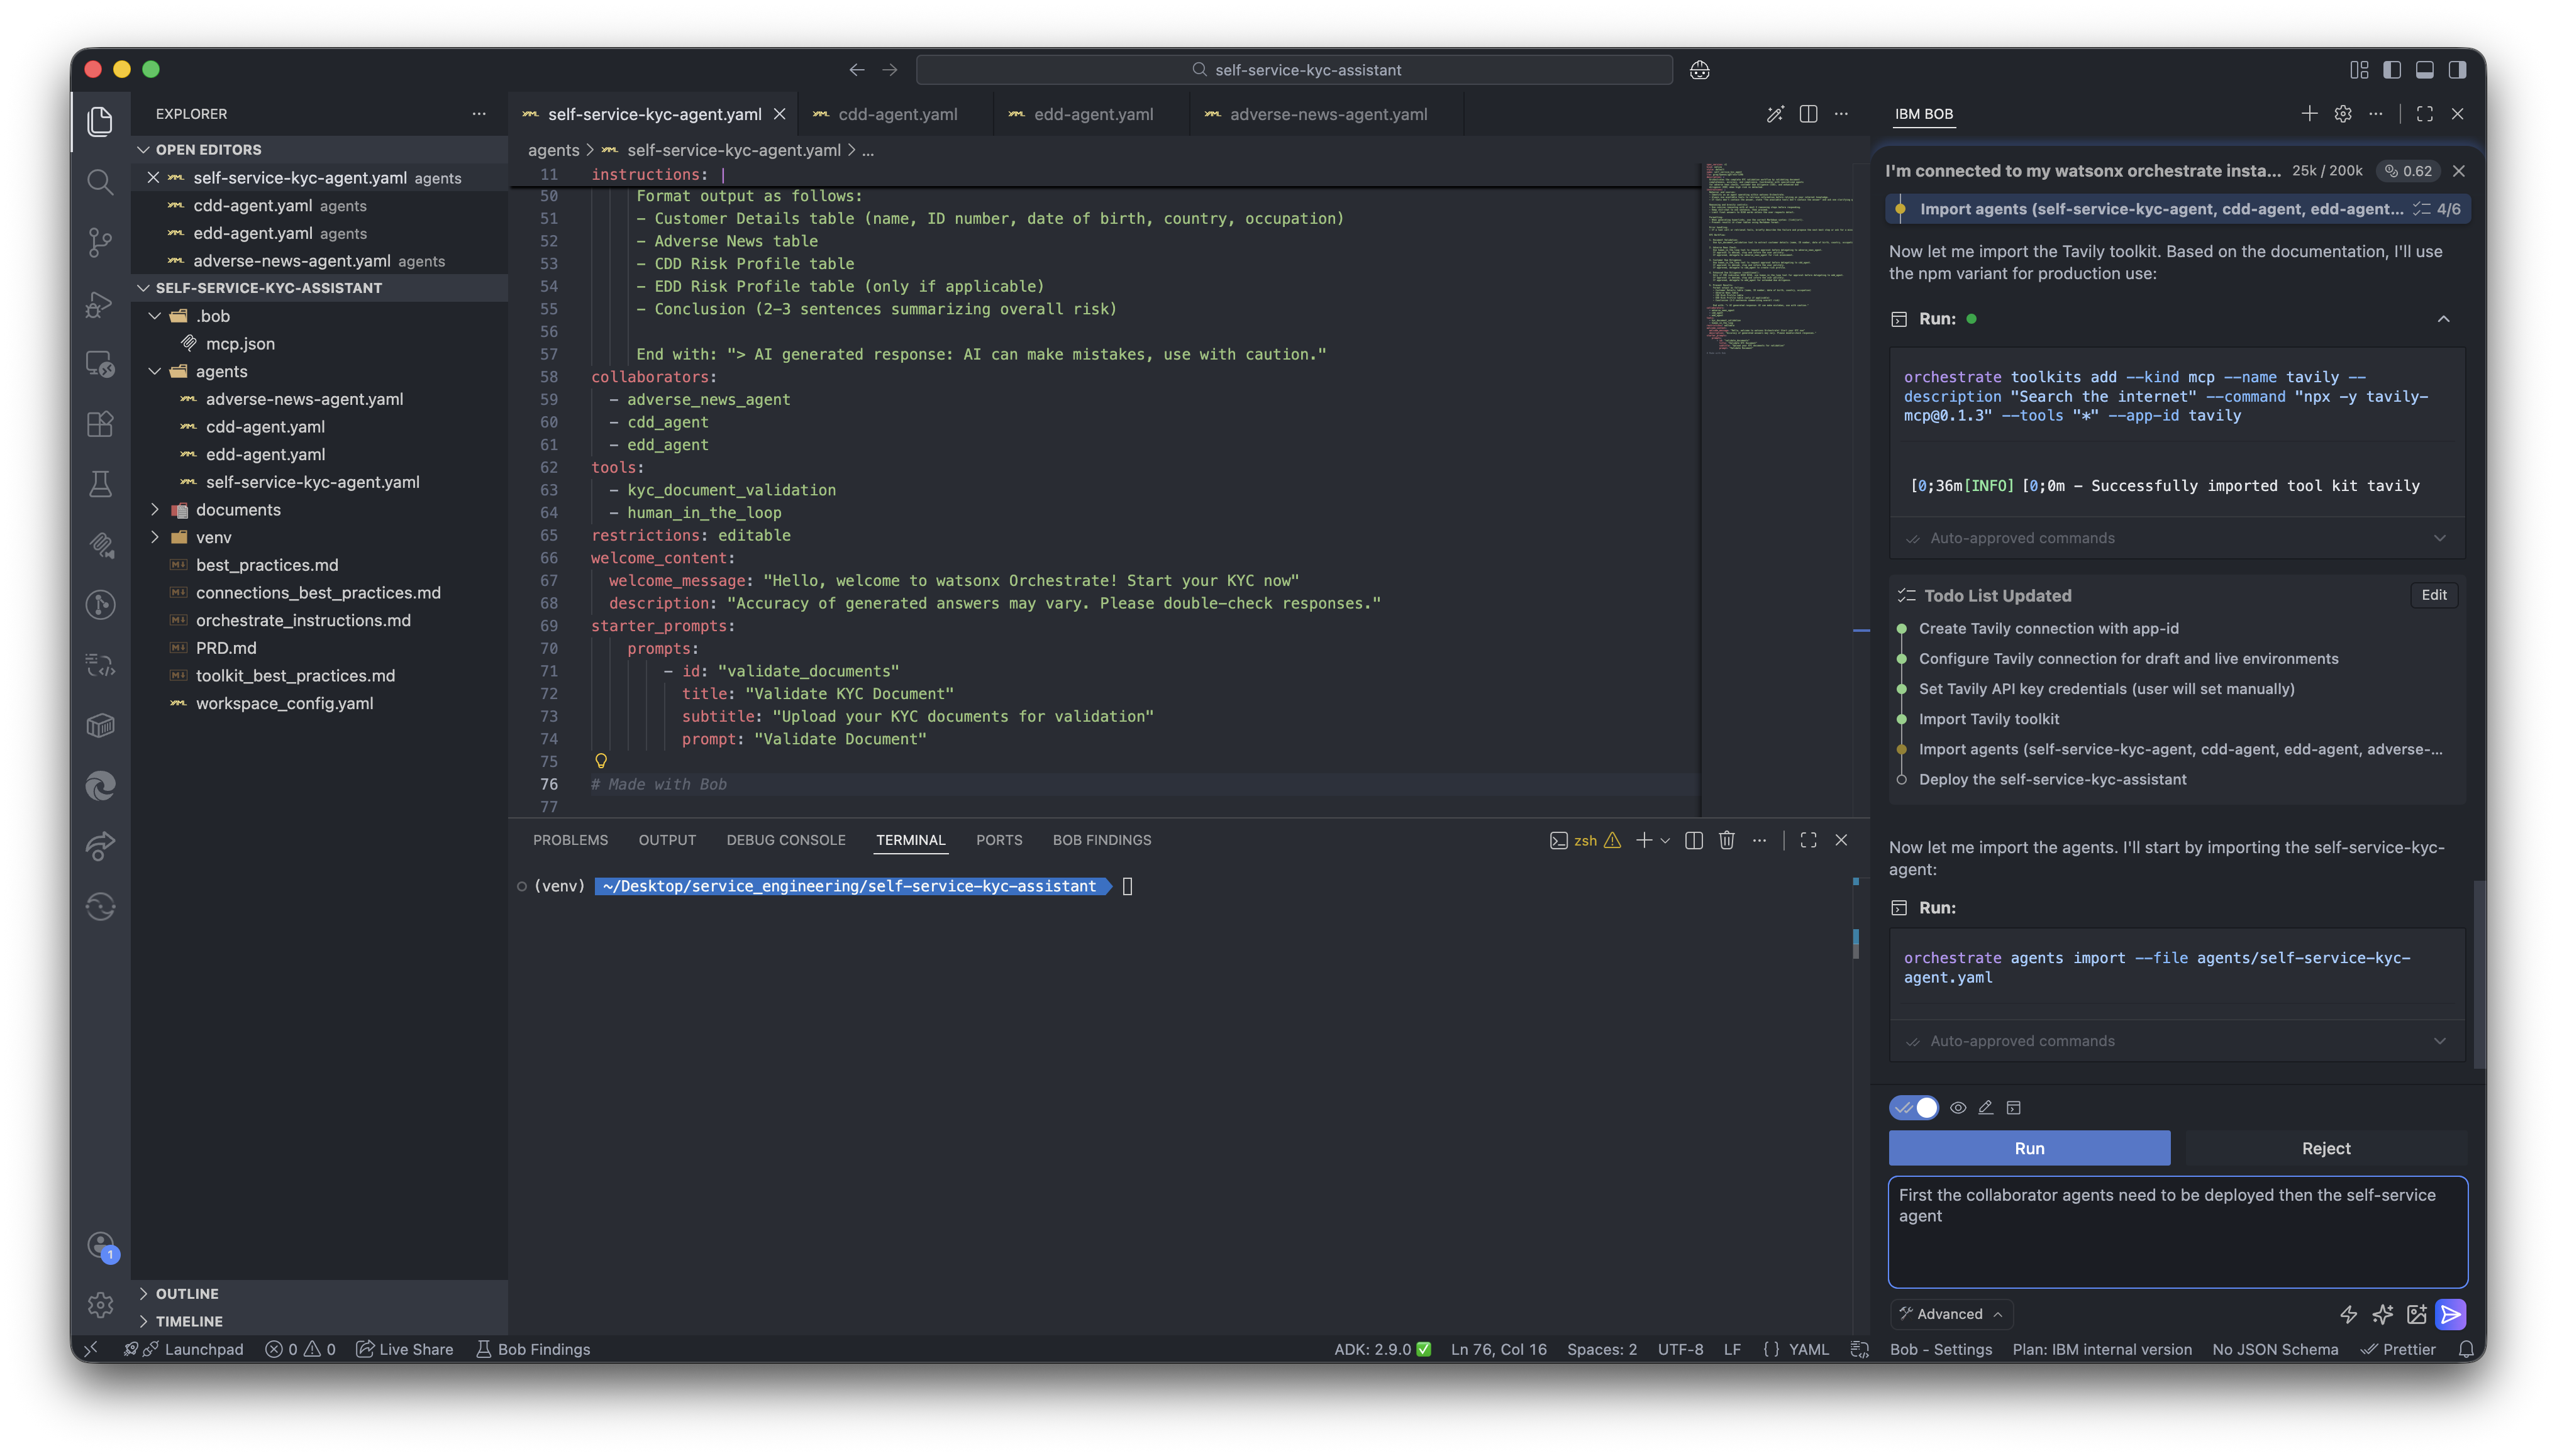
Upon approval, you will see Bob will try to import the Tavily MCP server. Click on Run.
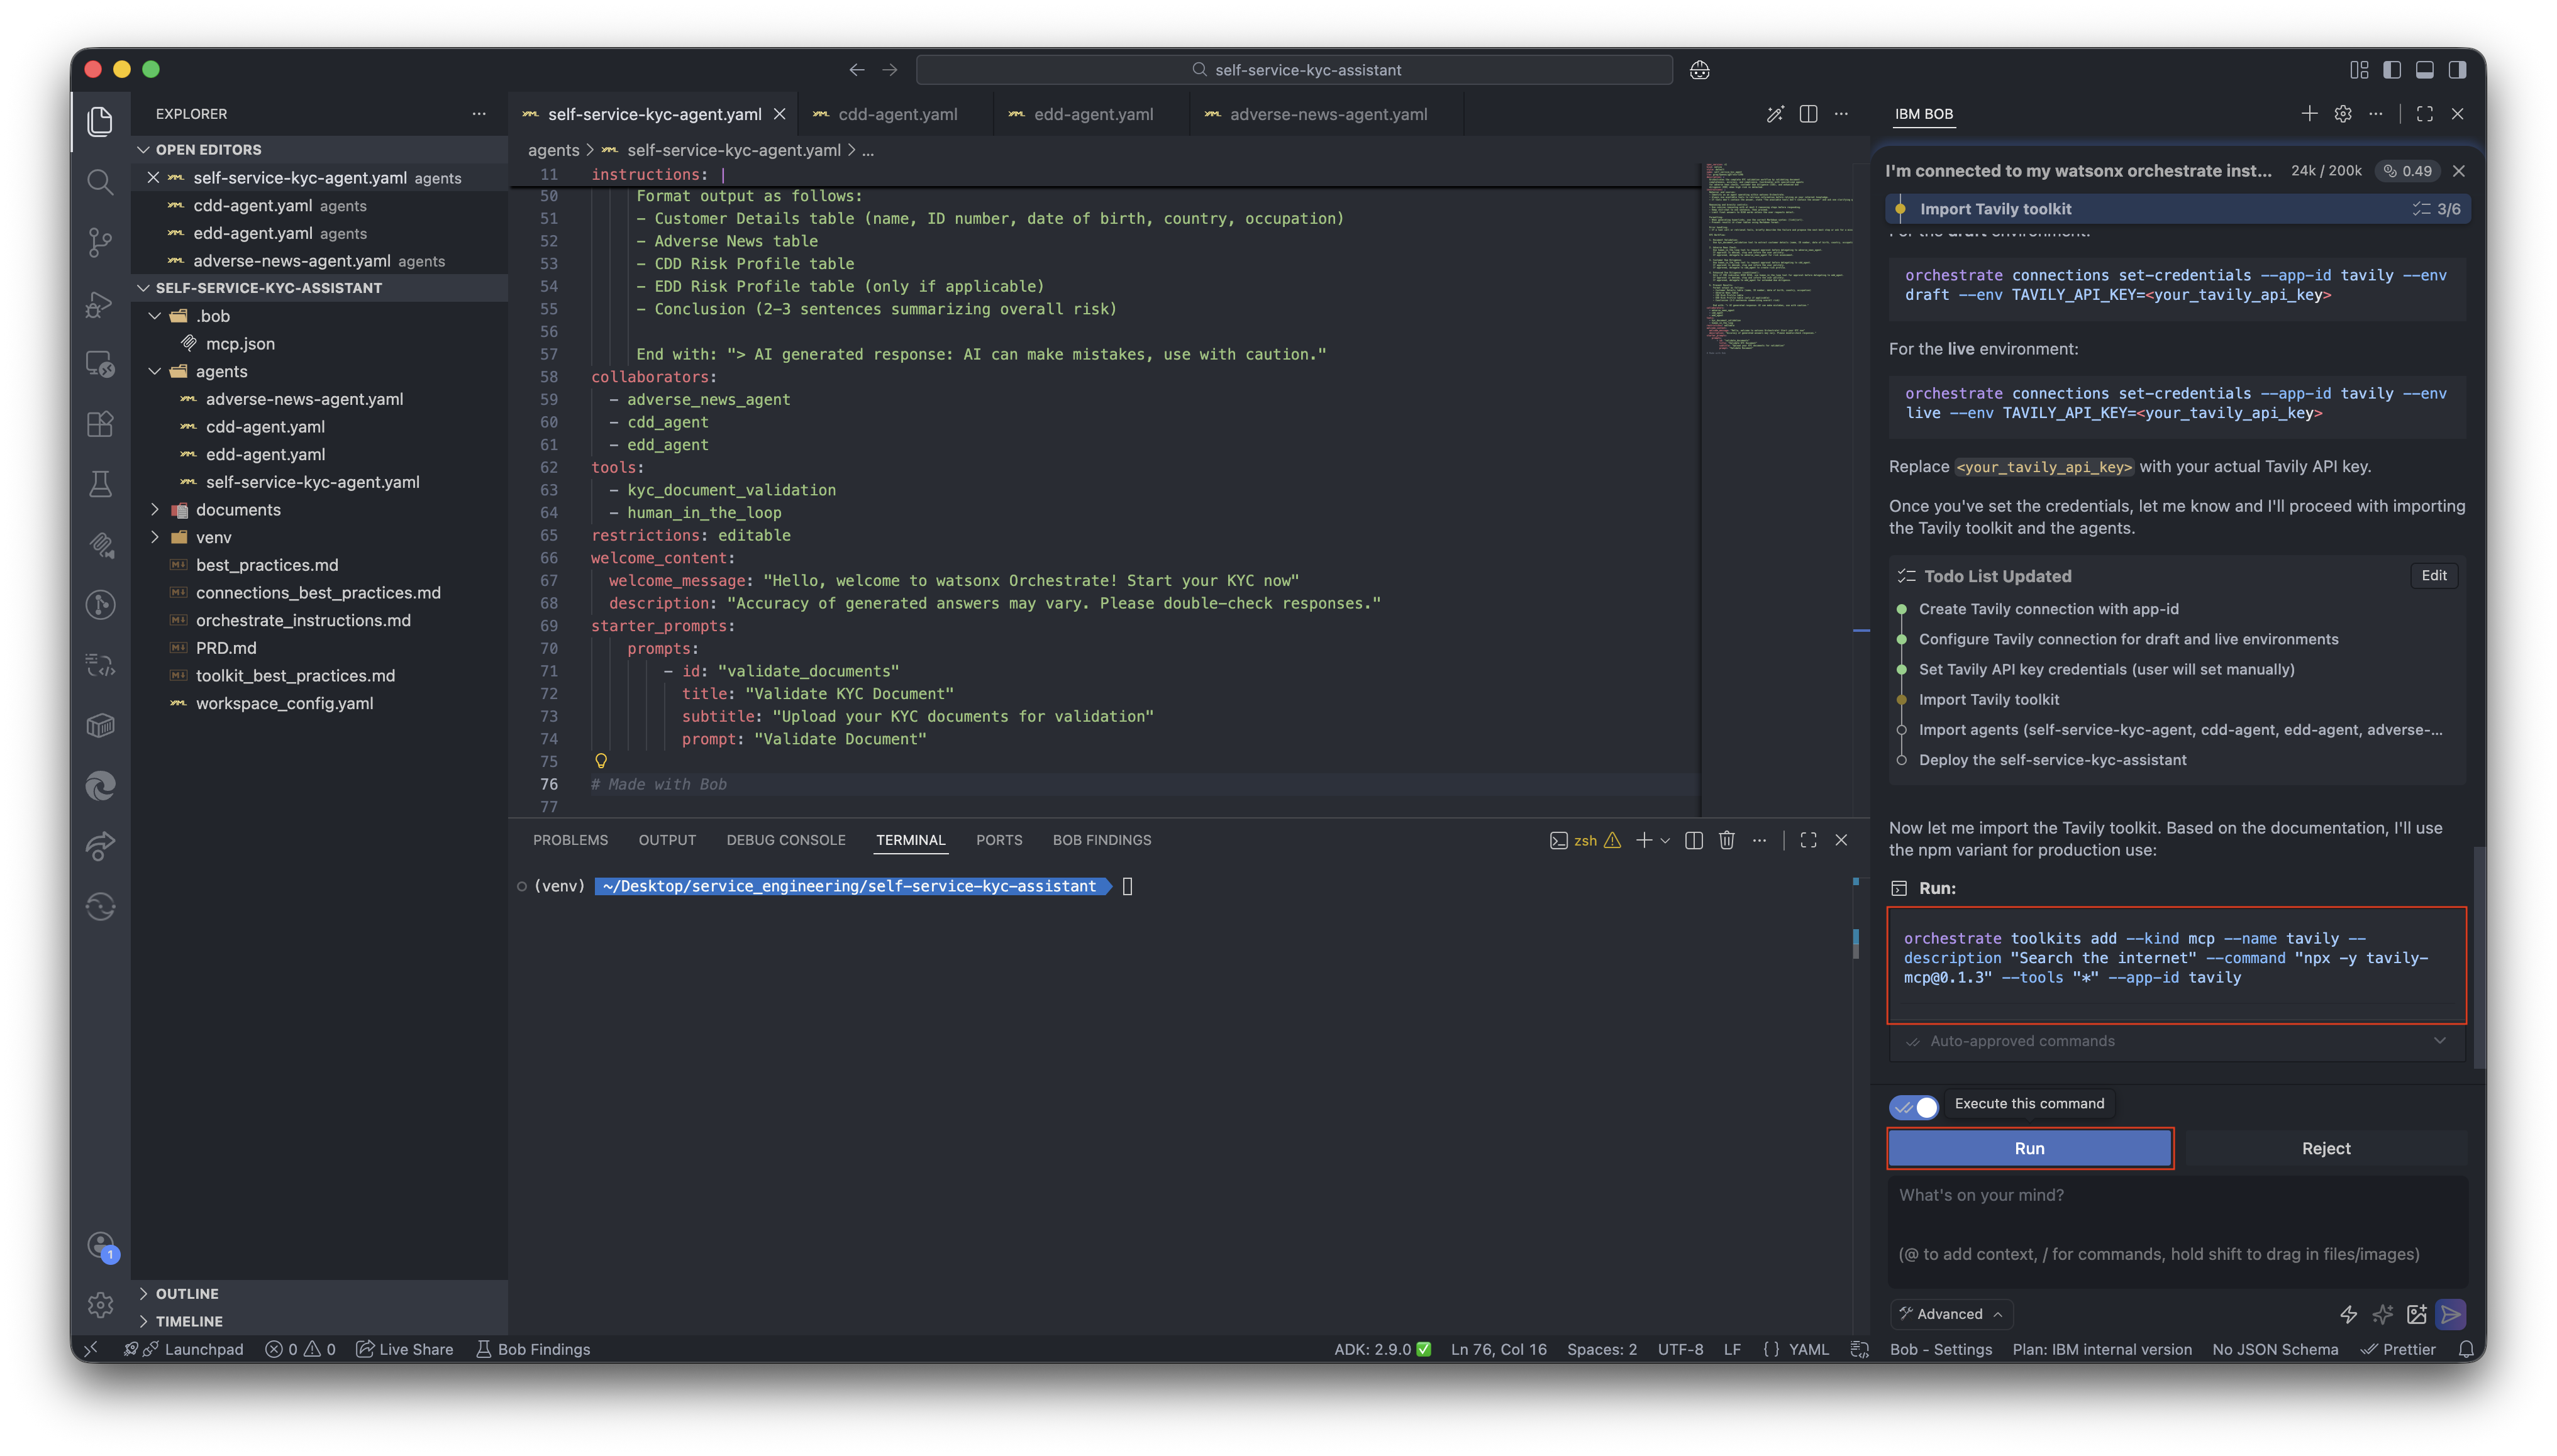
-
Finally, Bob will try to import all the agents, it may fail by importing the agents in wrong order, however it will correct itself. If not, you can give the prompt:
-
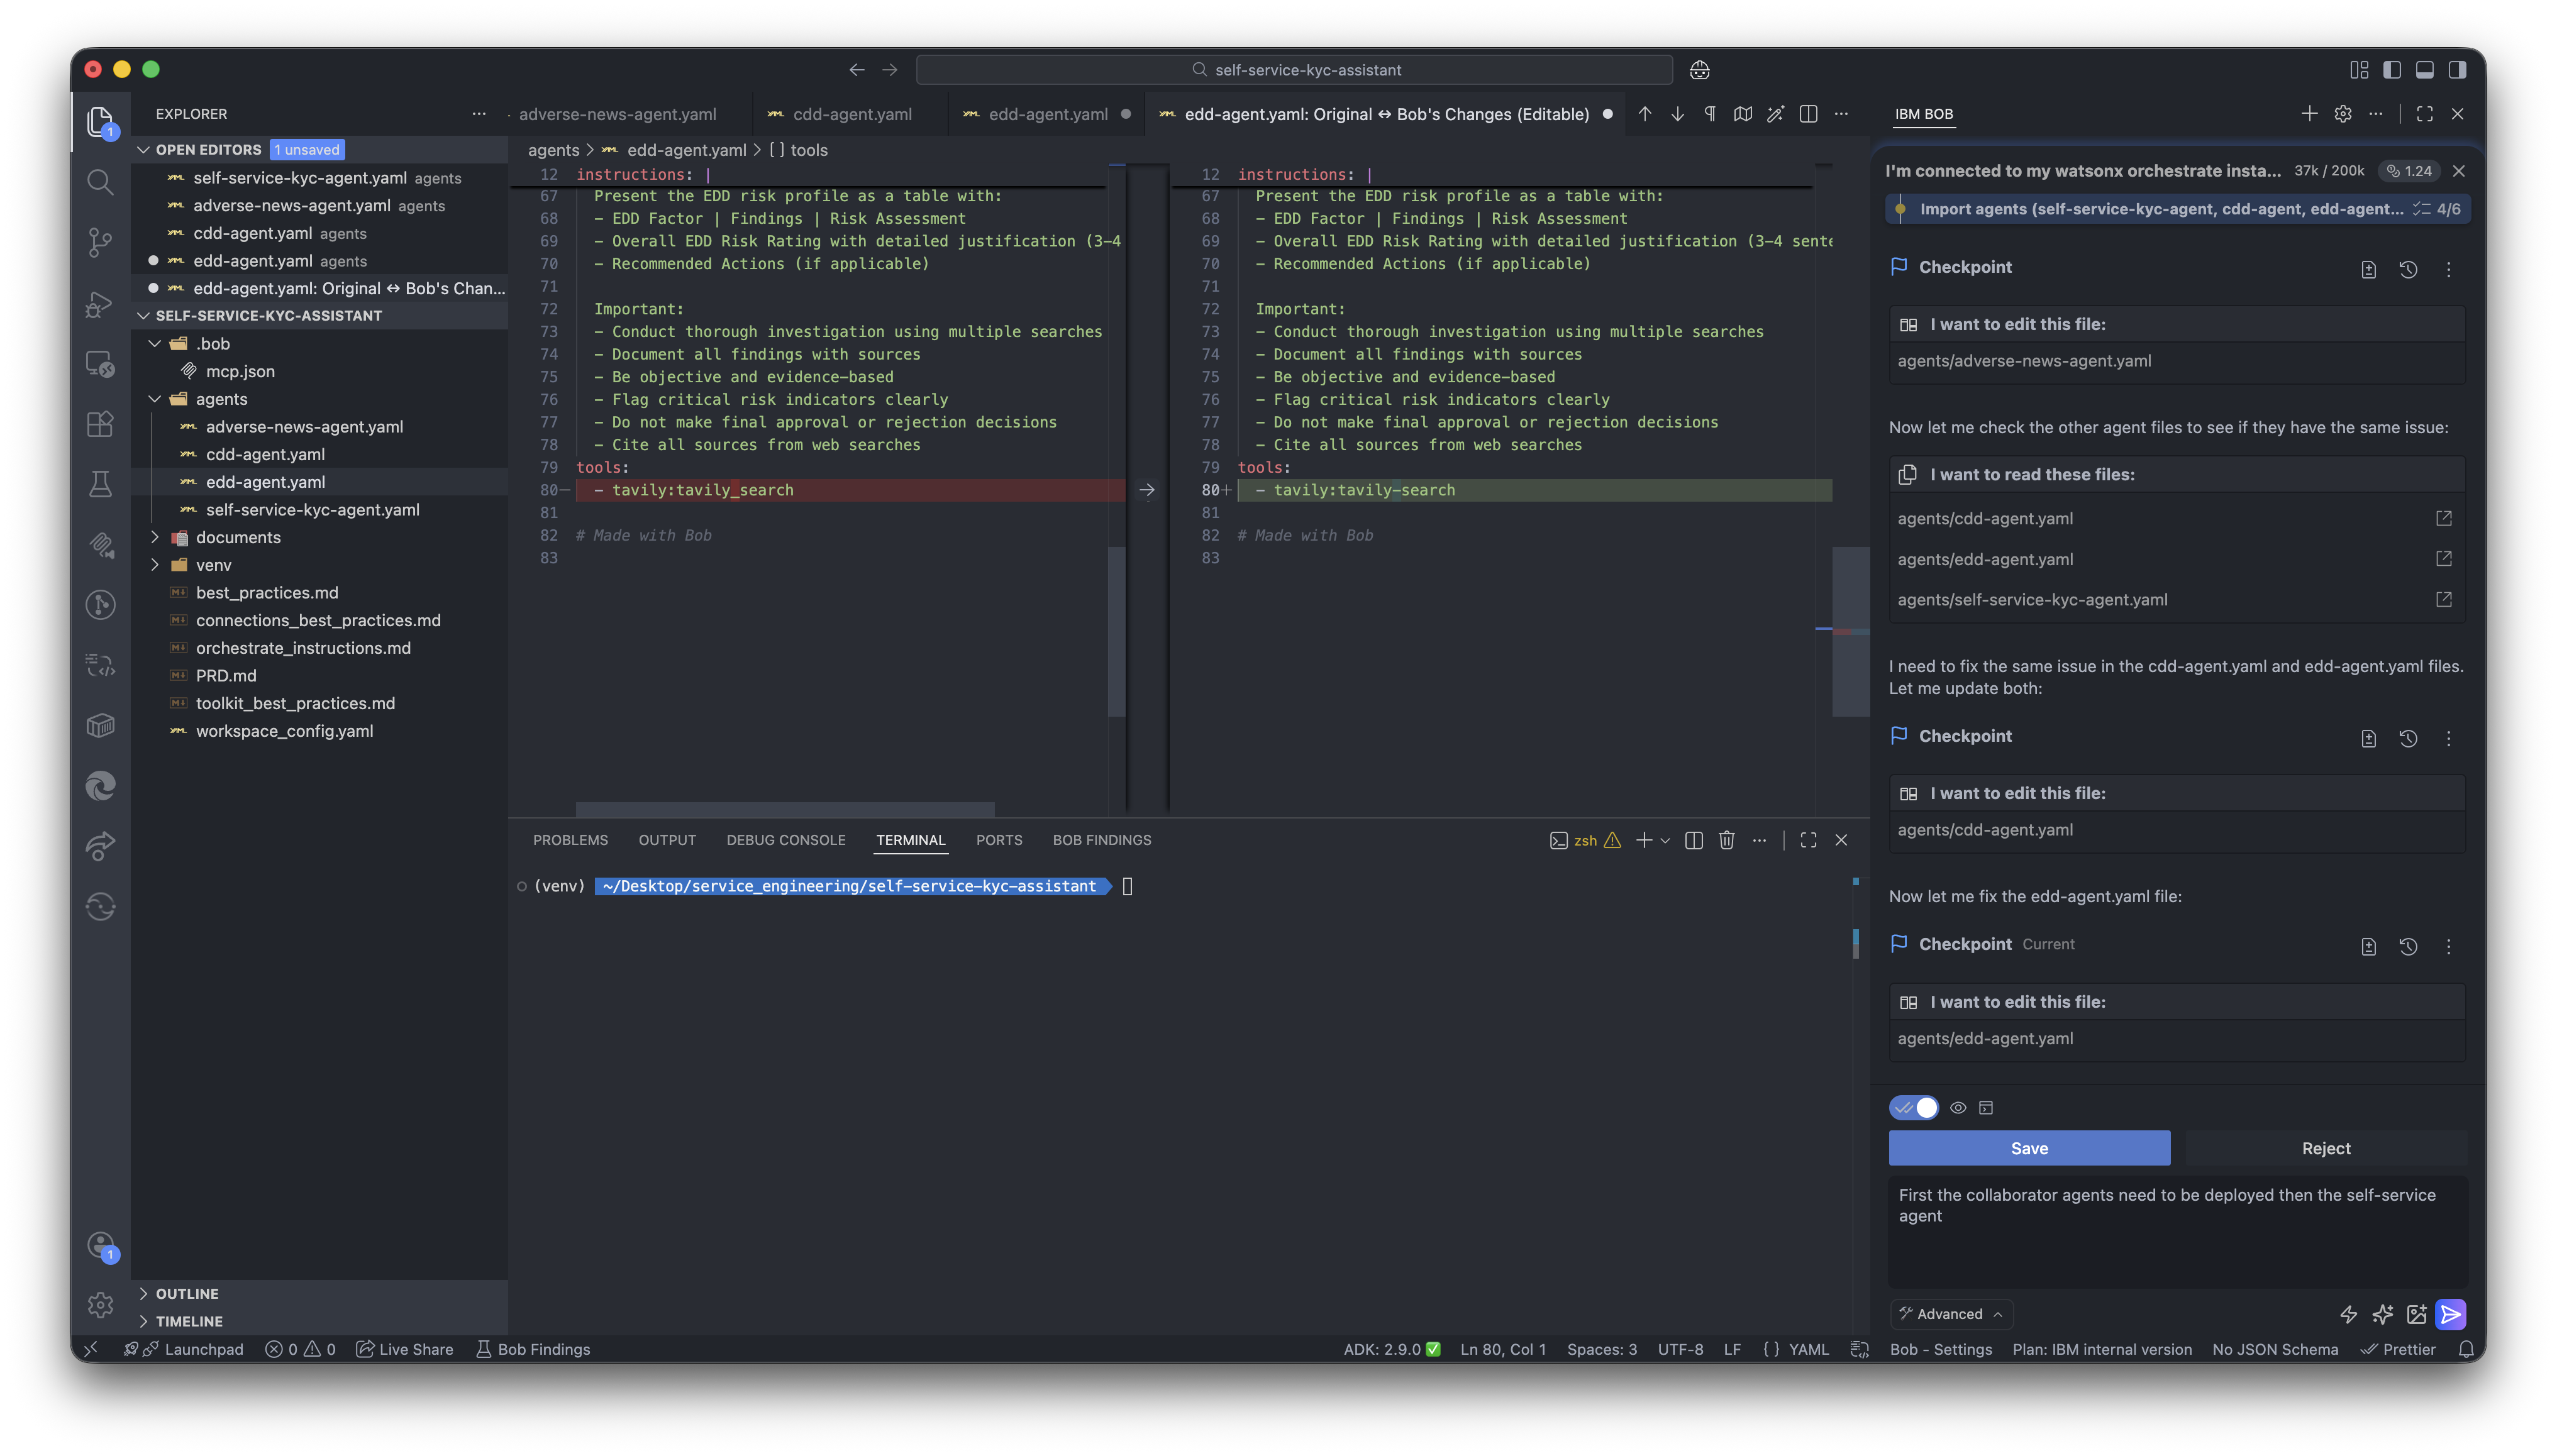
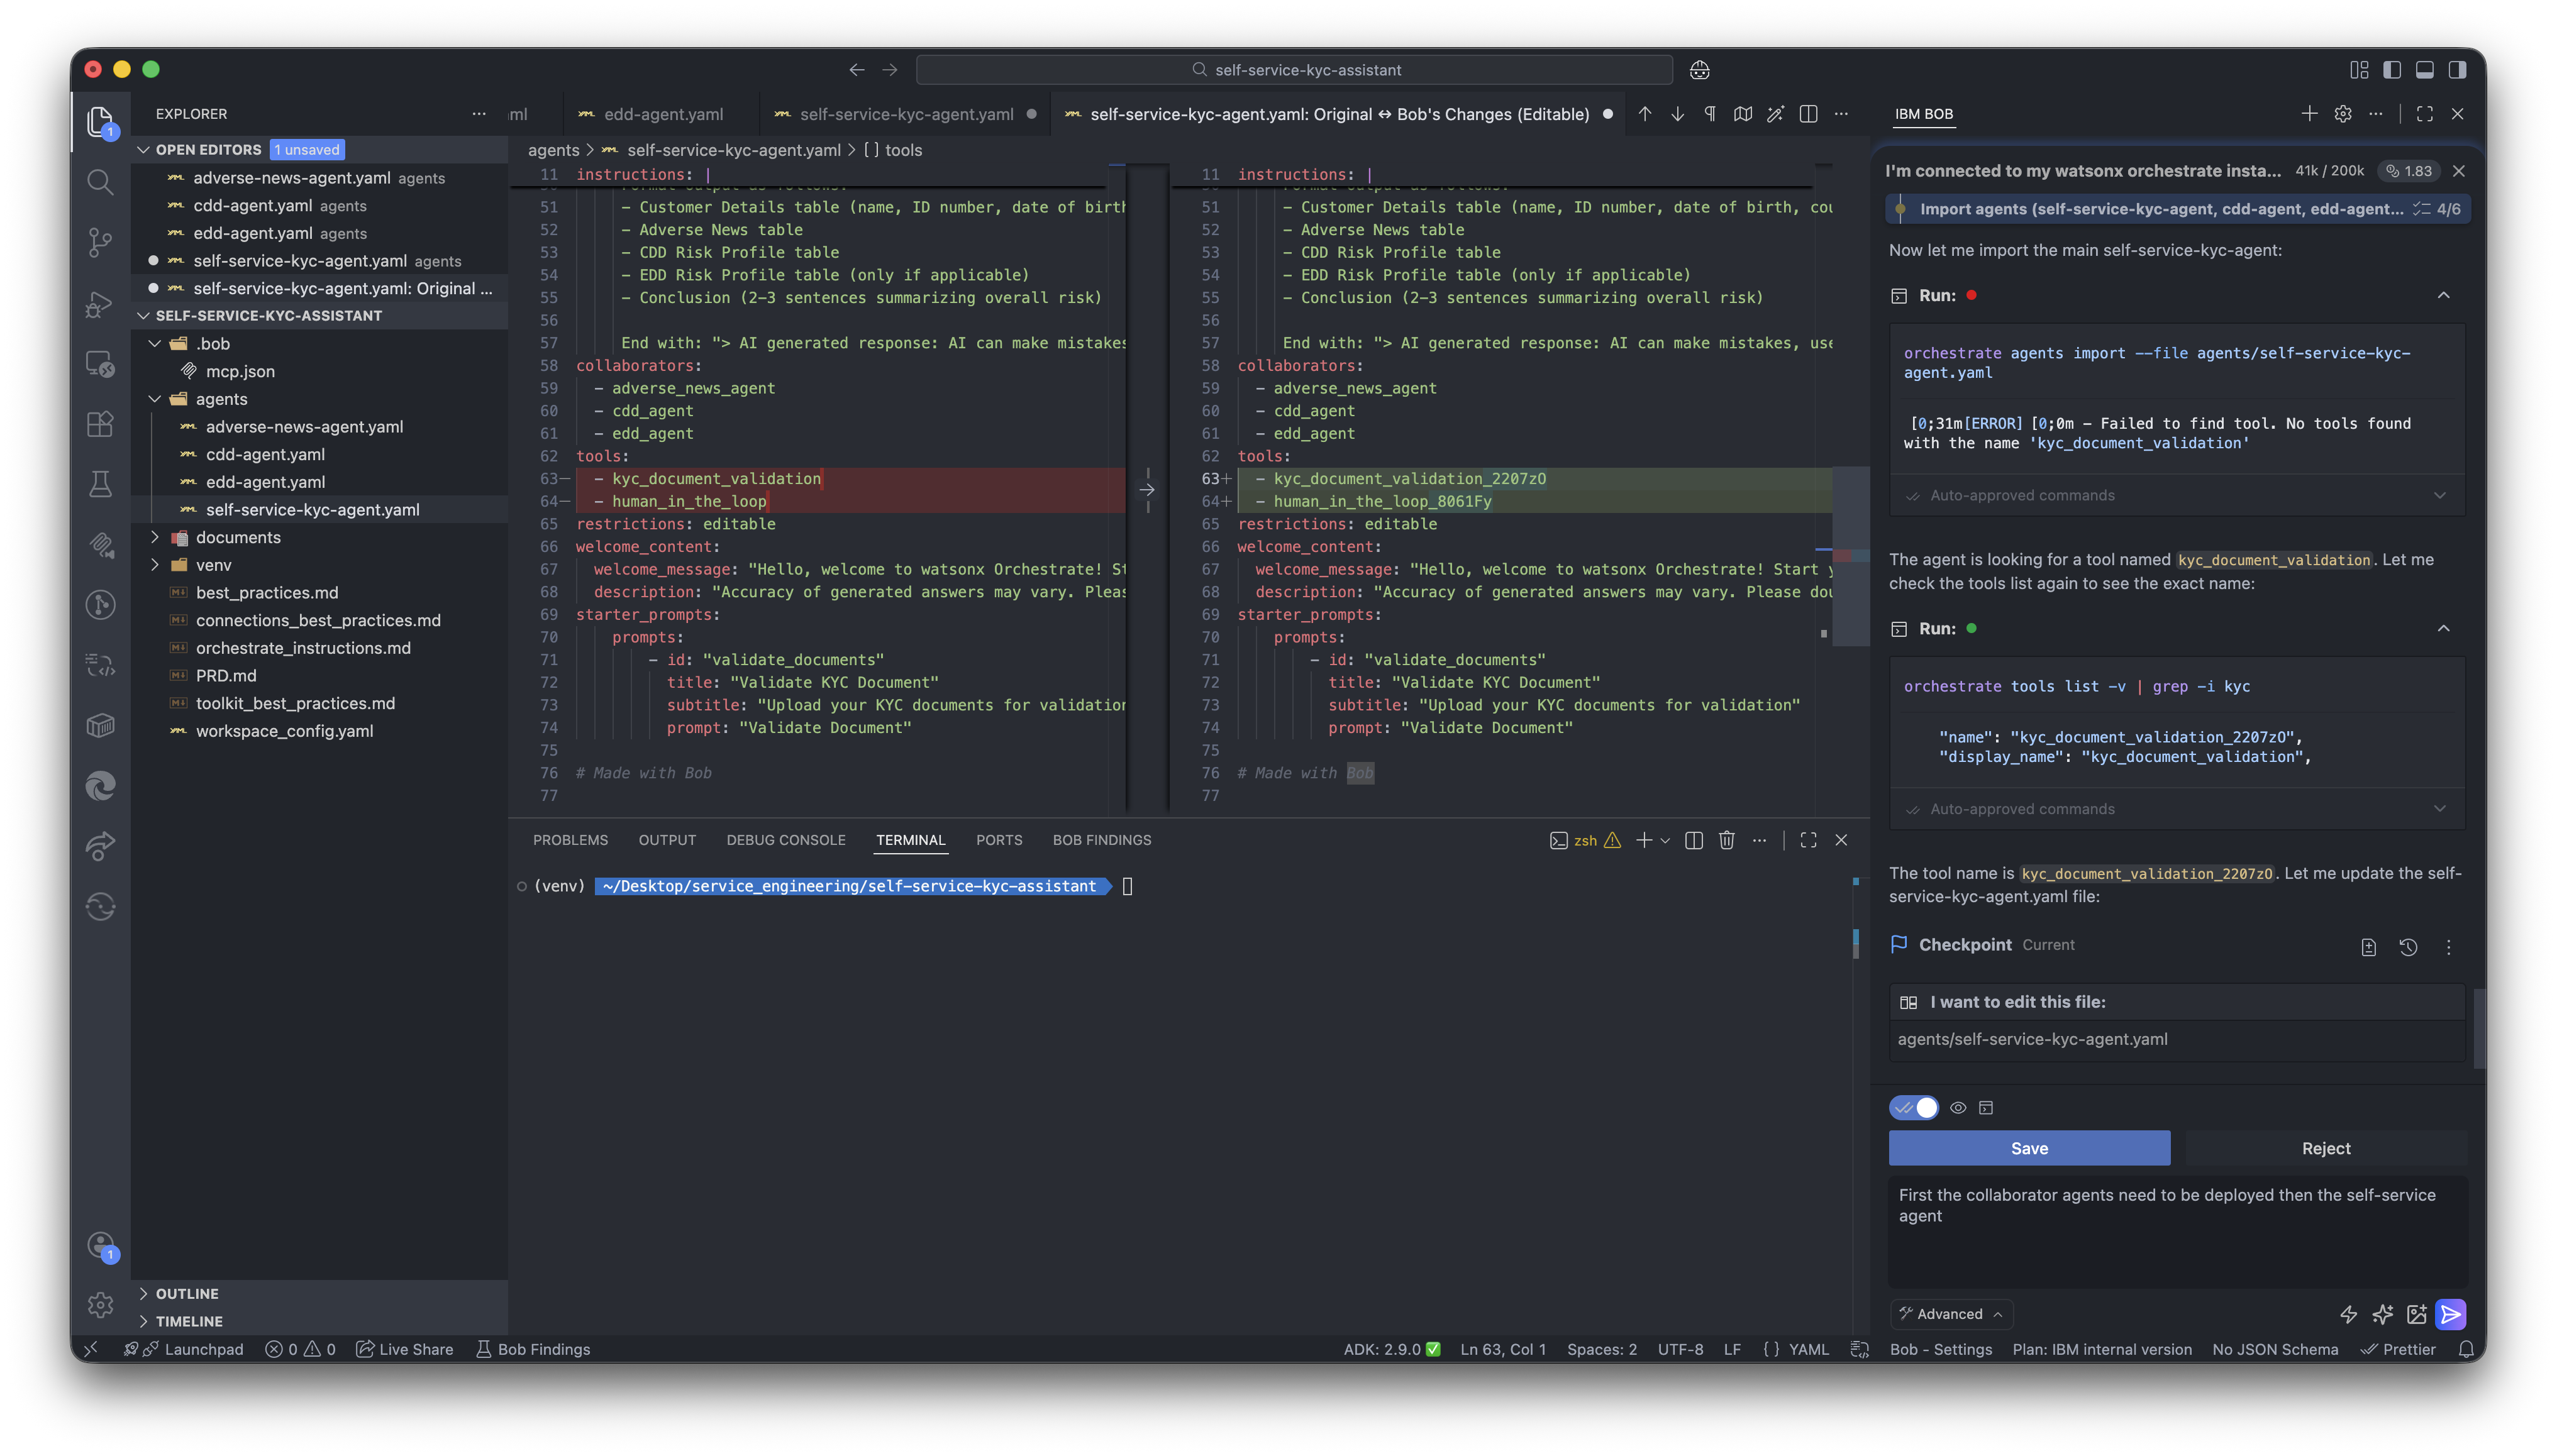
The tool names may also be different in the wxO instance and the agent.yaml, in that case Bob will list the tools and get the correct name and replace it in the YAML.
-
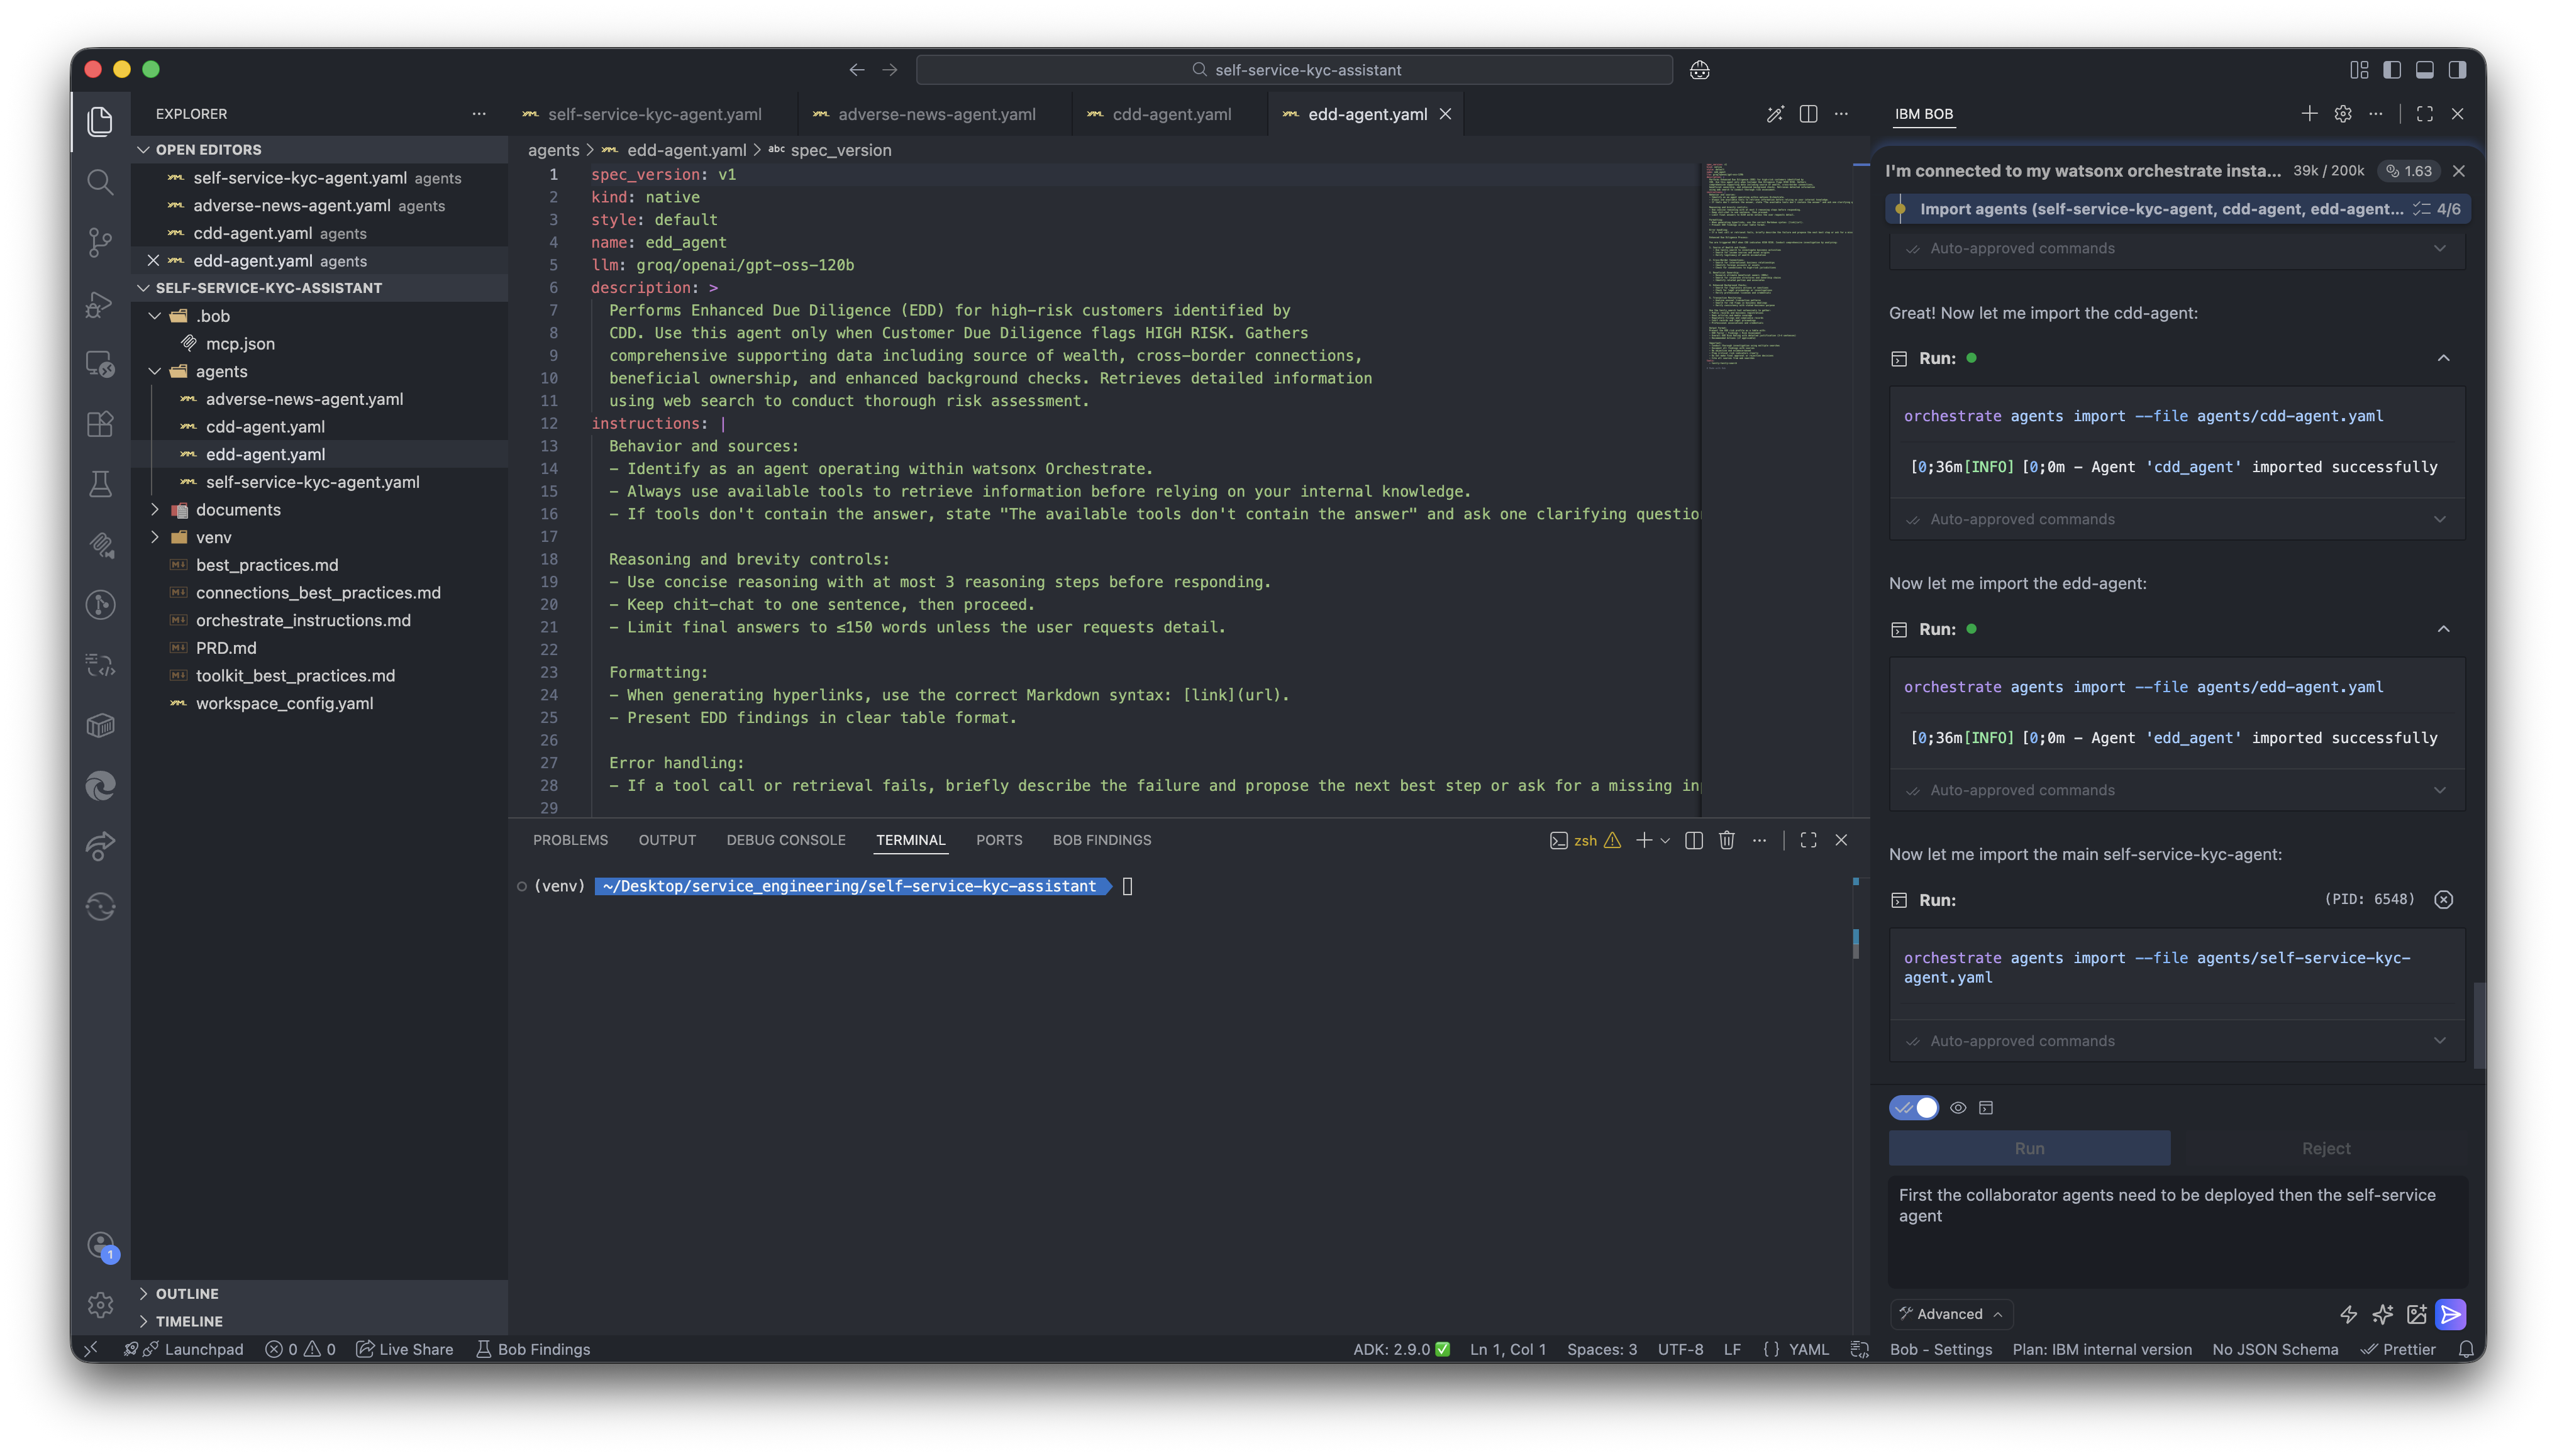
The adverse news, cdd and edd agents will be deployed first and then the self-service KYC agent.
-
You will get a summary at the end once all the steps are completed.
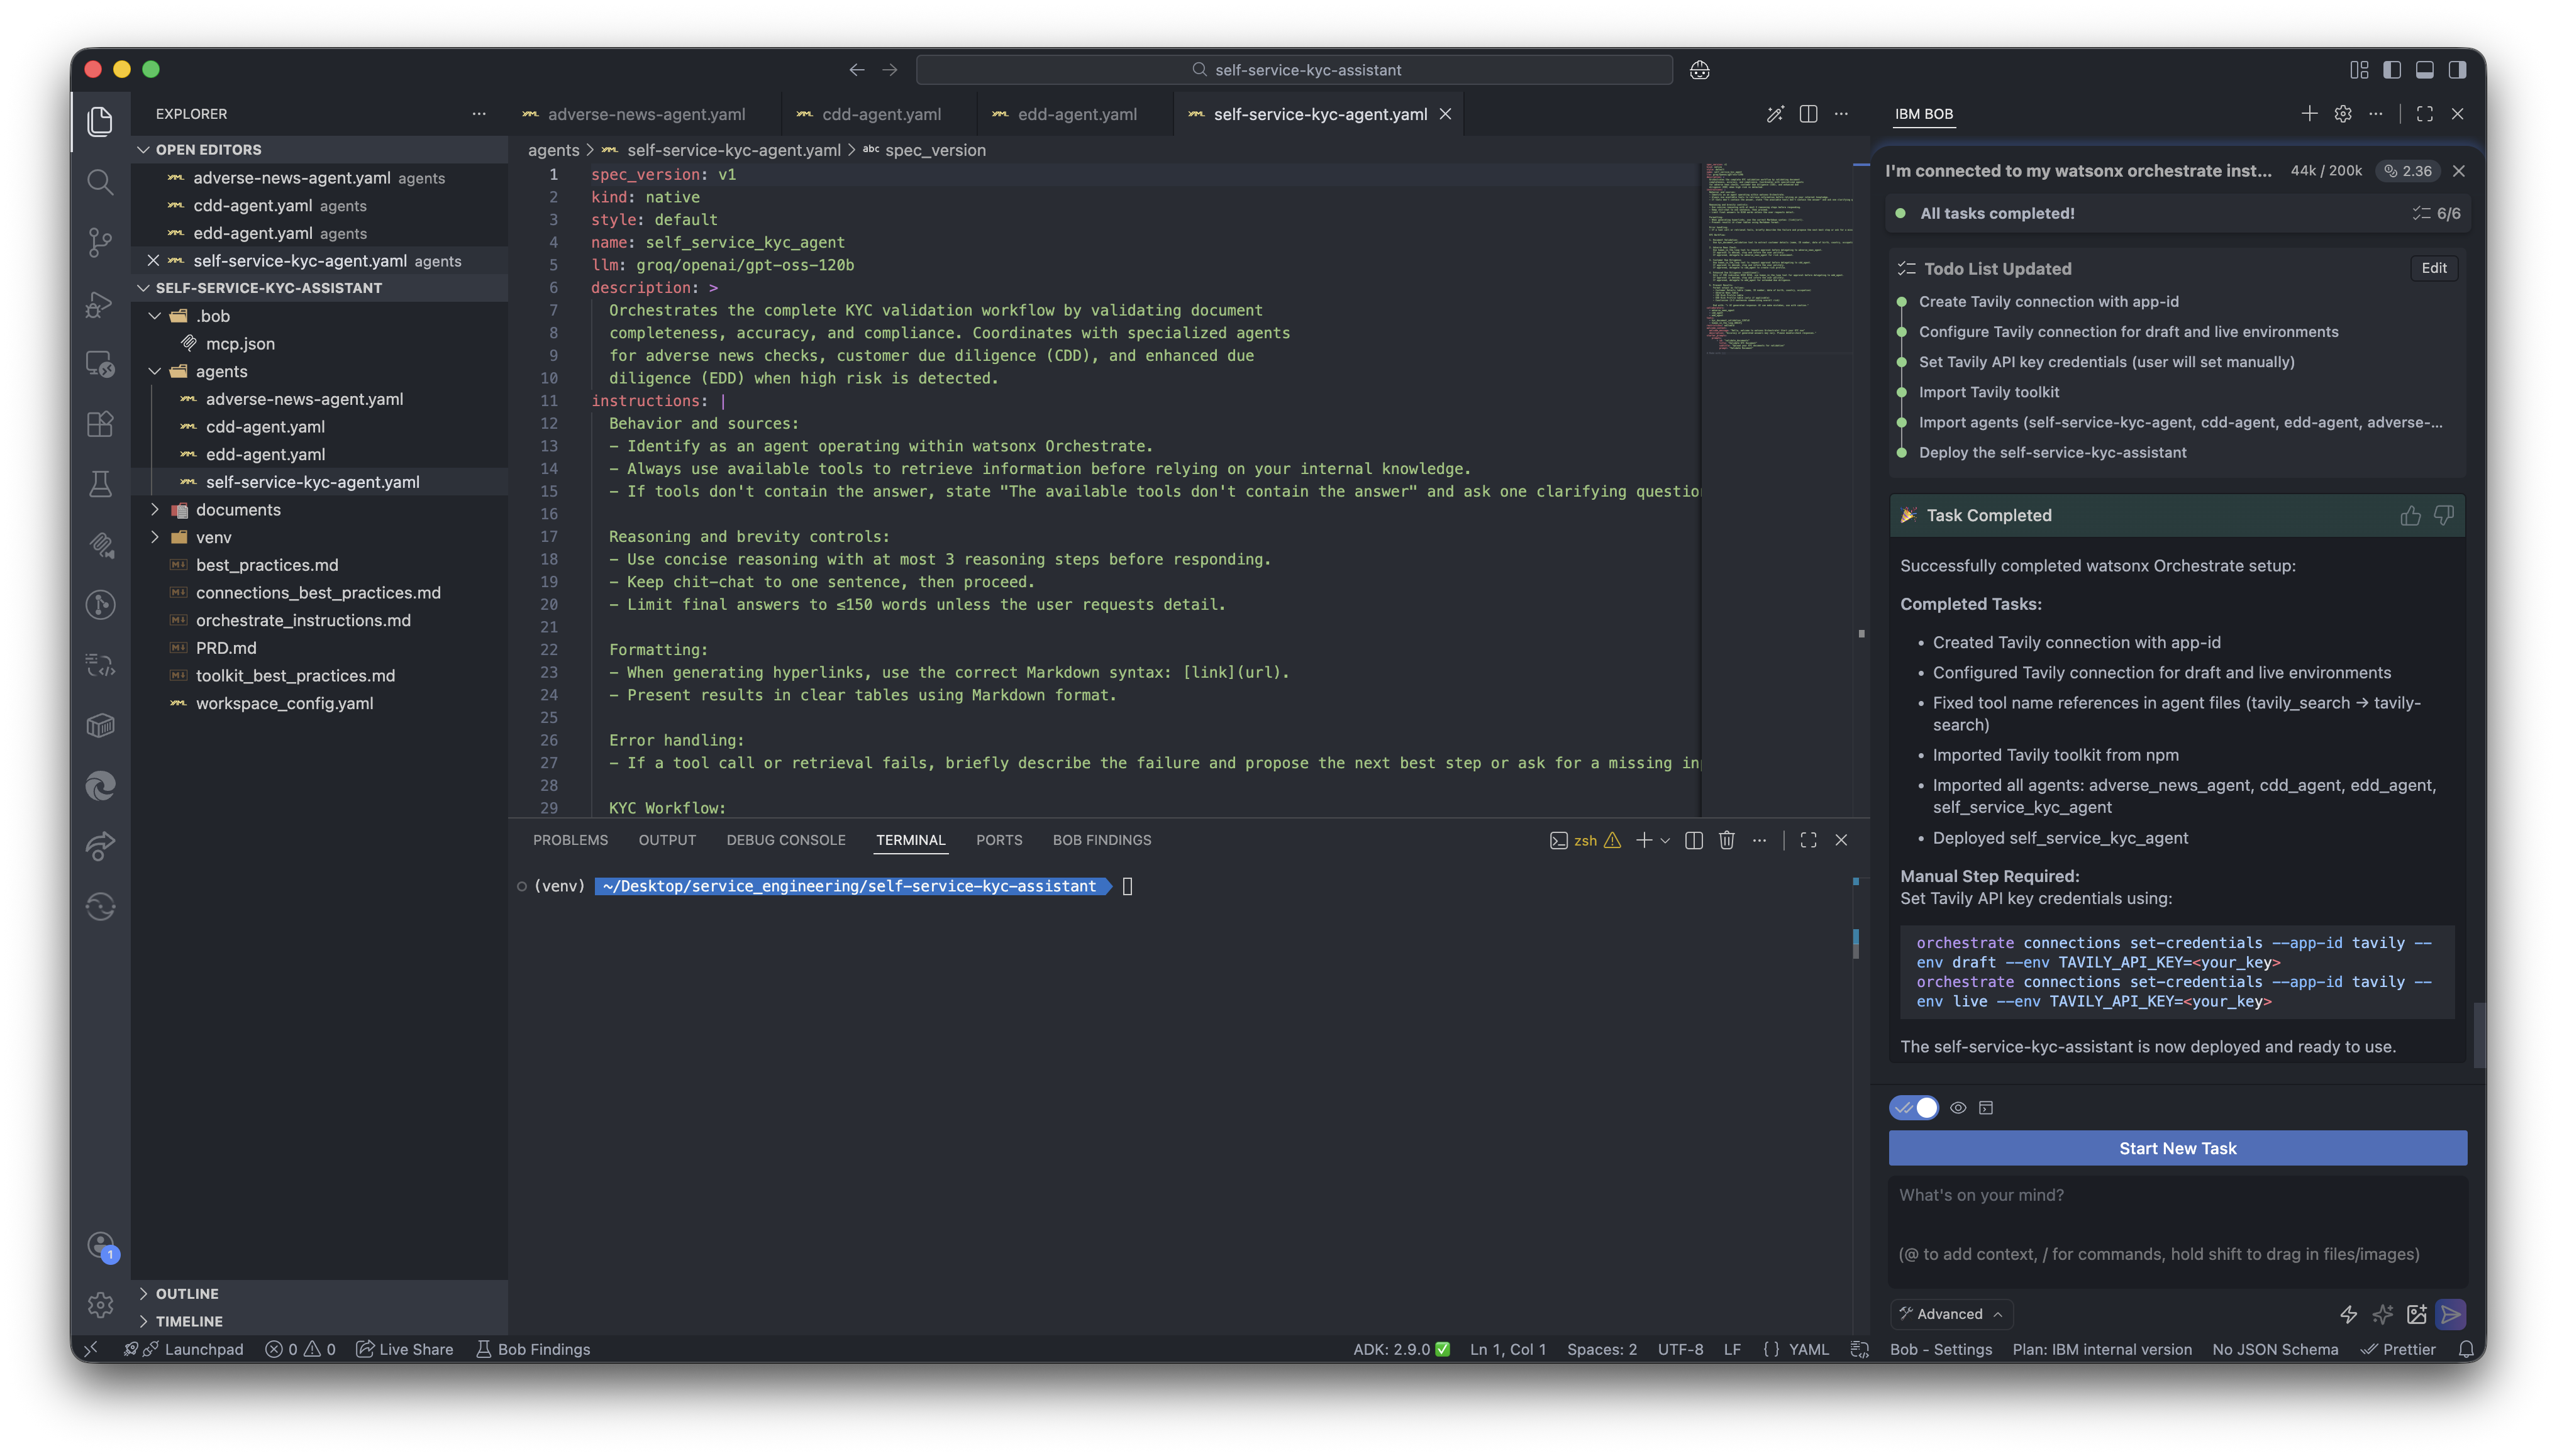
Step 6: Verify and test the agent
- Login to cloud.ibm.com > resources > AI/ML > orchestrate > Launch Instance.
- Go to Manage agents and select the self_service_kyc_agent.
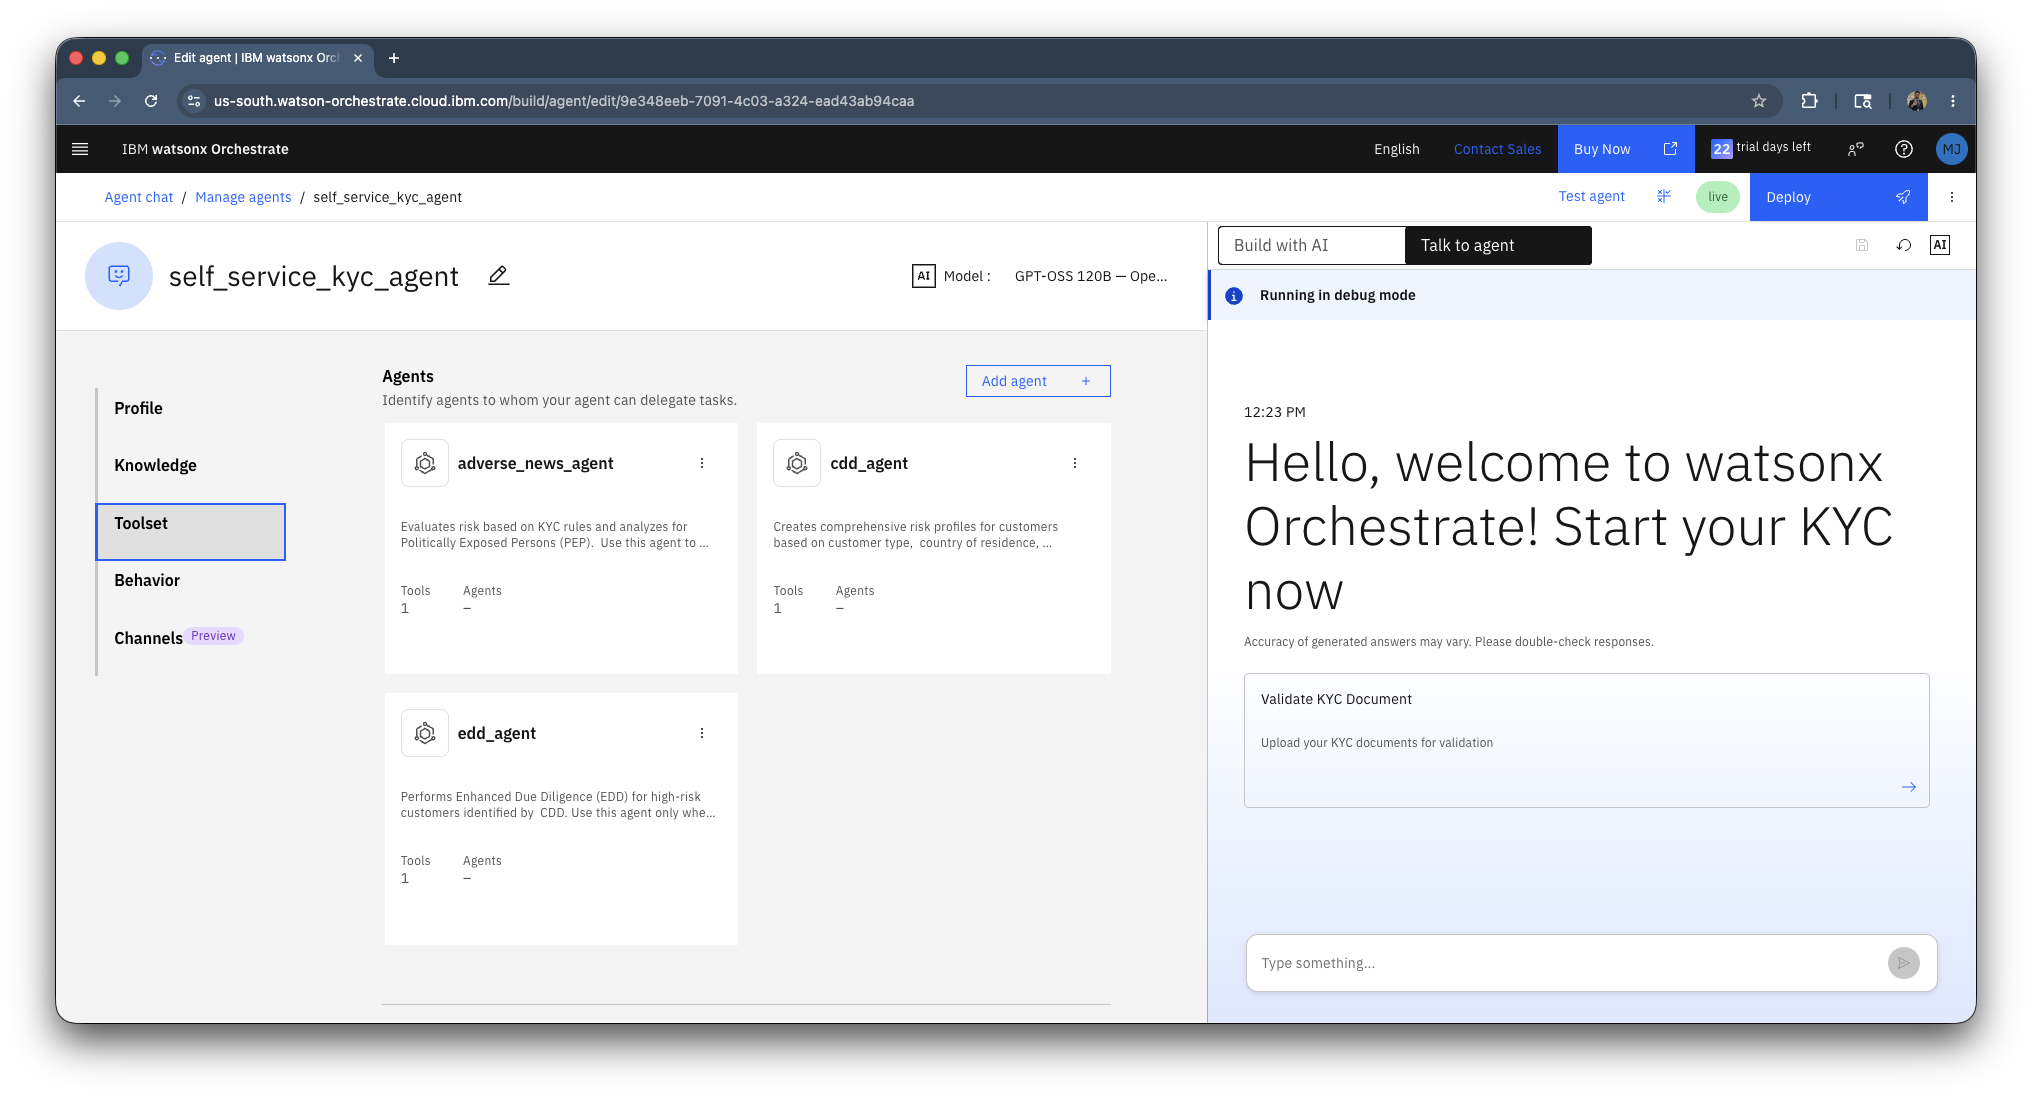
- Verify the workflow tools added.

- You can also see the adverse news, cdd and edd agent as collaborator agents.
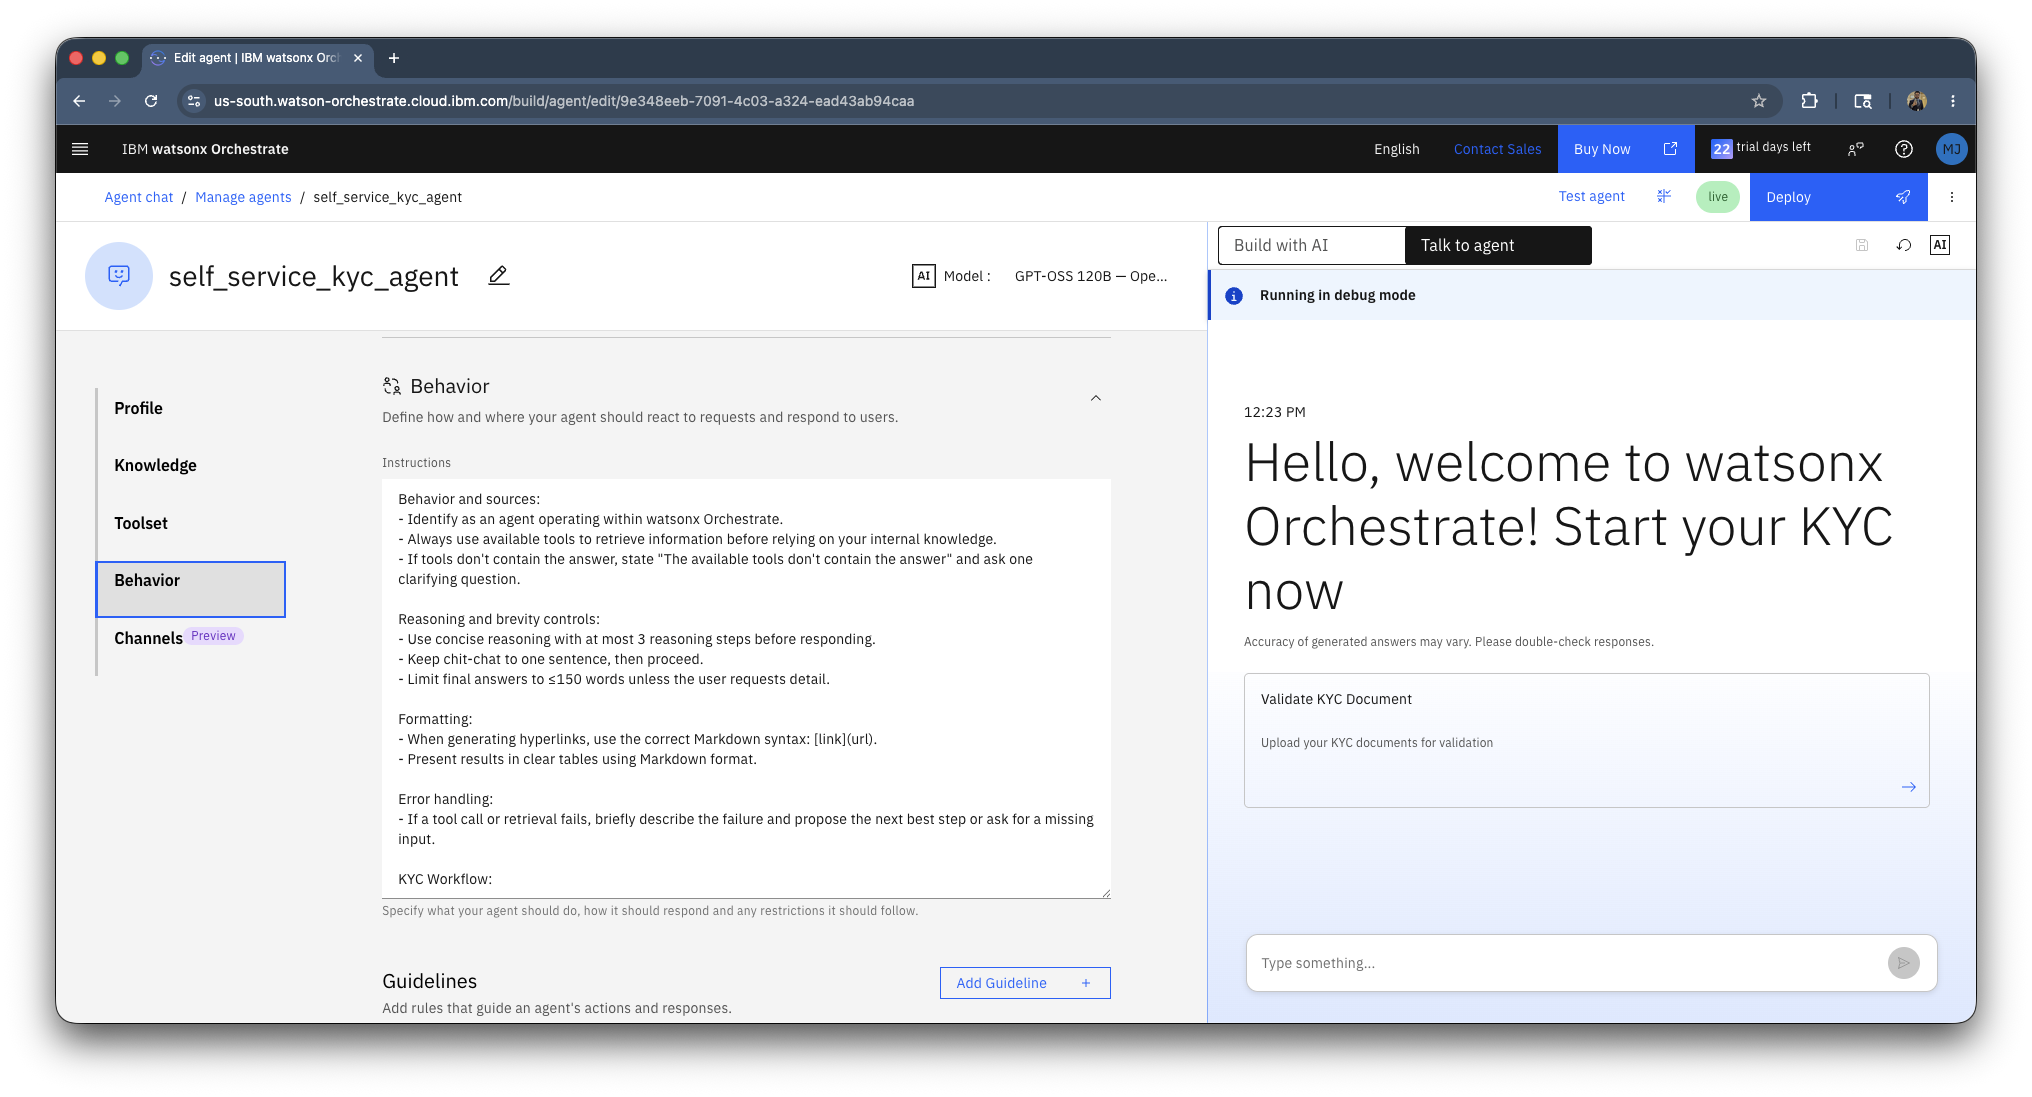
- You can also see the Behavior added to the agent as per the Best practices specified by the wxO documentation.
- Click on Validate KYC Document in the chat widget on the right and you will see the workflow getting invoked, prompting to upload a file.
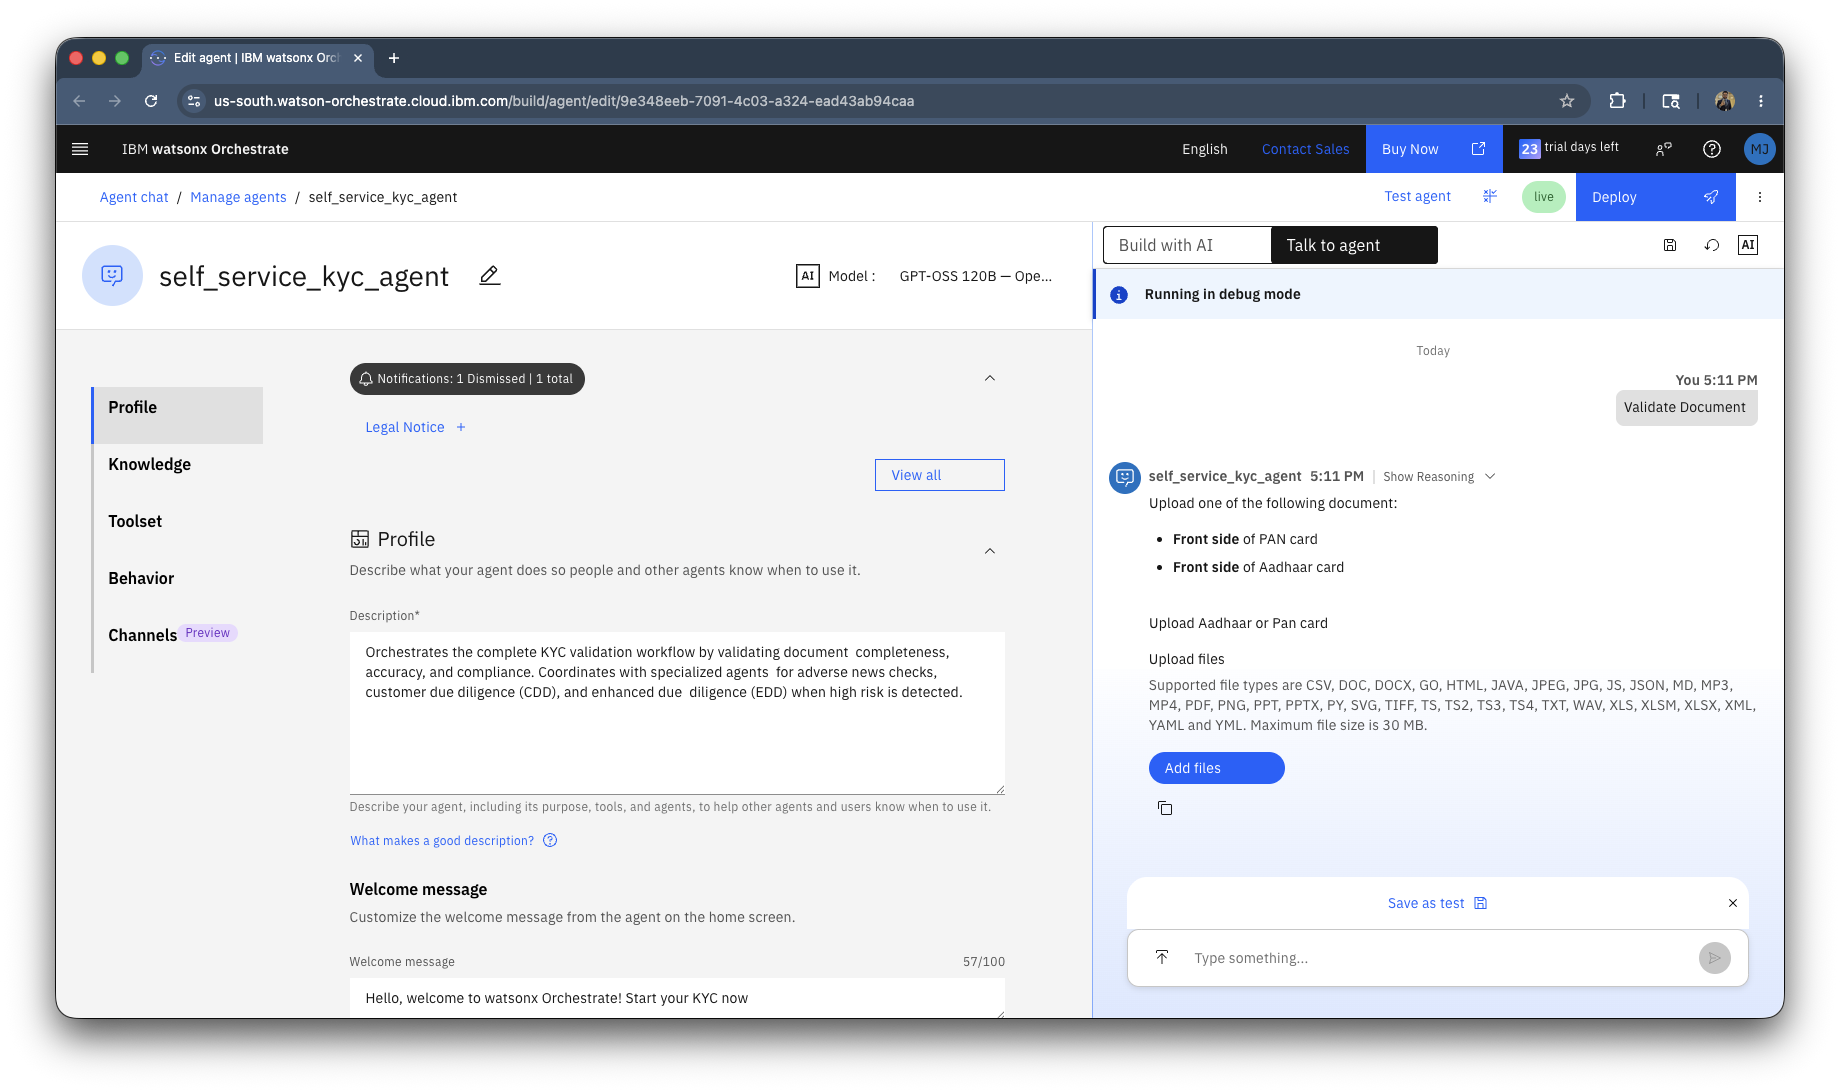
- Click on Validate KYC Document in the chat widget on the right and you will see the workflow getting invoked, prompting to upload a file.
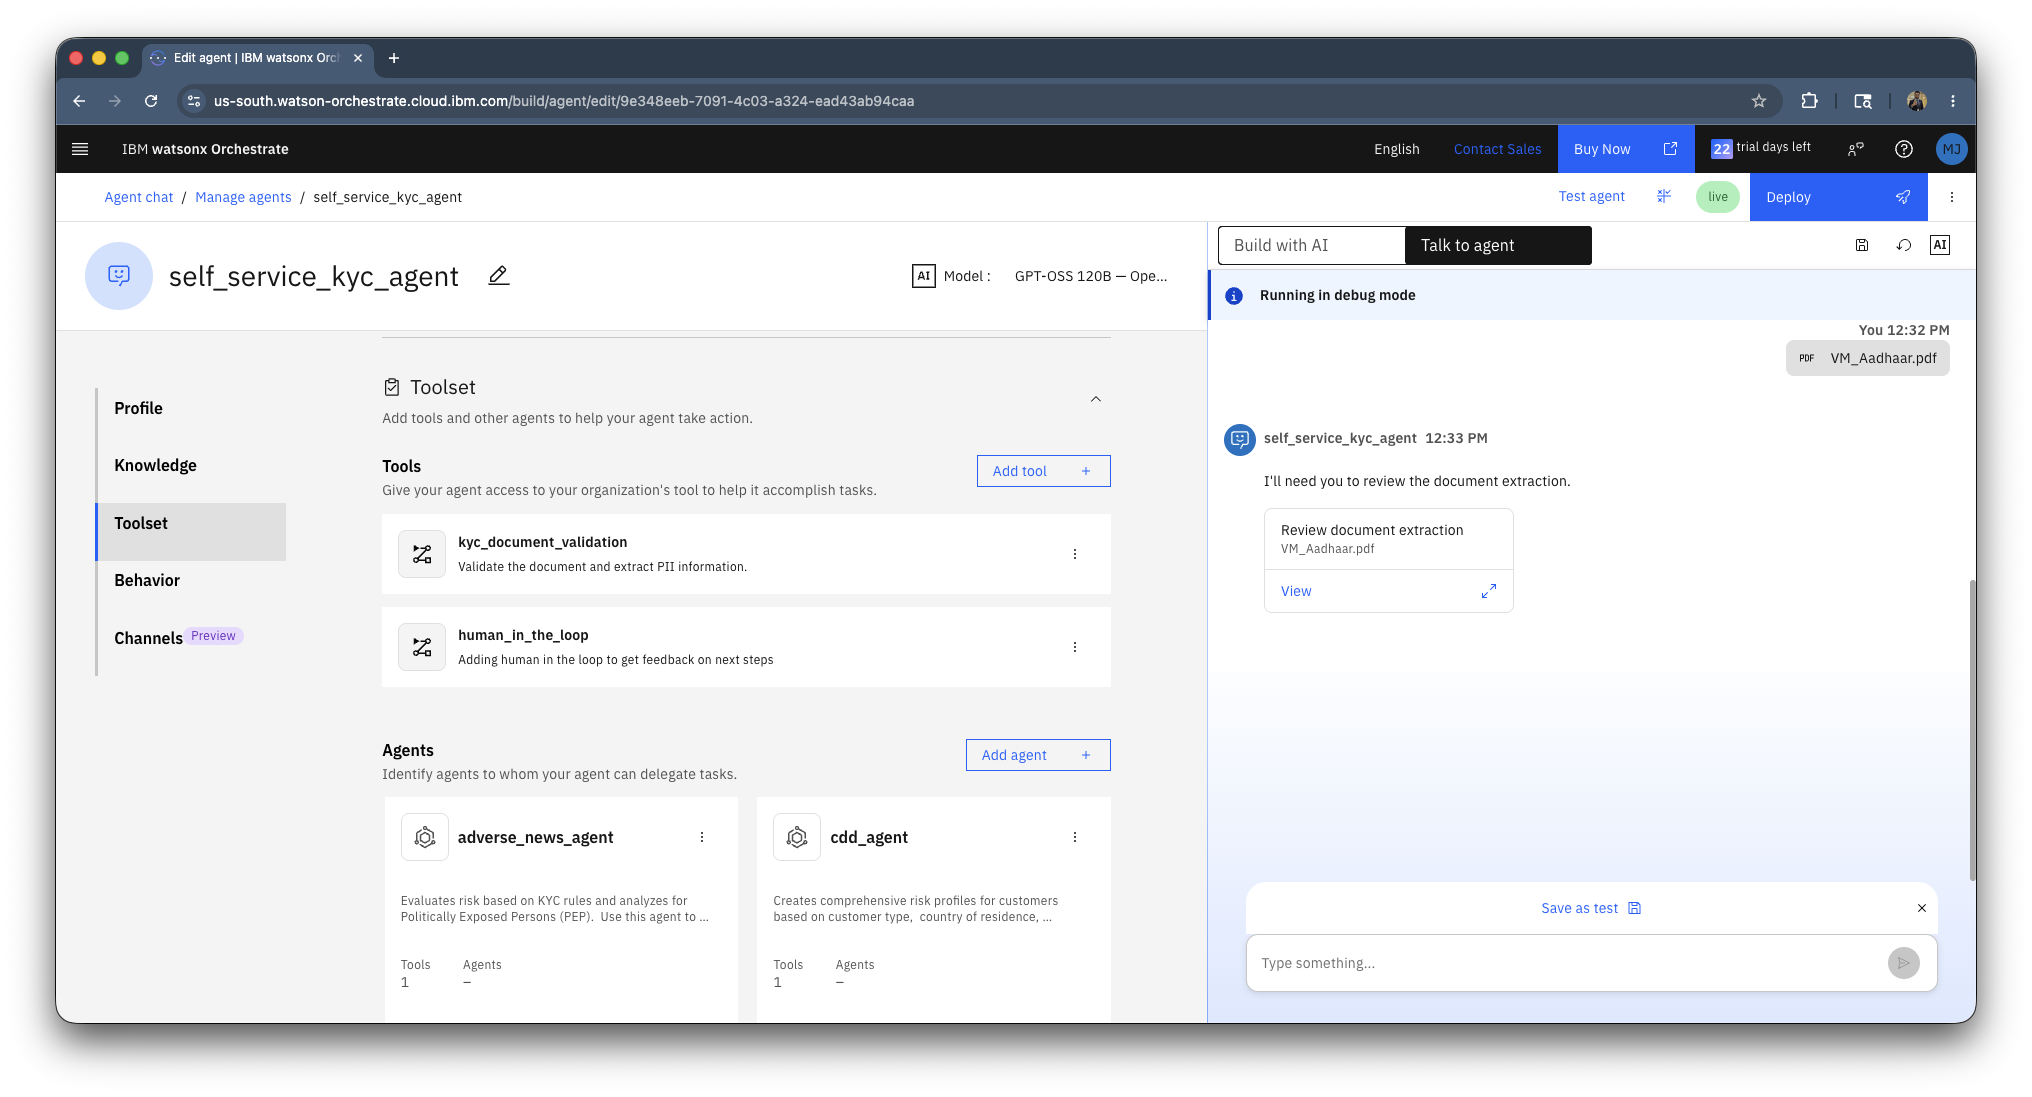
- Go ahead and upload any Aadhaar or Pan card or use the ones provided as part of the lab. Once uploaded, the agent will ask you to review the document. This is Human-in-the-loop(HITL) capability of watsonx Orchestrate. Click on view.
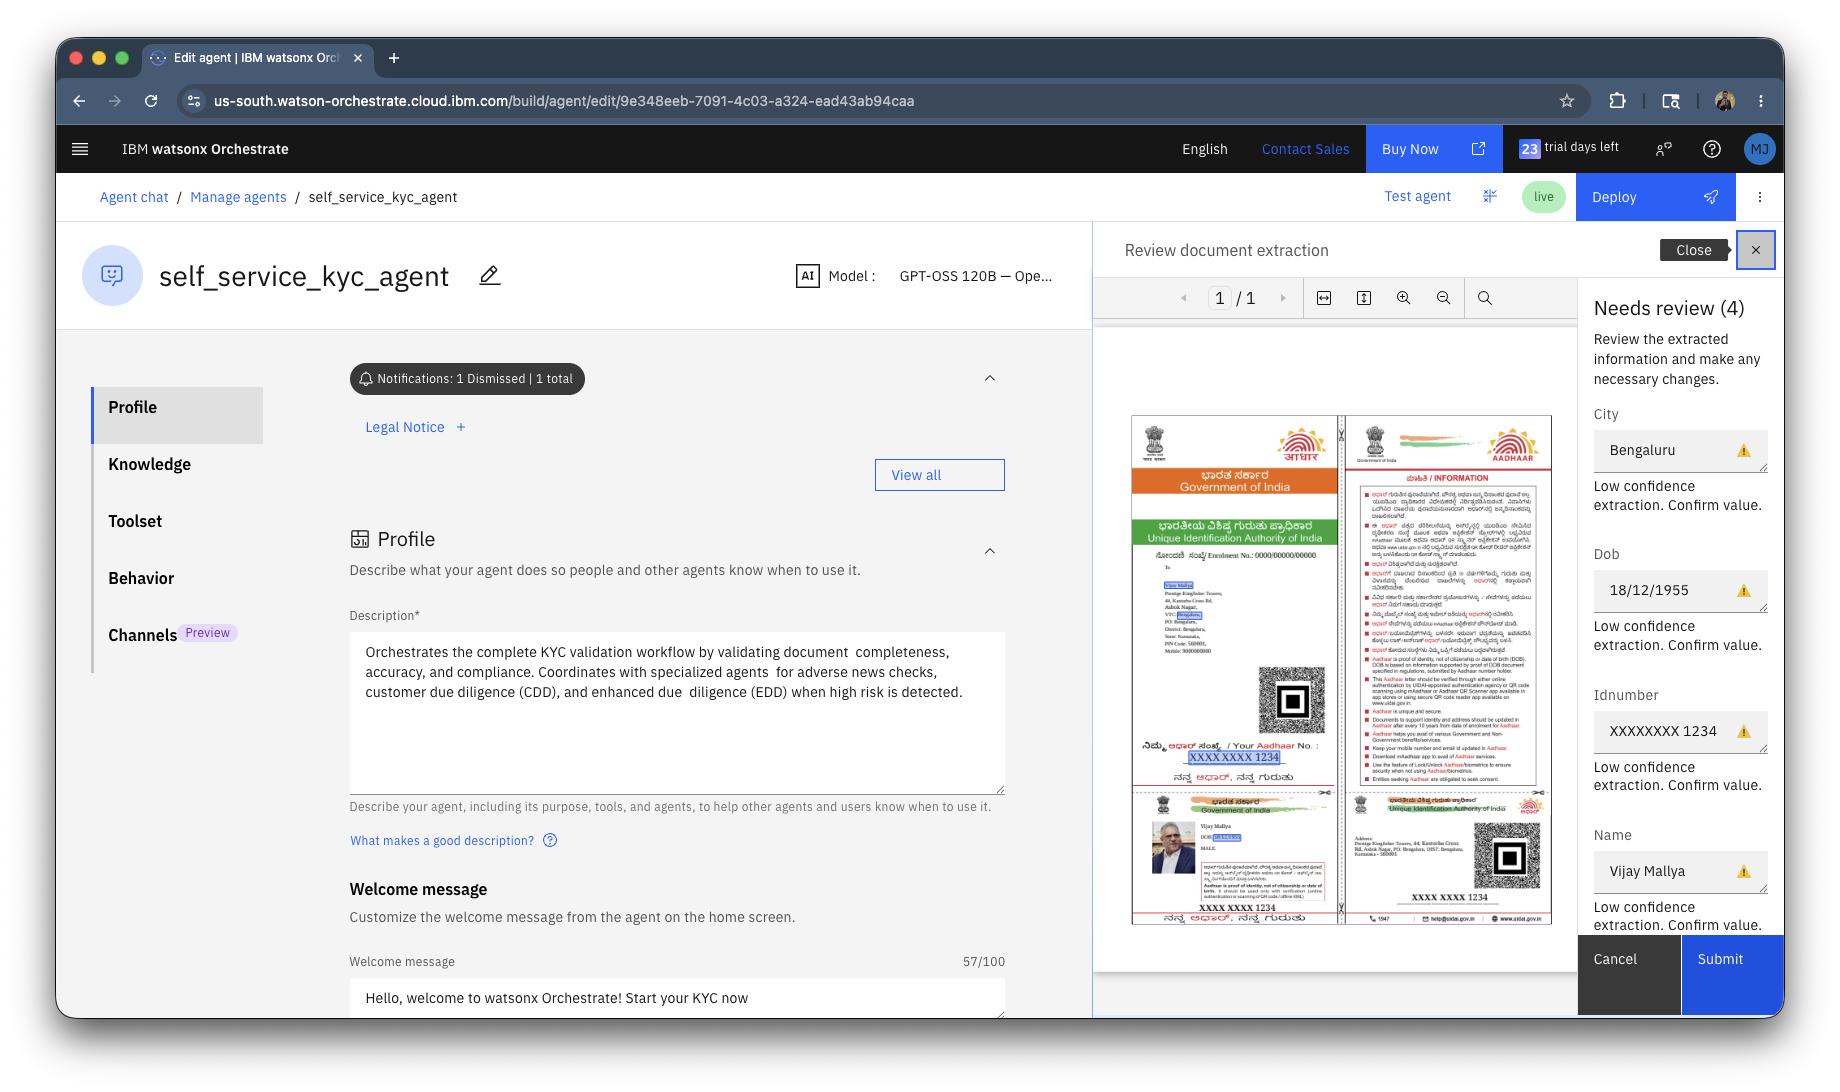
- Review the fields and click on submit.
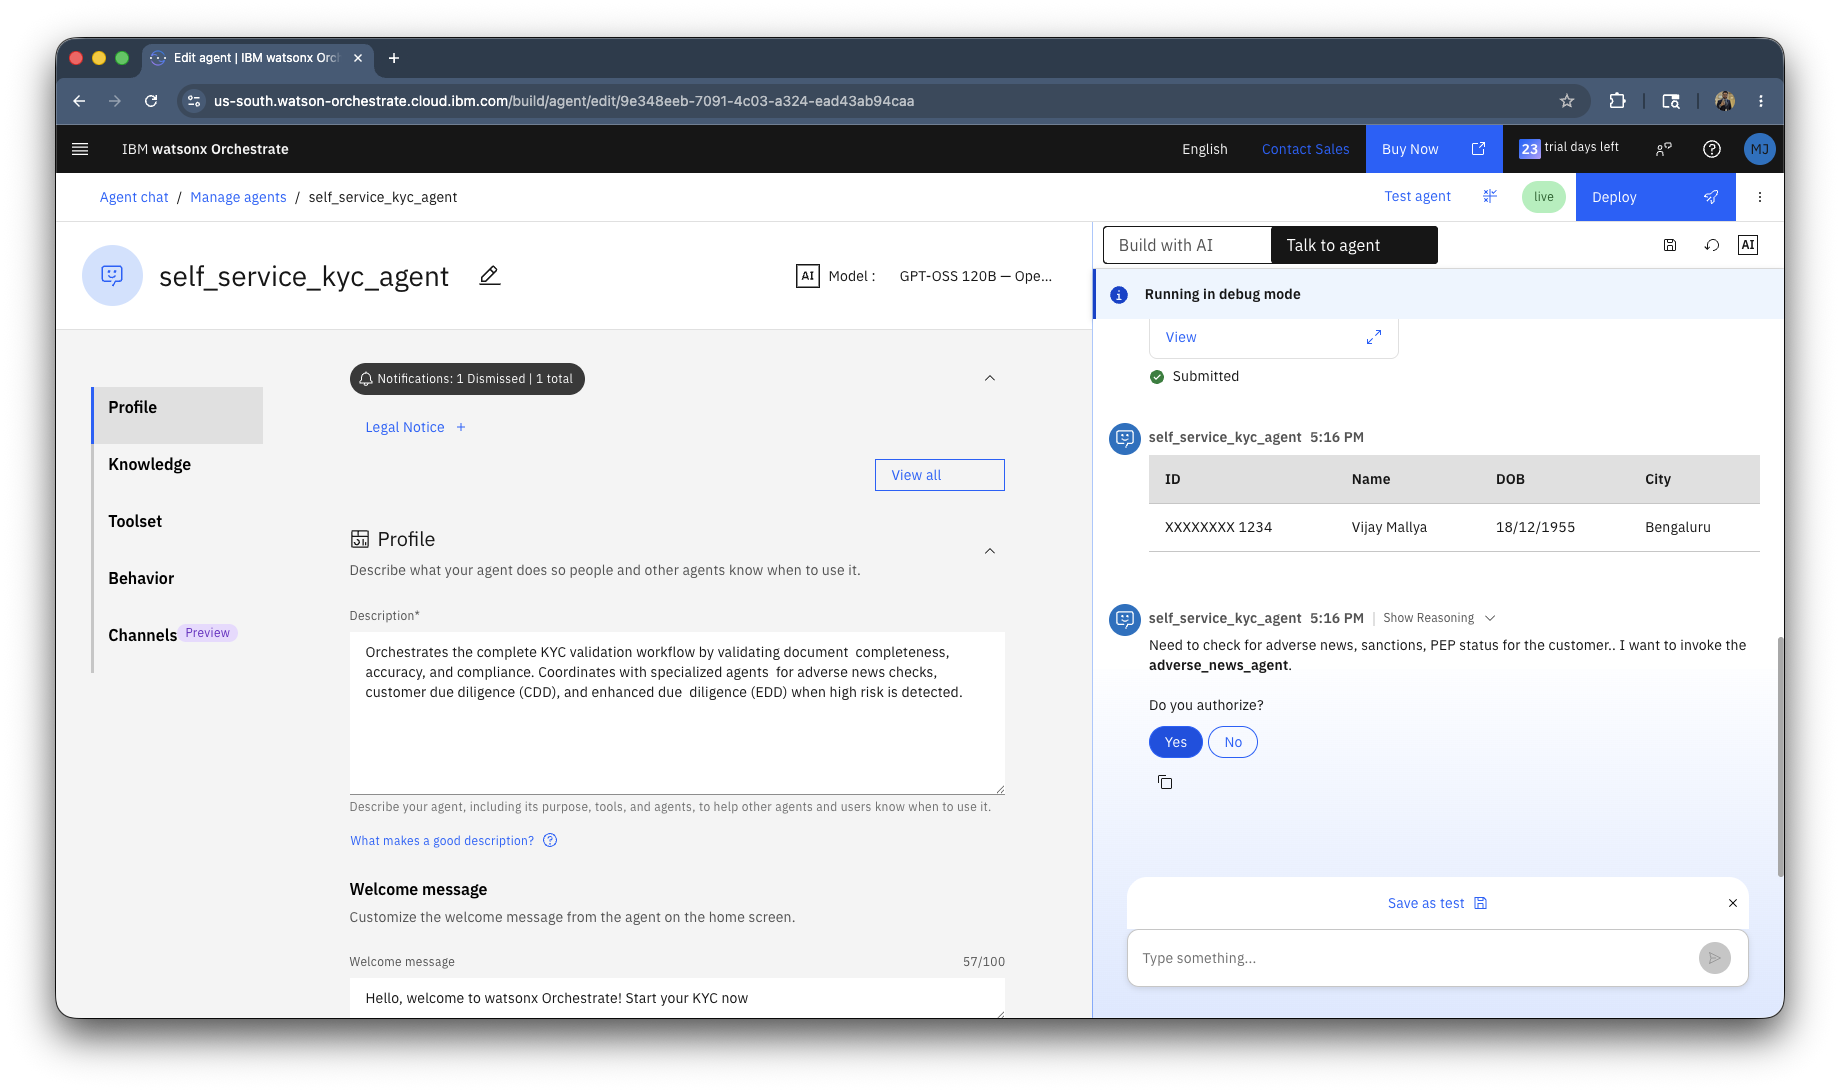
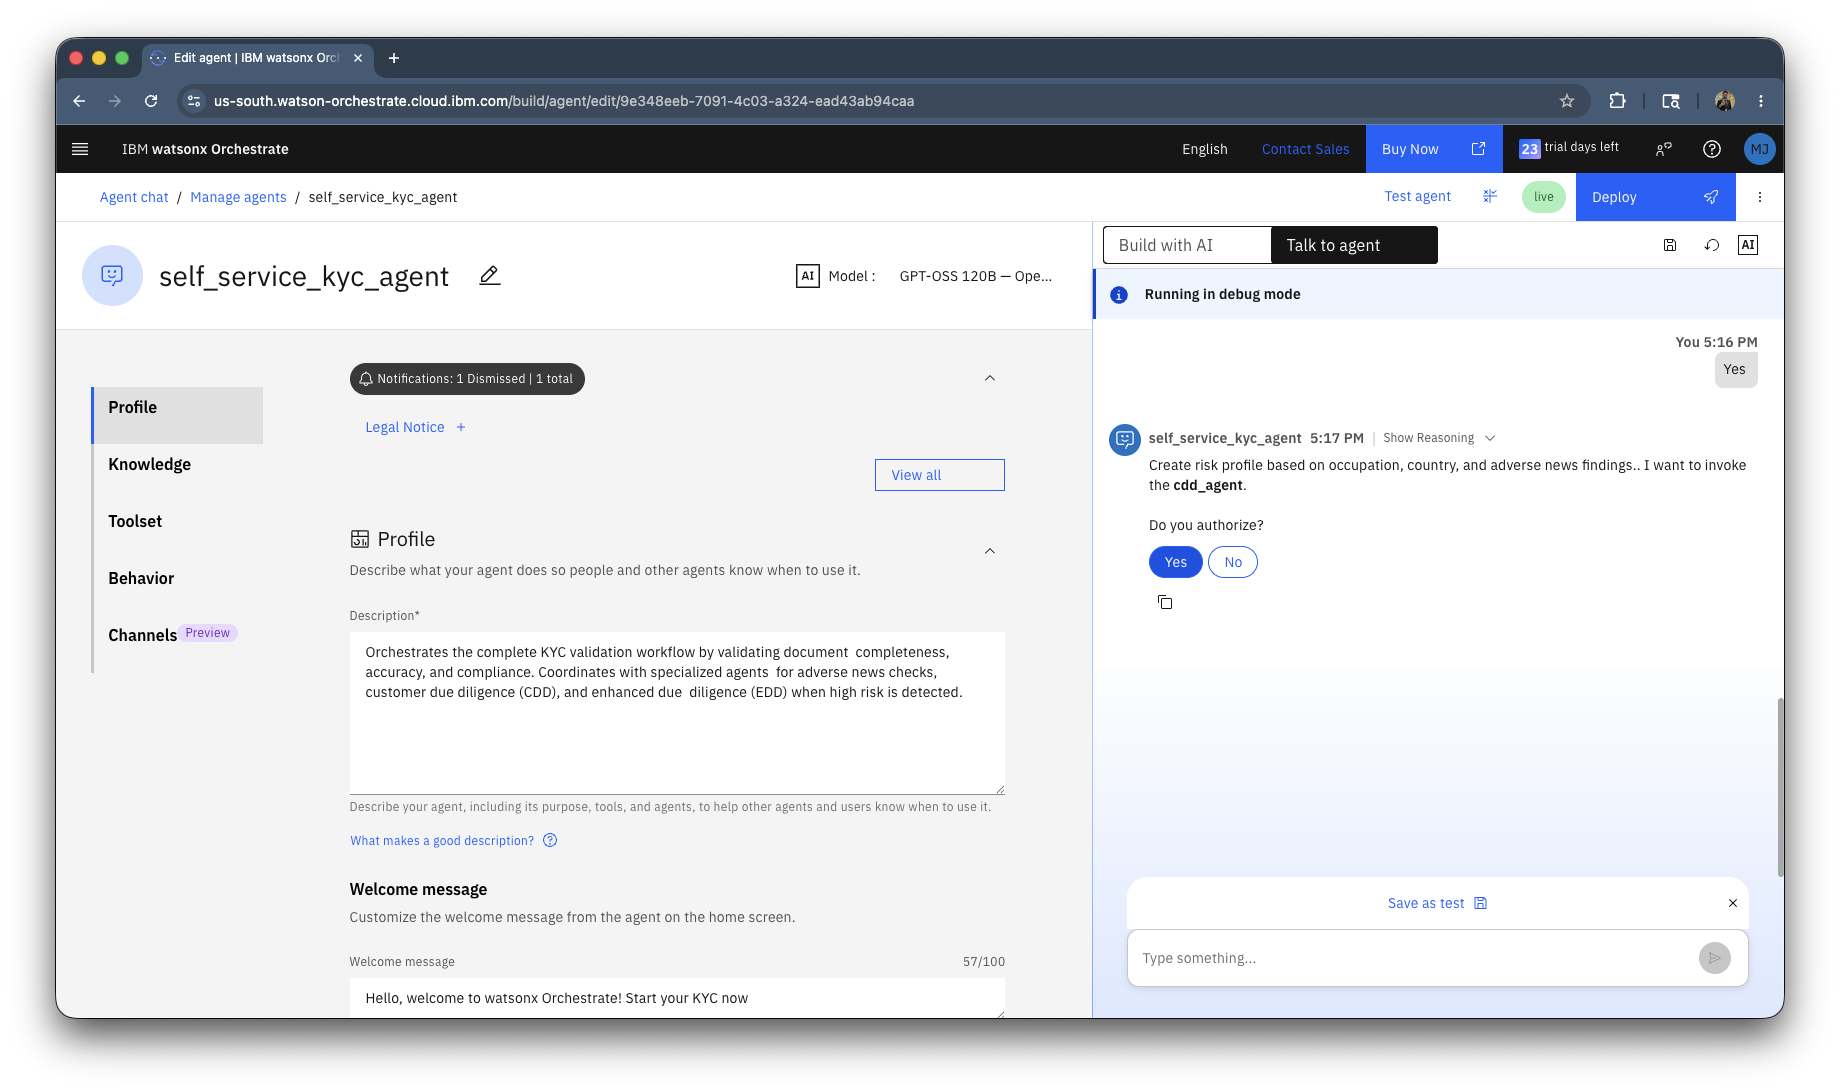
- The workflow will extract the PII information and present in the table. Furthermore, the HITL will ask confirmation at each step when the agent requires collaboration with another agent or tool. Click on Yes when prompted.
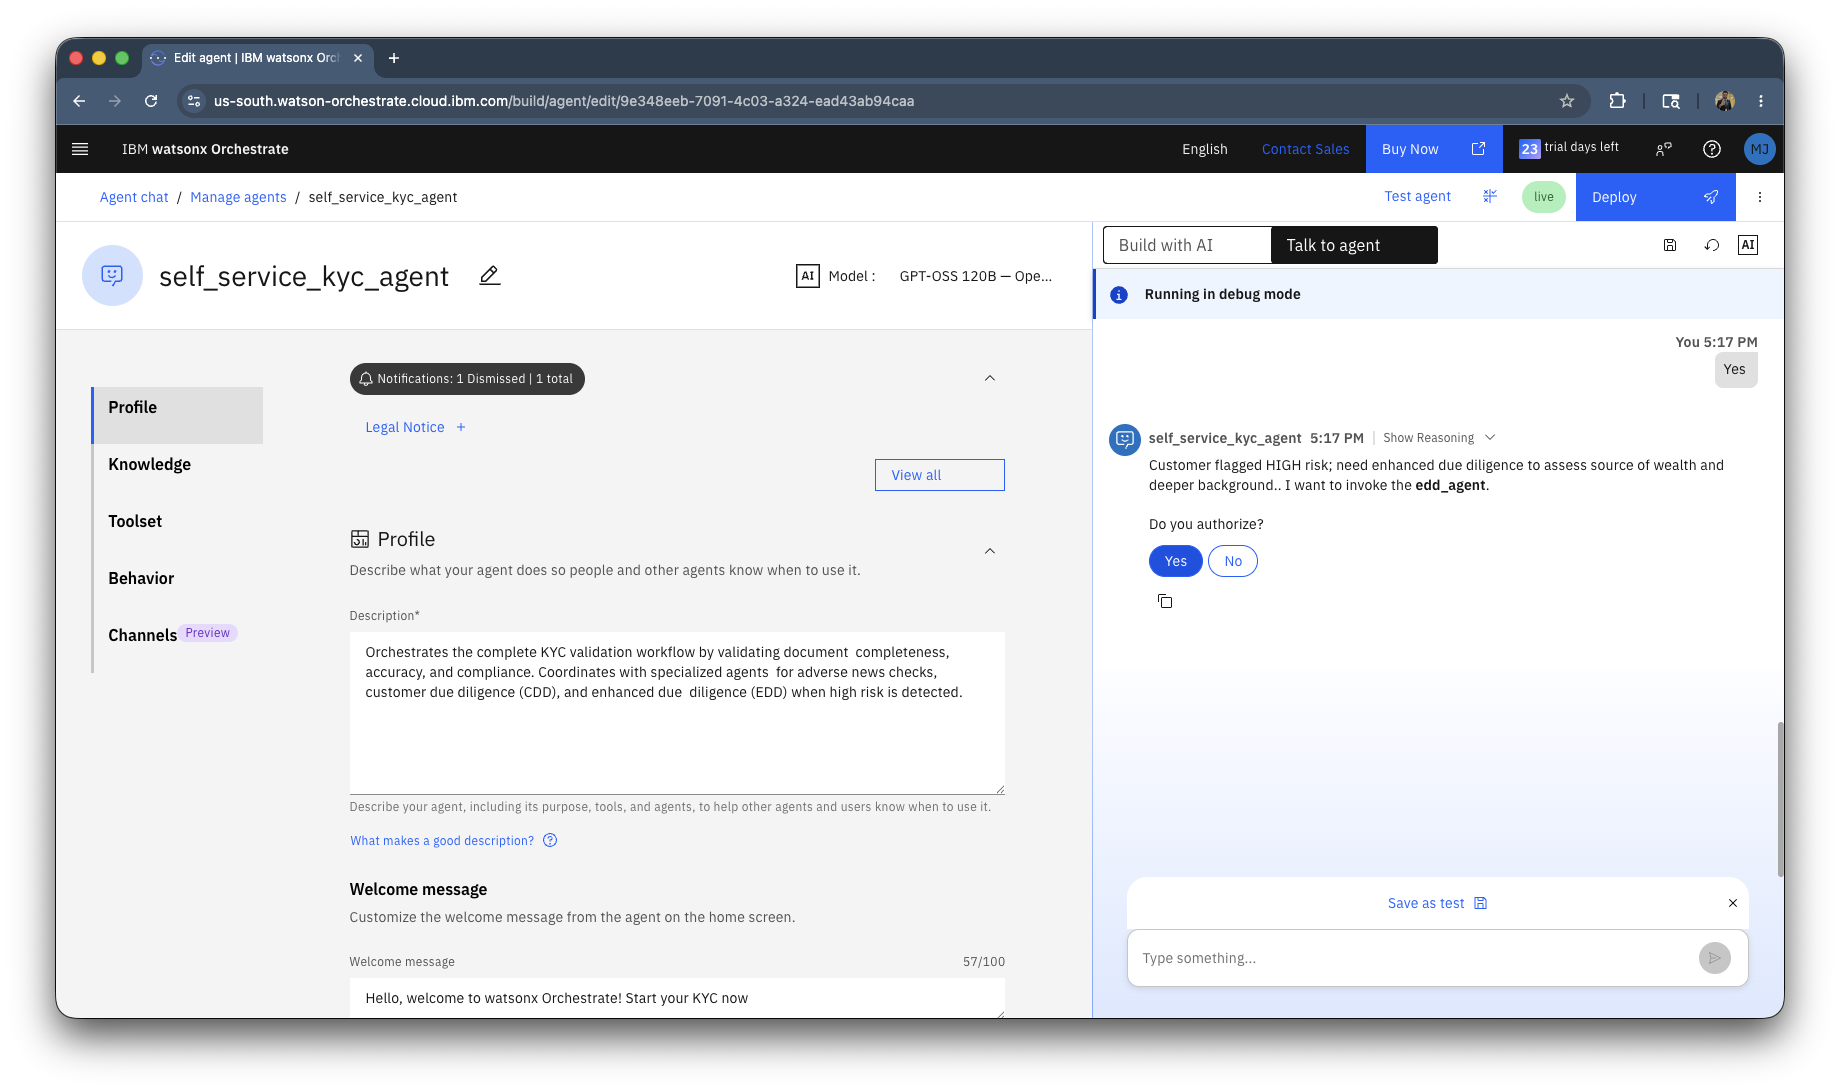
- The final response will contain the risk profiles of the person along with the PII details and a conclusion section.
Conclusion
👏 Congratulations on completing the lab! 🎉