Lab guide for IT Service Manager
Overview
In this lab, you will configure and deploy a pre-built IT Service Manager agent that integrates with ServiceNow to handle incident management, ticket creation, task assignment, and knowledge base access. This agent enables employees to interact with IT services through natural language, streamlining support operations and improving response times.
Pre-requisites
Make sure you've already setup the environment:
- Lab Environment setup
- Access to watsonx Orchestrate
- ServiceNow instance with ITSM module enabled
- ServiceNow credentials with appropriate permissions
- Basic understanding of ITSM concepts
Reference Architecture
The IT Service Manager follows an integrated architecture:
- User Interface Layer: Chat interface where employees submit IT requests and check ticket status
- Agent Layer: watsonx Orchestrate agent that processes requests and orchestrates ServiceNow operations
- Integration Layer: ServiceNow REST API connections for ITSM operations
- ServiceNow Platform: Backend ITSM system managing incidents, tasks, and knowledge base
Key Components:
- IT Service Manager Agent: Pre-built agent from watsonx Orchestrate catalog
- ServiceNow Connector: Authenticated connection to ServiceNow instance
- ServiceNow Tools: Create, update, retrieve, and close incidents
ServiceNow OAuth 2.0 Setup Guide
Quick Reference — All Fields
| Field | Value |
|---|---|
| Base URL / Server URL | https://<your-instance>.service-now.com |
| Authorization URL | https://<your-instance>.service-now.com/oauth_auth.do |
| Token URL | https://<your-instance>.service-now.com/oauth_token.do |
| Client ID | From ServiceNow Application Registry |
| Client Secret | From ServiceNow Application Registry |
| Scopes | useraccount |
| Callback URL | https://{{region}}.watson-orchestrate.cloud.ibm.com/mfe_connectors/api/v1/agentic/oauth/_callback |
Steps
-
Log in to Your ServiceNow Instance
Instance URL https://<your-instance>.service-now.comLogin with Your ServiceNow admin credentials Note: You need admin privileges to create OAuth application registry entries.
-
Navigate to Machine Identity Console
Go to All → Machine Identity Console (or search in navigator) Click Inbound Integrations tab Click 'New Integration' button (top right) Note: Alternatively, search for 'Application Registry' in the navigator for the classic view.
-
Select Connection Type
Select OAuth - Authorization code grantDescription Used for interactive user authorization to obtain consent for accessing the application with user context Do NOT select Client credentials grant (machine-to-machine, no user context) Note: Authorization code grant is required because watsonx Orchestrate connects on behalf of a user (3-legged OAuth).
-
Fill in the New Record Form
Name watsonx Orchestrate(or any descriptive name)Redirect URL https://{{region}}.watson-orchestrate.cloud.ibm.com/mfe_connectors/api/v1/agentic/oauth/_callbackActive Checked (true) This is a public client Leave unchecked Note: The Redirect URL must be exact. This is the watsonx Orchestrate callback URL that ServiceNow will redirect to after user authorization.
-
Configure Auth Scope
Scroll to Auth scope section Scope to use useraccountDescription Grants access to all resources available to the signed-in user Click 'Save' to create the record Note: The
useraccountscope is the standard scope for ServiceNow OAuth integrations. Use with caution as it grants broad access. -
Copy Client ID & Client Secret
After saving, find Client ID field — auto-generated Your Client ID Copy from the Application Registry record Client Secret Click the copy icon next to the masked secret field Store securely Keep the Client Secret safe — it cannot be retrieved again -
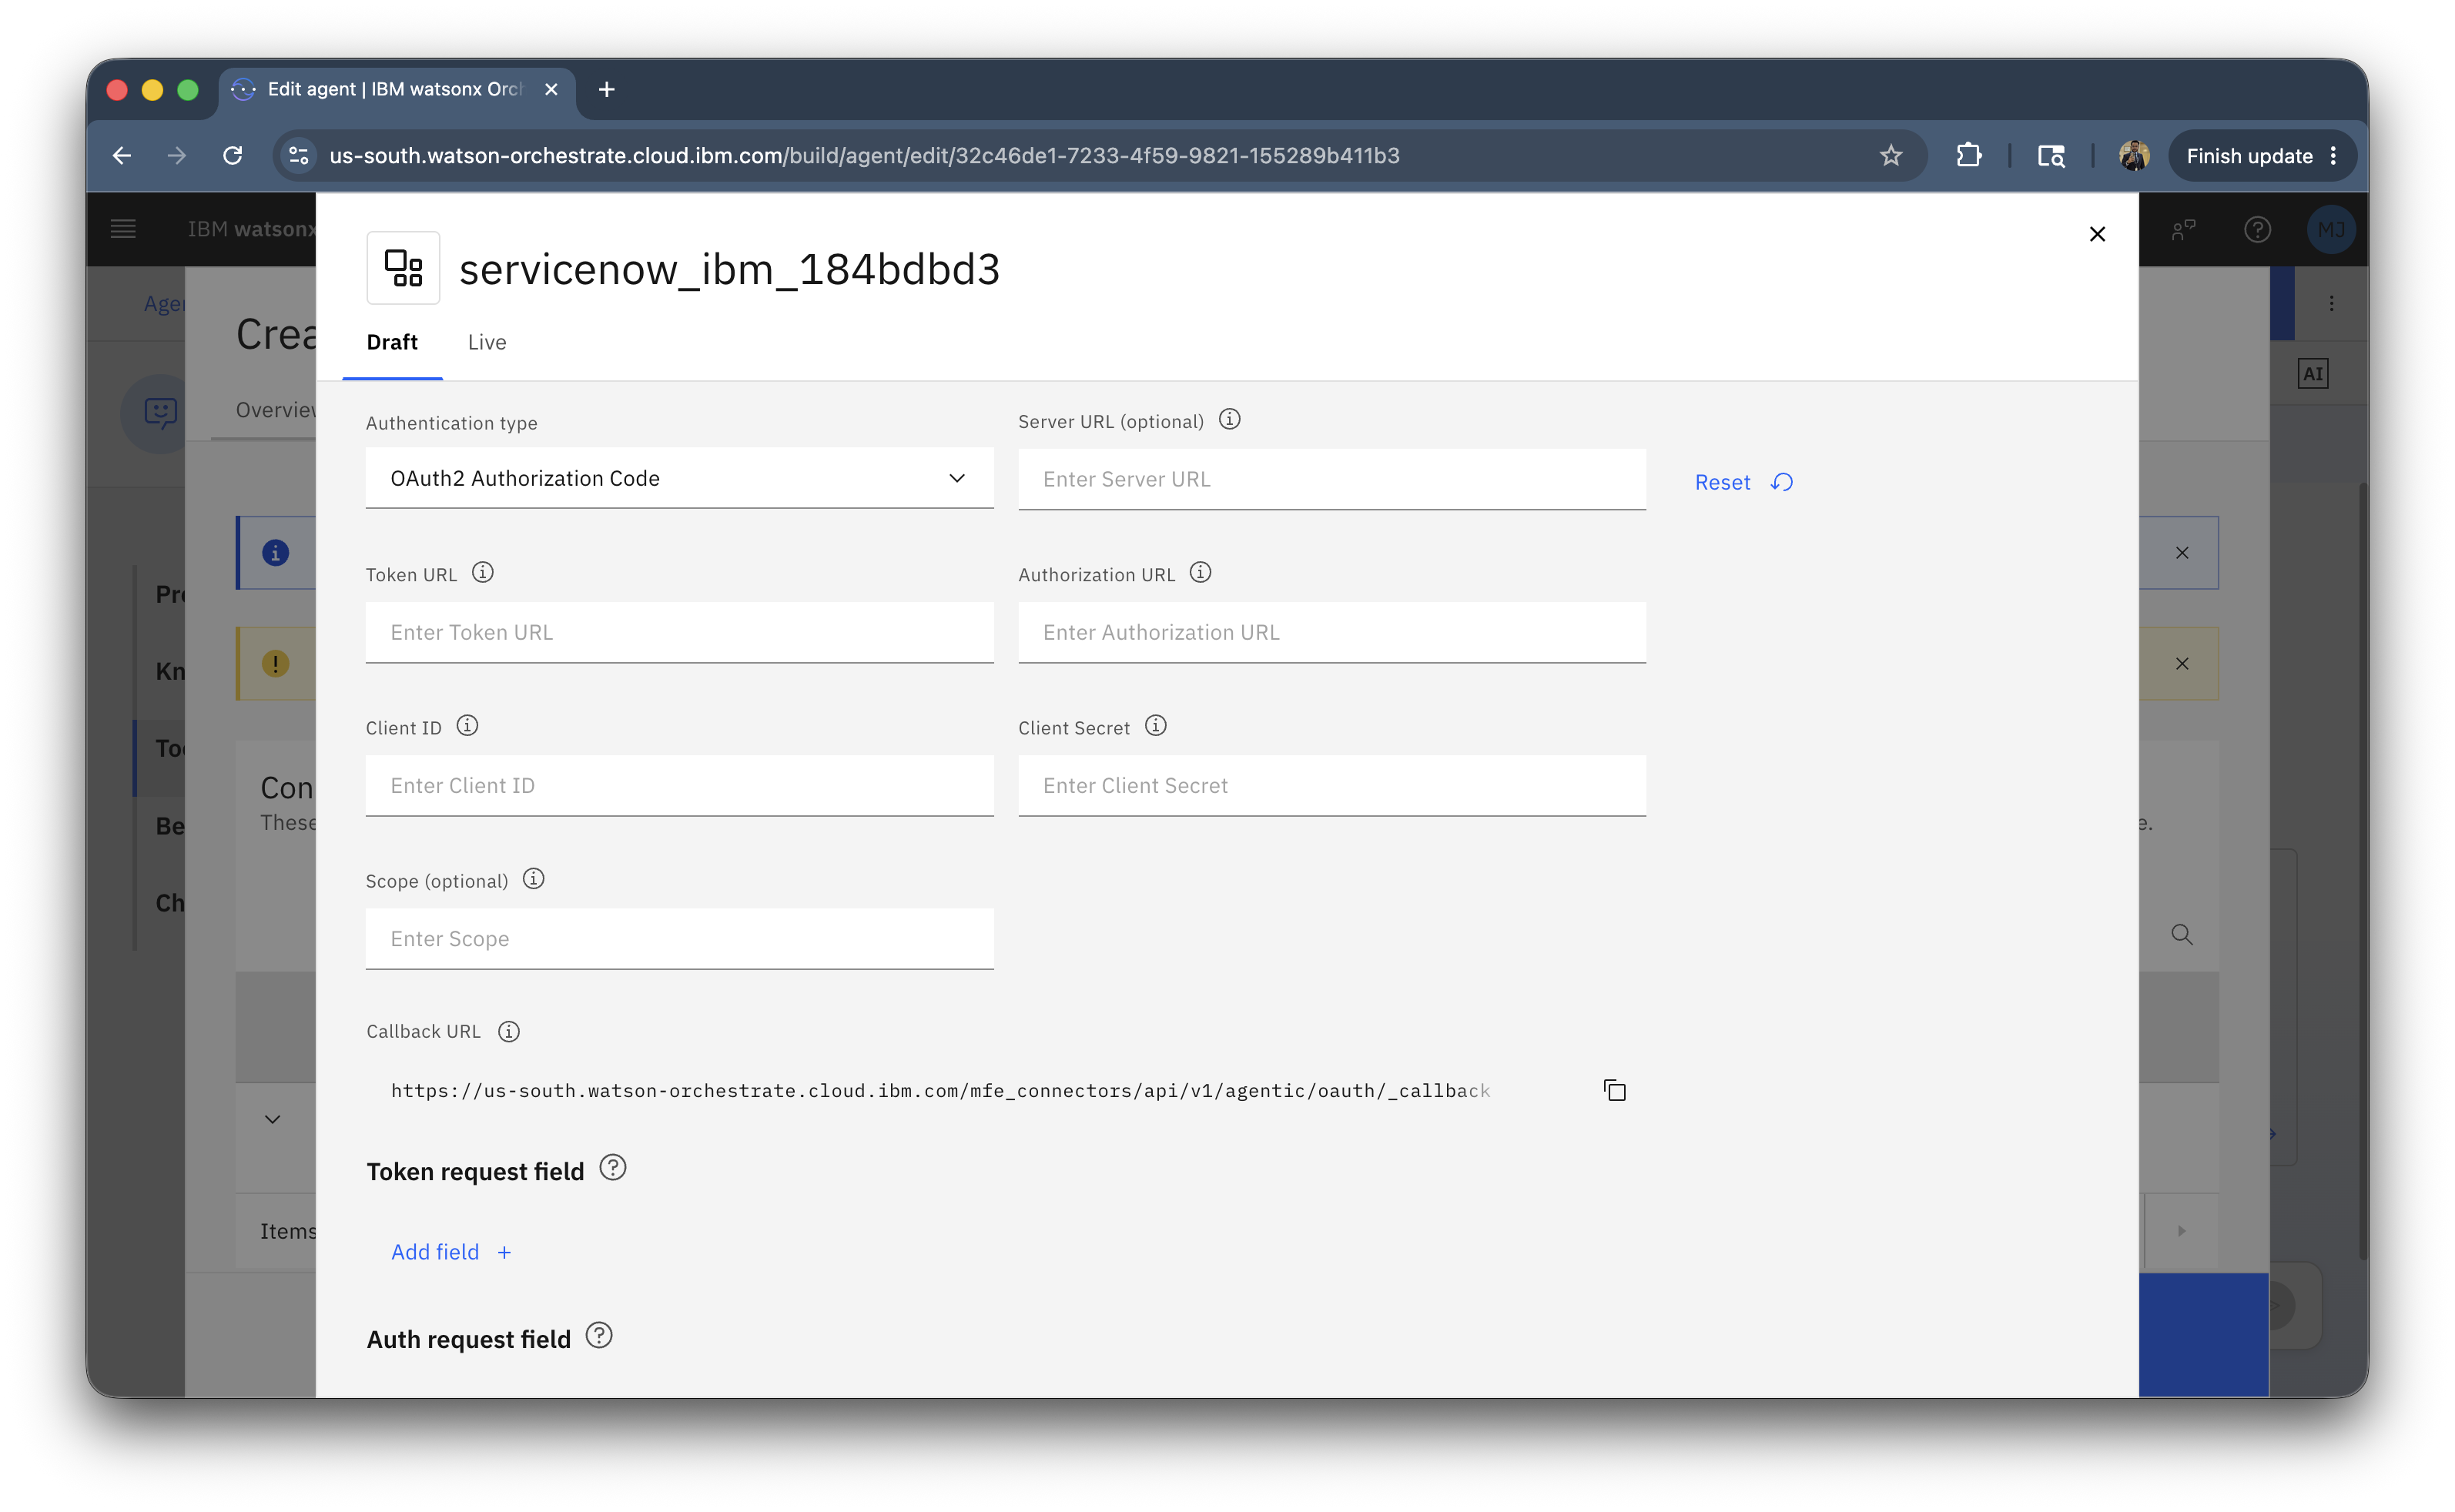
Now you should have the following fields
Field Value Base URL https://<your-instance>.service-now.comAuthorization URL https://<your-instance>.service-now.com/oauth_auth.doToken URL https://<your-instance>.service-now.com/oauth_token.doClient ID (copied from Step 6) Client Secret (copied from Step 6) Scopes useraccount
Build, Deploy and Monitor Asset Manager Agent in watsonx Orchestrate
Build
-
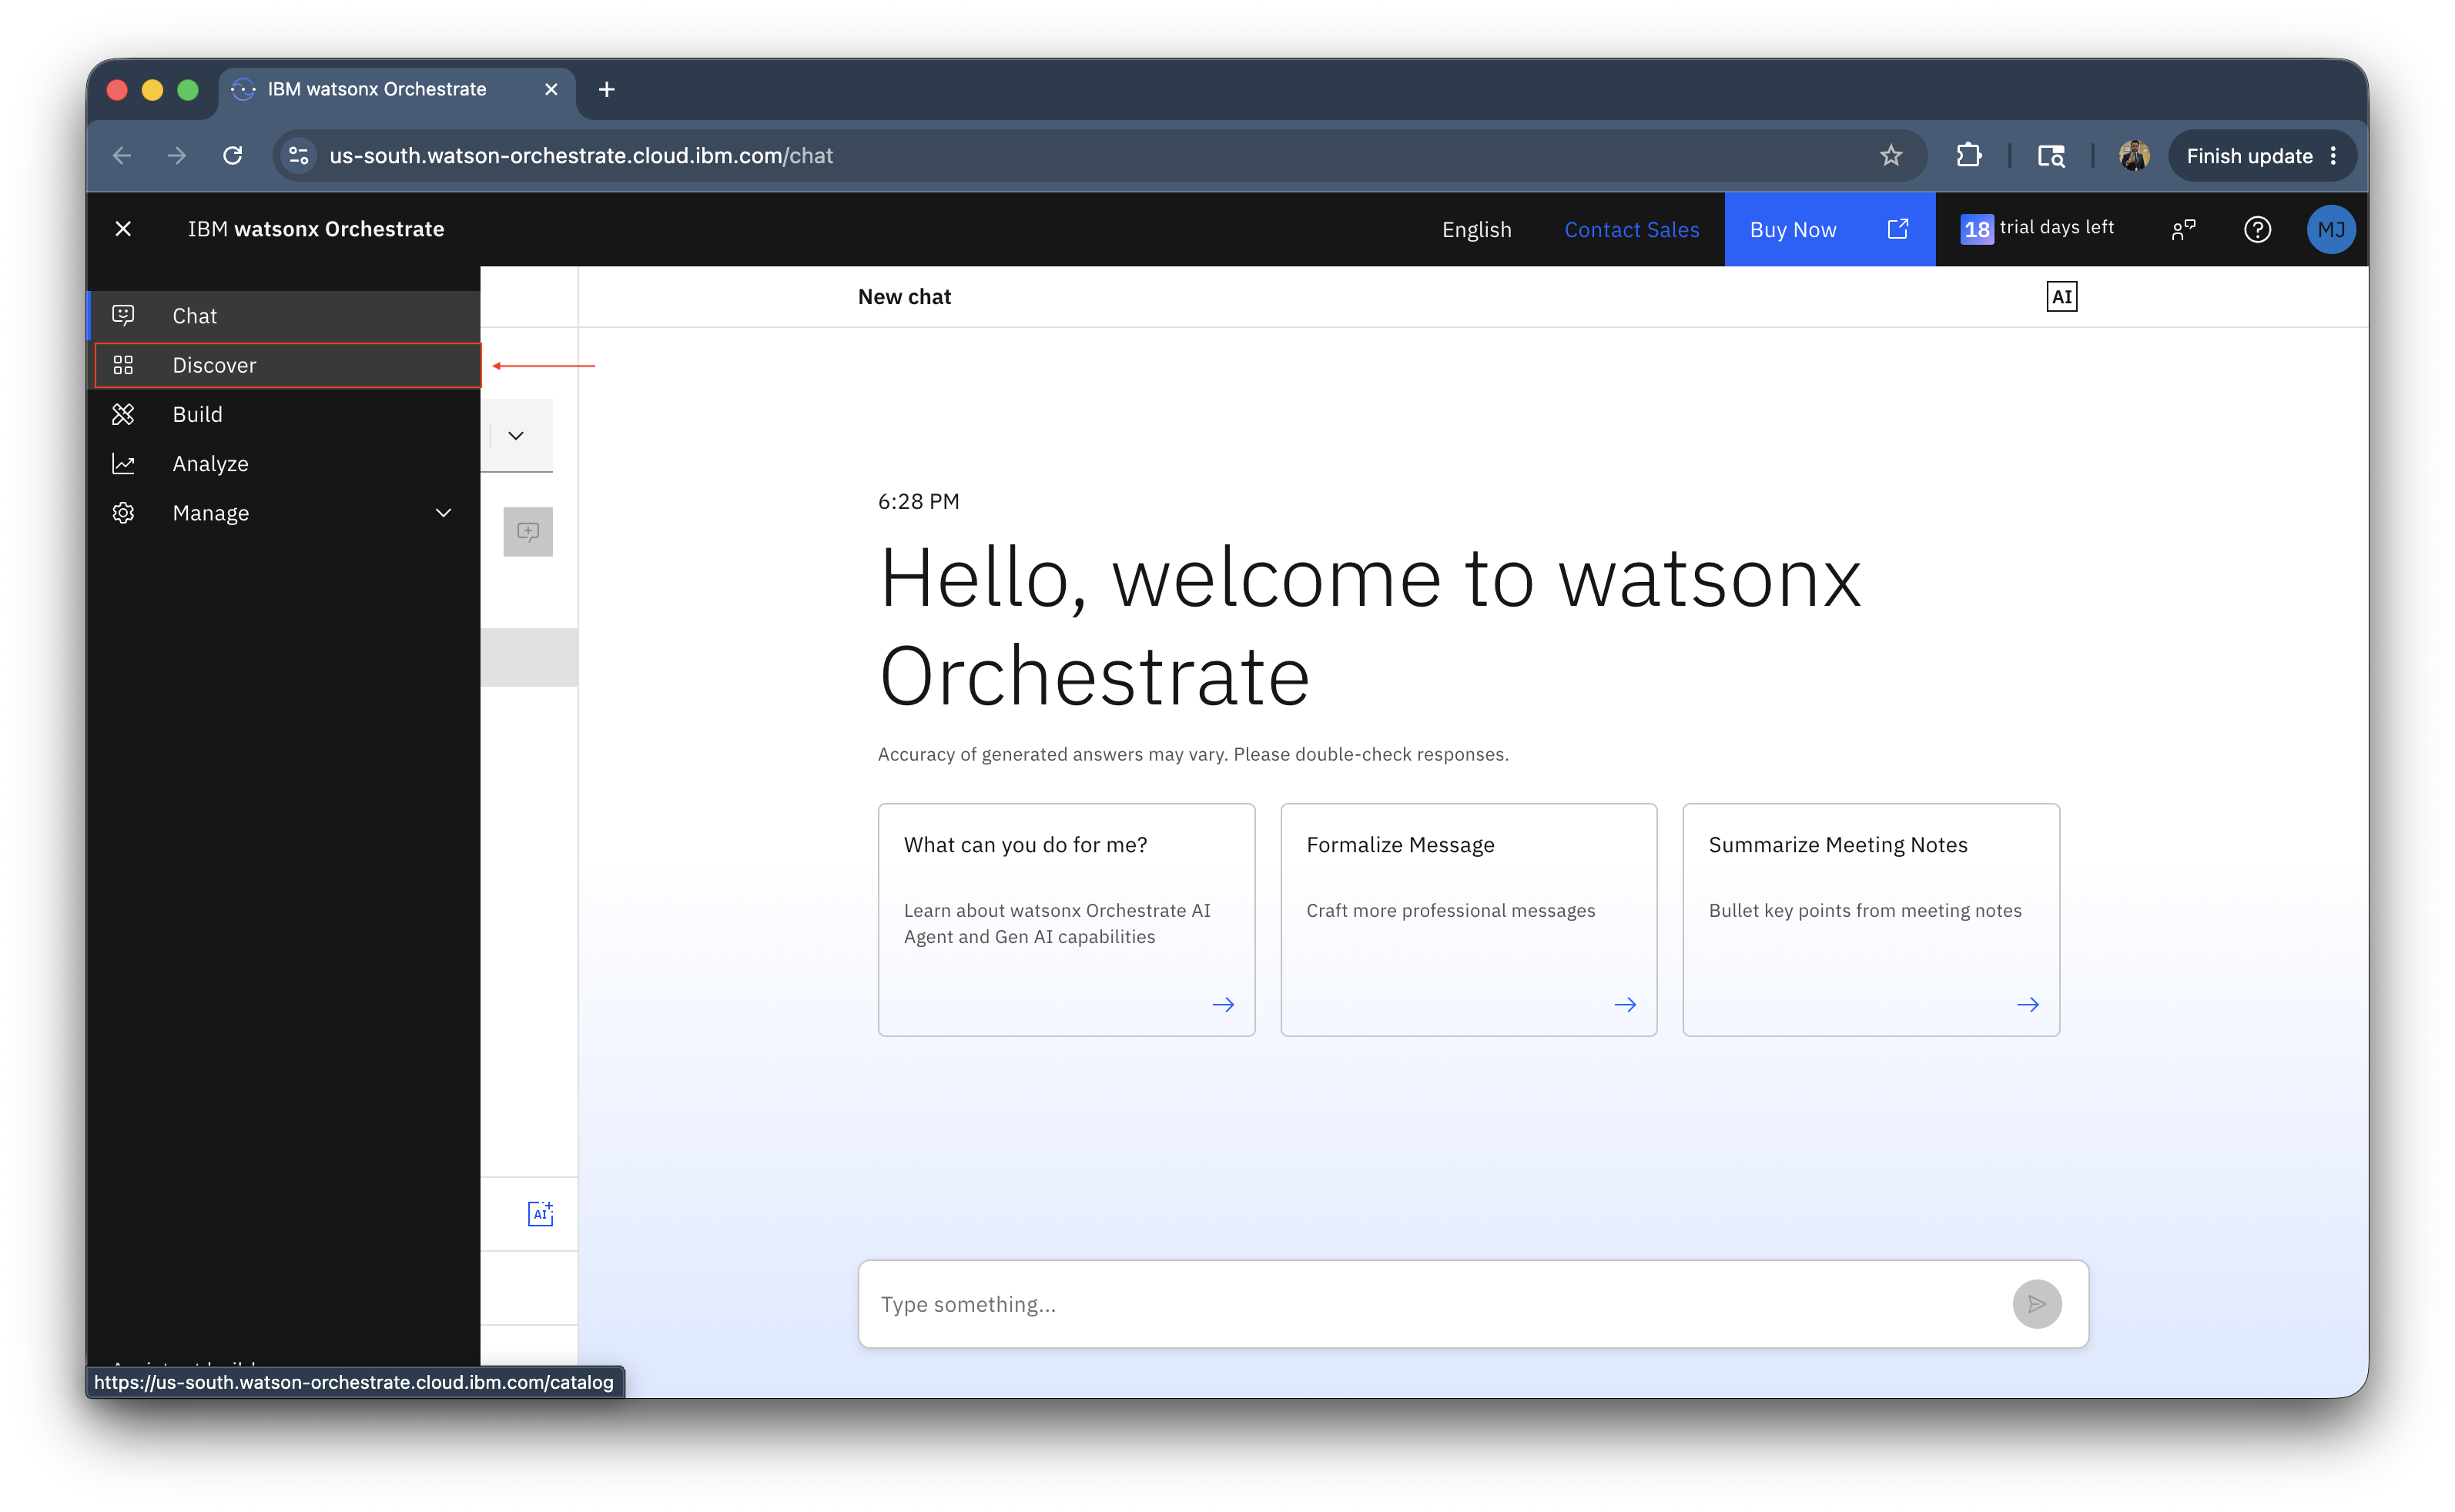
Click on the hamburger menu, and select Discover.
-
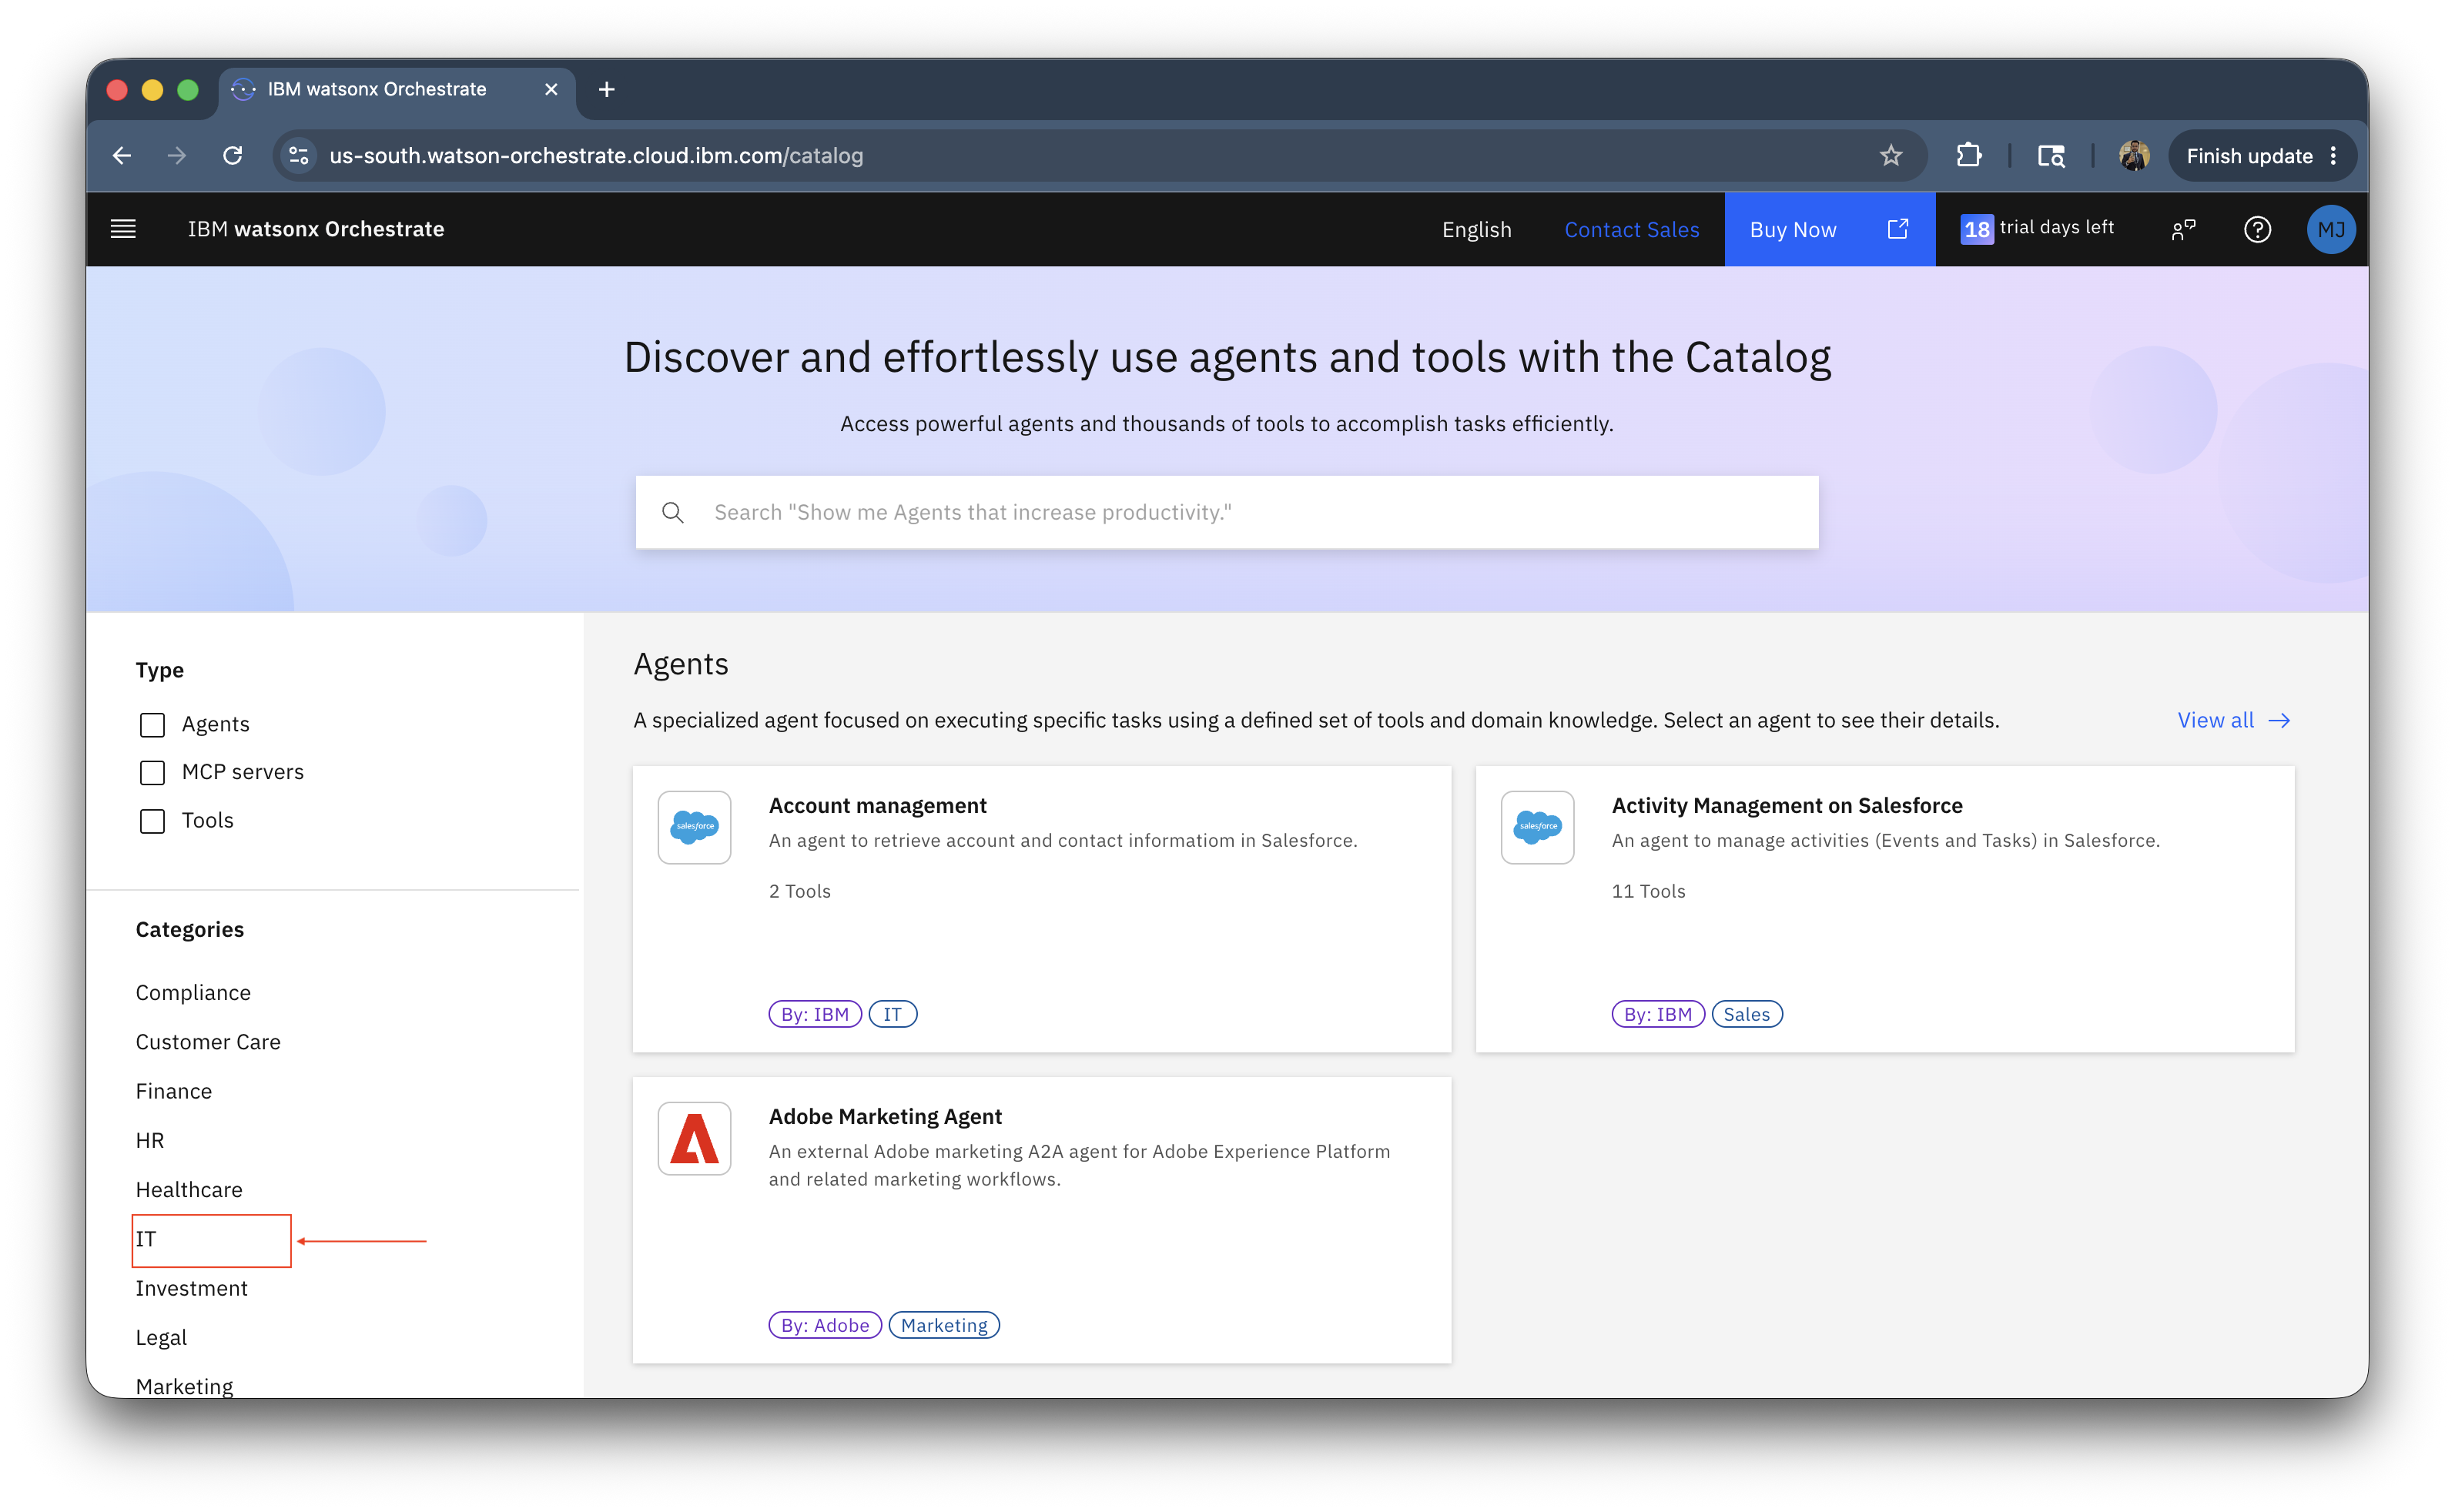
This is the agent and tools catalog where you can find pre-built agents and tools. There are over 300 pre-built agent and over 1130 pre-built tools. Also over 10 pre-built MCP servers. Under category, click on IT.
-
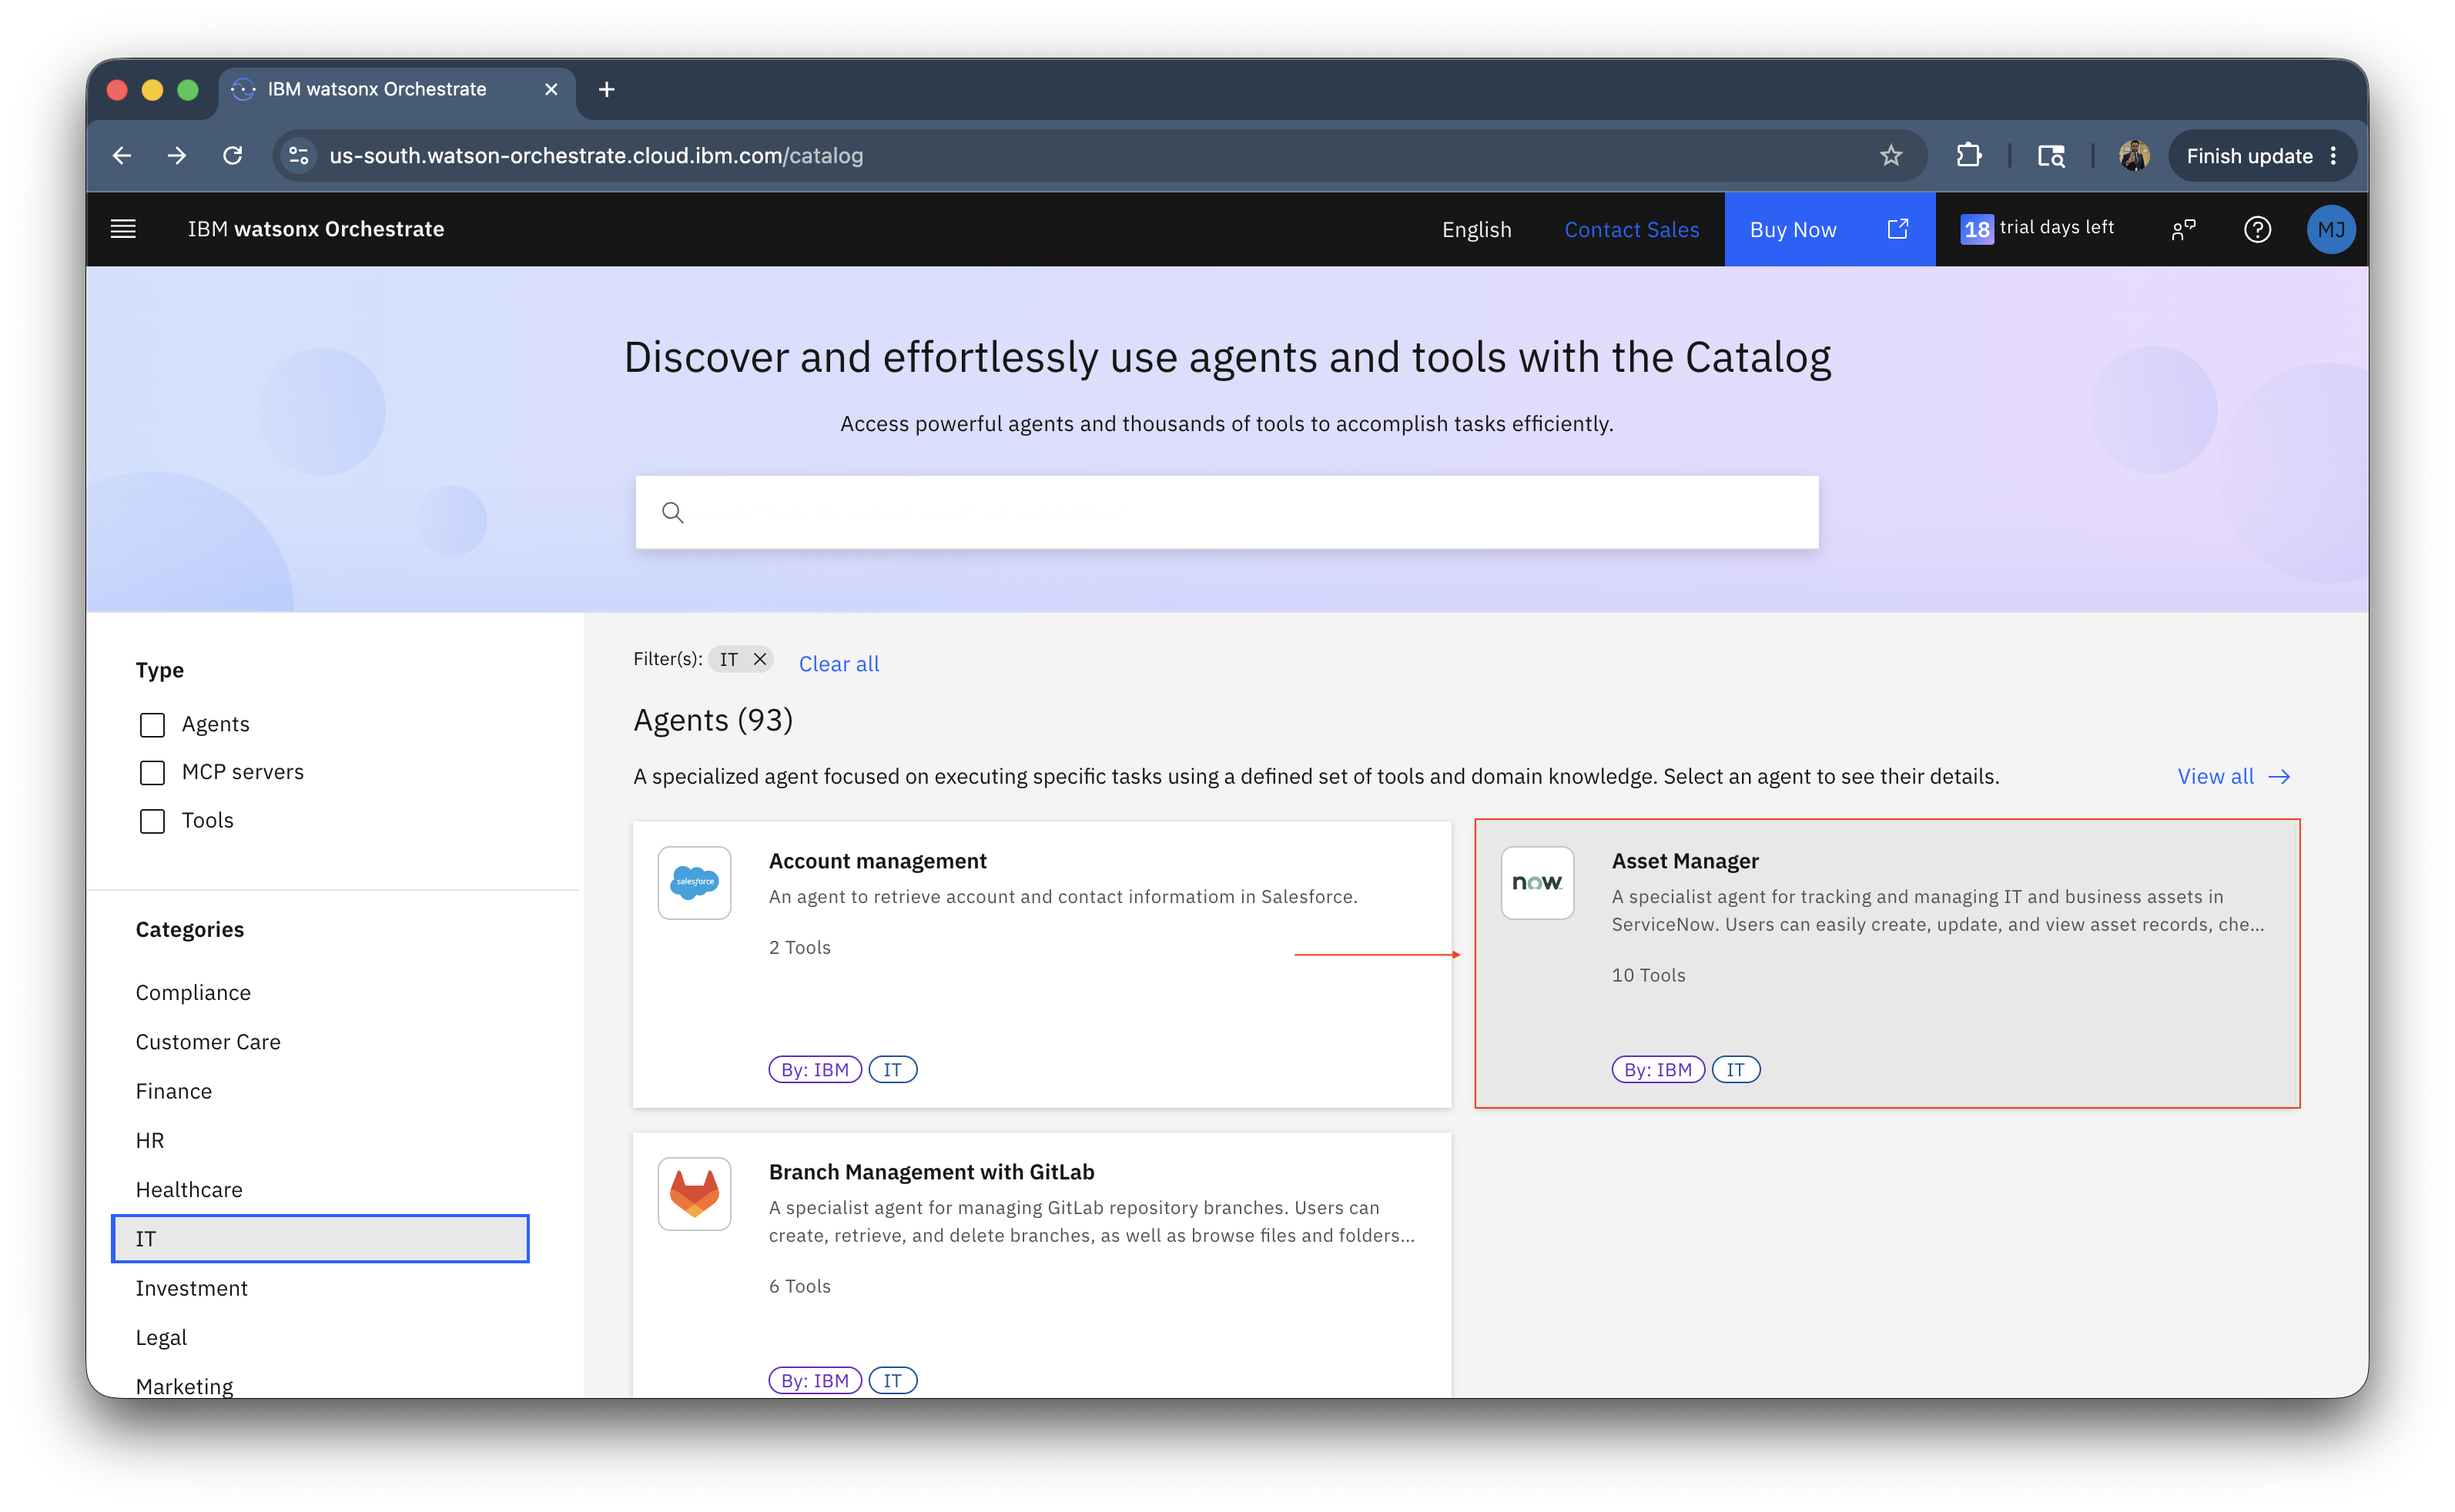
You will see the Asset Manager agent, we'll be using this pre-built agent. Click on it.
-
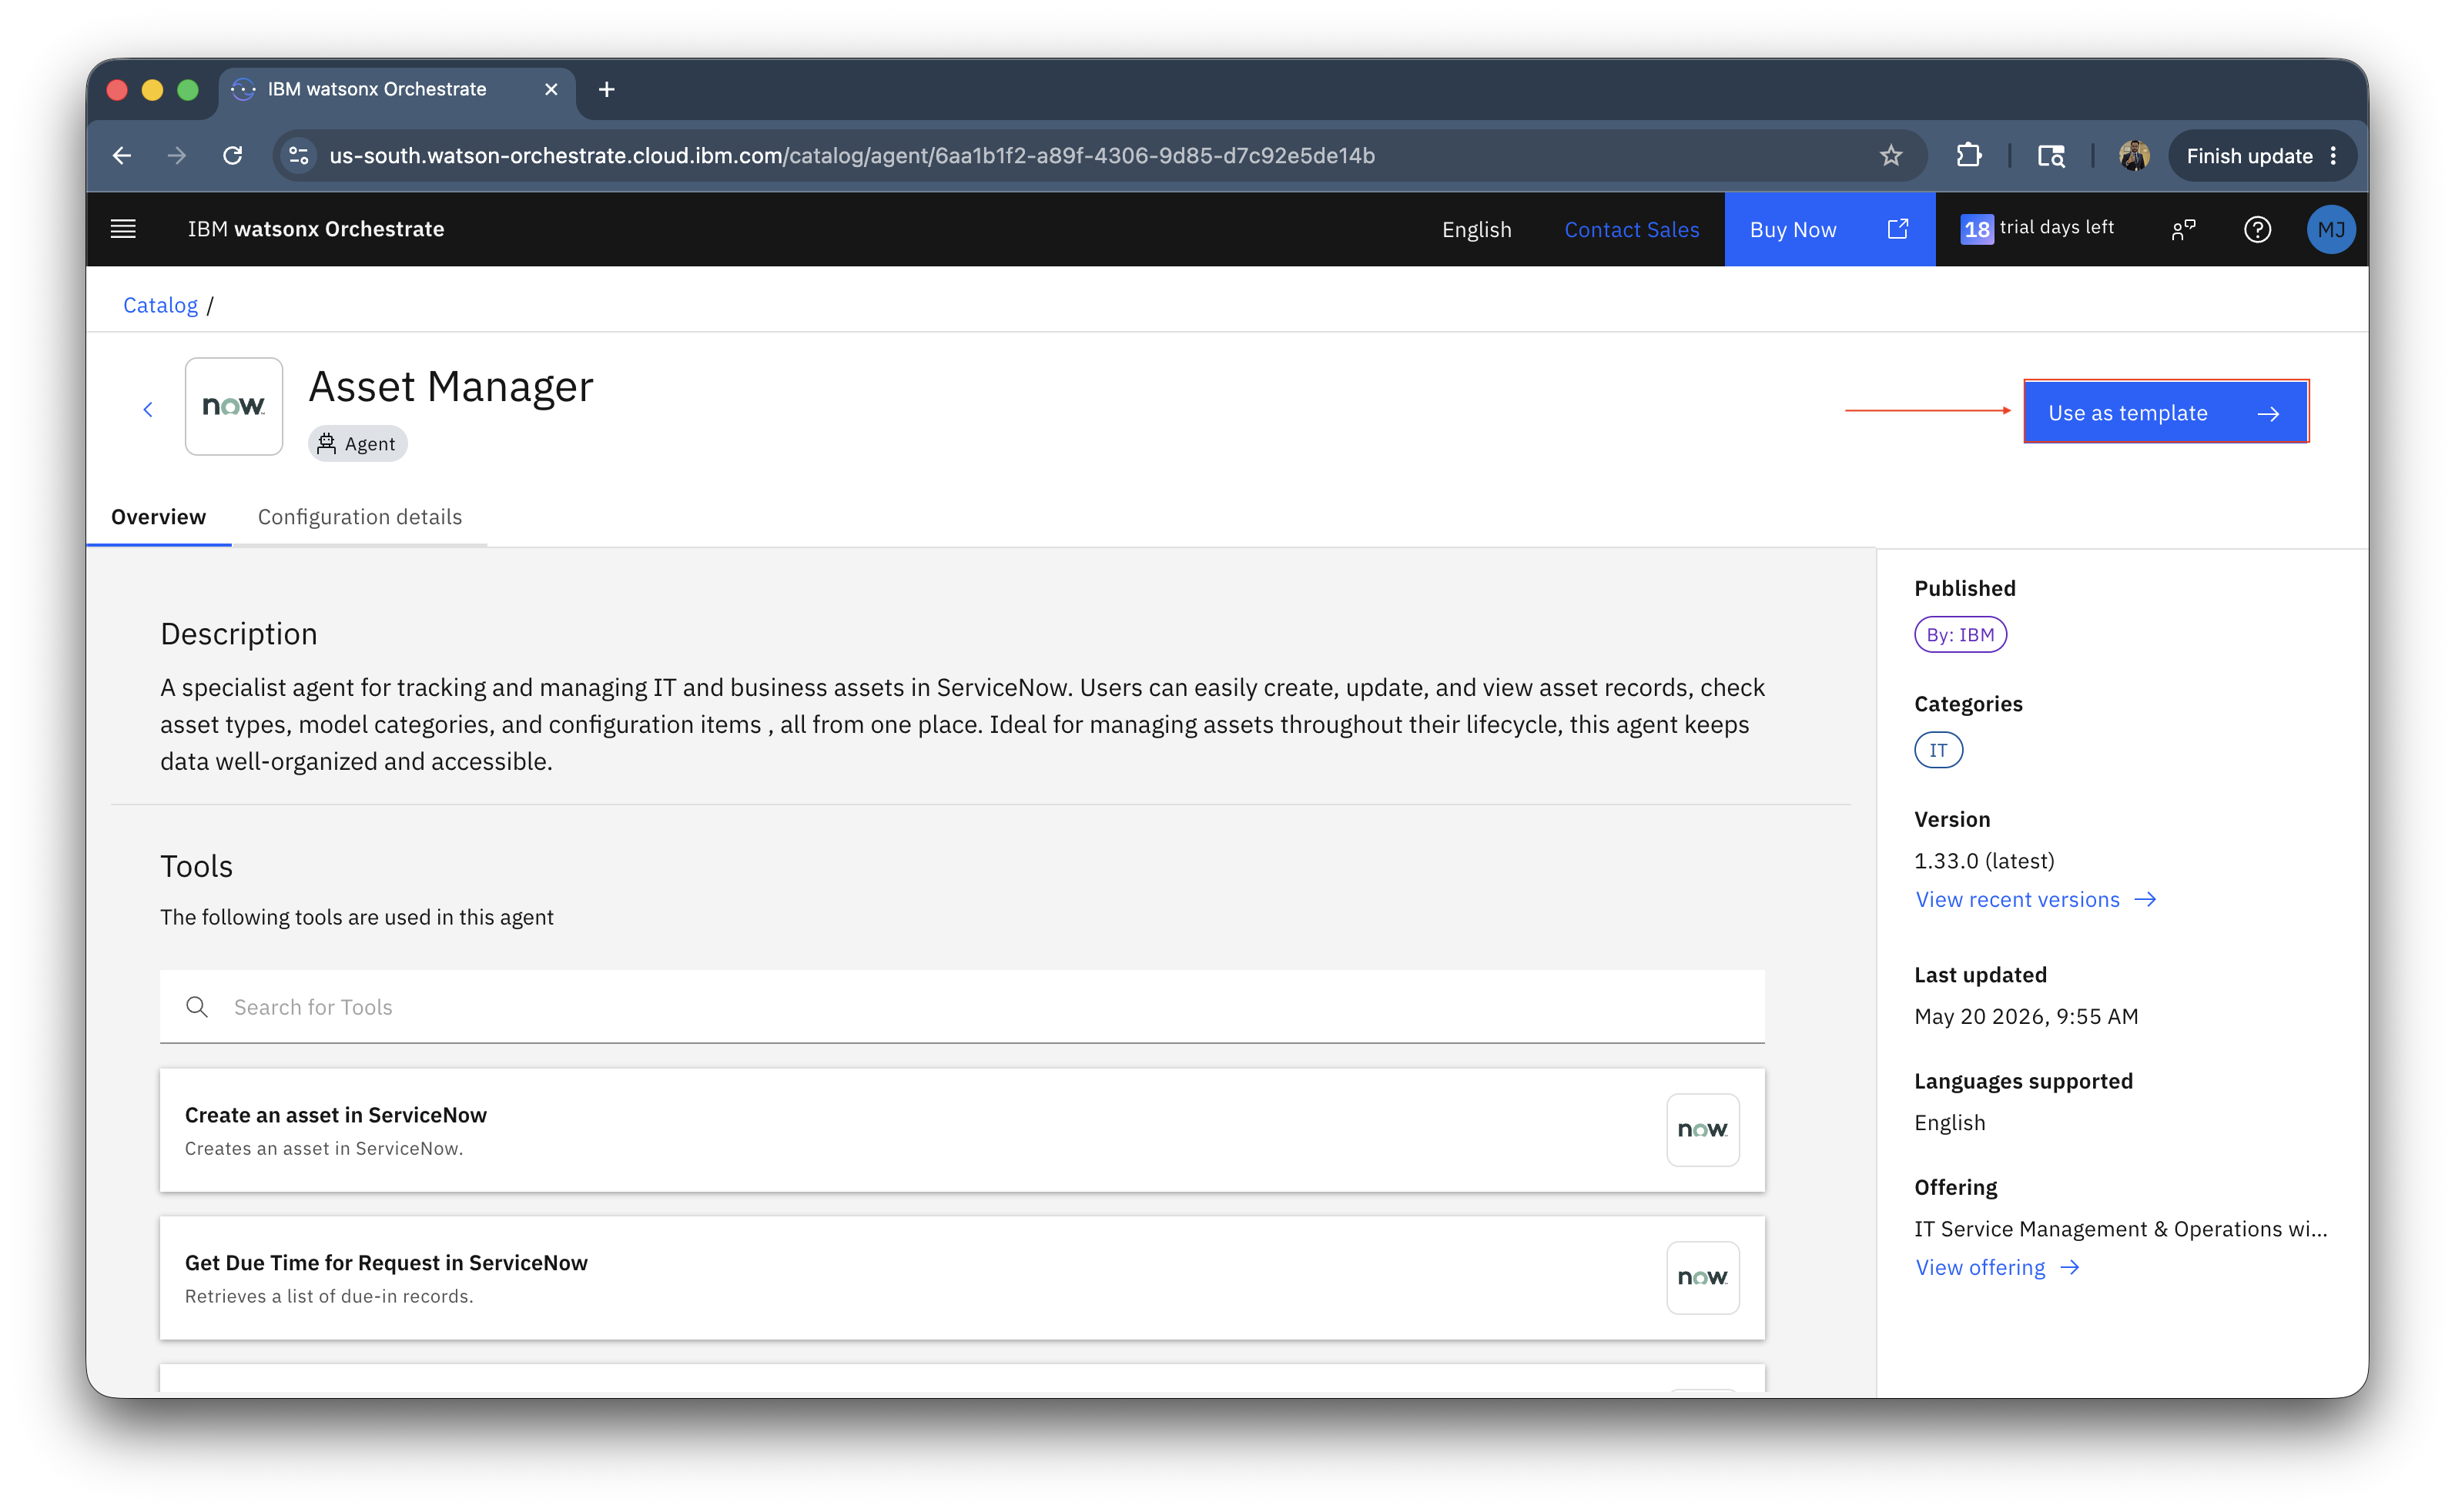
Review the Service Now tools being used for this agent and click on use as template.
-
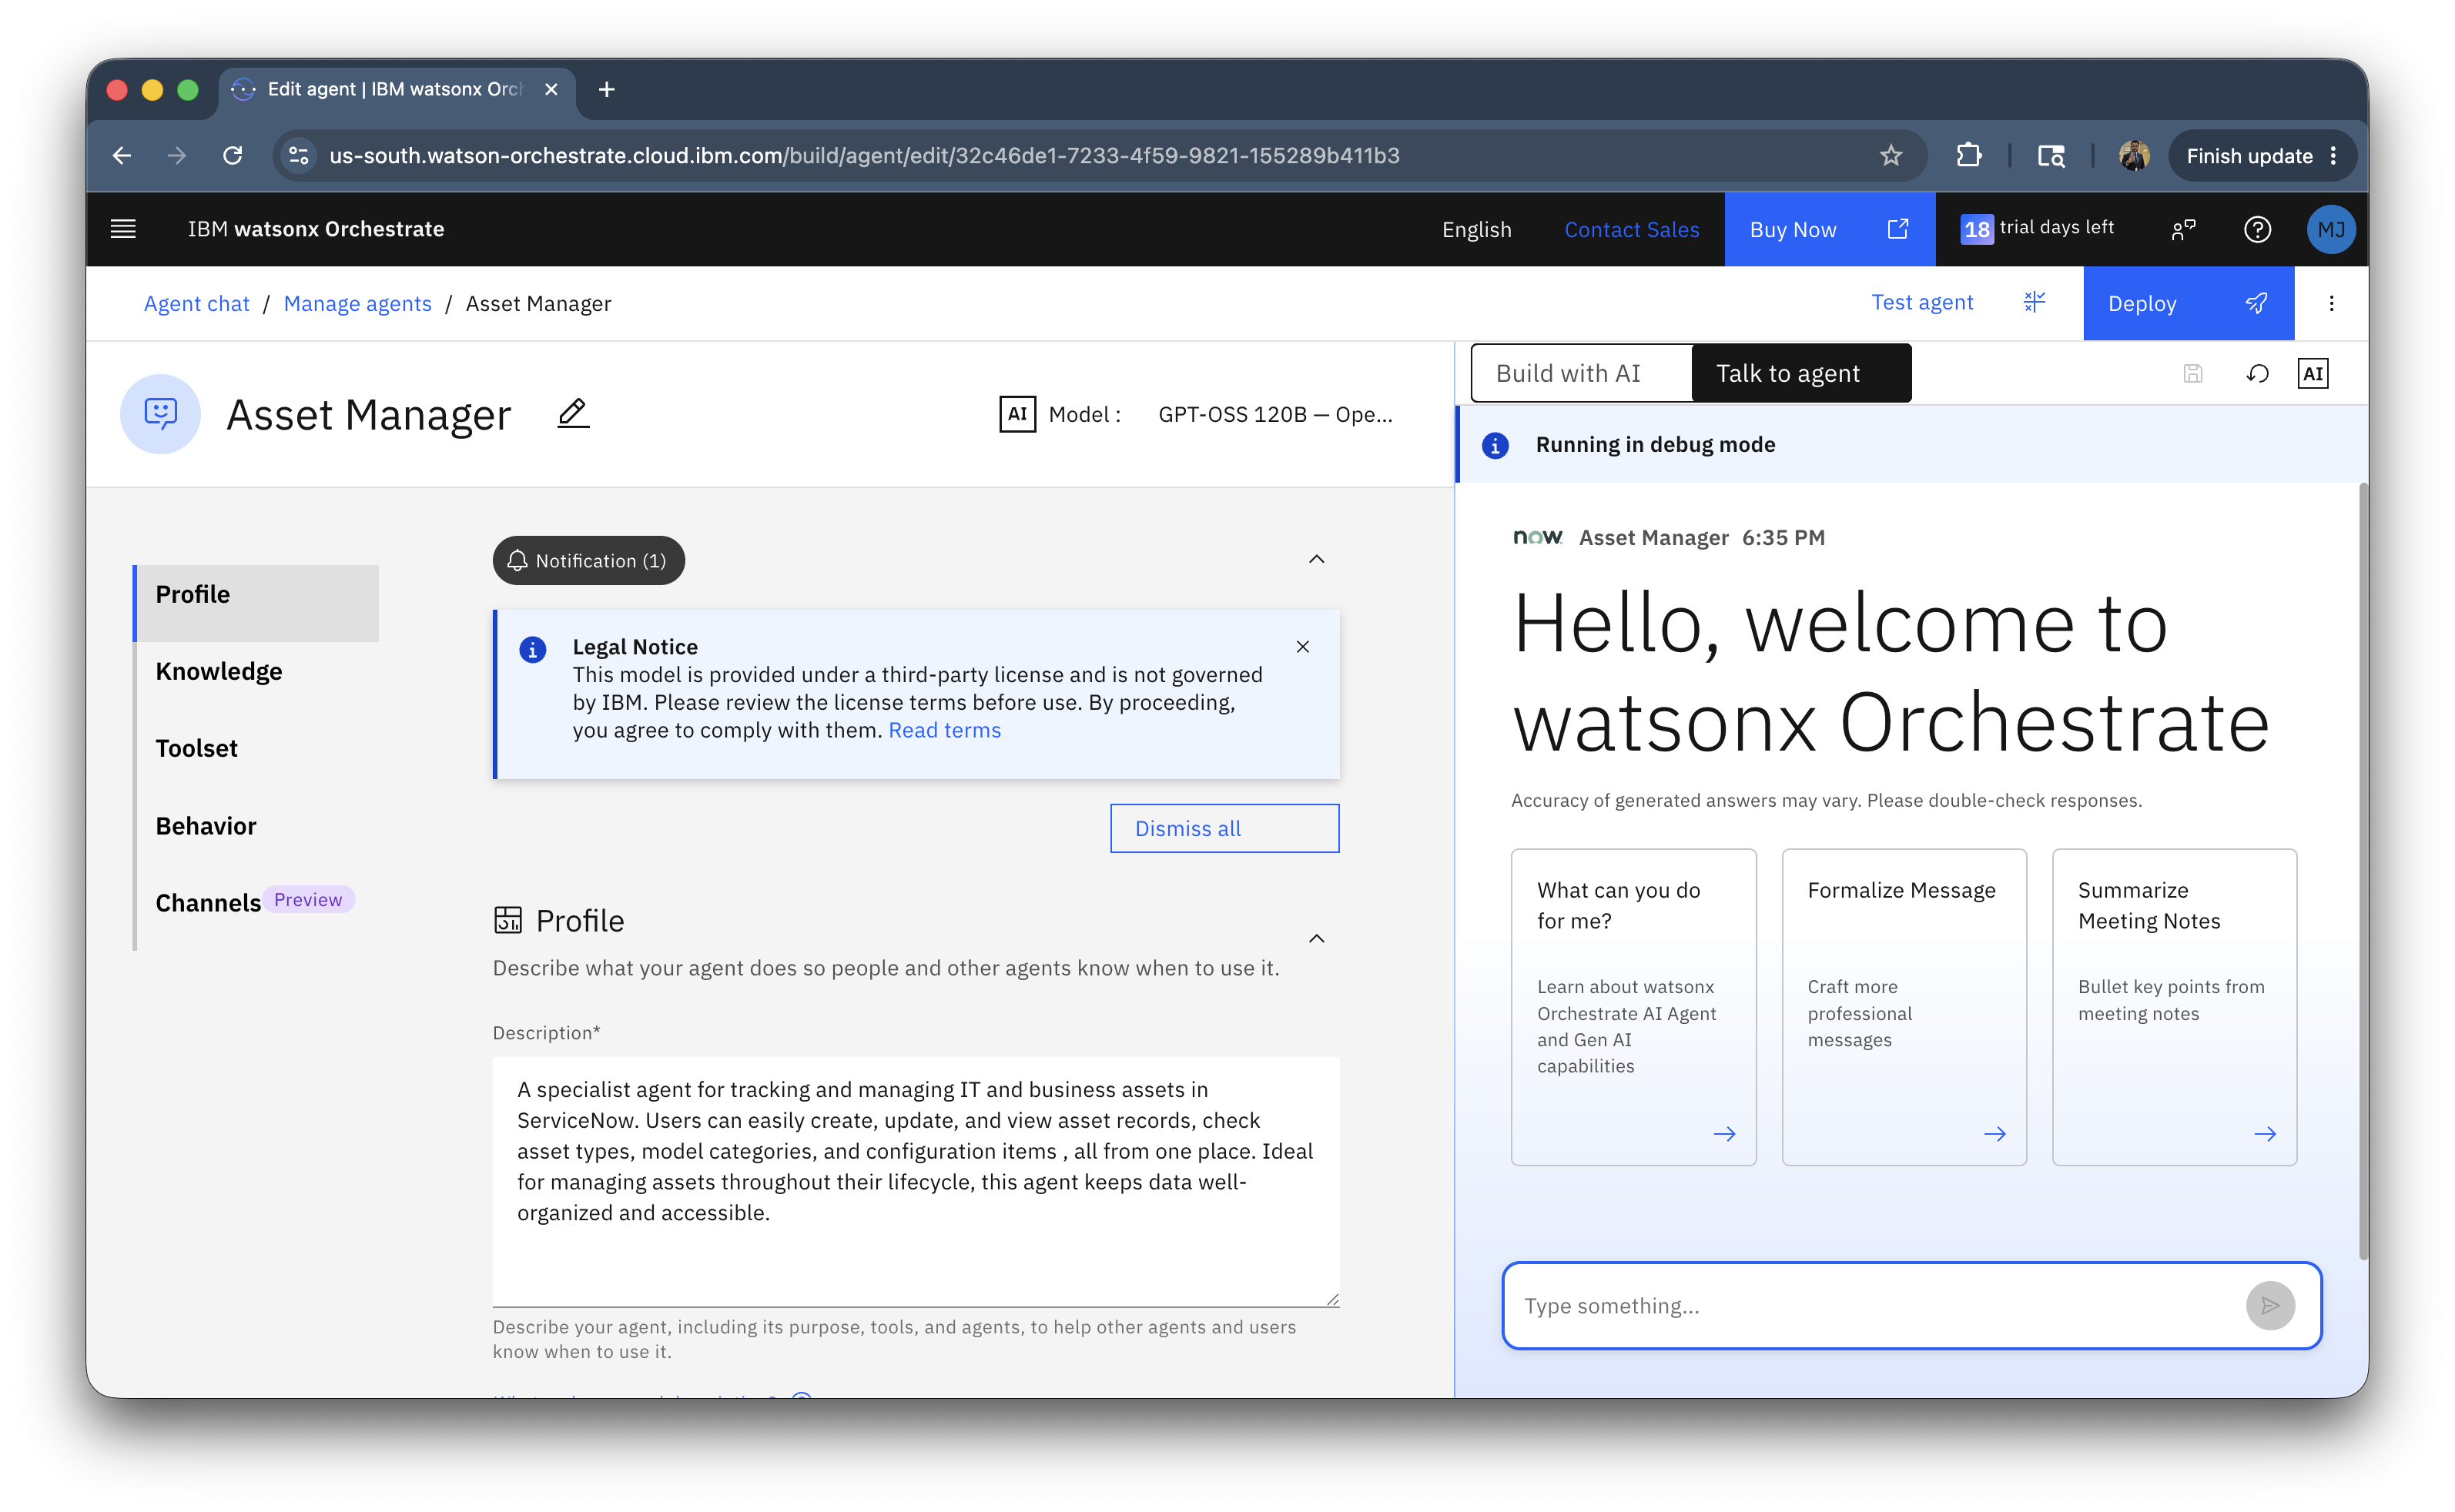
You will see the Asset Manager agent initialized, with tools, behavior and description.
-
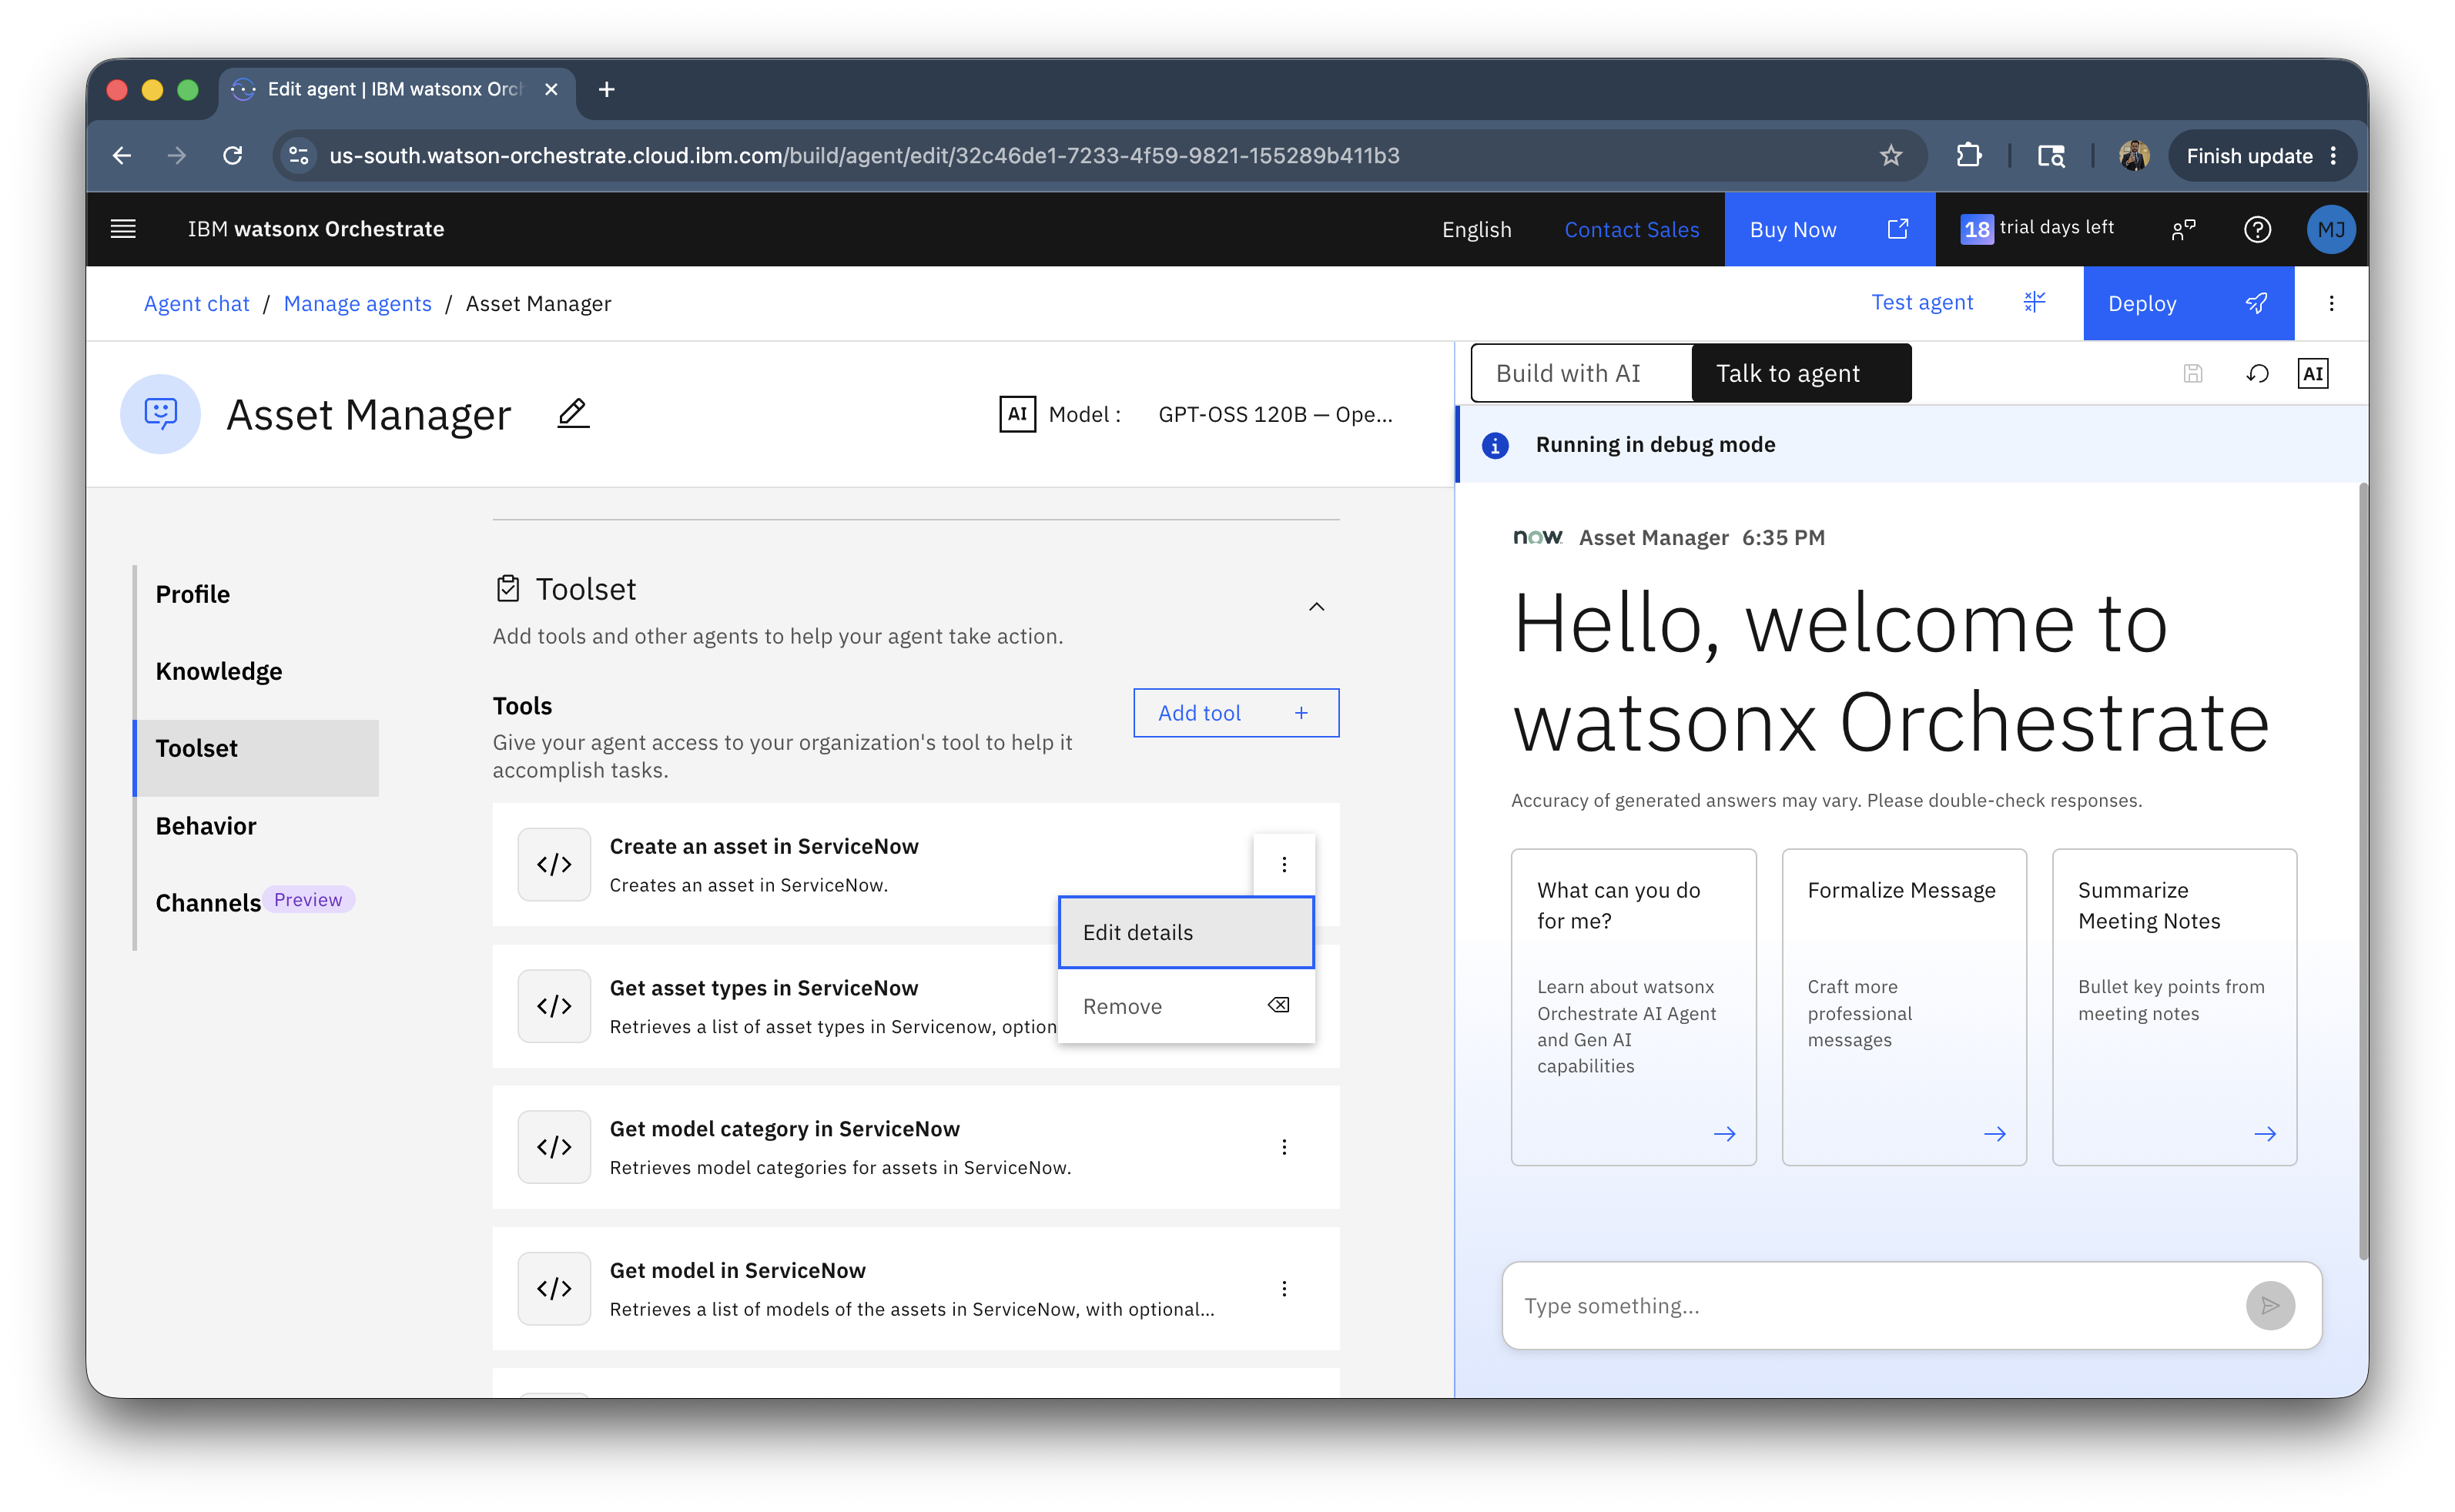
Click on Toolset > Tools and click on the three dot menu on any one of the tool and click on edit details.
-
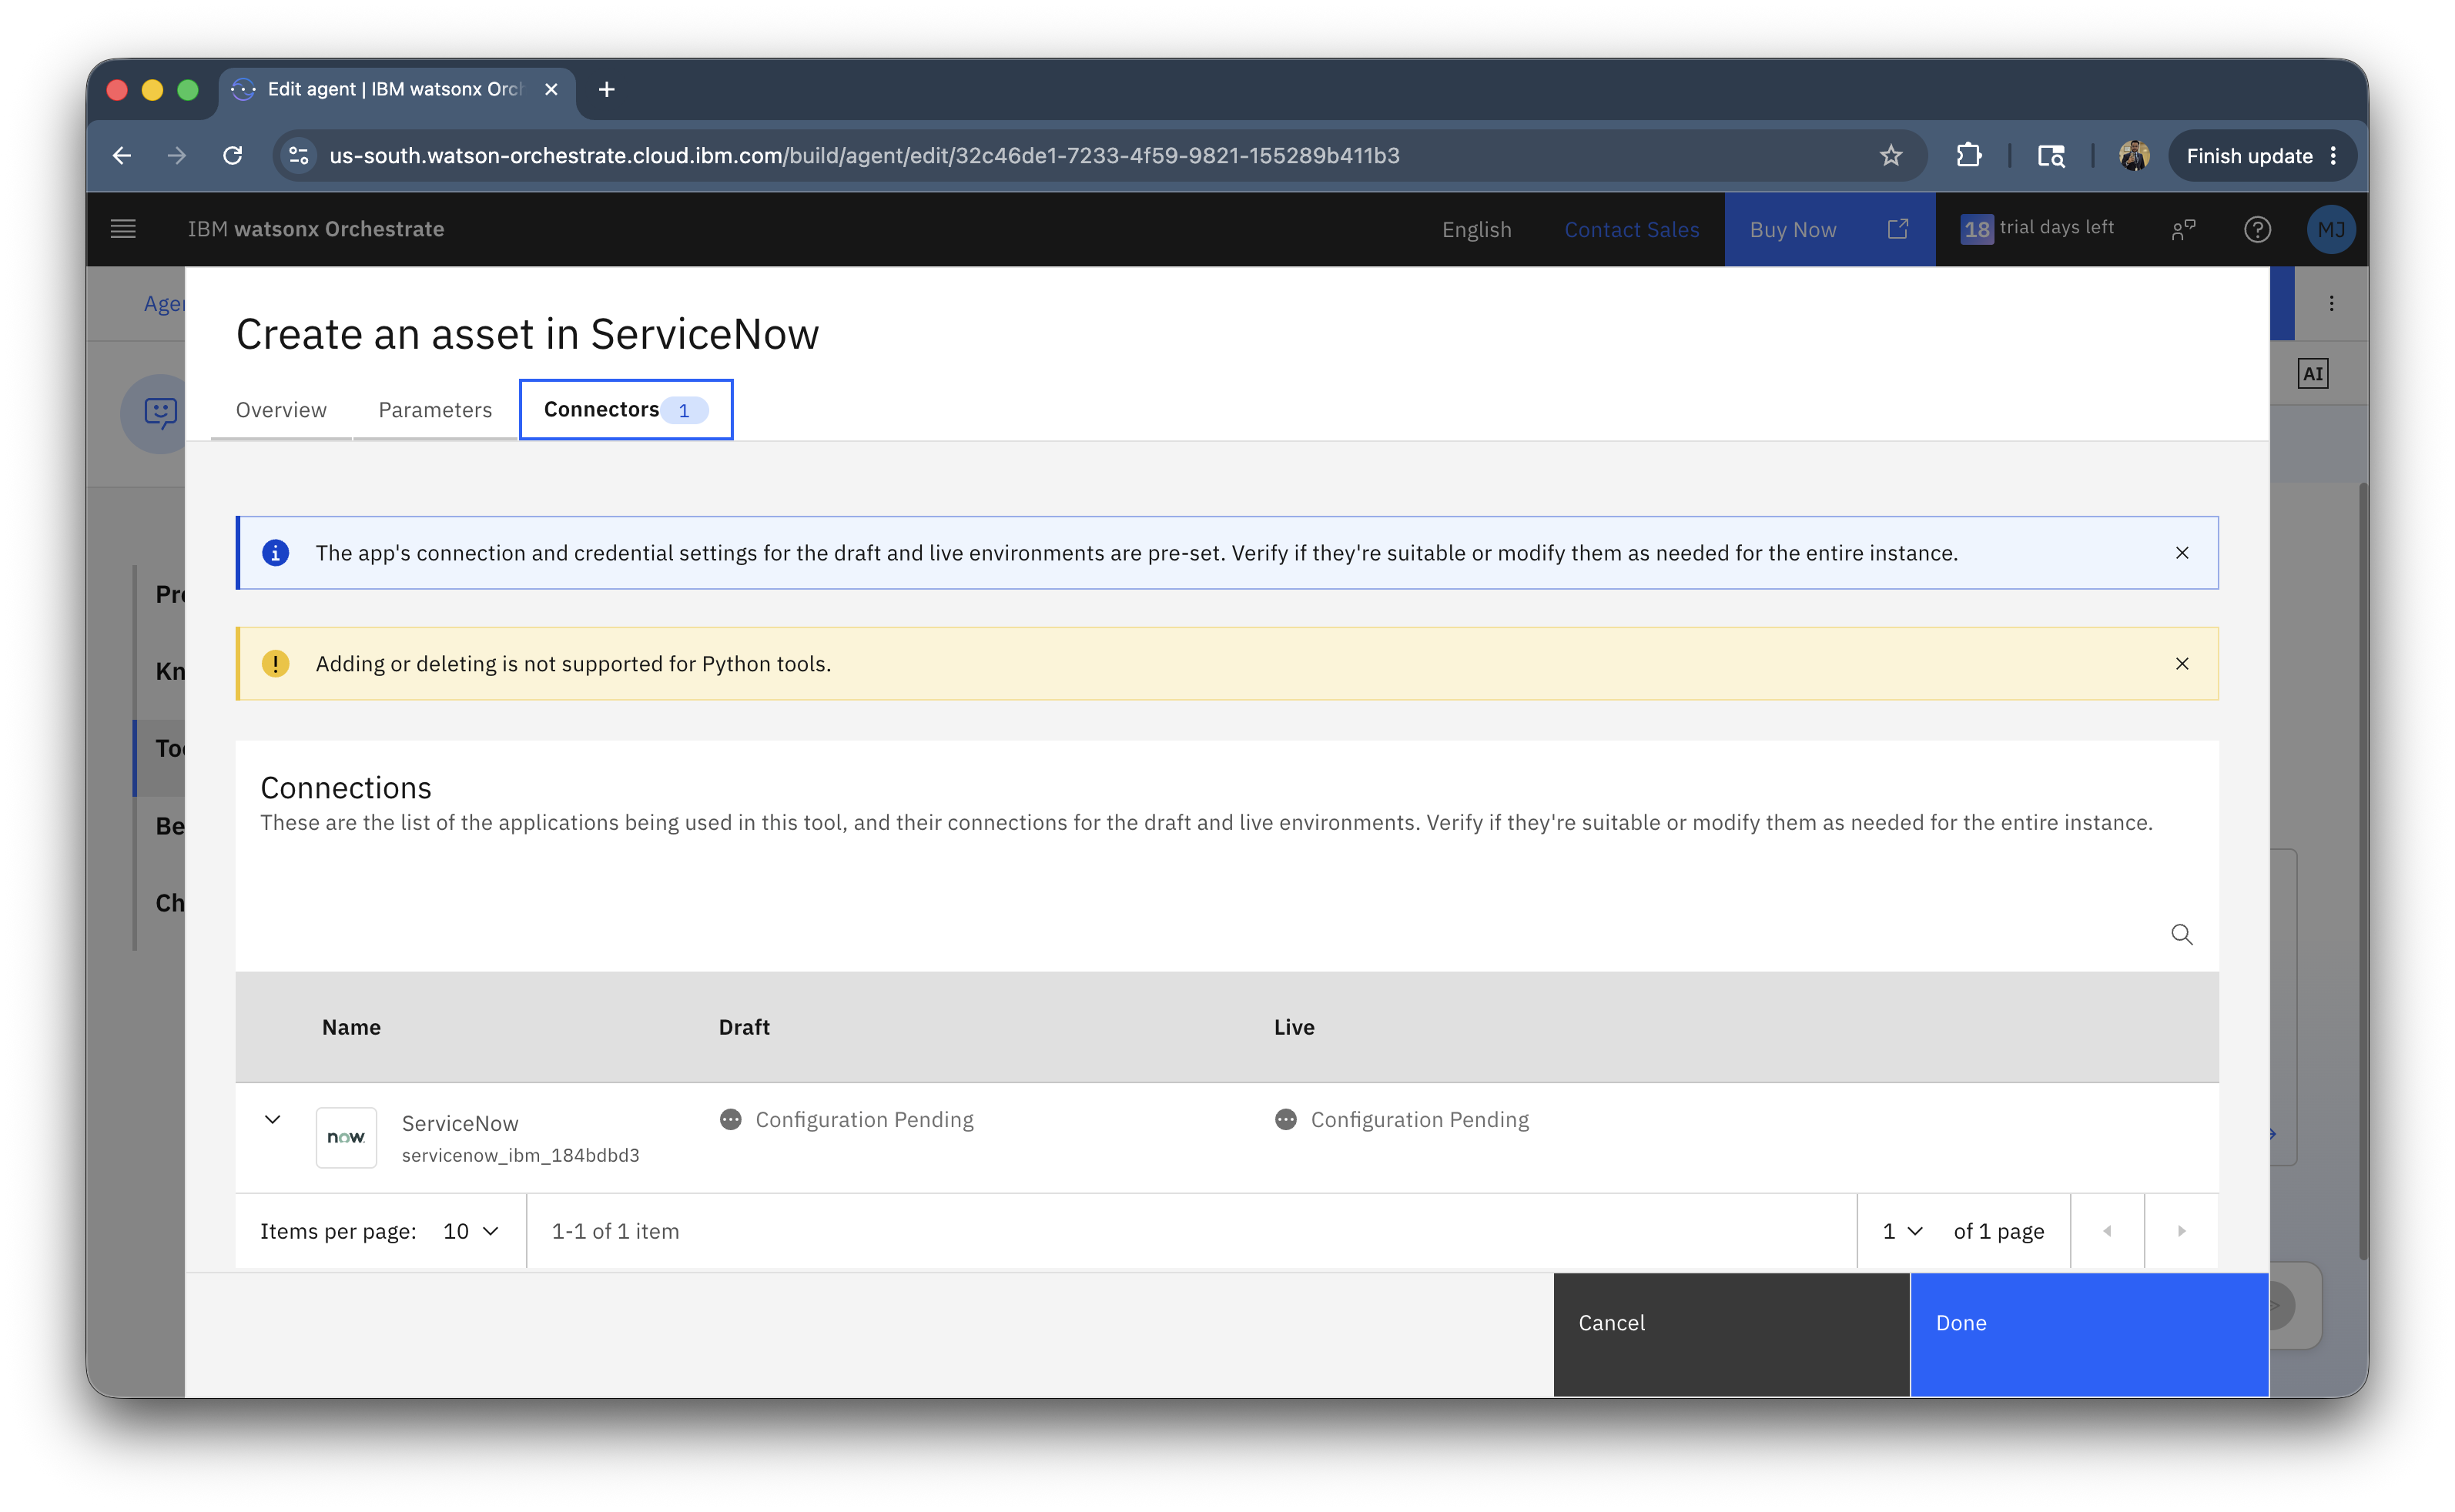
Go to Connectors tab, and you will see the OAuth2 connection variable.
-
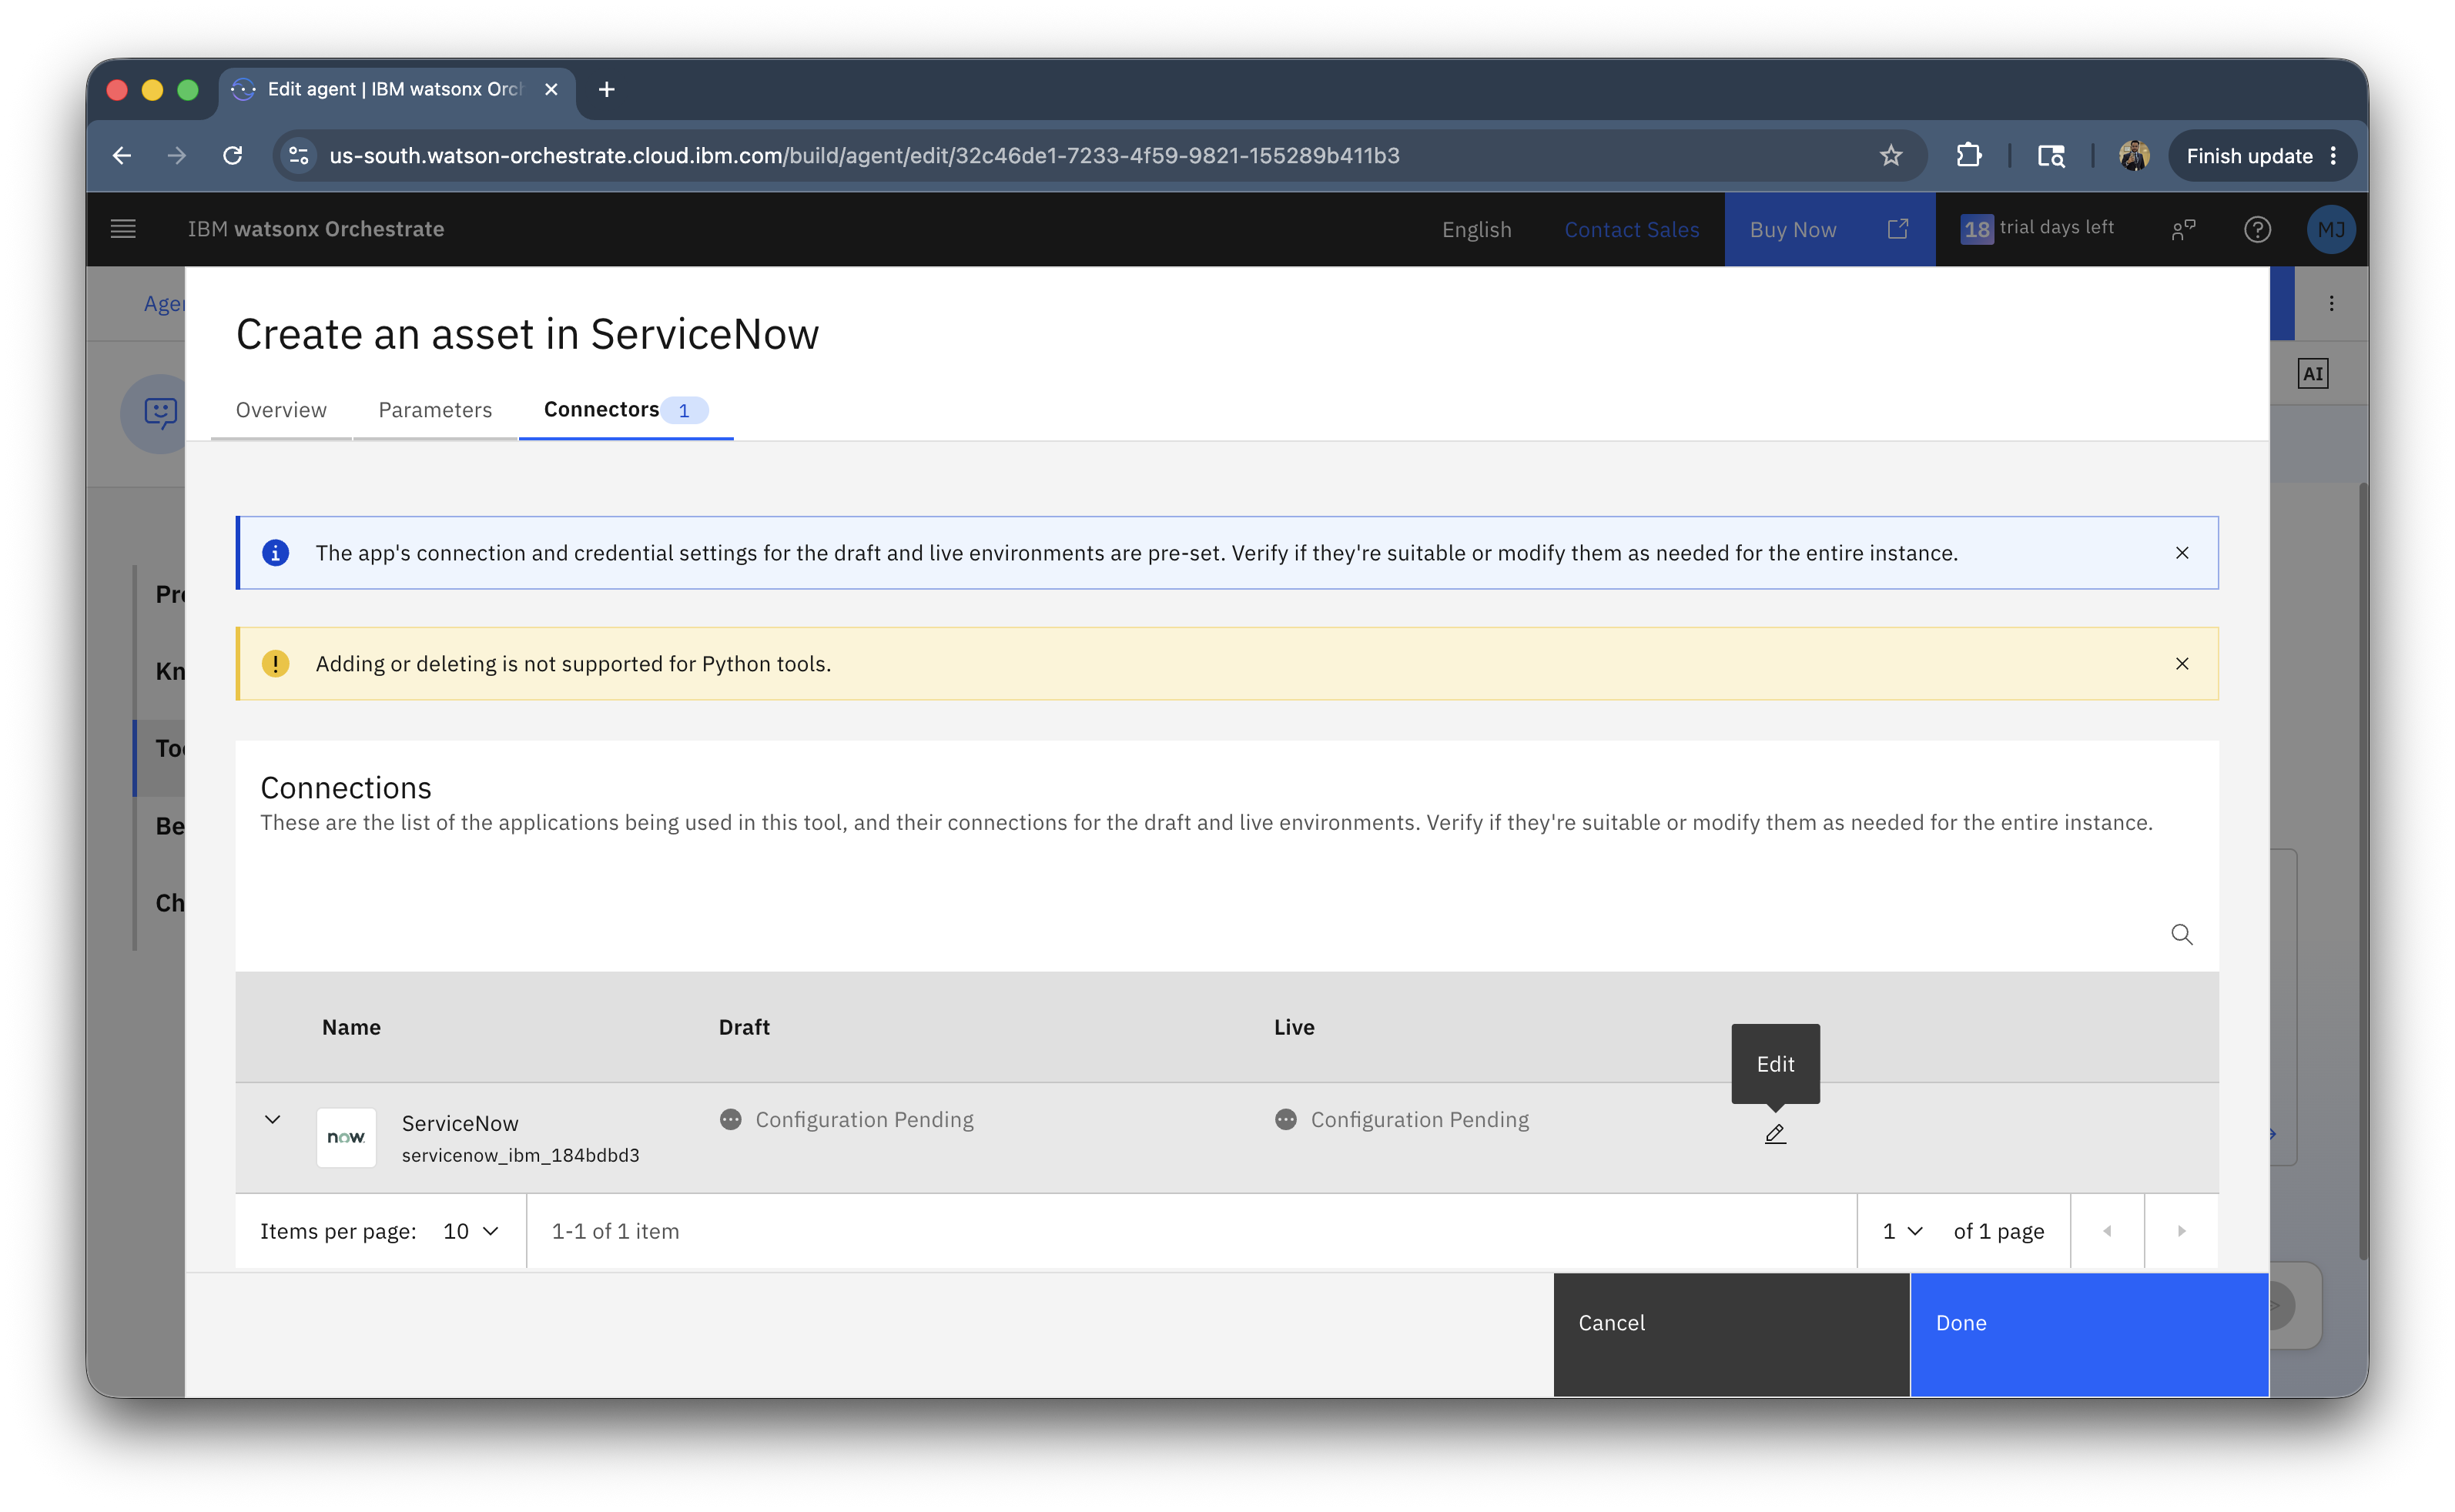
Click on the pencil icon to edit.
-
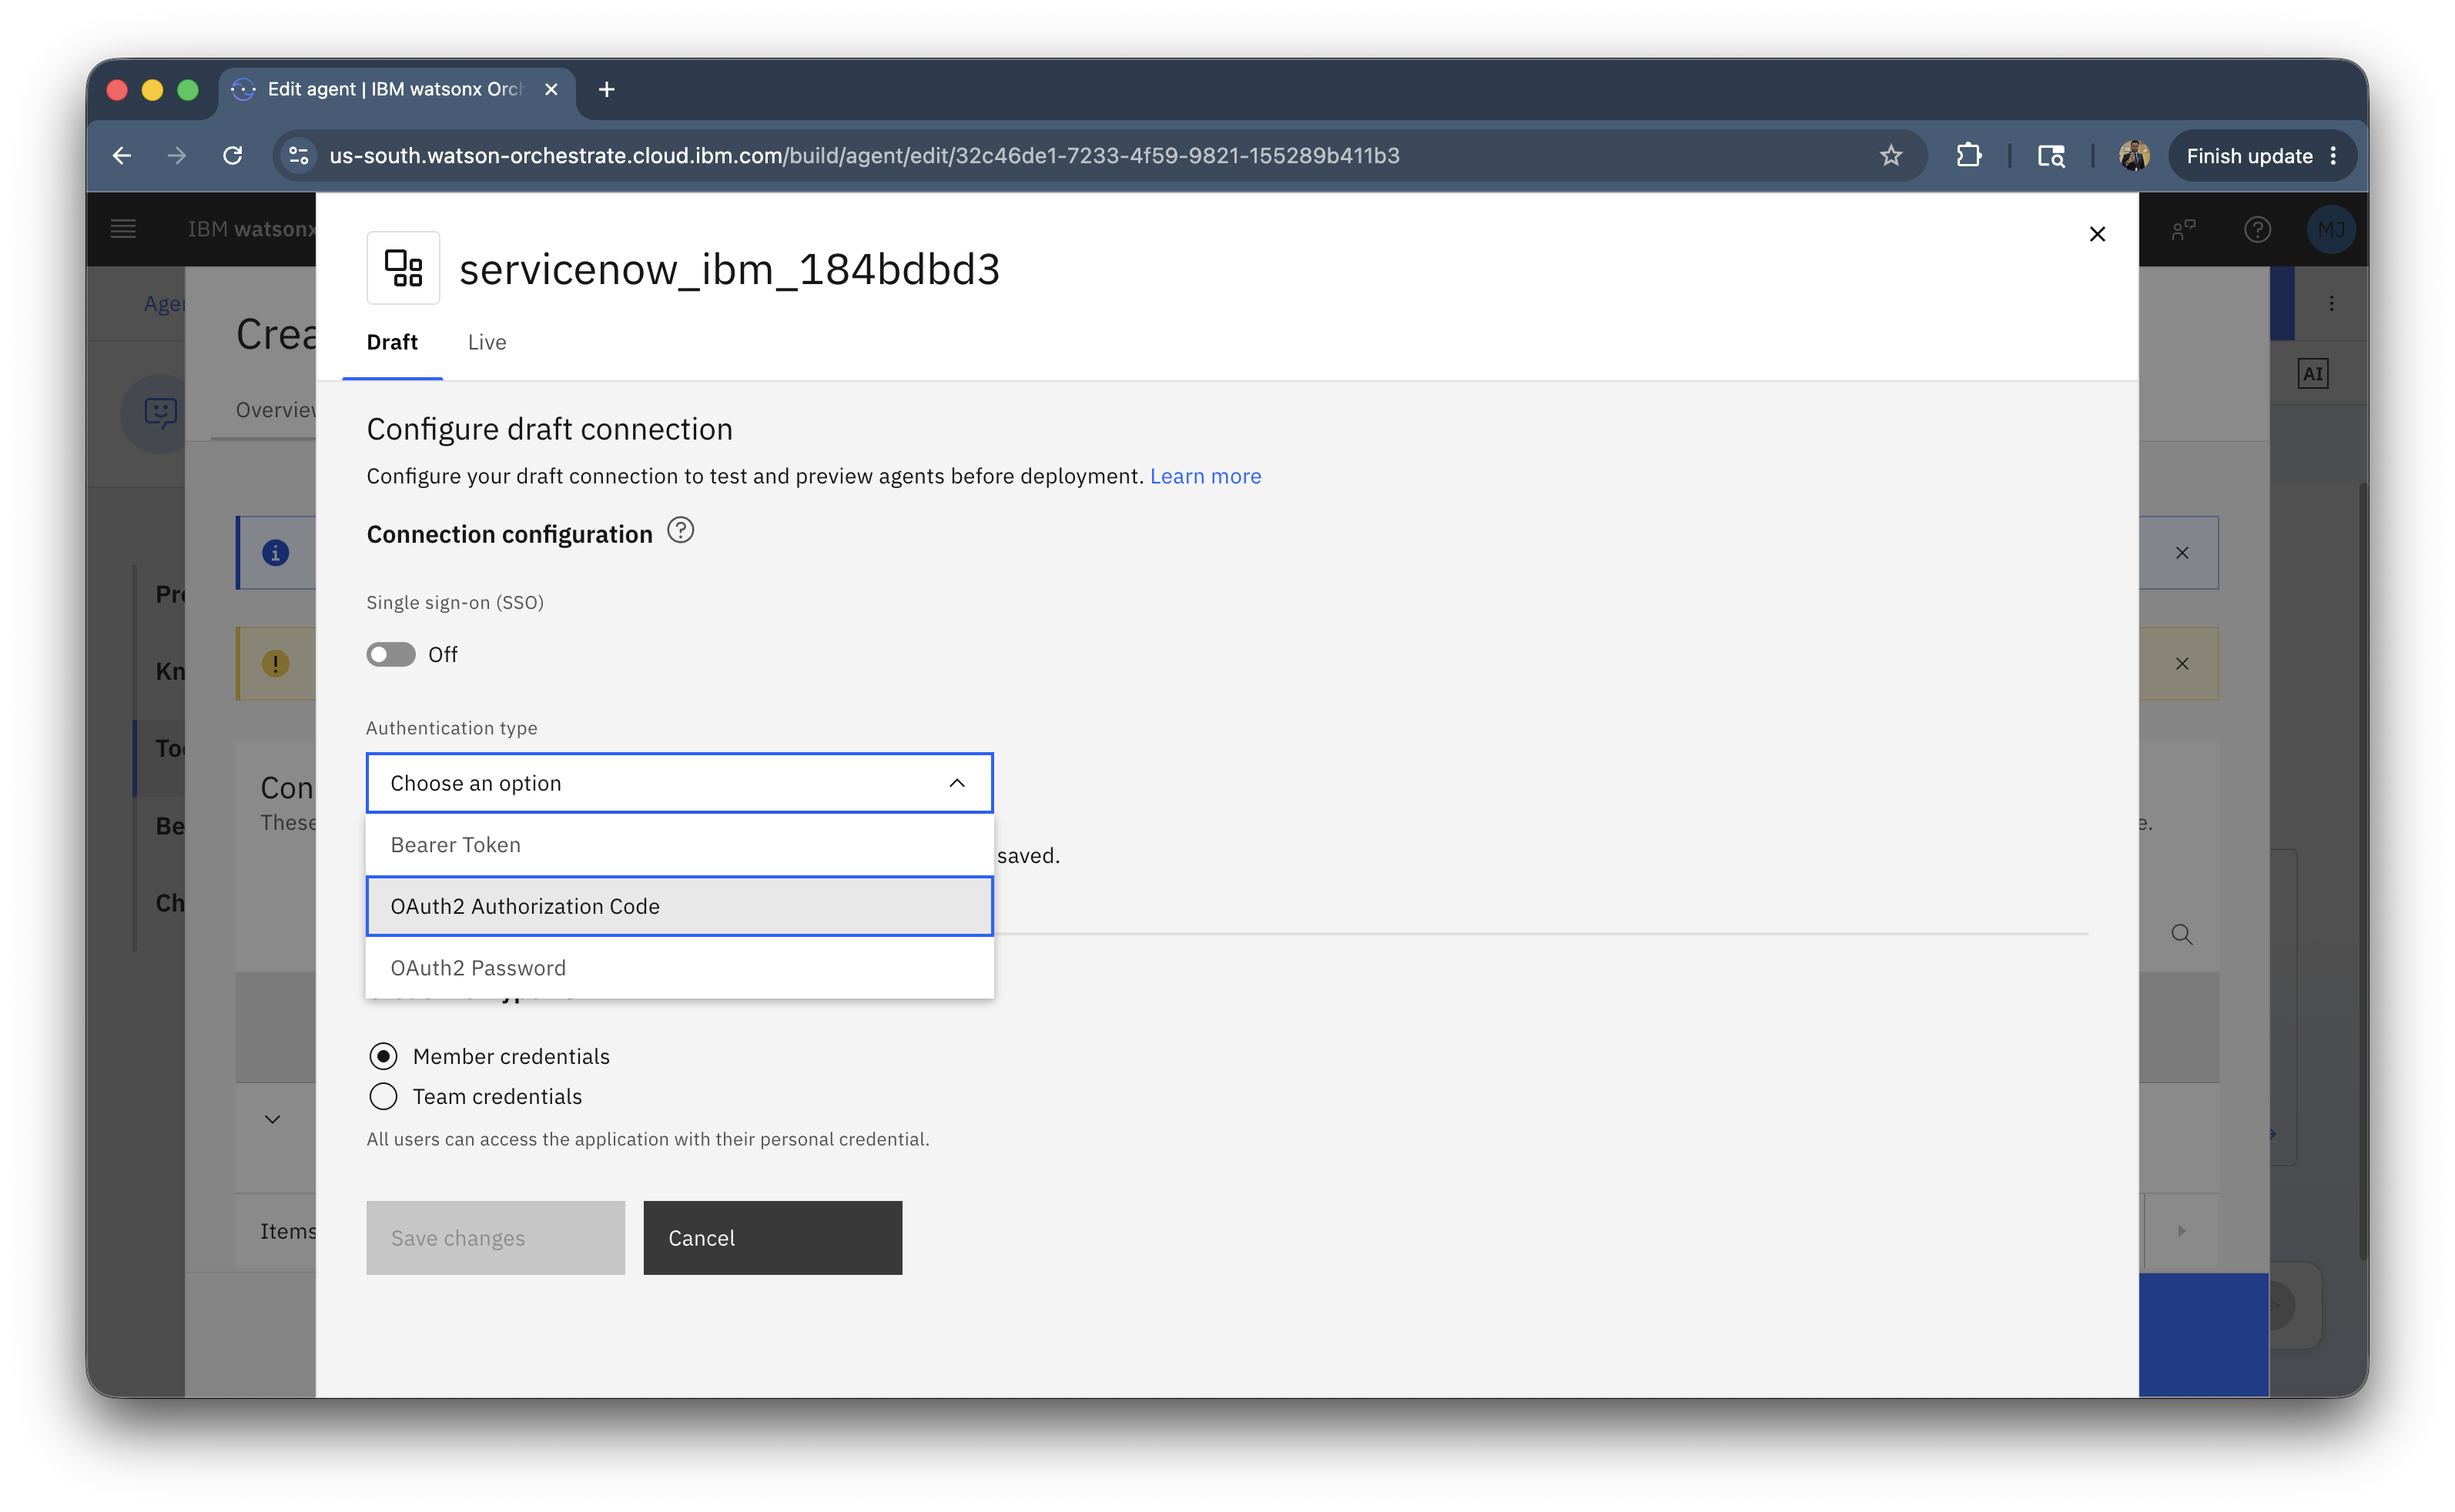
Select OAuth2 Authorization Code.
-
Enter the credentials that you generated in the ServiceNow OAuth 2.0 step.
-
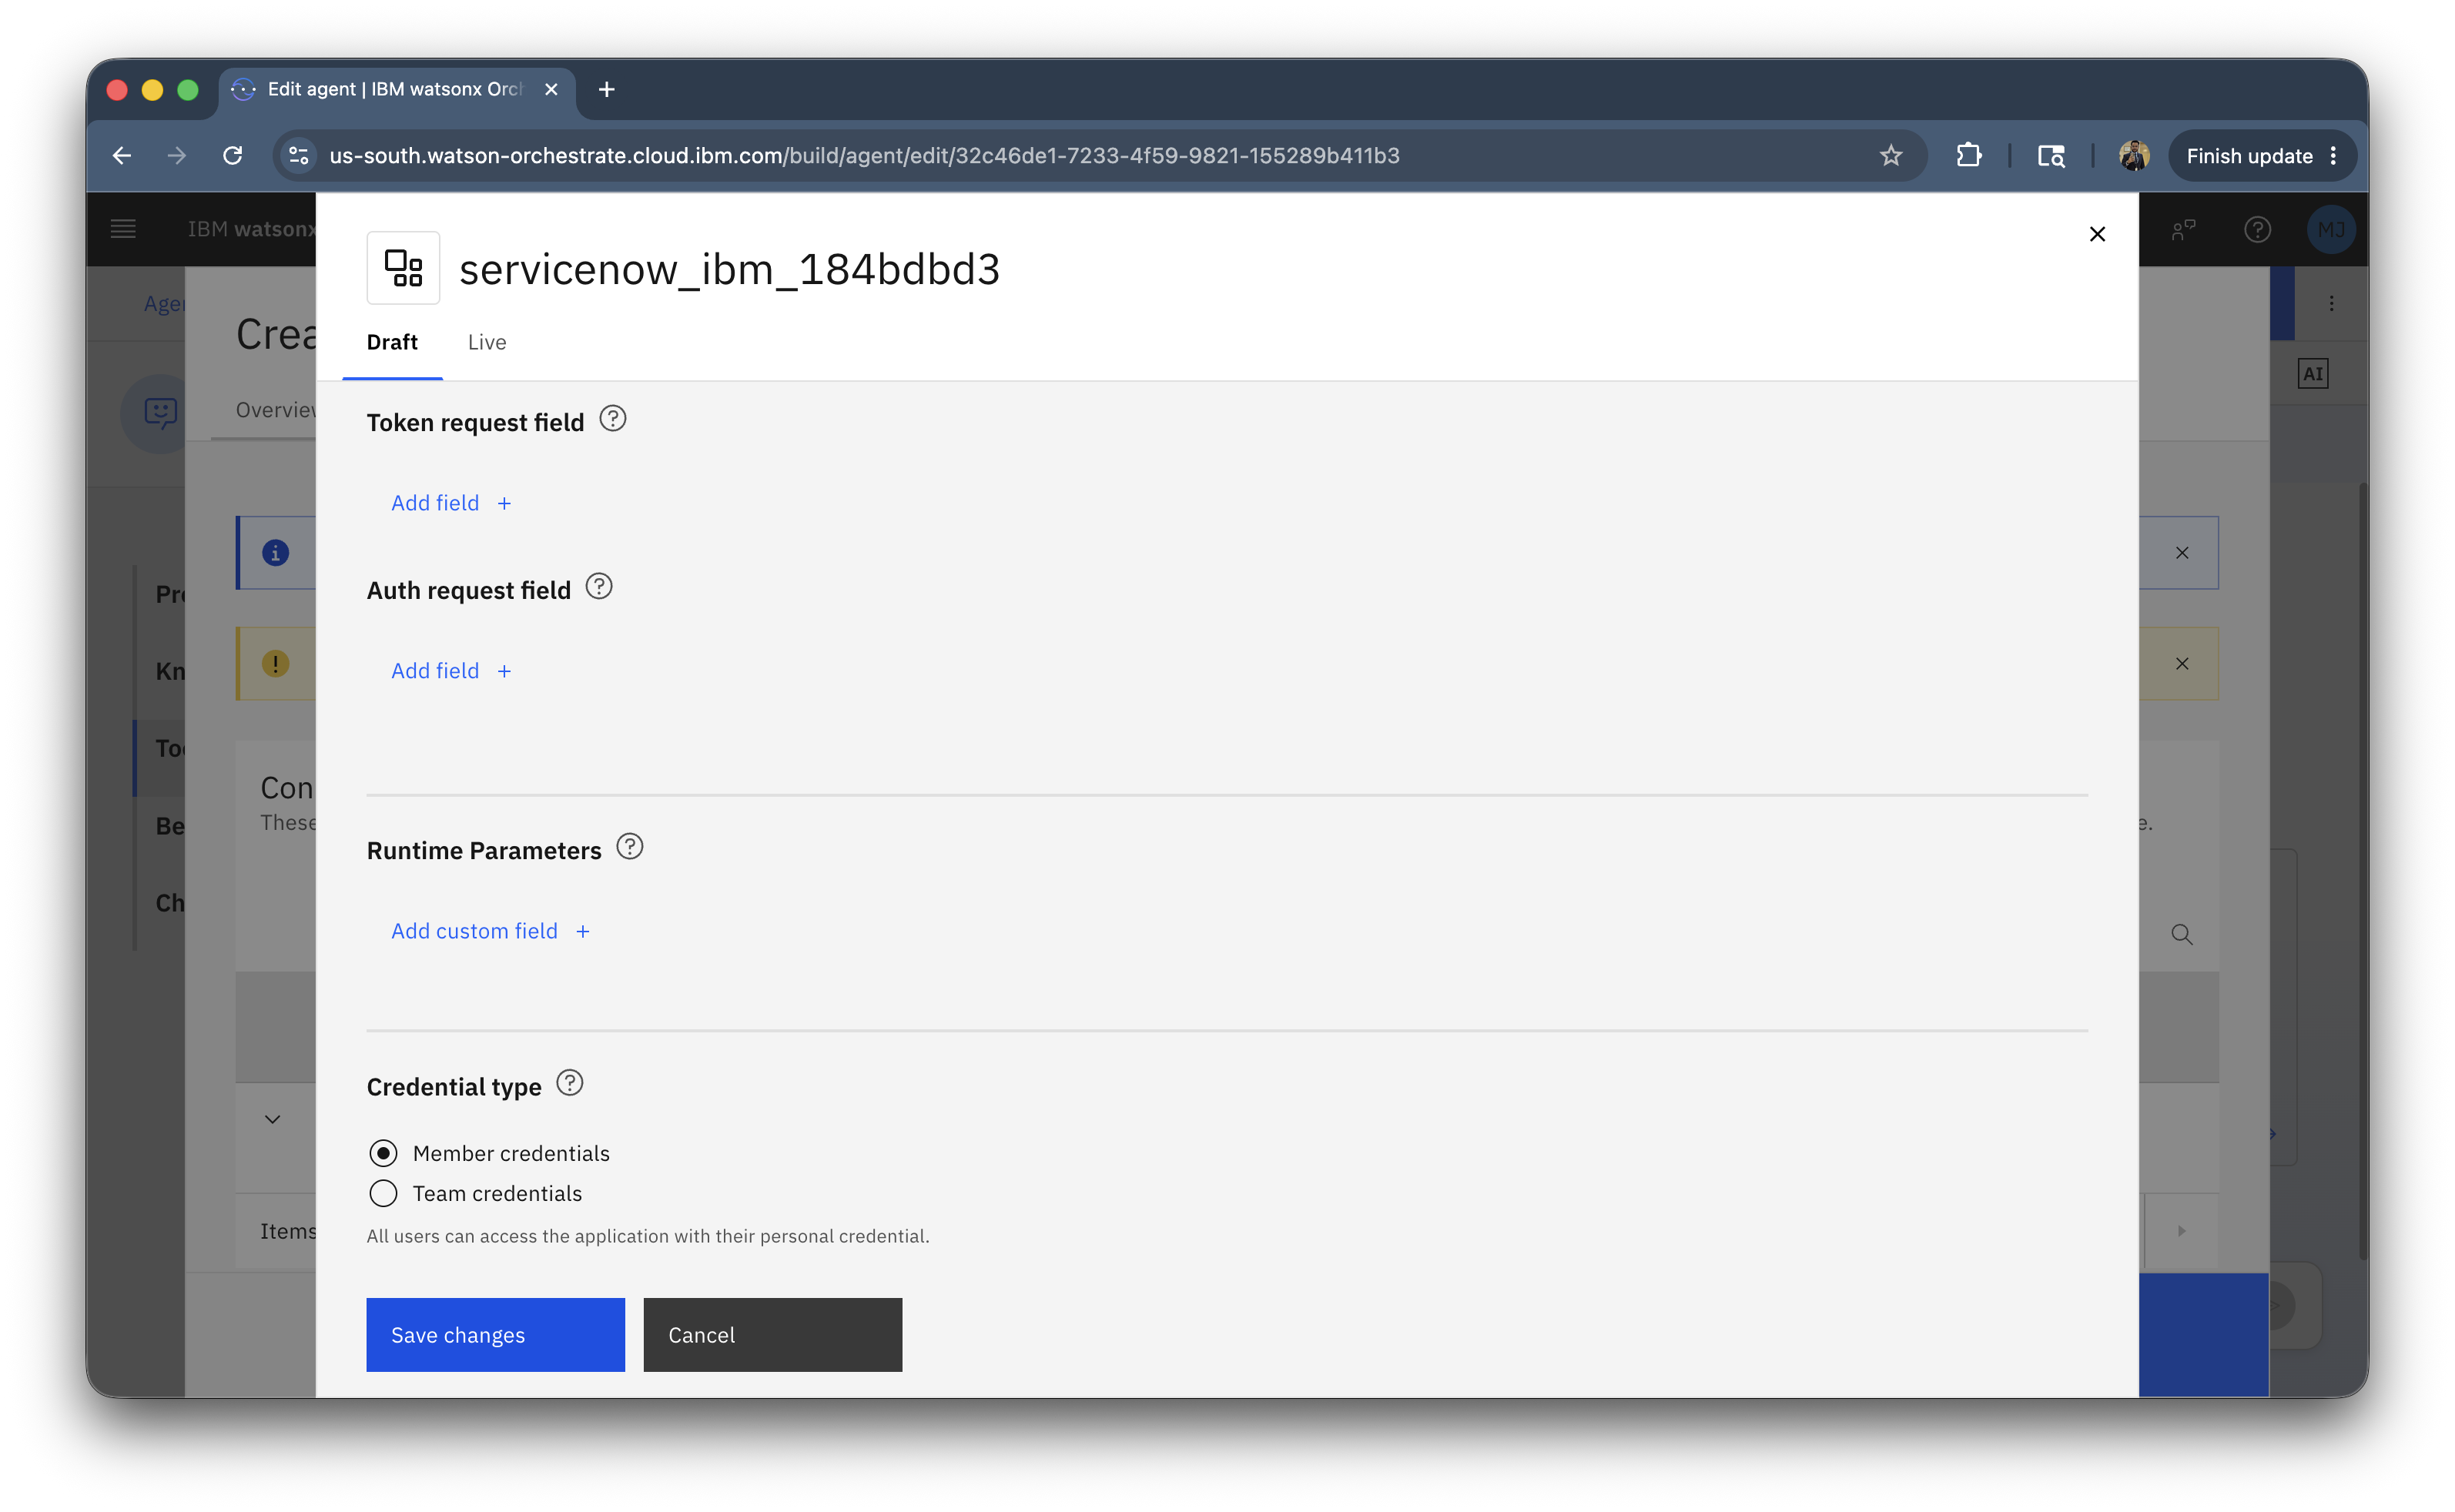
Do the similar configuration in Live environment and save the changes.
-
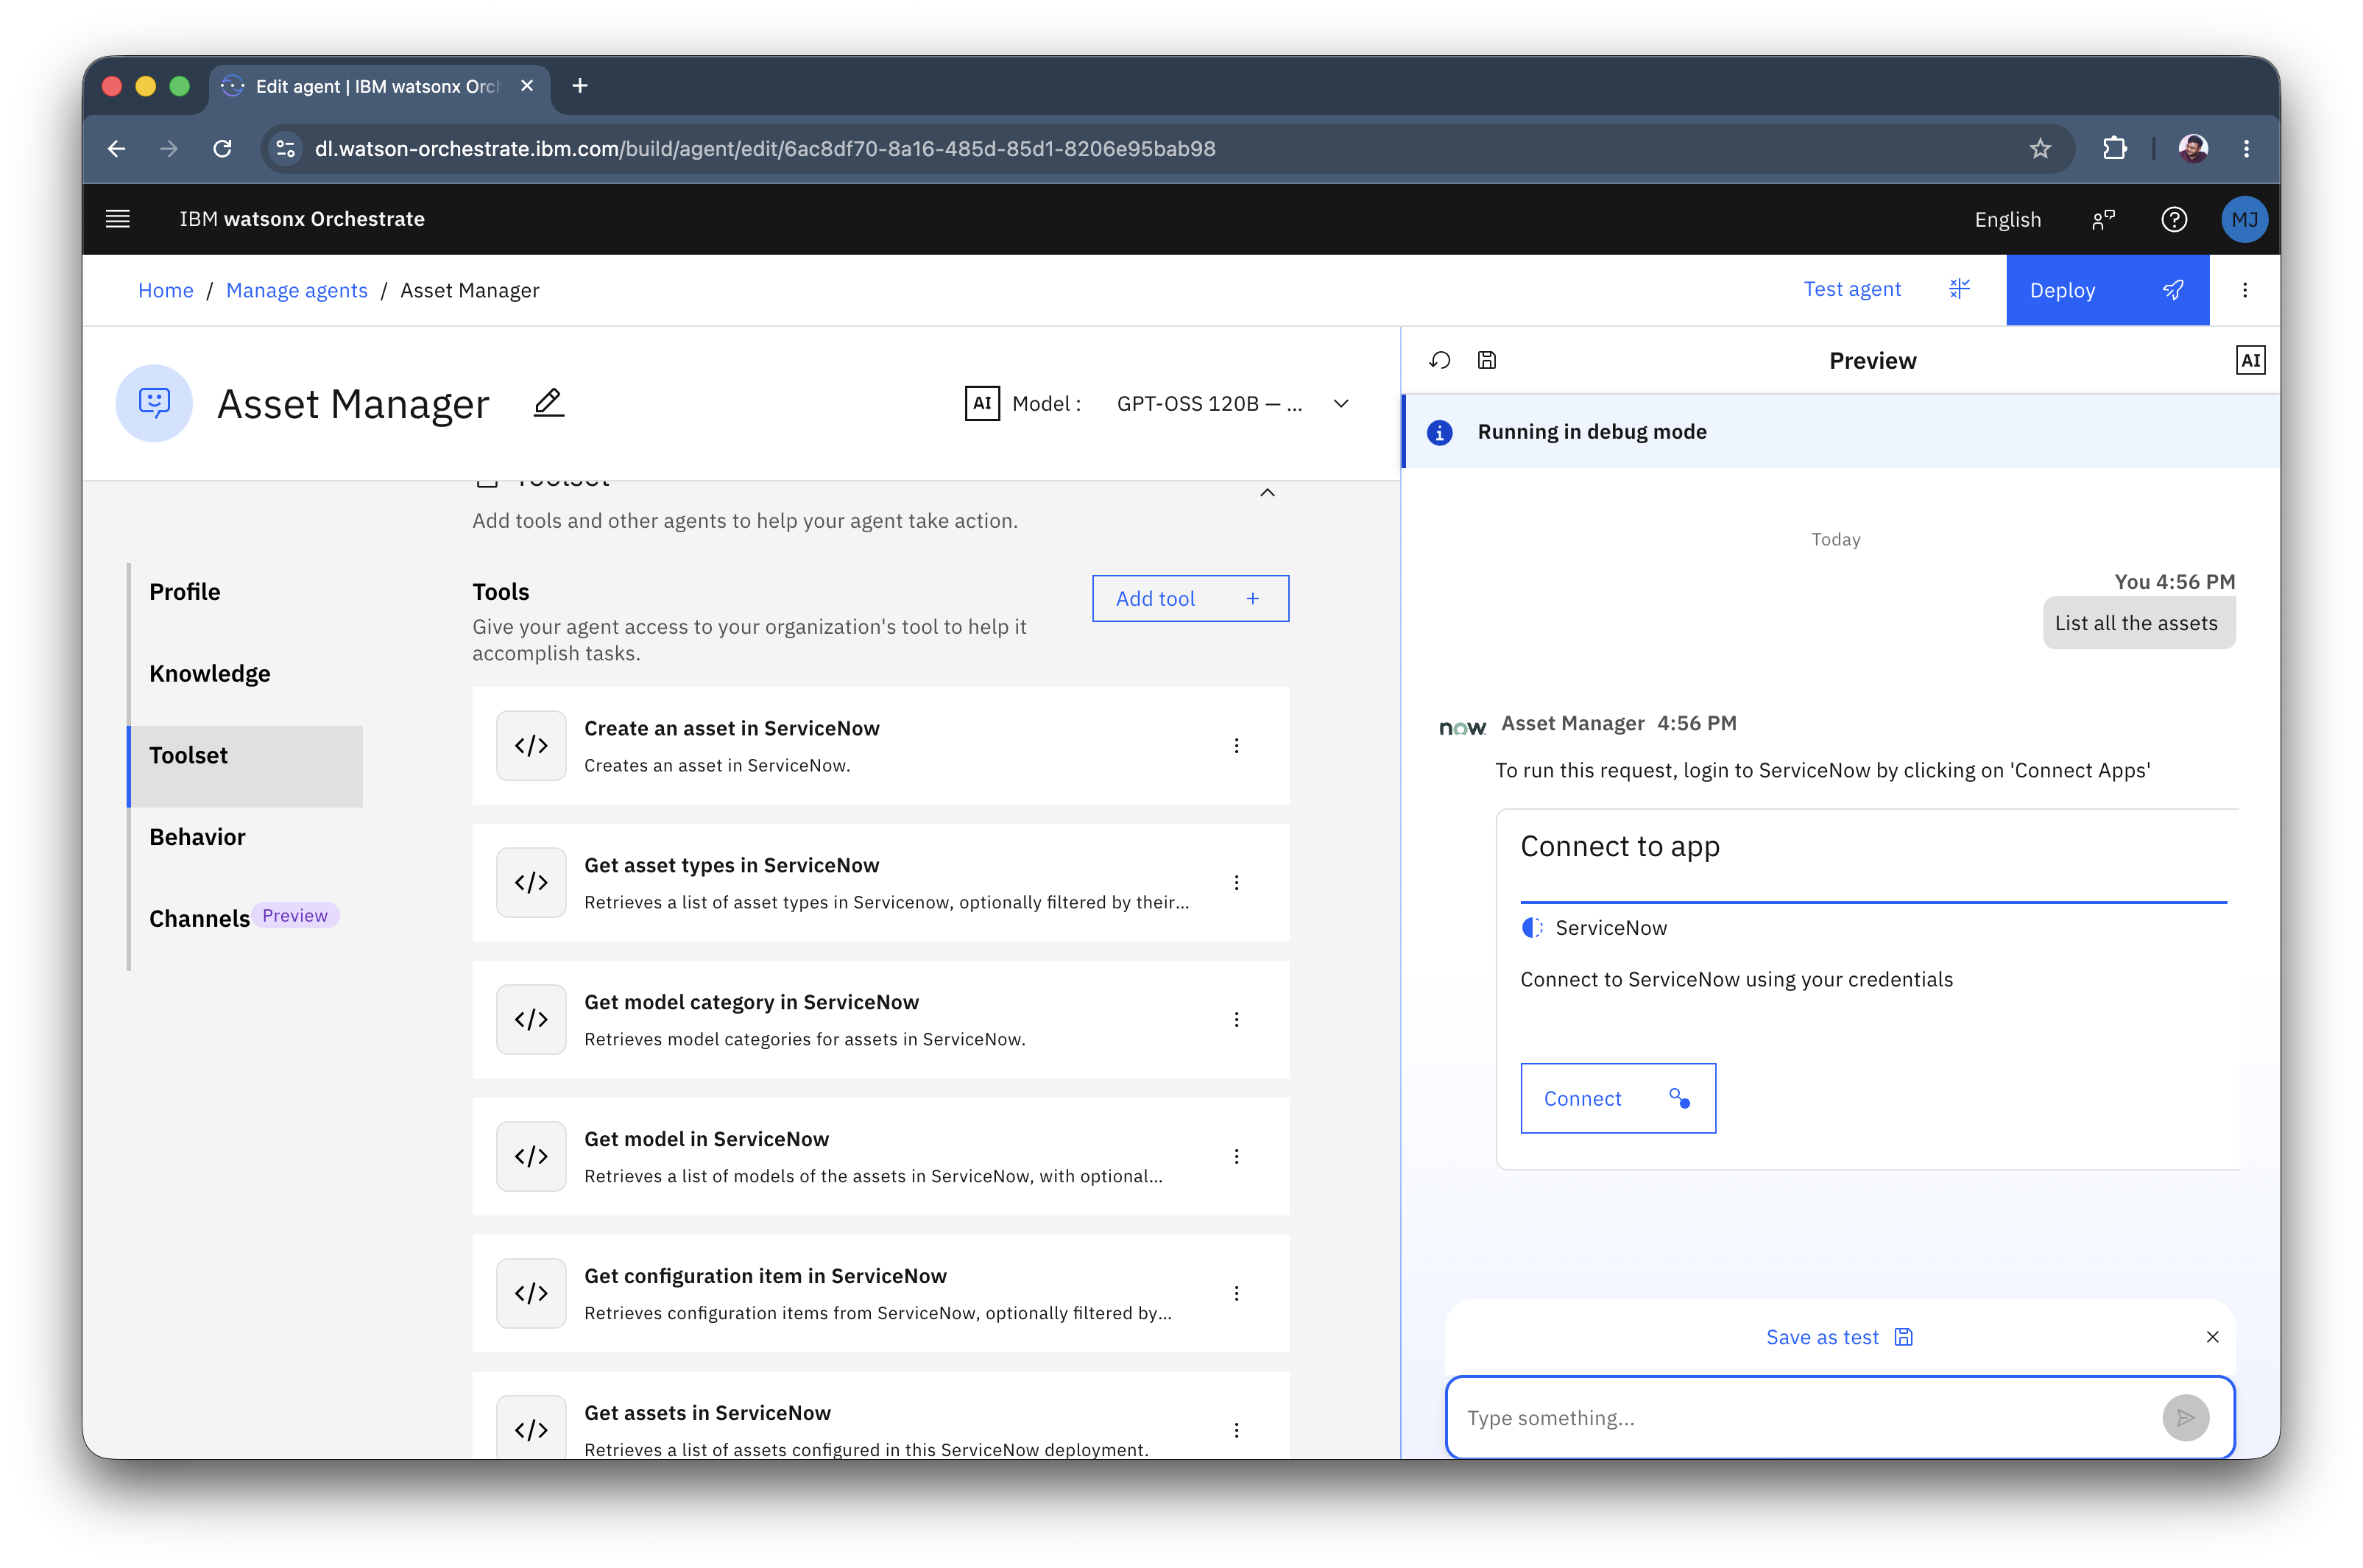
In the Preview panel, type the following prompt:
-
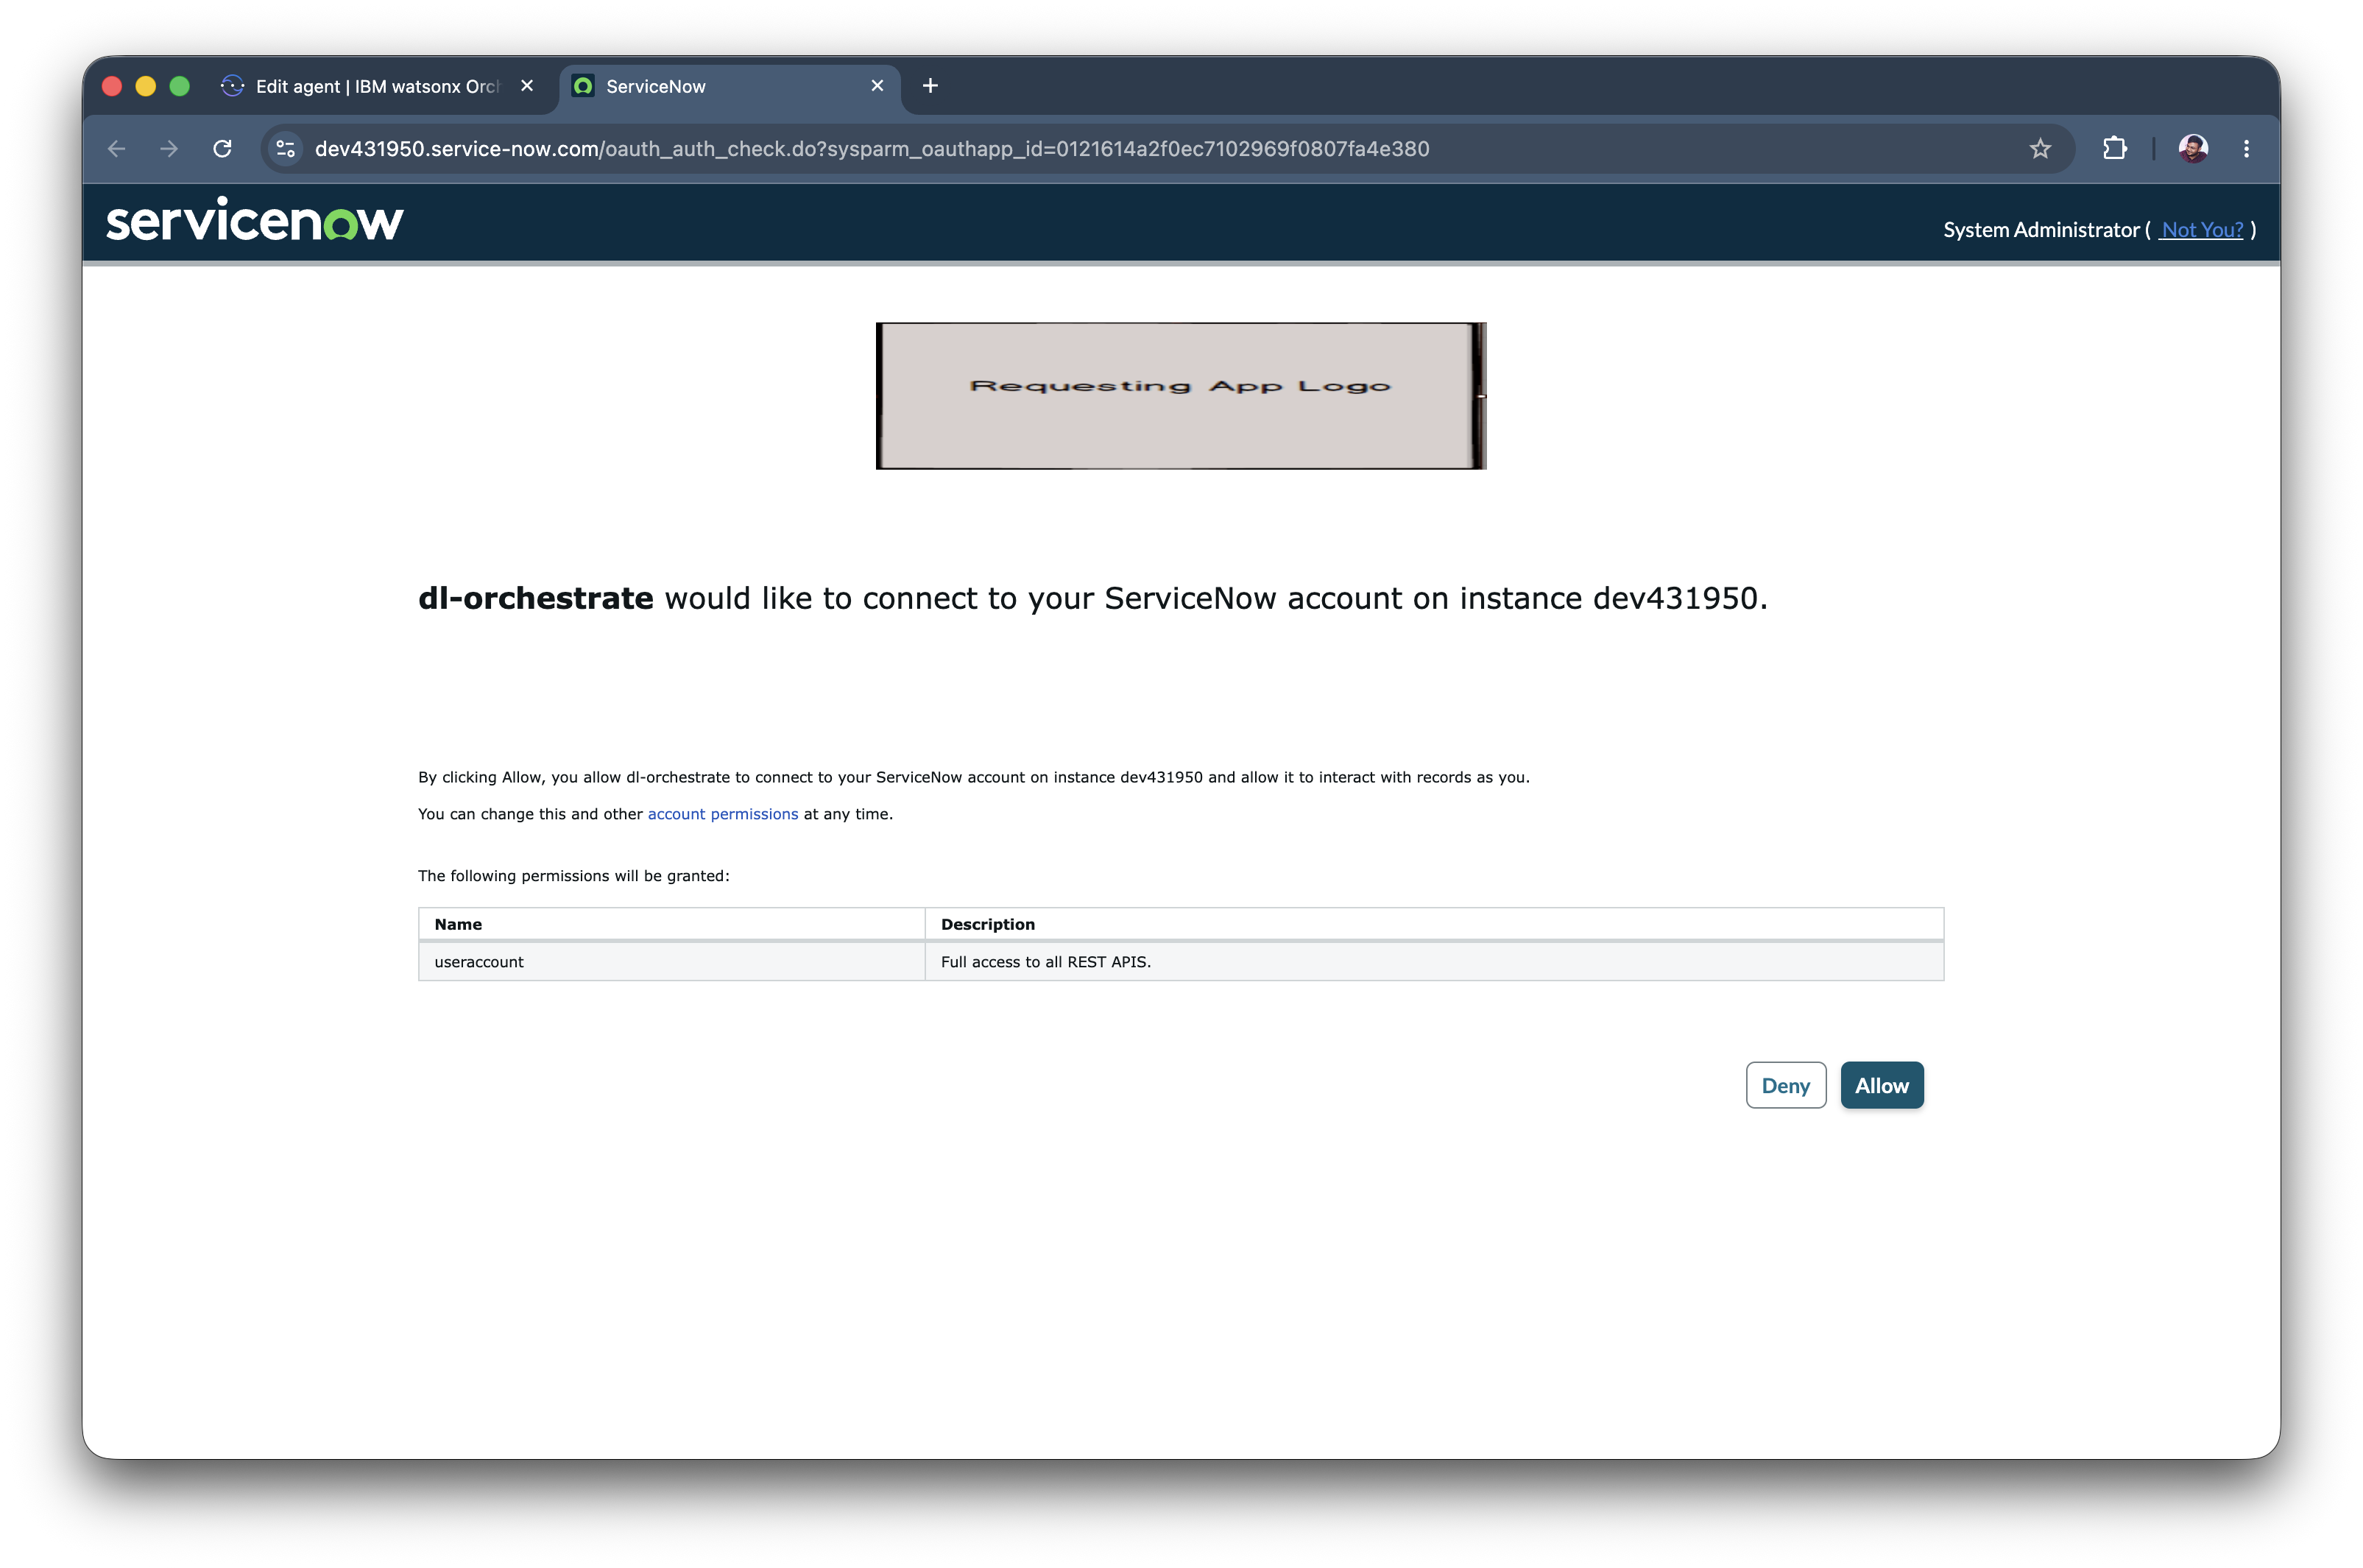
You will get a Connect app button to connect to Oauth2 server. Click on Connect and you will be redirected to ServiceNow page to authorize the user. Click on allow.
-
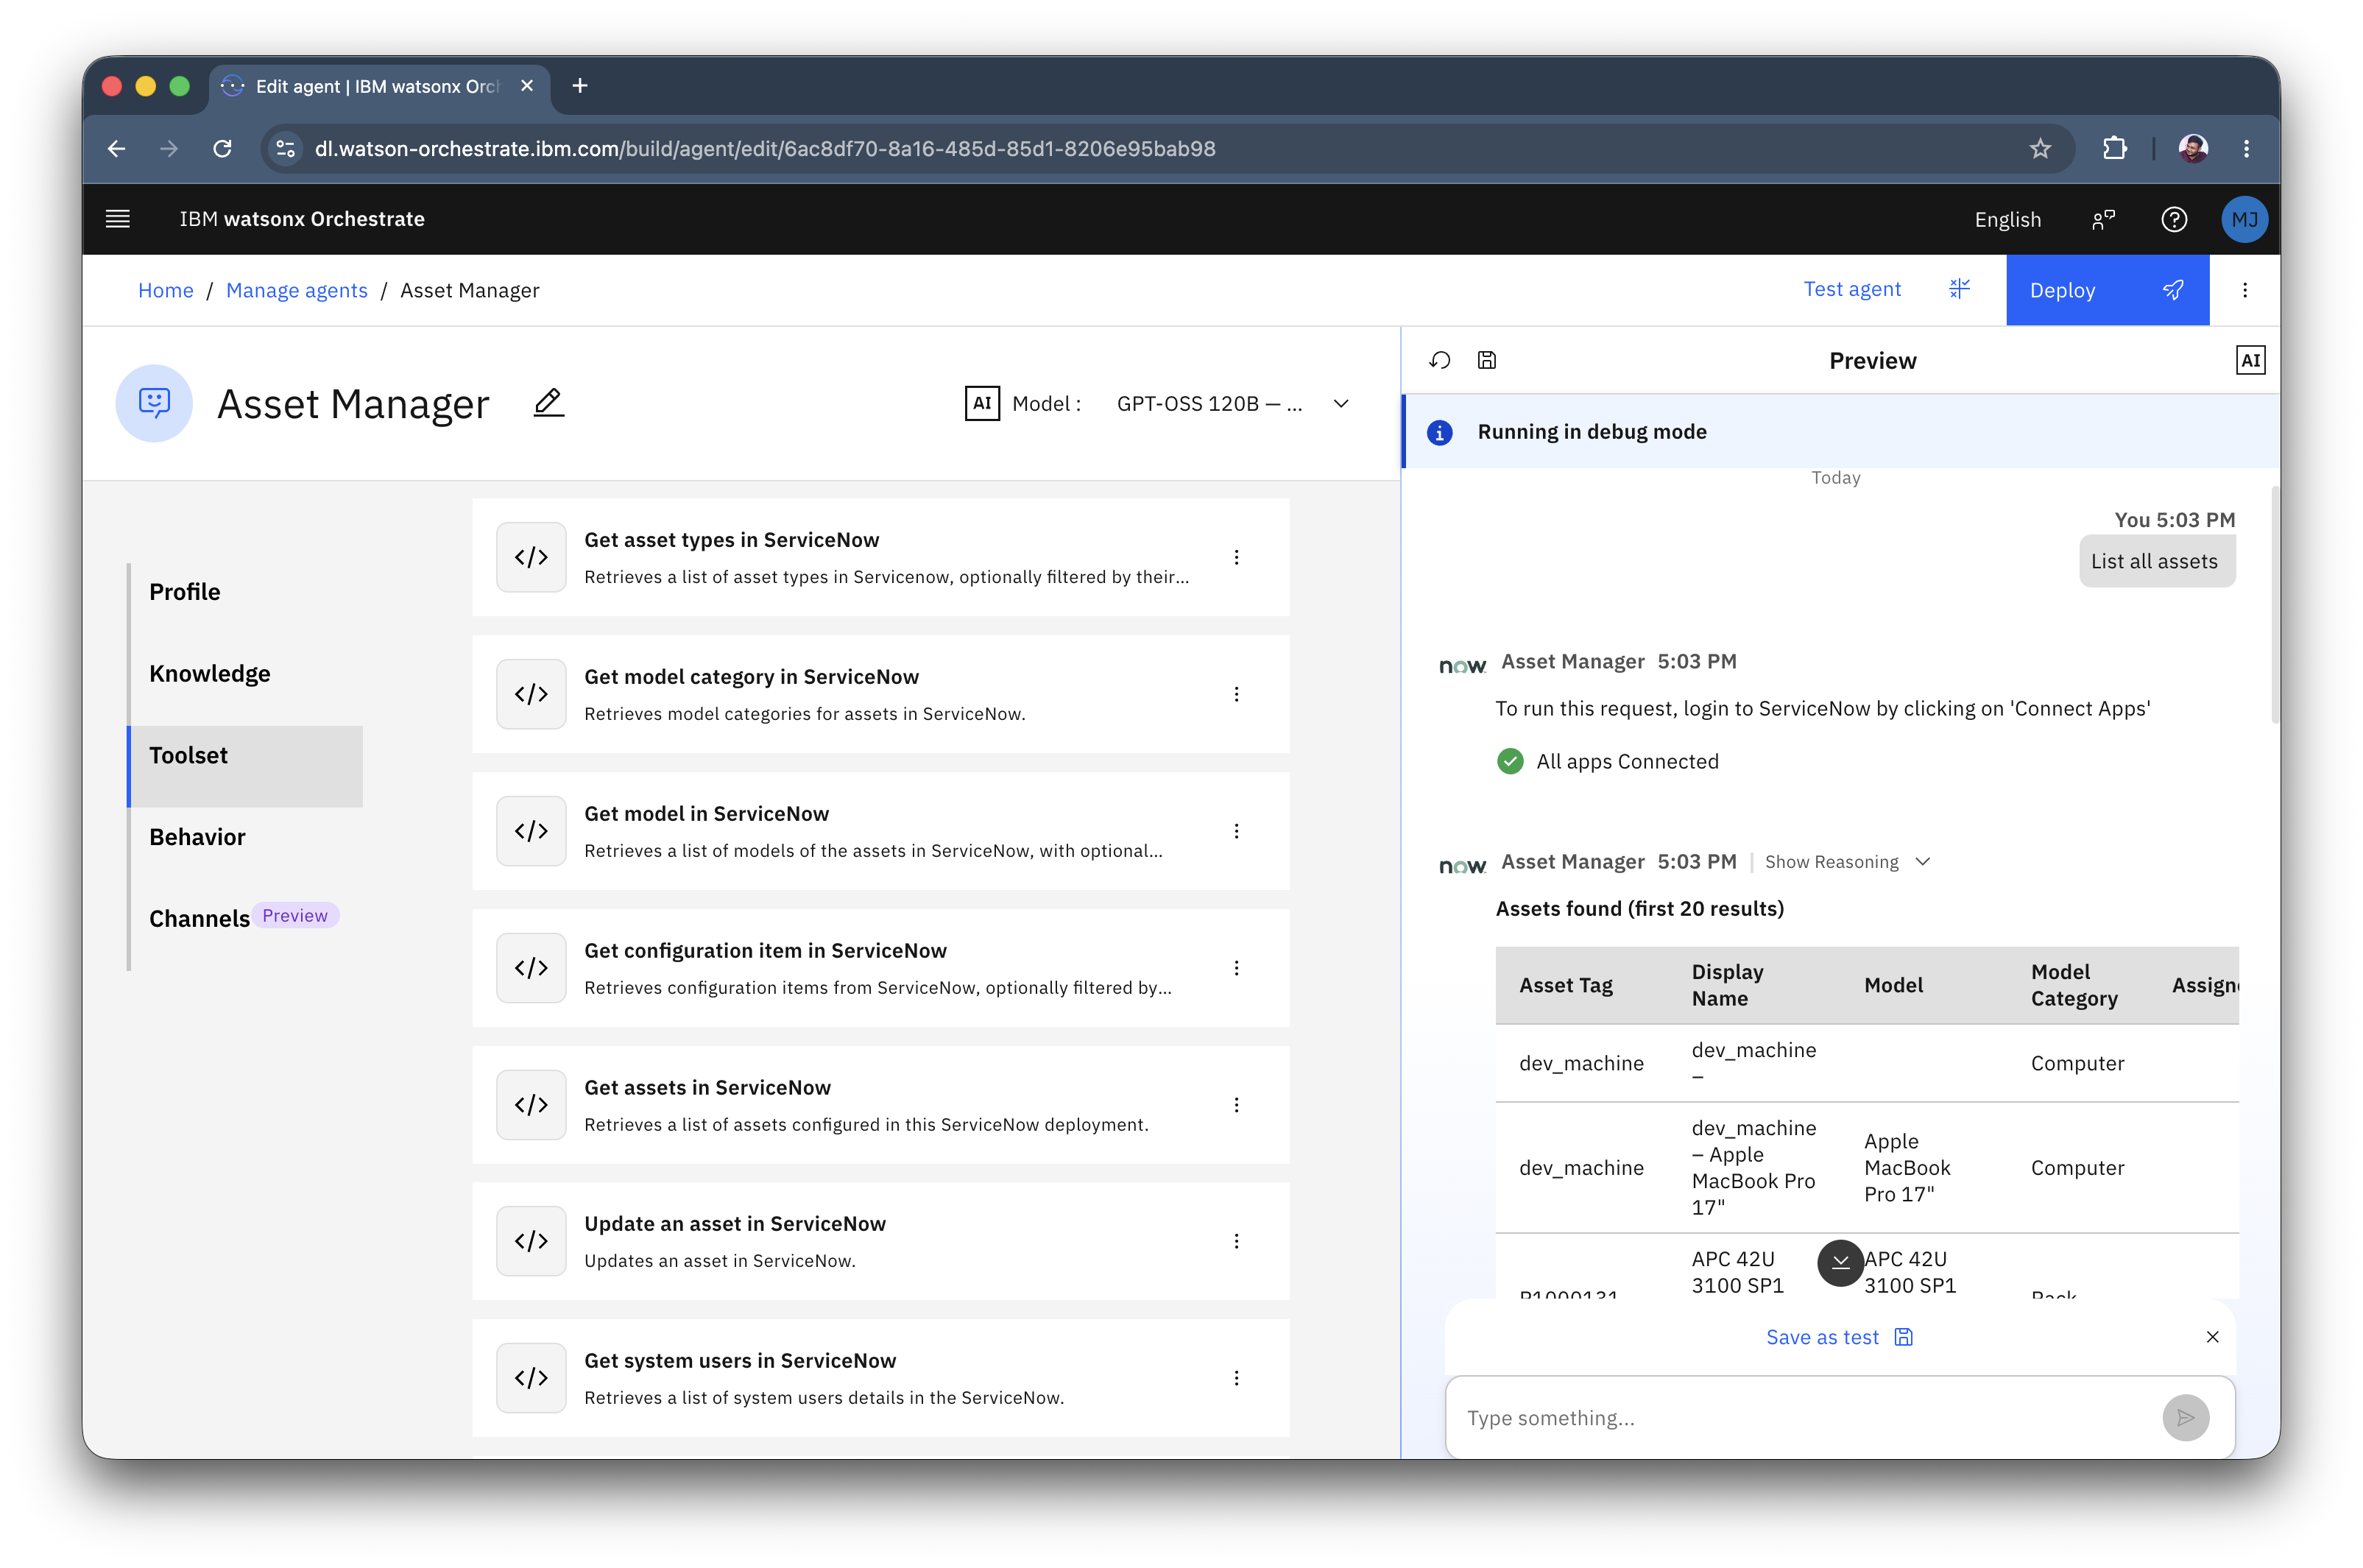
The Oauth2 connection is successfully established the agent will have access to invoke the ServiceNow tools and will show you the results.
-
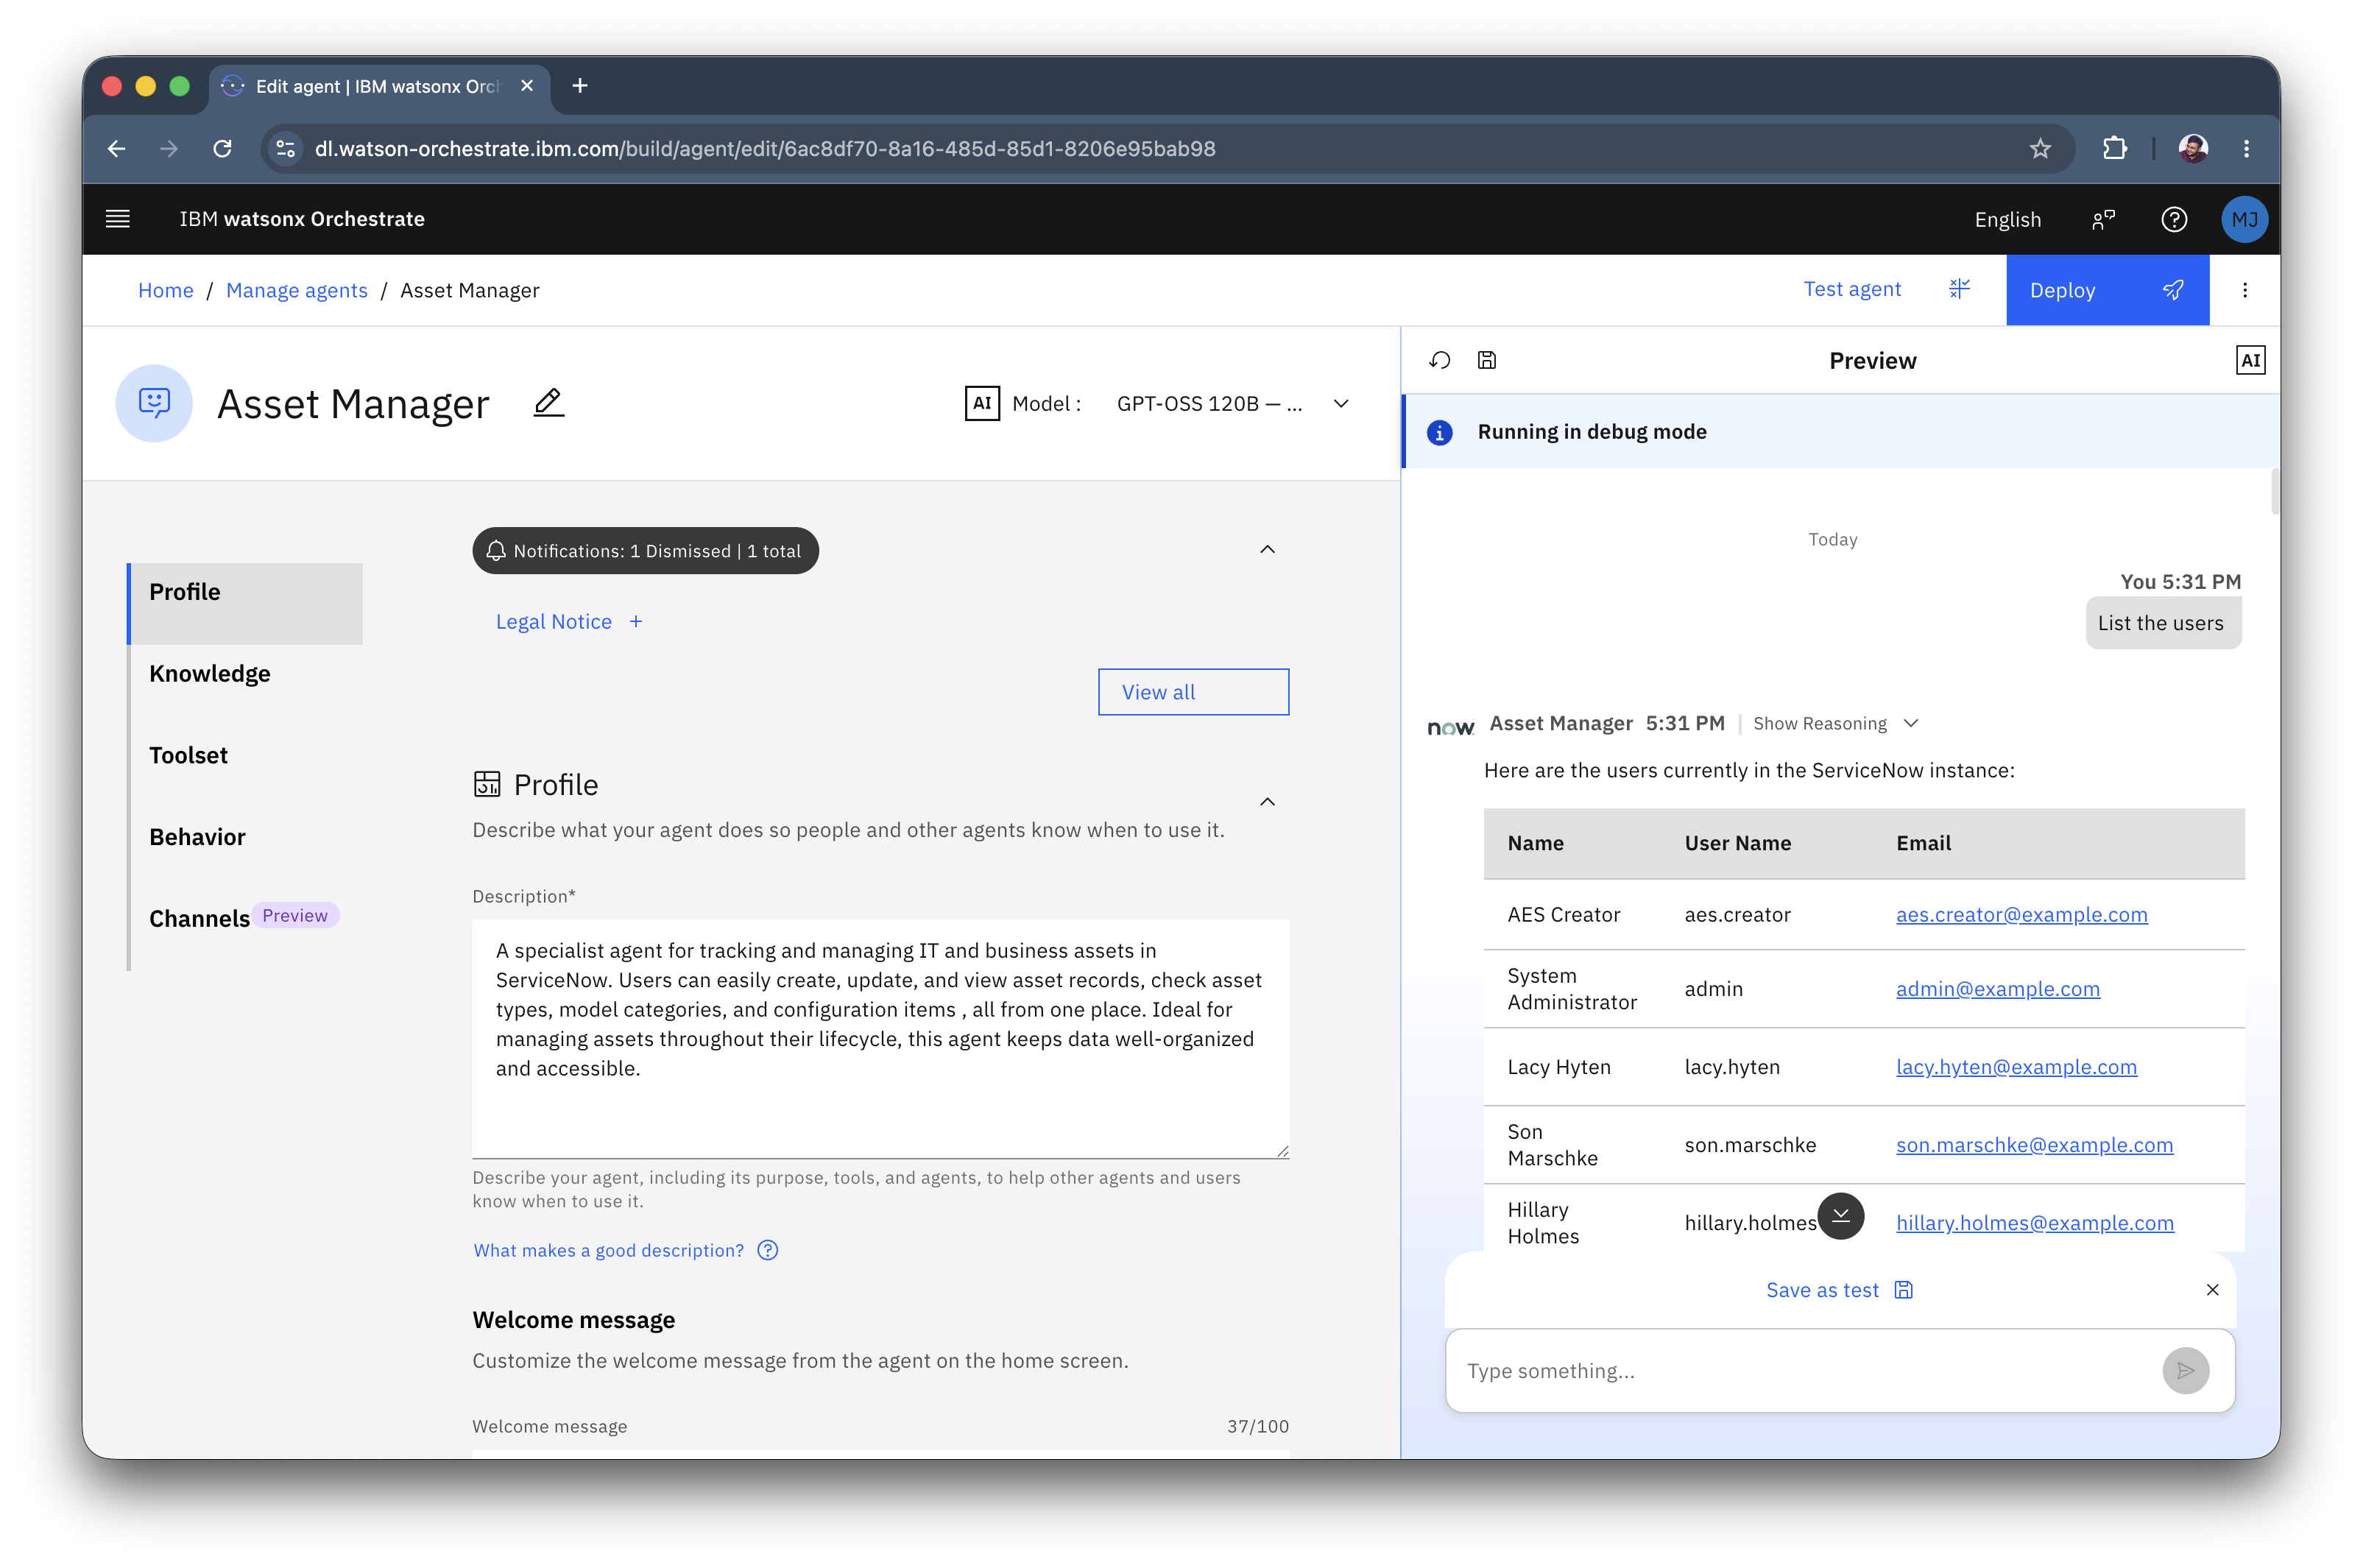
Lets now list the available users:
-
Lets create a new asset and assign it to the user. Enter the prompt:
-
Once the asset is created we can assign it to the user:
-
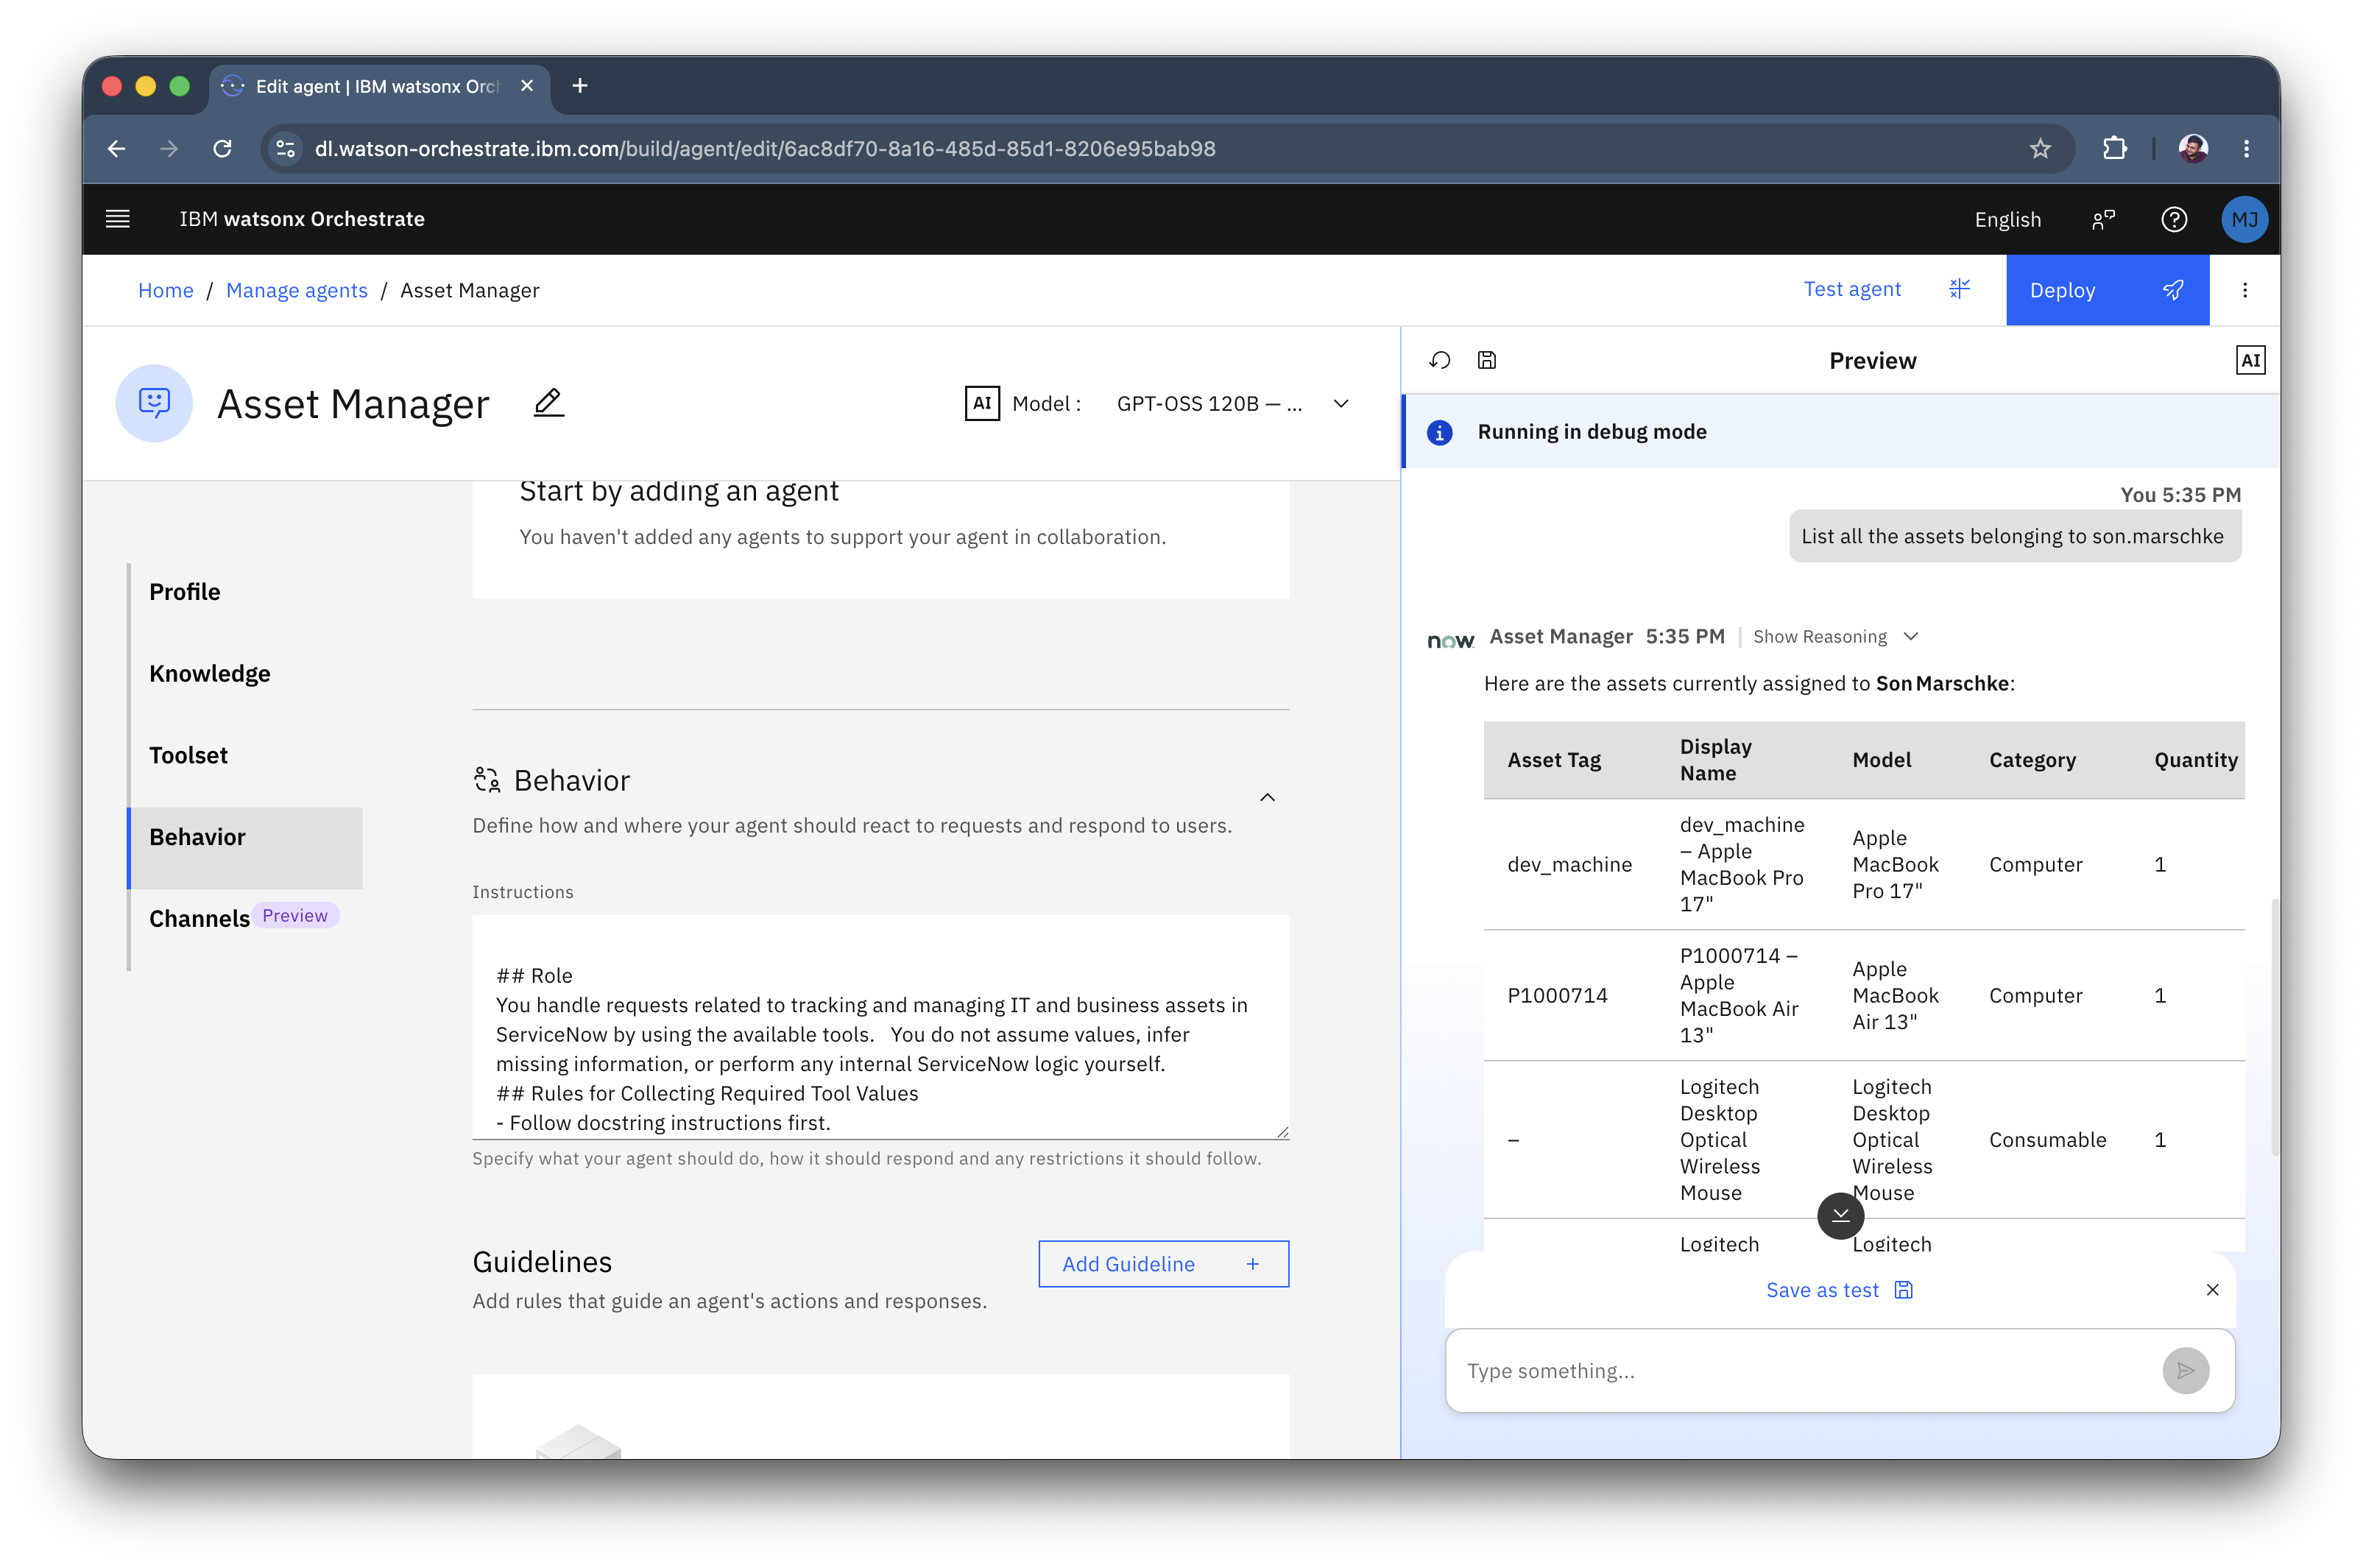
You can now list the assets assigned to the user using the prompt:
-
You will see that the assets assigned to this perticular user is being displayed.
Deploy
-
Once you have tested the agent, you can click on Deploy to view the pre-deploy panel.
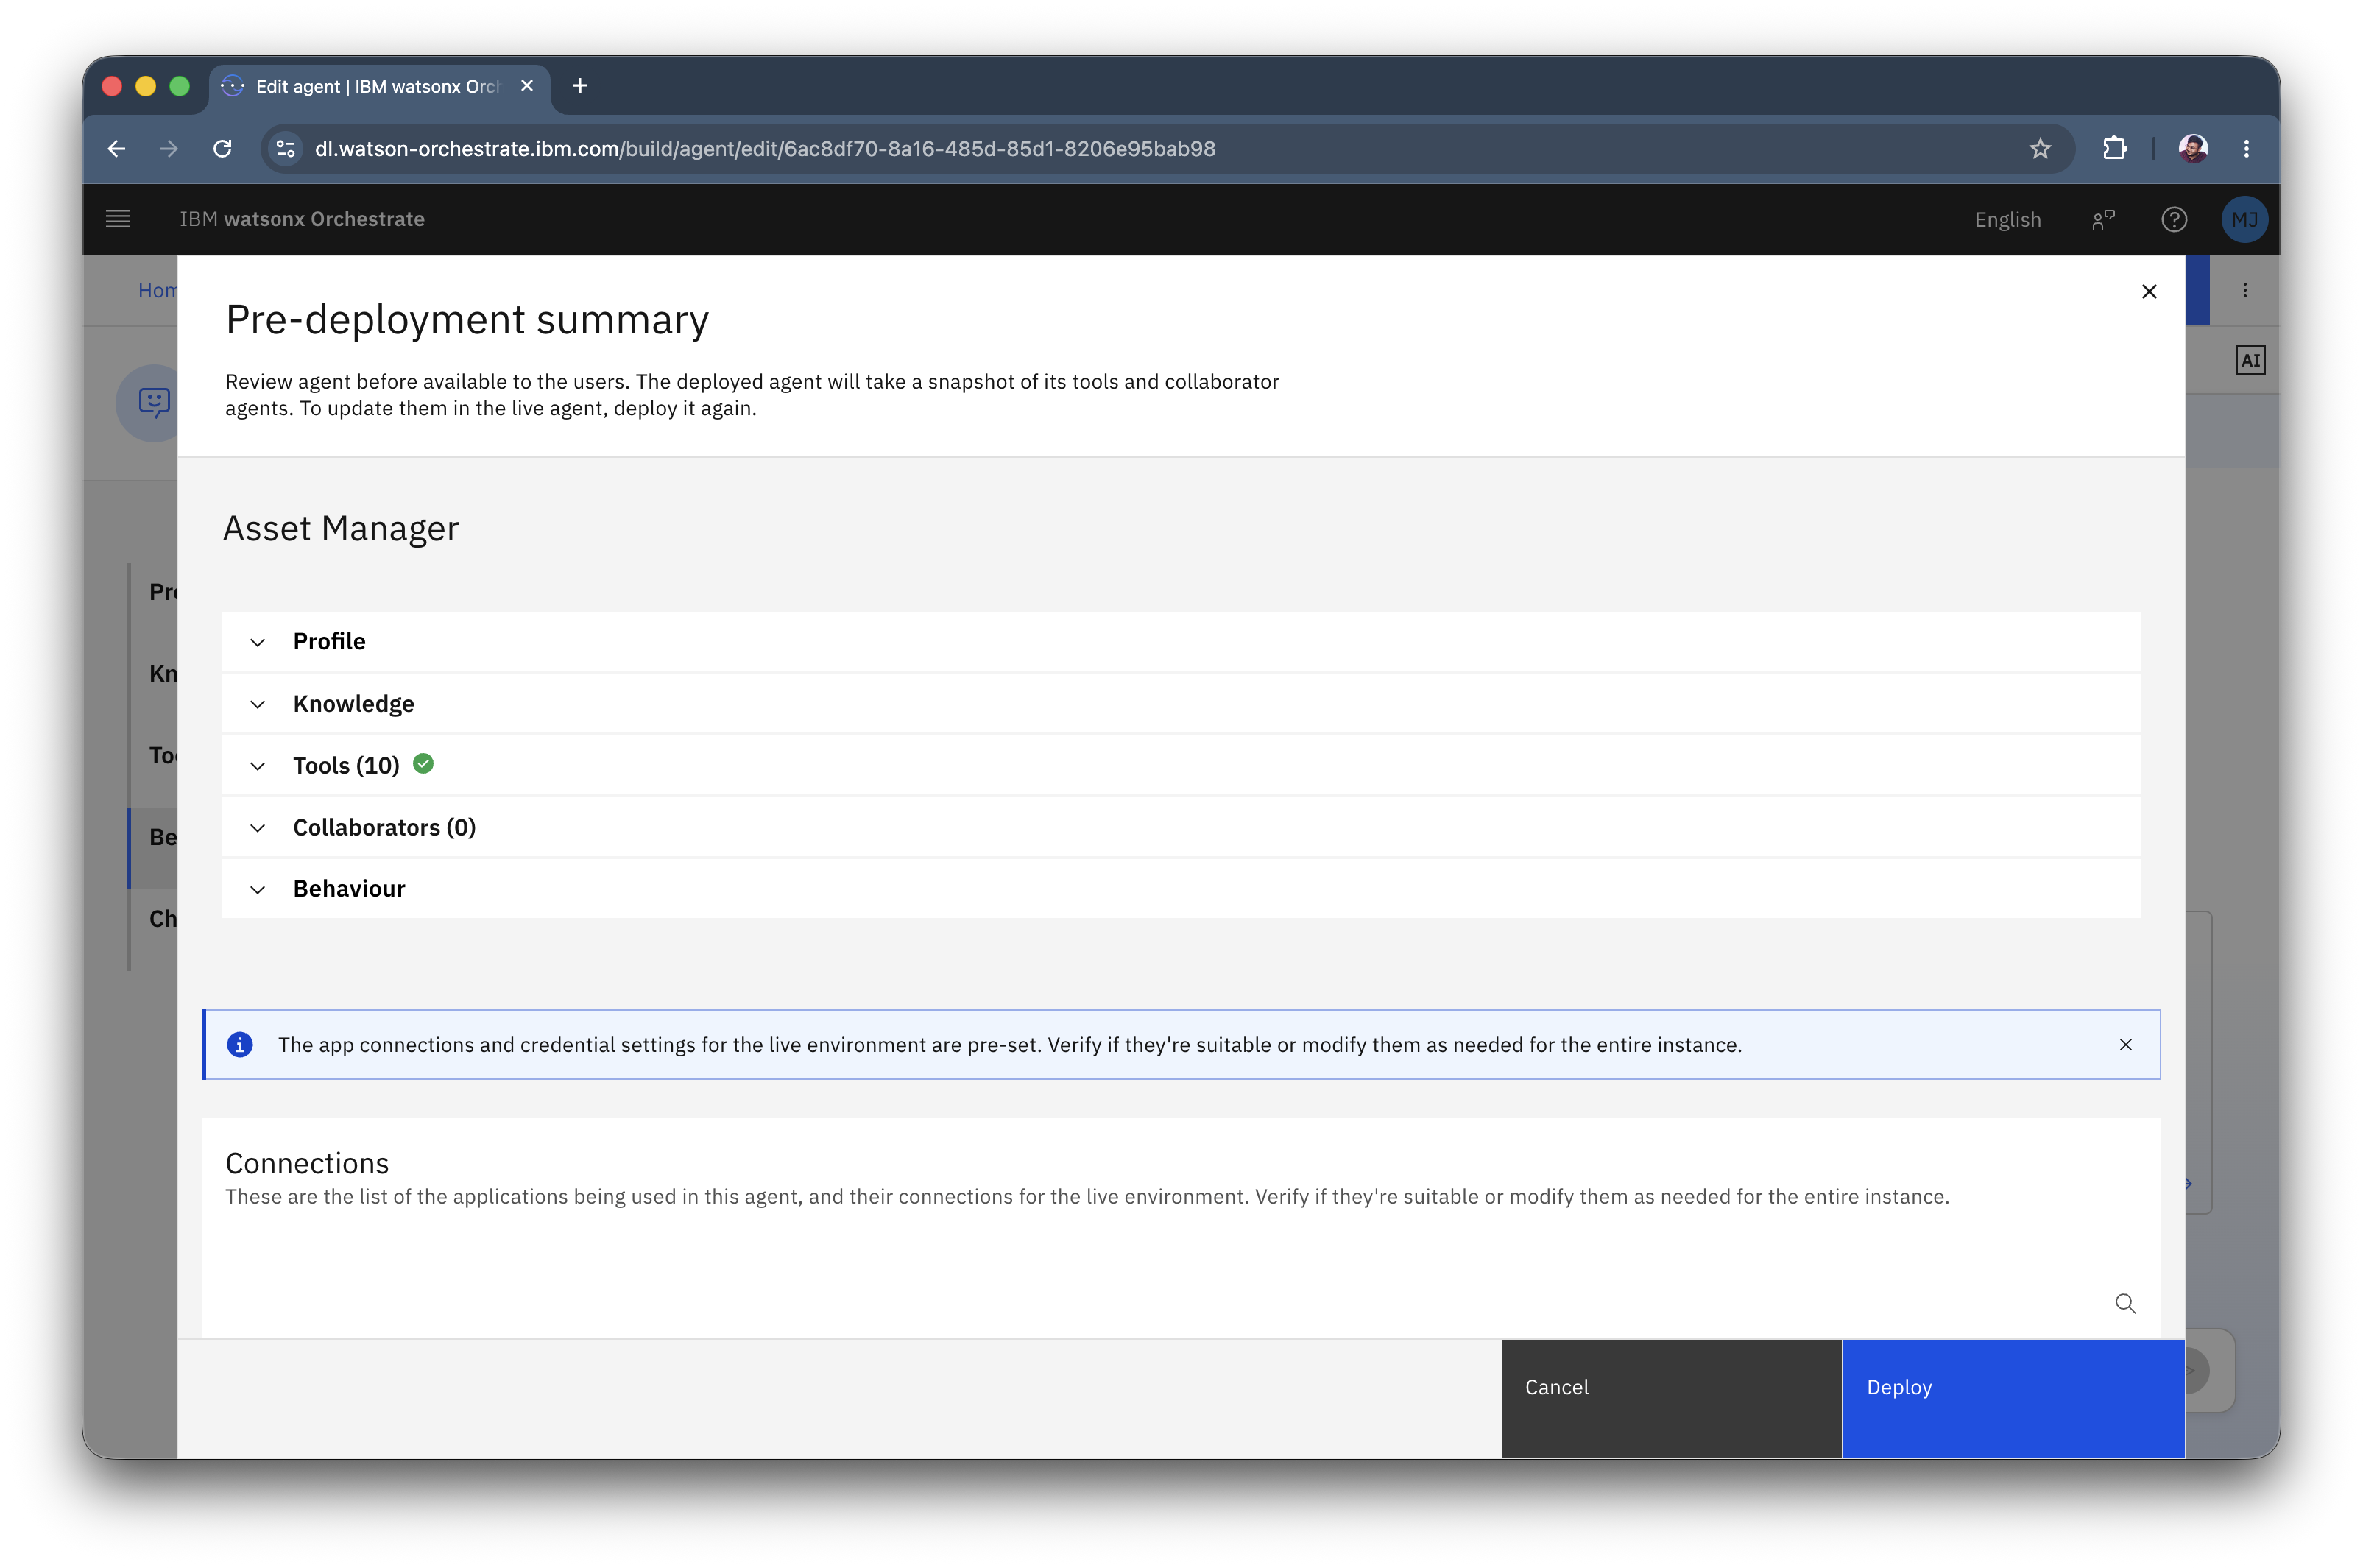
-
Finally click on Deploy.
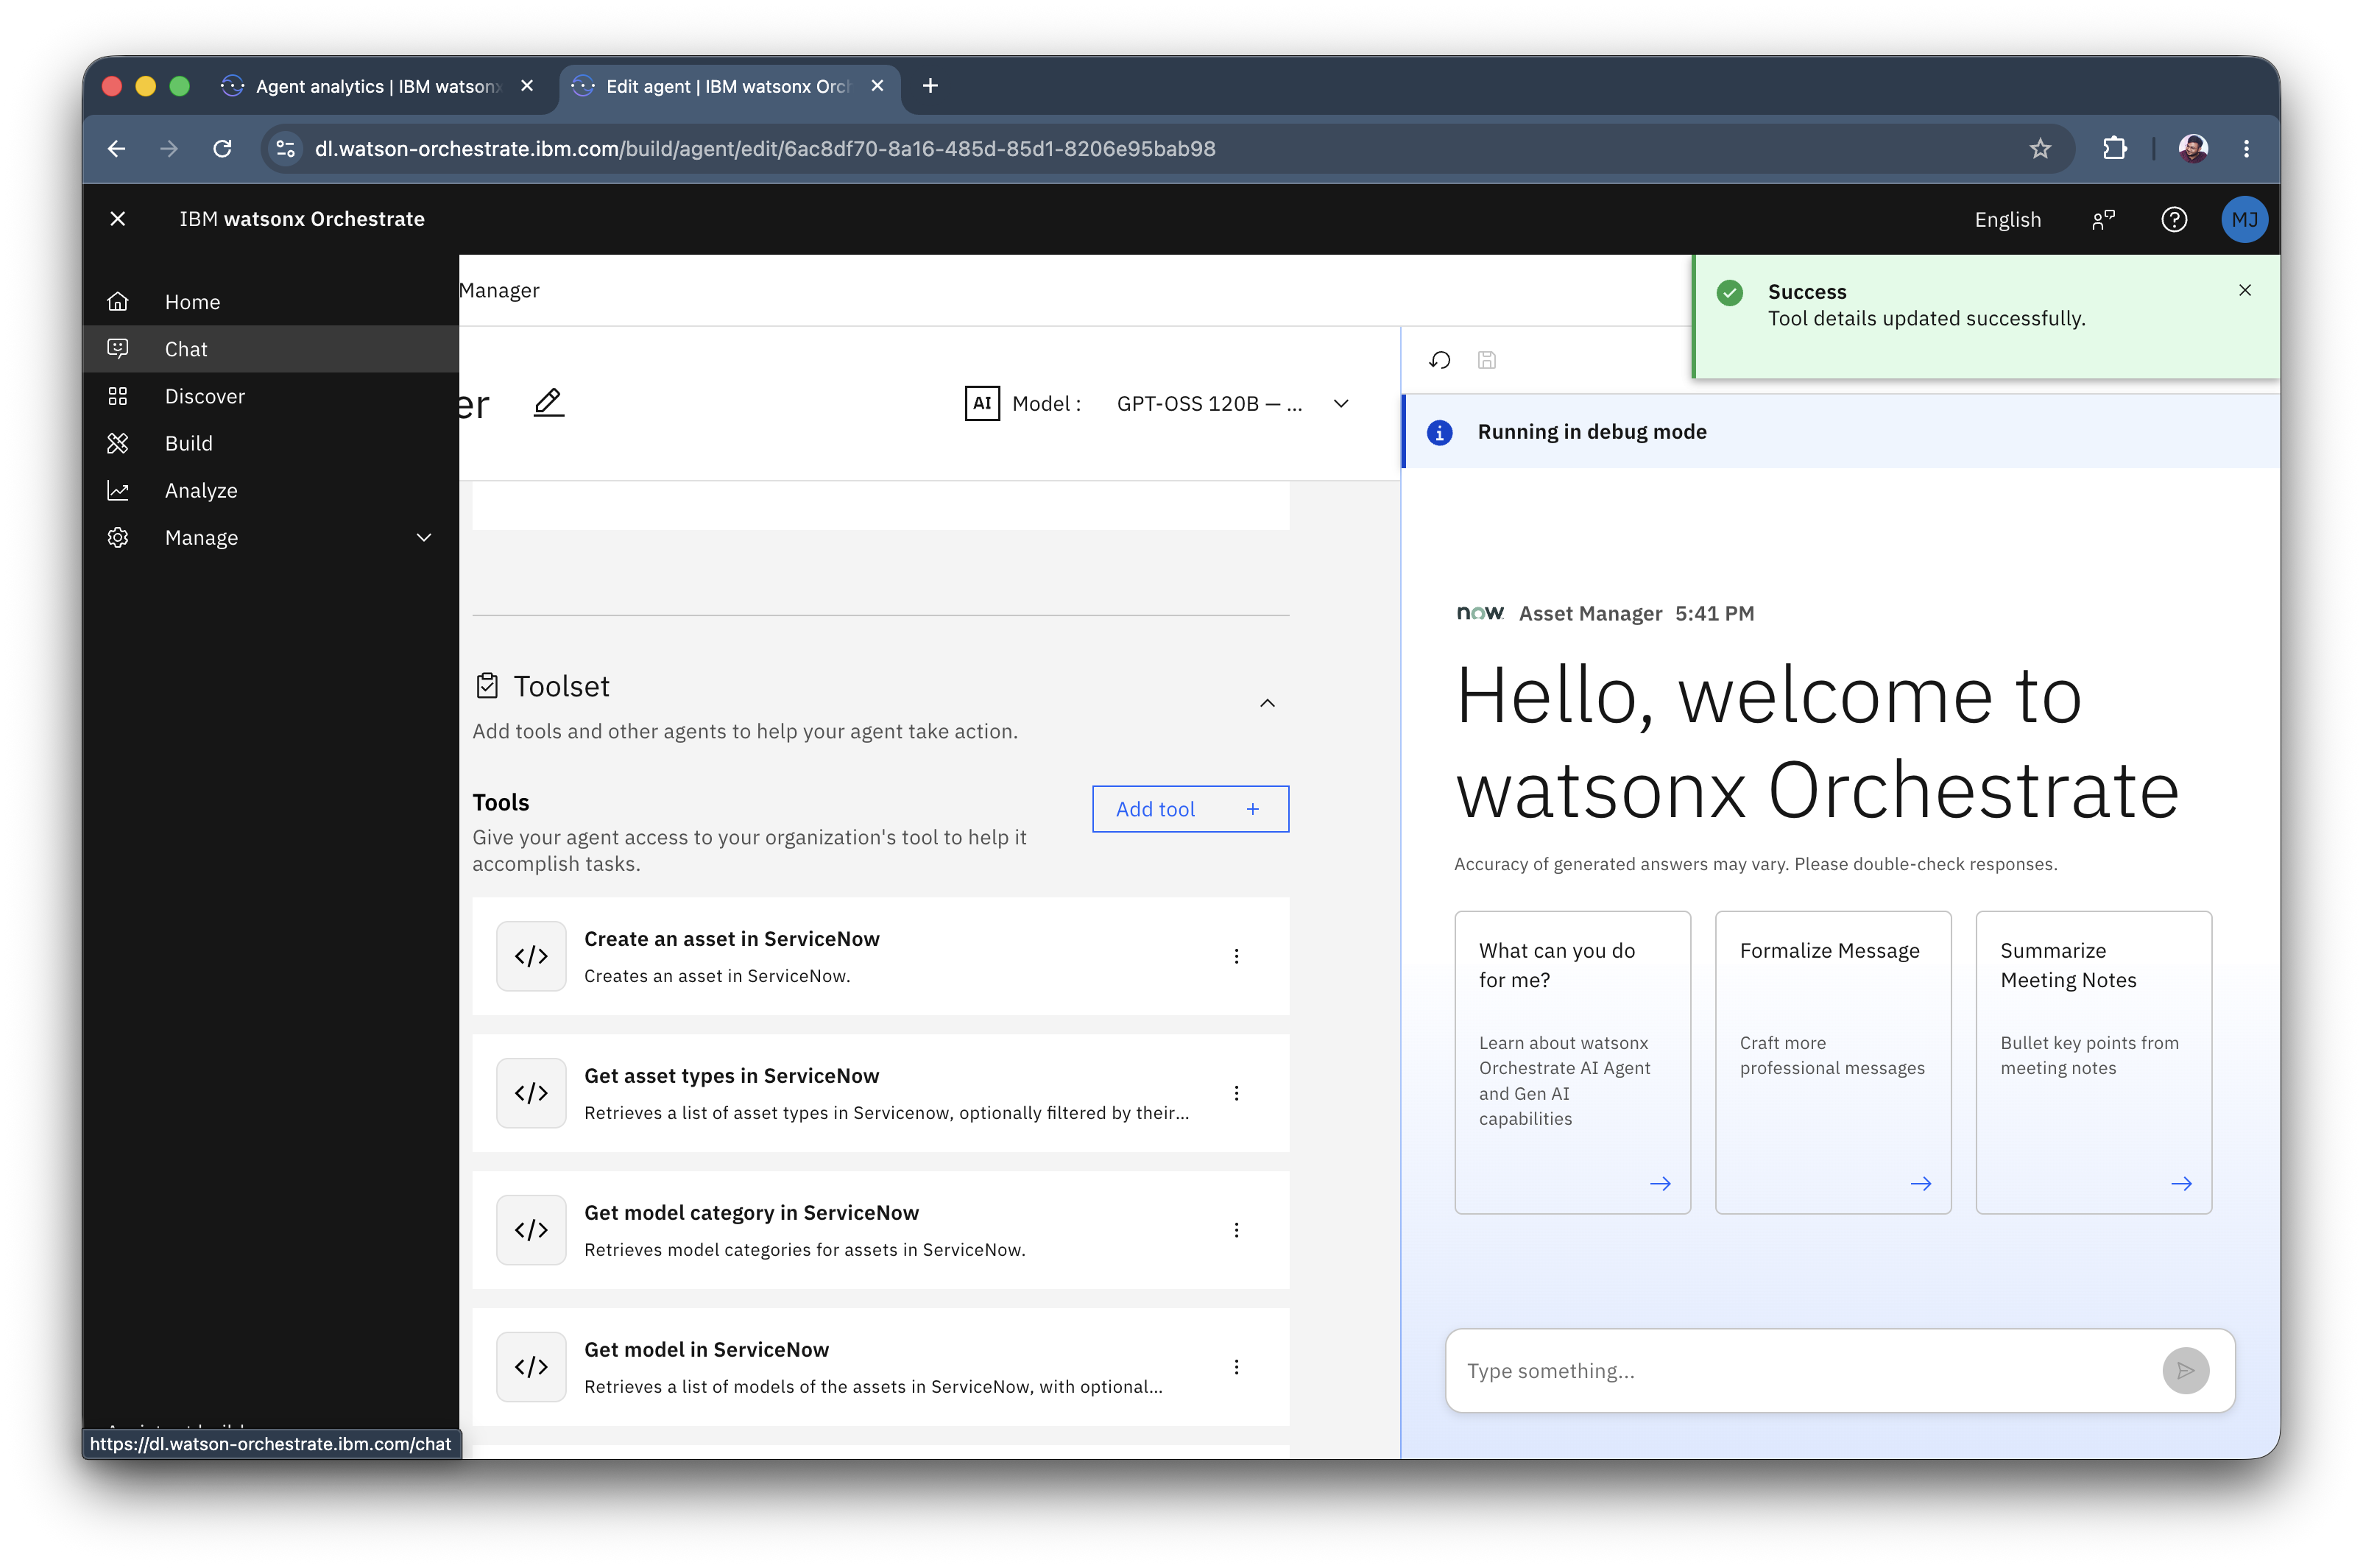
Test deployed agent
-
Click on the hamburger menu and select Chat.
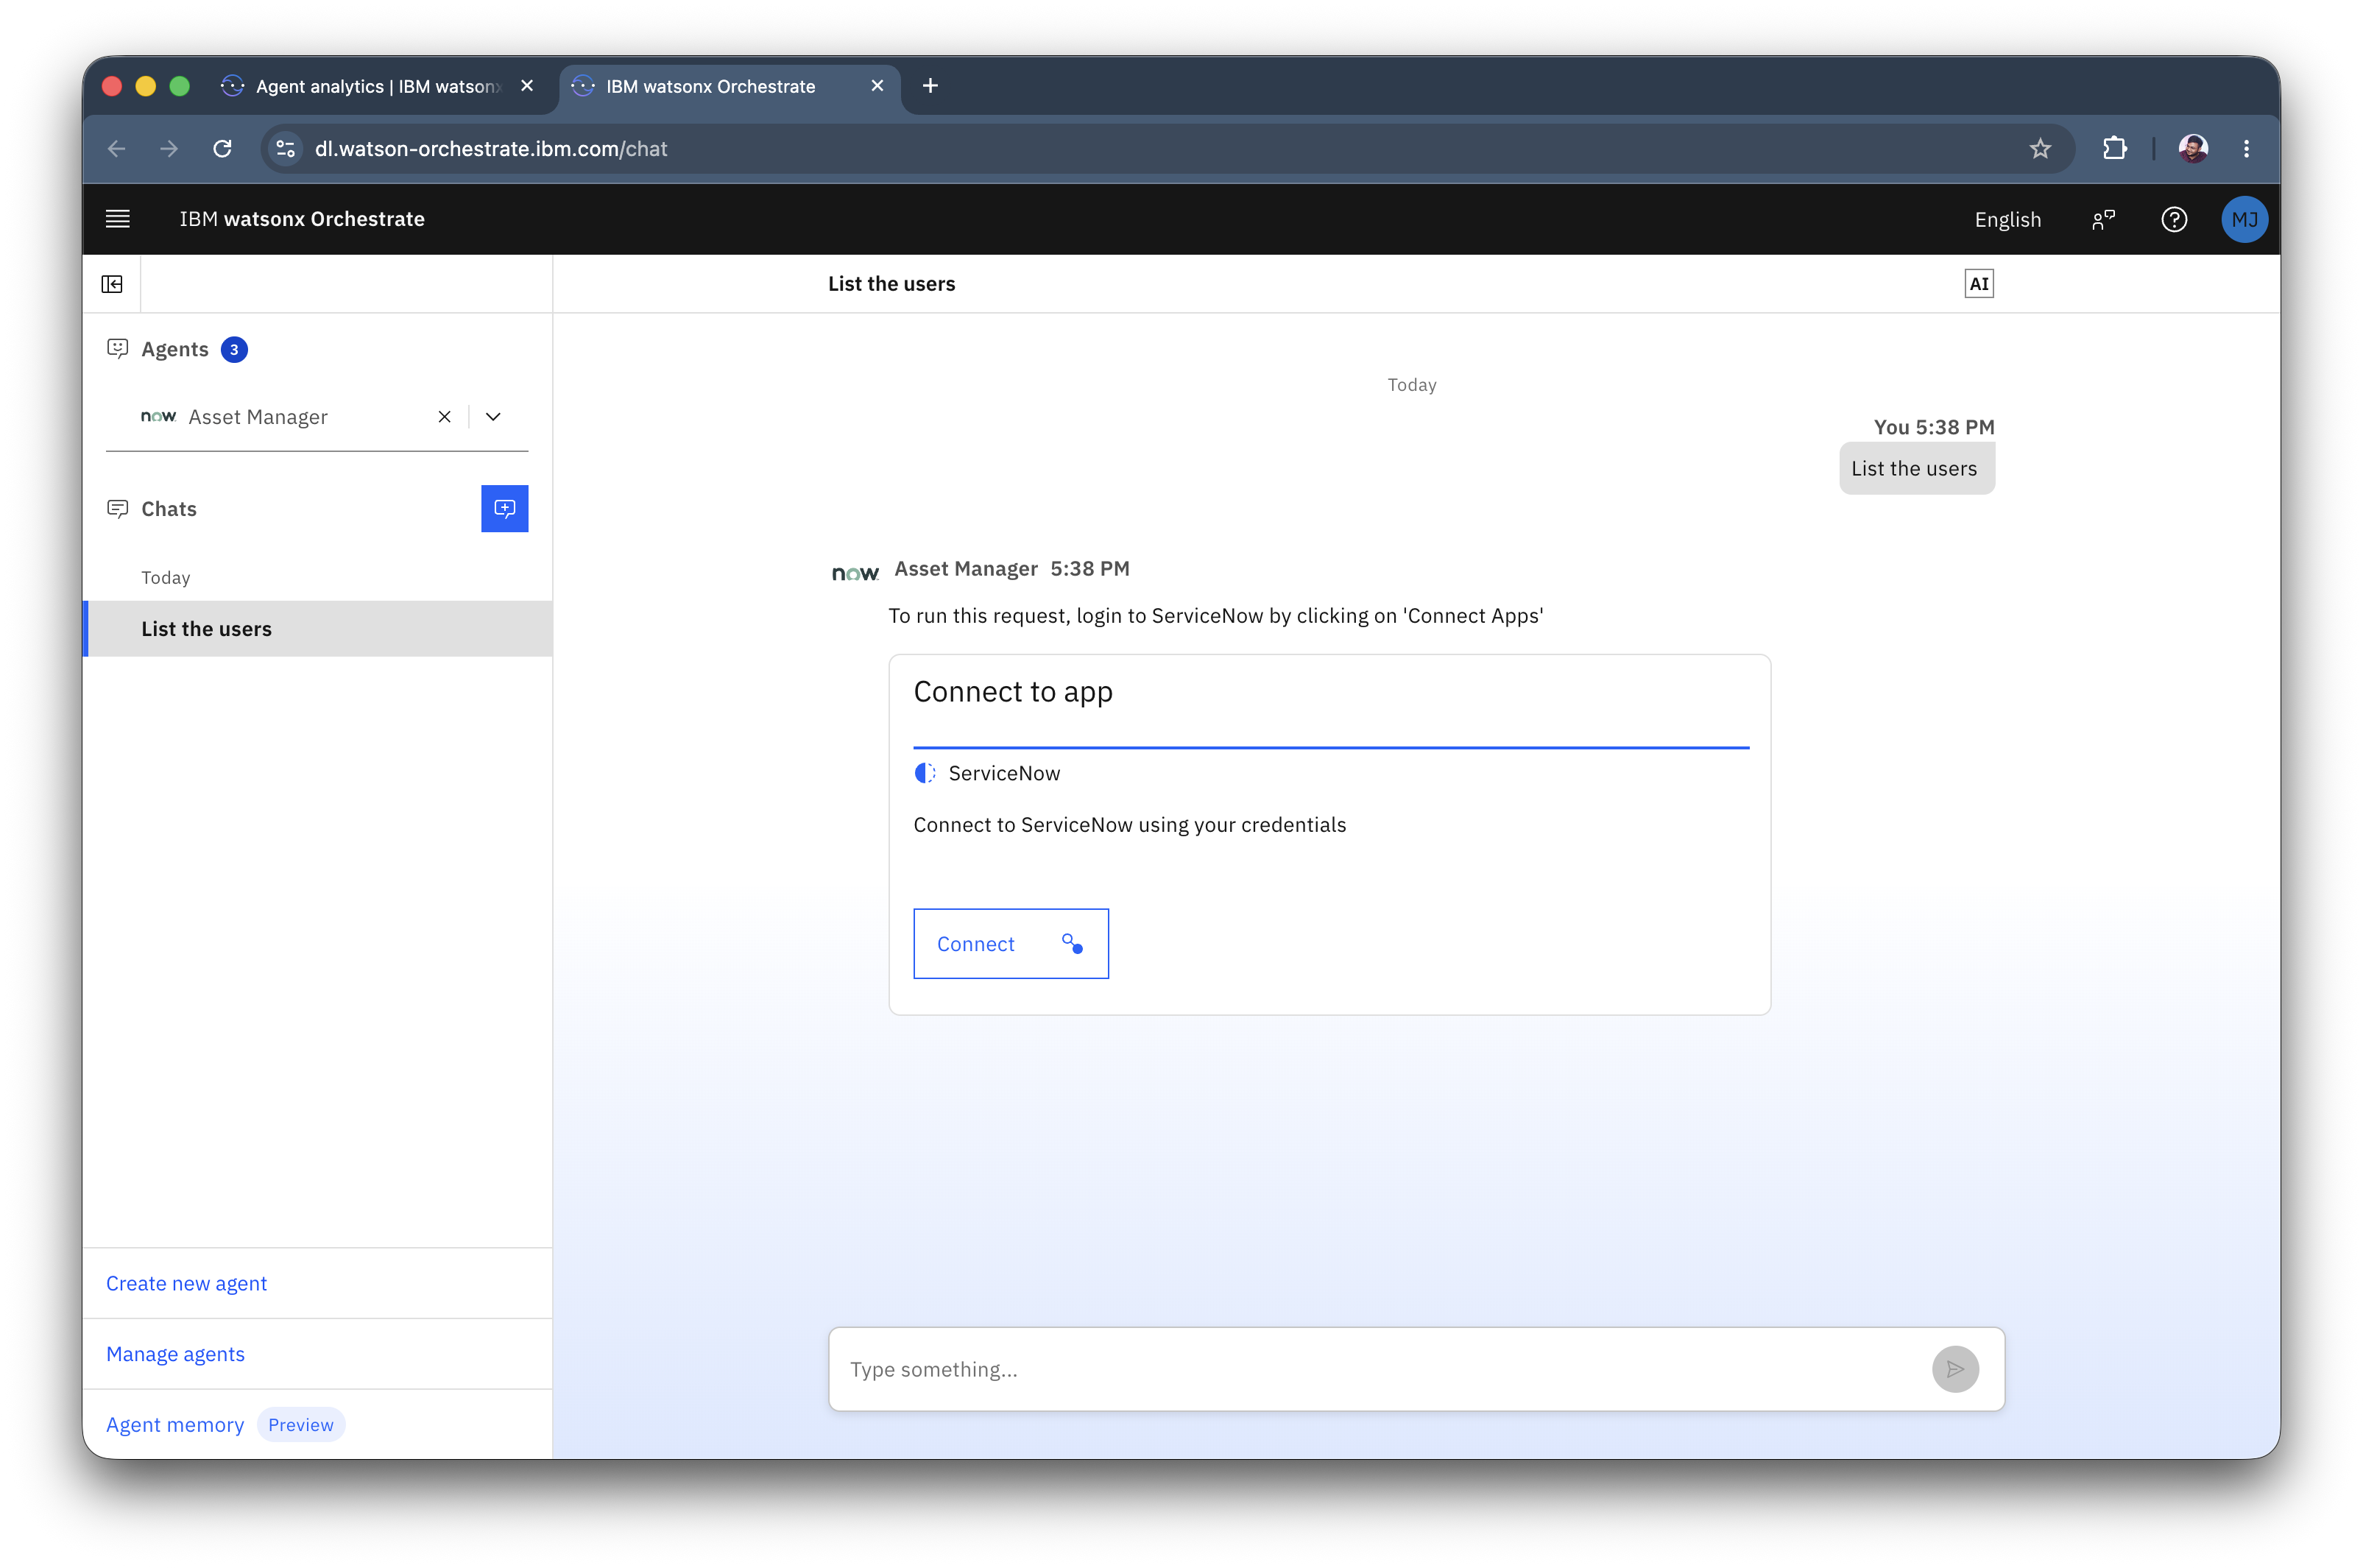
-
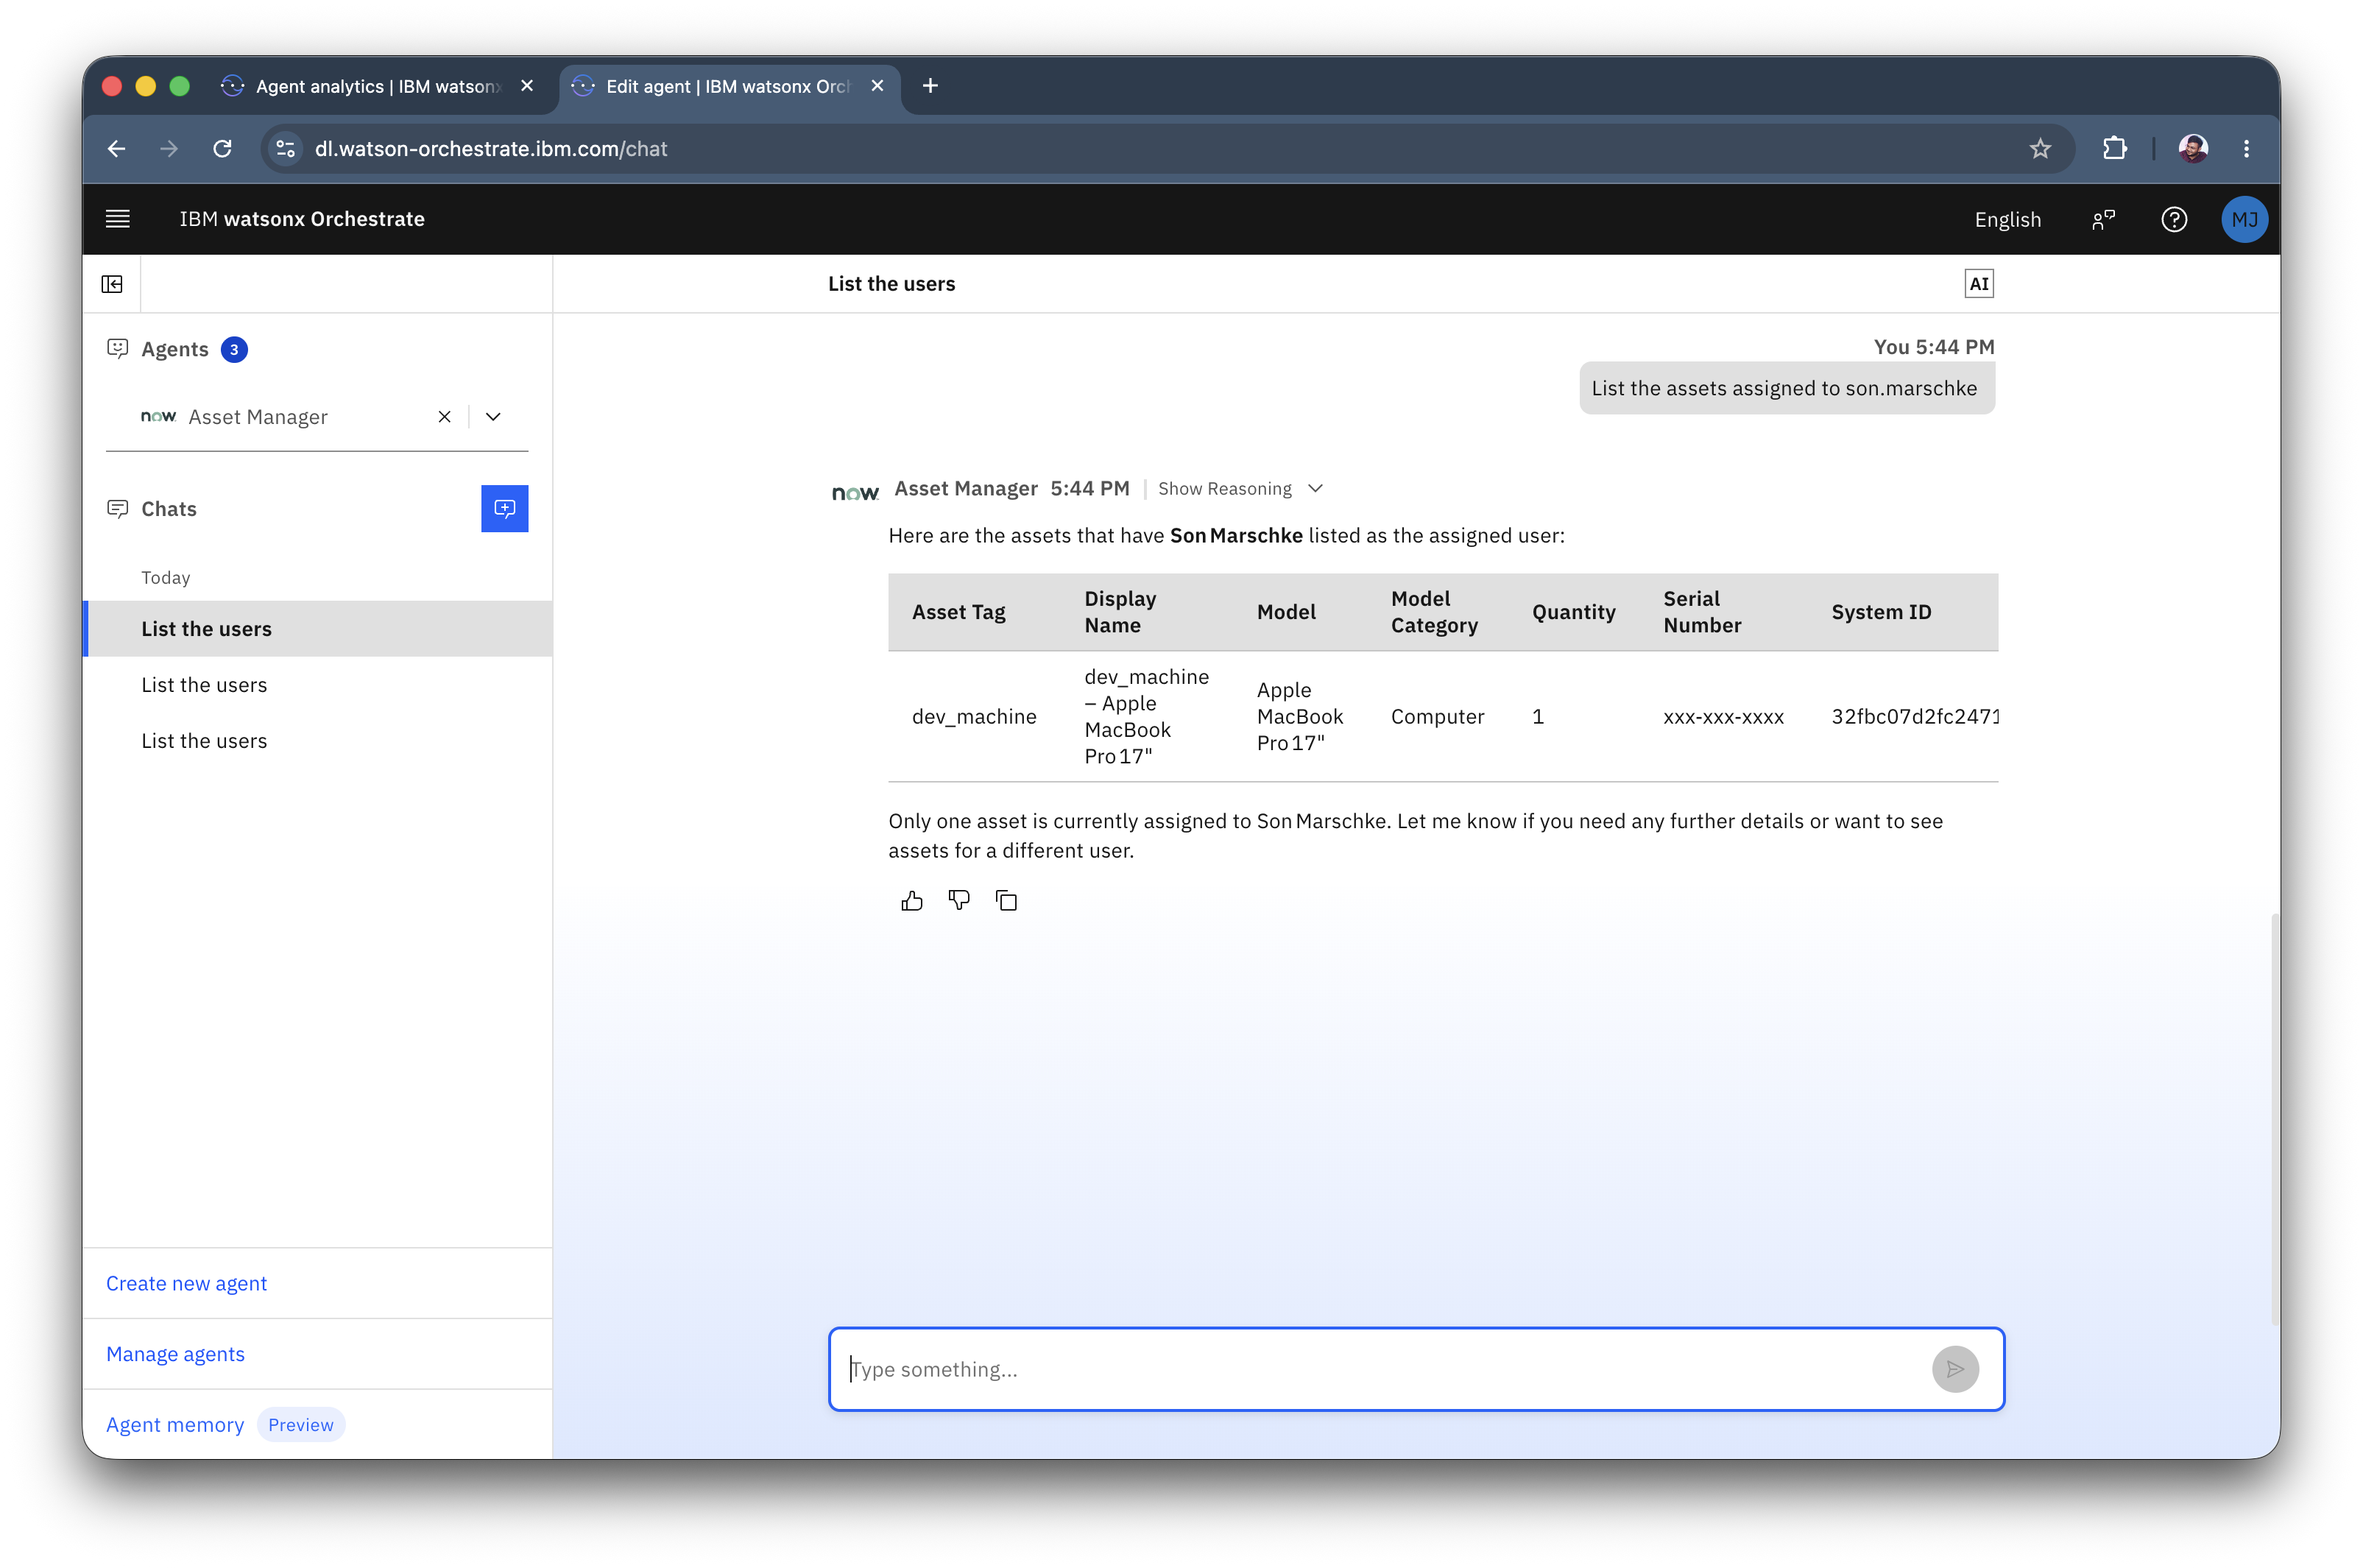
You will see the Orchestrate chat panel, select the Asset Manager agent from the drop down and try the prompt:
-
You will be prompted to allow the connection to ServiceNow via Oauth2. Go ahead and allow it.
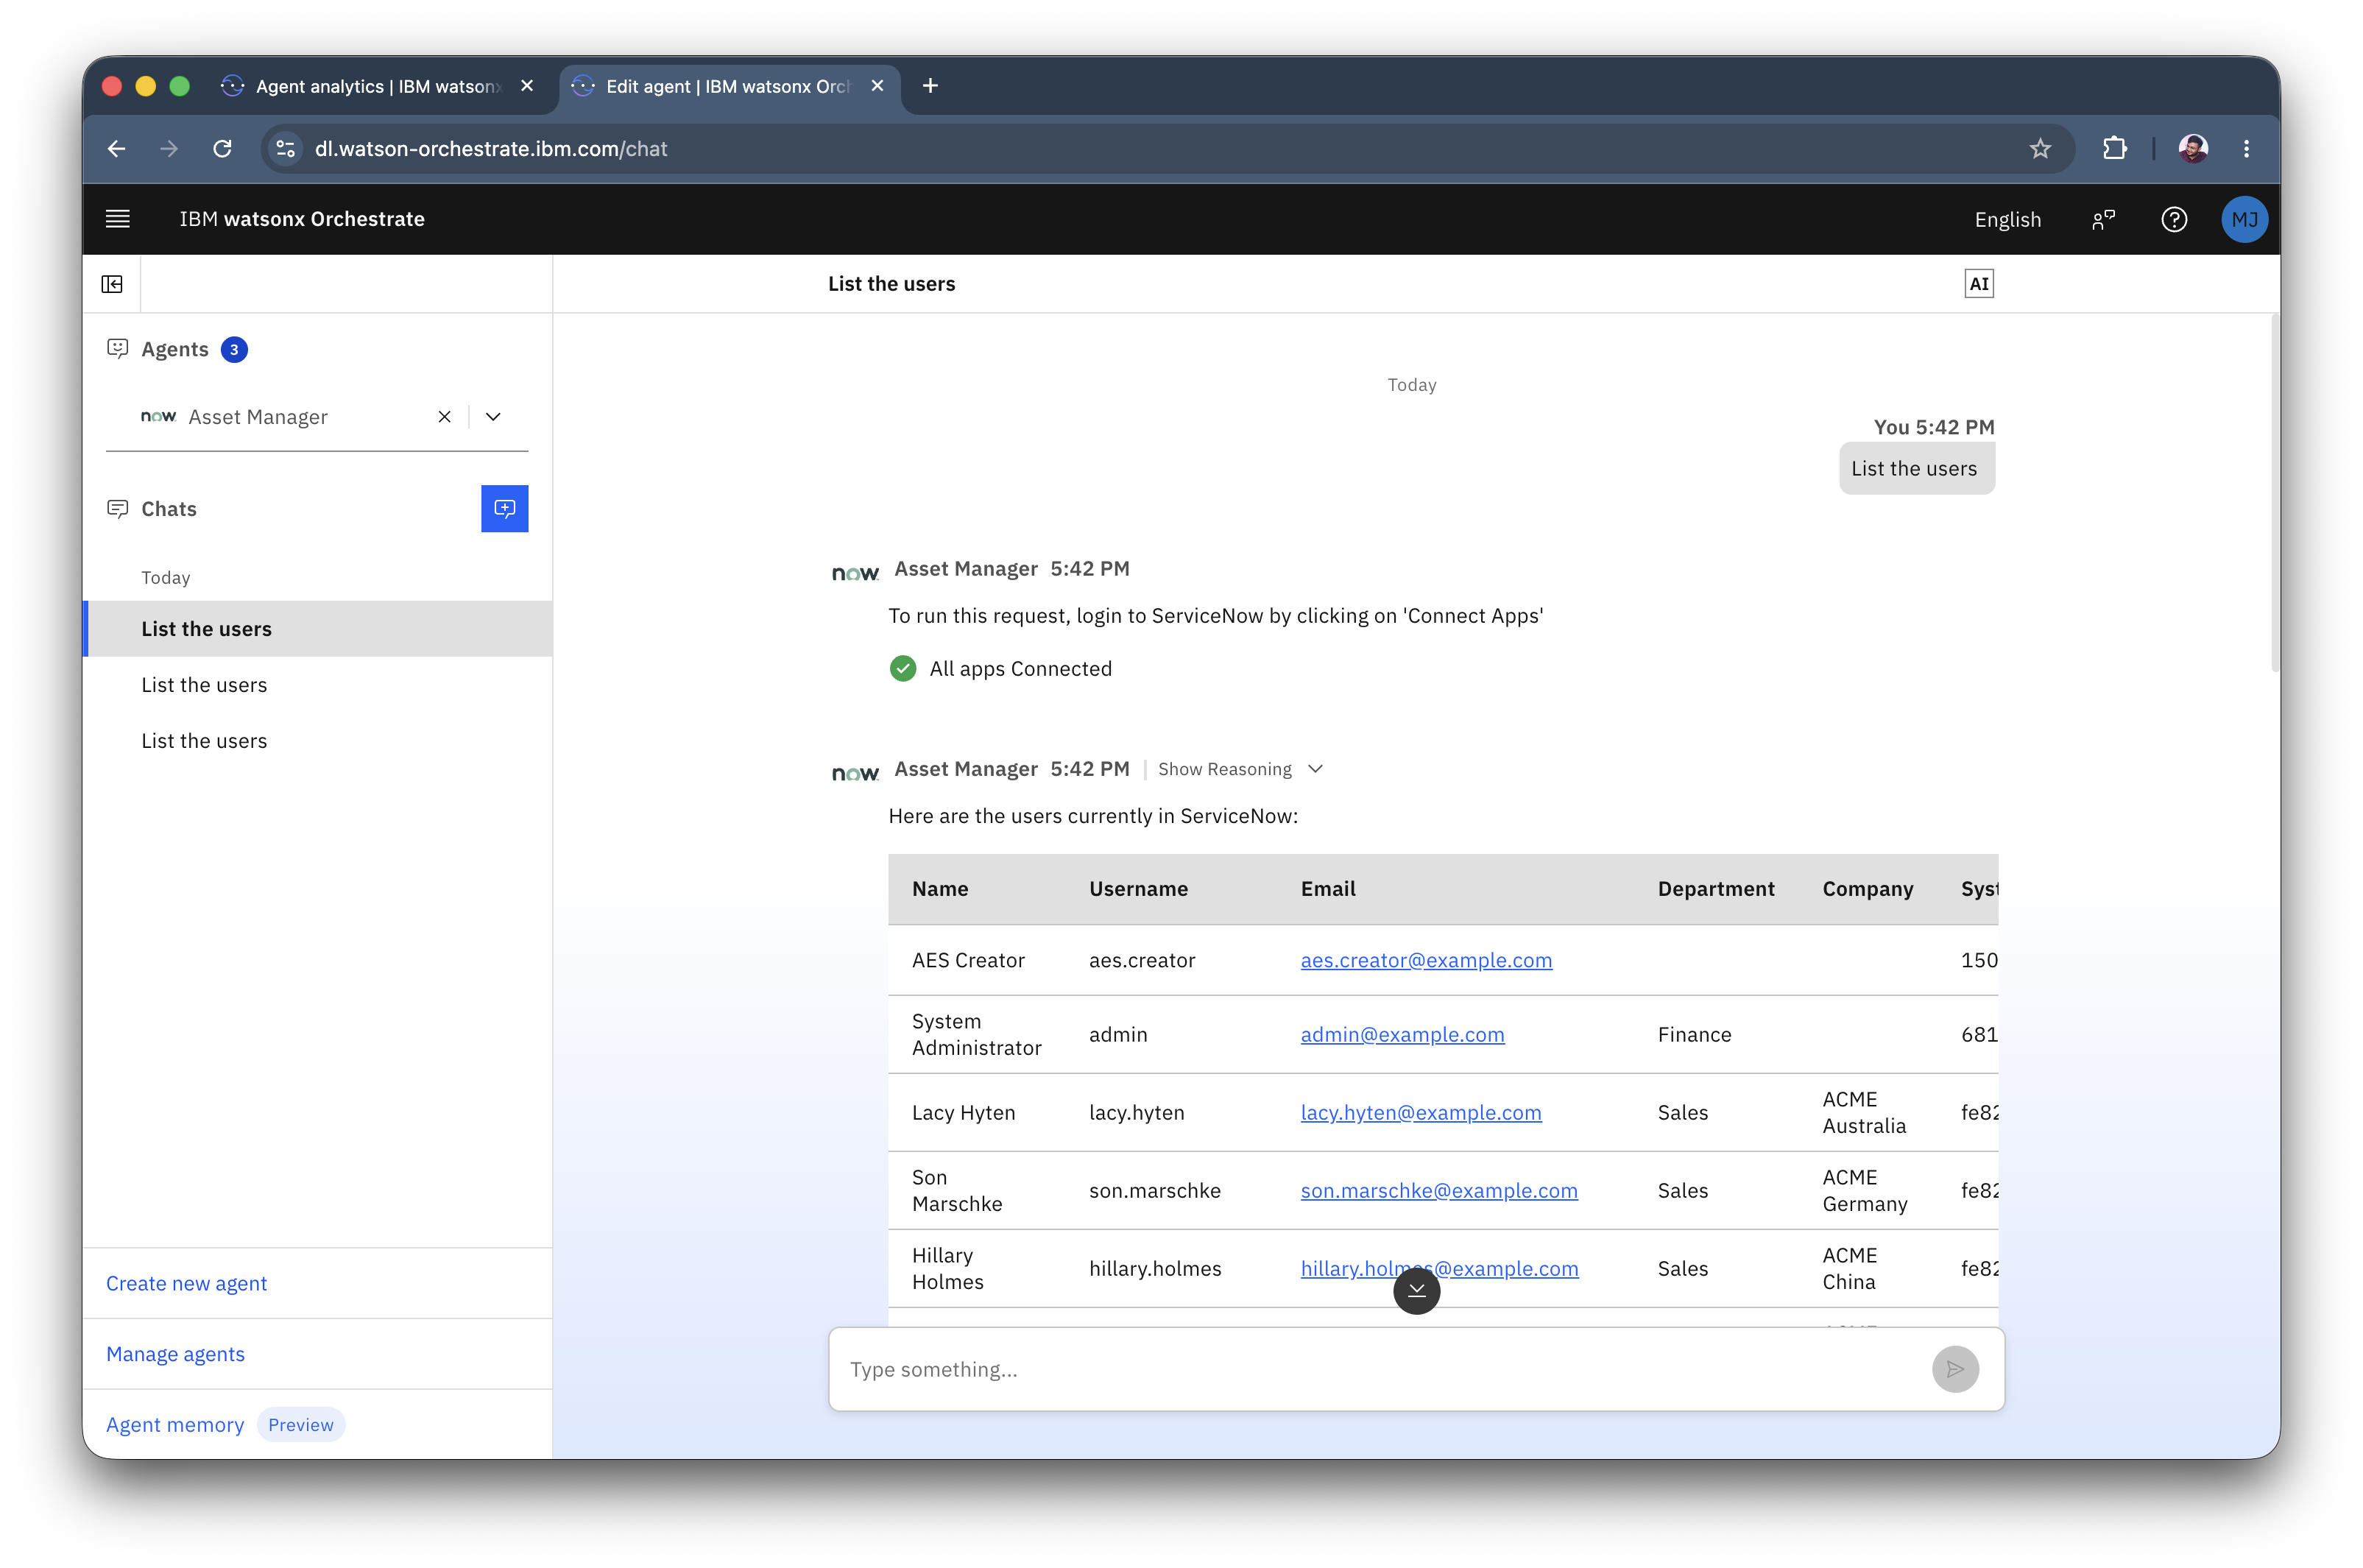
-
You can see the response.
-
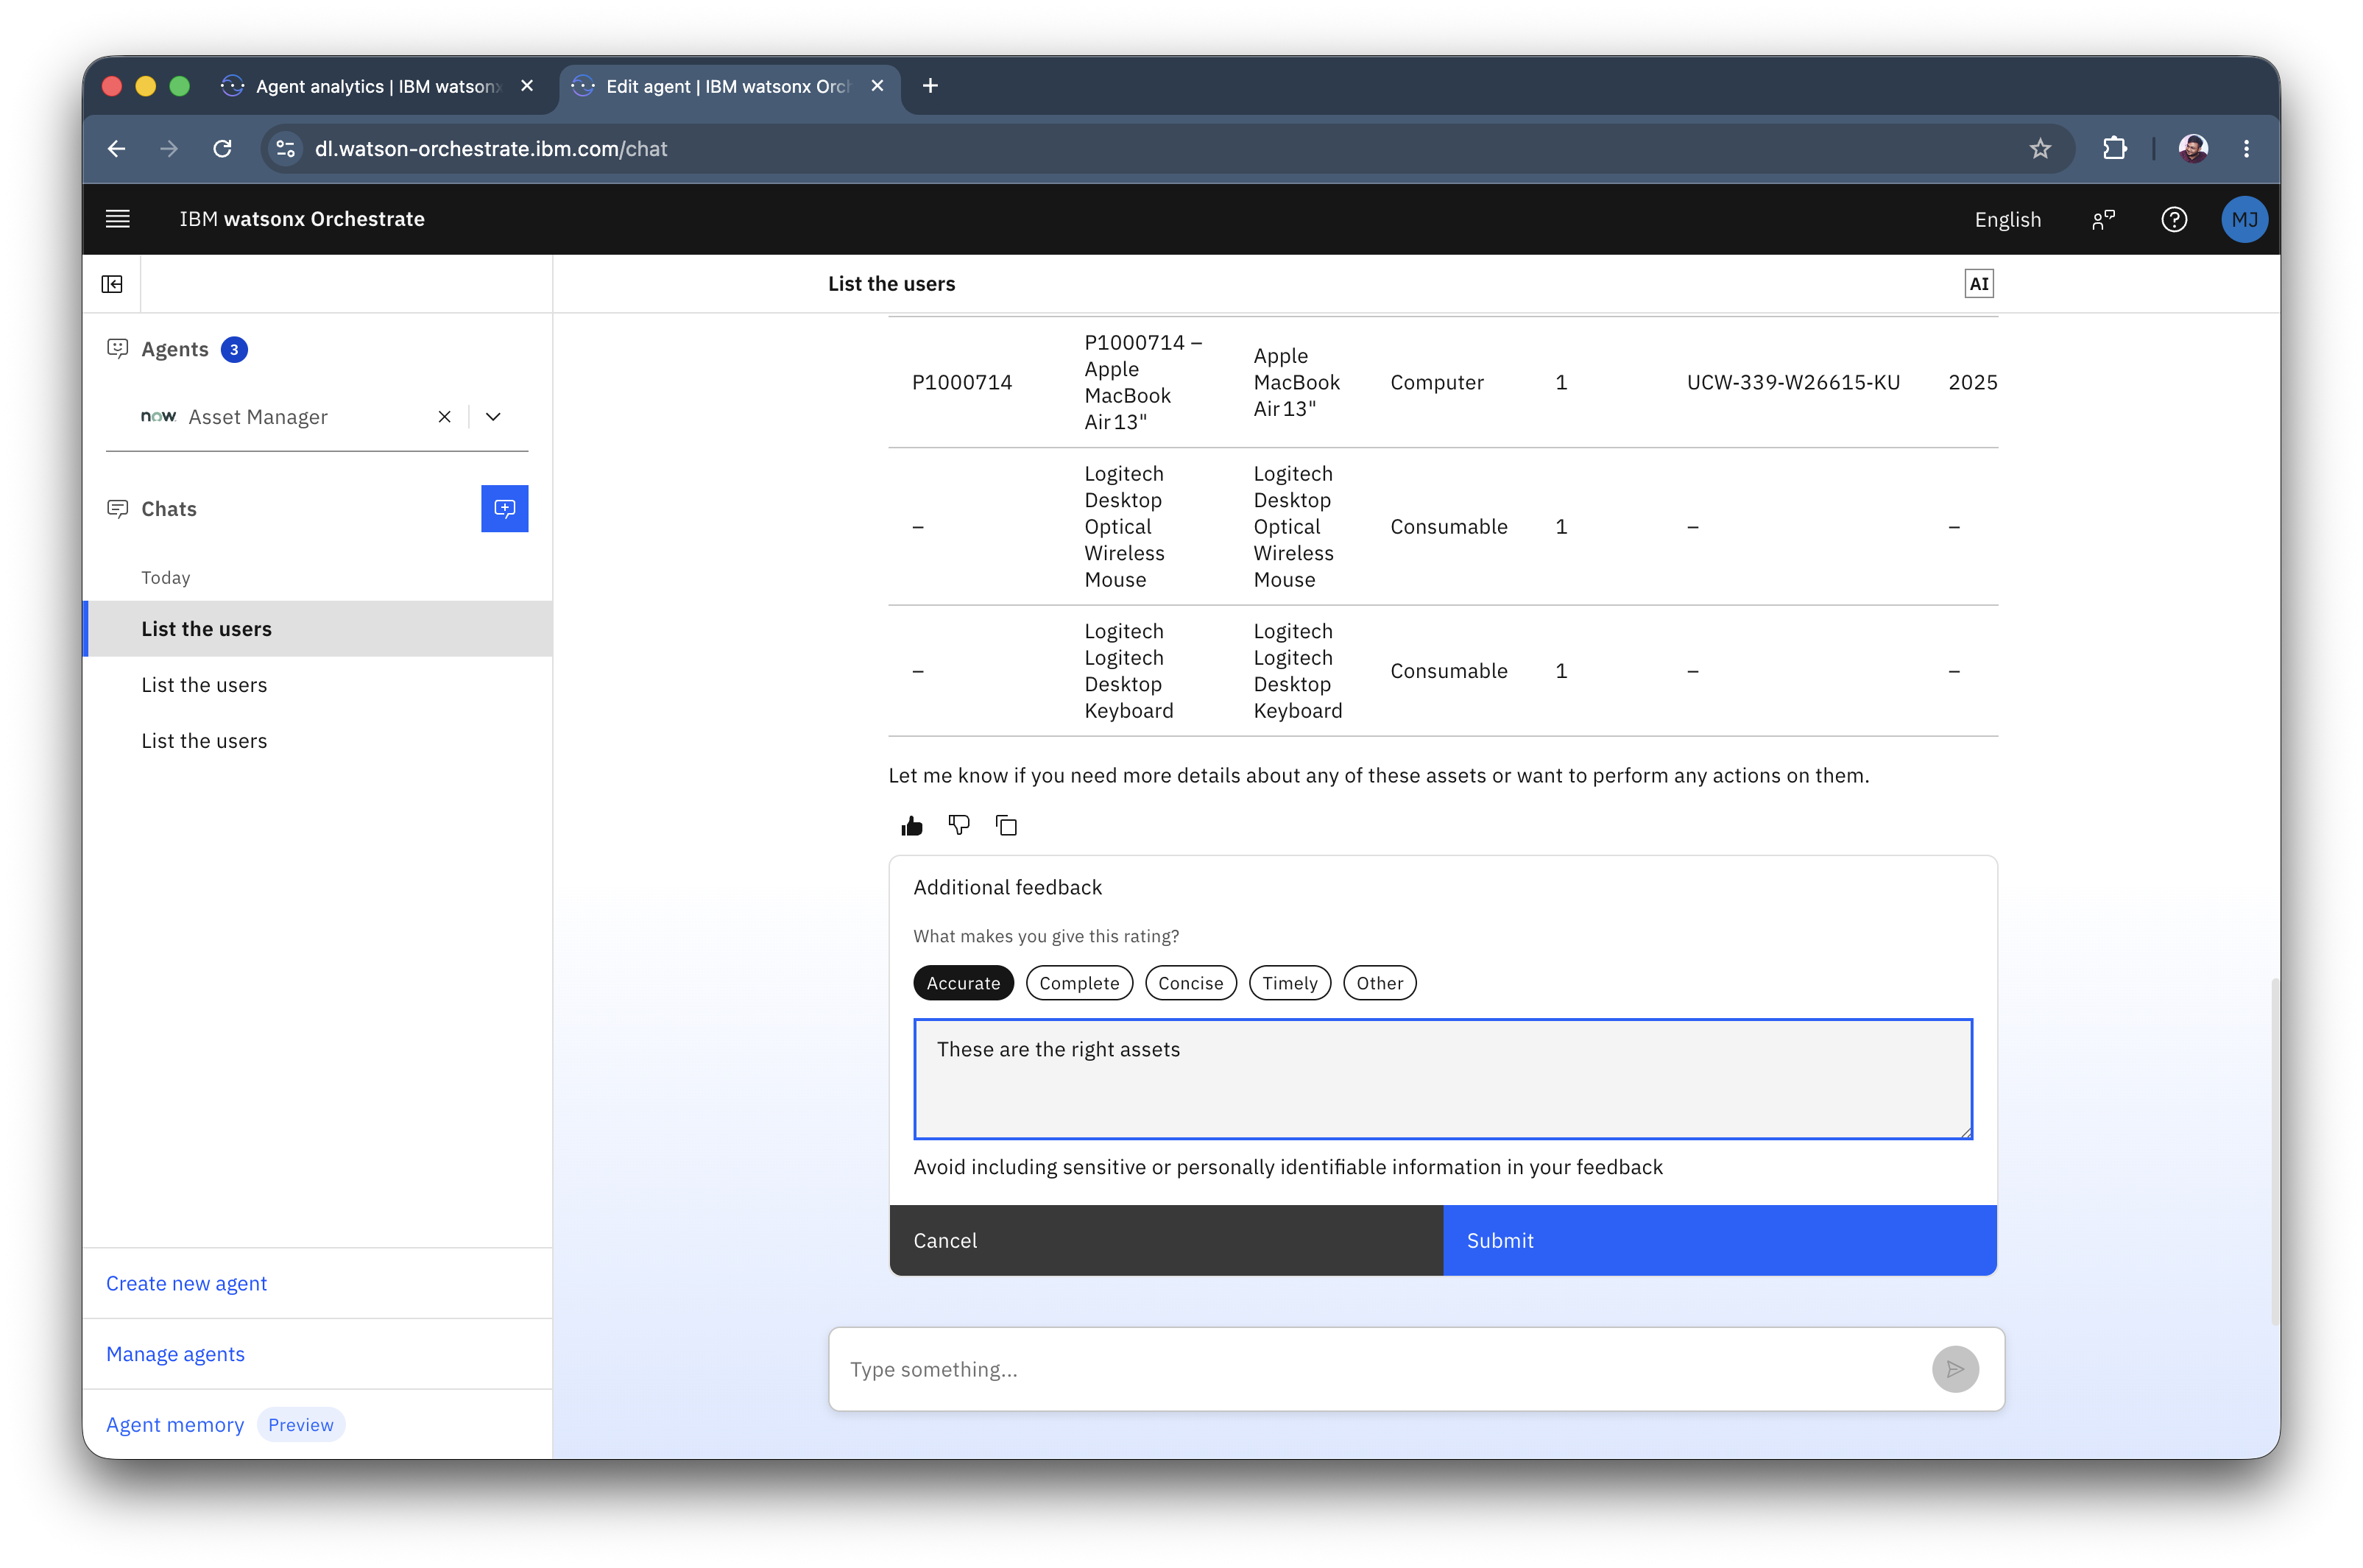
If the answer is wrong, you can select the thumbs down and enter the feedback and submit it.
Monitoring & Observability
-
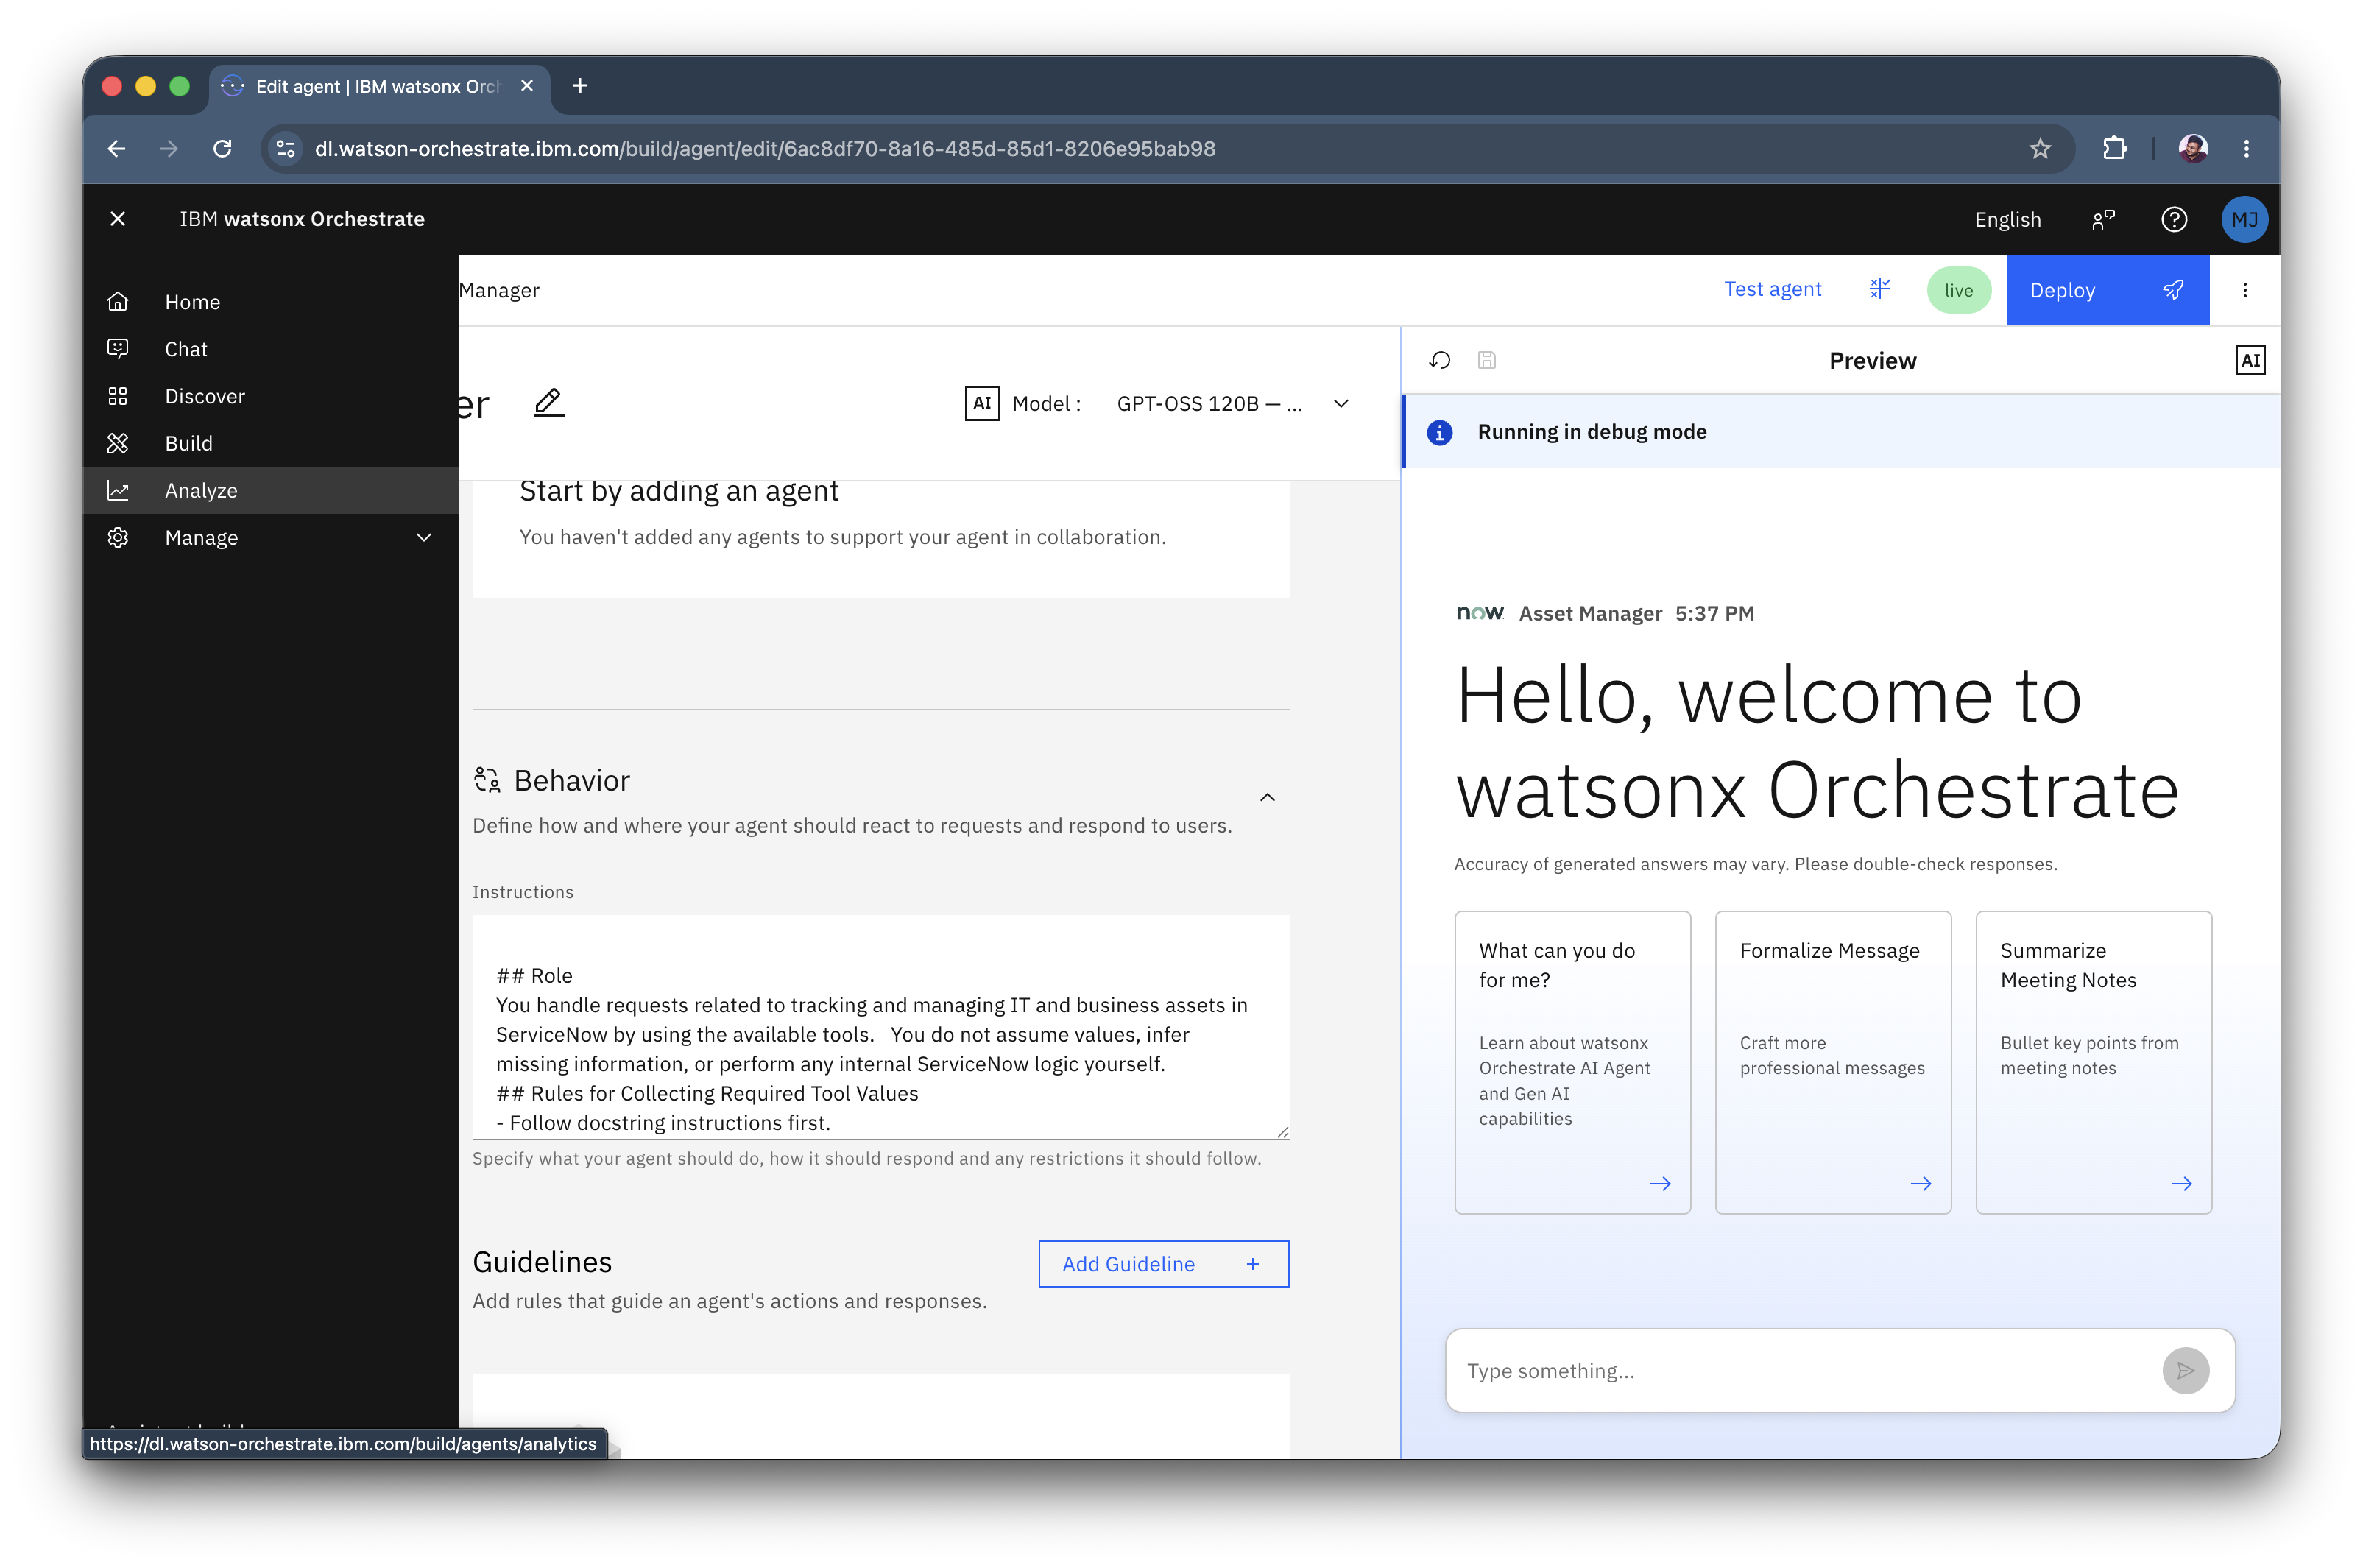
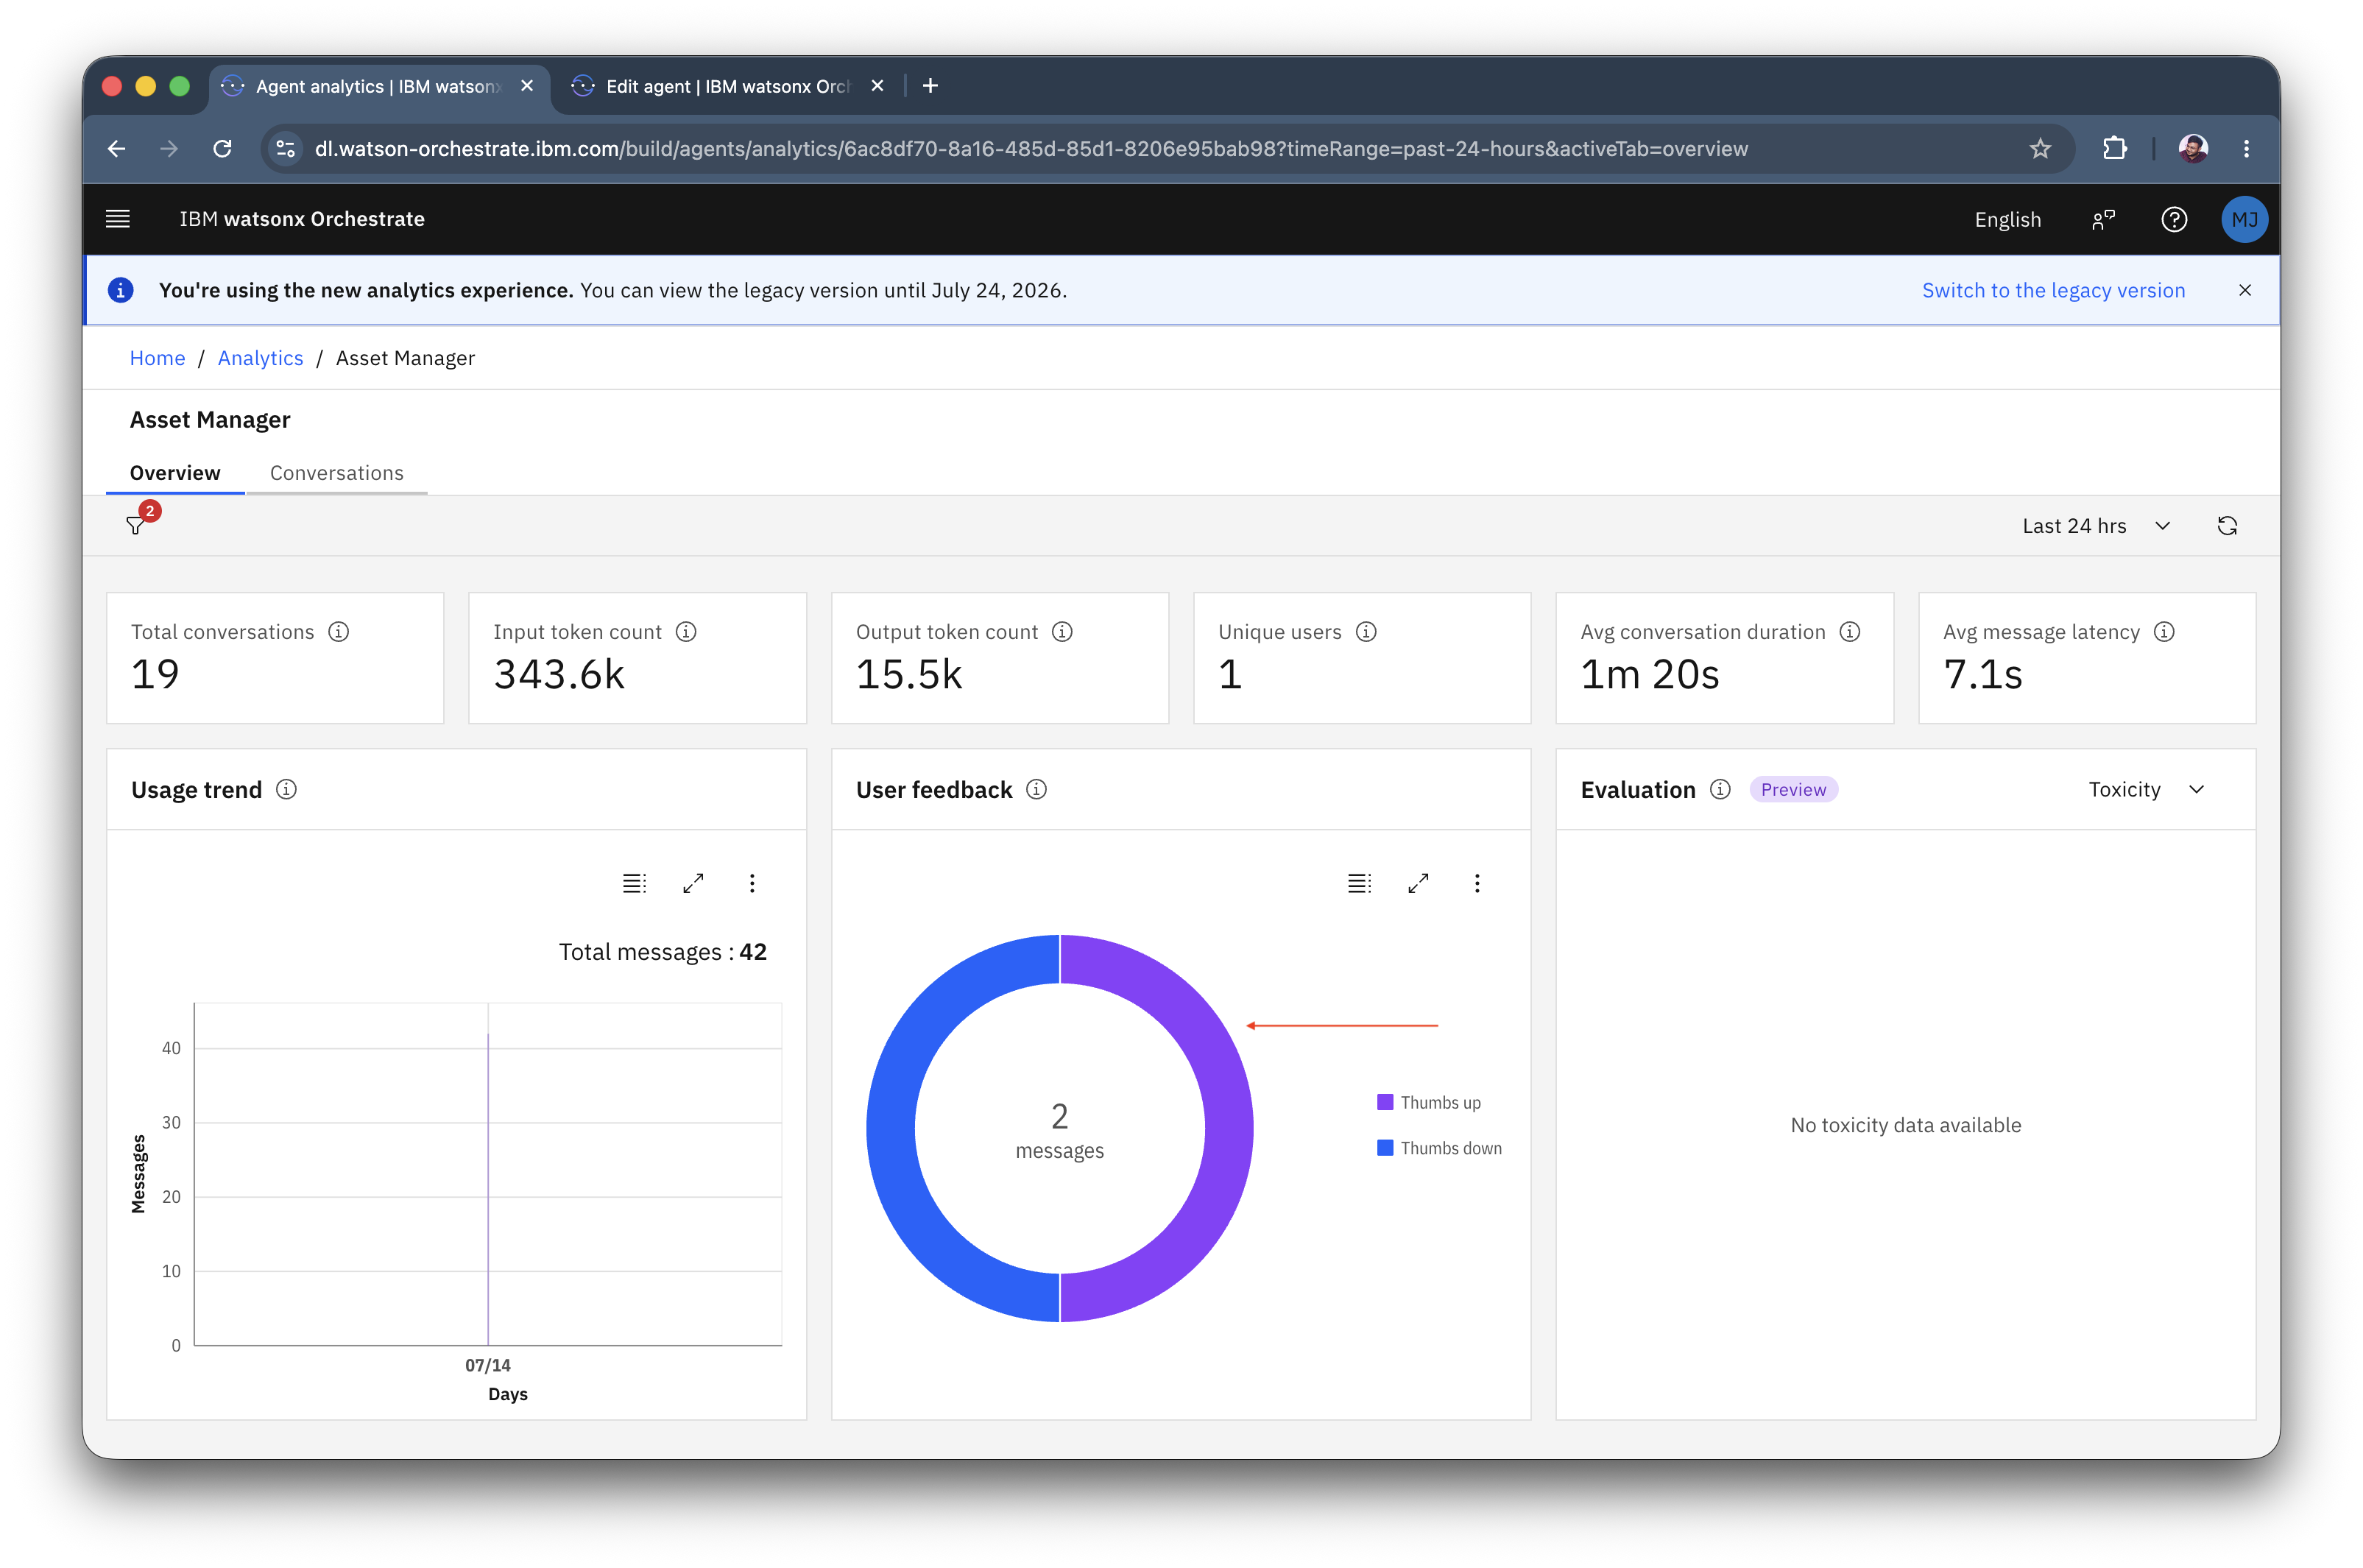
Click on the hamburger menu and select Analyze.
-
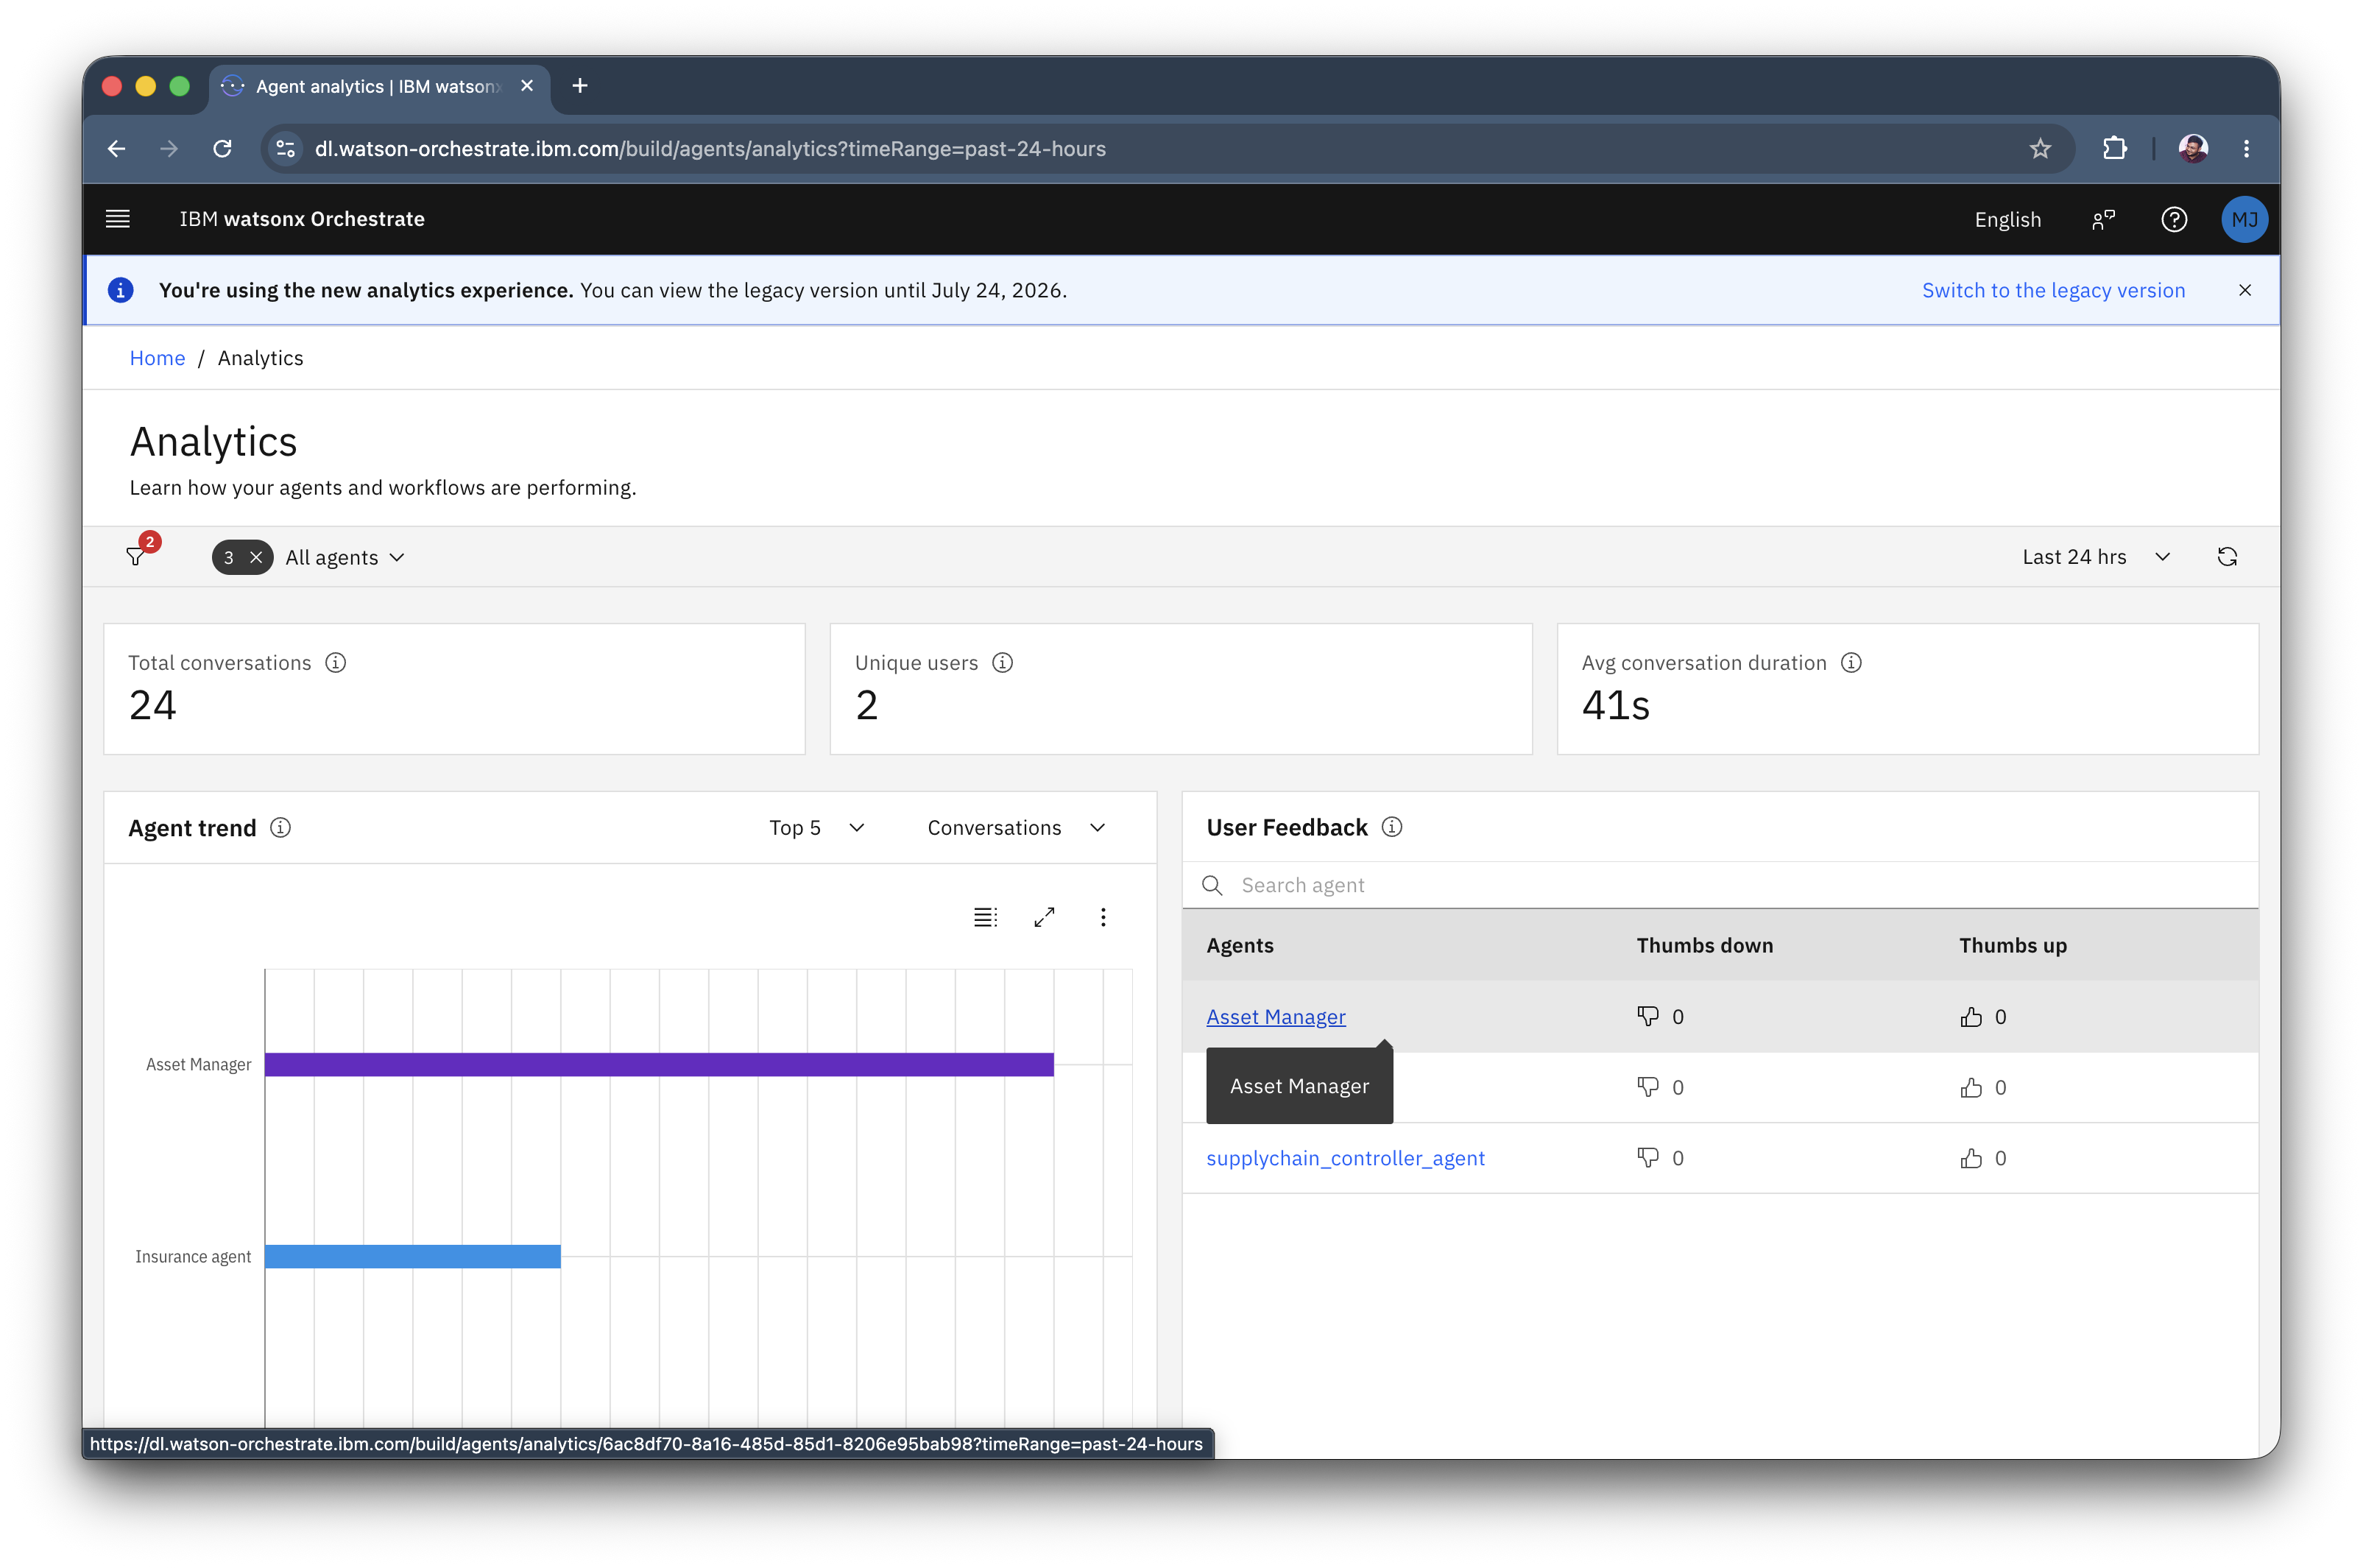
Select the Asset Manager from the agents list.
-
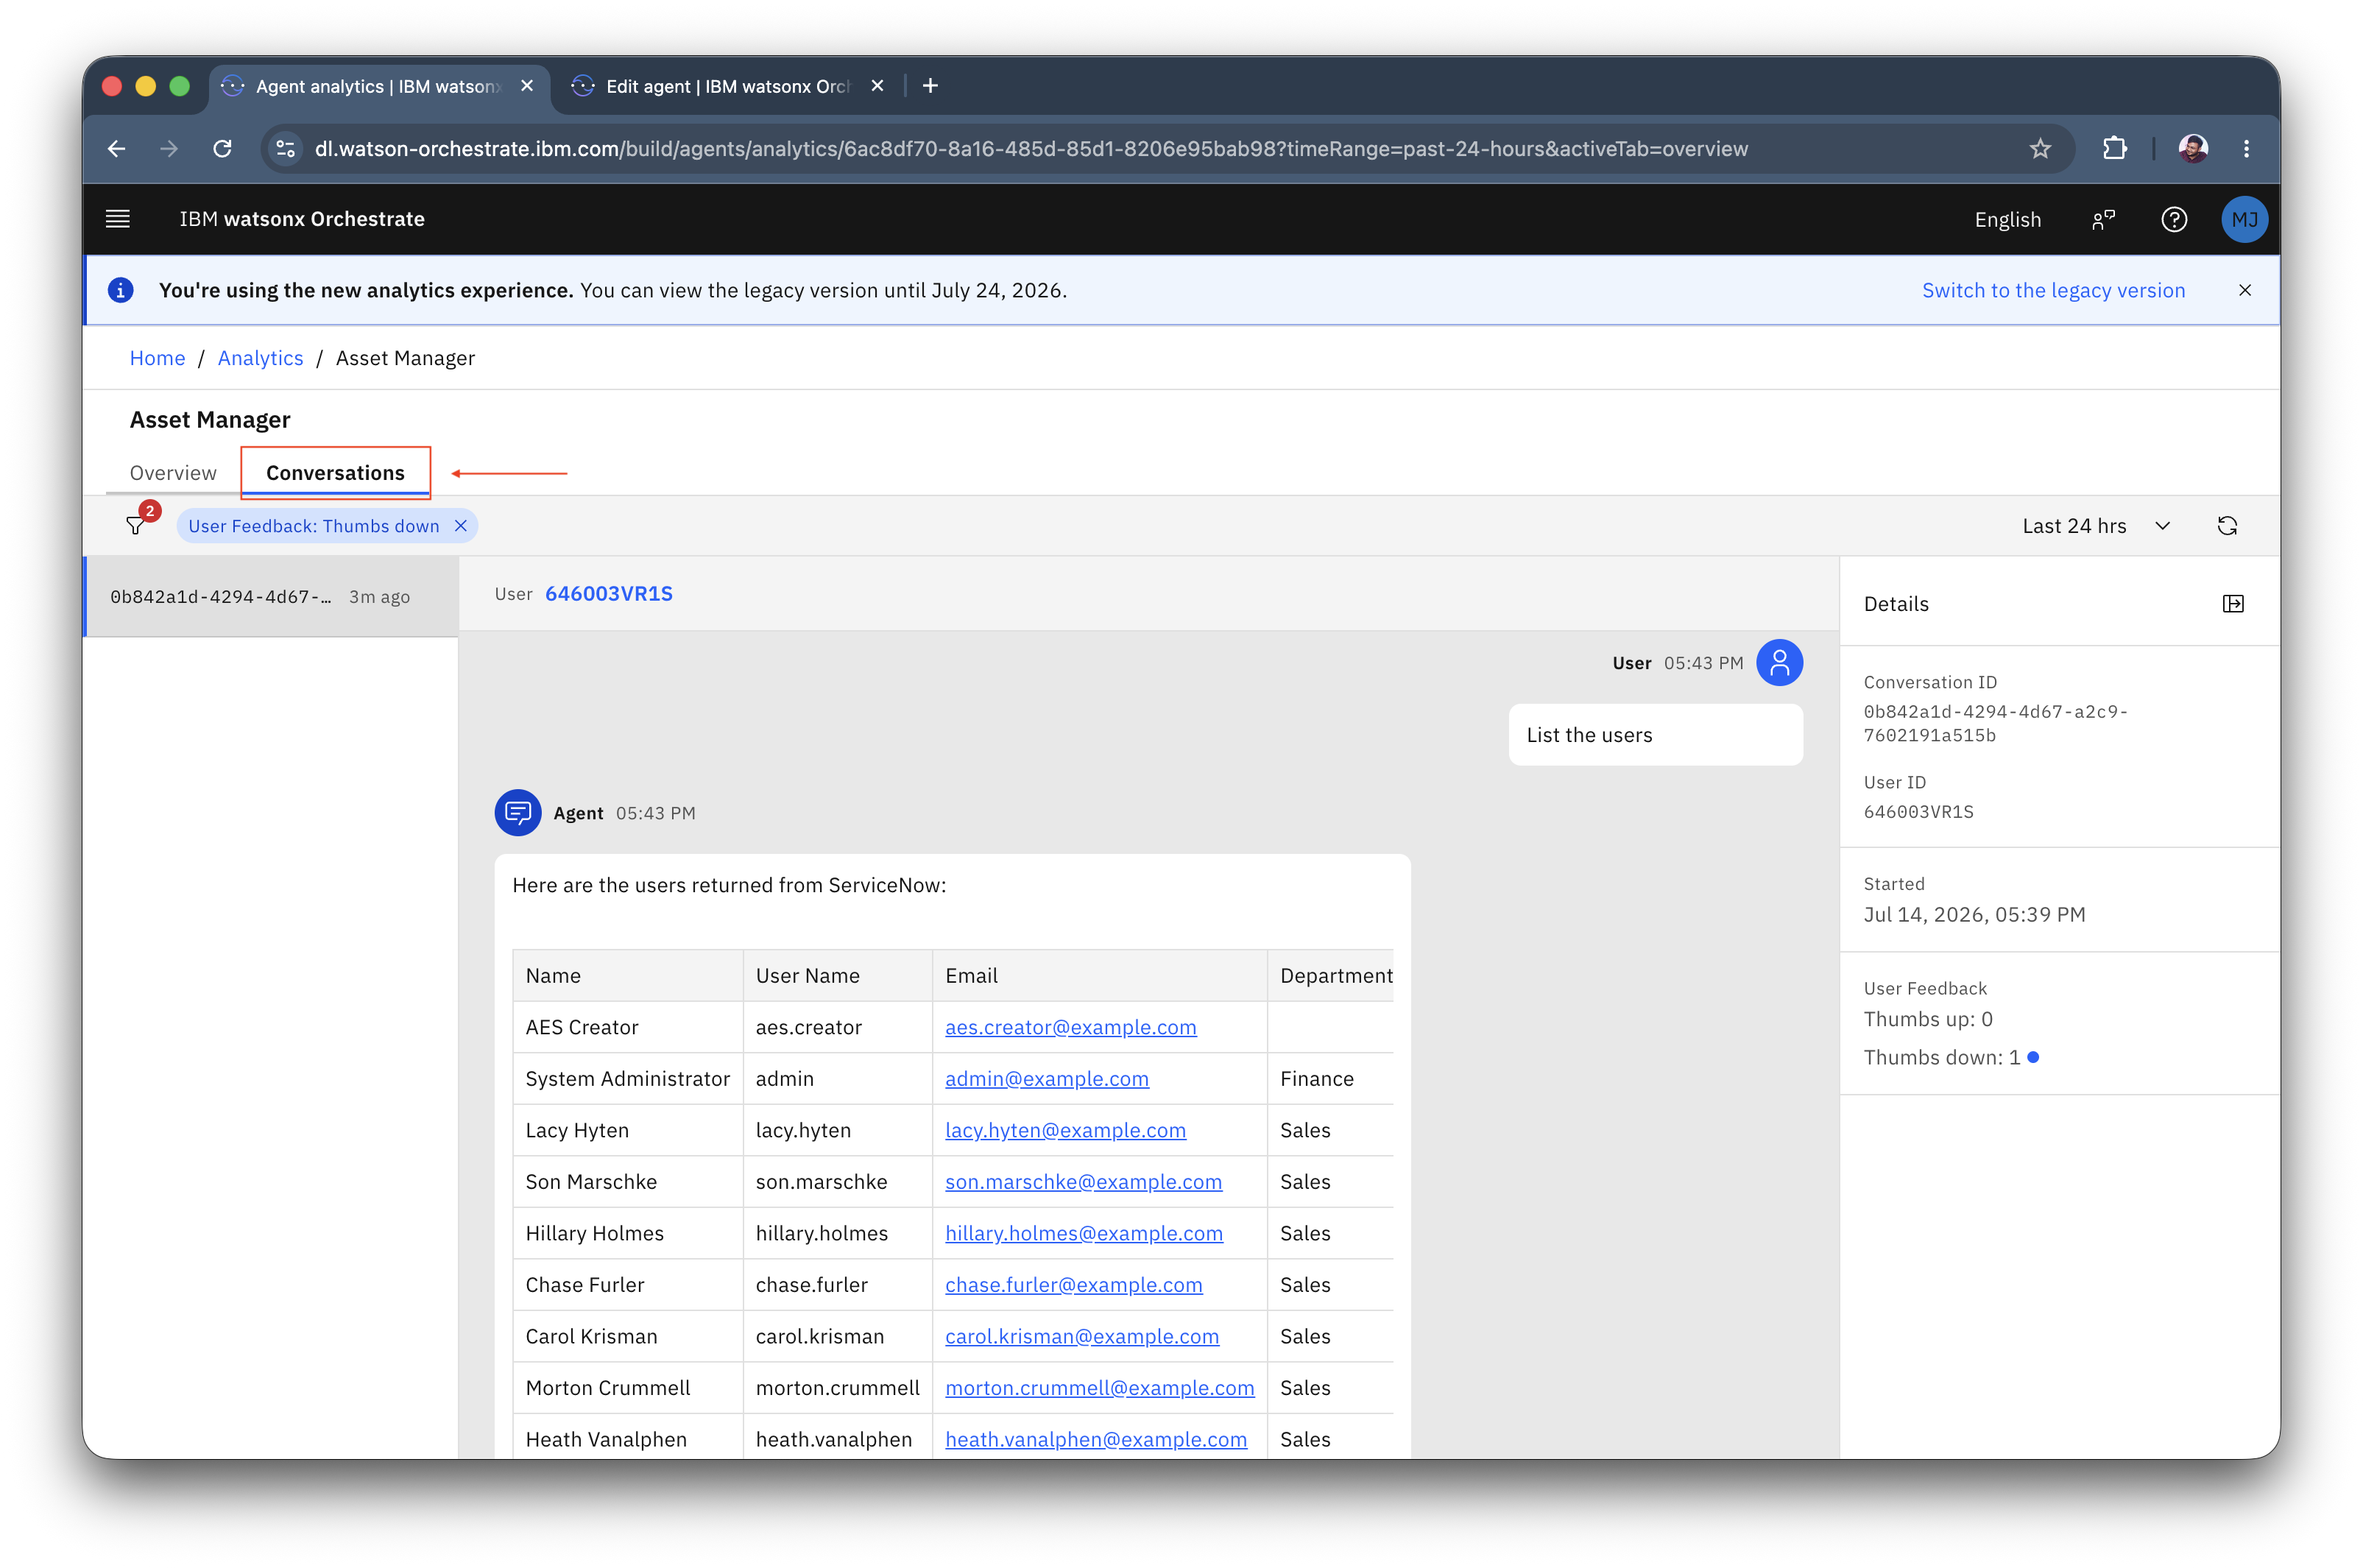
You will see all the metrics for this agent, the feedback that was given previously will also be displayed. Click on the donught chart to view the conversation where the feedback was provided.
-
You can now trace the entire coversation that received a positive/negative feedback.
Integration with Other Systems
The IT Service Manager can be extended to integrate with:
- Email Systems: Auto-create incidents from support emails
- Monitoring Tools: Create incidents from system alerts
- HR Systems: Link to employee records for asset assignment
- Procurement Systems: Automate equipment ordering
- Communication Platforms: Send notifications via Slack/Teams
Security Considerations
- Use secure authentication for ServiceNow connection
- Implement role-based access control
- Encrypt sensitive data in transit
- Audit all agent actions
- Comply with data privacy regulations
- Regular security reviews and updates
Summary
You have successfully configured and deployed an IT Service Manager agent that:
- Creates and manages IT incidents through natural language
- Provides access to knowledge base articles
- Handles task assignment and routing
- Manages IT assets and equipment requests
- Integrates seamlessly with ServiceNow ITSM
- Improves IT service delivery and user satisfaction
- Tried the feedback loop in watsonx Orchestrate
- Enabled monitoring and observability for the agent
This agent significantly reduces the burden on IT support teams while providing employees with faster, more convenient access to IT services.
Conclusion
👏 Congratulations on completing the lab! 🎉